HOLIDAY DONATION DRIVE - SUPPORT MSW - DO YOUR PART TO KEEP THIS GREAT FORUM GOING!
×


jgodsey
-
Posts
111 -
Joined
-
Last visited
Content Type
Profiles
Forums
Gallery
Events
Everything posted by jgodsey
-
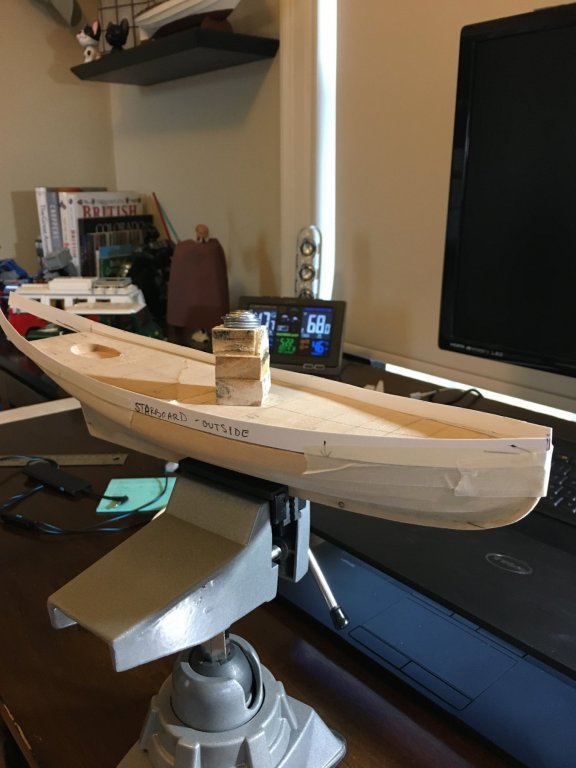
 With decking in place, it was time to glue to the bulwarks and start putting on the timberheads. Confession. This is when it all turned south. I was beset with of problems. All seemingly my fault. First, I couldn't get the bulwarks to adhere to the hull. I was using medium CA glue, but it wouldn't set up. It seemed to take 20 - 30 minutes for it to hardened. Each time the glue would get very crystallized and not hold strongly. The bond between the bulwark and the hull would come undone with the slightest of pressure. When separated, the crystallized glue would need to be scraped off and the adhesion area lightly sanded again. It took three attempts at gluing the bulwarks to the hull and required pinning at the bow and stern. Next came the waterways. I soaked the 1/32" x 3/32" strips in water for 3 minutes and bent them around the inside each of the bulwarks. Once again, the CA glue was giving me trouble. I guess I'm either stupid, stubborn or both, but it didn't occur to me to switch glues just yet. It required pins to keep the strips down. Oh well, I'll clean that up with white paint after all the timber heads are in. With the waterways done, it was time to cut and glue the timberheads. These were cut from the 3/64" square basswood and were two lengths - 1/4" for the main deck area and 3/16" for the quarterdeck. Then, they were glued to the inside of the bulwarks every 3/18". Measure - glue - repeat about 43 times, plus 5 more on transom. Bulwards on. Transom on. Waterways on. Timberheads on. Admiring my results so far and the unimaginable happens. I dropped the boat. It fell about 40" to the hardwood floors which by the way are harder than basswood and CA glue. Bulwarks break away from the hull (again!). One of the bulwarks breaks about 1" from the transom. The transom breaks away from the hull. Timberheads break away from the bulwarks. It's a mess. All my progress is laying there on the floor in small scattered pieces. Colorful language ensued!!! Then, just sitting and staring at the wreckage.
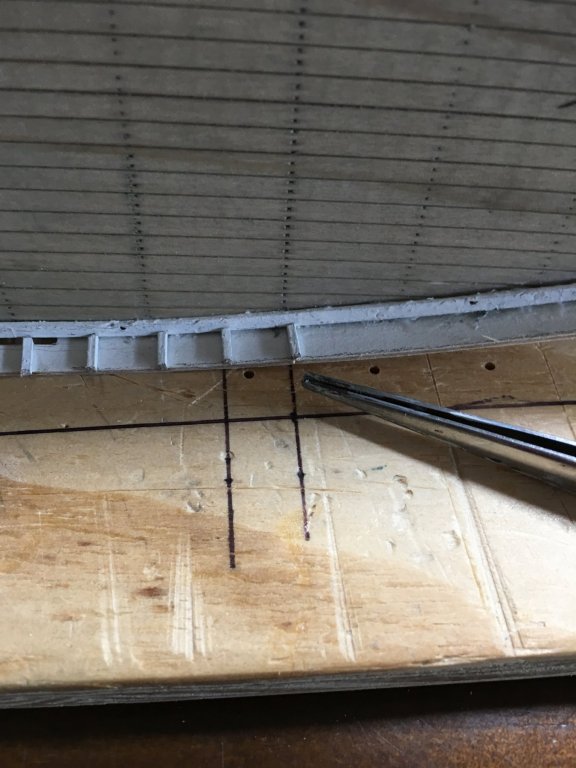
-
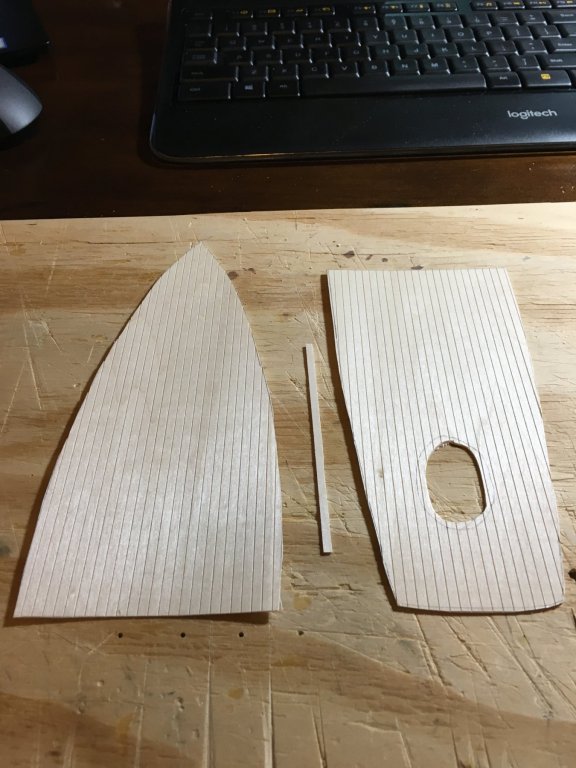
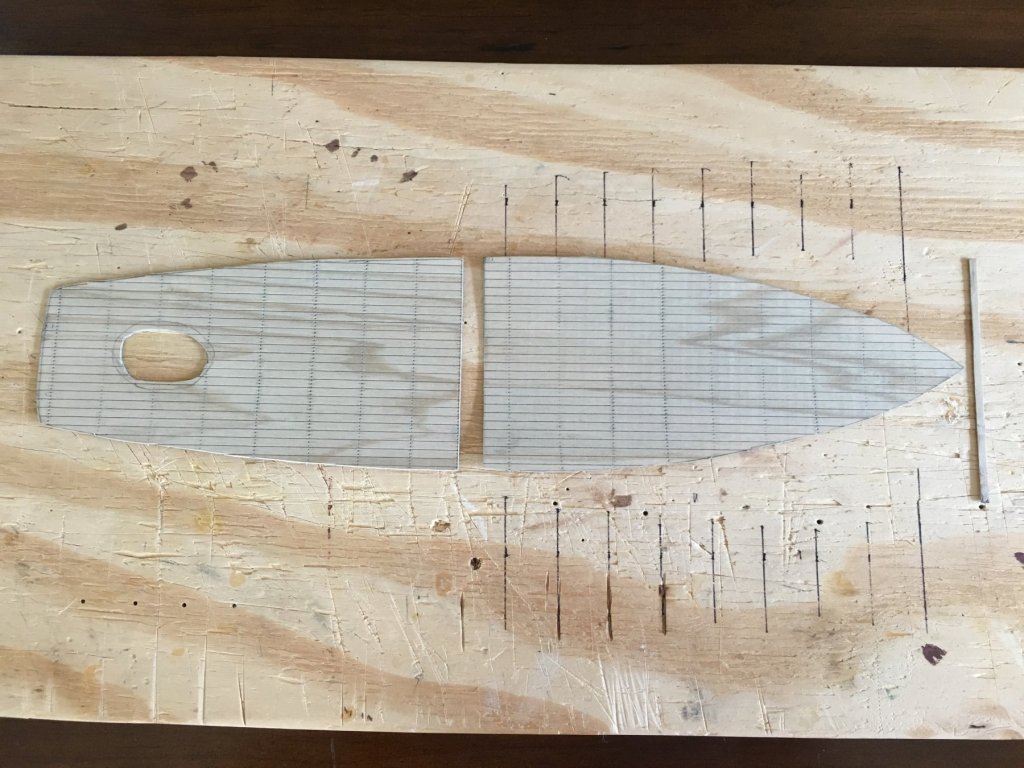
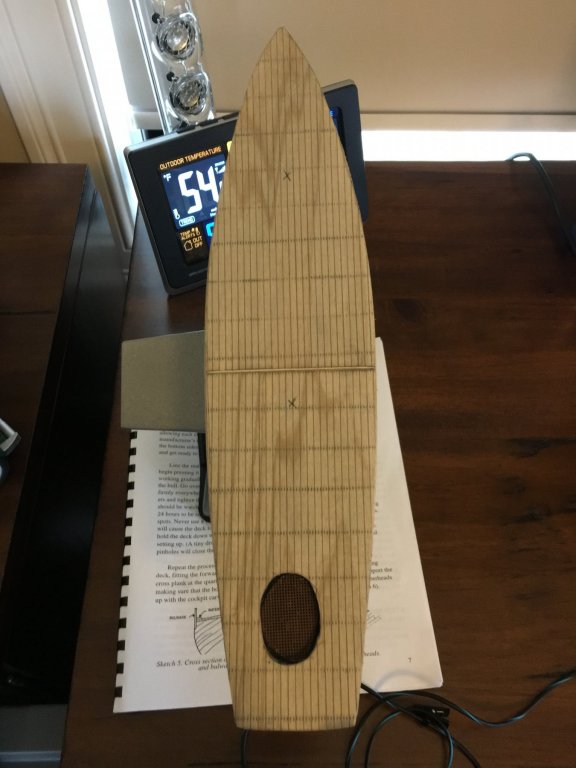
Although it's been a little over a month since my last post, I've been working on boat. It was time to prepare the deck and glue it to the hull. I traced the hull on to stiff cardboard (this has become my most important modeling tool) and used that as a template to cut the decking material. 3/32" x 3 1/2" scribed sheet wood. The next decision took me some time. Do I scribe treenails in the decking or not? Using a pounce wheel, I practiced on some decking scraps to first, see if I liked it, and second, can I do it consistently. Practicing and thinking on it for a couple of days, I decided yes, let's do it. I spaced the rows 3/4" of an each to simulate 4' spacing. I also stained the decking using Minimax Weathered Oak. This gave it a sun-bleached appearance and the treenail holes are there, but not overly contrasting. Then, the decking was glued to the hull using contact cement. I painted the cockpit floor black to provide a good background for the grating that will cover the cockpit floor.
- 60 replies
-
- 1
-

-
- mary taylor
- solid hull
- (and 2 more)
-
Patience is a virtue. Thanks Chuck!
- 1,784 replies
-
- 2
-
-
- winchelsea
- Syren Ship Model Company
- (and 1 more)
-
Hi Chuck, It was very nice to meet you today at the Ship Model Conference and Show. Seeing your work and products in person was a real treat. The quality and craftsmanship is amazing. Thank you for the kind and helpful modeling advice. One question. When do you expect the Syren Medway Longboat 1742 kit to be available? All the best, Jim
- 1,784 replies
-
- 3
-
-
- winchelsea
- Syren Ship Model Company
- (and 1 more)
-
Thanks Tim! Try so hard to get it right.
-
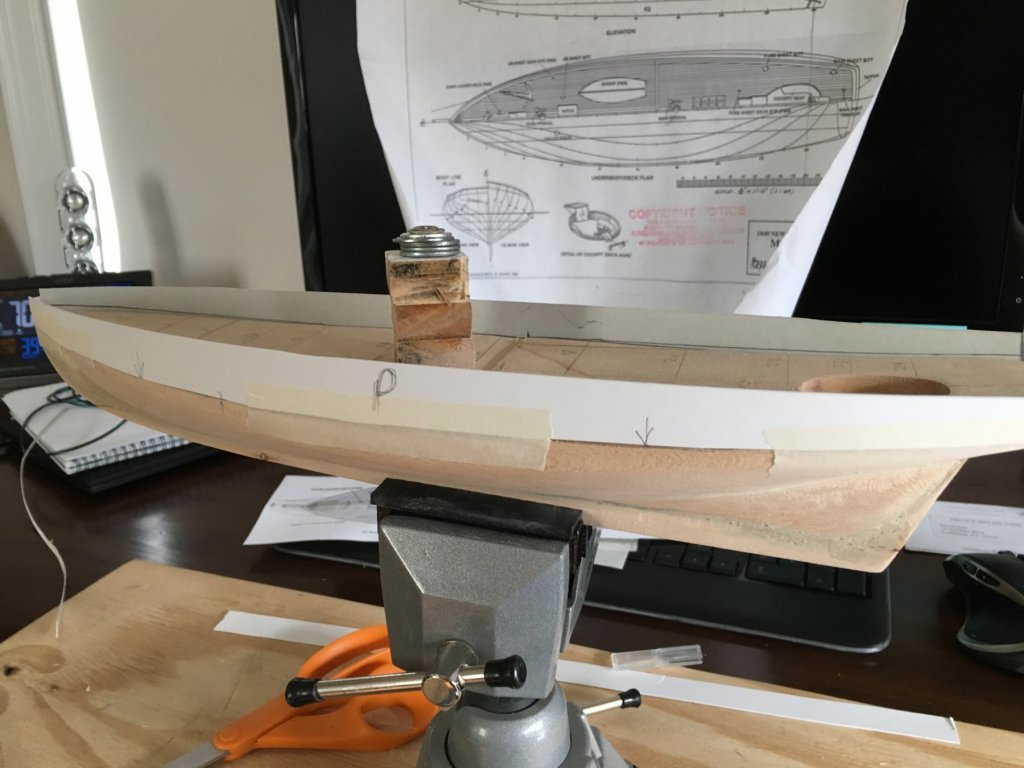
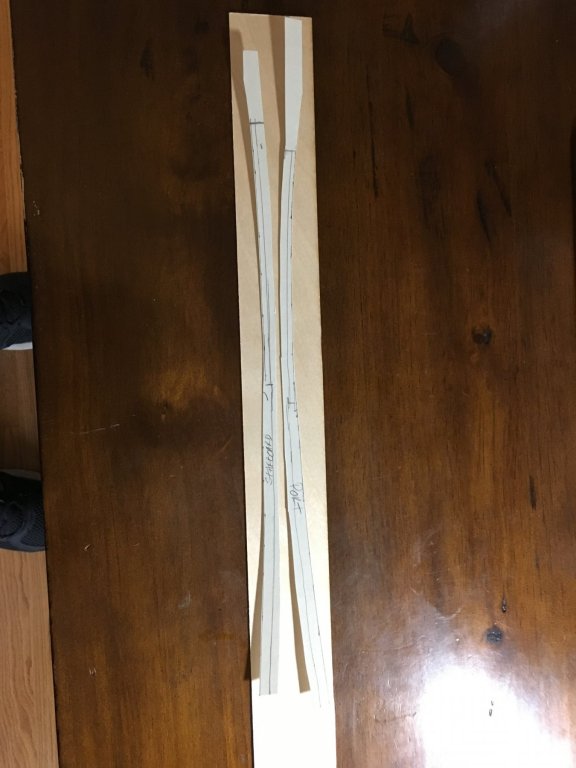
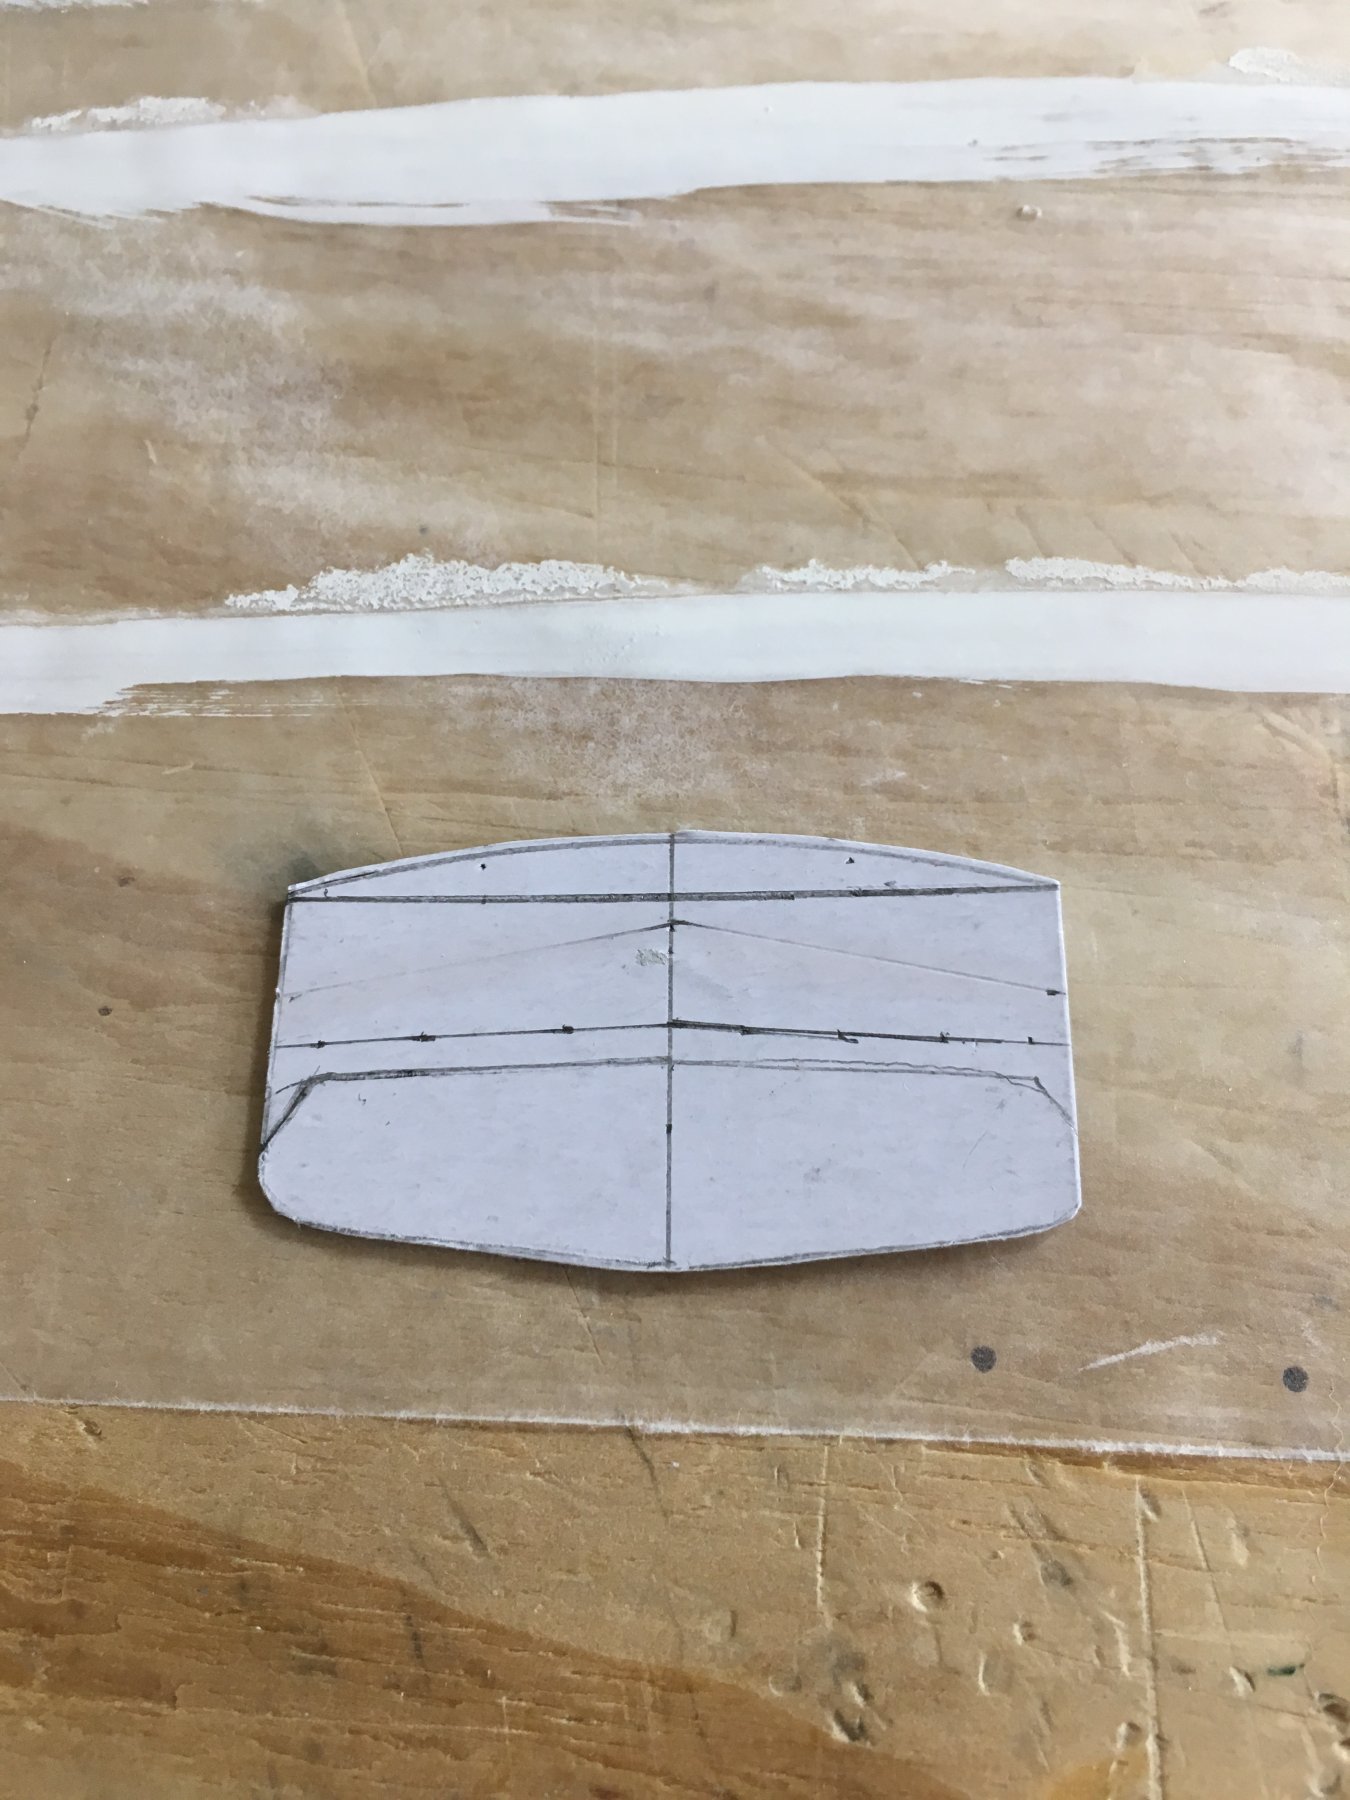
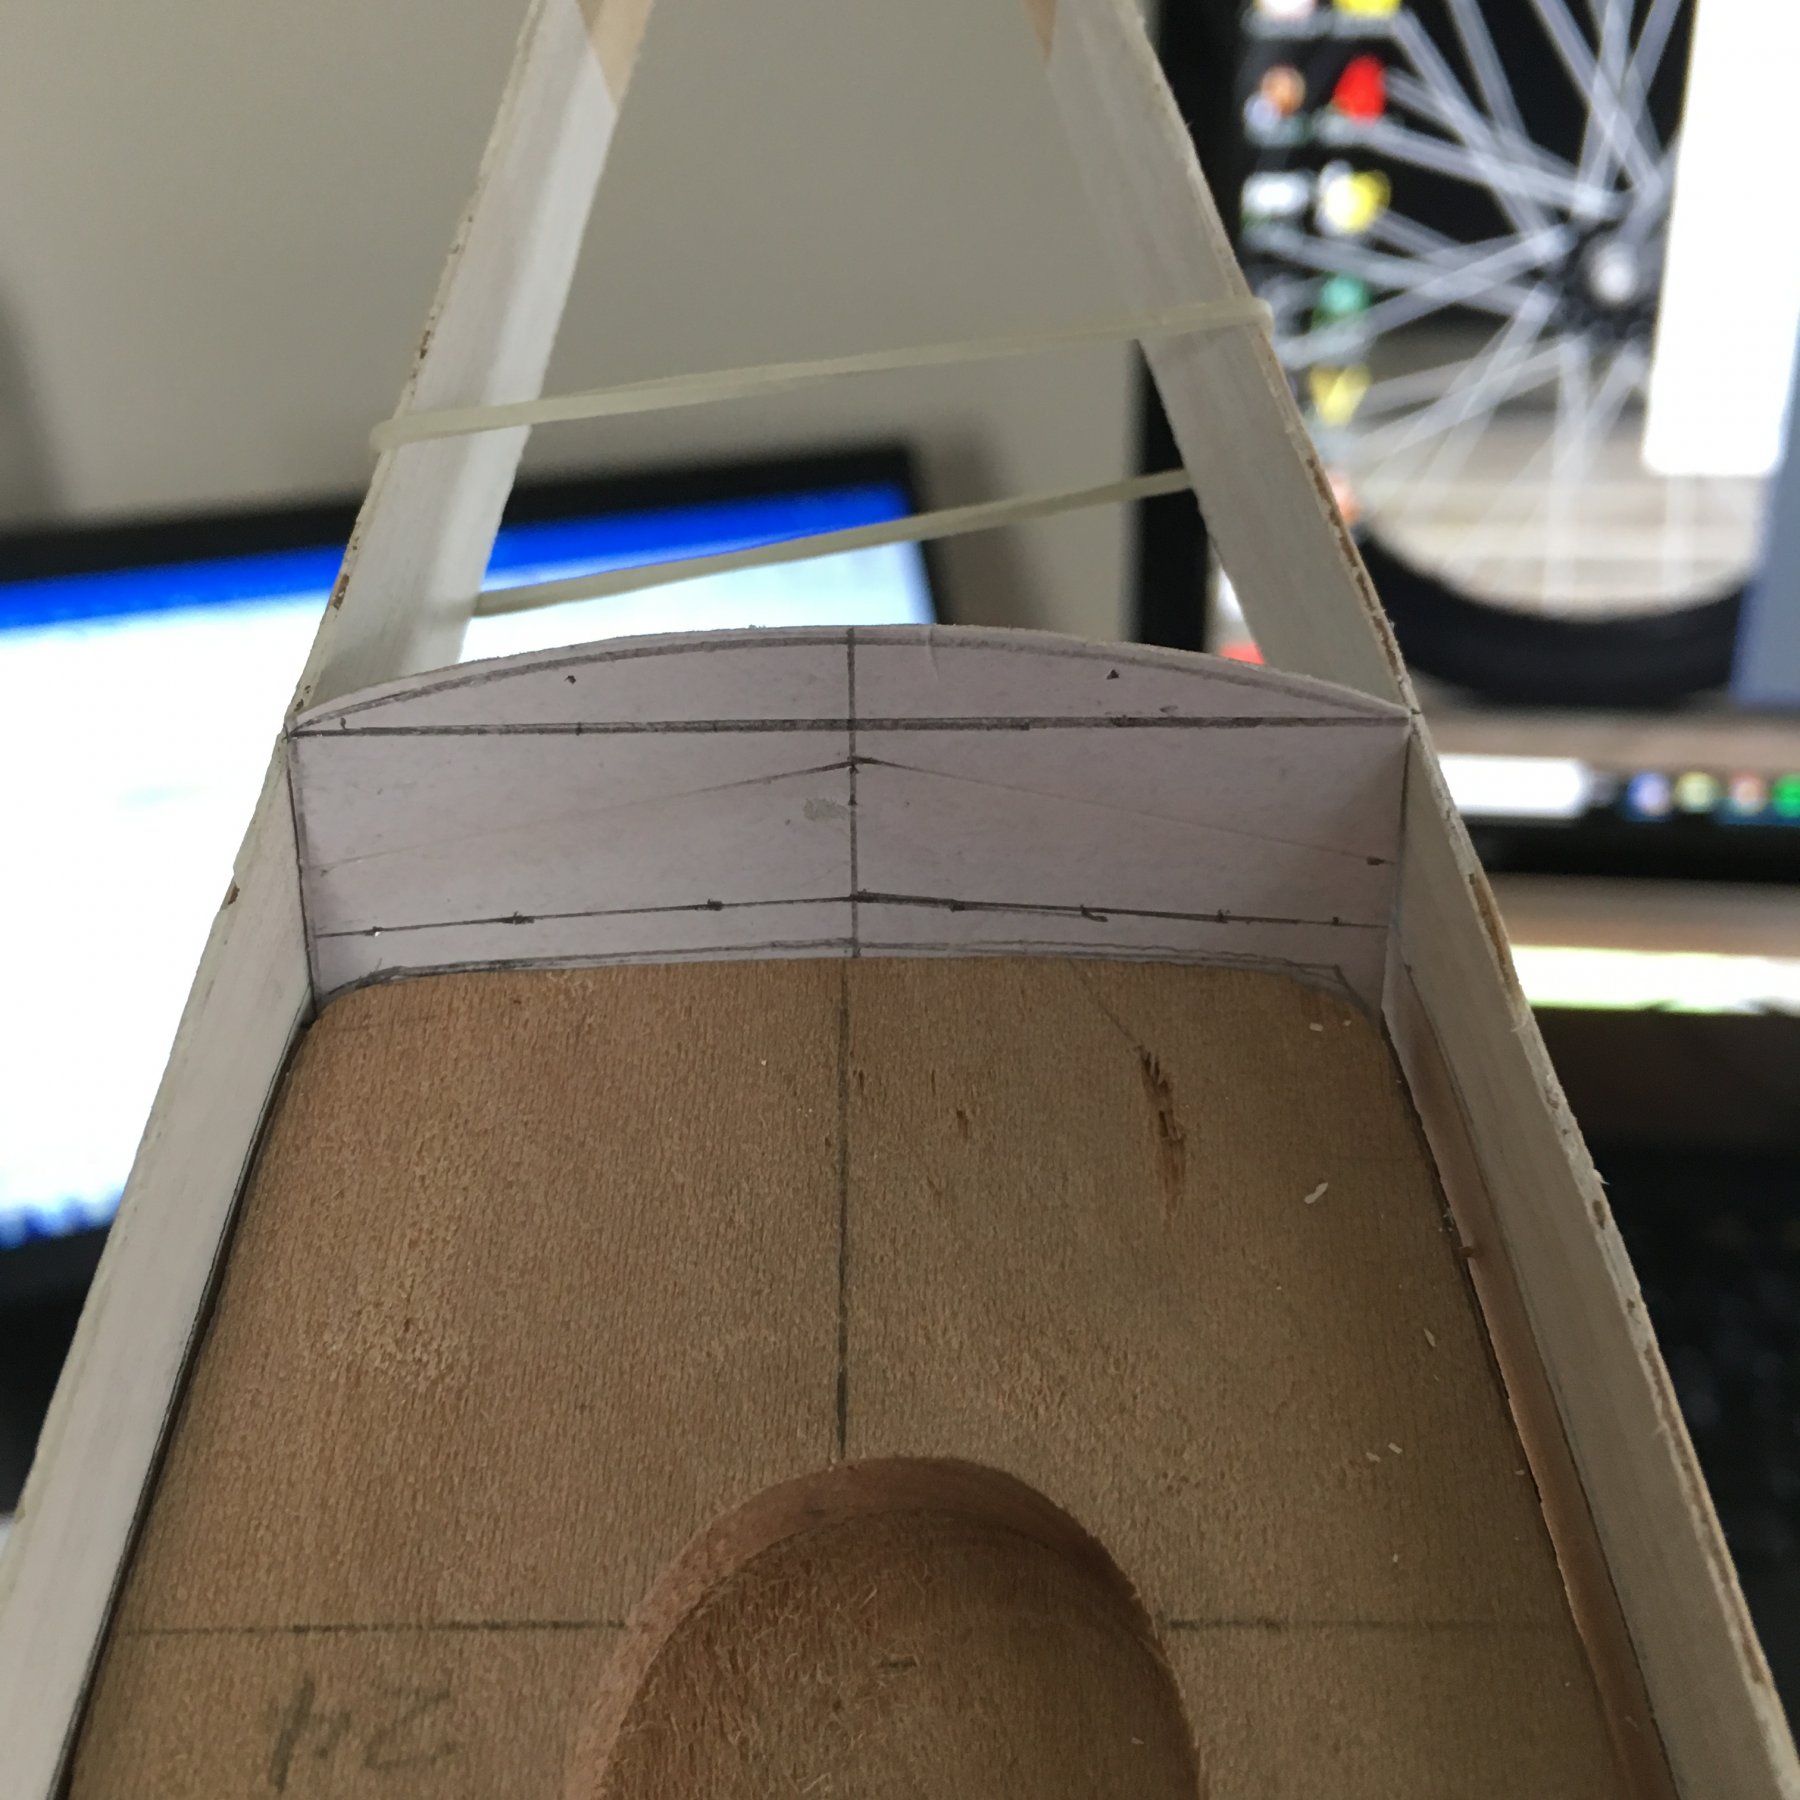
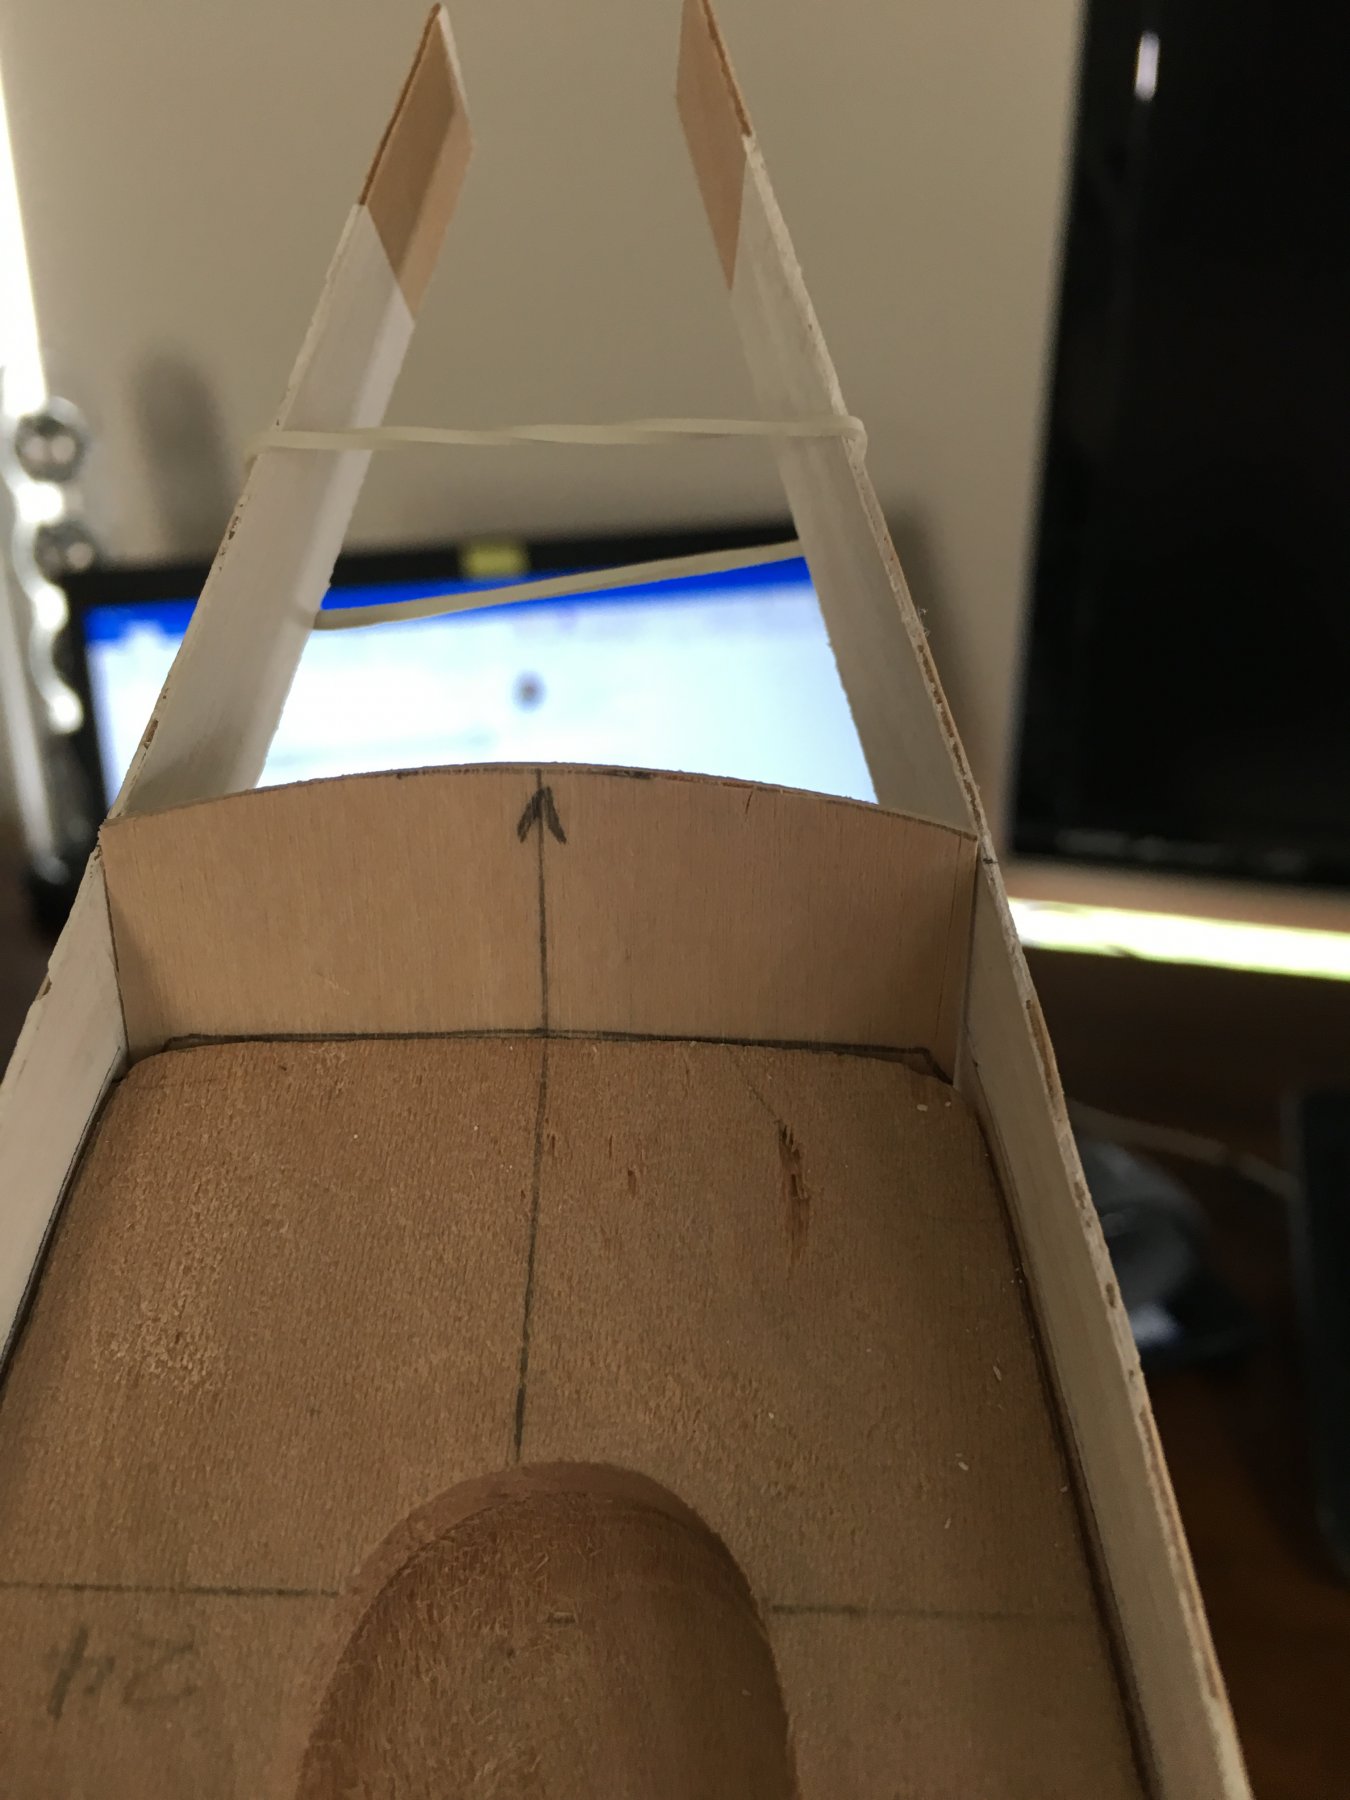
Made very good progress on the bulwarks. Started by shaping thick paper templates. I found that the weight of gift box cardboard is ideal. After getting the shape "just right", I traced the templates onto the 1/32" plywood and carefully cut them out. The bulwarks took a little sanding and smoothing, but they eventually fit well. After they're glued (several steps from now), I'll fill in any gaps with wood putty. No worries. Next, it was time to craft the transom template. Using basically the same method, stiff paper and a bit of geometry, the transom template was ready. Transferring the template to the 1/32" plywood was easy and the transom fits nicely. Per the advice of the instructions, I cut both the bulwarks and the transom a little tall. After they're glued, I can smooth them down to the right height and insure tight joints. So far so good. The next step is to cut, stain and laminate the decking to the hull. Again, using a stiff paper template, the decking is ready for staining. It's been a good few days in the shipyard. Cheers, Jim


- 60 replies
-
- 6
-
-
- mary taylor
- solid hull
- (and 2 more)
-
With a little wood putty, sandpaper and elbow grease, the hull is pretty close to complete. The next step is to cut rabbits along the deck edge for the bulwarks. Port side Starboard The bulwark rabbit came out well. Now, to create the bulwark templates fitting them to the rabbits.
.thumb.JPG.27727fafcd56c8fd79b1fa437827f2cd.JPG)
.thumb.JPG.28ce8db9e8620521eb2aa0481fed9a97.JPG)
.thumb.JPG.508b1d67e18b7da76ba3c6be9cadeb2d.JPG)
.thumb.JPG.d4261559a34fd72c9cc36d4d0551f267.JPG)
- 60 replies
-
- 1
-
-
- mary taylor
- solid hull
- (and 2 more)
-
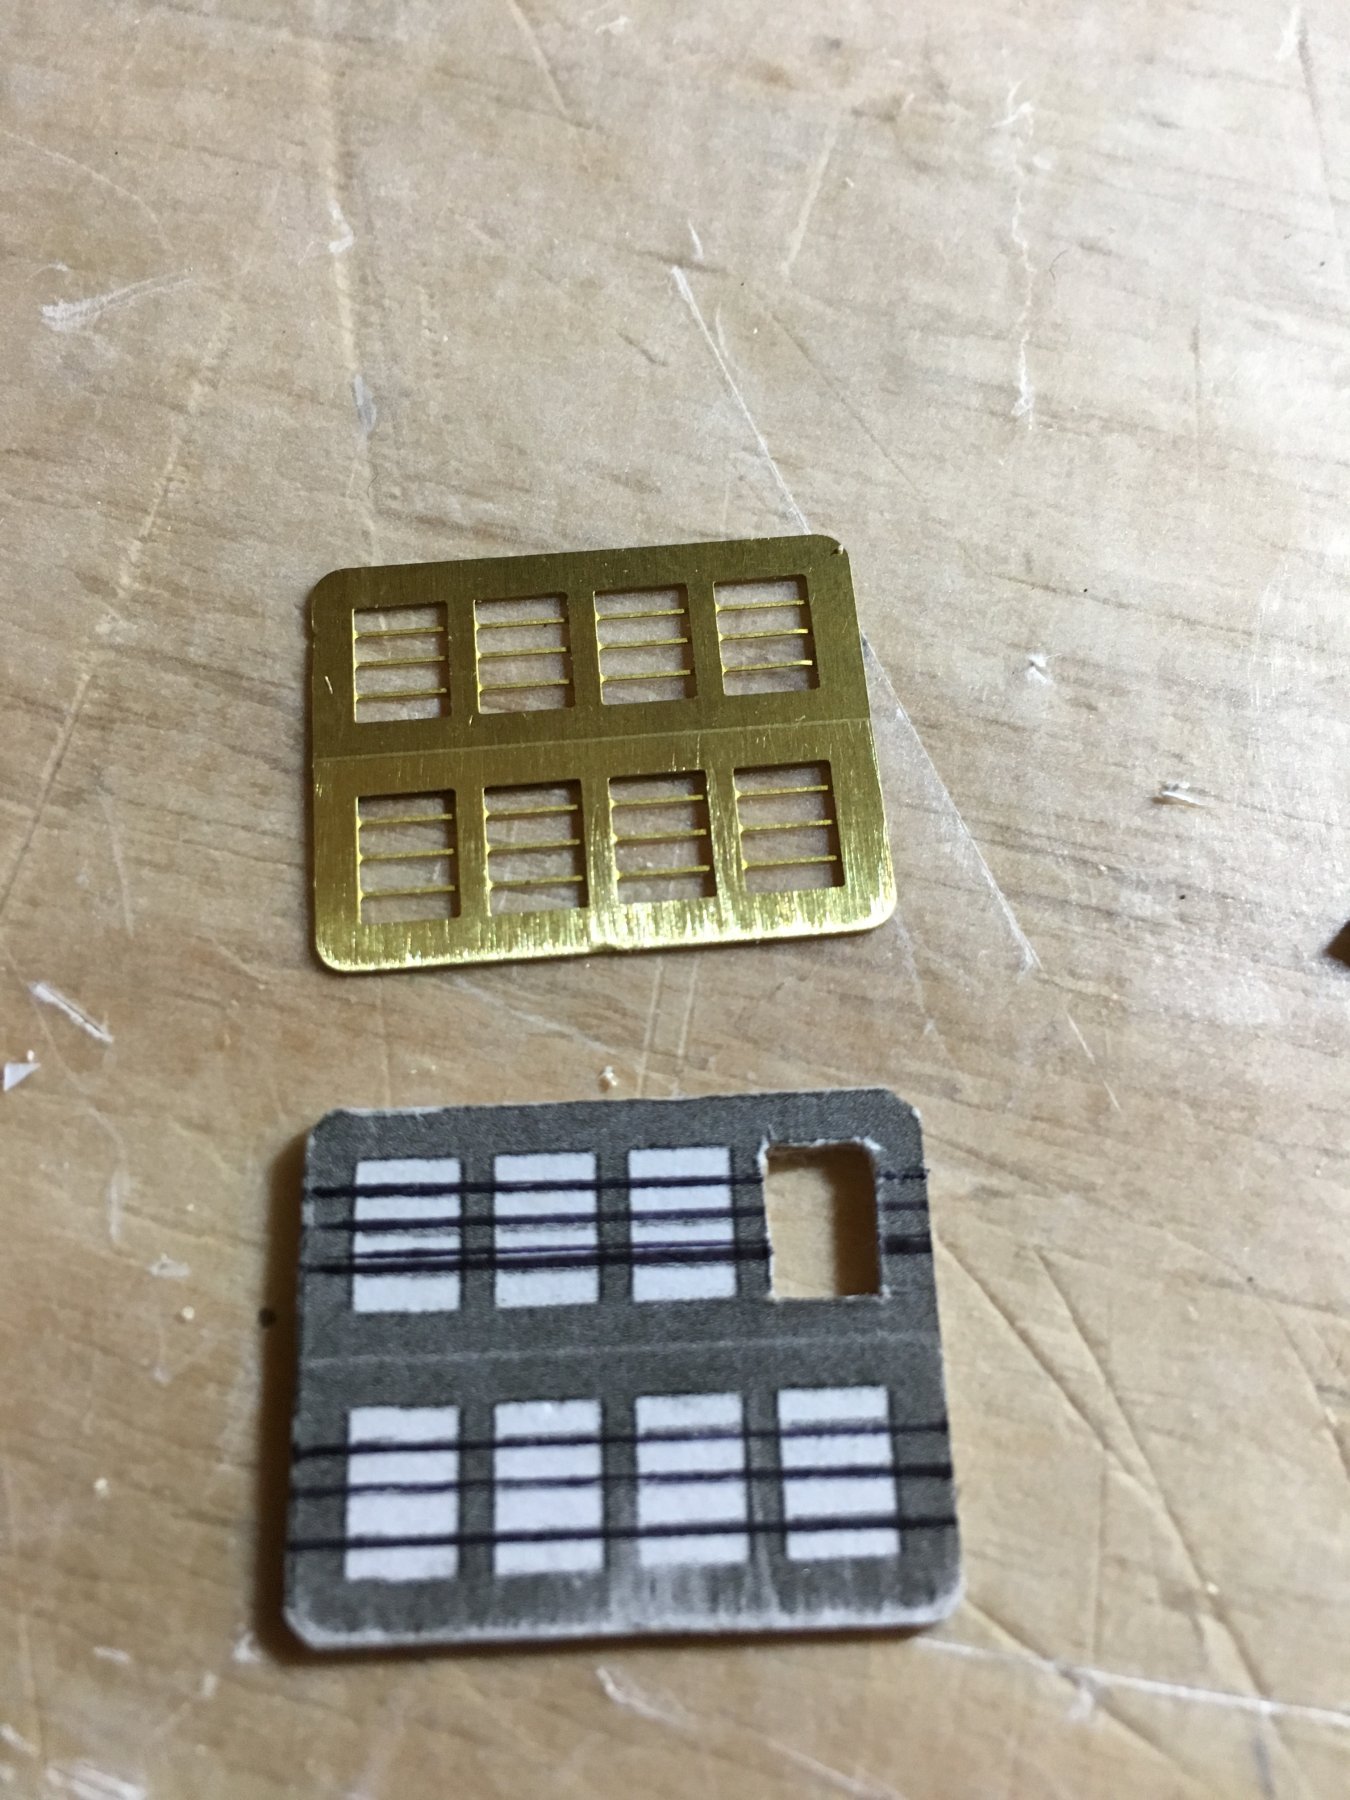
Another piece of deck furniture - skylight. I choose to scratch build the skylight rather than use the kit supplied Britannia. I'm pretty happy with the results. I photo copied the etched brass roofing, glue the copy to the 1/32" plywood, then carefully cut out the windows. I used .020" brass rod for the window grates. The skylight housing is made from the 3/32" scribed decking sheet wood. And, the finished result. The roof will be placed once the skylight is glued to the deck and the inside painted black.

.thumb.JPG.8ac31347d2cfa2b7c5c105a410ac5048.JPG)
.thumb.JPG.32bc33c06de0608e34575ec242a895c8.JPG)
- 60 replies
-
- 4
-
-
- mary taylor
- solid hull
- (and 2 more)
-
Finally was able to set the keel. Now, it's time to putty and sand the blemishes in the hull.
.thumb.JPG.cb09629ee47c39e1bff3e4b563265ab9.JPG)
.thumb.JPG.429439bcc4d3975e6e15ae7e1d9b4821.JPG)
- 60 replies
-
- 3
-
-
- mary taylor
- solid hull
- (and 2 more)
-
Still working on the hull, but made good progress on most of the deck furniture.
.thumb.JPG.7231762f11784a0d074ecd4362fc25c0.JPG)
- 60 replies
-
- 2
-
-
- mary taylor
- solid hull
- (and 2 more)
-
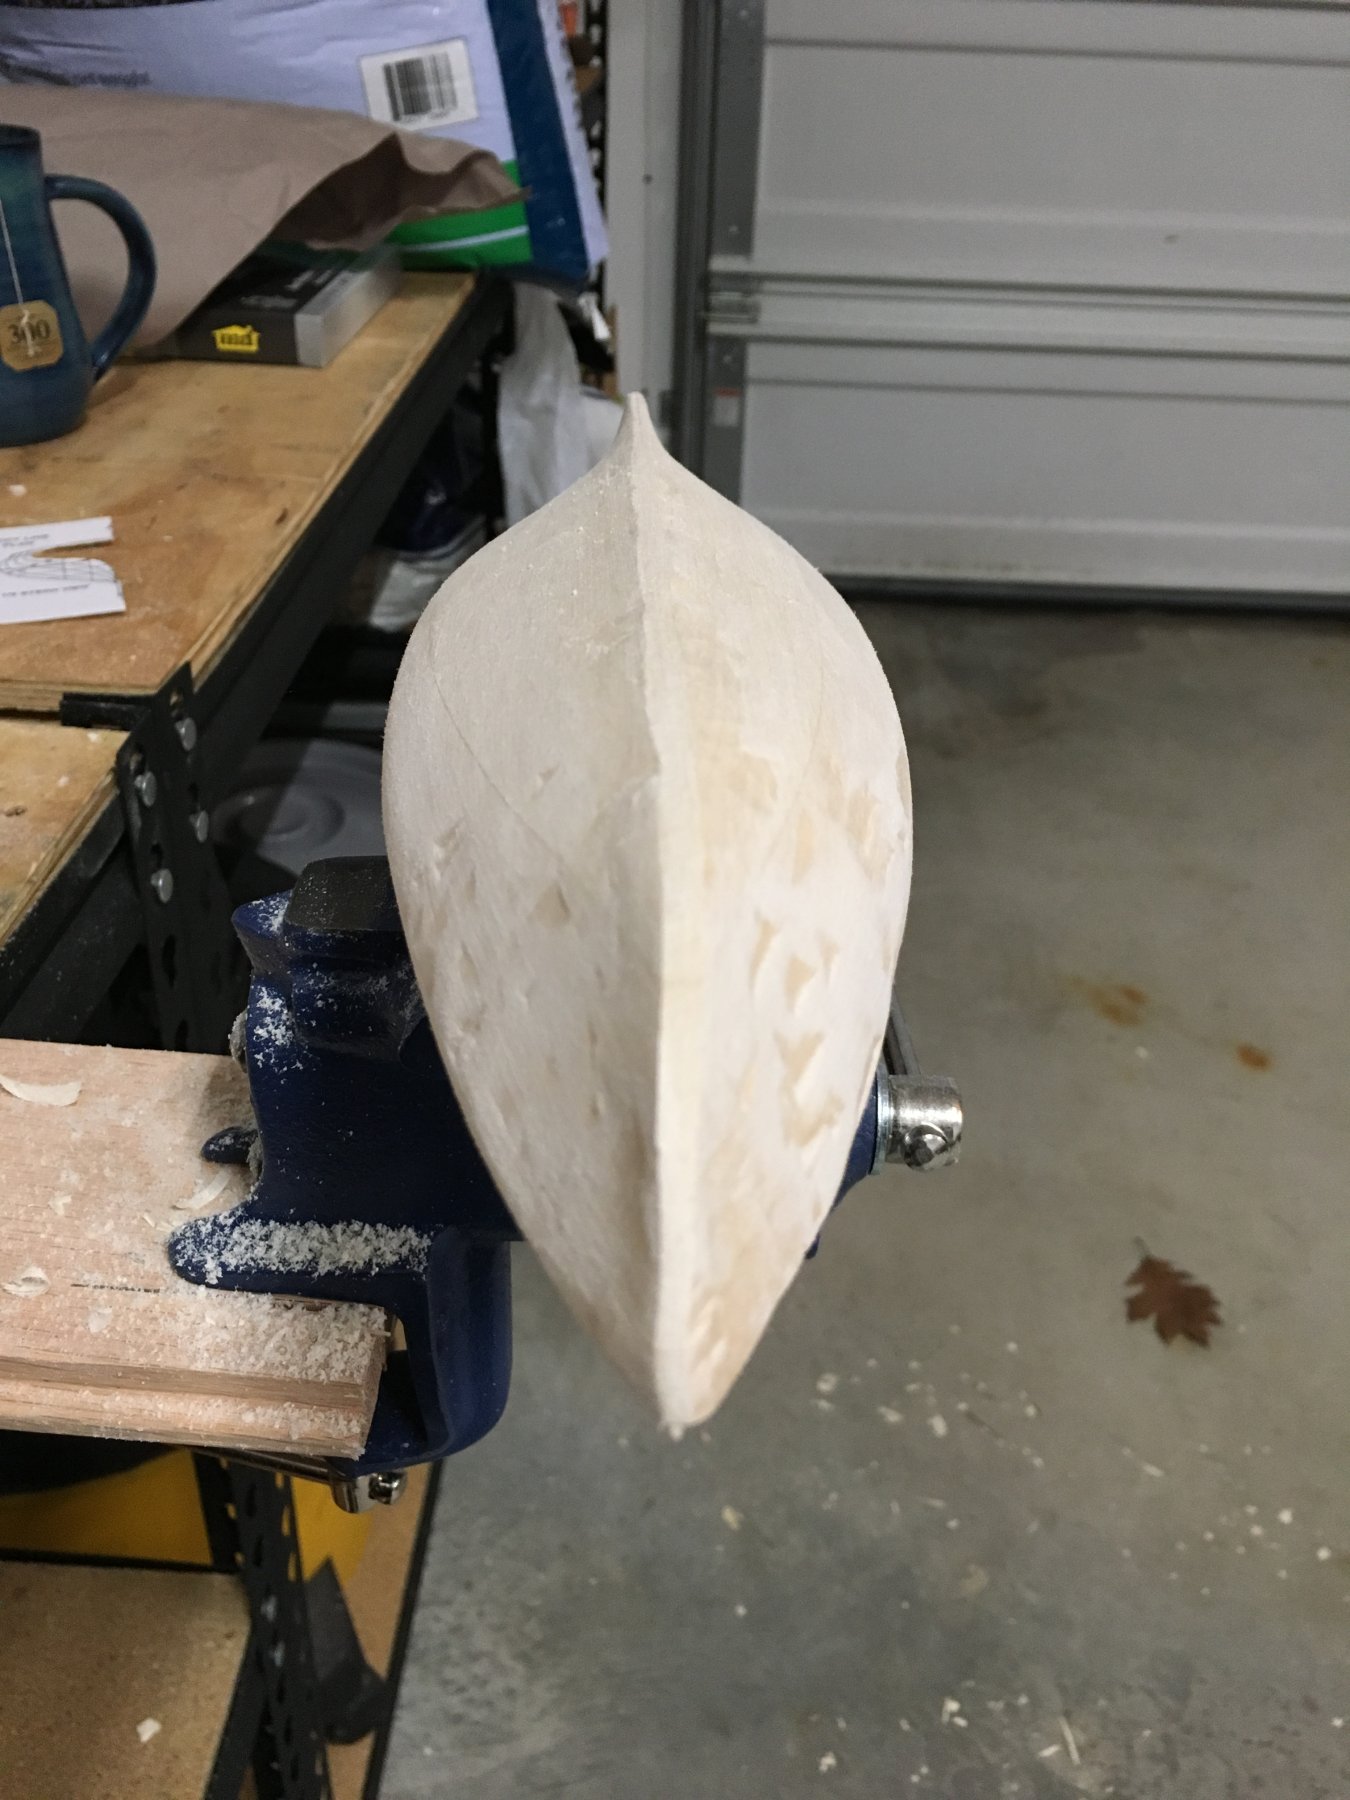
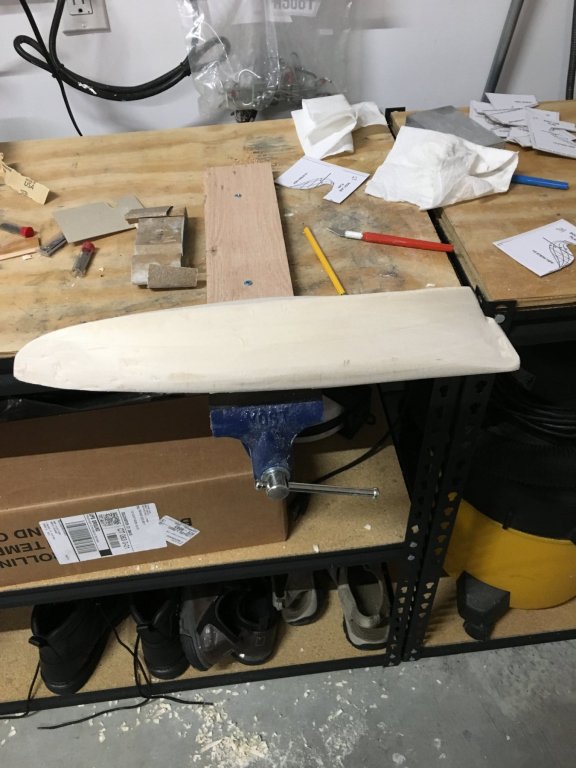
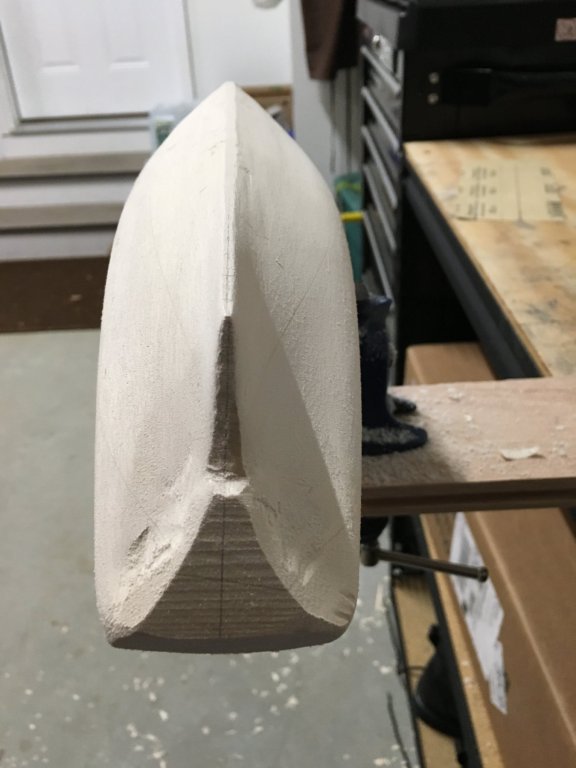
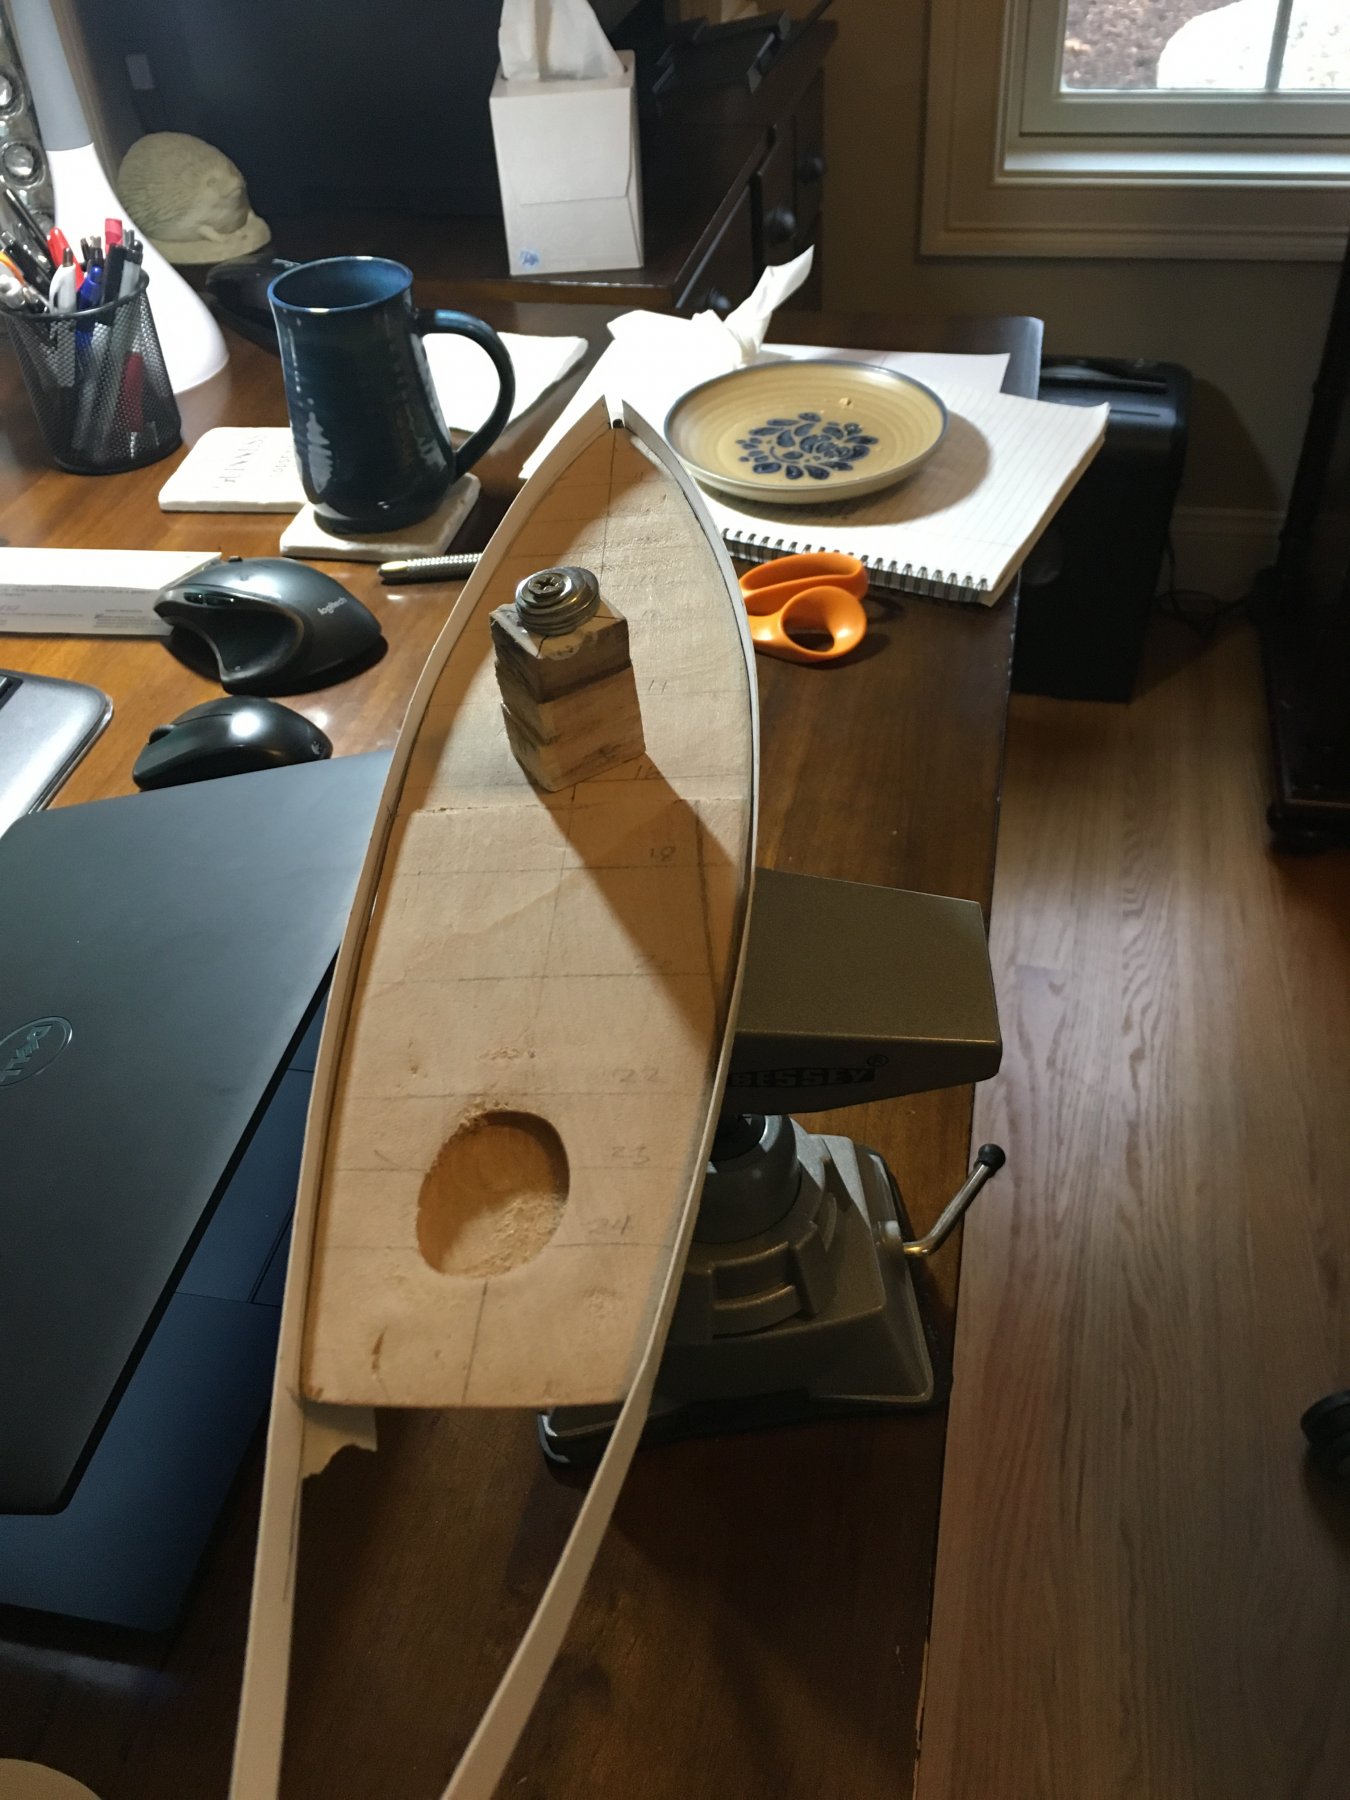
A bit warmer this weekend in Connecticut so I spent time rough shaping the hull. Still needs a little more work on the transom.

- 60 replies
-
- 1
-
-
- mary taylor
- solid hull
- (and 2 more)
-
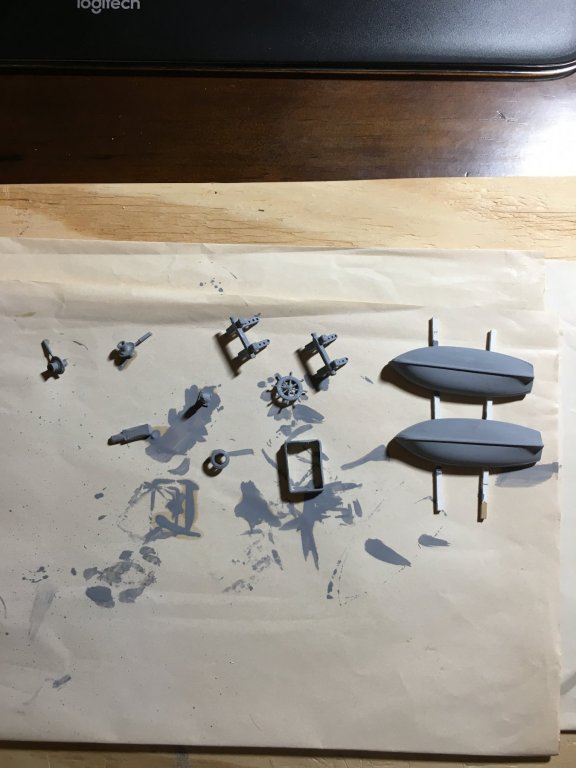
So, its too cold to work in my garage. The hull shaping will need to wait. I decided to get started on cleaning up and painting the Britannia casting pieces. Here's a few cleaned and primed pieces. Still more to go.
- 60 replies
-
- 3
-
-
- mary taylor
- solid hull
- (and 2 more)
-
Thanks Gary. I did check out MrBlueJacket's Mary Taylor build log, many times actually. It helped answer a few questions and I'll definitely be checking it multiple times as a guidepost for my own progress. Cheers, Jim
- 60 replies
-
- 1
-
-
- mary taylor
- solid hull
- (and 2 more)
-
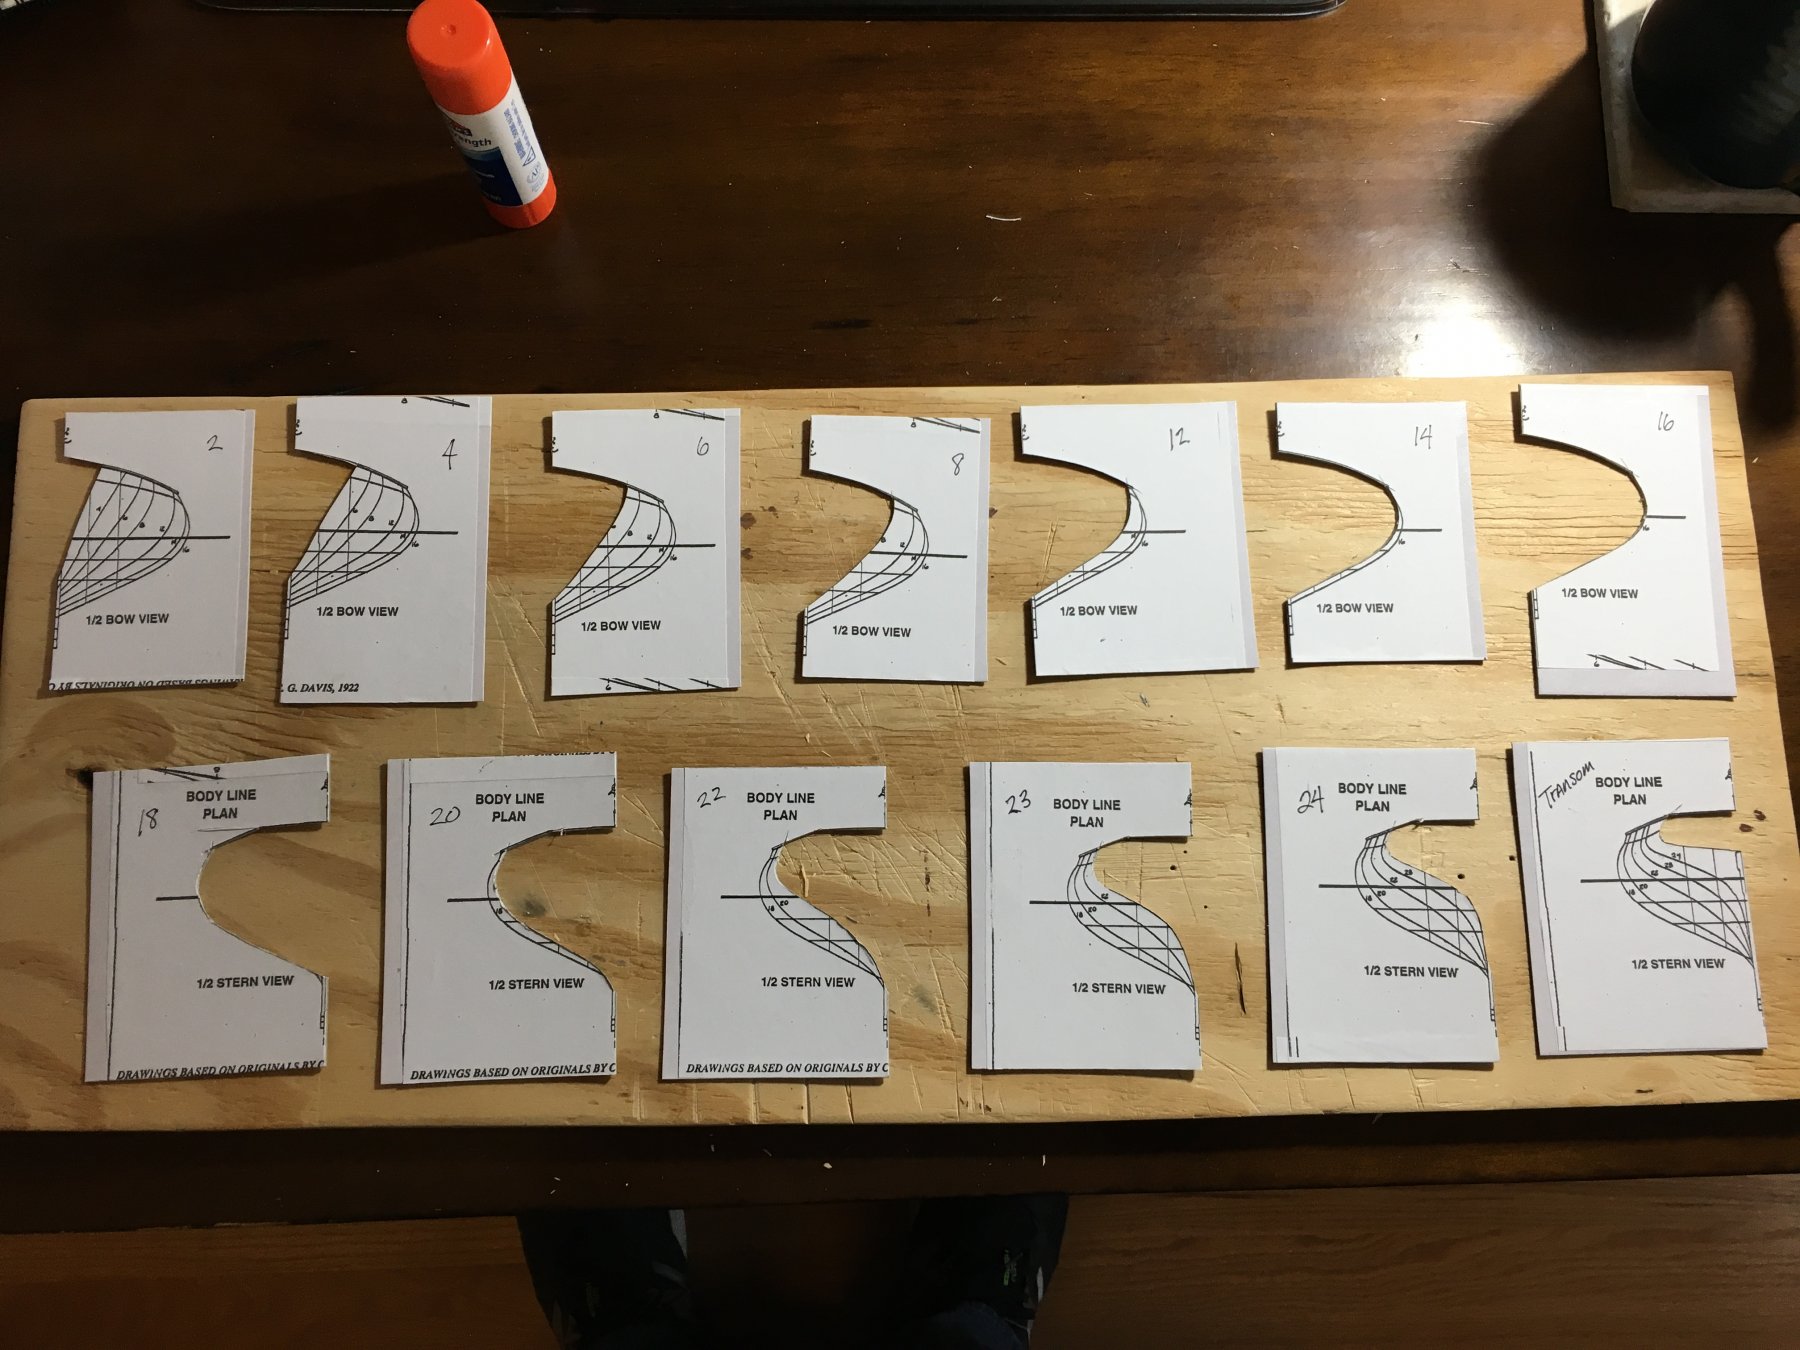
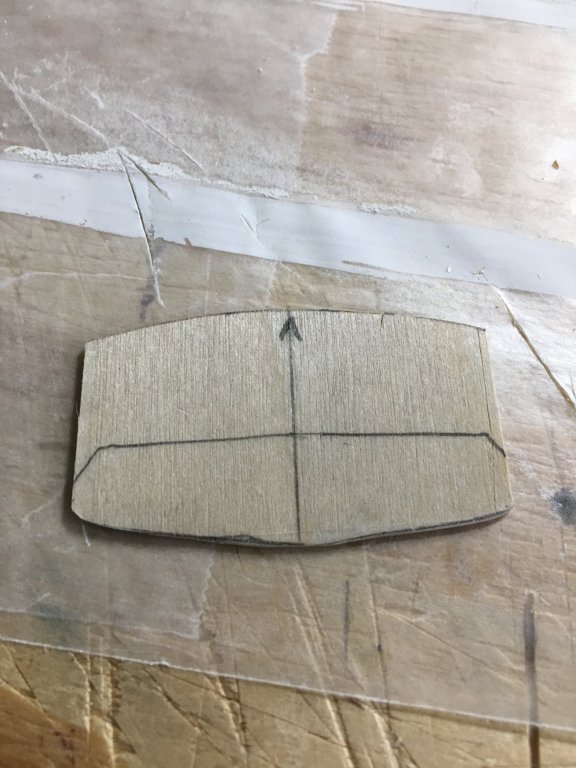
I glue copies of the Body Line Plan to cardboard, then cut out each station template.

- 60 replies
-
- 6
-
-
- mary taylor
- solid hull
- (and 2 more)
-
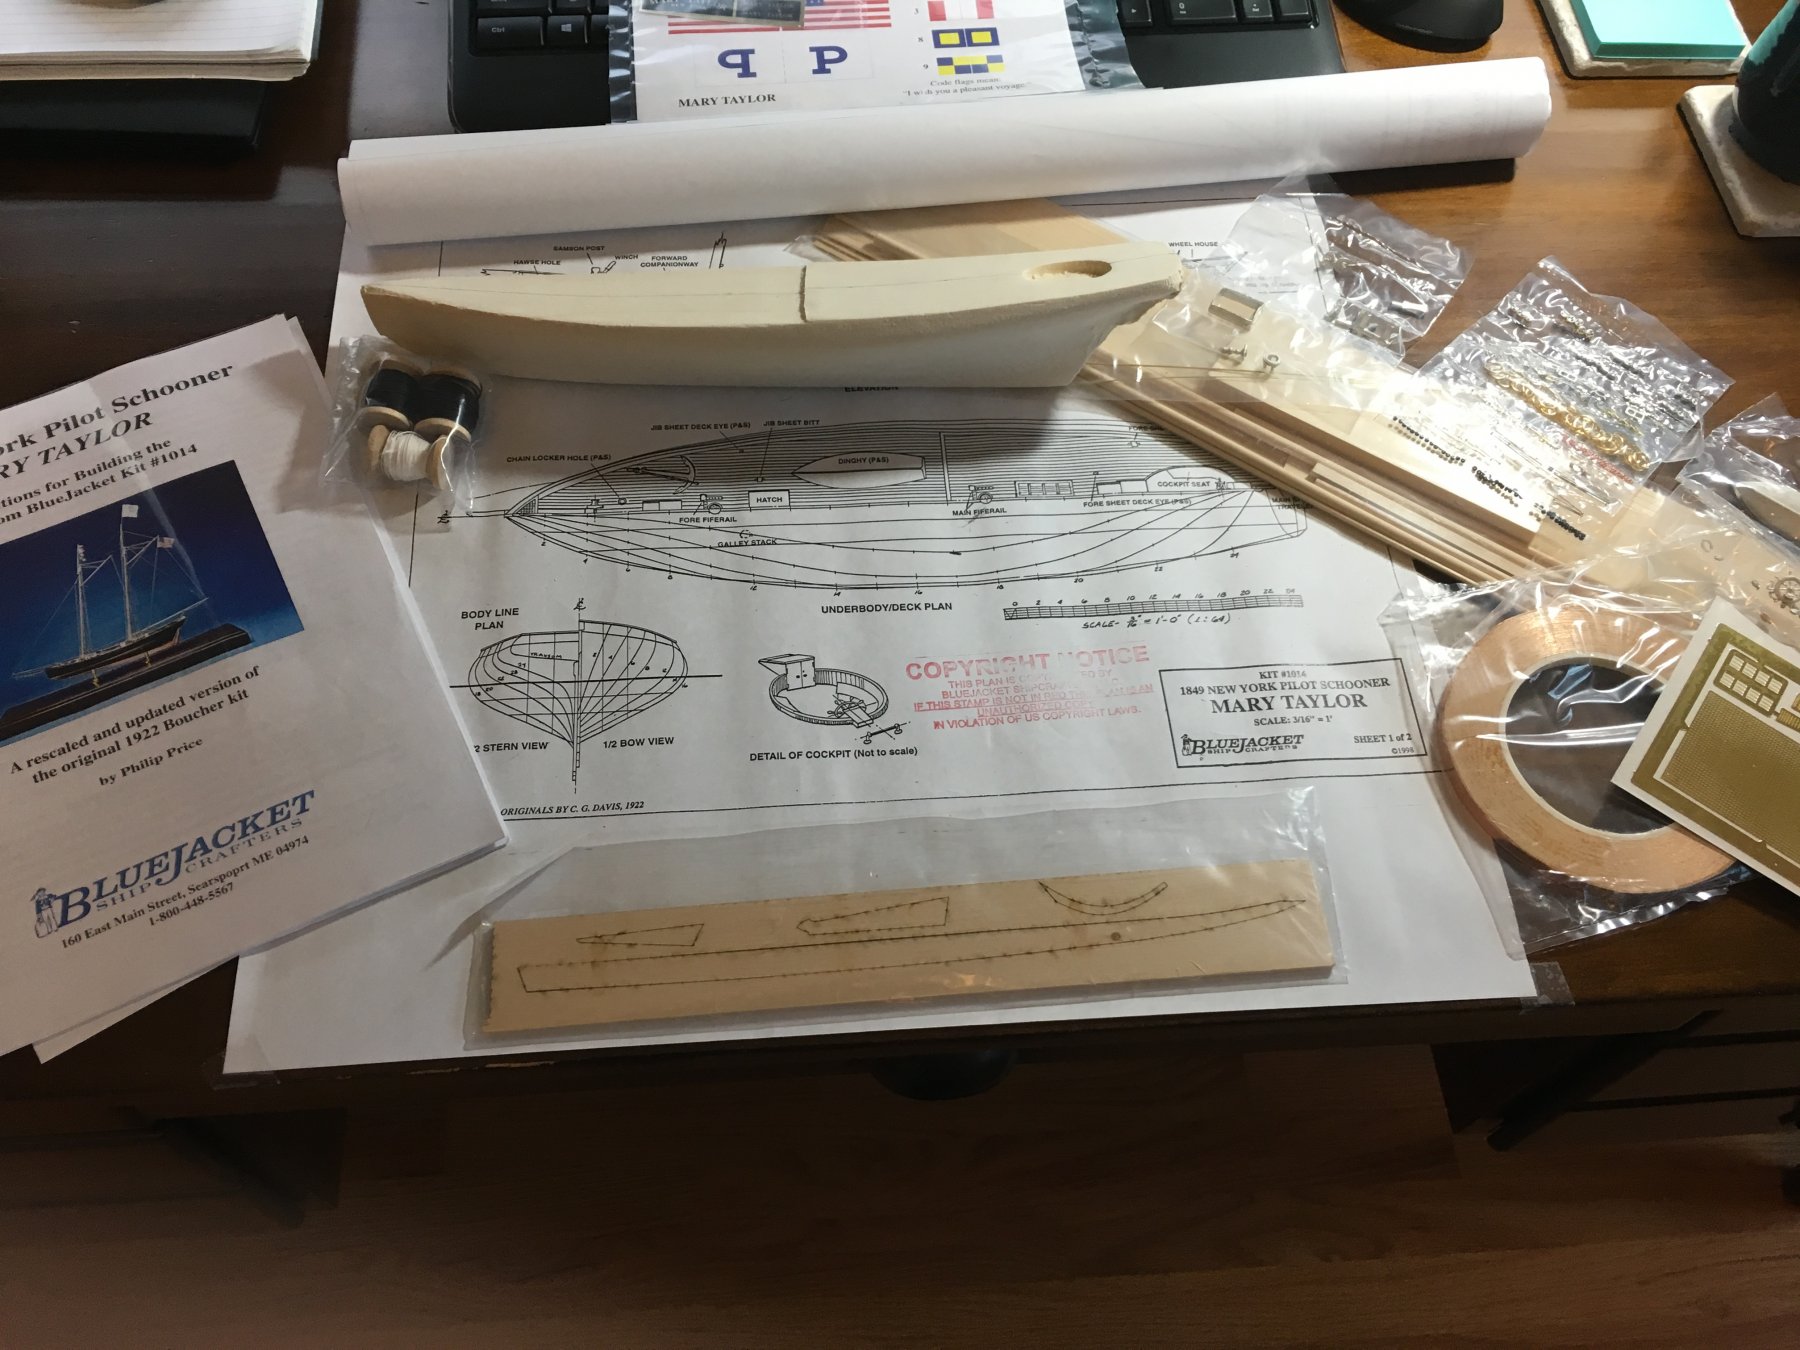
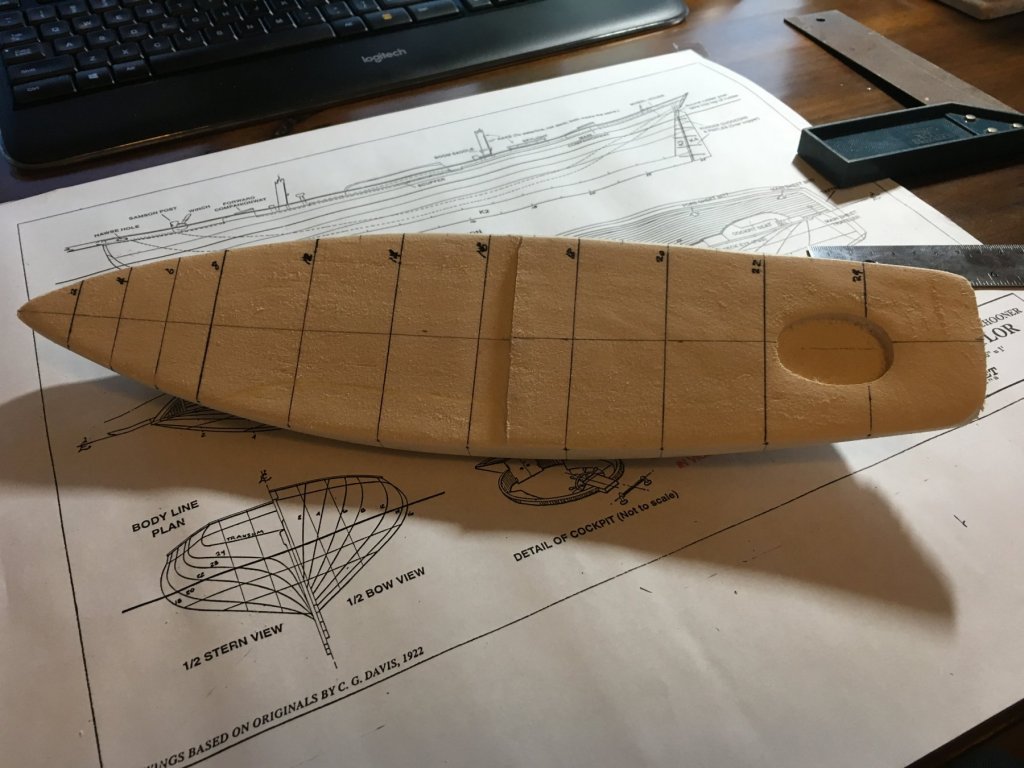
This is my 2nd build. Received the Mary Taylor kit for Christmas 2018. My first build was the Swampscott Dory from Bluejacket, so this is a real step up in difficulty. I'm excited to get started and welcome all helpful feedback. The instructions suggest two ways to shape the hull 1) by eye, or 2) using hull templates. Since I'm new at this, I've chosen the template method. It takes a bit more work, but should produce a more accurate hull shape. I've marked the station lines from the Body Line Plan. Now it's time to create the templates.

- 60 replies
-
- 6
-
-
- mary taylor
- solid hull
- (and 2 more)


.JPG.1cf23f20eeedc2ae002e3eb135556cde.JPG)
.JPG.765a19bba76ec893d98d33bf96bd044b.JPG)
.JPG.0e2c953c518fc5f0e14bcfbbca6d9df2.JPG)
.JPG.fb8221c4d888f1eadbd110e52dd88e7a.JPG)
.JPG.a168bb4198d33127d58f2a707d7ab3f7.JPG)
.JPG.e39805e88d59496530c54ecf142068a3.JPG)
.JPG.68713e384bb21df87c2fced47a66fd45.JPG)
.JPG.06a3d23b15637bdd1c960e9788d7d378.JPG)
.JPG.4d5521042227d0ee2abfaa3d05ba46de.JPG)