


jgodsey
-
Posts
111 -
Joined
-
Last visited
Content Type
Profiles
Forums
Gallery
Events
Everything posted by jgodsey
-
 Thank you Gary and Henrik. Your patience and kind words are very much appreciated. I've started a new build - New Bedford Whaleboat. It was a gift from one of my sons. I plan to re-gift it back to him once it's completed. All the best, Jim
 -
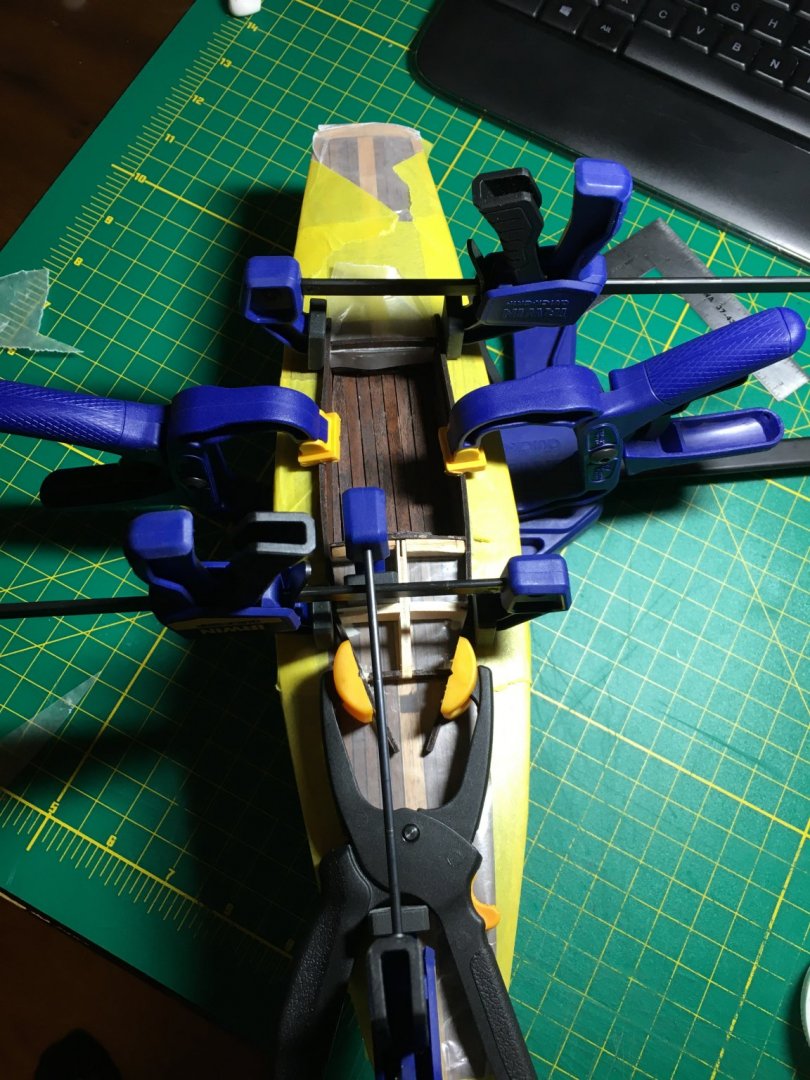
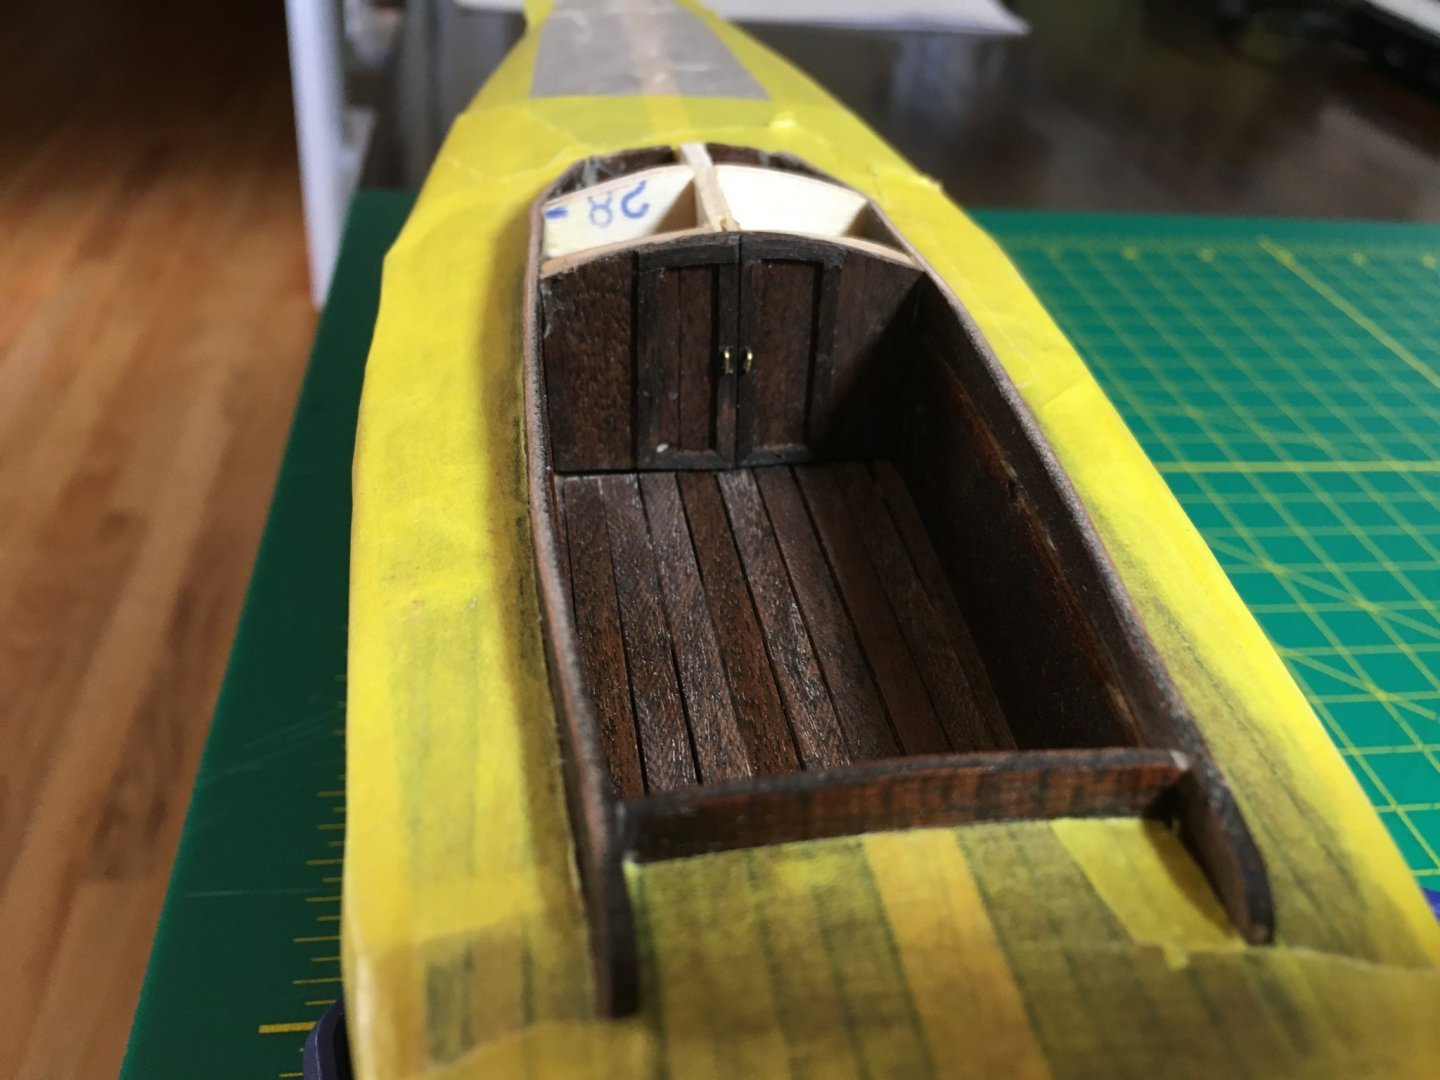
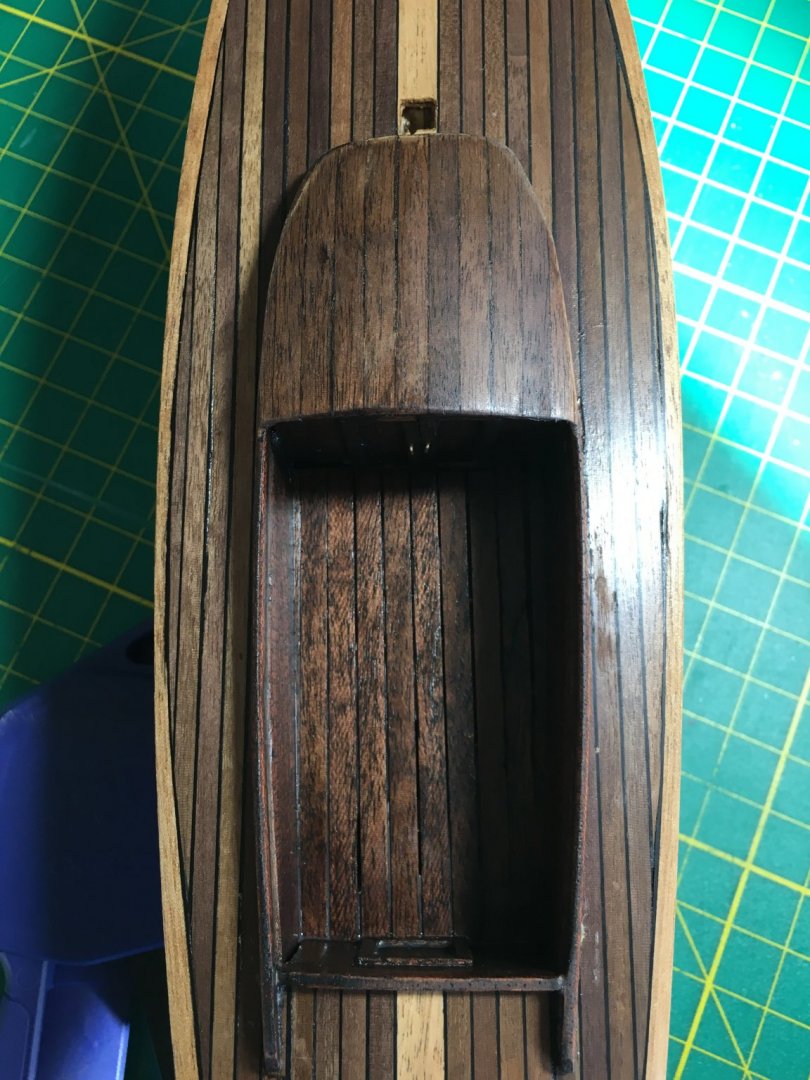
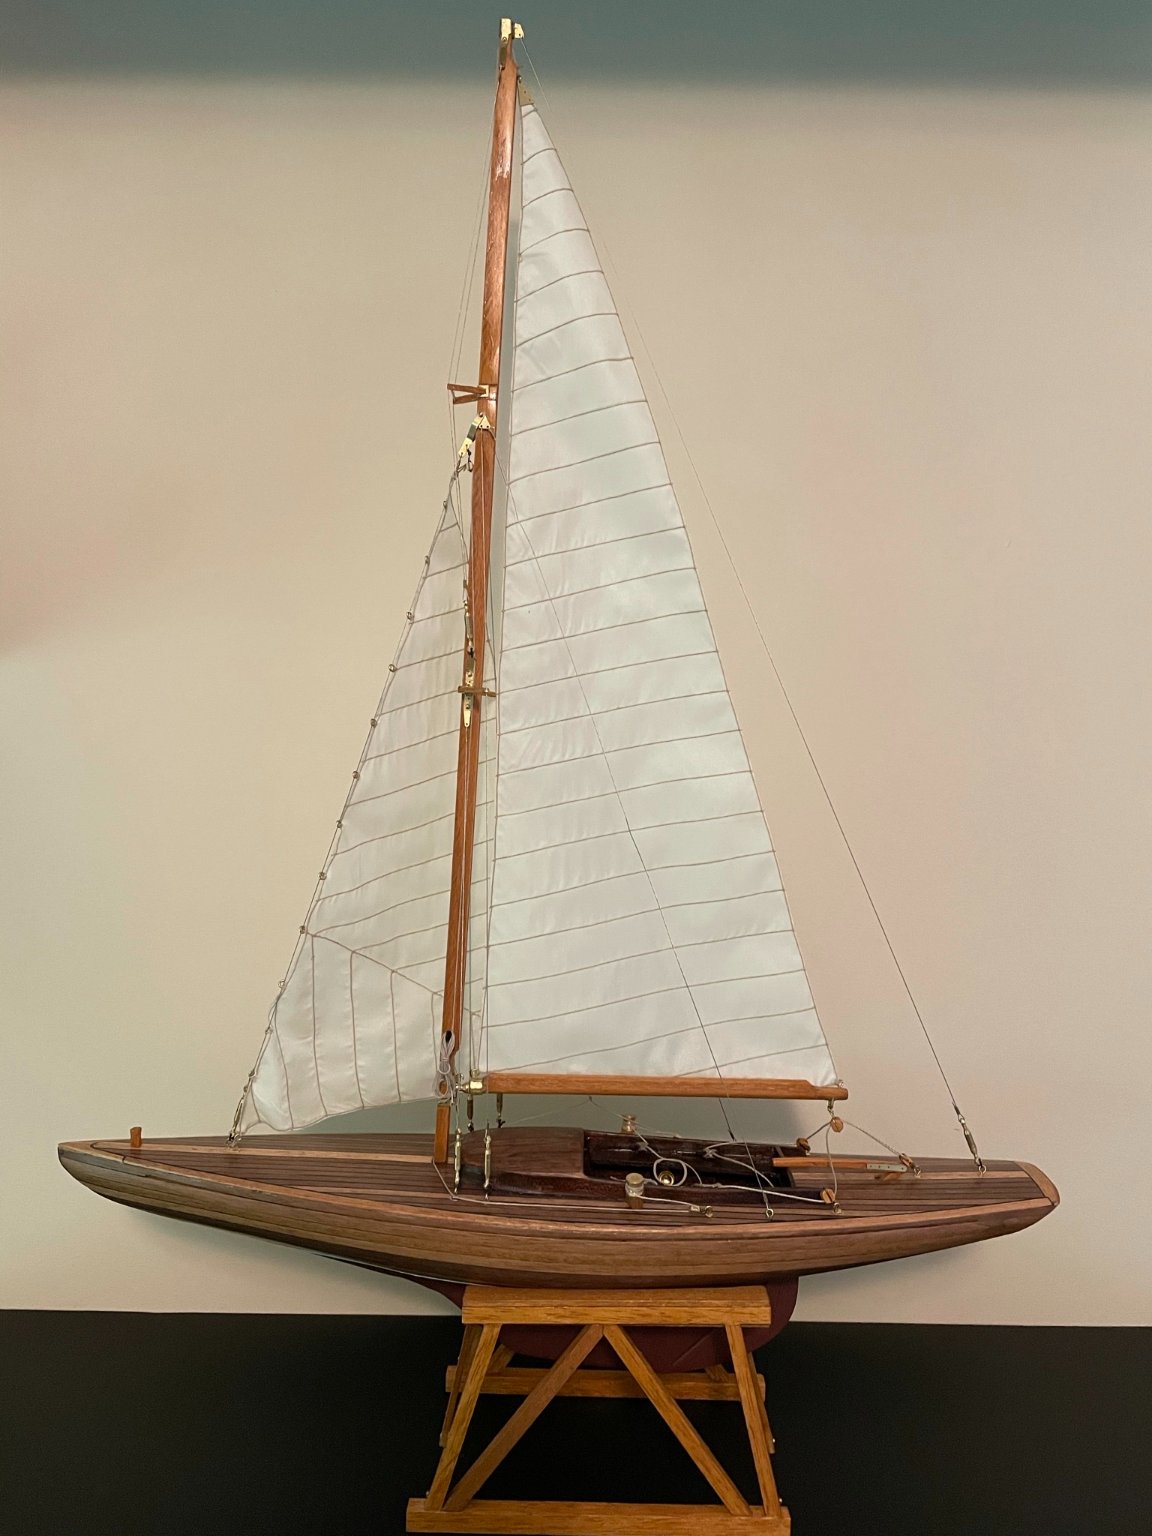
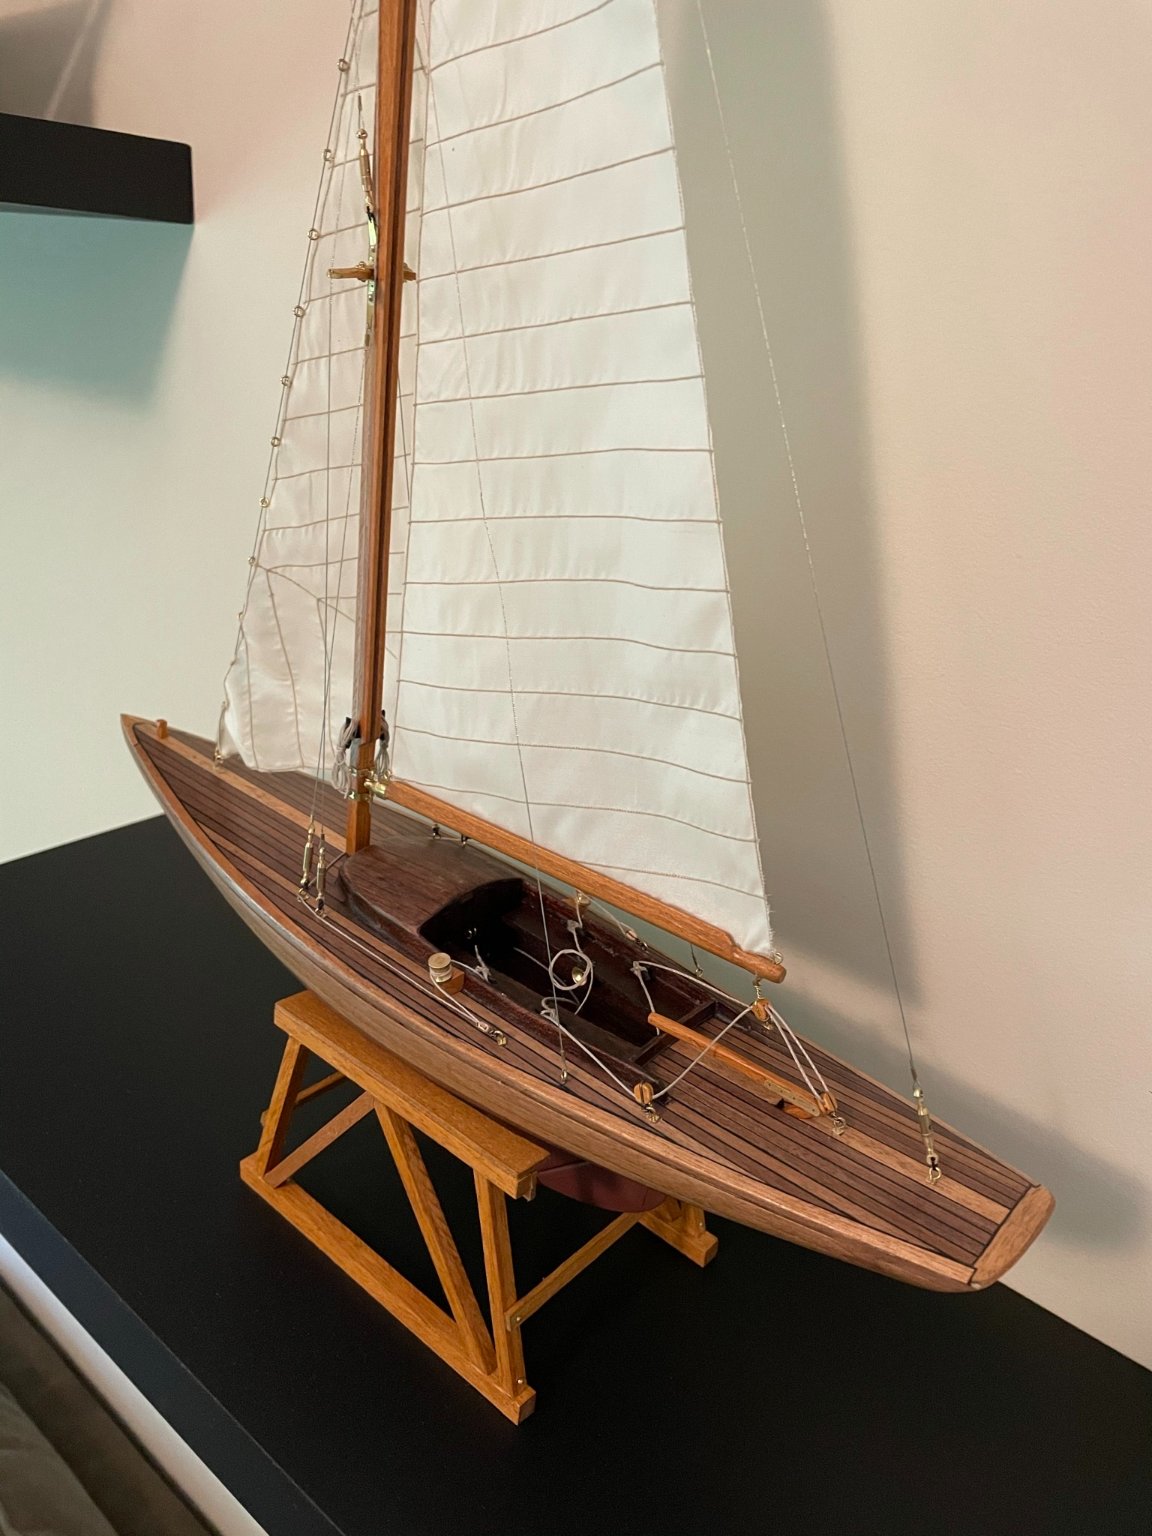
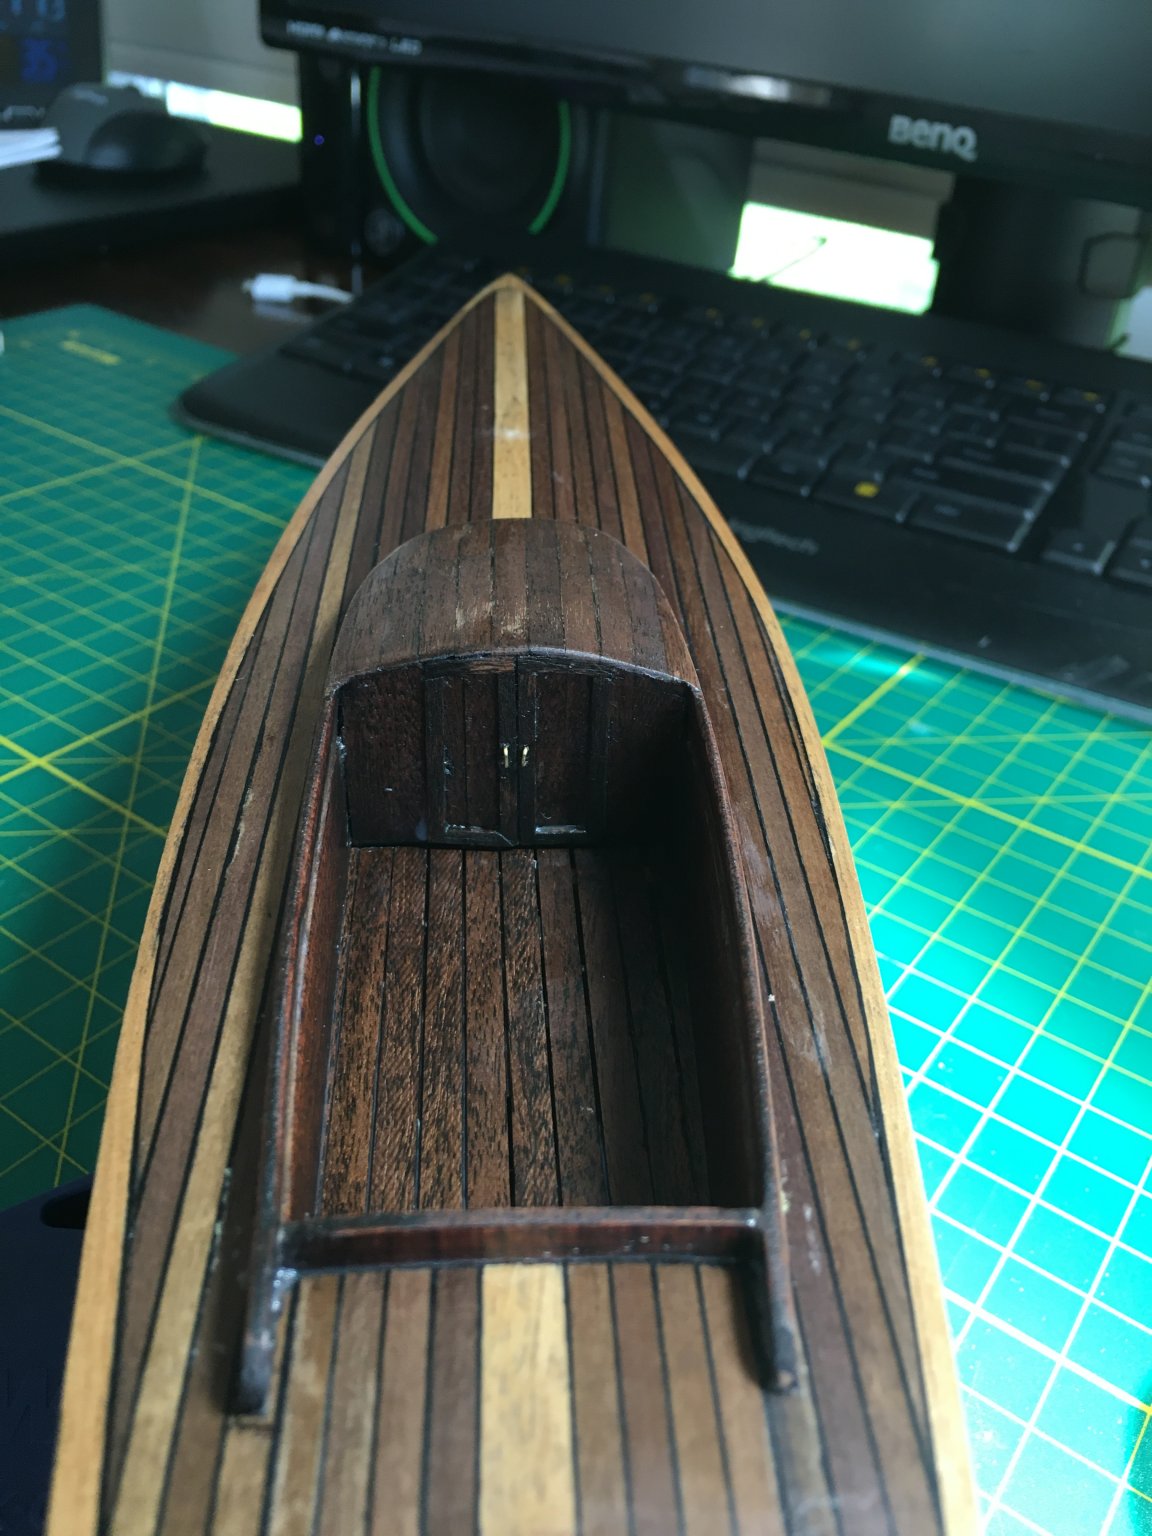
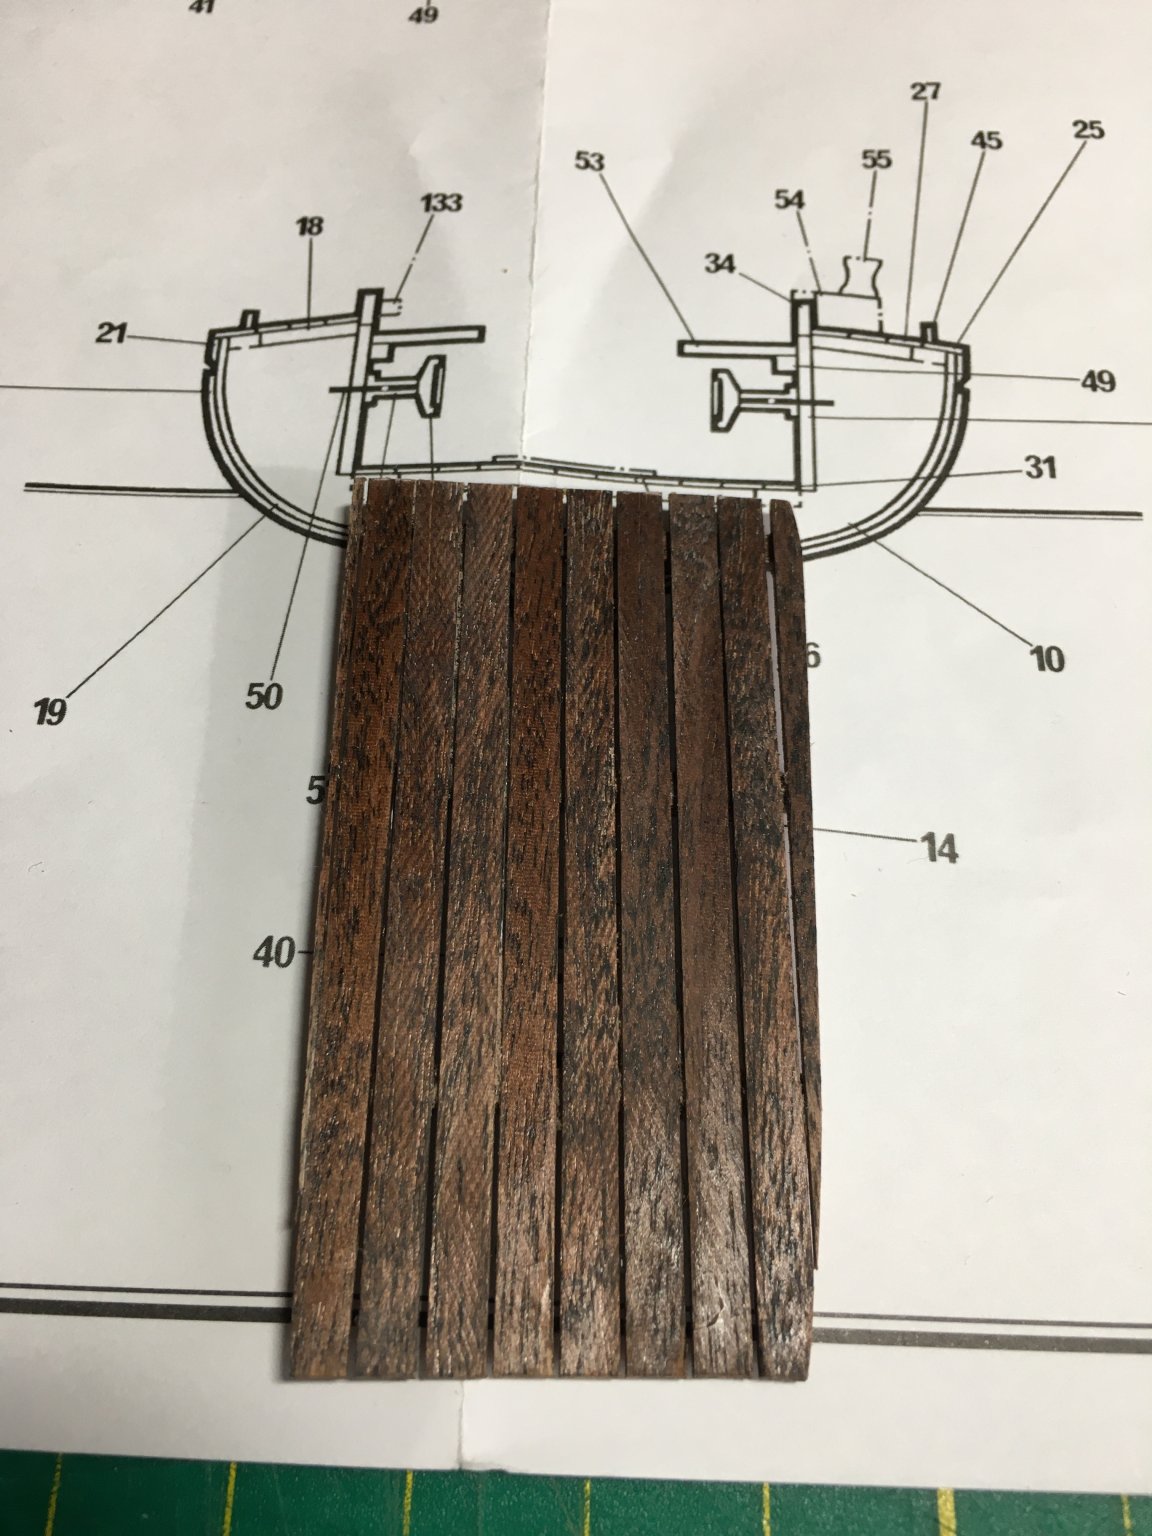
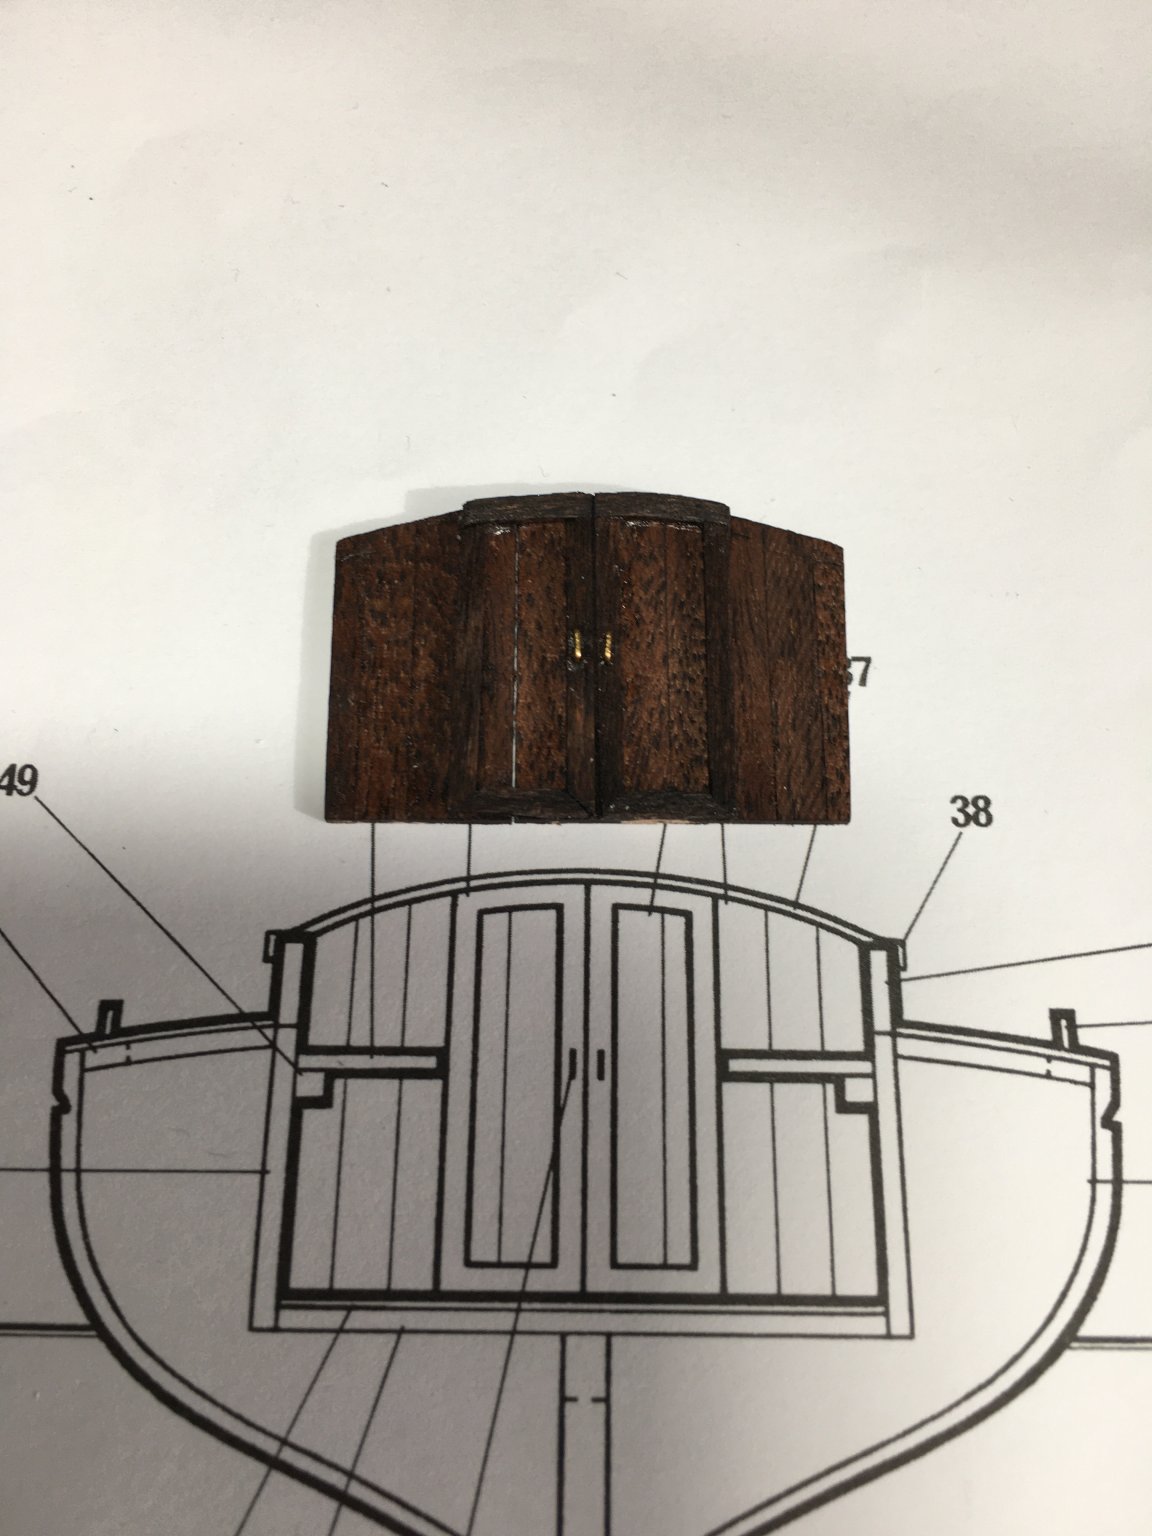
The build continues slowly, but surely. It's been all about the cockpit and cabin lately. Attaching the cockpit and cabin coaming was a tricky. I don't think any more clamps would have fit. 😀 But, the finished product works. I did cover the deck and hull with wax paper and masking tape for protection. Also, all the coaming and cabin roof planking was stained with Min-wax Mahogany. I'm trying to get a warm color that contrast nicely with the deck. The cockpit and cabin doors. Next up, planking the cabin roof. Here's the finished cabin planking. The cabin roof planking needed a short curve so the planks were soaked in boiling water for about 5 minutes. That made them very soft and easy to bend. Also, since CA glue reacts well with moisture, that is the glue that was used. The end result was a good bond, but the planks had actually swollen due to the hot water. Once they dried, they shrank back a bit exposing a few small seems in between. This required wood putty, more sanding and more staining. After that, 3 coats of of wipe on poly to match the deck. On to marking the water line and painting the bottom with "anti-fooling" paint - a.k.a. Floquil Reefer Red. Happy Memorial Day and Thank You! to all veterans. Jim


-
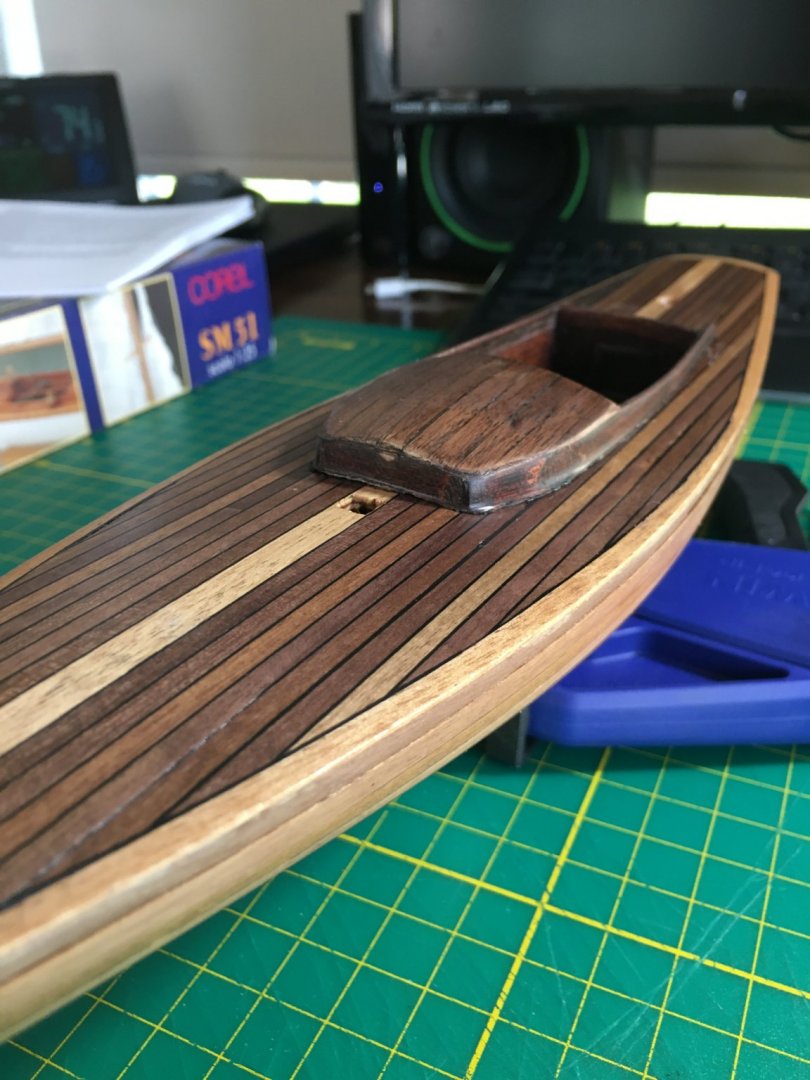
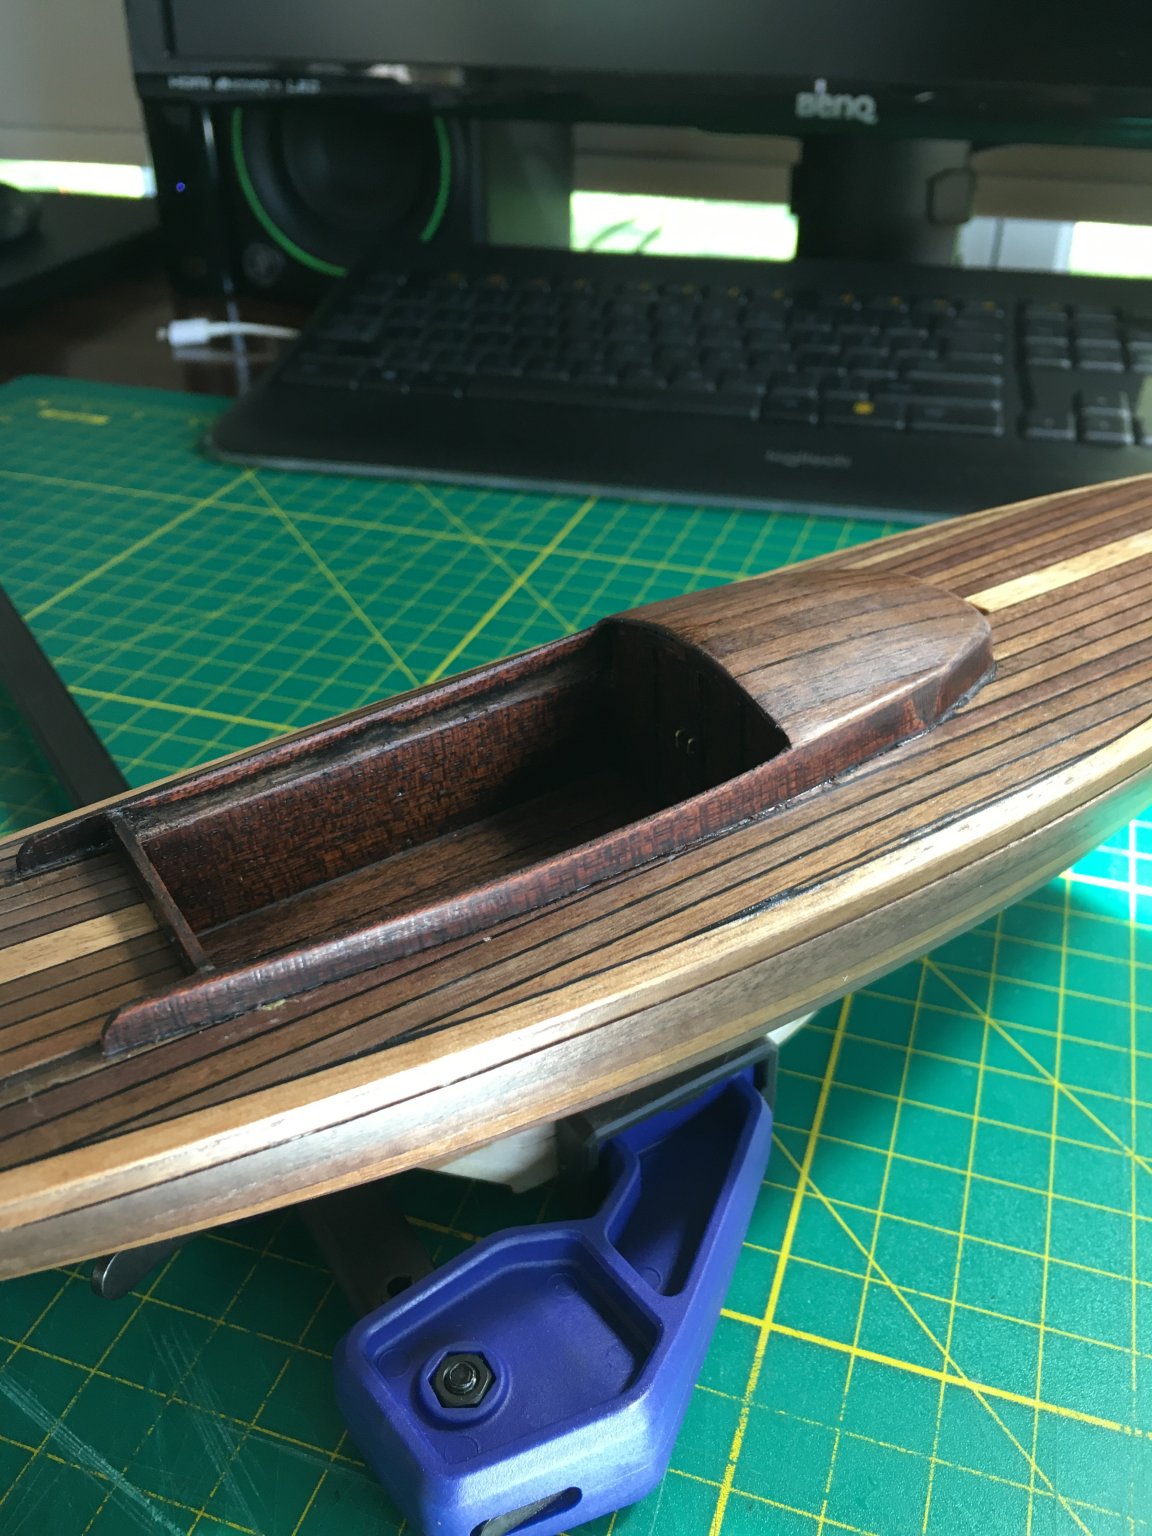
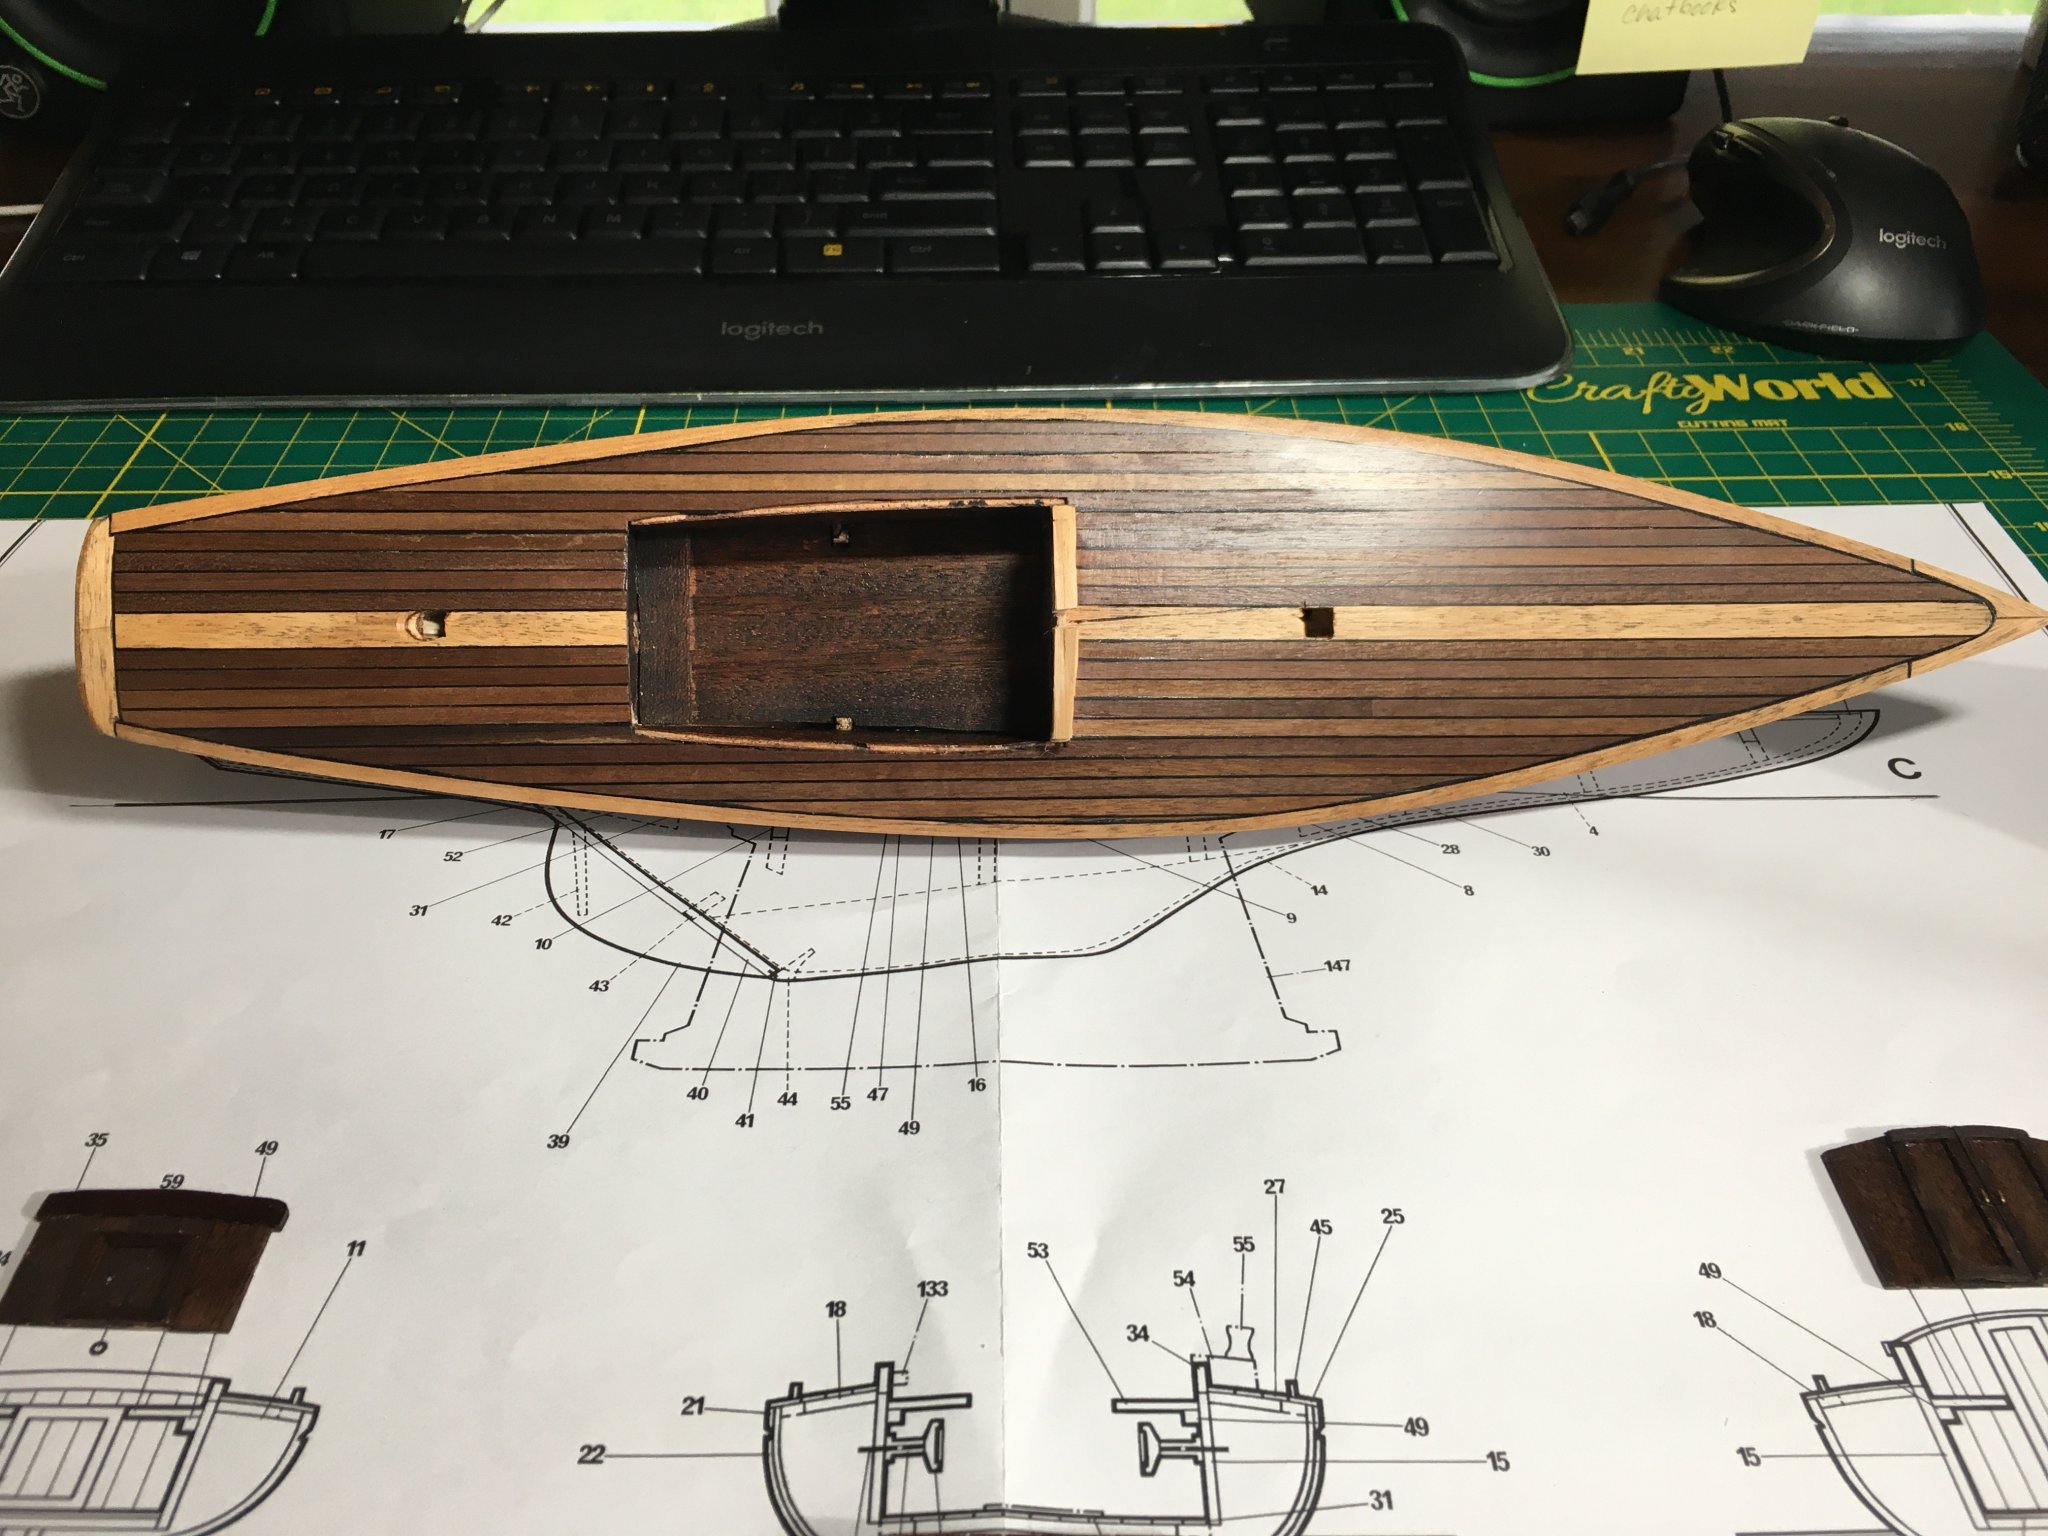
Hello fellow stay at homers😷 I’ve been plugging away at the Dragon. Hull and deck sanding is pretty much completed. Three coats of satin finish Wipe-on Poly has been applied and things are looking good. I’ve started building the cockpit and cabin area. The aft cockpit panel and fore cockpit panel are complete, along with the floor decking. Next up is planking the small cabin roof. Then, I need to mark the water line and paint the hull below the water line. Stay safe and happy modeling! Jim


-
Very well done! I've seen a few of these boats both in person and pictures on this forum. Your finished boat looks quite nice. Also, your build log and review at the end are much appreciated. I have the Picket boat kit waiting in the wings to start once my current build is finished. Be advised, I plan to steal as many of your ideas as possible. 😀 I'm looking forward to whatever your next build may be. Cheers, Jim
- 54 replies
-
- 1
-

-
- picket boat
- model shipways
- (and 1 more)
-
Great work as usual Gary! Where will these be mounted on the boat? Or, do you plan to create a diorama of the boat in action? Cheers, Jim
-
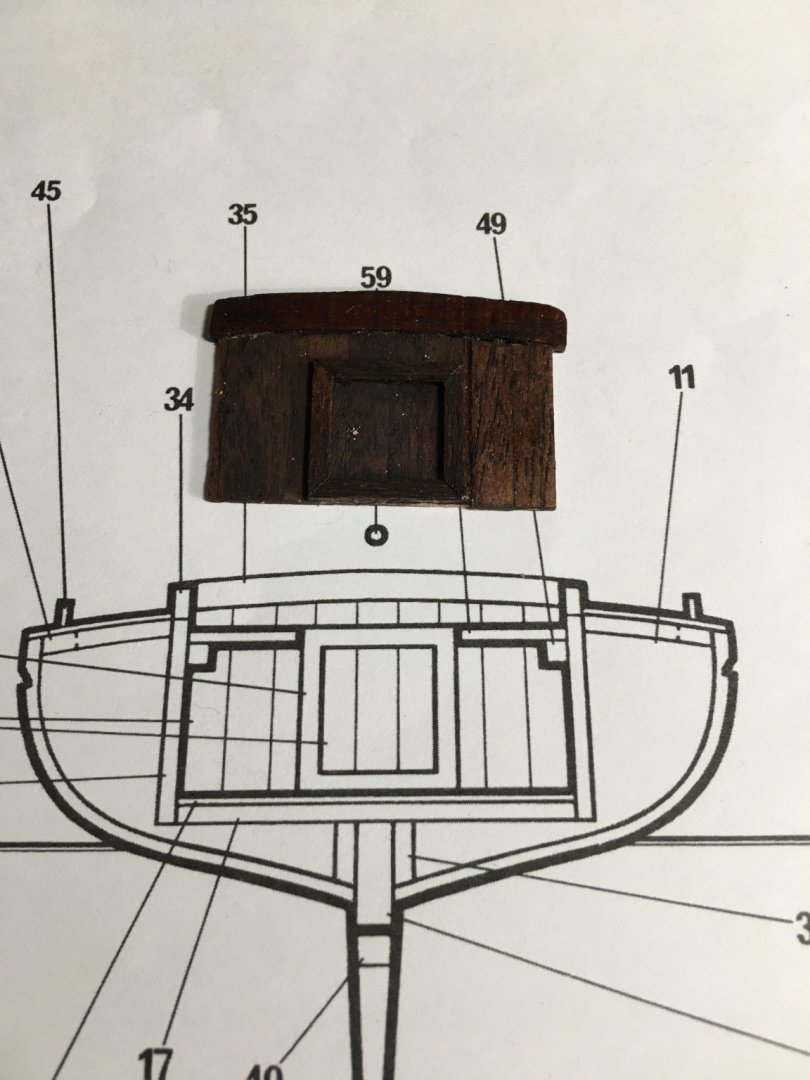
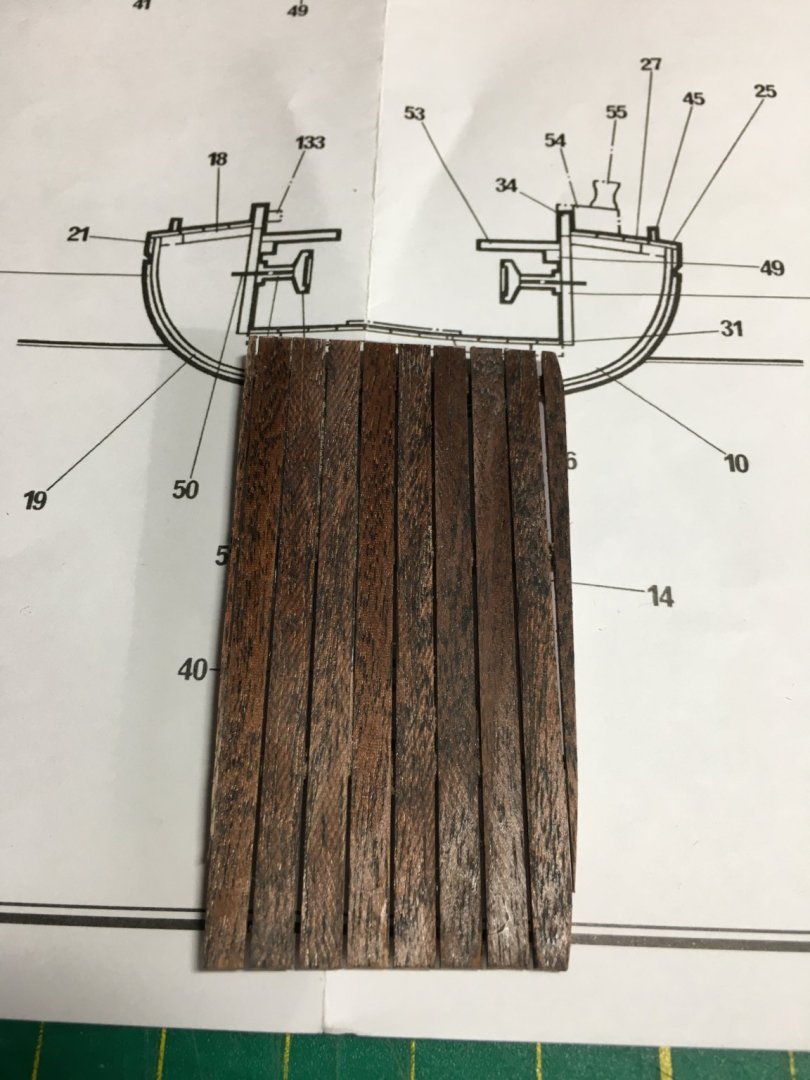
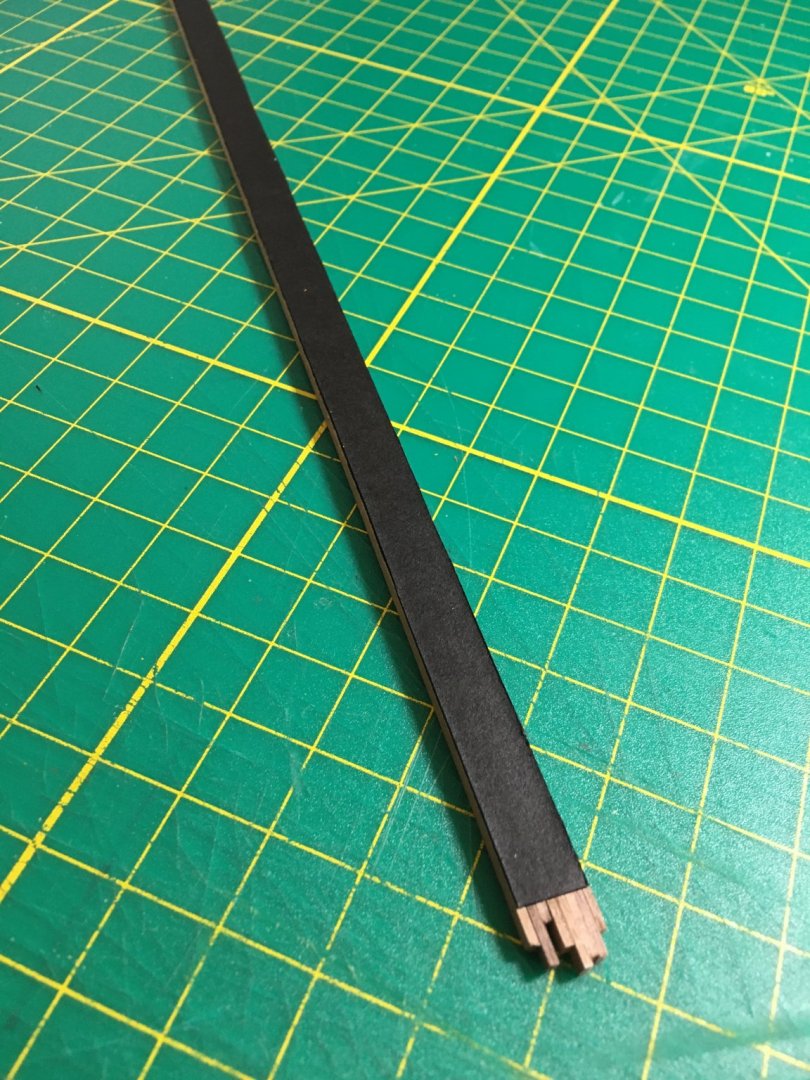
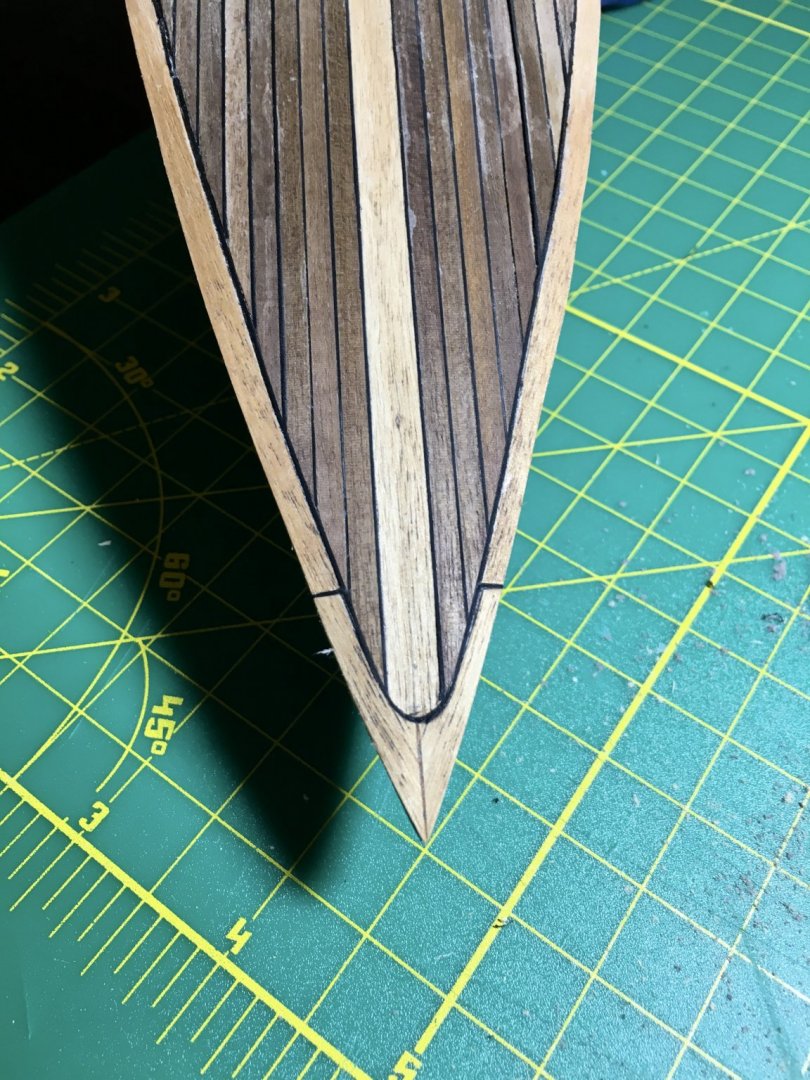
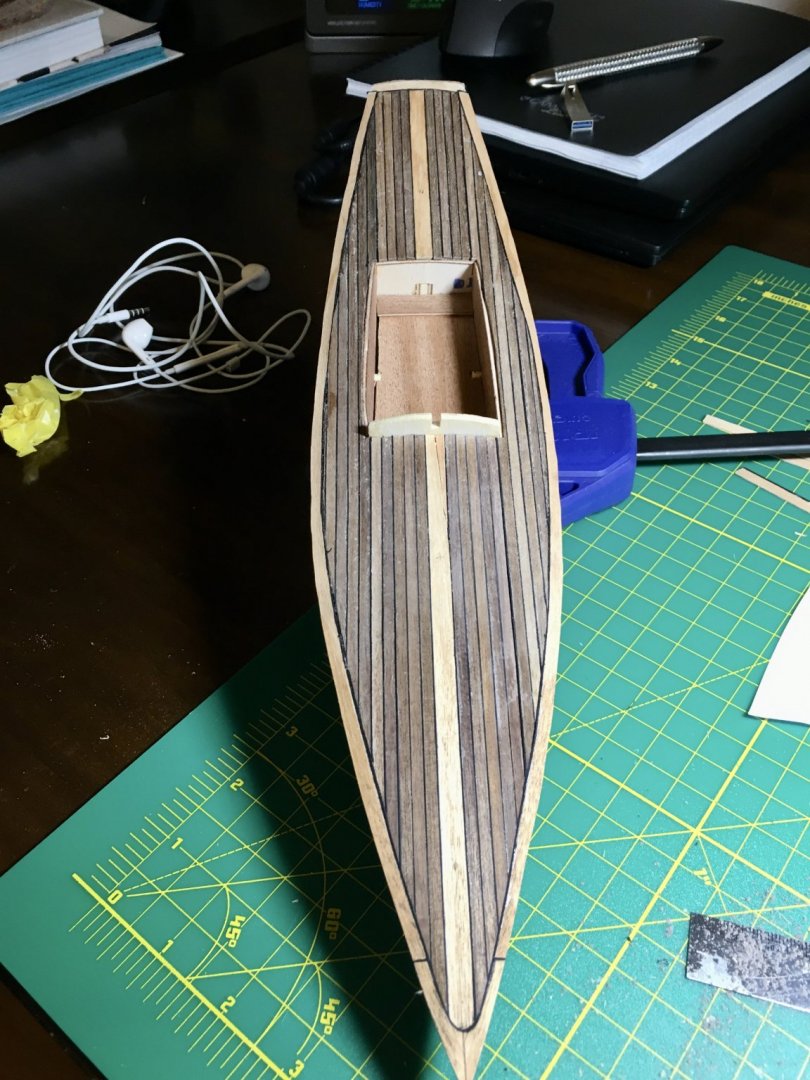
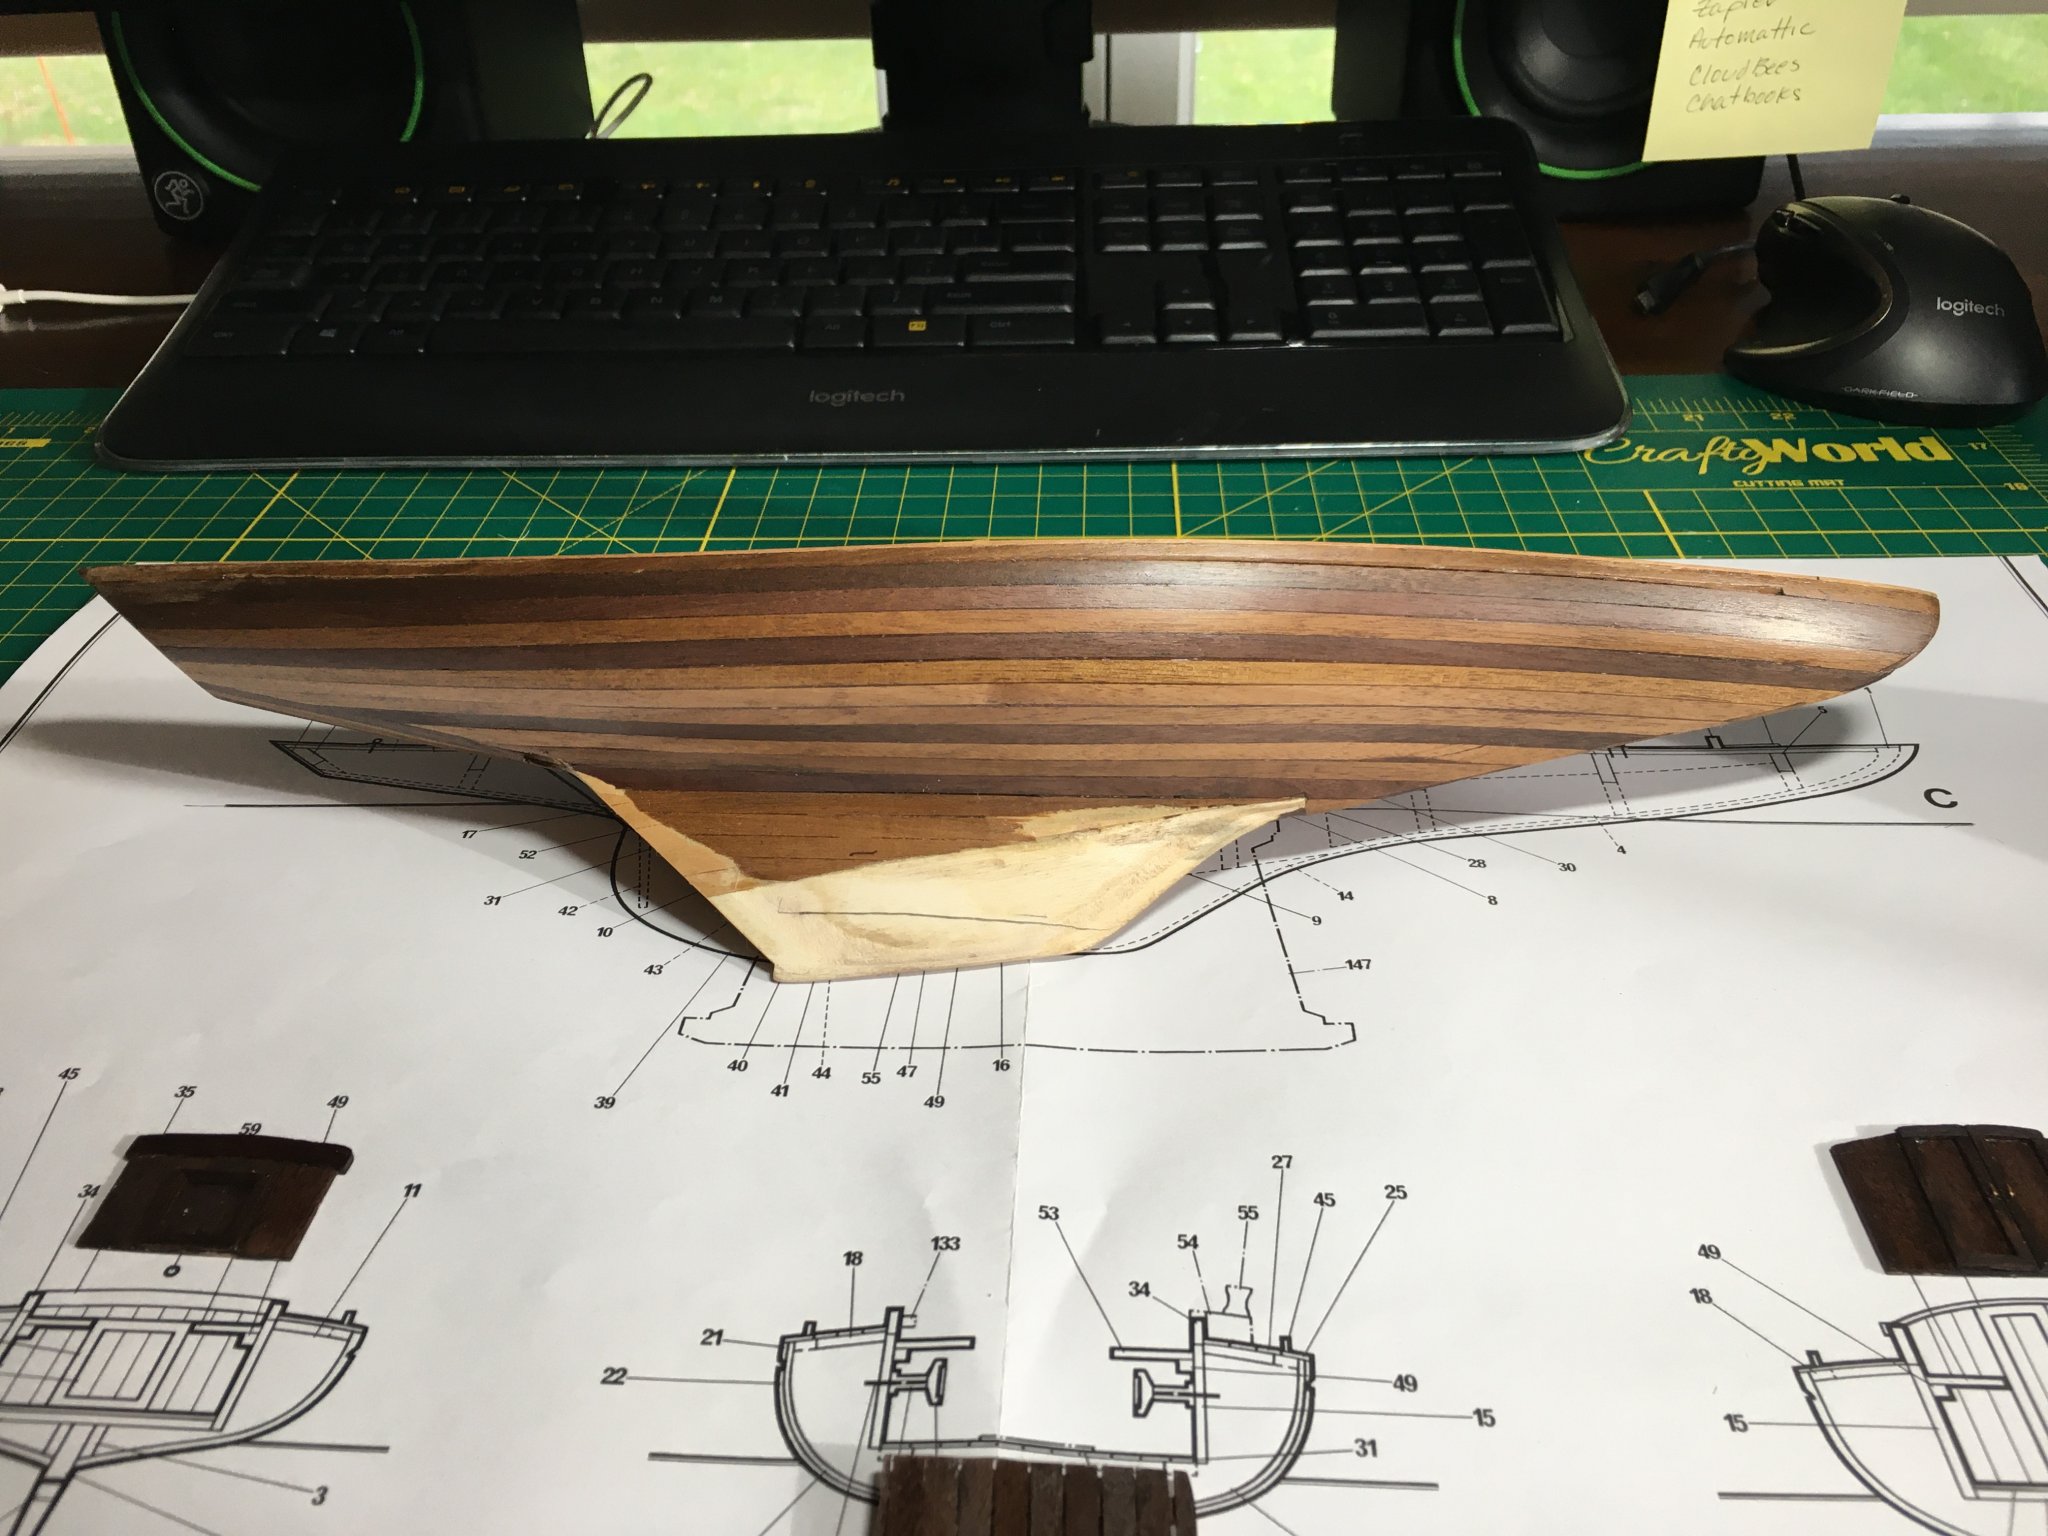
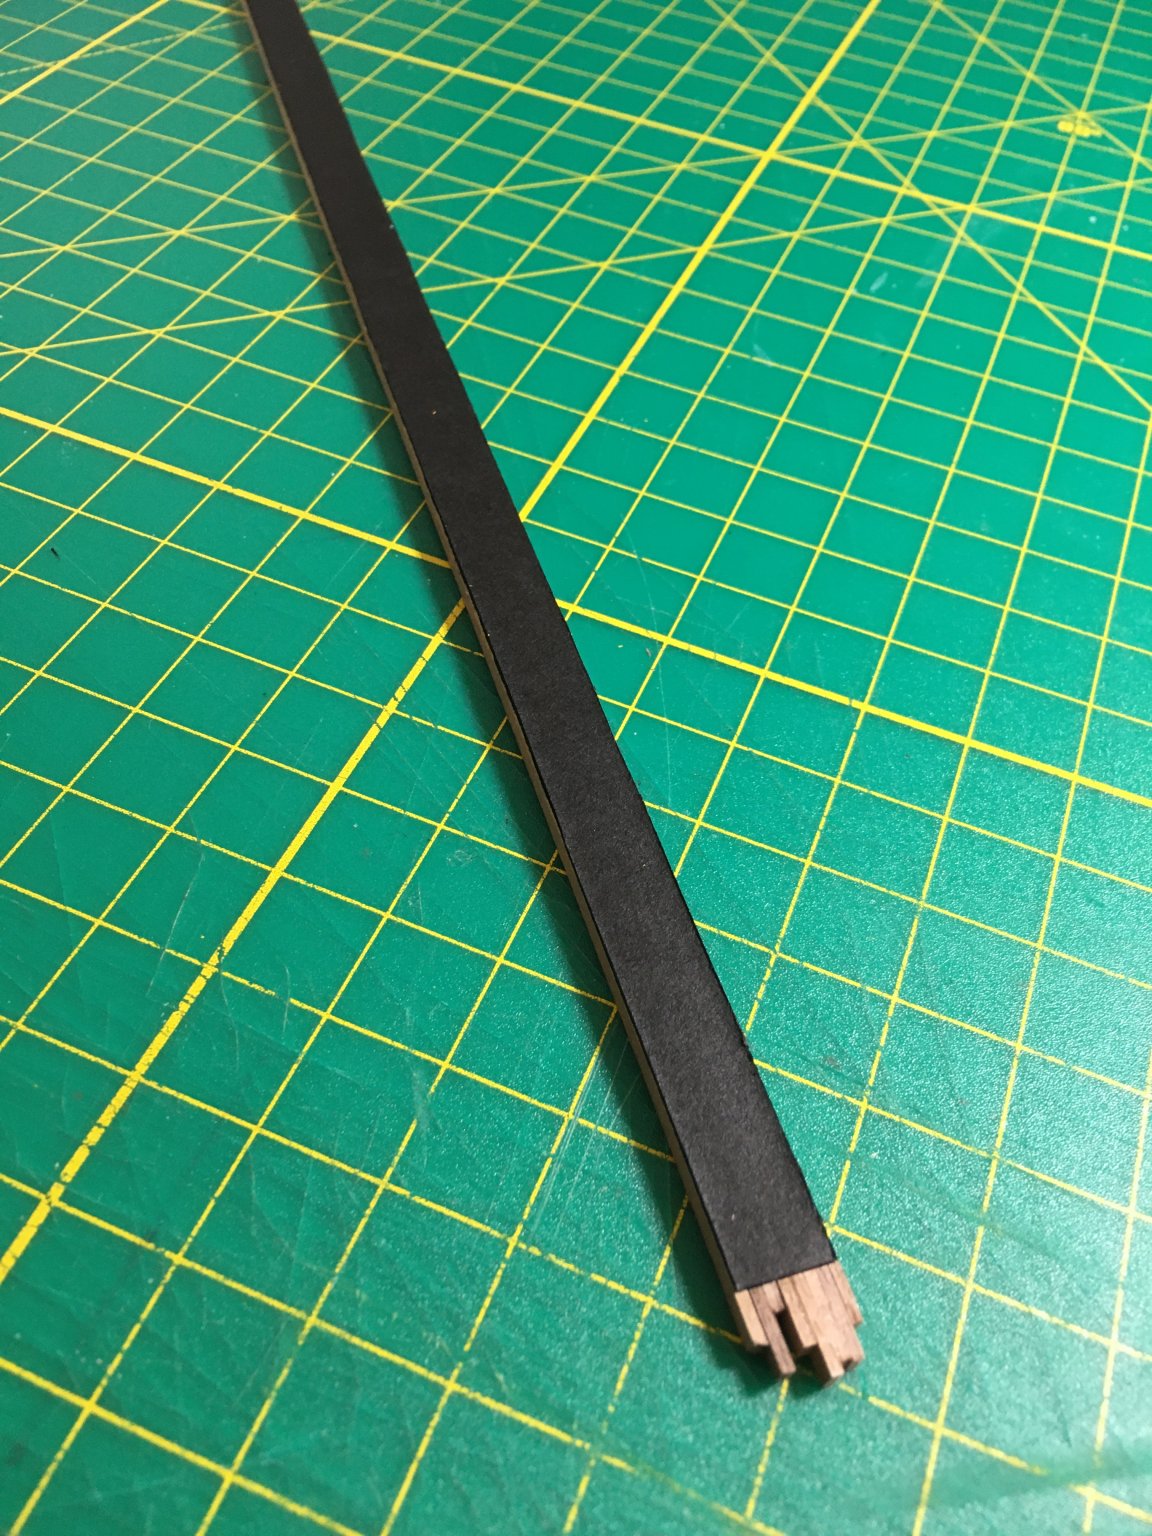
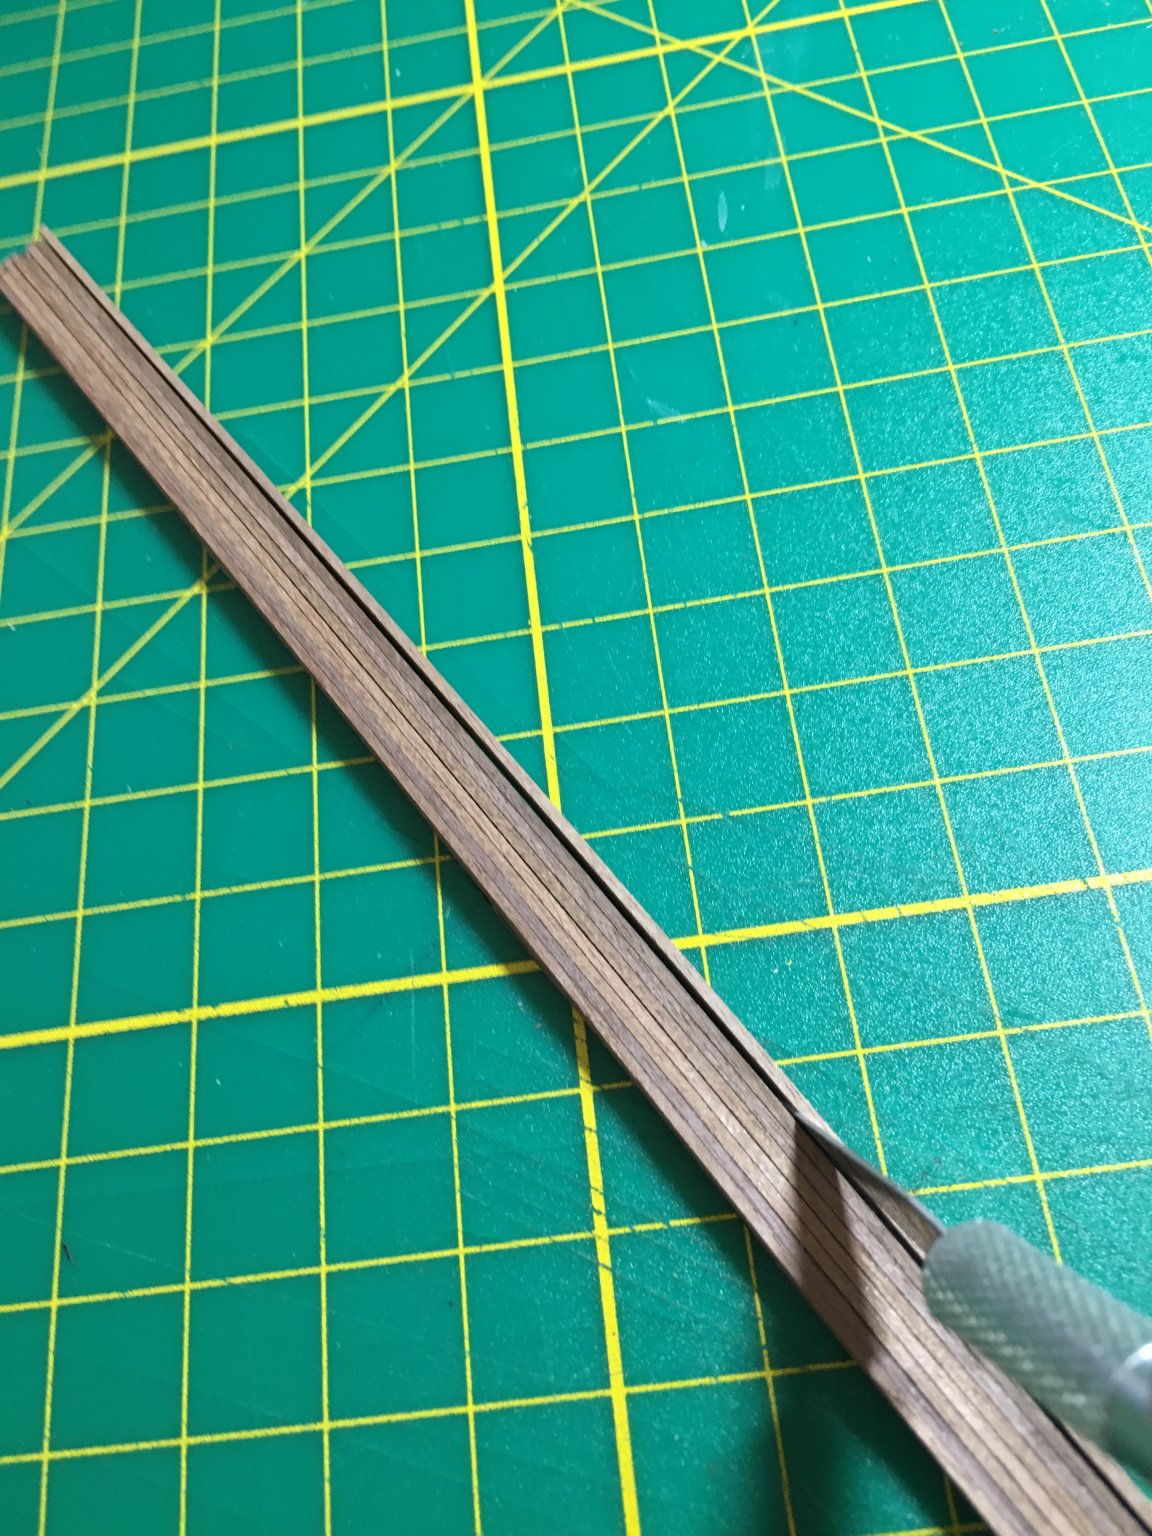
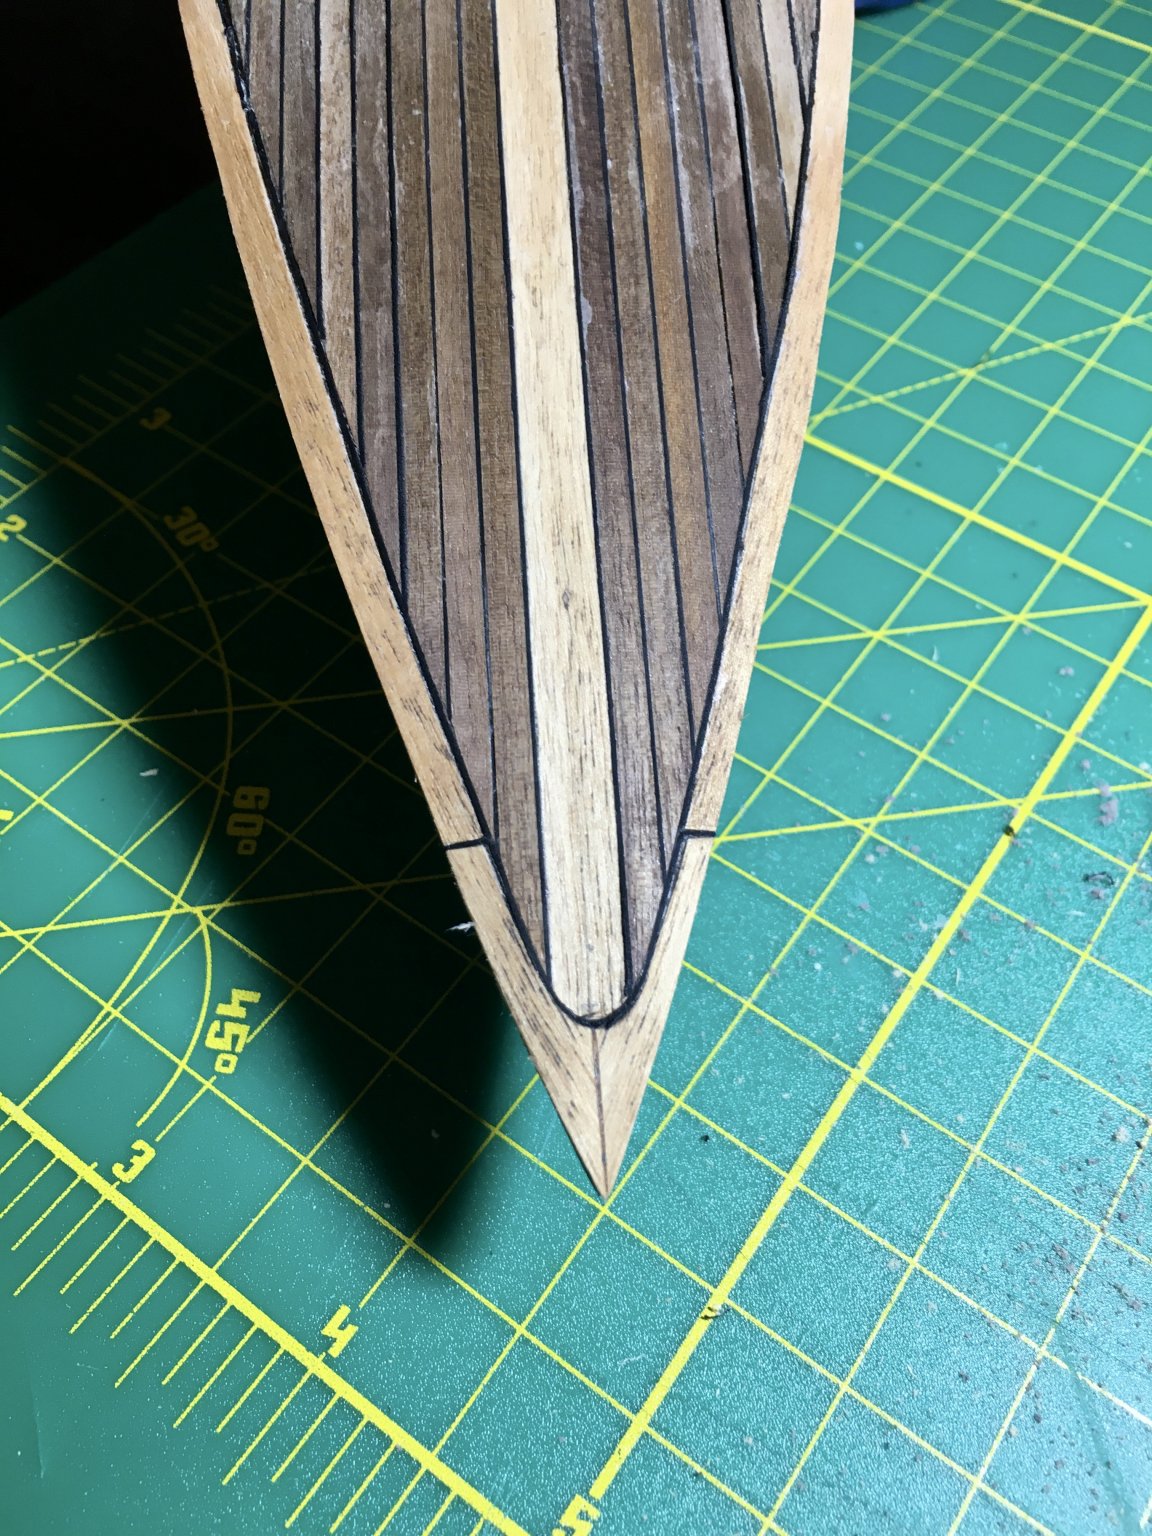
Wow! It's been a really long time since my last post. I've been working on the Dragone, but not keeping up with my postings. Sanding and shaping the hull and keel weight are underway. I'd say I'm about half done. The real work has been spent on the deck planking. The King Plank is Tangankia 1mm x 6mm and the deck planks are Walnut 1mm x 3mm. I saw several photos of real Dragon's that had very intricate caulking and thought that would be a nice touch. Also, several other modelers have created beautiful decks with contrasting caulking. I chose a heavy card stock paper that was deep black all the way through. Cutting a 1mm wide strip was a bit tricky. Ultimately, I settled on gluing several deck plank strips down onto the card stock using Elmer's wood glue. The key here was not to squeeze the planks together too tightly so that my Xacto blade could pass between them to cut the strip. The result is a single deck plank with a strip of black along one edge. At scale, the black card stock strip is approximately 1/4" wide. The step was gluing the decking planks down on the deck base. Again, Elmer's wood glue worked well and the rubber bands held everything in place. PS: Don't worry about that little crack in the King Plank. That will be covered up by the cabin. I left each deck plank long so it ran over the edges. This was much easier than trying to trim each one at the time of gluing. After all the planking was on, I simply turned the boat over and trimmed all the overhang with the Xacto knife. Next, the waterway needed to be placed. This too was Tanganika 1mm x 6mm for the contrast. The instructions called for cutting the curve into 4 pieces on the planking. These are the 4 strips laying on the cutting mat to the right of the hull in the photo above. By far, the hardest thing so far on the kit. I tried to cut these 4 times until I ran out of wood. None of them came out right. Scratch this idea! New idea. Buy more Tanganika that is long enough to run the full length from stem to stern. I found the wood with Cornwall Models in England. Very affordable, but took 4 weeks to get shipped to my home. The new full length 1mm x 5mm strips needed to be curved to fit the edge profile. I simply soaked the strips in hot water for 5 minutes or so and bent them similar to how the hull planking was bent. Sorry, no photos for this step. Before gluing the waterways down on the deck, the deck planking needed to be trimmed back from the edge by about 3 mm. This allowed the waterway to be flush with the deck planking. The black "caulk" came out just as I had hoped. This next photo is a close-up of the bow section. I sanded it a bit to clean up the glue and then wiped it down with a damp cloth. I'm thinking this will look very good once it's sanded completely and covered with a few coats of wipe-on poly. Now, it's back to the hull and deck sanding. Also, I'll need to add that little cabin. Happy modeling everyone and please stay safe through this bizarre time. Jim
.thumb.JPG.e92a70a700ce819b84af200d25c42f51.JPG)
.thumb.JPG.84f2ee030ef01c3d2222034d87a0a36d.JPG)
.thumb.JPG.a9a493e4bbf221dad9ccca8c5469bdfb.JPG)
.thumb.JPG.fcbefbec7b5009eb77880eedf84067d1.JPG)
.thumb.JPG.ec7cab739bc066e5d3ac714d3e138863.JPG)

.thumb.JPG.992244005f2ccef9e4c8986c64587cf7.JPG)
-
It is so hard to keep the perspective in mind. All your work is so realistic that without a scale reference, it all looks full size. Amazing. Jim
-
Hi Gary, the thought of a polished walnut hull has been rattling around in my head. A few of my model club members have also suggested it. We'll see how it sands up. Definitely going natural on the deck planking along with black caulking between the deck planks. Many thanks, Jim
-
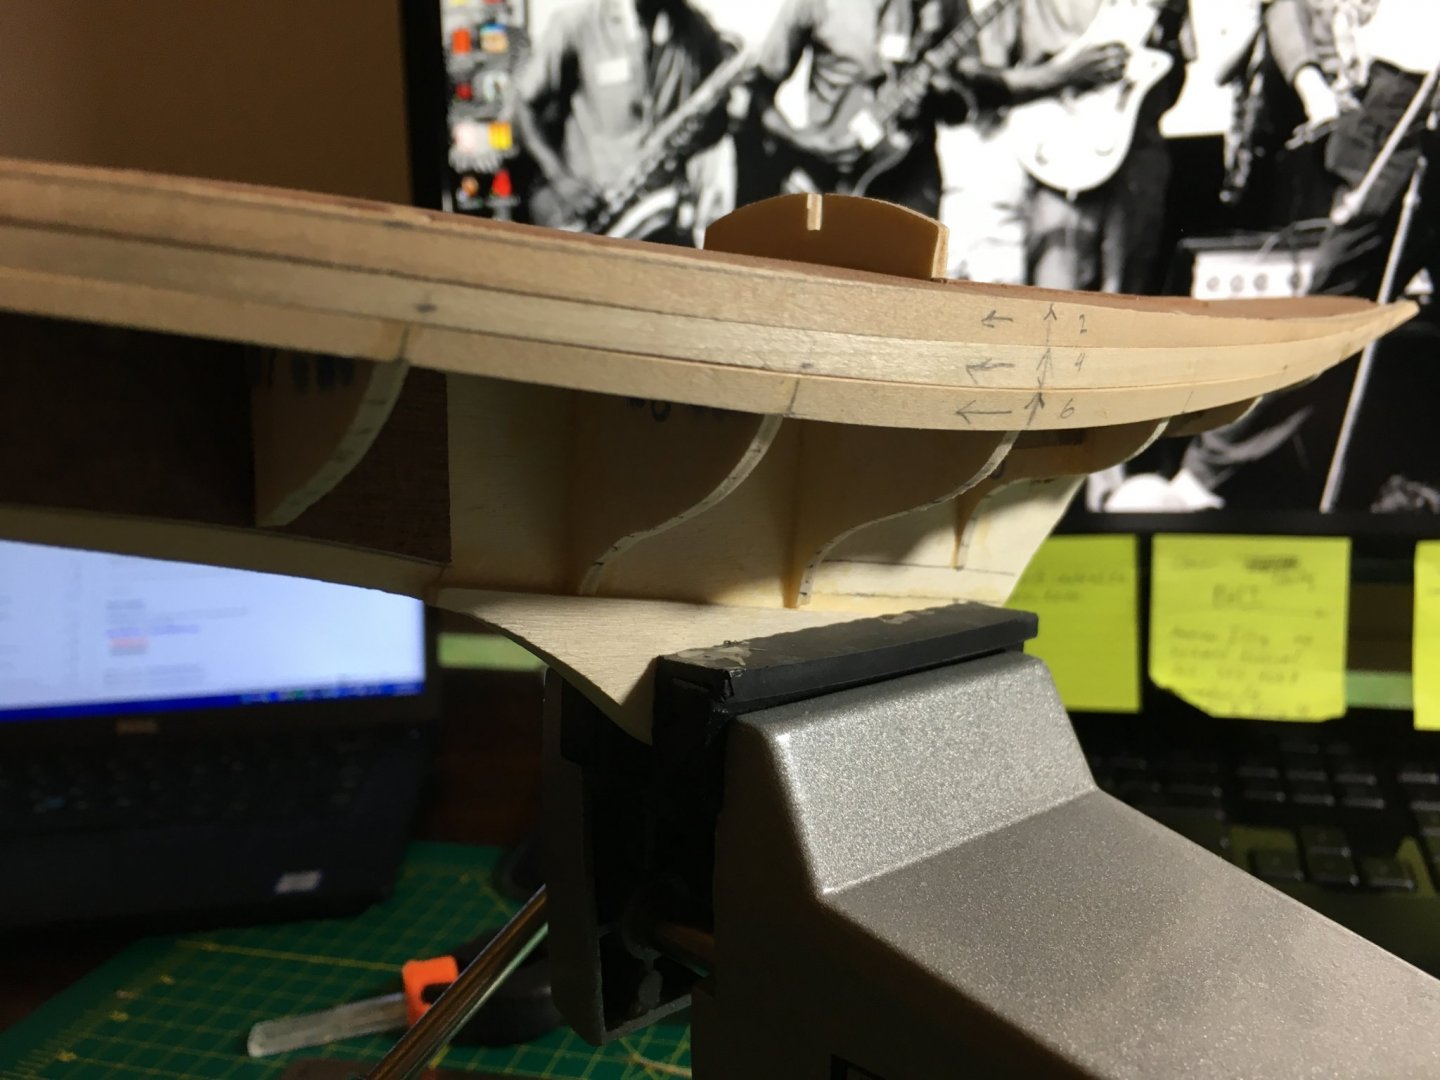
Happy New Year to all! I hope everyone had a pleasant holiday season. Six weeks since my last post. It was certainly a challenge finding the 1 weekend to finish the outer hull planking, but I finally did it. The outer layer hull planking is now complete. The unplanked lower keel area is intended to simulate the iron ballast keel. Next up, sanding. Couple of areas are needed. First, the overall hull needs to be smoothed out. The little peaks and valleys must be leveled. Second, the keel edges need to be shaped. Right now, all the edges are 90 degree angles. The leading edge needs to be sharpened to match the keel angle going forward. The bottom edge needs the corners rounded and the trailing edges needs to be knocked down to 3mm to match the rudder width. Thank you everyone for the likes and comments. Jim
-
Hi Tobias, This was my first build as well. Fun kit and definitely a good teach aid. Have fun! Jim
- 18 replies
-
- 1
-
-
- finished
- BlueJacket Shipcrafters
- (and 1 more)
-
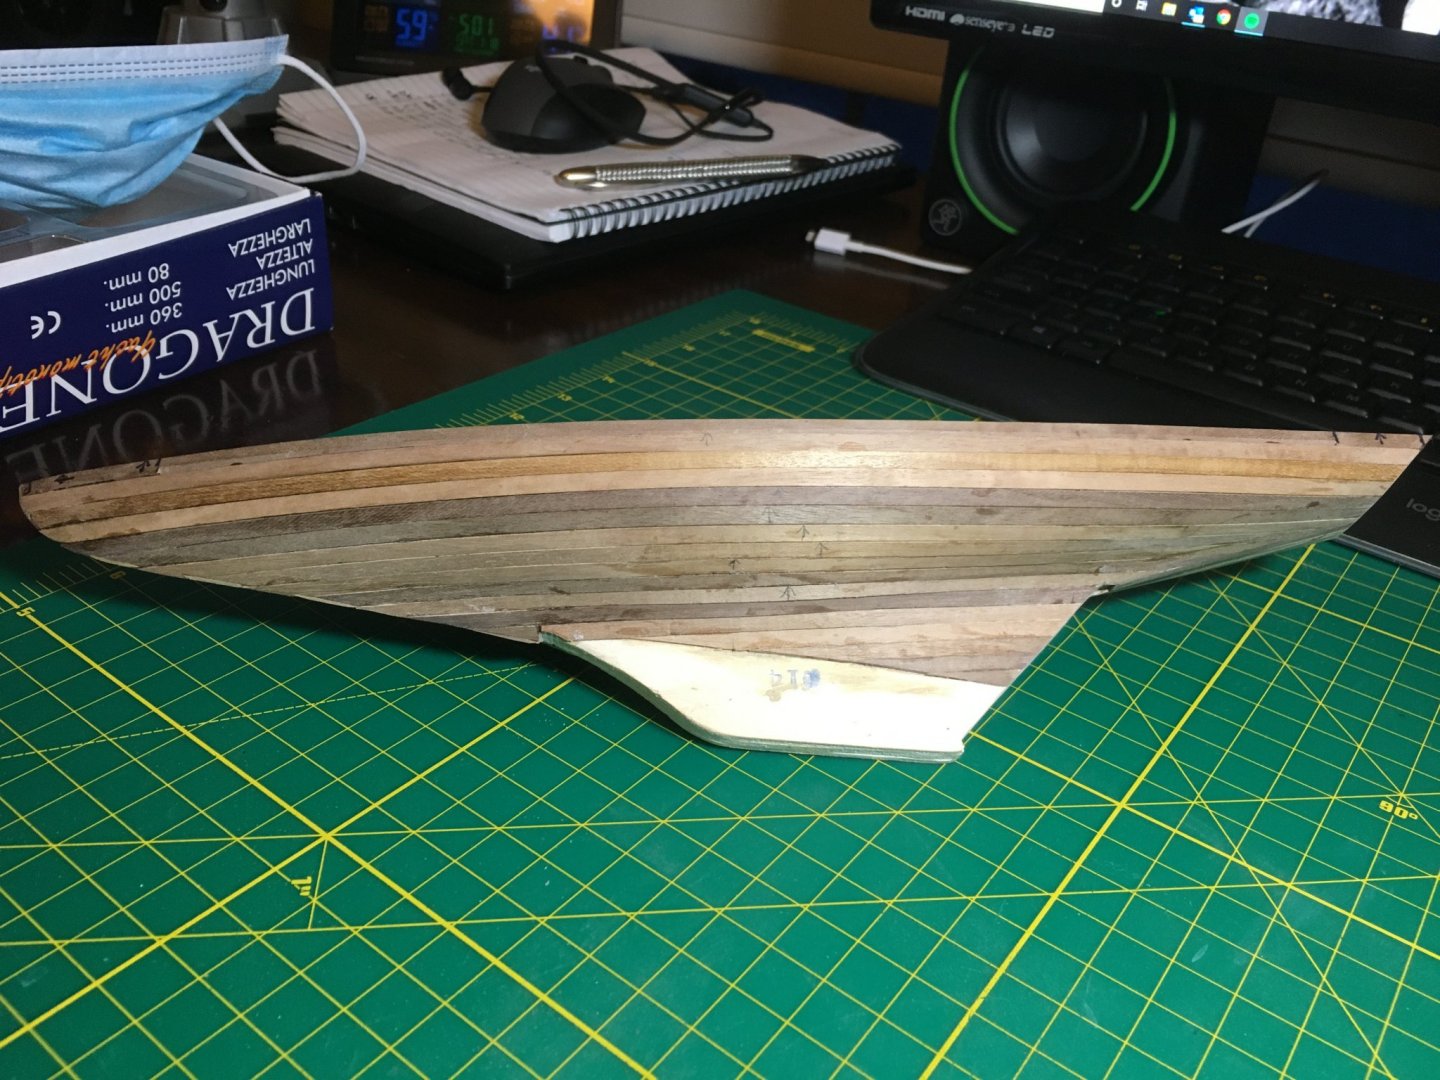
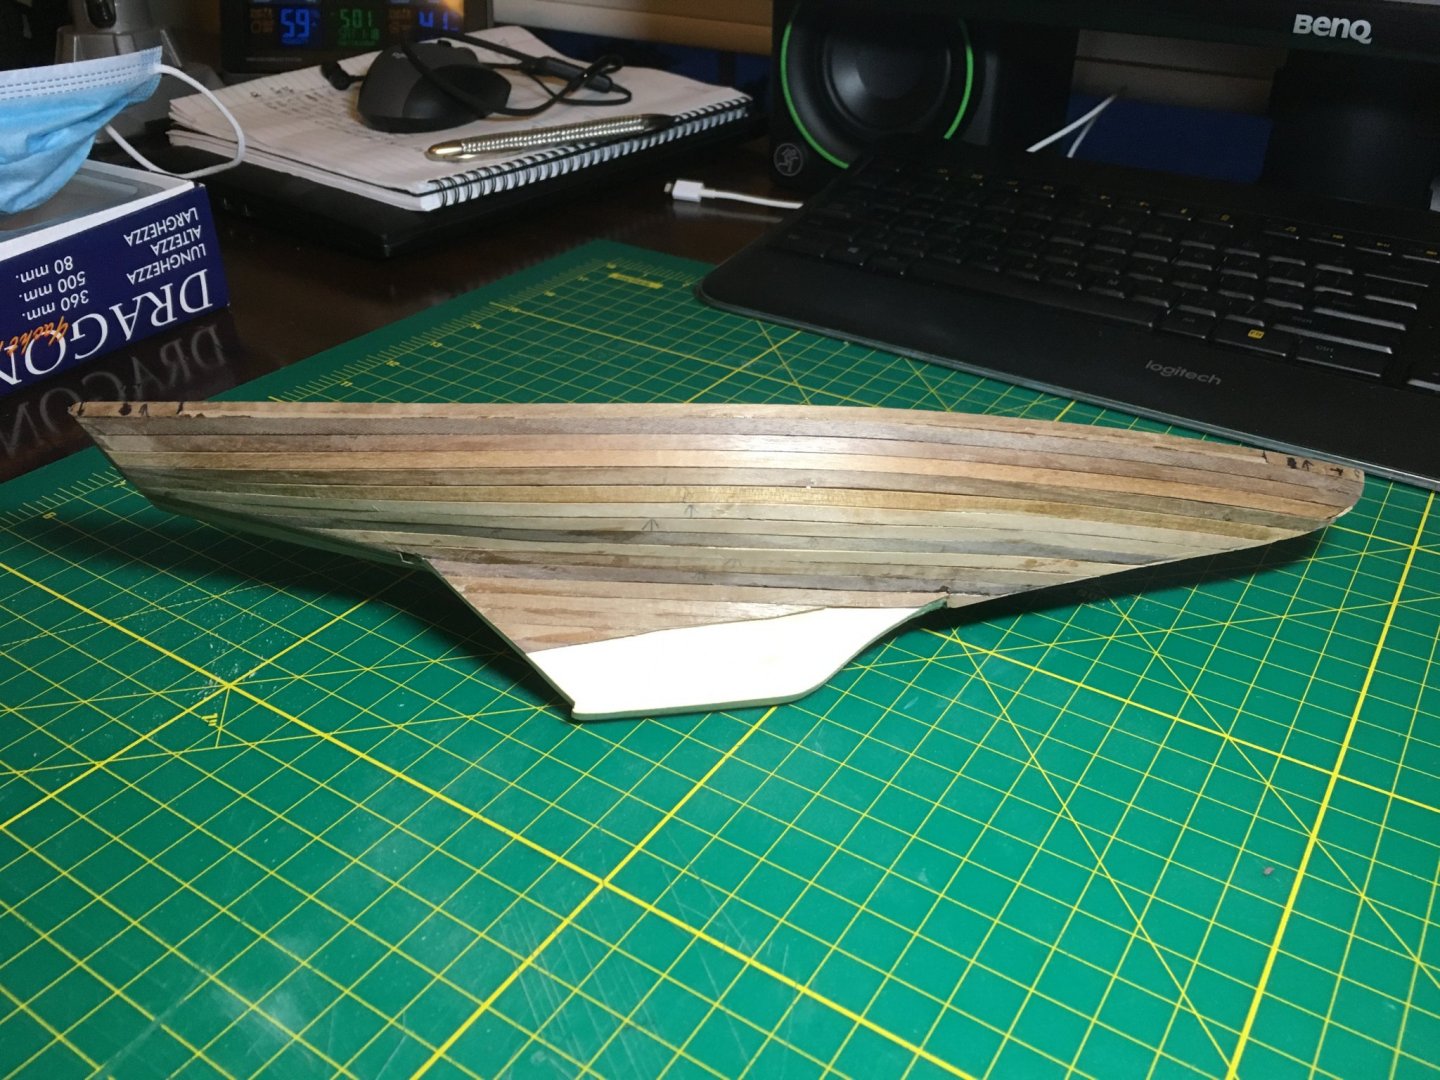
Thanks Jeff! Back in the shipyard this weekend to continue the hull planking. Managed to get 5 more rows completed on both the starboard and port sides. Basically, it's halfway completed. 7 rows on and 7 more to go. The walnut strips are a bit tricky and can crack. One must must be careful not to bend them too much. Before trying to glue any of the planks, I heat bend them across the width. This allows for a better fit when bending along the length while gluing. The fore keel edge has a few issues. I'm trying a slight herringbone technique primarily for strength. Since this hull will be painting, all the "imperfections" will be puttied and sanded. The stern end is coming together nicely. The center line strip provides a good end point for the strakes. I got so excited about how this was going that I laid down one more row on each side and trimmed the transom overhang. One more weekend will probably do it and the hull planking will be completed. After that, it's on to the deck planking. Cheers all, Jim
.thumb.JPG.488ae33f6a2e557e308290ee2afd6e7c.JPG)
.thumb.JPG.e8552bb0d5ab891998c35670a510487d.JPG)
.thumb.JPG.6b8fcc8a73c2e16a9a42adc3f8ea578b.JPG)
-
I managed to get a bit of the outer layer planking completed. The transom is done and the first 3 rows down from the sheer. On the next photo, you can see the bevel on the lower edge of the first strake. This is by design and is on both sides. It does make it look like the 1st and 2nd strakes are not tight, but they are. The strakes are going on pretty easily. I'm still using CA glue. Mostly because the Elmer's Wood glue takes too long to dry and clamping at the stem is very difficult. Too sharp of an angle and none of my clamps or rubber bands will stay in place. While I don't have a photo to post just yet, the remaining unplanked hull area has been lined off for the next set of strakes. I'm trying to decide how much width trimming to do on each subsequent strake. As was seen in the under-layer planking, the stem and stern ends of each plank get really thin, approx. 1mm. While this makes it easy to bend, it also makes it very brittle. This outer layer planking is walnut and is brittle to begin with. I'm thinking I may keep the strakes closer to their original 4mm width. This should make for some tricky cuts along the keel. Again, this will all be painted so any sins will be "swept under the rug." Either way, it shouldn't take too long to get the planking completed. Jim
.thumb.JPG.9270500e7d25b4722f1d6afe56e879da.JPG)
.thumb.JPG.0c7272fee3ecccd983aa20875b290d3c.JPG)
.thumb.JPG.6f0547a667f1fde7b758f11127a2f32c.JPG)
-
Thank you again for the Likes! The hull is ready for the outer layer of planking. It only took just a little putty and some patient sanding. Jim
.thumb.JPG.322d9593a9862eb8feb079ae80c2f96f.JPG)
.thumb.JPG.dc1f60853019901987d083dab68b8adc.JPG)
-
Thank you Chuck. This is a new skill for me and not every plank came out "perfect", but since this is the under-layer, the practice is good and I'll have a 2nd chance to improve on my technique. Thank you to everyone for your likes as well. Well, continuing my typical snails pace, I've finally completed the under-layer planking. Given this is my first planking attempt, I'm overall fairly pleased. After planking, the strakes overhanging the transom were trimmed and sanded flush. The next steps is a sanding, putty, sanding, rinse and repeat. I'll want to get a nice smooth base for the out-layer planking. The out-layer planking strips are walnut. I've been told, walnut can be a bit brittle on some of the tighter bends. I'll need to be careful and patient. Hopefully, I can make some more progress before the holiday madness takes over. Cheers everyone, Jim
.thumb.JPG.b782f688b557c3056faf14204a1996e2.JPG)
.thumb.JPG.fd2741129b10a29ae4052068faa30cc3.JPG)
-
The USN Picket is my next build once my current build is finished. You think you're slow?!? Compared to me, you're setting a land speed record! I'm looking forward to following your progress. So far, it's looks great! Cheers, Jim
-
Great weights, but they have an inherent problem. They tend to lose their weight over time. Why is the rum always gone? I'm looking forward to following your build. I'll keep my weights close at hand as well. Cheers, Jim
- 139 replies
-
- 5
-
-
- benjamin w latham
- model shipways
- (and 1 more)
-
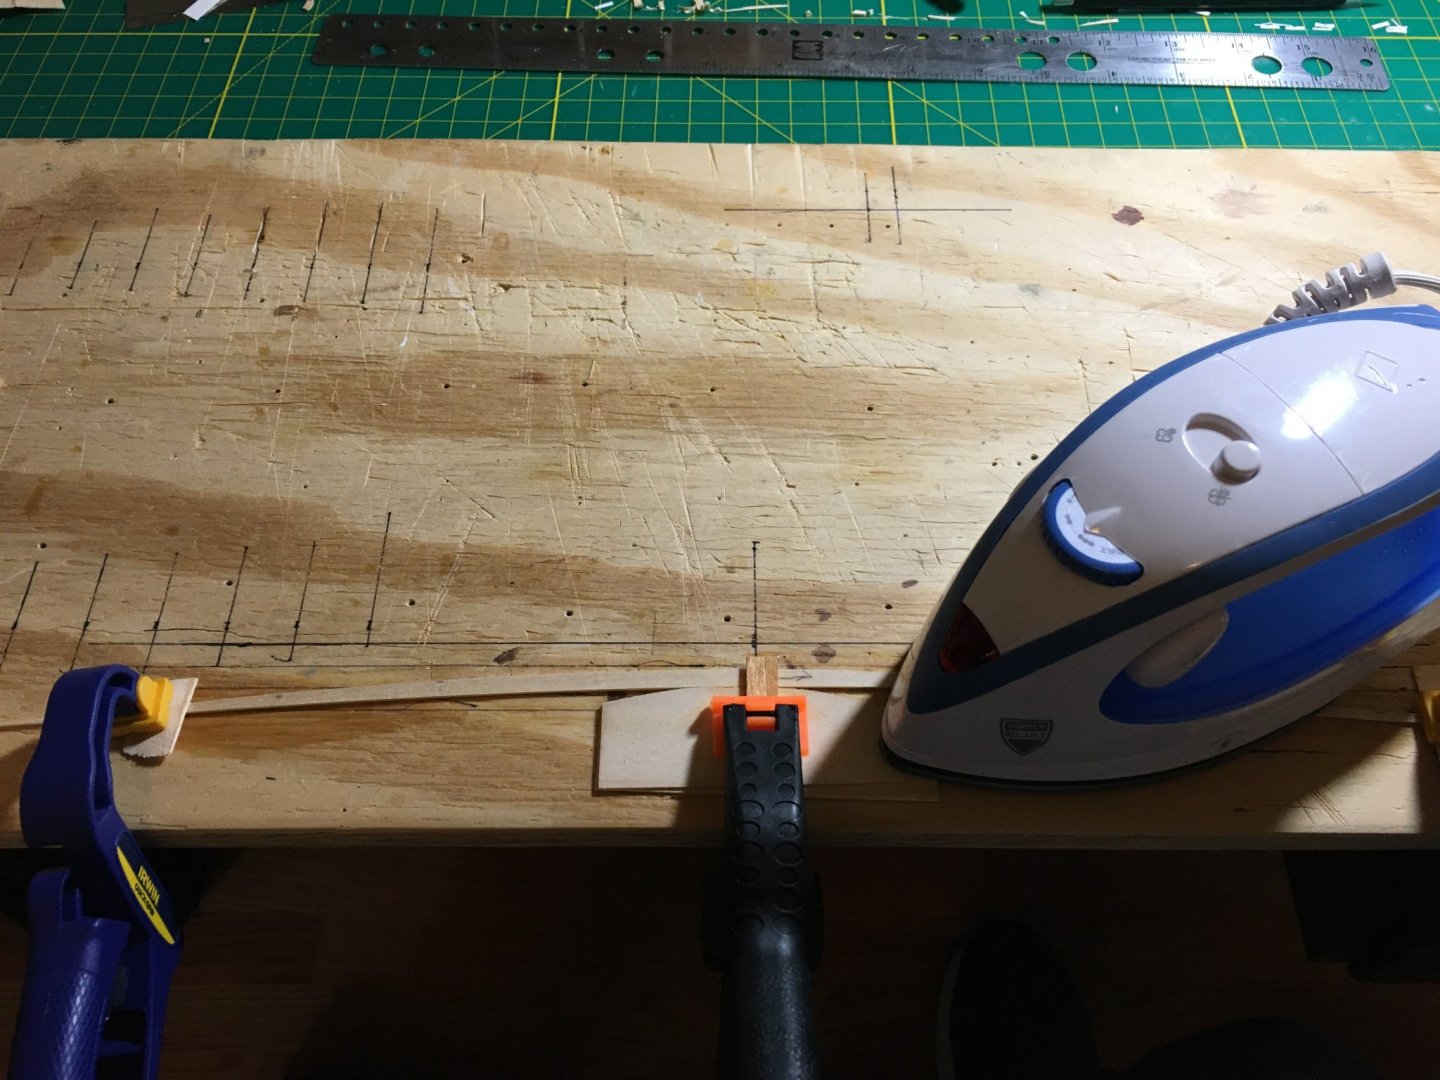
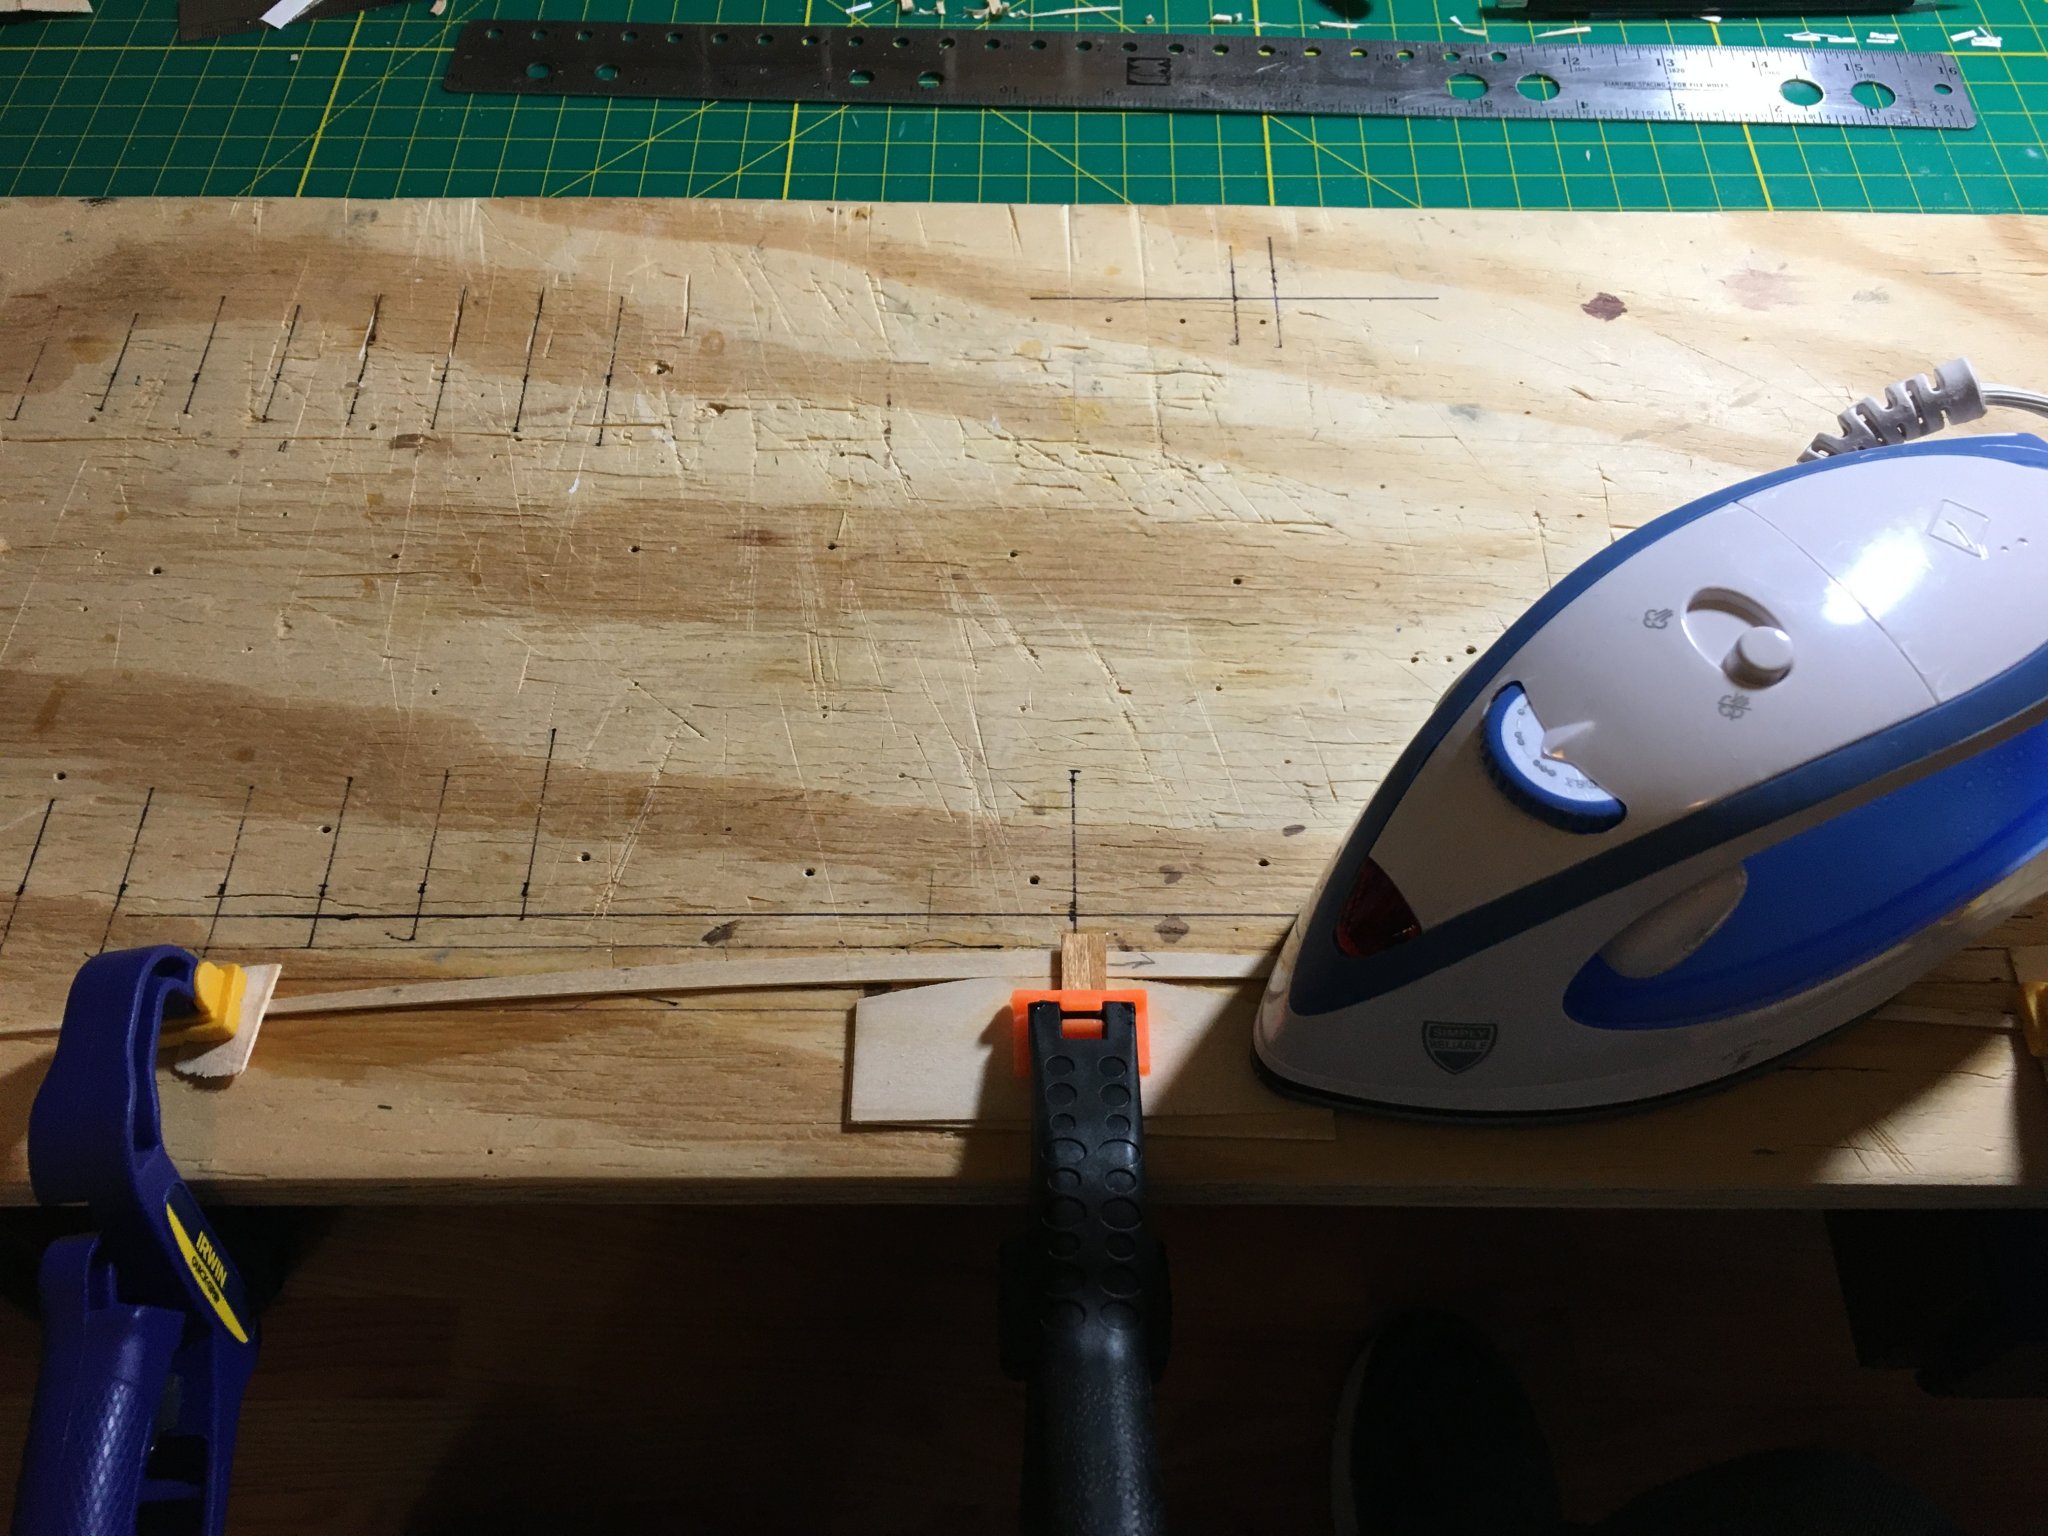
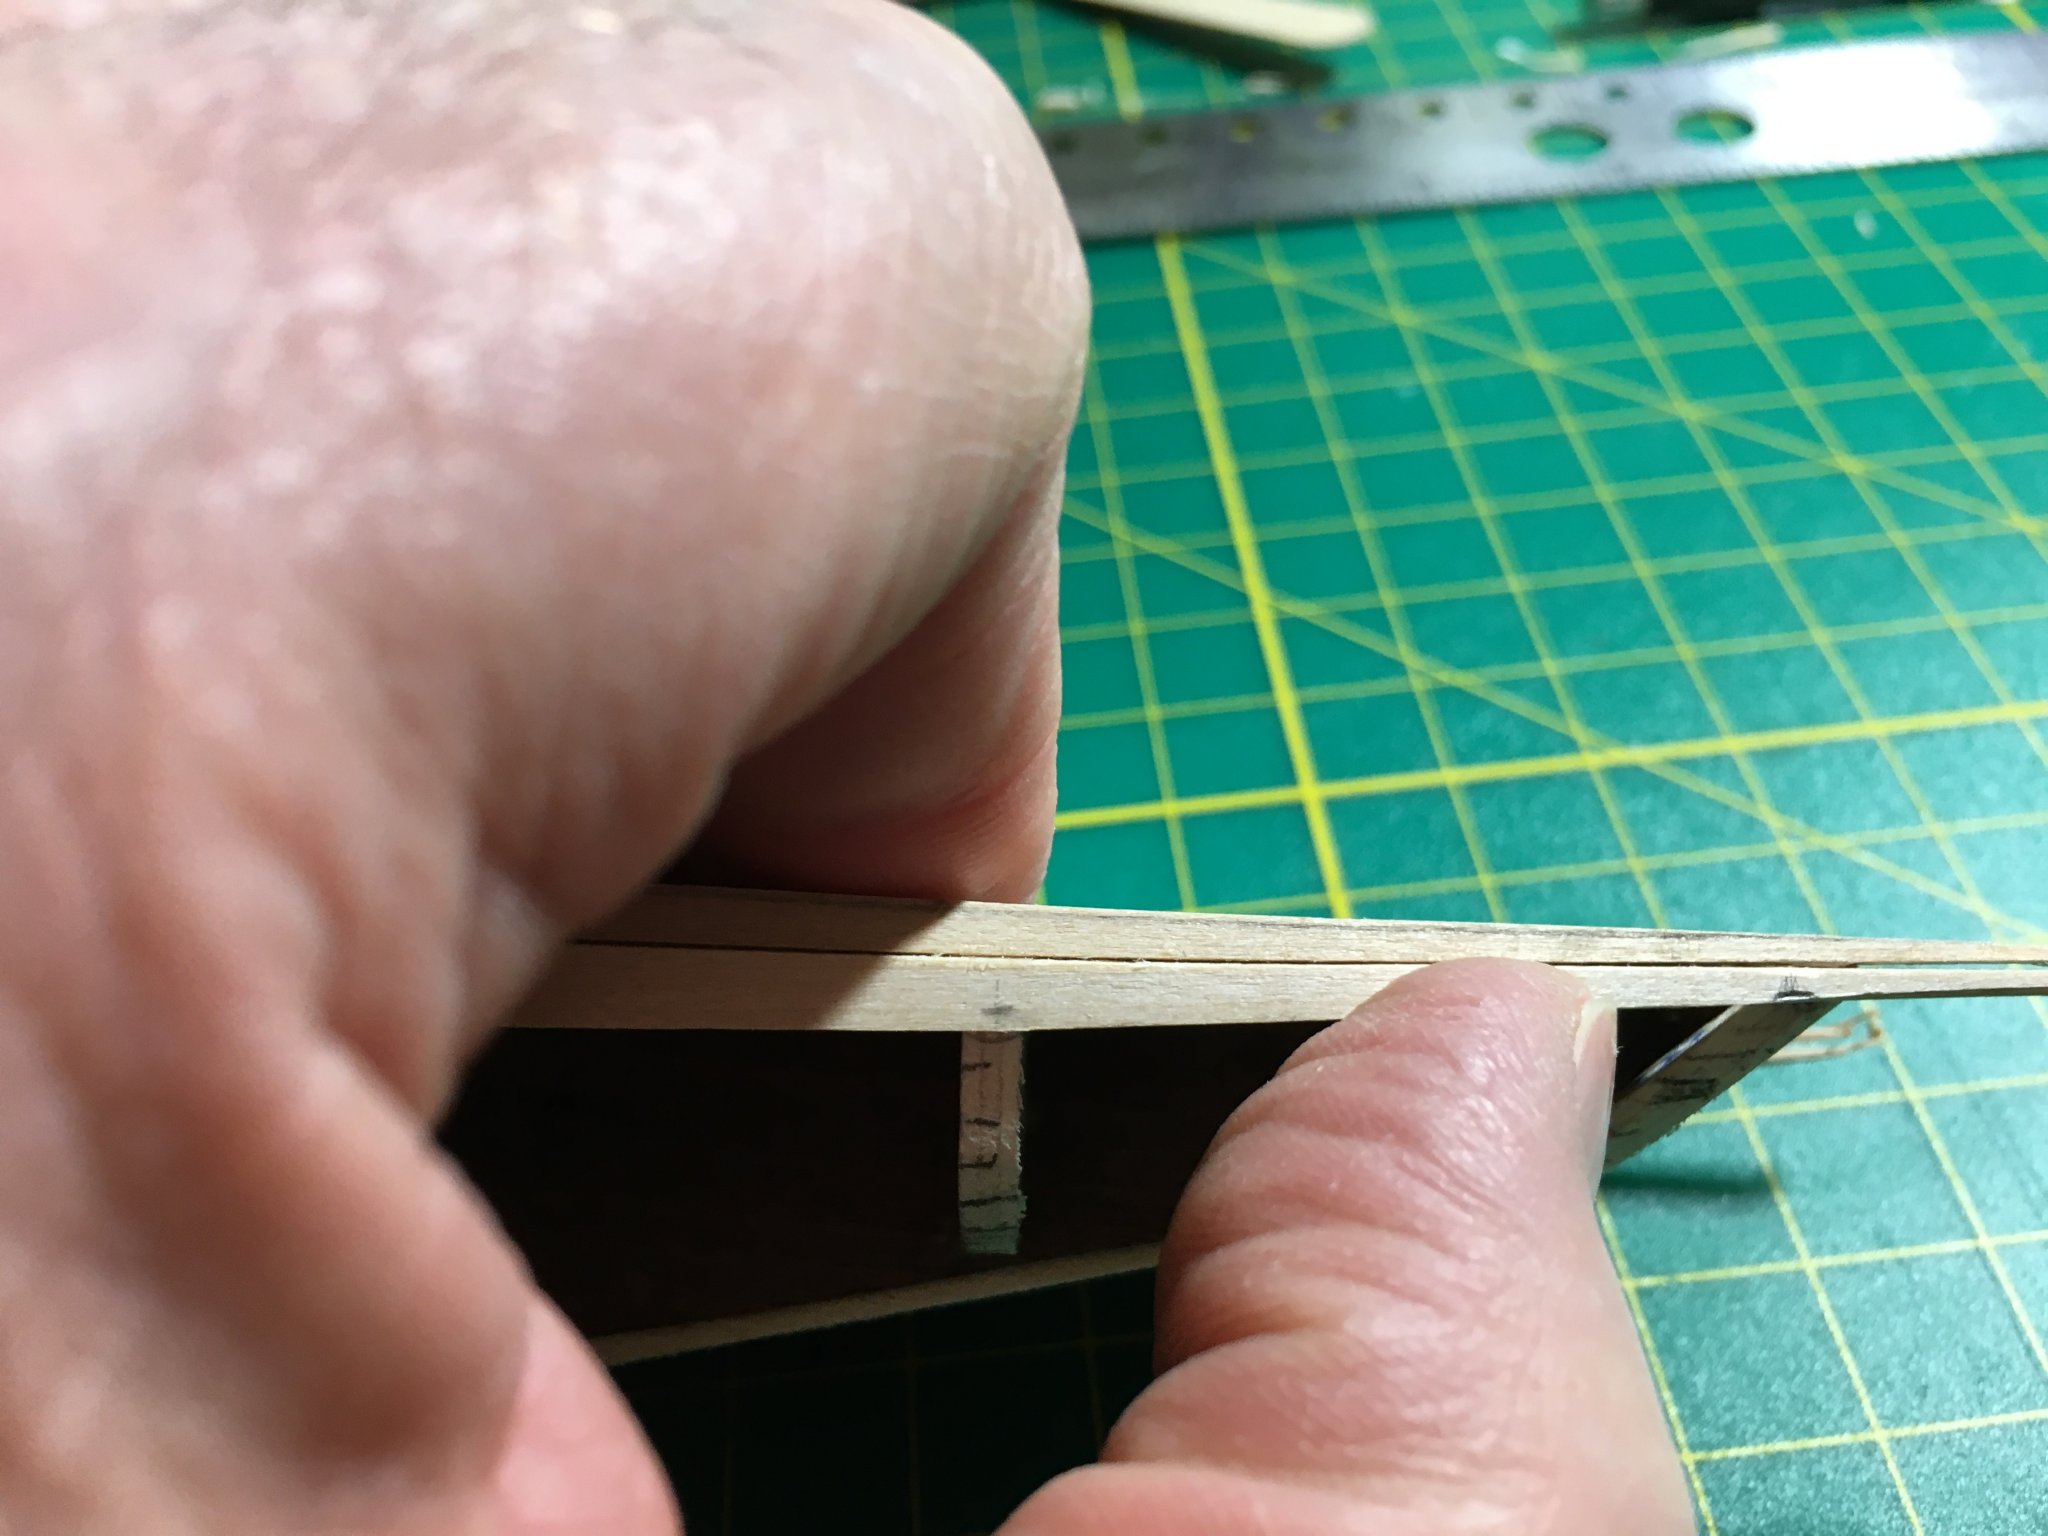
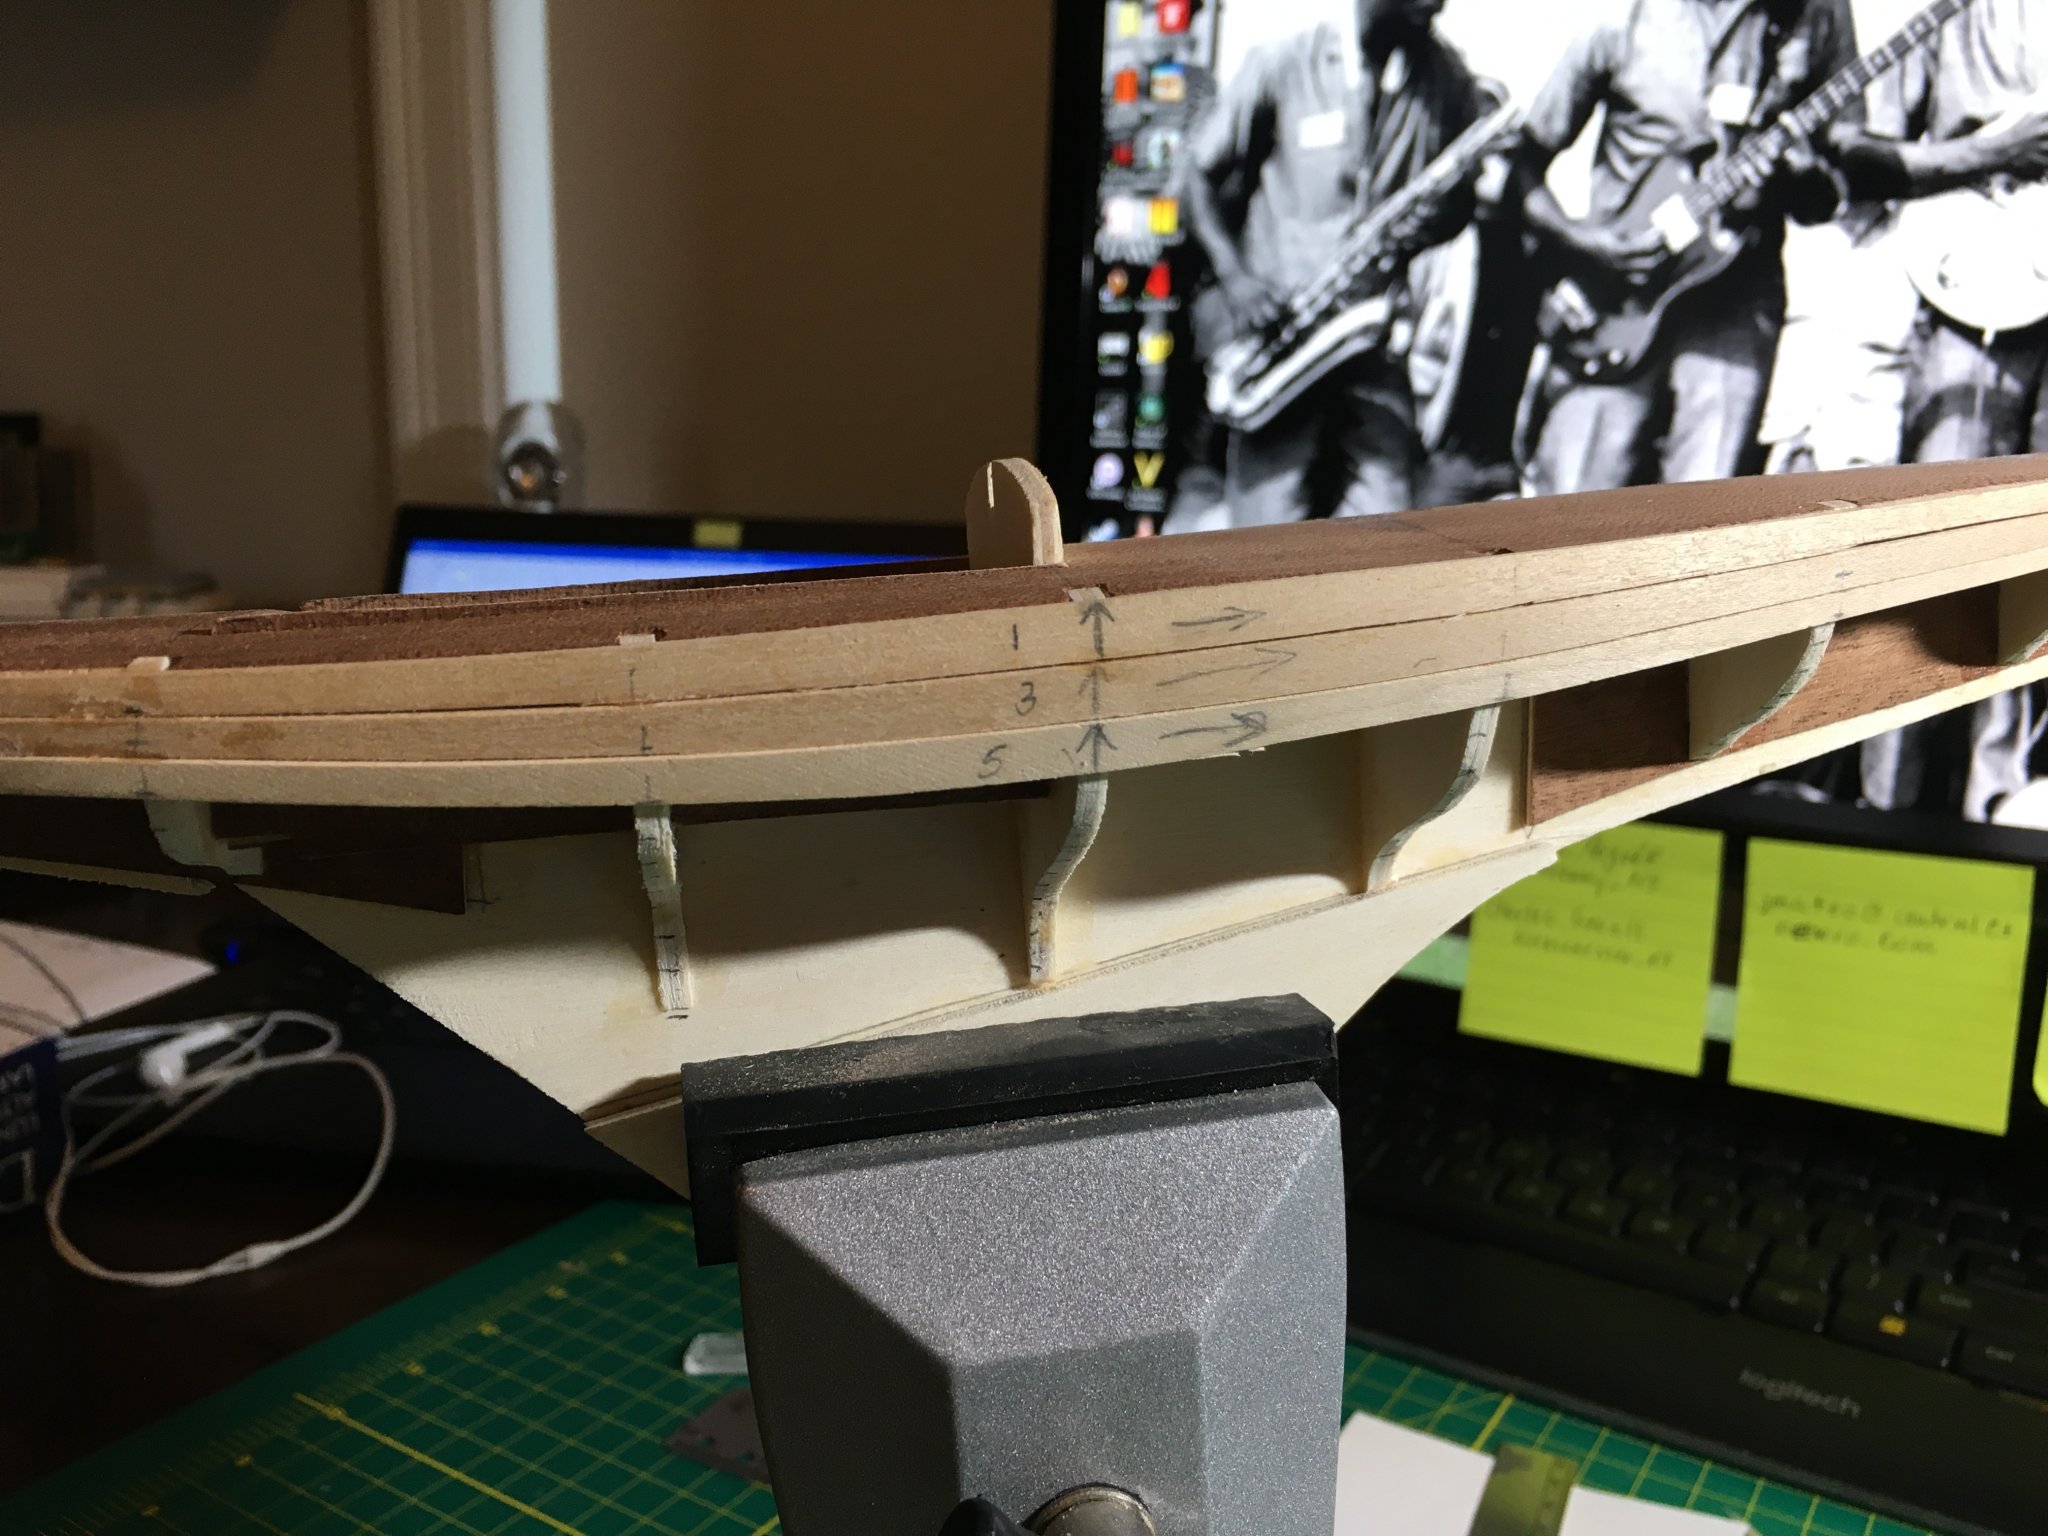
Well, I finally made it back into shipyard. Too much work and the Admiral was in the hospital. She's on the mend now, but definitely top priority for a time. PS: Thanks Gary for the complement and advice. As mentioned above, the hull planking is done in two layers. Using Chuck Passaro's method, I've started planking the under layer. First, the bulkhead positions are marked on the plank. Then with a tick strip, the plank width at each bulkhead is measured and transferred to the plank. The plank is then trimmed to its appropriate width along its length. On this kit, the planking strips are long enough to extend the full length of the hull. That may need to be adjusted as I get closer to the keel and more twists are introduced. To achieve the proper curve, the plank is placed into the curving jig, a little water applied to the surface, then heat is applied with a small iron. The beauty of this method happens next. Attaching the plank to the bulkhead after it's been shaped is very easy. I line up the plank and sand the adjoining edges to try and achieve tight fit. Then with just a small drop of CA glue on the bulkhead, I glue the plank and hold it for 20 seconds. I start with the middle bulkhead and each bulkhead on either side. Next, I glue the plank to the next two bulkheads aft until reaching the stern. Finally, I repeat going forward to the stem. No clamps, no pins. Just CA and finger pressure. The real trick is keeping the fingers out of the glue. It's an easy planking process, but does take time. I completed 6 planks - 3 port, 3 starboard in about 4 hours. My technique seems to improve with each successive plank. Once the under layer is completed, I might be doing OK. 6 down - 18 more to go. Cheers everyone. Jim


.thumb.JPG.41895cb36e105e004d9c41c872a0a856.JPG)
-
It's a bit heartened that you also get a bit frustrated at times. It's hard to tell since you make everything look so smooth and easy. It's like watching pro golfers make mistakes. It gives hope to us common folk. 😉


.JPG.e1df24278e12047a7d1fe3facbacd44f.JPG)
.JPG.280f3057eac96433250b2d590099c7c1.JPG)
.JPG.0b93fce345d1bd14864d13c1d82c515b.JPG)
.JPG.10eec26cd100916c838b961dc7e7935f.JPG)
.JPG.05fe39171088dbcaf7786d4fd0b92a1a.JPG)
.JPG.239b9e5071f6b0775451d7feb33bf659.JPG)


.JPG.ff3146f5713243a541e81885b5c88f2d.JPG)
.JPG.9c85780be00ccff09508e680ed449314.JPG)
.JPG.e0d3aca47135063d38a9f179cf7afb47.JPG)
.JPG.750225c437b874b397d491e5d1efe46d.JPG)
.JPG.939a5e96db5cd16a8ebfb54f14f8321b.JPG)
.JPG.b6573312d6972e1e08d9efcef508d2e5.JPG)
.JPG.b1a3f846a09aca64f6660b01034d7aa1.JPG)
.JPG.c35f86a66e8619443fe239025b889f8b.JPG)
.JPG.113548640e441cfee32ba1e75fa4810f.JPG)
.JPG.07d610a890e6c732c1d29bca263c1bae.JPG)

.JPG.1837dd1a6c0d9298df3f930329b82eb7.JPG)