HOLIDAY DONATION DRIVE - SUPPORT MSW - DO YOUR PART TO KEEP THIS GREAT FORUM GOING! (Only 24 donations so far out of 49,000 members - C'mon guys!)
×


John Gummersall
-
Posts
265 -
Joined
-
Last visited
Content Type
Profiles
Forums
Gallery
Events
Everything posted by John Gummersall
-
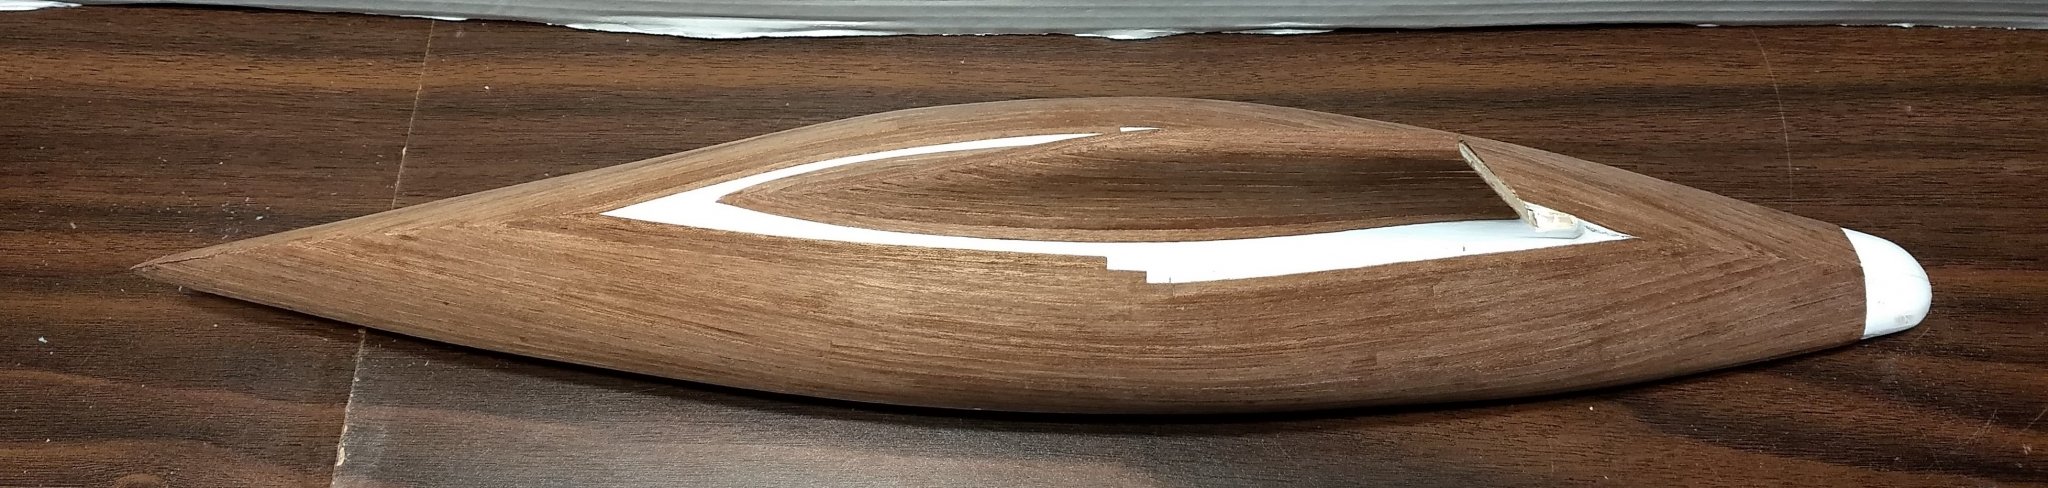
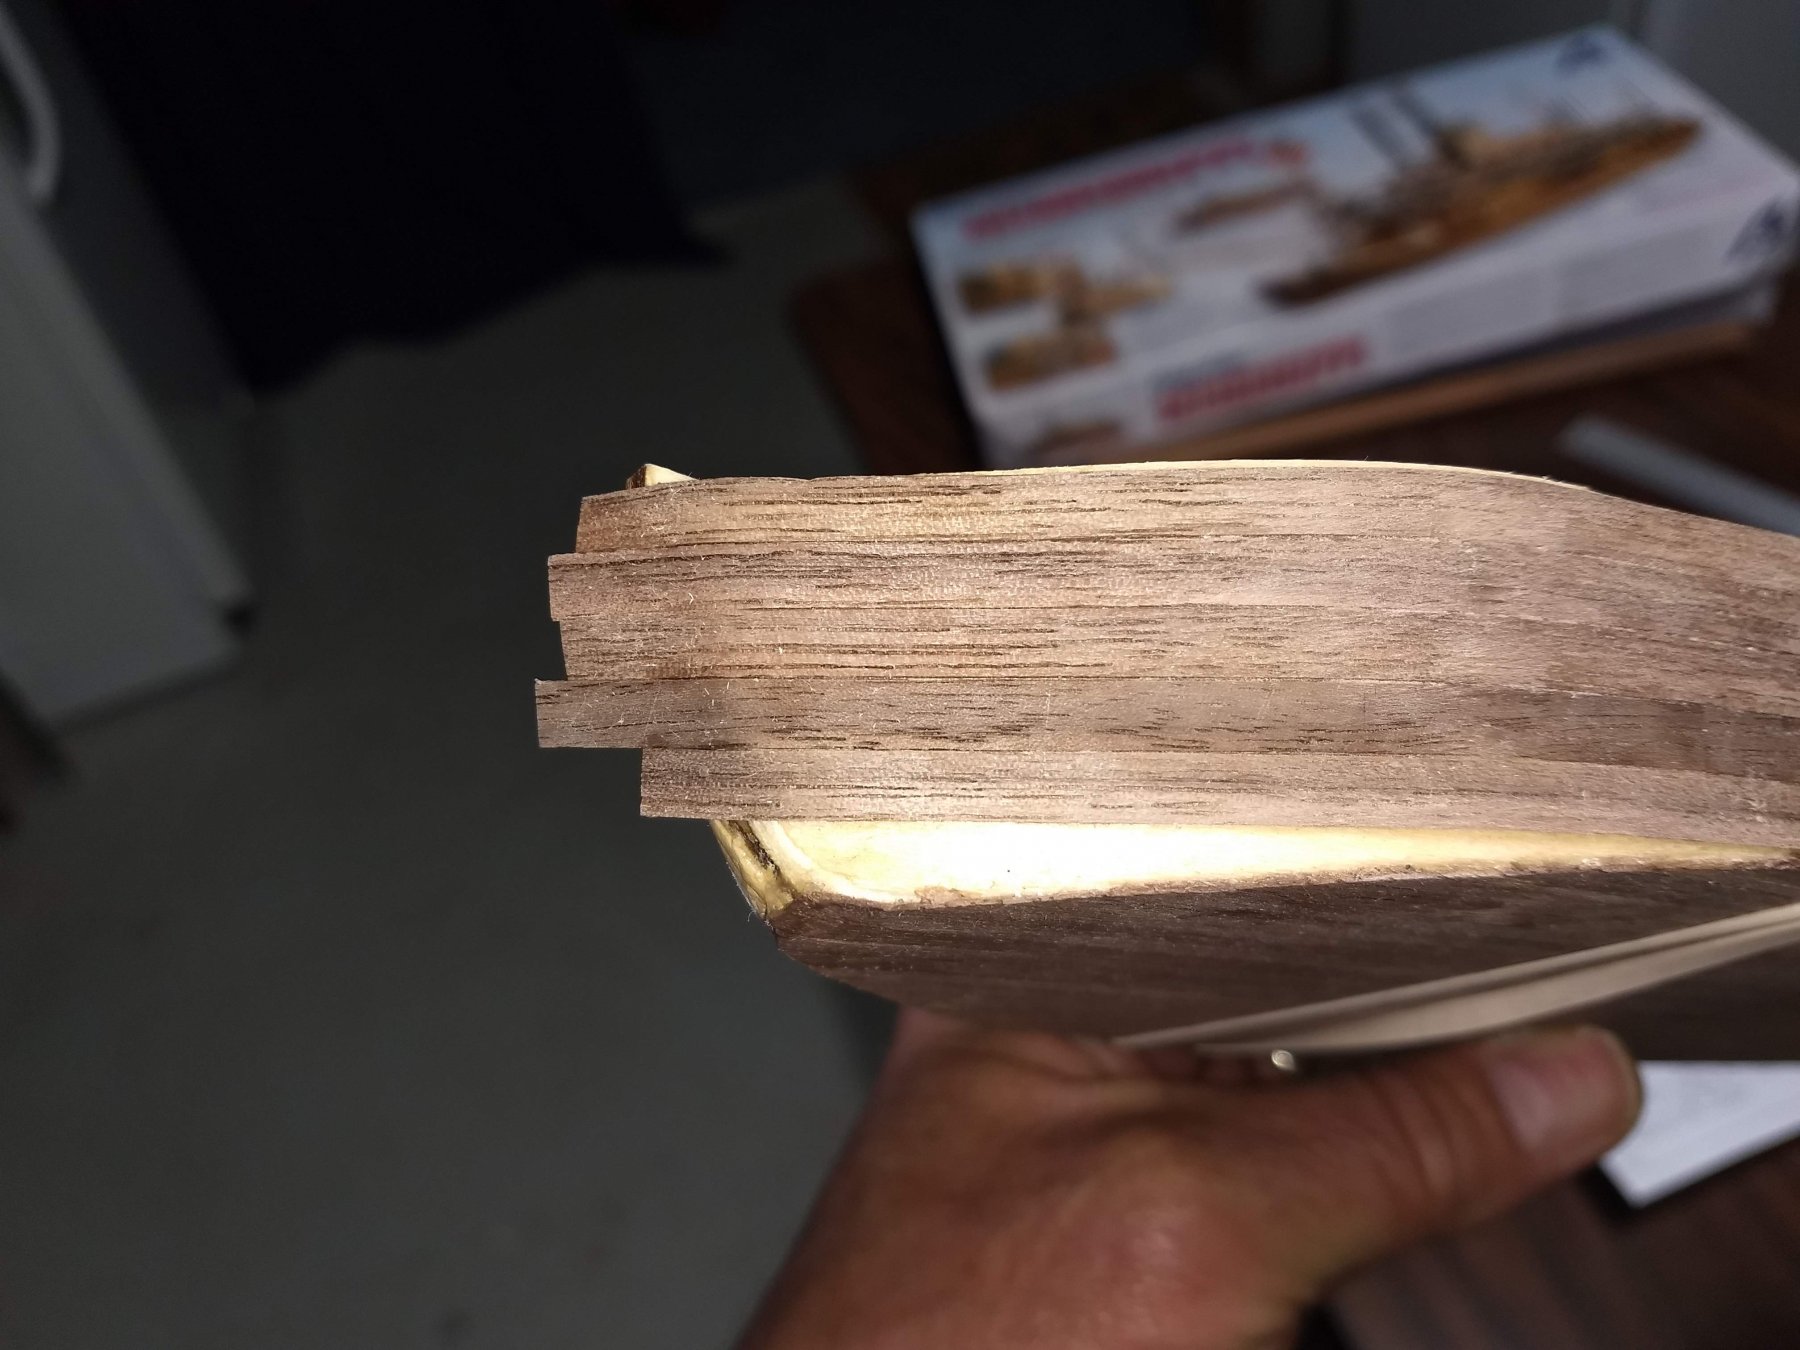
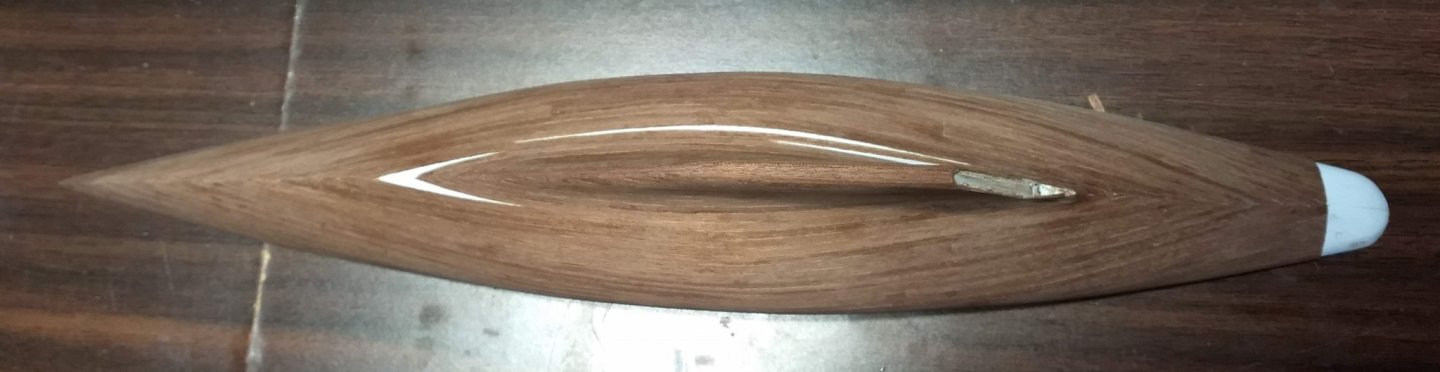
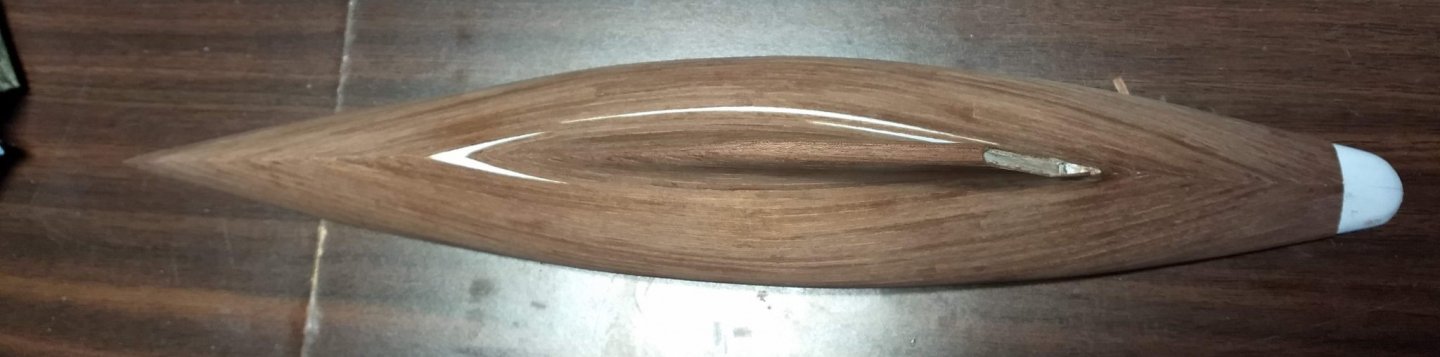
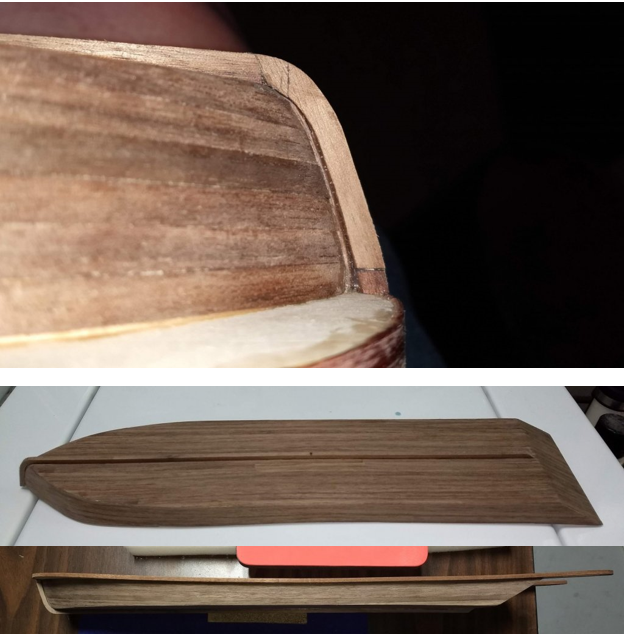
 Martin and Cornhusker,,,, I agree the stern section is not exactly "by the book". My modeling skills are expert by any means. Since I covered the stern section with wood filler, I had a hard time finding the exact center line of the stern section. As such I could not get the port and starboard planks to line up with a herringbone pattern. Unless they line up exactly, you end up with a funky lopsided stern section - or that was my result anyway. A lopsided stern planking would be no problem if I was going to paint the hull, but I think I am going to keep it natural. After several attempts at herringbone pattern, I was just not happy with how the stern section looked.. so I went with the center strip. Even that is not exact, but close enough. As for the 2nd planking wood, the instructions say it is mahogany, but it sure looks like walnut to me,,, So i guess the answer to your question of "mahogany or walnut", I really am not sure.
- 45 replies
-
- 1
-

-
- j-class yacht
- amati
- (and 2 more)
-
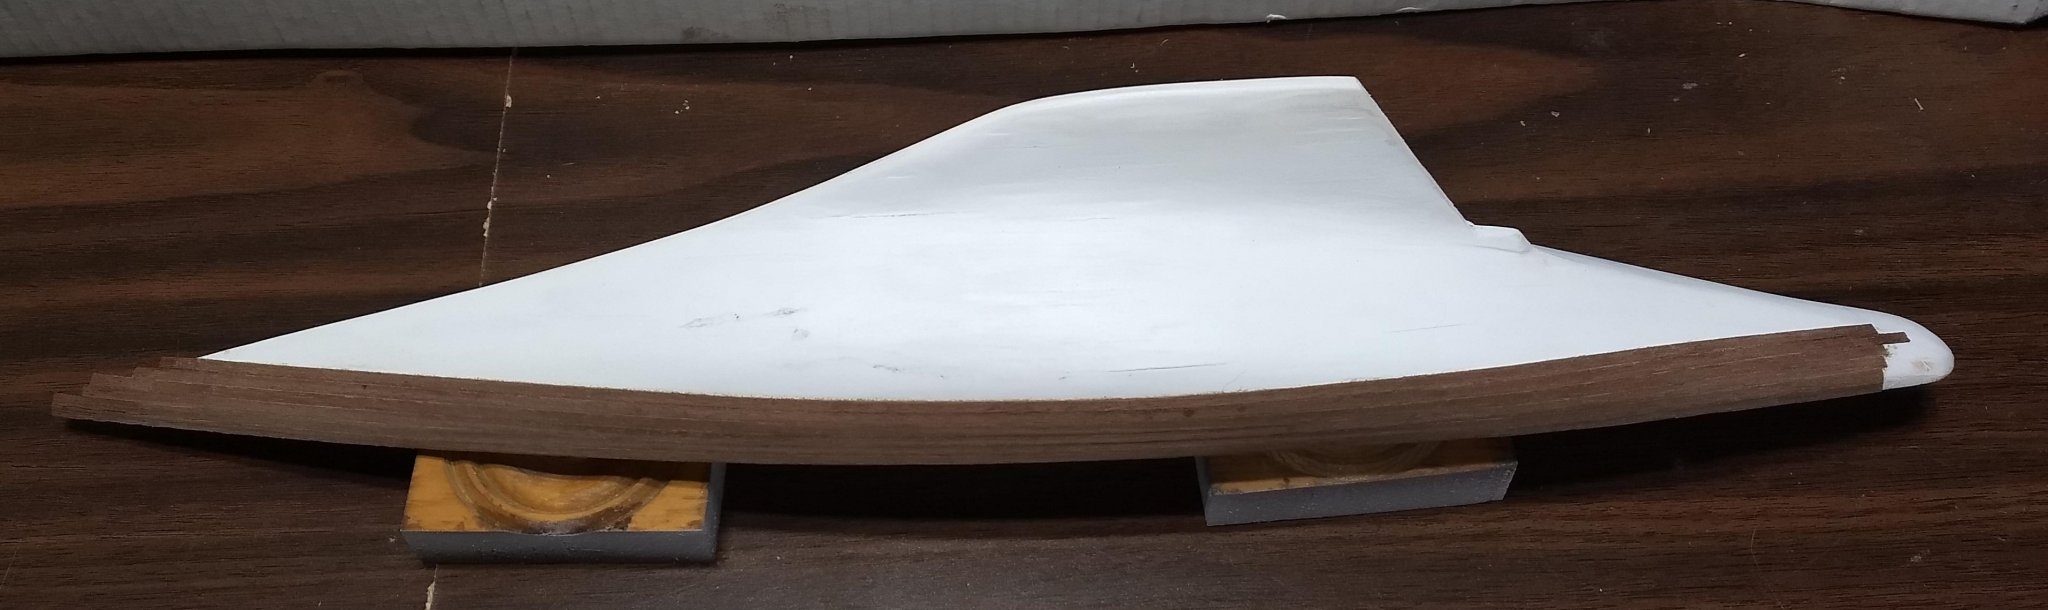
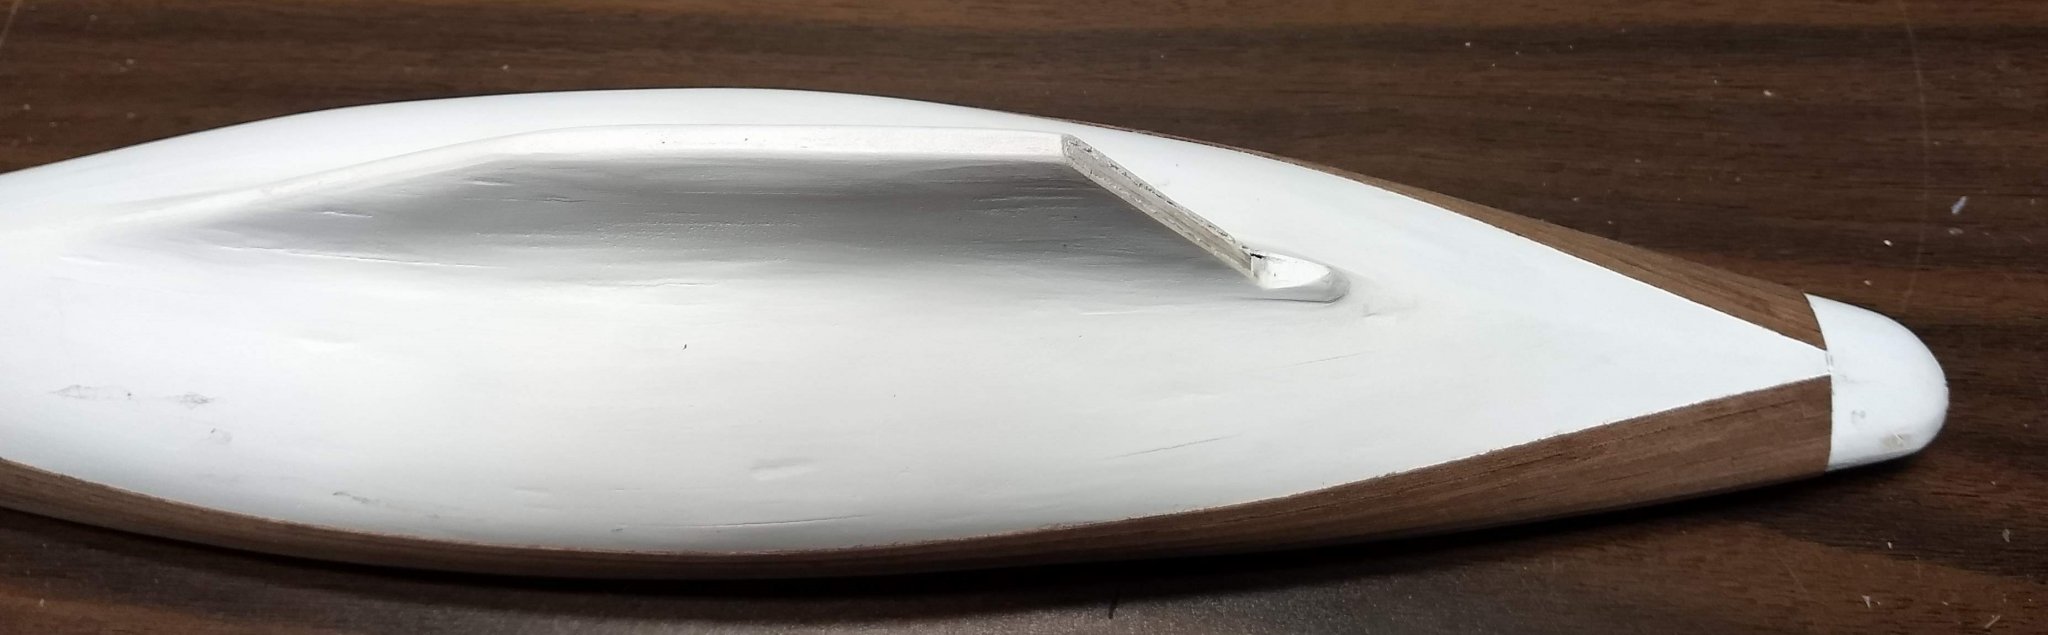
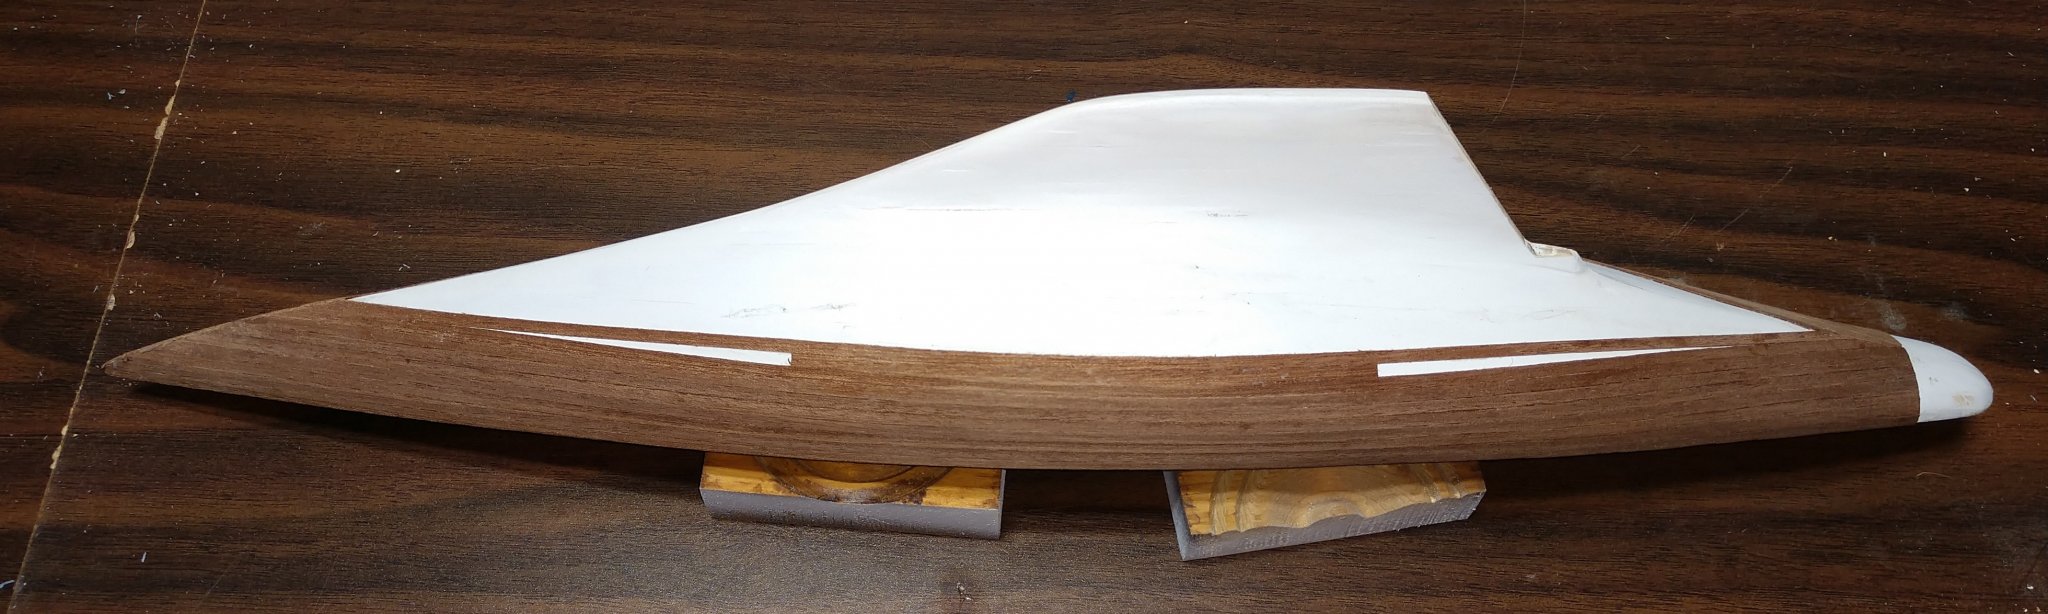
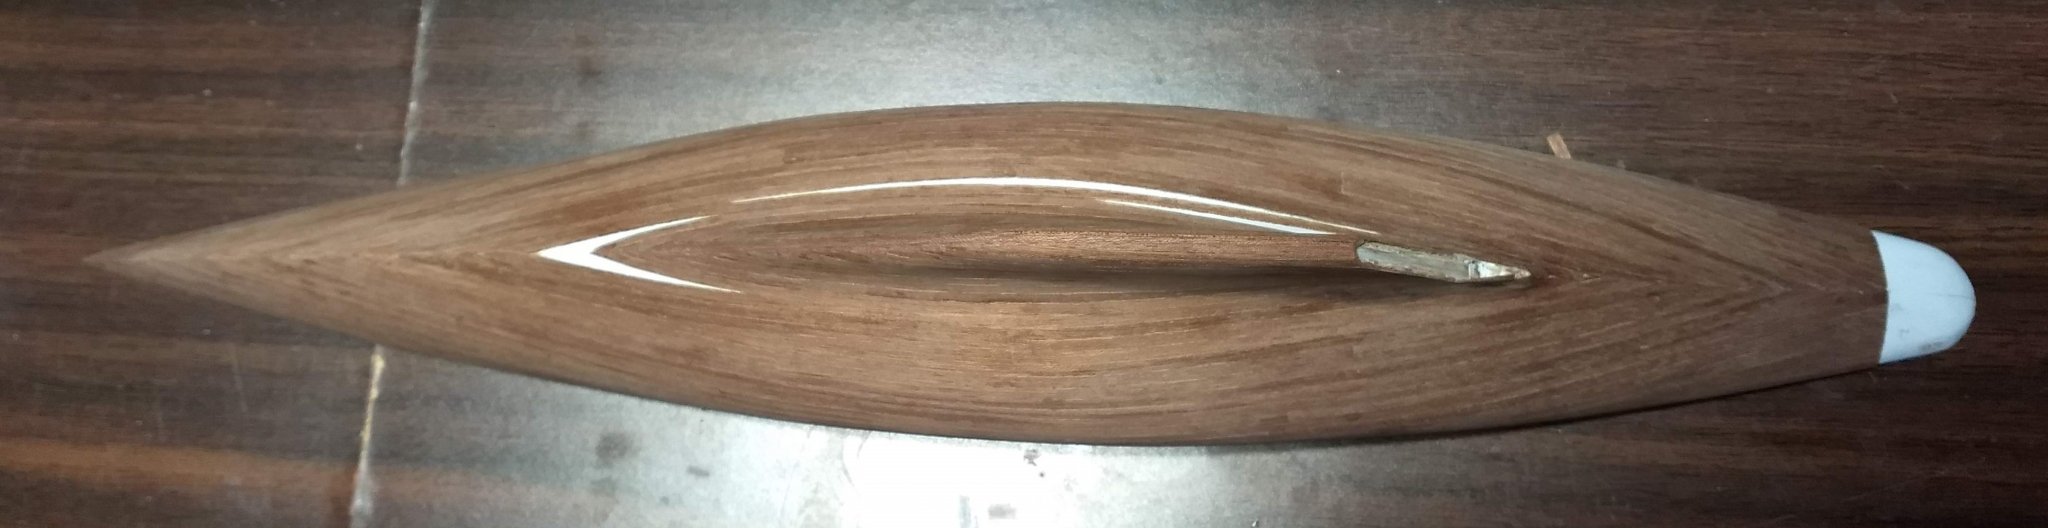
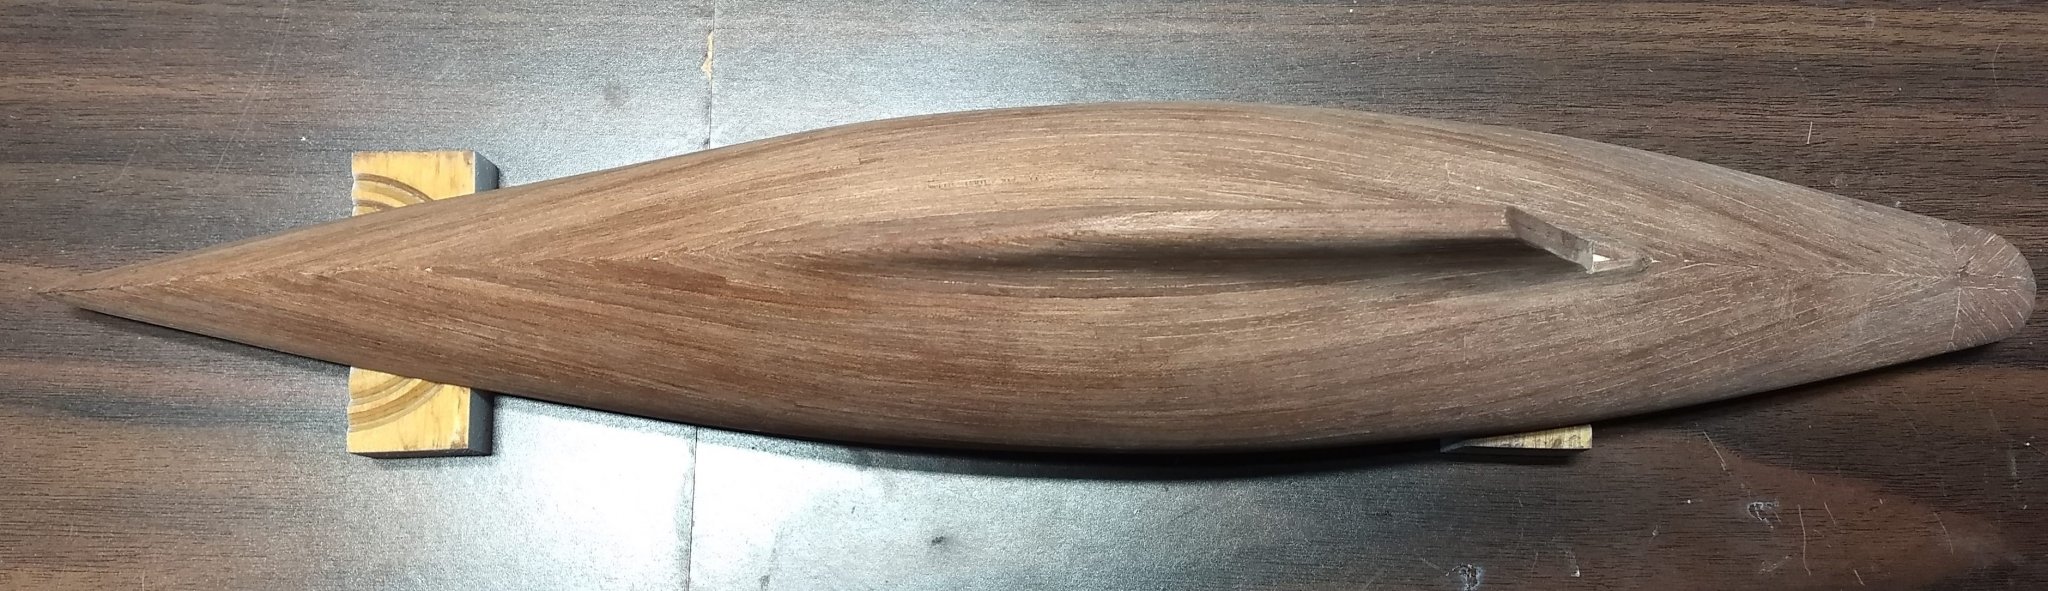
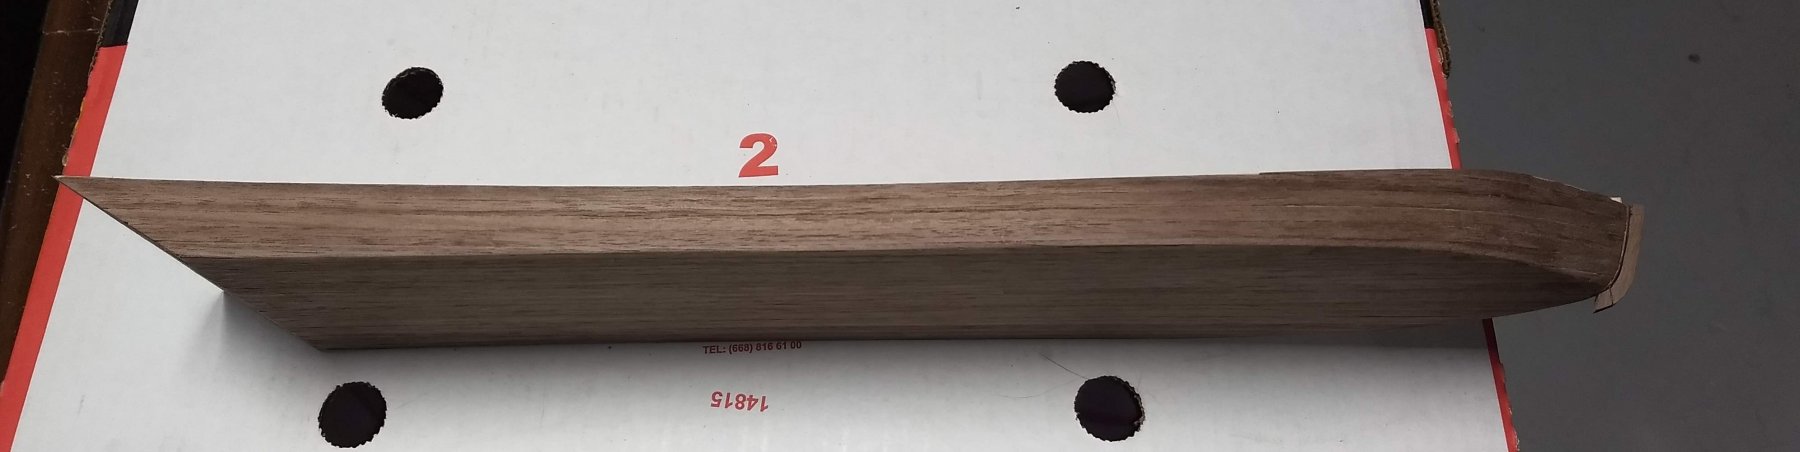
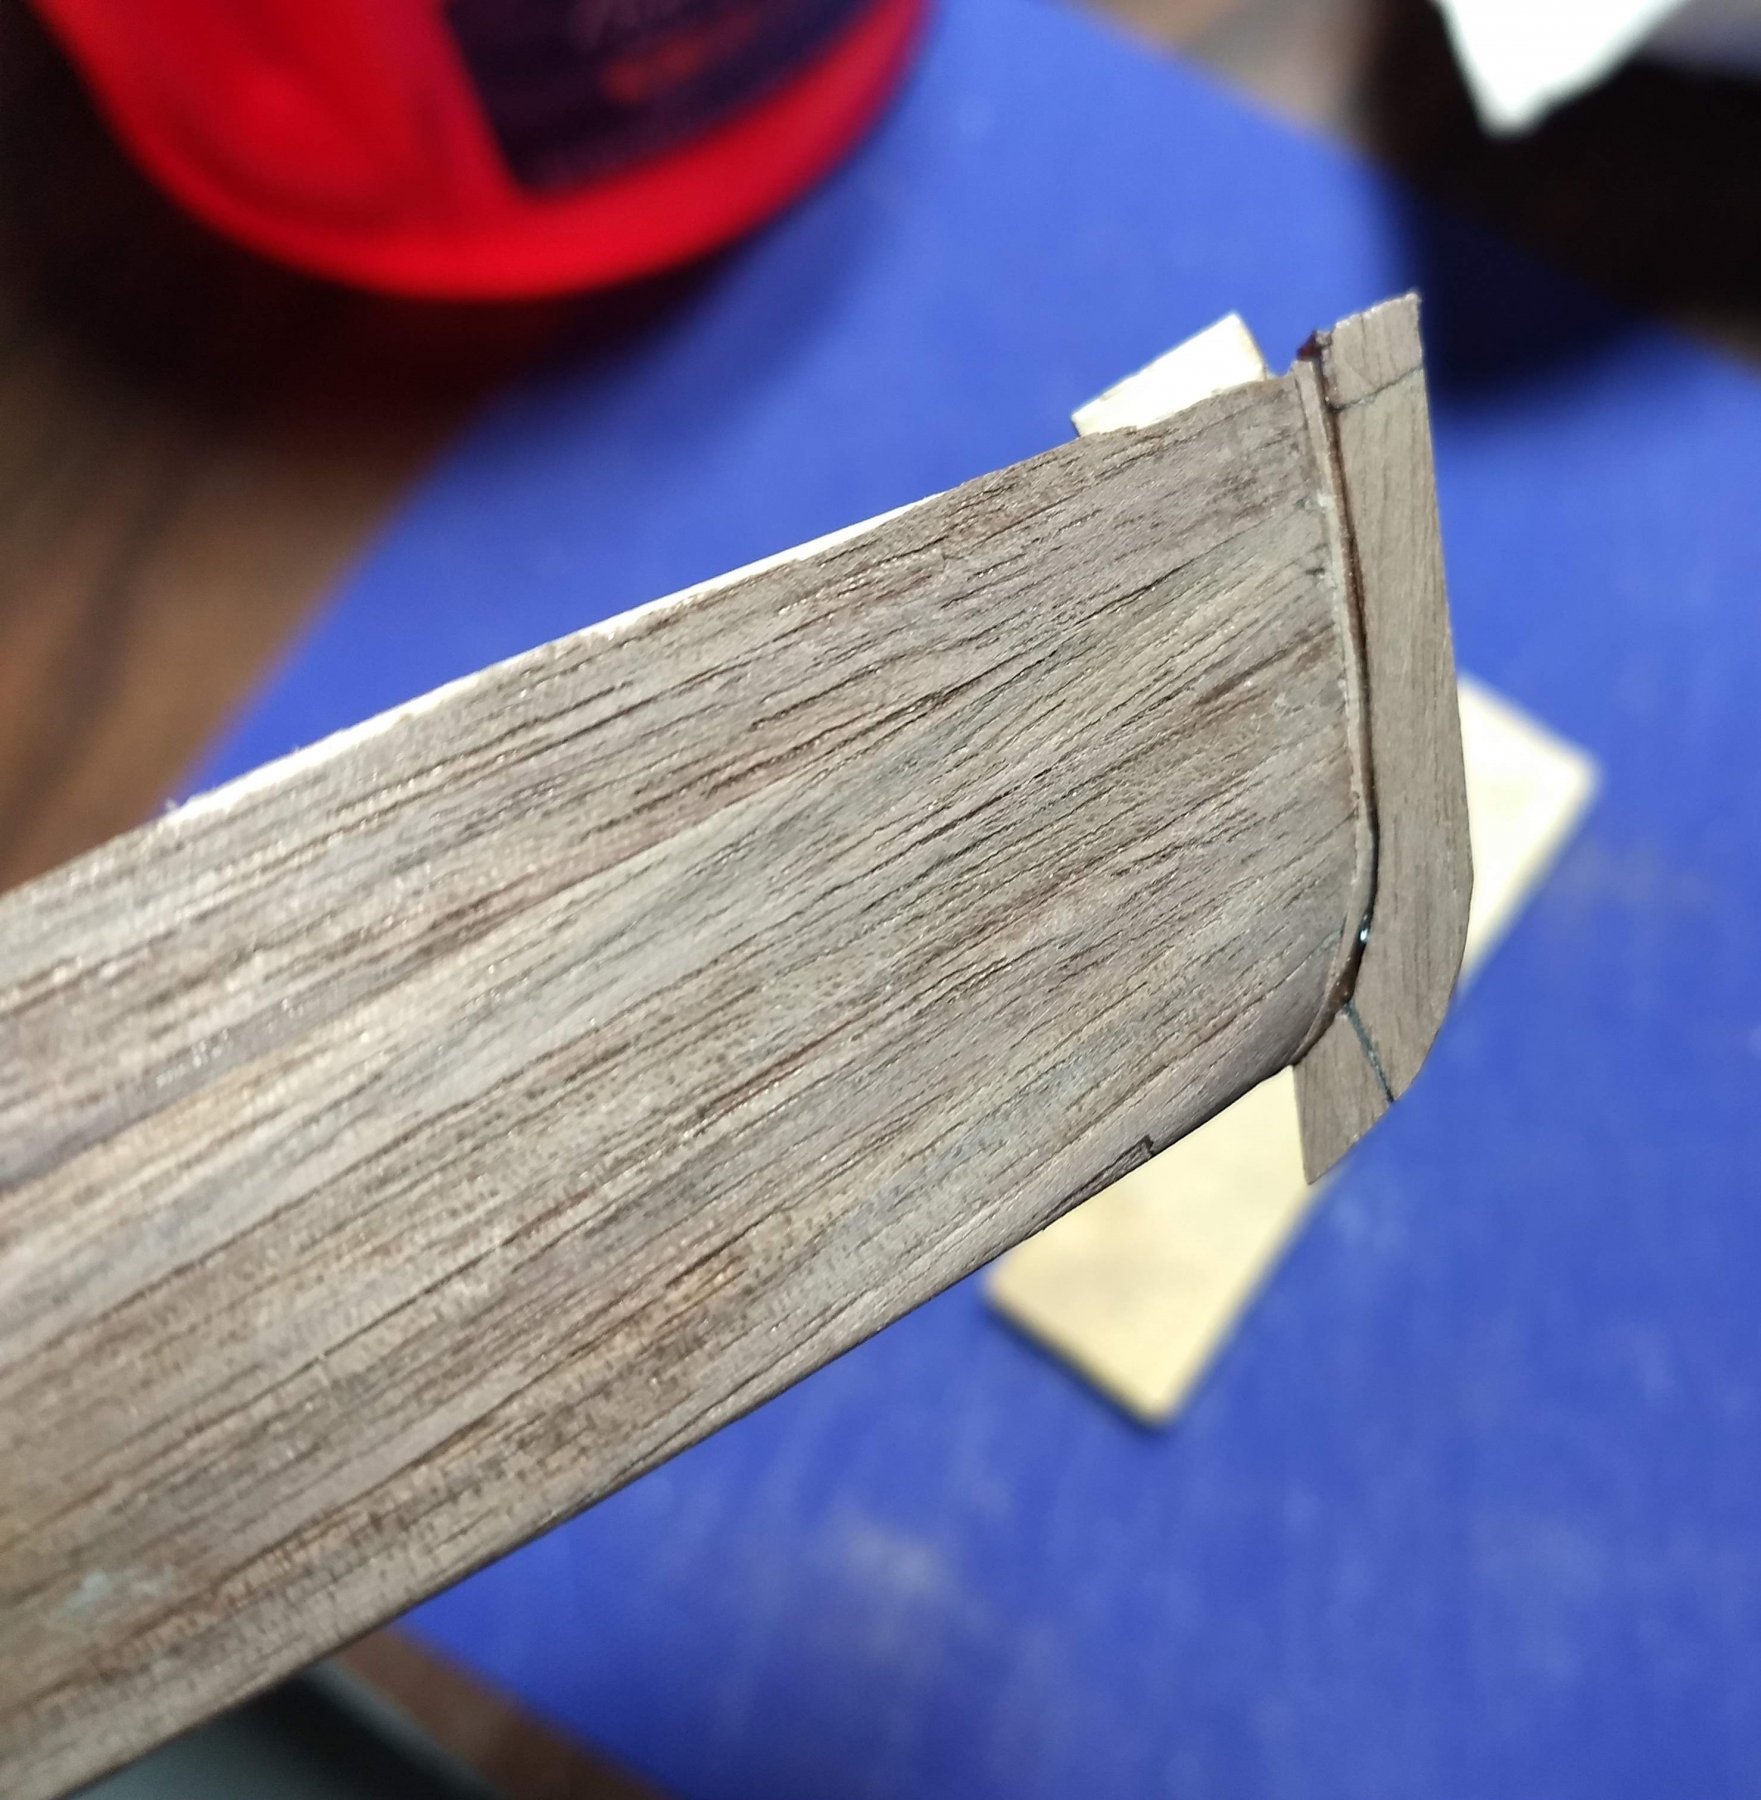
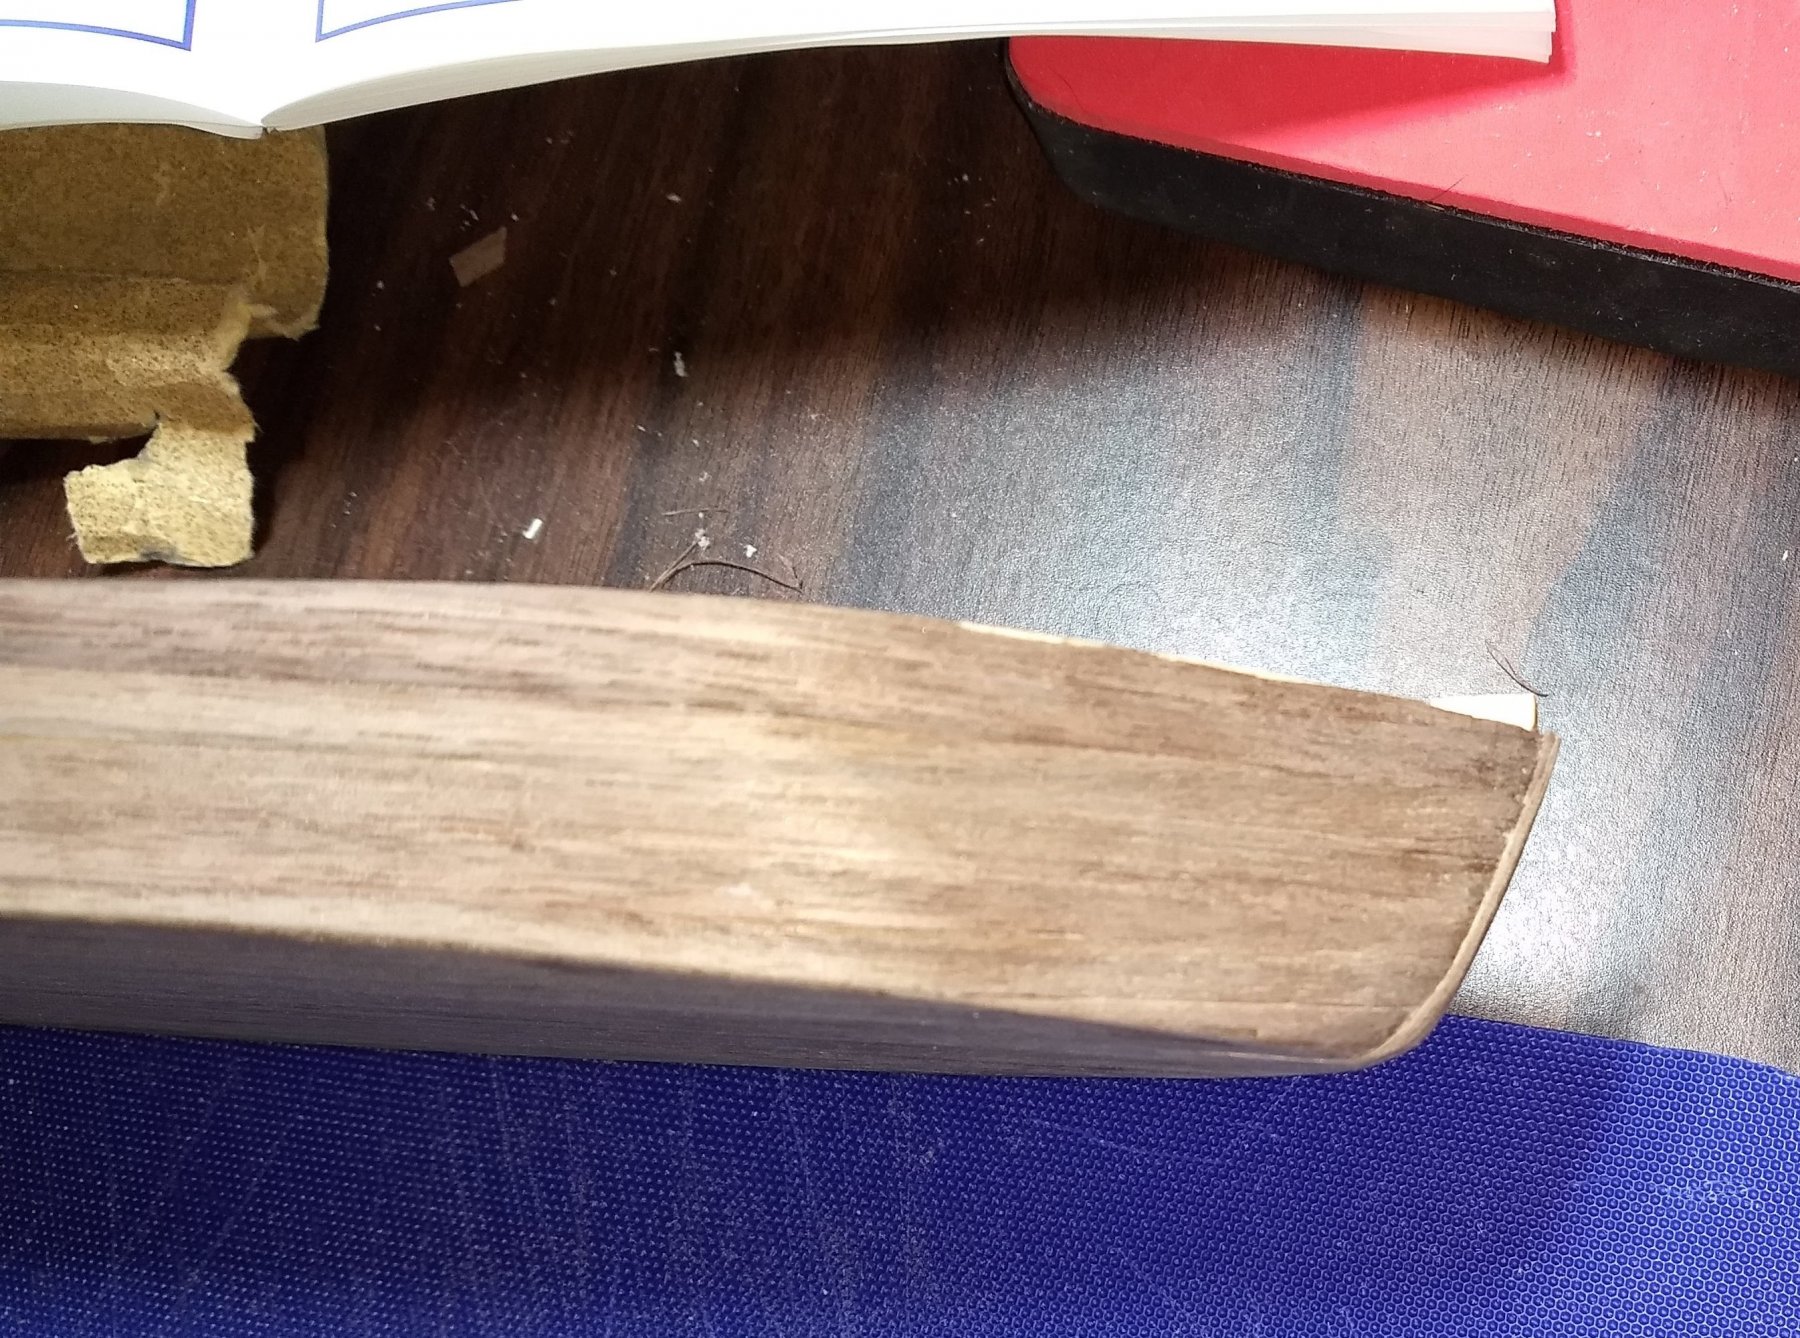
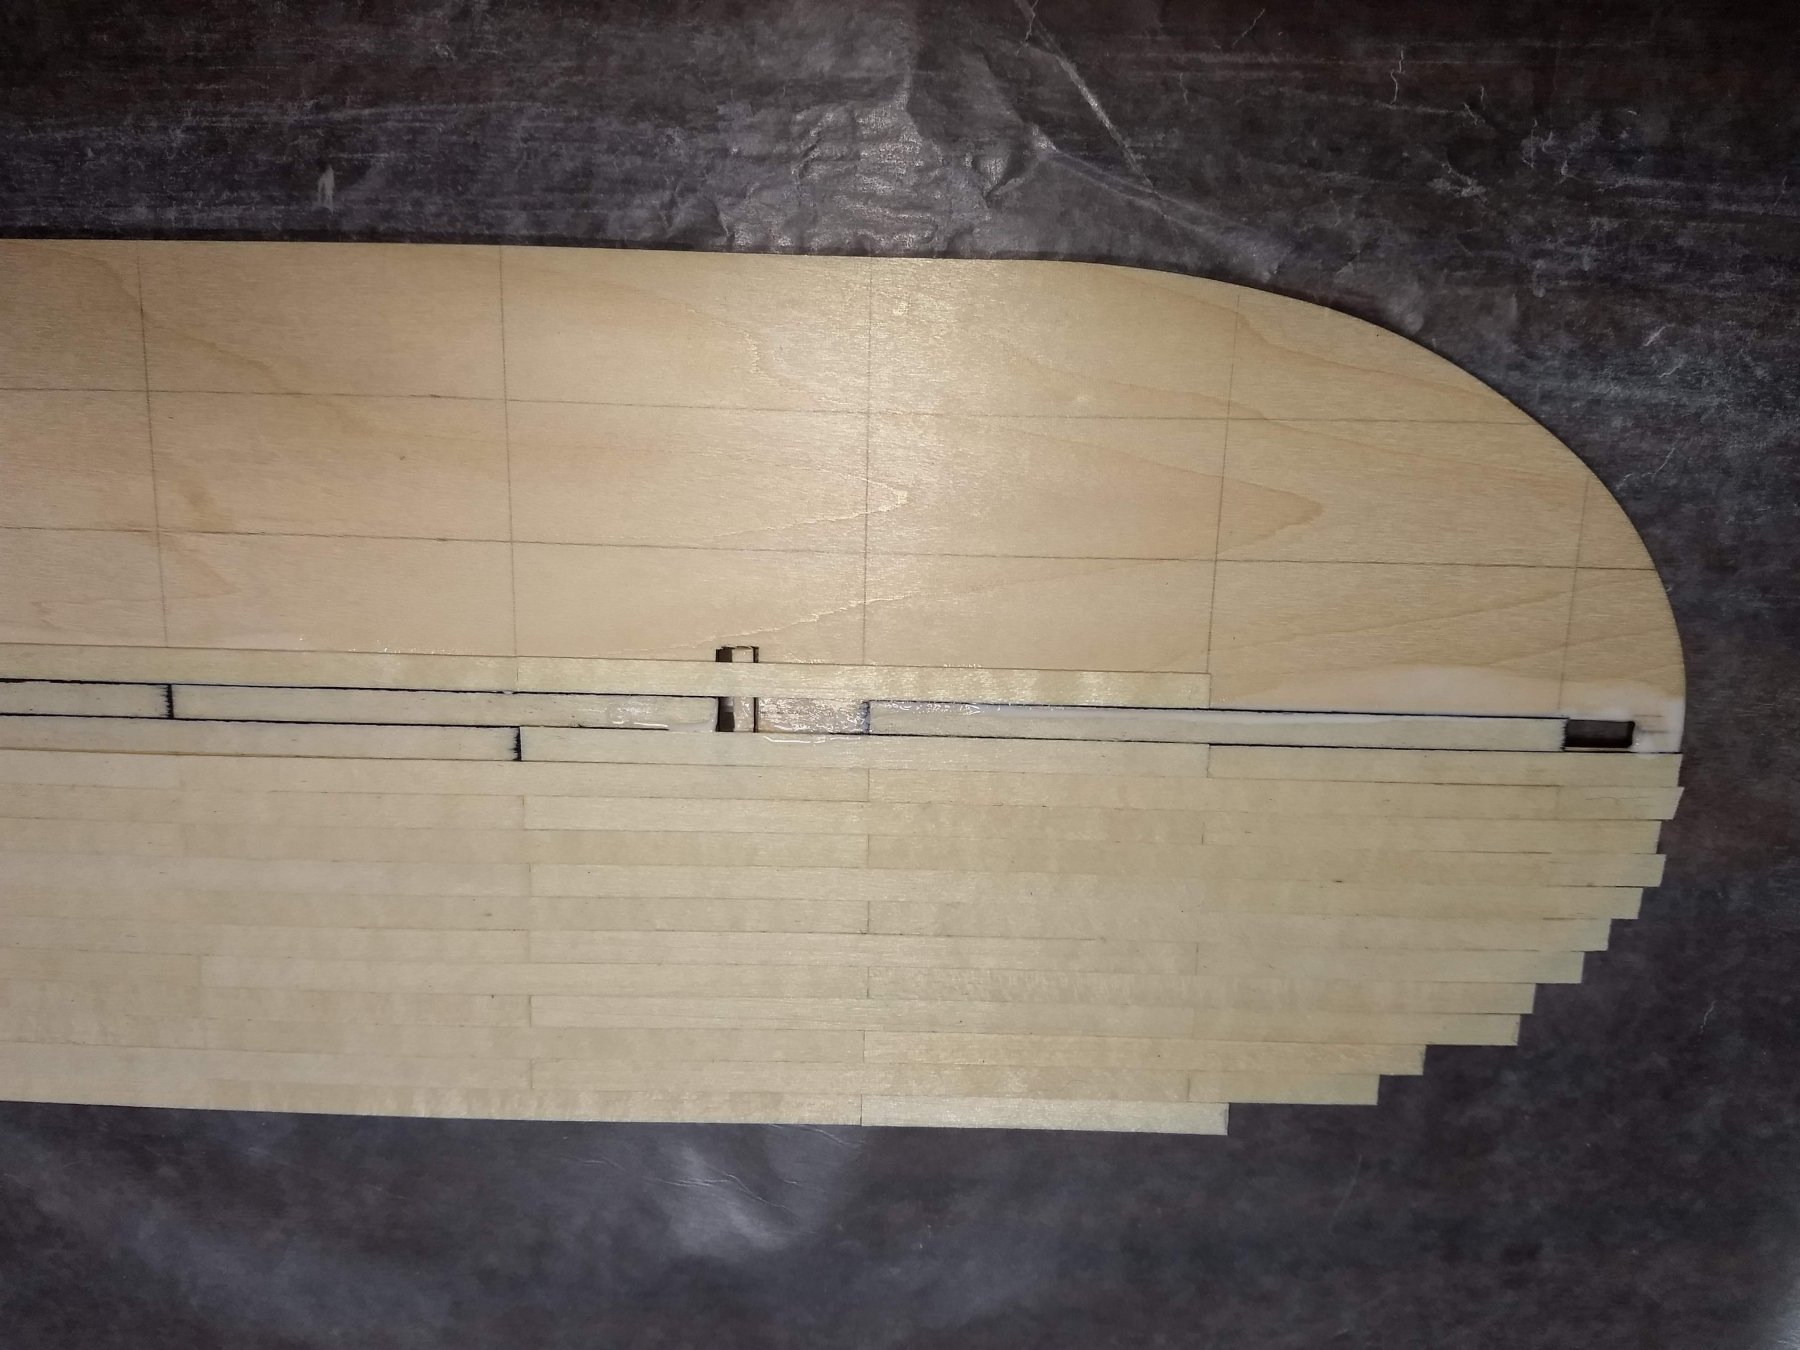
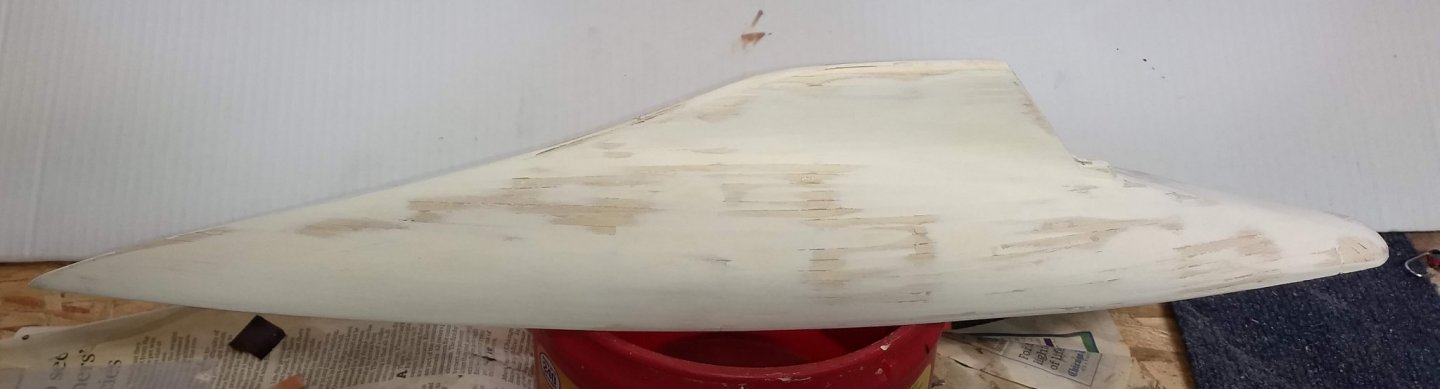
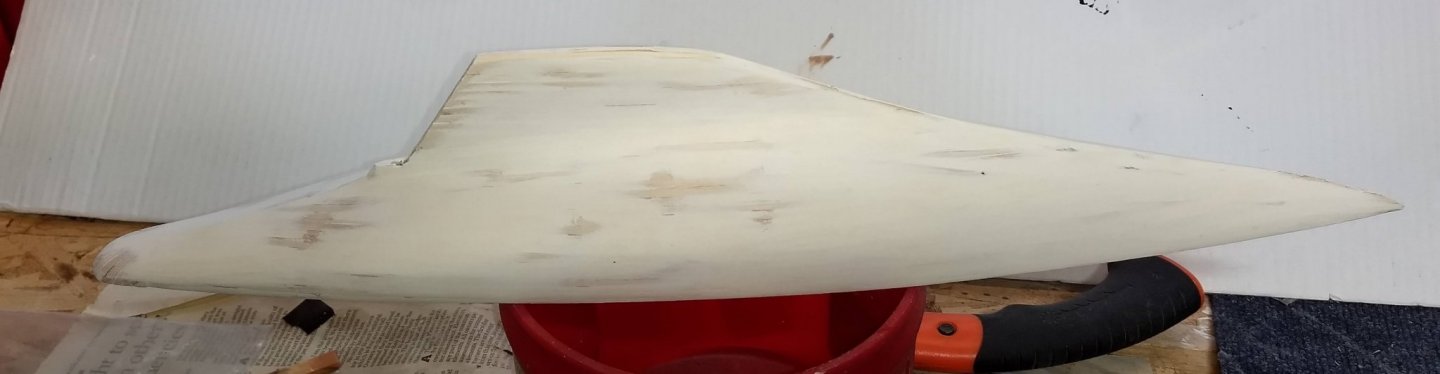
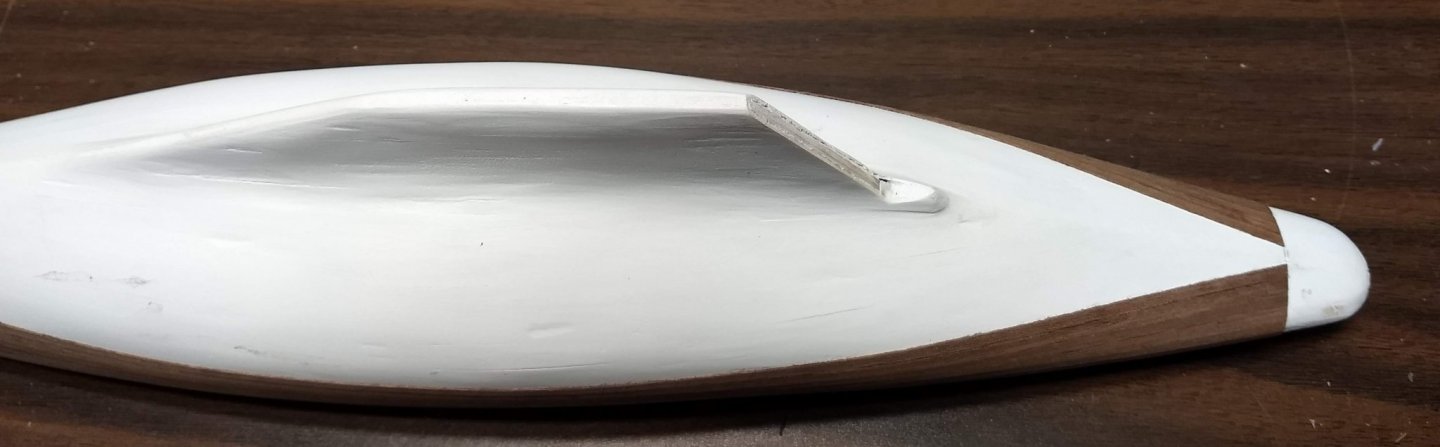
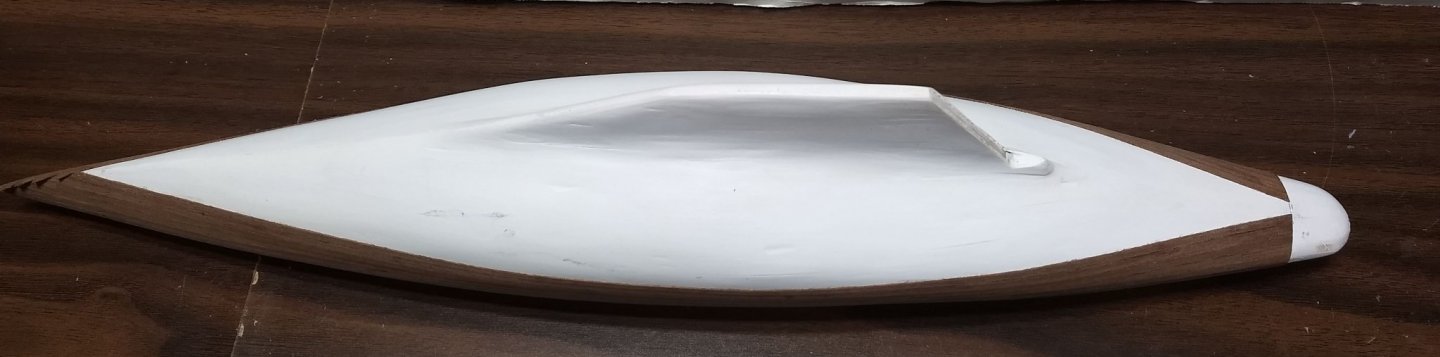
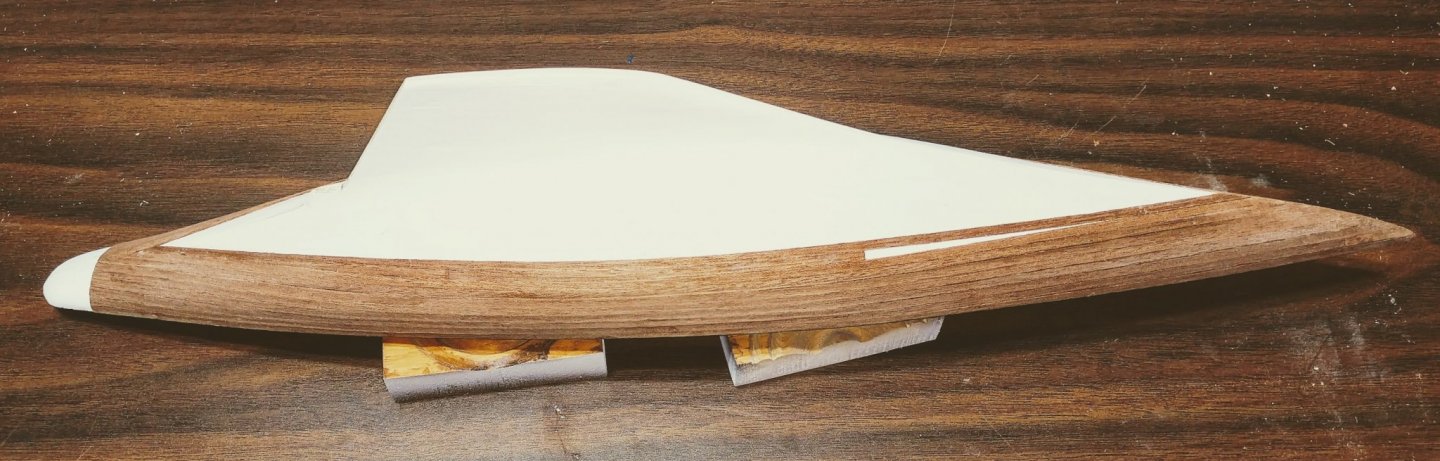
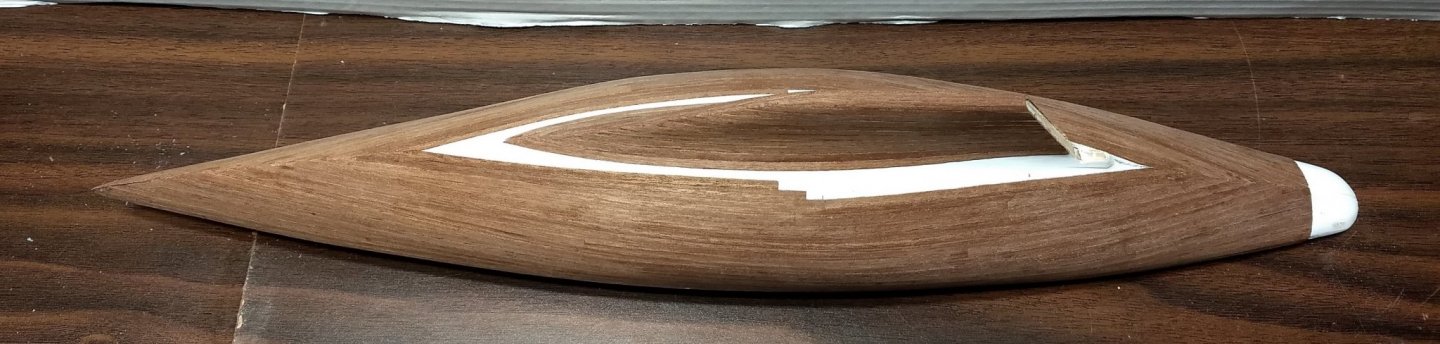
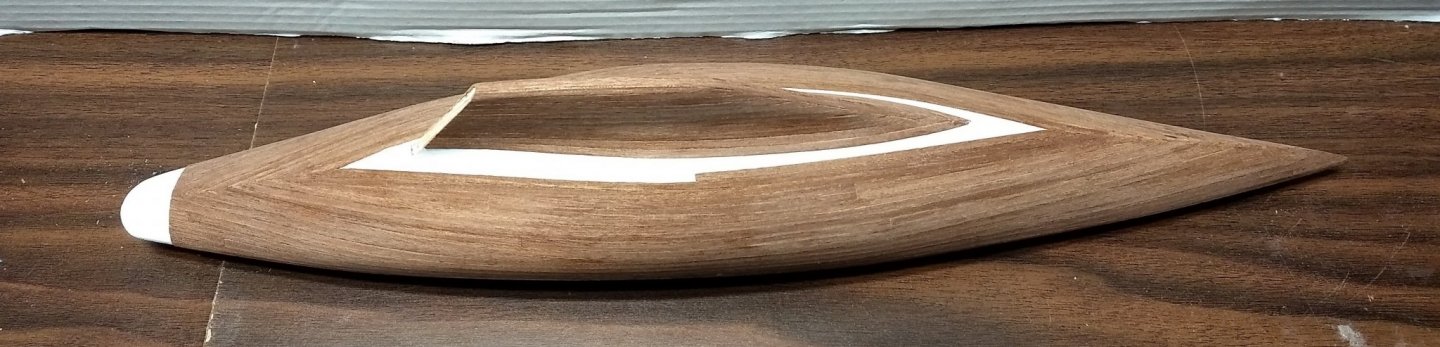
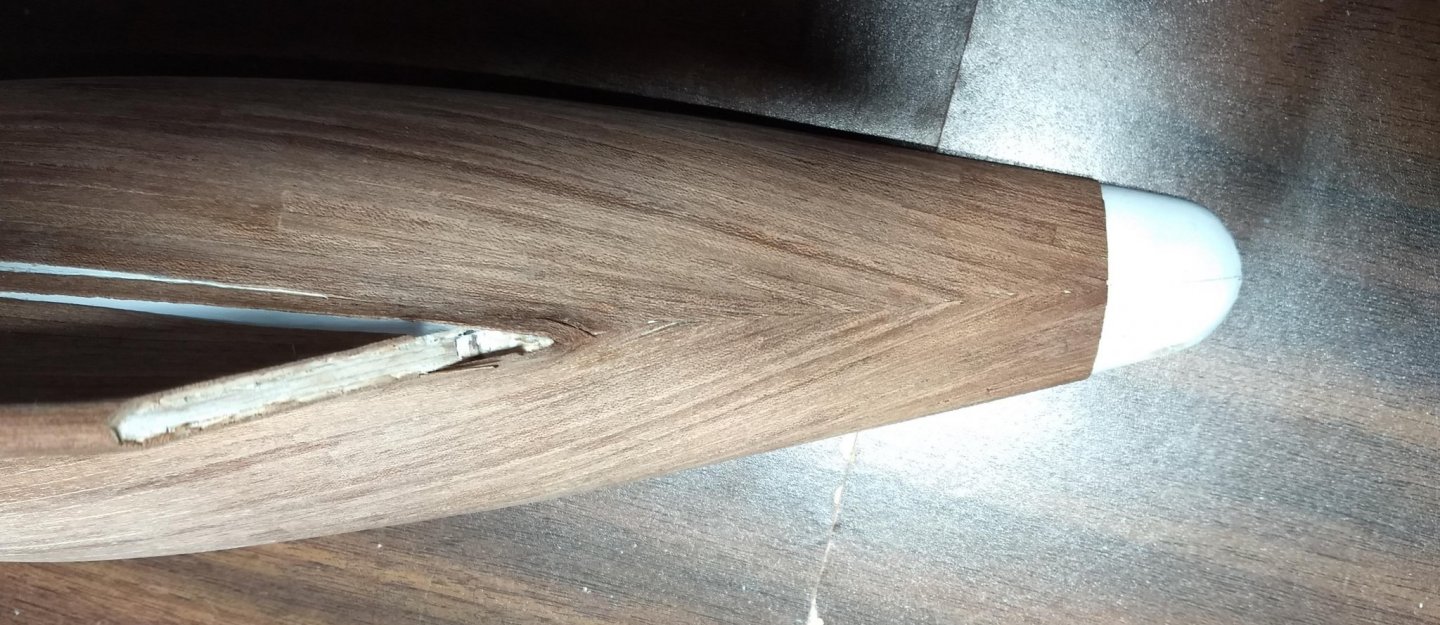
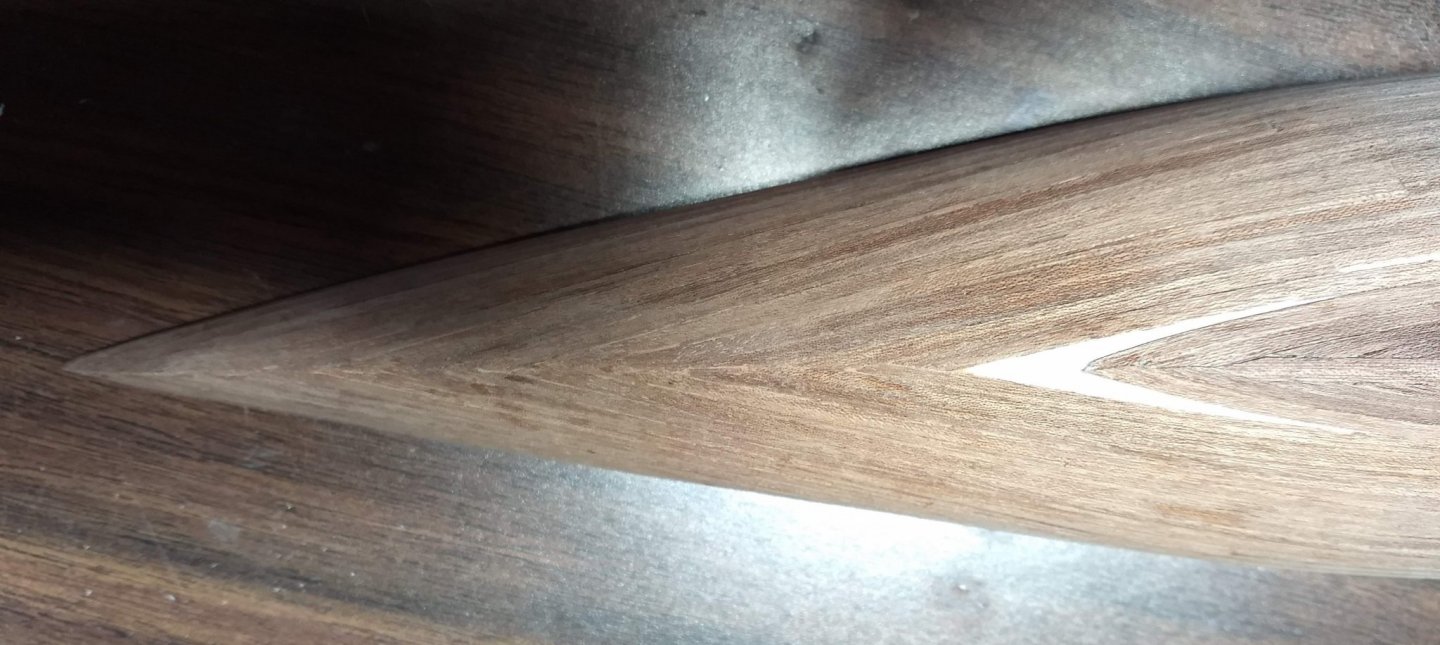
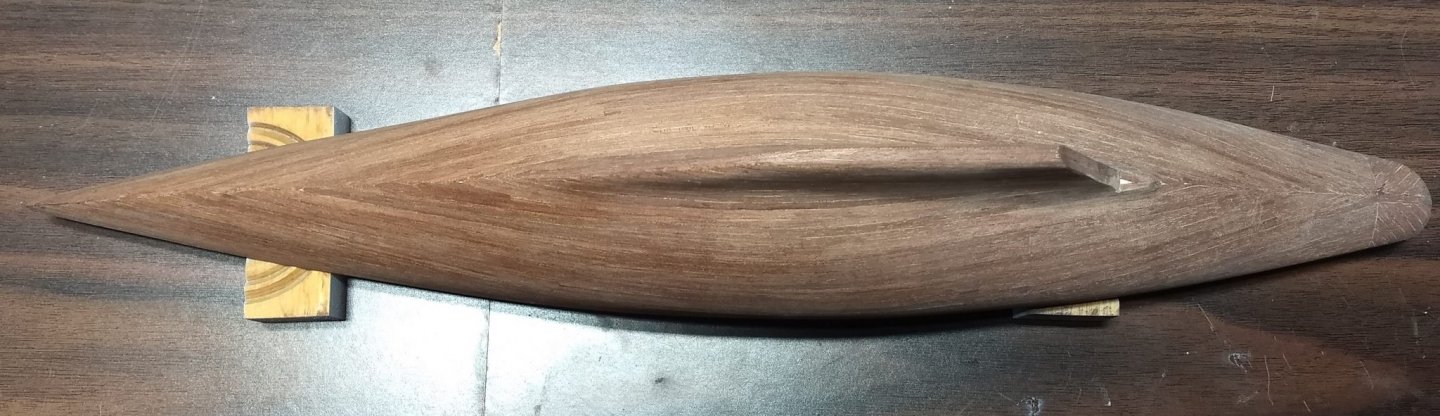
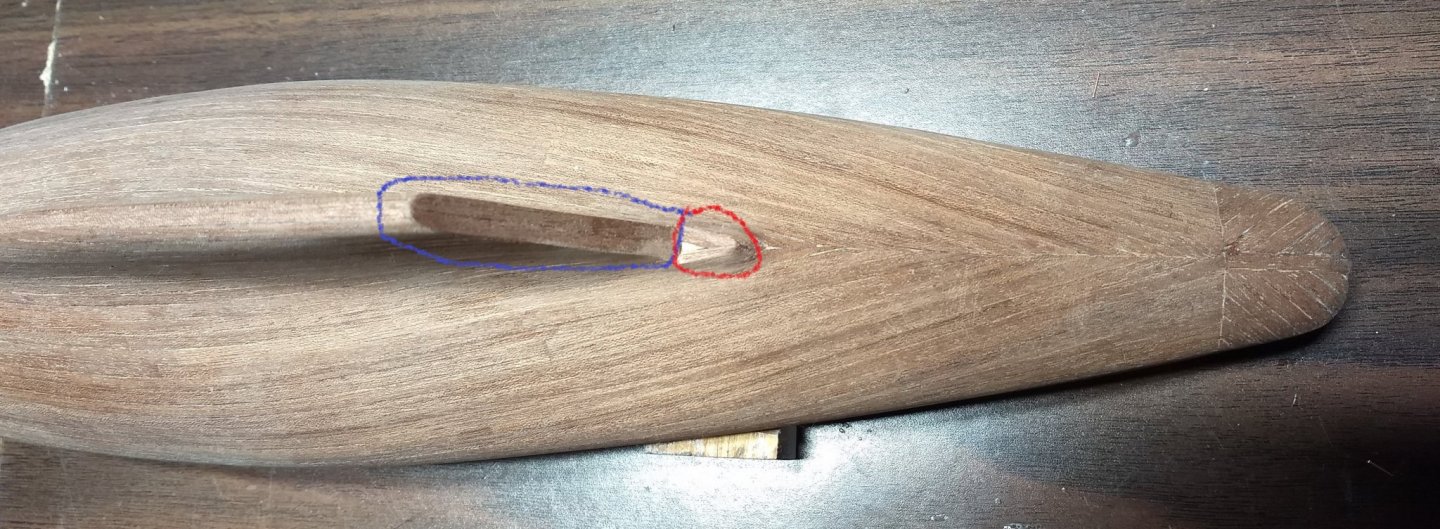
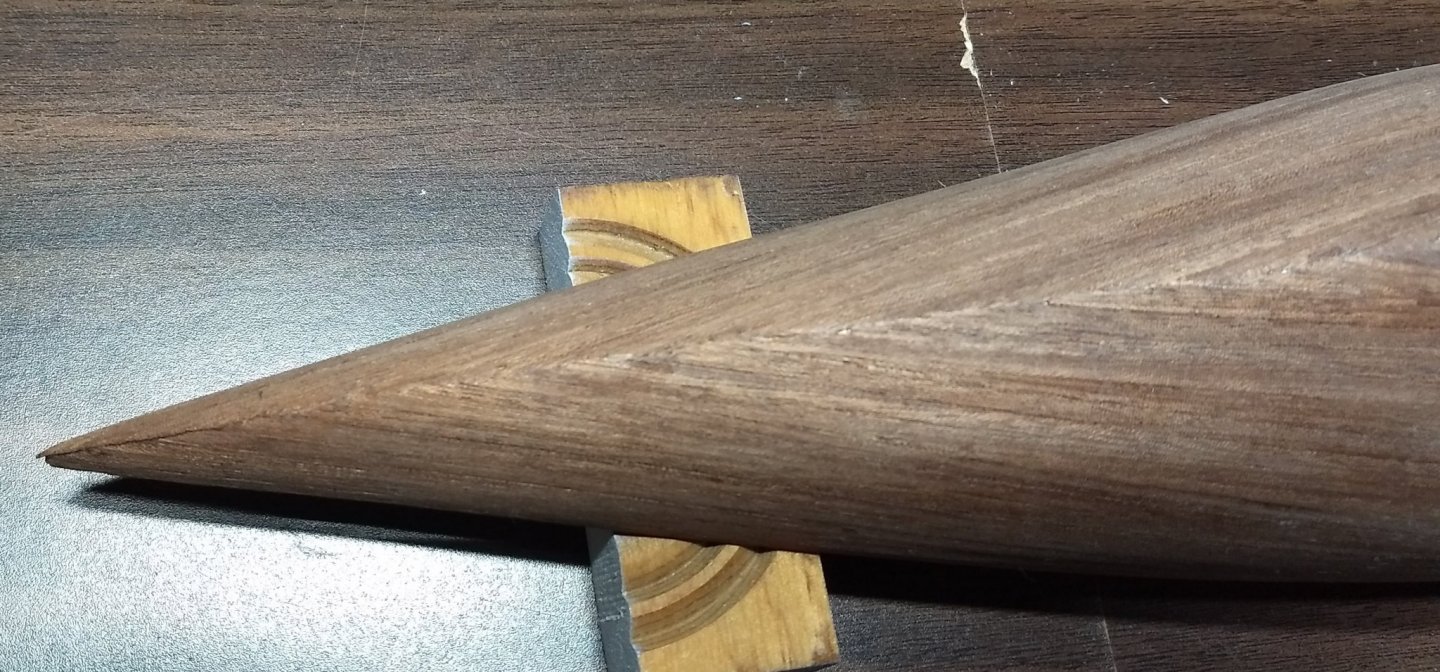
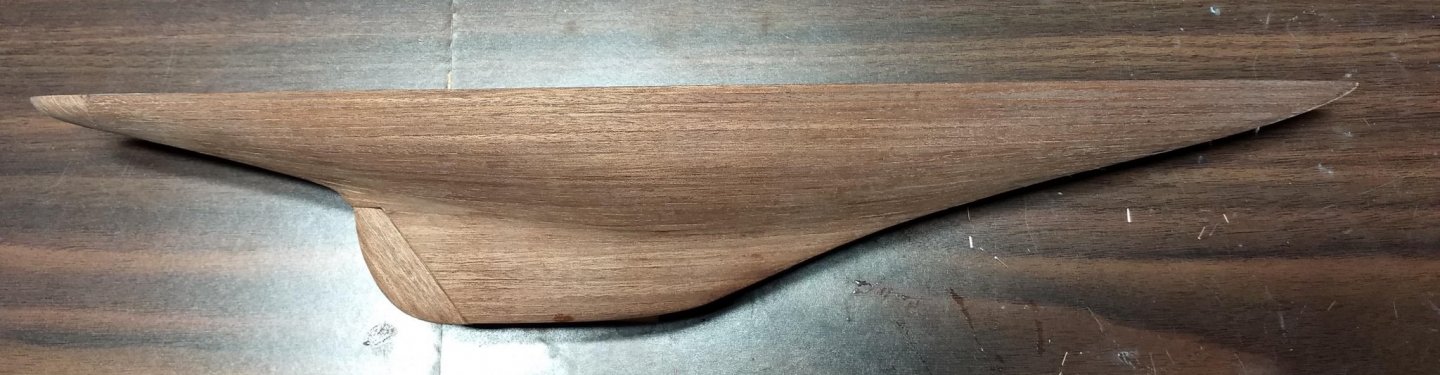
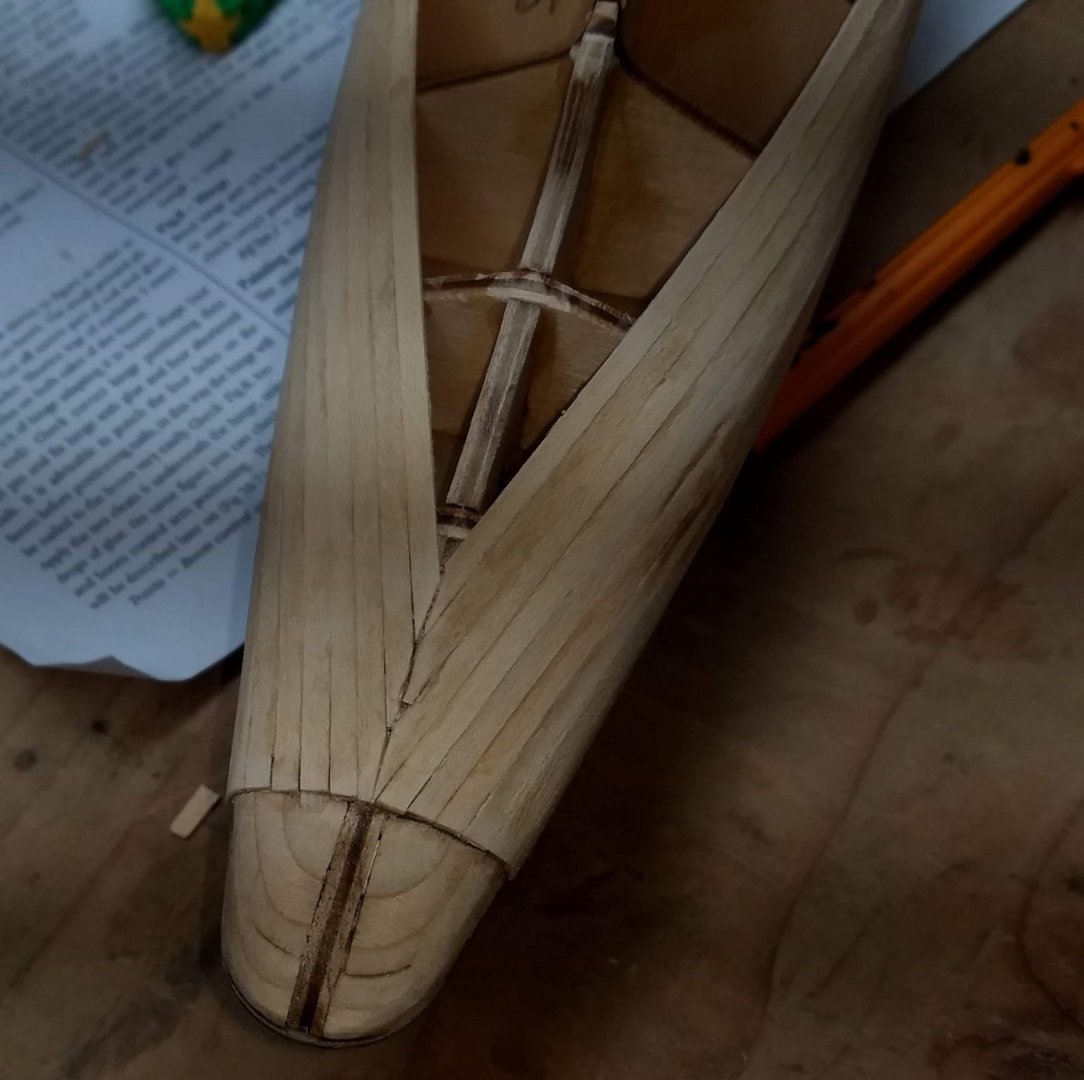
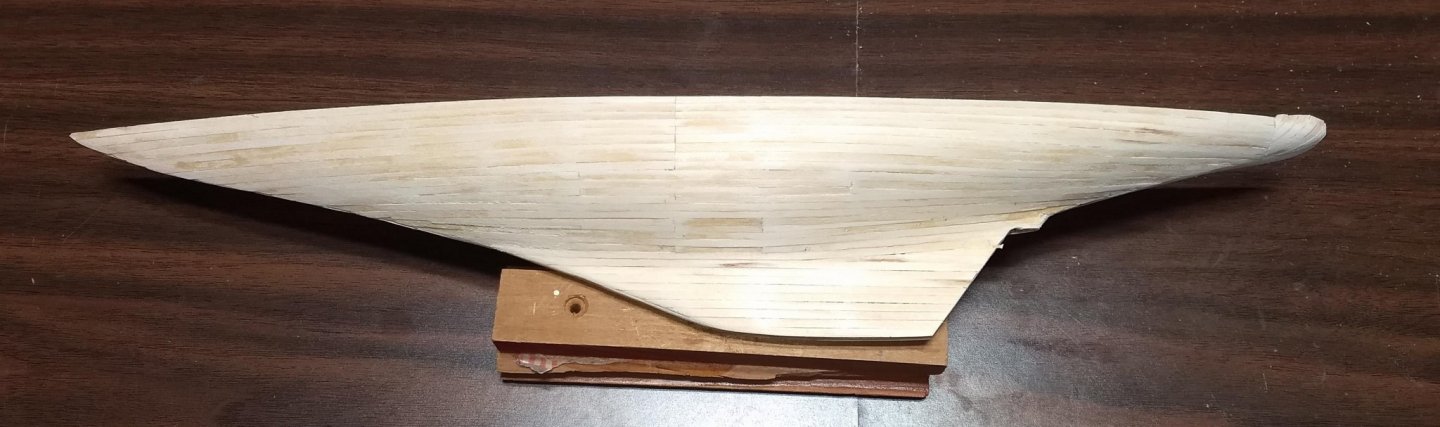
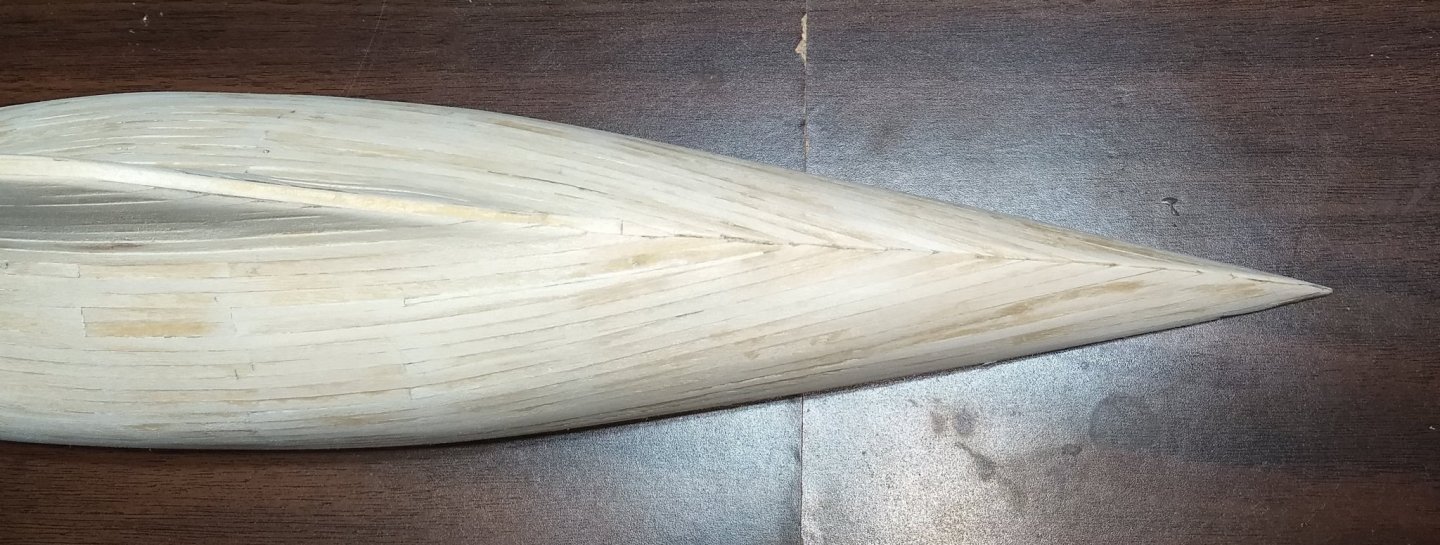
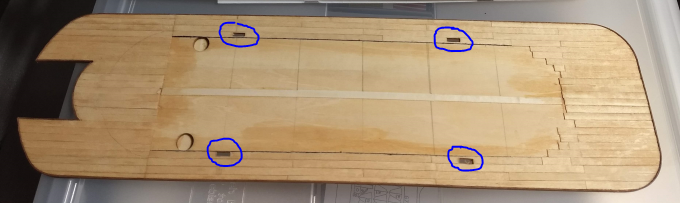
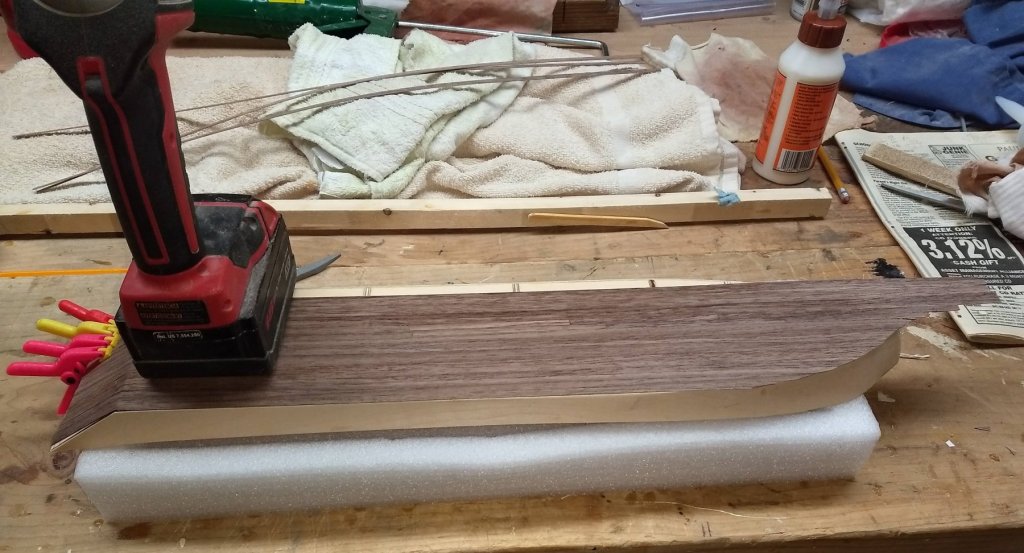
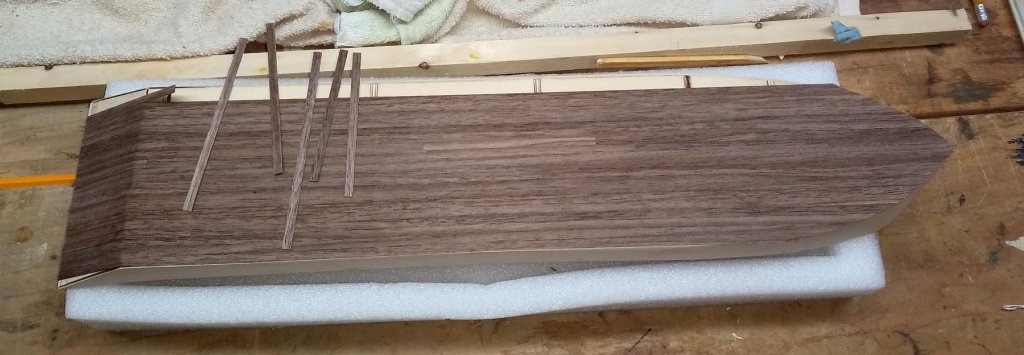
Now after a little quick sanding with 220 sand paper she should be ready for some wood filler. In my case I choose "Filla-in-a-bag". It can be ordered online (and other places) at www.goodfilla.com. I really like it to fill cracks and seams. It can be ordered in many colors, is water based, and has the consistency of toothpaste. It is really easy to apply and and smooth out over the hull. Since it is water based, you can dip your fingers in water as part of the smoothing process. You should end up with a very smooth finish. After it is dry, very easy to sand, or you could just wet your fingers again and smooth out any rough spots. Water sets it active again. Below are a few pictures after the "Filla-in-a-bag" has been applied Show below after a little sanding with 220. At this point if I knew I was going to paint the Endeavour, I would skip the 2nd planking as with a little sanding it would be ready for paint. But I am still on the fence about that, so I will go on to the 2nd planking. Since the Filla-in-a-bag is water based and re-activated with water, I decided to put on a quick coat of primer before the 2nd planking. That is probably not required, but I was not sure how the water based wood glue would react with the Filla-in-a-bag. I did not want that to potentially be an issue. And a quick coat of primer is easy, fast, and will take that worry away.. Below starts the planking from the top down,,,, I am not really skilled and planking,,, Too new at this. In my case I choose to overlap the planks at the bow and then cut off the excess. At the stern I was able to make the planks meet without overlapping/trimming them. I am not sure it that made the planking easier or harder, but in the end, after trimming, it all turned out looking pretty good And of course there are the unavoidable "filler" strips... Not sure you can do anything about that. In my case these came about the 13th plank. That may have come a little late. I probably should have added these "filler" strips after 8th or 9th plank as it took a longer and longer amount of time with each plank to get them to lay straight. Live and learn... At this point, from what I have read from other logs, it is best to start planking from the bottom of the keel and work toward the middle. To be honest, I am not sure that is good or bad. I am somewhat on a roll planking from the top and I kind of felt it would be best just to continue to the bottom - adding "filler" strips where needed to keep things straight. Anyway, I decided to start from the bottom and meet in the middle. I don't have any pictures from starting at the bottom, but it is pretty straight forward and the keep is pretty straight. It only get (shall we say) "interesting" when you meek up (with the top planking) at the curve in the hull. With more "filler" strips than I cared to count, I am slowly closing in at middle. My only saving grace is that, probably because the 2nd planking is so thin, with sanding, the seams merge together very well. In most cases you can not even see the seams. I will say though, LMDAVE mentioned in his log that you only had four "filler" strips. He is a true craftsman. If you want to know how to build the Endeavour see his log. If you want to know what not to do, follow my log. As I indicated earlier, with some trimming the overlapped planks at the bow turned out pretty good. I am not sure I would recommend it,,, Jury is still out if I really made things easier or harder for me. Only real tricky part about the 2nd planking is around the rudder post. The part highlighted in blue below is a little wider than the runner. In my case I glued two strips of the 2nd planking to that part of the keel and trimmed it down to size. Otherwise the bare wood would show on both sides of the rudder when it was attached. The part in red below required some sever bending for the 2nd planking. Not a real big deal as the planking is so thin. Soak in water for a few minutes the part of the 2nd planking that was to be bent, and with a little CA glue, it bends and glues pretty easily. Then with a little 220 sand paper, smooth it out. In addition, the triangular portion of the rudder post (part of the red highlight) is also a little wider than the rudder. As shown in the next picture, I put some 2nd planking on both edges of the triangle portion. No need to fill the triangle as the rudder will cover the middle portion. At this point the 2nd planking is done. Just need some very light sanding. And I really mean light sanding. The 2nd planking is only .5mm thick. Any more than light sanding and you are going to break through and the wood below will show through.... If that happens and you plan to paint the Endeavour, no problem, But if you do not plan to paint the Endeavour, you will have a lot of "fiddling" in your future patching the 2nd planking - trying to make it look like it was not patched. Not even sure it that can be done.... If you break through, your paint/no-paint decision will probably be made for you - you will be painting. At this point, I think I am going to keep the hull natural and not paint it the traditional blue (as the real Endeavour). We have a 36 foot boat years ago that was mahogany and all natural,, so I am kind of partial to that look. On to grain filler before the poly,,,,,


- 45 replies
-
- 4
-
-
- j-class yacht
- amati
- (and 2 more)
-
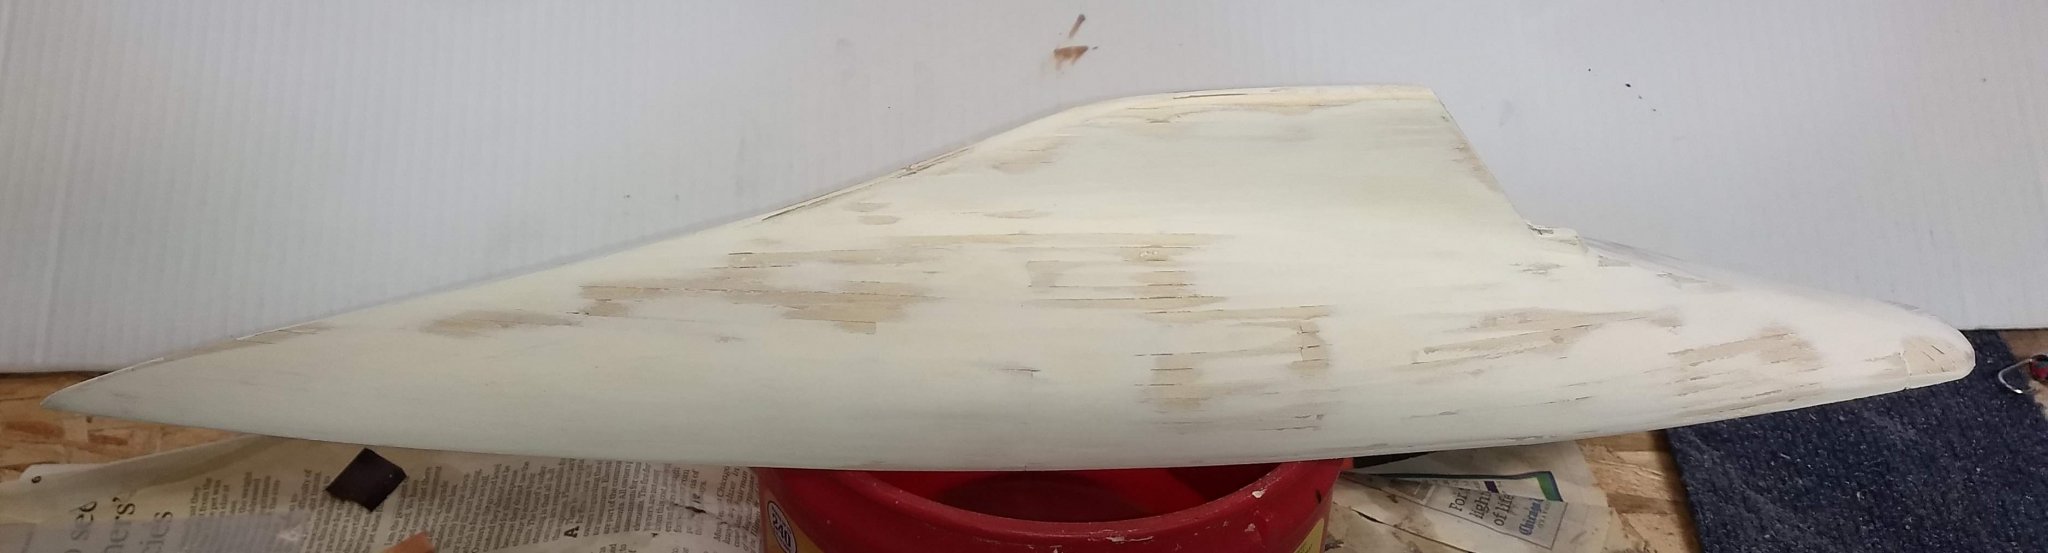
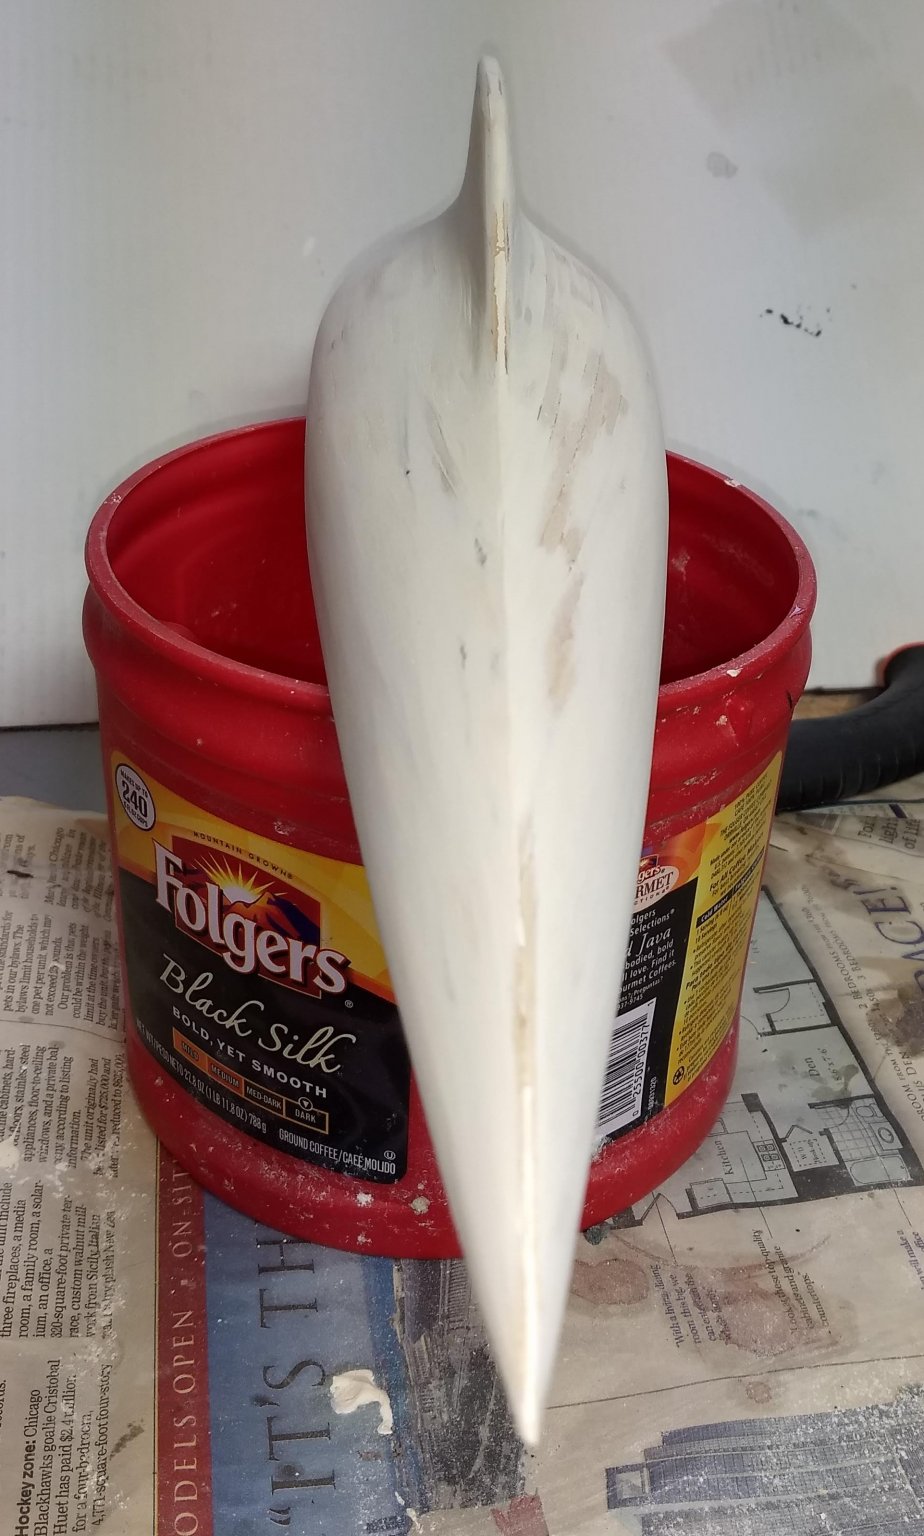
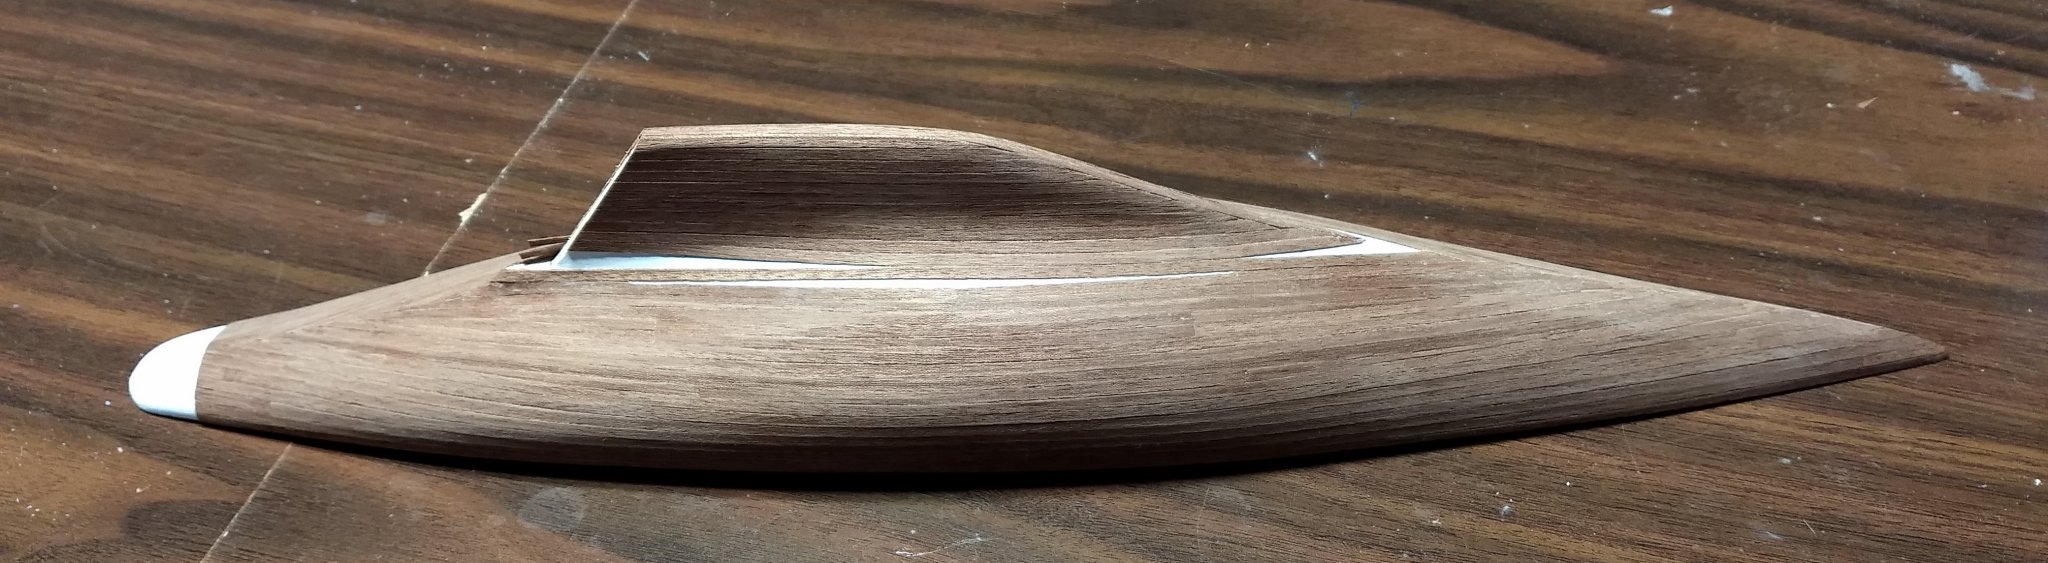
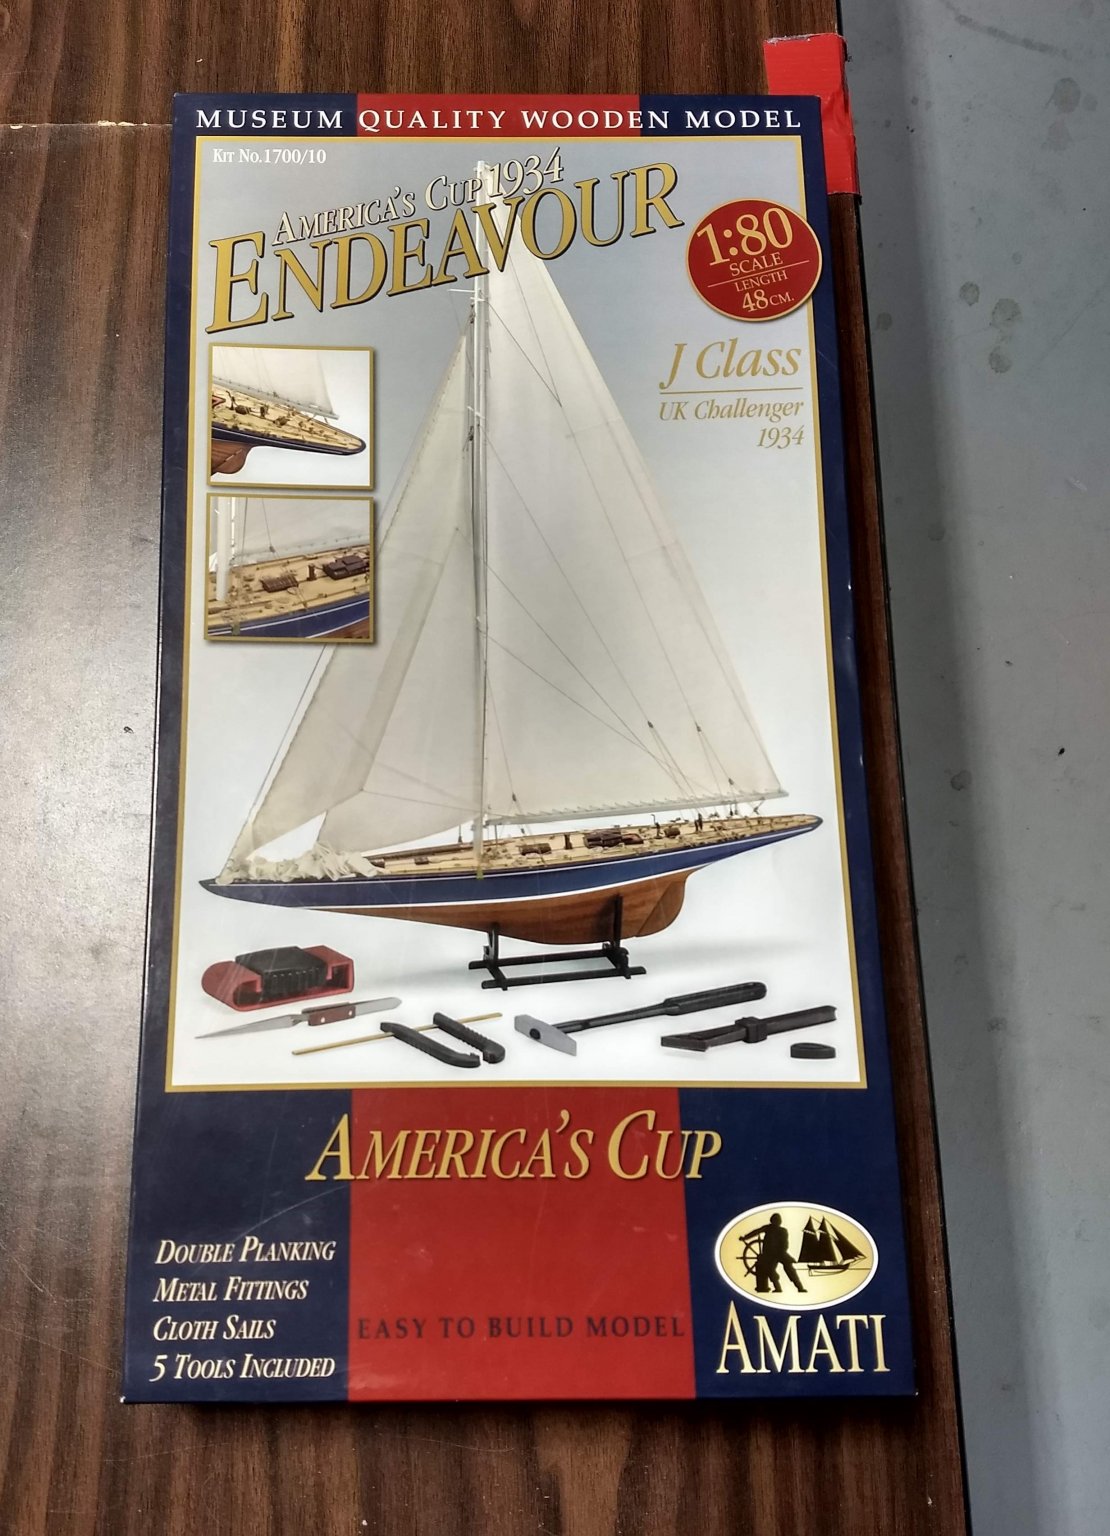
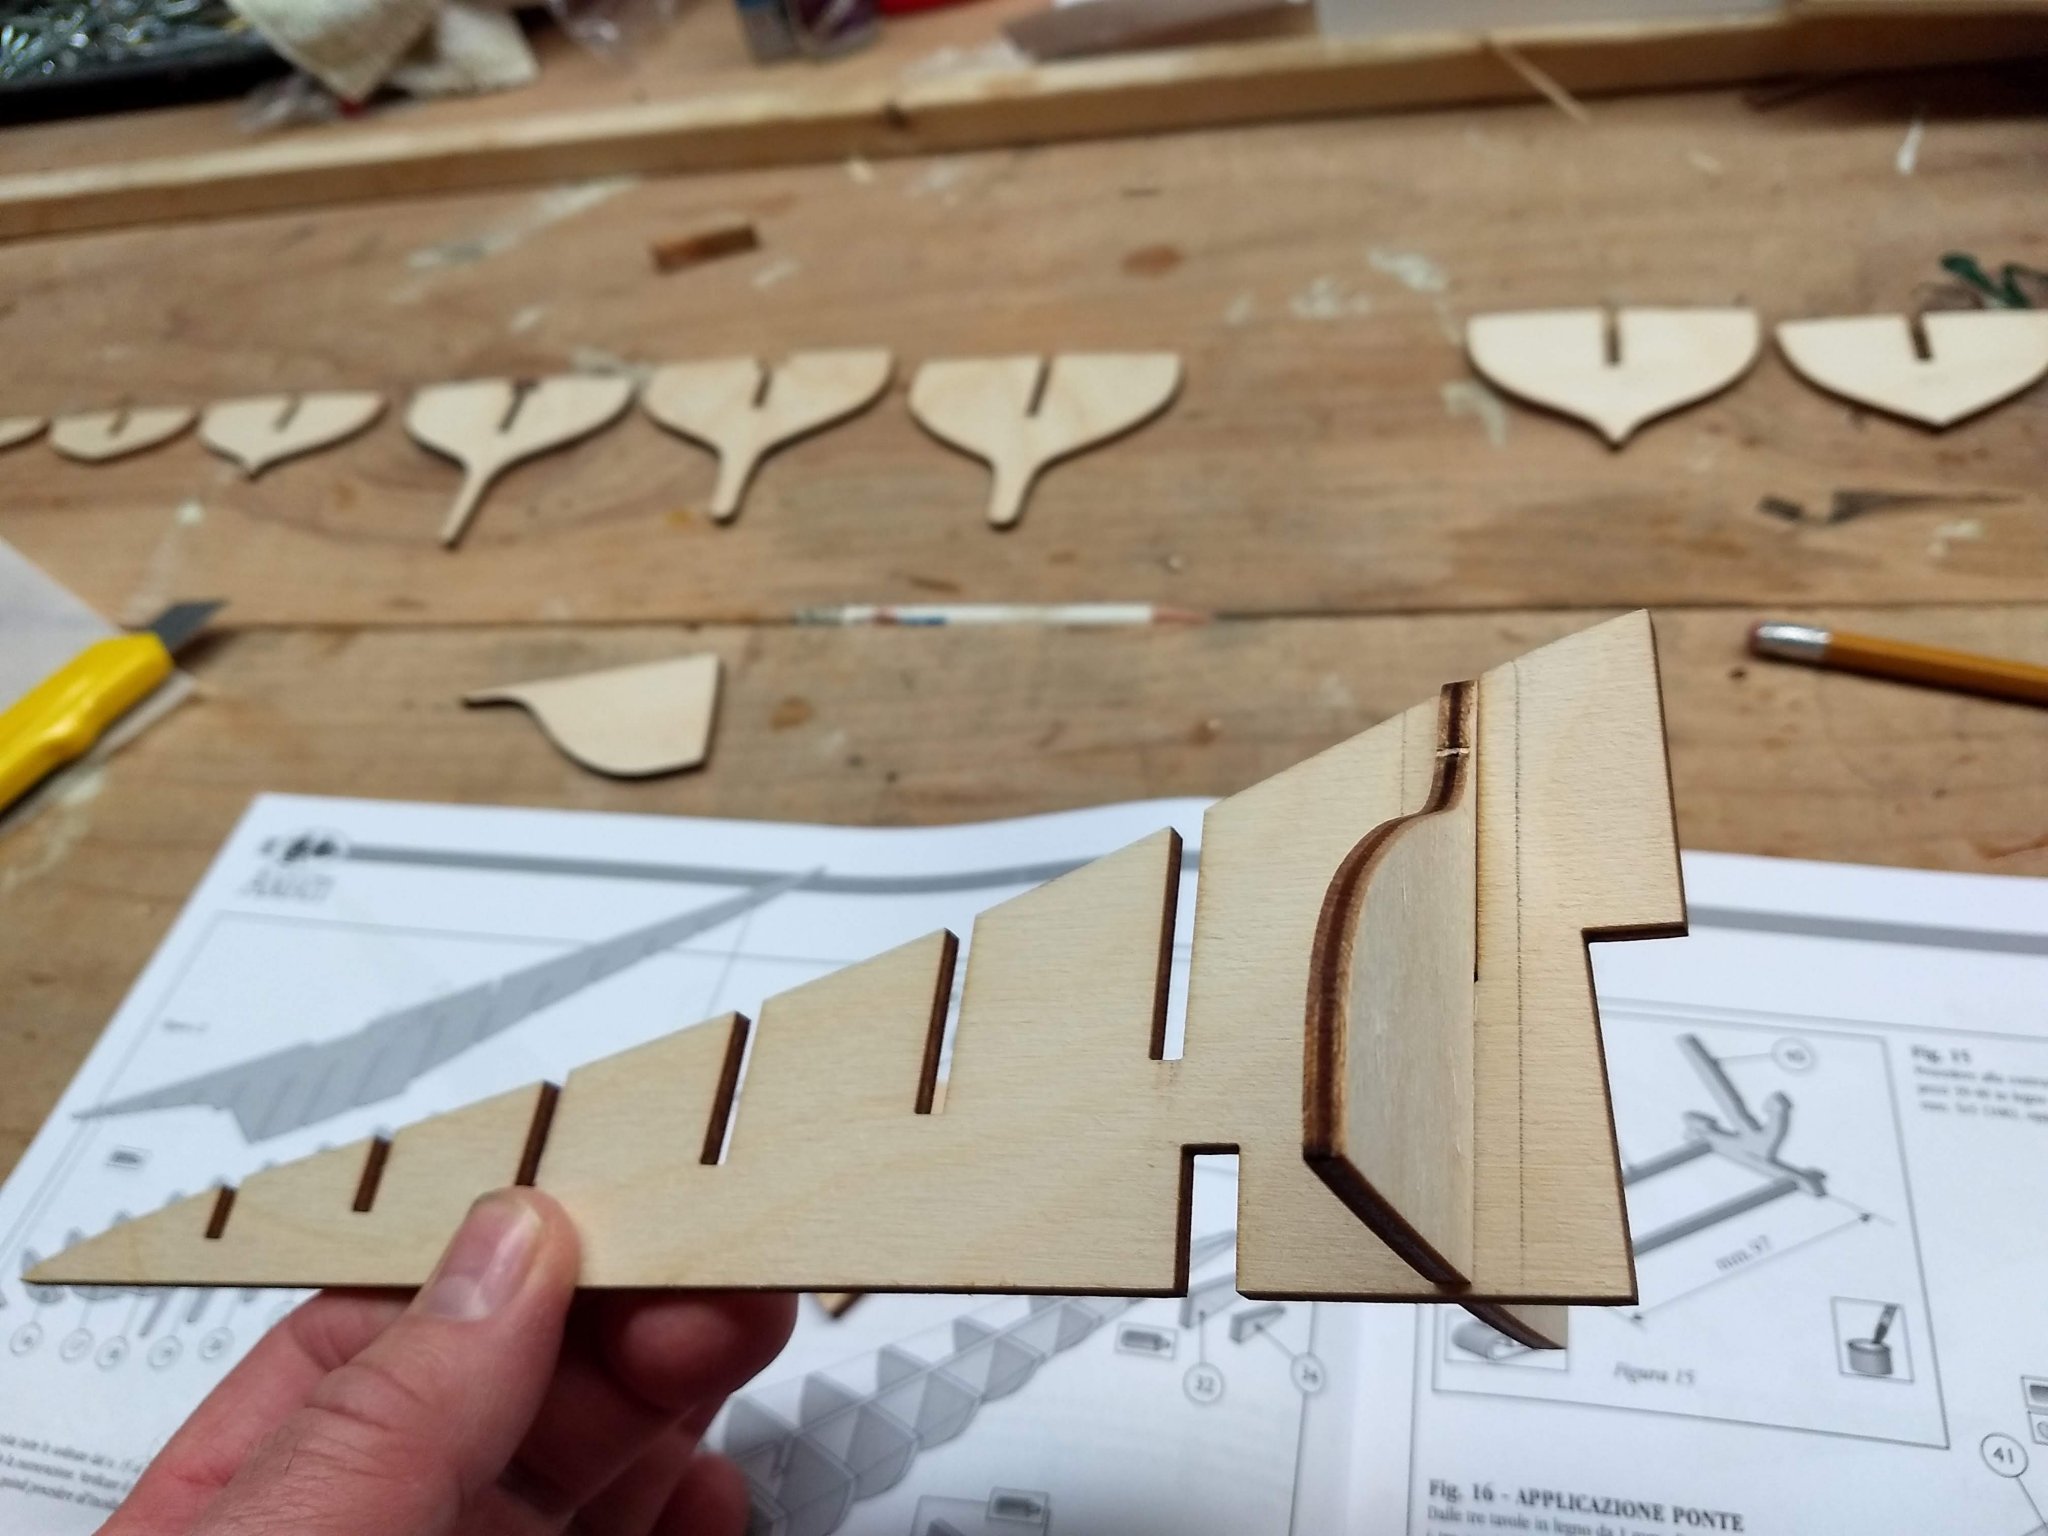
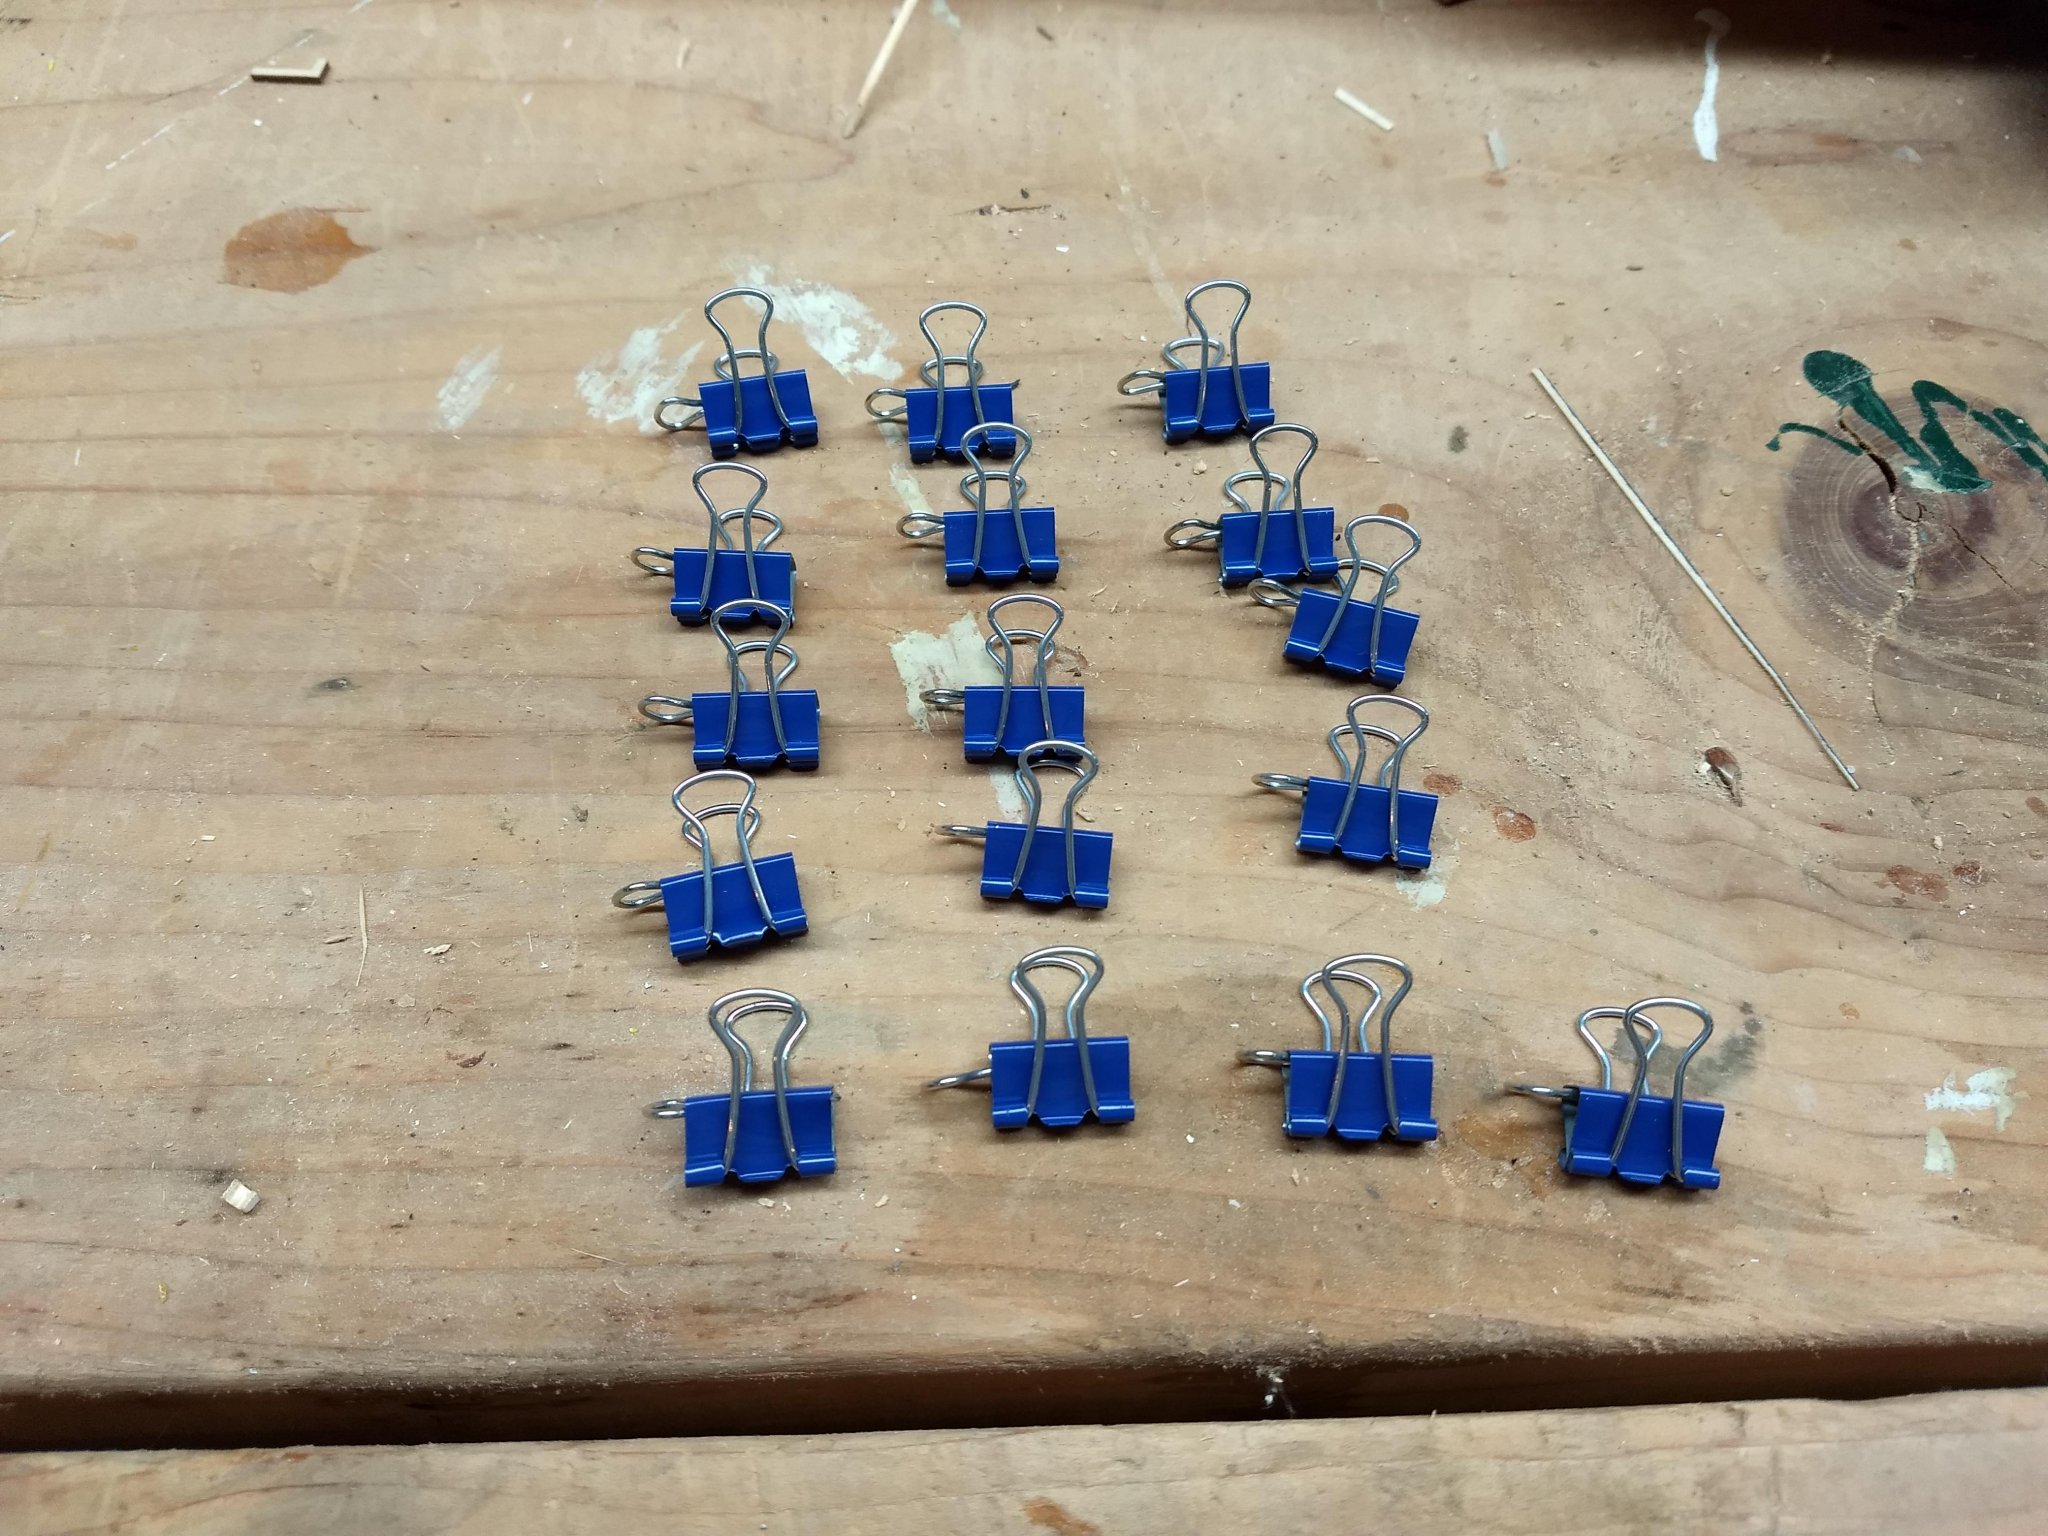
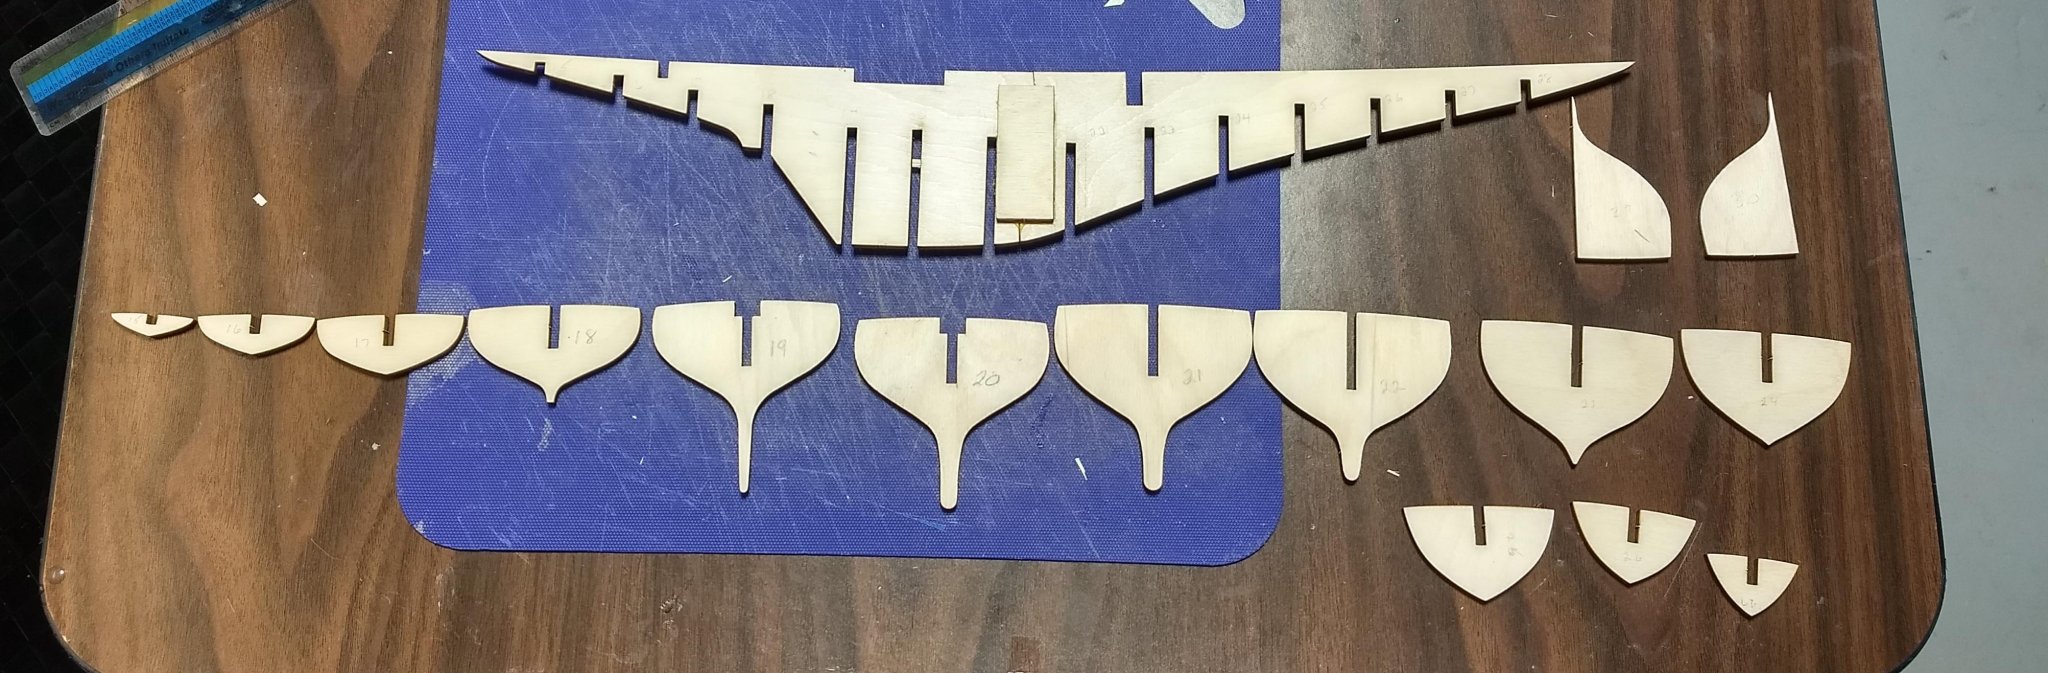
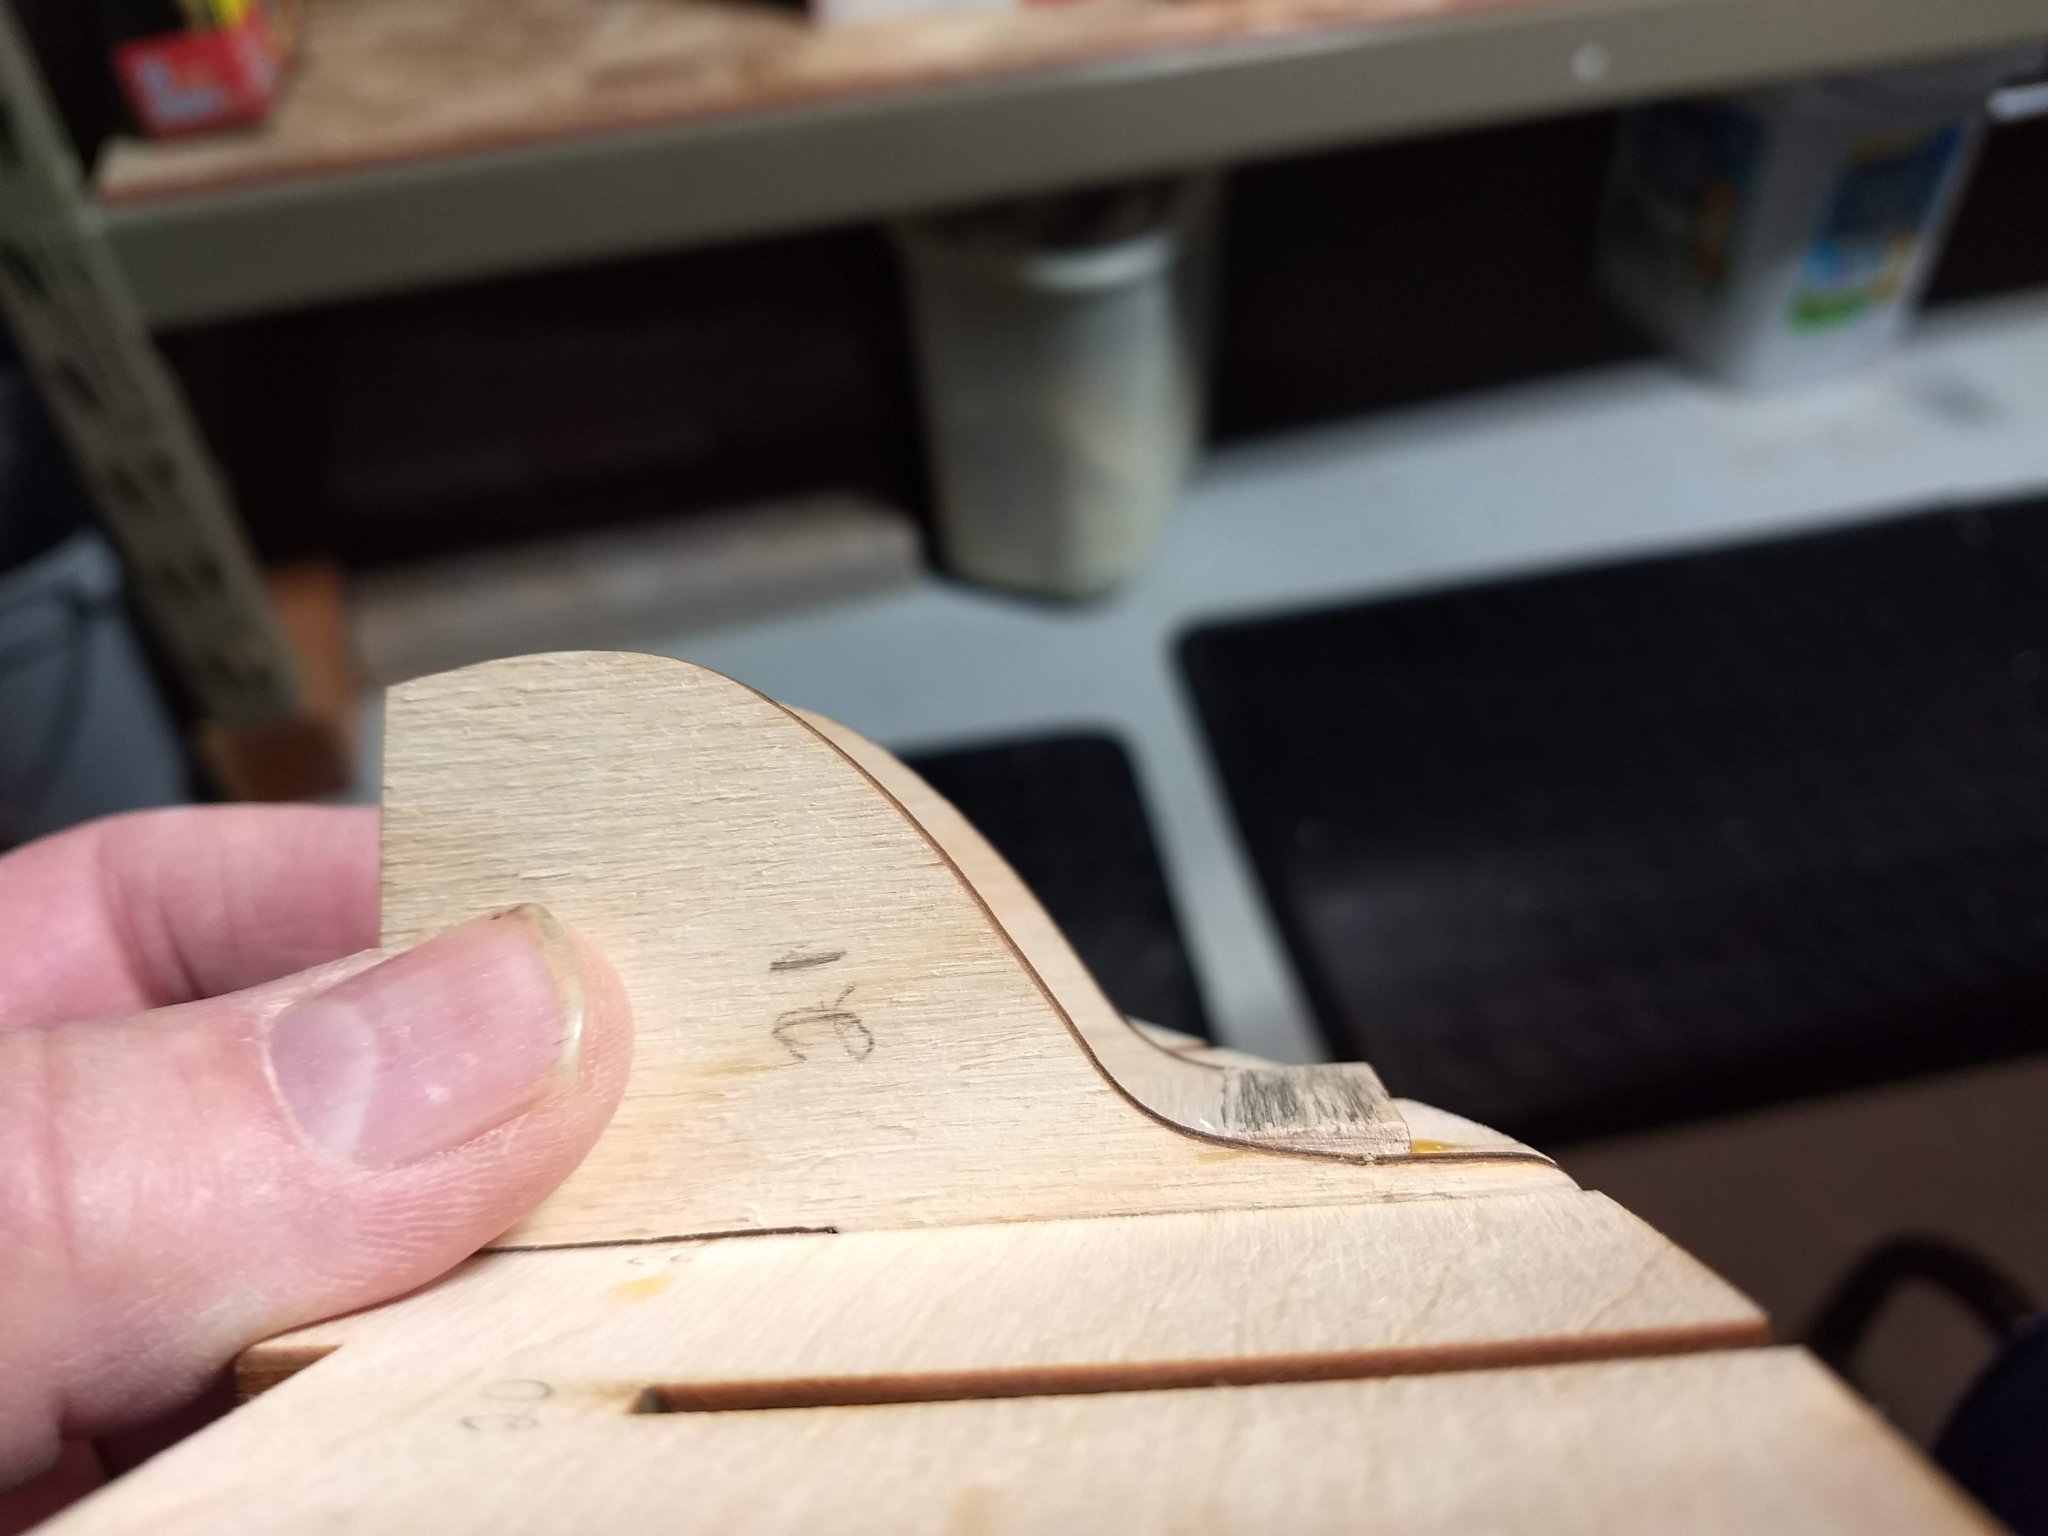
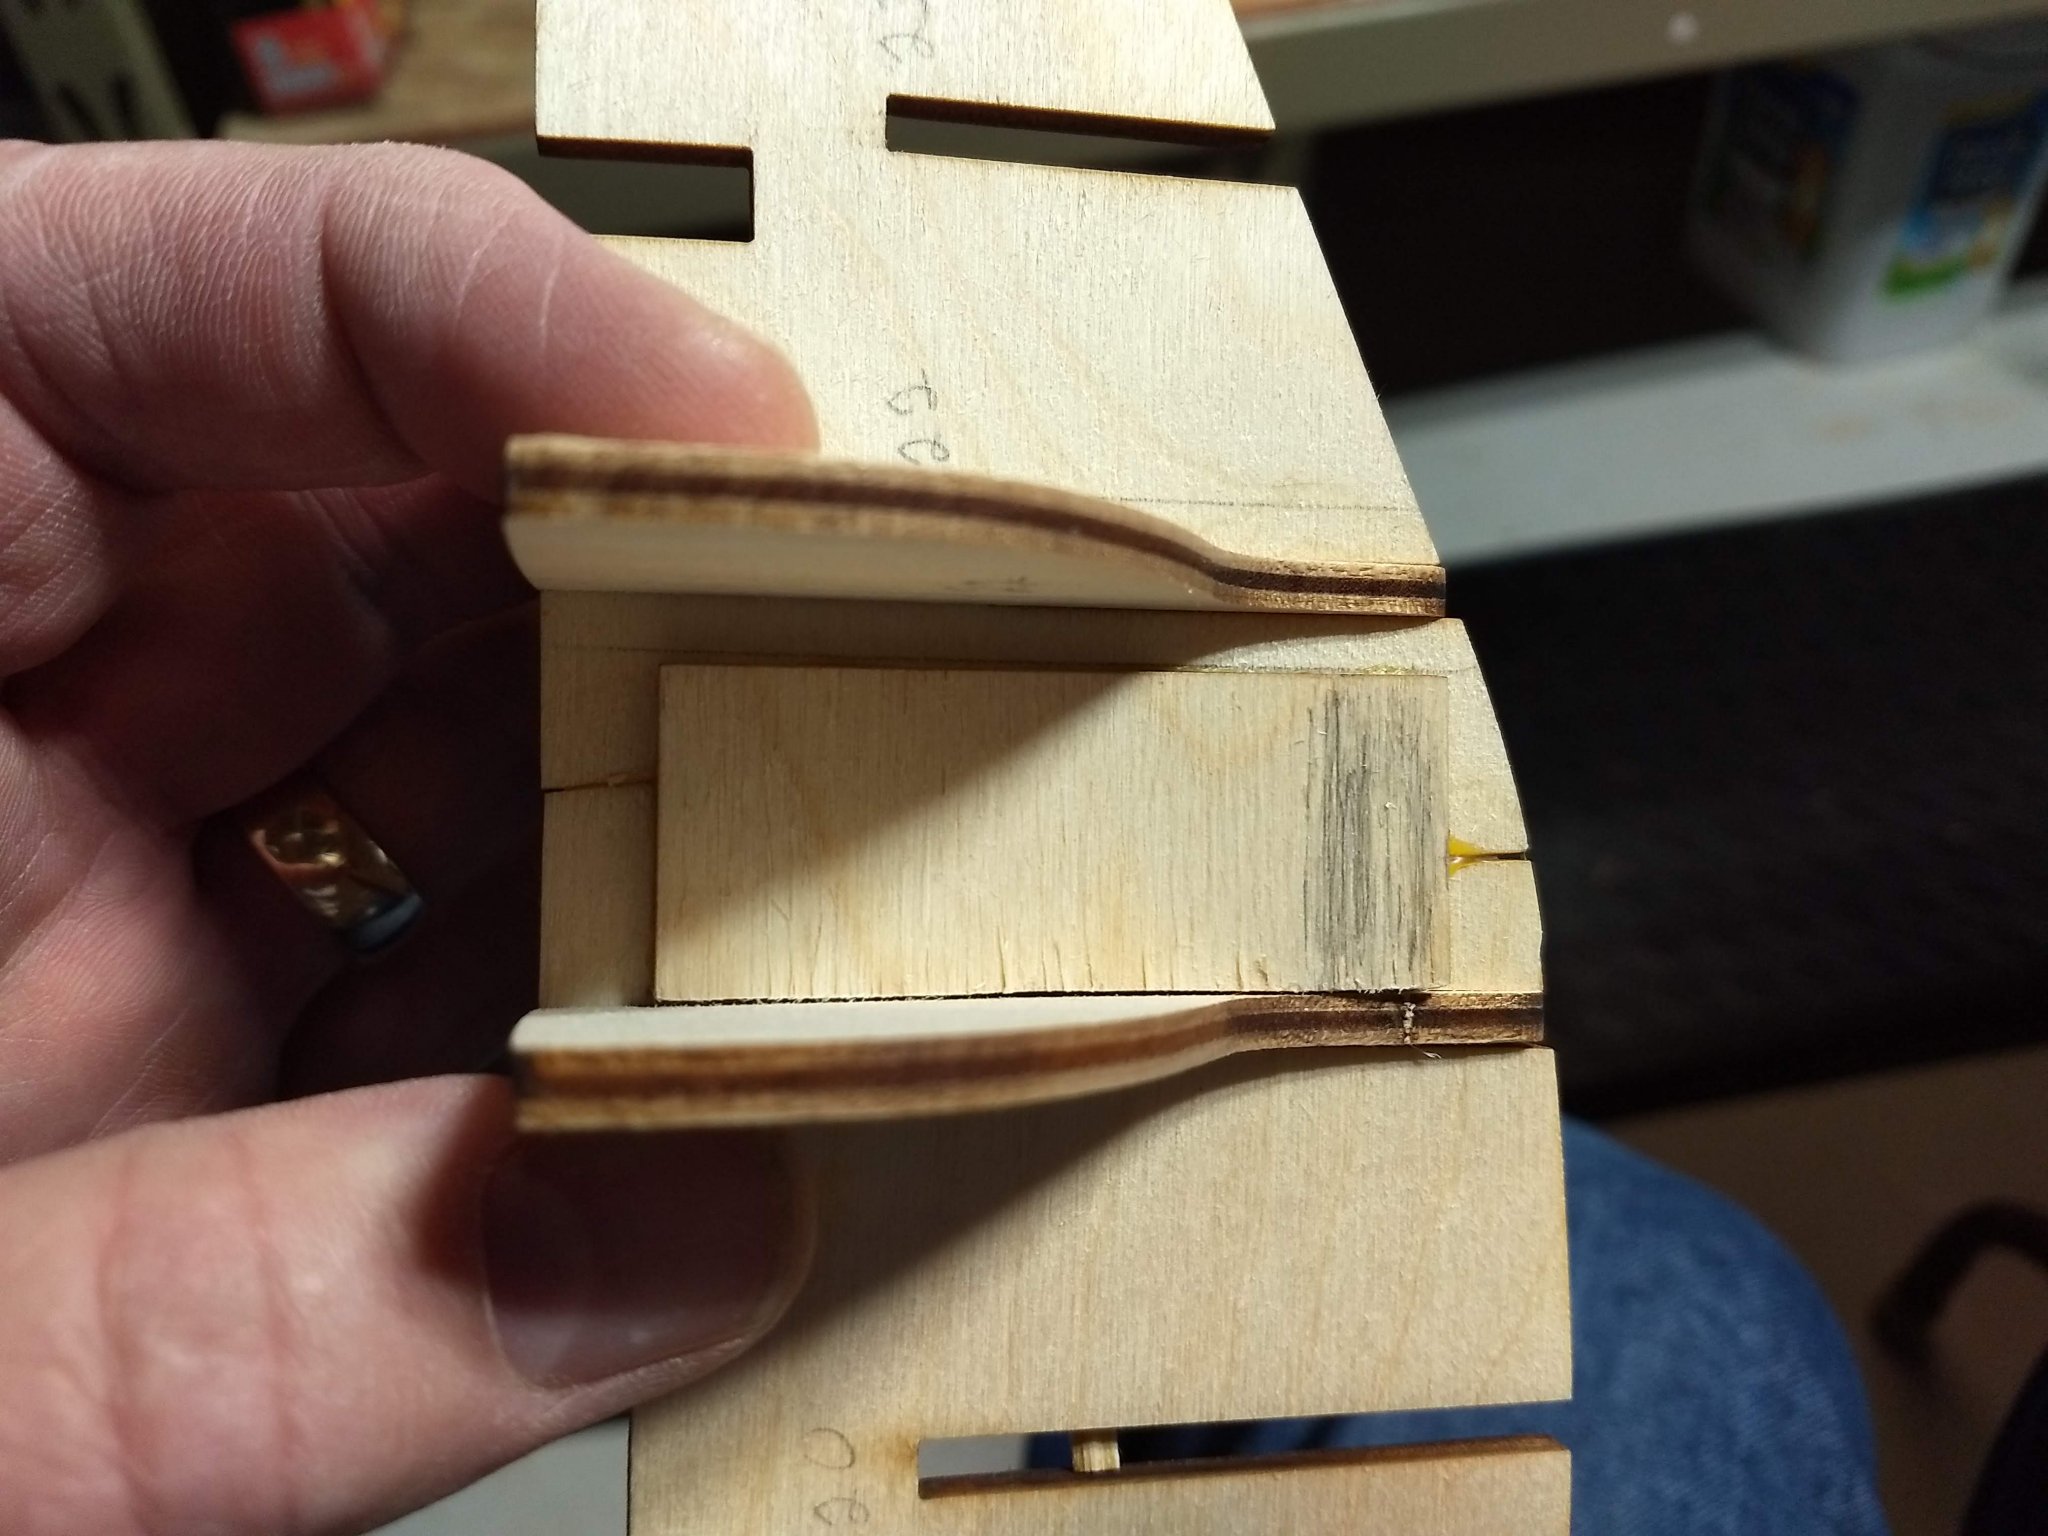
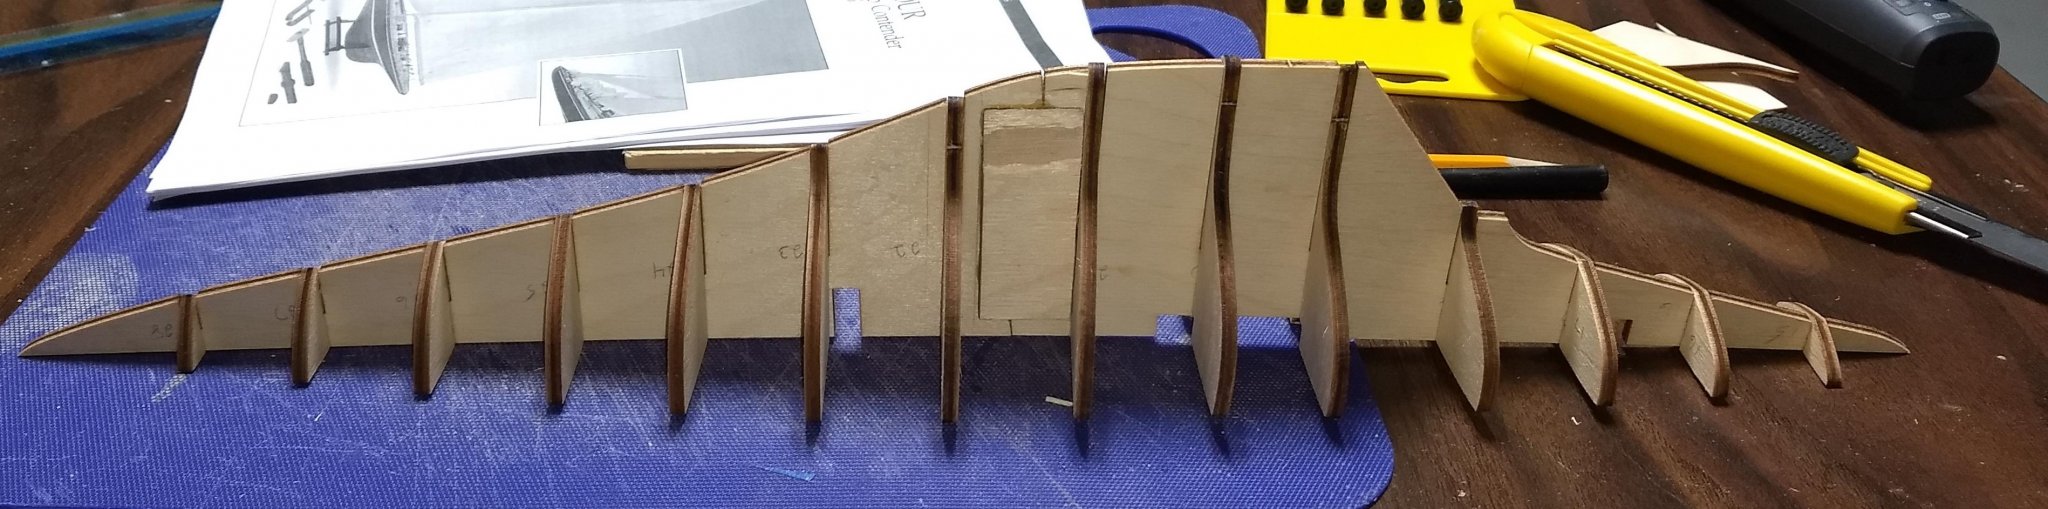
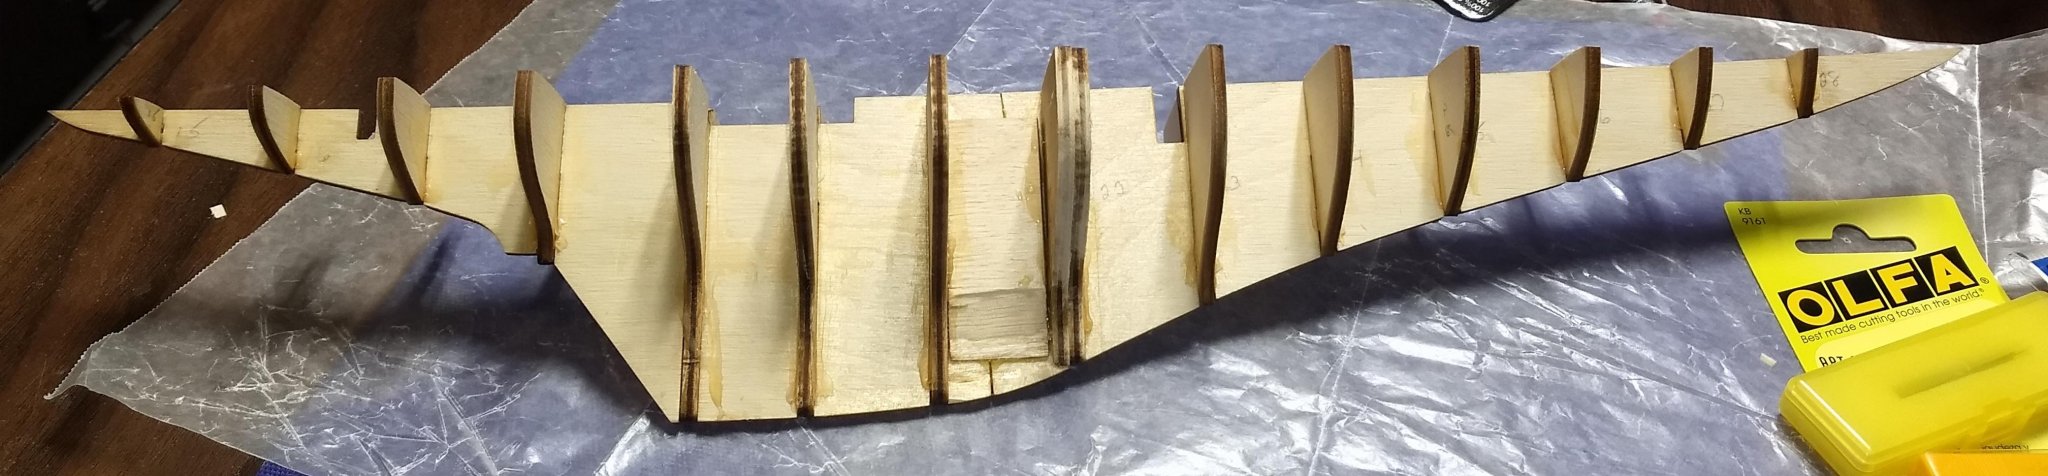
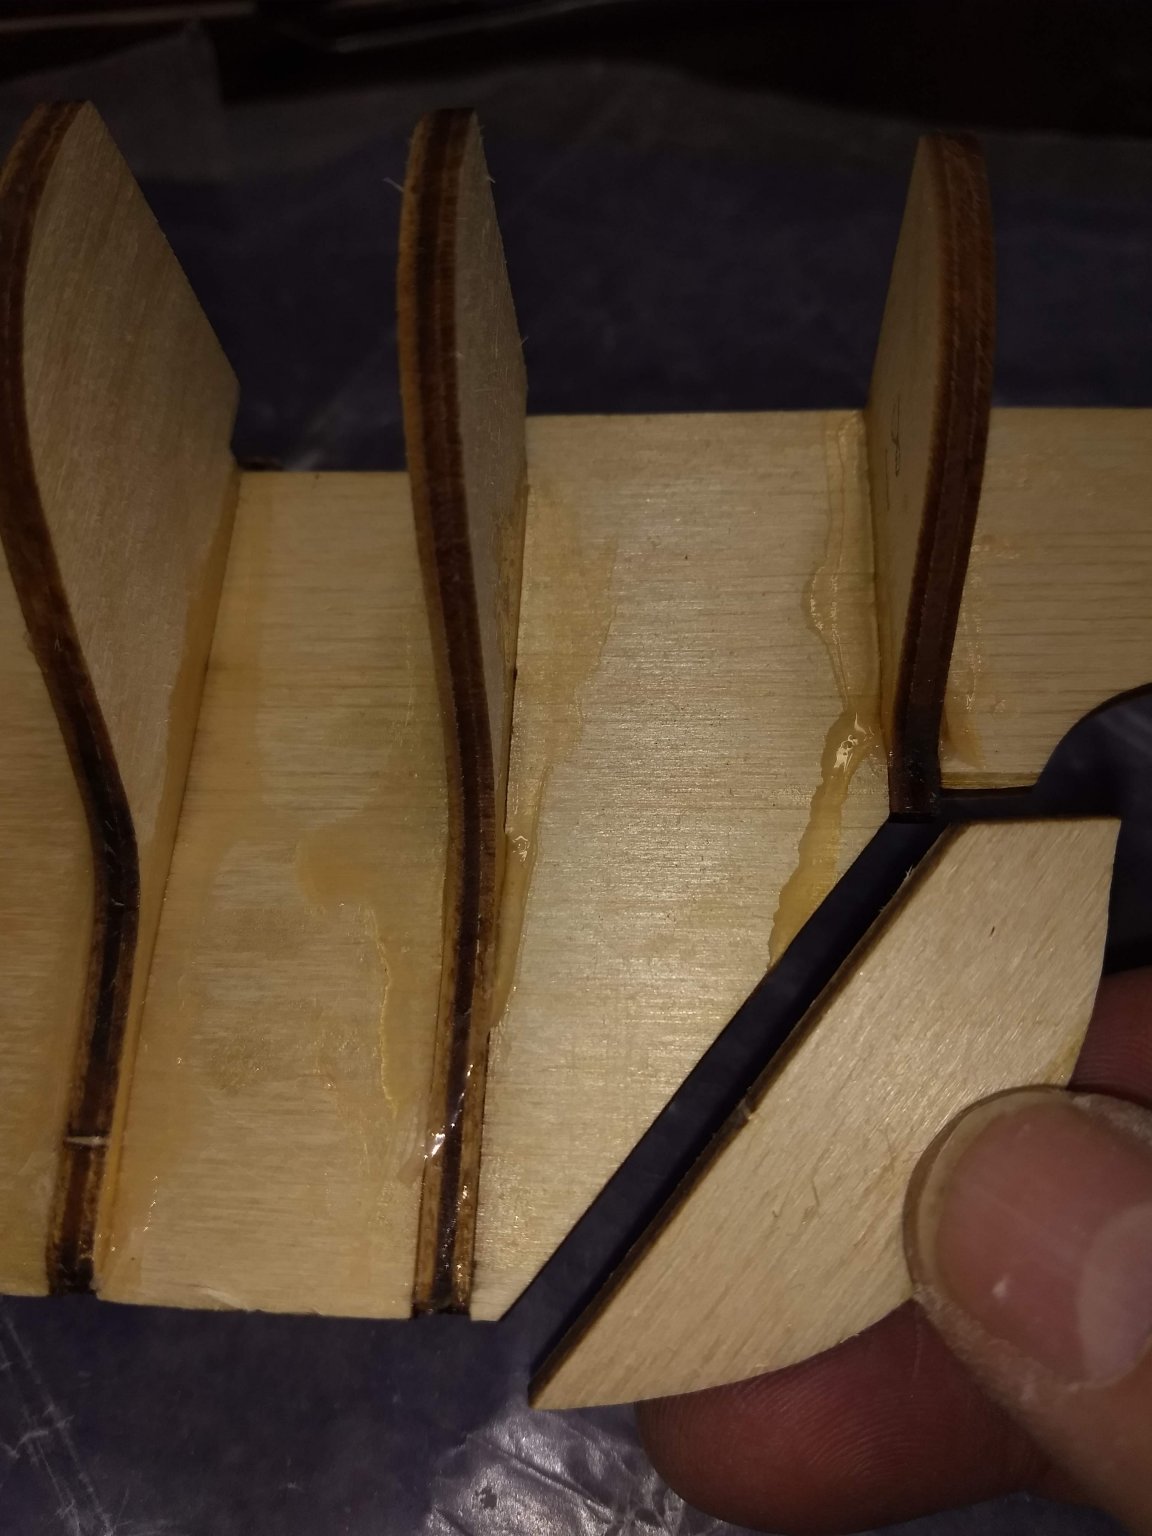
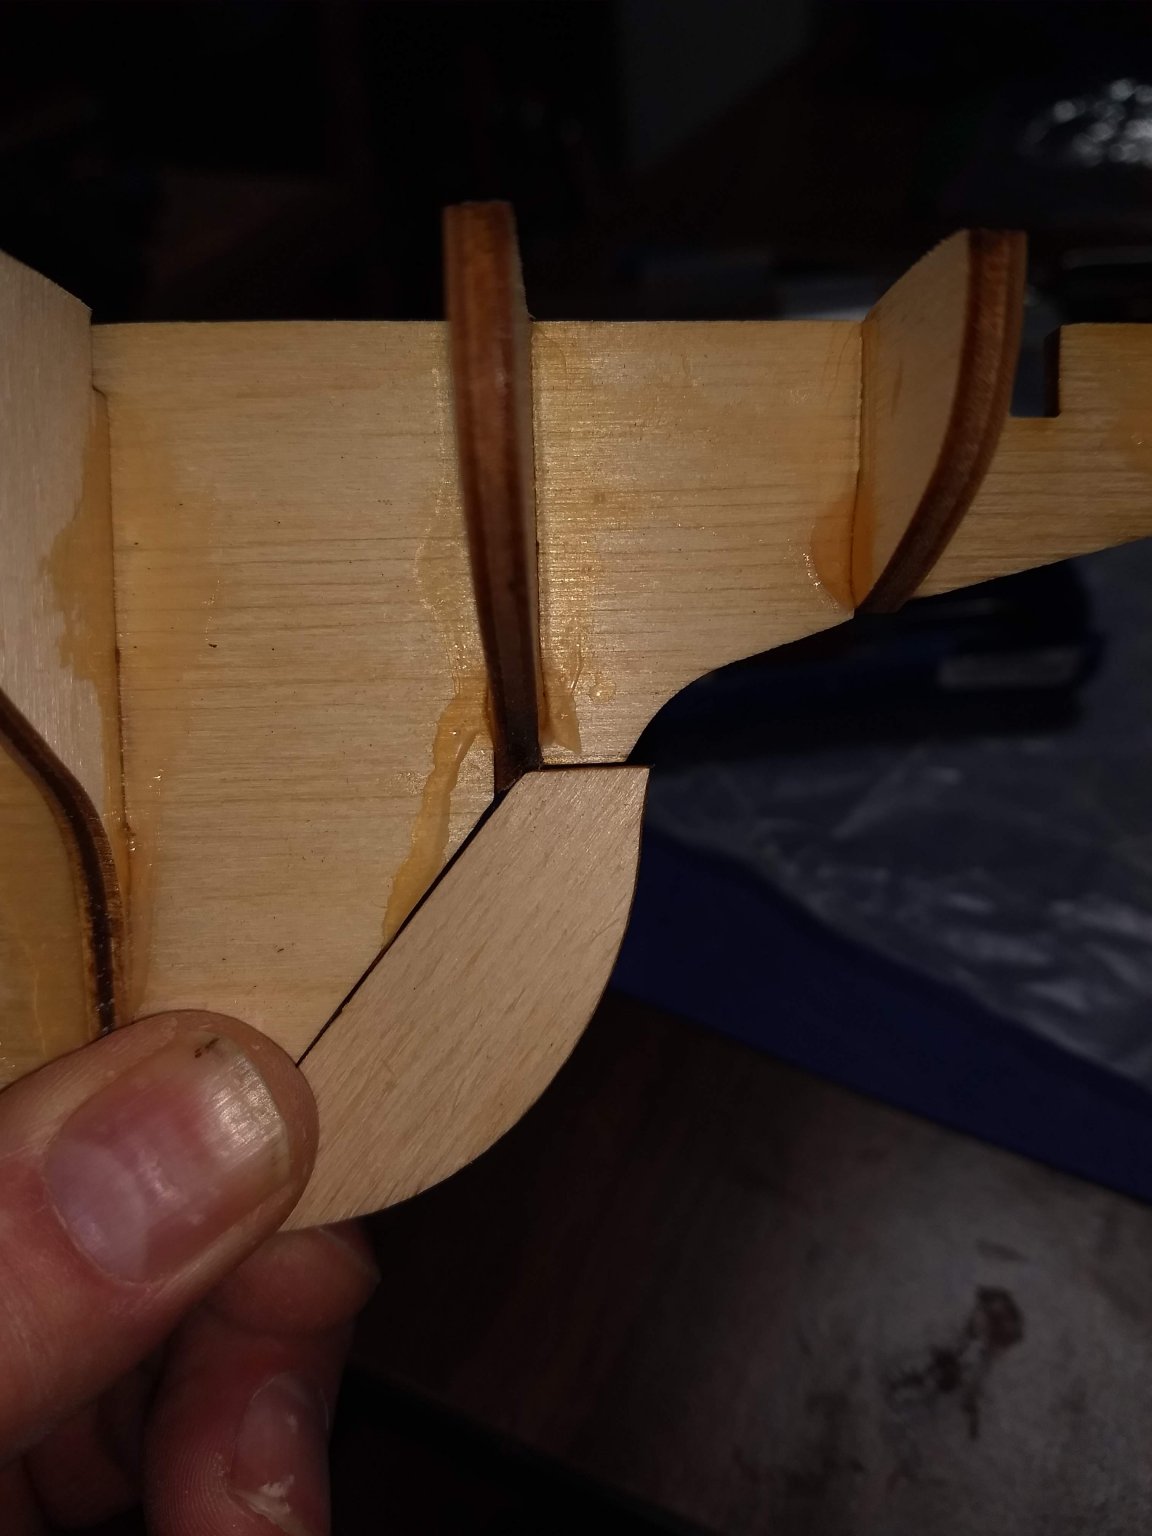
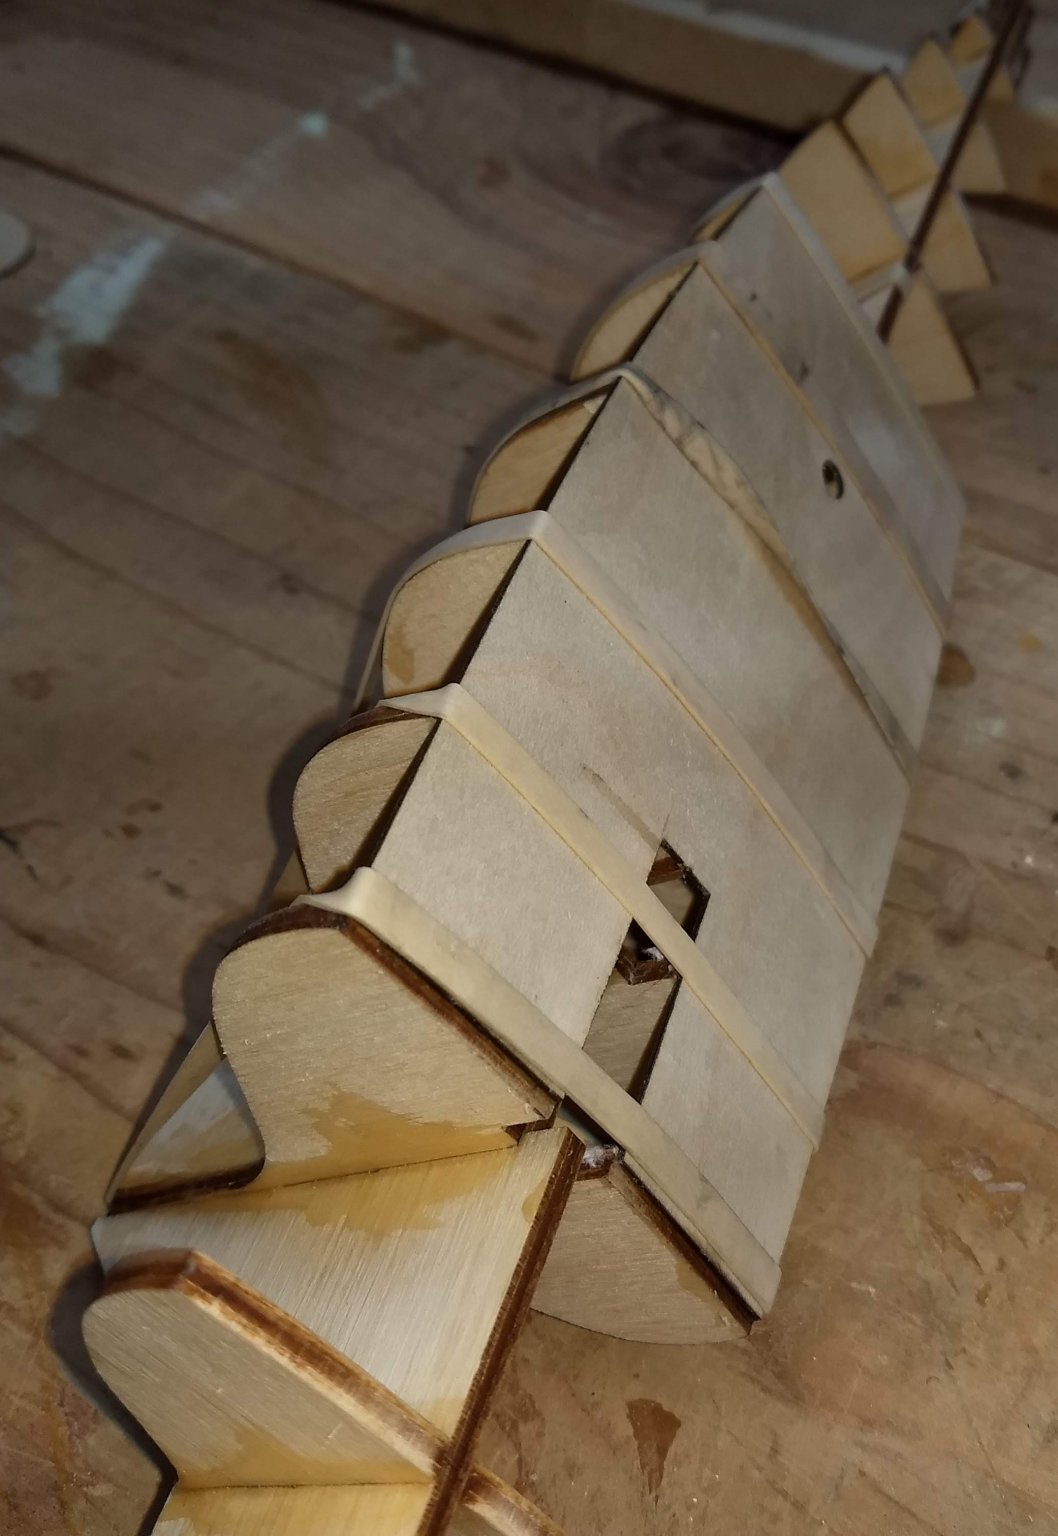
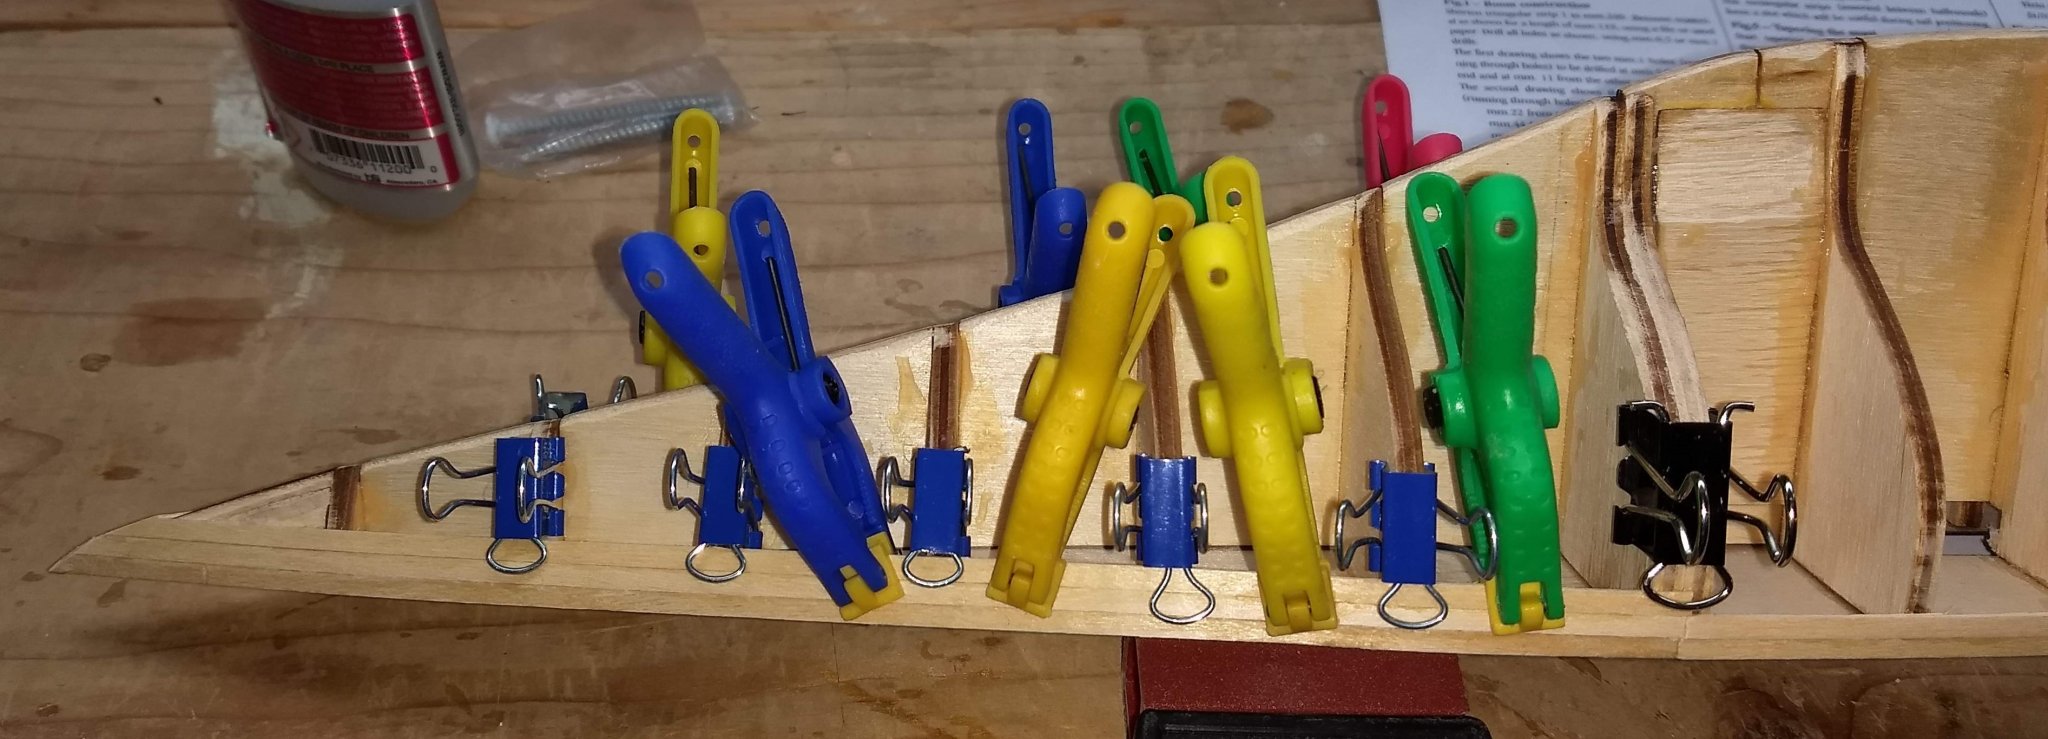
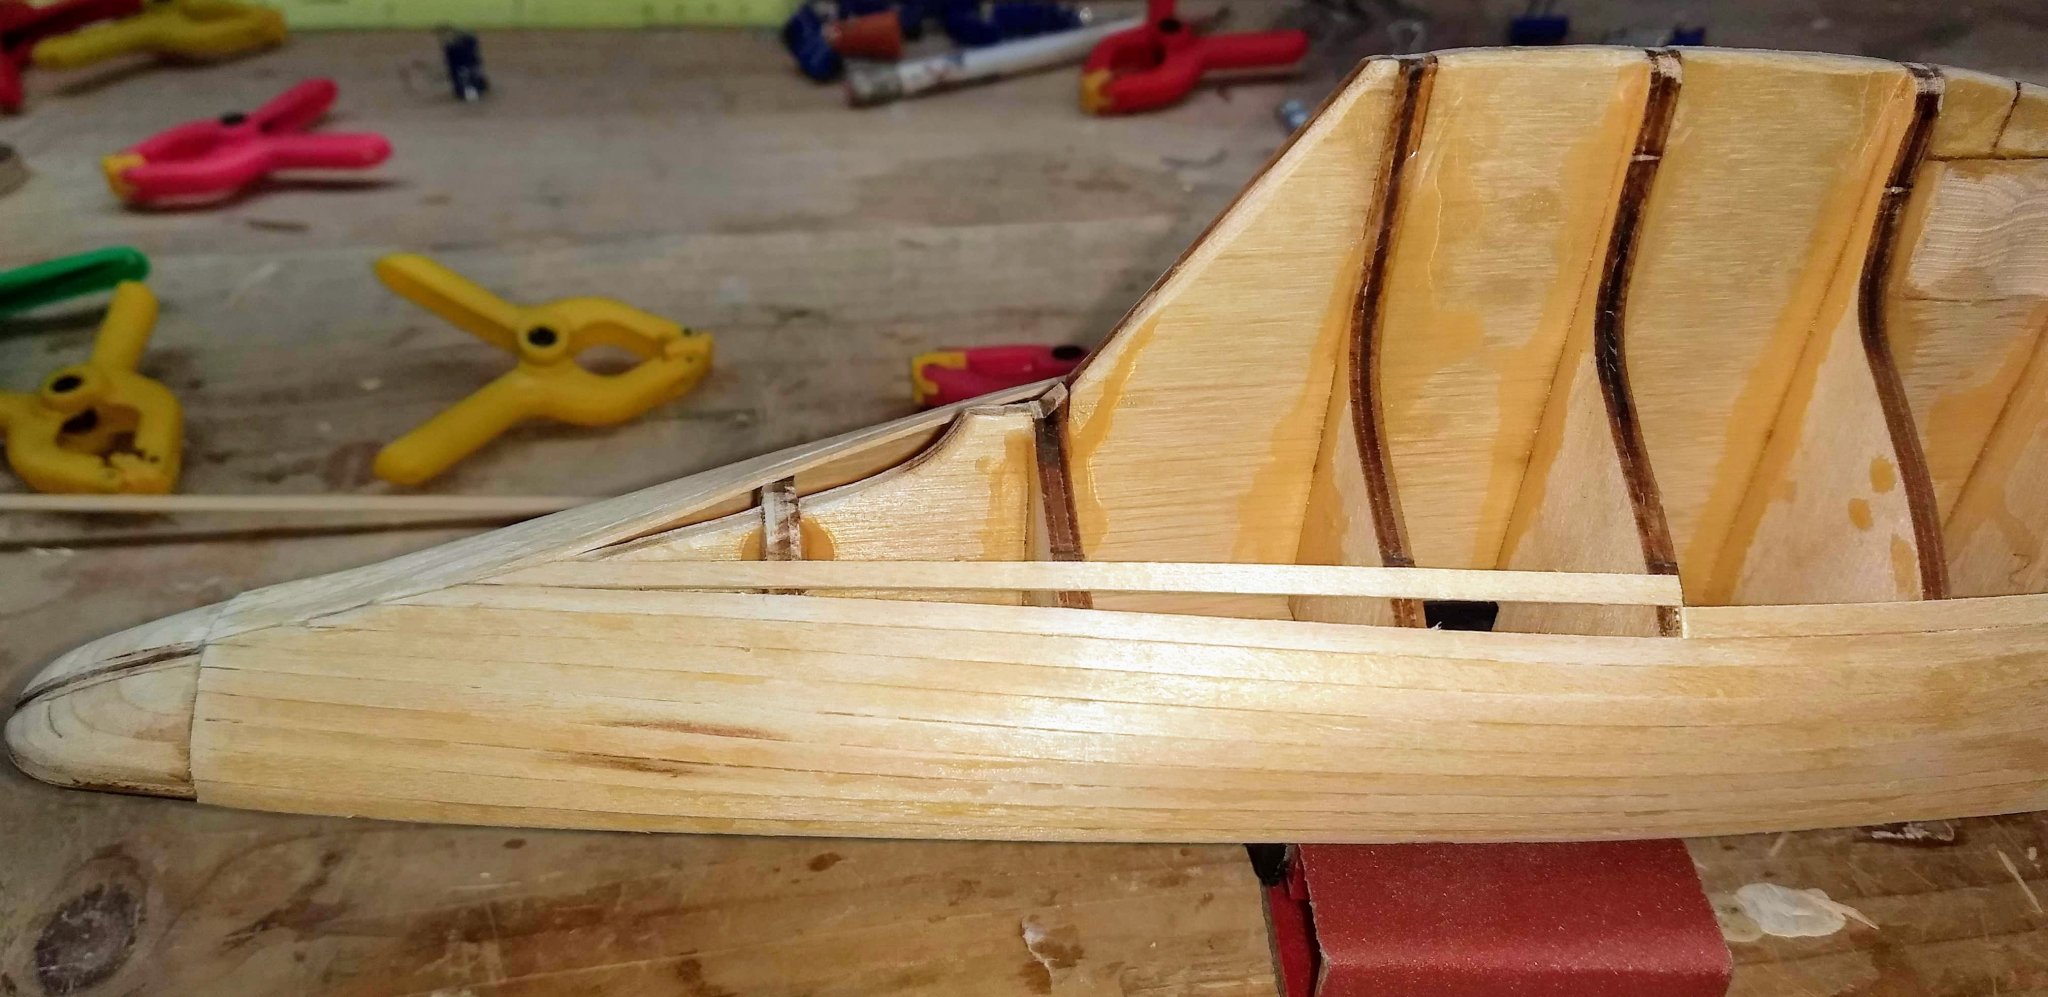
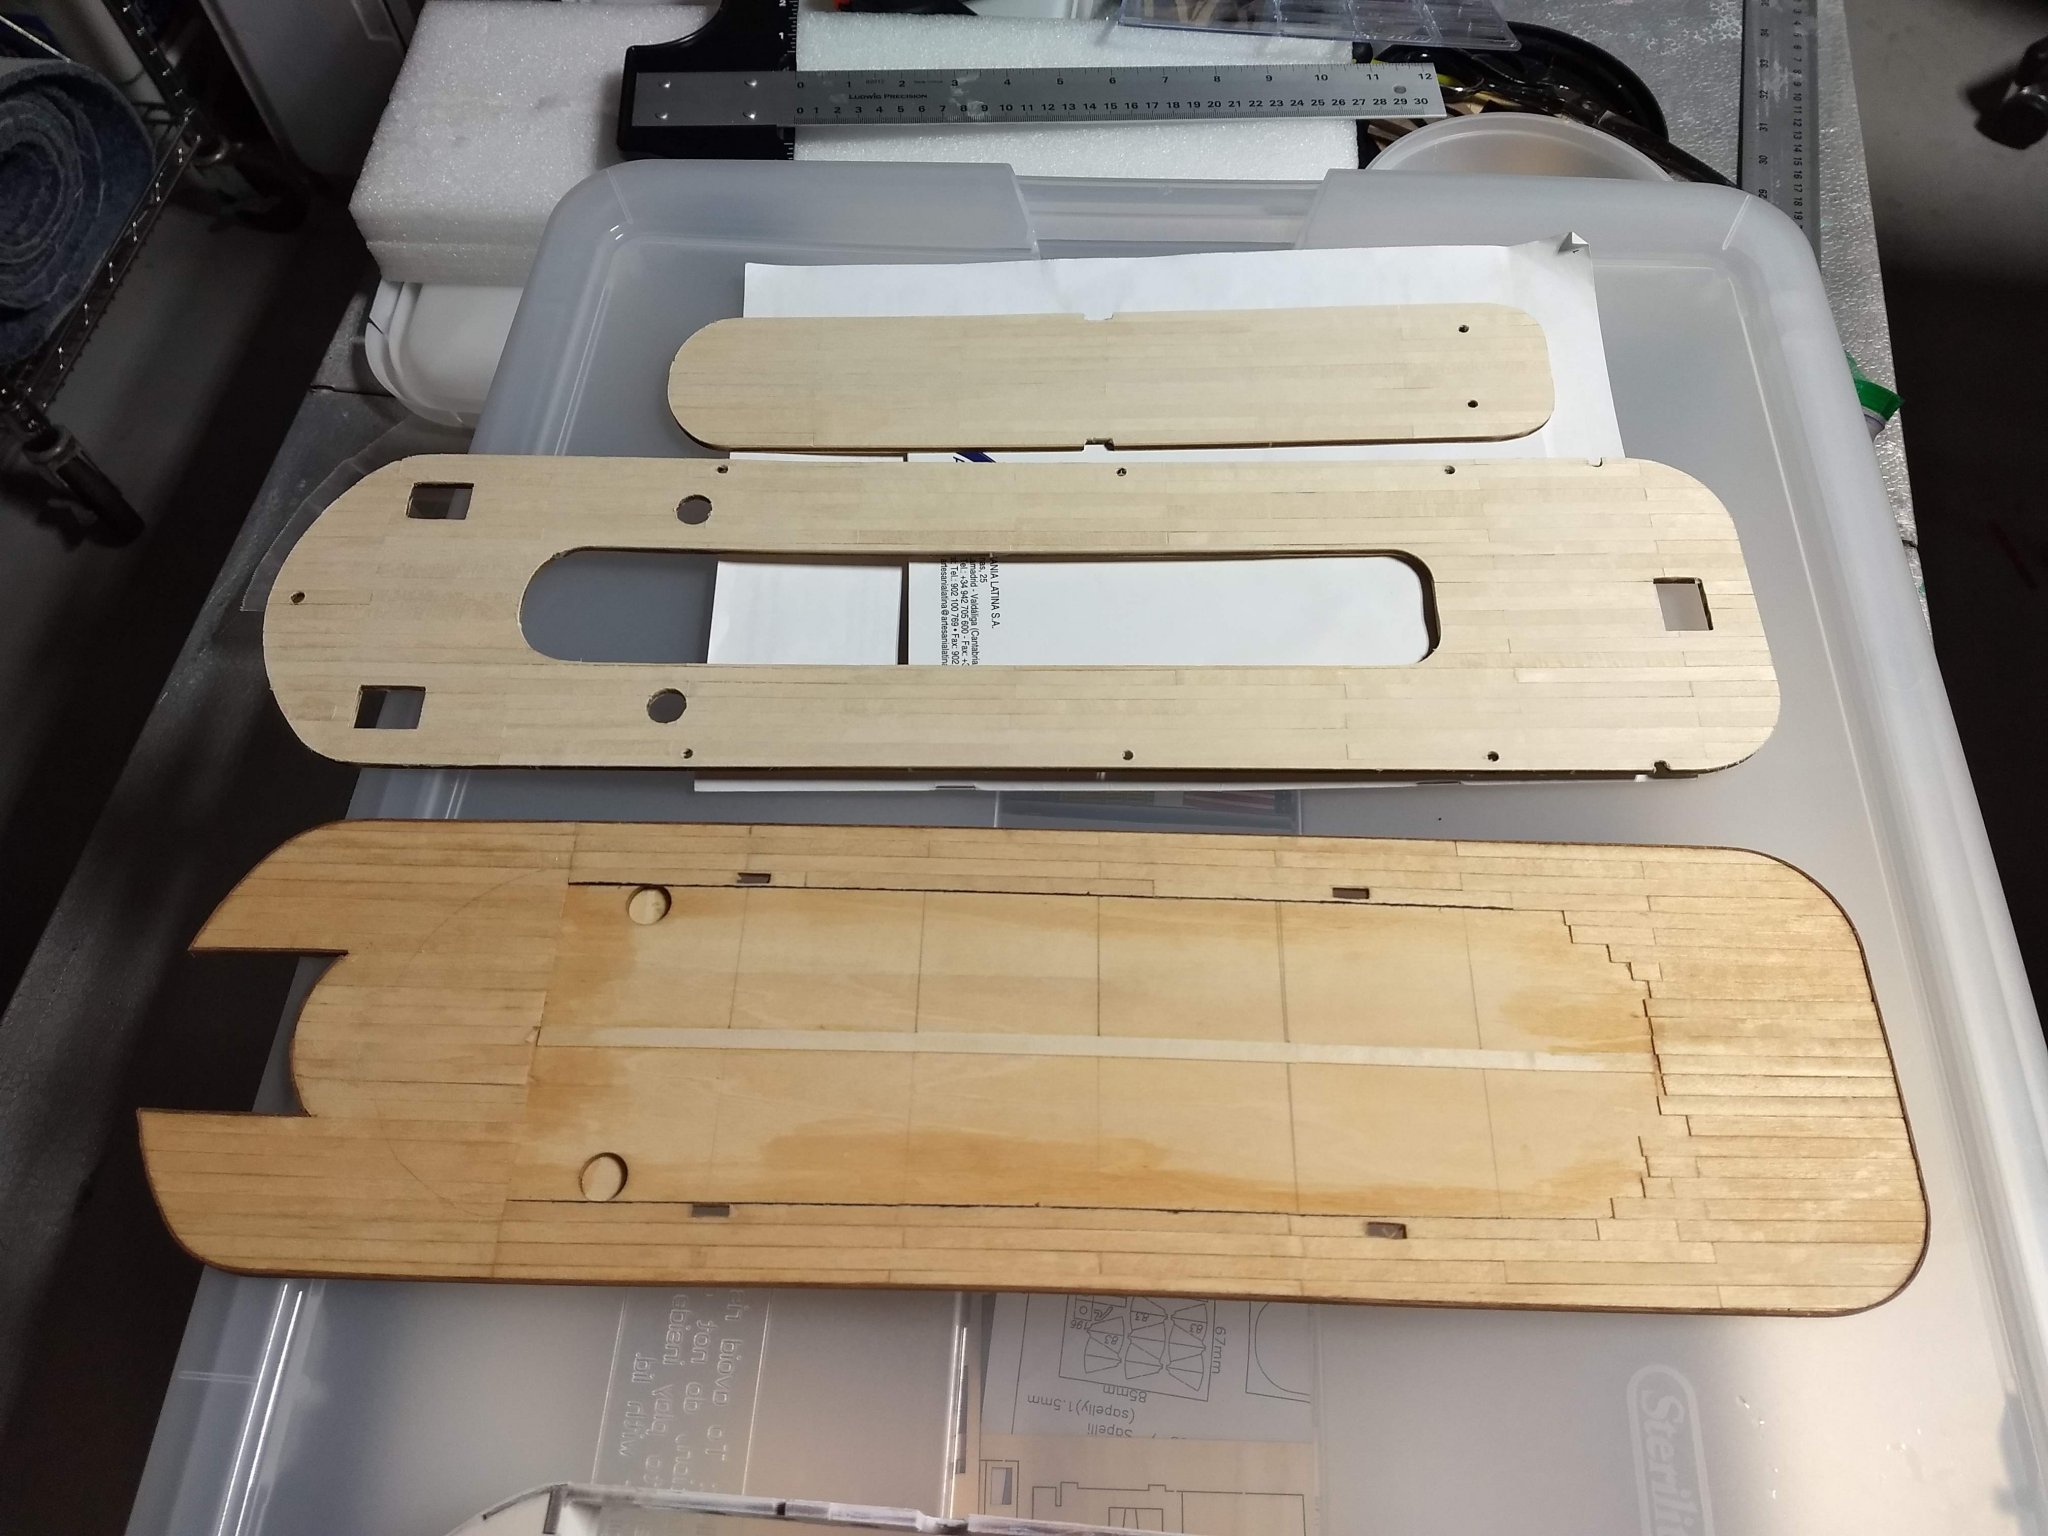
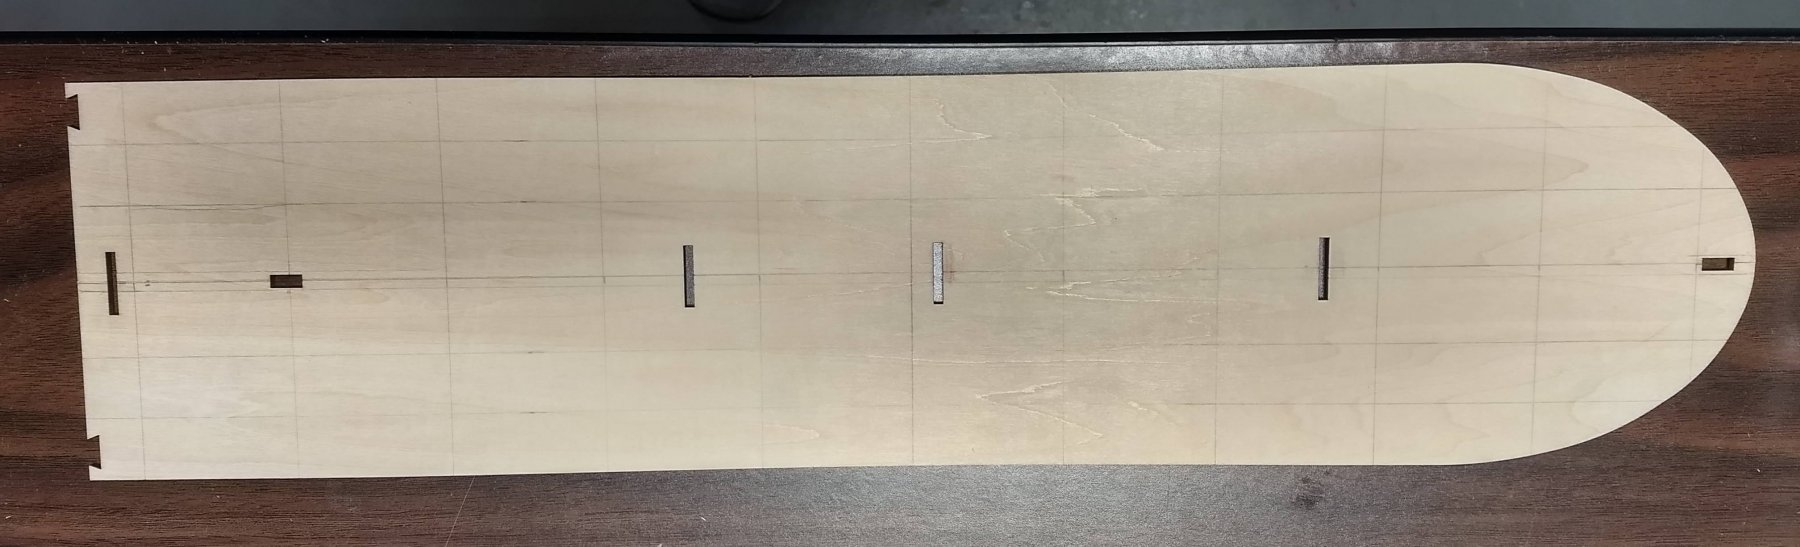
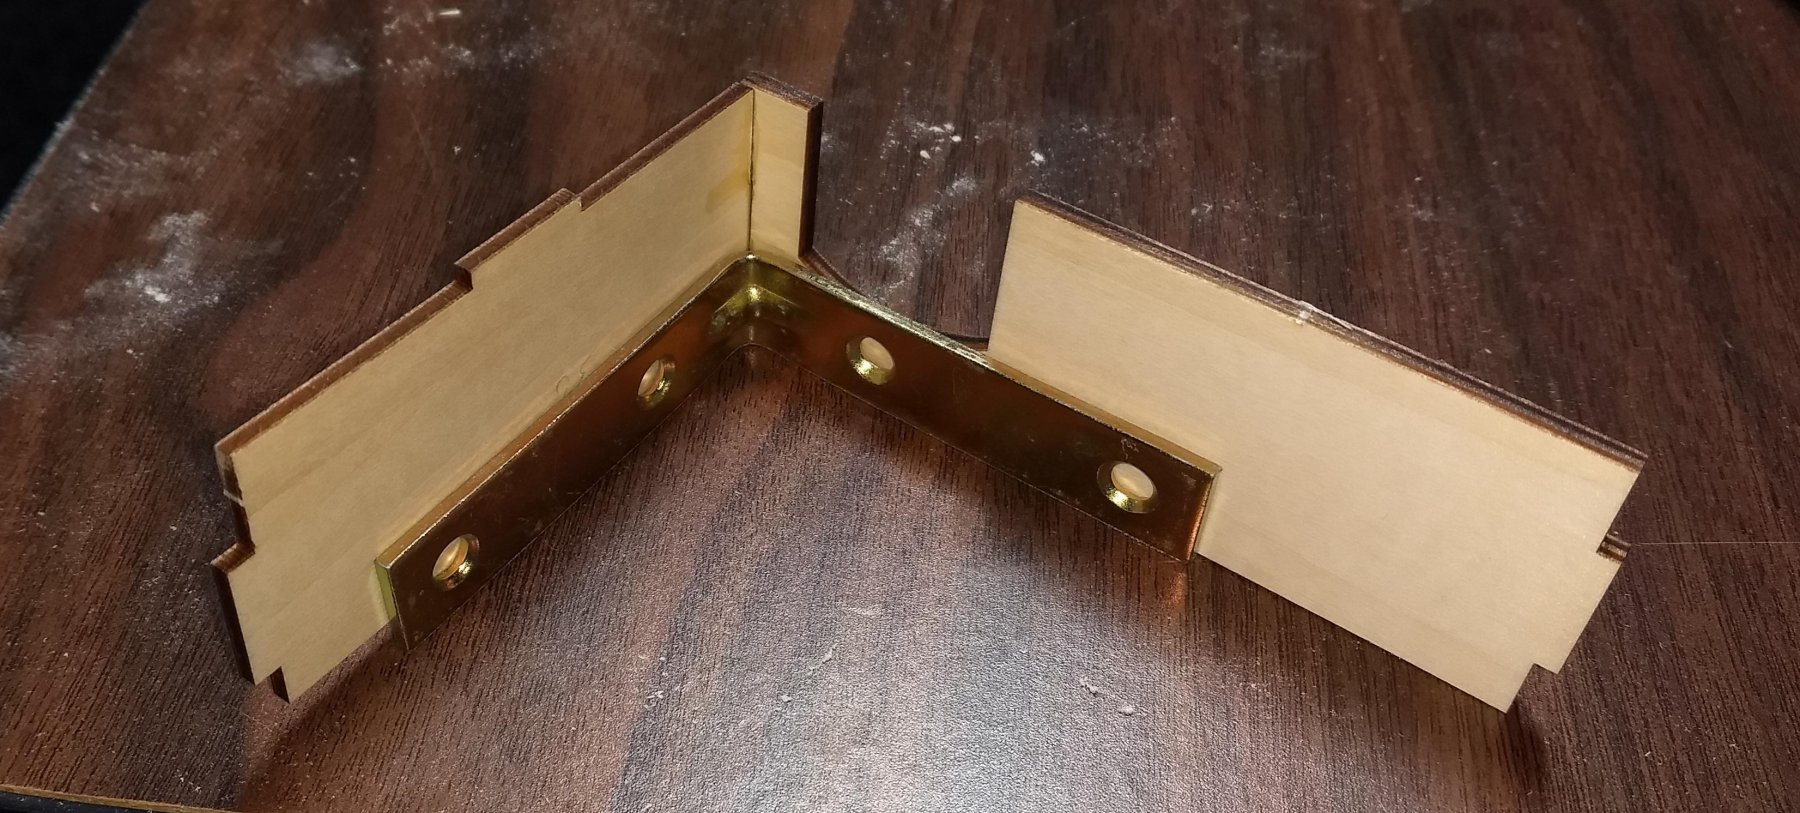
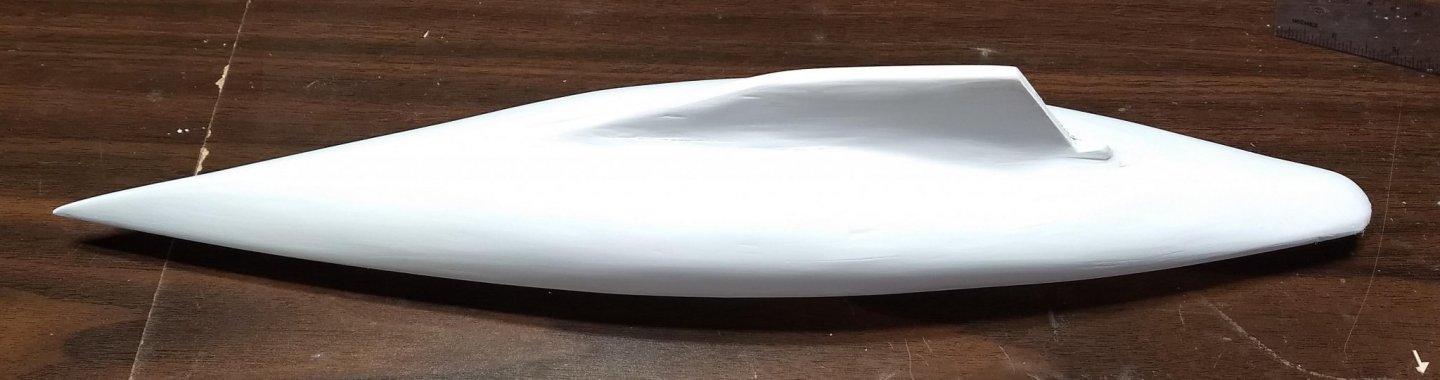
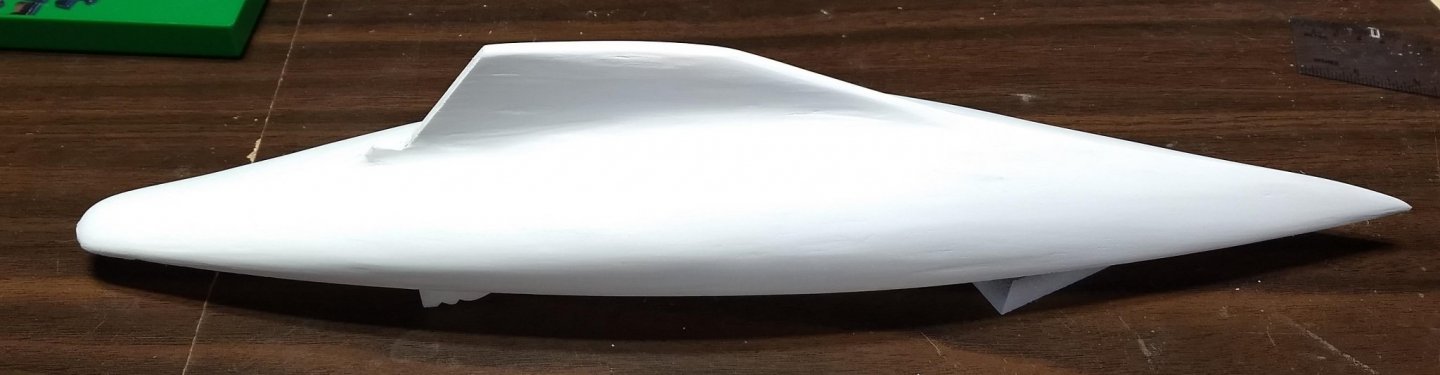
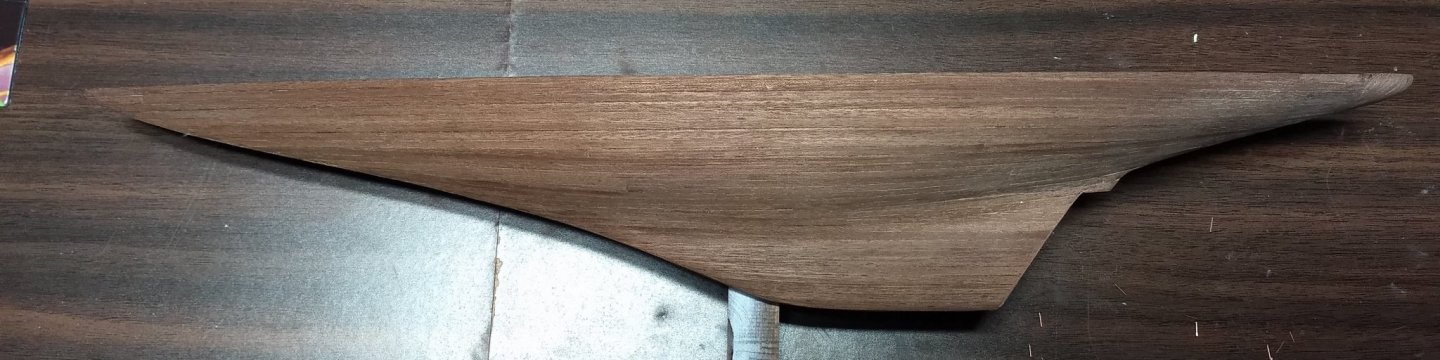
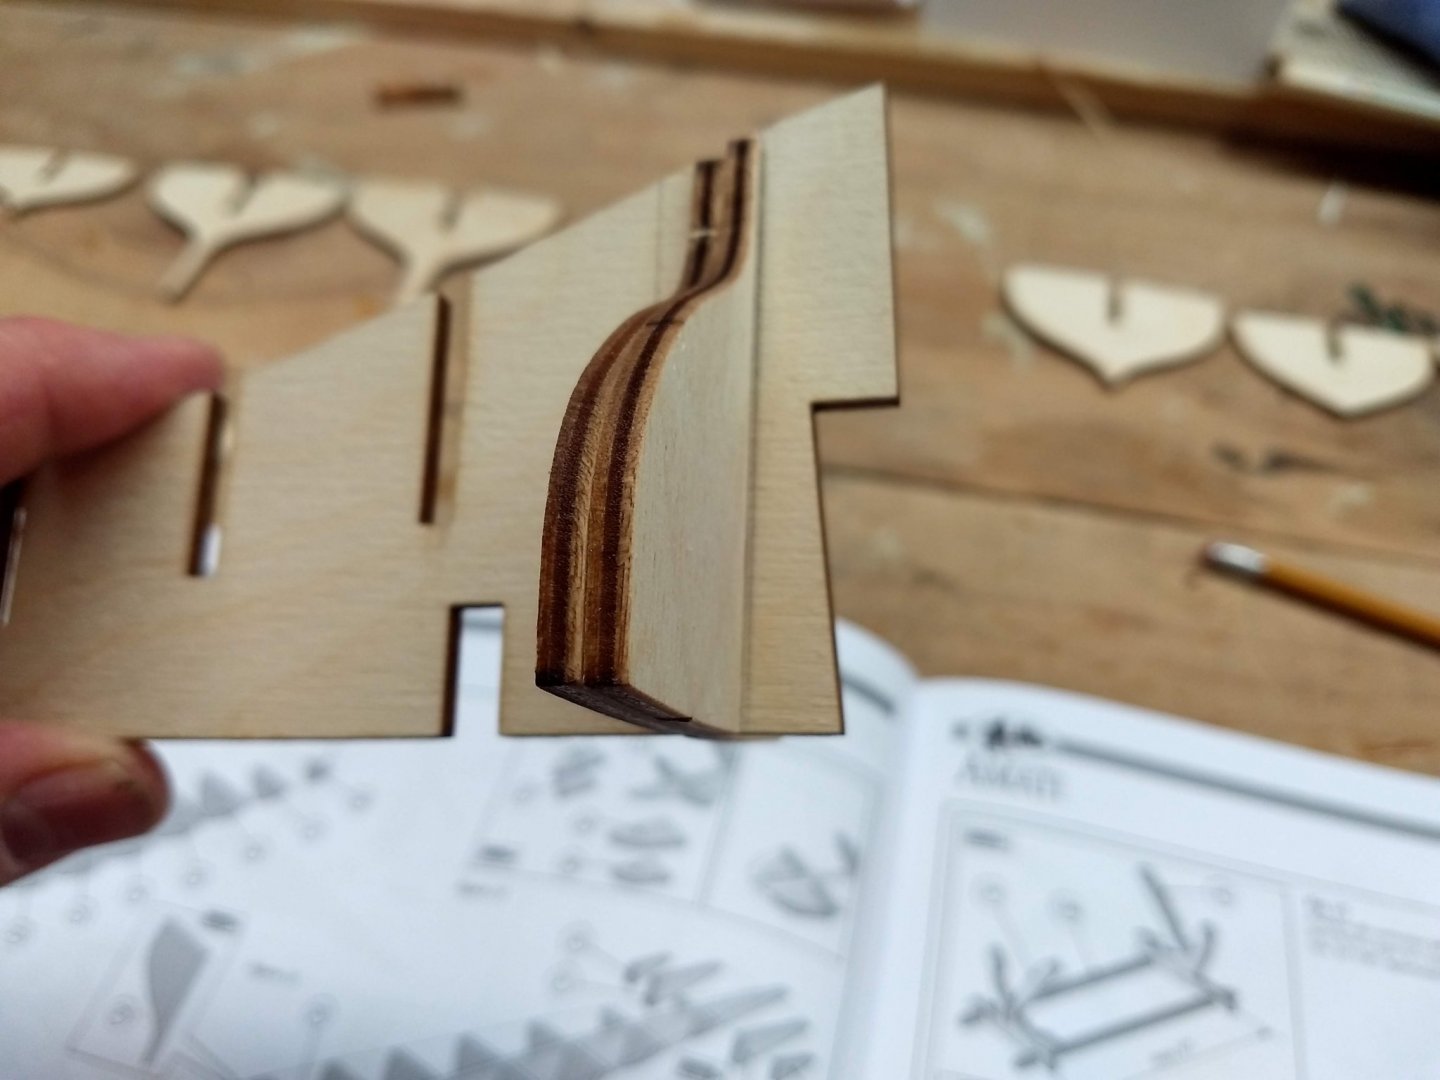
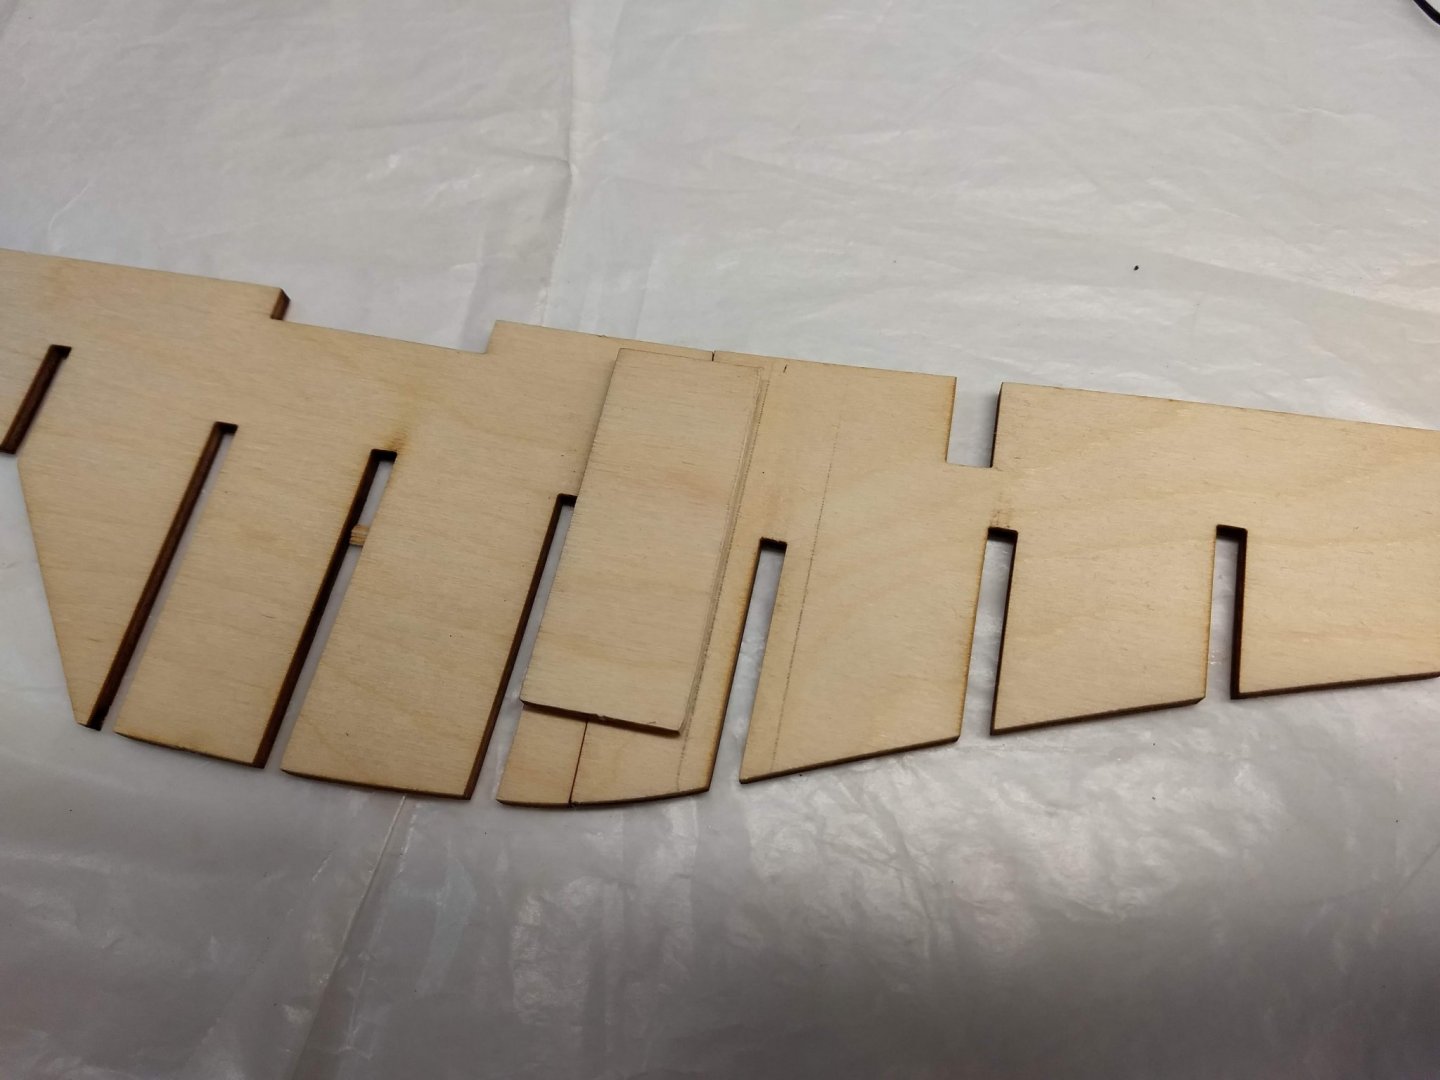
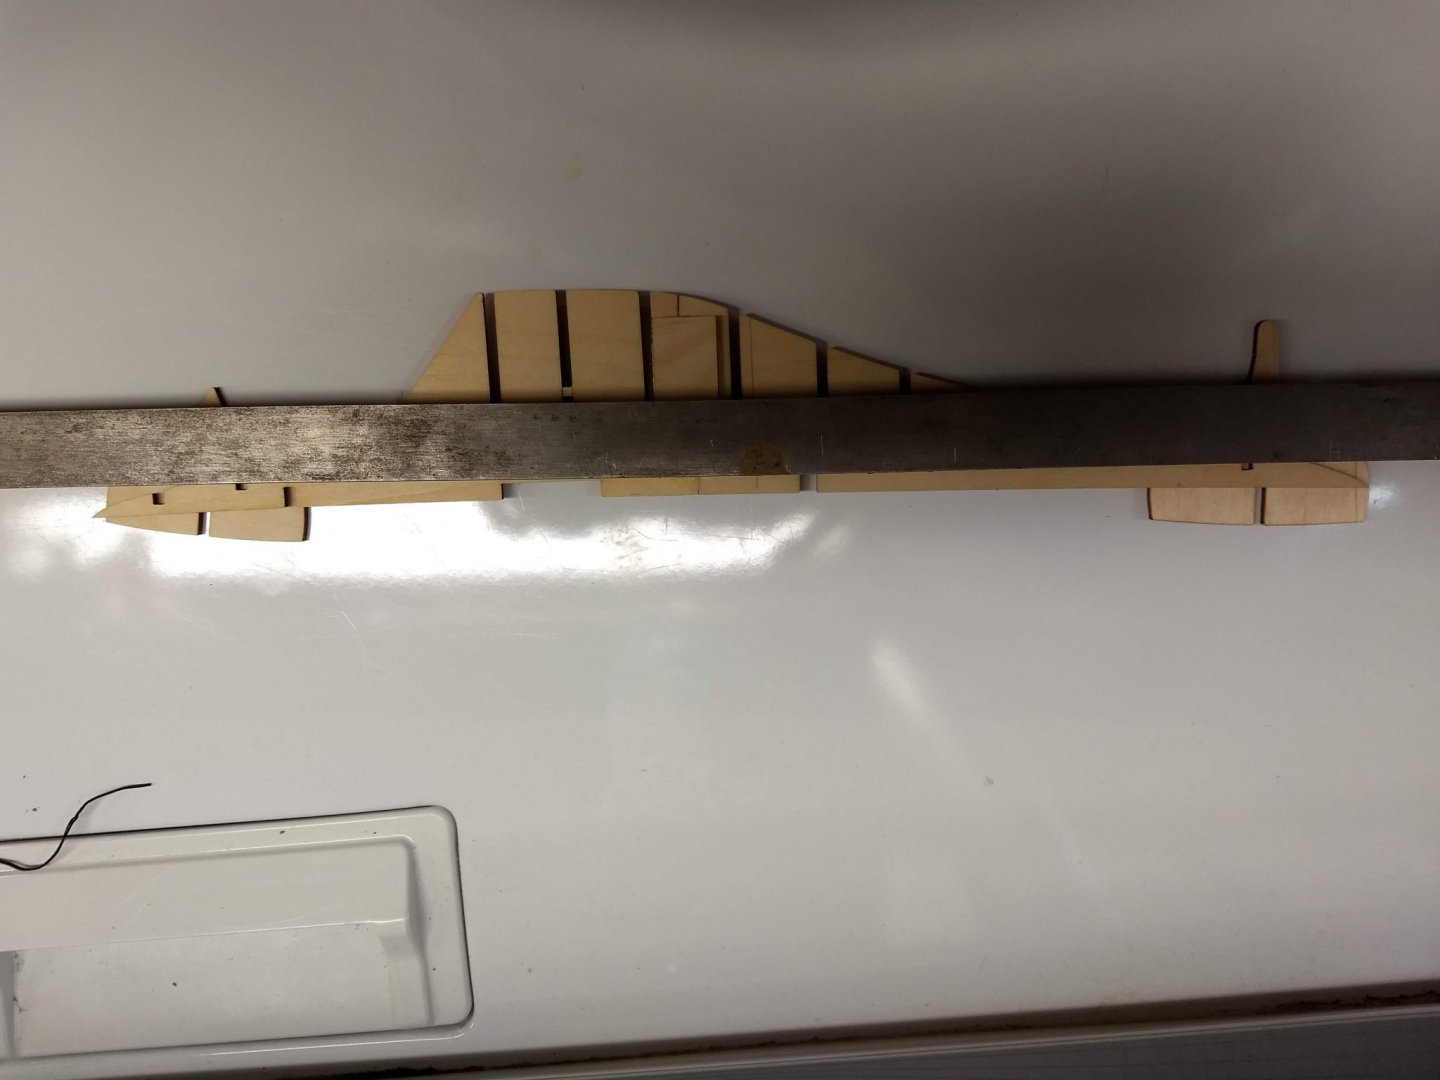
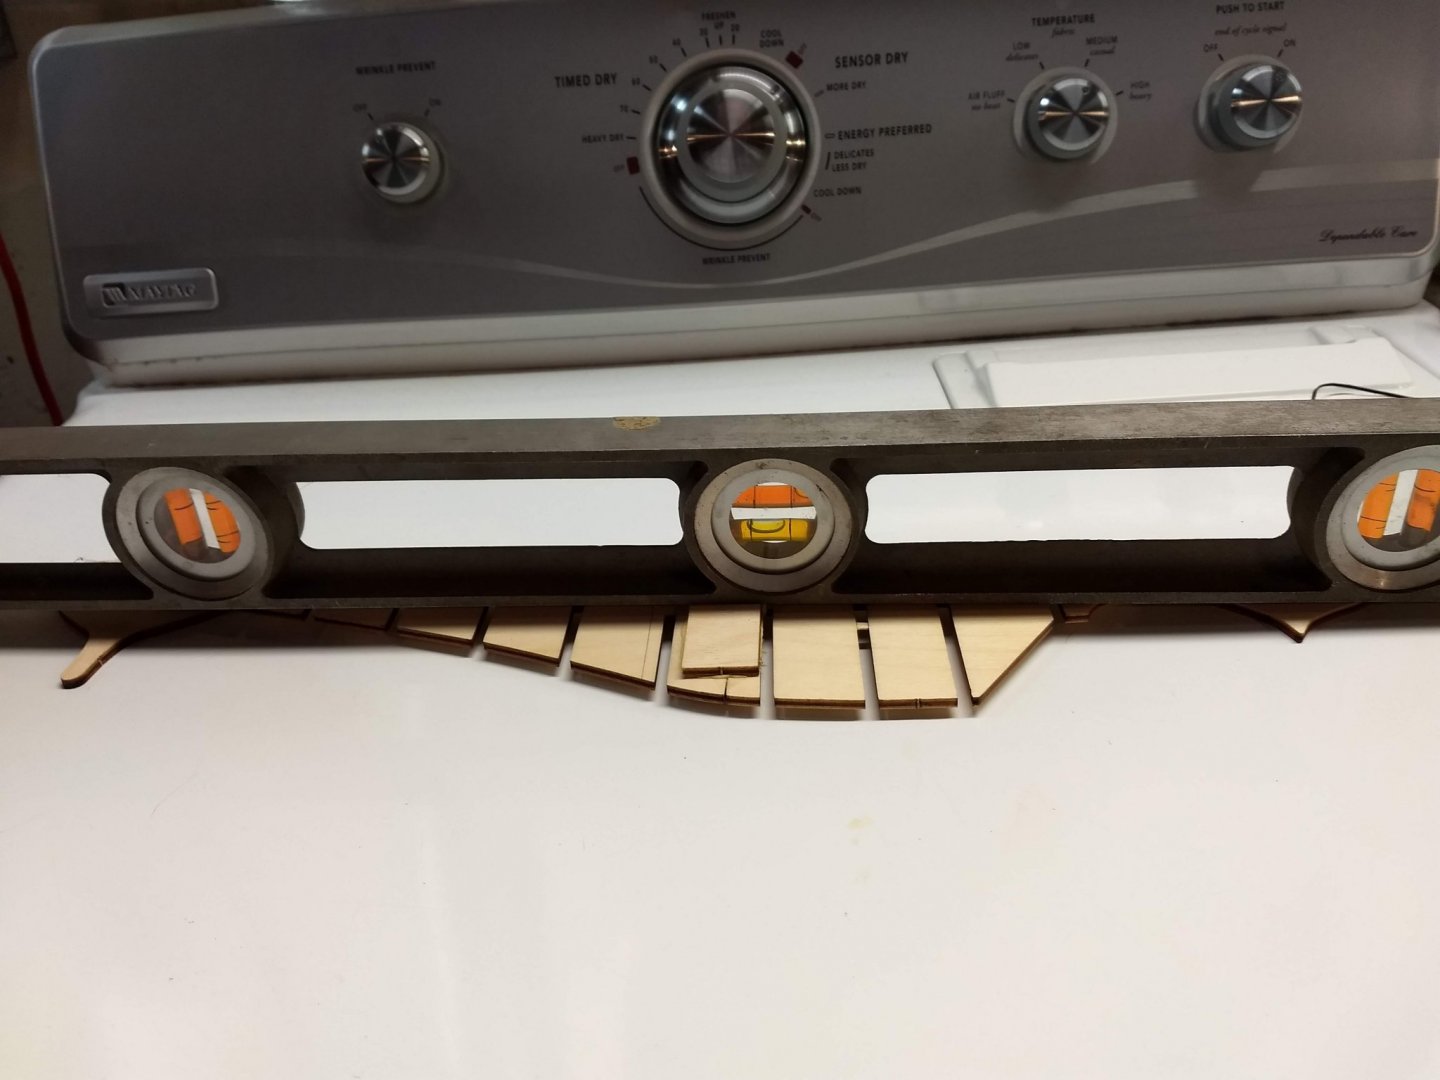
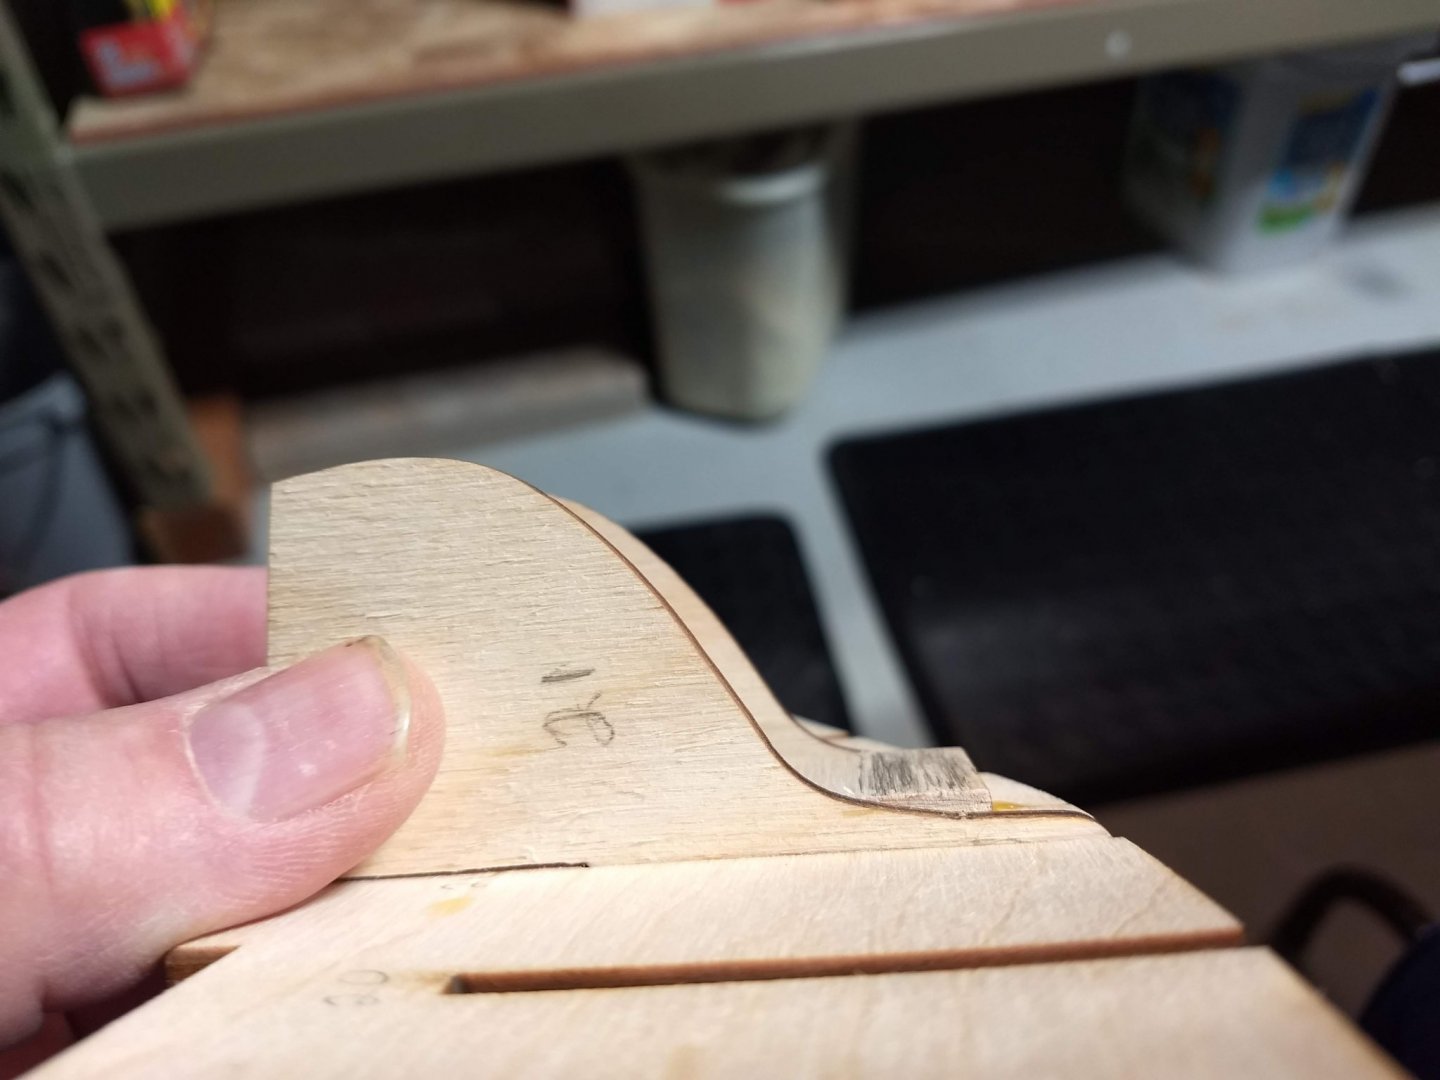
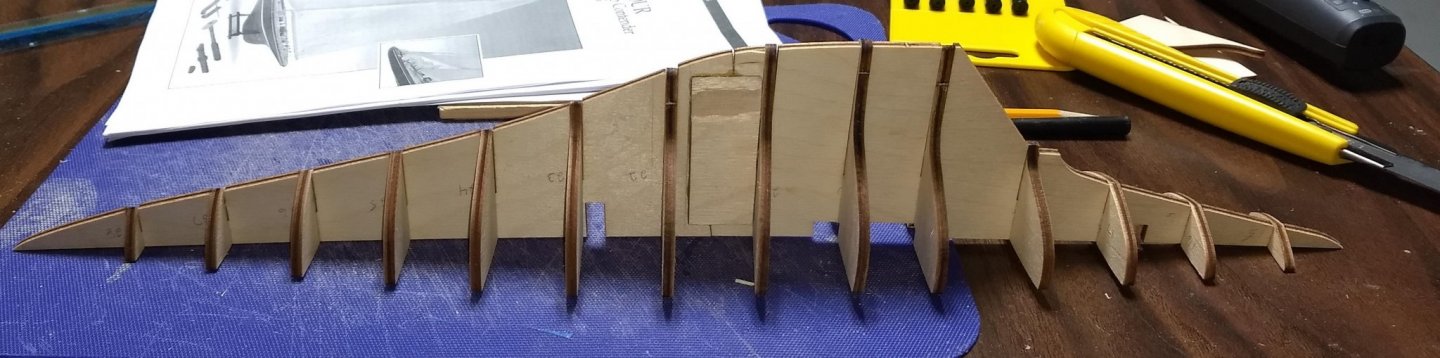
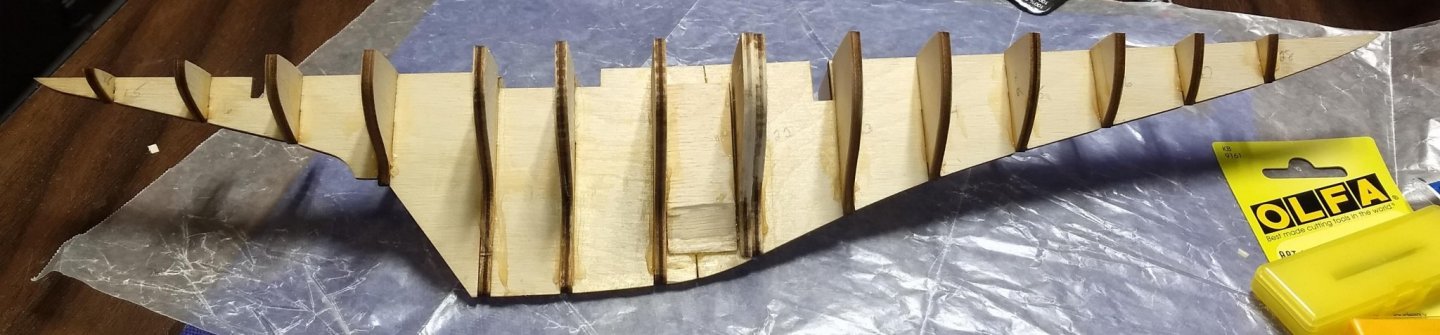
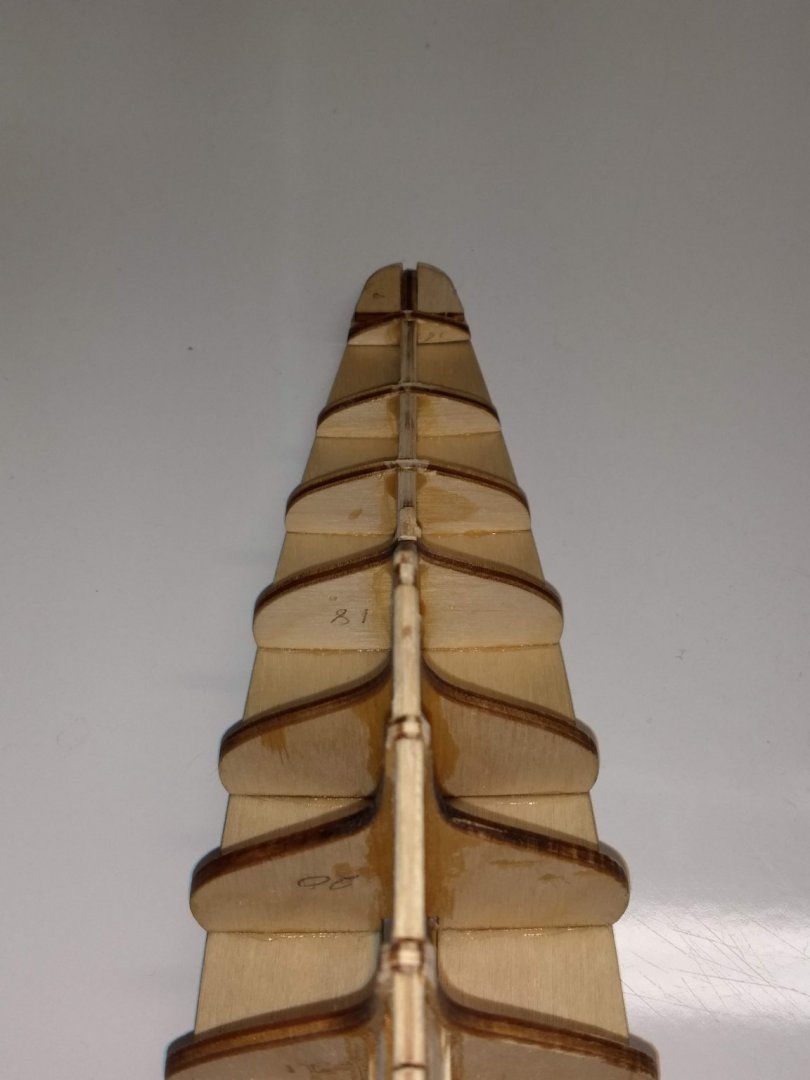
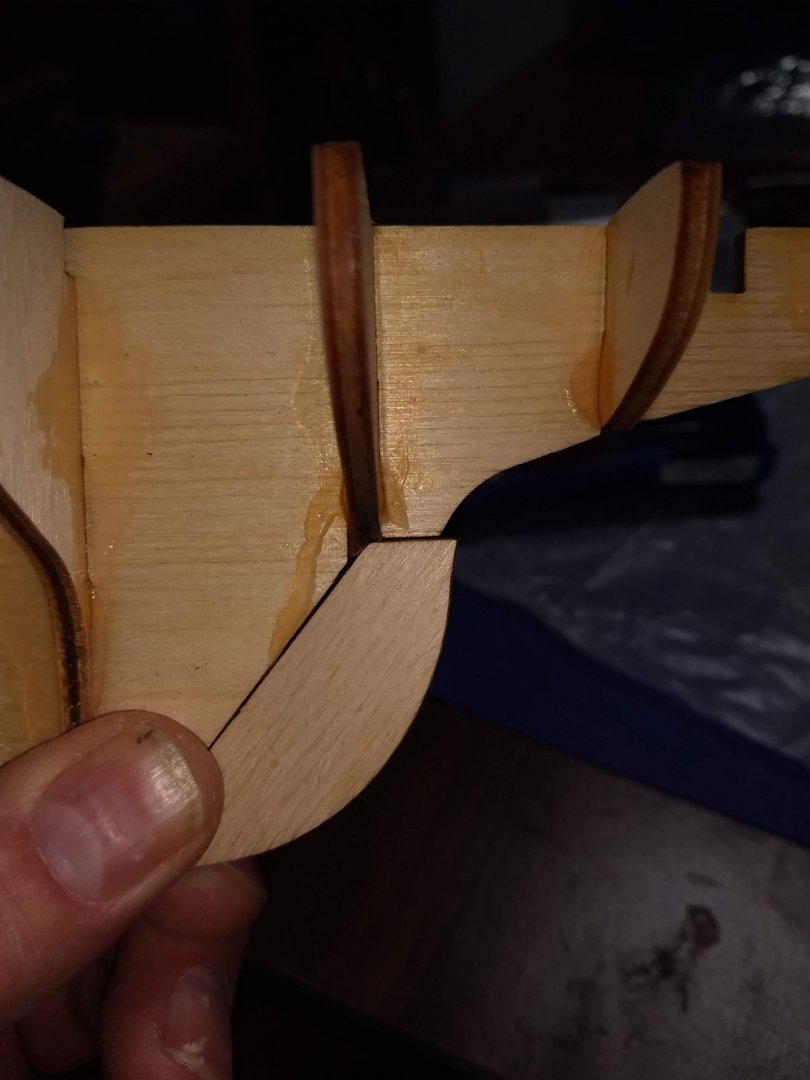
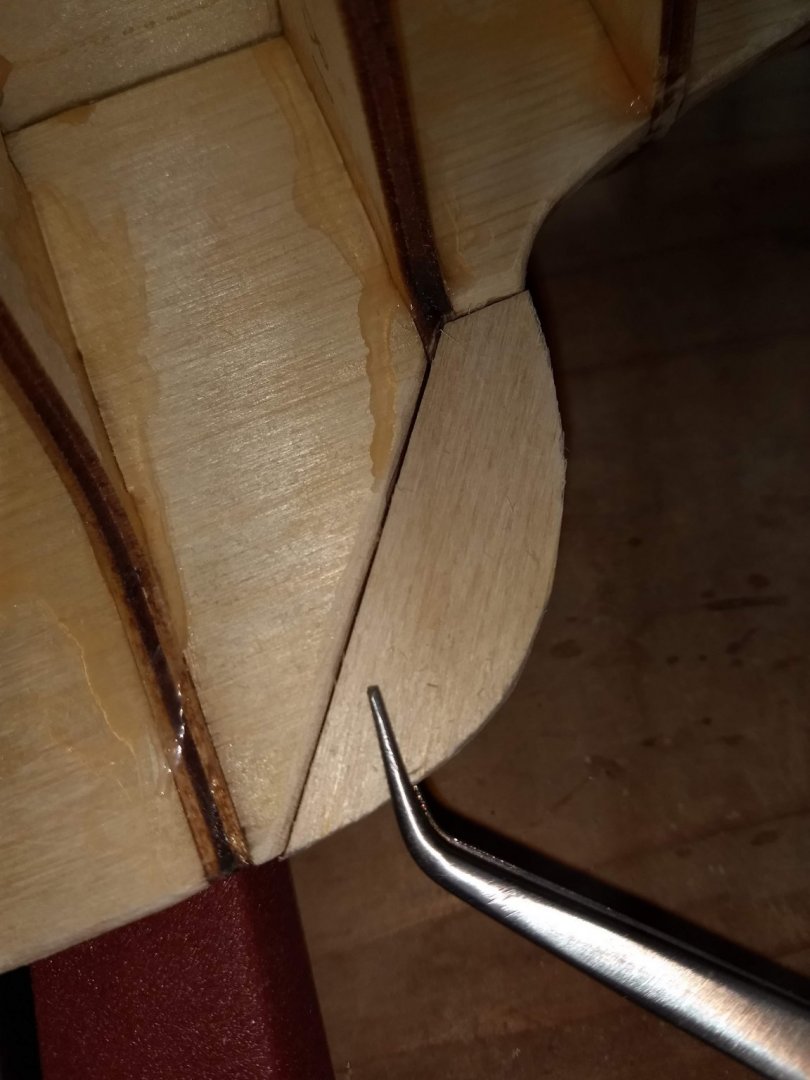
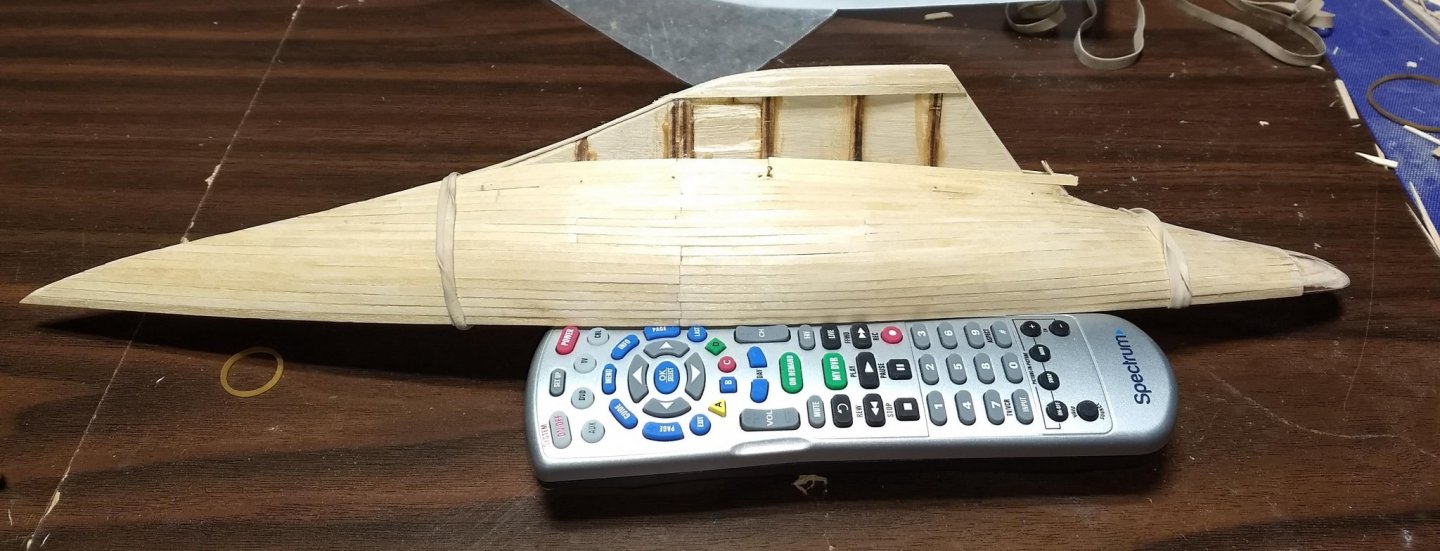
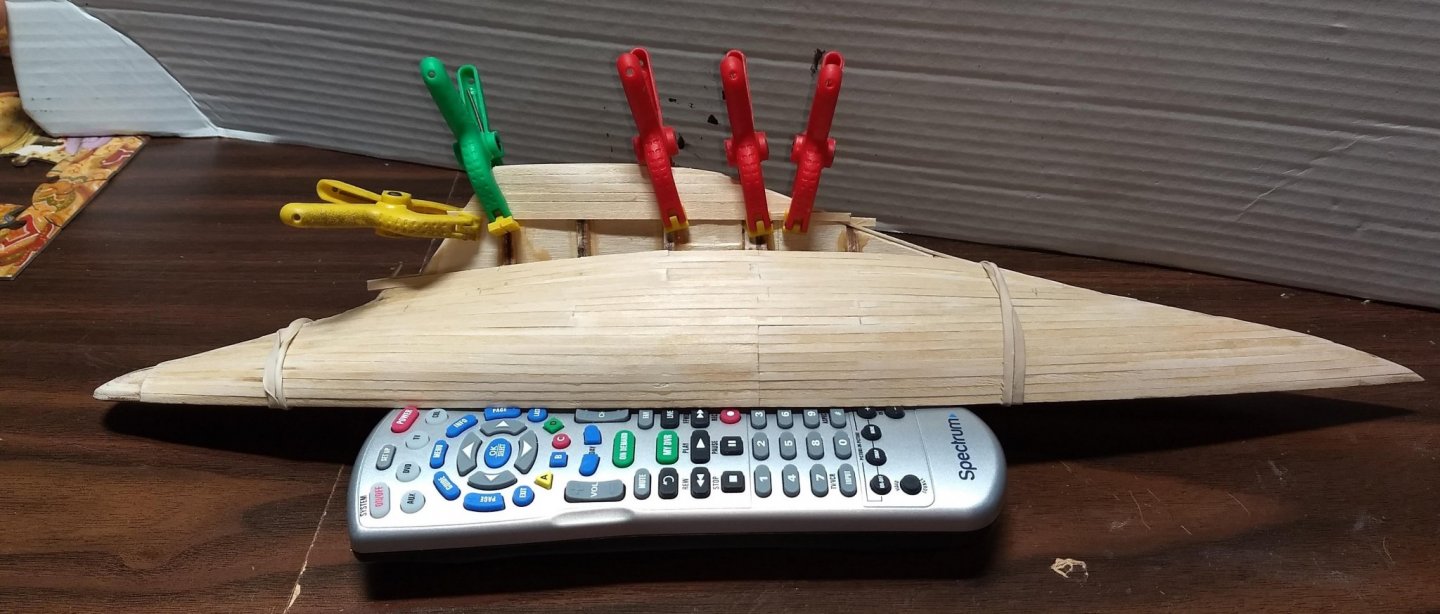
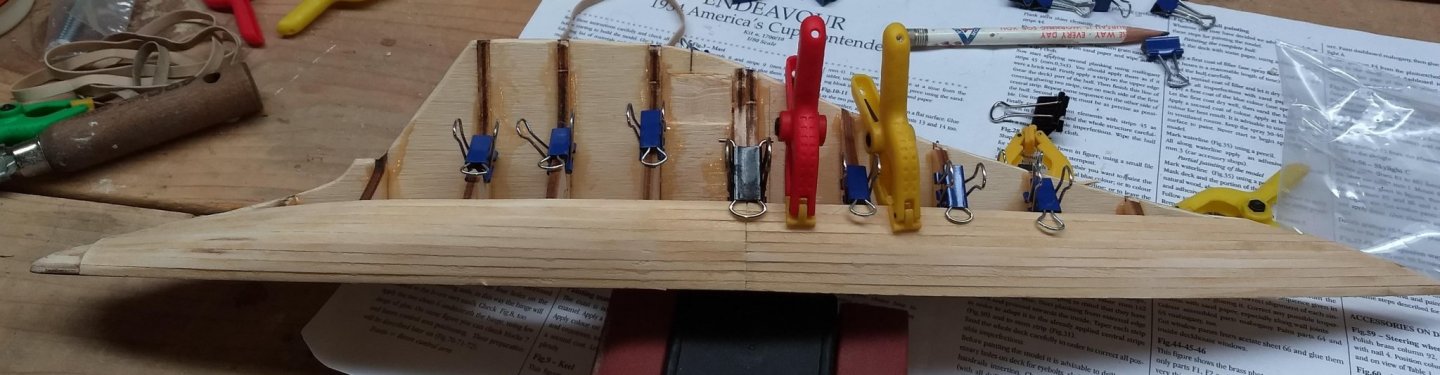
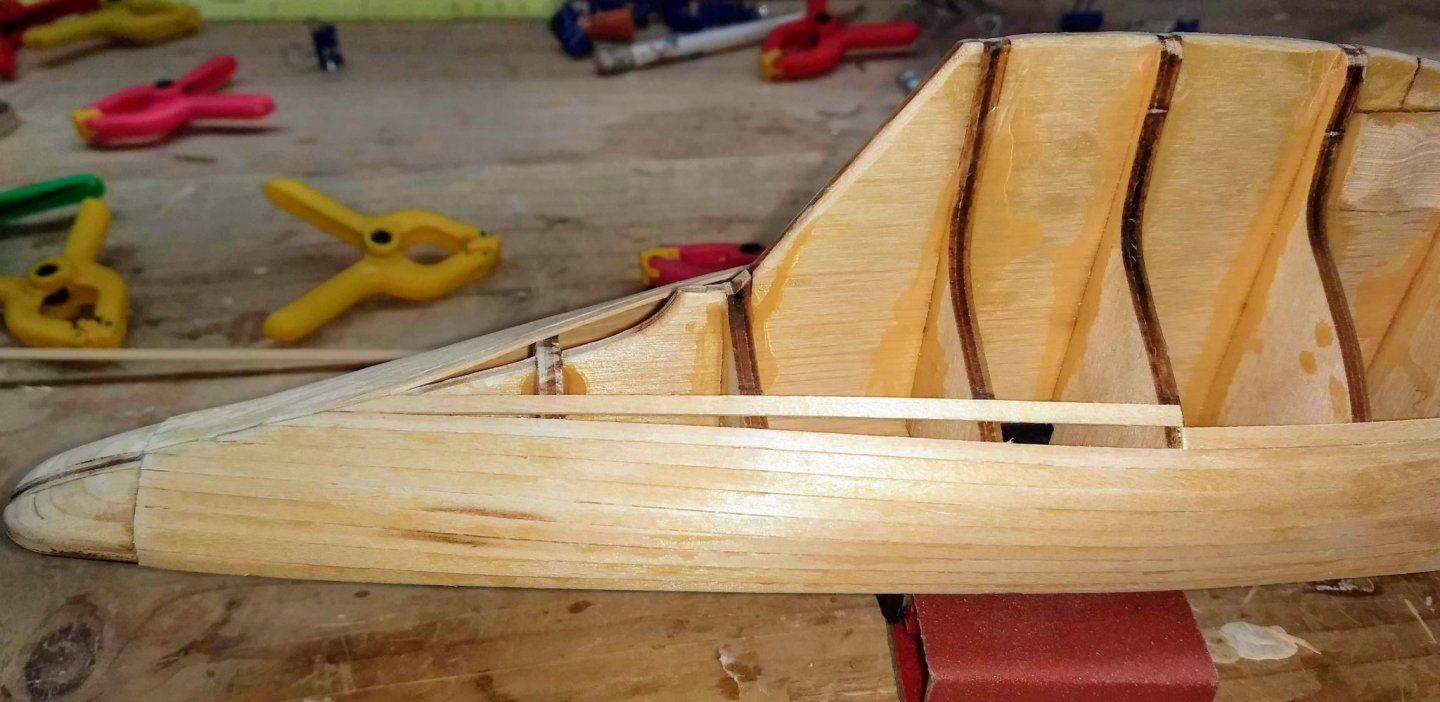
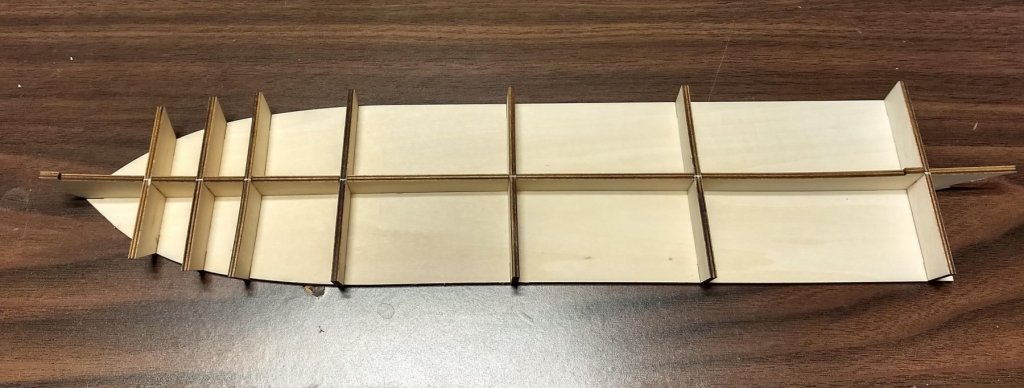
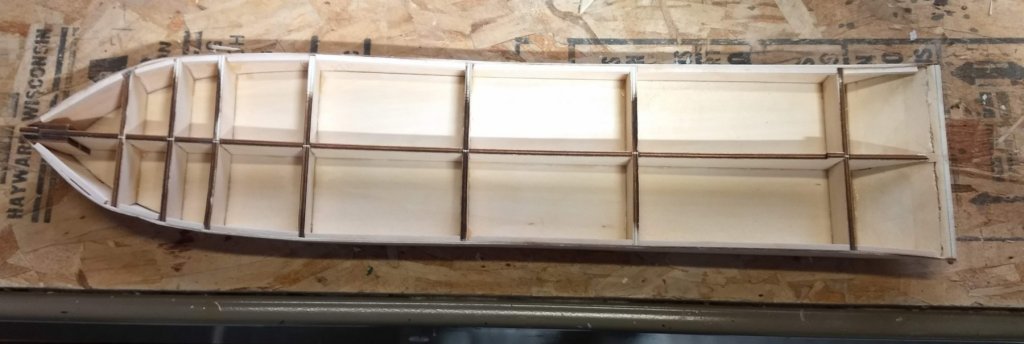
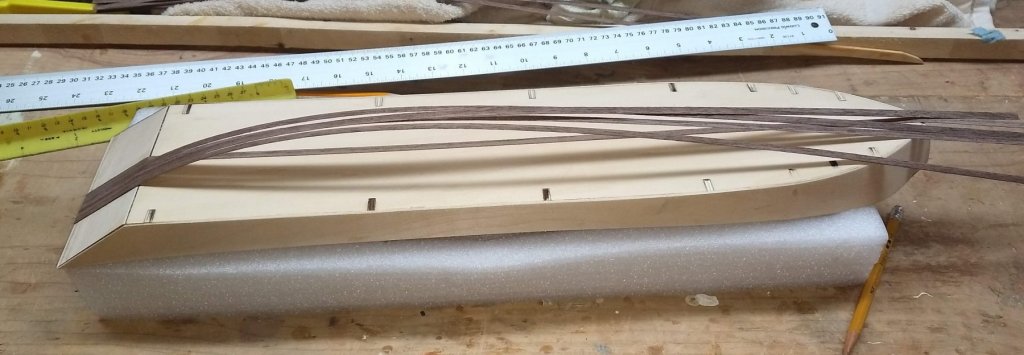
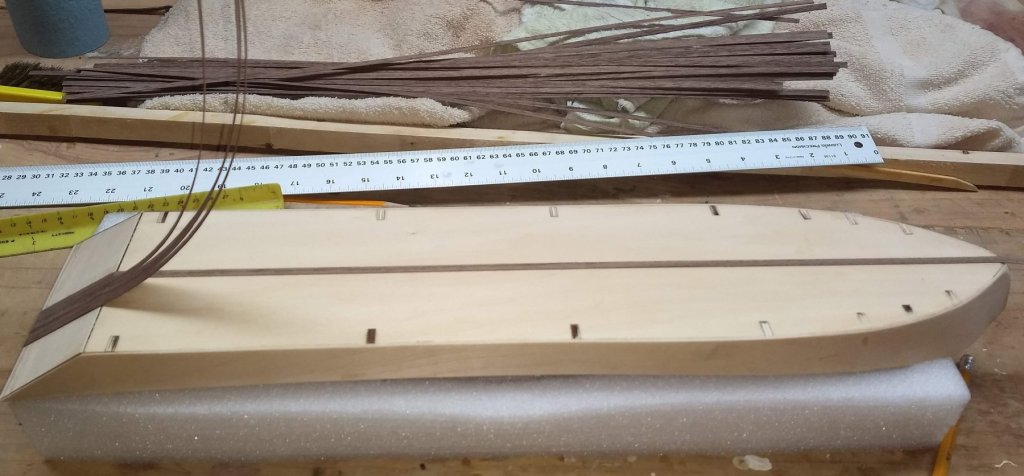
Just starting up the build of the J Class Endeavour Yacht. If some of you have seen my other logs, you know I am a beginner builder at best. Main thing is that I really enjoy the builds. In my past (earlier) life I raced 36' sloops (22 sq meter class) so the J Class yacht always caught my attention. So when looking for a model to build, the Endeavour caught my eye... As others have done, the instructions call to first build the mast and boom, but I was too excited to start the hull, so my mast and boom will come later too. Instructions call to fist connect the two keel sections with two rectangular support pieces - One on both sides of the keel. Does not specify an exact location. However you really need to insure the support pieces will not interfere with the section of the hull that is double reinforced as those double frame pieces are really close to these support pieces. In my case I dry fit the two double reinforced pieces and drew a line at the edge of the 2nd support piece. That way you will know where to locate the two rectangular support pieces. 2nd piece removed and line drawn. You need to verify when you add the two rectangular support pieces they do not cross this line... or you will have some "adjustments" in your future. With the double double reinforced frame pieces removed you can not glue the two halves or the keel. First side is easy just lay the tow keep halves together and glue on the support piece Support piece on the other side is more of a challenge, as you have to add a pieces of scrape wood under the bow and stern sections to keep the keep straight. In addition to scrape wood under the bow and stern sections I added a level (for weight) on top in an attempt to keep the keel straight as the glue dried. Not sure if that was a good idea or not, as then the glue dried and I looked town the keel, it still had a small bend to it. Maybe I should have used a vice to hold the pieces together. In any event, the bend was not severe, and I think when the deck is added, it will straighten out... Lets hope,,, Kind of hard to notice in the picture but there is a slight bend in the keel as it goes aft. Before I begin the frame sections, I decided to build some planking clamps out of paper binder clips. These are the same other modelers have made and really make the planking much easier. In my case I bought the smallest binder clips I could find. Before adding the frames, they were numbered just to keep them straight. Not so much with this model, but with another model I worked on, I did not number them and they were very similar is shape. And after getting them all cut out and put in a pile, it was a challenge to keep them straight. In any event, a good idea to number them. Below shows the first two frame sections added. Note in the first picture the double frame section is right up against the line I drew earlier. While the line helped me with fore and aft positioning of the keel support pieces I did not think of up and down positioning. Note in the picture above and below, the shaded wood. This is wood that sticks up above the frame section and needs to be shaved down. In reality the two keel support pieces need to be higher more toward the top of the keel, or as in my case, you will need to do some "adjustments"..... The instructions seem to imply the keel support pieces can more or less be positioned anywhere between the two frames.... So,,, do as I say, not as I do... Side view showing the keel support pieces sticking up above the frame pieces Adding the support frames is more or less straight forward... Be sure to verify each support piece is perpendicular to the keel. I would suggest some sort of right angle like a corner brace to hold each frame as the glue dries. In my case I attempted to keep the frames straight, but I have to admit there are a few close but not exactly perpendicular to the keel. I have a feeling I will pay for this with the later planking,,, At this point I was curios as to what the rudder would look like so I dry fitted it to the keel. Unless I am mistaken, the rudder is too large for the keel. Assuming this was a mistake with the kit i trimmed down the rudder to match the keel. After I did that, initially I was feeling pretty good as it turned out OK. But afterwards I got a little anxious wondering if the kit was correct and the mistake was me trimming it down. We will see later on... Below is the trimmed keel. Next the fore and aft sections of the deck were added to the frame. As I was hoping earlier, with rubber bands, clamps, and a little muscle, the bent frame straightened out when the deck sections were added. Let the planking begin,,,,, Below are a few pictures of the planking. Not much to say here as planking is pretty straight forward. I started at the top and worked my way down each side alternating each plank to avoid warping the hull, Every once in awhile I had to add a filler strip to keep thing straight, but no real issues with the first planking Closing in on the end,,,,, Complete with first planking,,,, Just need some sanding and wood filler to smooth things out. At this point the debate is still on as to whether to make the hull blue (like the real Endeavour) or have it natural with the walnut finish. Will make that decision after the 2nd planking,,,, How that turns out will probably determine which way I go,,


- 45 replies
-
- 7
-
-
- j-class yacht
- amati
- (and 2 more)
-
Thanks for all the comments..... I appreciate them. I am moving on the the Endeavour J class Americas Cup yacht. I have always admired the real boat, and now looking forward to building the model. john
- 42 replies
-
- 1
-
-
- king of the mississippi
- artesania latina
- (and 1 more)
-
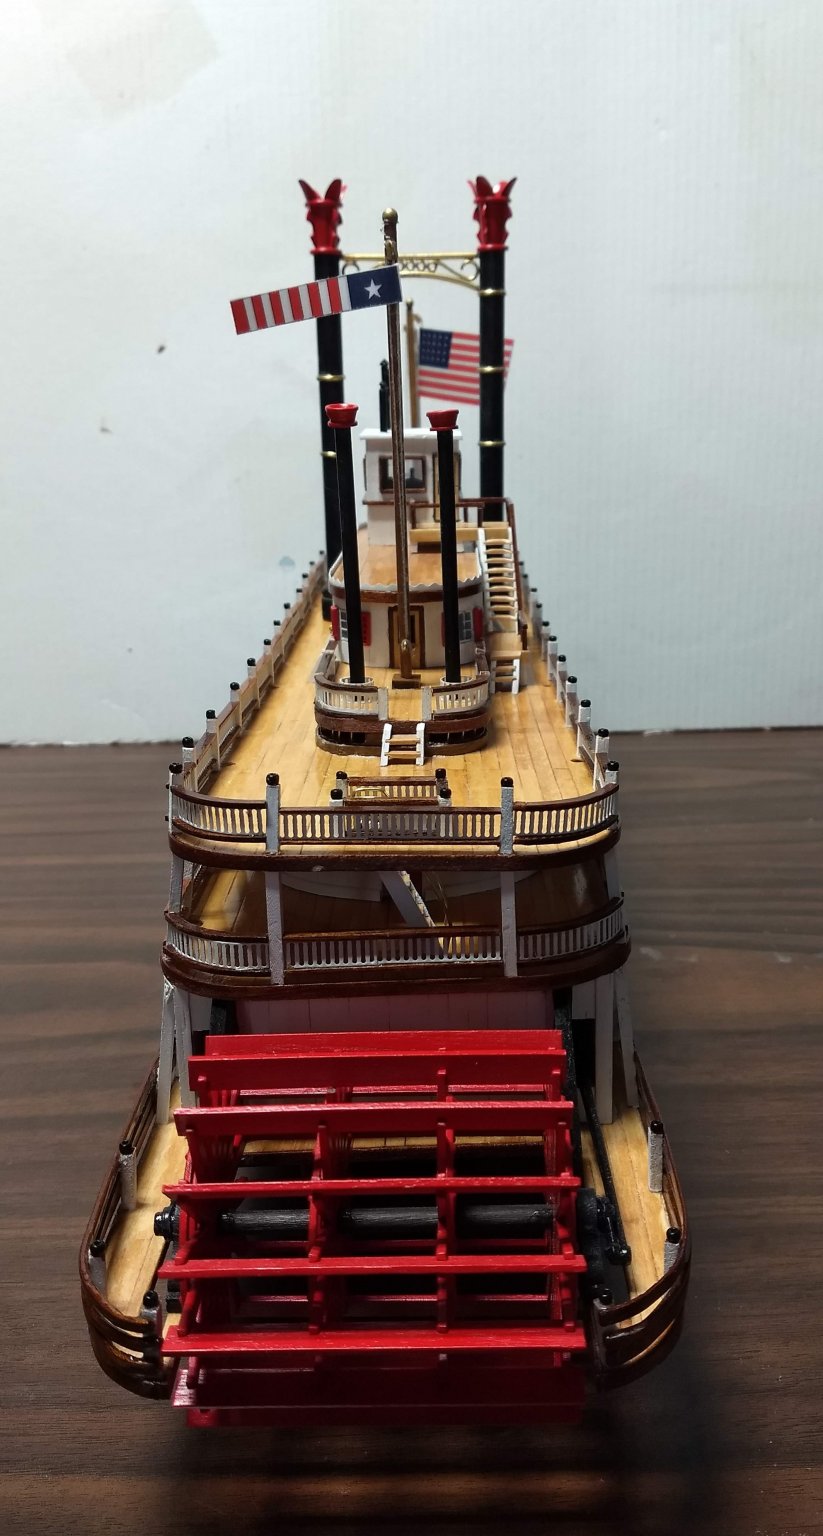
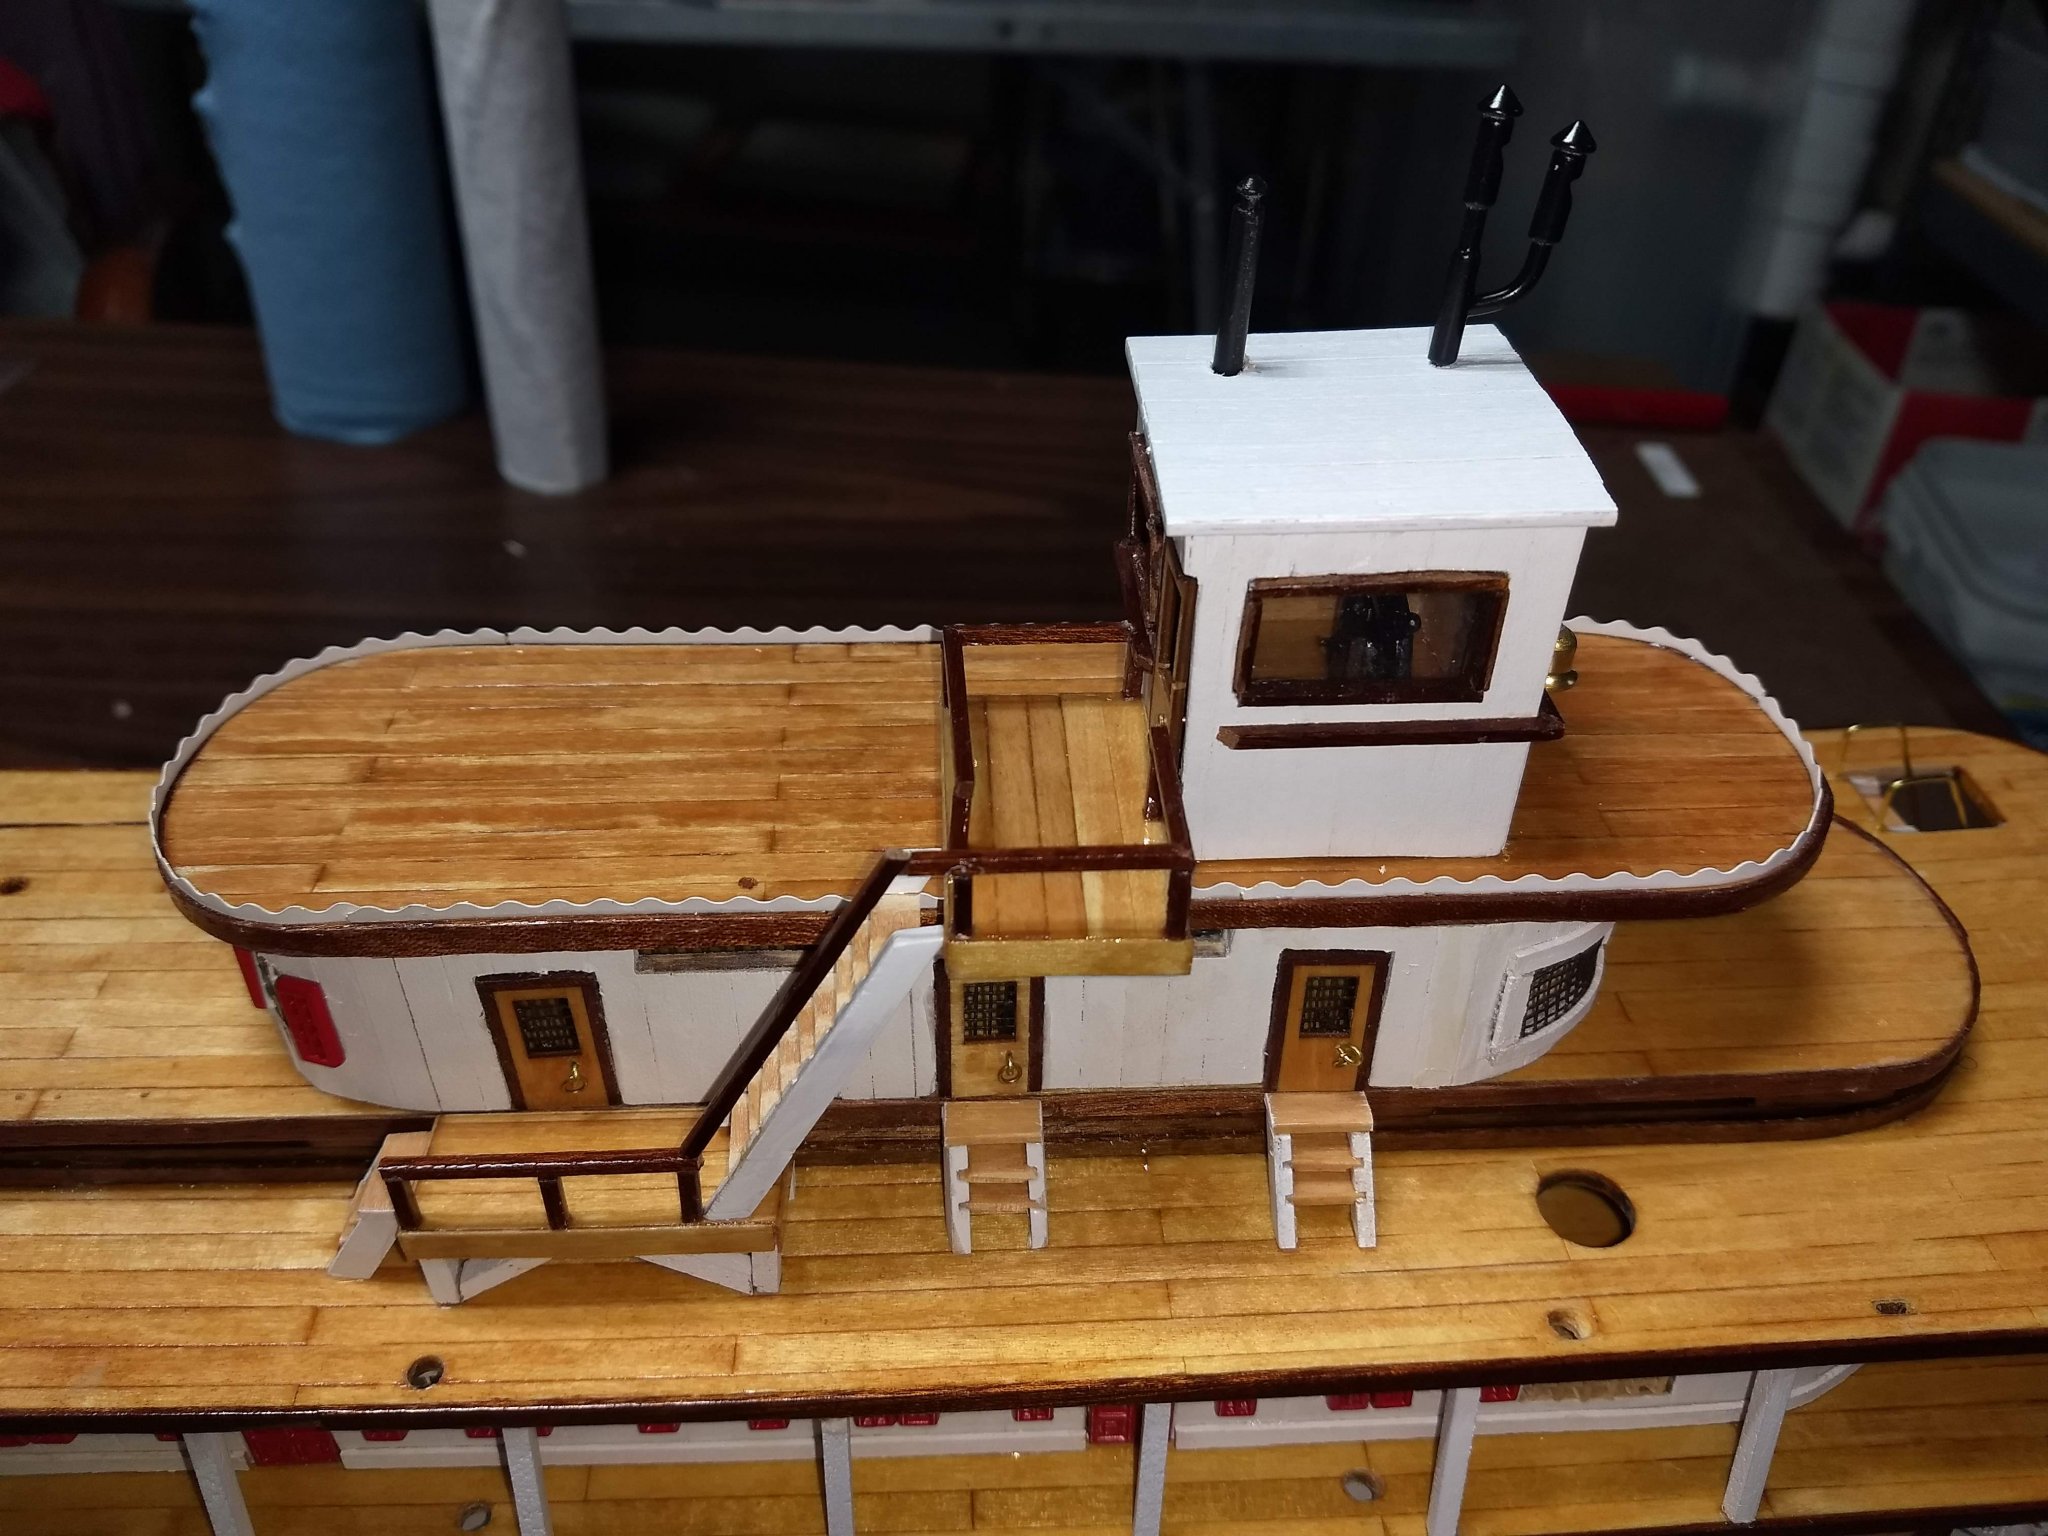
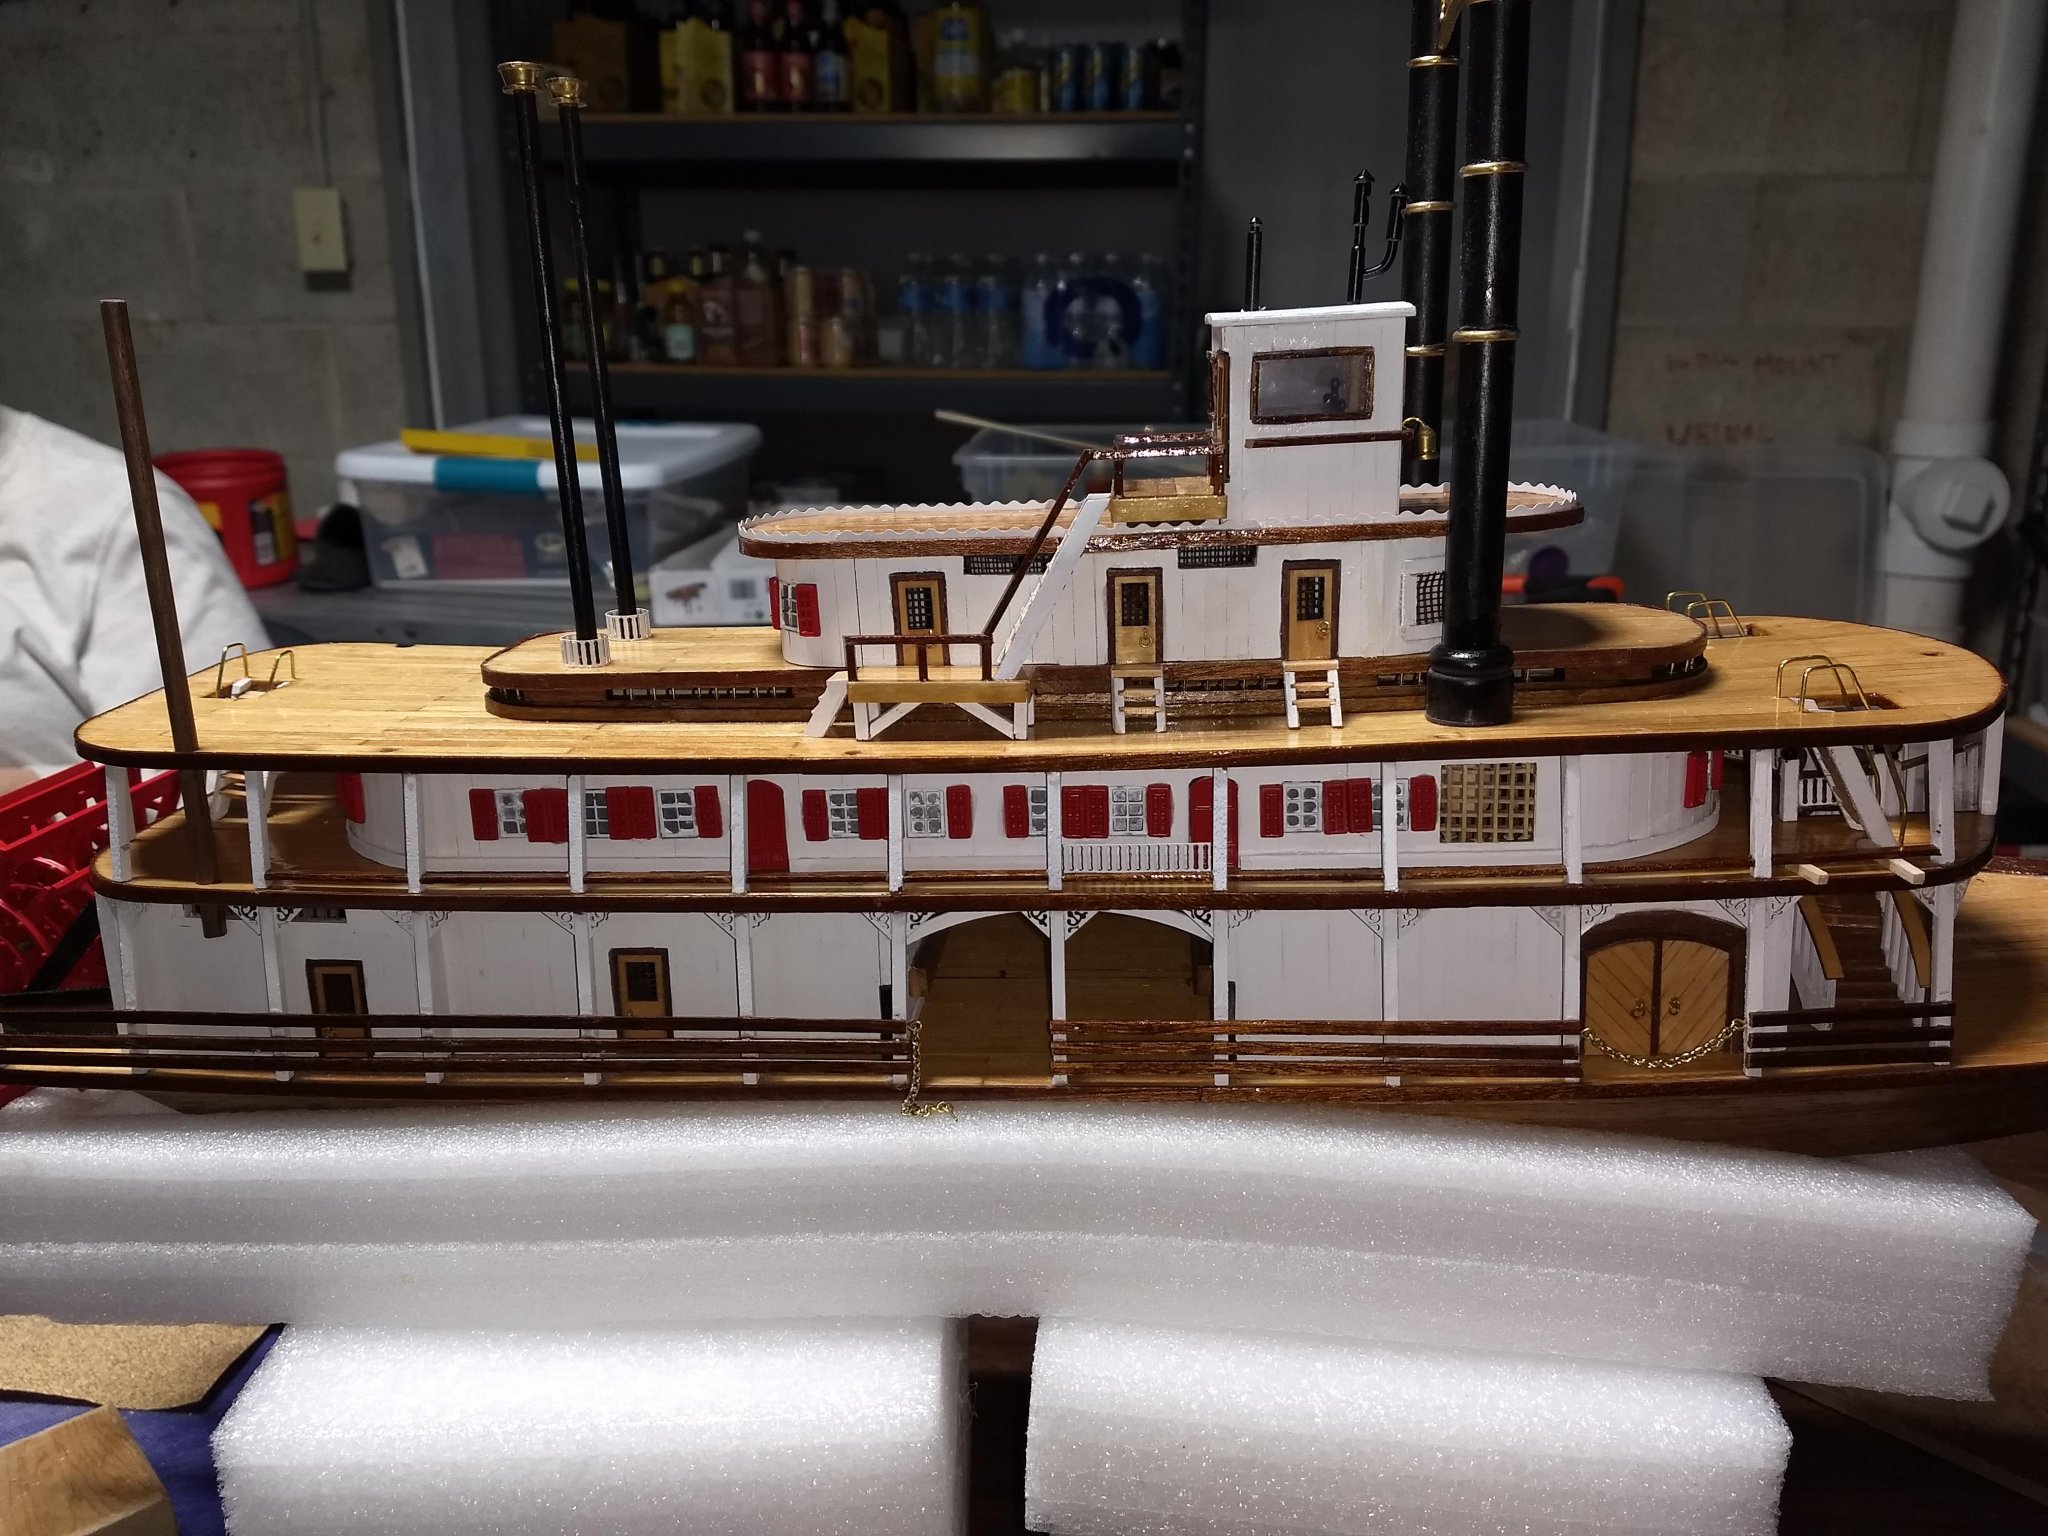
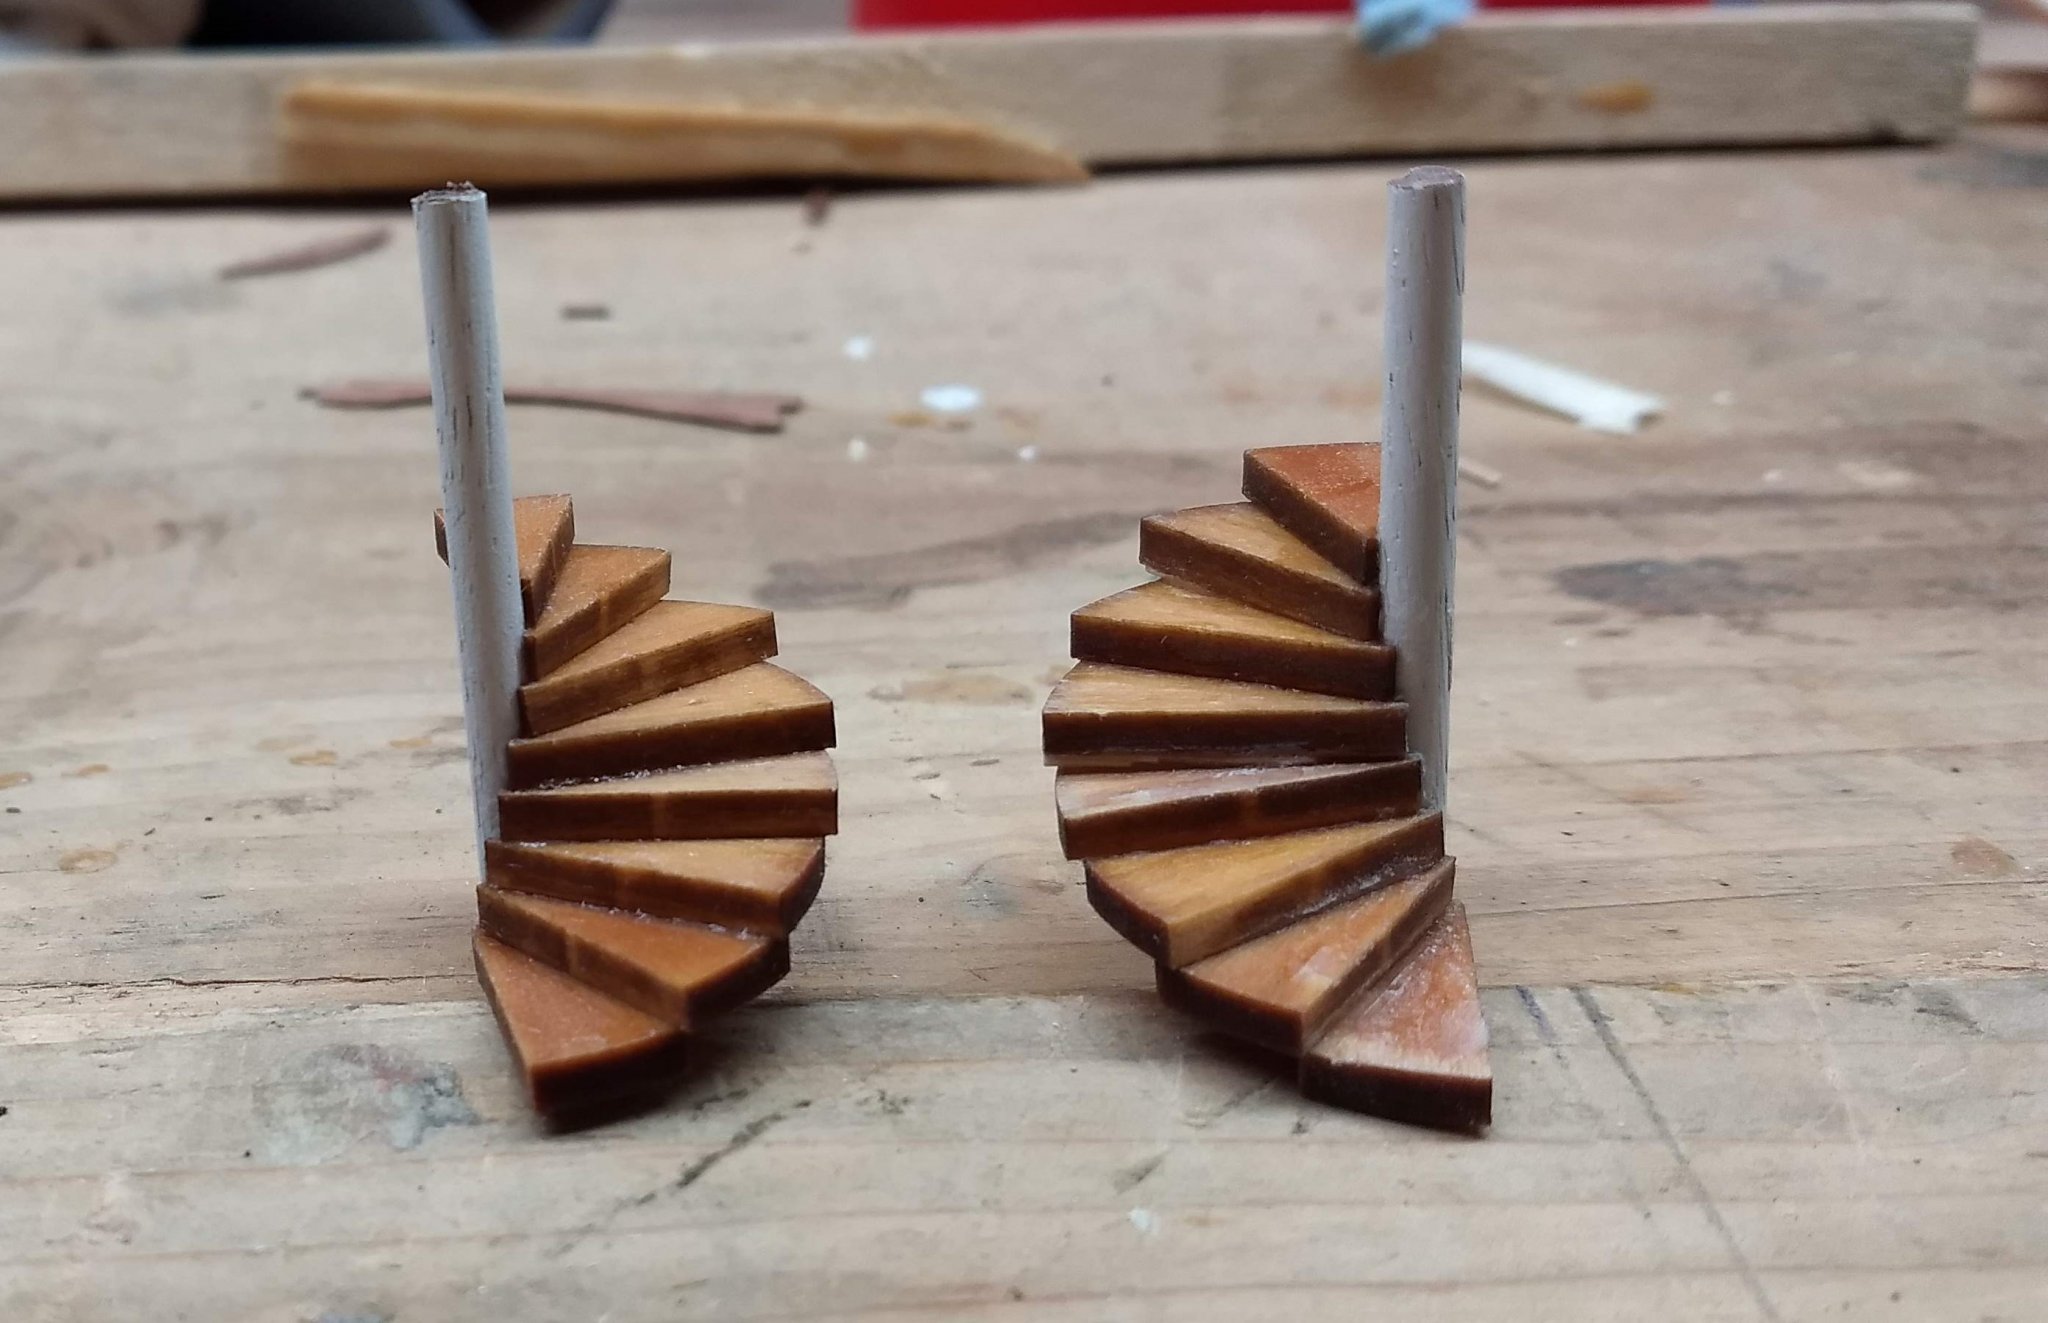
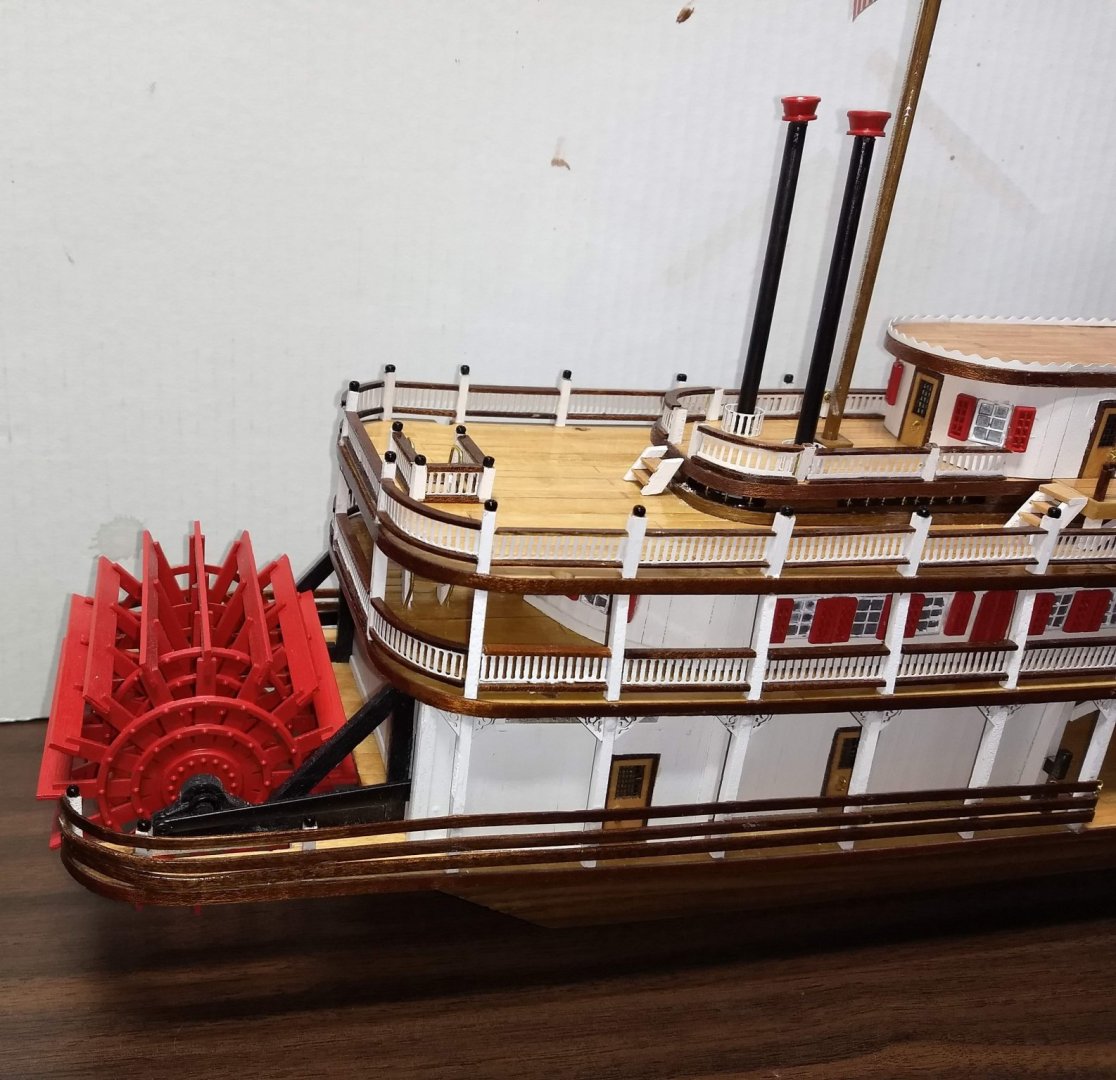
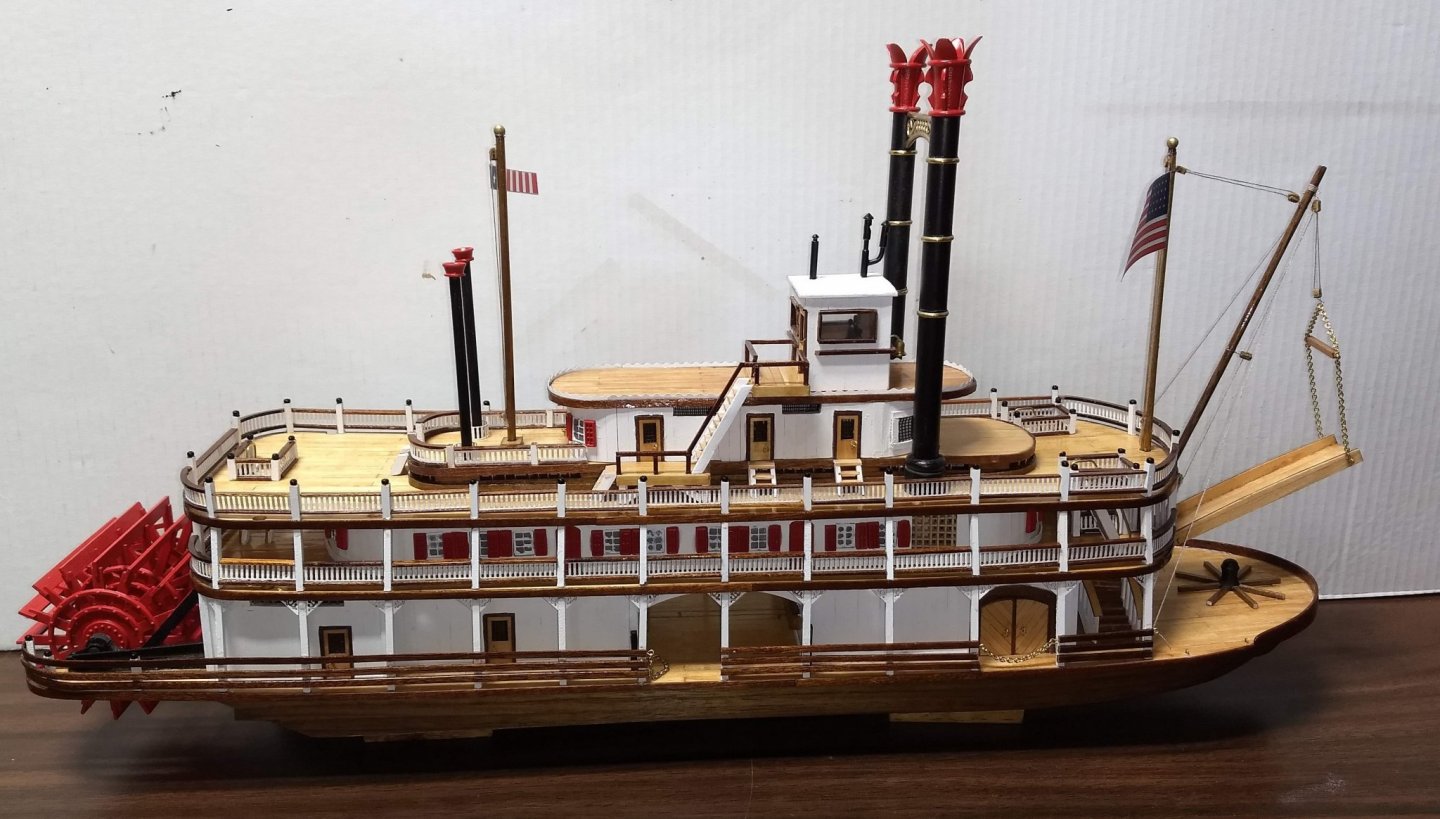
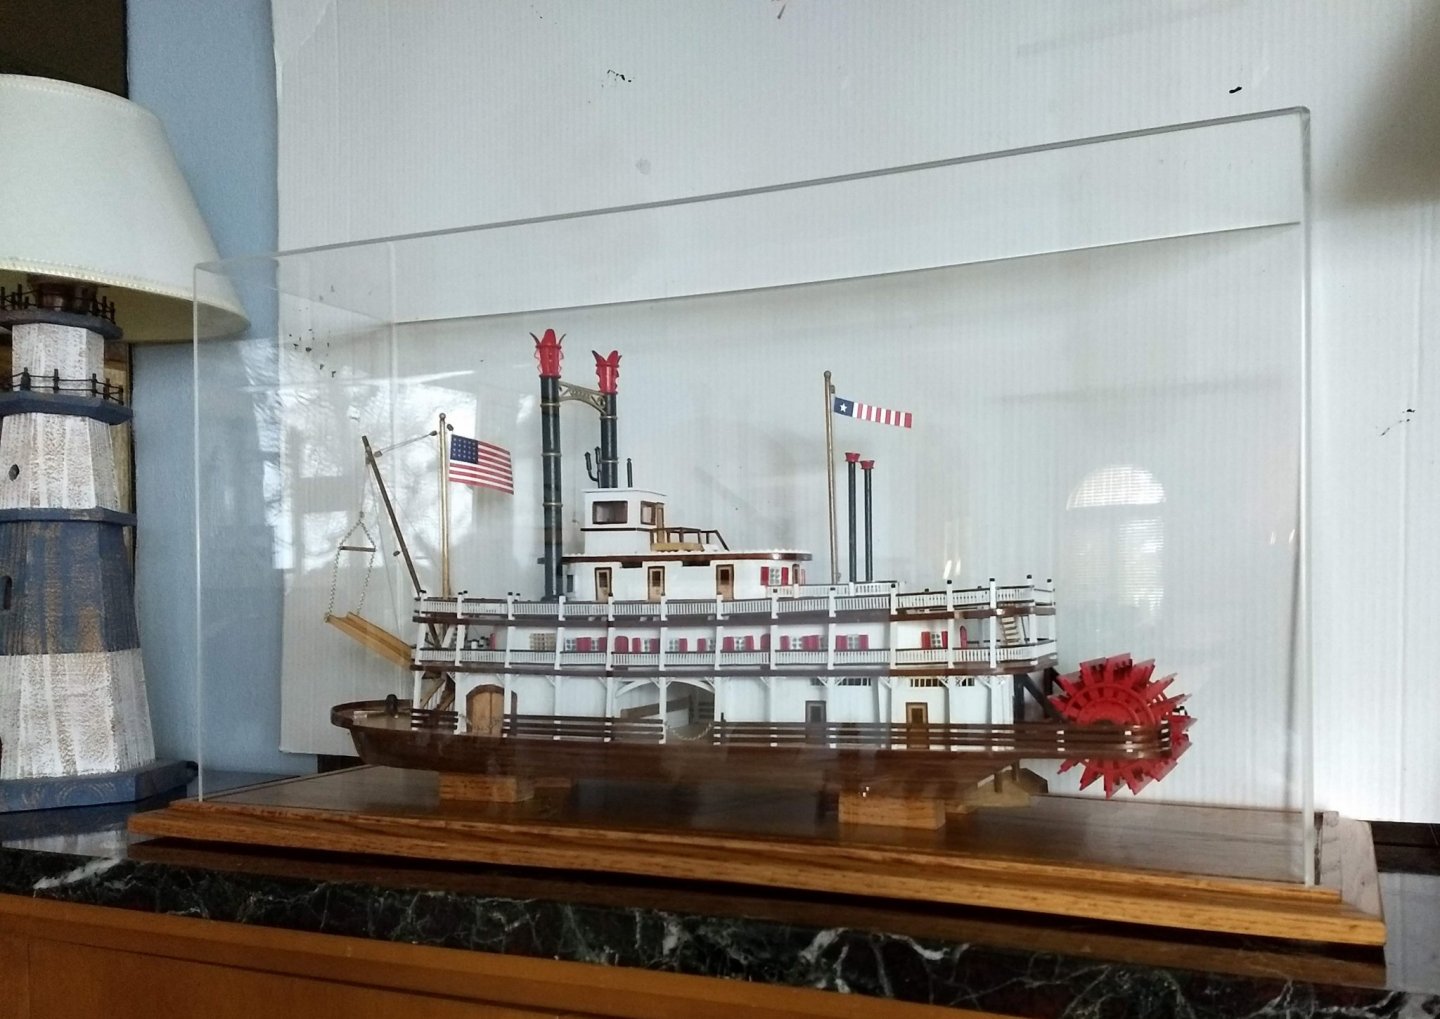
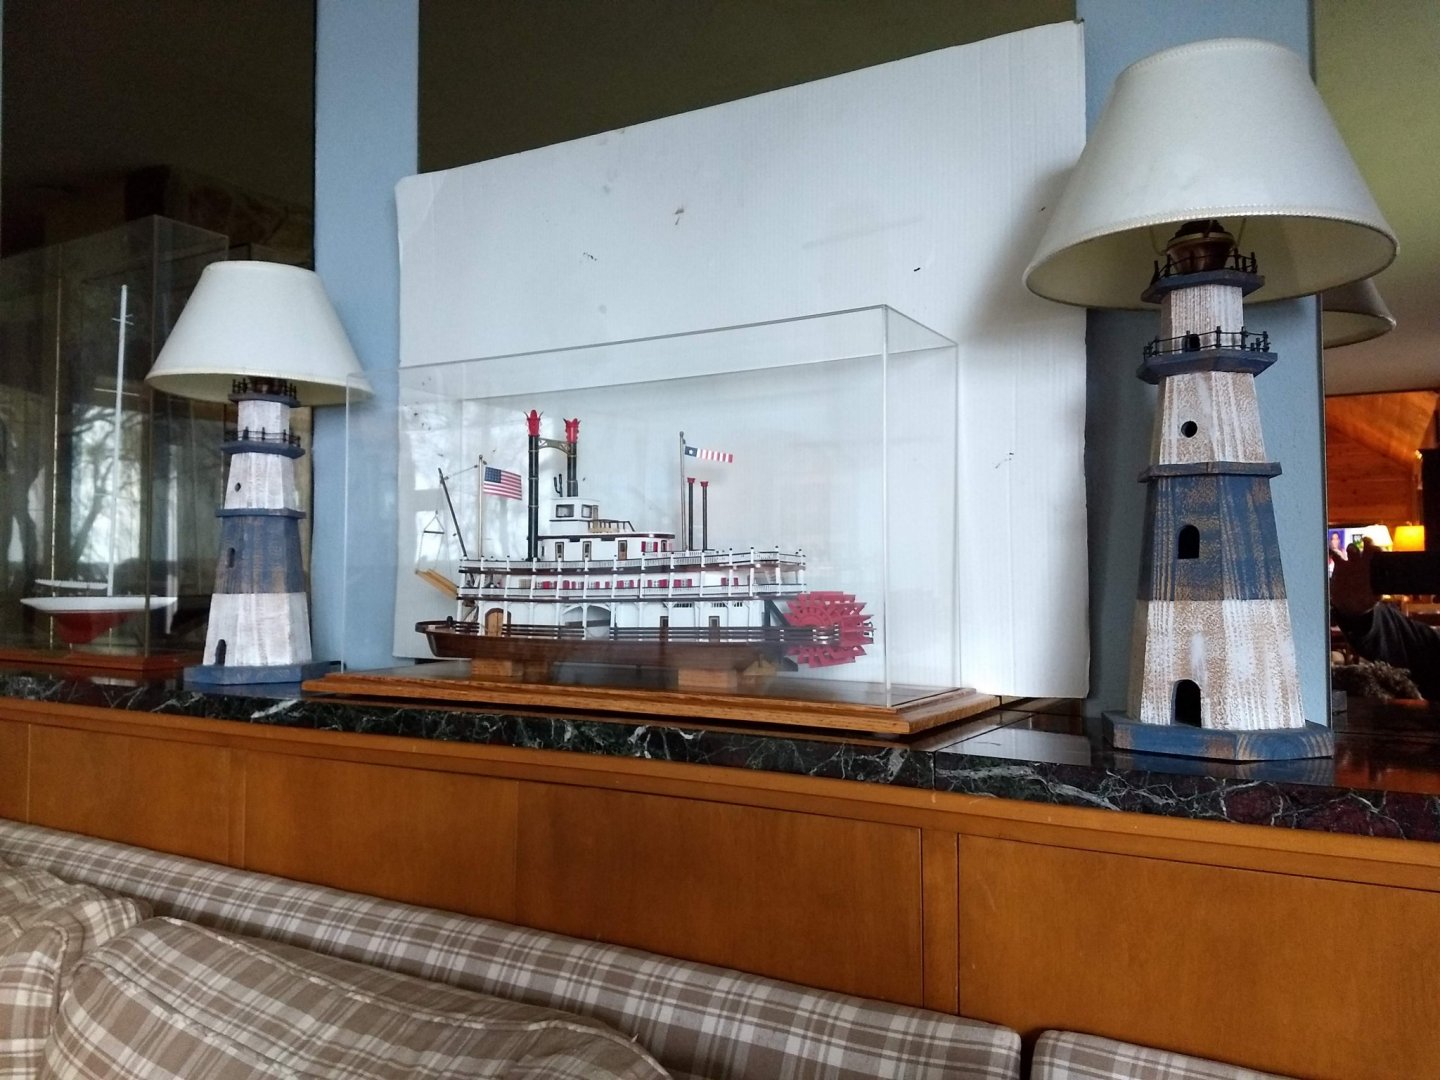
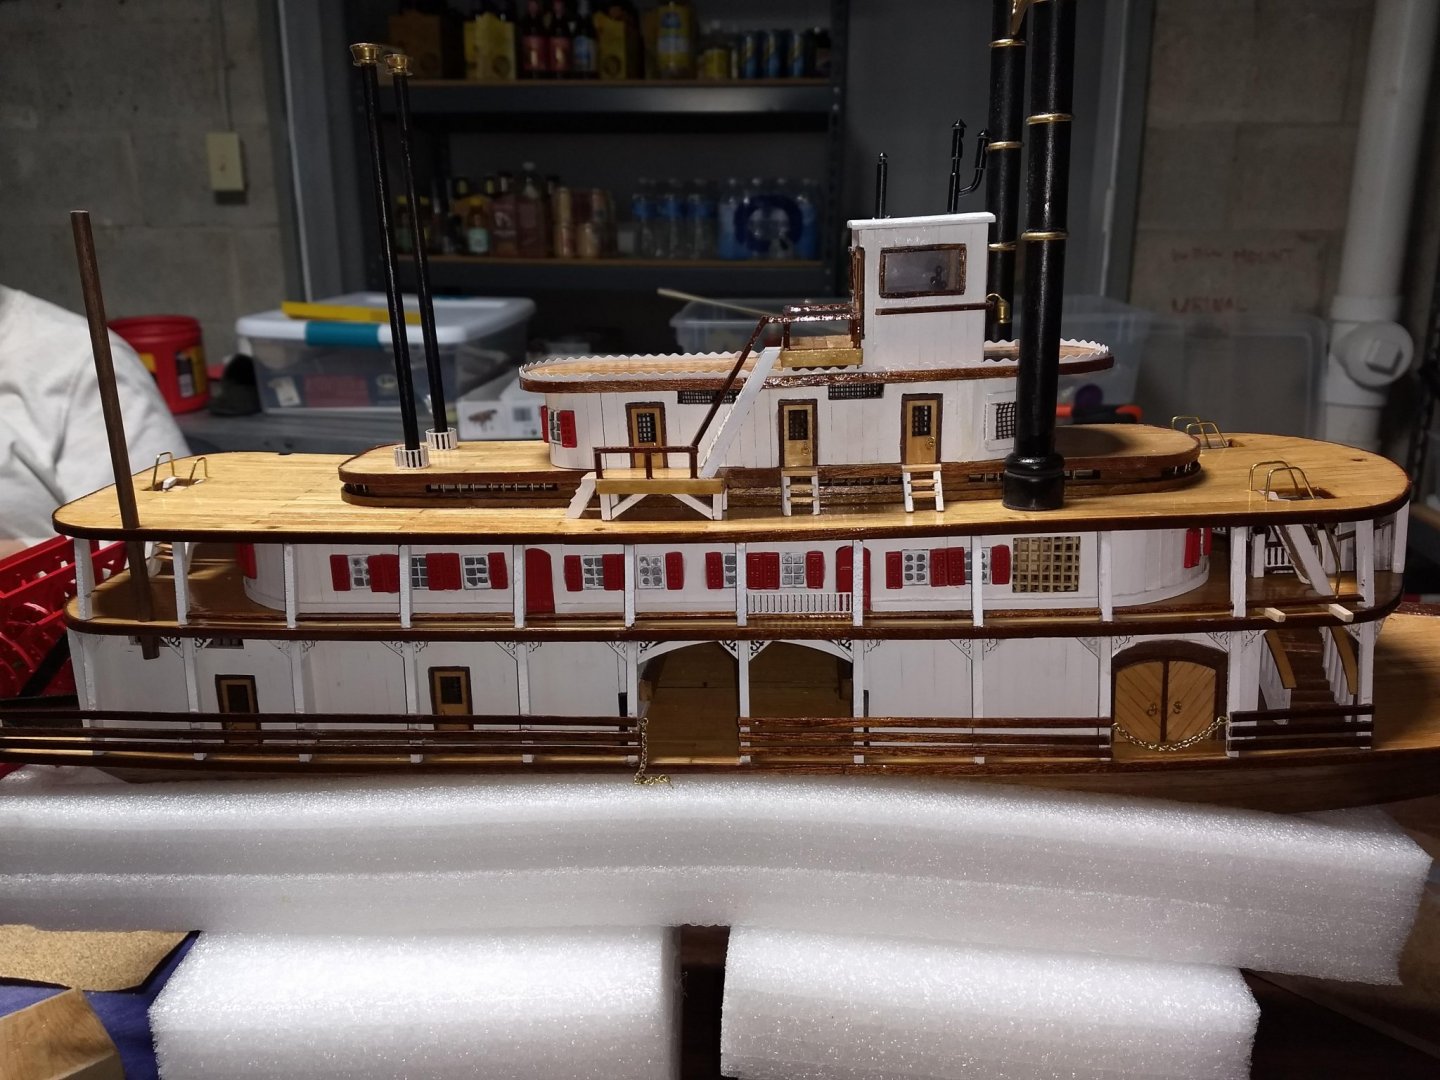
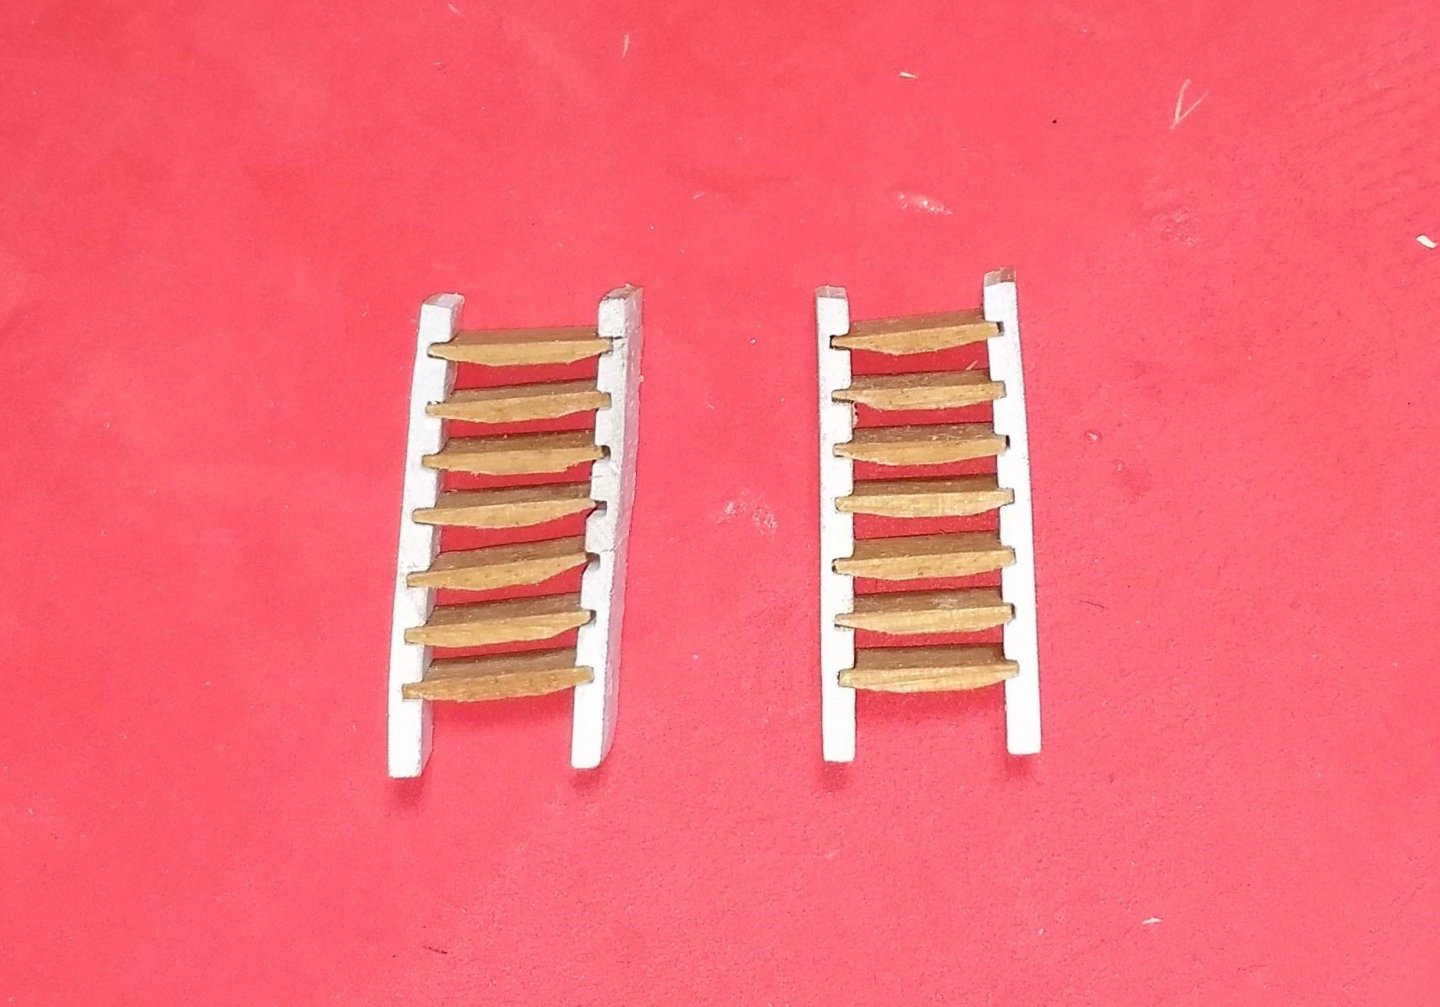
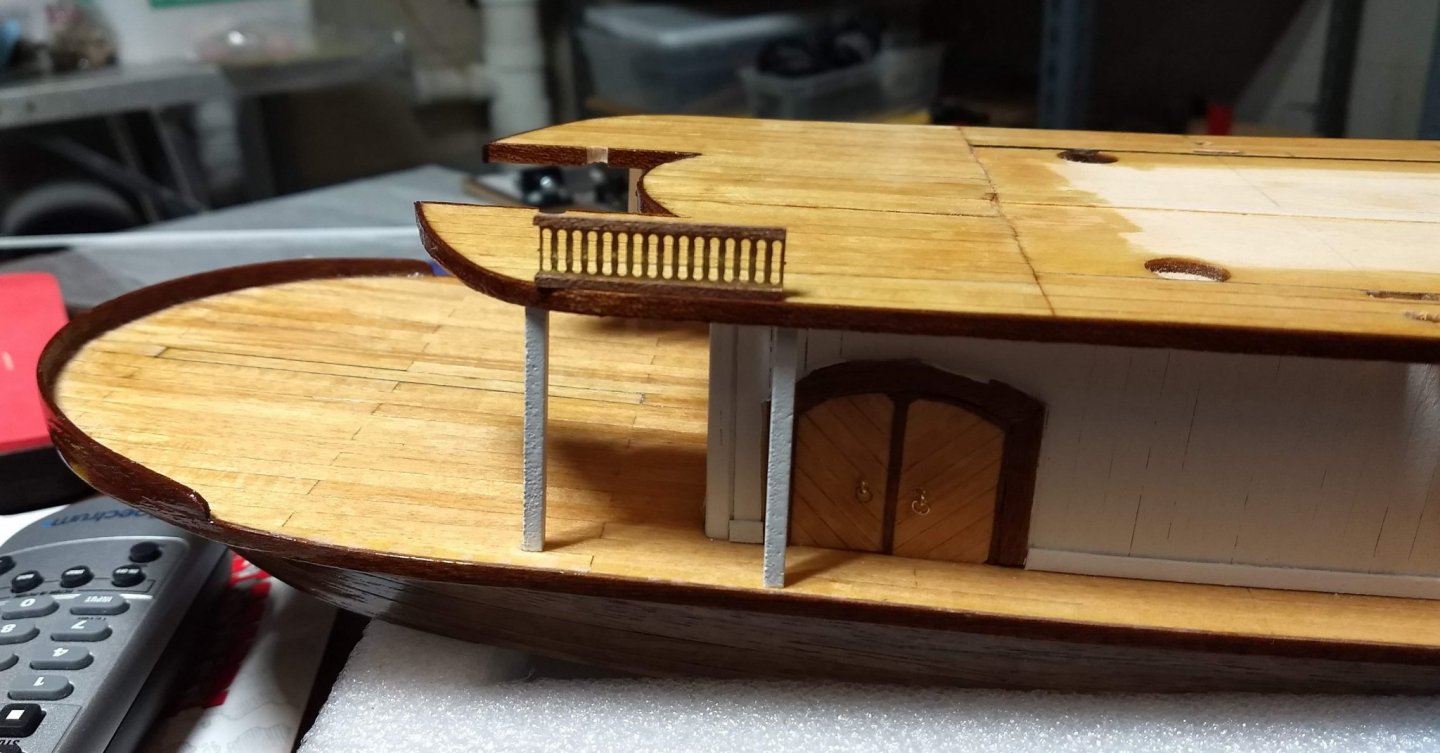
Finally,,,,, final pieces of wood arrived and last sections of the upper railing complete. Here is where I am going to "call it". It is done, granted it is not museum quality work, main thing is that I had fun along the way... To anyone wanting to build the King, I would say be prepared for a long haul. There a many pieces to this beauty. Only real difficult part of this build was the circular stairs. They take some time to get them right. Everything else in the model is pretty straight forward, just a lot of it. Especially those 2nd and 3rd floor railings. Building them really got old after a while. Anyway, below are some of my final pictures along with the King in it's final home. The final home shows my cardboard as a background. Kind of have to ignore that. In reality, behind the case is a mirror. Without the cardboard, the picture ends of me taking a picture of me. On to the next model 🙂


- 42 replies
-
- 11
-
-
- king of the mississippi
- artesania latina
- (and 1 more)
-
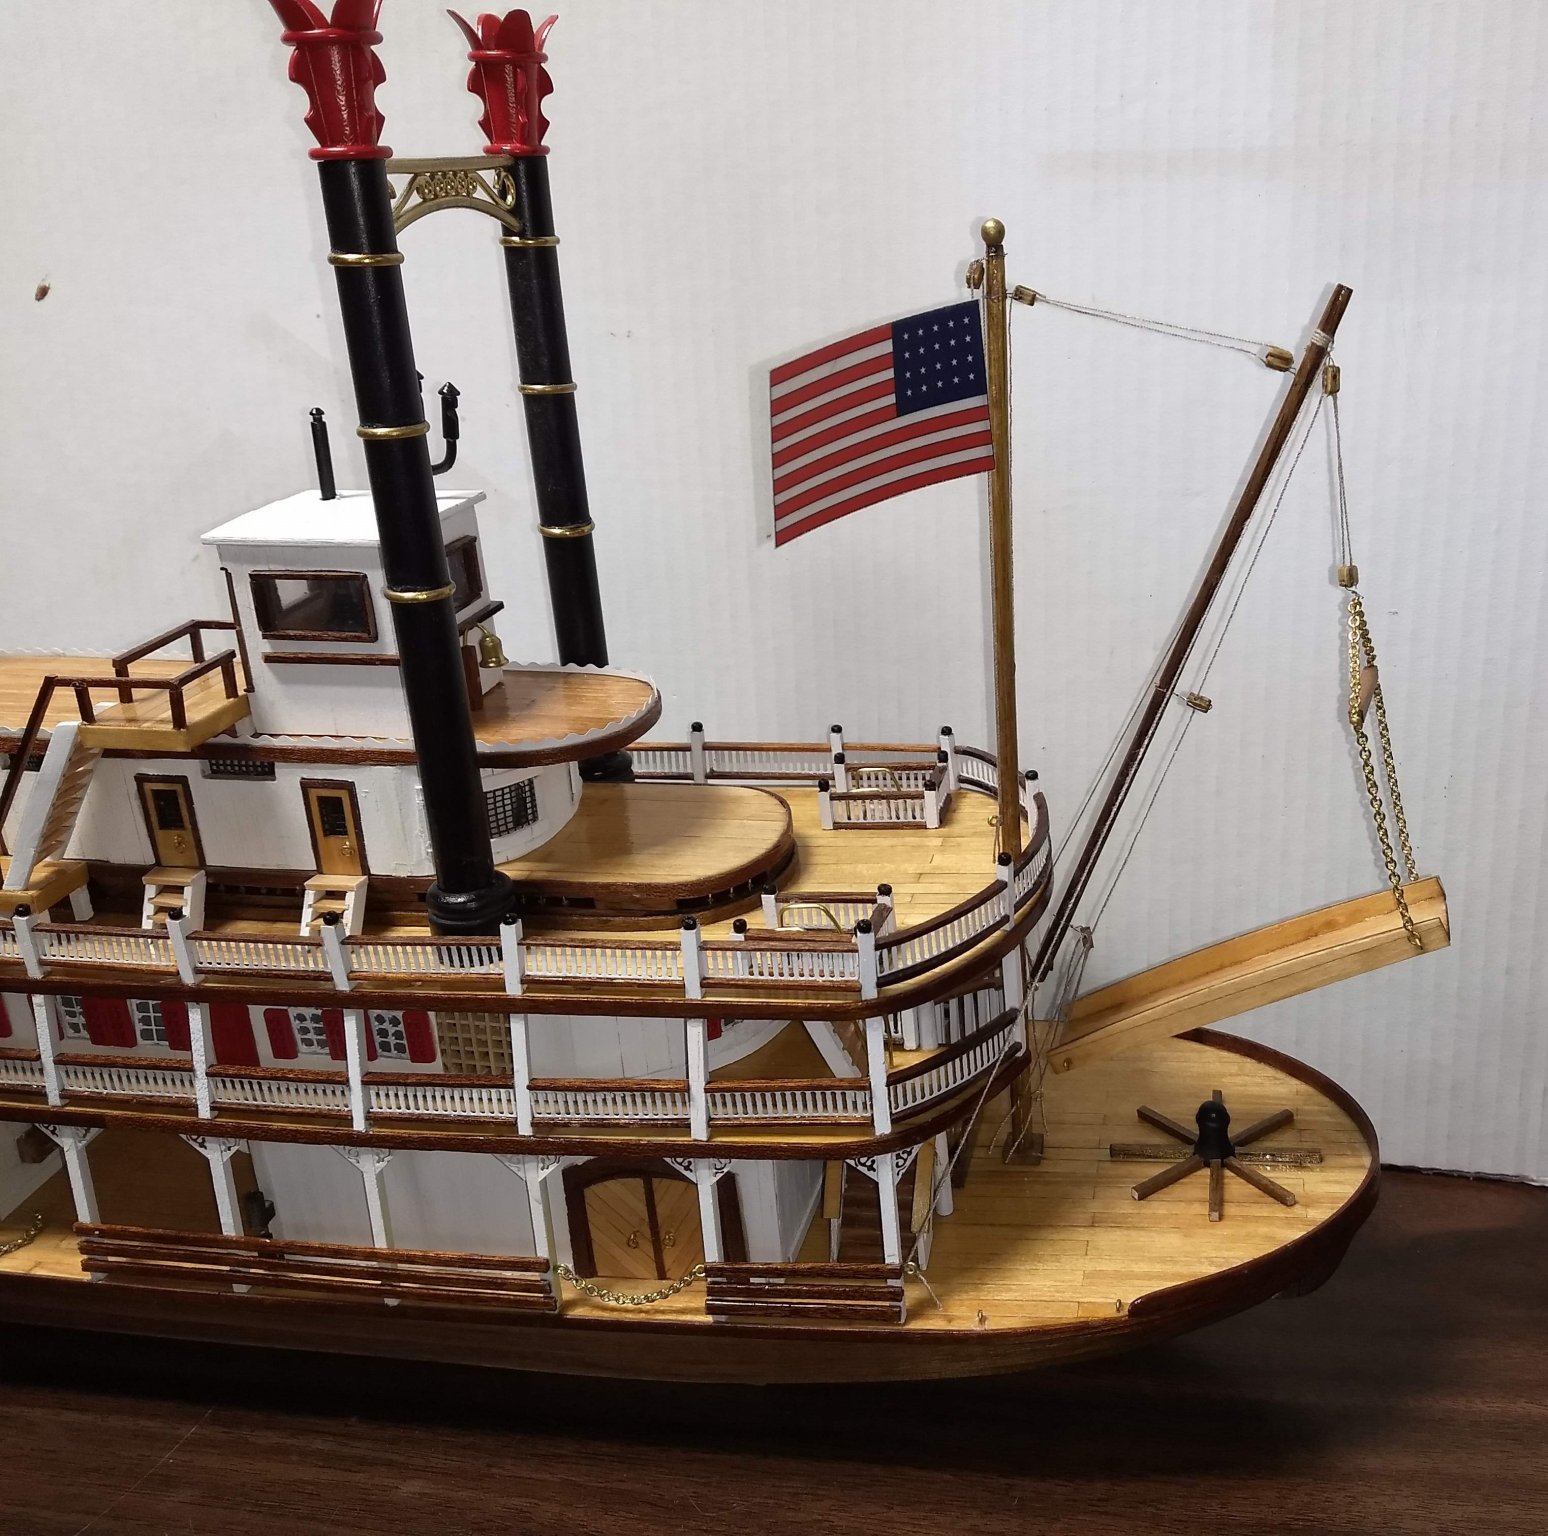
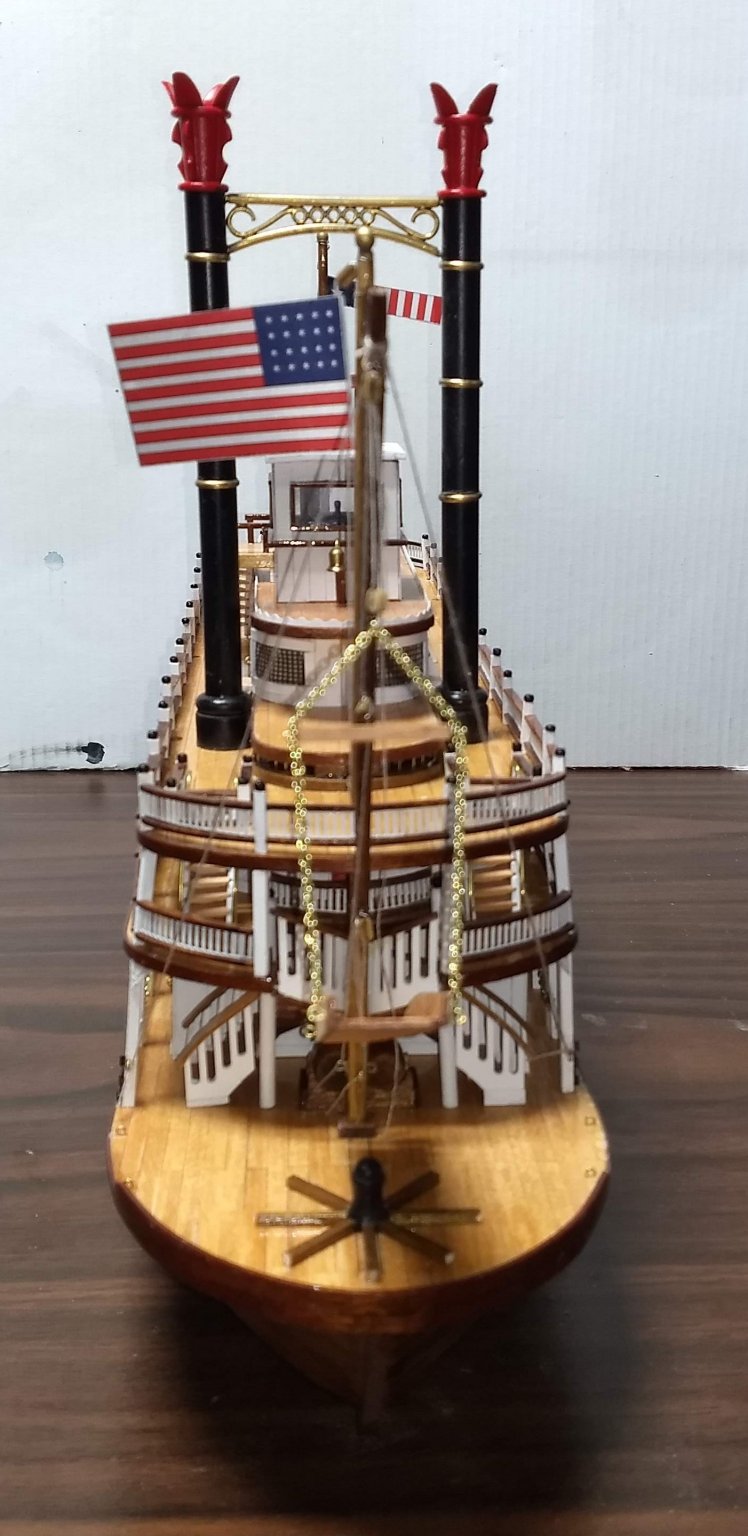
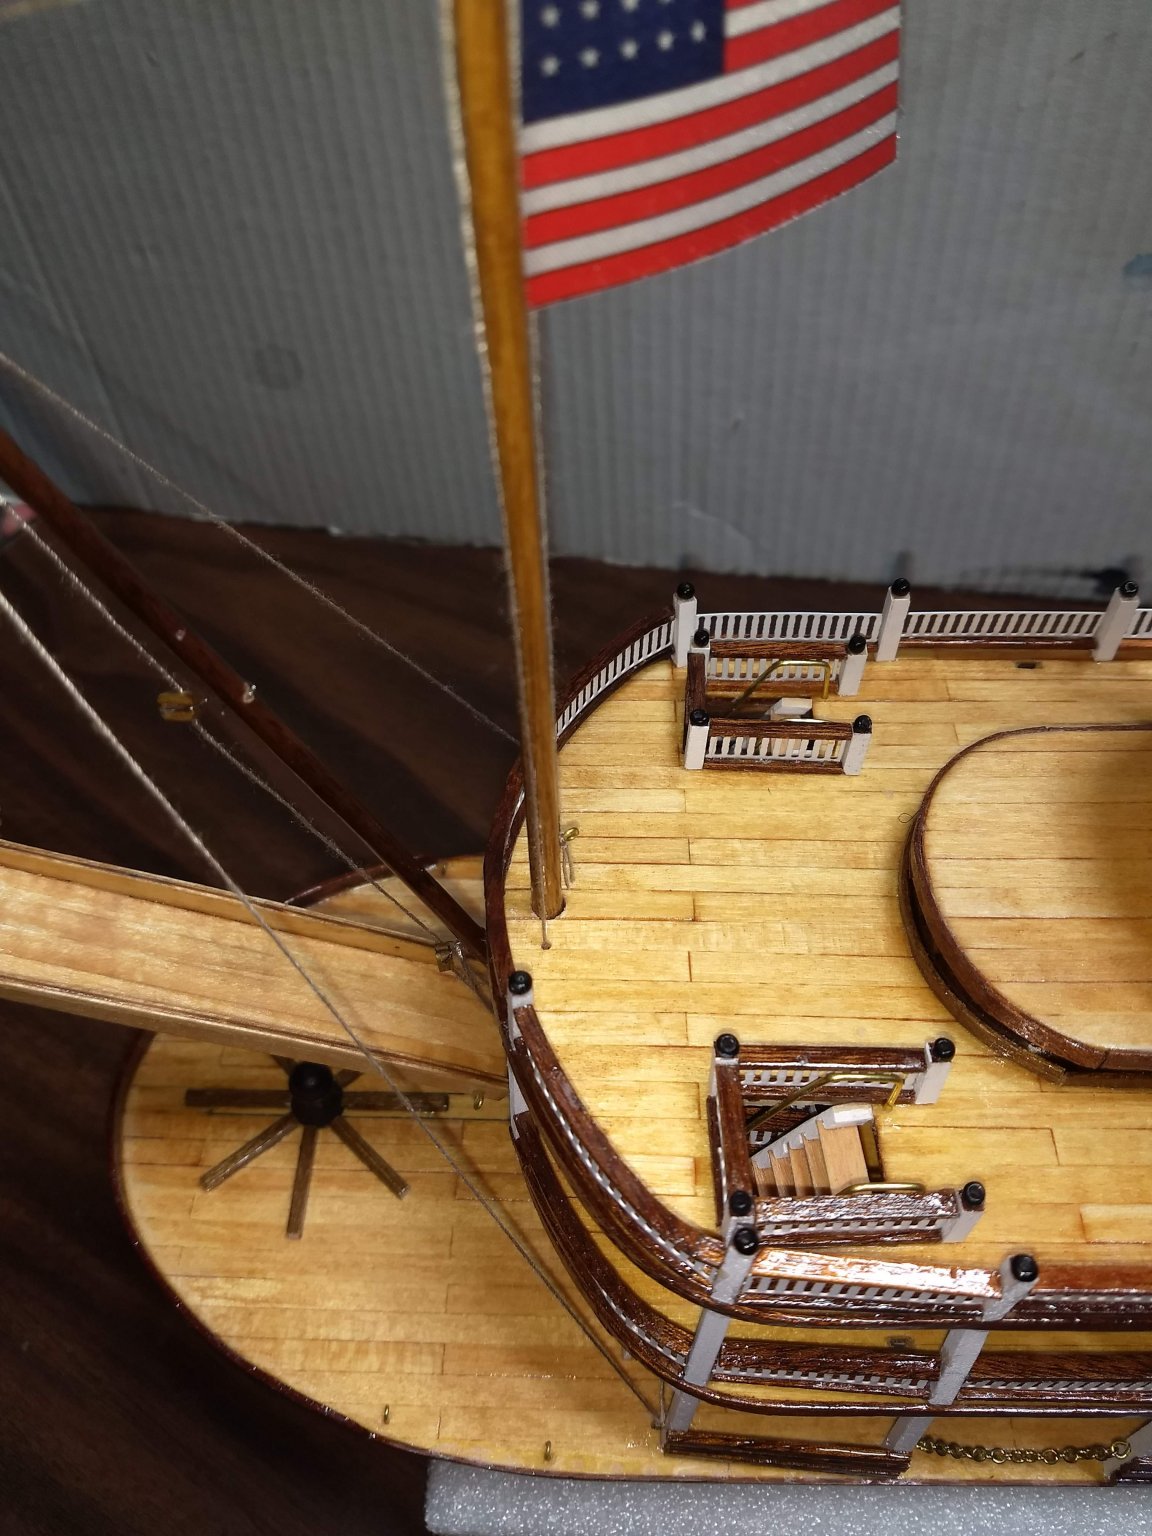
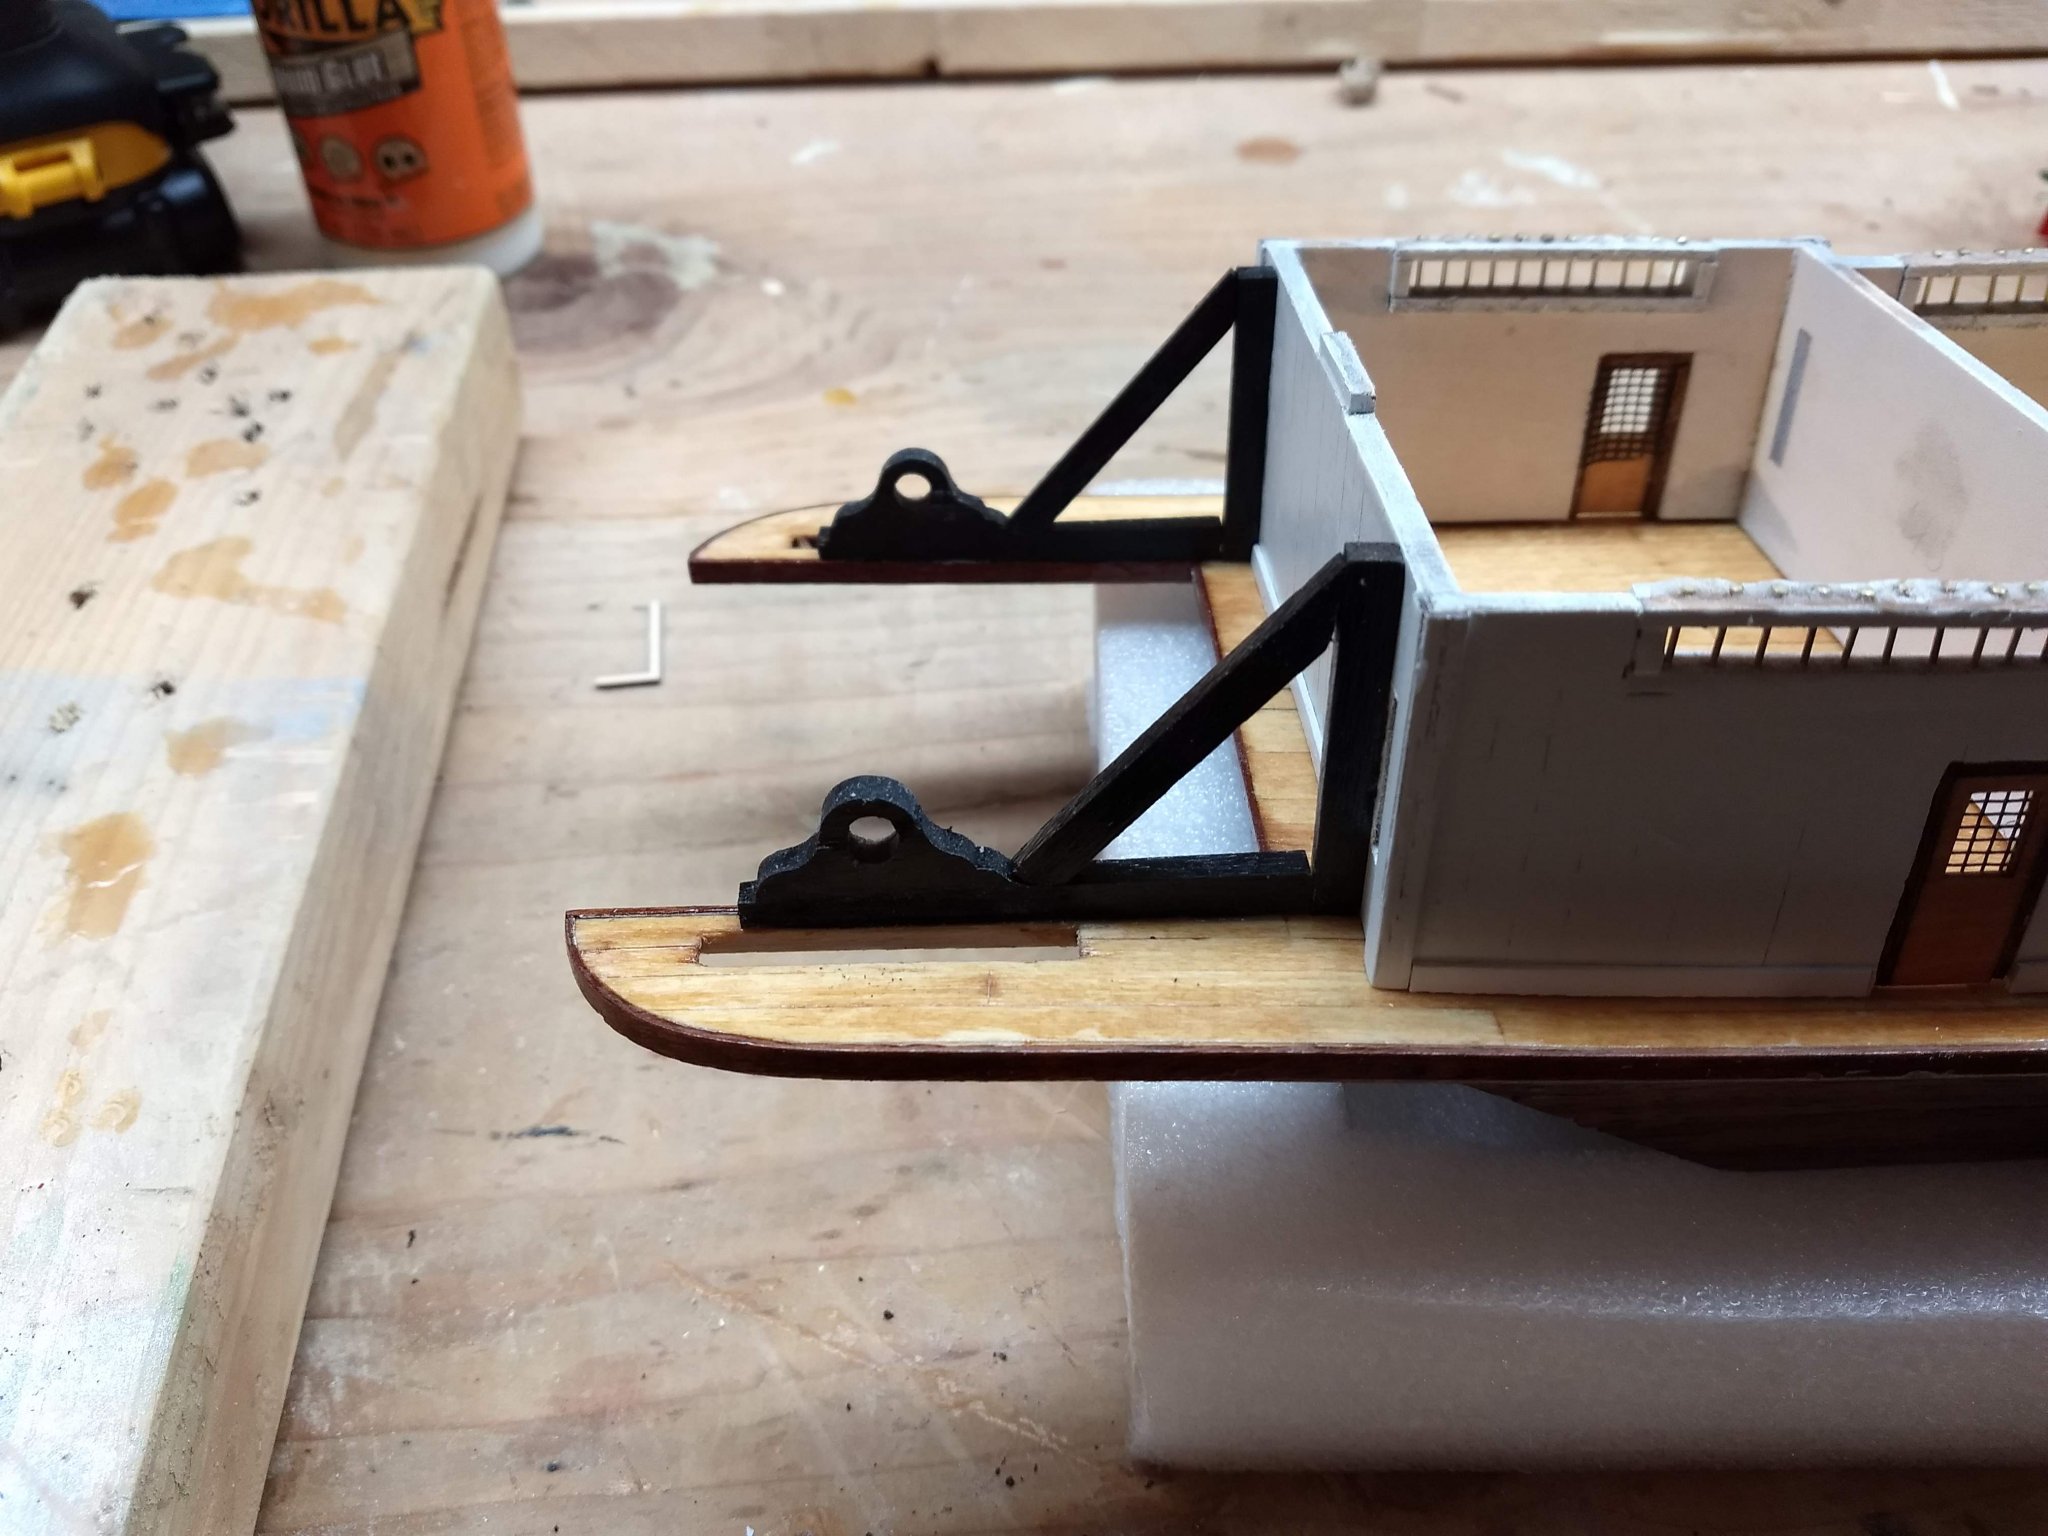
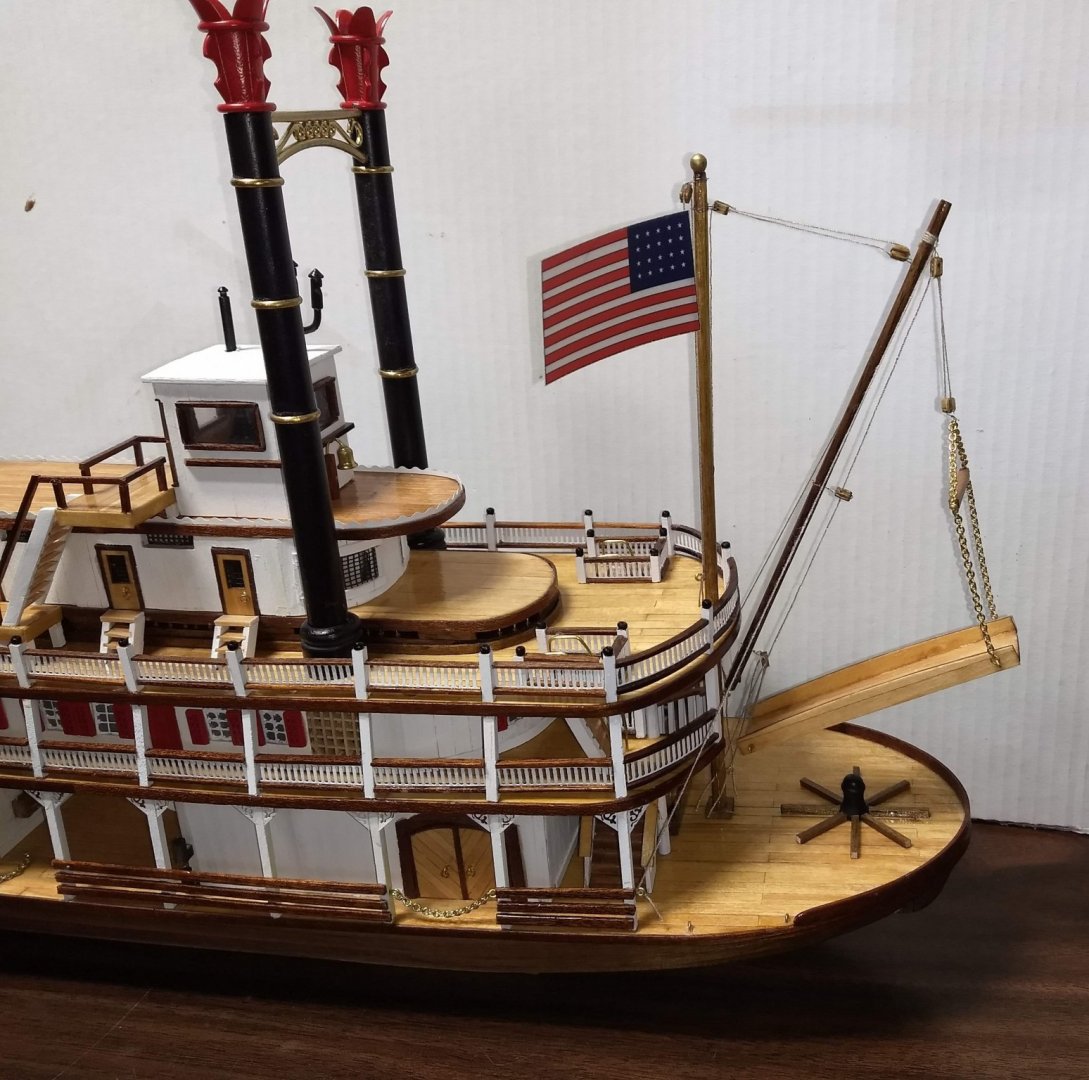
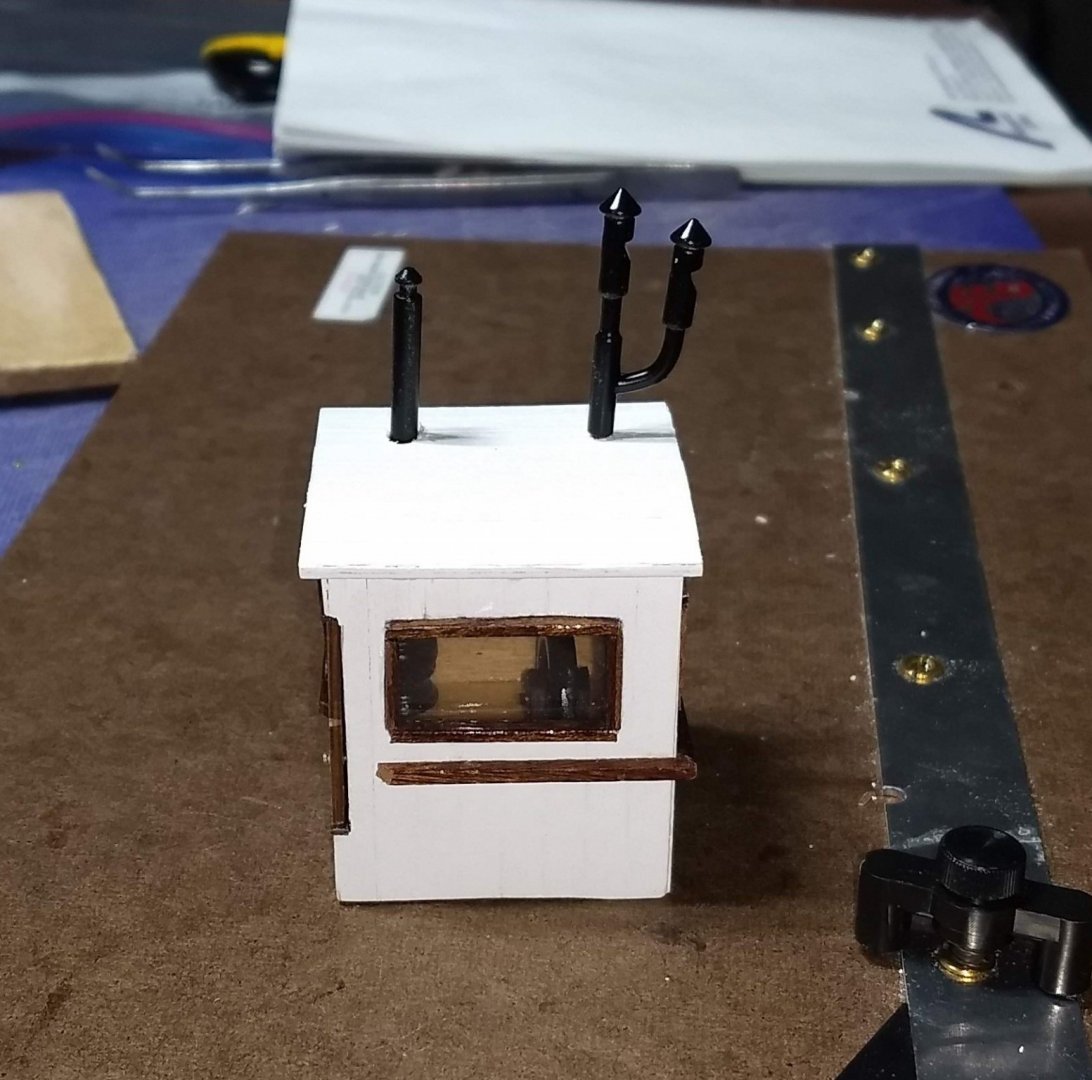
"not a mistake it's a customized job",,, I like that.... I will remember that next time I "customize" a portion of a model 🙂 Now time to install the forward crane and gang plank. This is why I have not attempted any ship with rigging. My hands are just not nimble enough to string rigging and make it look good. Having said that I have installed the gang plank with some of the guide wires (stings)... It took awhile, but with patience I was able to eventually feed the string through the blocks and complete the guidelines and and halyard. The plans call for the crane halyard to go outside the forward railing. That seemed strange to me so see the halyard rubbing on the railing. As such I drilled a hole in the 2nd deck at the base of the crane and fed the halyard through it. You can see the hole and halyard in the next picture. I think it looks better - to me anyway. And below is the final picture with the crane and gang plank assembled. I did not put in all the guidelines (strings) as to me adding them would look to "stringie". Let's call it "customization".... As noted before, I also skipped the forward, center, and aft masts. Again with all those guidelines, to me it would look too "stringie". Obviously I am on my own on this one as most others have included the three masts and guidelines. At this point I am about 98% complete. As mentioned earlier, I ran out of 1mm x 3mm wood for the railings. I have some on order, so just waiting for it to show up and then I will be all to "call it"

- 42 replies
-
- 4
-
-
- king of the mississippi
- artesania latina
- (and 1 more)
-
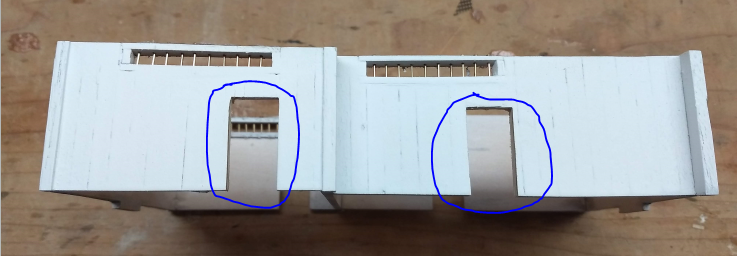
Bob, It all depends on what you call "out of alignment". When fitting the lower deck houses to the first floor, in my case, the forward house was only slightly out of alignment. So slight I could easily "show it who's boss" and made it fit and not be noticeable. Having said that, I see no reason why you could not make the forward slot a little larger and make it fit better. After all, the houses are glued to the deck all around - not just with the slots. So if one slot is a little larger, it will not be noticed and will not effect the integrity of the structure. But do see my notes on the 2nd/3rd decking. The holes for the stacks do not line up and you will have to make some adjustments prior to fitting the deck together or the main stacks (and steam stacks) will not line up. Be sure you adjust them and dry fit them with the stacks before gluing the 2nd/3rd decking. One more thing in the category of "do as I say and not as I do"... You will note the 3rd level house (stateroom) is on backwards. I have the windows toward the bow of the boat and the door toward the stern. It should be reversed. At the time, I was hasty, and just assumed the windows would be facing toward the bow. Again did not follow the plans - ugh. Anyway, by the time I discovered it was too late. Let's just call it a little (shall we say) "customization:. 🙂 John
-
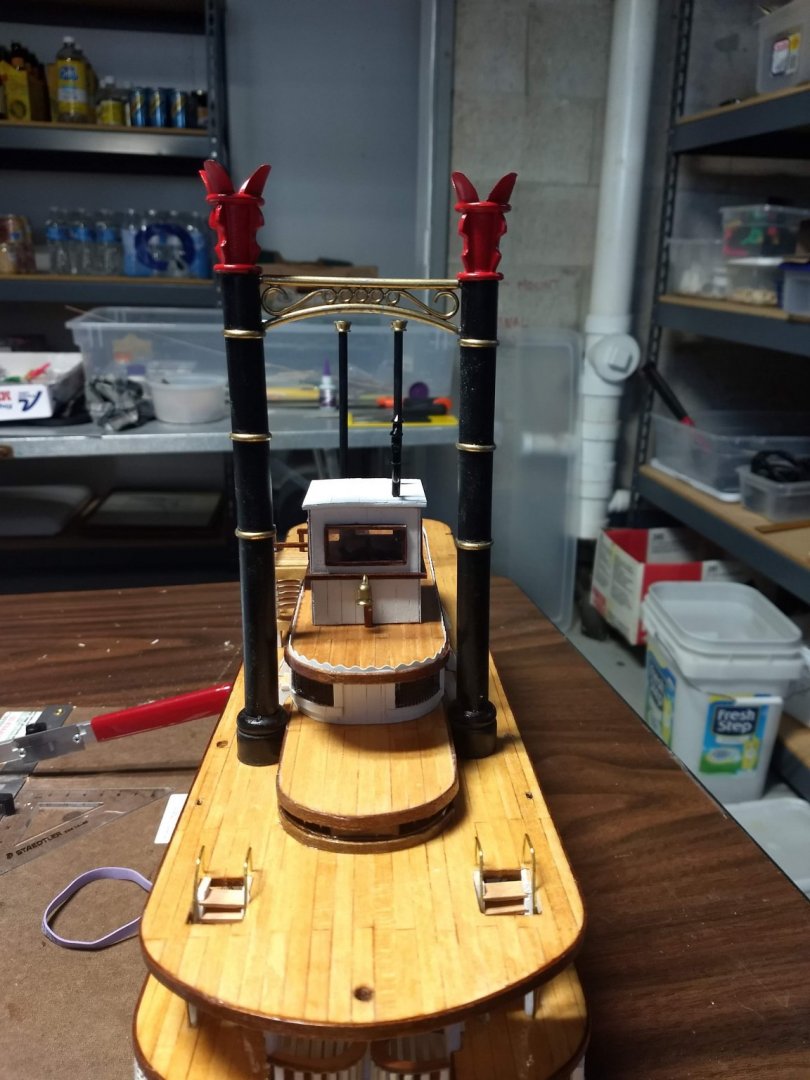
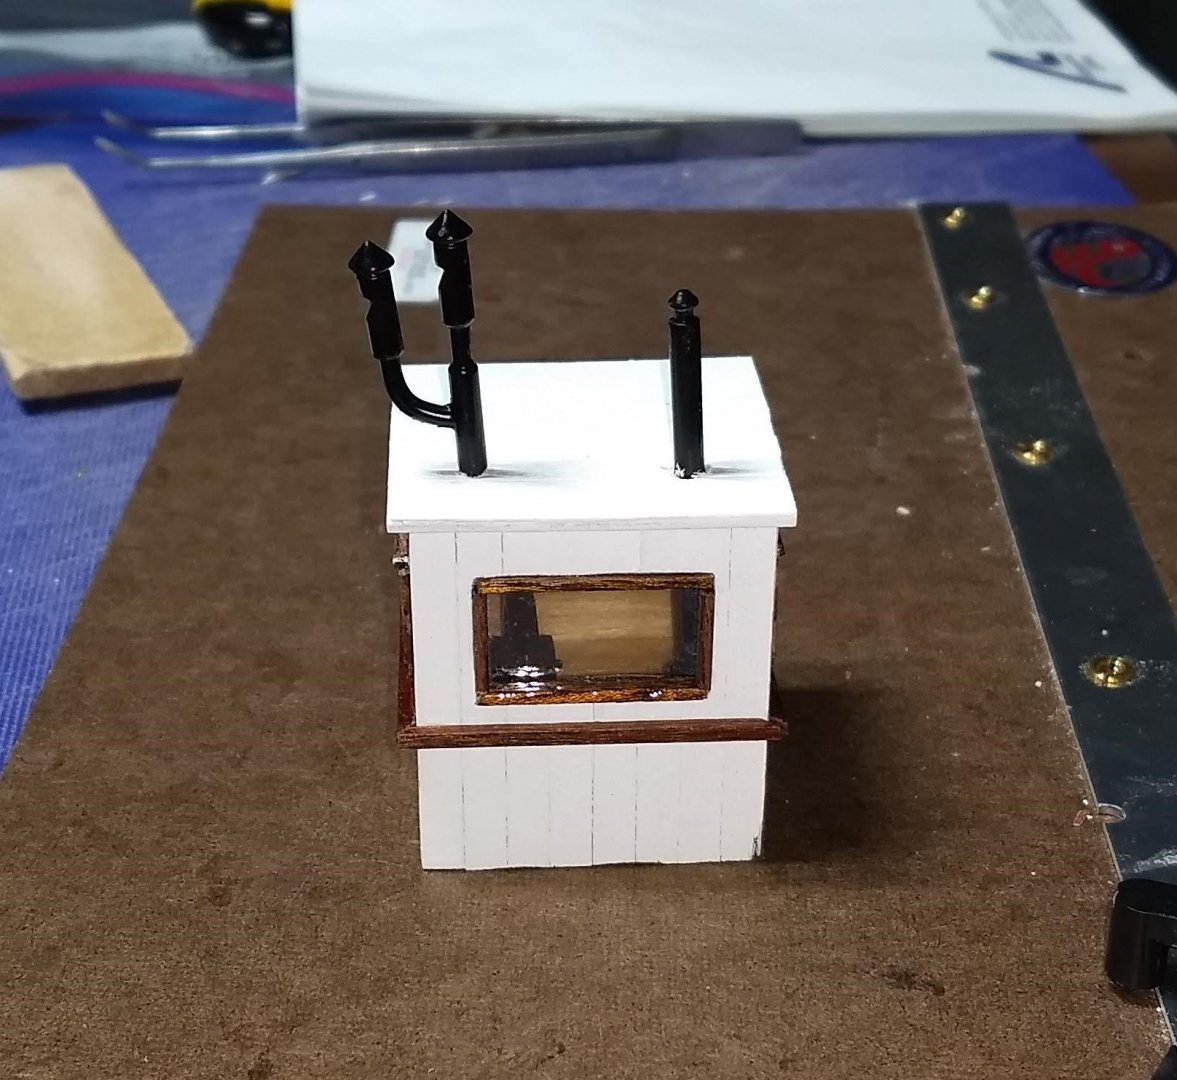
Bob, One more word of caution on the posts. Several of the posts are right next to where the steam stacks, bow and stern posts go through the deck. If you are not careful (like me), and the post are not in the correct position, the railings will interfere with the steam stacks, bow and stern posts. You really have to be careful with the post locations. When placing them, keep in mind how the steam stacks, bow and stern posts will later go though the decks. In my case I am skipping the bow and stern posts. Even though there is room for the bow and stern posts, if they were added, there would be very little room for a passenger to get by and would look a little funny. In my case I plan to add a few HO figures to the model and the spacing just looked not right. Anyway,,,, that is my 2 cents... John
-
Bob, Be sure to "do as I say and not as I do"....Not sure where you are picking up on your King, but my biggest mistake (that keeps coming back to bite) is the placement of the railing support posts. As mentioned earlier in my log, I thought only the posts locations that support the curved railing parts were important and the others could be (shall we say) "close enough. The closer you can make the spacing to match the plans the better - not just the spacing but the actual location of each post. You might consider making a copy of the ship top view diagram, cut it out and then lay it over your deck so you mark the exact location of each support post. I suppose that is common knowledge with experienced builders, but I am really just a novice at this - learning as I go.... This is my second model and you would have thought I would have learned my lesson with my first model - but no... With that build I also did not follow the plans exactly and paid for it in the end. With future ships I will try to match plans as close as possible - or so I say now,,, we will see what happens with the next model. 🙂 Also early on decide what you want to do with the steam stacks. I did not like the fact that they just looked like the end of a dowel rod that just stops outside the steam room. I tried to see if I could somehow make it look like it was going into the steam room, but at the stack was right up against the steam room wall, I could not make it curve into the wall. If you do decide not to do the steam room stacks, then you can lay decking over the holes early on in your build. Also be sure to count the number of railing sections and column bulbs. Do to my improper post locations, I used about four extra railing sections, so did not really have enough to complete the stateroom railings. Also, be sure not to waste any of the 1x3mm sapelli wood. Save every small piece as you go along. Other King builders have also mentioned that Antesania was a little stingy with it. On a good note, the is plenty of extra decking planks, so if you want a few "redos" as you go along, you will have plenty.
-
2nd and 3rd floor railings are just about complete.. A true lesson in patience. Each section was made up of three pieces - (base rails, hand rail, and railing pieces). Slowly building each railing seciontion going around the 2nd and 3rd floors, in addition to the railing sections around the top of each stairway on the 3rd deck, starts to get "really old" after awhile. Note on the starboard side of the 3rd flood the hand railing is not complete. That is because I ran out of the 1x3 mm sapelli wood. Either my kit did not have enough, or I somehow lost some sections. In any event, I will be going to our local hobby store and find some wood (hopefully close to 1x3 mm) and stain it to match the sapelli wood. I also want to point out that there seems to be the exact amount of railing sections needed to complete the model. None to waste. In my case (as mentioned earlier), I did not put the railing posts in the exact position as they were layed out on the diagrams. I keep paying and paying for that mistake. In my case some of the railing posts (at bow and stern) were farther apart than a railing section. As such I had to glue a couple railing section to together to make them fit between the posts. As a result, I did not have enough railing sections to complete the railing section around the stateroom. Not too big a deal as the "steam protectors" that go around the steam stacks are "similar" to the railing sections and I plan to use those for the stateroom railings. Should look OK, and no other choice. In any event, do not waste any railing sections when adding them. None to waste. On that topic, you might have noticed that I am not going to use the steam stacks. There does not seem to be a good way to show them going into the steam room. Plans call to just have the stacks stop at the side of the steam room. When I dry fit them, they just looked like what they were... a couple of dowel rods that just stopped at the side of the steam room. To me the ship looks better without them. I have a few holes in the deck (under the railings), but they are not too noticeable. I felt there was no way to fill the holes (at this time) and make the patch look decent. If you decide to not use the steam stacks, you can fill the holes where you are initially building the deck. Also in the category of "none to waste", I also seem to have the exact number of "column bulbs". Seems like artesania could have given a few extra. Even some of the ones used are deformed. I my case I used them all. In reality I should have done what others have done and found some other topping for the columns. You might consider that with your build.
- 42 replies
-
- 5
-
-
- king of the mississippi
- artesania latina
- (and 1 more)
-
Bottom row if the 2nd deck railing is just about complete. I can not stress enough, when positioning the vertical railing posts (earlier step) the closer you can get with the post positioning in the overall diagram the better. If done correctly, (not like in my case) each railing section should be exactly the same length, thus allowing to mass cut the railing sections the same length. In my case, since I close was "good enough", with my vertical post placement, each railing section has to be cut separately... A long tedious process. At this point the 2nd row decking (except the bow and stern sections is complete. Did not turn out too bad, but cutting three pieces for each railing section did get a little old. And I still have to do the same on the top deck. Now moving on to the pre-cut curved sections of the railings in the bow and the stern. As mentioned earlier, I did attempt to place the bow and stern posts in the correct position, knowing the pre-cut curved sections of the railings would later be coming. Even so, some (shall we say) "adjustments" had to be made. Will add pictures below after the bow/stern sections of the railings have been added.
- 42 replies
-
- 4
-
-
- king of the mississippi
- artesania latina
- (and 1 more)
-
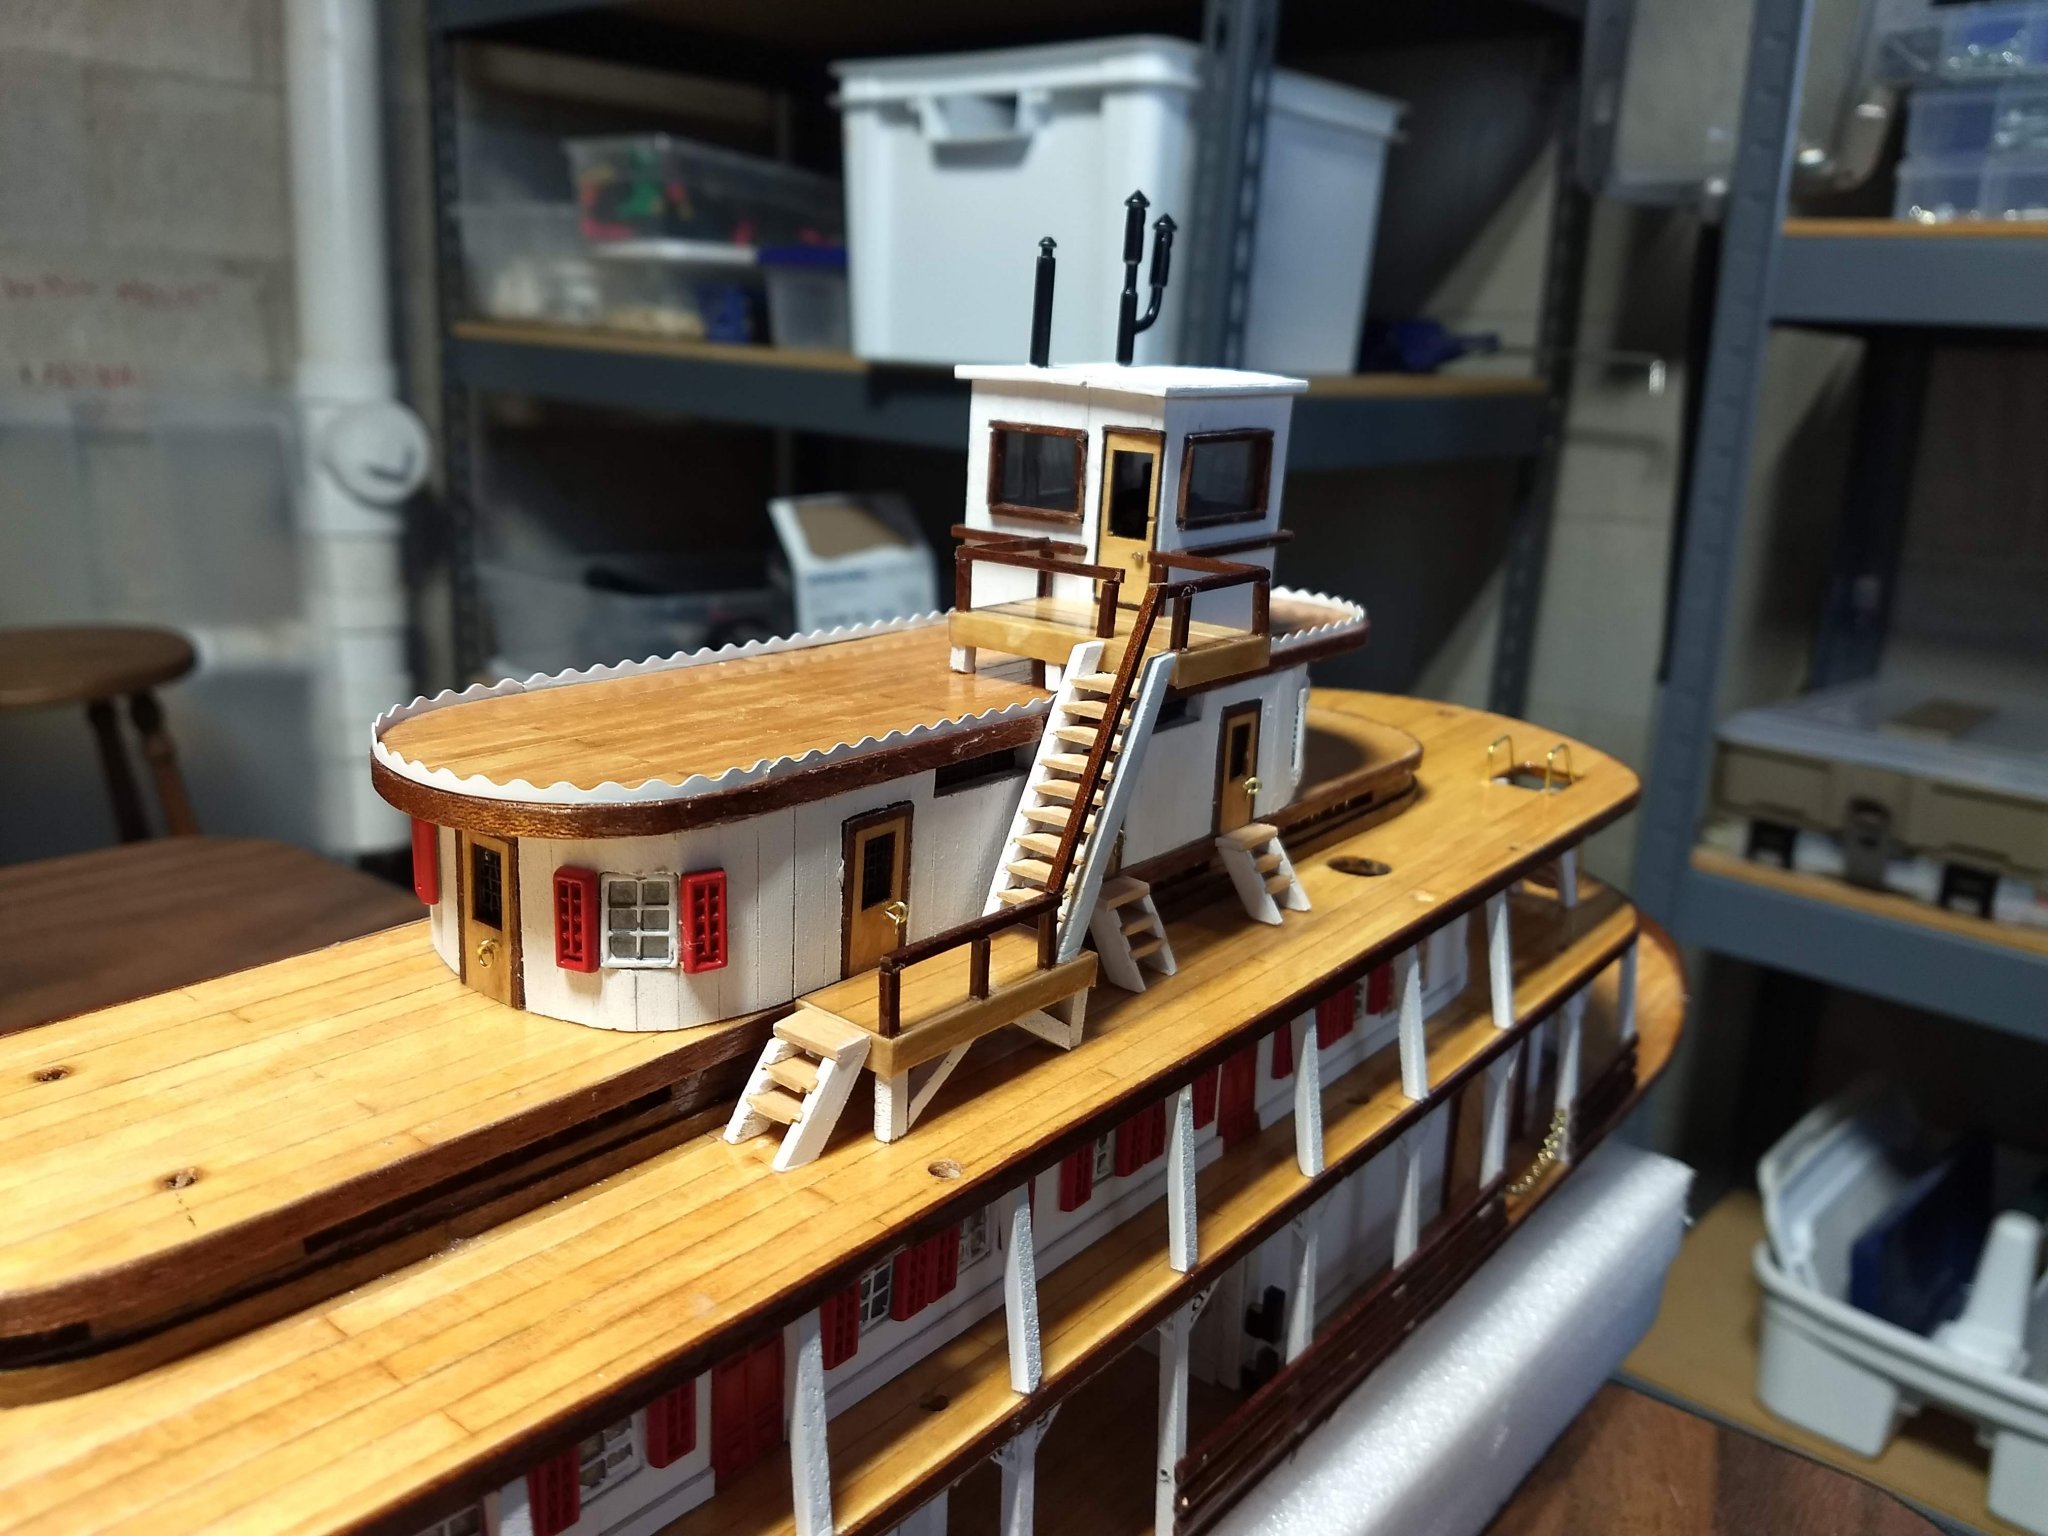
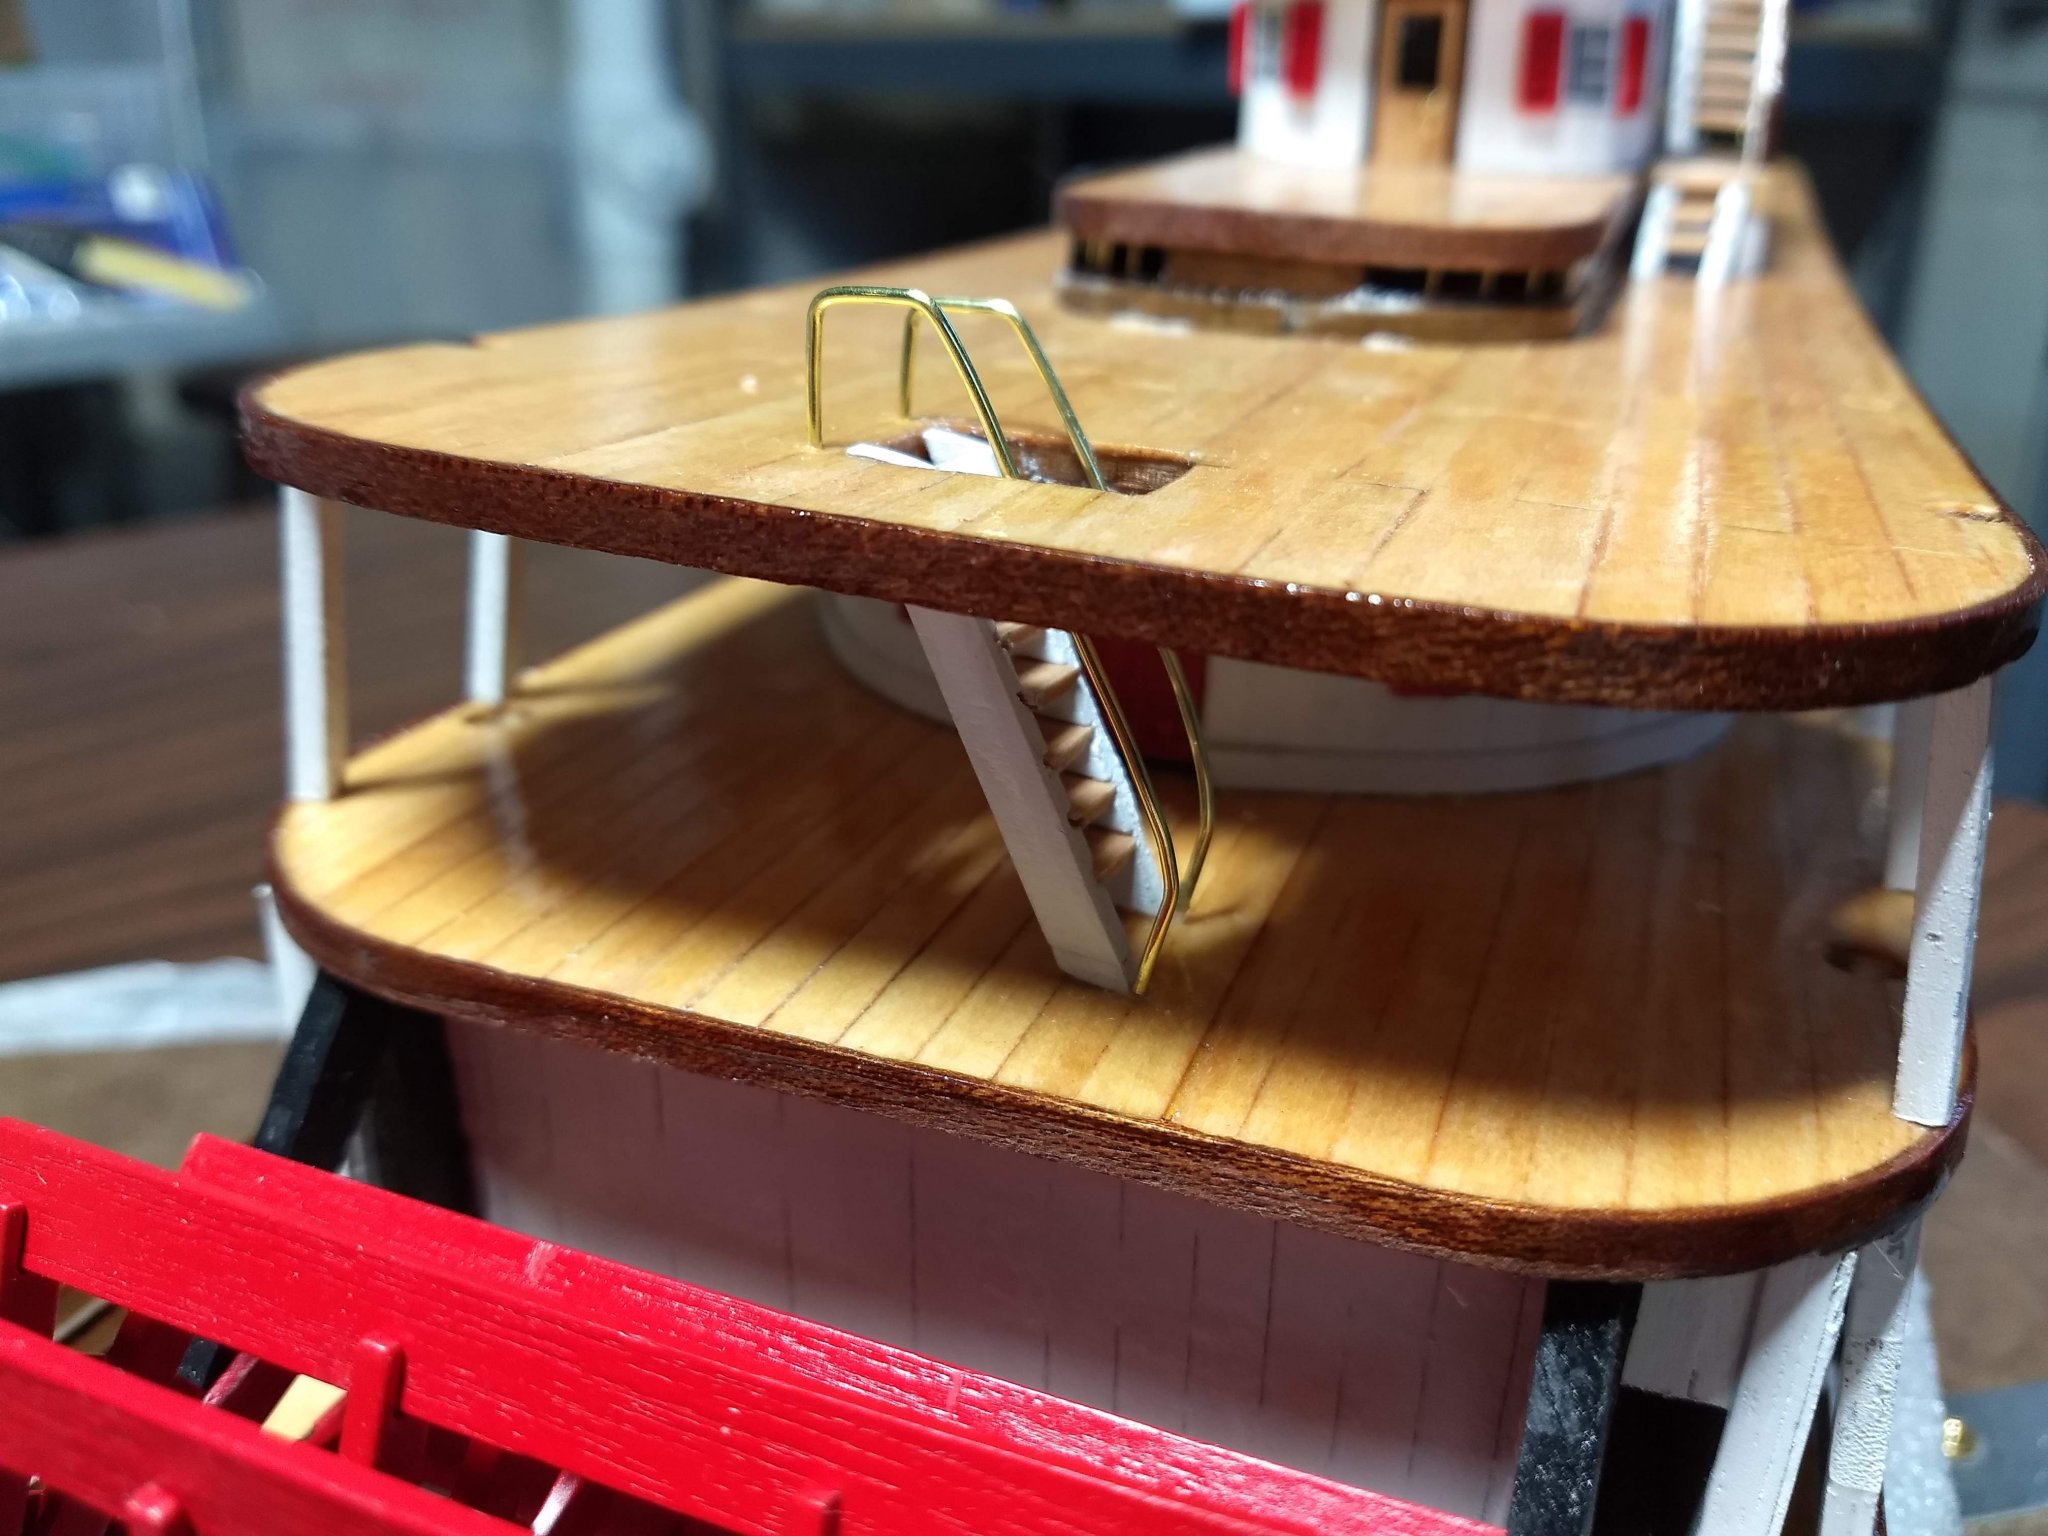
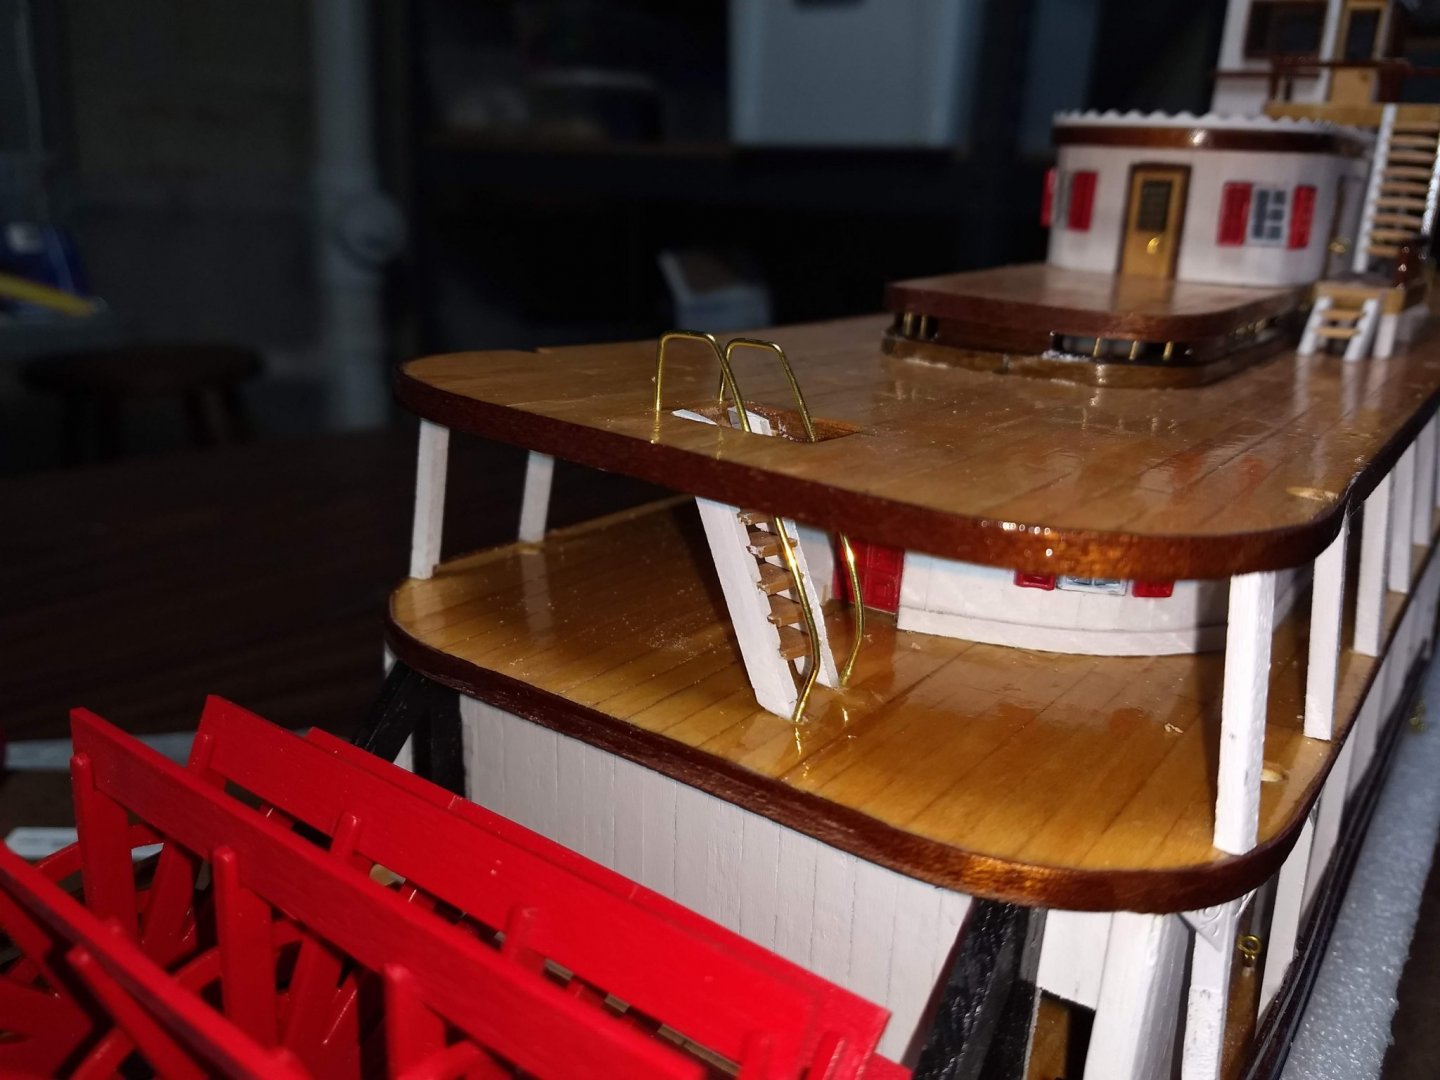
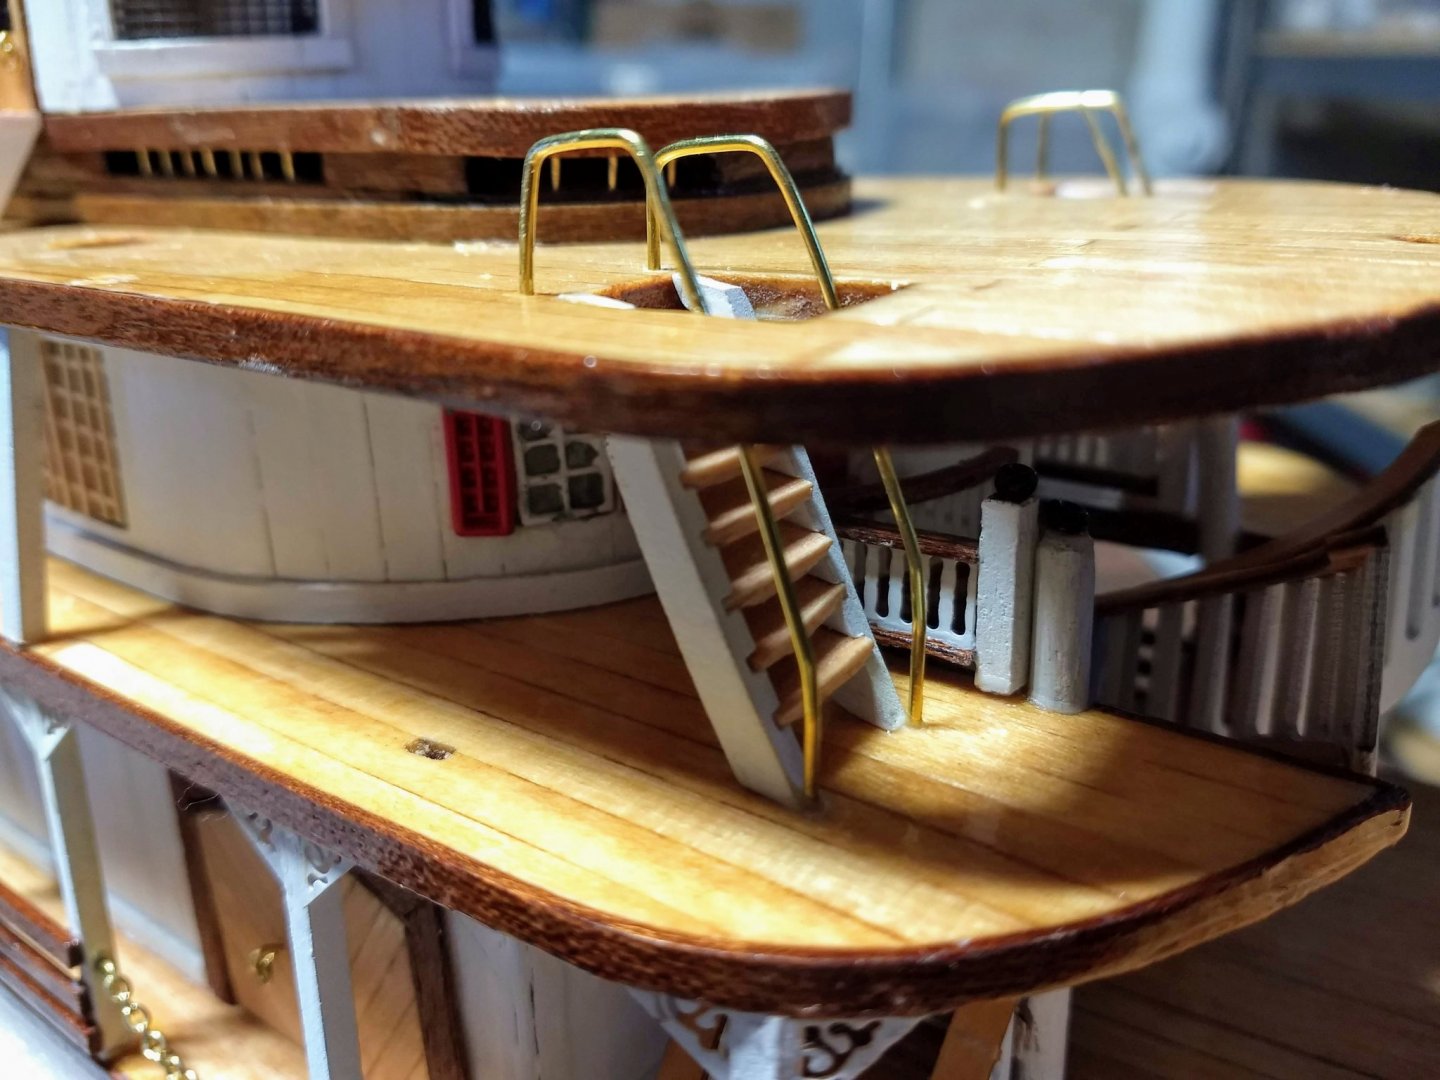
At this point it looks like I have gotten a bit sloppy with my pictures... A fair amount of work has been completed without pictures. Below I show the status after assembling the decks. Note the third deck (after all pin inserted earlier) has been attached to the 2nd deck. Instructions call to not glue on the 3rd deck so you can get to the inside of the boat. I have a feeling that is if you want to install lights and want easy access to the wiring and lights. In my case, we do not have lights, so I just glued on the 3rd deck. Captain's bridge was also attached. In building the various stairs that come out of the captain's bridge down to the 3rd deck, note that the first deck (outside the captains bridge) is a little wider than the plans call for. I have a feeling I did not locate the captain's bridge far enough back on the 3rd deck, as when I dry fit the stairs (with the normal deck width), they came down across the door on the 3rd deck. Making the deck a little wider, the stairs now easily clear the door on the 3rd deck. As I noted earlier,,,, you will save yourself a lot of grief if you follow the overall diagrams as close as possible with the positioning of the posts and decks. While not critical, a little extra time matching the build to the diagrams will save you some time In the category of "do as I say and not as I do", note the little white metal triangles on the post of the 1st deck. That is not correct. The white triangles on the first deck are supposed to be made of wood and the white metal triangles are supposed to be on the posts of the 2nd deck.... Not really want to redo them, so in my case, I will eventually add the wood triangles on the 2nd deck... 🙂 On 2nd thought,,, I will see how hard they are to break off. If I can get them off, without destroying they, I will move them to the 2nd deck. Here is a better look a the decks/stairs coming off the captains bridge. Note the wider deck coming off the bridge On to the wire railings for the stairs between the 2nd and 3rd decks. The actual stairs were built and mentioned earlier. Time now to add the wire railings. I was kind of dreading these railings as I felt there was going to be no way I could bend the wire to match each side of the stairs. Turned out to be easier than I thought. One hint to make it easier, drill a 1mm hole in the deck at the top of the stairs for the wires to be inserted. Not only will it make a good glue spot, but you can then make the top vertical part a little longer than required allowing the extra to be inserted a little into the deck. Just make sure you do not have too much extra as you do not want it showing in the ceiling of the deck below. No need to drill any holes at the bottom of the stairs... Just glue them where the deck meets the stairs. Here are a few pictures of the front stairs with railings And the stairs in the stern On to the main smoke stacks.... Not really much to say here,,, Main work was mentioned earlier when putting on 2nd and 3rd decks. At that time is when you have to line up the holes for the main smoke stacks. Assuming that was done earlier, not a big deal here to paint the stacks, insert the gold rings, cross brace, and insert the stacks. I will note that the State Room Mezzanine is a little wider that is shows in the plans (or more likely the main ship builder (me) here screwed up). End result is there there is not enough room to insert the stack base (ring) on each stack and still have the stack go through the deck hole. I had to wider the deck whole and adjust the stack base (ring) a little. Not a big deal and the stack base (ring) covers the larger hole. Just wanted to mention that some (shall we say) "adjustment" is needed when inserting the main smoke stacks. On to the 2nd deck railings... This is going to be ugly... A very long and tedious process. Starting with the lower rail I used 2x2mm pieces of wood as a guide to insure the lower rail is the same height off the deck all around the ship. You will see that below. I also attached the first set of railing below,,,just to see how ong and tedious this process really was going to take... I decided lay all the first row of wood railing on the side of the ship, then add the metal railing sections, then add the 2nd row of railing. Below show the first row of wood railing on the side of the ship. Next need to add the metal railing section. More to come on this,,, but with this kind of railing on the 2nd and 3rd deck,,, this is going to be on long ugly process,,


- 42 replies
-
- 5
-
-
- king of the mississippi
- artesania latina
- (and 1 more)
-
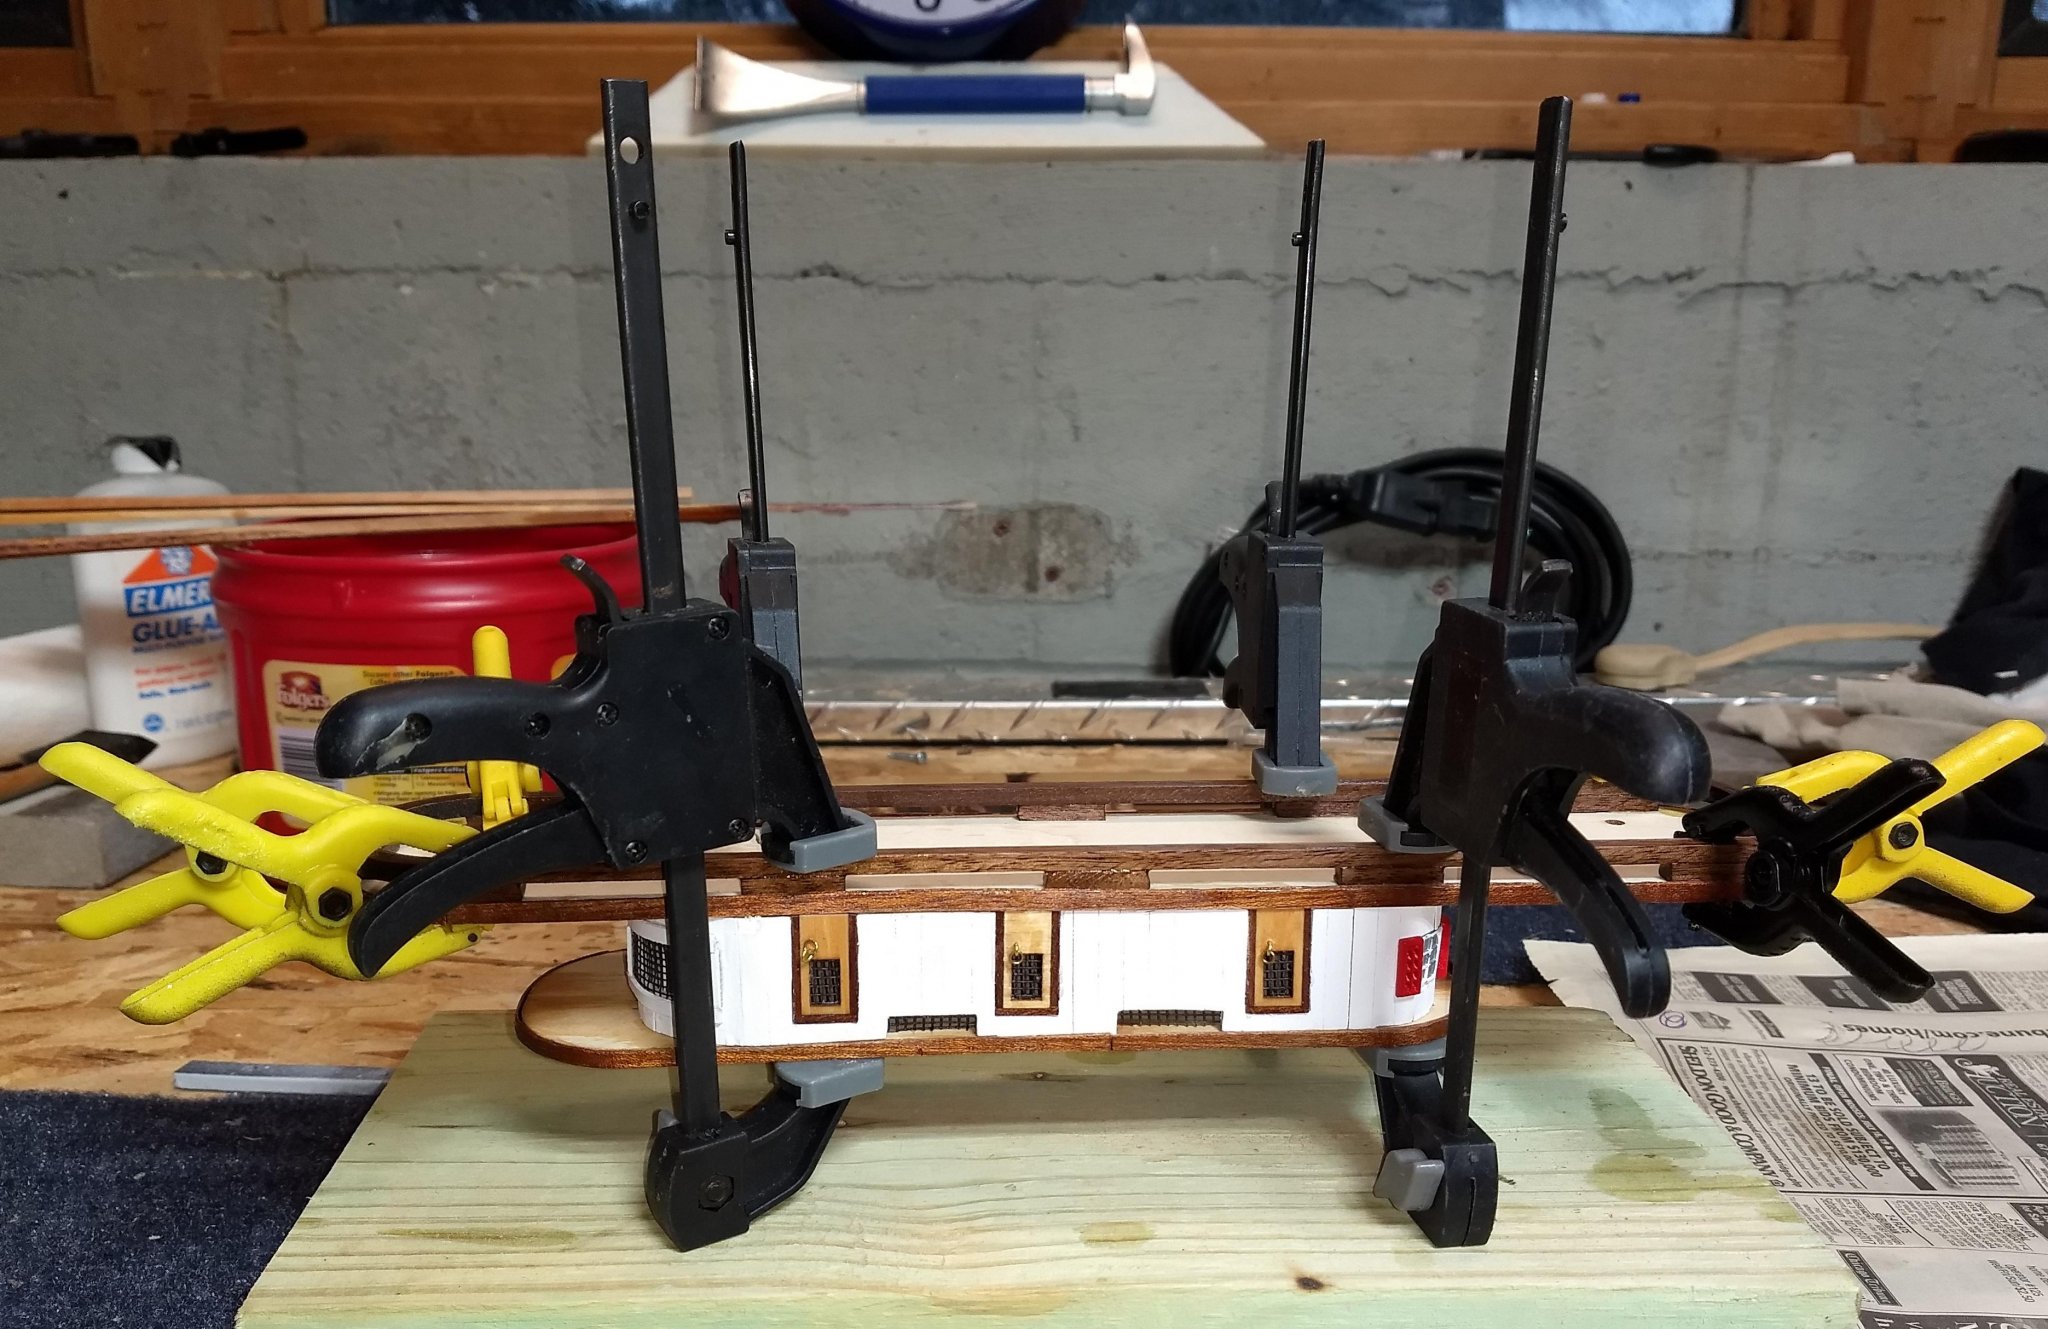
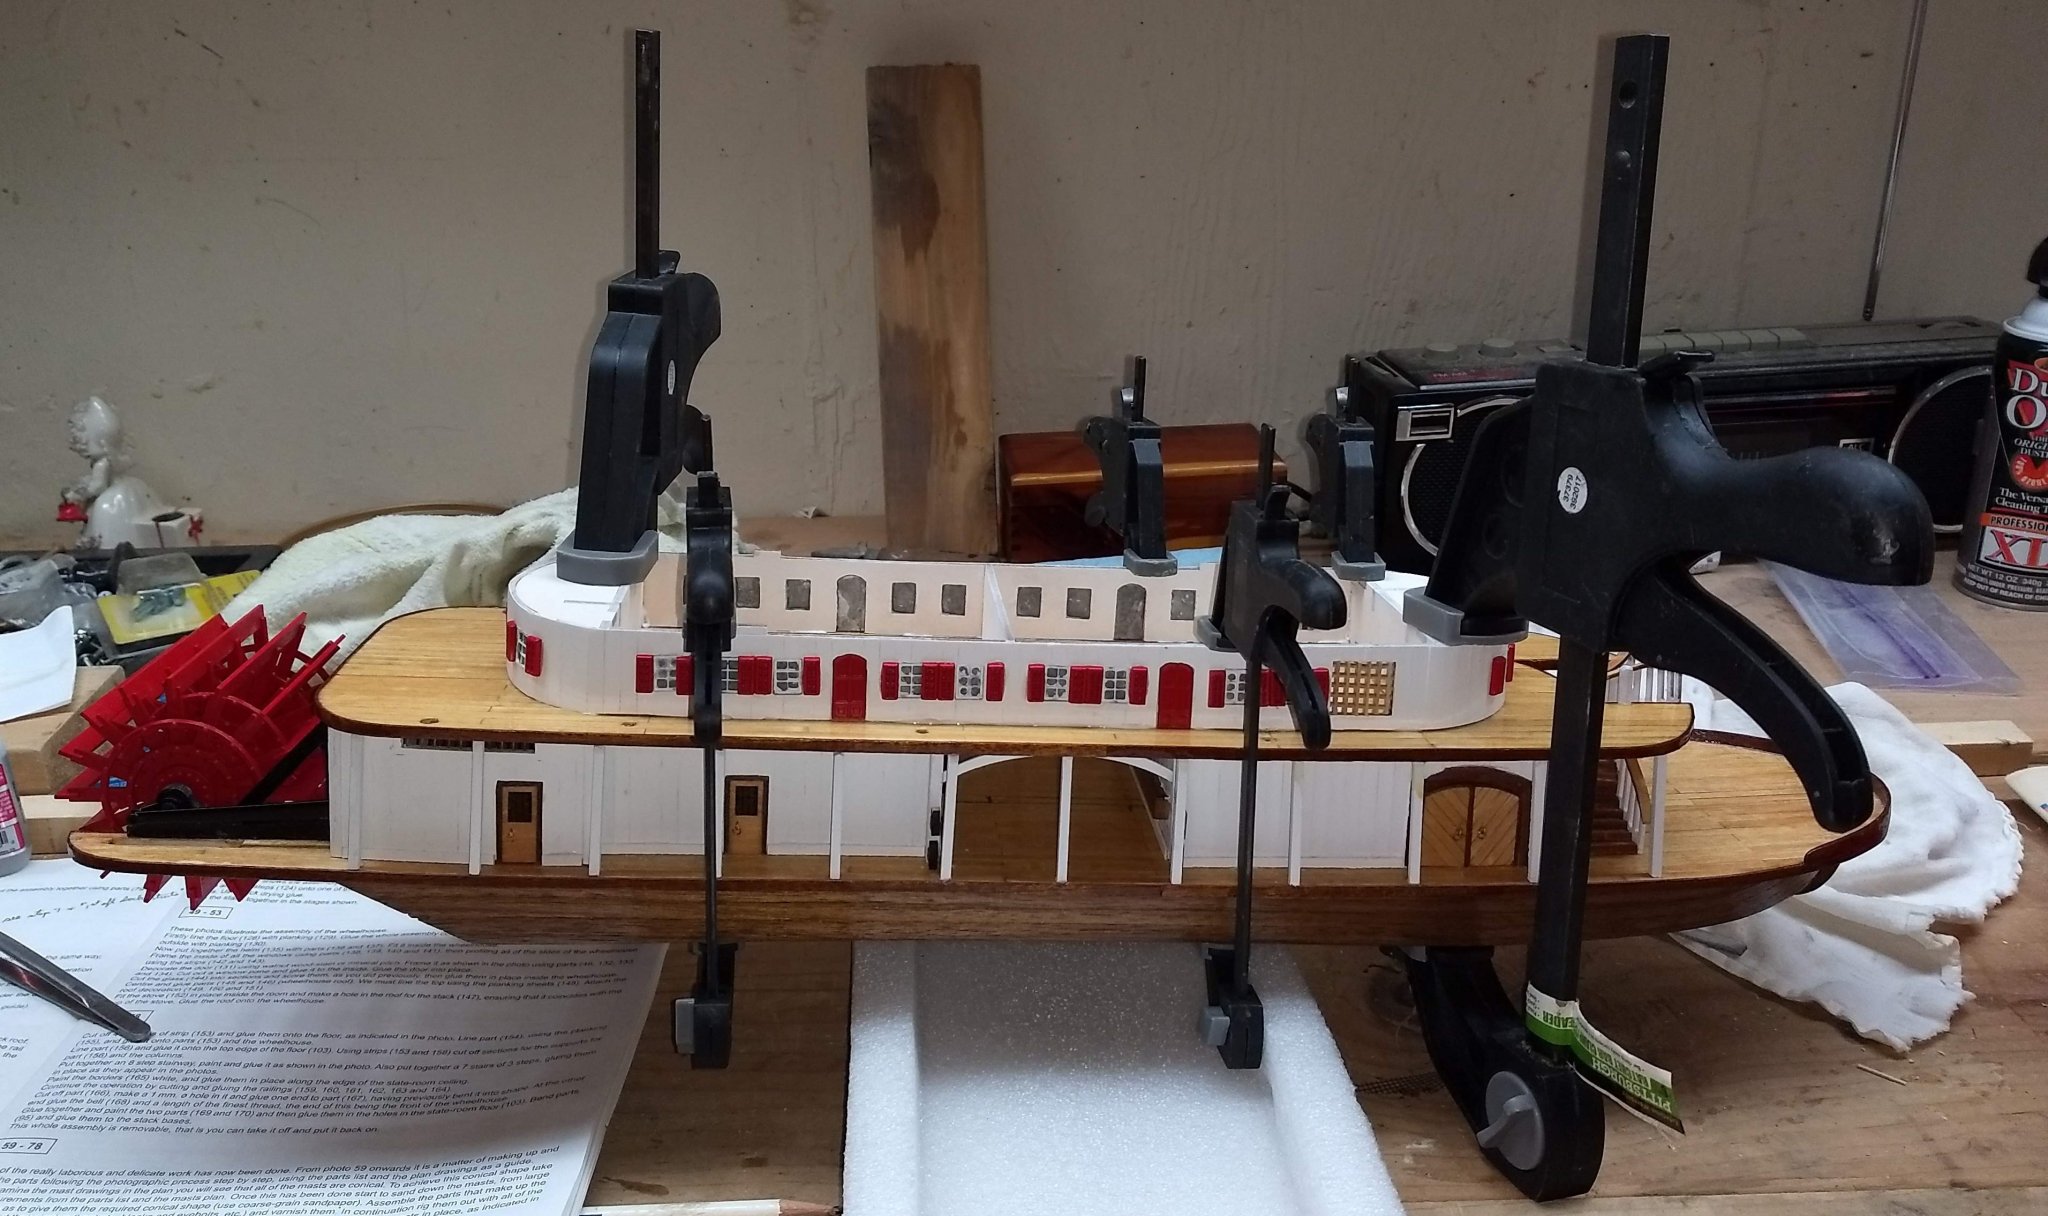
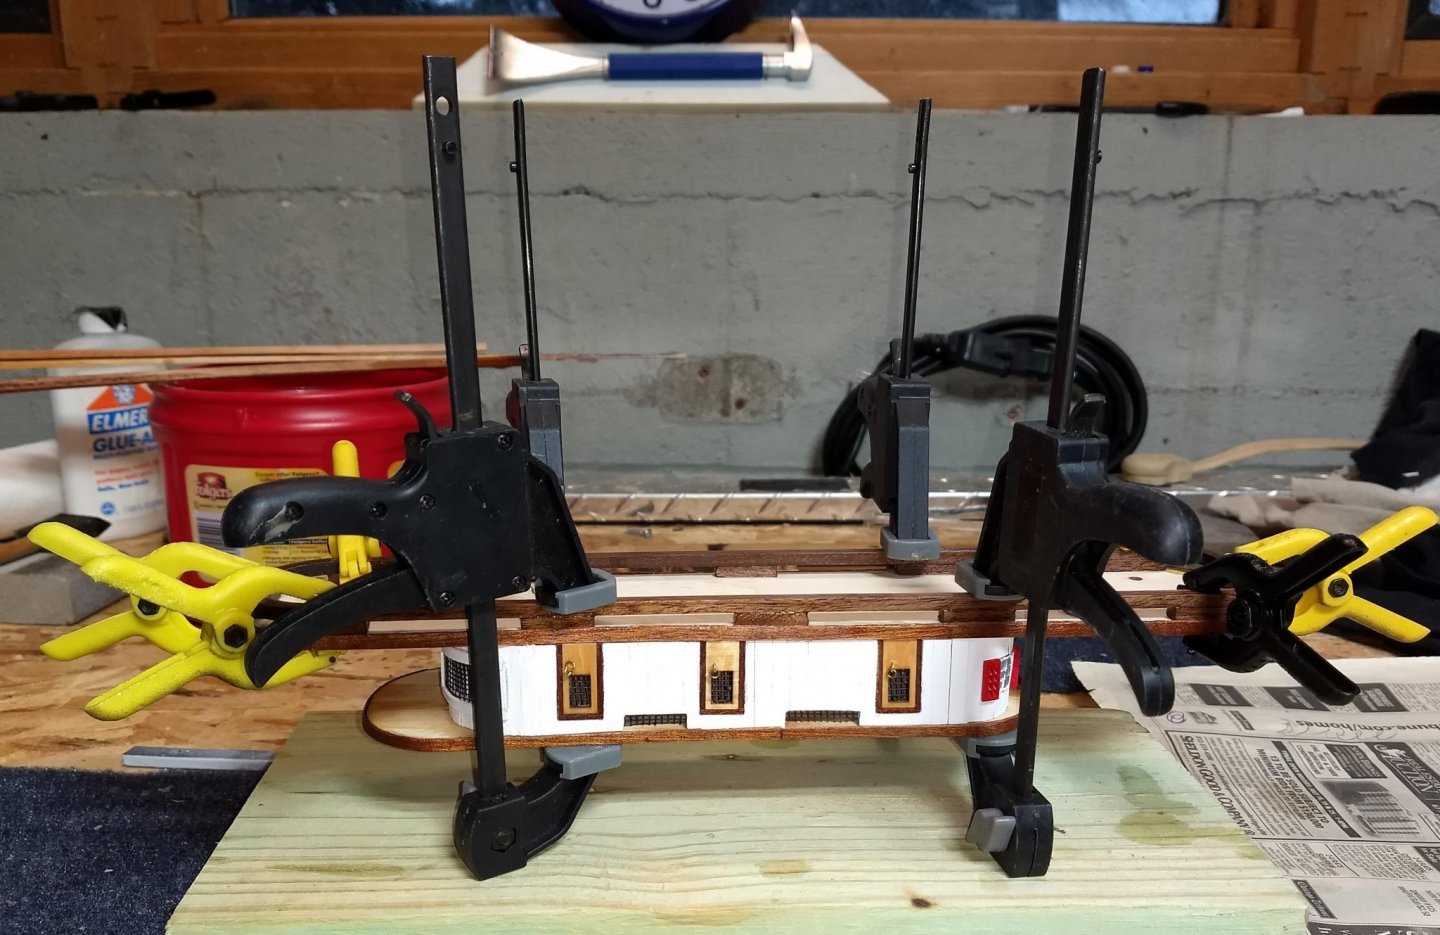
Auger, As they say when you are working with wood,,,, "you can never have enough clamps"... I have found that to be so true.. I found these clamps at Harbor Freight. They are not the best clamps (no where near as good as Irwin clamps), but they are really inexpensive and seem to work well on wood models. I would recommend your friend get a bunch of them. If you look in this build log, you will see I used several sizes. I mainly used 4" clamps. I would get the most of these. In addition the 6" clamps also come in handy... And when you want to start assembling all three levels, the 12" clamps are great. "you can never have enough clamps"
- 42 replies
-
- 1
-
-
- king of the mississippi
- artesania latina
- (and 1 more)
-
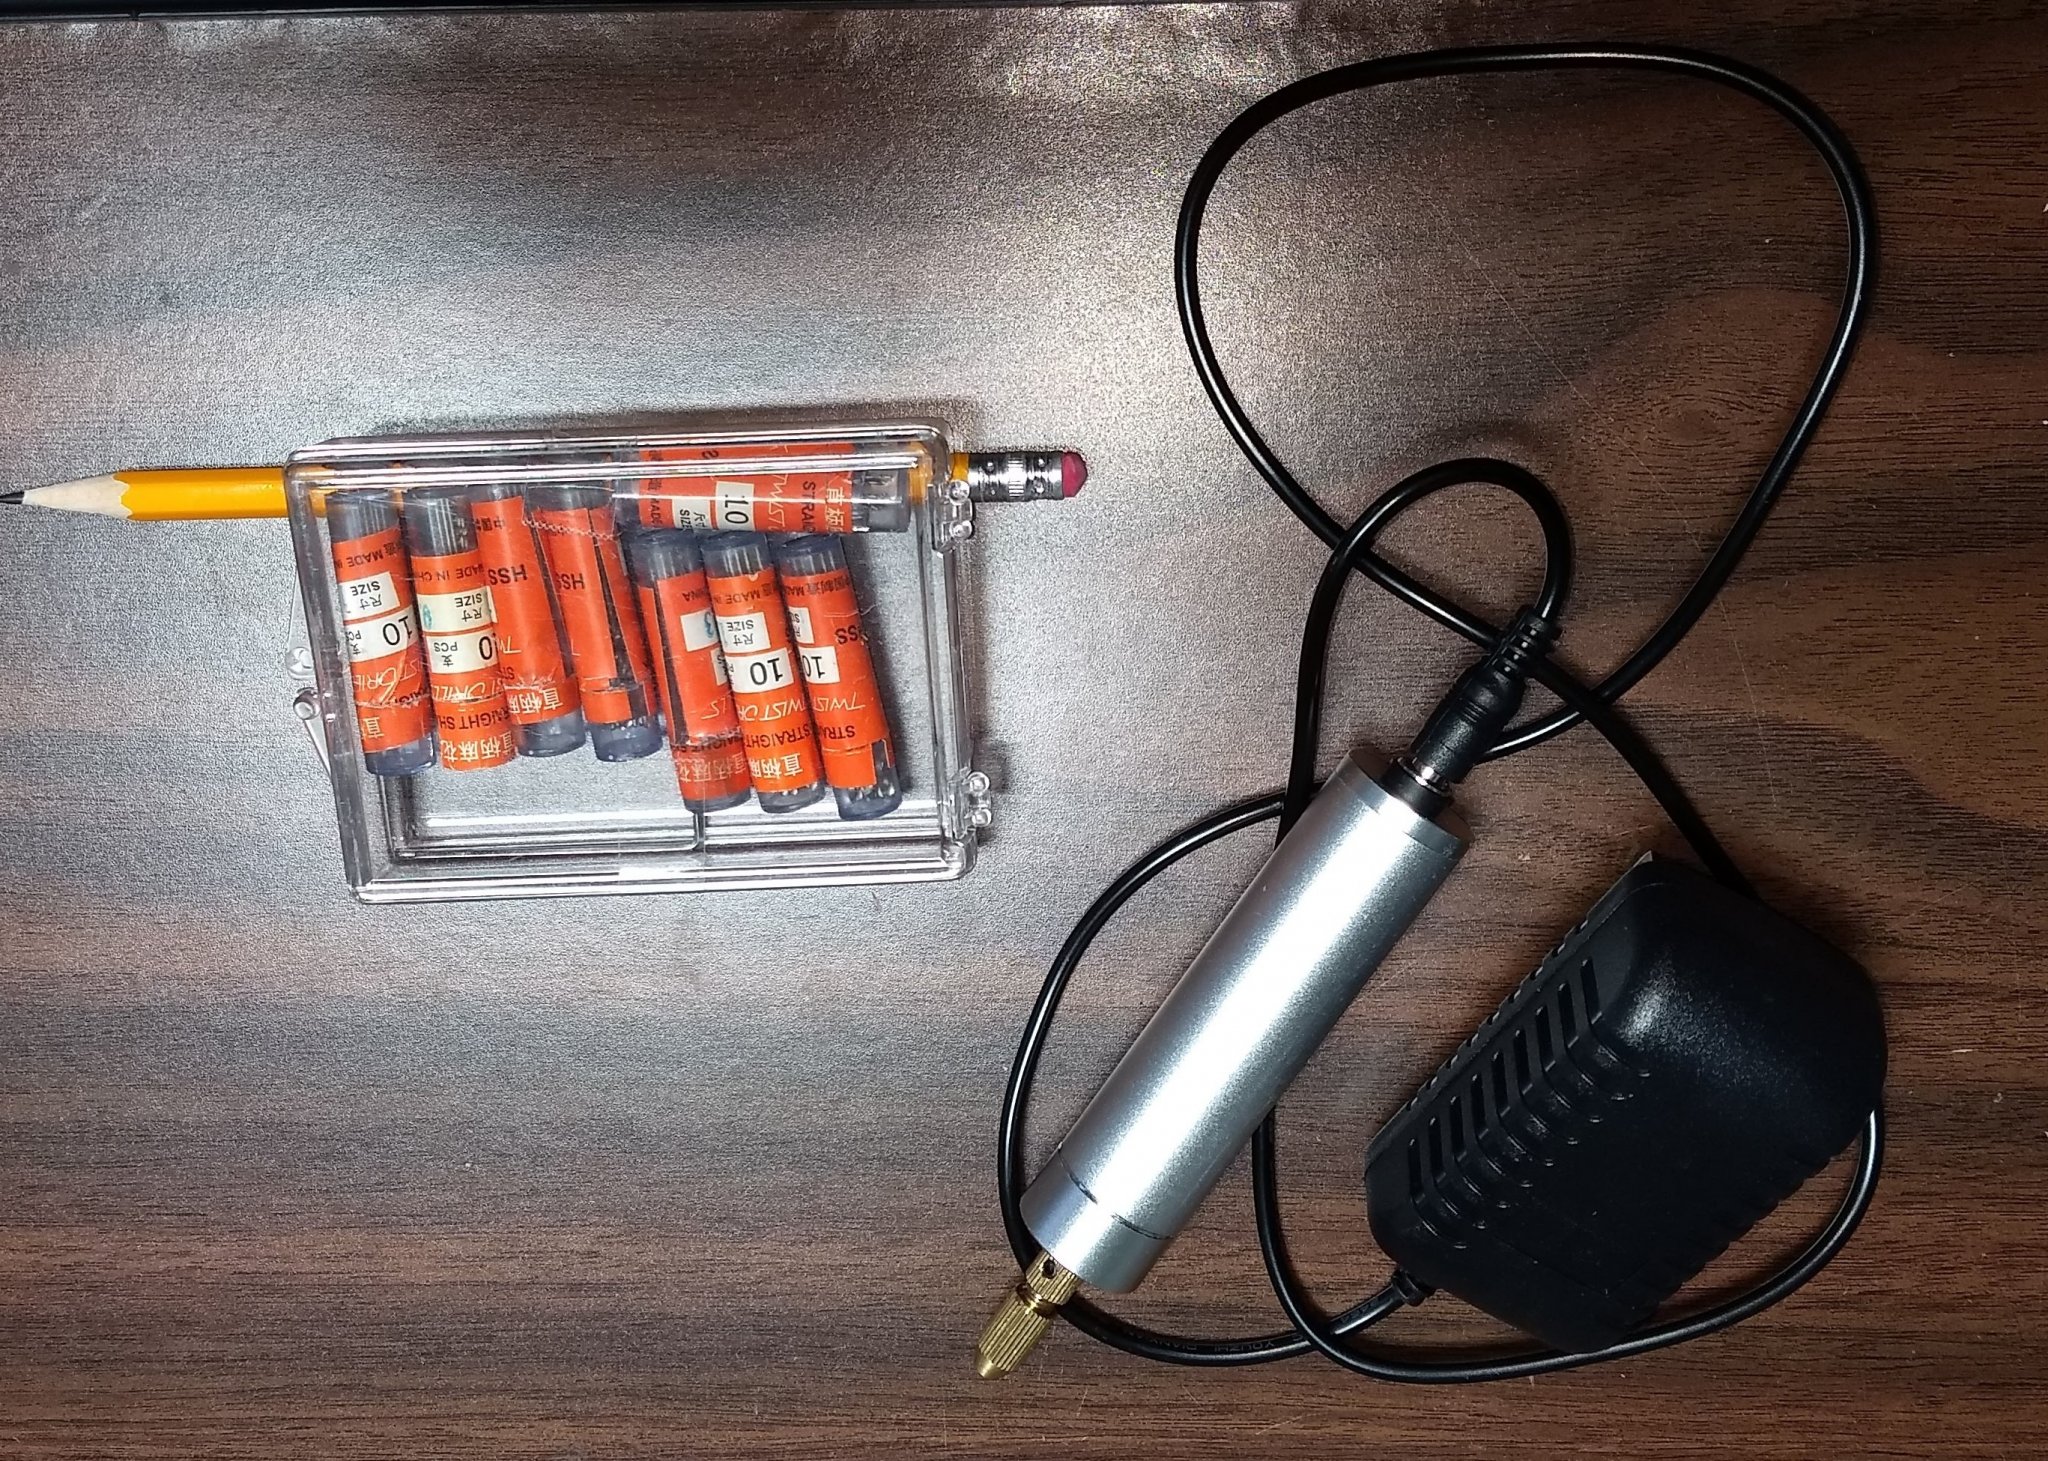
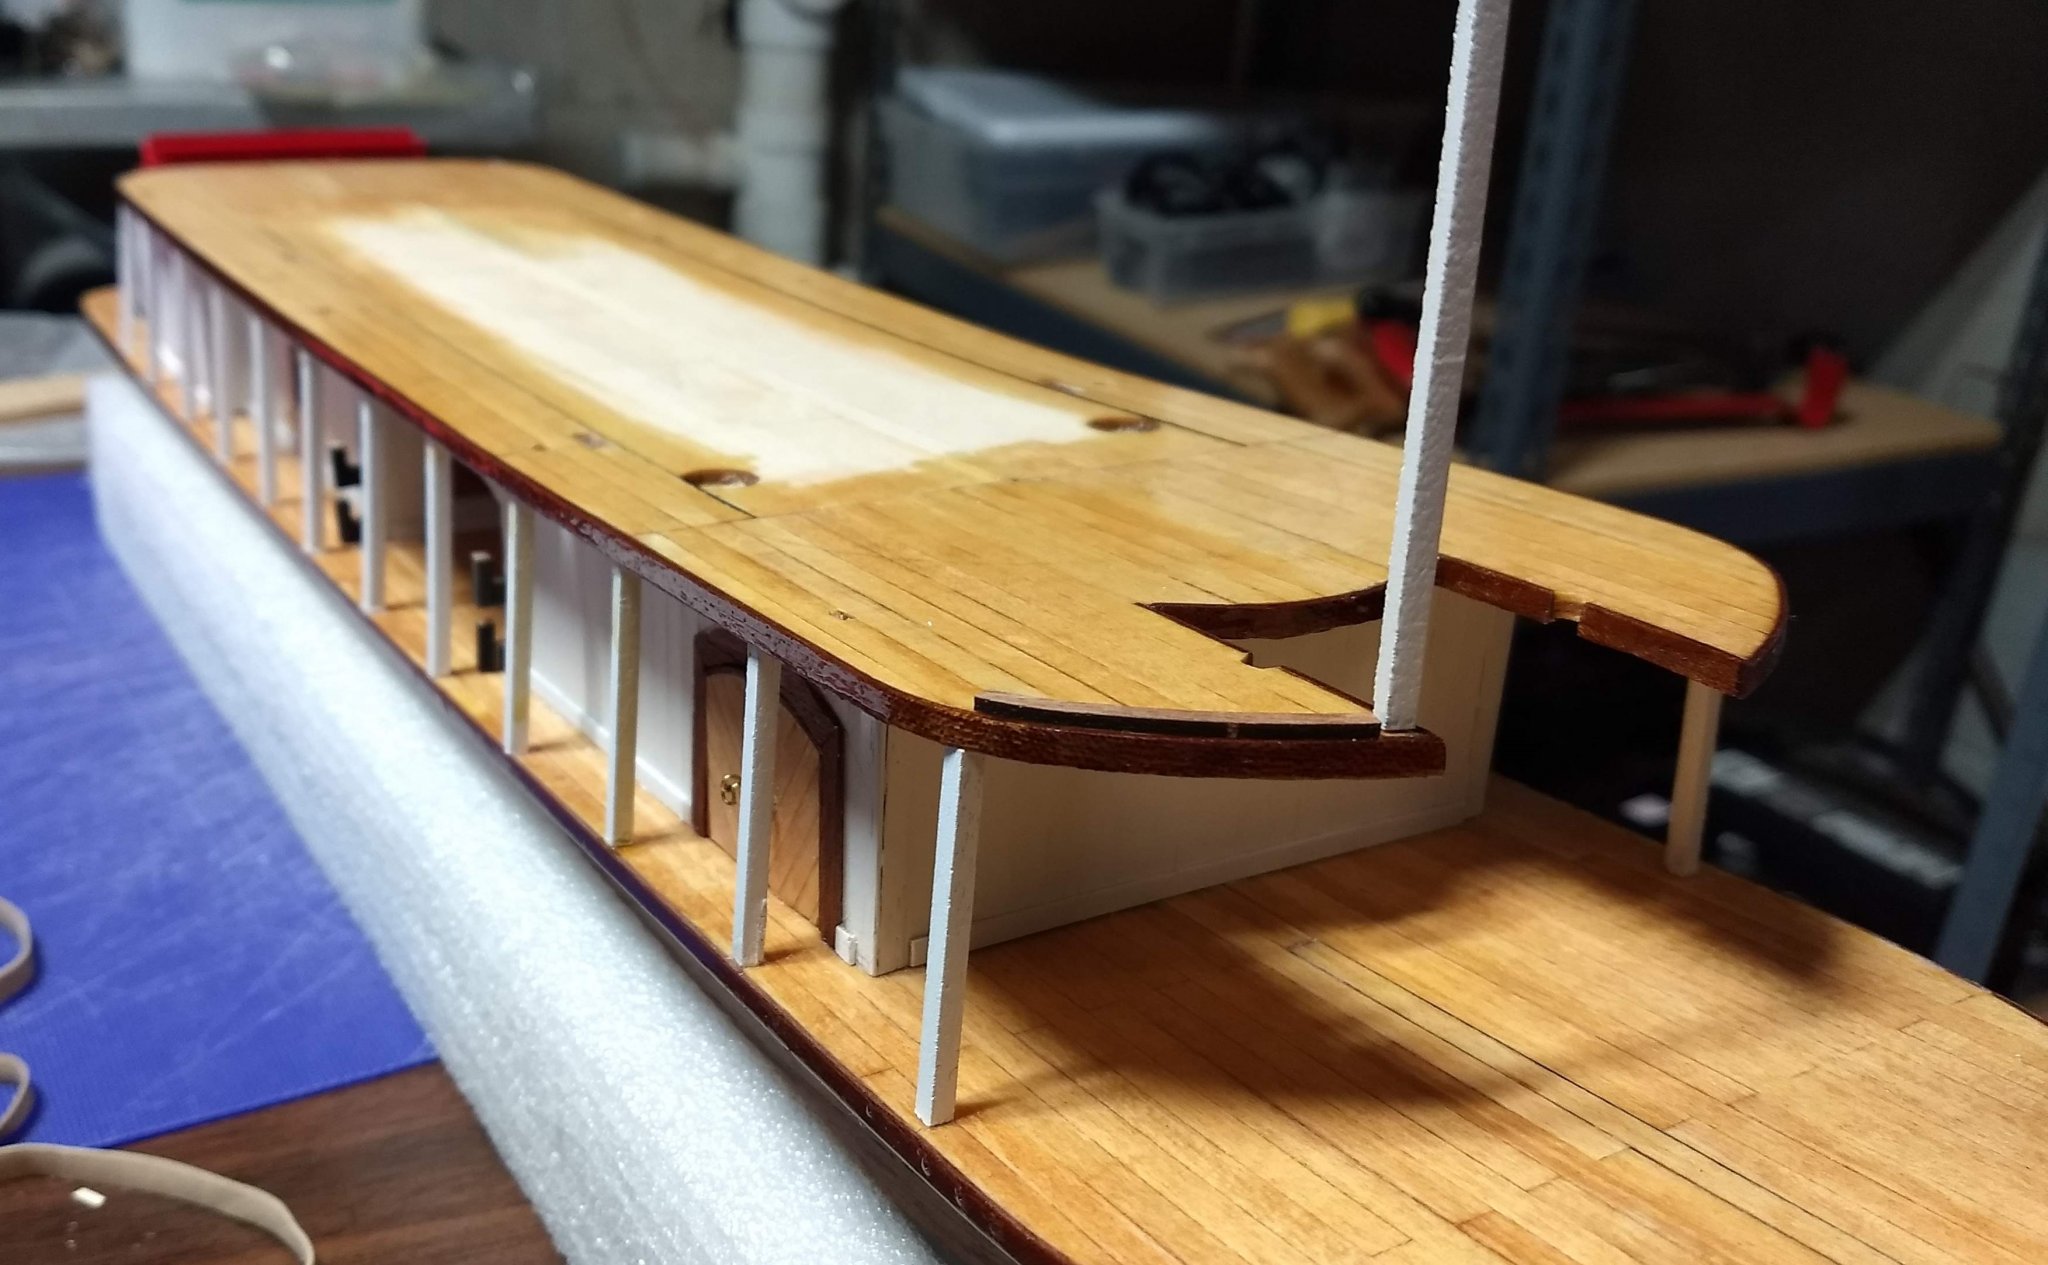
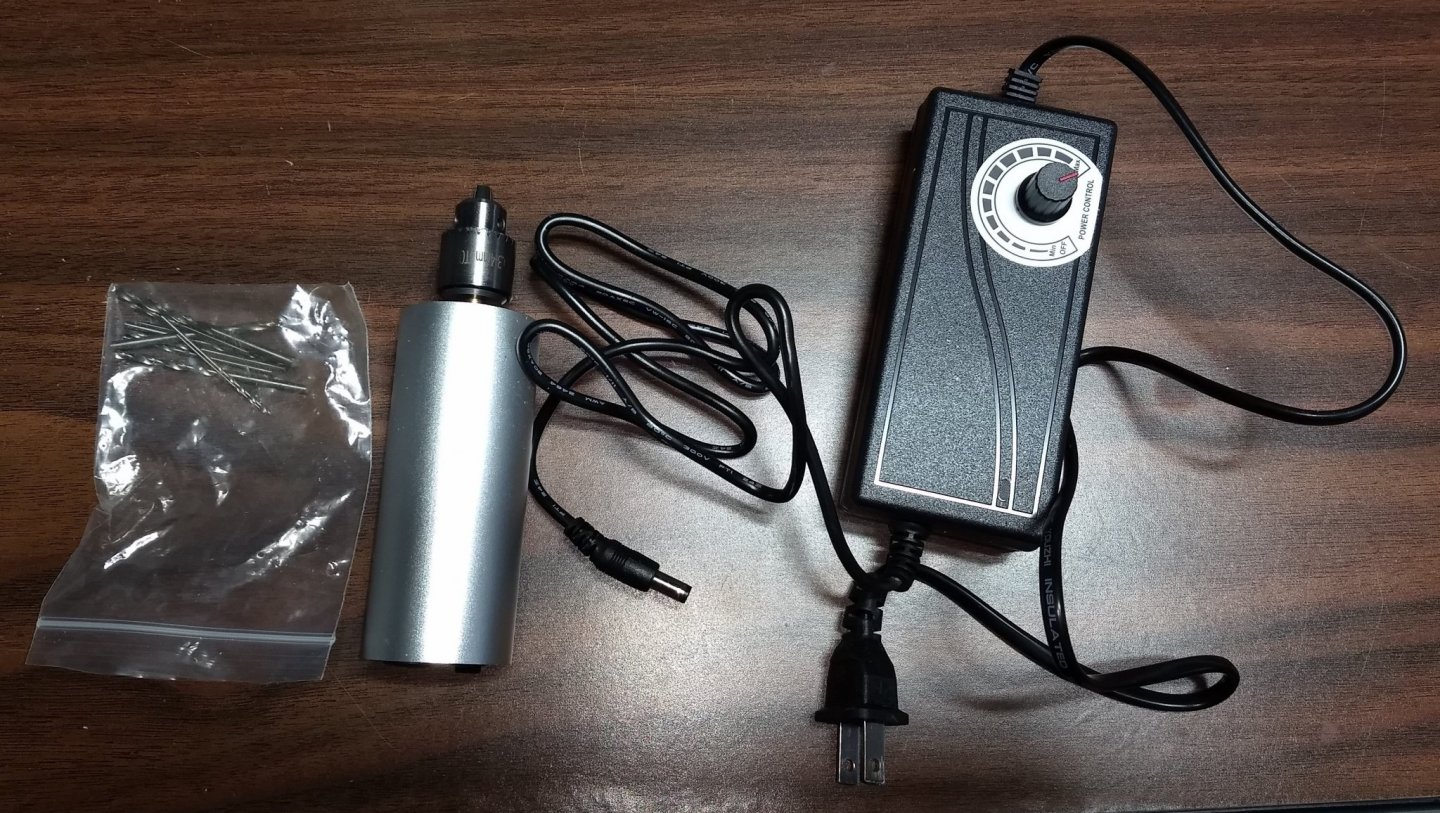
Time to put on the first floor railings. It does not show it in the instructions but if you look at the full size diagrams, it shows the first floor railings go all the way back to the stern wheel.. and match the hull curve. Best thing to do here is to pre-bend the railings. Add the stern posts to accept the railings Finally attach the railings Add the State Room Mezzanine slots and pins. Starting with gluing on the he wood frames around the State Room. Then on to the pins. Like the other pins inserted earlier doorway frames, the instructions call to insert the pins and the file off the heads so the next floor will fit on top. That was really hard. Way to hard to file the pin heads without effecting the wooden walls. As they say "dumb you get early, smart you get late". With this set of pins I decided, after drilling the holes, to cut the heads off the pins and then insert them into the holes. At lot easier, and with just a dab of CA glue, they easily stay in place. You really need some sort of electric drill to make the holes. There are so many holes to drill, you will go crazy drilling them by hand with a pin vise. Here are a few examples. The drill set below is only 15$ (us) on Ebay. It comes with 80 bits ranging from .8mm to 1.5mm. There are 10 bits of each size. A really good bargain. Drill works great, but the problem is you really an only easily use the .9mm through 1.1mm bits. The included bits smaller and larger do not fit into the drill. But if you are only looking for .9mm - 1.1mm holes the is a real bargain. If you need smaller and larger holes a better option is below. It is new on Ebay for about $35 (us) and can easily handle bits down to .5mm and up to 4.0 mm. As you can see it comes with a bag of bits. No idea what size they are,, just a bag of random bits. You would need some sort to calibrator to determine the bit size. This is a really great setup... just need to get the bits. Having said that there is another great deal on Ebay for bits. Here looks like you can get bits from .5mm to 3.5mm for $1.39 (us) for 10 bits.... Looks to be the same set of bits that came with the first drill set. .... and free shipping Back to the model,,,,Here are the first few pins inserted And later on with all of them inserted.


- 42 replies
-
- 3
-
-
- king of the mississippi
- artesania latina
- (and 1 more)
-
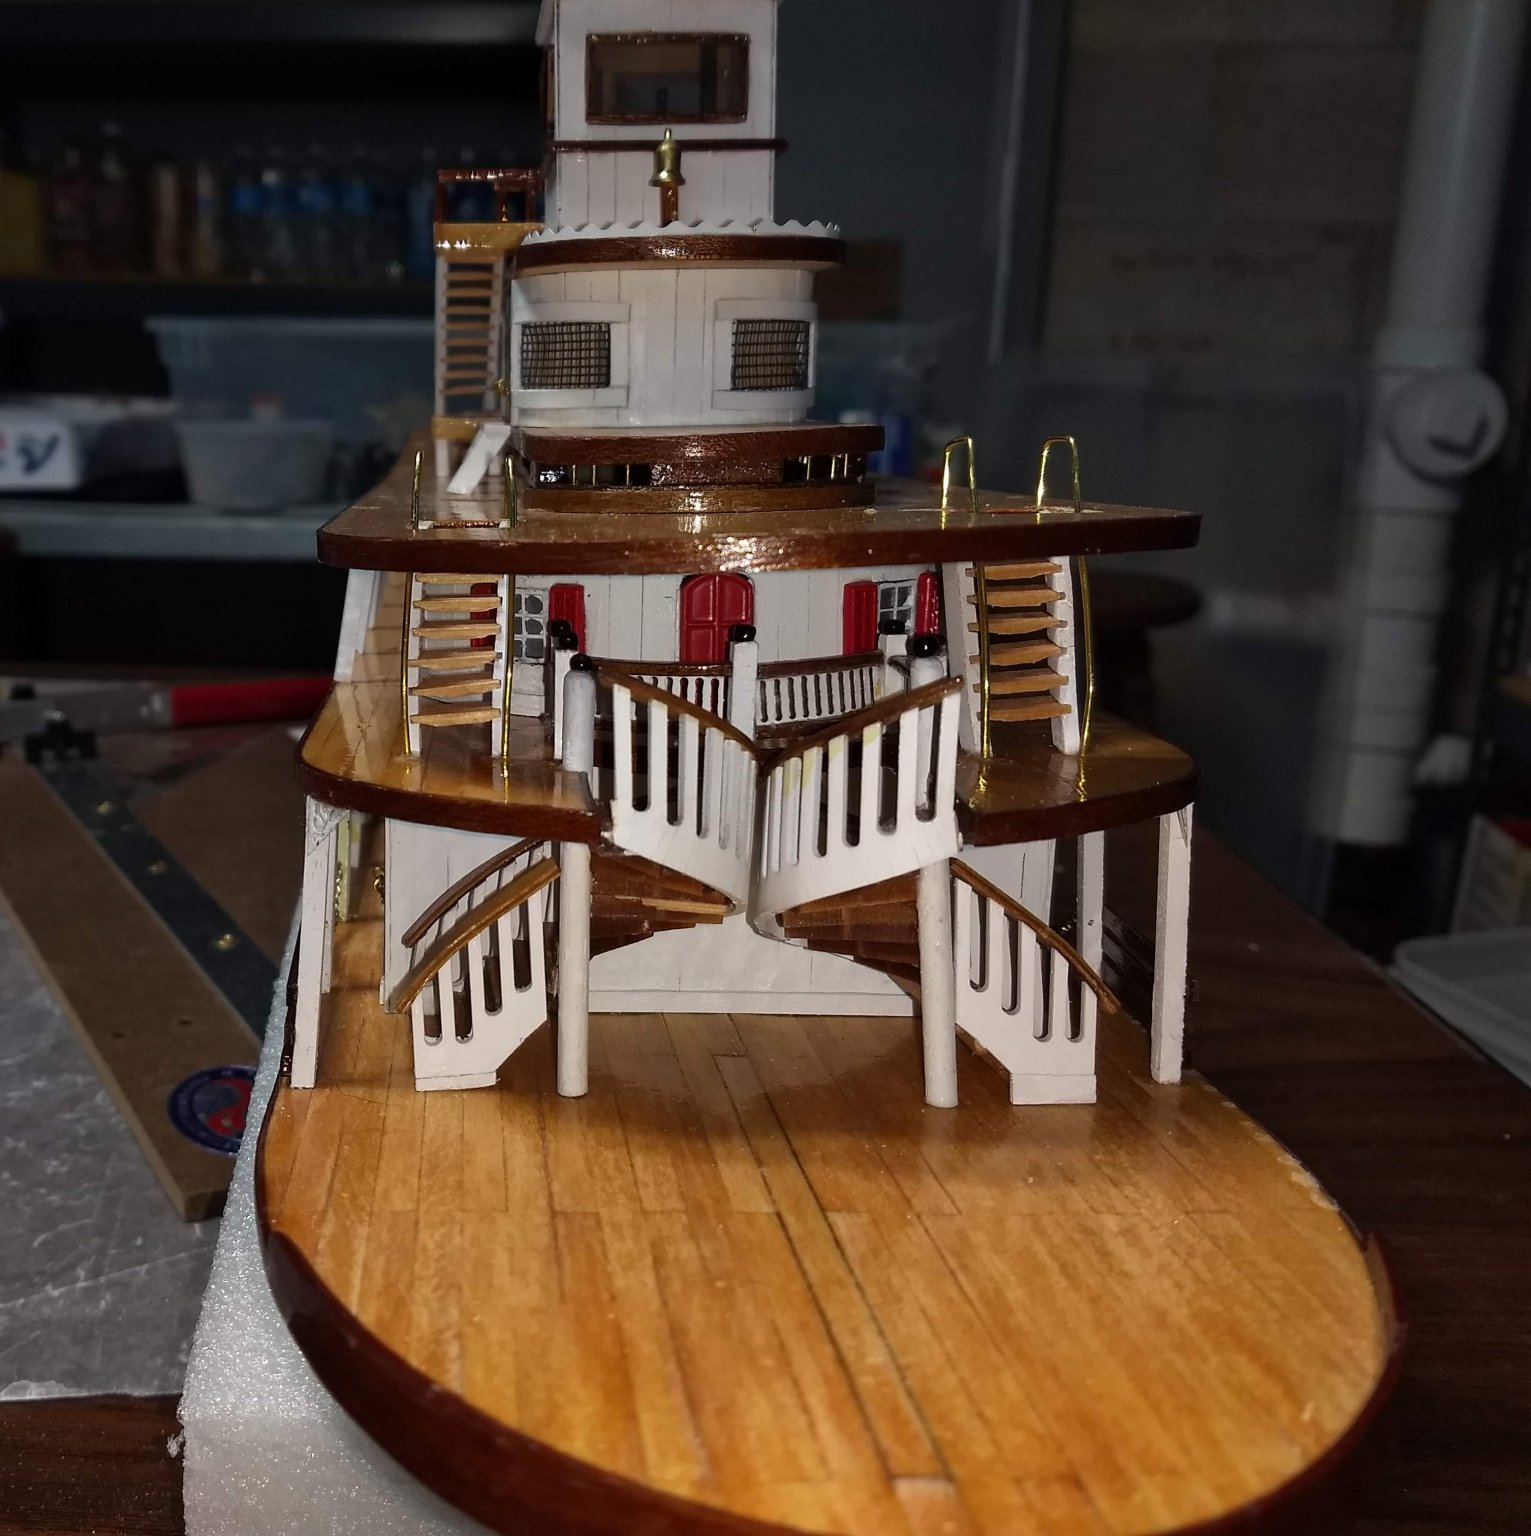
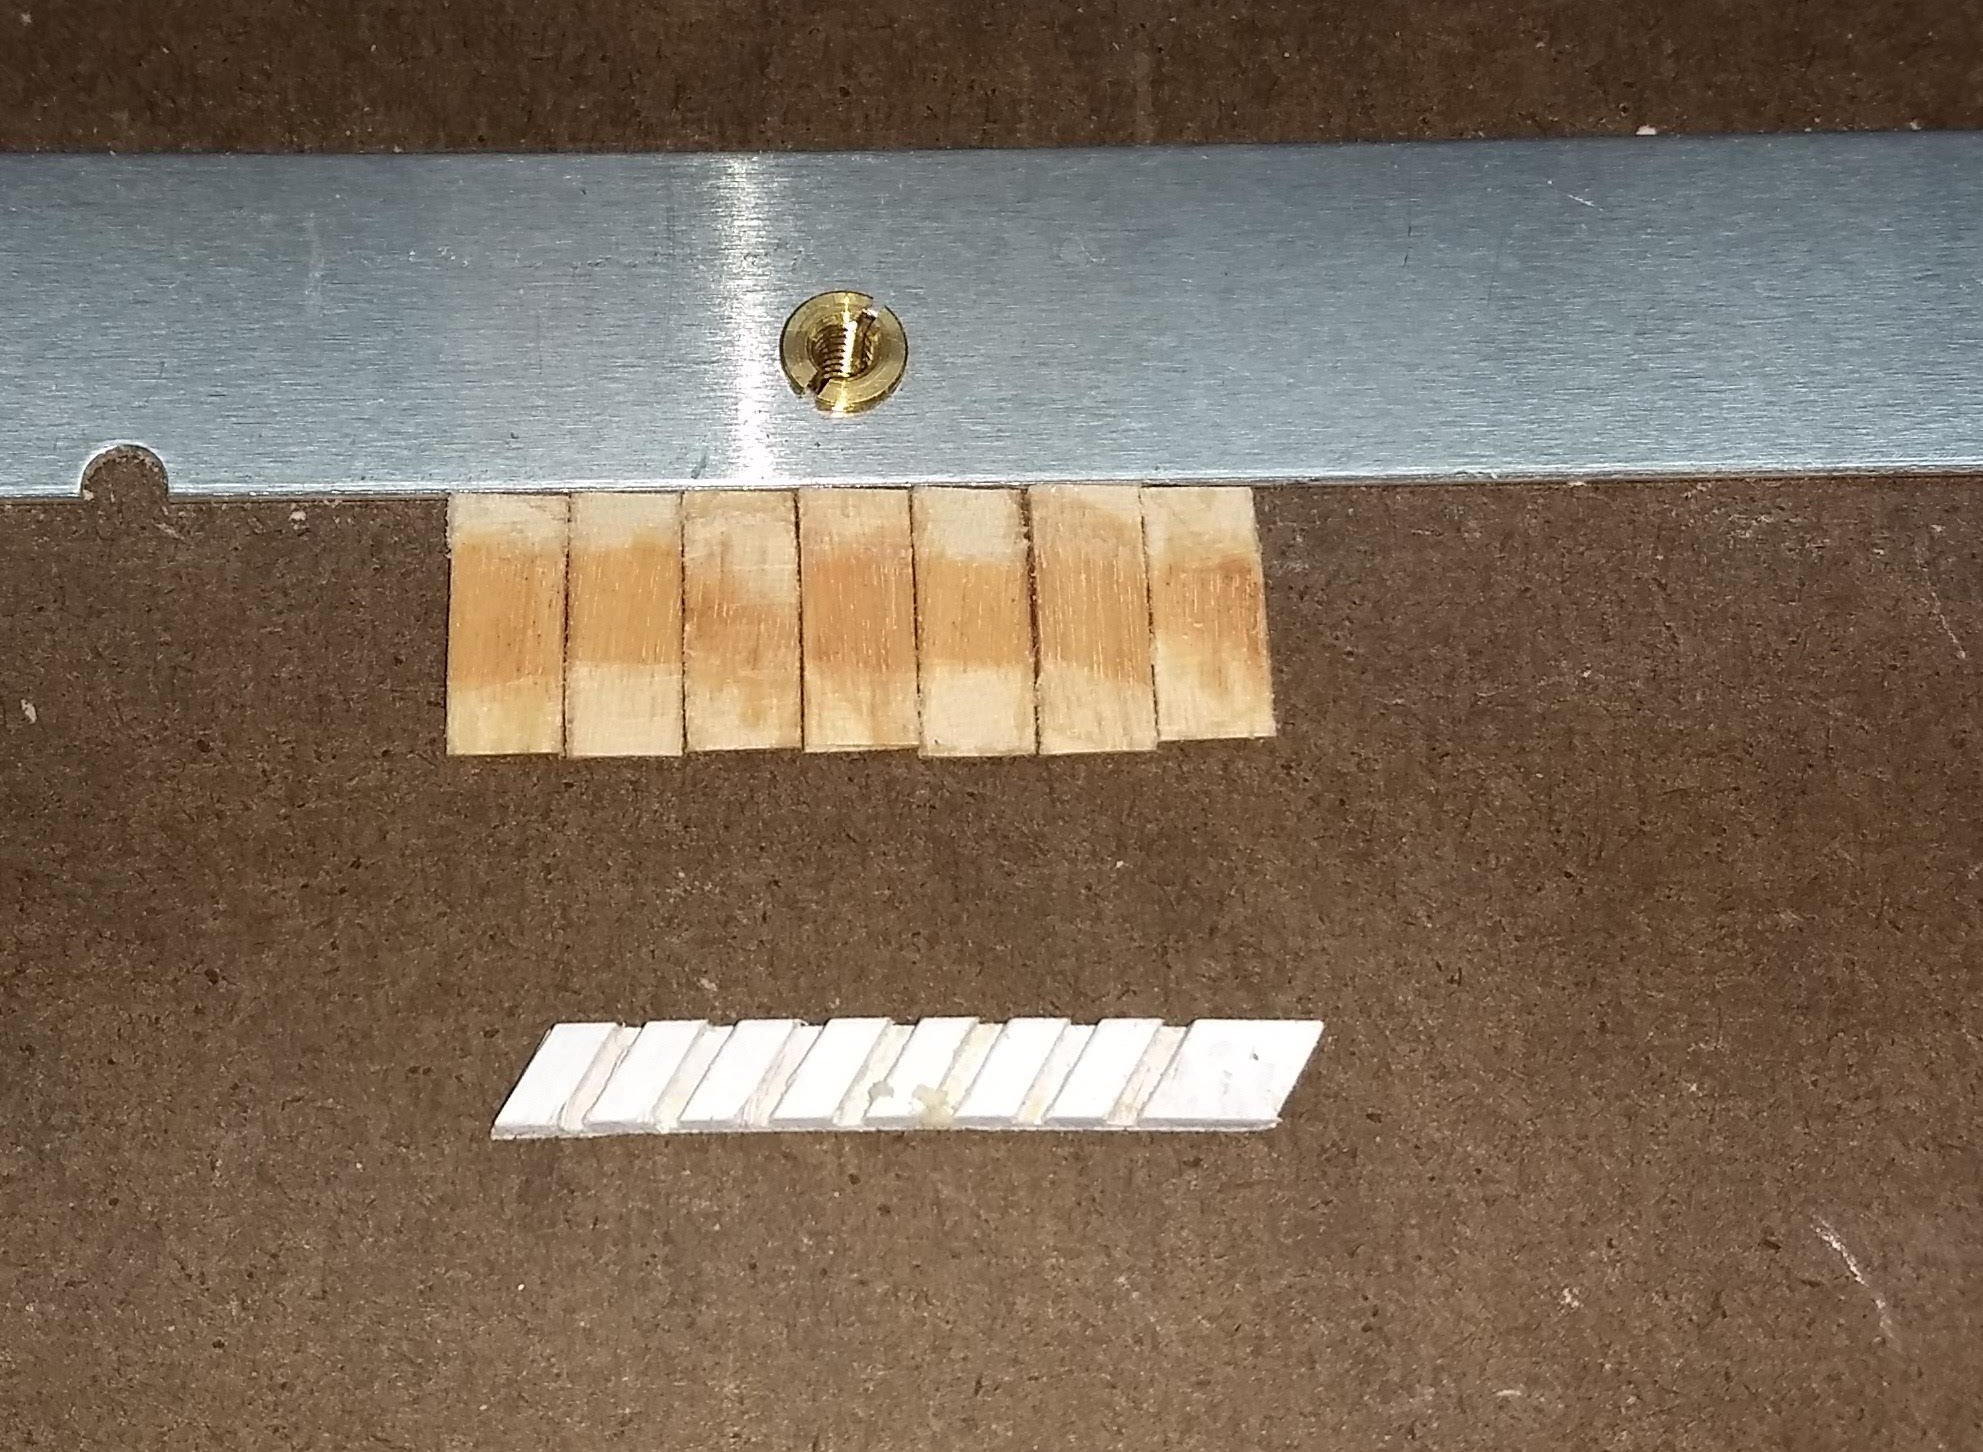
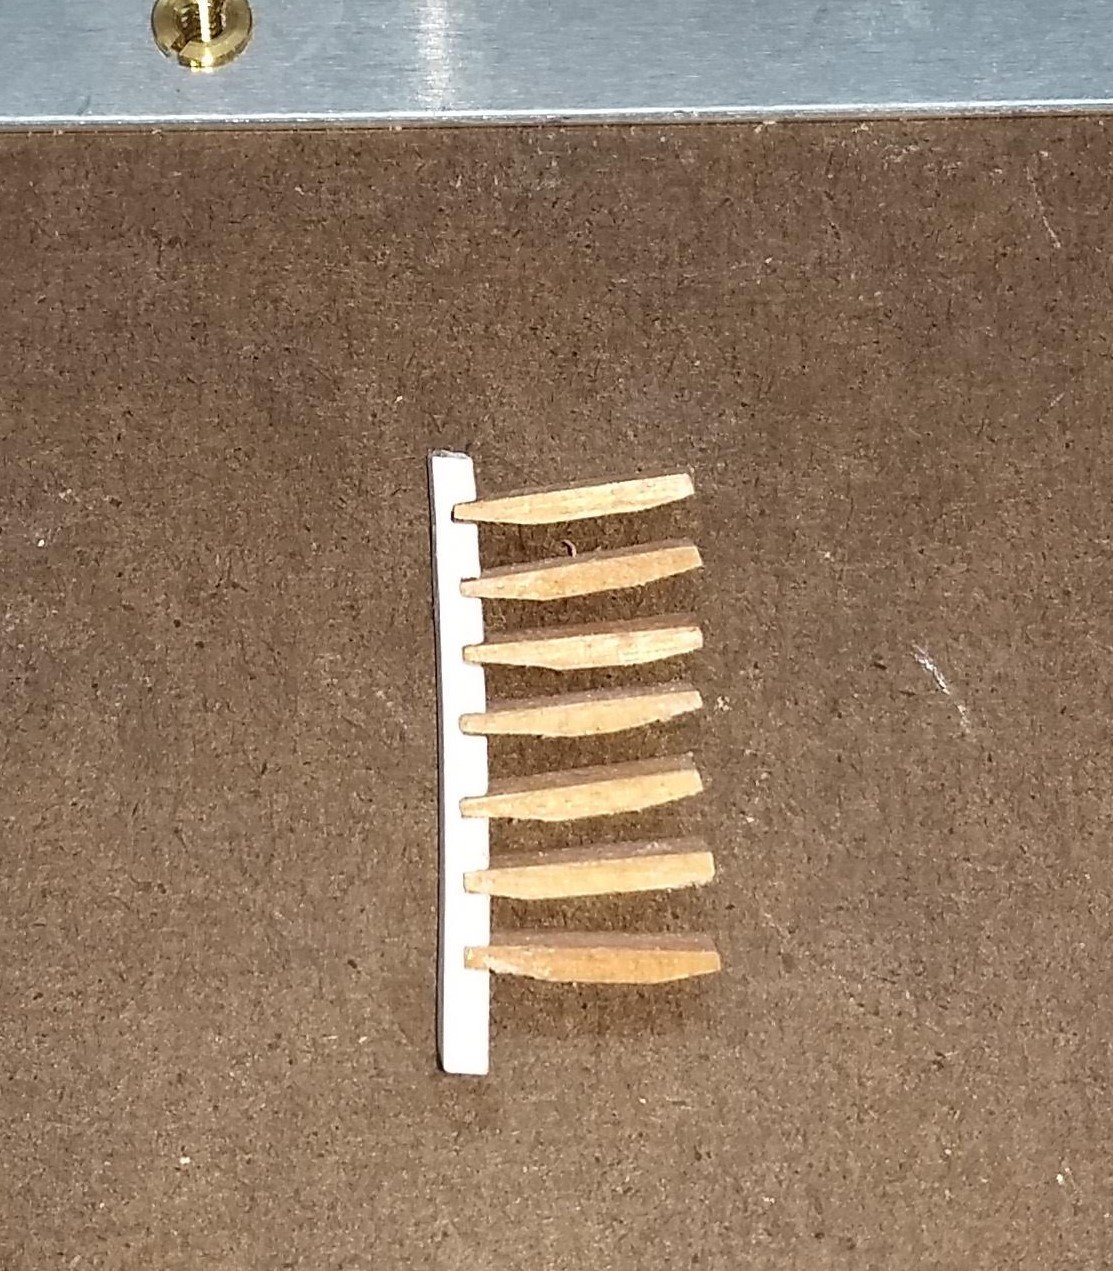
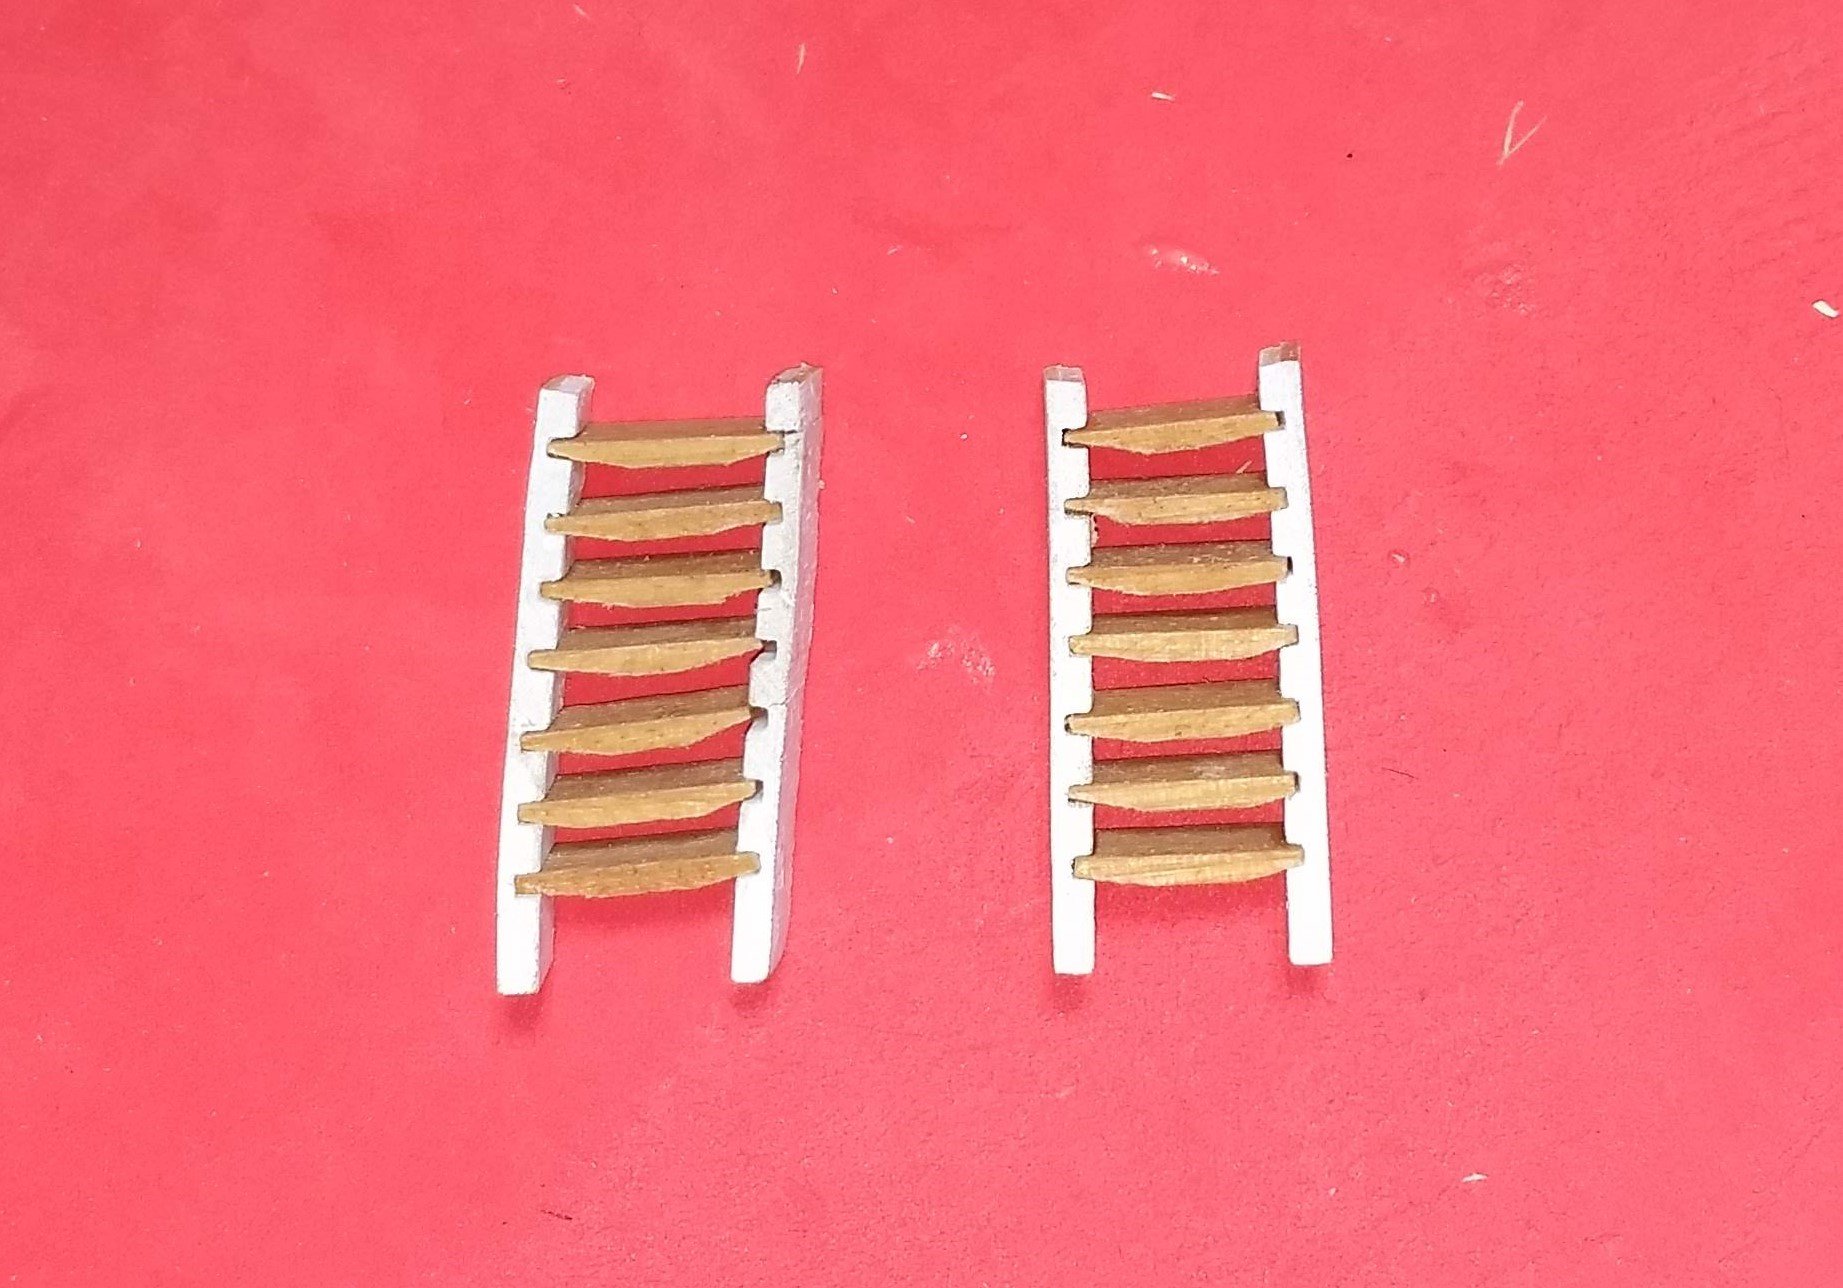
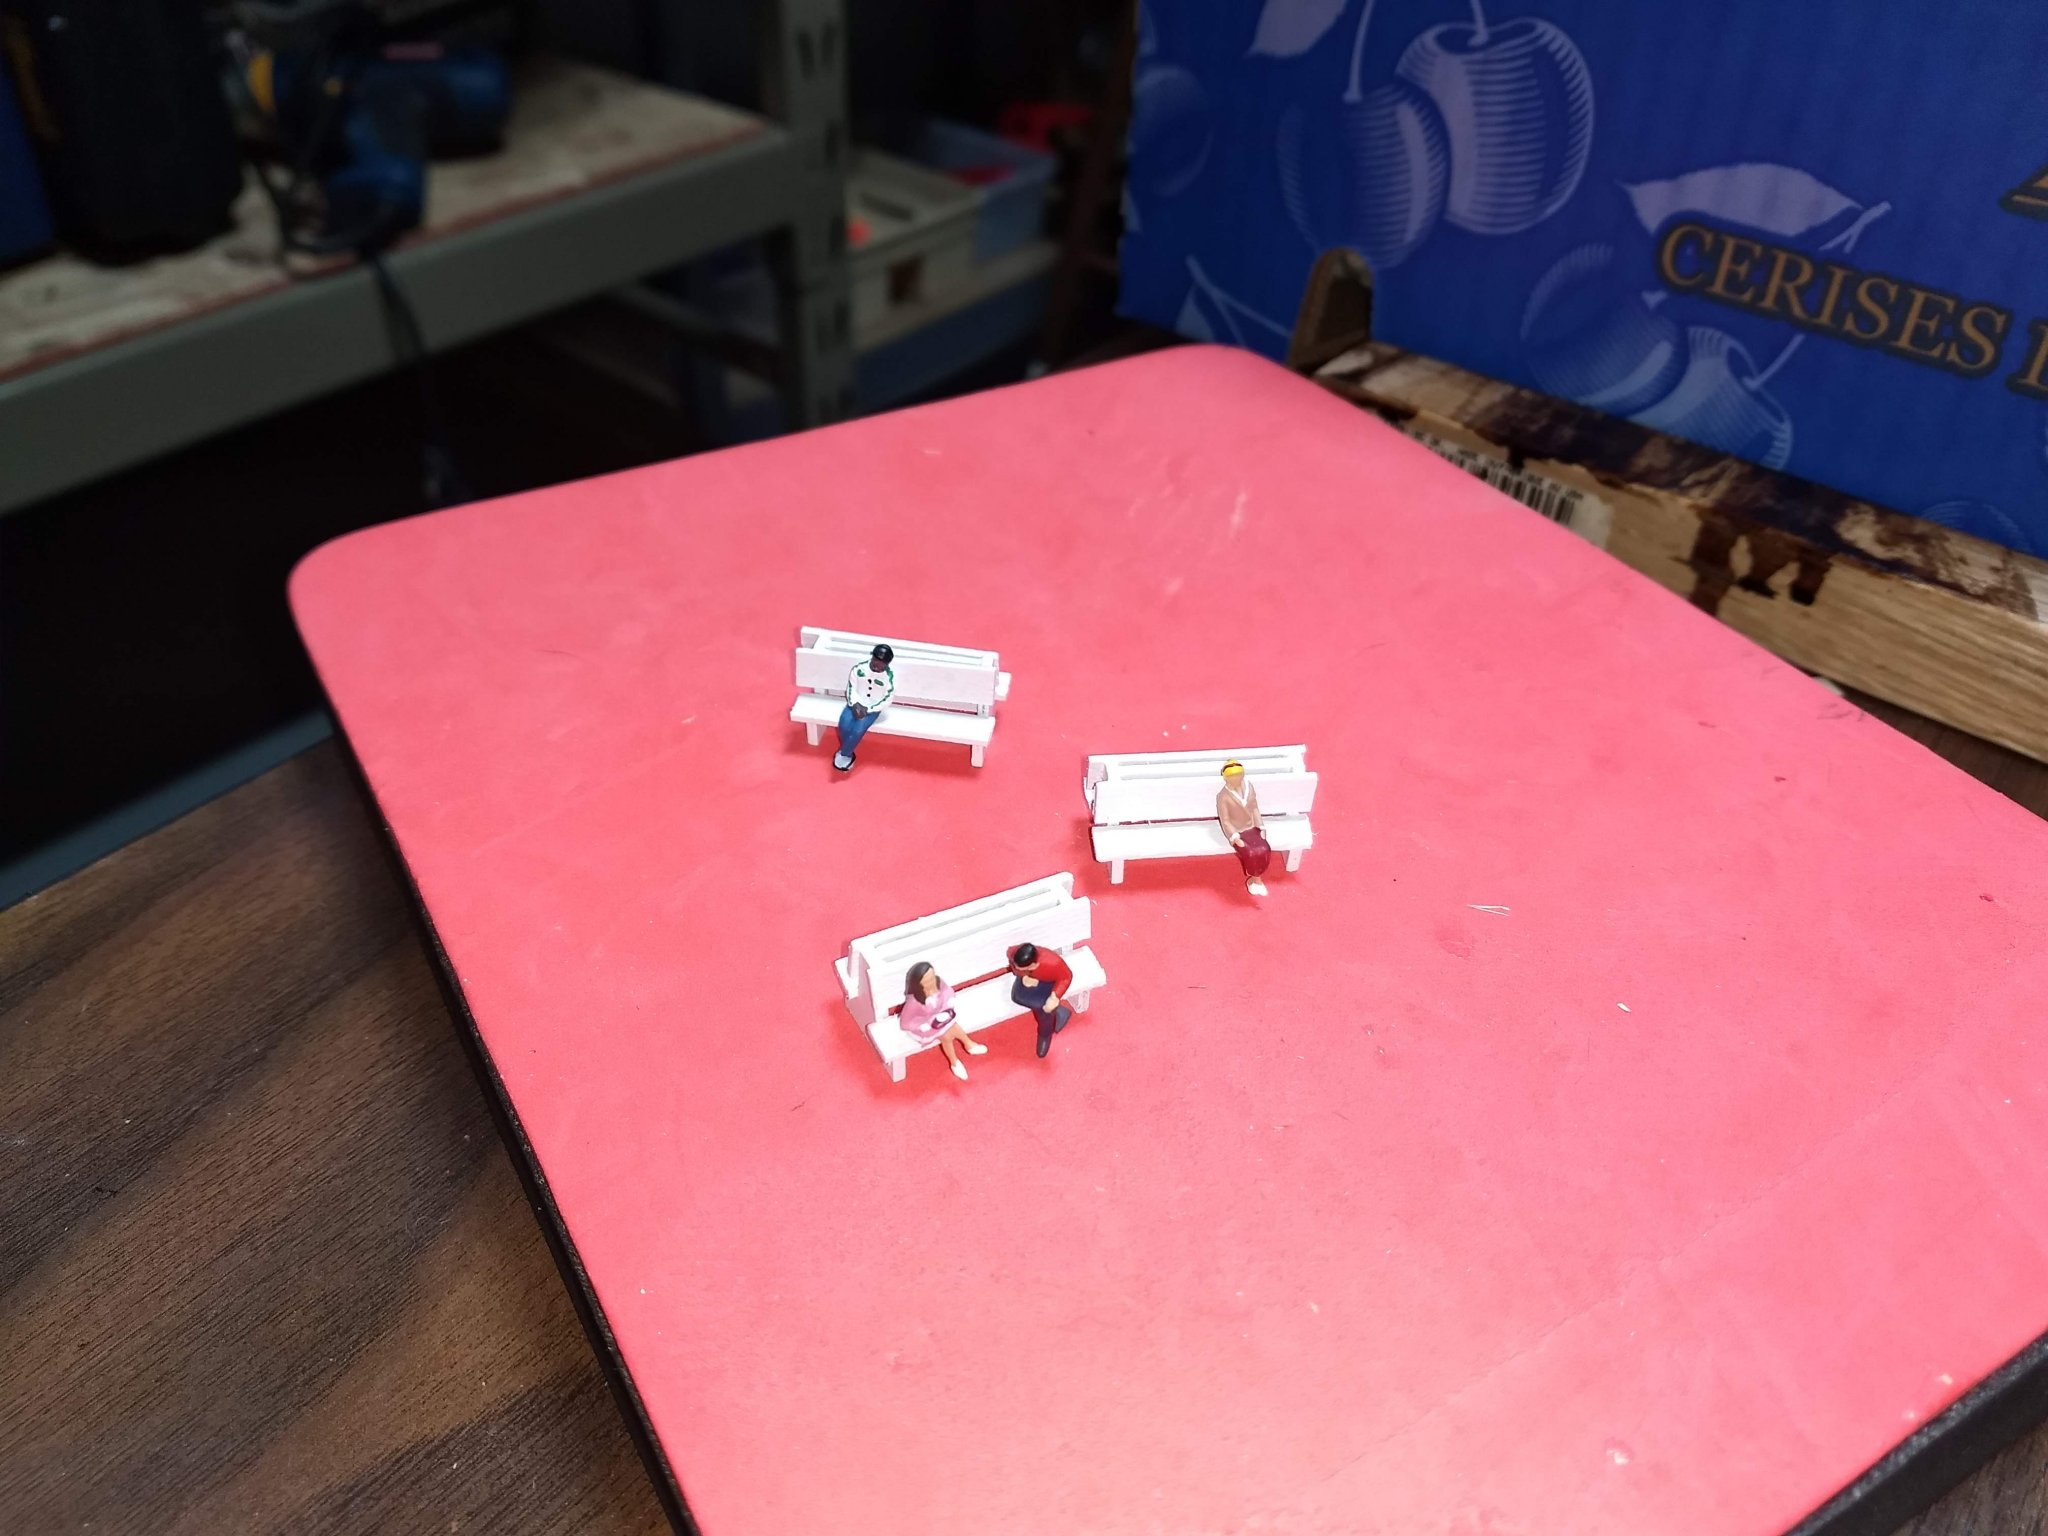
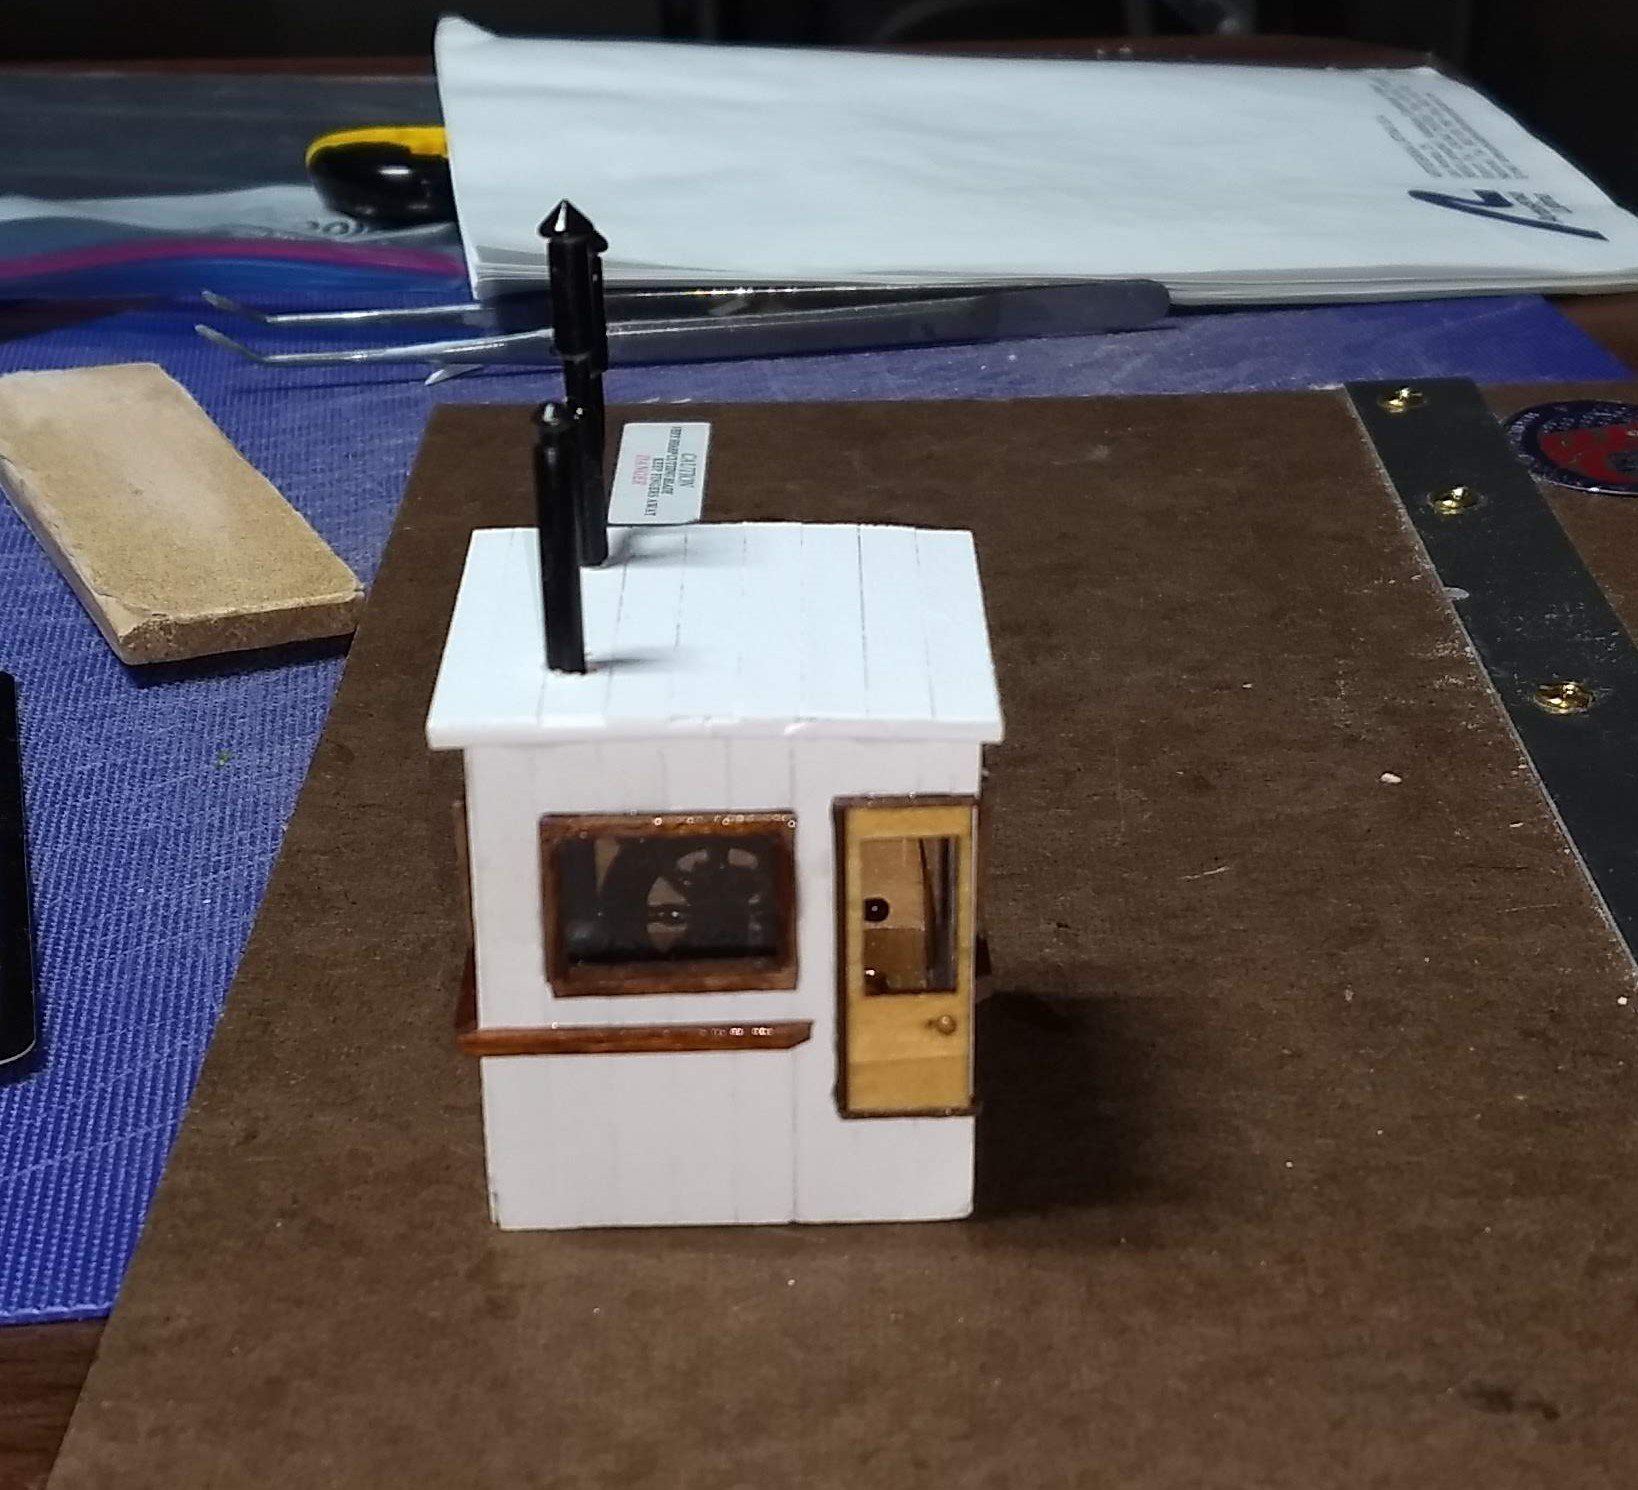
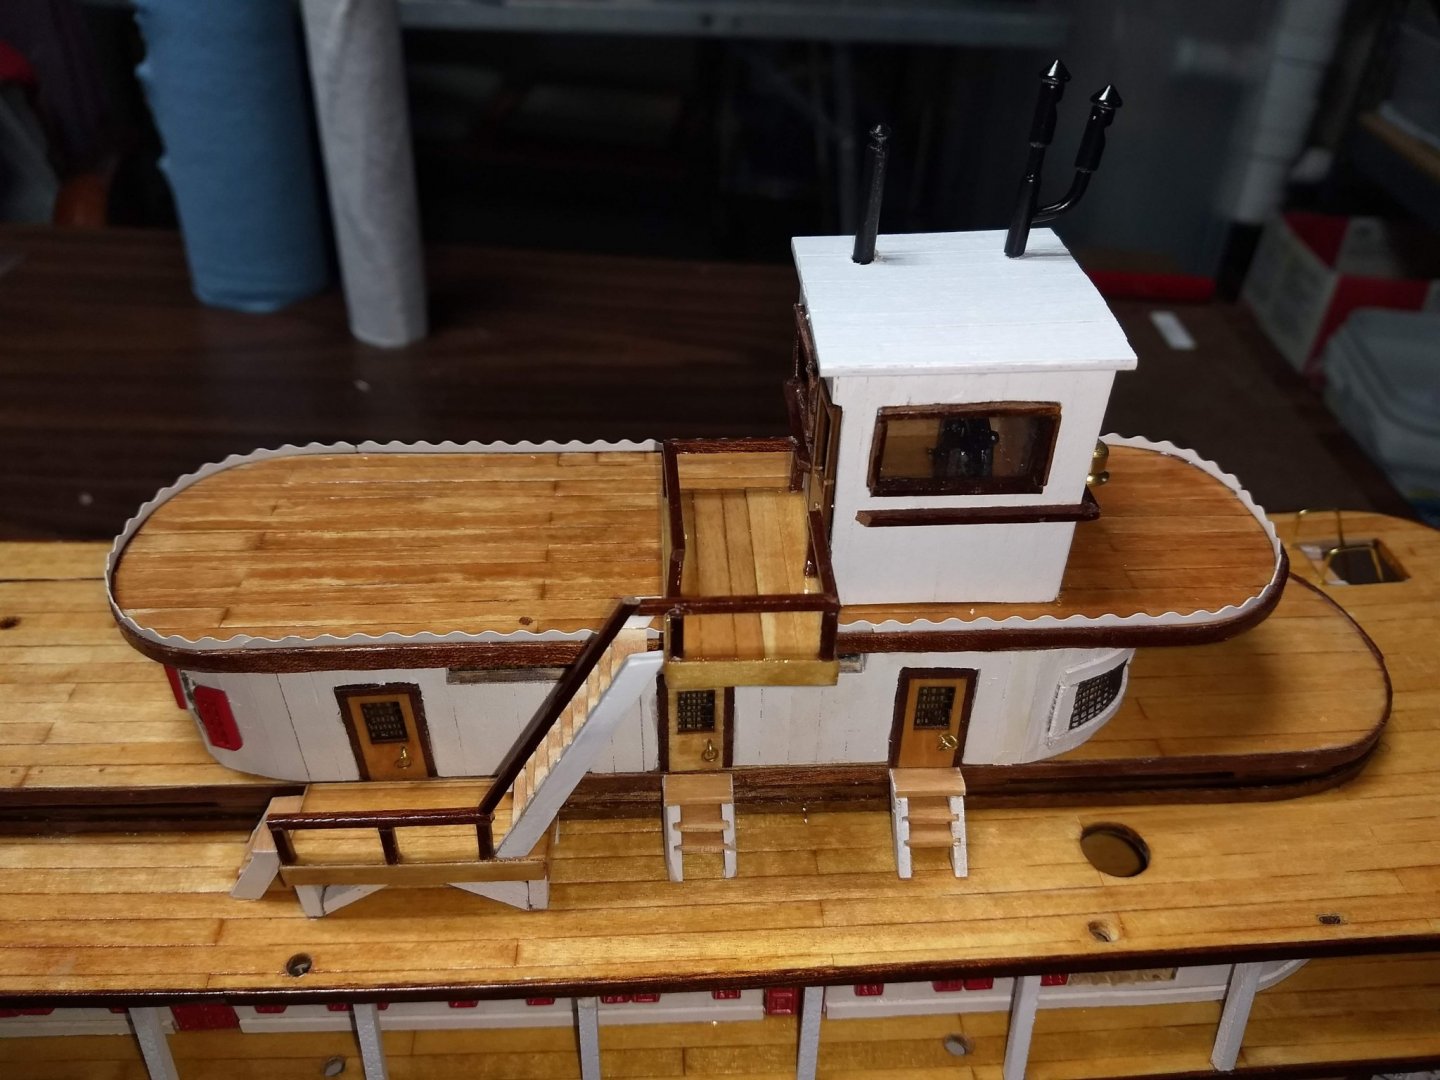
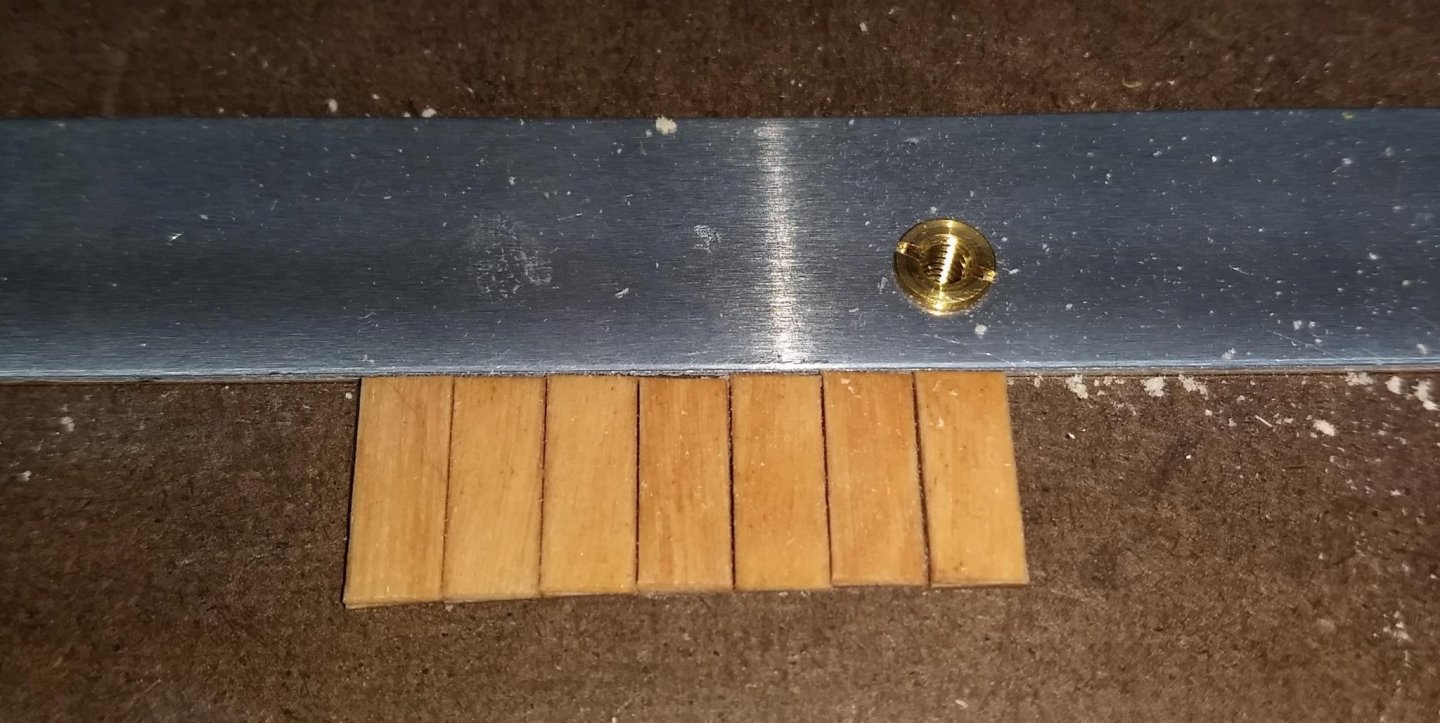
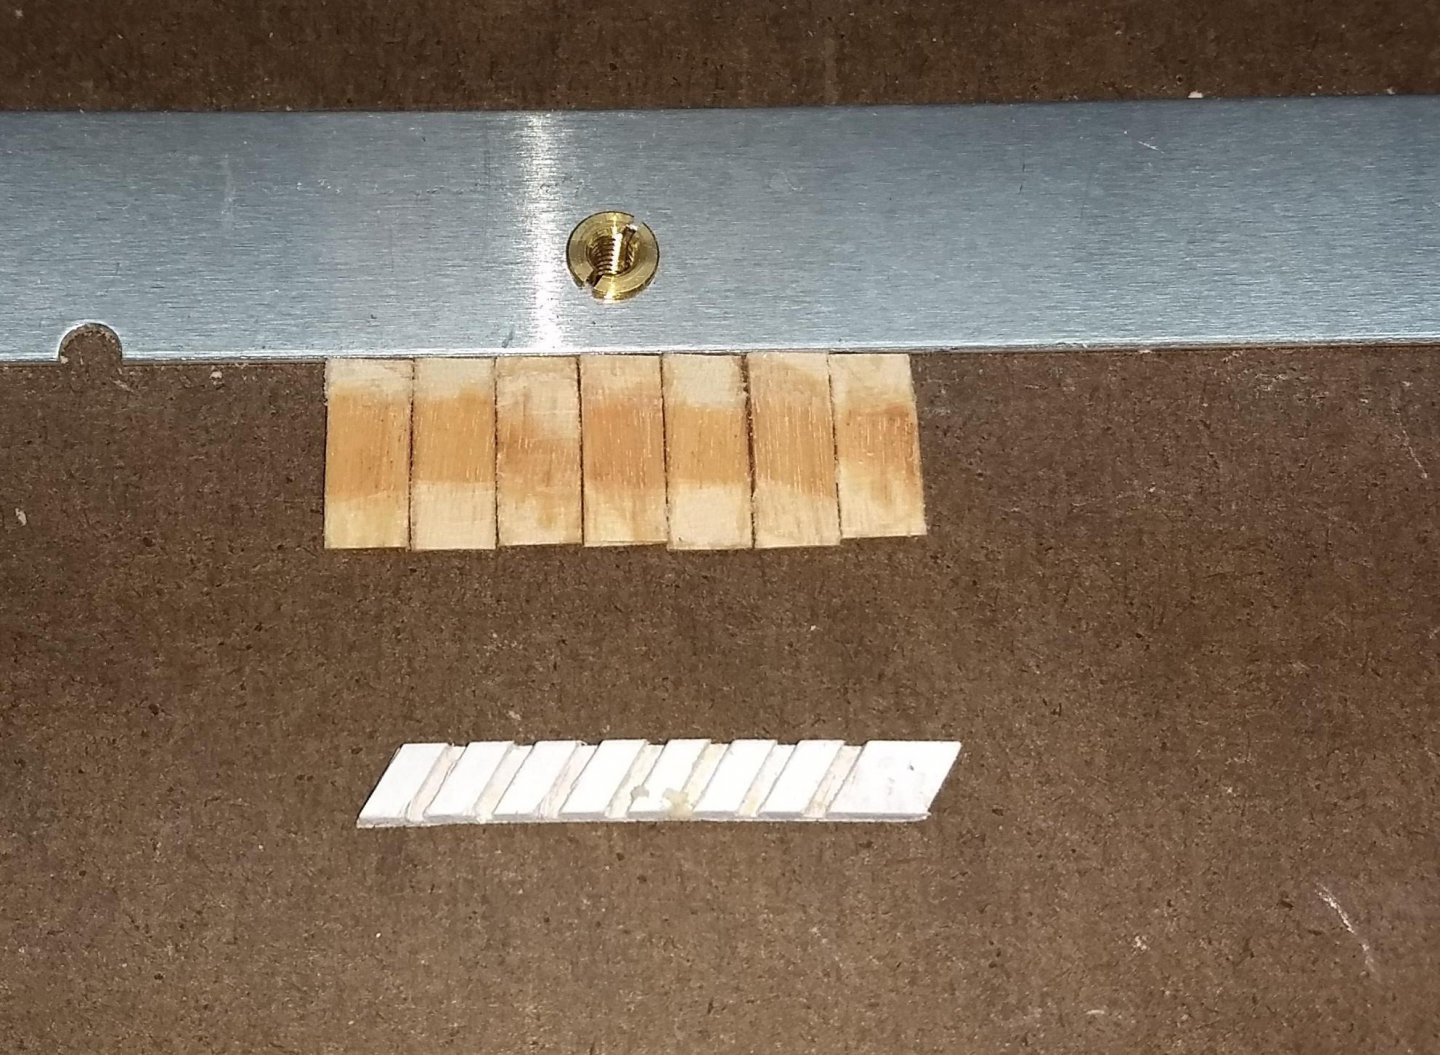
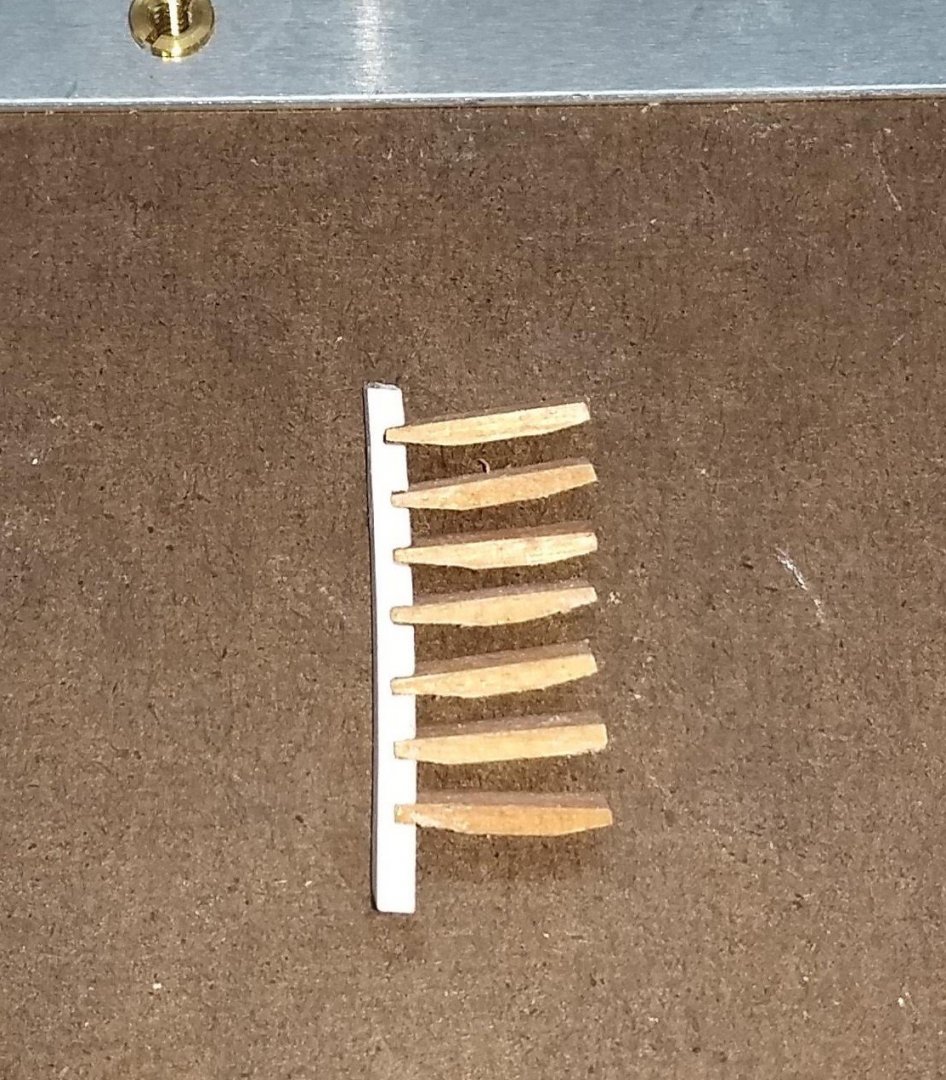
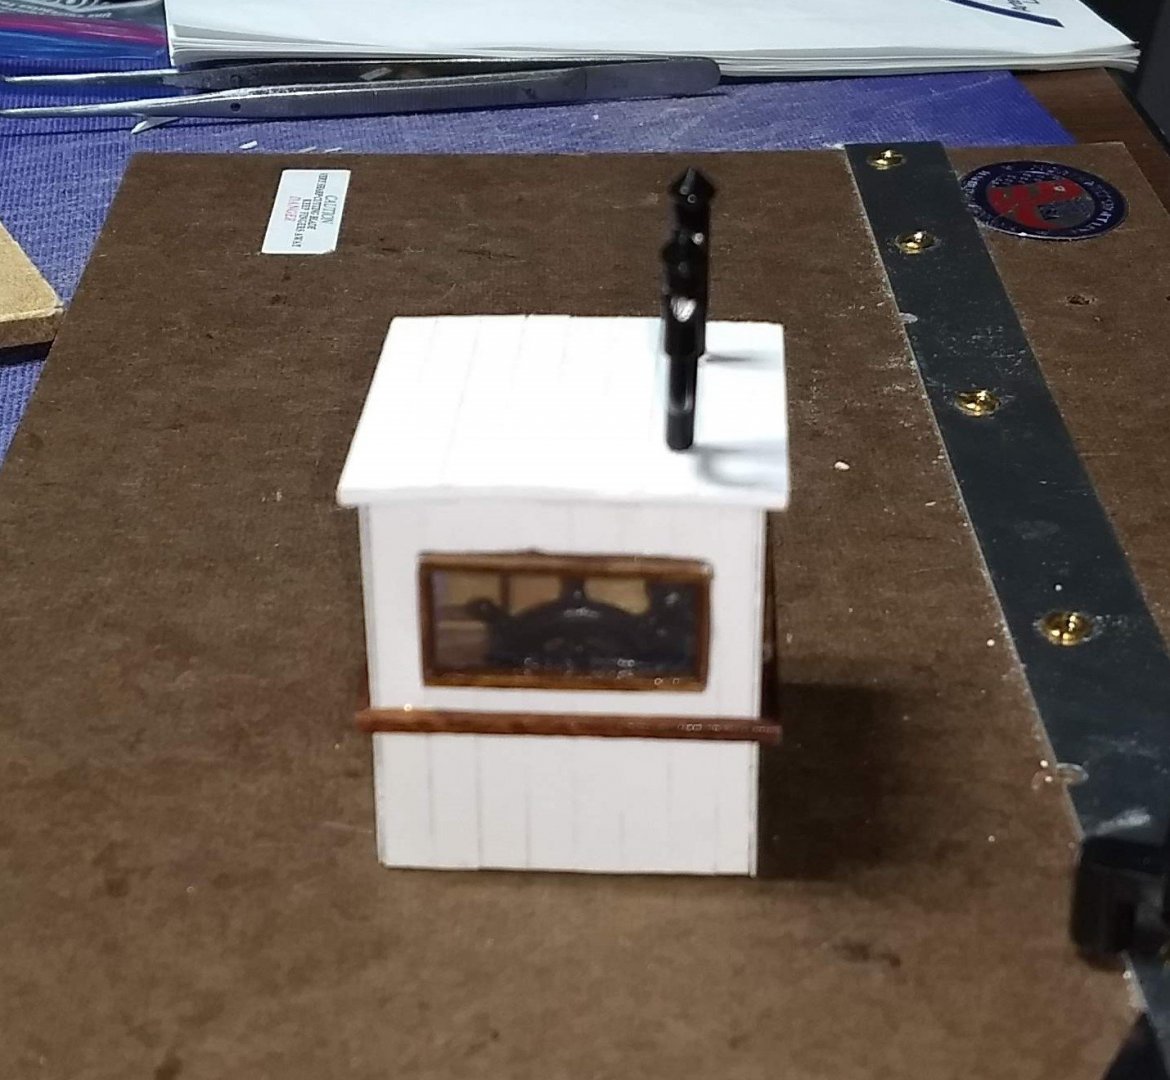
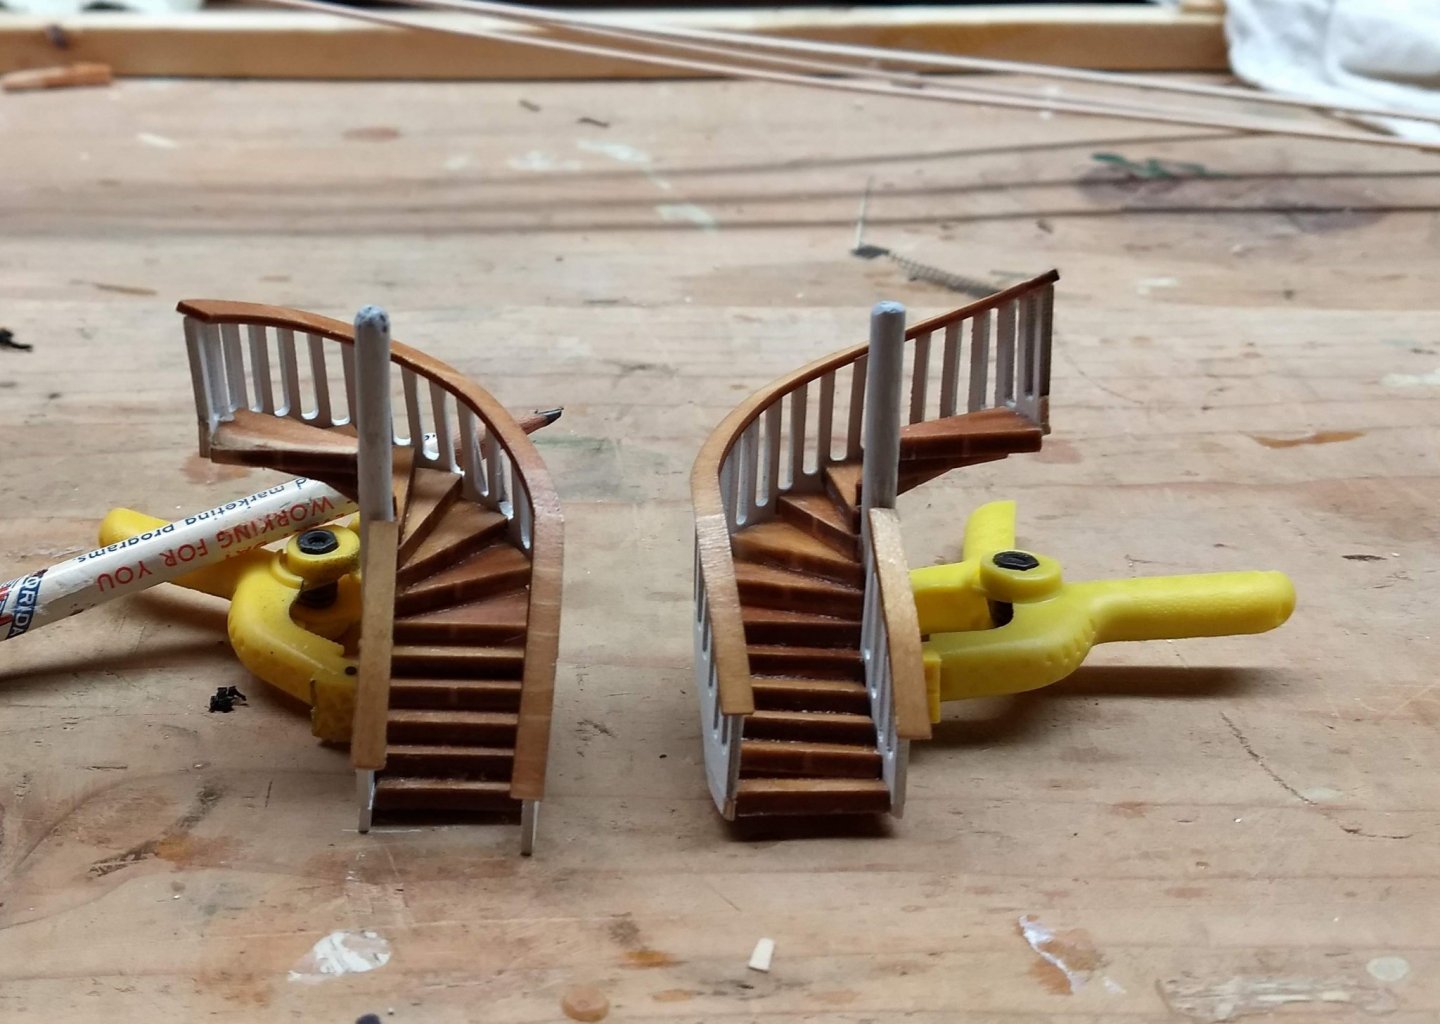
Now the the circular stairs are in place the next layer is put on the ship. Since it was previously built, it was just waiting on the circular stairs to be completed At this point I started the two seven step vertical stairs. The idea here is to create two sets of seven stair treads, add them to one half of the risers and then glue on the other riser. It is really important that all seven treads are exactly the same length. Otherwise, the second riser just will not fit. And if any force is applied, the risers will break (they are really delicate). Again, ask me how I know that :-). Below are the treads cuts to size It turns out the treads do not fit in the slots on the risers. Again, apply any force and they will break. Option here would be to expand the riser slots or make the treads a little thinner. I have a small file, but not small enough to fit into the riser slots, so I choose to make the treads a little thinner. I slimmed down the bottom of each tread as when they are applied to the risers, you will not notice it. Below shows the thinned treads and riser, Next insert the treads into one if the risers And finally add the 2nd riser to complete the stairs Next I started to work on the benches. No big deal here, they went together pretty straight forward.... As soon as they were completed, some passer-bys decided to sit on them On to the captain's bridge. Pretty straight forward, but it takes some time, as lots of details. If you look close you can see the steering wheel and pot belly stove on the bridge.


- 42 replies
-
- 3
-
-
- king of the mississippi
- artesania latina
- (and 1 more)
-
Auger, Thanks for your response. I have been a little slow with my updates as I did not realize anyone was actively watching this build log. I just figured I would create the log for some future builder of the KOM. I will try to provide more current updates in the future.
-
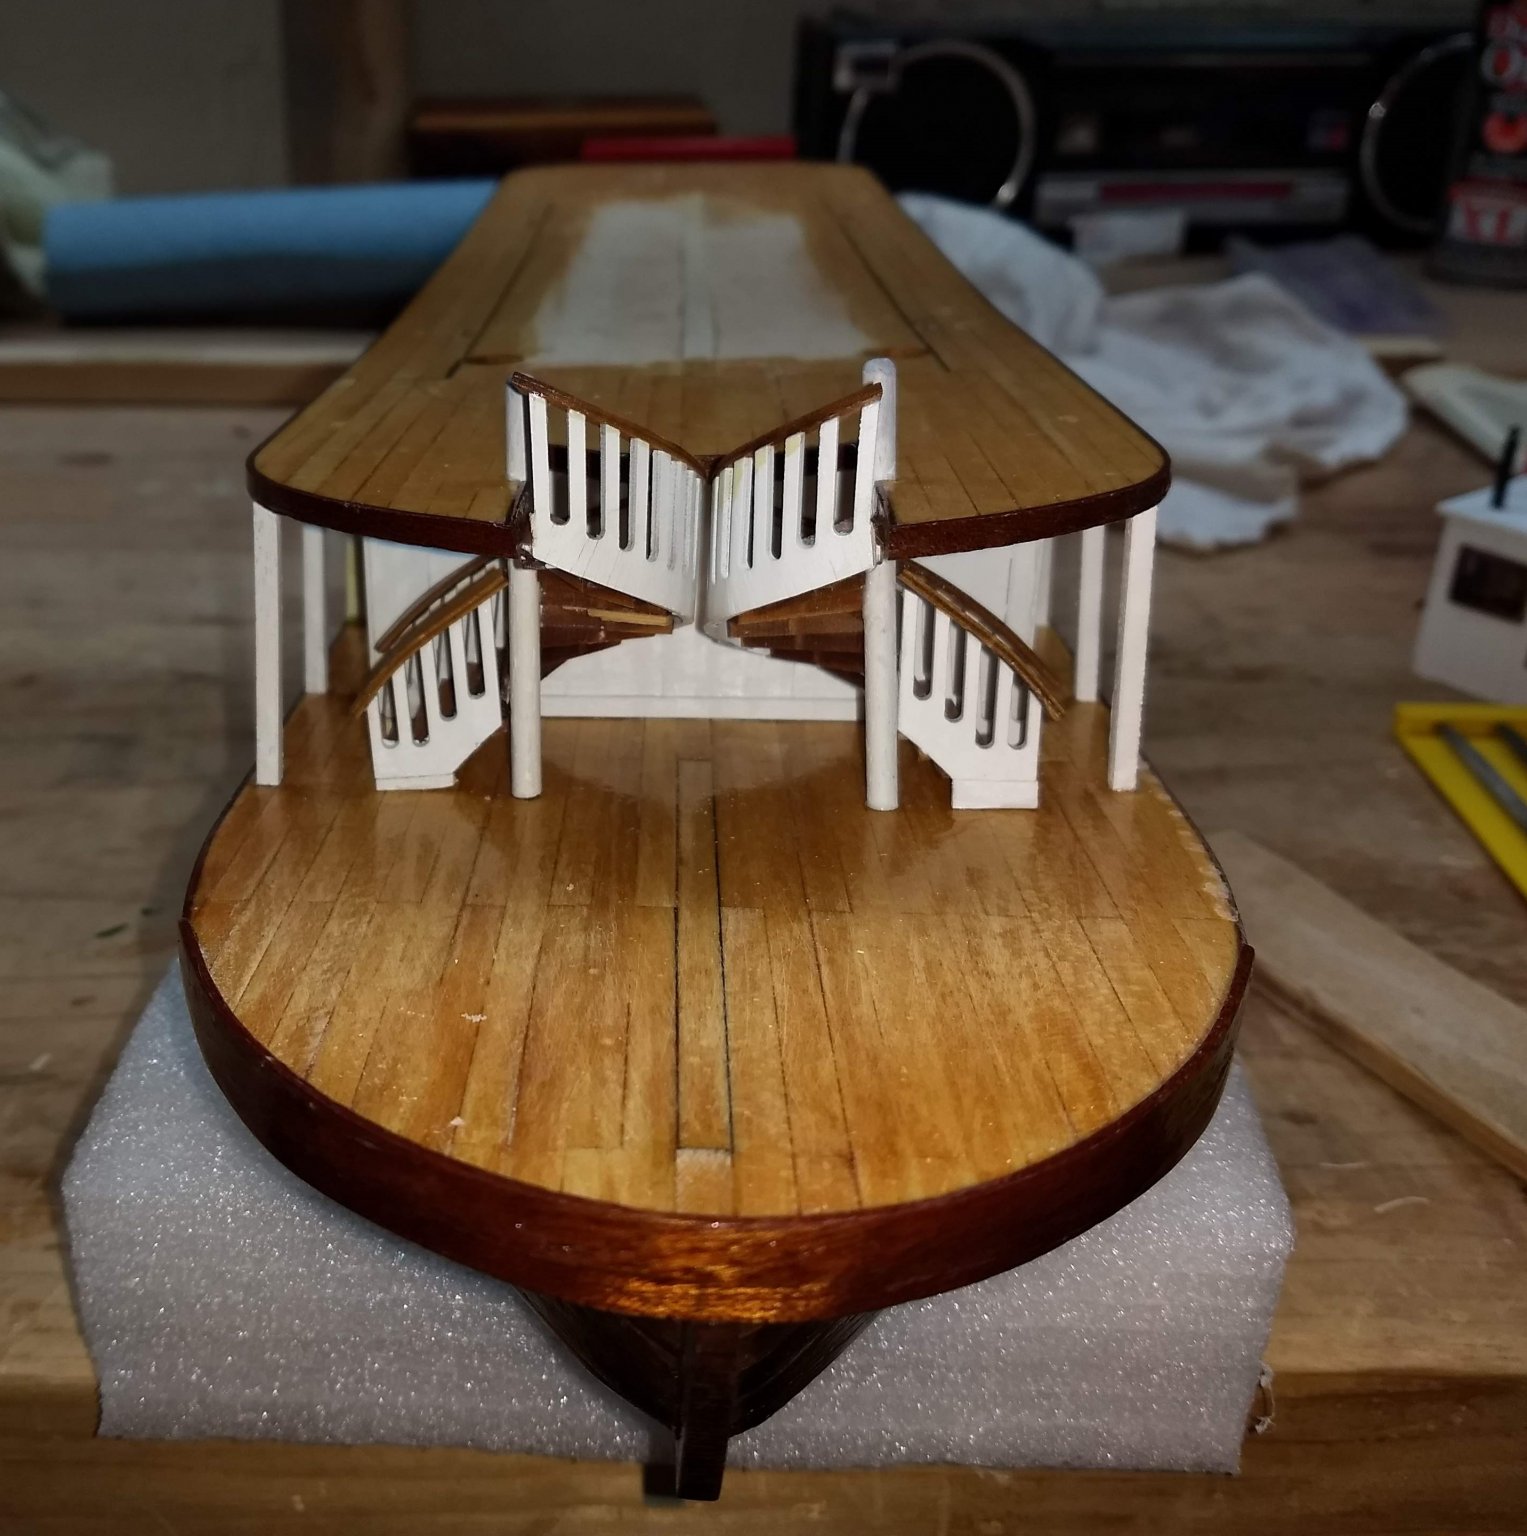
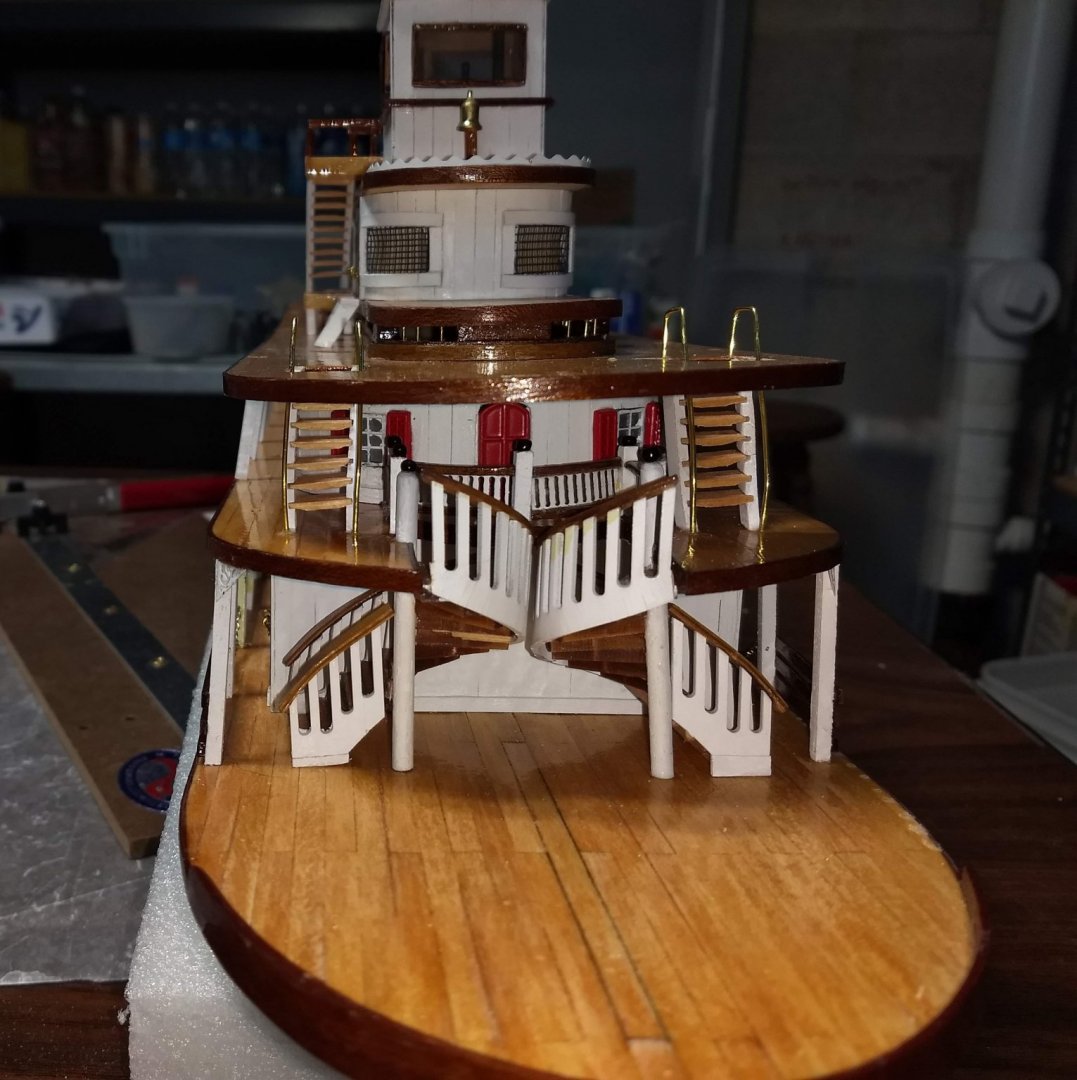
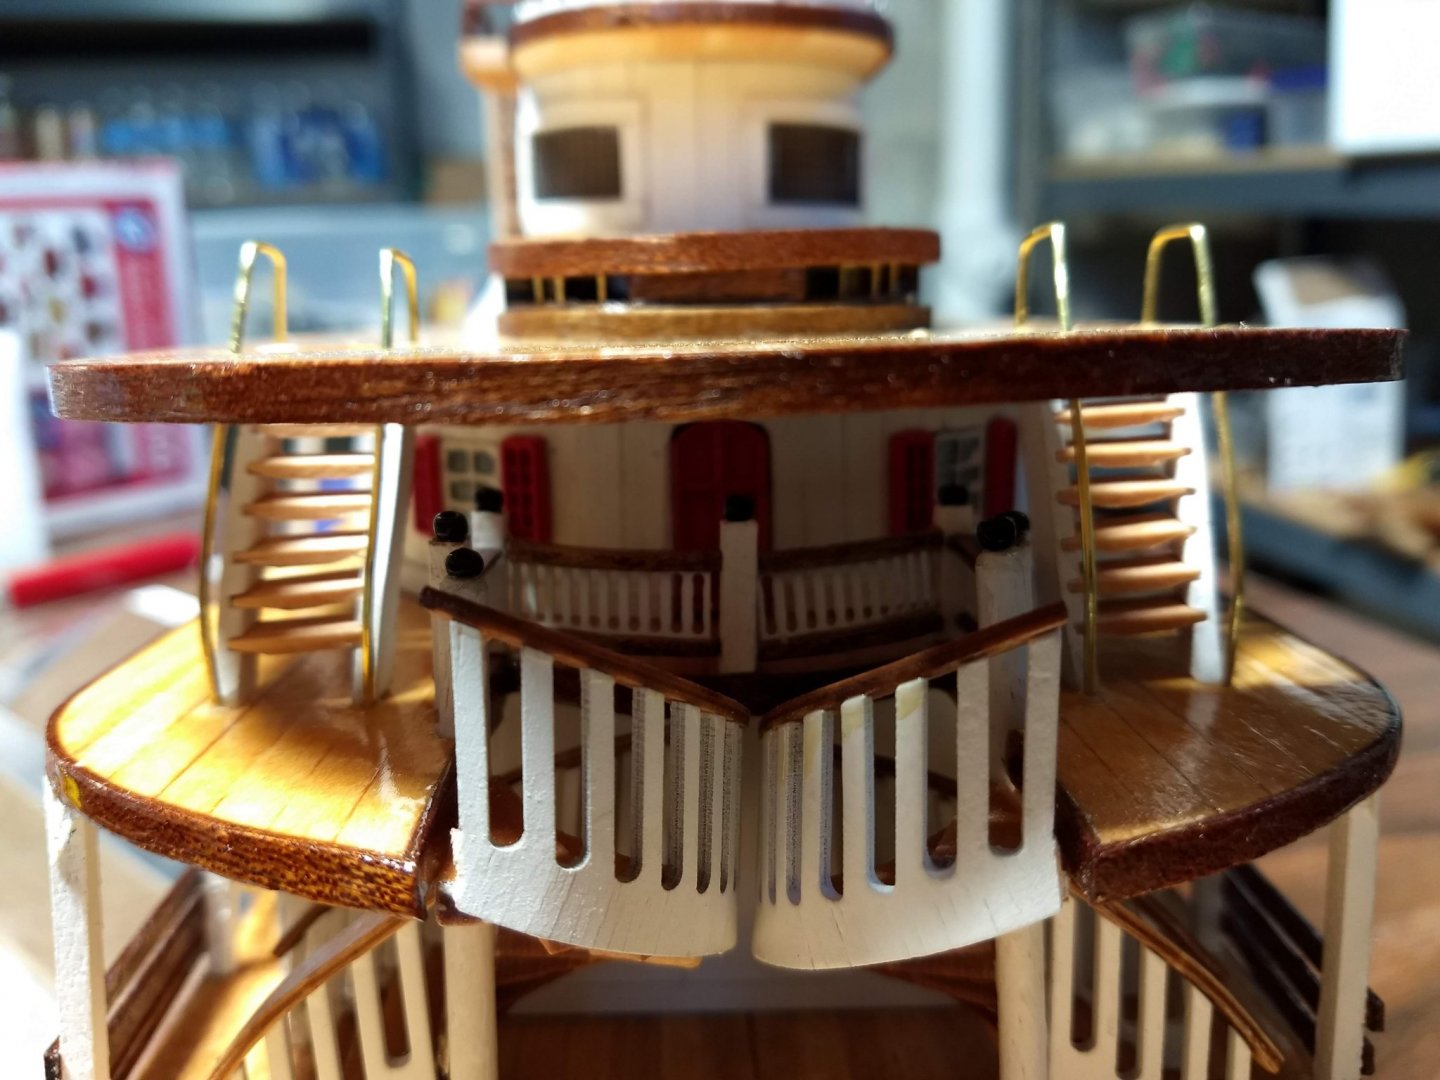
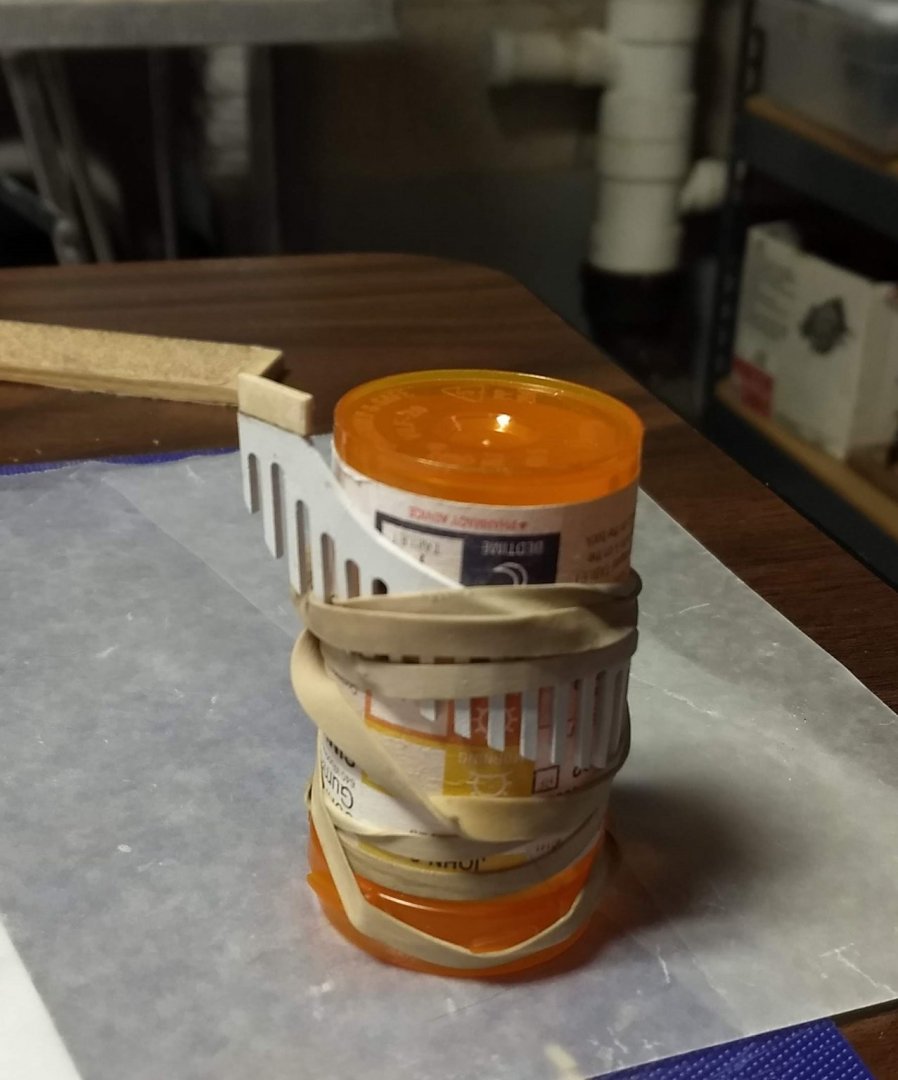
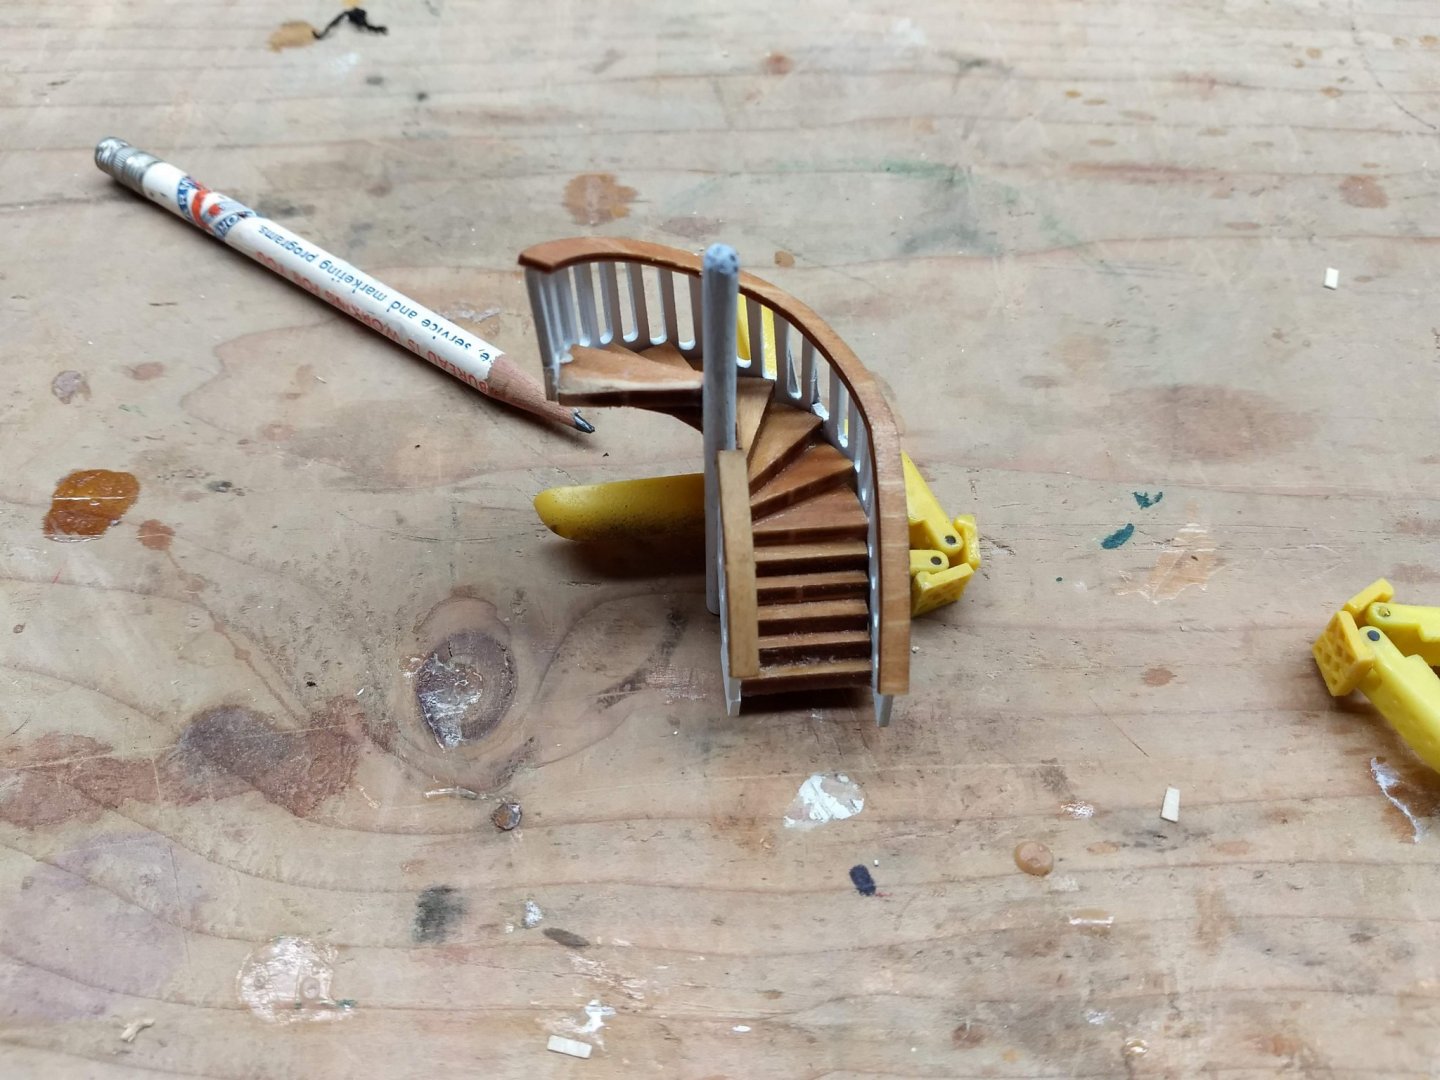
Now on to the circular railing... Soaked the railing for an hour or so, then with a heat source(soldering iron) bent them into shape. Even so still had all sort of trouble trying to hold the railing to the steps. Finally the solution was to wrap the wet/bent stairs to a prescription bottle that was about the same size at the radius of the stairs. That did the trick. The next day when the railings had dried, they were the shape of the prescription bottle (and circular stairs). Not the straight part of the stairs was not wrapped to the bottle. The next day the railing could easily be held by hand around the circular stars until the CA glue dried. Unfortunately I do not have a picture of the stairs before the railing were applied, but railing were not a big deal. The railings were pretty close to the shape they needed to be in to match the stairs. Just soak the railings, apply heat, and they can easily be bent into shape to conform to the stairs. Finally, glue into the ship Note the extension I put on the bottom of each star. It really is needed as the vertical railing post are too short and if you do not add an extension, the stairs will show between the vertical posts. I probably should have done a better job hiding the seam and now need to go back and try to fill the seam. Expert models would do a better job with the stairs, but with my limited skill, in my opinion, the stairs came out pretty good. On to the stateroom. Not much to say here. More or less like the lower stateroom. I highly suggest building the frames around the doors, enlarge the door openings to accept doors(and frames), then glue them into place. It take some time to do this, it just is not room to do as stated in the instructions,, That is - build the frames in the door openings, and insert the doors. Just is not room. Again, I used door screen for the windows instead of the clear plastic. On the putting in the Head posts. Here, do as I say, not as I do. You need to look at the overall plans (large diagram) and locate the posts in the exact location as specified by the plans. Otherwise, the curved railings in the bow and stern sections will not match the posts. Ask me how I know this? 🙂 I started out OK and since the railing sections are all the same size, I assembled a few of these and used them as a template to get the proper spacing between the posts. All good these, but I did not put the first post in the exact spot as specified by the plans. Here are a few railing sections used as templates. In my case they will eventually all be sprayed white (including the railings). Here shows using the railing segment as a template for the next post Below comes in the issue. Note the curved railing on the 2nd deck. In order for the curved railing to match a post, the post in the lower lever has to be in the correct location. As the 2nd level post need to be above it. In the below pictures, all looks OK, but the lower posts had to be (shall we say) "adjusted some in order for the 2nd deck posts to line and accept the curved railing in the bow and stern sections. Avoid my pain and take not from the plans the exact location of each post.


- 42 replies
-
- 6
-
-
- king of the mississippi
- artesania latina
- (and 1 more)
-
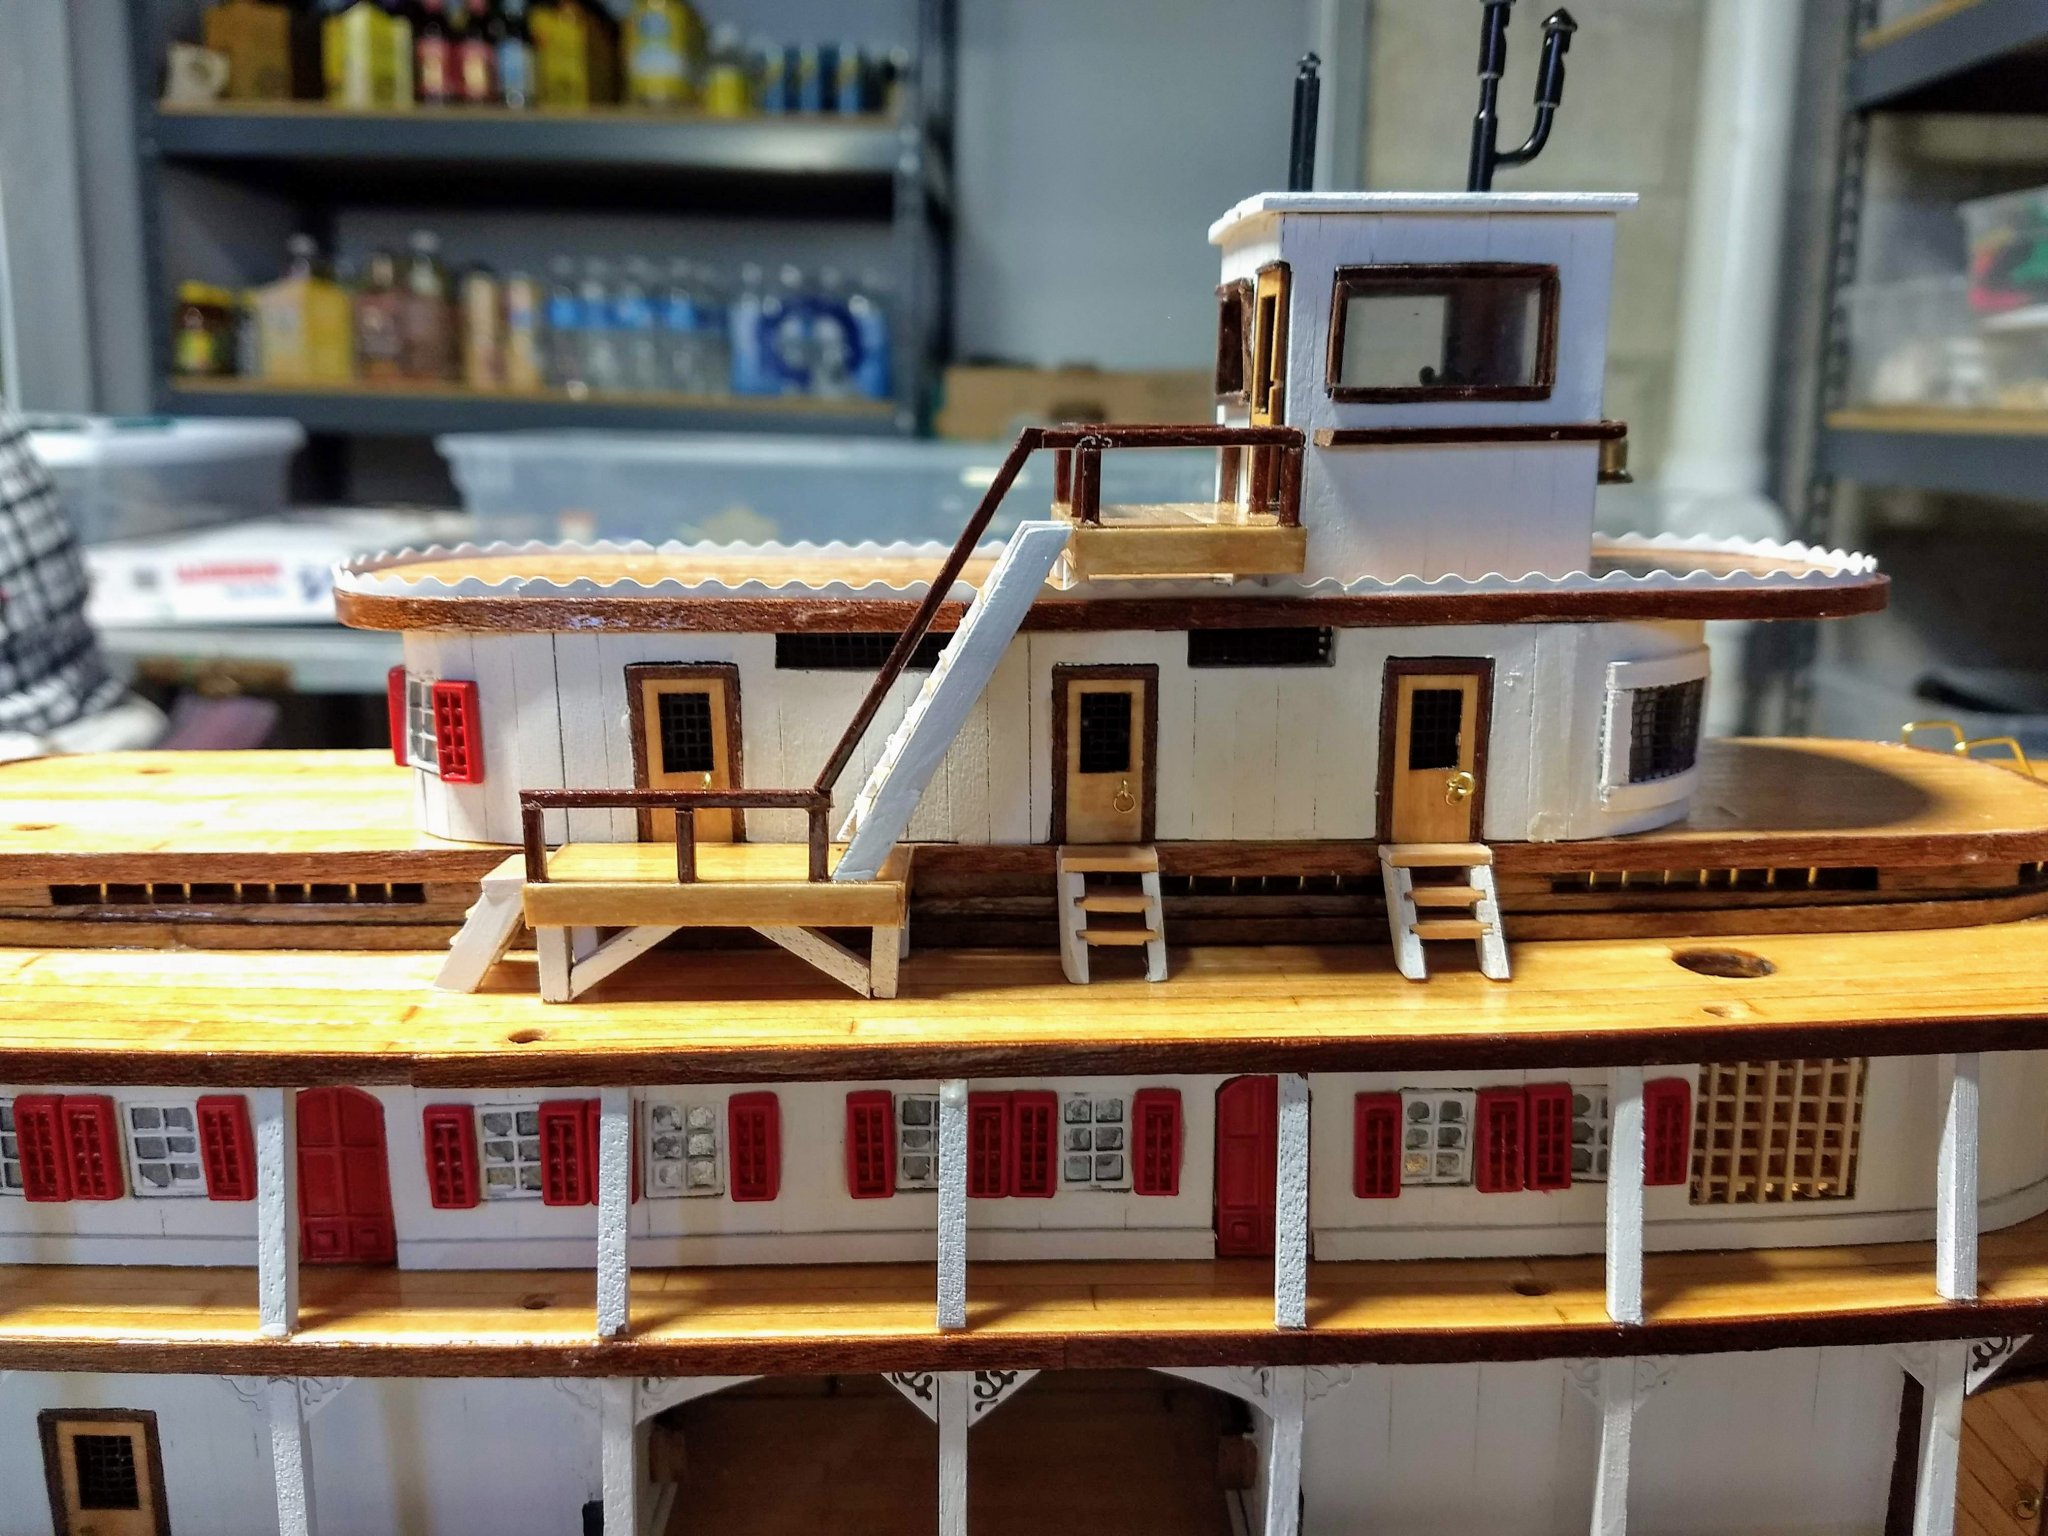
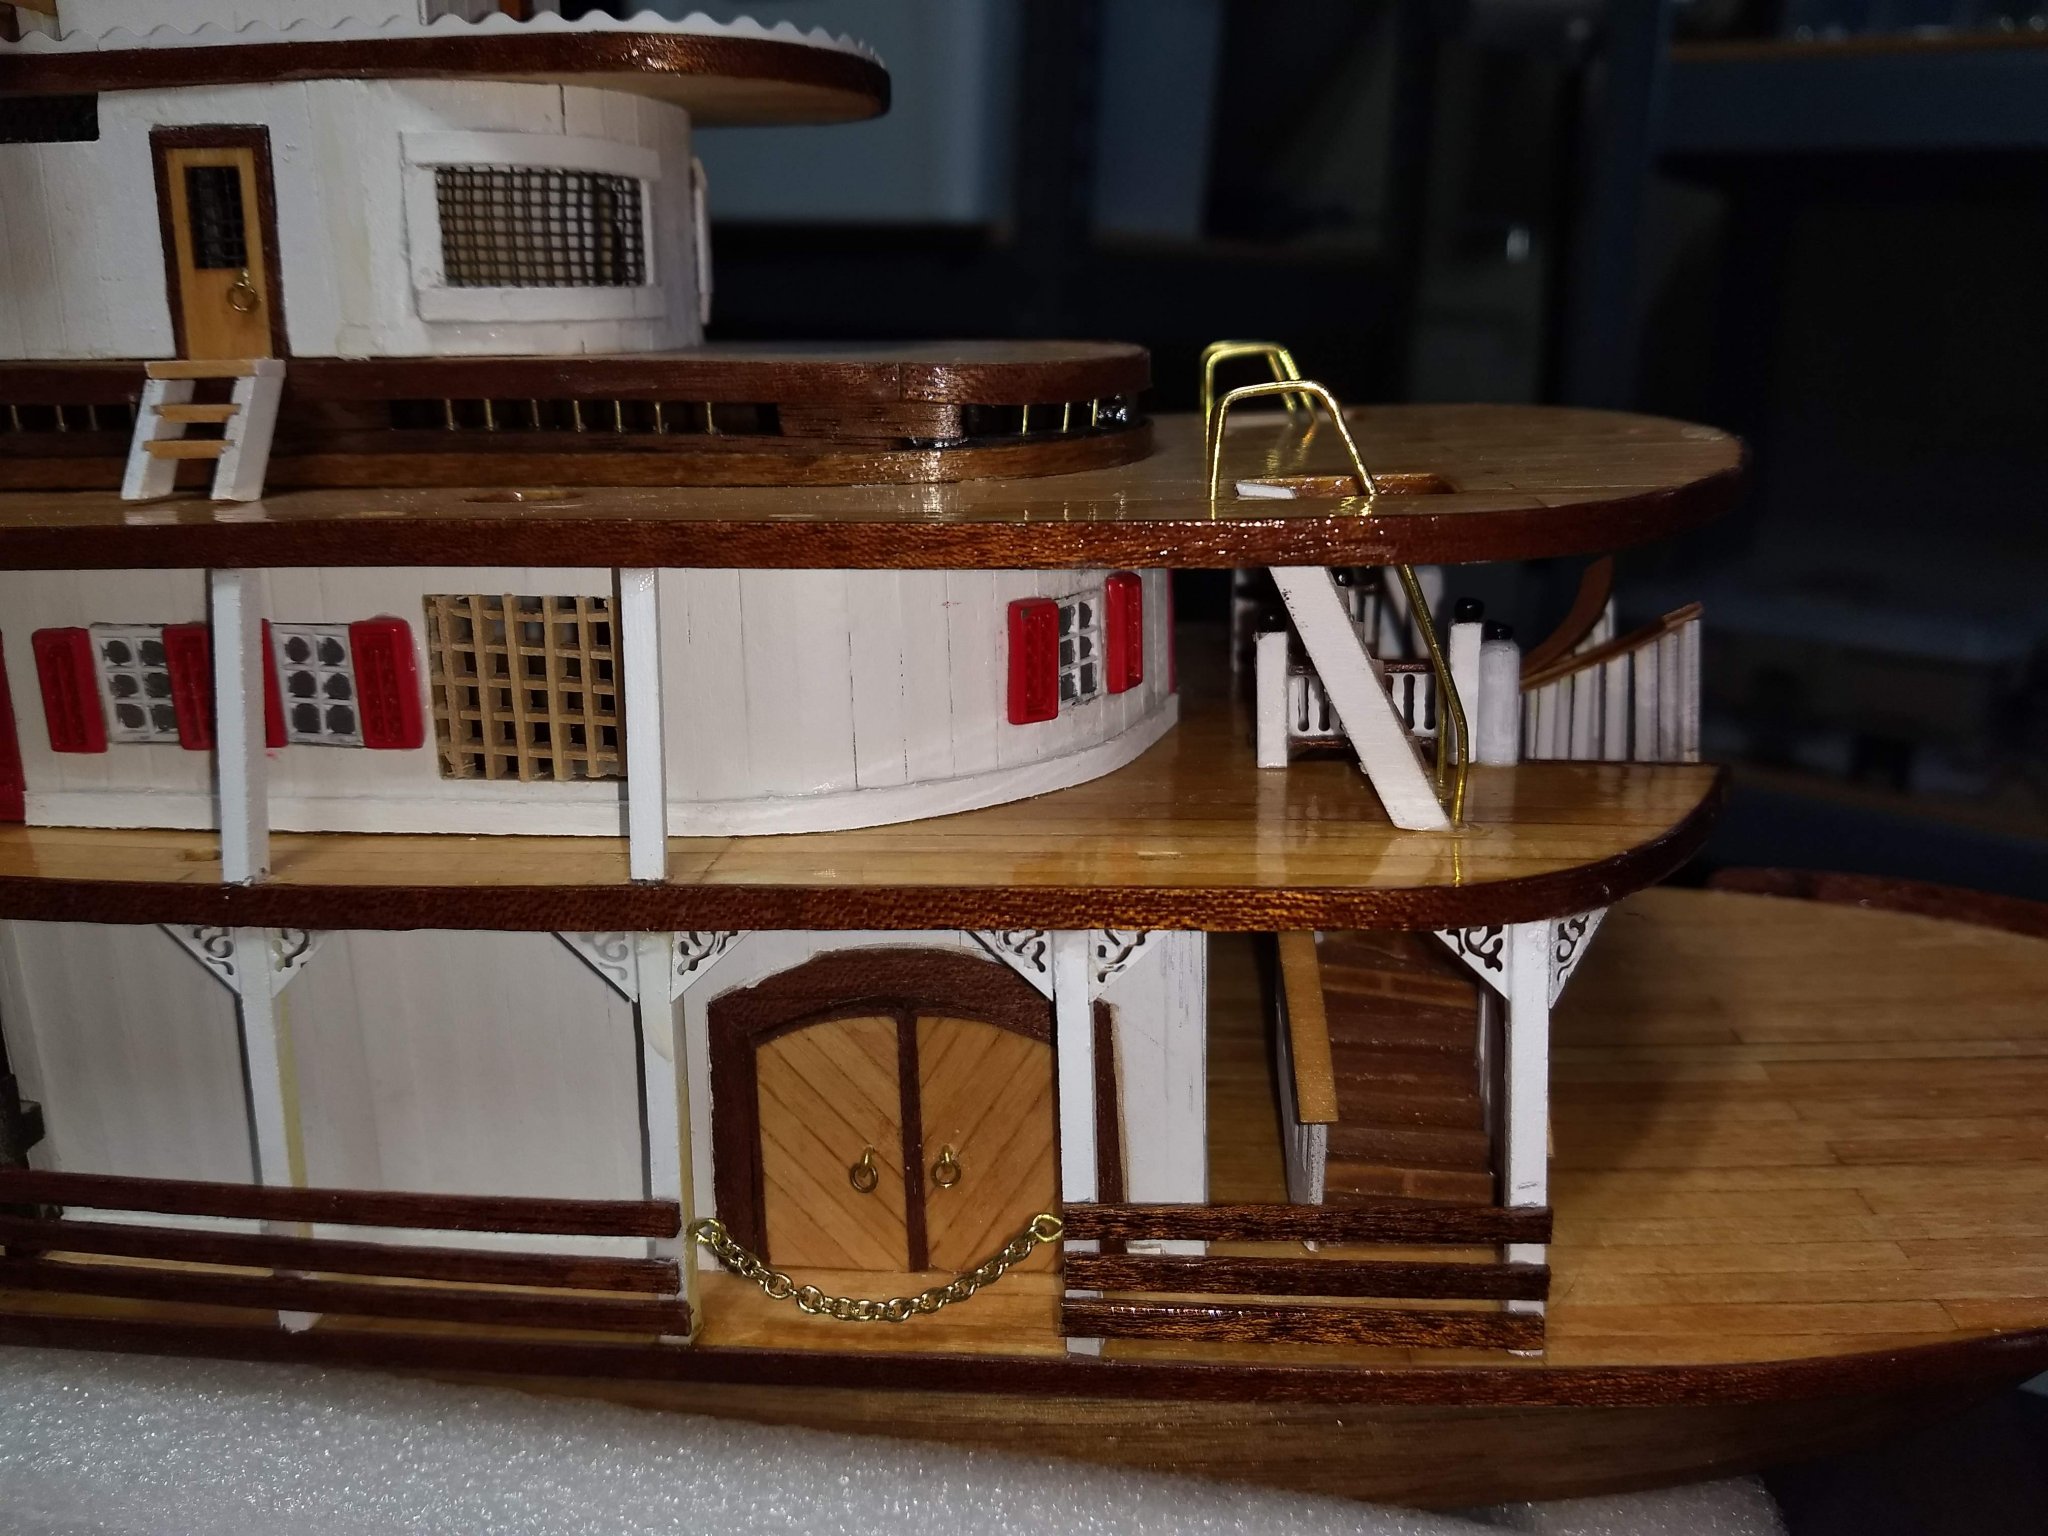
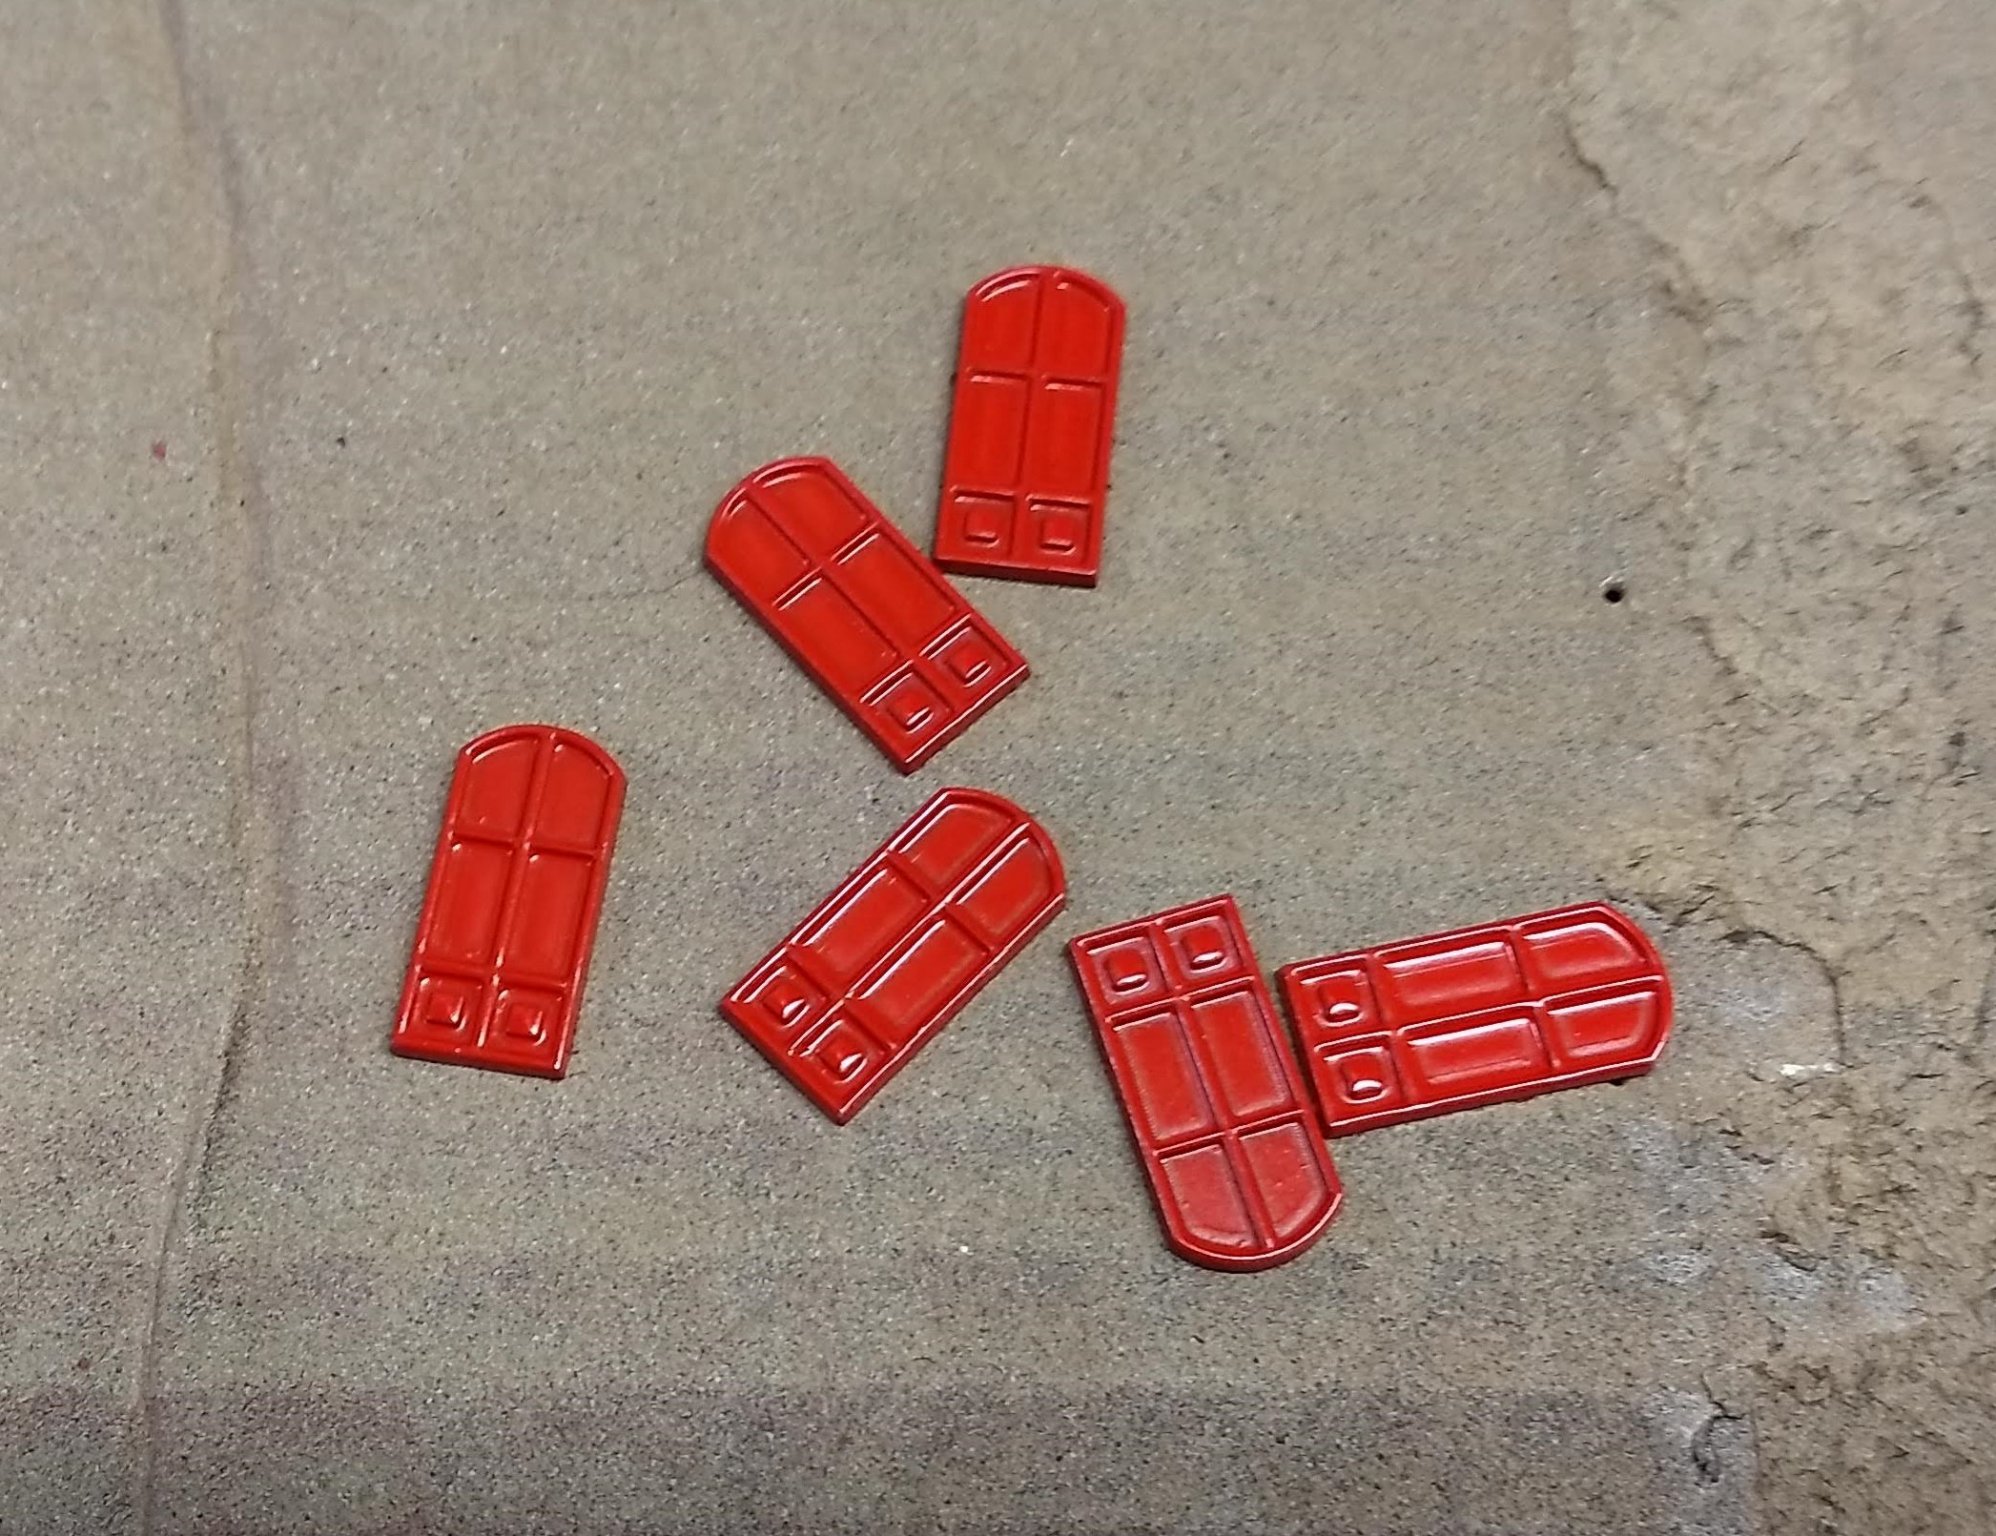
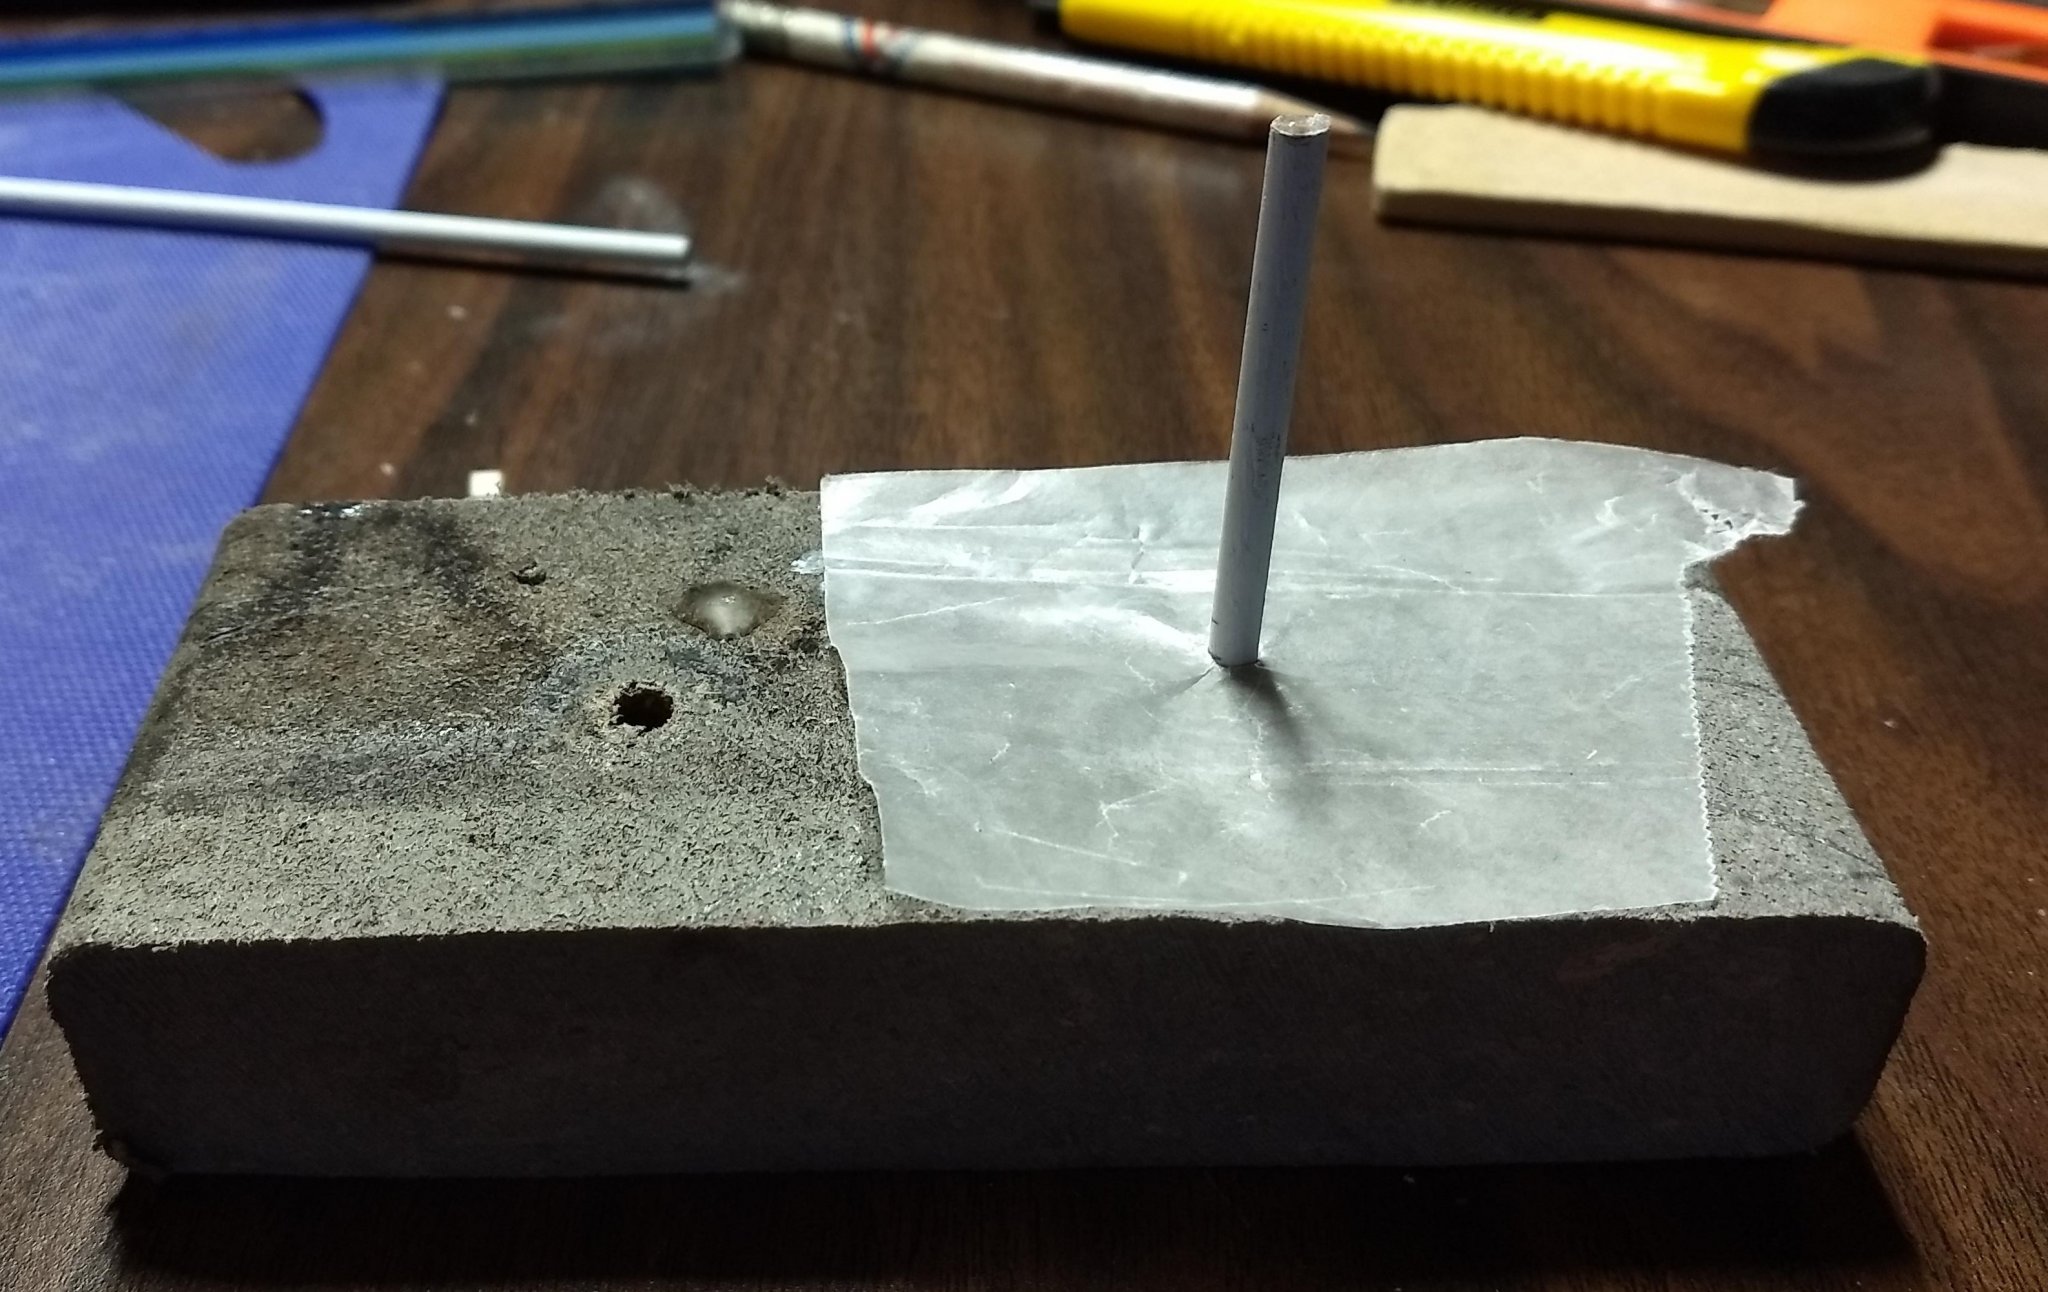
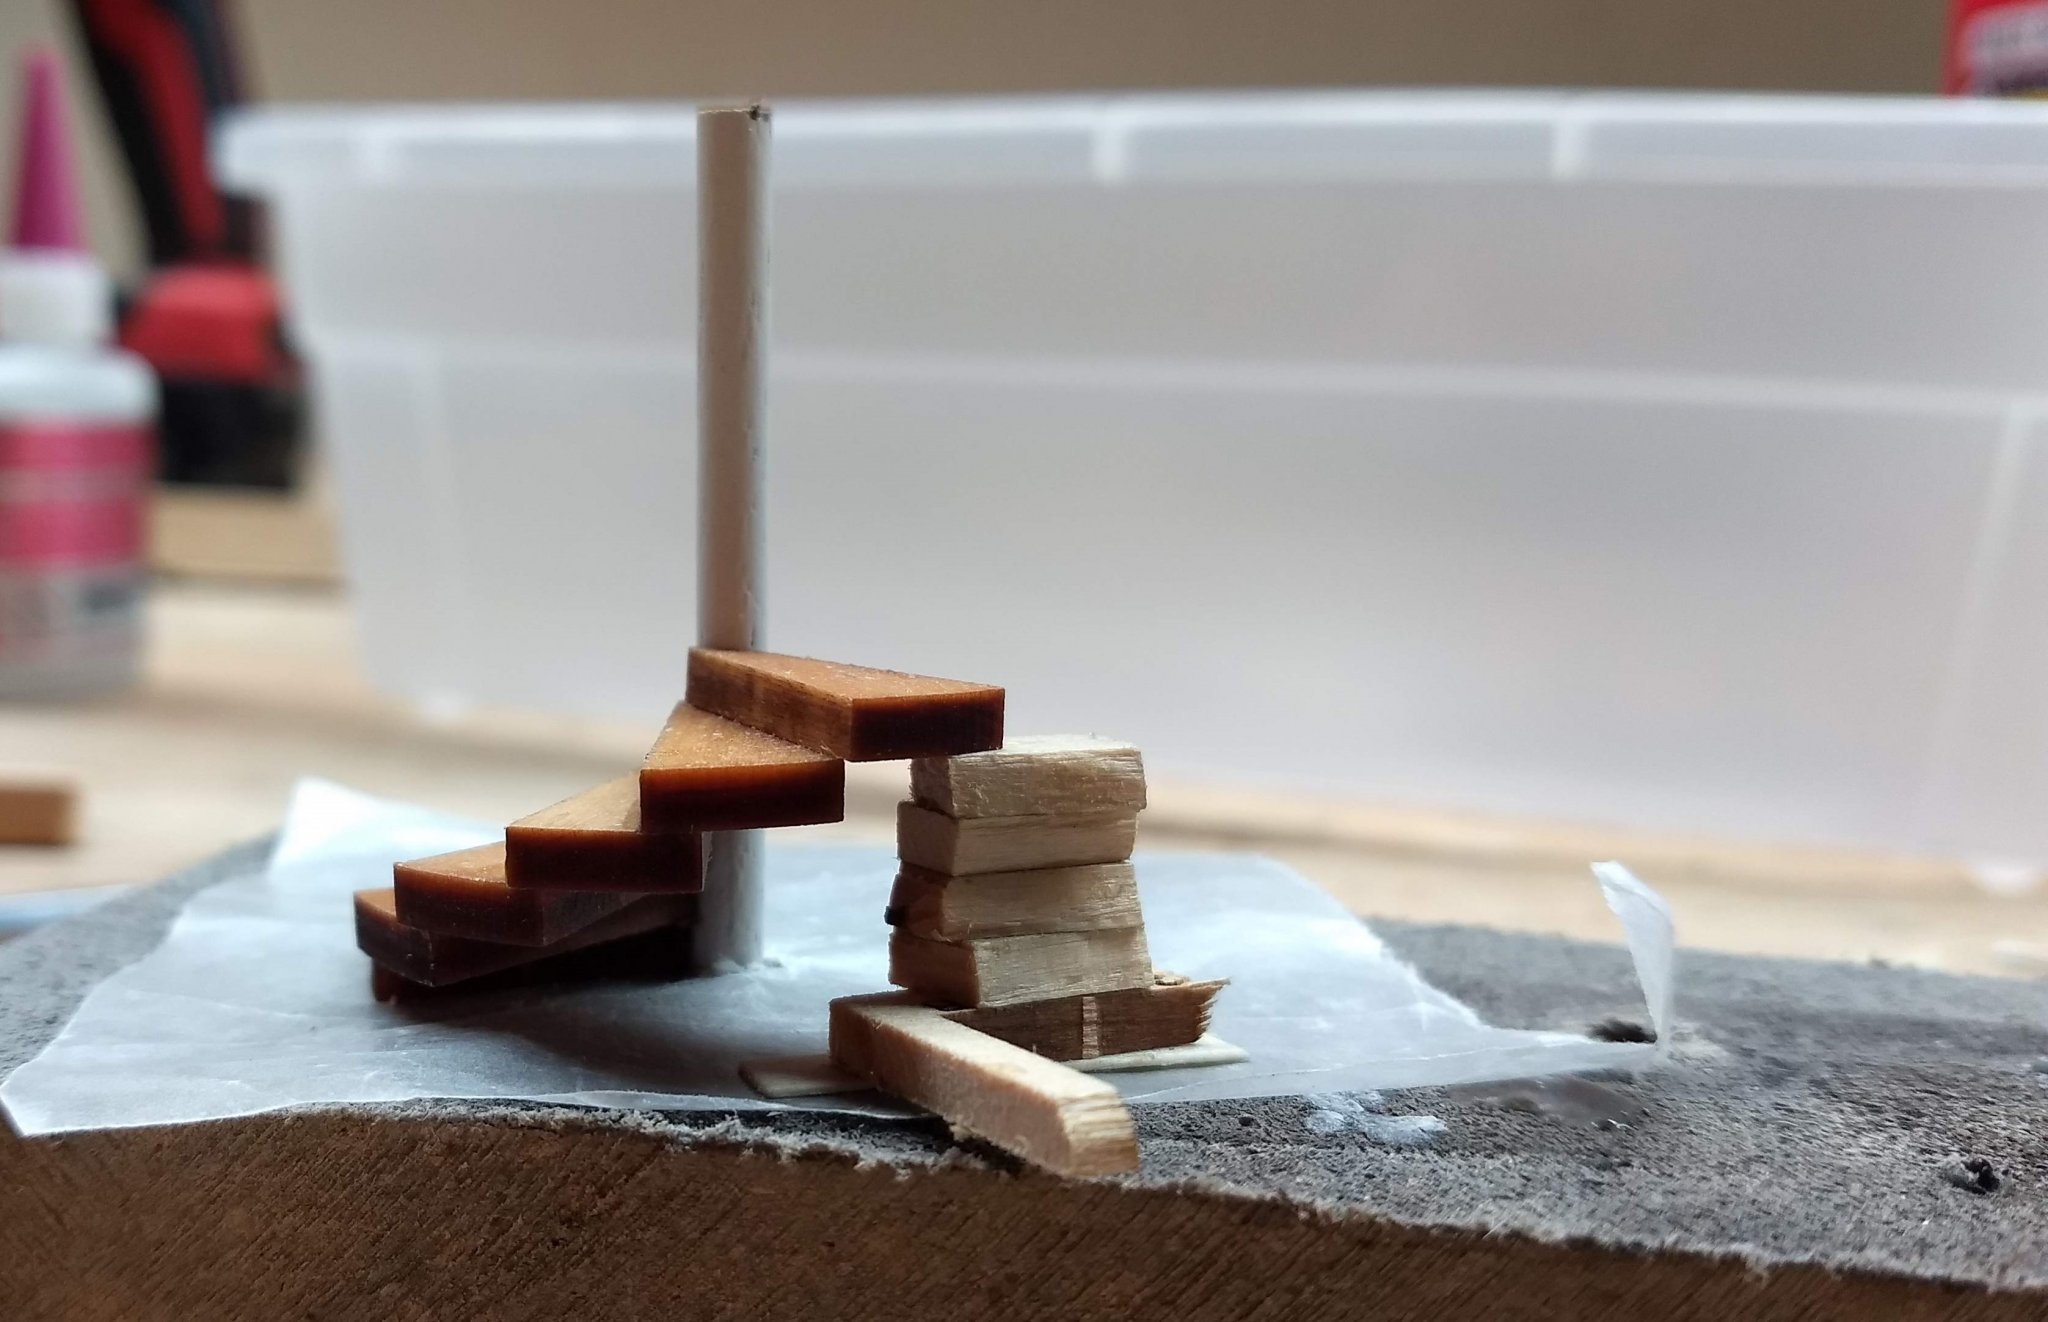
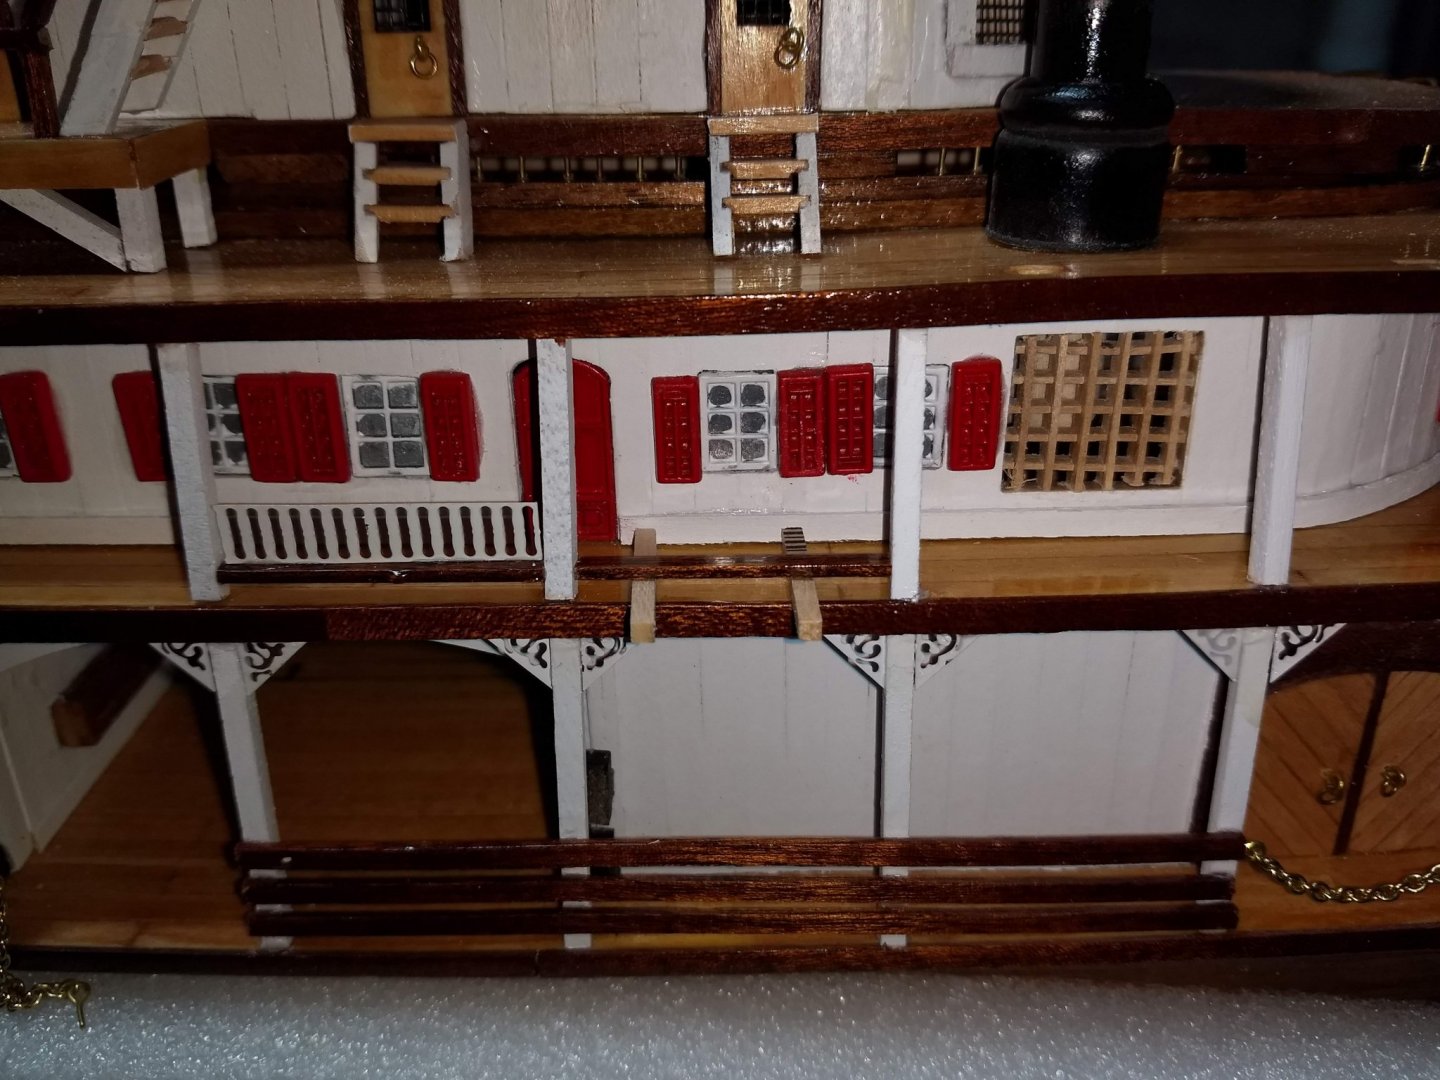
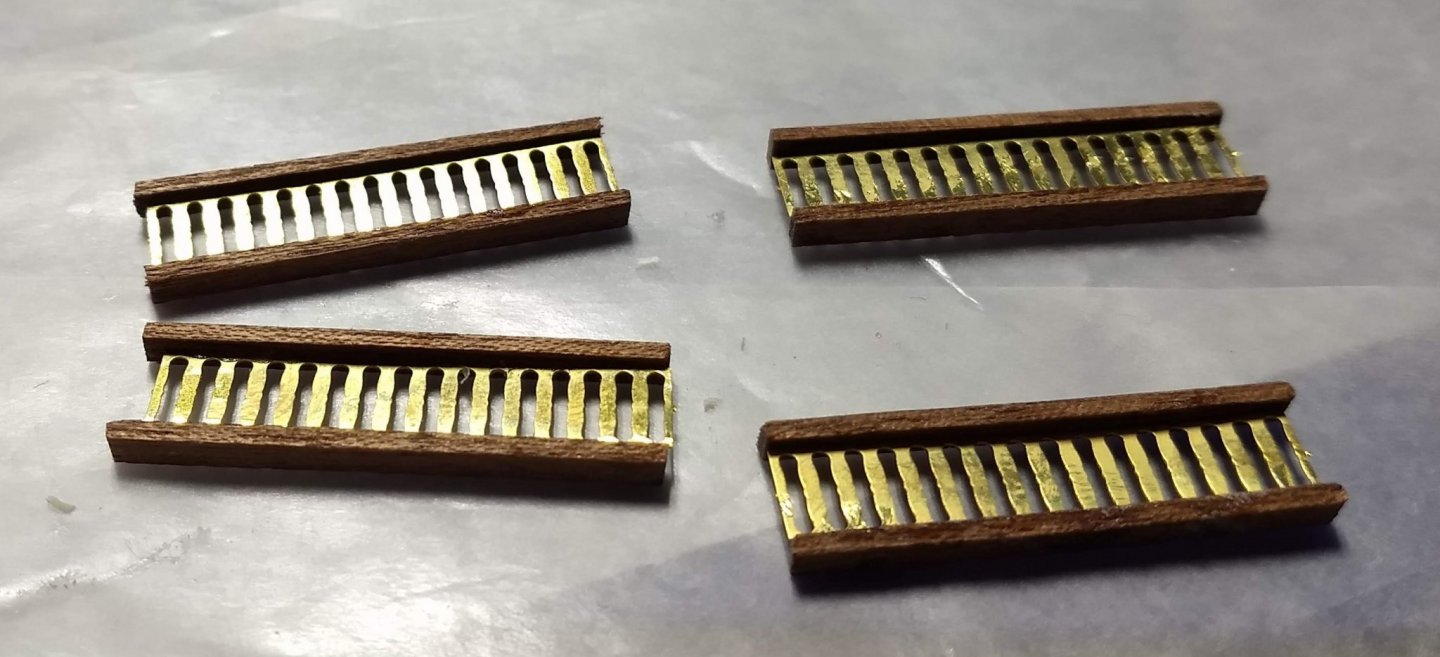
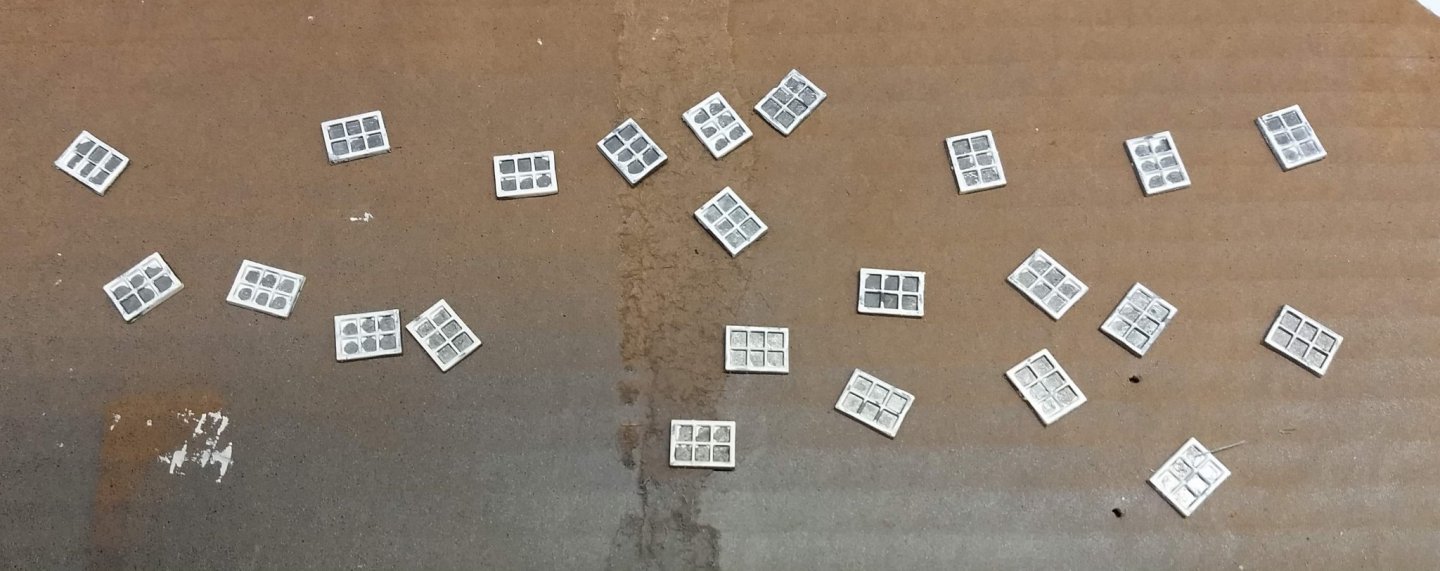
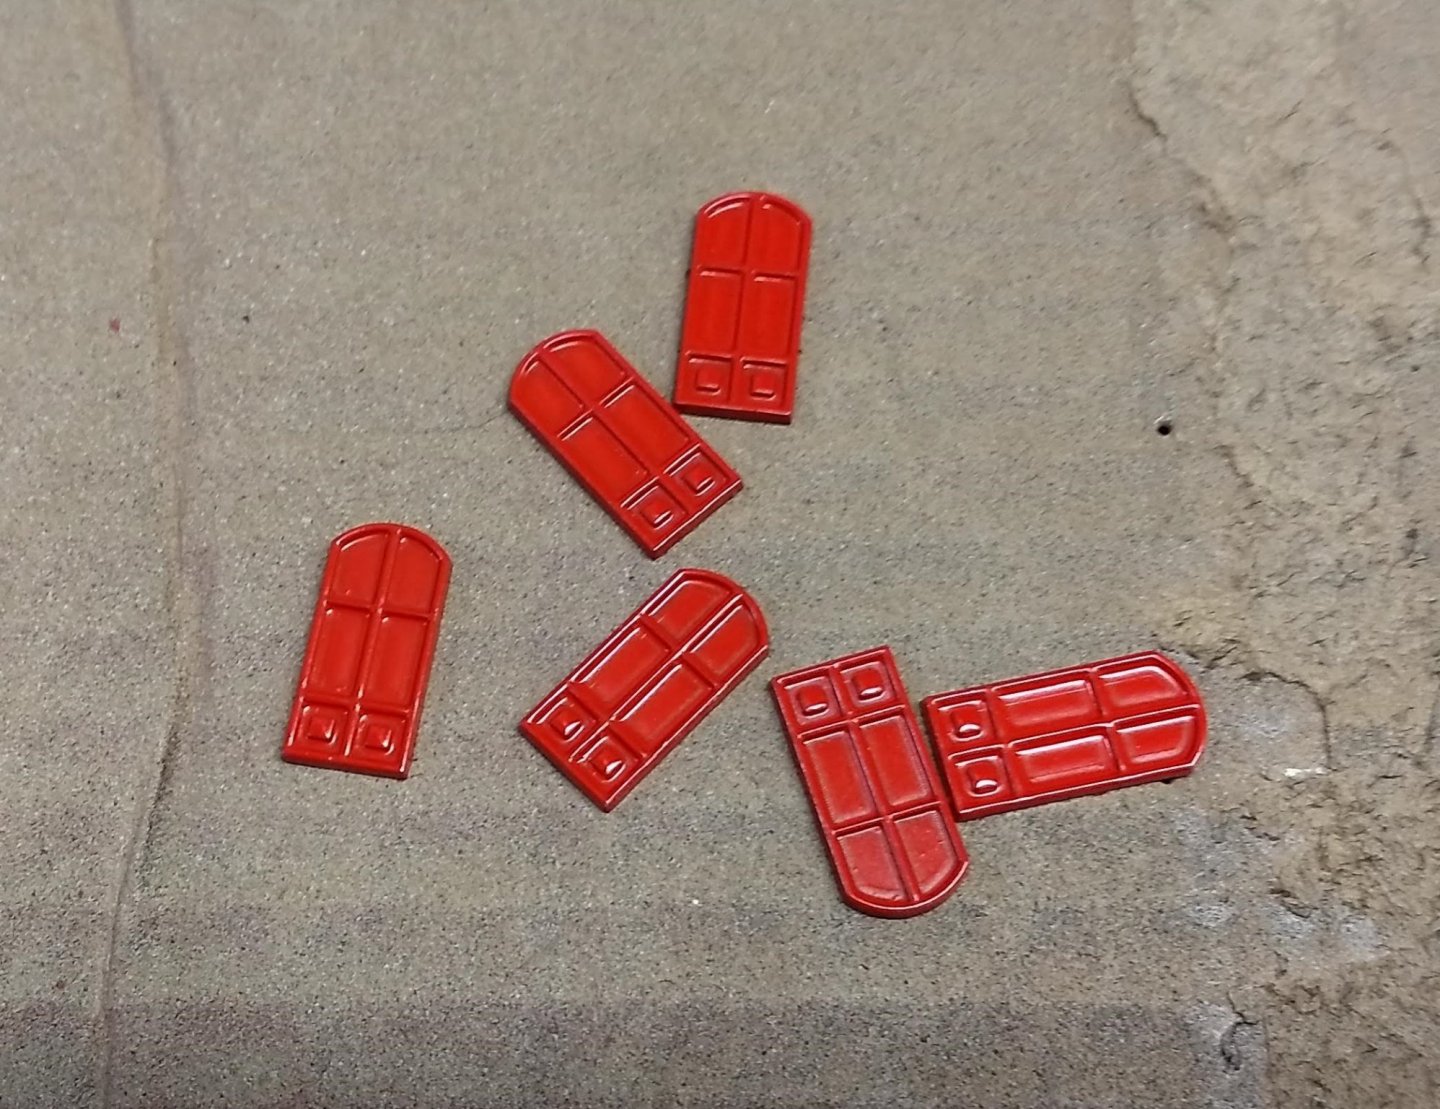
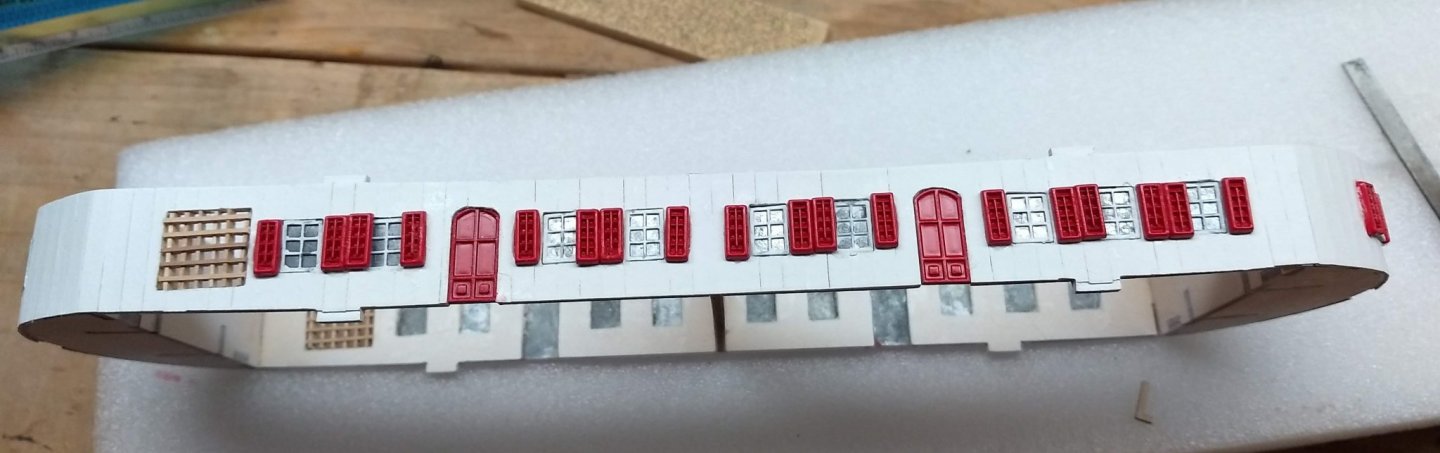
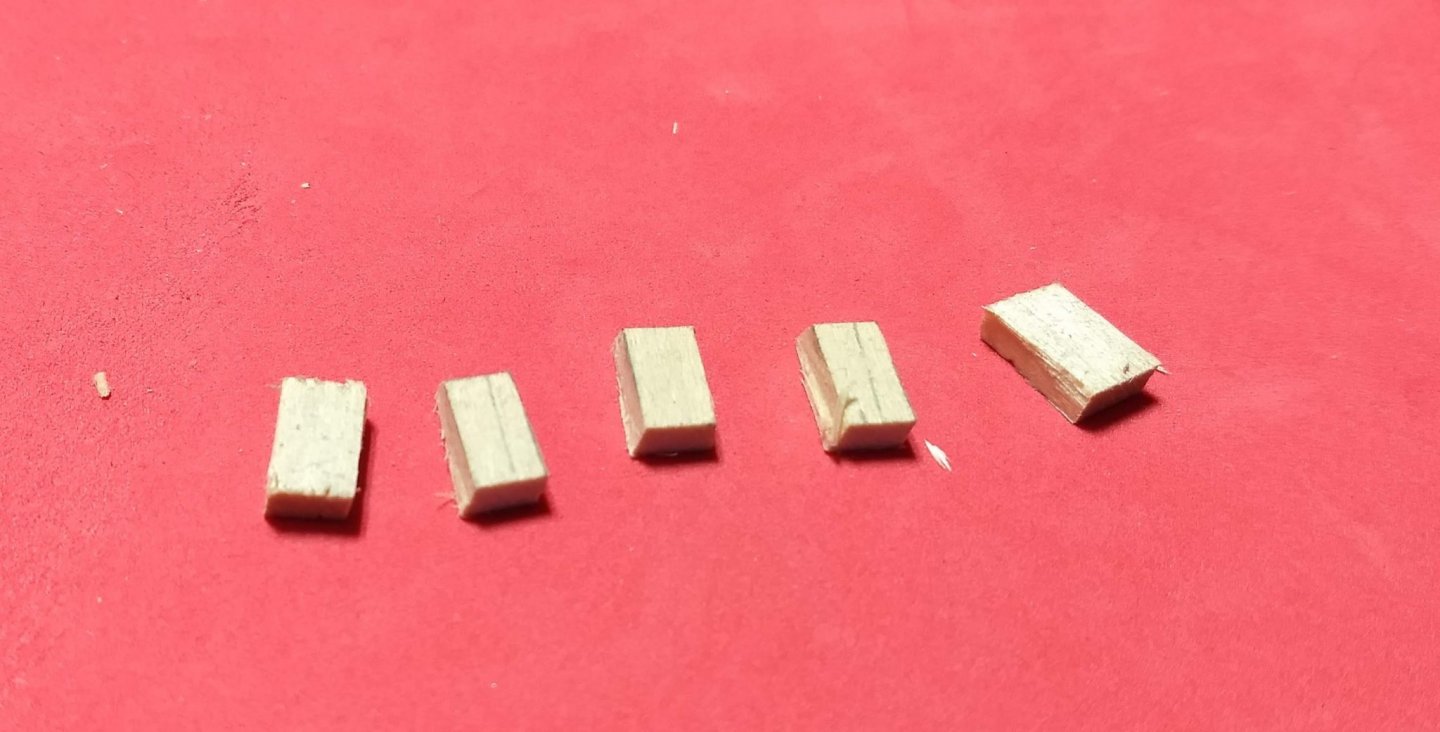
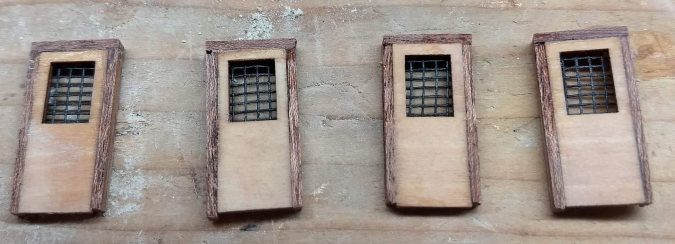
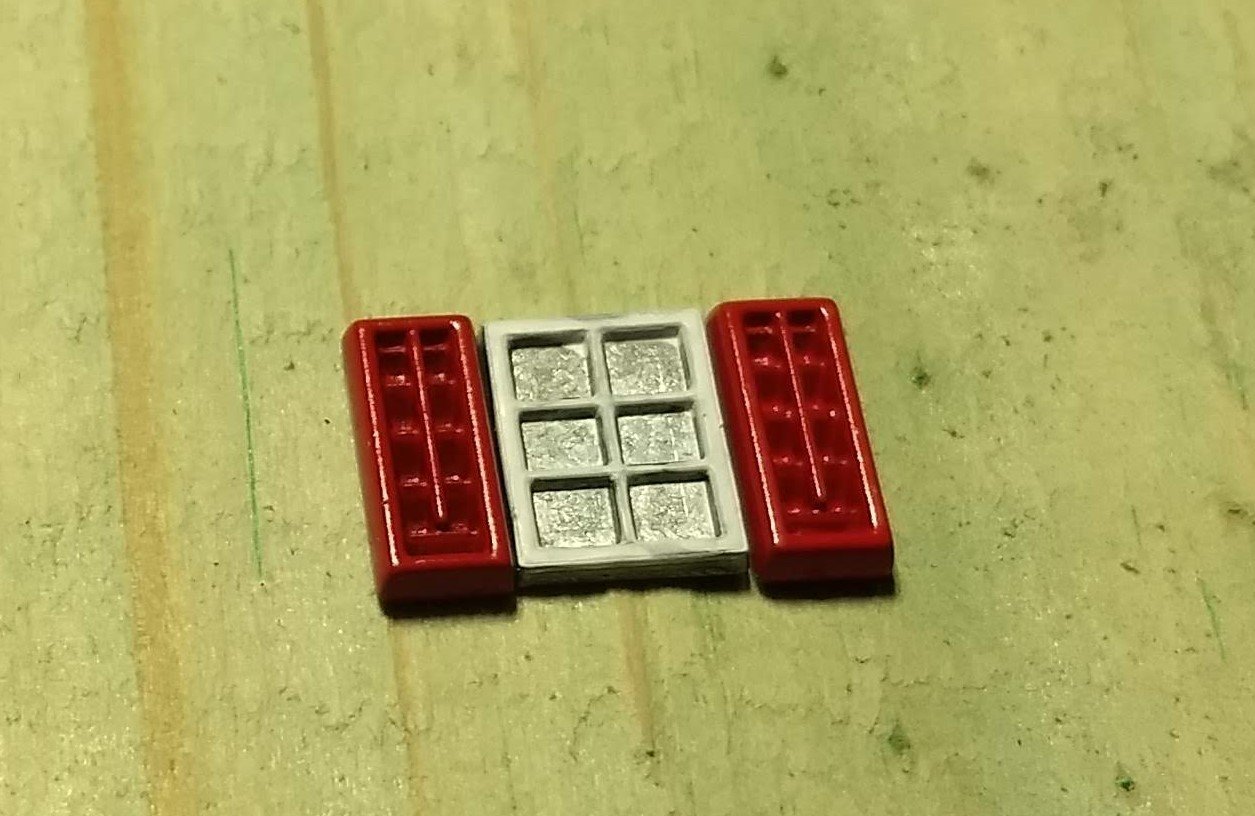
On to the main set of windows and doors... In this case they are all metal. I choose to only paint the window frames (white) and leave the windows the metal grey. Looking at the windows, it seemed to be more realistic view (to me anyway). Doors are solid red. Doors, Windows and window frames installed On to the dreaded circular stairs.... Looking at various build logs everyone had a lot of (shall we say) "fun" with the circular stairs .... 🙂 Based on the build logs there are several ways to take them on. I choose to follow the logic Adrieke used in his build. It seems to work pretty well for me. Start with the center pole cut to length. Actually I cut it a few mm longer than the desired length. I figured the extra length may come in handy when mounting the stairs into the ship. Since the first five steps are straight, mark the center pole at the height a little higher than the five steps. This is where the first curved step will start. Drill a hole in a block the depth of the five step mark and insert the center pole Cut a few extra pieces of wood from the same wood the that steps were cut from. These pieces will be the same width of each step (since they came from the same wood as the steps). These extra pieces of wood will be used to steady each step (as the glue dries) as each step is added . As each step is added, add another piece of wood to stead the step. Extra pieces of wood Below shows the fifth step being added. Note the five pieces of wood used to steady the step while the glue dries Us CA glue here and you will not have to wait very long to add the next step. Below shows both set of step built. I need to clean up some of the extra glue, but not too bad. Next, the five straight steps and the railings will be added. Hope fully that will not be to much "fun" 🙂


- 42 replies
-
- 4
-
-
- king of the mississippi
- artesania latina
- (and 1 more)
-
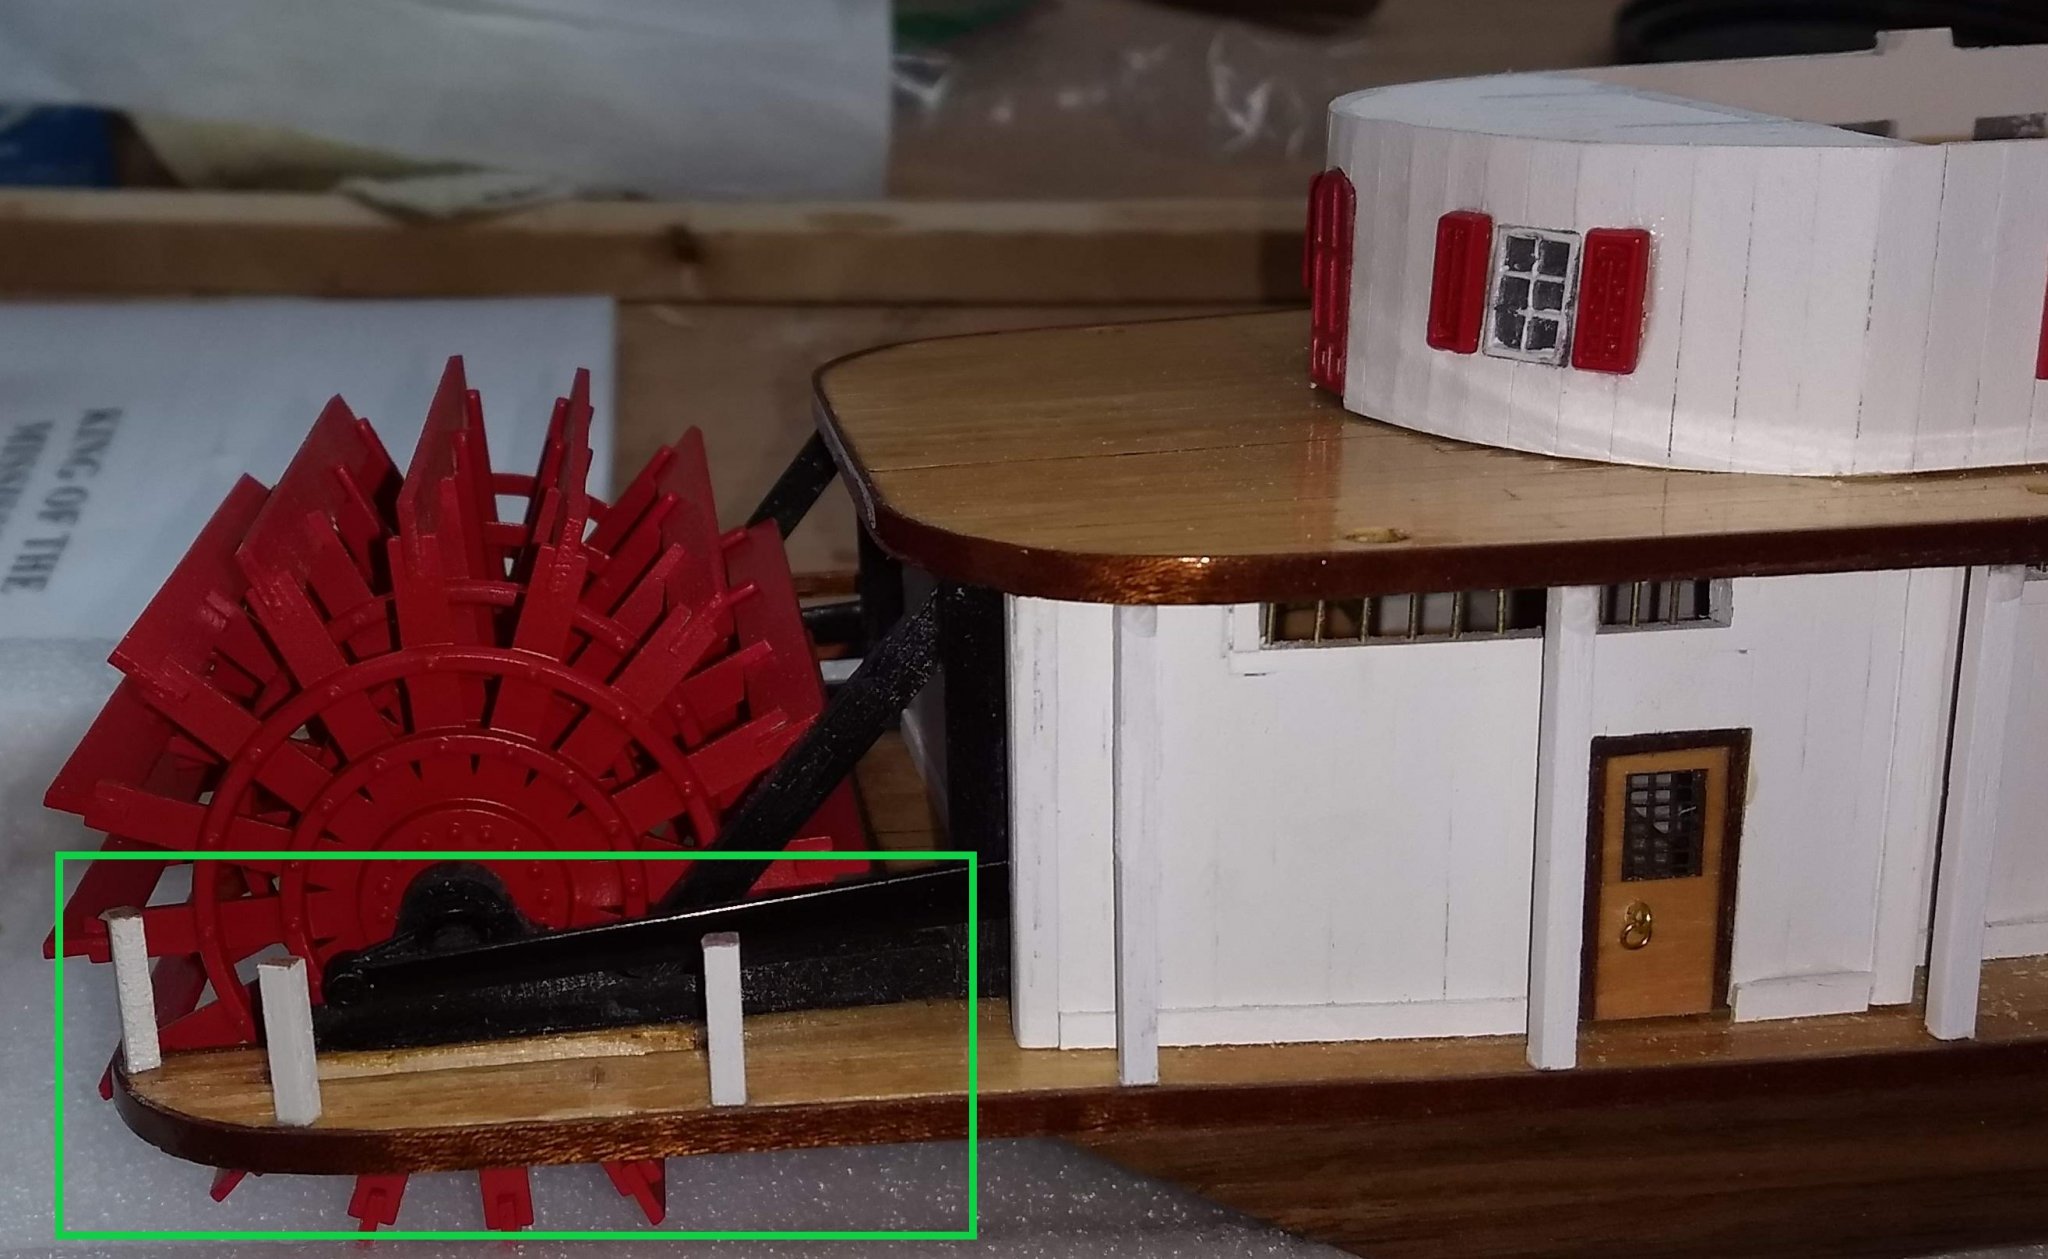
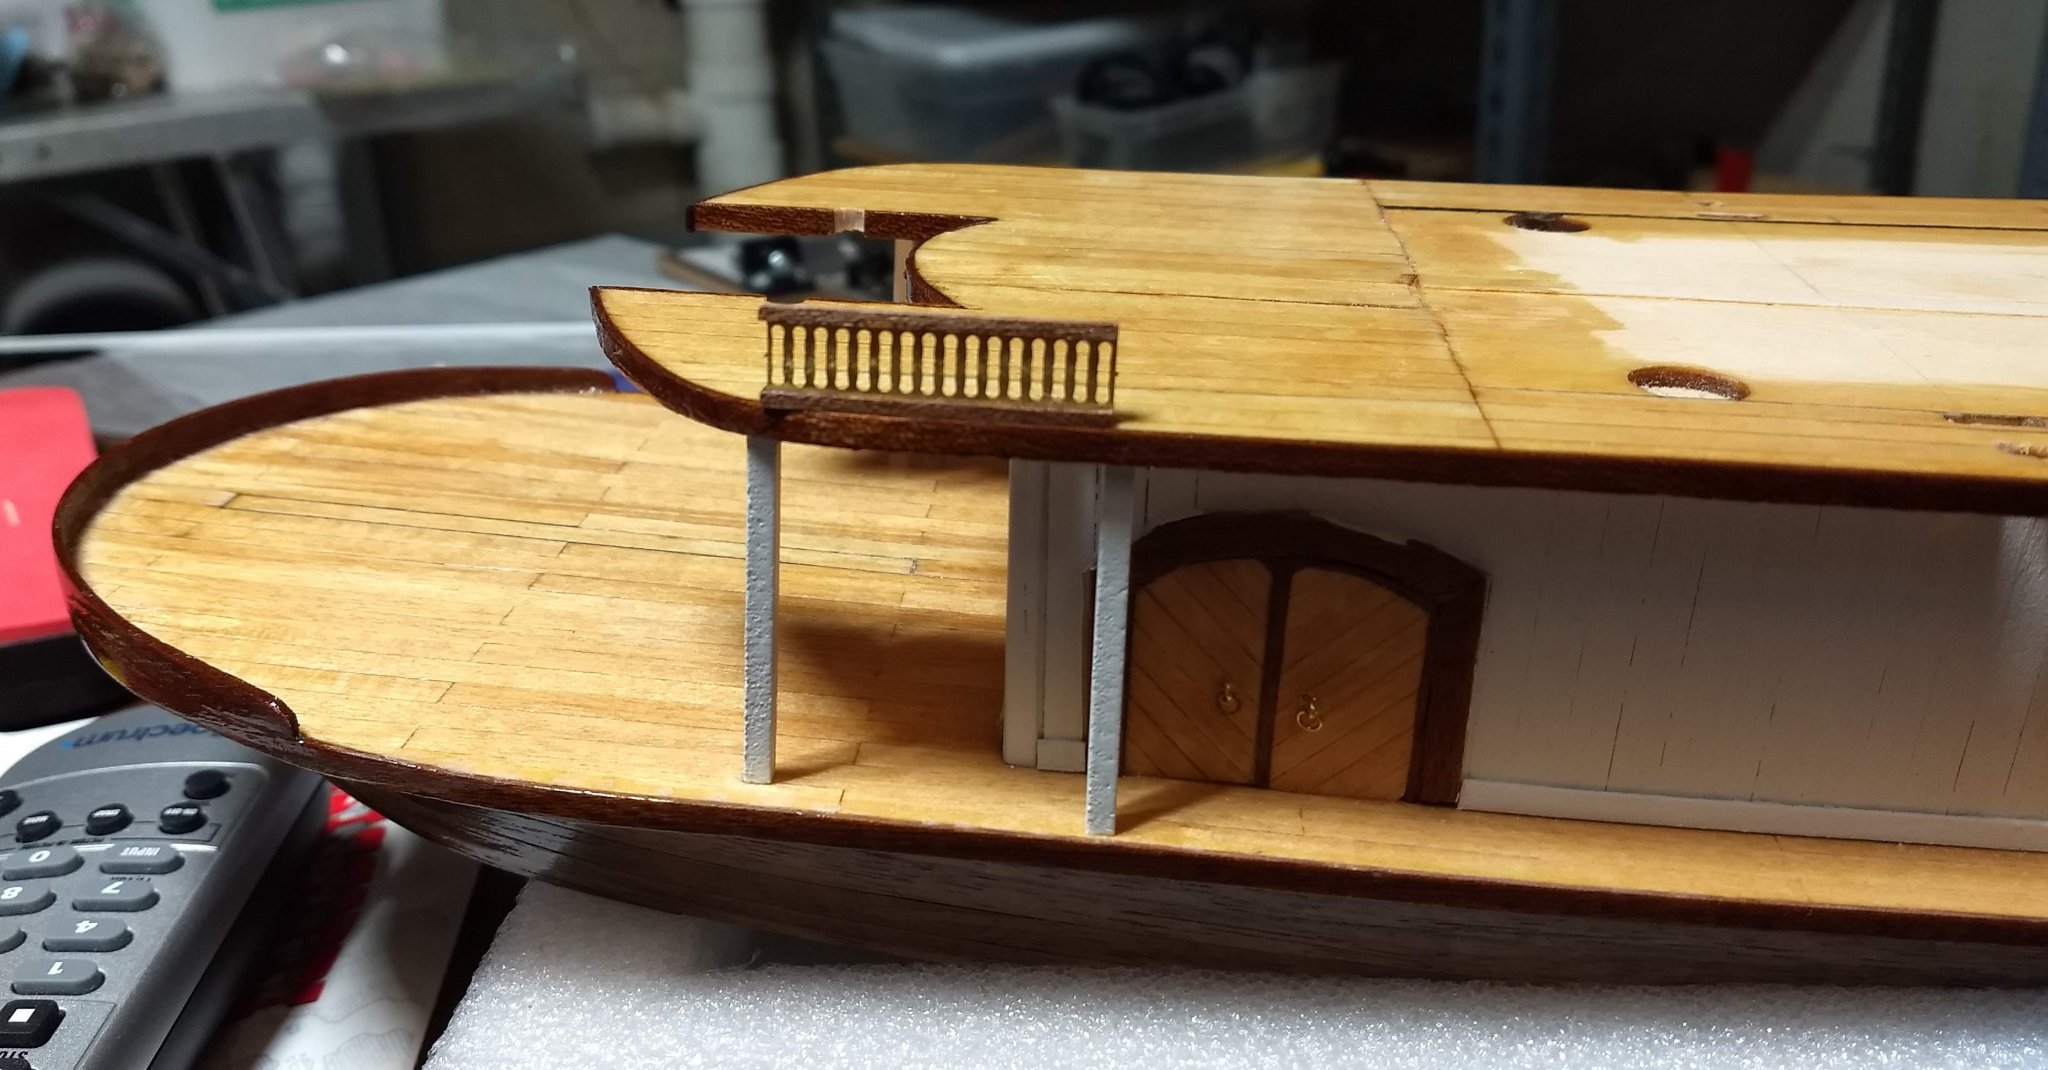
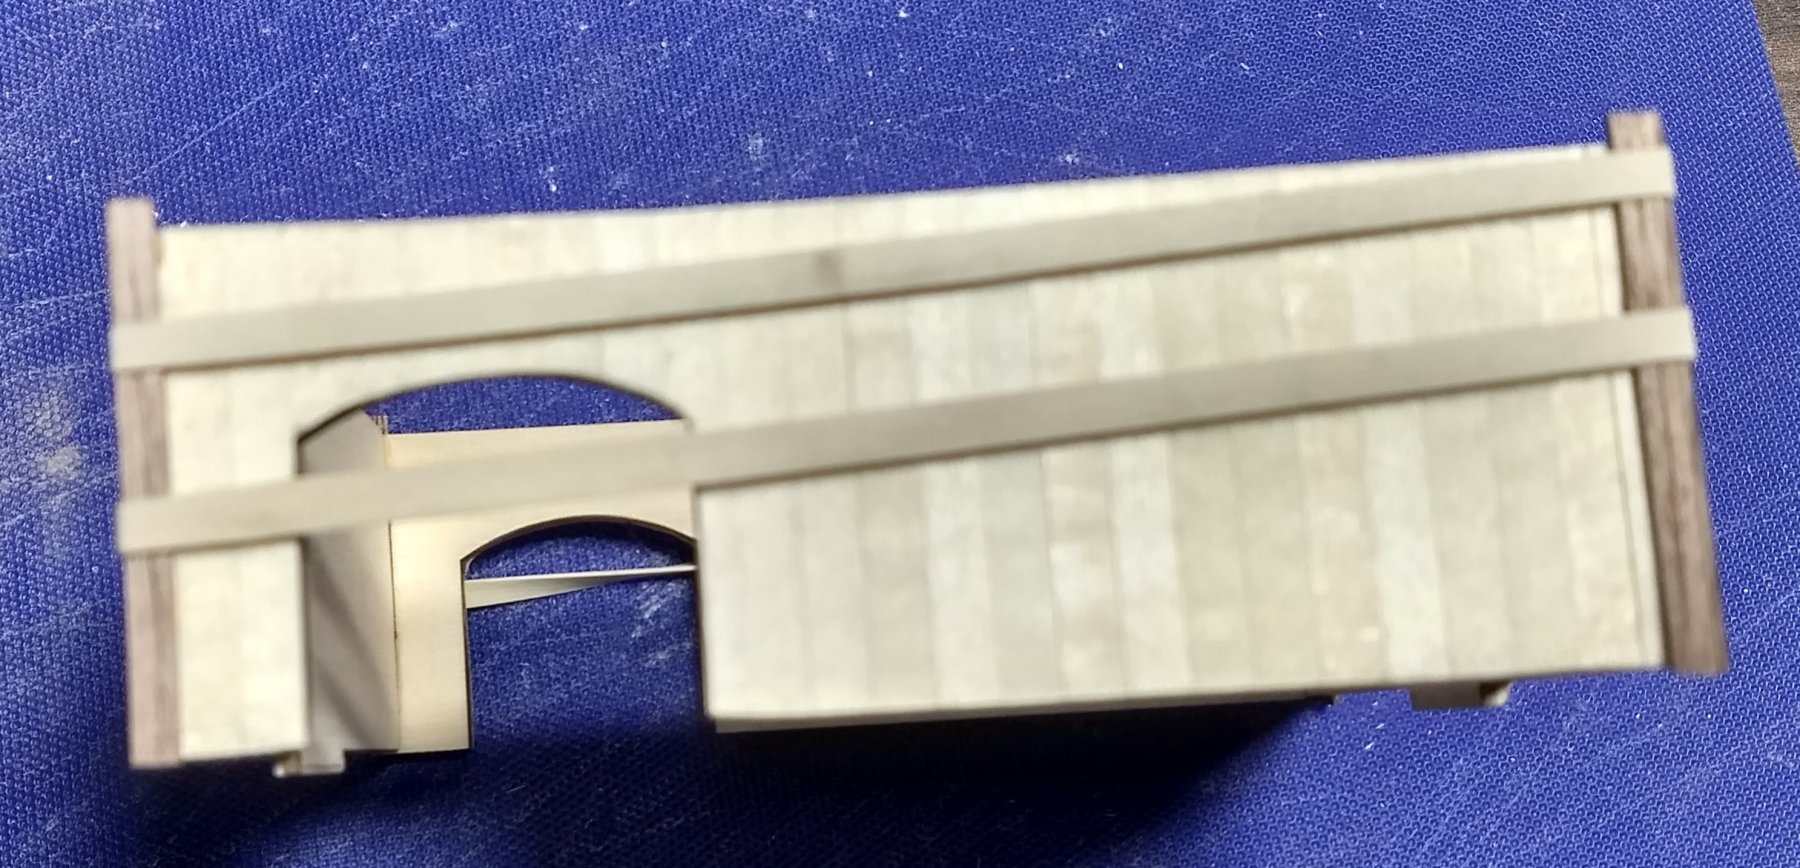
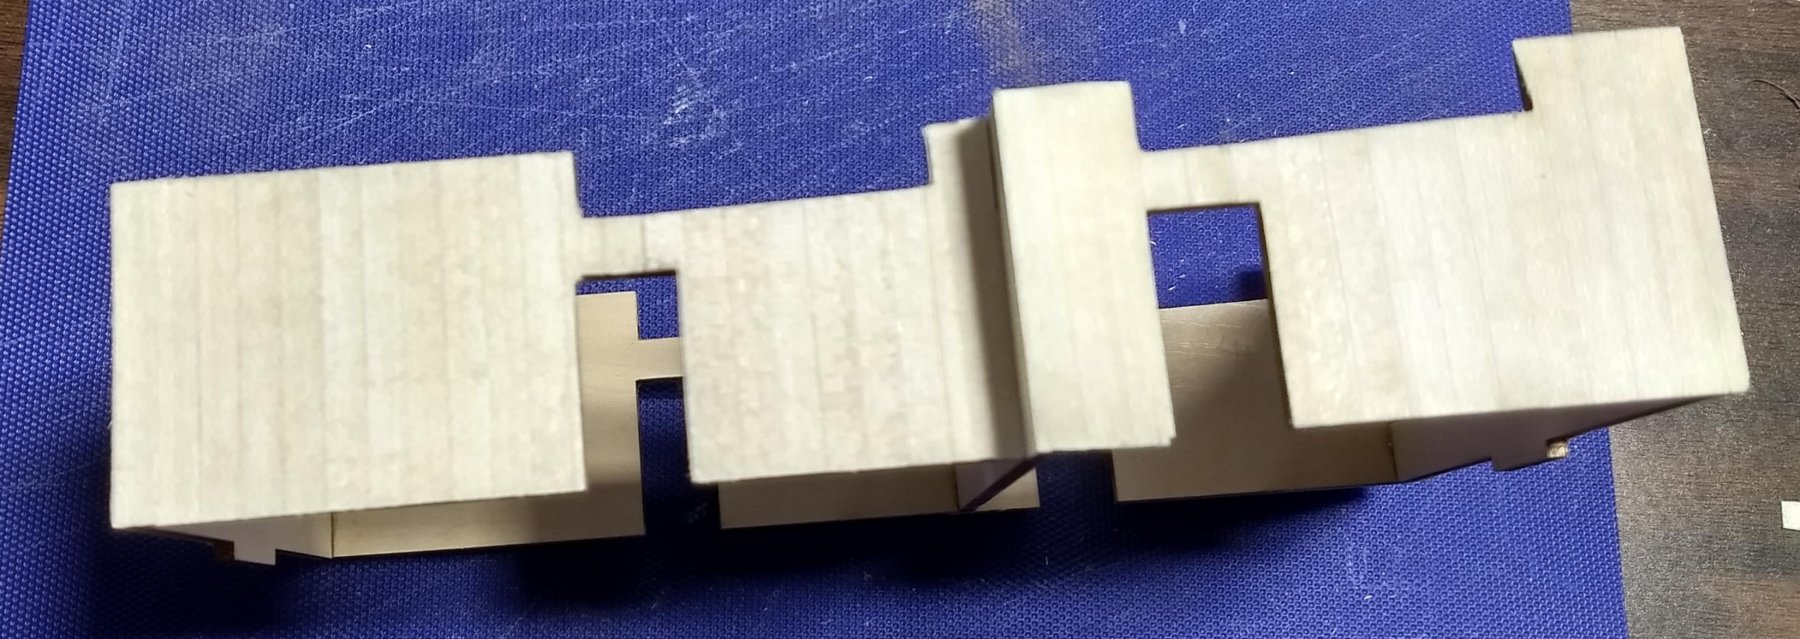
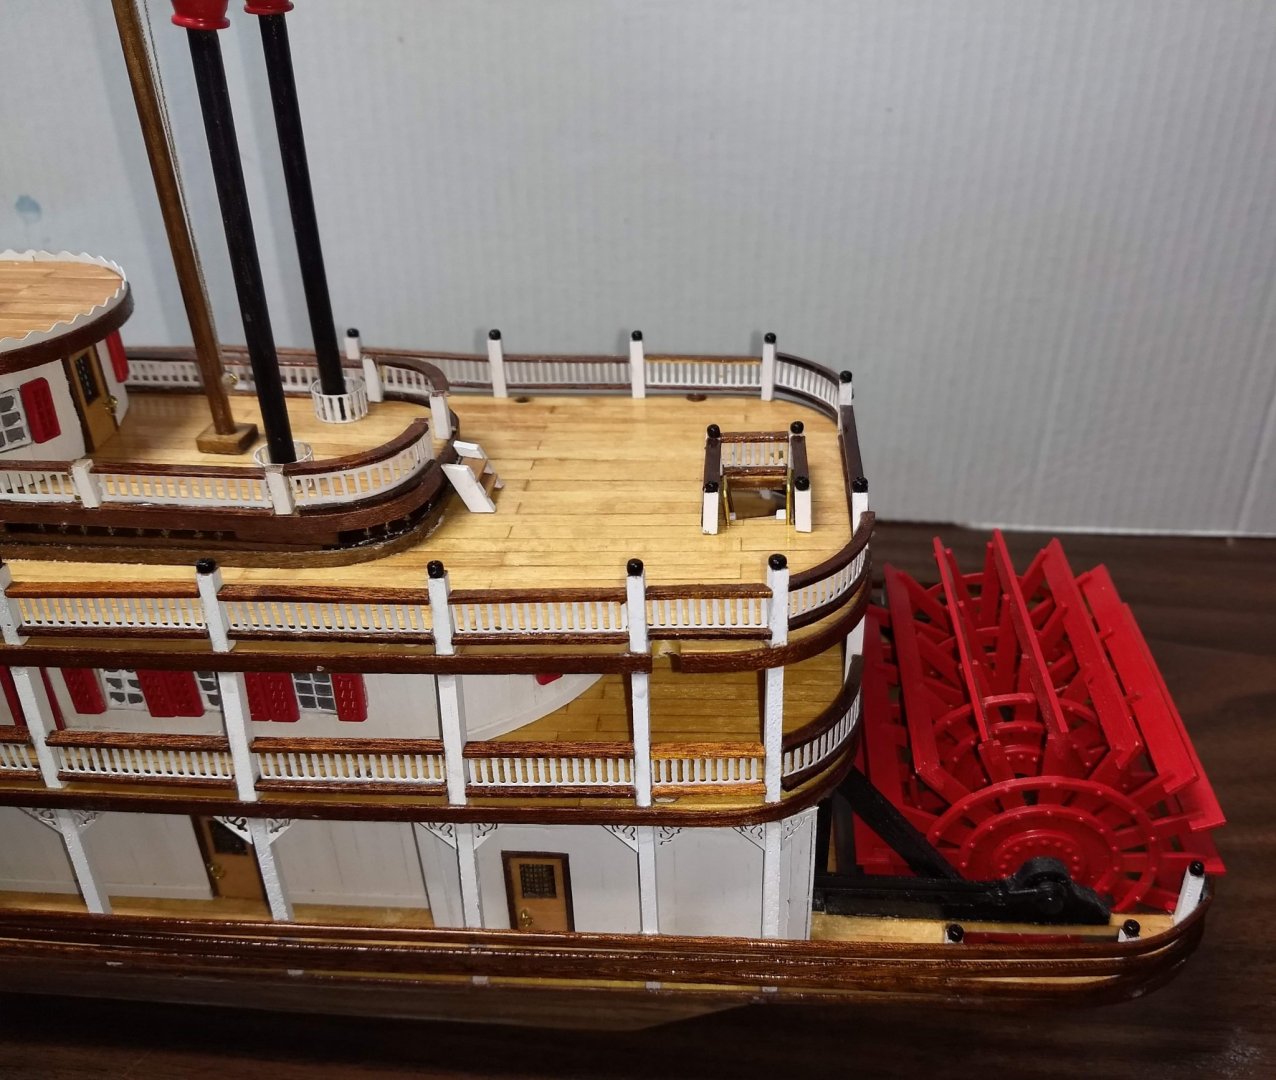
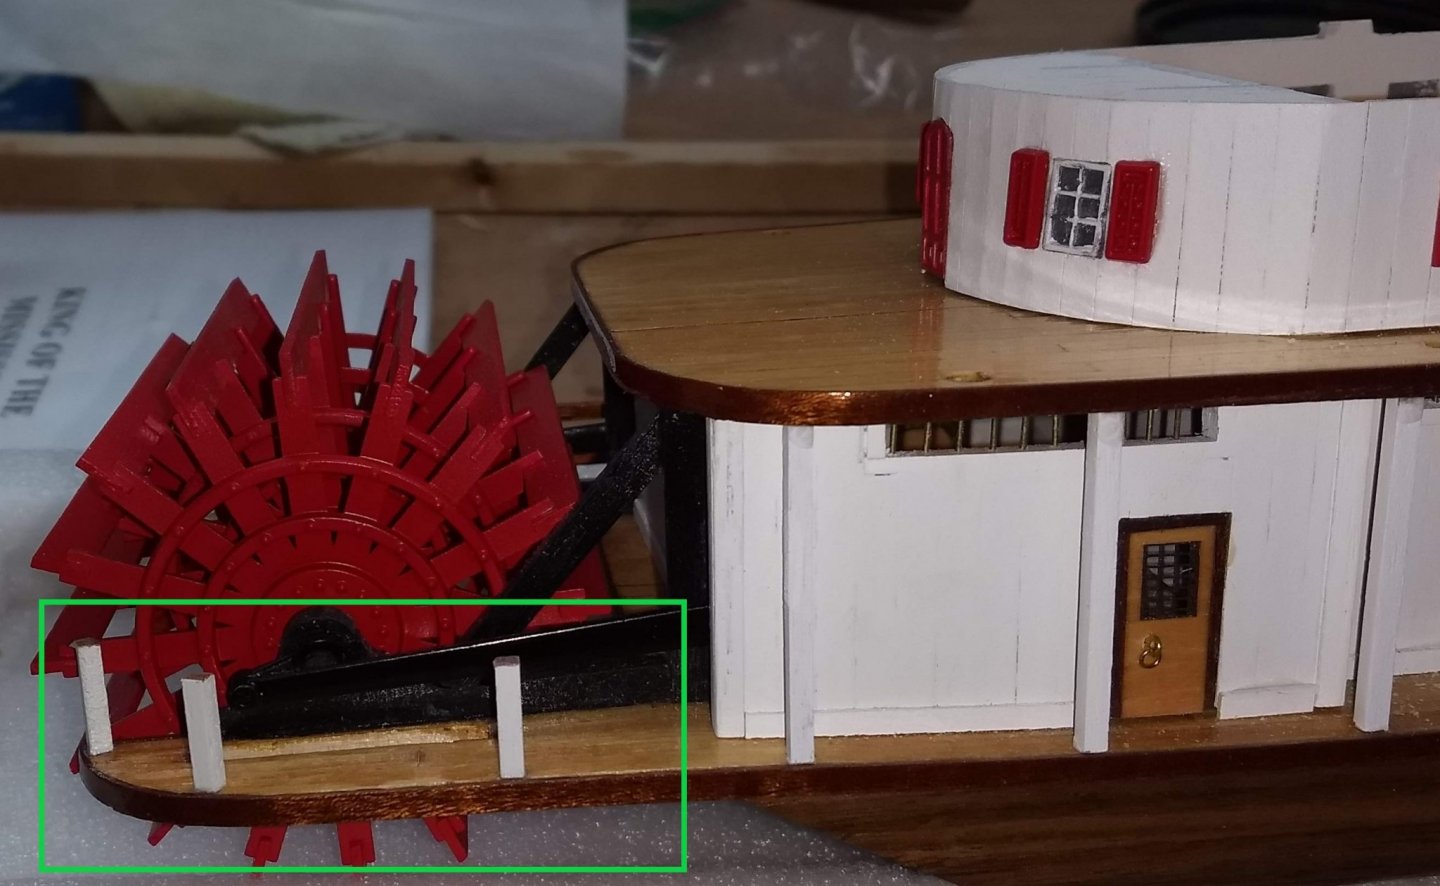
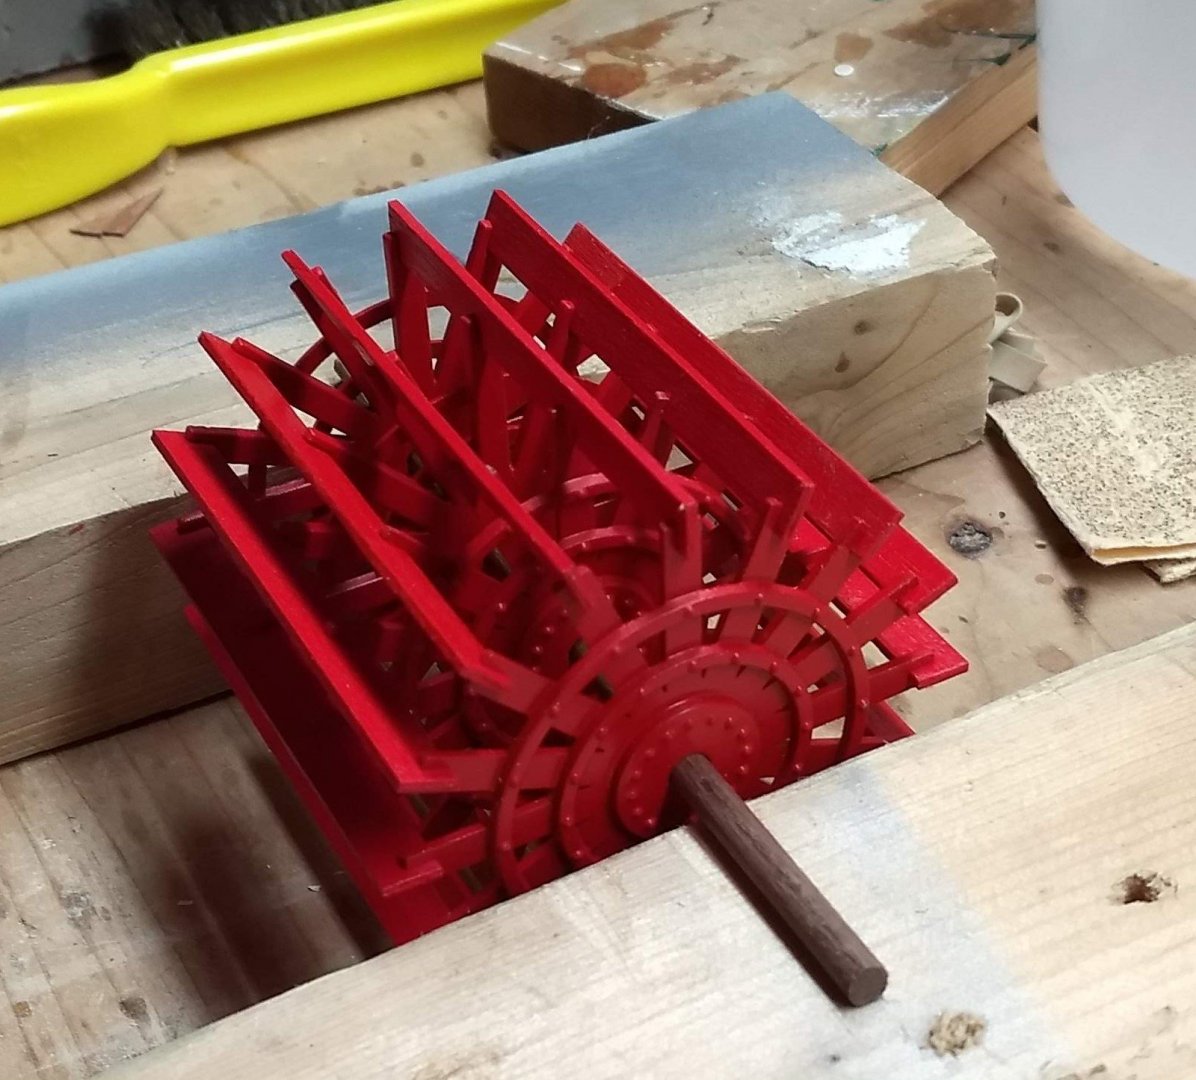
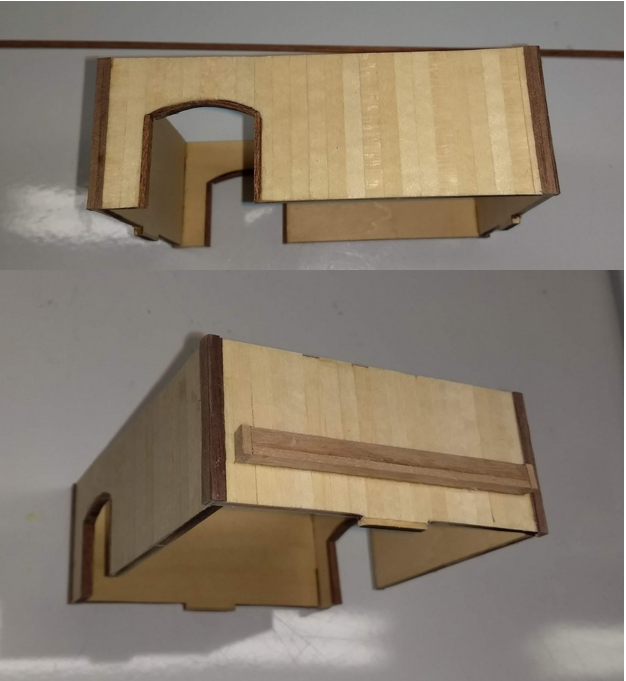
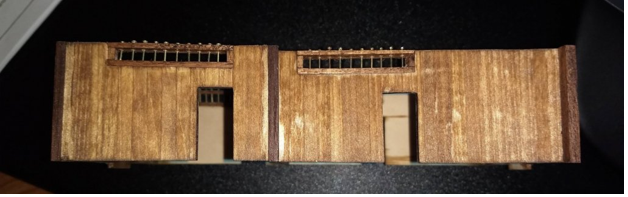
Paddle-wheel complete. By painting the paddles the fit was so tight into the wheels, that no glue was needed. Just pushed them into the wheel slots and done. Again, the use of the two 2x4s to support the paddle-wheel made it very easy. Paddle-wheel mounted in it's final home If you are following along with the actual instructions, you will notice I am not doing things in order. Basically jump back and forth, trying to anticipate issues that may com along in the build. At this point I am putting the engine room doors on the engine room. The instructions call to first put in the door frames and then put in the doors. Problem is, the door opening is only 12mm wide and the doors with frames are 14mm wide. A problem if you put the door frames first. In my case I build the frames around the doors and then made the door opening wider to match the door and frames. Below shows 12mm door opening - too small to fit doors and frames And prebuilt doors and frames. At this point the door handles have not been installed. They will be installed and then the door openings (above) will be widened to fit the doors and frames


- 42 replies
-
- 4
-
-
- king of the mississippi
- artesania latina
- (and 1 more)
-
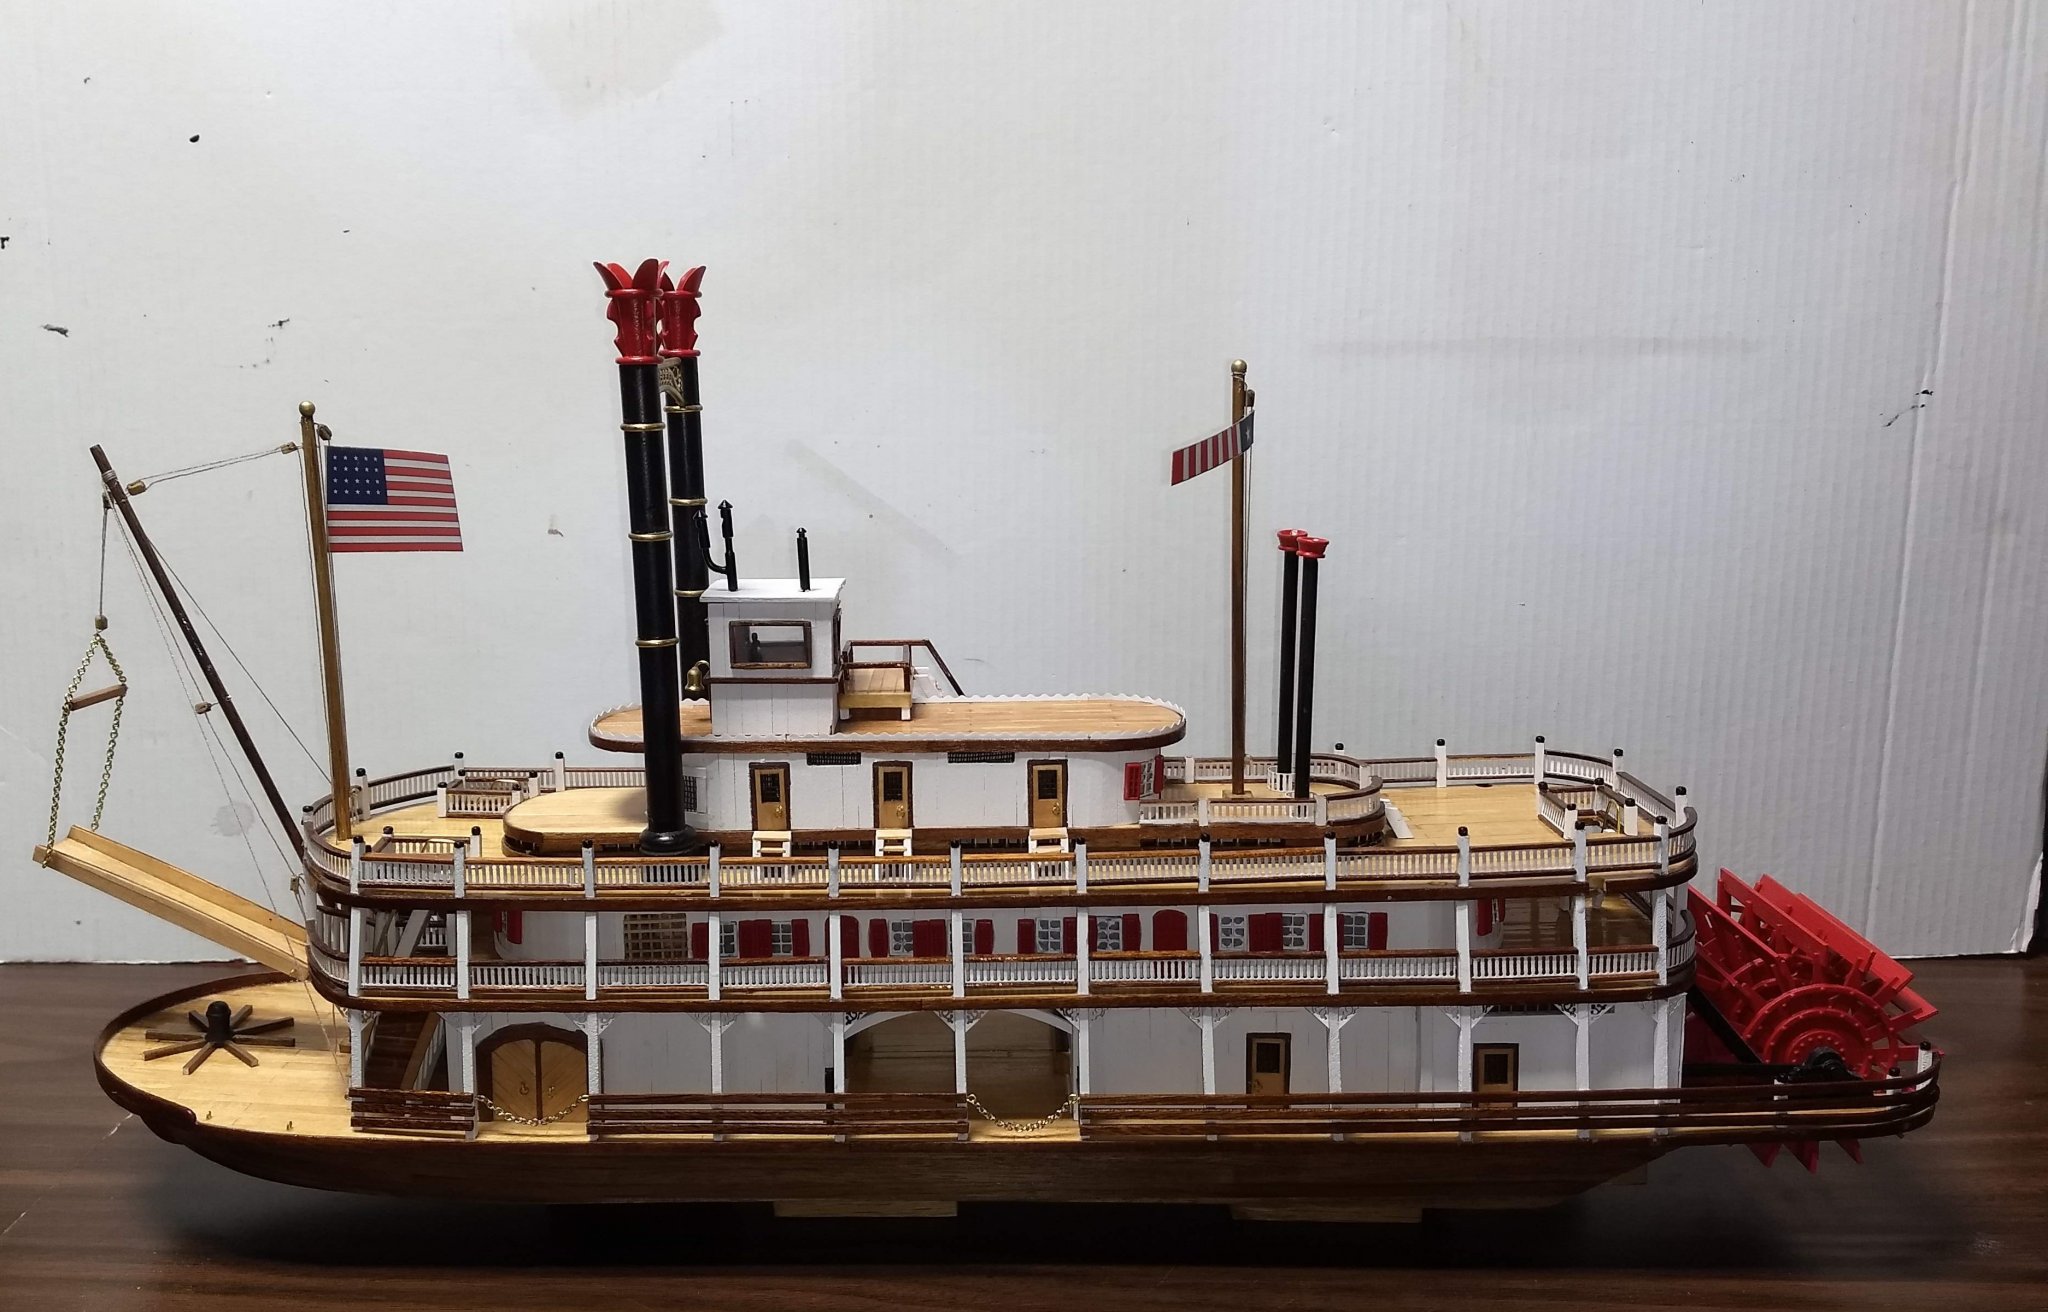
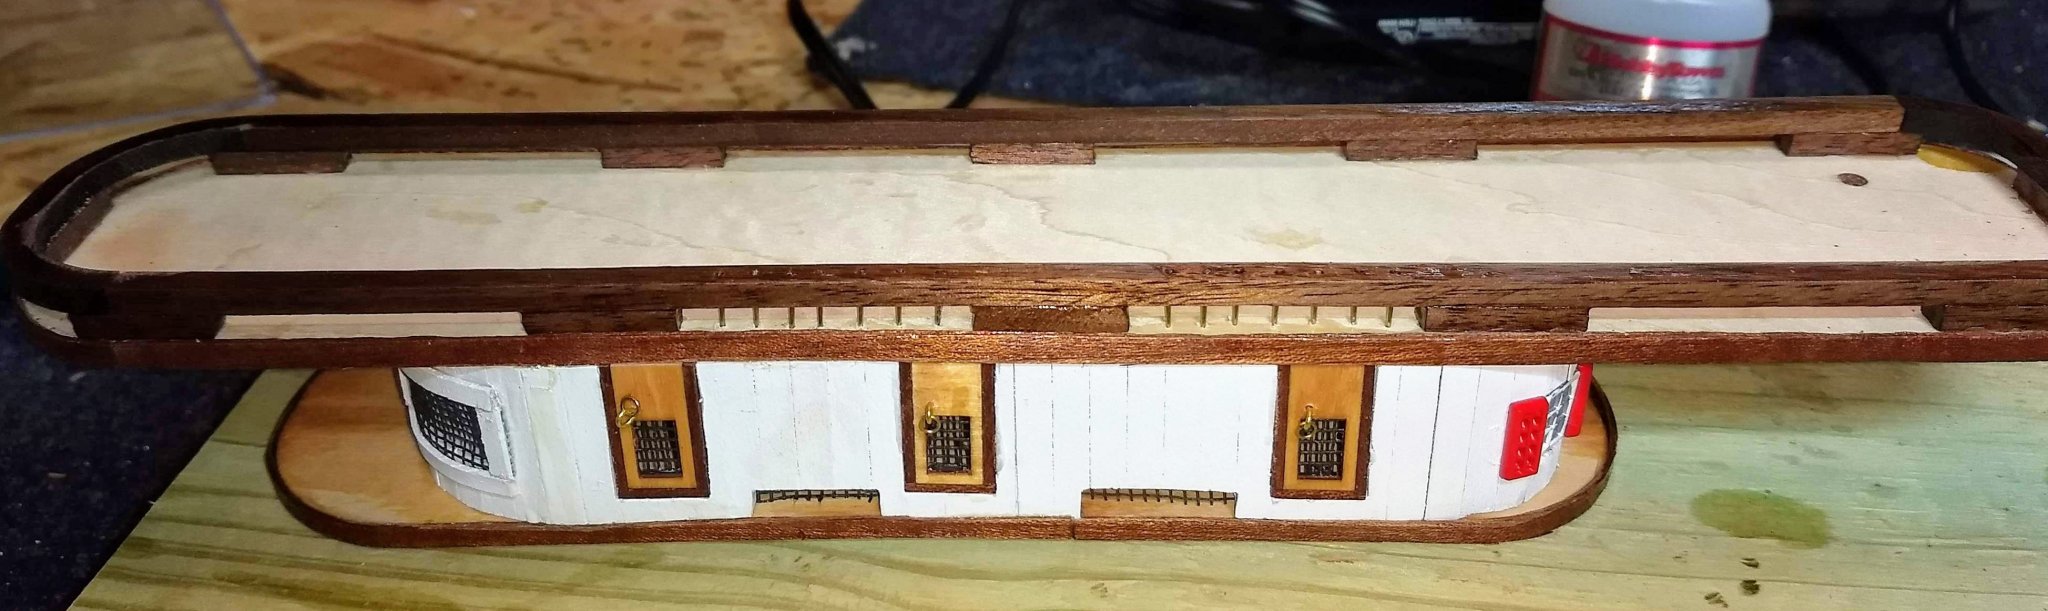
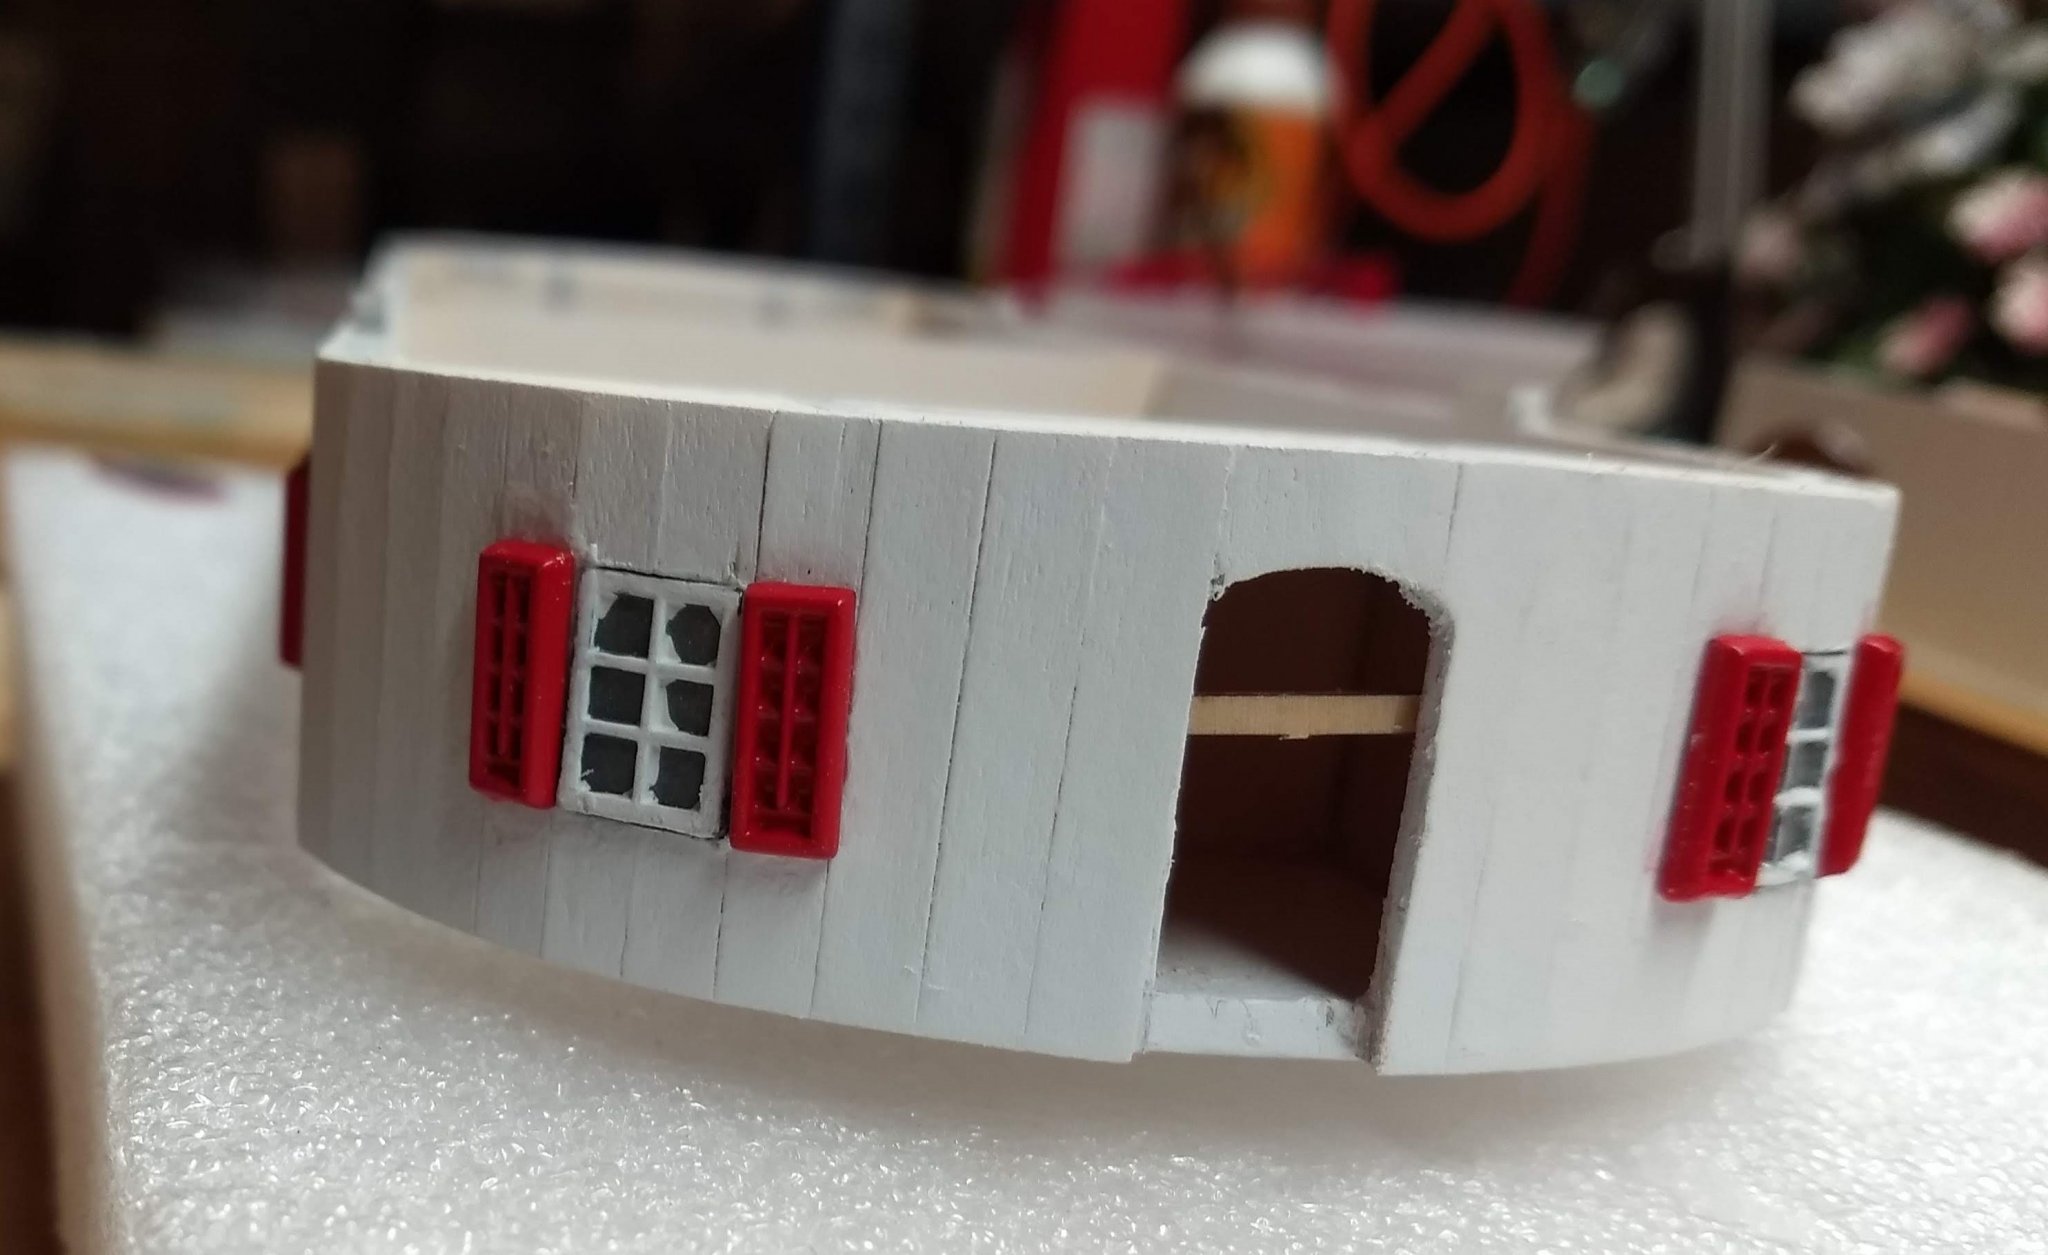
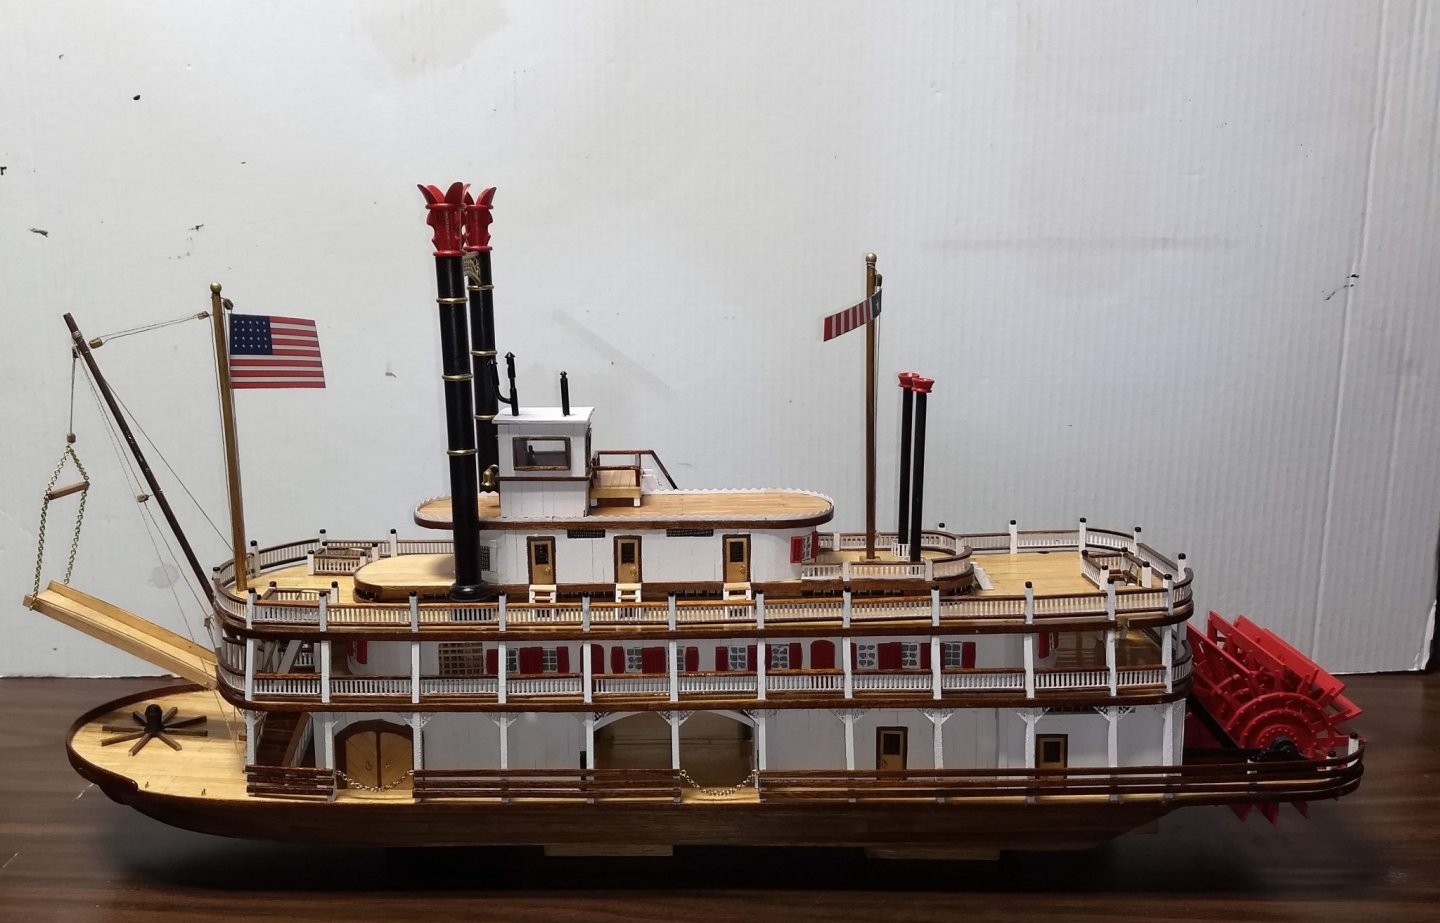
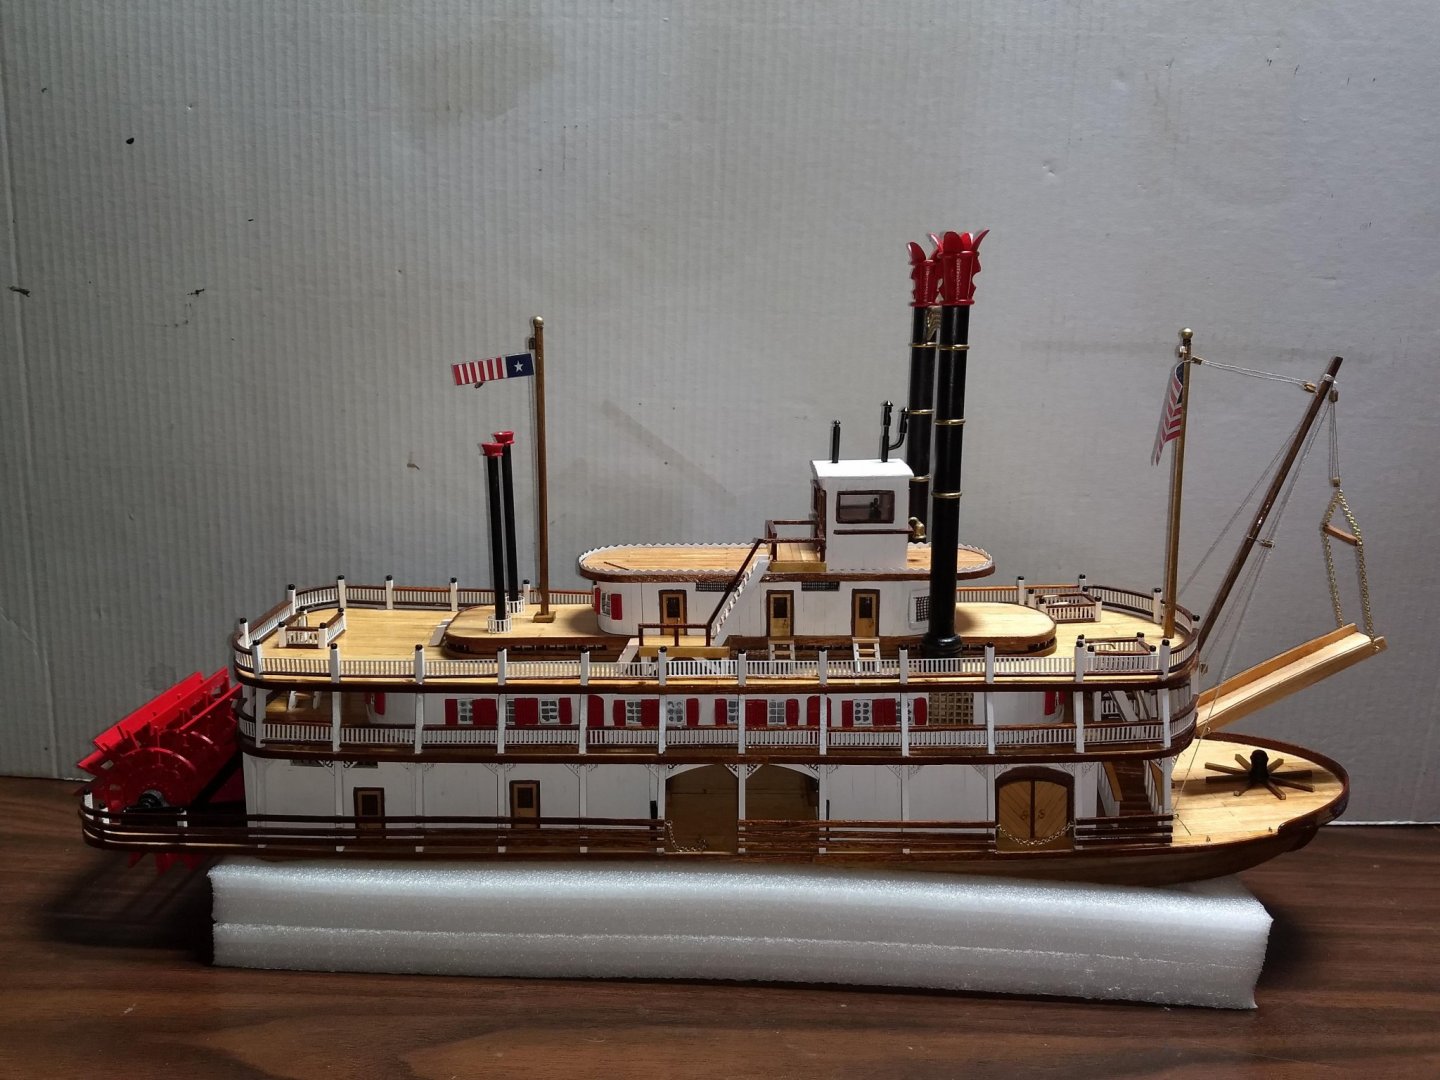
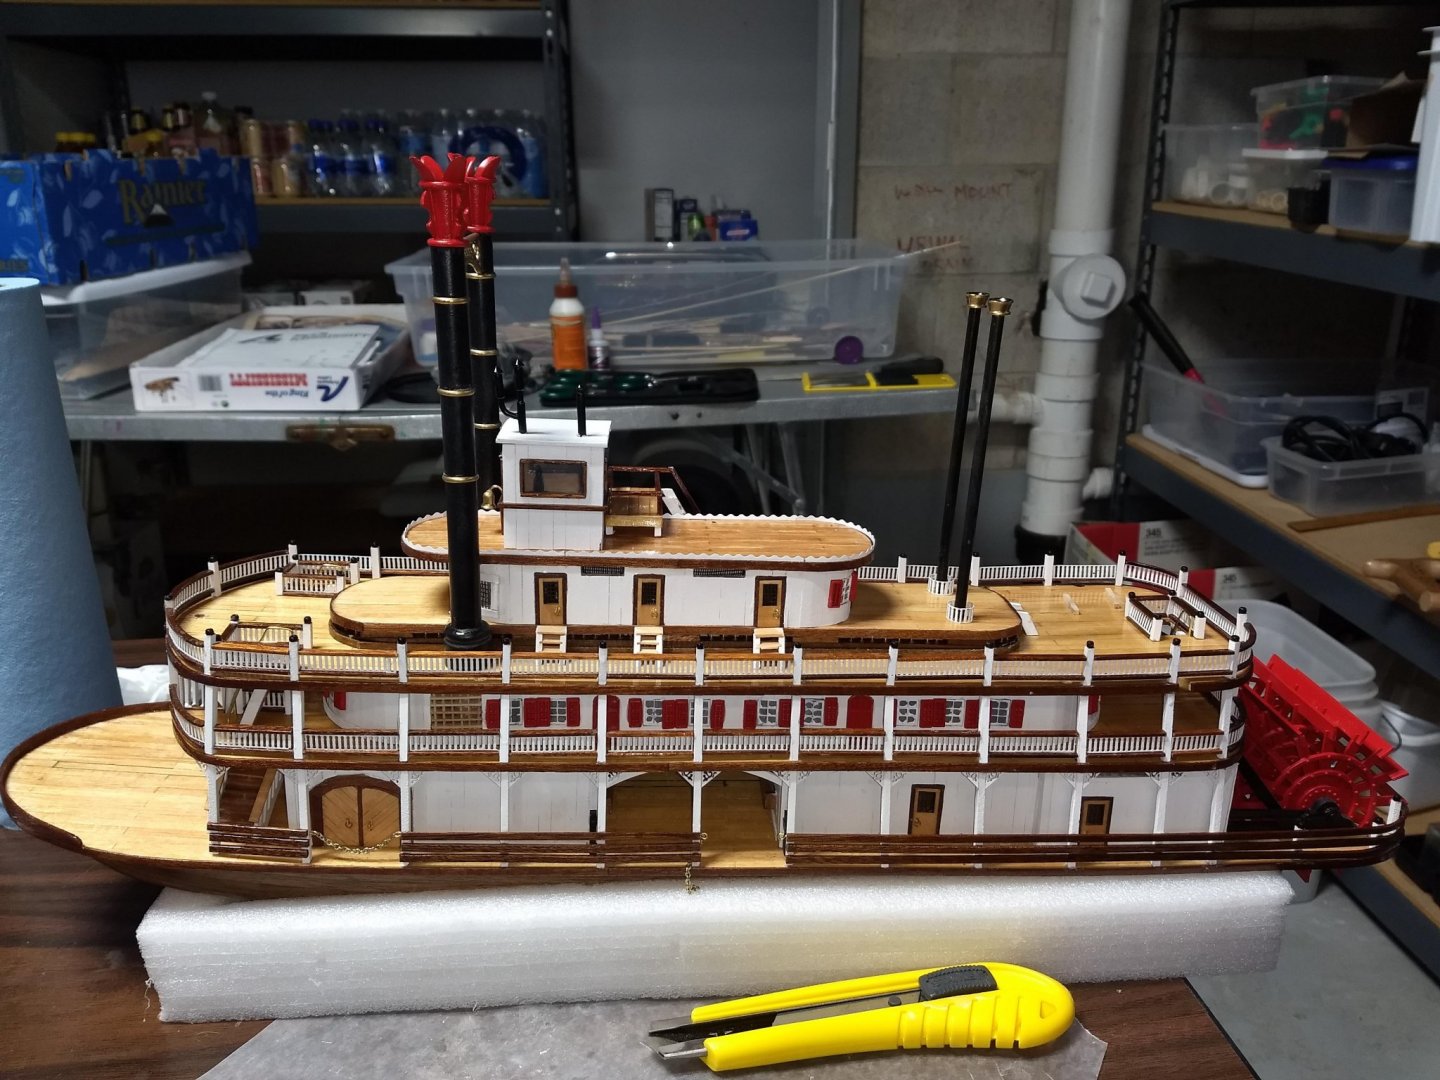
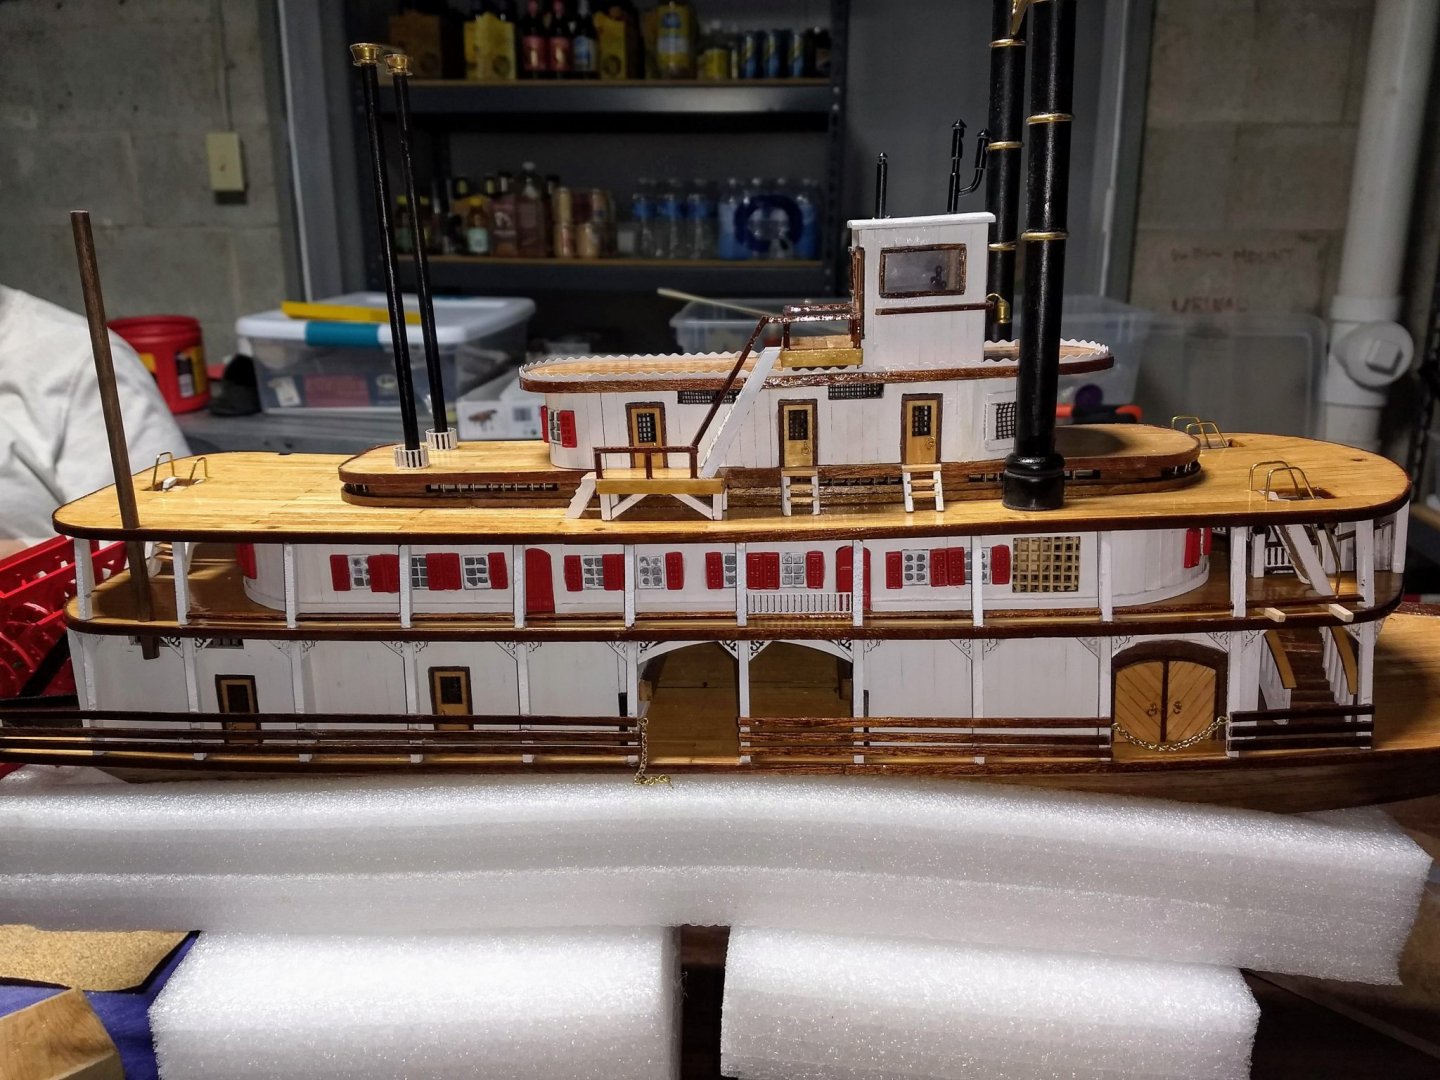
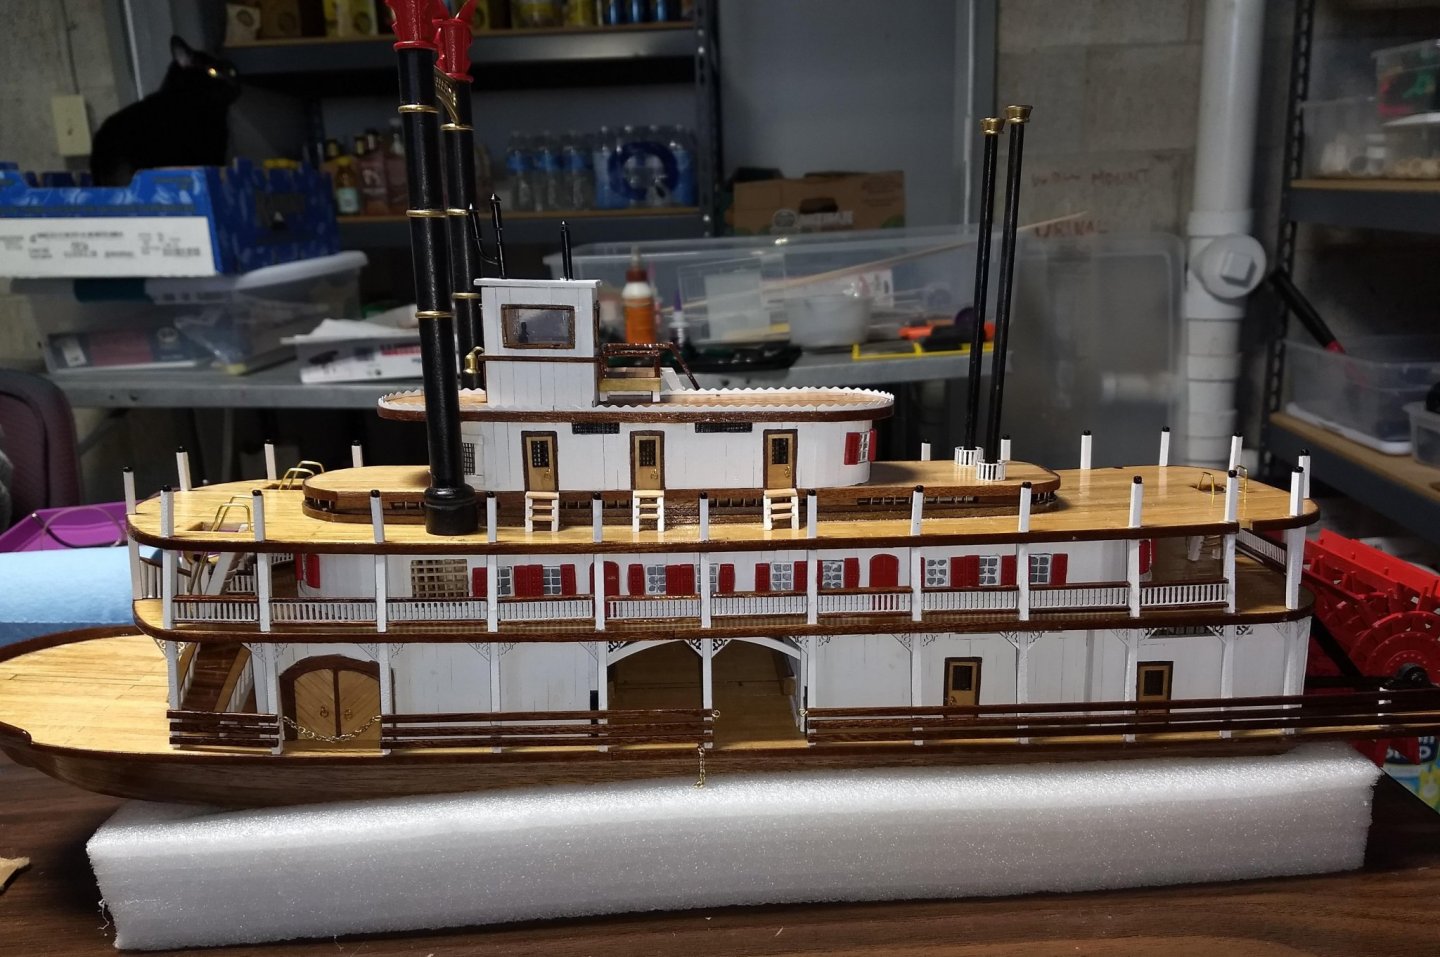
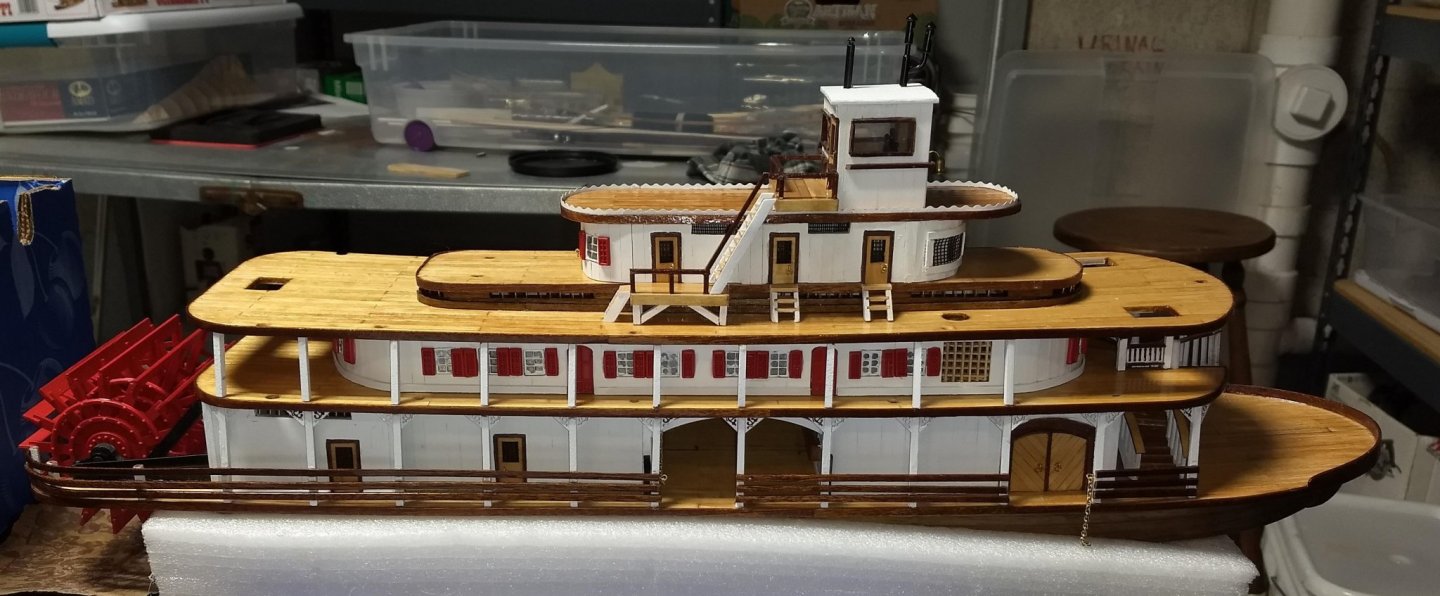
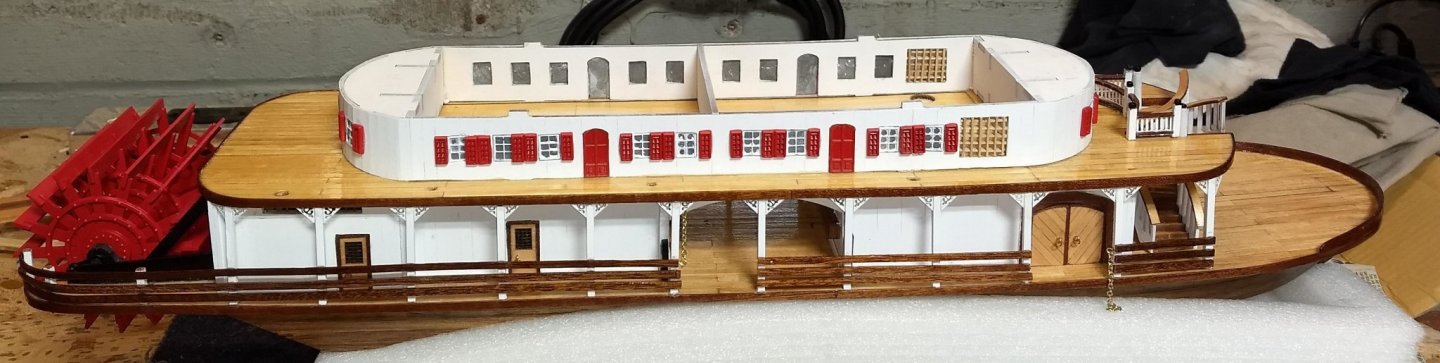
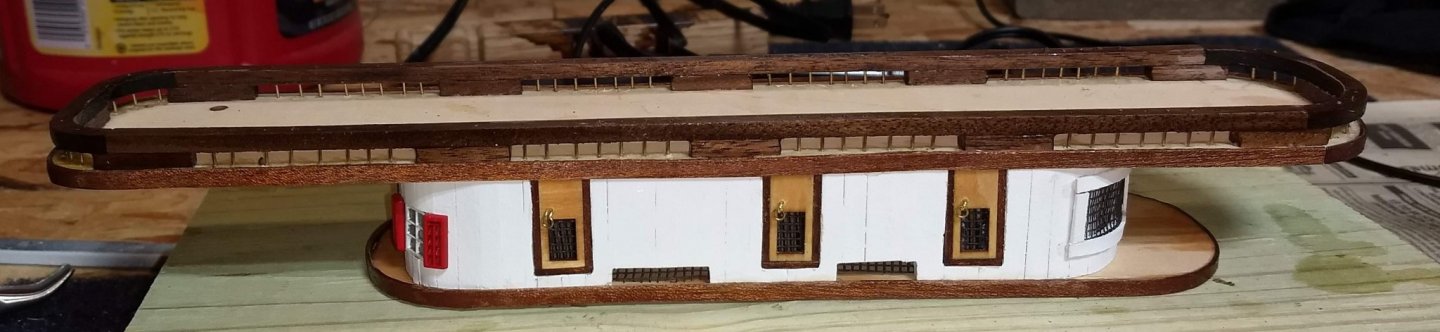
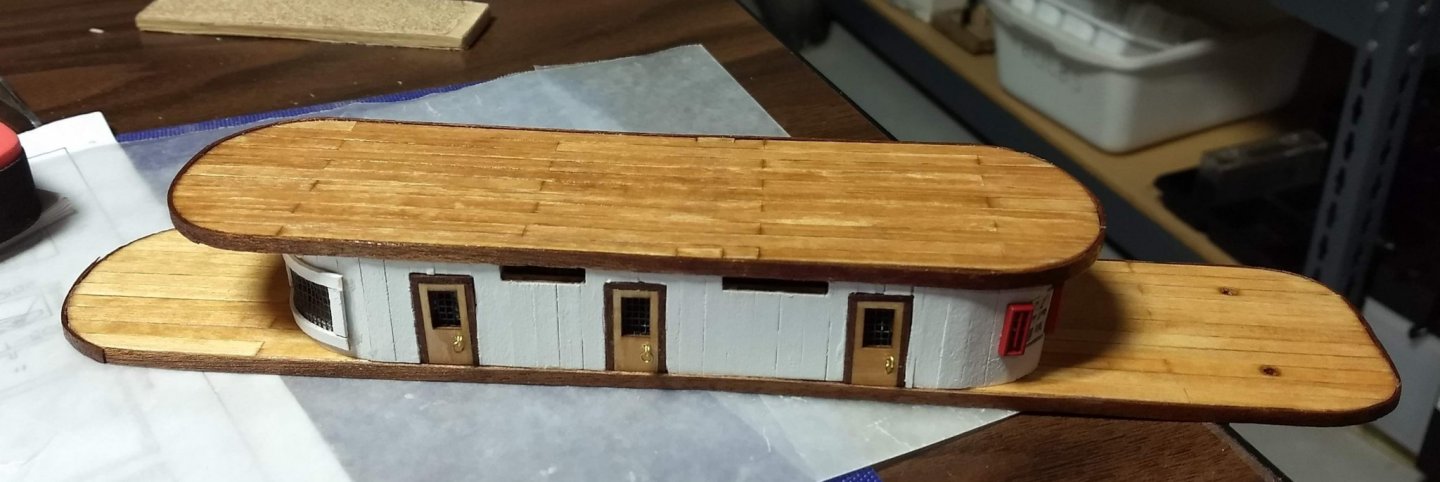
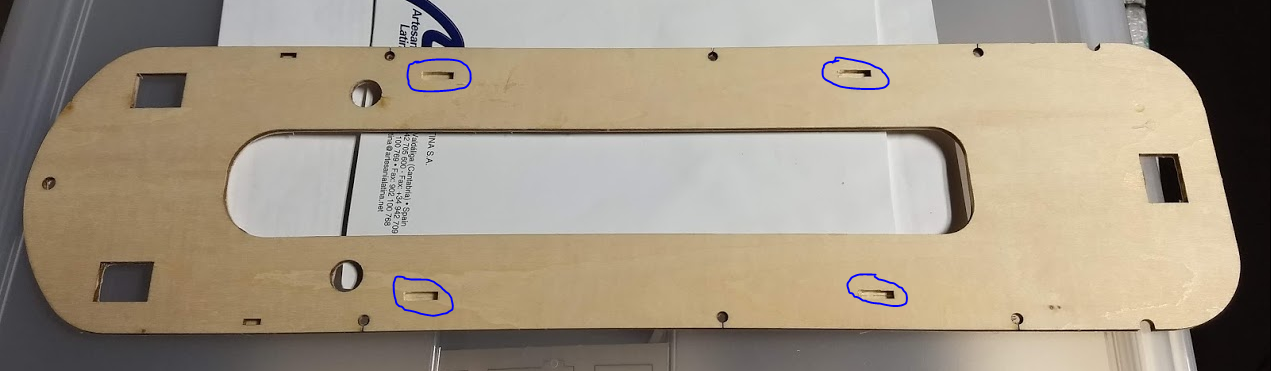
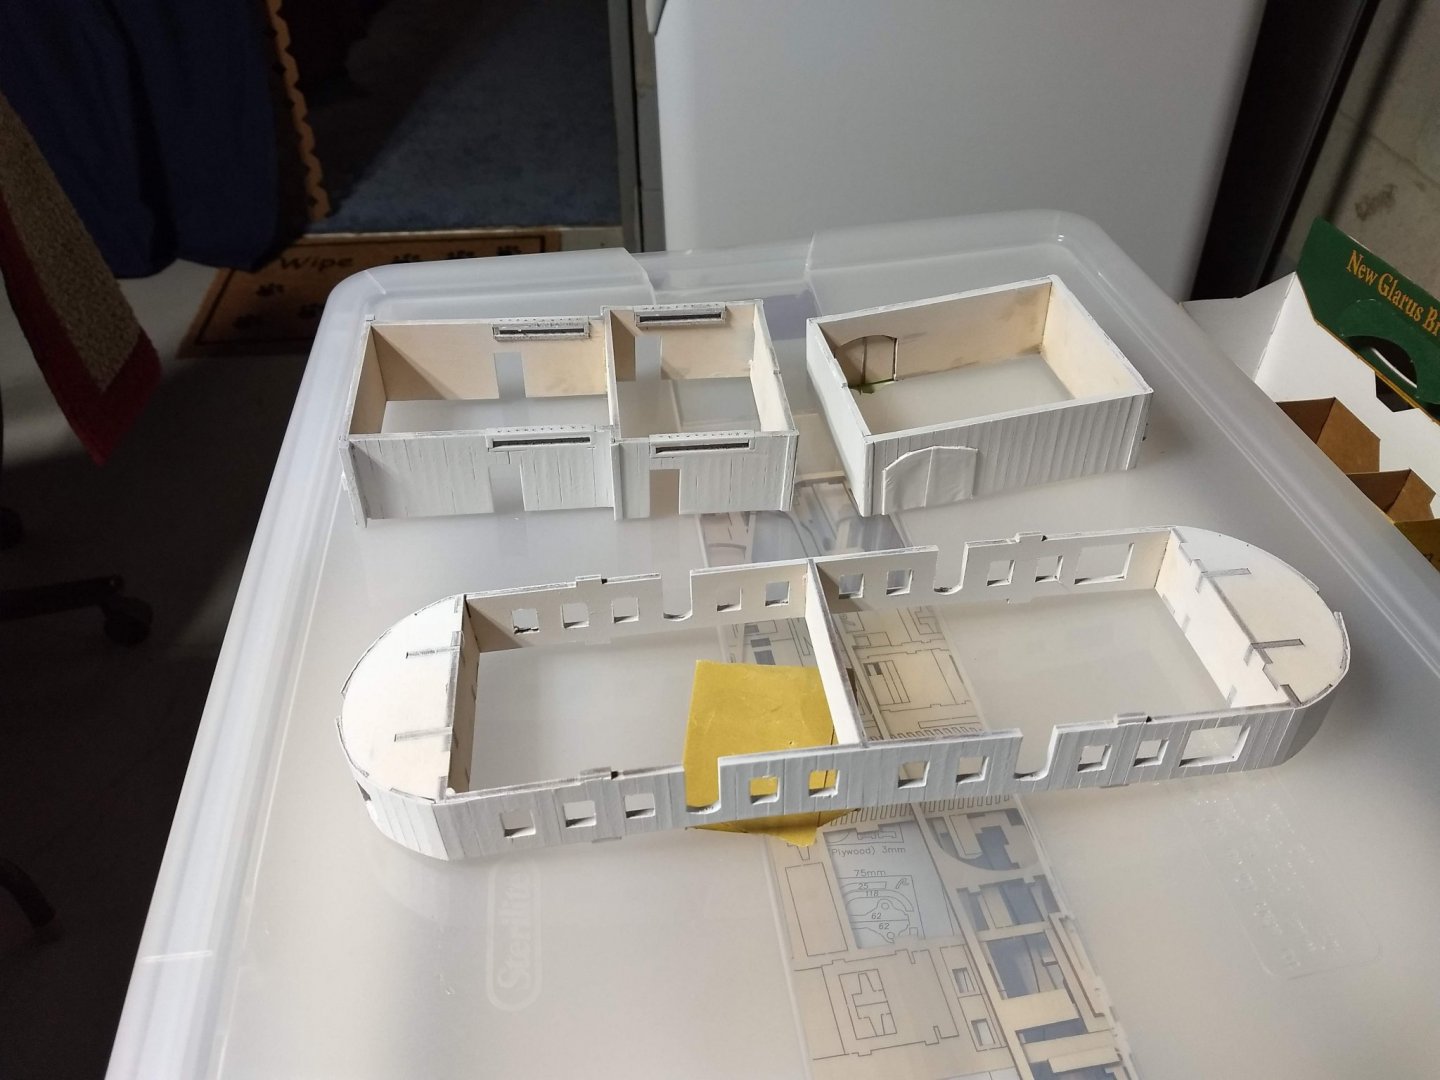
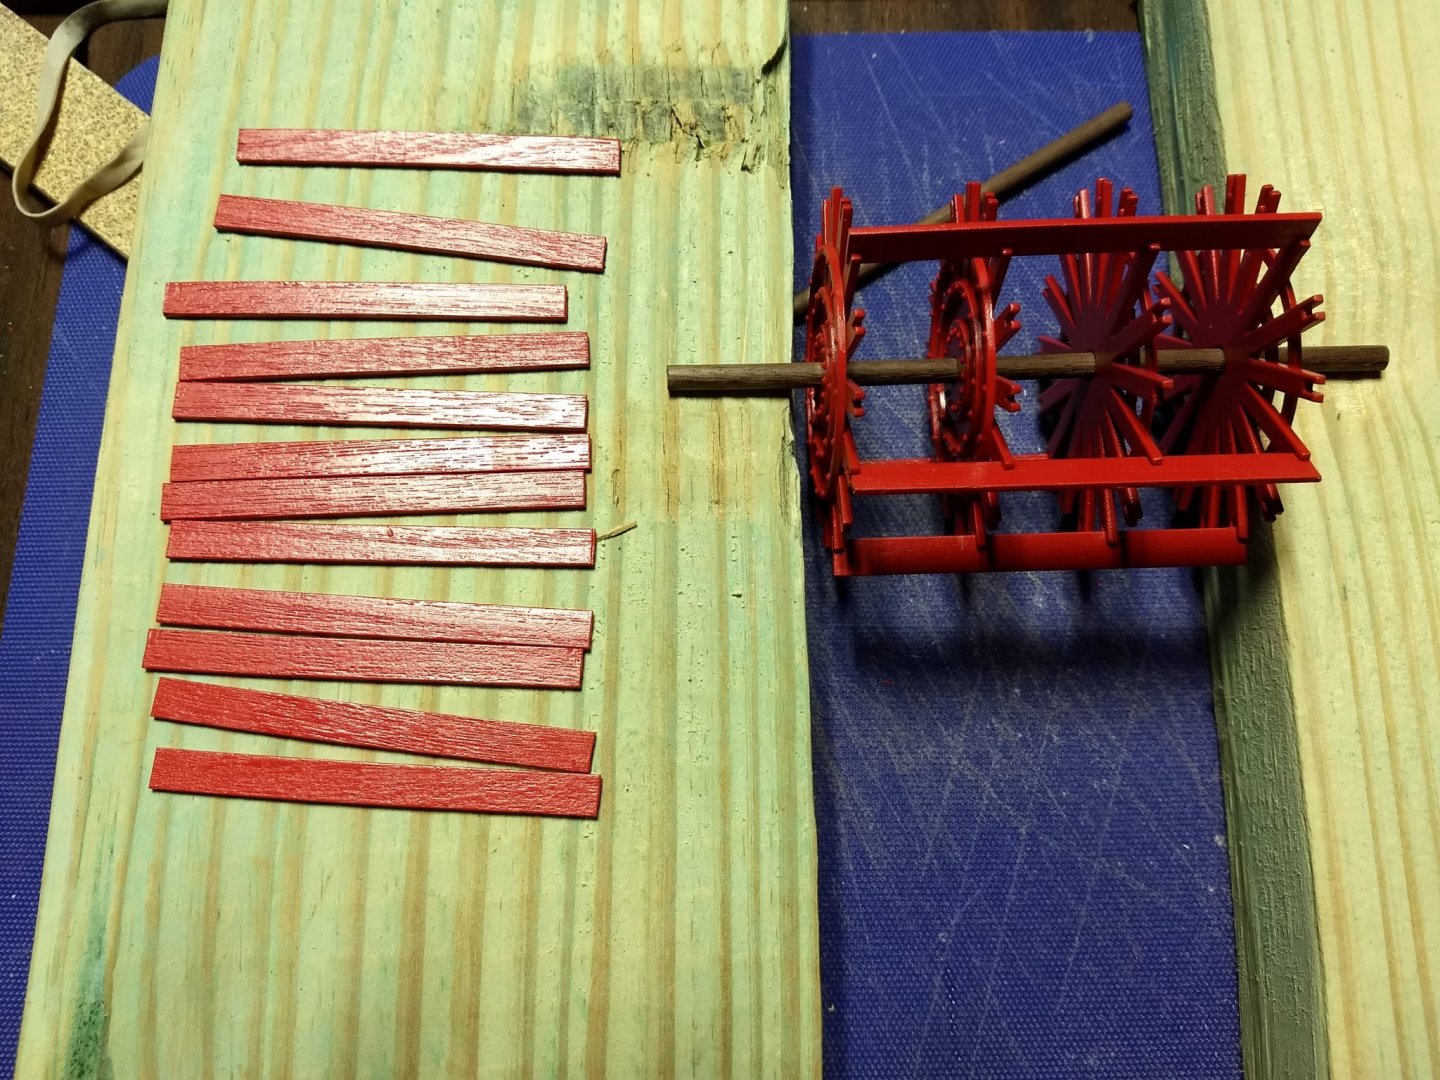
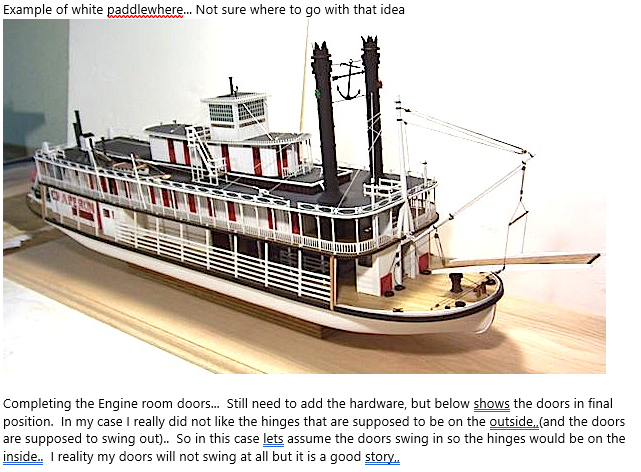
Earlier I mentioned I did not like how the stain turned out.... As a result, I made an executive decision and decided to paint the Paddlewheel boat mostly white with some red trim. That seems to be the color of most riverboats I have seen.... I know this goes against all logic and all other buildings of the "King"... but here we go... Below shows the first three rooms painted white. Since some of the doors were already in, I masked them as I plan to have all doors as intended - that being stained. Window frames will be white, windows will be the natural metal color, and the window shutters will be red. One item of note here, the first room at the bow of the boat does not exactly fit into the slots on the deck, but they are close. In fact so close I just forced it in. It is not noticeable as the slot was very close. Later on I though I probably should have just made the slot a little bigger. The larger hole would have been on the inside the room, so no one would notice it. Besides the two rooms are glued to the deck all around, not just where the slots go through the deck. So no need an exact fit on the slot that could be enlarged. Below show how the windows will eventually look when installed. The window frames (white) where dipped in white paint rather than painstakingly trying to paint the frames with a brush. Looks seems pretty good and a whole lot easier. I could have first painted the windows some color and then dipped to paint the frames, but I decided the window with the natural metal finish against the white paint looks pretty good. Not sure I could have come up with a better paint combination, so they will remain the natural metal color. Below is the 2nd, 3rd, and 4th decks. 2nd deck has been stained, but 3rd and 4th deck remain to be stained. Build logic is the same as the first deck. Cut 10mm lengths of wood, mark the deck every 5mm, and stagger every other seam. The plans call for straight planking on the 1st and 4th decks with herringbone design on the 2nd and 3rd deck. I choose to make all four decks straight planking. Again, that is how I have seen most boats. Note on the 2nd deck I did not plank where the rooms will be sitting. Once complete, the room will completely cover up the deck, so I skipped planking deck that would never see the light of day. A couple notes,,, After the 2nd deck is planked, be sure open up the four holes highlighted below. Slots in the base of the room walls fit into these slots. Rooms are connected to the deck via those holes. After planking the 3rd deck, open up almost all of the slots in the deck. However on the 3rd deck (picture below show the bottom of the third deck), do not open up the highlighted slots. Slots in the top of the 2nd deck rooms fit into these slots and will be flush with the decking. If you open these slots, you will see the stubs from the 2nd deck rooms showing in your 3rd deck floor. As me how I know this :-).... I ended up tearing up planing and had to re-plank some of the boards. On to the paddle-wheel. In my case the blades and wheels will be solid red... Only suggestion here is as you add the blades to the wheels, have the shaft supported between two 2x4 blocks. I started out trying to put in the blade but just holding the shaft and wheels in my hands, but the hole in the wheels are a little bigger than the shaft, so it was a little wobbly. Assembling them between two 2x4 blocks made it much easier.

- 42 replies
-
- 2
-
-
- king of the mississippi
- artesania latina
- (and 1 more)
-
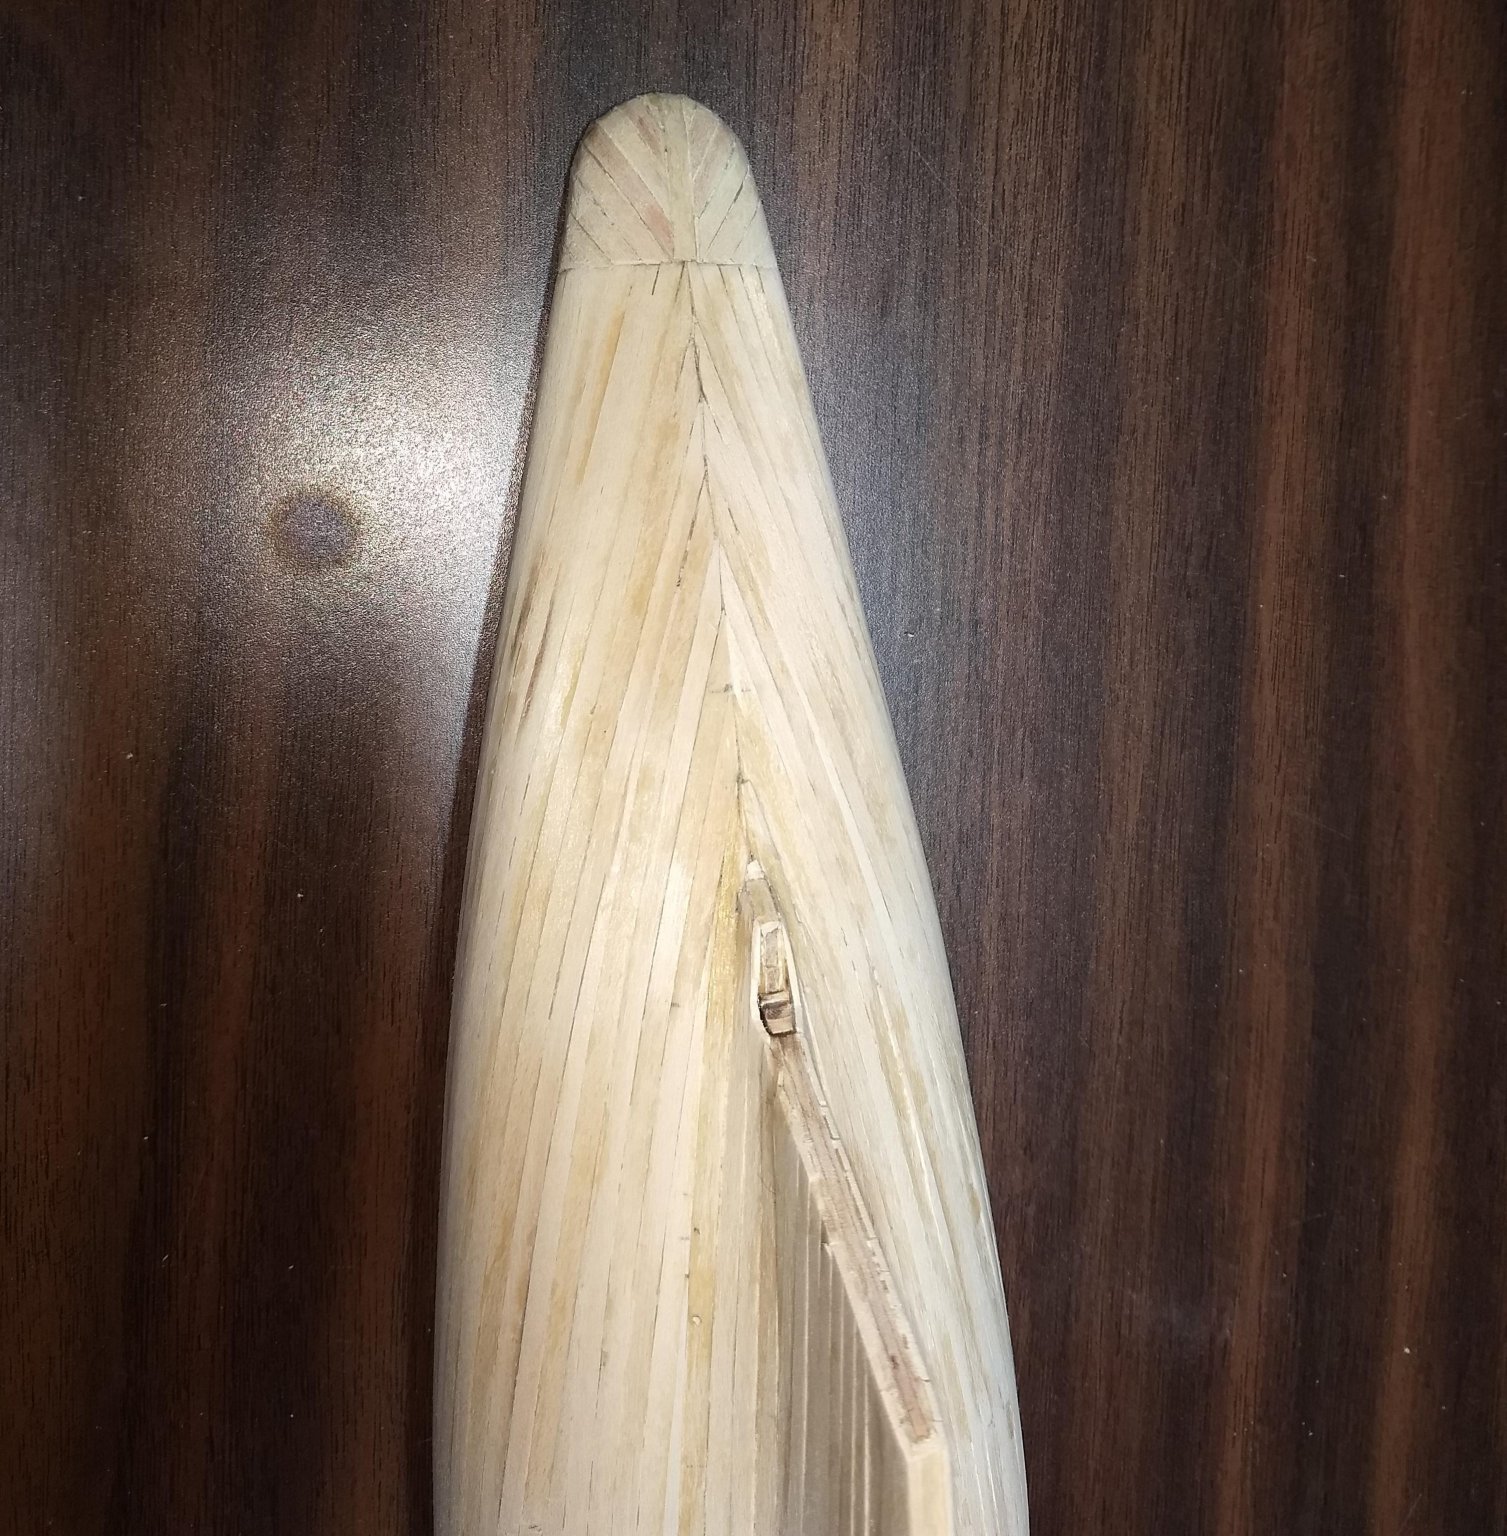
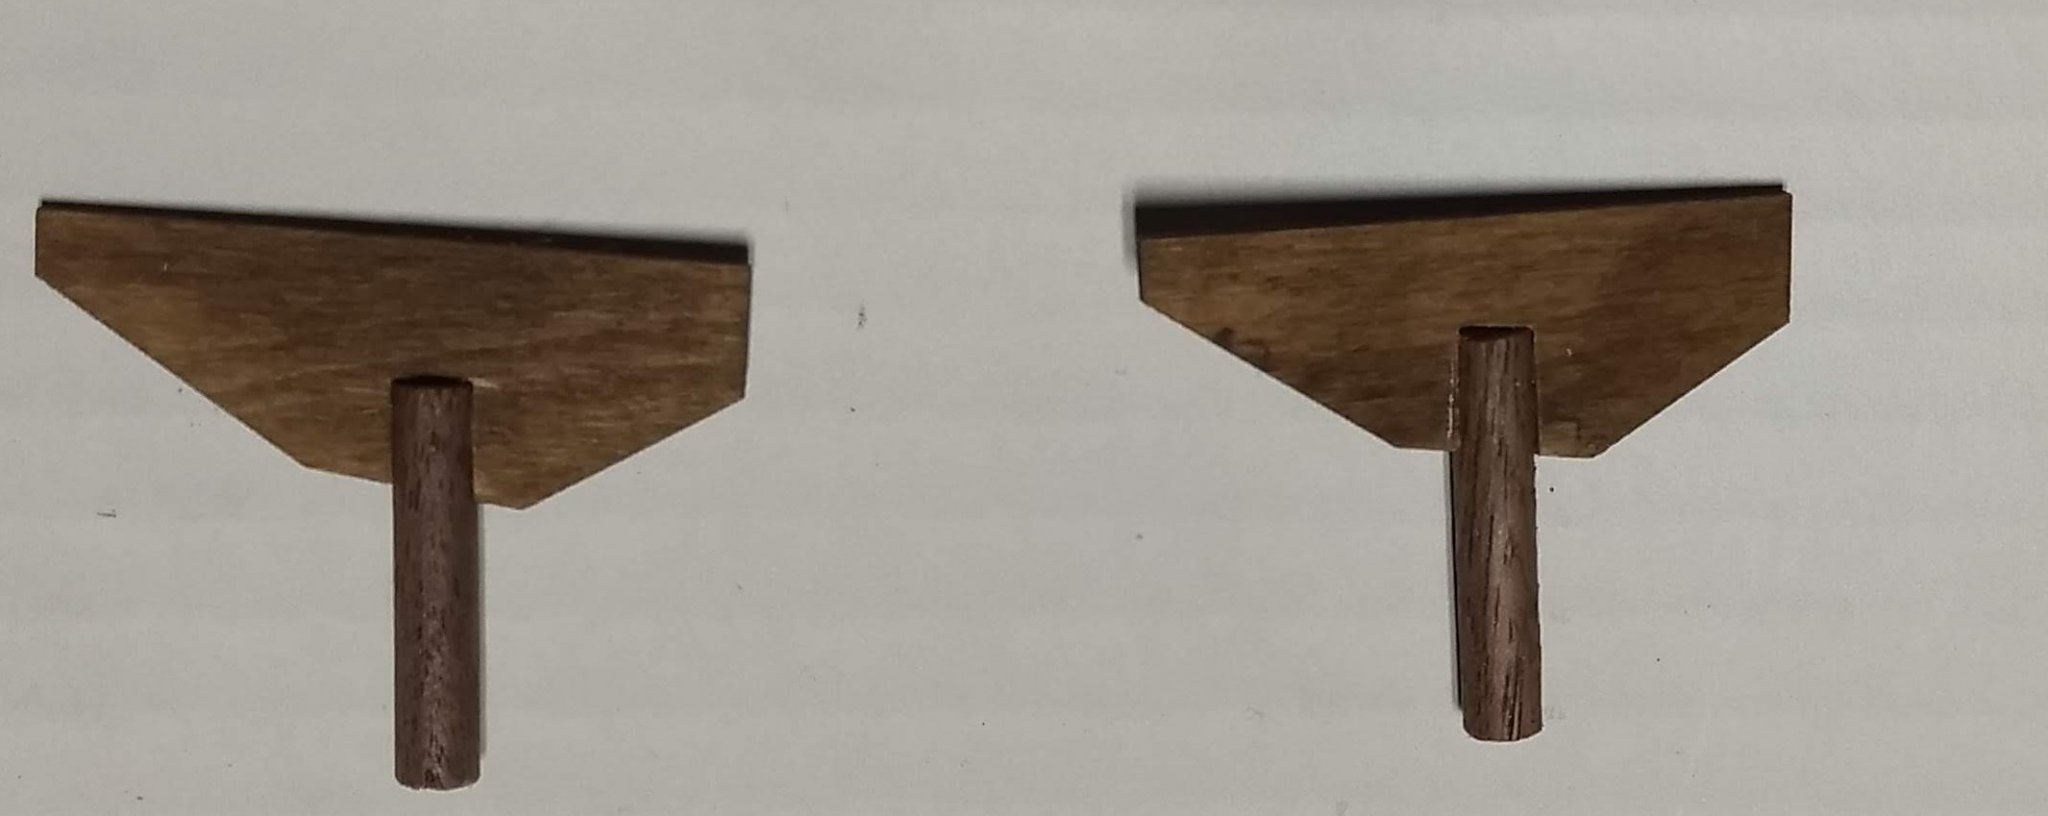
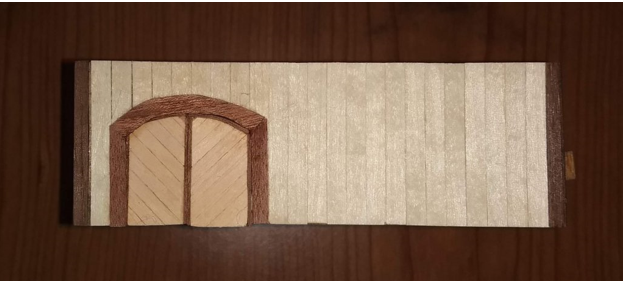
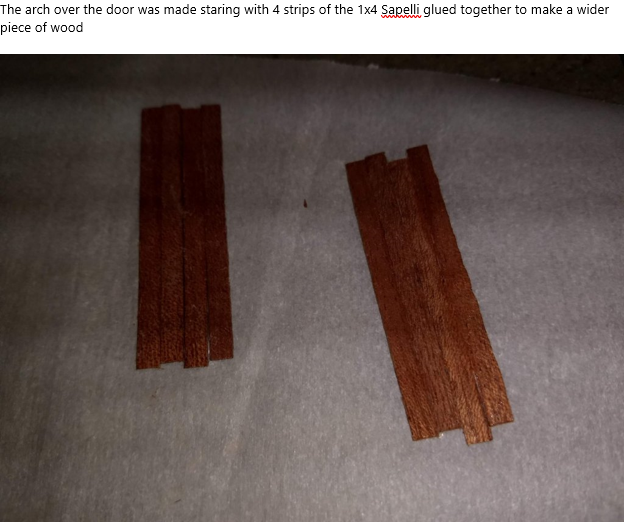
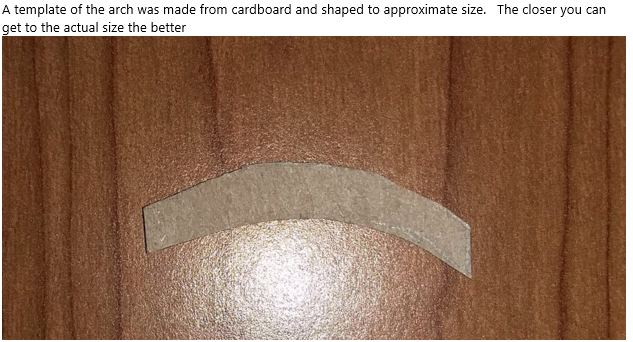
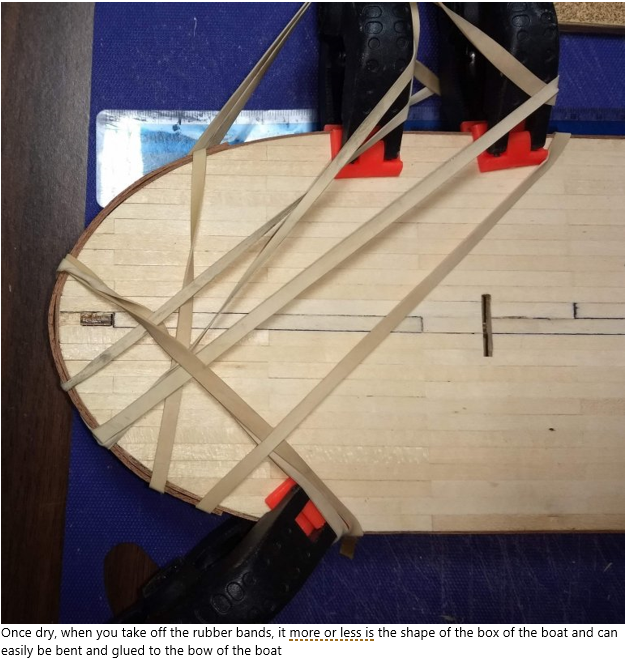
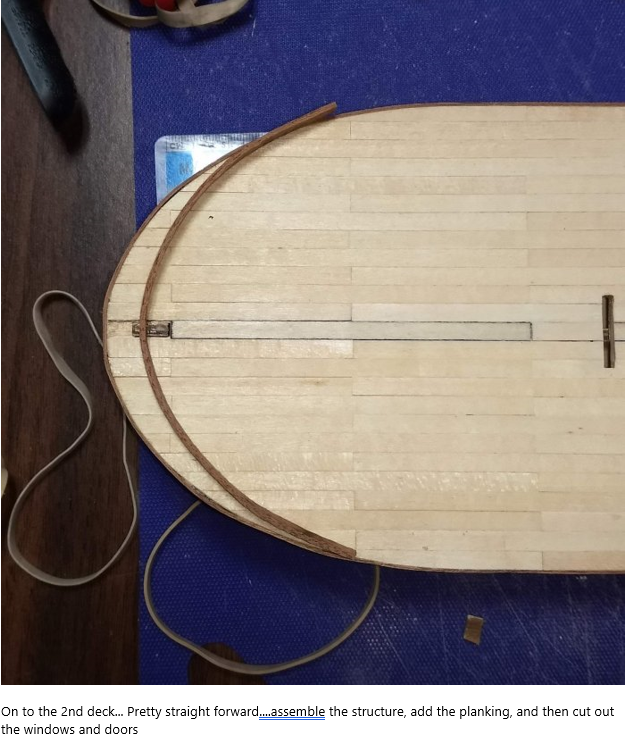
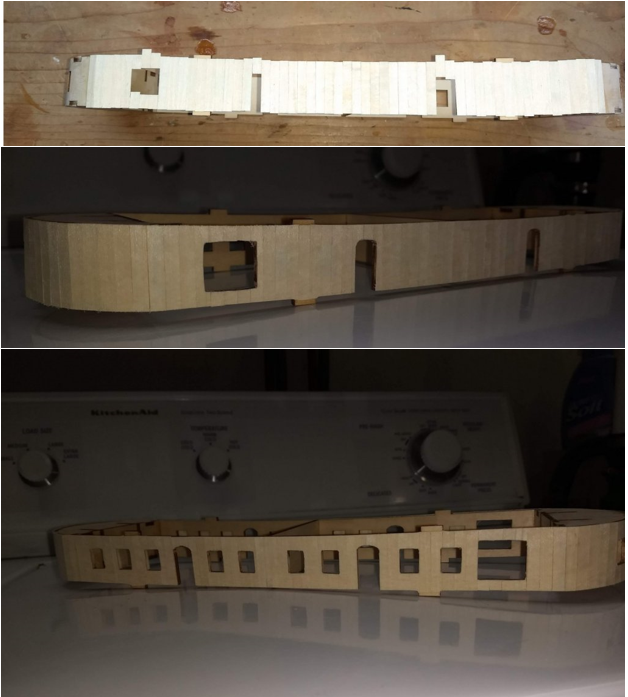
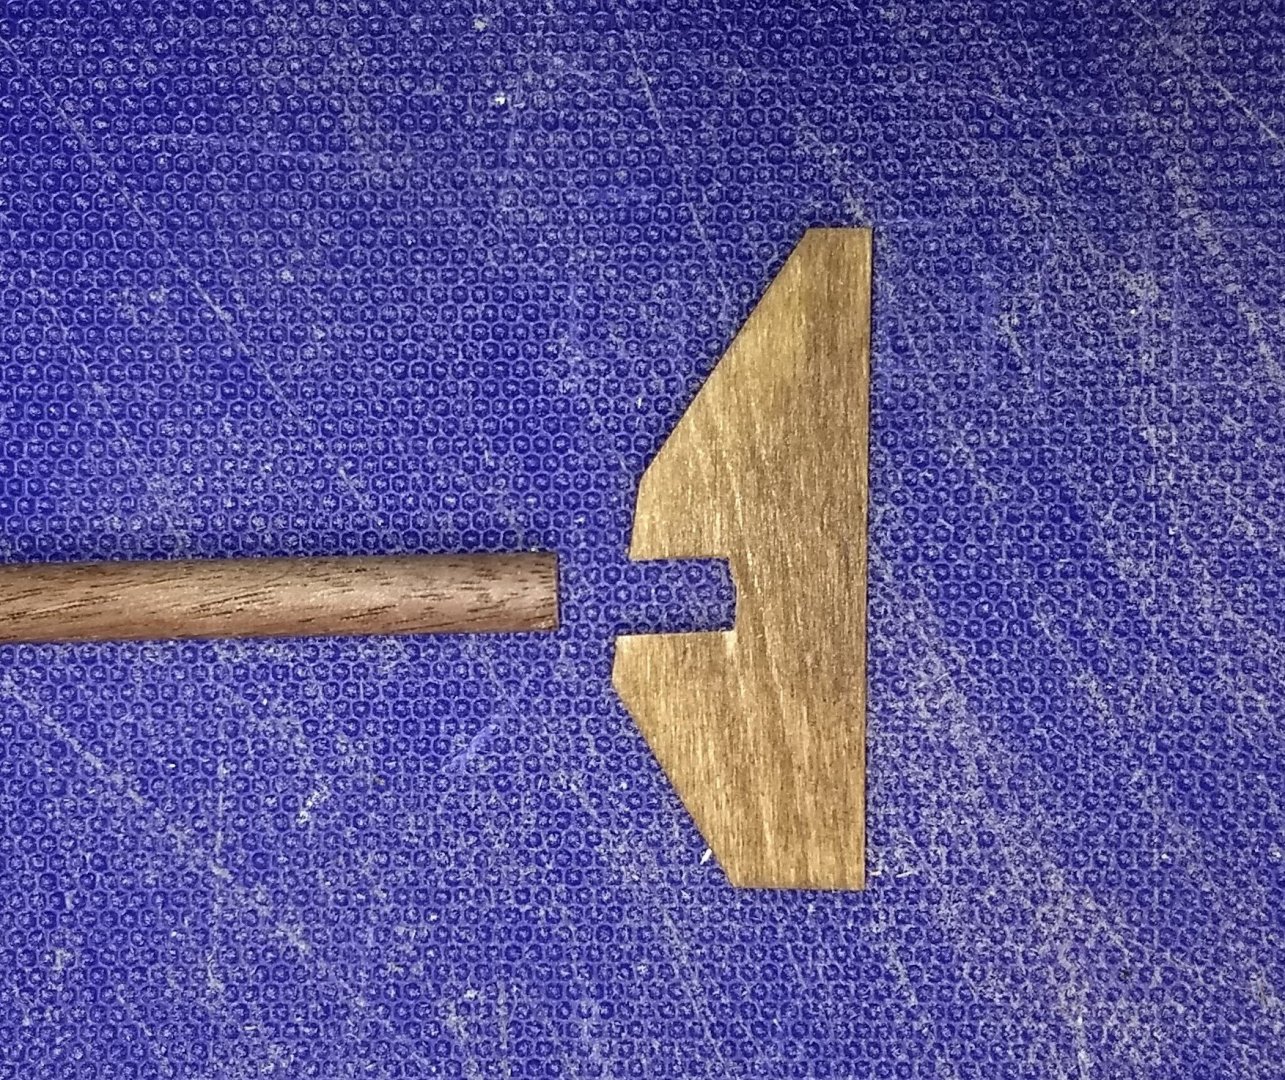
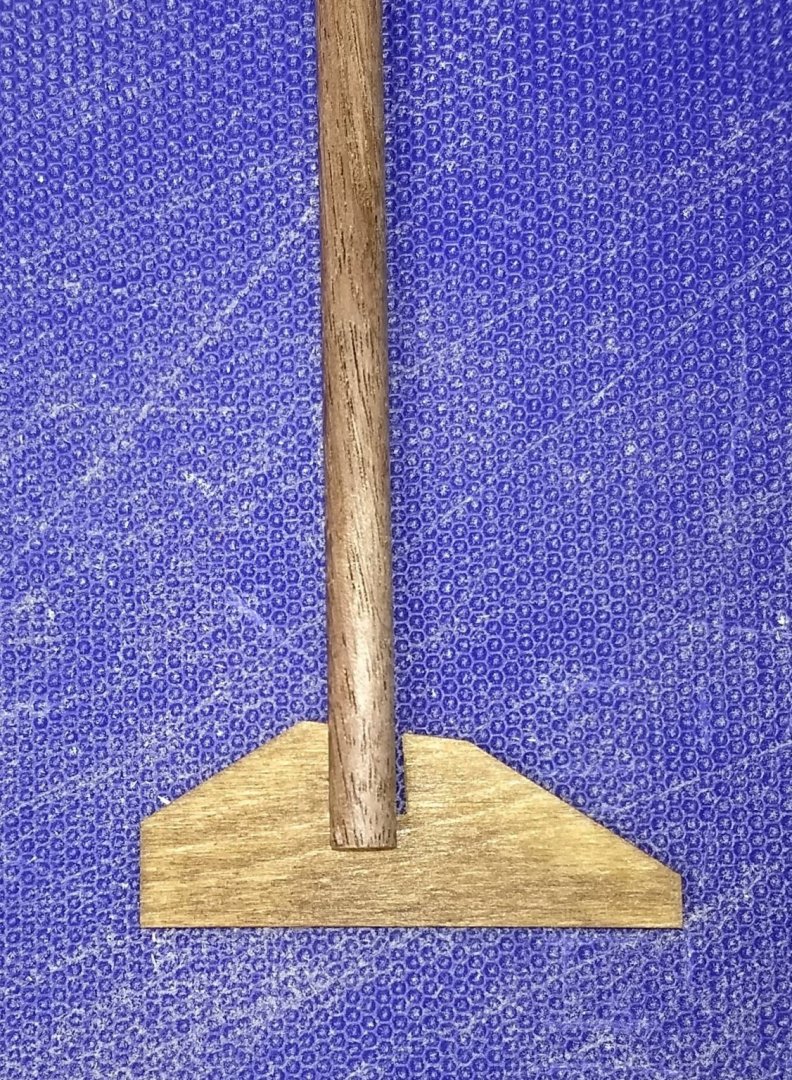
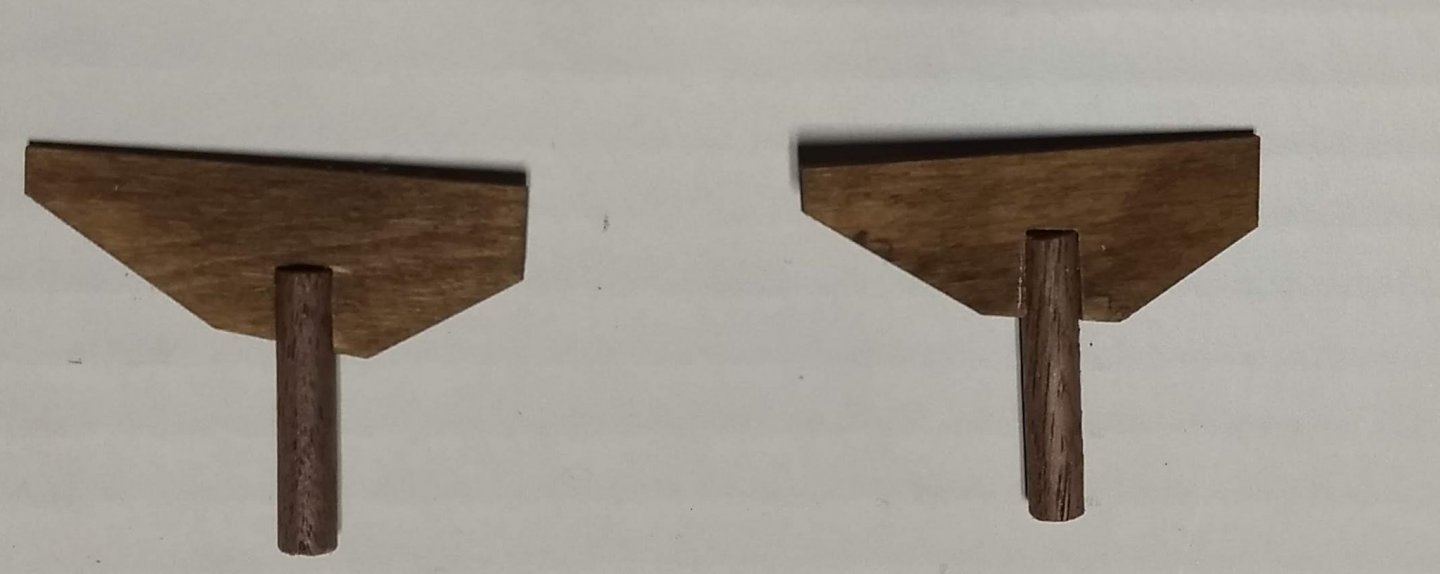
Hull is complete and deck glued. All pretty straight forward. I will say (as others have) the attaching the stempost to the keel is a challenge. The curve is not correct for the hull. In my case I had to cut the stempost and use a piece of the keel to reshape it to match the hull. If you look close you will see the joint in the stempost.. About the best I can do with my limited skill. Also below is the bottom and side views Started working on the boiler room. Only hitch here is the instruction call for the door frames to be 1x3x34 Sapelli. Problem is the wall are 1x4. Best to use the 1x4 Sapelli wood, but if you use the 1x3.. just make sure it line up with the outside of the doors,, and no one will ever notice Engine room is the same story. Use the 1x4 Sapelli. wood for the doors. Below is the stained Engine Room.... I committed a beginners error,,,, I did not test out the stain on a sample piece of wood... I used the same stain I used on other woods so did not think to sample... End result is stain that is way too dark (for my taste) and a little blotchy. Not quite sure what I am going to do about it. One option is to replank the Engine room - and all would be OK,,,, other option would be to go in complete opposite direction and paint the boat white.... Not sure I have seen a real life steamboat that was natural wood color,, most seem to be white... So that is an option I an considering,,,, At that point it was just a matter of using the template over the Sapelli to cut out the arch. It takes some time, but I like the final result. Next on to the WaveCatcher... WaveCatcher is 1.5x5 Sapelli. In order to bend it, I soaked it in water for about 5 min and then used a soldering iron to bend the wood to match the bow of the boat. It was then bent around the bow and "rubber banded" until it was dry Next step call for the rudders. Instructions all to "Make an 8mm deep groove in the rudder shafts and insert the blades" The shafts are made from 5mm Walnut dowl. Cutting an groove 8mm long in a 5mm wide dowl shaft is well beyond the skill I have. Instead, as shown below, I cut the slot in the rudder blade and inserted the shafts into the blade End result is pretty good and a far easier Building of the staterooms are below. Pretty straight forward. Plank the entire stateroom and then cut out the doors and windows
- 42 replies
-
- 2
-
-
- king of the mississippi
- artesania latina
- (and 1 more)
-
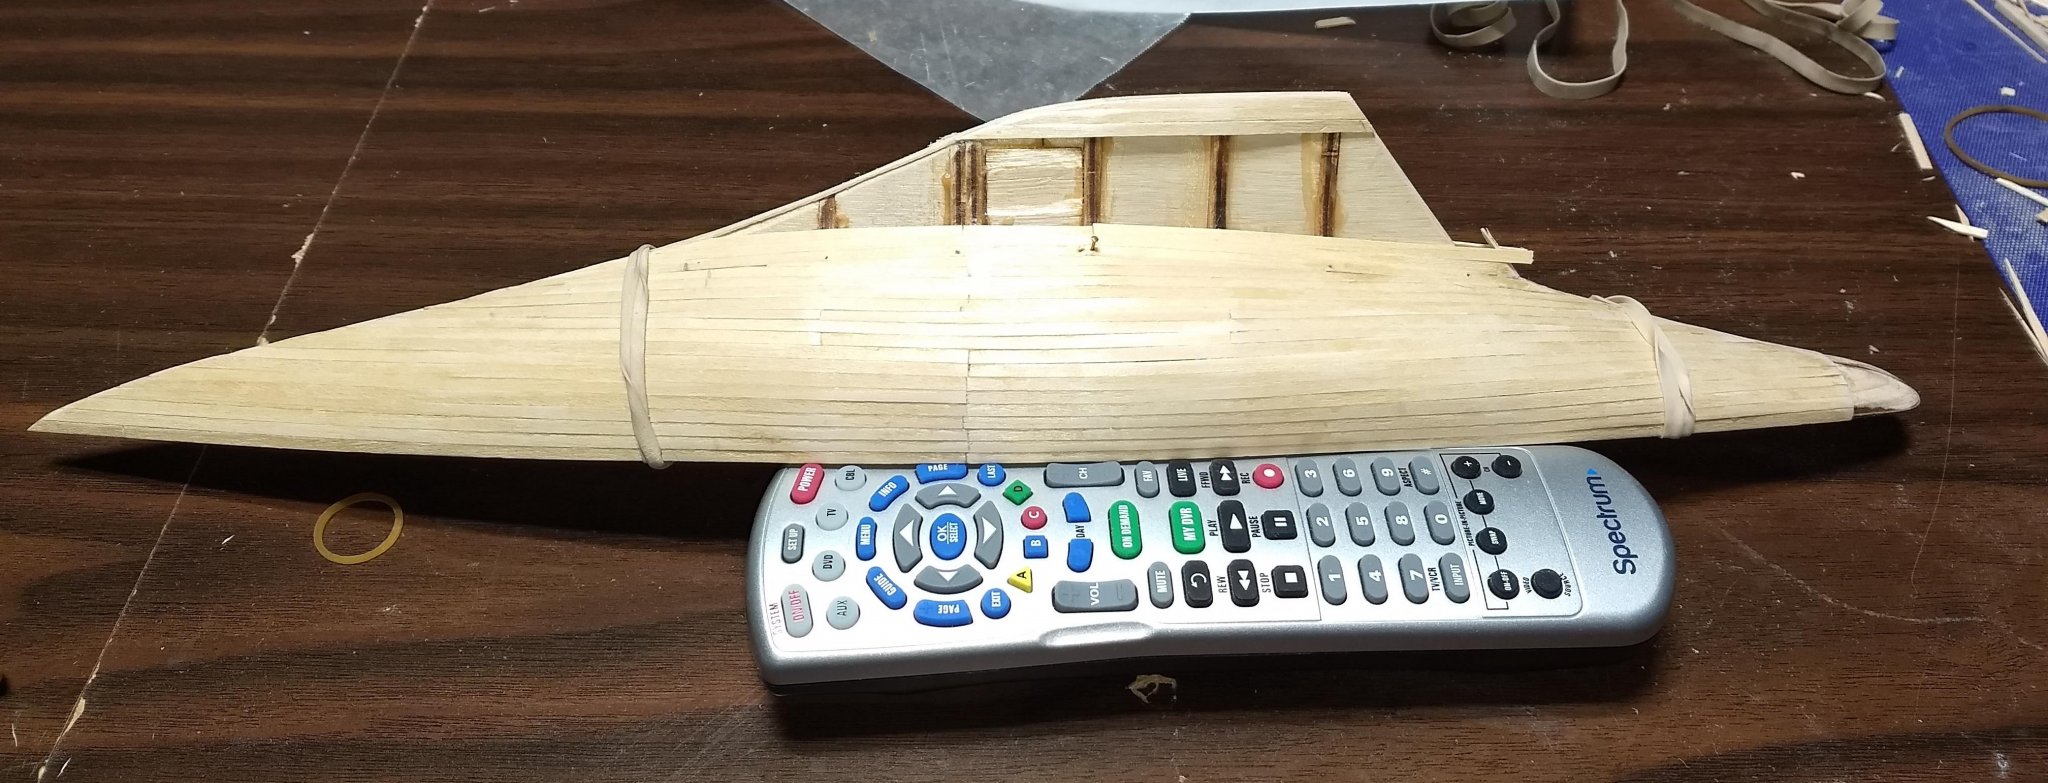
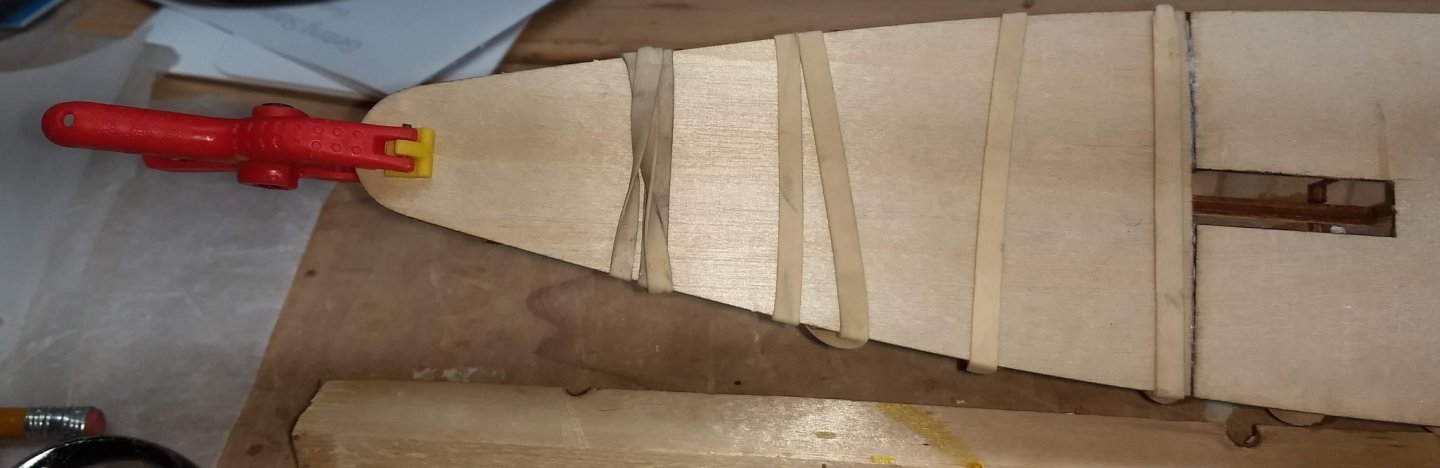
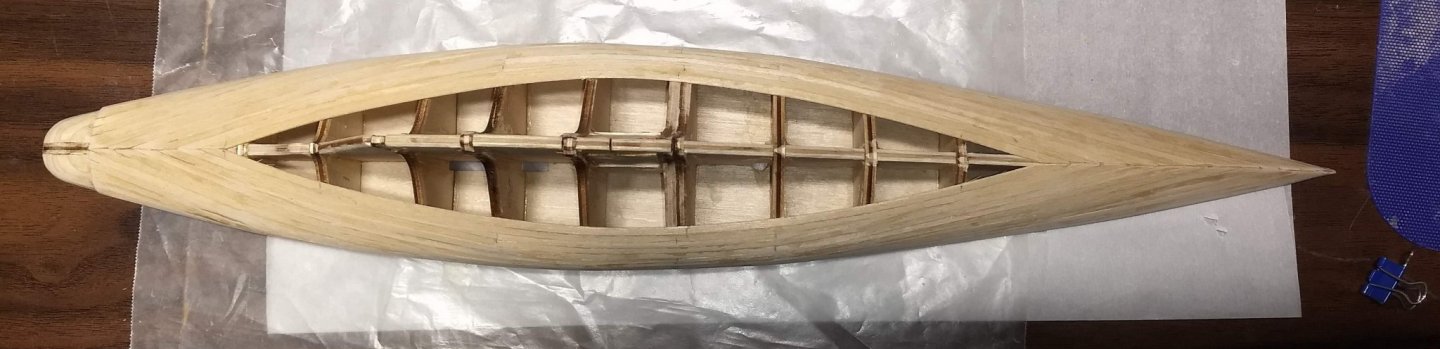
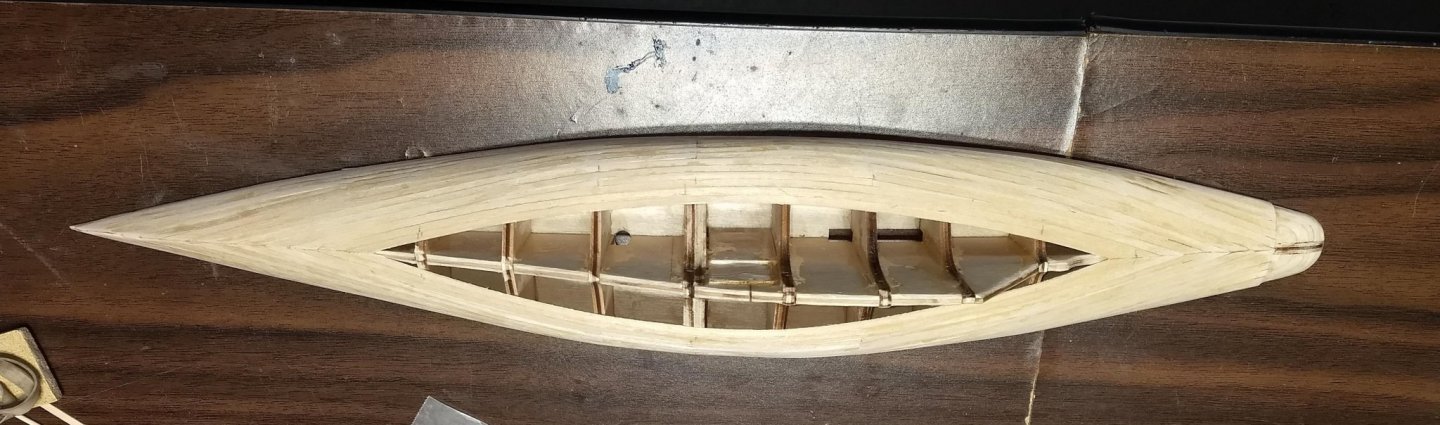
Wherry is in it's final home... Similar to the boats in the picture above it. The rope that came with the model, while is probably to scale, looked a little "thread like". Instead I opted for a candle stick wick. Wick used to make candles. It is braided and looks pretty good. The fish net is an extra strong hair net used by female equestrians with long hair... That too looks pretty good to me as a fish net. Anyway, I really enjoyed this build, but being a novice builder, I did make some mistakes. My main issue was mentioned earlier when I only lined up the plank marks at the bow and stern. I did not think the mark in the middle of the plank mattered. While the exterior of the wherry looks good, some of the planks on the inside are too close or too far from the next plank. Next planked ship I will pay closer attention. Also as mentioned earlier it is not real obvious, to a beginner, the bow and stern of each plank... especially when they are all in water soaking. I would recommend, if you are not sure as to the bow and stern of each plank, to mark the bow and/or stern of each plank,,, just so you do not make the same mistake I made and install them reversed. Have fun,,,, I did,,,

- 12 replies
-
- 4
-
-
- lincolville wherry
- finished
- (and 1 more)
-
Anna, I just started a build of the King Of The Mississippi. While I am a ways behind your progress it looks like it will be a fun build. Looking forward to your next post John
-
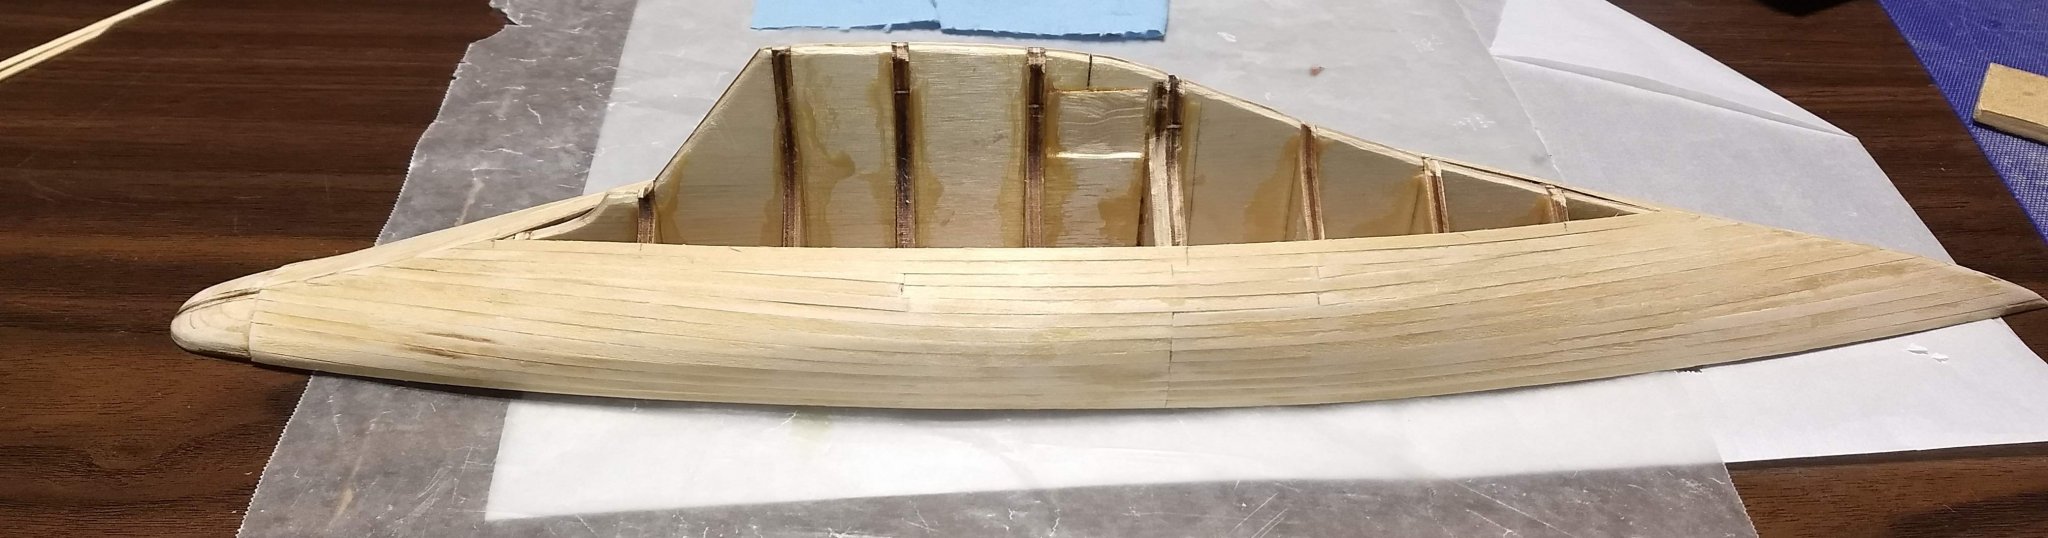
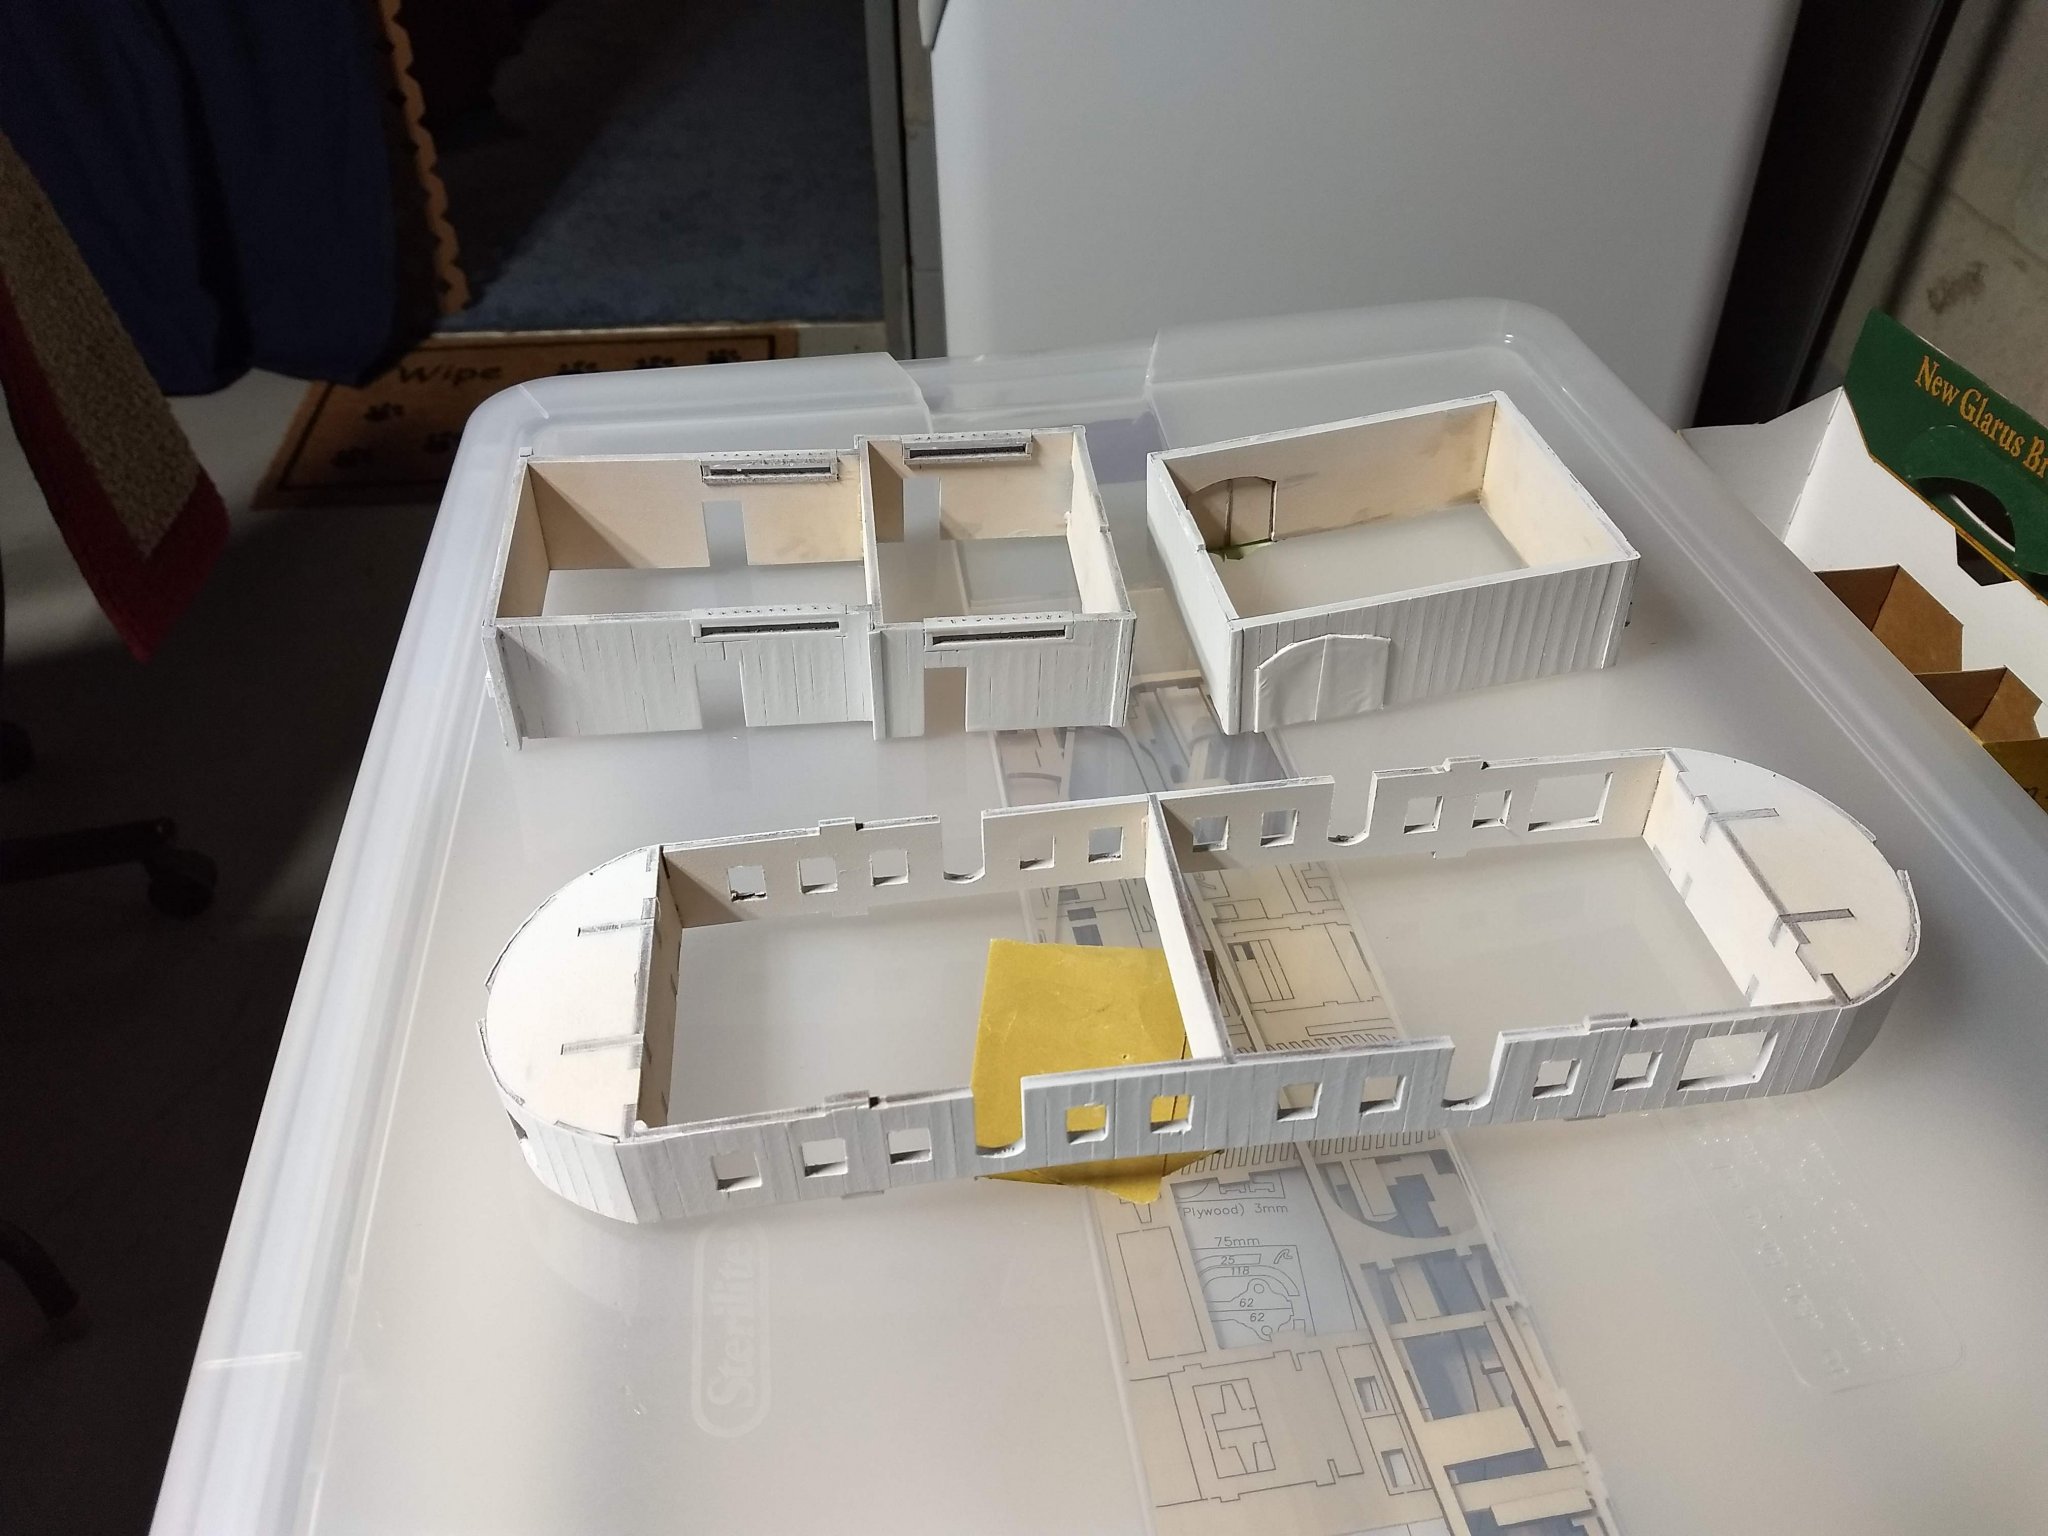
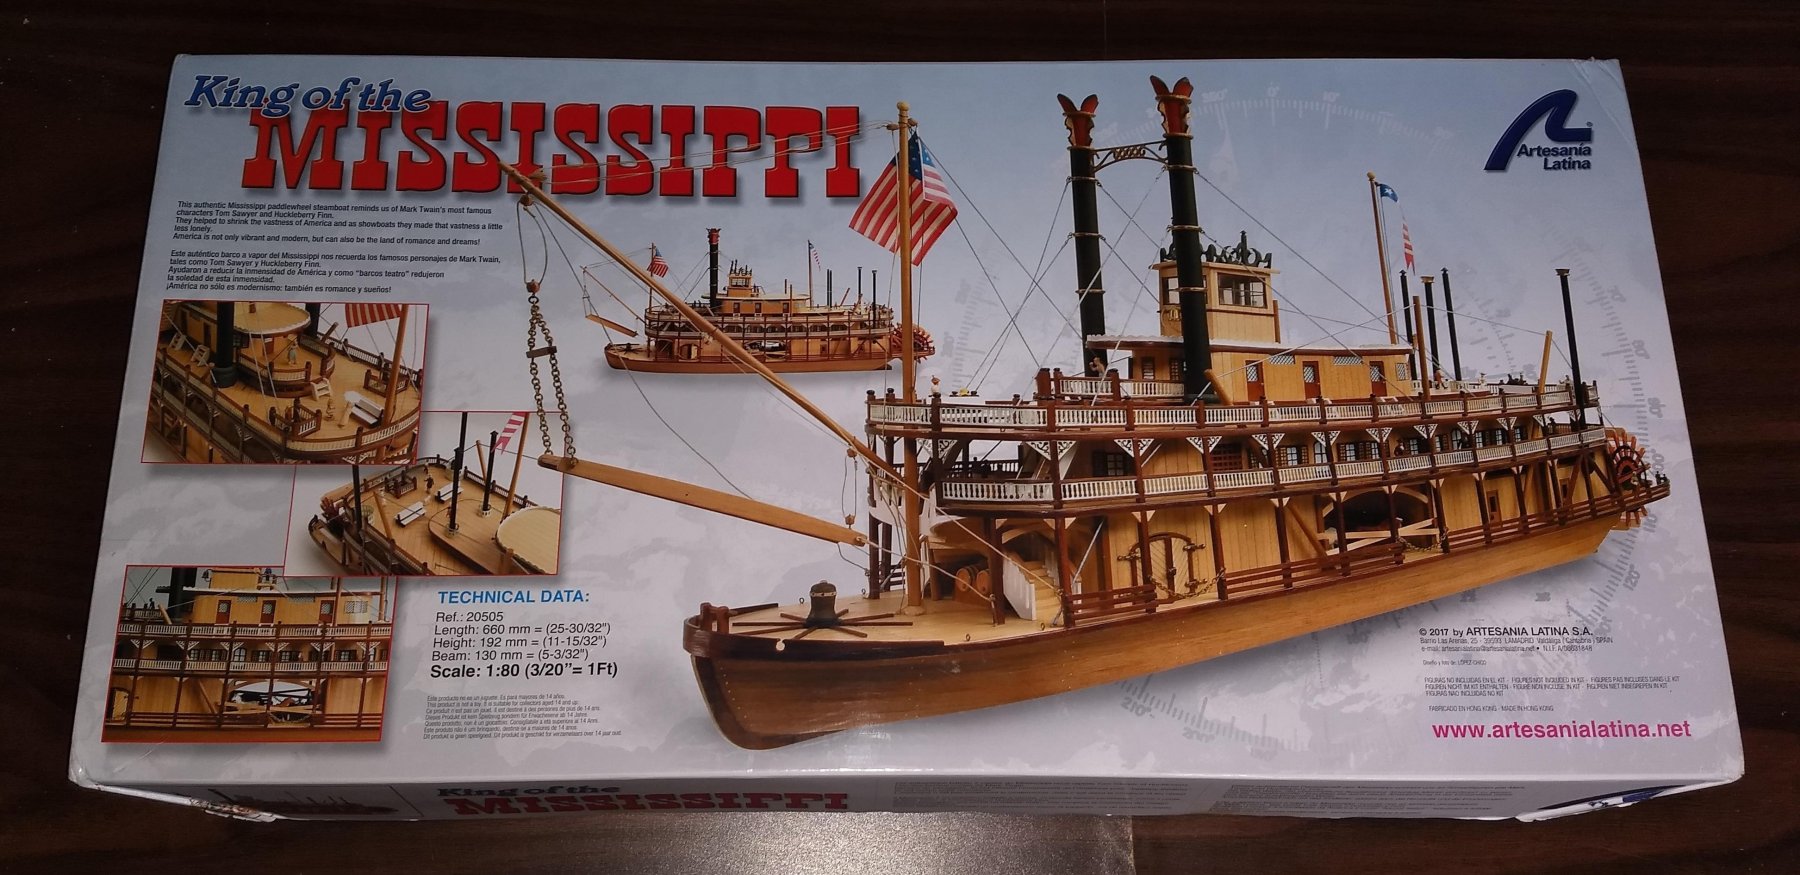
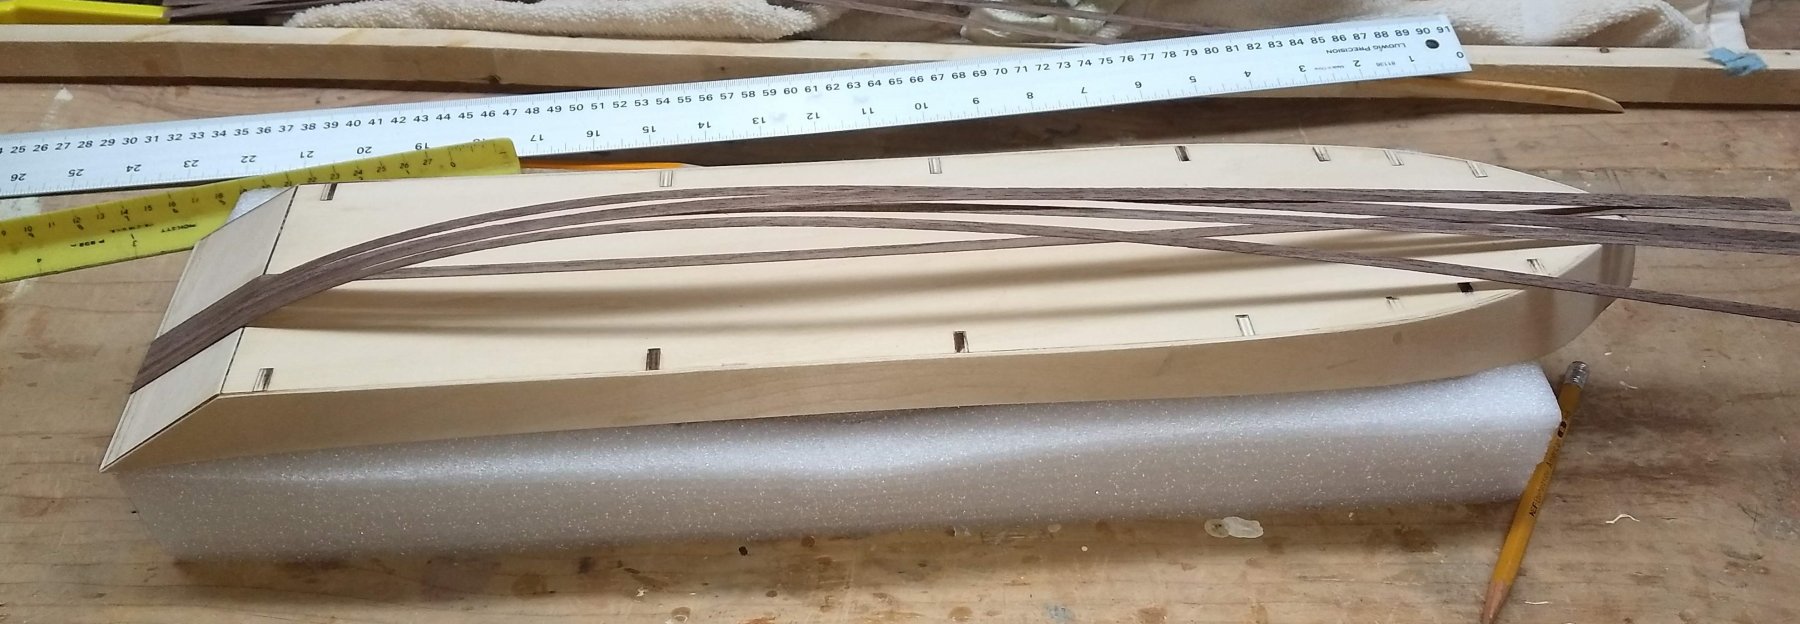
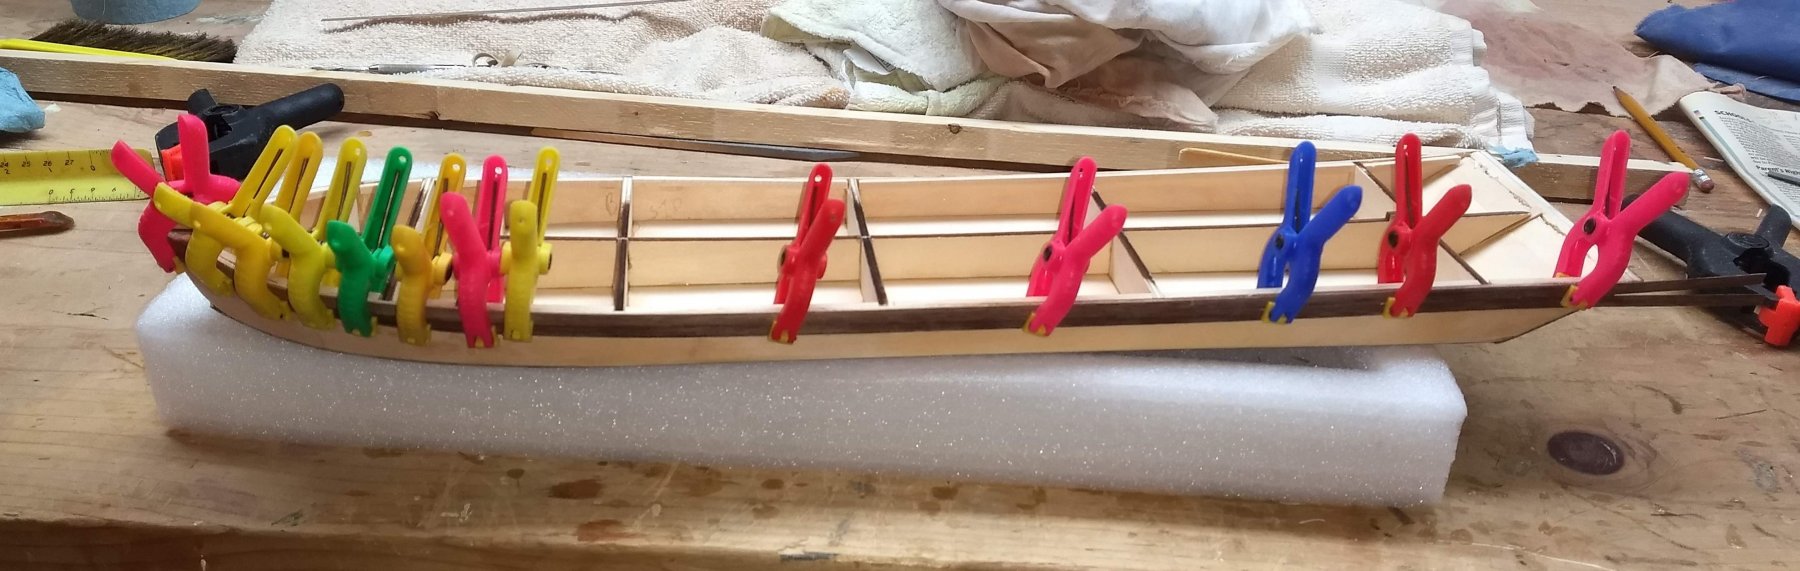
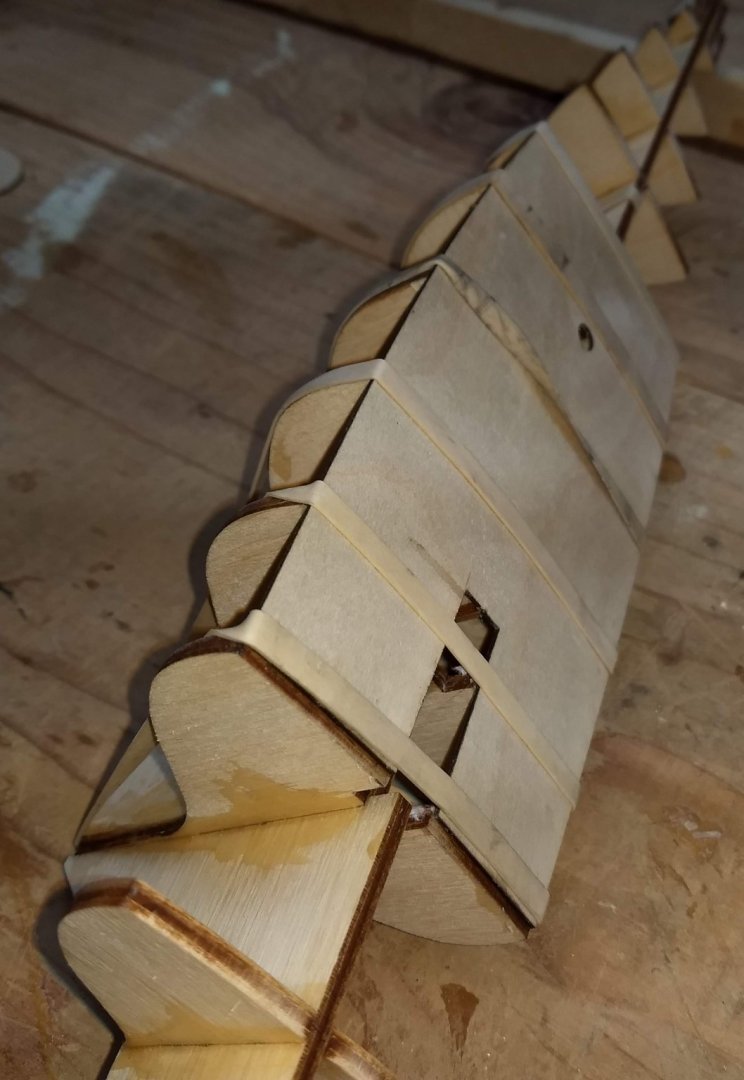
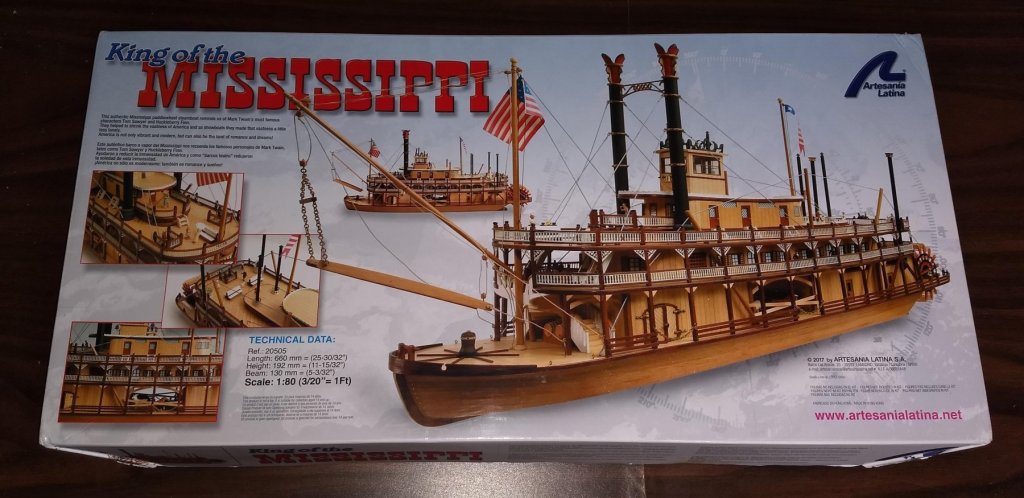
I am a relatively new modeler and plan to take on the King Of The Mississippi. Main reason I am attempting this is due to the vast number of build logs on MSW. I have studied them all and have been intrigued by some of the ingenuity and customization that has been done by the various shipbuilders. Even the logs have have not been completed were invaluable showing various stages of the builds. Besides that,,,, the King Of The Mississippi just looks like a cool model. The version of "the King" I have is 2017.. Maybe some of the issues that earlier shipbuilders encountered have been corrected by Artesania.... But I guess that is probably too much to wish for,, So here we go... Note the date of 2017 Box contains three shrink wrapped items First part of hull structure is pretty straight forward. Parts fit nicely with only a little sanding to make the bulkheads seat better. The instructions call to glue in the upper stern board to the slanted portion of the false keel. Note below that I did not do that at this time. Turns out the slant in the slanted portion of the false keel does not match the slant in the bulkheads. Thus later on when you install the bulkheads the upper stern board does not match the bulkheads. Others have pointed out this issue and later had to "fiddle" to make the upper stern board match the bulkheads. Instead I decided to glue on the bulkheads and then make the upper stern board match the bulkheads Note the upper stern board not installed. I do not have a good picture, but below shows the bulkheads installed and the upper stern board lined up with the slant in the bulkheads. You have to insert a small piece of wood between the upper stern board and the slanted part of the false keep to take up the space, but this is a much easier way to deal with this issue than gluing in the upper stern board before the bulkheads. Ignore that extra piece of wood glued to the upper stern board... Initially I thought the upper stern board was too long so I cut it down,,,, Mistake on my part.. No big deal as the mistake will not show once the hull has been planked On to planking the hull Lay the first row of planking down the exact center of the hull and let this dry. Make this a straight as possible as it is the base for all the other planks Note the planks are paper thin and very easy to bend,, Should not be a problem bending the wood. No need to pre-heat or steam. Since there is a bend and it does take some time for the wood glue to dry, I choose to lay about 5-6 planks (at a time) in the stern part and later (about 20 min) bend them over and glue them to the hull. I could have used CA glue, but I am the world's worst CA glue'er and usually get it all over the model. However I have since found the the CA gel works great and much more forgiving,,, One note,,,,, There are supposed to be 30 hull planks - 6 mm in width... While there are 30 planks, they are only 5 mm in width. As such there are not enough planks to have full planks on both the bottom and hull sides. Since the hull planking on the bottom will never see the light of day on the completed model, that is where you want to have planks with joints. Basically take some of the planks that extend beyond the bow (picture above) and butt them together to make some of the planking on the bottom of the hull. In my case I ended up with three bottom planks that were made up of several smaller pieces. The pieces butt together very well and you can hardly see the joint. In theory you could do this on the side bulkheads but best to do this with the bottom hull planks that will never be seen. In the end I used 18 planks to cover the bottom and have 12 full planks to cover both side bulkheads Side Planking,,,


- 42 replies
-
- 6
-
-
- king of the mississippi
- artesania latina
- (and 1 more)