MORE HANDBOOKS ARE ON THEIR WAY! We will let you know when they get here.
×


mfrazier
-
Posts
253 -
Joined
-
Last visited
Content Type
Profiles
Forums
Gallery
Events
Everything posted by mfrazier
-
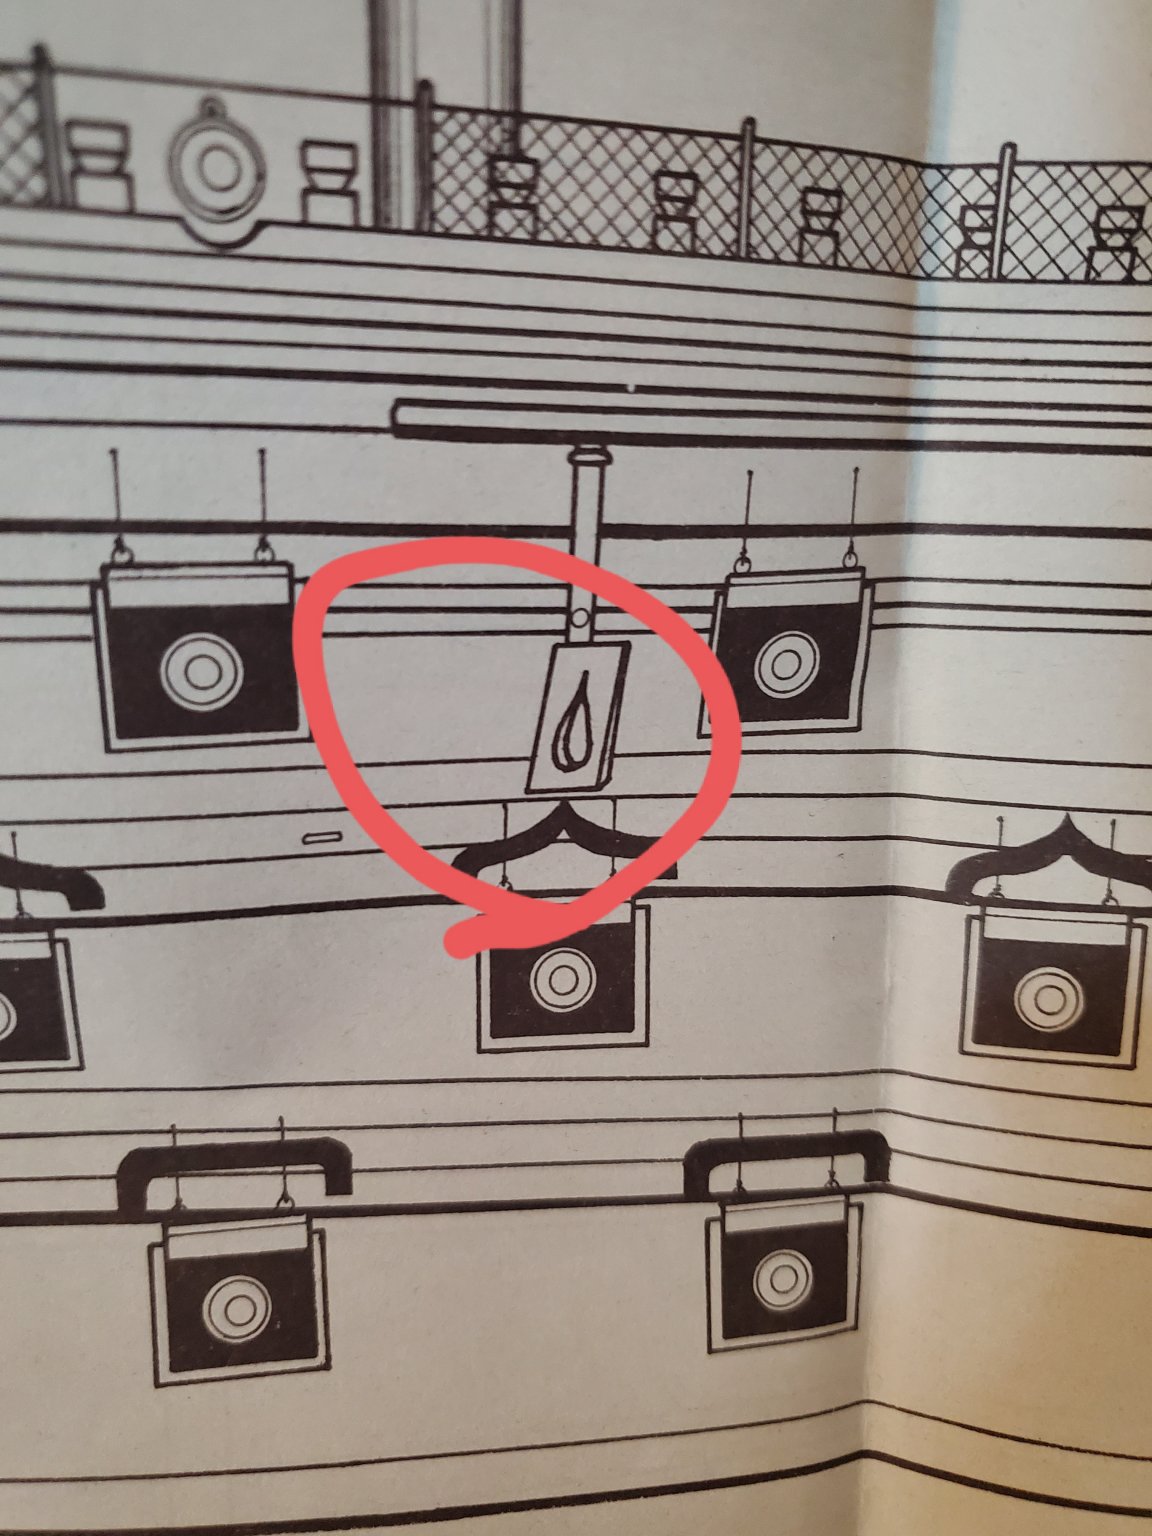
 While correcting problems and mistakes on the hull, I was looking way ahead ( I seem to do that a lot) I spotted this on the plan prints. Can someone please explain what this is? There is no mention of it anywhere in the instructions or anything. I must be supposed to make this thingie as there isn't one anywhere in the kit parts. Thanks in advance, Mark Frazier
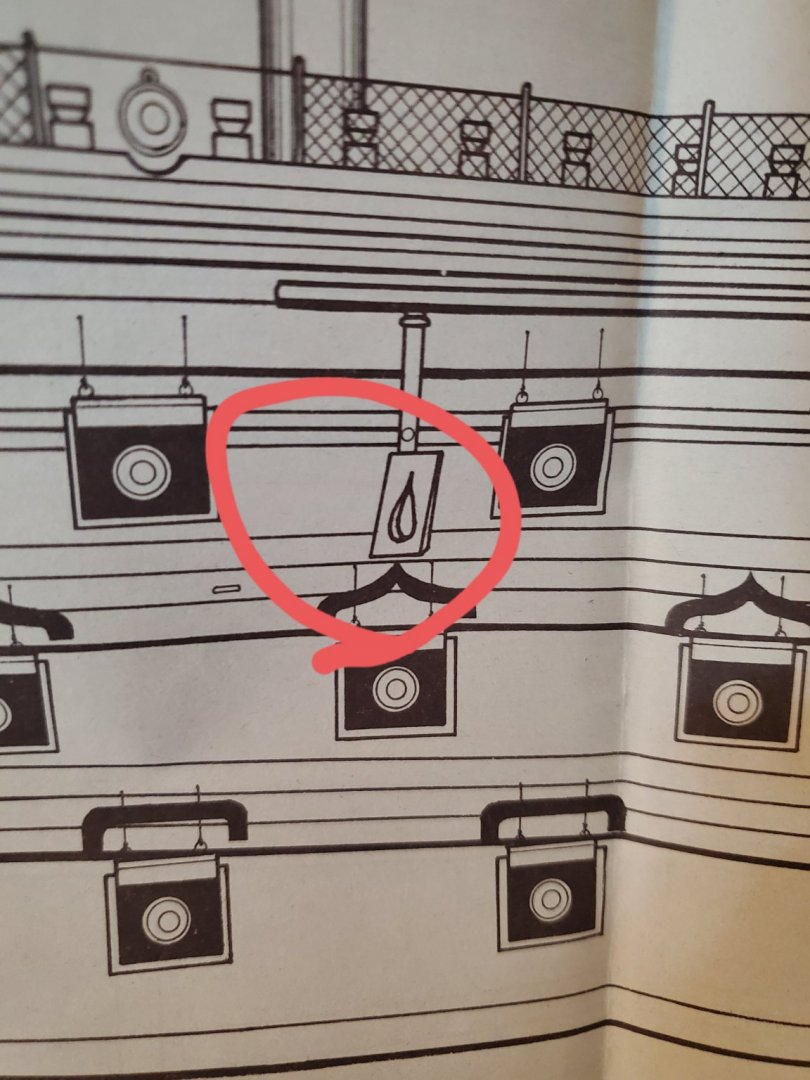
-
Thanks Kieth. I followed about six different build logs of the Victory on here and one of you fellows, I can't remember who, had pointed this problem out during their build. If it wasn't for that, I would have had the same problem with the port heights and the deck. This is one example of the valuable information that is shared among everyone here helping make kit builds a higher quality and more enjoyable experience. Mark Frazier
-
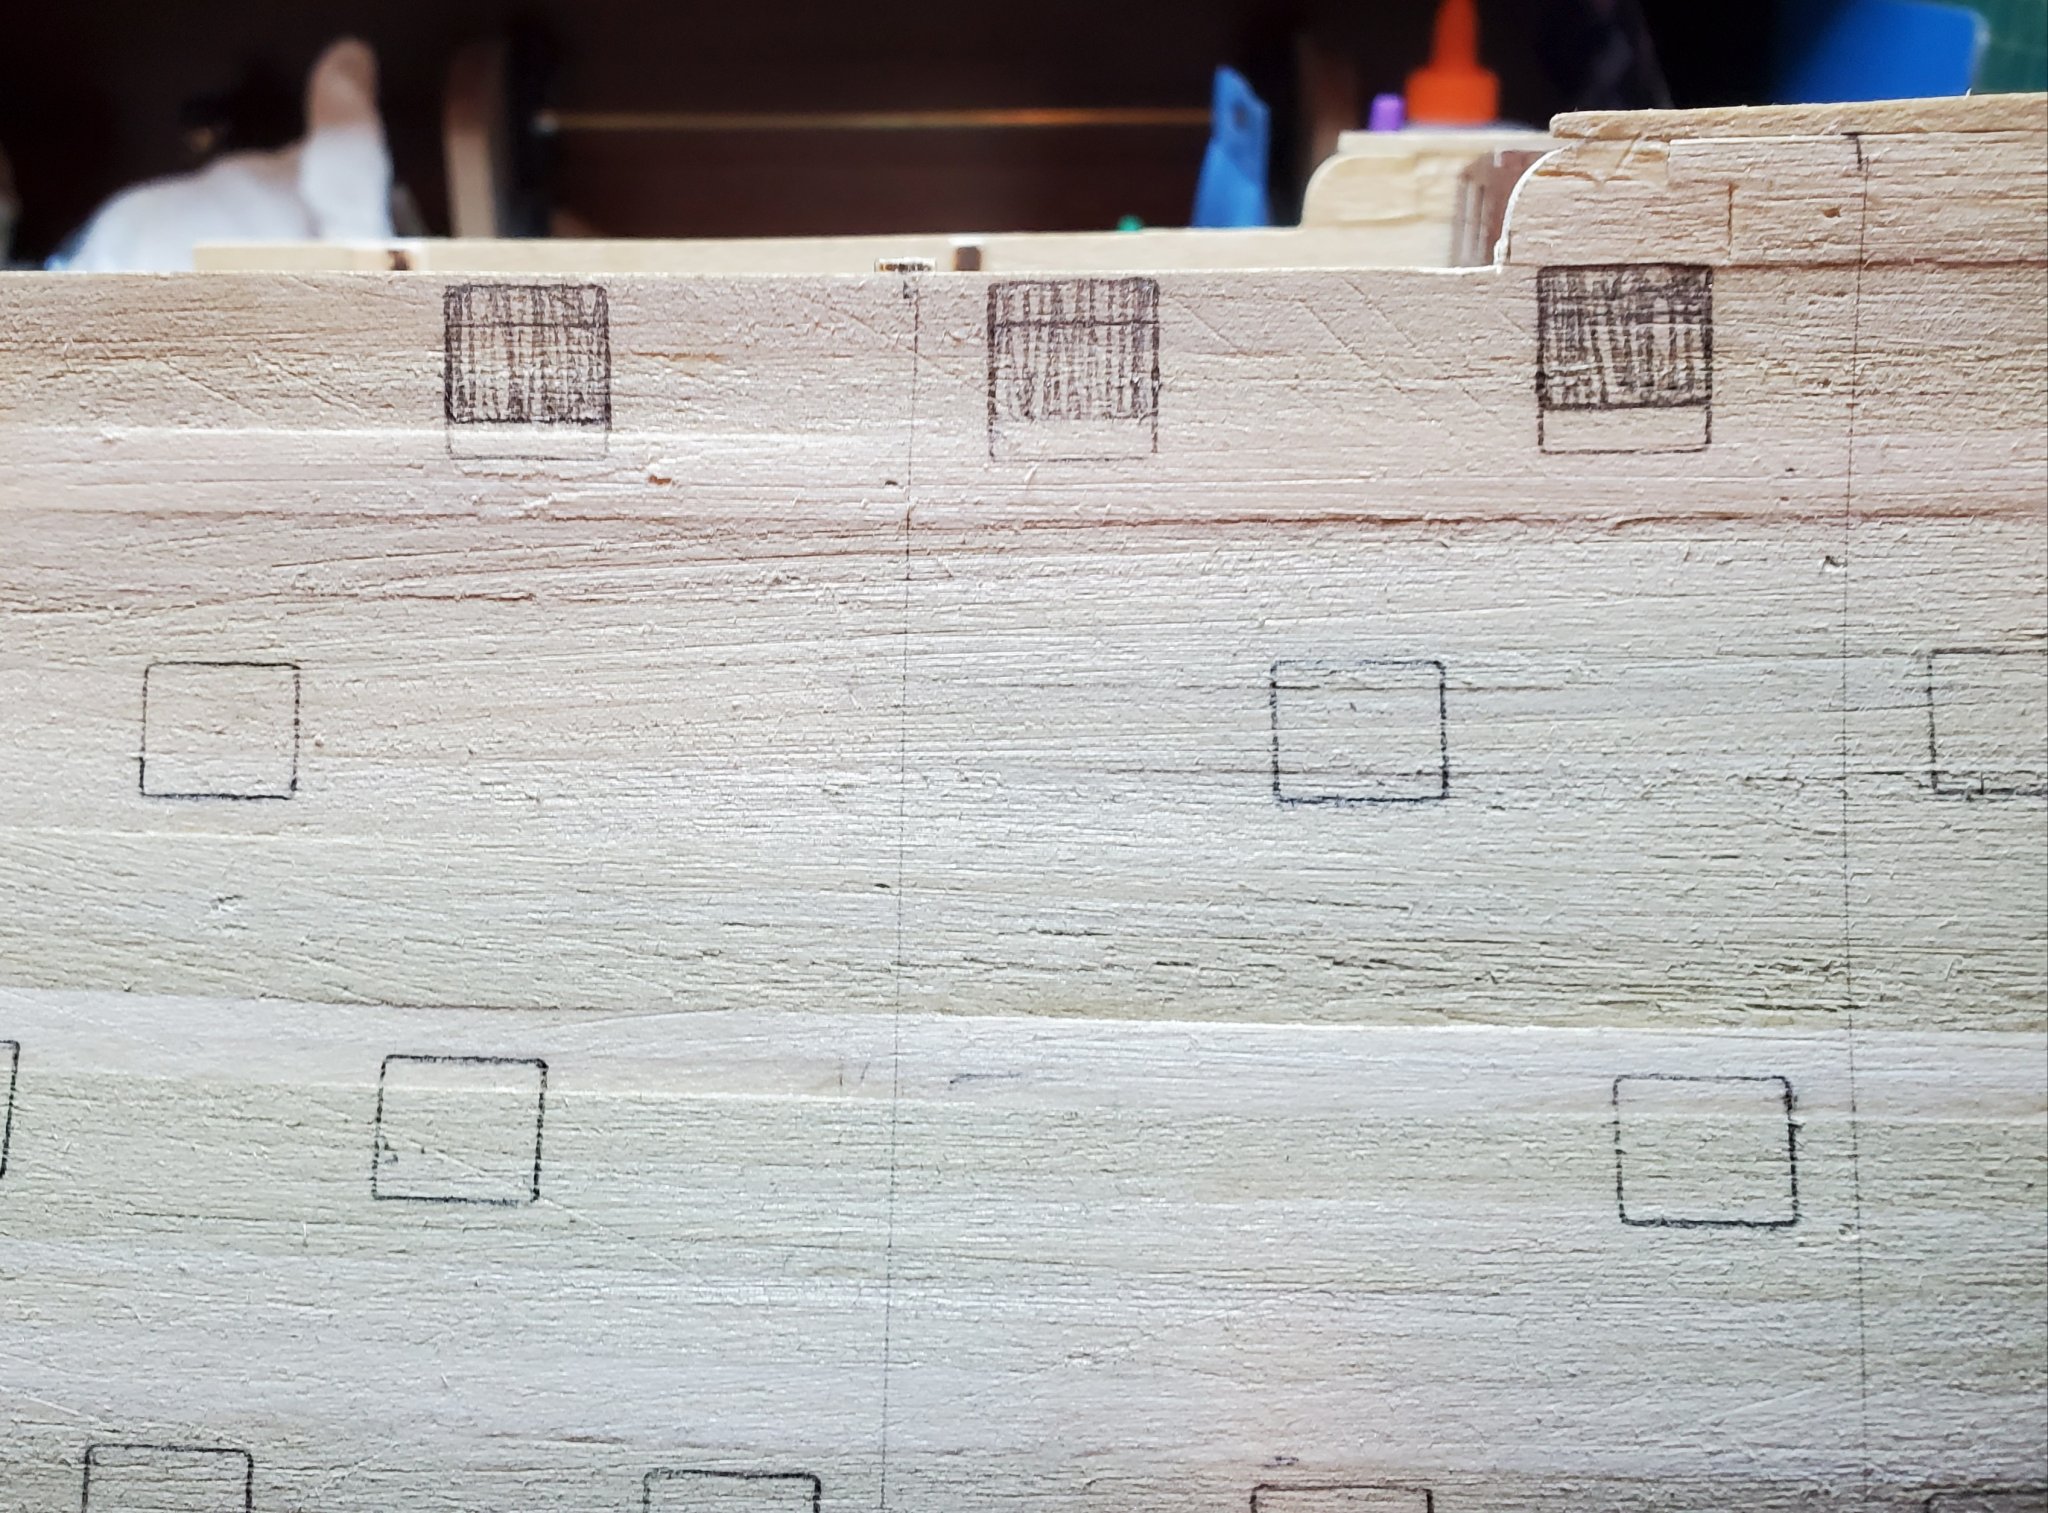
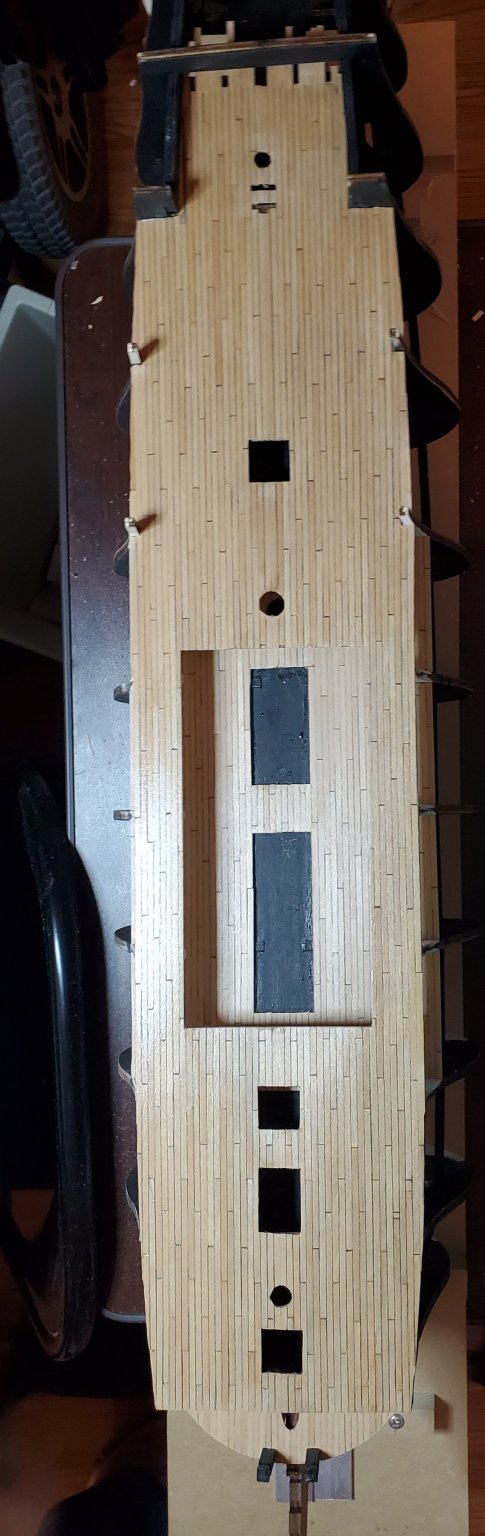
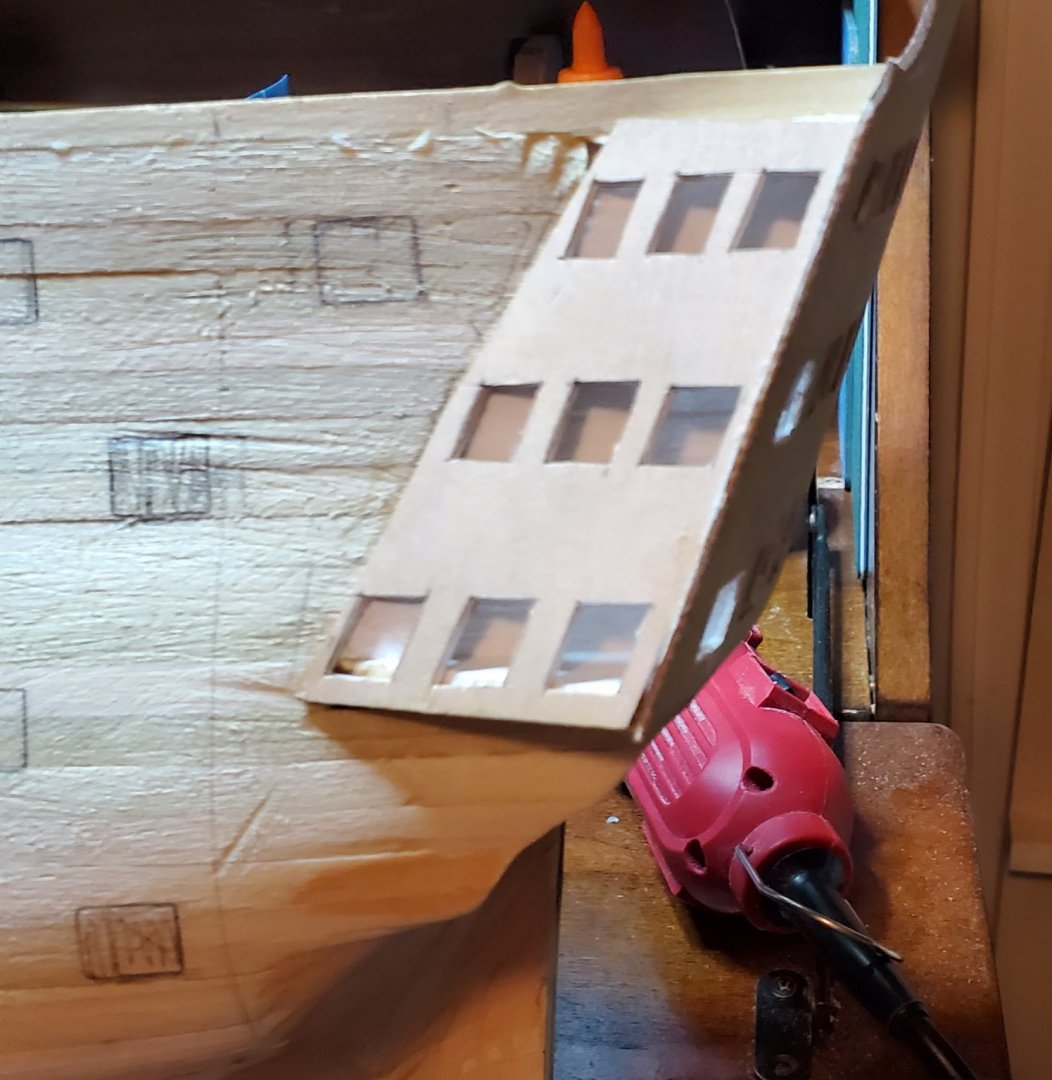
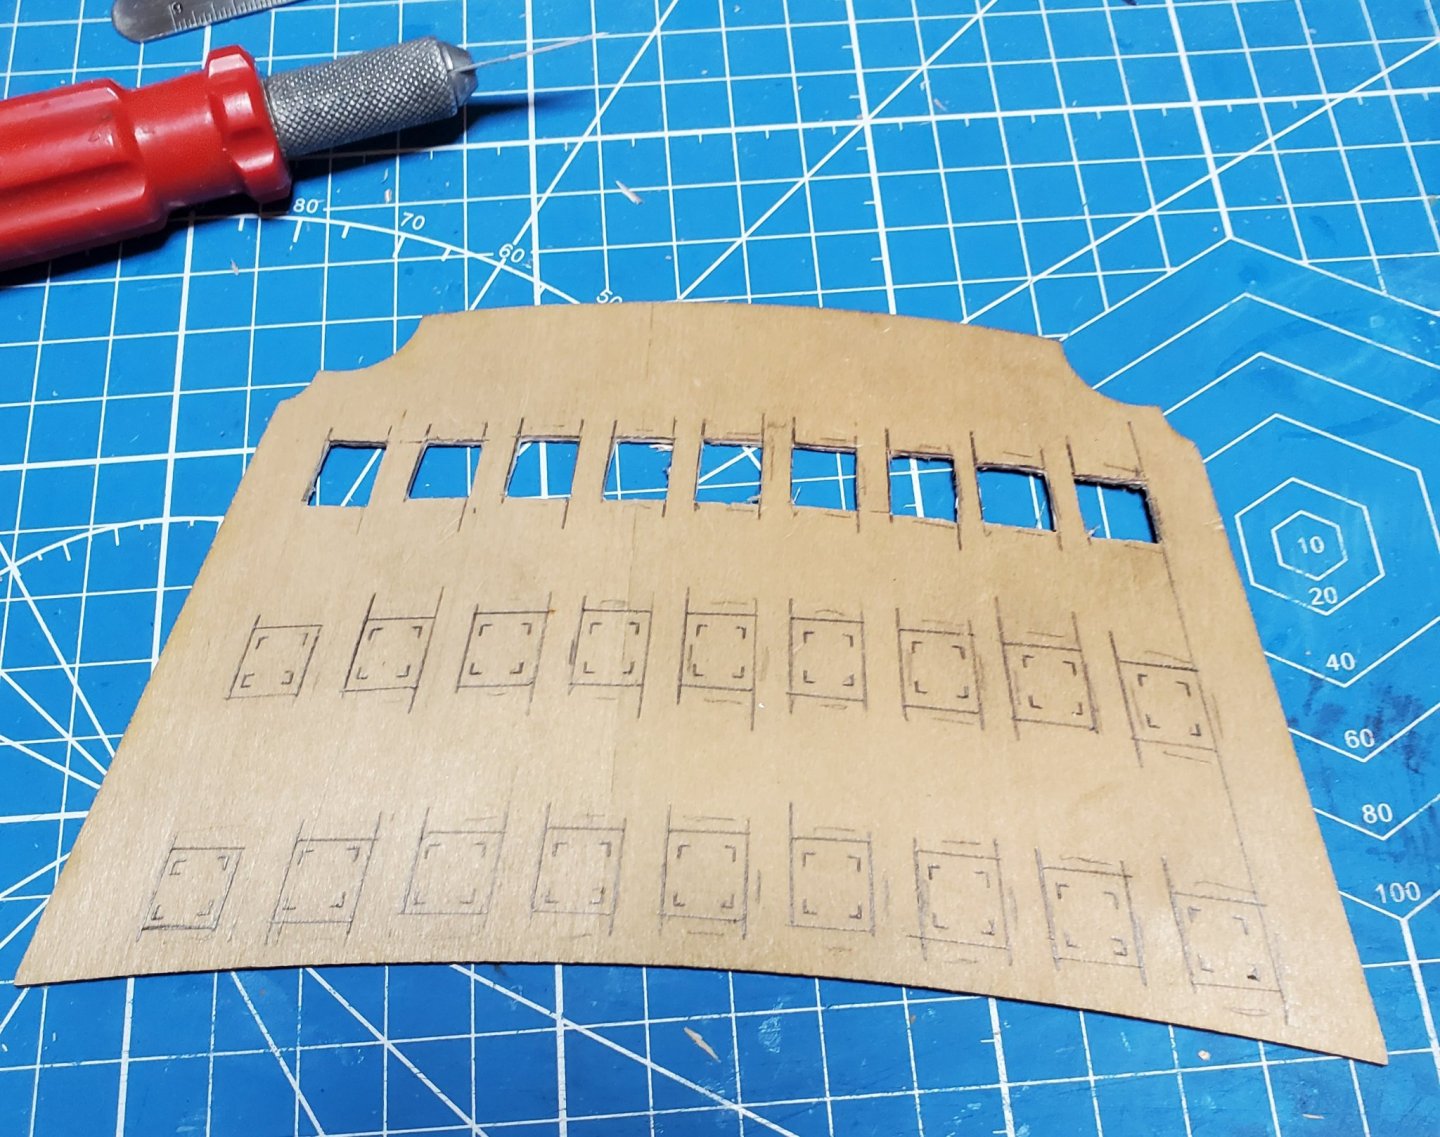
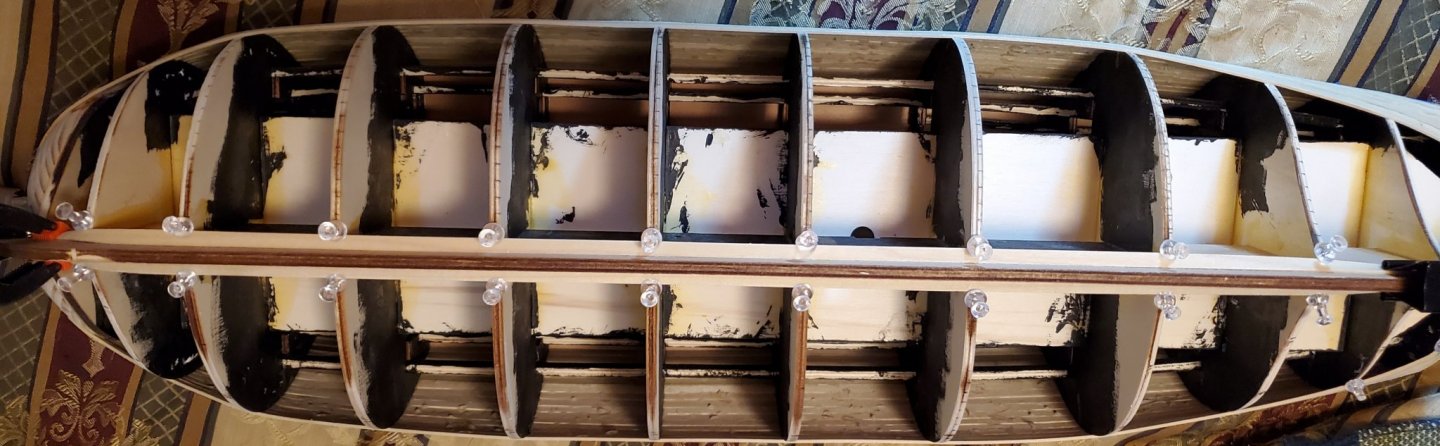
I want to thank everyone for their input. It is good to have other opinions and ideas. Keep them coming. I spent several hours fixing the stern base panels. As expected with this kit, they did not fit and needed slight modification. But they are as close as possible now. I cut out the windows in the side panels also. I laid out all the gun ports and shifted three in the stern and six up front to try to avoid hitting bulkheads when I cut them out, ( which is next). I decided to check the cannon height on the deck with respect to the gun ports and sure enough, they are way off. I'm glad I checked this before cutting the ports. Seems I remember one of you fellows mentioning this problem with your kit and I kept it in the back of my mind. You can see in the photo , I raised them a good 1/8 inch. I also checked to make sure that last one that is under the stairs to the poop deck won't interfere with the stairs. I will have to add a board on top of the waist wall to make up for the shifted ports. I plan to cut the ports, then line them and sand flush. Then after second planking the ports will be recessed the 1 mm , as that is the thickness of the second plank layer. Mark Frazier

-
Thank you. I thought that was what he meant. I tried it black at first but it looked worse to me. I now regret not having cut it back but can't now as the base panel is glued on and I doubt it can be removed safely. It is a poor design on Mantua's part ( as are a lot of things). It will show less once the glass is in the windows also. Mark Frazier
-
Thank you, Bill. I am finding it fun and challenging to try to make this kit into a better model.
-
Keith, I am not sure what edge you mean. Mark
-
Thanks OC.
-
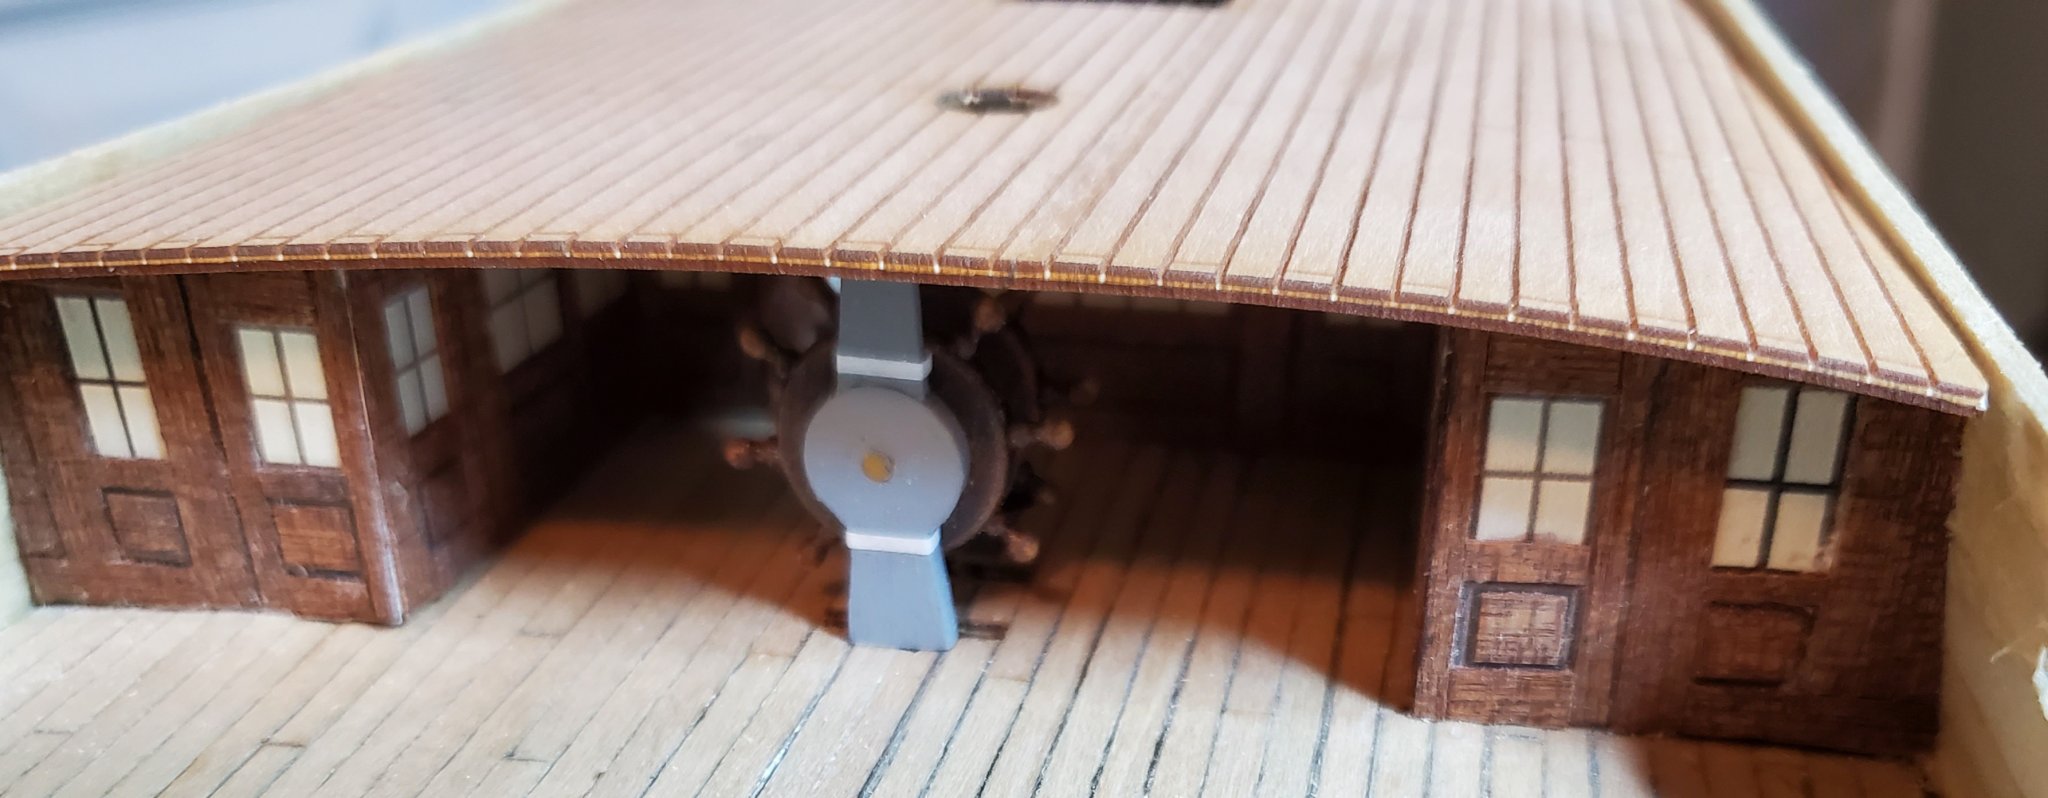
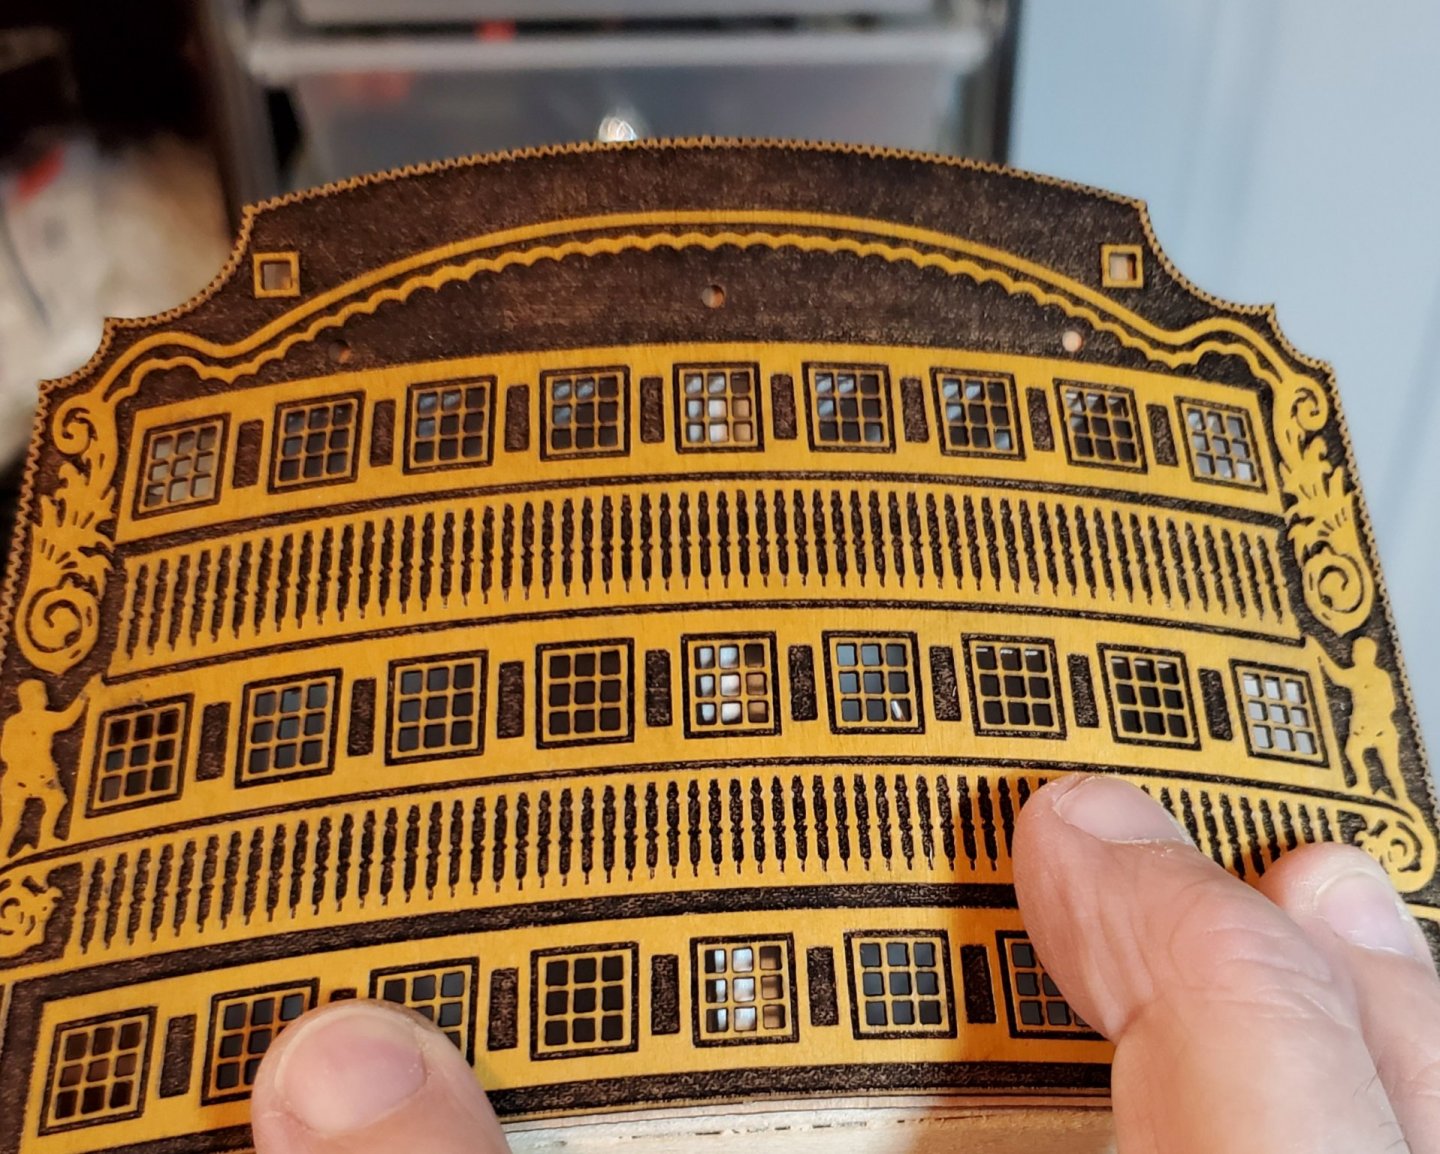
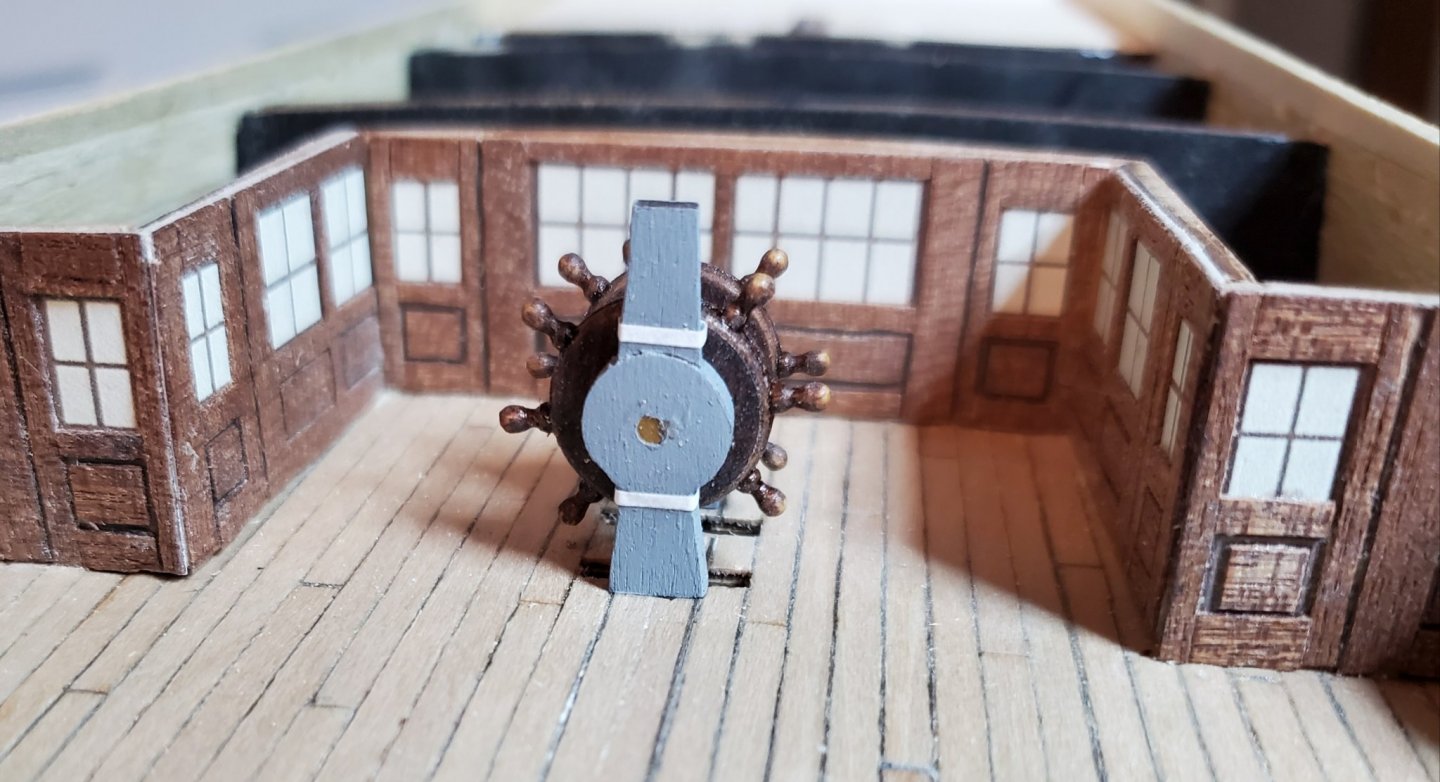
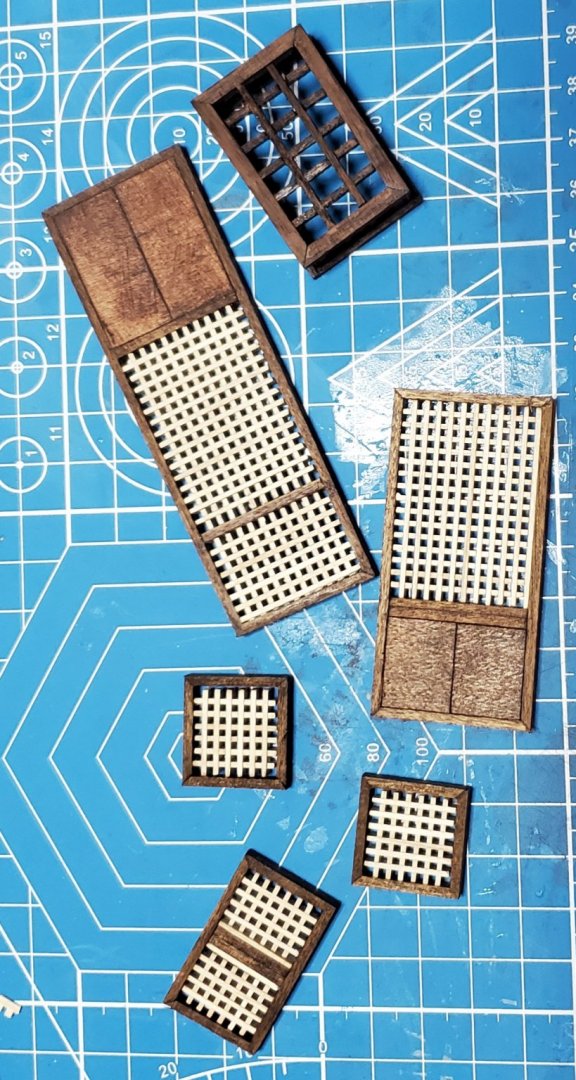
A little more progress. I need to build some of the stern galleries before I can second plank the hull. This meant I had to fit the poop deck before fitting the stern gallery framework and the ships wheel is needed to fit the poop deck ..... so ...... the ships wheel. The setup from the instructions .... well ..... it just sucks. The ships wheels were way out of scale, so I sanded as much as I could to thin them down without ruining them. I could order some to scale ships wheels but they are 15 dollars apiece and you really can't see much of them, so I modified the kit ones to look a lot better. Now the stand for the ships wheels in the kit is just a piece of plank and looks just awful. I wanted it to look like the real one so I tried to carve one..... this thing is small and a fiddly little thing to try to make. This was my third attempt and I finally made something I didn't throw in the trash can. It is only 24 mm tall. I am happy with this one. ( I can't wait to try to make that tiny binnacle that sits in front of it). I still have to plank the poop deck and I have to put the rope on the ships wheel before gluing the poop deck in place. ( you have to watch that everything is done in the right order or you end up not being able to do something without tearing something back off). So ..... with that done, I painted the inside of the stern galleries white. I was going to cut that center part of the frame out as it is right in the middle of the windows, but it is not that noticeable once the windows get installed, and even less once the glass is put in the windows. And after the panel is planked and trimmed out, everything will blend in well. ( I can see it in my mind). I have a plan if it works out. I don't want to paint the hull, I prefer to stain it. I am not intending to copper the hull either ( unless I really screw up the second planking) so the parts that would normally be black ( such as the wales) will be stained ebony black. I probably will paint a few details but most things will be stained. Oh .... and that etched panel for the stern galleries .... the only part that will be visible, is the cross bars in the windows and the pillar rails between the windows. I intend to plank it walnut and make molding and trim to cover it. ( I hope it works out). We shall see. Mark Frazier


-
Looking really great. I'm looking forward to getting this far on mine. Your details are awesome. Mark Frazier
-
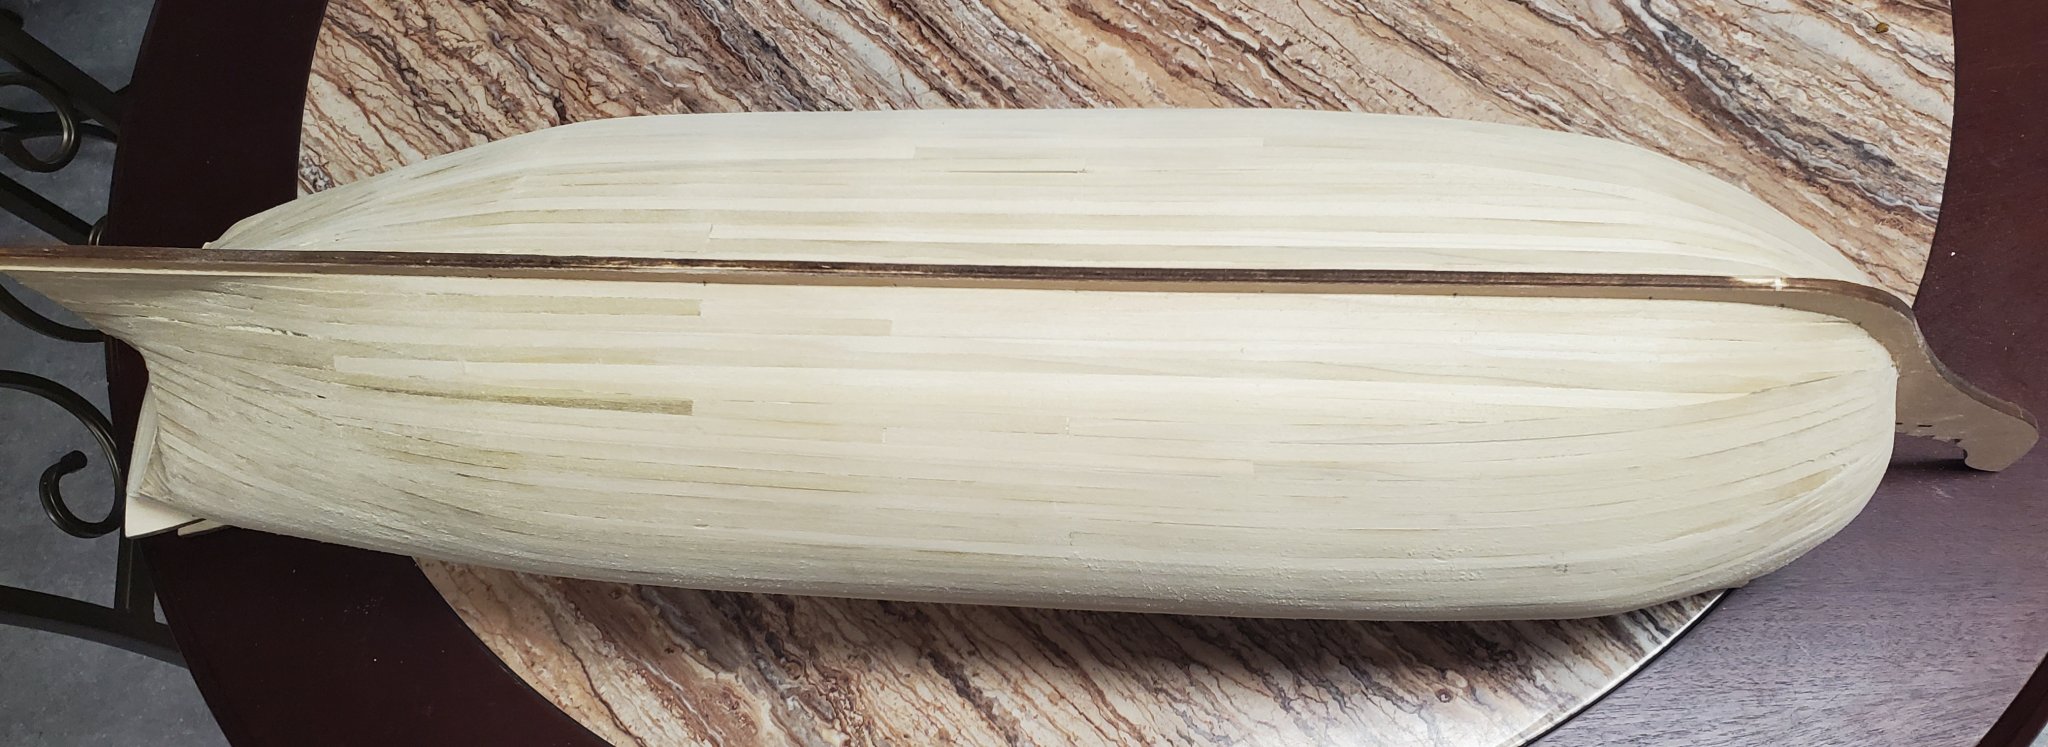
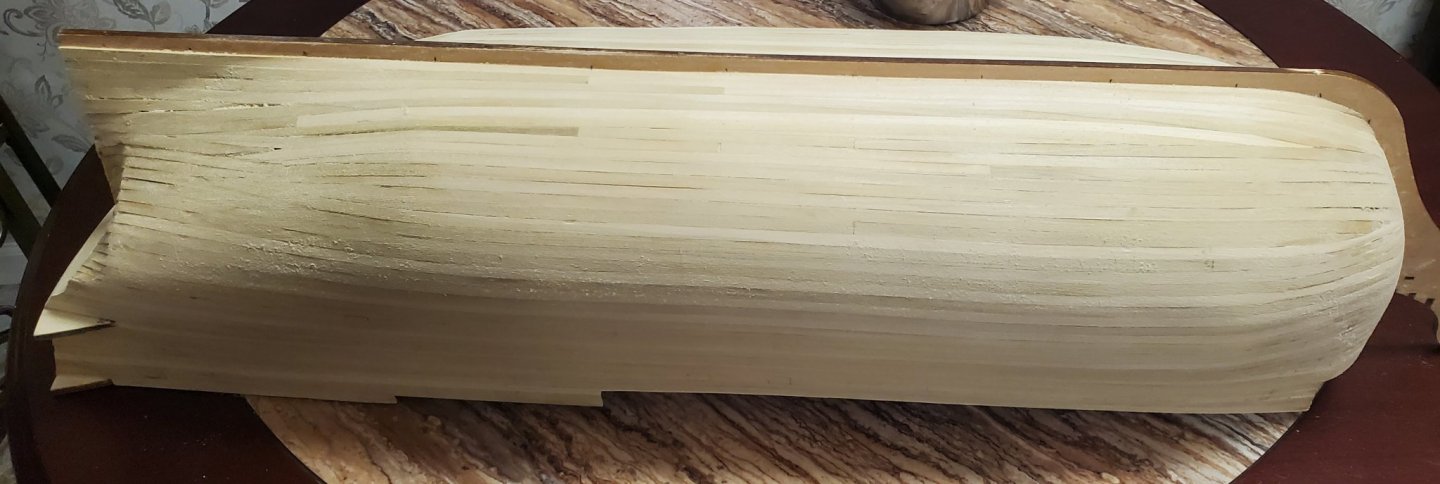
Thanks OC., You're correct. I am so happy to have the first planking done. I am much more excited now. I can't wait until the second planking is done. I love doing the details. It only took a few hours to sand the hull and it came out better than I thought. I needed very little filler. I started sanding with 80 grit sandpaper but it was going to take forever, so I went out to my shop and got a 80 grit sanding belt for metal and cut it, put it on a sanding block and it ground that hull down in minutes. Then I run over it with 80 grit paper and smoothed the surface some. The kit stern is really lacking. I will paint the inside of the galleries white. The windows are kind of hard to see in so I am not going to get carried away decorating the inside. I was going to put the floors in with black and white checked floors but they will be very hard to see so I don't think it is worth all the work to finish the inside rooms when they can't be seen. I am still thinking about how detailed to make the rooms. Mark Frazier
-
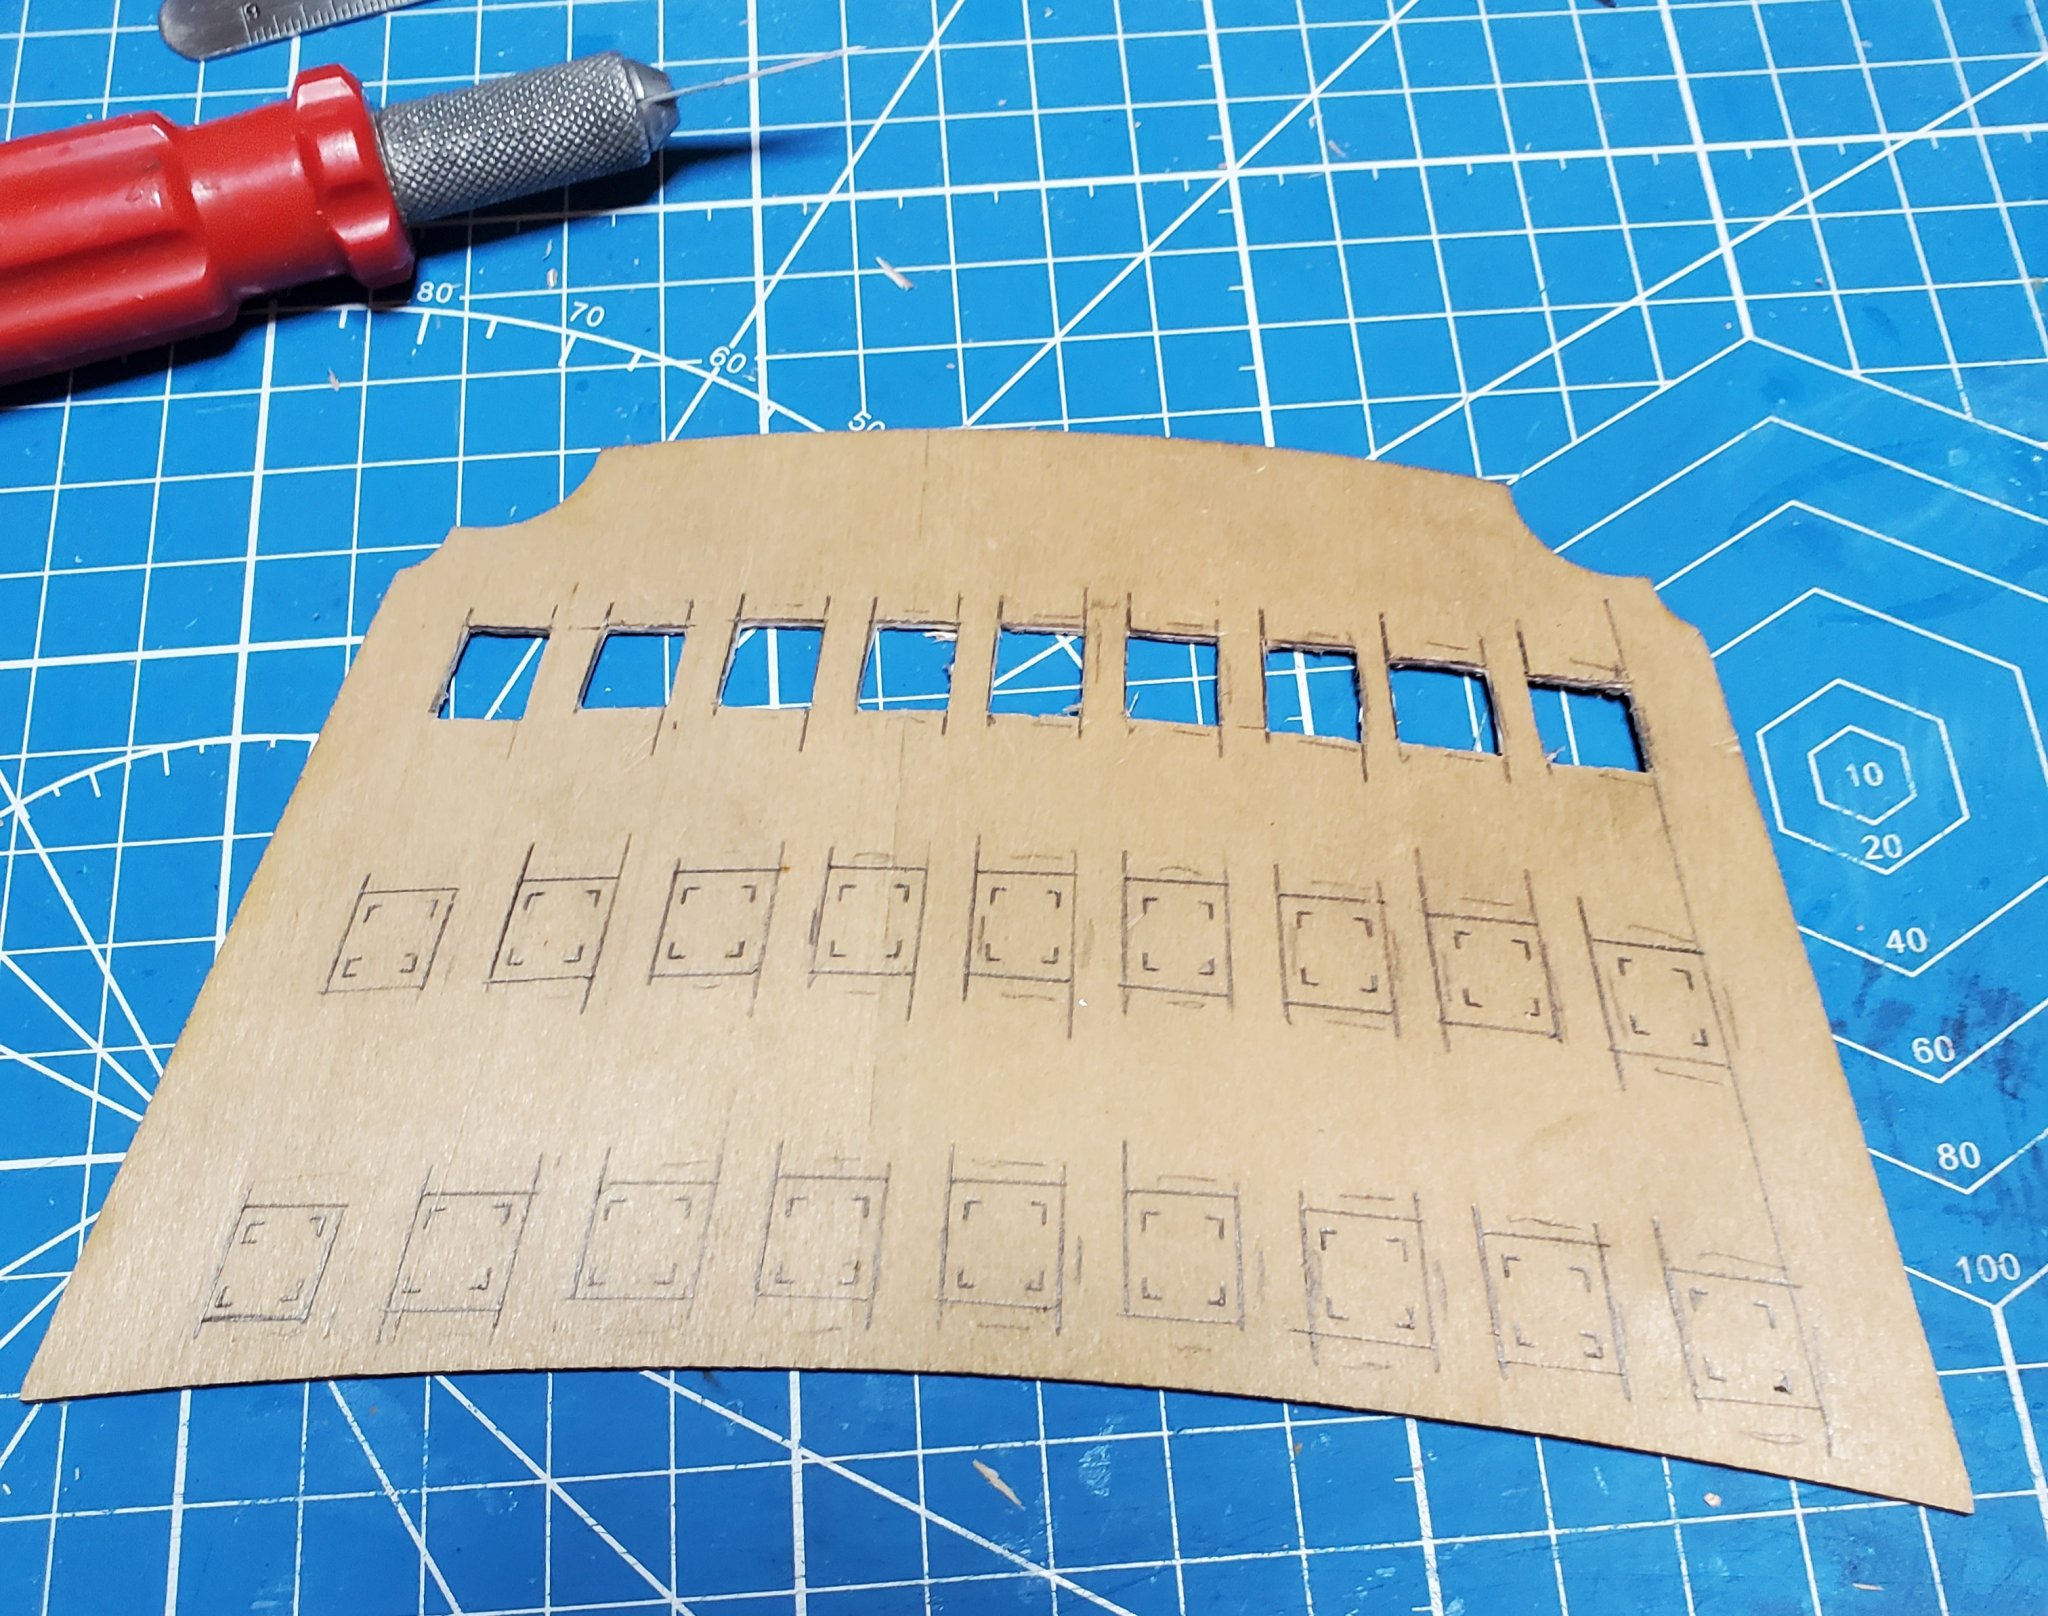
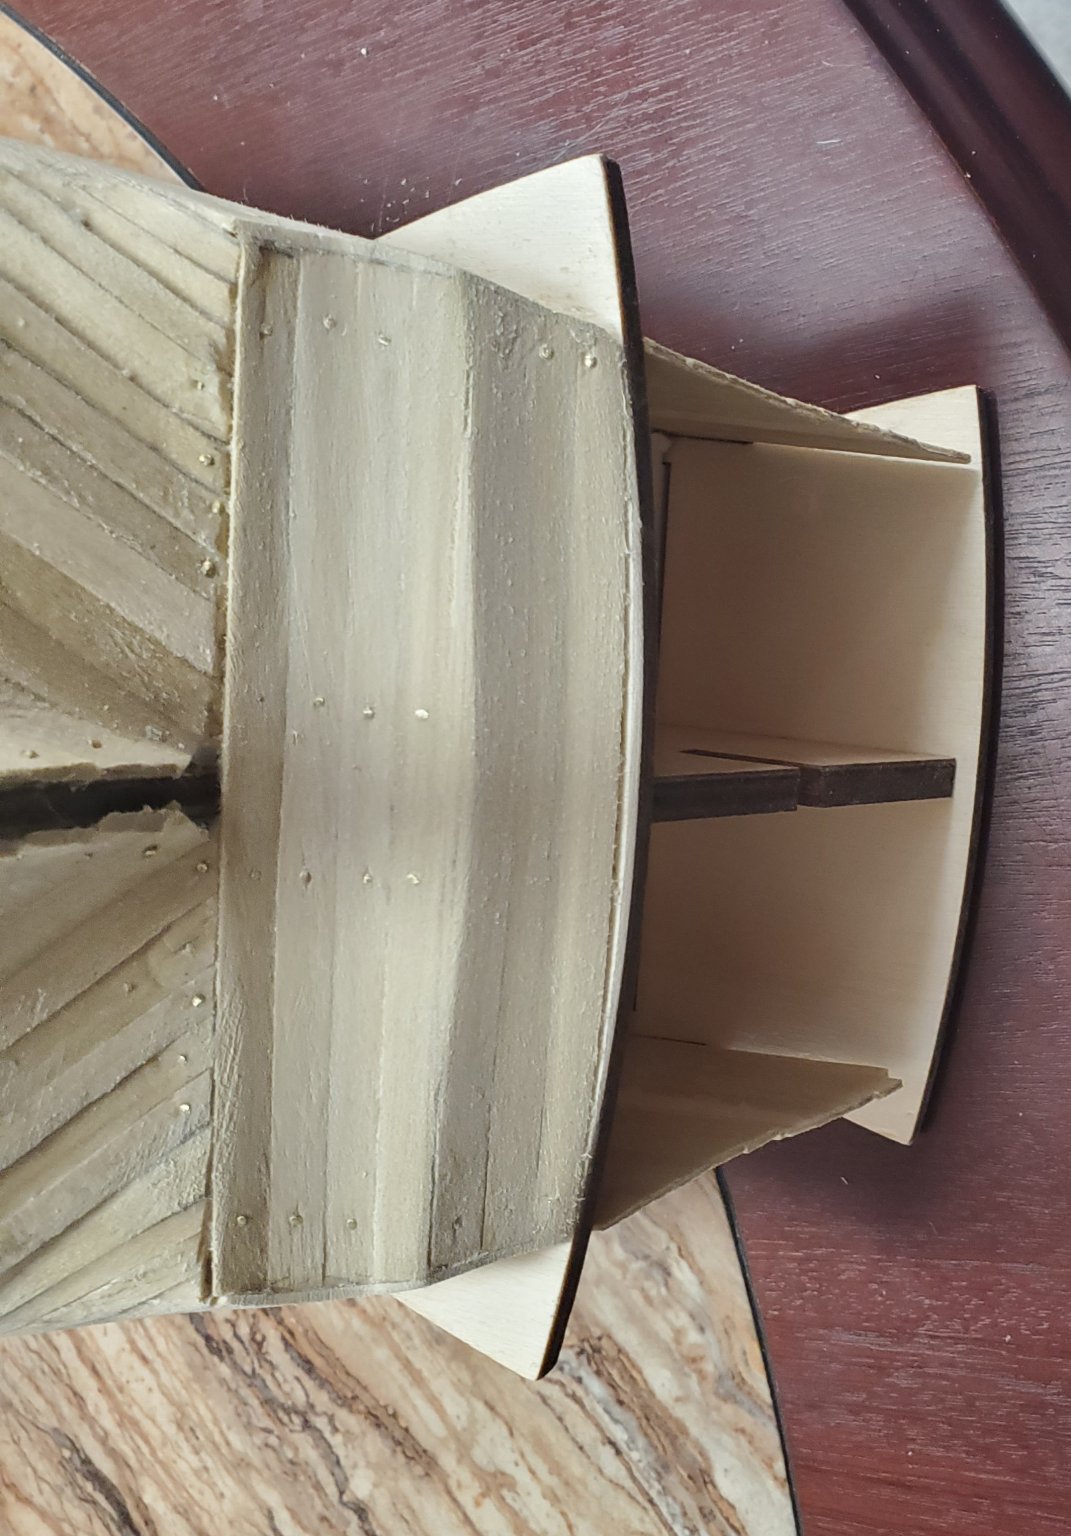
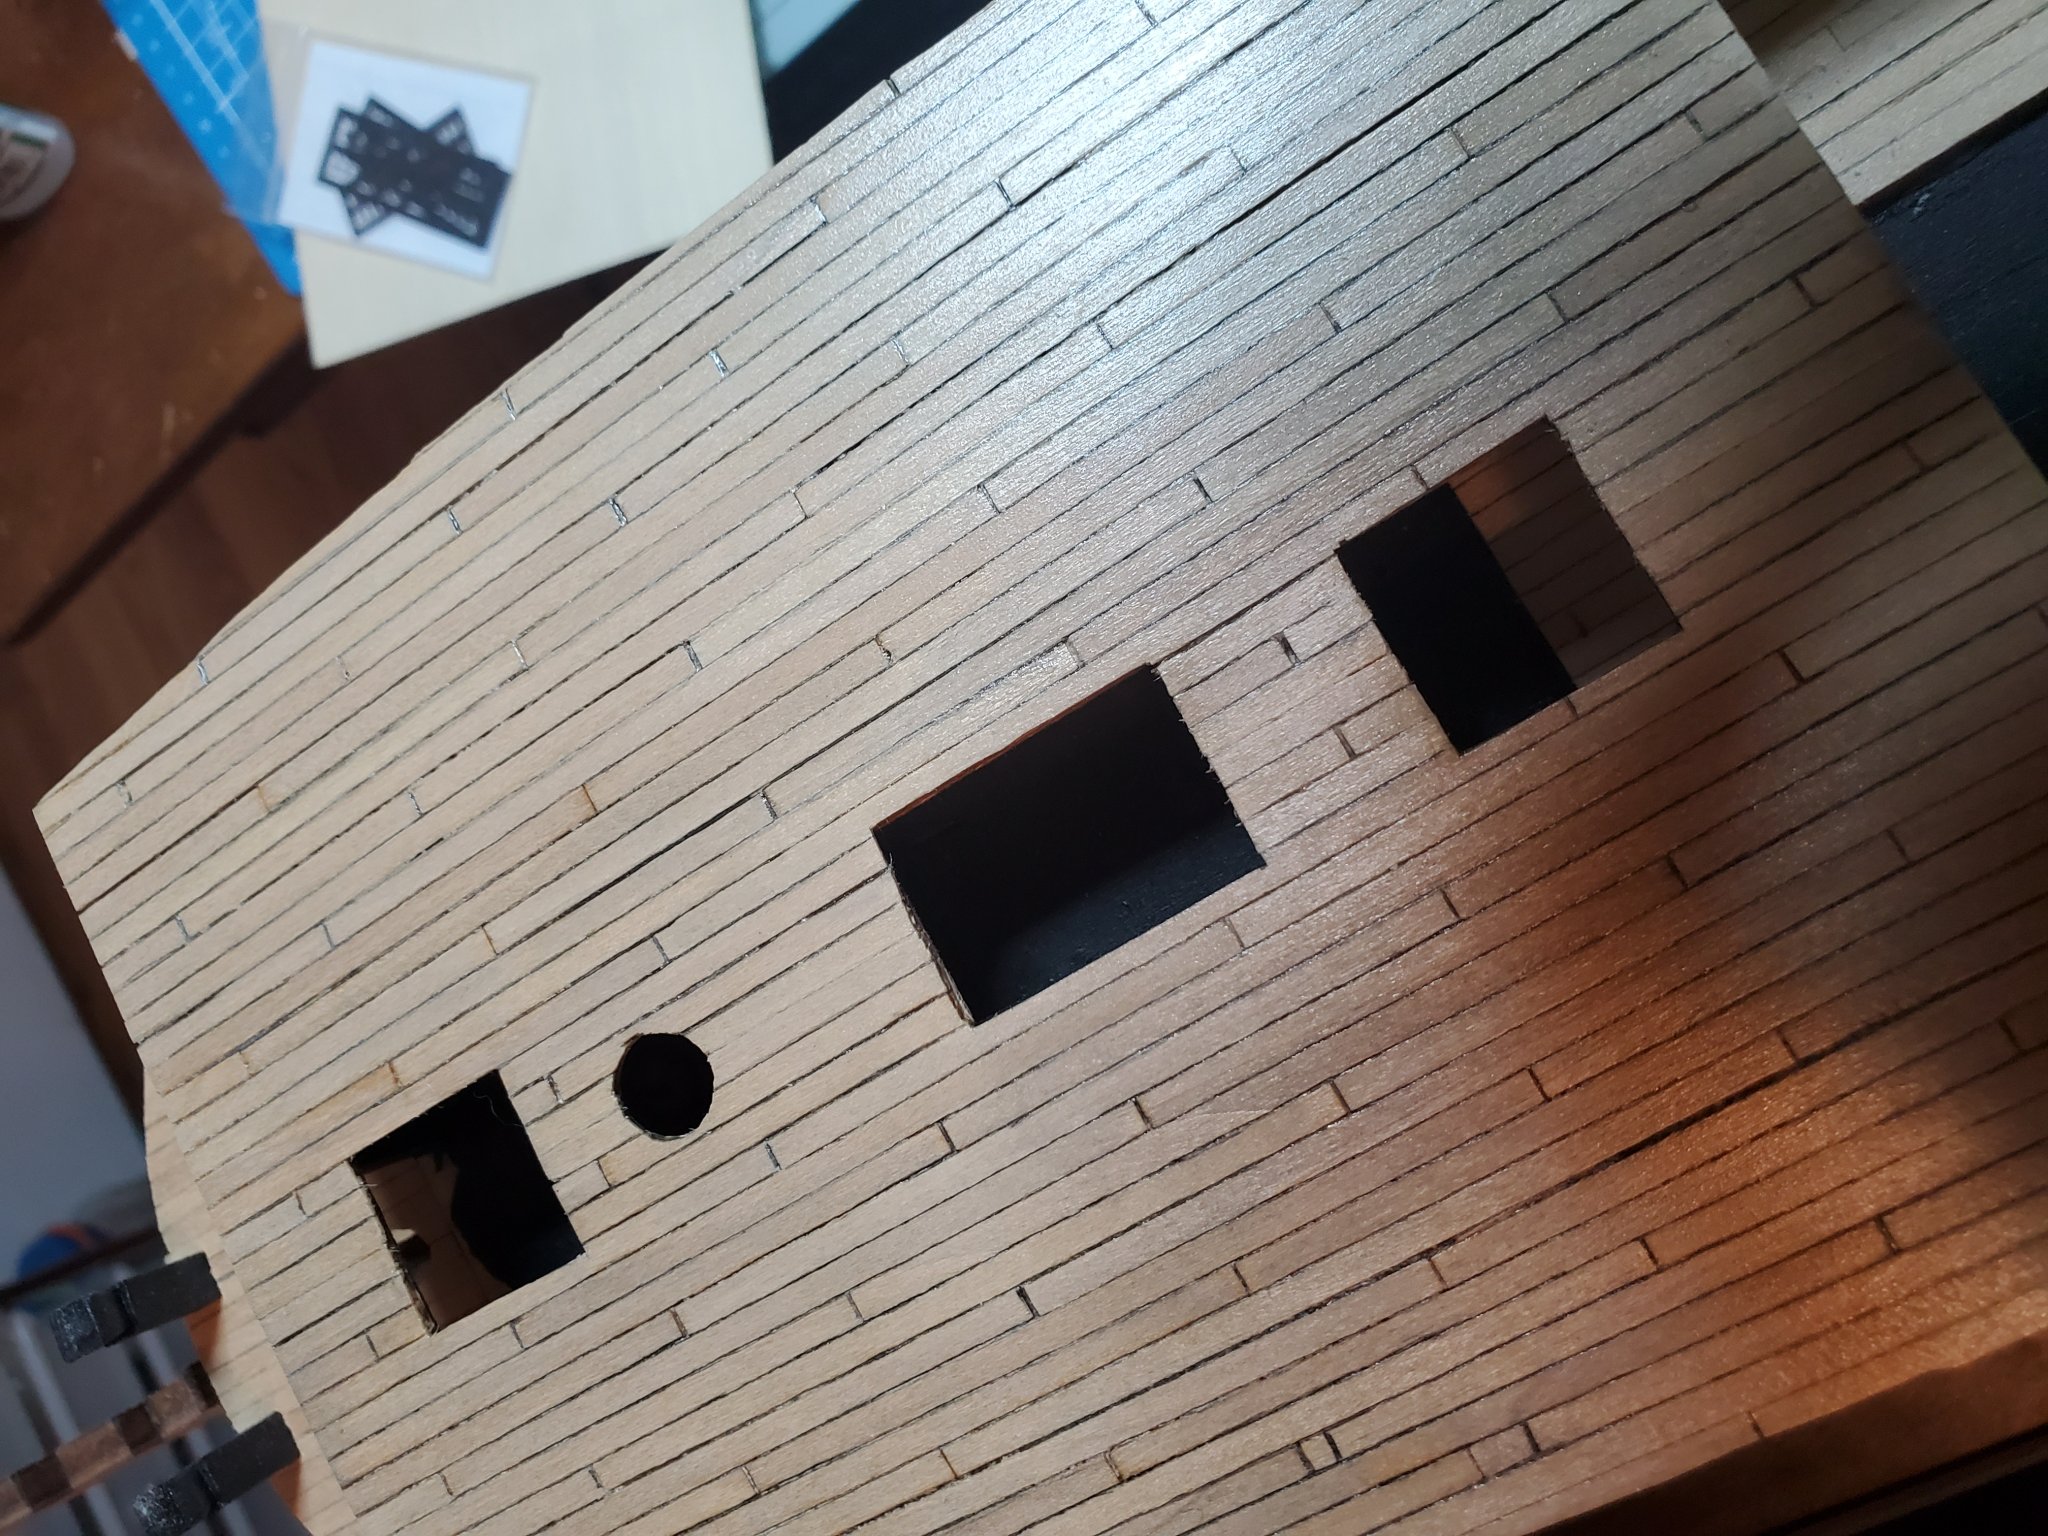
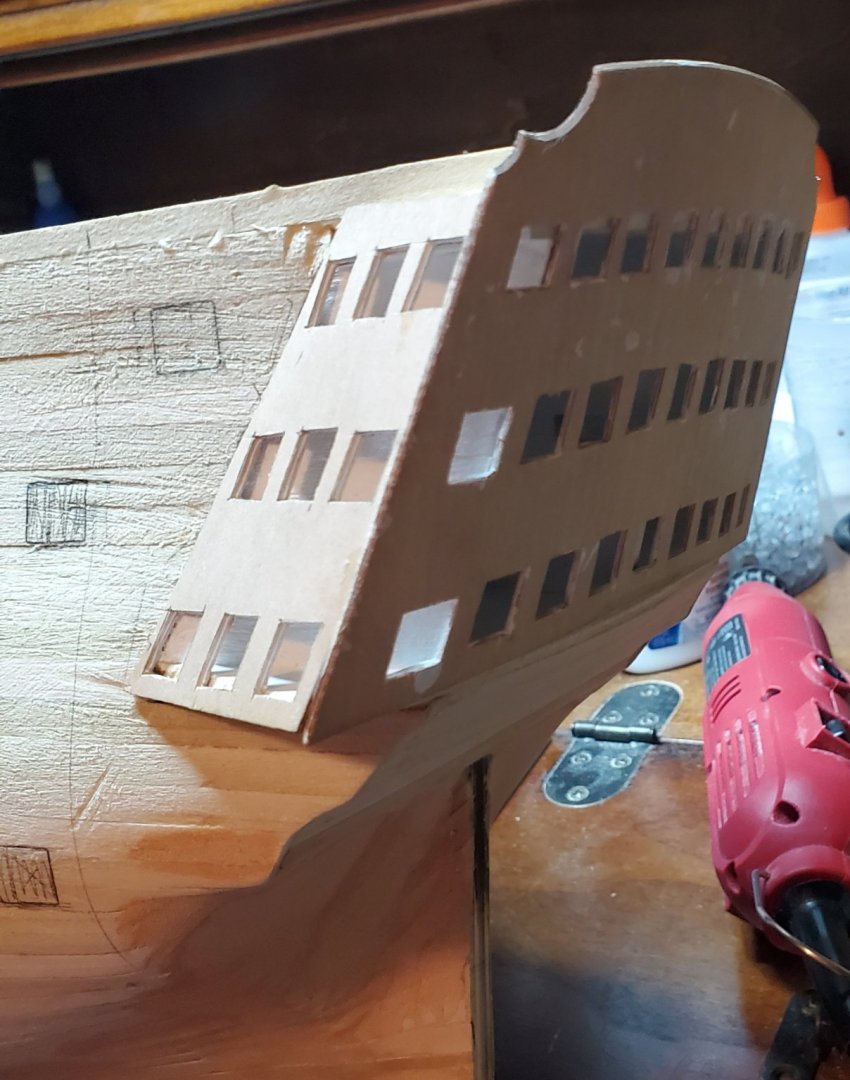
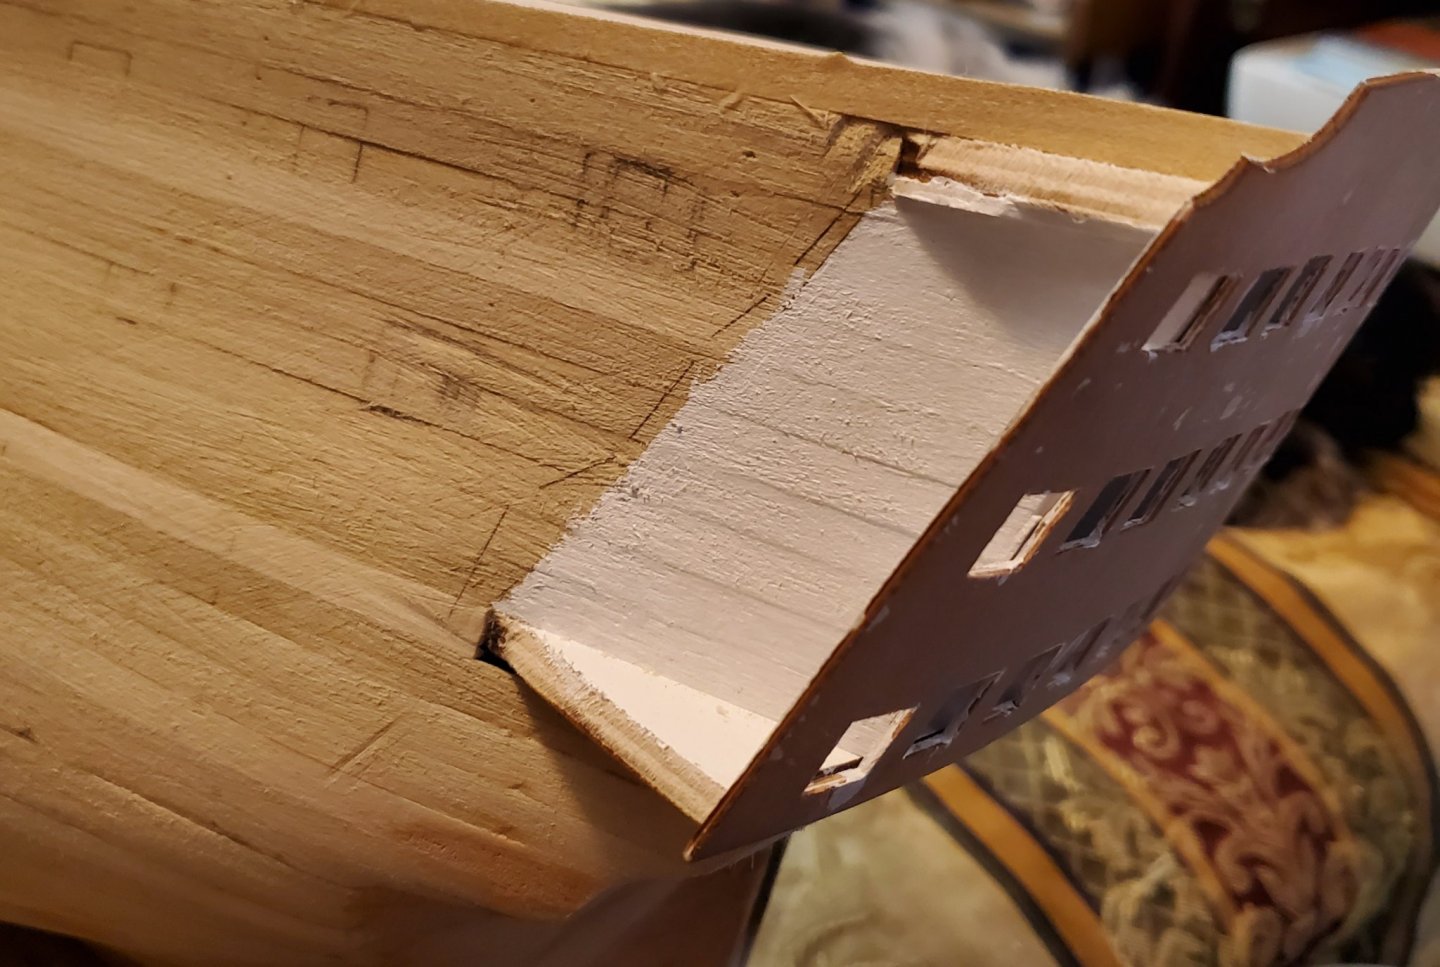
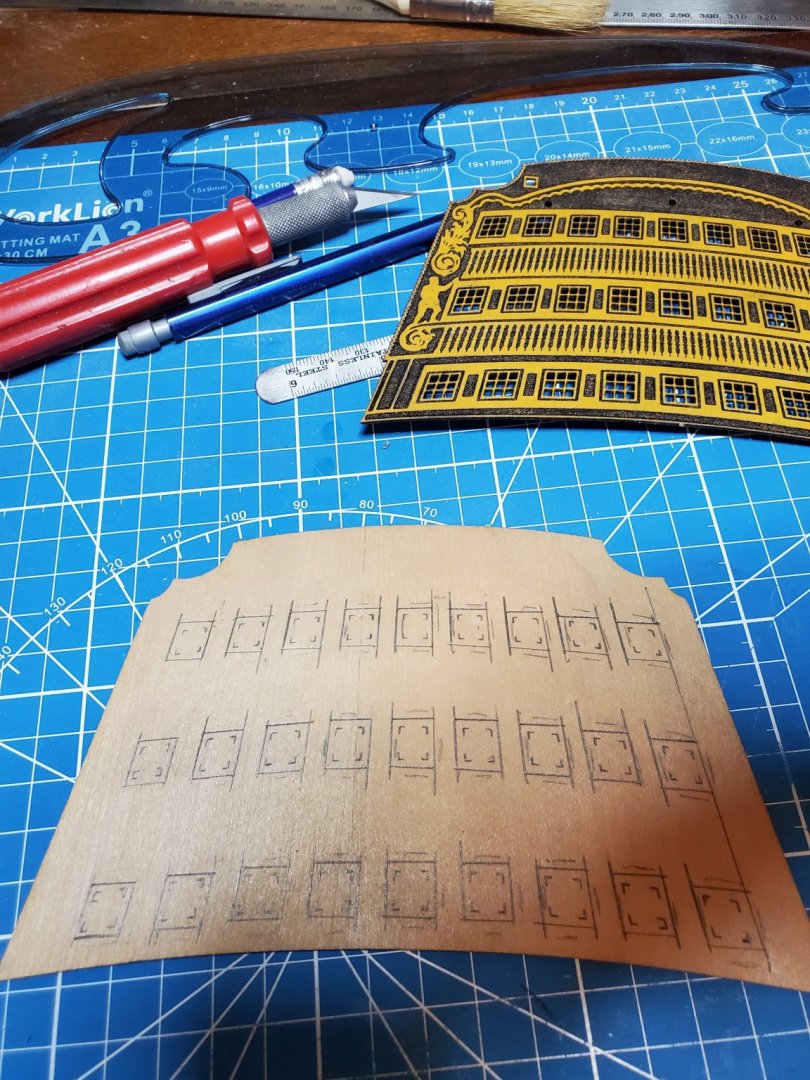
While getting the hull ready for second planking, I will start working on the stern. This is the part I have been worried about doing. The kit calls for painted wood behind the windows. I don't like that. I think I can use the stern parts as a base instead of making everything from scratch, at least I will try it. The worst that can happen is I have to start over from scratch, but if it works satisfactorily, things will be easier. I made a paper tracing of the stern panel and used it to lay out the windows. Next, I am cutting the windows out. I will like this much better than blocking them up. It is going to take a few days to get all the windows cut out. This panel goes behind the etched stern panel. My plan is to plank the etched panel with 1 mm thick walnut and add trim around the windows. This will give depth to the rear of the stern and I can use the pillars between the window rows on the etched panel. I don't know how it will look until I try it, so we shall see. I need the stern framework on before I start the second planking. Mark Frazier
-
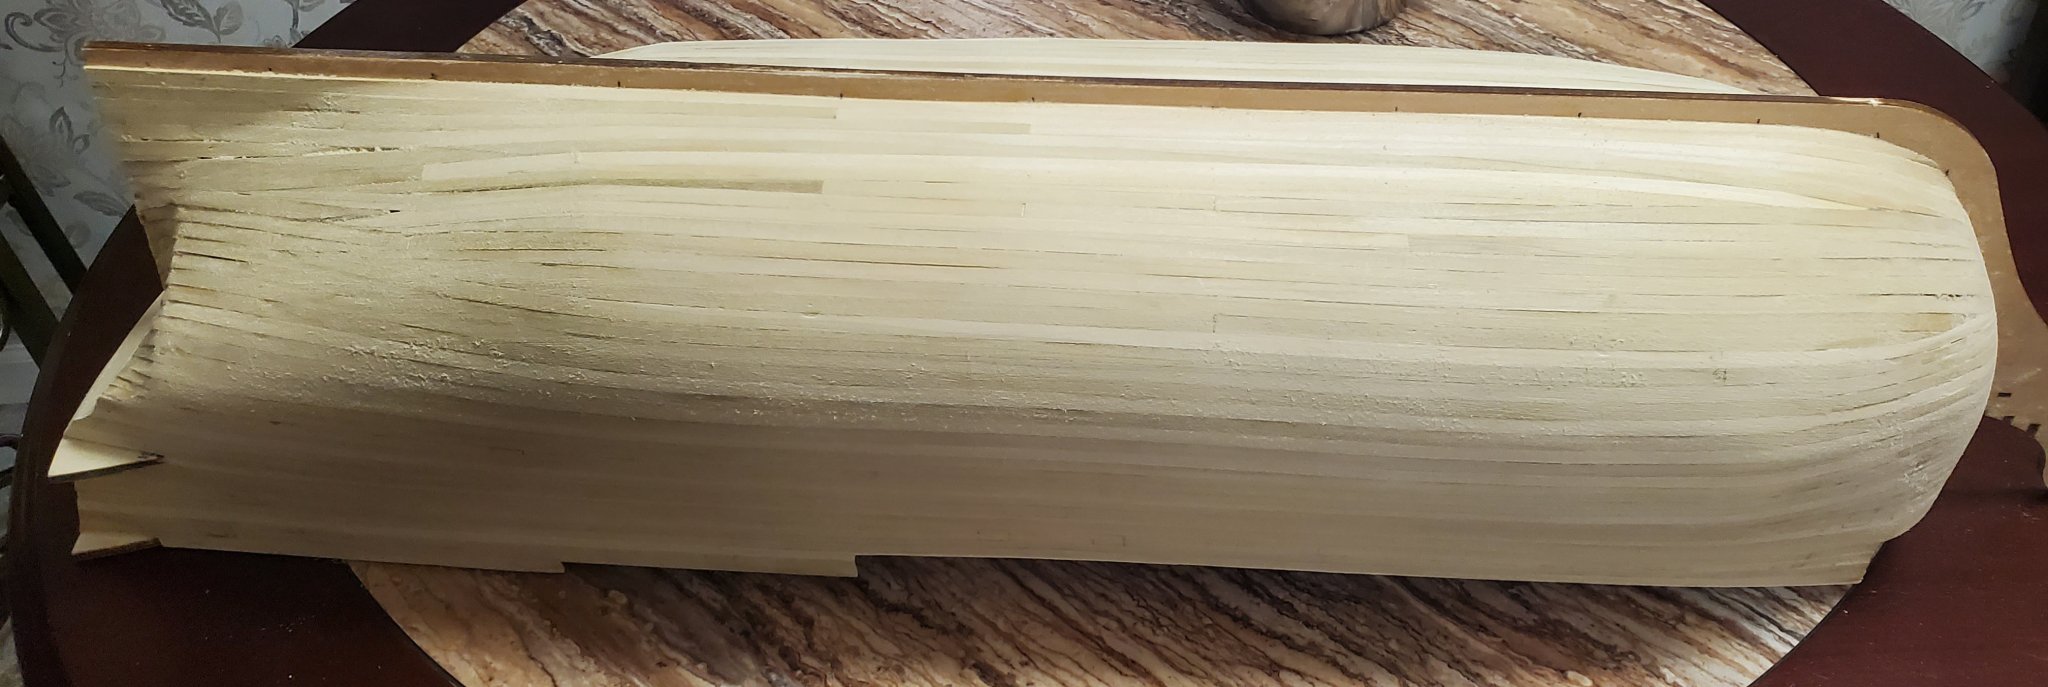
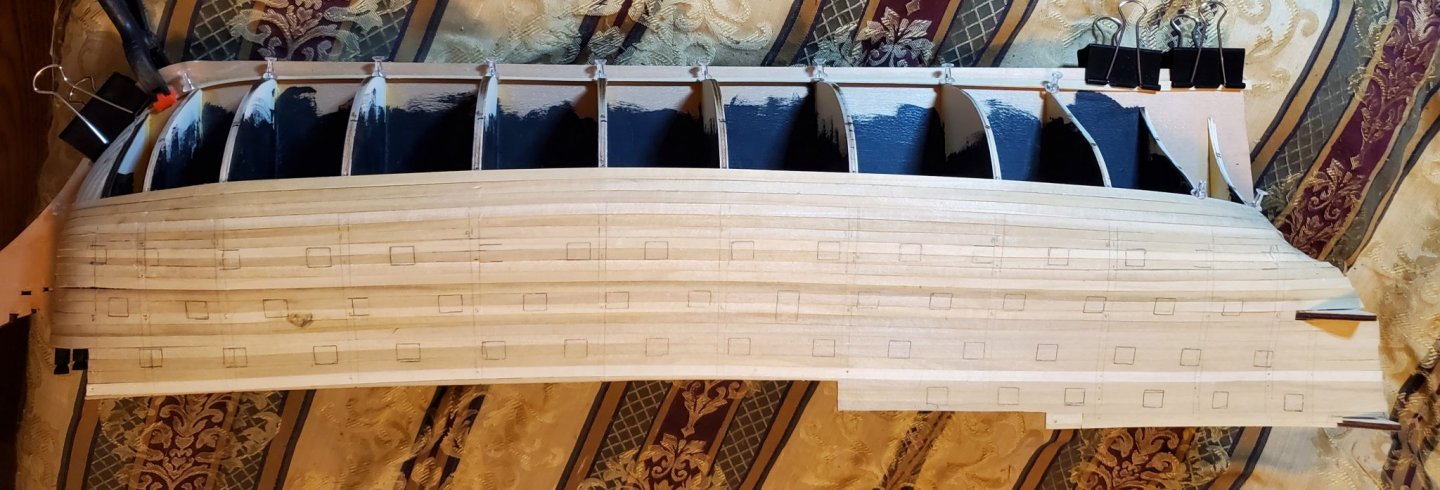
Well ..... the first planking layer is done and a preliminary sanding. There are some areas that need a little filler. I will fill those and sand again. Progress is slow at this point, but how well this is done will reflect on the rest of the build. Mark Frazier


-
I have been trying g to figure out the sides up towards the front of the deck. ( the instructions say nothing and the print is hard to tell). How does the kit say to do this? Is there a "layer" of planks on the outside edge with a cap rail on top? and the post rails just inside them? This kit seems to handle this area differently than the other builds I have looked at. Mark Frazier Your build is looking really good.
-
That was what I was going to do. There is a semi deck below in the center, but it was farther down and the stairs would have been too long. I was going to put a block on there for the stairs to land on, but I had gone too far with the planking before I realized this situation making it impossible to do without removing a lot of planking on one side (which I don't want to do because it would get destroyed, as it is edge glued and glued to the bulkheads) so I will leave the doors. As we know, they will be hard to see anyway. (unless I find a way to fix it). Thank you for that info dafi, it raises an interesting point. I am not building a Trafalgar model. I know this ship went through many changes from the time it was built until Trafalgar. It would be interesting to know as many details of when it was built as we do at its present state. Before getting this model, my research showed me that each model manufacturer had many detail differences. I believe some of these, such as this detail was purely a short cut to make production less costly rather than be historically correct, but that is just my opinion. I wonder if the original building plans for this ship still exist and what the difference is between then and now. It is things like this that make building the model interesting, at least to me. Mark Frazier
-
Well .... I made a decision about the hatch covers or stairs (as it should be). While I found I can cut the hole for the stairs, there is no place to attach the bottom of them. There is a false part deck in the center but it is to far for the stairs to reach ( unless I make a really long set of stairs ... not likely). For this reason, I will stay with the hatch covers as in the instructions. If I had caught this earlier, I would have put a block in the bottom for the stairs to set on, but I ain't no way in this life tearing half the planking off to fix something no one will notice, ( at least not in my world).The only person(s) that would ever know is someone like us (and I'm the only one I know personally). I wish I could fix this to what it should be, but it just isn't worth the trouble as the view is about 80 percent blocked by the life boats and all the fixtures around this opening. So..... on with the planking and building a Victory.
-
Are you trying to make make accept the kit way?? I'm just kidding. If they did, McKay didn't mention it. Maybe by the time I finish planking, I will have convinced myself the doors are ok..... I doubt it though.... 😆 LOL.
-
Thanks OC., That was my discovery from McKay's book. Two sets of stairs facing the middle. Now, my quandary is cutting the hole for them. This stupid kit has a panel under the deck in the center 5/32" thick. This would have been easy had I caught it earlier. I am convinced they did this just to make the kit easier to make ( more convincing a poor company). If ..... if... I can use the right angle attachment for my dremel and a circular saw blade for dremel .... I might be able to get in the space. If this does not work, I will have no choice but to leave it alone and that..... well, won't get into that. I will correct this.... if I can. Mark Frazier
-
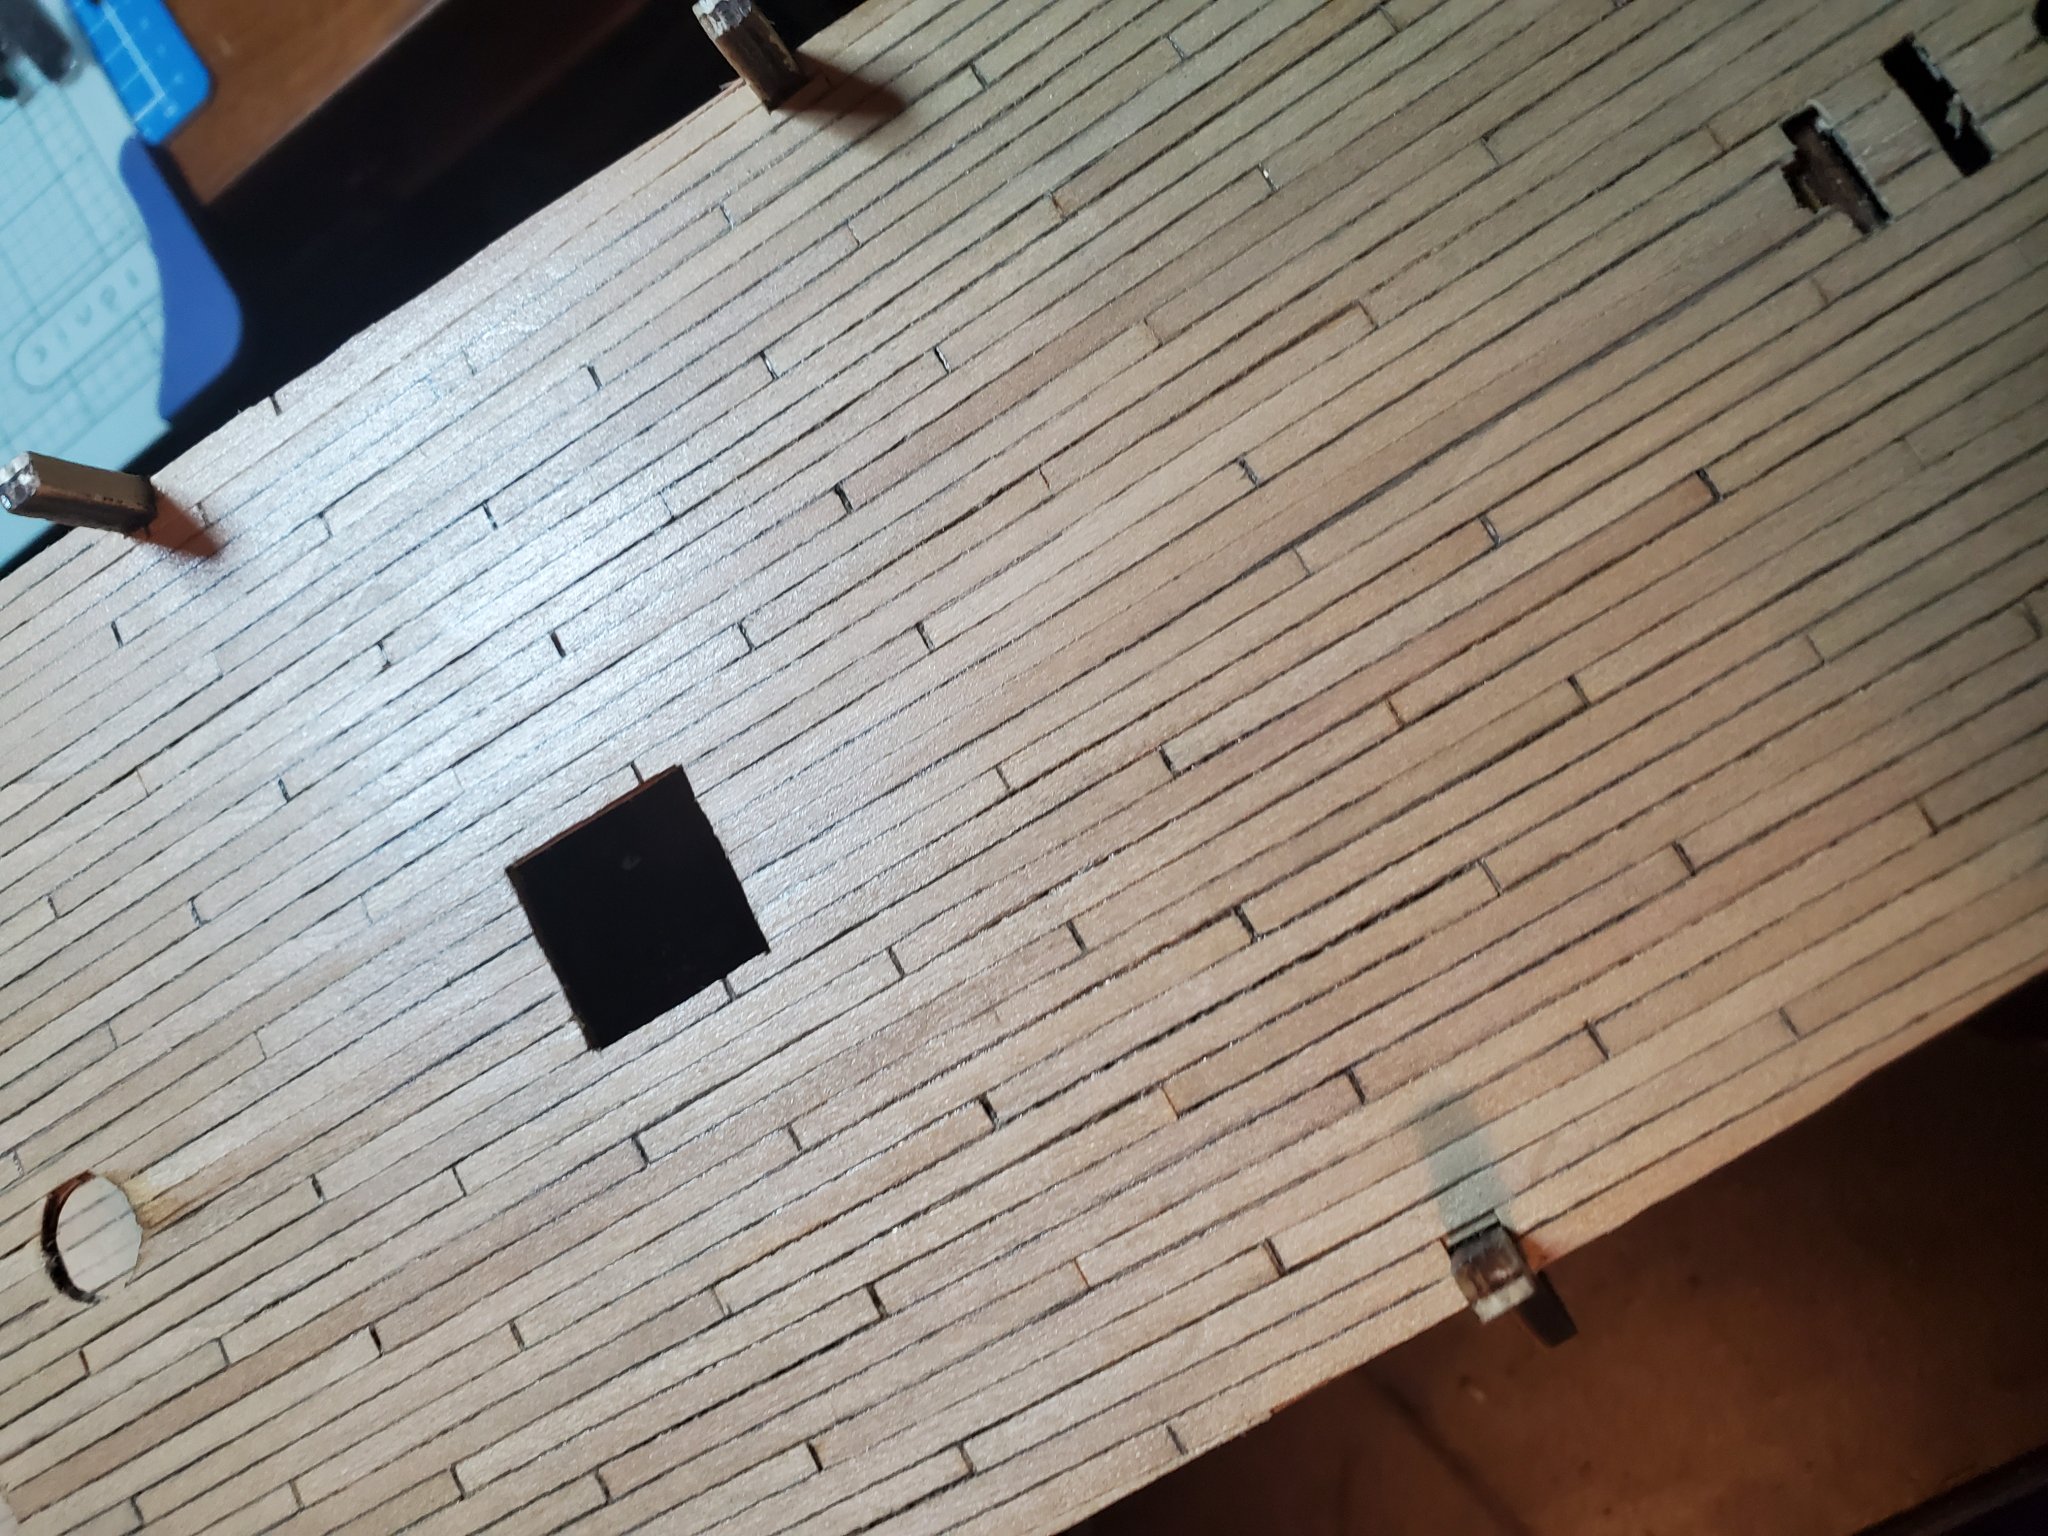
I am still planking away on the first planking layer. This is how I get myself in trouble, ( but I always seem to manage a way out), I lined off my hull and put tick marks for every plank on each bulkhead indicating the amount of taper needed and theoretically everything would work out even .... BUT .... as usual I get scared getting closer to the bottom and just had to go start from the bottom and plank up. Now hopefully it all works out. AND .... I was waiting for glue to dry so I was sitting looking at my book by John McKay to check details and discovered a flaw, a problem, something wrong, (at least in my eyes ). The grates on the gun deck in my kit have doors on the end .... hatch covers ????? ... I don't know, but the book shows stairs in both these locations. Now, in my mind, this is a problem, .... could I cut these openings and install stairs? ..... yes .... should I ? ..... I'm not sure.... the kit calls for the doors here... in reality, they are stairs, but once the life boats are installed, no one will ever notice whether they are doors or stairs, but I will ( sometimes I hate being a perfectionist). Now don't get me wrong cause I am taking artistic license in the fact I do not plan on painting the outside of the hull or coppering it, so I will probably follow the incorrect kit plans when installing the wales because they will divide the colors of the wood. So does this give me permission to use hatch covers instead of stairs? .... maybe ...... no not really.... do I want to cut the deck out and cut up the gratings I built? .... not really .... so why do I feel the urge to make this detail correct? .... I have to think about this. What would you guys do? By the way, there are no stairs in the kit for here. ( asking myself, why does that even matter?) ...... sheesh... back to planking before I burn brain cells out. Mark Frazier

-
Why thank you, OC. I worked hard to try to make it look nice.
-
MikeE, They must throw anything they have lying around in these kits. What I did , after a light sanding to level the deck surface, was use a .5mm drafting pencil ( mechanical pencil you load .5 mm lead into), with a ruler, I drew a line on the seam between the boards and across the ends of the boards. Depending on how heavy a line you draw makes it darker or lighter. Then used 220 sandpaper to sand the decks a little more so the lines were all even colored and not too dark. This simulates the caulking between boards. Like the photos of my decks here: I finished the decks with a gloss acrylic coat I got at the art supply store. I brushed it out thin so it wasn't real shiny. They came out good. After the finish sanding, you may have to lightly touch up some areas with the pencil again before finishing. Just use light pressure to keep the line matching the surrounding areas. ( if you get it too dark, just hit it lightly with the sandpaper). Mark Frazier


-
My deck planking was very light in color. The walnut strips in my kit are for the second planking layer. You should start a build log as you will get a lot of help from the members of this forum if you want it. I wouldn't worry about how good you are. I am certainly not in the league of some of these other fellows ( there are some astonishing builds on here), but it is nice to have the help, opinions, and suggestions you can get on here. When I had to settle for this kit instead of the one I ordered, I searched the internet and could not find any completed builds of this kit. I wondered why? Hopefully I can get the first planking done in the next couple weeks. Keep me posted on your progress. Mark Frazier
-
My instructions ( I use that term very loosely) covers both woods but my kit only came with lime wood. I don't think I would have used the balsa anyway. There is so much wrong with this kit, I will end up replacing and/or scratch building a lot of it. All my wood is very poor quality. It is very dry and brittle. The edges are all pretty rough. I run a sanding block over the edges of each piece before using to make them usable. The deck planking was horrible. The wood was dry and brittle and the sizes were not consistent. I used some of it and replaced some with planking left from a previous kit. I ordered the Caldercraft figure head, ( the kit figure head is just horrible), fire buckets, and cannot balls ( I couldn't believe they didn't supply cannon balls with the kit). I have also ordered some wood strips to rebuild the stern galleries. I found I must keep looking and thinking way ahead to avoid mistakes and problems. Like the gun ports. I checked the pattern against the keel and bulkheads before I started planking and saw a problem. Otherwise it would have been a mess had I done the planking and then tried to follow the instructions. I am interested to see how you handle this kit. Have you started a build log? Mark
-
Hi MikeE, Are you building a Mantua Sergal kit? Mark
-
I have mulled over all the choices and now I can finish the first layer of planking as soon as I make the new gun port template. Mark Frazier
-
While not impossible, it would be difficult doing it through the little opening and getting a good cannon mounting surface on a few of them. They would have to be cut back about a half inch. Moving them a little is a better option as long it it looks right.