HOLIDAY DONATION DRIVE - SUPPORT MSW - DO YOUR PART TO KEEP THIS GREAT FORUM GOING! (Only 13 donations so far - C'mon guys!)
×

The Lazy Saint
-
Posts
264 -
Joined
-
Last visited
Content Type
Profiles
Forums
Gallery
Events
Everything posted by The Lazy Saint
-
 Hi all, Spent a little time today on the anchors, still detail to add though. I think they will look ok in position when completed. I also varnished the deck. Best wishes as always. The Lazy Saint.
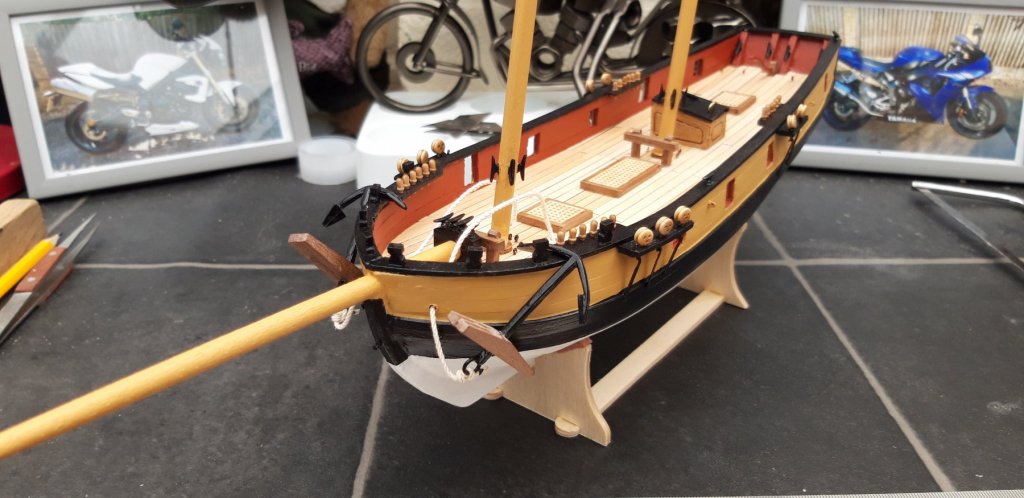
- 65 replies
-
- 6
-

-
- ballahoo
- caldercraft
- (and 2 more)
-
Hi all, A busy day today, it was far to hot to venture outside so l got plenty done in my den. I completed my Deadeye Strops and Chainplate Straps, a very fiddly job but i managed it ok and, imo, to a reasonable standard. I also finished the shaping/sanding of my Masts, fitting of Cleats to those Masts and finally, painting. Best wishes as always. The Lazy Saint PS At no time ever will l discuss Rudders, Rudder hinge assemblies or copper eyes associated with hanging Rudders. 🤬

- 65 replies
-
- 5
-
-
- ballahoo
- caldercraft
- (and 2 more)
-
Hi Edward, That sounds like a great idea to speed up the sanding process, and save a bit of elbow grease. I saw your answer to the chain plate problem, very good indeed, l am looking forward to seeing them fitted. Best wishes as always. The Lazy Saint.
- 65 replies
-
- 1
-
-
- ballahoo
- caldercraft
- (and 2 more)
-
Hi Eamonn, Thanks for the tip re the rudder, l will keep it in mind. I am looking forward to you adding to your build log as it has helped me no end so far. I have my fingers crossed you start your rigging before l mine. Best wishes as always. The Lazy Saint.
- 65 replies
-
- 2
-
-
- ballahoo
- caldercraft
- (and 2 more)
-
Hi Edward, They look great, they definitely will suffice. Good job. Best wishes as always. The Lazy Saint.
- 84 replies
-
- 1
-
-
- sherbourne
- caldercraft
- (and 2 more)
-
Hi all, I didn't get a great deal done today as l only had a couple of hours this evening. I thought l would spend the time looking at, and sanding, the masts. As l am shaping by hand it will take awhile but it seems to be ok so far. Best wishes as always. The Lazy Saint.

- 65 replies
-
- 5
-
-
- ballahoo
- caldercraft
- (and 2 more)
-
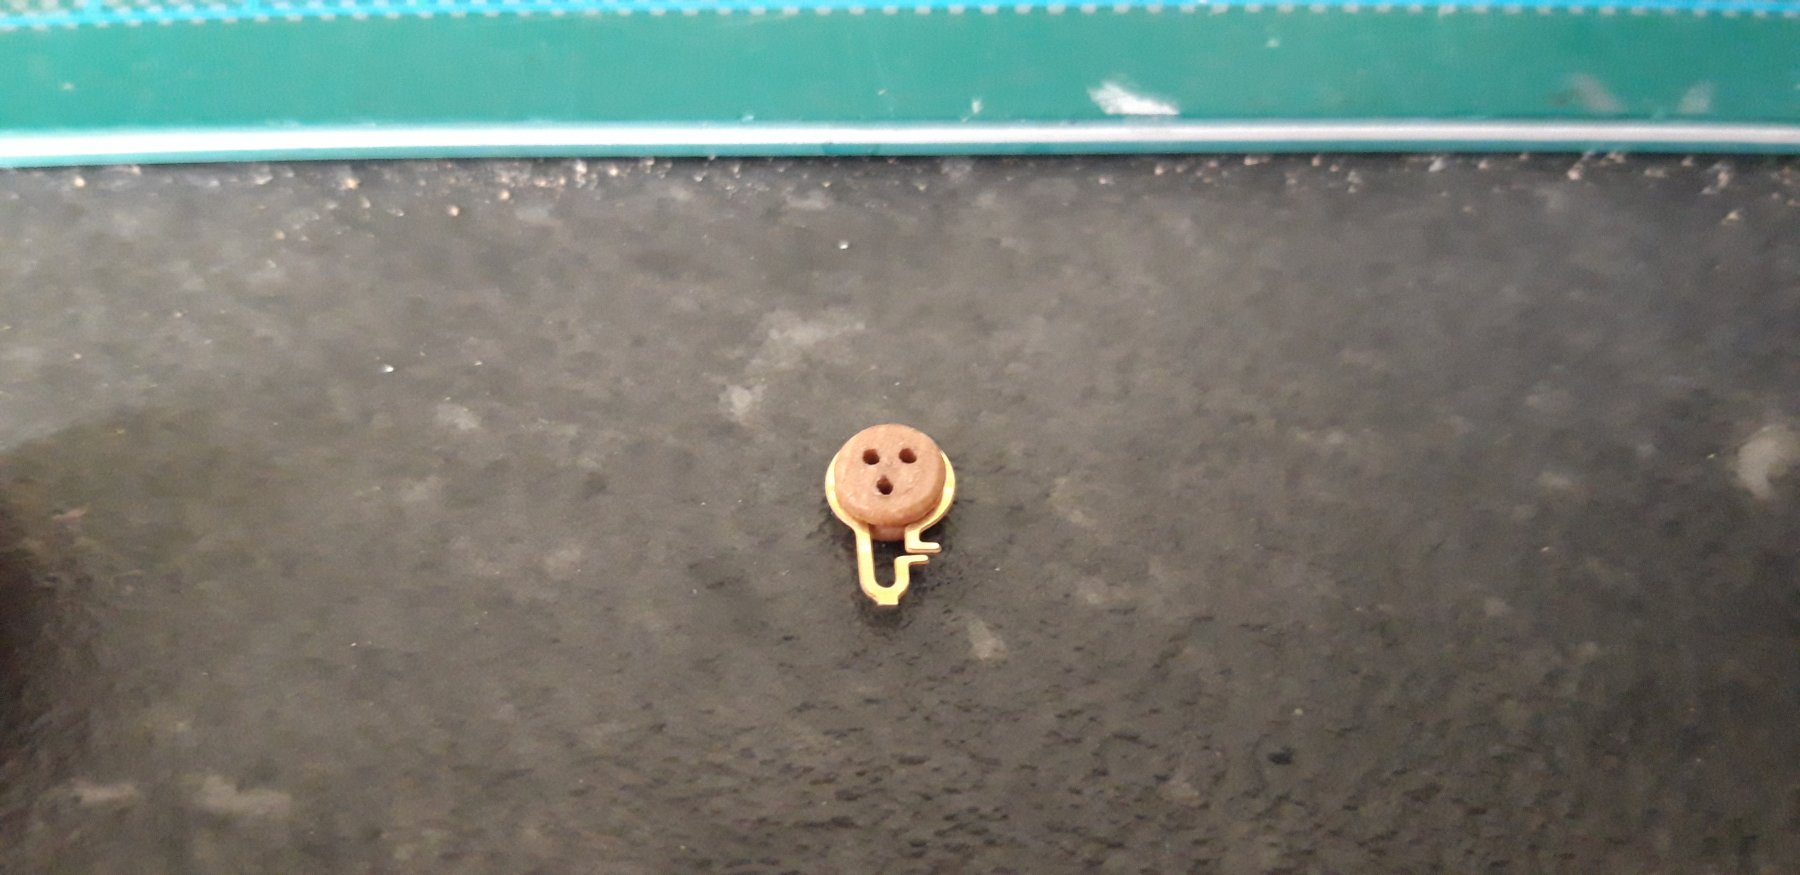
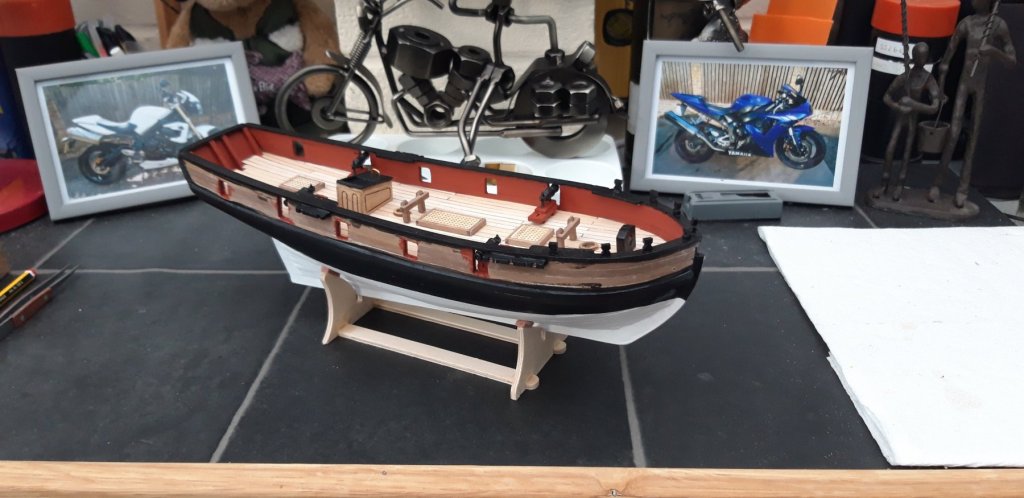
Hi all, Thanks for letting me know you have the same problem Edward, at least l now know it's not something l am getting totally wrong. I managed to get some 0.4mm brass wire from Hobby Craft today and made my own, it was fiddly but most of it is hidden within the Channel's. I am happy with the result, although l only managed 3 today, perhaps l will complete them over the next few sessions. I also applied another colour. Best wishes as always. The Lazy Saint.


- 65 replies
-
- 7
-
-
- ballahoo
- caldercraft
- (and 2 more)
-
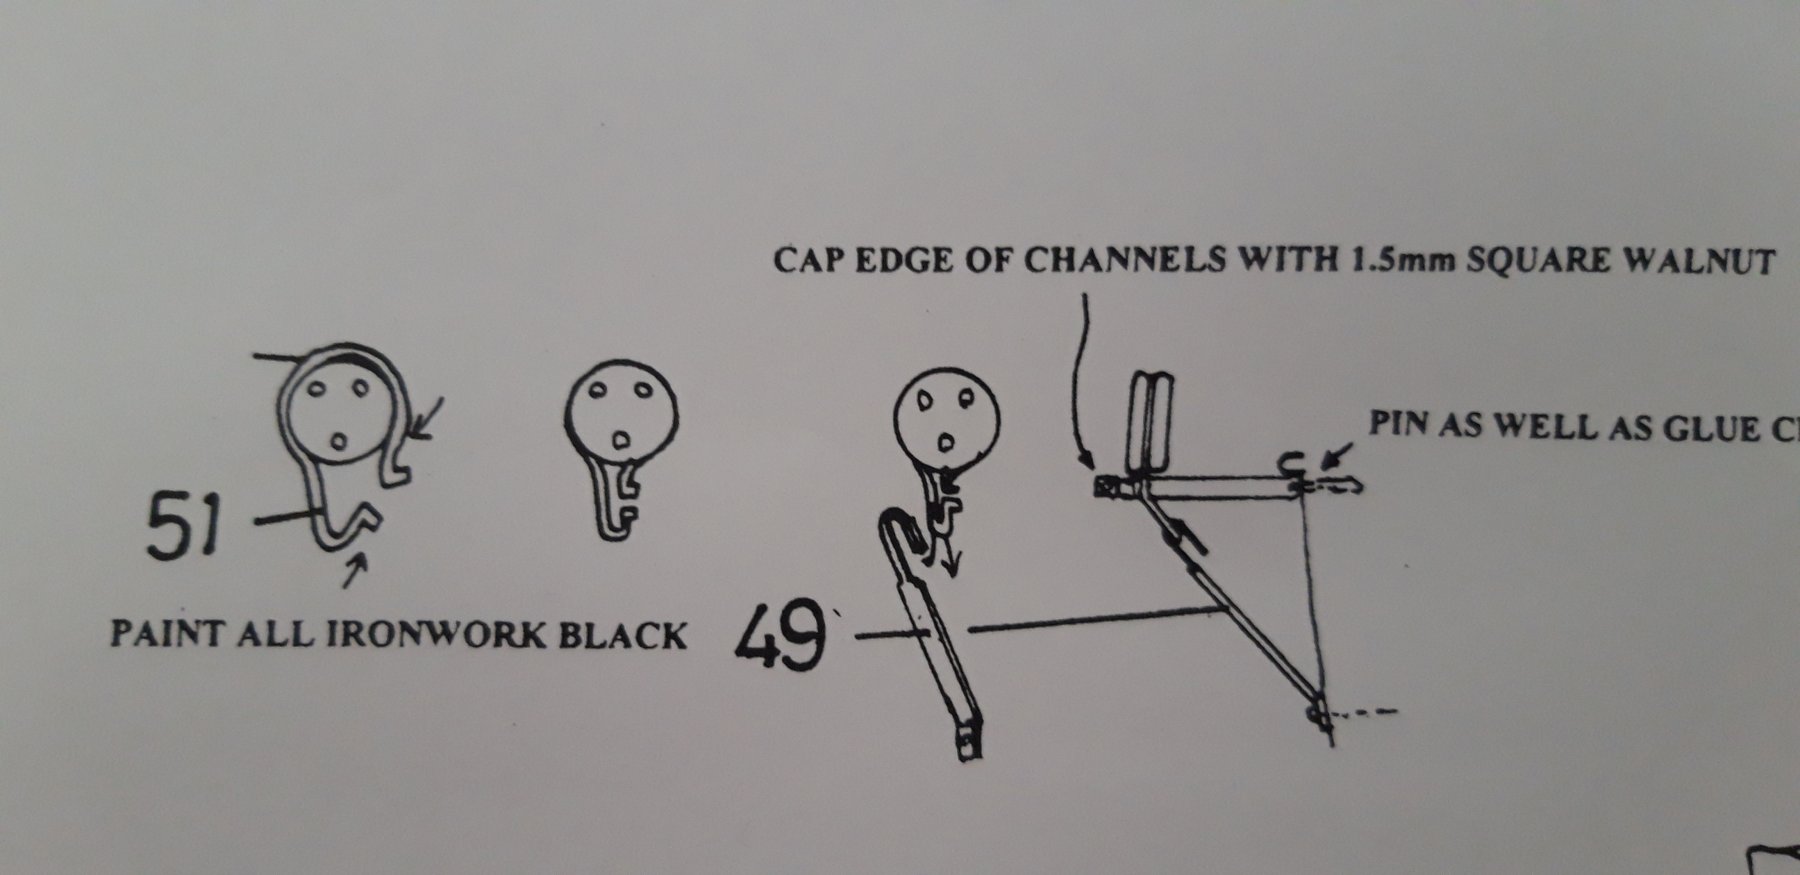
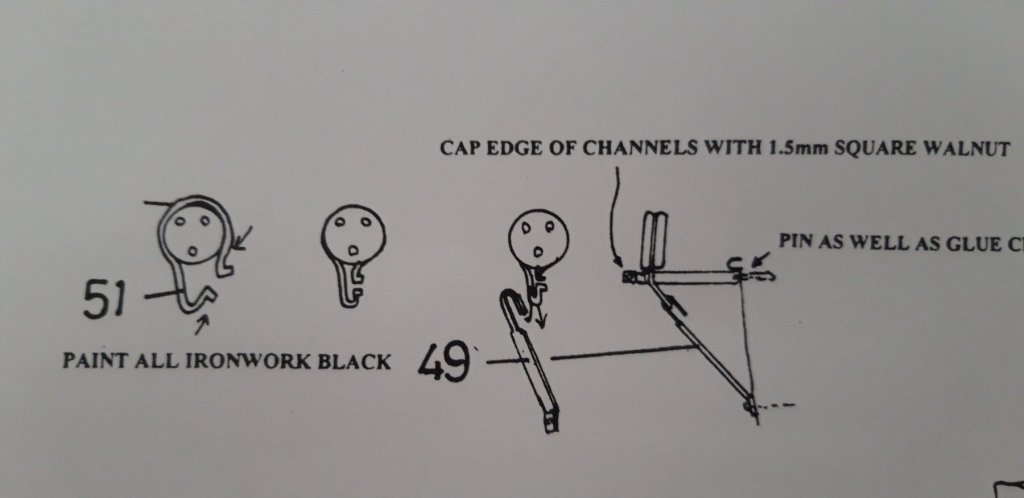
Hi all, This morning l am looking at the Channel's and the fitting of the Deadeye Strops (51) and Chainplate Straps (49) The problem is that, as shown, it is not possible (imo) for them to fit into the cut out channels. l would have to cut off the two lugs on the Deadeye strop. Ok, that isn't a big problem, however l would still have to widen the channel. The alternative to widening the channel would be to close the gap in the strop to fit, however, by doing so would prevent me attaching the Chainplate Strap. All the above can be dealt with one way or another but the final problem is that the strop is too short and so to that end the Chainplate Strap won't stretch between the strop and the main wale. Raising the main wale is not an option ha,ha. I remember seeing on one build, l am unable to remember which, the use of wire to replace the kit parts. This may be the route l shall take but l would like to know what l am doing wrong, have l missed something. Best wishes as always. The Lazy Saint.


- 65 replies
-
- 2
-
-
- ballahoo
- caldercraft
- (and 2 more)
-
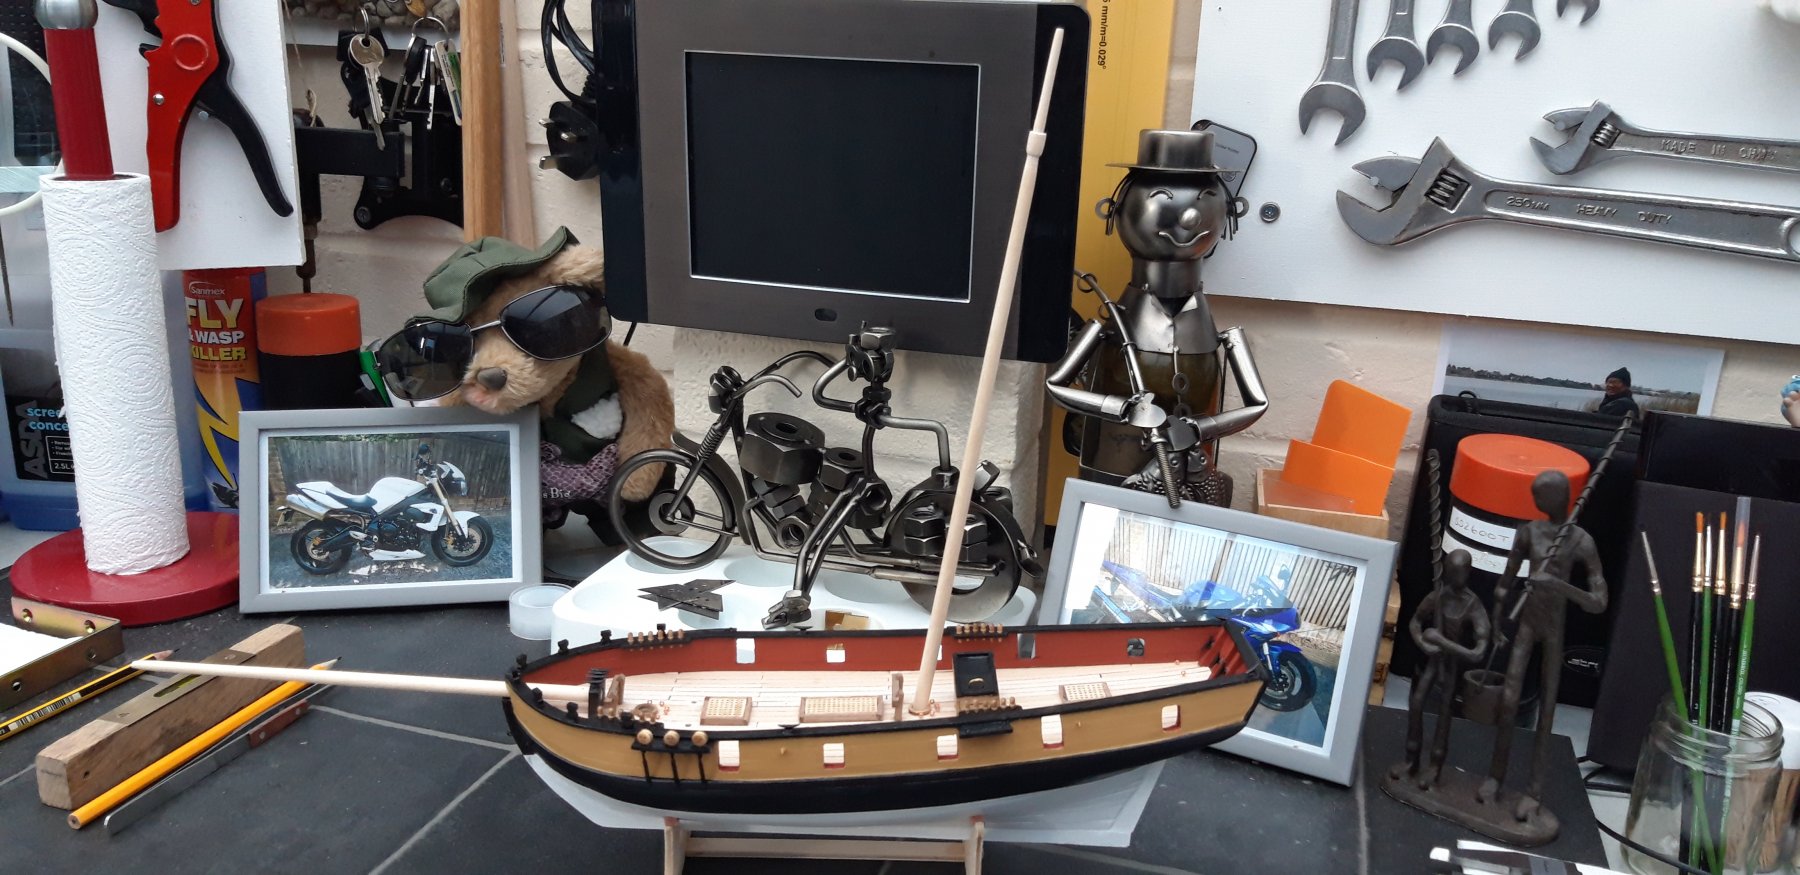
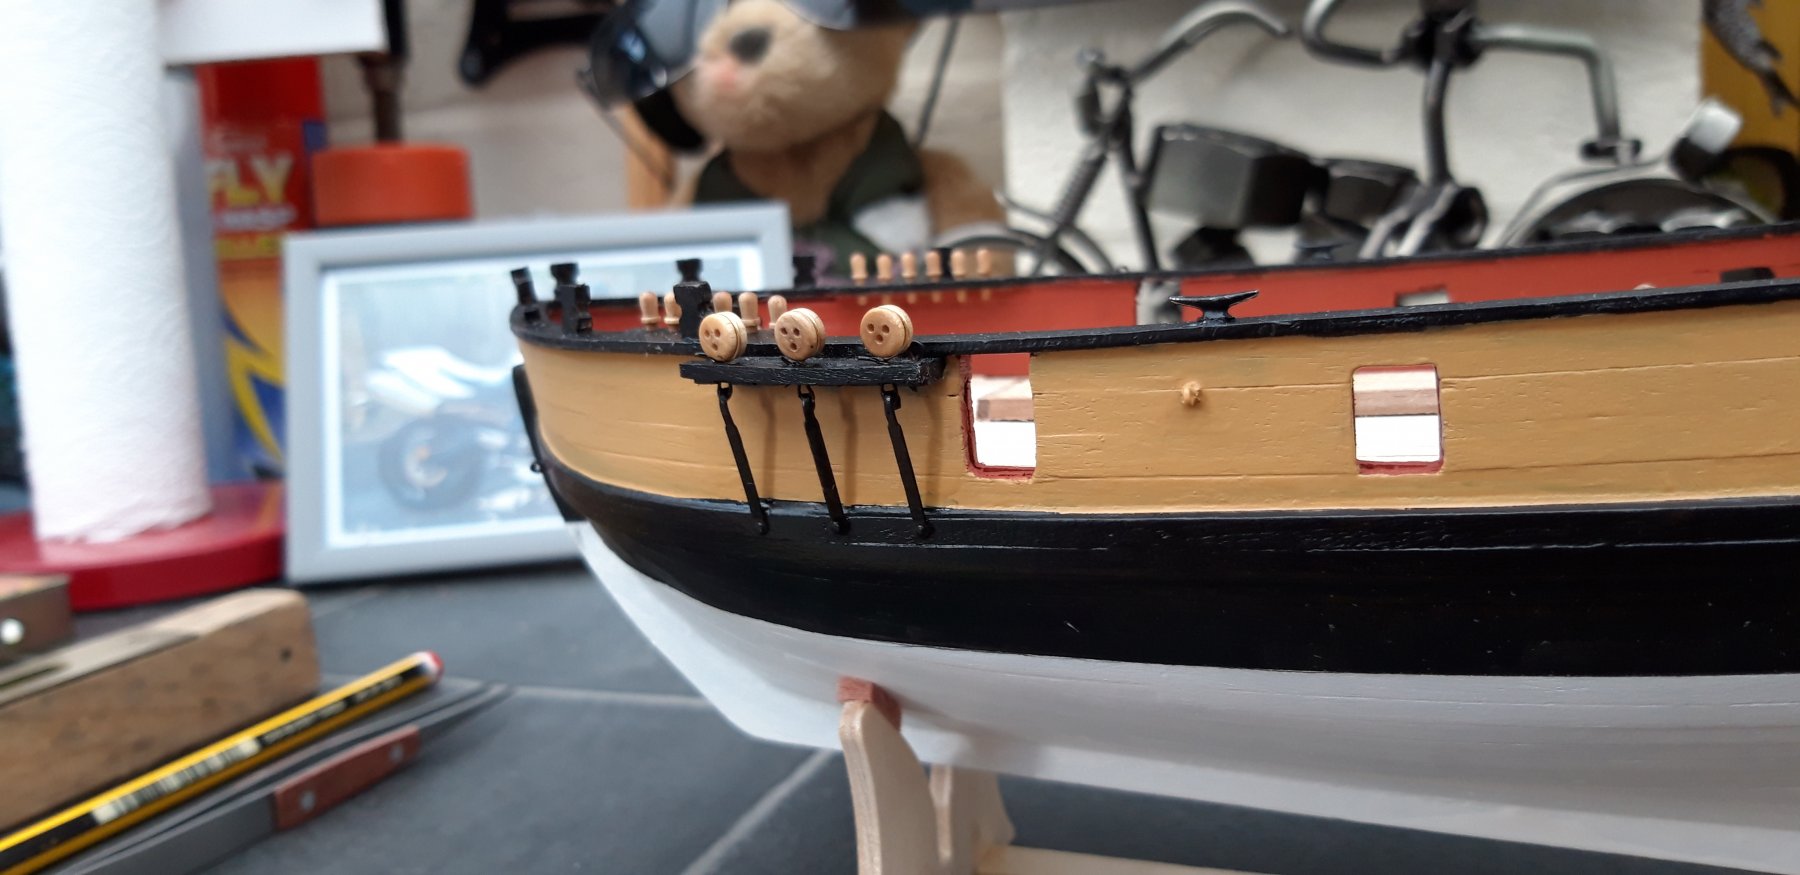
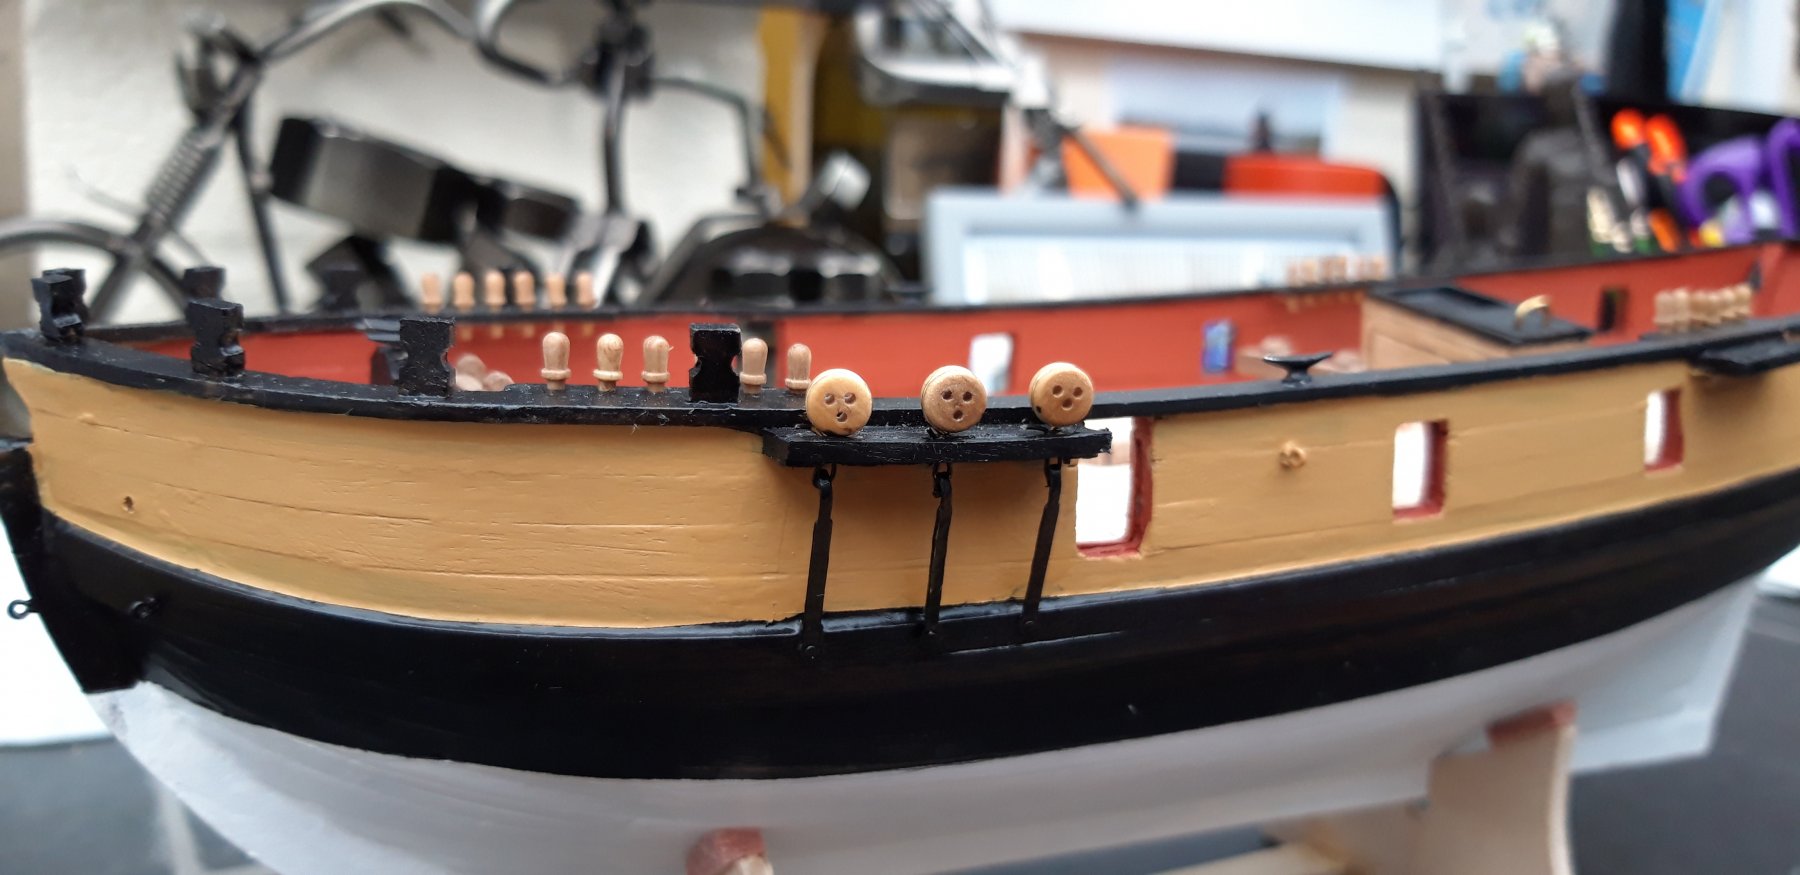
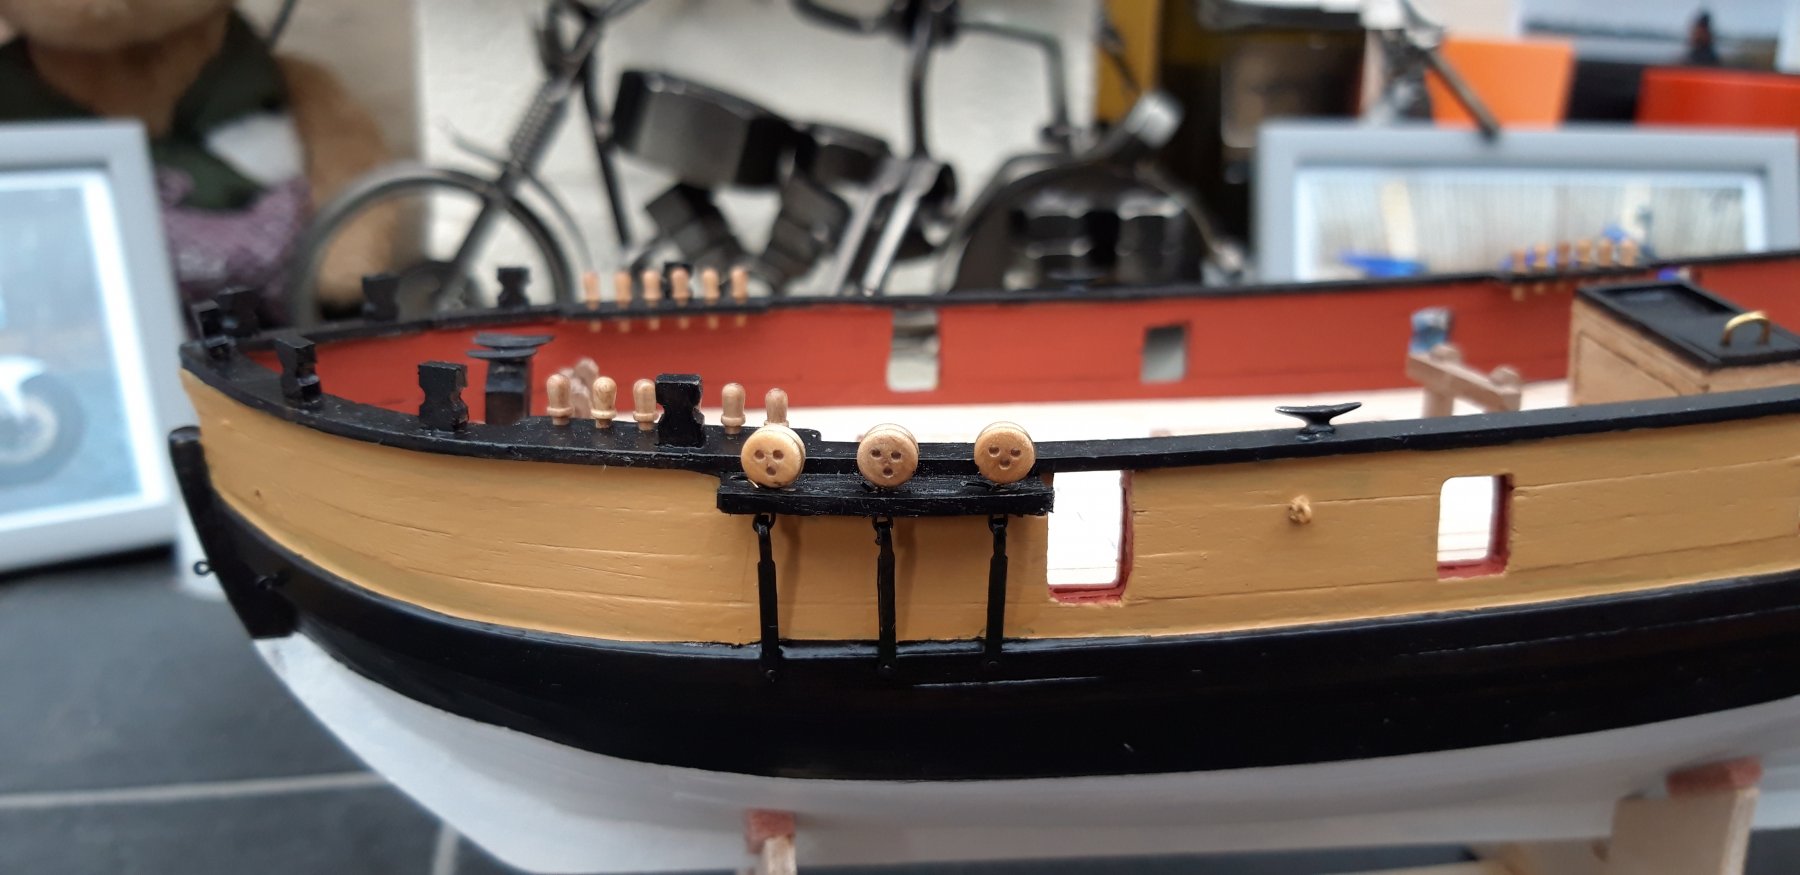
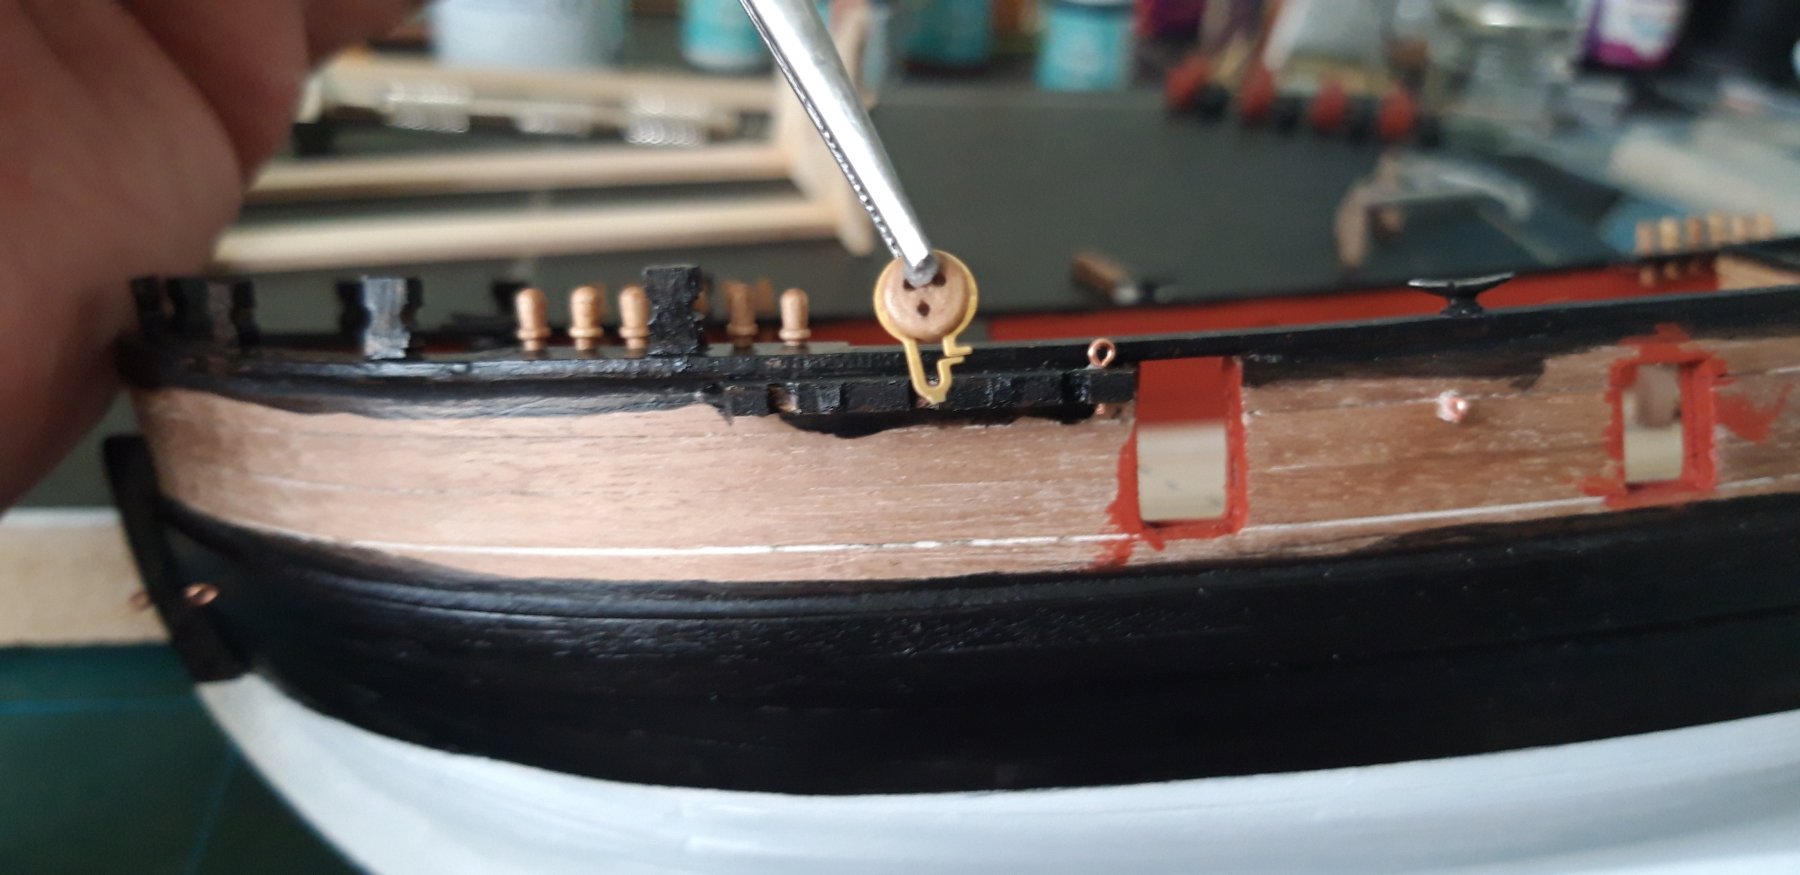
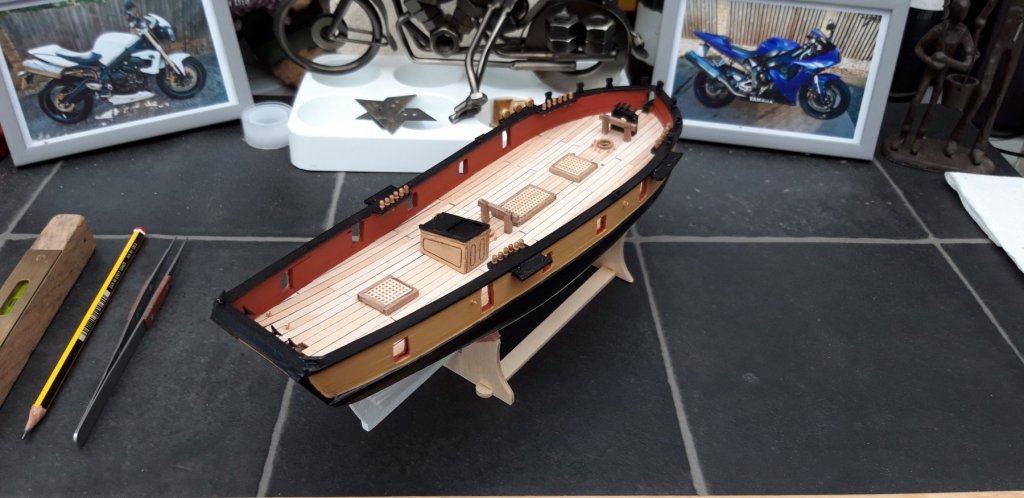
Hi all, Thank you Edward, for your kind words. Today l added the white paint, put together the Carronades and painted them. I also fitted the Eyelets, Cleats and Belaying Pins, phew, that was a fiddly day. I was just about to drill the first hole for eyelets around the formast when l noticed with horror l had fitted the Mast Bit Support Post the wrong side of the mast. I said "oh darn it" or words to that effect. At least l noticed and was able to rectify the problem. Best wishes as always. The Lazy Saint.


- 65 replies
-
- 8
-
-
- ballahoo
- caldercraft
- (and 2 more)
-
Hi Mike, Wow, you have got a lot of great advice to set you off. That is the beauty of forums like this, there is so much expertise to draw from and so many people willing to help. The only thing l will add is that if you do decide to hand paint always thin the paint. I would always prefer to lay down four thin coats rather than one thick. Airbrushing is undoubtedly a superb method but you can't beat the enjoyment of painting by hand imho. Best wishes as always. The Lazy Saint.
-
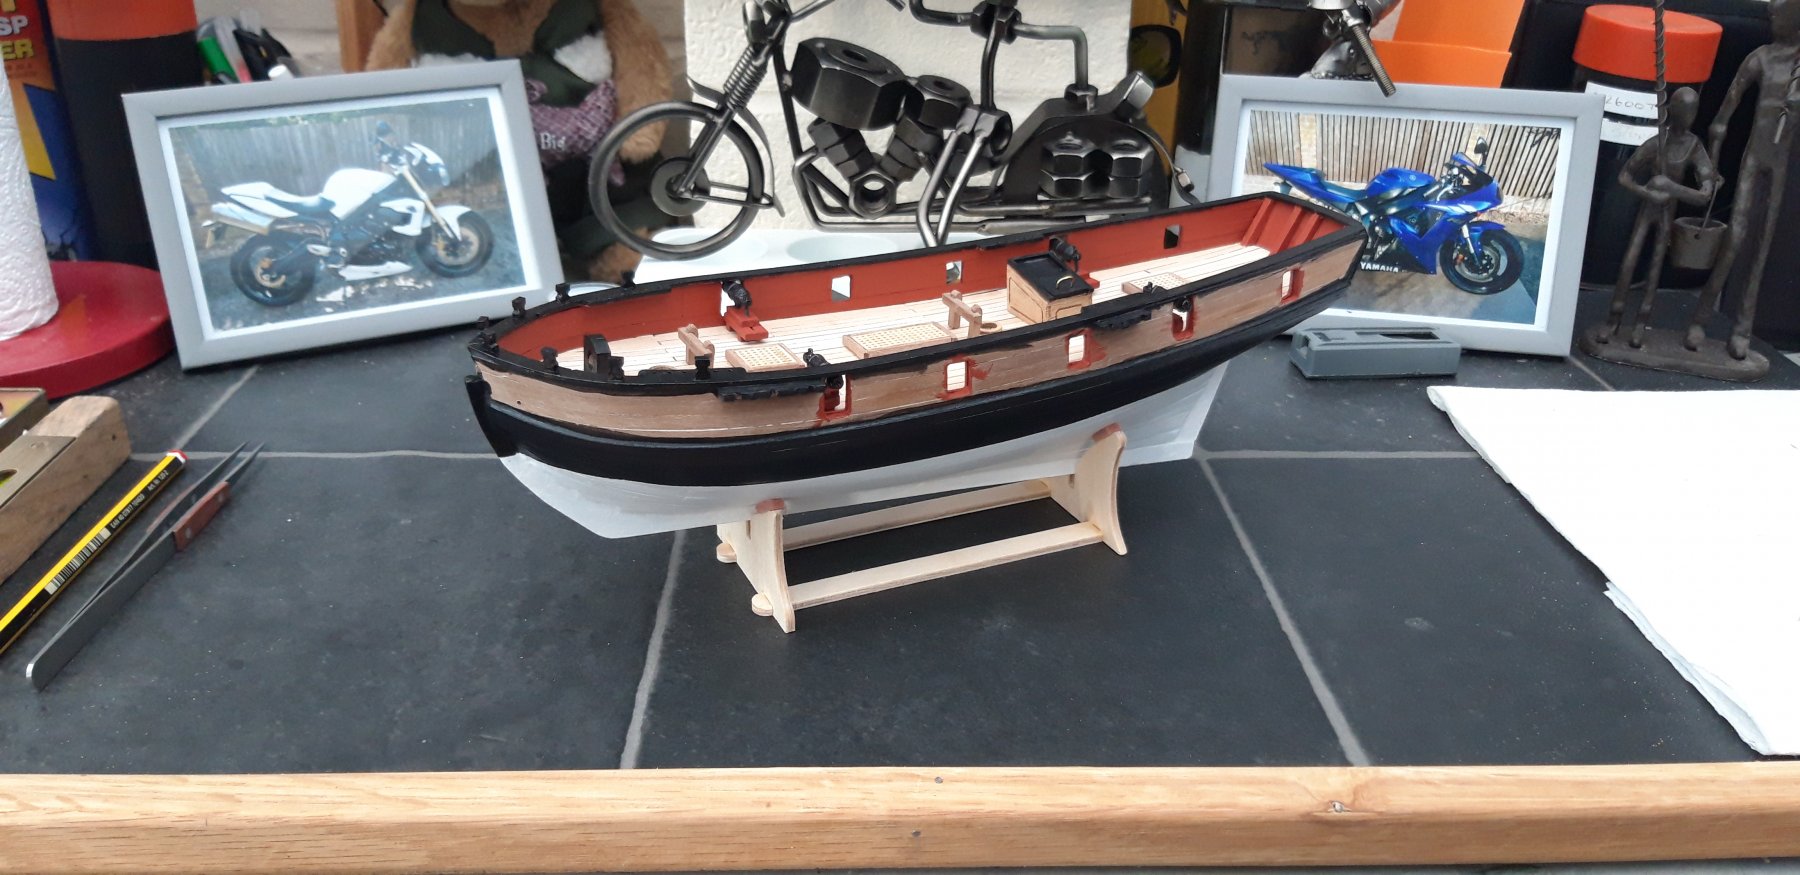
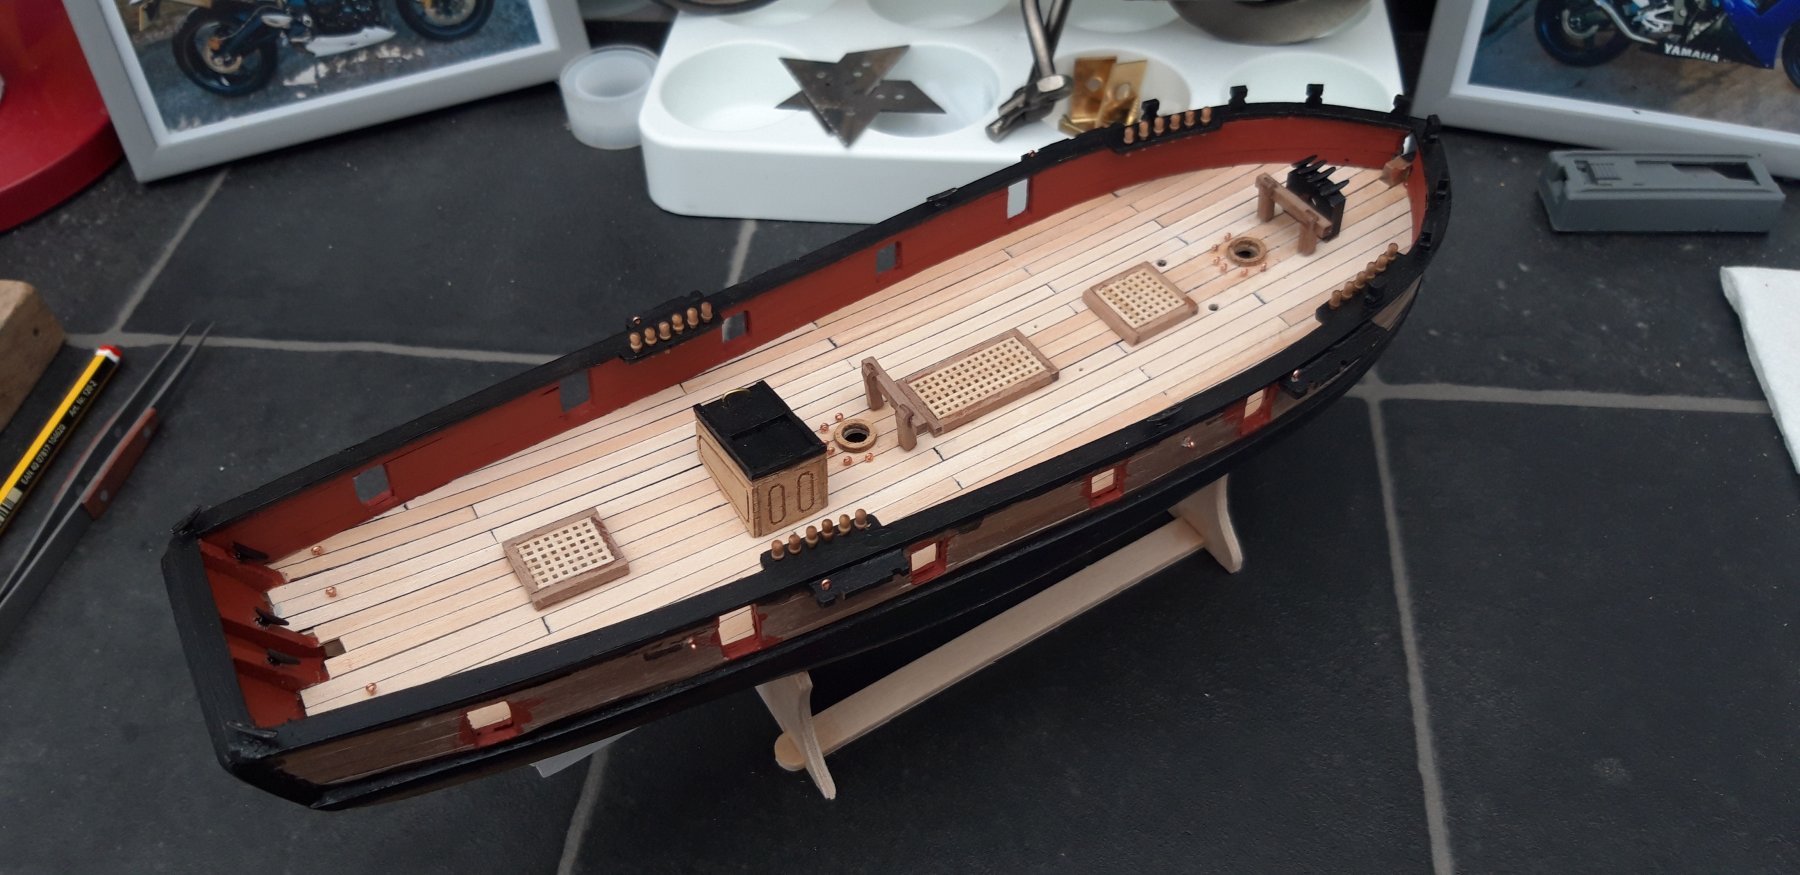
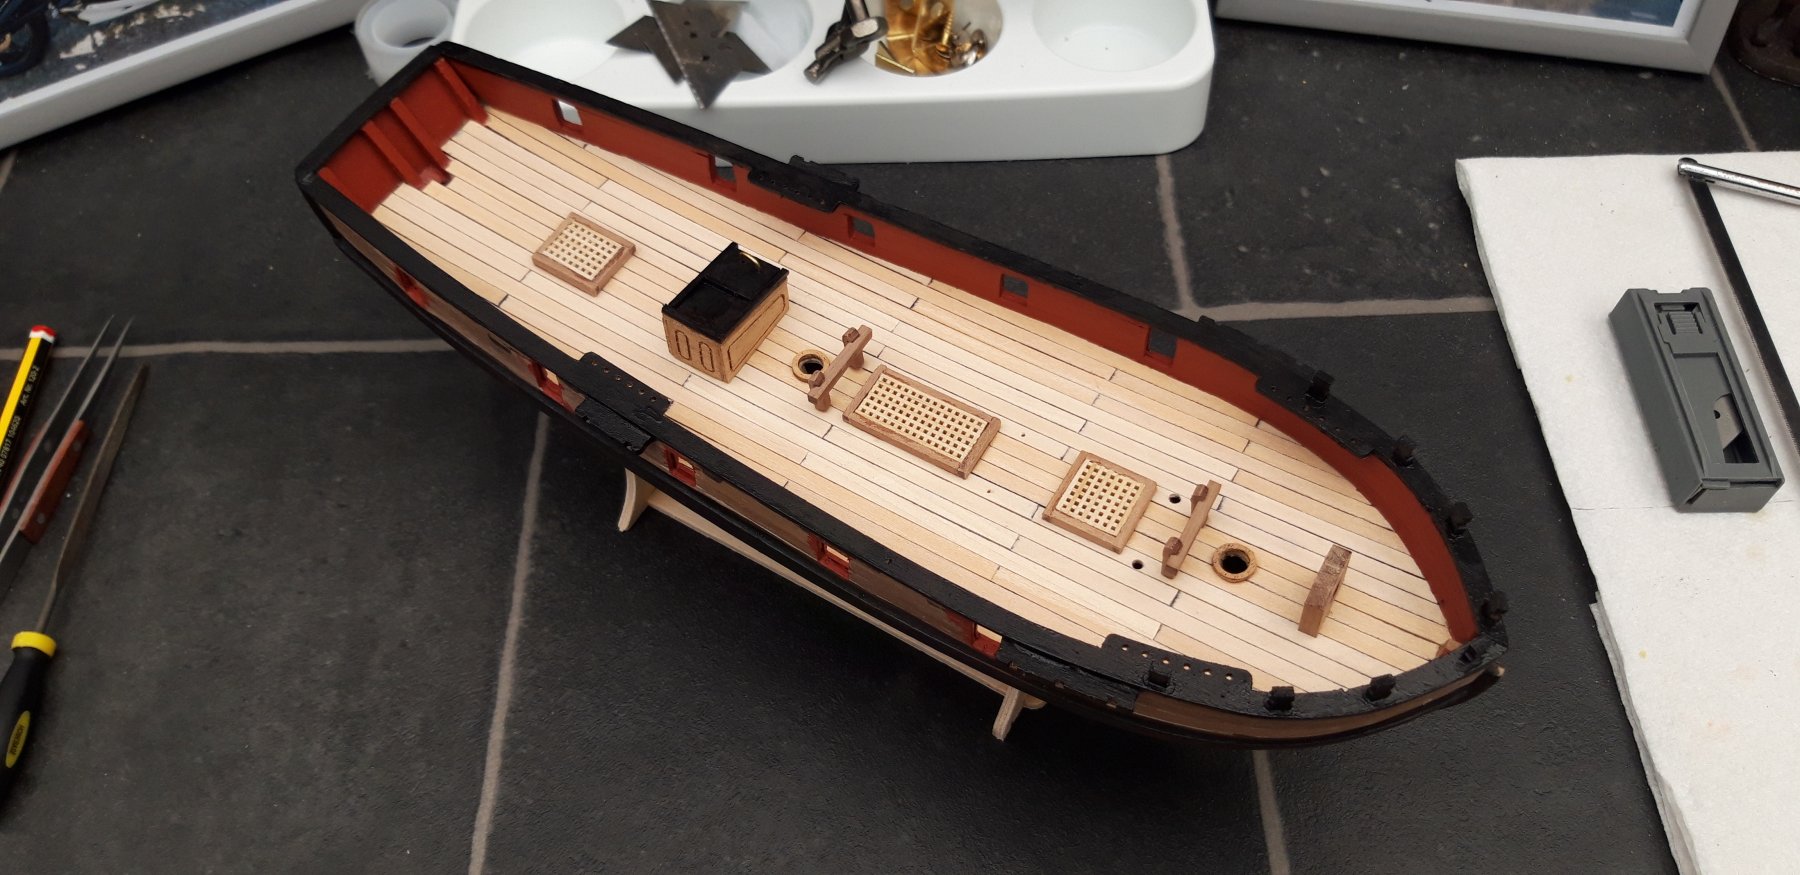
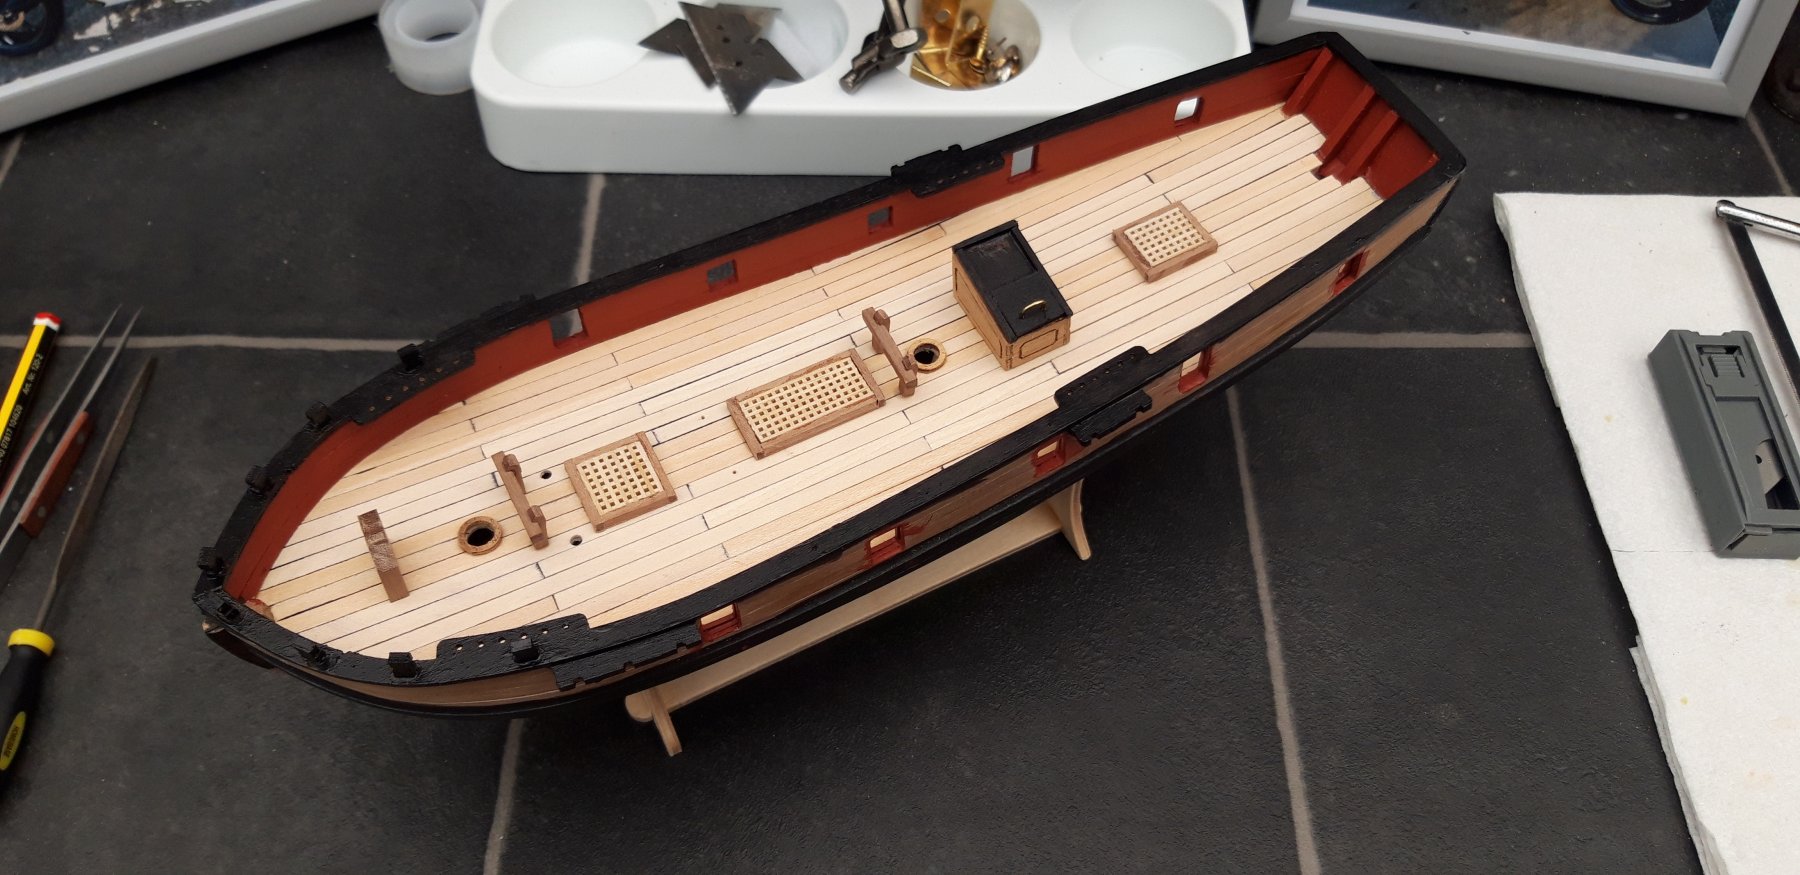
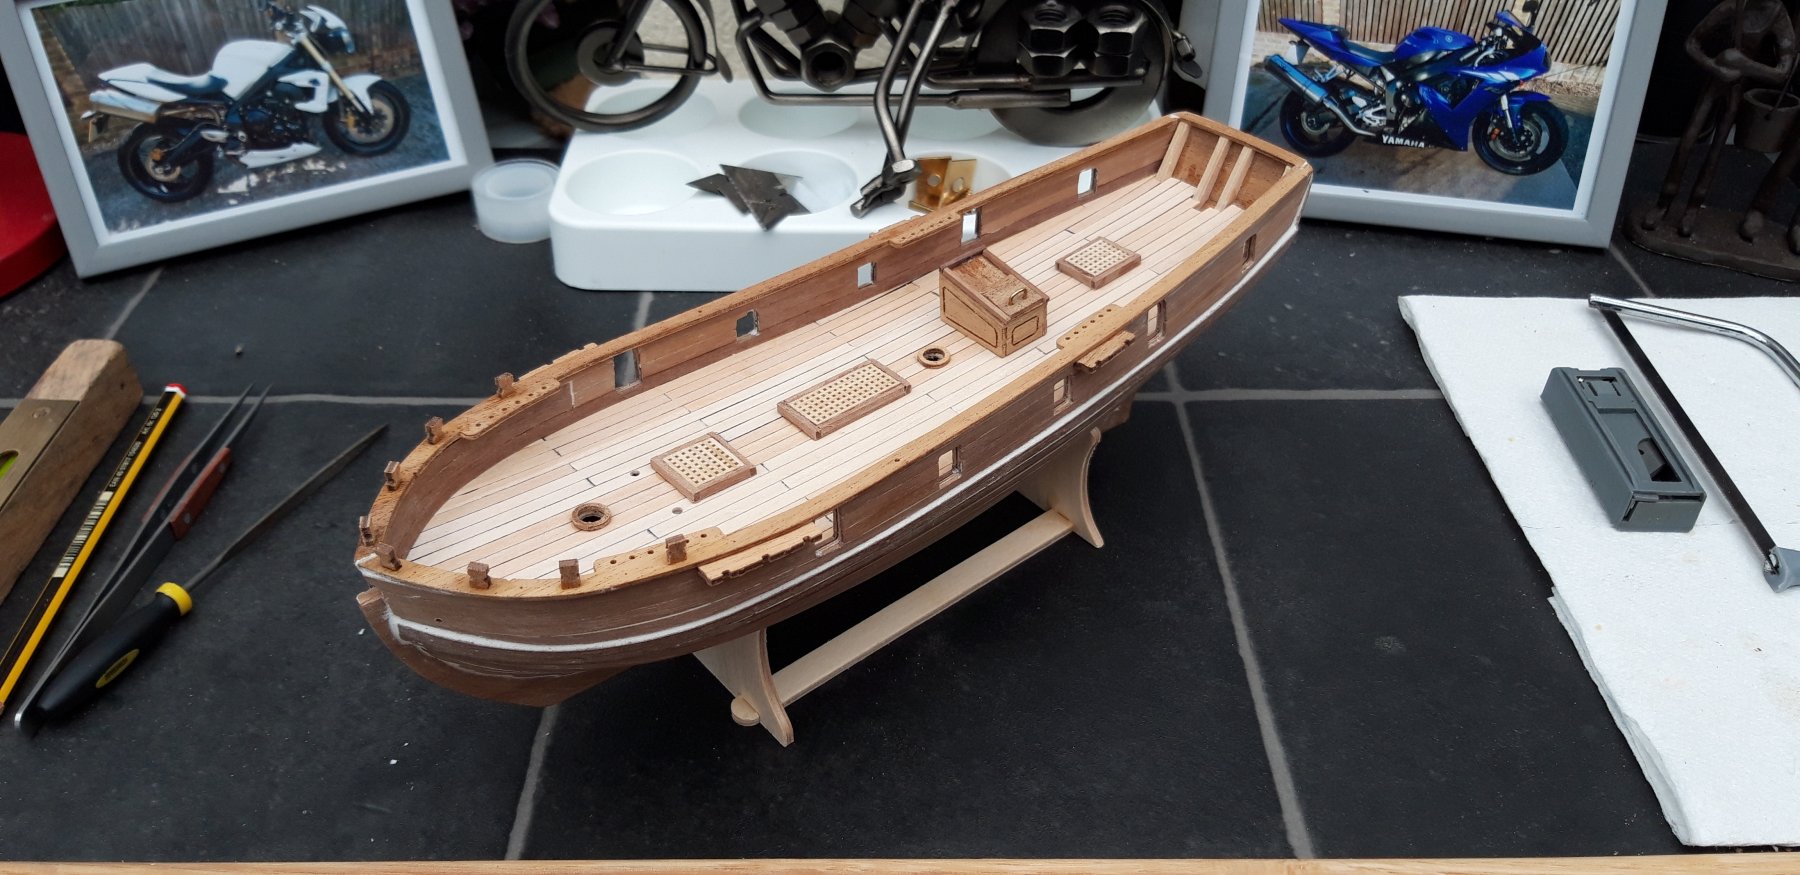
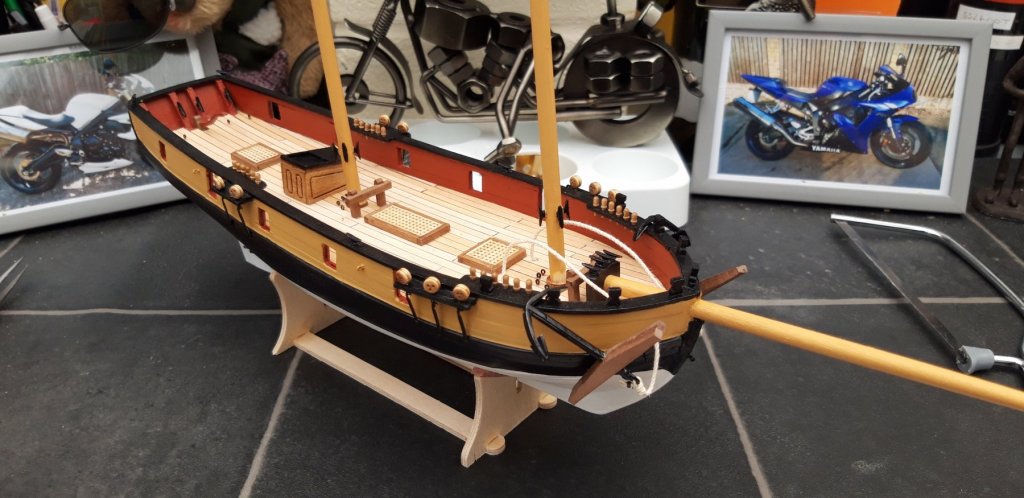
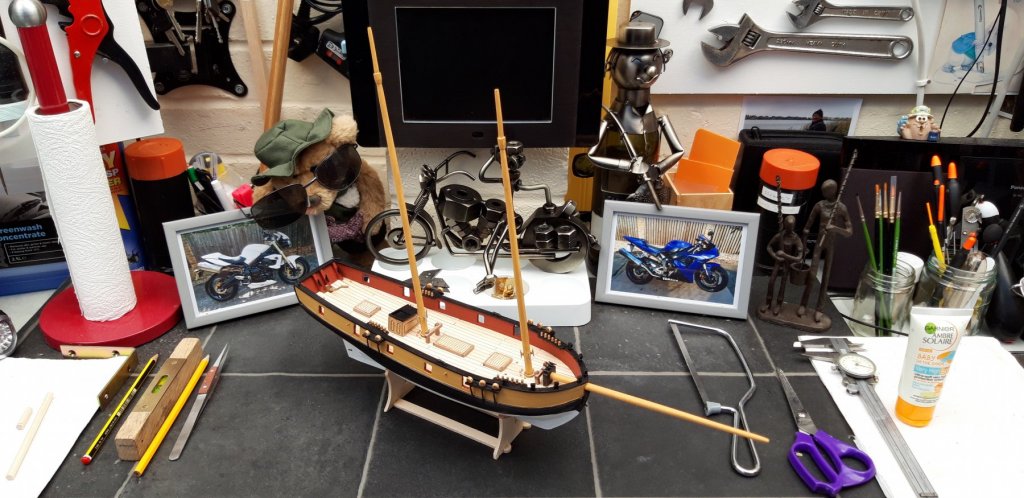
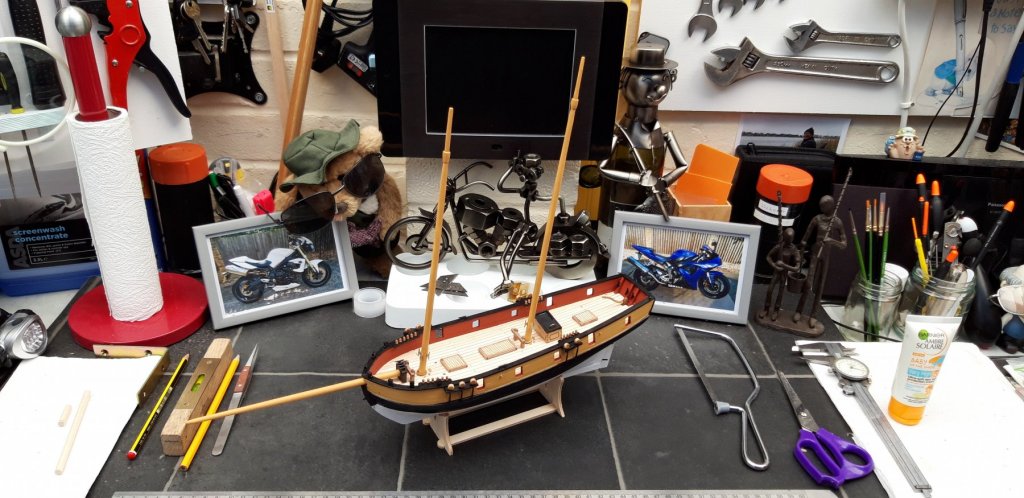
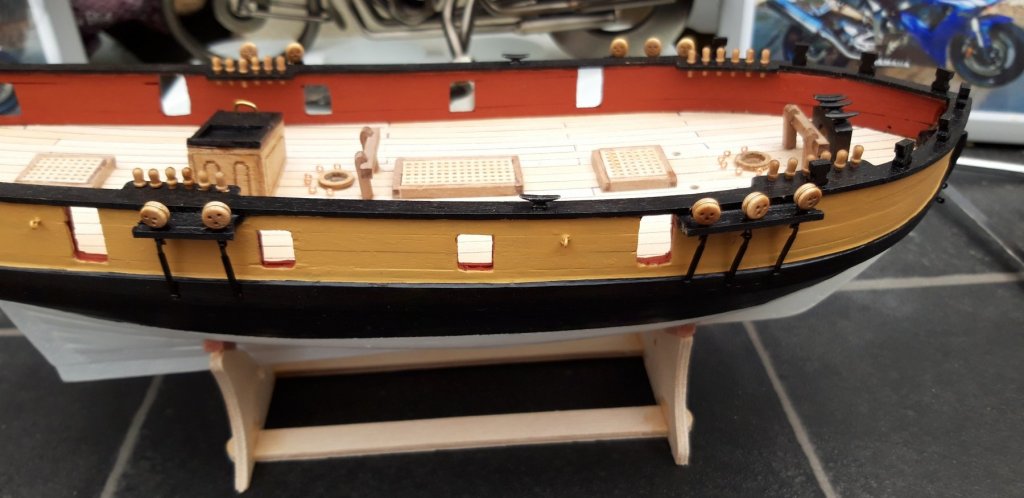
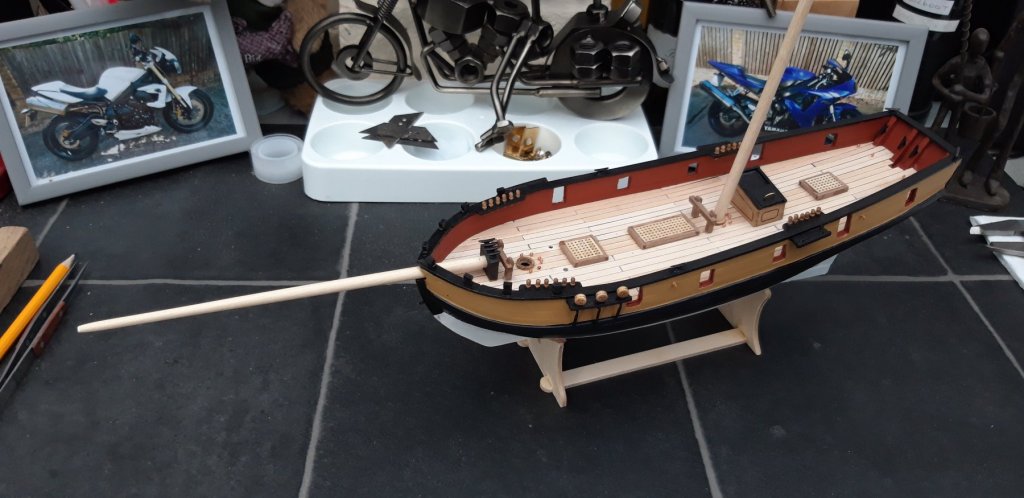
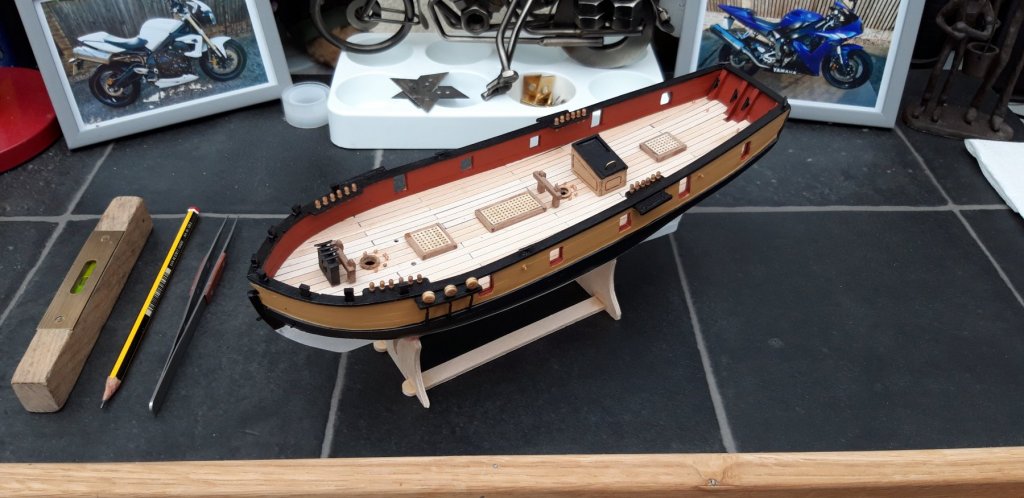
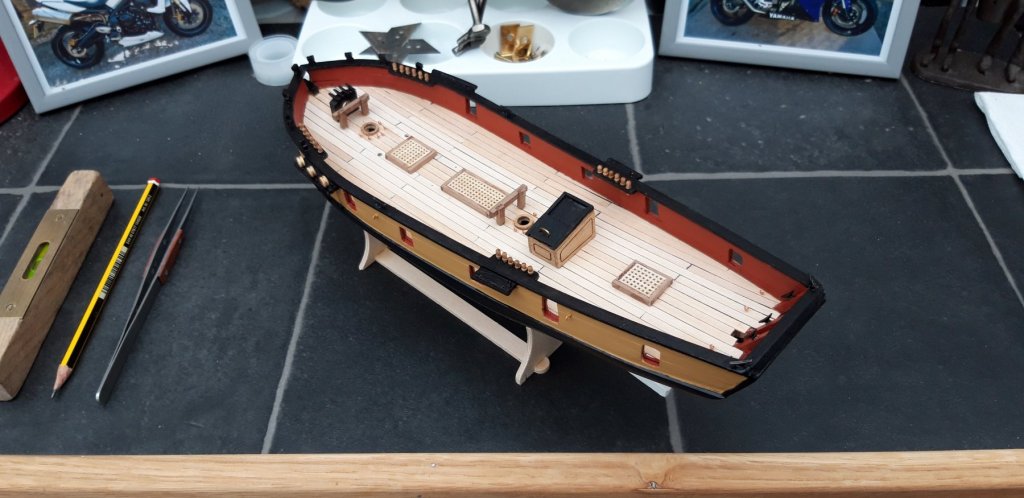
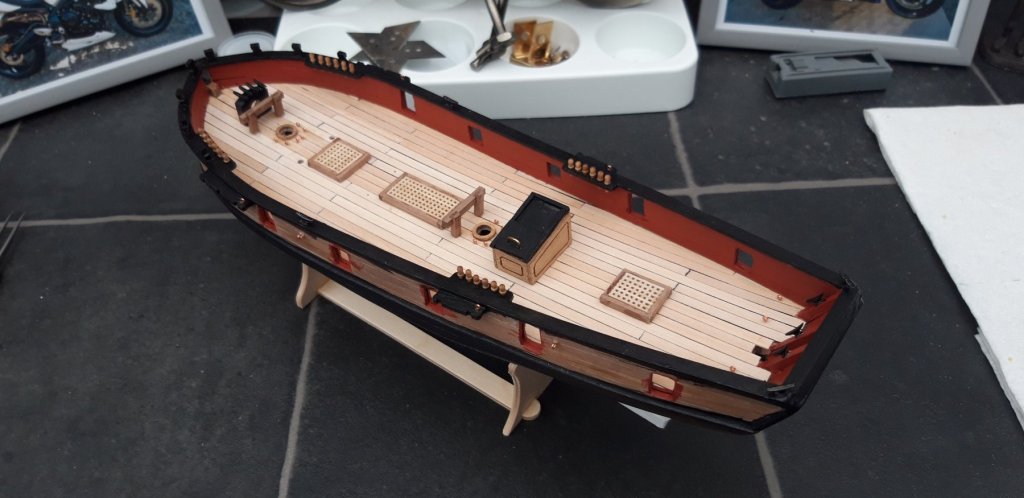
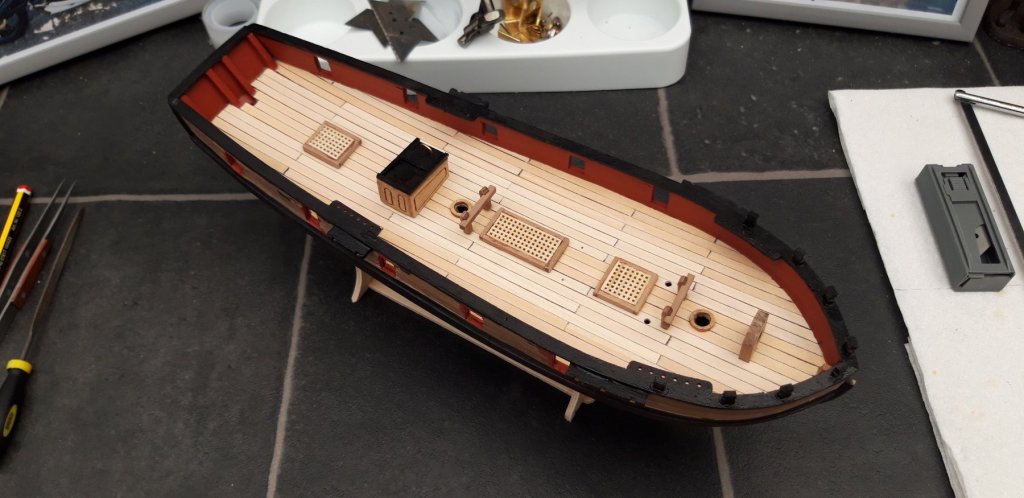
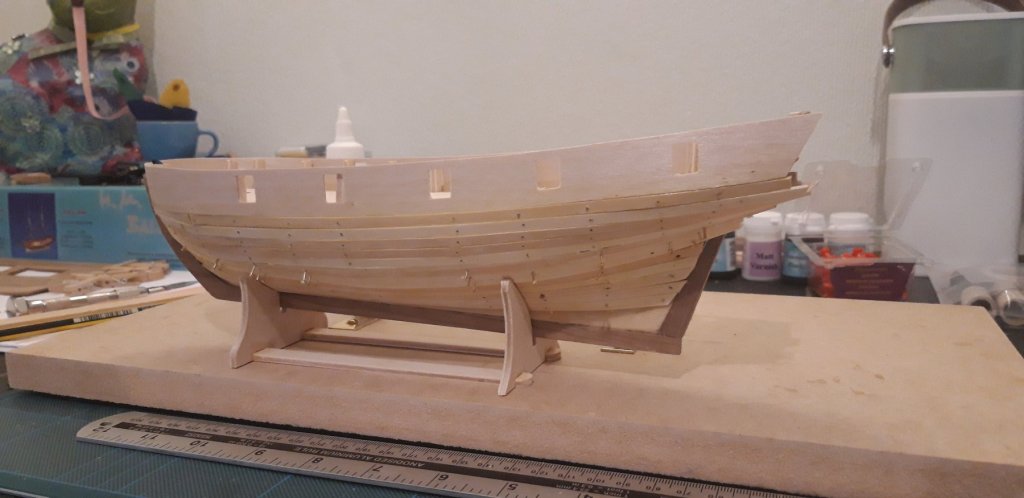
Hi all, As promised, a little bit of colour and l think it makes the deck stand out quite nicely. I did, however, have a mishap today. I lost the capping piece to one of the deck pumps, hence the reason for their absence. I will make a duplicate out of wood, it's a bit of a pain but its my own fault, l must be more careful. Best wishes as always. The Lazy Saint.

- 65 replies
-
- 7
-
-
- ballahoo
- caldercraft
- (and 2 more)
-
Hi Mike, I will try my best to point you in the right direction. 1. Always clean plastic models before you start the build. Use warm soapy water and clean without removing from the framework/sprue. If you don't it may be difficult to get paint to adhere. 2. Best to prime as a finer finish will result. I used spray primer from Halfords. Don't use thought in hot weather or you may get a pebble dash effect. I hand paint all my models so can't help with airbrushing. 3. I use Tamiya and/or Airfix, its personal preference l think, most are good. My preference is water based, not as tough, but easier to manage. 4. I have always used the colours recommended with the kit and never had an issue. 5 & 6 I believe best practice is build the model painting as you go, finalise painting, panel lines and fine details. Once painting is completed coat with a gloss varnish then apply the decals and seal them with gloss varnish. When the varnish is dry you can start the weathering process, the decals are weathered along with the rest of the model. Finally, when you are happy apply a mat varnish to seal everything in. 7. I found Tamiya glue to be as good as any. I hope this helps. Best wishes as always. The Lazy Saint.
-
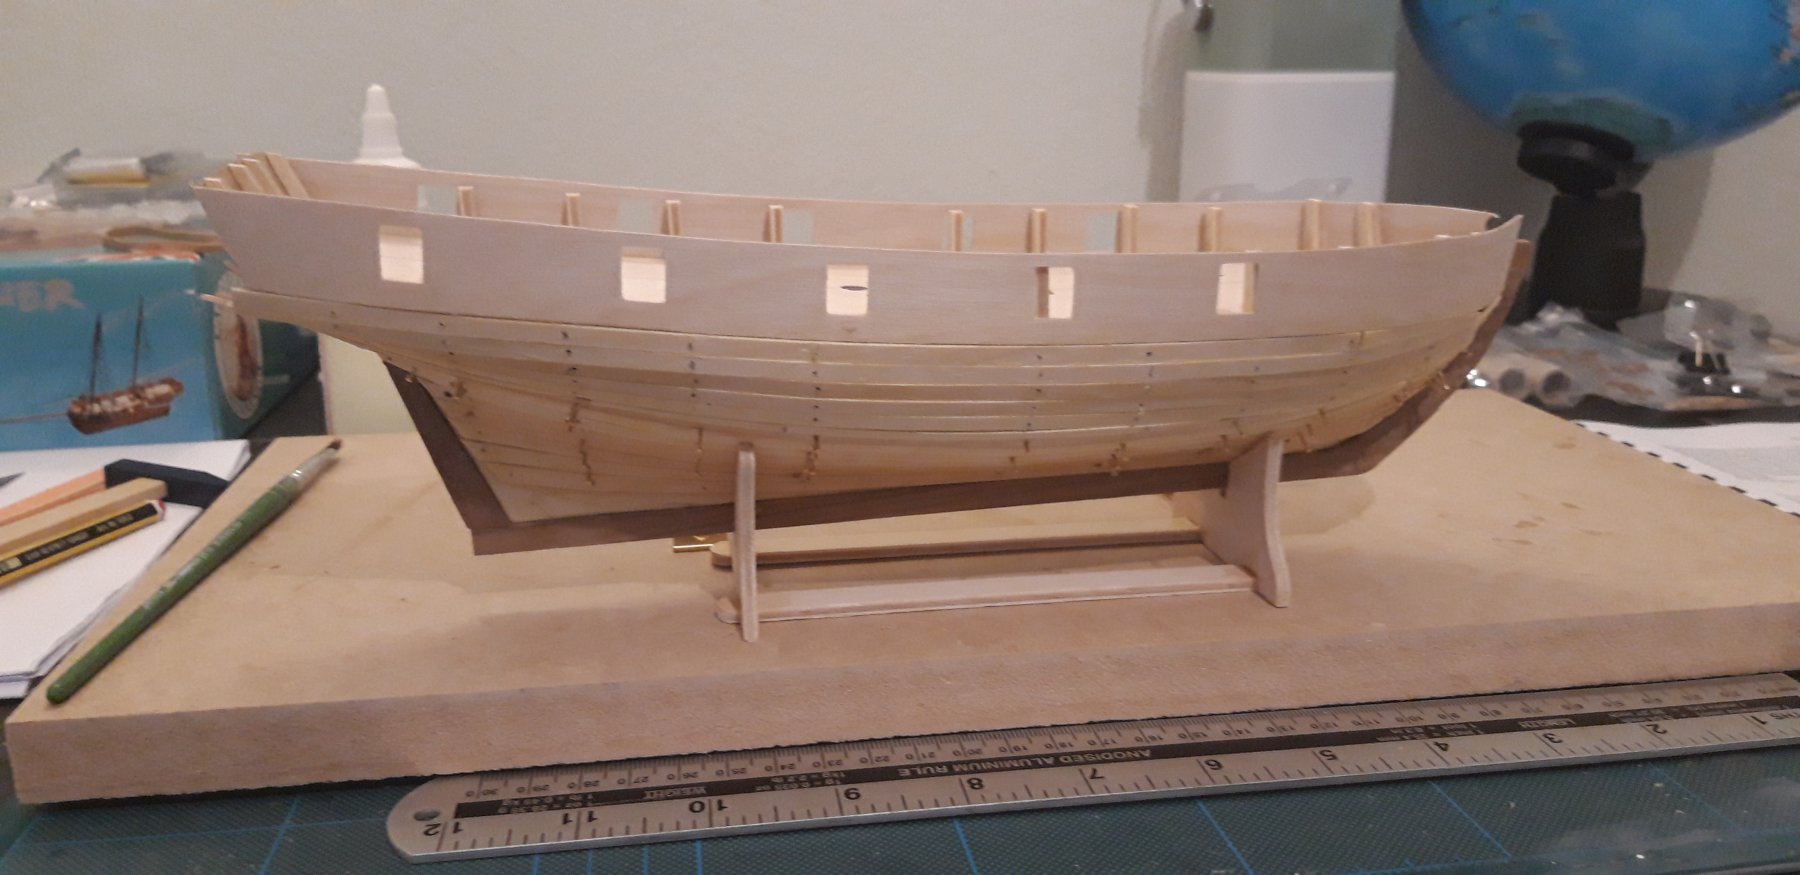
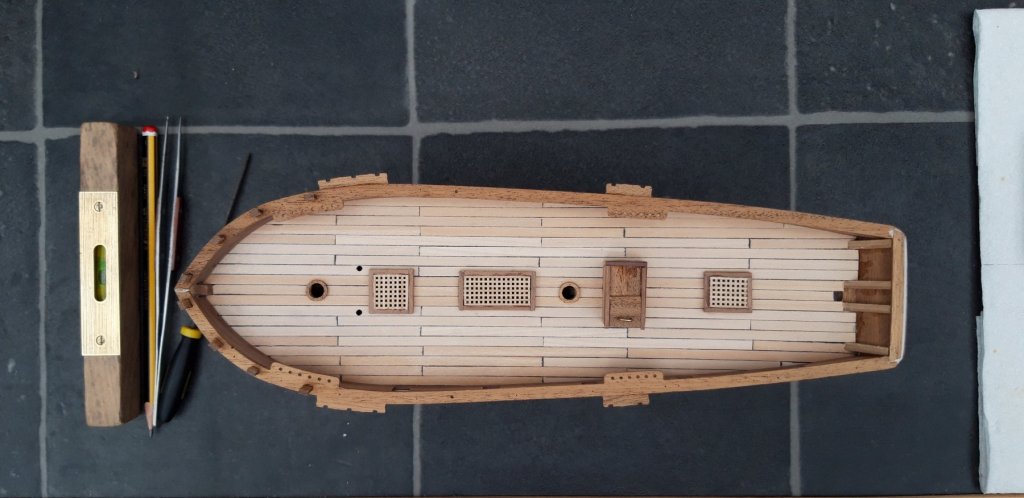
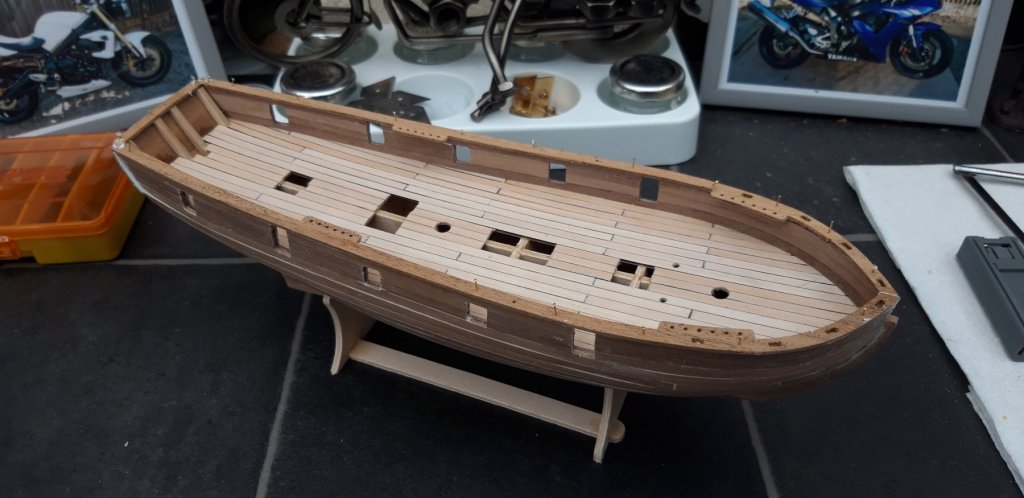
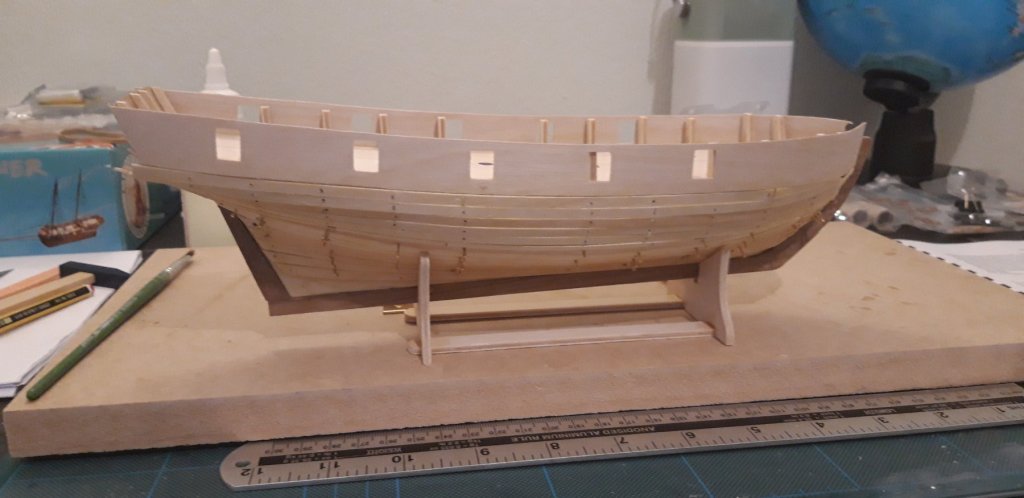
Hi all, I enjoyed today's session, it depended less on my wood working skills and more on my basic modeling knowledge. I fitted the companion way, the gratings, timberheads and the two sets of channels. There are a few more items to add, such as the hand pumps, but the construction of the hull is almost complete. I hope l will have added a bit of colour by the time l post next. Best wishes as always. The Lazy Saint.


- 65 replies
-
- 4
-
-
- ballahoo
- caldercraft
- (and 2 more)
-
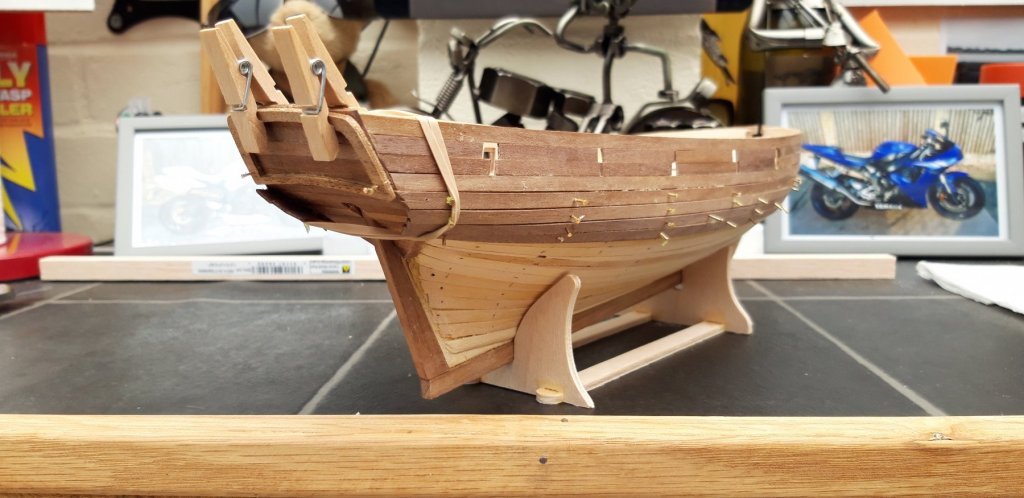
Hi Mike, Thanks very much for the tip and the link, it looks just the thing l am needing. Today l fitted the main wales, trickier than l thought. Note to self: Just because something looks simple enough, do not assume it is so. Best wishes as always. The Lazy Saint.
- 65 replies
-
- 5
-
-
- ballahoo
- caldercraft
- (and 2 more)
-
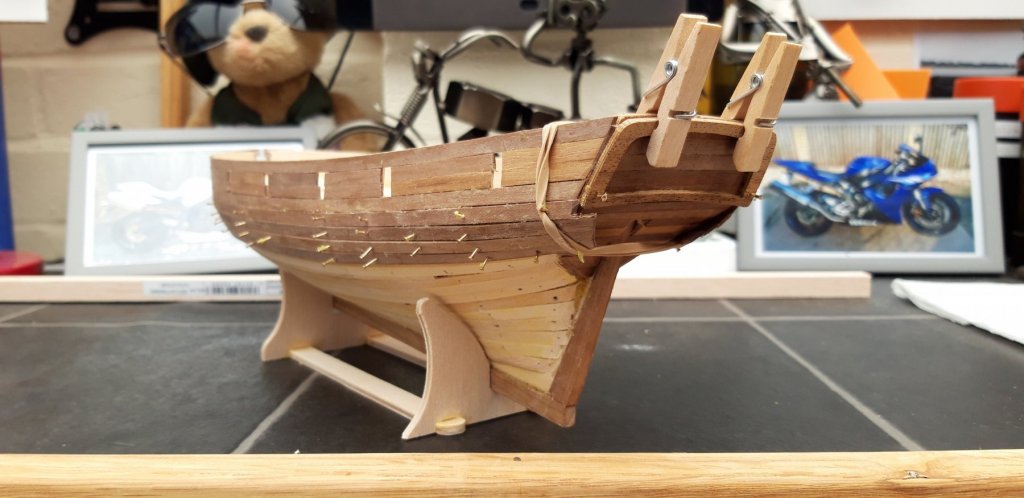
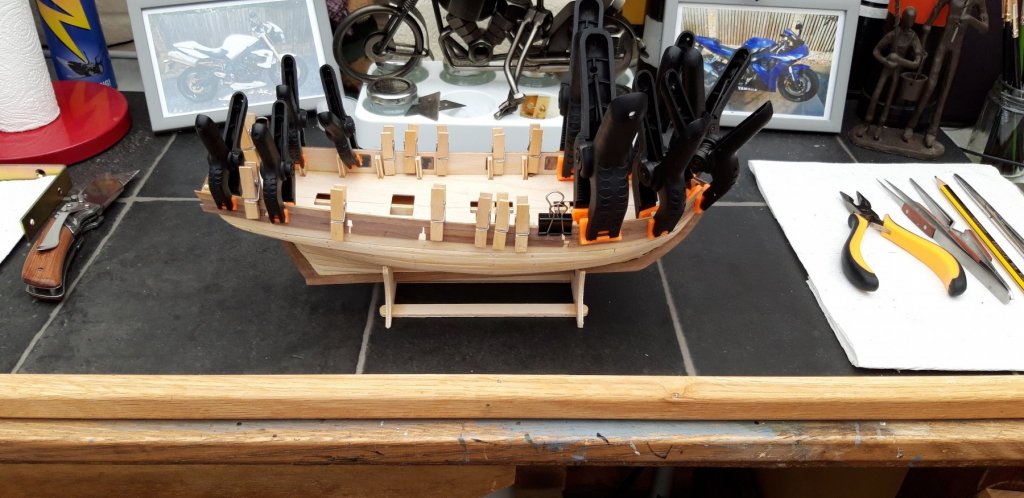
Hi all, This afternoon l have completed the inner planking, cut open the gun ports and fitted the bulwark capping rail. During my next session l will be fitting the main wale. I shall also make a start on the deck fittings. Best wishes as always. The Lazy Saint.
- 65 replies
-
- 4
-
-
- ballahoo
- caldercraft
- (and 2 more)
-
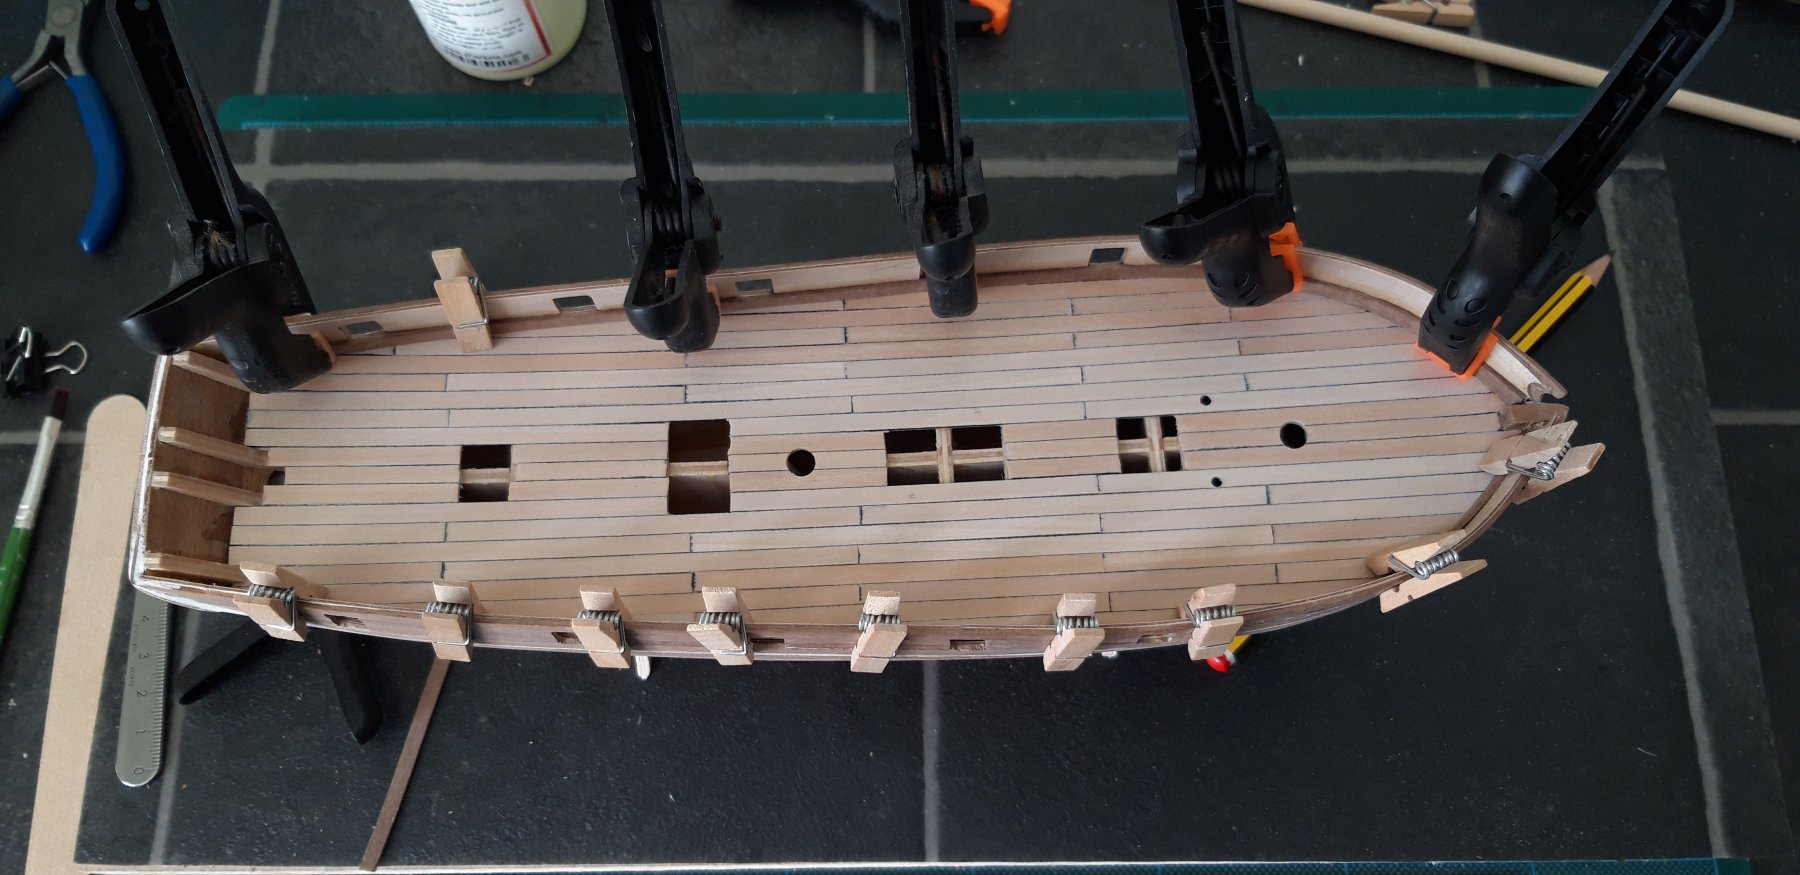
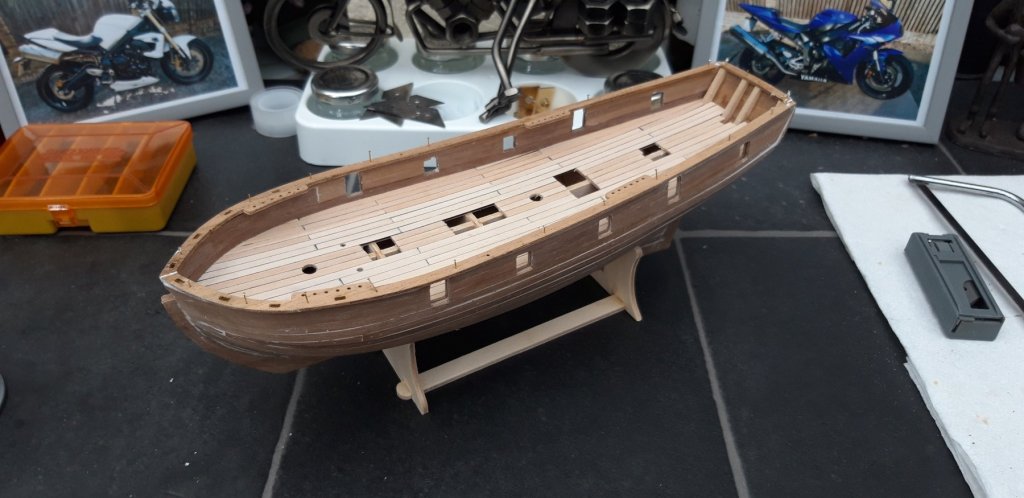
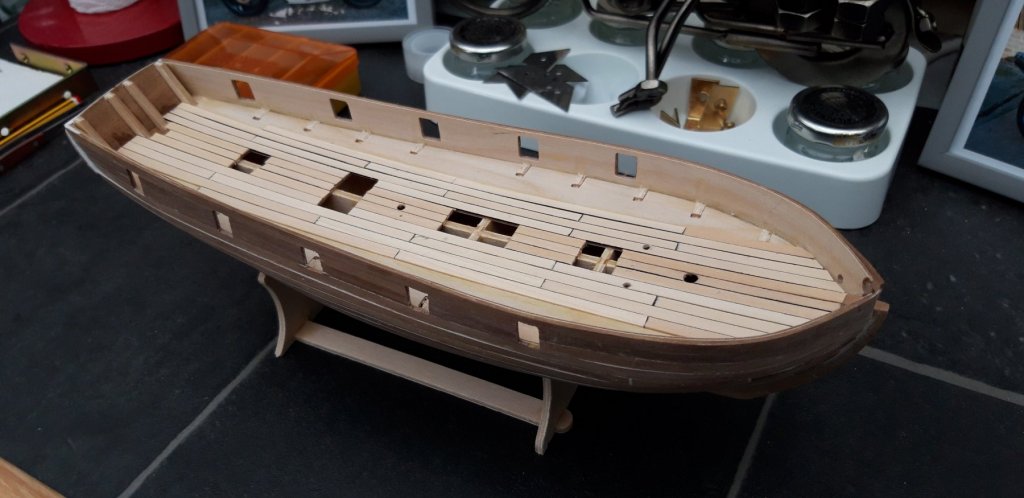
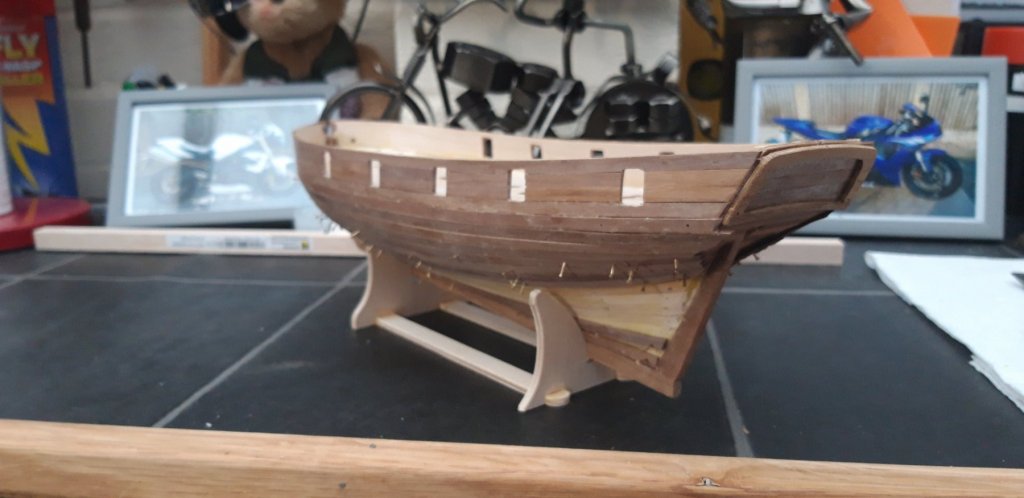
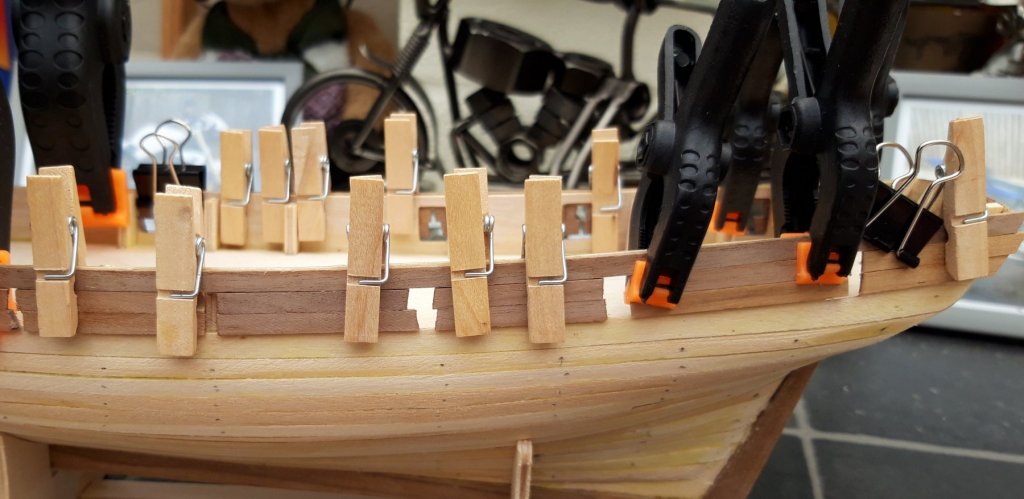
Decking completed and the first plank of the inner gun port bulwarks fitted. I have also filed out the holes for the masts. During my next session l will complete the bulwarks and cut out the gun ports. Best wishes as always. The Lazy Saint. PS. I must work on getting better/straighter cuts for my plank ends, perhaps a plank cutter would be a good investment.

- 65 replies
-
- 5
-
-
- ballahoo
- caldercraft
- (and 2 more)
-
Hi all, Today l have started the deck planking and am happy so far with the results, however, l have found it surprisingly difficult to get perfectly straight cuts. I have simulated the caulking with a permanent marker pen which seems to have worked well, although can highlight any errors in cutting. I am being critical l know but if l don't highlight these problems/errors l am afraid l may well make them again. Best wishes as always. The Lazy Saint.
- 65 replies
-
- 5
-
-
- ballahoo
- caldercraft
- (and 2 more)
-
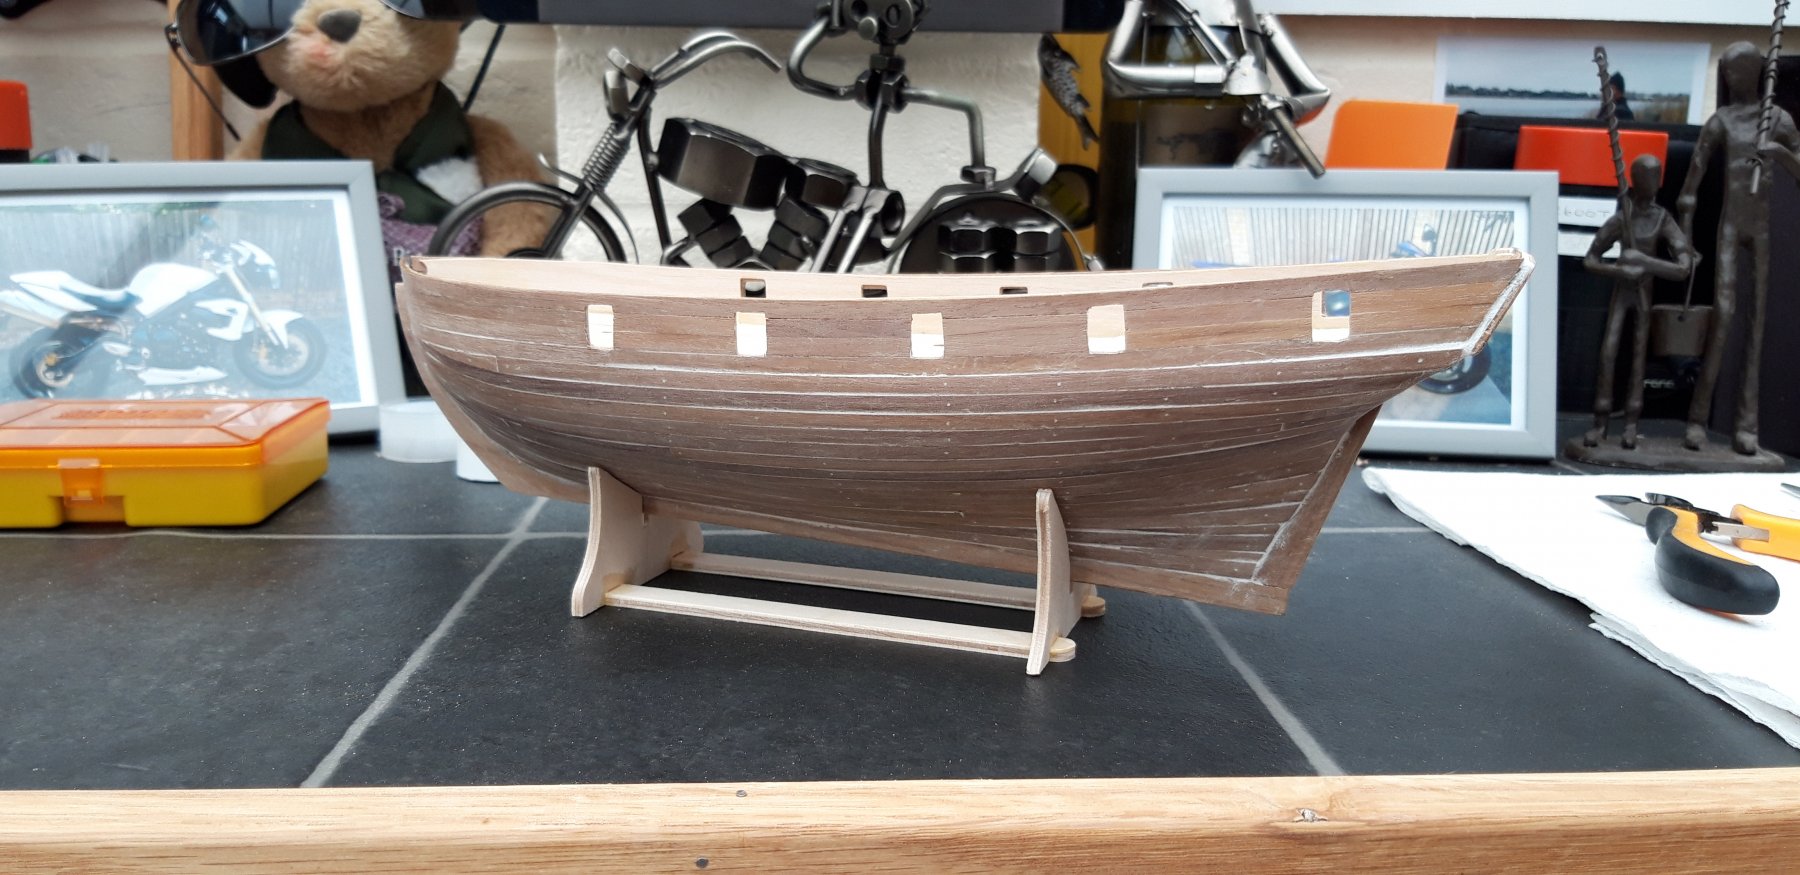
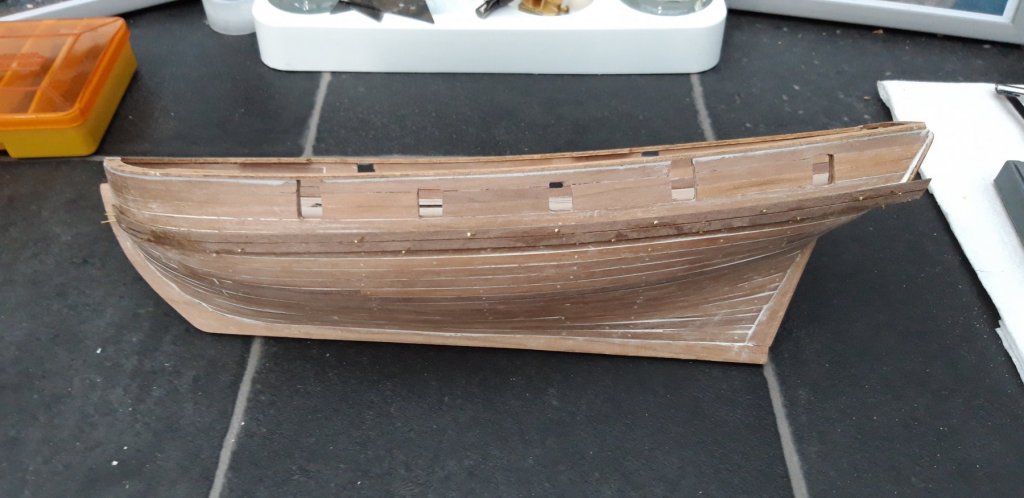
Hi all, I have been busy preparing the hull for painting by trimming, filling and sanding. I do still have more sanding, but not much and I haven't had to use too much filler, which l am pleased about. All the errors l am left with can be attributed to my failure to appreciate the importance of the bearding lines and rabbets. If l work on correcting my five lessons highlighted in the previous post l should produce a better hull next time. I am now looking forward to planking the deck and the inner walls of the gun port bulwarks. Best wishes as always. The Lazy Saint.

- 65 replies
-
- 4
-
-
- ballahoo
- caldercraft
- (and 2 more)
-
Hi Paul, Thank you very much for the information, it is very much appreciated. Best wishes as always. The Lazy Saint.
-
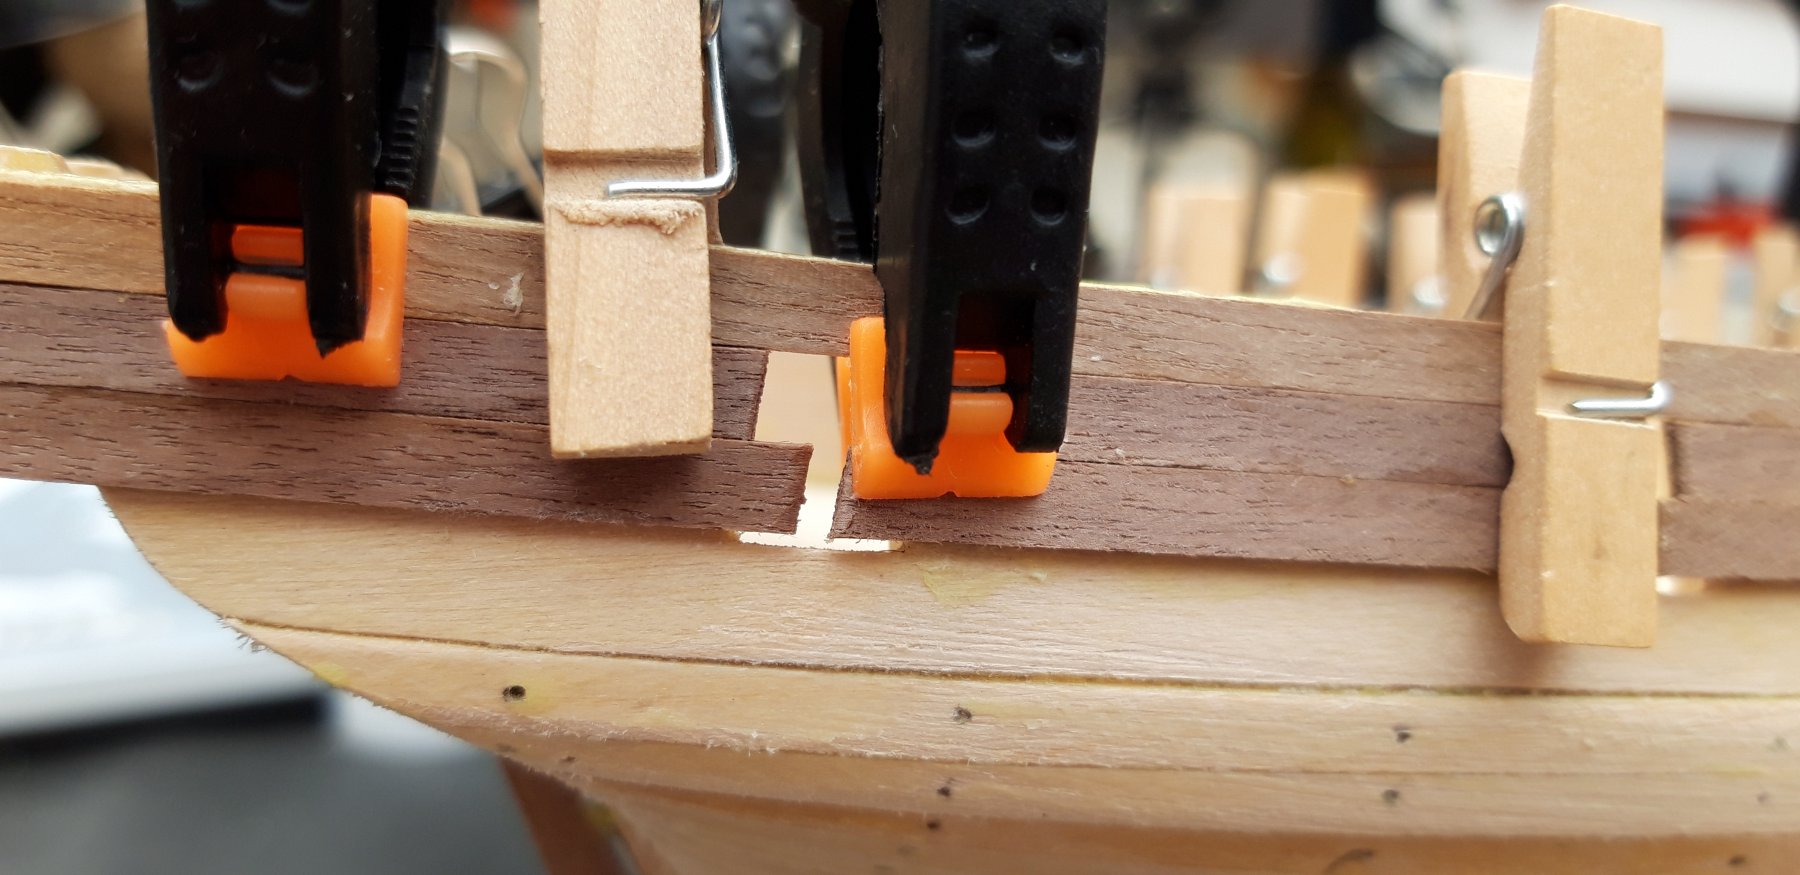
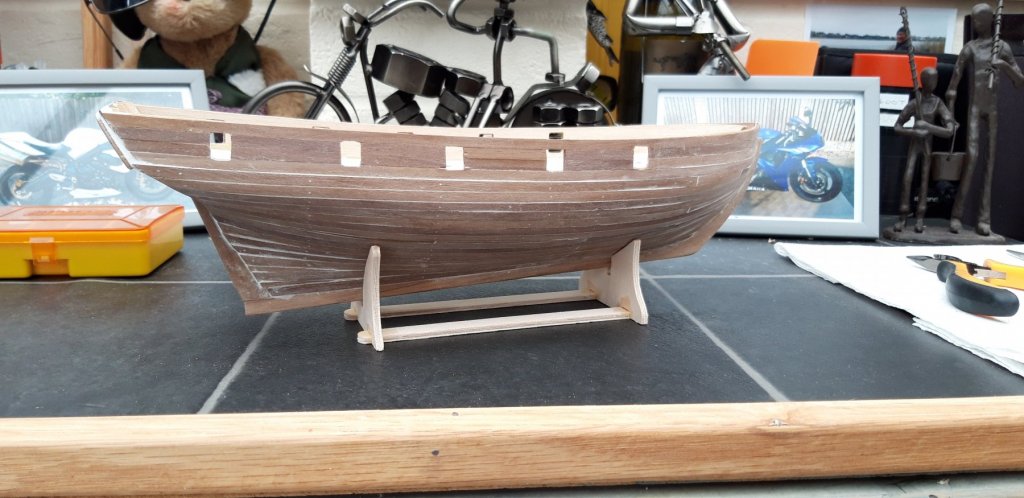
Hi all, Well l have completed my first hull planking. l am not too disappointed as it is my first attempt and l have learnt a lot. Planking a model ship is certainly a challenge, my hat off to all you builders out there who produce model's of such high standard's. My next tasks will be to prepare the hull for painting by trimming, filling and sanding. The five most important lessons l have learnt so far are: 1. The bearding and rabbet lines. These are much more important to the final look of the hull than l realised. I won't pay lip service to them next time. 2. Beveling the bulkheads. It is surprising how much wood you can sand away in such a short time, l won't be making work for myself next time. 3. Taking more time over cutting individual planks. I won't move on to the next plank in line untill the one l am working on is absolutely correct, this may mean my scrap wood pile grows but ultimately it will lead to a better looking build. 4. Make my build sessions shorter. As l get more tired l tend to accept poorer quality work, there is no rush. Best wishes as always. The Lazy Saint. 5. I will not add the keel untill the planking is completed.


- 65 replies
-
- 7
-
-
- ballahoo
- caldercraft
- (and 2 more)
-
Hi ccoyle, Thanks for the sanding sealer tip, l shall use it as l do plan to paint. My wood working skills are not sufficient yet to display a varnished ship, although I am quit pleased with the gunport bulwarks. Do you recommend a specific sanding sealer? Should l look for a sealer produce for model ships or would a trip to B&Q suffice? Many thanks for your input. Best wishes as always. The Lazy Saint.
-
Hi all, A few more planks in. One more session should see the hull completed and, with any luck, a bit of sanding / filling should produce a reasonable job. Best wishes as always. The Lazy Saint.

- 65 replies
-
- 6
-
-
- ballahoo
- caldercraft
- (and 2 more)
-
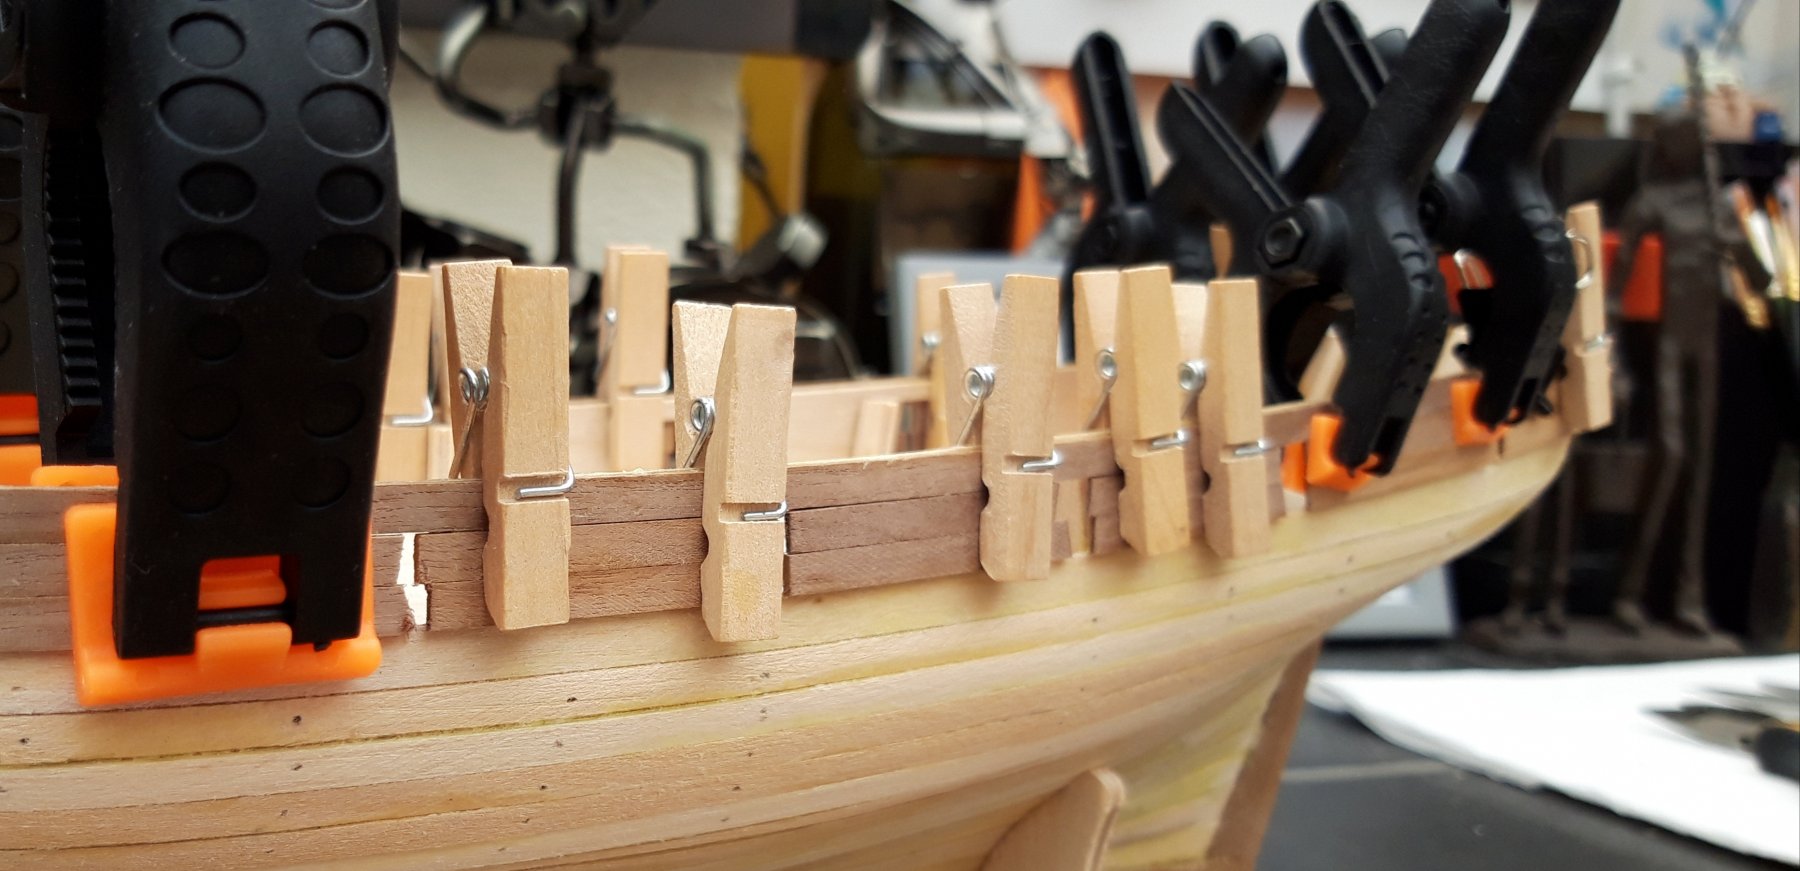
Hi all, Today l have planked the stern and am five planks down the hull. I am finding that the planking is very time consuming but very absorbing, time just flew by today. Yesterday l missed my lunch! 🤣 During my next session l will endeavor to progress by another five planks, but not tomorrow, tomorrow l am going 🎣 Best wishes as always. The Lazy Saint.
- 65 replies
-
- 5
-
-
- ballahoo
- caldercraft
- (and 2 more)
-
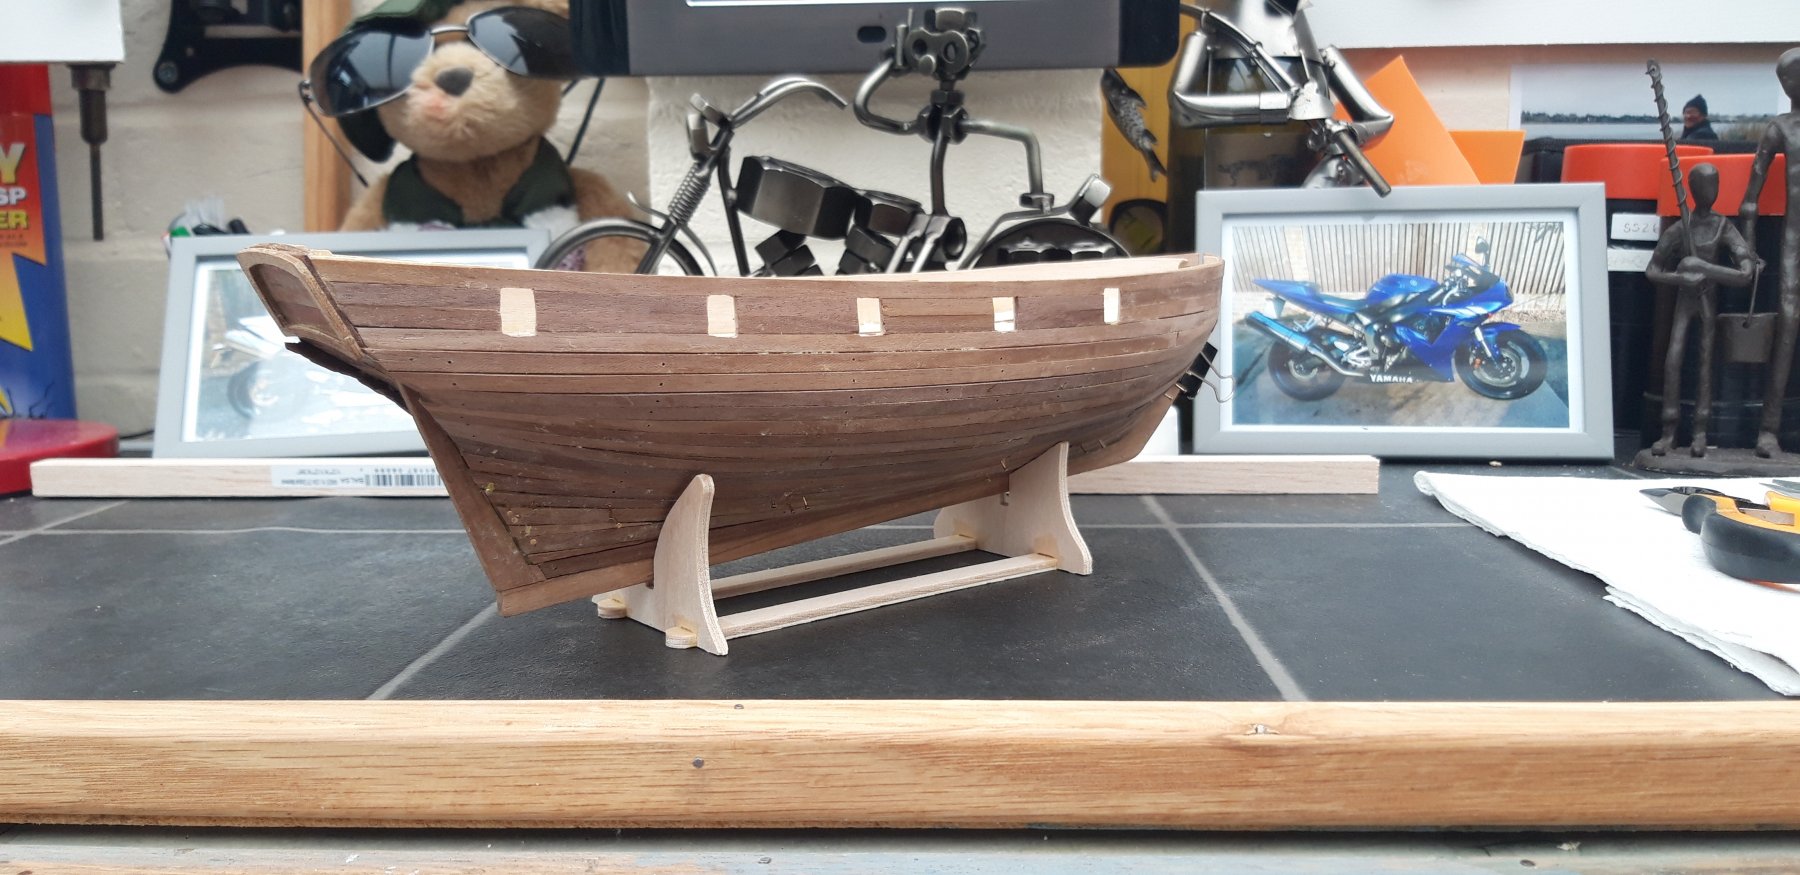
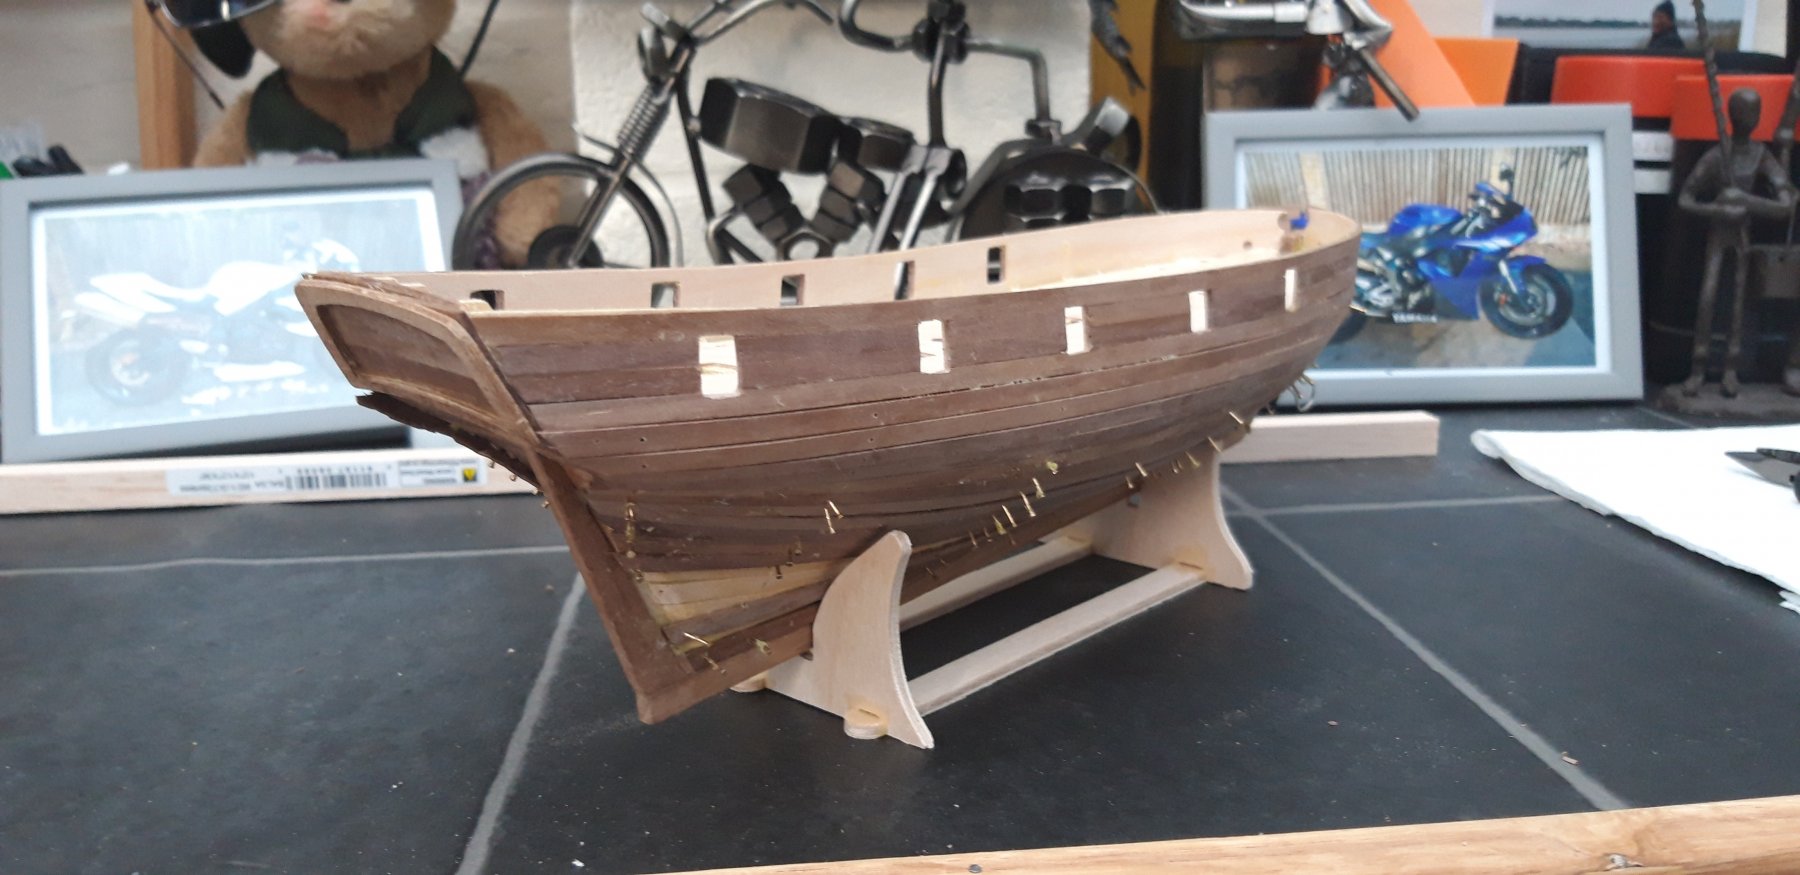
Hi all, I have sanded it smooth and l am glad to say l have not had to resort to too much filler. I have started the second planking and completed the first 3 planks on either side. I am not using pins as l would like this (gunport bulwarks) area left unpainted, if my planking is ok l will use varnish, if not l will paint it. I will now work carefully and slowly down the ship. Best wishes as always. The Lazy Saint.


- 65 replies
-
- 8
-
-
- ballahoo
- caldercraft
- (and 2 more)
-
Hi all, Well that is the 1st planking in place, still a lot of tidying up, filling and sanding. Ha ha, l know what you mean Edward, thank goodness for filler and sand paper. I am reasonably happy with the outcome, it is, after all, a learning curve that l am on. I understand my errors and l shall learn by them. With luck the 2nd planking will be easier. Best wishes as always. The Lazy Saint.
- 65 replies
-
- 4
-
-
- ballahoo
- caldercraft
- (and 2 more)