HOLIDAY DONATION DRIVE - SUPPORT MSW - DO YOUR PART TO KEEP THIS GREAT FORUM GOING! (Only 13 donations so far - C'mon guys!)
×

The Lazy Saint
-
Posts
264 -
Joined
-
Last visited
Content Type
Profiles
Forums
Gallery
Events
Everything posted by The Lazy Saint
-
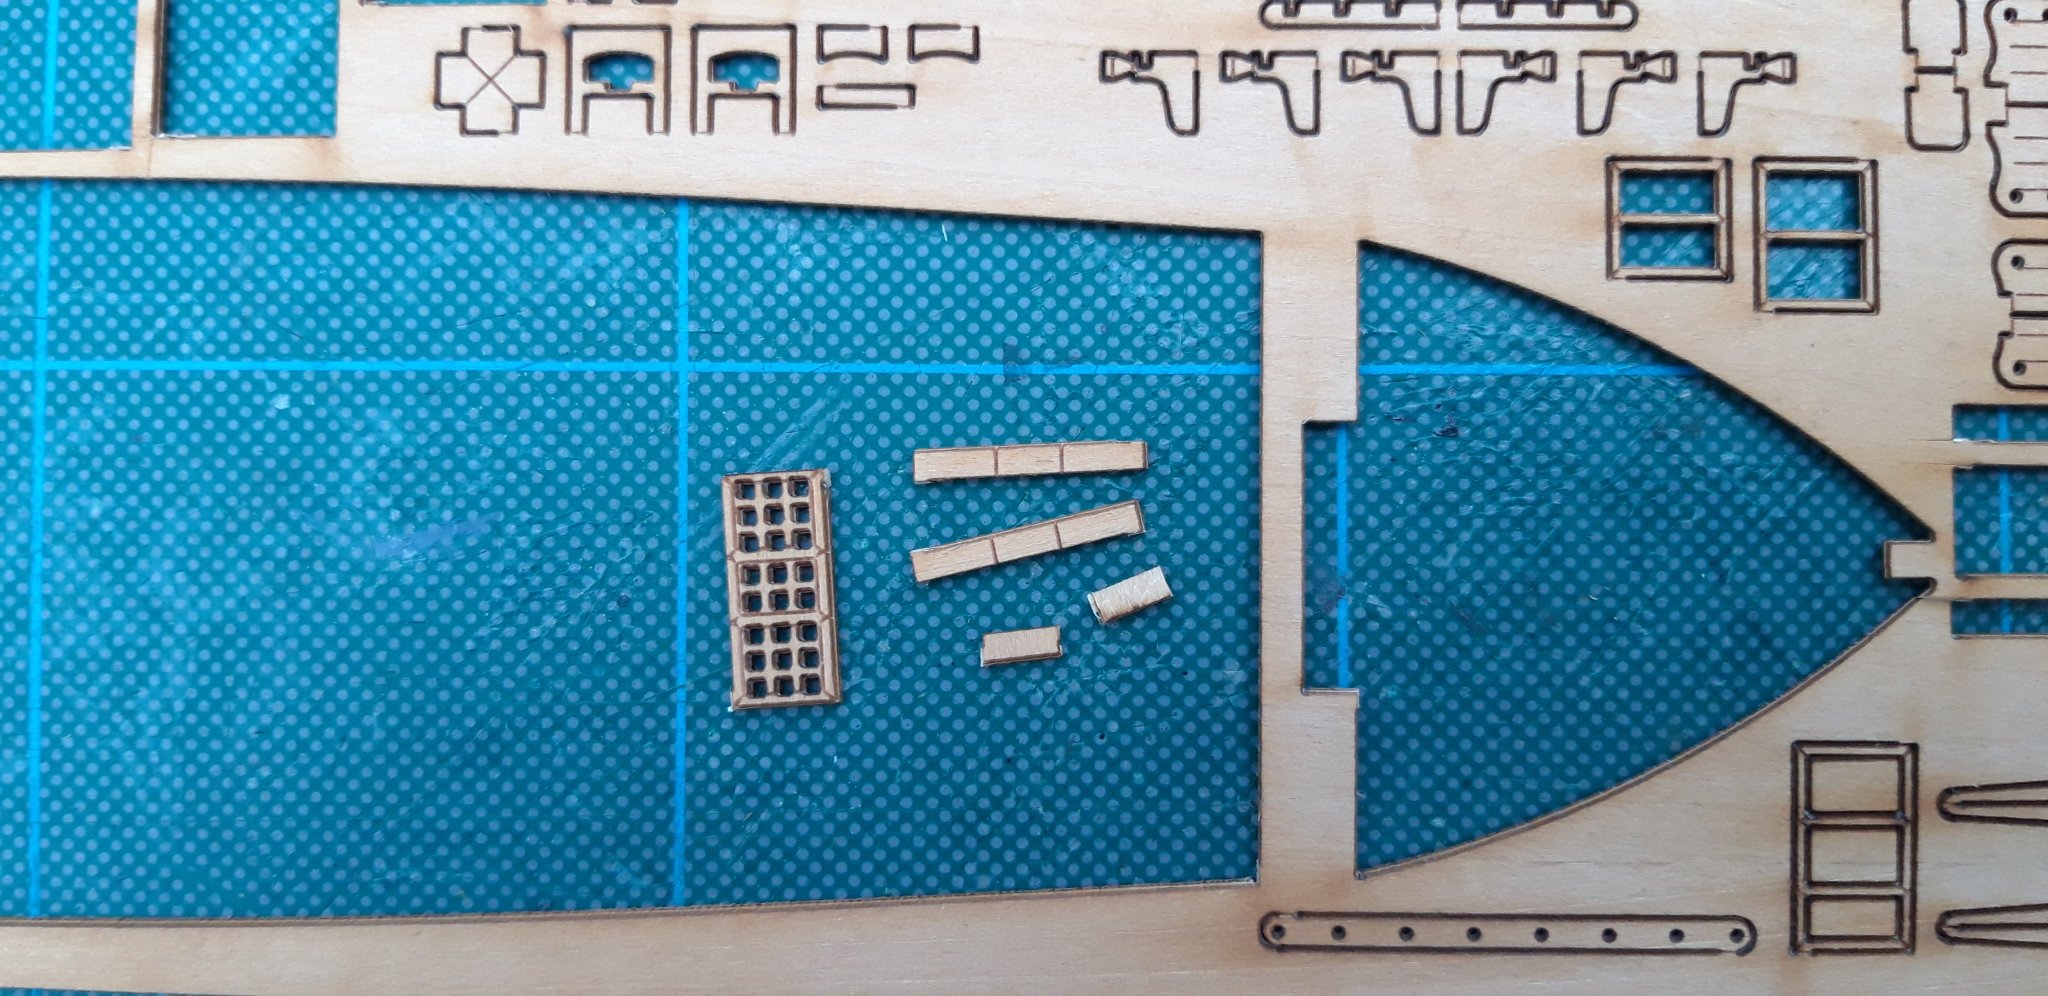
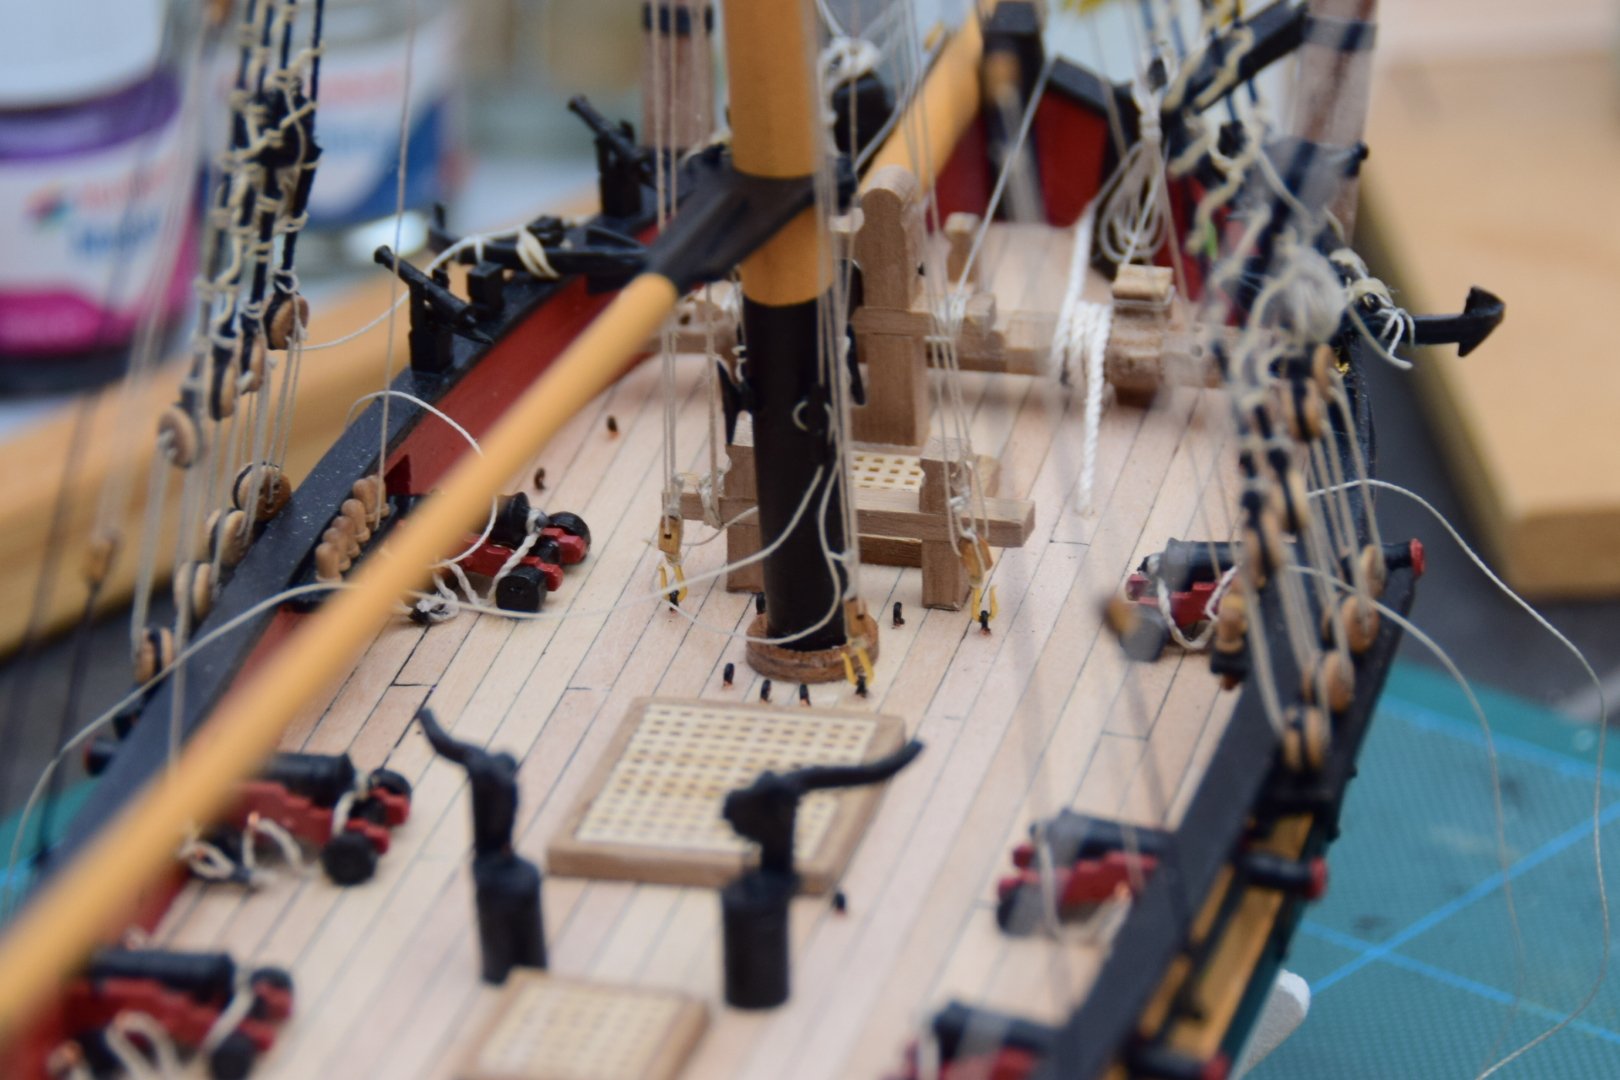
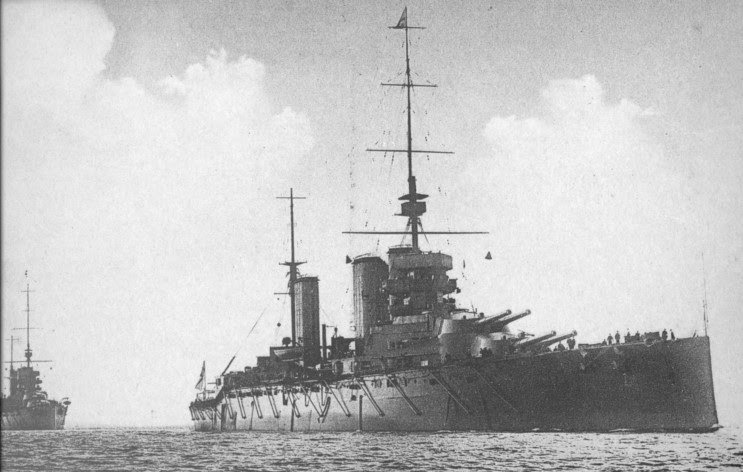
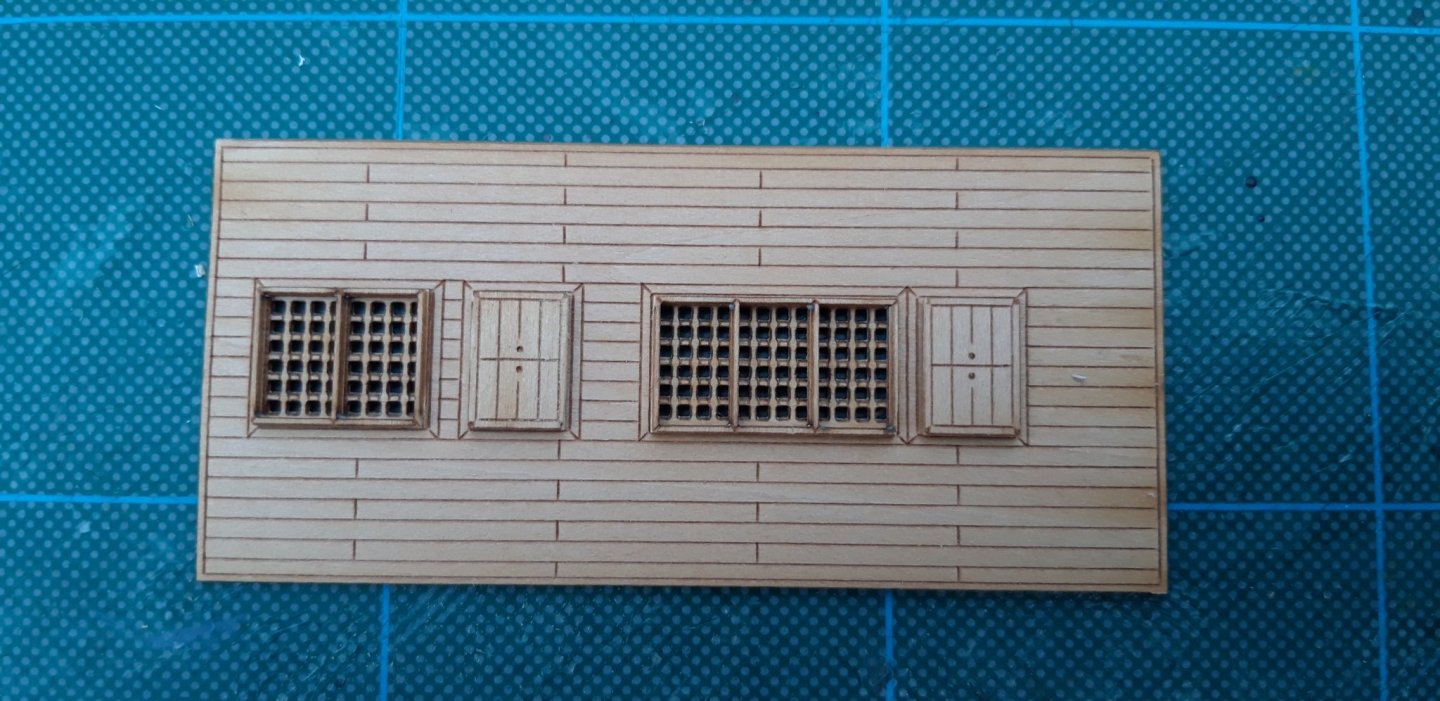
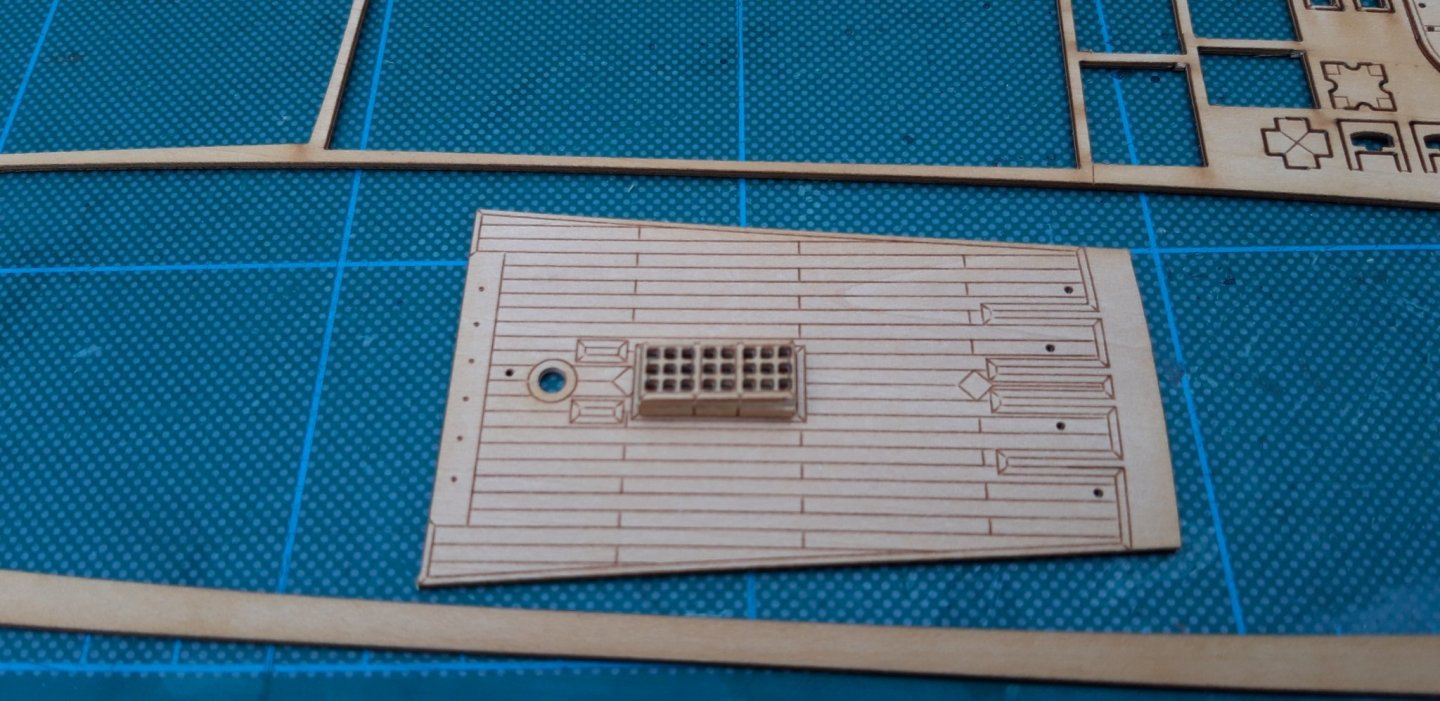
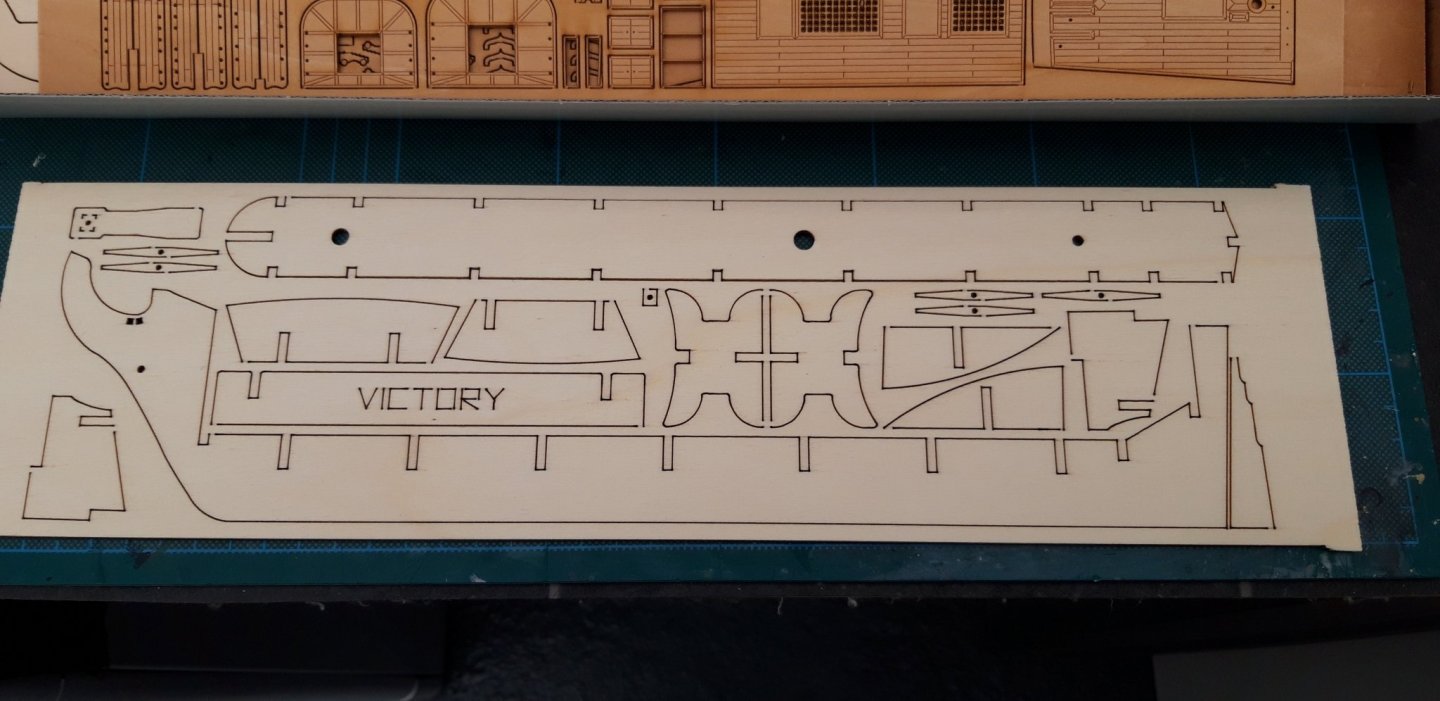
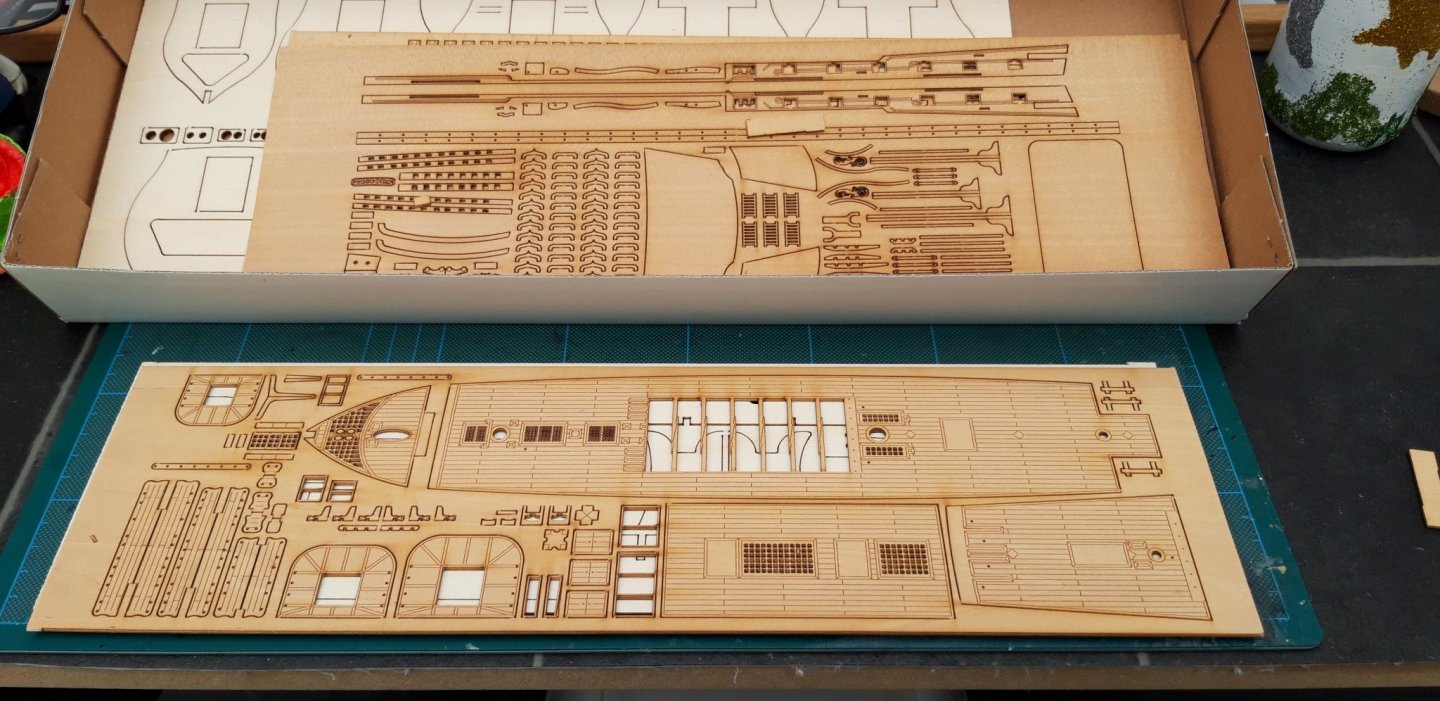
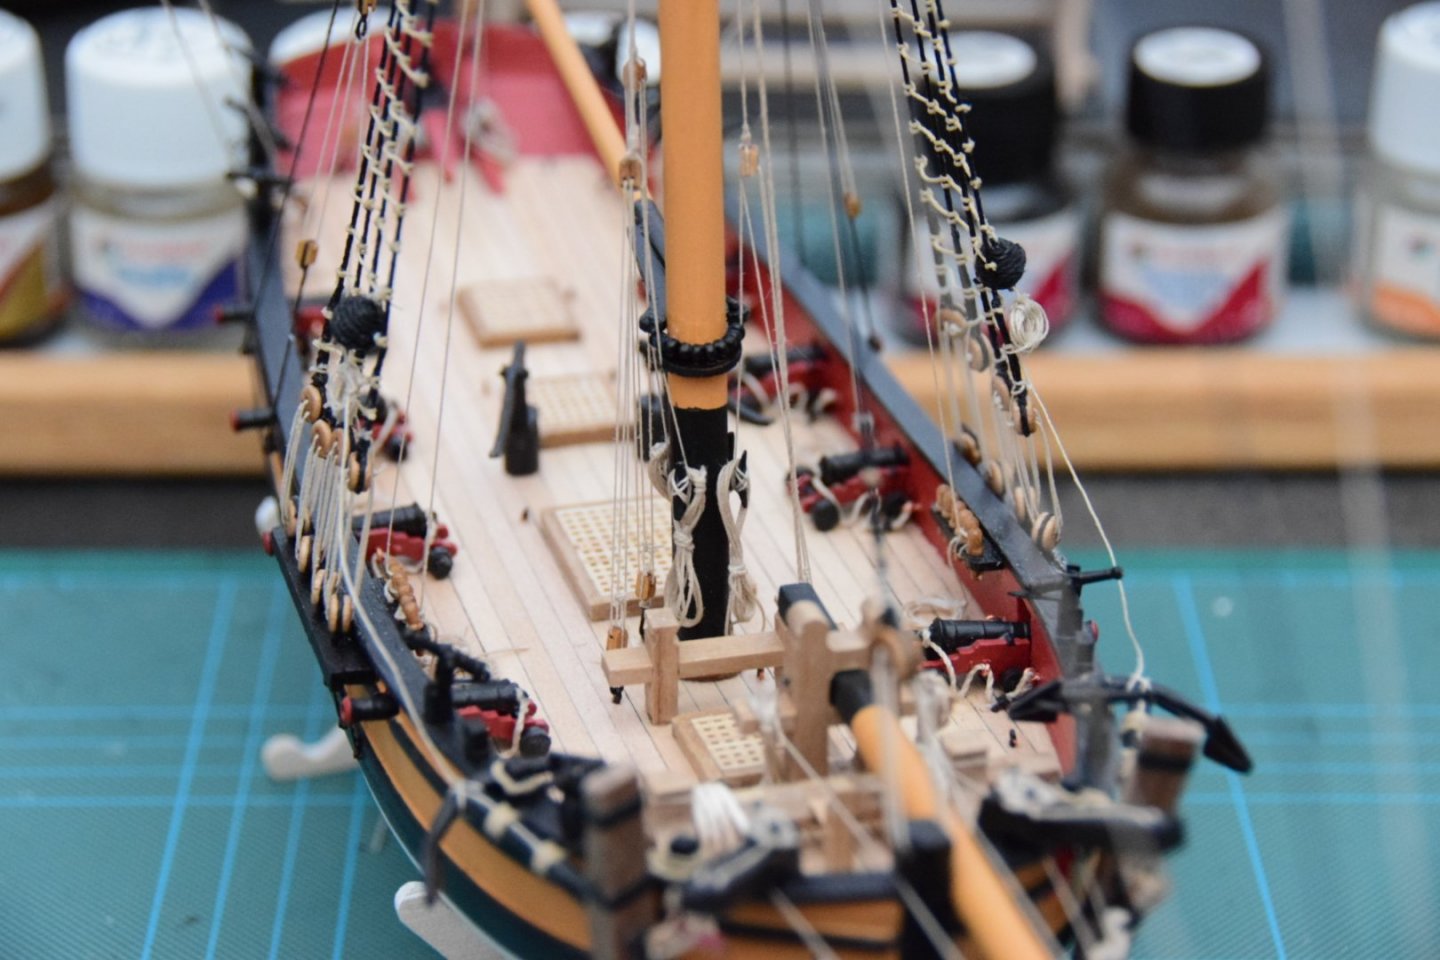
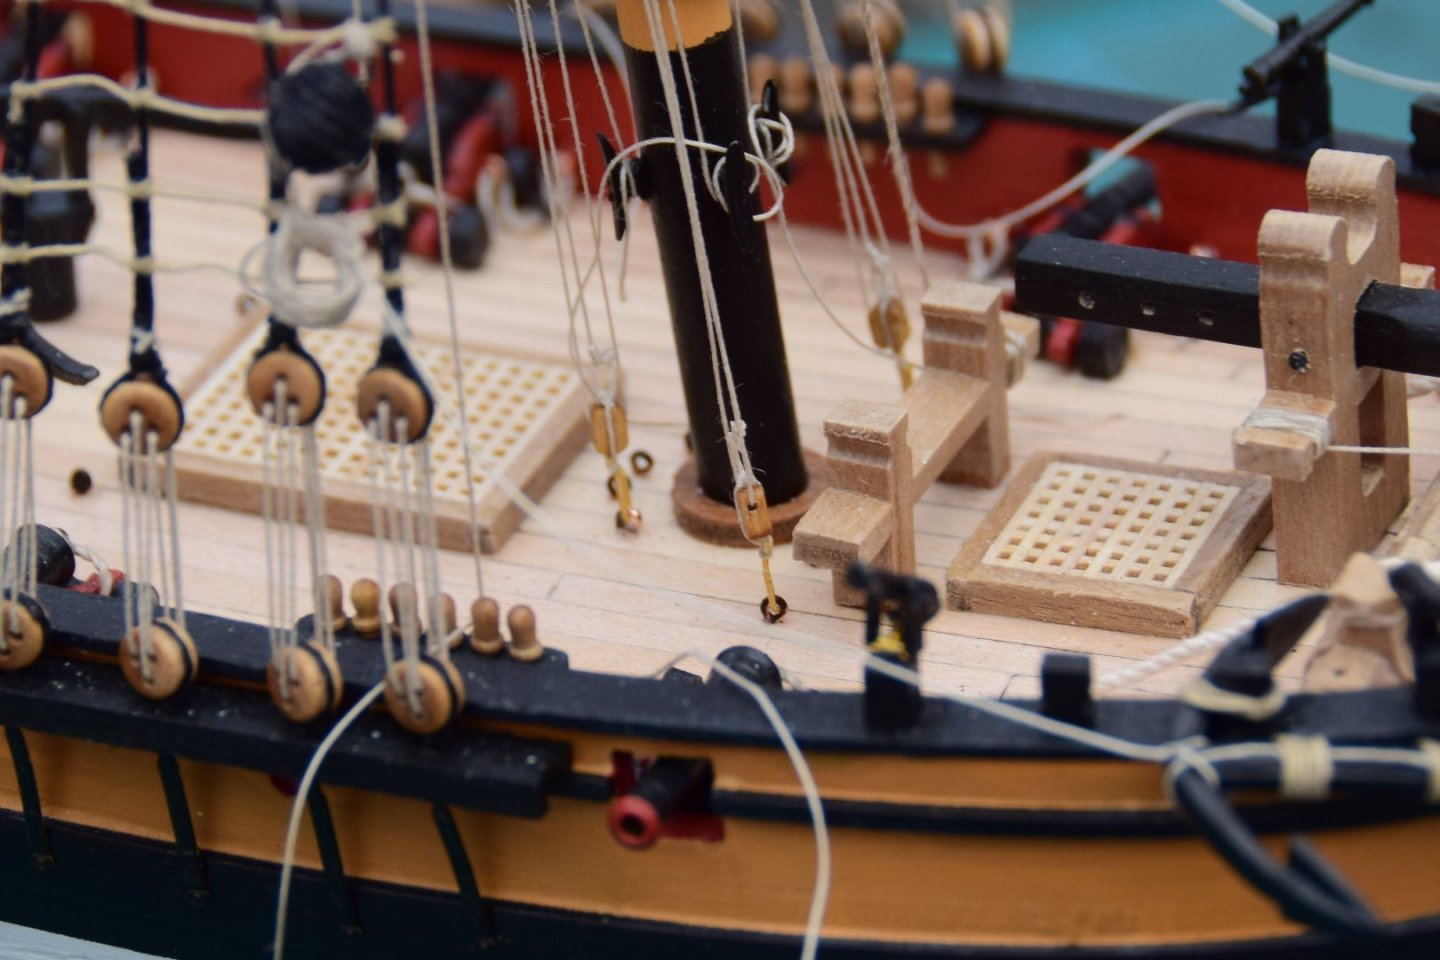
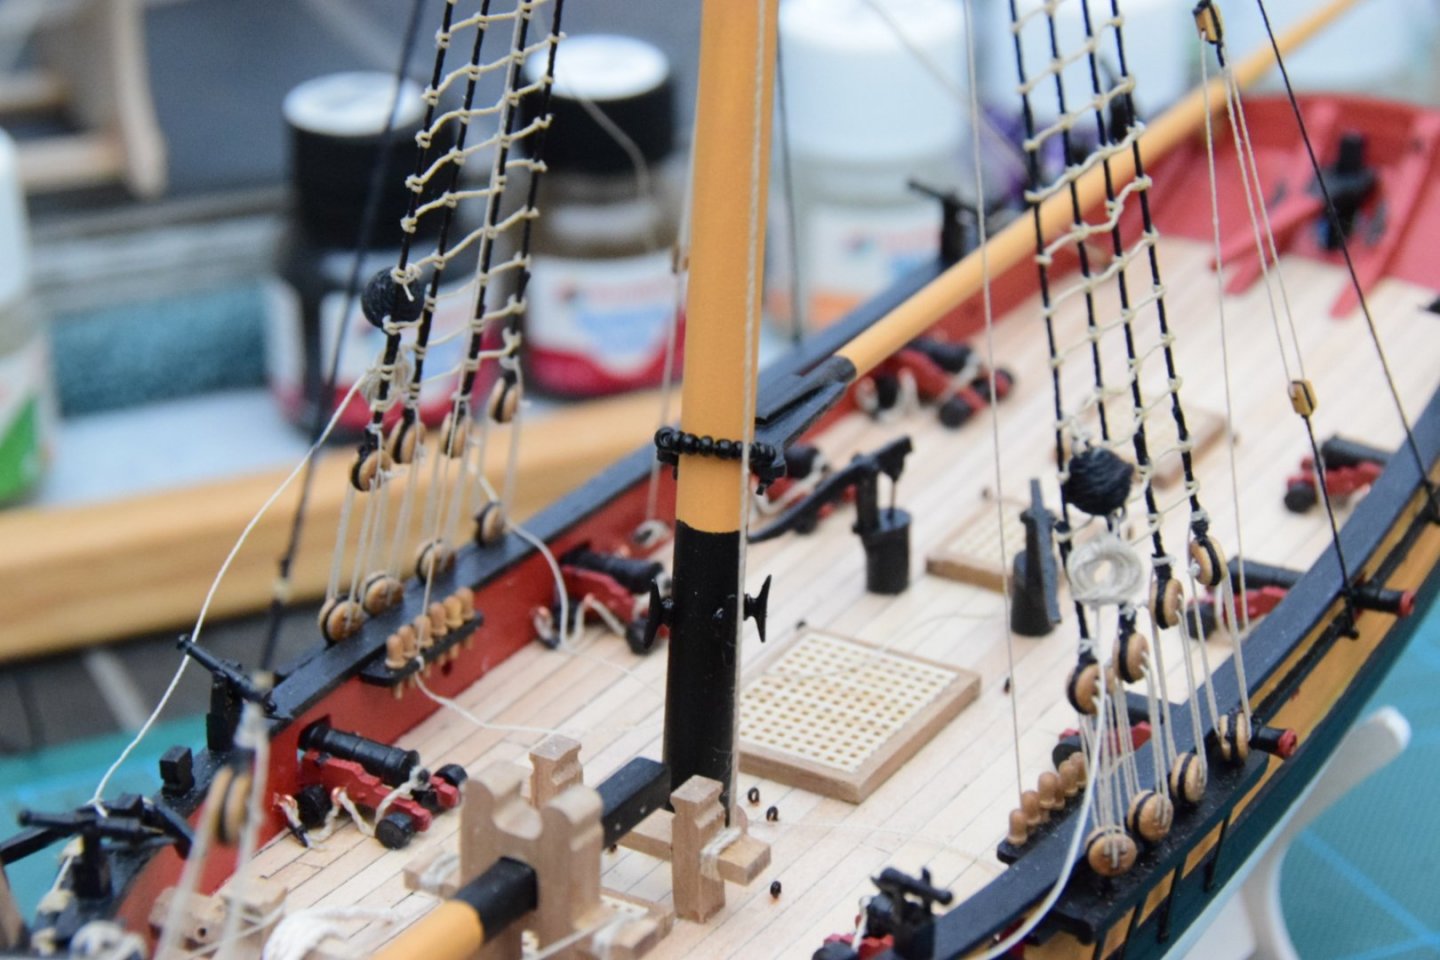
 Hi all, Thanks for your wisdom Rick, appreciated. Just a quick session this morning to investigate the decks and hatches. Again l have to say the laser cutting is realy quite good. Here is the lower deck removed from the framework. Very little tidying up required l am pleased to report. The framework for the Gratings is super fine and very delicate indeed. It requires the finest of scalpel blades and several light pressure cuts to successfully remove them. Use anything heavier at your peril. l also used a very fine grade paper for sanding. l used tiny amounts of wood glue on the grating as l really do need some wiggle room here. CA would certainly be out of the question. None of the Gratings are glued in place yet, just placed in position, neither are the decks, although the bulkheads are. l hope to be able to get some light wood for the filler blocks this morning which means l can crack on with the hull after lunch. Best wishes as always, The Lazy Saint. Session. Time. Total. 02. 1 hr. 4 hrs.
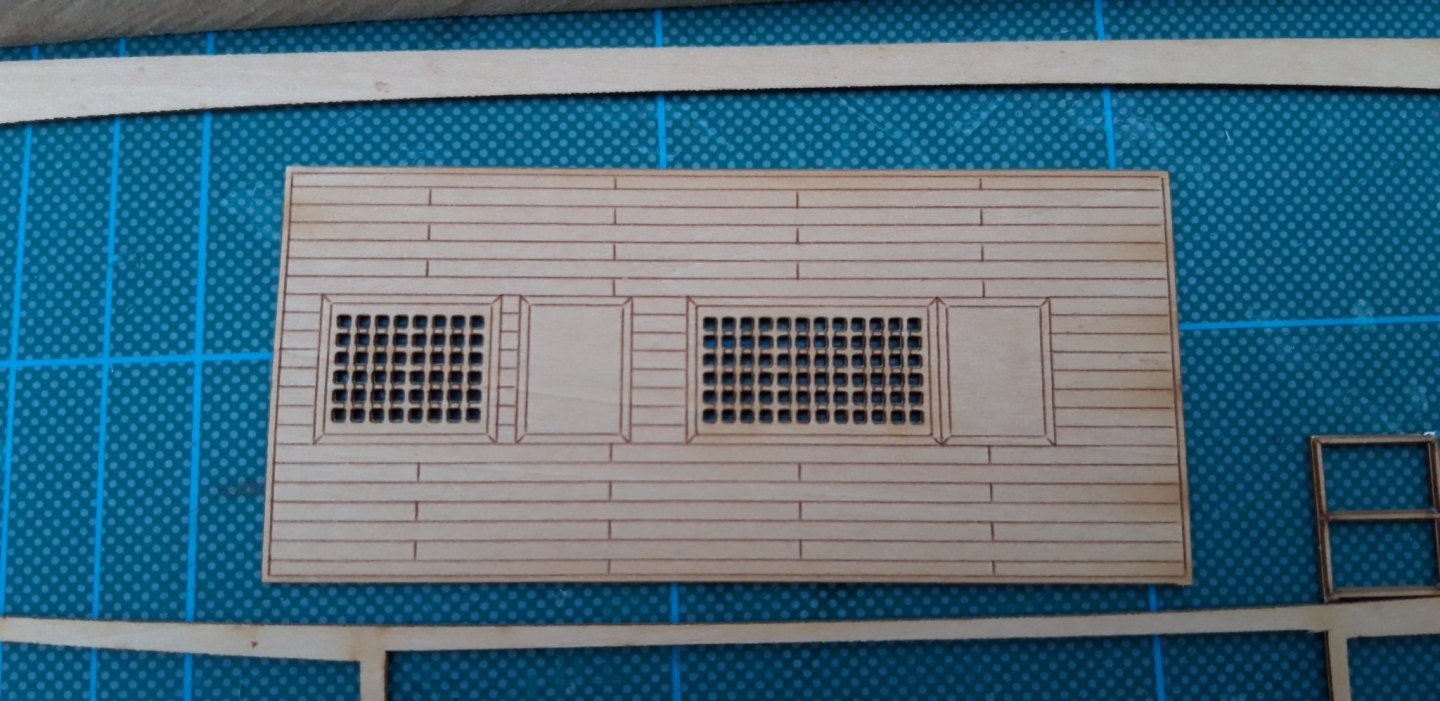


-
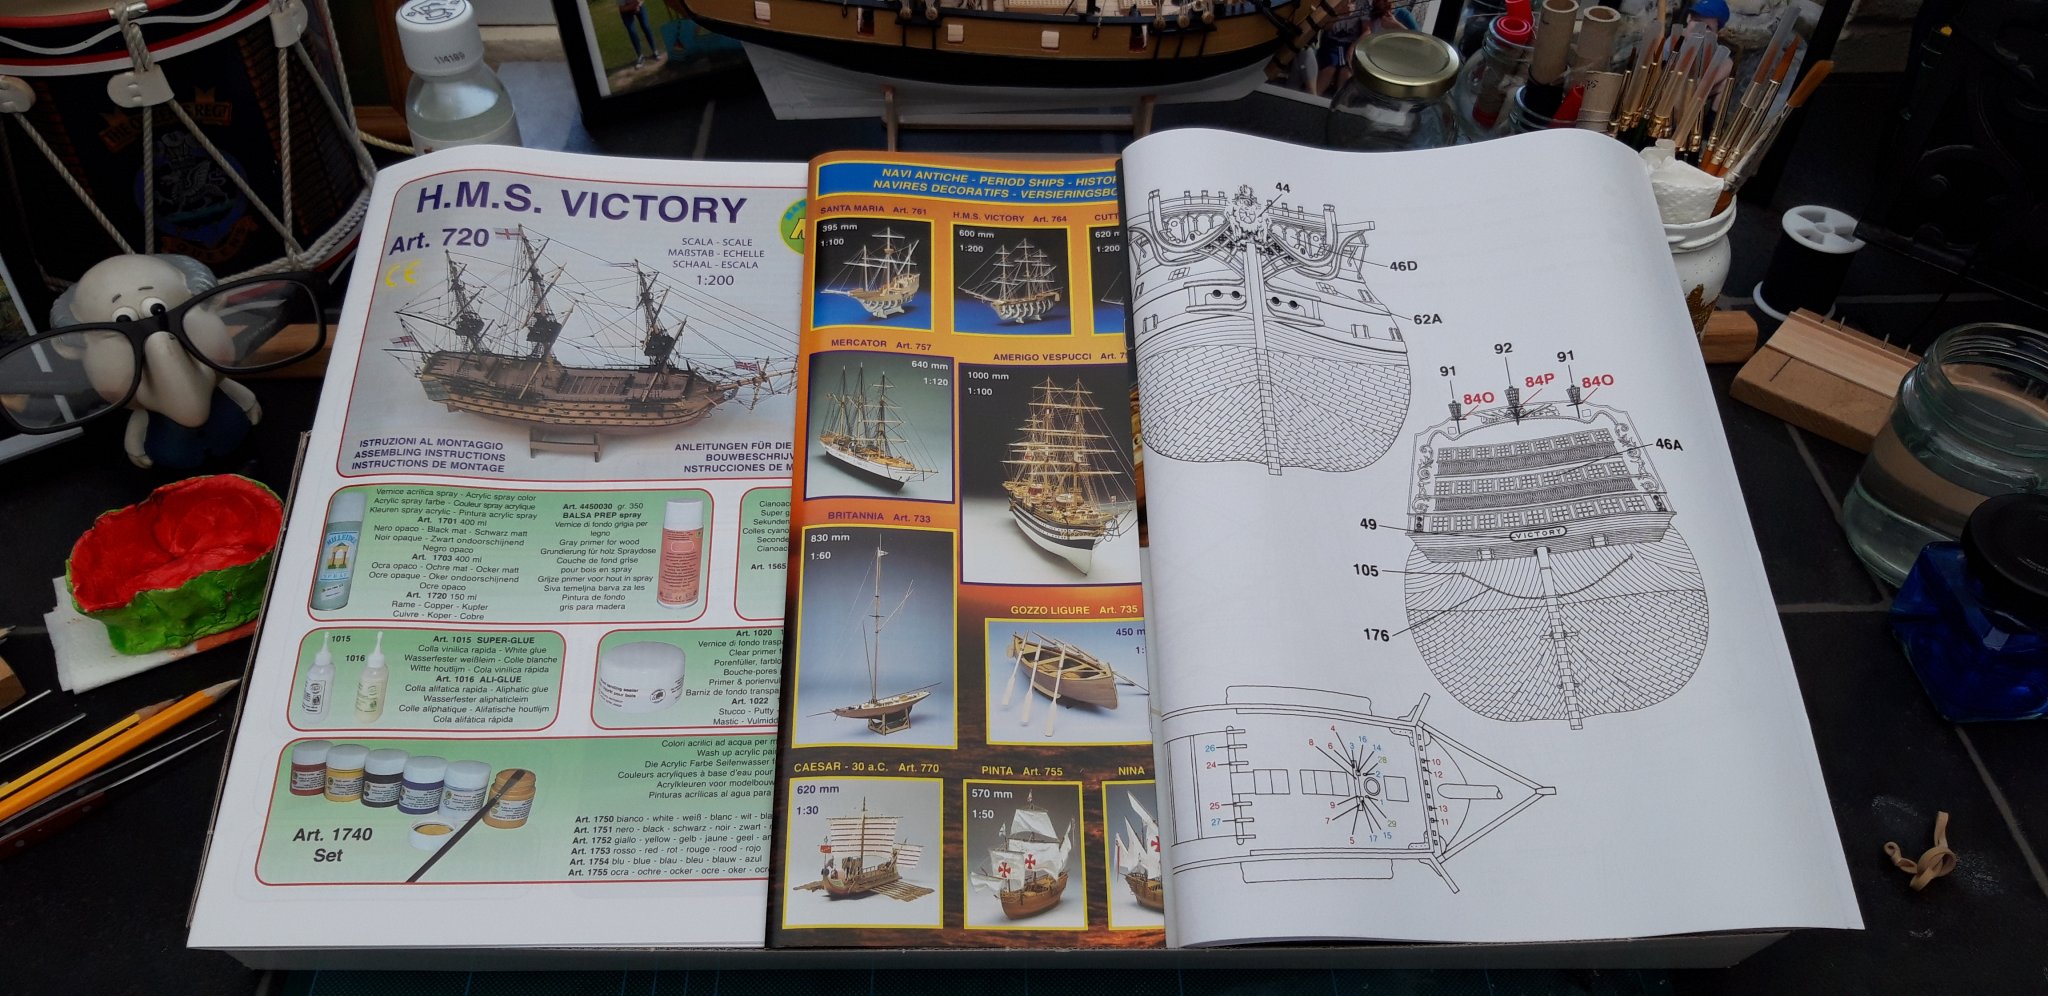
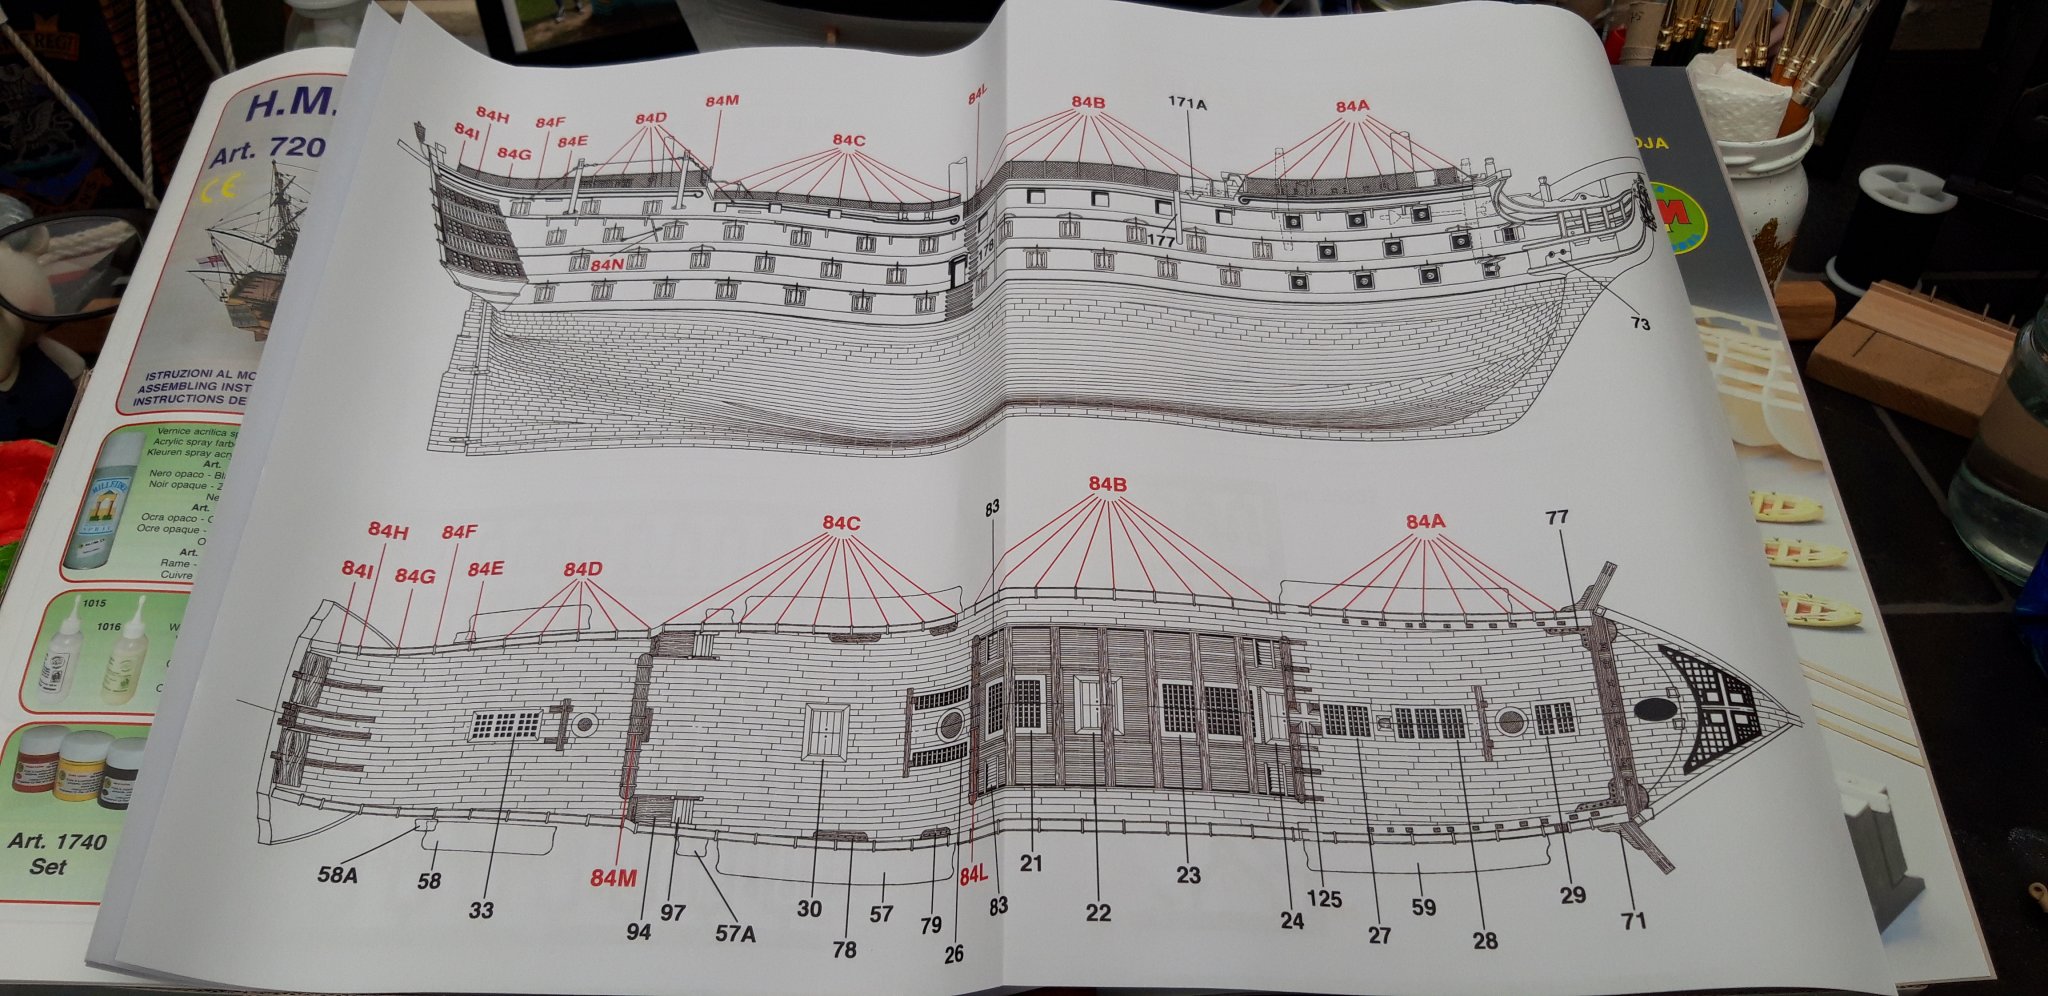
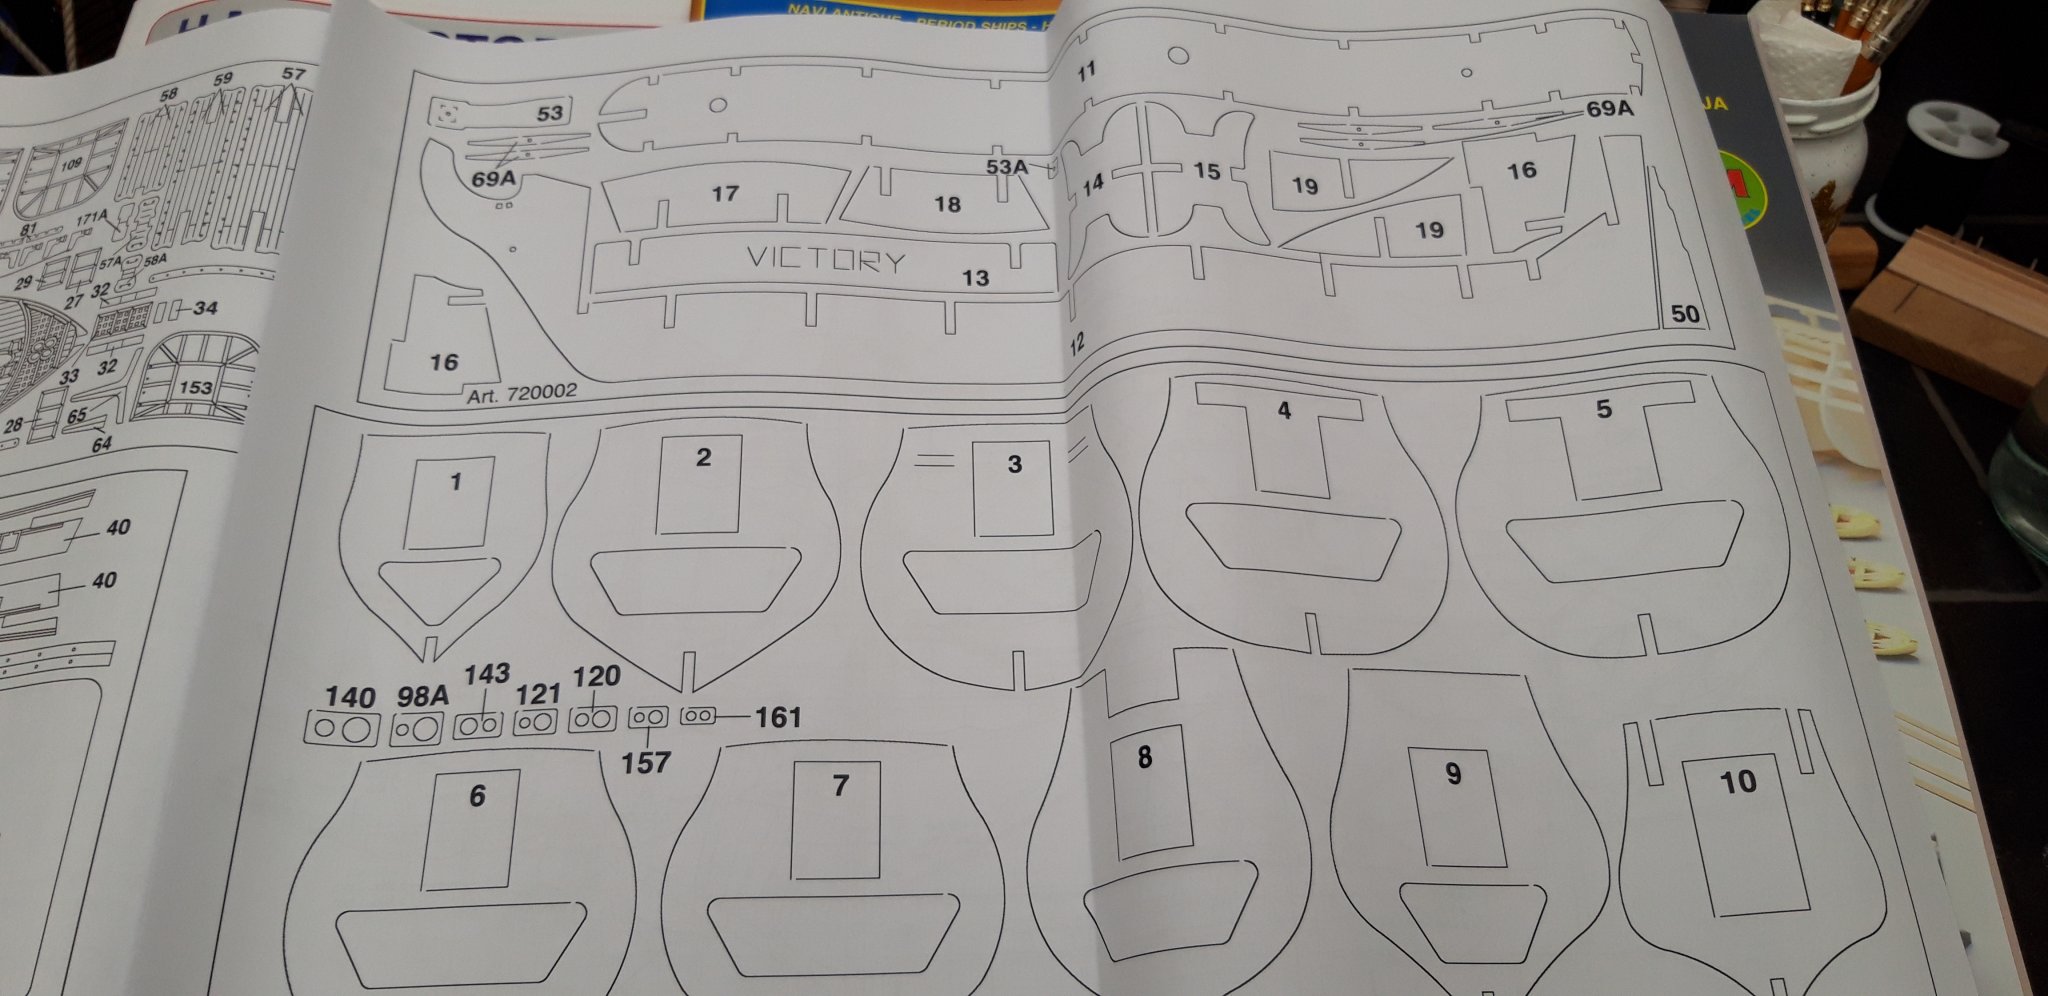
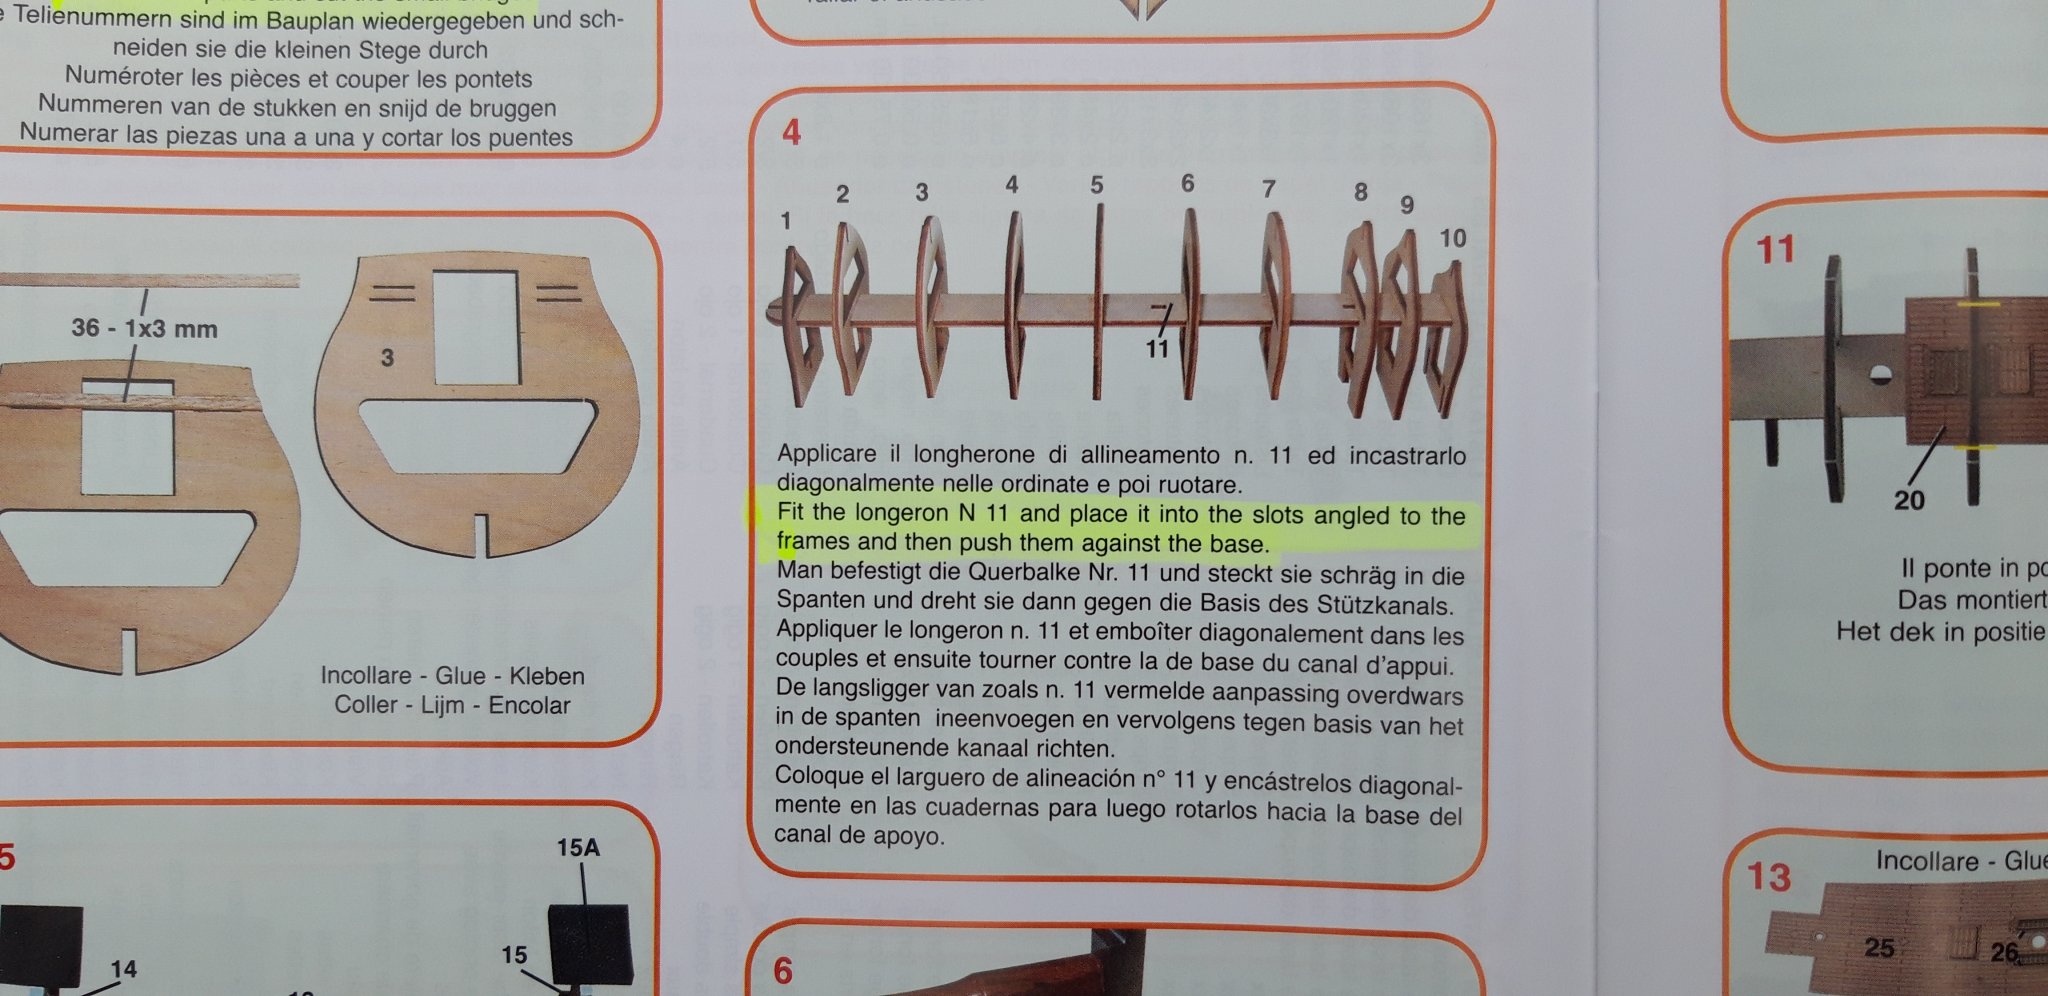
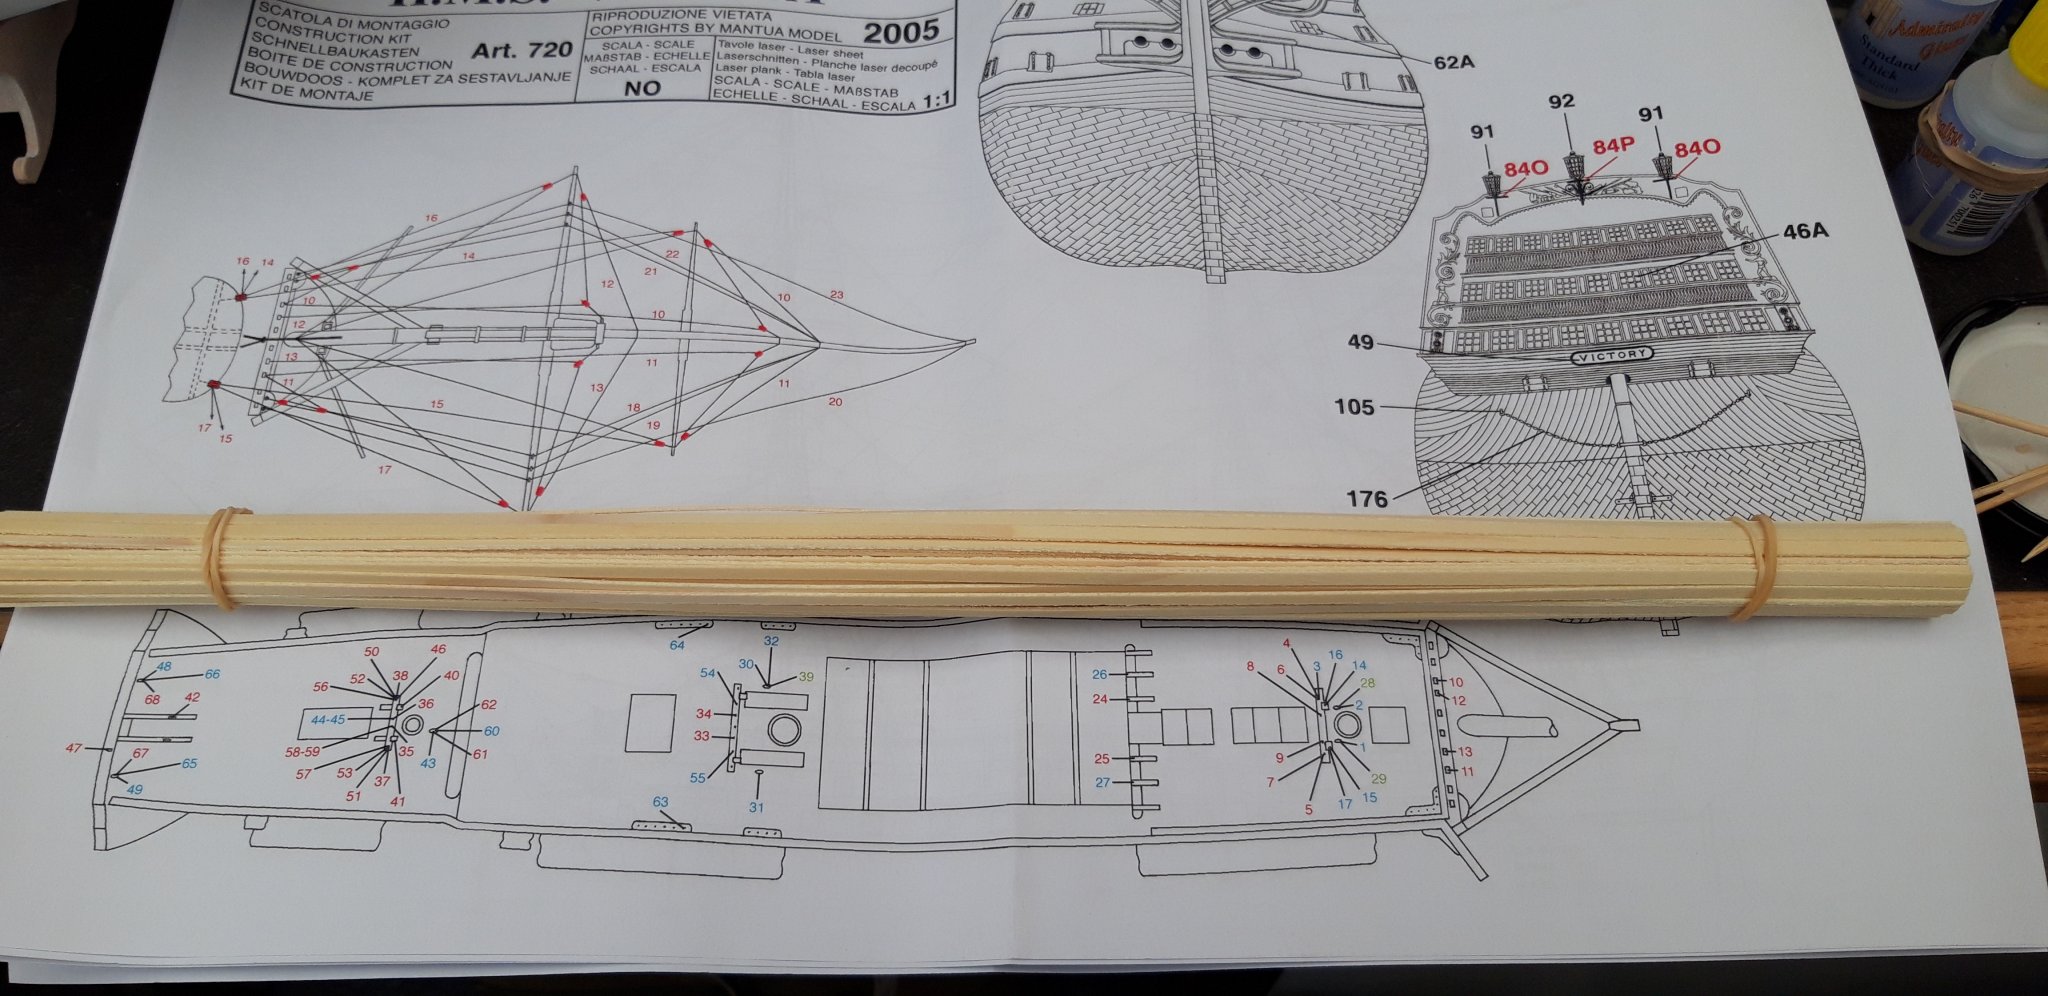
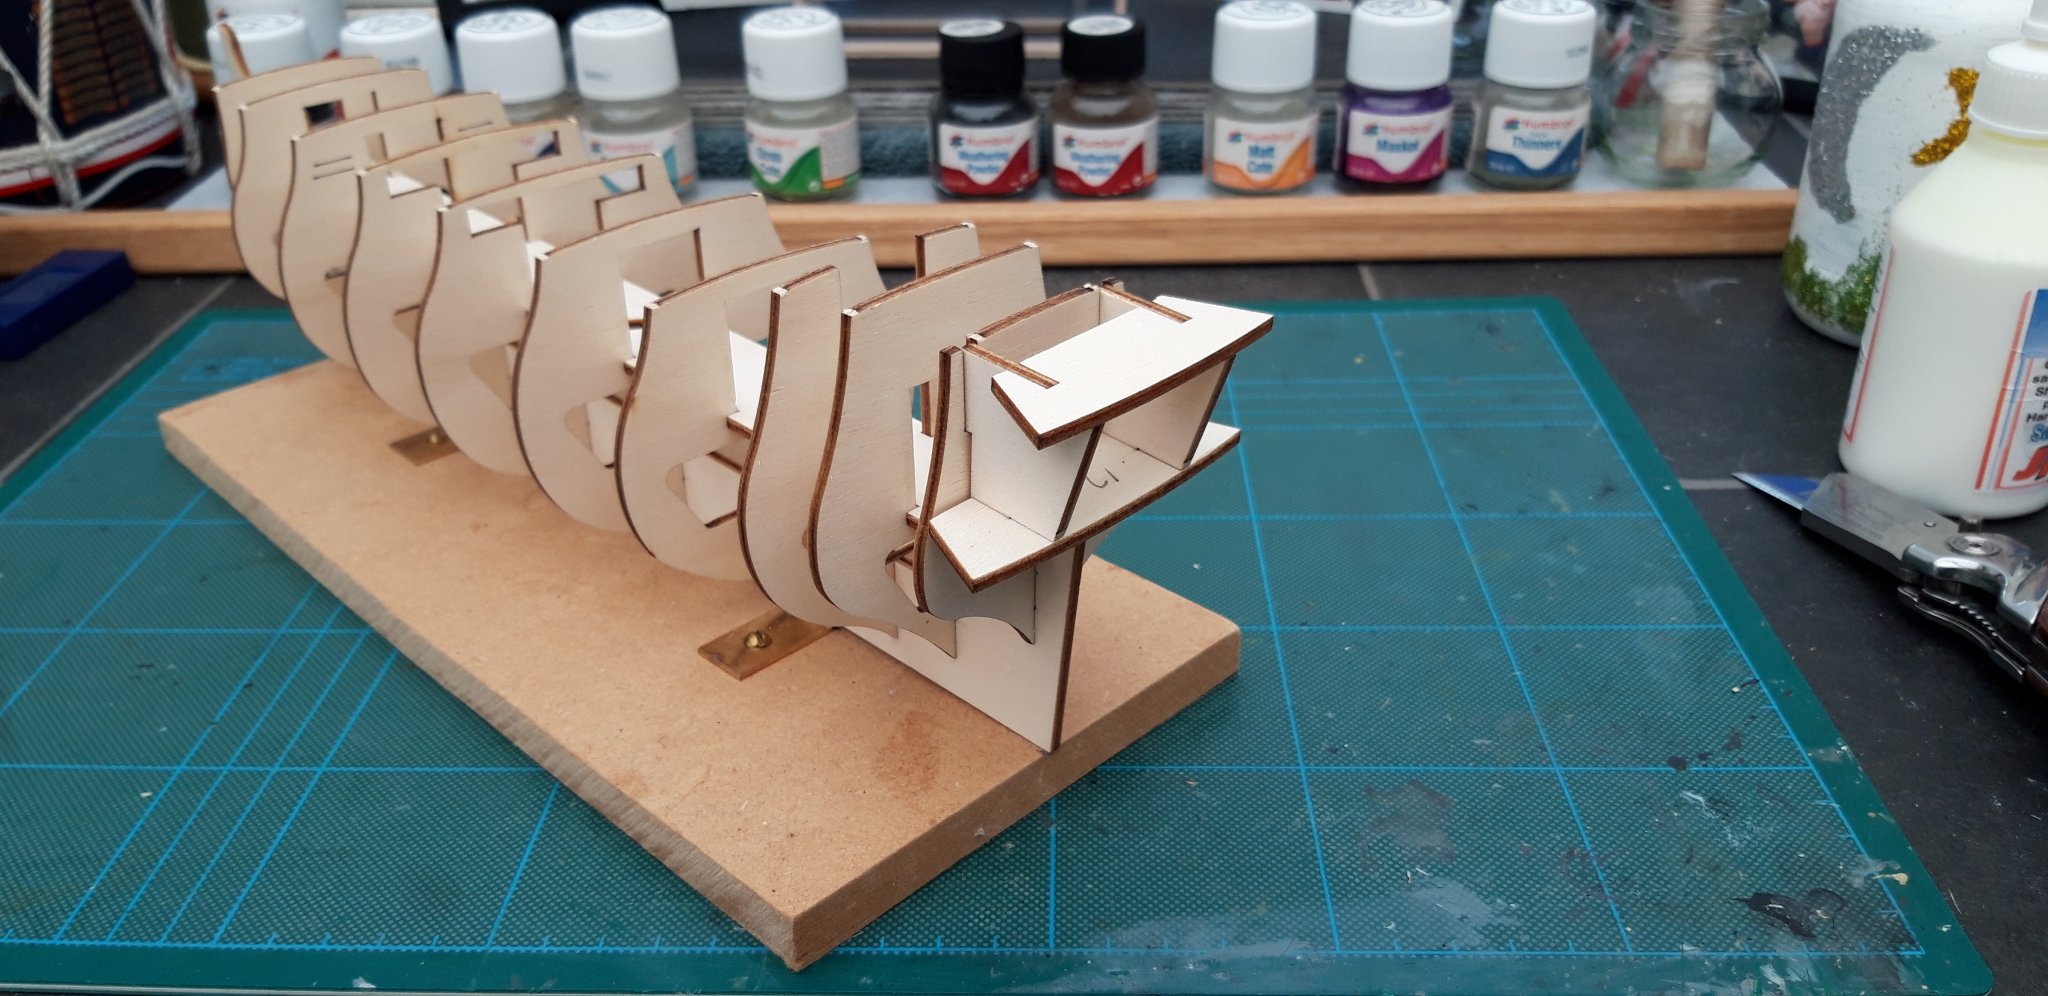
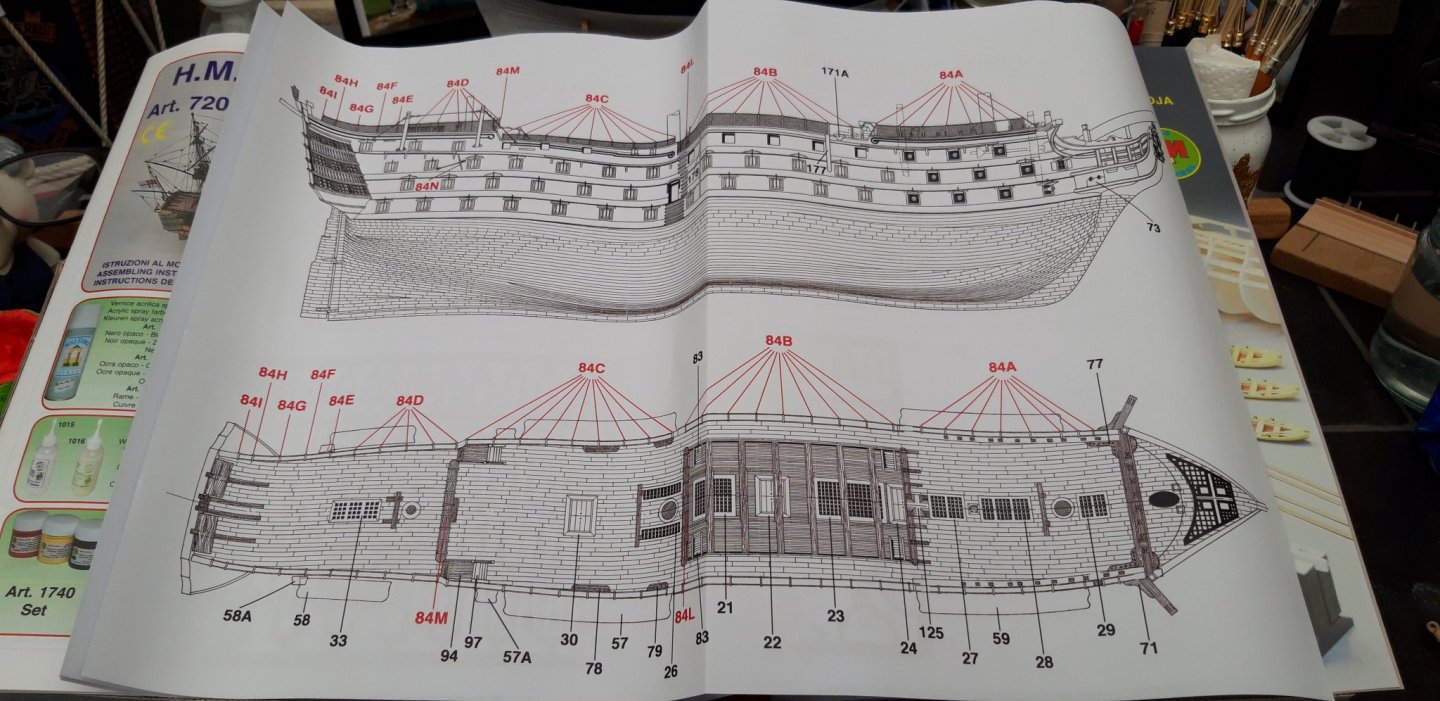
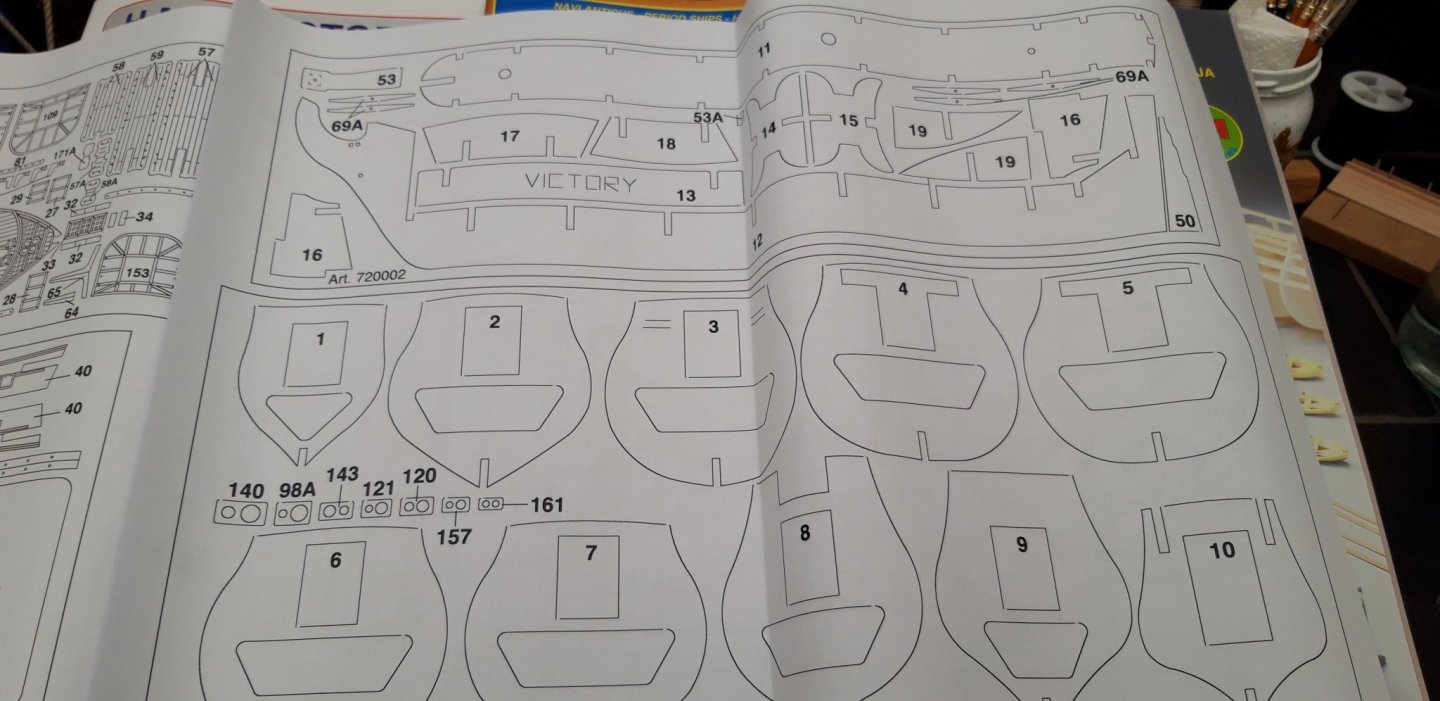
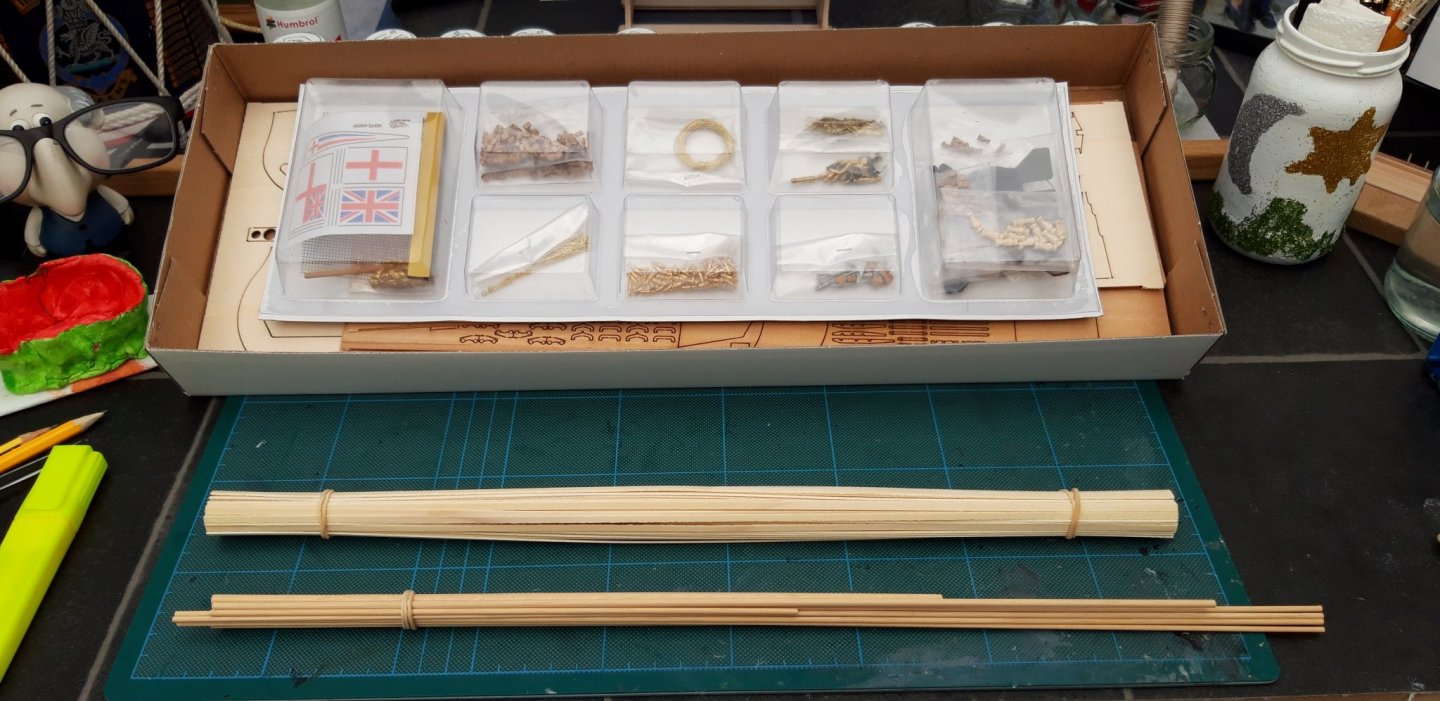
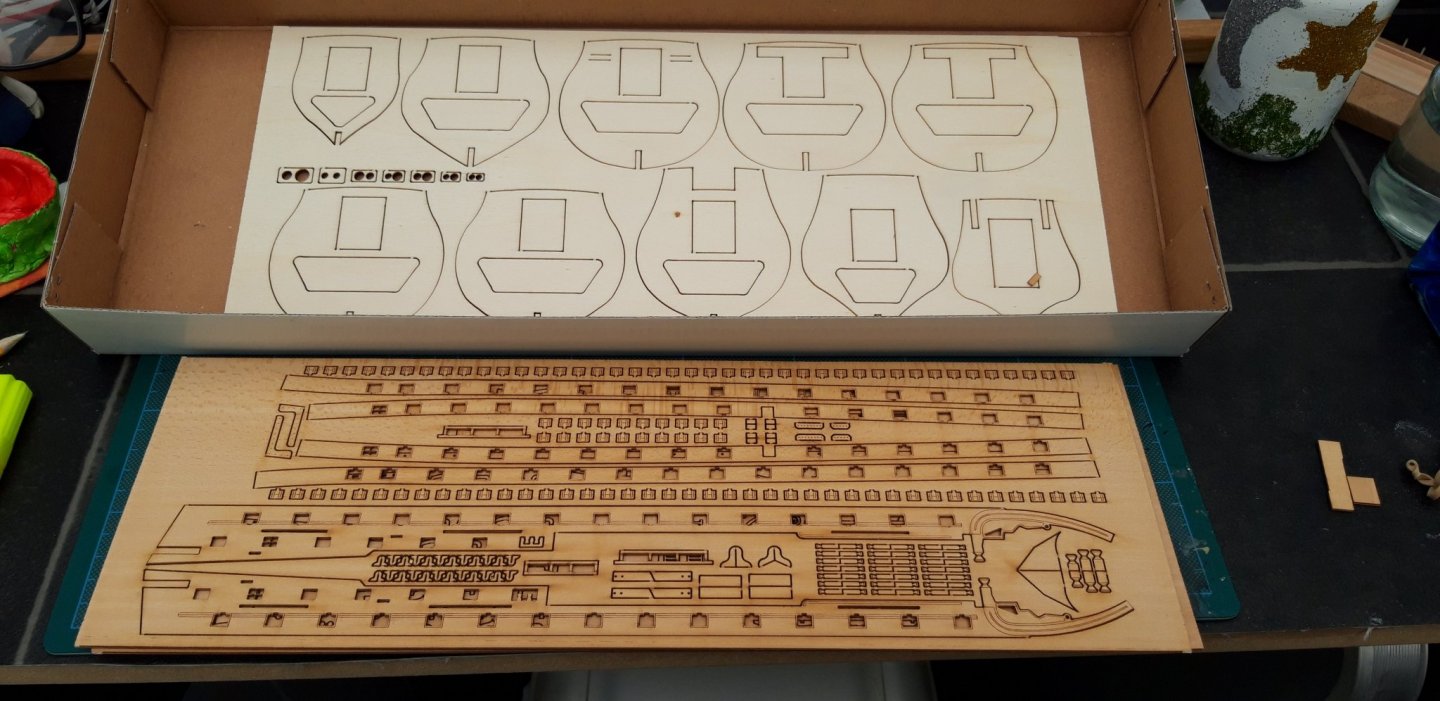
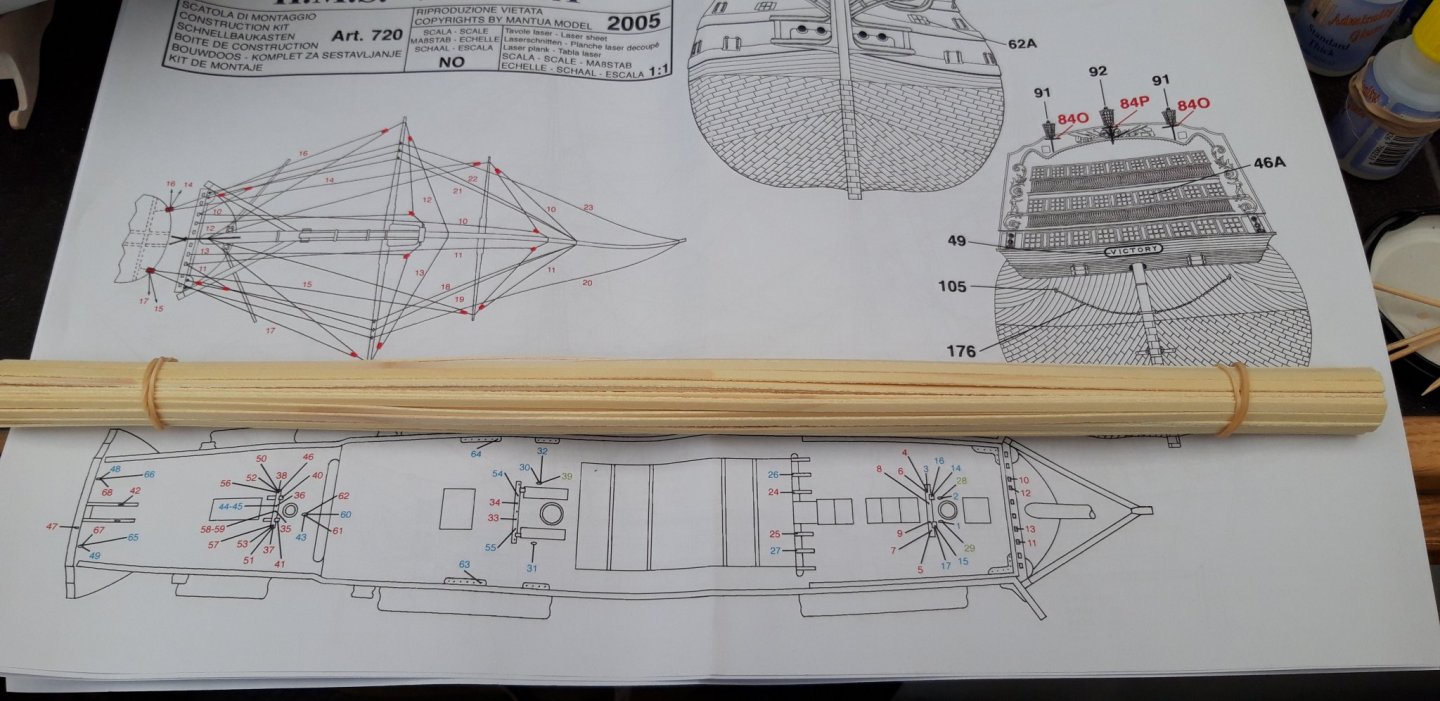
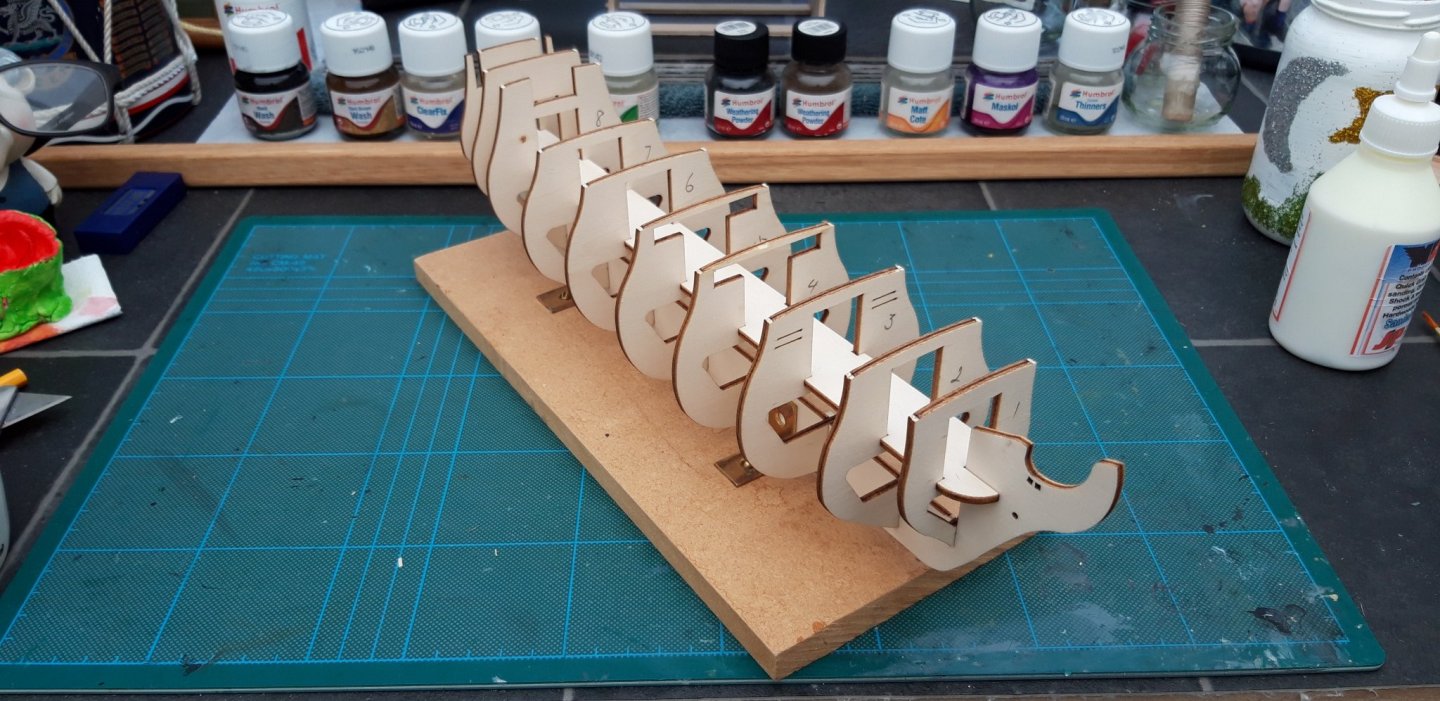
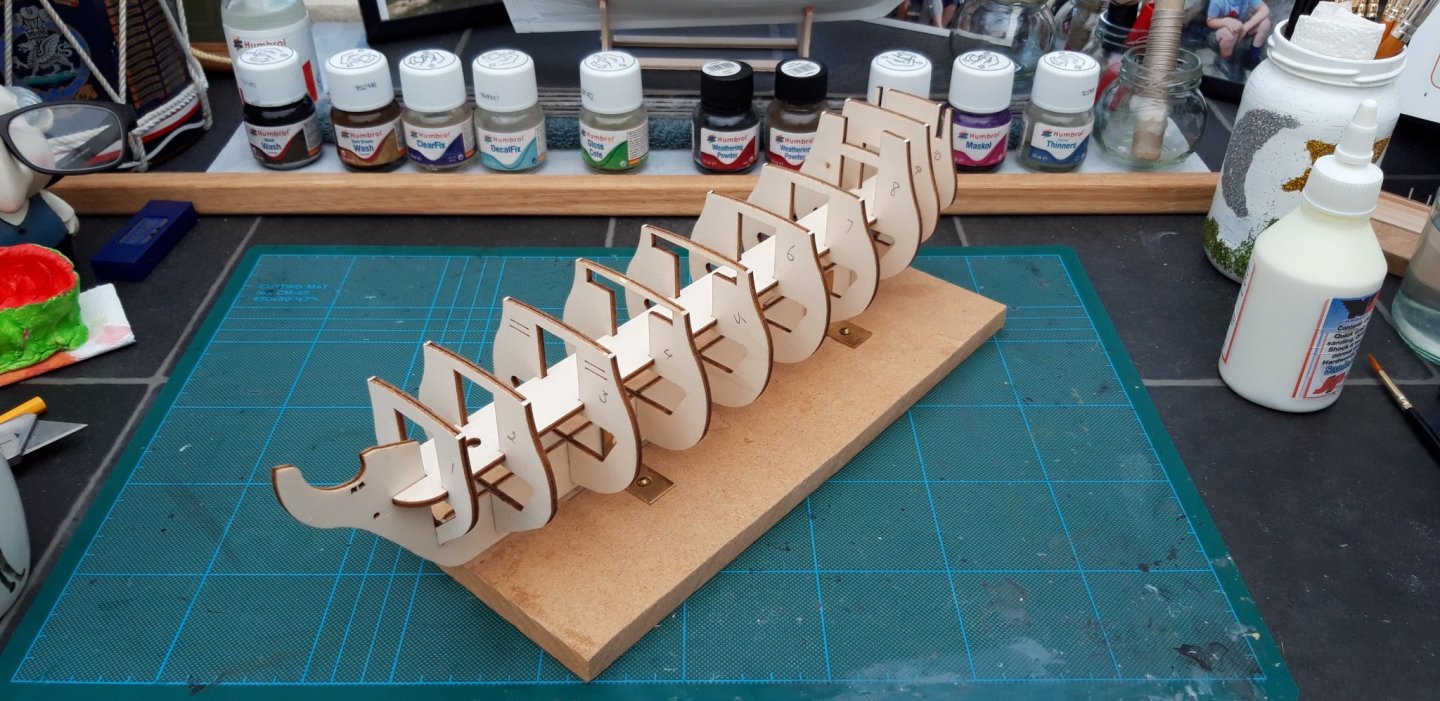
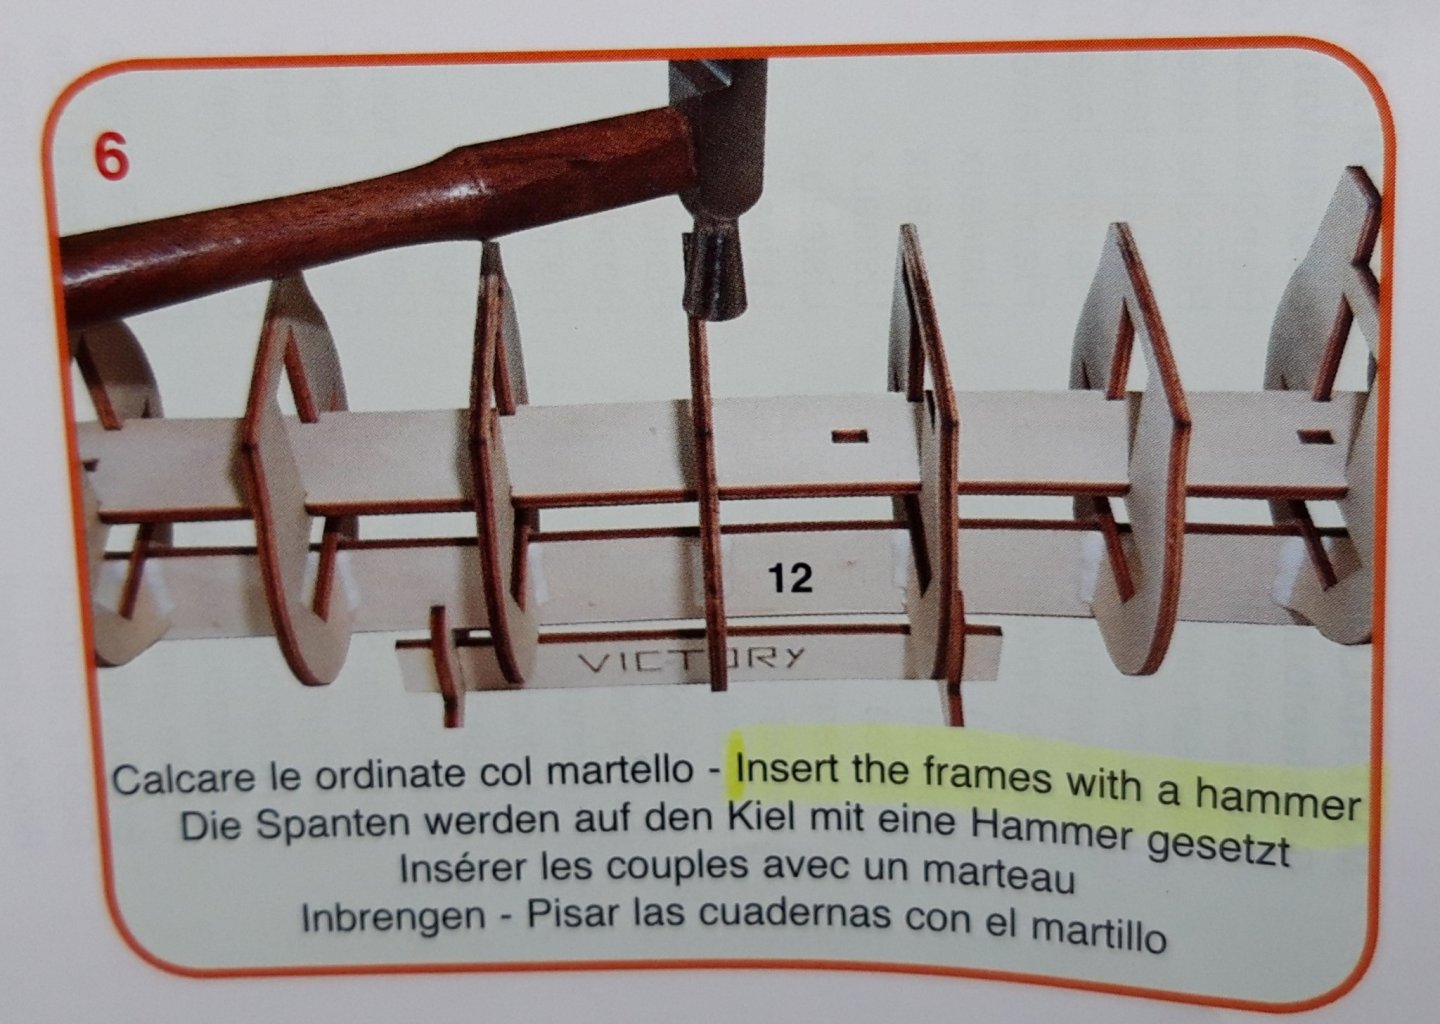
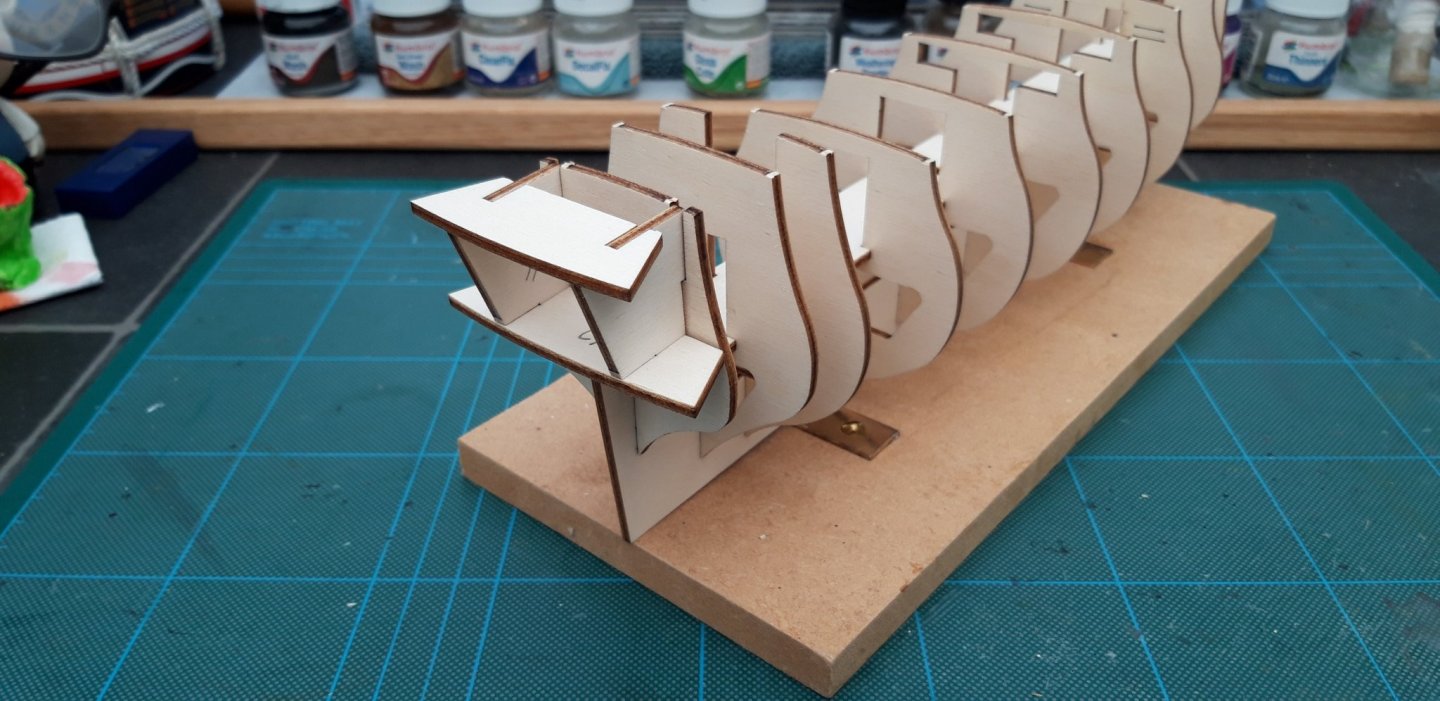
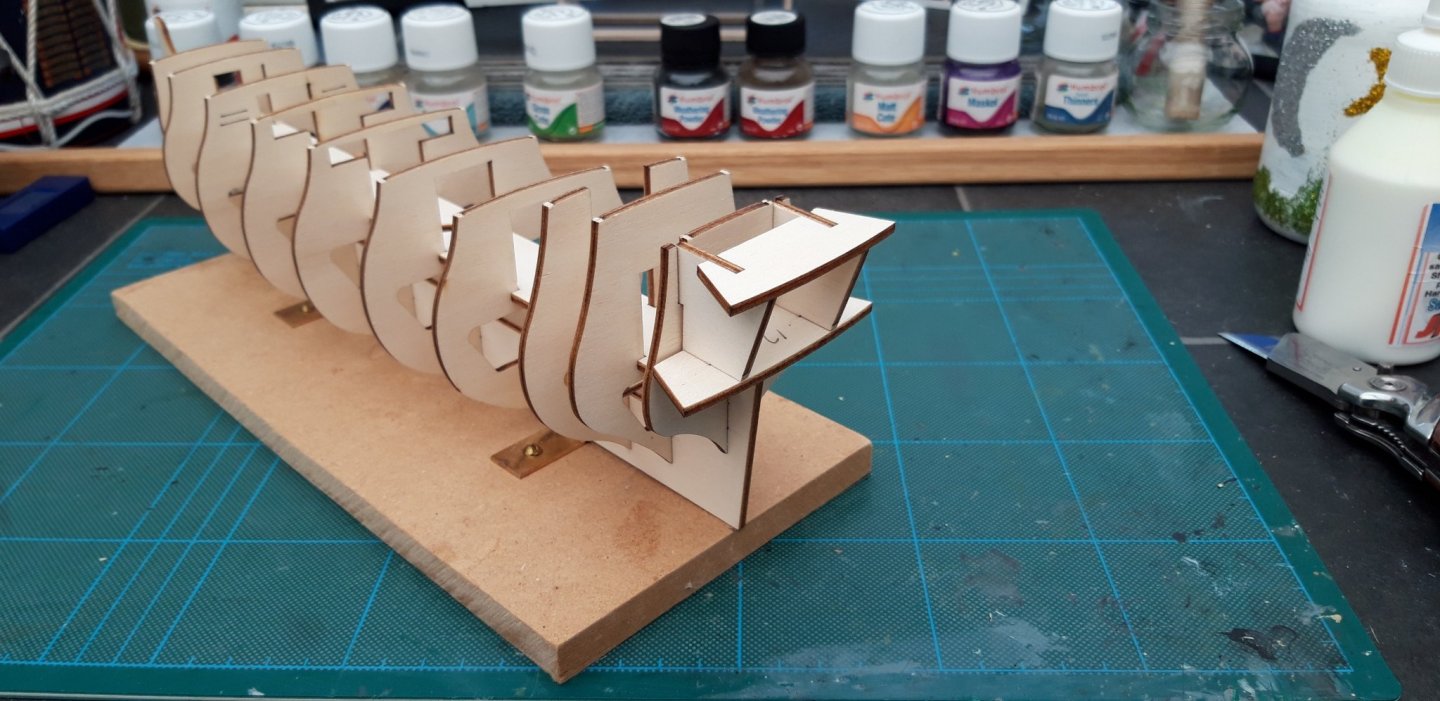
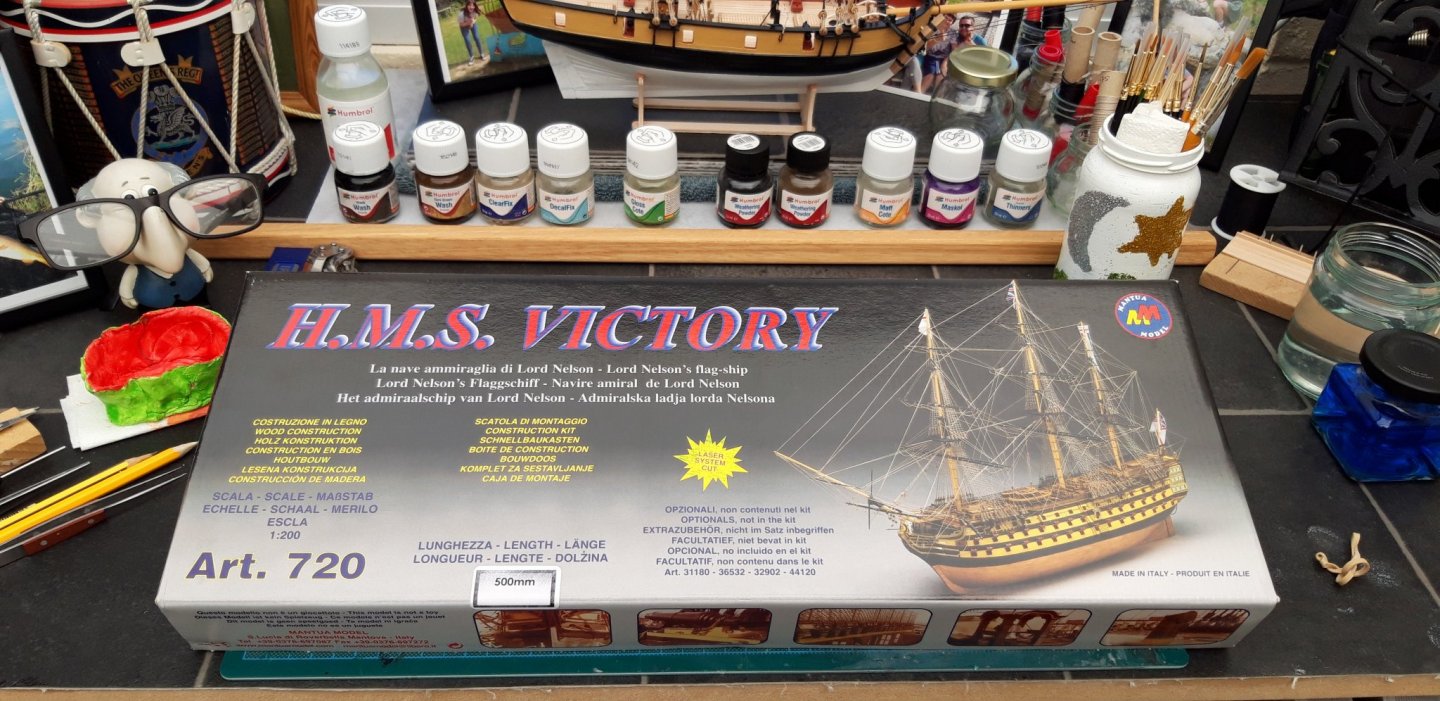
Hi all, Here l am once again with my third wooden ship build. I have chosen this particular build for two main reasons, firstly, l would like to build HMS Victory but have not the room to display one of the large models l have seen, good grief, the Caldercraft example is bigger than the wife. The second reason is that I like the idea of posting the first completed build log for this particular model, l might be wrong, but l don't think one has been completed. The postman delivered my package today and l started on it immediately. I must admit to being a little apprehensive as l was a bit concerned as to why no other example has been posted, was it a poorly designed model, was the wood of poor quality, or perhaps, as someone remarked at the end of their attempt "it's un buildable". l will see, whatever the reason it will be a great challenge. And here she is, the box art is very nice even if what l find inside isn't. Well the paperwork, instructions and plans look great, so far so good. They look quite detailed and seem straightforward enough at first sight, although there seems to be a lot of numbers and arrows. I expect it will be clear when l study them. The nice colour instruction book looks interesting, these pictures should help no end, as they say "a picture paints a thousand words" It is written in several languages so, to make things a bit easier, l shall go through first highlighting all the English wording. All the fixtures and fittings (for want of a better phrase) look good, although l haven't undone the individual packets. The laser cut plywood is as good as you could want and l am very pleased with it l must say. The strips of wood for the planking is of a disappointing standard. Now, is it a disappointing standard because the rest is so good....... l shall have to carefully sand each strip before l use it. Here you can see the framework dry fitted, it was a very fiddly task but each piece fitted nice and snug. I am glad to report that my first impression of the wood quality and cutting precision was correct and everything is straight and true. Ha ha, Mantua recommend inserting the frames with a hammer, l do not. The wood is, as l have already said, good quality but not very robust. The stern pieces also fit well. During my next session l will look at filler blocks and the tapering of bulkheads. Best wishes as always, The Lazy Saint. Session. Time. Total. 01. 3 hrs. 3 hrs.


-
Hi all, Last post here. I decided on the 1:200 Scale Victory build by Mantua as my next build. Best wishes as always, The Lazy Saint.
- 104 replies
-
- 3
-

-
- sherbourne
- caldercraft
- (and 1 more)
-
Very nicely done mugje, am l correct in thinking that is black paint and walnut stain? Best wishes as always, The Lazy Saint.
-
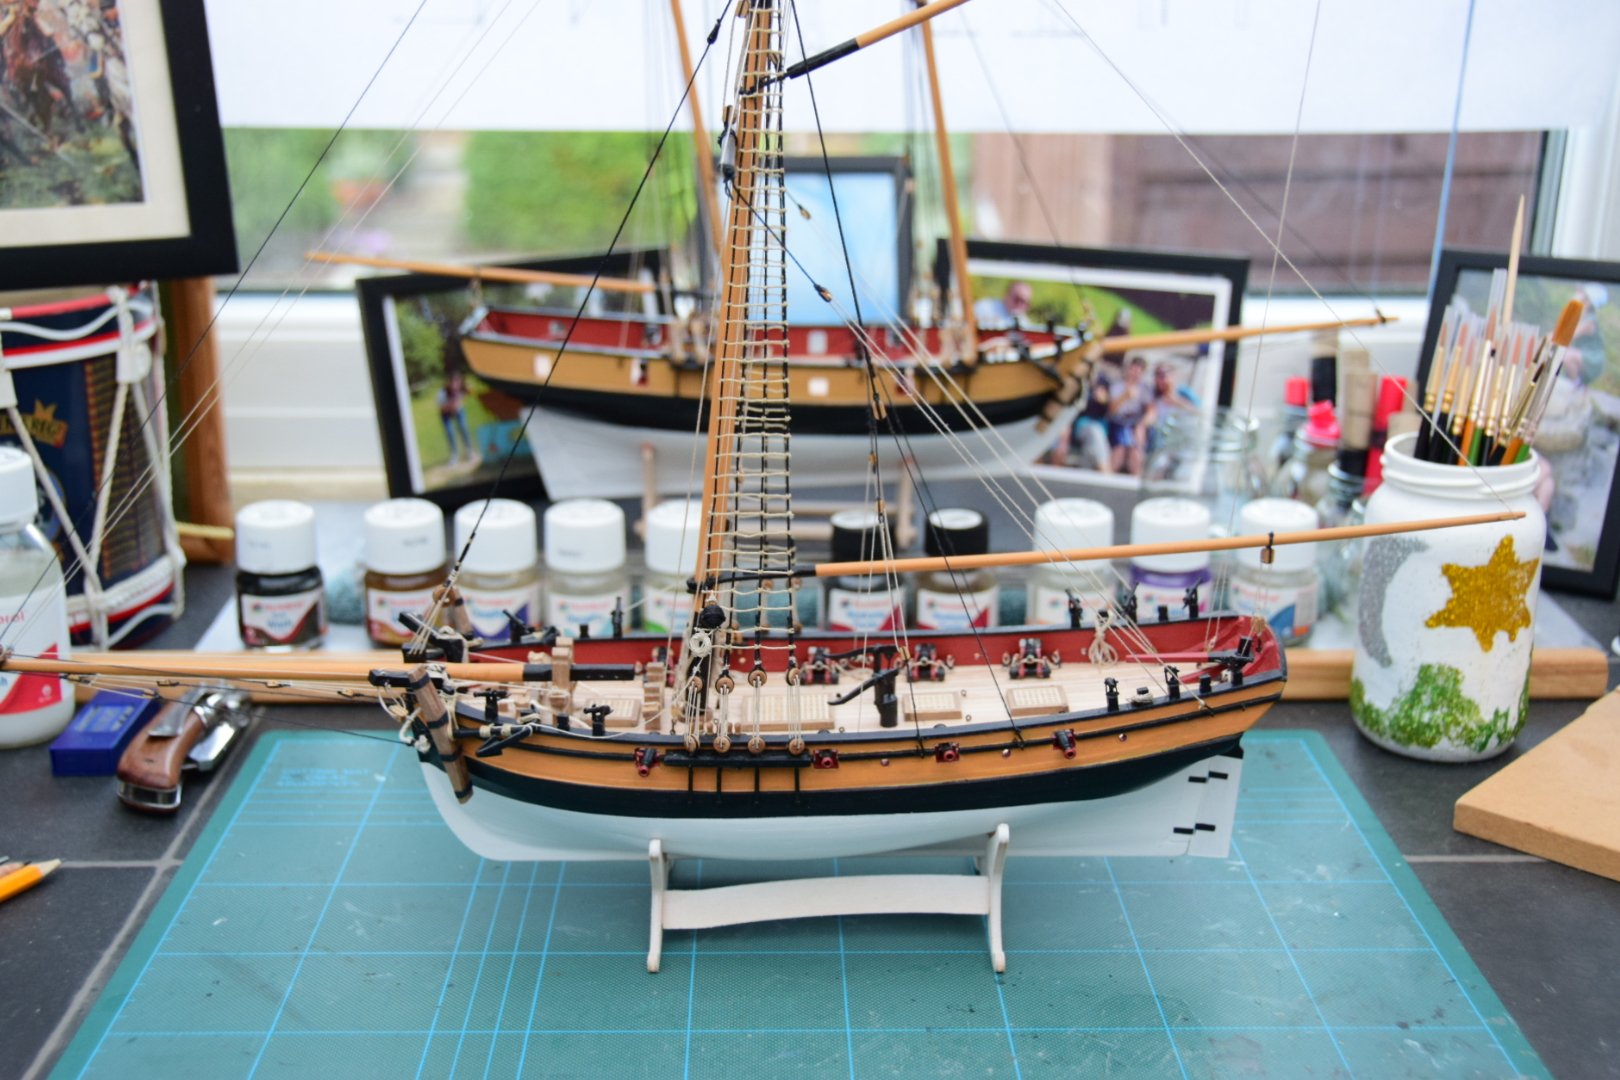
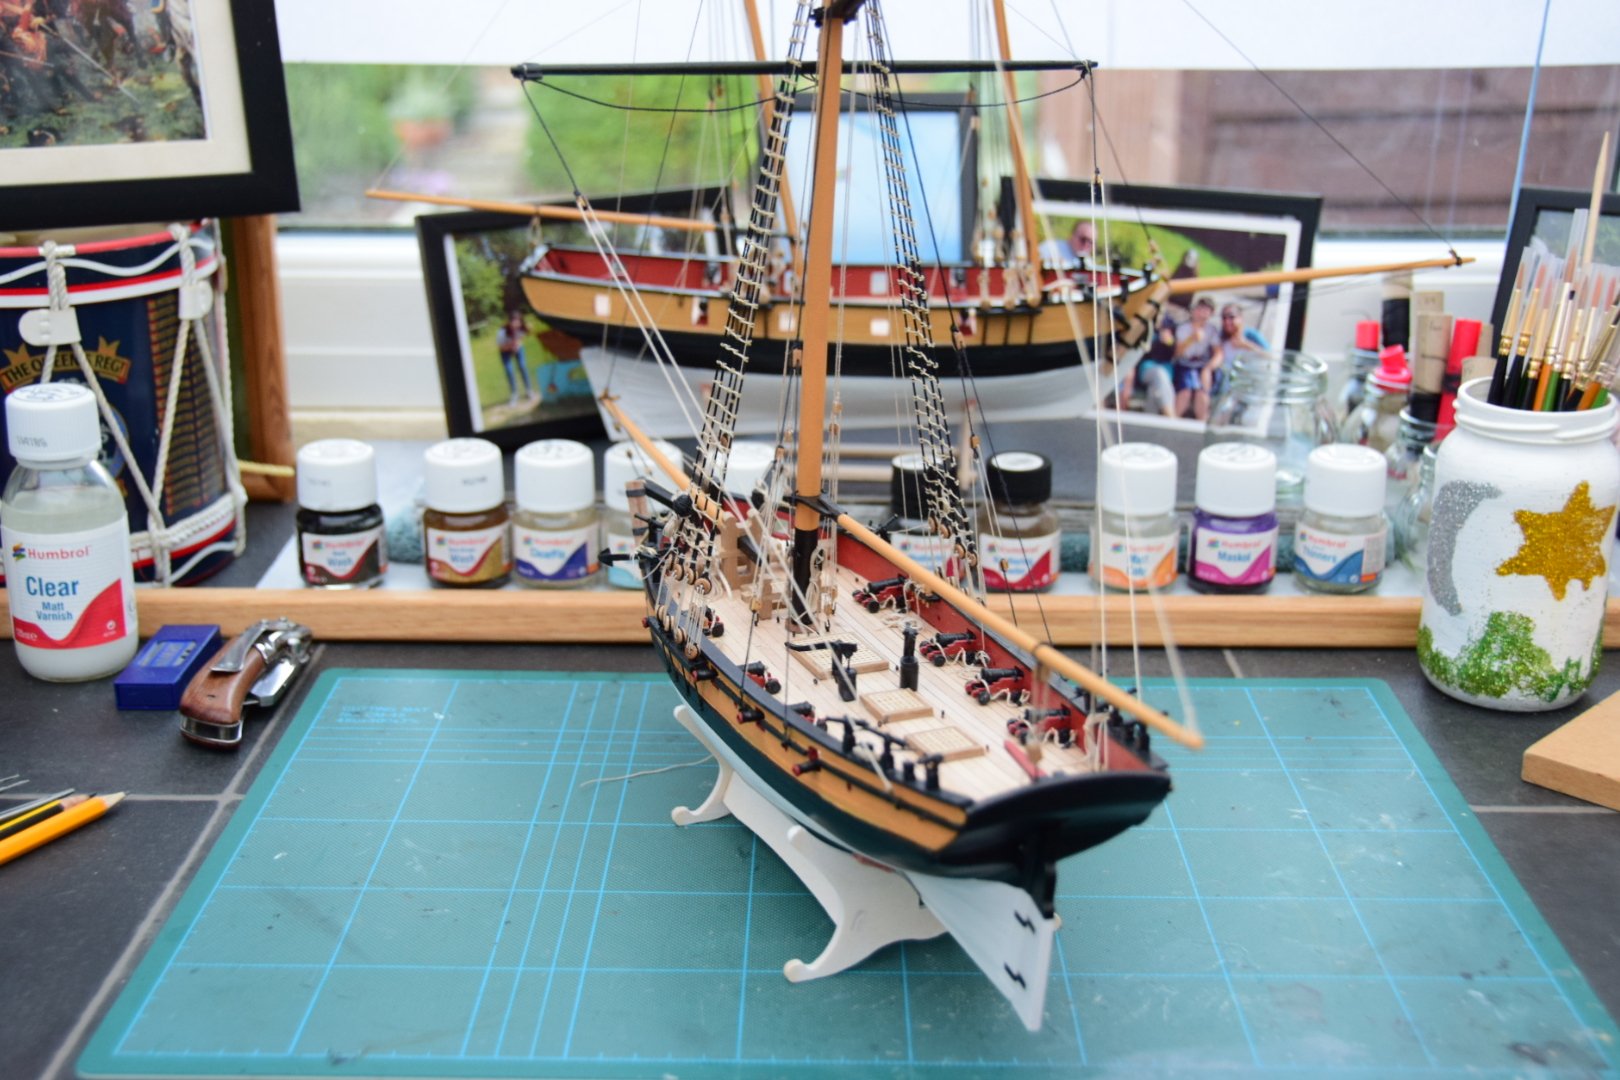
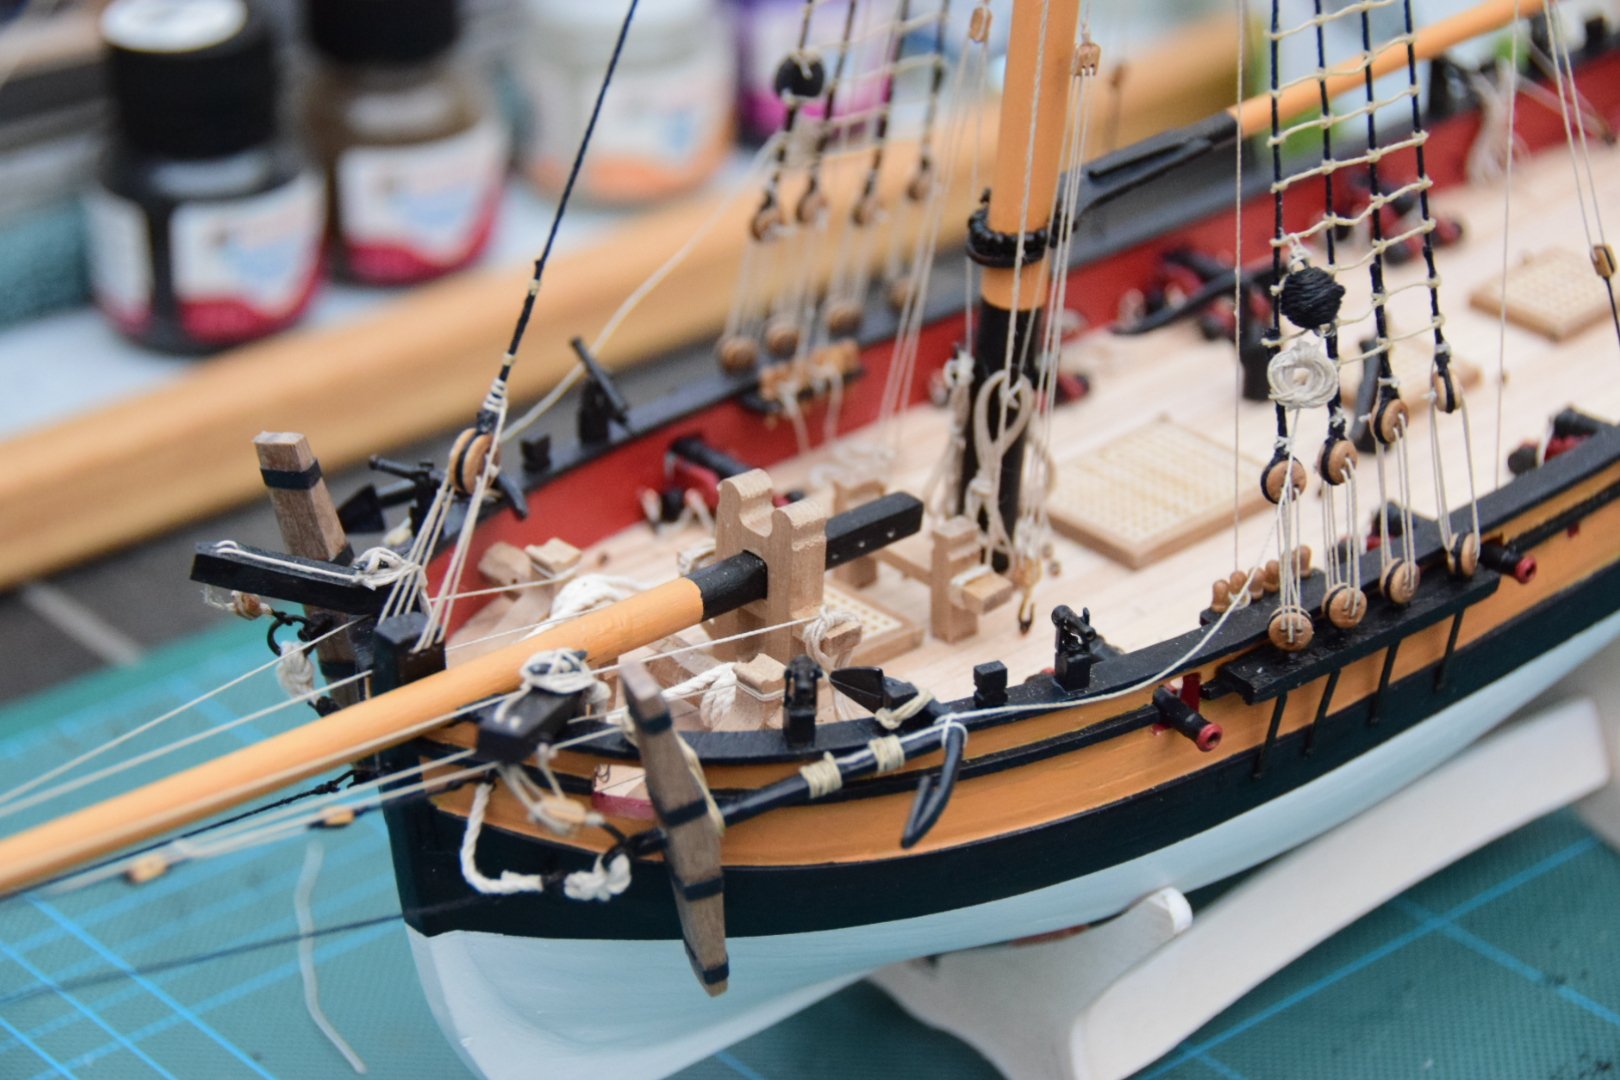
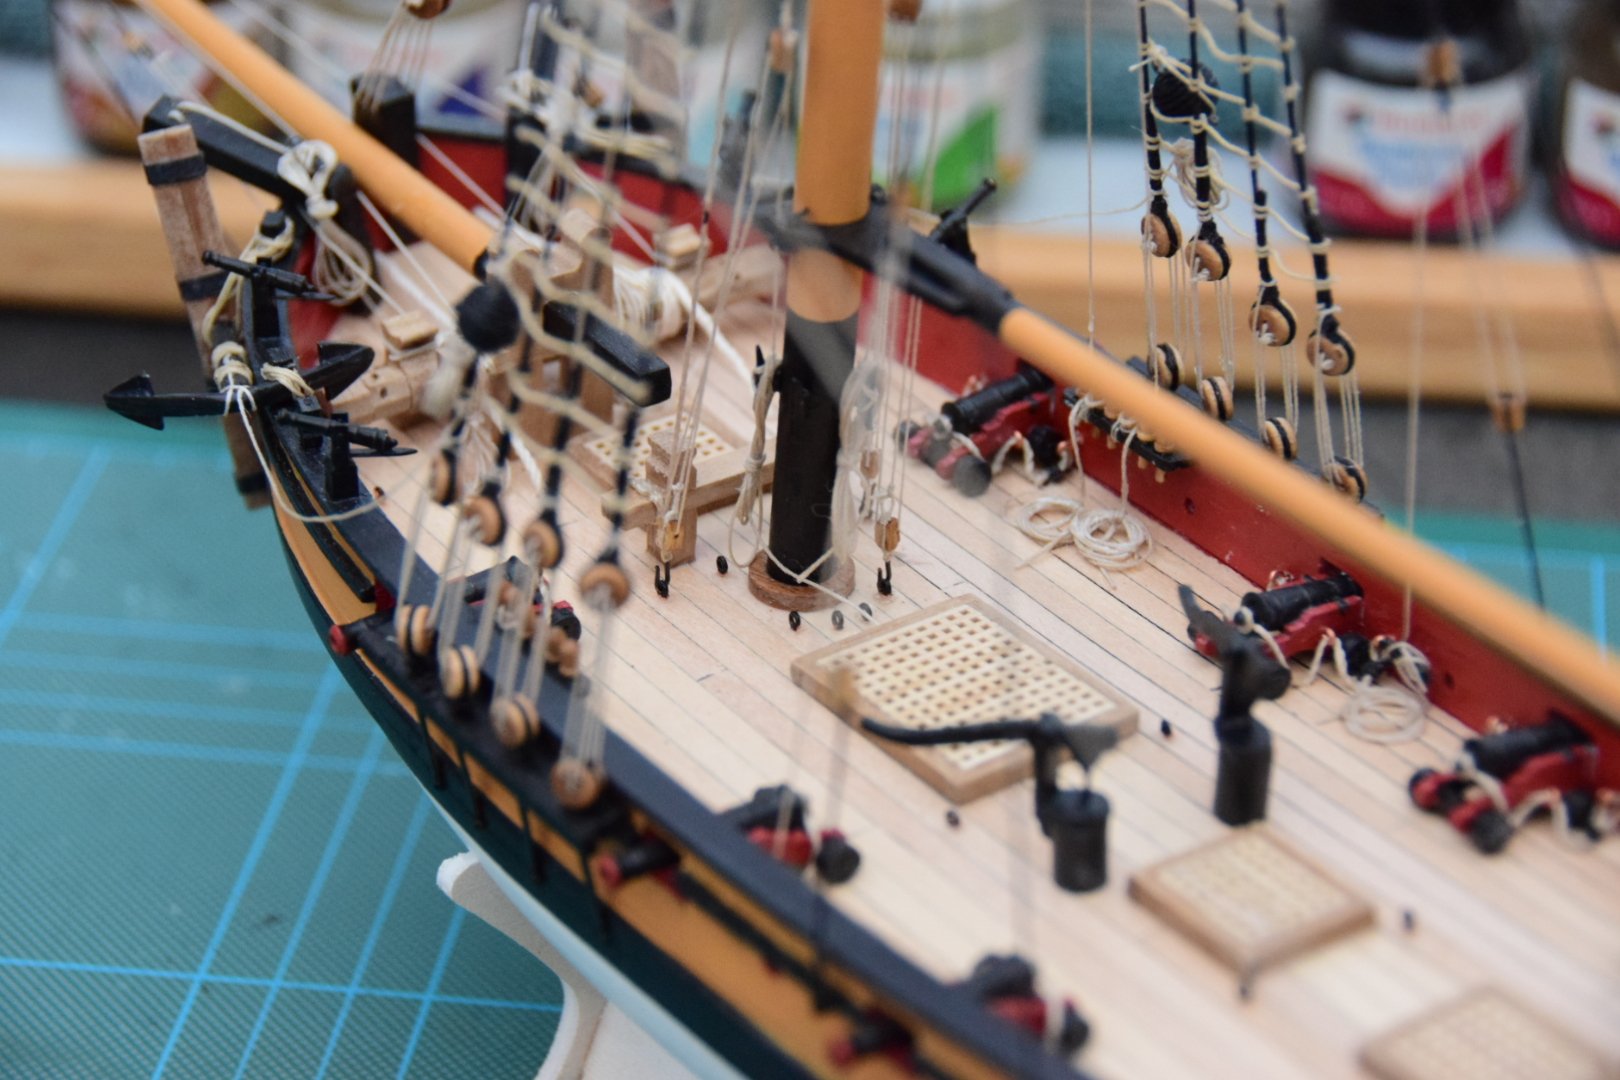
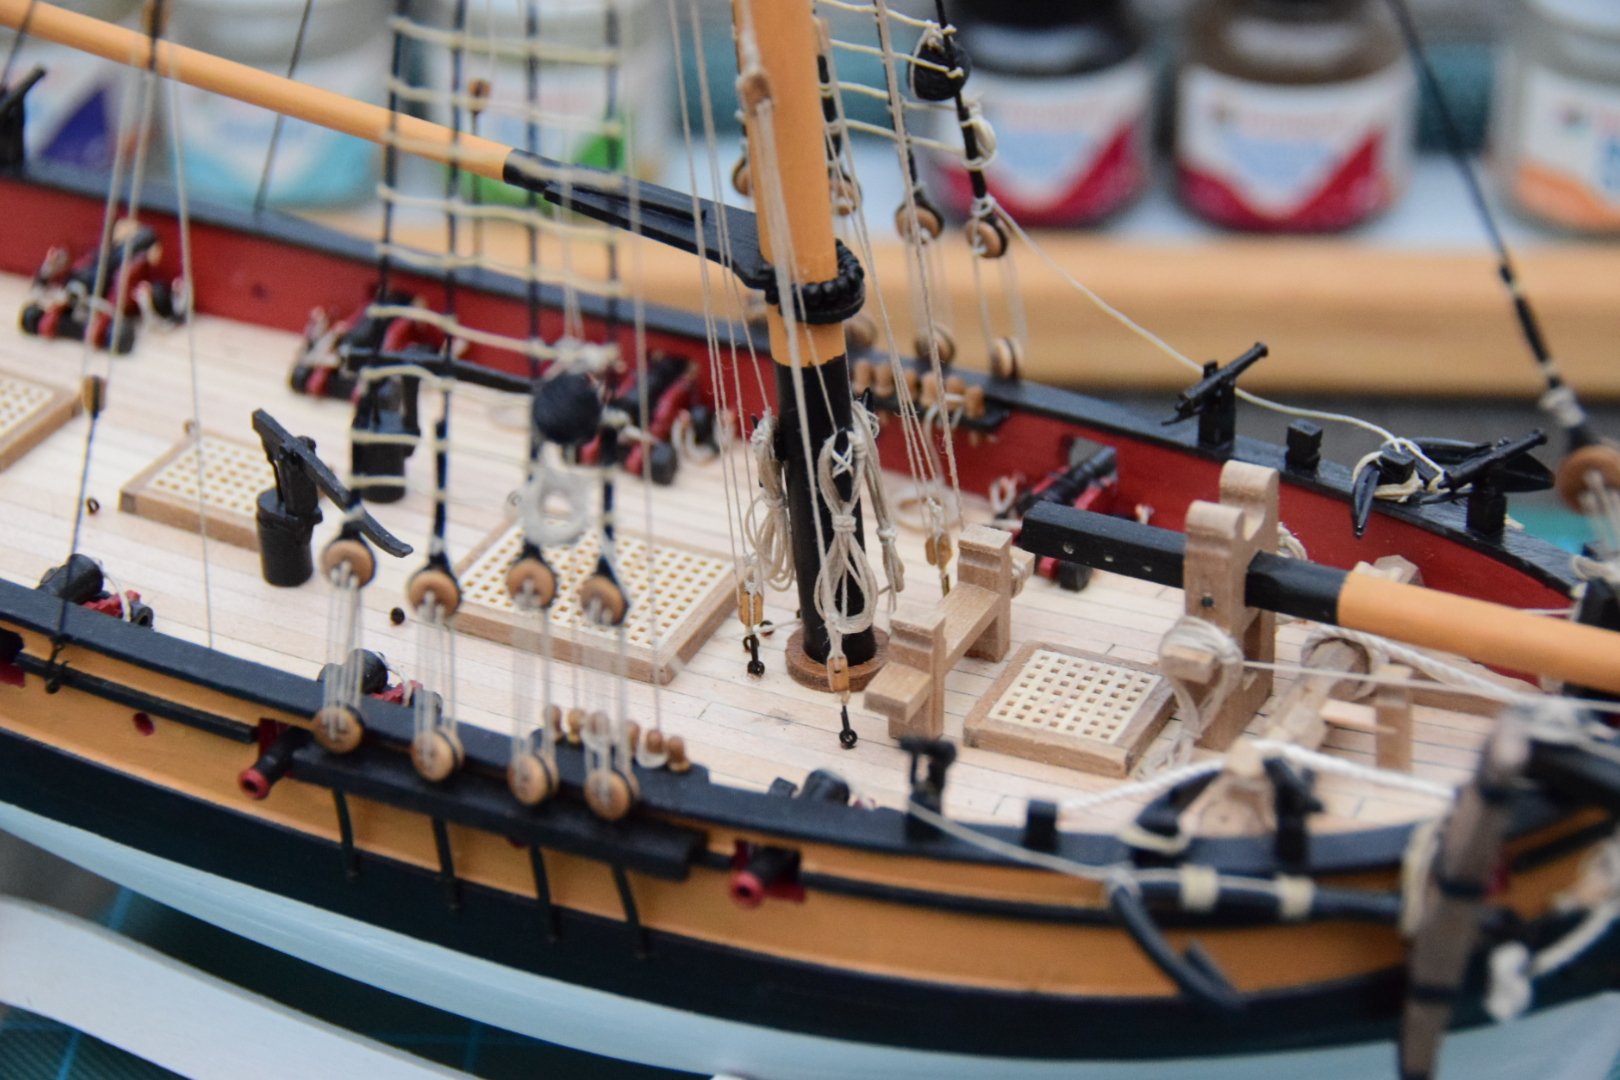
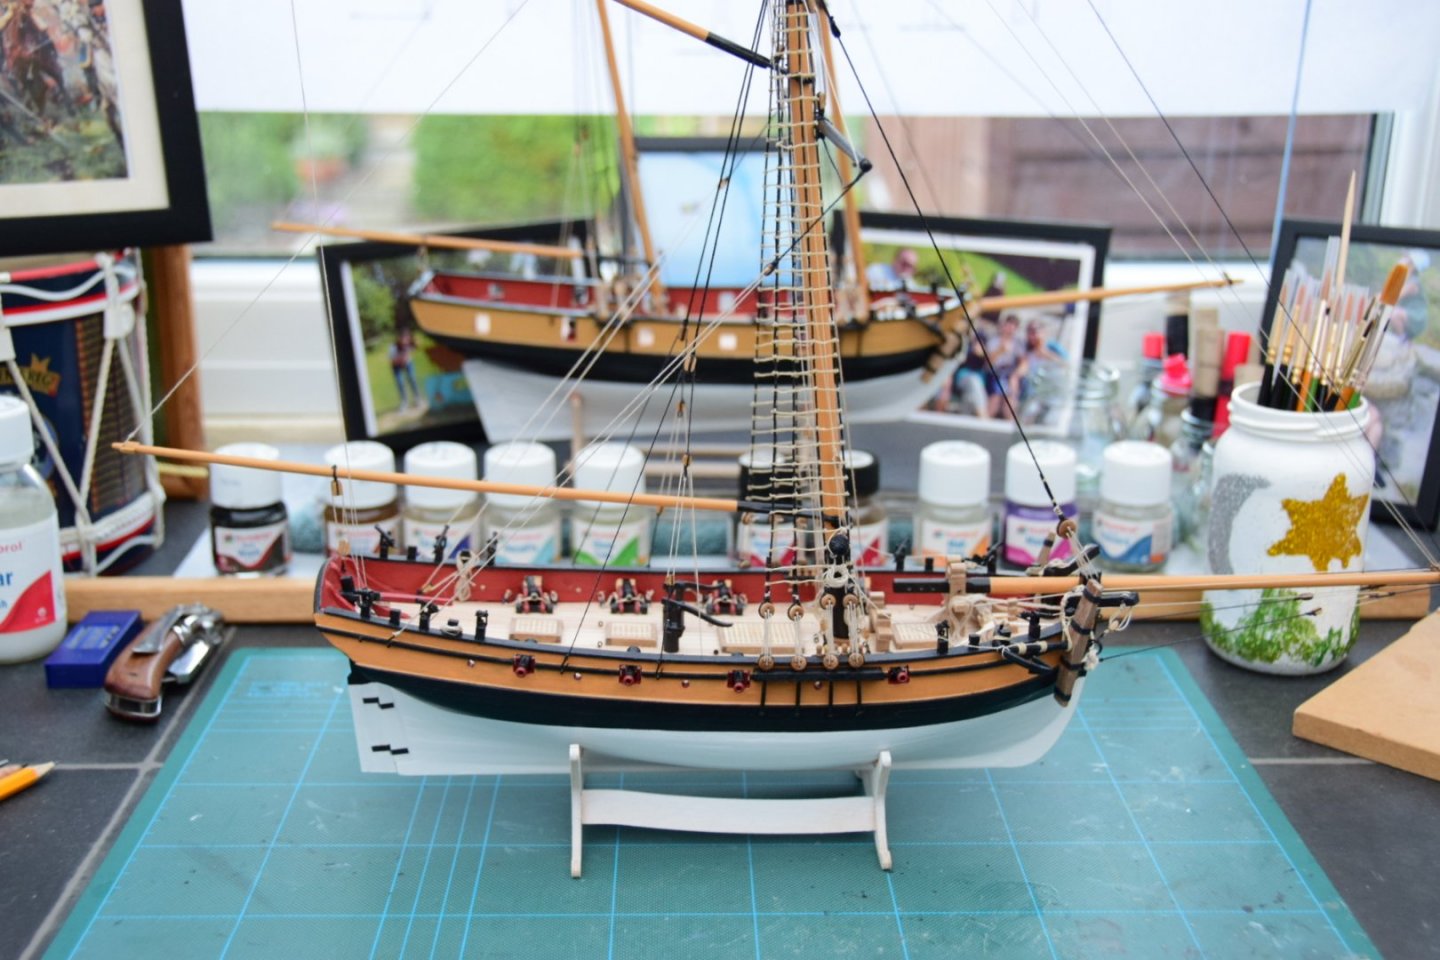
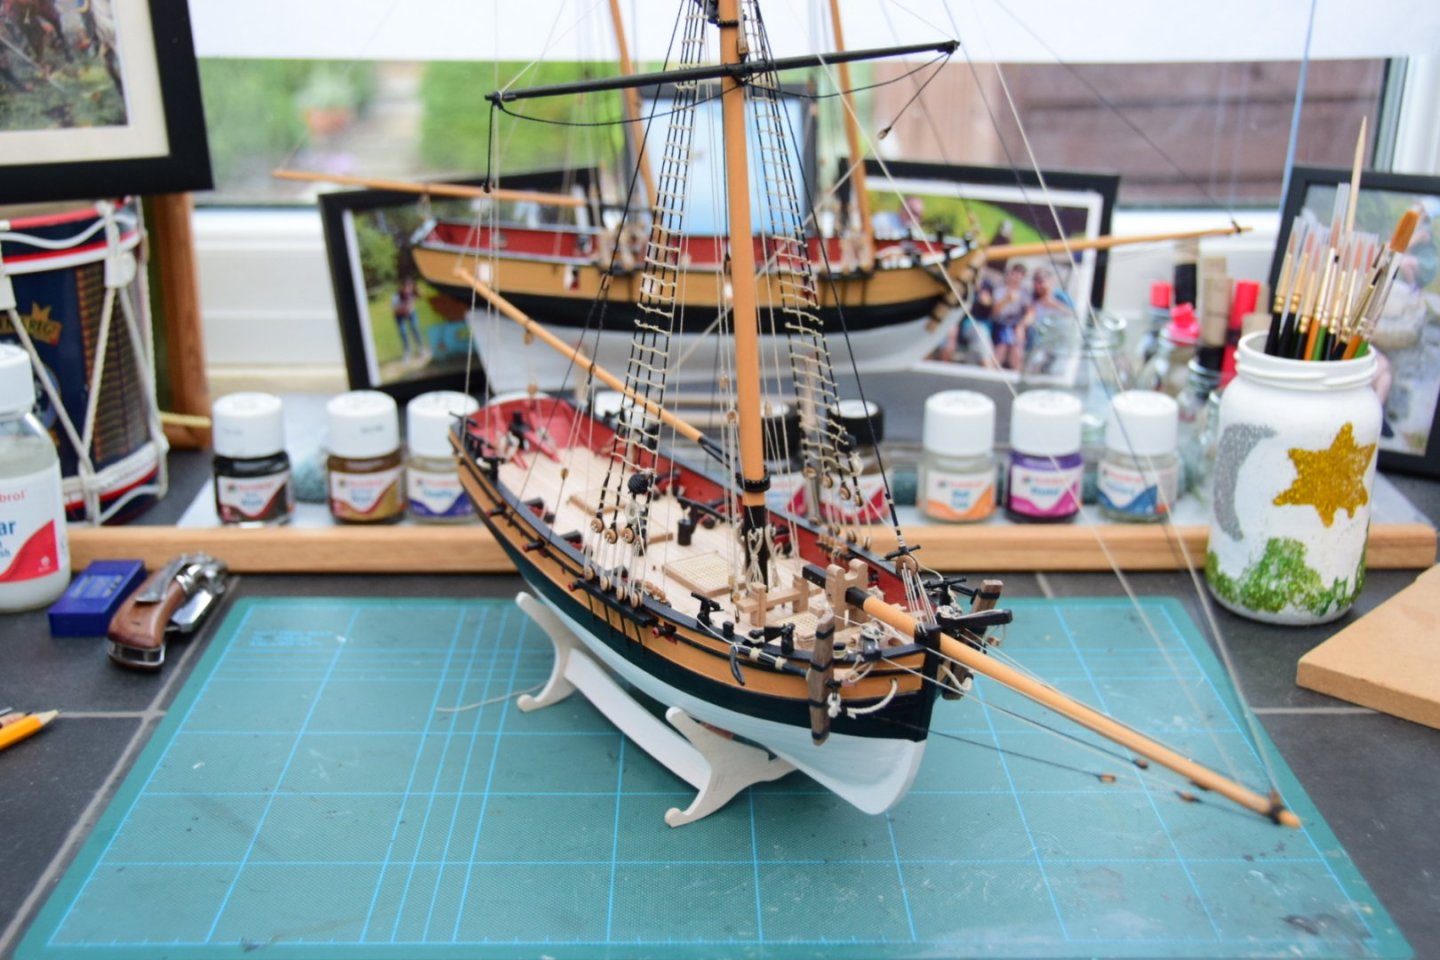
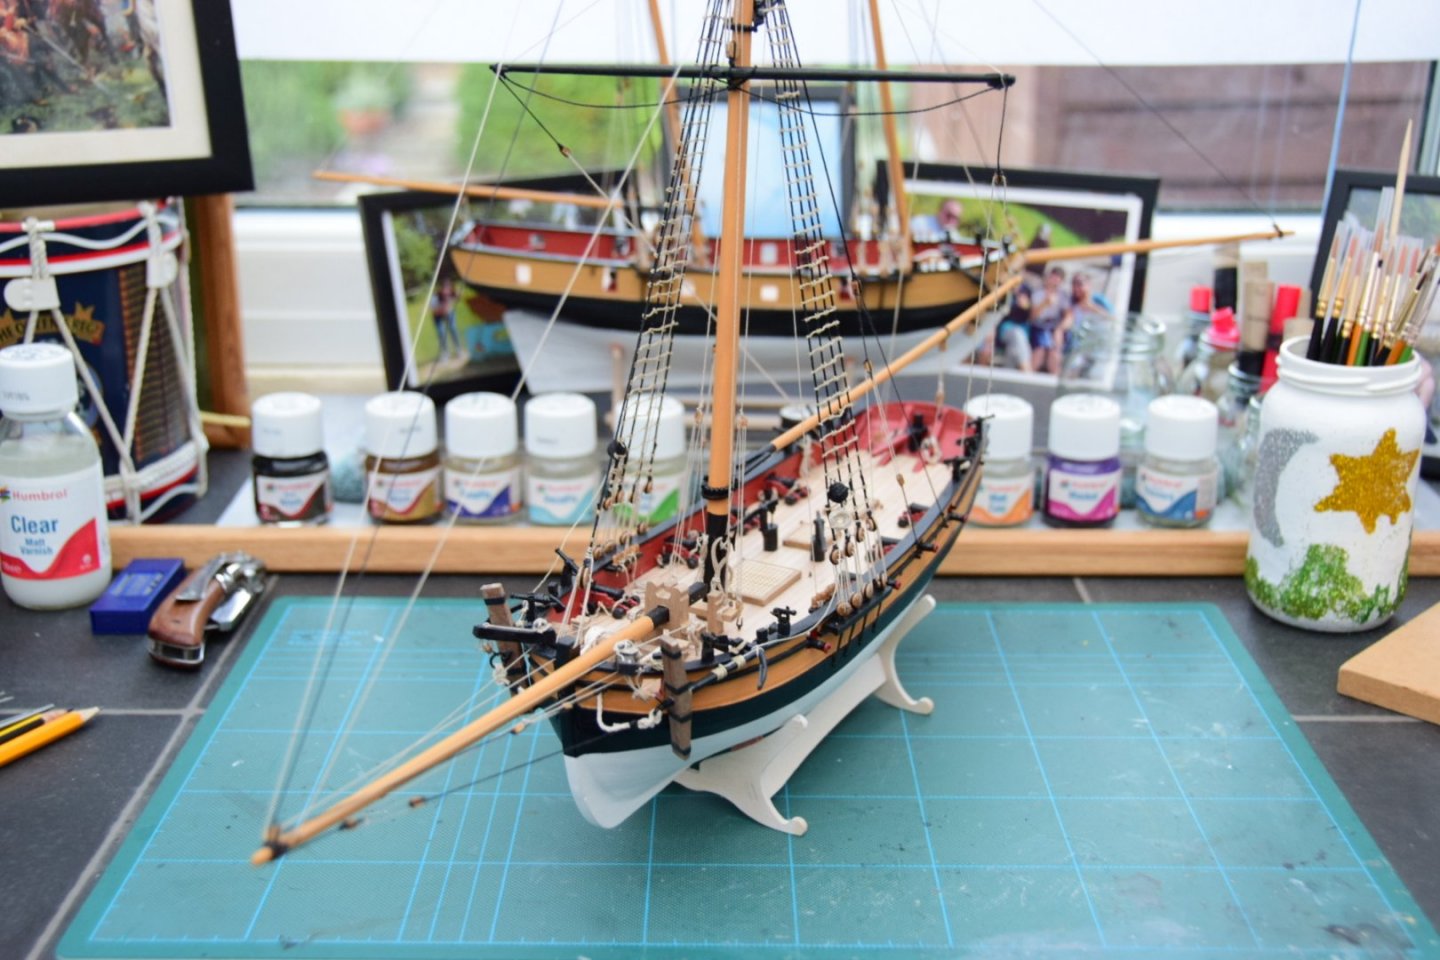
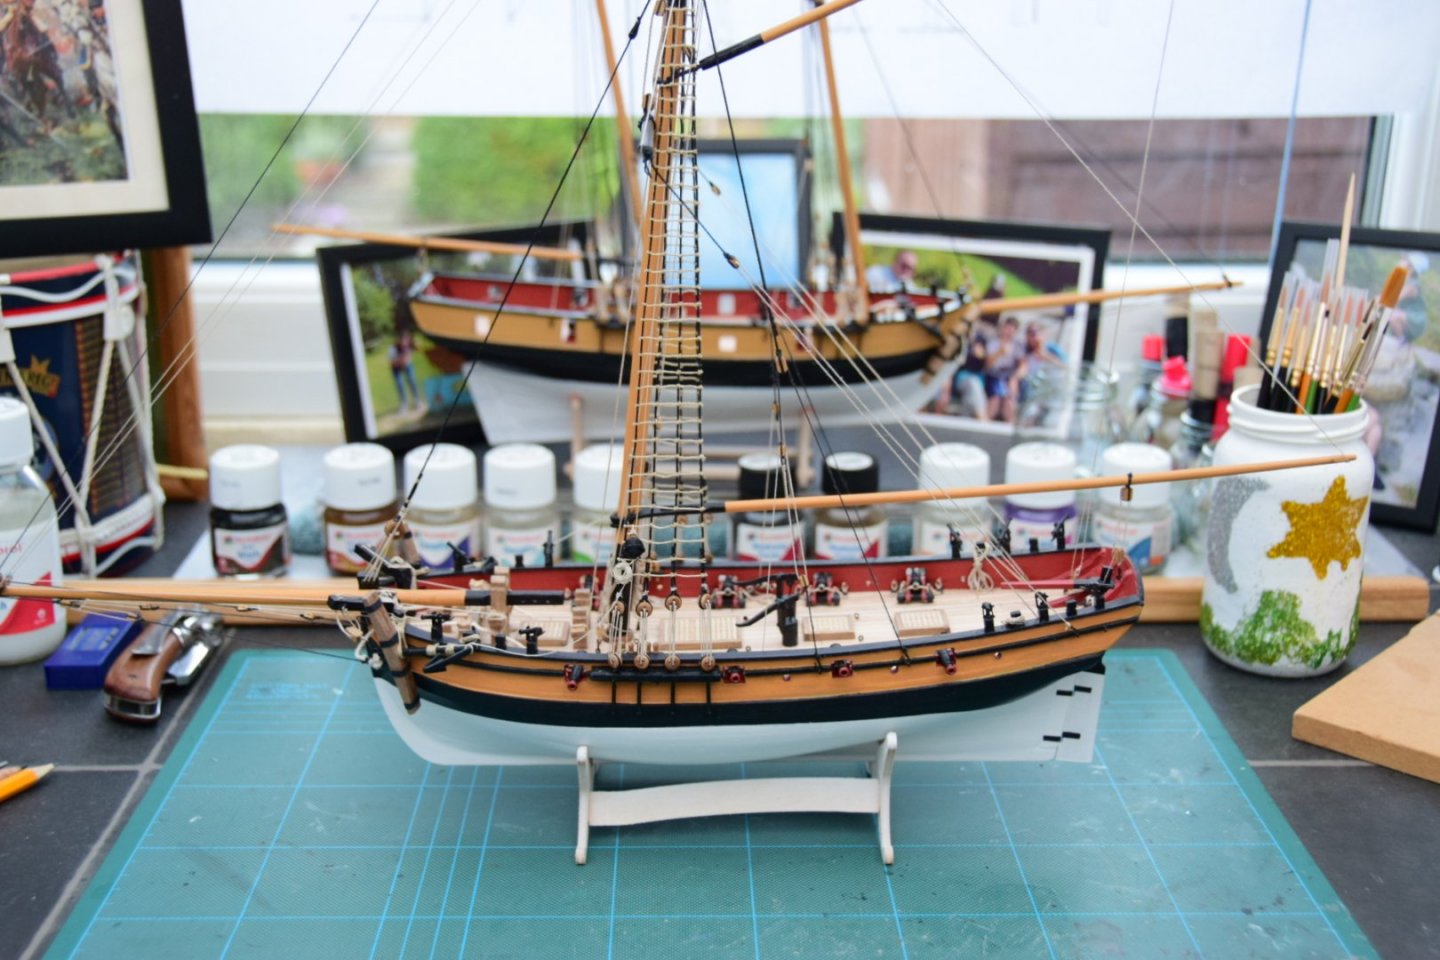
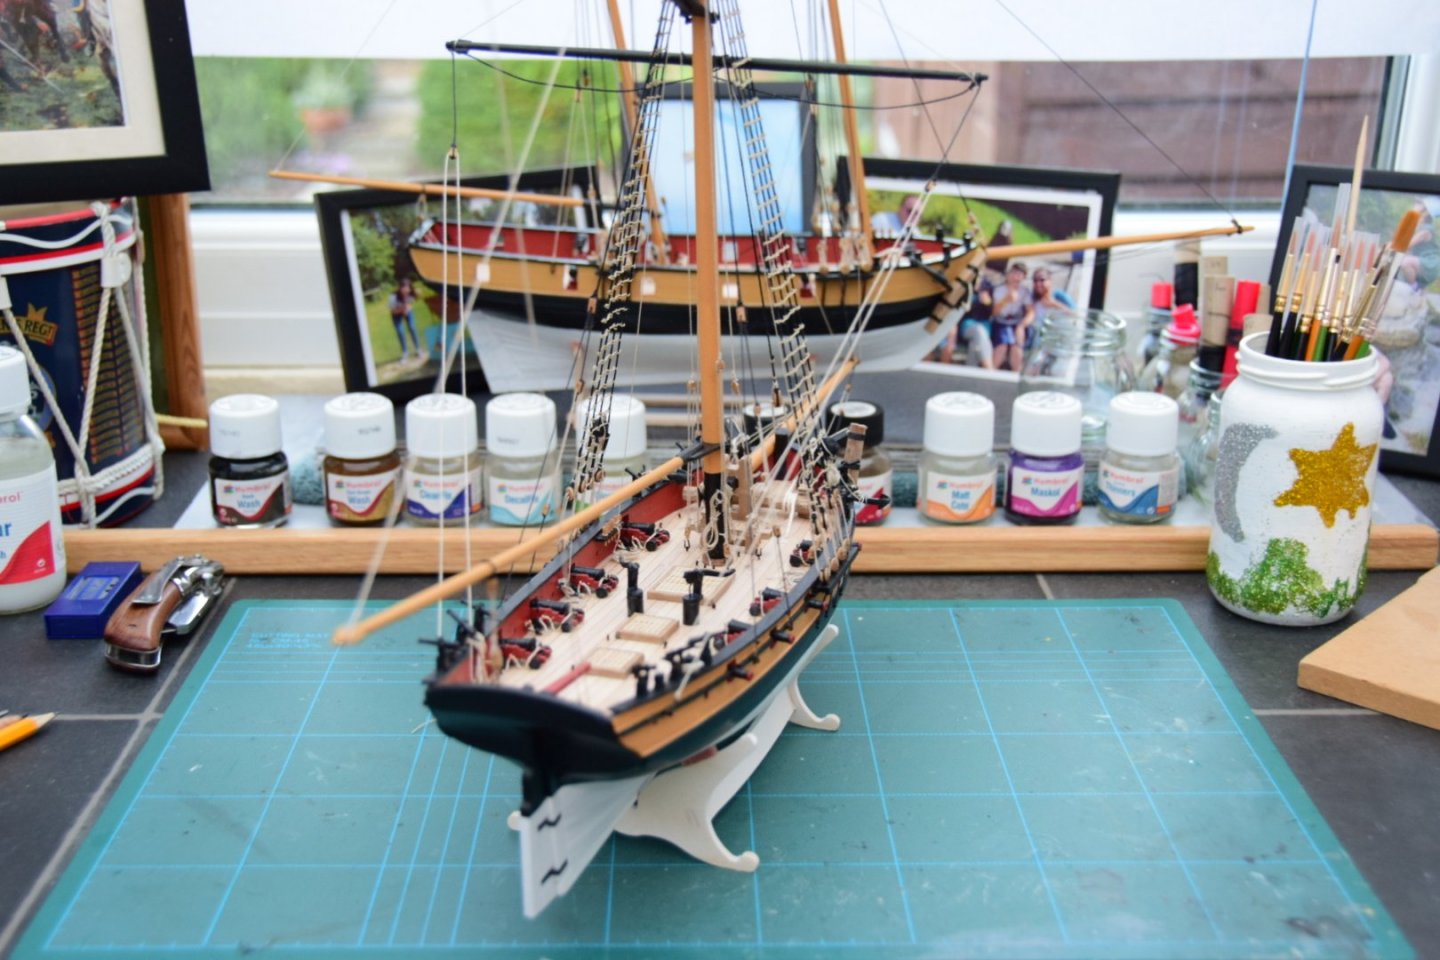
Hi all, Thanks again Edward for your kind words and, again, they are most appreciated. Well, here are the final pictures, l have enjoyed making the Sherbourne and learnt plenty on the journey. I like to think l rectified the mistakes l made during my first build, the "Ballahoo" but l am afraid l still made plenty more during this build. I guess that is a fact of life. Thank you all for looking in and encouraging me, for the likes and, of course, for the invaluable advice l recieved from time to time. Best wishes as always, The Lazy Saint.


- 104 replies
-
- 14
-
-
- sherbourne
- caldercraft
- (and 1 more)
-
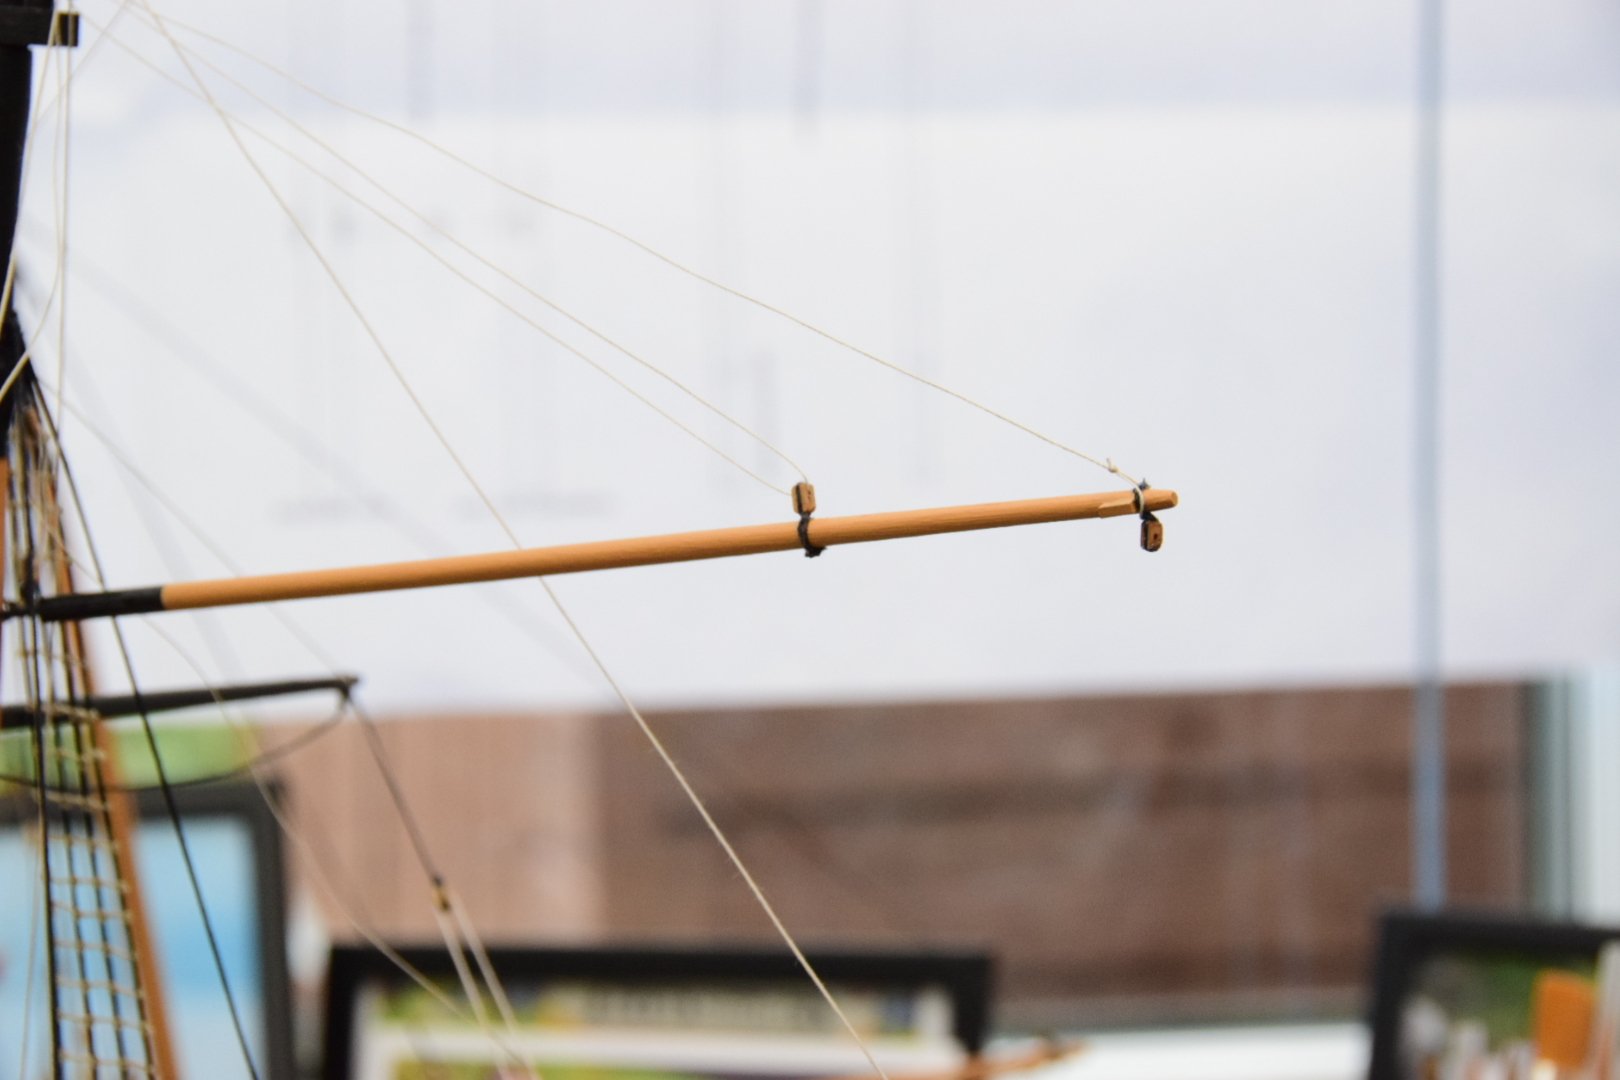
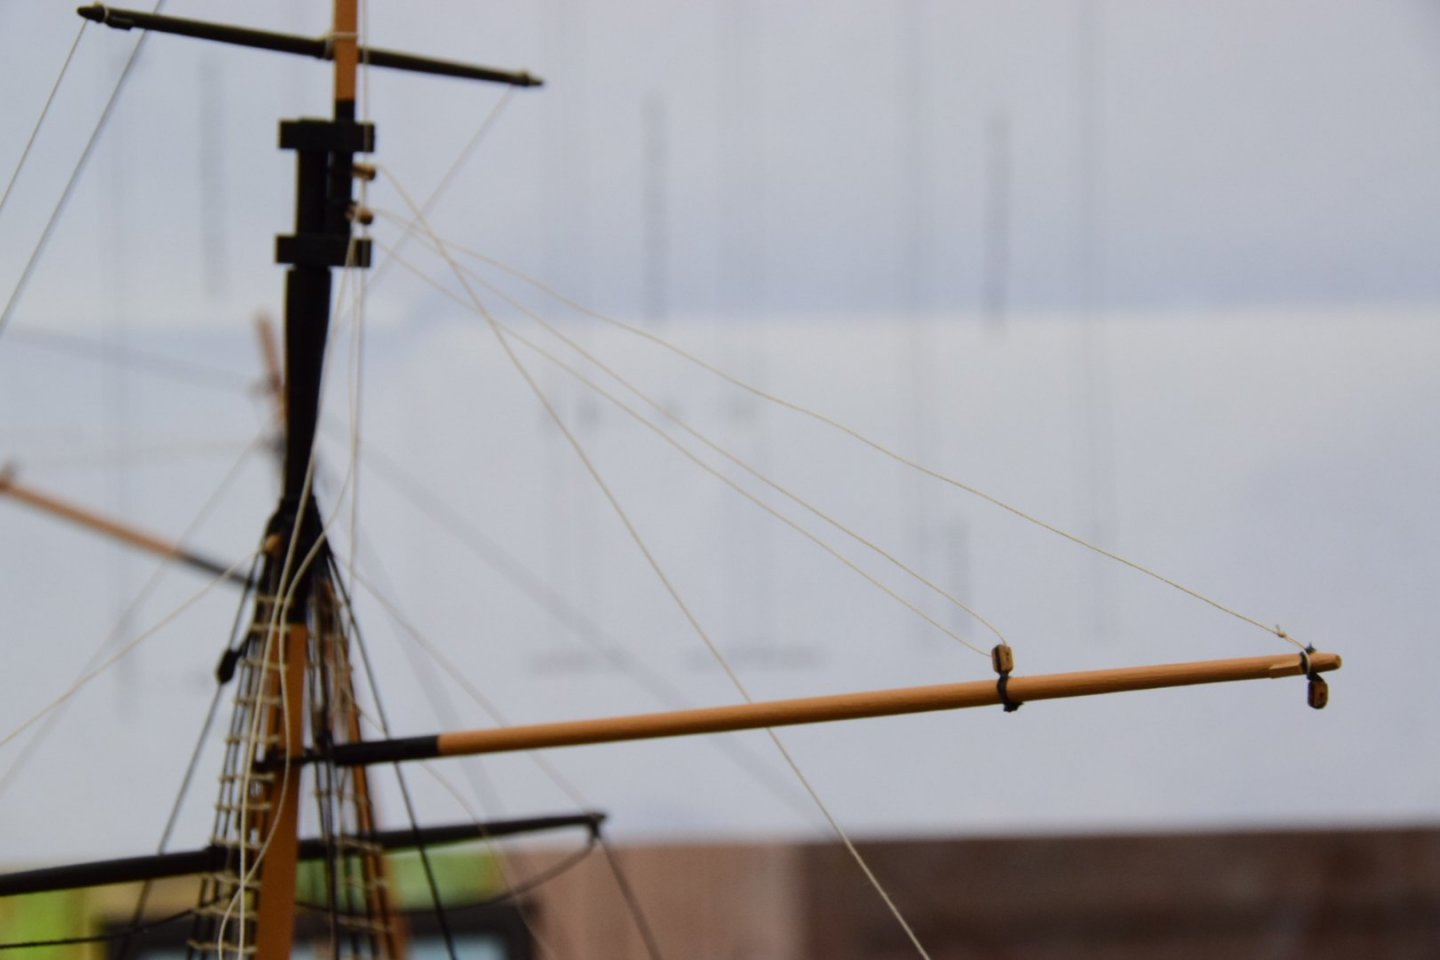
Hi all, Very nearly in the closing stages now as l have just tied up the last bit of rigging. All that is left is the tightening up of all the running rigging, painting the ironwork and the final touches like the rope coils etc. Gaff Boom tackle. Gaff Boom Lift and Upper Yard Lift Now l am coming to the end of this build my thoughts are leaning toward my next project. I had thought l would tackle Caldercrafts "Pickle" but l may attempt. The 1:200 Scale HMS Victory by Mantua. I have seen one very good example of a completed model but very little else. There is no completed build log here on MSW, although there are a number of unfinished (barley started) examples. My question is why? I don't think it is a new model so is it because the Scale is smaller than most prefer? Is it because the quality is poor? perhaps it falls bellow the acceptable level of realism? I do not know but perhaps someone reading this knows and can advise me before l commit myself to weeks of building bliss/building frustration. Actually, I rather like the thought of the challenge that posting a completed build of this particular model would give me. Any advice will be greatly appreciated. Best wishes as always, The Lazy Saint.


- 104 replies
-
- 5
-
-
- sherbourne
- caldercraft
- (and 1 more)
-
Hi Vane, The coppering looks like it is going on very nicely indeed. Best wishes as always, The Lazy Saint.
-
Hi mugje, She certainly does look good, well done and keep up the good work. Soon you will be on the rigging. Best wishes as always, The Lazy Saint.
-
Hi Norway, Tiny things indeed, but you are managing them well. Looking good. Best wishes as always, The Lazy Saint.
-
Hi mugje, Great looking deck, red or white the jobs a good one, well done. Yours looks great too Norway. Keep up the good work. Best wishes as always, The Lazy Saint.
-
Hi Vane, l hope I am not over simplifying things but is the waterline not marked on your plans/drawings. I have taken these measurements and adjusted my waterline marker so that is correct for both bow and stern. I then drew the line. I hope my explanation helps, if l have miss understood you please excuse me. Best wishes as always, The Lazy Saint.
-
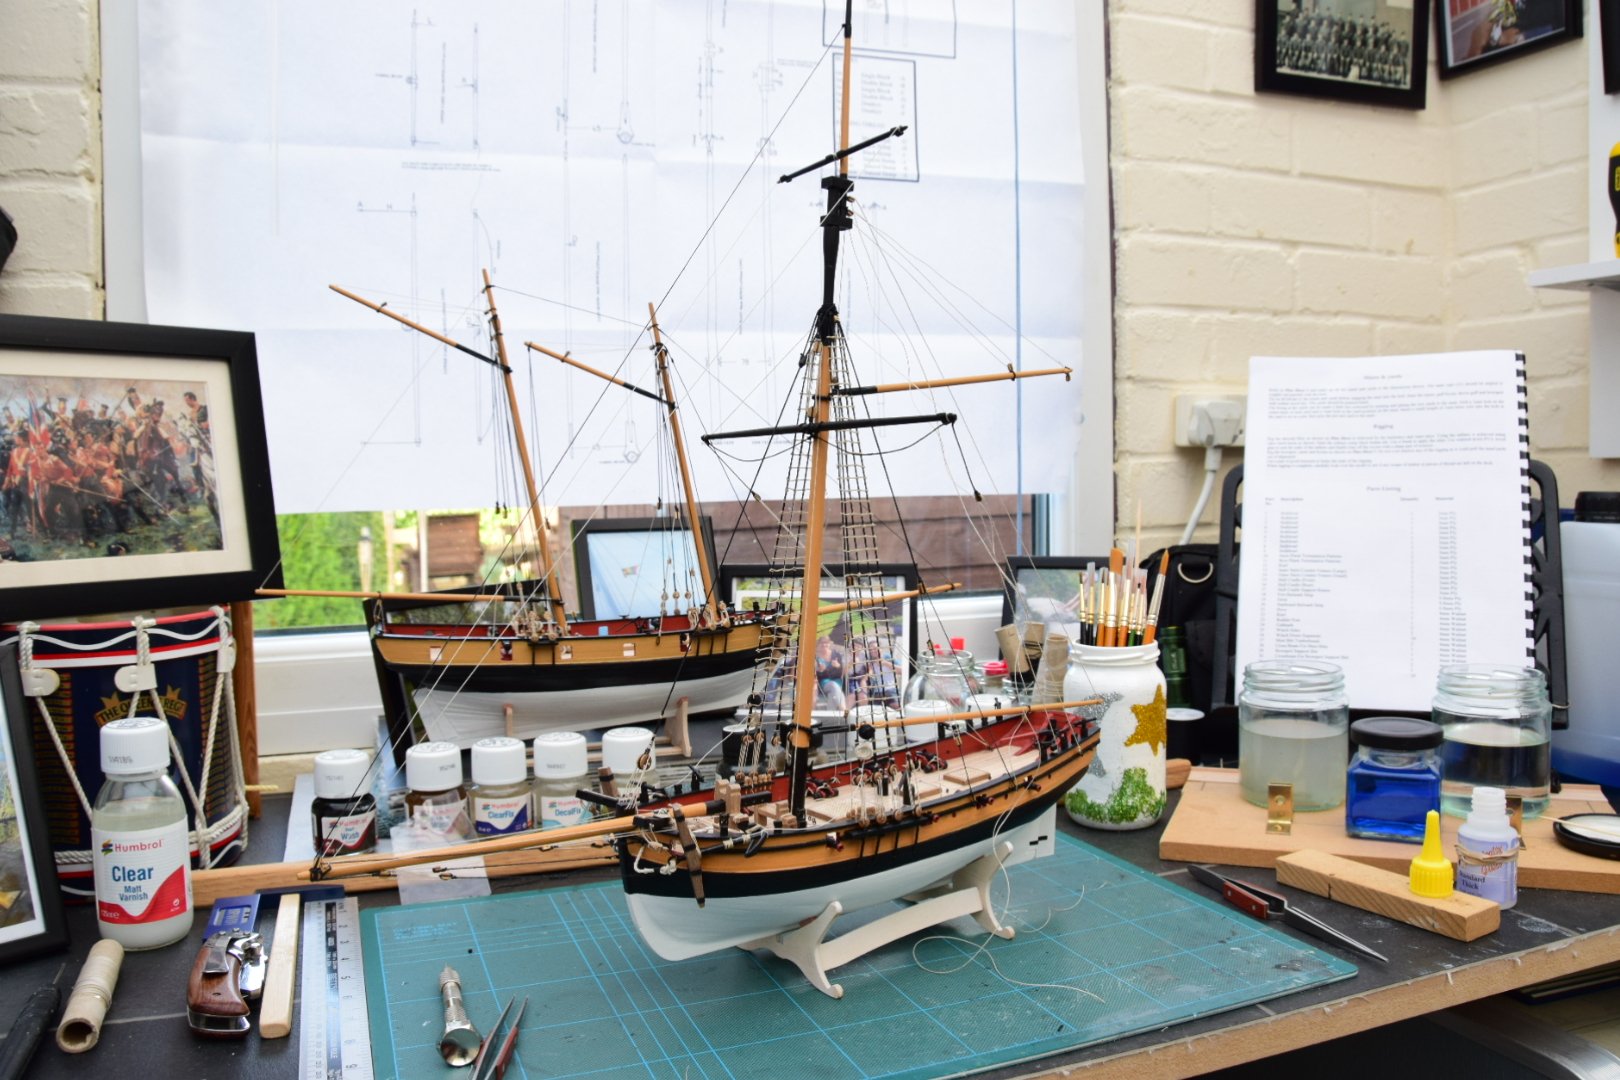
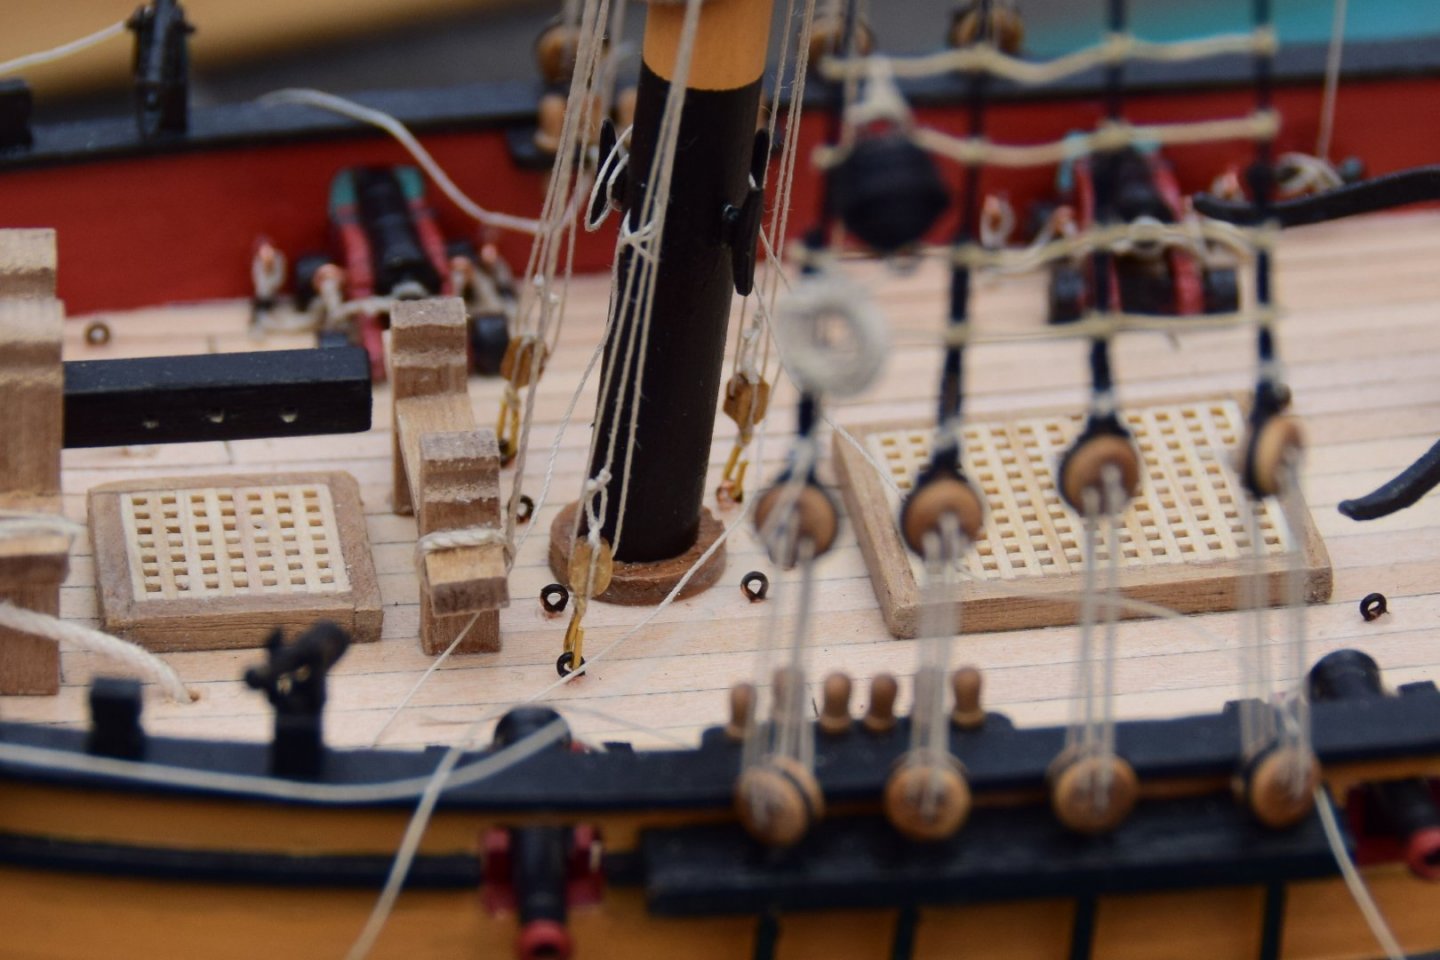
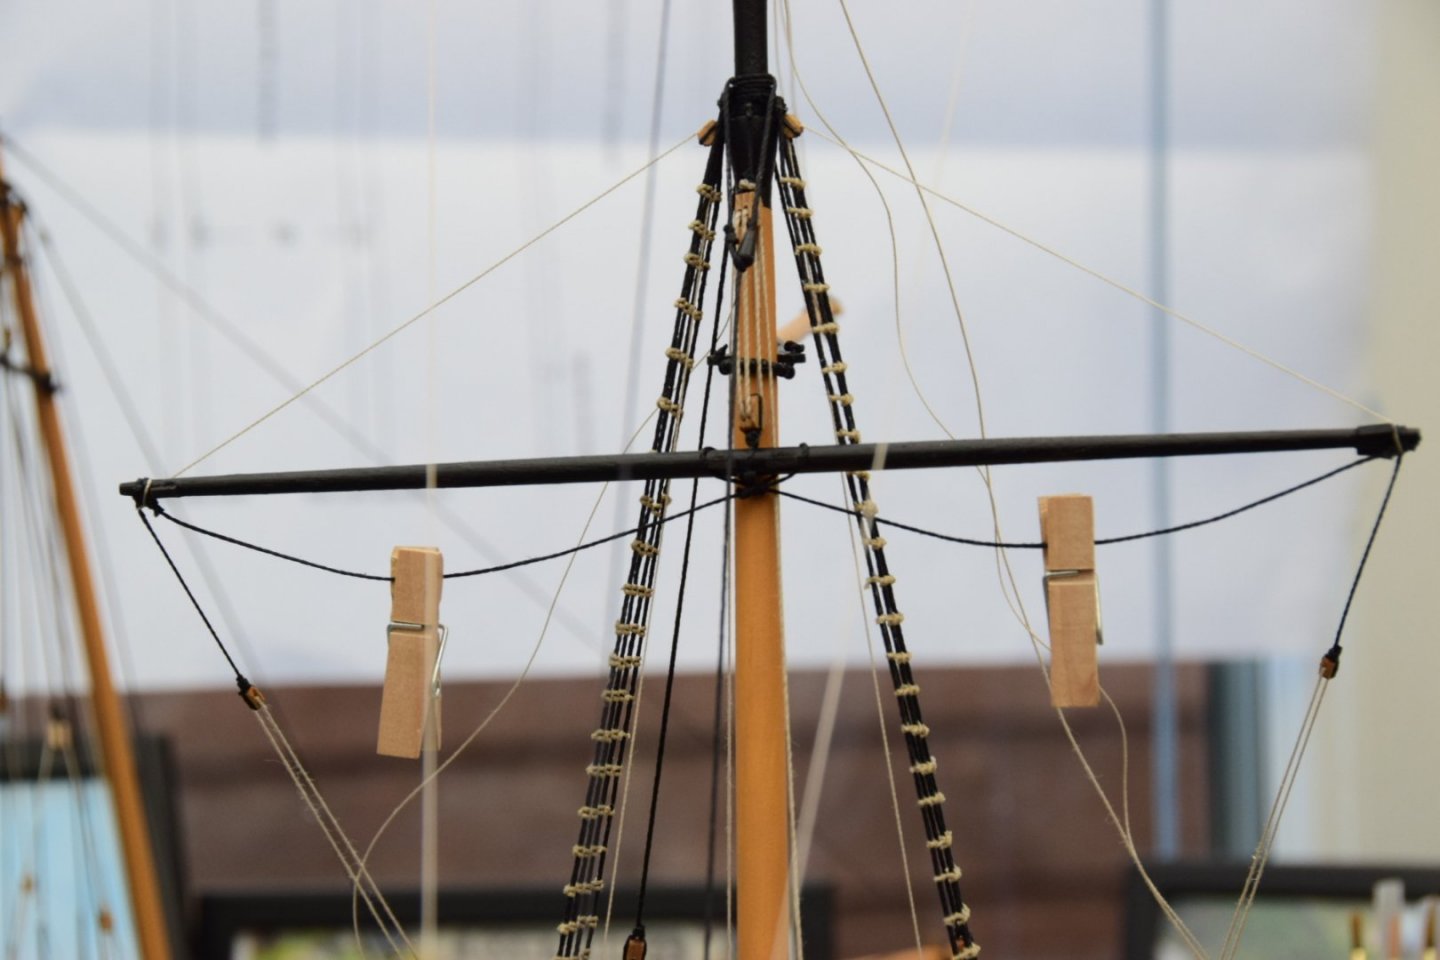
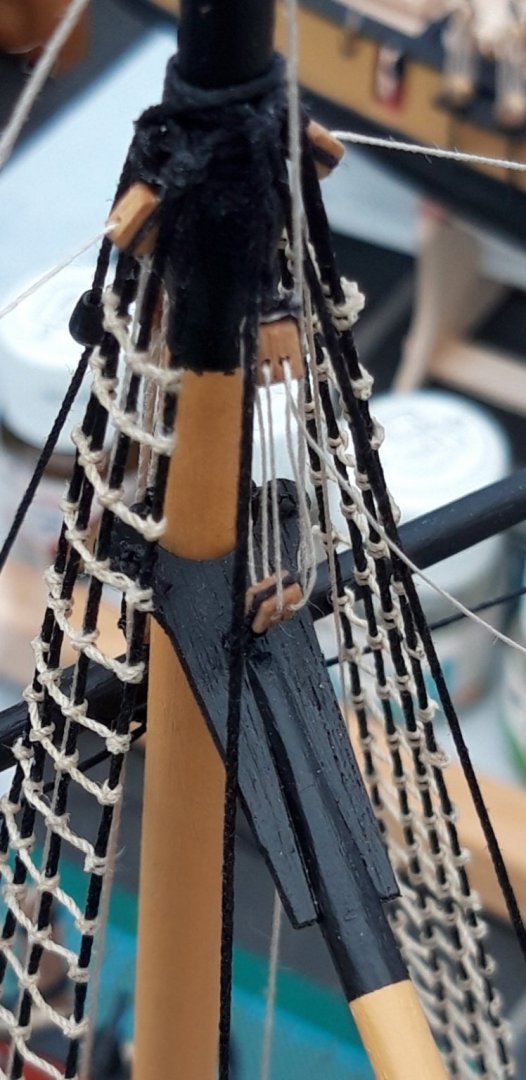
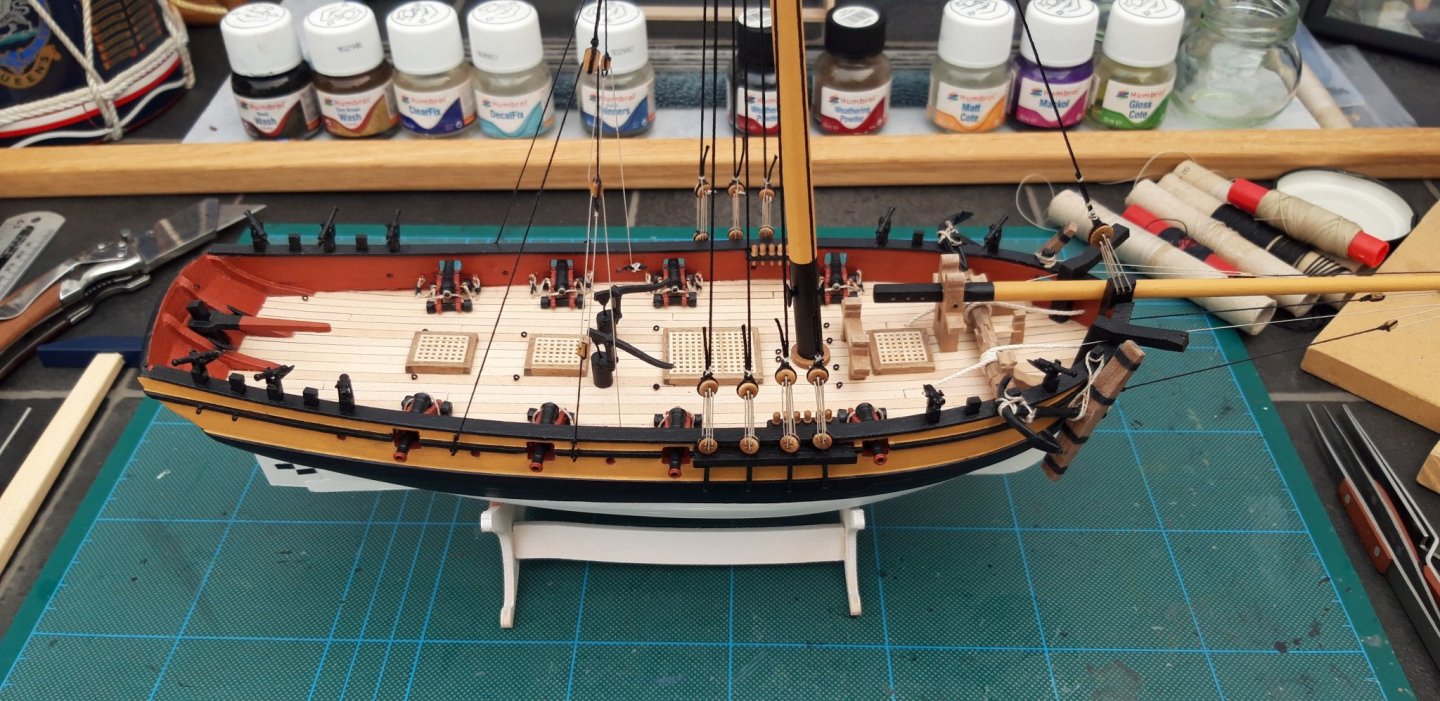
Hi all, Thanks for the comment mugje, very kind of you to say, and thanks Rick for the great tip. Once again your advice has made a big difference. As Rick advised, diluted PVA applied and, to encourage that desired curve, mini pegs attached. Once dry, carefully remove pegs, and the jobs done. l also fitted the Parrel Beads to both the Gaff Boom, and the Driver Gaff. The more rigging that is done the more fiddly and awkward things become, it starts to look like a cats cradle. Several times it seems like l have spent 5 minute or more painstakingly threading a line through a Cleat only to find l have passed it the wrong side of another piece of rigging and now faced with unthreding and starting again. Ha ha, l expect you all know what l mean. This is how l have left her. l haven't tied it all off yet, l shall do that on my next session, if l do it now l will make an error for sure. It is a cats cradle but l think l know which line goes where............. l hope. Best wishes as always, The Lazy Saint.


- 104 replies
-
- 10
-
-
- sherbourne
- caldercraft
- (and 1 more)
-
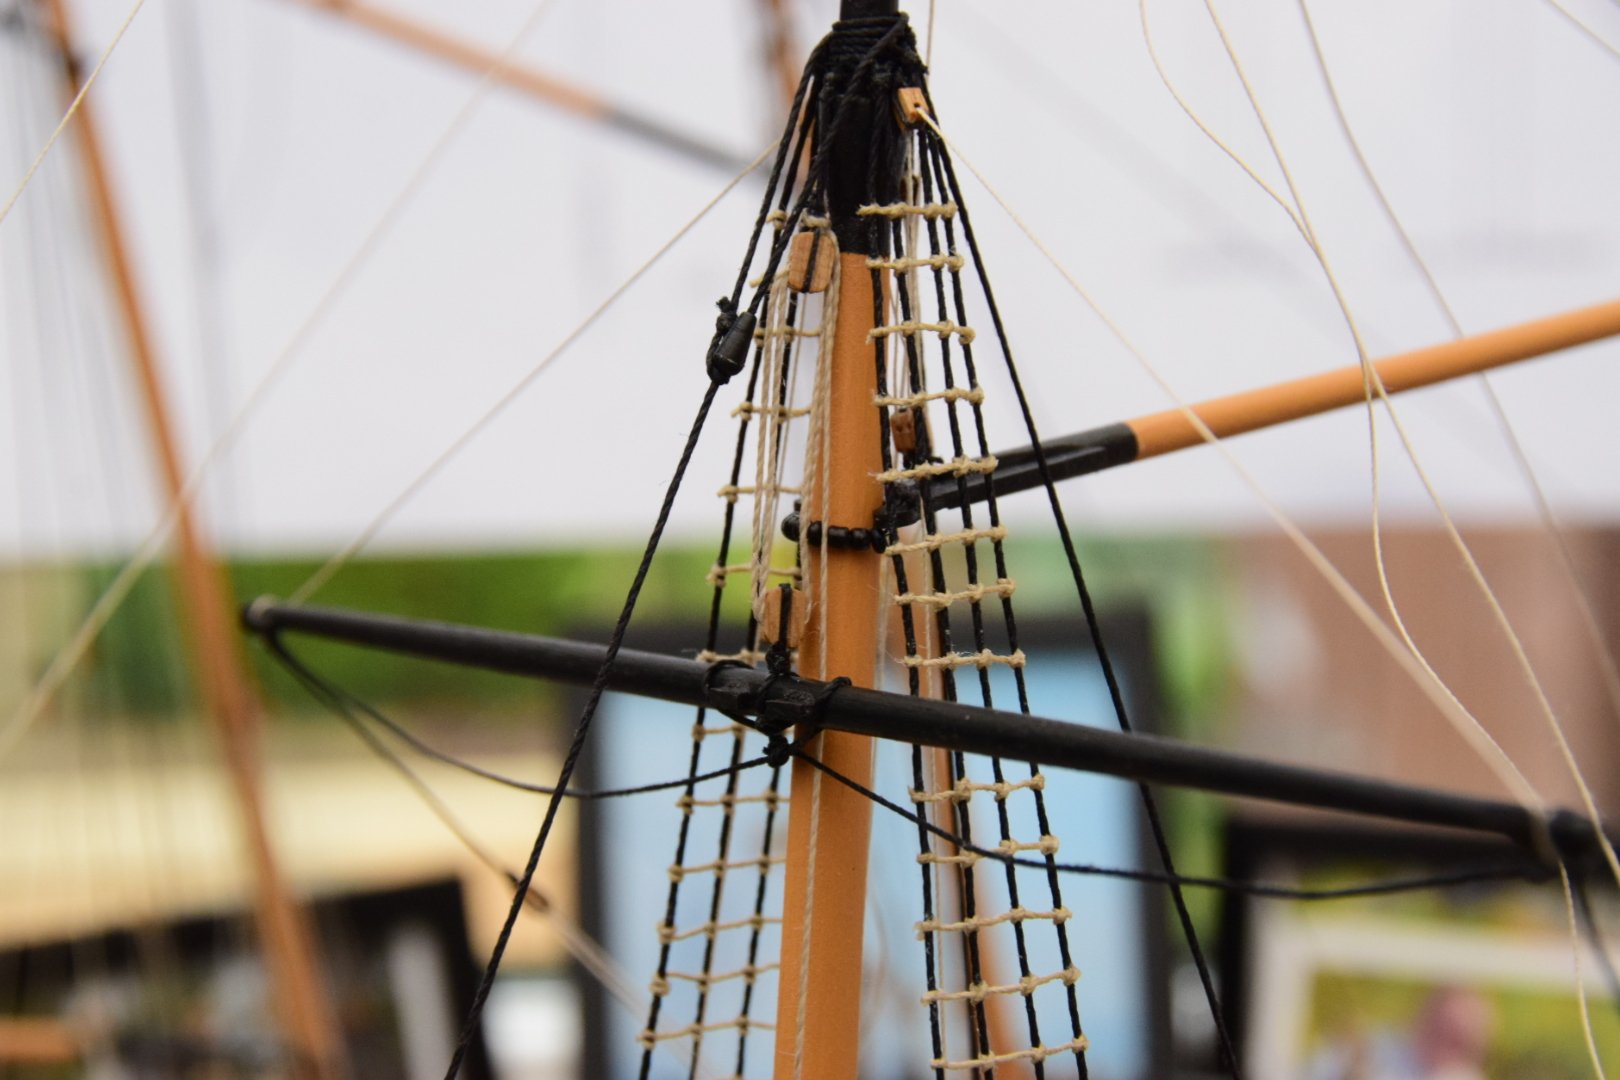
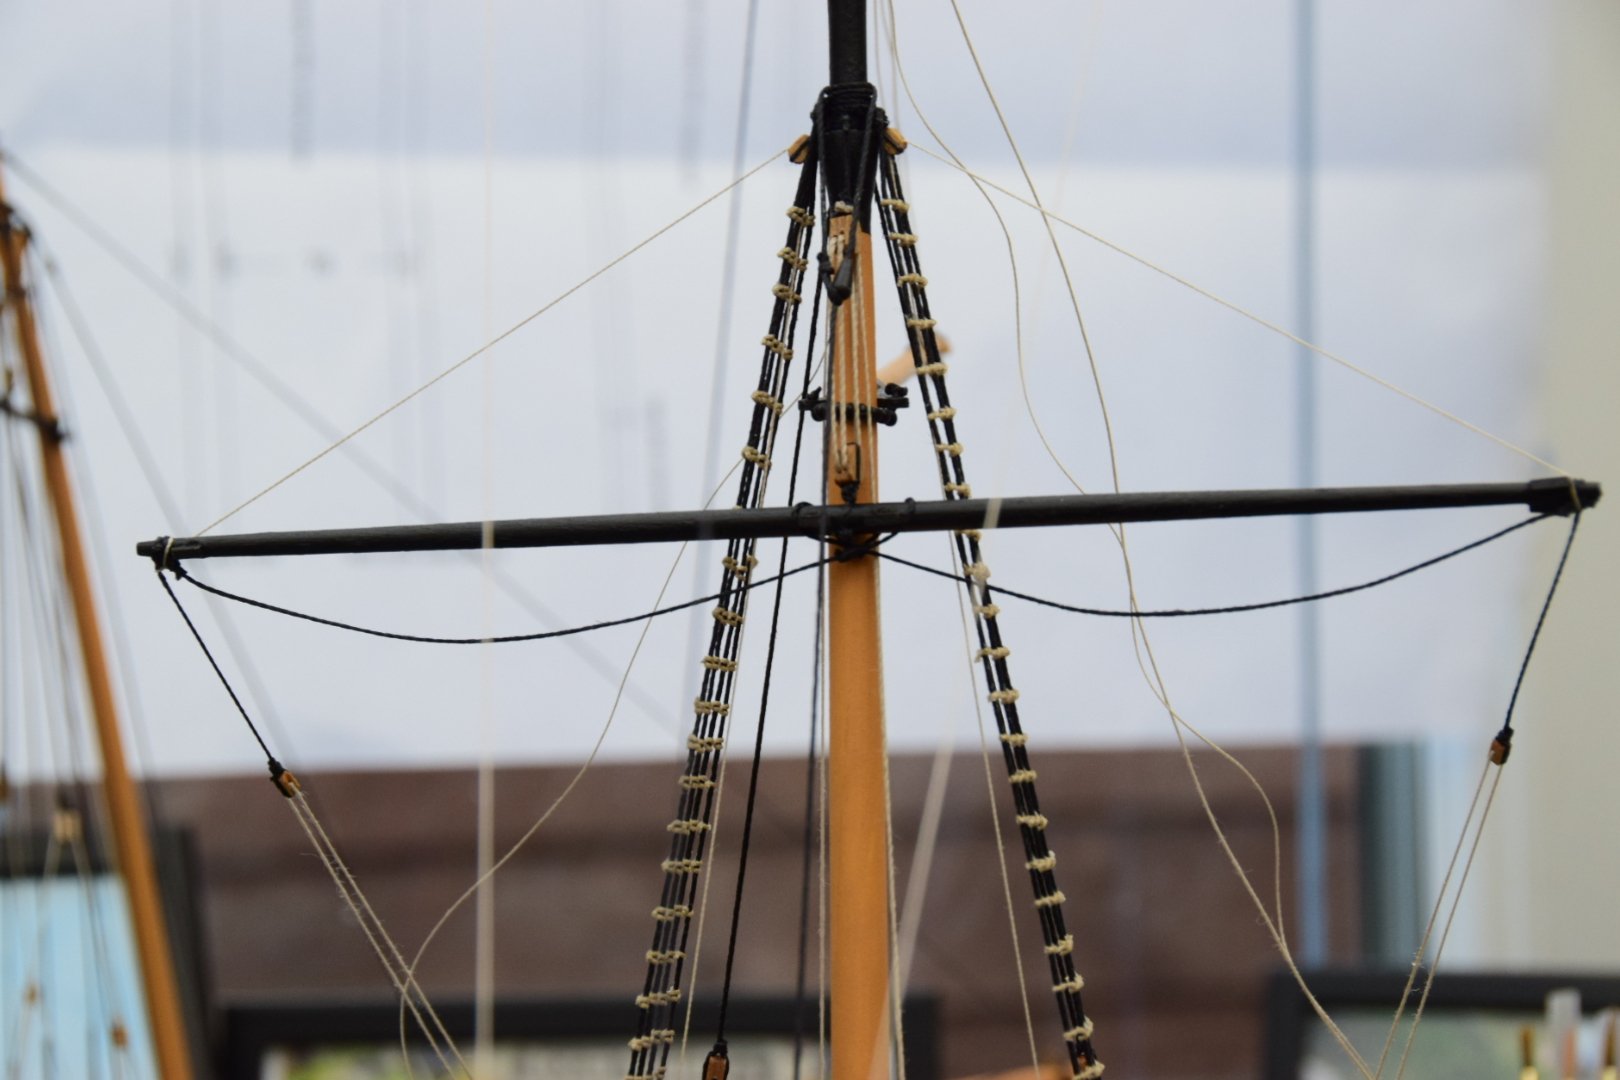
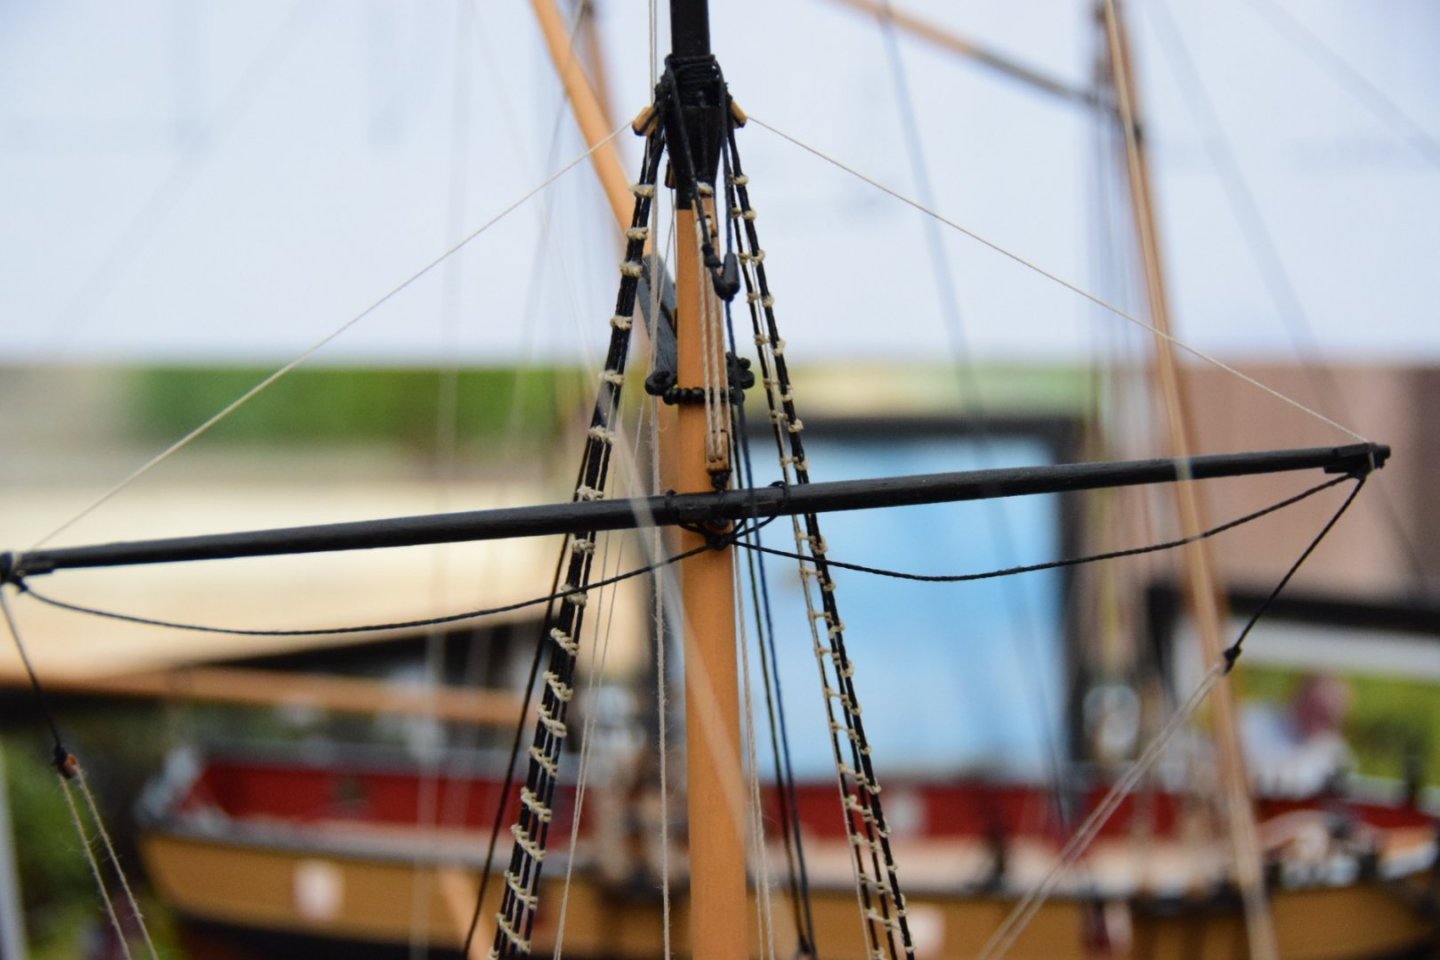
Hi all, Thanks Edward, appreciated as always. Today l have fitted and rigged the upper and lower yards and, all being well, my next session will see the Gaff-Boom and the Driver-Gaff fitted. Time permitting of course. Best wishes as always, The Lazy Saint.


- 104 replies
-
- 8
-
-
- sherbourne
- caldercraft
- (and 1 more)
-
Hi Norway, That planking looks great, as does the coppering. Well done, l am thinking of Pickle as my next build so l shall follow along if l may. Best wishes as always, The Lazy Saint.
-
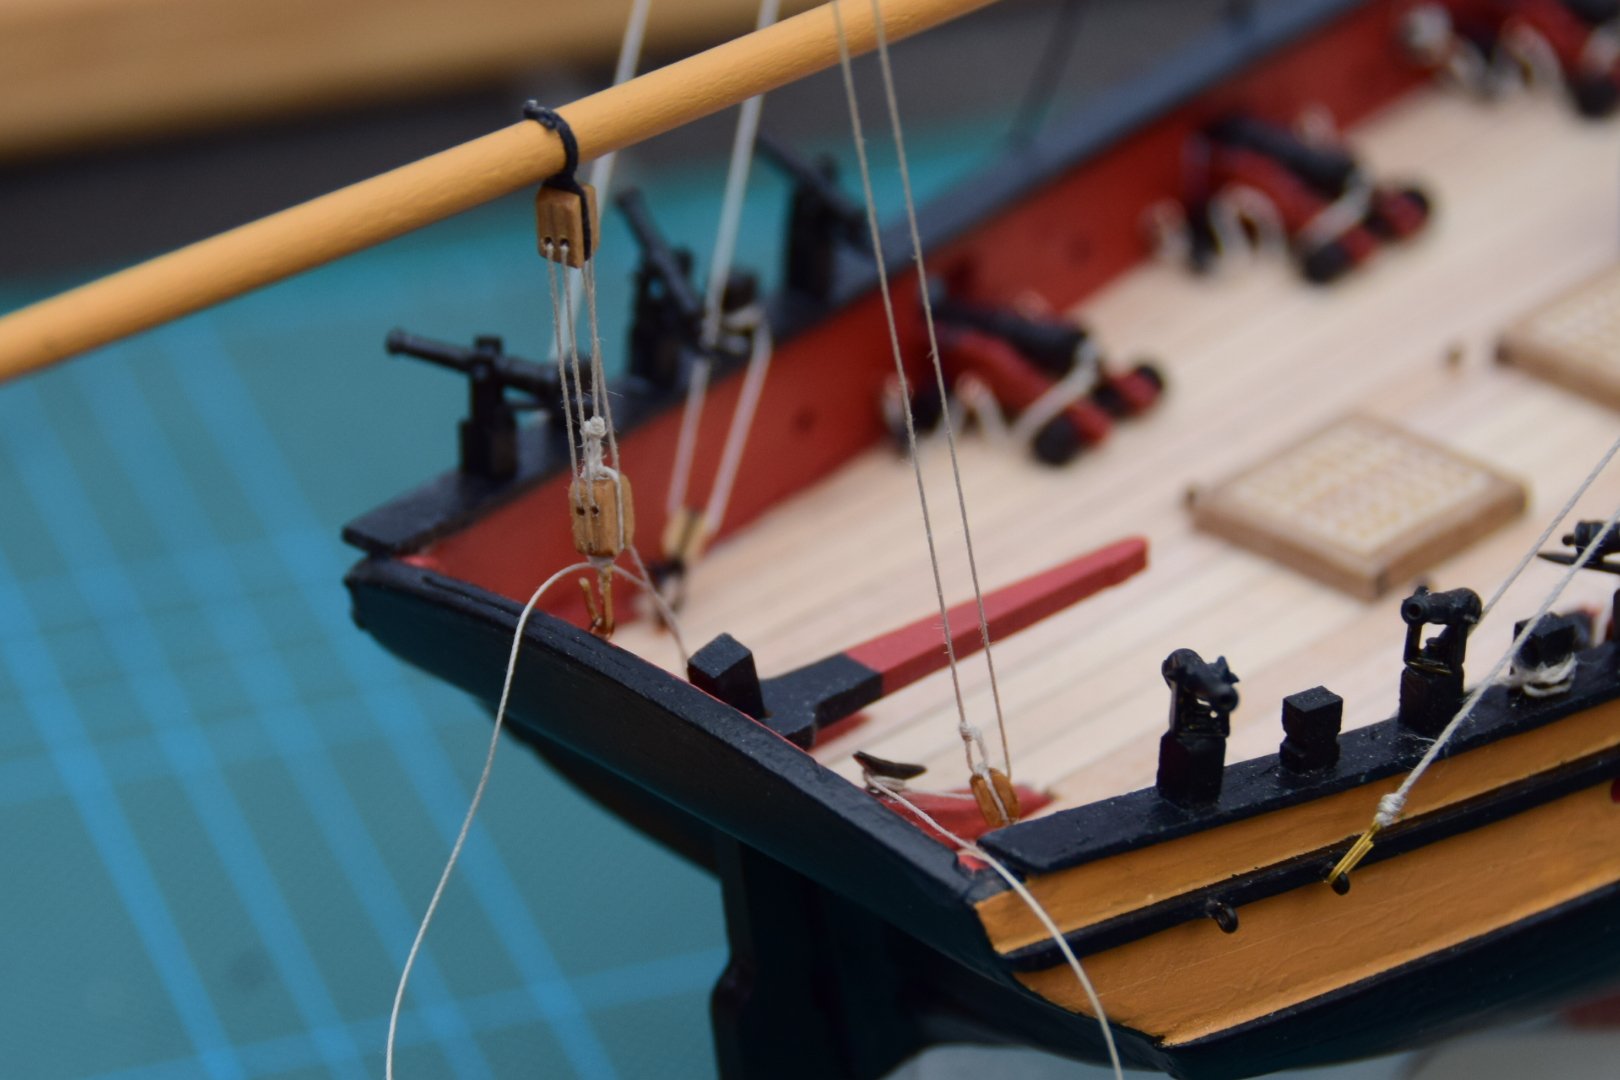
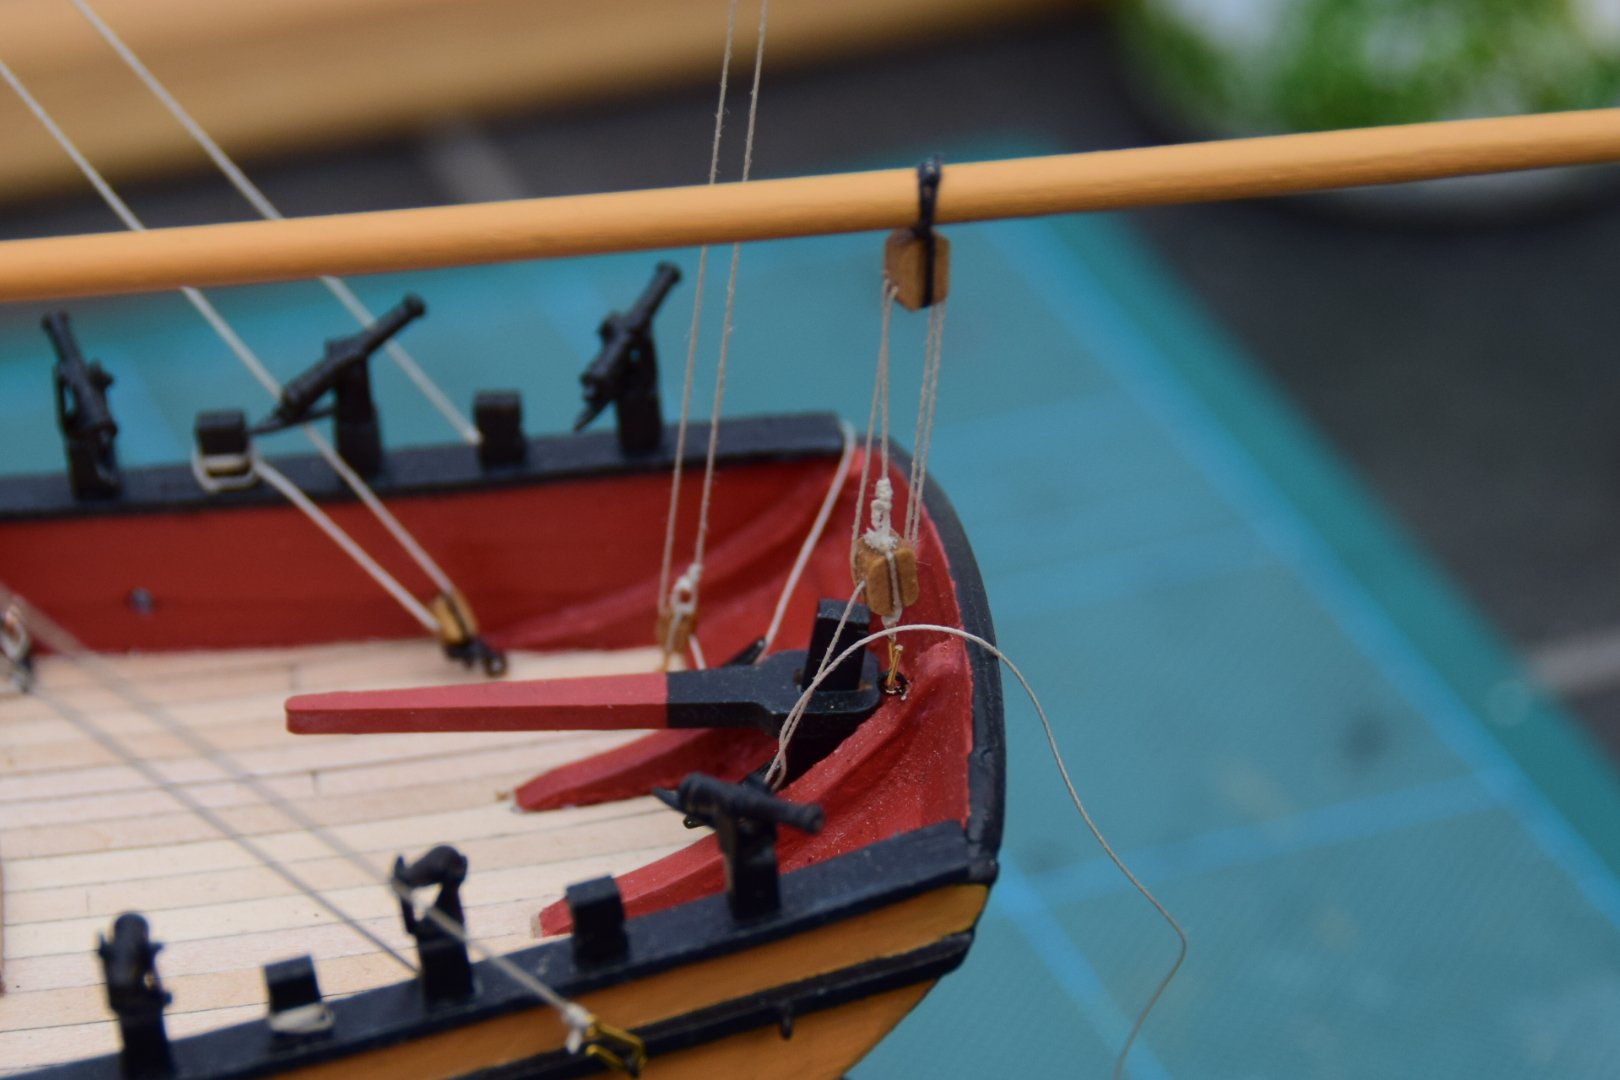
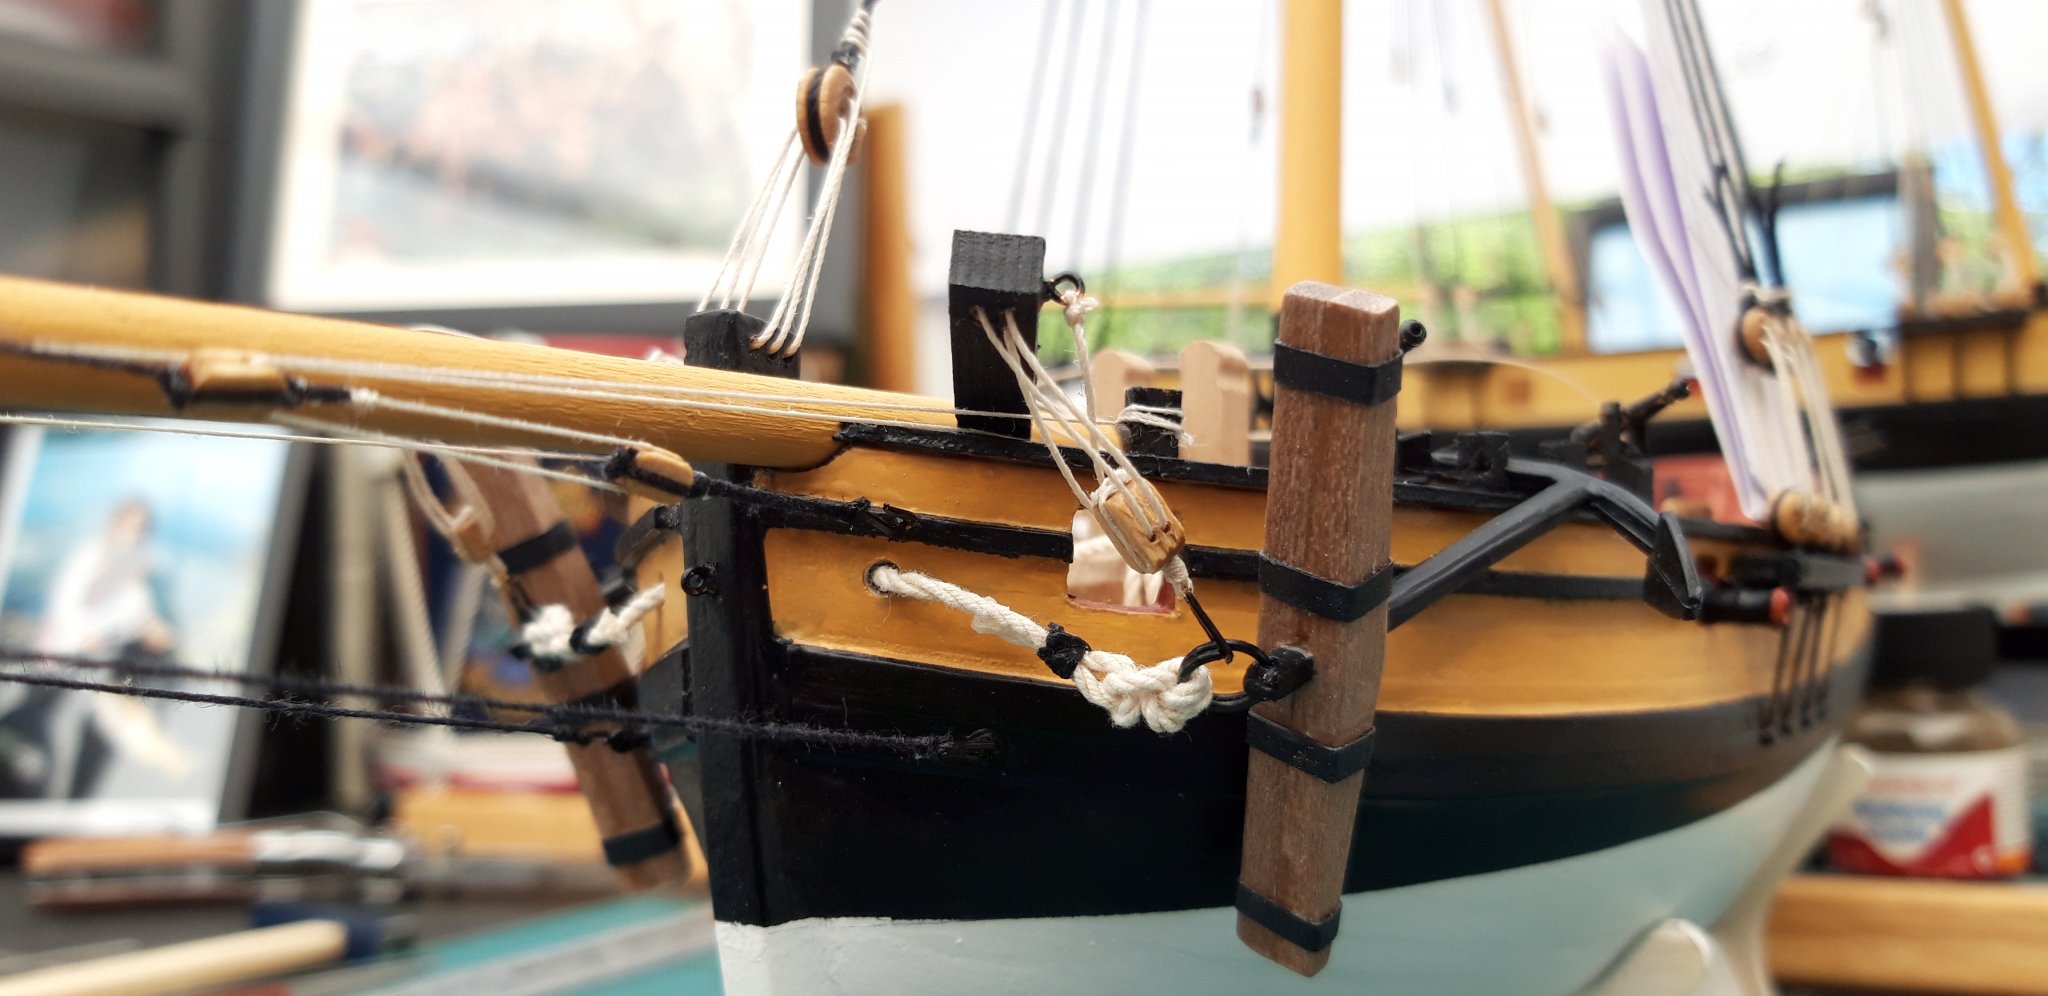
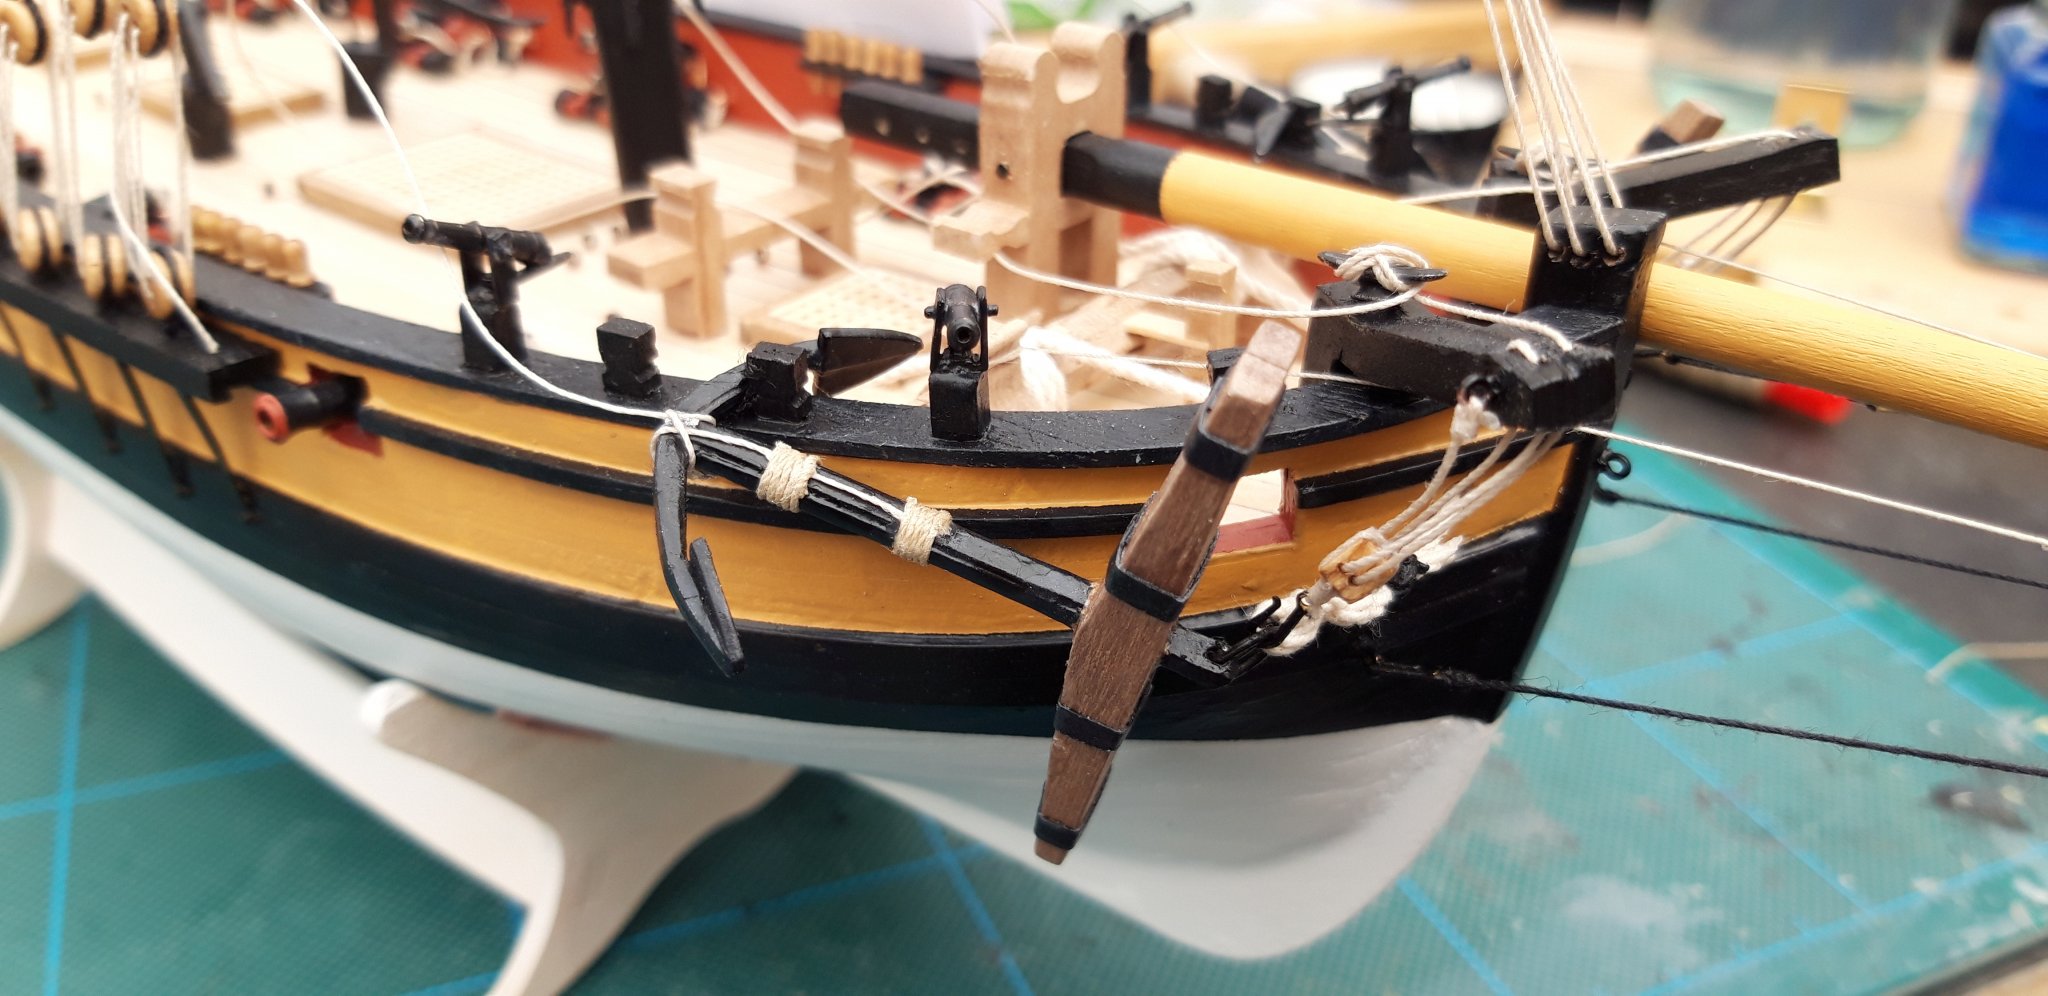
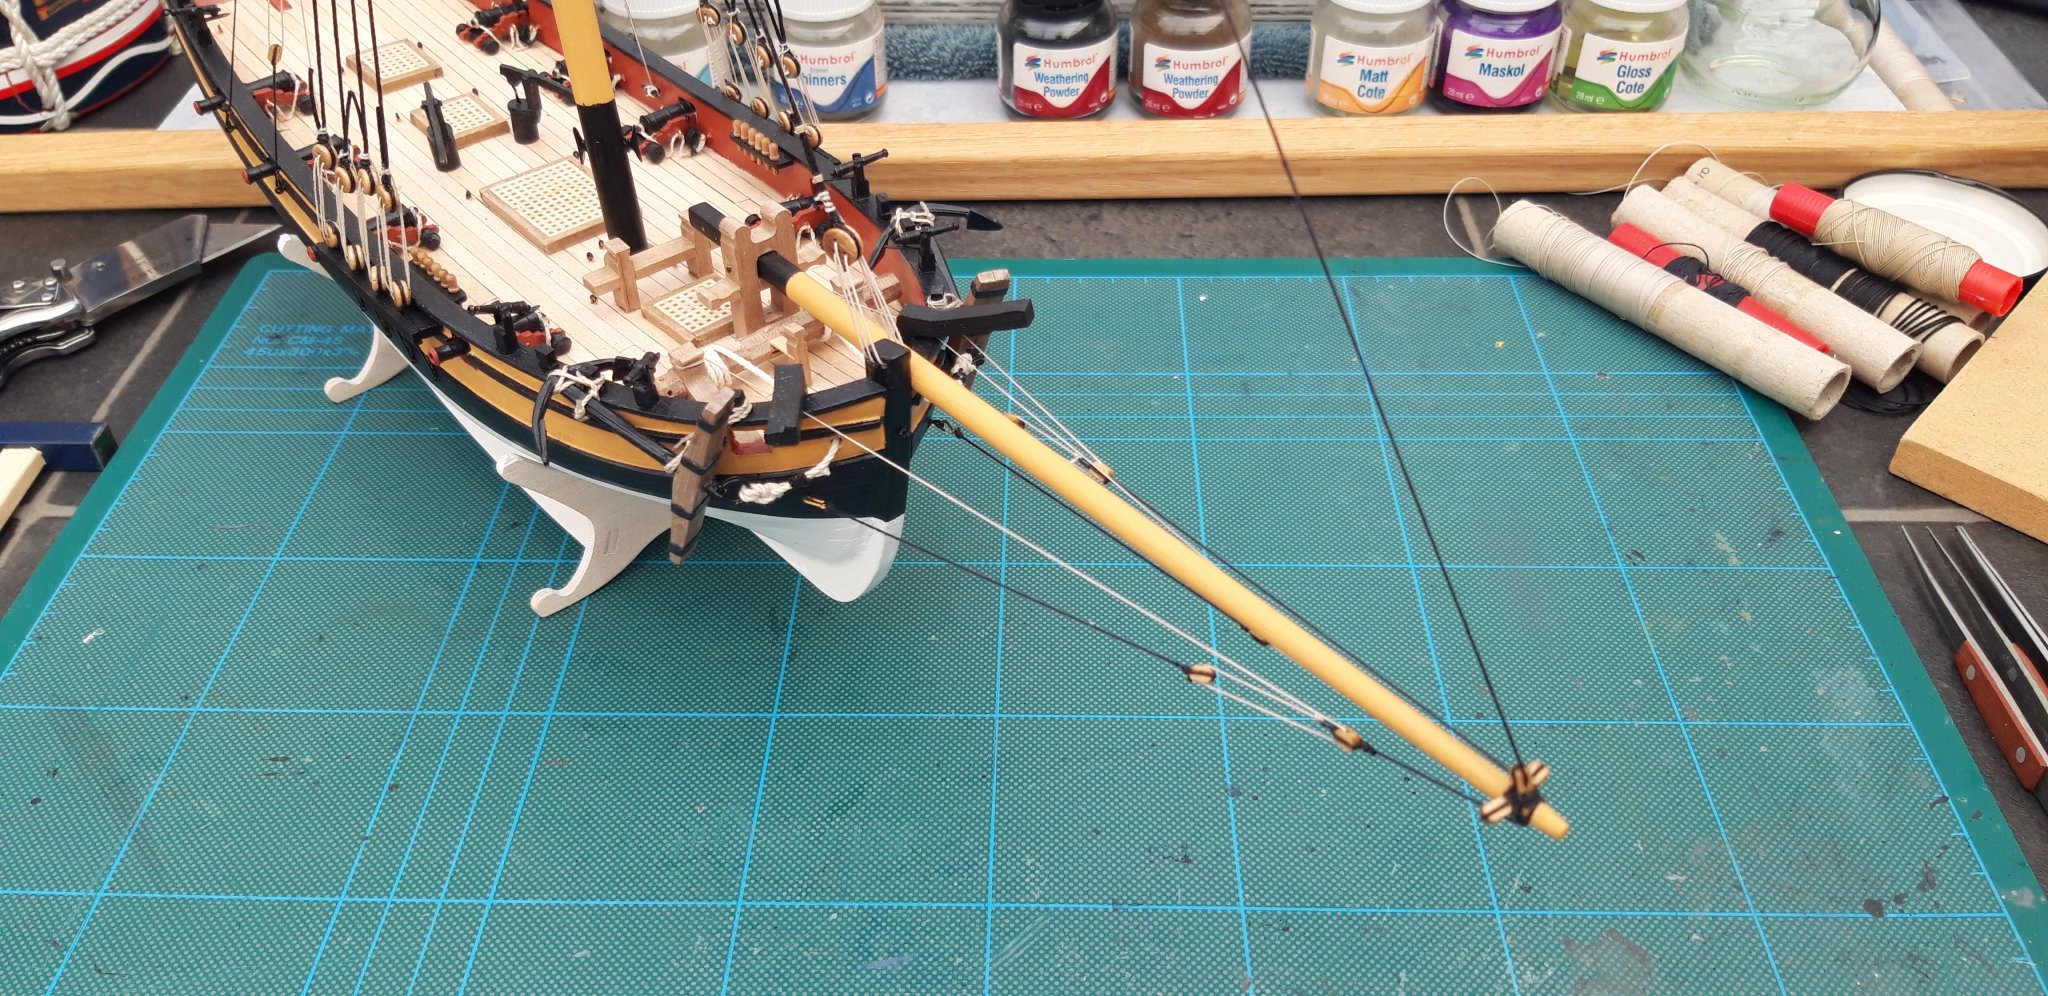
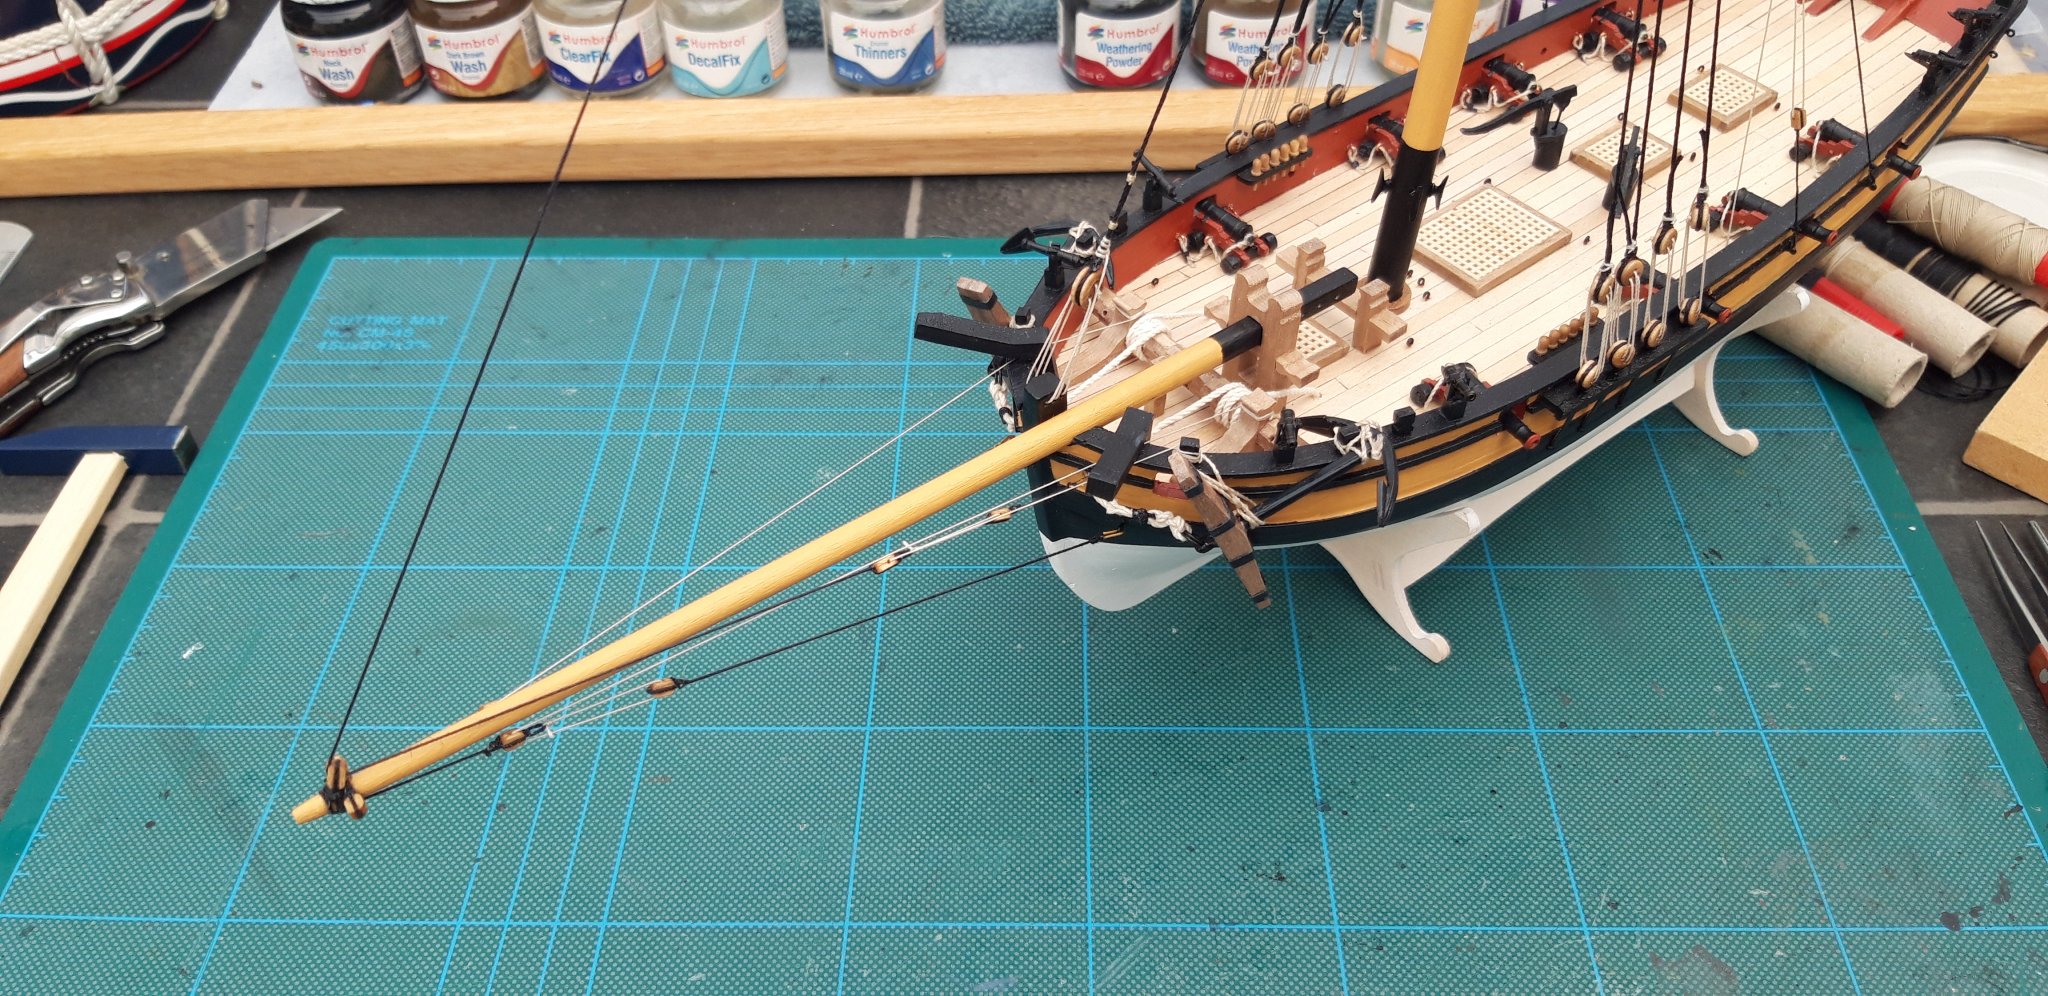
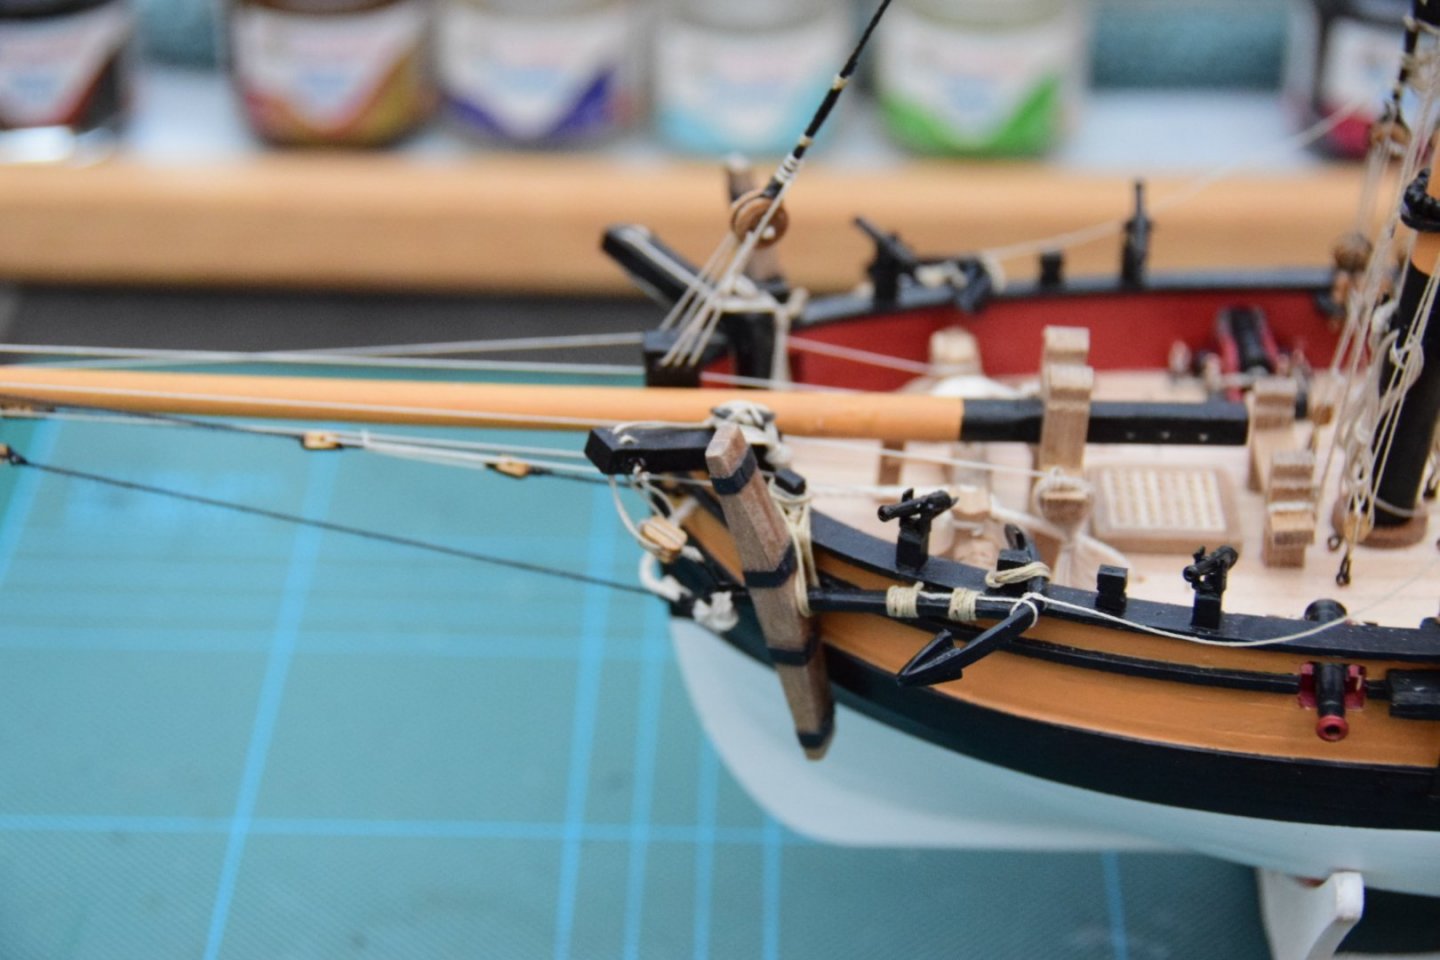
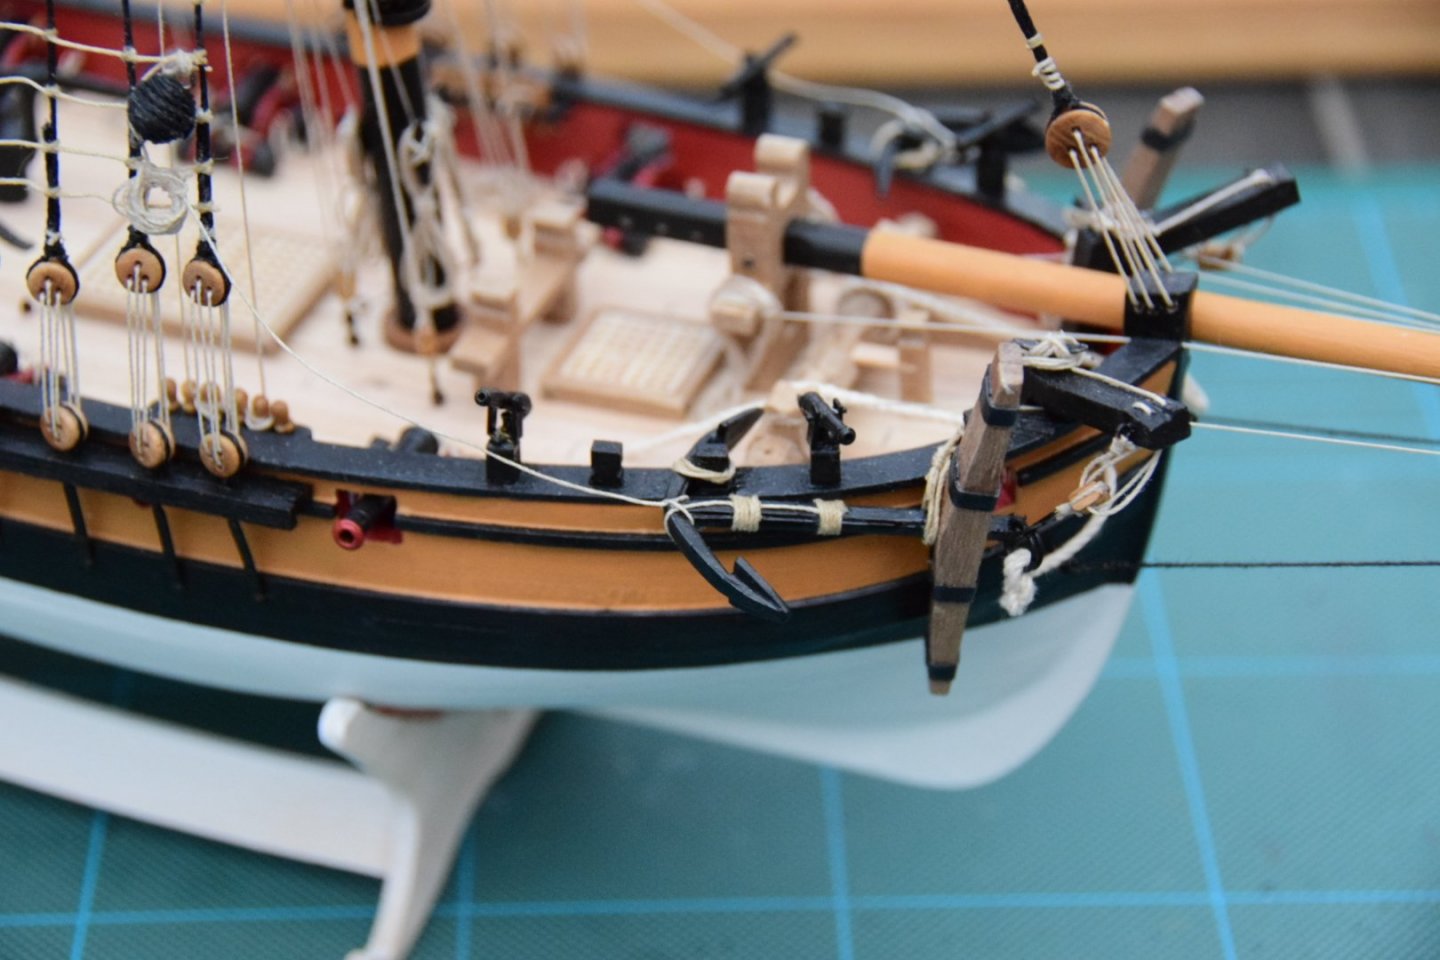
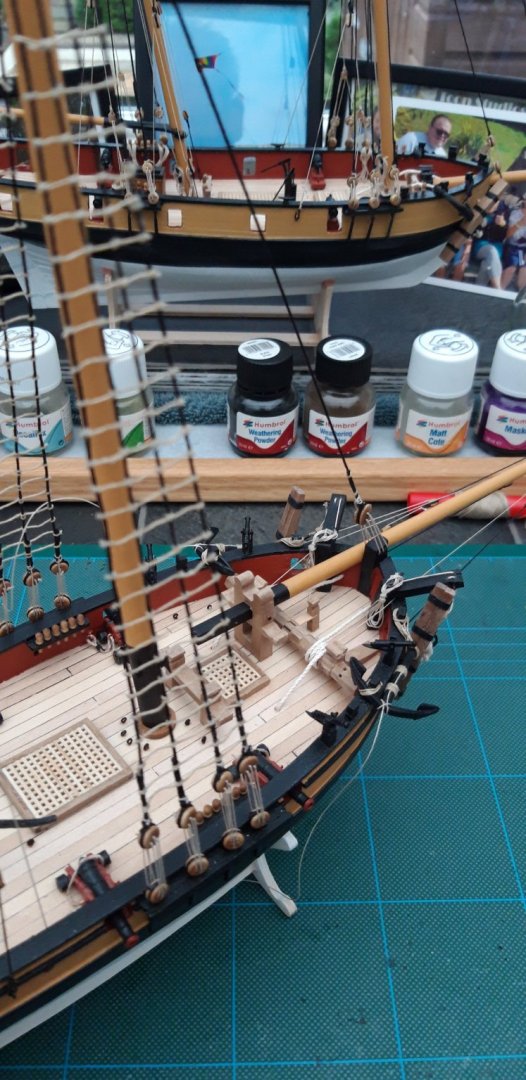
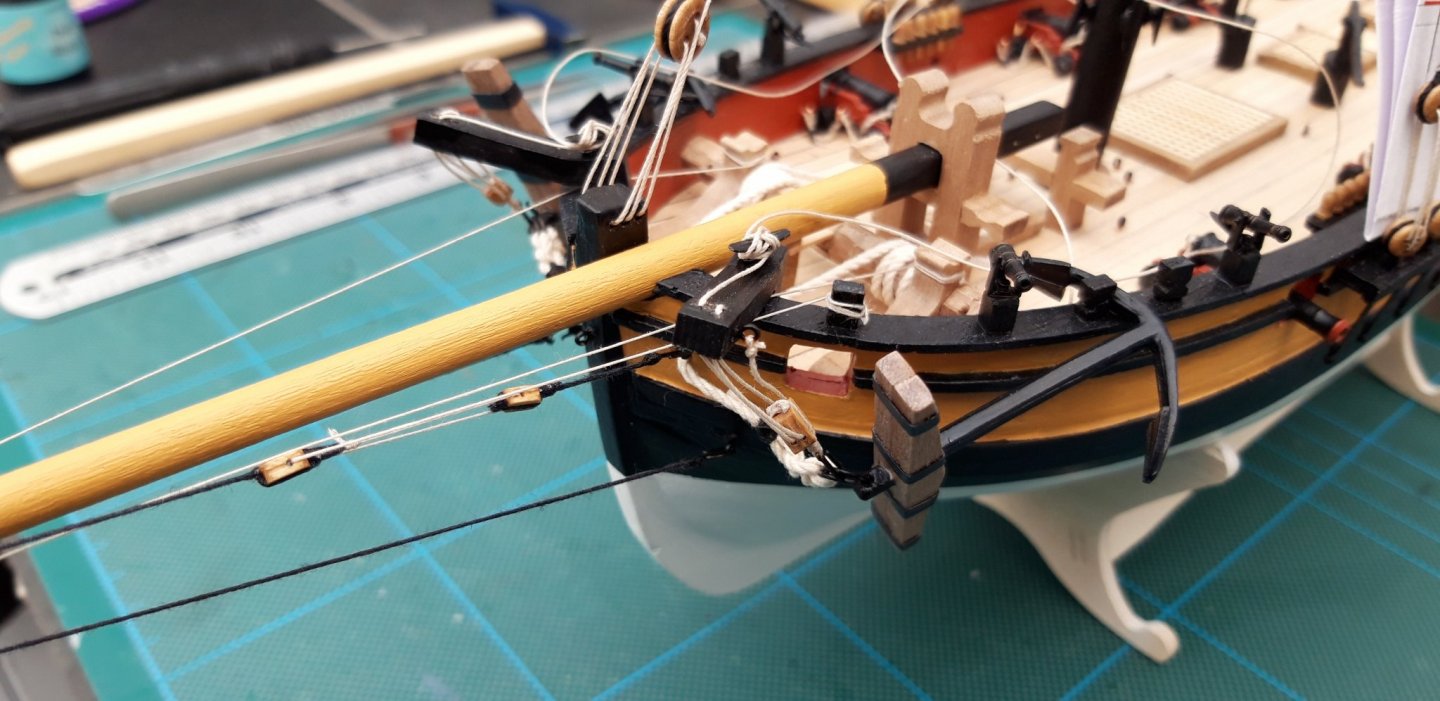
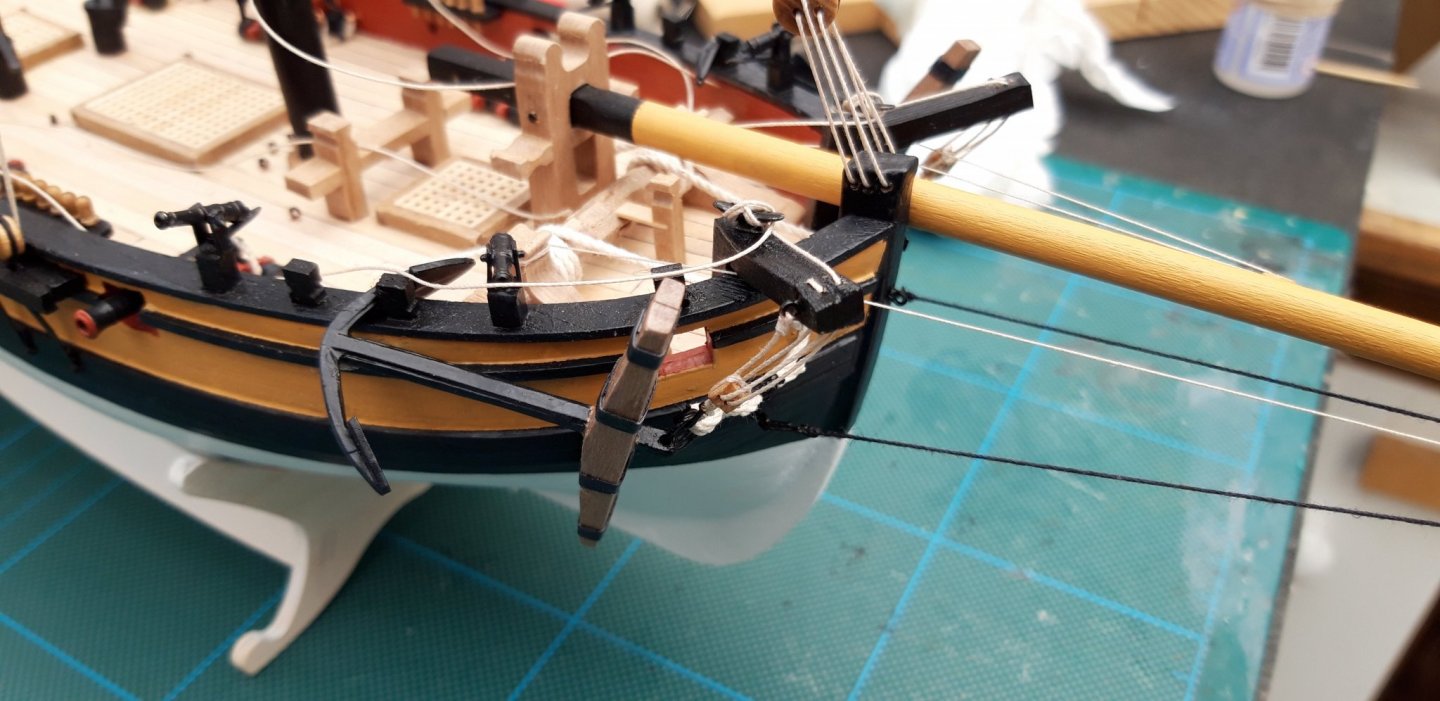
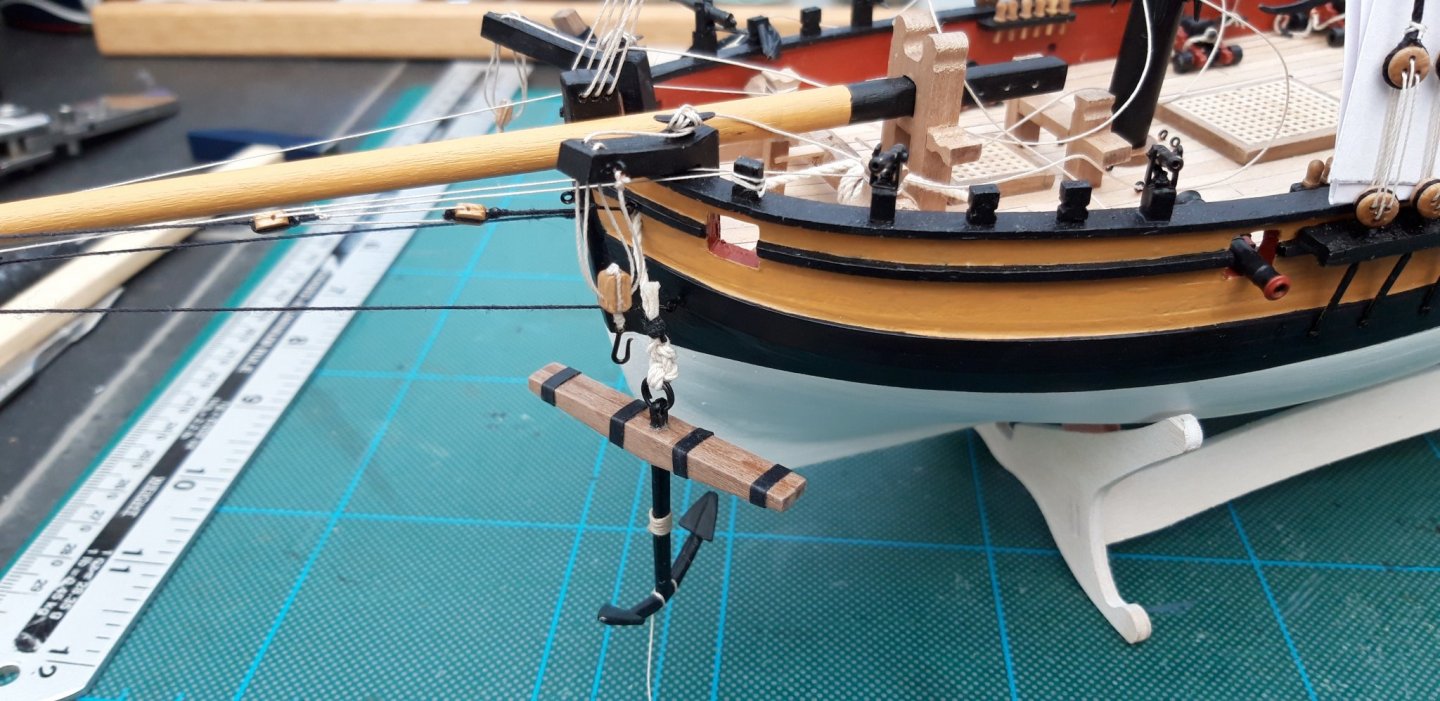
Hi all, The final job for today was to finish the rigging of the anchors. l am pleased that l didn't just follow the kit instructions as, without question, rigging the anchors has enhanced the whole build. Best wishes as always, The Lazy Saint.
- 104 replies
-
- 7
-
-
- sherbourne
- caldercraft
- (and 1 more)
-
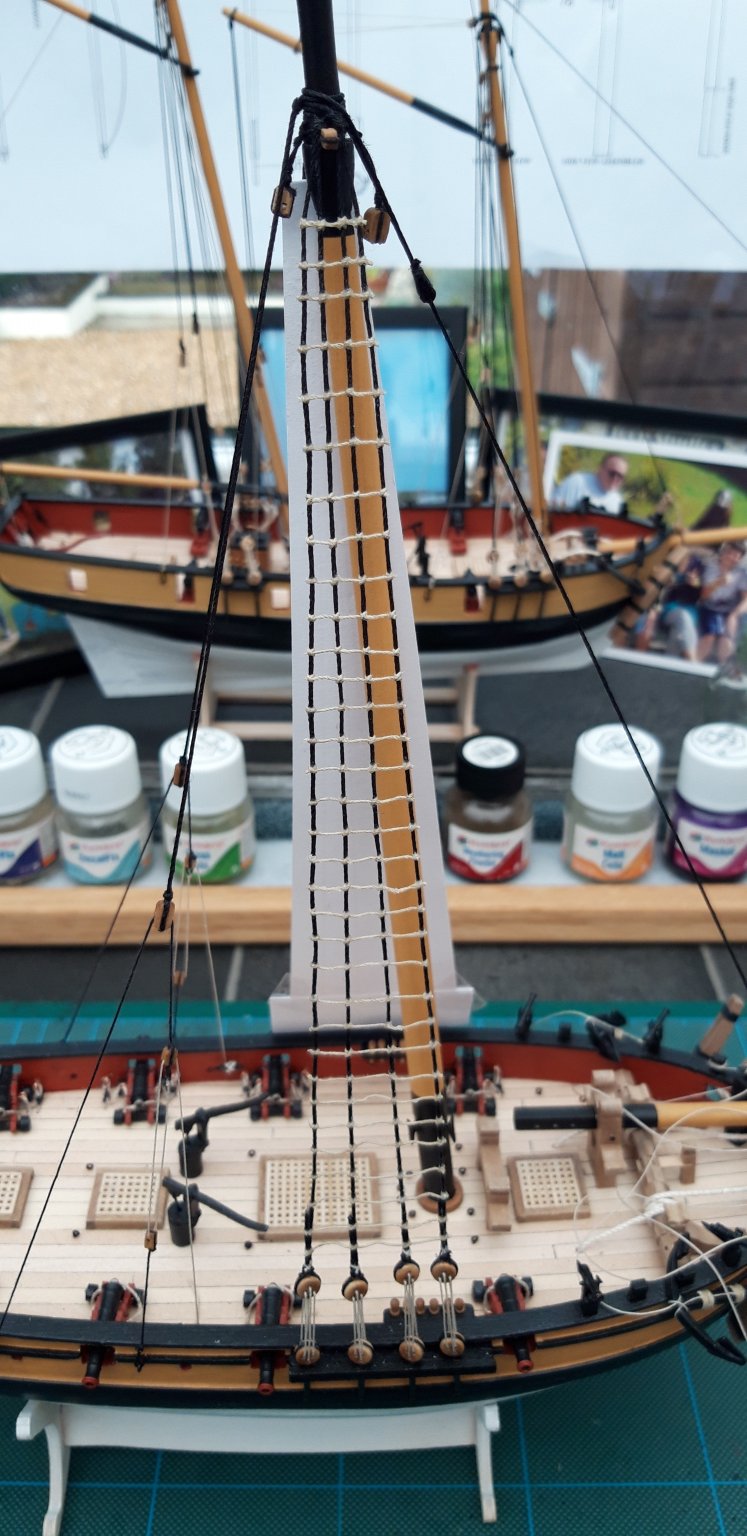
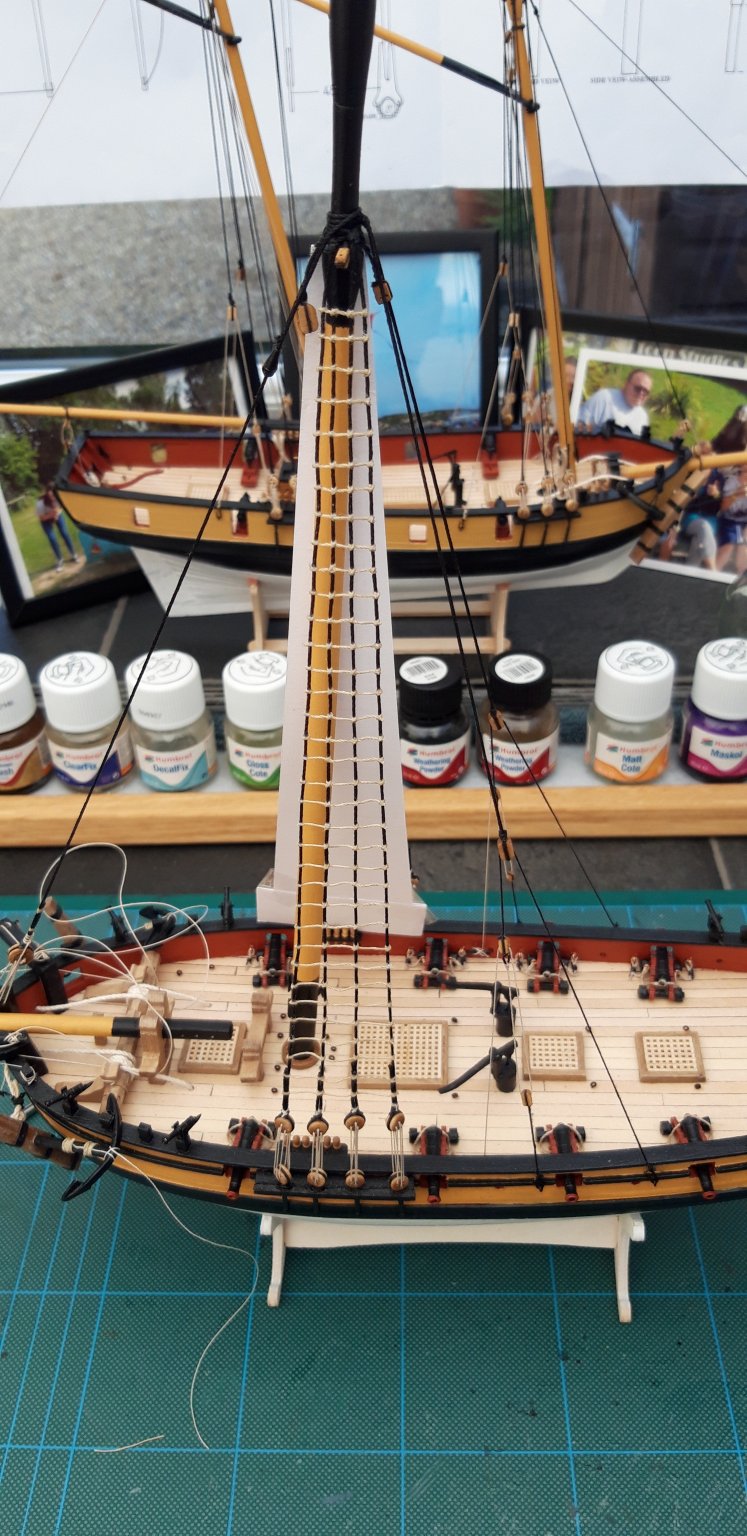
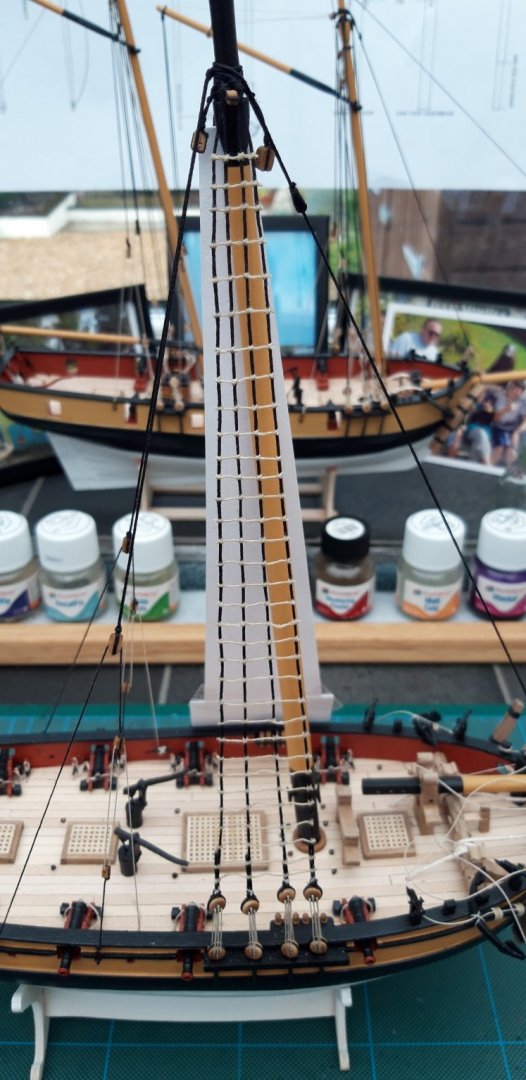
Hi all, Starboard ratlines now completed. Best wishes as always, The Lazy Saint.
- 104 replies
-
- 7
-
-
- sherbourne
- caldercraft
- (and 1 more)
-
Hi mugje, Those Elm tree pumps look great, are they the kit supplied pumps or have you upgraded? Keep up the good work. Best wishes as always, The Lazy Saint.
-
Good work Phil, l have to agree with Wallace. You go that extra mile that makes a difference. Best wishes as always, The Lazy Saint.
-
Hi all, I have managed to complete the ratlines for the Port Shrouds, now on to the Starboard Shrouds. Best wishes as always, The Lazy Saint.
- 104 replies
-
- 9
-
-
- sherbourne
- caldercraft
- (and 1 more)
-
Well done with the rudder mugje, l seem to have a problem with them. You have done a great job on yours. Best wishes as always, The Lazy Saint.
-
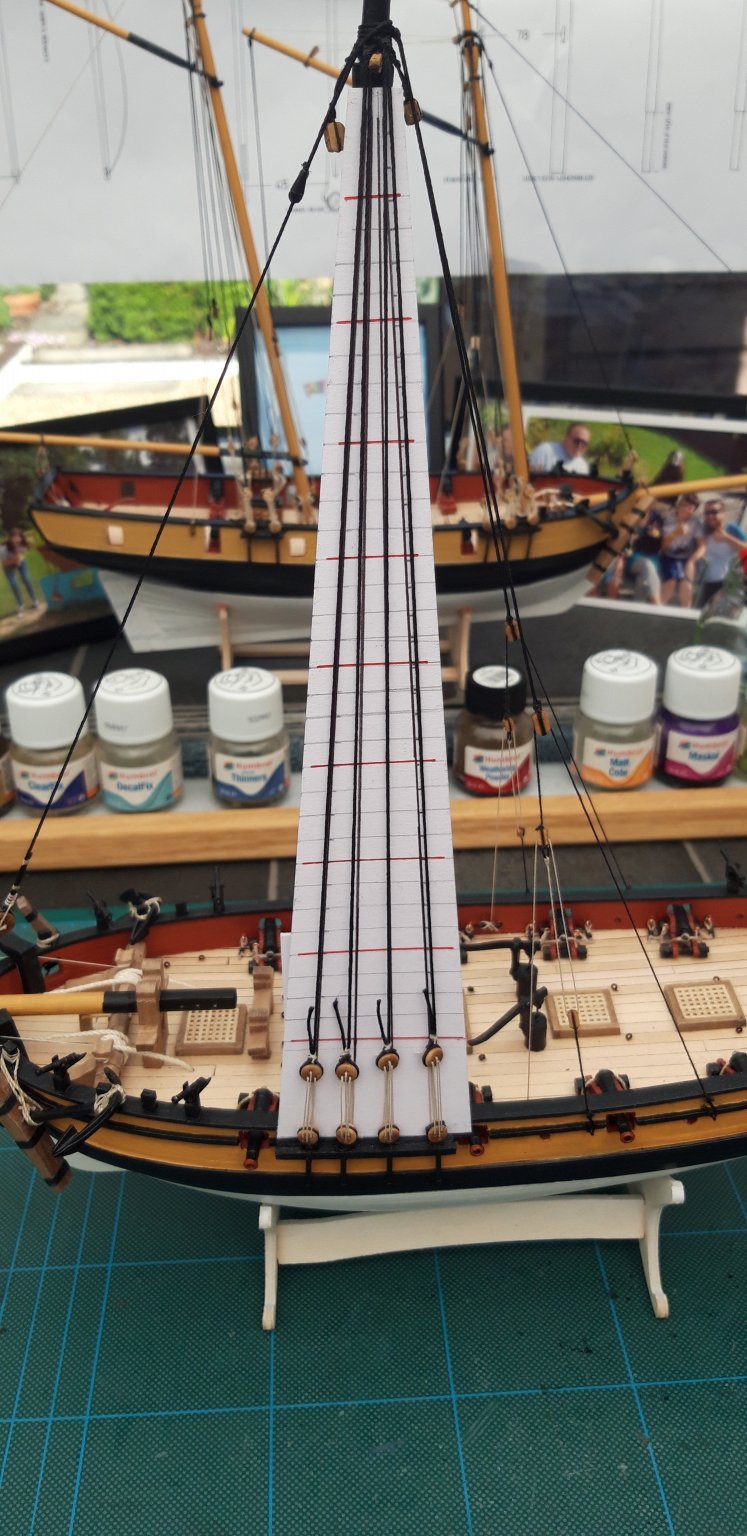
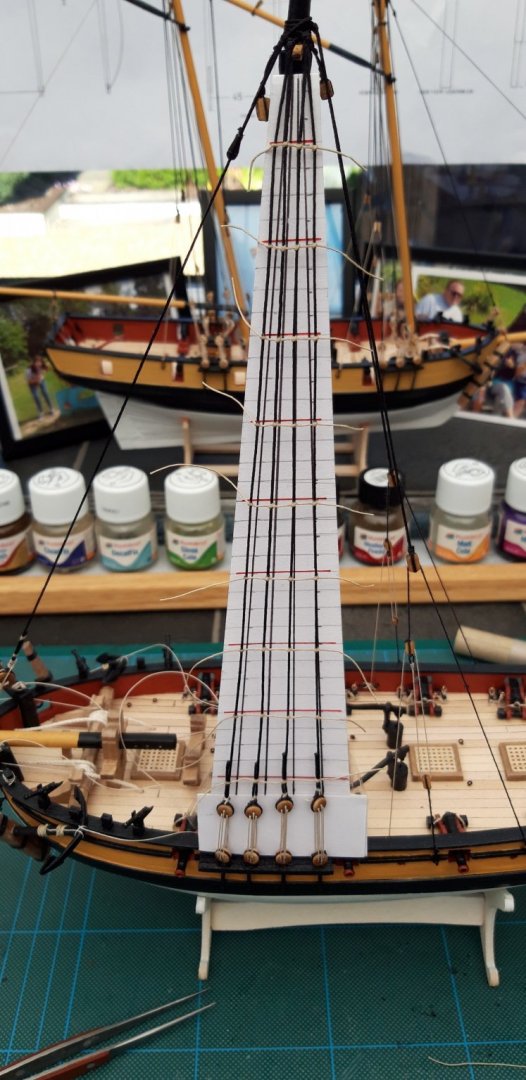
Hi all, Ha ha, yes he certainly did Edward, and thanks for your kind words. I started on the ratlines today and must admit l thought at first that l lacked the dexterity required for the task, but, after many attempts (not to mention half a spool of thread) l got it. I have now managed to get into a rhythm. I have run out of time today so l hope l can pick up that rhythm again during my next session. Best wishes as always, The Lazy Saint.
- 104 replies
-
- 7
-
-
- sherbourne
- caldercraft
- (and 1 more)
-
Hi Edward, Am l correct when l assume you started by just purchasing the plans, all other items you will make/purchase when you get to that relevant stage. 🤔 Best wishes as always, The Lazy Saint.
-
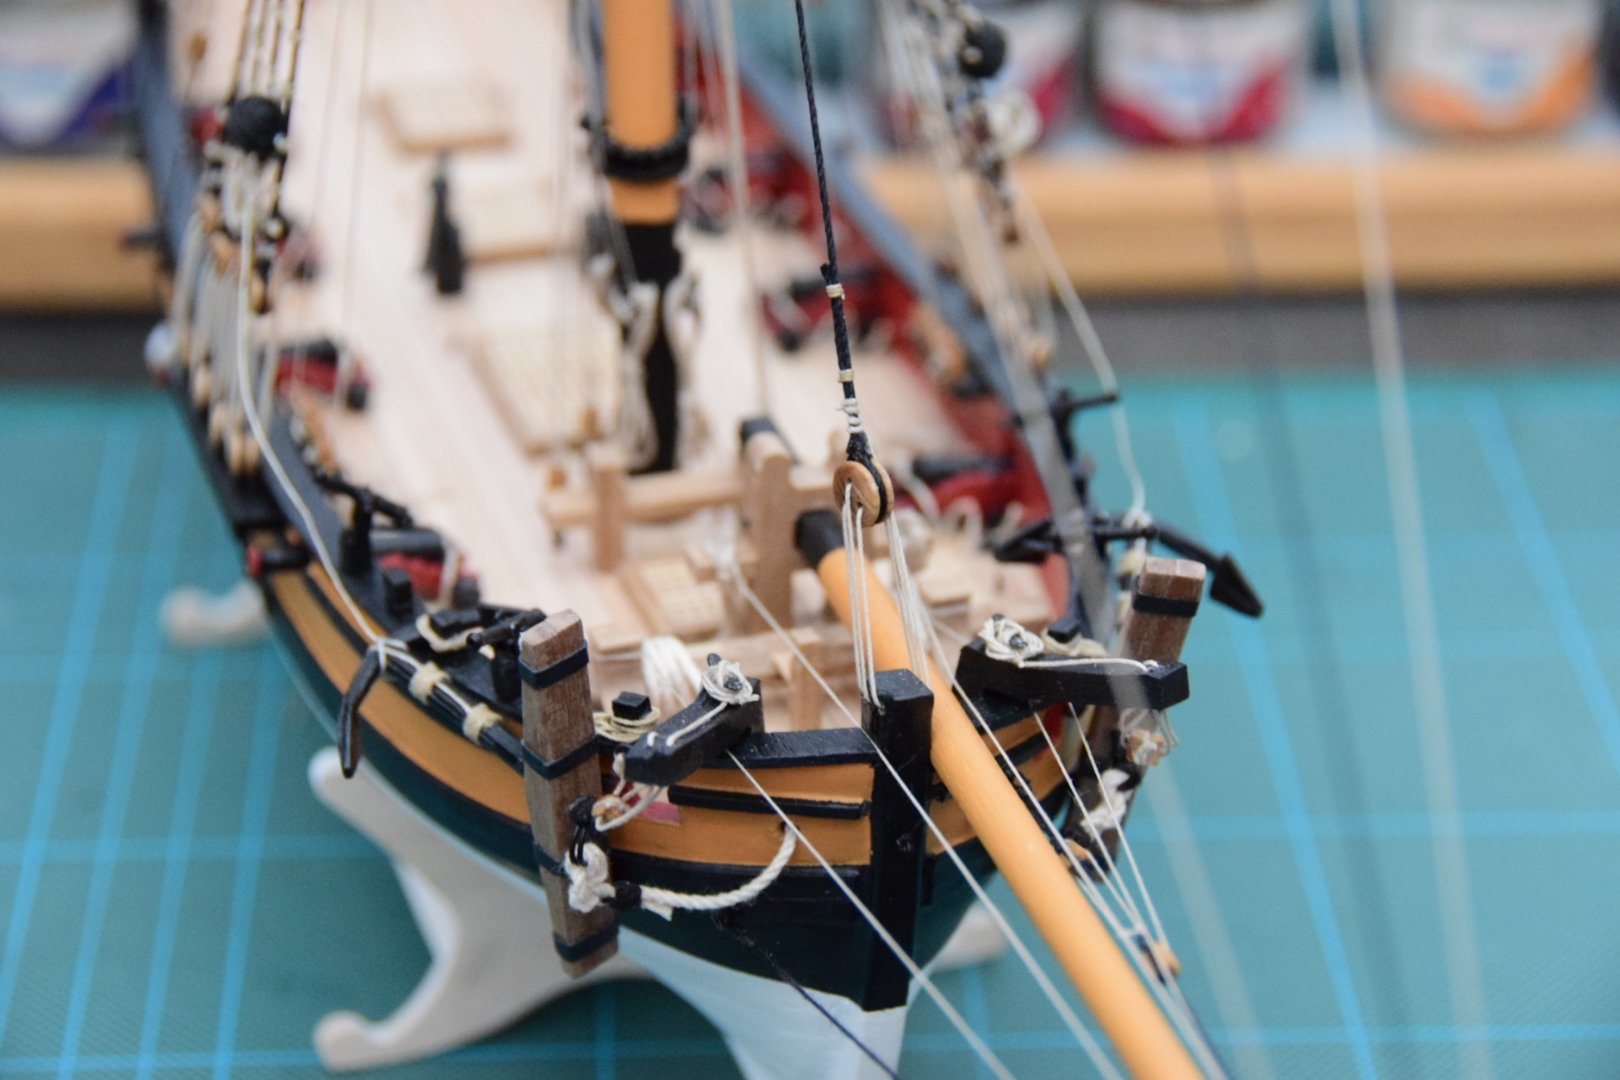
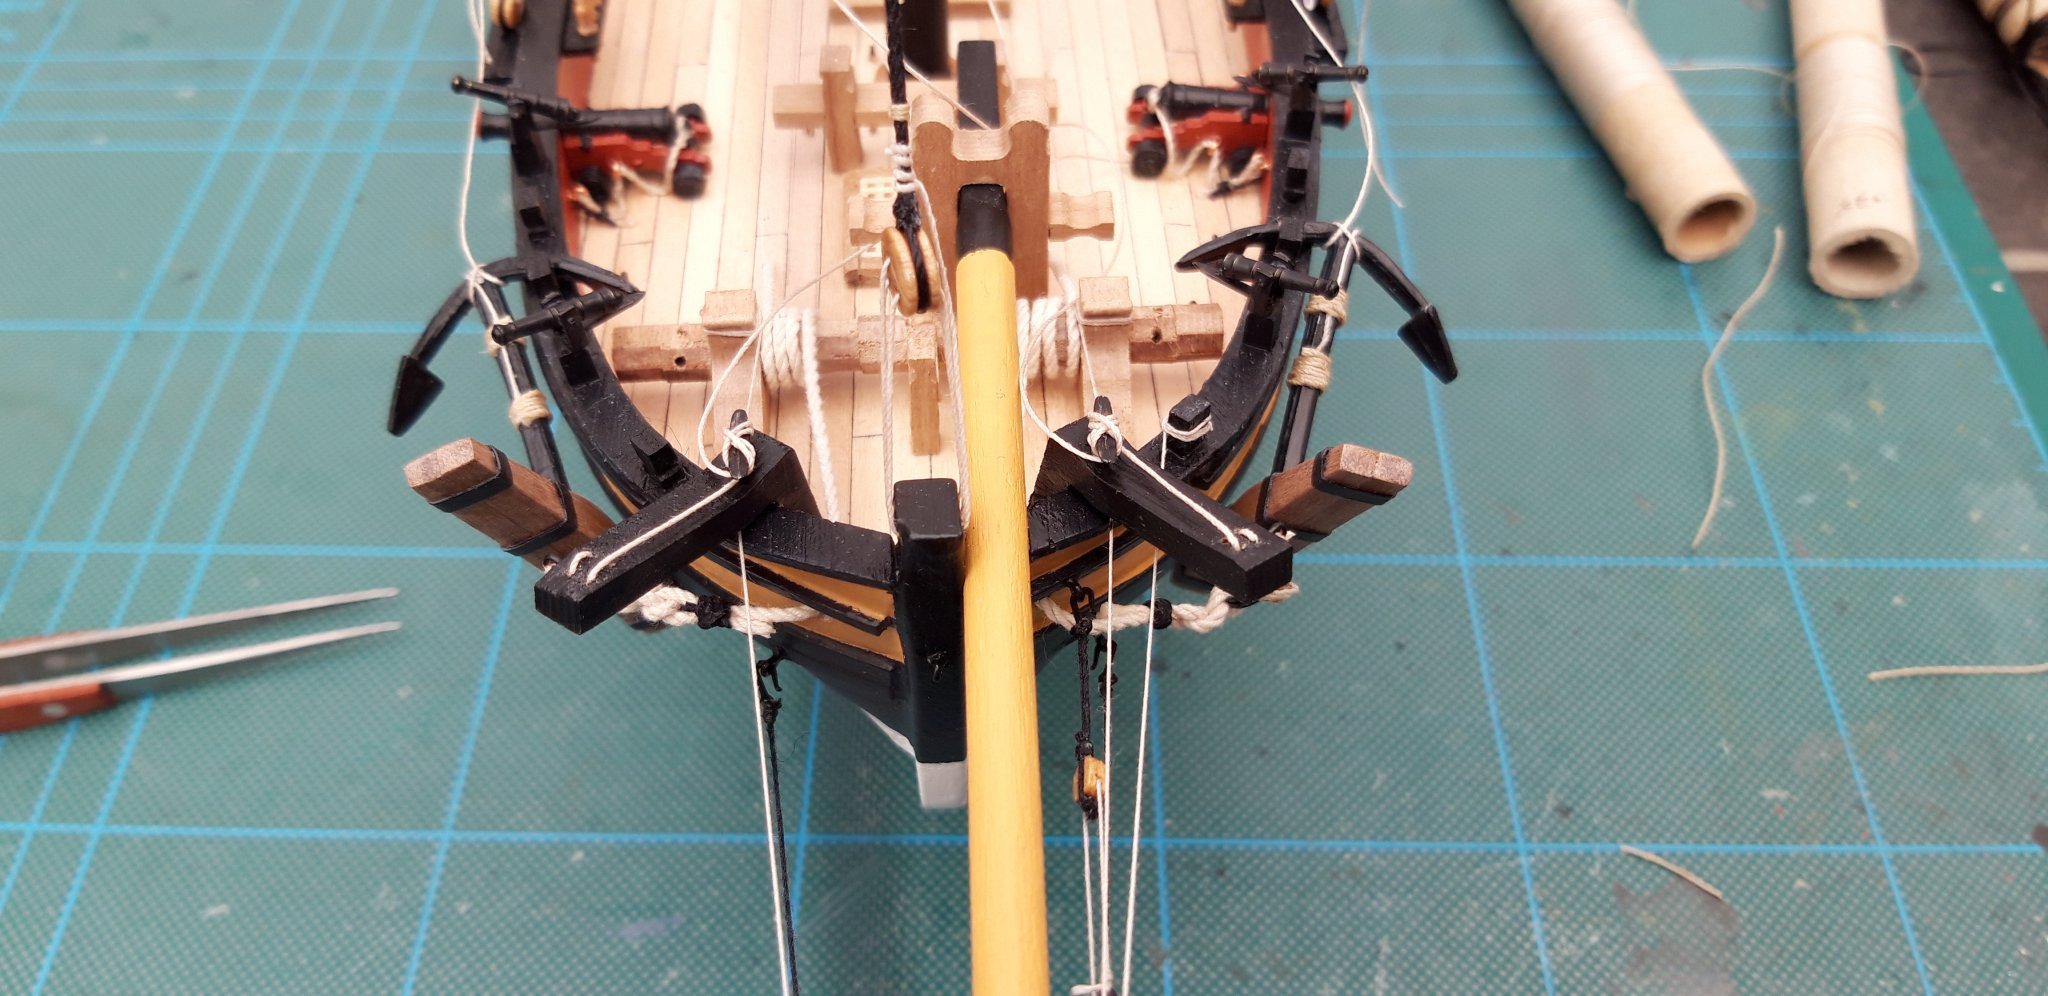
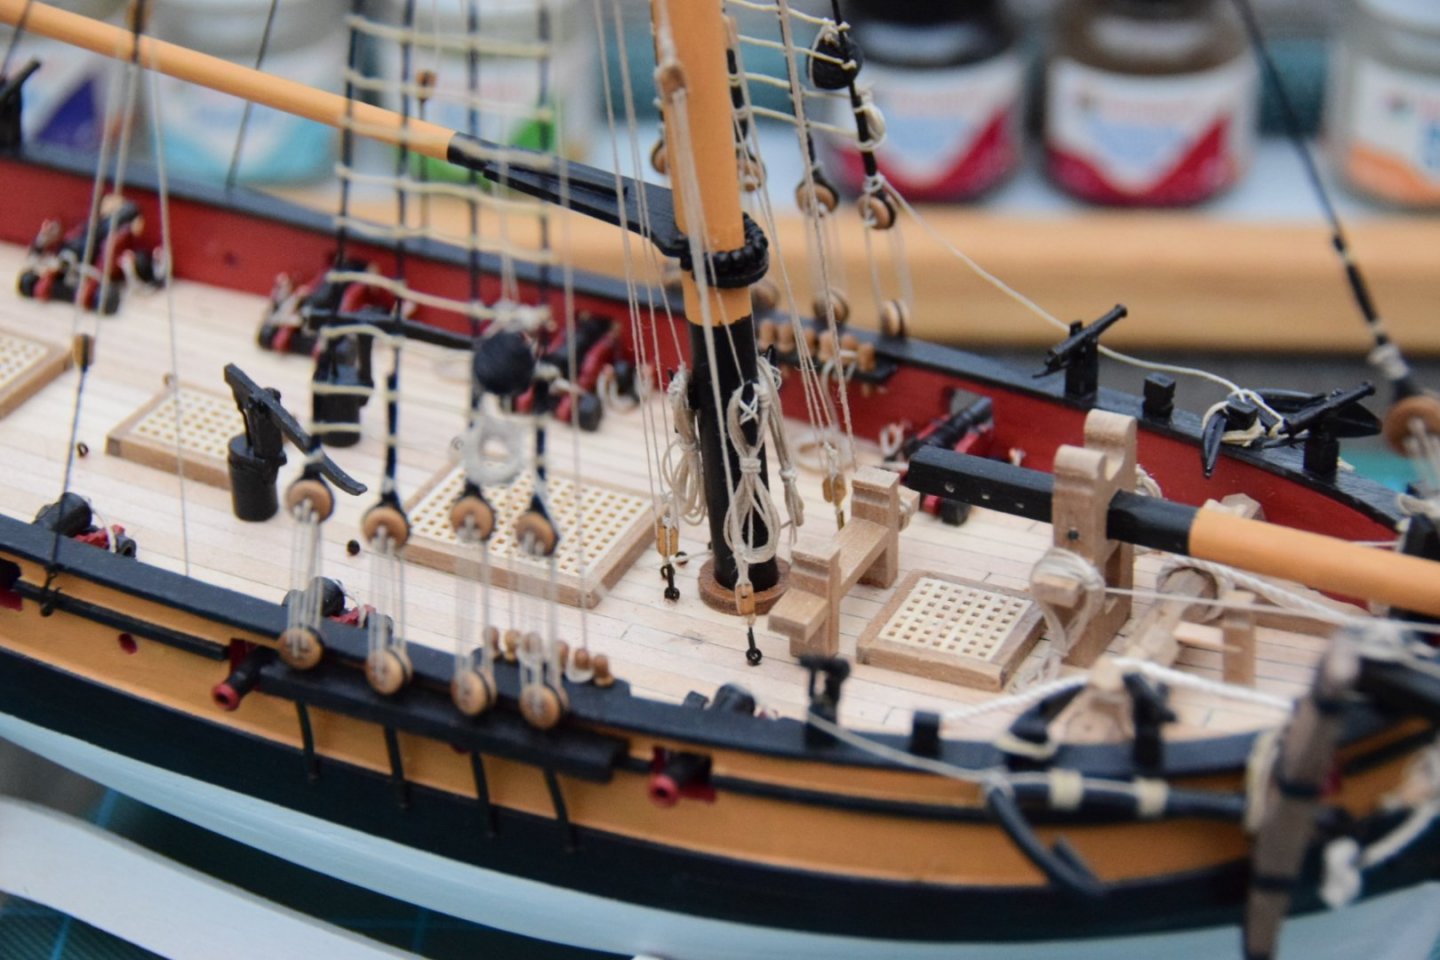
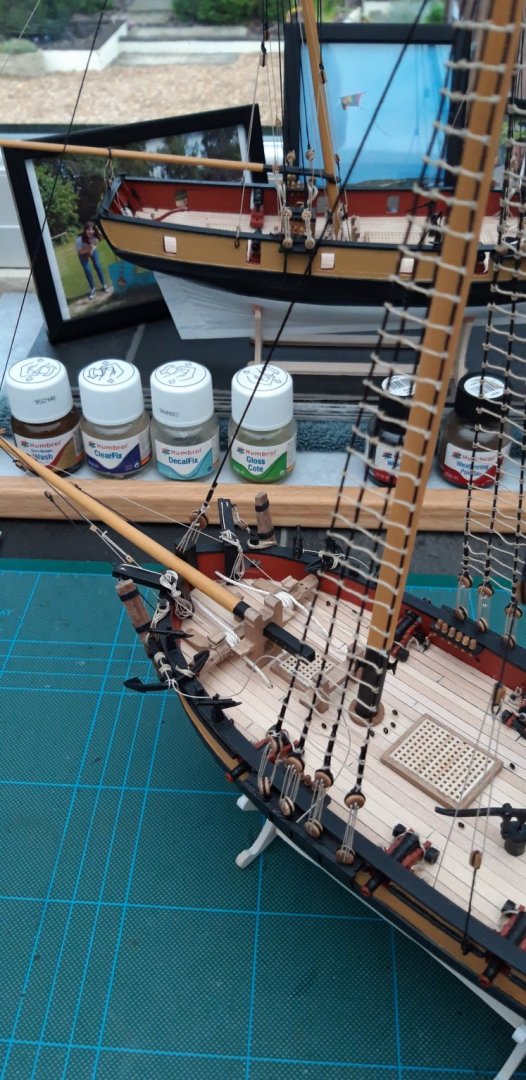
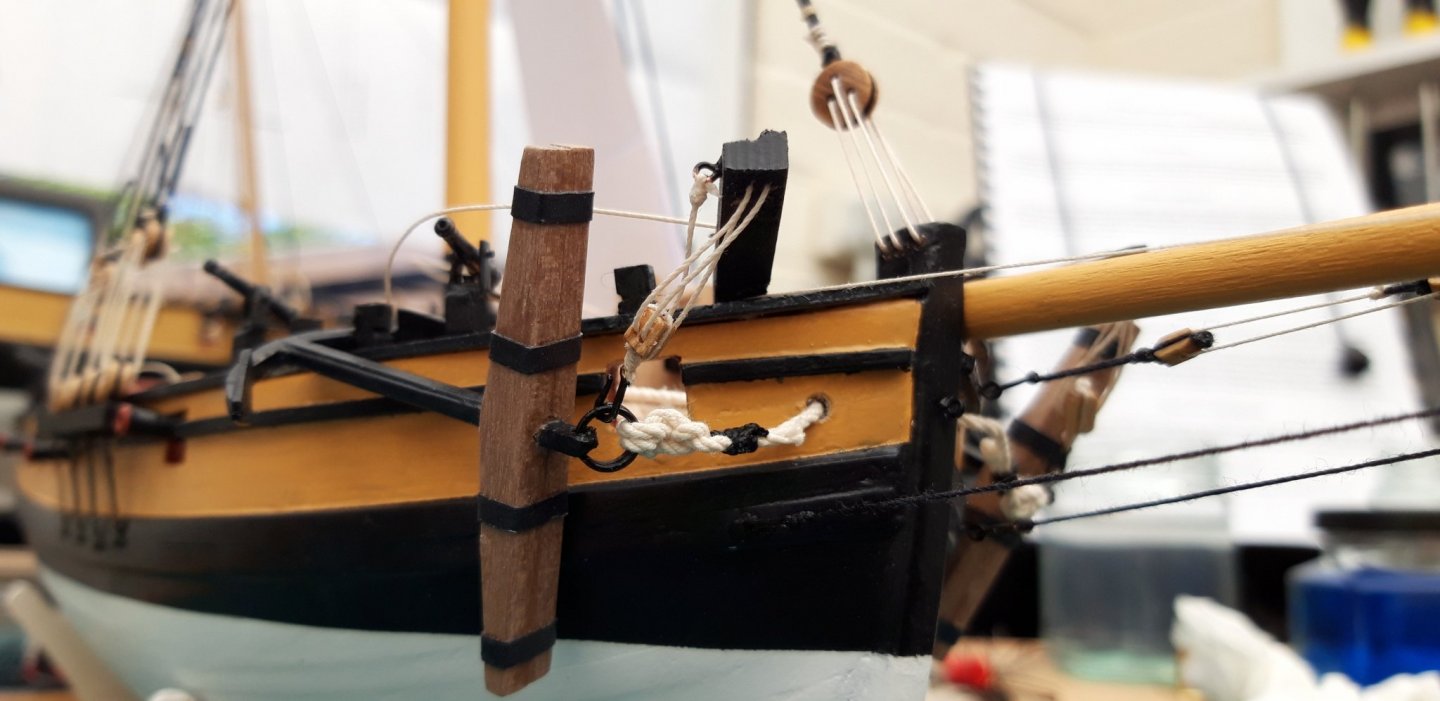
Hi all, Thanks Rick for such great info/encouragement on my Anchor problem, thanks Tony for that great recommendation and thanks Dirk for shaming me into action. 😂 Here is where l am at now. I drilled the four holes in each of the Catheads for the pulleys, l also attached an eyelet to each. Rigged with a double block and hook and attached to the anchor. once l was happy l had rigged each anchor correctly, l lowered each for the fitting of the anchor buoys. My last task of the session was to re hang each of the anchors in what will be their final positions (approximately) Once again, l shall wait until l am happy before tying off. Tomorrow l shall lash them down, adjust where necessary and tie down their rigging. I shall also make and tie up the anchor buoys. Best wishes as always, The Lazy Saint.


- 104 replies
-
- 10
-
-
- sherbourne
- caldercraft
- (and 1 more)
-
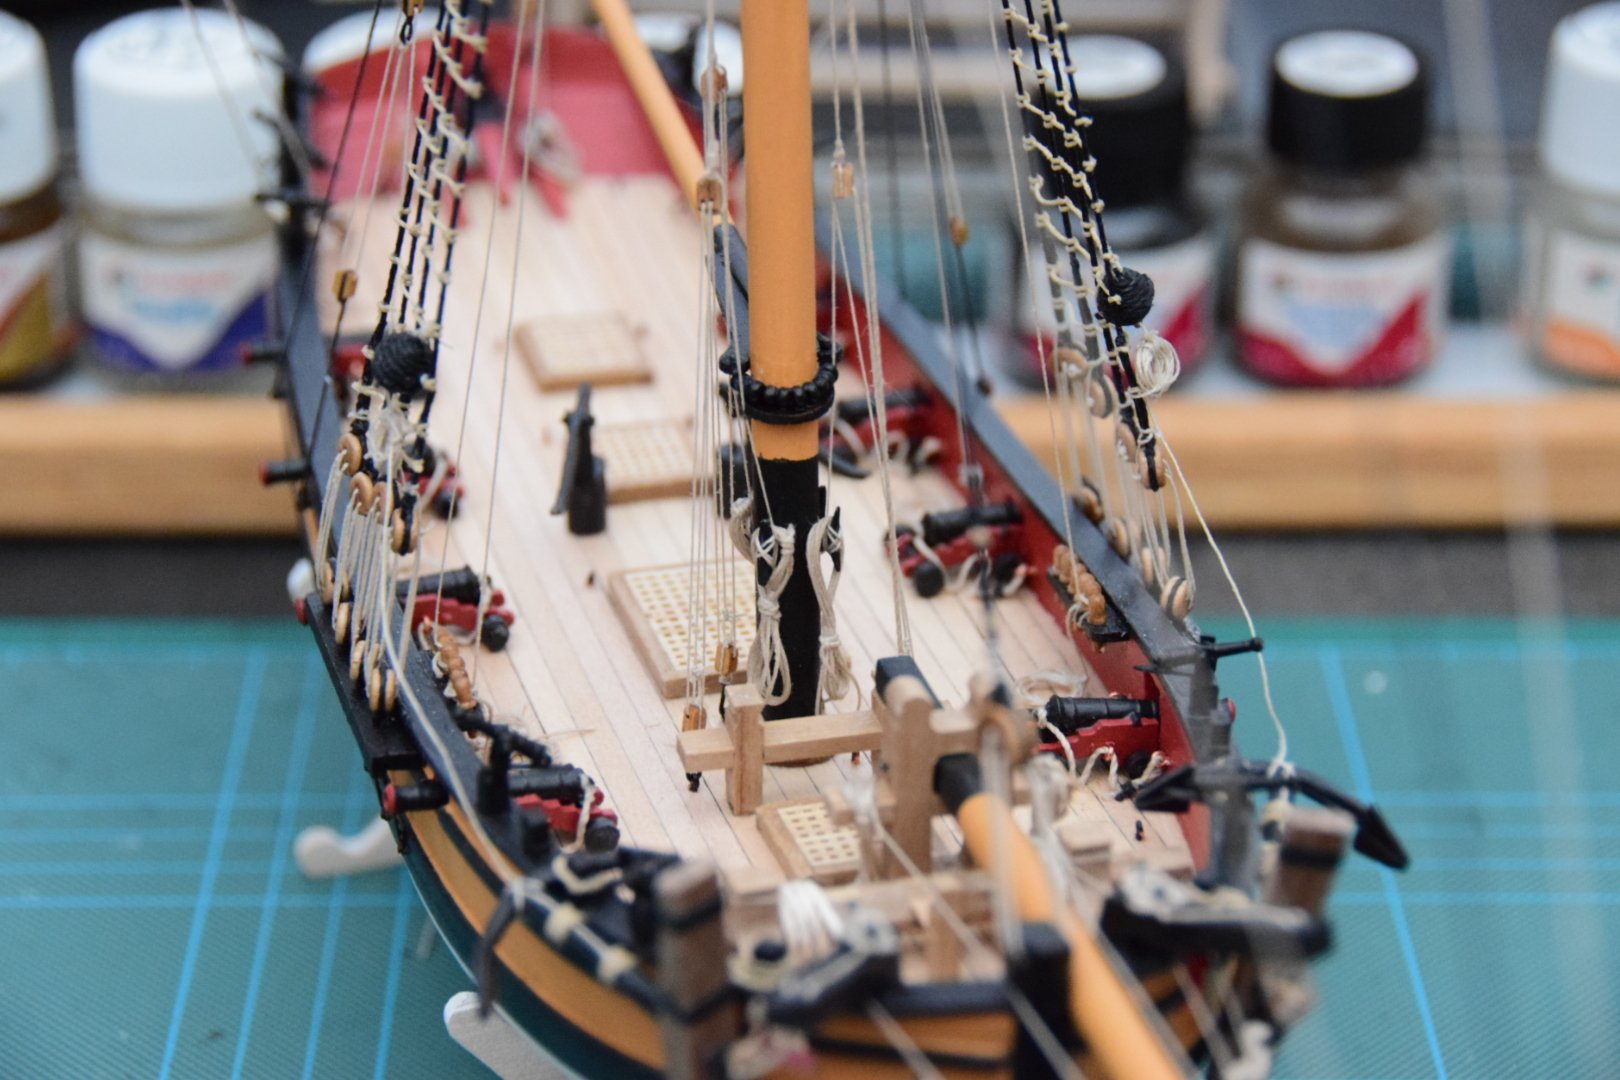
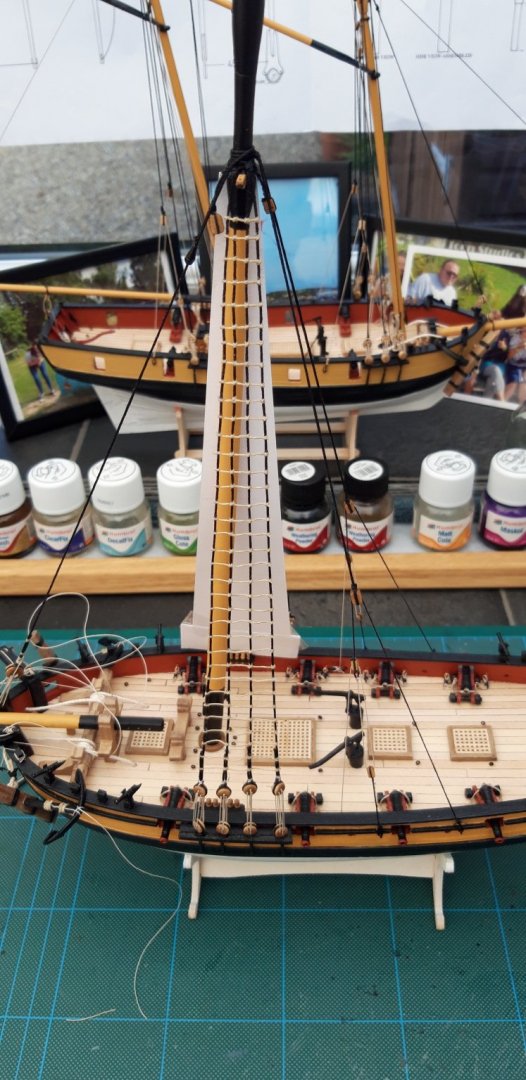
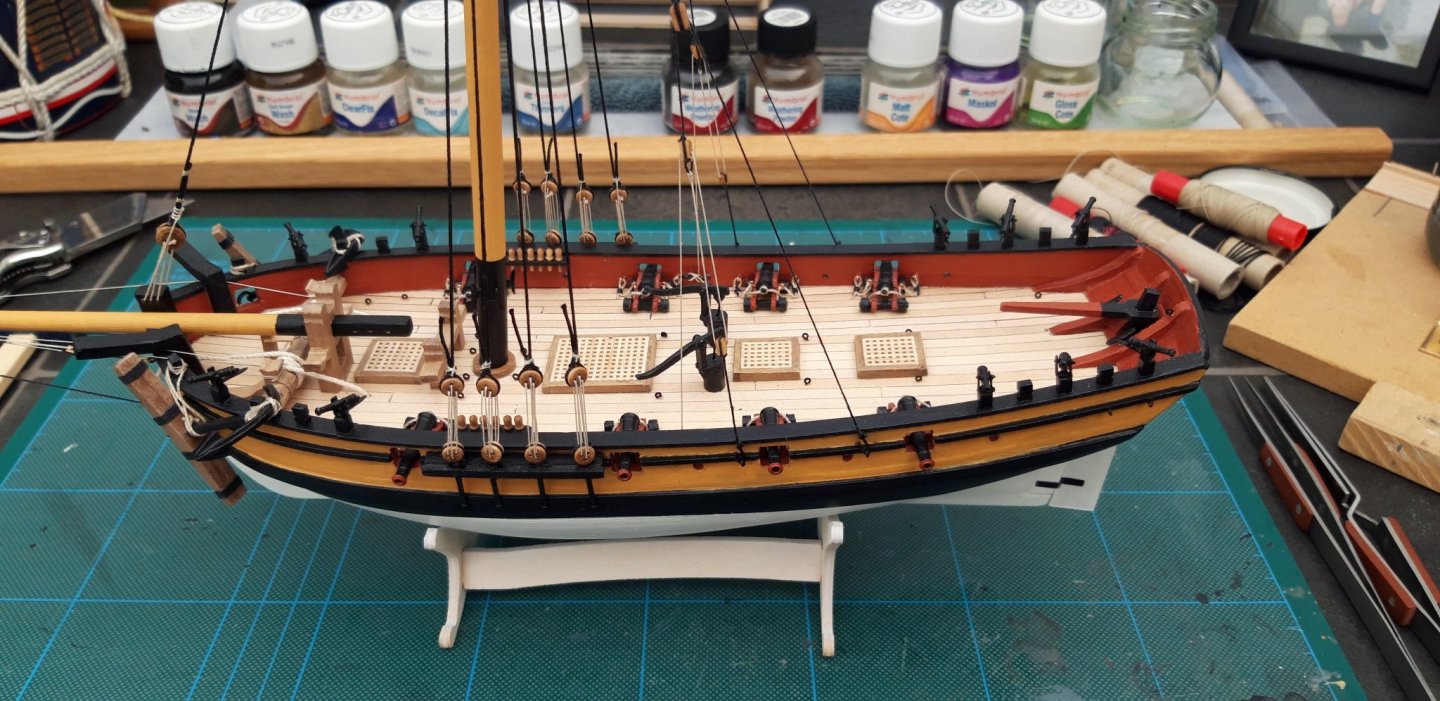
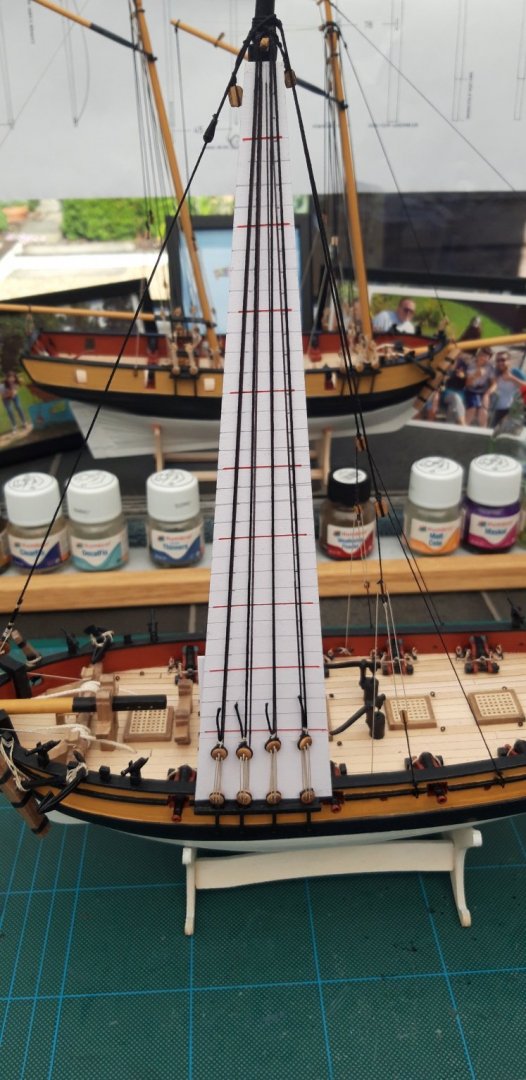
Hi all, This afternoon l completed the standing rigging and, all in all, l am happy with my efforts. I was hoping to get all the Deadeyes perfectly level but it's the devil's own work achieving it. On my build there is a slight error on each side. I did, however, manage to correctly align the Chainplates. Hopefully this will redeem me in the eyes of the purists. 🤗 It certainly looks a lot more tidy now l have cleared the deck of all the loose ends of standing rigging. Hi Rick, regarding the Catheads. l have googled the rigging of the Anchor/Catheads but l have been left a little bemused. I have also seen an example on an absolutely superb build by Tony / tkay11 but l still don't "get" it. I have put it aside as something for further study and, as there is no mention of it in the instructions, l have decided to leave it as it is. Fortunately l am not building a museum piece ha ha. My next task is the ratlines, it is my first attempt at these as they weren't required on my Ballahoo. I have prepared my template, as l have seen on a tutorial elsewhere on MSW and, with luck, will produce somthing a sailor would be happy climbing. Best wishes as always, The Lazy Saint.


- 104 replies
-
- 11
-
-
- sherbourne
- caldercraft
- (and 1 more)