desalgu
-
Posts
363 -
Joined
-
Last visited
About desalgu

-
 Esap reacted to a post in a topic:
Duchess of Kingston 1778 by desalgu - Vanguard Models - 1:64 - Royal Yacht
Esap reacted to a post in a topic:
Duchess of Kingston 1778 by desalgu - Vanguard Models - 1:64 - Royal Yacht
-
 yvesvidal reacted to a post in a topic:
Duchess of Kingston 1778 by desalgu - Vanguard Models - 1:64 - Royal Yacht
yvesvidal reacted to a post in a topic:
Duchess of Kingston 1778 by desalgu - Vanguard Models - 1:64 - Royal Yacht
-
rcweir reacted to a post in a topic:
Duchess of Kingston 1778 by desalgu - Vanguard Models - 1:64 - Royal Yacht
-
rcweir reacted to a post in a topic:
Duchess of Kingston 1778 by desalgu - Vanguard Models - 1:64 - Royal Yacht
-
Ryland Craze reacted to a post in a topic:
Duchess of Kingston 1778 by desalgu - Vanguard Models - 1:64 - Royal Yacht
-
TimF reacted to a post in a topic:
Duchess of Kingston 1778 by desalgu - Vanguard Models - 1:64 - Royal Yacht
-
Dr PR reacted to a post in a topic:
Duchess of Kingston 1778 by desalgu - Vanguard Models - 1:64 - Royal Yacht
-
Dr PR reacted to a post in a topic:
Duchess of Kingston 1778 by desalgu - Vanguard Models - 1:64 - Royal Yacht
-
Dr PR reacted to a post in a topic:
Duchess of Kingston 1778 by desalgu - Vanguard Models - 1:64 - Royal Yacht
-
Dr PR reacted to a post in a topic:
Duchess of Kingston 1778 by desalgu - Vanguard Models - 1:64 - Royal Yacht
-
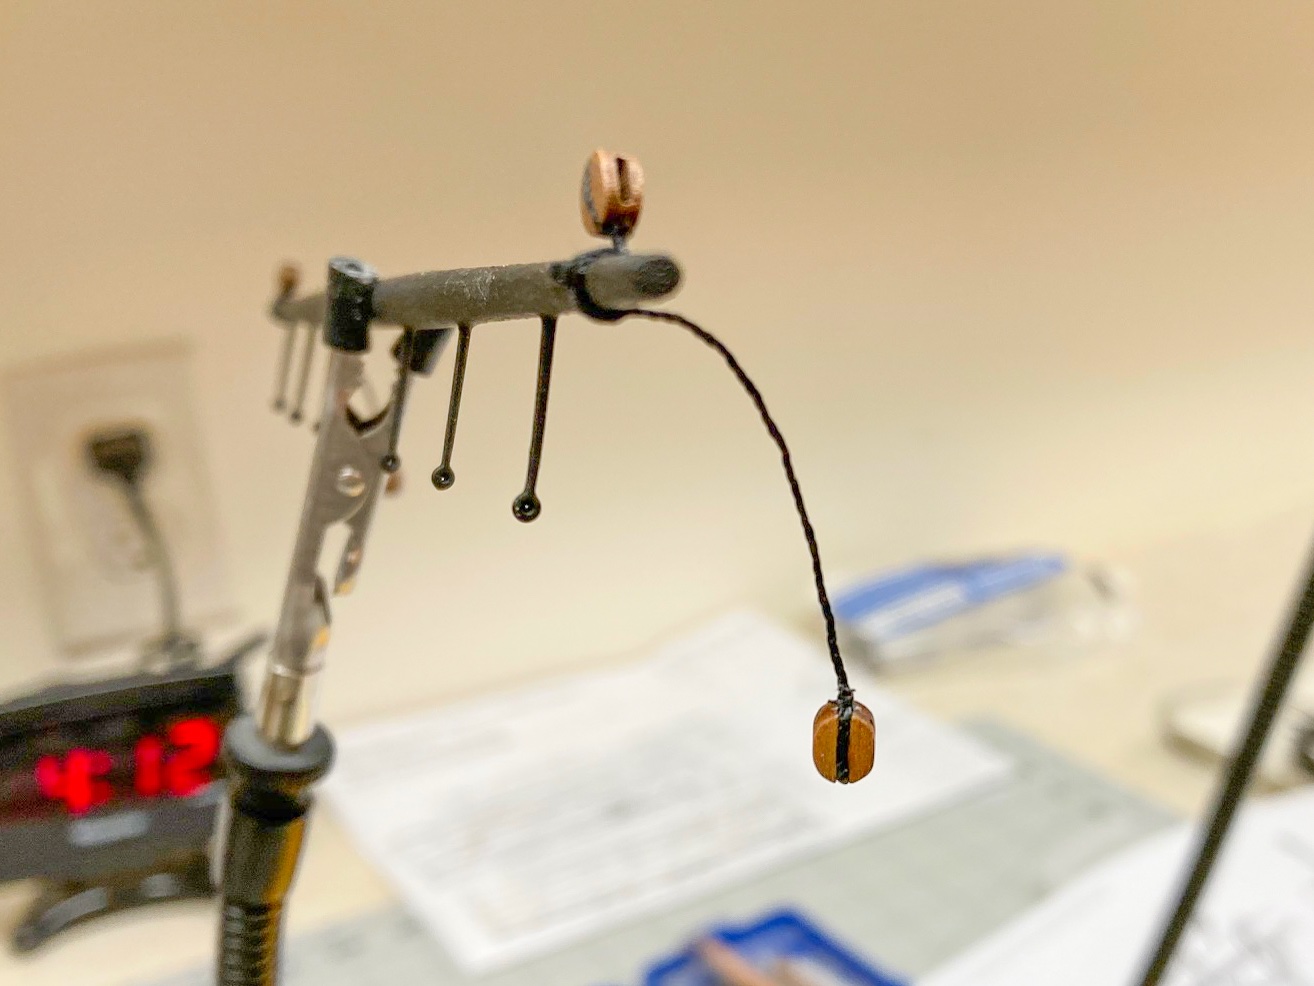
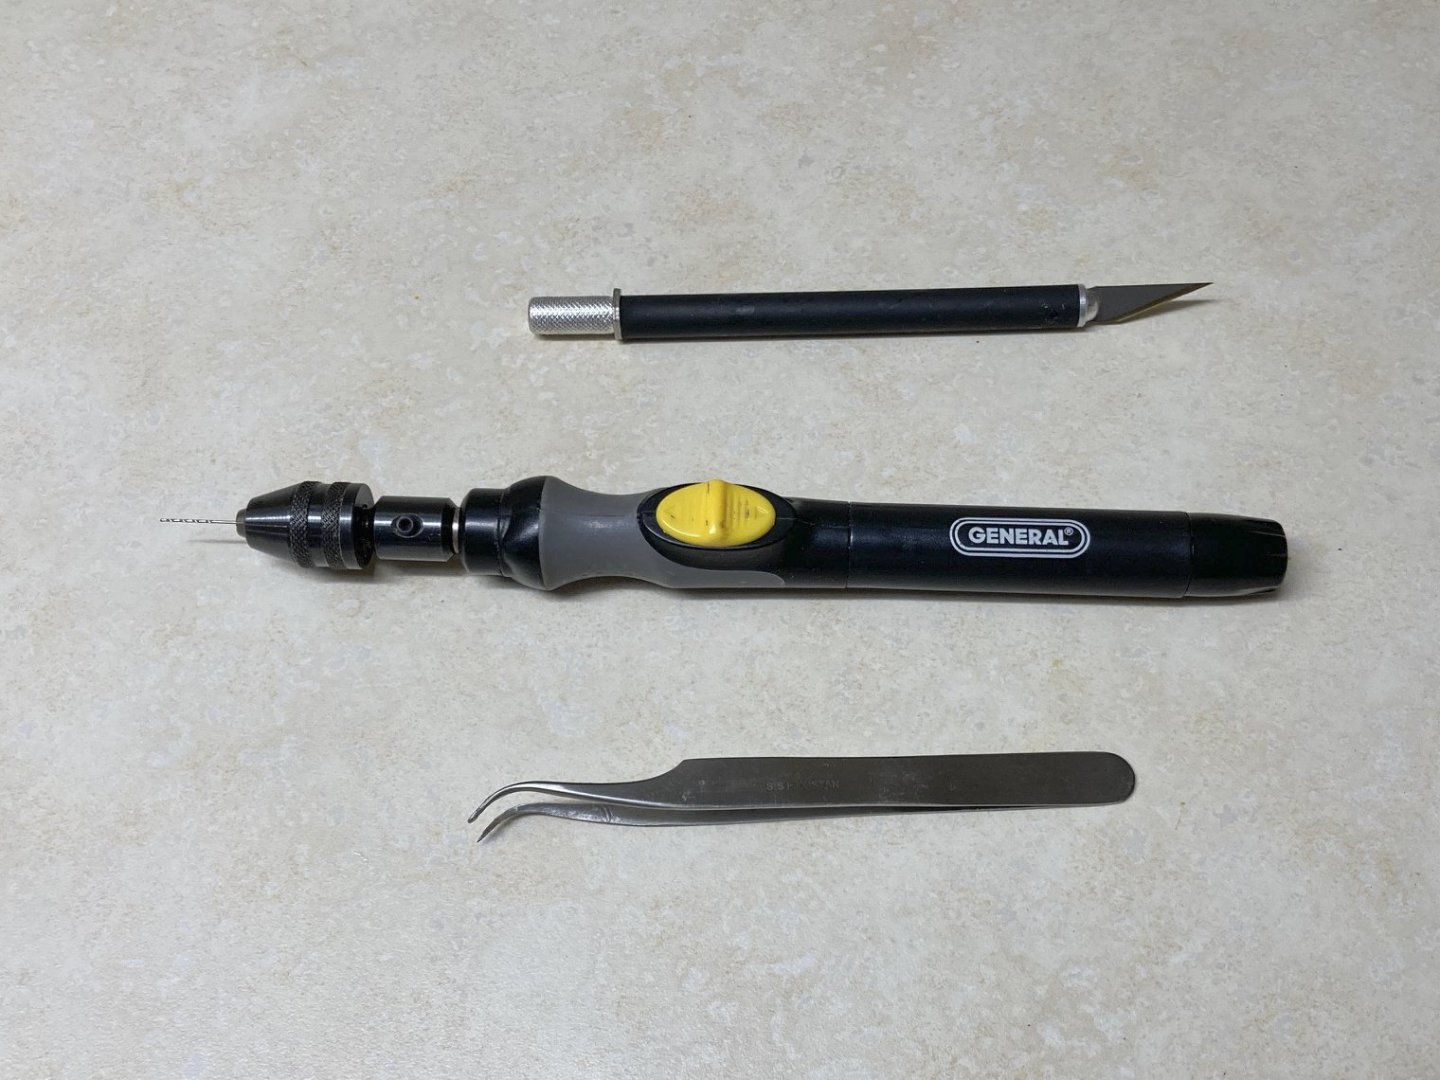
Here's the battery-powered little drill I've used a lot building model ships the past 10 years. It turns the drill bit slowly, so you can accurately position it and hold it there while drilling. It's great for drilling little holes to pin things and for enlarging holes in little blocks. It comes in handy all the time. The xacto and tweezer show you about how big it is. Pretty sure I've recommended this before, but it's worth repeating.
-
Thanks guys! I can see the light at the end of the tunnel now that I'm working on the braces. Here's a tip that I've seen before, but of course forgot over the extended building time for my model. When you start using blocks, either while rigging or just pre-installing on yards, drill out the holes a little bit before you do anything with the blocks. The Duchess uses a lot of 3mm blocks and I'm using a #73 drill bit to slightly enlarge the holes. If I put some CA on tip of threads to slightly harden them, I can feed them thru the blocks pretty easily. But I didn't drill out many of the blocks, and trying to do that after installed on the model is sometimes rather difficult. I use a battery powered slow drill that I got either from micro-mark or amazon. I've had it for years and it is the best tool I've got for working on model ships. It works with very small bits and turns slowly so you have lots of control with it. Works great for drilling out blocks and many other tasks. I'll try to remember to post a photo next time. The 3mm blocks are as small as I can work with these days. I used to be able to work with the 2mm blocks, but can't seem to deal with them now after I had cataract surgery. Fortunately I had already done most of the work involving them several years ago. Even so, I still dropped a couple of 3mm blocks on the floor. They get away from you real easy. My floor in hobby room is carpet squares and the little blocks just flat disappear when you drop them. I get down on the floor and feel around for them, and I find most that I drop after a while. But I know I've lost several, maybe 3 or 4, while building the Duchess. Now I'm running short on them, but think I have just barely enough to finish. It looks like I have lots of the other blocks as spares.
-
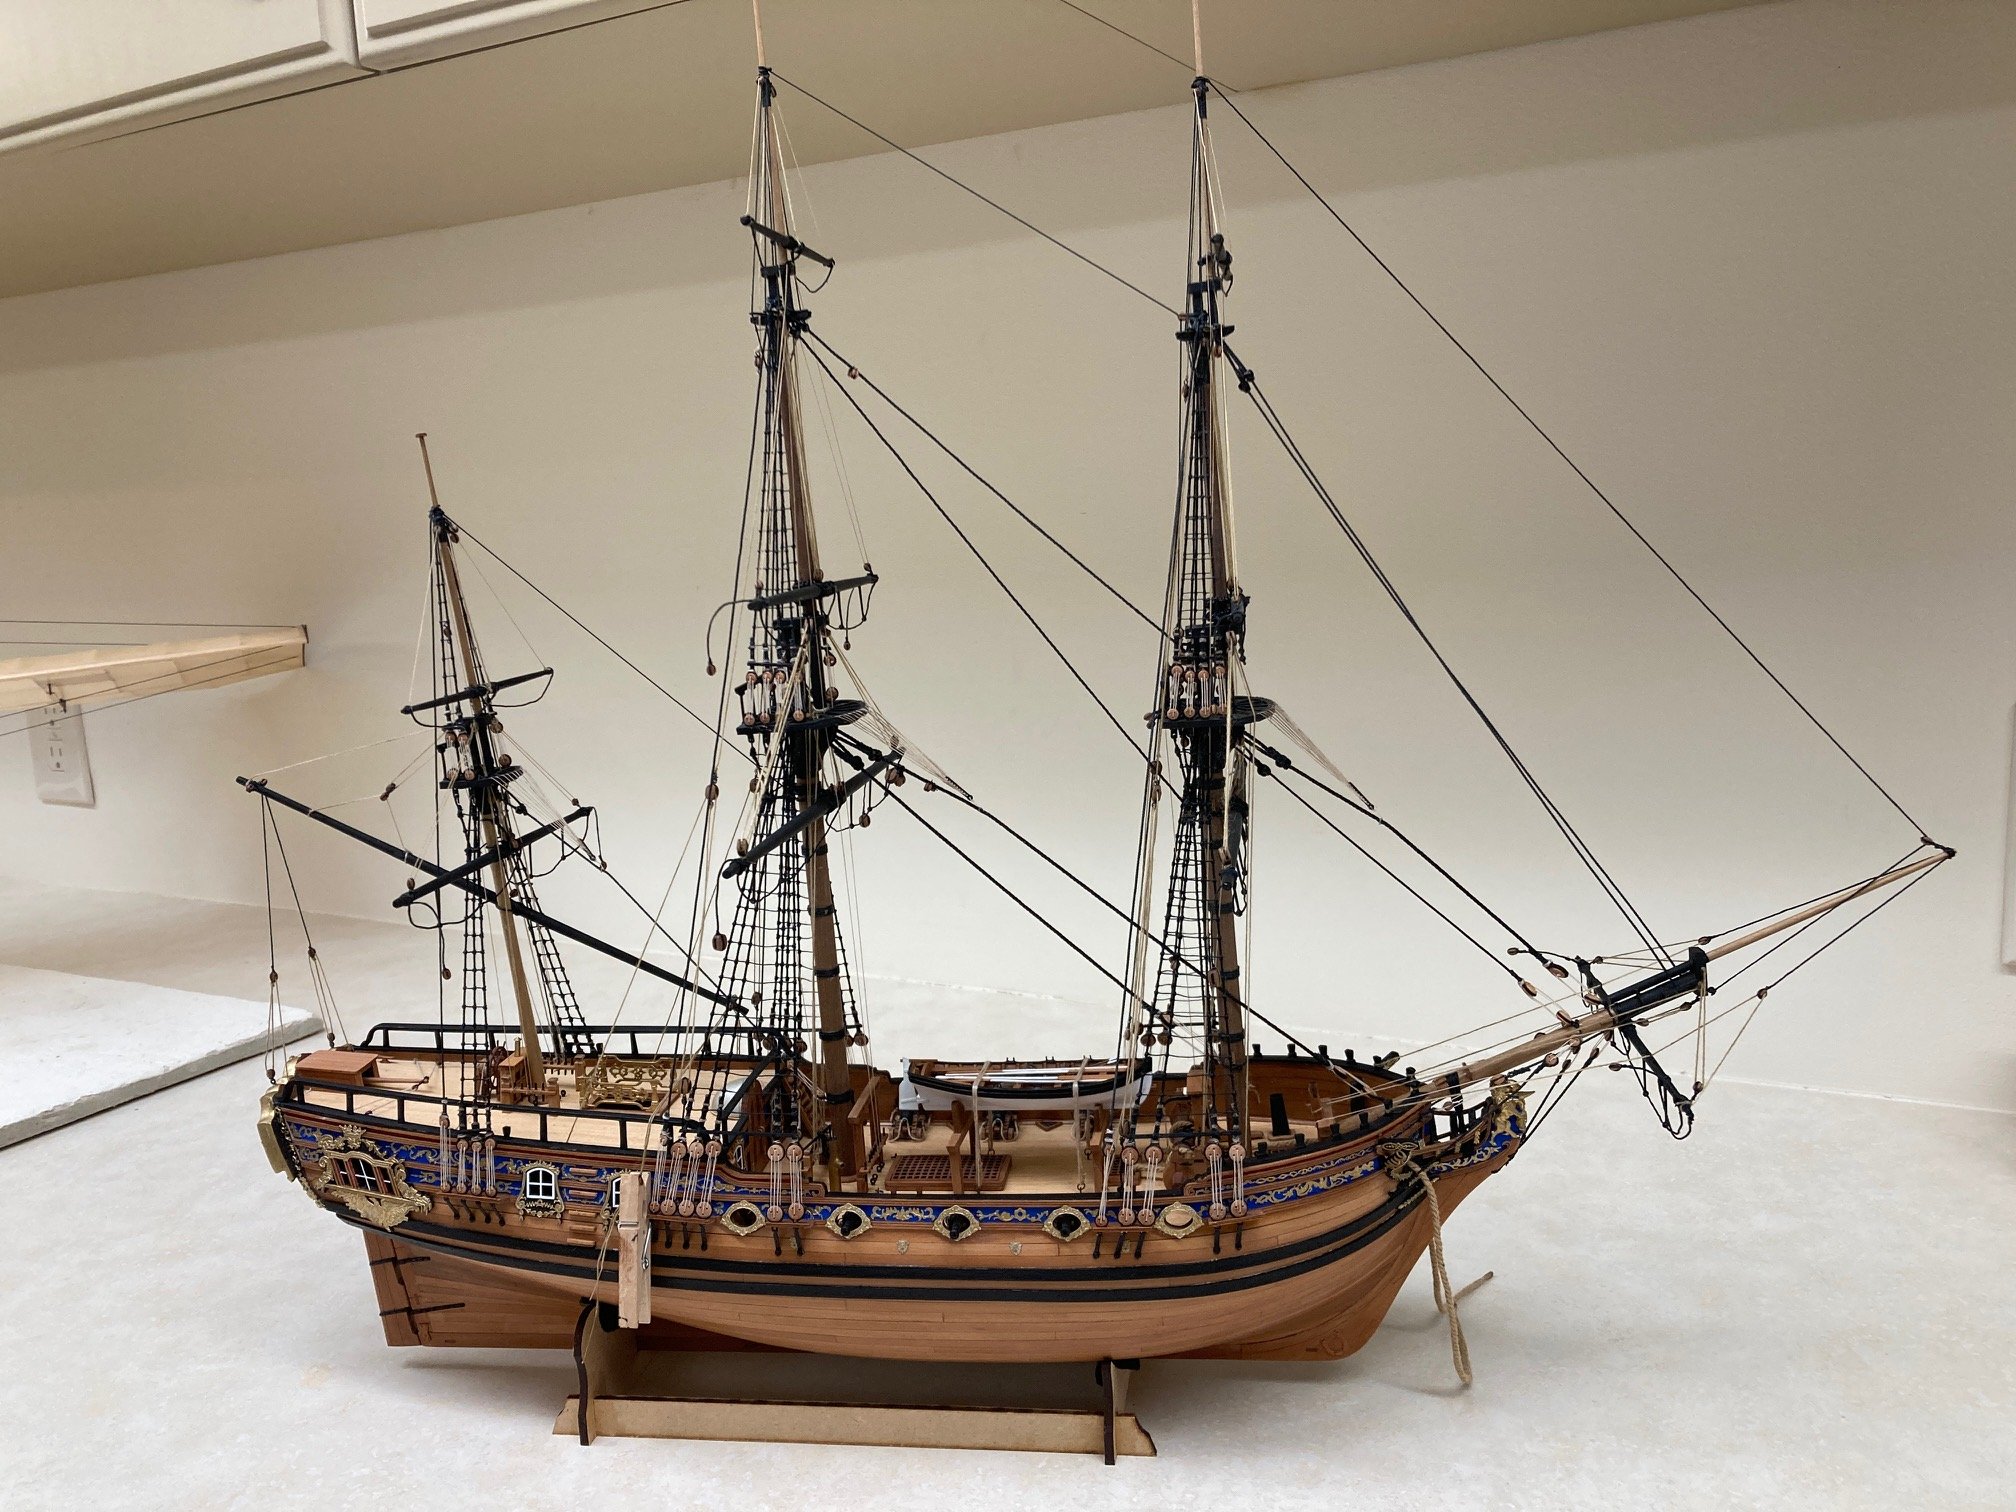
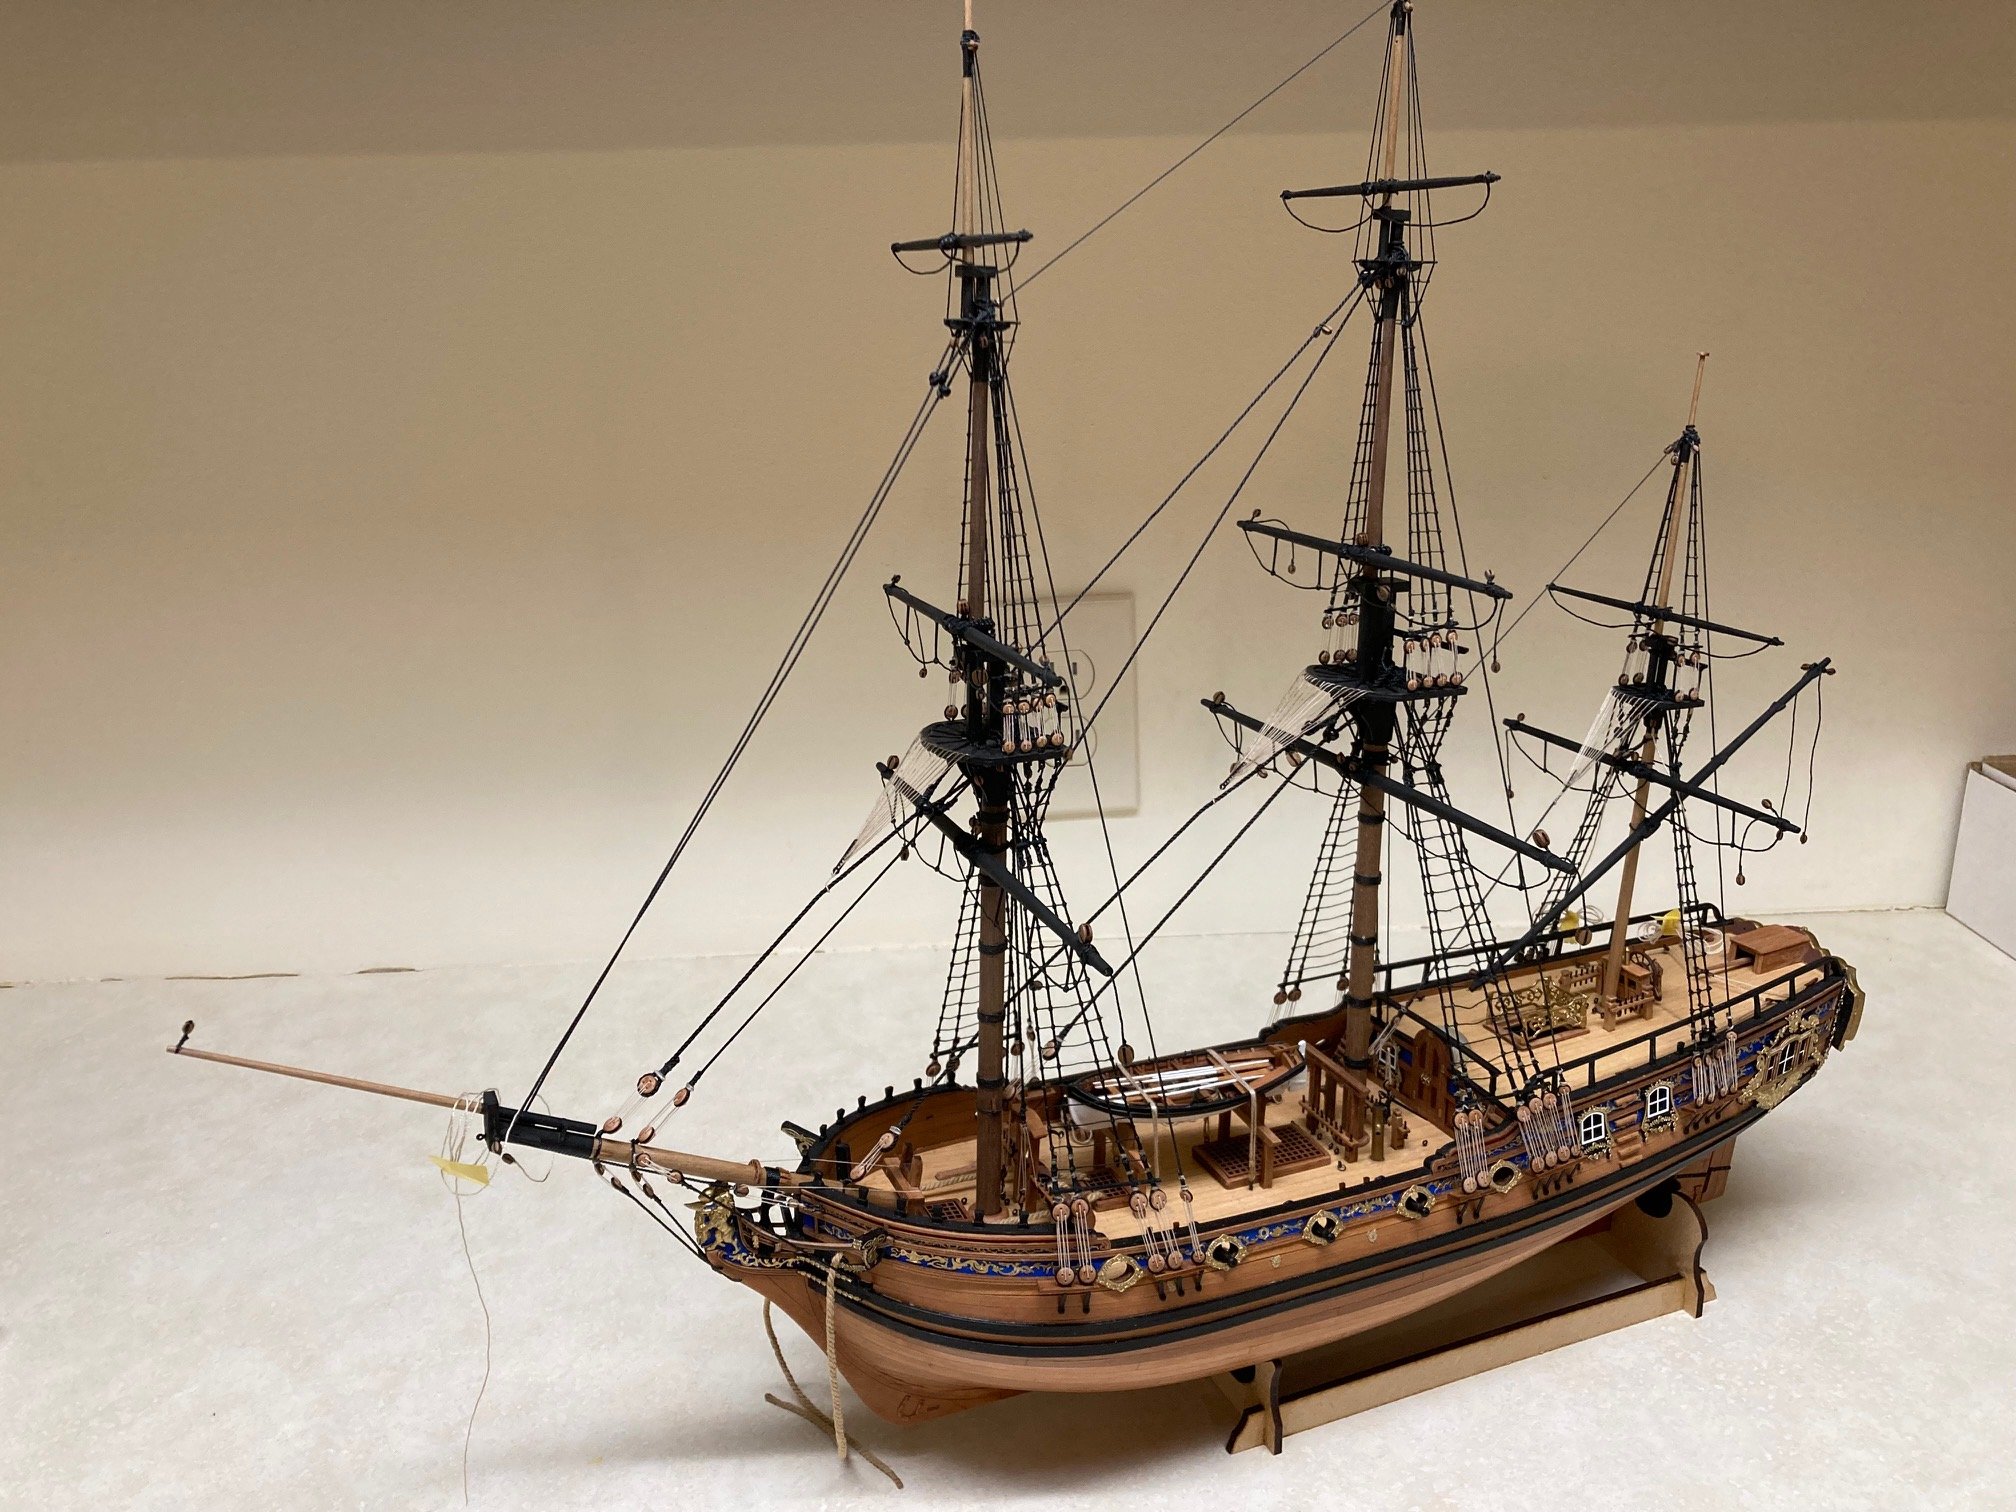
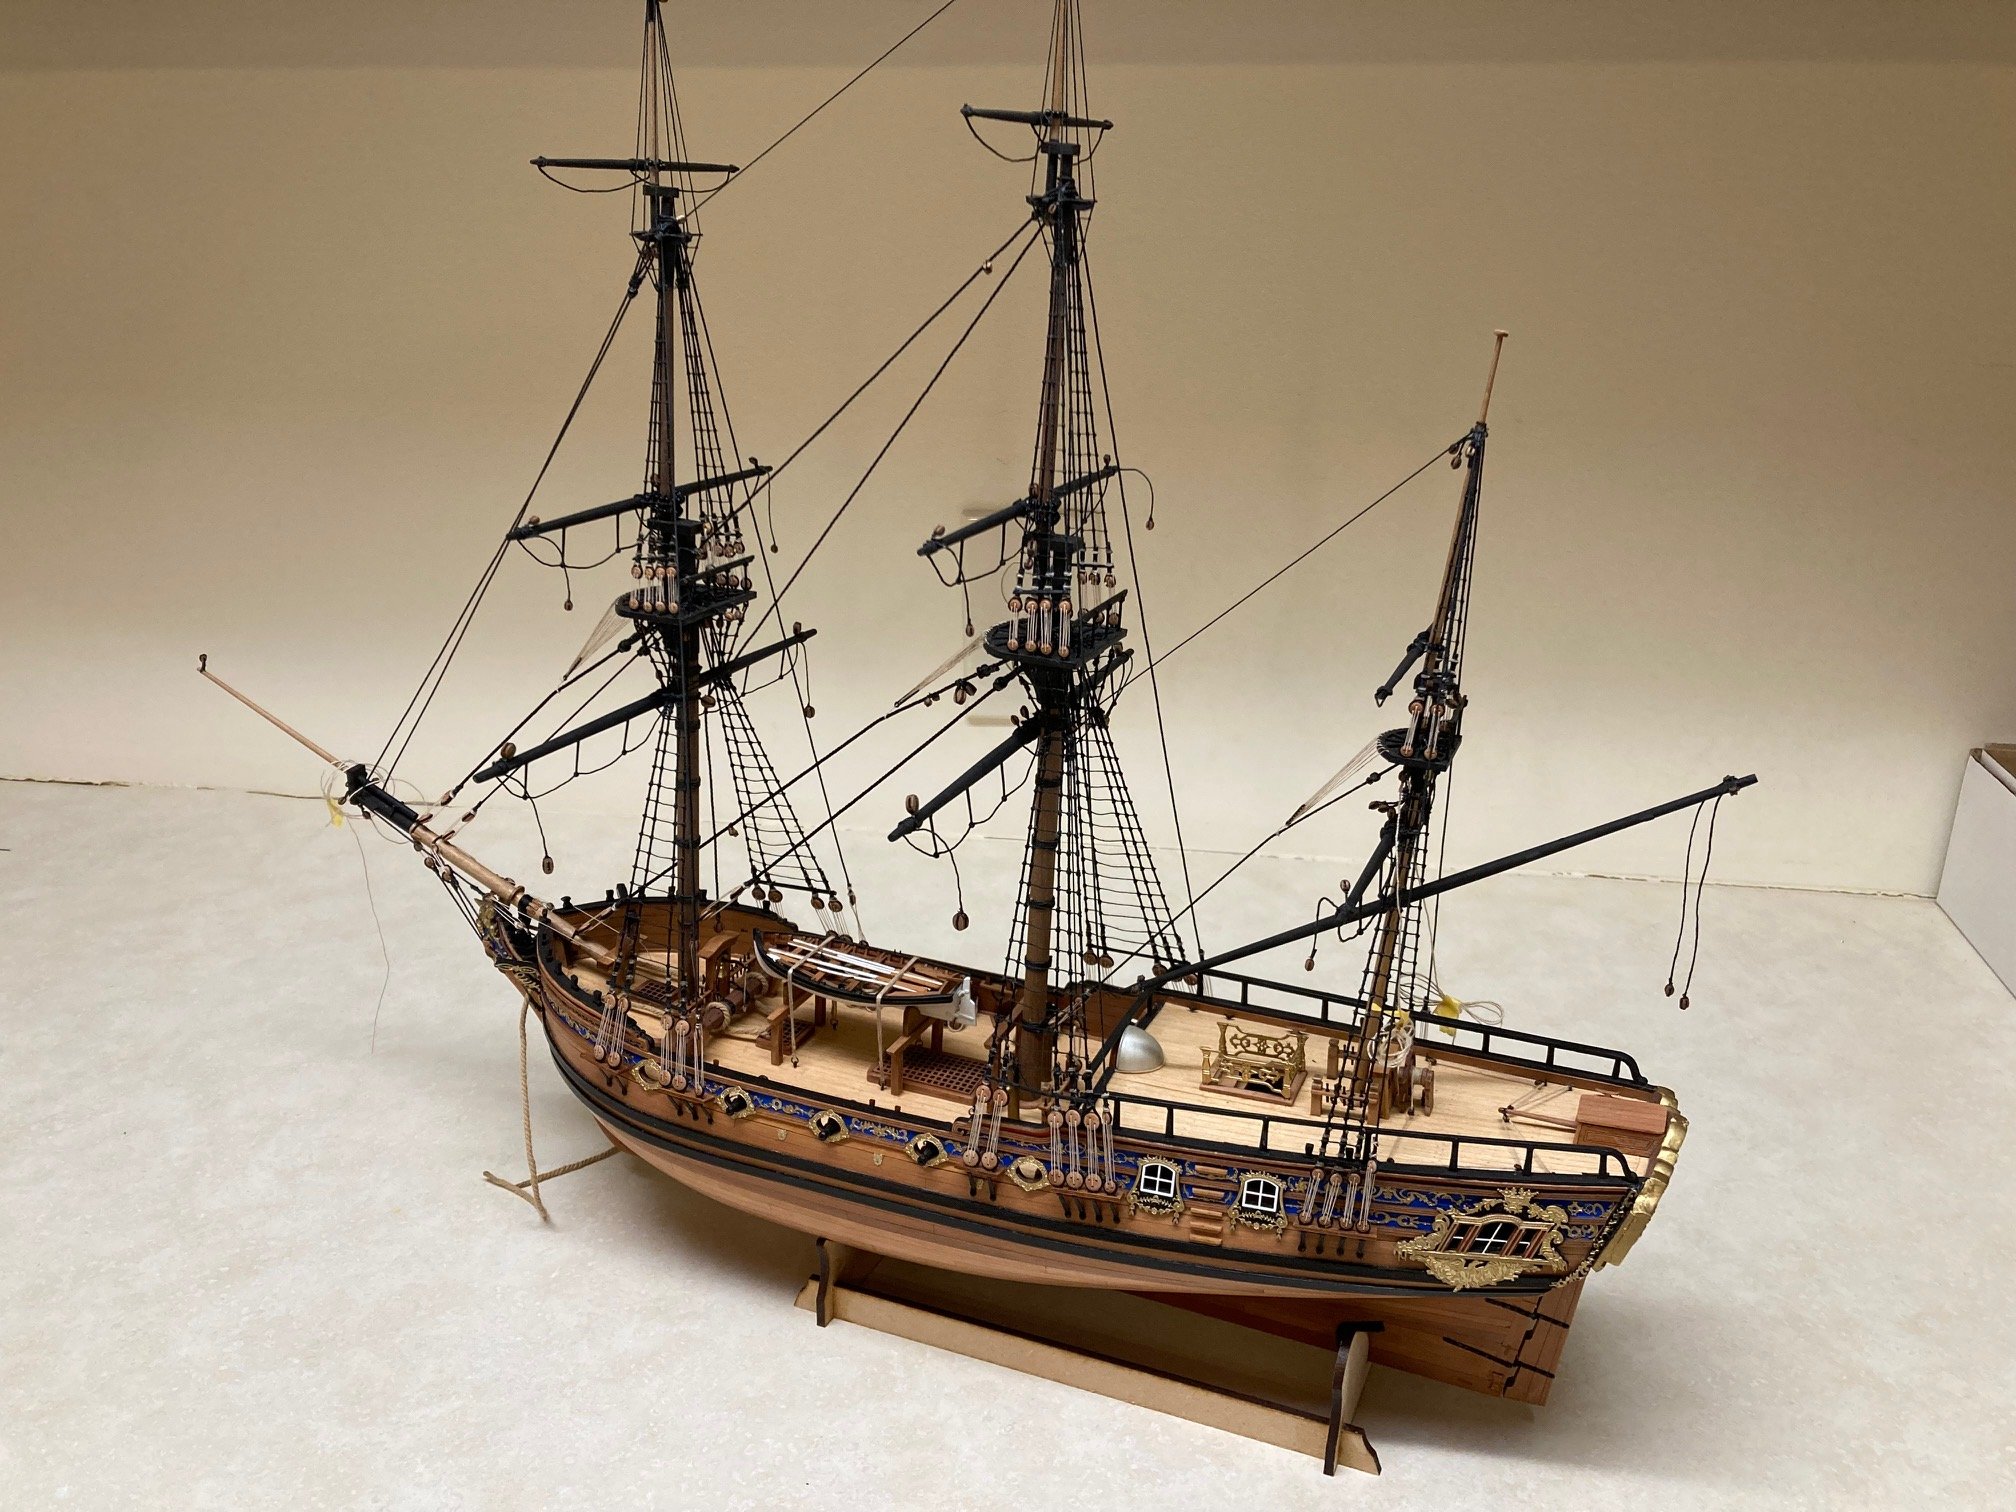
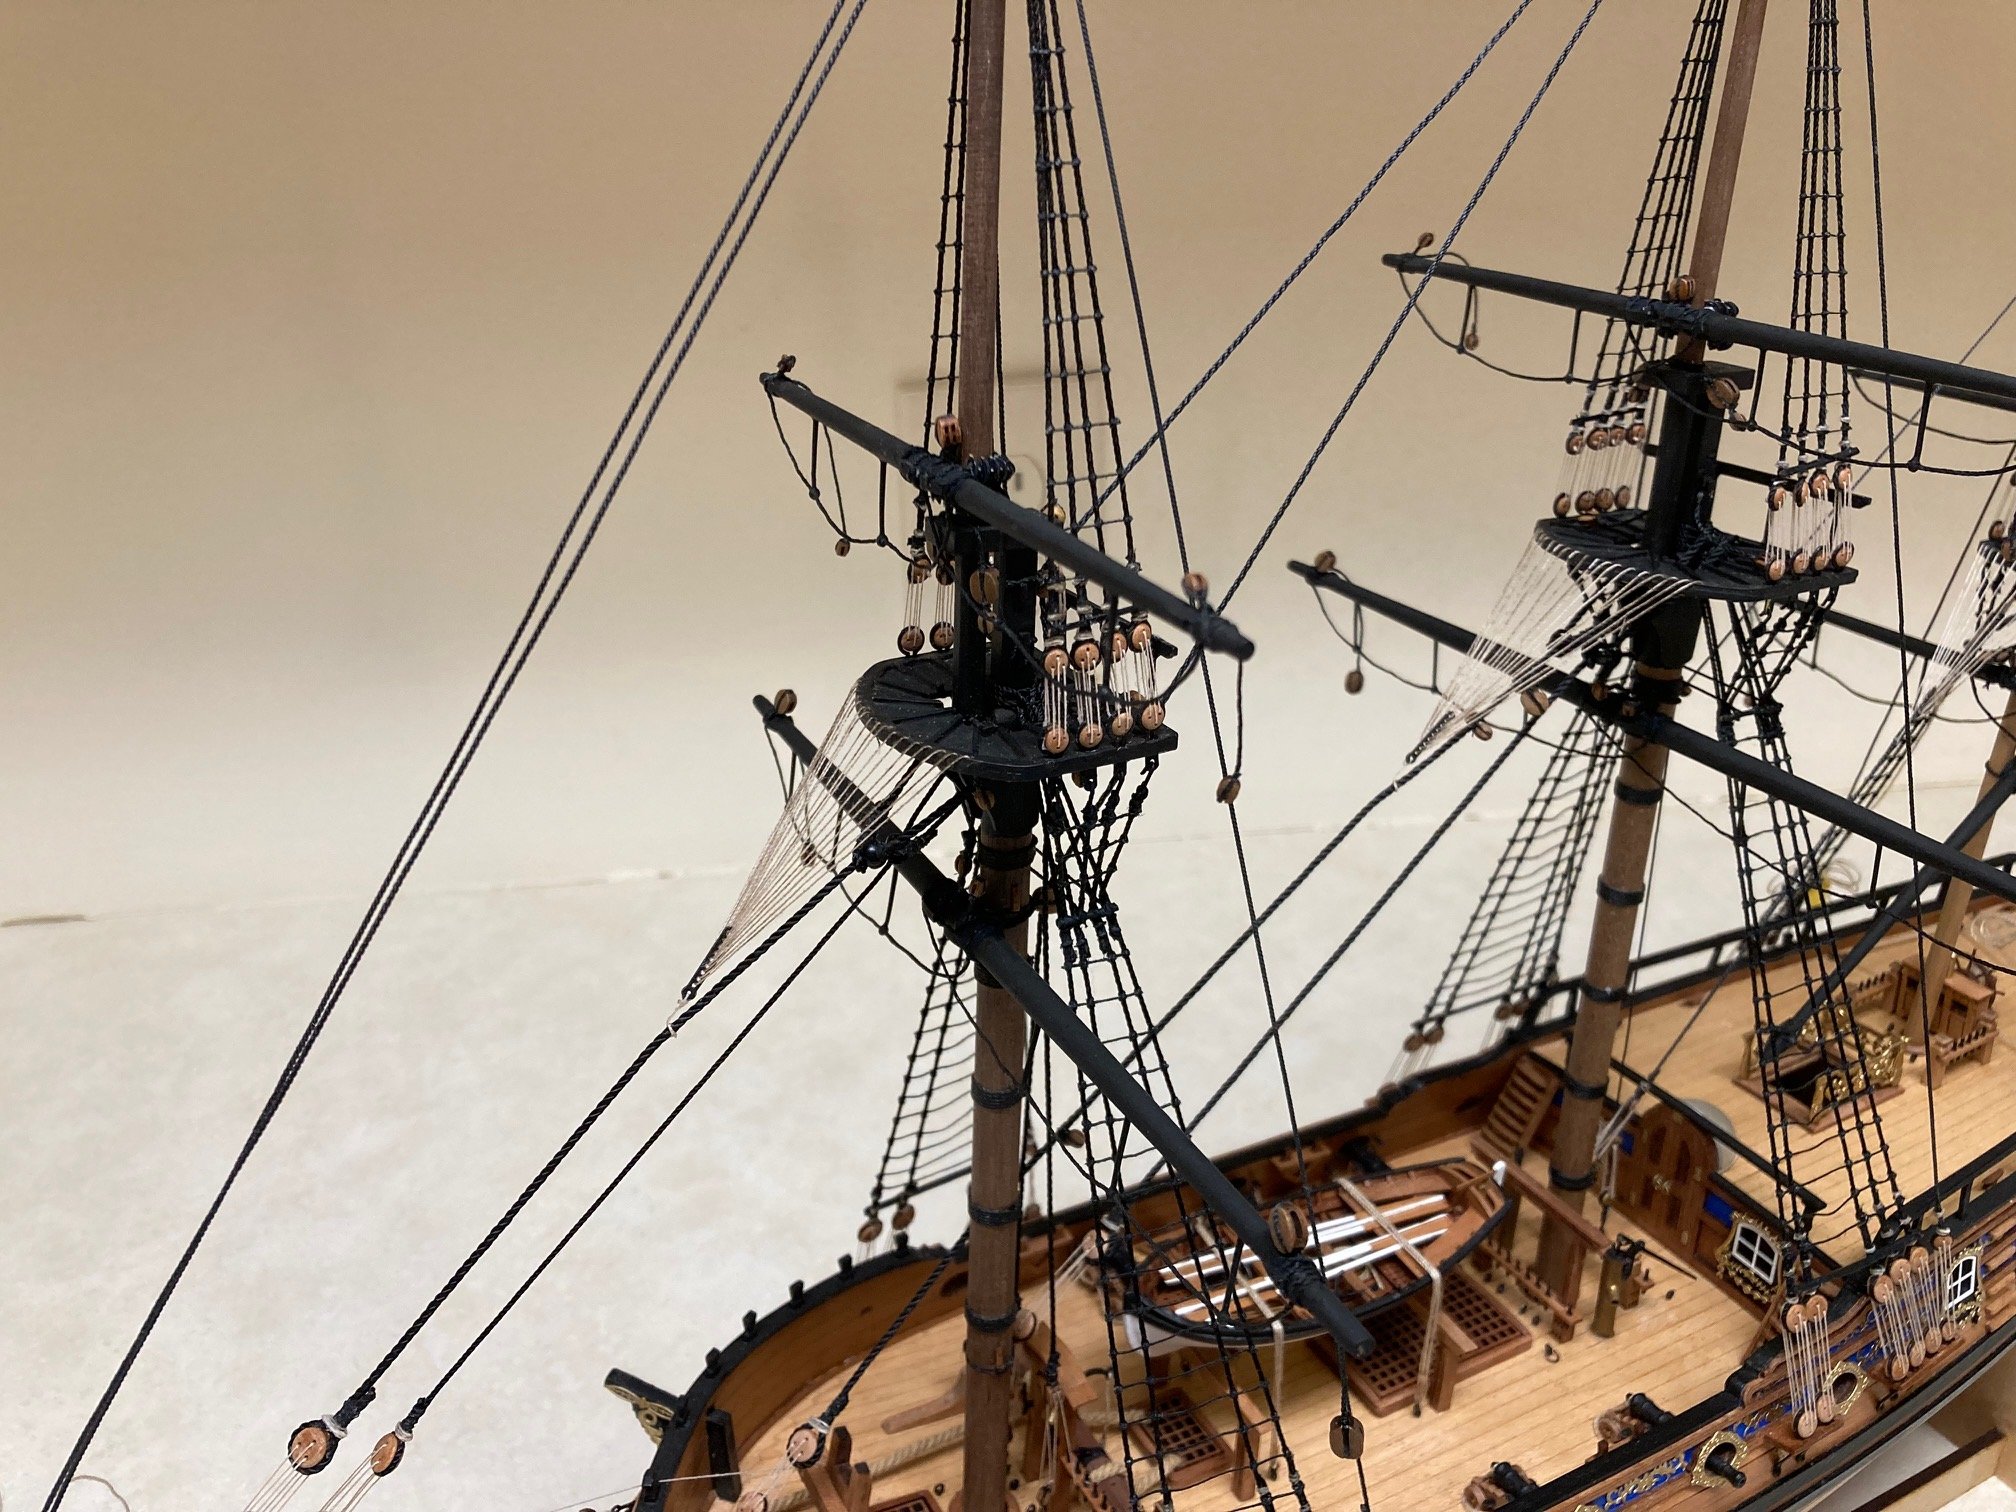
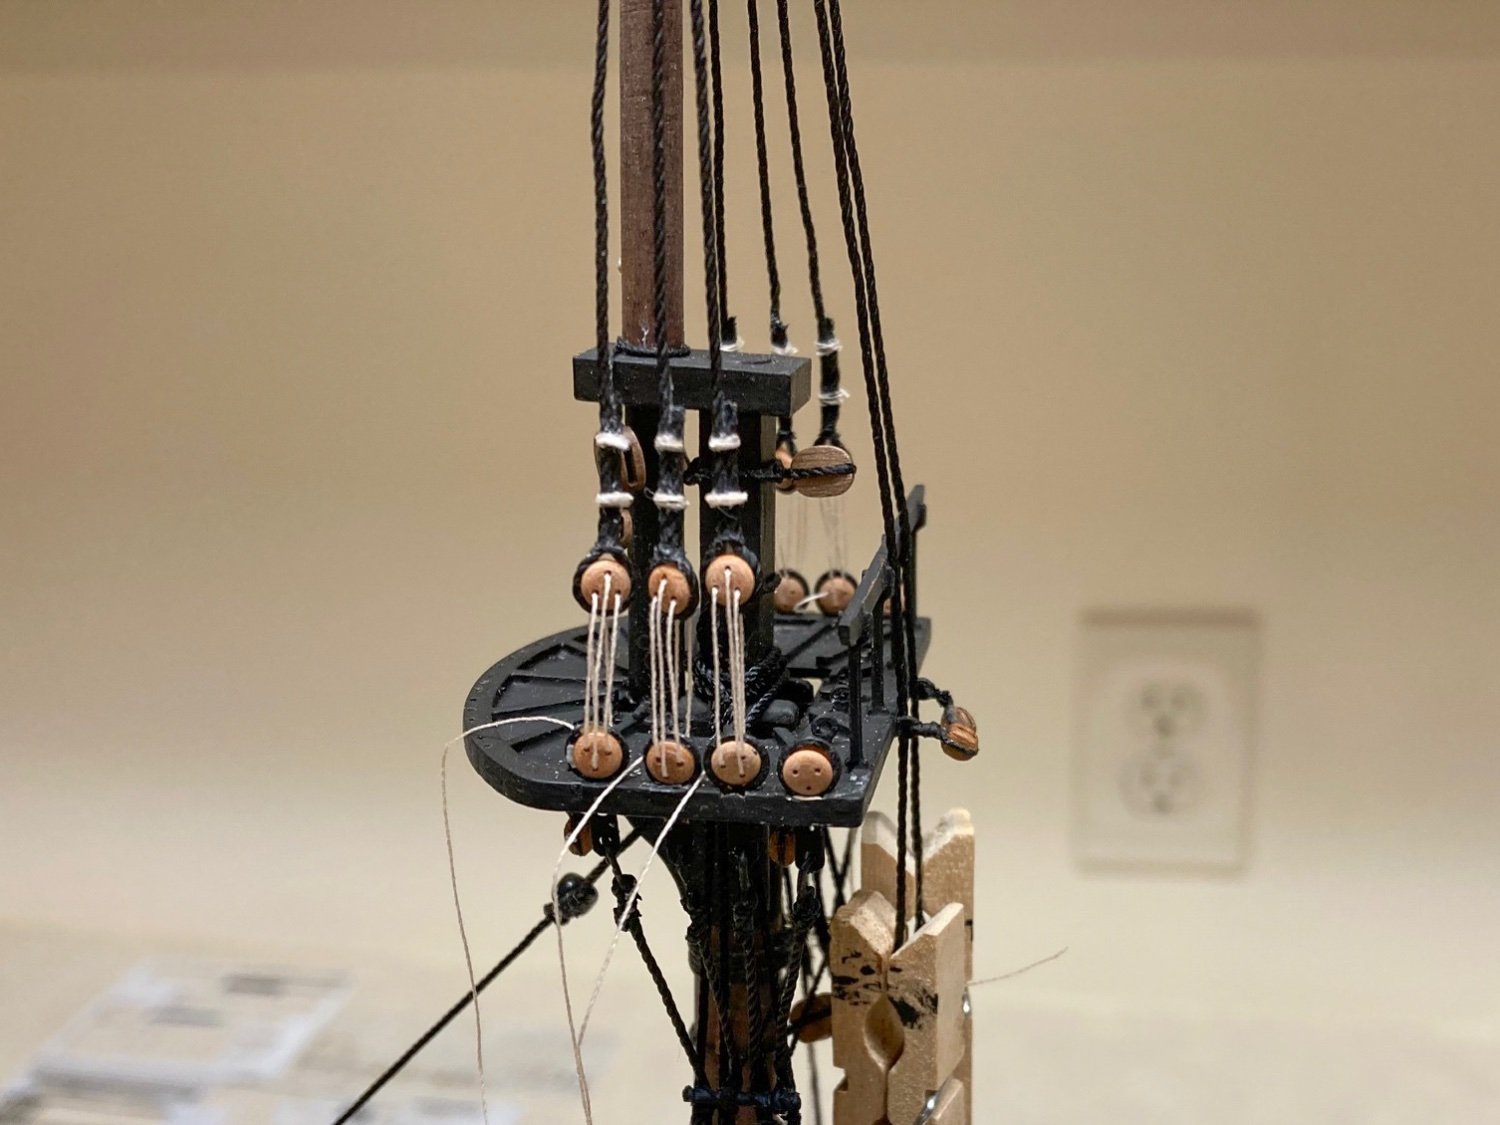
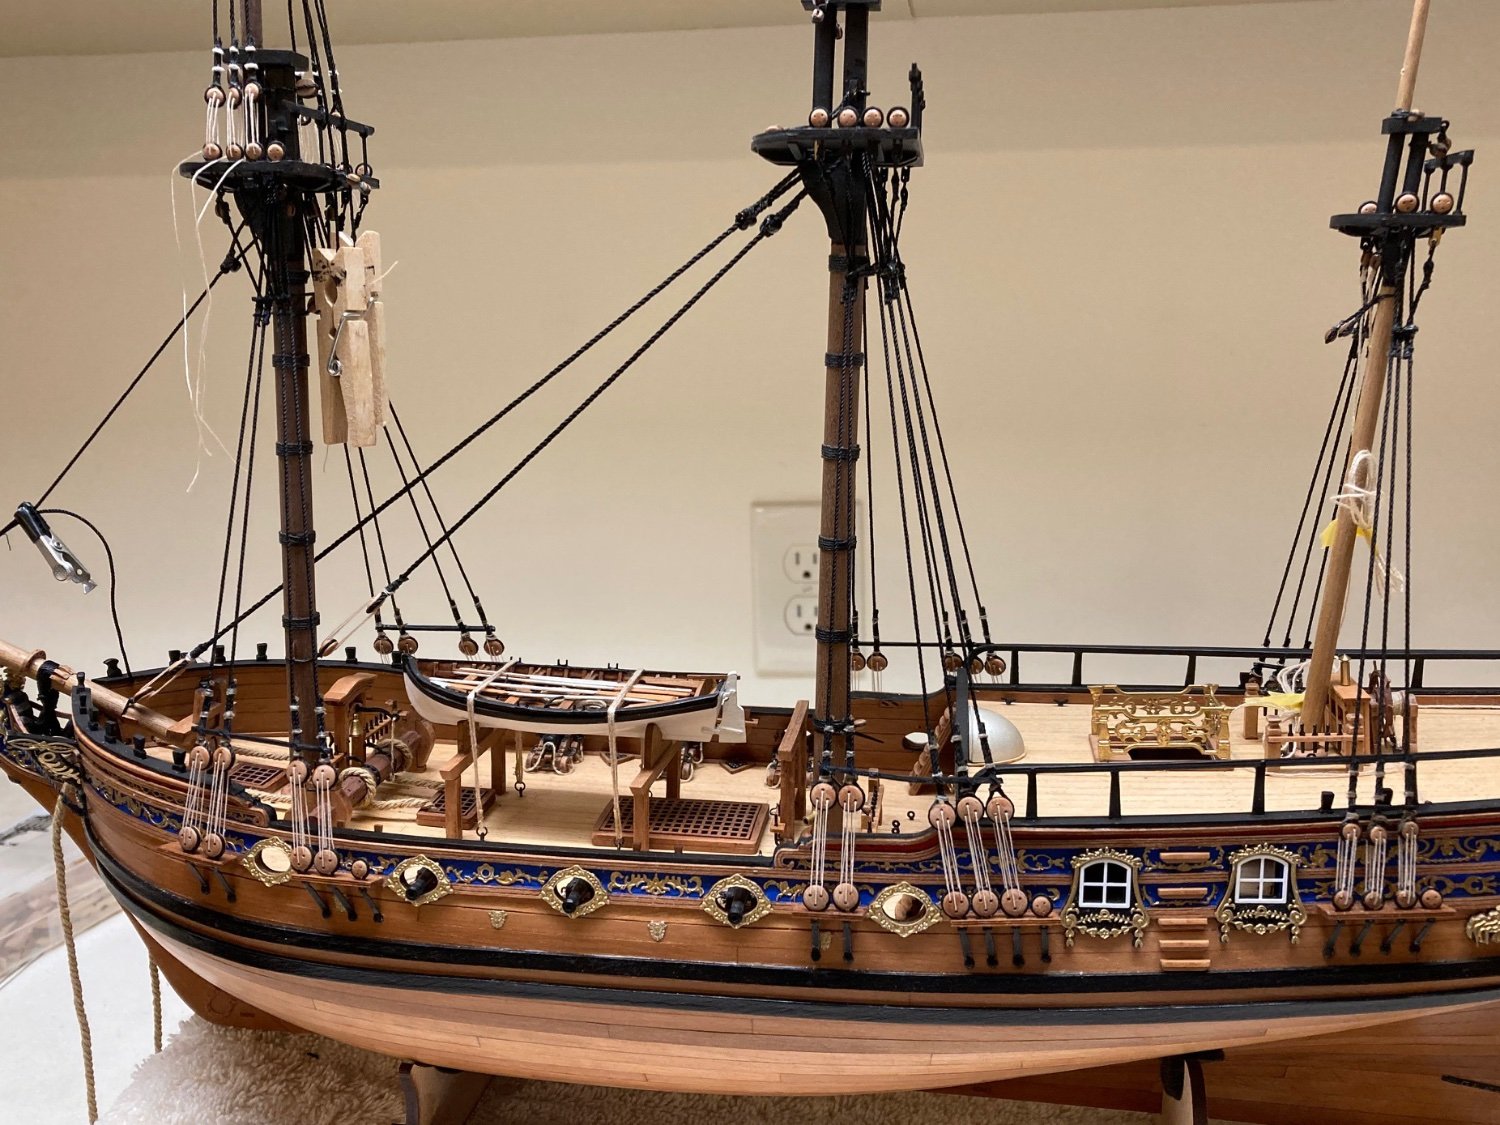
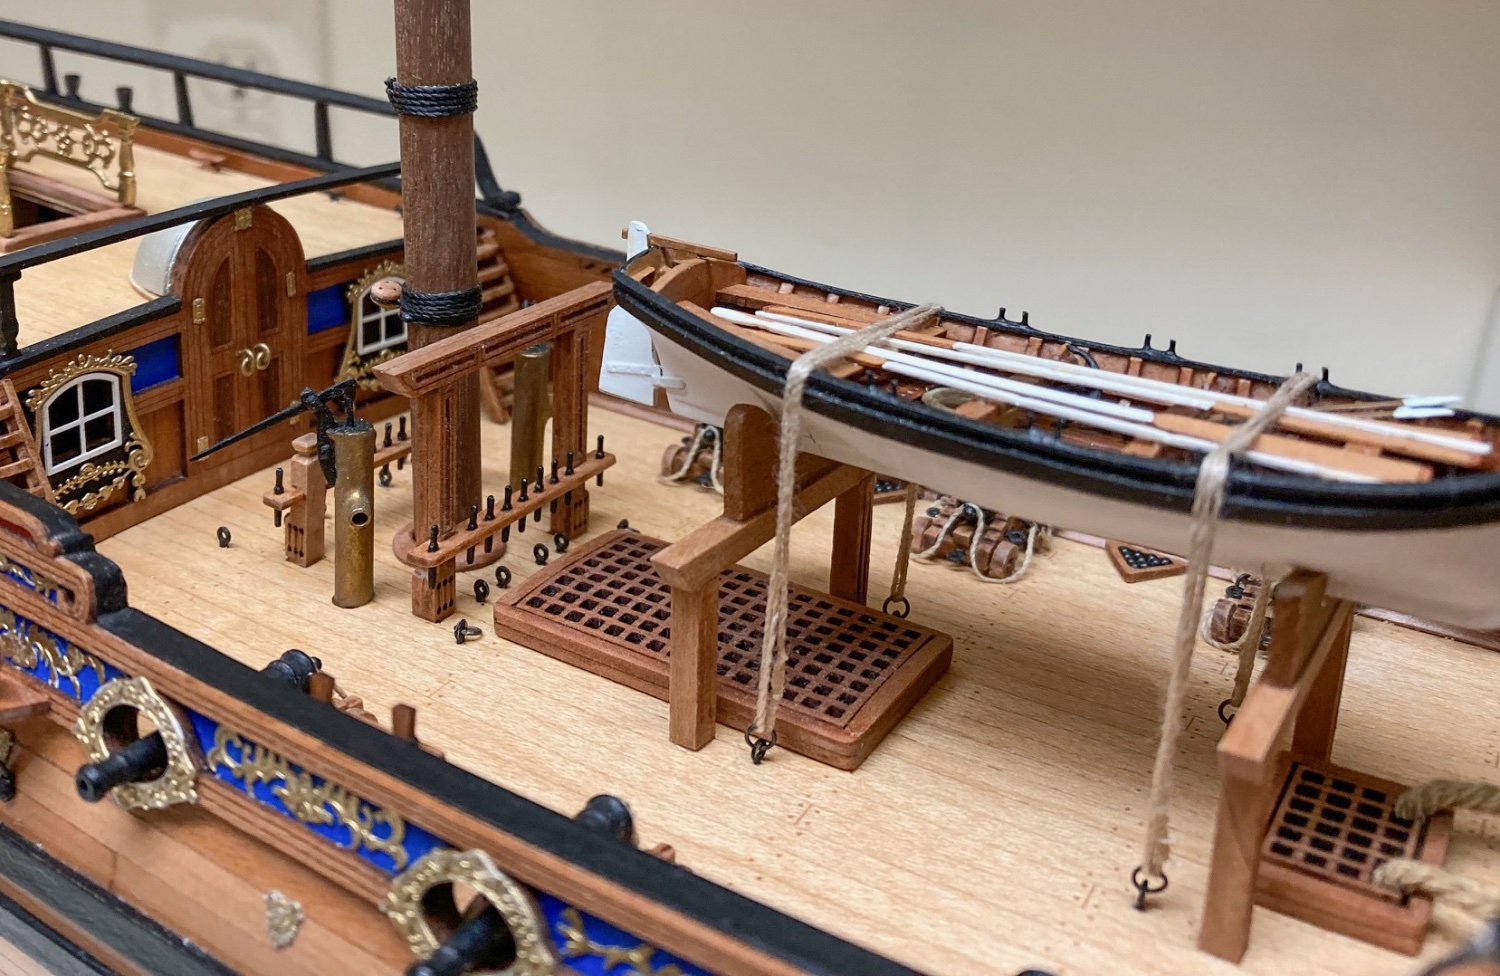
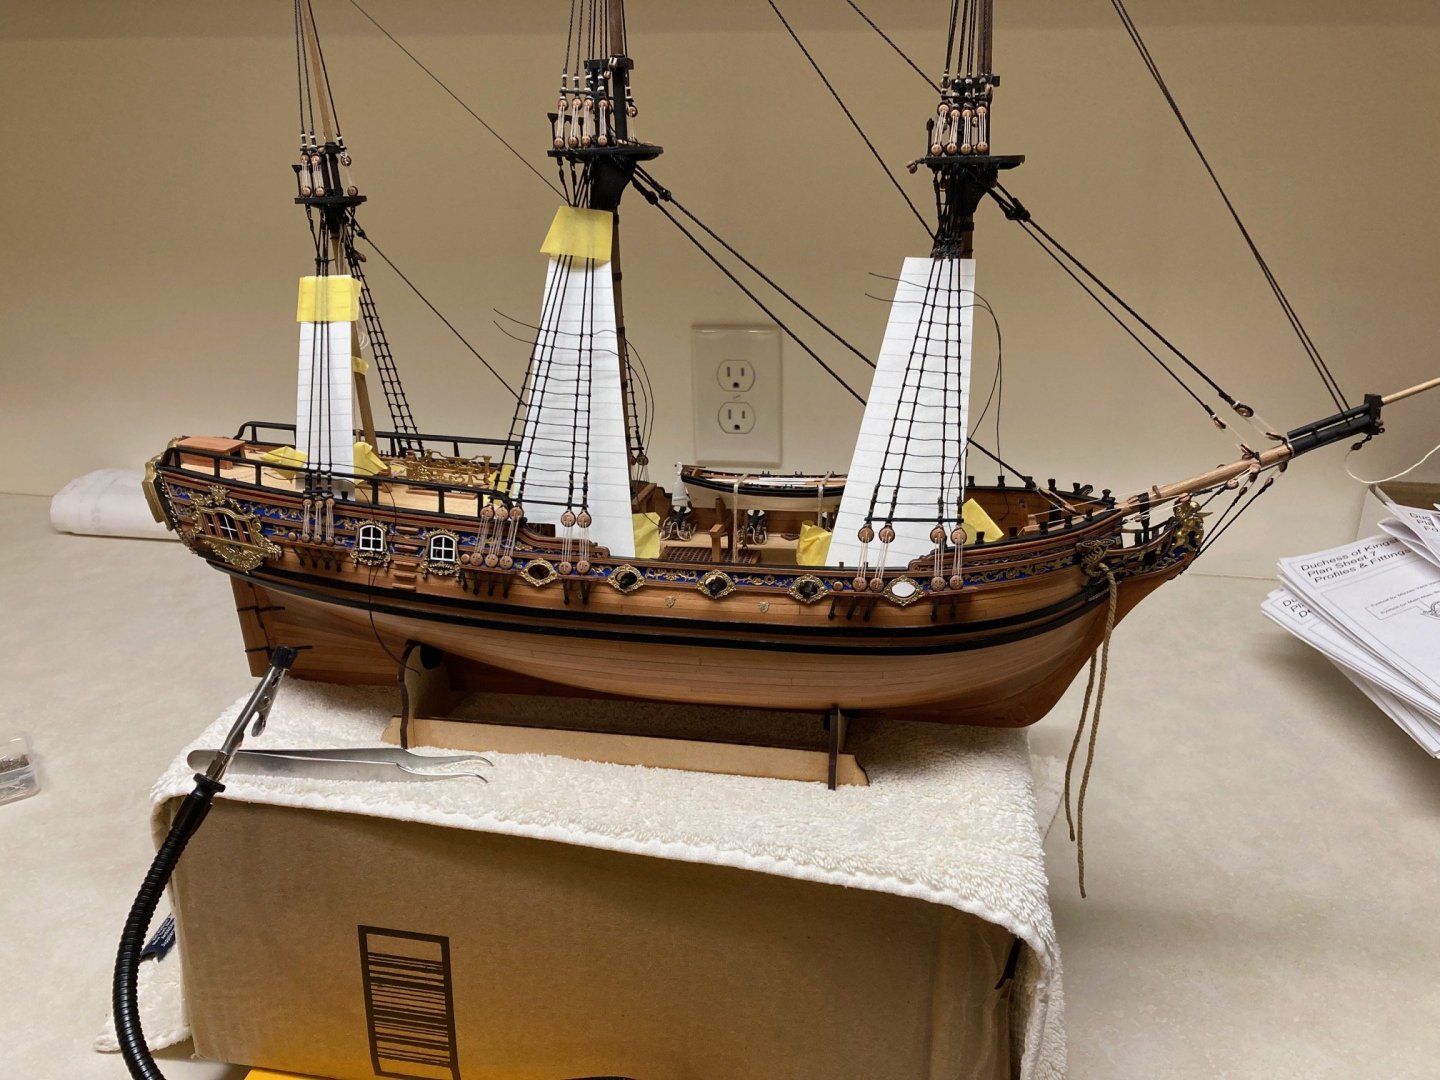
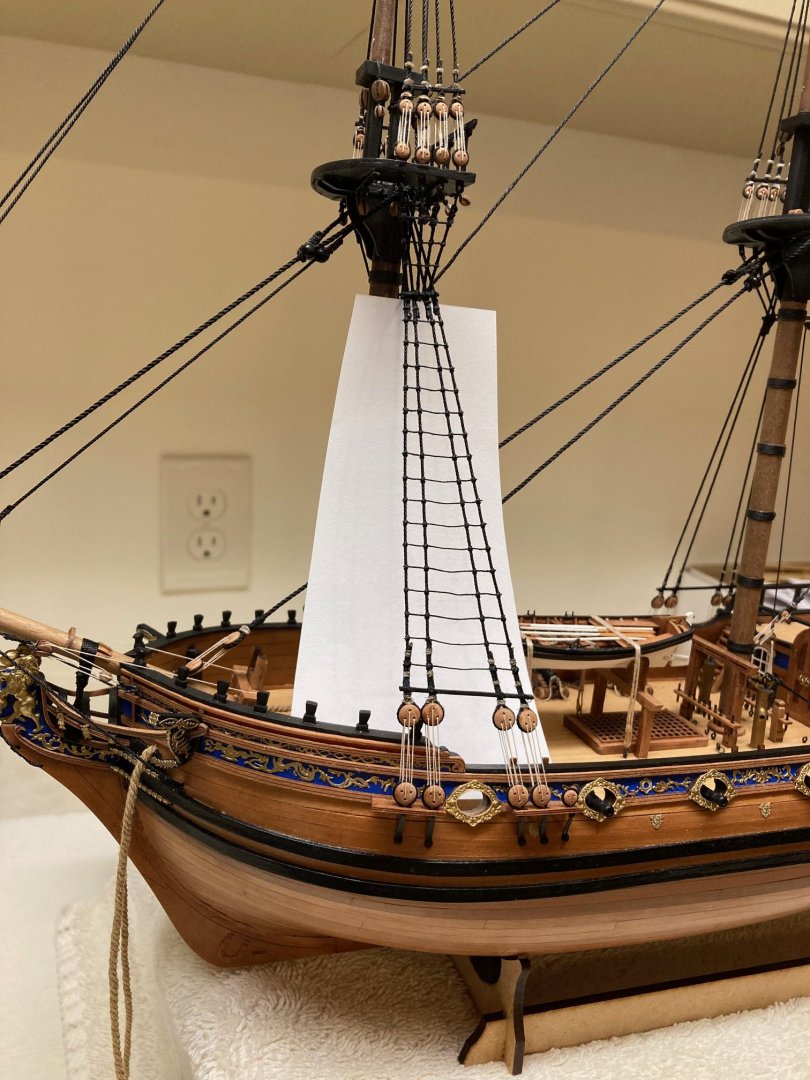
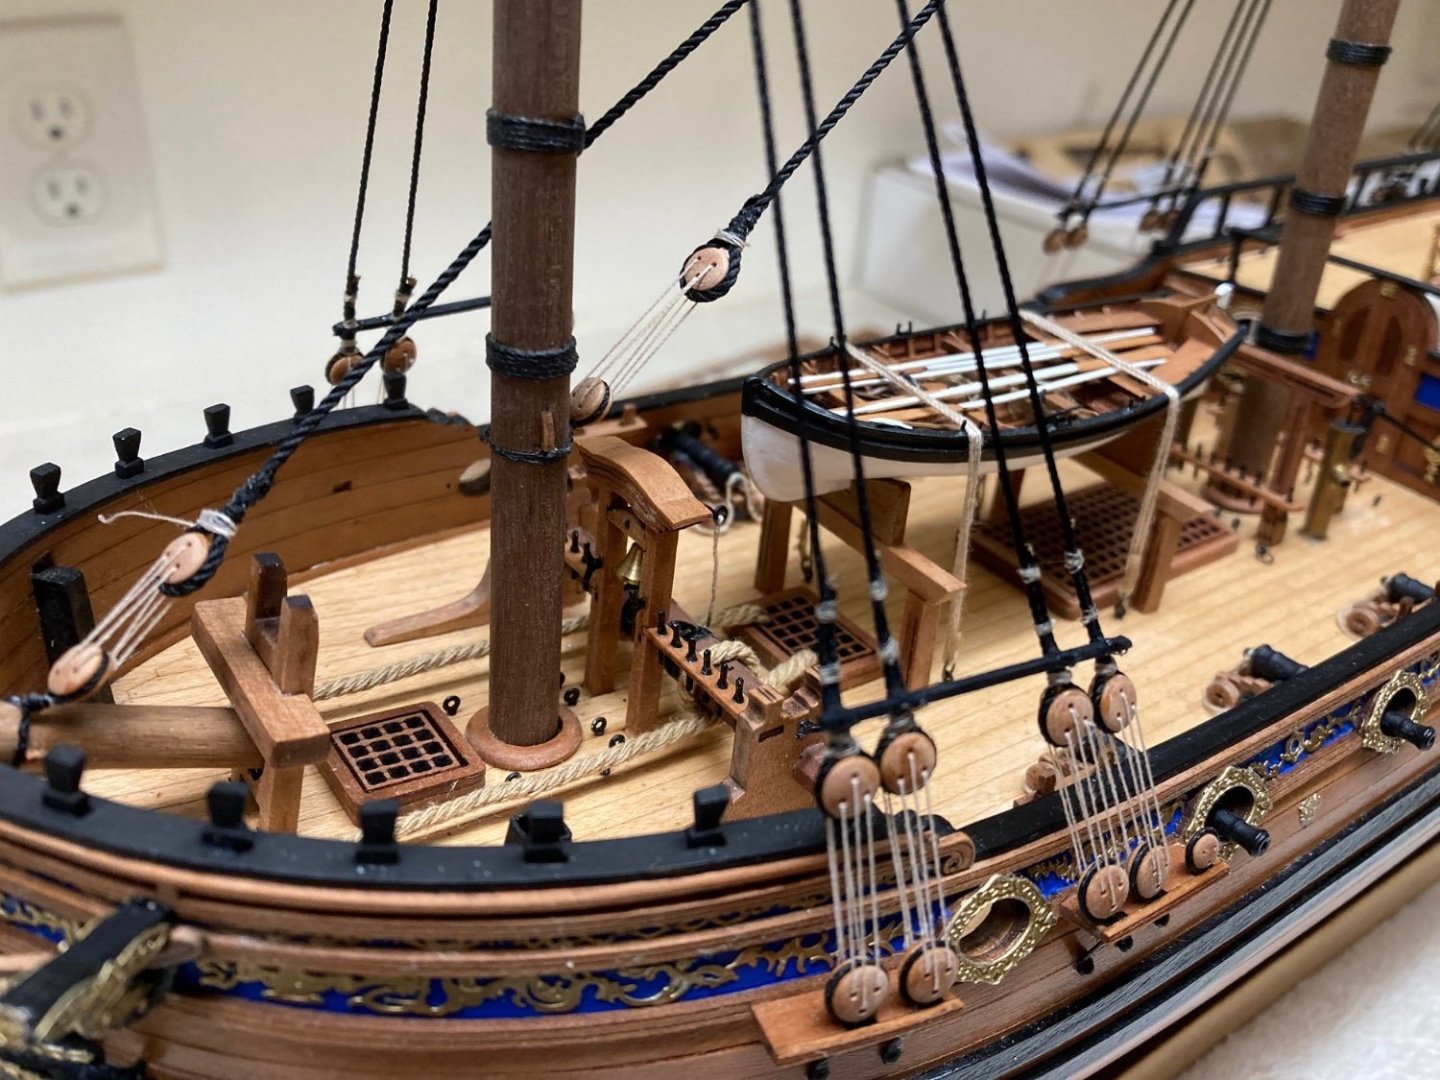
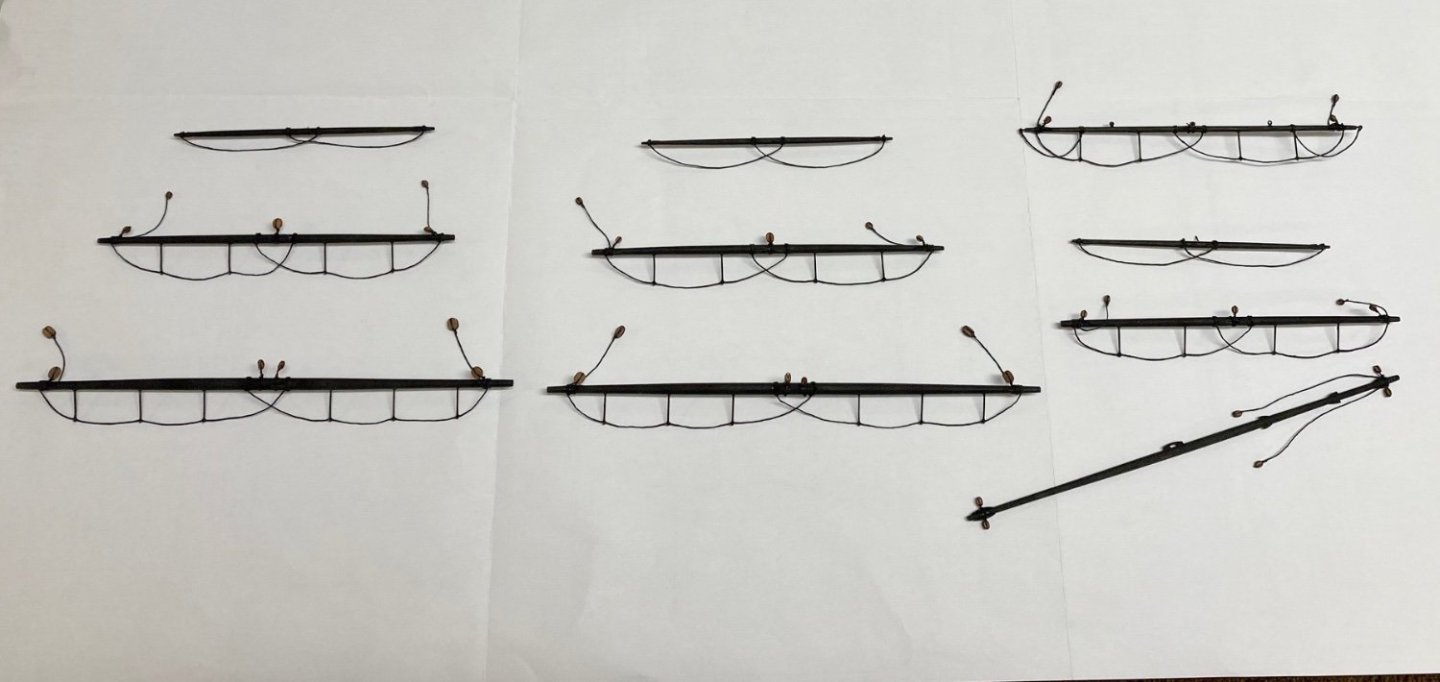
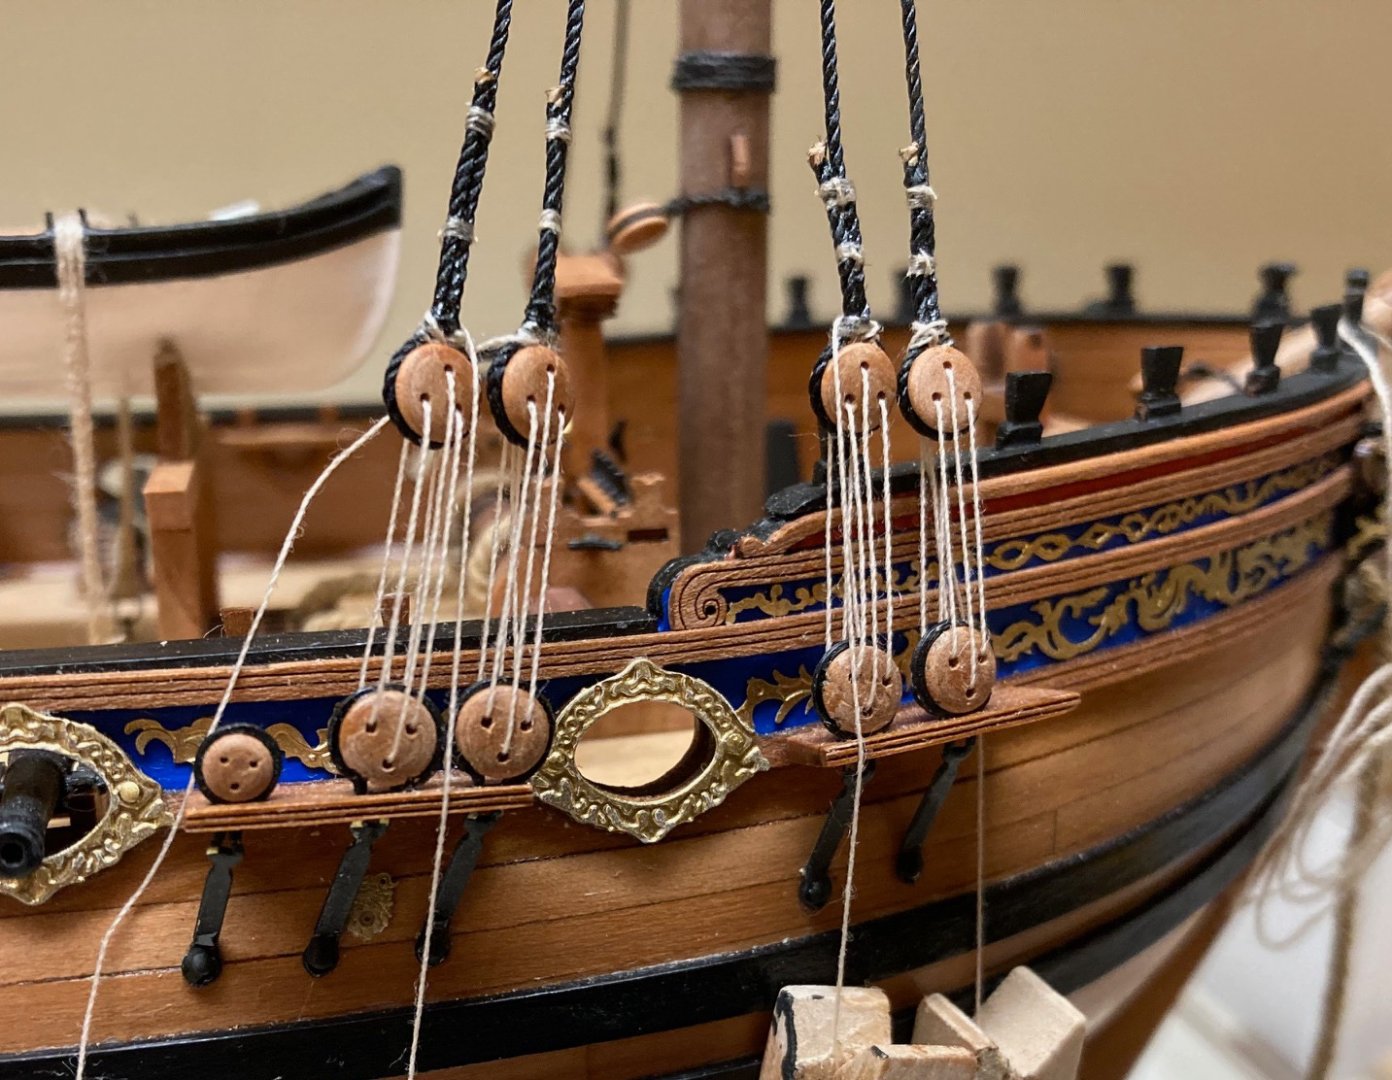
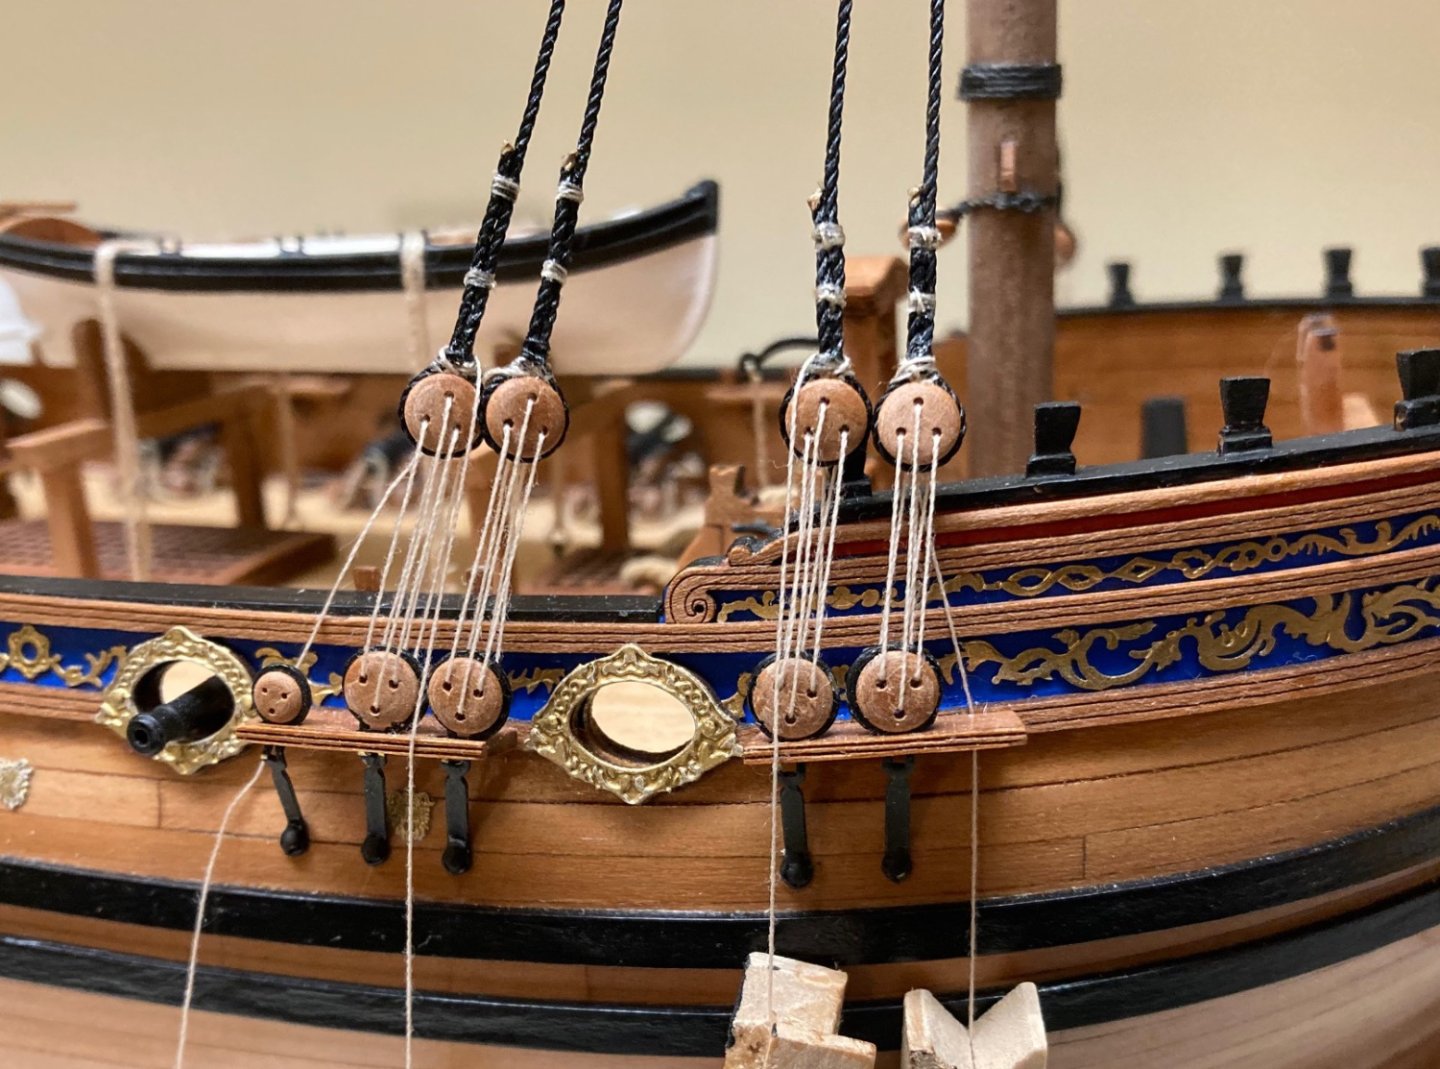
Thank everyone! I needed some encouragement. I got the lifts on without too much trouble, so I'm just starting the last stage of rigging, the braces. All of a sudden I will create a spider's web. Here's a few photos of what it looks like now.


-
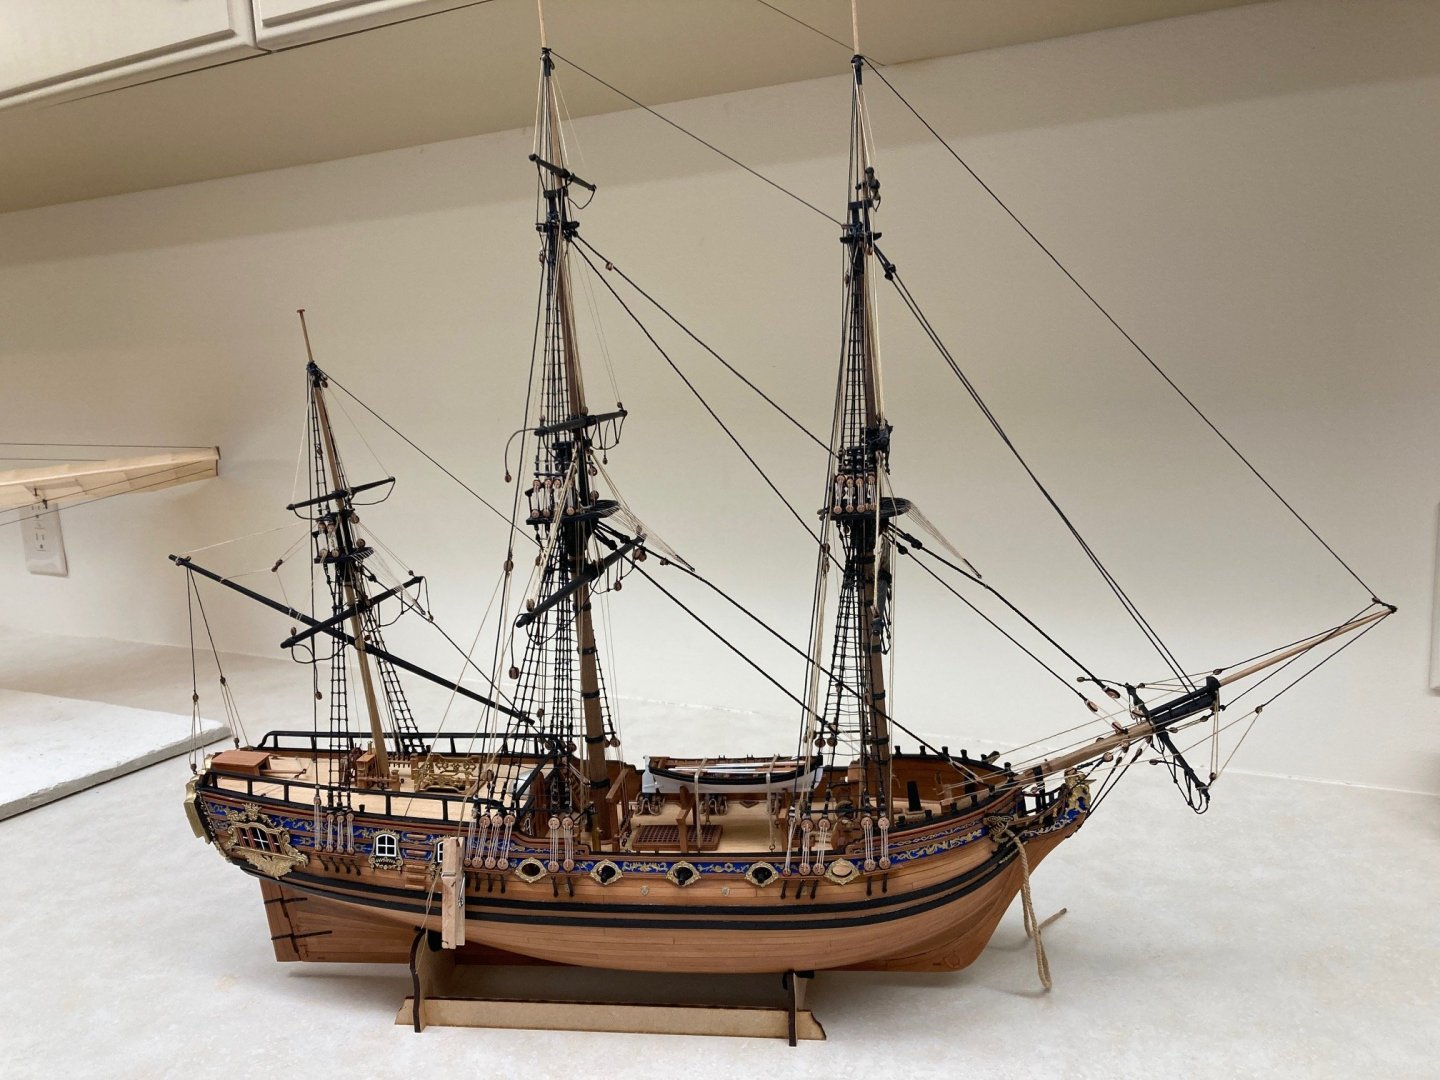
Making slow progress on rigging. I've finished ratlines and back stays, and I just added yards. It's starting to look like a ship. Starting work on jeers and ties. Here's a few photos showing current status. I would post more photos, but I'm finding it difficult to take photos of rigging and show anything other than a jumble of lines (could do closeups, but you don't want to see my work close up!) I'm having to take a few shortcuts, especially with knots. I've always had trouble with rigging and working with the tiny blocks, and after cataract surgery I don't see as well closeup, especially depth perception. But I want to get it finished, so doing the best I can.


-
Thanks Bob! Here is progress on ratlines. I have the lower port ratlines done, and am over halfway done on starboard side. I'm getting a little faster at it. About the time I think I'm starting to get good at it, I'll be done. And then who knows when I'll do it again!
-
I've been plugging along with rigging. Finished the shrouds and stays, and I've been working on ratlines. Just finished ratting the port lower shrouds, so took couple of photos, and thought I'd let people know I'm still working. Now that winter has arrived, I'll pick up speed a little bit although I'm always slow at rigging. I get very distracted from models with other hobbies when the weather is nice. The kit plans call for 0.10 black thread for ratlines, but I'd used the majority of it for seizing shrouds and stays, so I knew I didn't have enough to do ratlines. I had black thread in a couple different diameters that I thought would work, and decided on the slightly larger "heavy duty" thread. I probably should have used the thinner regular thread, but by the time I figured that out, I had already done too much to change without it looking goofy. So I kept going. I started on the mizzen mast since it looked easier. I'm not sure it makes much difference though. It took a bunch of knots to get good at tying them, but now I can do it fairly quickly. Tweezers really help grabbing thread ends, and the "extra hands" thingy helps hold the ends of threads while you're tying knots. The large gap between the inner shrouds gave me some trouble, and I just did the best I could. I have had to glue every couple of knots as I go along to keep them from coming slightly loose as I work across the shrouds. I used CA and it works fine, although you need to let it set before continuing across the shrouds. If you accidentally touch the thread to the CA before it sets, a little part of the thread becomes stiffer, and it's harder to tie the next knot depending on where CA hit the thread...if that makes any sense. I learned to go slow, and it wasn't a problem.

-
Here's some progress photos of rigging efforts. I'm working on the topmast shrouds and ran low on rigging thread. Ordered some Amati thread, but it looks a size too small. Seems I recall someone else saying the same in another build log. Got some more ordered hoping it matches the size in the kit. I also started work on the main stays. On the main shroud deadeyes I had trouble with them twisting or rotating a little and not staying lined up. Not sure what caused this other than I could not get the deadeyes oriented perfectly. I fought this for a while, and then decided to add a small strip of wood just above the upper deadeyes like I've seen on other ships to keep them aligned. And here's an overview of where I'm at rigging. Really just getting started. I use clothespins or small alligator clips to keep threads out of the way or apply a little tension to them. I'm waiting to tighten lashings until I get all the shroud lines done.


-
I'm guessing a lot of people following my build log have given up on me. I just took a long break from working on the Duchess. It's been a year struggling with not seeing quite as well up close after cataract procedure (the good part is I see a lot better at distance). A bigger problem was trouble with bright lights, or for a while with much of any light. I kept removing bulbs from overhead shop lights in the hobby room, but never could stay in there long. With time, though, things have gotten better, and I have no trouble working there now. Still don't seen as good closeup as I used to, so it's more difficult to work on model ships, but it can be done. I also had a couple of other minor health issues last year, so I didn't get much done on a lot of other things besides models. So I'm back on the Duchess after a long layoff. I can tell I'm out of practice. I'm a bit frustrated that I'm not doing the same kind of work that I was doing, but then I've never been very good with rigging and knots. My fingers and thumbs seem larger than I remember. To make any progress I decided to use simple knots simulating others. Otherwise, I doubt I'd ever finish, and I'd like to finish the Duchess. It will look fine as long as you don't look too close, about like my other models, LOL! Rigging is always difficult to photograph, and mine won't look too good up close. I'm just getting started. I have the lower shrouds done and am finishing up the futtock shrouds. I'm following the order of the manual, but was very tempted to do the stays first, then the shrouds. I prefer working from inside out, and from low to high. I've also attached blocks and footropes to the yards, and I'll attach a photo.
-
Fiddly is hardly the word for your windows! Absolutely incredible work. You are moving up to a different level and will be carving figureheads before long. 😄
-
Great work as always! You always amaze me. The checkerboard floor came out real nice. Some thin plastic over it to protect it for a while would be a smart move. Loved your tool for creating small square strips with a plane. I need to learn to make little tools and jigs like that to make things easier. I tend to just jump in without thinking. You're braver than I am to make window frames from scratch. The test window frame looks pretty good from the photos. No matter which window frames you use, you may end up having to add shims or something to get the proper fit. I think it's personal preference whether you use the Micro film or thin acetate sheets for windows. Or you can be a wimp and not use anything like on my models. Whatever choice you make, it would be nice to be able to see the inside of the cabin with the floor and other items. David
-
Your model is absolutely amazing! I can only echo what everyone else has said. And I agree, the boxwood is awesome. I'm glad you left the hull unpainted to show it off. Now I'm embarrassed to put my photos online. I'll be using your excellent build log a lot while doing rigging. Rigging is my major weakness, I have such fumble fingers. If I can do a tenth as good as you've done, I'll consider it a success. I'm glad you had a good trip. I've read a number of books on antarctic exploration which were fascinating. I have another friend that I think is on an antarctic cruise ship right now. I'll have to switch over to HMS Winchelsea and keep learning from your build logs.
- 345 replies
-
- 1
-

-
- Duchess Of Kingston
- Vanguard Models
- (and 1 more)
-
And here's a couple of photos of my efforts seizing shrouds. I've been struggling with this, trying to add more detail than I did on previous model. I've been somewhat successful in that, but then I overlooked some of the basics. With the long layoff, I've gotten a bit sloppy about things. This is after a couple of redo's and is probably the best I can do right now. I haven't tightened or tied off the lashings yet. I still have one more shroud pair on the port side left to do.
-
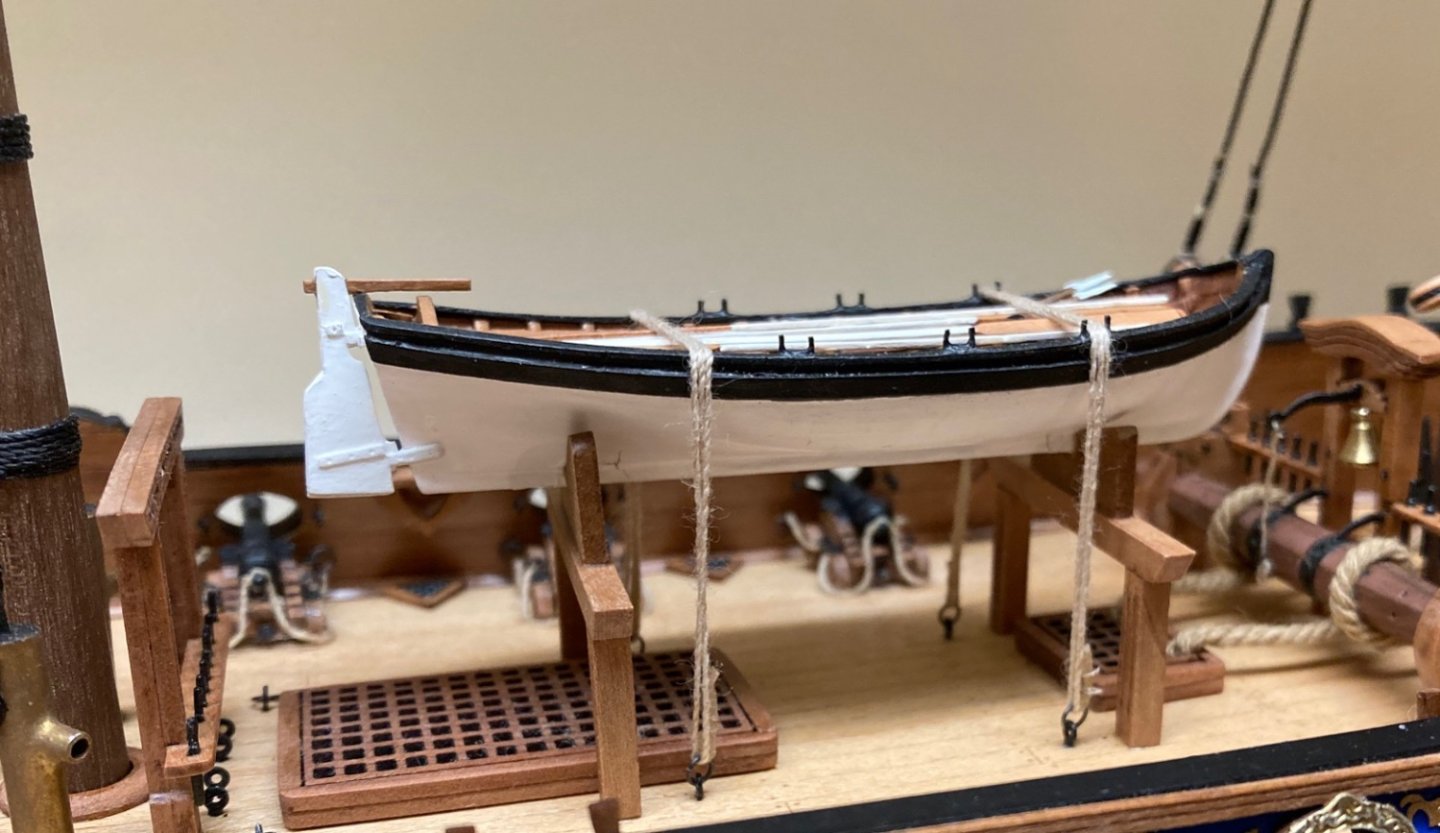
I started on the shrouds and then I decided to glue the ship's boat to the deck. It looked like the shrouds might interfere with my fingers when working with the ship's boat. I'm still struggling with both my closeup vision and my skill level. I've tried readers and a magnifier, and couldn't use either for any length of time without starting to get headache, so I'm still trying to figure out if there's something I can do to get a slight improvement. I don't need much. Here's how the ship's boat looks on the deck. The camera shows all my difficulties seizing ropes.

-
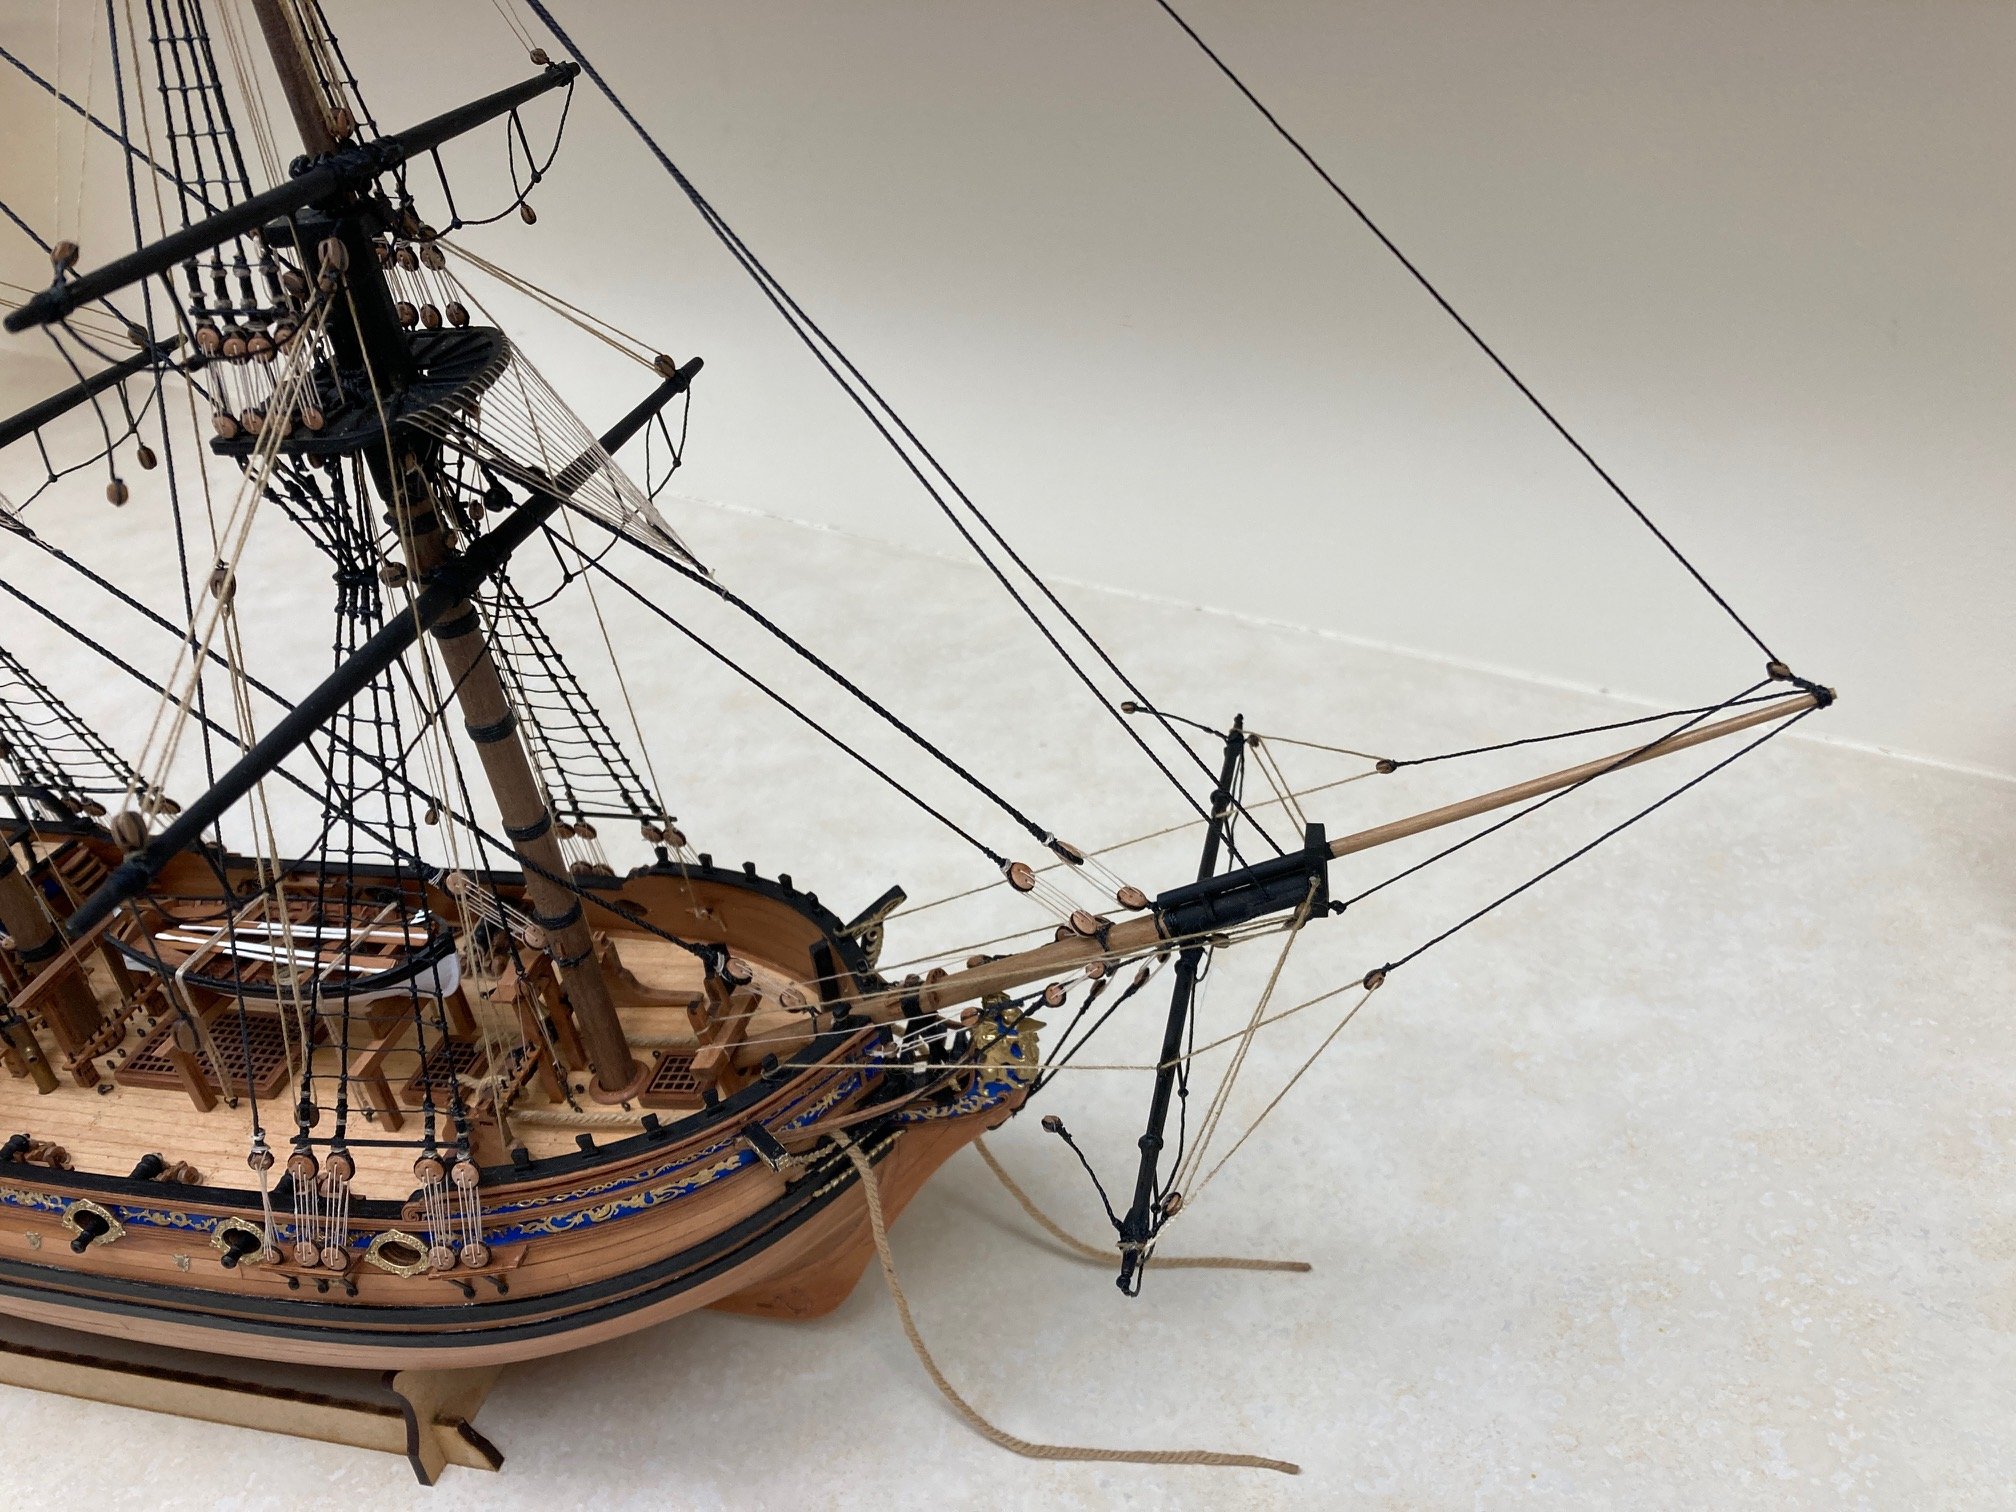
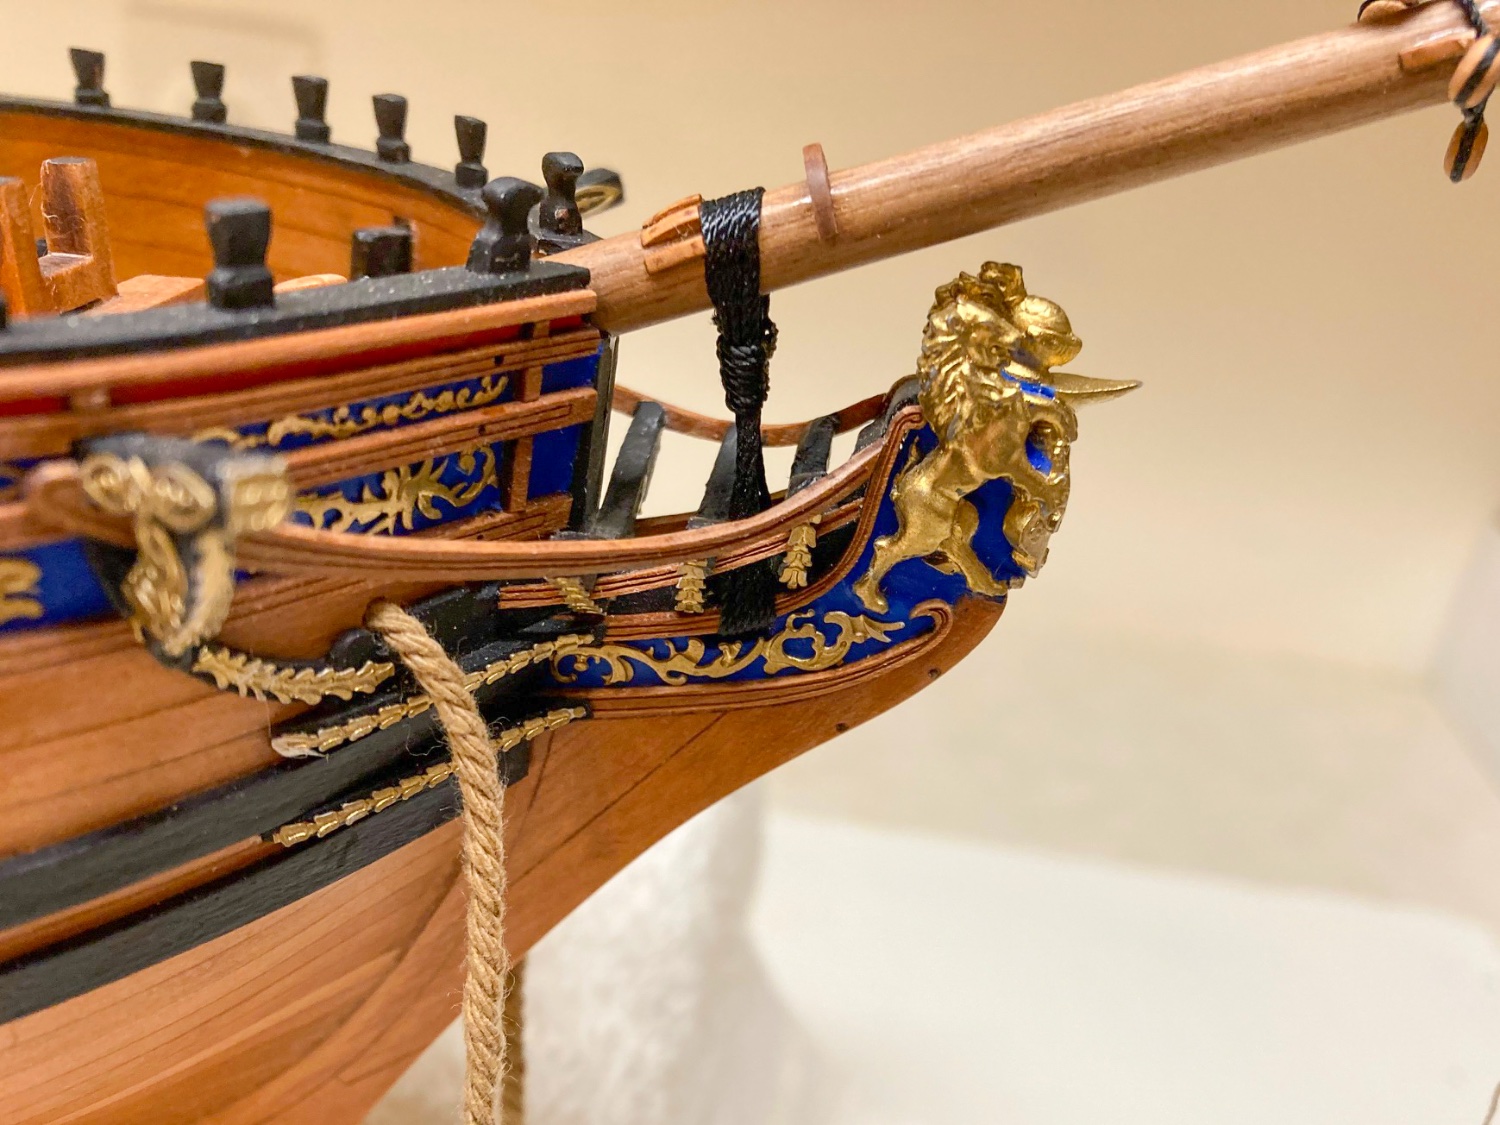
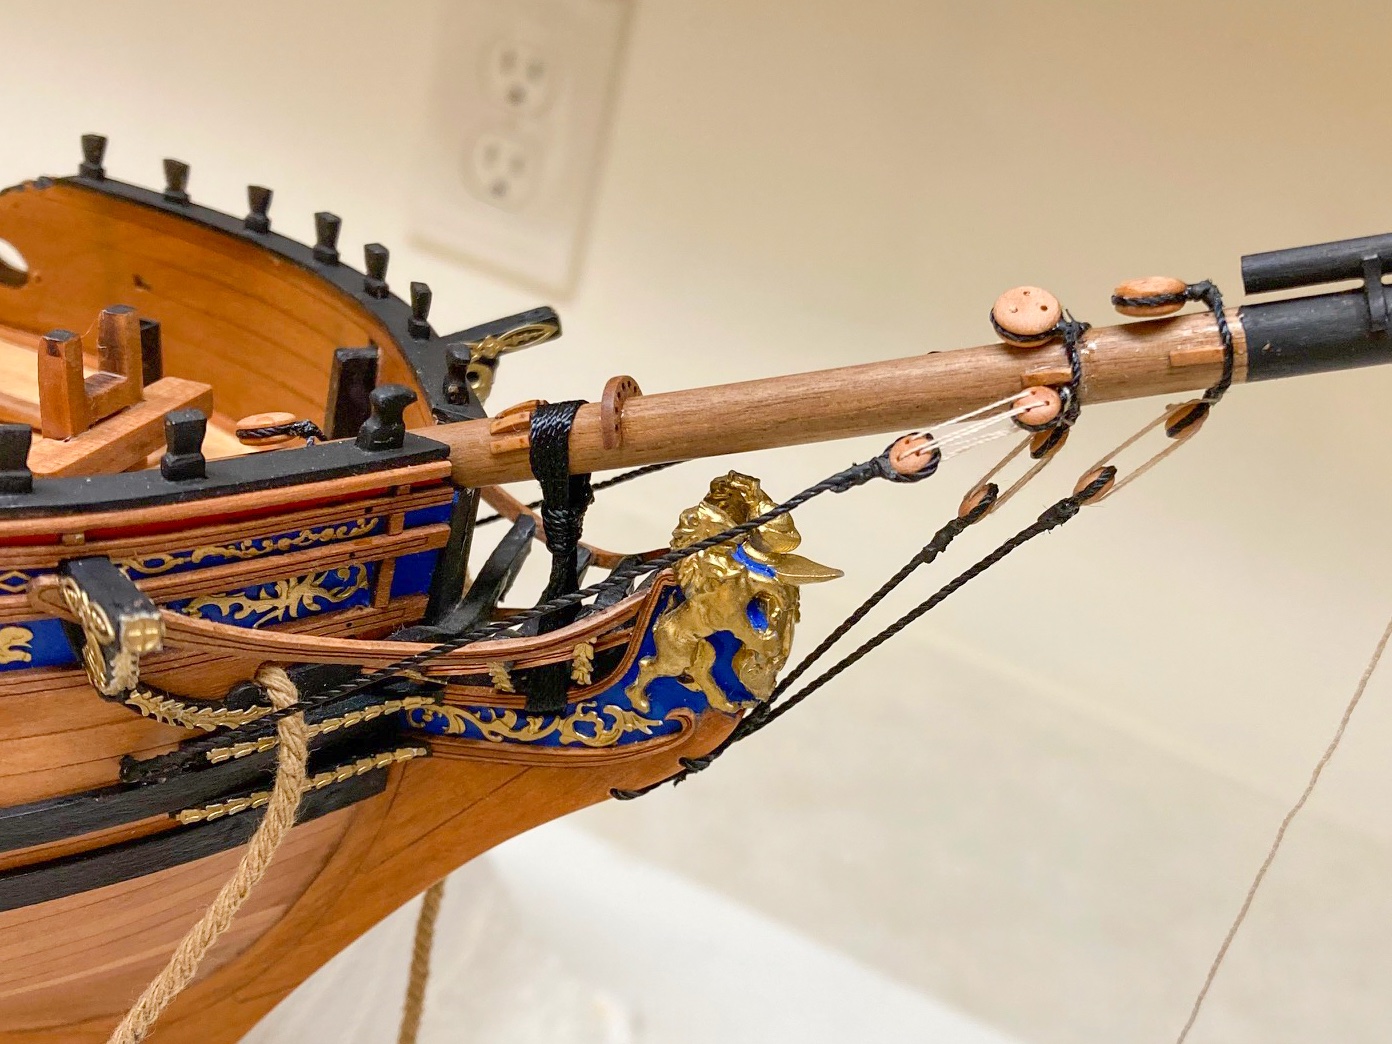
Derek @DelF, I looked at your build log, and you're done! It looks amazing, a superb job!! Your rigging is something to behold. I have no idea how you manage to do it so quickly. I go at a snails pace, and that's with me simplifying knots. After doing the bobstays, I realized I should have doubled up the ropes. But I'm going to leave it as is, and treat is as a learning experience. I have a couple of references on rigging, but have been lazy about using them. They can be discouraging because I'm so poor with doing knots with such small threads and in tight places. Shrouds are next and I'm about to give it a go. I'm thinking I'll try something like what you did on Speedy. That would be a major upgrade to what I did on Siren. Can't thank you enough for your excellent build logs! Did your trip to Alaska go ok? And speaking of bobstays, here's couple of photos:
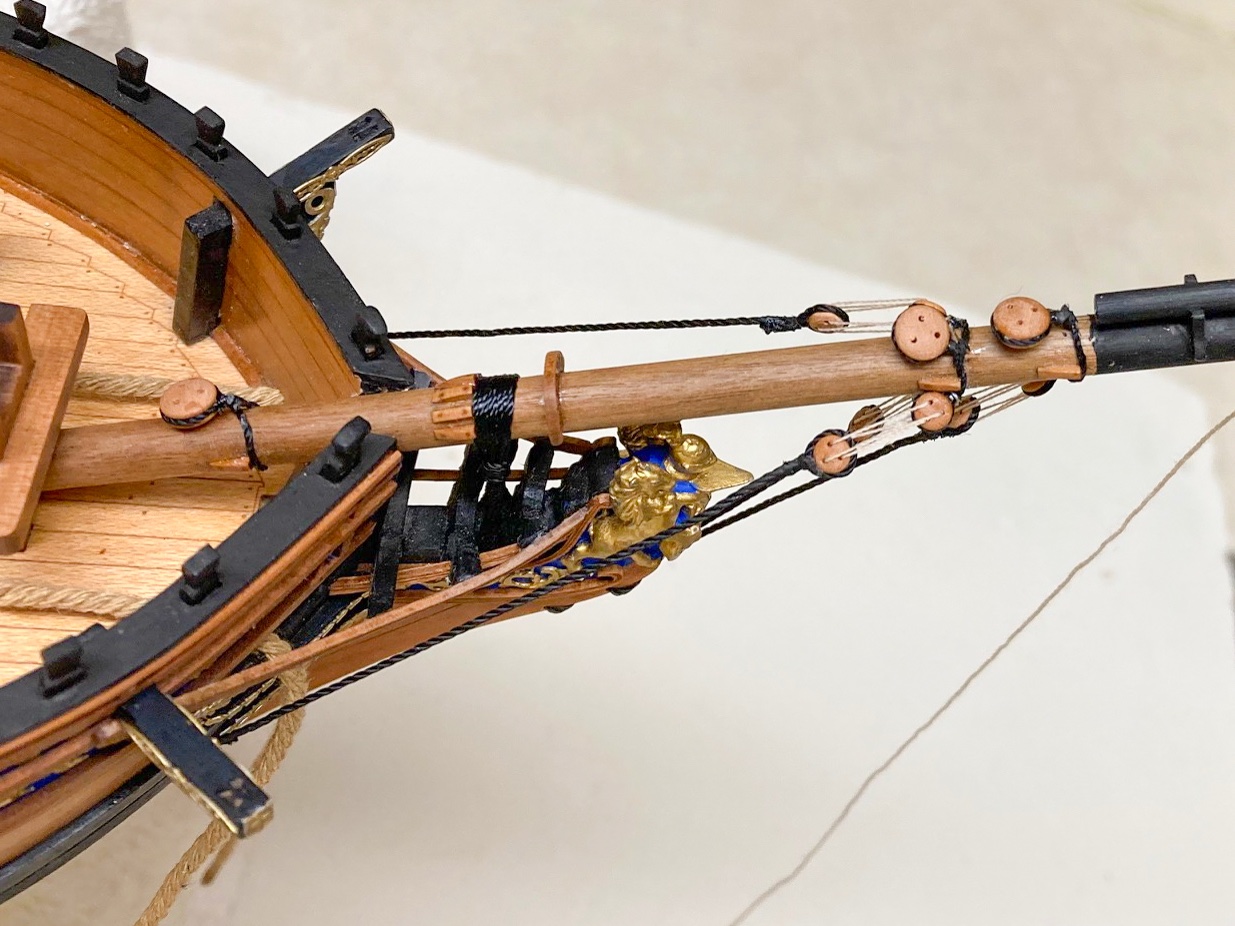
-
By now Derek you are way ahead of me, and I'll be using your log as a reference. I've already scanned a little of it, and as usual, your model looks fantastic. I'm trying to get going again on the Duchess. With a long layoff, I'm way out of practice, and I'm learning to work now that I'm not so near sighted after cataract procedure. Without my glasses instead of focusing at a few inches, it's about at about a foot. It's still a case where I'm constantly putting glasses on and taking them off, but I was always doing that. It's not all that different, and I'll get used to it. I left off ready to start rigging with the bowsprit gammoning. It took a few tries to get it halfway decent, and it will have to do. Then I started attaching some blocks to the main yard. Attaching blocks to all the yards and doing the foot ropes is going to be a slow process. I think I'll work on some of the other bowsprit rigging at the same time so it doesn't get too repetitious. Not a lot to show this time, but wanted to let everyone know I'm back.