DelF
-
Posts
1,409 -
Joined
-
Last visited
7 Followers

.thumb.jpeg.fc5d633a7b34428fcf19419a73d56d55.jpeg)


About DelF

- Birthday 07/13/1951
Recent Profile Visitors


-
 Ryland Craze reacted to a post in a topic:
HMS Speedy by Delf - FINISHED - Vanguard Models - Scale 1:64 - Master Shipwright edition
Ryland Craze reacted to a post in a topic:
HMS Speedy by Delf - FINISHED - Vanguard Models - Scale 1:64 - Master Shipwright edition
-
Taygz reacted to a post in a topic:
Looking for the Correct Sequence and Terminology for Deck Plank Butt Shift
-
Mr Whippy reacted to a post in a topic:
Duchess of Kingston 1778 by desalgu - Vanguard Models - 1:64 - Royal Yacht
-
Hi Delf. I’ve been following your Speedy build which has been really helpful, so thanks very much. For the main yard and fore yard truss pendants, which ring bolt on the deck did you use and where did you tie it off?
-

Hi. Apologies for the tardy reply - I haven't visited the forum for a while.
I'm glad you found my log helpful. It's a few years since I rigged her so I had to get the model out off the shelf to refresh my memory. Just abaft each mast there is a short line of ring bolts. In each case, I used the outermost ring on the port side. I had a look back at my log and the following section explains how the line was tied off: "The next job was to seize a double block into the end of each pendant, with the falls rigged to a single block hooked to an eyebolt abaft the mast. The kit instructions simply say to belay the end of the falls to the nearest convenient point. I believe it is neater and equally valid (according to TFFM and others) to wrap the spare end round the tackle and finish with a half hitch. I used a clip to hold the tackle in place while I did the hitching." In other words, you hook the lower block to the portside ringbolt then bring the line up about half way back to the double block, wrap it round itself a few times and finish with a half hitch. You can see this in the log photos illustrating this step. I understand this was common practice where a tackle only had to be adjusted occasionally.
Hope this helps, and best wishes with your build.
Derek
-
-
DelF reacted to a post in a topic:
Original Copy of Davis' Seaman's Speculum Found
-
DelF reacted to a post in a topic:
Chris Watton and Vanguard Models news and updates Volume 2
-
DelF reacted to a post in a topic:
Chris Watton and Vanguard Models news and updates Volume 2
-
DelF reacted to a post in a topic:
Chris Watton and Vanguard Models news and updates Volume 2
-
 DelF reacted to a post in a topic:
Sandpaper Grit
DelF reacted to a post in a topic:
Sandpaper Grit
-
Gregory reacted to a post in a topic:
Zero Clearance for Table Saws
-
Canute reacted to a post in a topic:
Zero Clearance for Table Saws
-
Canute reacted to a post in a topic:
Zero Clearance for Table Saws
-
Canute reacted to a post in a topic:
Zero Clearance for Table Saws
-
Keith Right, I understand your question now. Although the tape is quite thin it does create a slight step when you're sliding the fence towards the blade. However it is easy to lift the fence over this step before tightening the screws at the ends of the fence to fix it in position. This hasn't caused any problems so far but if it did, perhaps when ripping a length of wood with the fence resting on the tape edge awkwardly, I'd simply cover the rest of the table with tape. Hope That helps. Derek
- 12 replies
-
- 2
-
-
- Zero clearance
- table saw
- (and 1 more)
-
mtaylor reacted to a post in a topic:
Zero Clearance for Table Saws
-
Gregory reacted to a post in a topic:
Zero Clearance for Table Saws
-
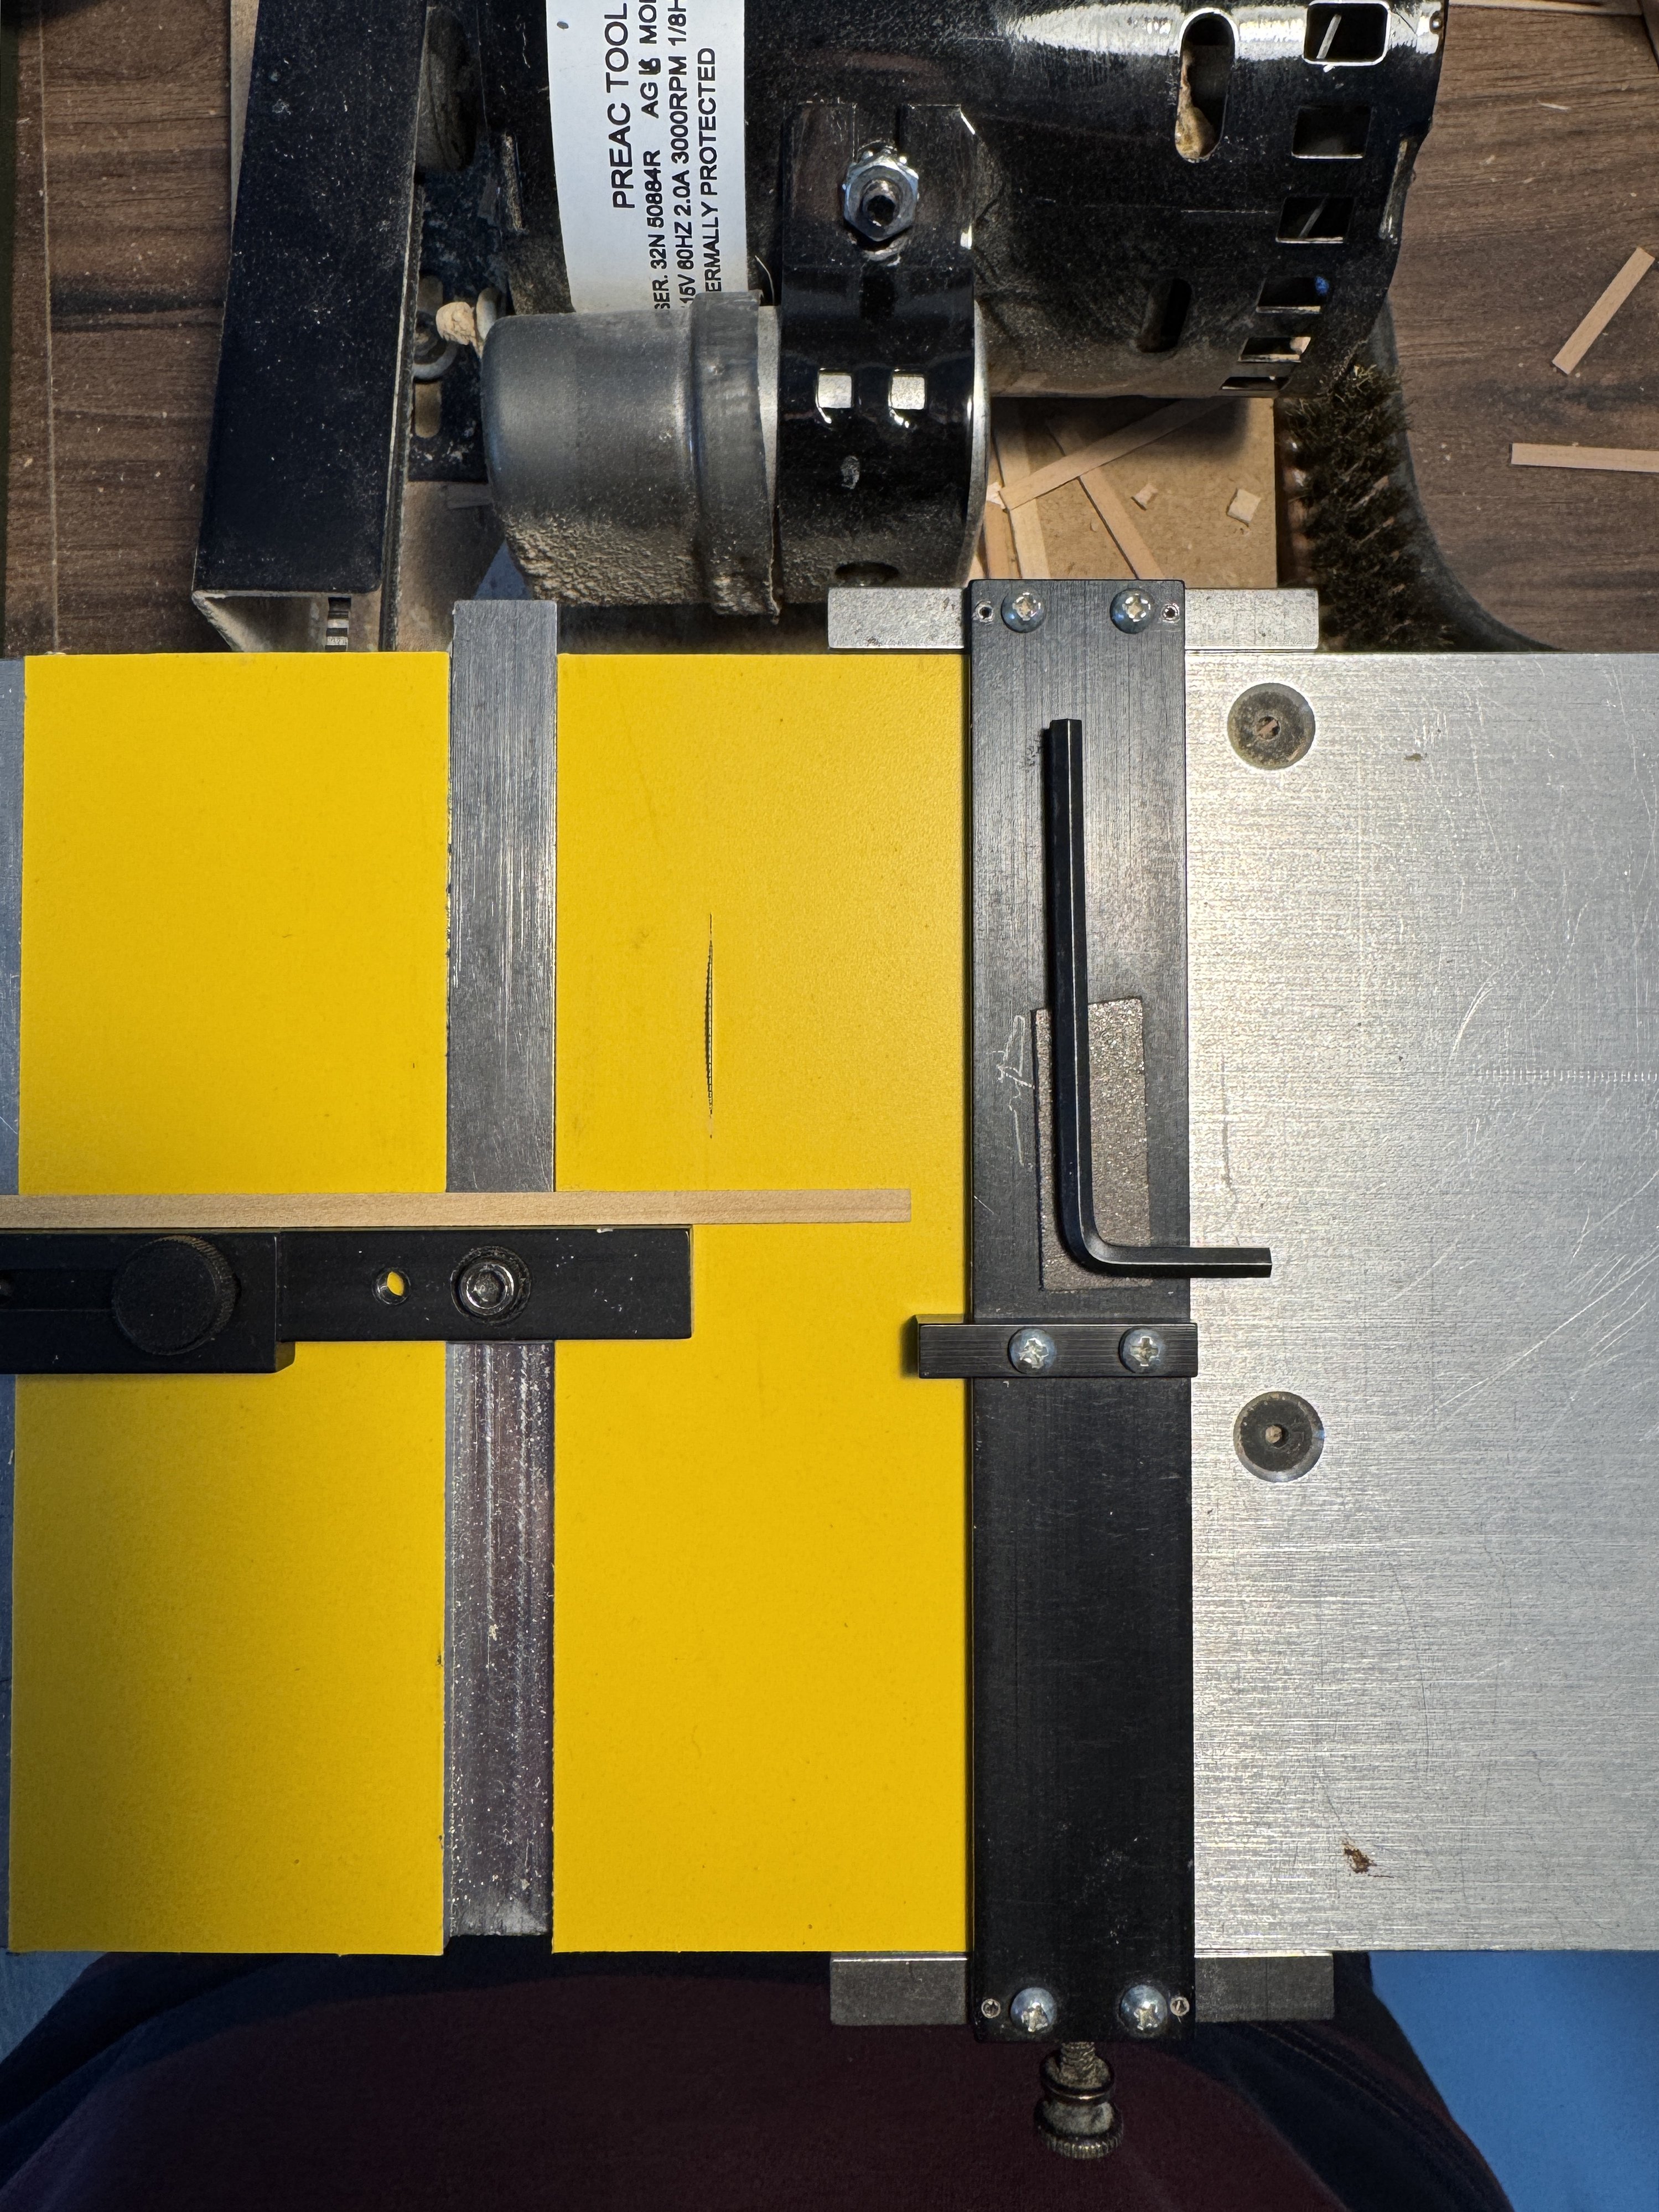
Hi Keith, apologies for the tardy response. This isn't a problem on the Preac as the sliding fence doesn't extend in front of the saw, as you'll see from the photo. Derek

- 12 replies
-
- 3
-
-
- Zero clearance
- table saw
- (and 1 more)
-
 chris watton reacted to a post in a topic:
HMS Sphinx by Delf - Vanguard Models - 1:64 scale
chris watton reacted to a post in a topic:
HMS Sphinx by Delf - Vanguard Models - 1:64 scale
-
 DelF reacted to a post in a topic:
HMS Sphinx by Delf - Vanguard Models - 1:64 scale
DelF reacted to a post in a topic:
HMS Sphinx by Delf - Vanguard Models - 1:64 scale
-
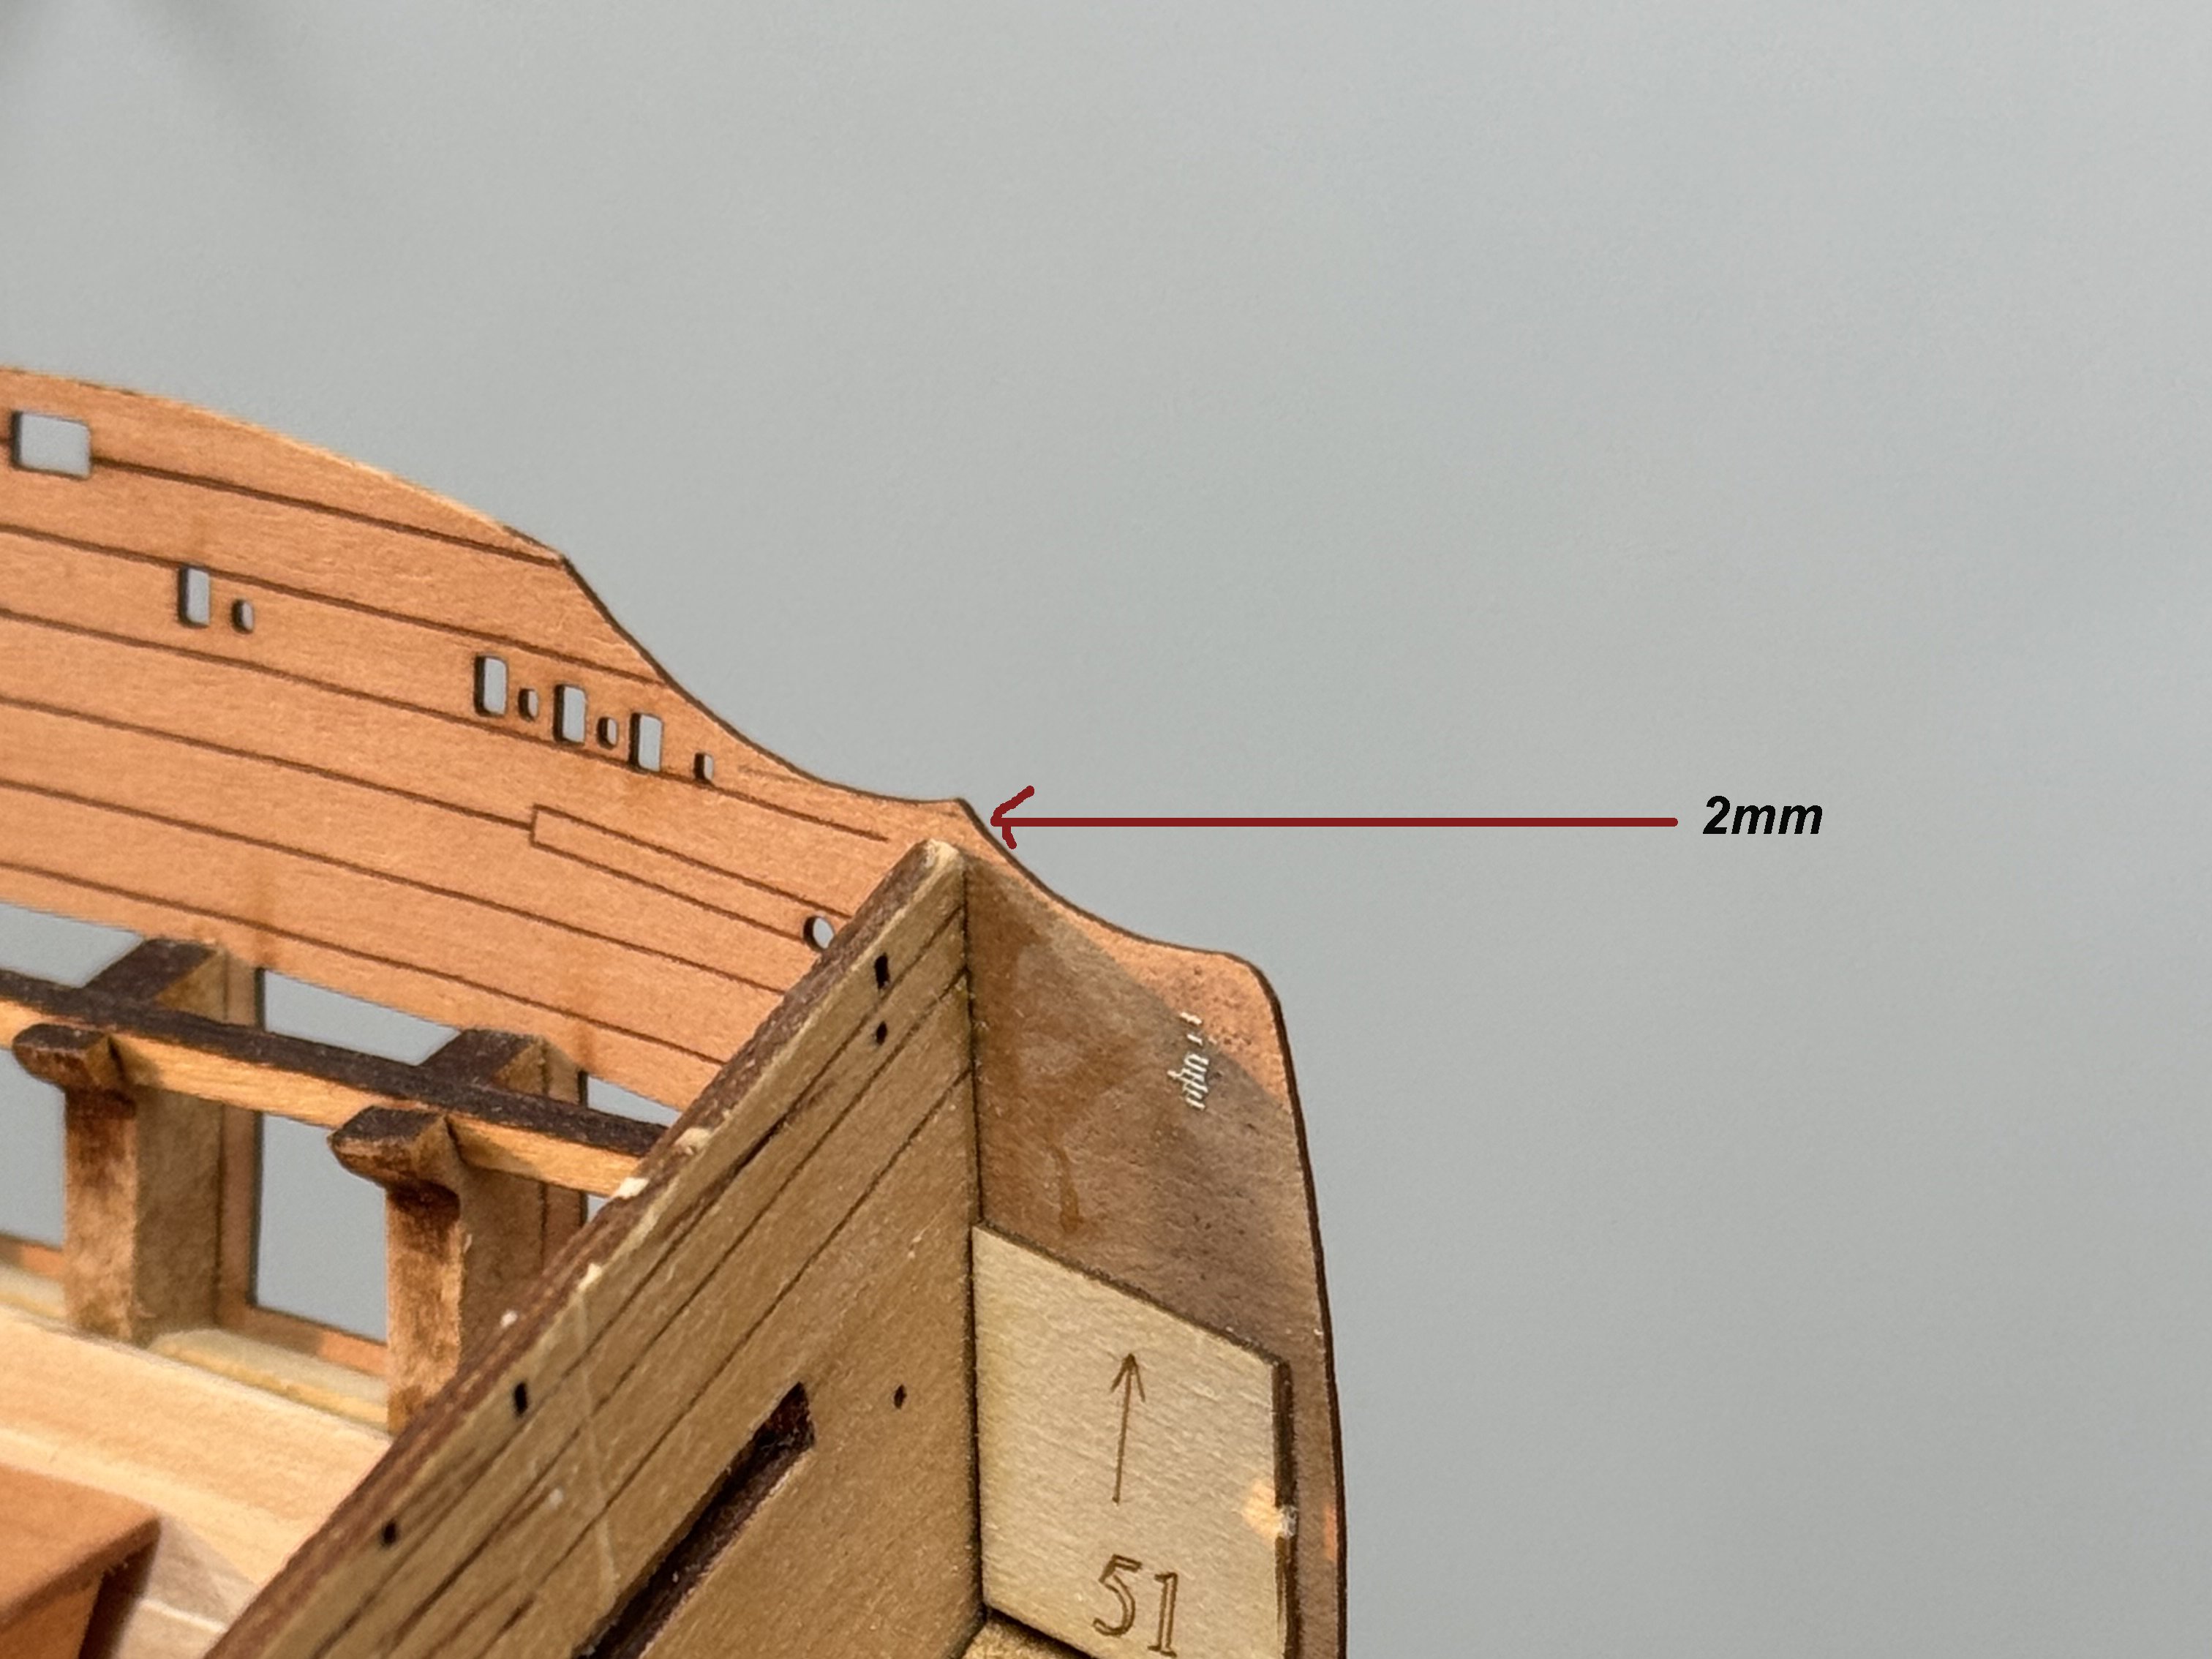
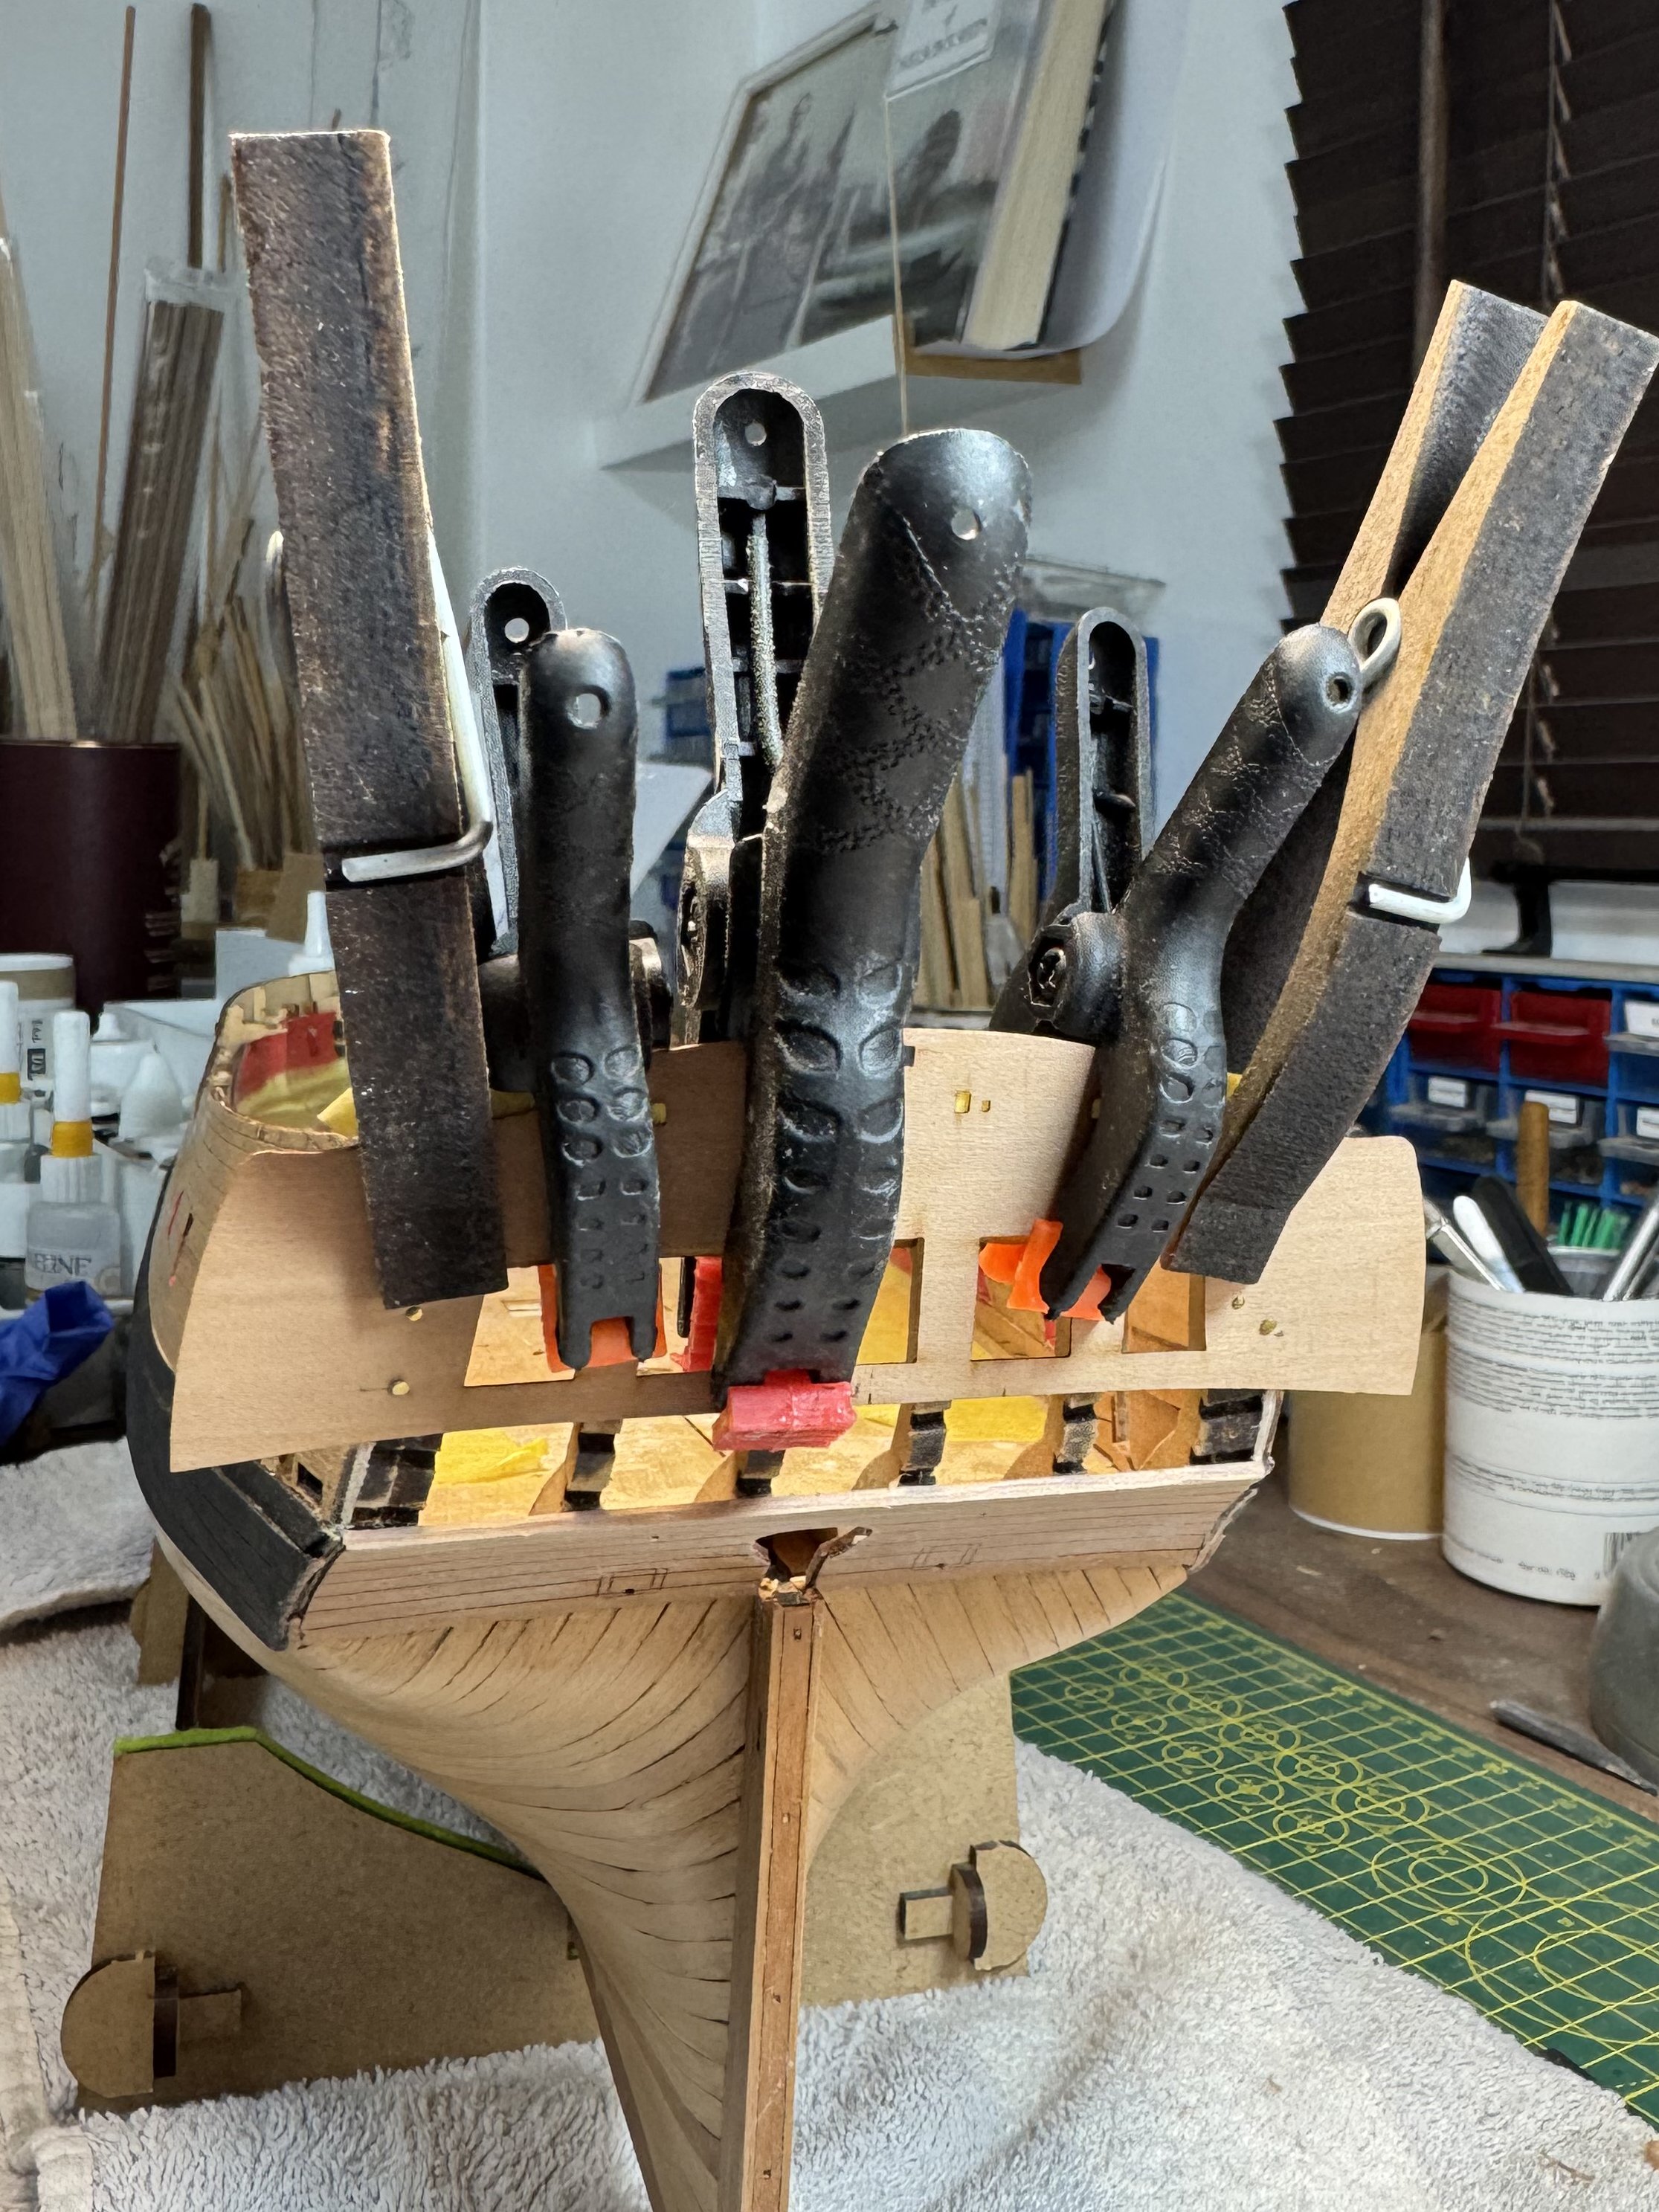
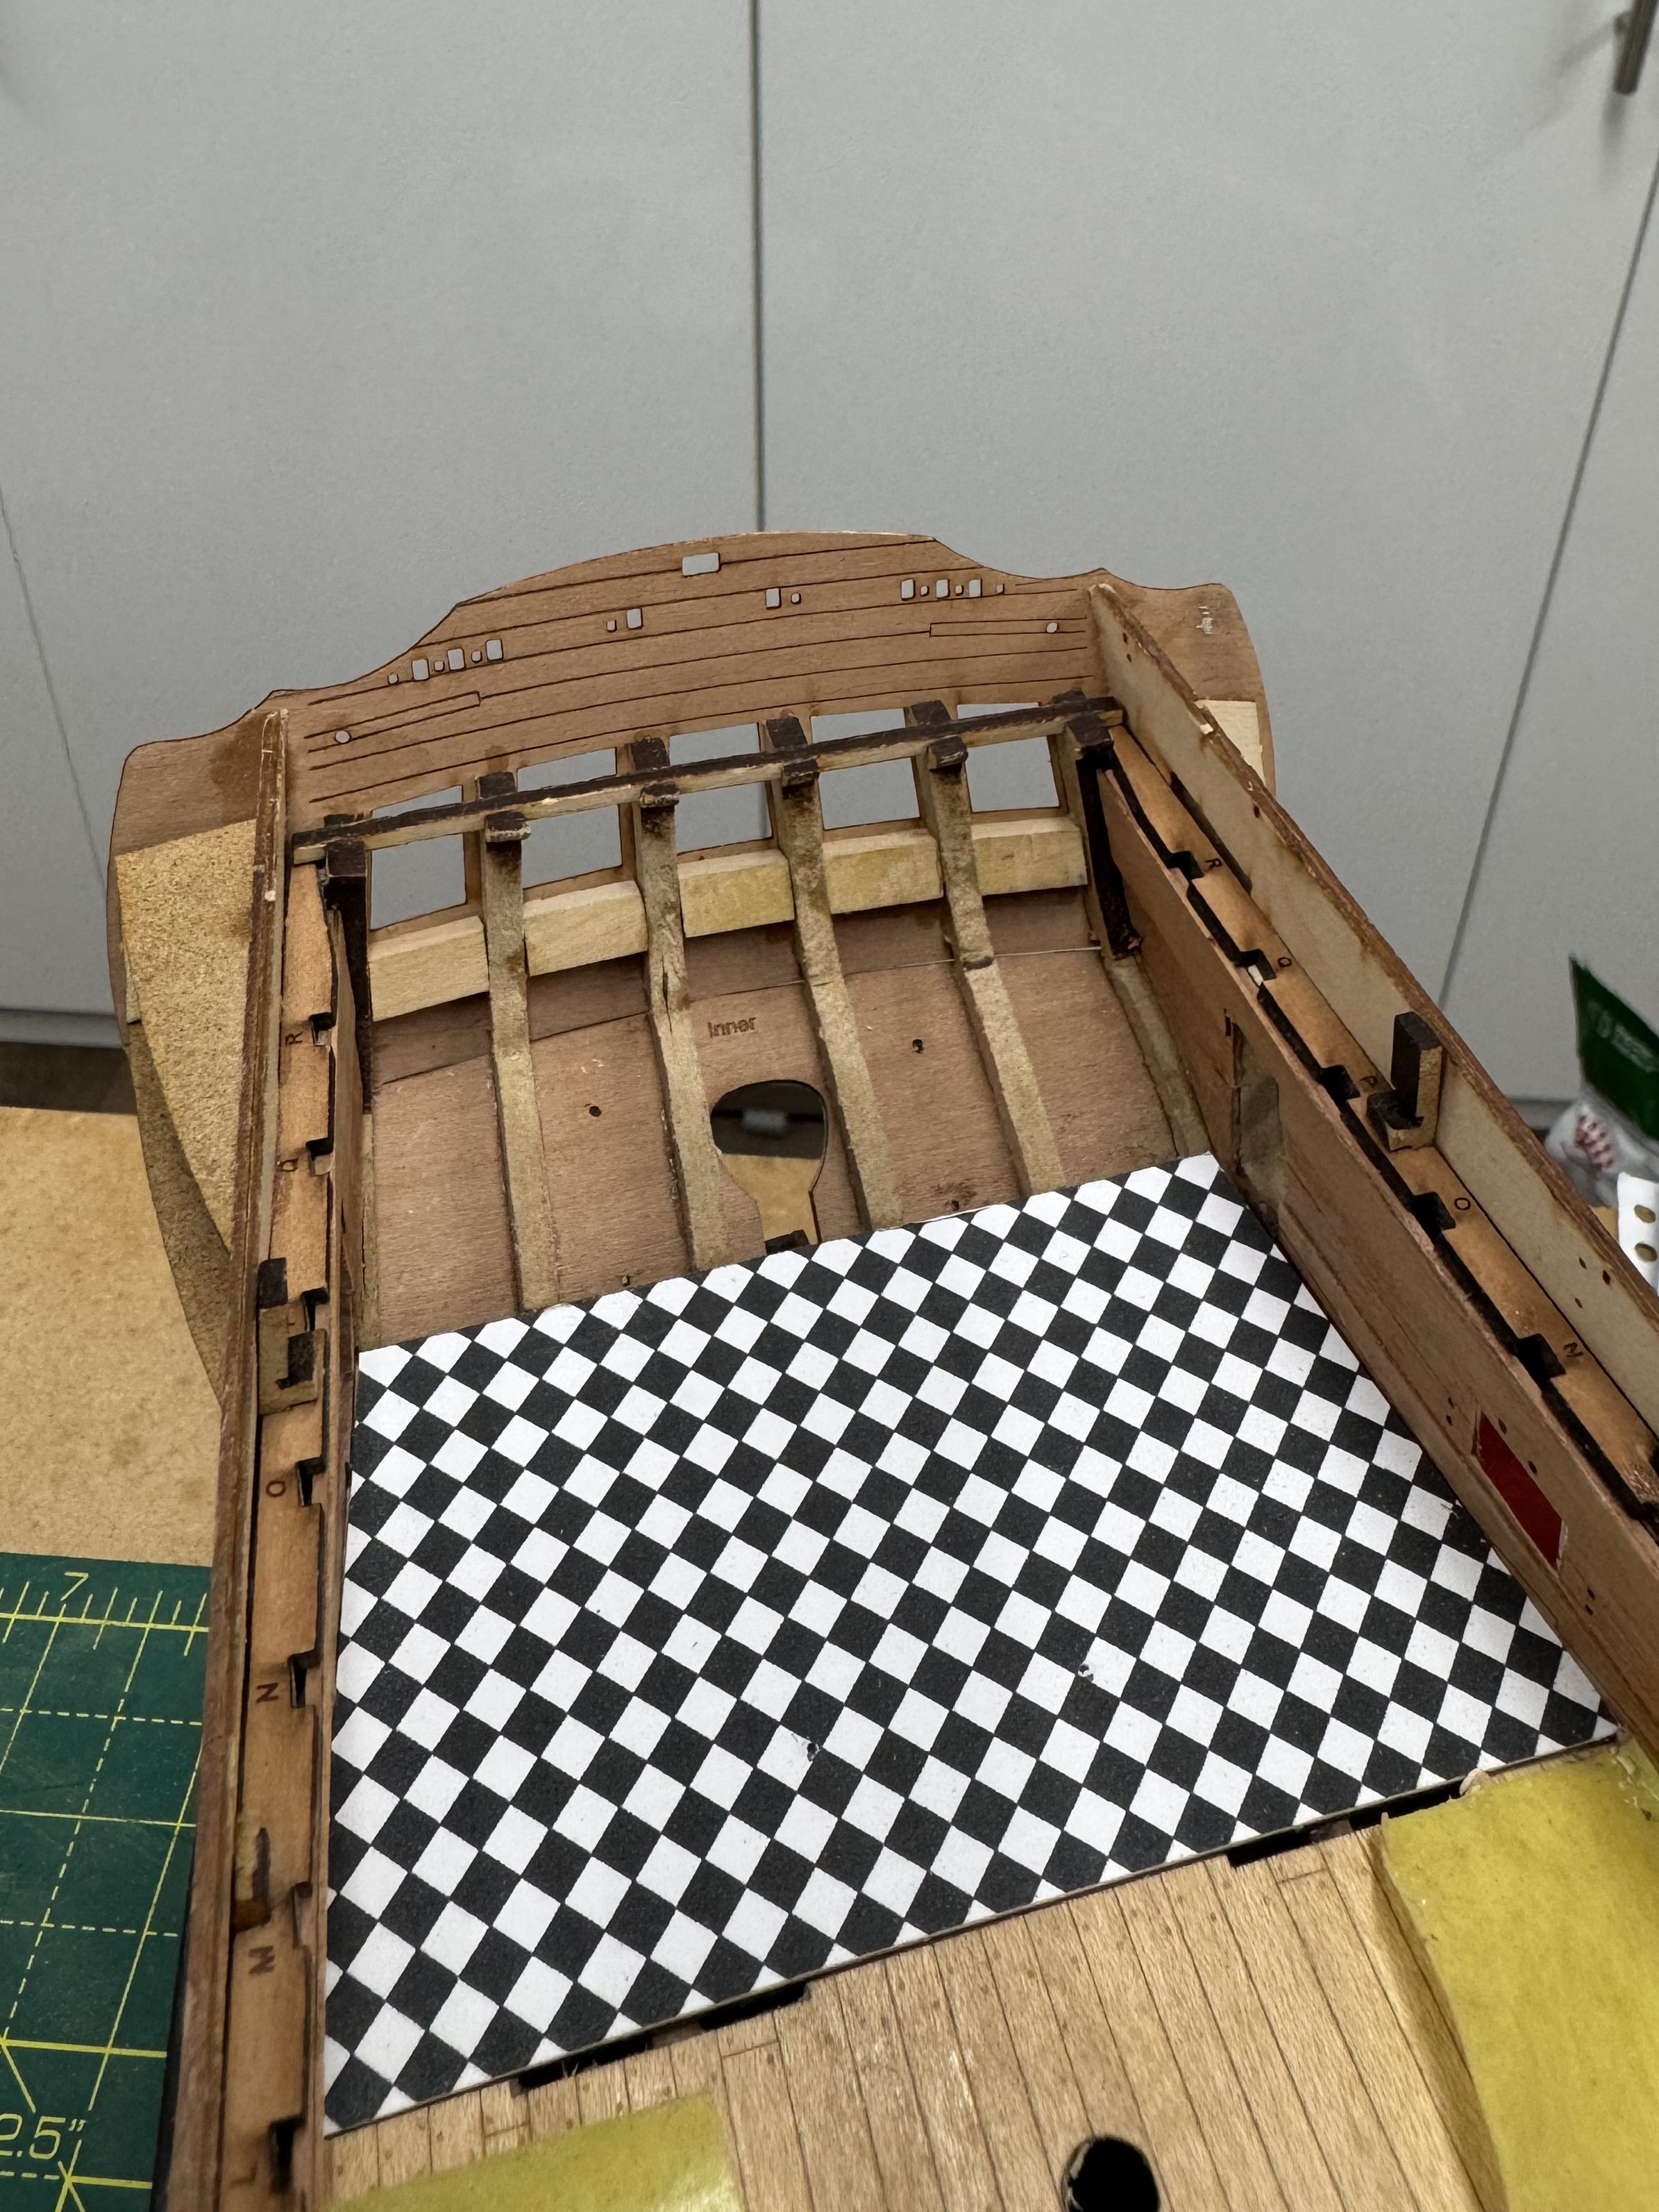
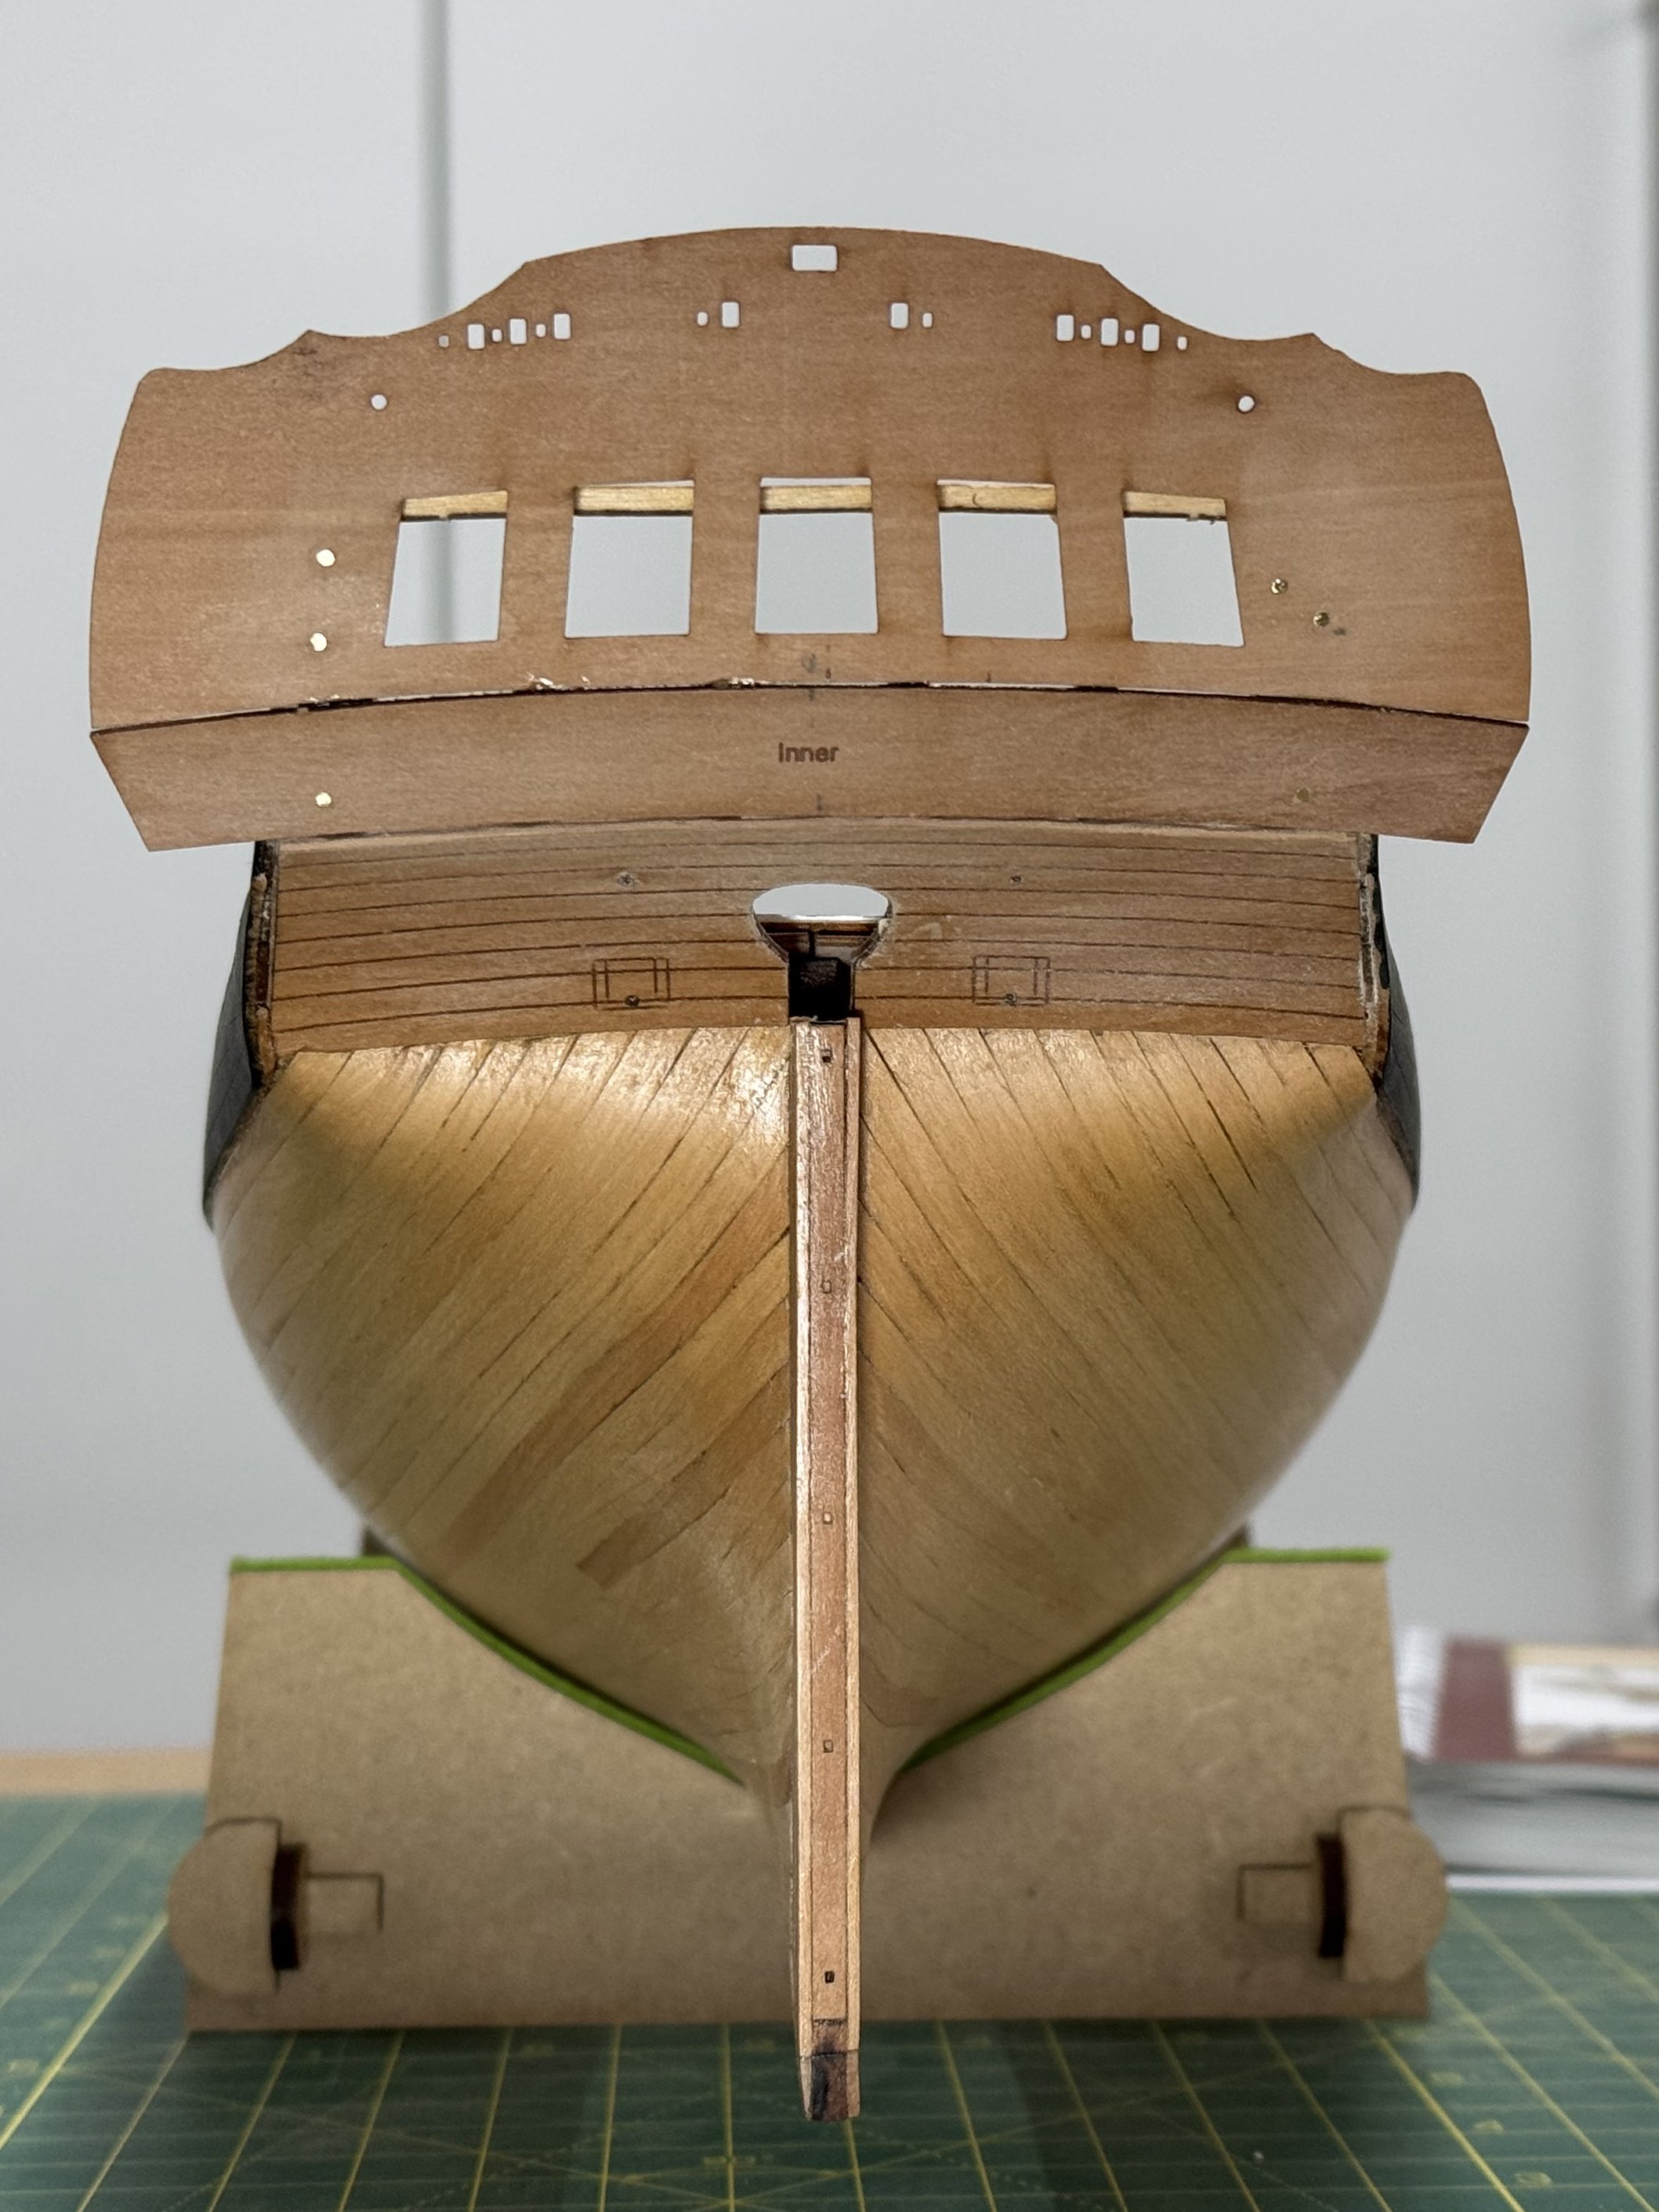
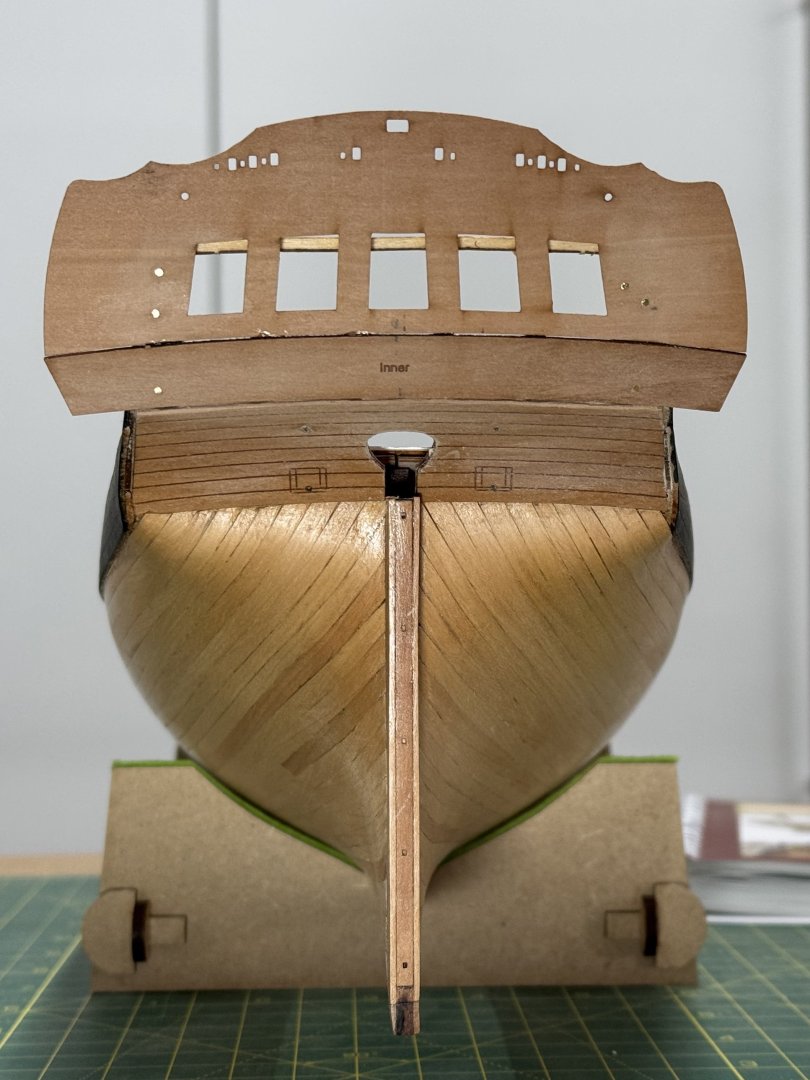
Work on the stern I’ve fallen a bit behind on the log again so I’ll have some catching up to do. My excuse is that we’re planning to move house and there’s a lot of work to do to get everything ready for the sale. Anyway, the Upper Counter and Stern Fascia (Inner) went on easily, once I’d satisfied myself they were in the right position. The latter is crucial, as others have stressed. I decide the best sequence was to fit the inner Stern Fascia first. This photo from later in the build shows how the fascia needs to be 2mm above the bulwark in order to leave room for the capping rail on the latter: Fitting was straightforward, with the usual clamps helped by a few pins: The Upper Counter was then easy to fit below: In this final photo I’ve dry-fitted a few items to get a feel for the next steps, including some of the quarter gallery components and the cabin floor. Chris provides two options here, either a wooden floor with a laser etched checker pattern or a paper pattern on one of the plan sheets. I chose to use the latter, preferring to scan the pattern and print it rather than cut the sheet. My first impression is it’s too bright, so I’ll look for ways to tone it down before gluing in place. That’s it for now. Progress, albeit slow. Derek


-
DelF reacted to a post in a topic:
Zero Clearance for Table Saws
-
A big thank you to @kurtvd19 for his article in the Autumn edition of the Nautical Research Journal, in which he describes his zero clearance solution for the Preac table saw. My Byrnes saw has a recess in the table that allows me to use inserts of different widths to accommodate various blades, thereby ensuring smoother and more accurate cuts. The Preac saw lacks this provision, but Kurt found that the Zero Clearance Tape from Fastcap.com, which is designed for full-size machines, works equally well on the miniature saw. The products comes as five 2" X 16" X 0.025" strips of tough self-adhesive PVC tape - more than enough for the little Preac. I had to get the tape through Amazon so at £12.39 it was more expensive than in the US but still worth it. Cheaper brands were available but I decided to play safe with the one Kurt recommended. Once in place with the blade lowered, the blade is raised to create a slit in the tape. I tried the tape with my thinnest blade - 0.1"/0.25mm - which I would normally only use on the thinnest stock. Anything too thick and the blade would wander all over. With the tape in place I was able to cut much more substantial material with very smooth results. Rather than keep changing the blade and the tape, I think I'll keep the Preac with the thin blade for comparatively delicate work and use the Byrnes saw for everything else. Derek

- 12 replies
-
- 8
-
-
- Zero clearance
- table saw
- (and 1 more)
-
DelF reacted to a post in a topic:
Chris Watton and Vanguard Models news and updates Volume 2
-
DelF reacted to a post in a topic:
Chris Watton and Vanguard Models news and updates Volume 2
-
DelF reacted to a post in a topic:
Chris Watton and Vanguard Models news and updates Volume 2
-
Yeah, I see what you mean. It looks awful, I'll have to paint it. Perhaps I could just paint that one plank? 🤪
-
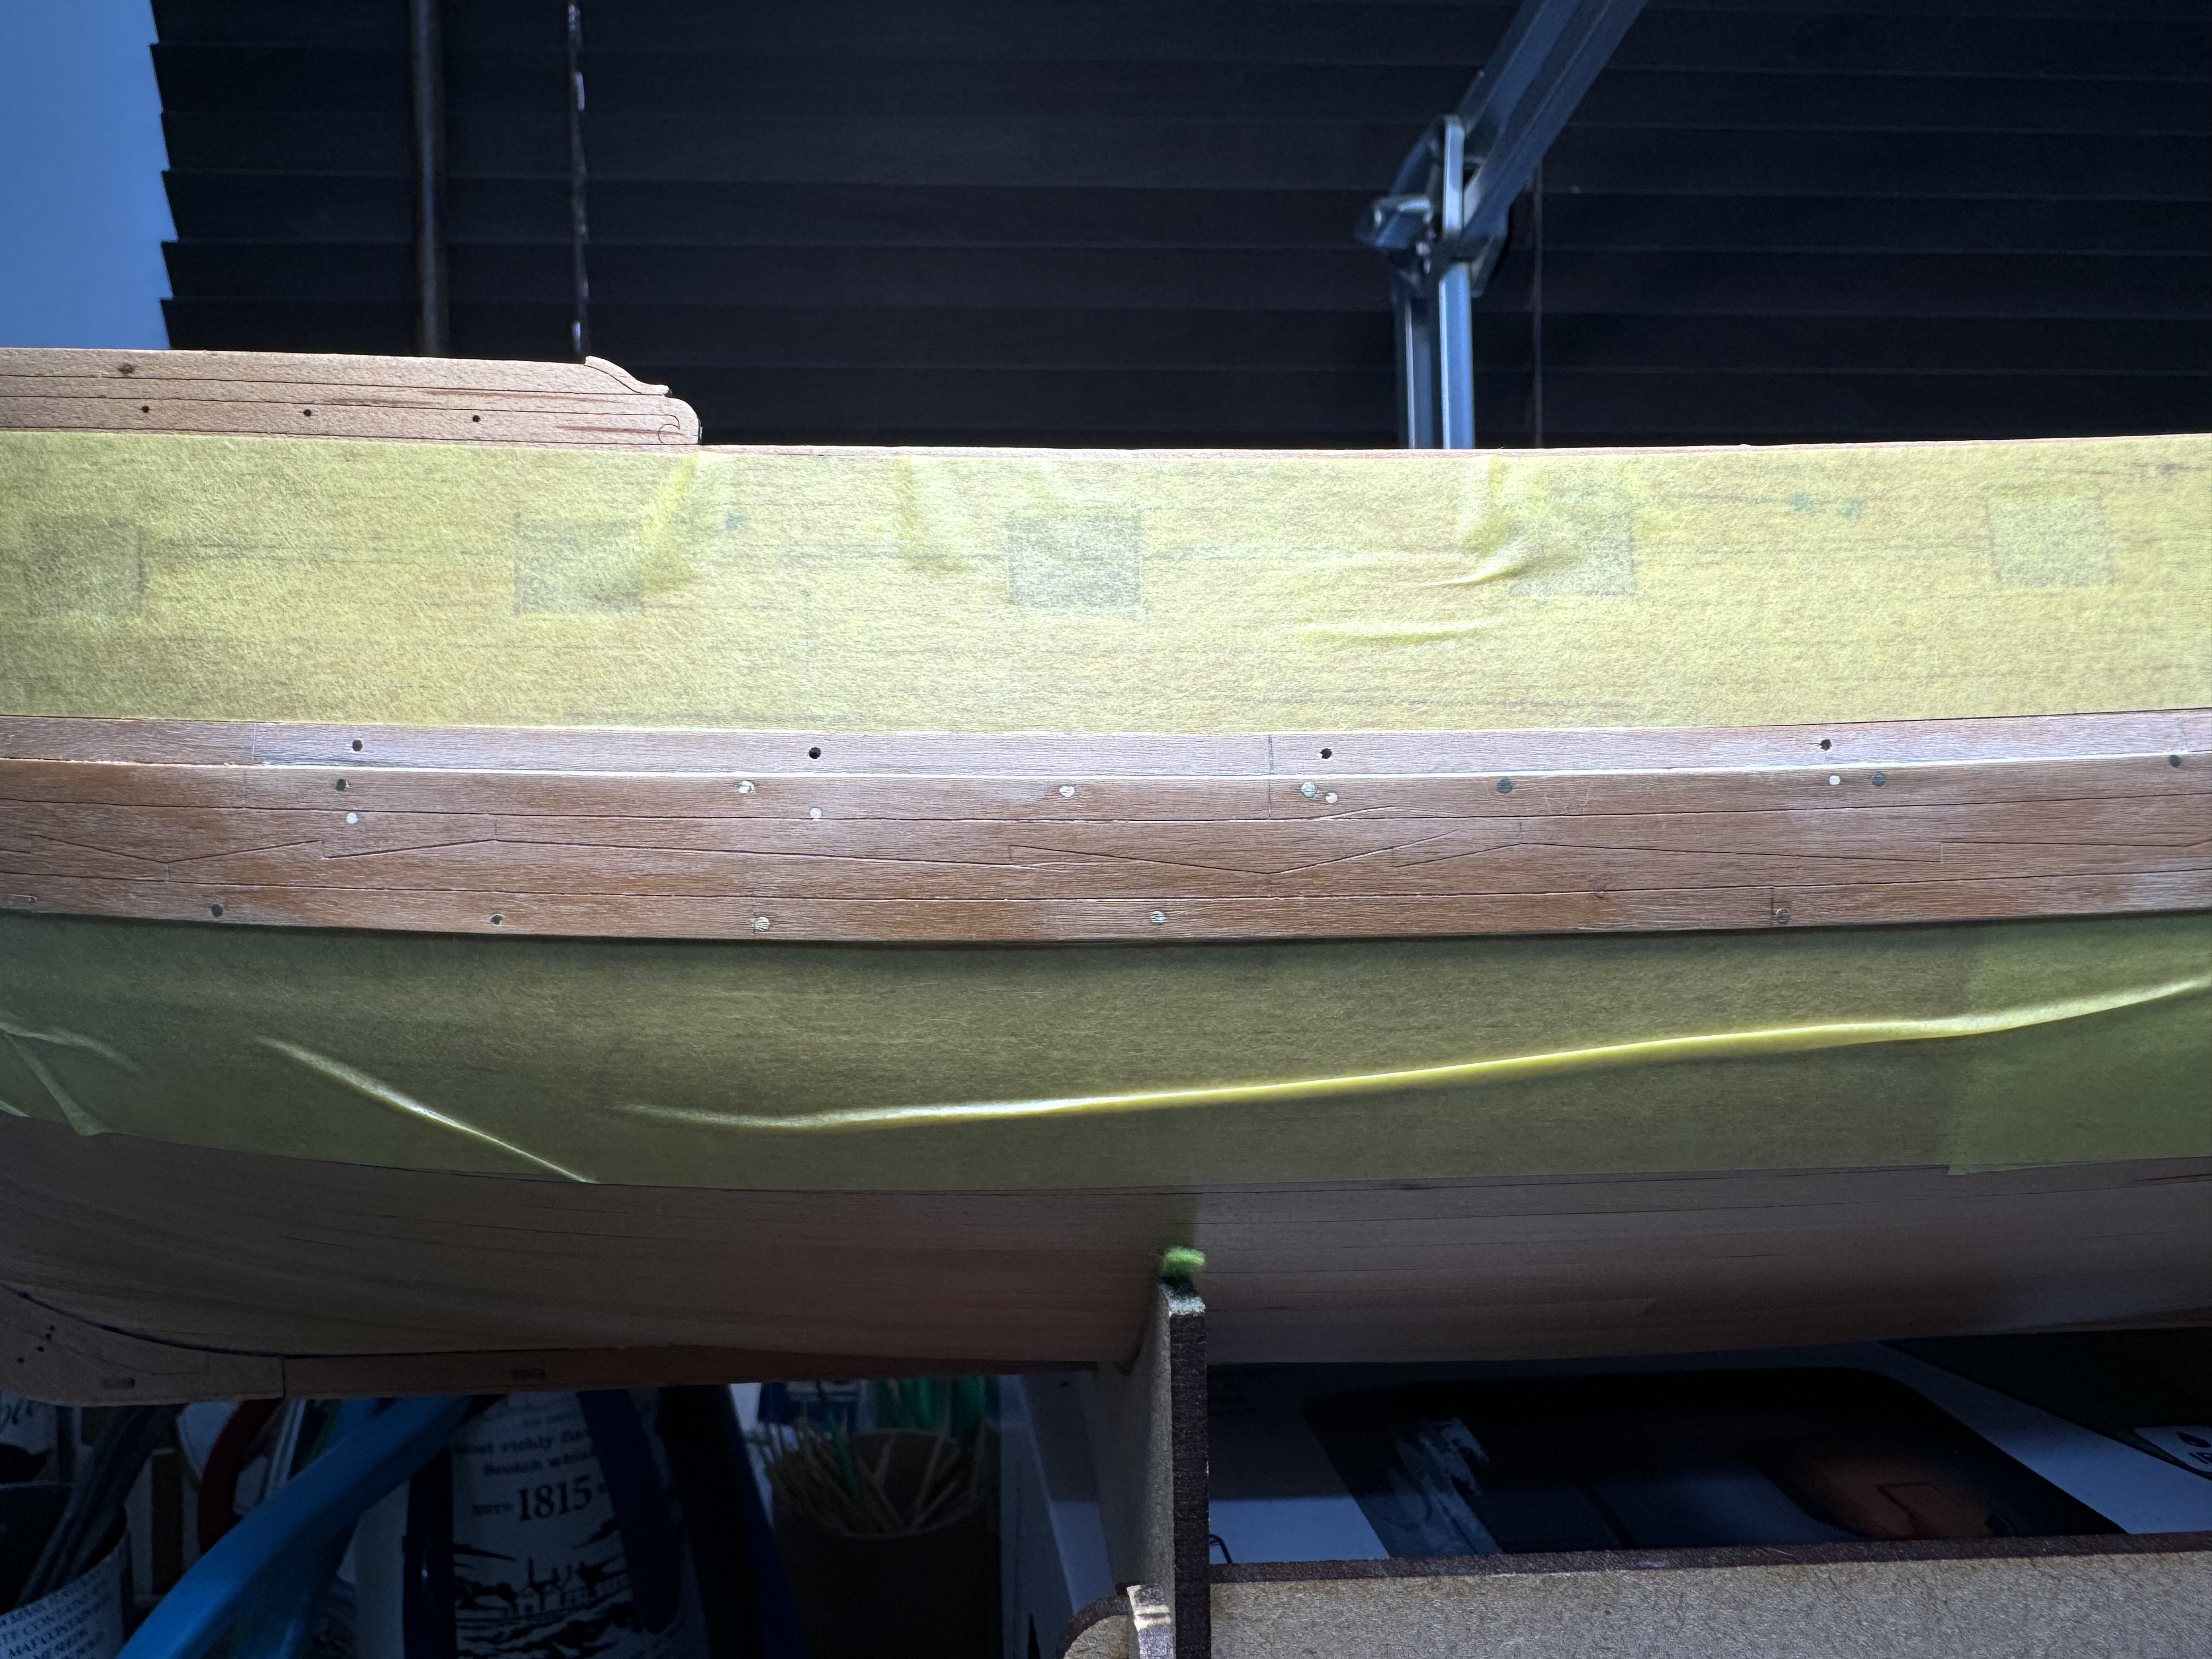
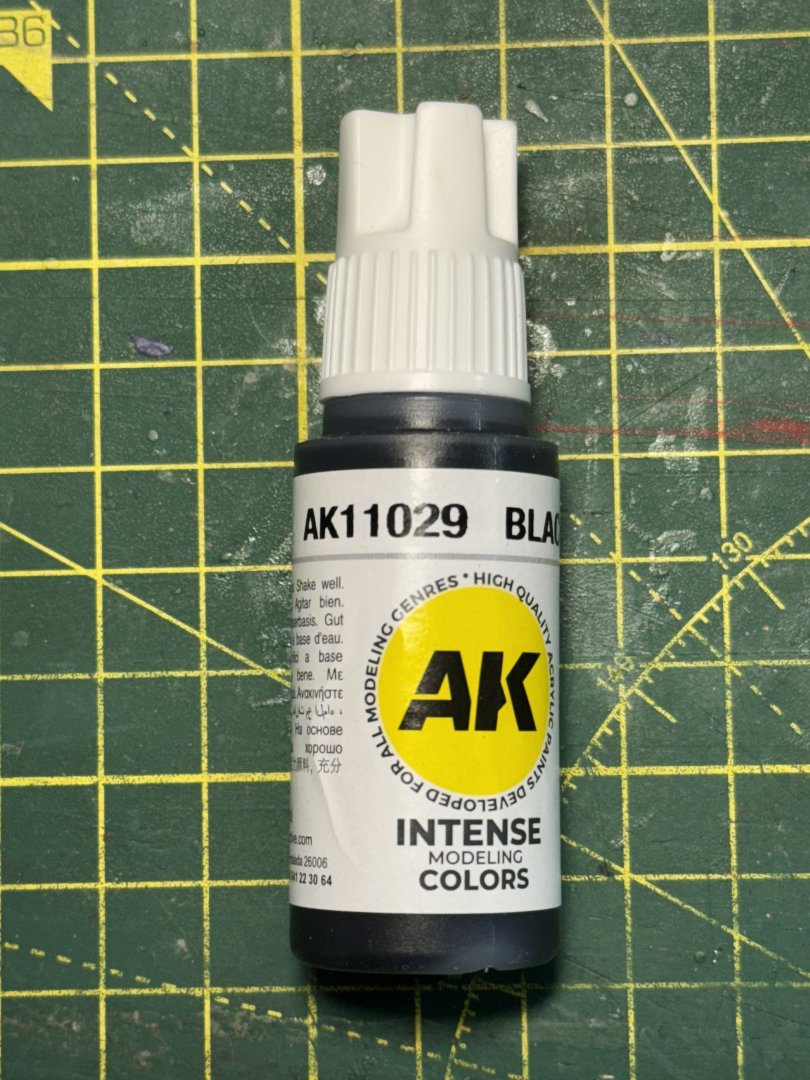
Wales Thanks everyone - it's good to be back. Today’s task was prepping and painting the wales. Probably a bit early in the build for this, and I’ll undoubtedly need to touch them up later on, but after so long with a bare hull I was itching to get some contrast. I’d originally intended to leave the pins I used when gluing the wales, but eventually decided the heads just wouldn’t look right. So the first job was to file them down - very carefully! Next I considered the scuppers. As others have pointed out, these seem to follow an odd line along the wales. I took my lead from @Blue Ensign's log and shifted them all to the first plank above the wales, using a 1mm drill for the new scuppers and some filler for the old: Then it was on with two coats of AK 3rd generation acrylic black, slightly diluted and applied by brush. Starting to look more like it. I was pleased that the planking lines etched into the wales were still visible after two coats. Next I'll be focusing on the stern. Derek


-
Thanks - glad it's not just me!
-
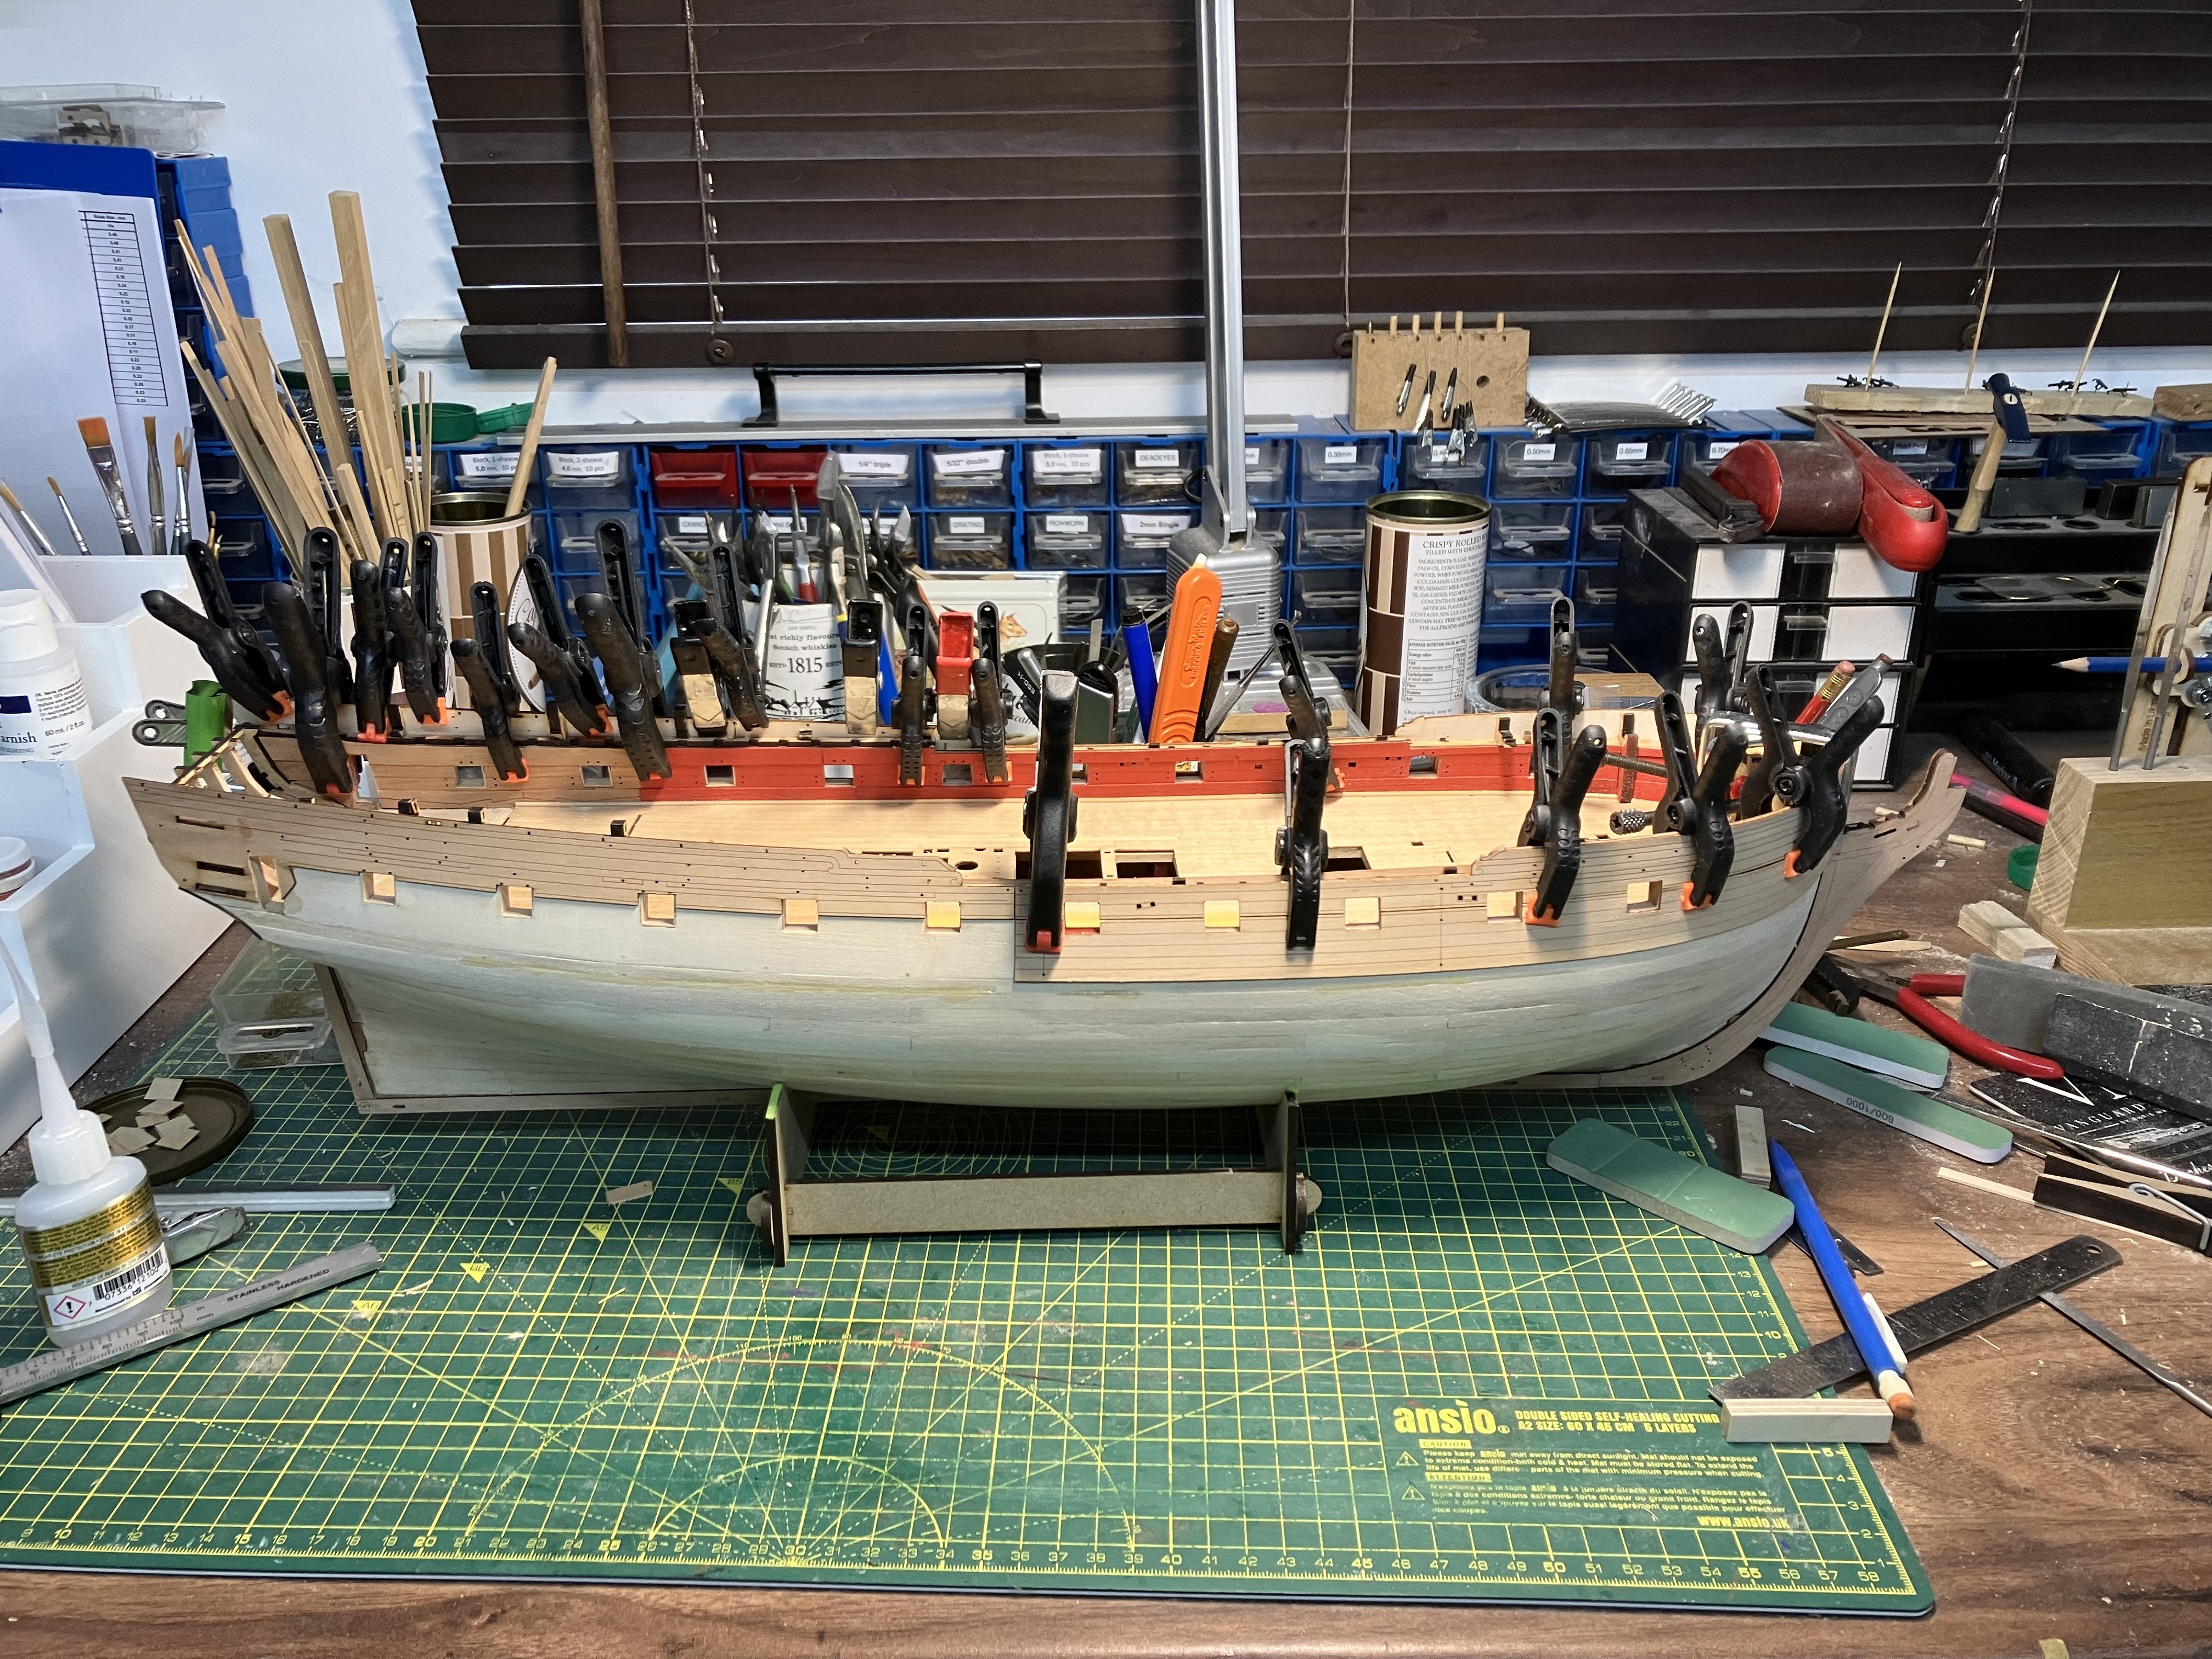
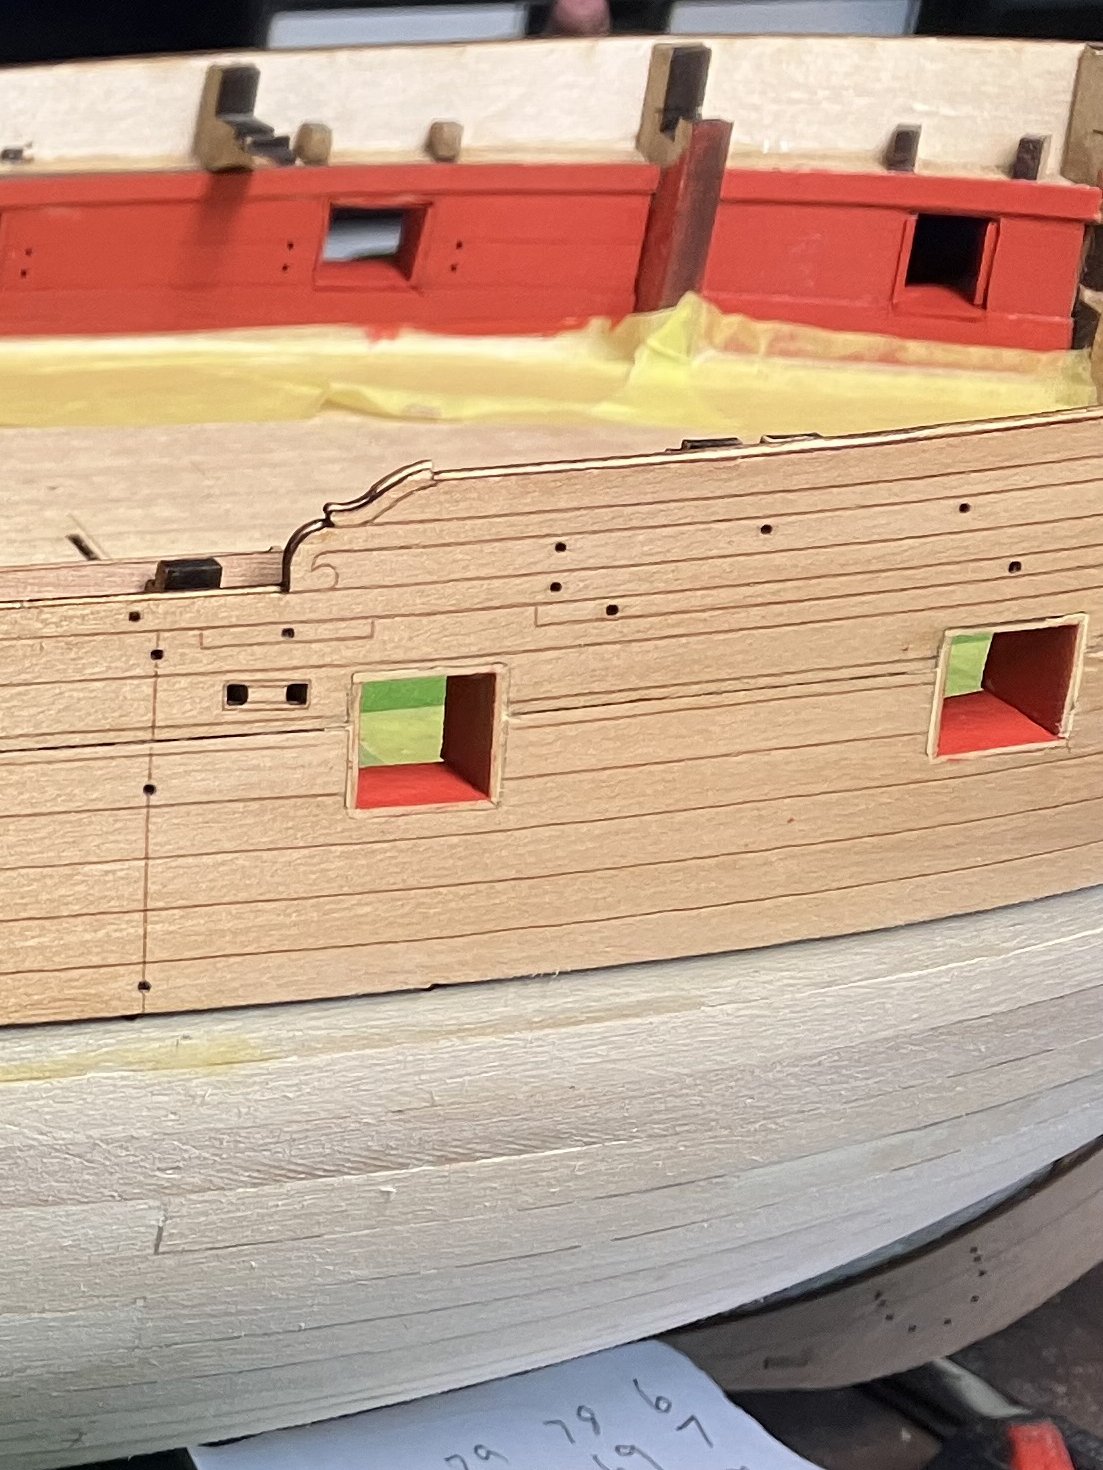
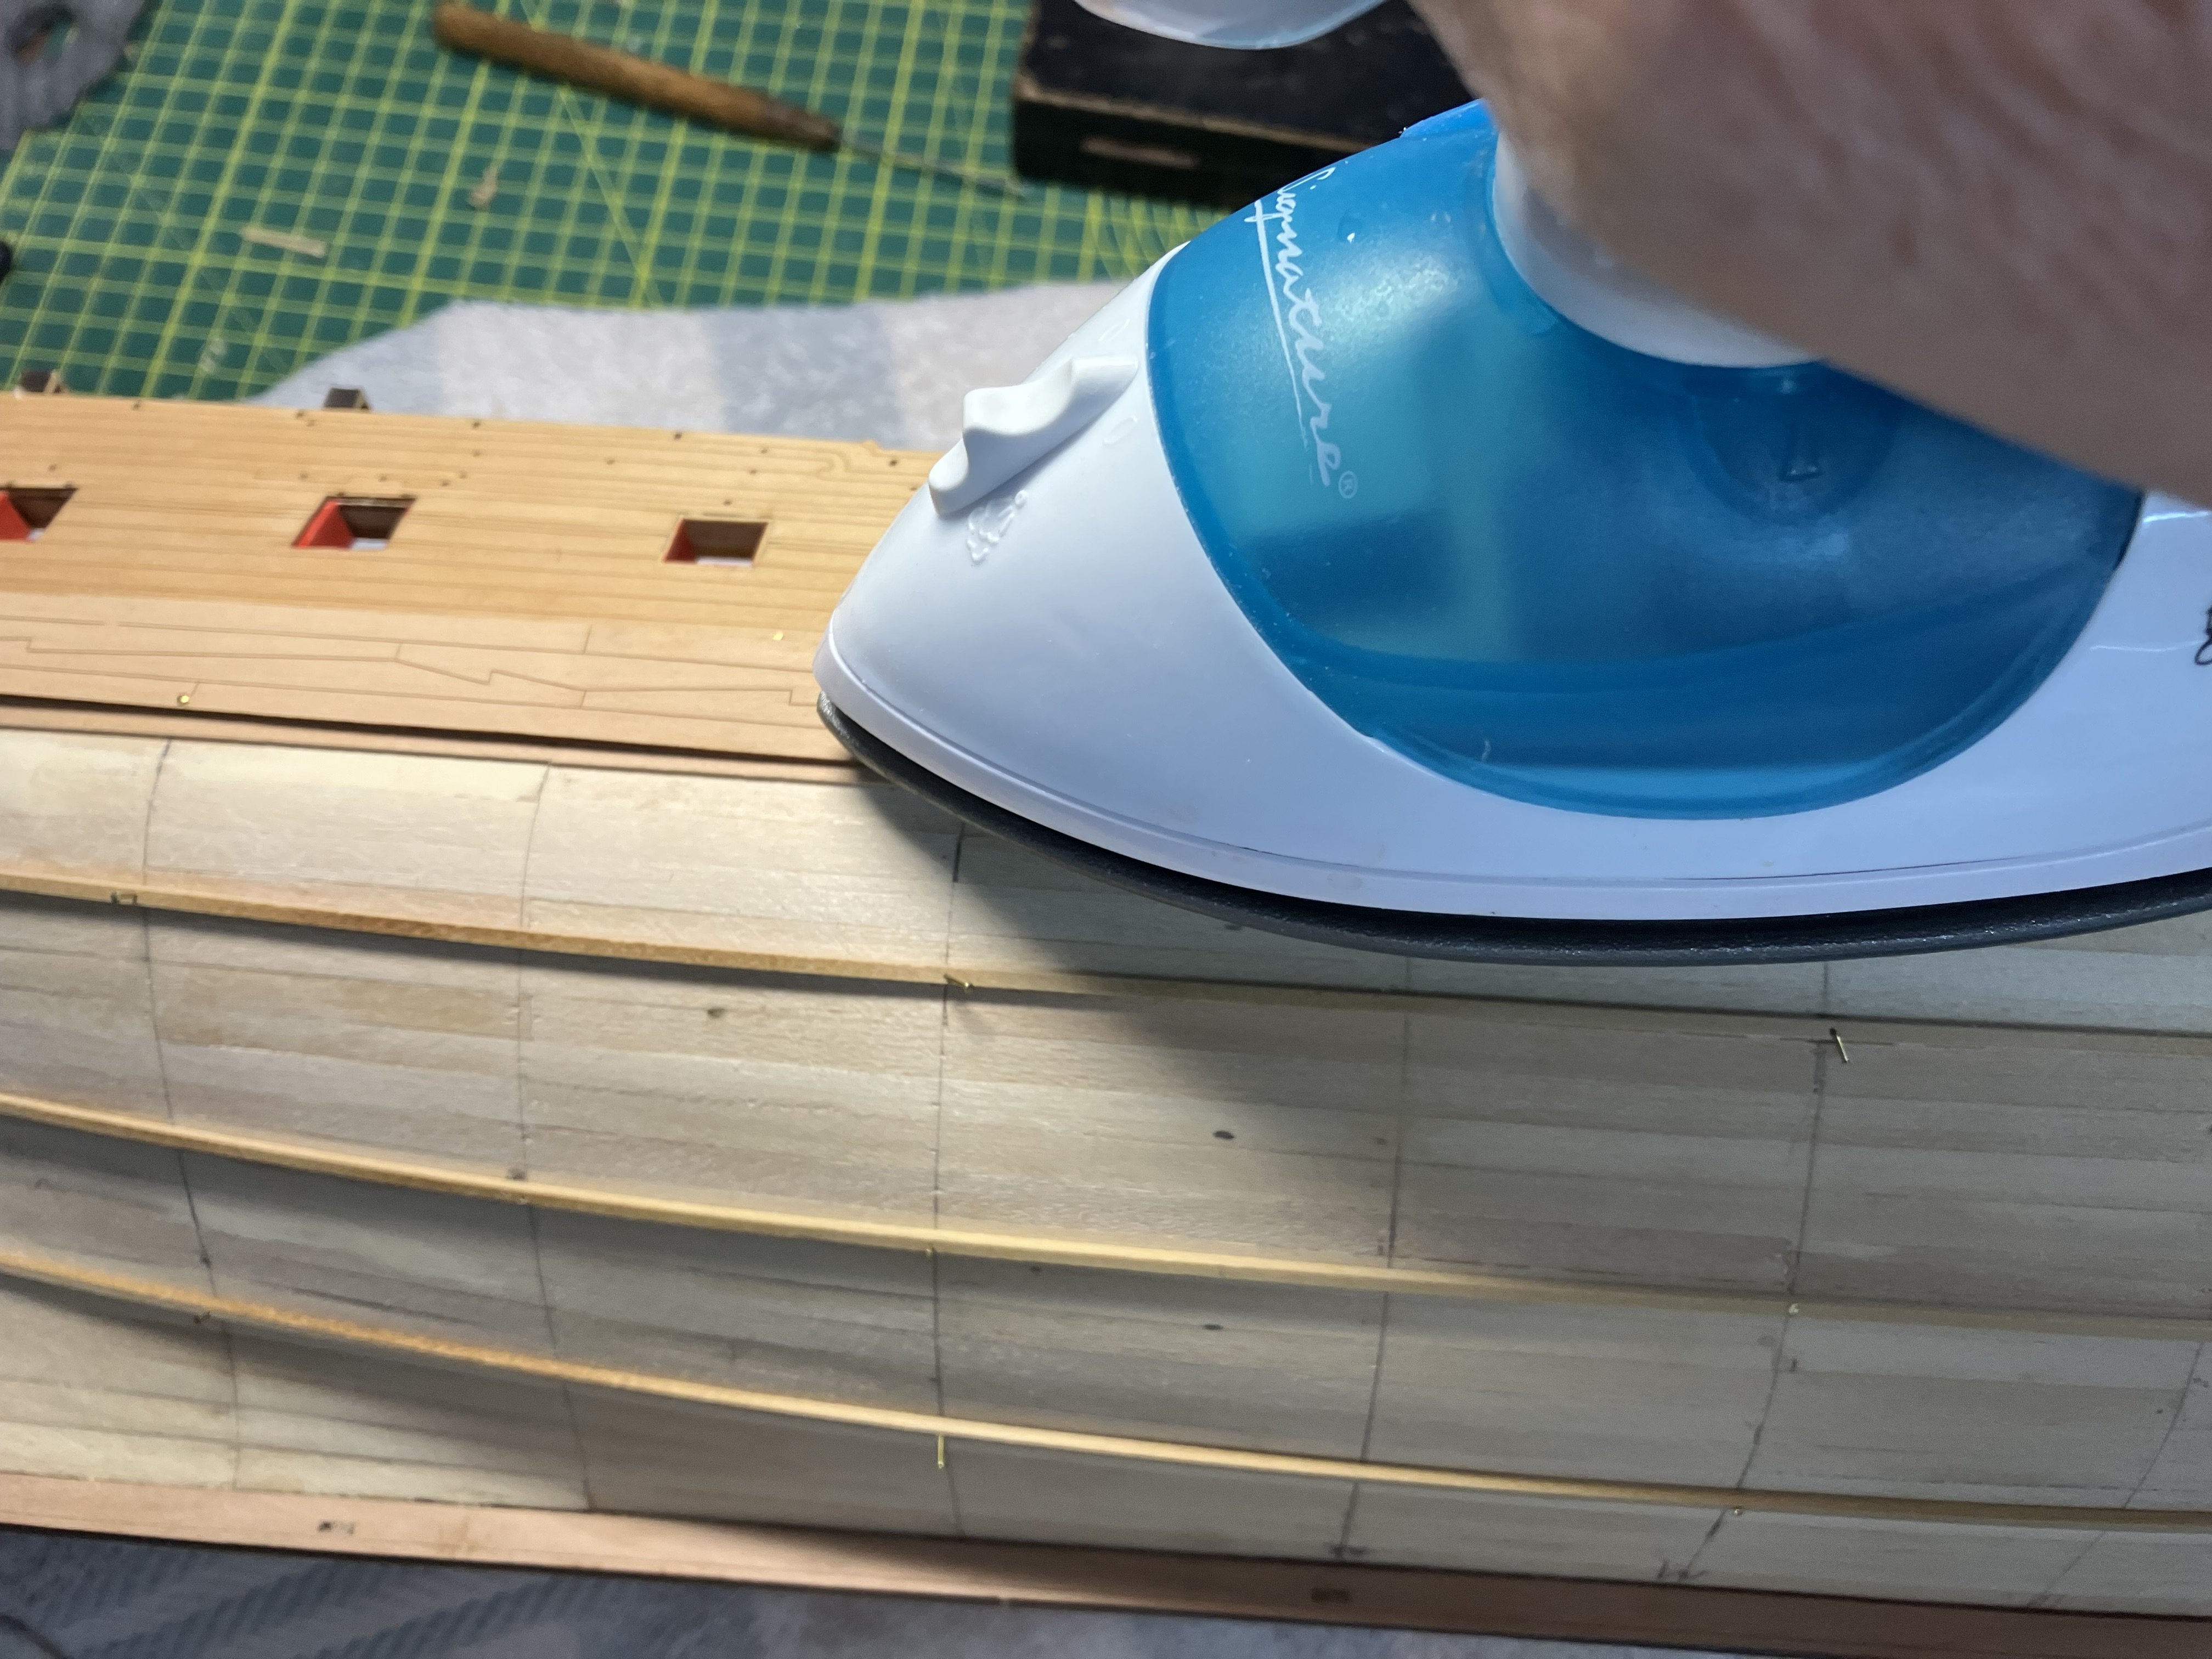
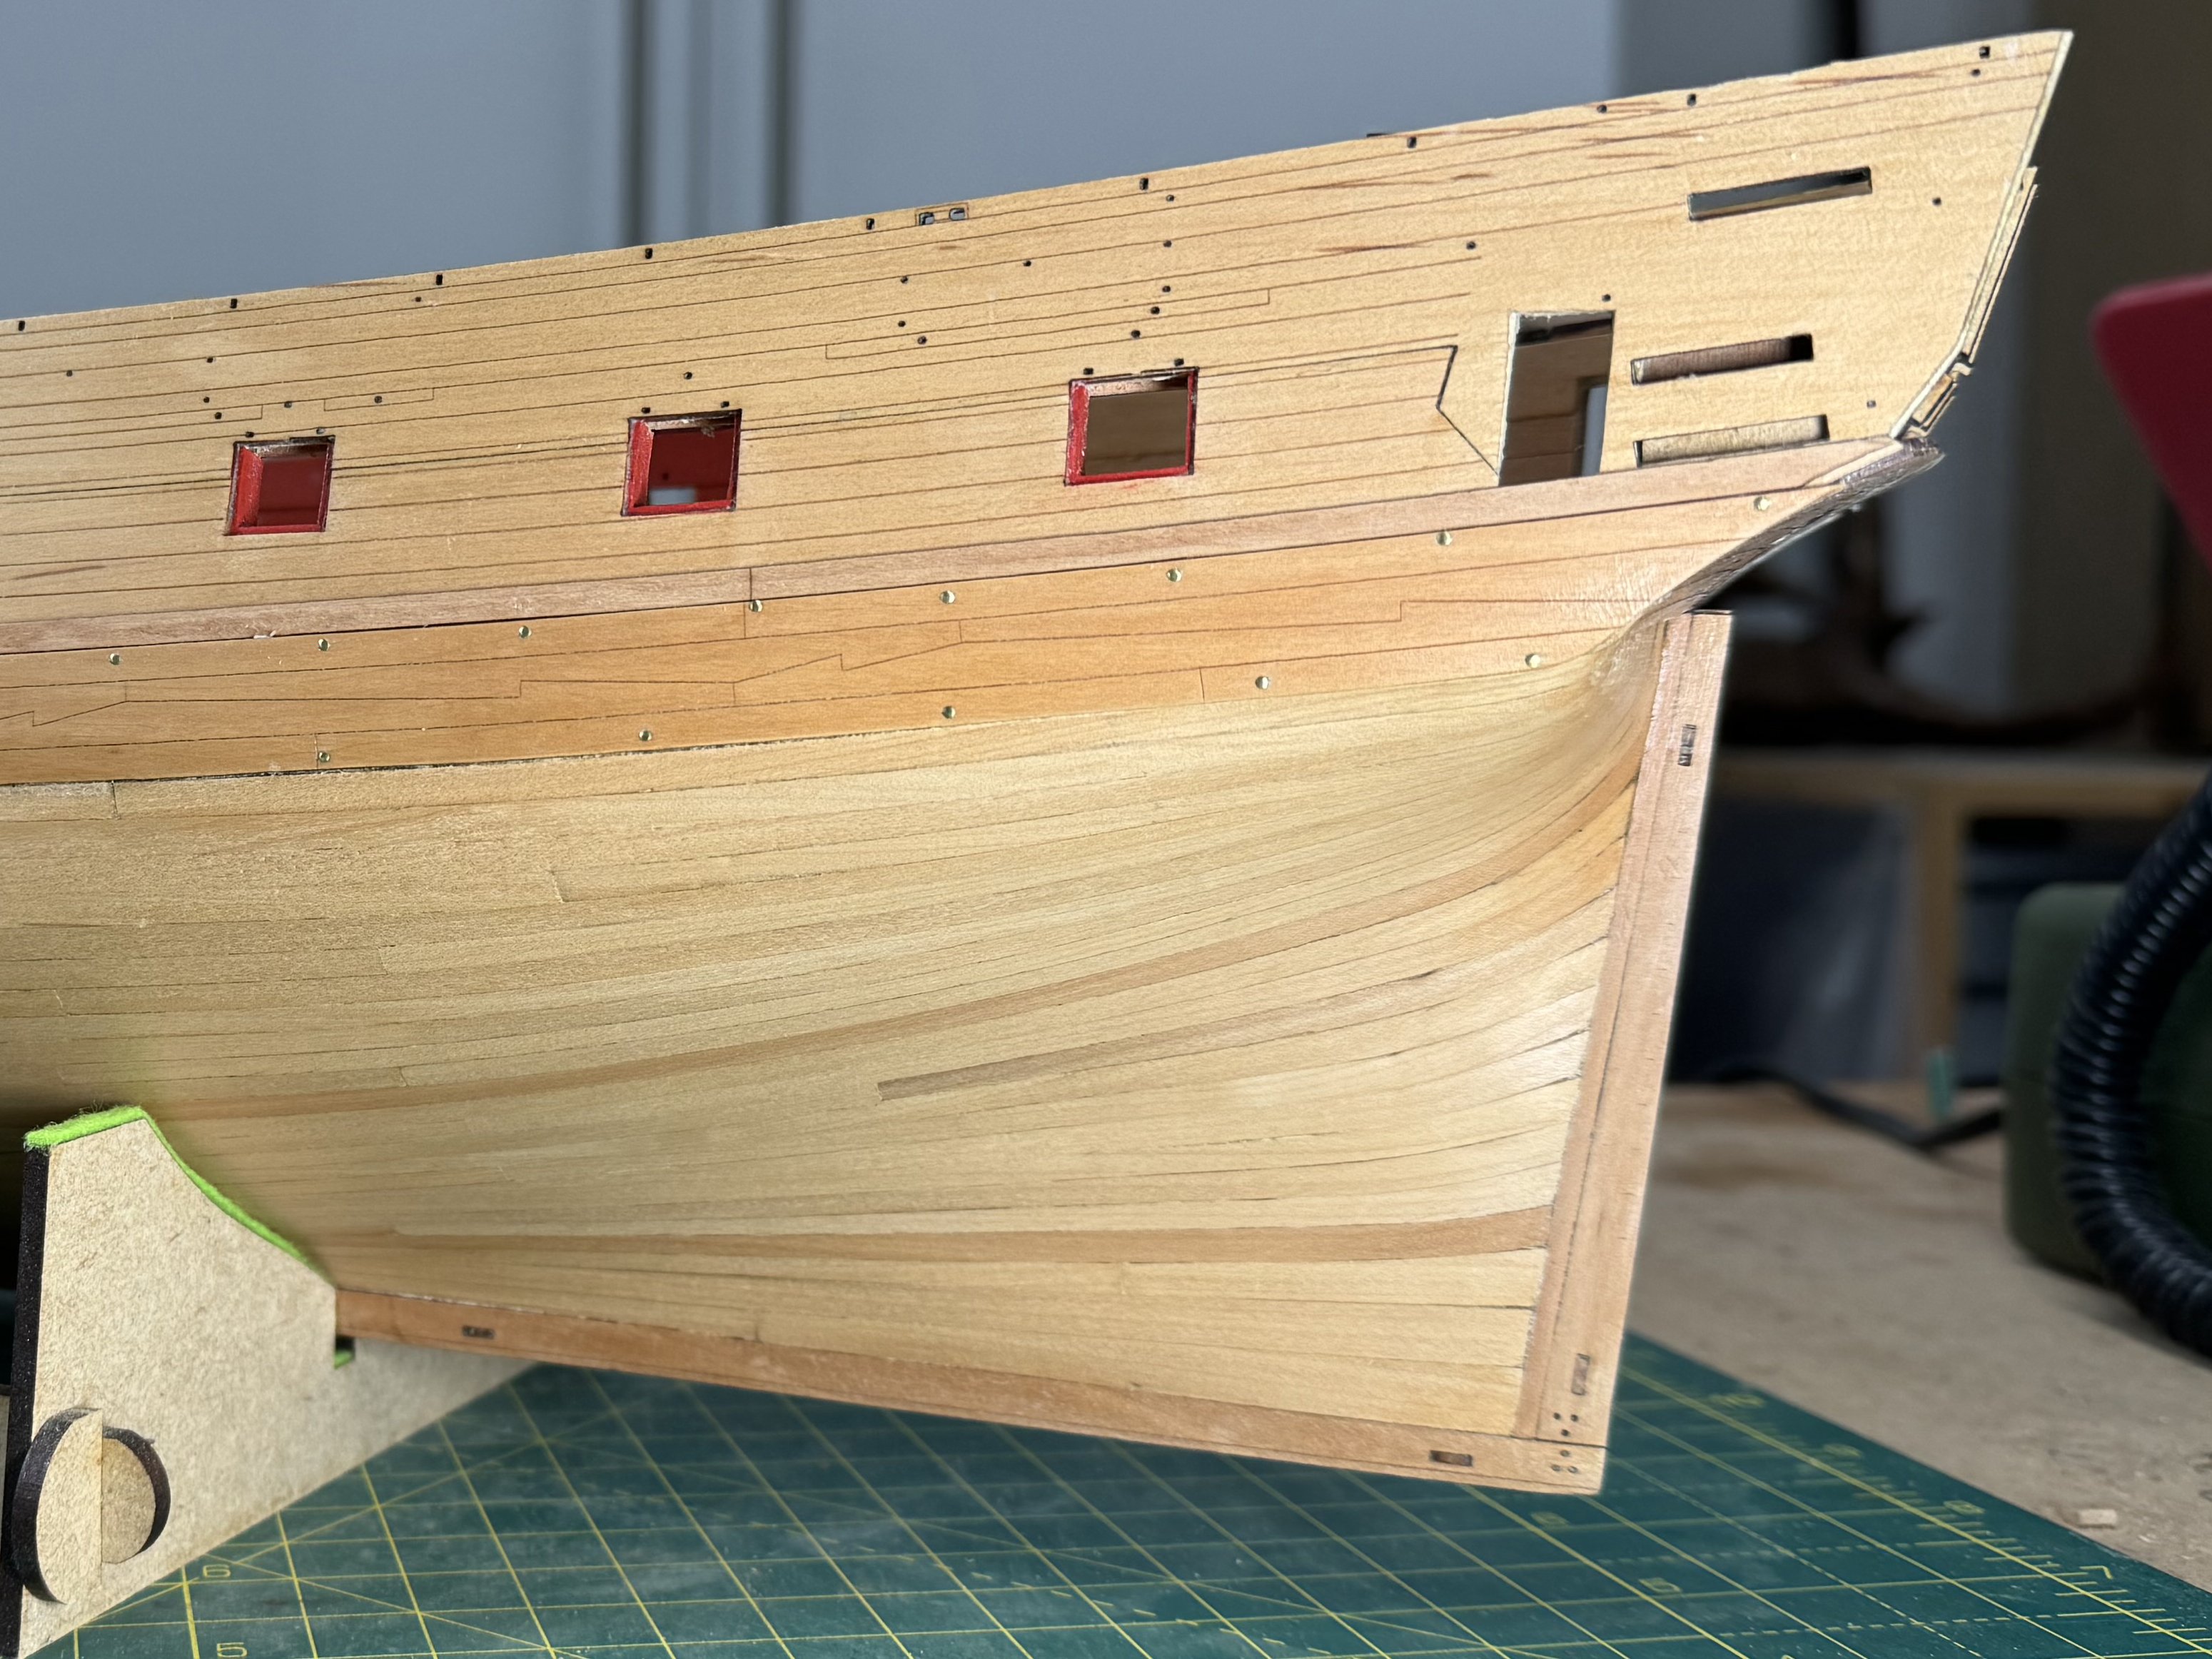
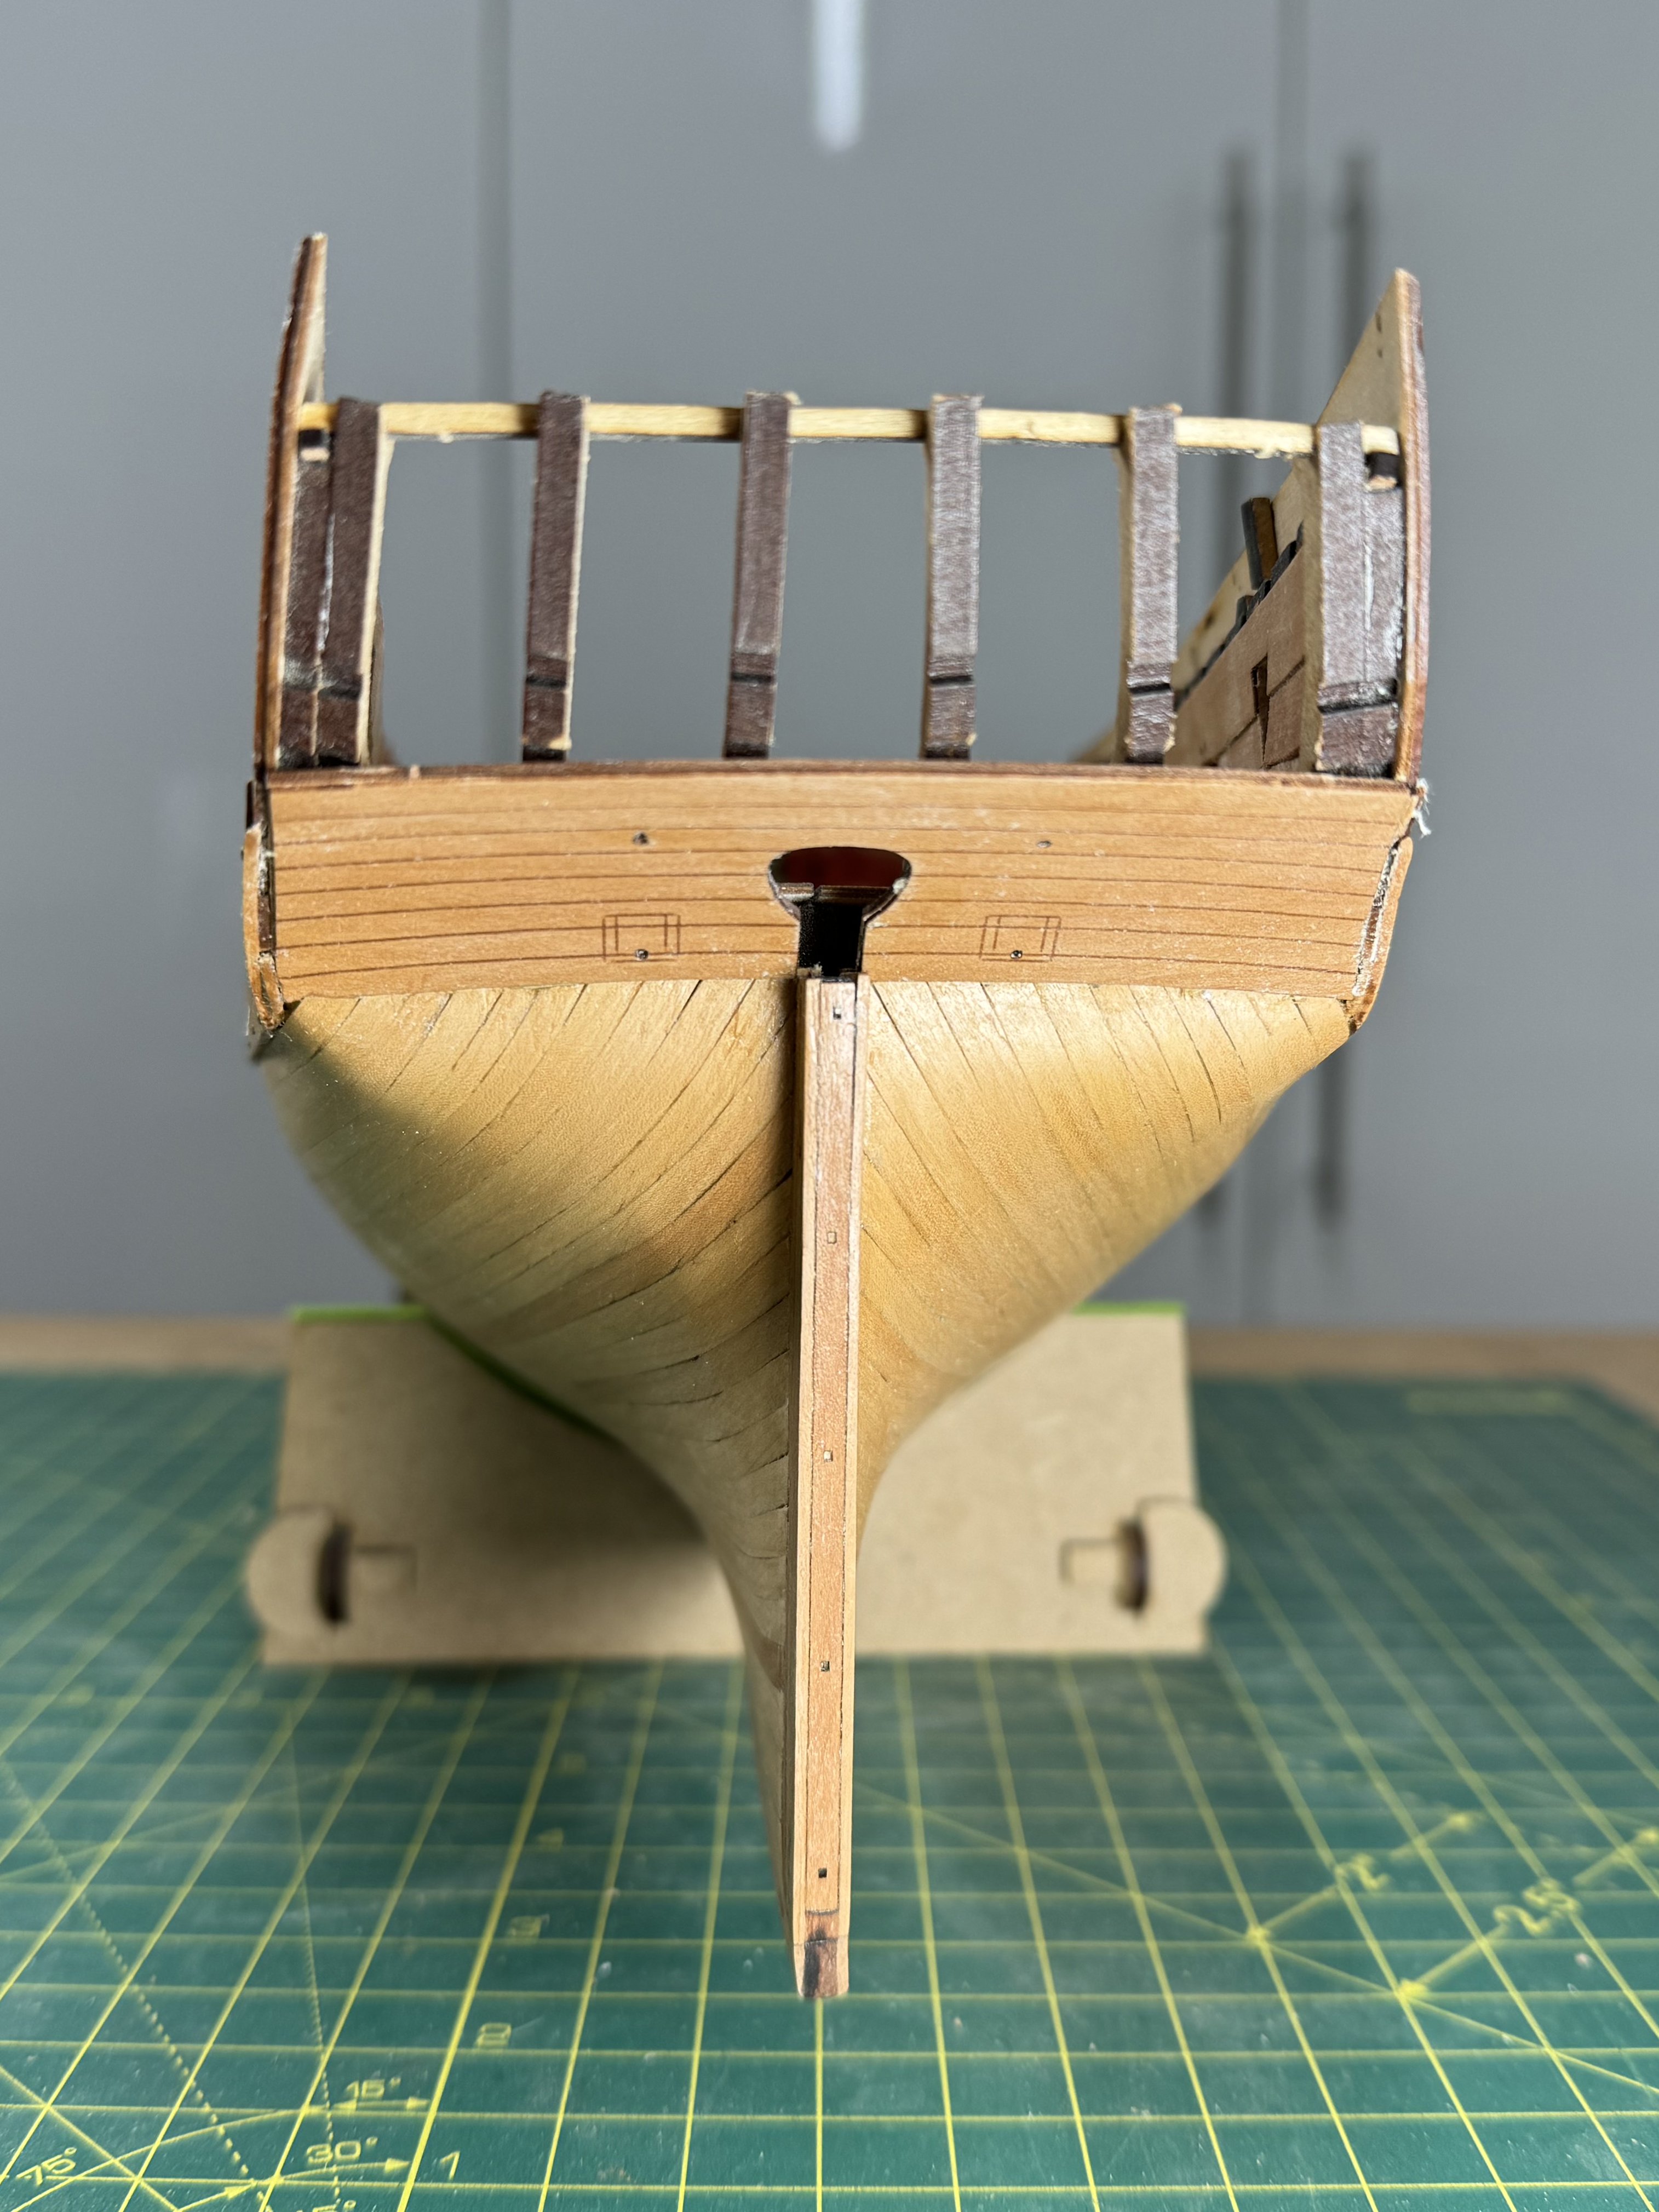
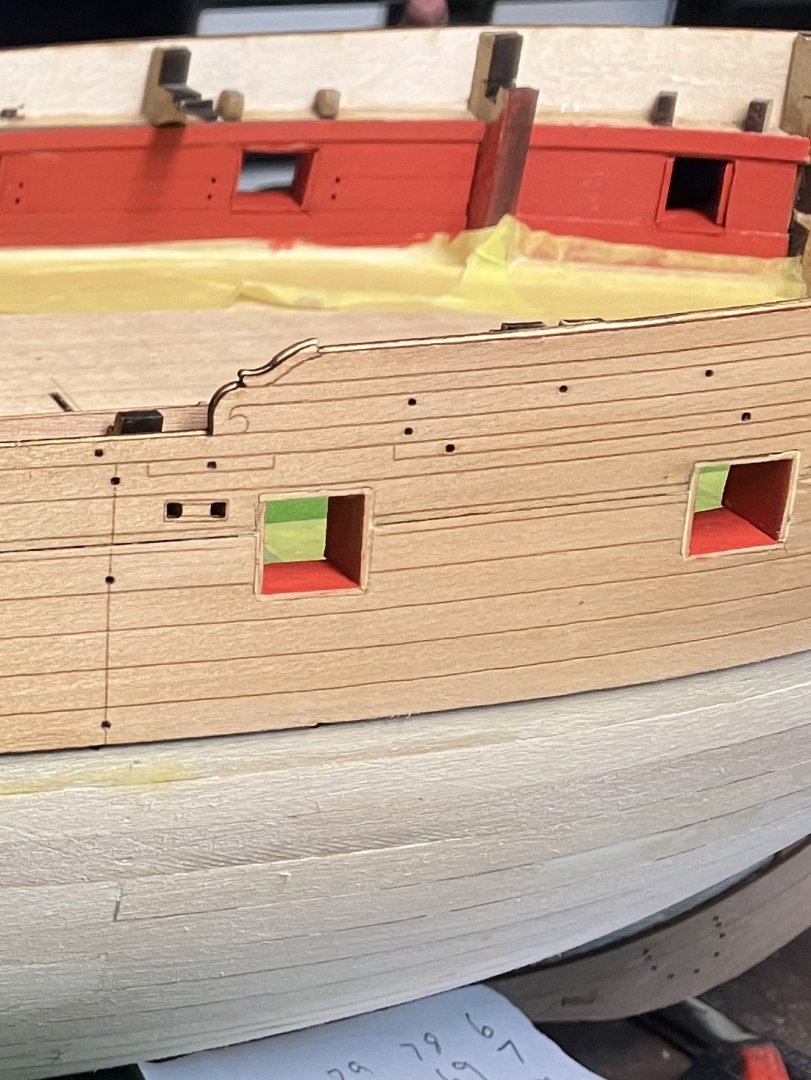
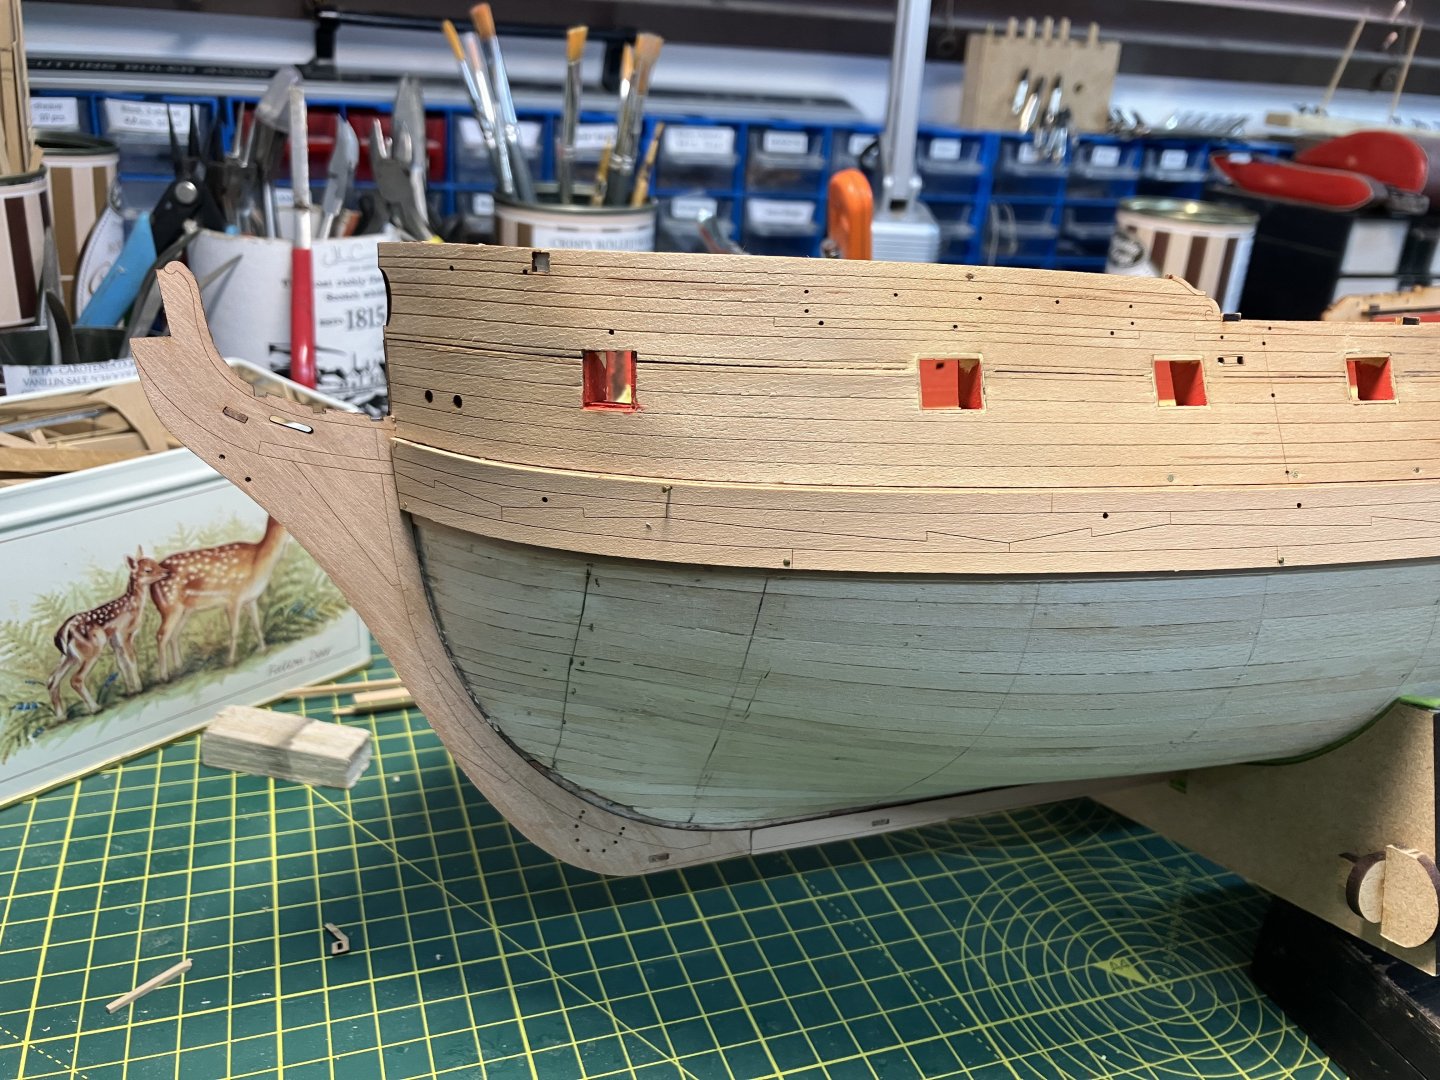
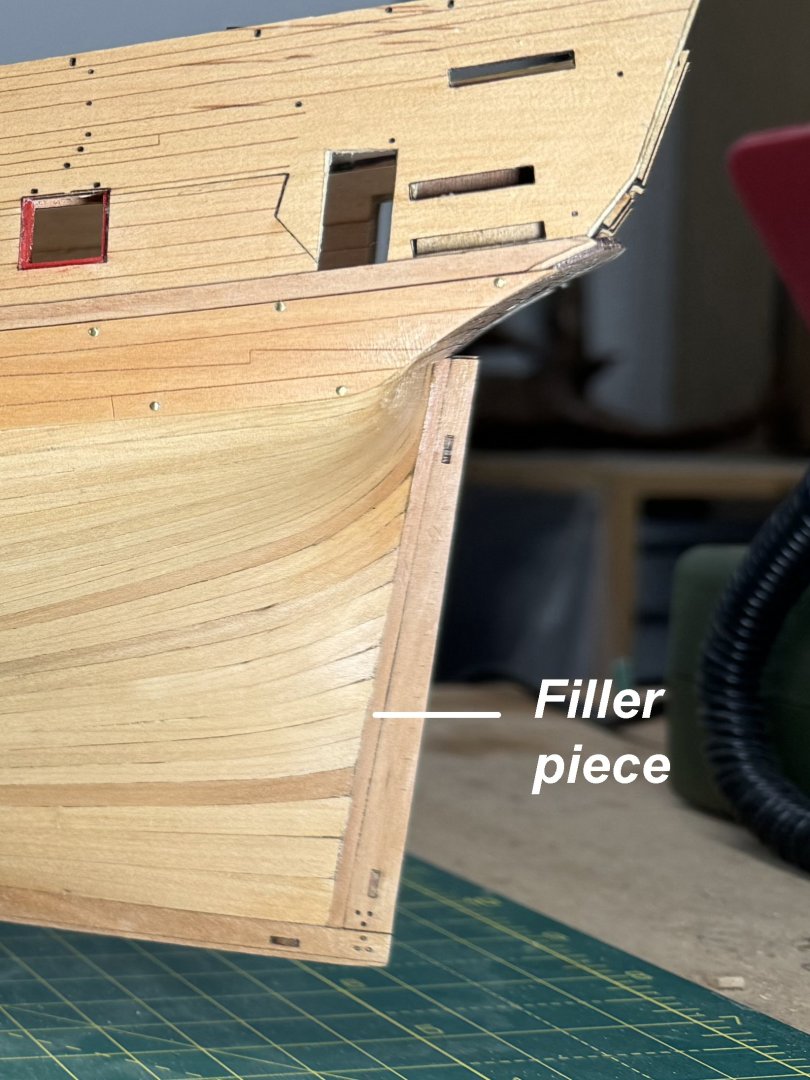
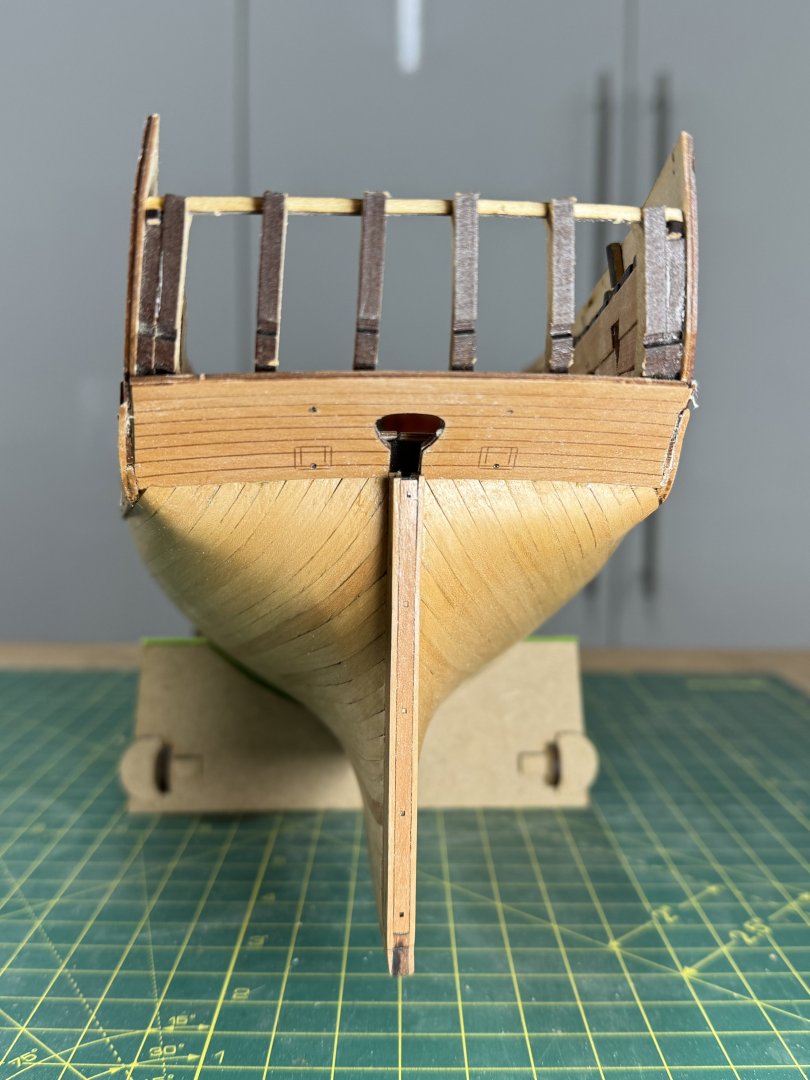
Second planking finished – some detail Thanks for the likes and kind comments. As promised in my previous post, here’s a couple of instances where I departed slightly from the build manual. Gun ports The outer planking patterns went on as per the manual, with the usual profusion of clamps and pins: However, like many other modelers I lined the gun ports as I didn’t like to see the raw layers of wood and MDF: The wales The manual suggests completing the second planking then attaching the wales. However, I wanted to line off the hull and plank it using proportional dividers (as described in my Duchess of Kingston log). I tried dividing the hull into planking bands but found this difficult when working across the whole of the second planking area: I eventually decided the method would work best if I worked from the wales down. So I planked down to just below where the wales would sit, attached the latter, then trimmed any exposed second planking back to the bottom of the wales. I didn’t get any good photos post-trimming, but here’s one showing the wale in place… …and another showing my method for flattening any gaps between the wale and the hull! NB I left off the trimming last plank under the wales until the final stage before I resumed second planking. I wanted to satisfy myself that I could get the battens in place (measured from the bottom of the wales) so that they ran fair and divided the hull into useful bands. Wider planks & a bodge at the stern I was chuffed that I was able to plank the entire hull without a single stealer or dropped plank. This was partly due to the method used, but also because I used wider planks in key areas at the stern: For these I just cut suitable pieces from the 0.8mm laser cut pear sheets. The bodge came in this same area. I’m not sure why (probably an issue with the first planking), but when I brought the second planking up under the stern counter it was obvious there was going to be a sizeable gap between these planks and the rudder post. The only solution I could come up with was to bridge the gap with suitable wood cut to size. Hopefully it doesn’t look too unsightly: Just a final note on planking. I'm still having to take care with using ca. Although the odorless ca from BSI (Bob Smith Industries) that Glenn (@glbarlow) recommended to me works well, I still look for ways of minimising my exposure. The method I use now is akin to spot welding - on a plank I'll put a spot of ca every half inch to inch or so then fill the gaps with PVA. Works well for me and so far I'm avoiding the problems that I suffered on Speedy. Now that I’m up to date and able to spend more time in the workshop I’ll try to keep the log in better shape. Derek


-
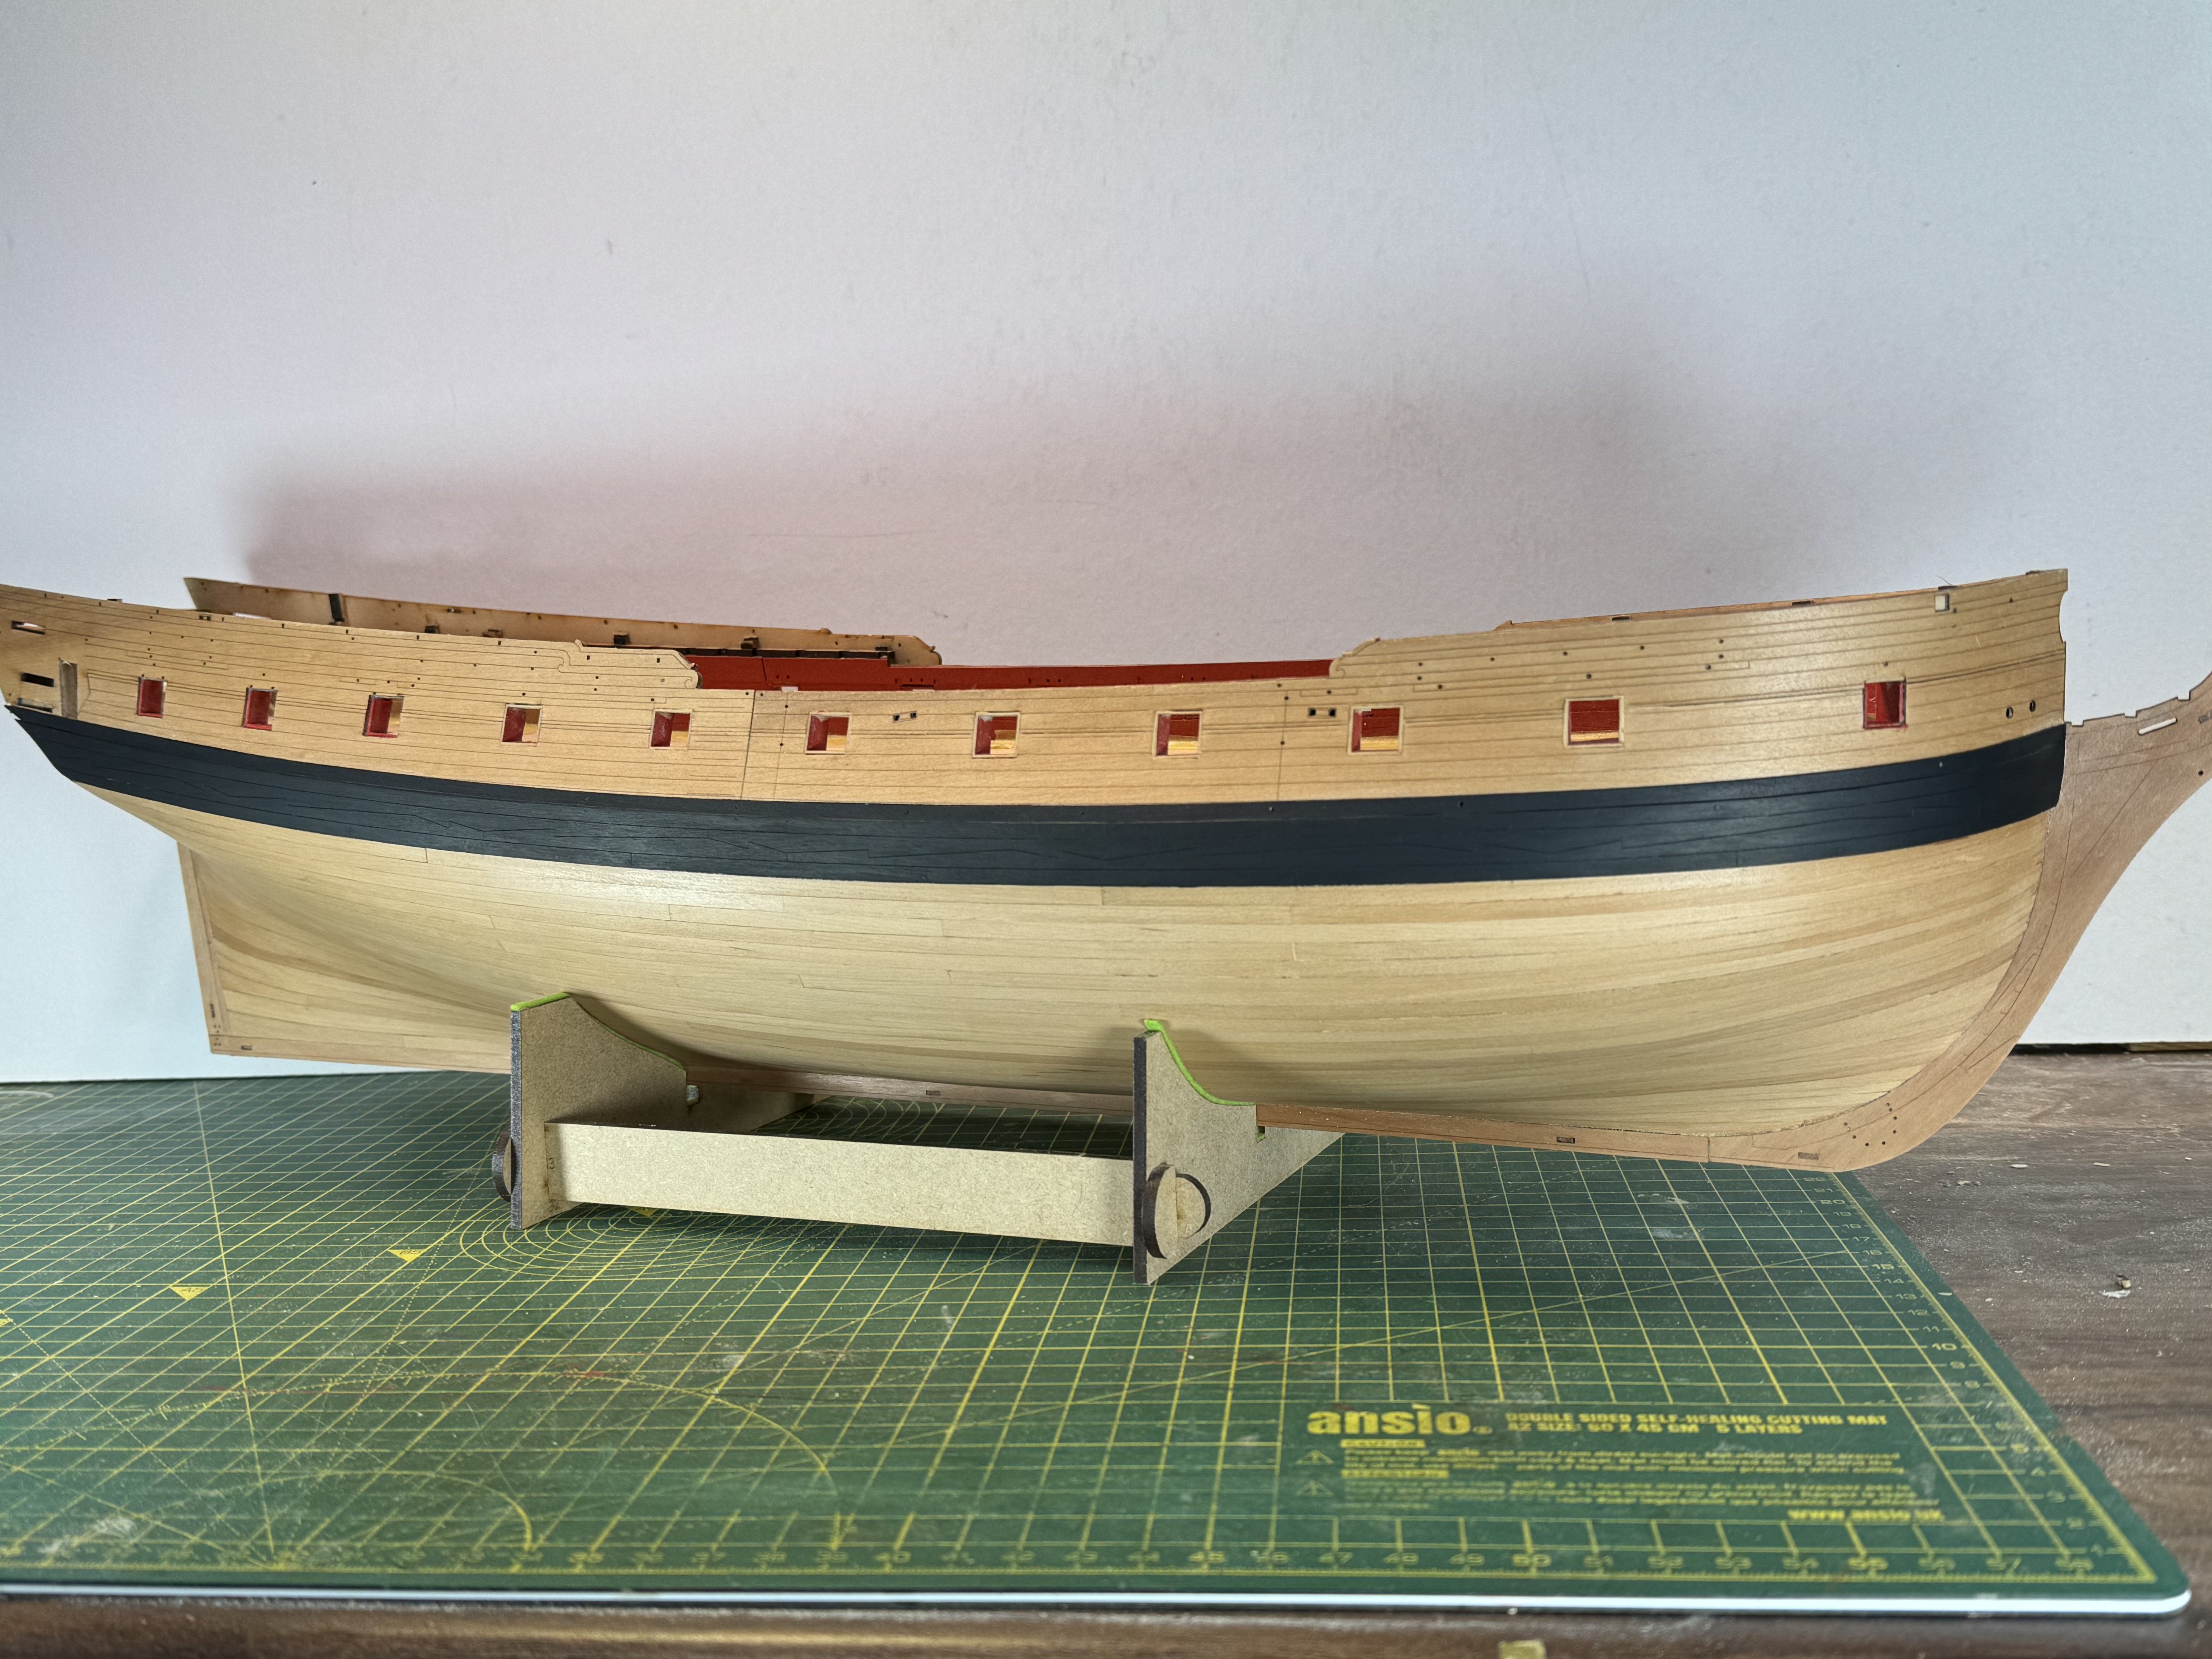
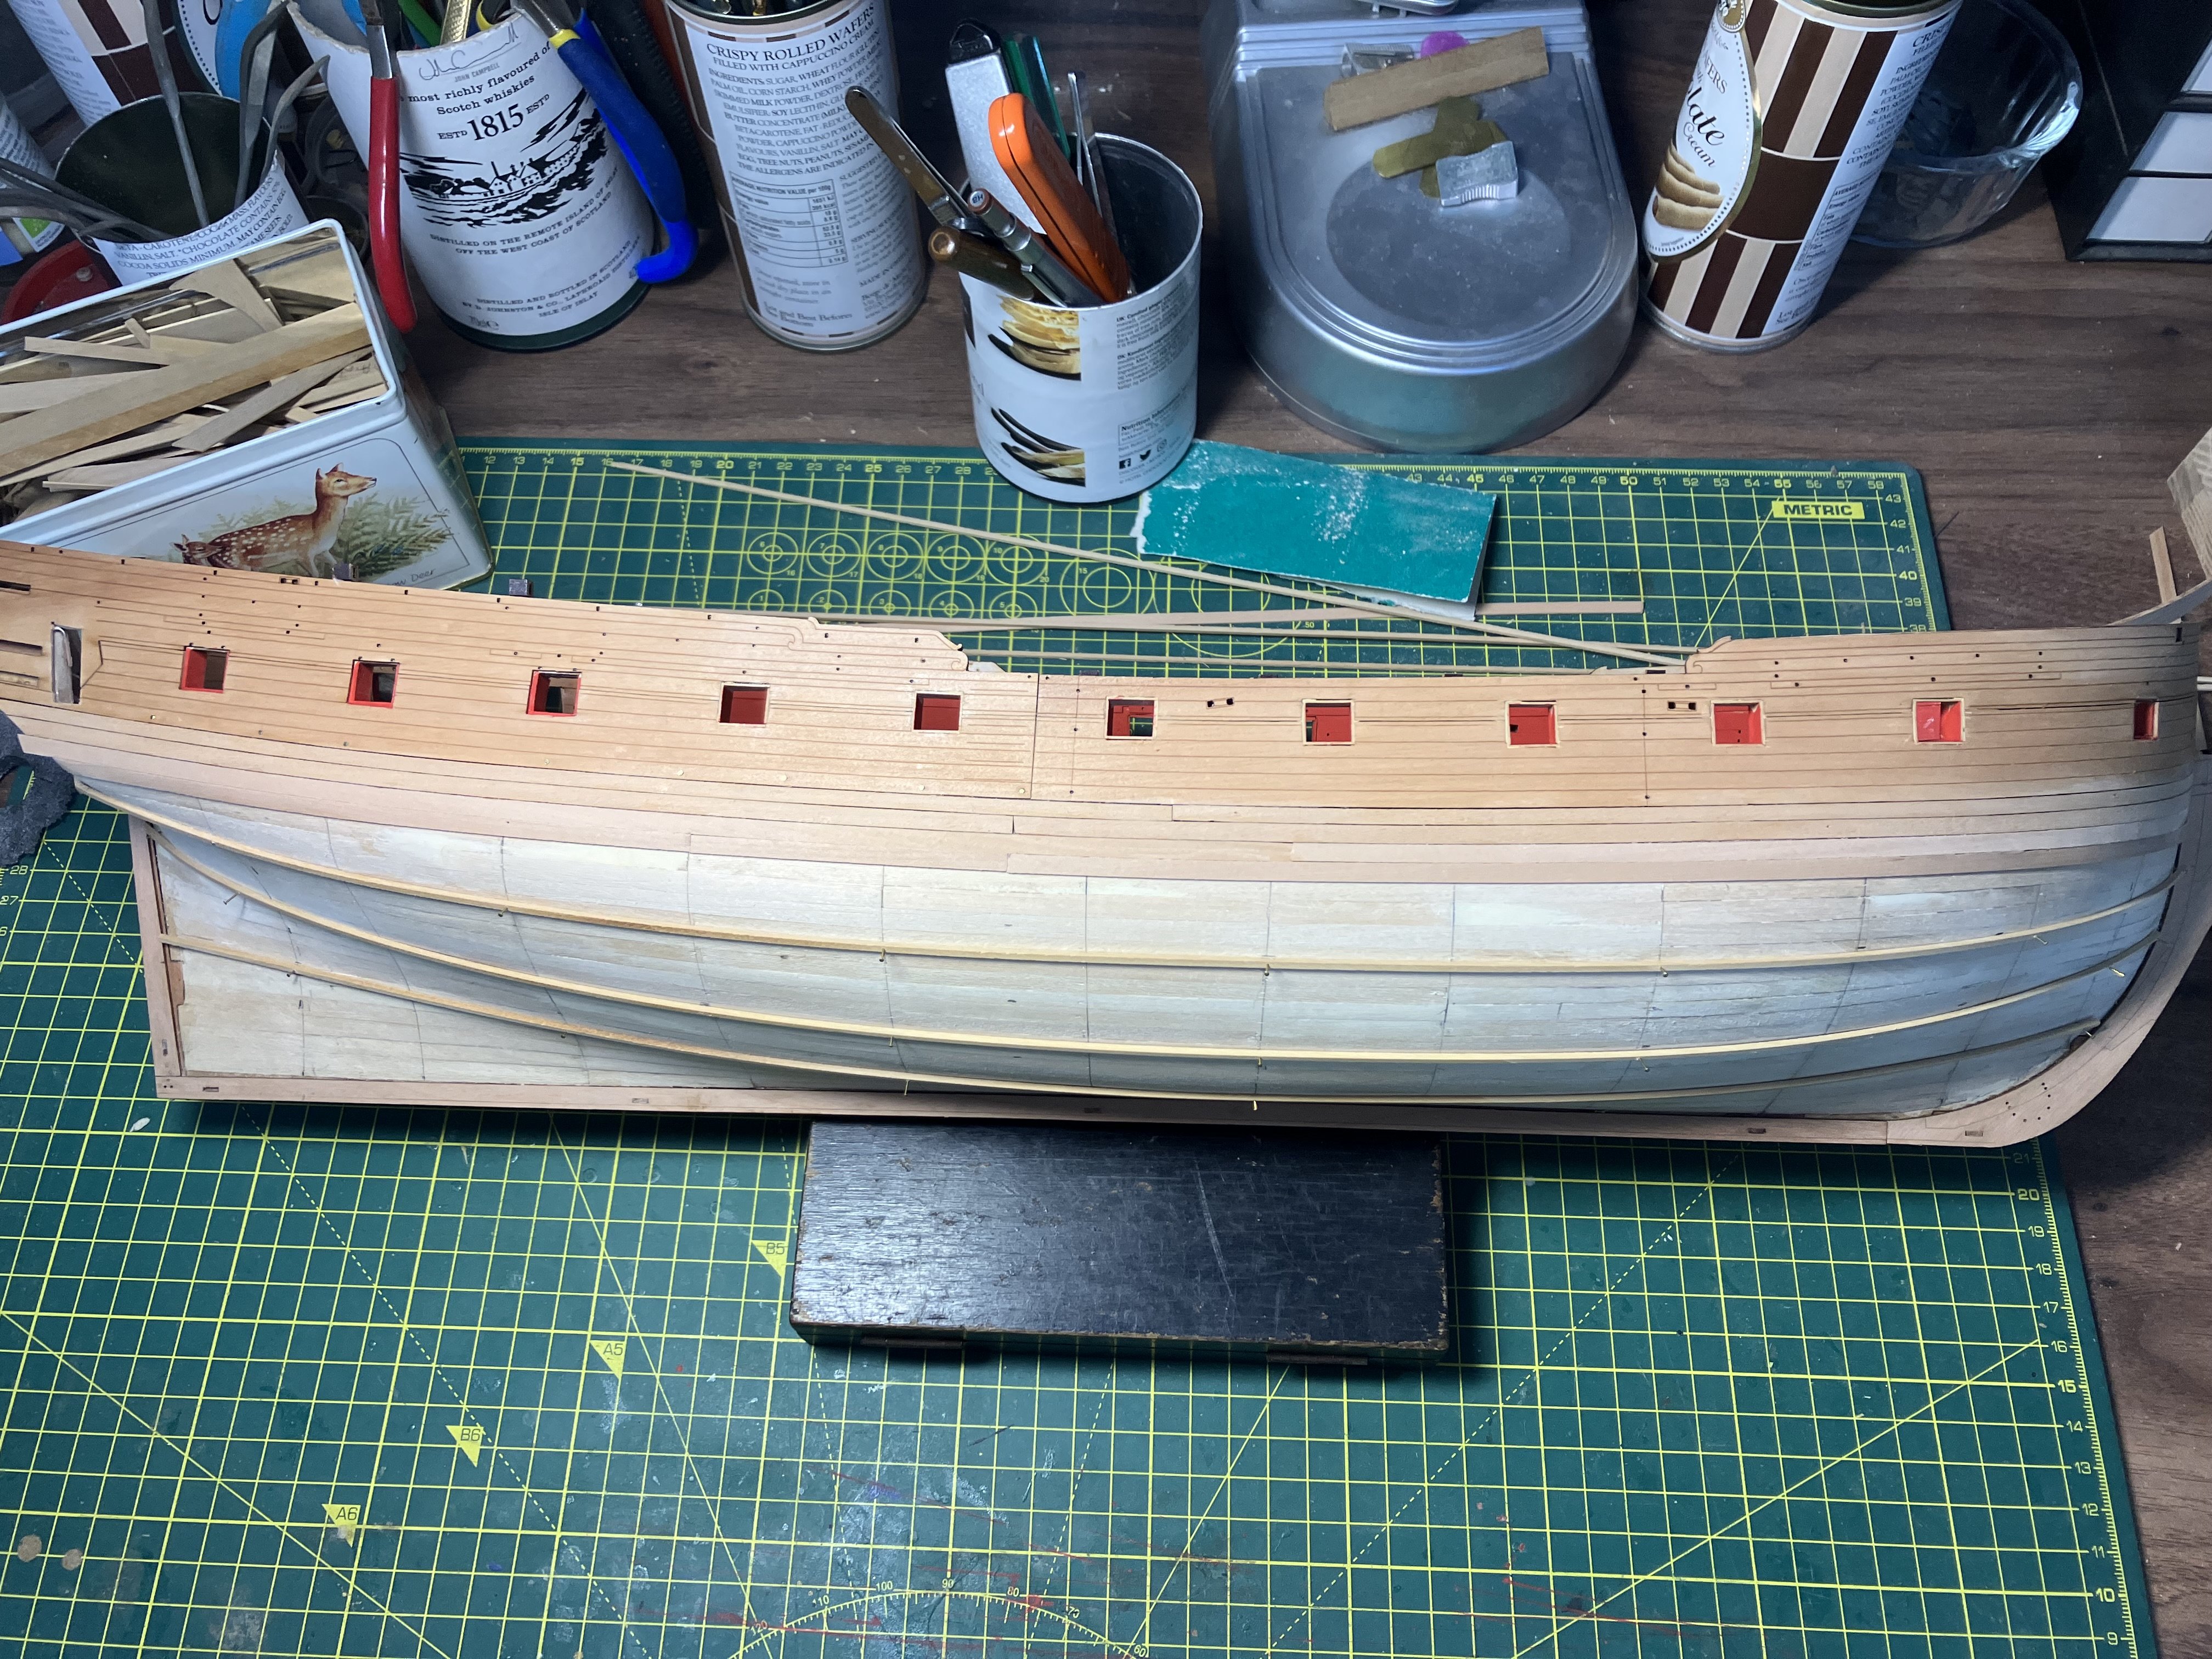
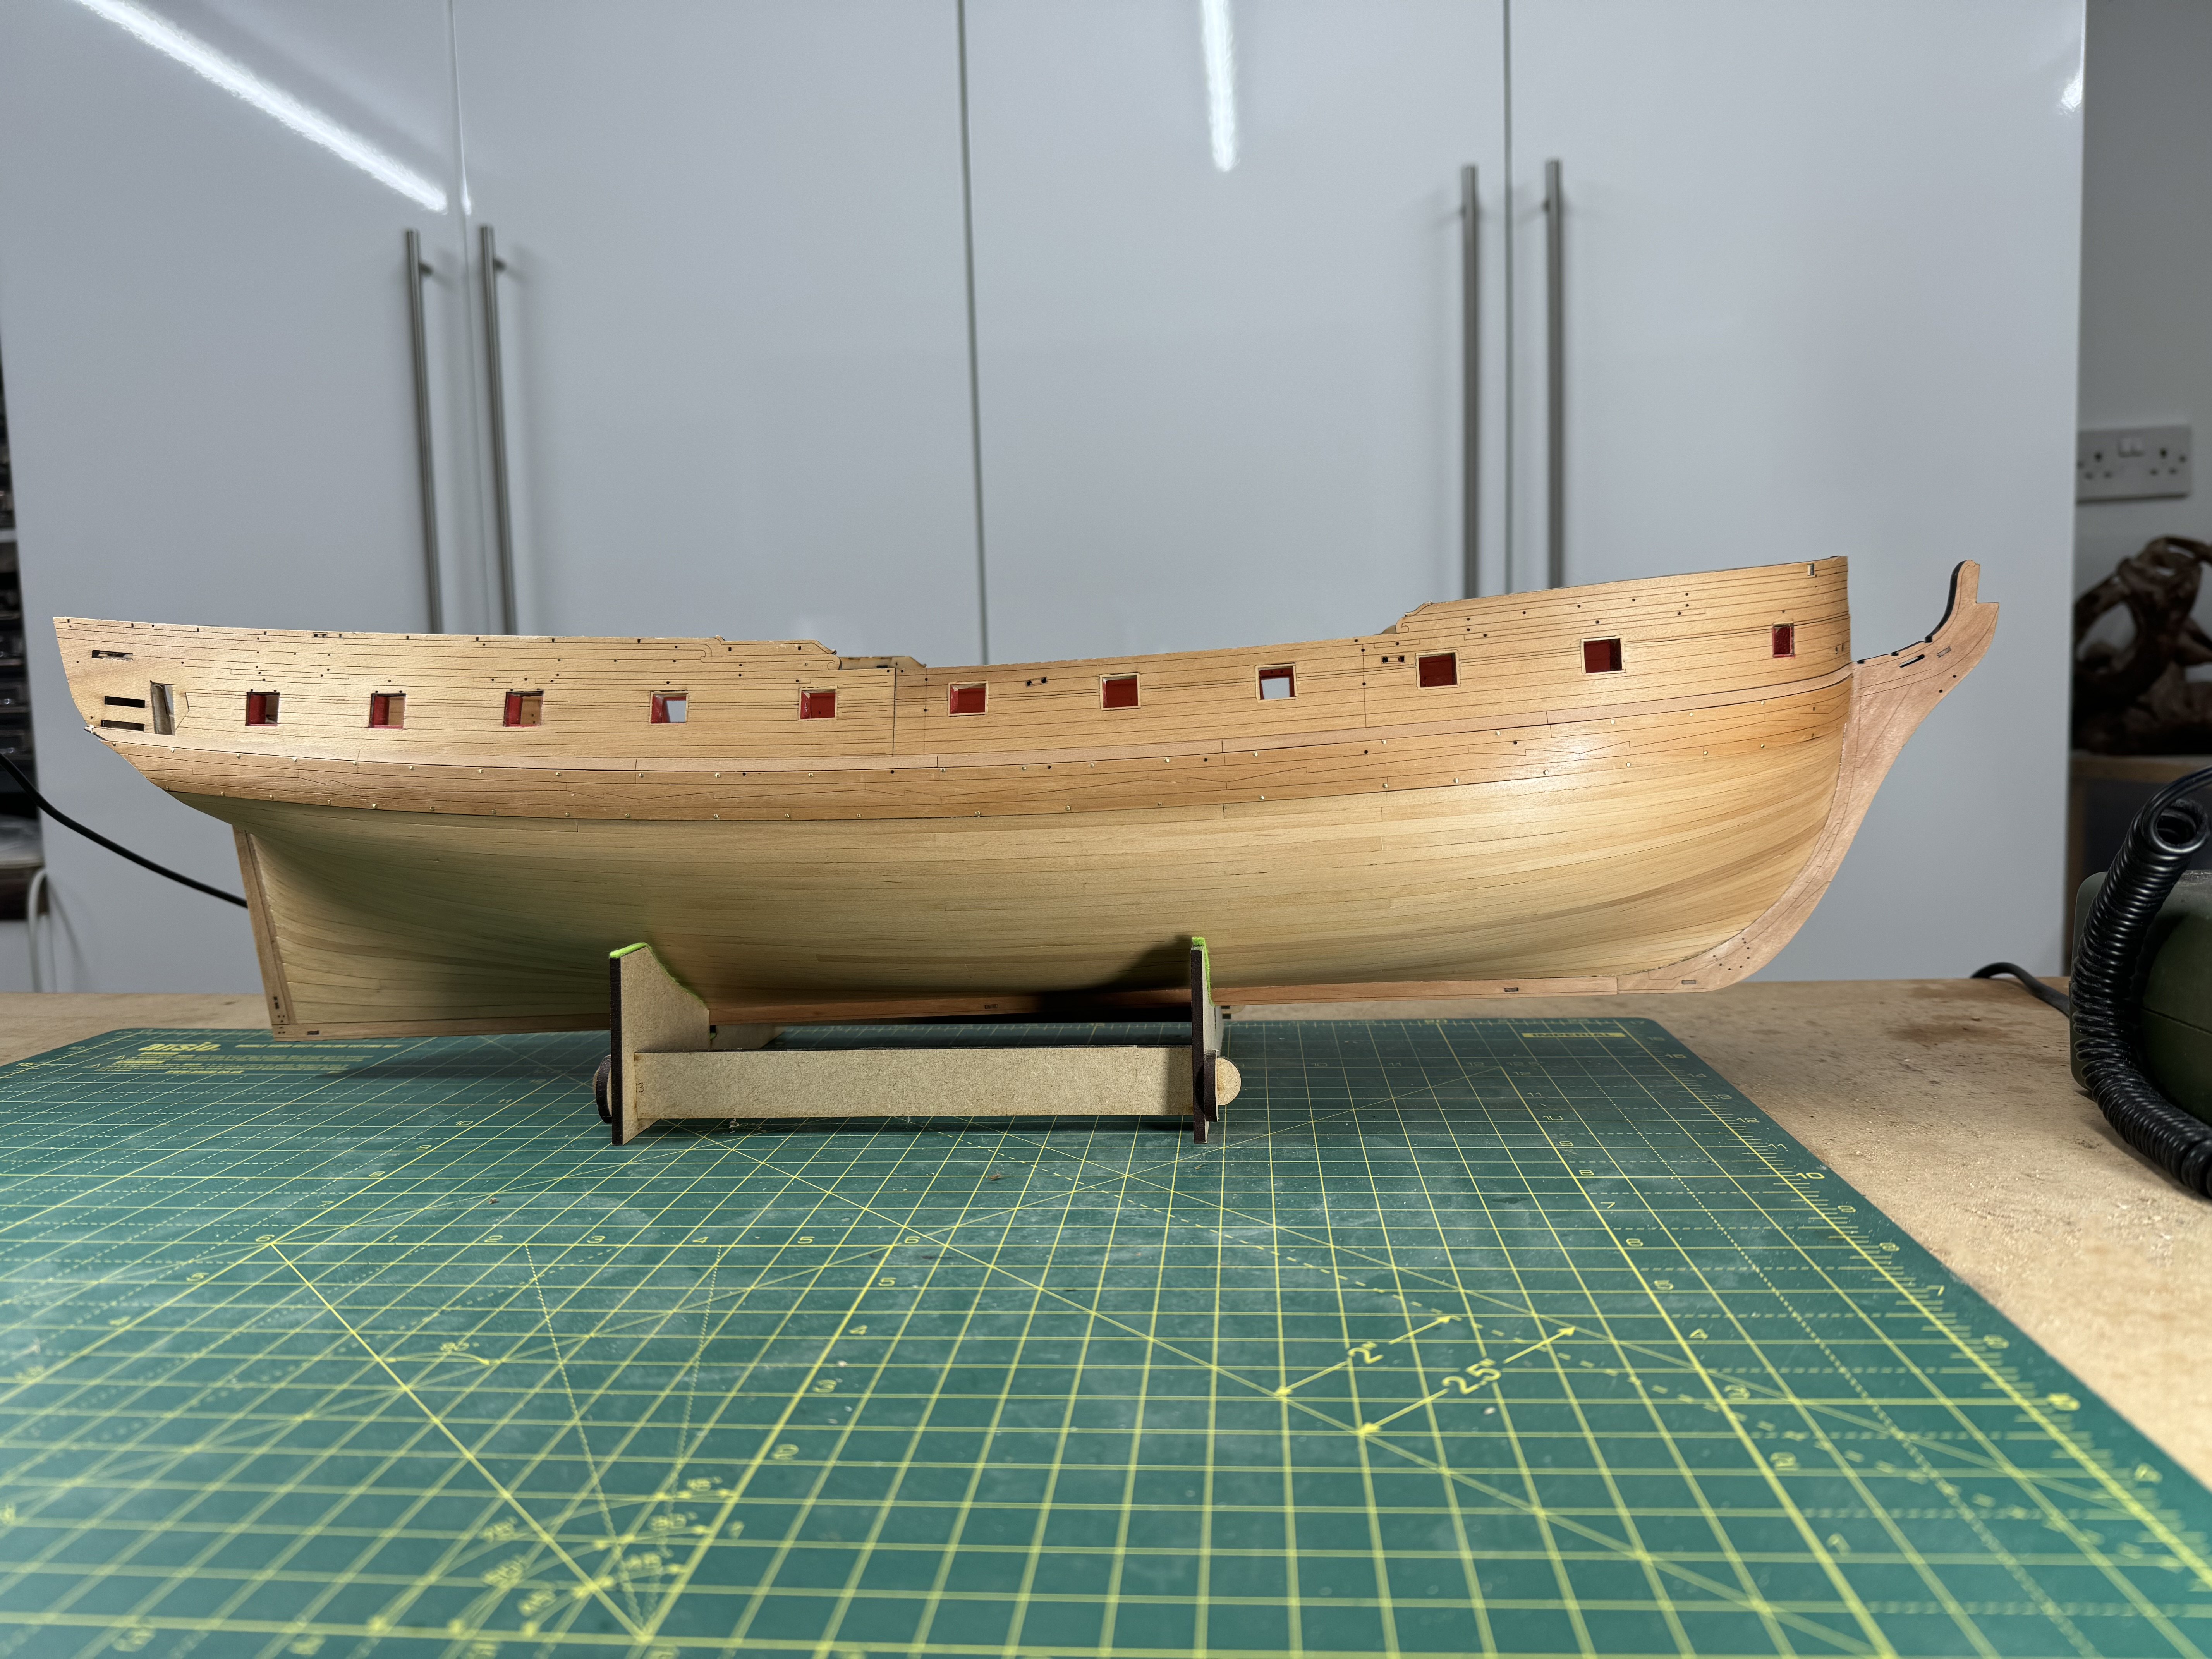
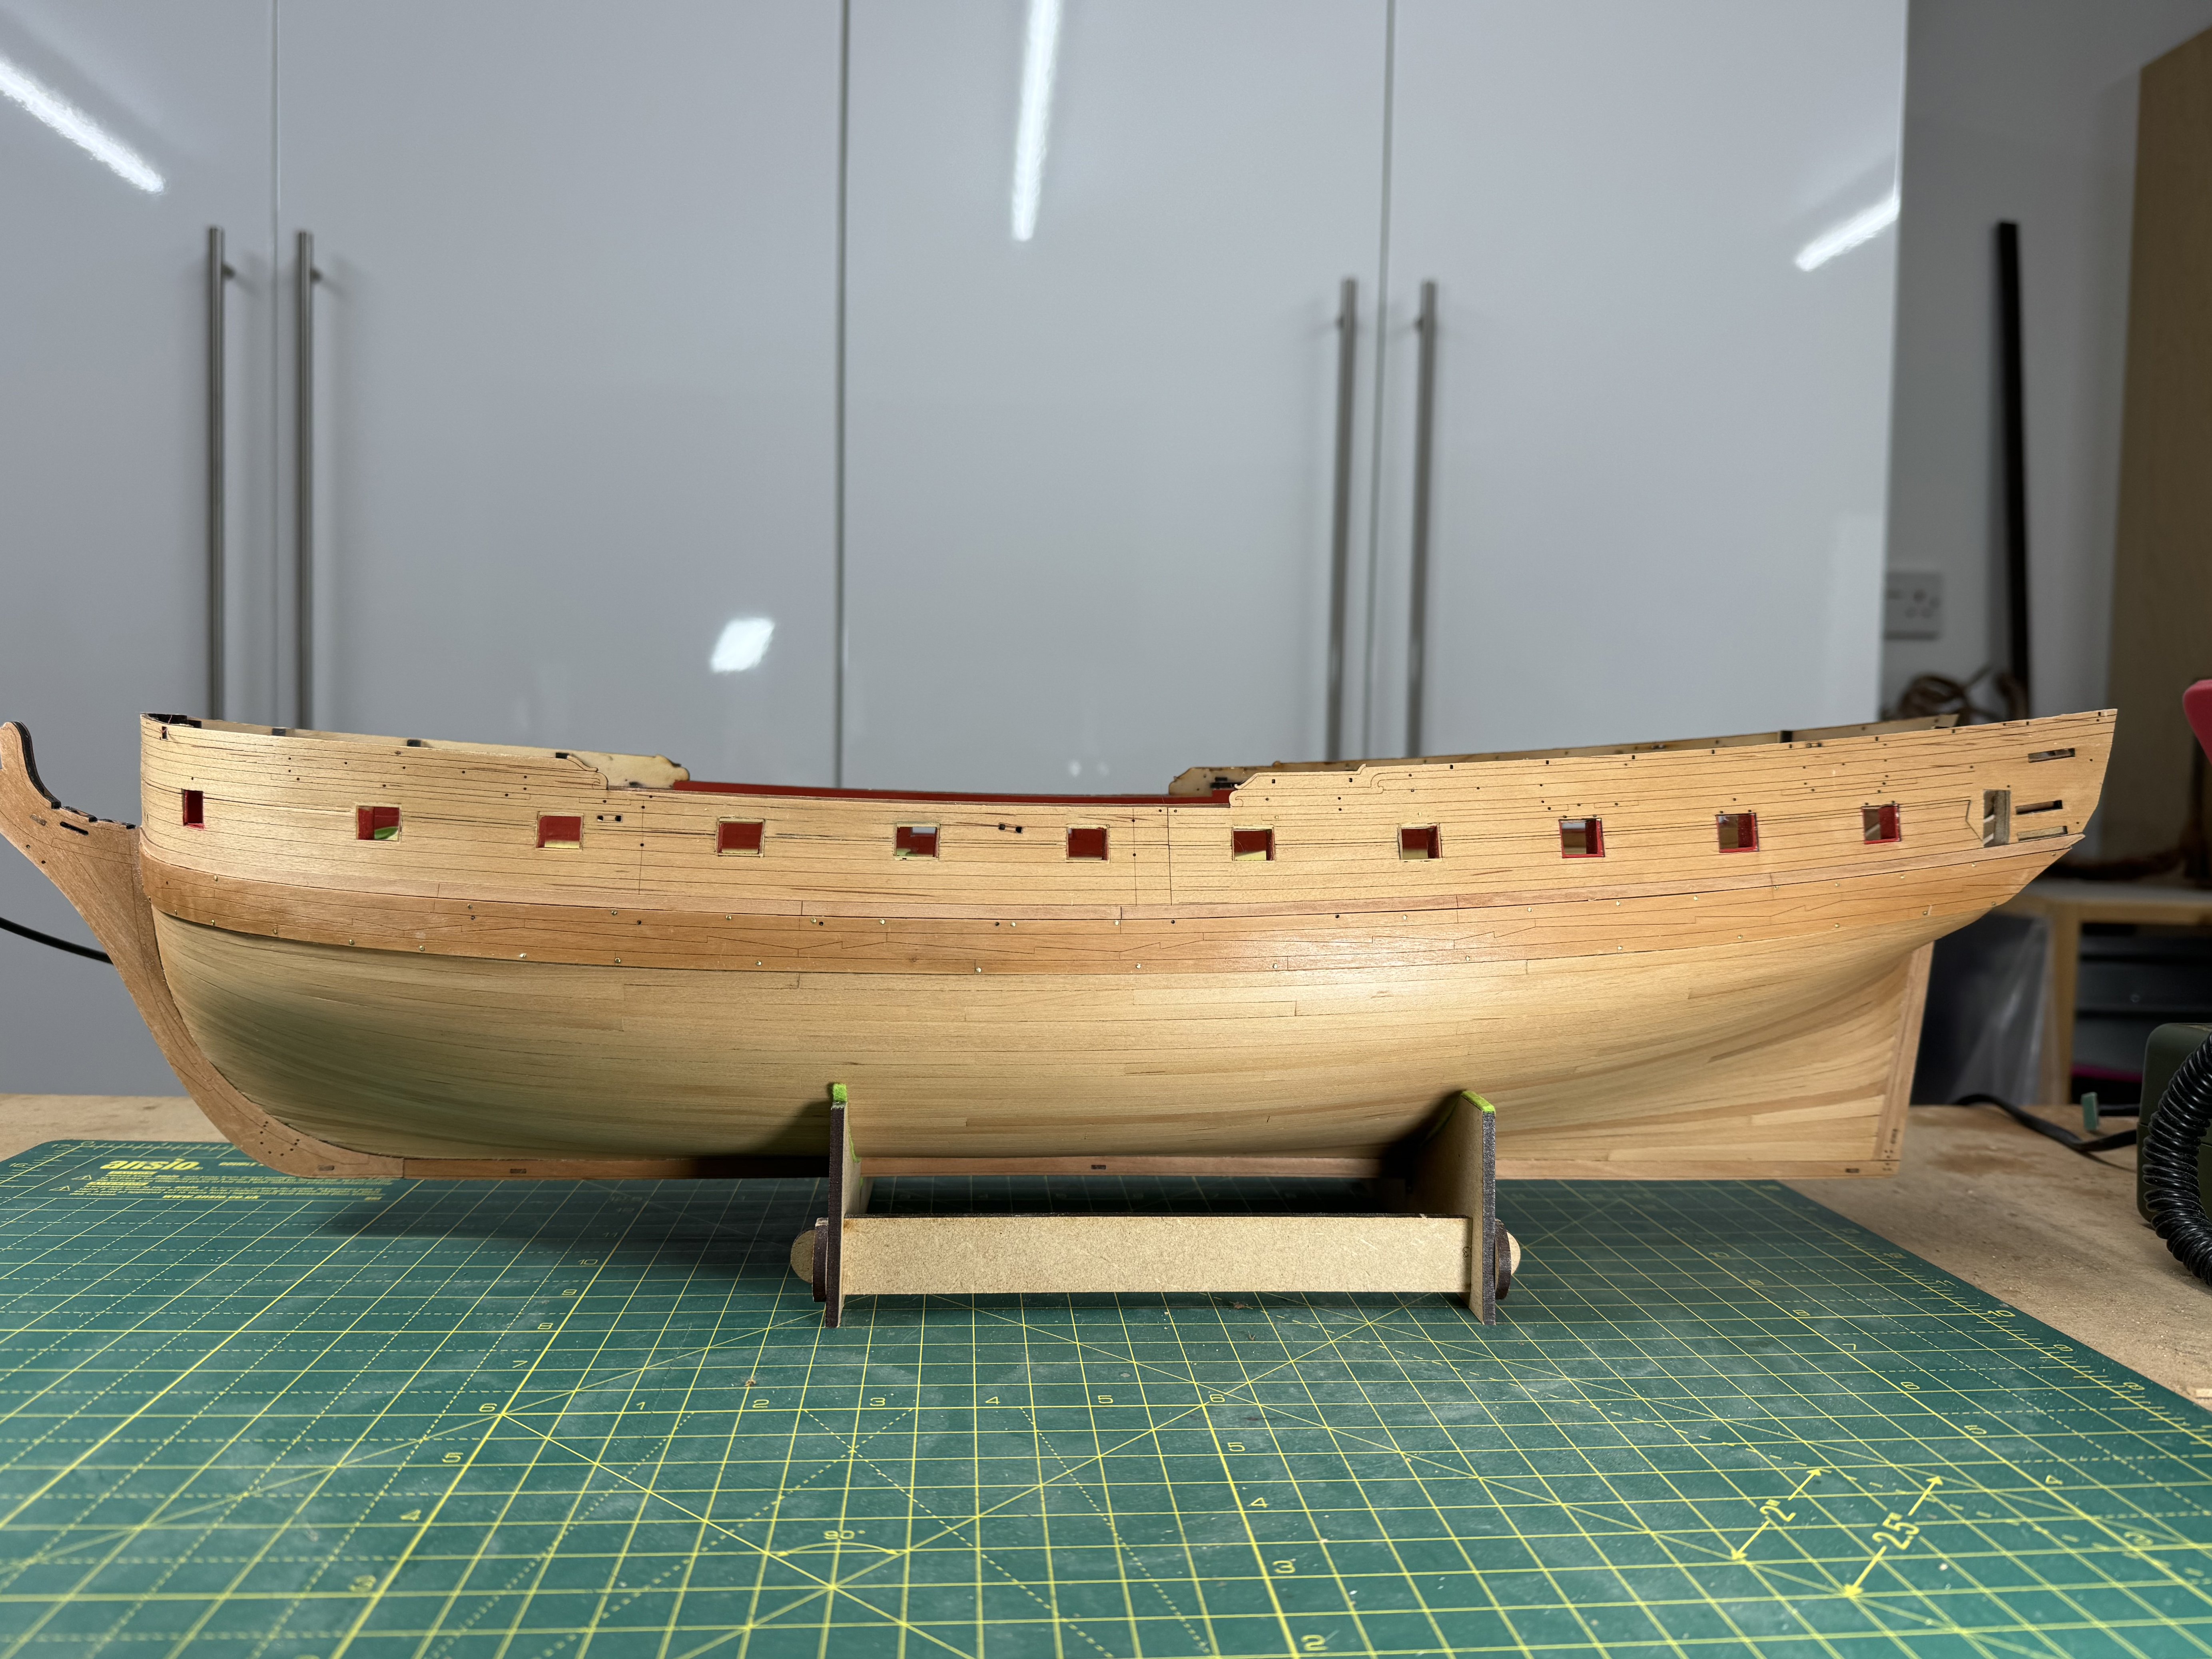
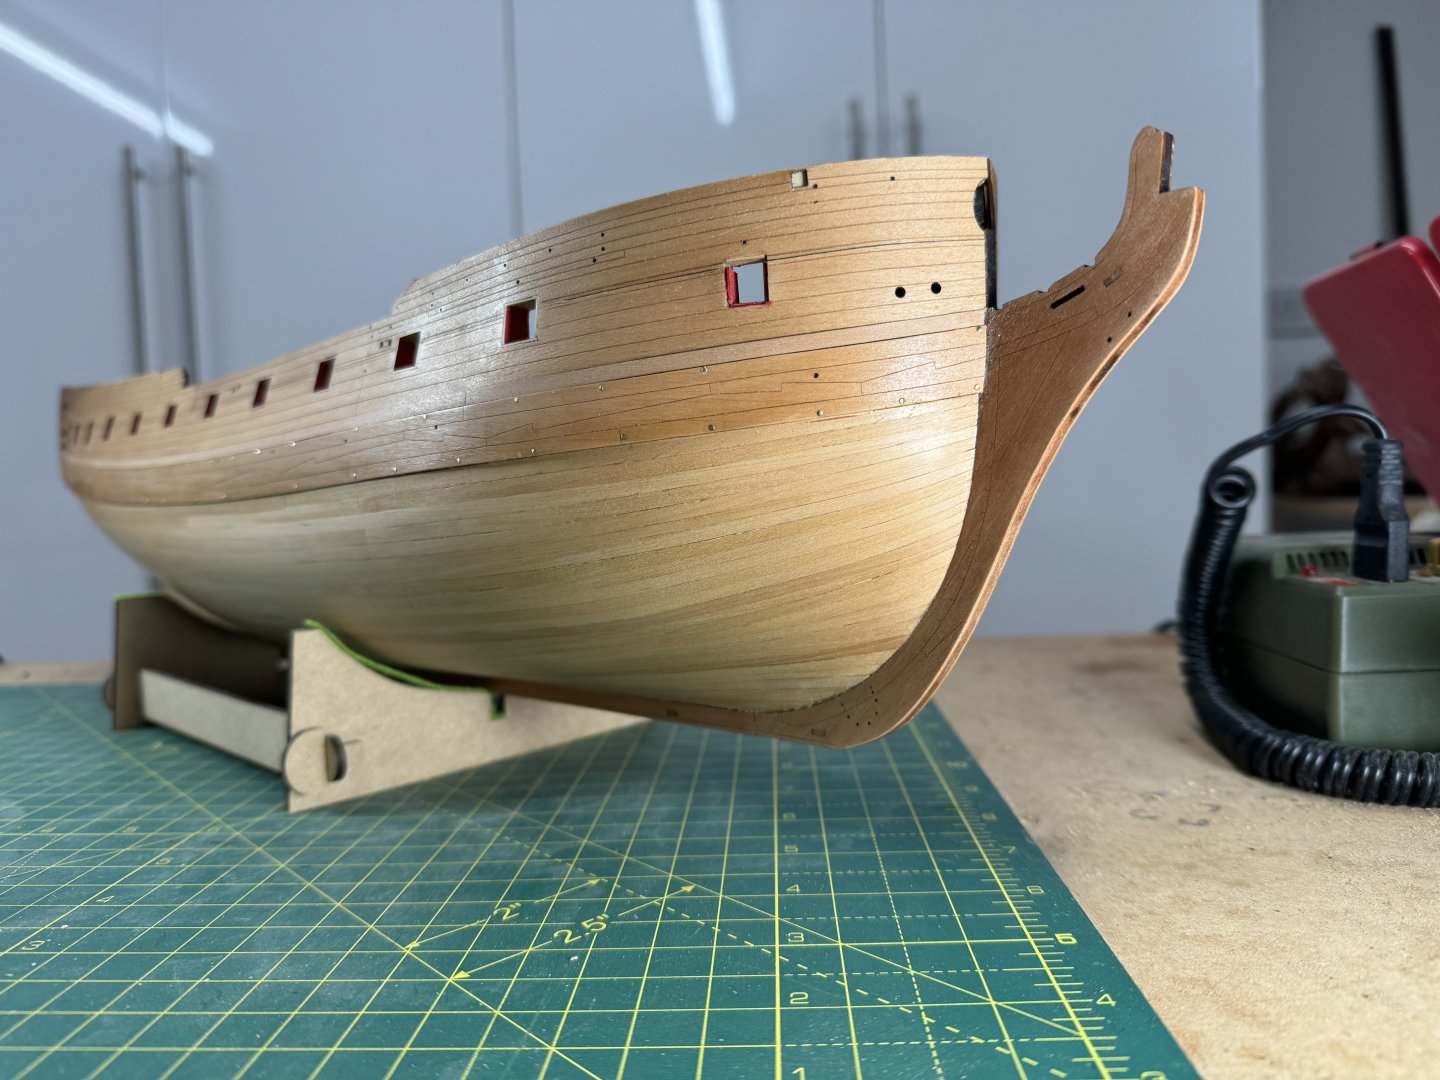
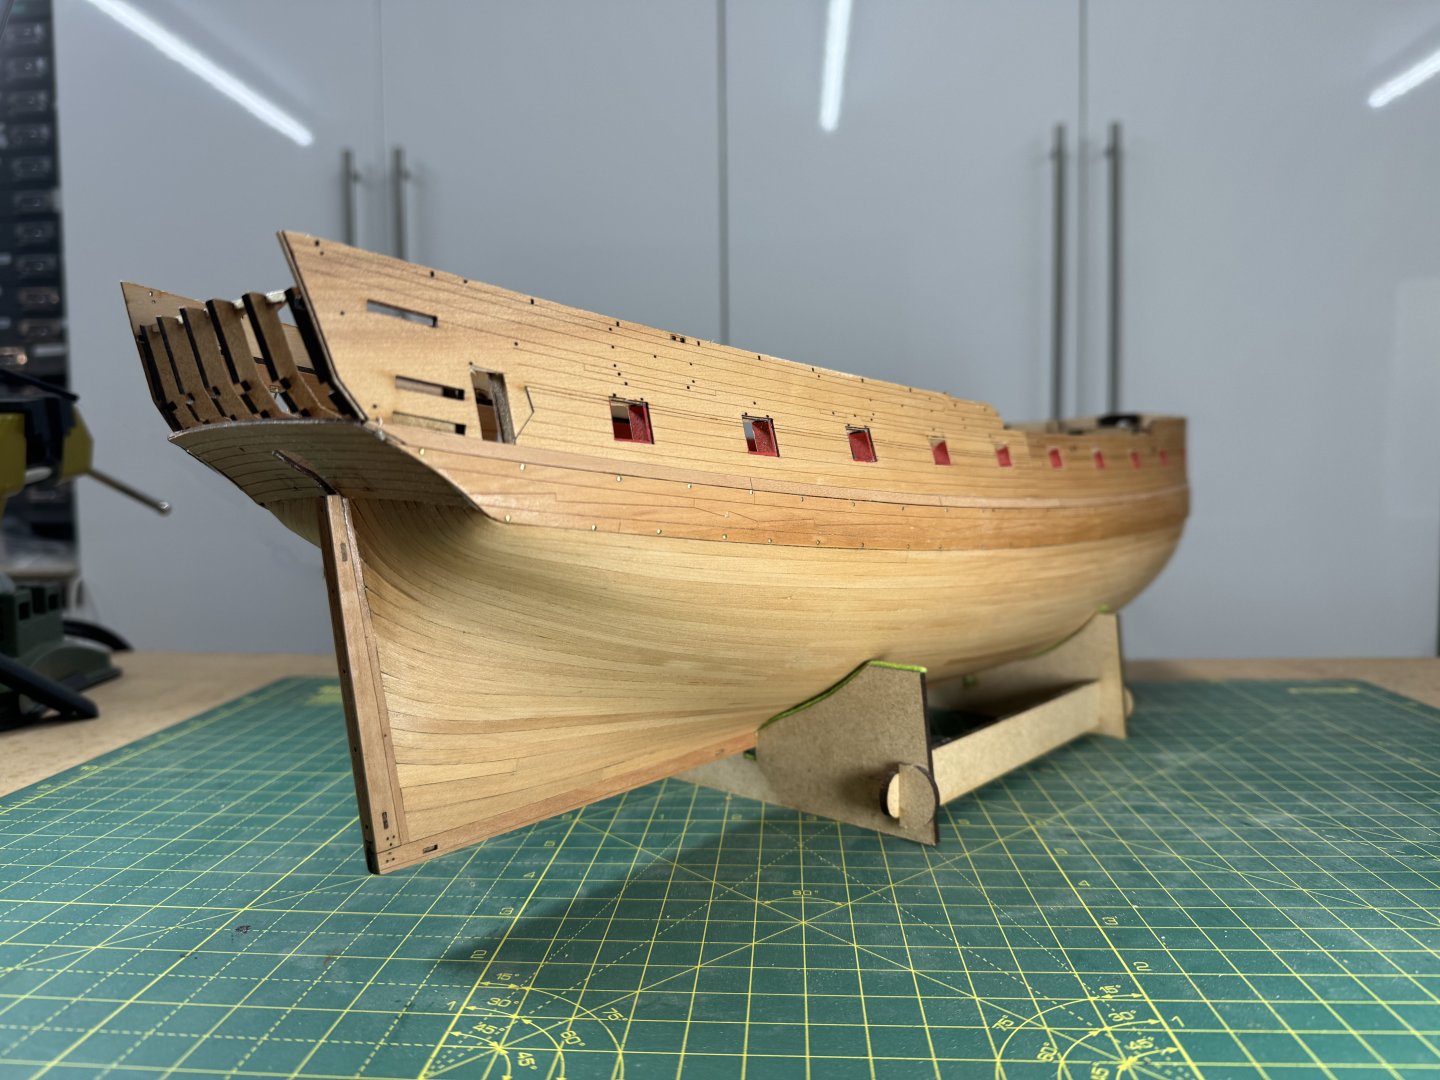
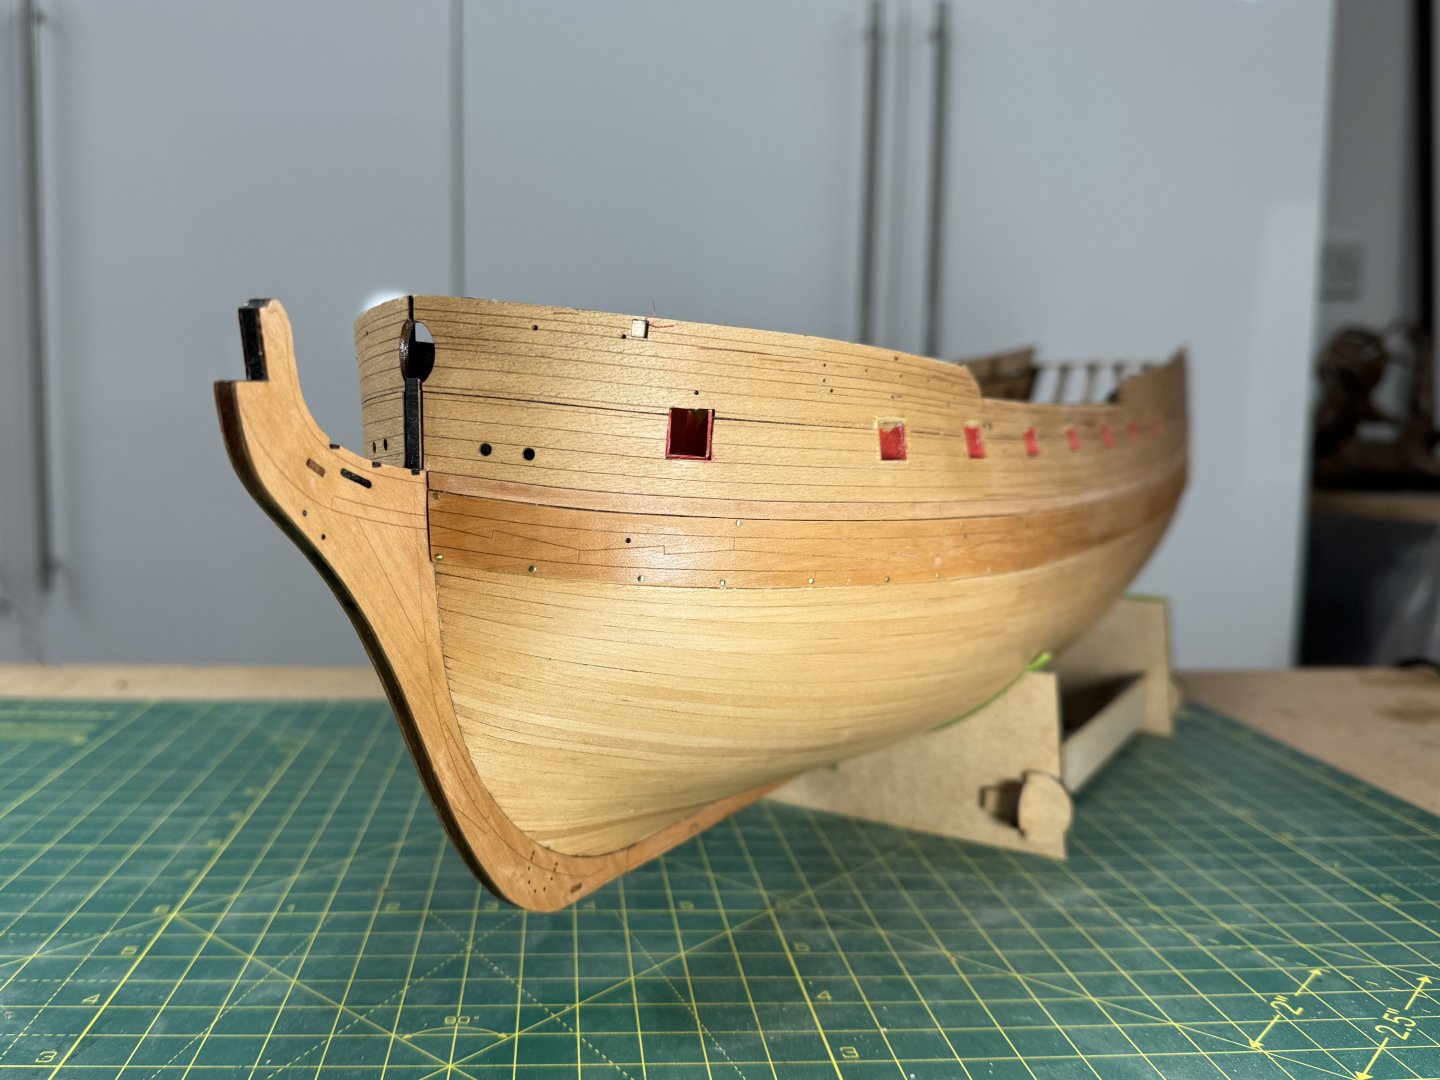
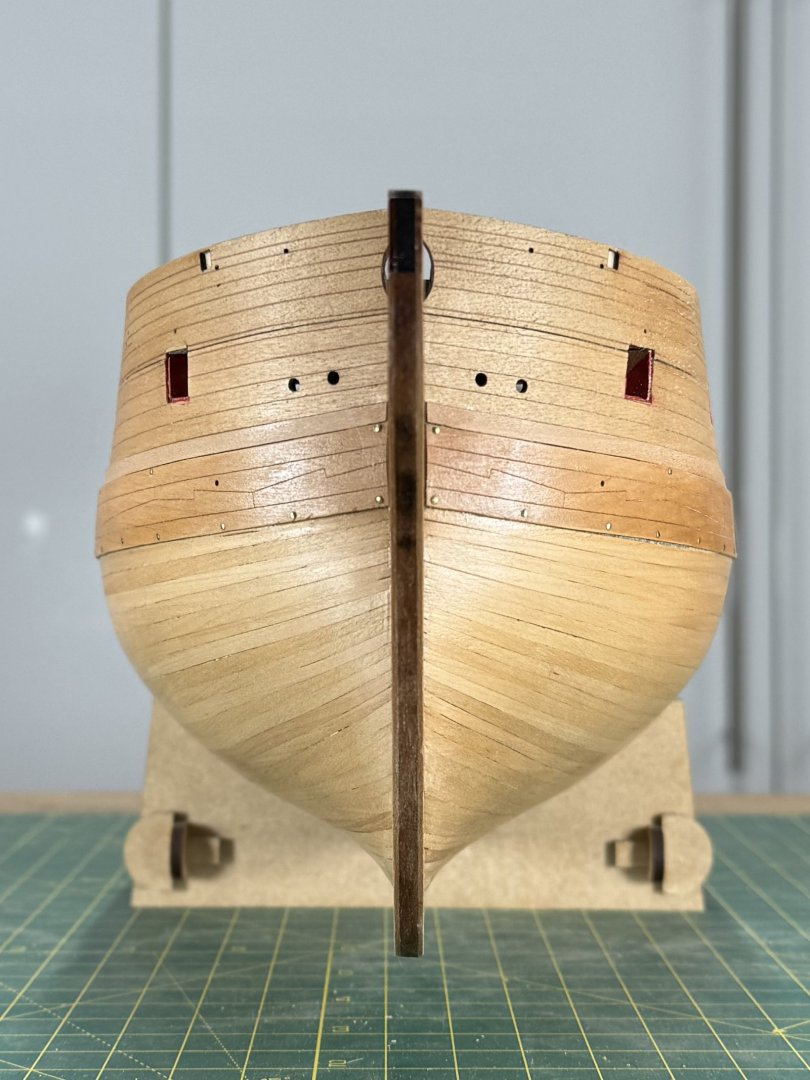
Second planking finished (at last!) Apologies @DonSangria for missing your enquiry. My model making has been so infrequent and disjointed over the past 16 months that I’m afraid I’ve neglected my build log and the forum. Here’s a belated attempt to catch up. I’ve missed photos of several steps so rather than offer an incomplete narrative I’ll just show some pictures of the current state of play, then in a following post I'll explain one or two of the steps where I’ve departed slightly from the build instructions. Here’s the second planking finished, sanded, and an initial coat of wipe-on-poly applied: Looking at the photos, I'm tempted to leave the hull unpainted, at least from below the wales. I'll follow on with some more information on intermediate steps, hopefully later today. Derek


-
Hi Glenn Still alive and kicking! I've just been so busy with other things I've had hardly any time to devote to modelling. HMS Sphinx is still waiting for me to finish planking and Indefatigable is still in the box so I'll have plenty to keep me occupied when I'm able to spend proper time in the workshop. Busy or not, I should have spent more time on the forum - I regret not having caught up with your work on Winchelsea over the last year or so. Wow! stunningly beautiful. You must be very proud of your craftsmanship. Best wishes, and I hope to get back to my log before too much longer. Derek
- 345 replies
-
- 4
-
-
- Duchess Of Kingston
- Vanguard Models
- (and 1 more)
-
Many thanks Bob - I hope my log is helpful to you, but with Chris Watton's great instructions and plans you won't go far wrong and it looks like you're already off to a flying start. Best wishes Derek
- 345 replies
-
- 3
-
-
-
- Duchess Of Kingston
- Vanguard Models
- (and 1 more)
-
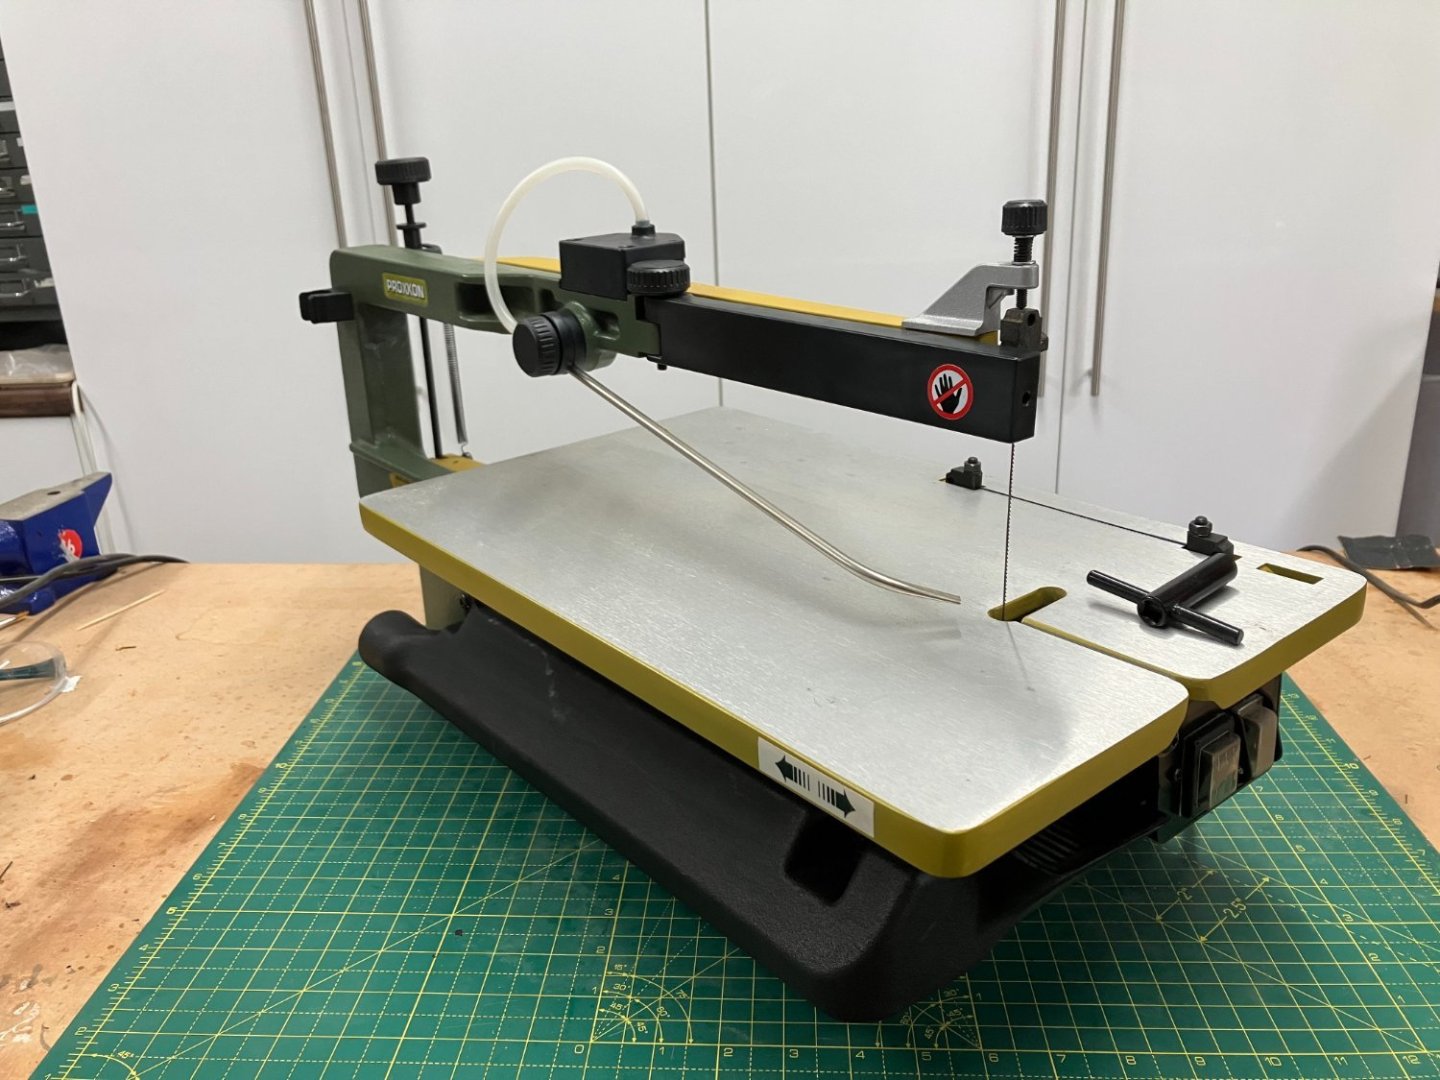
We are planning to move to a retirement village later this year and I won't be taking my larger workshop tools with me. I've already put my larger lathe and mill on ebay, but would much rather my modelling equipment went to a Forum member (I'm also listing my oscillating bobbin sander). I'm hanging on to smaller tools and in a funny sort of way I'm looking forward to going back to a simpler way of modelling. This is Proxxon's top of the range scroll saw and does everything you could want such a machine to do. I've used it quite a bit but it's still in perfect working order and comes with a set of coarse, medium and fine blades. I particularly like the handy slot on the table that keeps the blade holders exactly the right distance apart as you fit the blade. The saw currently retails for around £450 and I would be happy for it to go to a Forum member for £300. The saw is heavy (20kgs) so will need to be collected in person, from Worksop in North Nottinghamshire. Derek
-
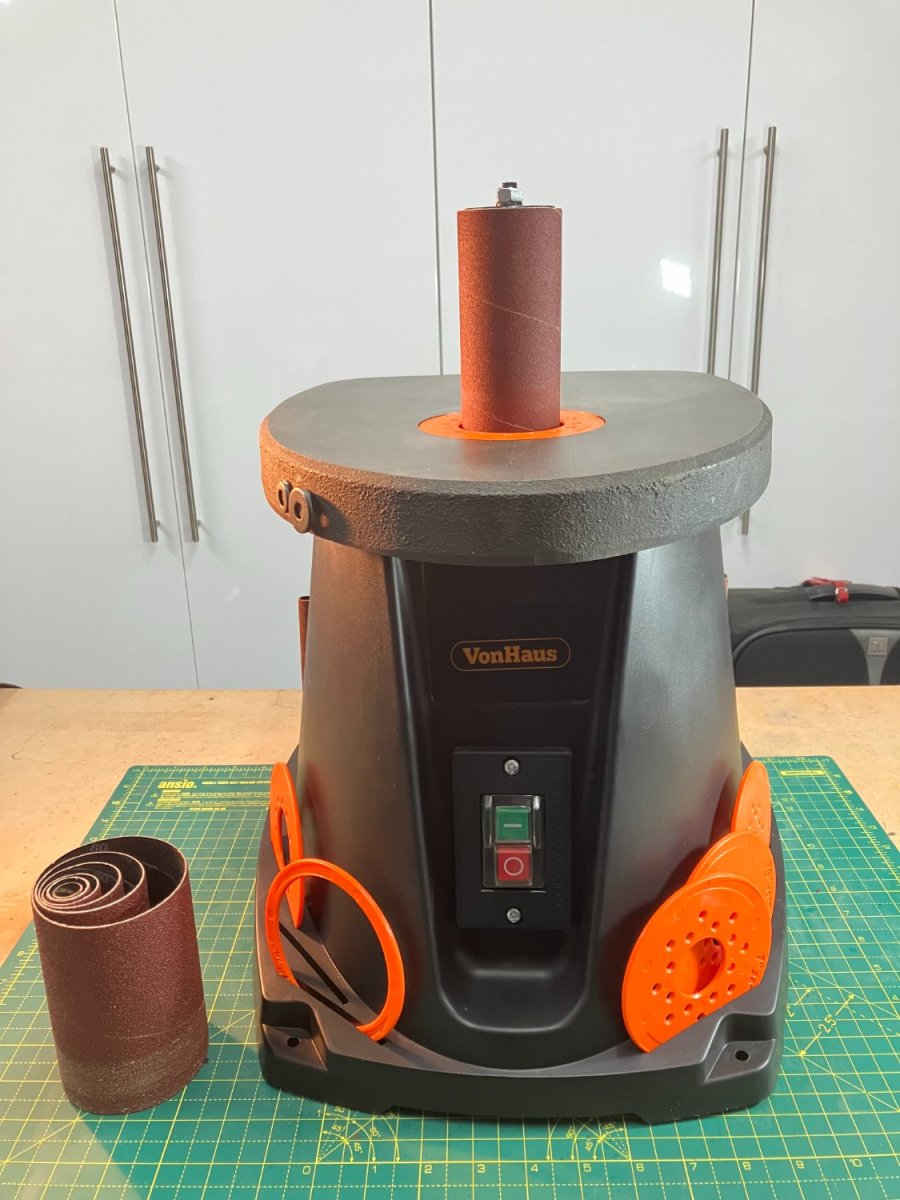
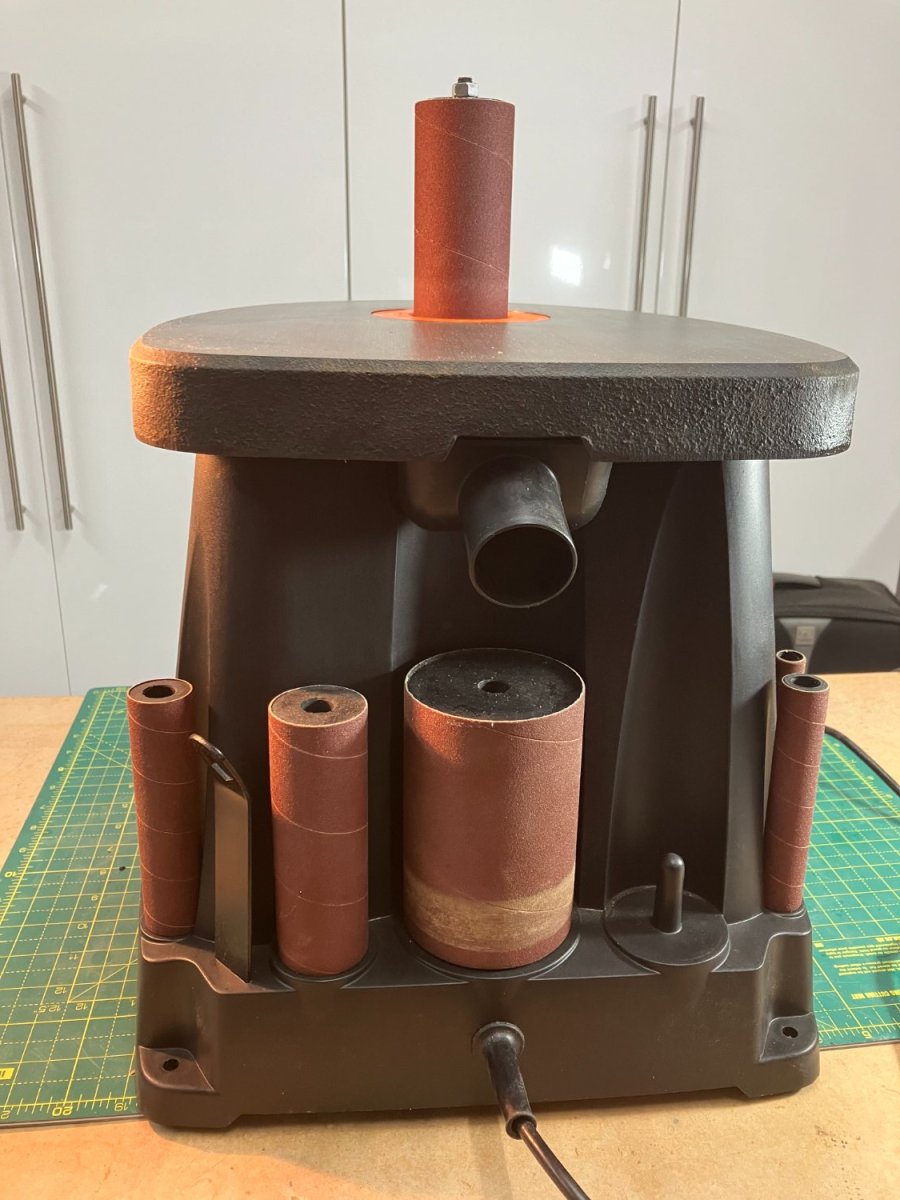
I originally bought this with a view to scratch building HMS Winchelsea. I don't think that's going to happen now as I've still got HMS Sphinx on the stocks and Indefatigable and a couple of smaller kits in their boxes. We're planning to move to a retirement village later this year so I won't be taking my big workshop tools with me (I'm also going to list my Proxxon DS460 scroll saw). I used the sander once to shape some replacement parts for a friend's rocking horse and it did a great job. It's very solidly built and would be useful for general DIY jobs as well as model building. The machine came with six coarse grit sanding sleeves and I bought a second fine grit set. The sander retails for just under £170 plus around £10 for the extra sleeves. I'd be happy for it to go to a Forum member for £100. Due to size and weight this will have to be for collection only, from Worksop in North Nottinghamshire. Derek


-
Hi Glenn. Apologies for missing your post - spending time with family and friends has kept me away from ship building for a while, apart from a bit of fiddling with port lids, which I'll log shortly. I'm hoping to get onto 2nd planking once the next set of visitors and holidays are out of the way. Derek