

Pat Lynch
-
Posts
103 -
Joined
-
Last visited
Content Type
Profiles
Forums
Gallery
Events
Everything posted by Pat Lynch
-
 A question about the Endeavour's channels. The A.S. kit and the Oz replica, do not show any brackets from the channels to the hull above. However a couple of very nice models by builders on this forum who have good references show some brackets. Easy enough to make but is there an explanation? Cheers, Pat
 -
Next small step up this very steep learning curve were the various vertical parts attached to the external hull - mountings for the small guns (culverins) fore and aft and the tricky fender strips which I assume were to protect the hull when hoisting stuff to and from small boats along-side. The shape of the fenders must match the profile of the hull and no way could I shape them using the suggested wood size so a piece of 5 X 2 Walnut was used and laboriously filed to fit my hull - and of course, both sides were slightly different but after some grain filler and painted in the manner of the replica, it looks OK (at a few yards distance). Close-up pictures always look worse than when the whole subject is visible! Pat

- 111 replies
-
- 1
-

-
- artesania latina
- finished
- (and 1 more)
-
The rails along the top of the gunwales are of 5 X 2 Walnut and I'd pre-bent them to fit the curve of the deck (well almost fit). A tiny drop of med CA holds them in place OK. I can lift the hull by them The paintwork is still a 'work in progress'. One of my pet dislikes (for me) is leaving excess wood texture in the finish and at 1:60 scale, it isn't easy! So these rails have had a couple of coats of well-sanded sealer before painting but it still shows some grain. I may give it another fine sanding before the final coat. The paint on the rail is Tamiya NATO Black - more a very dark grey than a true black. Using different shades of the same hue to give some variety to a model adds a bit of interest (I think!). The Black is a flat paint so after drying, it was given a good buff with a soft cloth to add some shine to the edges. Now, all those vertical bits from the hull sides up the railings........ Pat


- 111 replies
-
- 3
-
-
- artesania latina
- finished
- (and 1 more)
-
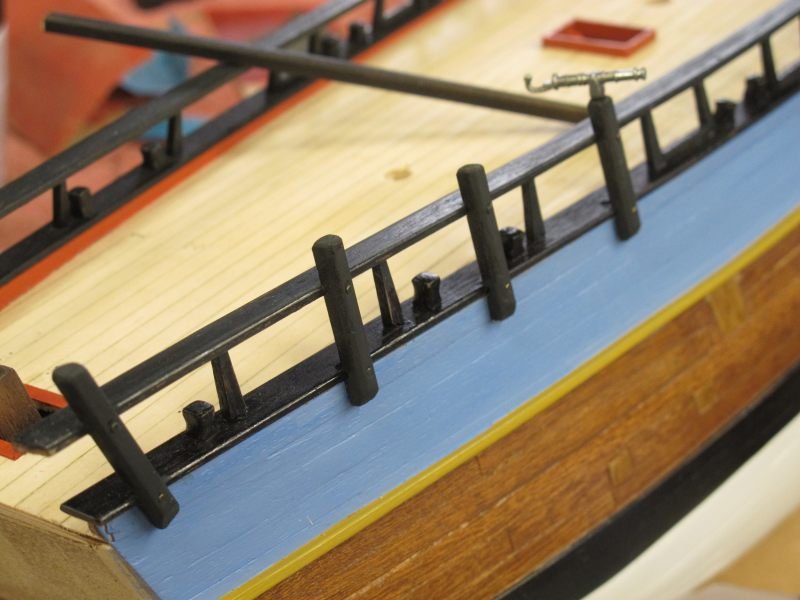
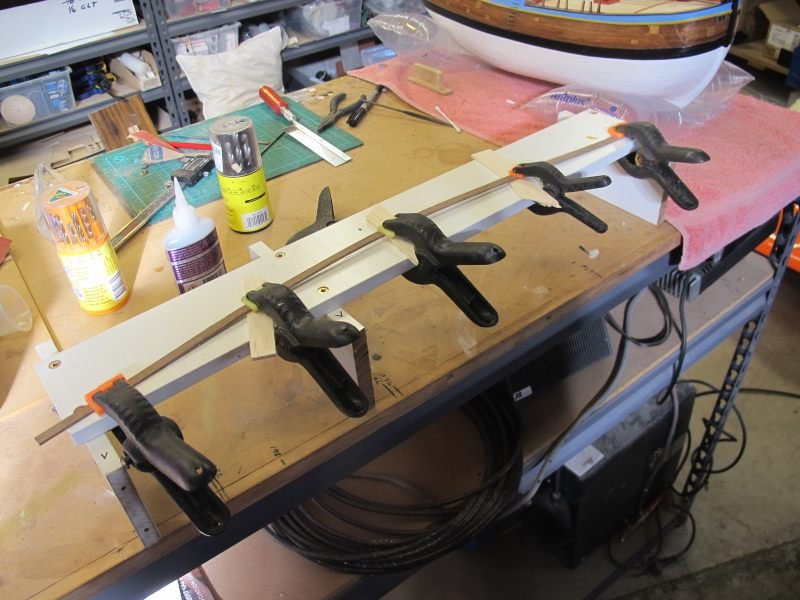
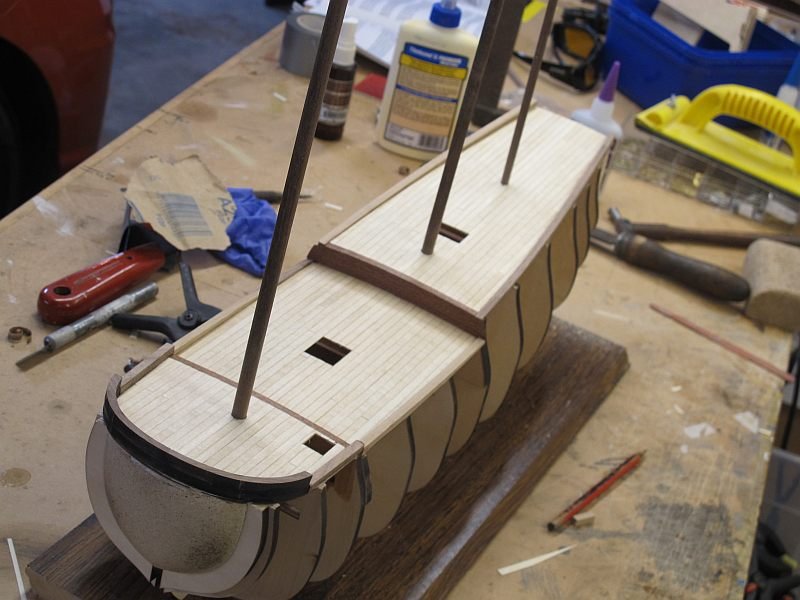
Thanks for the encouraging words folks The next task on the books are the stanchions and mooring posts (bollard?) The stanchions have their lower end rounded to fit into a 2mm hole drilled in the gunwale top. I was sure they'd be at a slight angle to match the hull sides so that's what I did. The mooring posts were from 4 X 4 walnut. I used the 4 jaw chuck on my little lathe and gave them a bit of shape and 5mmlength. They are CAed into positions on the ship (not always clear where!) I also wet and steamed some 6 X 2 walnut strip and clamped to give me two lengths with a curve in 2 dimensions. They will be glued to the rail supports hopefully with little strain on the joints. Pat
- 111 replies
-
- 1
-
-
- artesania latina
- finished
- (and 1 more)
-
Retirement does the trick! but yes, I do have an Admiral on board but she loves craft, art, music .....and model building
- 111 replies
-
- 1
-
-
- artesania latina
- finished
- (and 1 more)
-
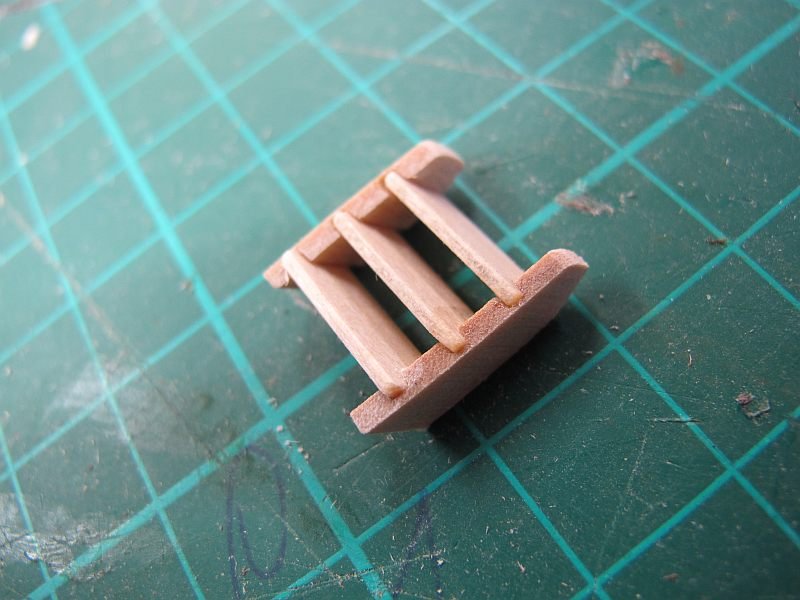
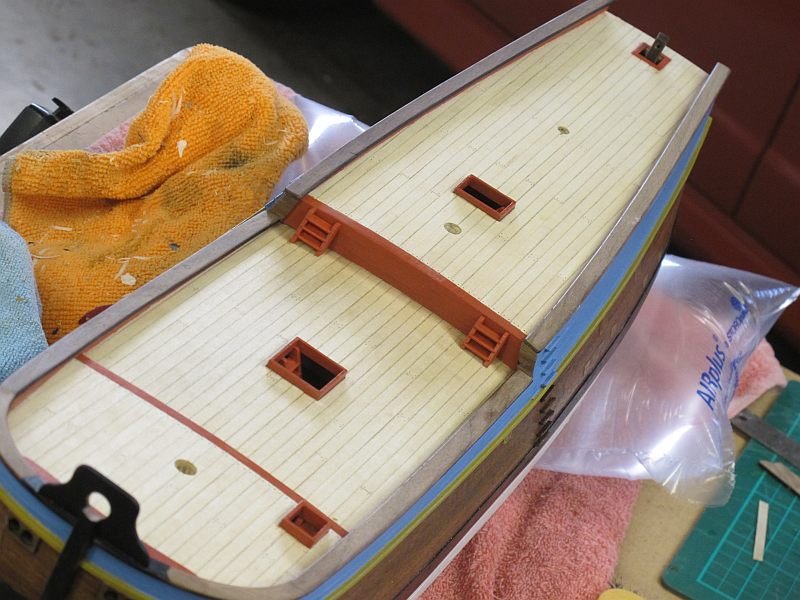
One small step for a man....... Well, five sets of steps actually. As a break from other stuff, I thought getting the steps down onto deep hole in the deck might be better soon rather than later. Plenty of step material is supplied - including the usual grooved side parts. I had to be careful to select a left/right pair where the slots for the steps matched! Cutting the steps to exactly the same length was also important and a small jig helped with that. After the first couple of almost-invisible steps down small, dark holes, I went a bit more carefully and fine sanded the side rails and a length of step tread wood, then gave it all a coat of sanding sealer/grain filler. Another fine sanding and the slots cleaned out with an exact-size file, the two end steps were glued in place (a tiny drop of Med CA) and checked for squareness. The remaining steps were inserted and given the tiniest drop of thin CA to hold them in place. Another even finer sanding plus a coat of paint completed them, the ends were cut to fit the location and they were CAed on place. I had also sanded the sides as thin as I dared having read comments about that in other posts. Although not strictly scale, I allowed the steps to protrude slightly in front of the side rails - it seemed to give a tidier finish. (imho ) I have to start on the various rails soon and am pondering the many elements.... Pat
- 111 replies
-
- 4
-
-
- artesania latina
- finished
- (and 1 more)
-
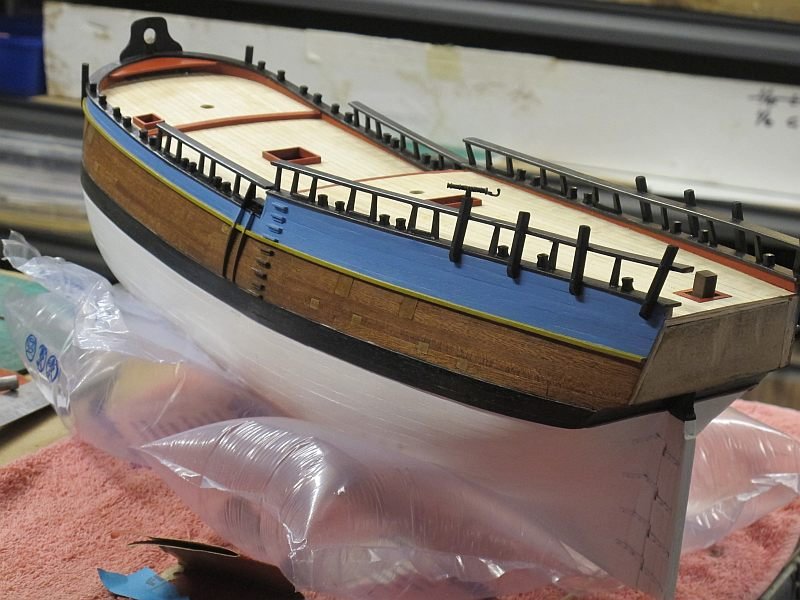
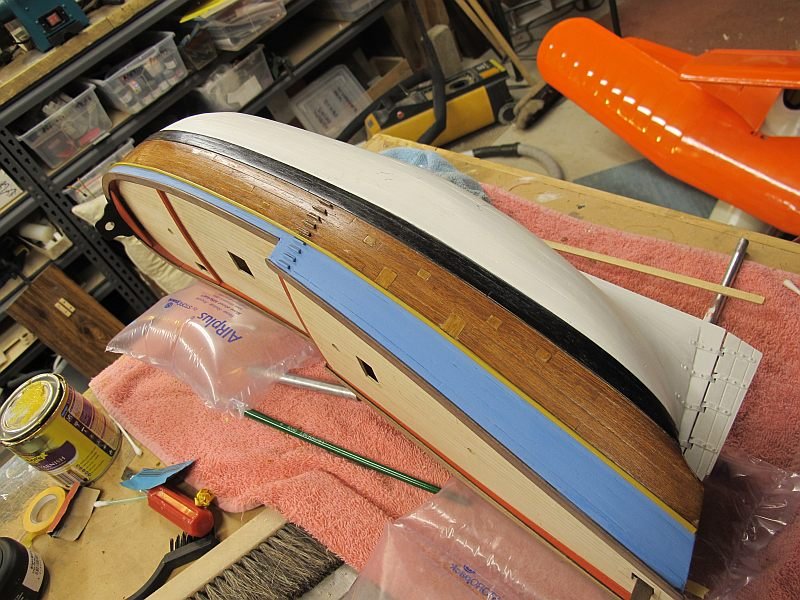
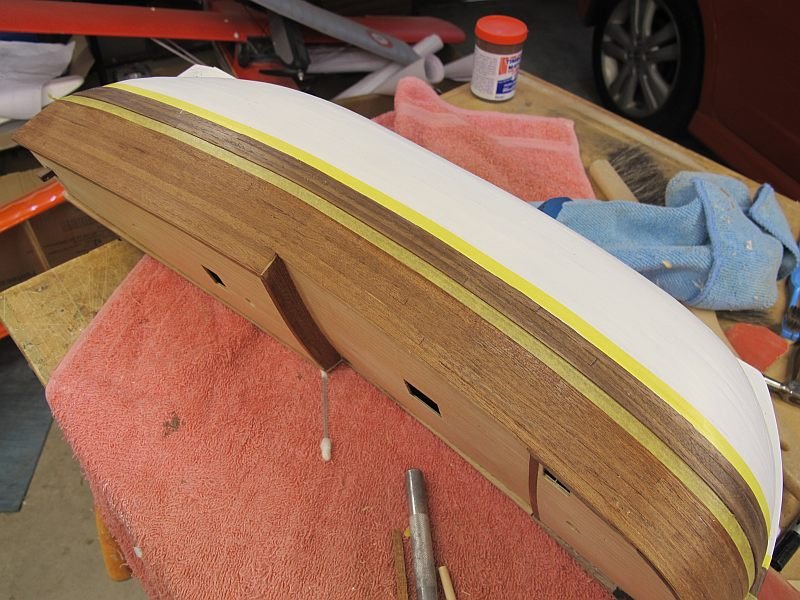
After a few false starts, I decided to use Yellow ochre as the basic trim colour. It is a bit subdued compared with a freshly painted replica but looks good on a small model. The channel wales were masked off with Tamiya 6mm masking tape (nice stuff) and carefully pressed adjacent to the wale. A primer coat of Tamiya Flat deep yellow was applied (not too runny) and then Reeves artist quality acrylic was applied and allowed to dry. The wale will be de-painted where the channel parts are to be fixed. It seems the replica does not have the braces from the channels back to the upper hull as some plans must indicate. More research needed Pat
- 111 replies
-
- 3
-
-
- artesania latina
- finished
- (and 1 more)
-
With the planking done, a slower pace is inevitable. I wanted to get the lower hull details sorted so the side hatches and vents were done. I didn't like the cast objects supplied as replica photos showed them to be flush with the hull so small recesses were chiselled in the sides and .4mm Birch ply 'doors?' were glued in place. They were given a coat of walnut stain to darken them a little and after the first hull coat of Cabots Maple stain/varnish they have a subtle difference in appearance - esp. with vertical grain. Dummy hinges will be added later. The location of these openings is a combination of info sources. As usual, this Endeavour is a mix of A.L. design, stuff gleaned from other modellers, the Ozzie replica plus a bit of my own preferences. I'd like to get the chain-plate wale painted while I can still get some masking tape in there so that may be next. My build sequence is rather personal - I do the same with model aircraft. Some parts seem to get the final finish before others are built - often for rational reasons, but often just because I feel like it Pat
- 111 replies
-
- 4
-
-
- artesania latina
- finished
- (and 1 more)
-
Thanks Pat - It's all questions at the moment but I enjoy the problem-solving as I go (with a little help from other builds!) Interesting the differences between the Endeavour reference books and the Oz replica! But I guess almost any model of an old ship is going to be a compromise. Esp. if built from a kit. Thanks for looking in on my efforts Pat
-
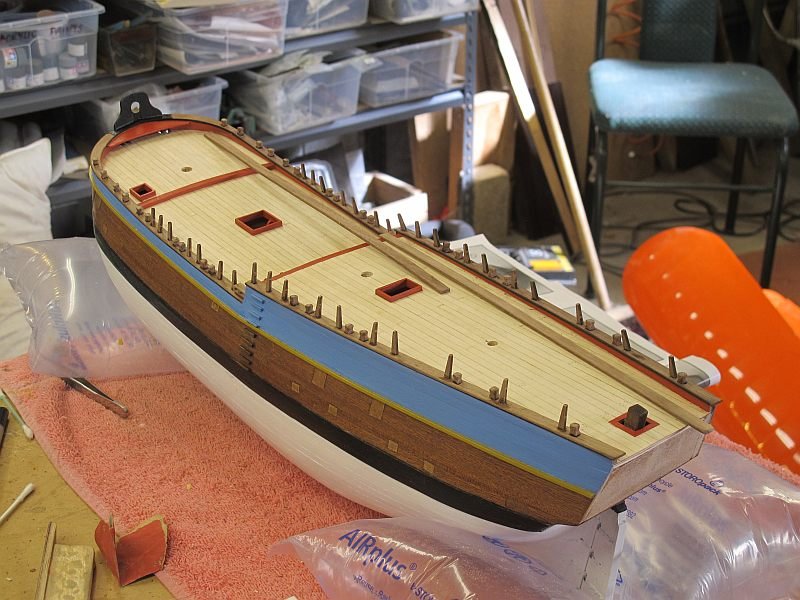
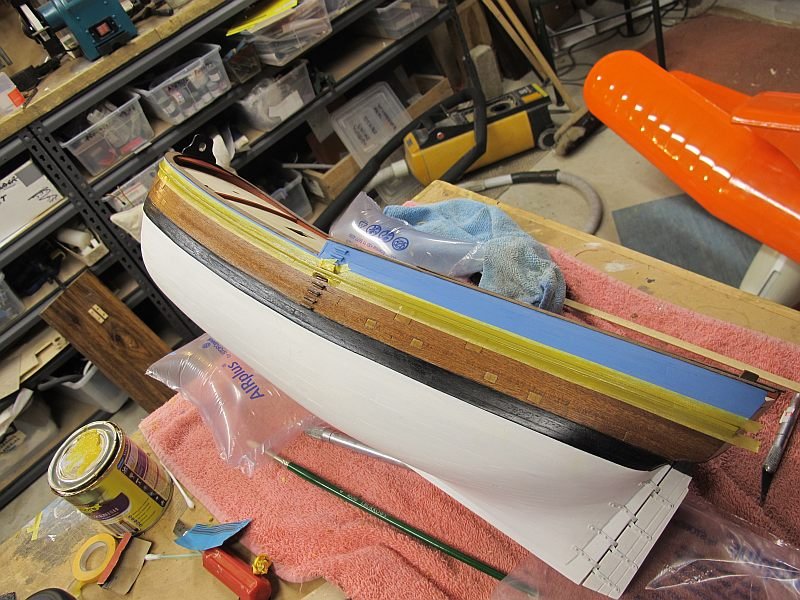
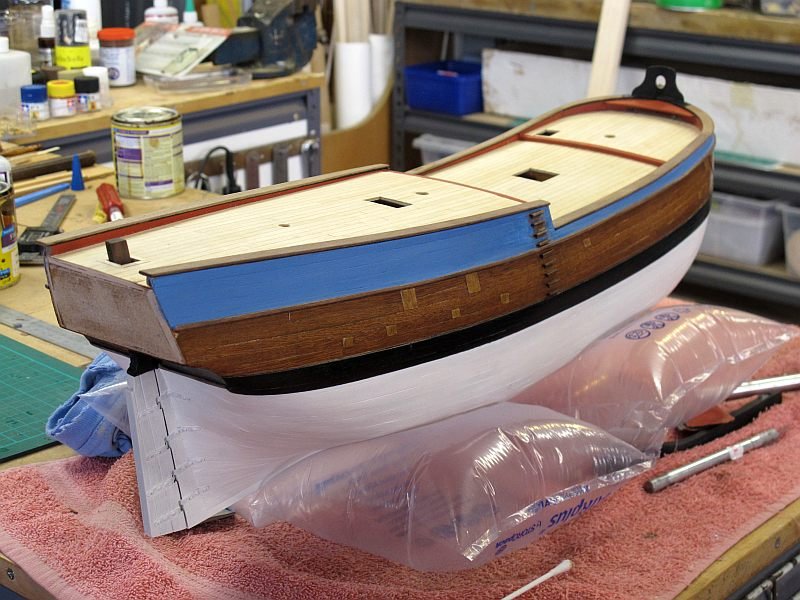
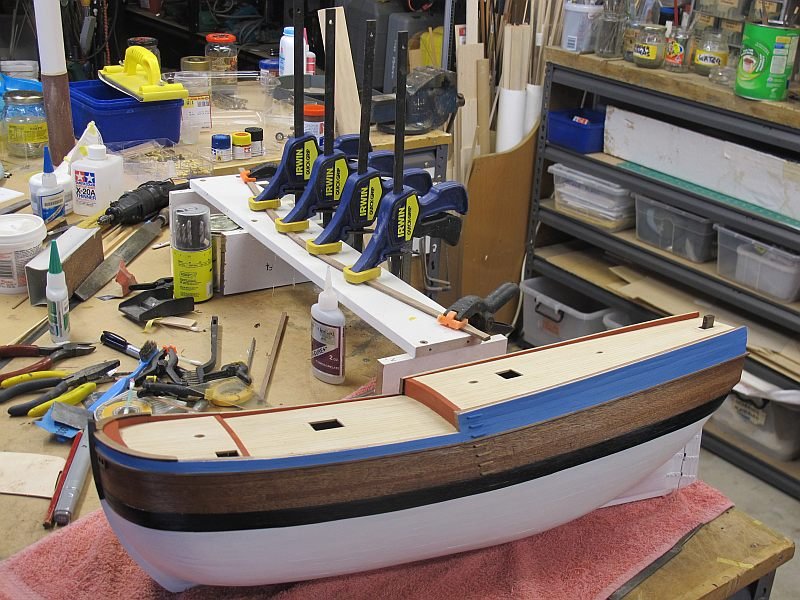
A rainy day gave me an excuse for getting out of the garden and into the workshop! After a couple of trials, I mixed a blue that was a bit duller than the photos of the replica but which suit the small scale model OK (imho)! When the paint is fully cured, I'll mask off the yellow chain-plate wale and experiment with colour there too. The gunwale capping sections at the bow fitted perfectly and were glued in place - the rest of the gunwale capping (not sure of the nautical term!) needed some pre-bending edgewise (8 X 2mm) to be fitted nicely so that must wait until the walnut strips have dried. While waiting, I masked off the inside faces the gunwales and painted them a sort of brick-red colour - something close(ish) to the replica photos. Pat
- 111 replies
-
- 2
-
-
- artesania latina
- finished
- (and 1 more)
-
A long while ago Pat but many thanks for a great, helpful build thread. I refer to it often Pat (also)
- 517 replies
-
- 2
-
-
- Endeavour
- Artesania Latina
- (and 1 more)
-
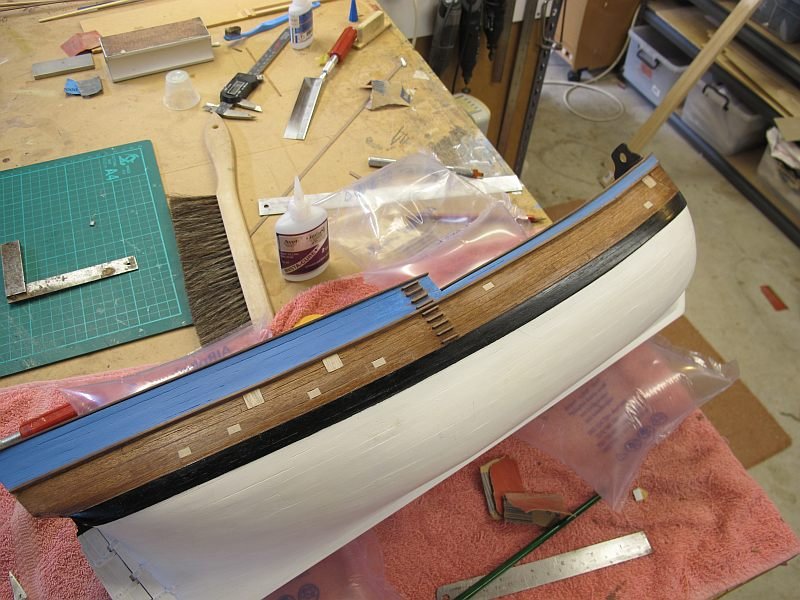
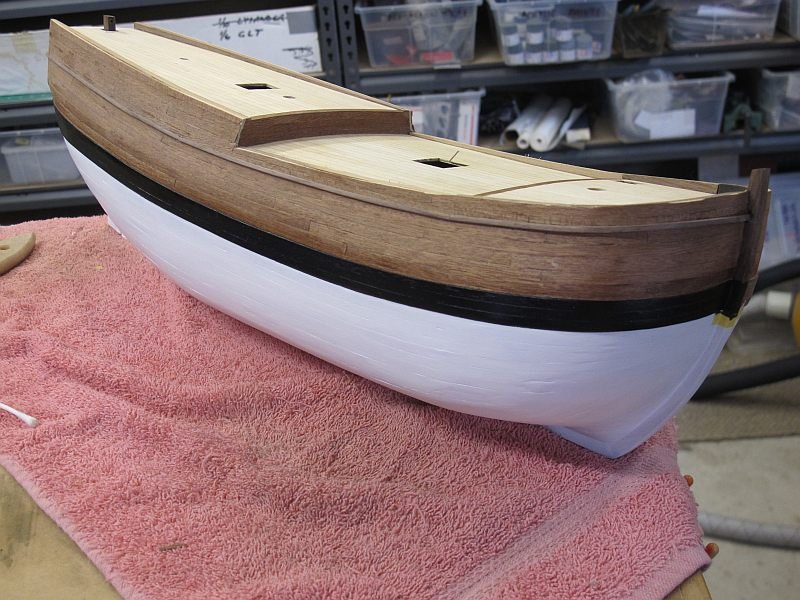
The waterline wales were masked off with Tamiya 6mm tape and Tamiya semi-gloss black painted on. I was careful to use a minimum amount of paint while doing the masked edges to minimise leakage under the tape. It worked! The tape was removed as soon as the second coat was applied. I also added the moulding that runs where the chain-plates are fitted. This had been pre-curved to fit the bow and all is well!. This piece will be masked off later and painted yellow (of some sort) along with the chain plates. I intend fitting out the hull sides with the various openings, steps etc and painting the upper blue area prior to capping the Gunwales. This will make it easier to paint the exterior blue and interior red of the gunwales. That's my plan anyway
- 111 replies
-
- 2
-
-
- artesania latina
- finished
- (and 1 more)
-
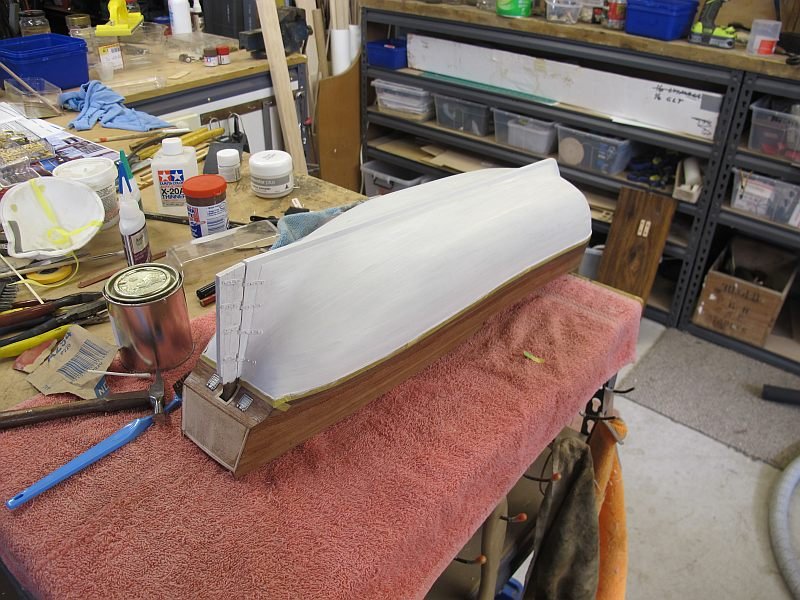
Thanks VB. Naturally it seems that a painted finish may well need a top-notch planking job to look good. Mine was a little lacking in places so I applied microscopic amounts of white filler to the offending gaps and gave Endeavour its first white undercoat. After a good sanding with 800 wet n dry, I decided the rudder should be fitted as it too is mostly white. That took a couple of hours making up and securing the hinges. The nails were given a tiny drop of thin CA to secure them. While the first coat of white acrylic on the rudder was drying, I gave the hull its first white finish coat - it'll need one more I think but although the planks look a bit uneven when viewed close-up, so does the replica full-size - it's wonderful having so many excellent pictures available on the 'net. Later this evening I should be able to apply the last white coat and remove the masking tape (6mm Tamiya). Pat

- 111 replies
-
- 2
-
-
- artesania latina
- finished
- (and 1 more)
-
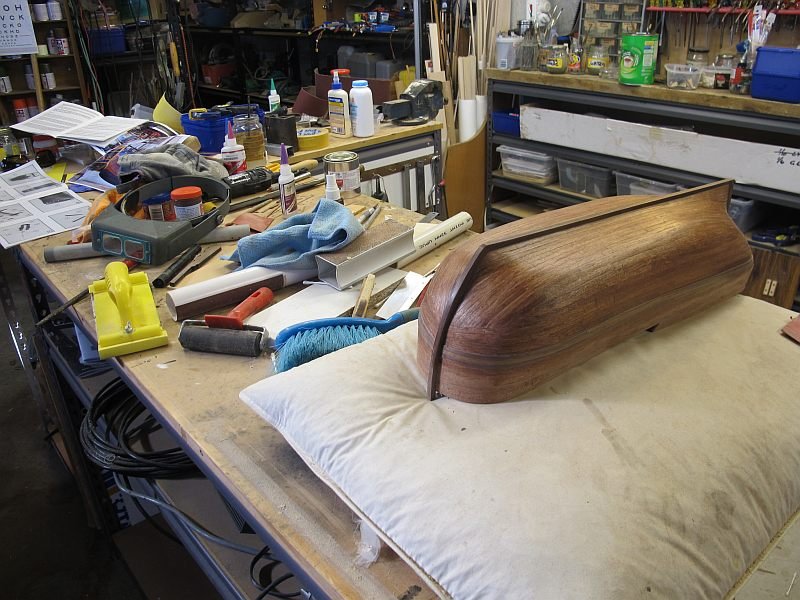
Having decided to go with a painted model, I also decided to complete the lower areas before starting to detail the top-sides. The underwater areas are white and the main waterline wales are black - on the replica. On the curved area under the transom windows are two hatches and the rudder post surround. The little cast metal hatches supplied look quite good but need to be recessed flush with the hull to look right. Suitable sized holes were chiselled into the hull and after some cleaning up, the little hatches were glued in place. This whole hatch/rudder hole area is black like the wales so will be almost invisible......... Many things look a bit rough close up but I hope the overall impression will keep me happy
-
A milestone reached! After a few days intermittent work, the hull planking is finally done A lot has been learnt, mistakes made and ideas sorted. I had decided at the outset that I'd make a painted model using the Australian replica as a guide (with some limitations) so the finish didn't have to be perfect in many areas but a lot of work needs to be done as the model is built - hull must be painted while things are accessible, what areas can be masked off while others are painted or details that need to be added before/after painting. It all makes for interesting thinking times! The timber veneer planking has been given a coat of sanding sealer/grain filler before any cracks or gaps were filled with water-based dark wood filler. All was sanded back, given another coat of sealer, sanded again and the lower hull is ready for paint (white). I should also make and fit the rudder as it will be mostly white too as are the rudder hinges. And so a few small details on the lower transom need to be fitted and then the water-line wales and lower transom can be painted a black colour. I will use Tamiya acrylics because I have them (I use them a lot on rc aircraft). So that's the plan - I may even stick to it (after a good bench tidy-up) Pat

- 111 replies
-
- 4
-
-
- artesania latina
- finished
- (and 1 more)
-
Thanks Chris - I had wondered about contact adhesive but its consistency makes it a little messy to work with. I'll trial it on something simpler one day. The joy of gel CA is no clamps or other temporary fixing devices BUT it has a lot of drawbacks - particularly if the planks is not accurately placed first time , I also spray the rear of the strip with CA accelerator which makes life exciting at times. I use CA almost exclusively on my rc model aircraft and am used to its peculiarities! On with the planking - Pat
-
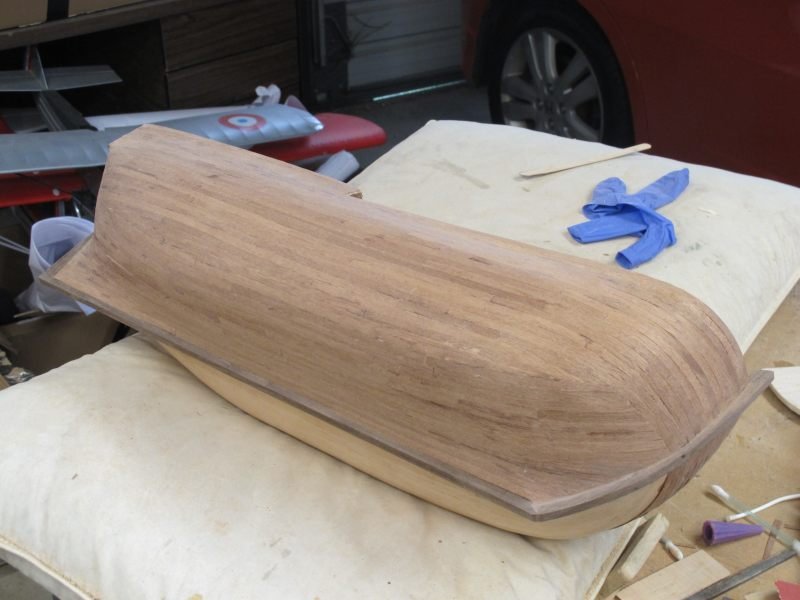
Learn by trial and error! My long-passed Dad always said "the man who never made a mistake, never made anything" - I have made plenty of mistakes here but am learning fast The second veneer skin is about 3/4 completed - quite a steep learning curve but good fun never-the-less. Since I am experimenting with CA as the adhesive I had and extra bit of learning to do. The very porous 'mahogany' soaks up the CA very easily and transfers some of it to my fingers - makes for interesting language at times. But we are getting there. The lower hull below the main strakes will be painted white and the strakes themselves, black. As per the replica ship. So some gap-filling is permissible. Whew! I added the strakes now to help define the areas and provide a little 'bench rash' protection. Just the second side to finish and the most challenging part will be done. Until I start the rigging........ The bottom wood has been given a coat of lacquer-based grain filler - shows up the bits that need attention! Pat
- 111 replies
-
- 5
-
-
- artesania latina
- finished
- (and 1 more)
-
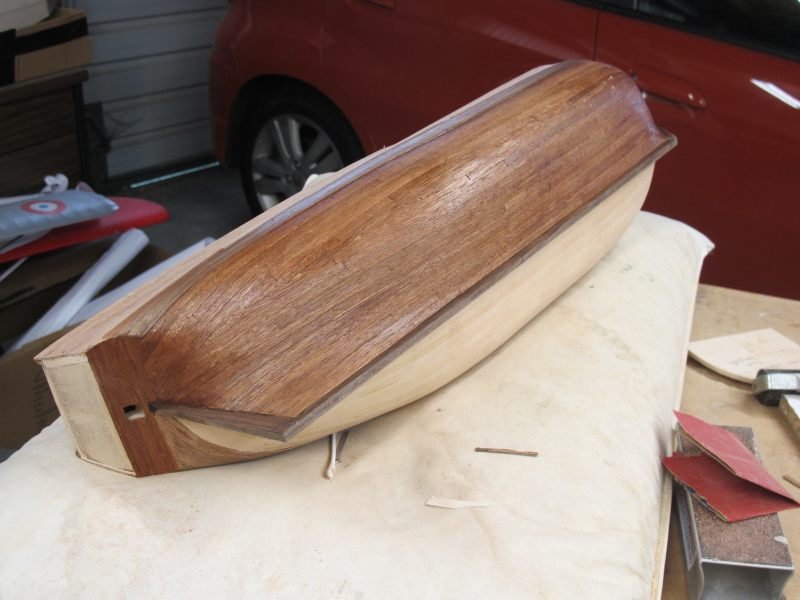
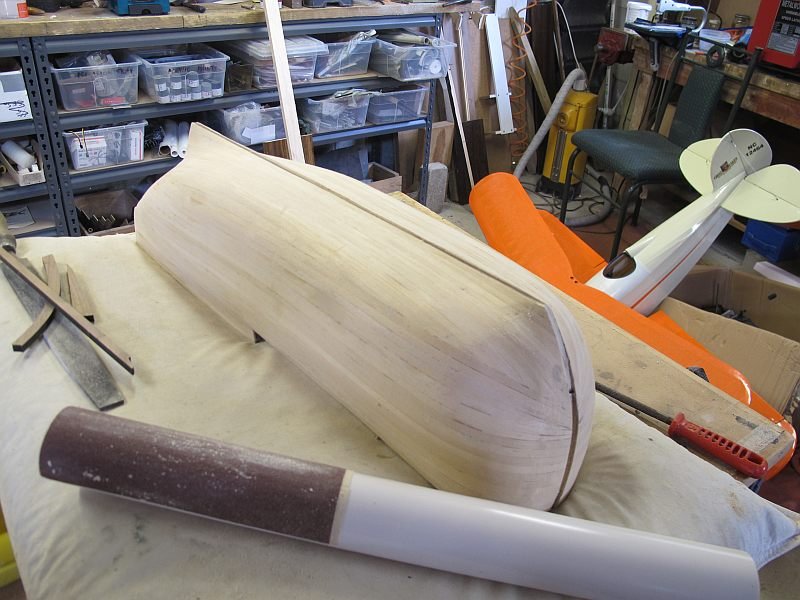
It's been a few days since my last post - exactly the time taken to get the first planking layer fitted. Almost to my satisfaction! It was a great learning curve - about trying to get the flow of the planking right, the importance of having the frames well prepared and learning a few things that would have made life a little easier I hadn't bothered shaping the moulded wood bow part to match the stem part and so had a lot of laborious filing and Dremelling to get the groove to match the supplied Walnut parts - but all is now done amid much muttering..... I made a handy tool for the concave areas, from some 120 grit belt-sander paper stuck to a piece of !.5" tube with double-sided tape. Worked a treat. It would be a good idea also, to pre-cut the rudder post holes perhaps slightly undersize - it was not an easy task afterword. But everything else went mostly as per plan. I have not used any filler anywhere so something must have worked! Still to be fine-sanded but most of the smaller inconsistencies of the planking have been removed and it is almost ready to ponder the critical final .6mm Mahogany veneer. Scary I'm wondering if a neater job might result if the stem, keel and rudder post parts might be better fitted now so the finished planking can be carefully laid up to these parts for a better fit.....more pondering. Time for some gardening now but all seems to be progressing OK - sometimes in spite of the written instructions. Thank heavens for MSW foruns and the wonderful builds I can consult Pat ps. As usual, I got the photo sequence back-to-front! I'll work it out one day!

- 111 replies
-
- 4
-
-
- artesania latina
- finished
- (and 1 more)
-
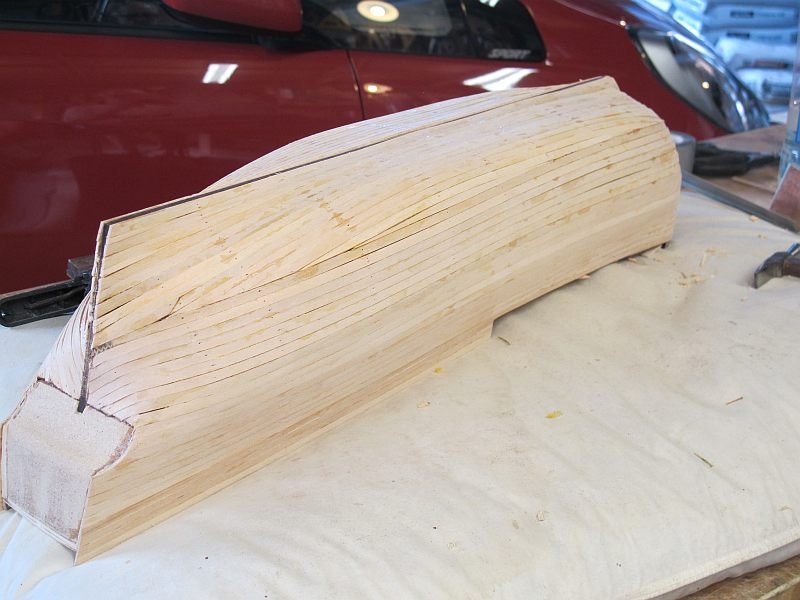
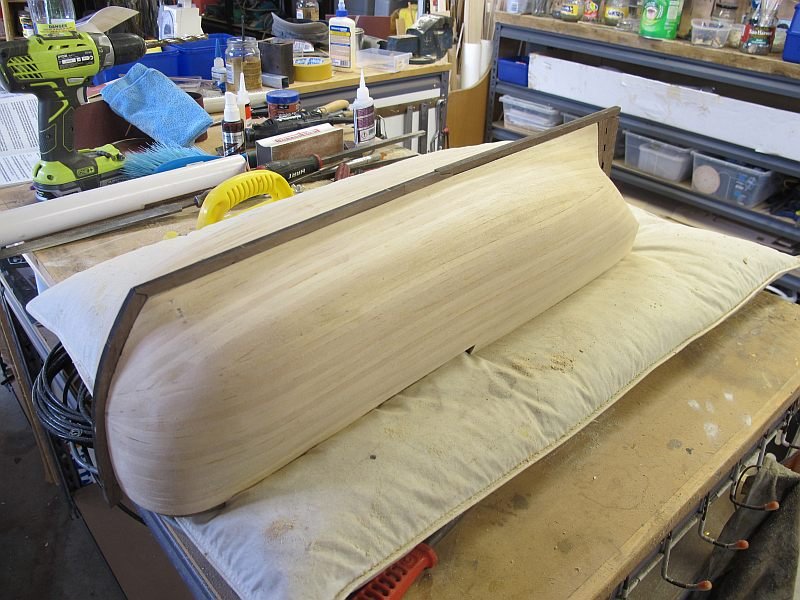
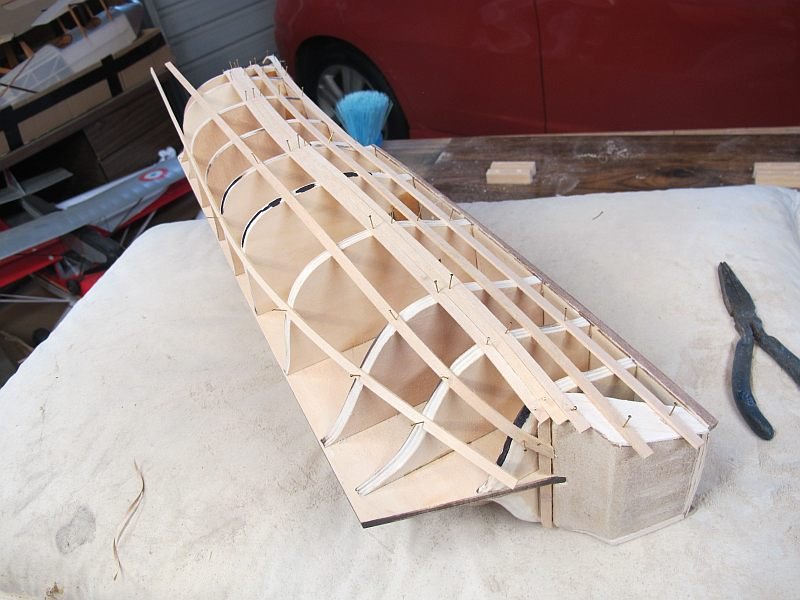
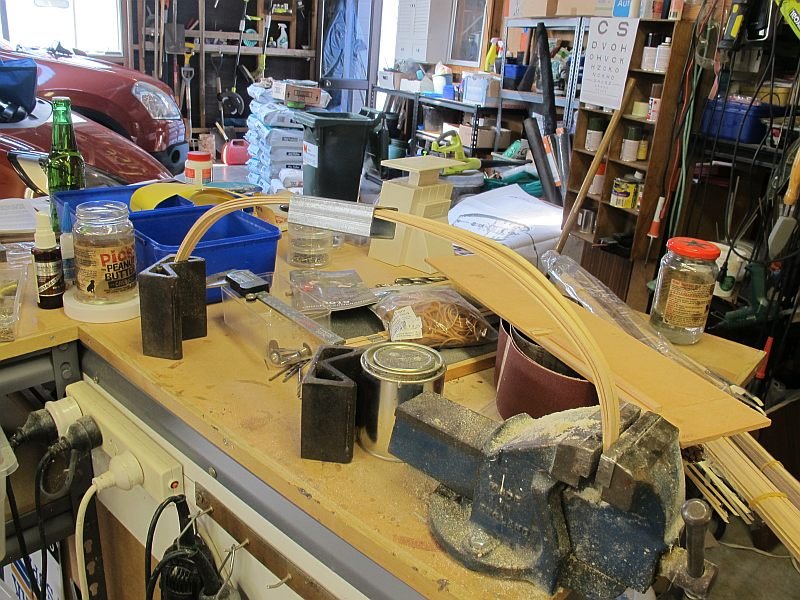
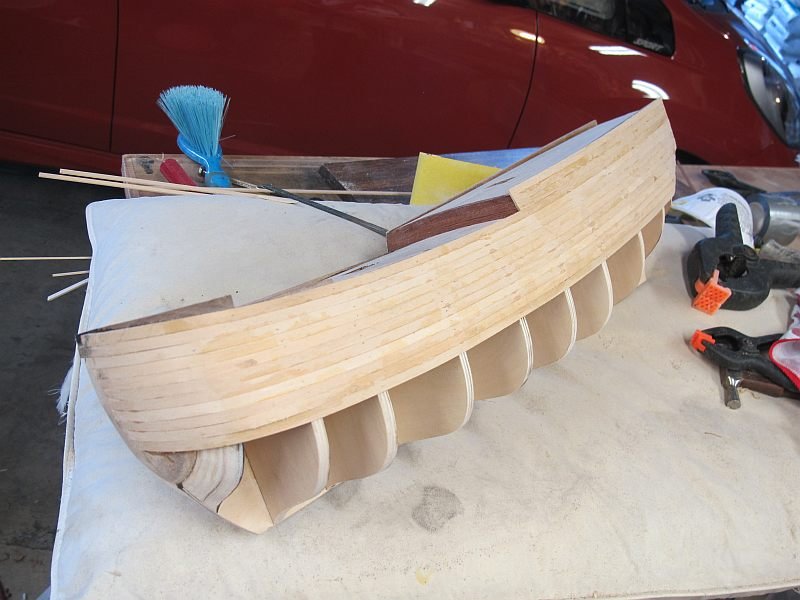
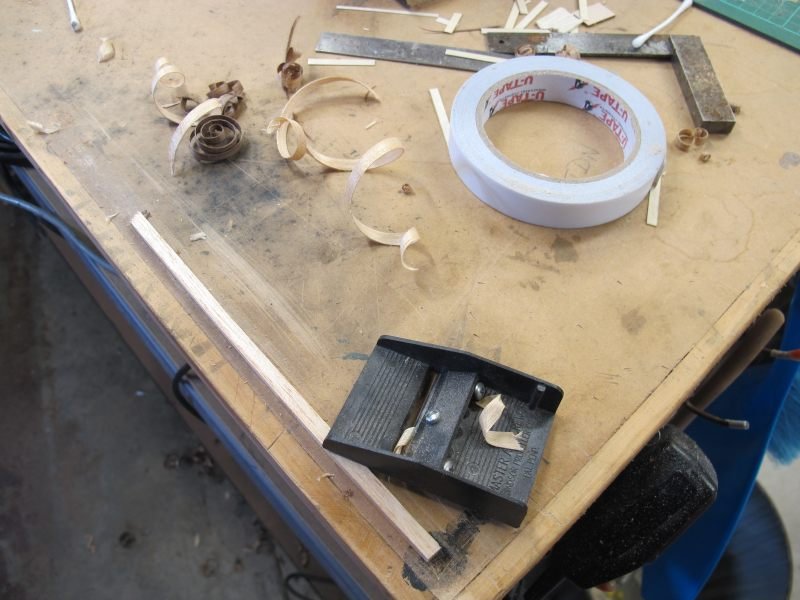
Yeeehaaa! The planking has been started. It's great having looked at so many builds on this and other forums and knowing that despite the apparent roughness of the first planking layer, it can always be cleaned up ready for the final veneer layer. I did lots of trial runs with the pine strips to identify uneven formers and make sure the pre-curved strips could be coaxed arounf the tight bends - esp. around the rather confusing transom area. I think I have it sussed out now. I ploughed on get the first run of 11 planks in place with only a small amount of muttering......each plank had a thin bead of Titebond brushed along it edge and was attached to each frame with a drop of med CA plus a temporary nail. The CA had cured by the next plank and so one line of nails slowly worked its way down the hull - all to be removed after I paused for a break. It will be dead easy to sand as the hard CA is only between plank and frame - sanding should be easy(ish). Now I'll do the other side to the same level...... Pat Pic #3 shows the various test runs to identify wayward frames Pic #2 is my rather crude pre-curving 'jig' after soaking in water for 10 minutes' Pic #1 is the current status
- 111 replies
-
- 3
-
-
- artesania latina
- finished
- (and 1 more)
-
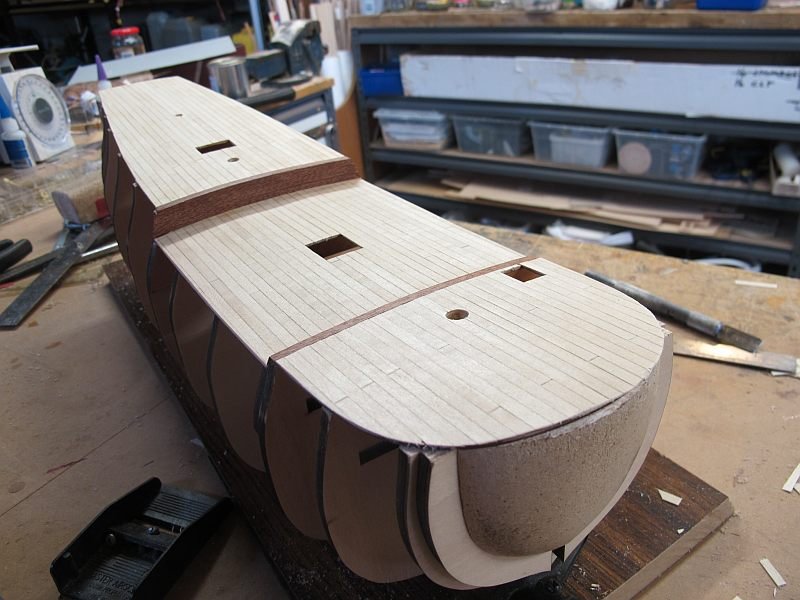
A few steps forward! The various Walnut Gun'wales were added after chamfering the underside to match the deck camber. I also tapered them to very close the shape they will need to be later. The frames have had their first heavy shaping using 80 grit sandpaper on long sanding bar and with a piece of flexible wood to verify the planking lines, things are looking OK (albeit a bit rustic at this stage. The rather crude moulded wood-fibre block at the stern is a bit lacking in accuracy but I added a couple of balsa sides to give me a better feel for the required shape - I am getting a better understanding of the flow of the planking even though it is only the underplanking I dealing with. A length of the pine first layer was nailed in place to verify the all-important sweep of the hull lines - it's almost right - I'll do some adjustment tomorrow. Even an ex-collier had some aesthetic charm I did the planing/shaping of the gunwales by sticking the wood to the bench with double-sided tape while shaping. The tape holds things perfectly without clamps etc. Pat

- 111 replies
-
- 4
-
-
- artesania latina
- finished
- (and 1 more)
-
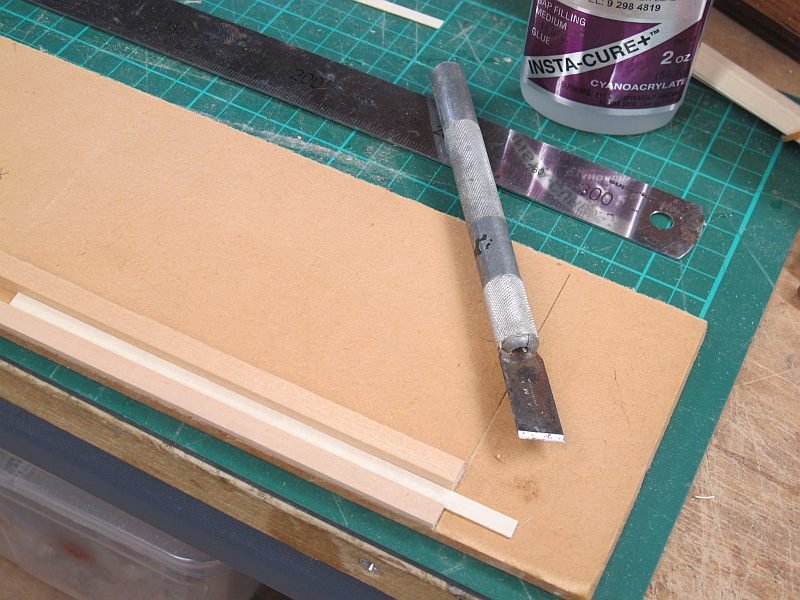
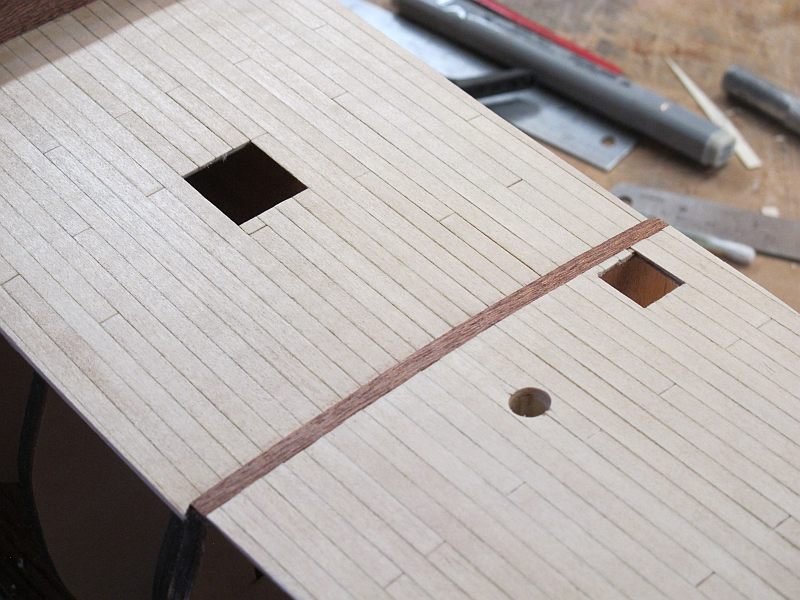
Back again after some serious research (of other people's work) plus a look at the deck of the replica. I noted others who had been unhappy with aspects of their experiments and then devised my own methods using the best of what I could find I made up a simple jig to help me cut planks to length and square - a wood guide and a square guide for an Xacto 1/2" chisel blade. I liked the caulking effect that some have used but wanted it fairly subtle so tried some Artists spirit-base makers until the shade was as desired - a light grey. Each plank was cut and the edge given a VERY delicate wipe with the pen. The result suits me but for some maybe a bit pale. After setting a centre 'board' down the centre, the shorter planks were glued in place using a series of fictitious deck beam positions marked on the ply base. The medium CA glue was run as a narrow bead down the centre of where the plank fitted using just enough so nothing squeezed out from underneath - no mess and a few seconds held in place then on the next one. The whole deck was done in about 3 hours. After cutting the various holes, some 180 W&D paper got it all smooth and the decks received a coat of sanding sealer and rubbed back again.I'll give it one more before any staining later. Now I get to see about the dreaded Gunwales which need tapering to match the lines of the hull......after the lower hull is planked. Hmm. Can it be made easier? Pat

- 111 replies
-
- 3
-
-
- artesania latina
- finished
- (and 1 more)
-
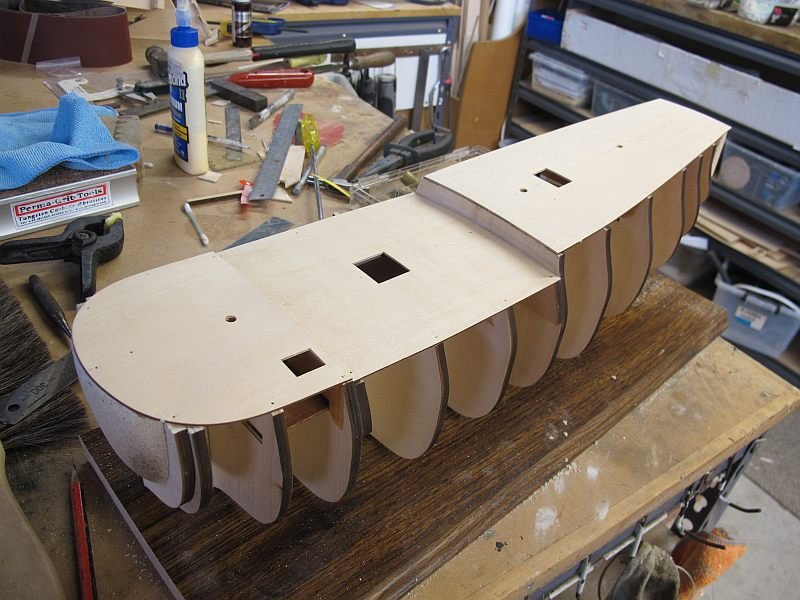
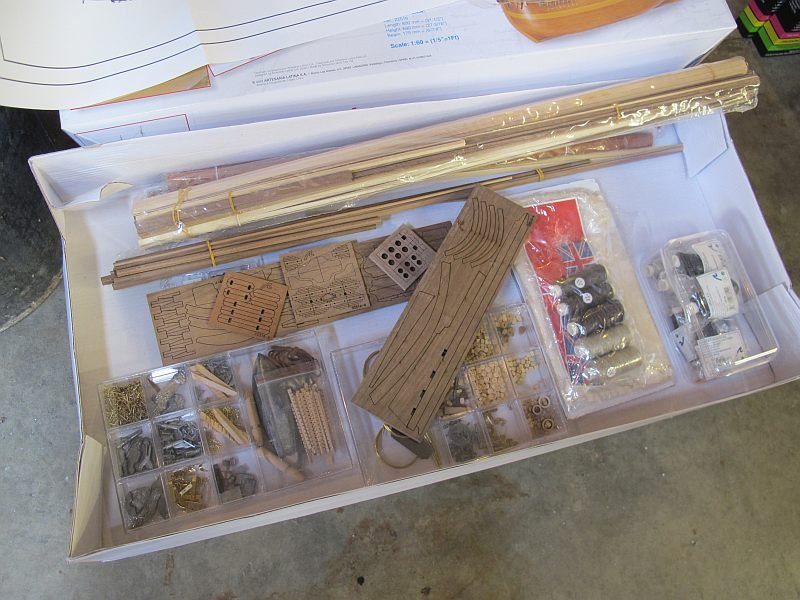
Hi Mark and thanks for the words of encouragement! Although I was born NZ, I had lived in Oz for nearly 50 years, returning to my home town after my wife's passing a few years ago. So, I have a foot both sides of the ditch I had a day off (it is Sunday) and got stuck into the Endeavour and now, after barely a day's work, am ready to study the plans and other build logs to get my head around the deck planking. Importantly I must differentiate between Boxwood, Walnut, Mukali, Sapelle, and Samba ! I think Samba is the light-coloured strip intended for the first hull planks and Mukall is a fine-grain pale strip for the deck planking. Maybe there is a resource guide somewhere showing these woods? The hull at deck level got a very thorough sanding to bring everything the required level and the ply deck panels were glued/nailed in place. All good. I show the box contents - all parts are laser-cut and very tidy and well-fitting (so far) so I'm fairly happy with the progress. For those wondering, I have used CA (med) almost all my aeromodelling life and am a strong advocate of it. Titebond is used sparingly when parts need some fudging time to get aligned. Whether CA is OK for finish planking remains to be seen - it my soak through the .6mm strips? Anyway, enough for tonight while I study a book on planking and try and recognise a gun'wal or waterway, nibbing strake or wales..........etc Pat
- 111 replies
-
- 4
-
-
- artesania latina
- finished
- (and 1 more)
-
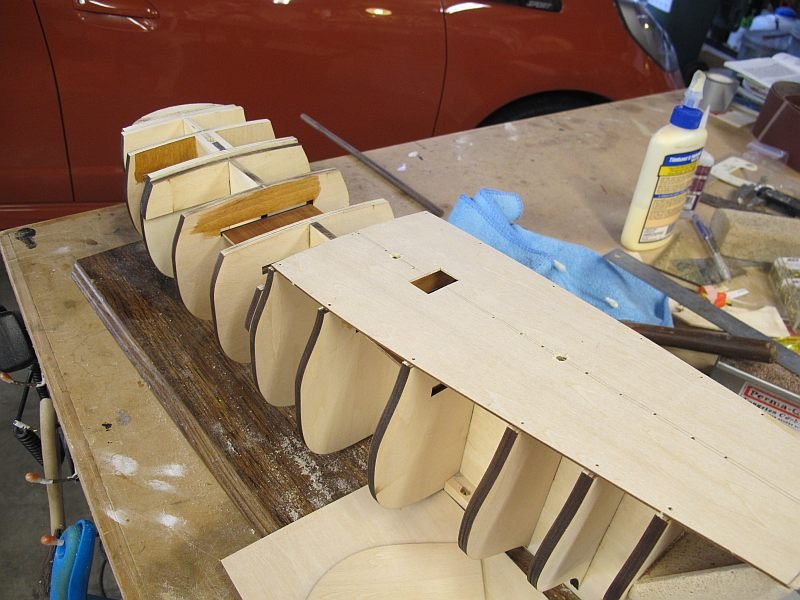
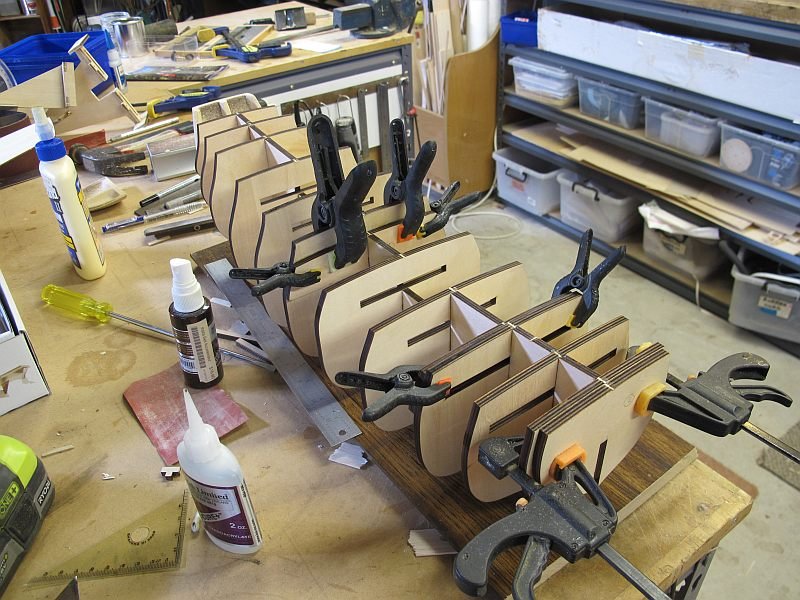
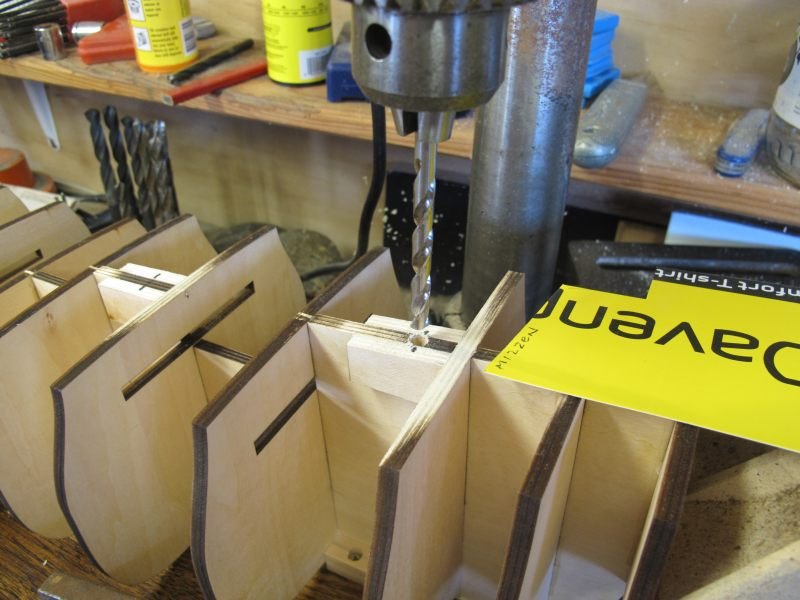
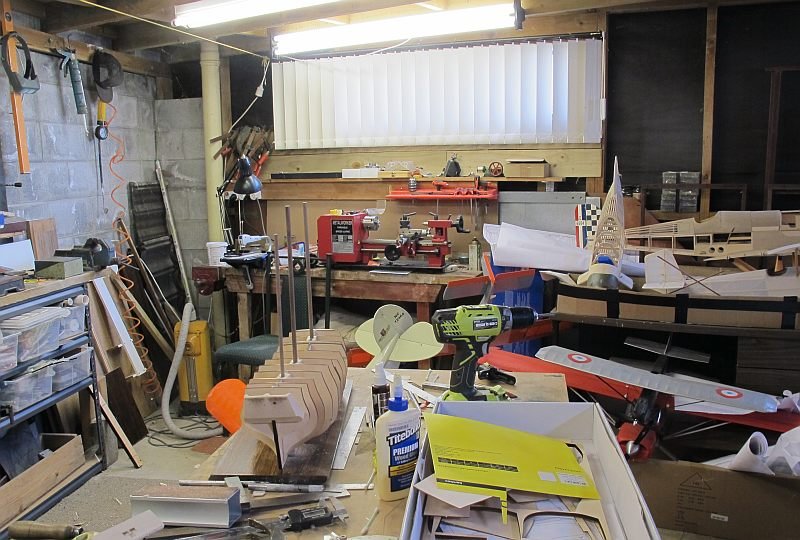
Hello from New Zealand - my first post although I've been a casual browser for many years! I recently decide in my older (wiser?) years to build a tall ship and as the Endeavour is a well known vessel in NZ and Australian history, decided this was it. The A.L. kit was available locally (NZ) and here I am. I'm a reasonably experienced modeller (scratch built rc scale aircraft - mostly WW1) and have a fairly well equipped, but untidy, workshop. My hope is that I can ask questions of the vastly more experienced crowd here on MSW. My hope is that this model can be completed, unlike my previous attempt (another story). So, enough waffle - I scanned the kit's contents, found the expected generally OK quality, have read a few builds on other forums and decided to perch here and share my stumbling beginnings. First, a base was built to secure the 6mm ply keel to while the 6mm frames were all fitted squarely, and the decking pondered. I also marked out and pre-drilled the mast holes using card angle guides and my small drill-press to ensure the lower mast sections were all lined up! I'm looking forward to some relaxing fun! Pat
- 111 replies
-
- 6
-
-
- artesania latina
- finished
- (and 1 more)