modeller_masa
-
Posts
950 -
Joined
-
Last visited
Content Type
Profiles
Forums
Gallery
Events
Everything posted by modeller_masa
-
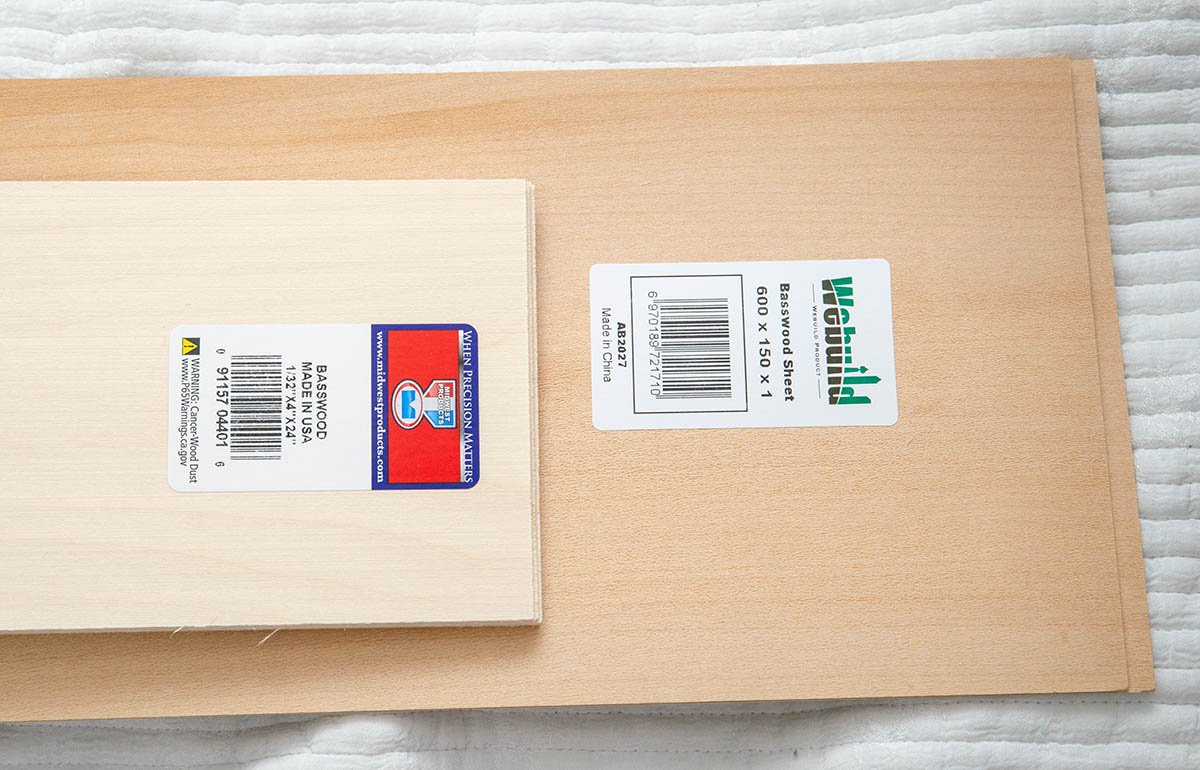
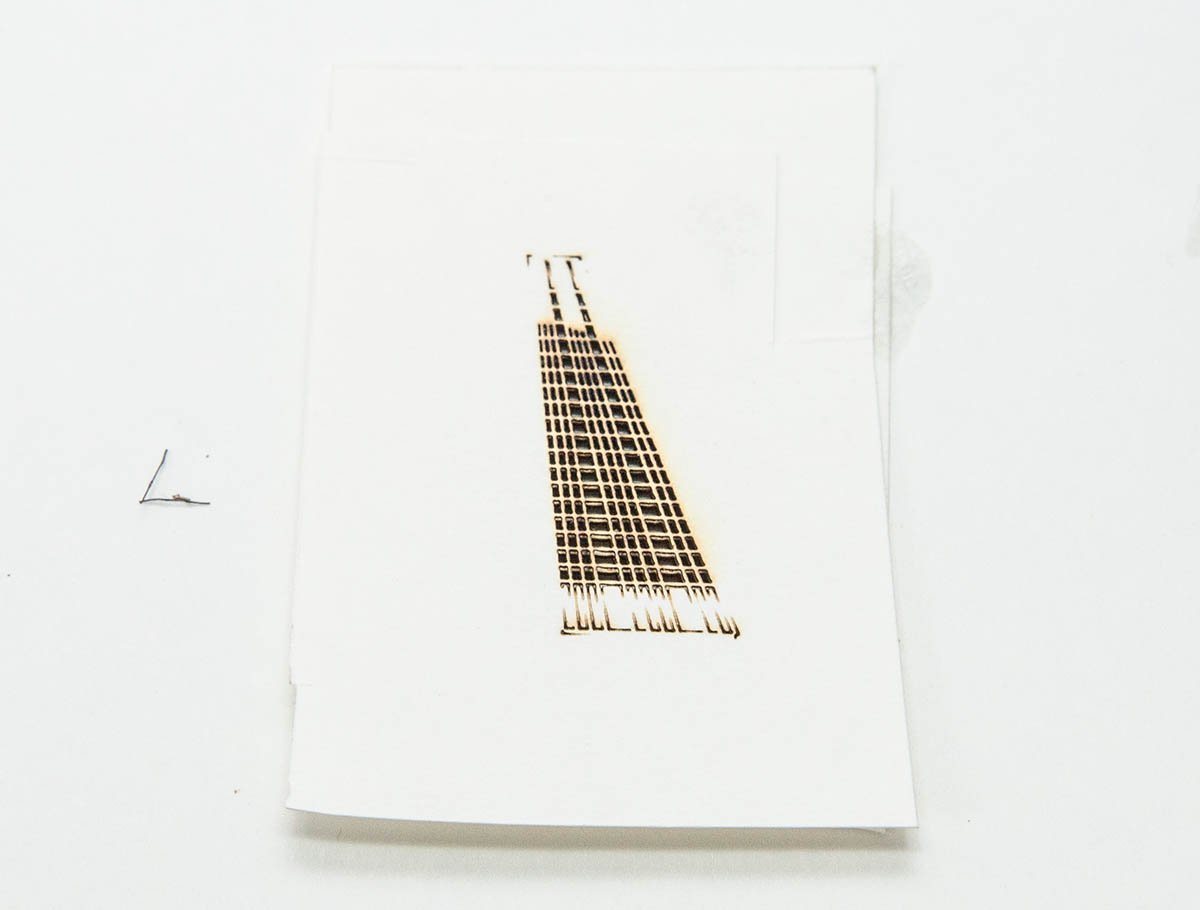
I made the line tapes using powerpoint. It's minimum scale is 0.01mm, so it is more accurate than human hand. Also, don't hesitate to make planks. You can buy additional 1/32 basswood sheet at anywhere.
- 13 replies
-
- 1
-

-
- half hull planking project
- NRG
- (and 1 more)
-
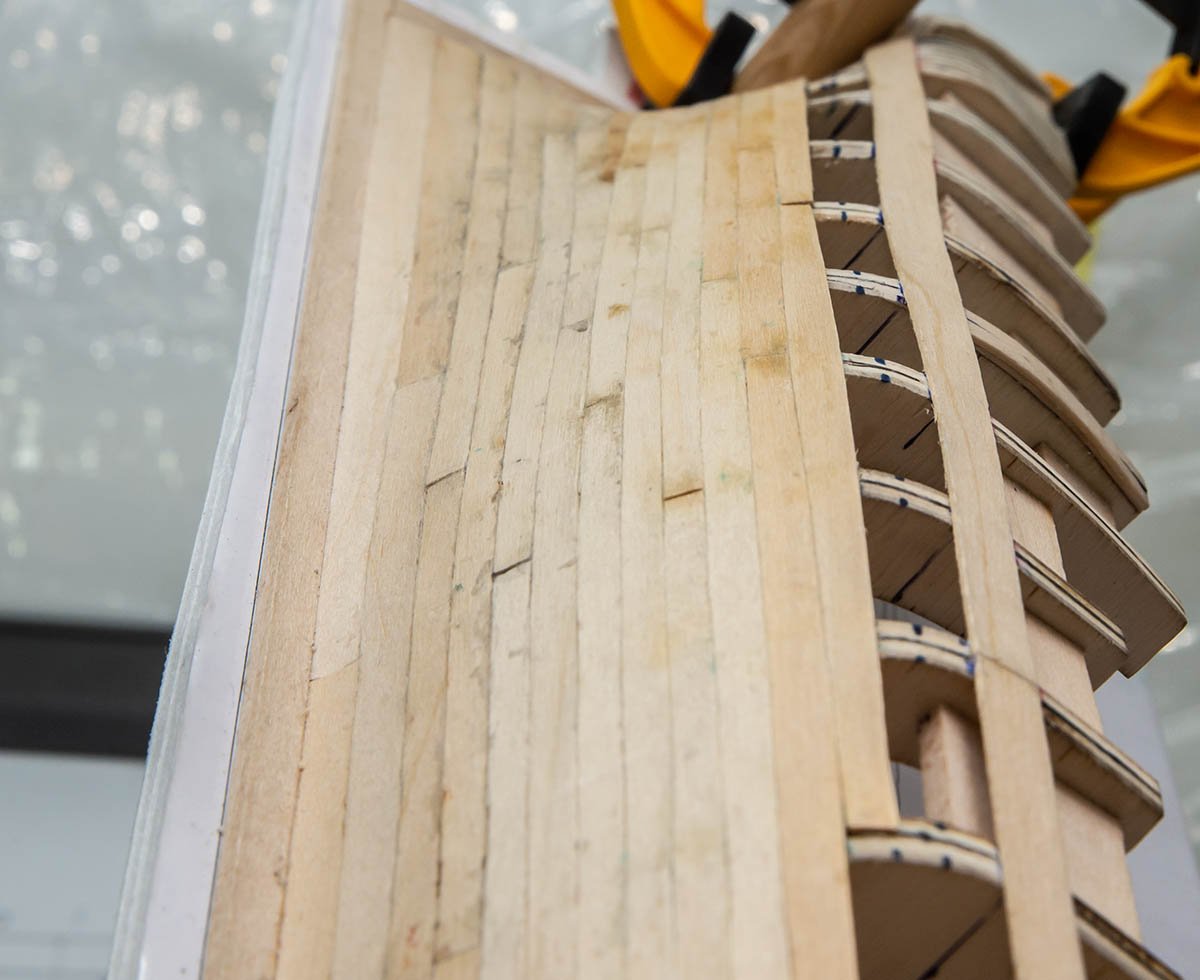
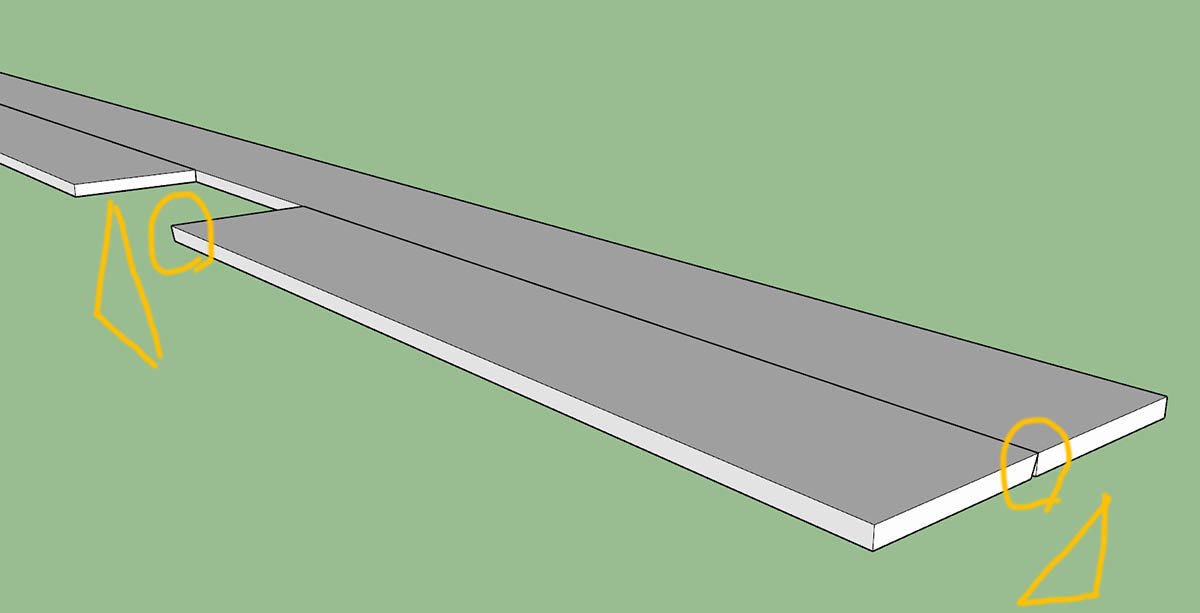
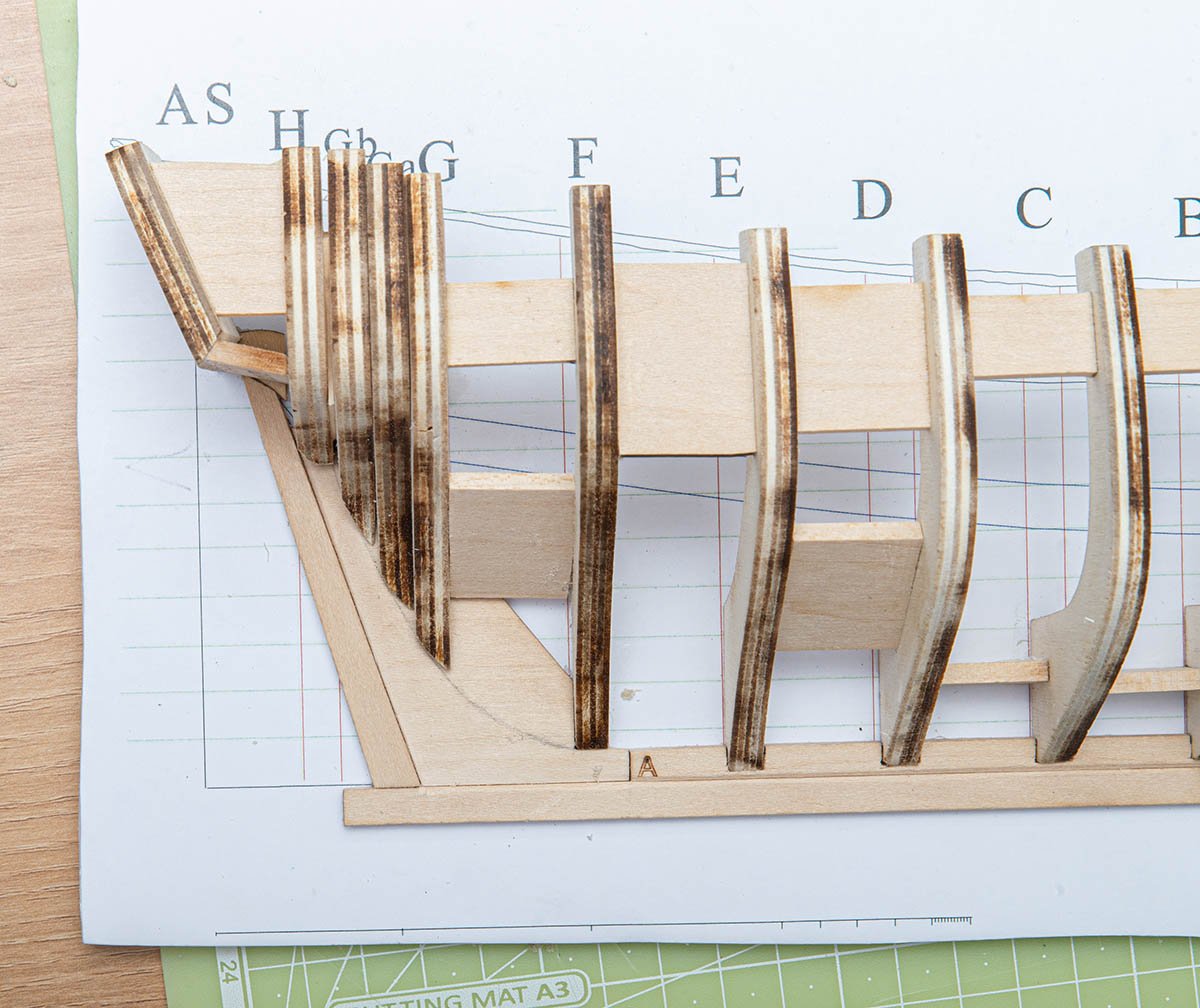
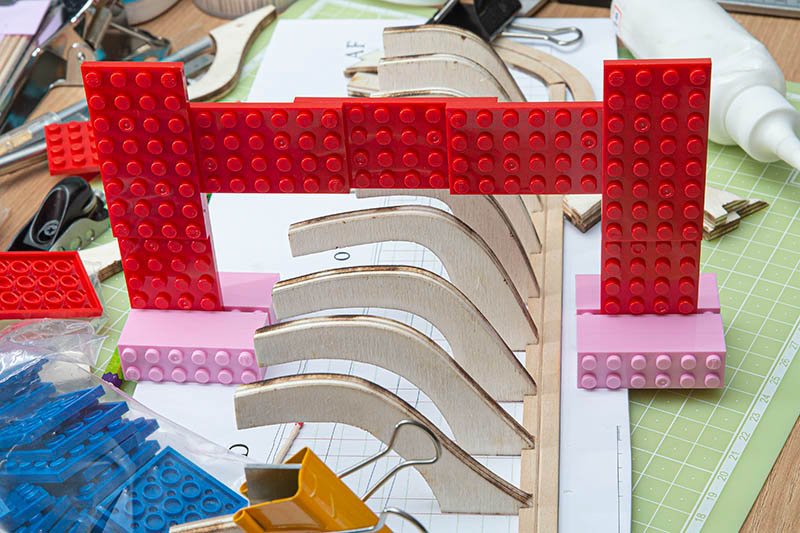
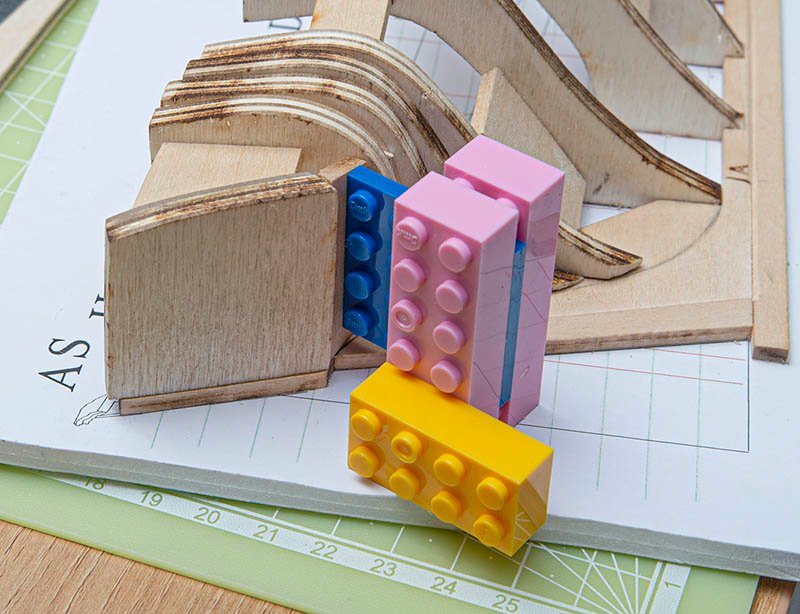
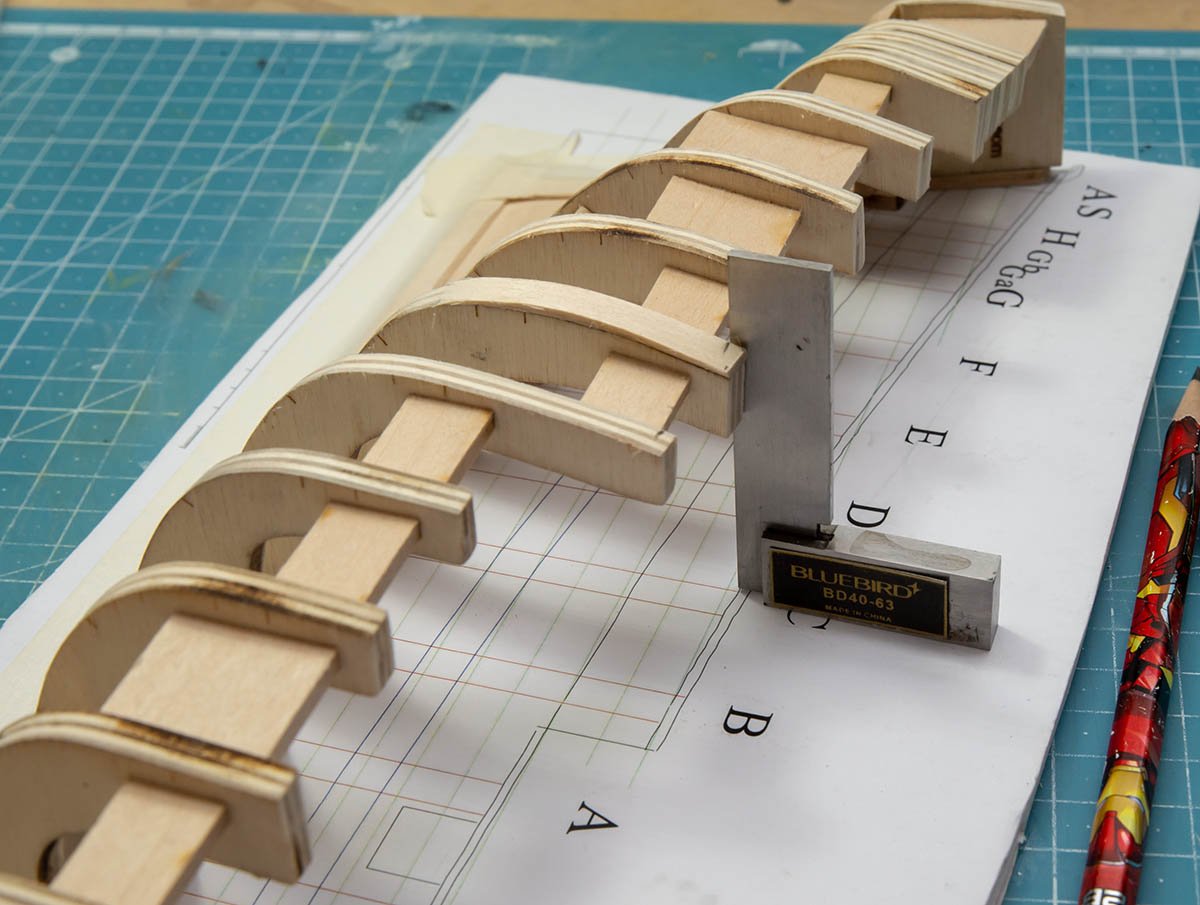
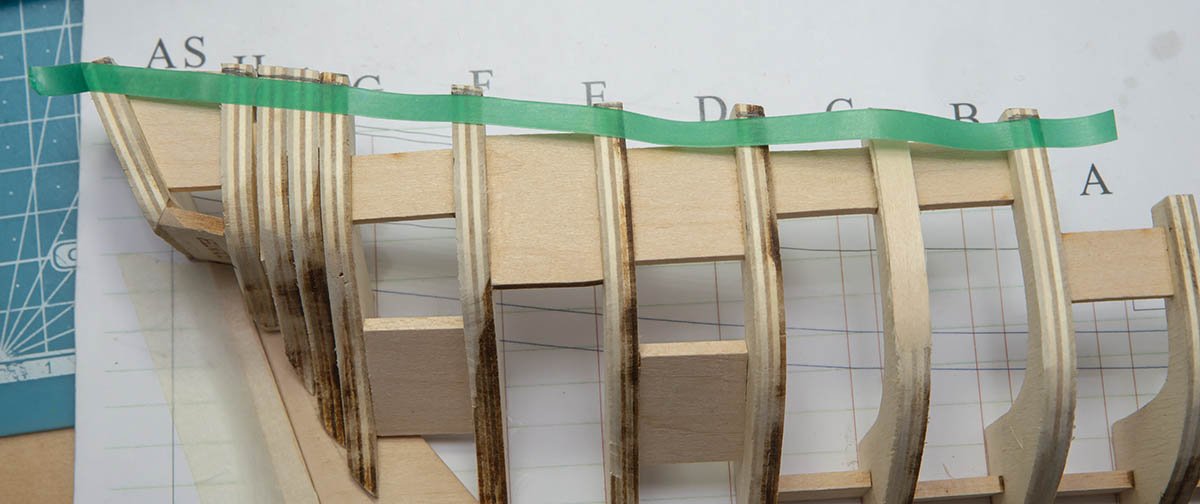
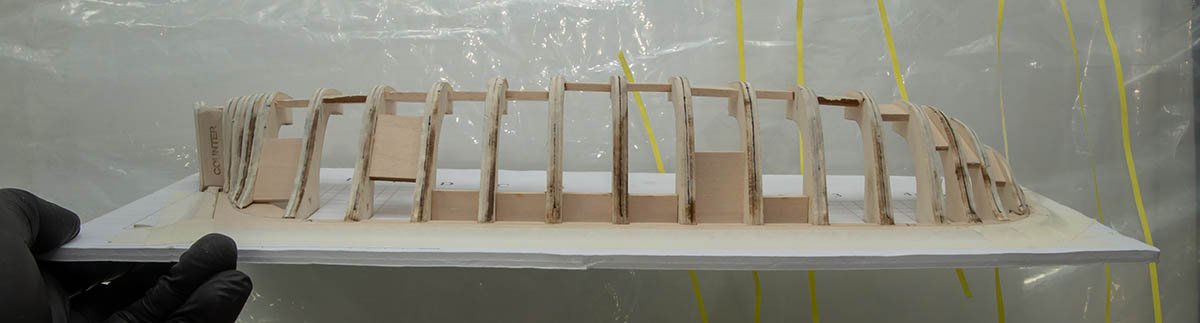
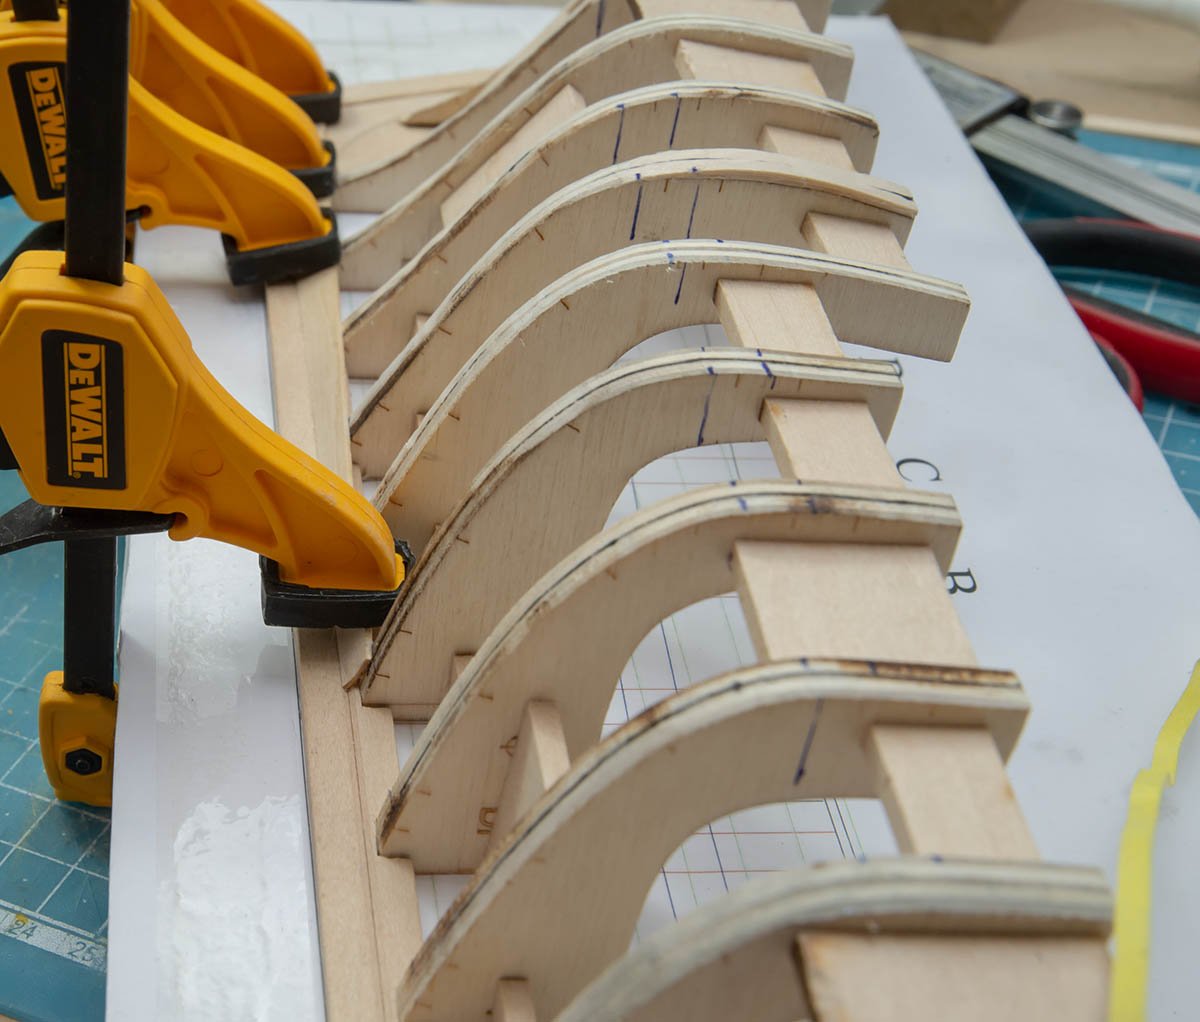
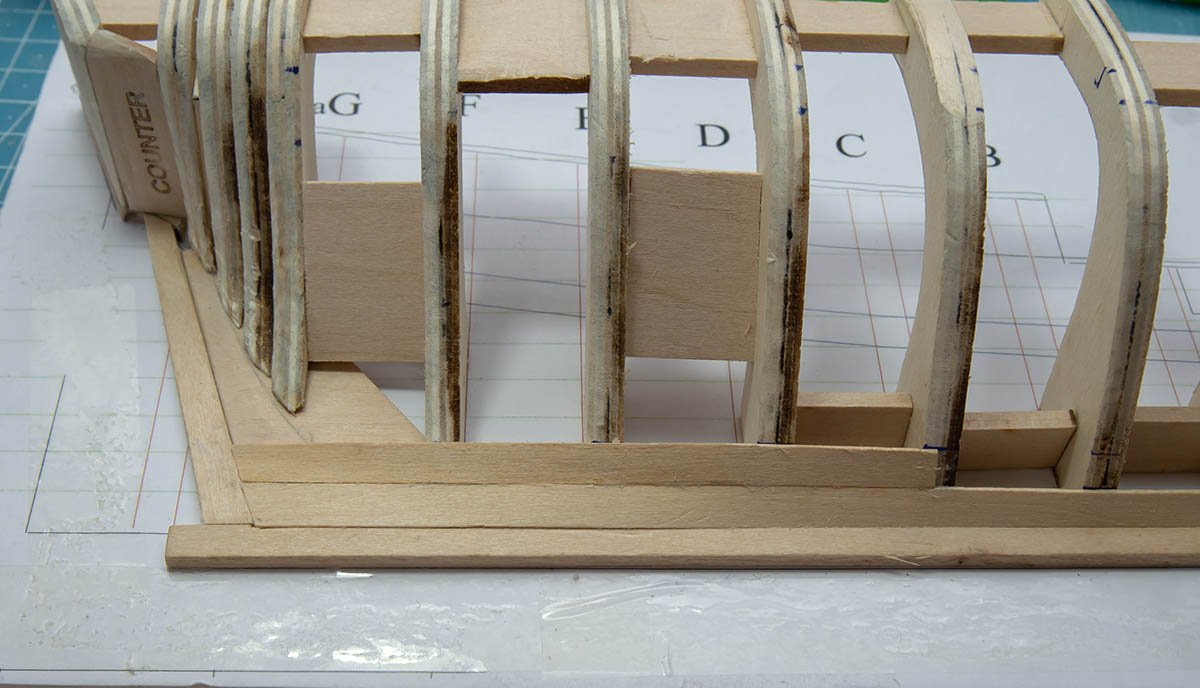
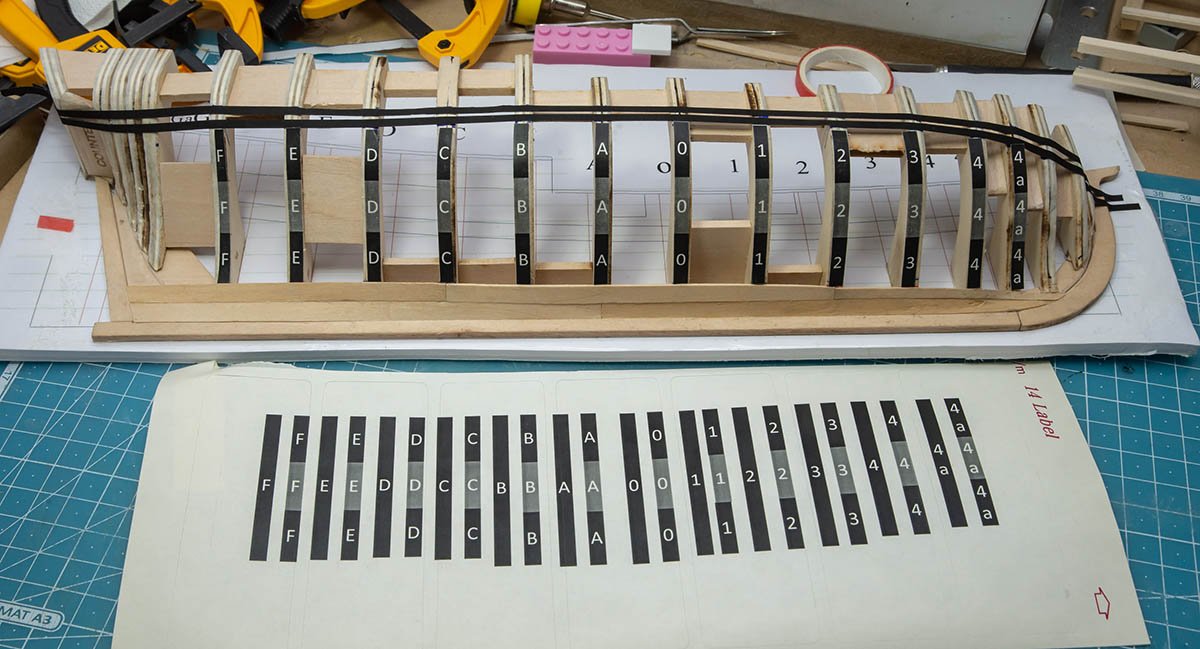
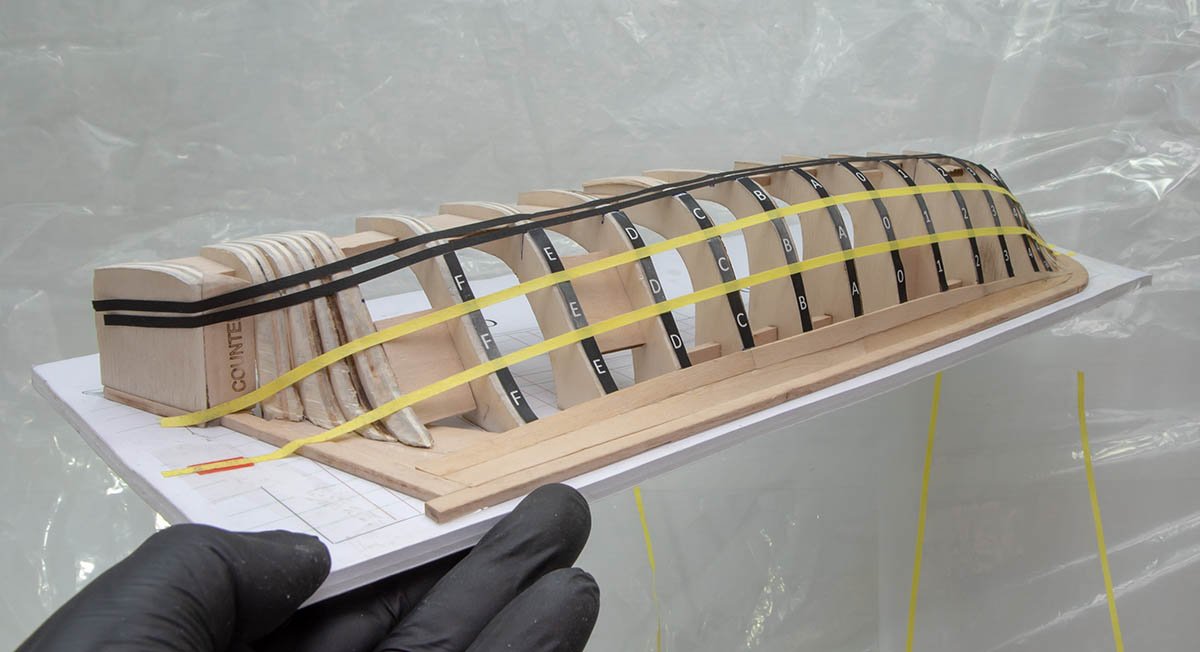
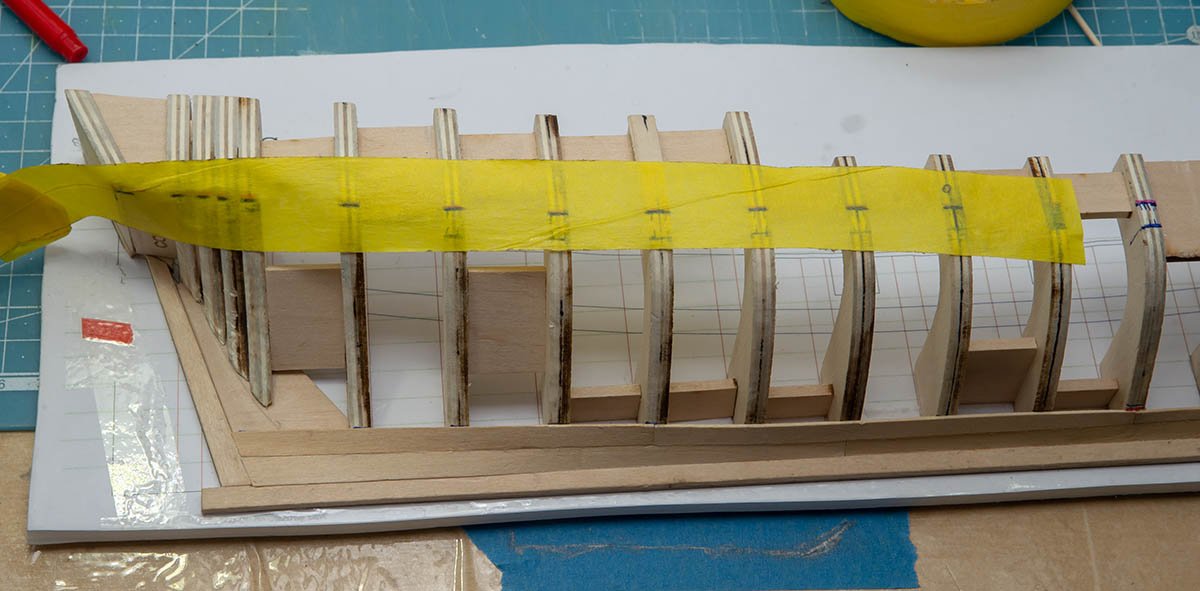
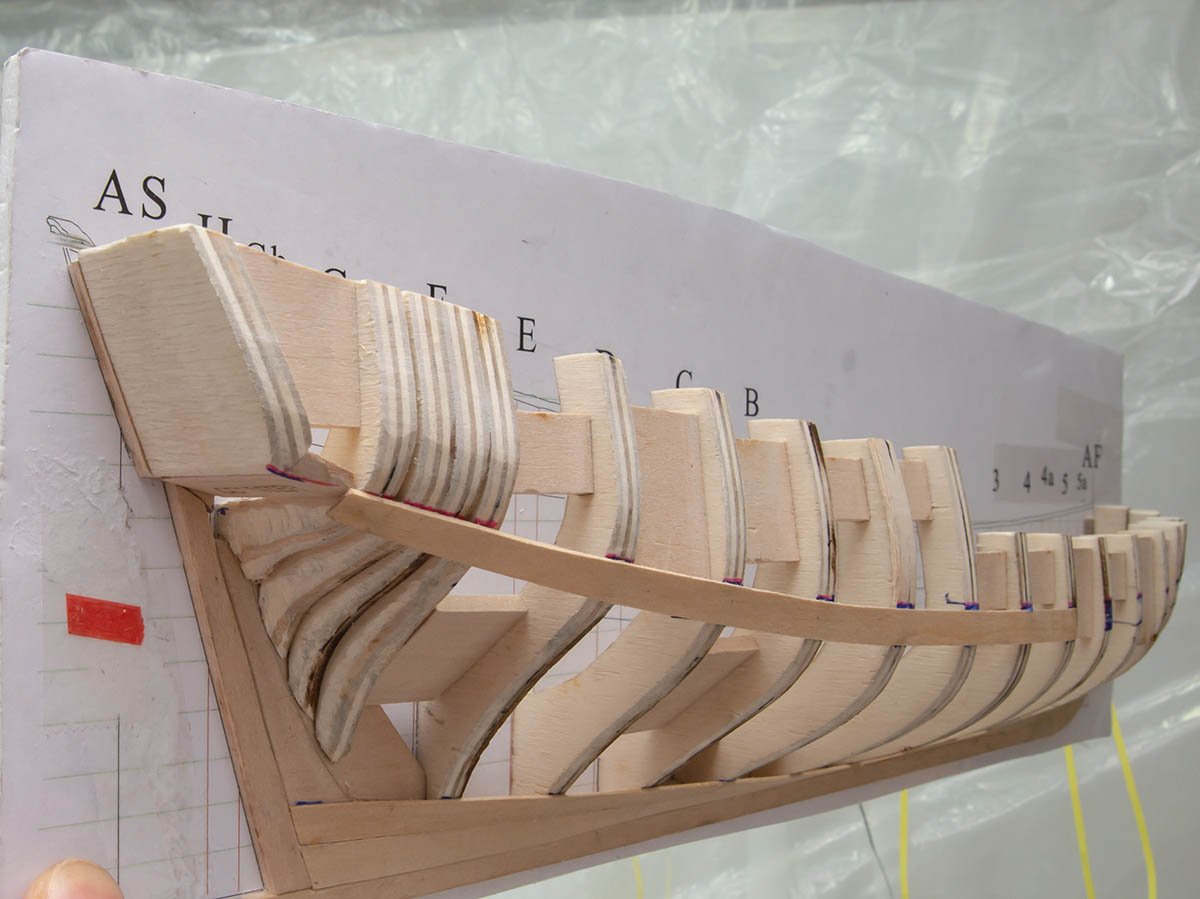
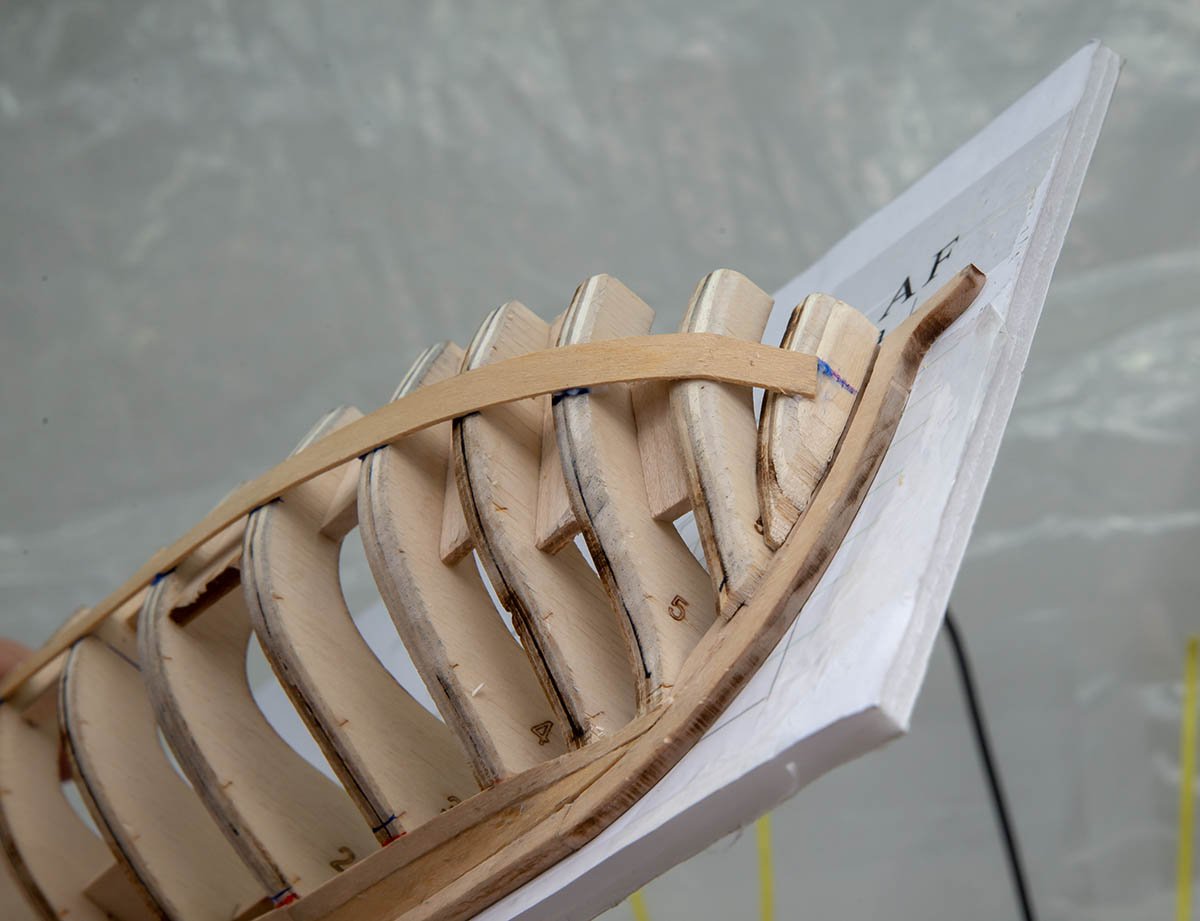
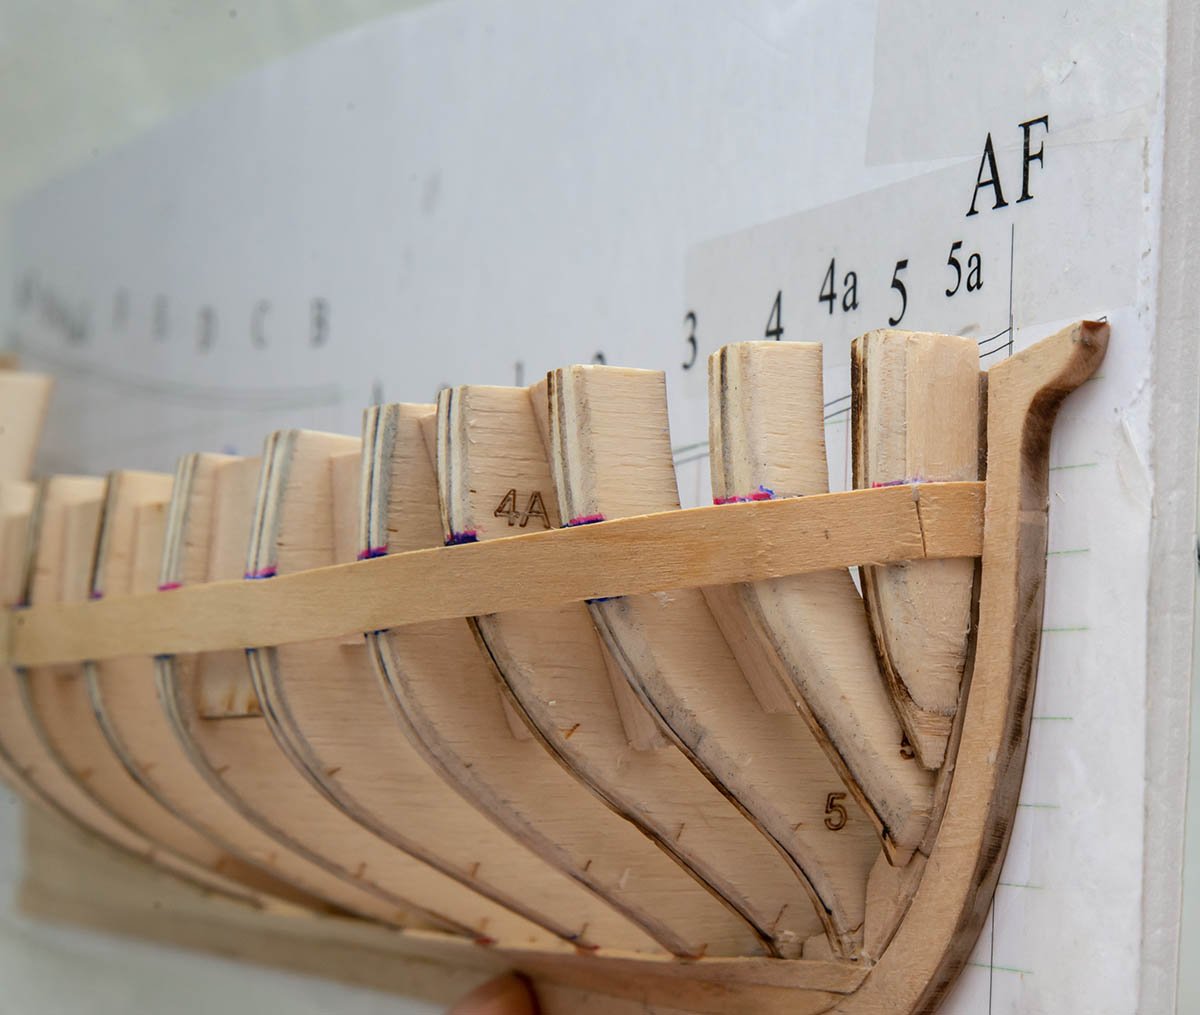
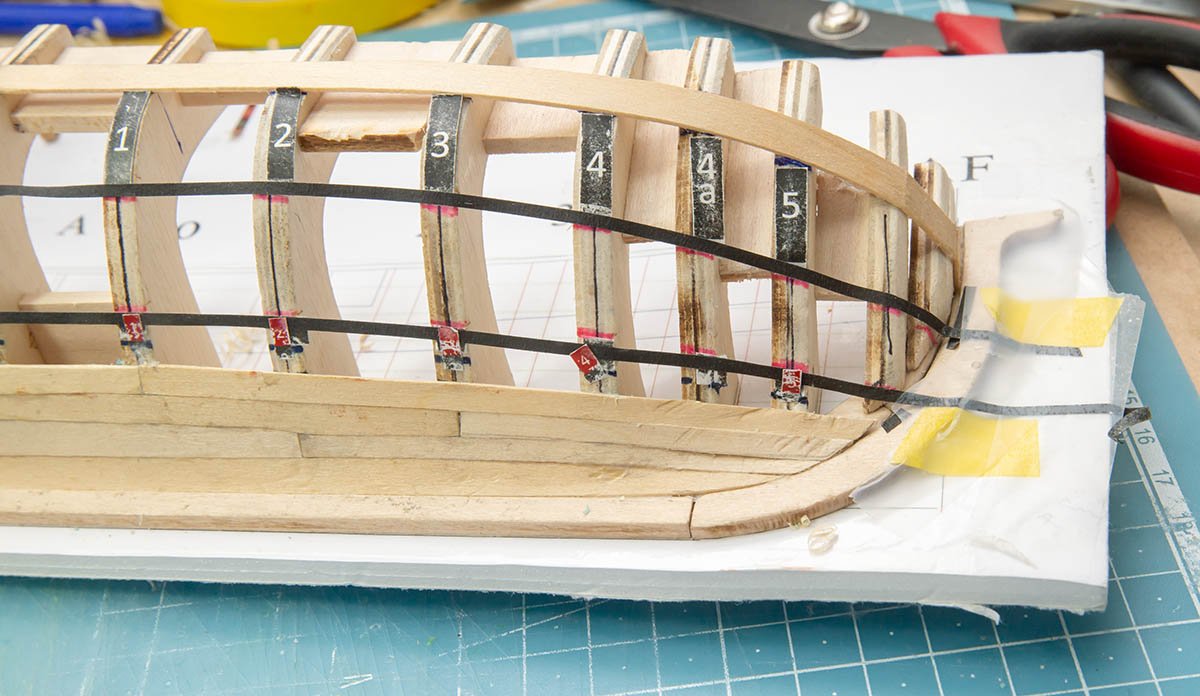
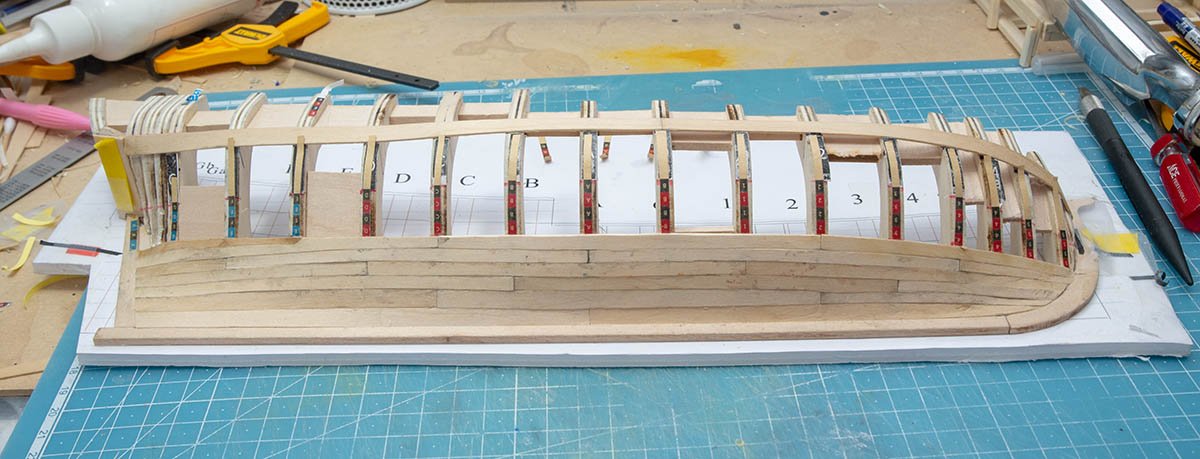
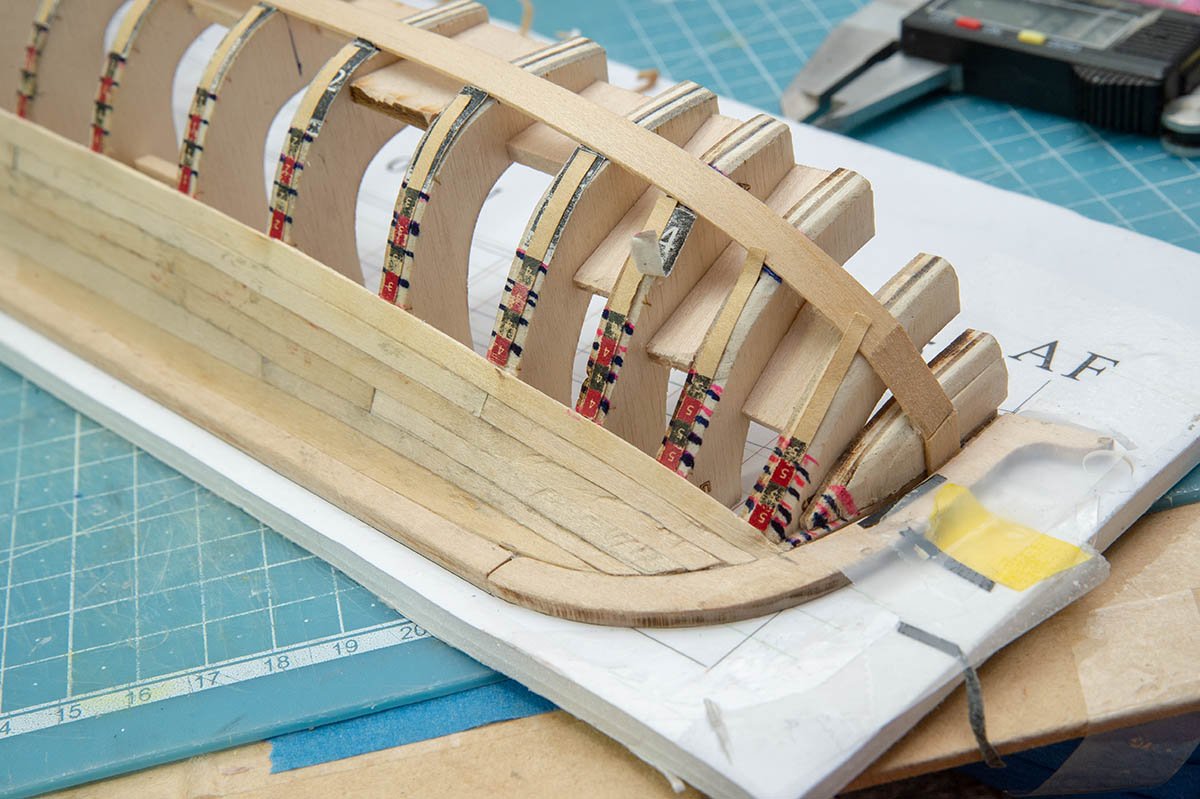
As I progress more planks, gaps between planks are smaller than before. My method is giving a slight slope to an edge of a new plank. It makes more consistant looking surface and less light leaking. But I'm not sure this is the best way yet... In addition, each line of planks are not looking good in my opinion. All of the planks tend to be slightly wiggly... I would say that the biggest reason of the issue is that wrong hull fairing and inaccurate cutting, but fixing the issue is too difficult for newbie. I think filling spaces between frames with balsa wood and making a fish shape hull rather than a frame-bone shape may help to get a proper hull fairing lines more easily for newbie.
- 13 replies
-
- 6
-
-
- half hull planking project
- NRG
- (and 1 more)
-
Hello, Mikeredroom. It is fascinating to hear that someone started this beautiful kit. I look forward to your project how it will be different from my job. Please make a new post and make people to concentrate on your project. If you leave a comment like @mikeredroom or hyperlink of my article, people can compare yours with mine. 👍
- 75 replies
-
- 10
-
-
http://www.hobbyworld-usa.com/Store/index.php?id_product=9610&controller=product Unfortunately, Both large and small building slip from Hobbyzone is out of stock. (I got a back-ordered mail from the shop.) Instead of it, I found an another building slip by Ukraine company. https://www.ebay.com/itm/254100199778 (LMG BB-09 Sailboat building berth) It covers hull up to 750mm, and has a rotation function like the big size building slip. It has higher price ($100) and exterior is not durable more than the Hobbyzone made. (Thinner wood panel with relatively inaccurate laser cutting.) I ordered one because I was curious about the contents and its structure. They are also selling similar berth for plastic airplanes and battle ship models. Most of them look not that useful, but their challenges are interesting.
-
- 4
-

-
-
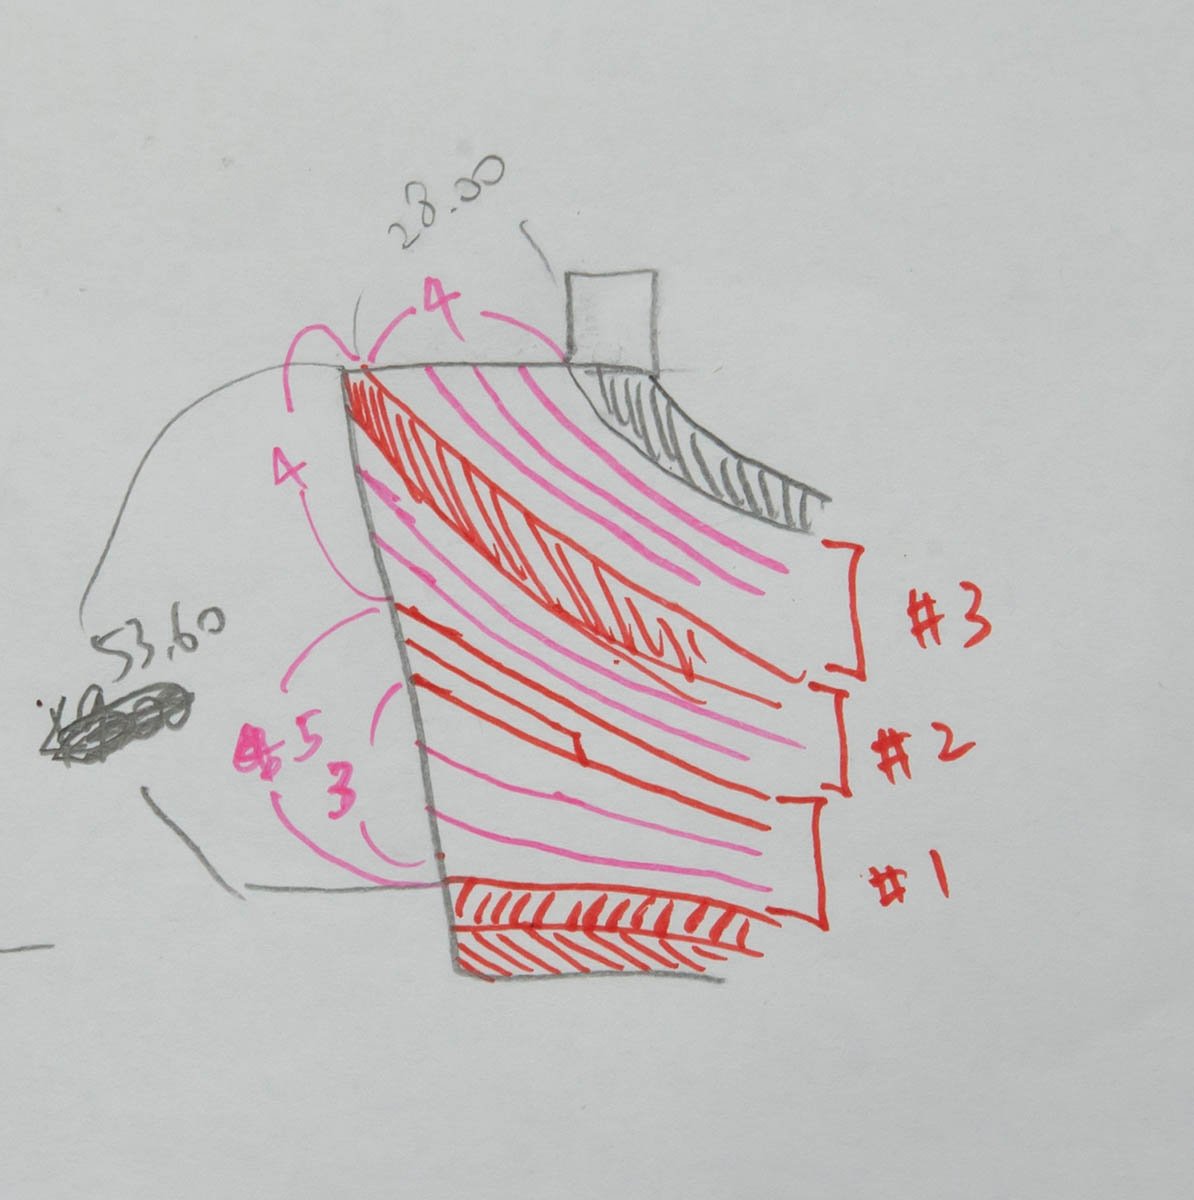
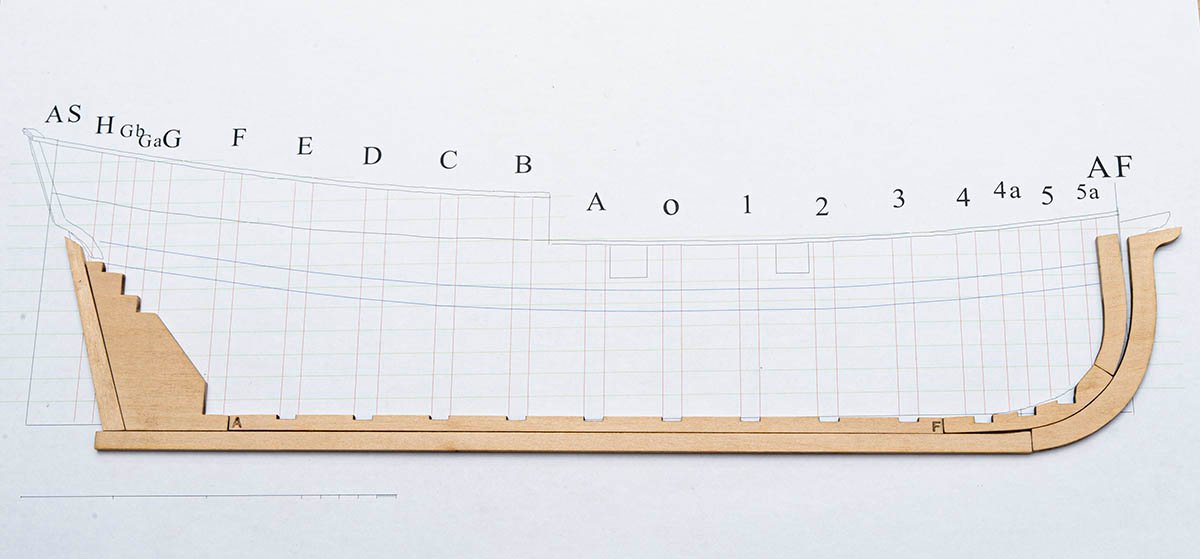
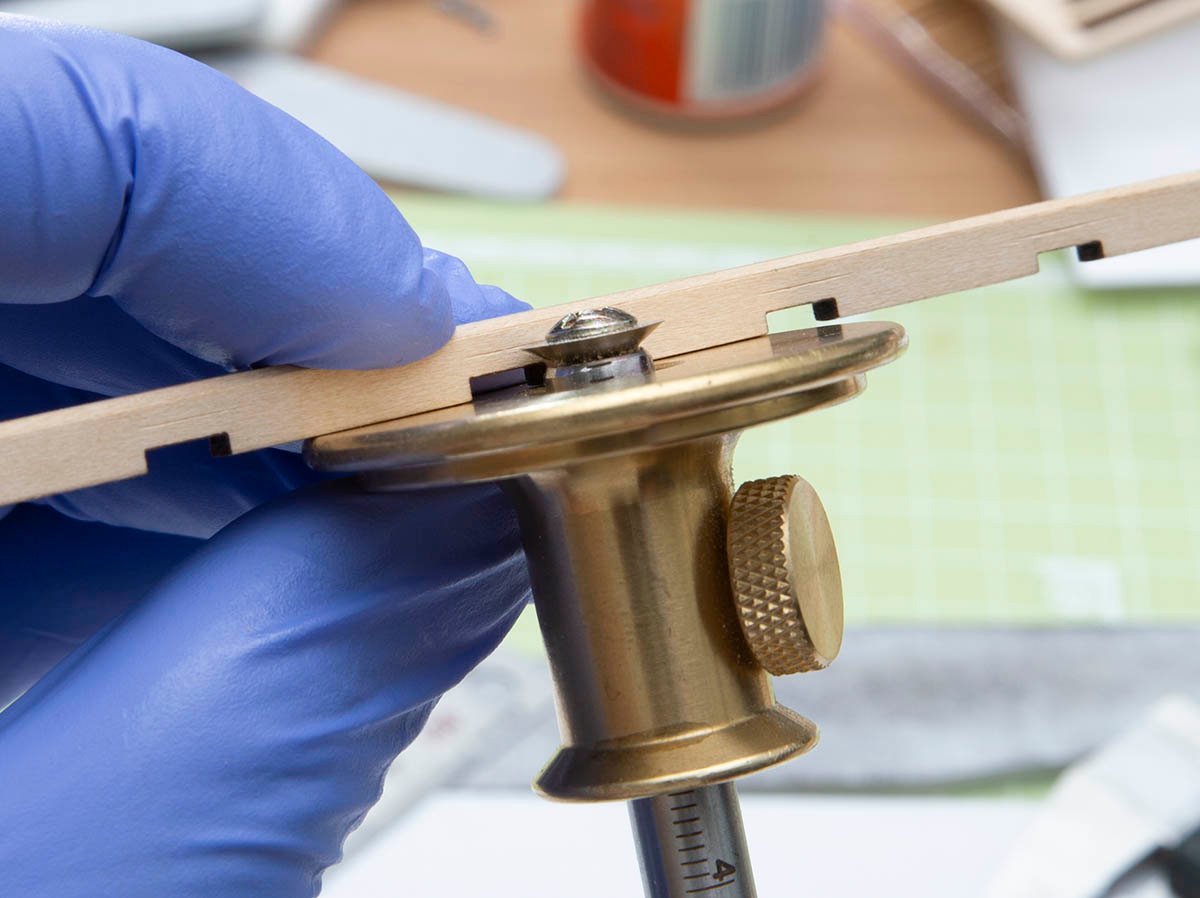
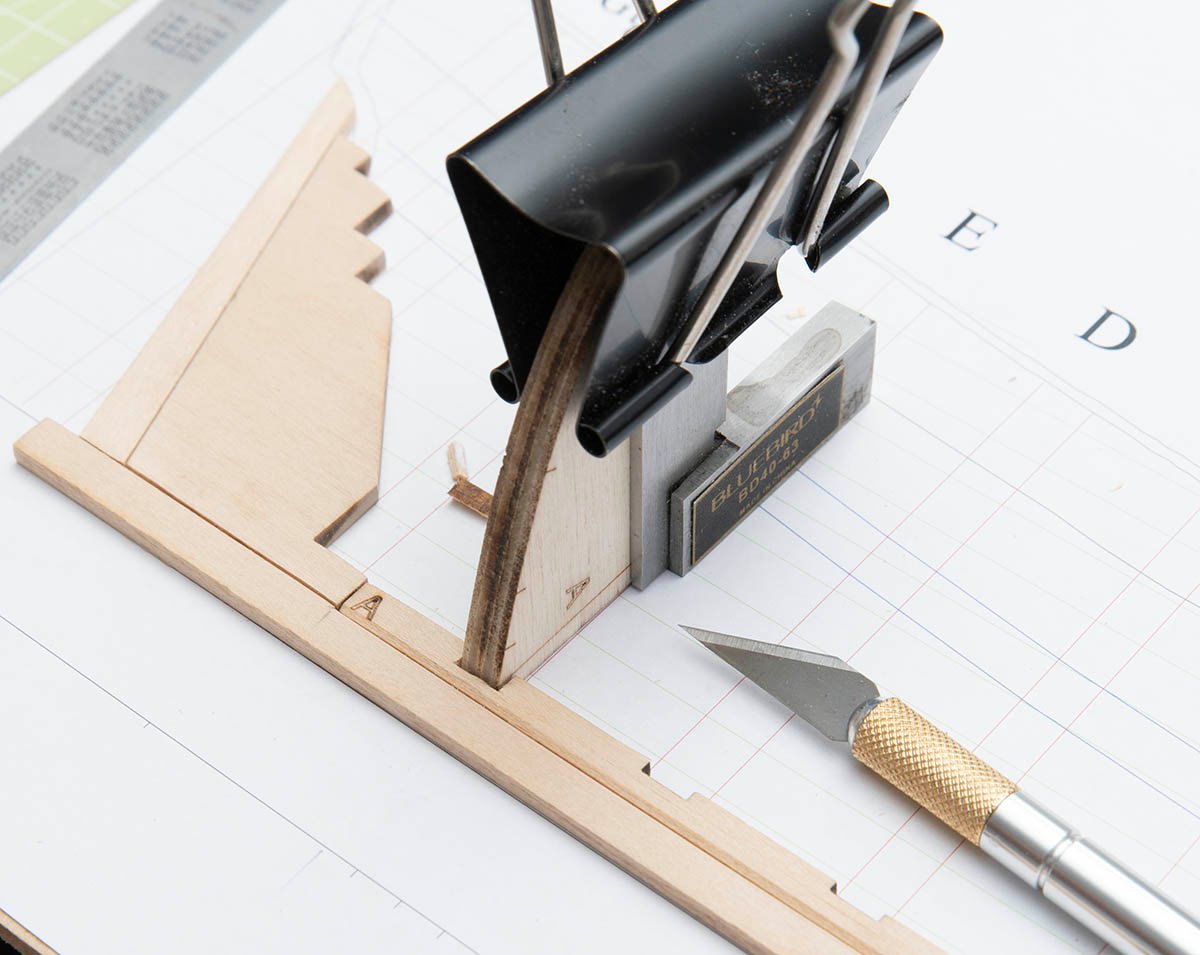
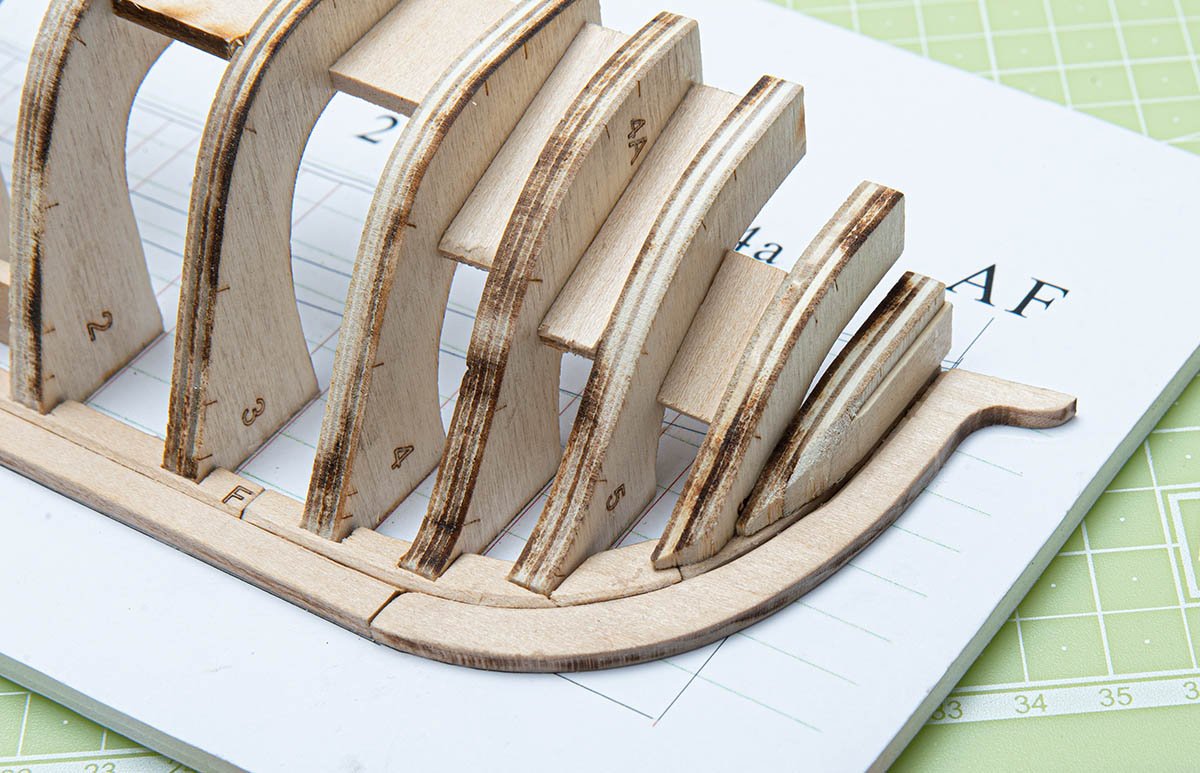
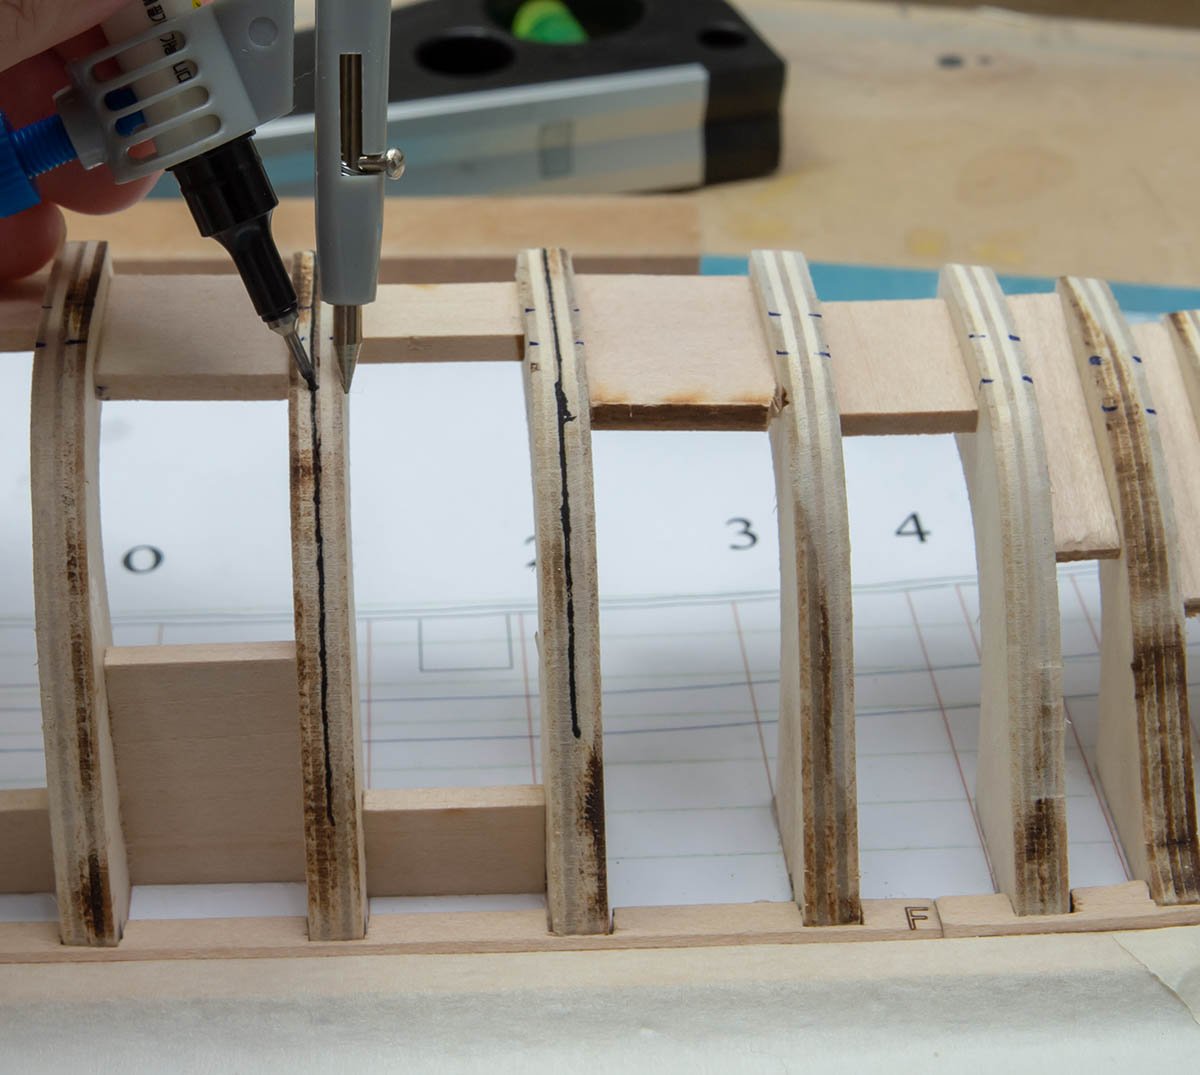
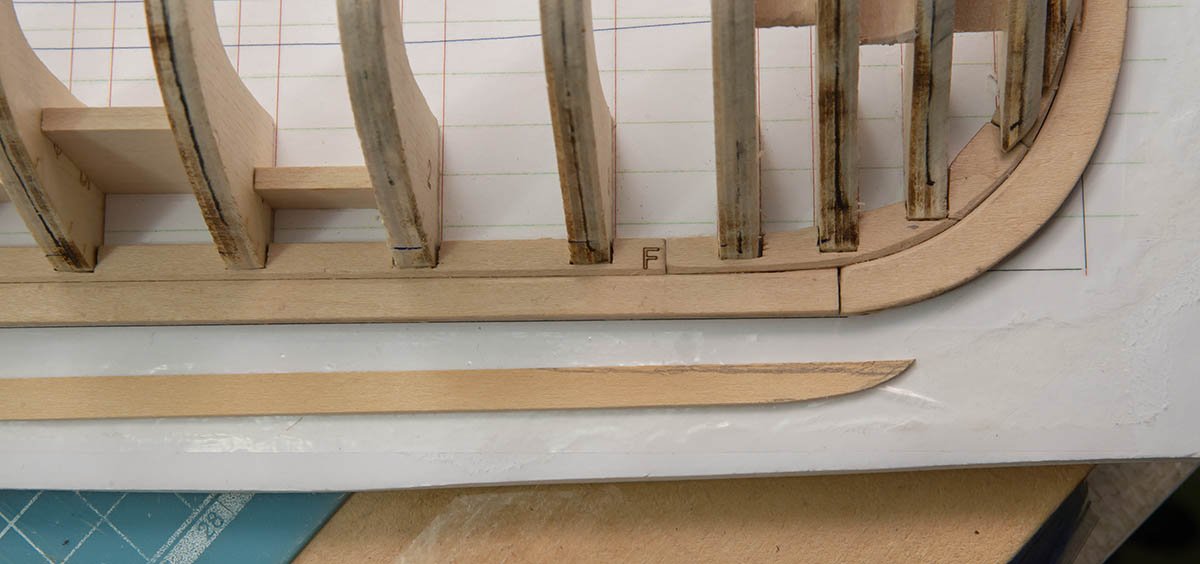
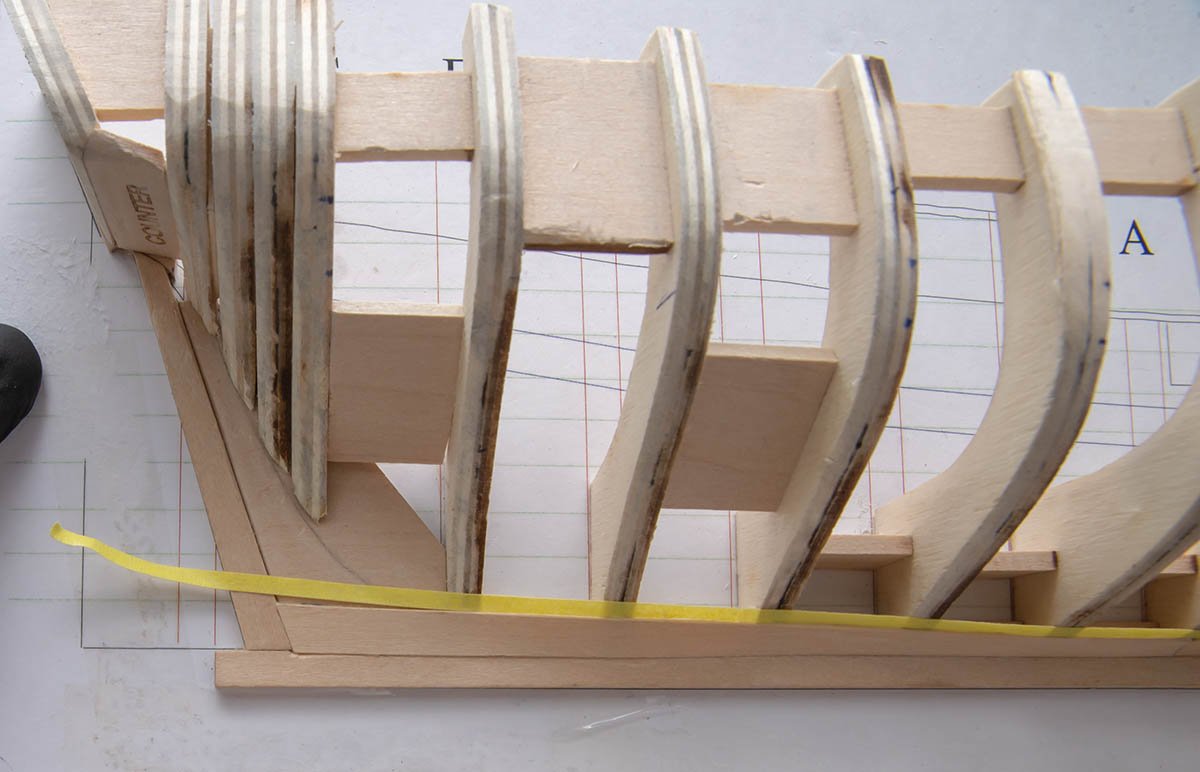
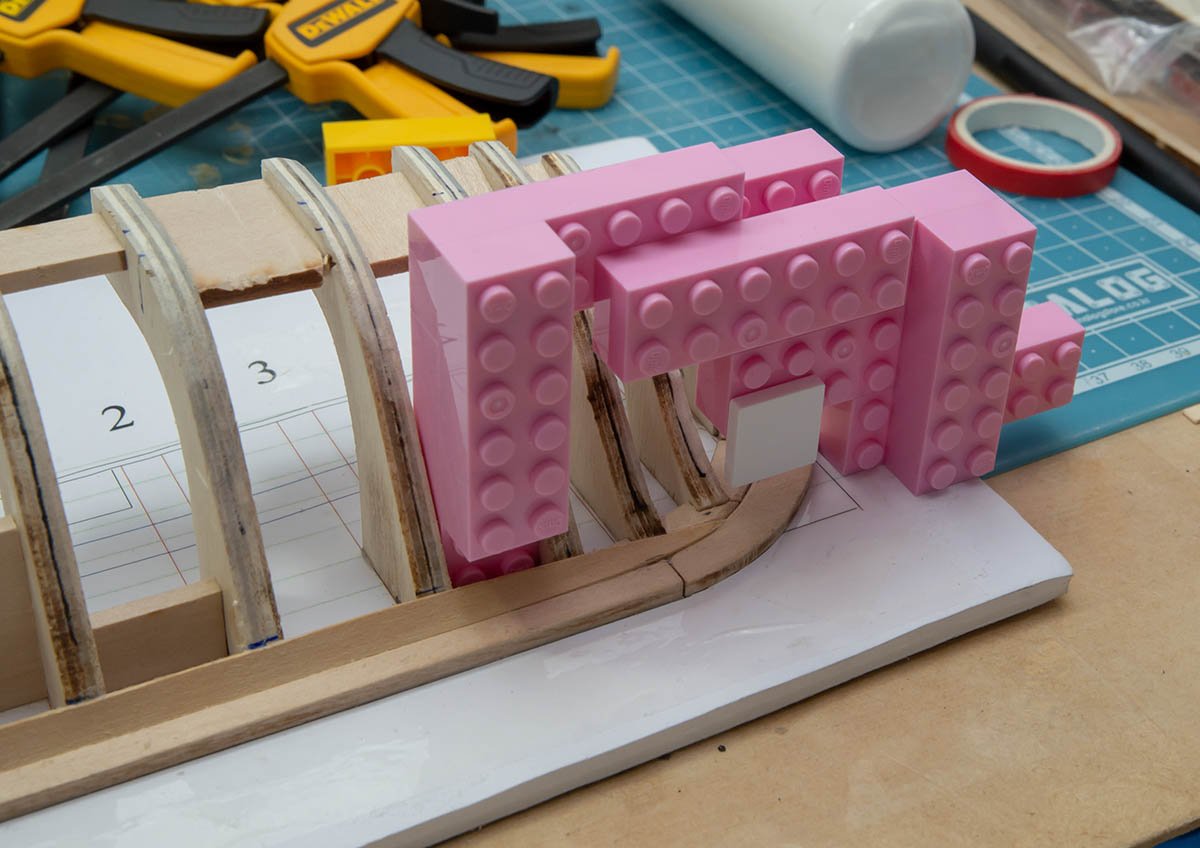
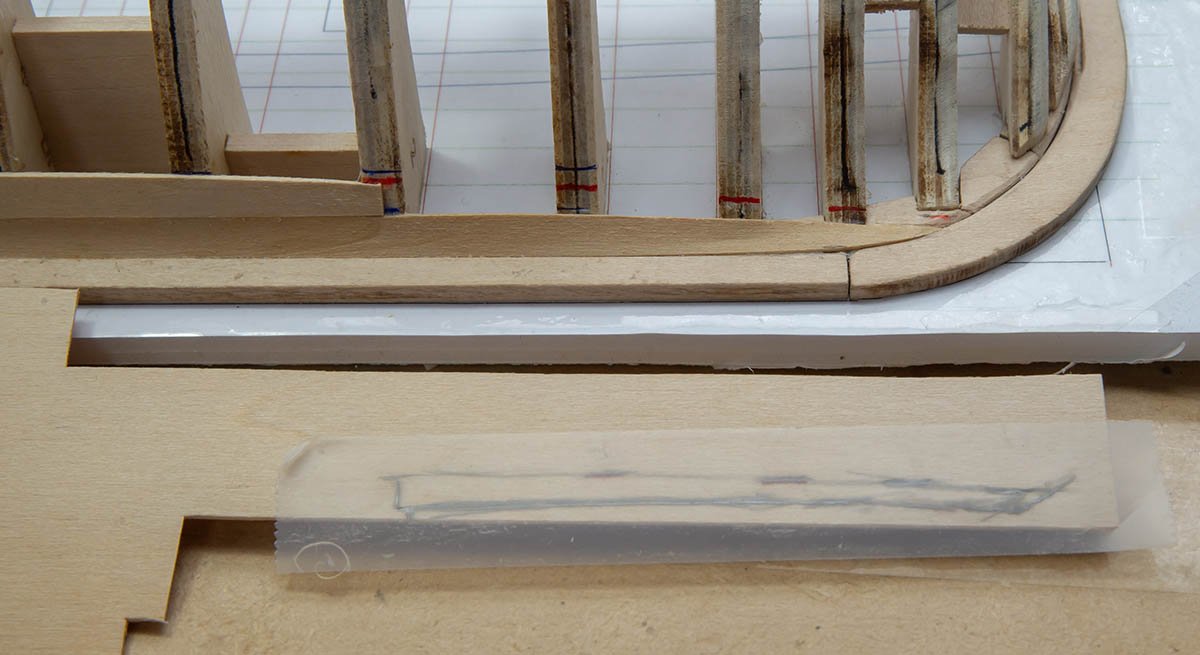
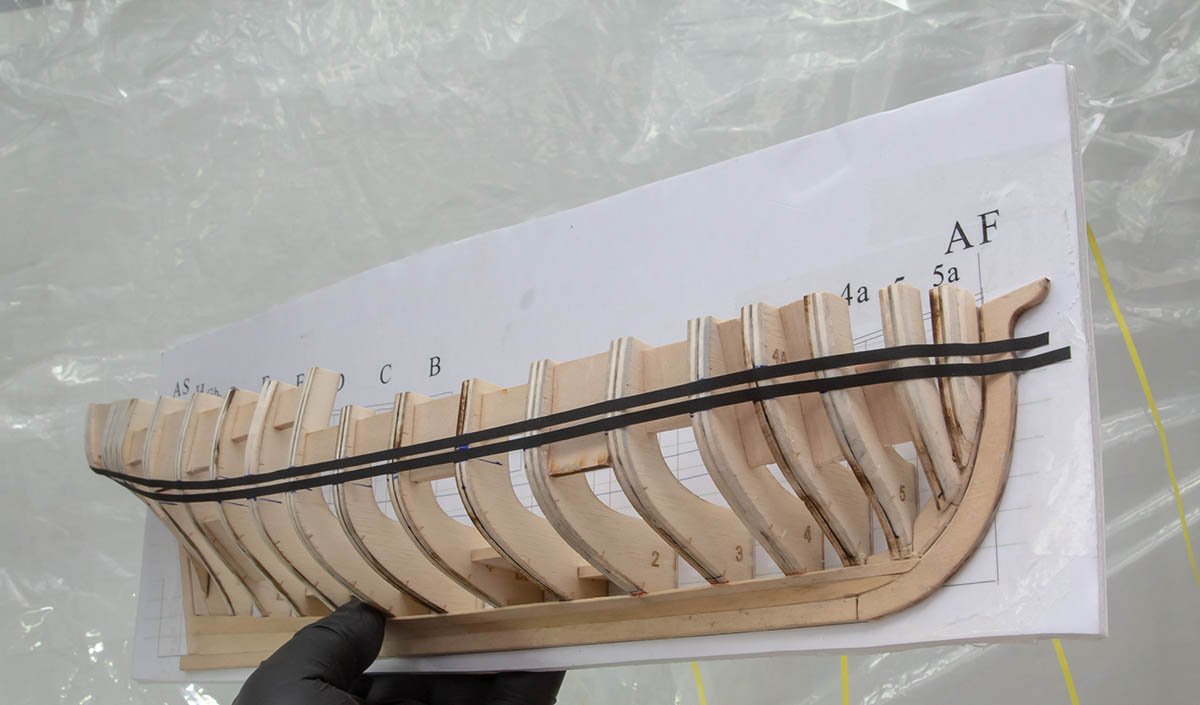
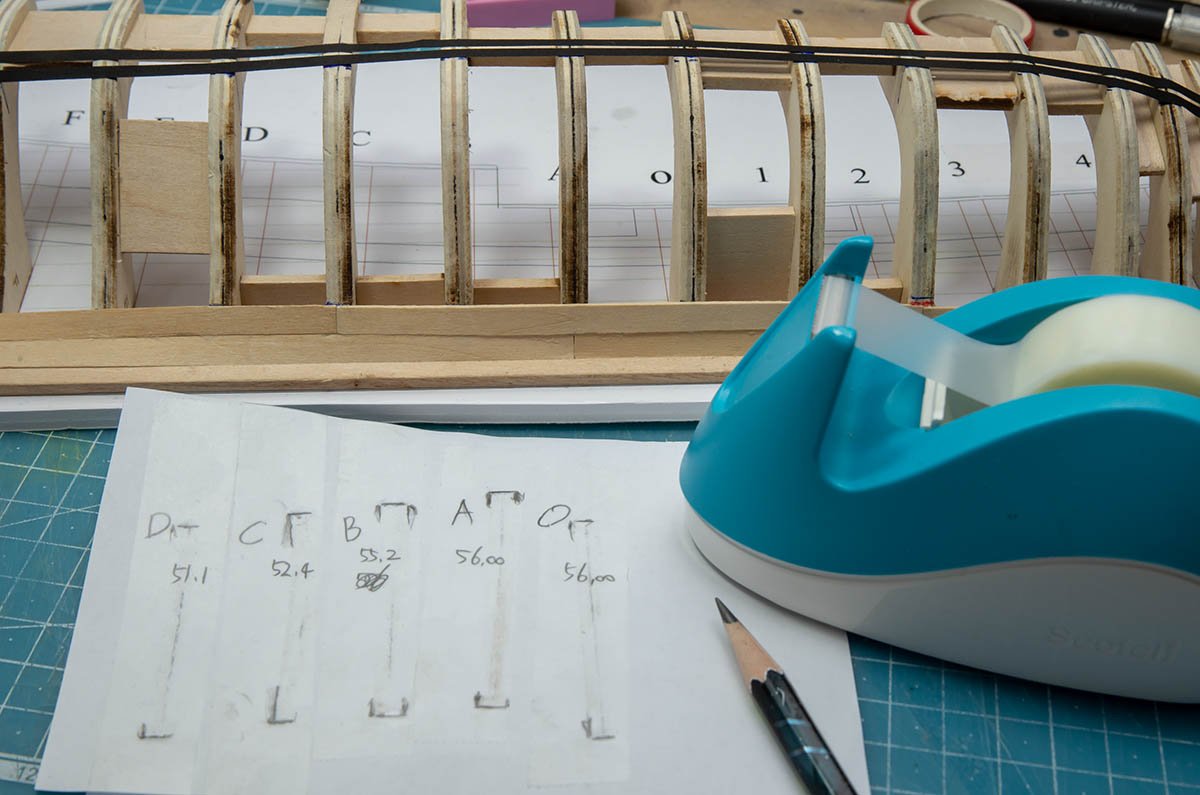
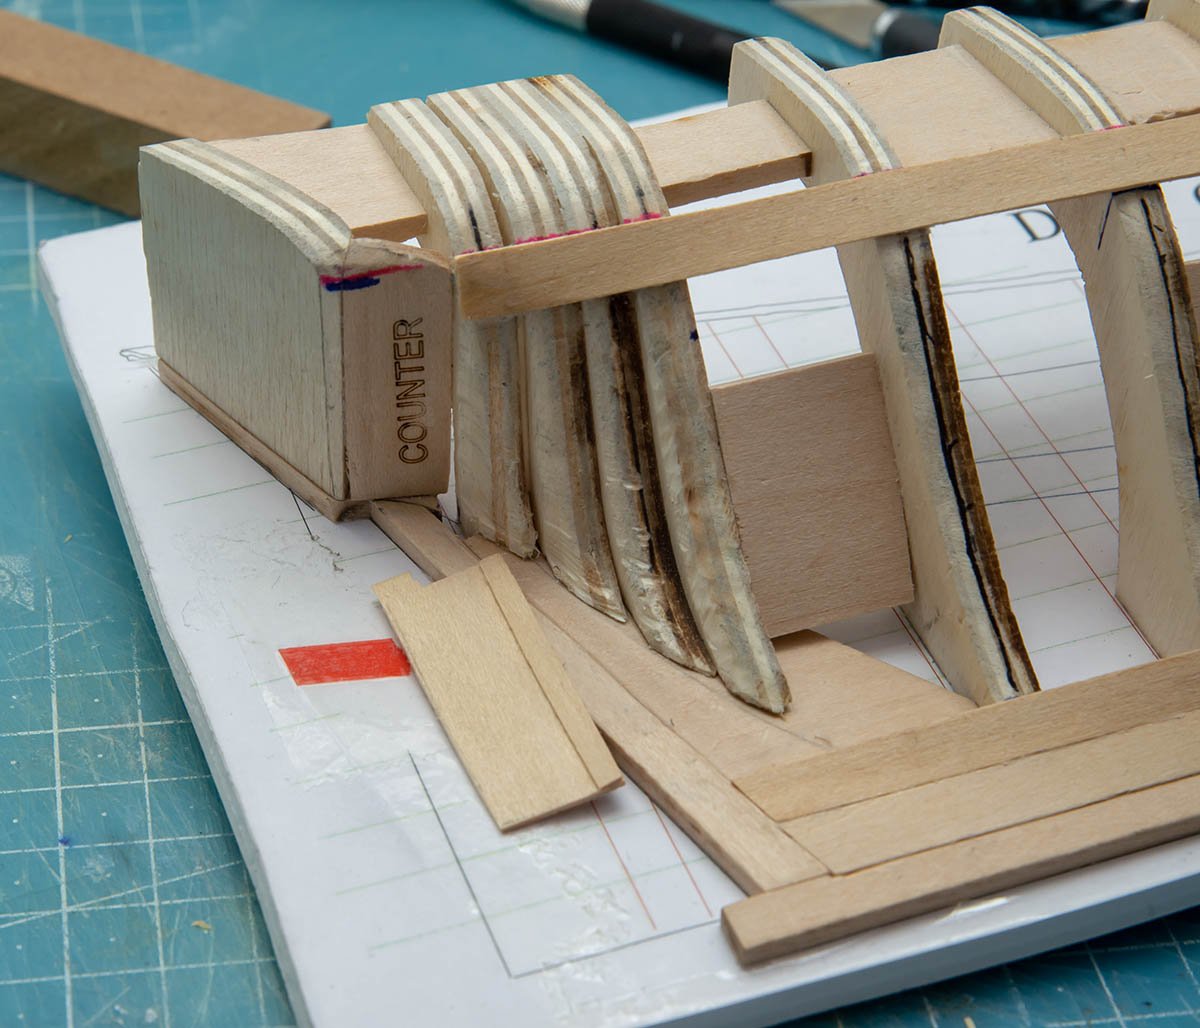
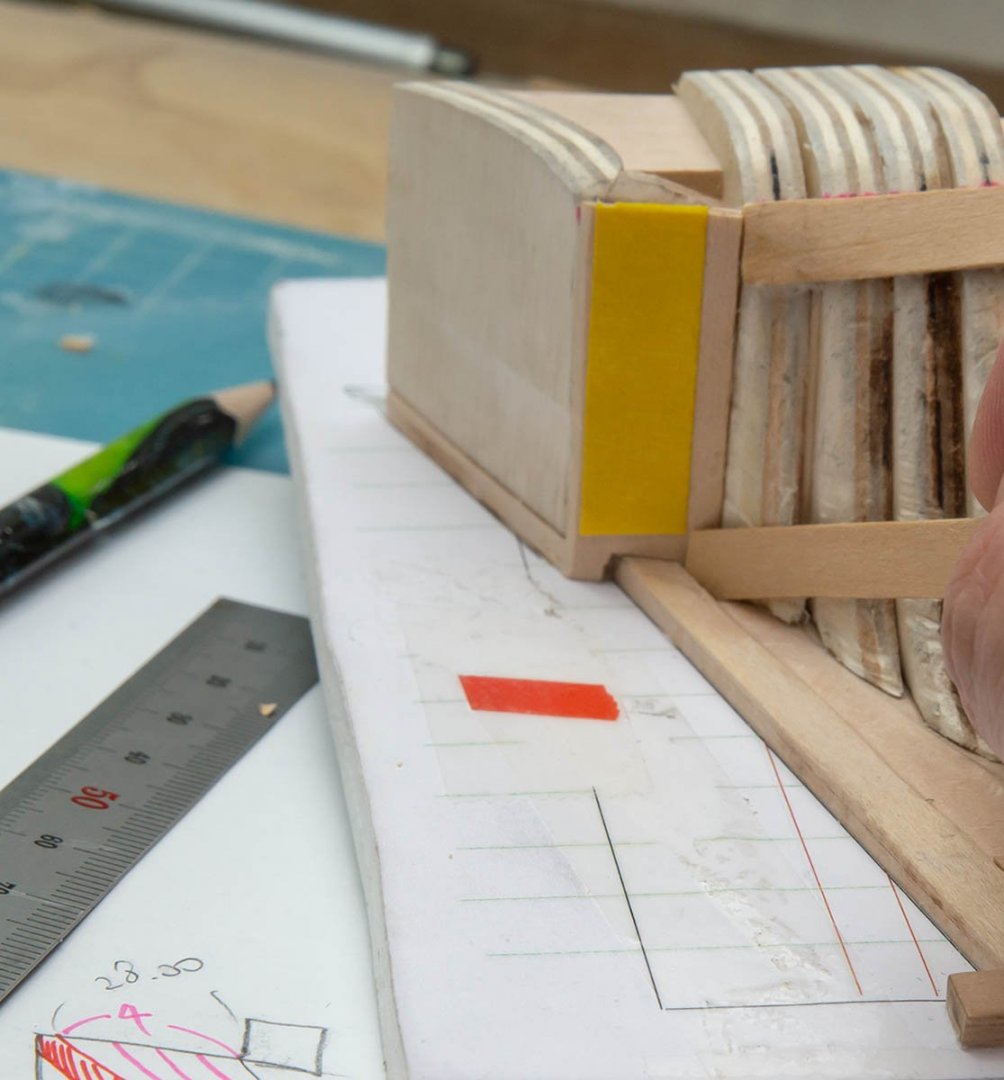
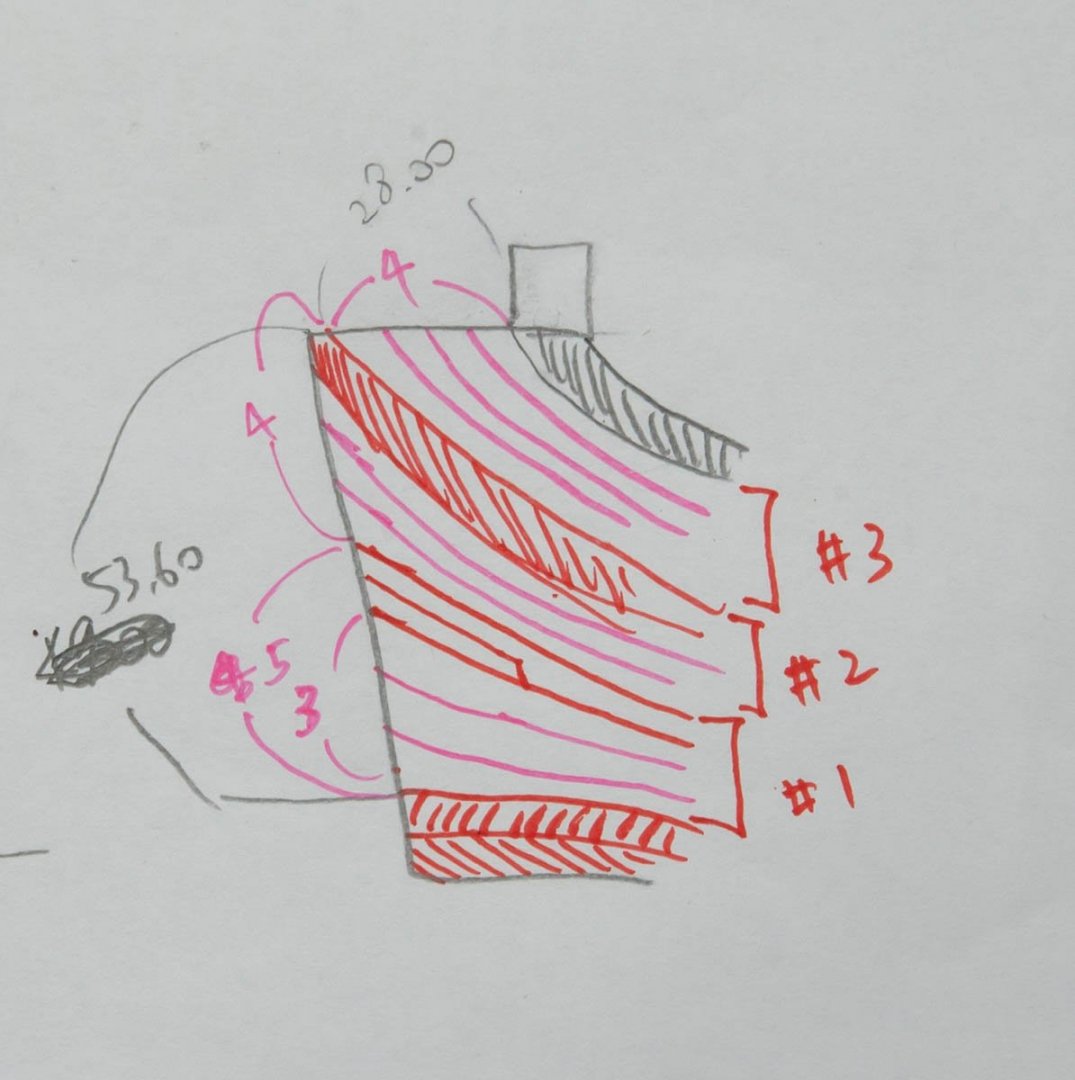
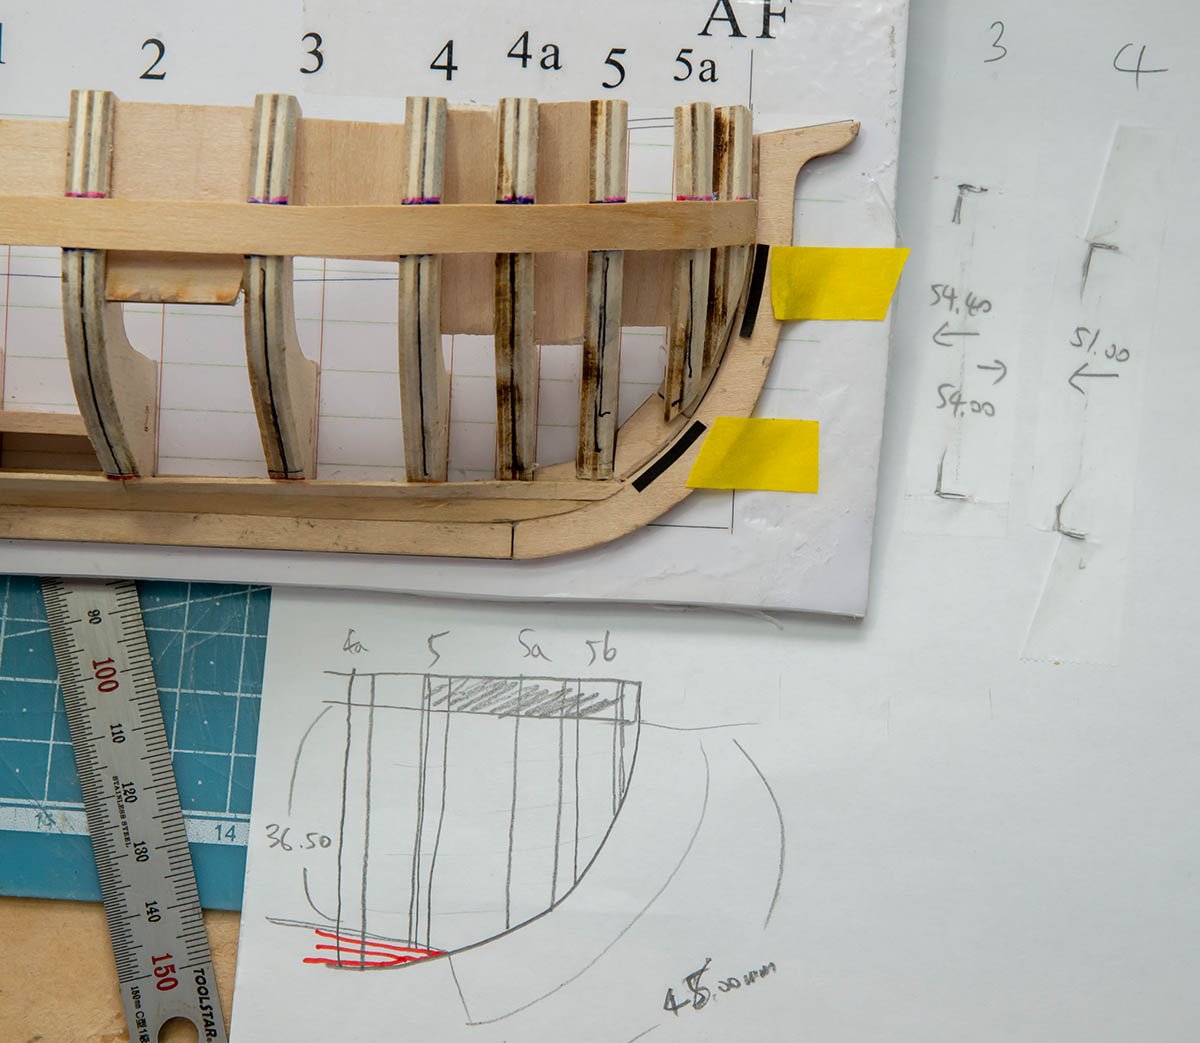
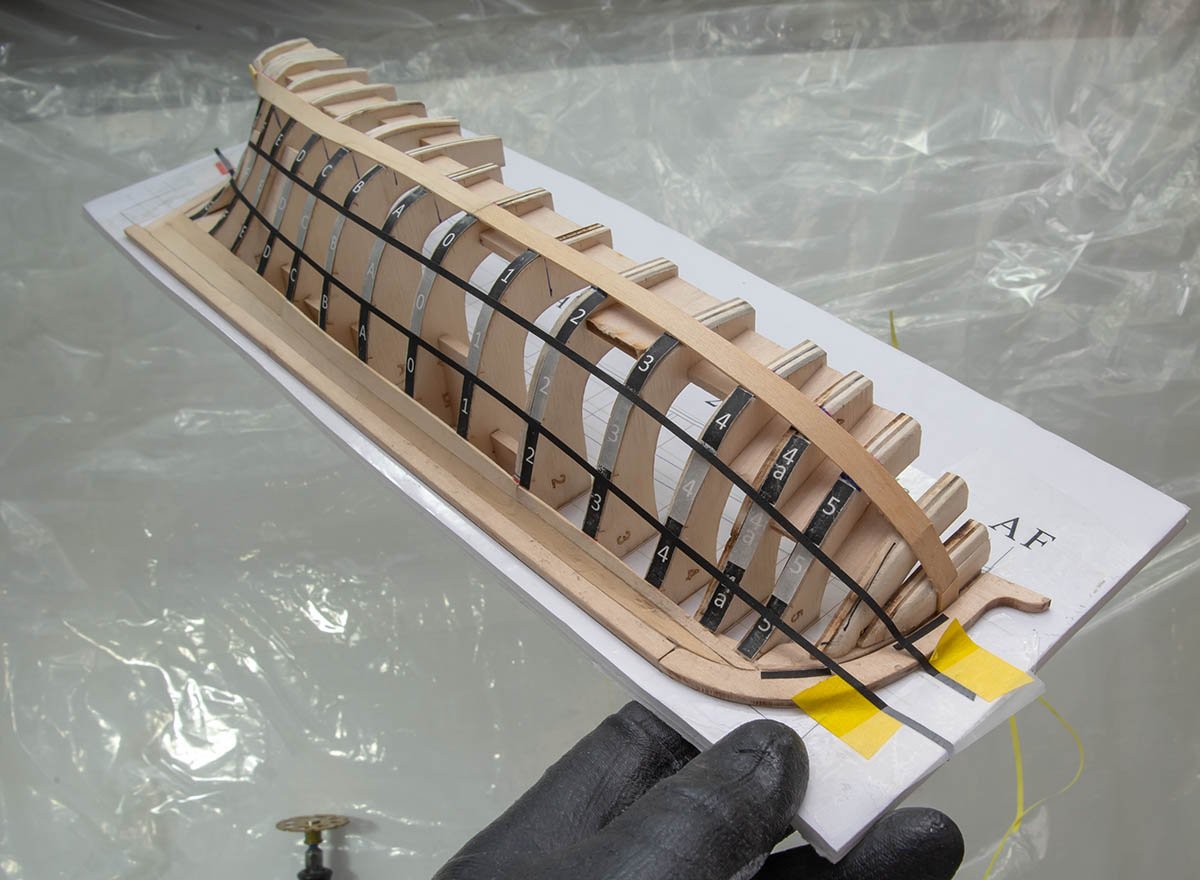
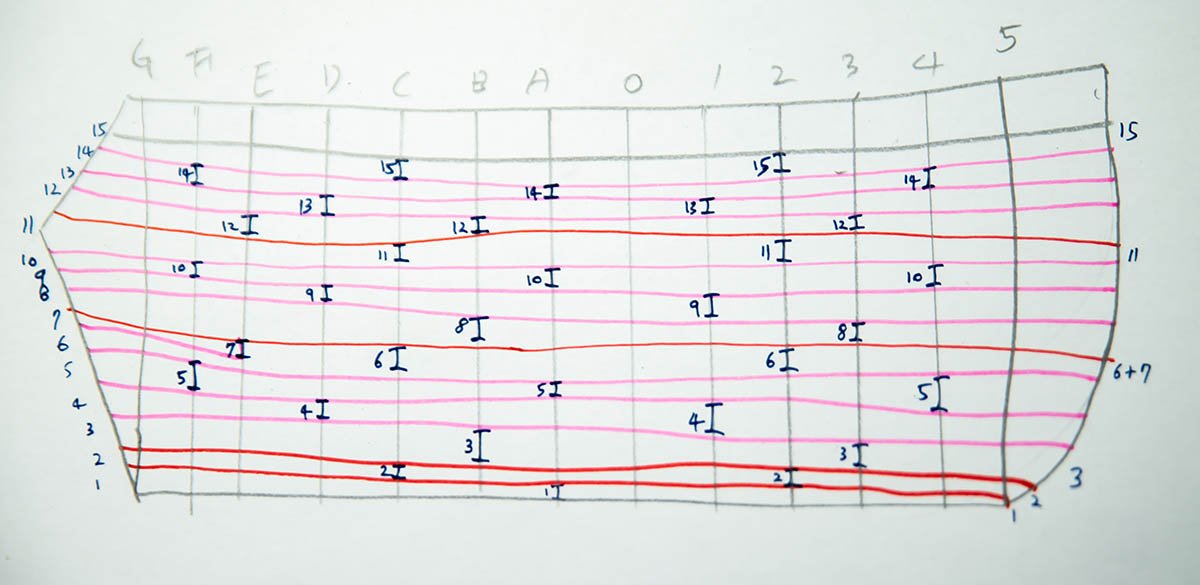
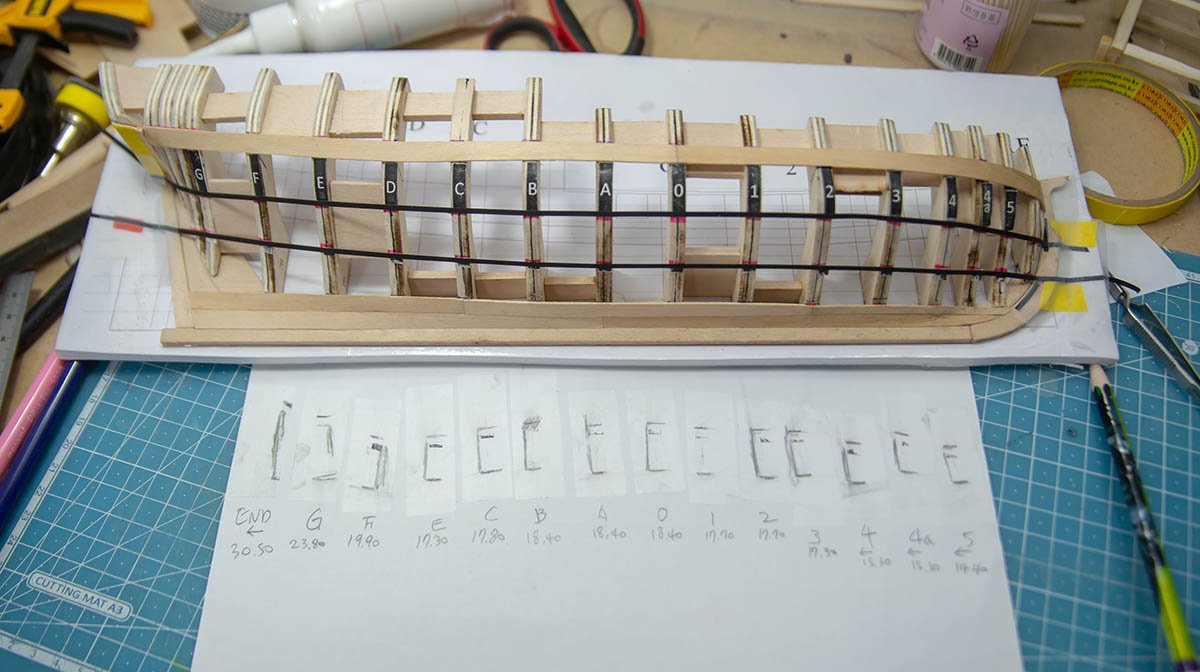
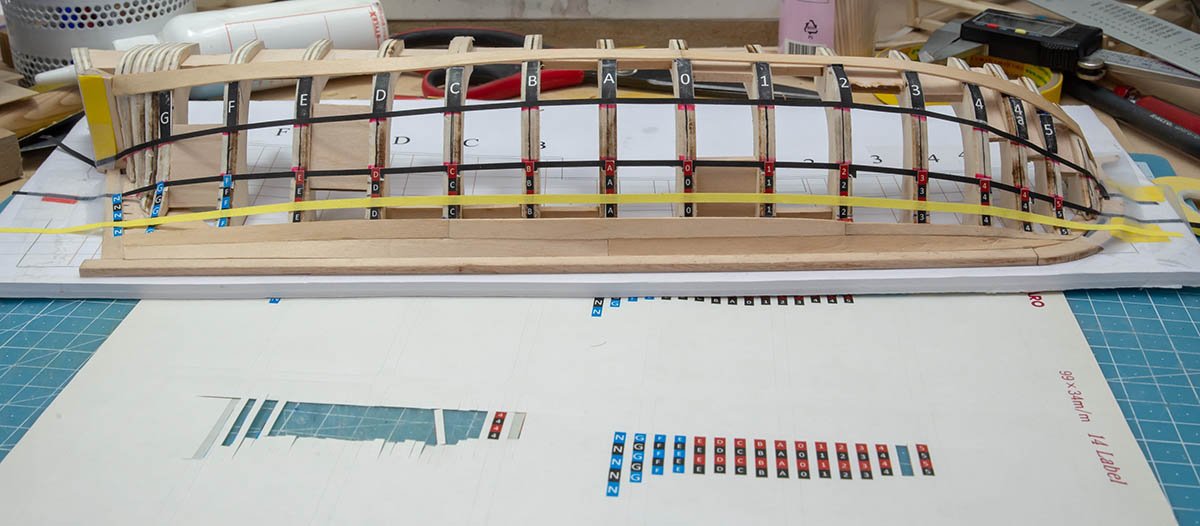
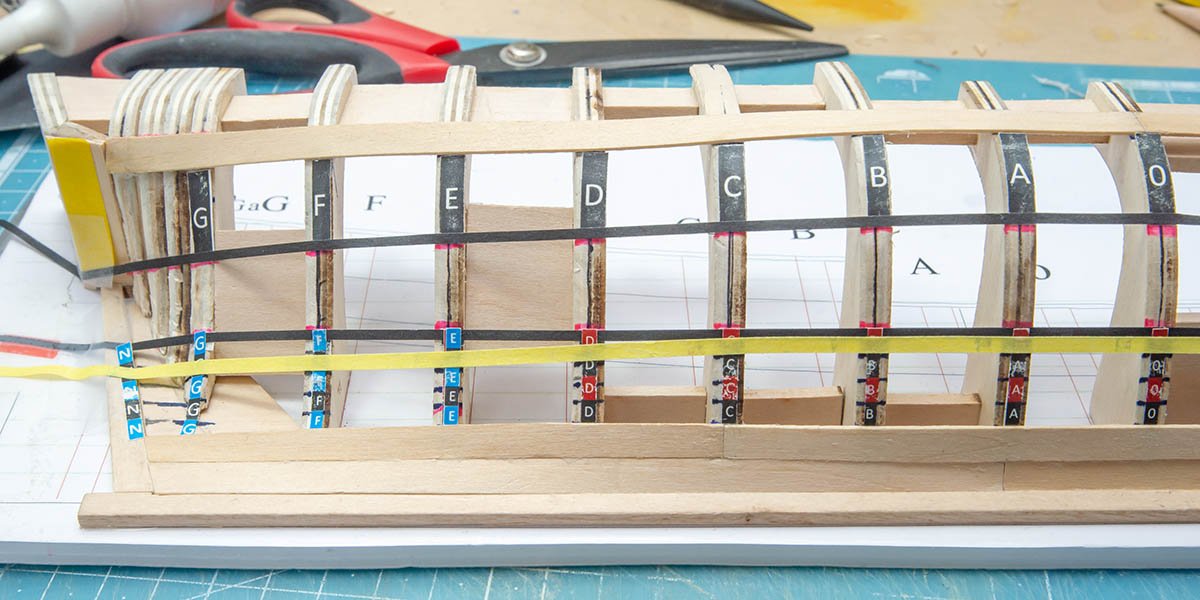
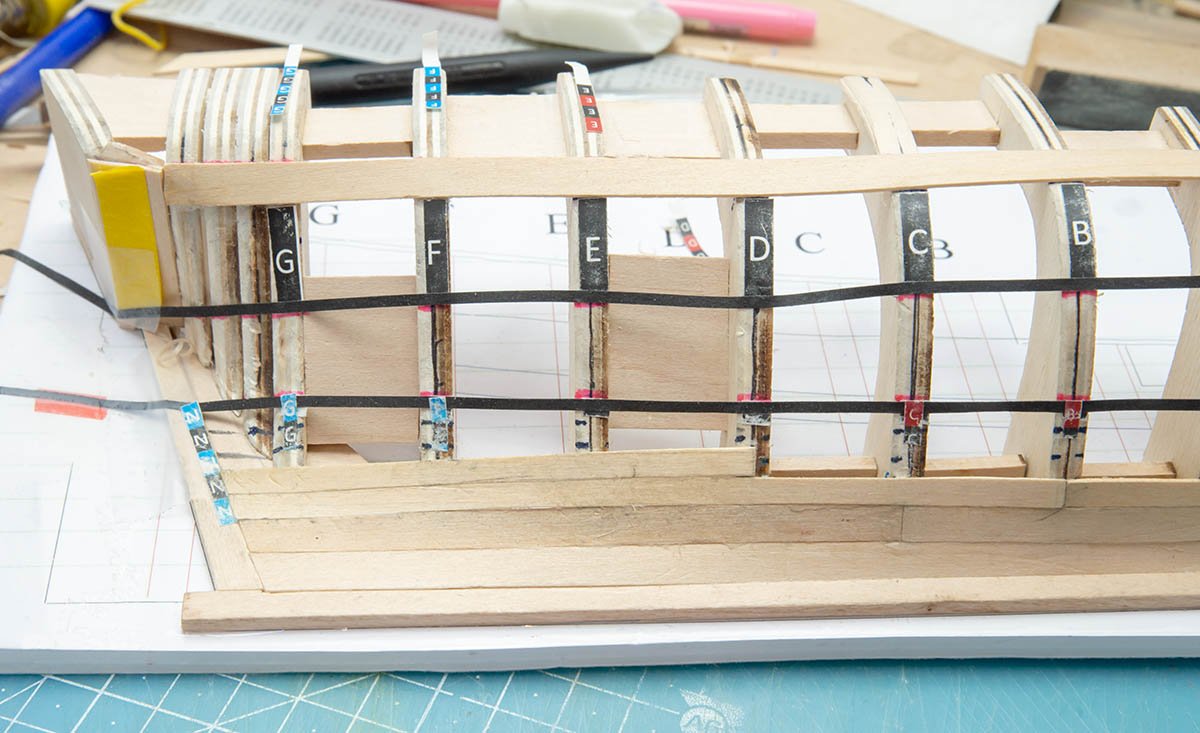
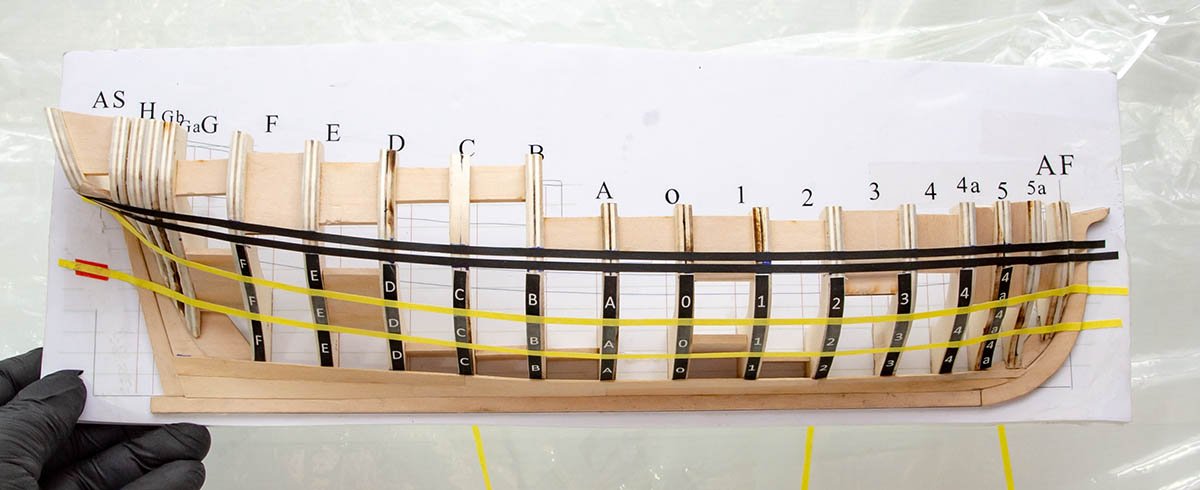
Hello, This is my last project of this year. I was going to upload this post after completion, but I decided to upload current status. I would like to hear advices regarding planking work. The hull fairing is the most difficult and important job. Hull fairing determines all the planking plan. I didn't understand it on April. It was a reason I stop this kit for half a year. No smile garboard I found that the garboard and the first strake must be under the first waterline before too late. Fixed. For easy work. I jumped to the black wale strake. After that, I splitted lower frames into three segments. This black wale strake also determines all the planking plan and shape of the ship, so I shouldn't have decided to go it first easily. It affects all the lower planks. Broken, but not a big problem. This is a big problem. wrong position. Added thickness to counter. Planks will go to the yellow tape. (Shorter counter area) Carefully peering into Toni's pictures... and understood! Determining how to device the fore end. The yellow tape (by height) is the best for good lining. Peering into Toni's pitures again... and AHA! Measure - printing - adjusting lines - marking - planking, again. Mistake. The pink is corrected line. Getting hard to bend strips... This is a digital temperature controlled iron. Oops. Another mistake. (Very short plank between two frames.) No time to make the strip again... I think I should have to measure all the length of frames when I did hull fairing. I had to draw all the height lines of each planks and black wale strake before I attach it. Also, it would be better if I gave gentle curve to each frames for easier bending. It is very difficult to understand the idea, but I finally learned it from this kit with Toni's guide. (Too difficult to follow it! 😫) If you found any more mistakes or have advices for better result, please feel free to leave a reply. One of my issue is that a minimizing gap between upper and under planks. (Light leaks.) Sanding a little by little is too time consuming. Thanks for introducing this education kit, Toni, and thanks for reading.


- 13 replies
-
- 9
-
-
- half hull planking project
- NRG
- (and 1 more)
-
Sorry about delay. 😔 I'm doing the NRG half hull planking kit. I rescheduled due date of this project from June 2020 to June 2021 which is the person's birthday. I'll restart this build from March 2021, and complete two more wooden models before that. In 2020, my last complete project will be NRG HHP kit. I'll upload it next month. I hope you have happy holiday and safe new year.
-
What is this wire made of?
modeller_masa replied to modeller_masa's topic in Masting, rigging and sails
Thanks for interesting know-how, wefalck. I have a plan to make my first rope machine with 3D printer. I'll show you if I success to make a rope with this 0.01mm copper wire. -
What is this wire made of?
modeller_masa replied to modeller_masa's topic in Masting, rigging and sails
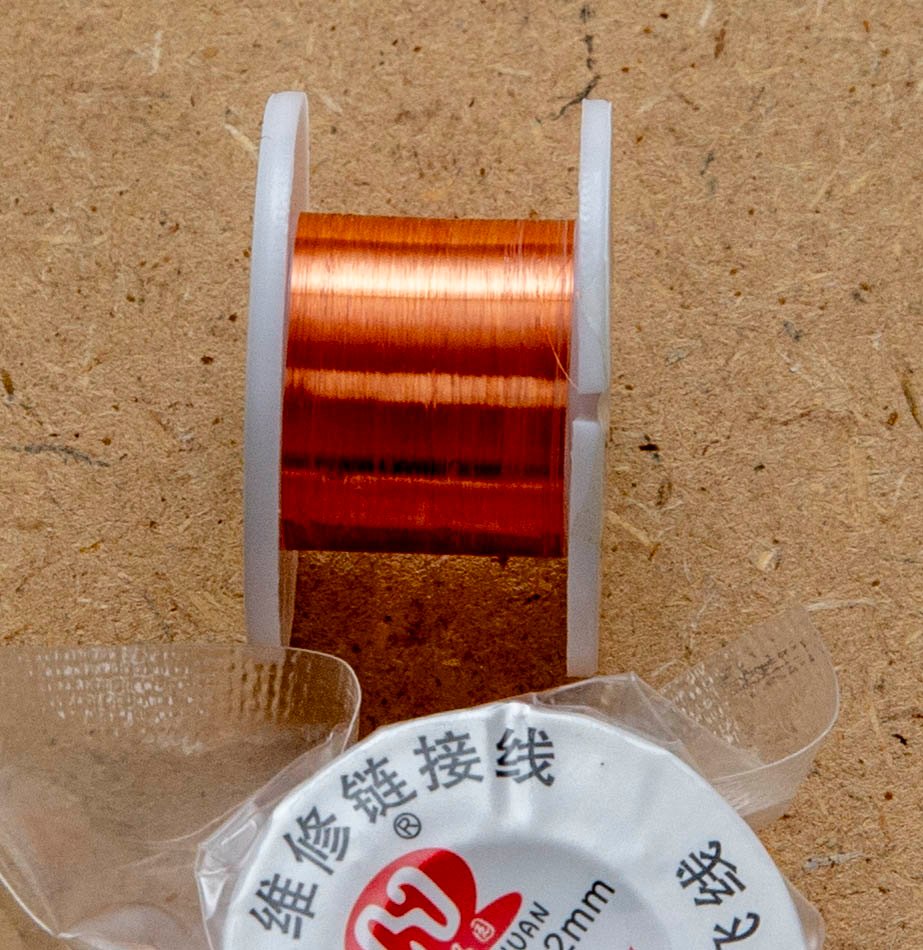
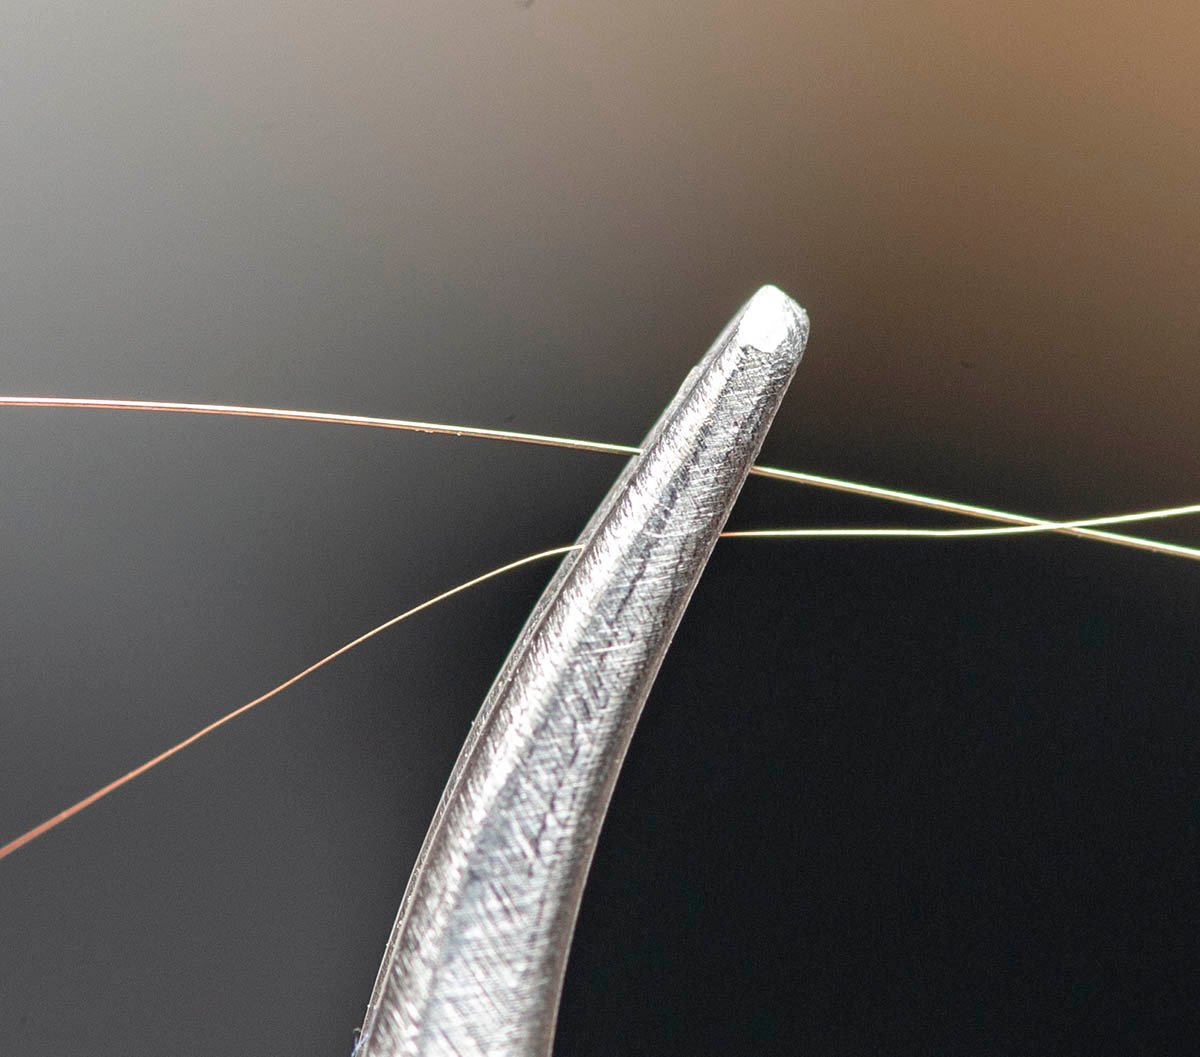
I got a hint from Phil's post. It is hard to buy 56 AWG copper wires or unusually expensive. Instead of splitting stranded AWG wires, I bought logic board jumper wire. It is a pure copper wire with 0.010mm and 0.020mm diameters. ($2.99 per each for 50 meter) It is super thin that it feels like a cloth. Unfortunately, it is also weaker than a molybdenum wire, that very small force can cut the wire which means it can't be used as solid wire. Compared with 0.035mm molybdenum wire. It looks like real 0.010mm pure copper wire. Of course, it burns well. This is the end of my journey. I'll stick to the molybdenum wire or thicker copper wire when I learn how to make wire ropes.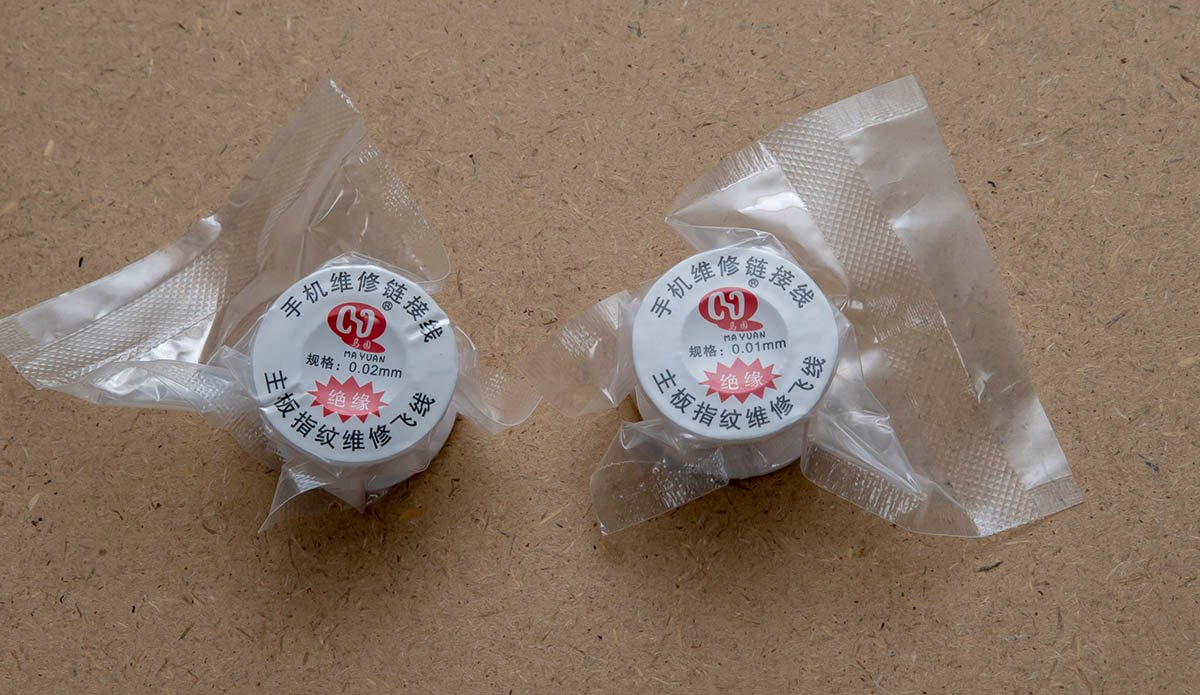
-
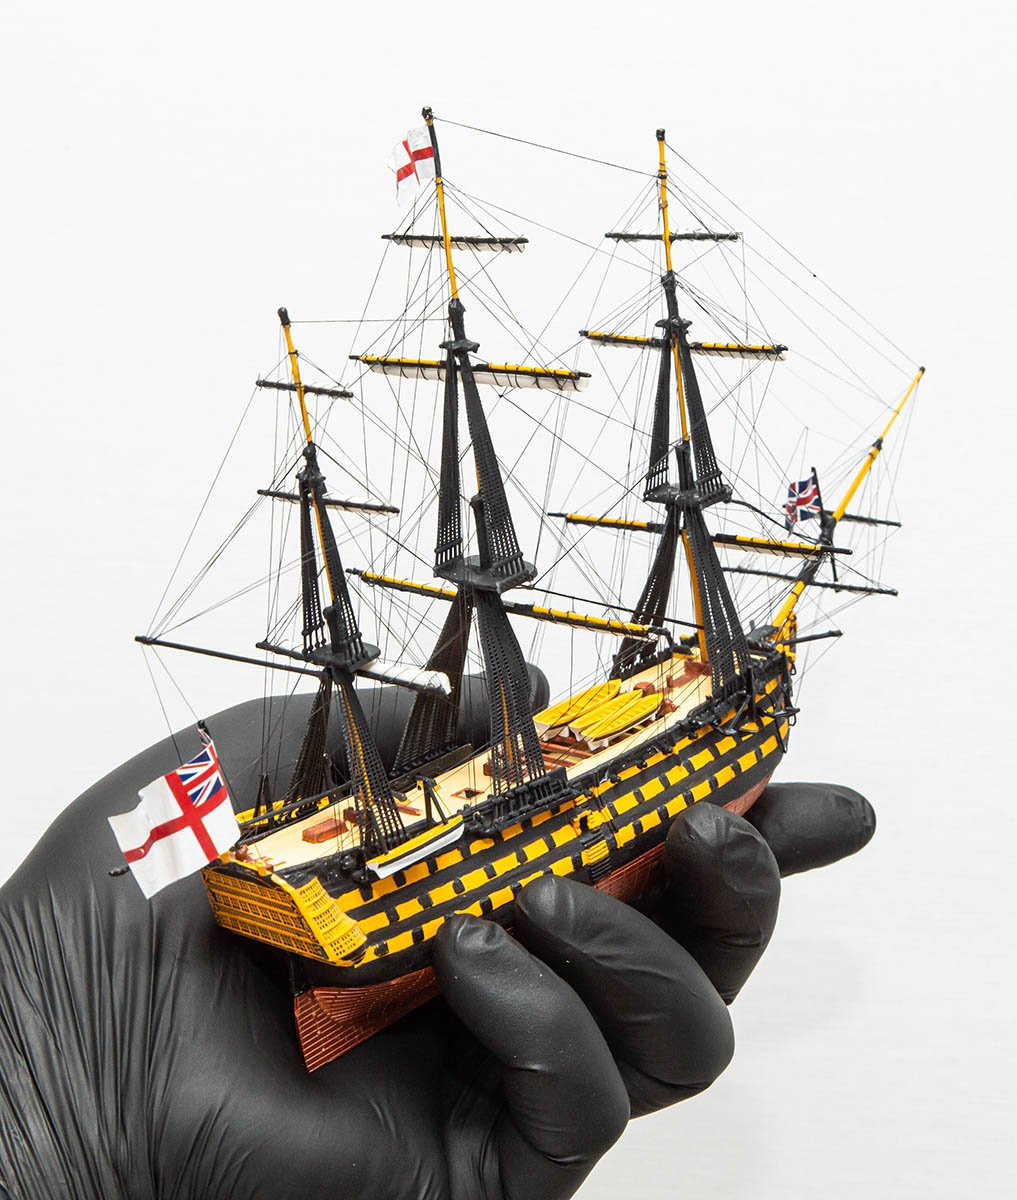
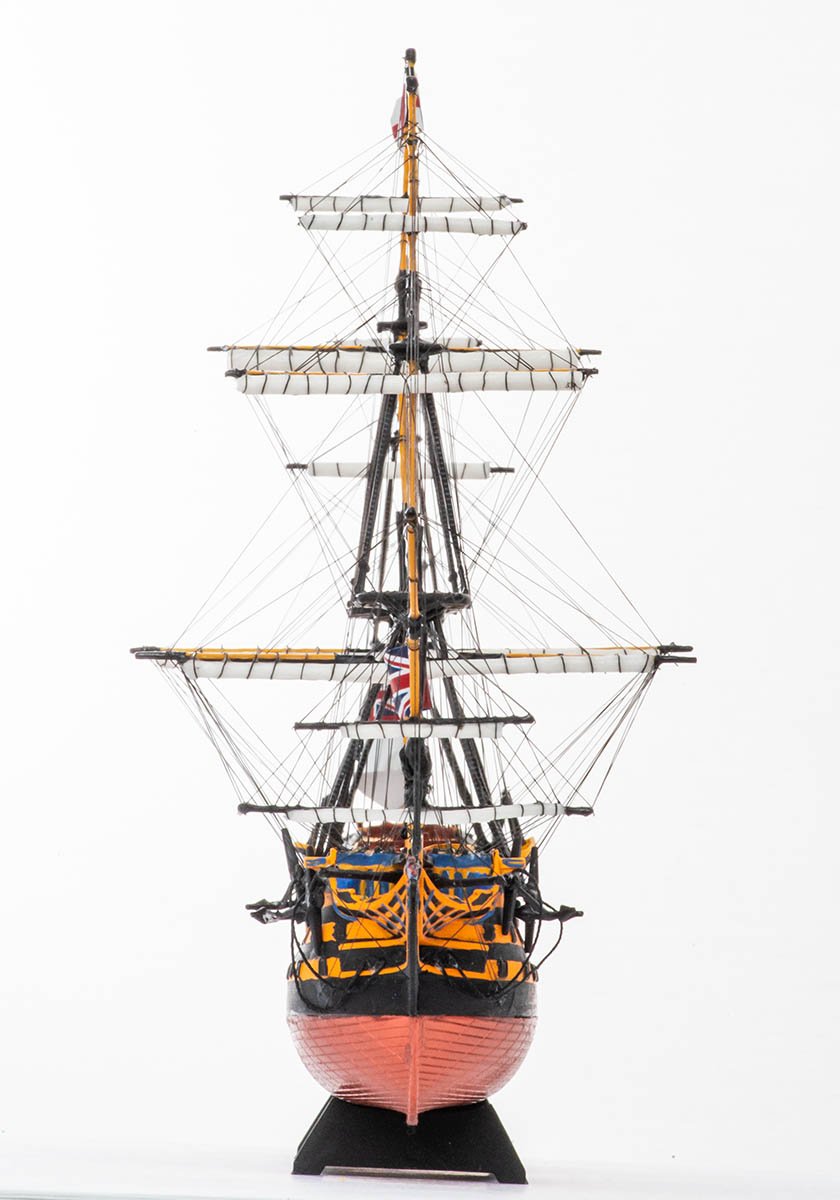
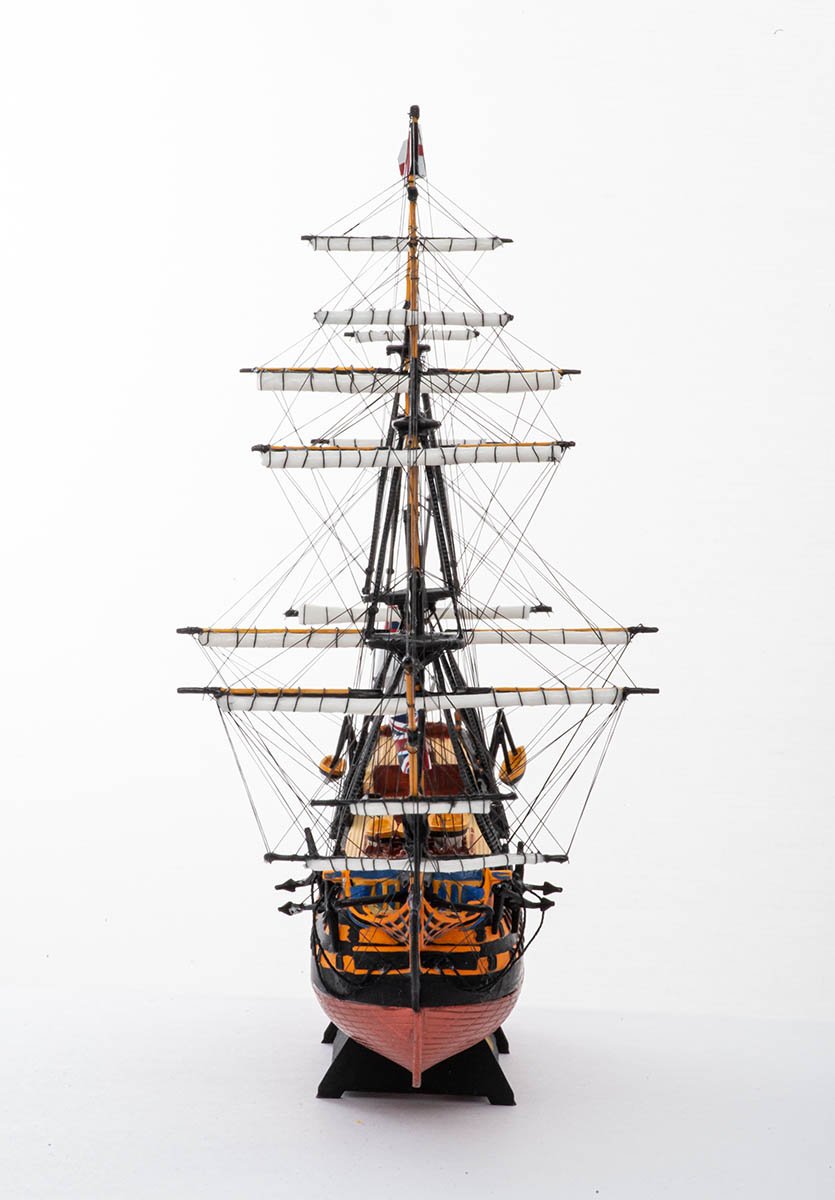
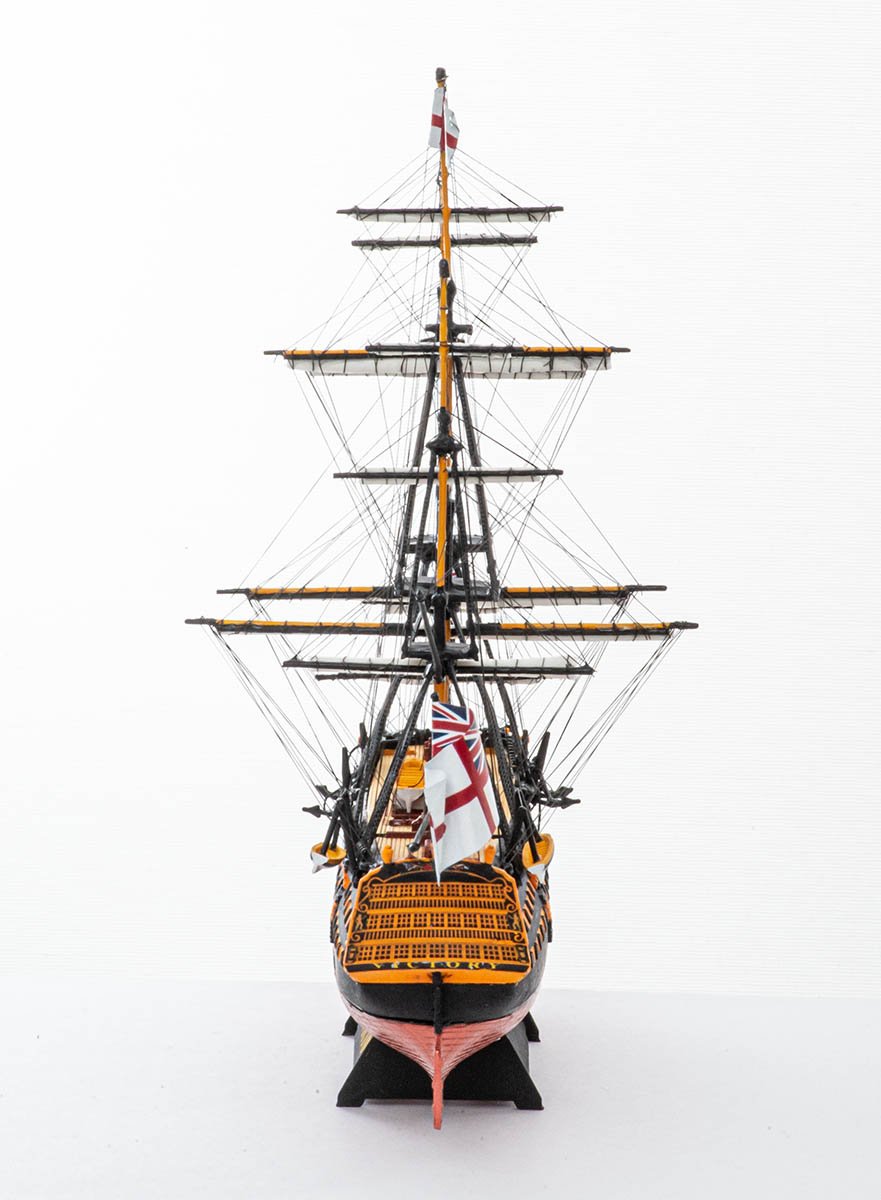
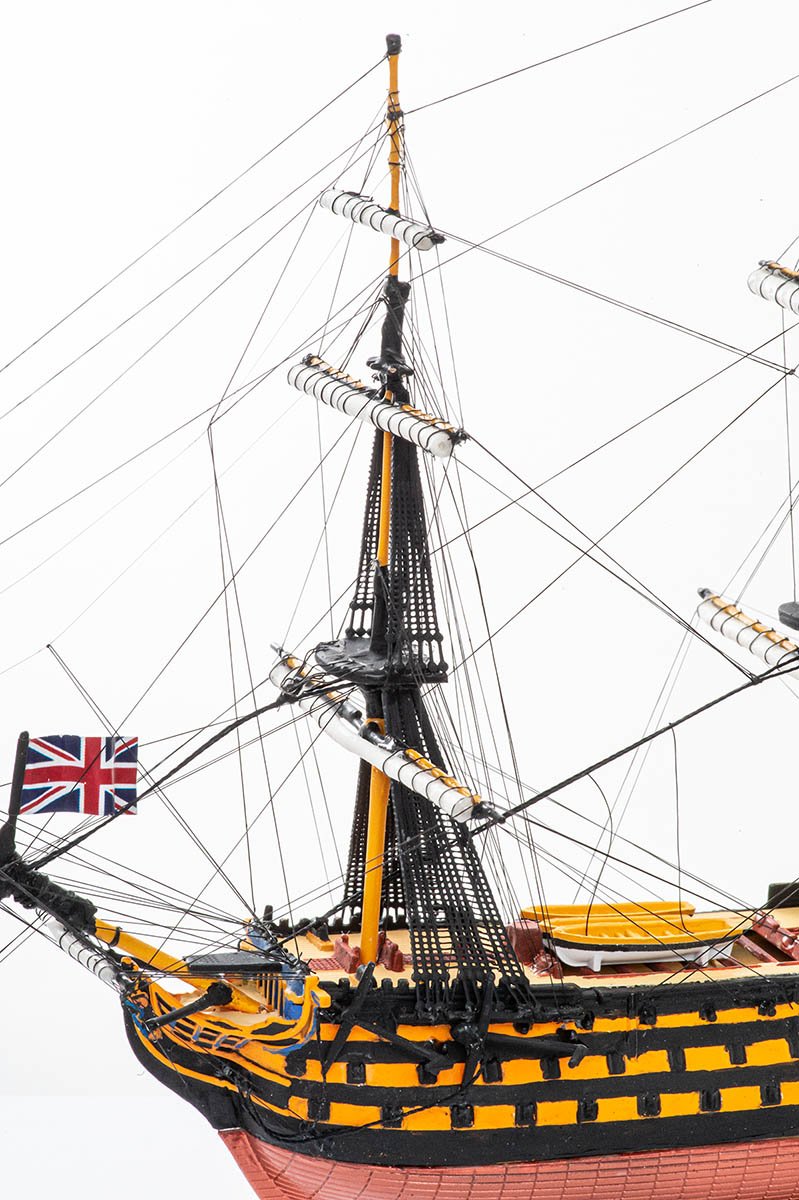
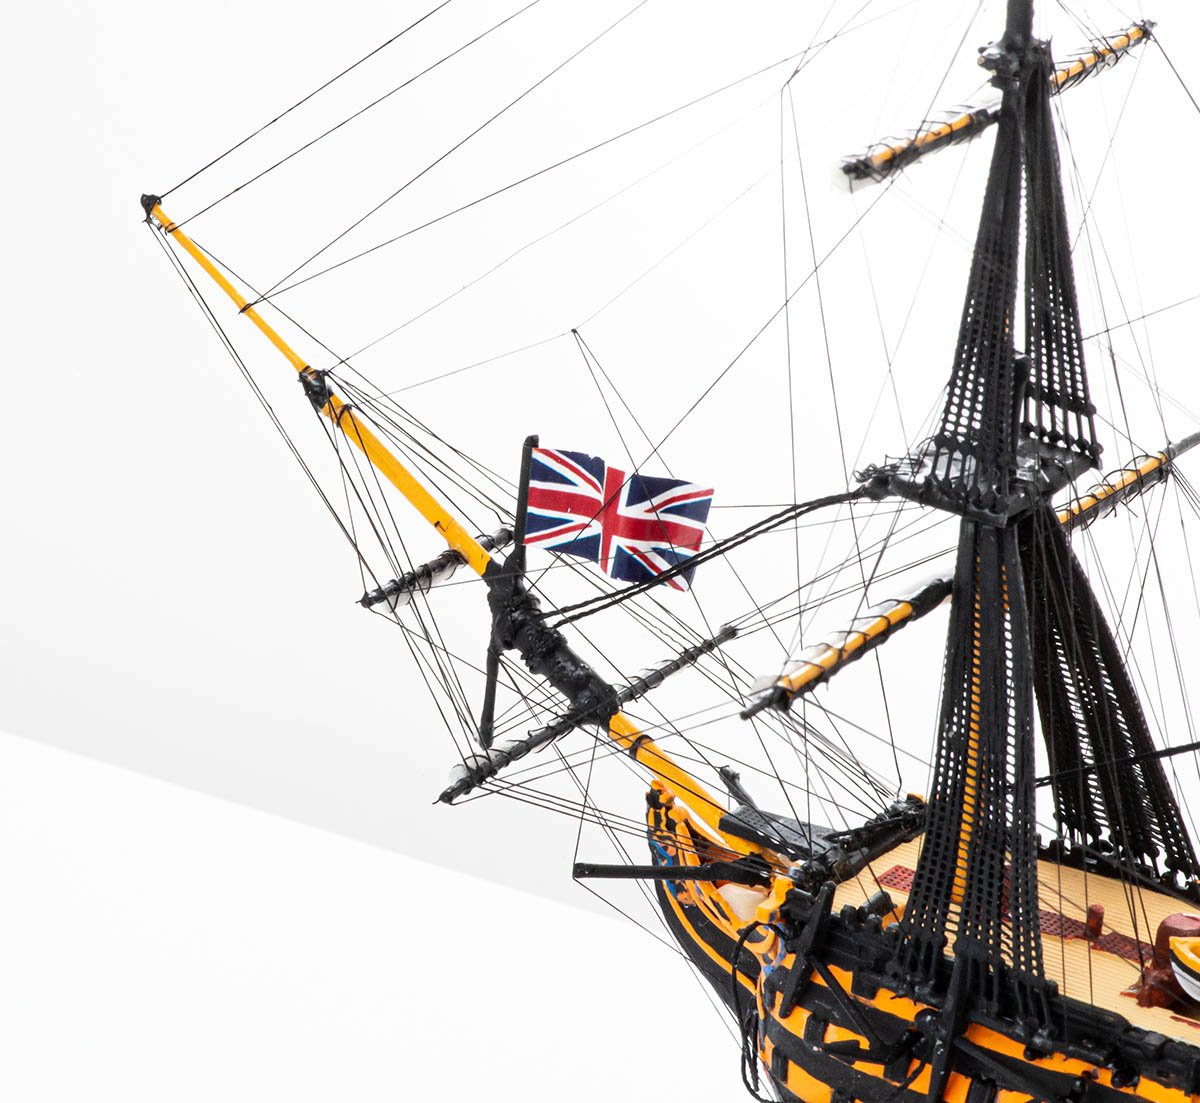
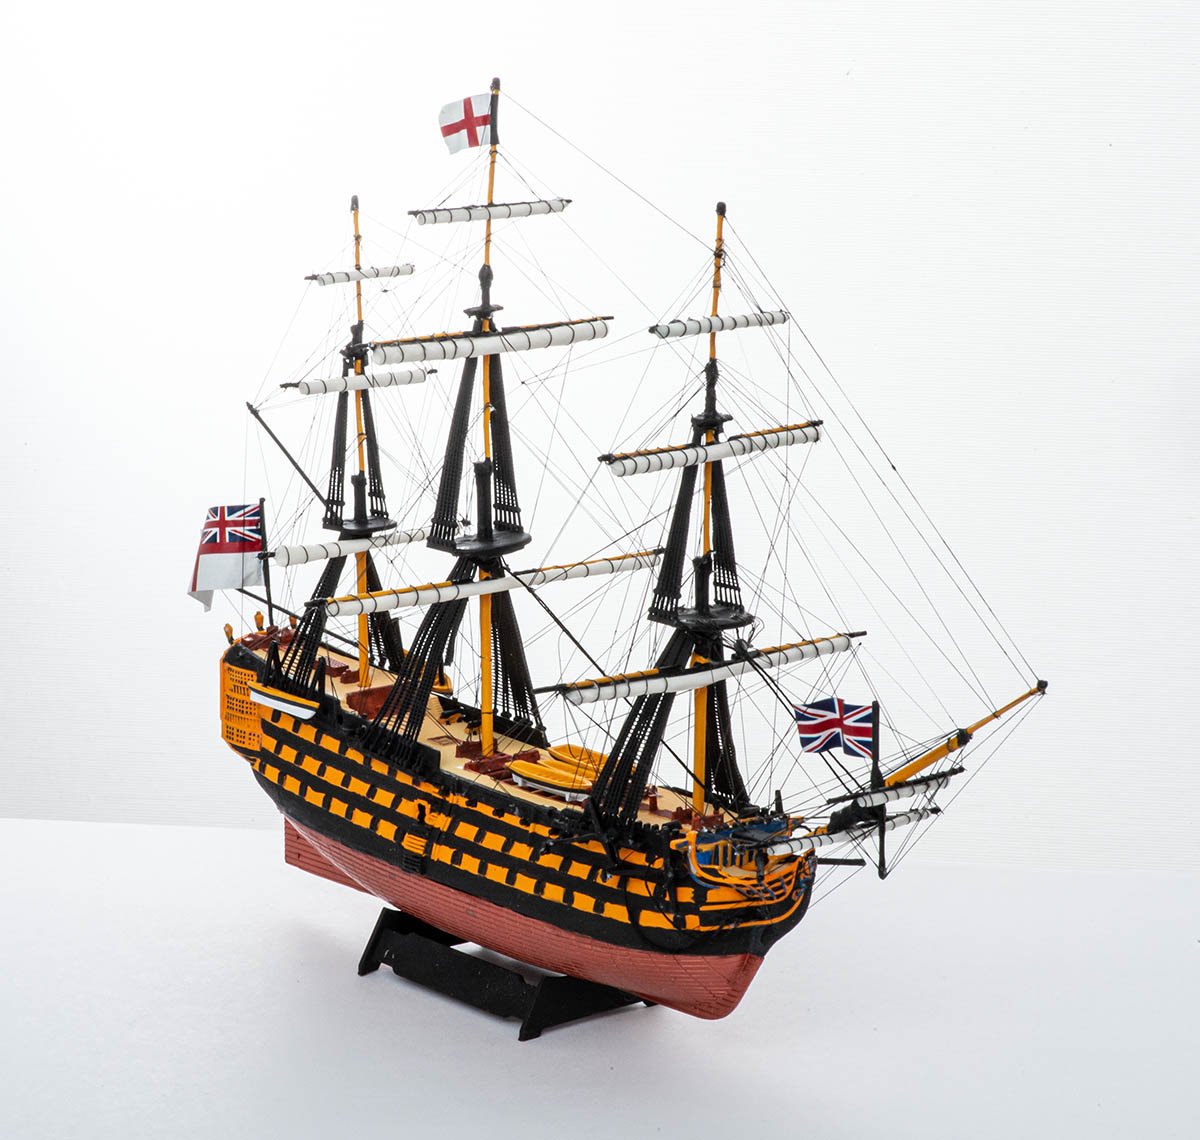
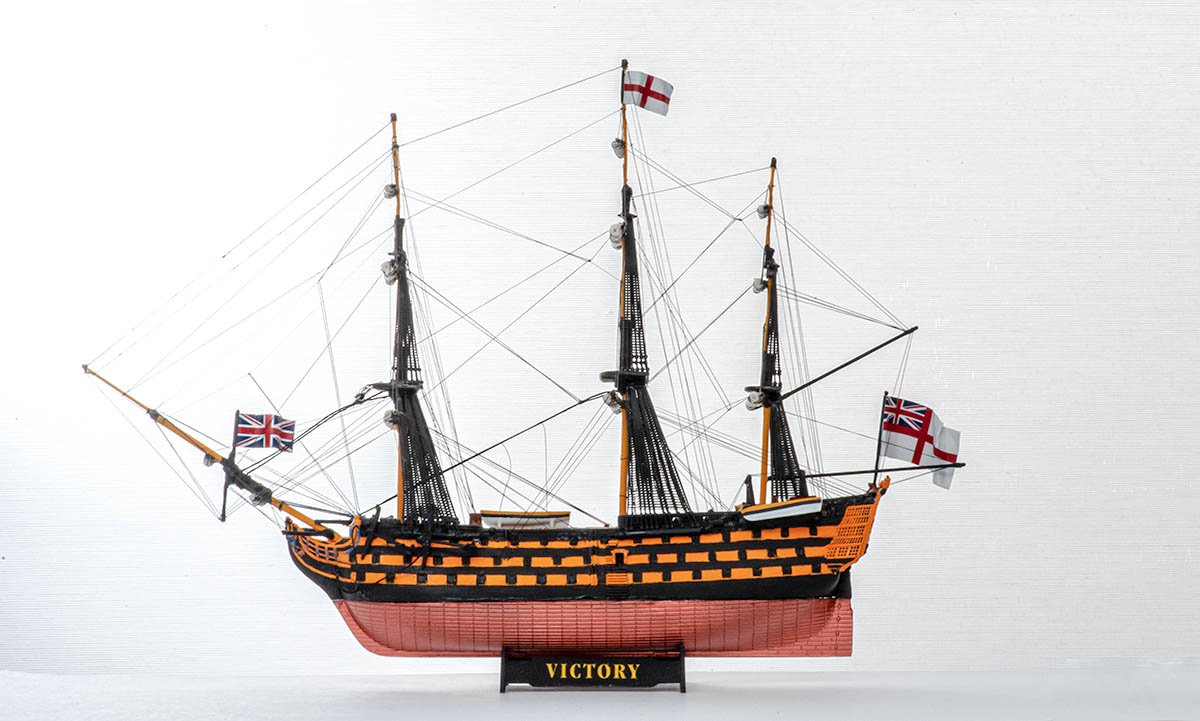
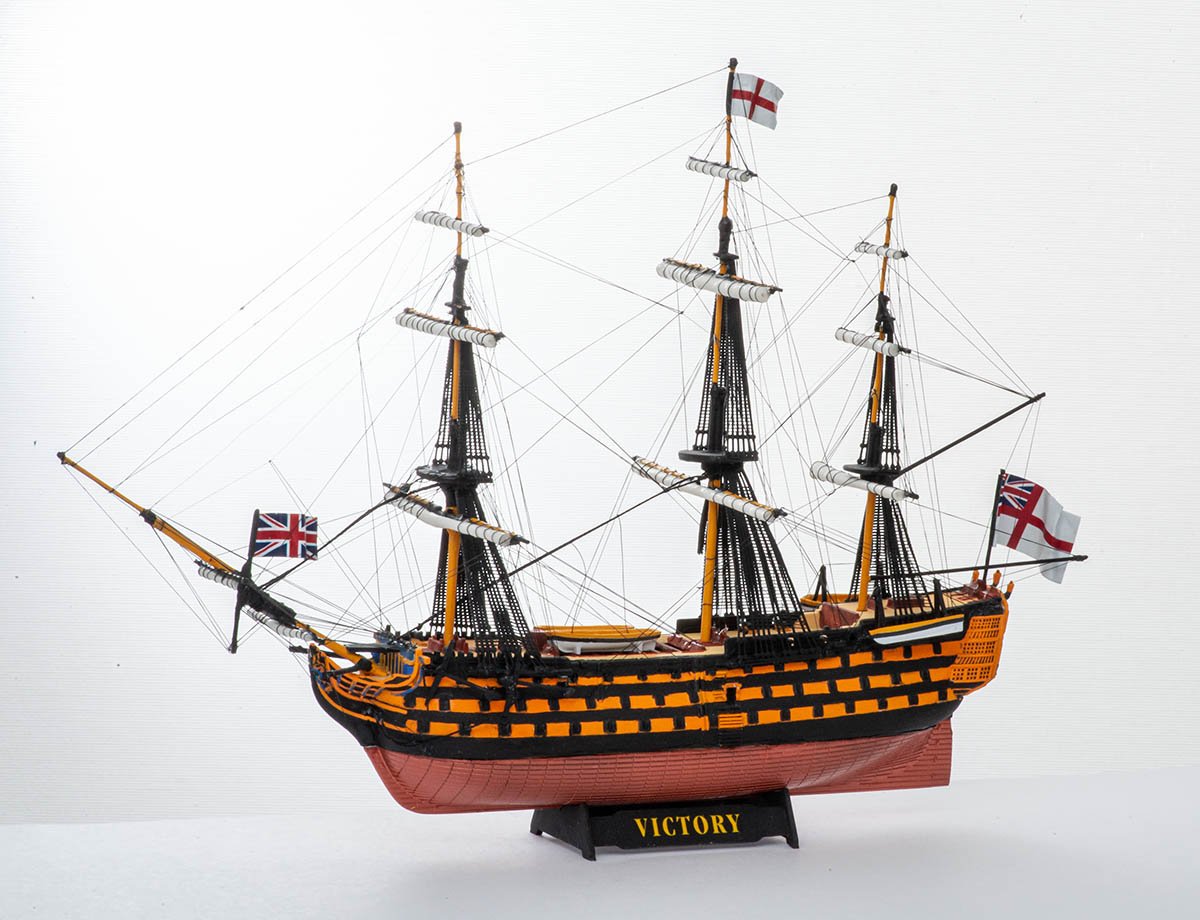
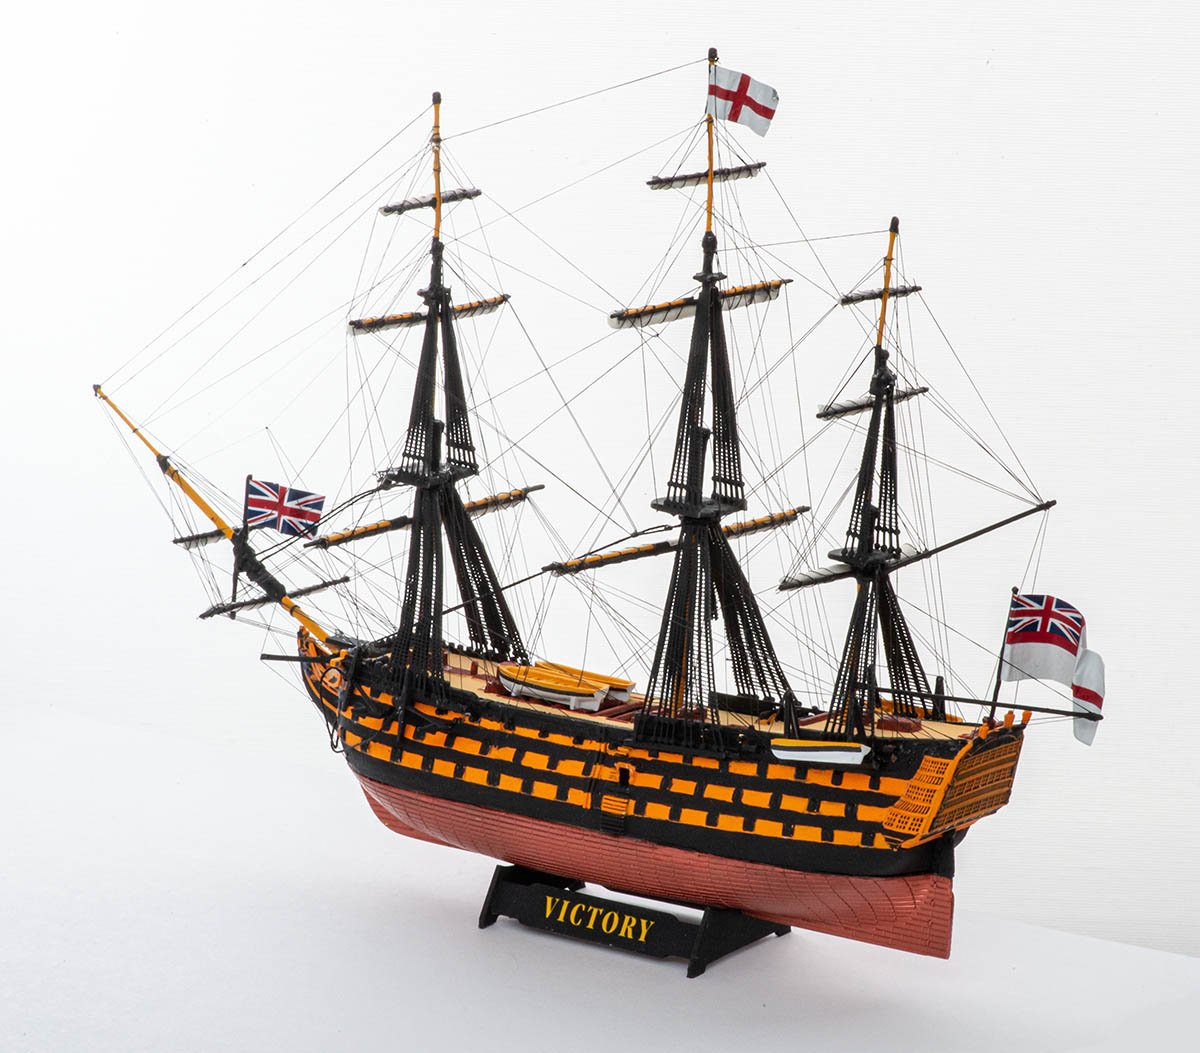
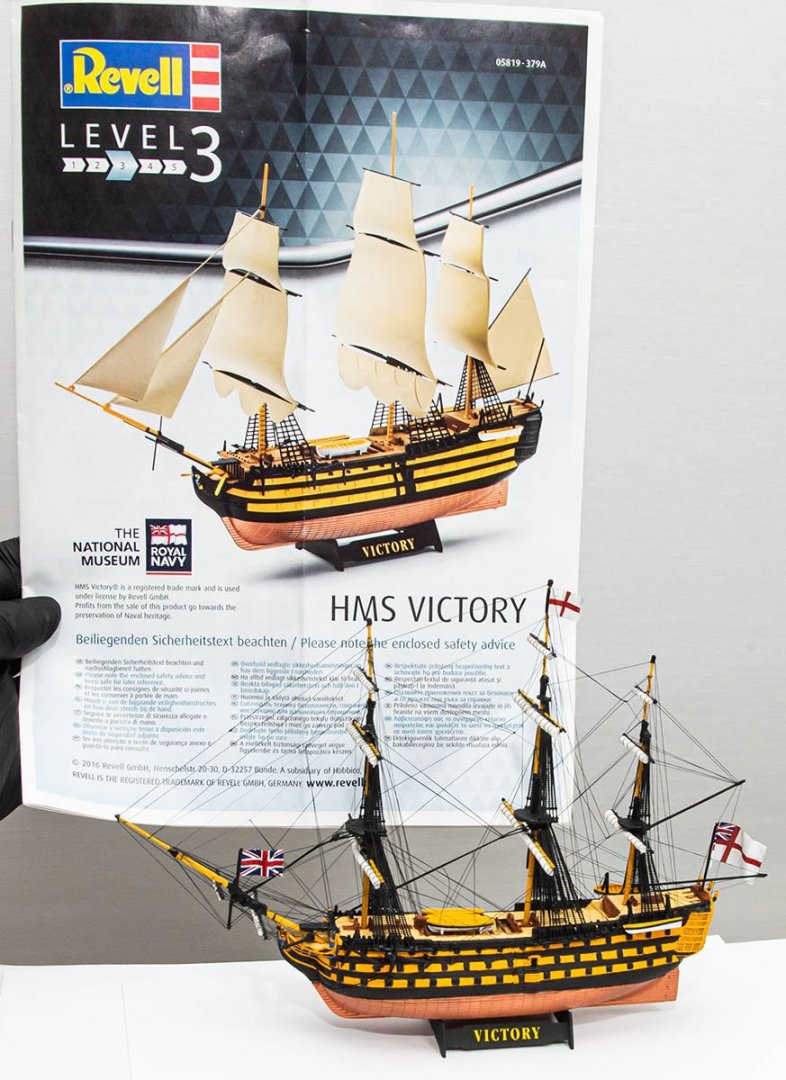
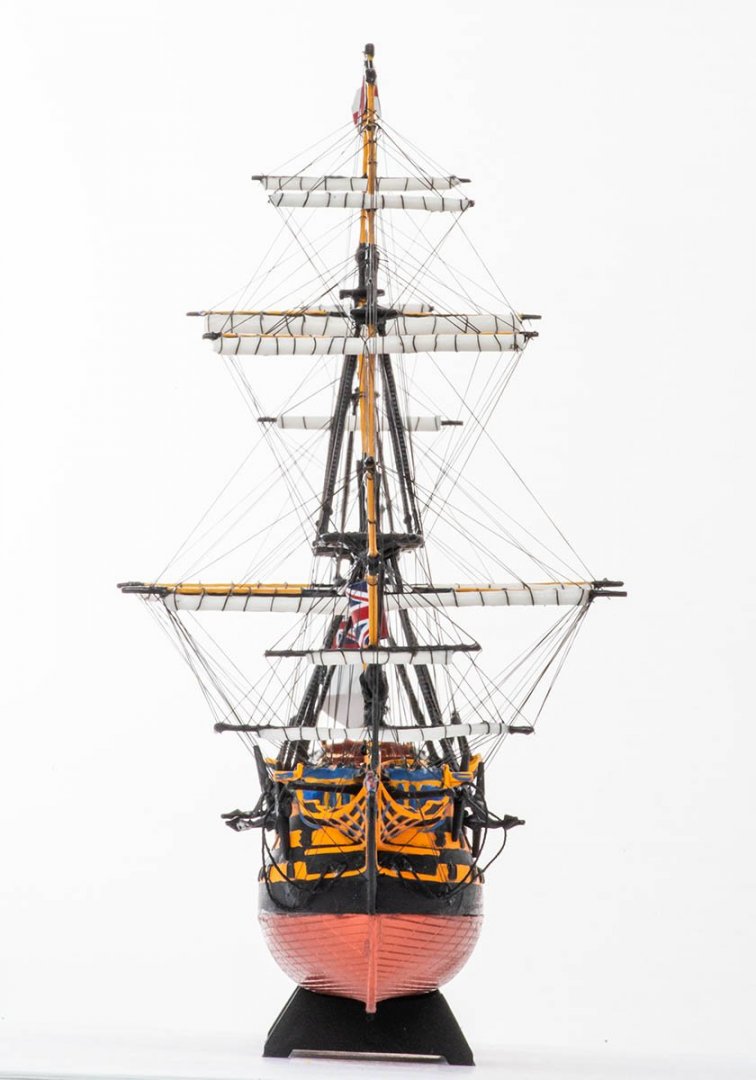
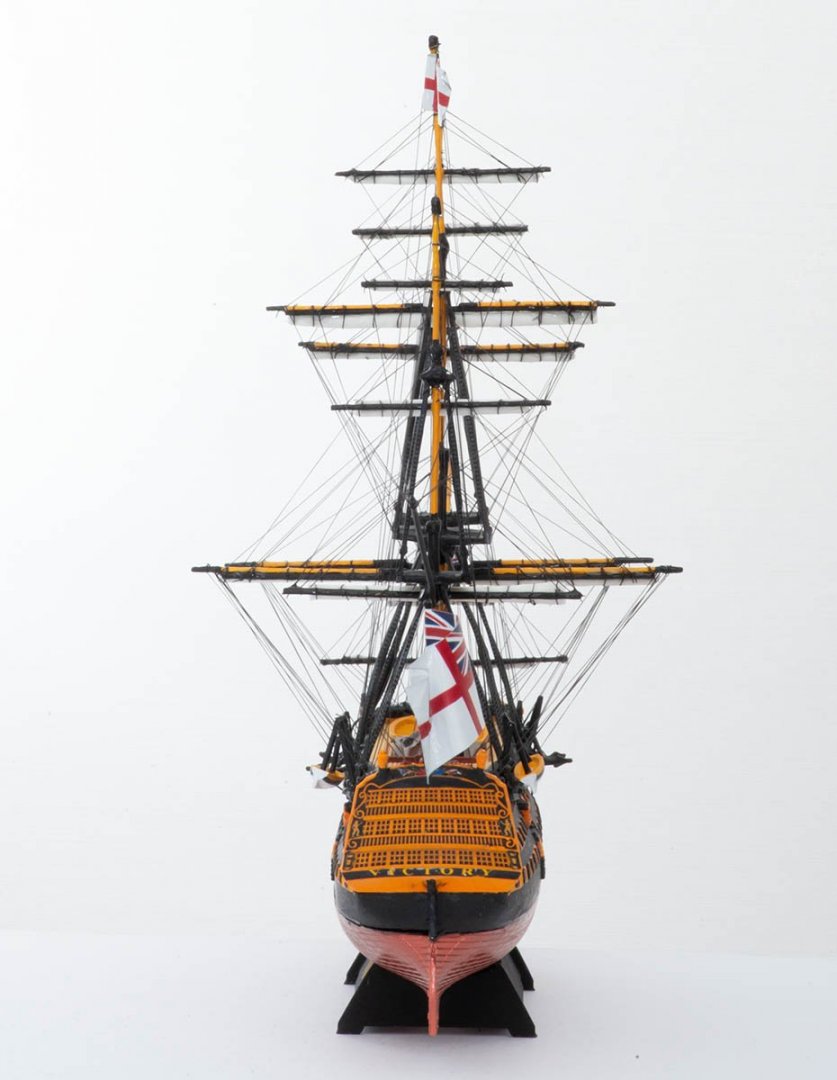
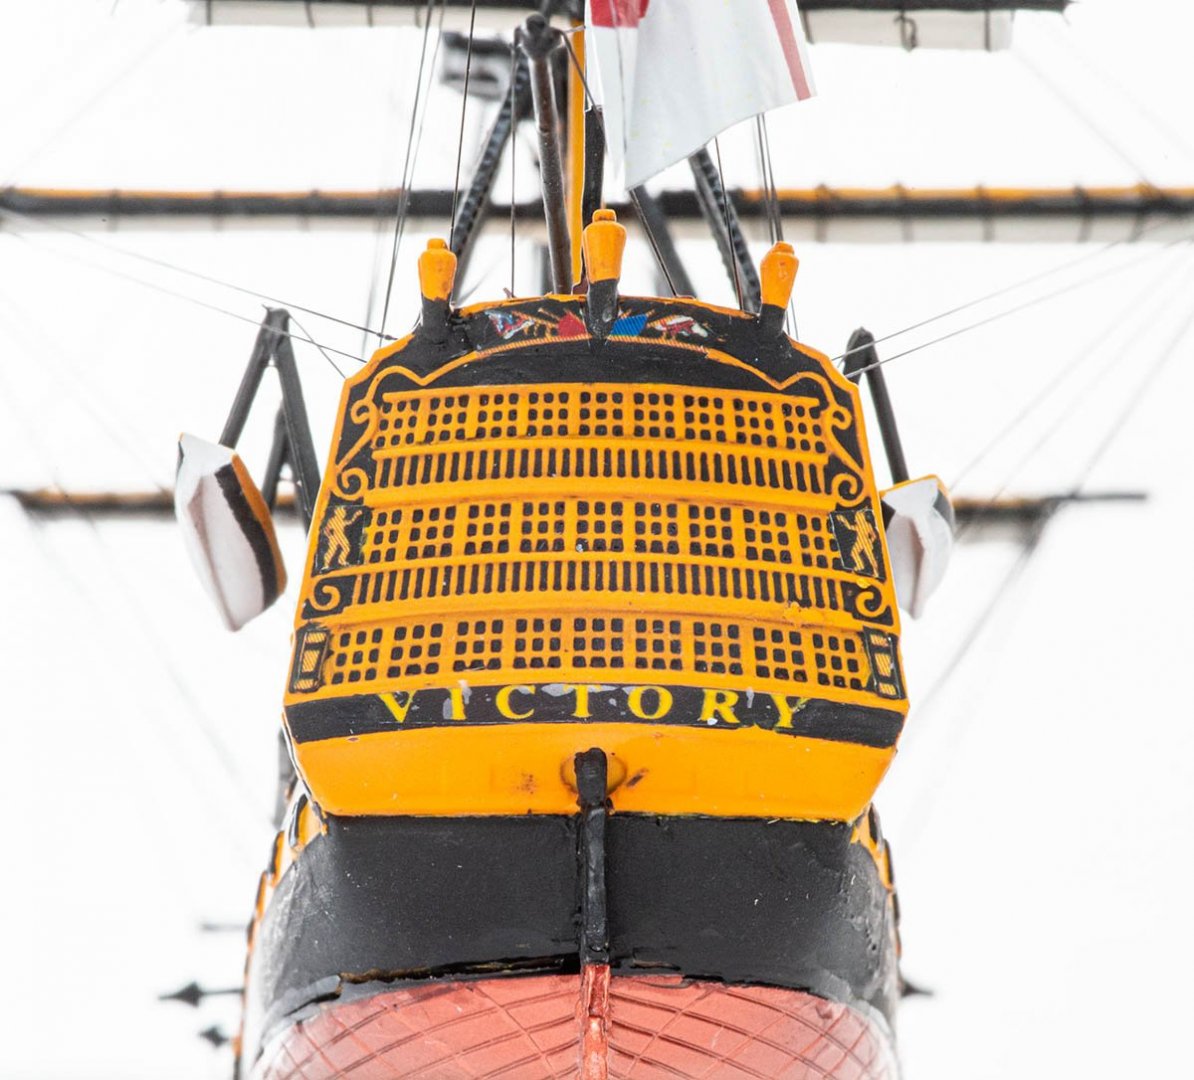
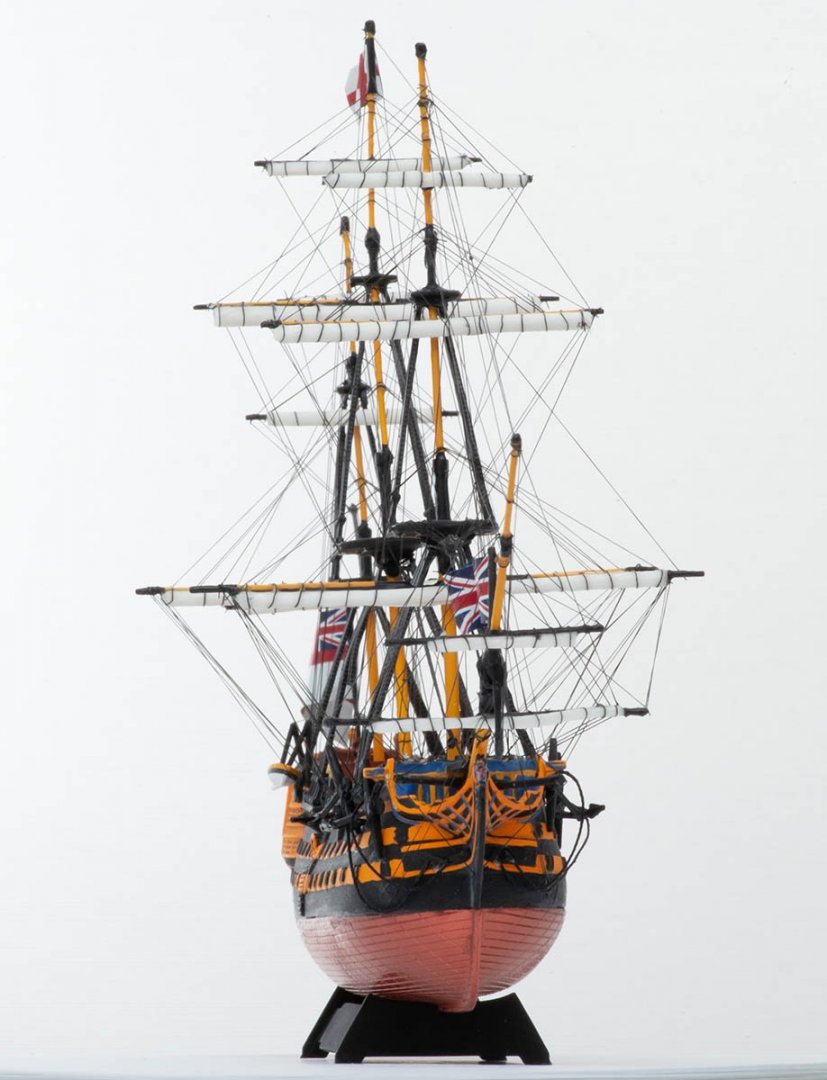
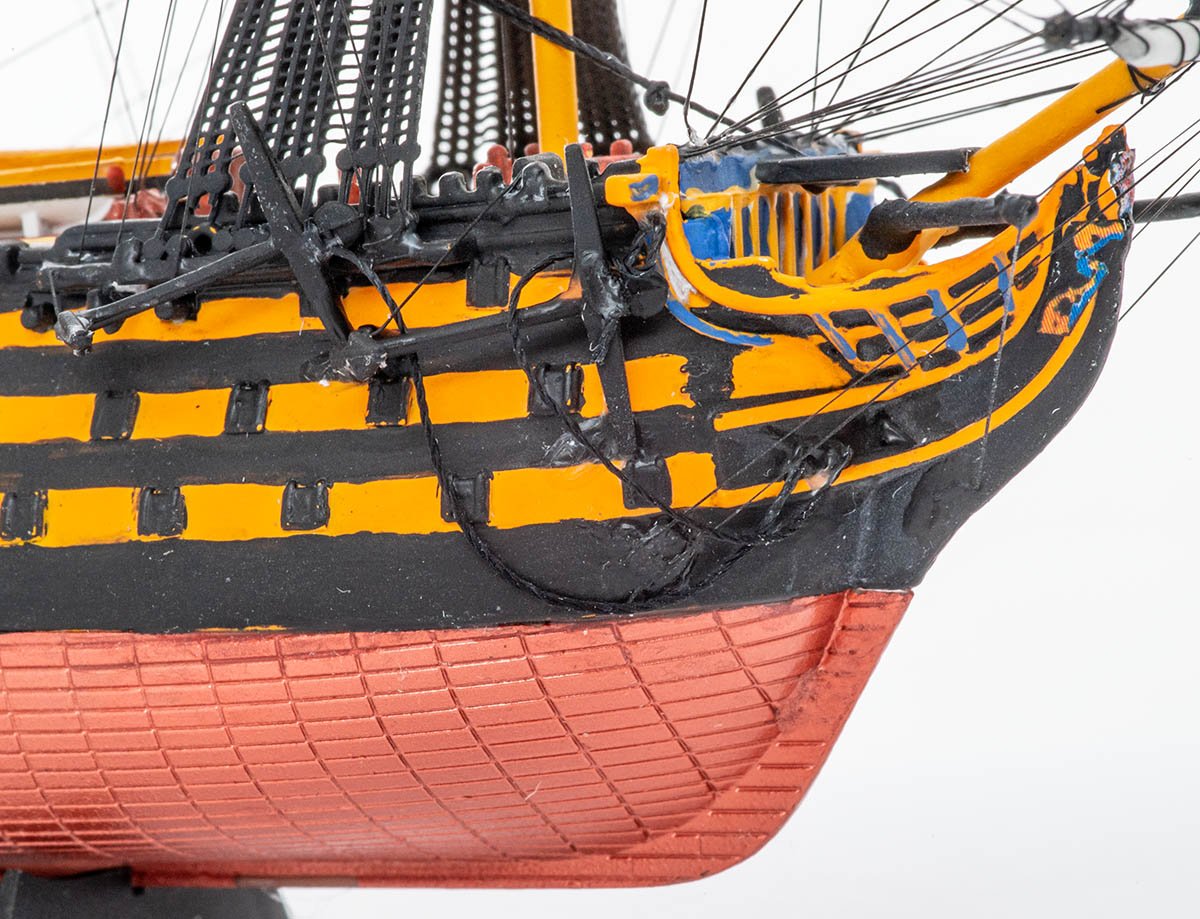
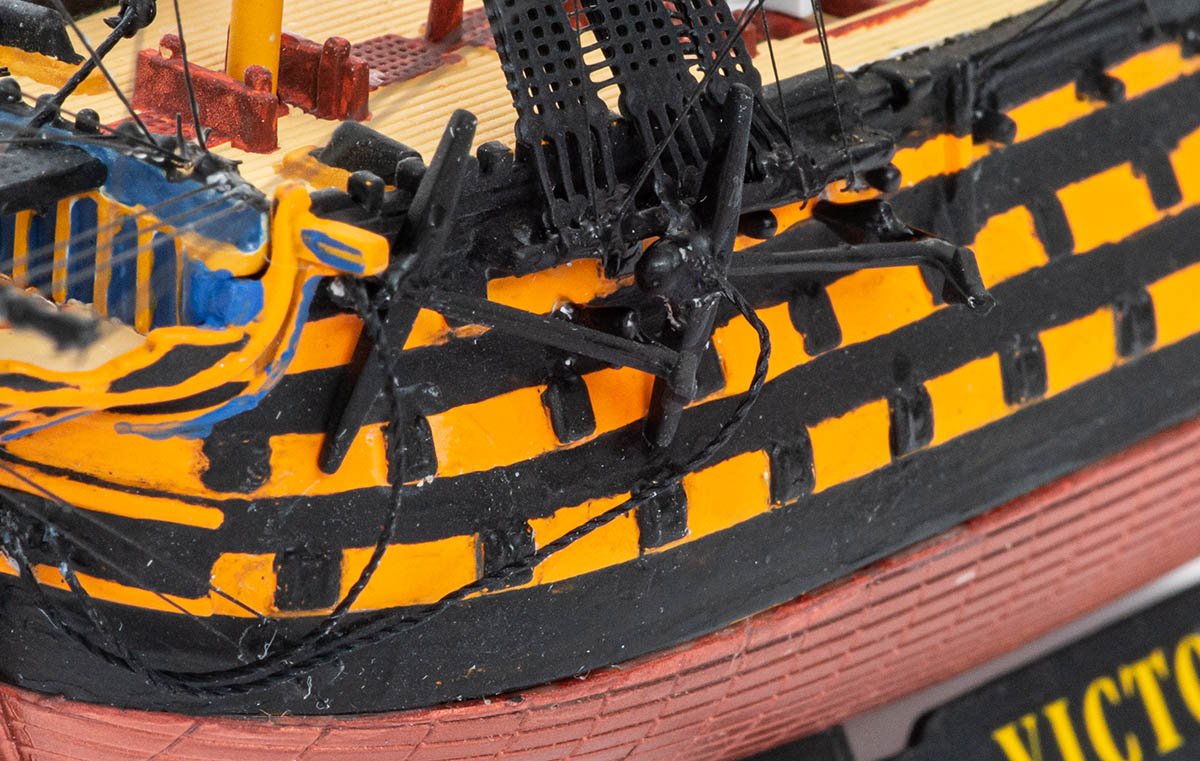
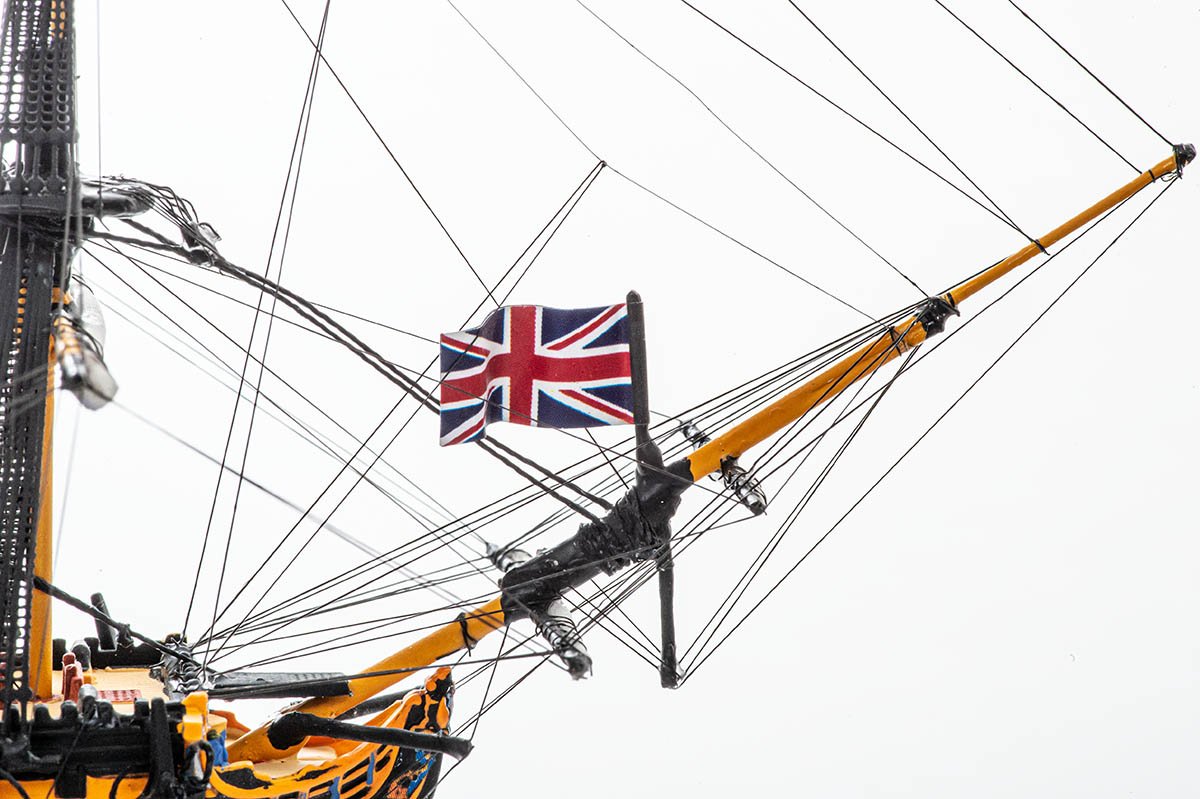
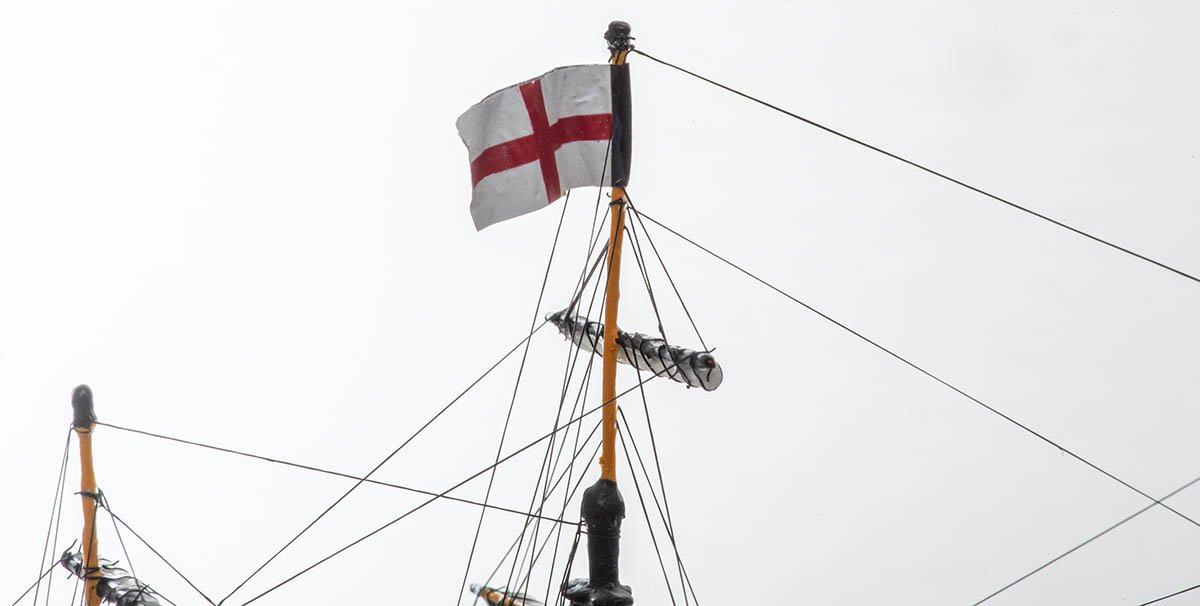
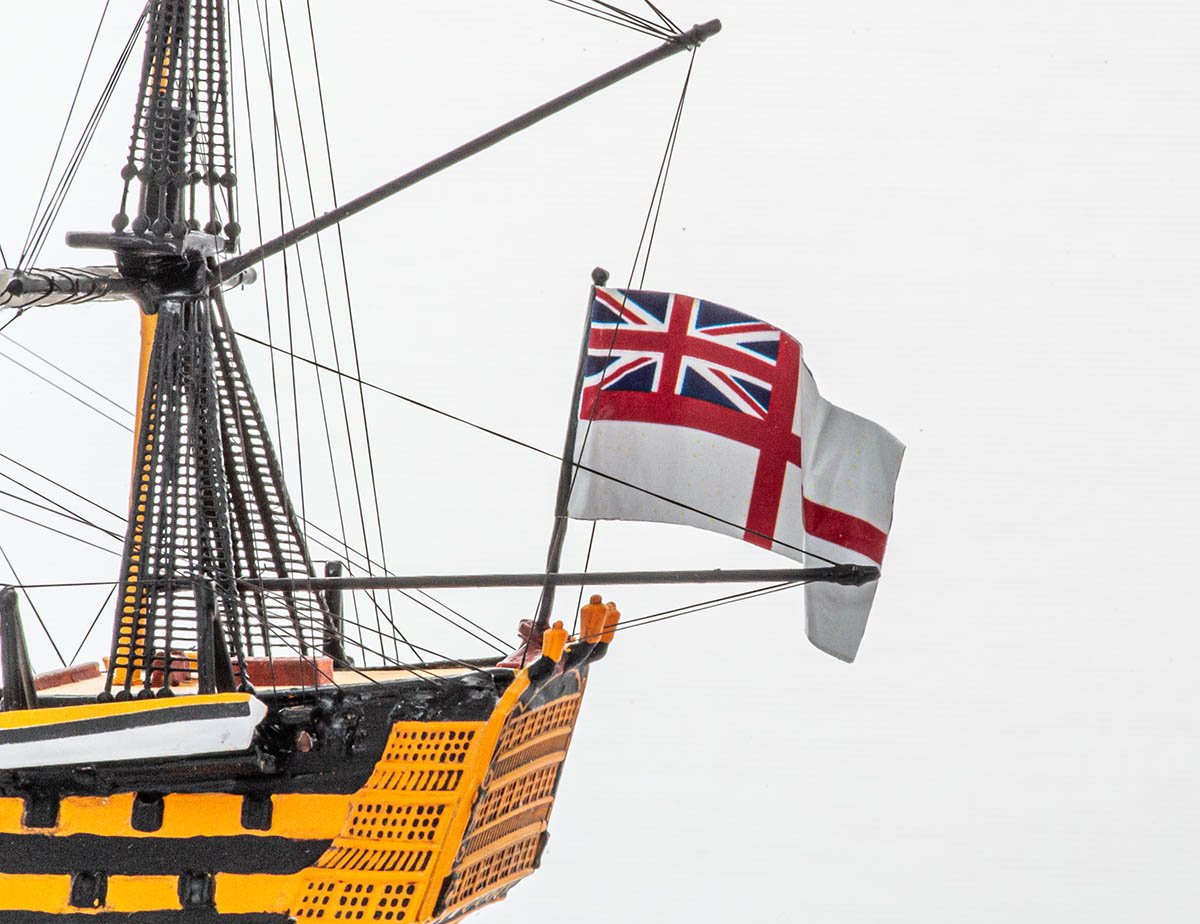
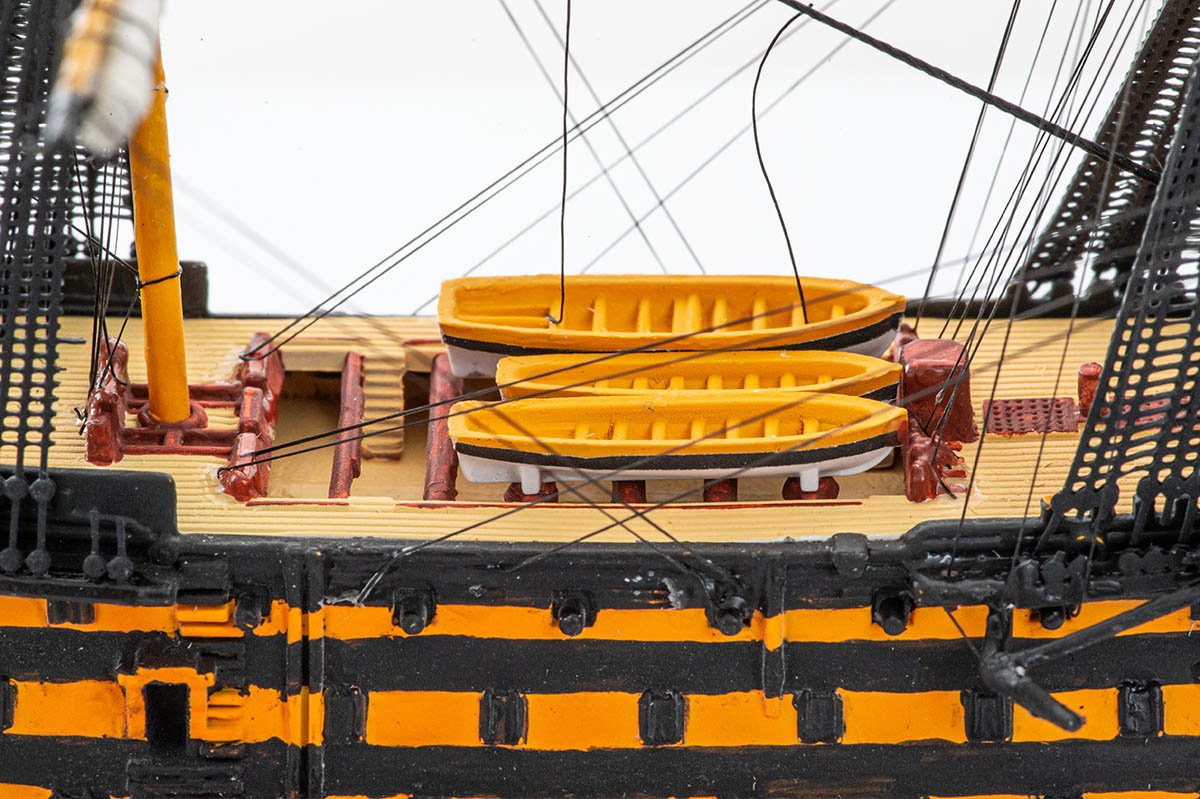
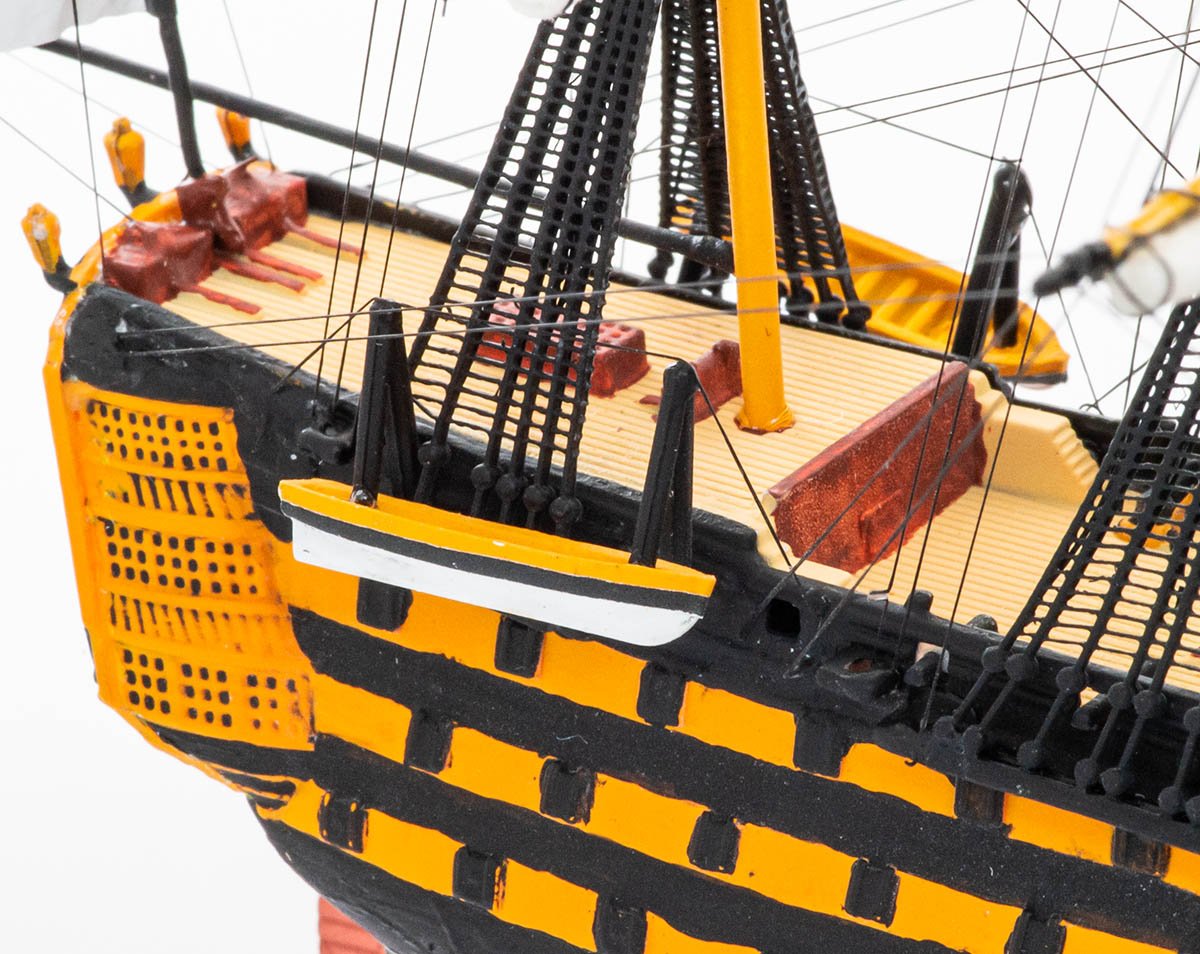
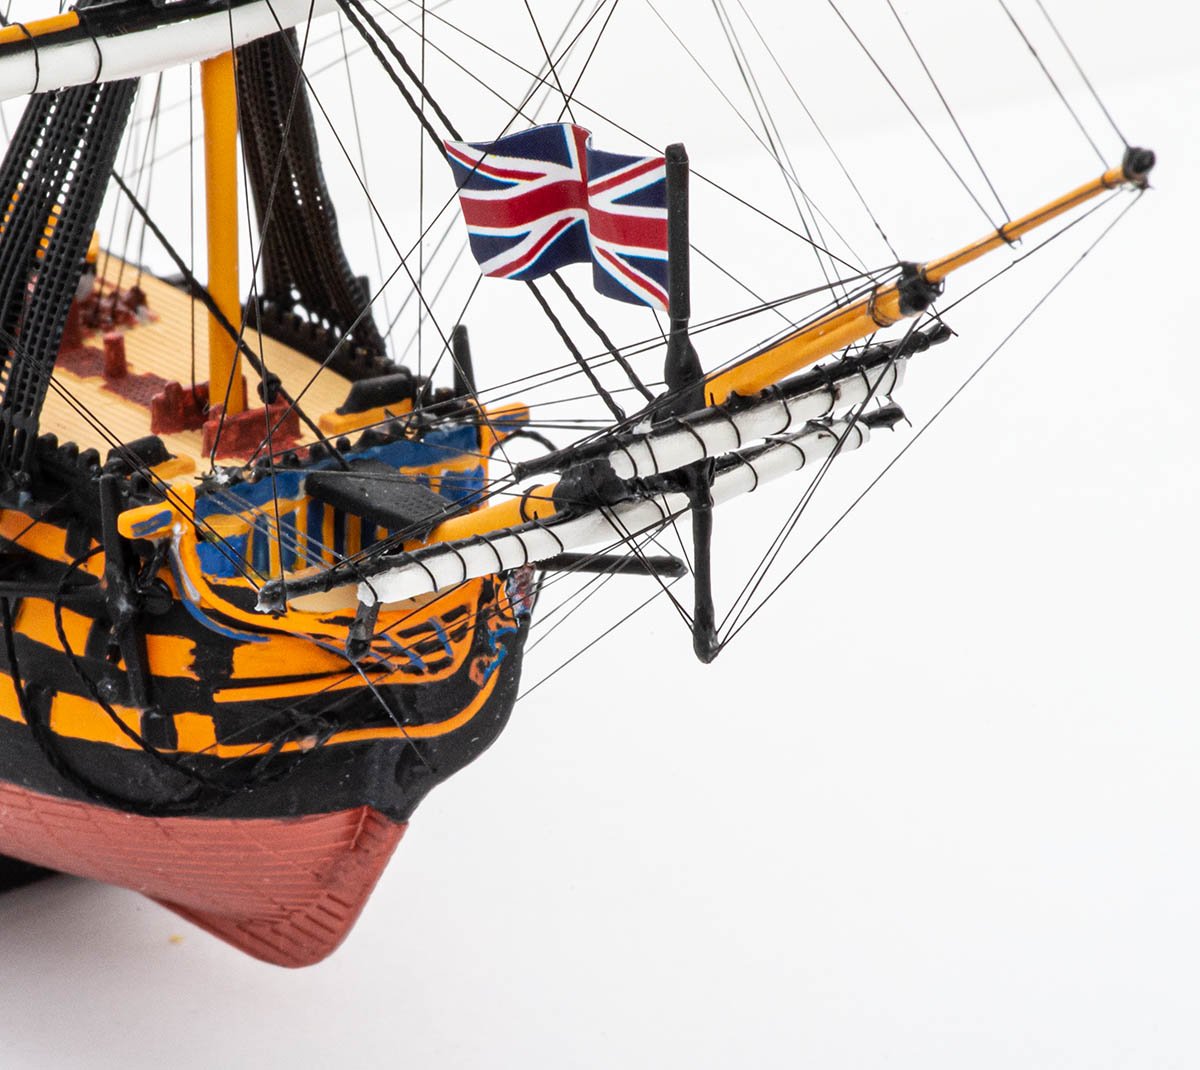
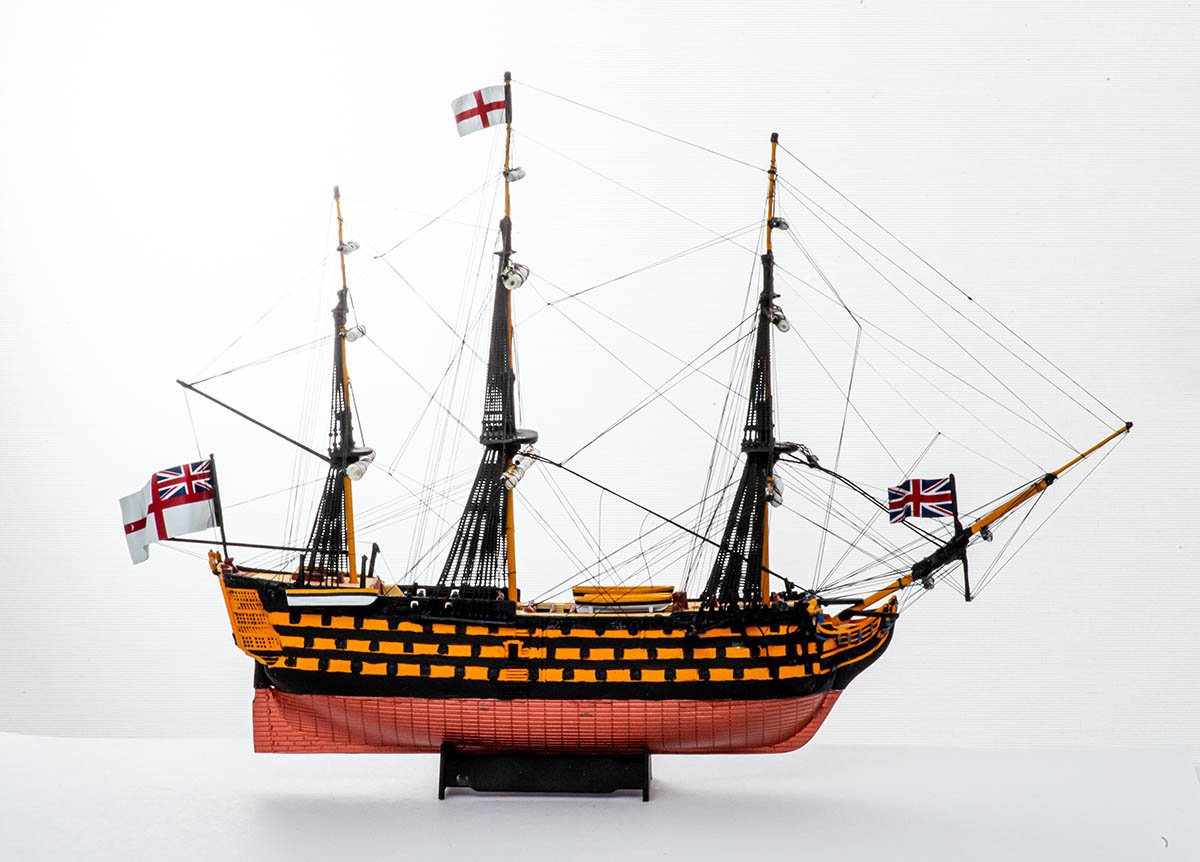
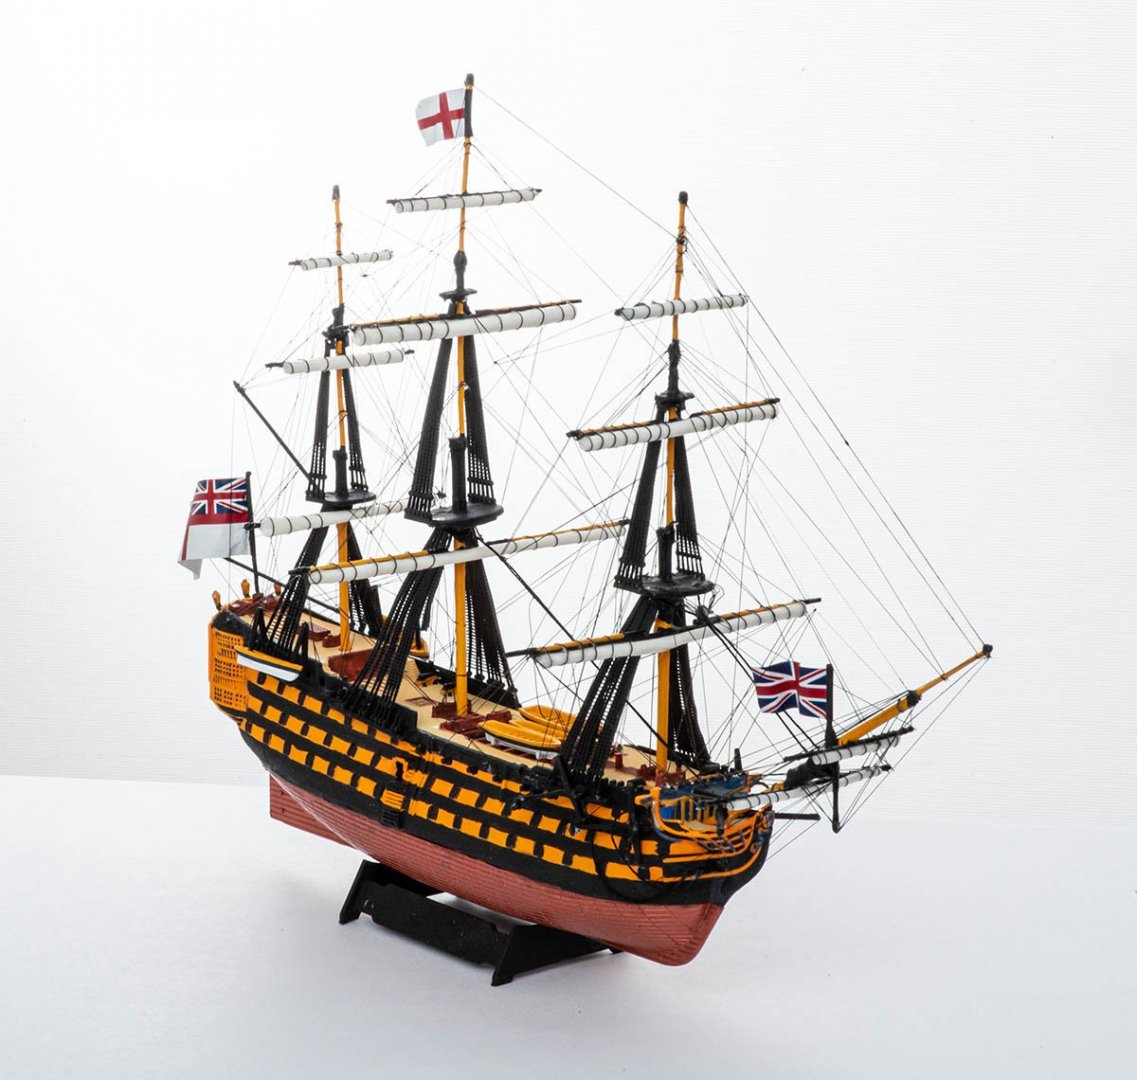
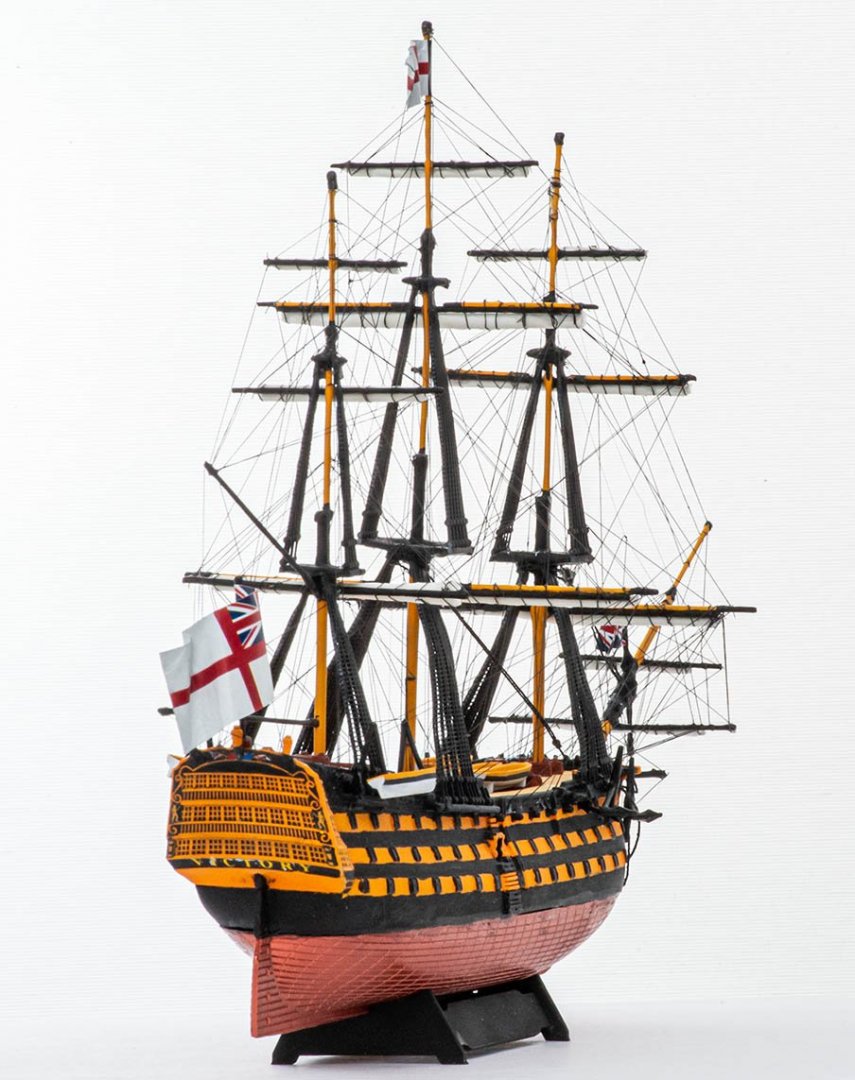
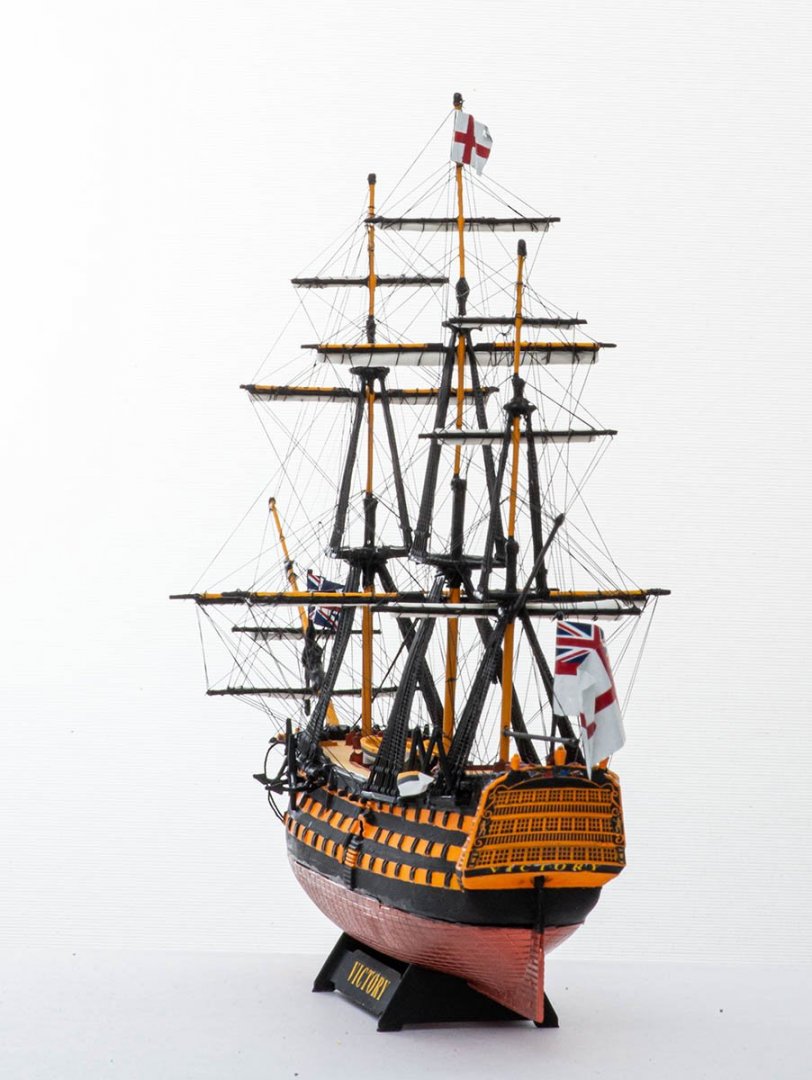
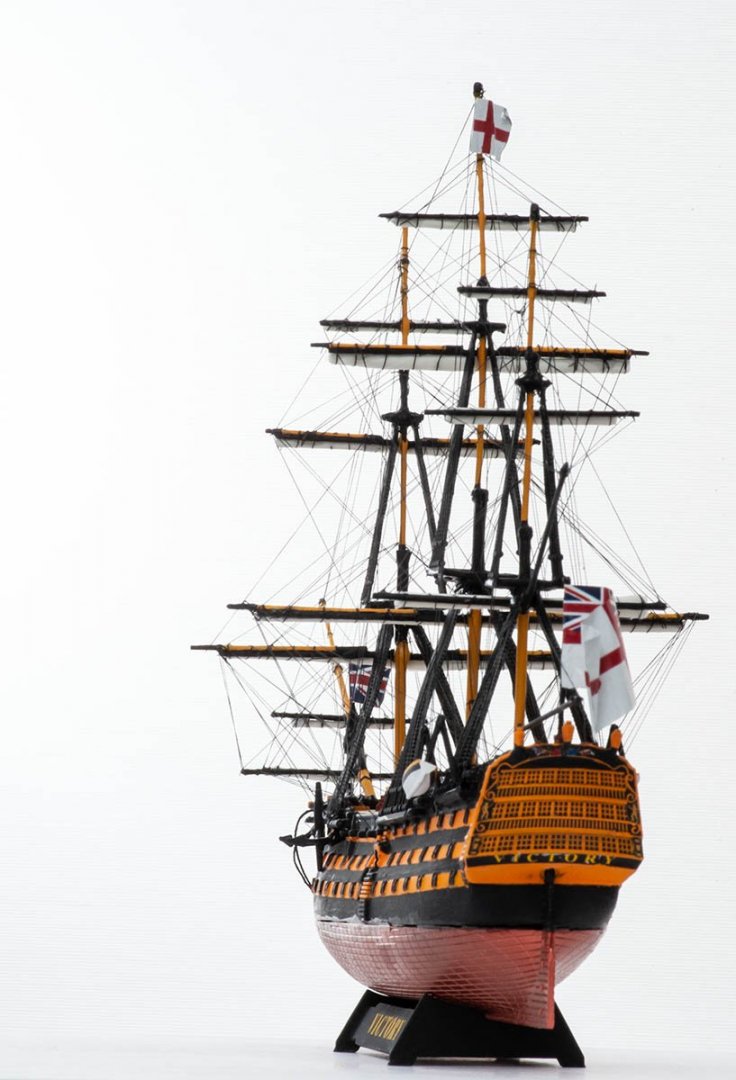
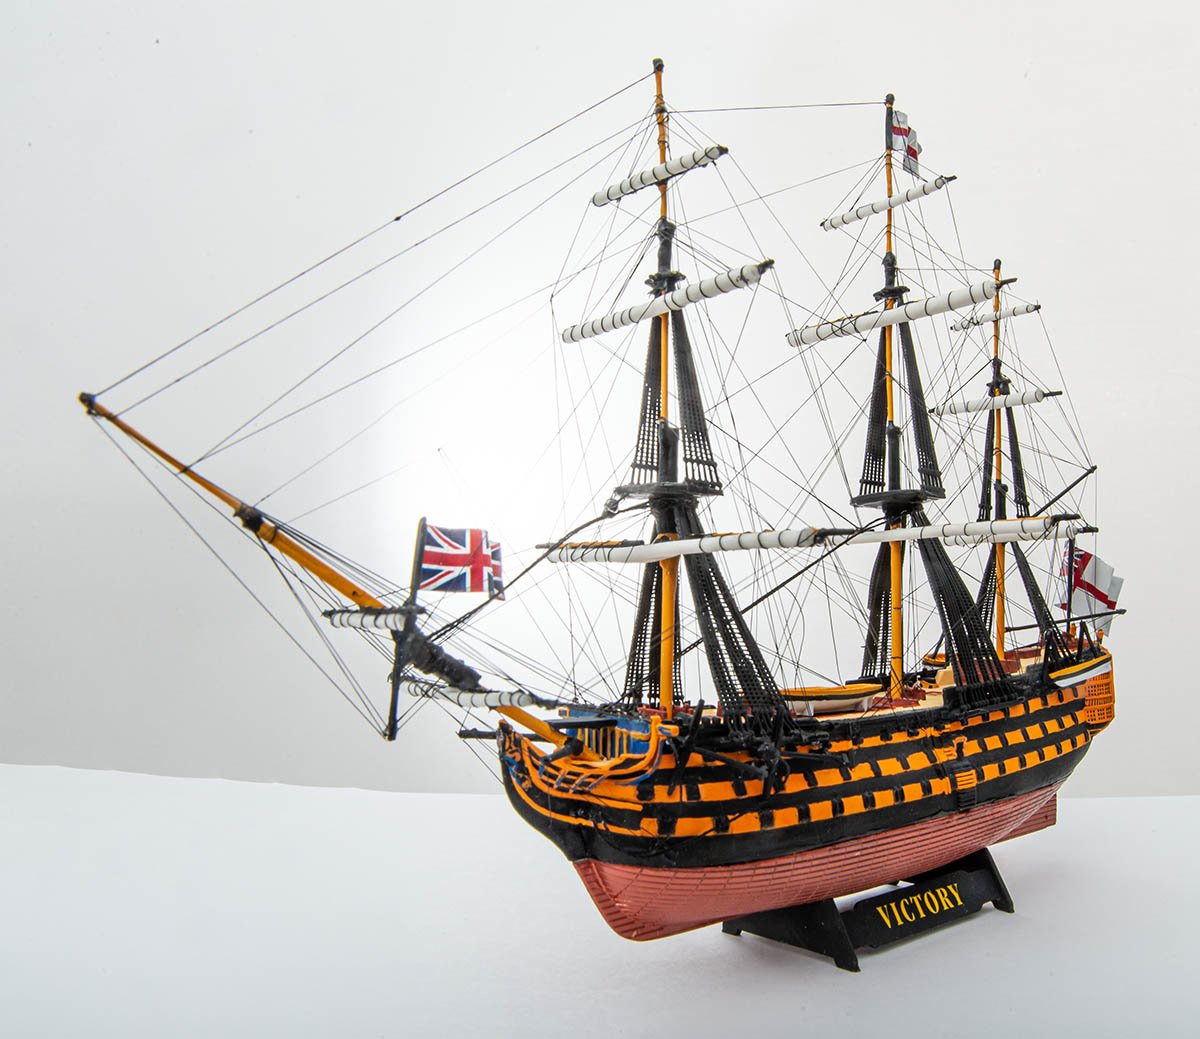
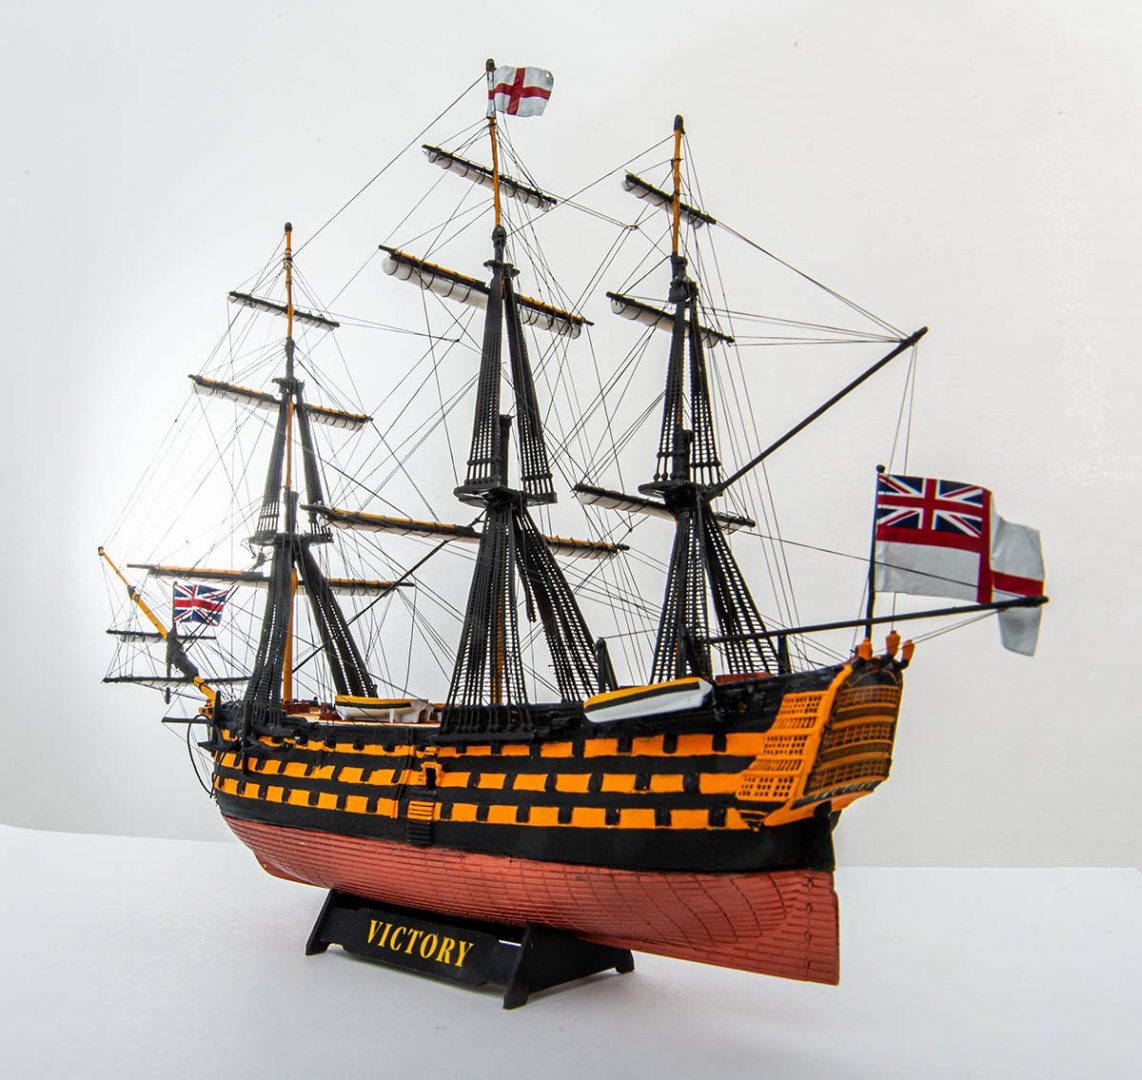
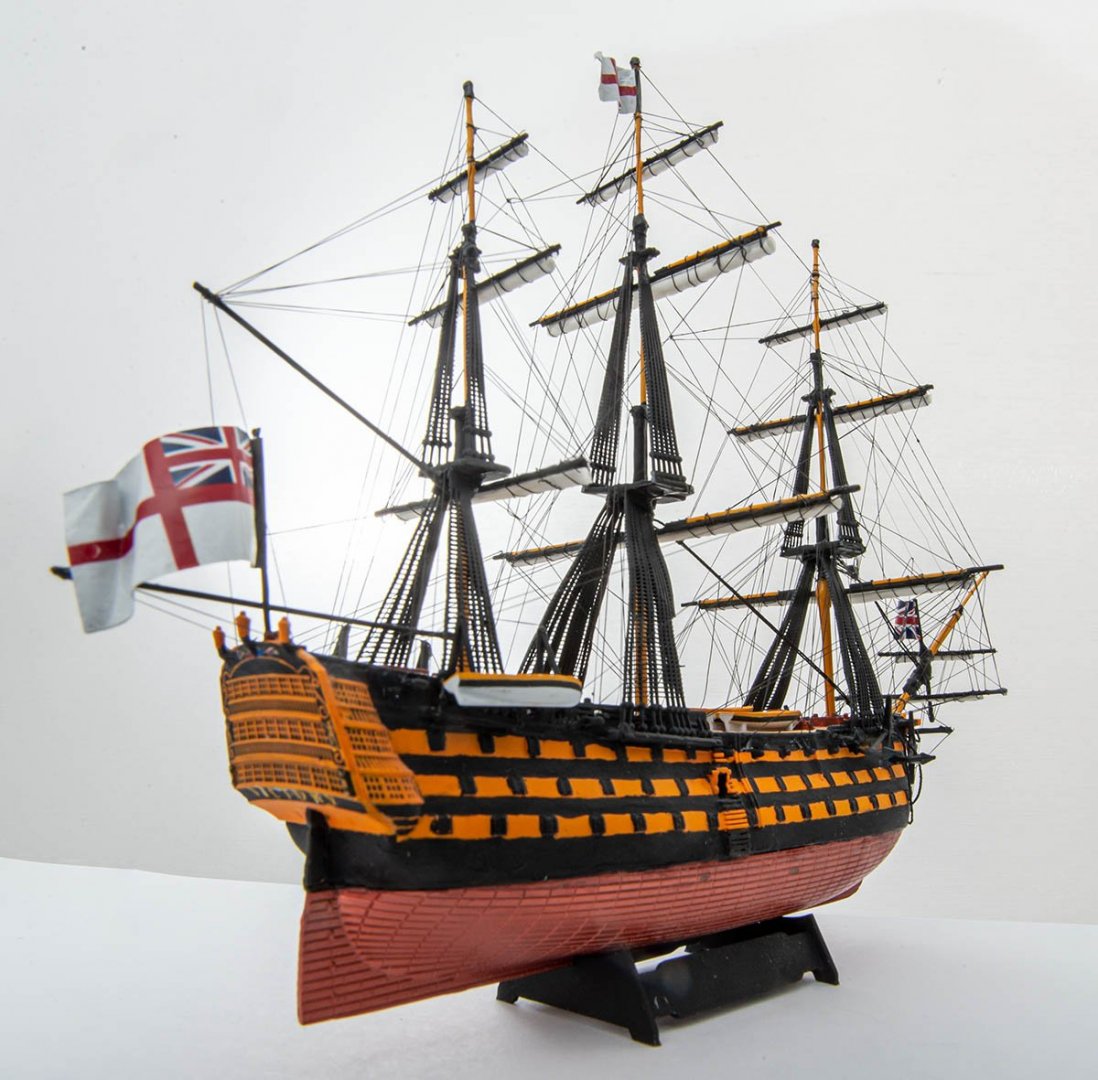
Hello. This is Revell HMS Victory 1/450 (#5819). It is my first Victory. There is a neodymium magnet in the hull of the ship. I can use it as a magnetic clip.


-
What is this wire made of?
modeller_masa replied to modeller_masa's topic in Masting, rigging and sails
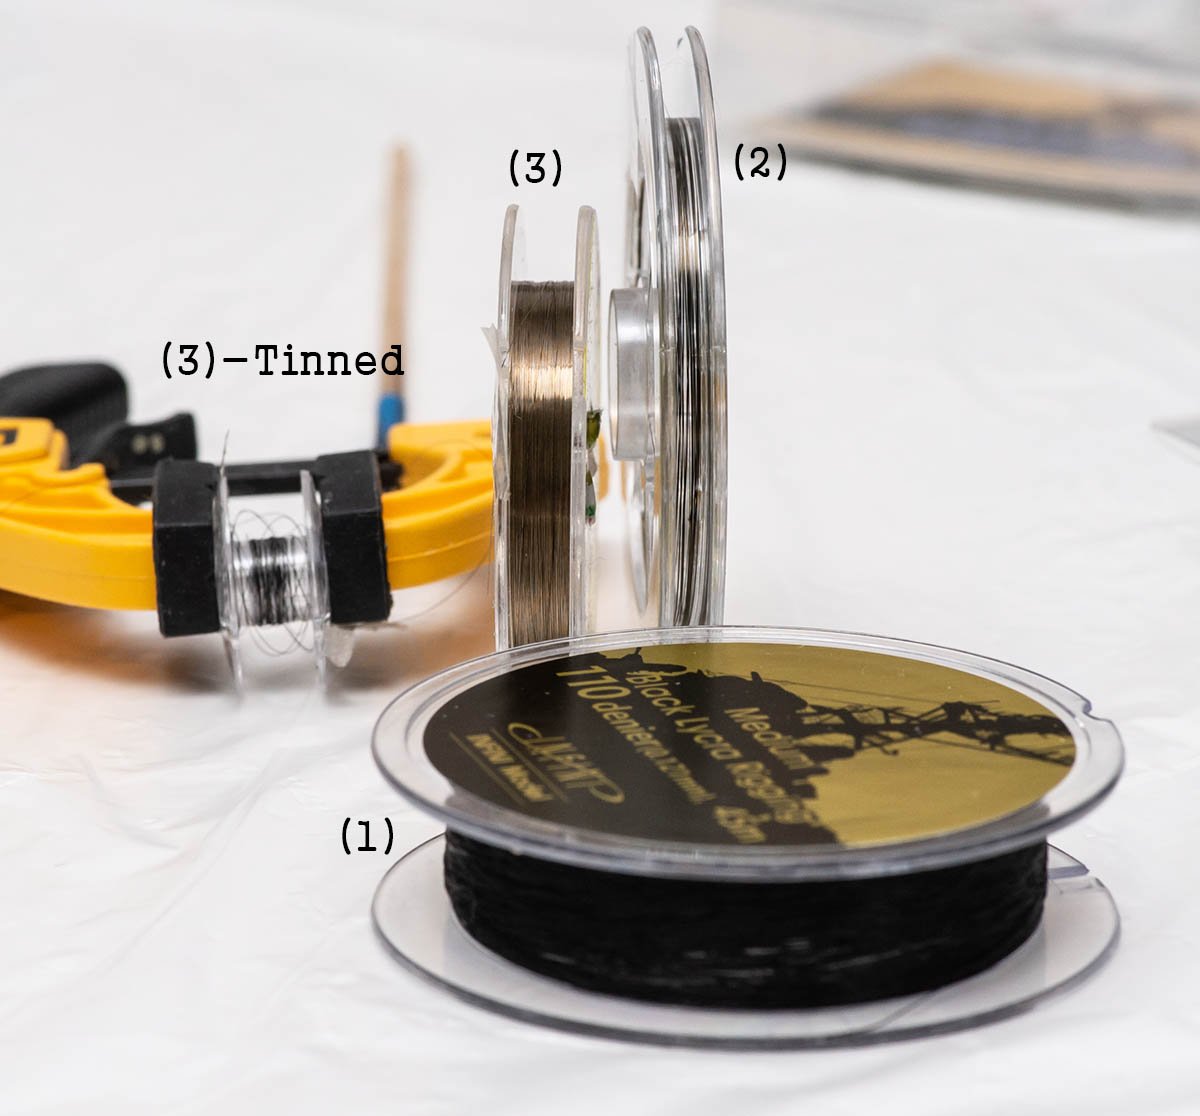
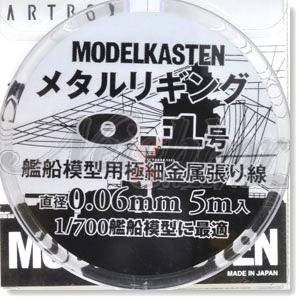
Hello. I bought additional test matter. It is (2) the Modelkasten Metal rigging thread from Japan. Its thickness is 0.06mm, and the length is only 5 meter for $25. The color of the (2) is less blacker than (3) Tinned molybdenum wire. Also, it is a bit more shiny than (3)-T. The other mechanical characteristics are very similar to the $7 cheap molybdenum wire. And... Metal ignition test... (2) Modelkasten metal wire also burns well more than (3) molybdenum wire... I think the Modelkasten uses a slightly different metal, but it is more dangerous than molybdenum wire. If you are using the Modelkasten metal rigging wire, the molybdenum wire will be 1/60 cheaper alternatives. If you are a smoker or care about safety, stick to traditional threads.

-
https://www.korabelhobby.com.ua/ships/russia/ Have you ever heard about the company? I found the company from the scalemate. Of course, it is not the 'Master Korabel'. Looks like it is one of the youngest company founded in 2019. These are their lineup. The only problem is that they don't sell the products over old soviet border... I'll wait till they sell the products on eBay.

-
What is this wire made of?
modeller_masa replied to modeller_masa's topic in Masting, rigging and sails
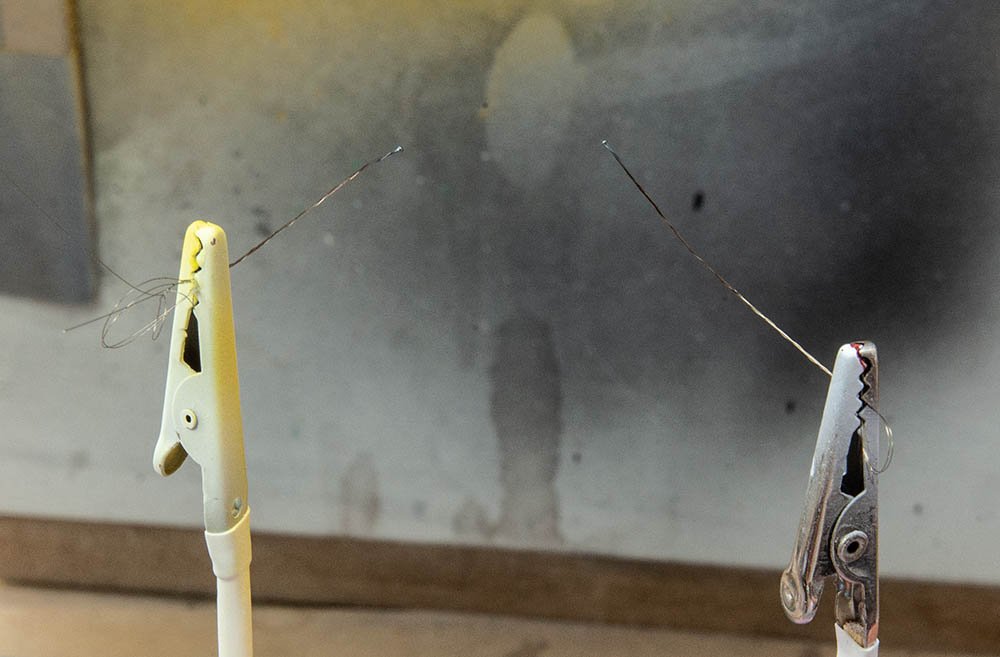
Hello, wefalck. Thanks for professional description about the material. The reason I was scared of this wire was an explosion accident. I wrote my hypothesis based on the accident. When I was testing a mass production device of tinned wire seems like a cat's cradle, I made a fire with torch in curiosity. A temperature of the gas torch's fire was 1,200 celsius, and the multiple wires were under some tension...... and exploded within a second literally. The shiny sparks splashed out all over the room. Really fortunately, there was no fire. The upper animated gif picture was captured under a secured condition, and it was burnt less than a second as I made a fire. I don't smoke, but I'm sure that overlapped and twisted molybdenum wire on completed wooden model ship will be burnt more faster and longer than sole wire if smoker touch the tip of a cigarette. I constructed a little experiment to prove my intuition. I made a thread that has 7~8 molybdenum wires, and removed tension for safer test. Also, I used normal fire starter. The result. It started slower than single wire. after 2~3 seconds, it exploded and splattered short red-fired-wired around a table, and stop to burn. My hypothesis about faster and sensitive burn was wrong due to a heat conduction. However, its explosion damage and heat production increased as an amount of burnt wire increased. You can see the burnt-blackened wires at the end of both wires. It didn't happen on sole wire. It means more heat production. Therefore, if there is more heat source = more wires, I would say that an entire wire can be burnt like a nuclear bomb. I'll test a metal rigging thread for consumer market from Japan. I want to check it has same issue or not.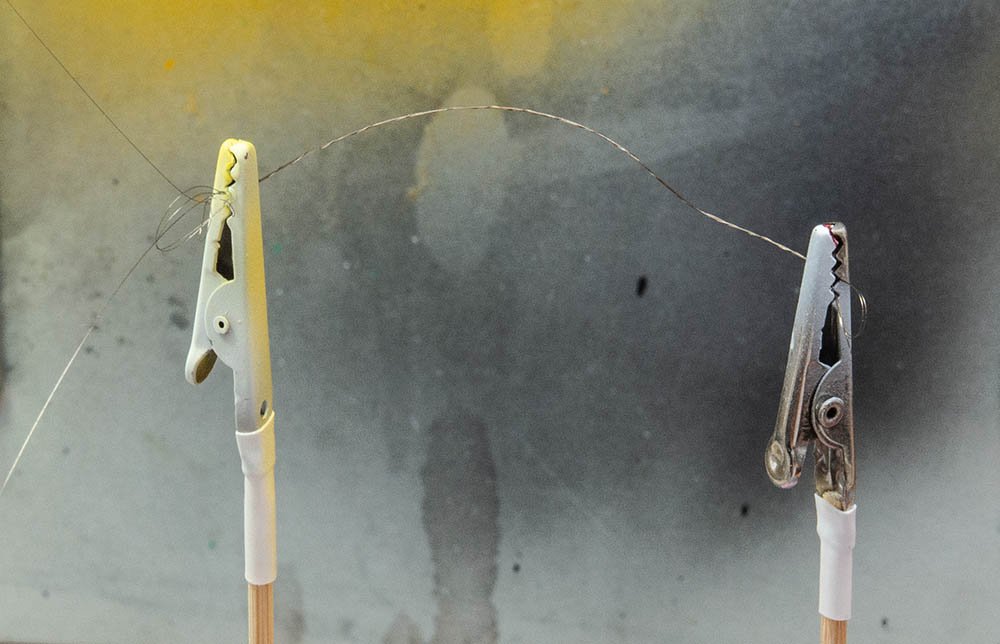
-
What is this wire made of?
modeller_masa replied to modeller_masa's topic in Masting, rigging and sails
I confirmed that the wire doesn't burn without explicit flame. I tested non-flame temperature test with my digital temperature control iron. At 220 celsius, it didn't burn and change. Therefore, room temperature or sunlight without lens effect won't be a problem. The only issue is that a tiny spark can cut and burn entire wires... I think it is not good for model work... -
What is this wire made of?
modeller_masa replied to modeller_masa's topic in Masting, rigging and sails
Hello, Pat. When I searched about this wire, I accidently found what this is made of. They called it 'Molybdenum cutting wire'. It must be sole Molybdenum wire or Molybdenum steel which is commonly used for bicycle frame (Chromoly molybdenum steel). According to the wikipedia, the Molybdenum is super durable and oxidize coating resists well against water and air. Its temperature expansion is known as minimum among metals . (1/5 of copper) The only issue is burning temperature in my interpretation. The oxidize coating burns from 300 celsius, and this wire burns like a firecracker. It seems pretty much dangerous... I tested other materials such as fishing gut, but they don't burn this explosively. I don't have 'metal rigging wires' from Japanese company, so I didn't test them yet. Also, please consider me a newbie. I've never heard about the 'boiled linceed oil method'. I would say that you are considering about 'making multi threads wirerope'. I'm making the Revell's 1/450 HMS Victory and my skill is relatively low. I have a nasty plan to attach this kind of sole wire with CA glue directly. (like the 1/700 modern ship models.) Hello, grsjax. Probably molybdenum steel coated with copper...? I didn't imagine that I can't cut this 0.035mm wire with my hands.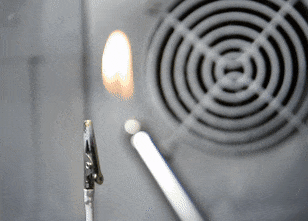
-
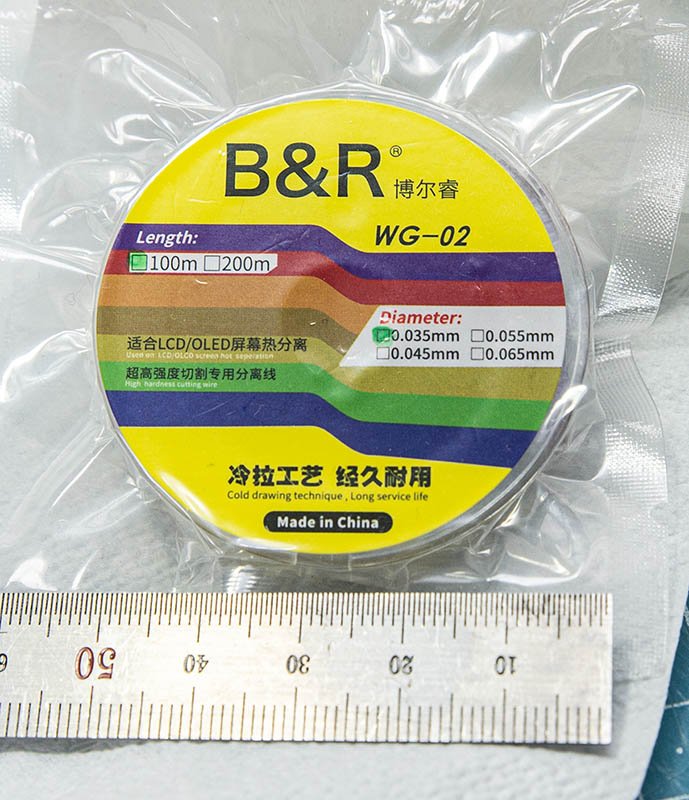
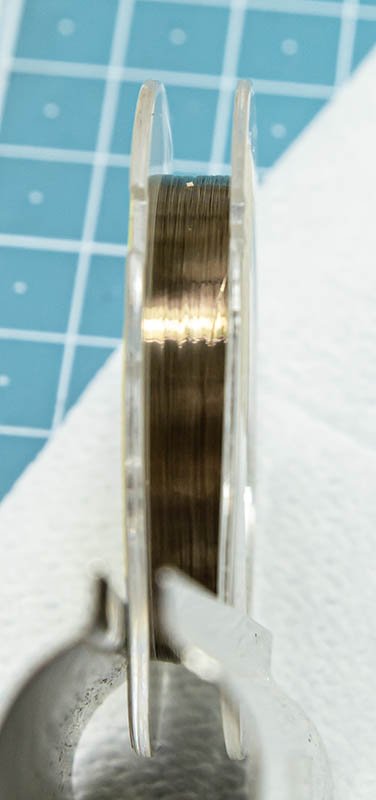
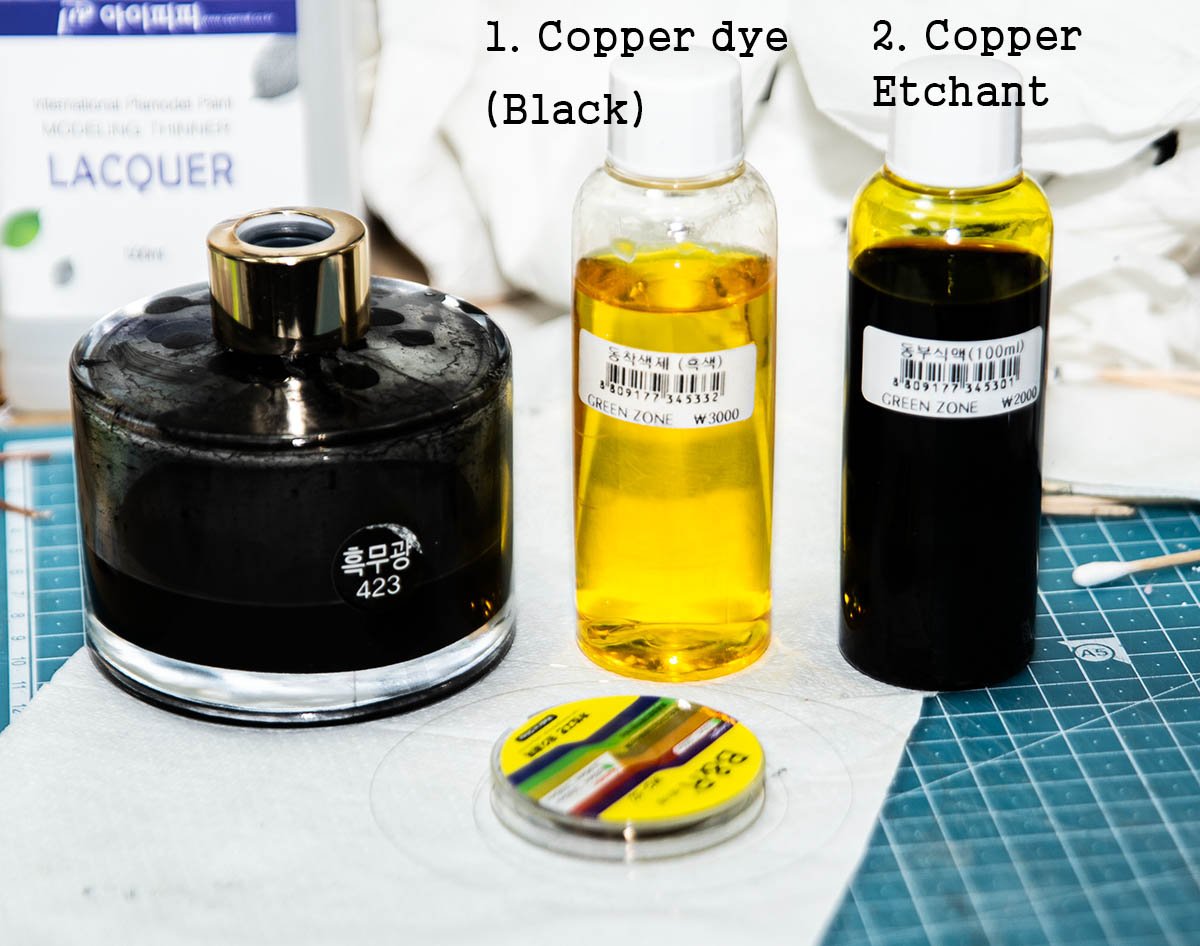
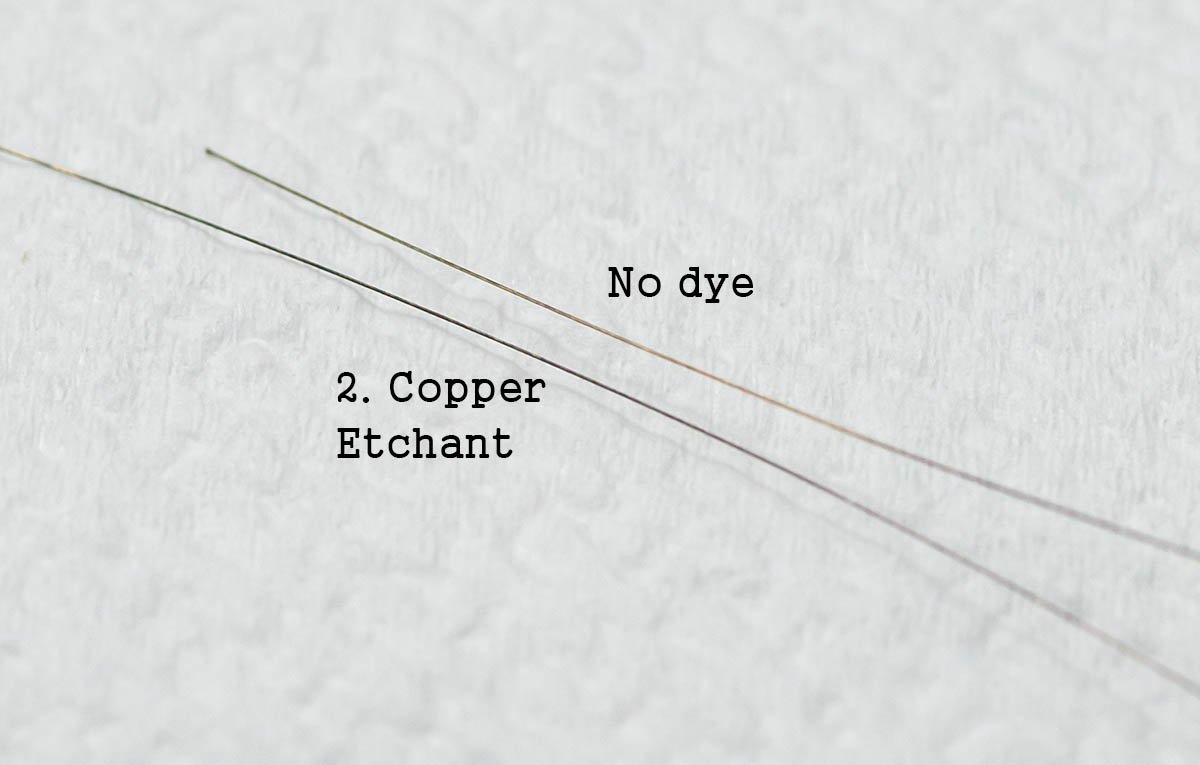
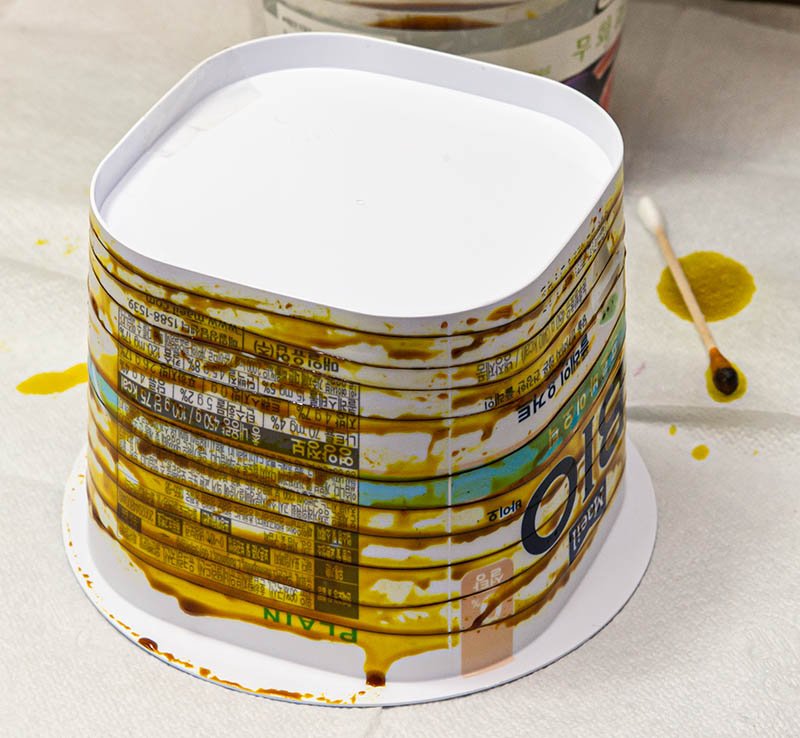
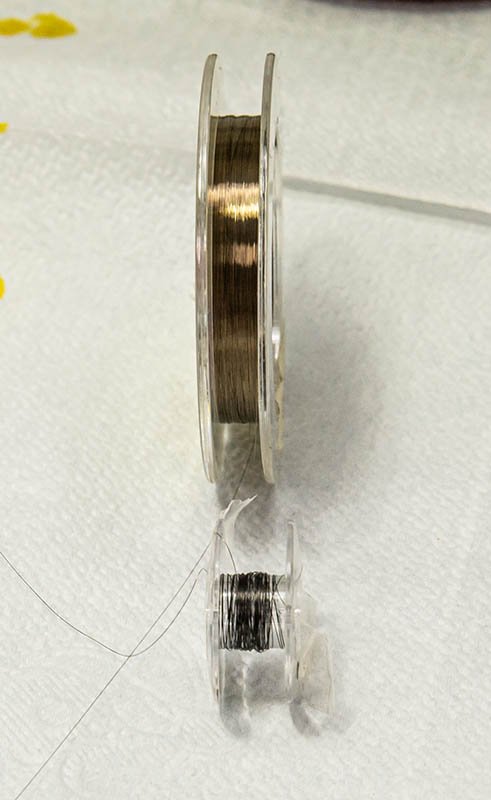
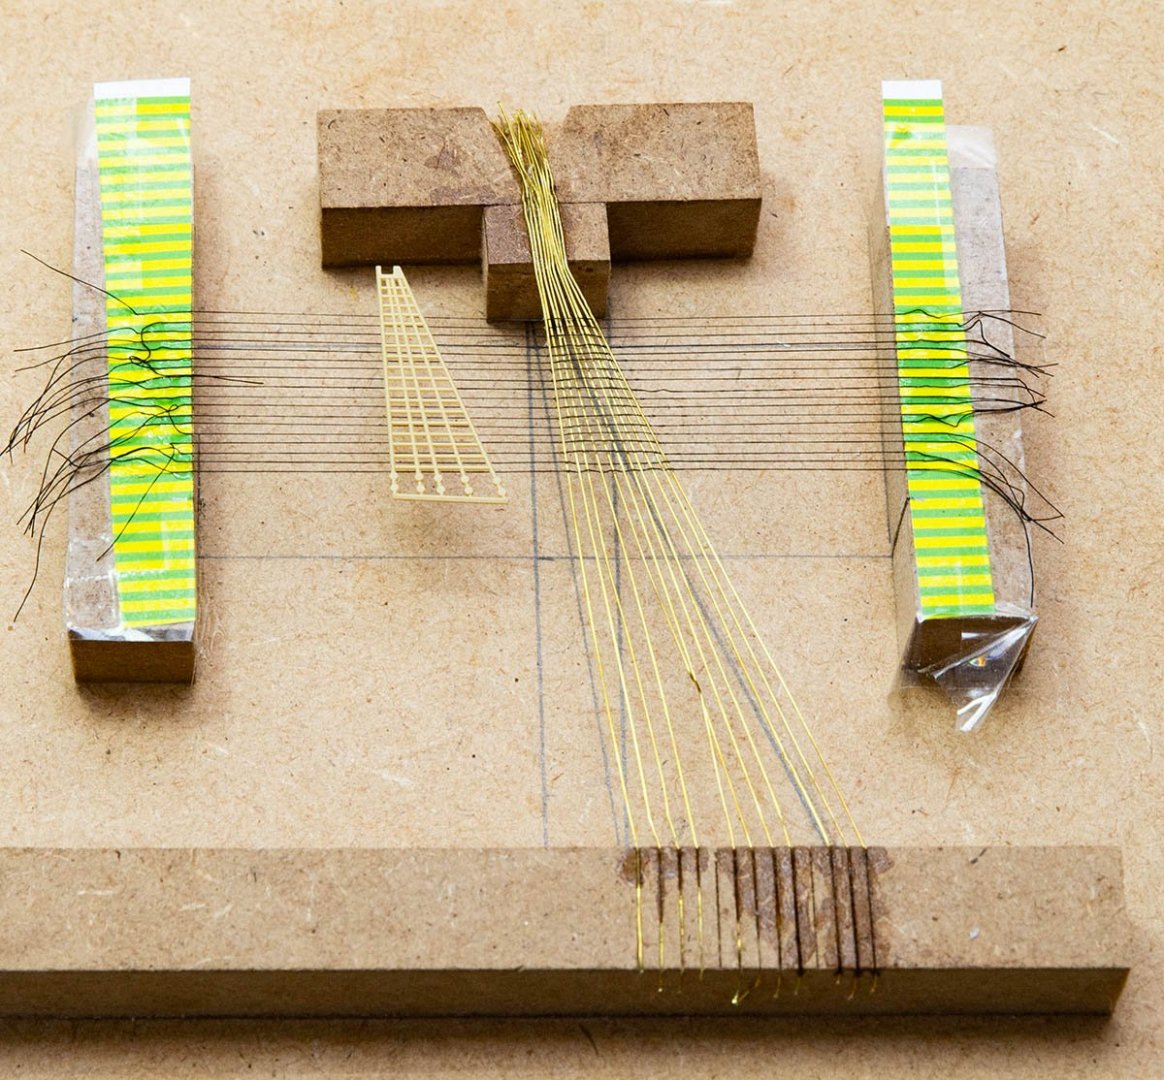
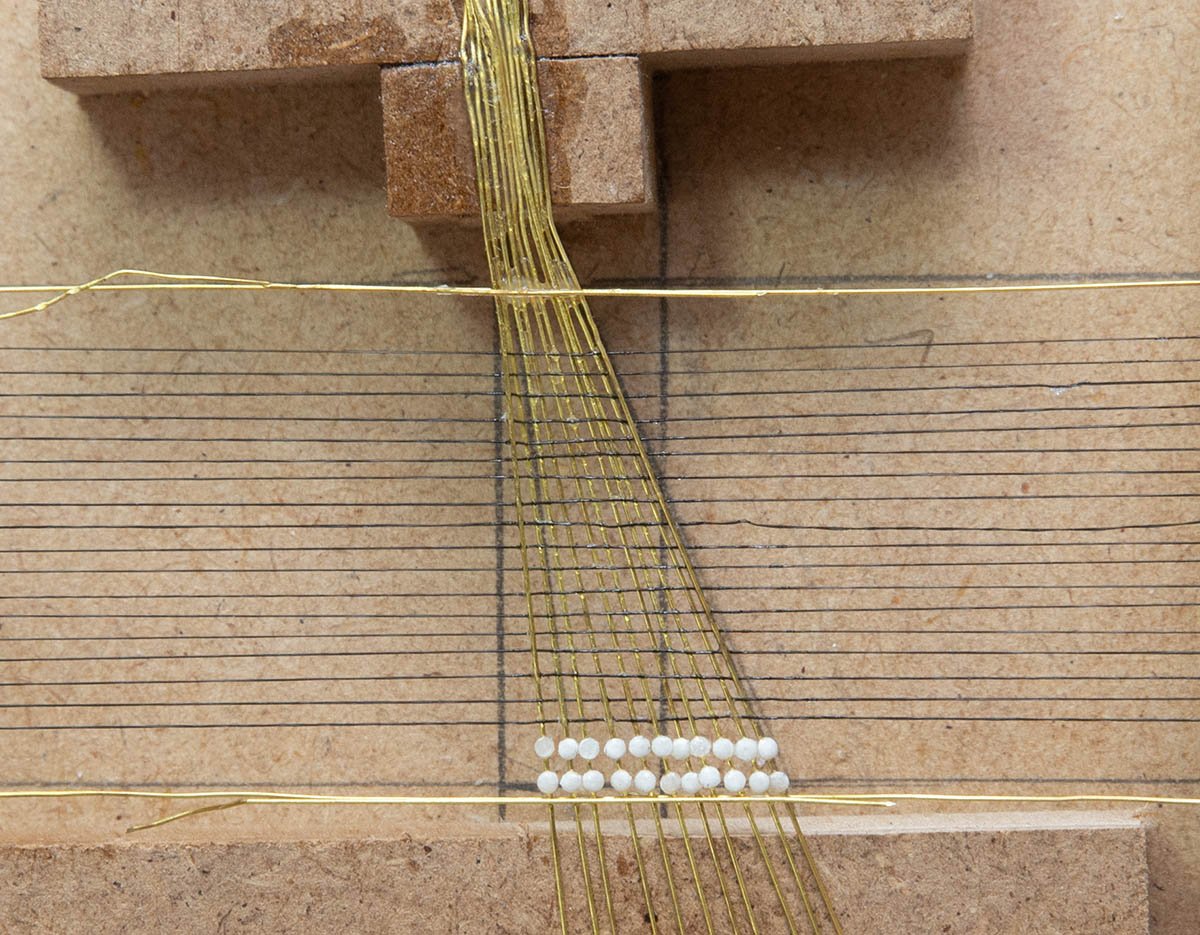
To get the thinest and strong metal rigging wire, I bought this 'LCD cutting wire' at aliexpress in China. The desciption says it is used for splitting multi layers of LCD screen. https://aliexpress.com/item/1005001373913755.html It has various diameters such as 0.065mm, and mine are 0.035mm and 0.065mm. Unfortunately, the seller didn't specify its material. I guess it is molybdenum steel or NiCr steel. It is stronger than hair, so I couldn't cut it with scissors or my hand. I needed nippers. It sticks to magnets. Its color is like 10K fake gold or oiled copper. It can be easily bandable and foldable. I can make it various shapes easily and it holds the shape well like a steel wire. It is not stretchable like a steel wire. I didn't like the color for my HMS Victory 1:450, so I decided to dye or tin it. (1) lacquer with shellac metal primer - Failed (2) Copper dye - Failed (3) Copper Etchant - Succeded The color became a satin black (half matt half gloss). I used copper etchant which is very commonly used and accessible in SK. The chemical reaction finishes within 2~3 minutes, so the problem was mass production. I worried about hard cleaning if I apply the copper etchant to the whole bobbin directly. I used pet case as bobbin. The bottom of the picture is the result - 4 meter tinned black wire. I would say that this is enough for 1:450 HMS Victory. + Keep away from any fire. If you are heavy smoker, don't smoke near of this wire. It burns explosively like a firecracker. By the way, what is the wire made of? I know that NiCr wire is eligible for wooden model ship, but the wire is thicker than this. If I know the material of this cable, I may be able to investigate its longterm chemical stability.

-
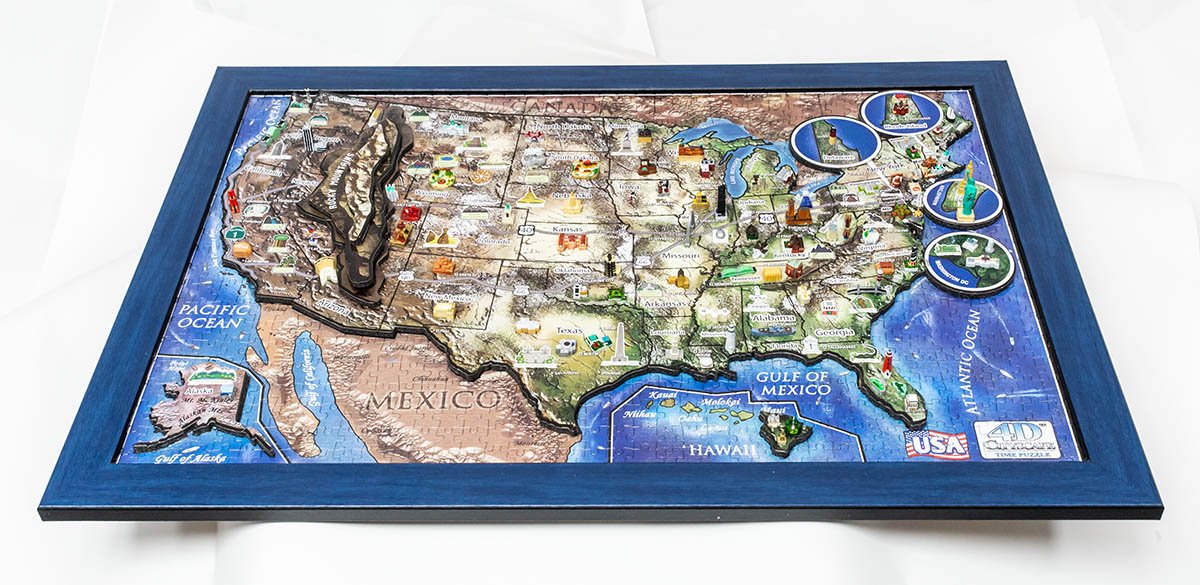
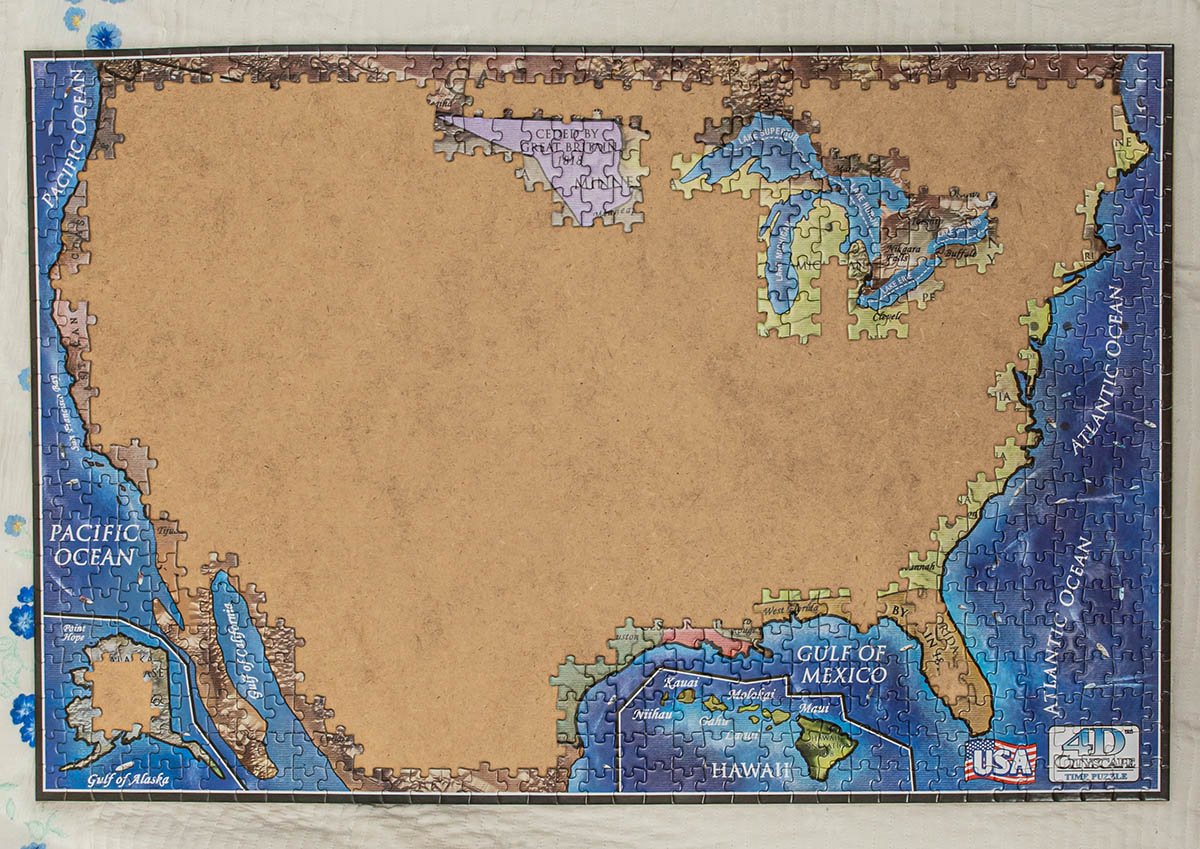
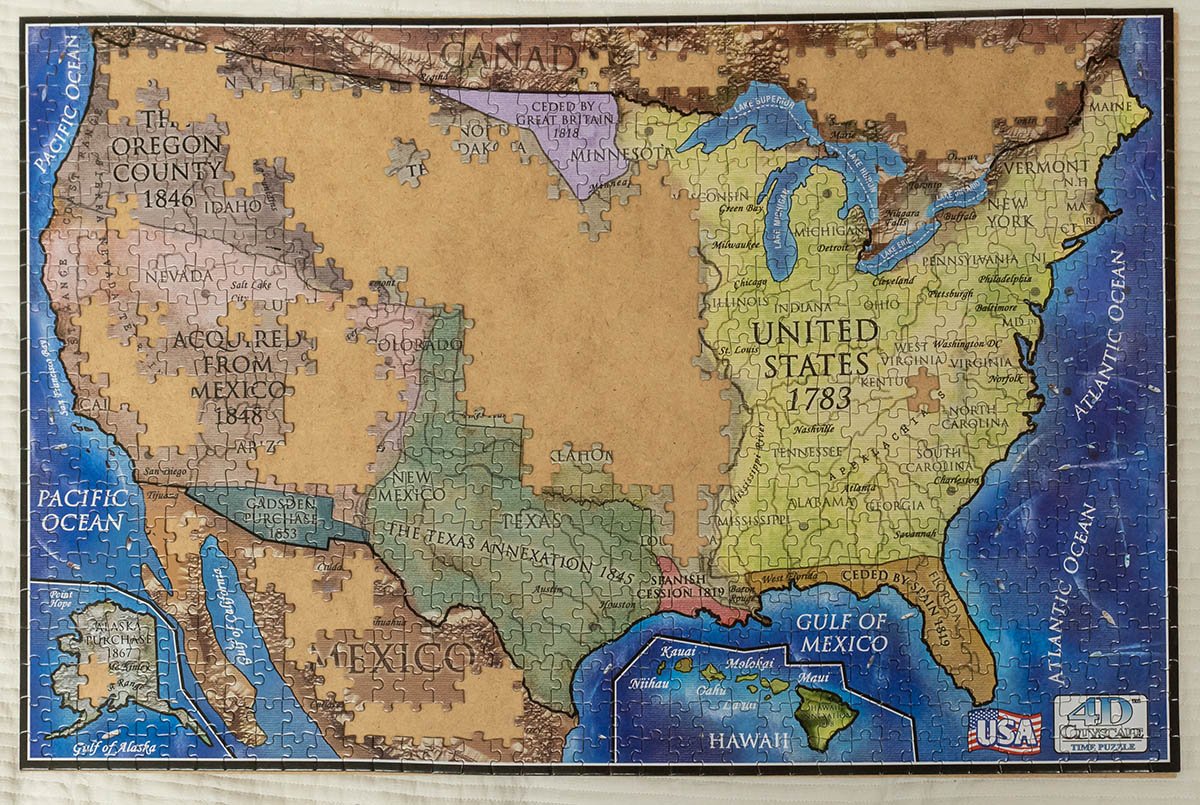
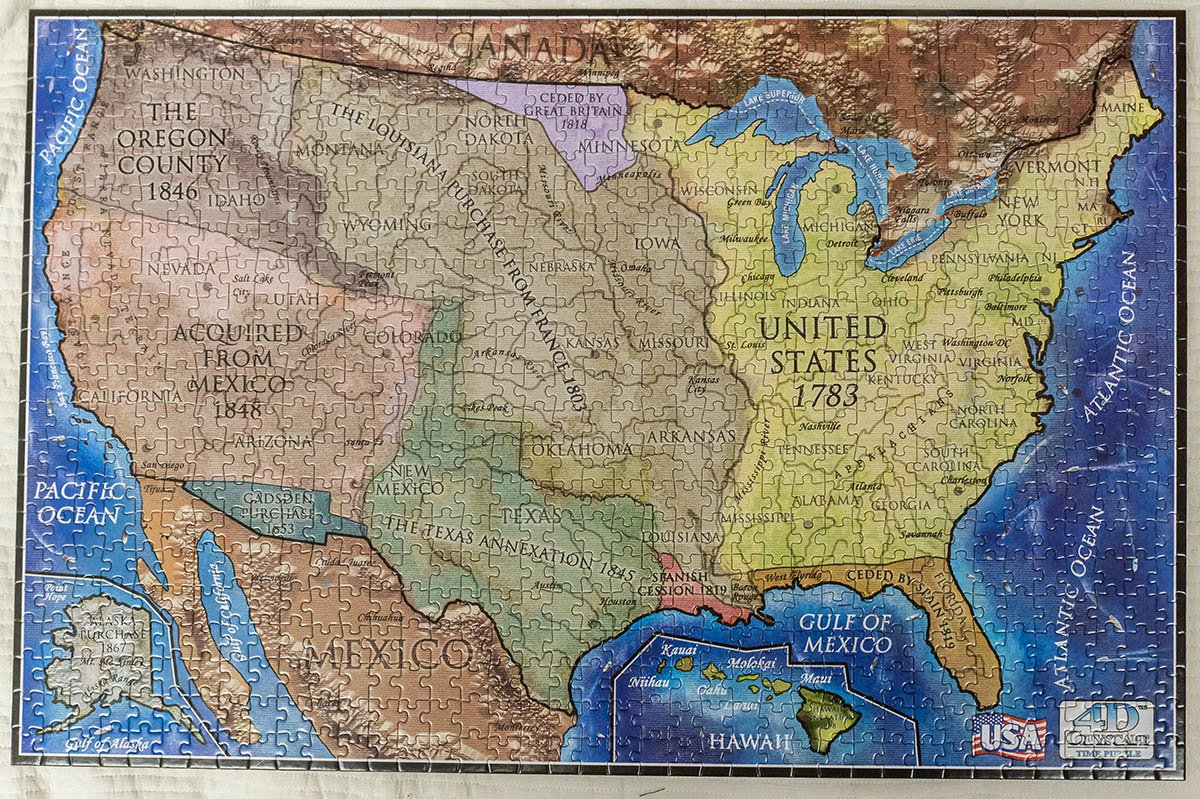
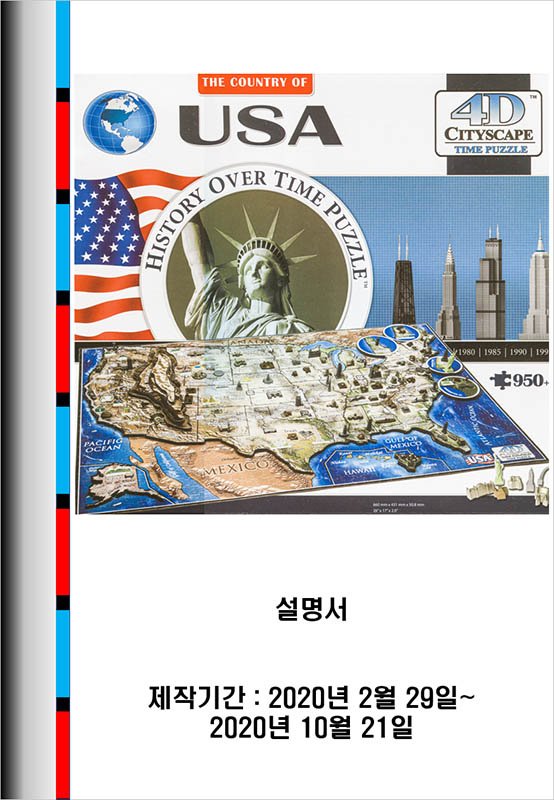
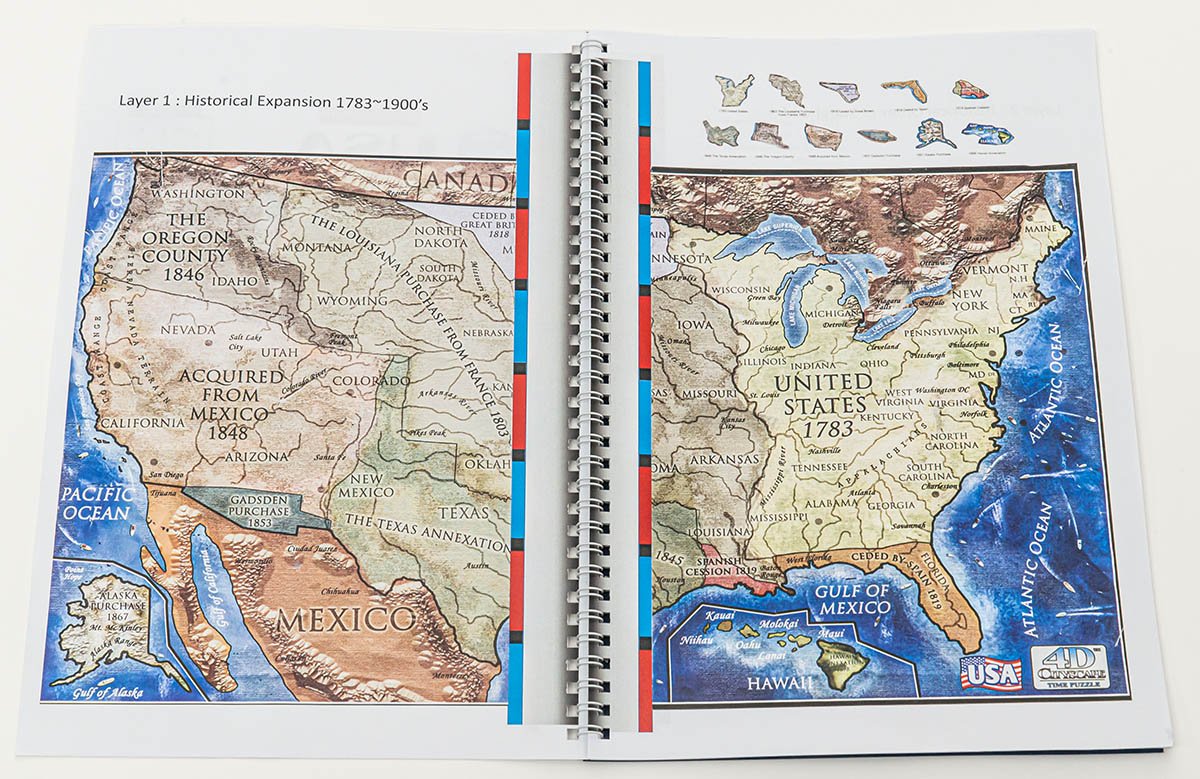
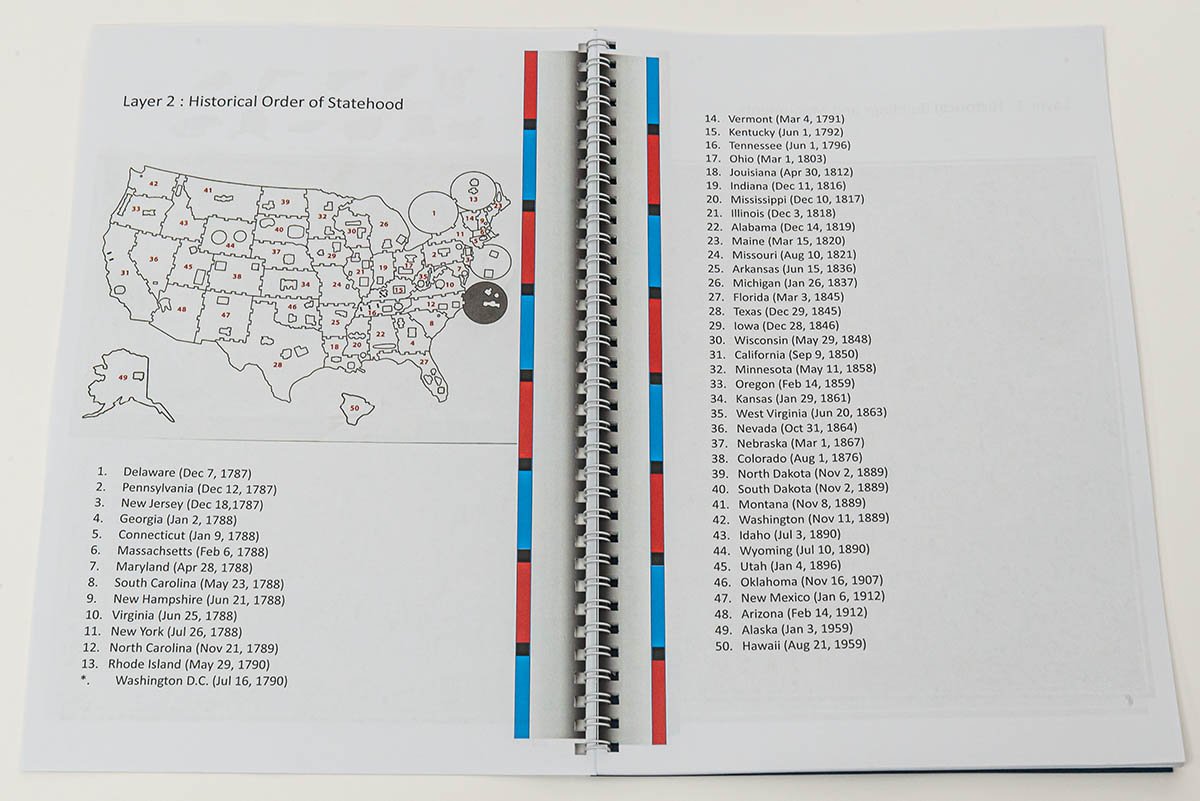
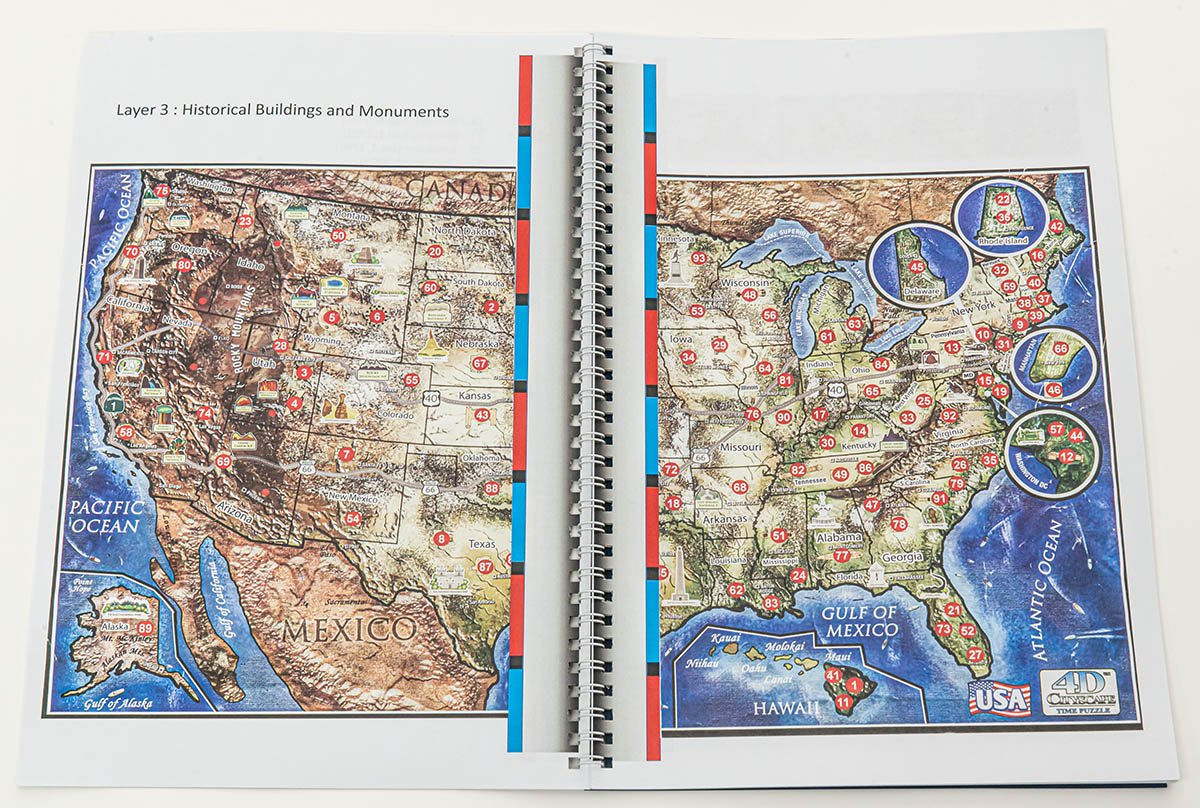
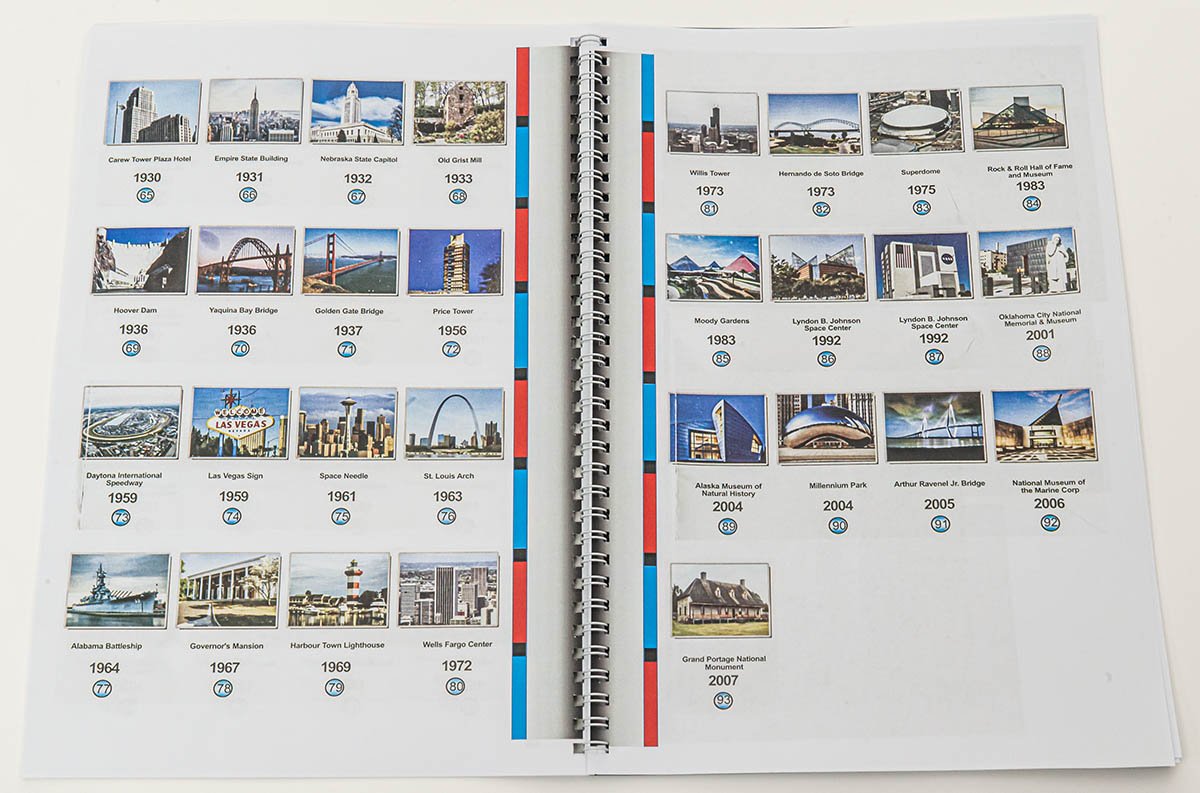
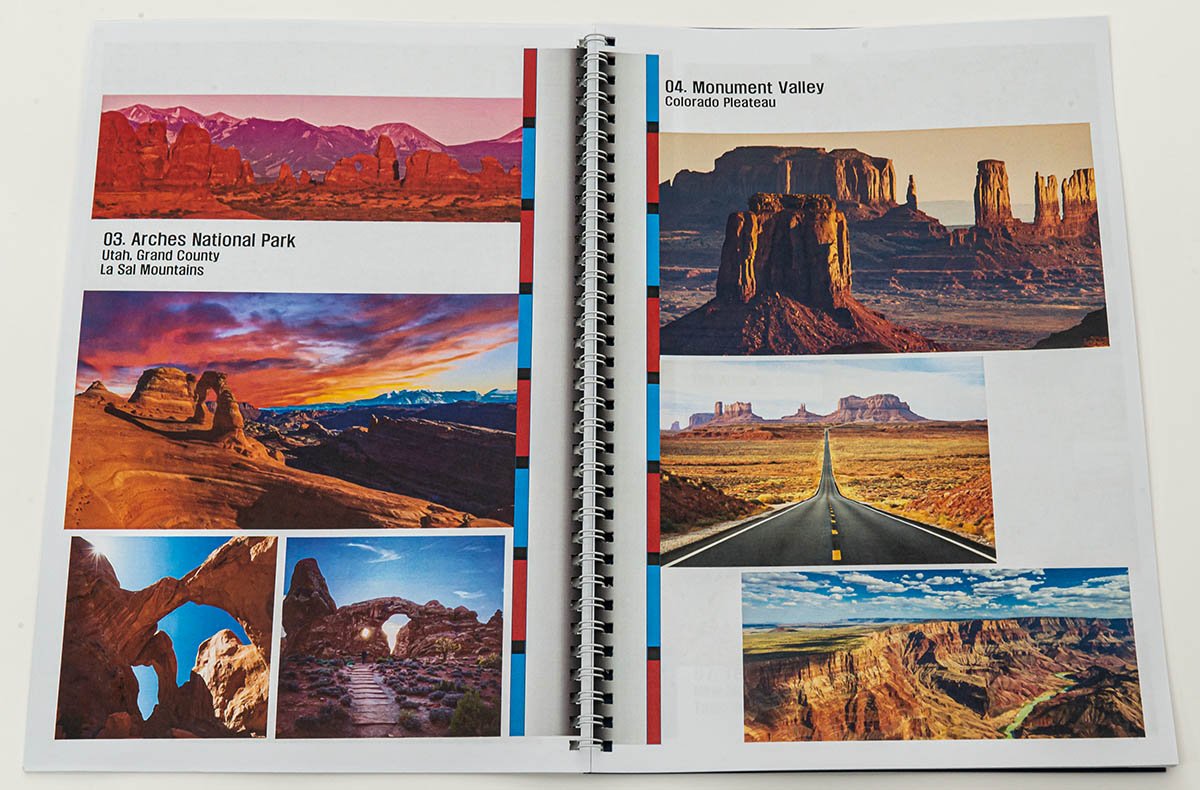
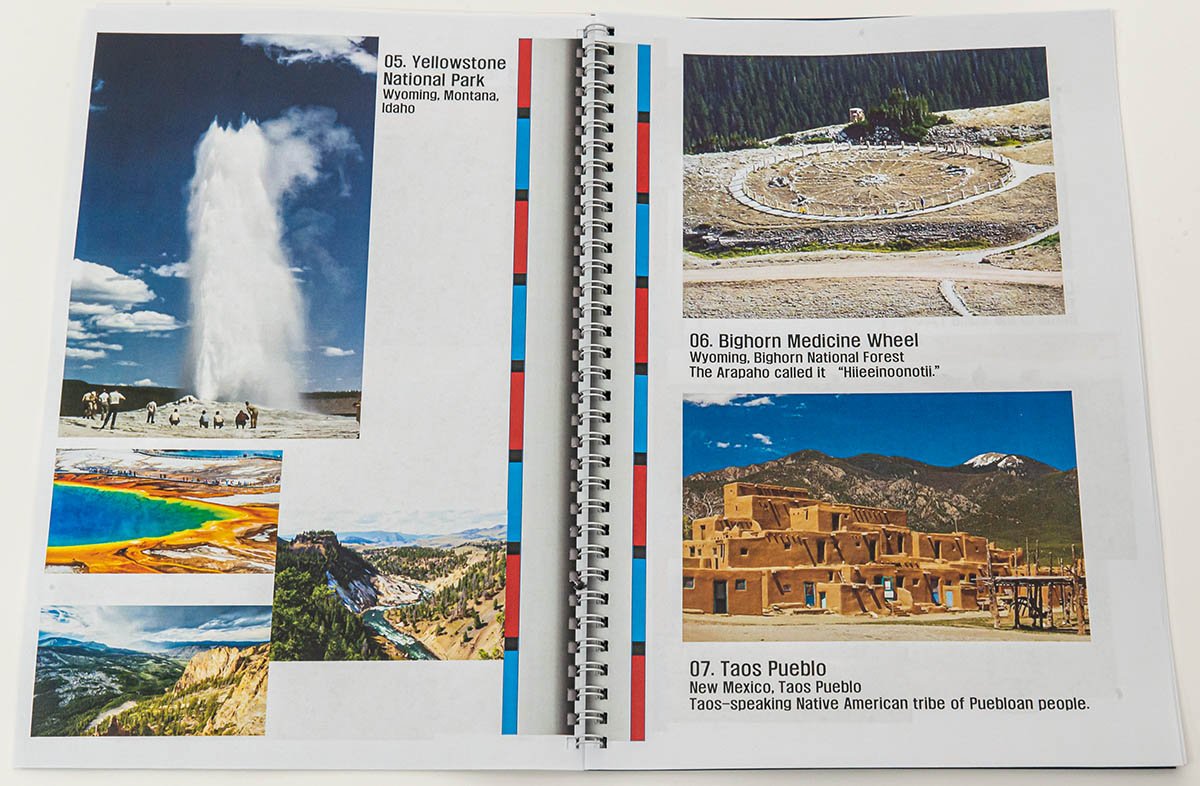
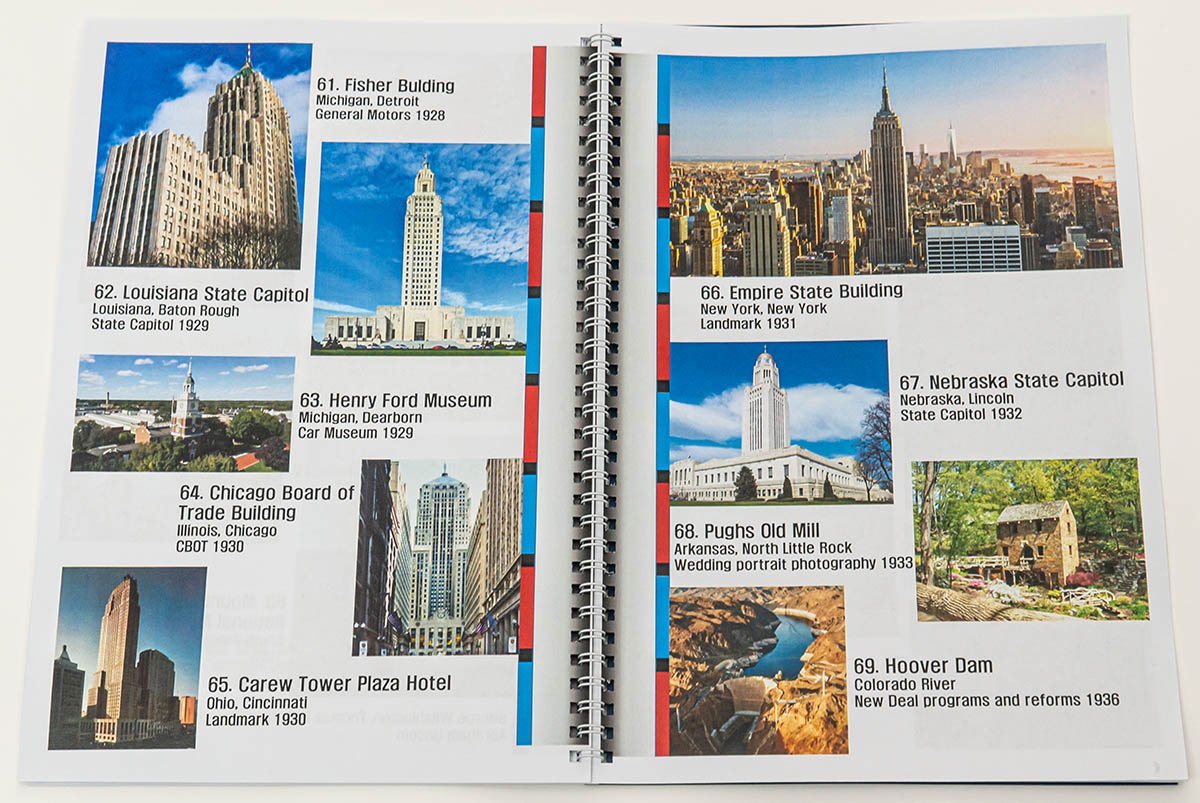
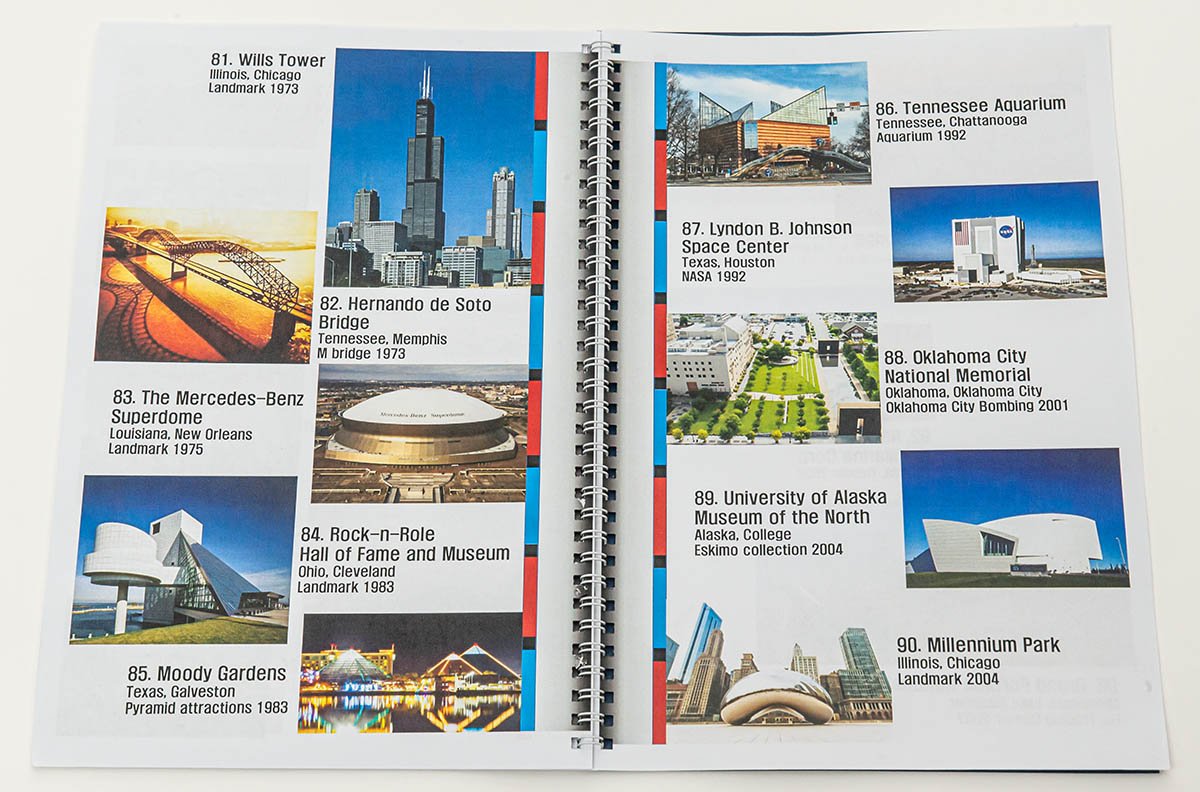
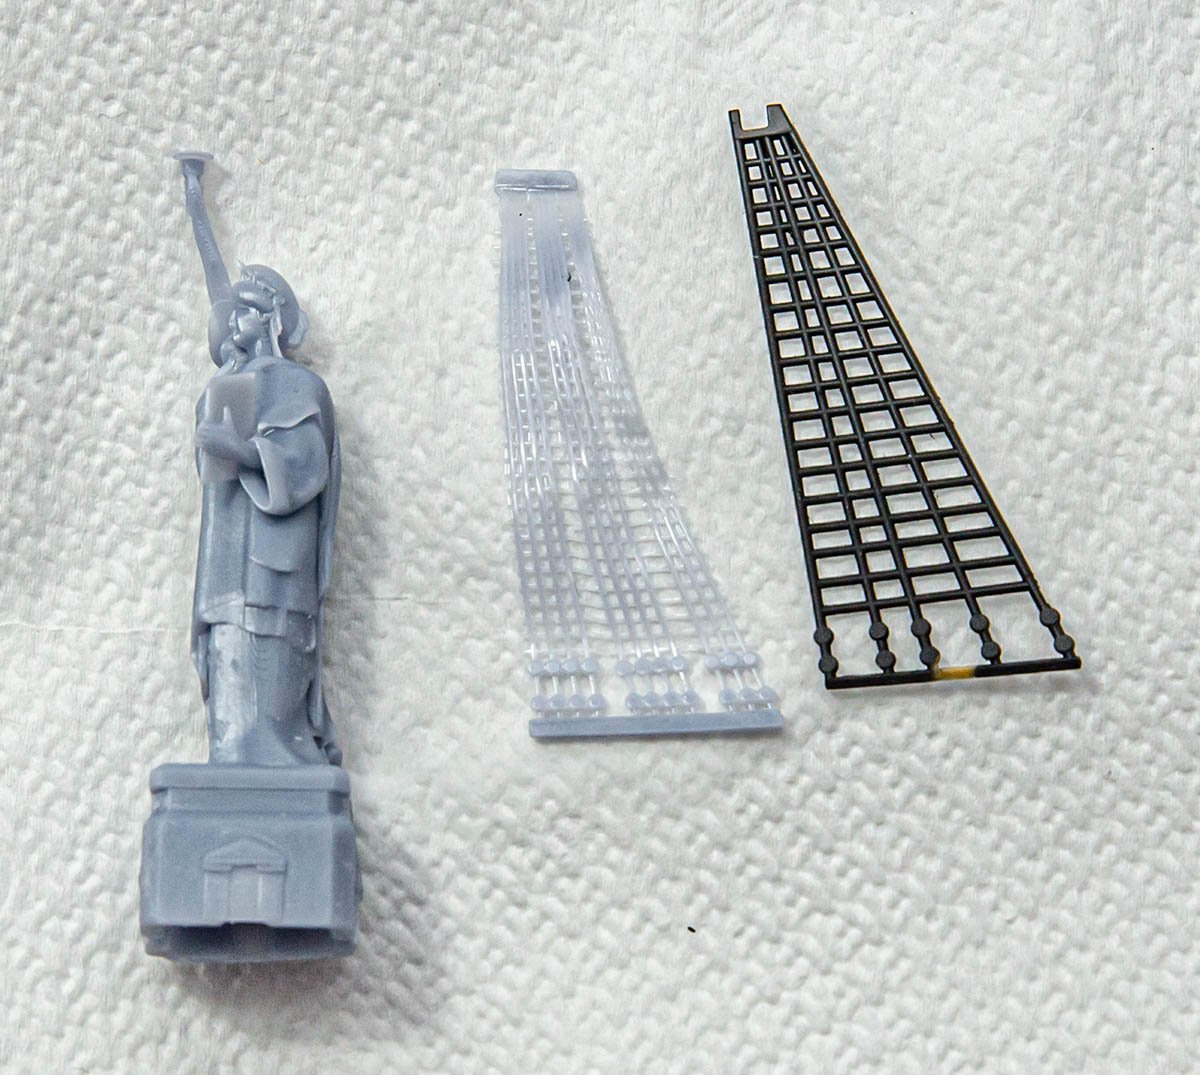
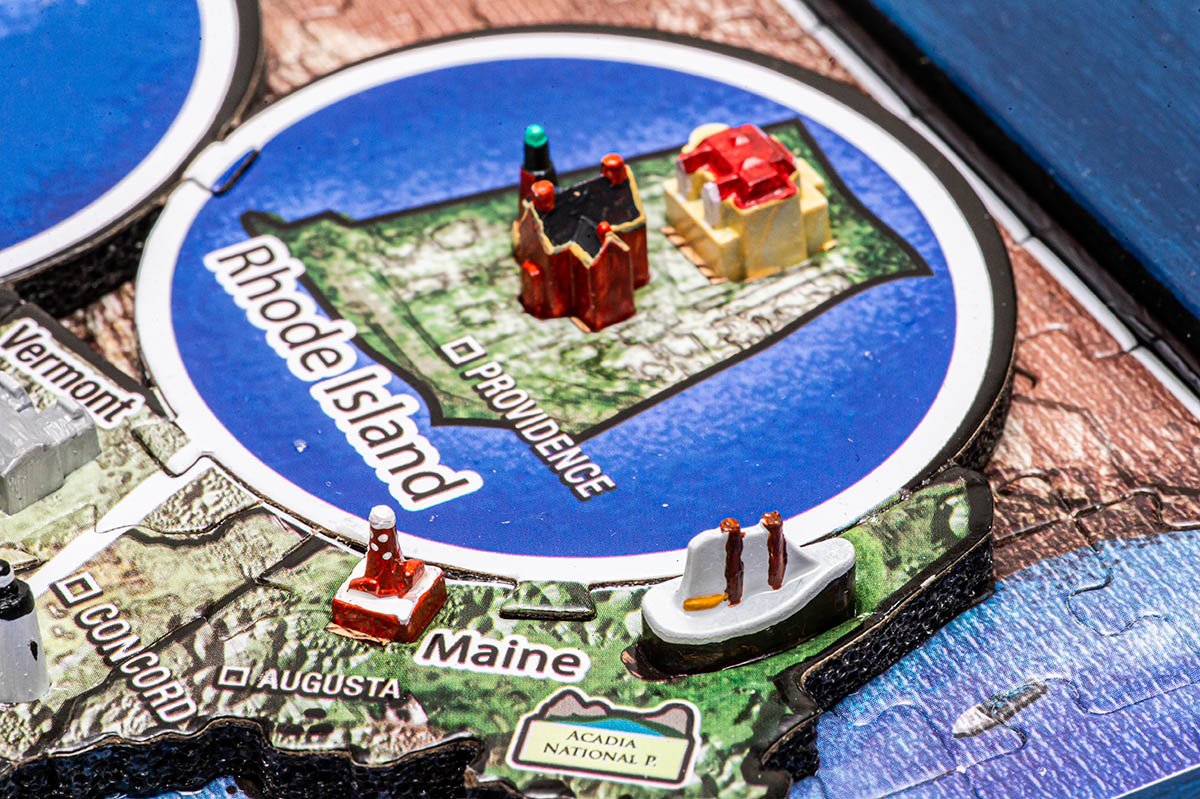
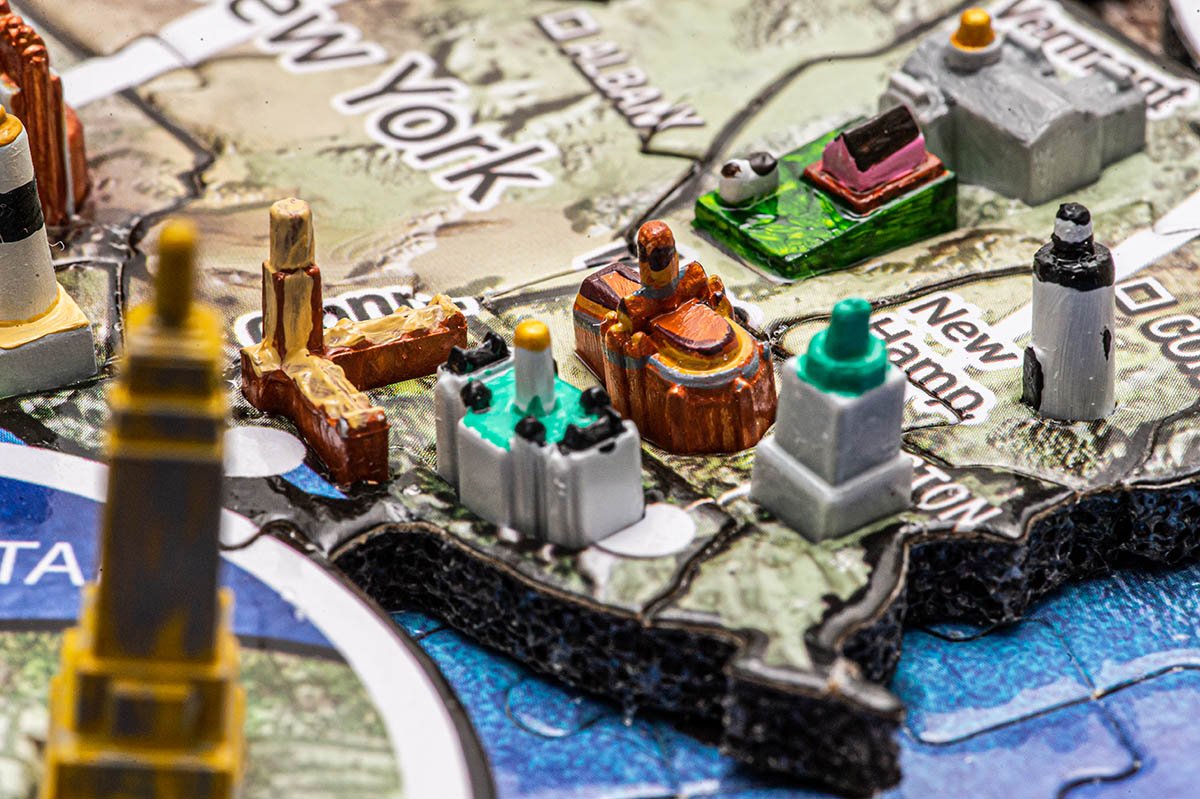
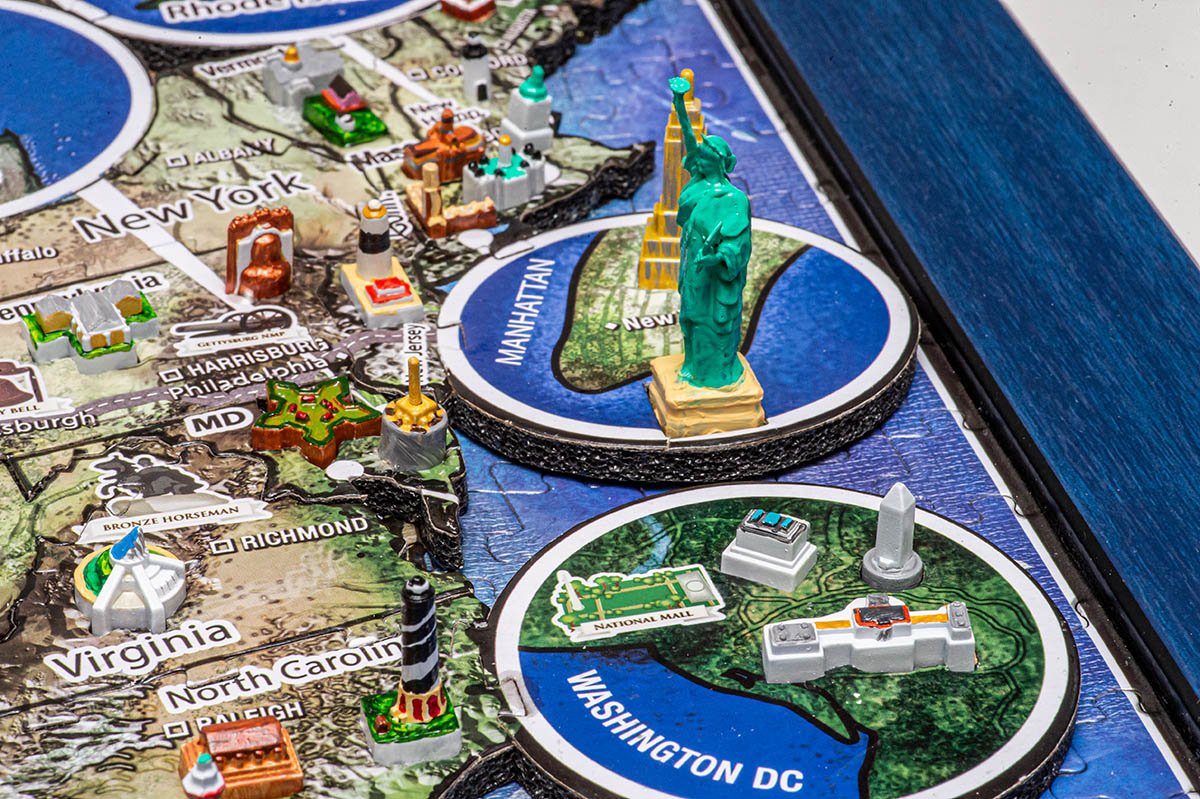
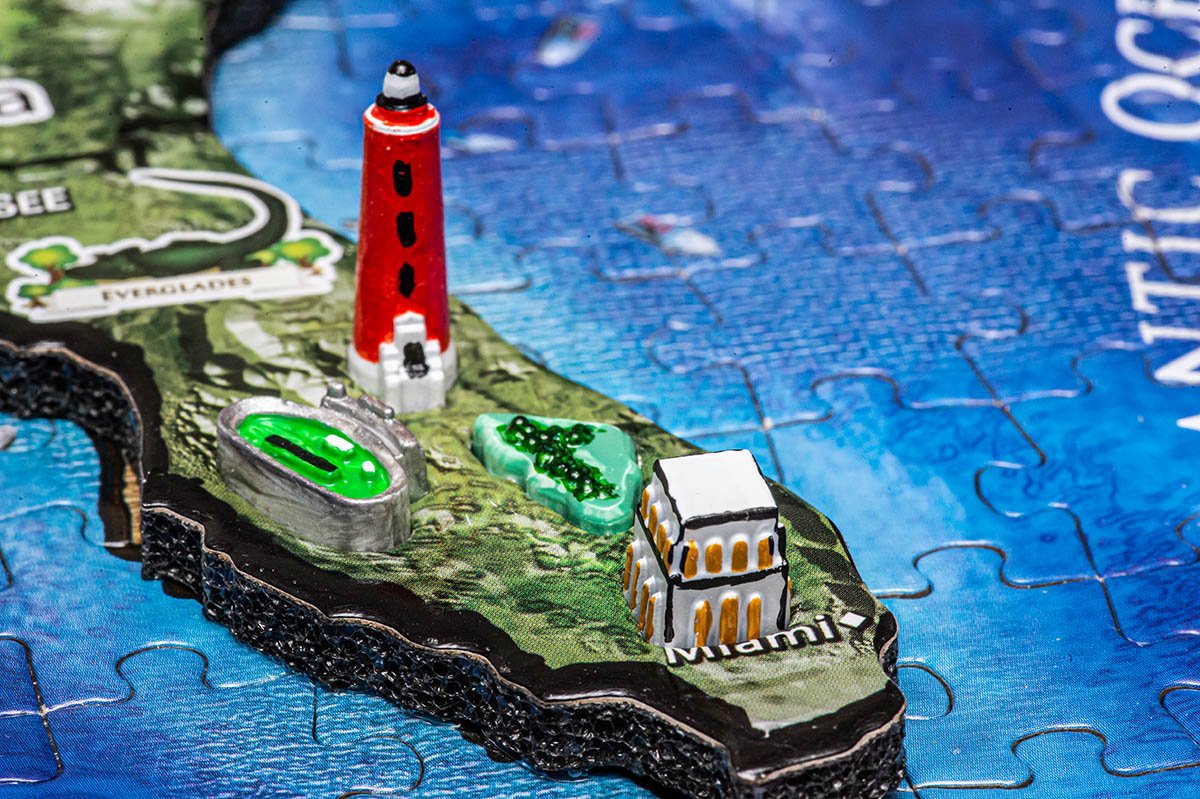
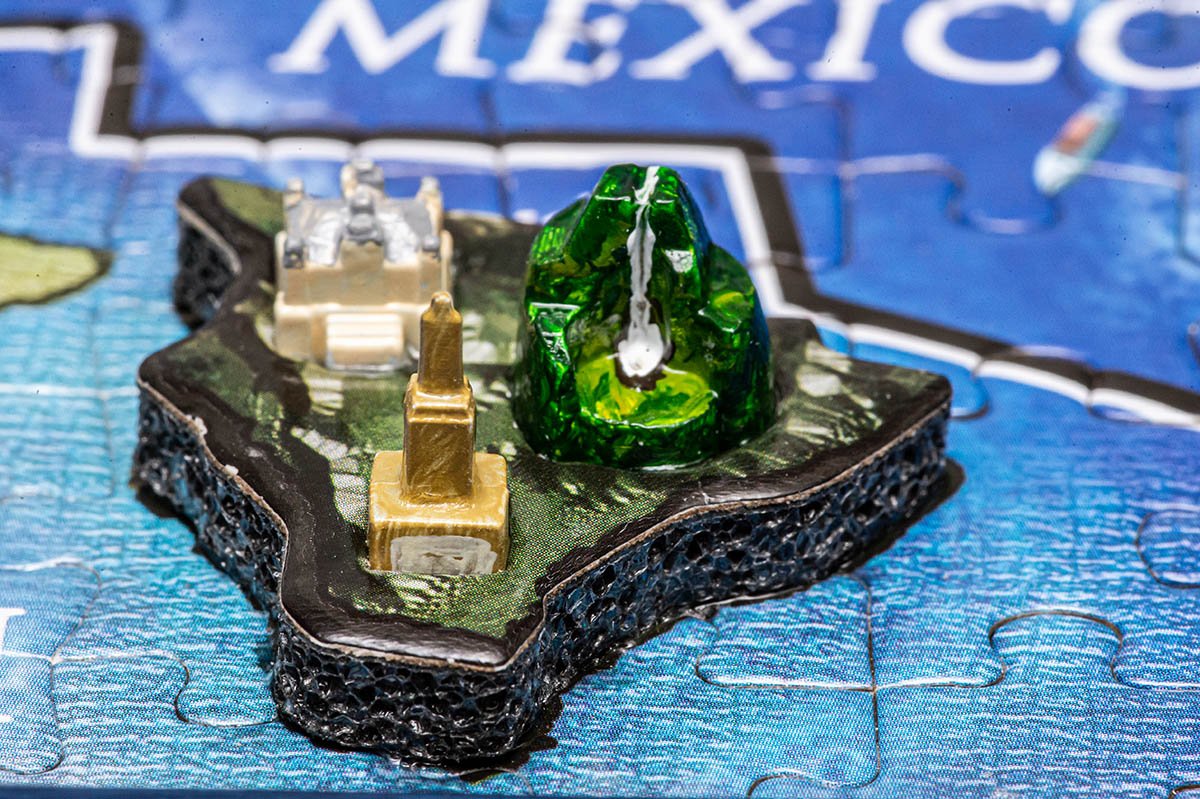
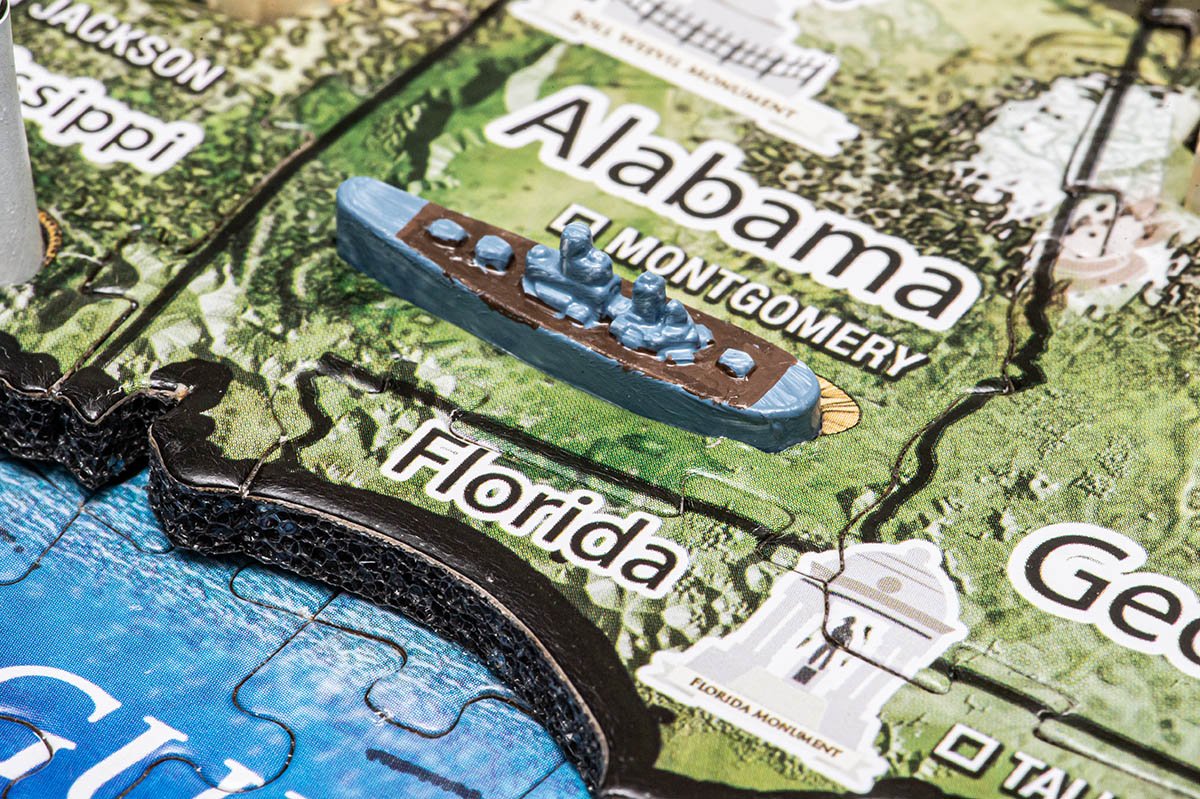
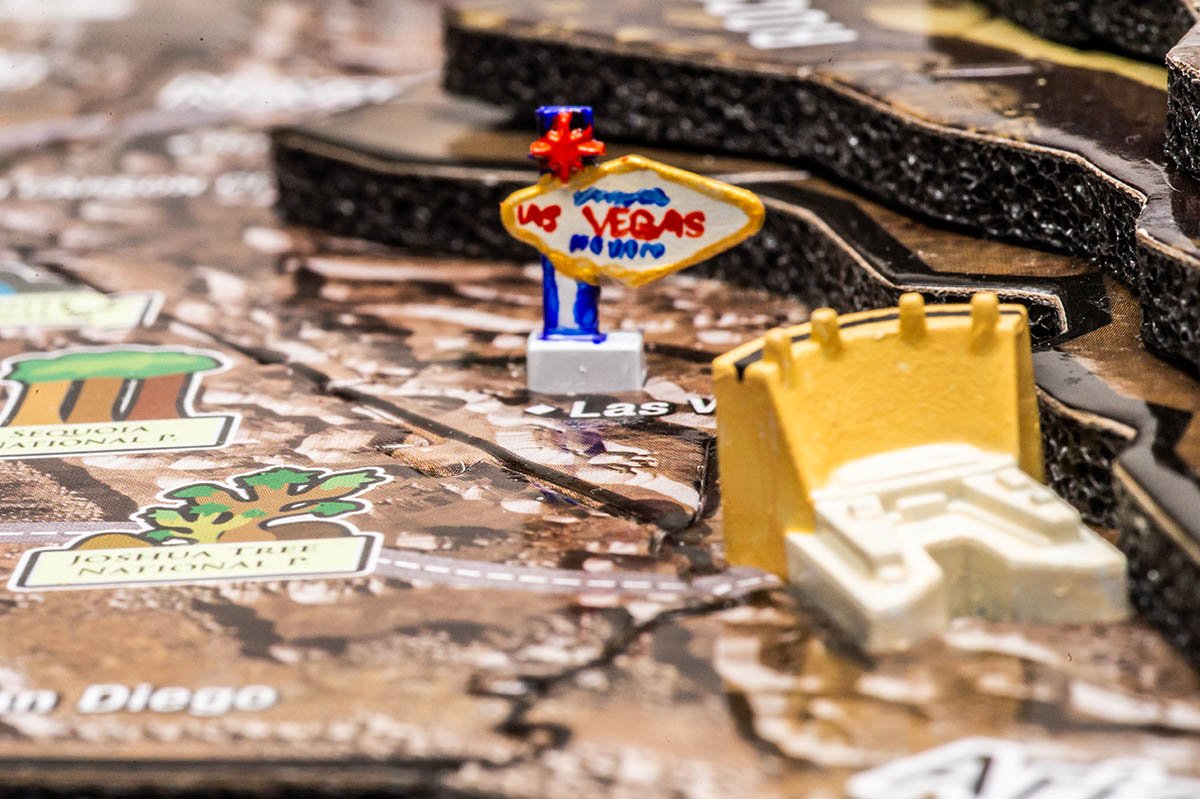
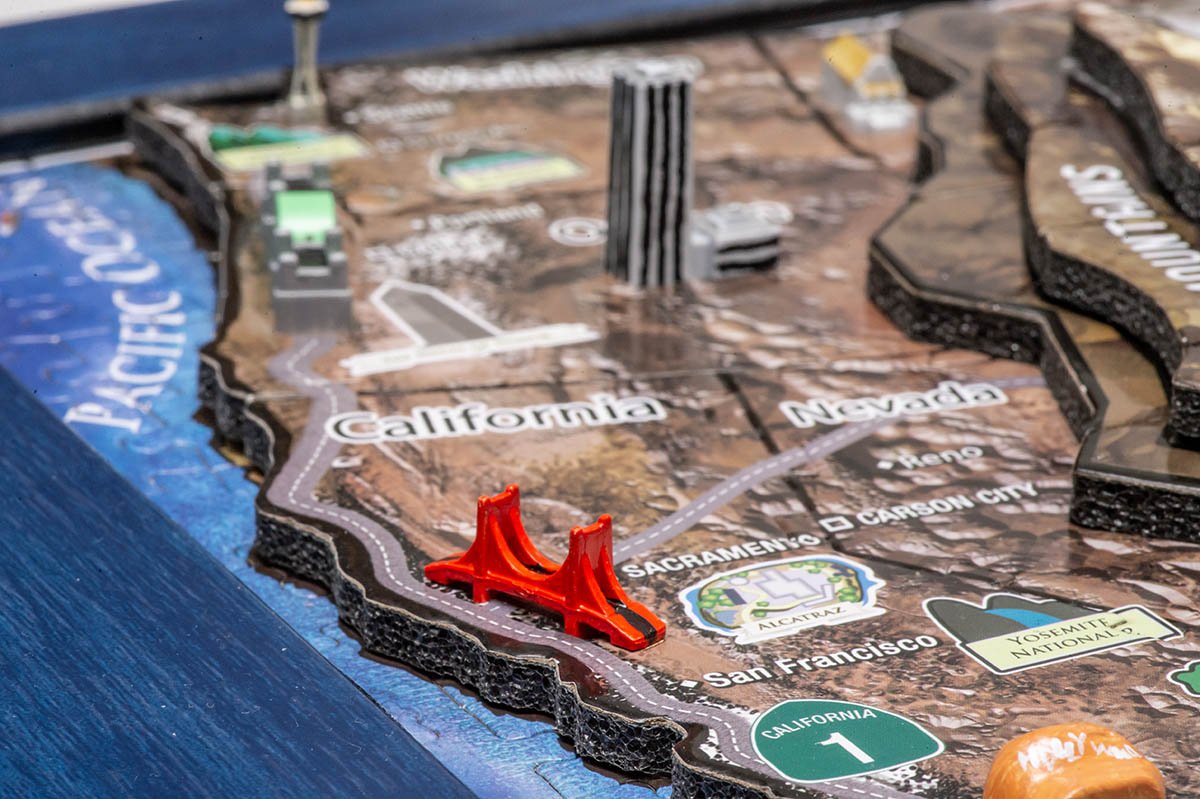
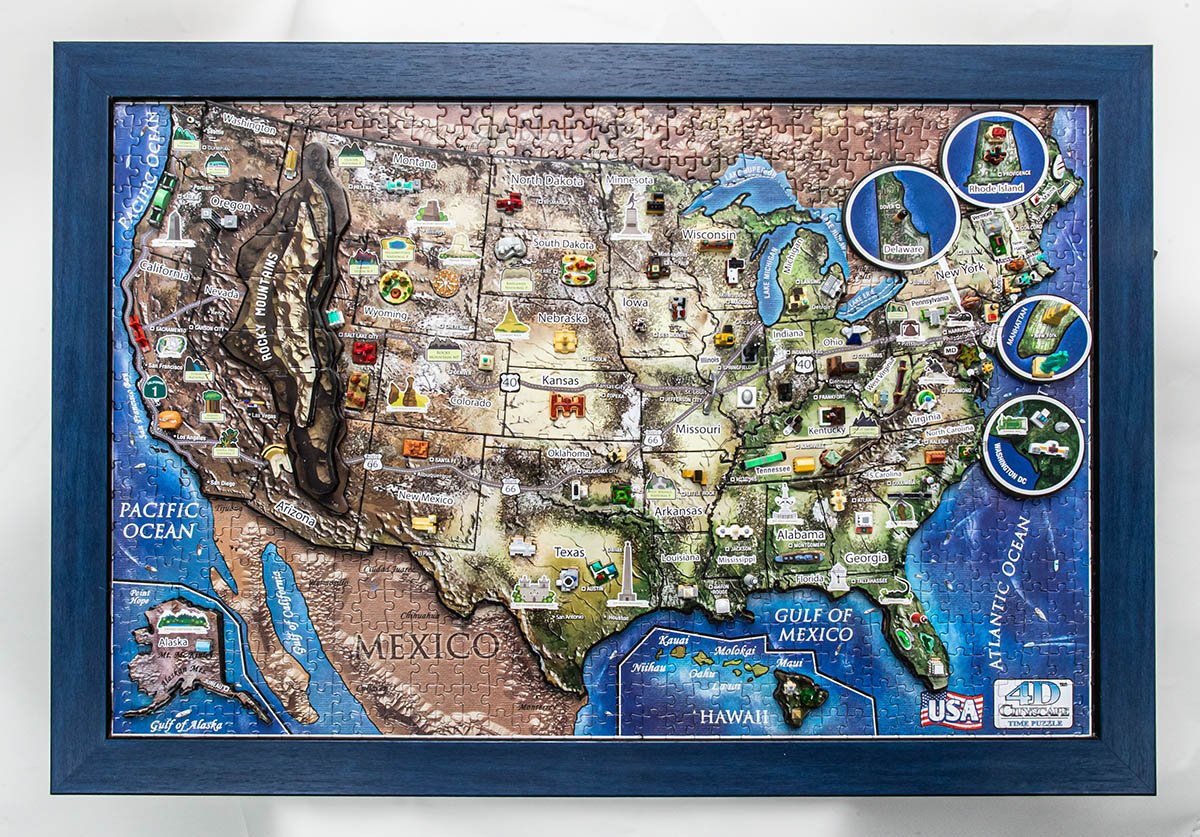
I'm not a fan of puzzle because a child played lots of puzzles when she was an infant. (As you expected, she started, and I completed 1K pieces puzzle every time...) Therefore, when I found this puzzle, I thought this puzzle is pretty much promising to compare with the past puzzles. This puzzle has some educational features, and unpainted figures inspired me to concern painting works I haven't experienced. I used PVC glue to attach 950 pieces puzzle with custom ordered frame, and epoxy glue to the rest of works. Also, I used acrylic paints with the Pledge as varnish. I also made a manual for her. I thought the coloring of the entire puzzle and hand paints on each figures are not looking good due to my poor art sense, so its artistic value is not appropriate for girl's room... Instead of it, I included lots of beautiful and interesting pictures into the guidebook to attract interests and add educational values. It was great chance to train how to use brush and acrylic paints. Every hobby areas helps each other, and this kit definitely helps newbies like me. At near the end of the process, I found that the statue of liberty fled for freedom from my home. She might be bored my slow hand... I had to print it using my new 3D SLA printer. The center shroud is my test sample to enhance my another ongoing project - HMS Victory 1:450 model. (The right shroud is an original part.) There are some reasons I couldn't focus on painting work. Some building figures are not accurate or wrong buildings. For example, No. 86 is not the Lyndon B. Johnson Space Center, but the Tennessee Aquarium. Also, a figure of the Alaska Museum of Natural History is completely different from the picture of an original manual. The box says its version is 'v1.1', and I hope you get newer version that includes fixed manual and corrected figures if you buy same kit. I attach TXT file in case of you are interested in a corrected list of building figures. In addition, I would say that selection of buildings are a bit biased. Probably newer kits supervised by National Geographics will be more educational and accurate. 4D Cityscape USA Building List.txt This is my compaint against the kit company, so you can skip this paragraph. The company promised that they will release Seoul city kit soon at Toy show in South Korea, 2014. However, they haven't released any Korean kit yet... Instead of Seoul kit, they released kits all of surrounding nations including smaller and younger cities. Although brushing work was still fun after I found the old record, I thought I would have cared more if this was Korea kit... I decided I will make my own 4D cityscape puzzle kit of Korea if the manufacture won't make it. I have SLA 3D printer and CNC machine, so I can make all puzzle components of my nation's version anytime. It's not my priority work, but I listed it at the end of wish list. I hope you enjoyed to watch an unfamiliar model work as I always do on this forum. The next model will be a train to be finished within this month.


-
- 7
-
-
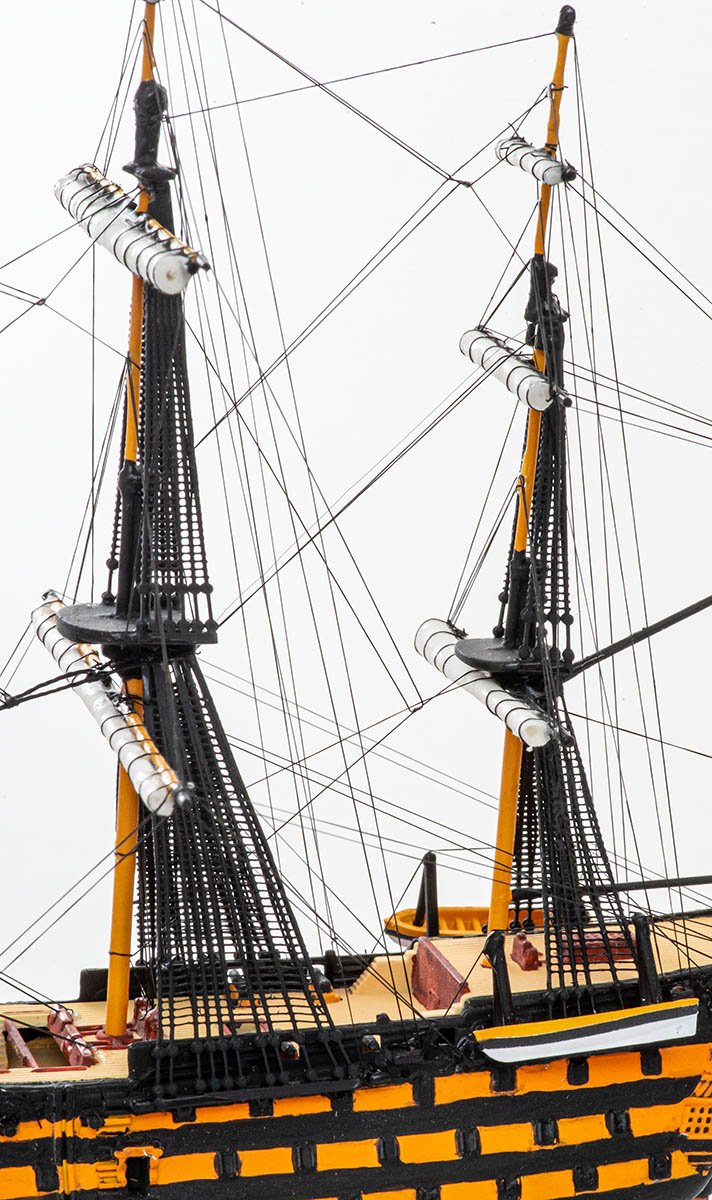
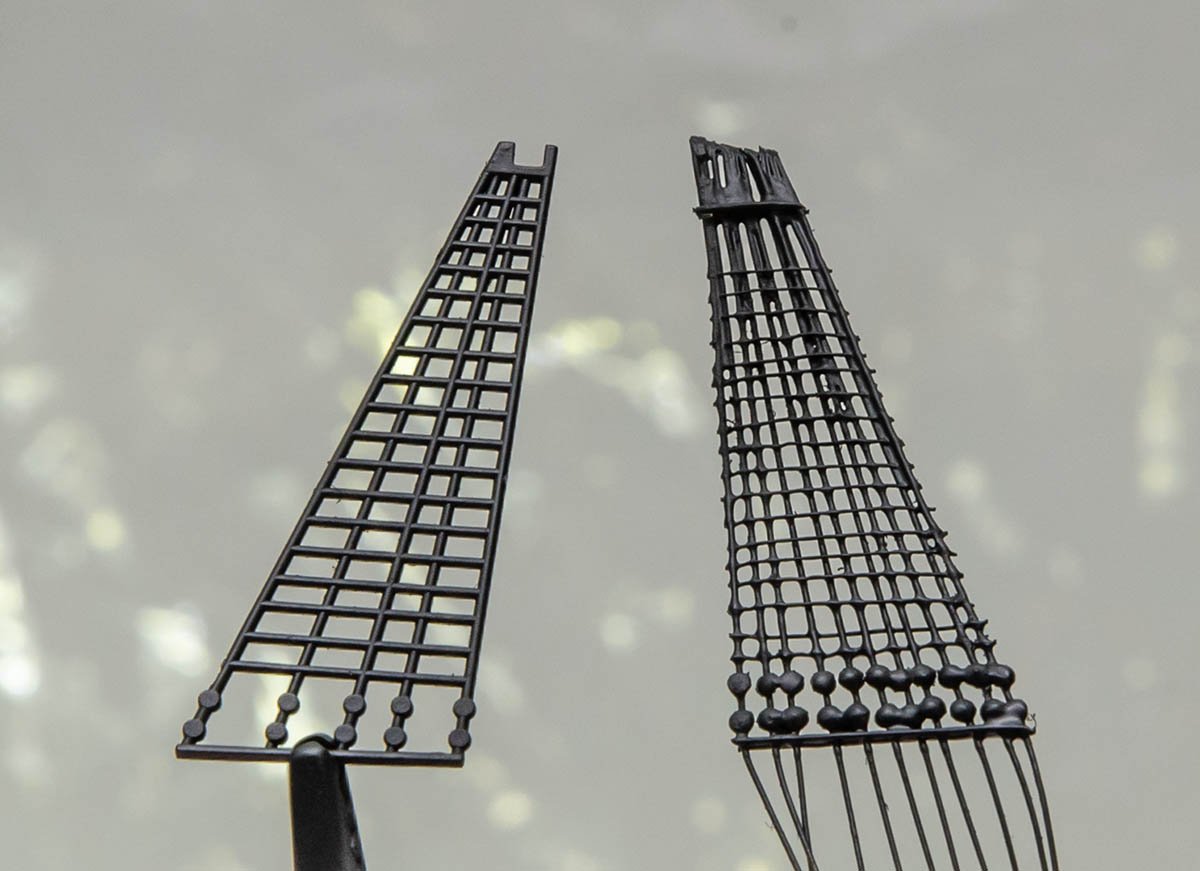
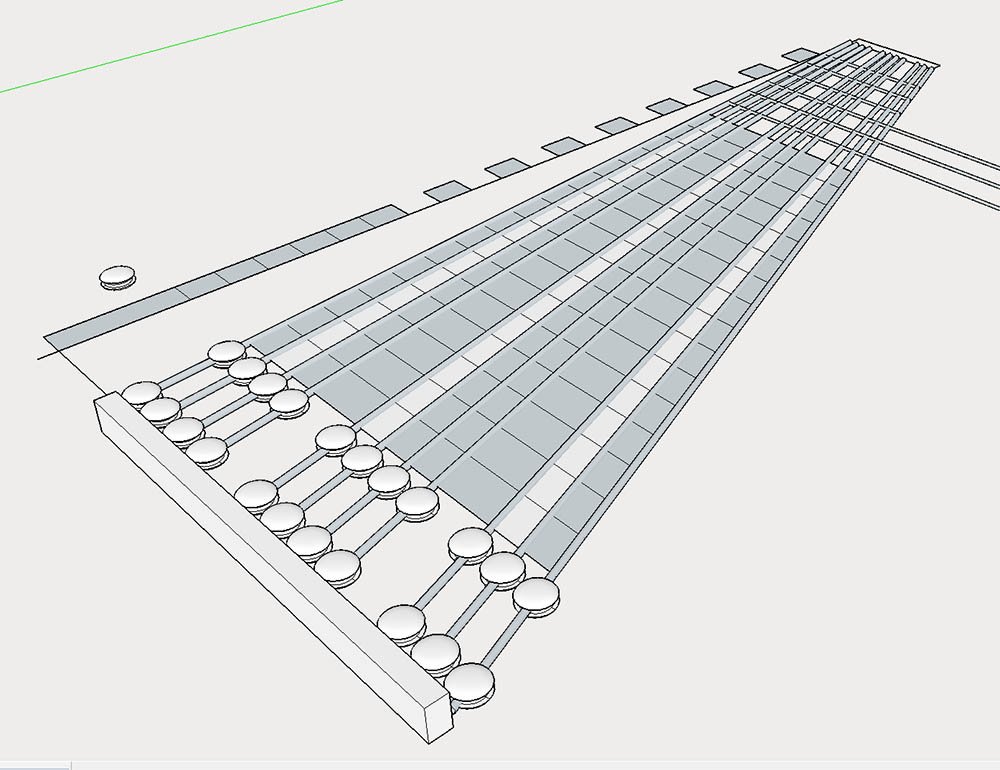
I made some shrouds for 1/450 Victory.
modeller_masa replied to modeller_masa's topic in Masting, rigging and sails
That's 100% correct. How did you know that?! I applied shellac as metal primer and black lacquer can spray which costs $3 to the second part. It is exciting to hear that my unintended solution from accidental experience is already proved centuries ago. That's what I ordered. How did you know that?! You should have installed spy ware on my PC... 😱😁 I couldn't imagine people use such various materials for model. In addition, I started to think about 1/200 scale professional grade miniature ships because someone already made it. Thanks for expanding my insight, Wefalck. -
I made some shrouds for 1/450 Victory.
modeller_masa replied to modeller_masa's topic in Masting, rigging and sails
Allan and Wefalck // Thank you for great guidances. I found and ordered NiCr wires and other cutting wires down to 0.035mm at Aliexpress. Also, flexible glue aka shoes glue as metal primer is very interesting. https://www.jrusselljinishiangallery.com/pages/mccaffrey-pages/mccafferythumbs.htm Looks like Lloyd McCaffery did amazing works. I ordered the book at UK Amazon. It is amazing that he managed such a small scale like big scale model ships. That's really impressive, charming, and thrilling. -
I made some shrouds for 1/450 Victory.
modeller_masa replied to modeller_masa's topic in Masting, rigging and sails
wefalck // Thank you for the advice. I'll check what is 'tinned cooper wire'. It should be stronger than metal primer with lacquer spray, and easy. Also, Robert A Wilson's books seem pretty useful. In Seoul, South Korea, rainy season is usually shorter than a month. Two months of rainy season like tropical region embarrassed many people in Seoul. I had to run air conditioner all day. 😂 Most wood workers stop to work during the season, so I followed their reference. I think I should buy dehumidifier to keep working condition against gobal cimate change. shipman // It is the first time I know his name and he is banned from here. I couldn't find the reason of the ban. Could you give us an article link why he was banned? -
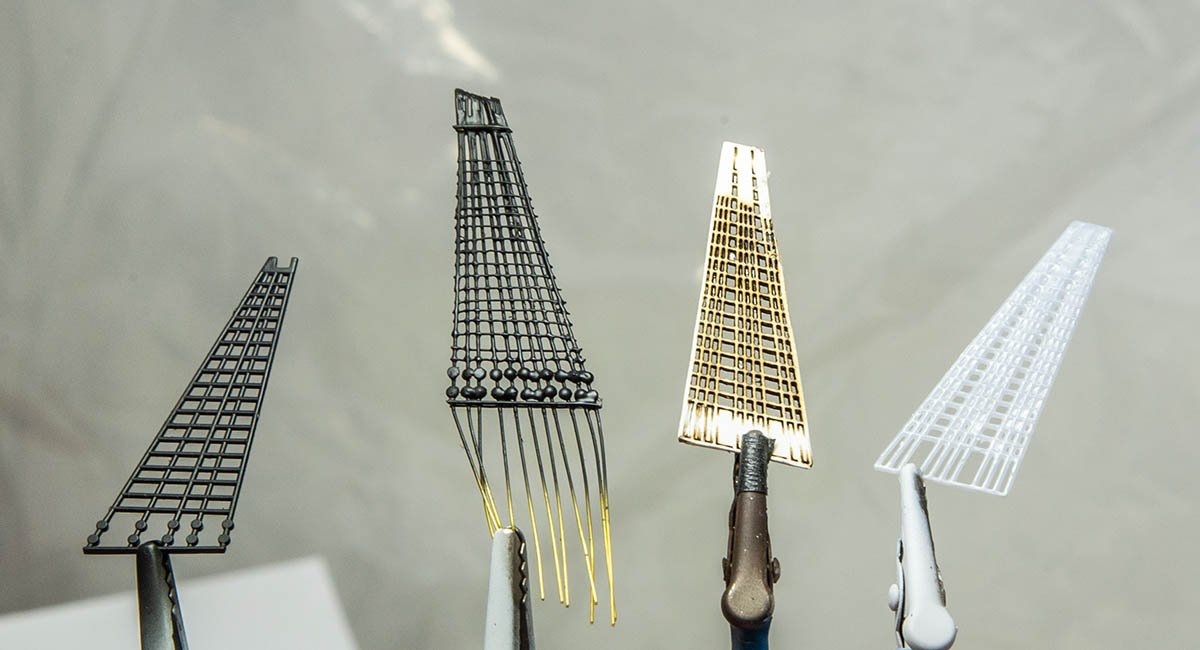
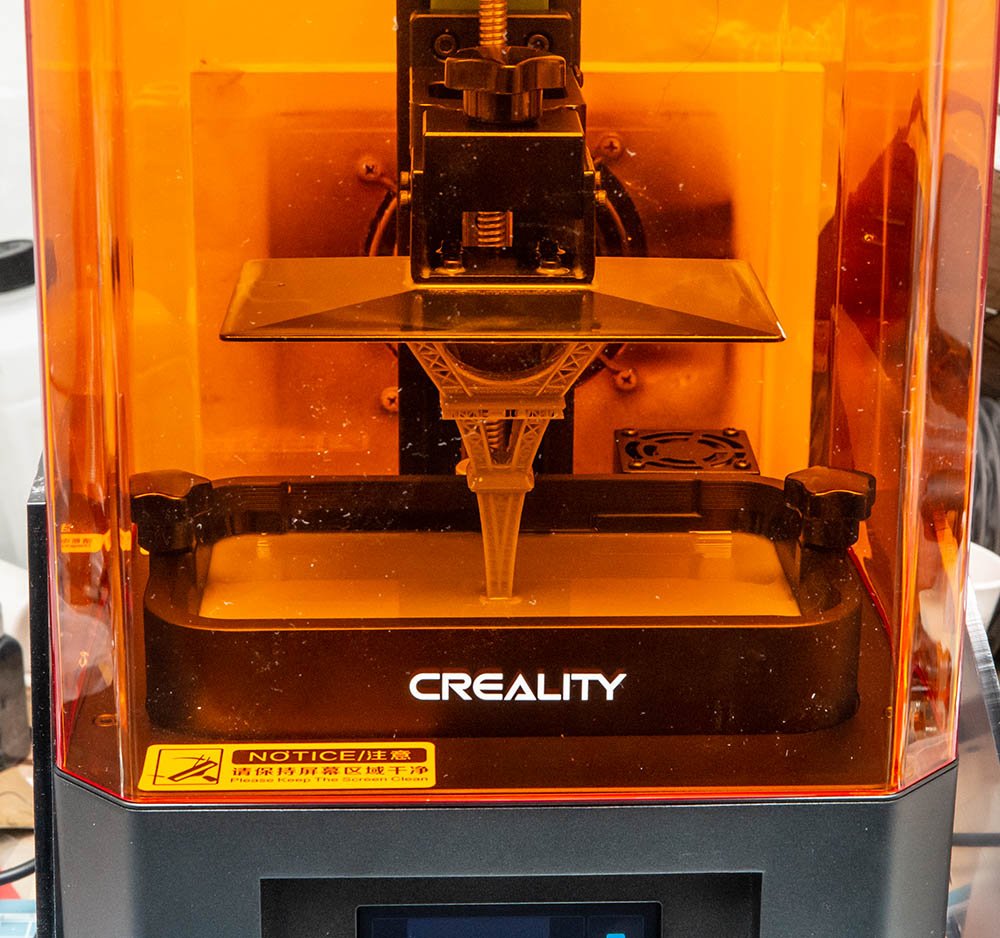
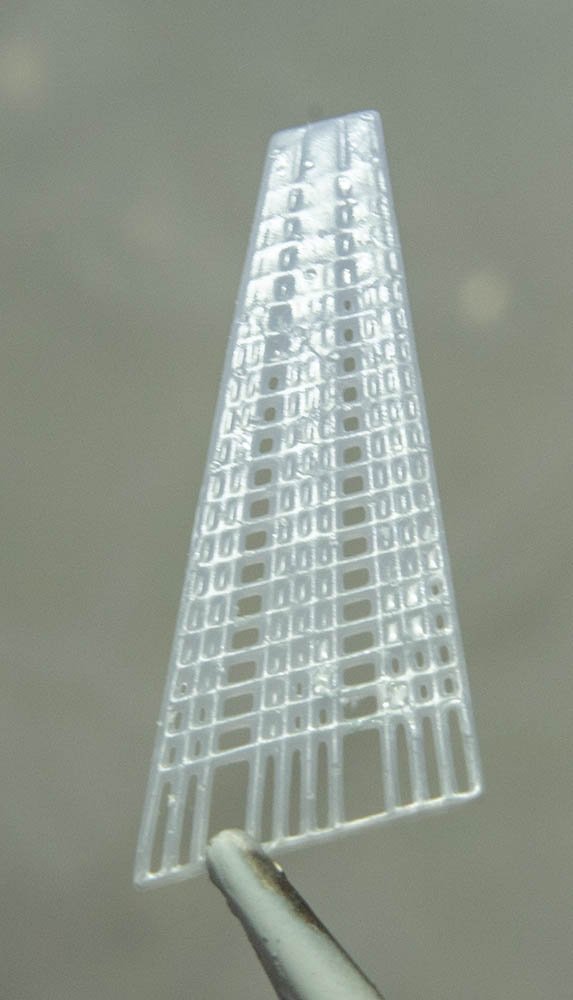
Hello. It was super long rainy season on Jul and Aug. I couldn't do any modeling work for two months, and it almost killed my interests in hobby. To heat up my hobby engine, I restarted from relatively easy kits such as plastic models I purchased long ago. (From left to right) The first one is a genuine part from HMS Victory 1/450 (Revell). The part is the lower shroud of the first mast of the ship. Remeber the length of ship is not longer than your palm. The detailed are removed hefty, and it annoyed my creativity engine. At first, I approached from traditional way - I used brass wires and lycra rigging threads. The result slopes, but I like the human errors. The second one is from my new CNC laser engraver. I made 4 papers and combined them to get enough width. The result is much clearer, but the laser is too thick. I would say that the most slim width of laser is 0.50mm which means thicker than fine modelling razor saw. I would say that my laser CNC is not good for too detailed parts. The last one is from my new SLA LCD 3D printer from CREALITY. (The model name is LD-002R.) It shows much finer result than usual FDM 3D printer, but it is still not enough for 1/450 HMS Victory... However, I believe that I will get better result without changing it when I get more know-hows. I'm waiting for $200 metal 3D printer. My SLA resin 3D printer shows much better result than my hand, but the resin is not durable. I would say that metal-material SLA 3D printer which costs $100,000 now will be a game changer. I hope you enjoyed to watch my trial and errors.

-
Straightening metal cast parts
modeller_masa replied to modeller_masa's topic in Metal Work, Soldering and Metal Fittings
There's not much pictures I can show now. I would say that I need 2~3 weeks to complete it. Please wait till I finish it. English is not my main language, so that a writing buildlog is a bit time consuming work.
-
Straightening metal cast parts
modeller_masa replied to modeller_masa's topic in Metal Work, Soldering and Metal Fittings
Sorry about not having enough time. I'm very quickly building current kit to compare with the past unfinished projects. My priority is a wooden model ship, and I'm doing this for 'clearing a tower of kit'. For that reason, I'll skip the '2mm' errors which only railfans can find. 😆 (The putty is necessity due to an area of adhesive.) https://forums.mylargescale.com/24-product-reviews/87210-occre-costa-mza.html I'm referring this well-written buildlog. This person did better than me. You'll see sepia-tone pictures soon. -
Straightening metal cast parts
modeller_masa replied to modeller_masa's topic in Metal Work, Soldering and Metal Fittings
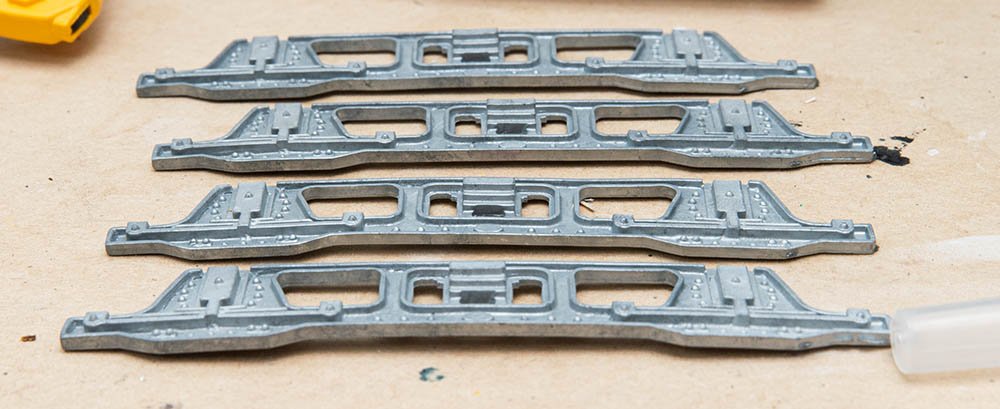
Hello, cog. I like your brilliant idea. I already applied similar solution to other critical issues that this kit has. In this case, I may need to cut 3 times and create four pieces. This old kit when the company was 9 years old in 2009 has many challenging issues. Not bad for practicing, but time consuming. 🤔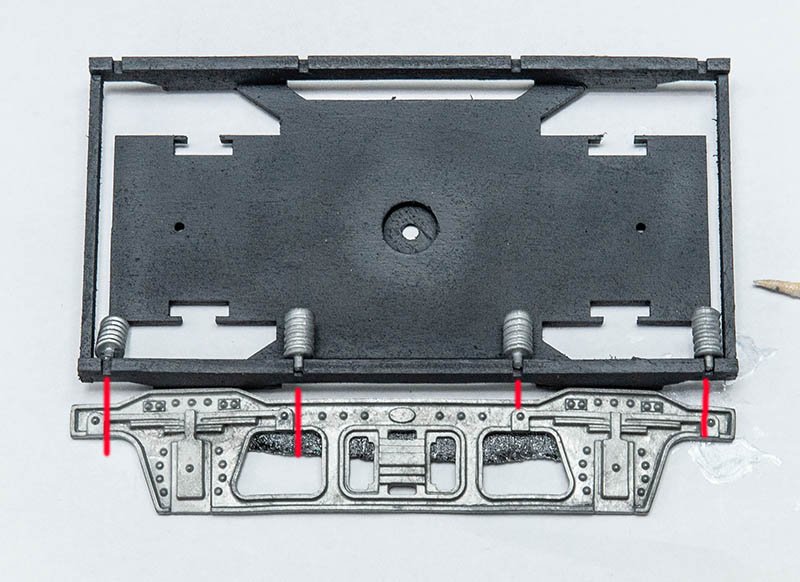
-
Straightening metal cast parts
modeller_masa replied to modeller_masa's topic in Metal Work, Soldering and Metal Fittings
I decided to apply poly putty. The result is acceptable. I found that size of the metal parts don't fit the frame. It is about 5% bigger than plan. CNC or 3D printer is sole savior.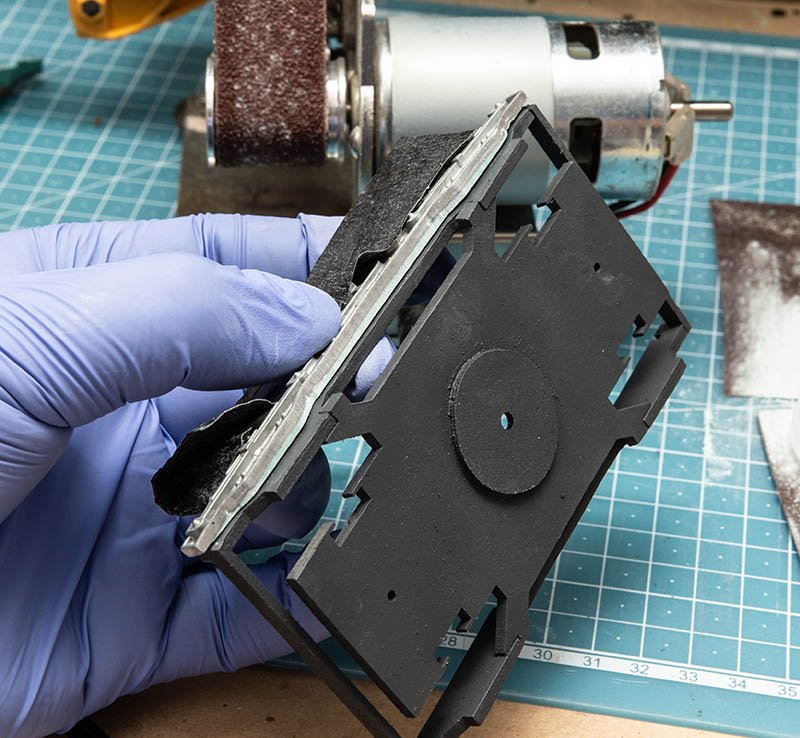
-
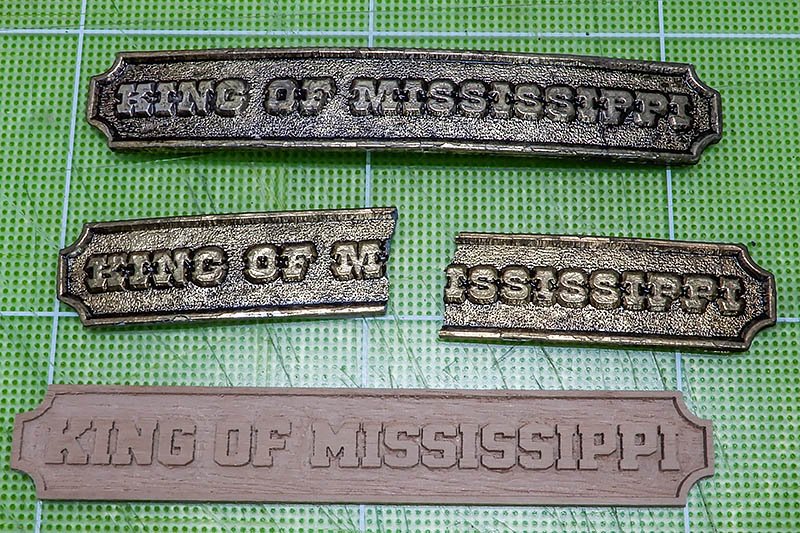
Hello, I have question about bent metal cast parts. These parts are from Occre old train kit. (Ref #56000) This kit was built in 2009 or before, and many metal cast parts includes these are already bent as most old discontinued kits do. The Occre's case is better than the AL's 1987 kit. The name plate of the AL ship was so bent that I couldn't put it in a ship without breaking a part. Fortunately, the AL's name plate is relatively simple that I was able to make the name plate with small CNC machine. However, the Occre's metal cast parts are so complex that I need 3D cad plan which is I didn't study yet. Fortunately, it looks like the vent is relatively weaker than the AL's case. Is there any way to recover the slightly vent metal cast parts without damage? If not, I'll fill the space with putty, and try to make the fat parts naturally without pushing it...