modeller_masa
-
Posts
950 -
Joined
-
Last visited
Content Type
Profiles
Forums
Gallery
Events
Everything posted by modeller_masa
-
Thank you for your concern, James. I'm fully recovered and in full condition! I'm hanging on the project again. But it's a painting. Wood sealer, acrylic primer, acrylic paint, and varnish... The curing process takes too much time! I may upload the next post in the next weekend. See you again!
-
Preparing Standing Rigging.
modeller_masa replied to ford34tom@comcast.net's topic in Masting, rigging and sails
It depends on the purpose of the uses. Temporary-fast-soluble adhesion - Nail polish clear color (Lacquer based) Temporary-medium speed-soluble adhesion - Dewaxed shellac Temporary-slow-soluble adhesion - Diluted PVA wood white bond Long-term-protective coat - Diluted PVA wood white bond, dewaxed shellac, candle wax, bee's wax, thread wax, etcs Permanent-Instant-non soluble strong adhesion - CA super glue (Extreme caution!) You can apply the protective wax to the threads before rigging. It removes thread fuzz and prevents thread from getting entangled. You can apply the protective wax after all the rigging work, but beware of spilling glue on the deck or sails. -
I tried shellac as a sealer, but the surface has much trouble... I applied DIY 1 pound cut shellac twice and sanded. I'll test an acrylic sealer next time.
-
The surface of wood is very different from plastic or metal. I pay attention to many conditions when I paint on wood. - Wood species: Oily or porous surface - Structure of wood: Heartwood-Sapwood, growth ring, direction of grains - Defects: burls, etcs Also, there are various types of paints - Transparent: Traditional oil varnishes, Shellac, etcs - Opaque: Sealer, putty, primer, epoxy coat, lots of sanding, water or alcohol based paints, sanding again, matt varnish. I don't know what the best answer is. Don't start from forever soup from many makers. Read the acrylic paint maker's instructions for the one you are using and use a wood primer the maker recommends.
-
https://www.youtube.com/watch?v=IRvvVYMhZ2c Metallic paints have several different types. The differences among pigment, dye, mica, and metal powder determine the characteristic of metallic paints. This knowledge will help to adjust your metallic paint properly. --- I see. So the question is, what is a proper primer for 3D printed parts. I apologize for misunderstanding.
-
need instructions for Heller 1/100 le soleil royal
modeller_masa replied to MrBlueJacket's topic in Plastic model kits
https://www.scalemates.com/kits/heller-58899-le-soleil-royal--1365069 Is this the resolution you wanted? -
Thank you for your concern. The doctor said that it was not a big injury. I'm reading some unread books. I'm hoping to get back to work soon.
-
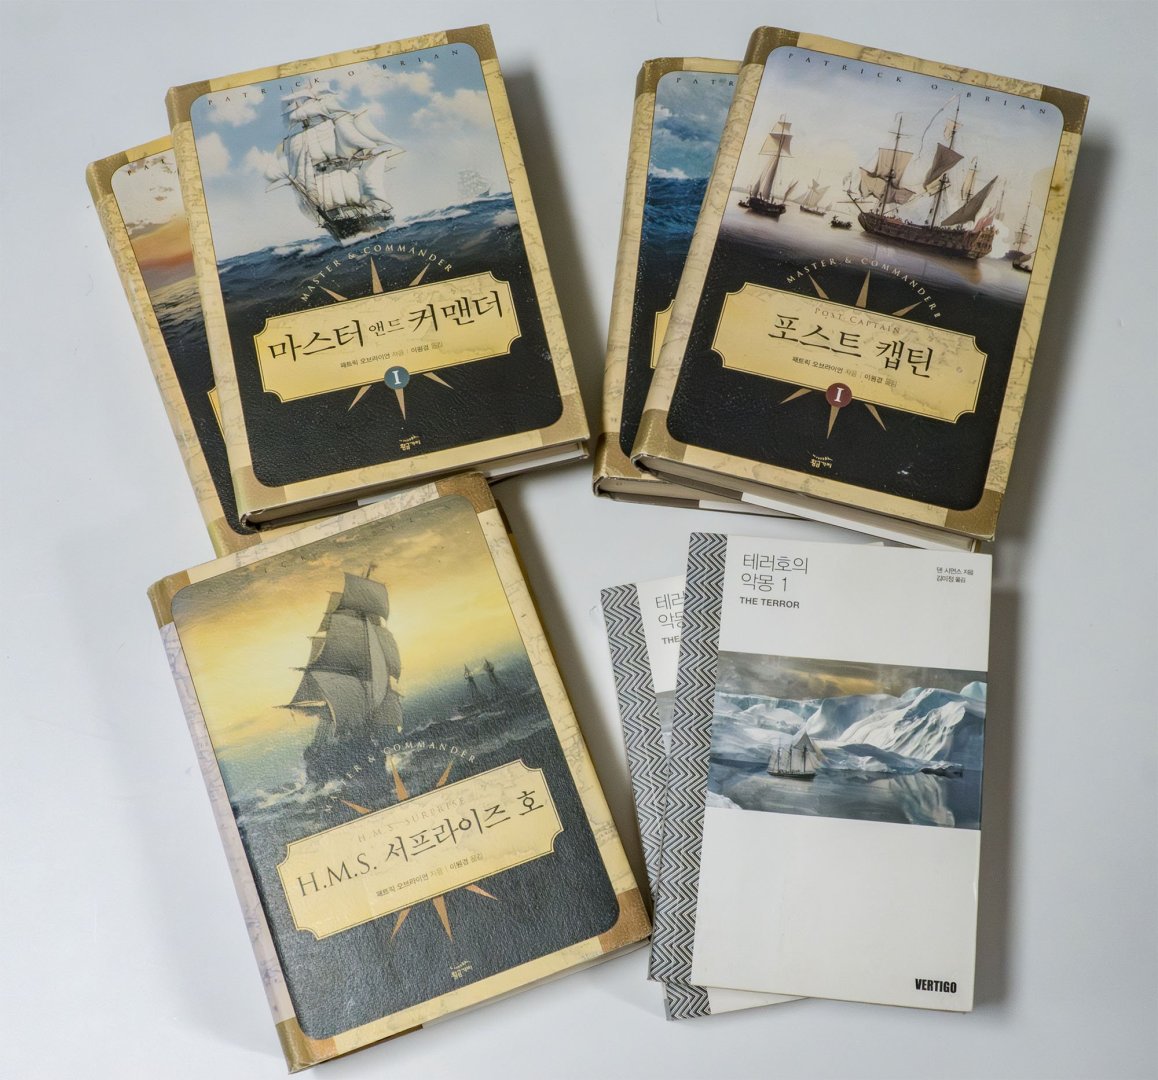
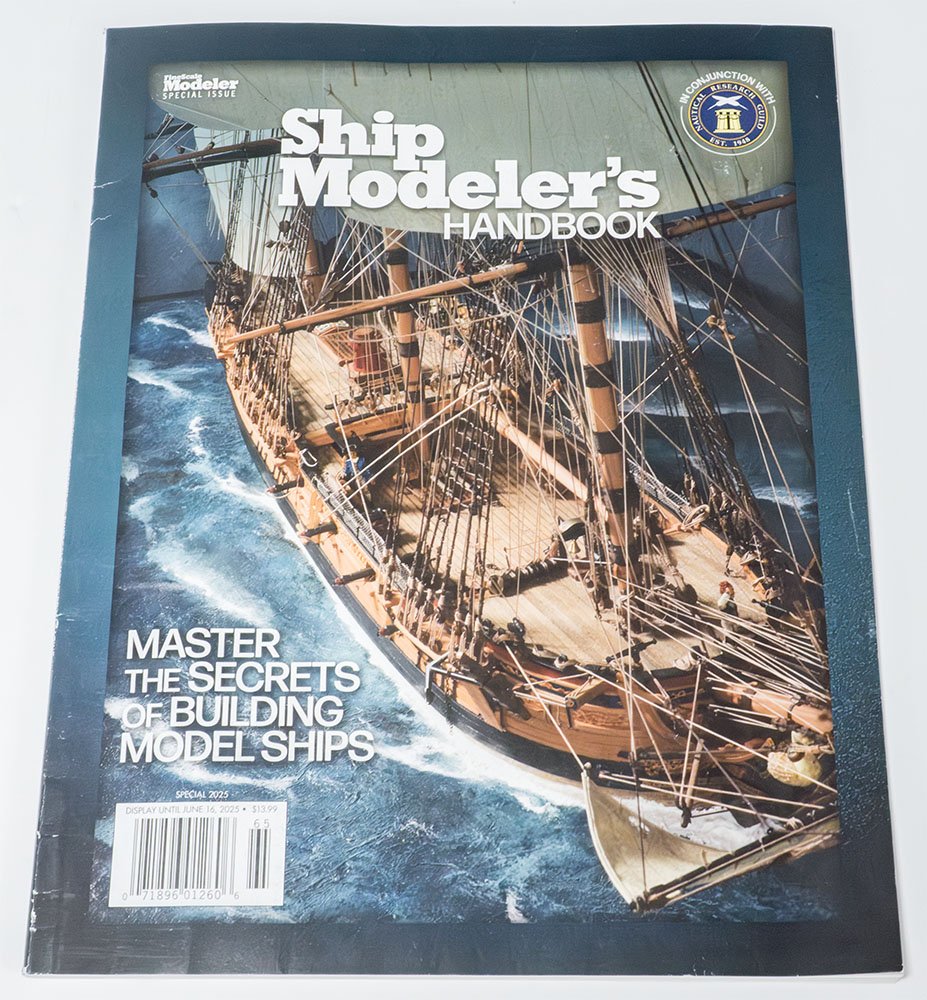
I received the modeller's handbook. It was surprising that the book has a guide for Swift 1805. By the way, I got hit by a car last week. I was literally flown. Flying is always amazing. 🤪 I'll go rest a bit.

-
Planking problems
modeller_masa replied to Mrgj24's topic in Building, Framing, Planking and plating a ships hull and deck
It is a famous issue. You can read or buy the general planking technique instructions. Then you'll find that you can't apply the instructions to most kits because they have different hull-frame structures. The last step is manipulating the original planking technique to fit the weird structure of the kit. Many build logs and various modification methods will help the progress. -
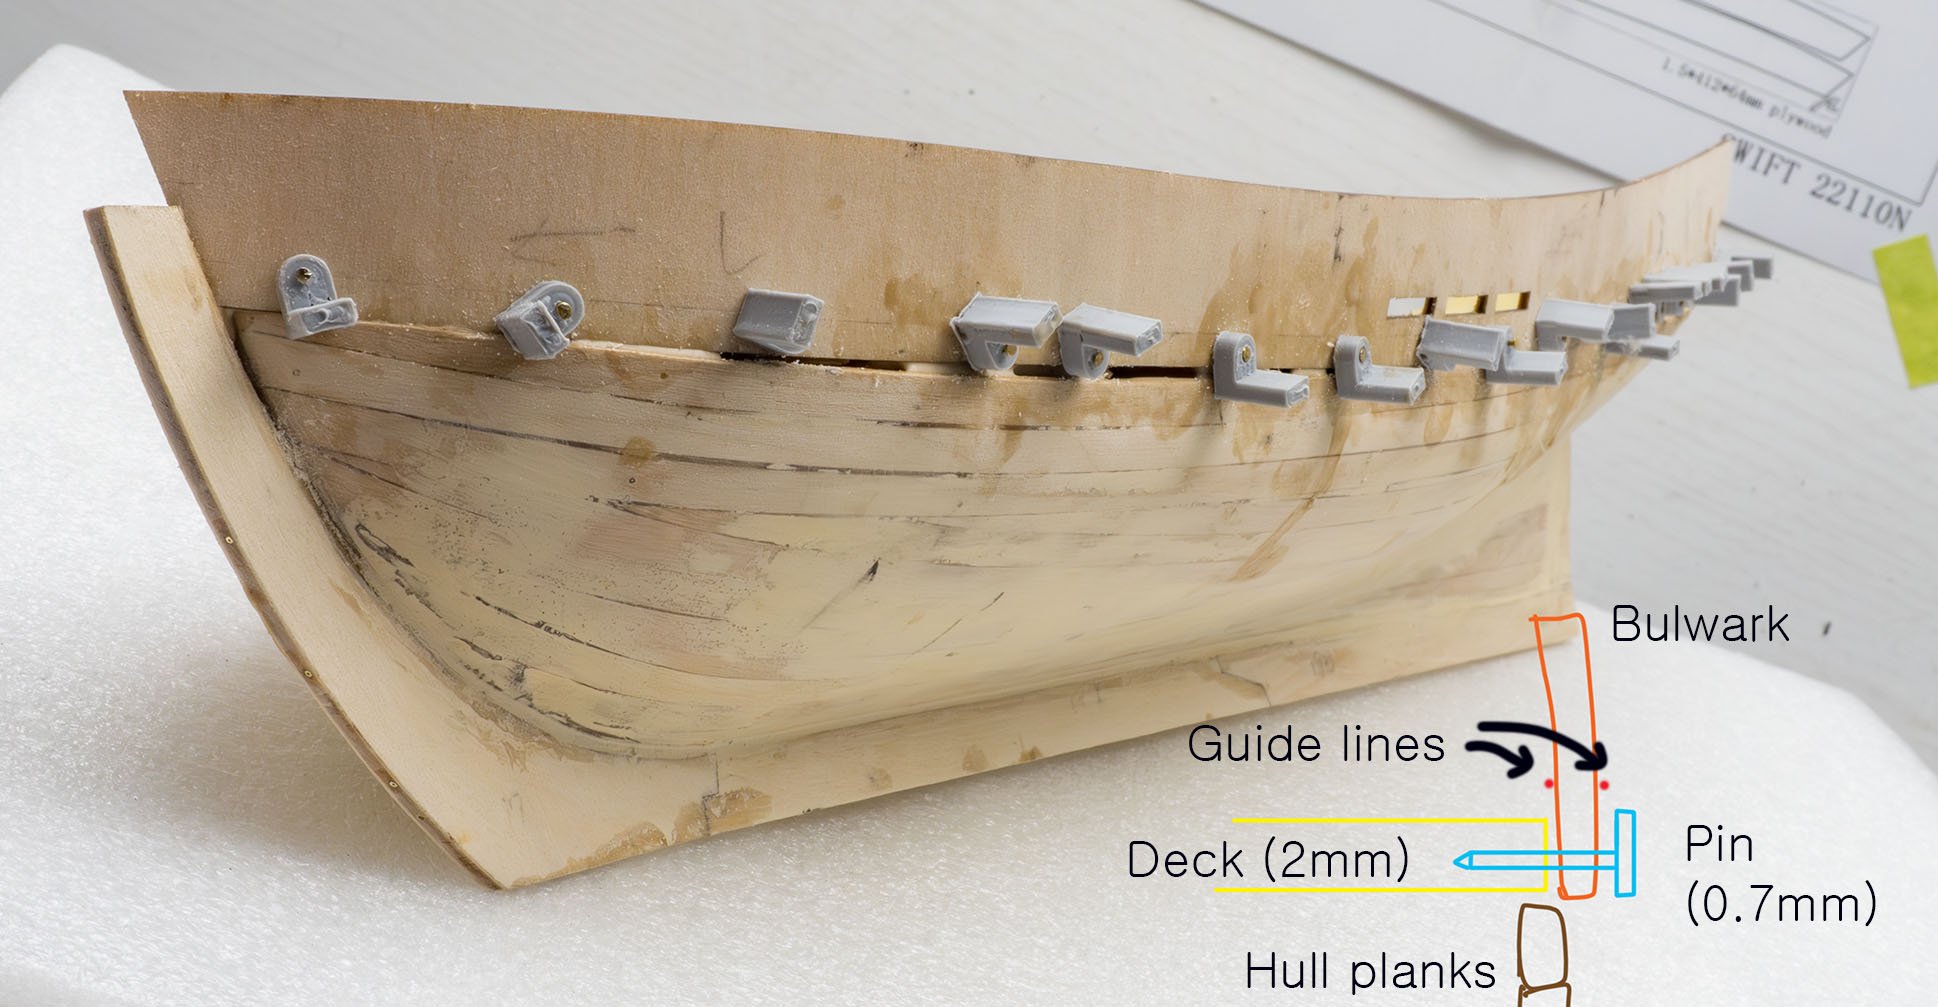
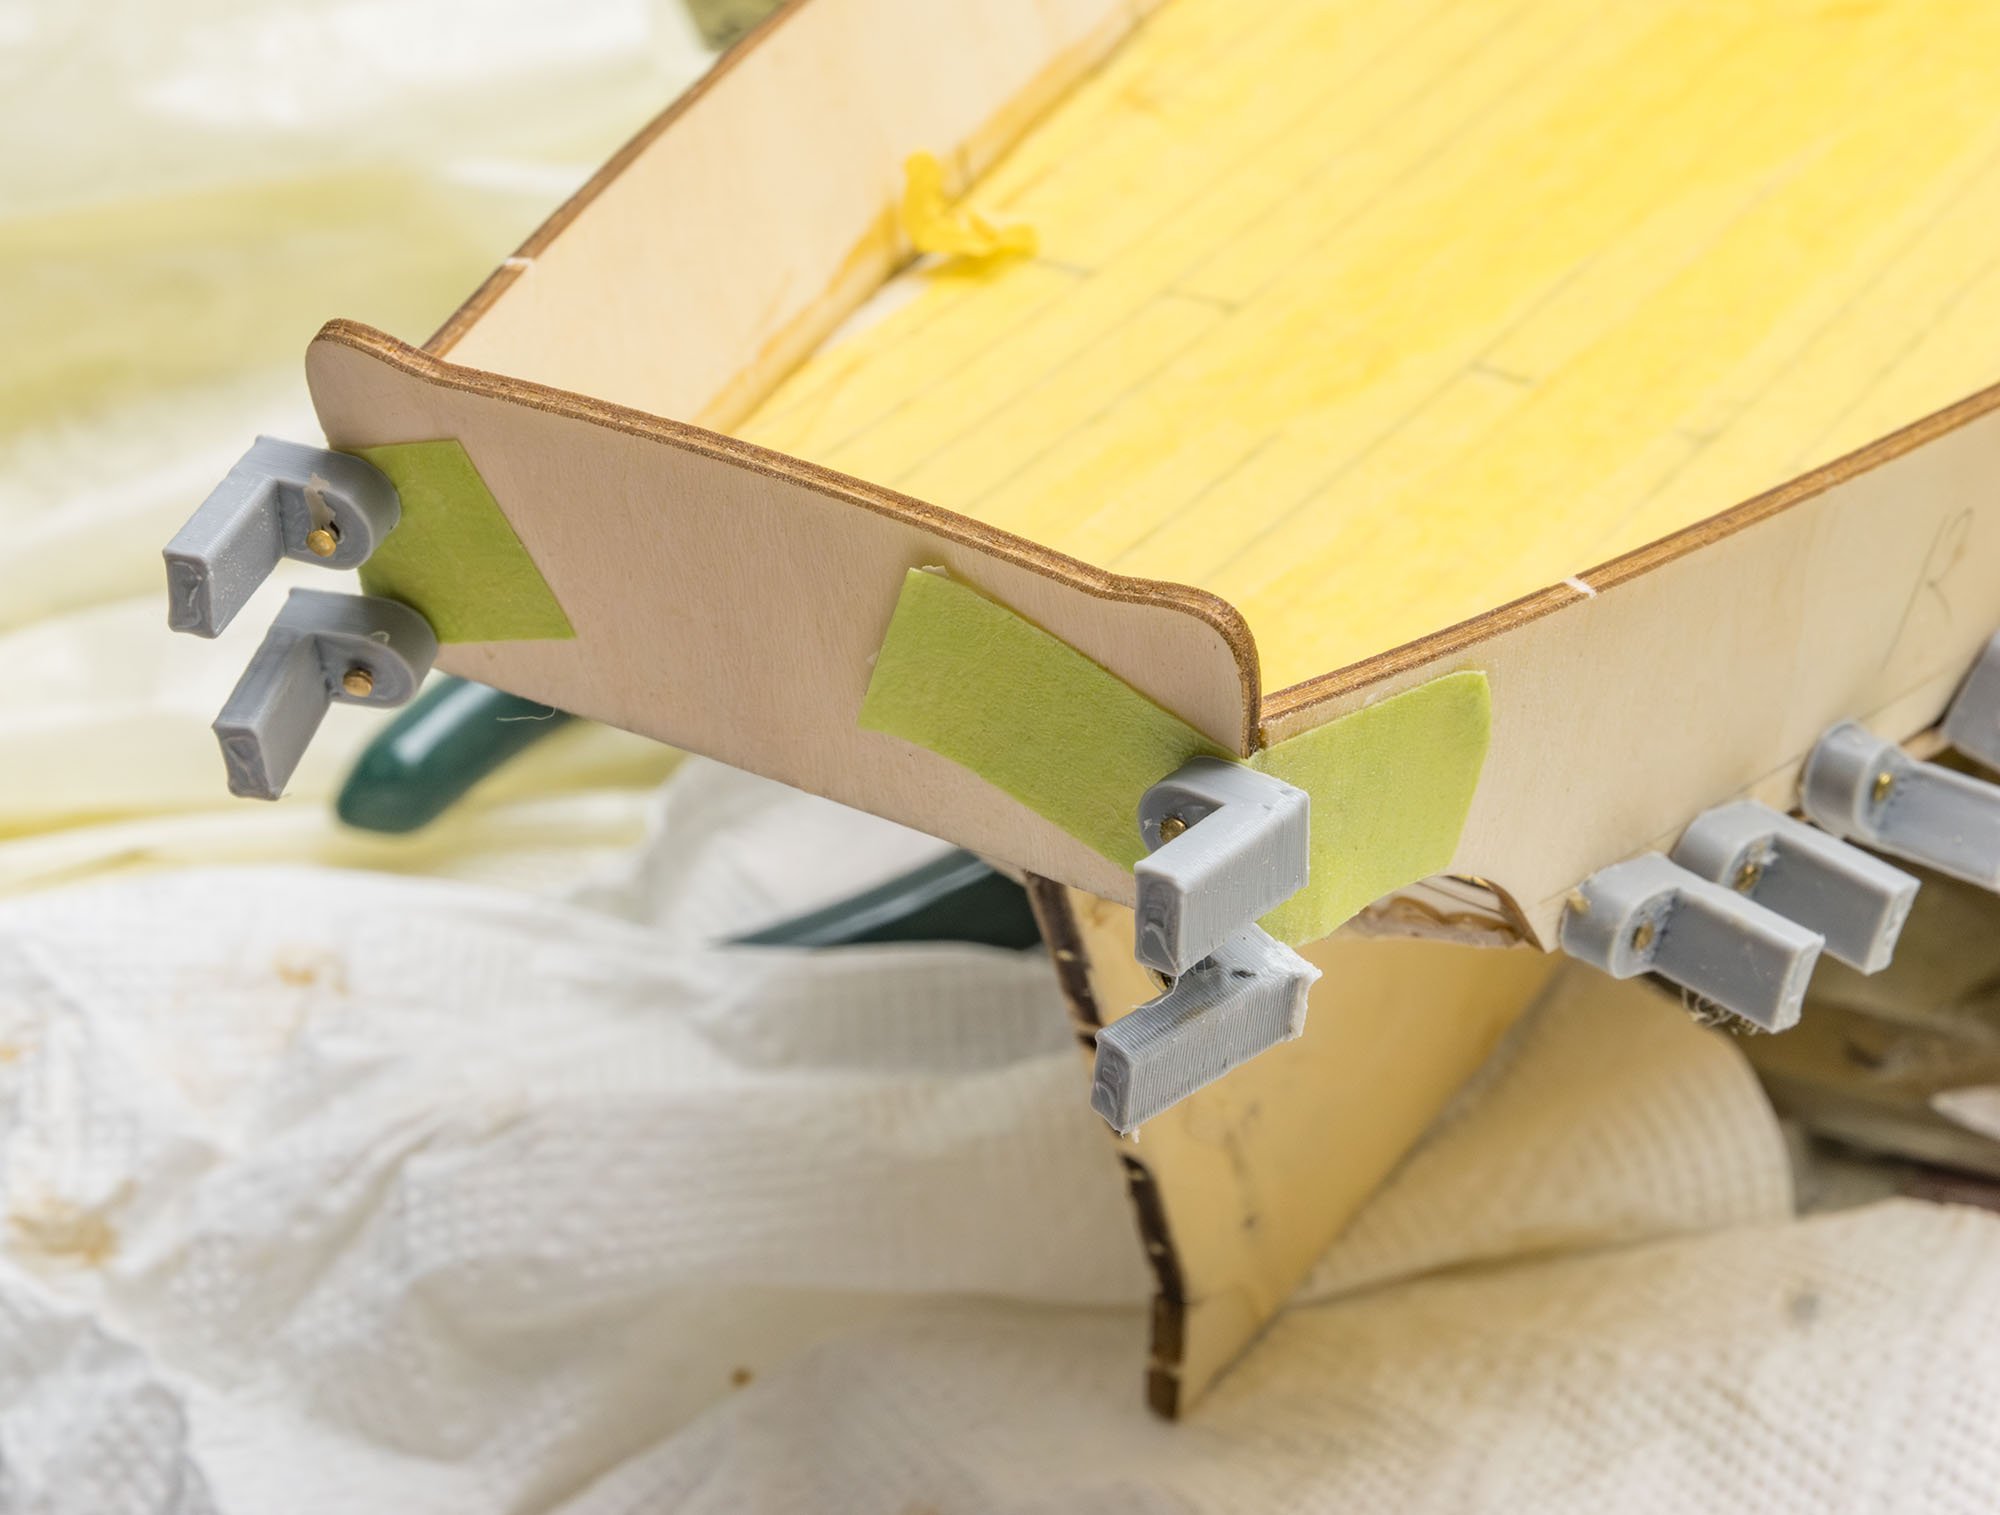
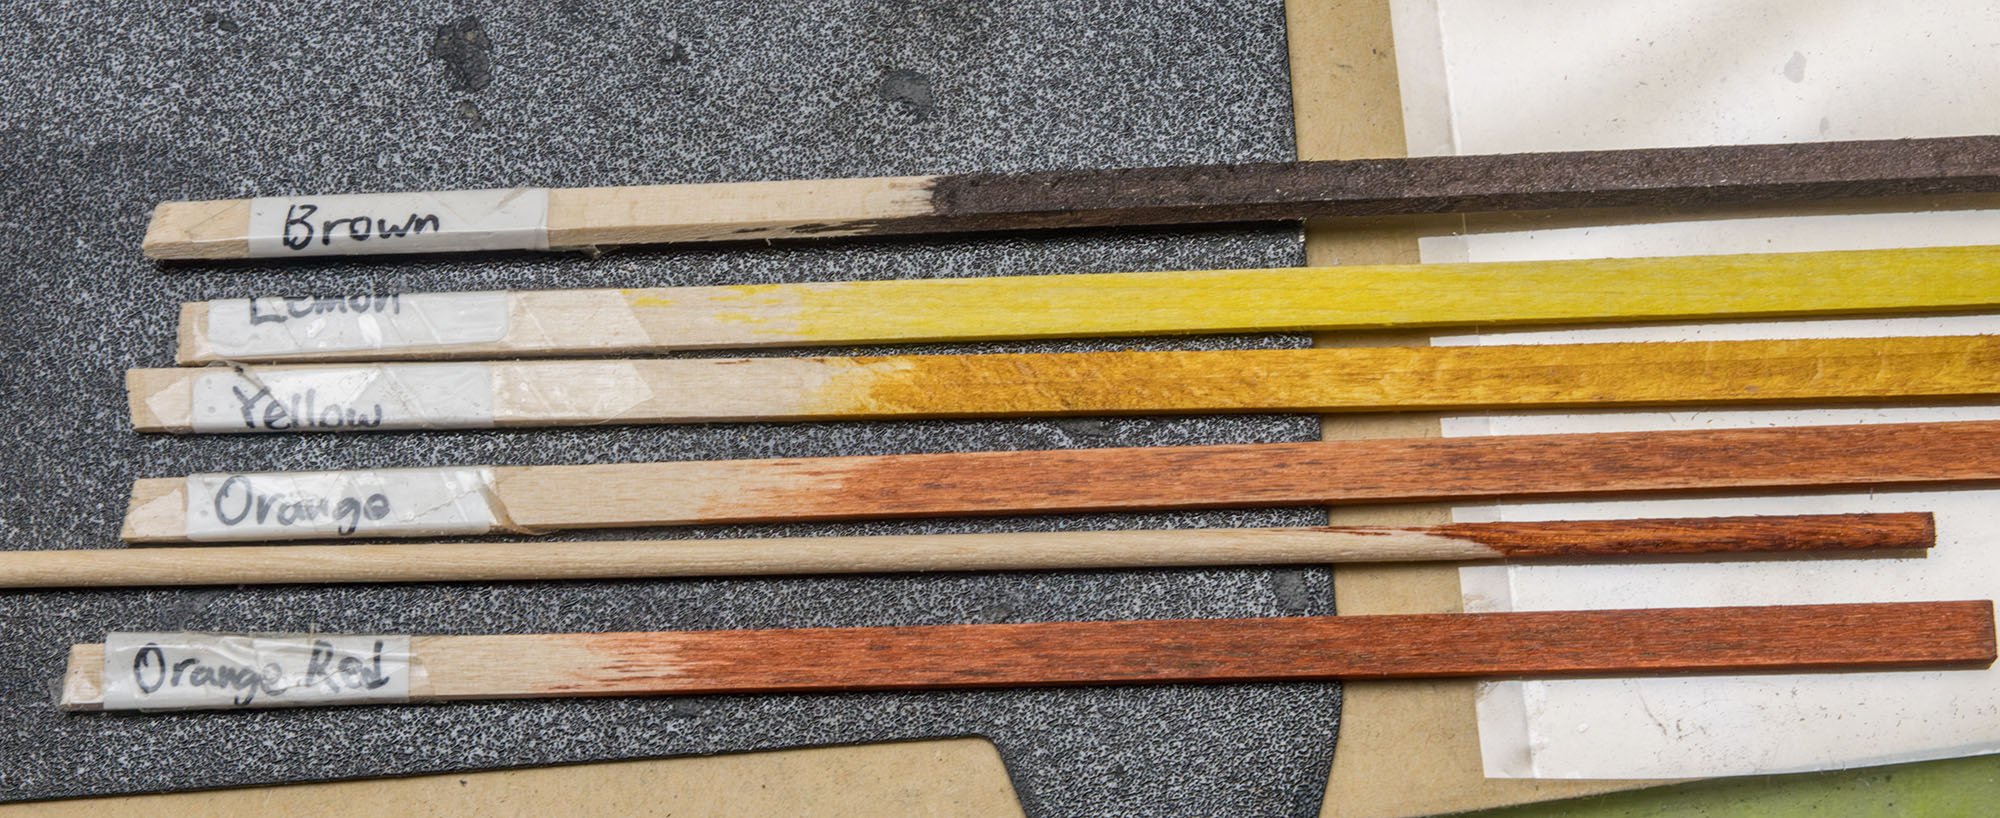
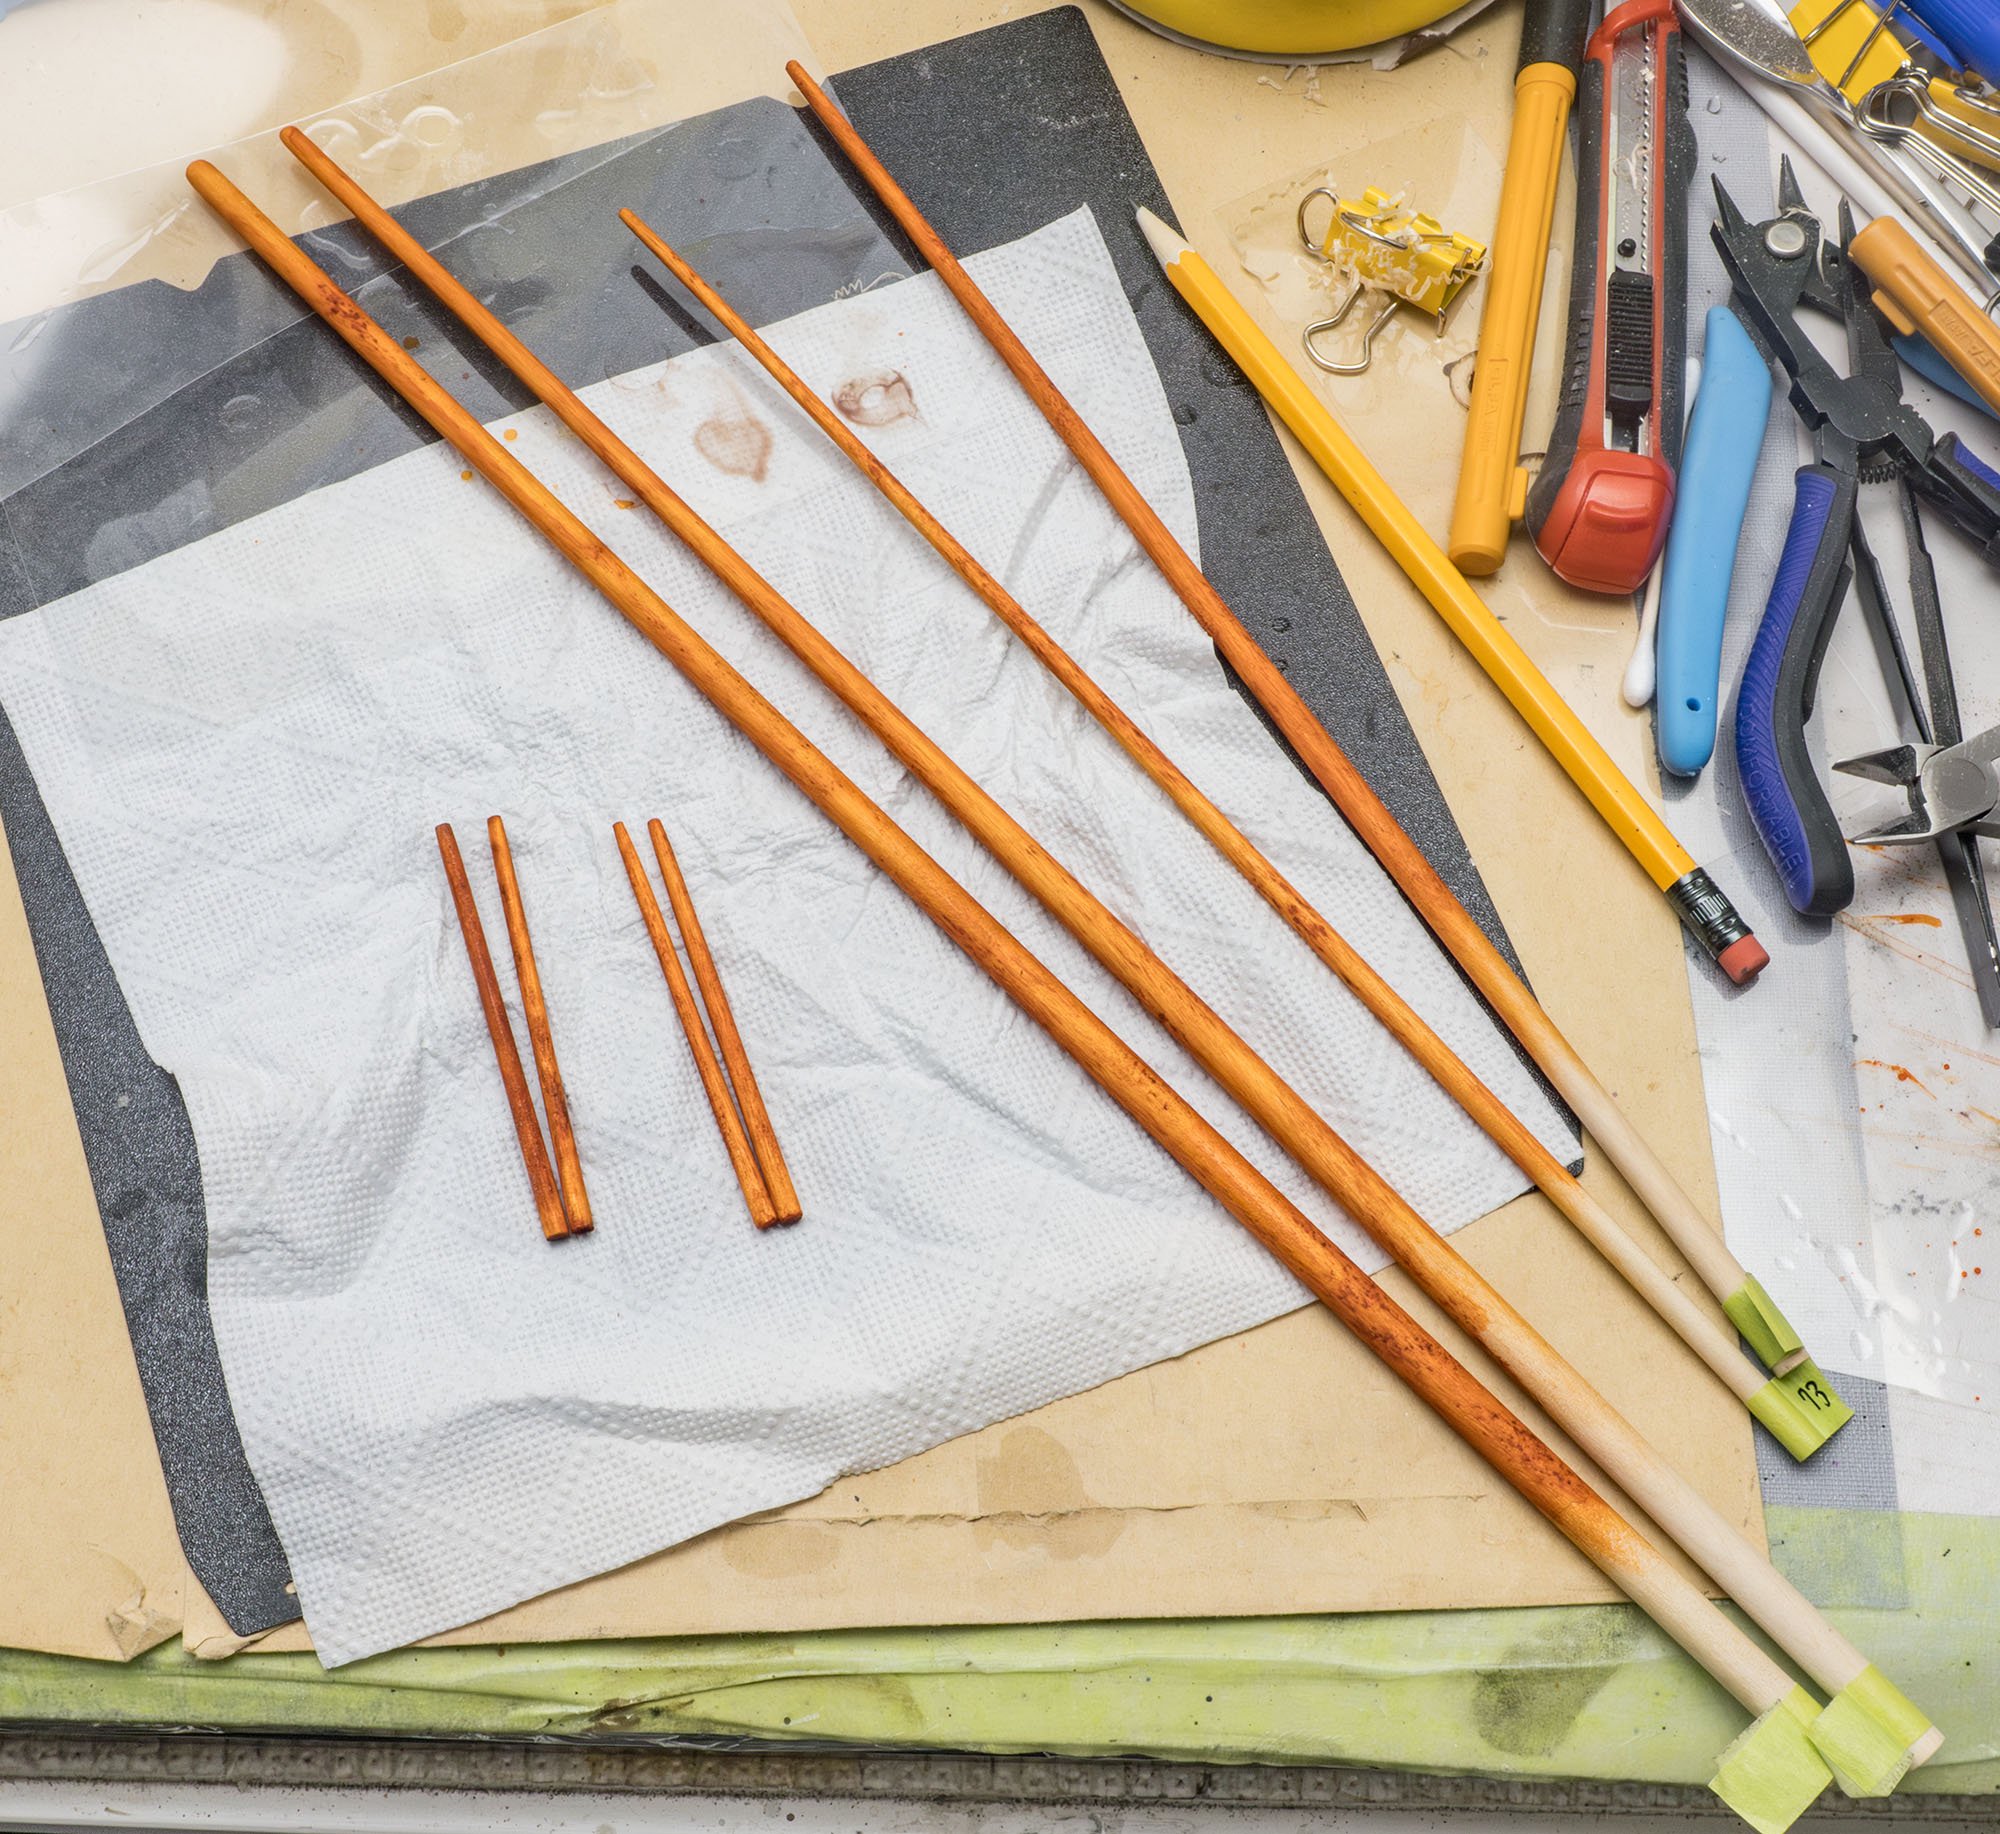
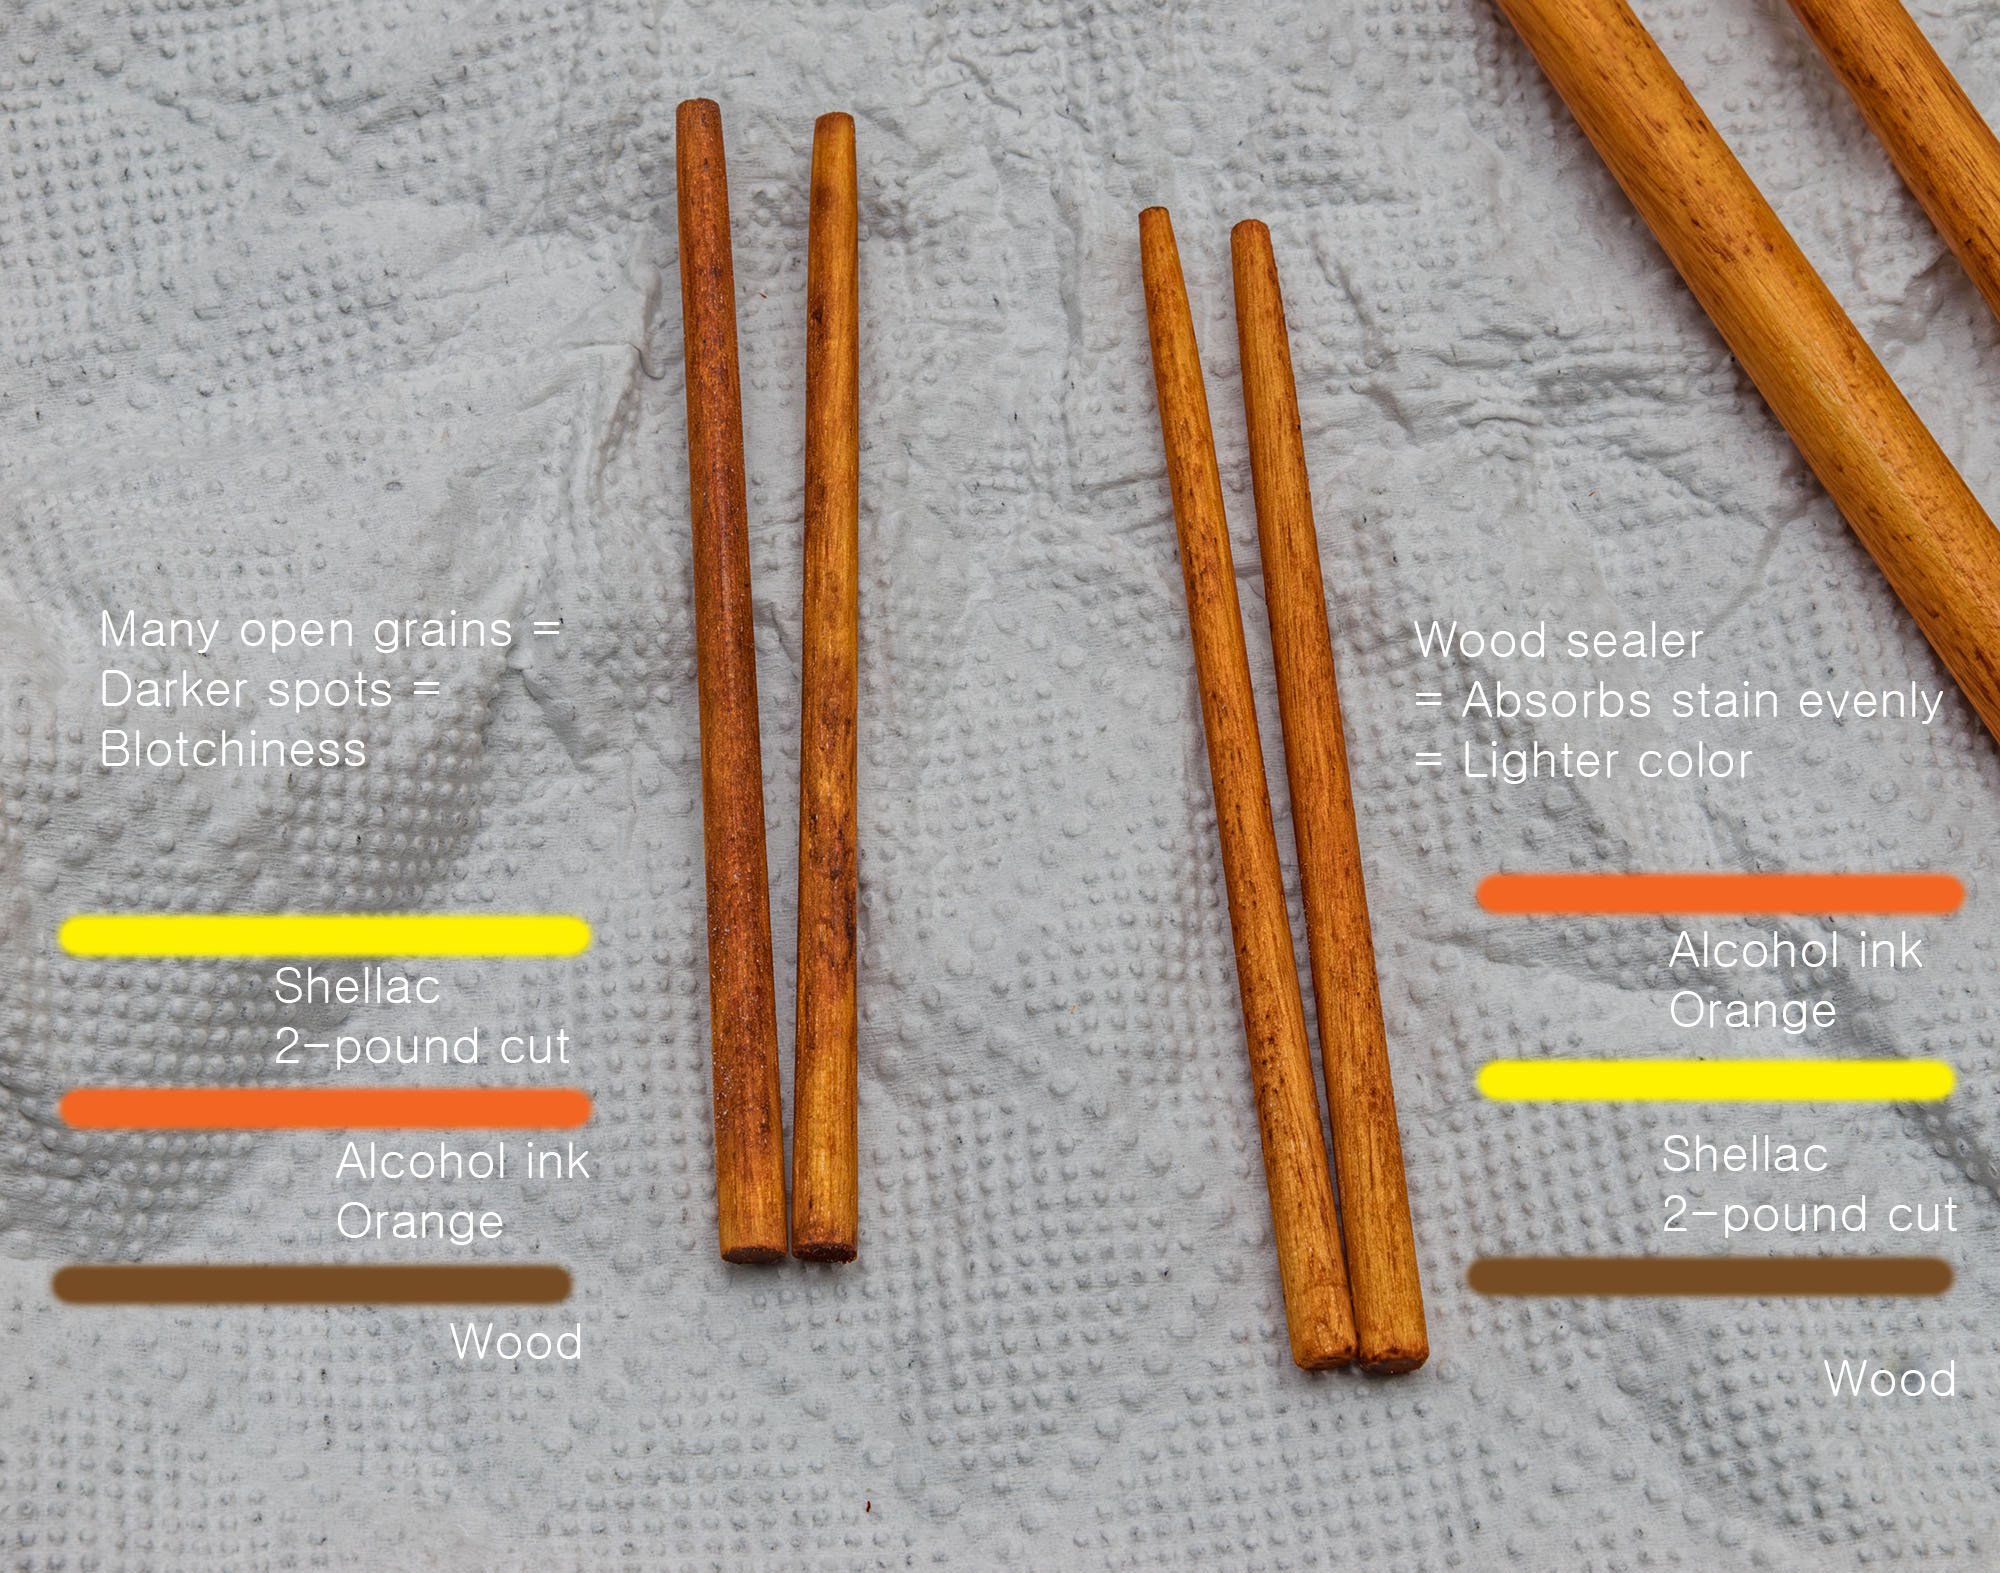
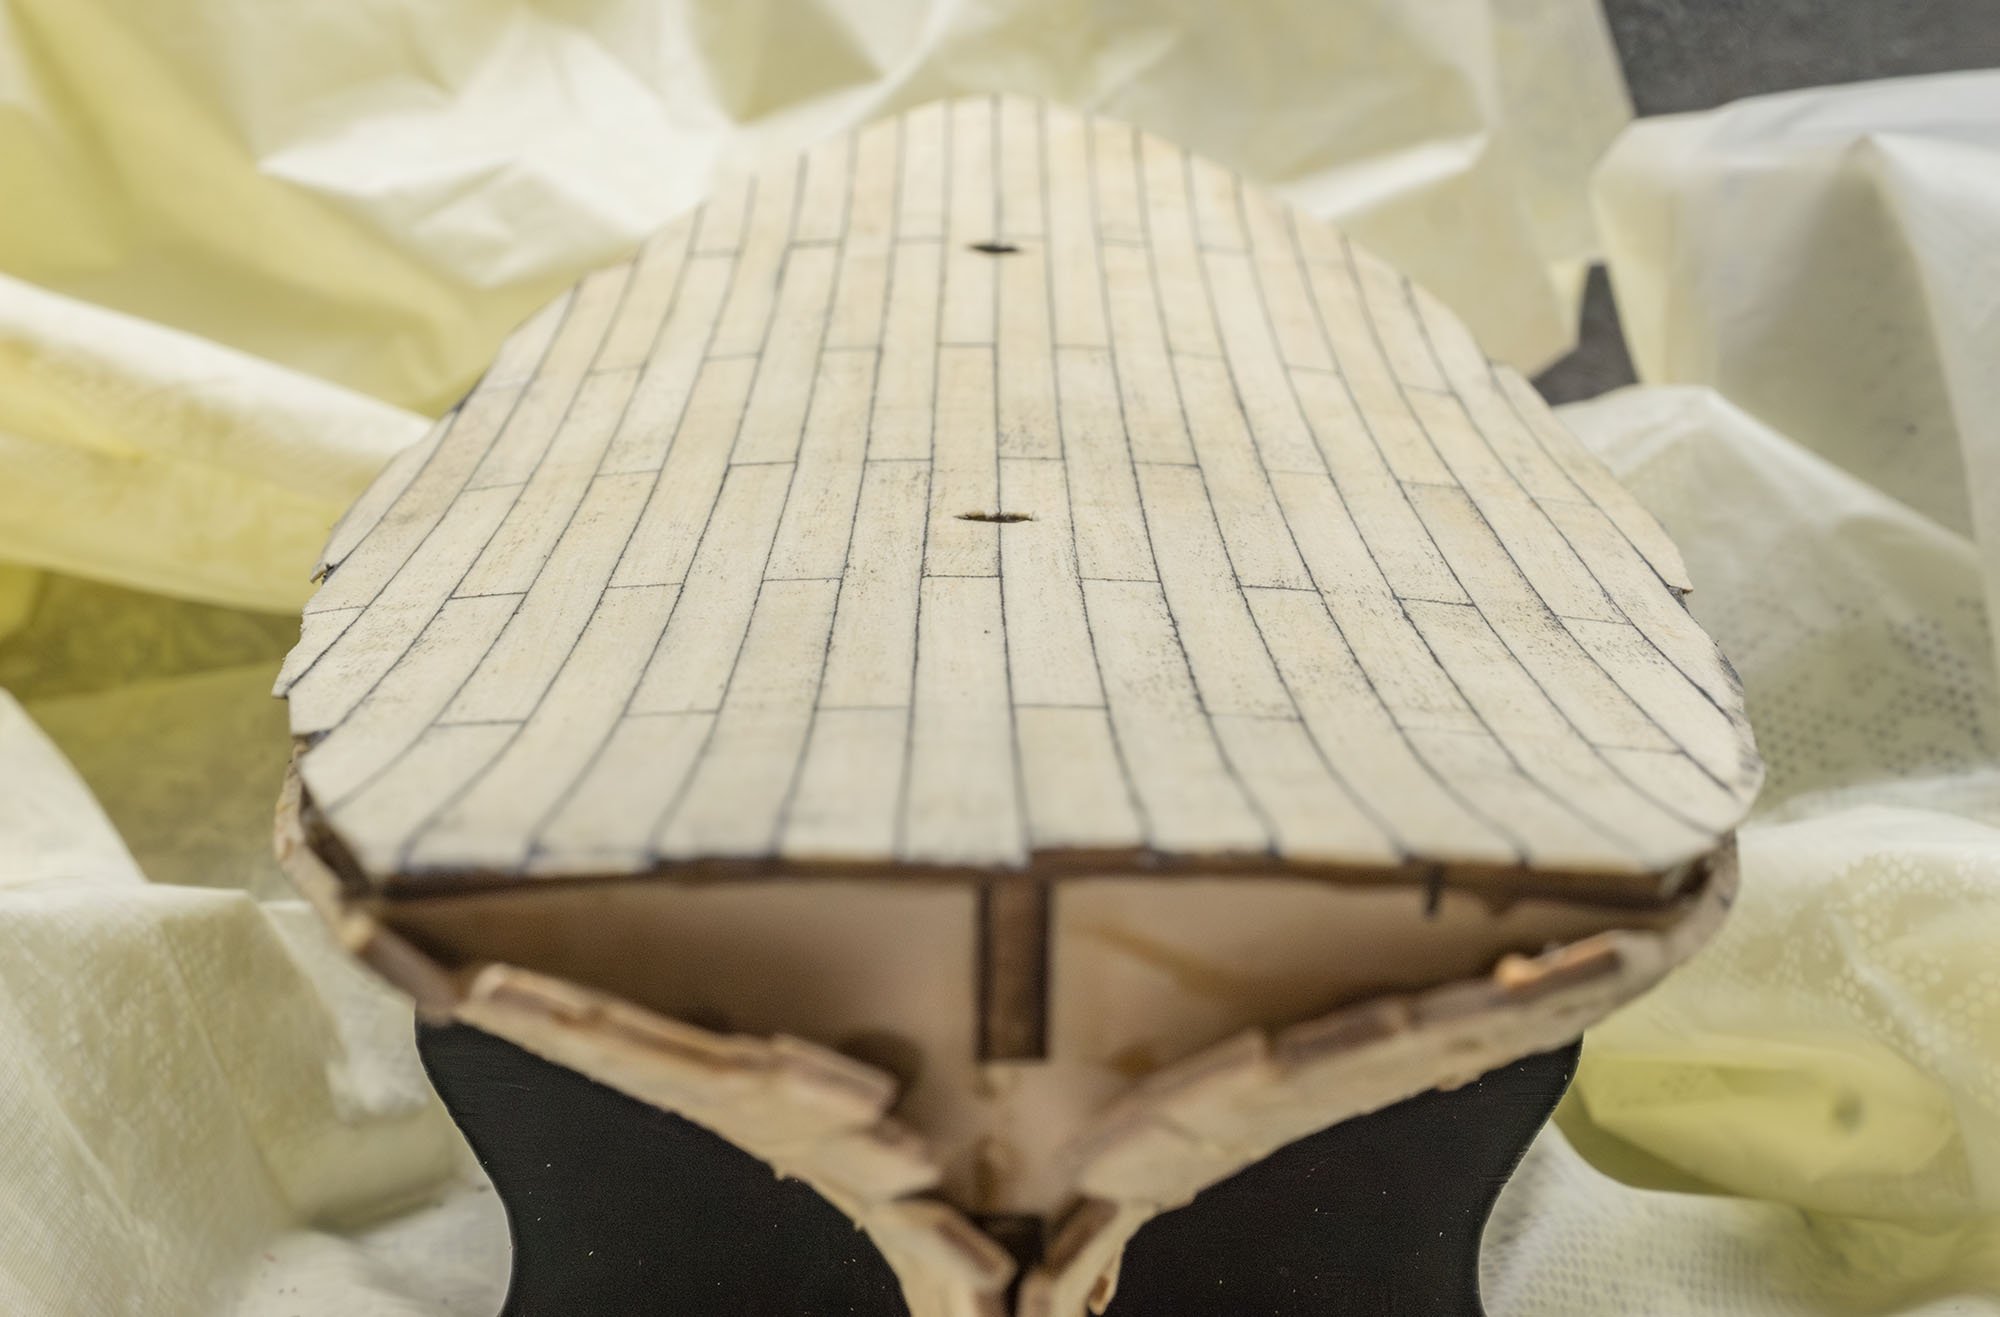
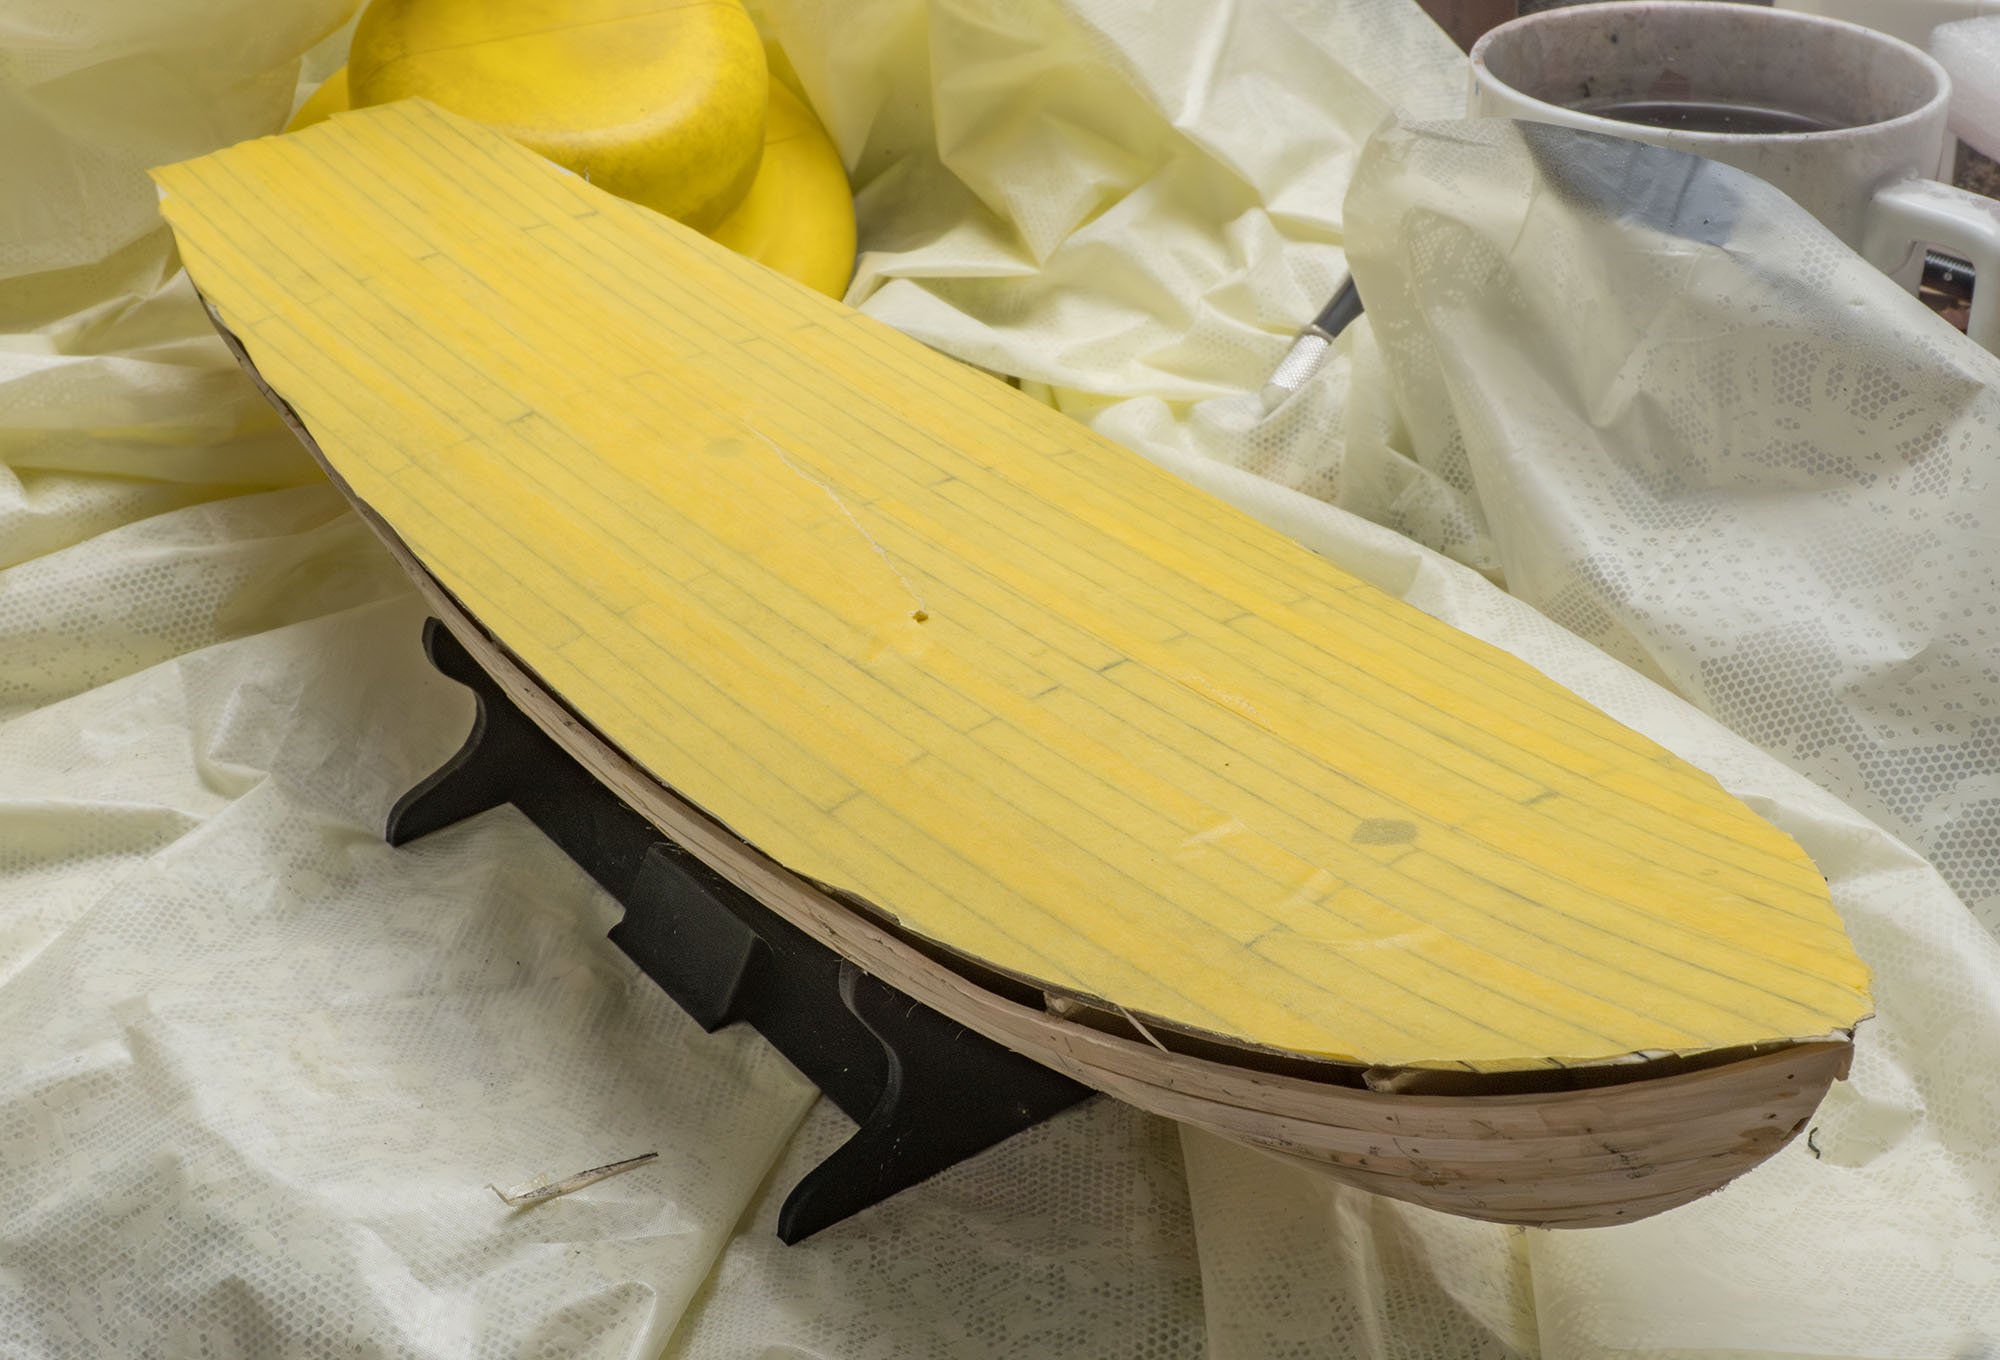
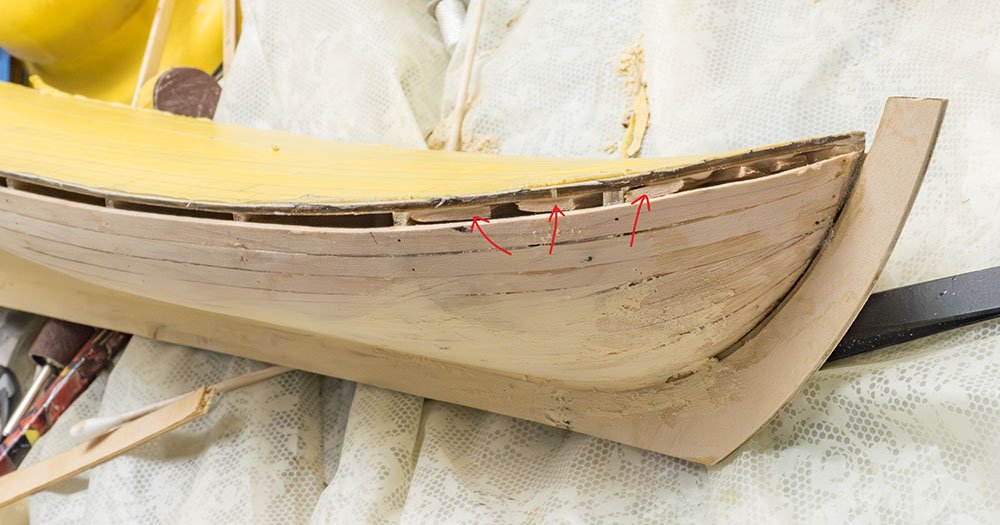
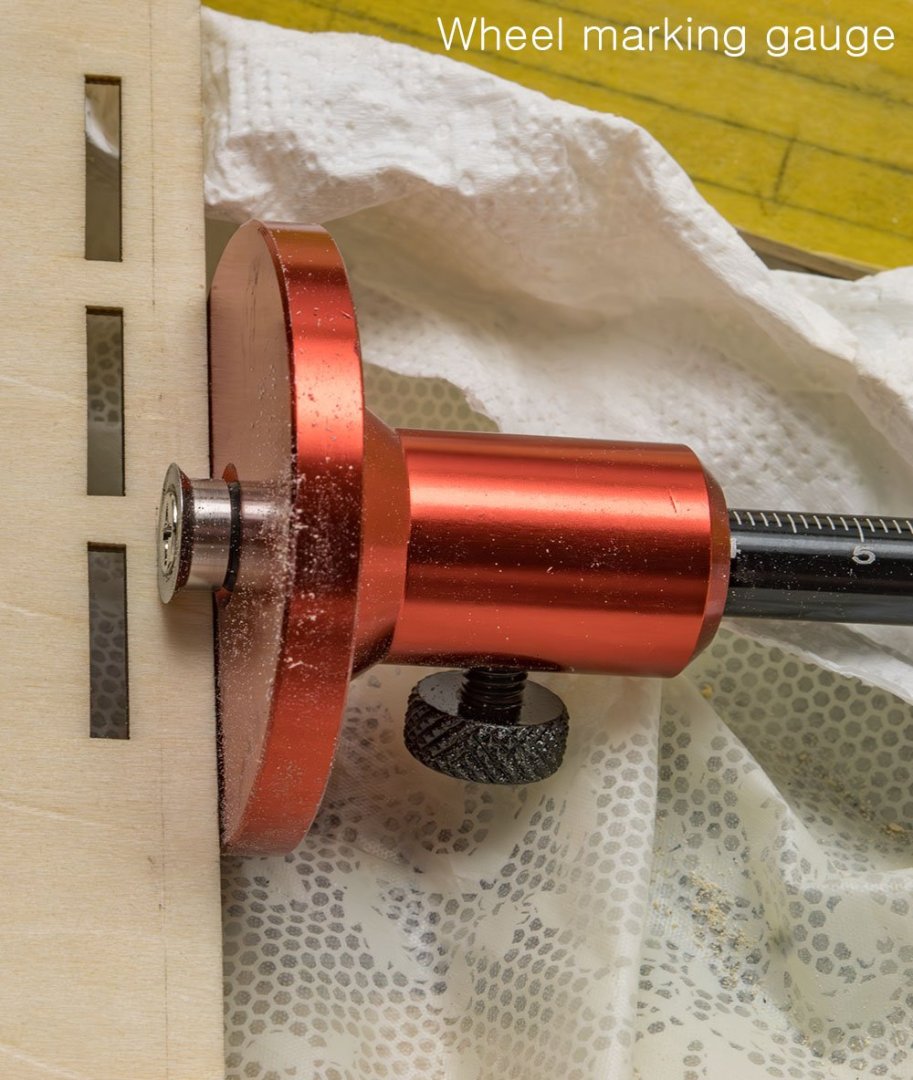
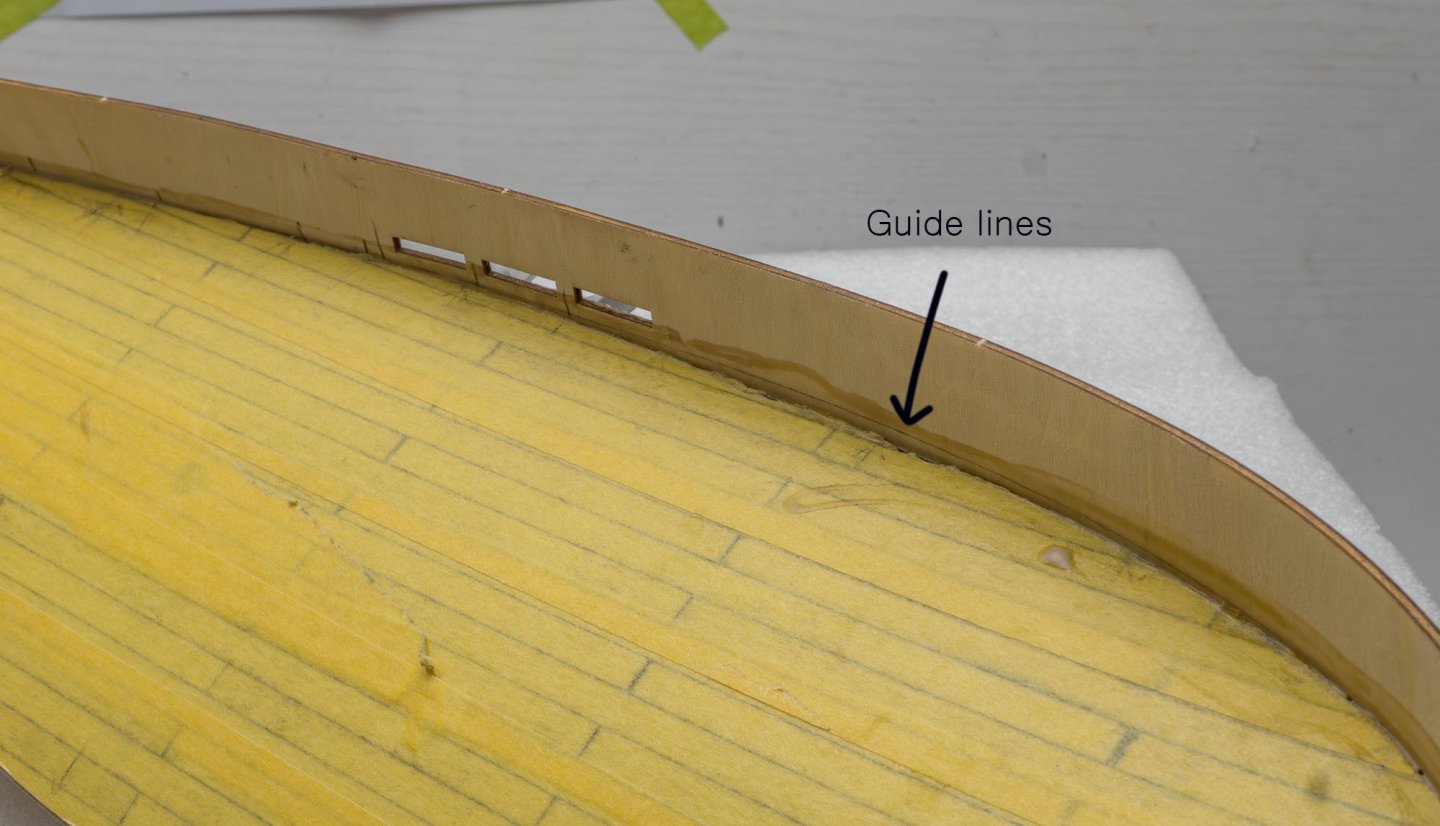
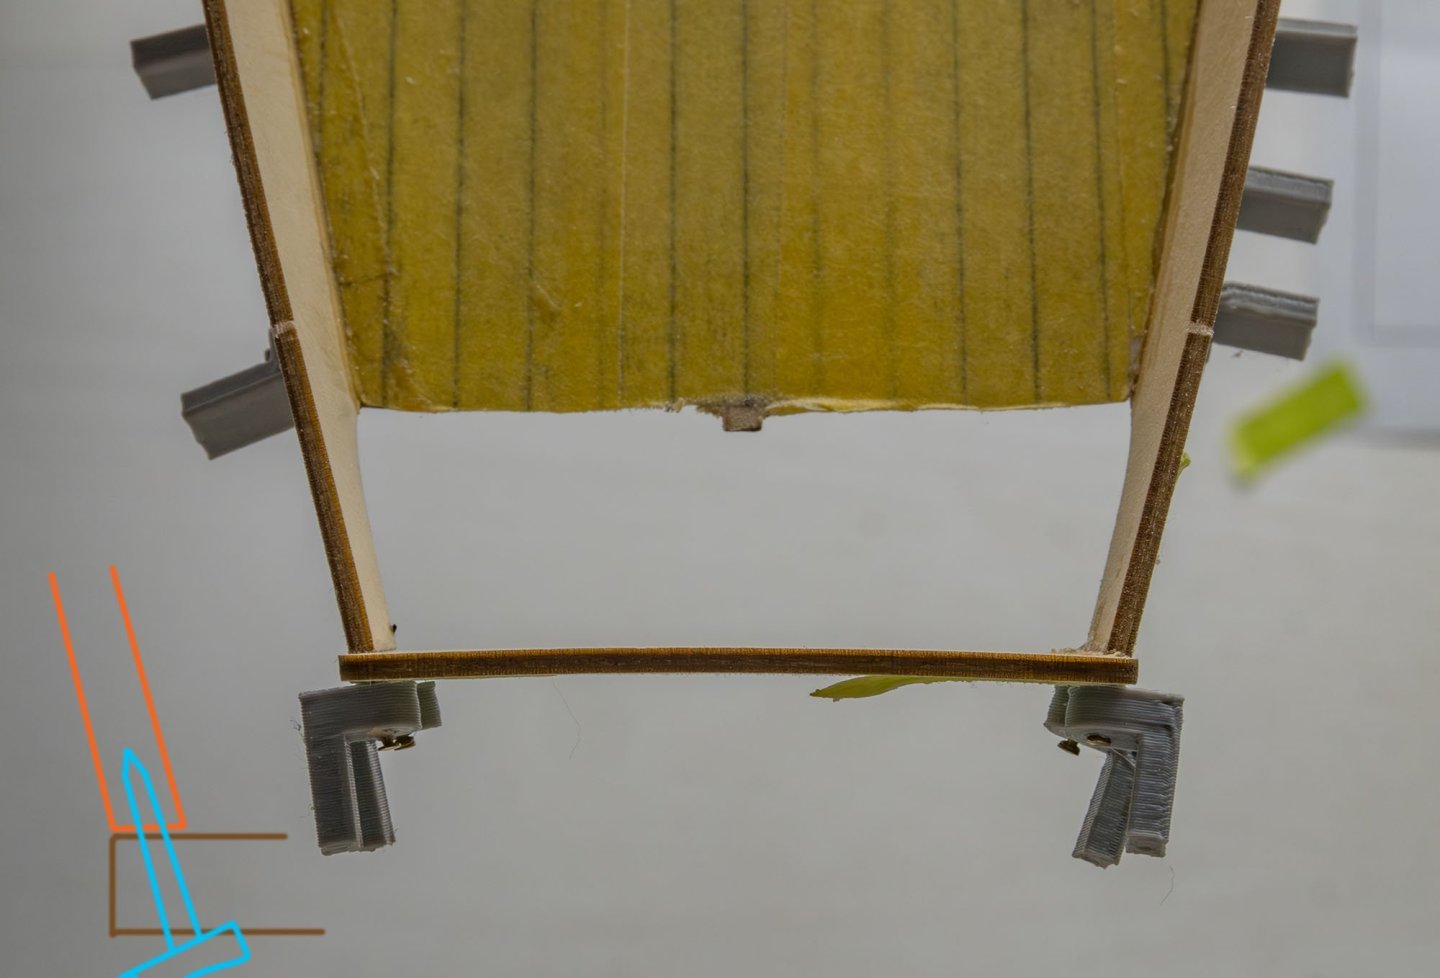
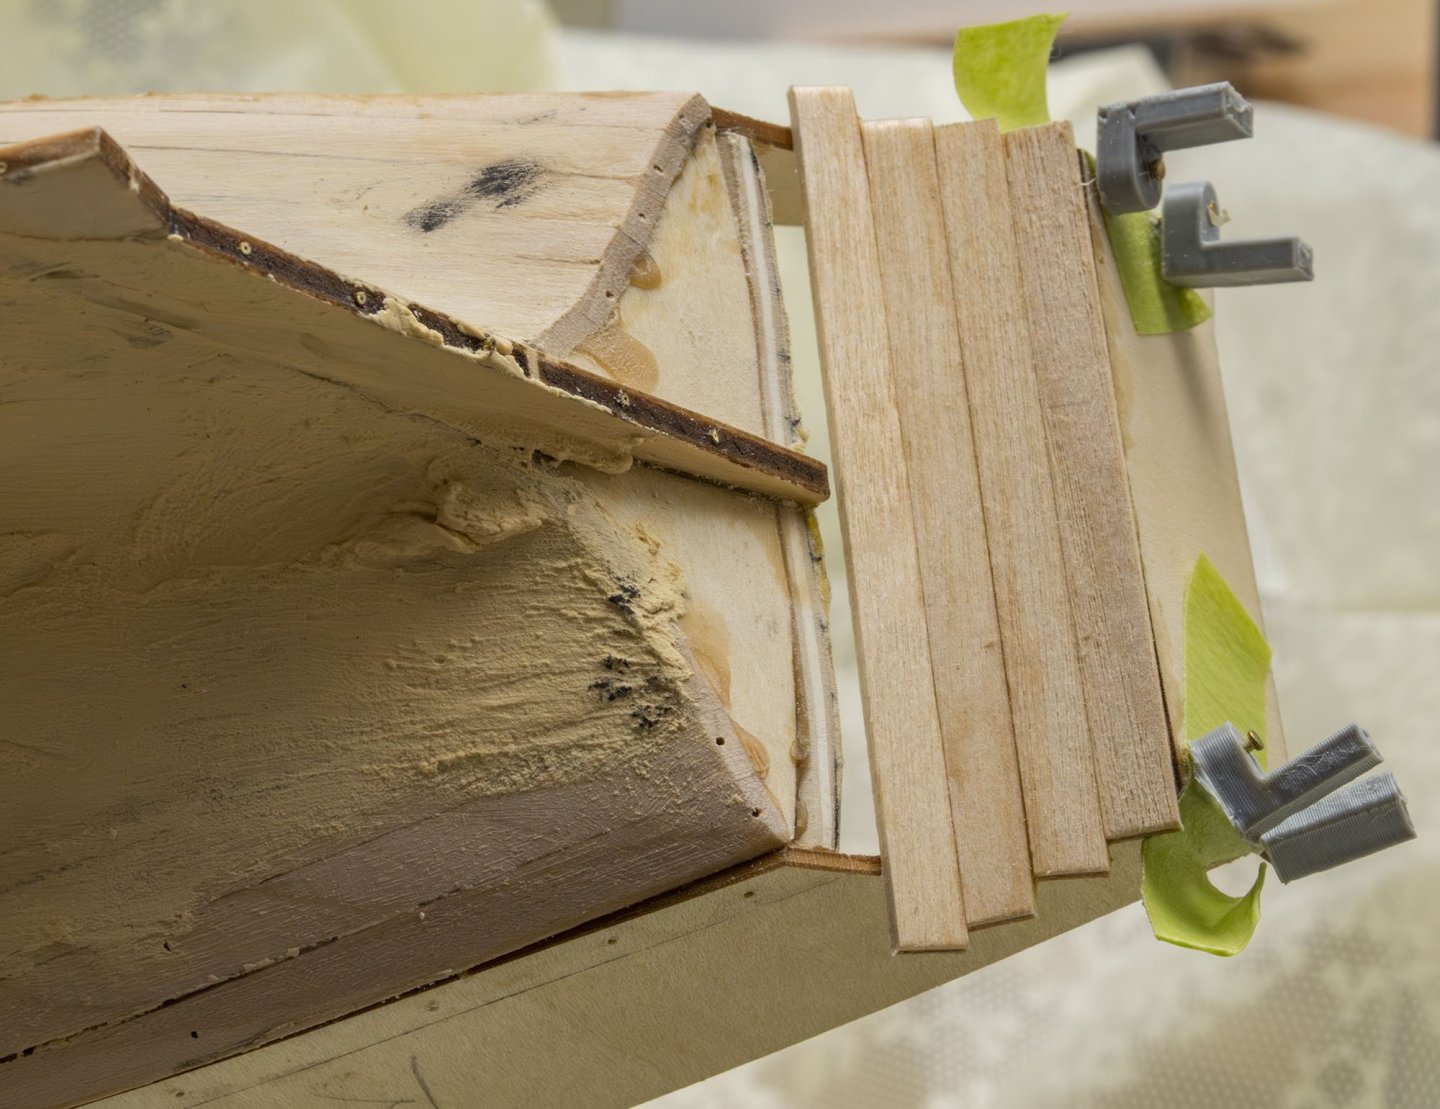
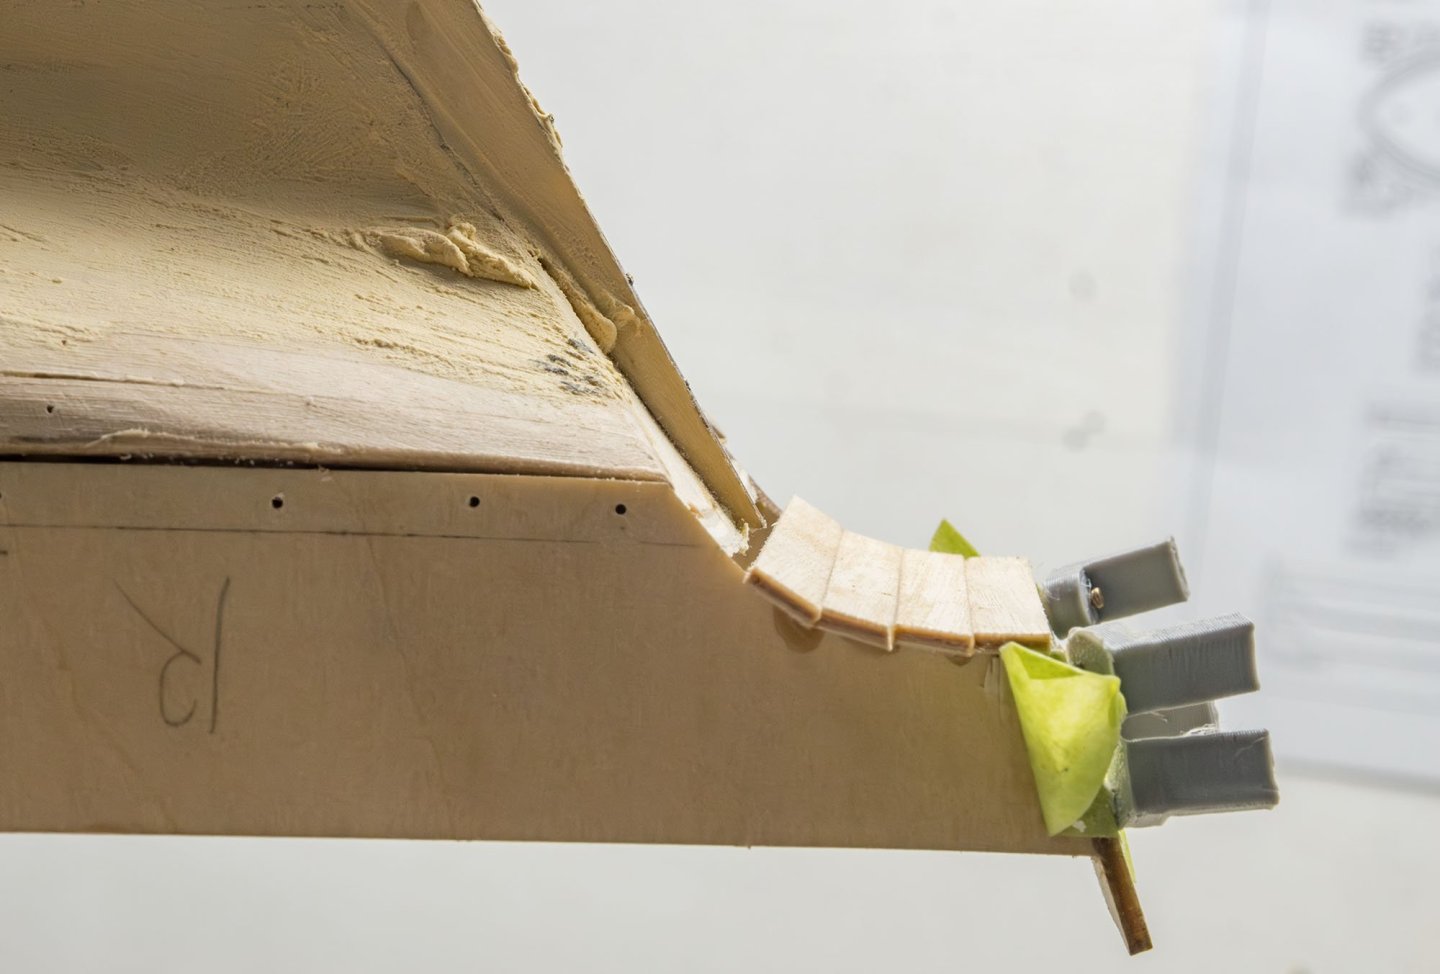
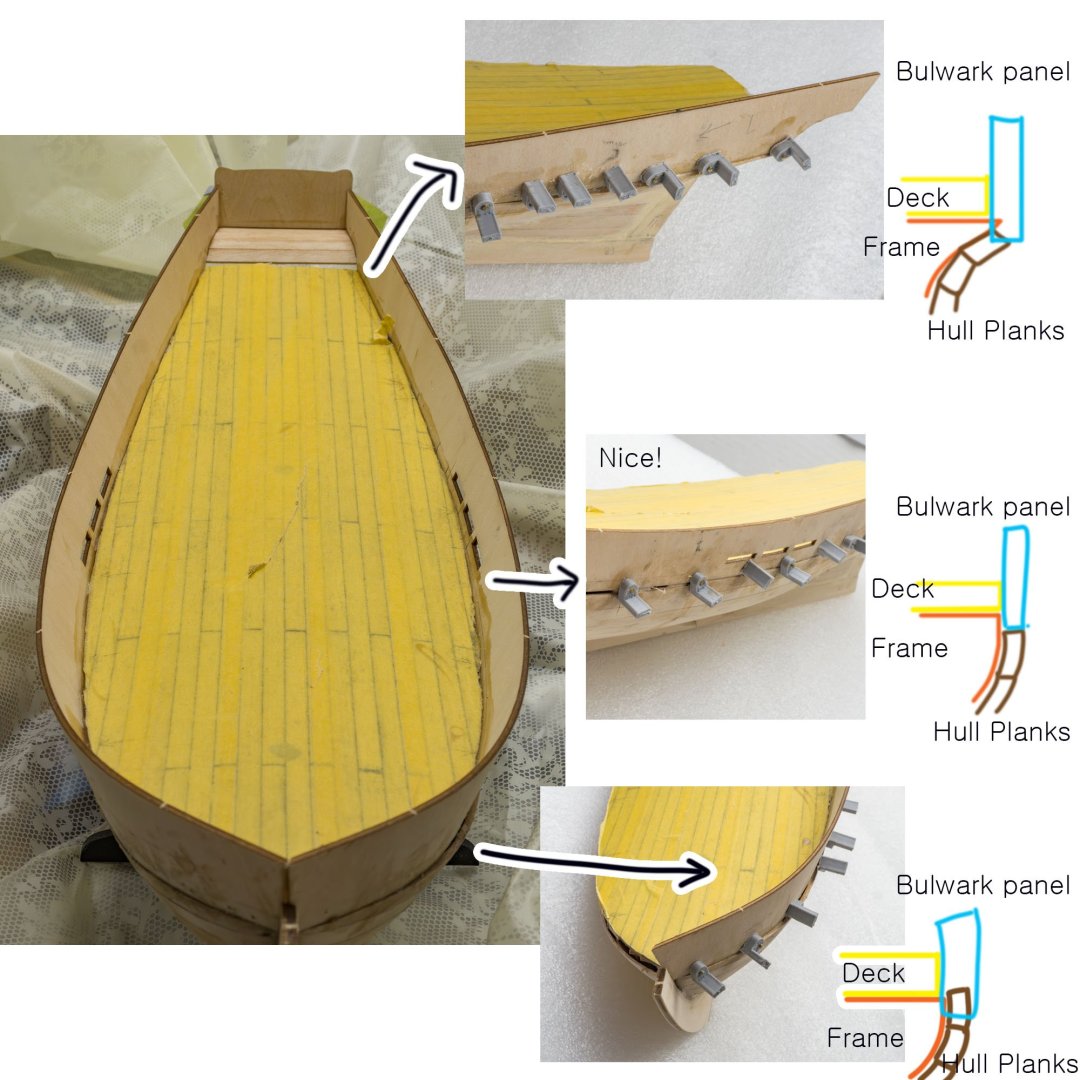
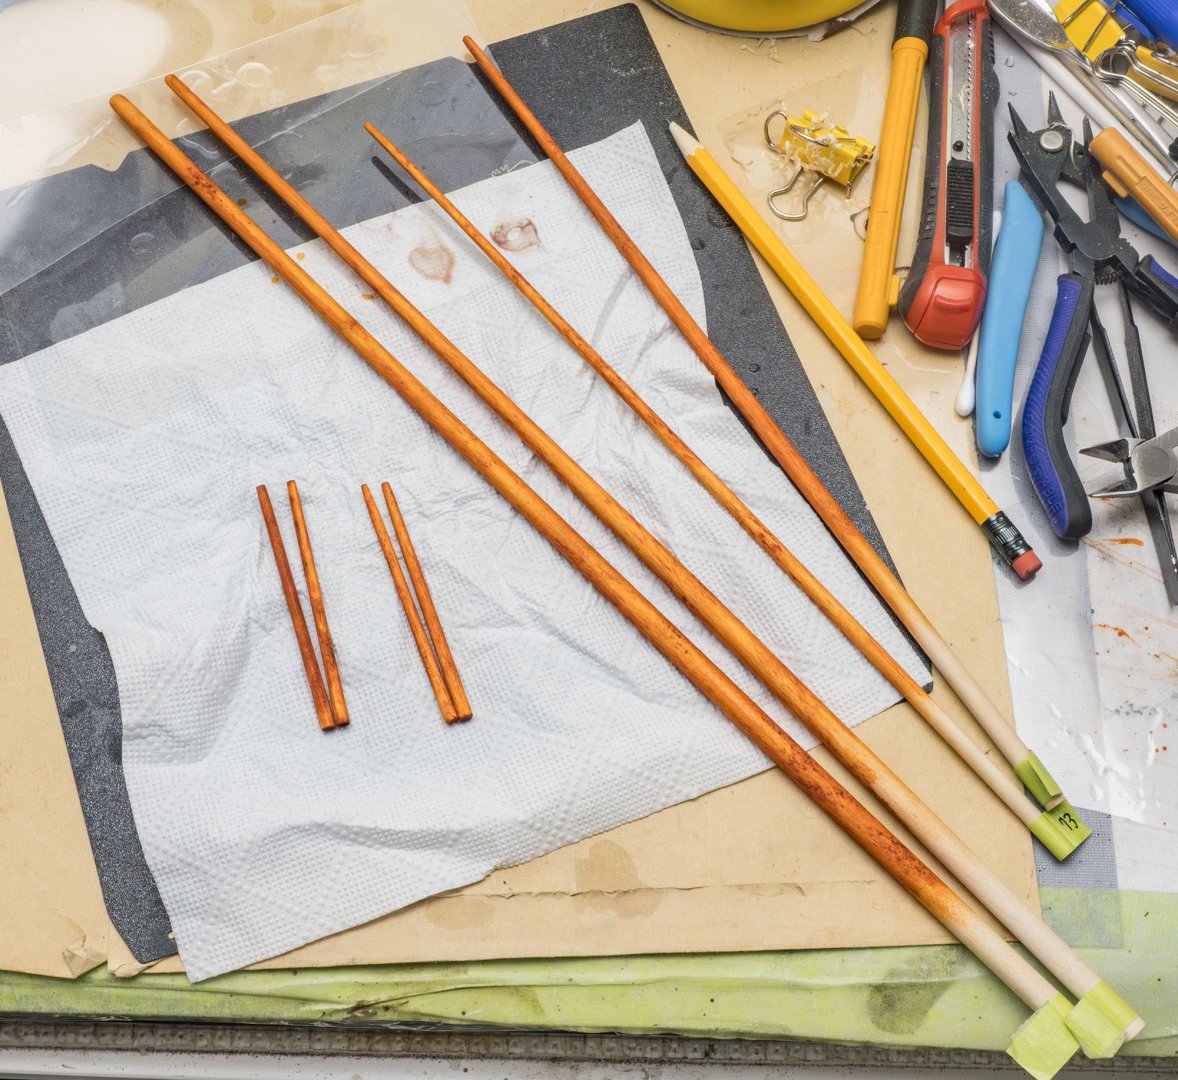
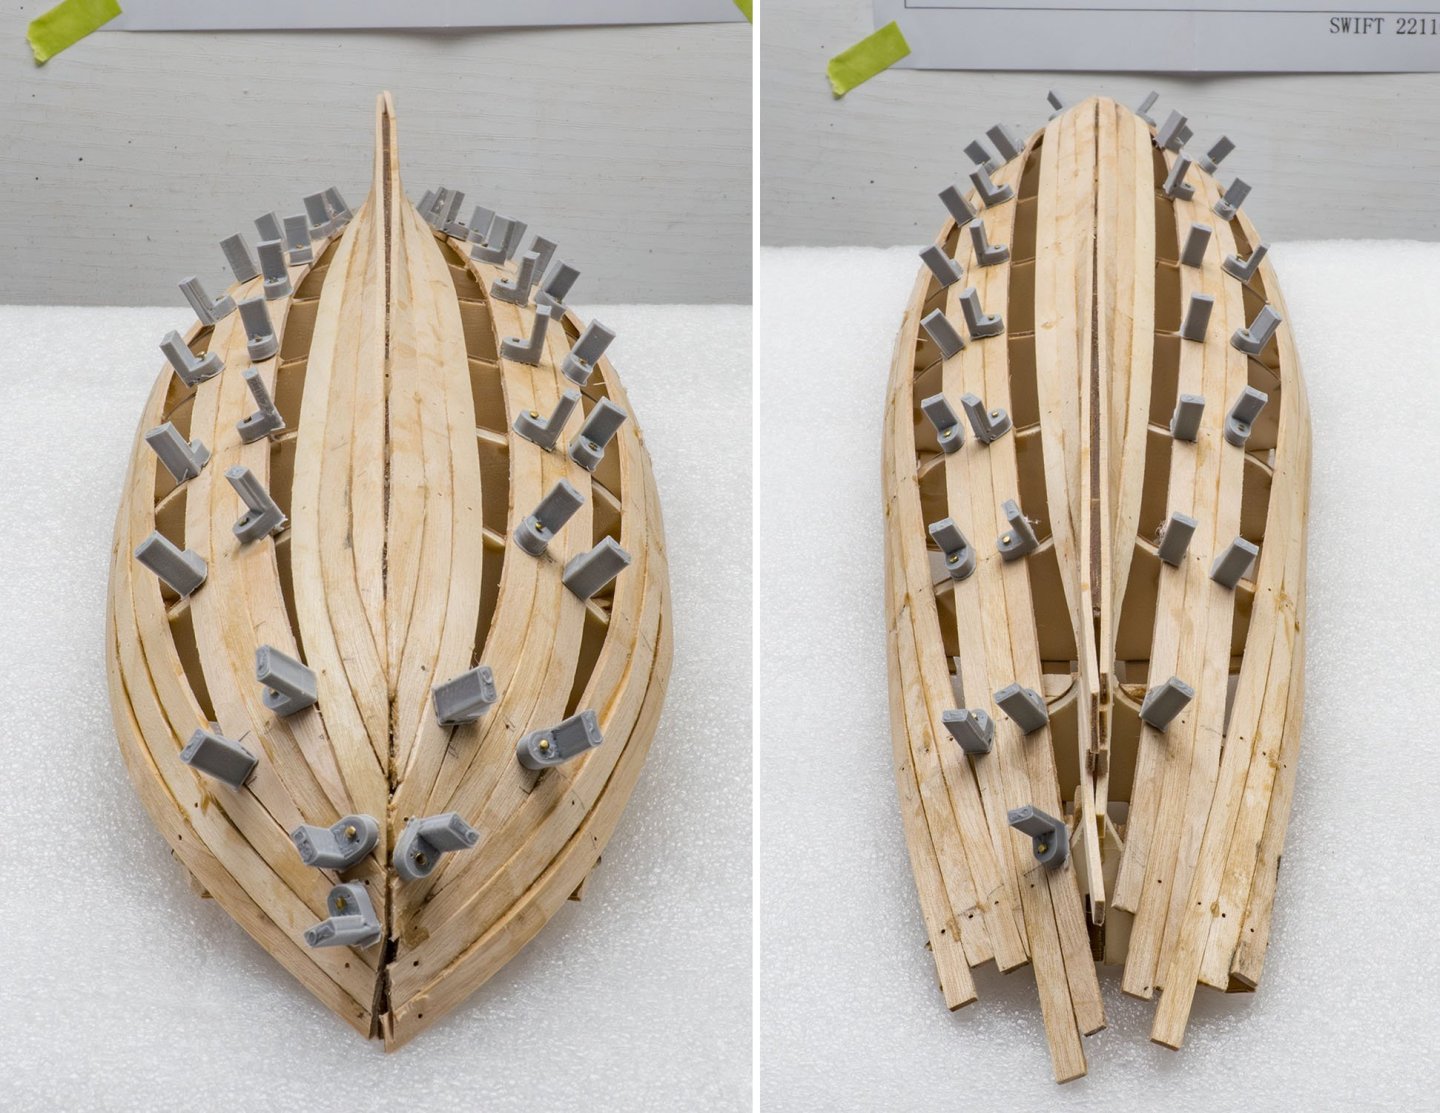
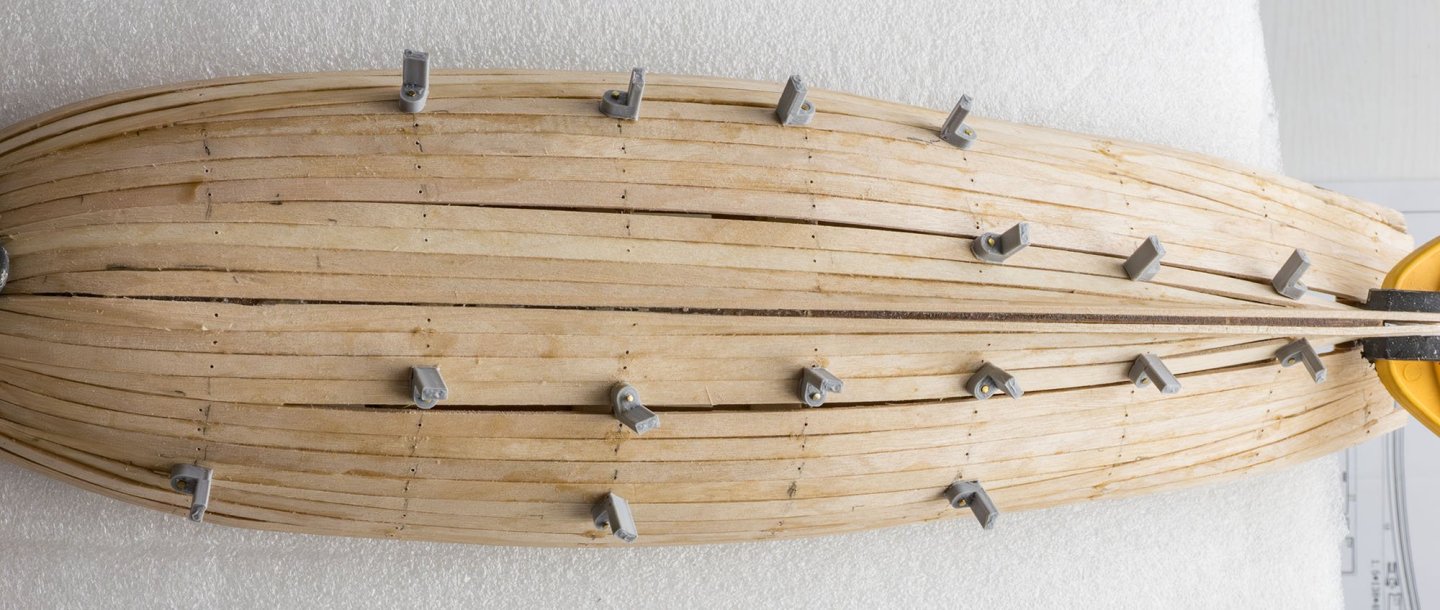
Thank you for watching my project, Ronald. The oil pastel didn't penetrate the thin wood strips. The bulwark installation was tough work. I forgot to add wooden blocks under the edge of the deck plates. (Red arrows) I precisely pinned the bulwark panel to the deck. I drew guide lines using a marking gauge. This is the reason I didn't make holes on the deck planks. The transom part was easy work. I summarized the issues related to the bulwark component. I made some 3D printed guide parts for a bulwark installation. I'll use them in future projects. It is the first time I use the alcohol based ink. Masts and bowsprit. The alcohol inks penetrate wood very well, like the oil based stains. It is essential to apply wood sealer before I use the alcohol inks.


-
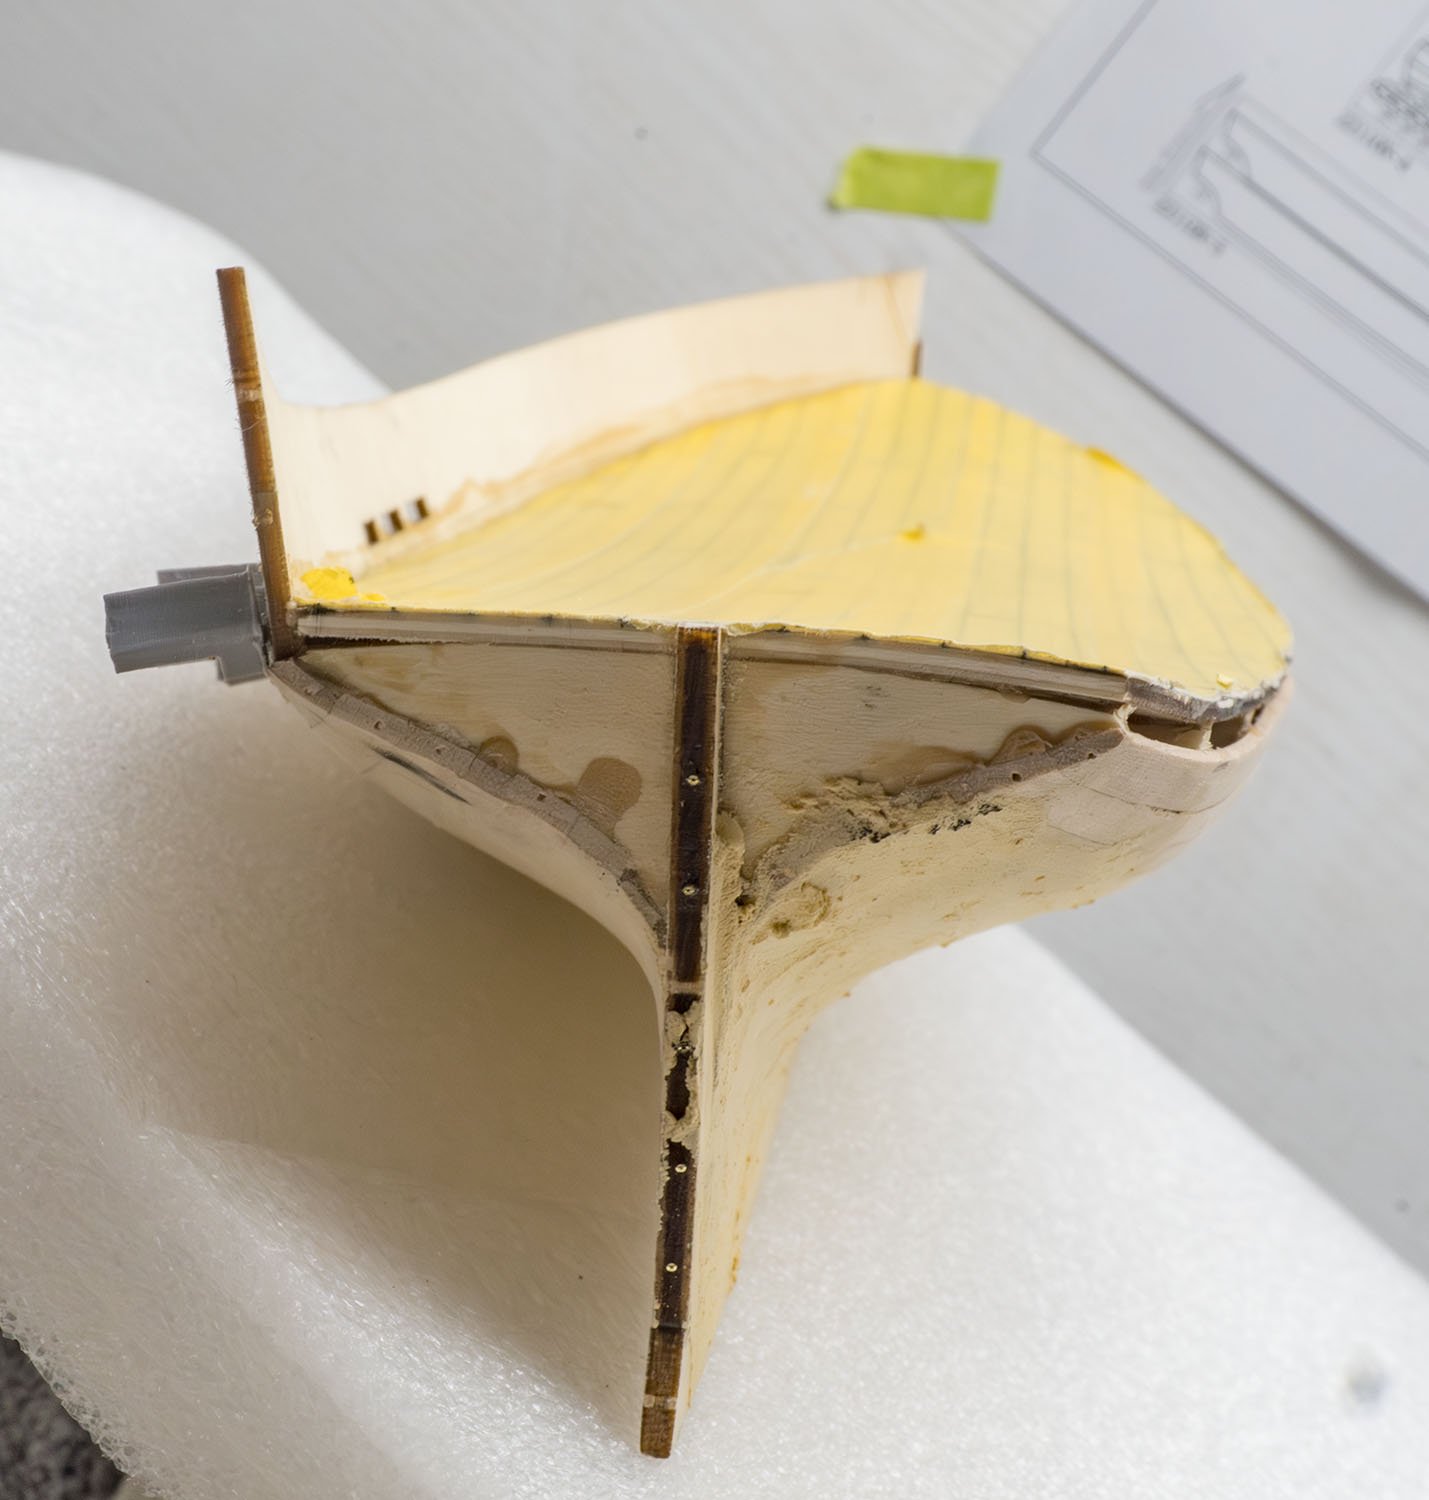
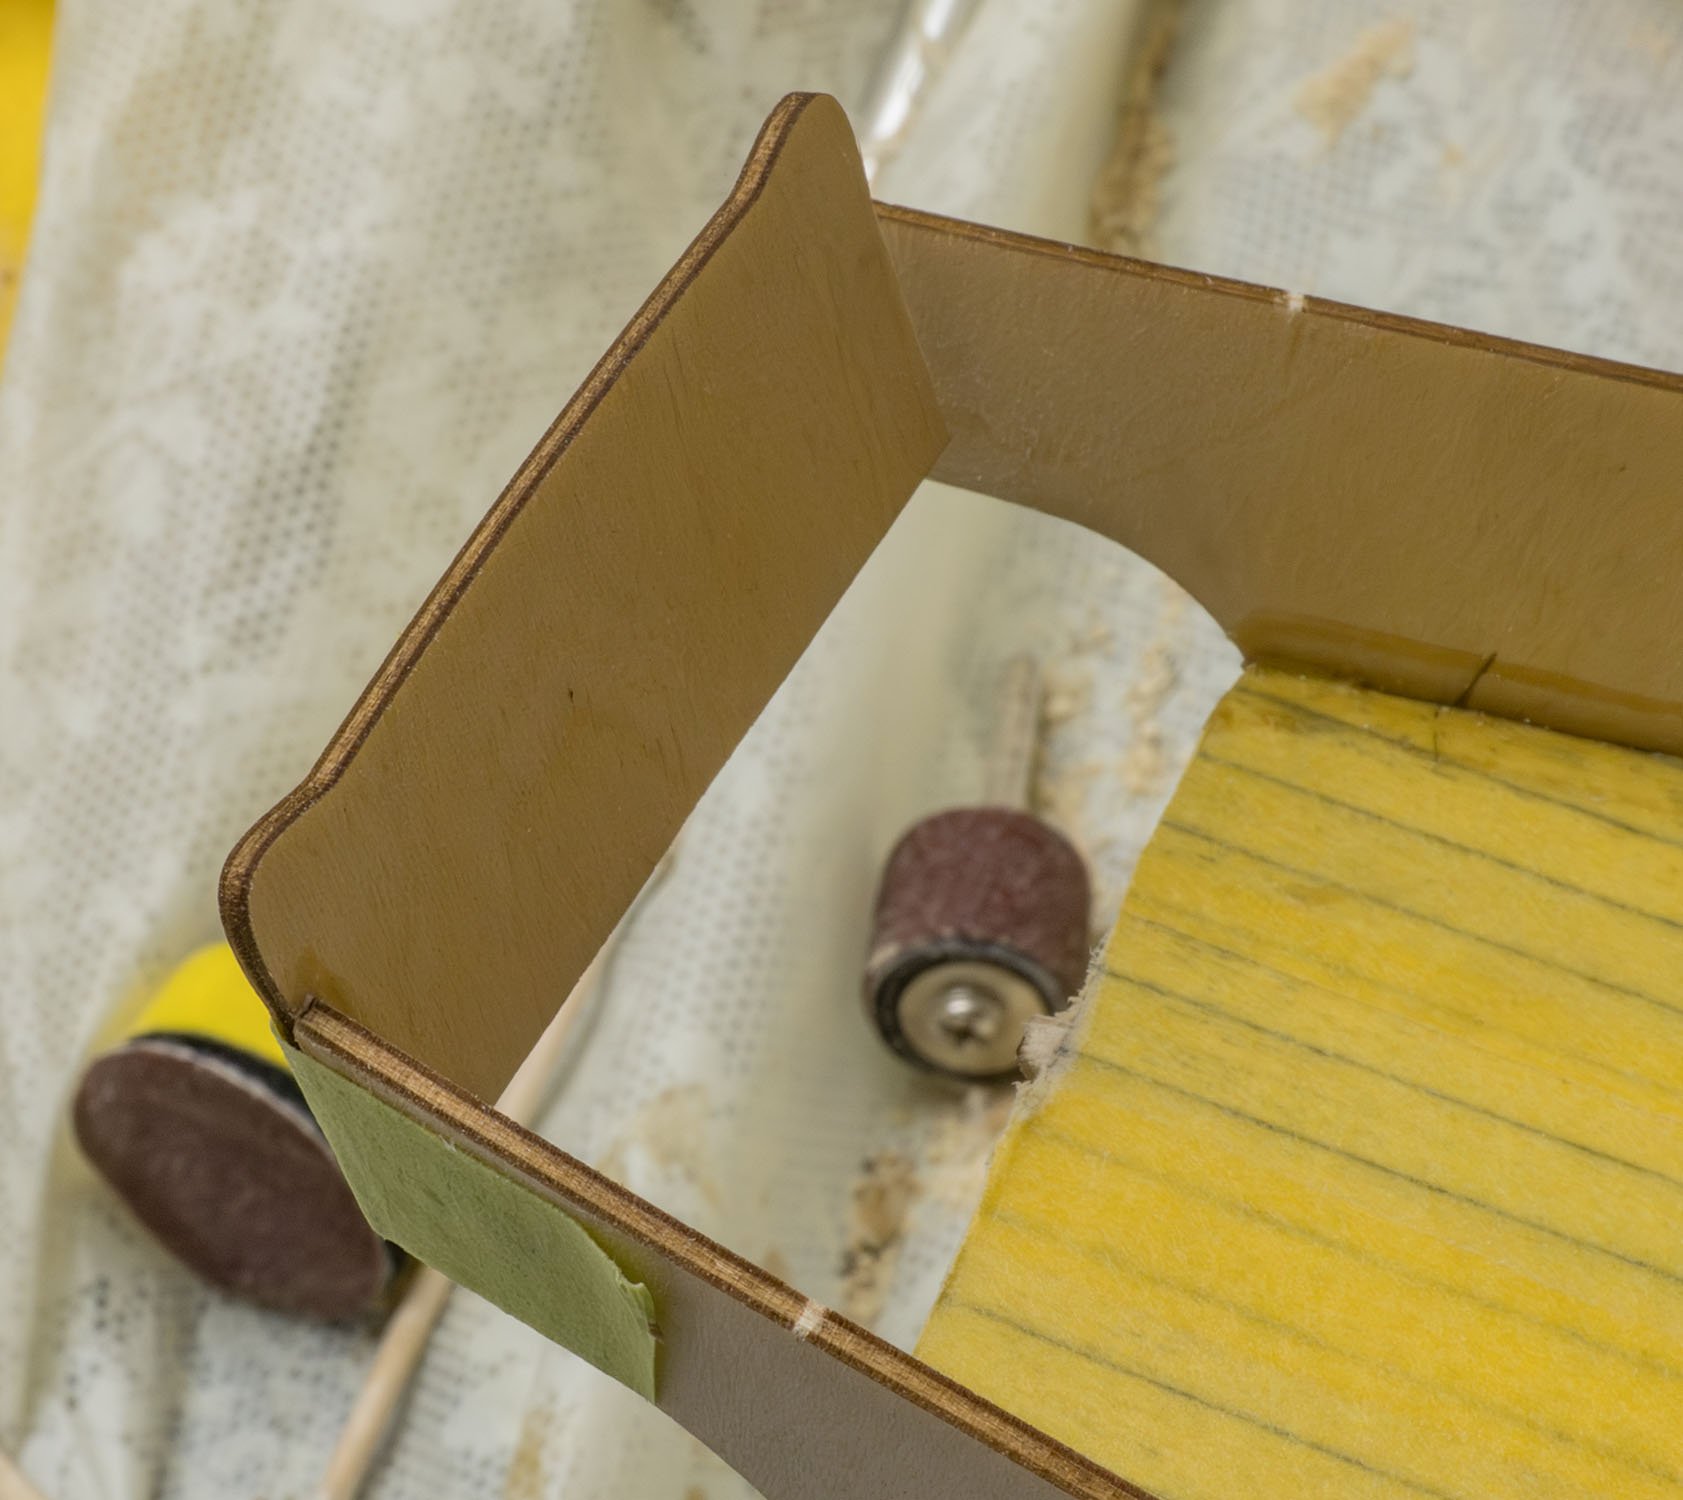
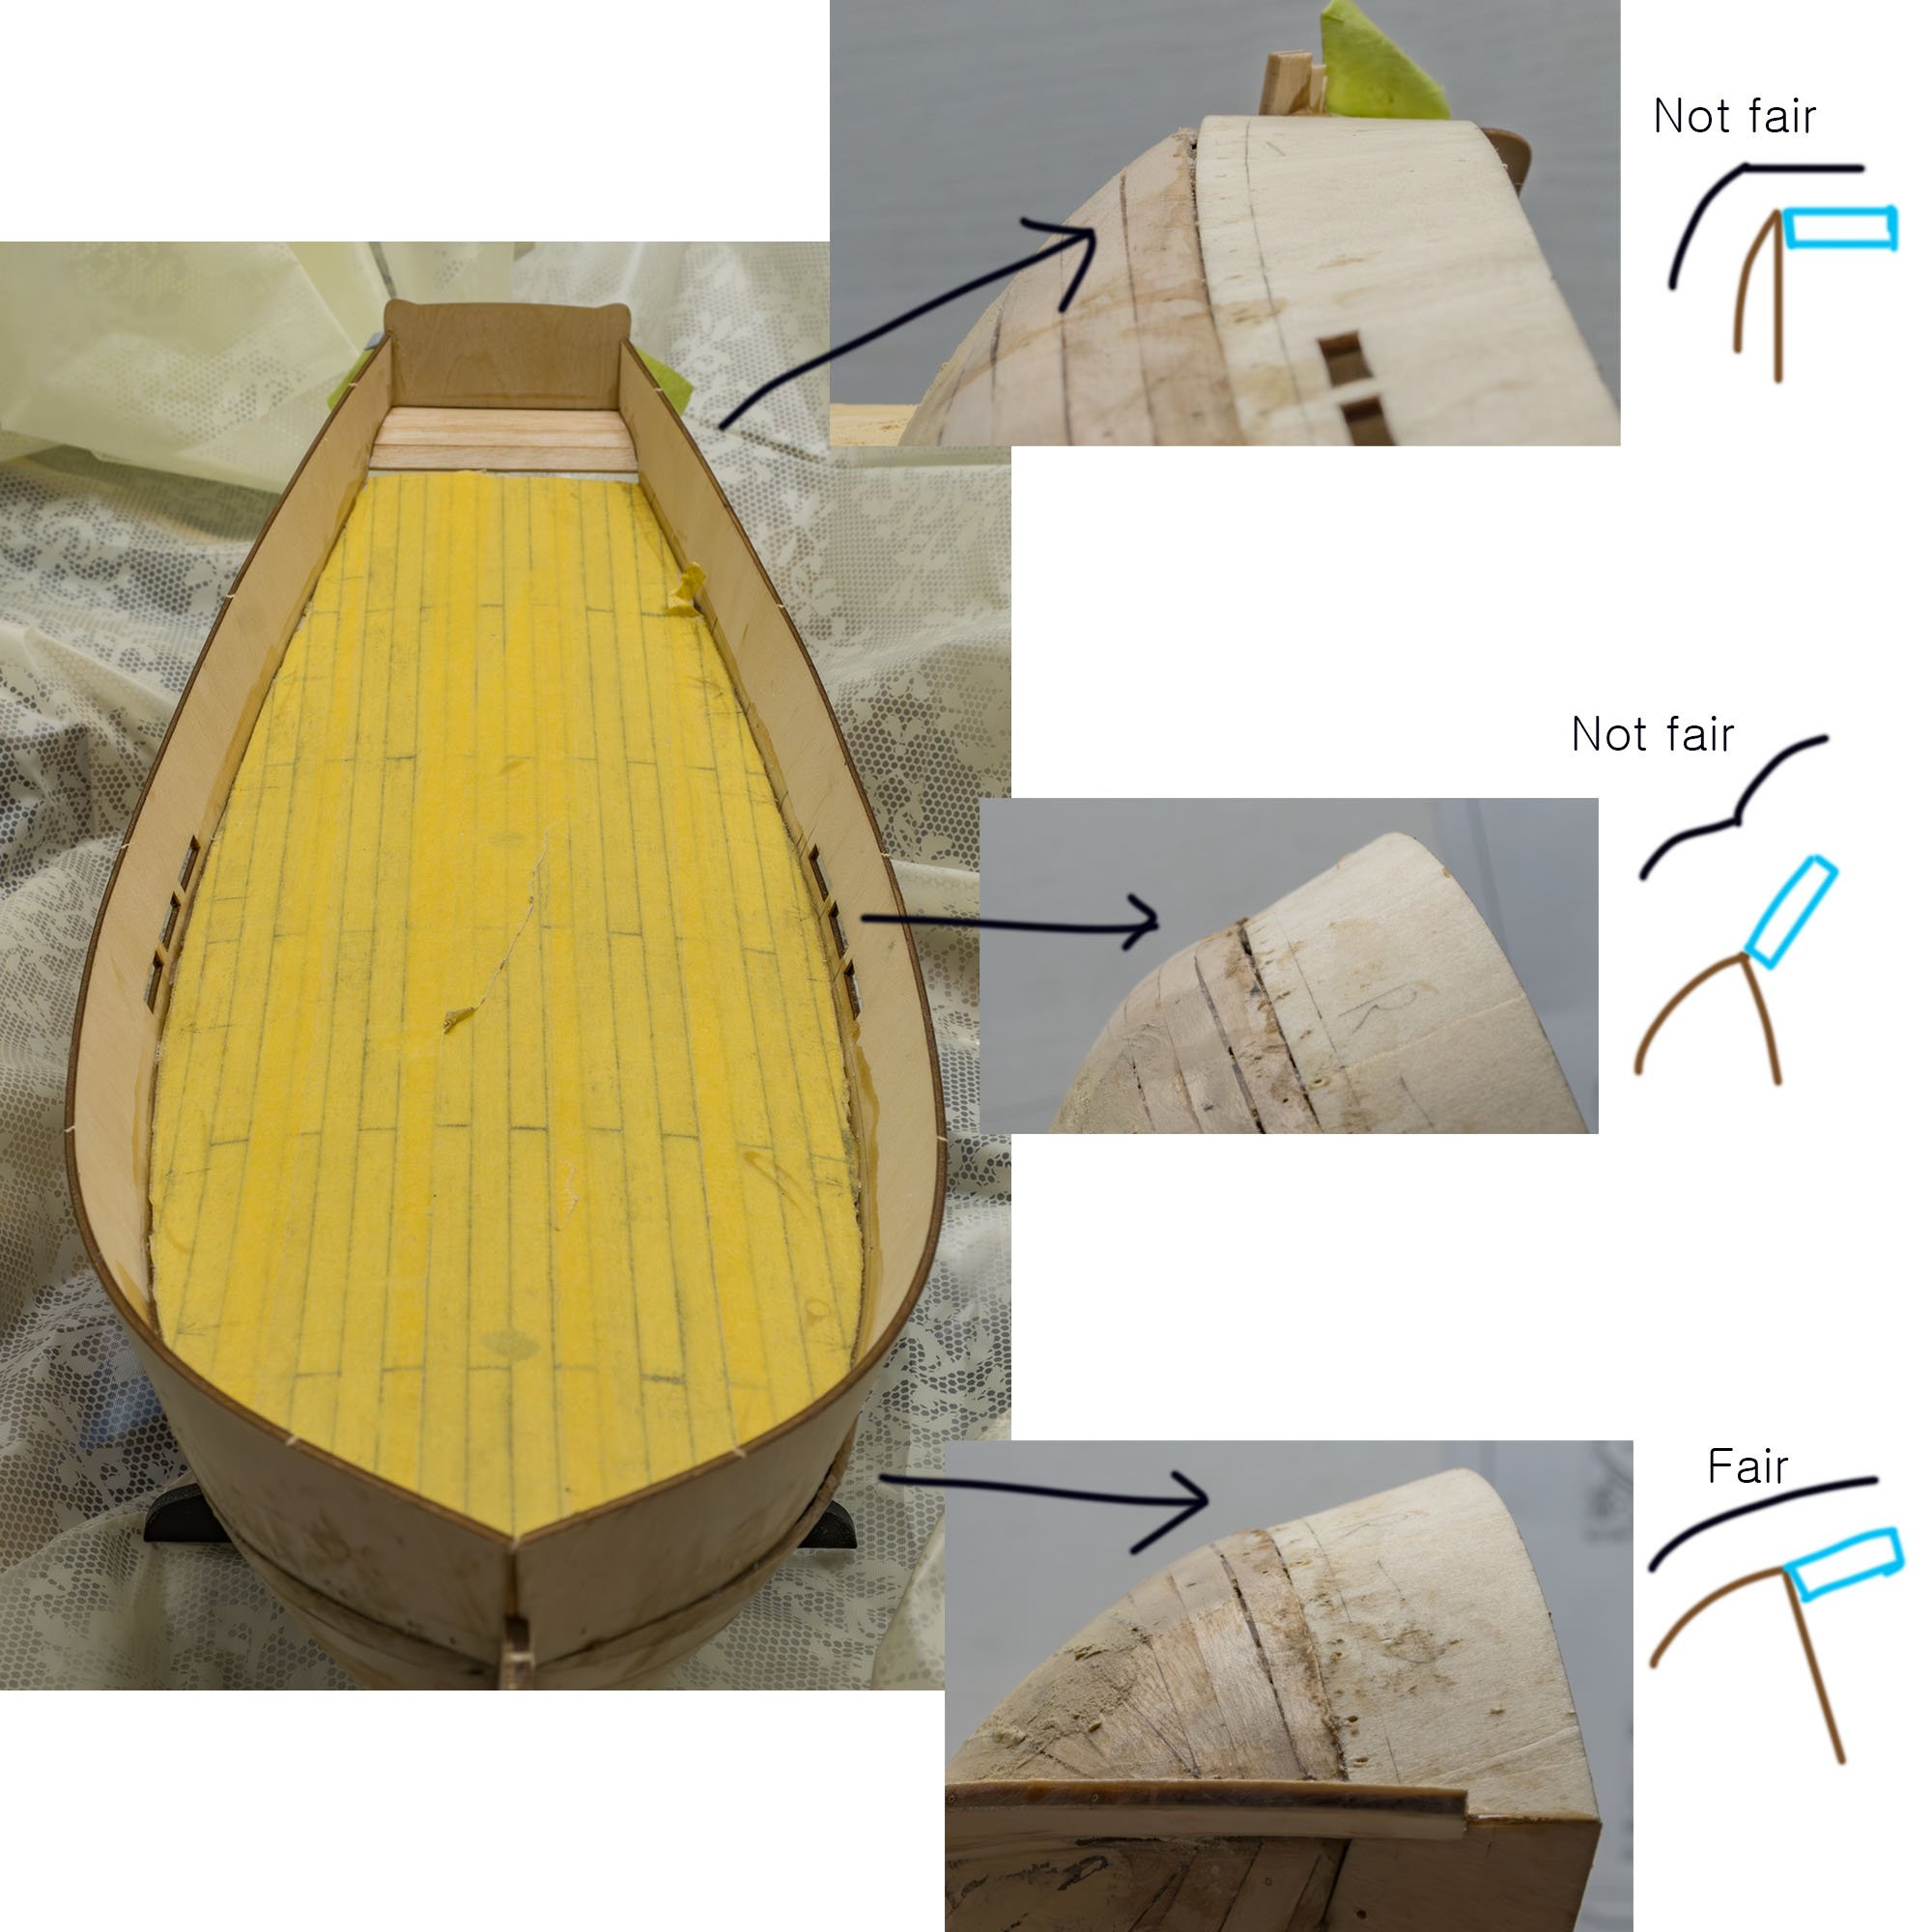
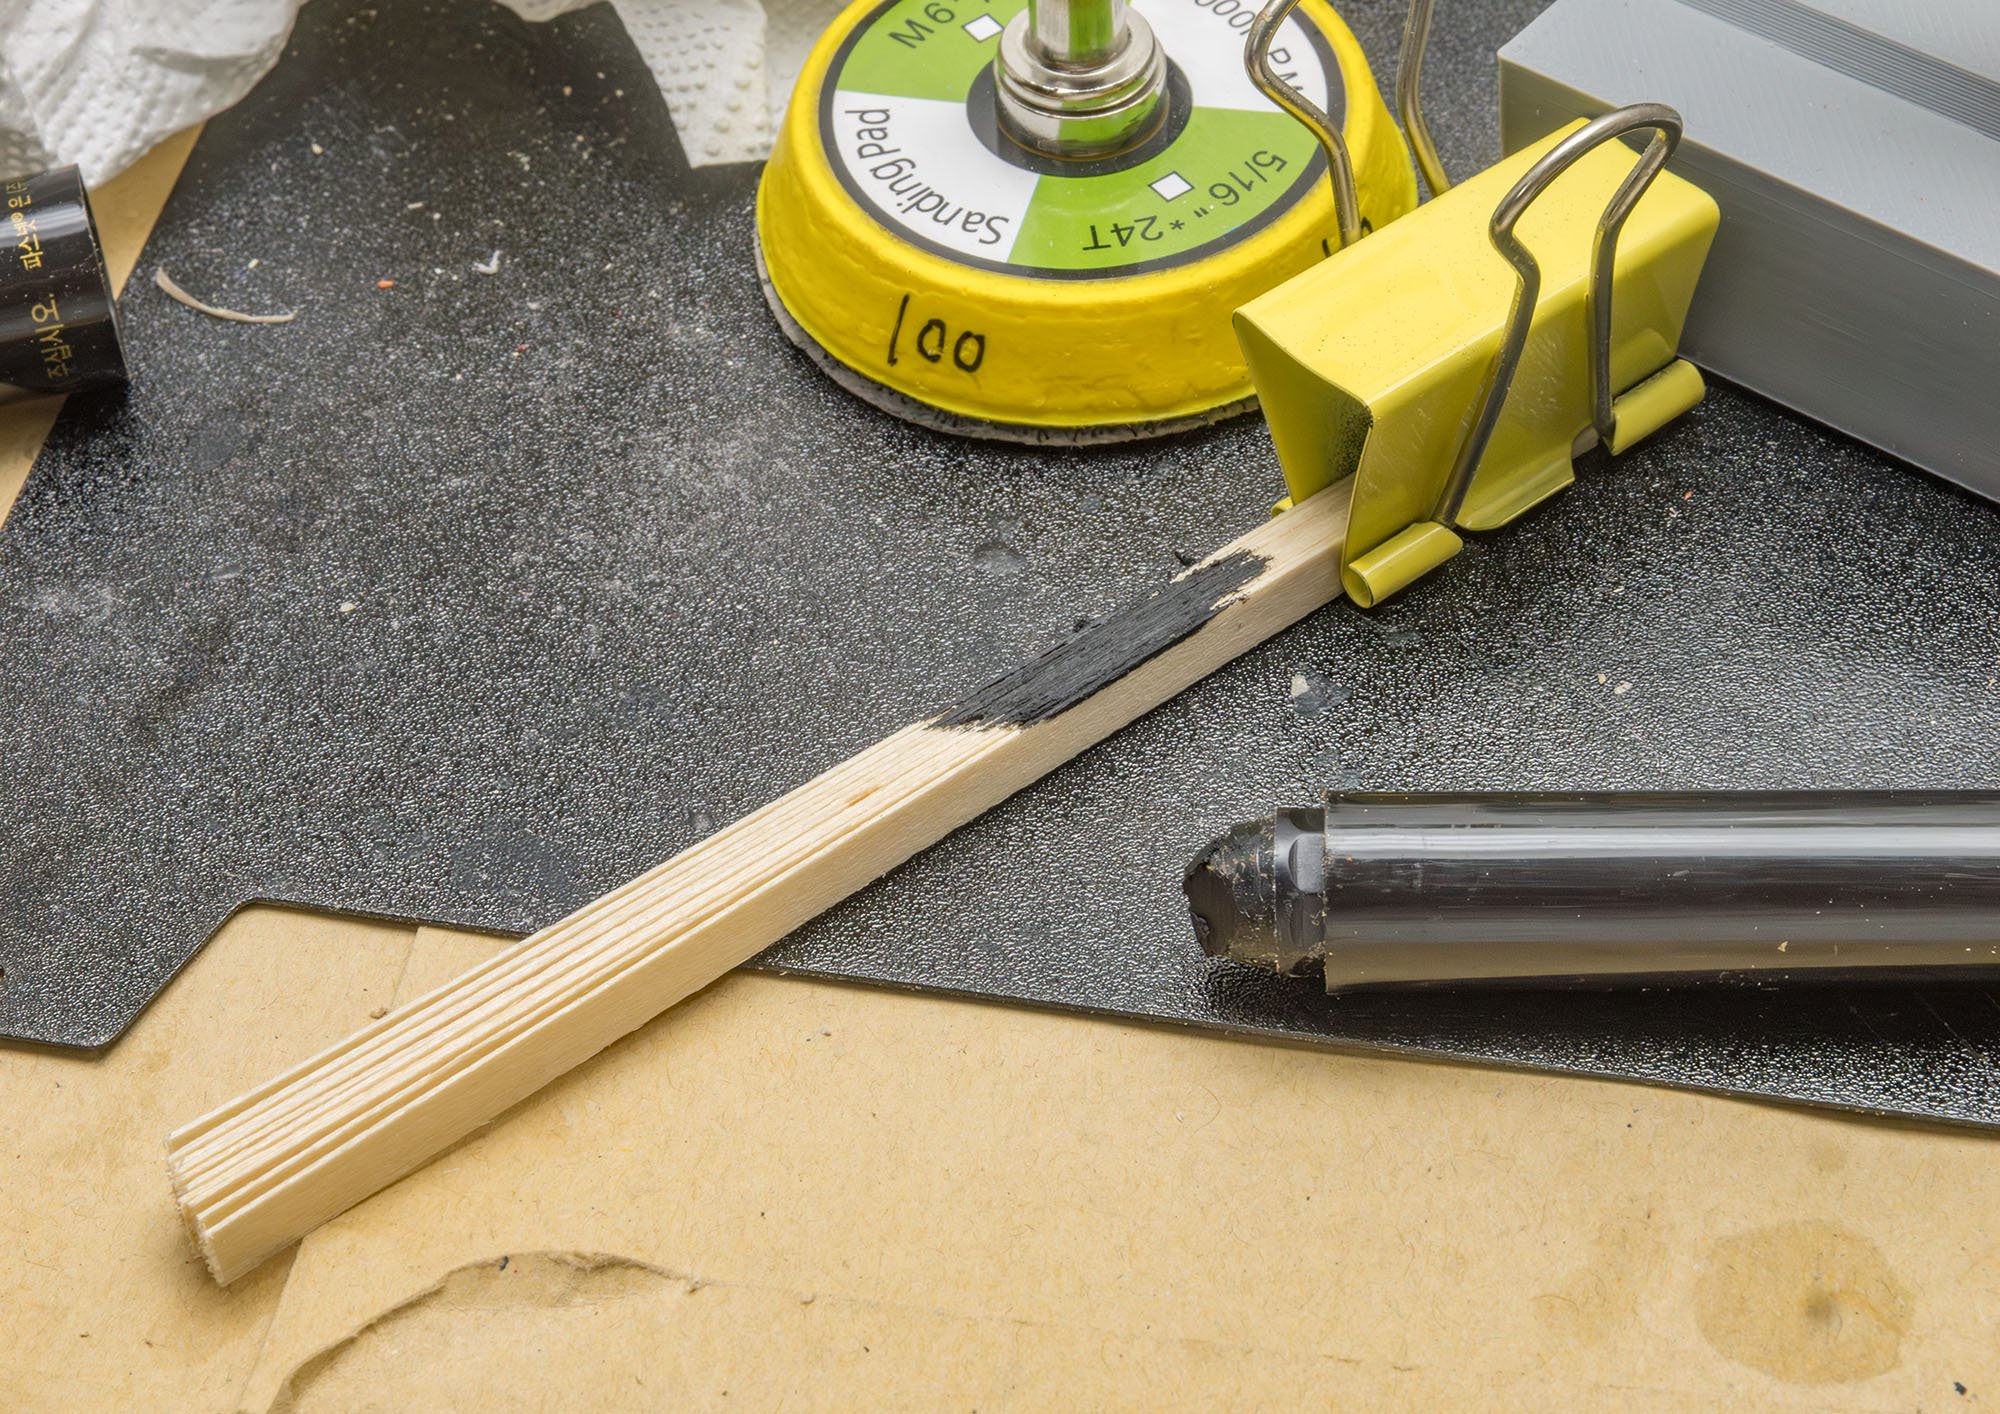
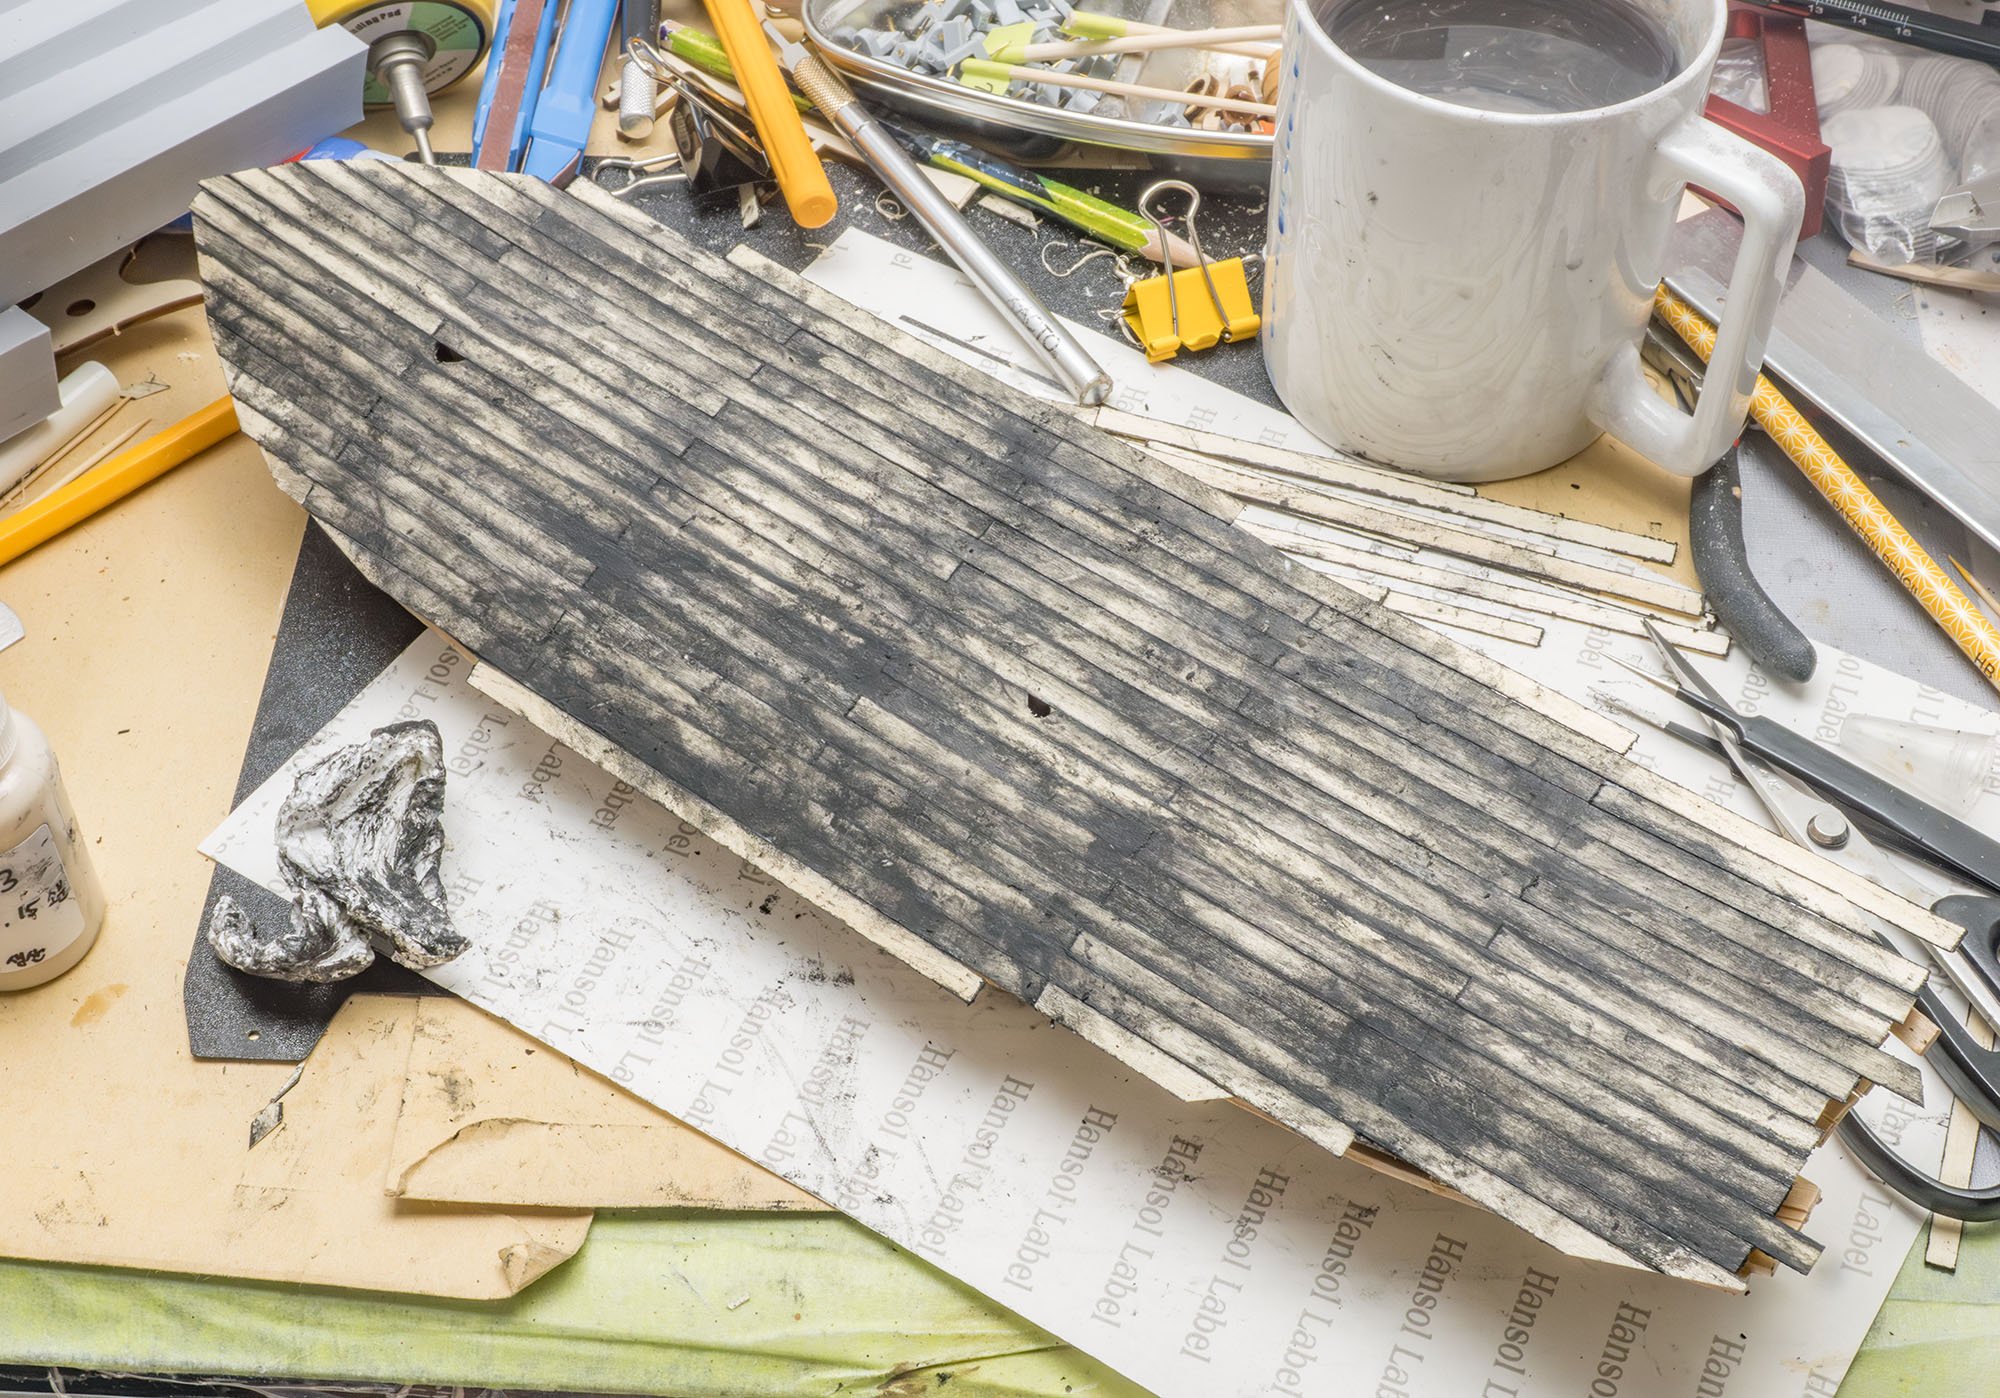
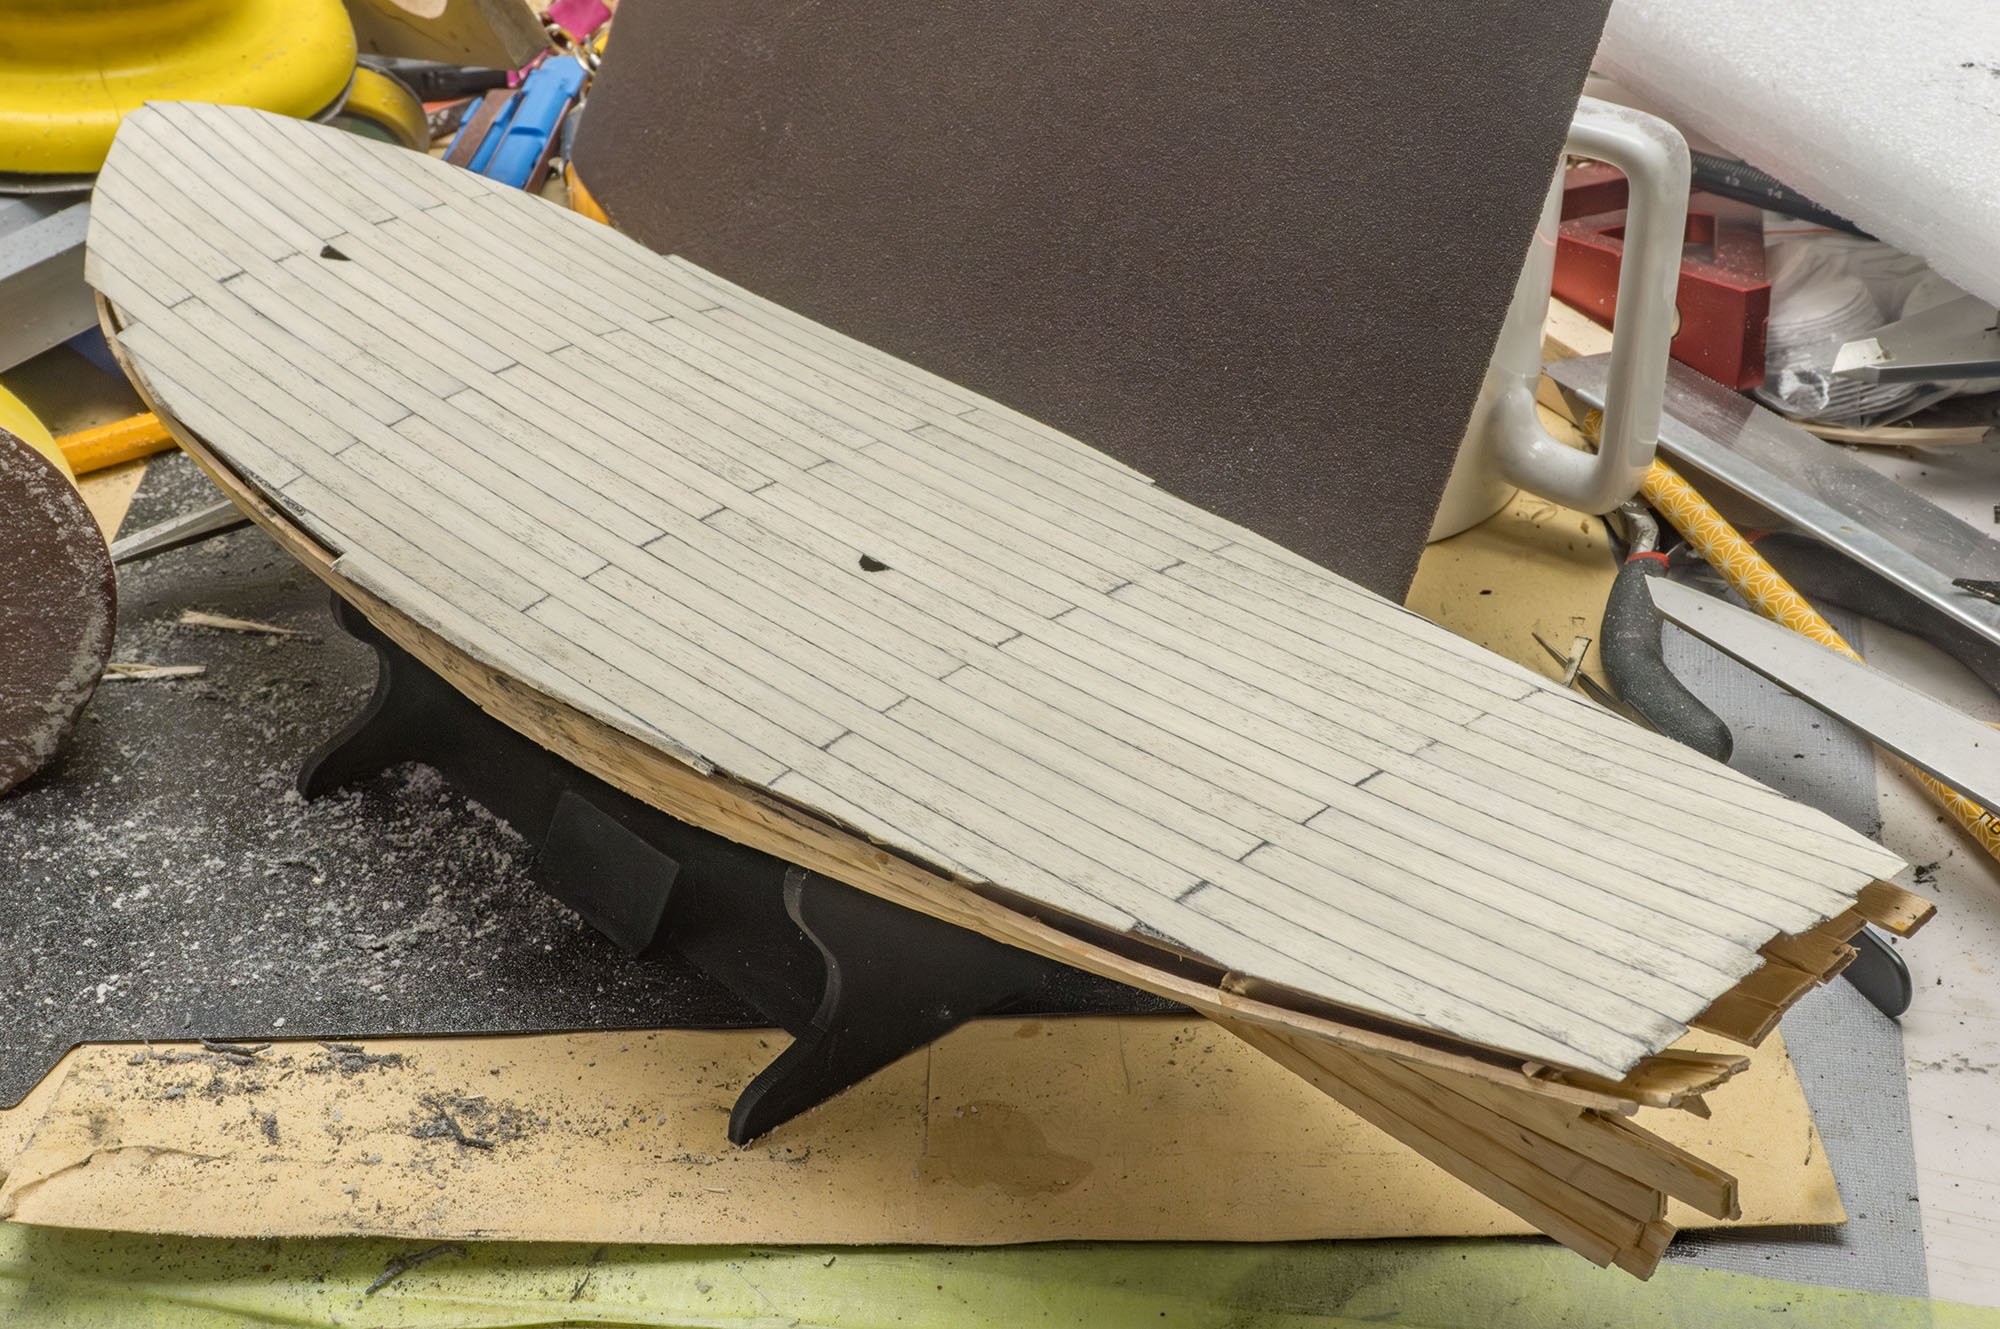
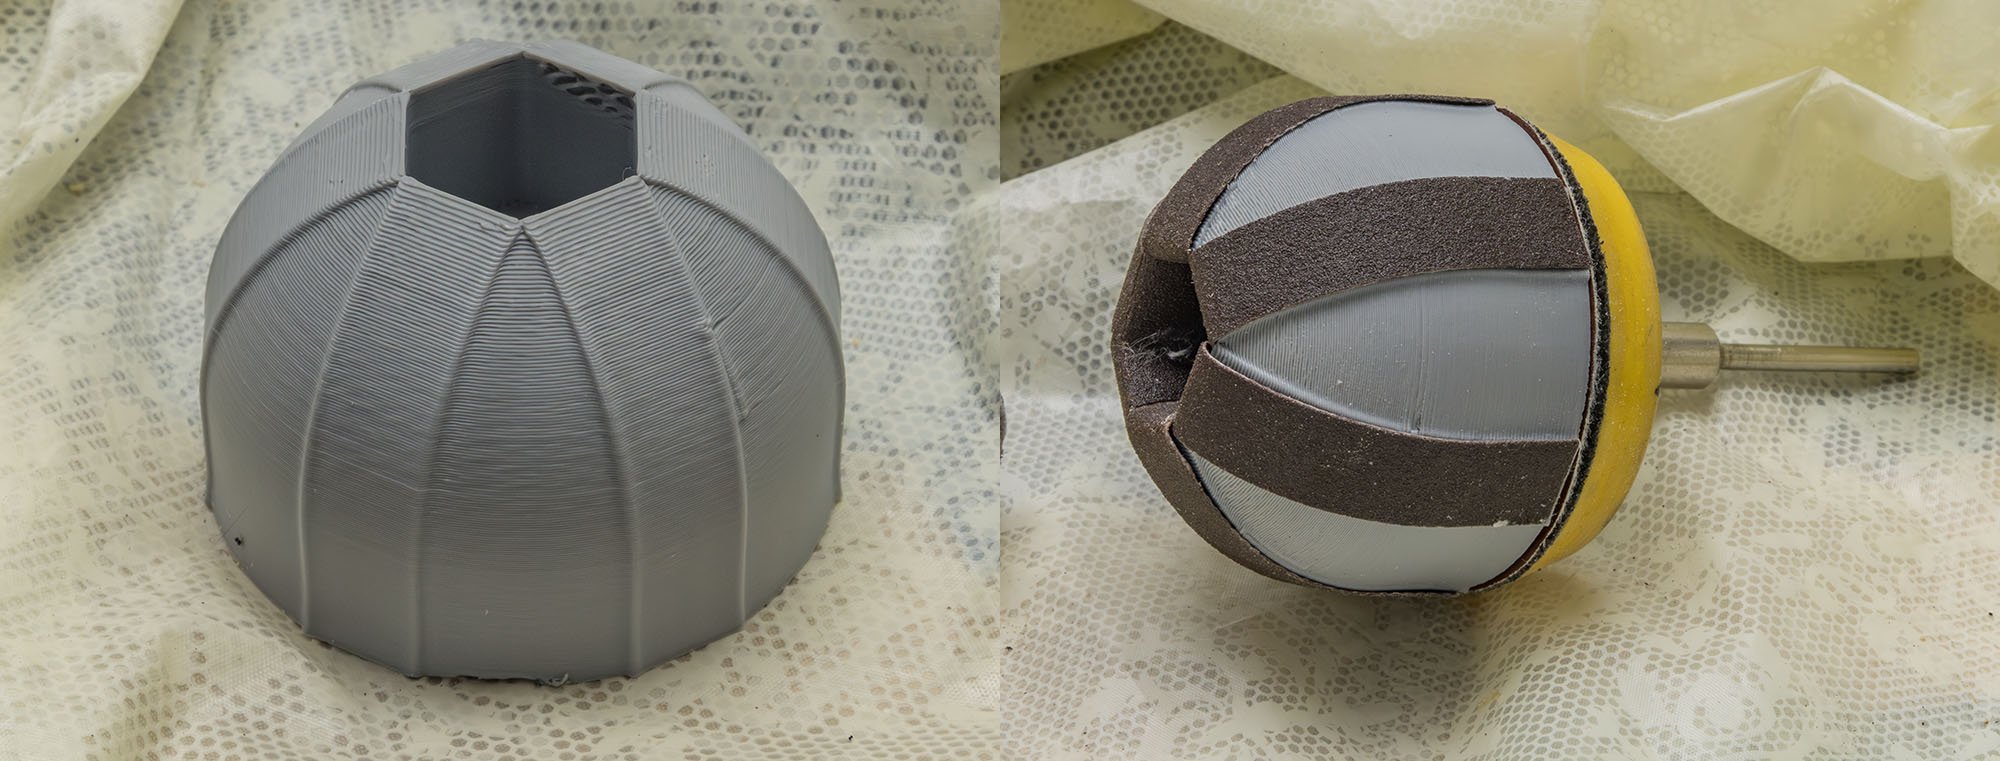
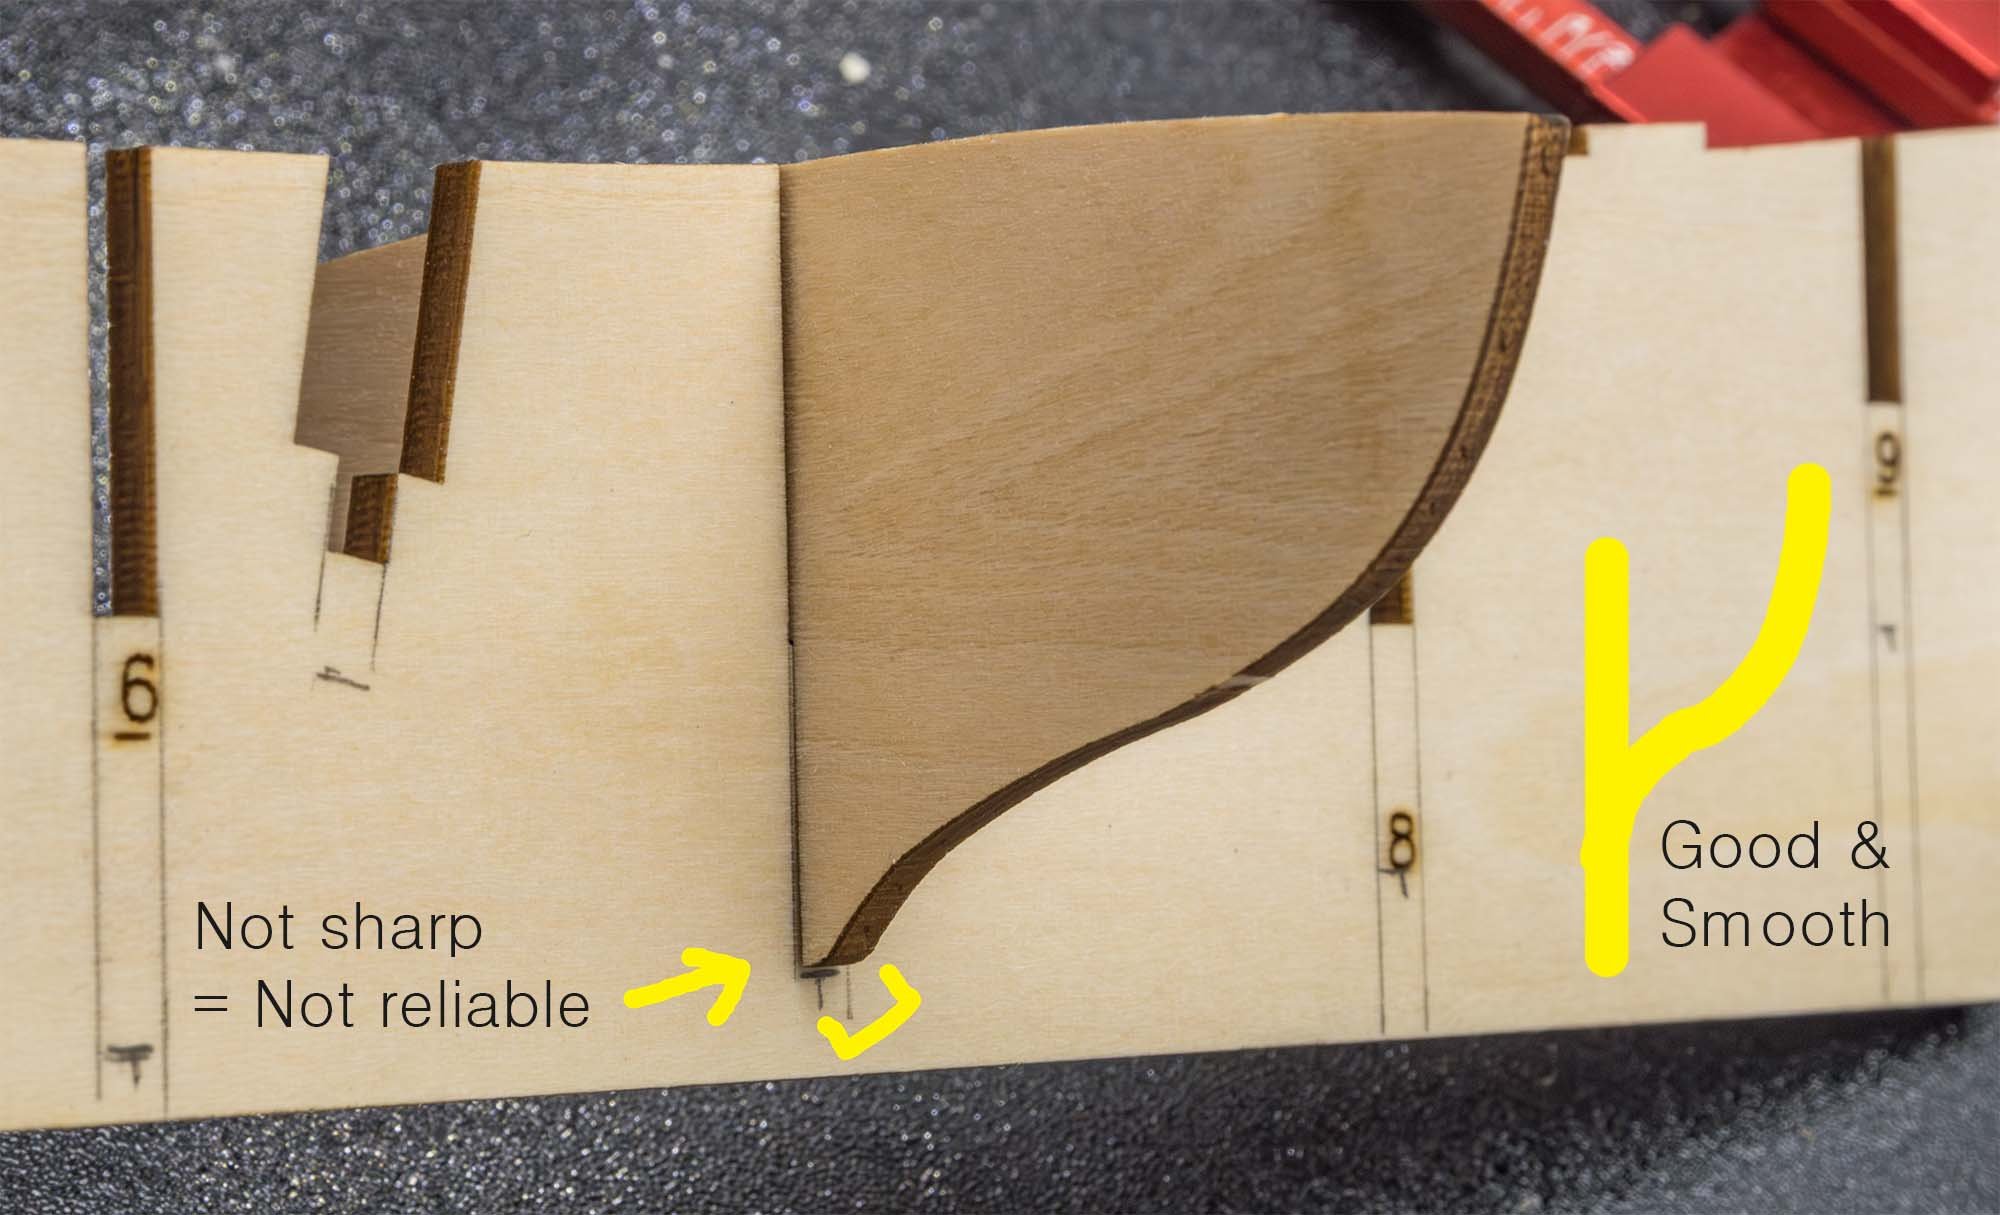
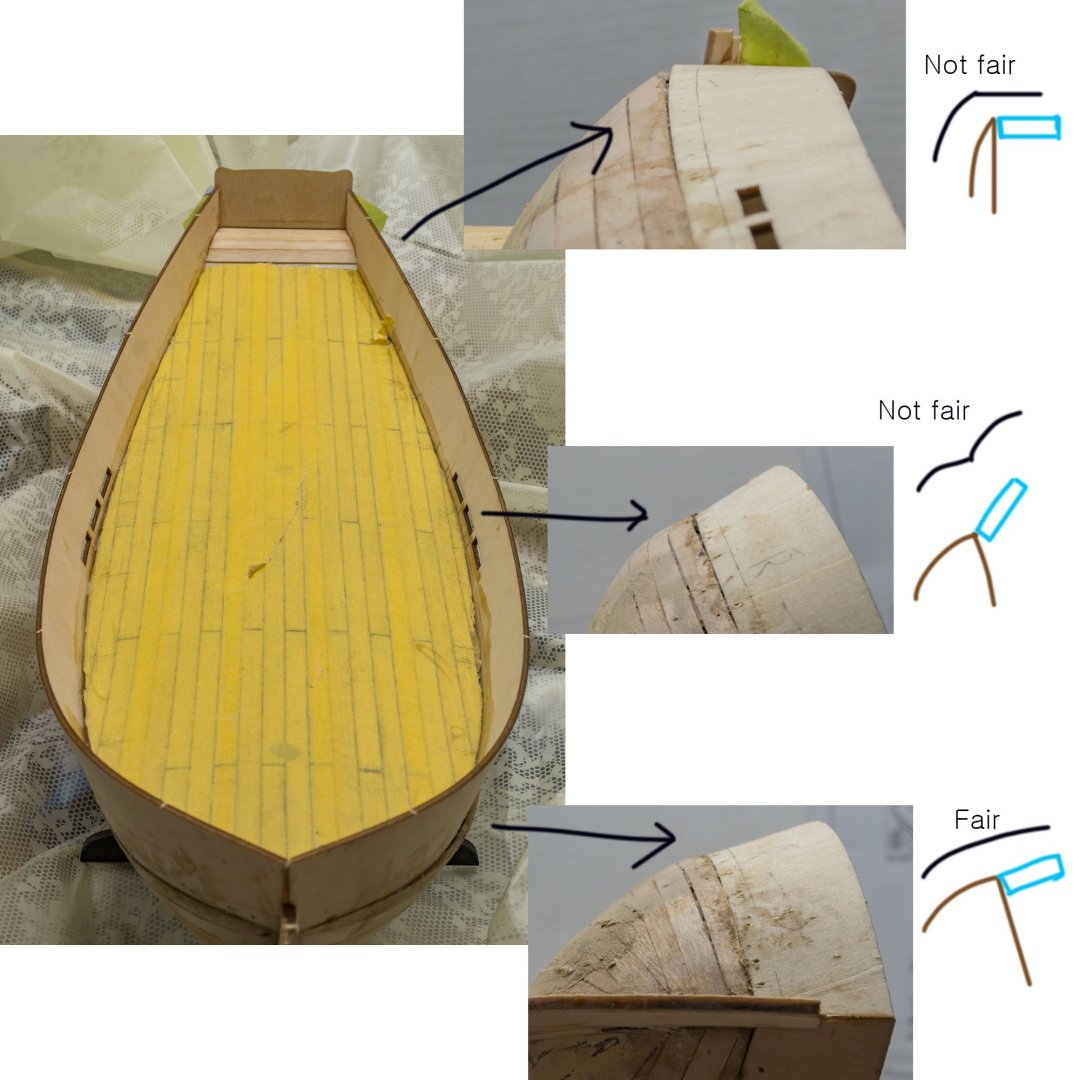
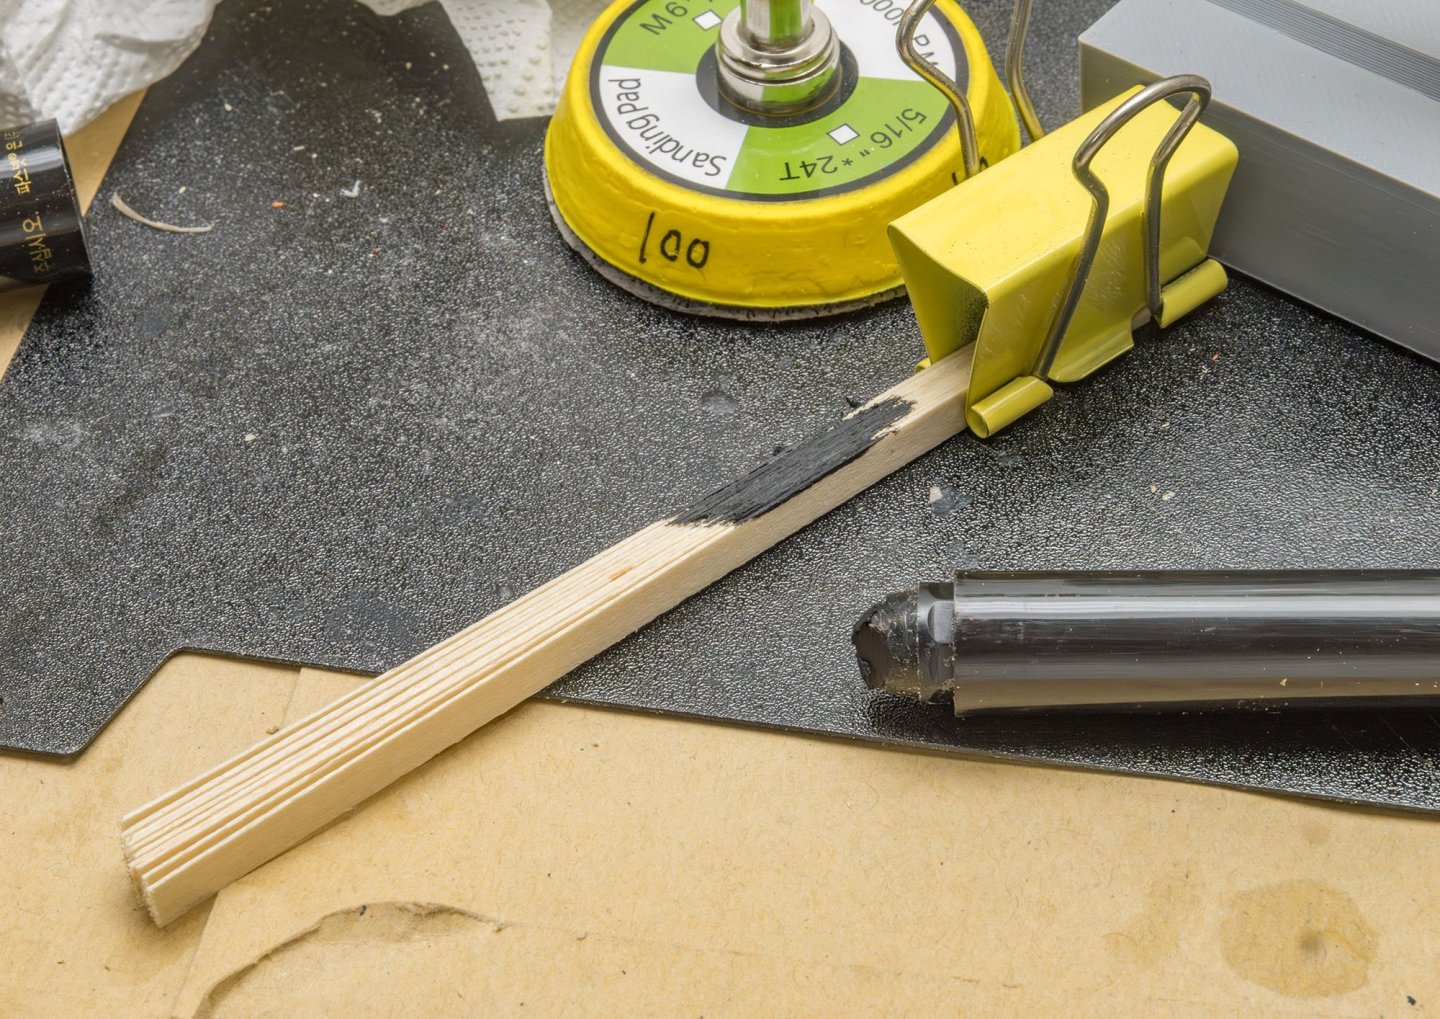
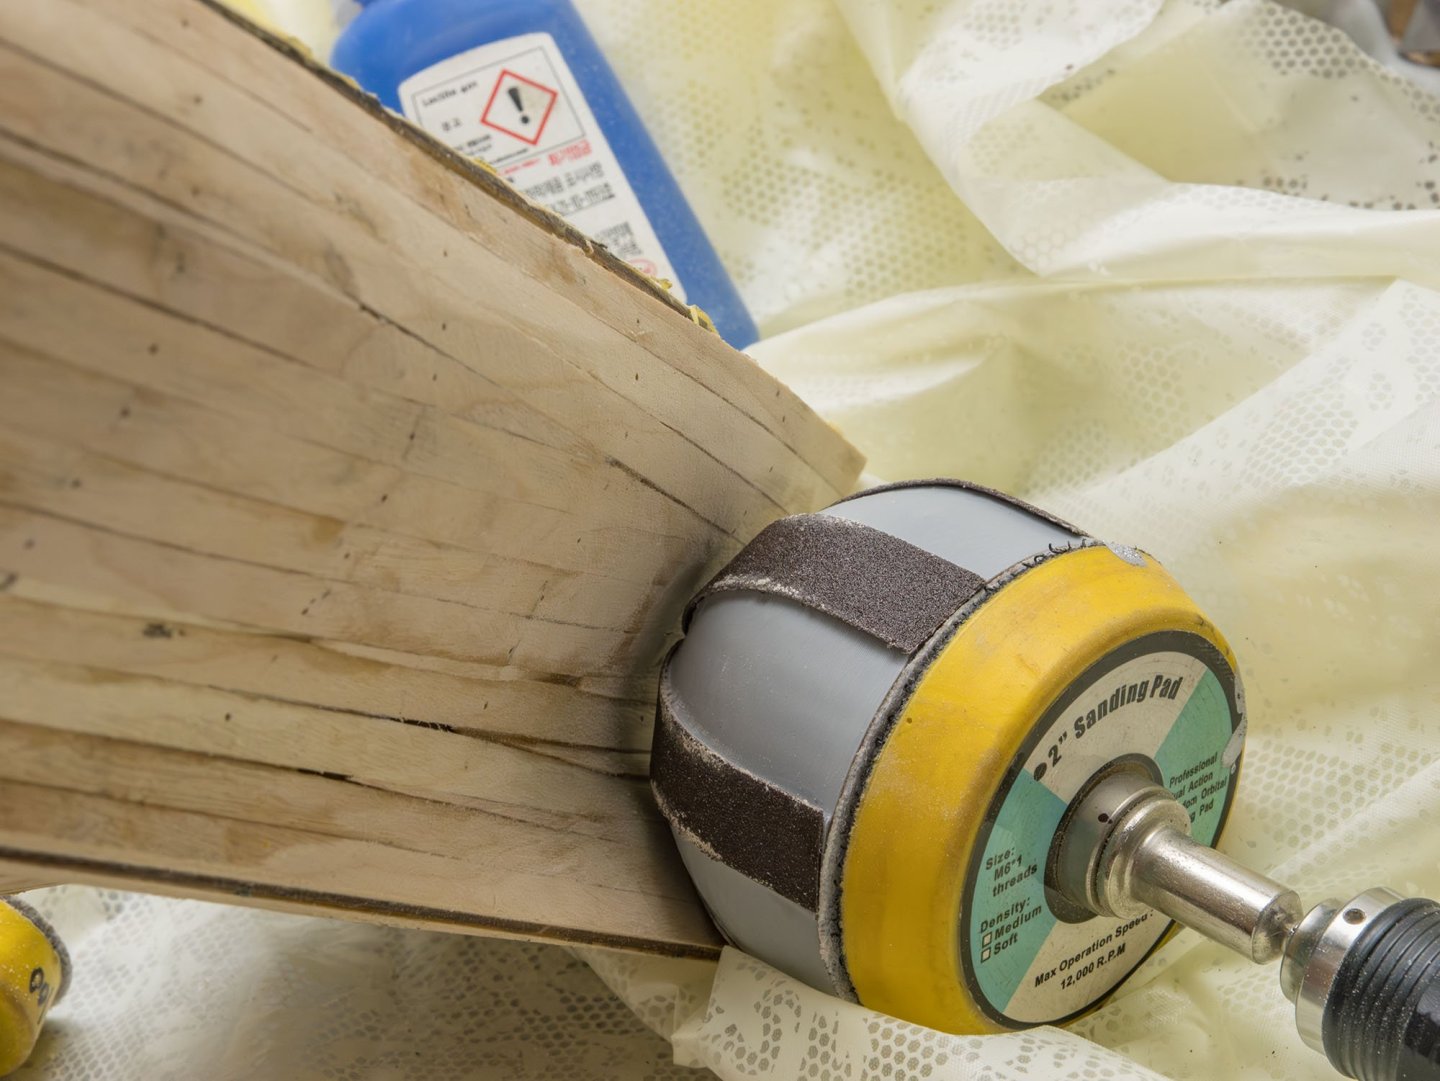
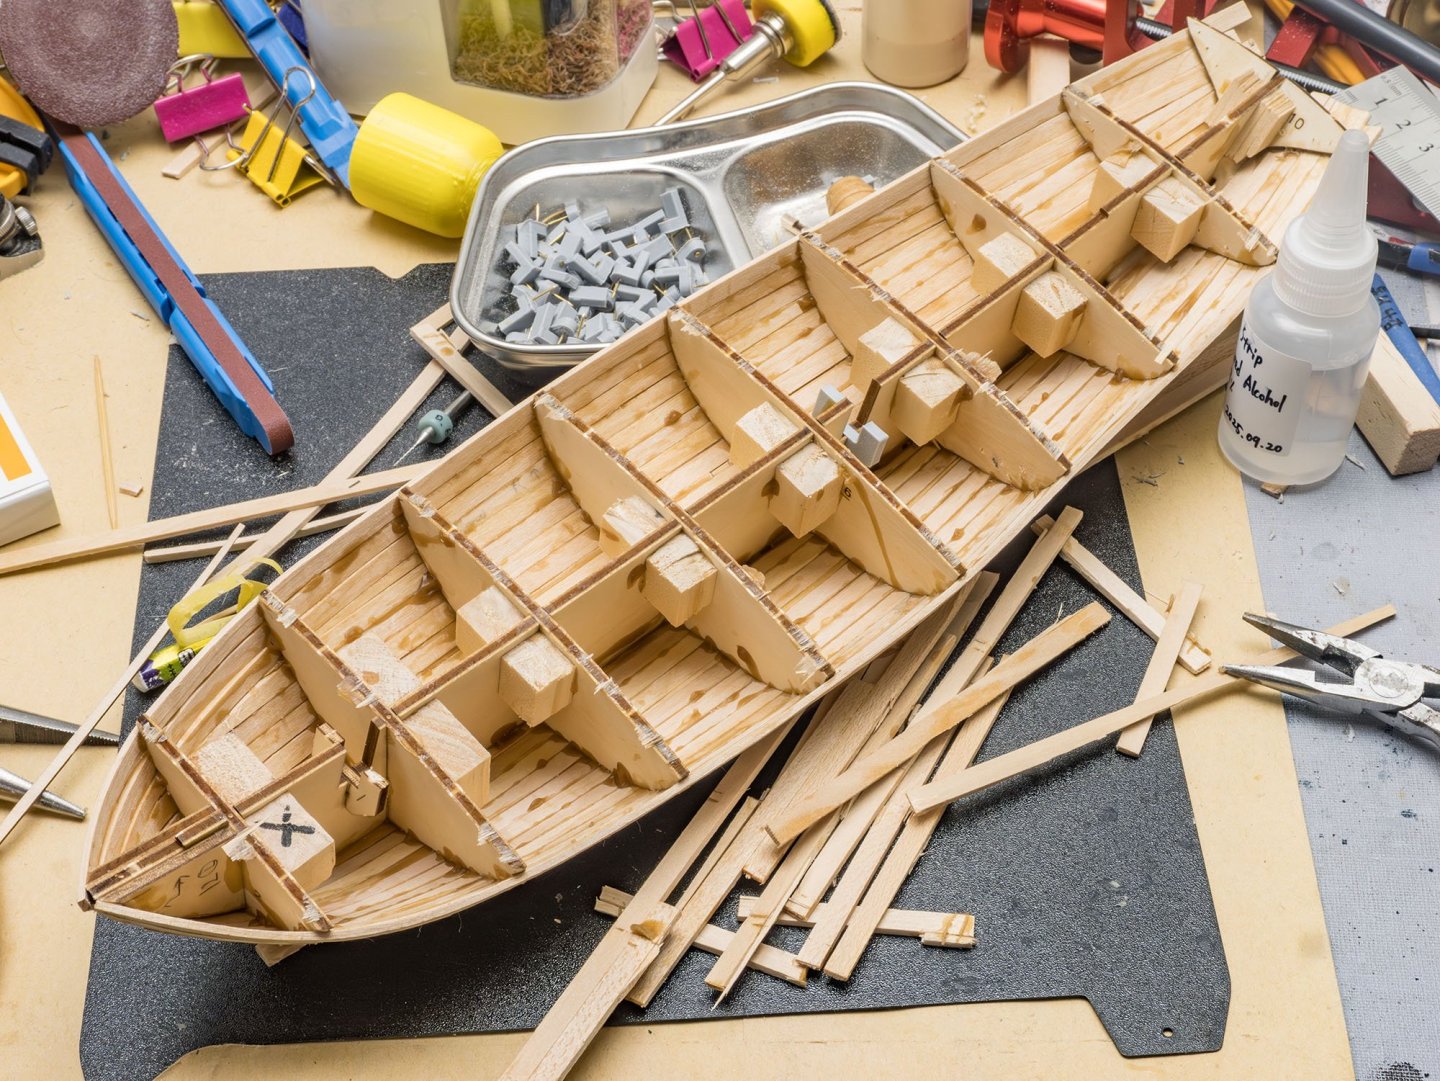
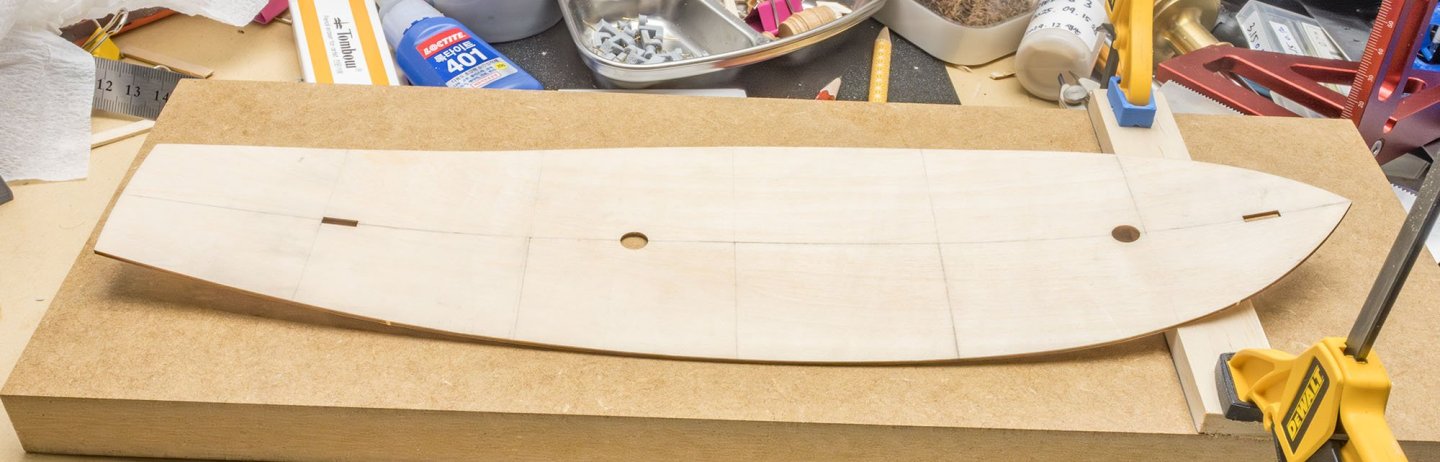
Deck caulking. I used an wax oil crayon. It's really dirty, but it can't penetrate the wood layer. After massive sanding... Not clean, but weathering effect. I added protective masking tape before I did hull sanding. I made a sanding ball to sand concave deadwood area. But it didn't work well.... The sanding detailer is the only valid option in the progress. The brass rods reinforce slim keel parts. I roughly sanded the hull. I'm checking the hull line carefully to attach the wide bulwark part. 🔎 I watched all the Tally Ho videos before I started this project. I found that the garboard rabbet in this kit is different from the Tally Ho project. Tally Ho has a very smooth rabbet line, but this kit is not designed in that way. I don't know much more...


-
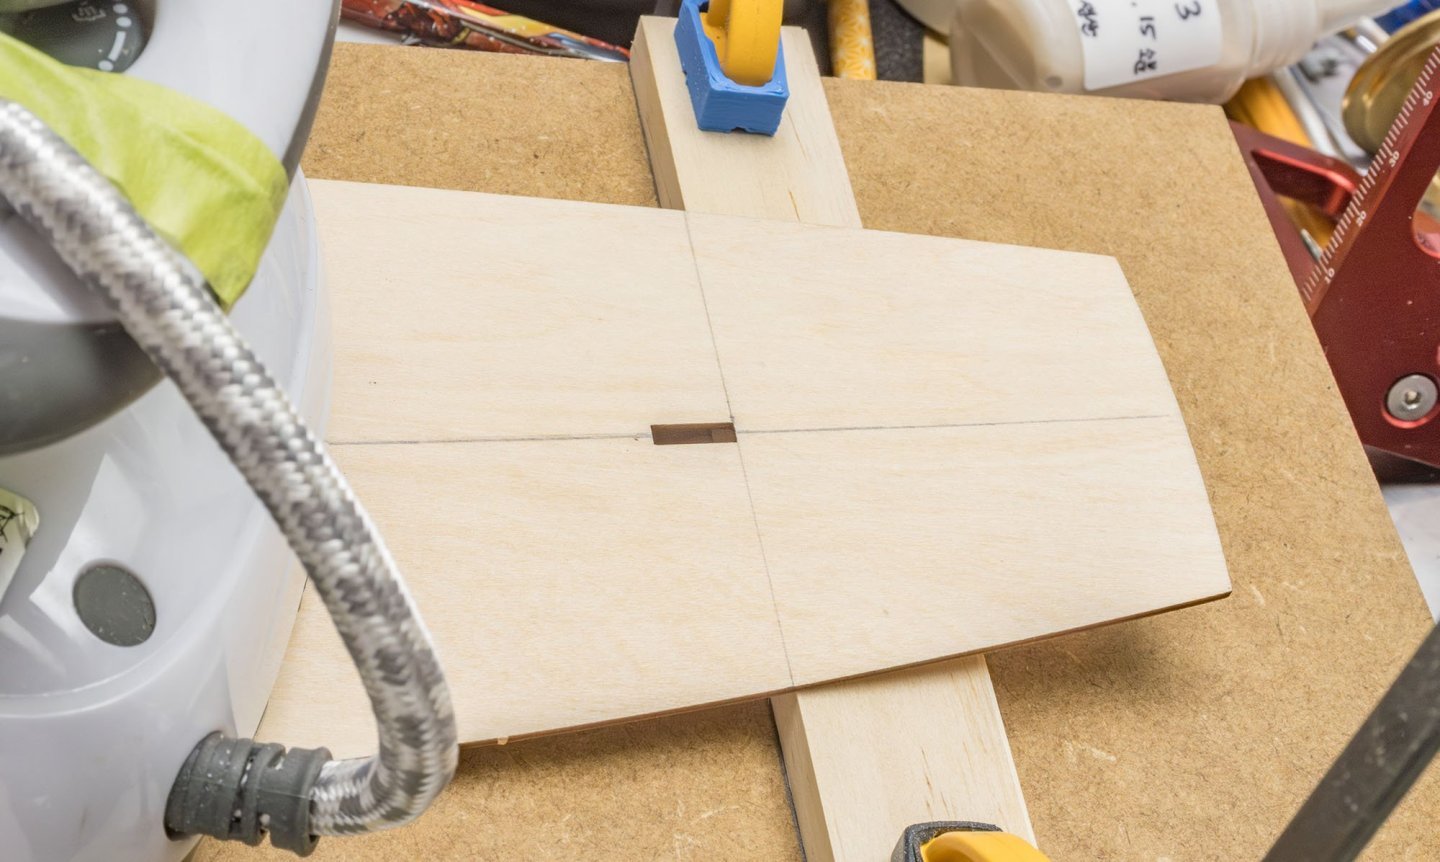
Deck installation Upgraded display stand. Preparing deck planks. Building masts. I found my DIY ropes from last year's stashes. Better than original. Polishing and dyeing blocks. I used an alcohol ink and shellac. Cleats Blackening the brass parts. Tomorrow's work will be deck planking, bulwark, and sanding the hull. 😎


-
My understanding of modeling and painting is growing as I build more models. I said that the weathering is covering a mistake a year ago. Now I make a flawed surface to build intended weathering effects. Control every mil and 0.01 millimeter.
-
Thank you for watching my project. As much as I learn, I know more that I don't know.
-
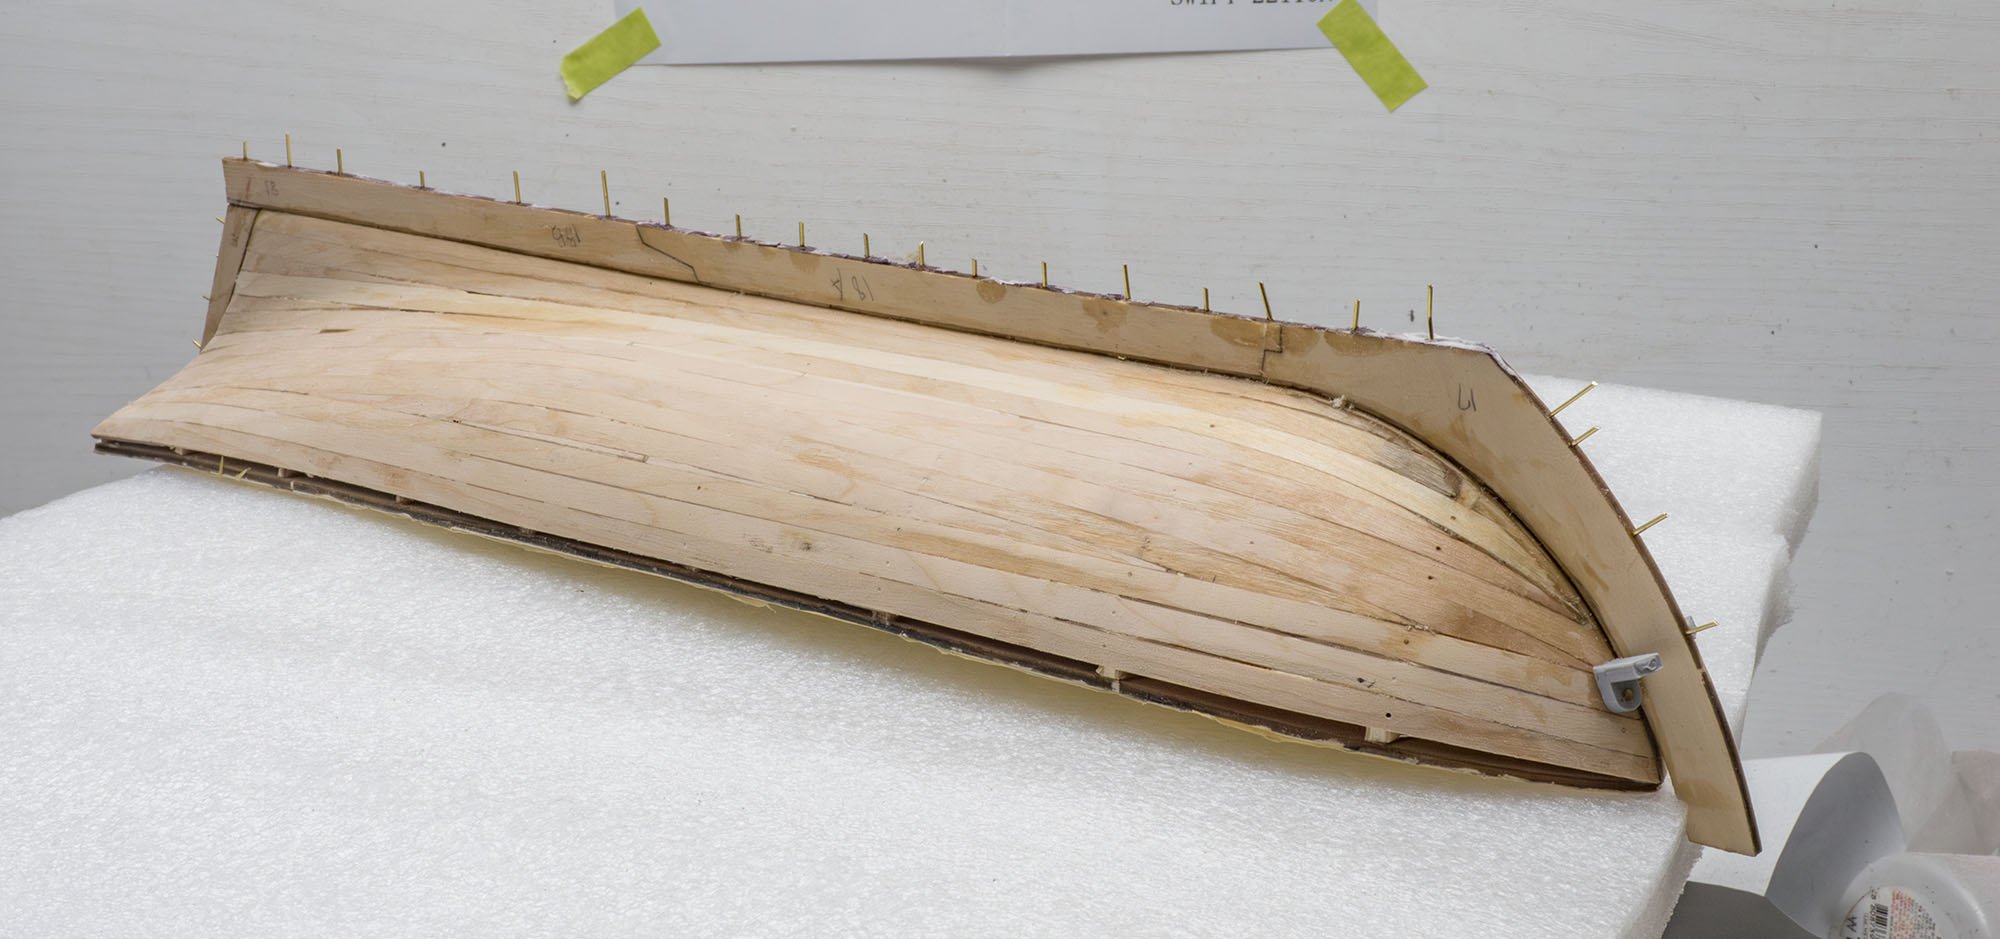
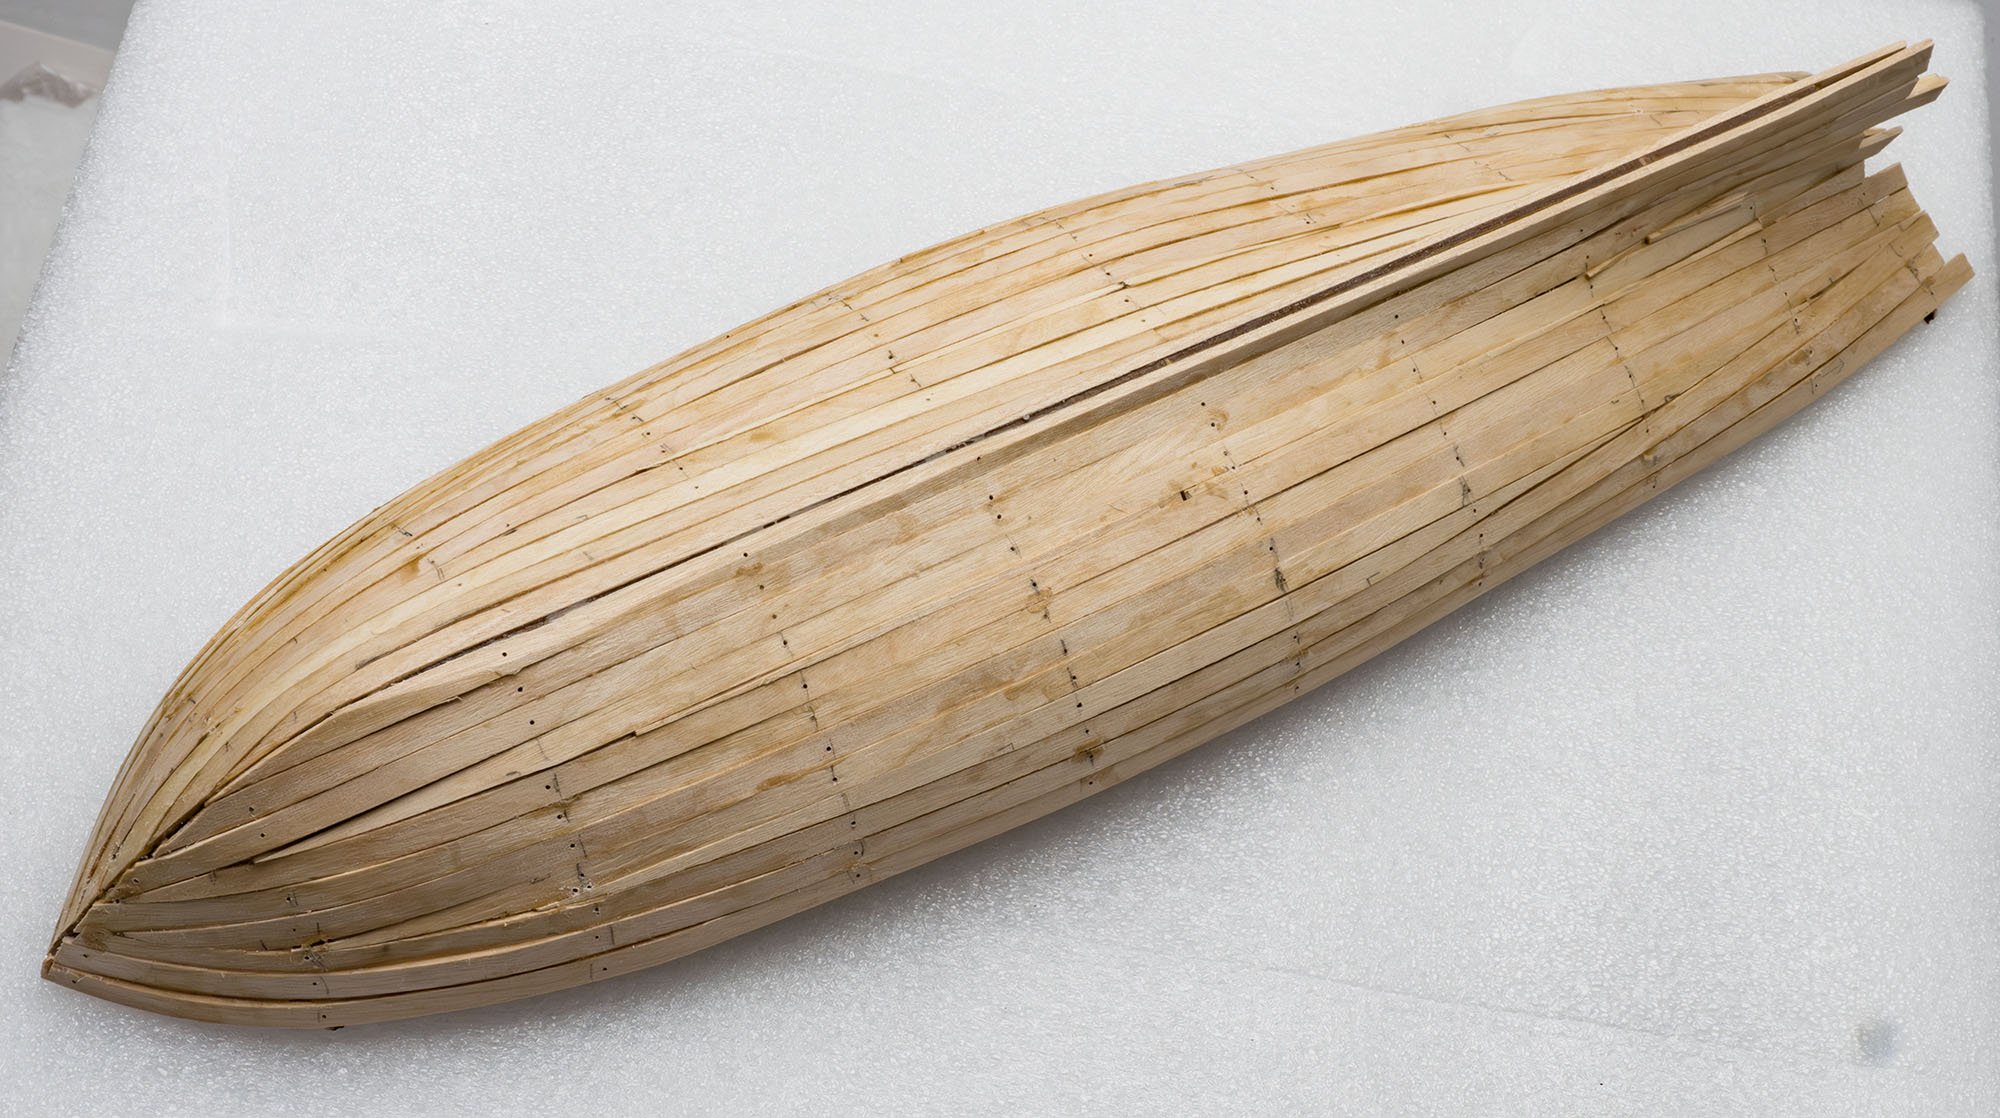
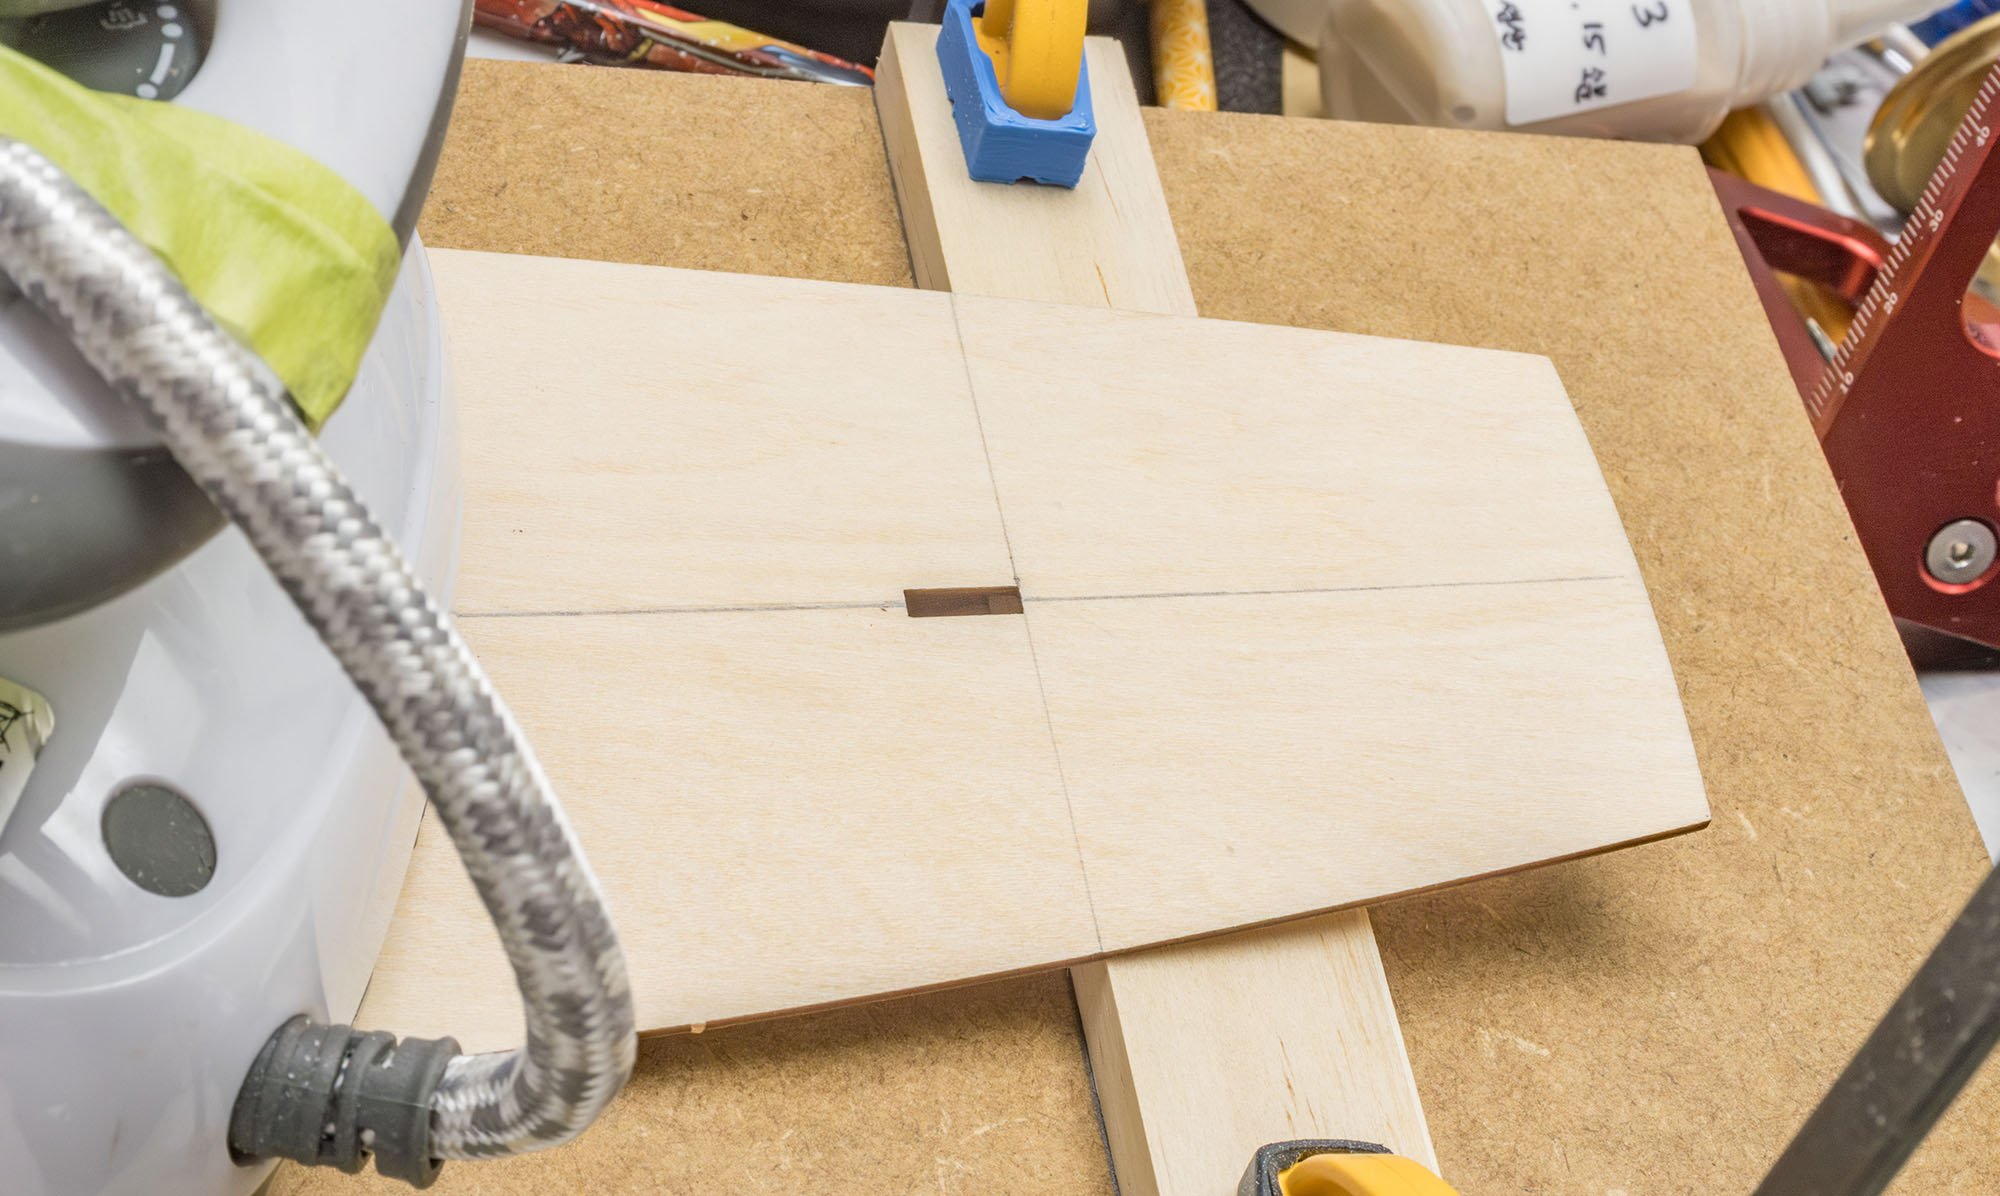
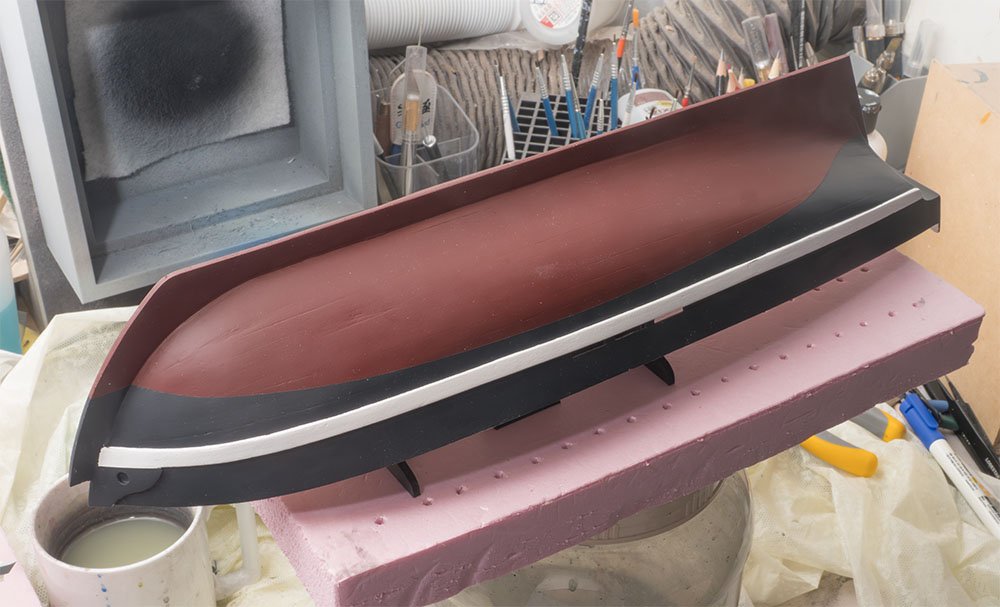
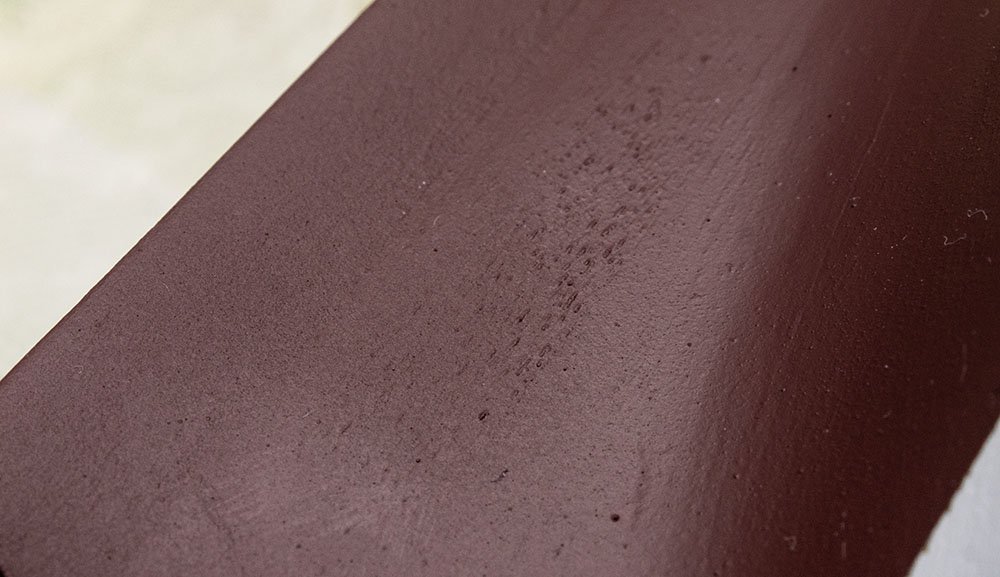
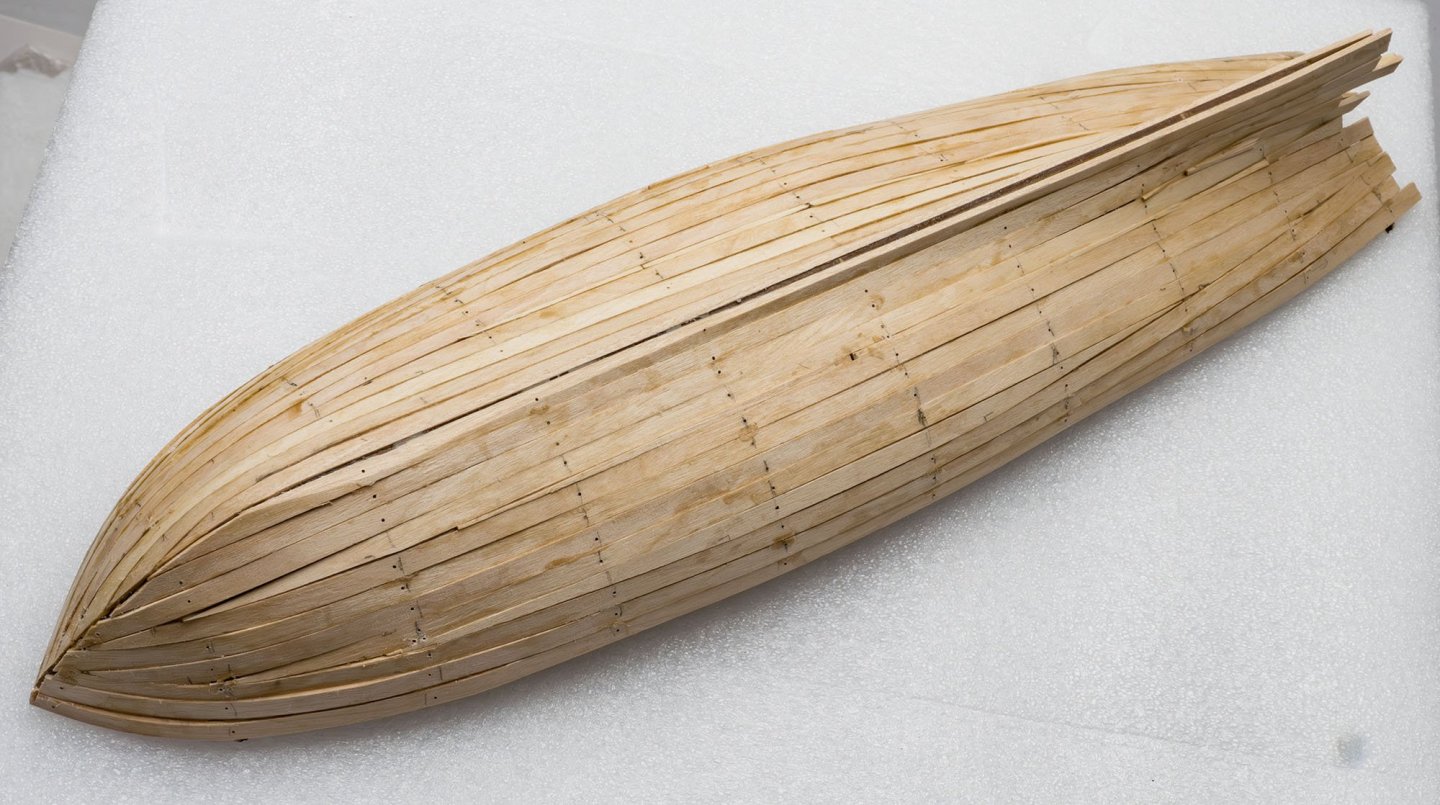
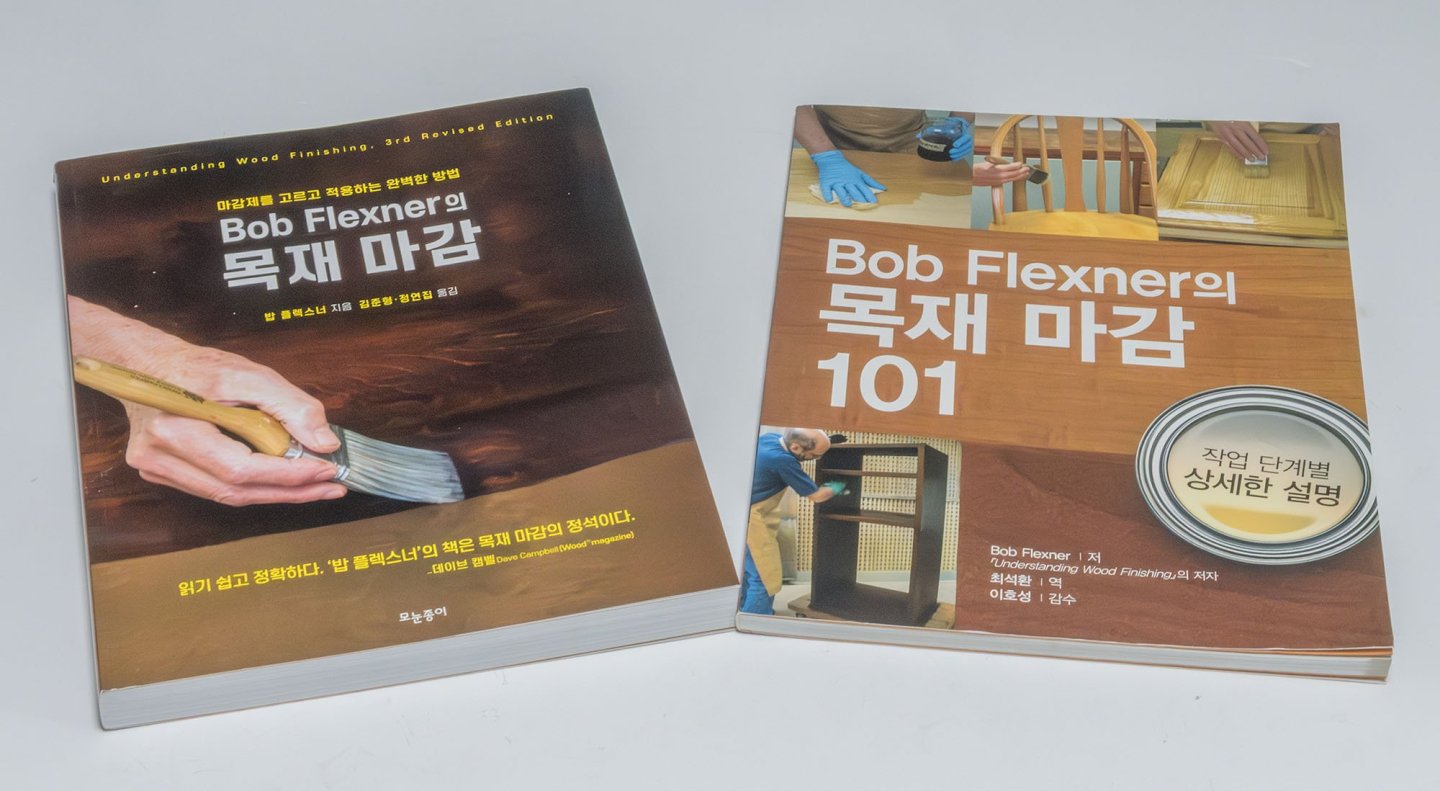
I filled all the large gaps before I applied a wood filler. After I finished planking, I removed all the plank battens. The next step is a deck installation. I warped the deck using a mini iron. The mini iron is really useful! It's over 300 W! Also, I'm studying about varnish. I want to make a clean and smooth surface, like a plastic model project. Is it time to abandon my favorite shellac?

-
I can't believe it! Based on your previous build logs and the expert skills you have demonstrated, you should have gained experience with many kits and met good friends. I'm checking every corner when I turn and polishing my tech one by one. I wish I'll be at the level someday.
-
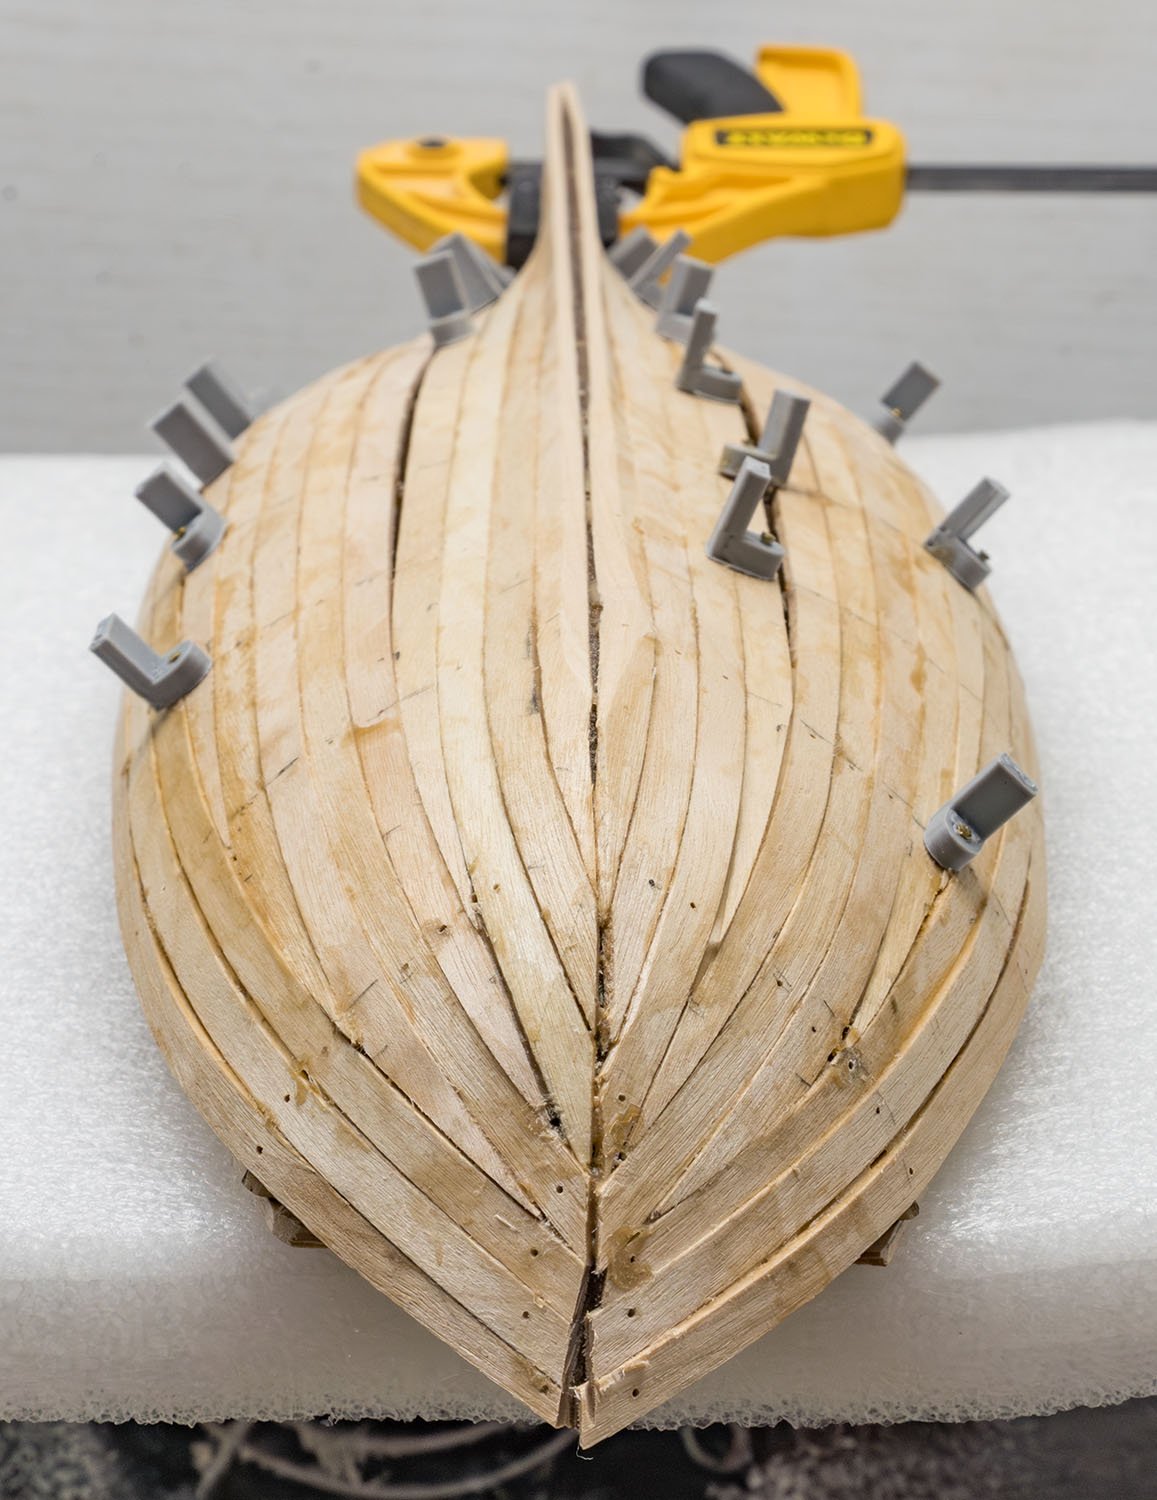
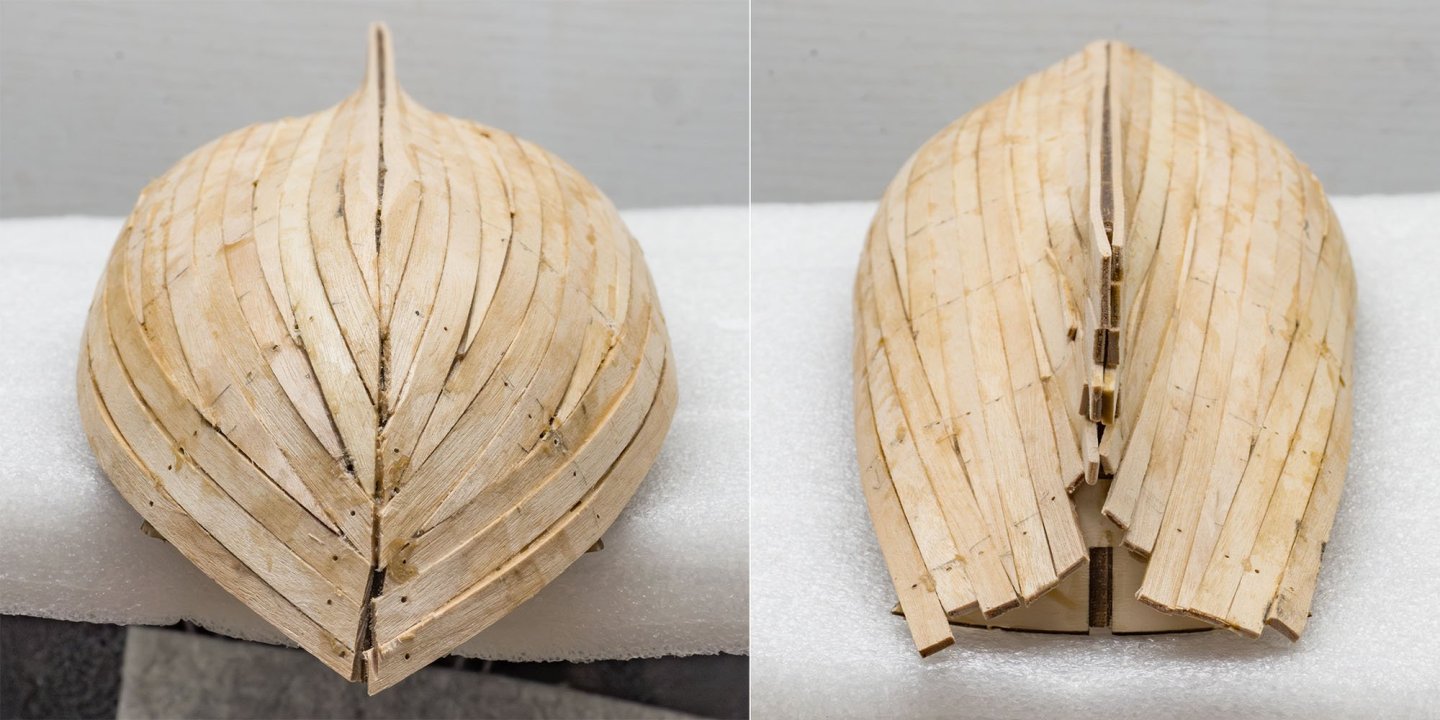
Well... my rabbet and mortise doesn't work with this kit. 😪 I changed my plan and followed the AL manual. 4 belts x 4 planks Looking good. I used $9 mini iron only. Garboard First strake Wale Stealer Half my work has been done!


-
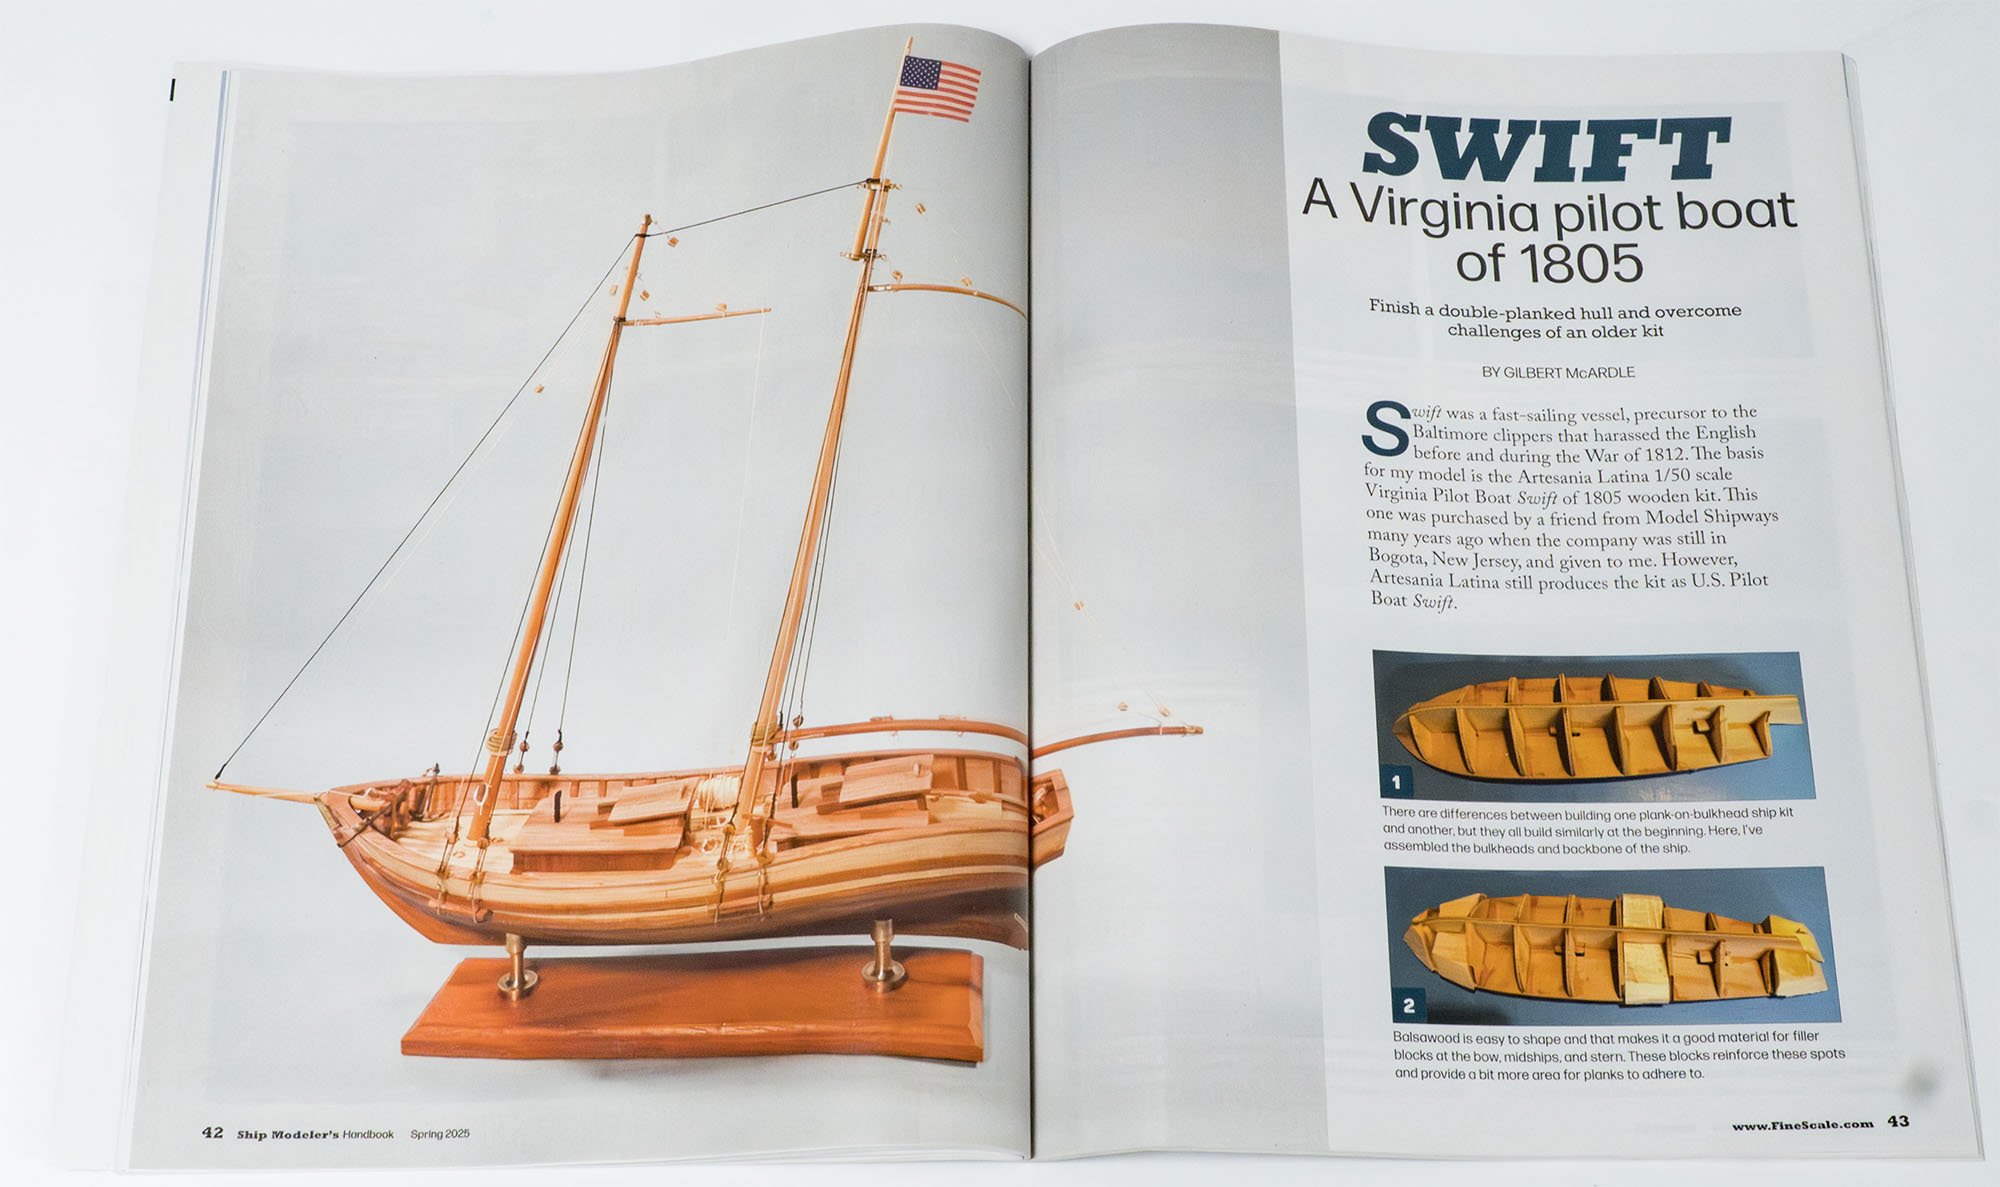
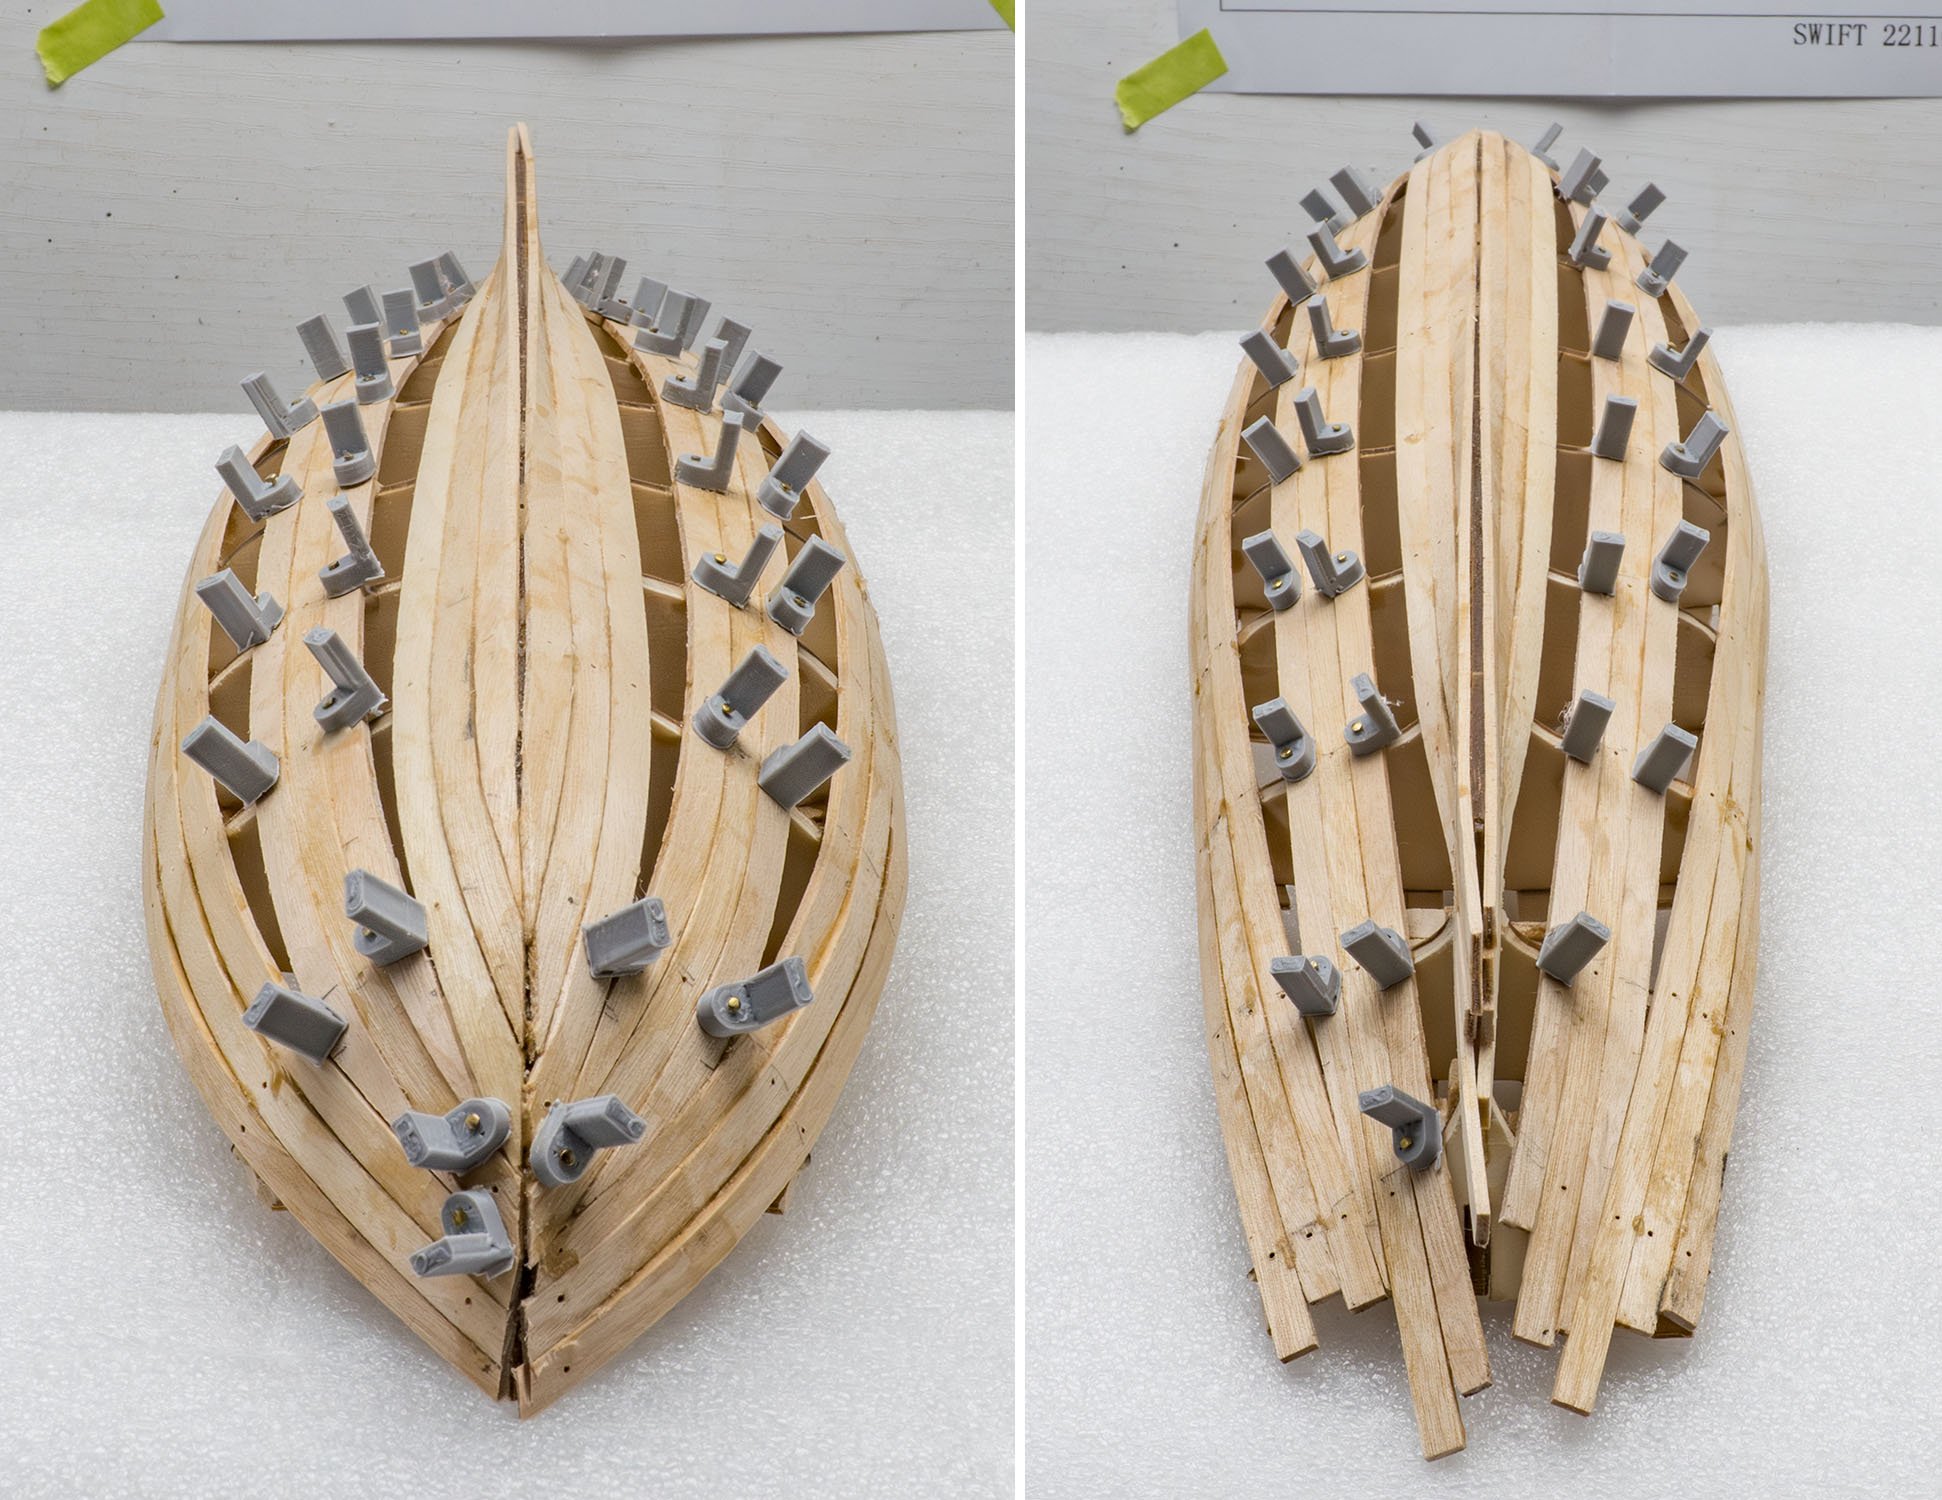
I'm building a famous ship that has already been modeled many times. The 22110-N Swift kit is the cheapest intro line-up of the Artesania Latina. It is a two-masted schooner with simplified details, and has been renewed several times for 50 years. There are tons of American schooner kits with better details in the market. This post won't be a tutorial-like build log. I'm studying my building technique. I hope you skim my post quickly, and I'll be much obliged if you find any interesting point. 3-Dimentional error checking Fixing errors Plank battens This is a small ship. Temporary planks are done. The end of hull framing.


-
Thank you for the kind words, schooner. I saw your 1/350 resin models. I'm not an American, but thank you for your service, captain!
-
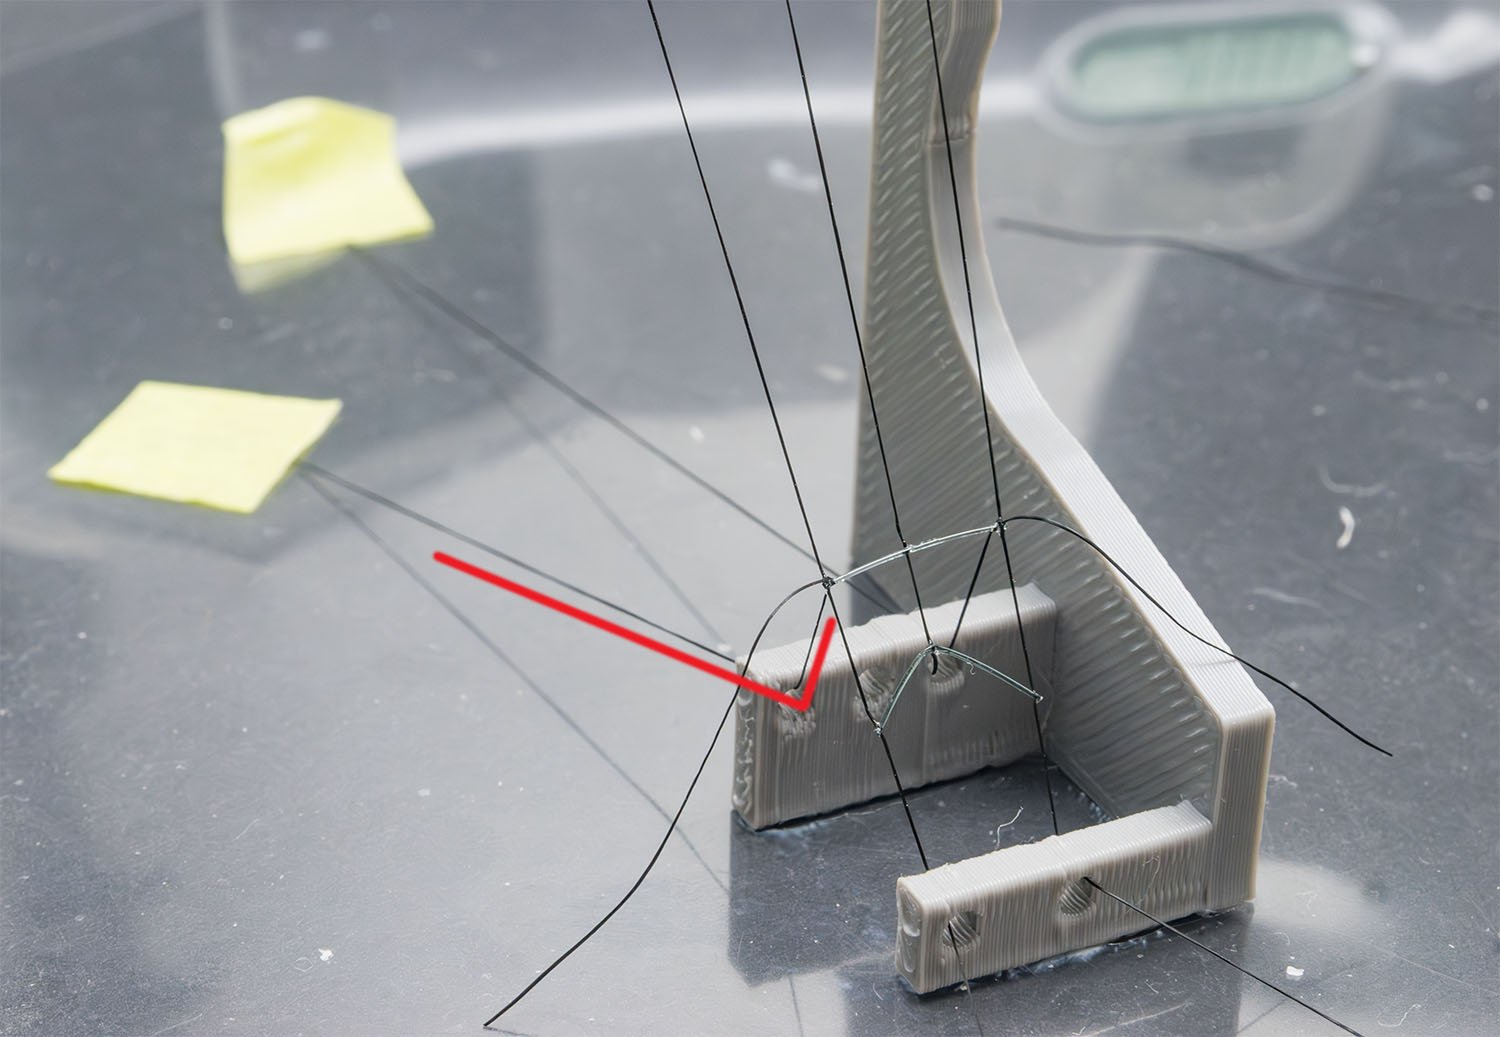
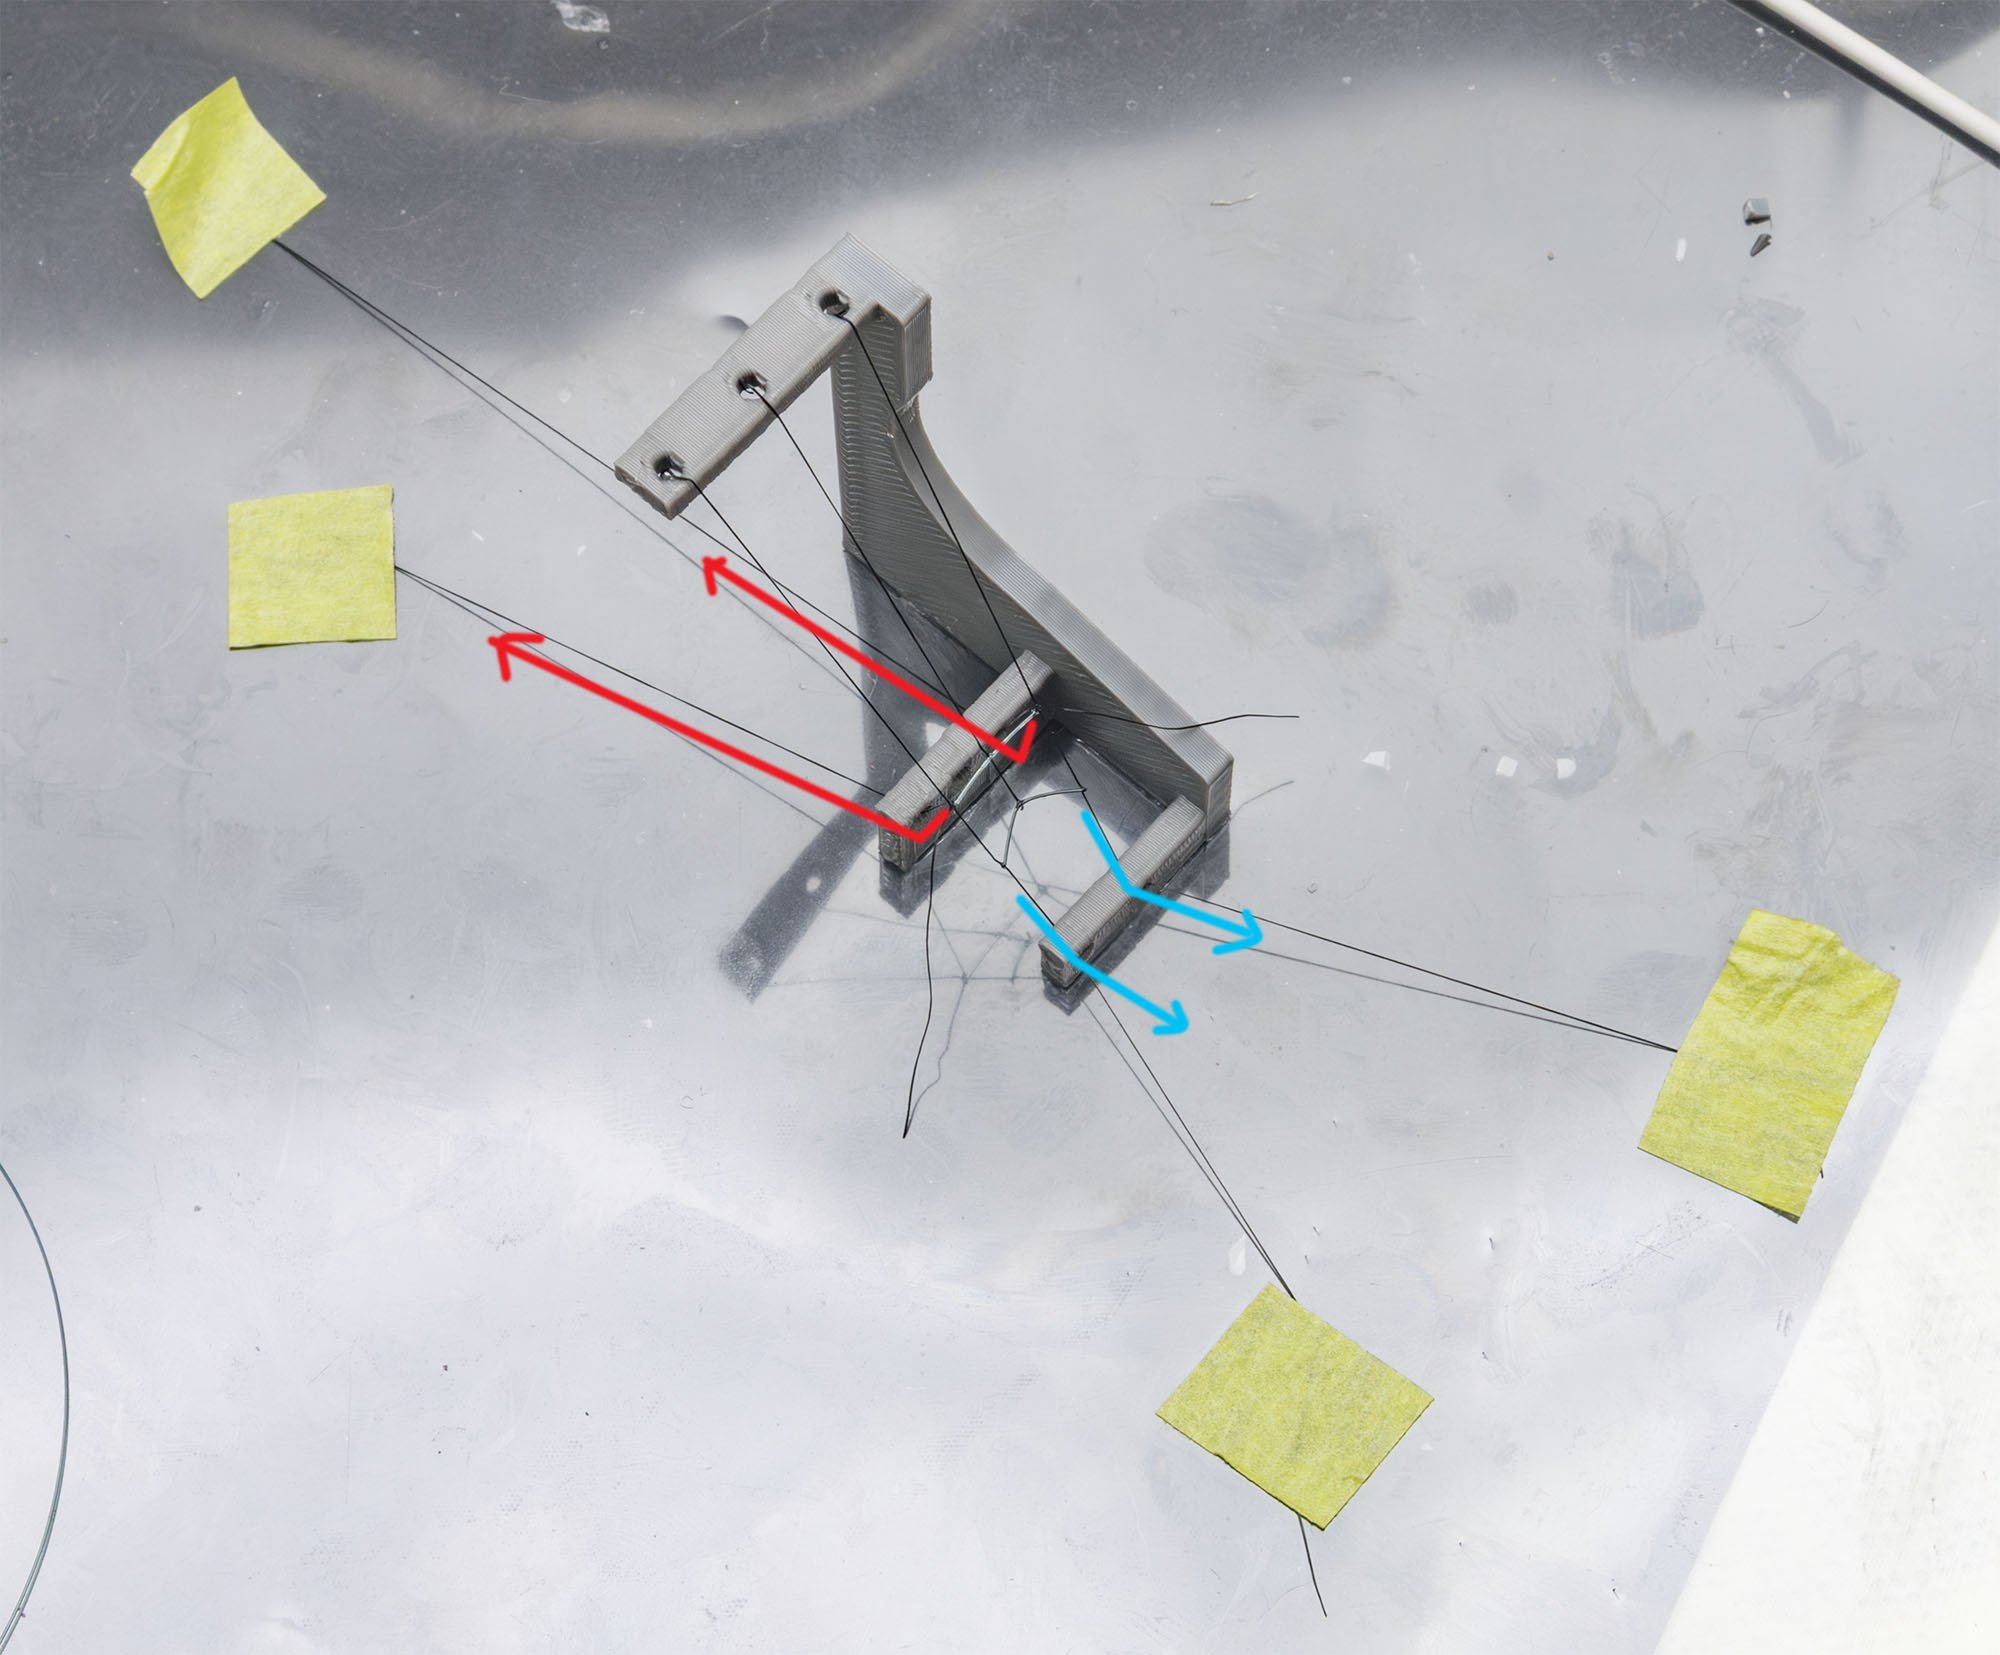
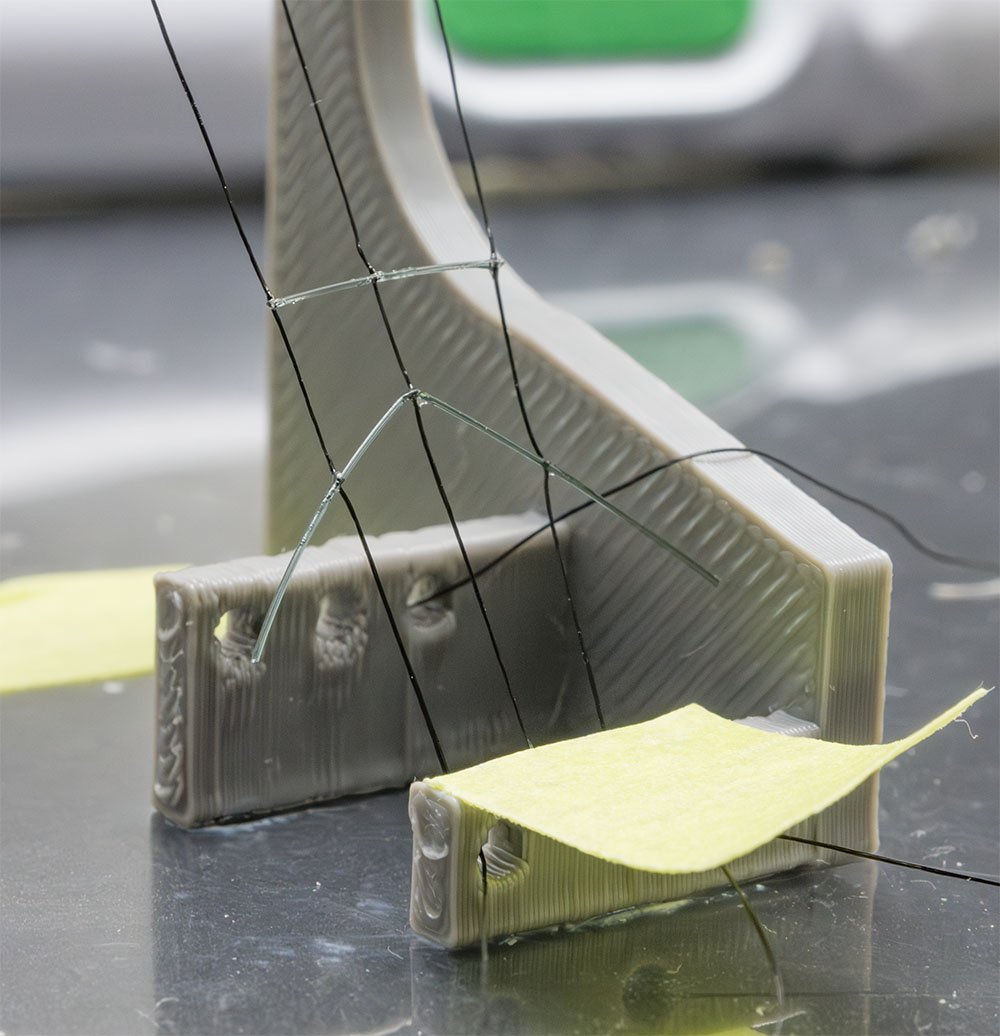
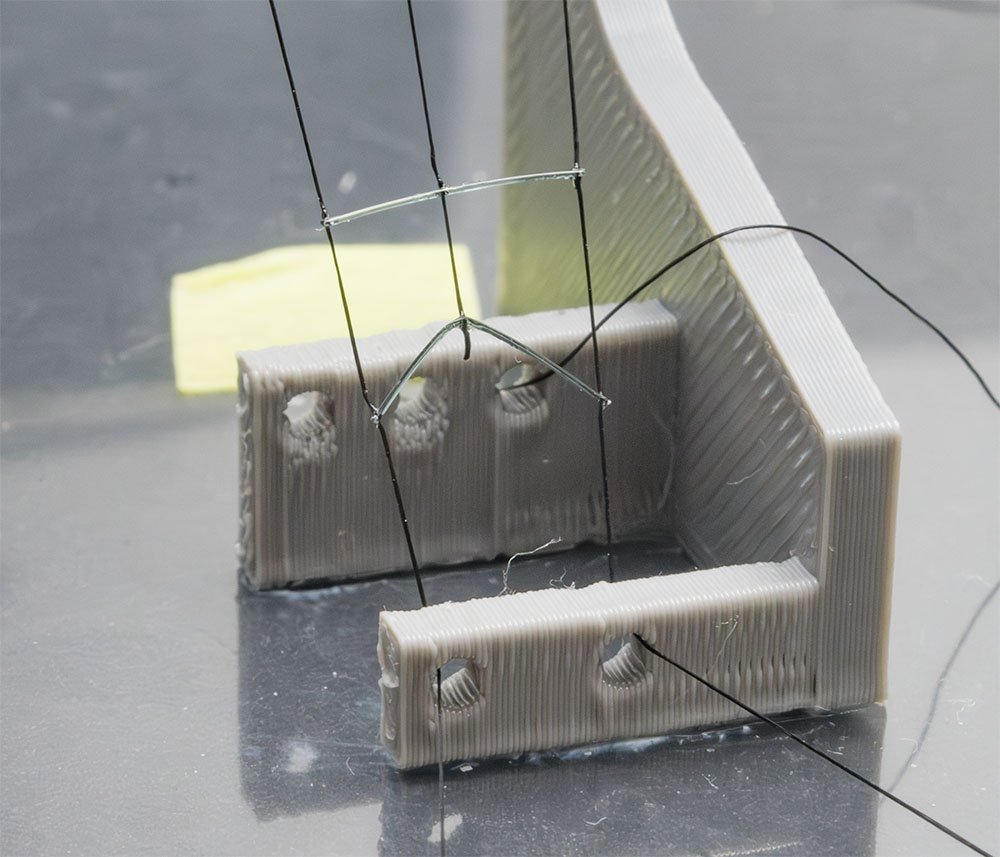
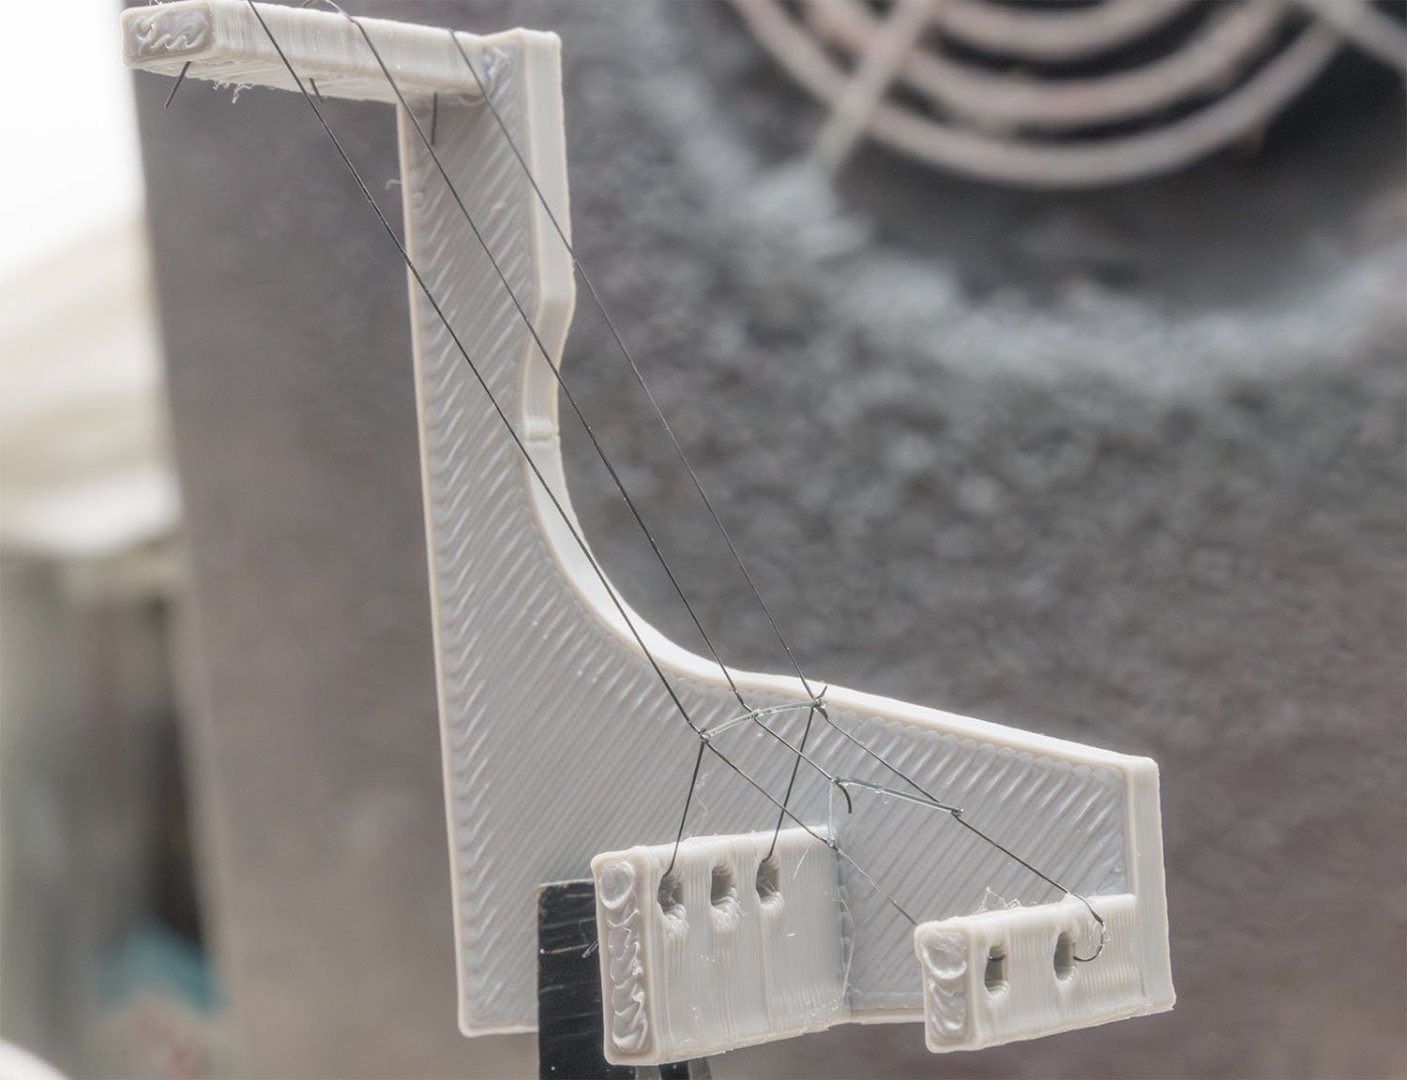
Before I started the final rigging work, I printed a rigging practice. The lines are lycra or spandex elastic threads from Infini models. All right. It seems good! A placing the railings was not easy work... See you tomorrow!


-
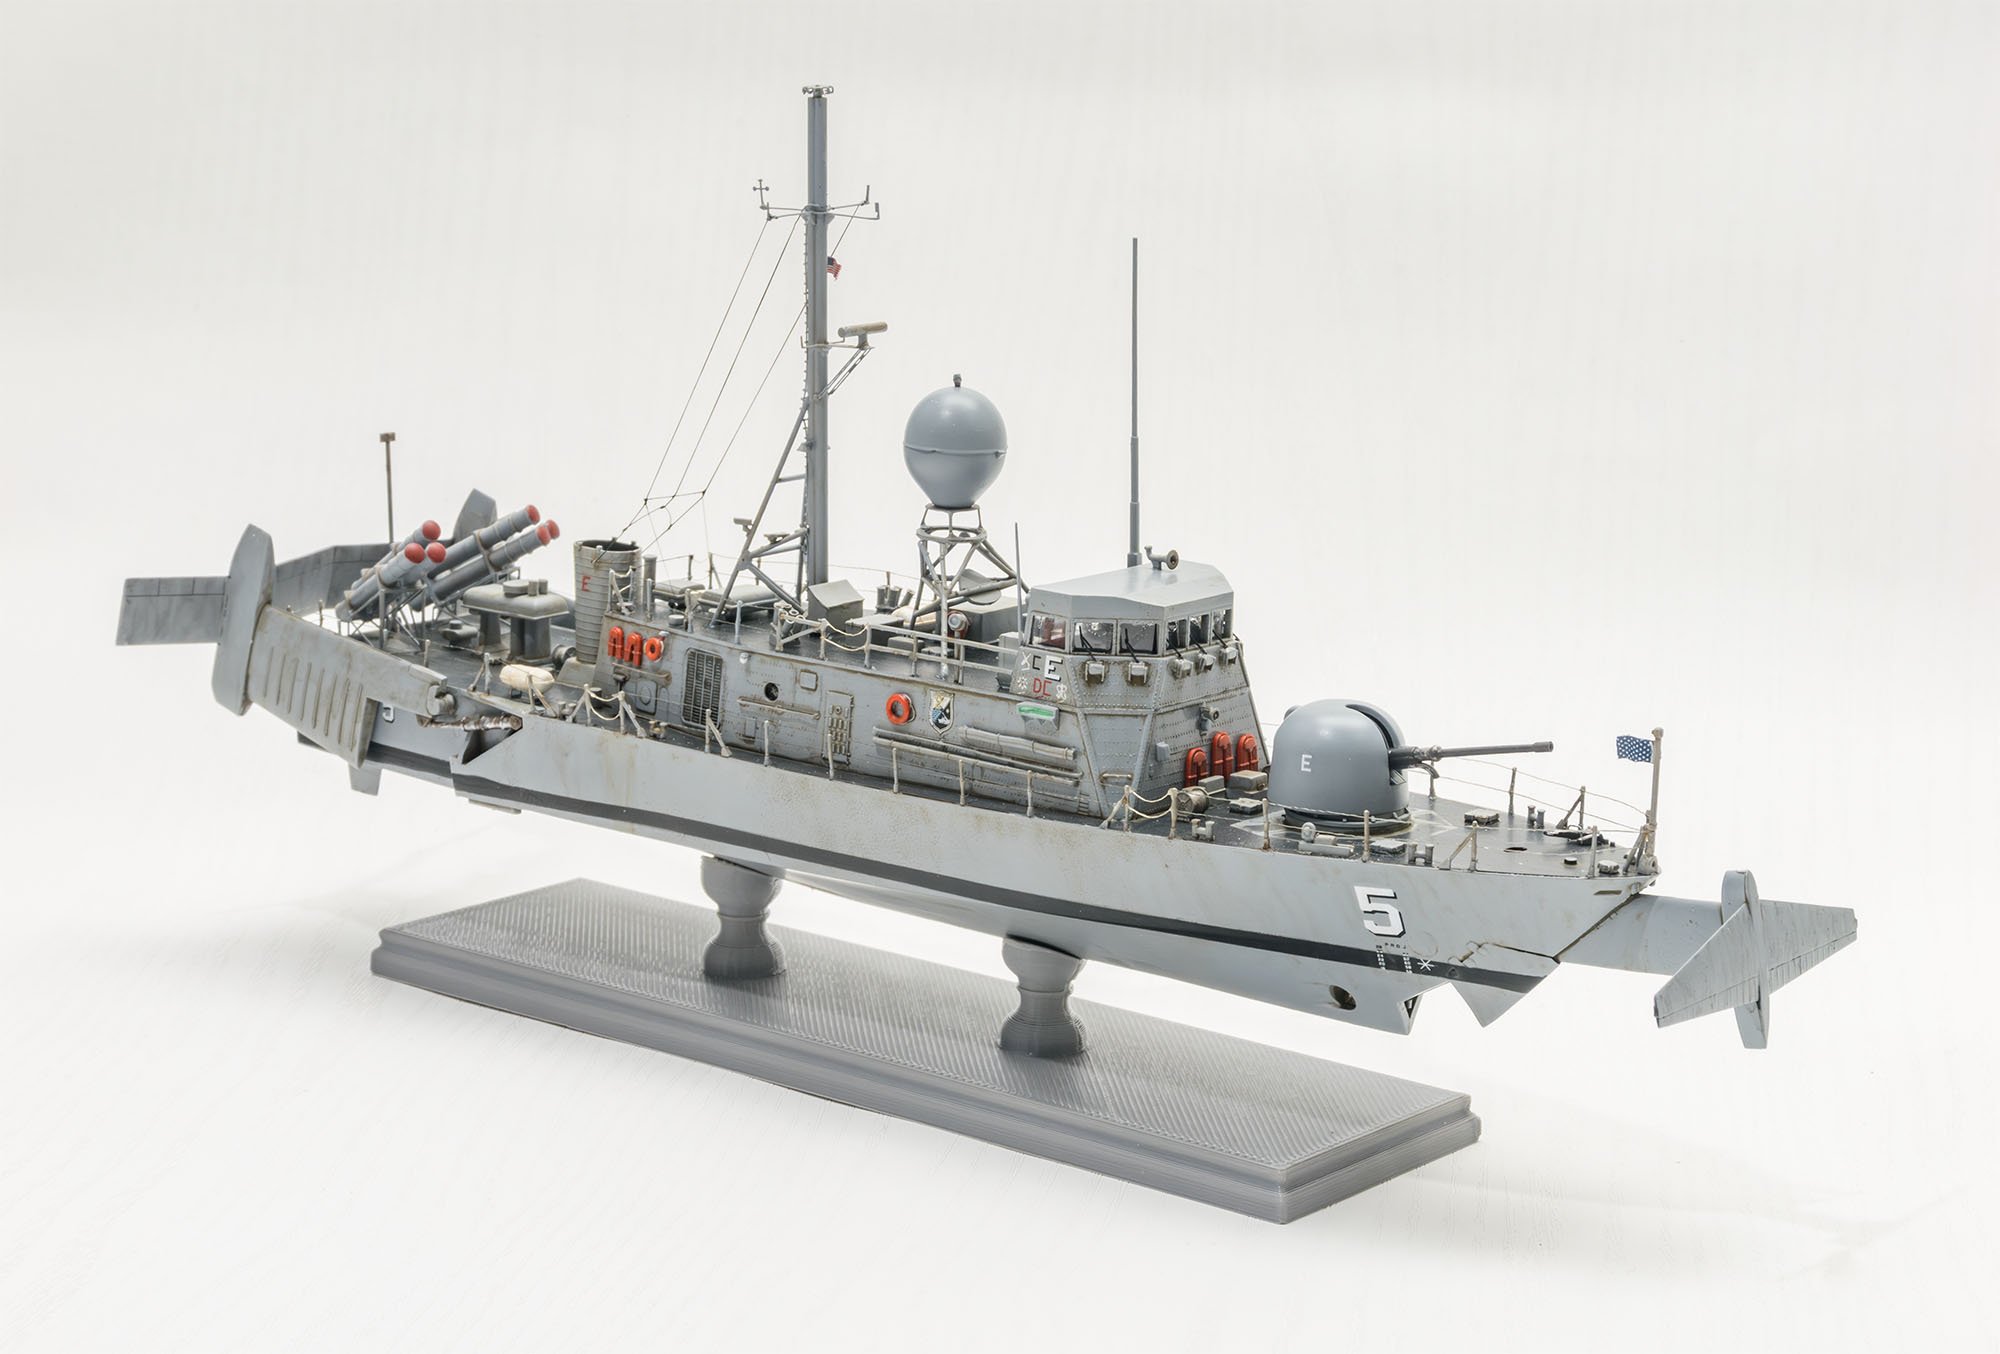
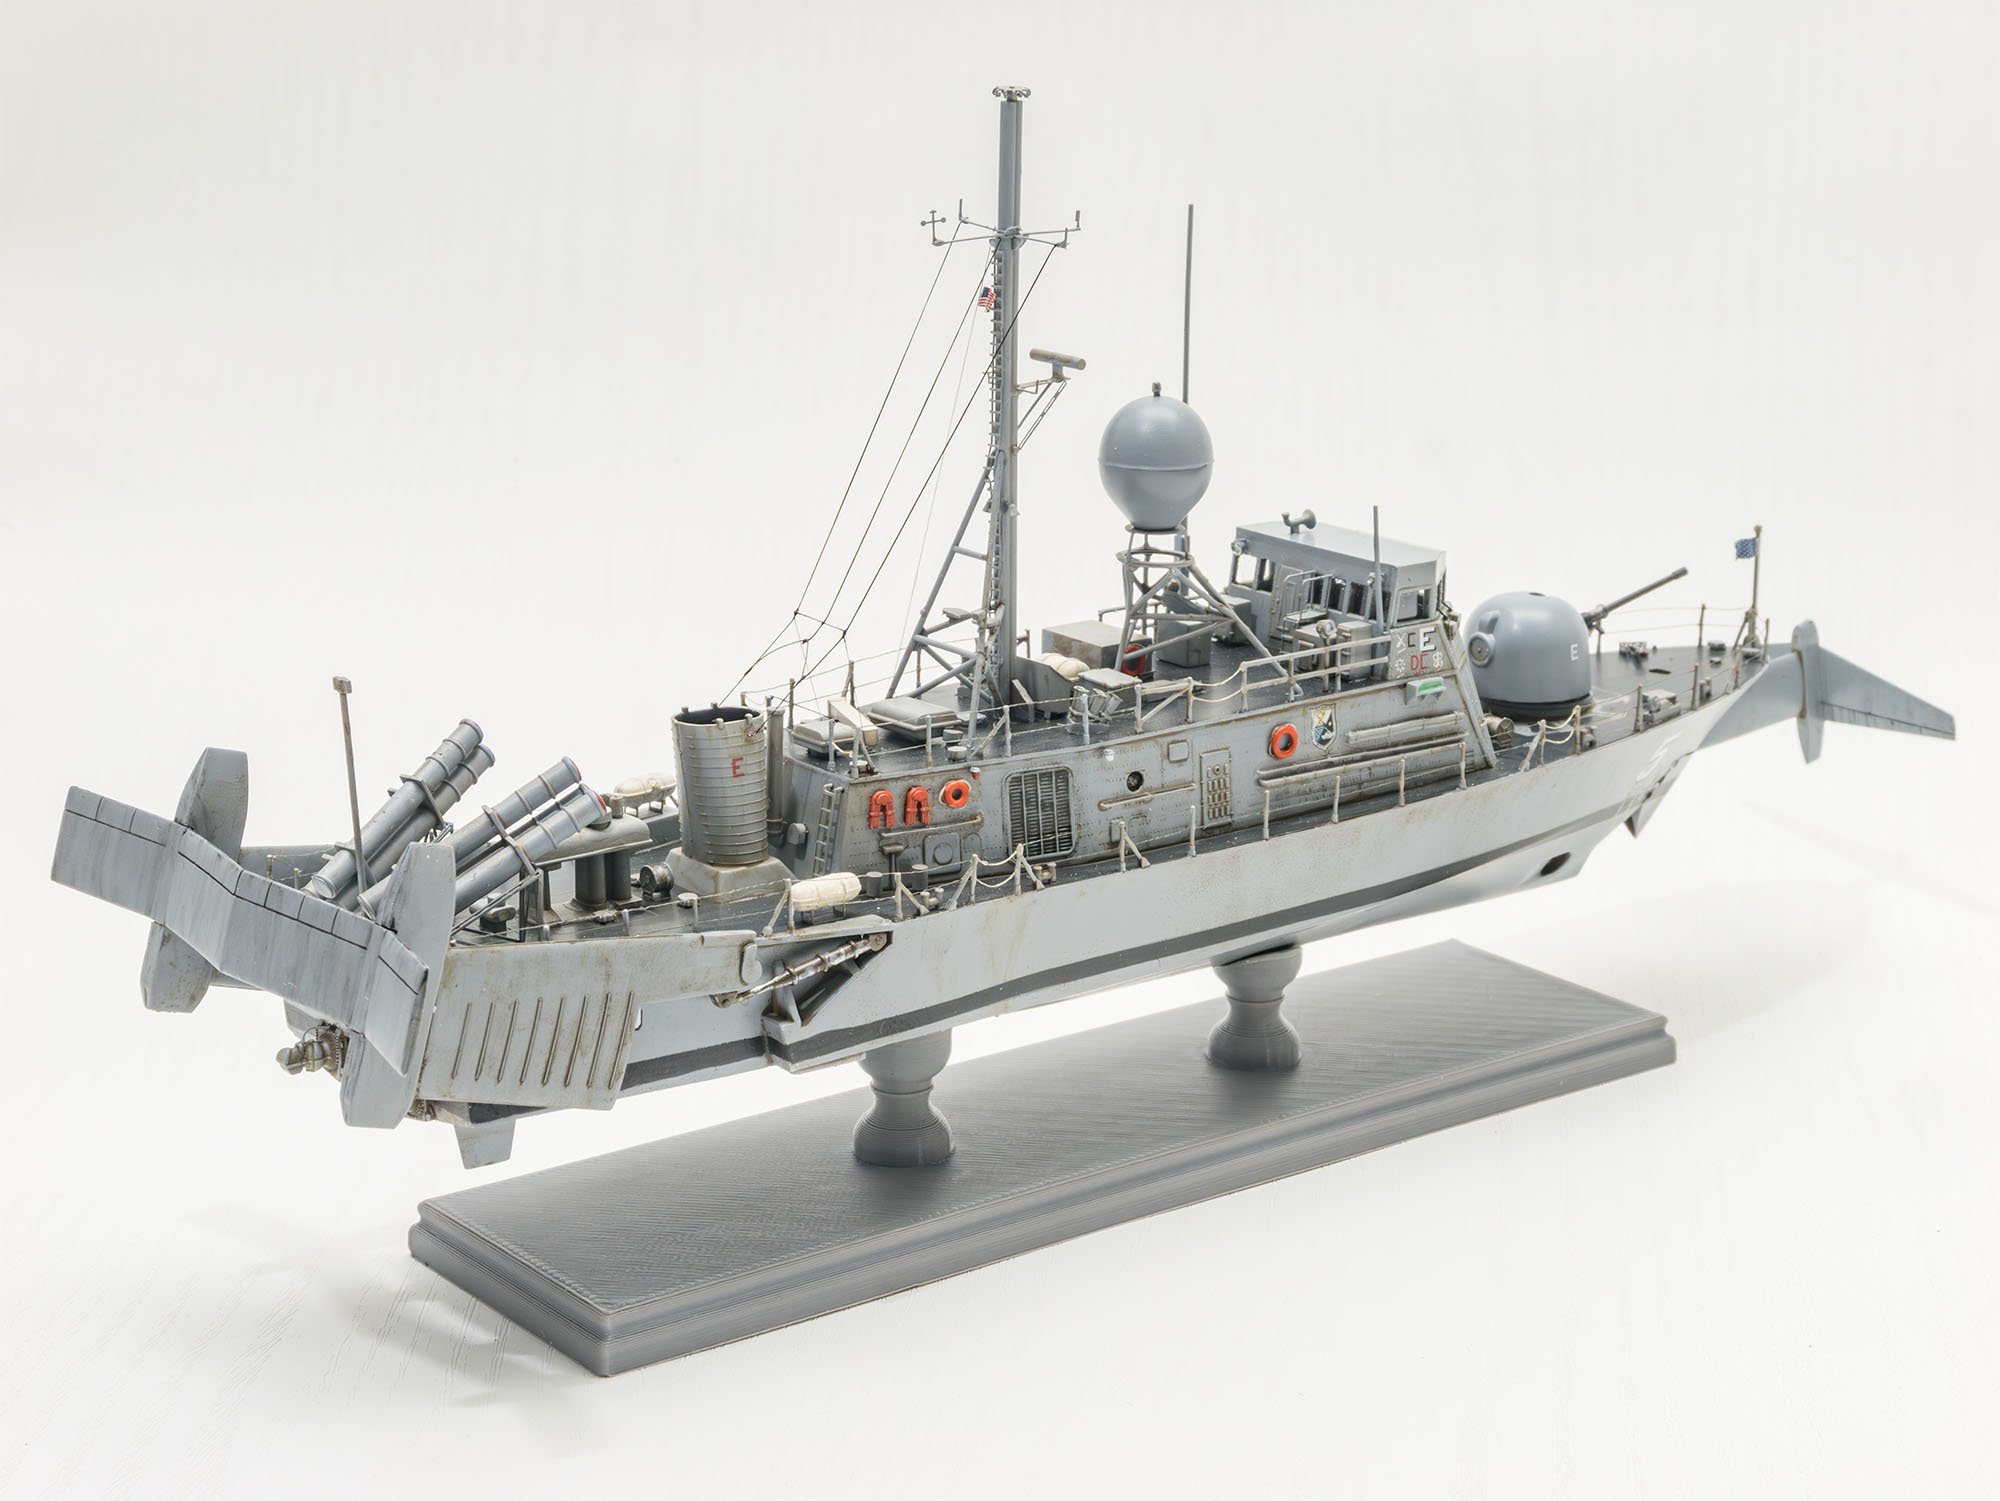
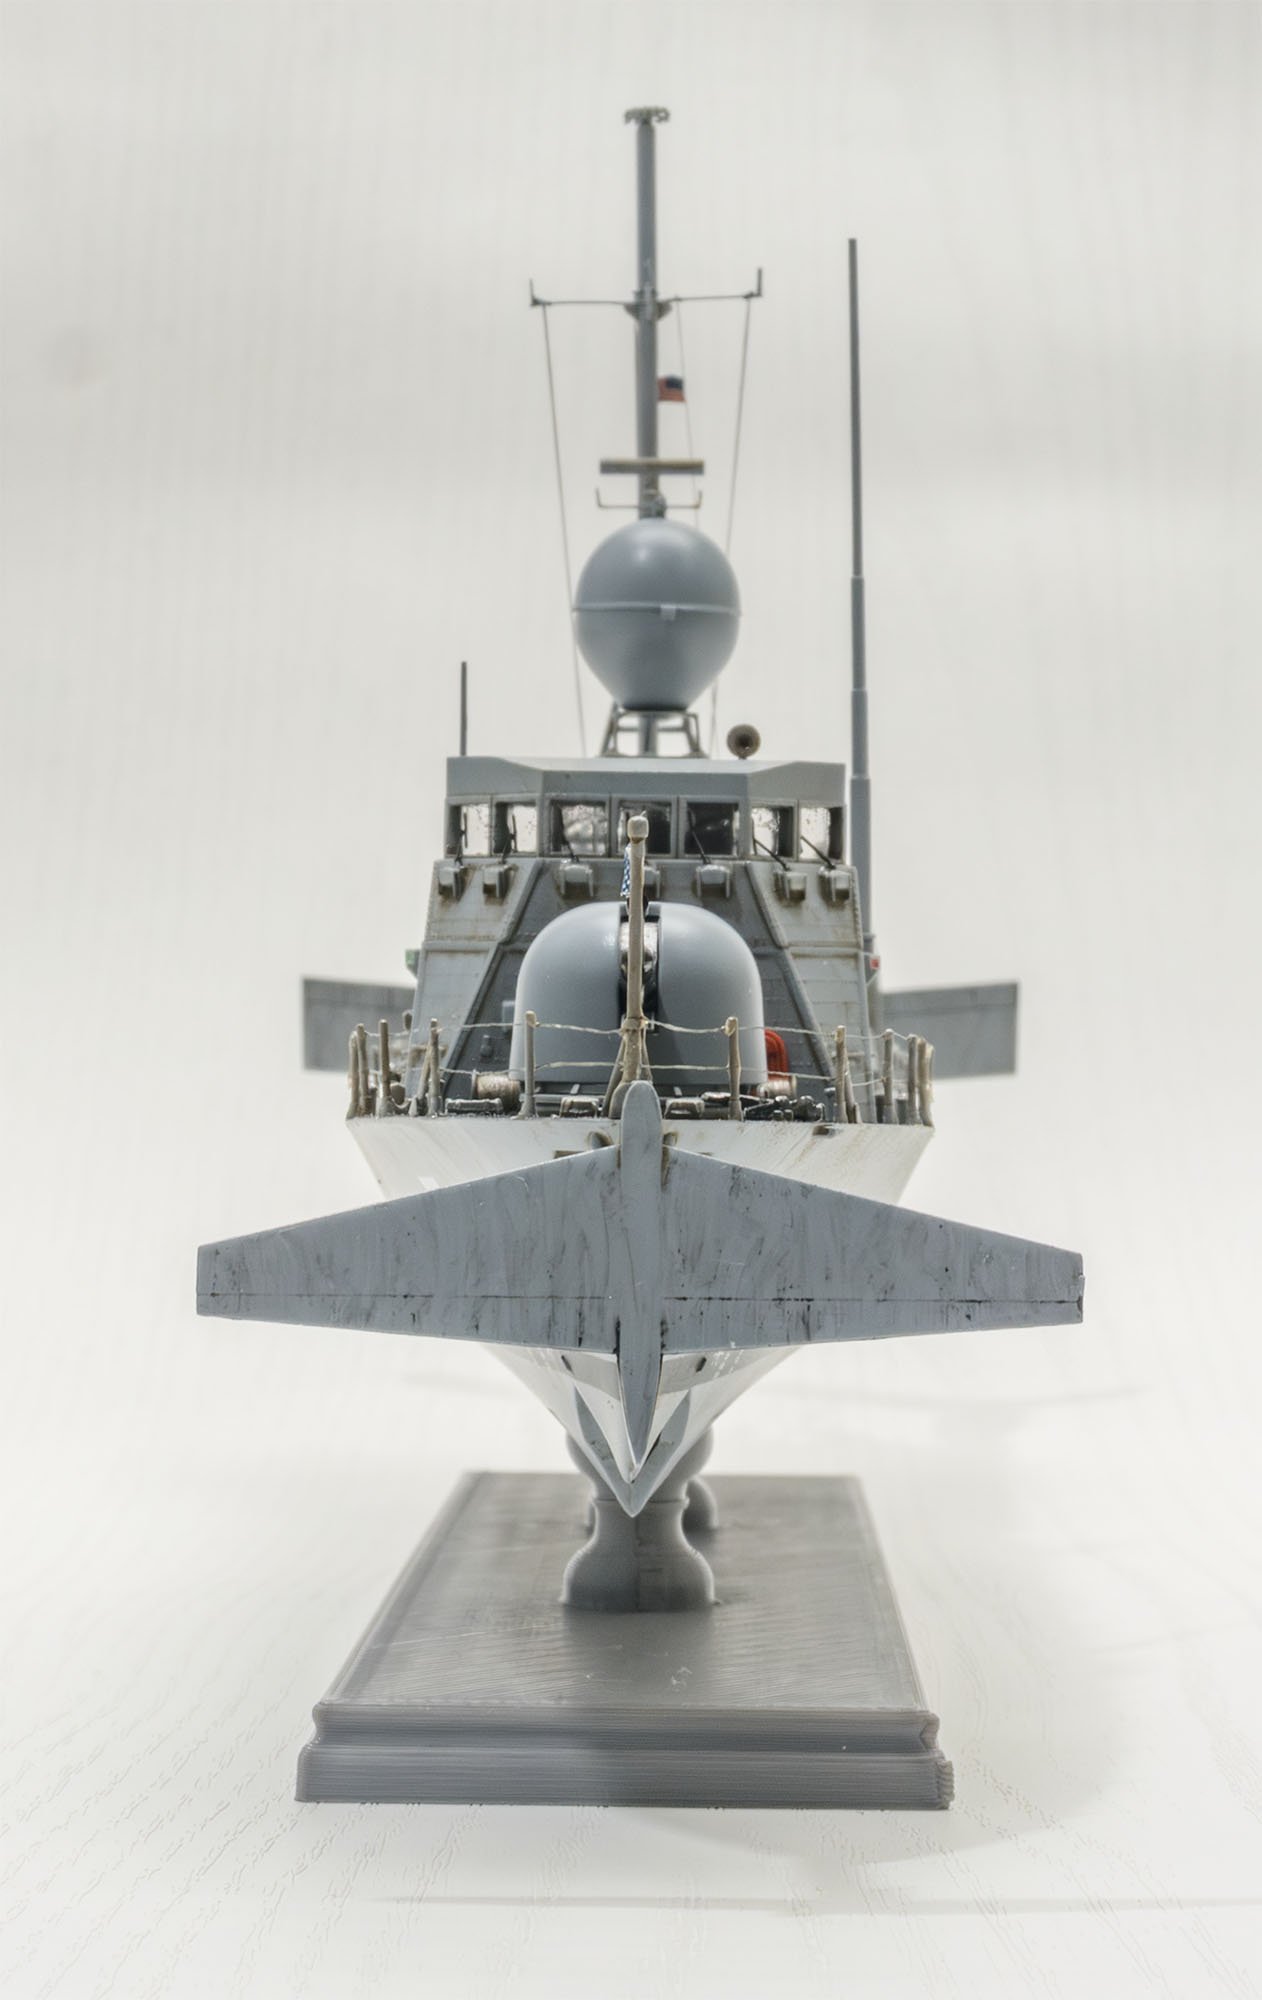
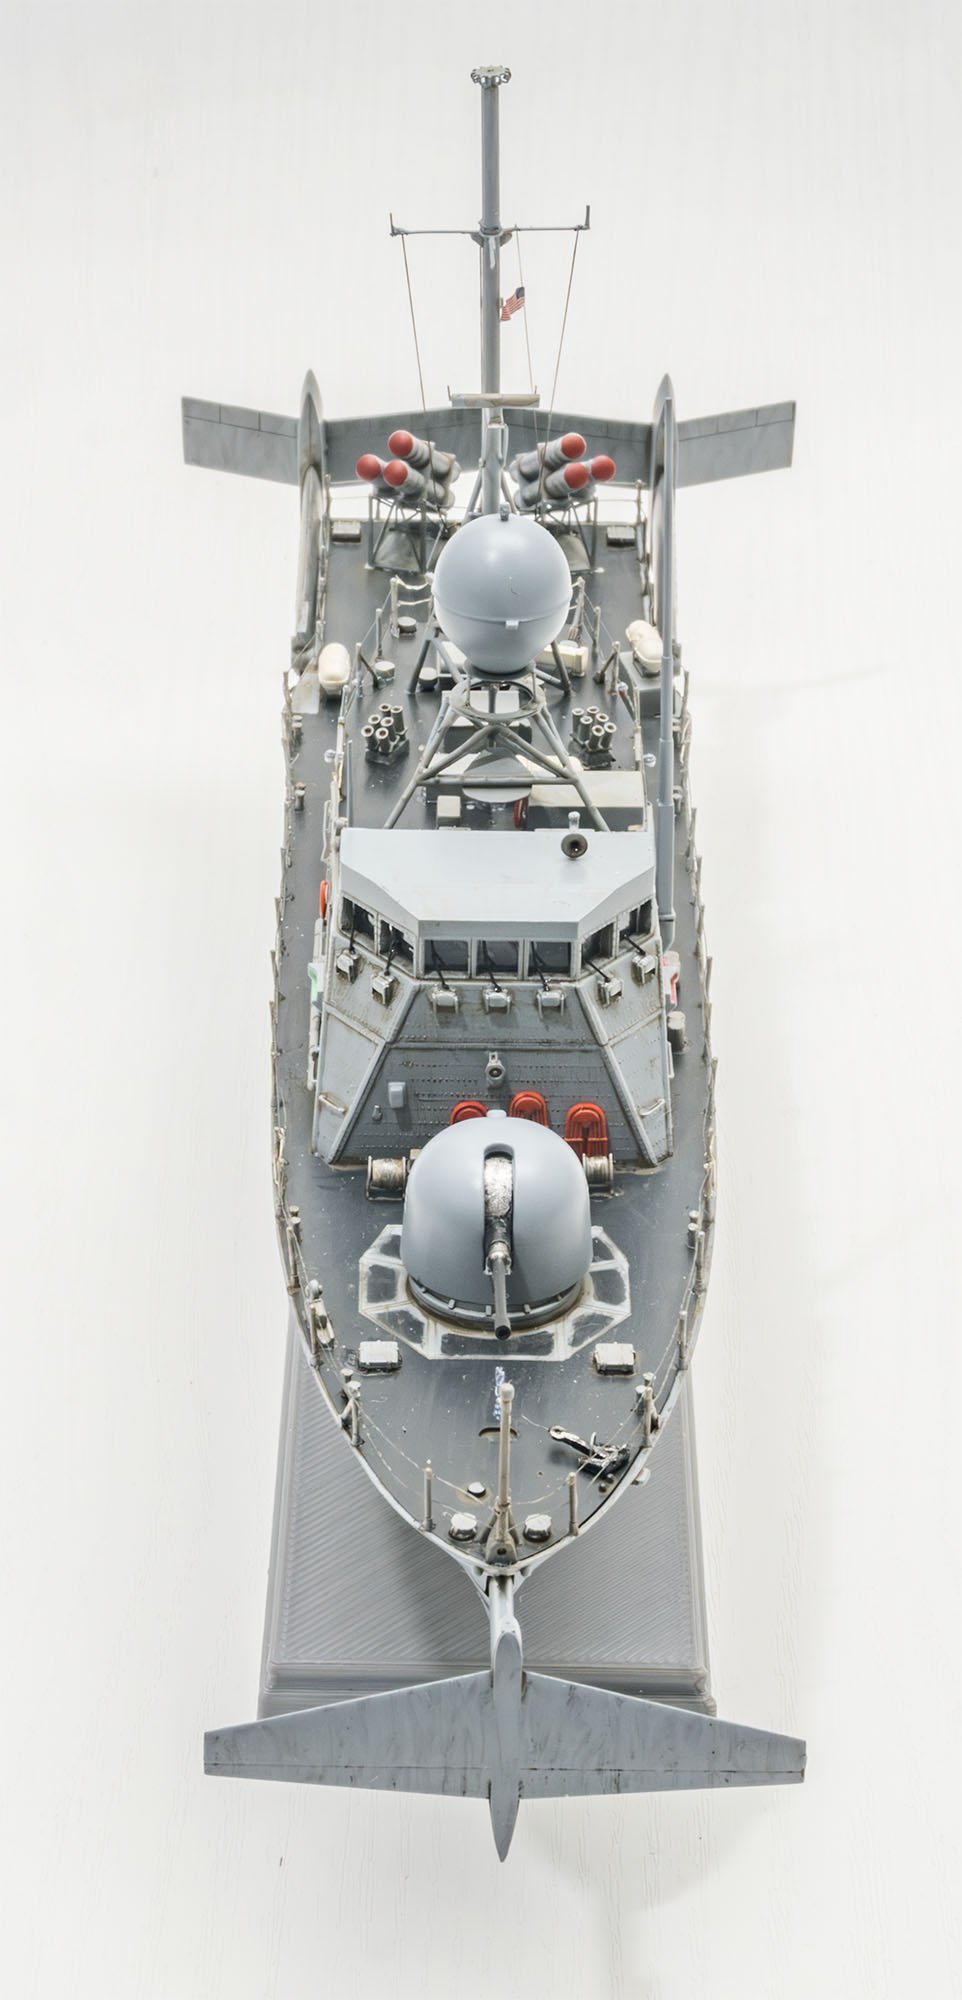
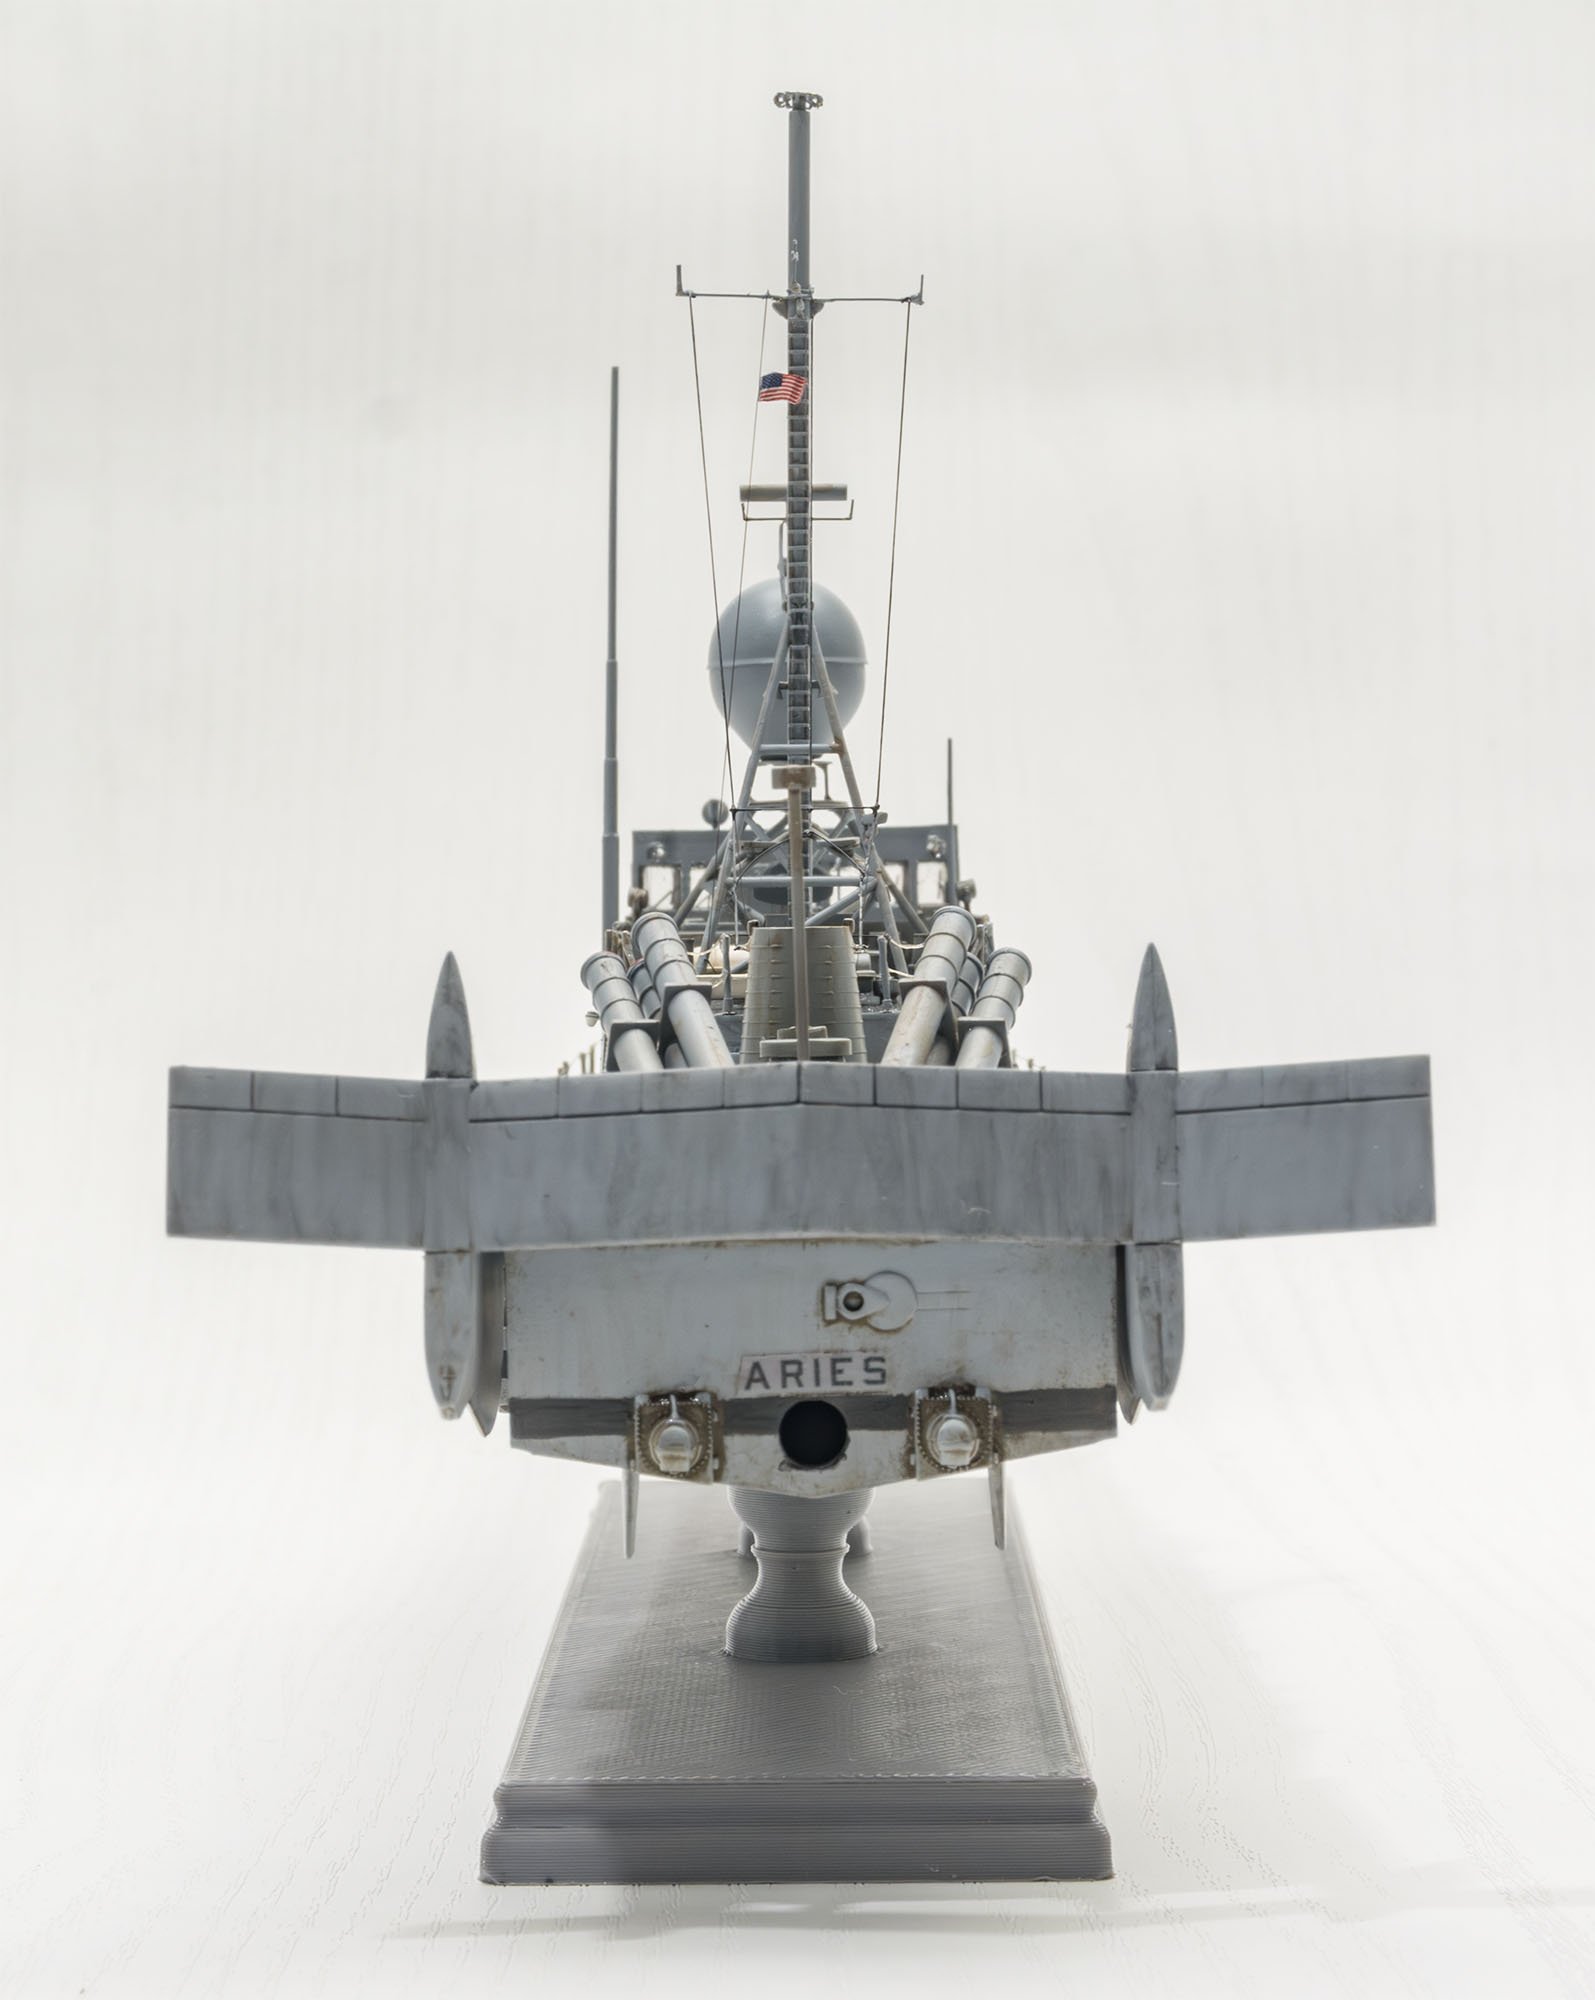
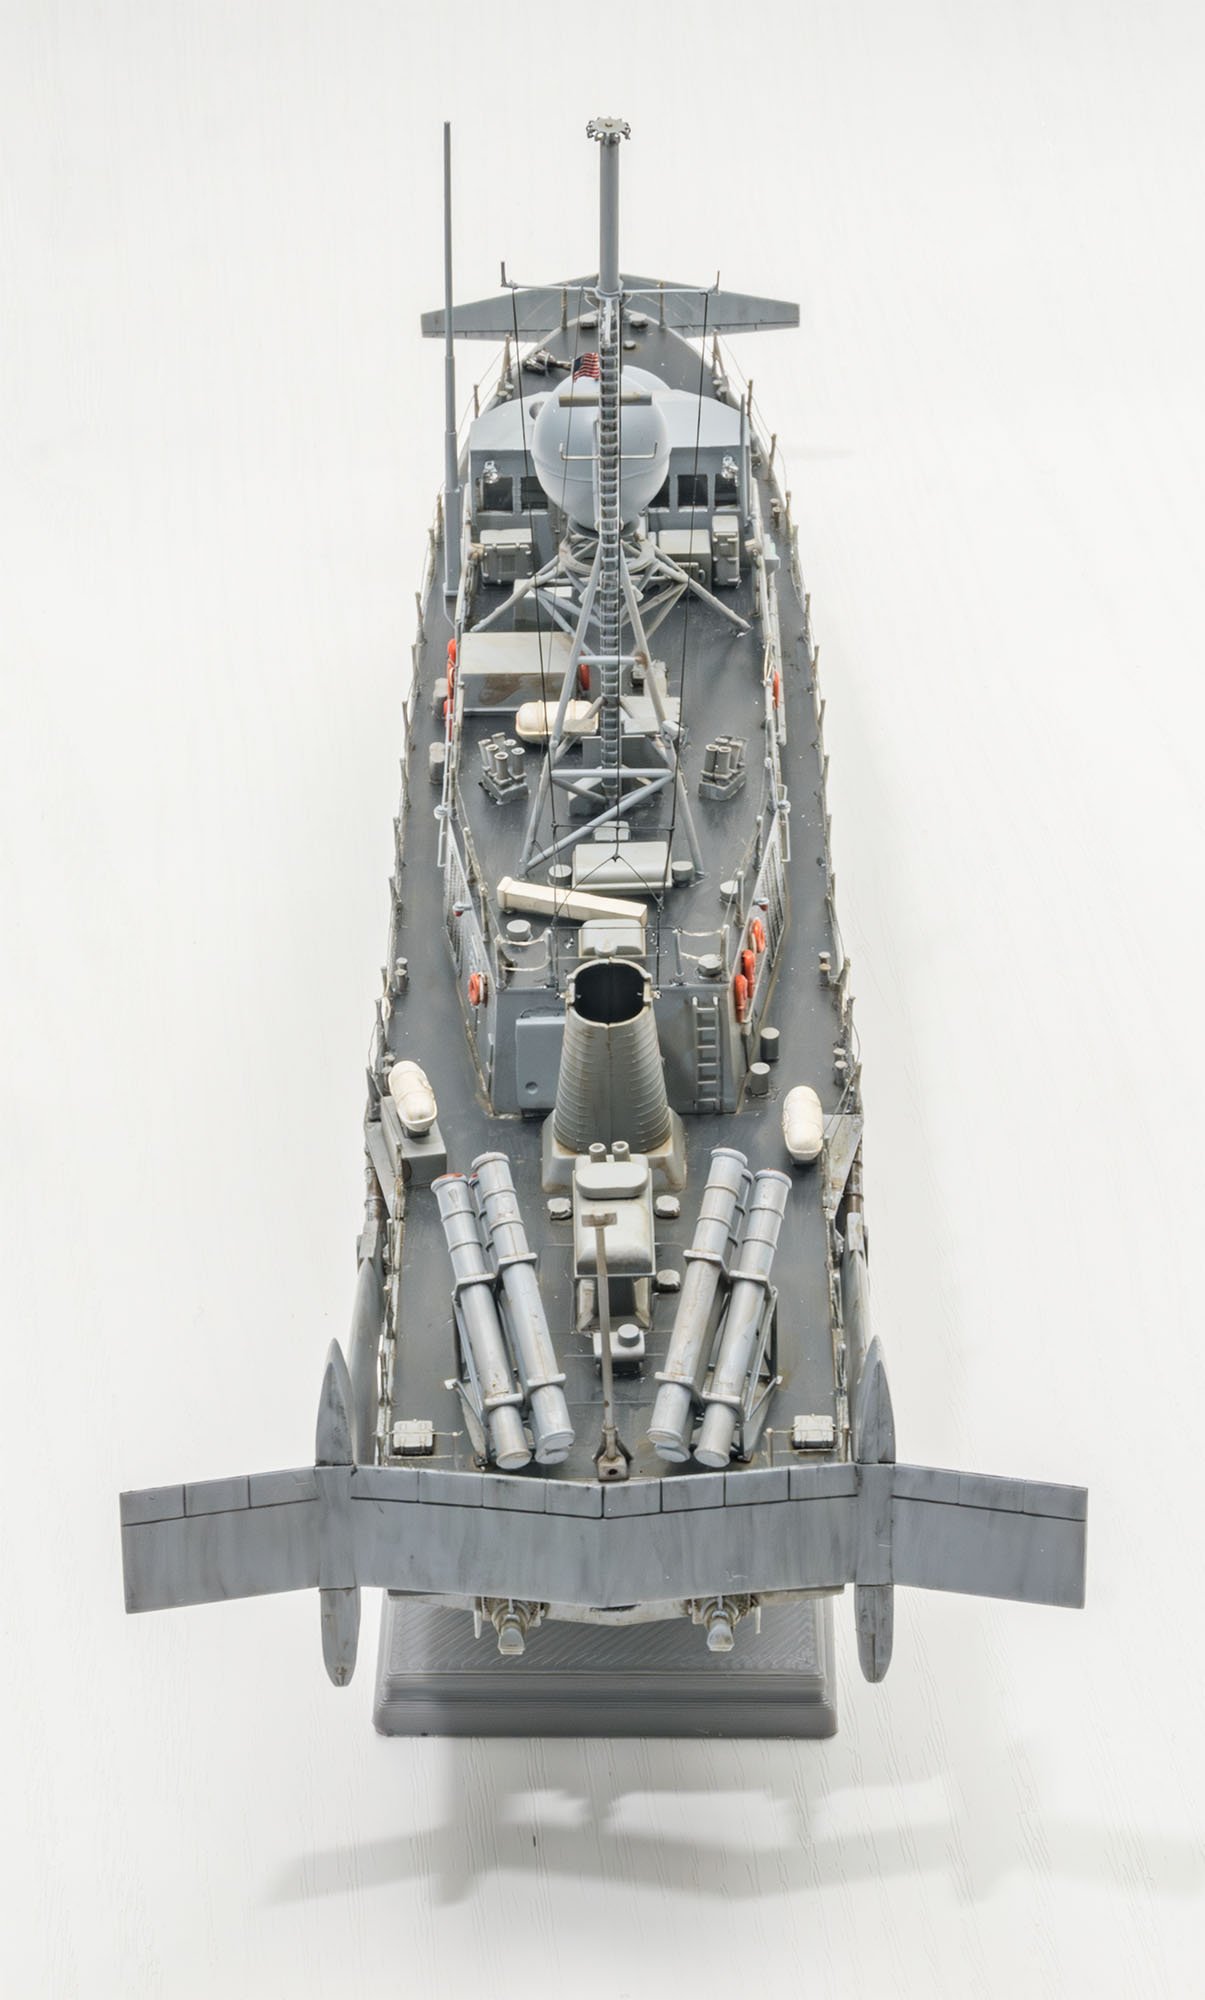
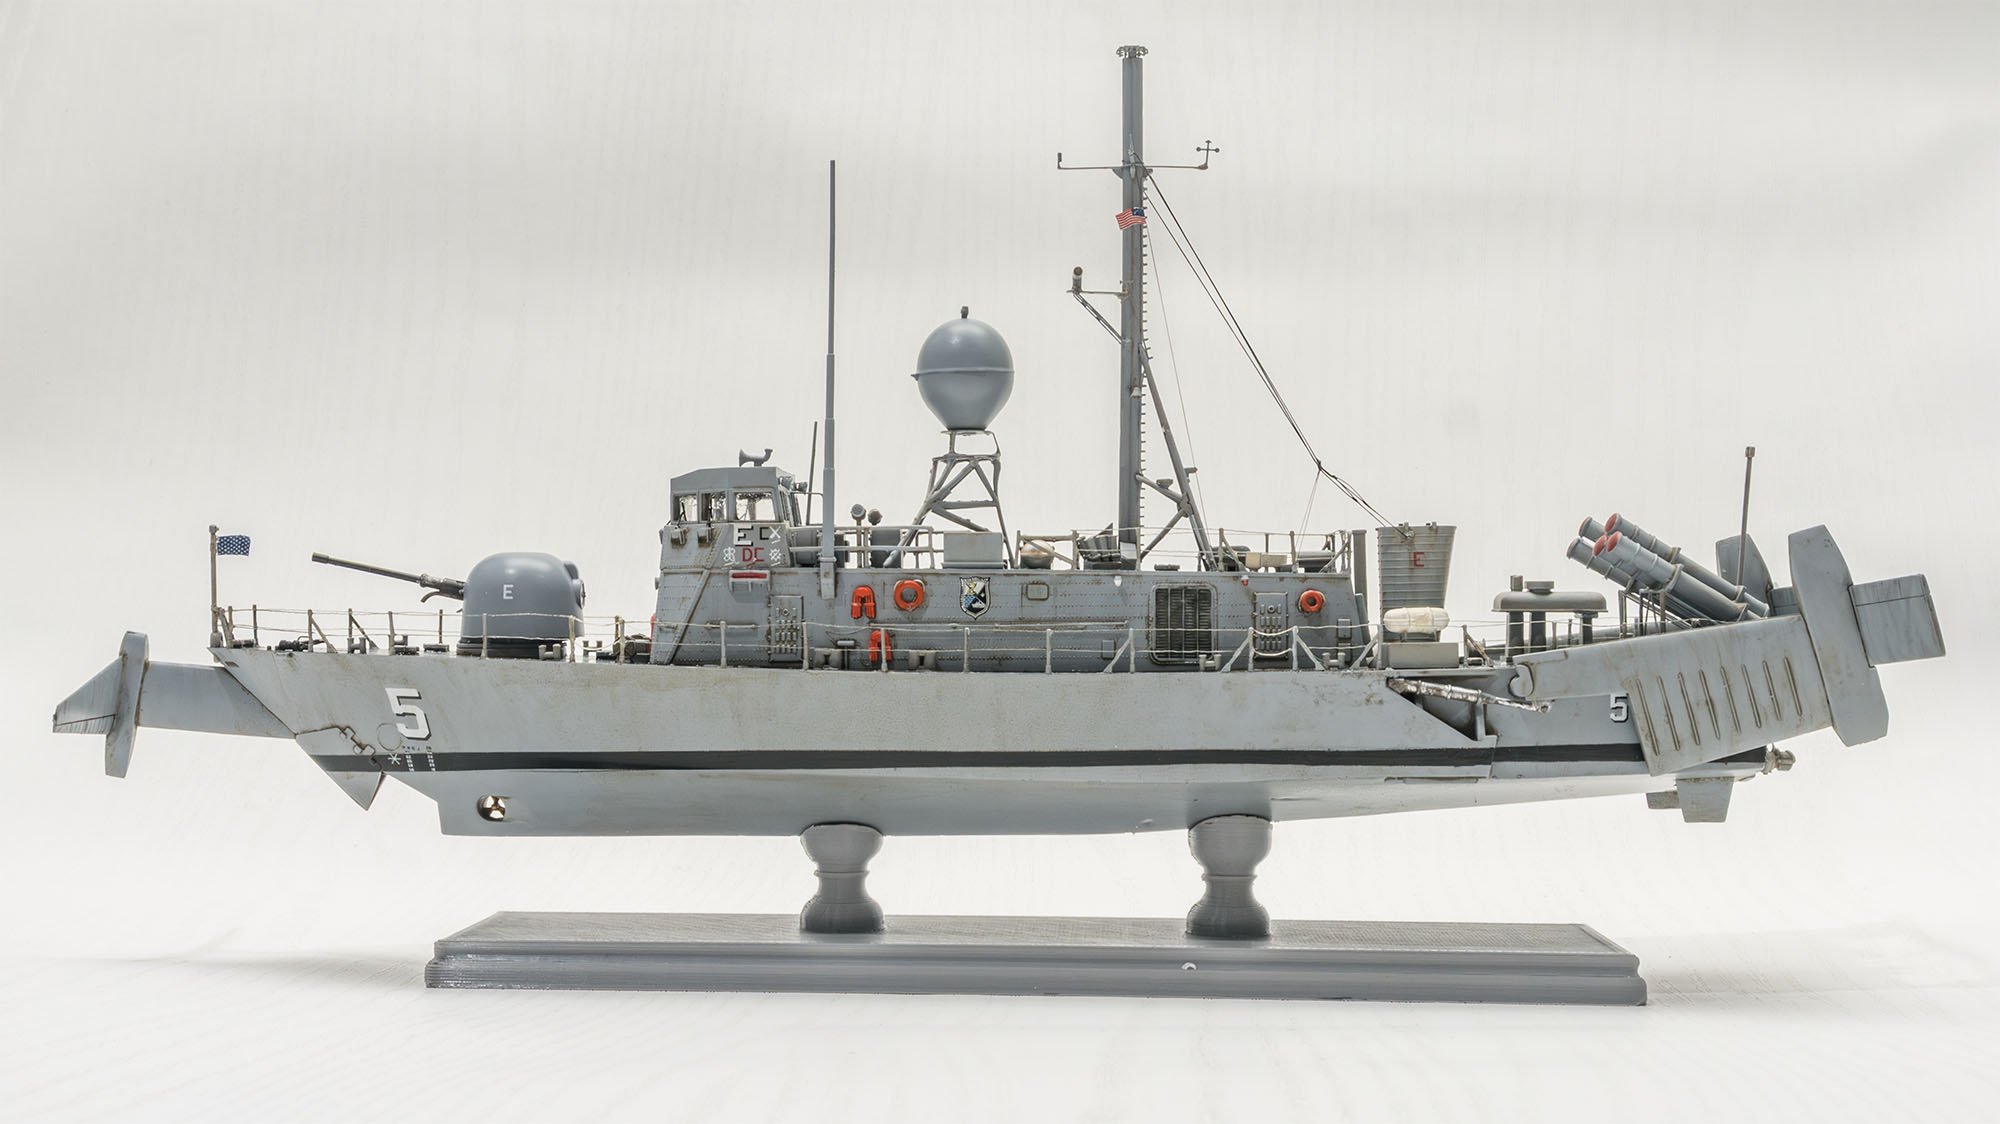
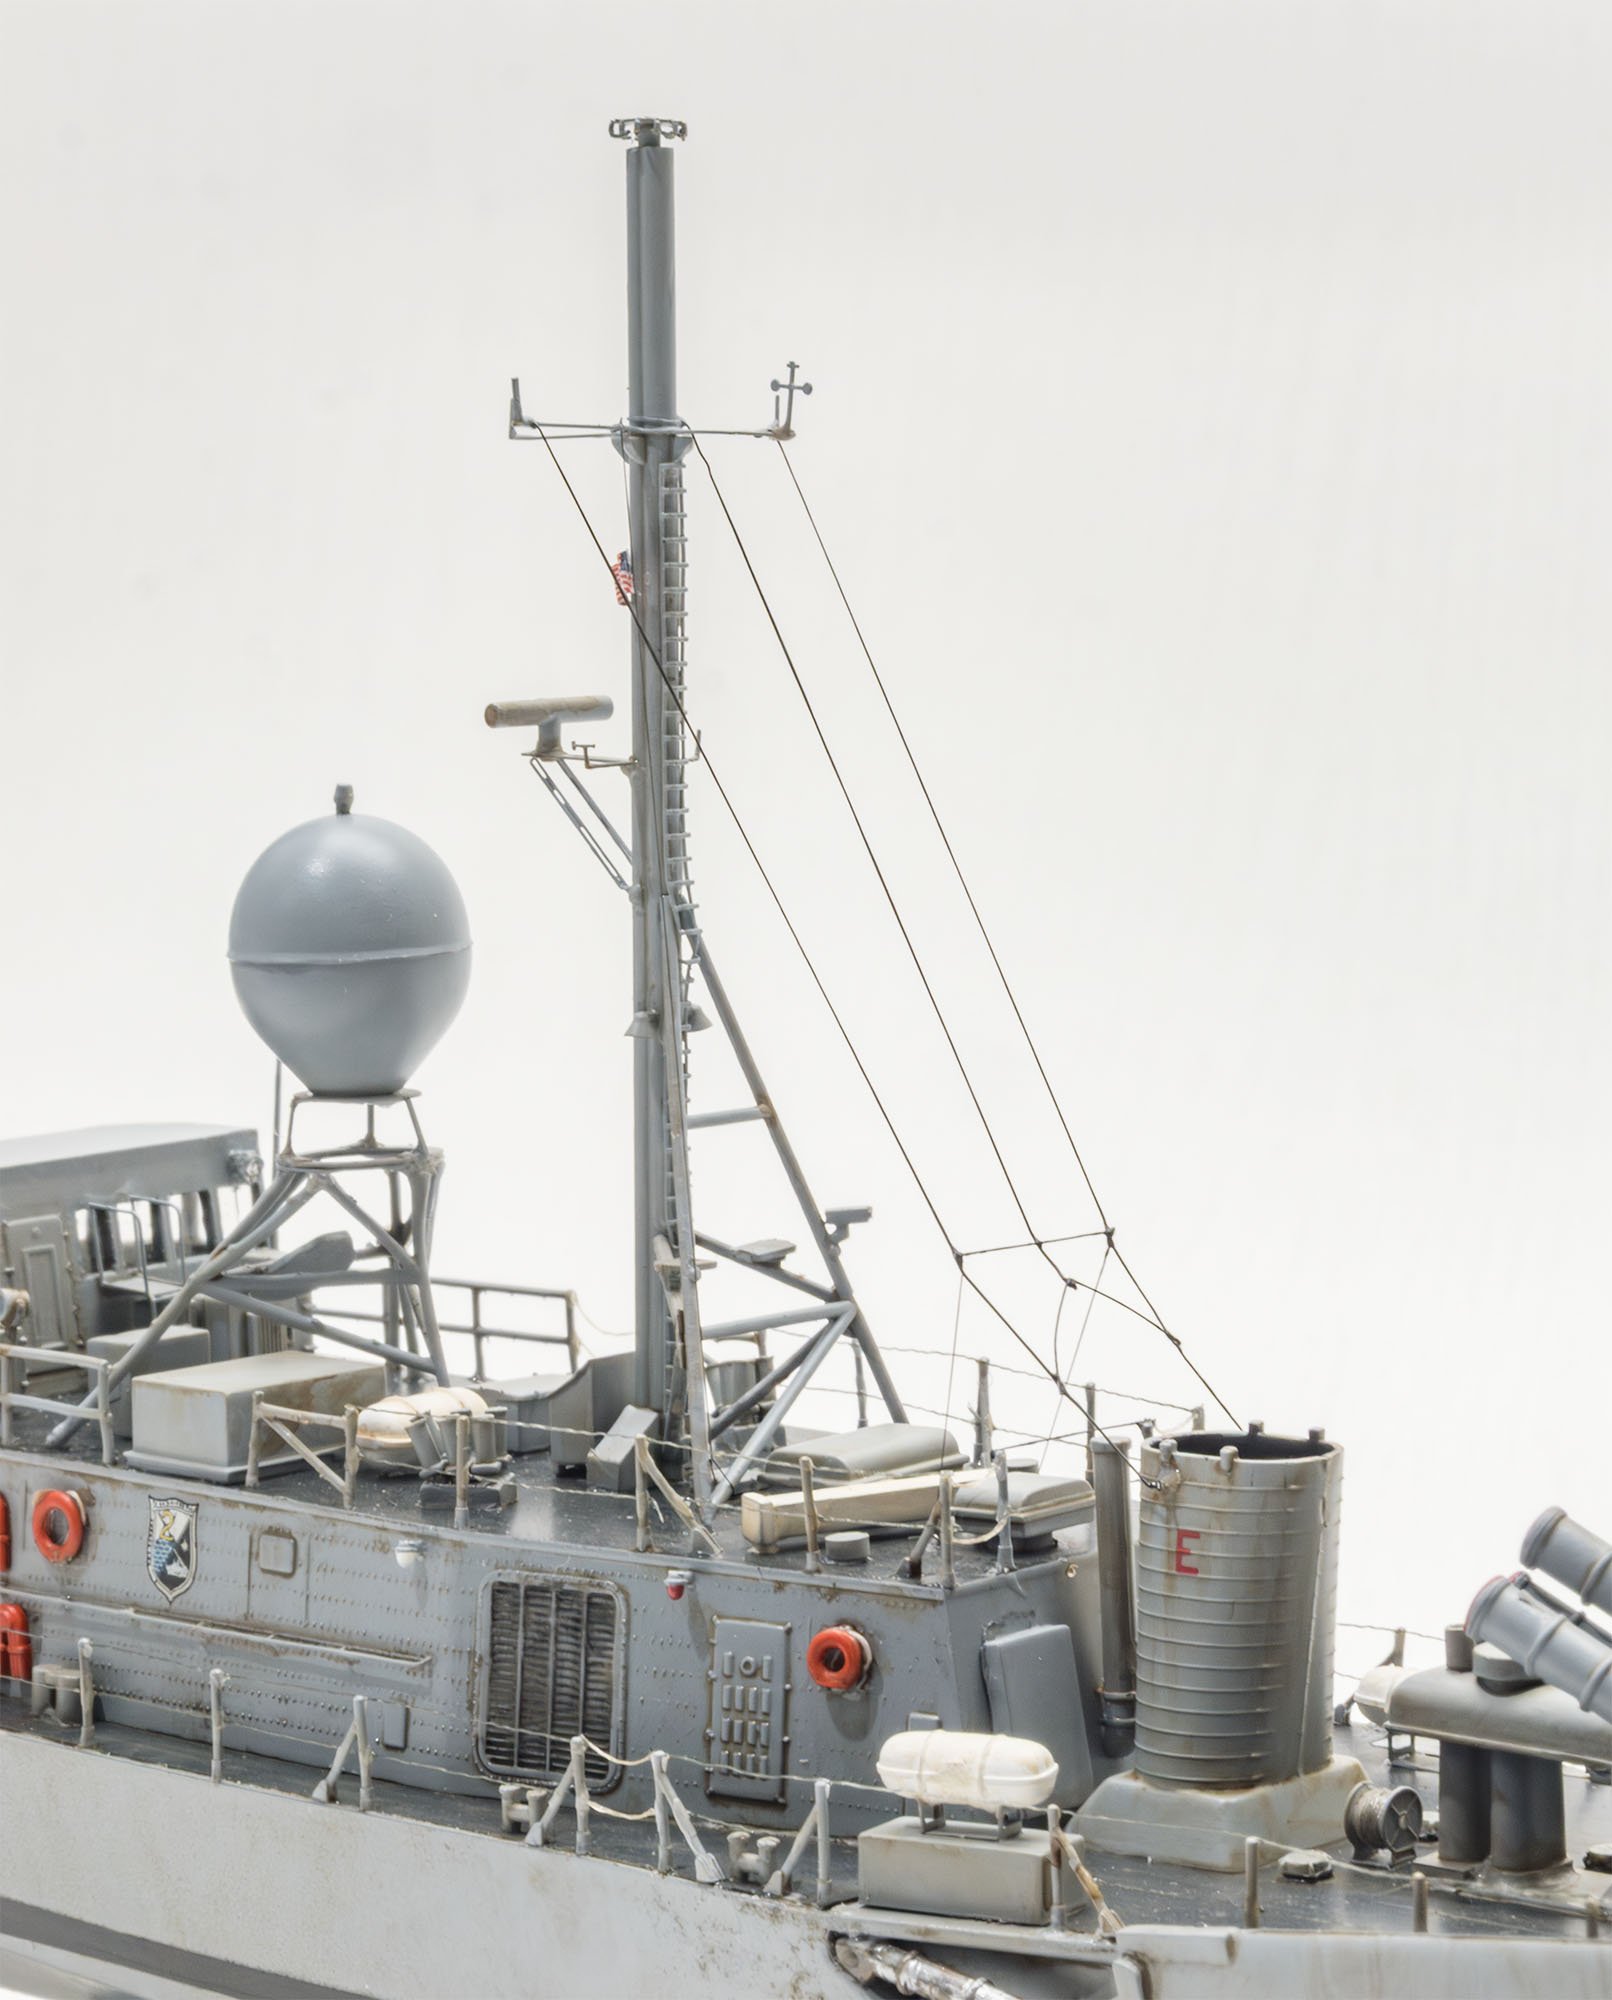
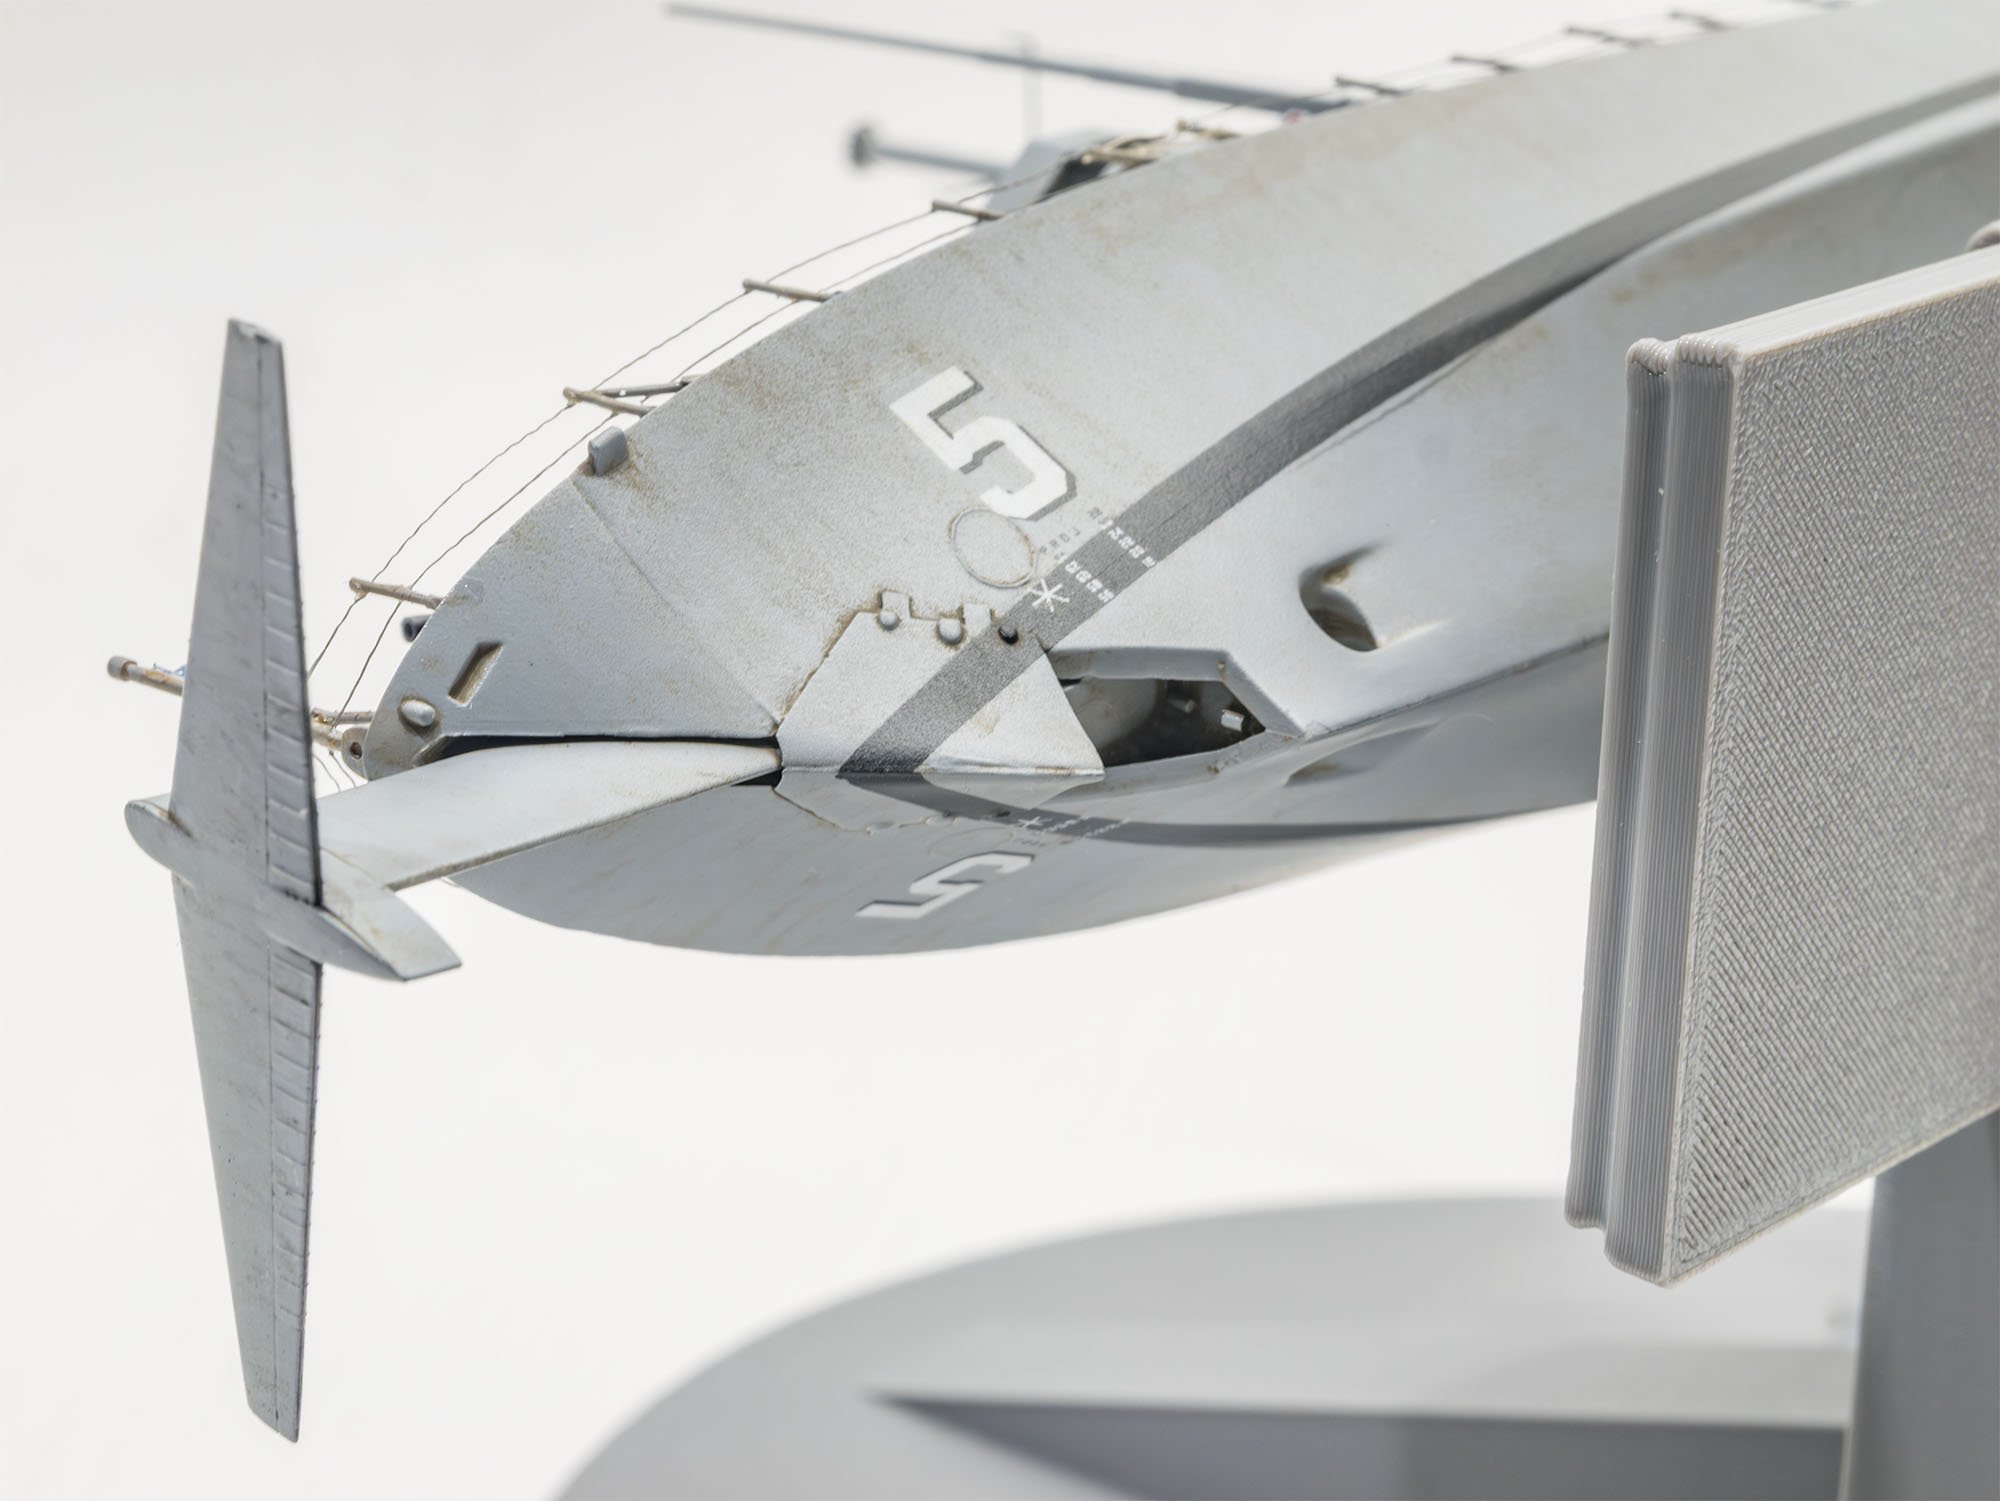
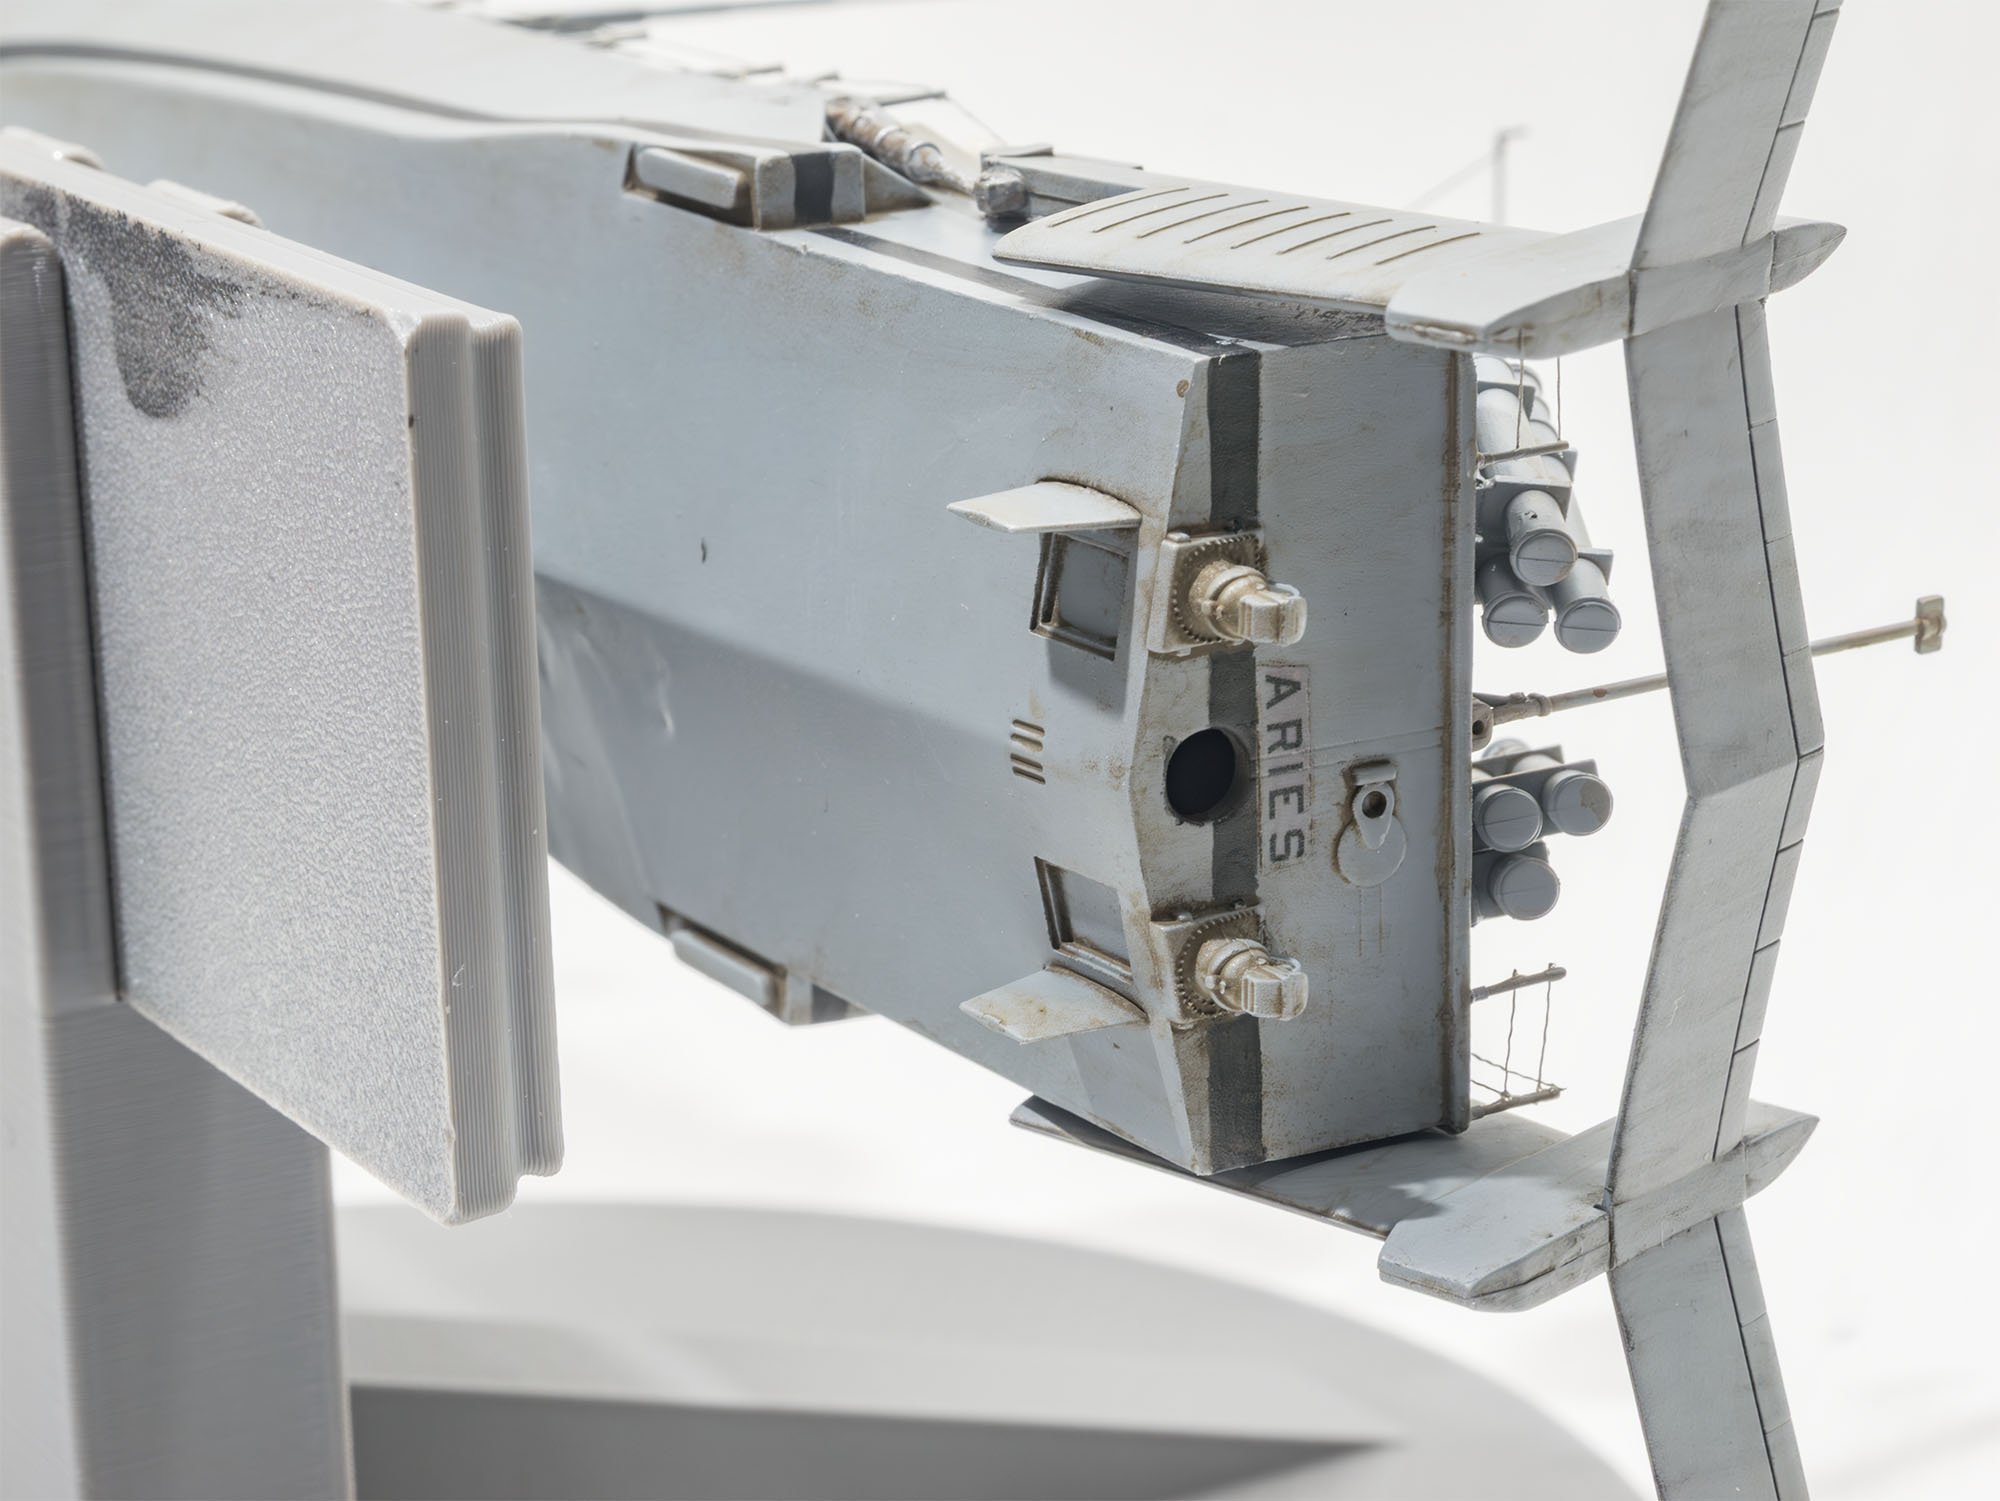
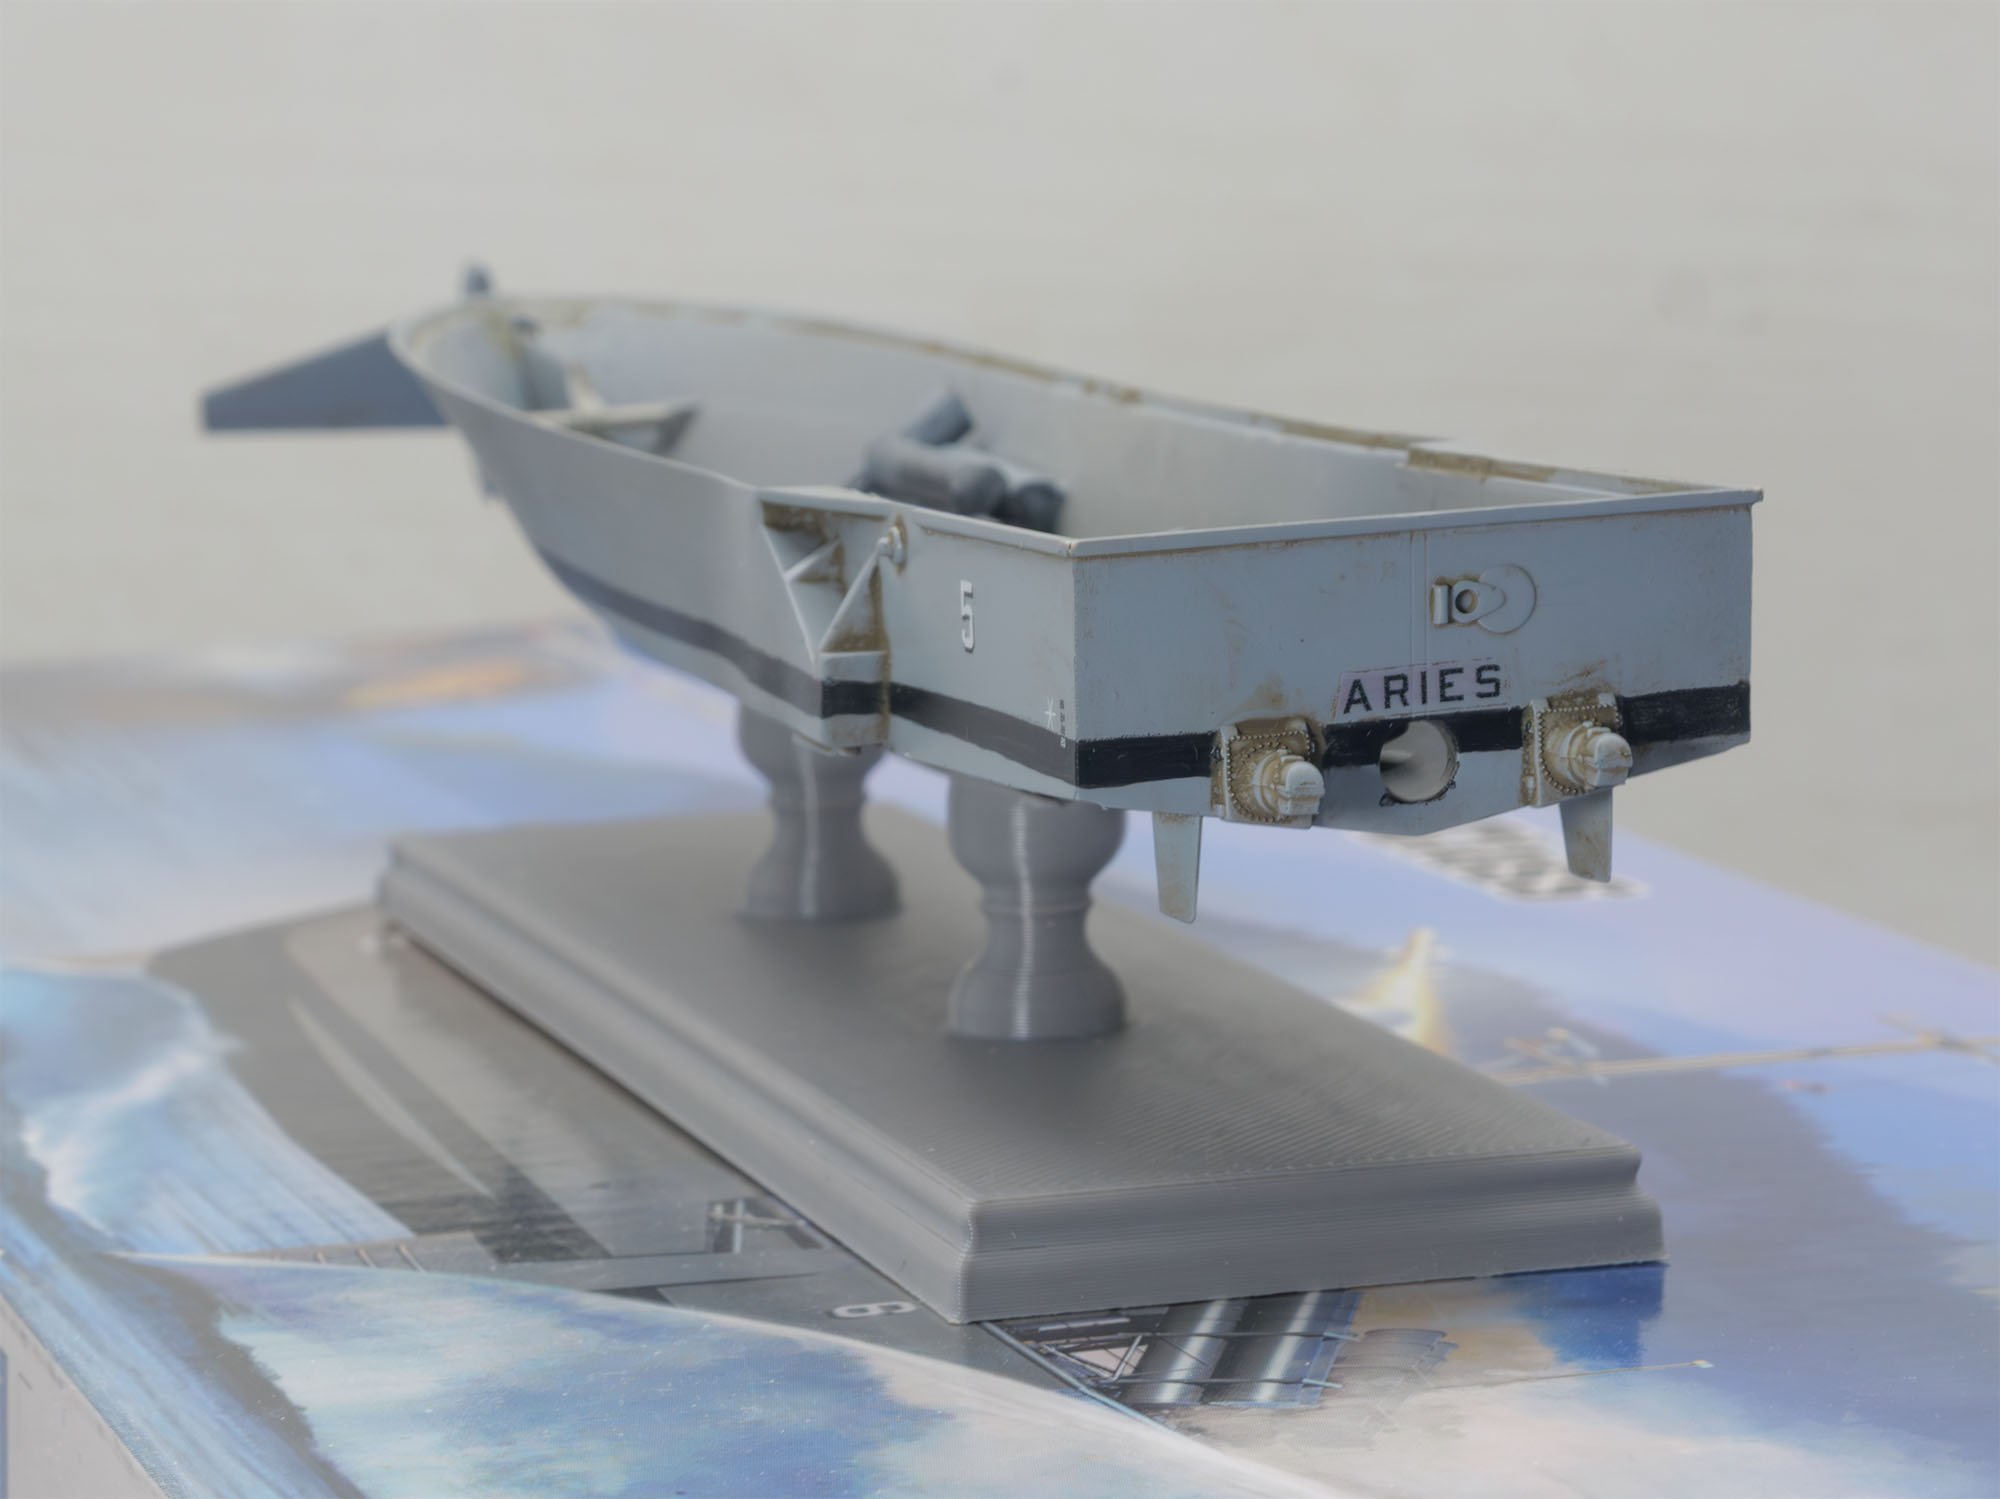
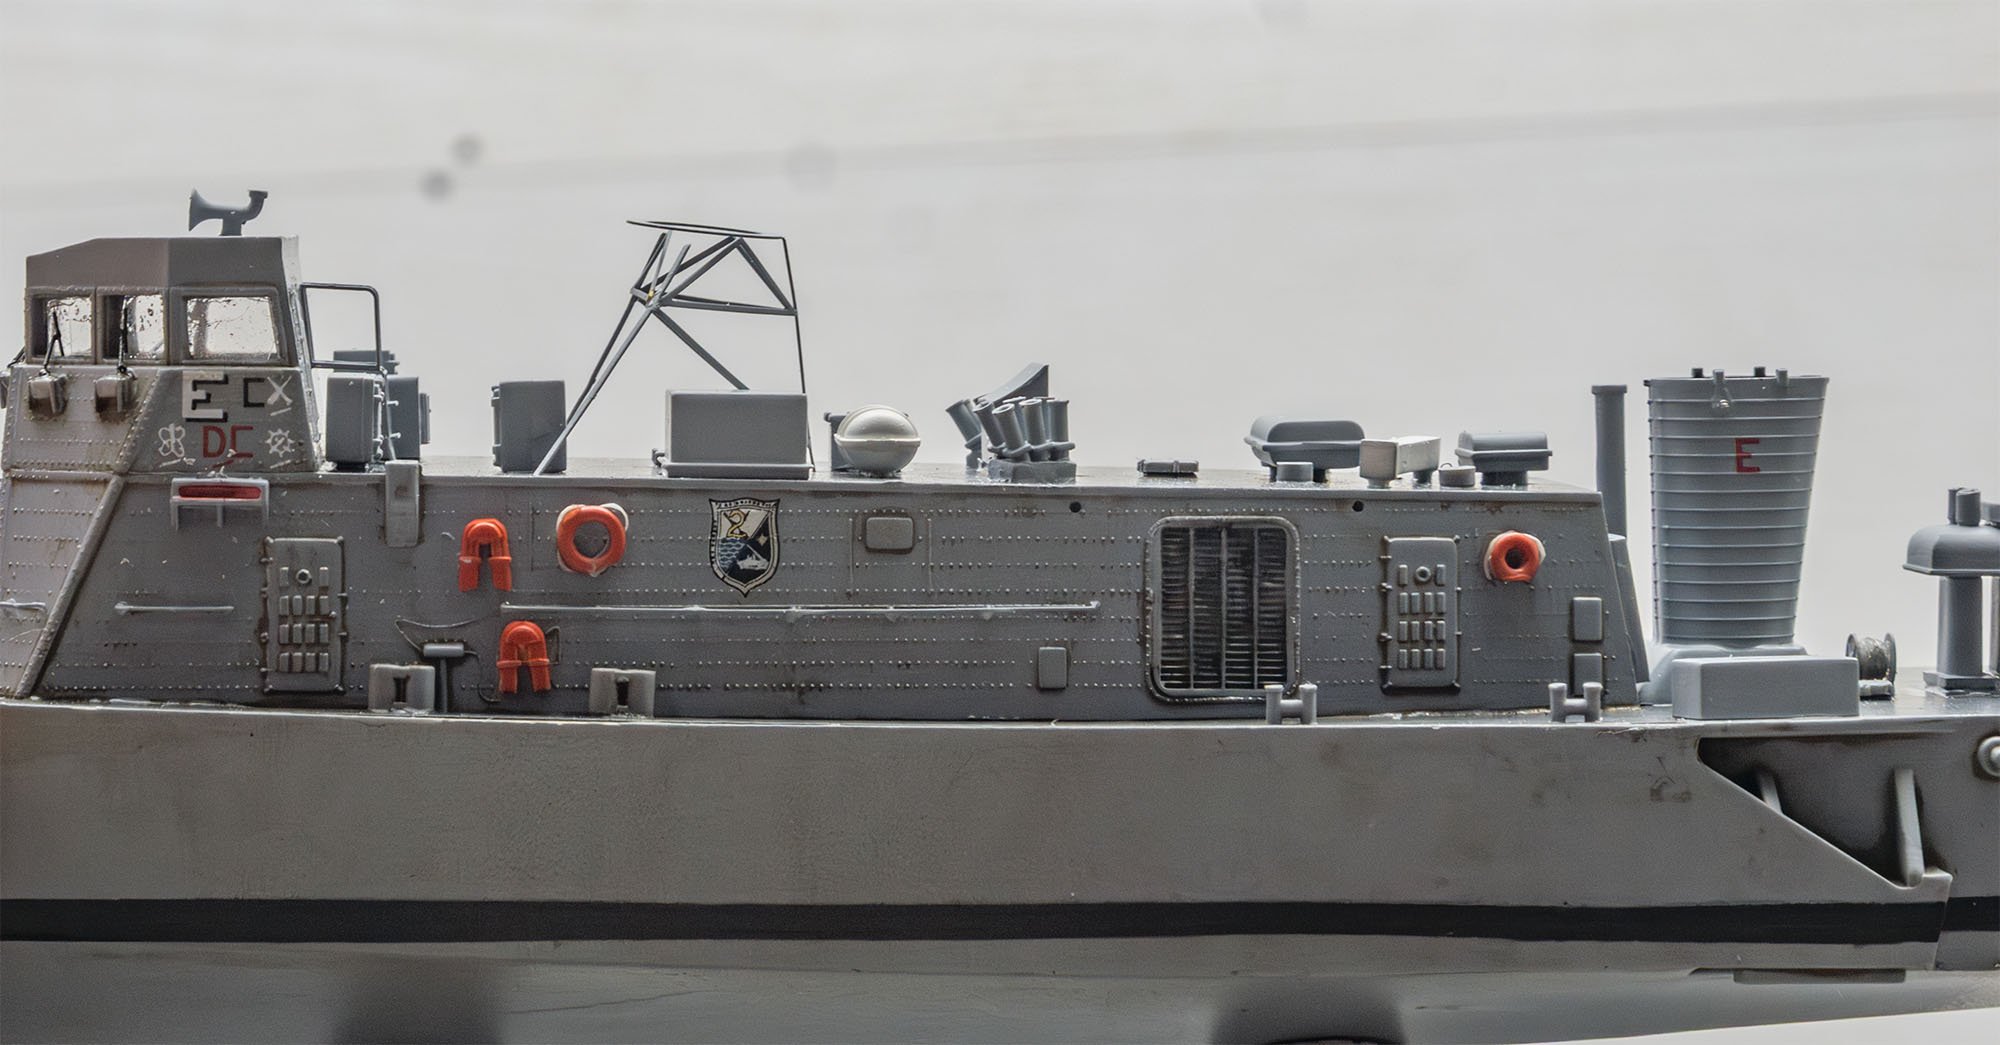
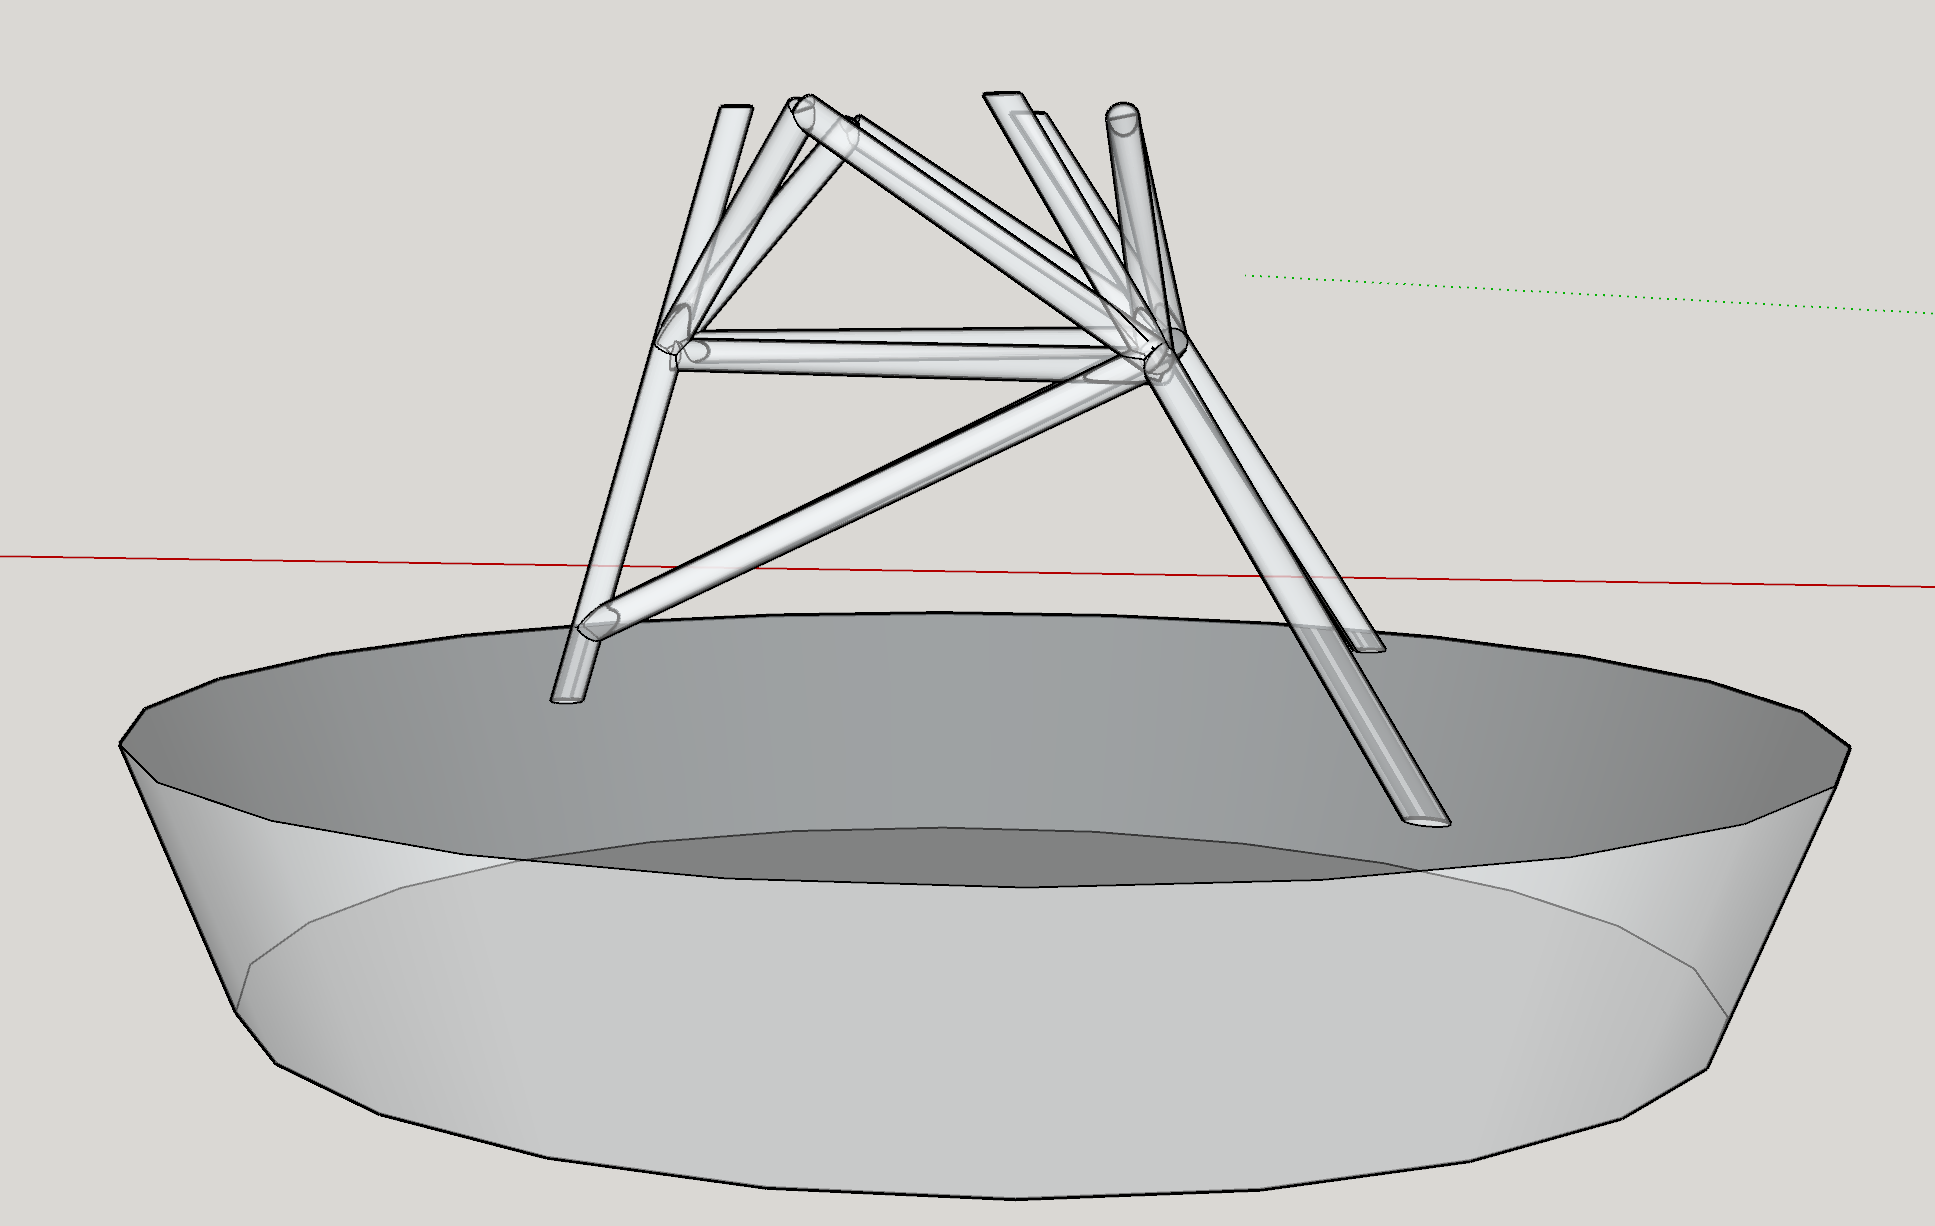
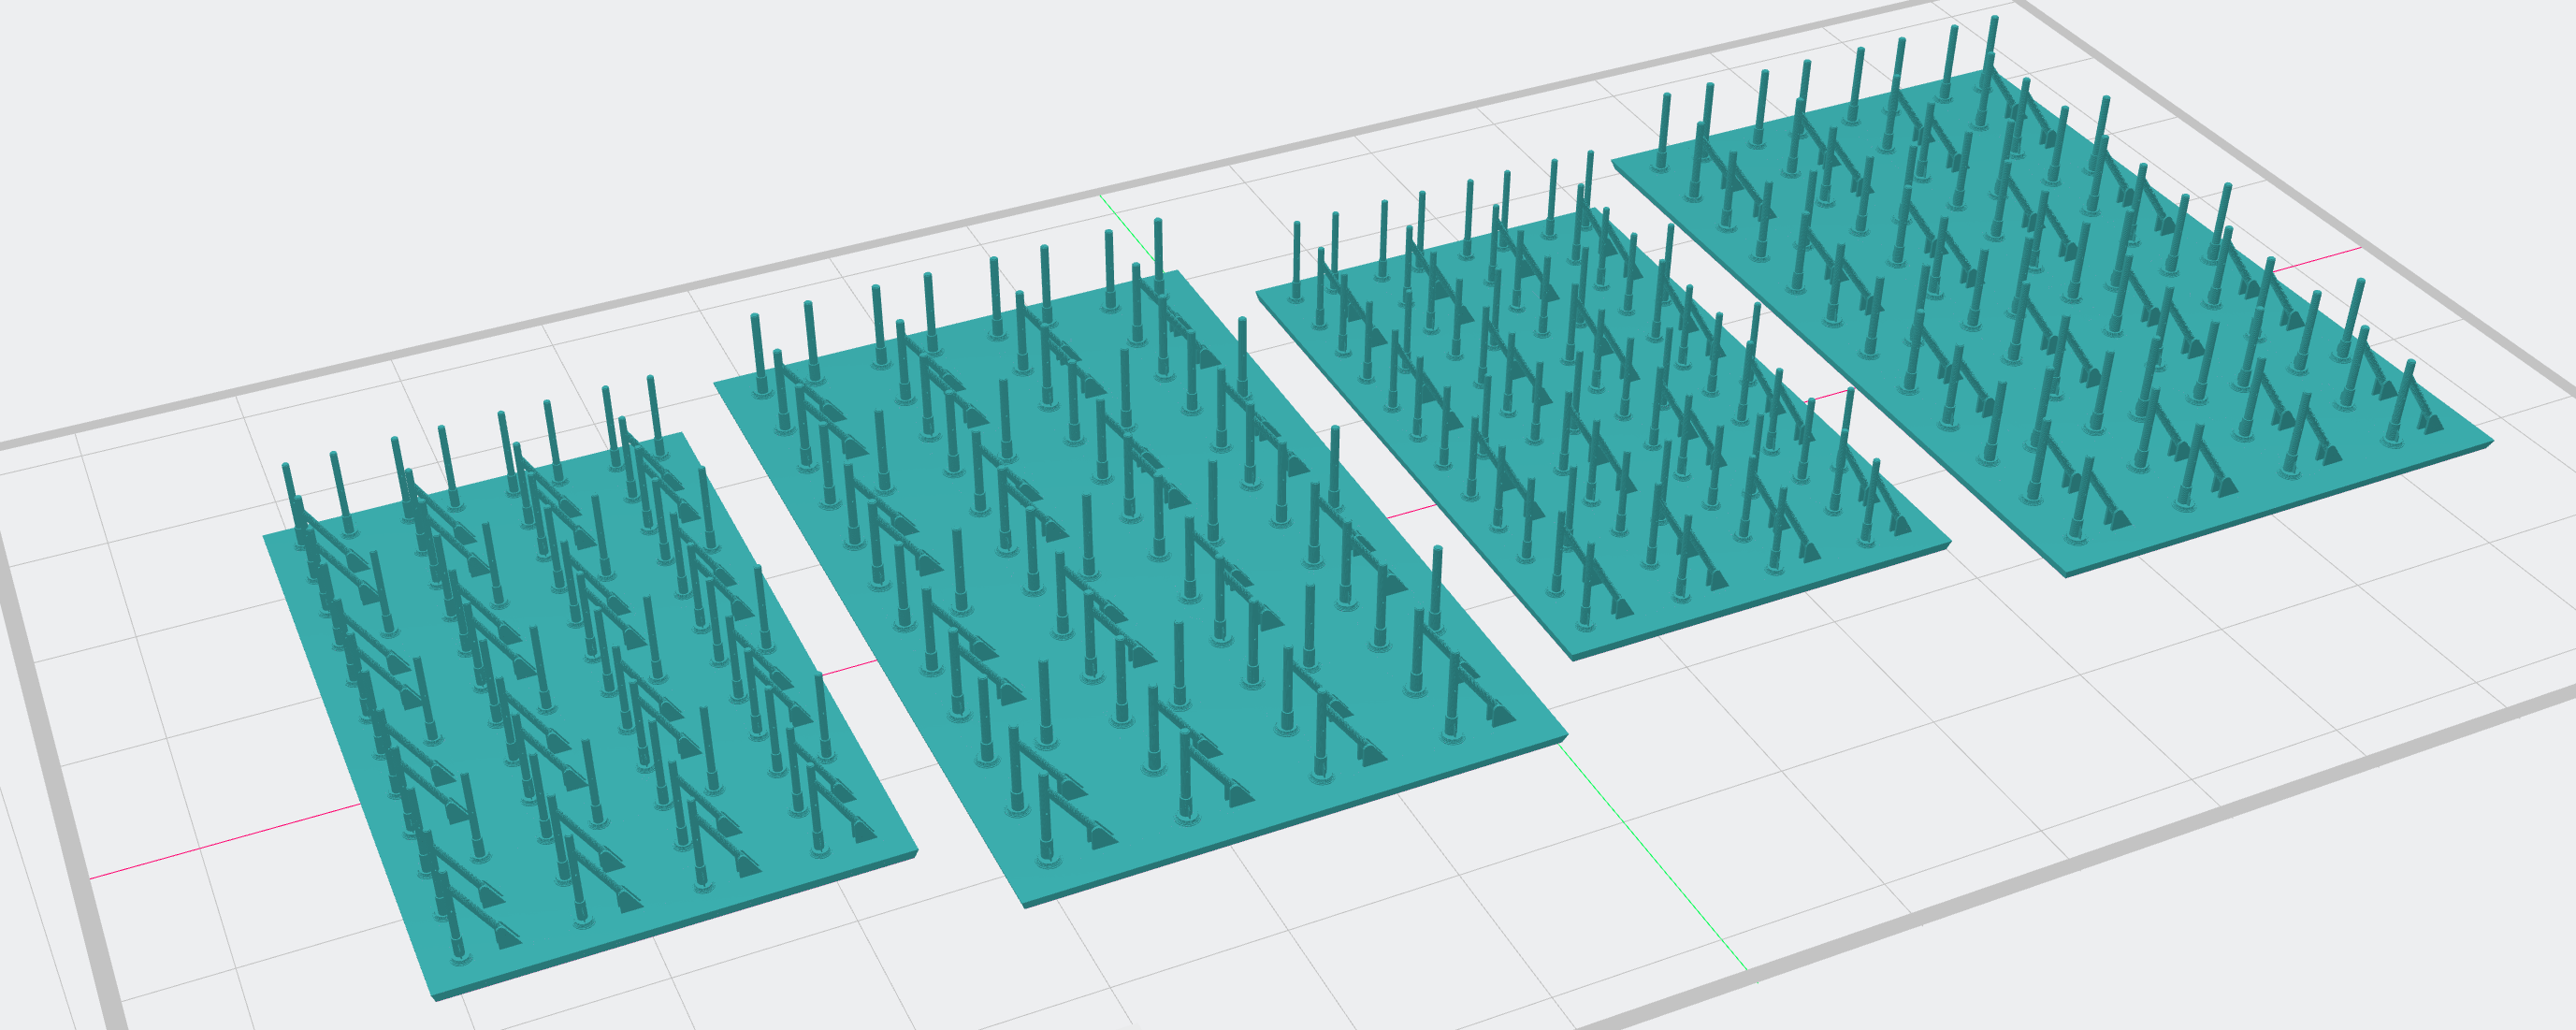
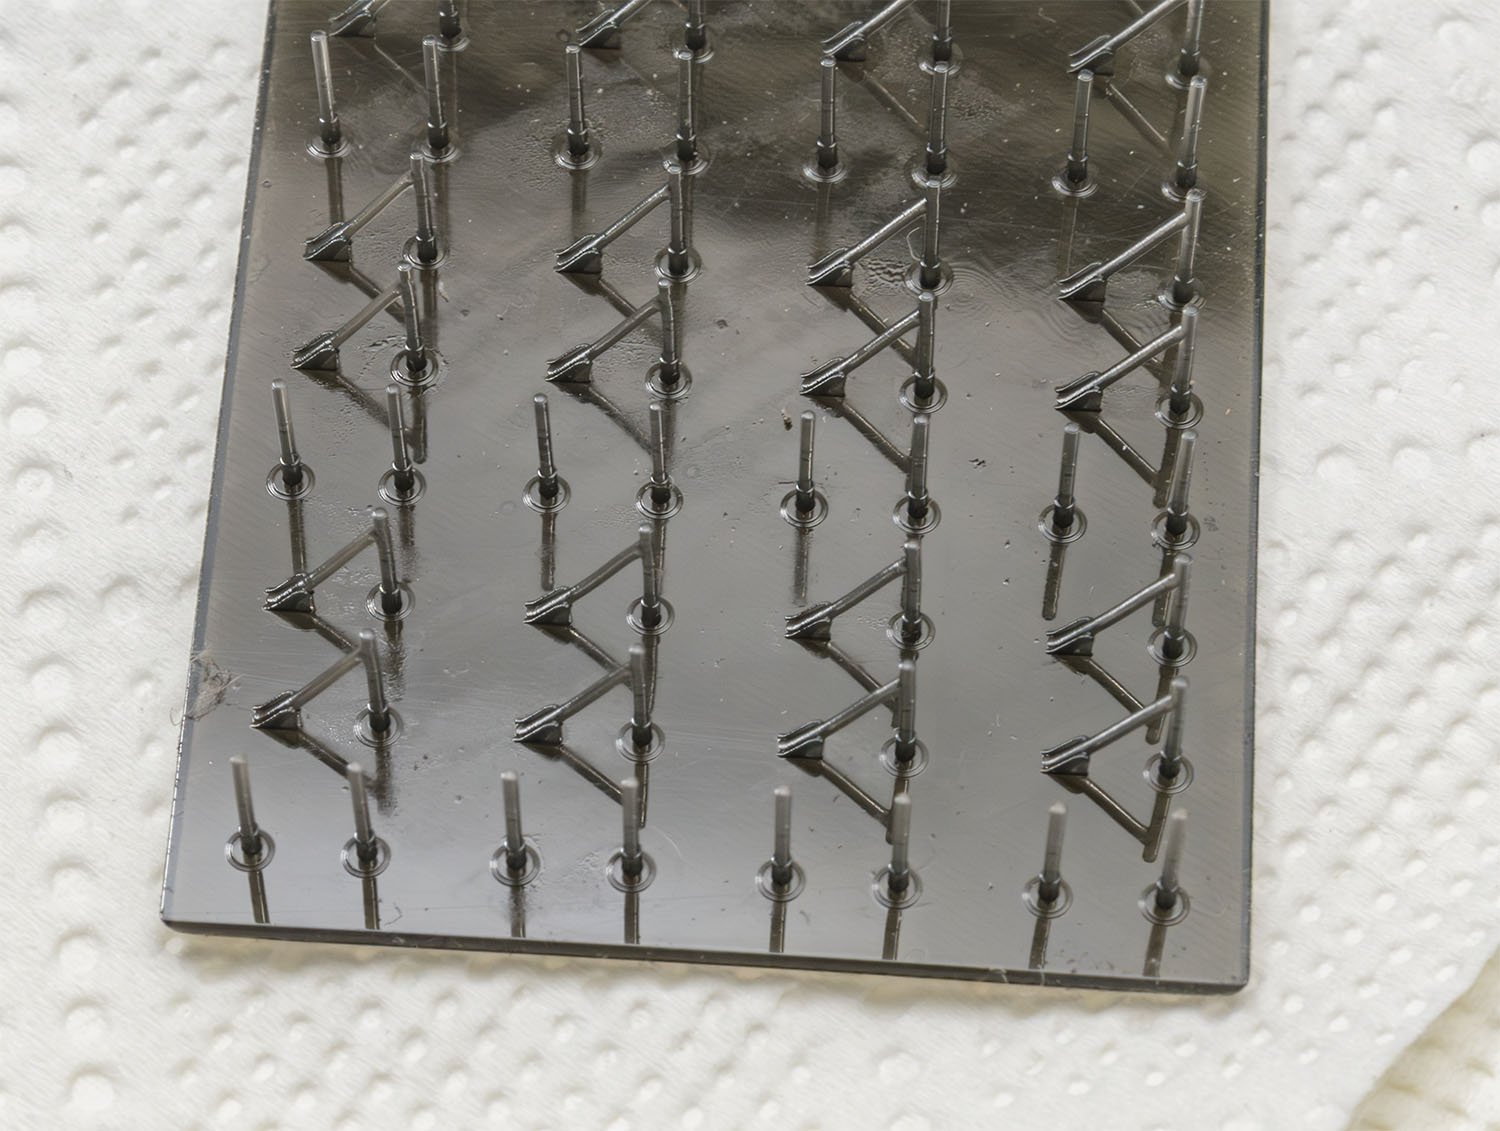
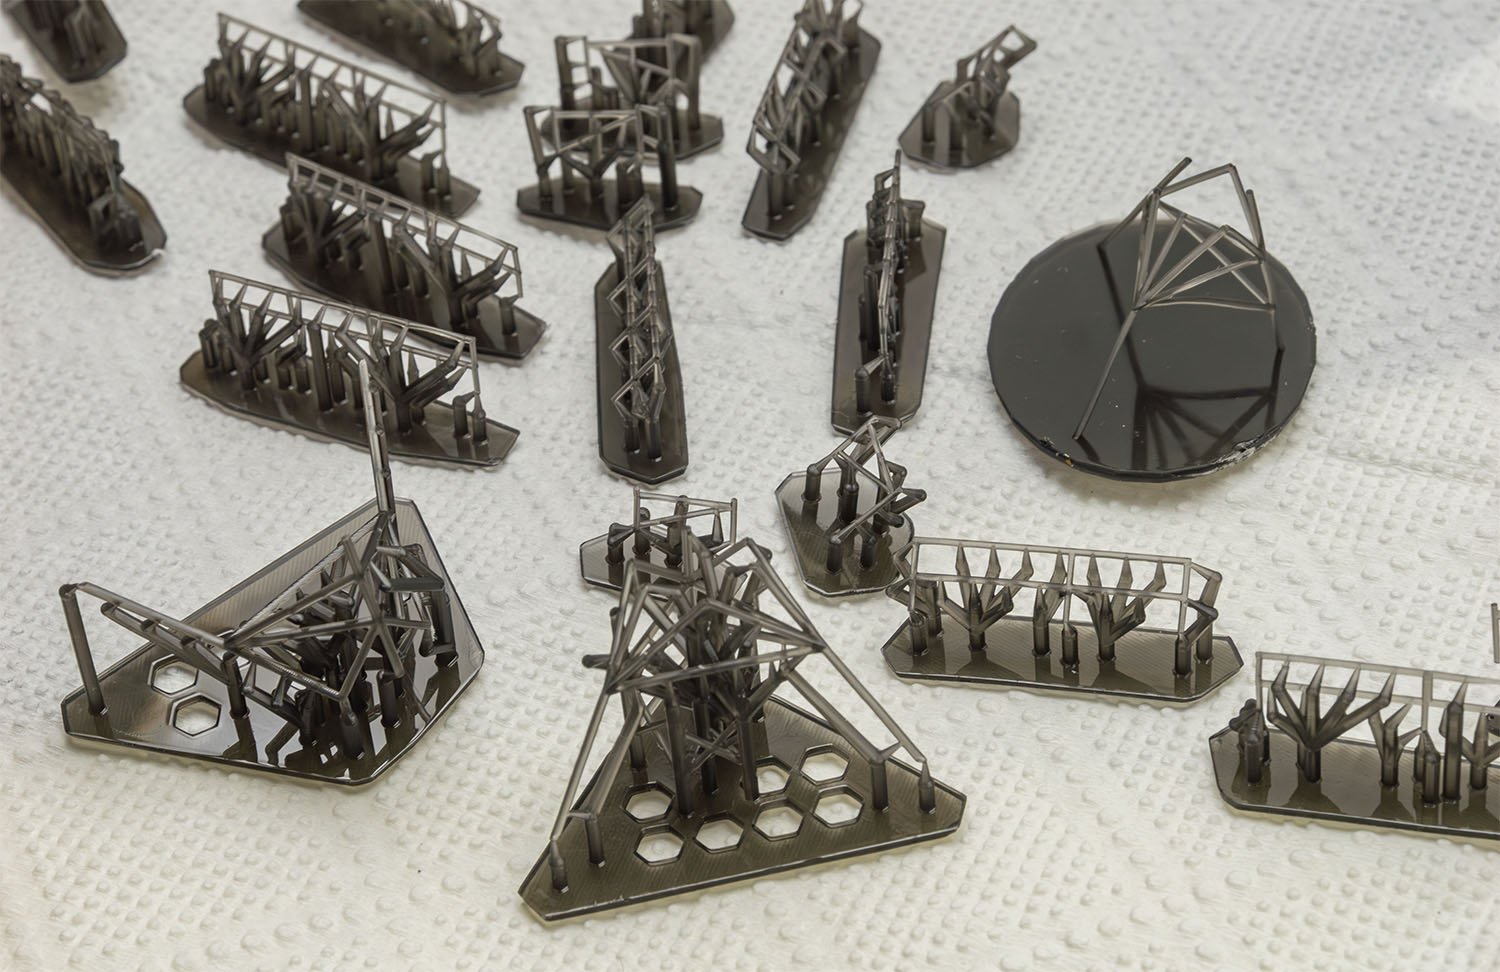
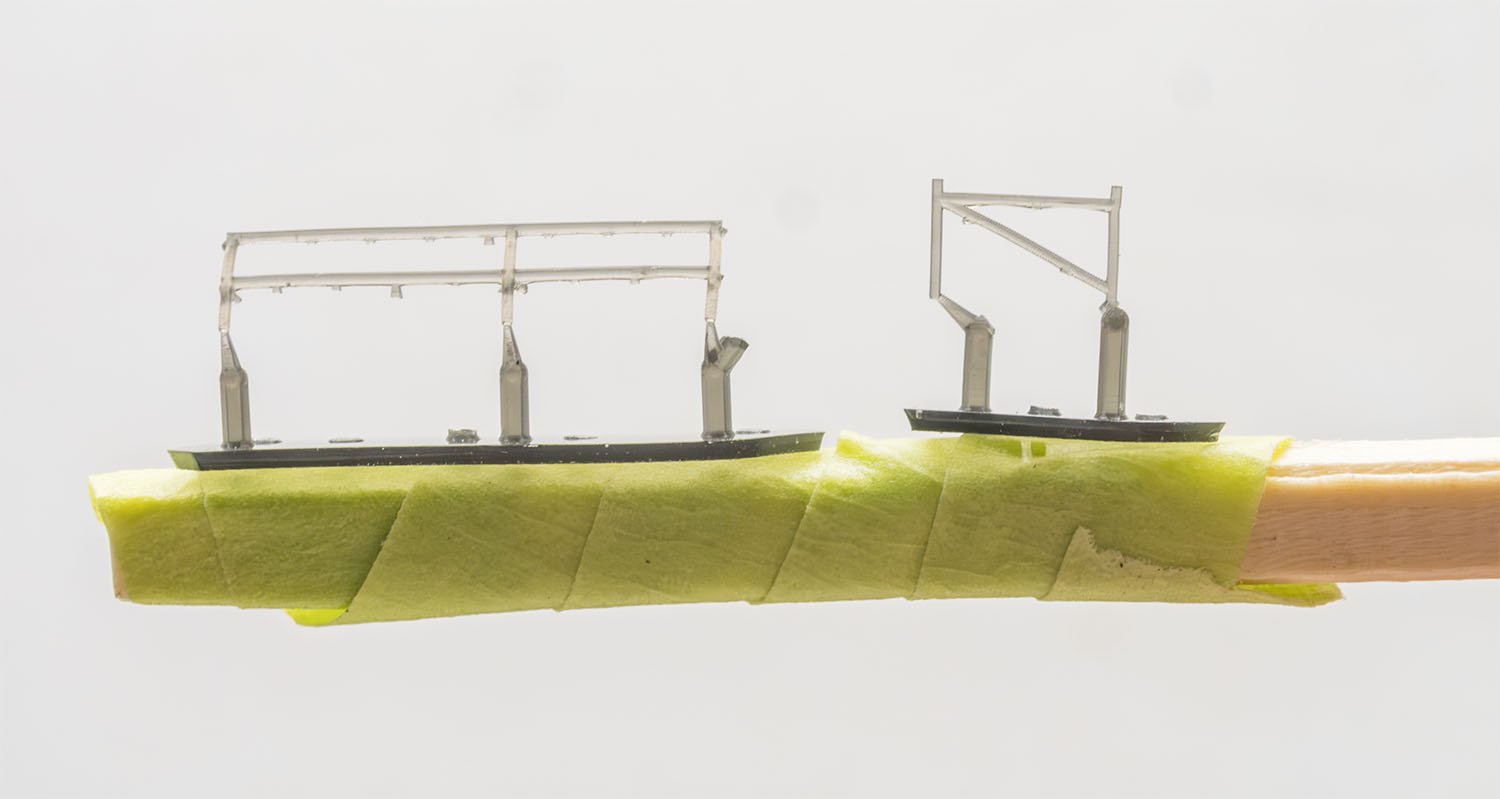
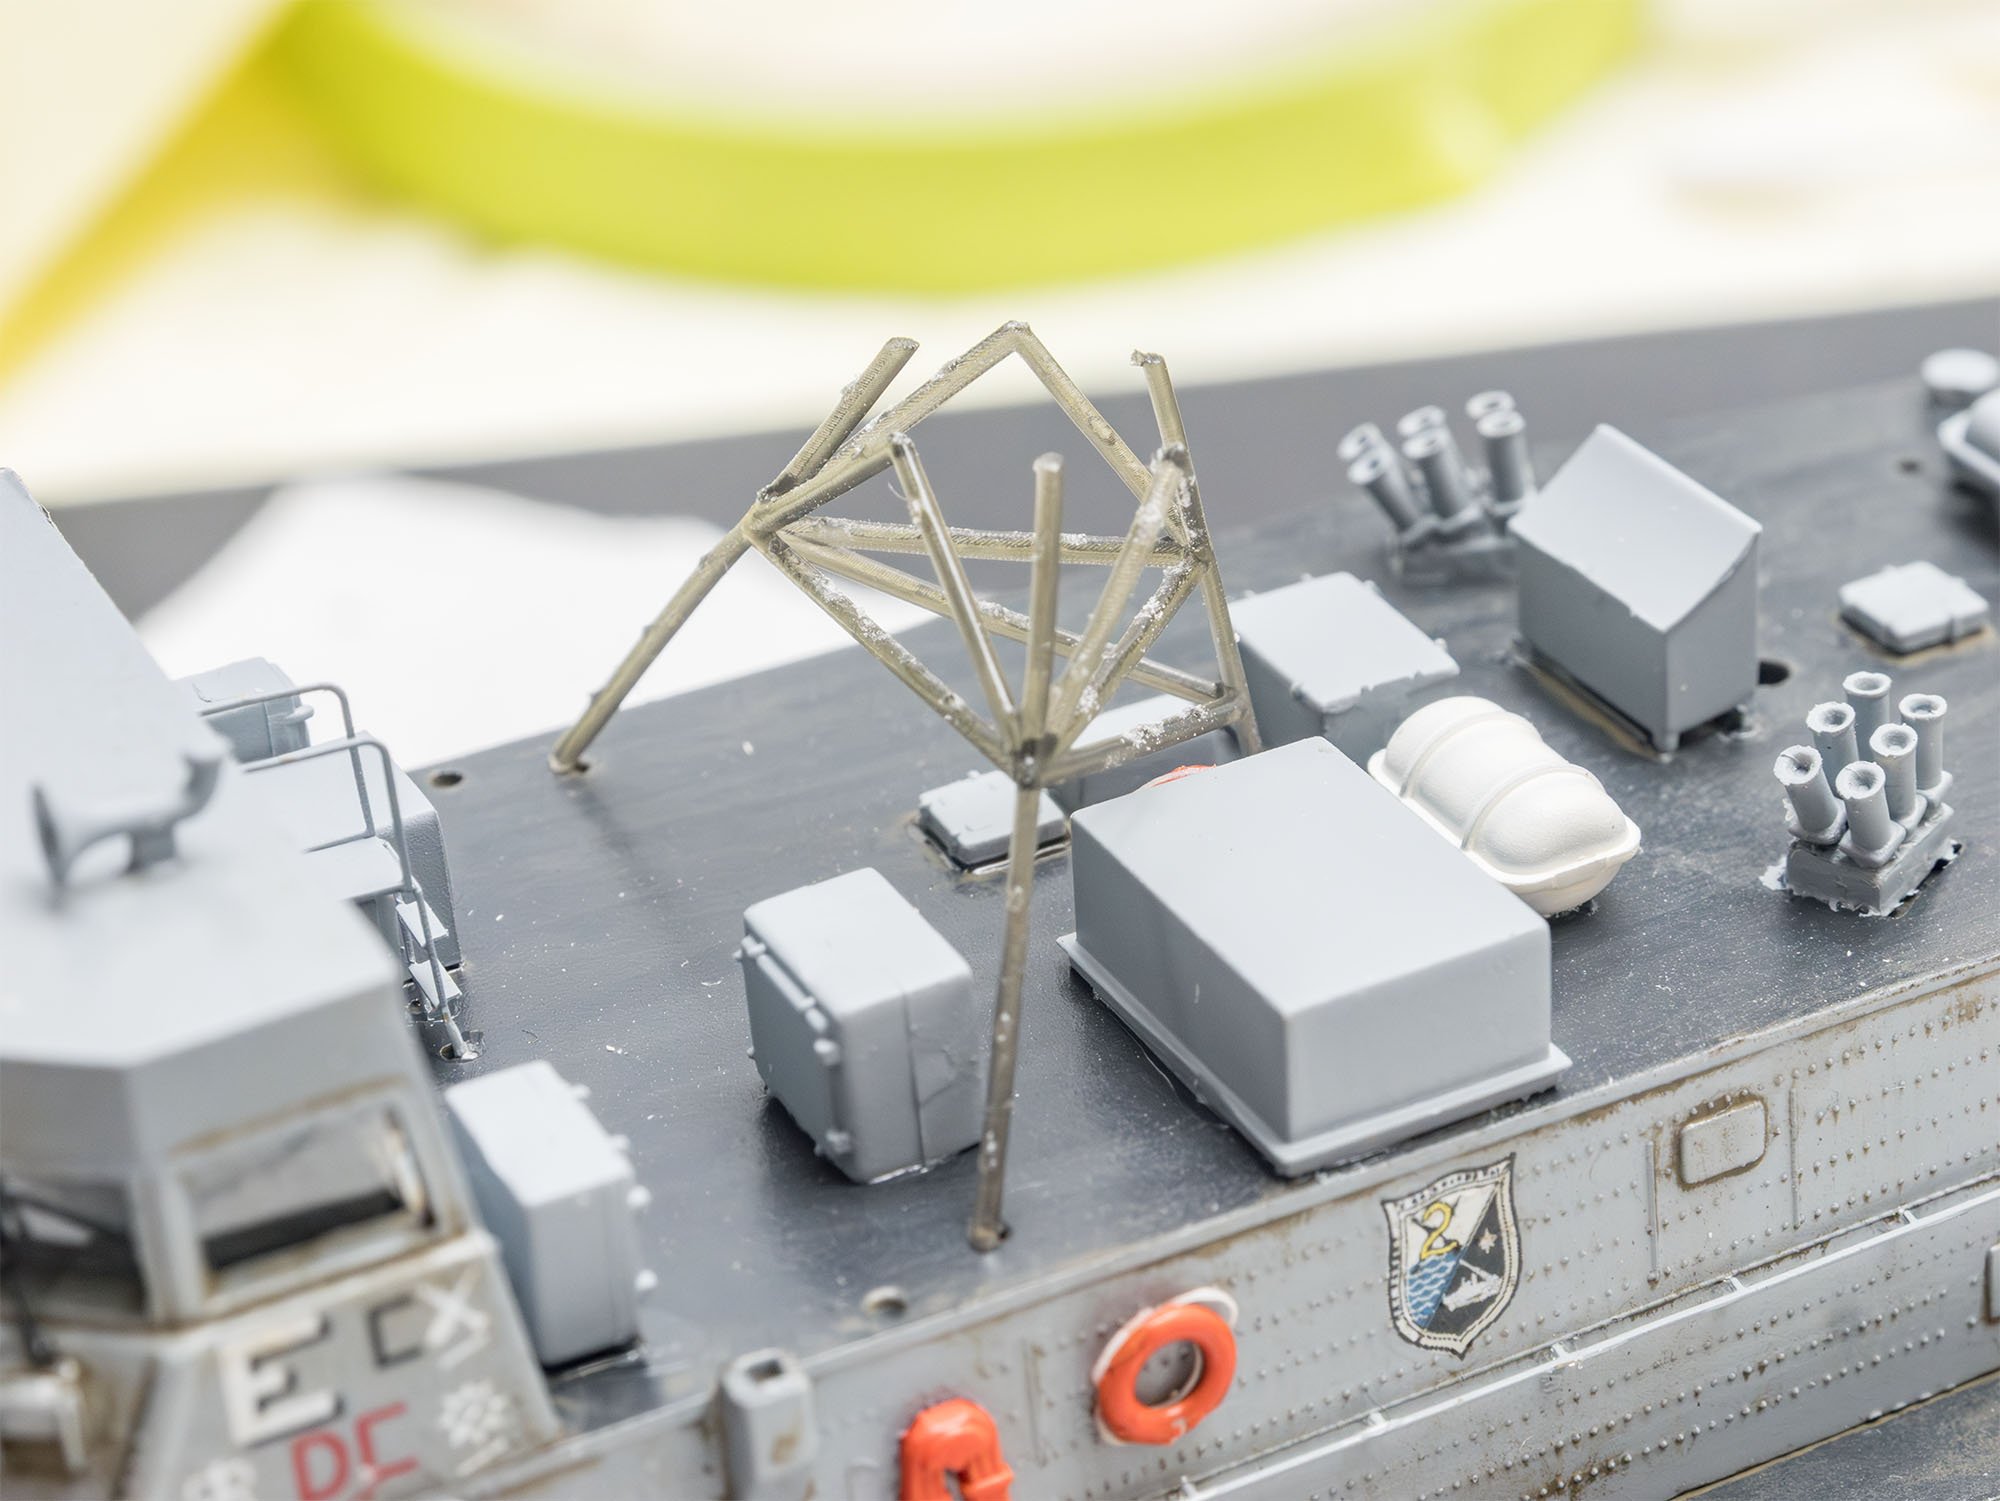
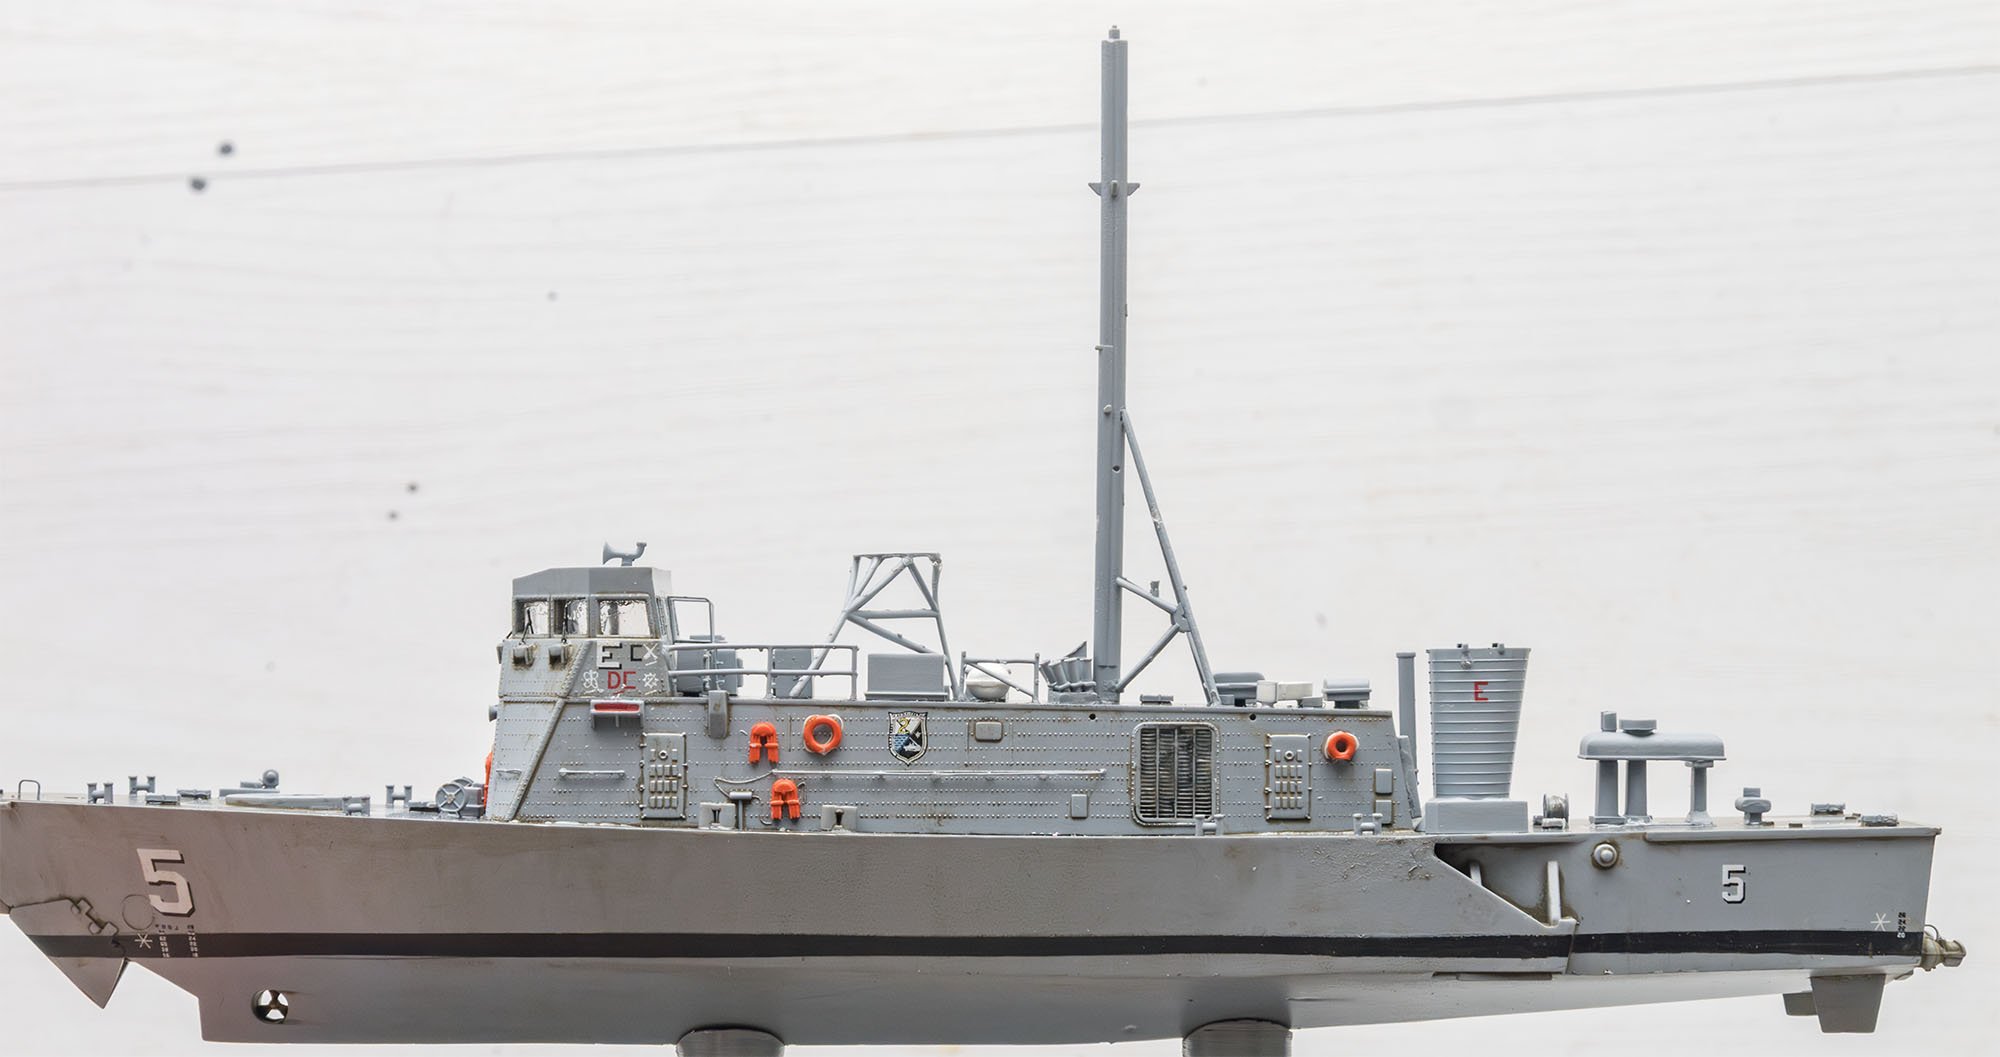
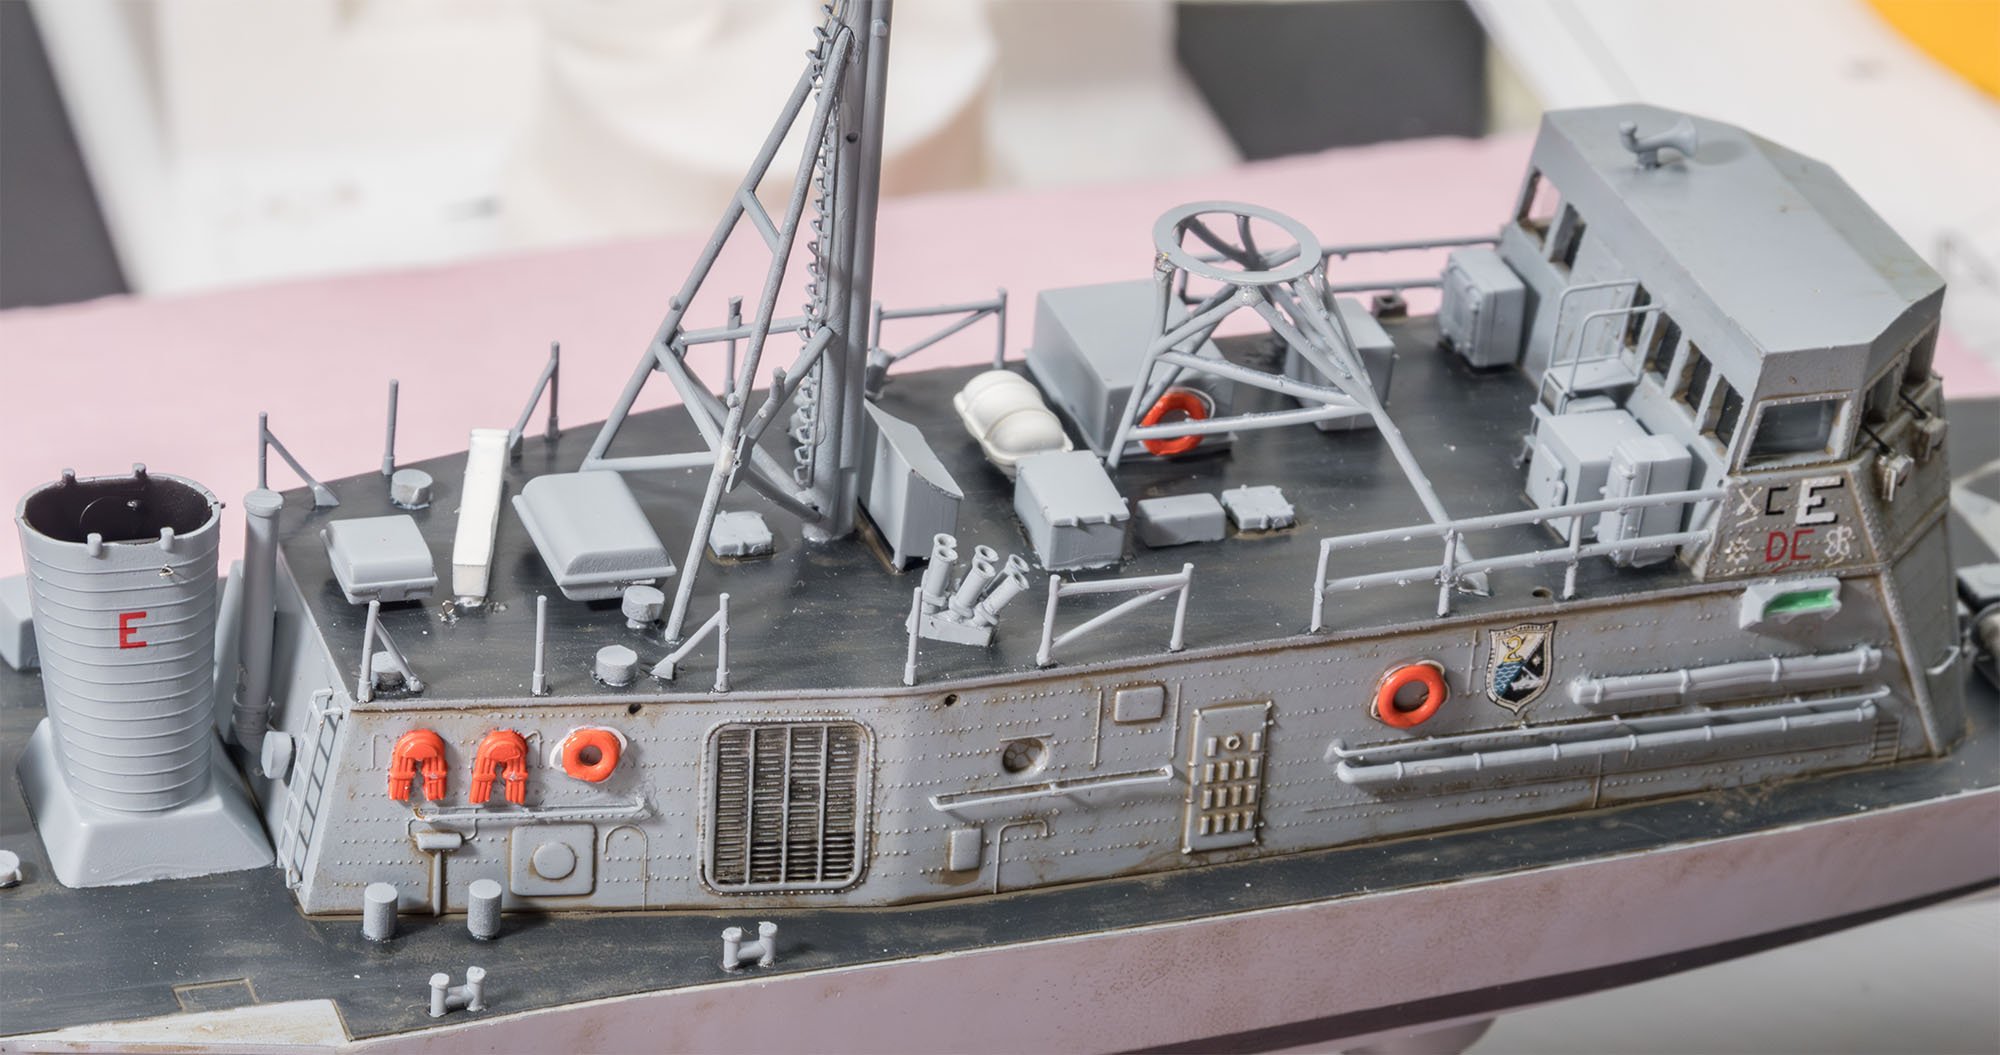
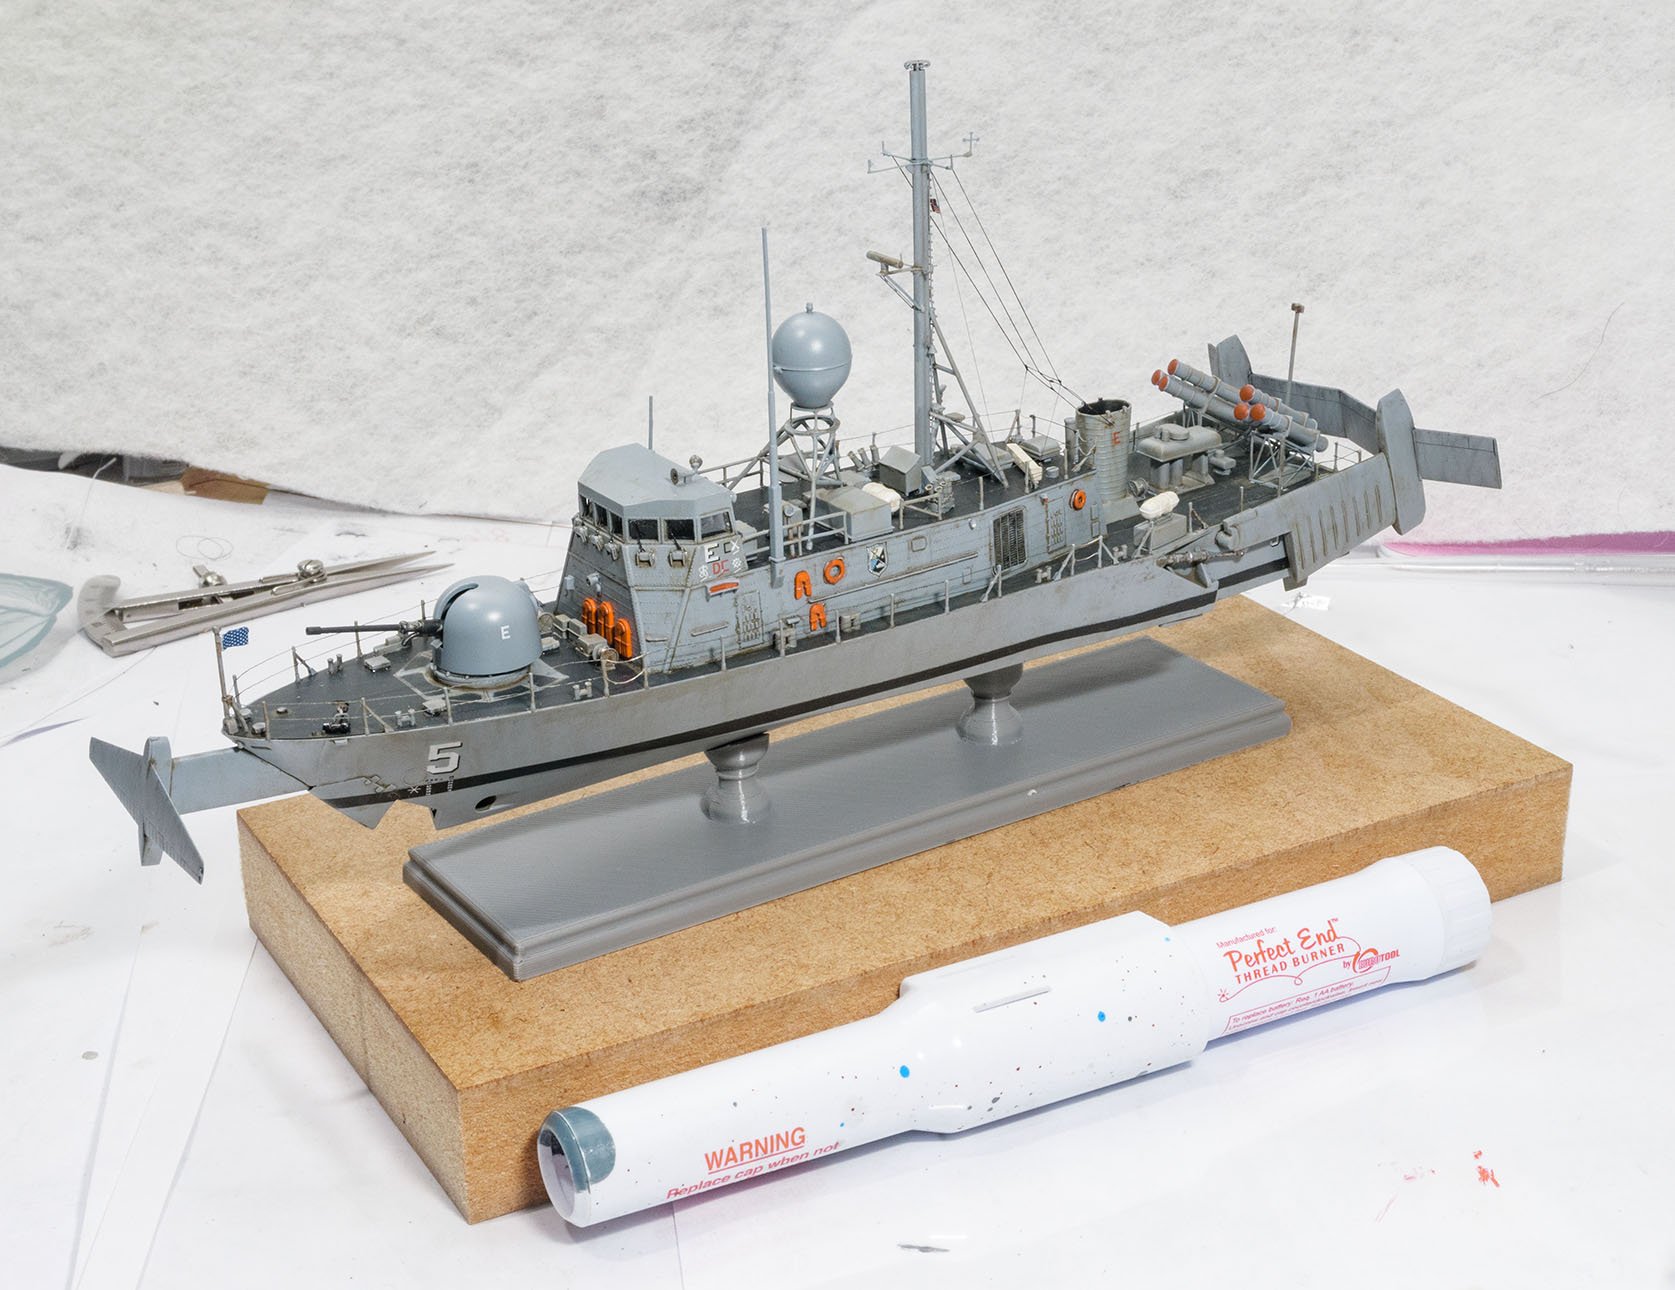
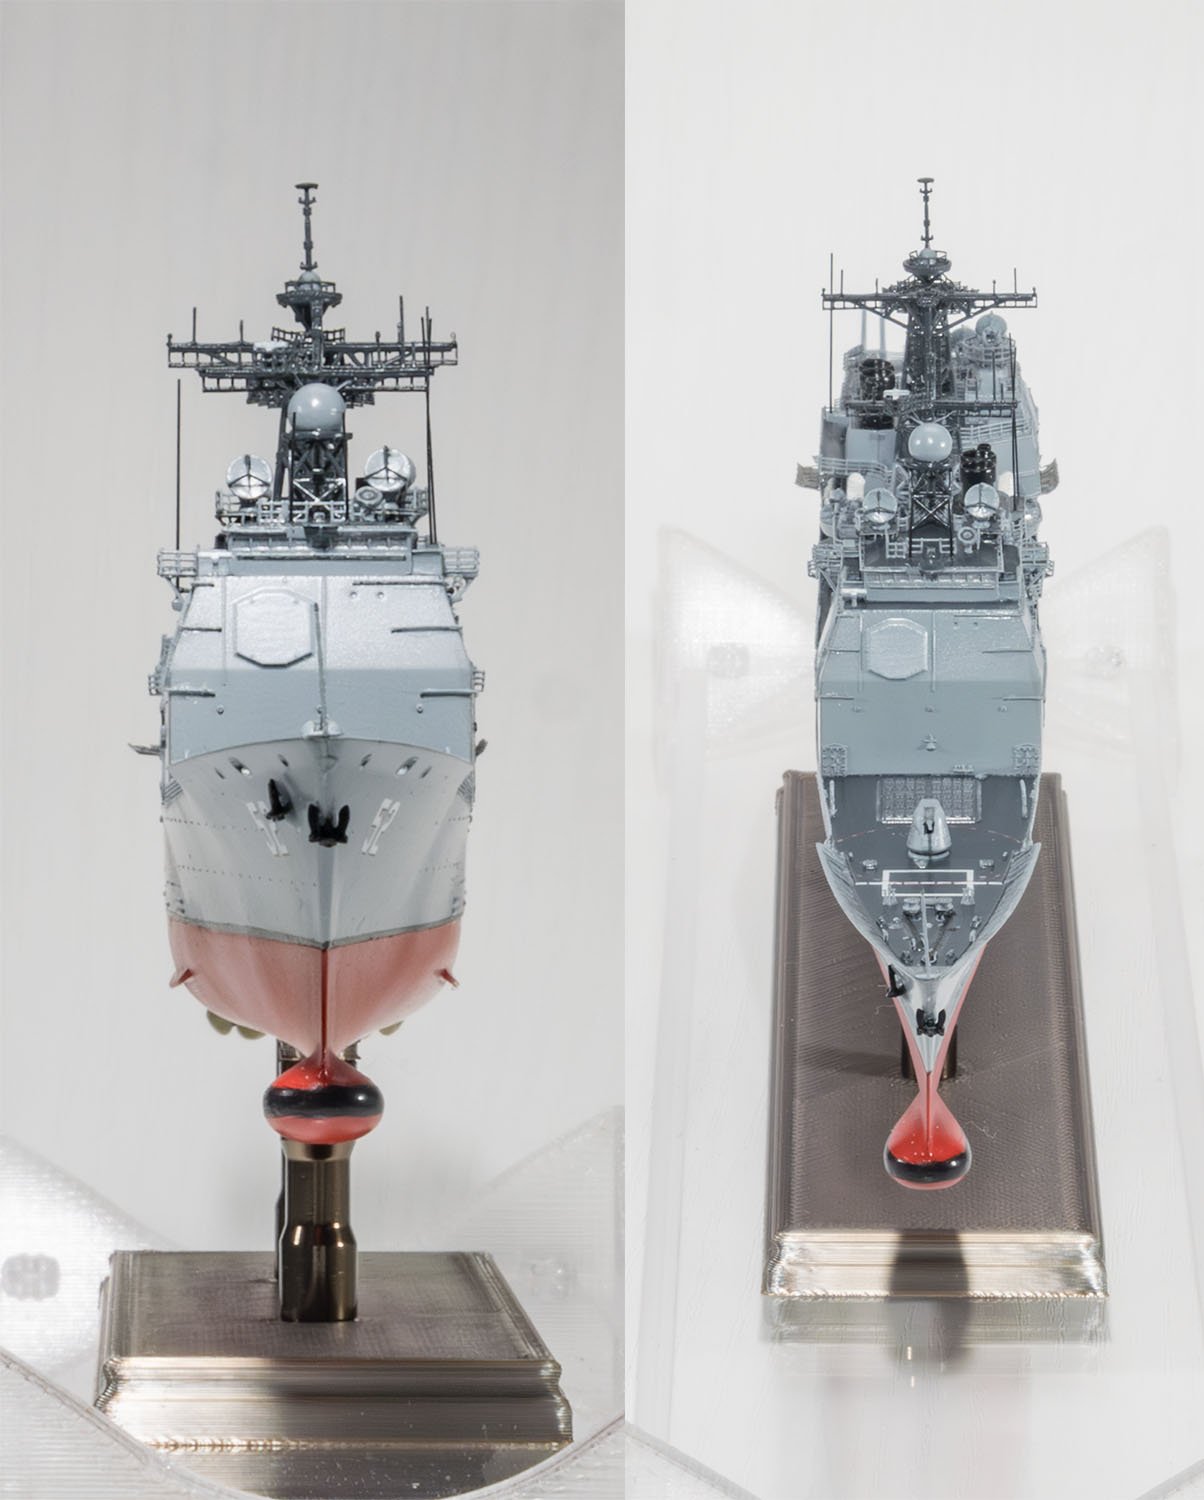
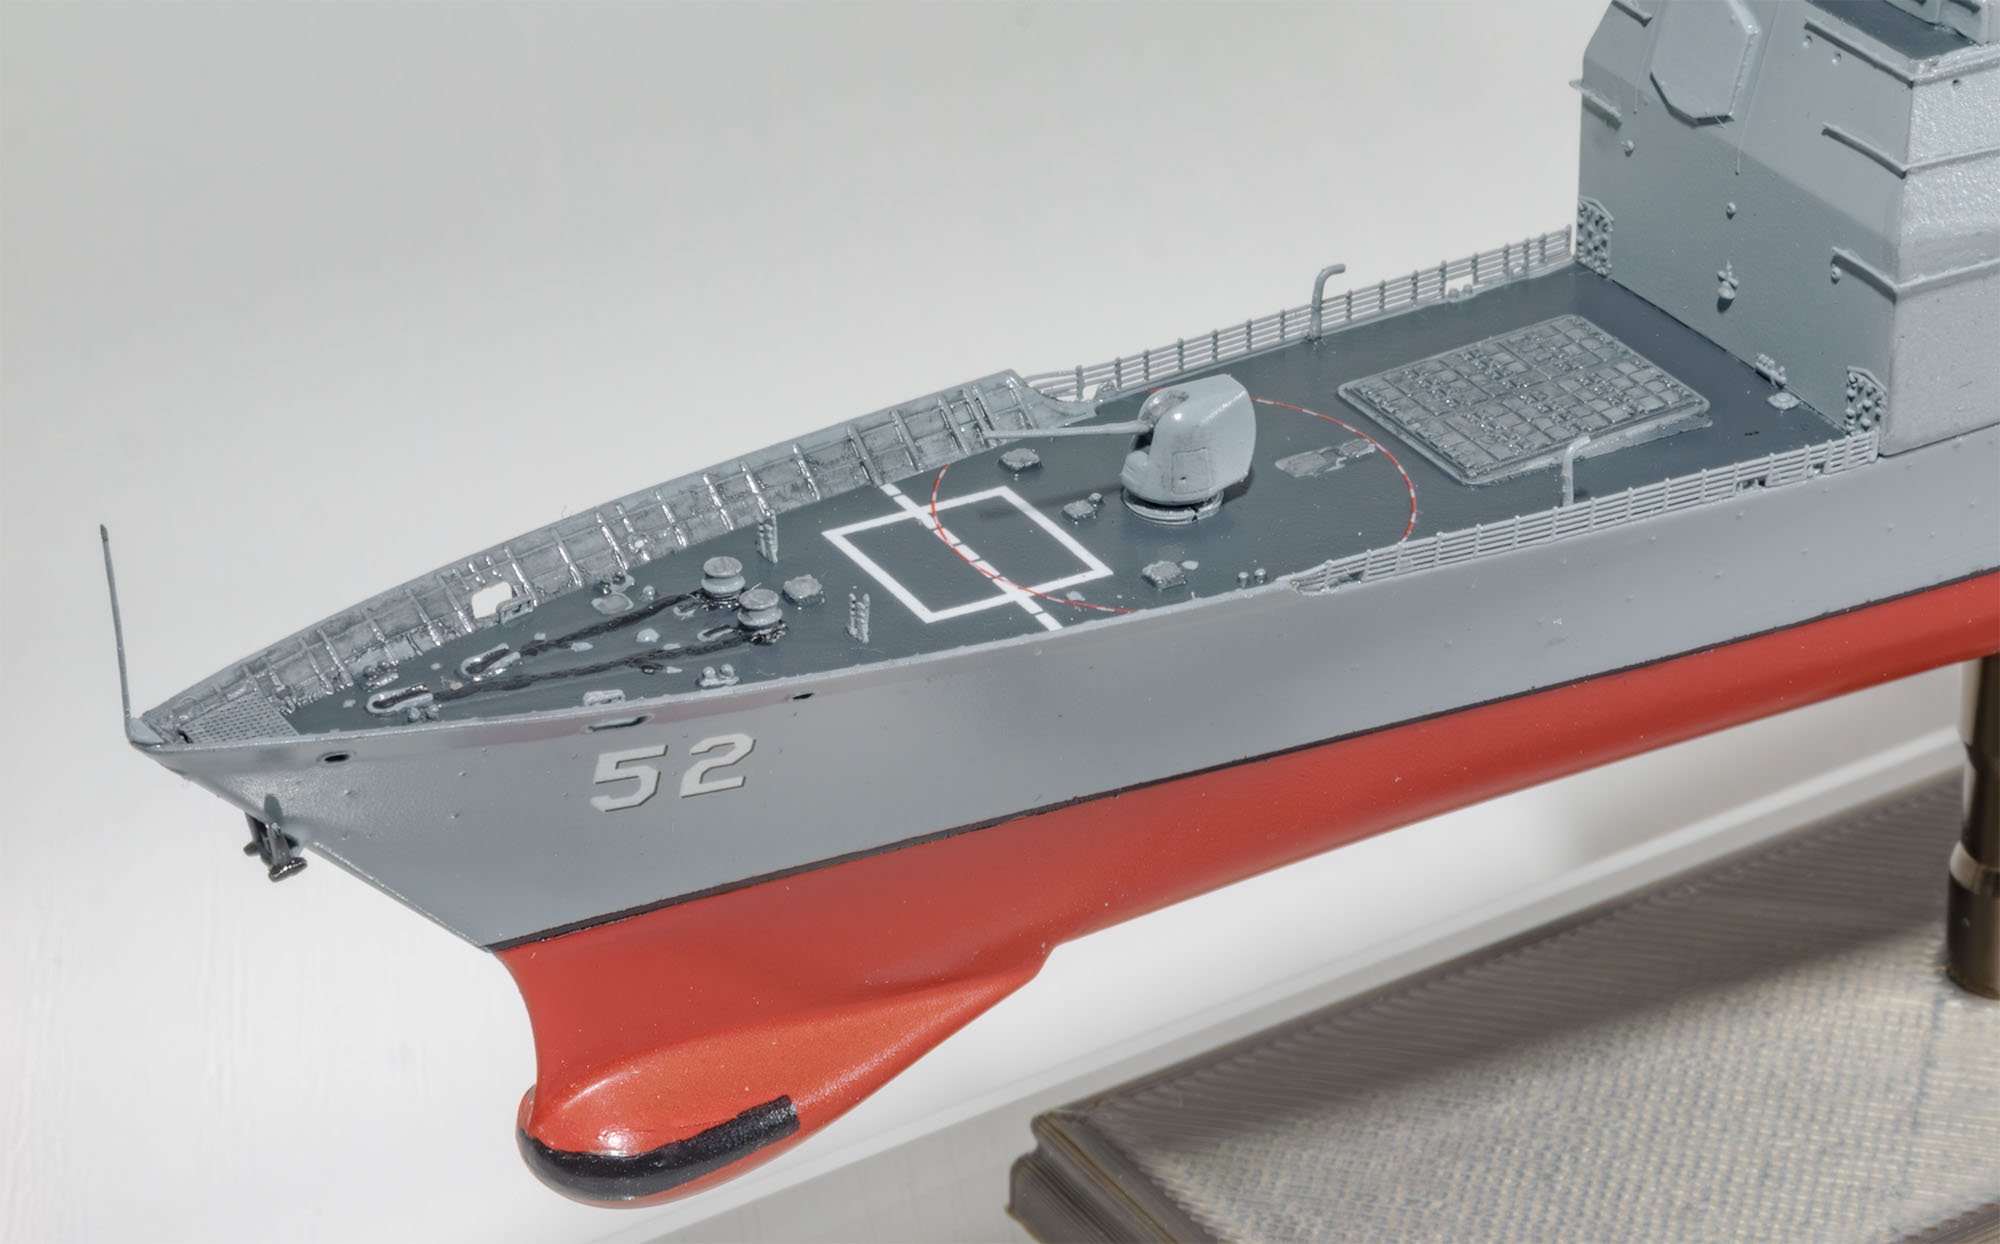
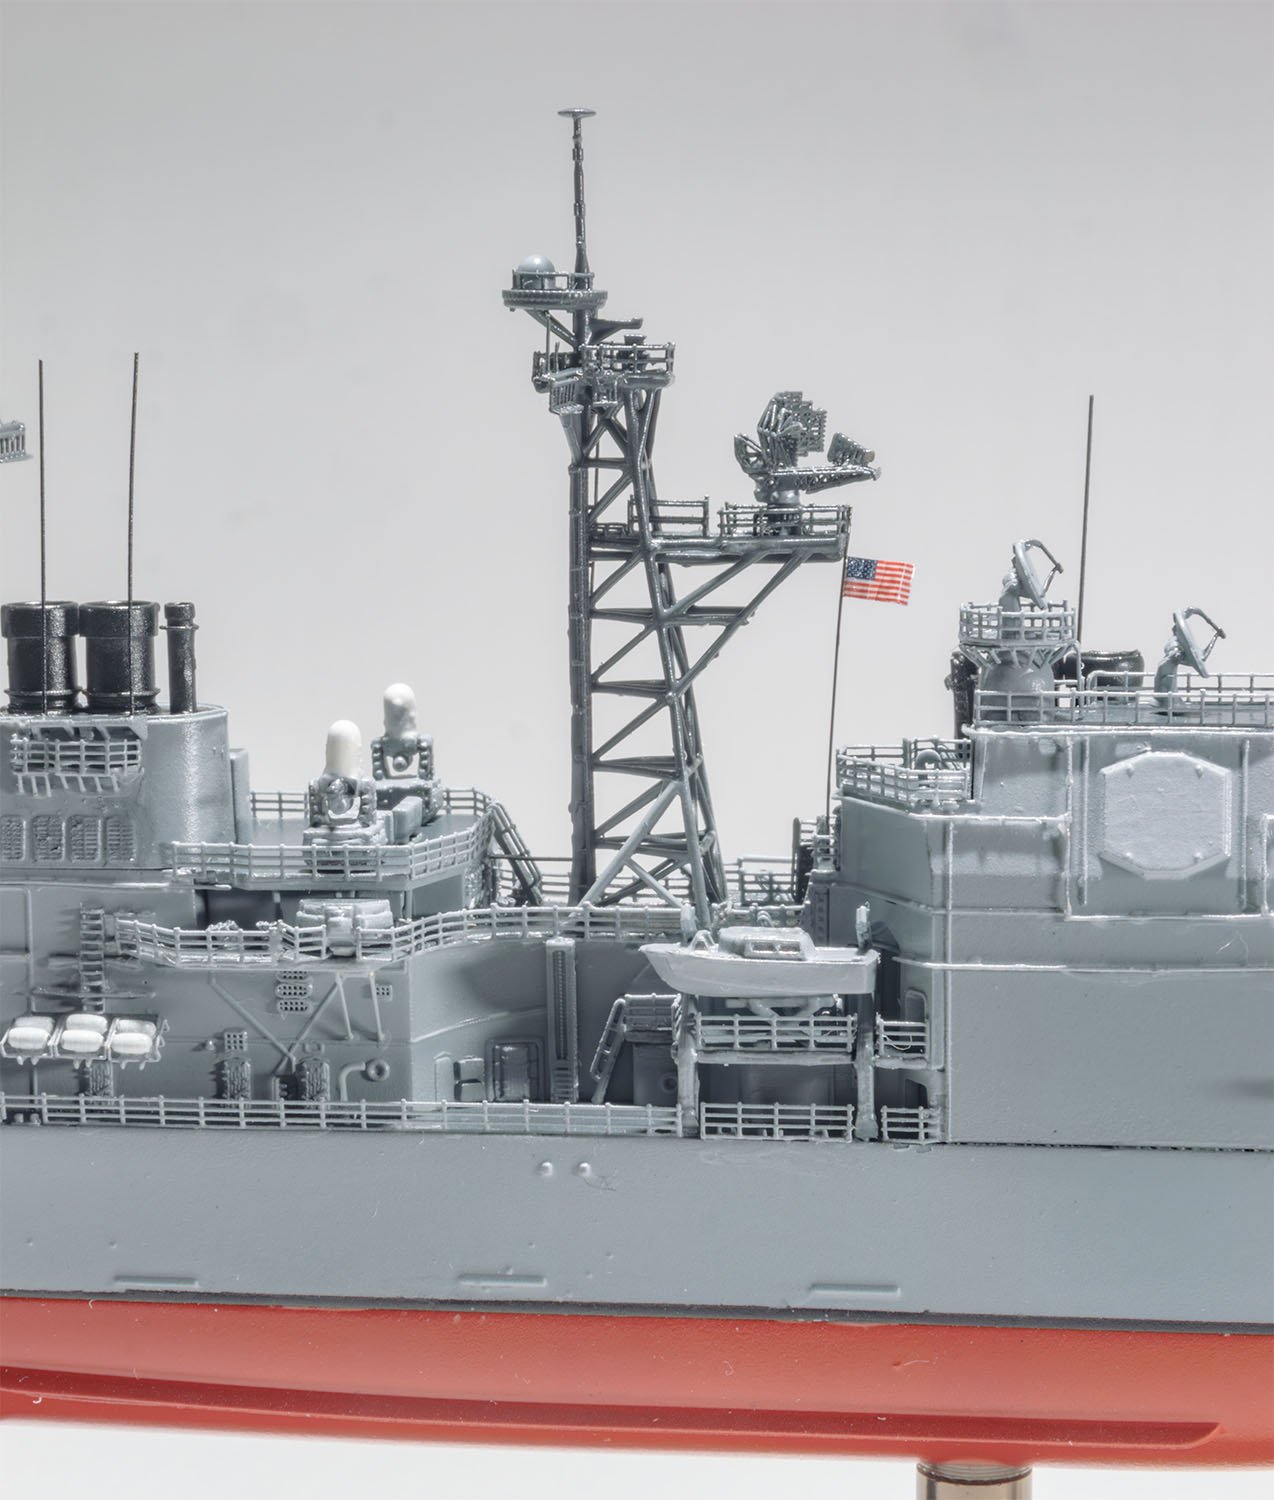
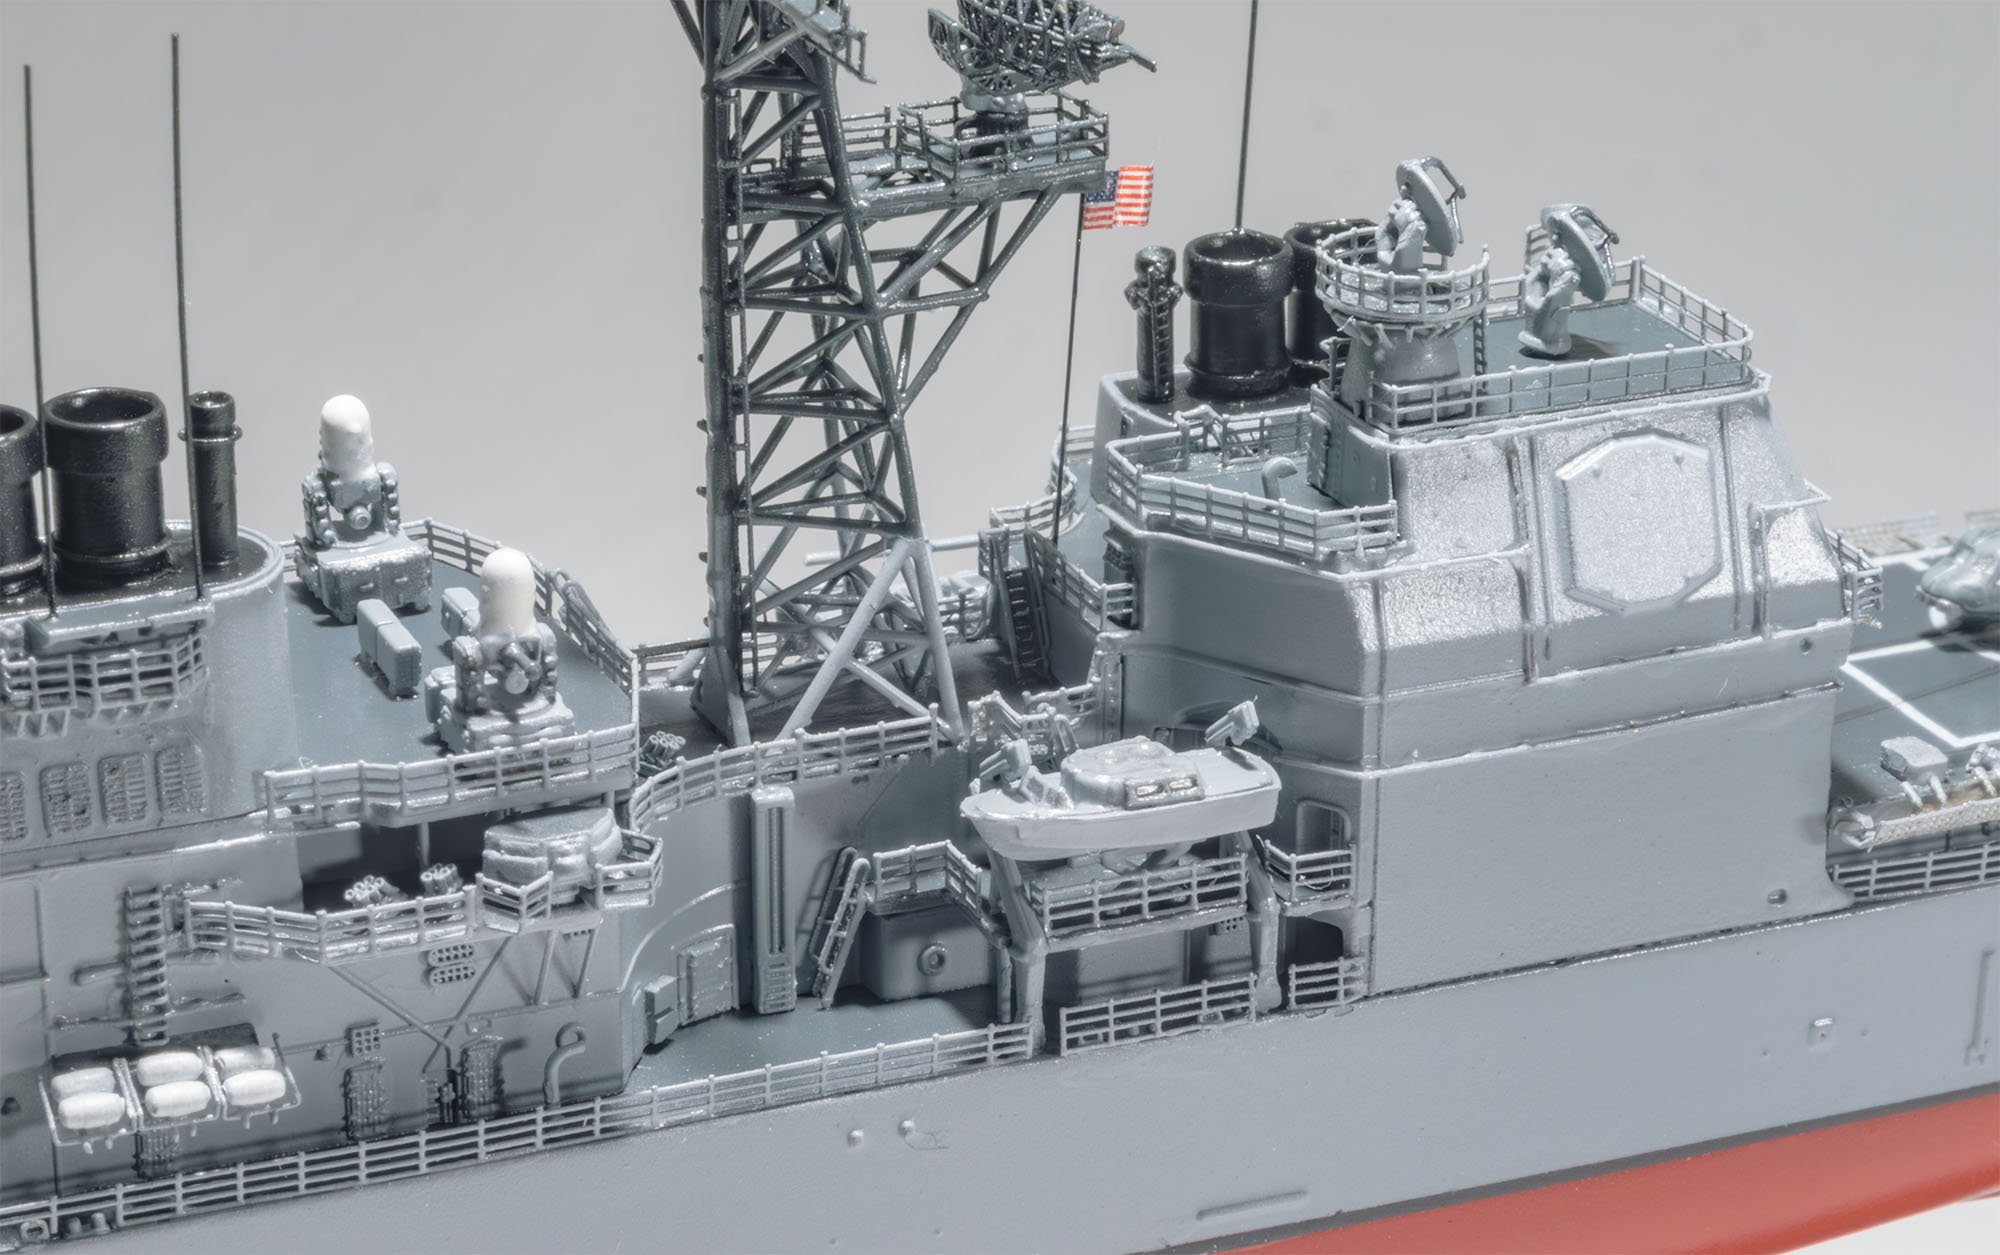
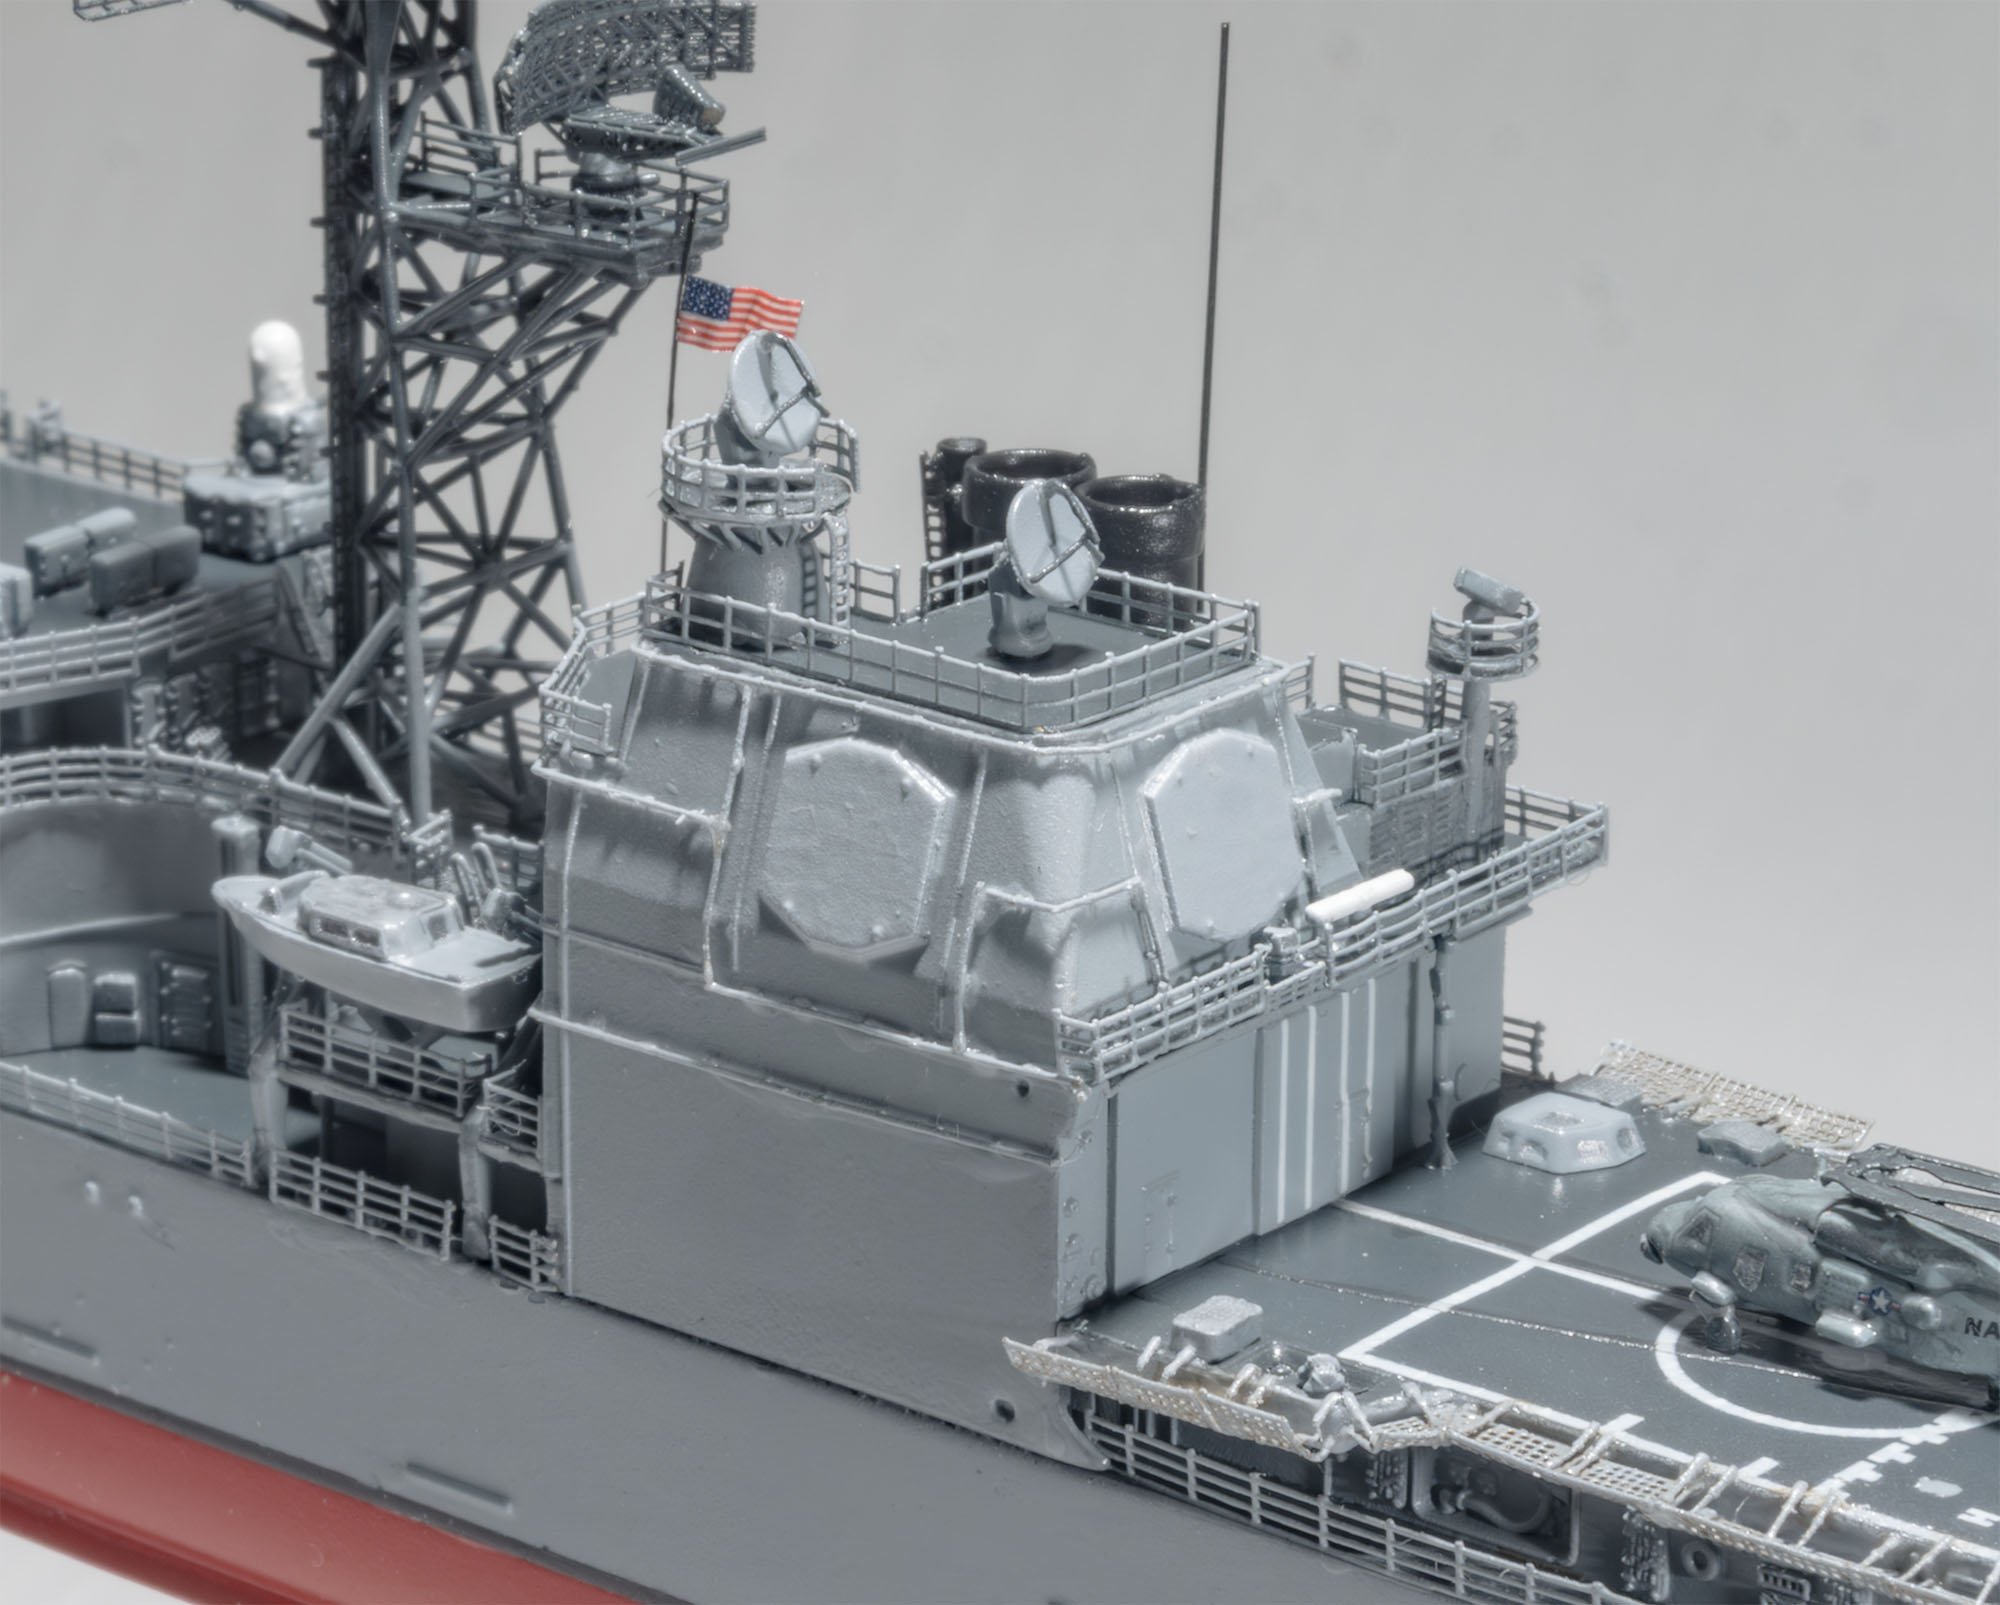
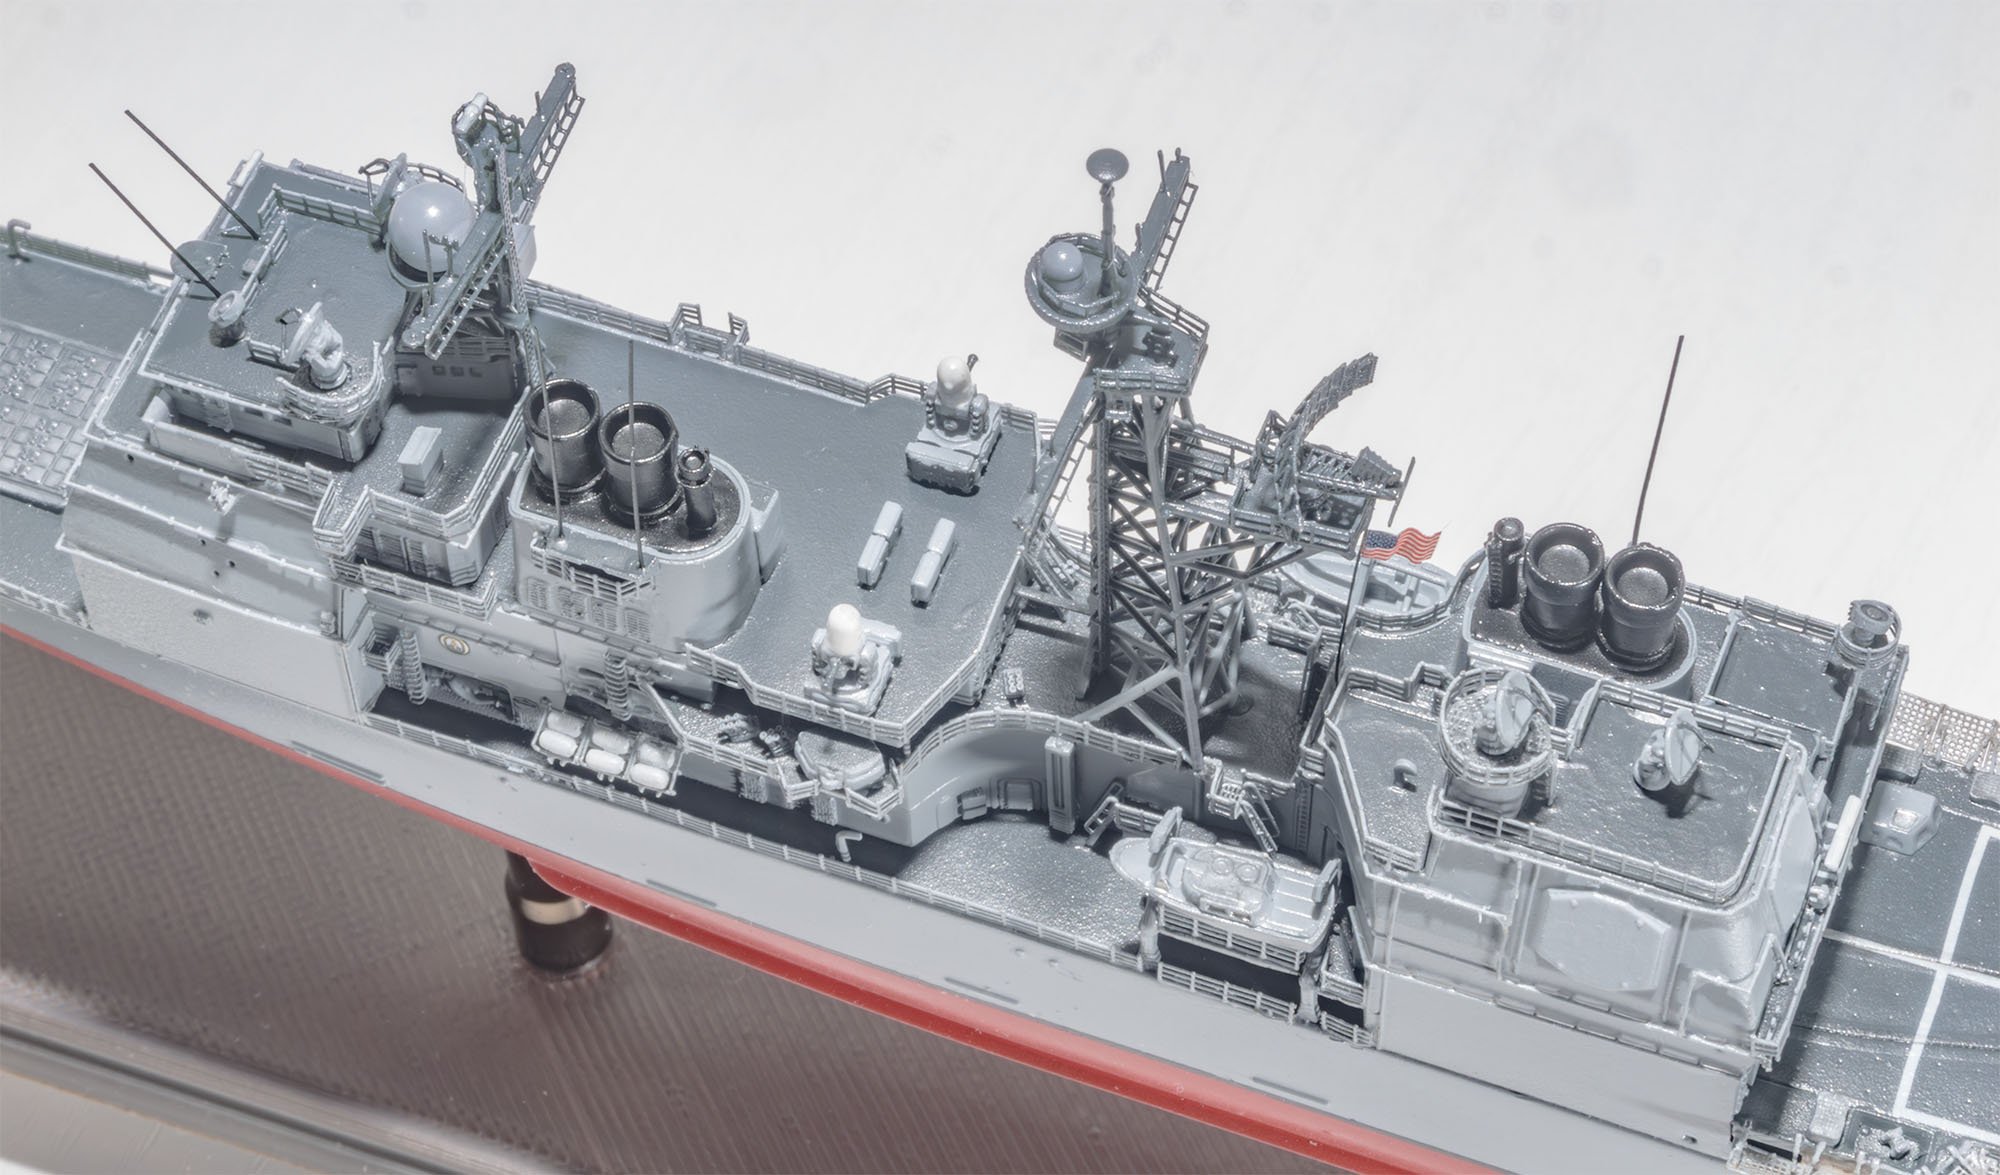
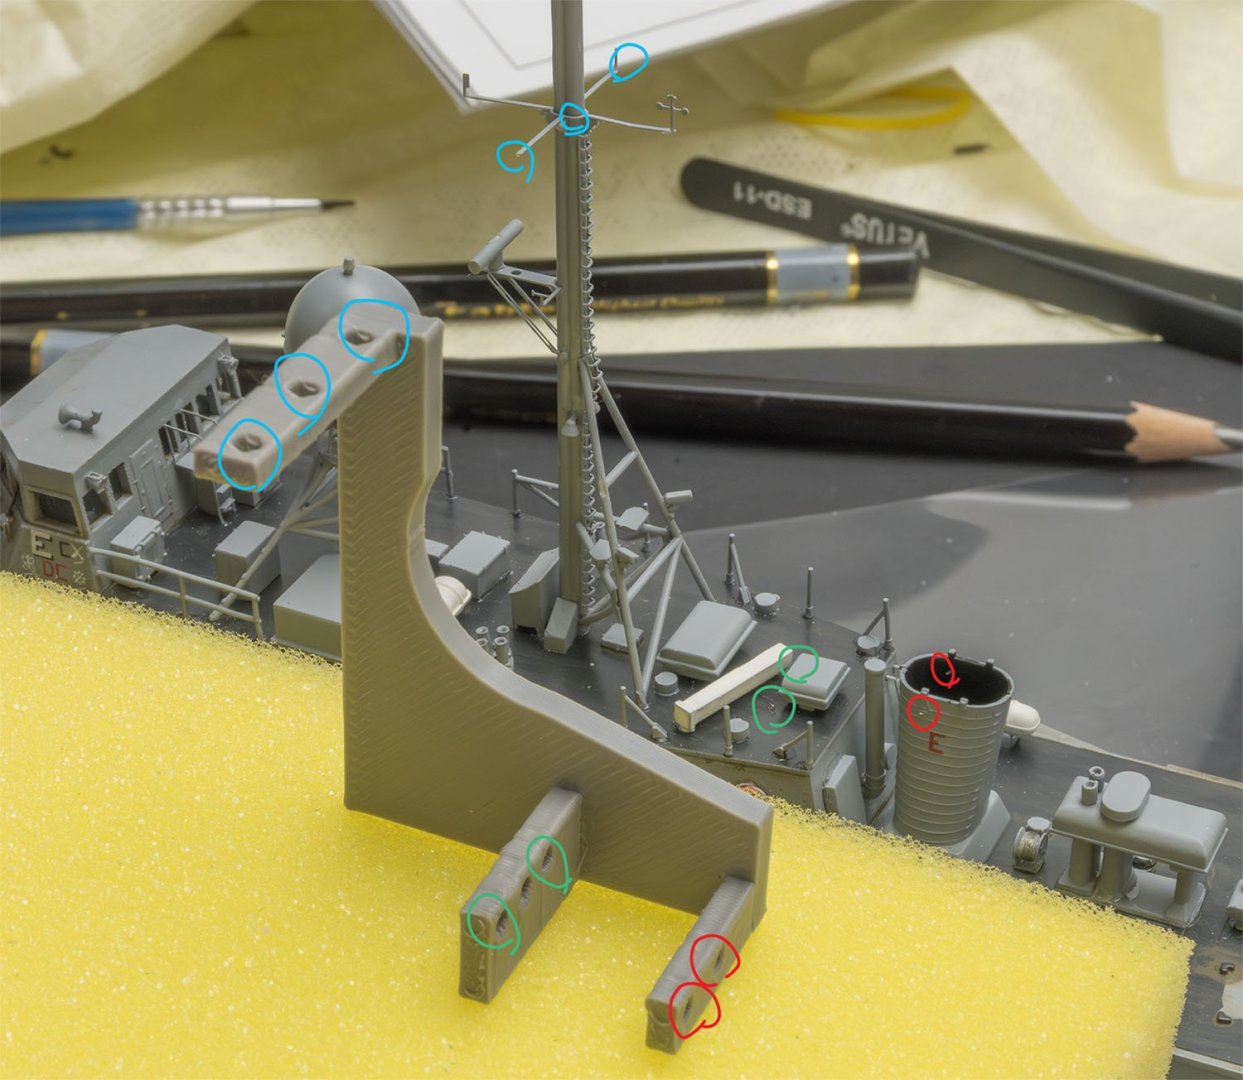
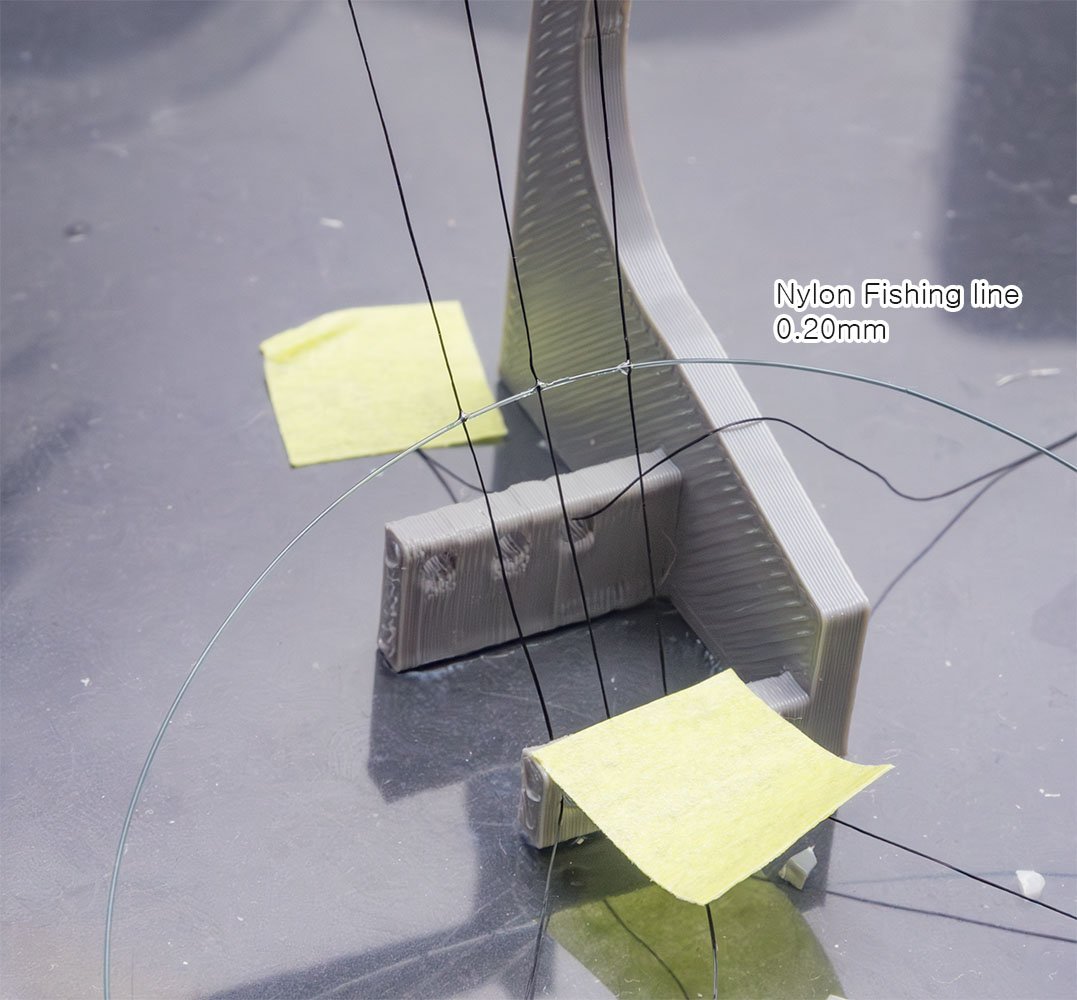
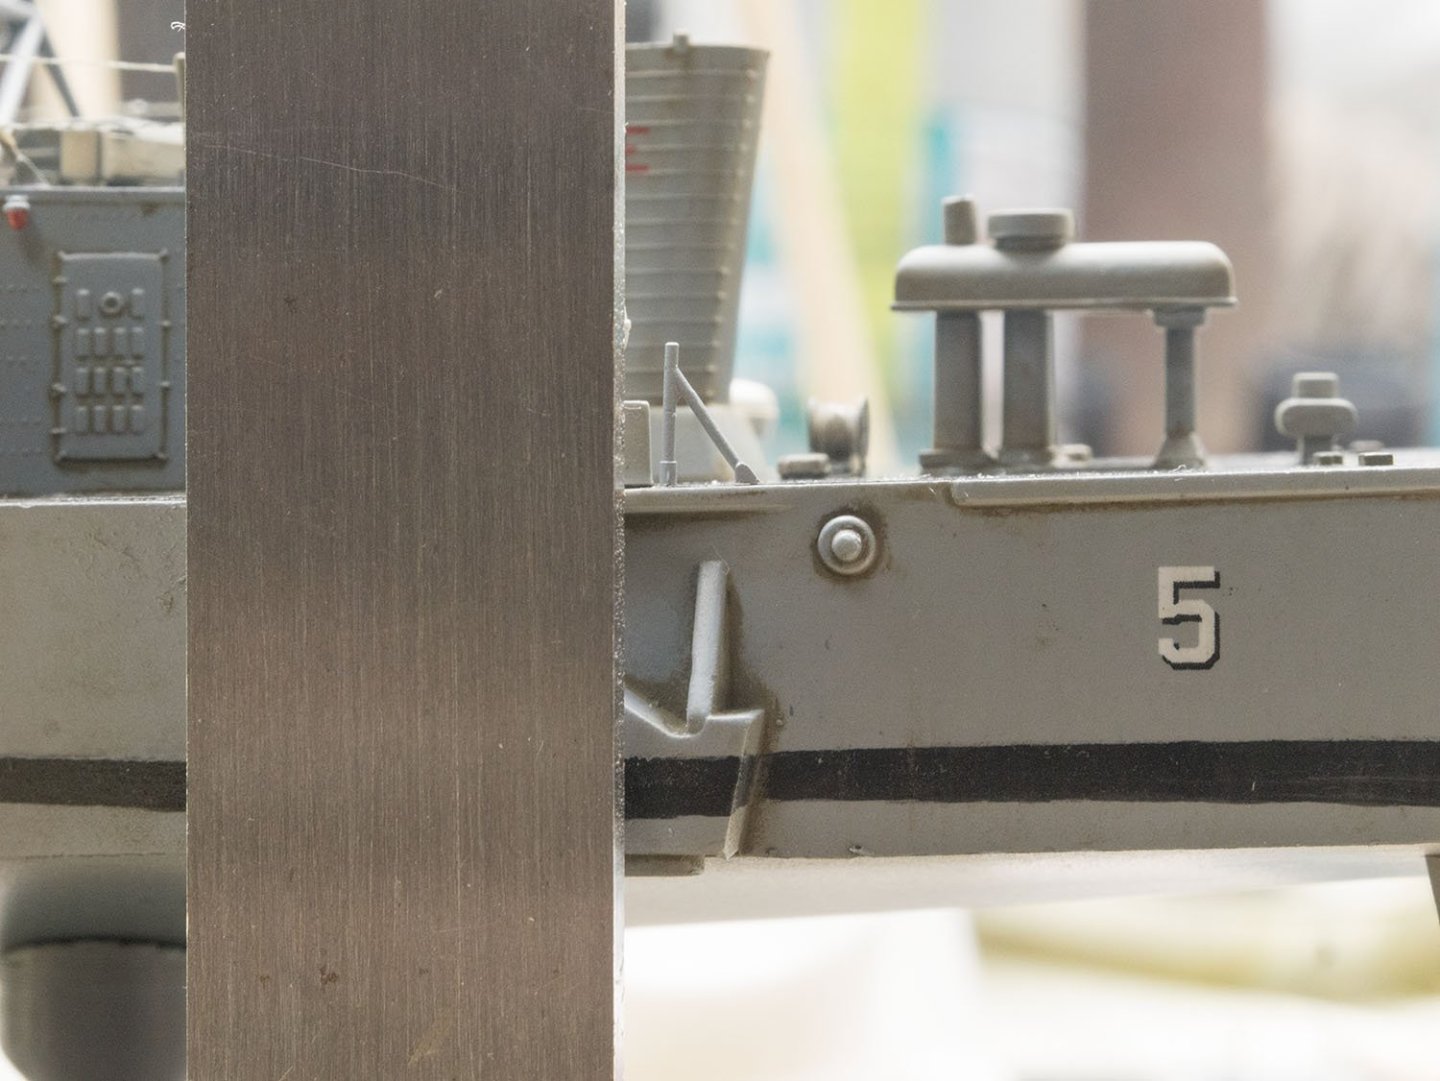
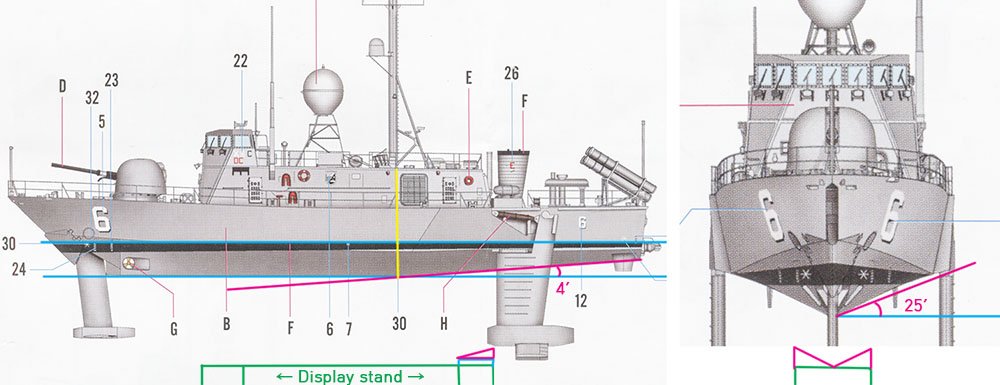
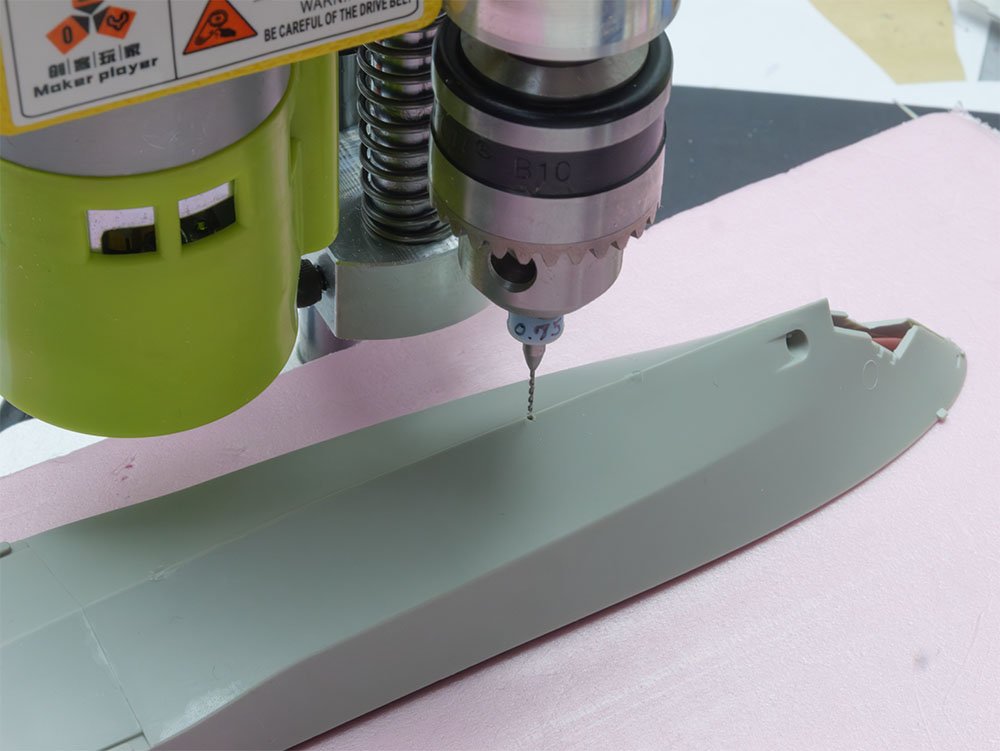
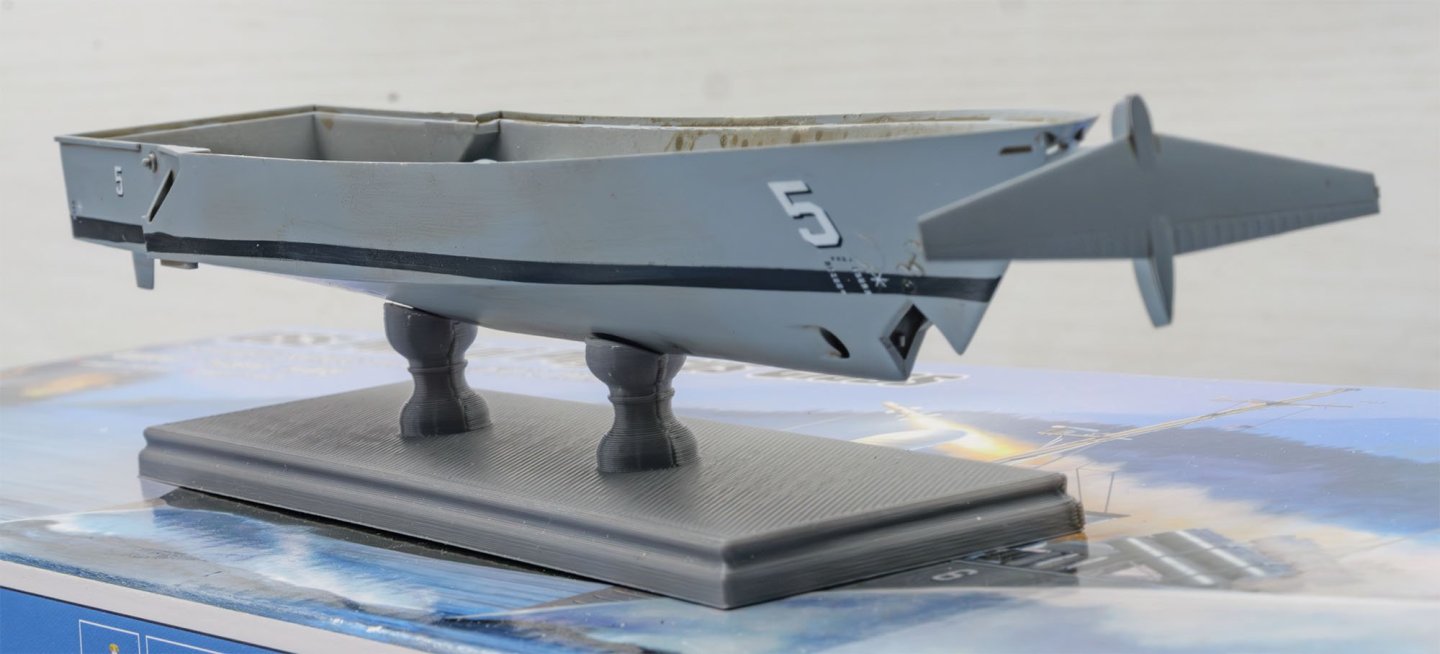
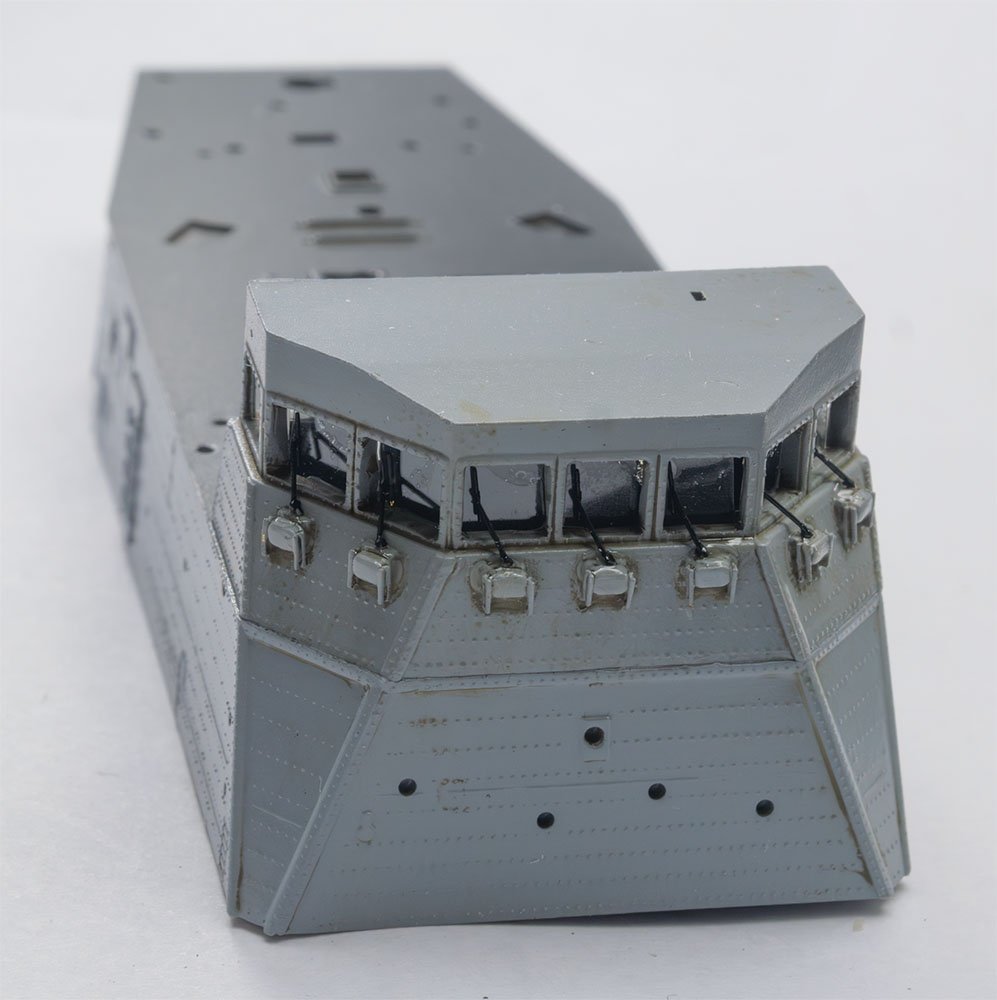
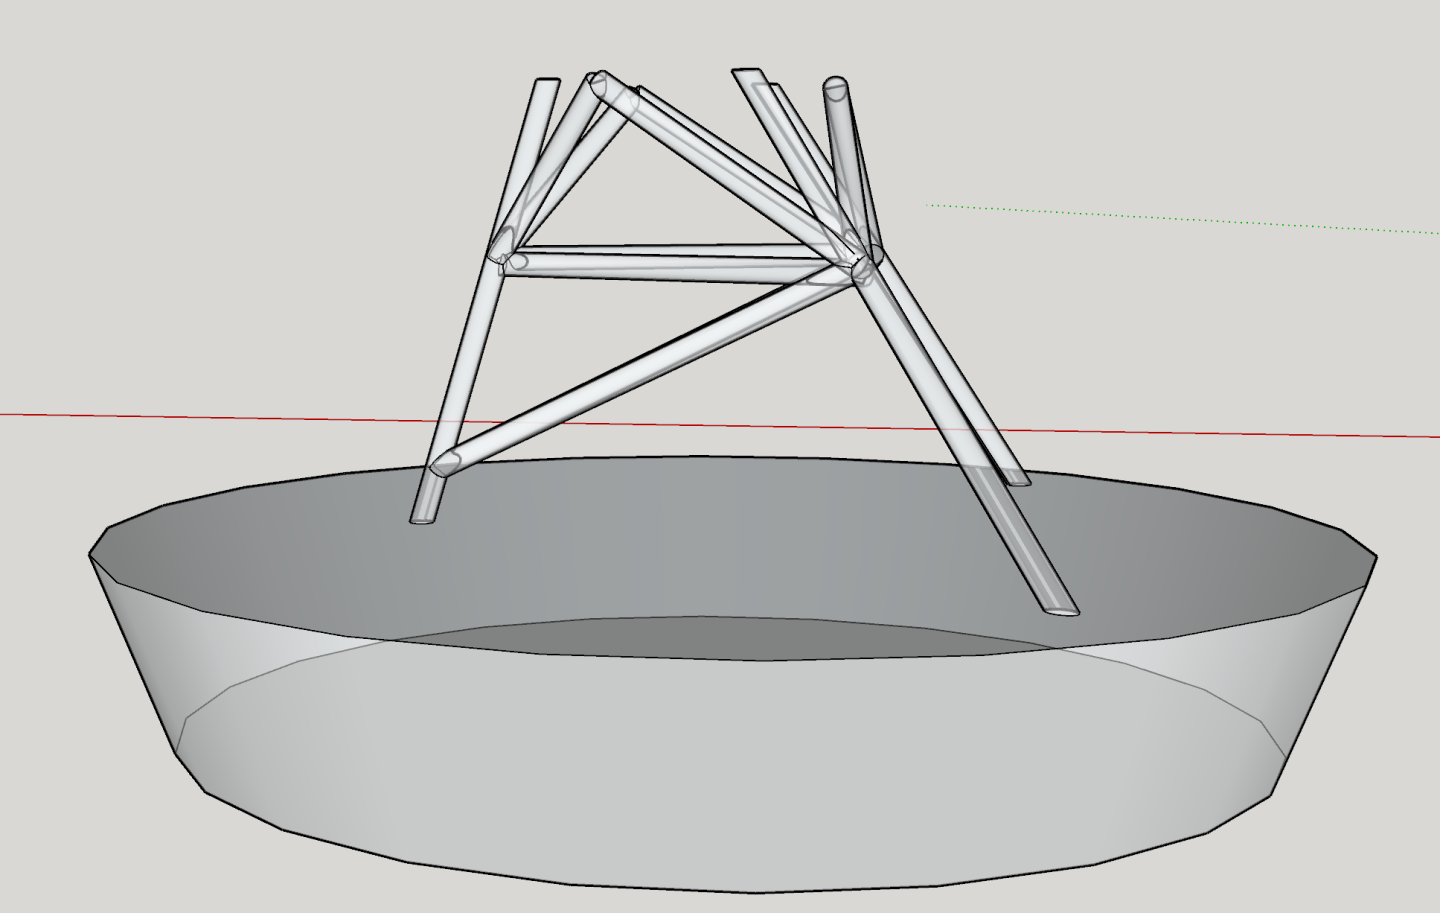
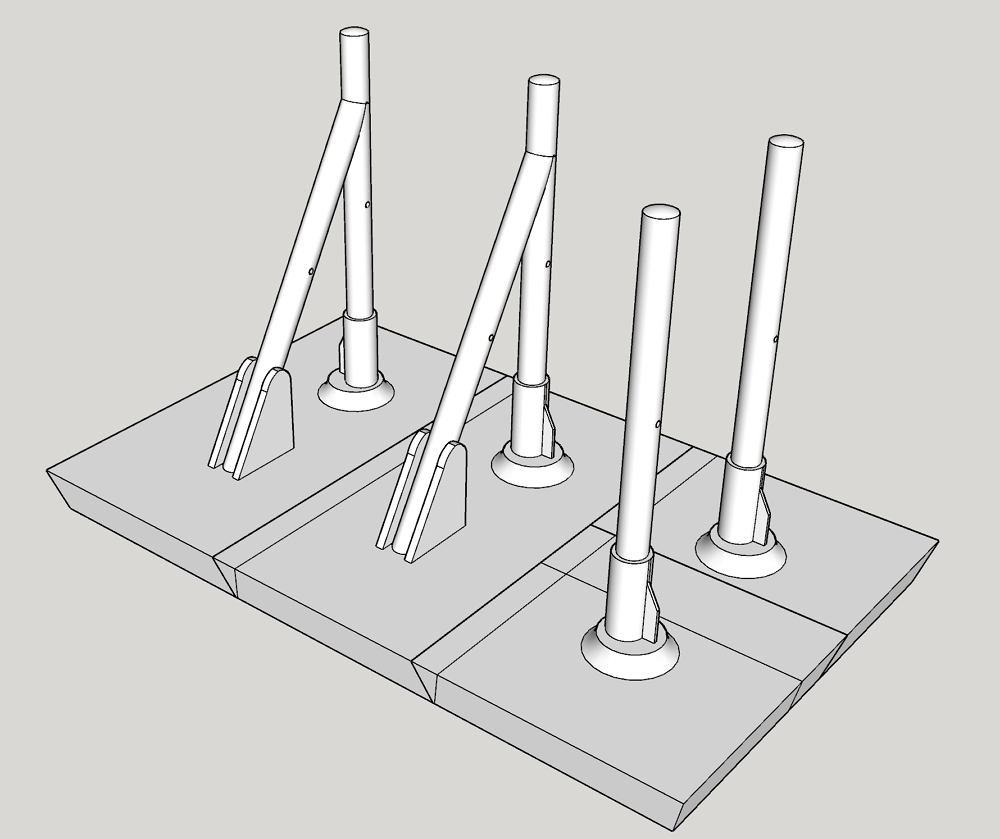
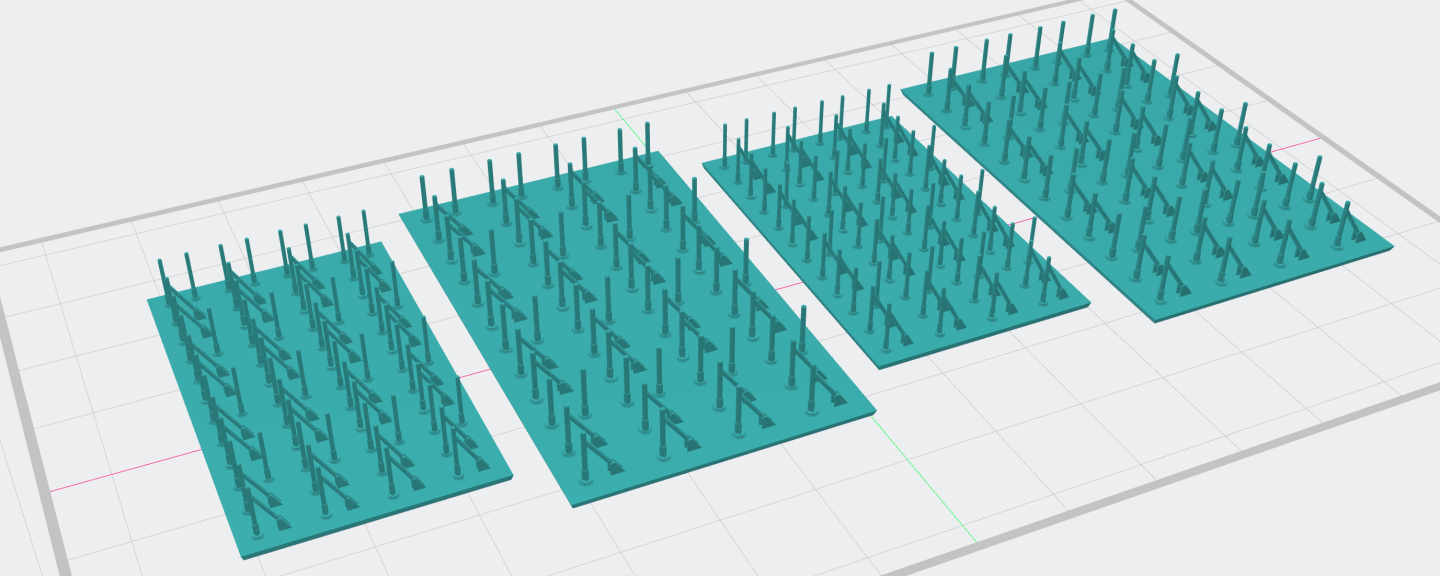
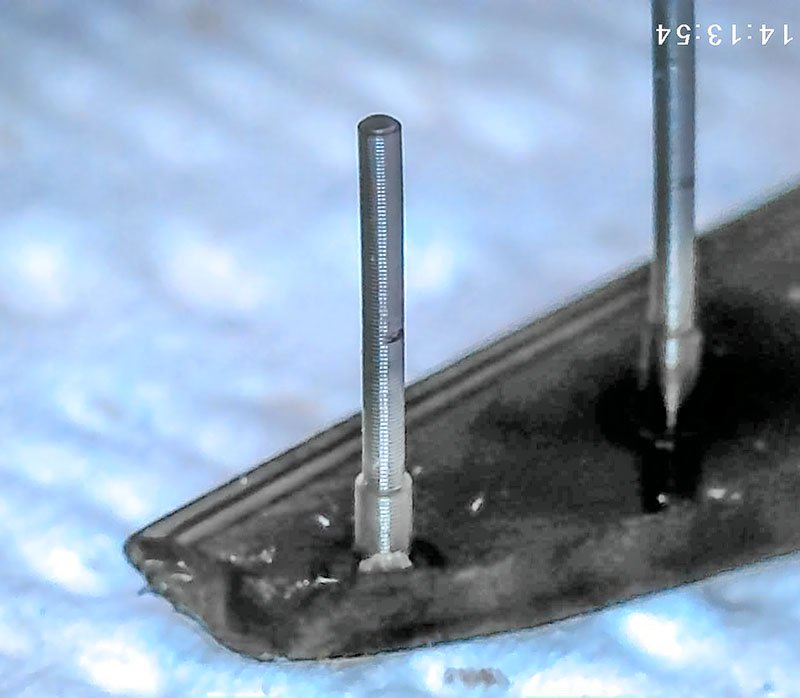
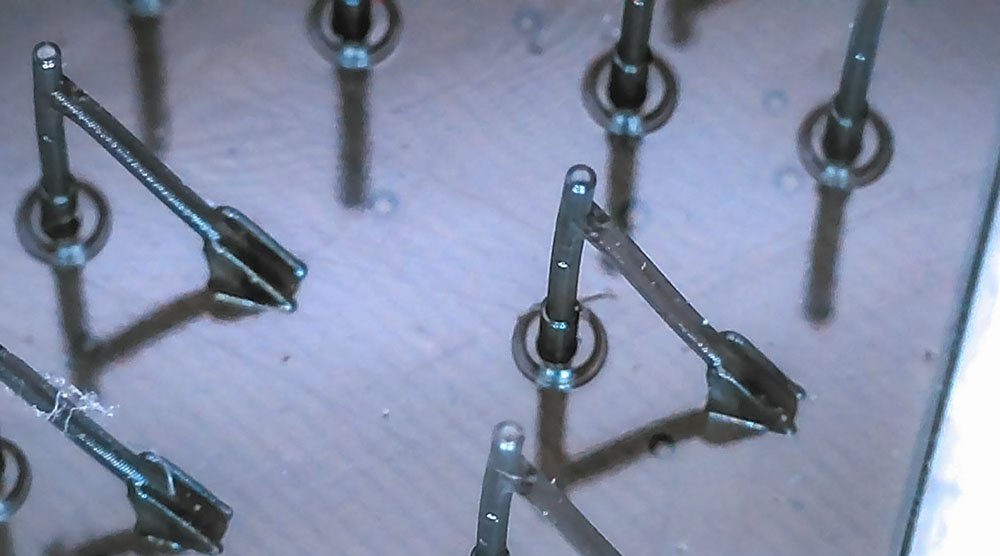
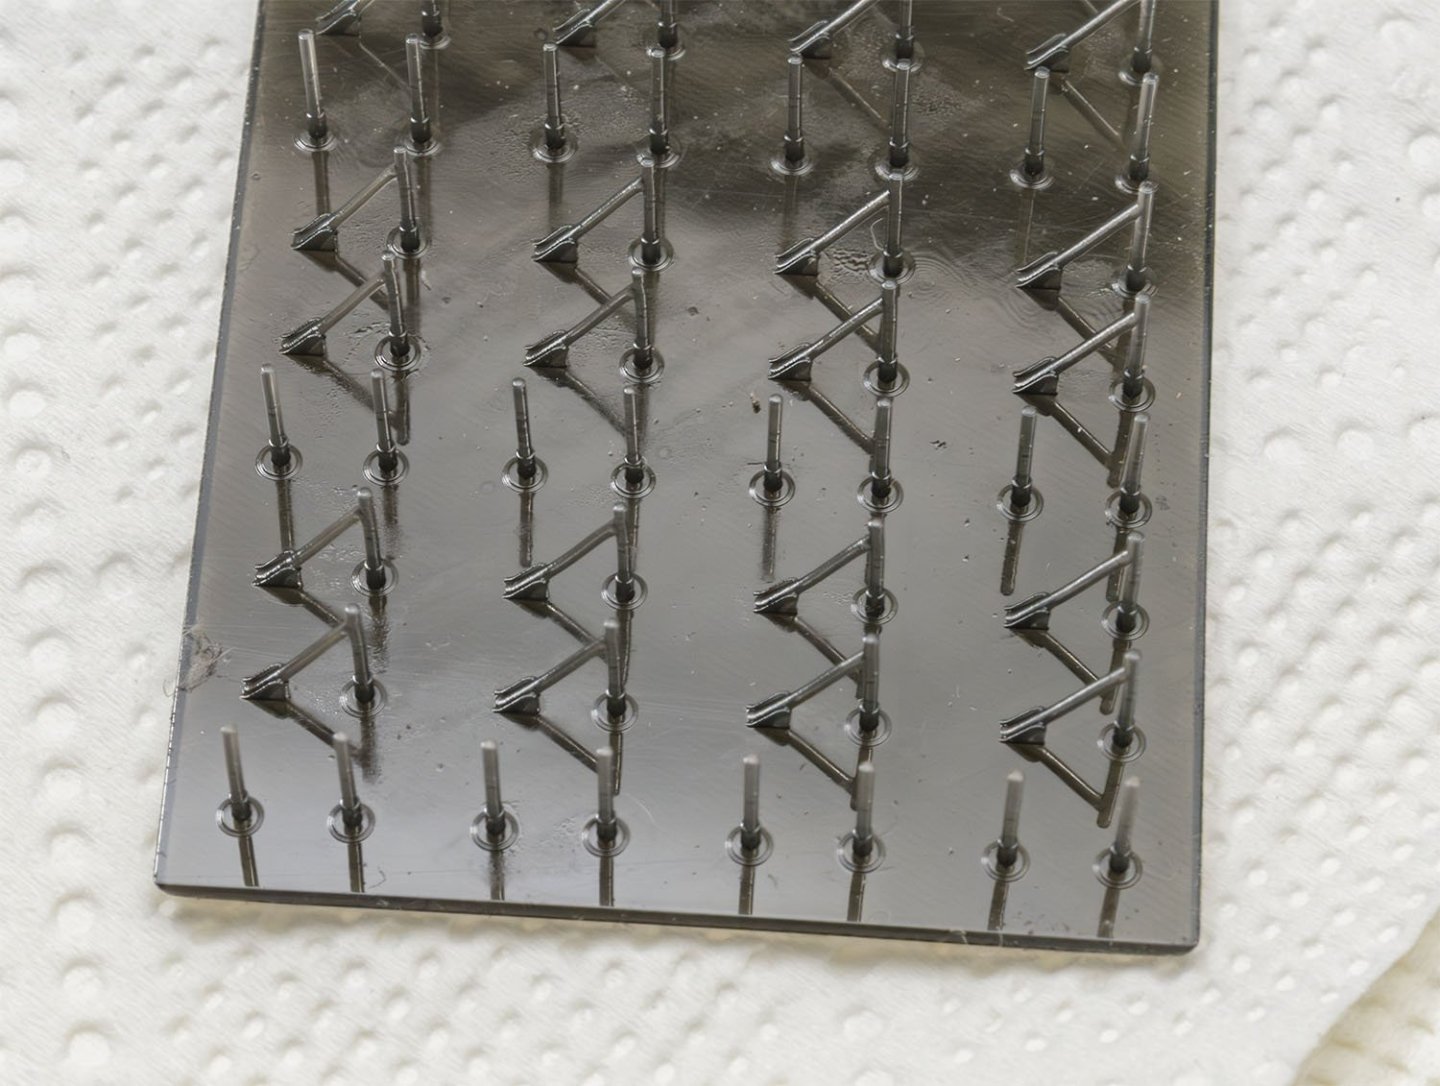
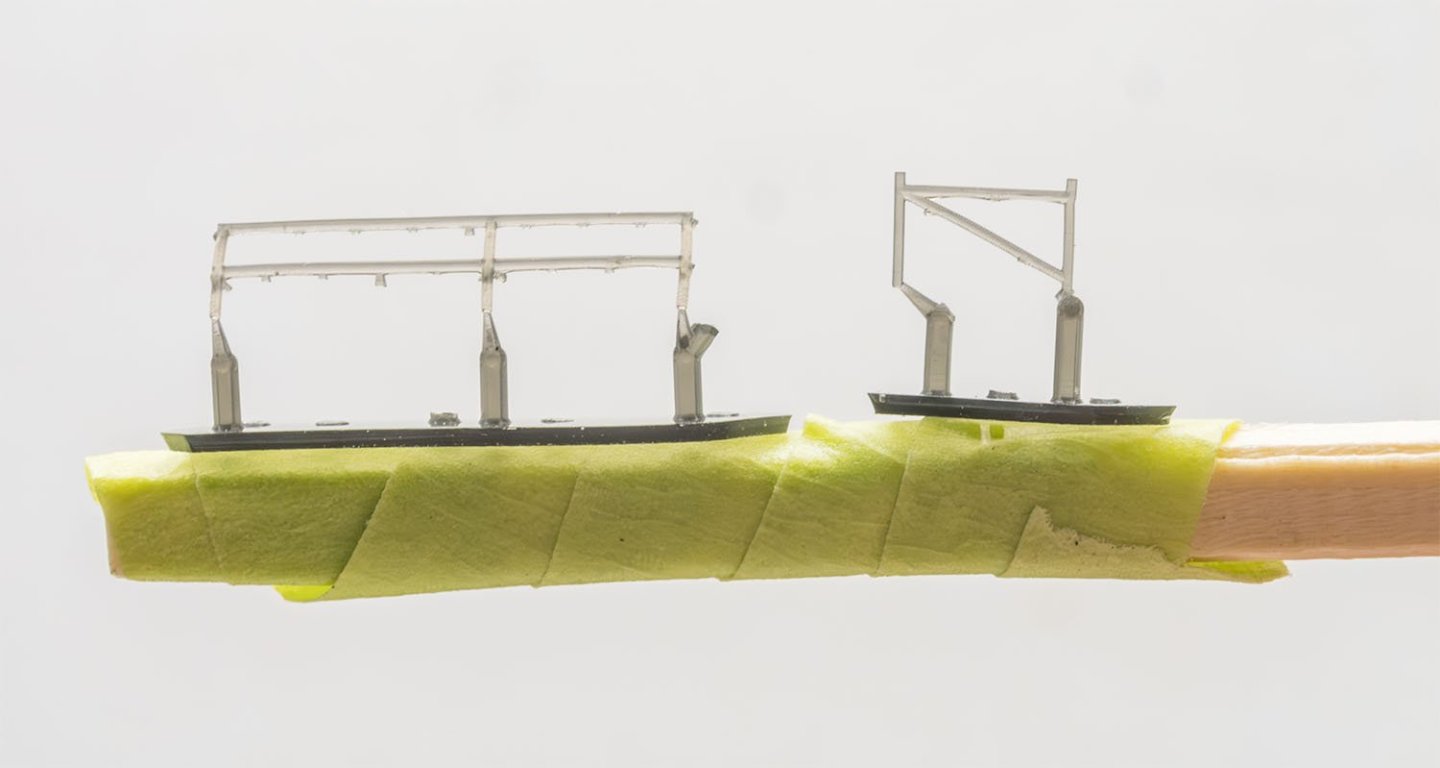
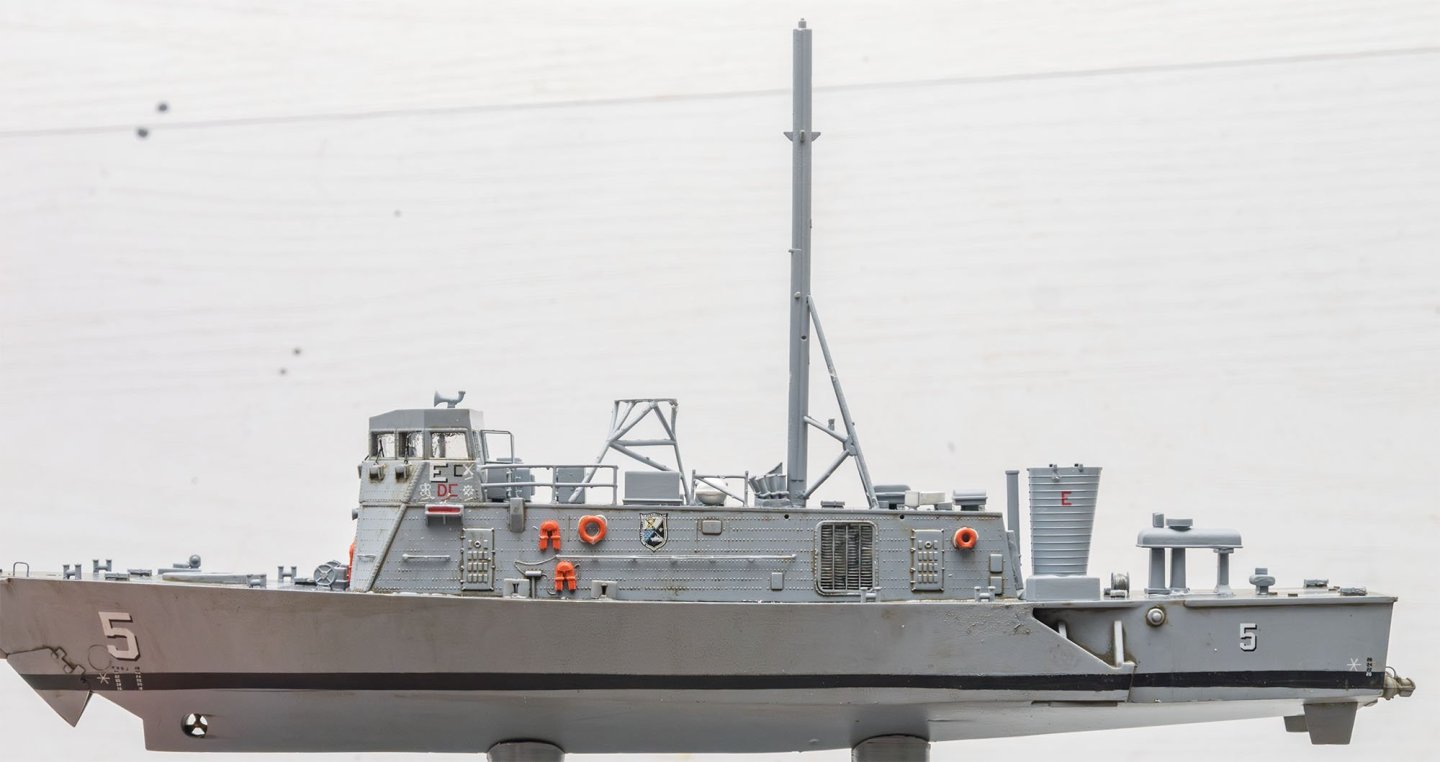
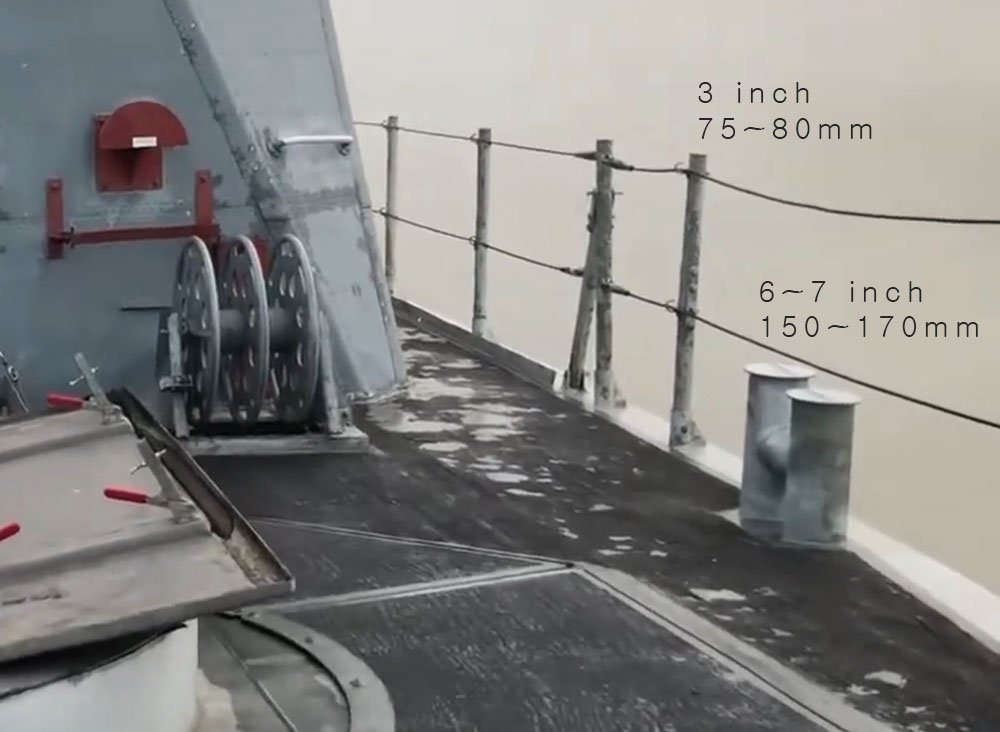
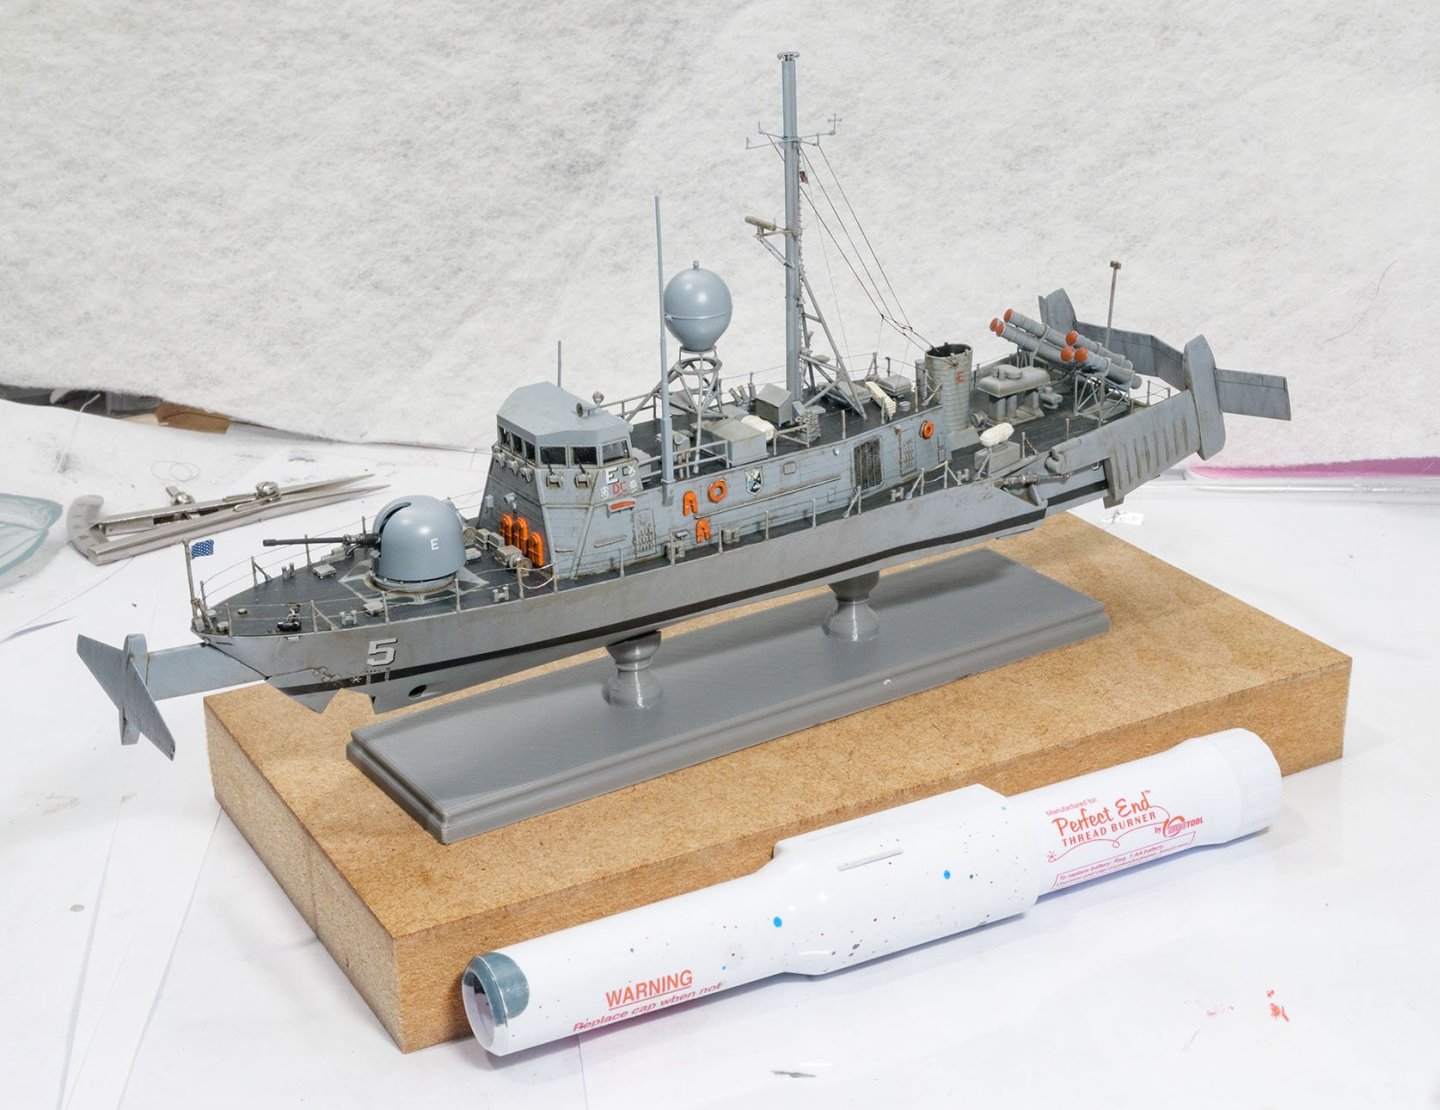
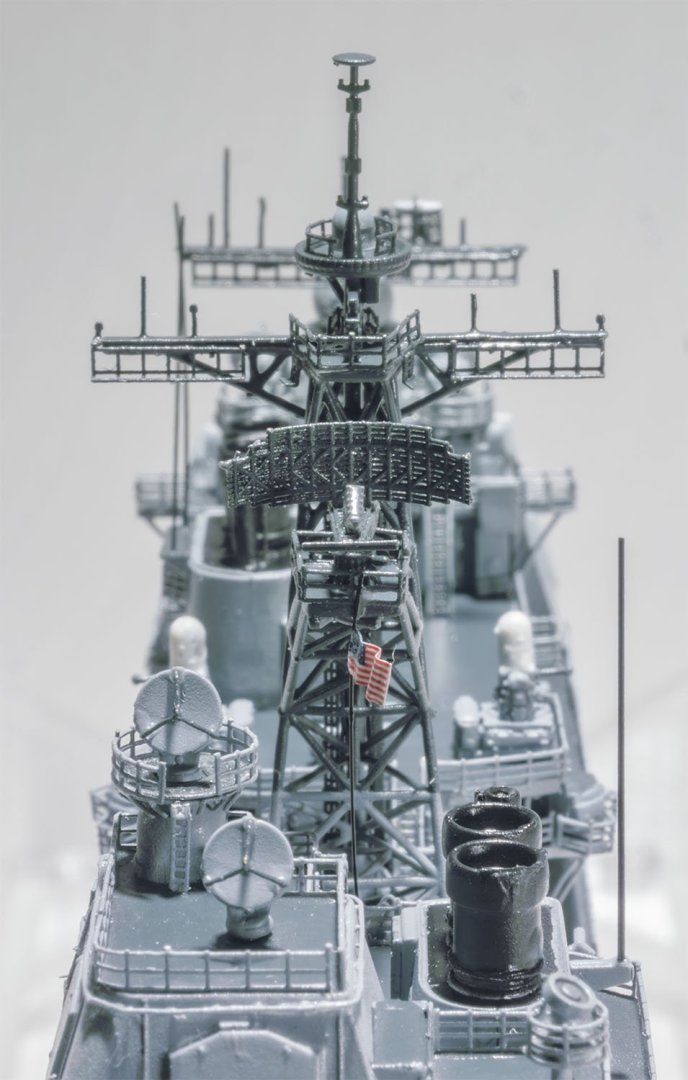
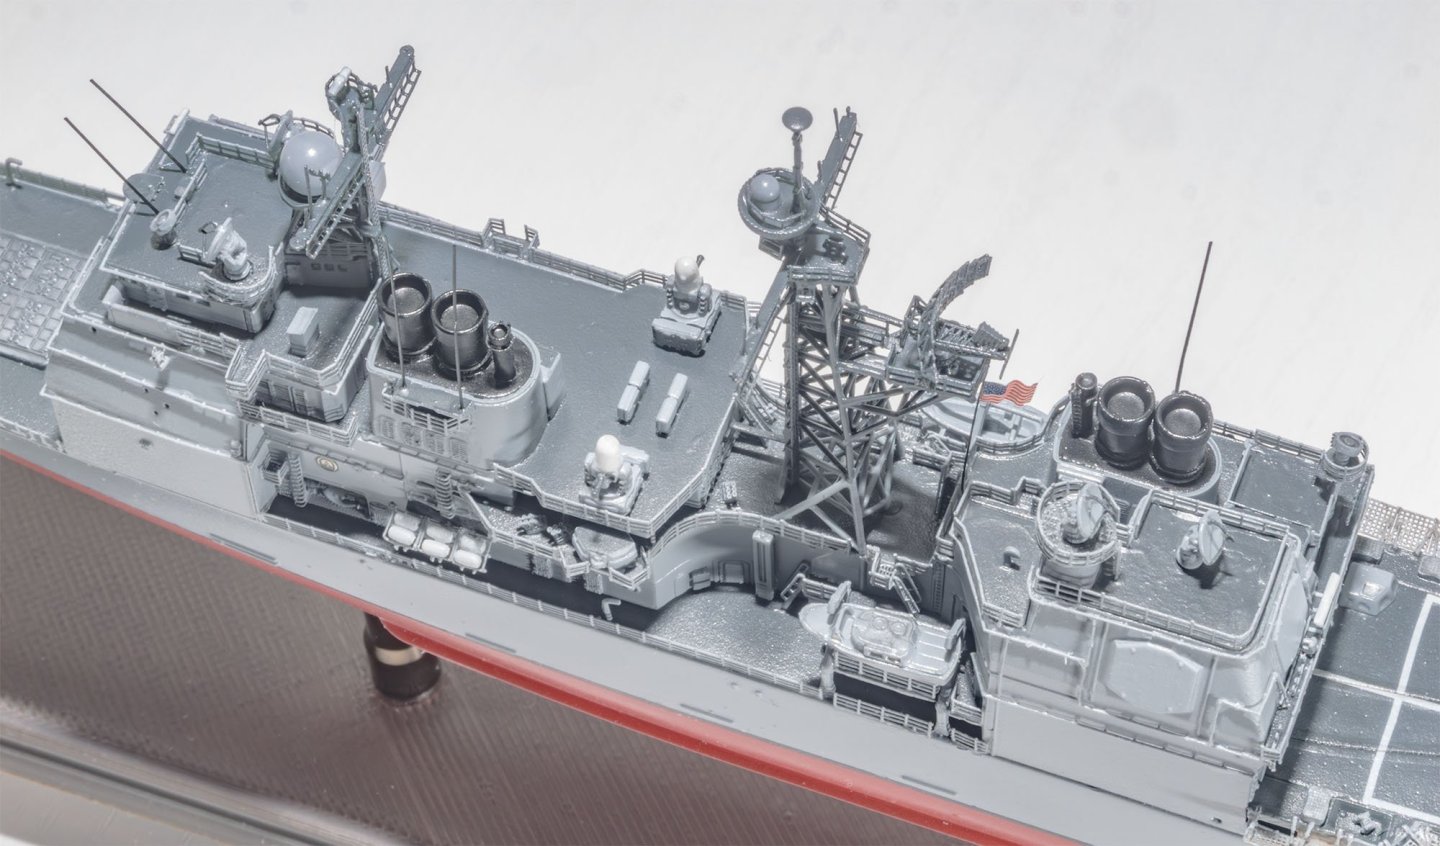
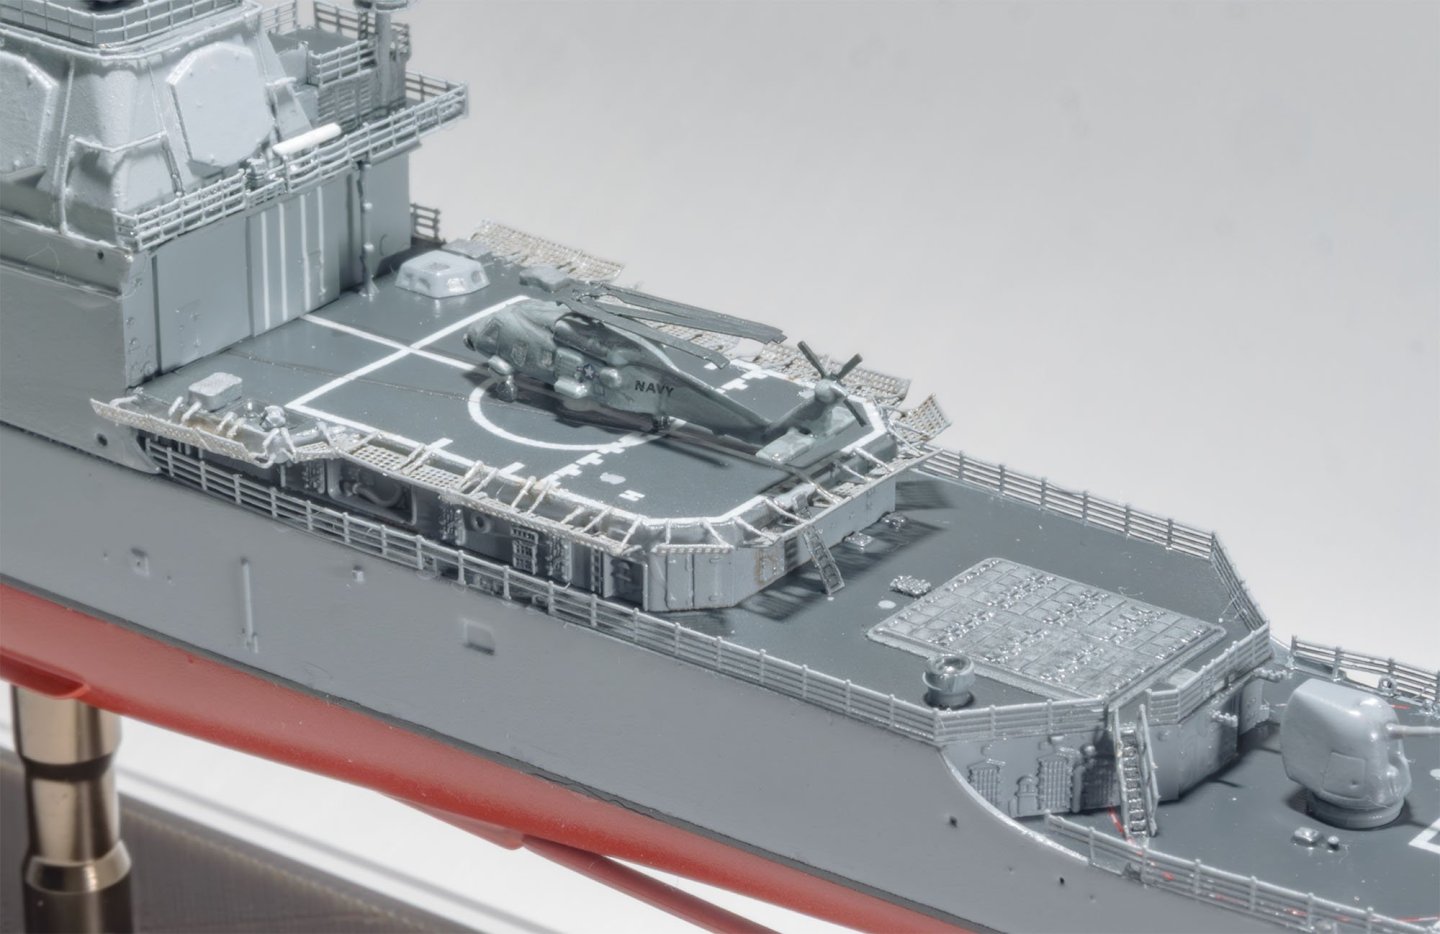
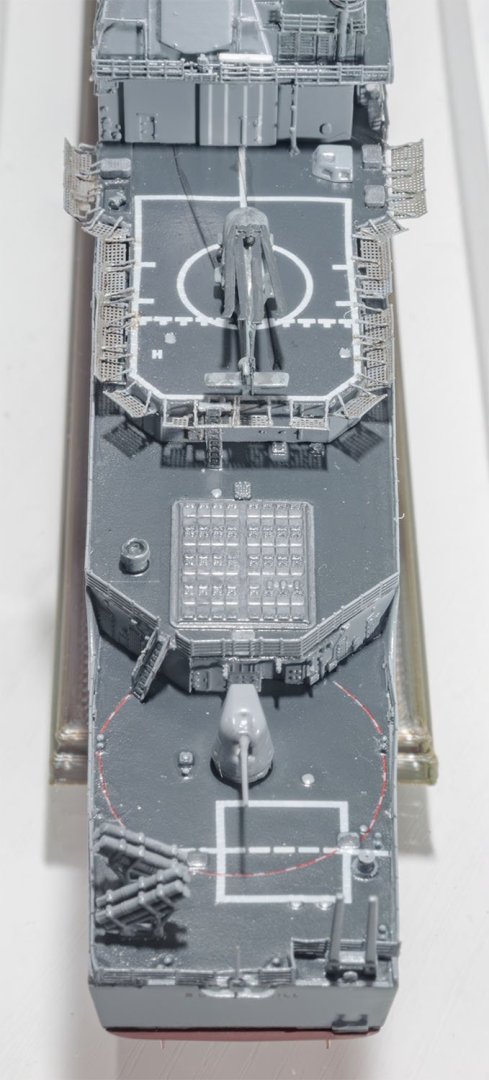
It's finished now. I'll take pictures and videos tomorrow... 😪 USS Aries (PHM-5) is a museum ship in Missouri. These are my reference pages. NAVsource https://www.navsource.net/archives/12/1605.htm Tour videos https://www.youtube.com/watch?v=RIhwvKUIHco https://www.youtube.com/watch?v=w2ClX9Llzm8 https://www.youtube.com/watch?v=nNAqXiB5LN8 I started from printing a custom display stand for the boat. A new drill machine. I drilled all the windows and polished them one by one. Not the best windows... They are OHP films. I found that the Trumpeter's PE parts are not better than Flyhawk's. It is really difficult to fit the PE parts of the antenna tower. Designed and printed more parts. AND added handrail parts. They are 50% thicker than the real railings. The real railings are 3 inches thick. Better than the poor assembly of PE parts.


-
It was tough work. Thank you for watching my project and see you next month again~


- 9 replies
-
- 8
-

-

-
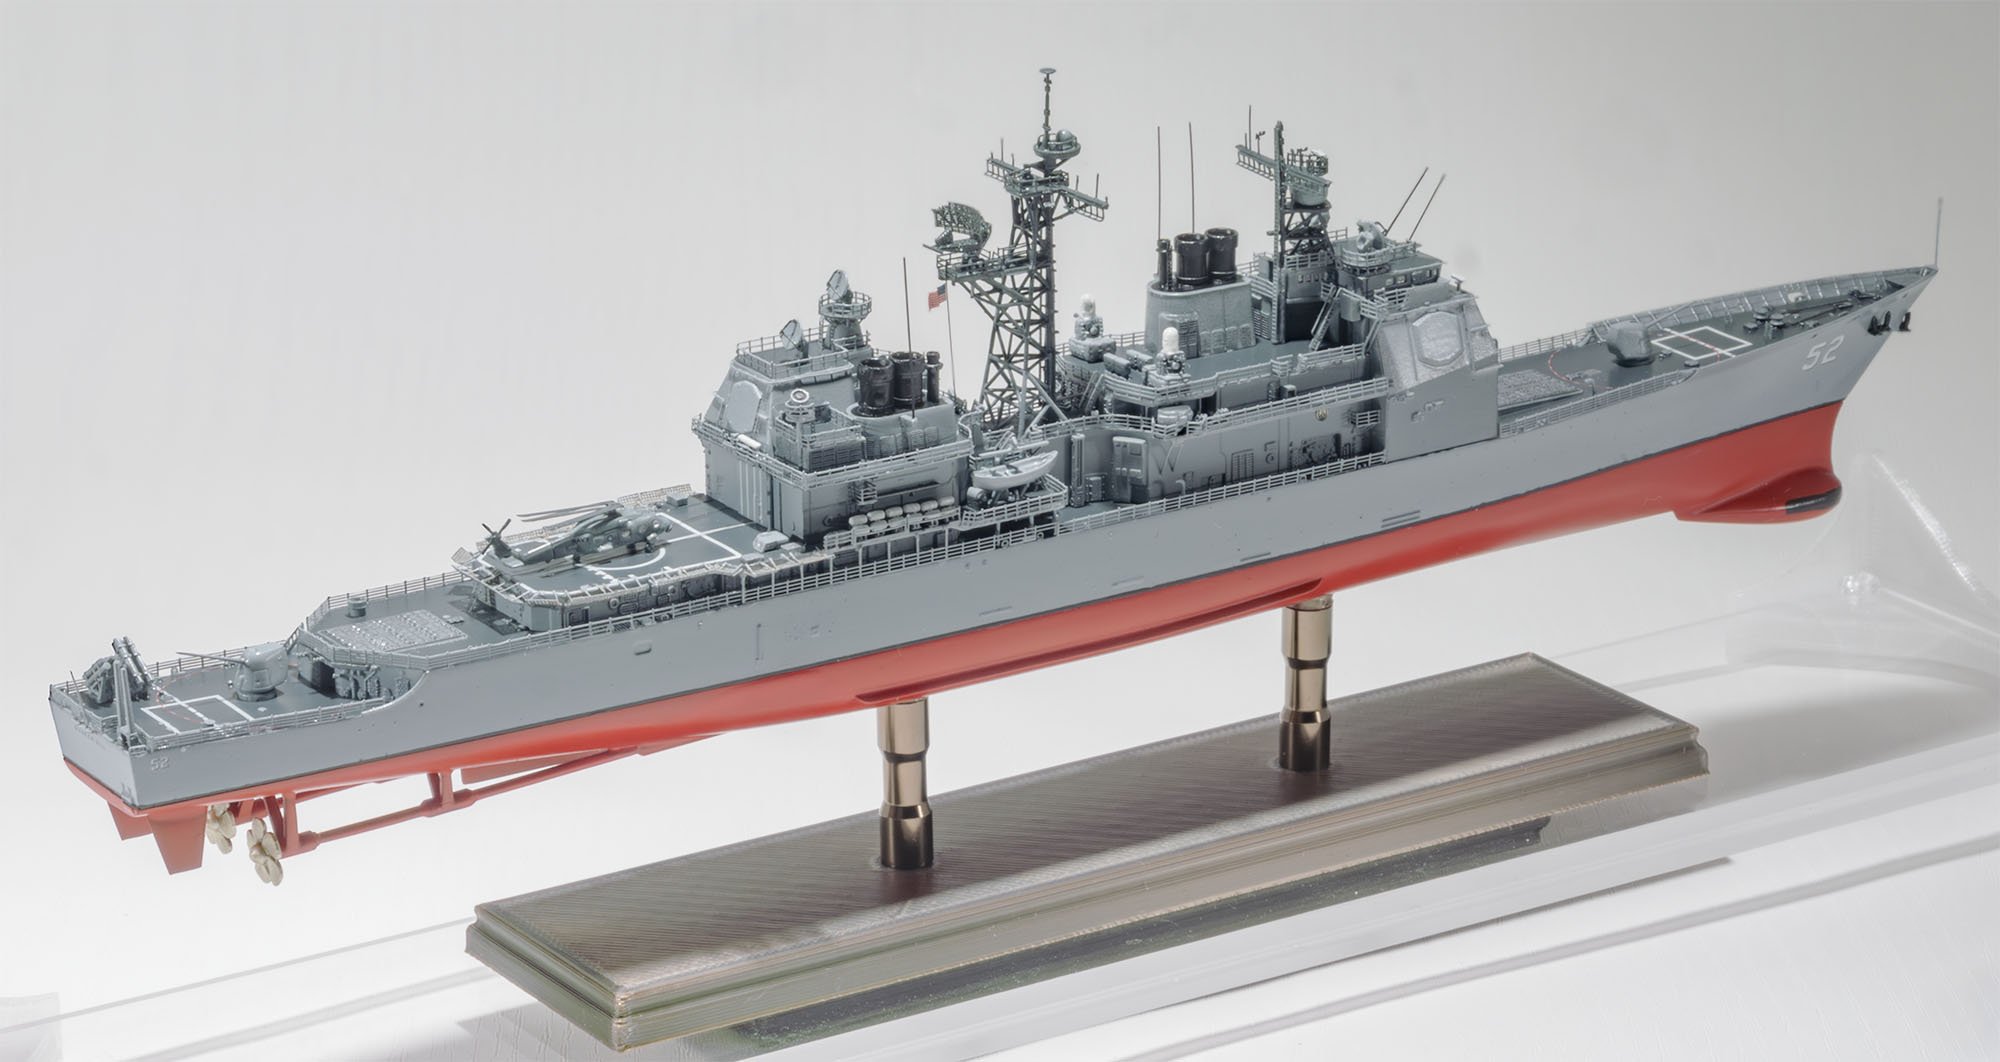
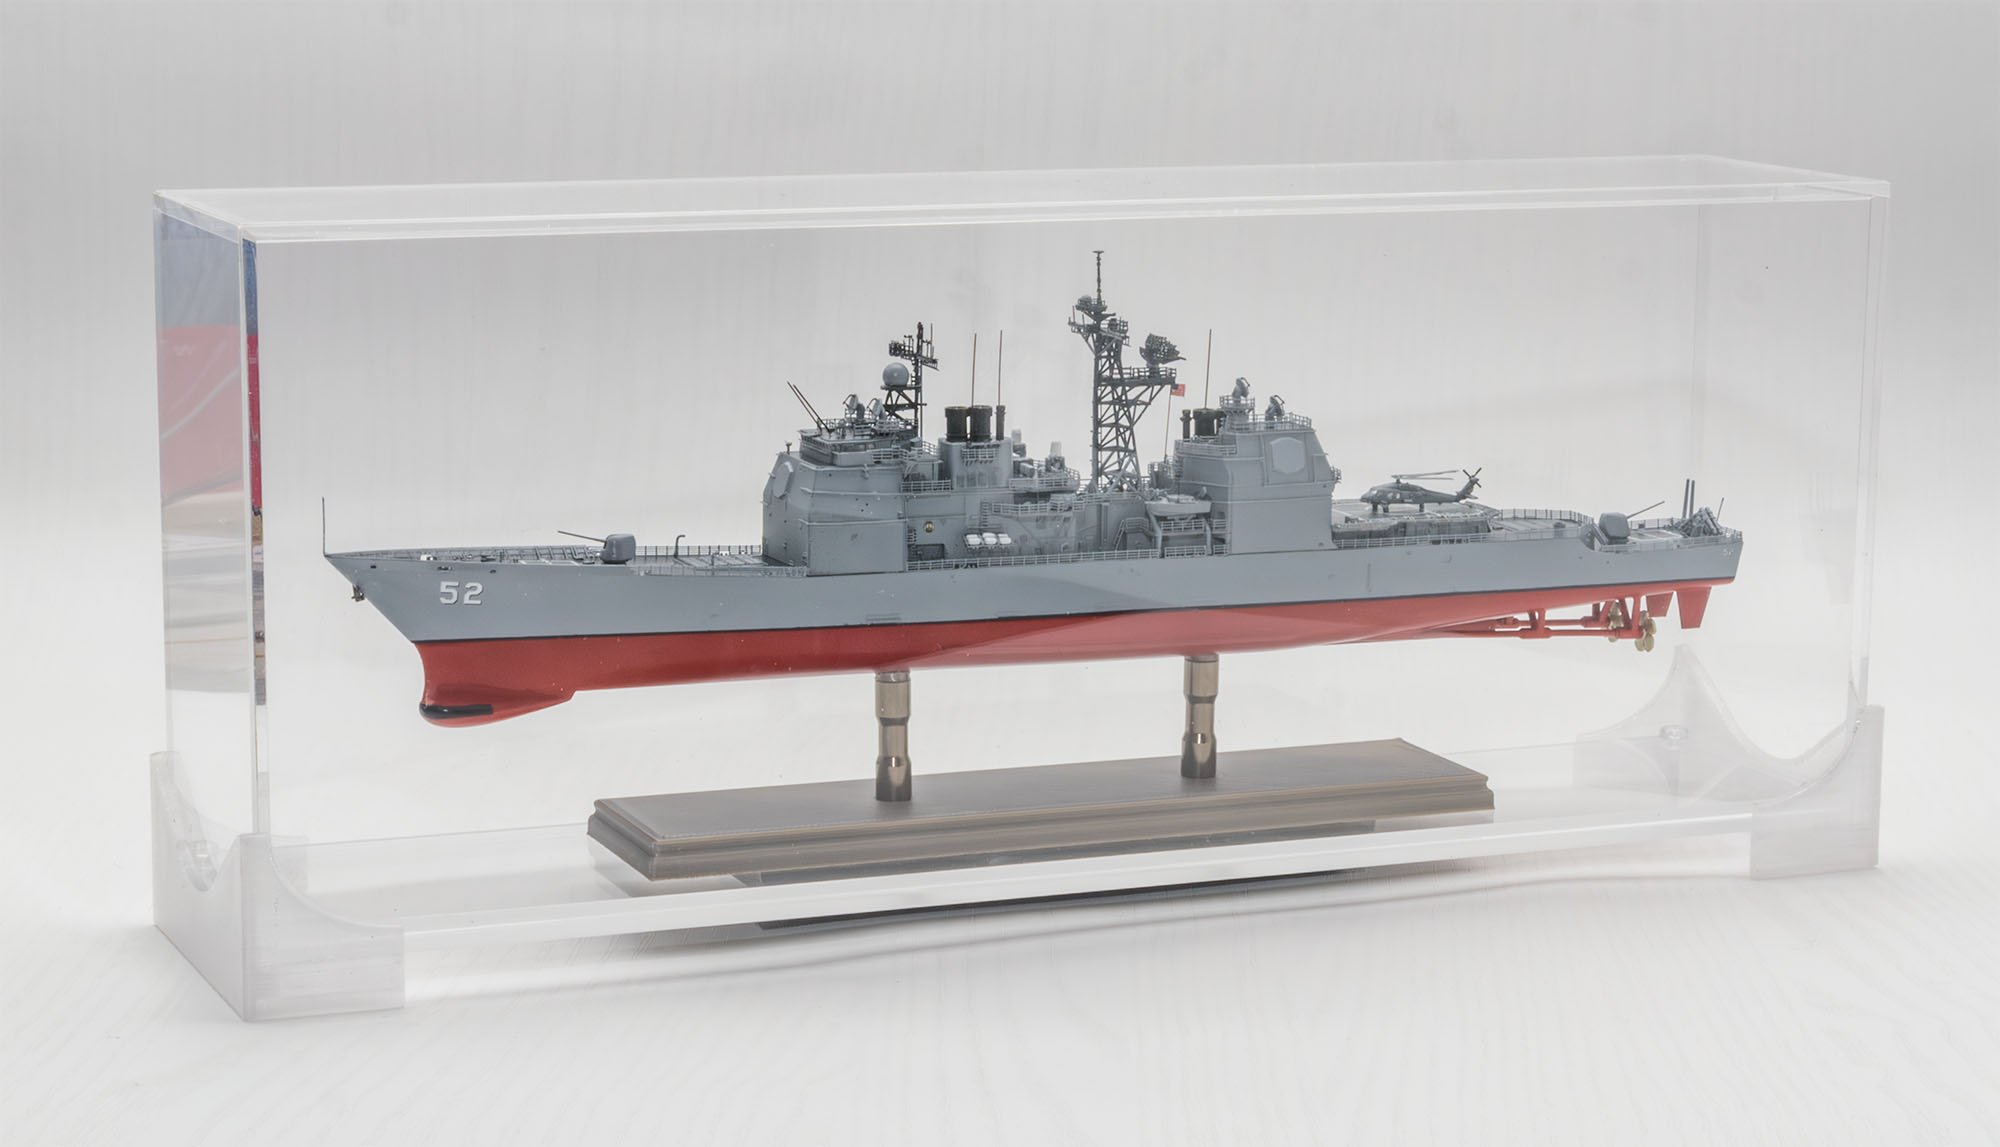
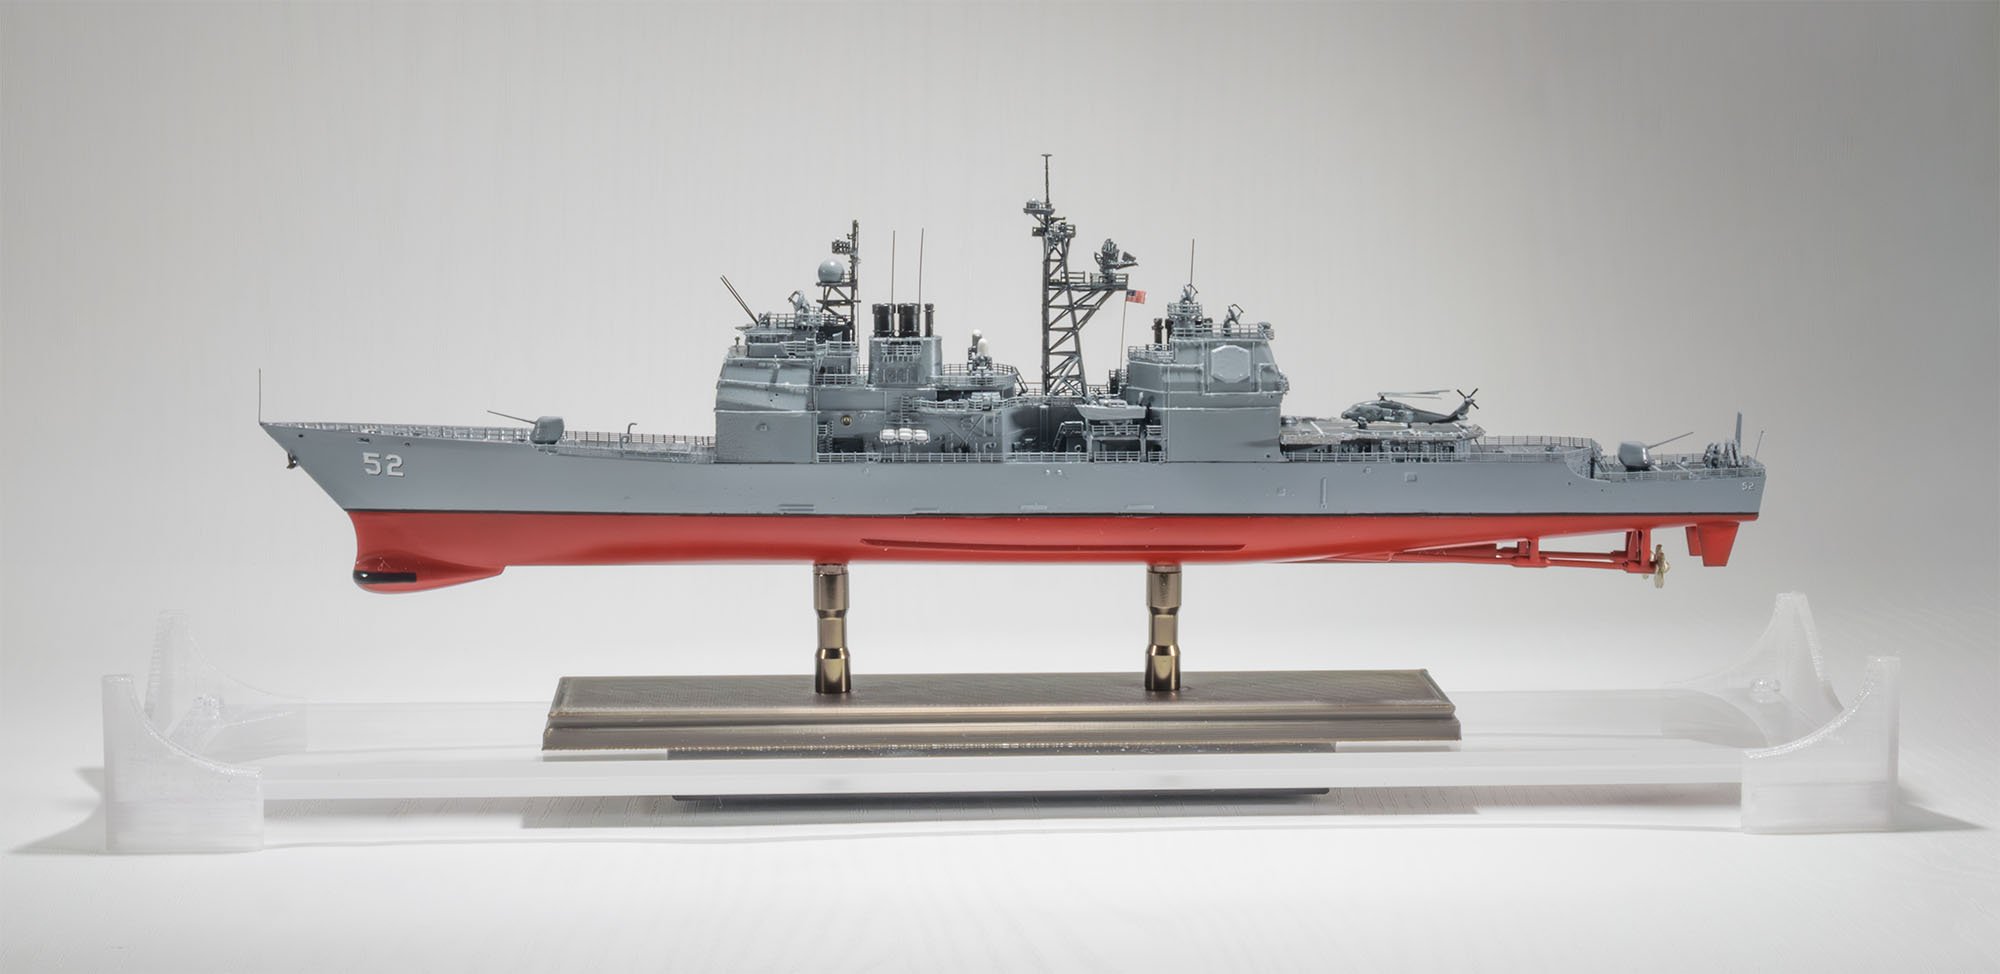
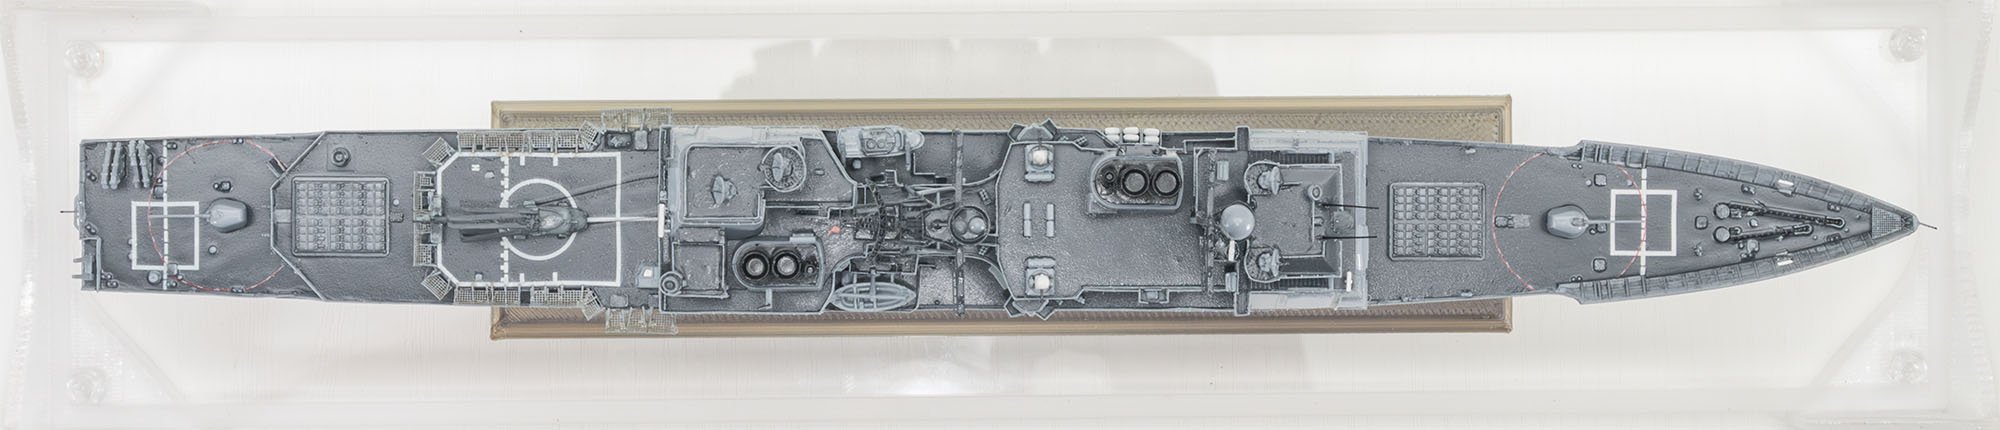
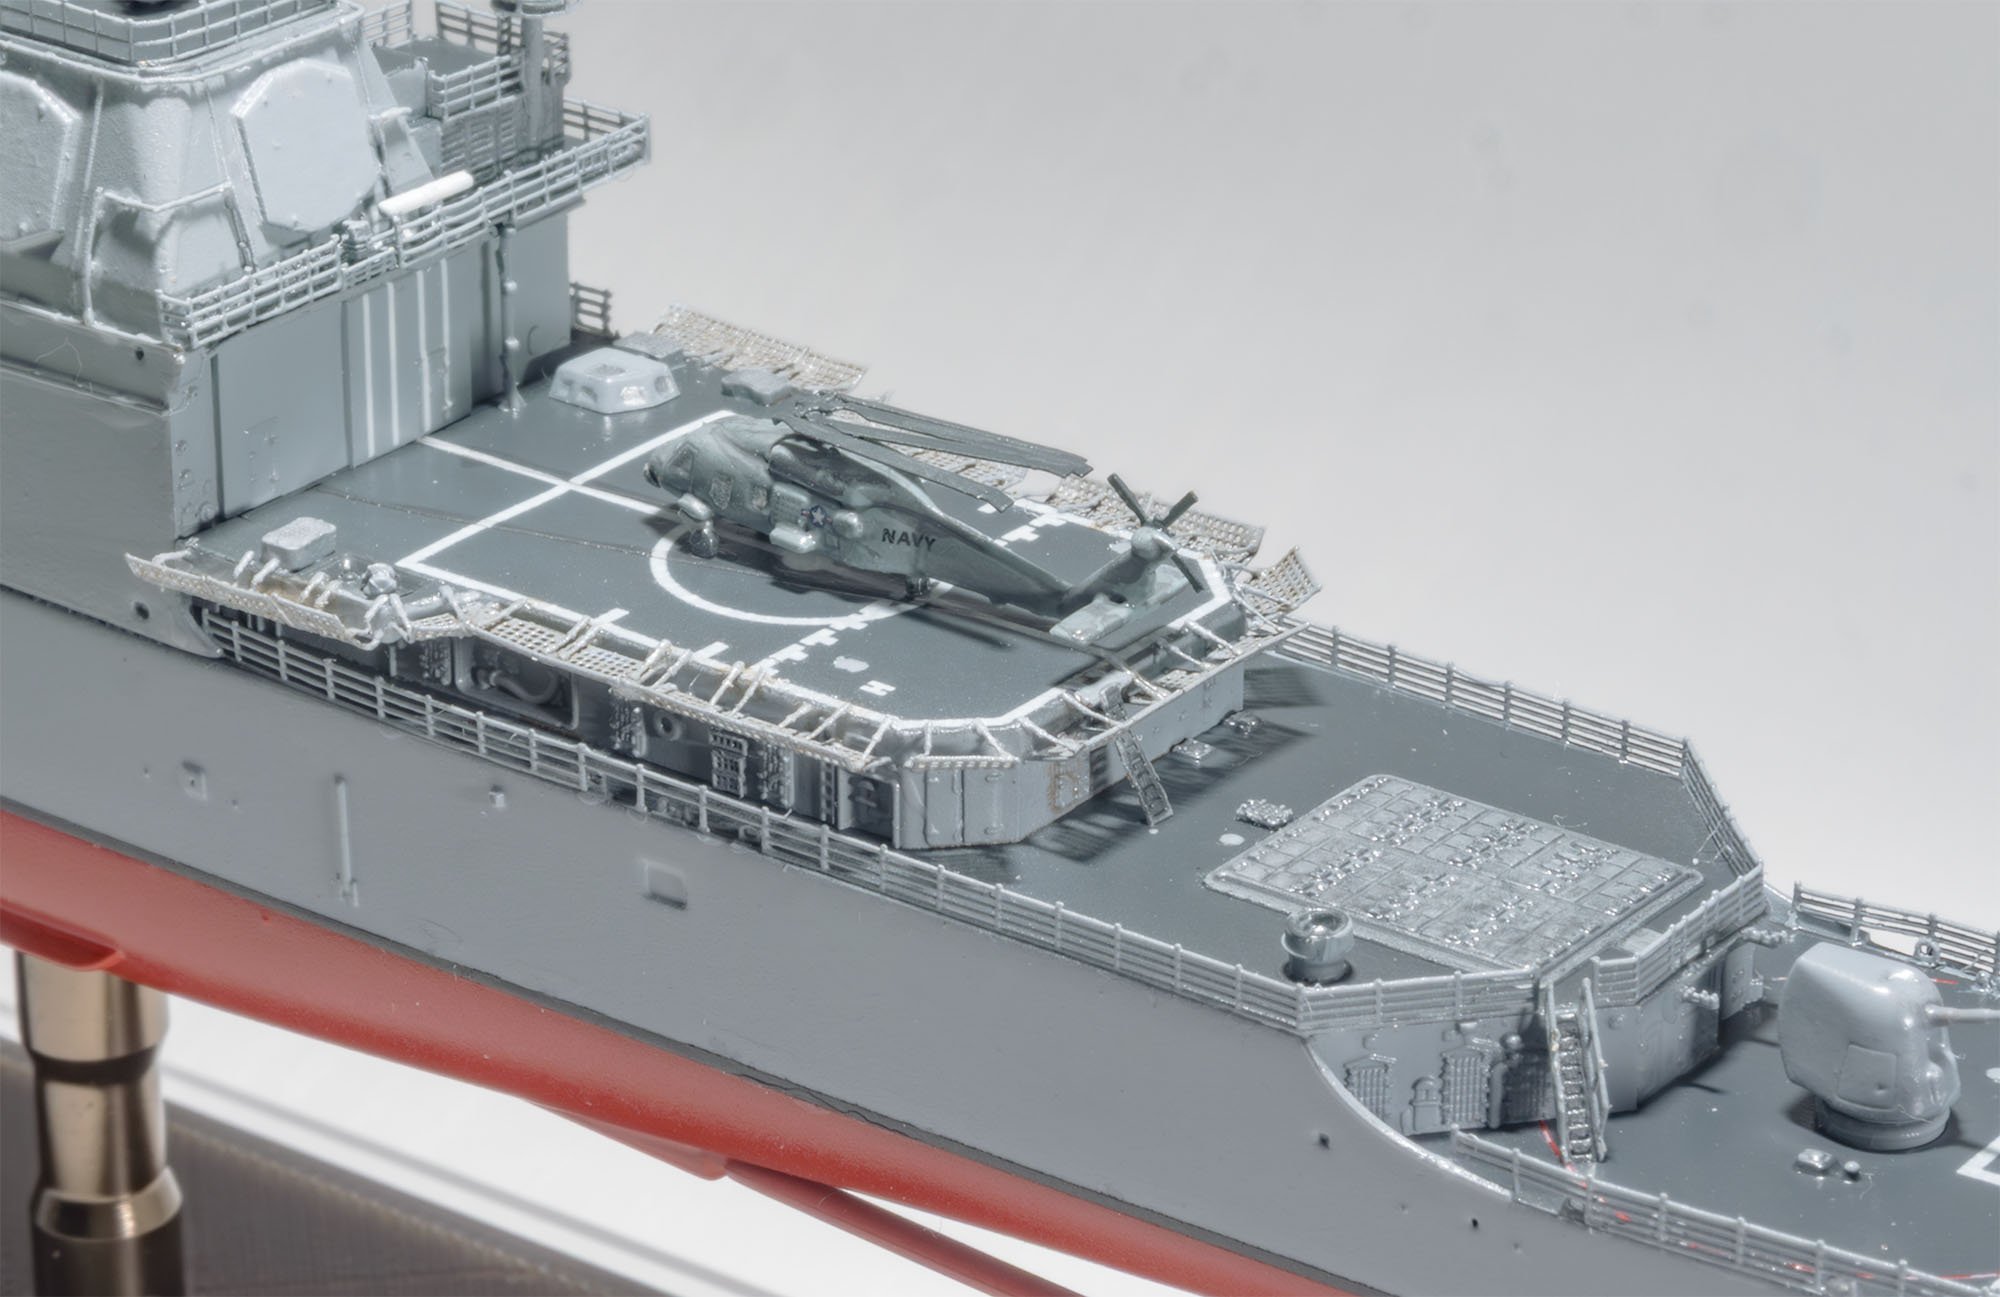
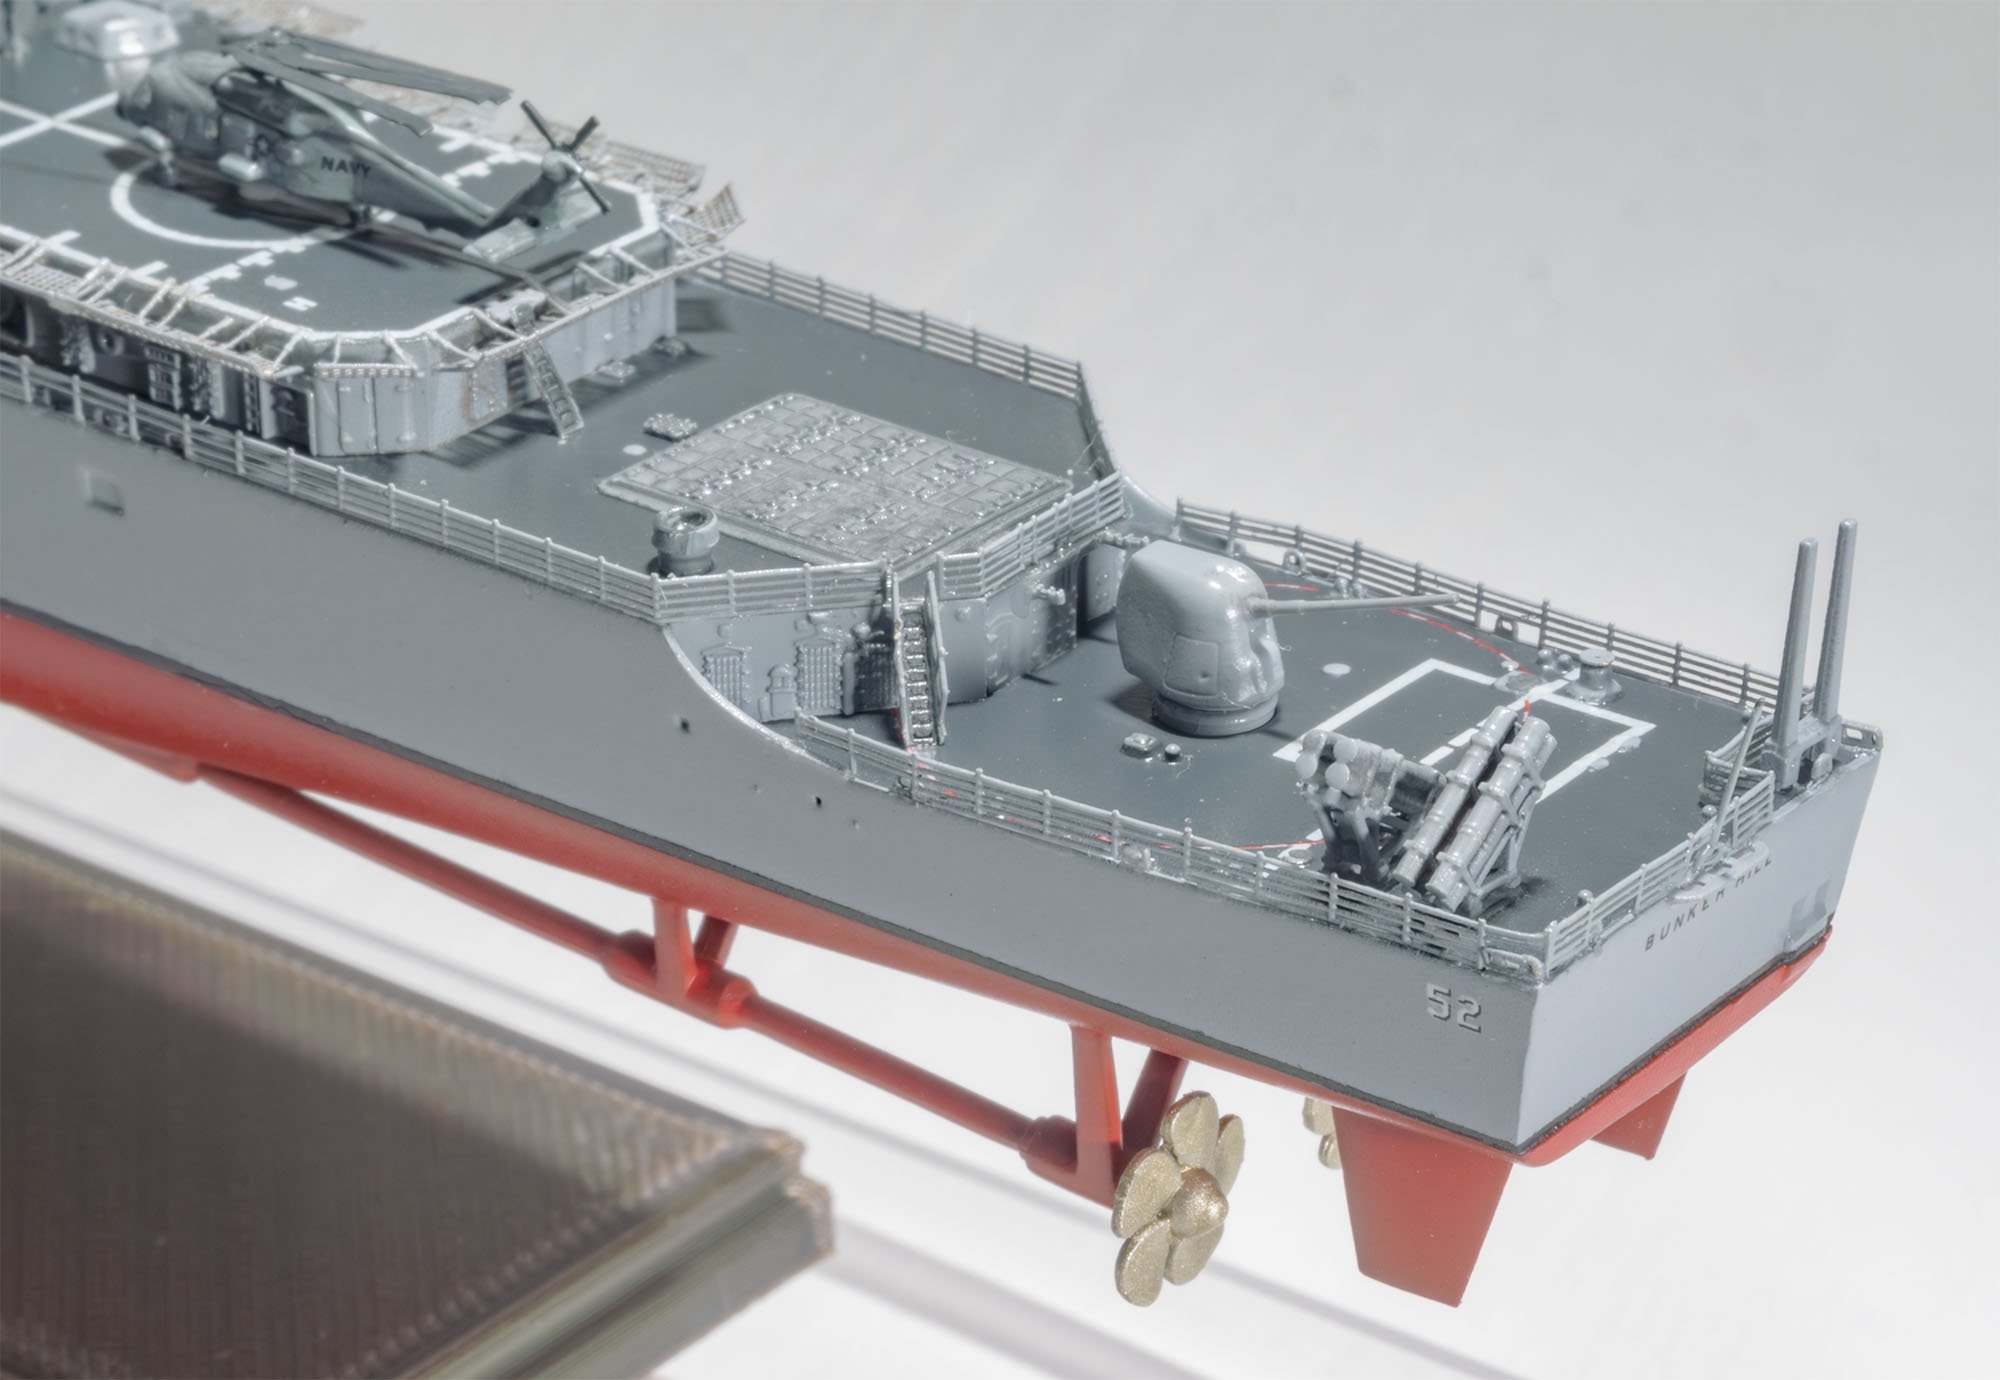
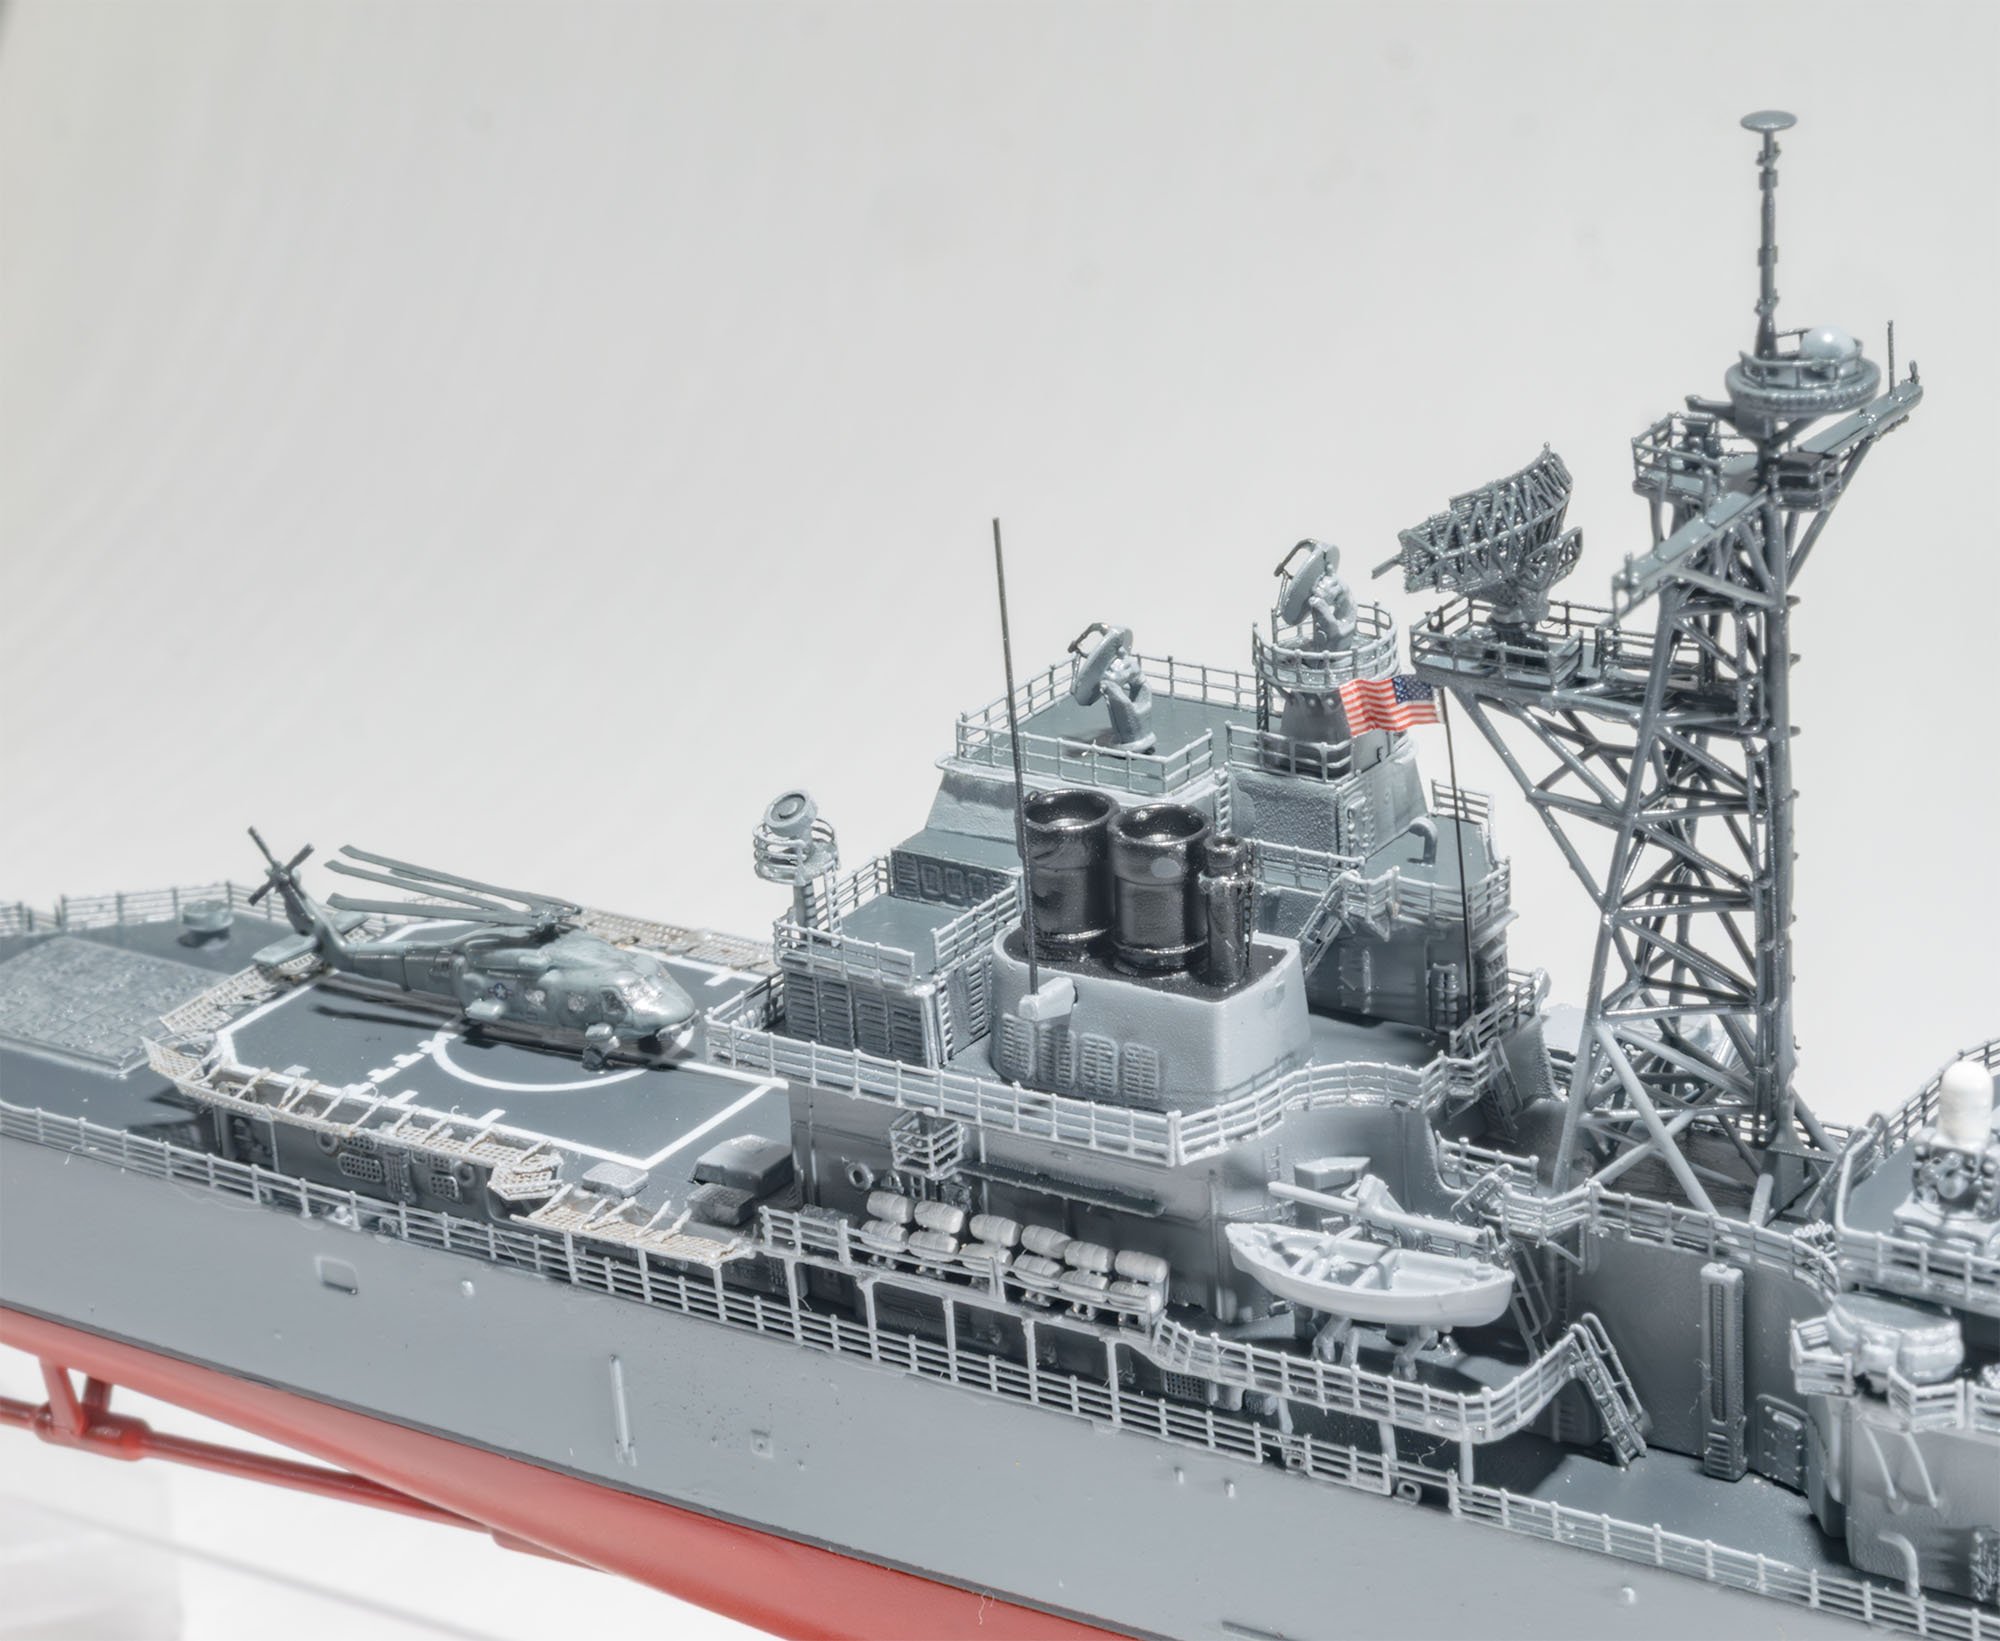
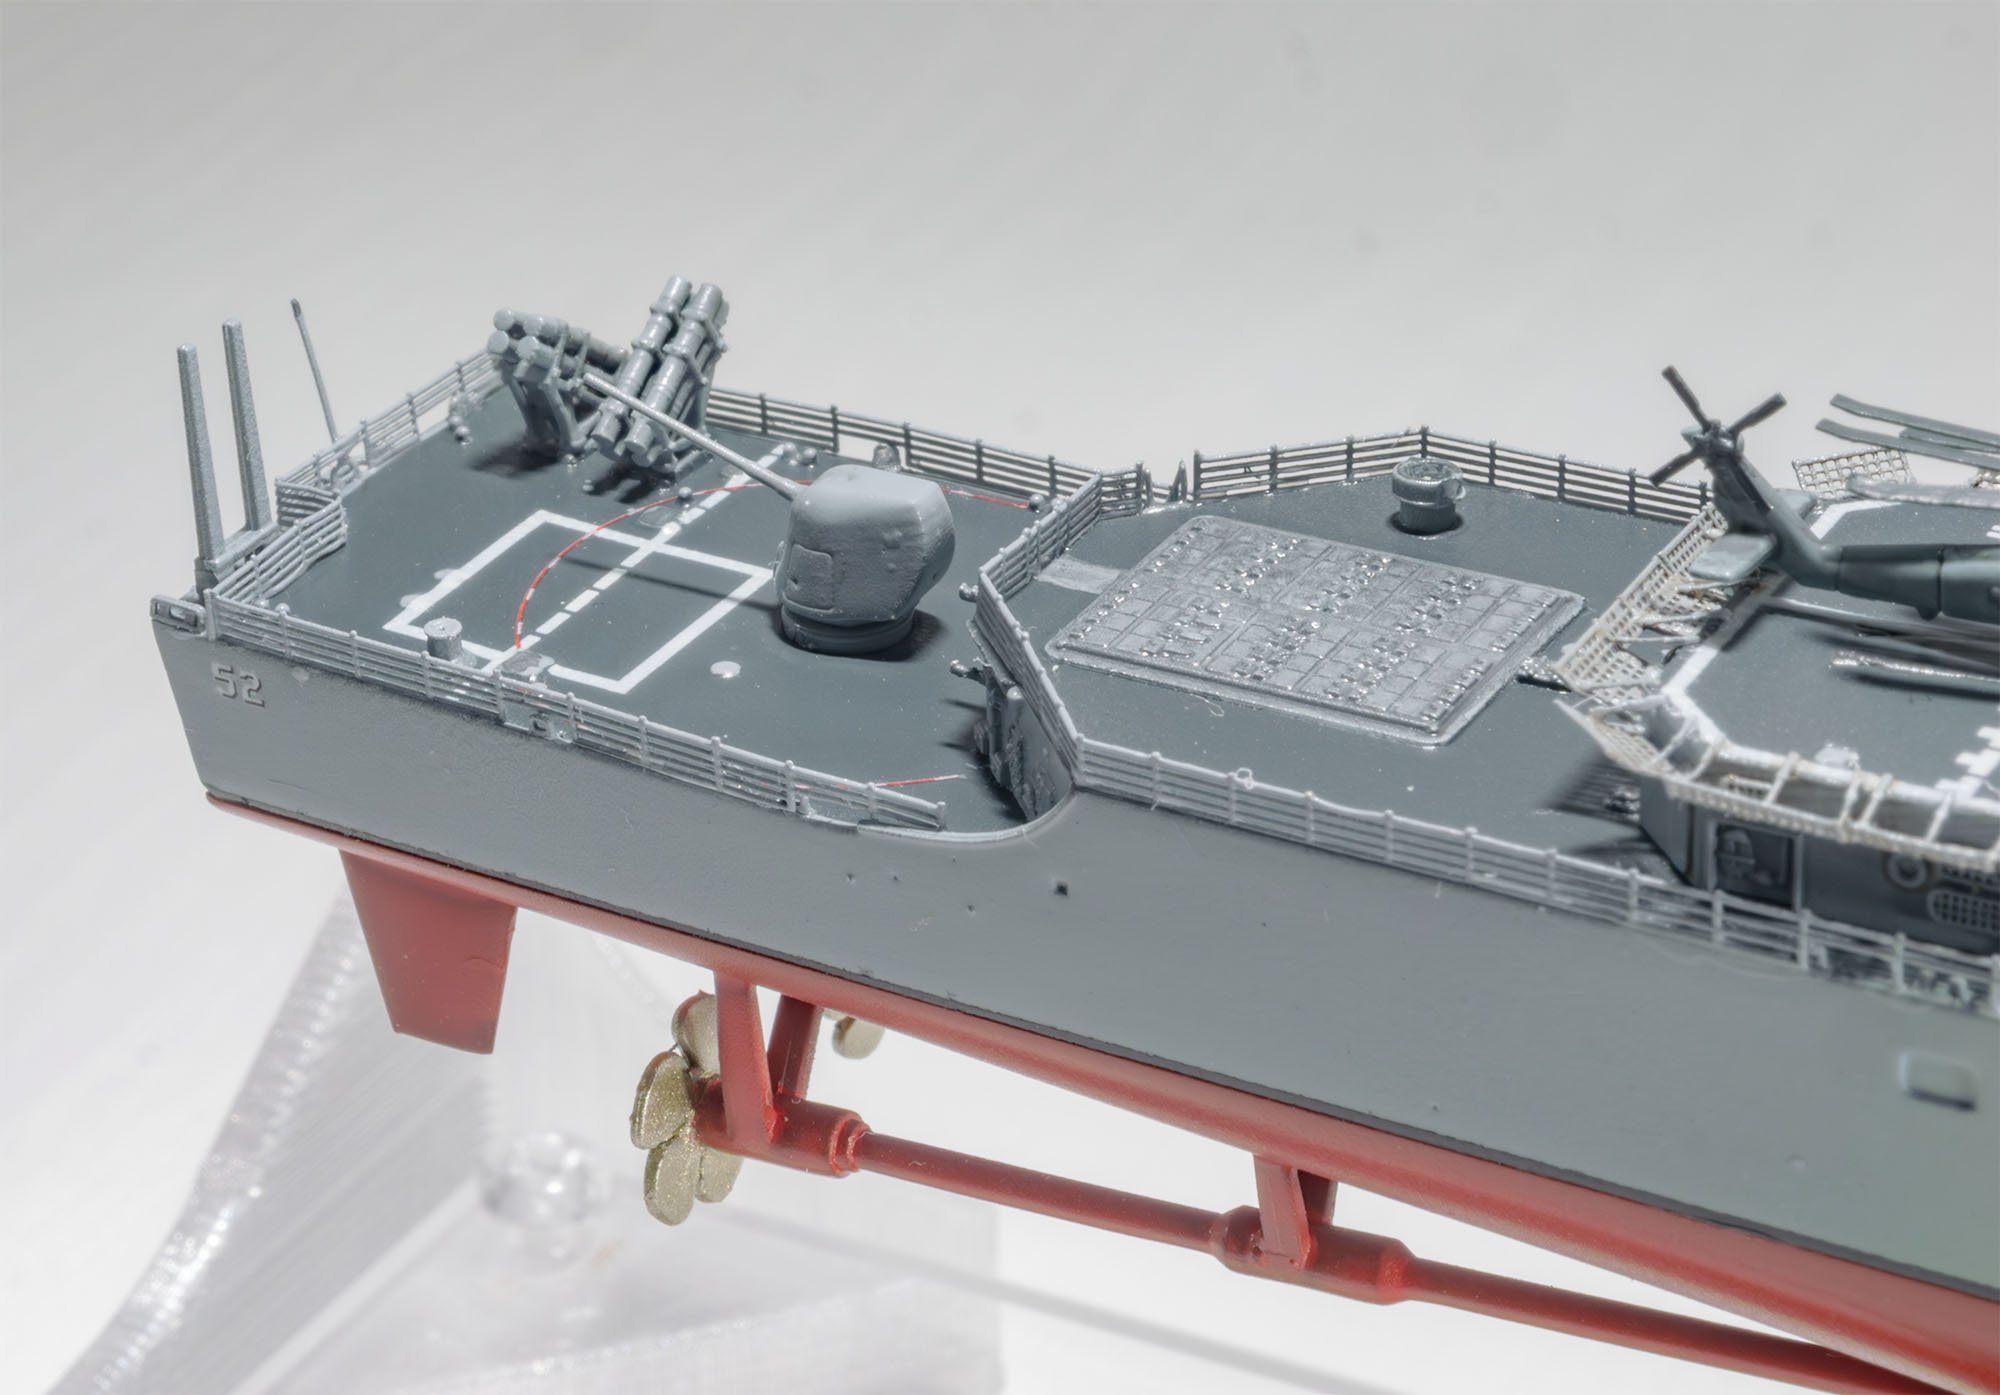
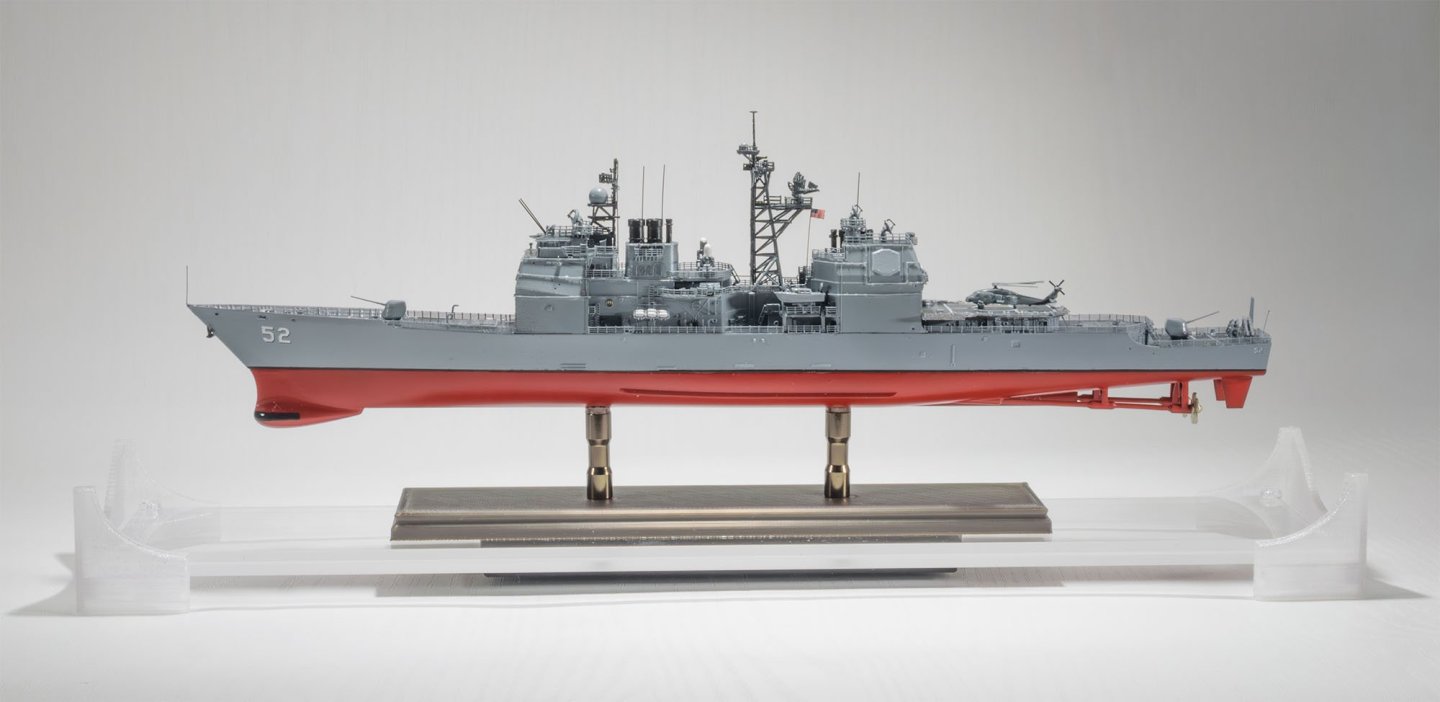
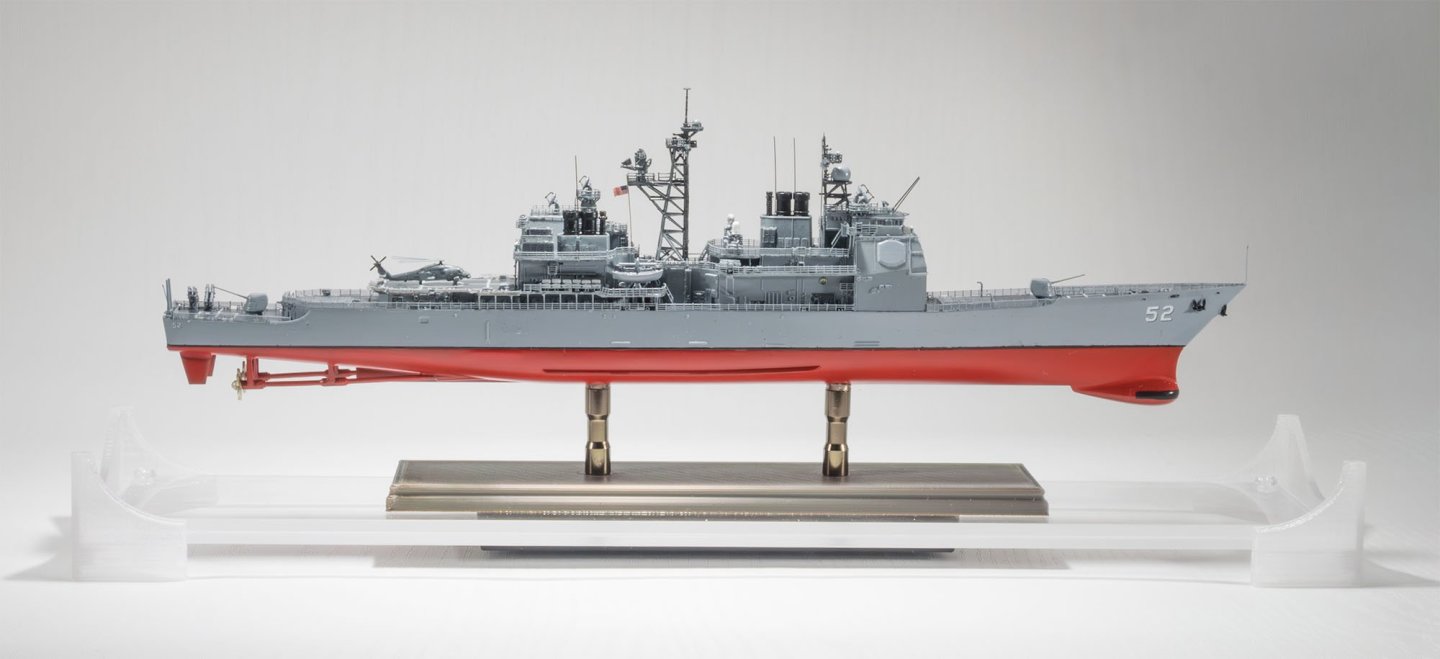
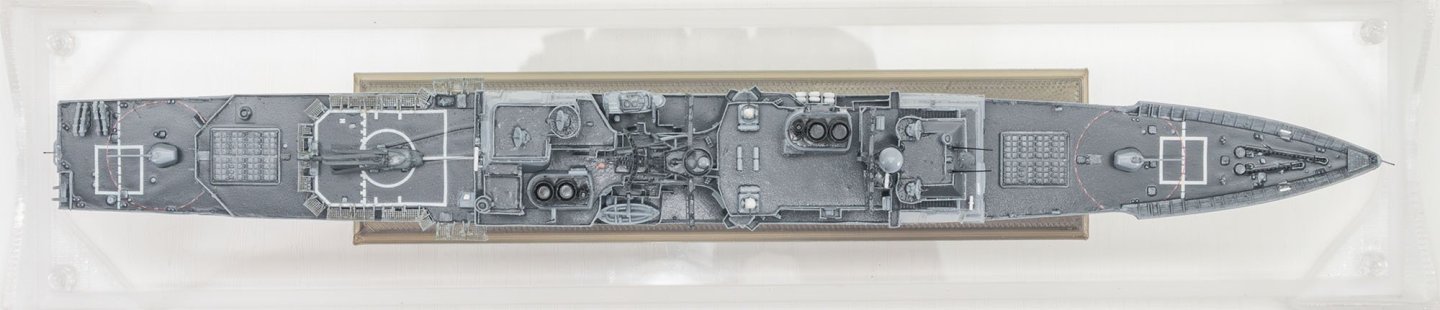
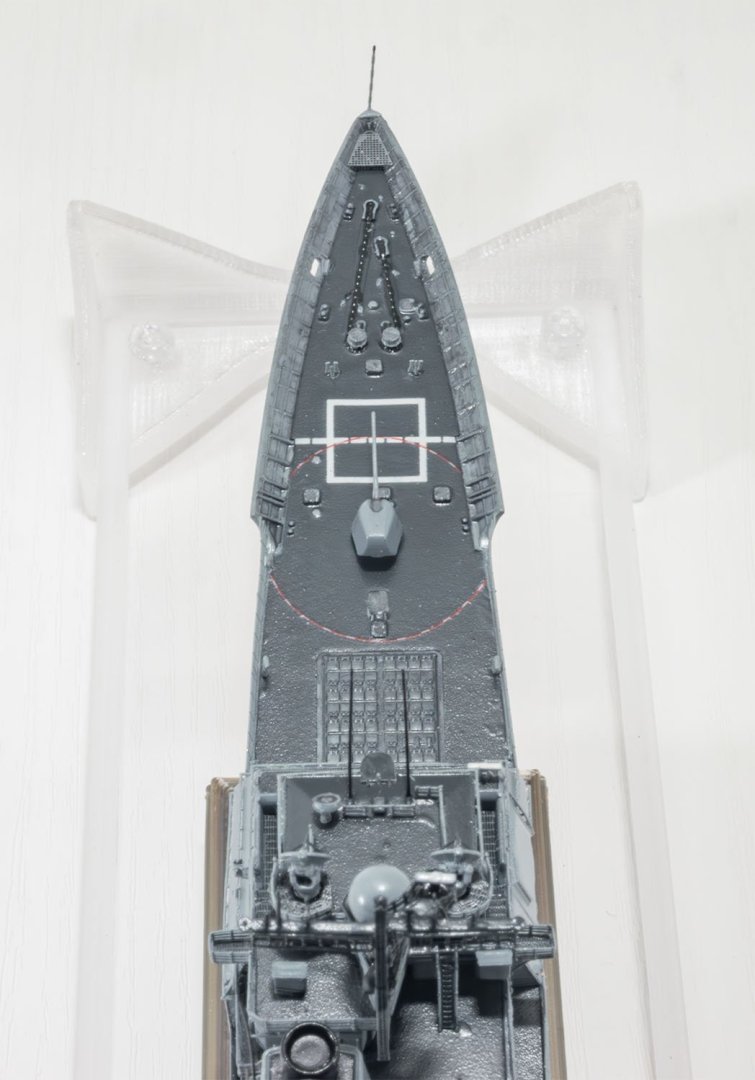
- Bunker Hill
- Flyhawk
- (and 2 more)
-
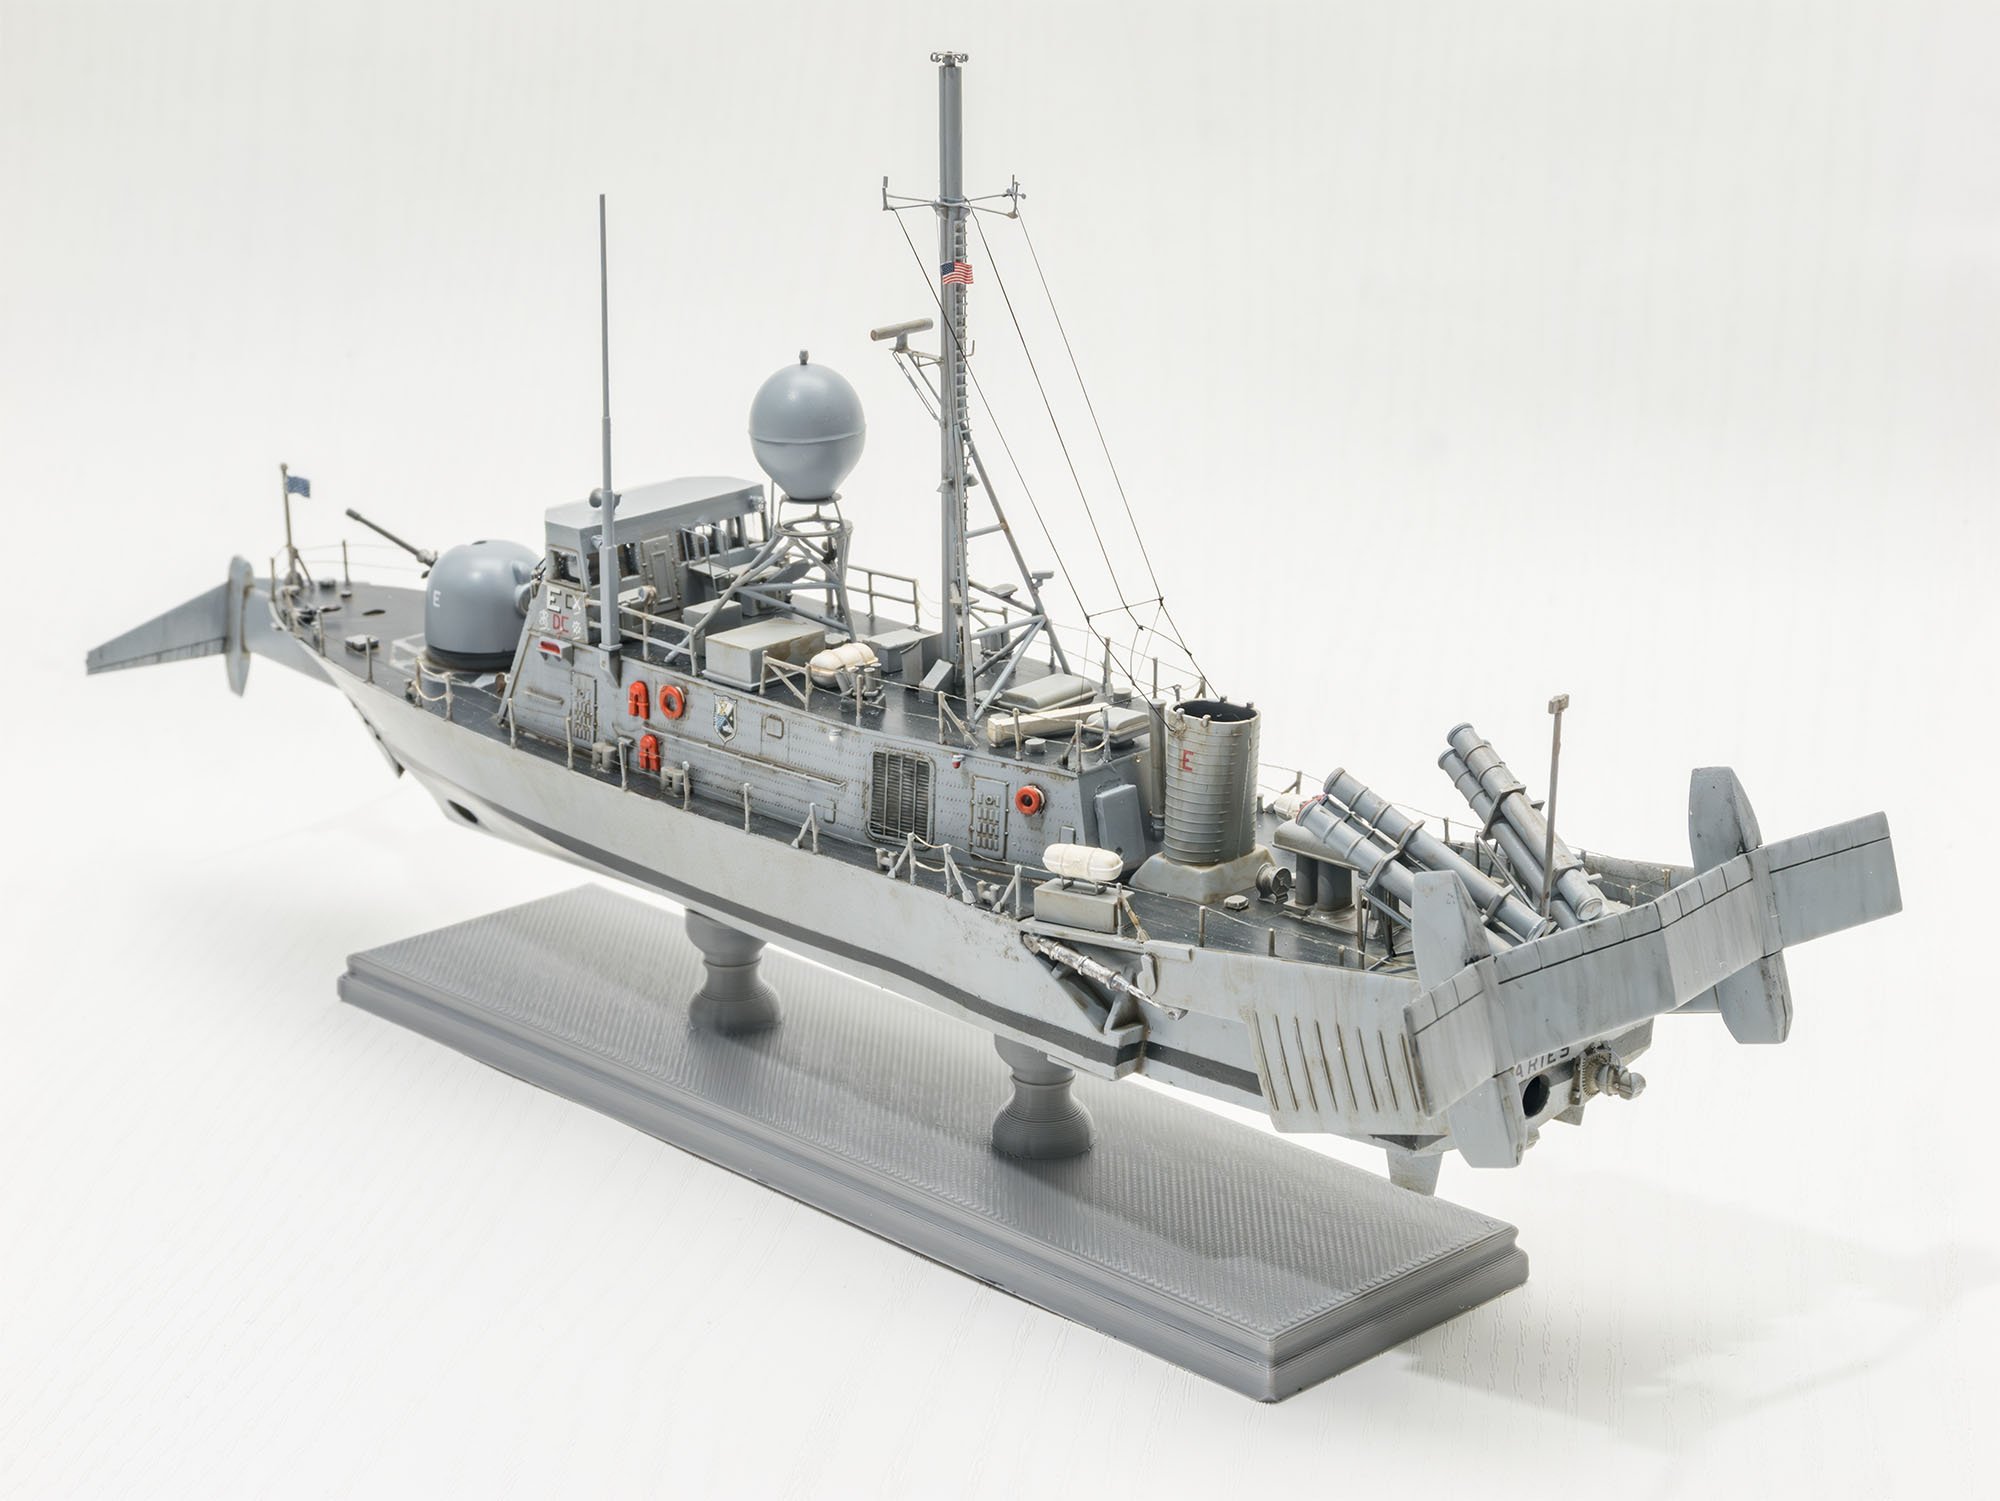
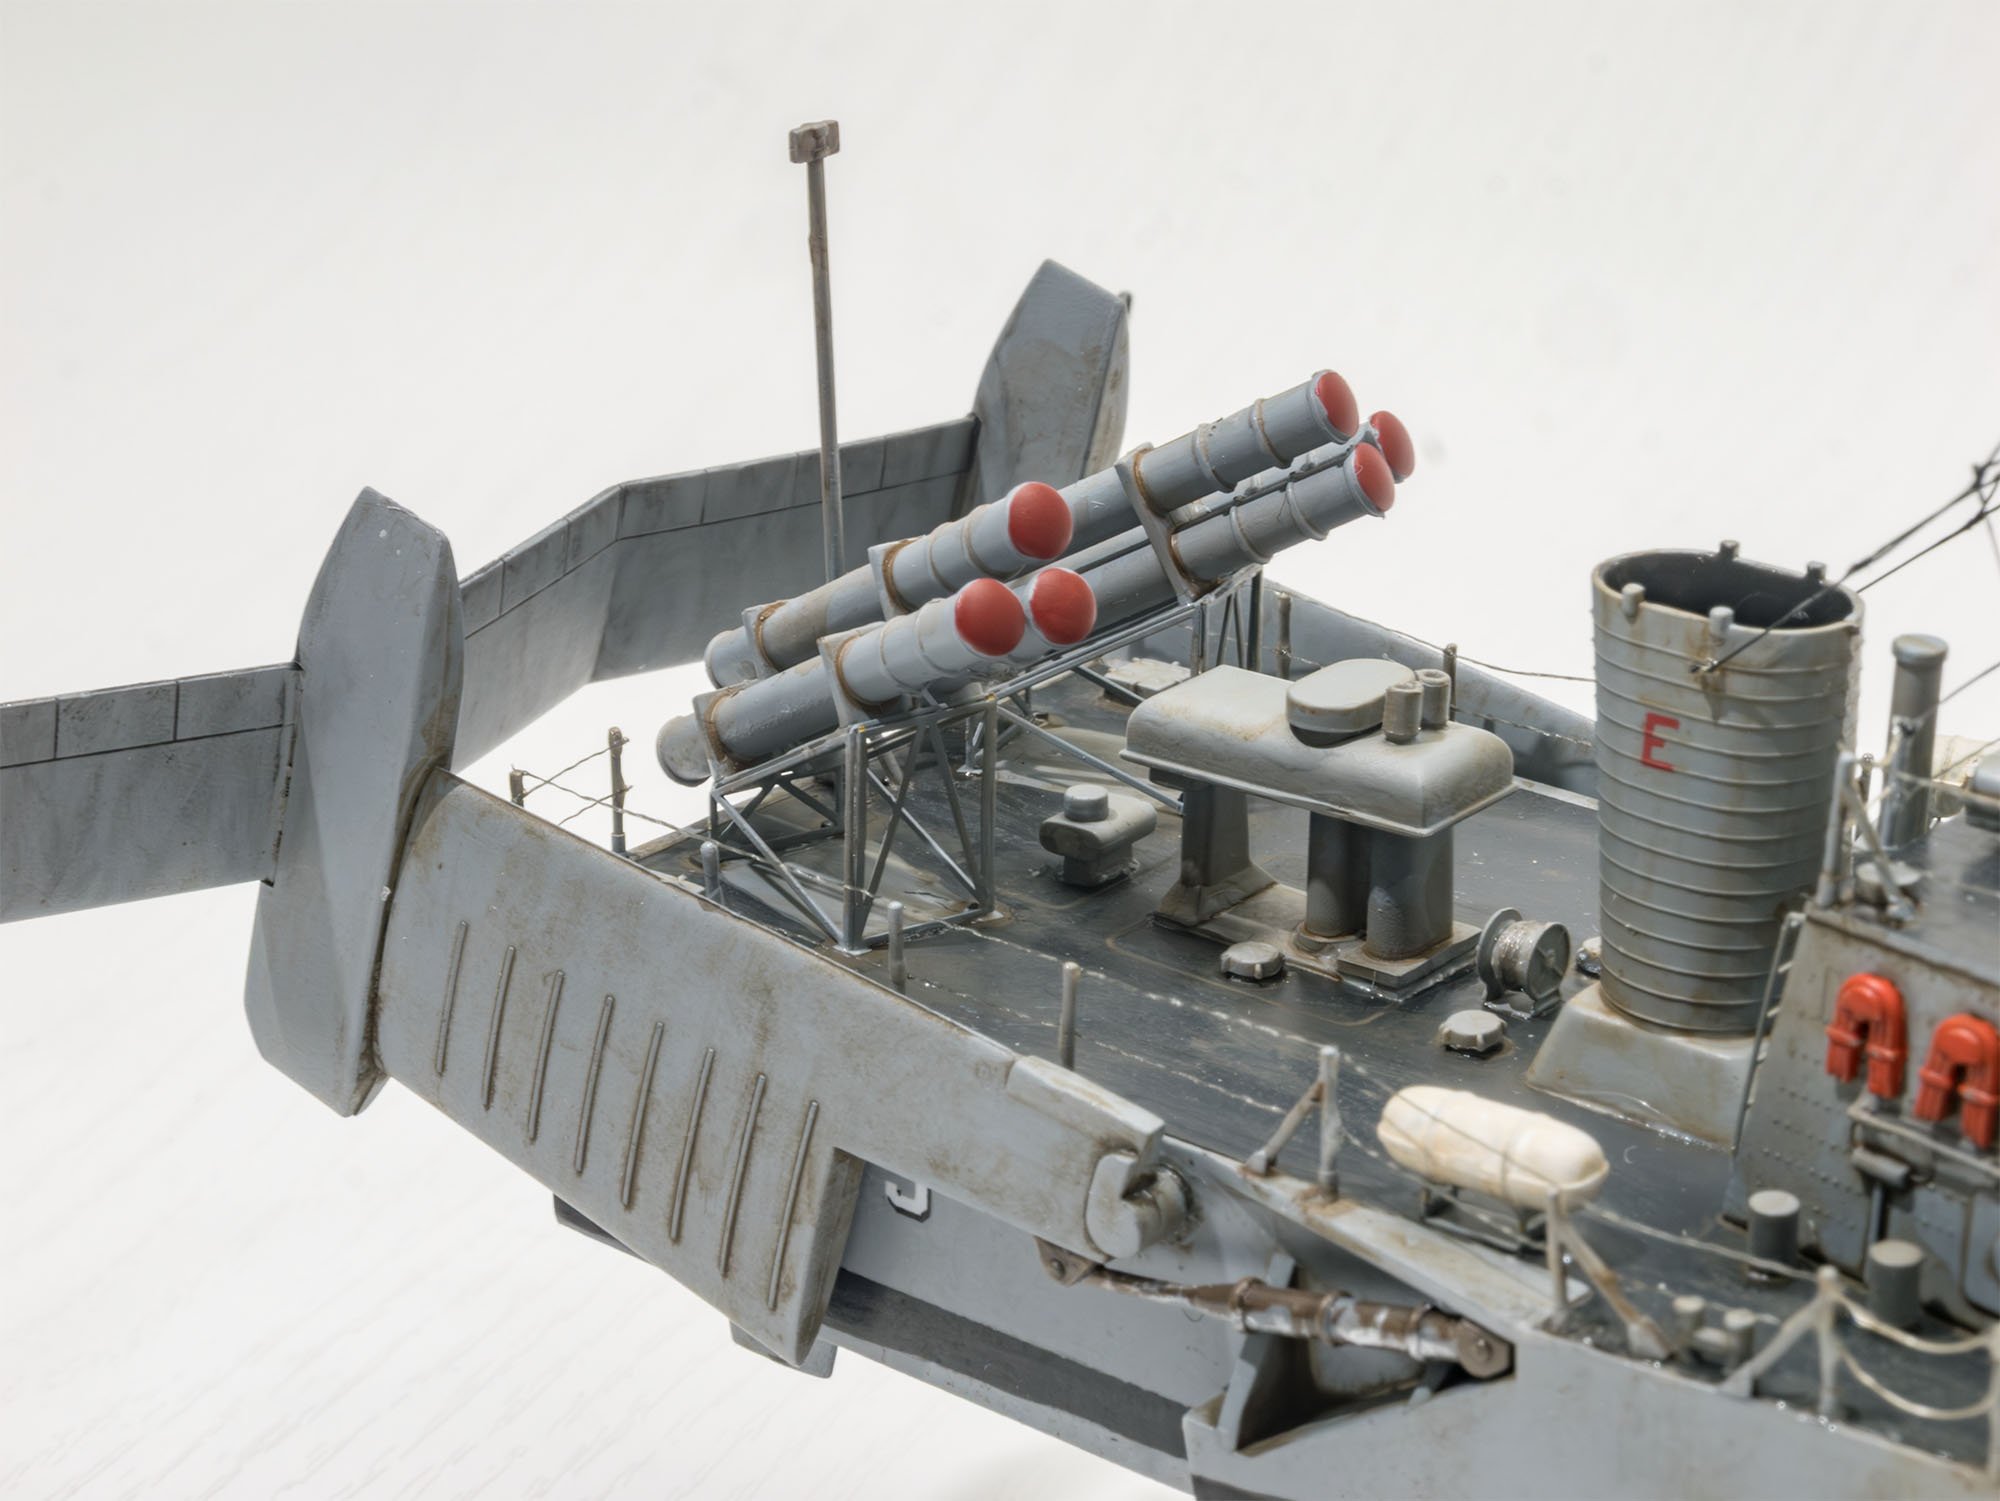
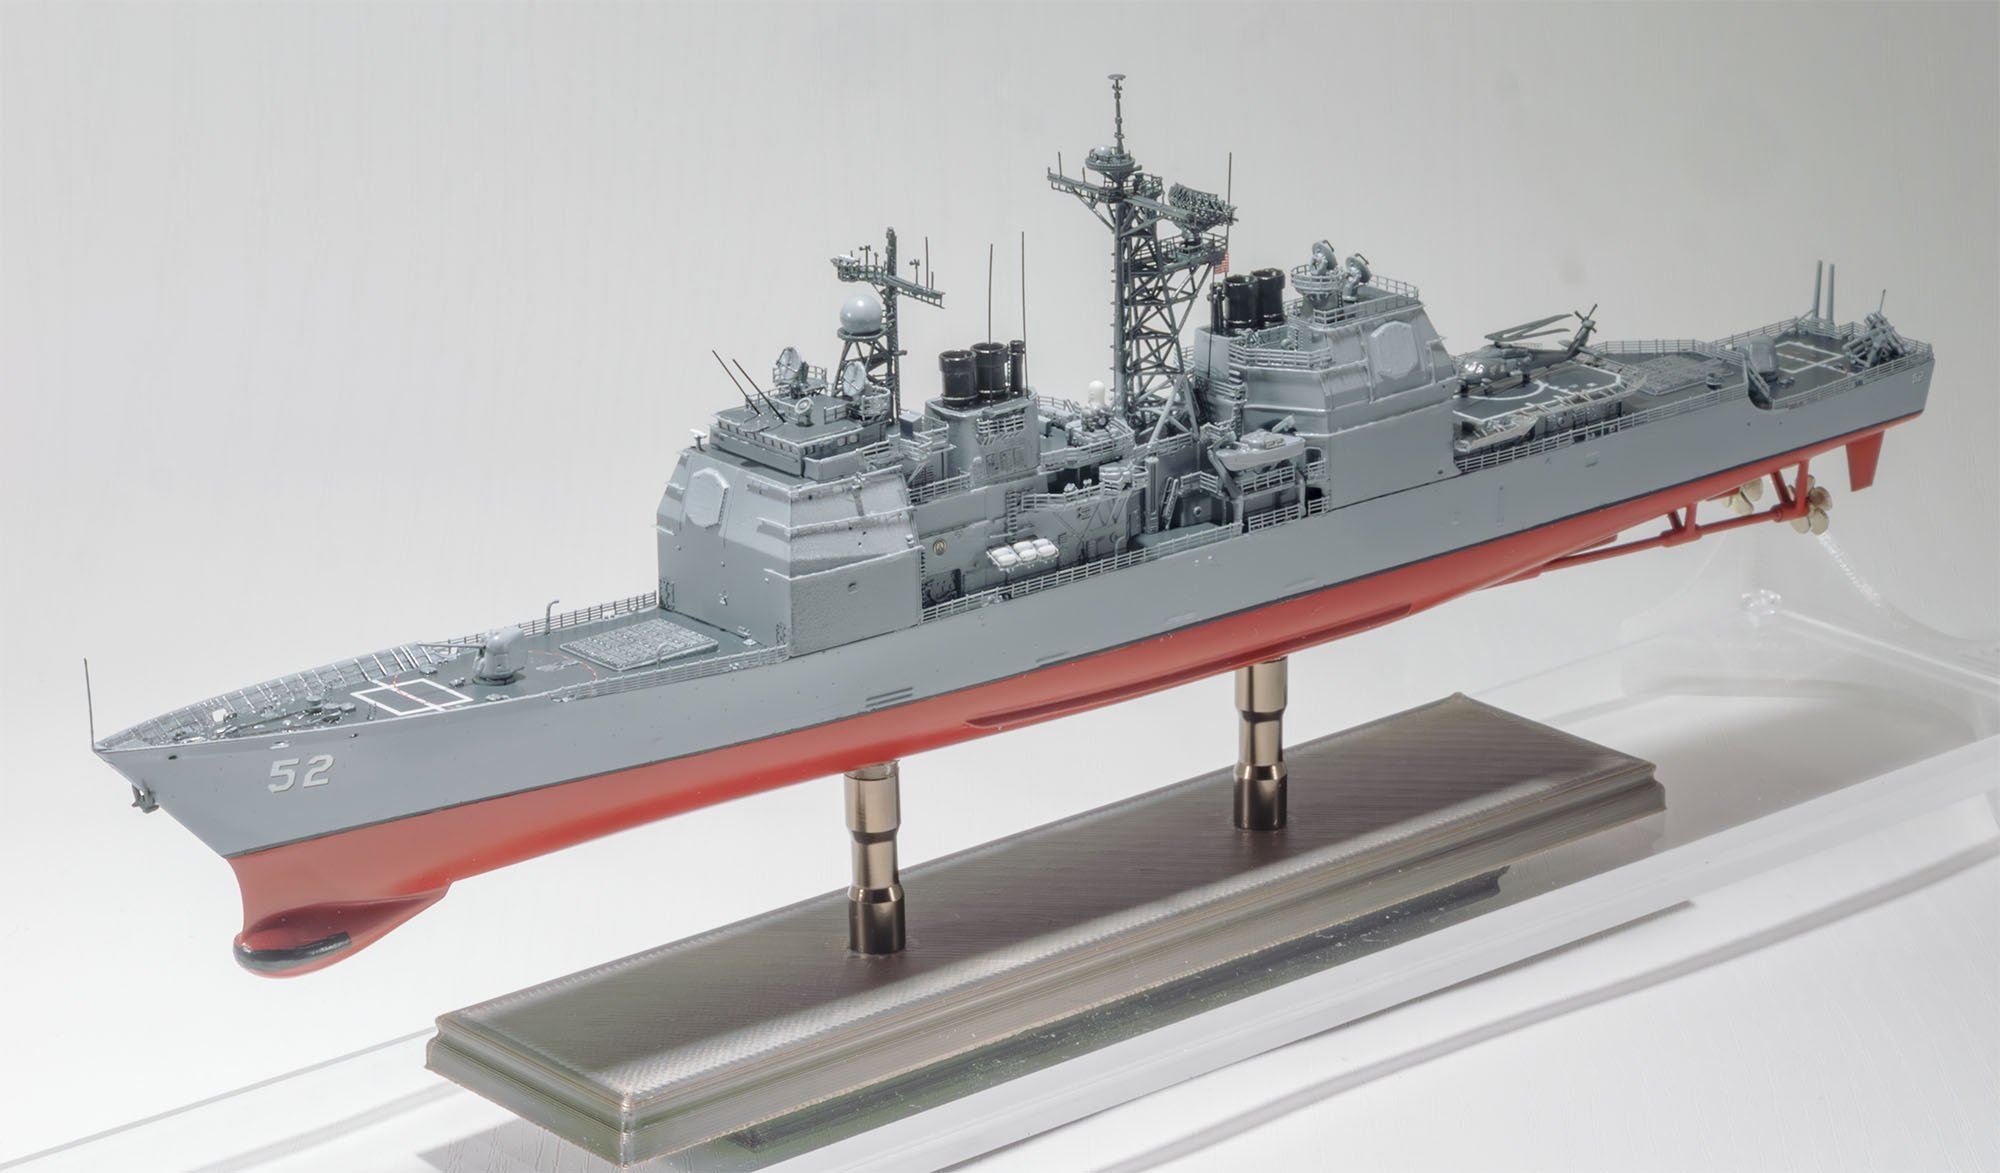
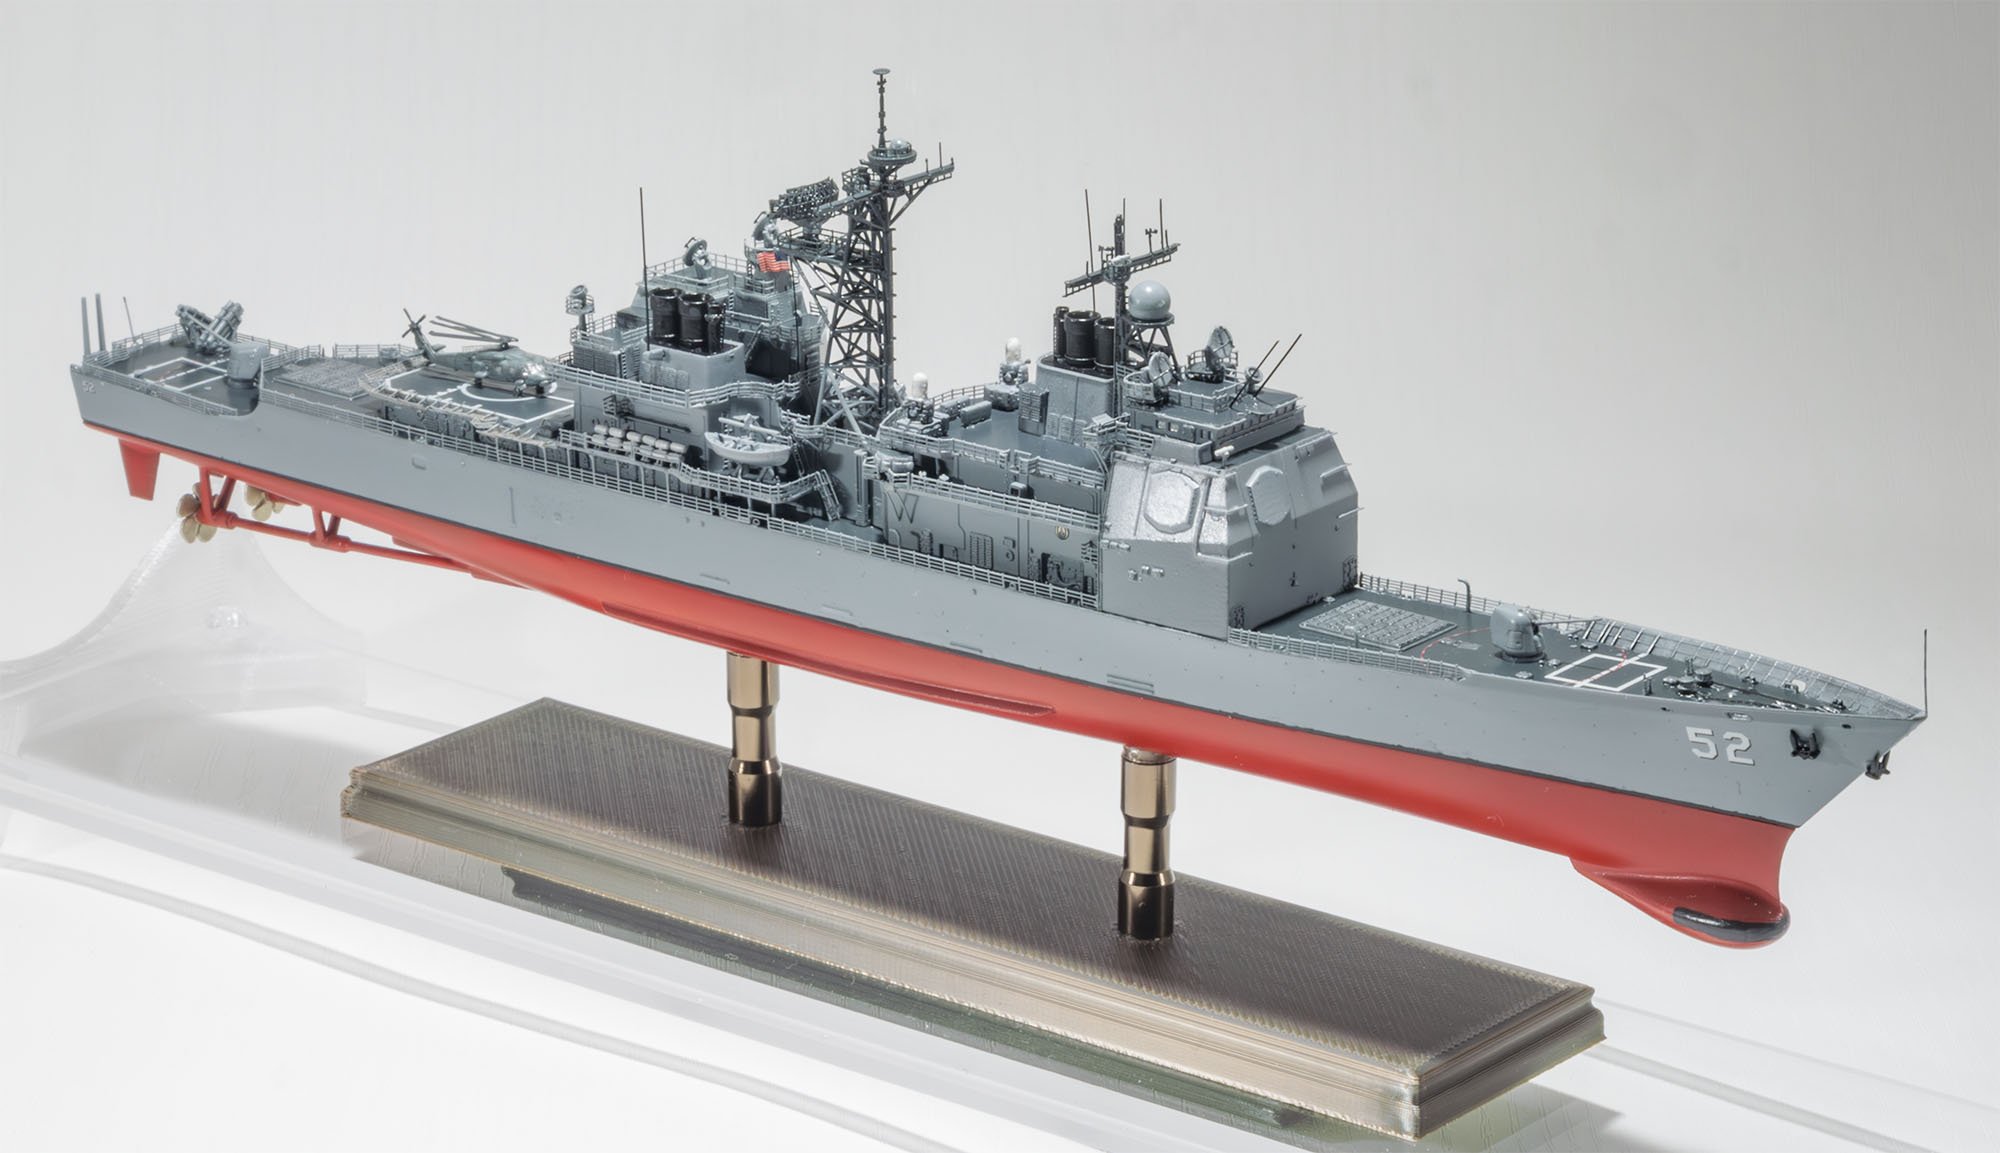
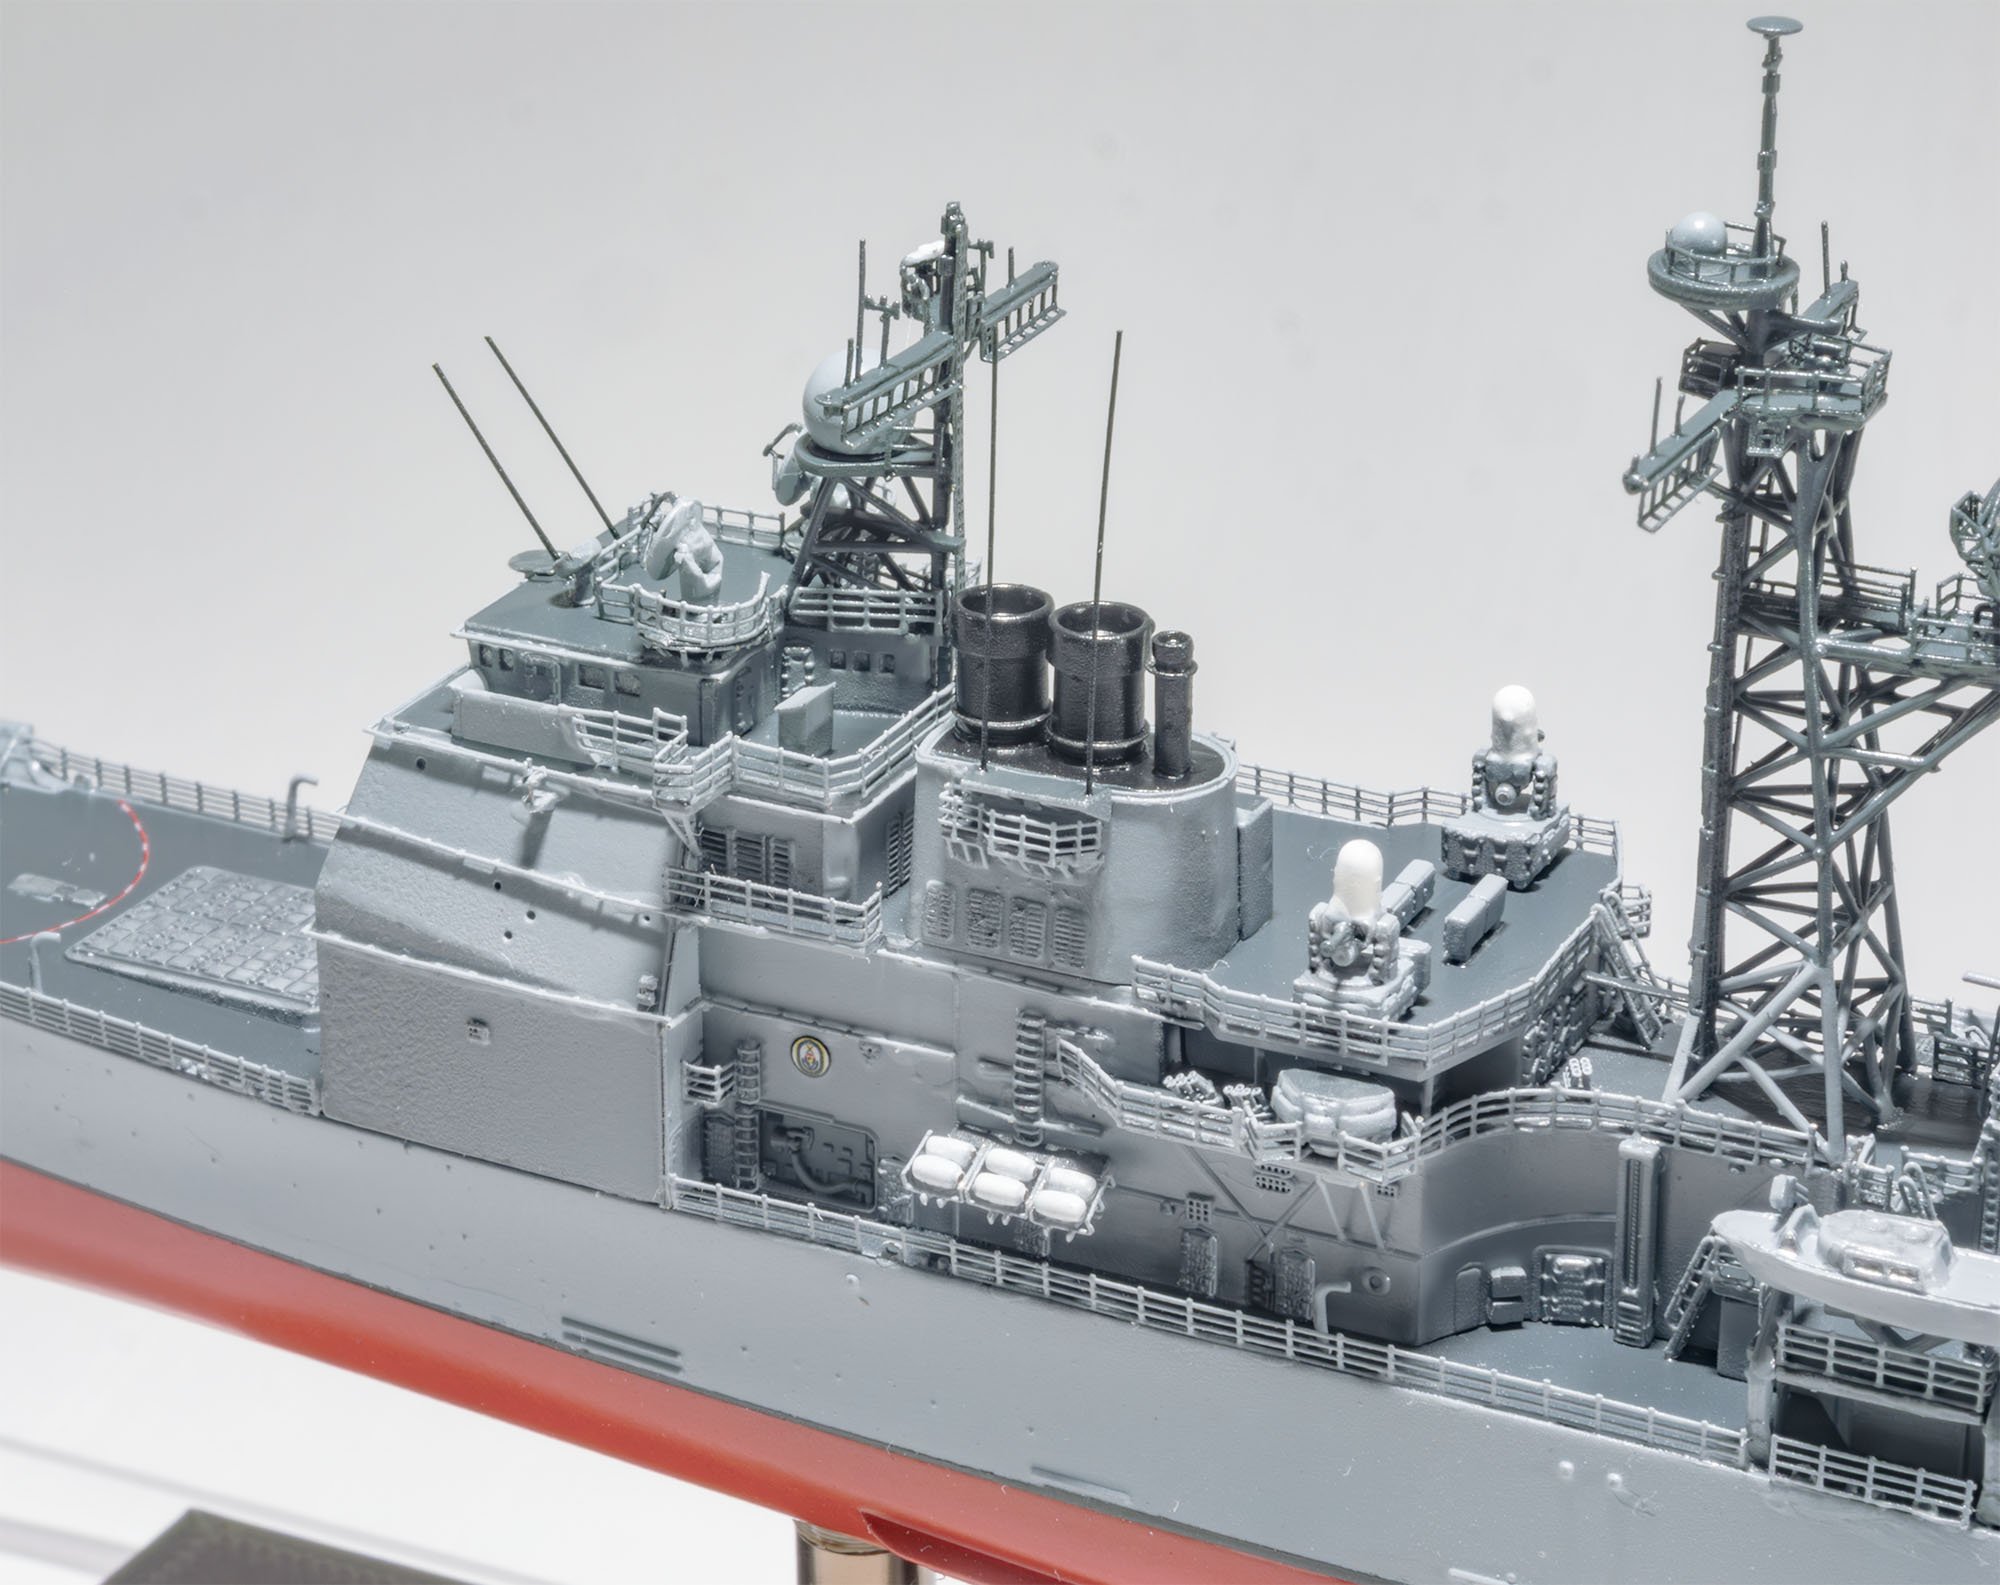
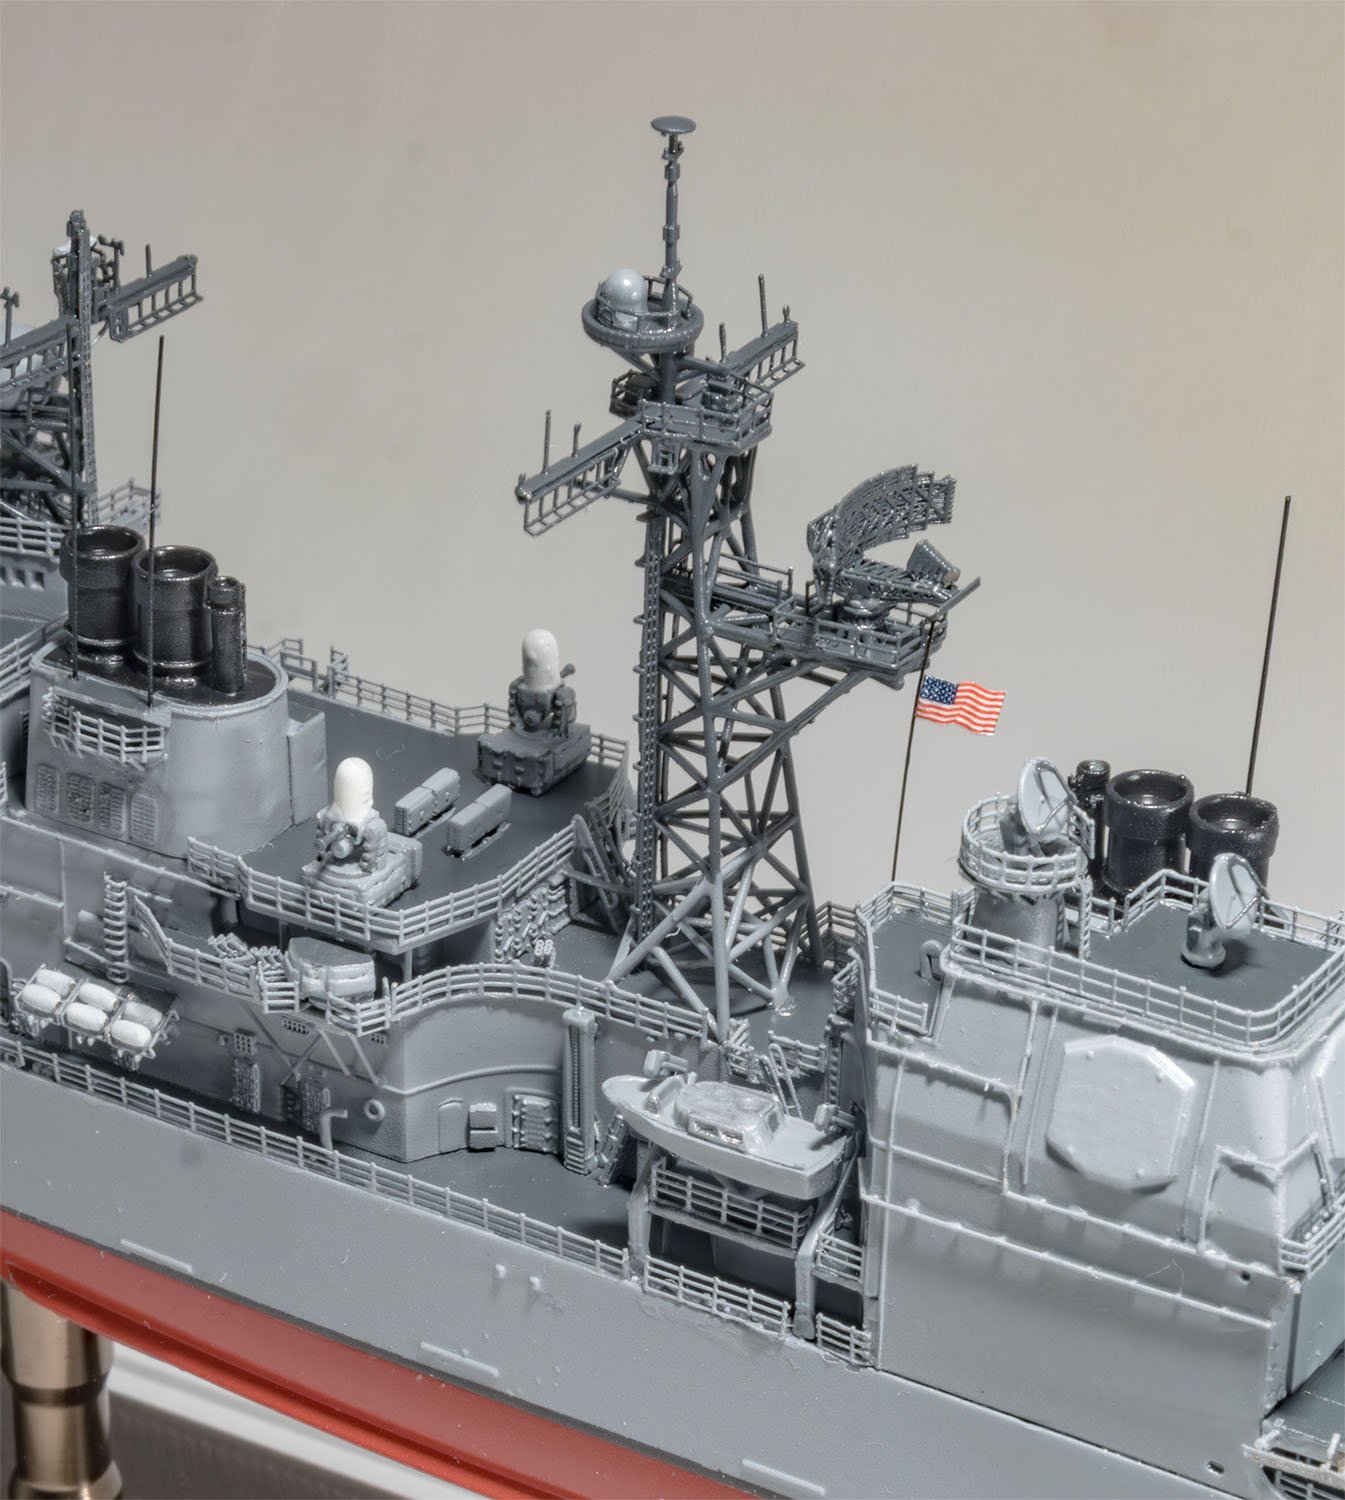
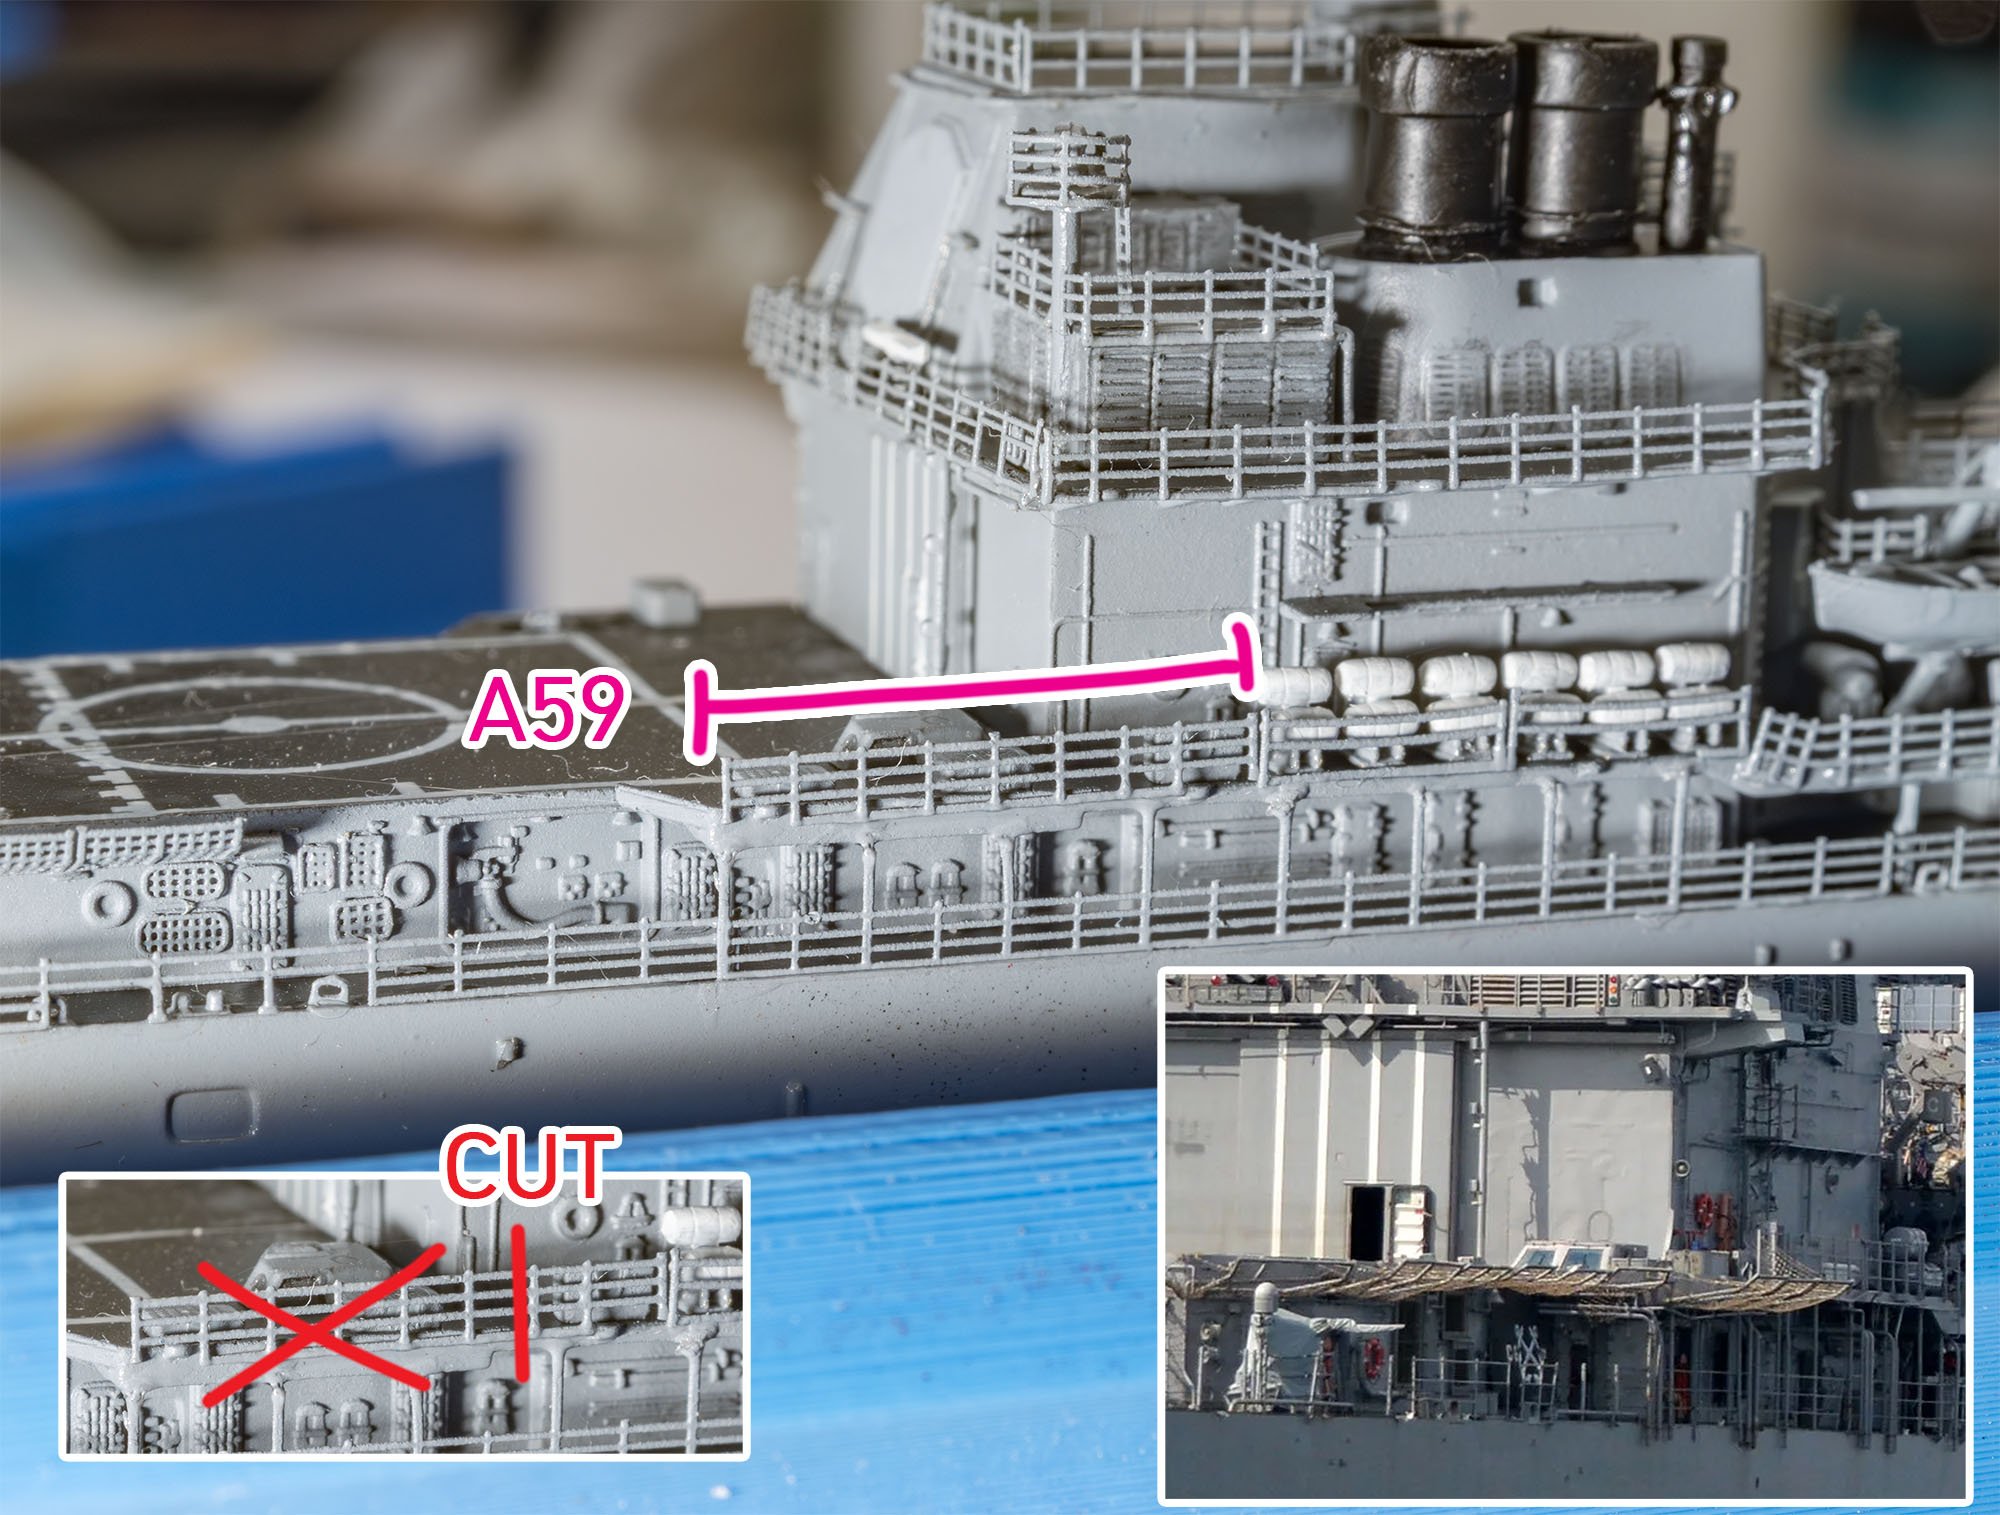
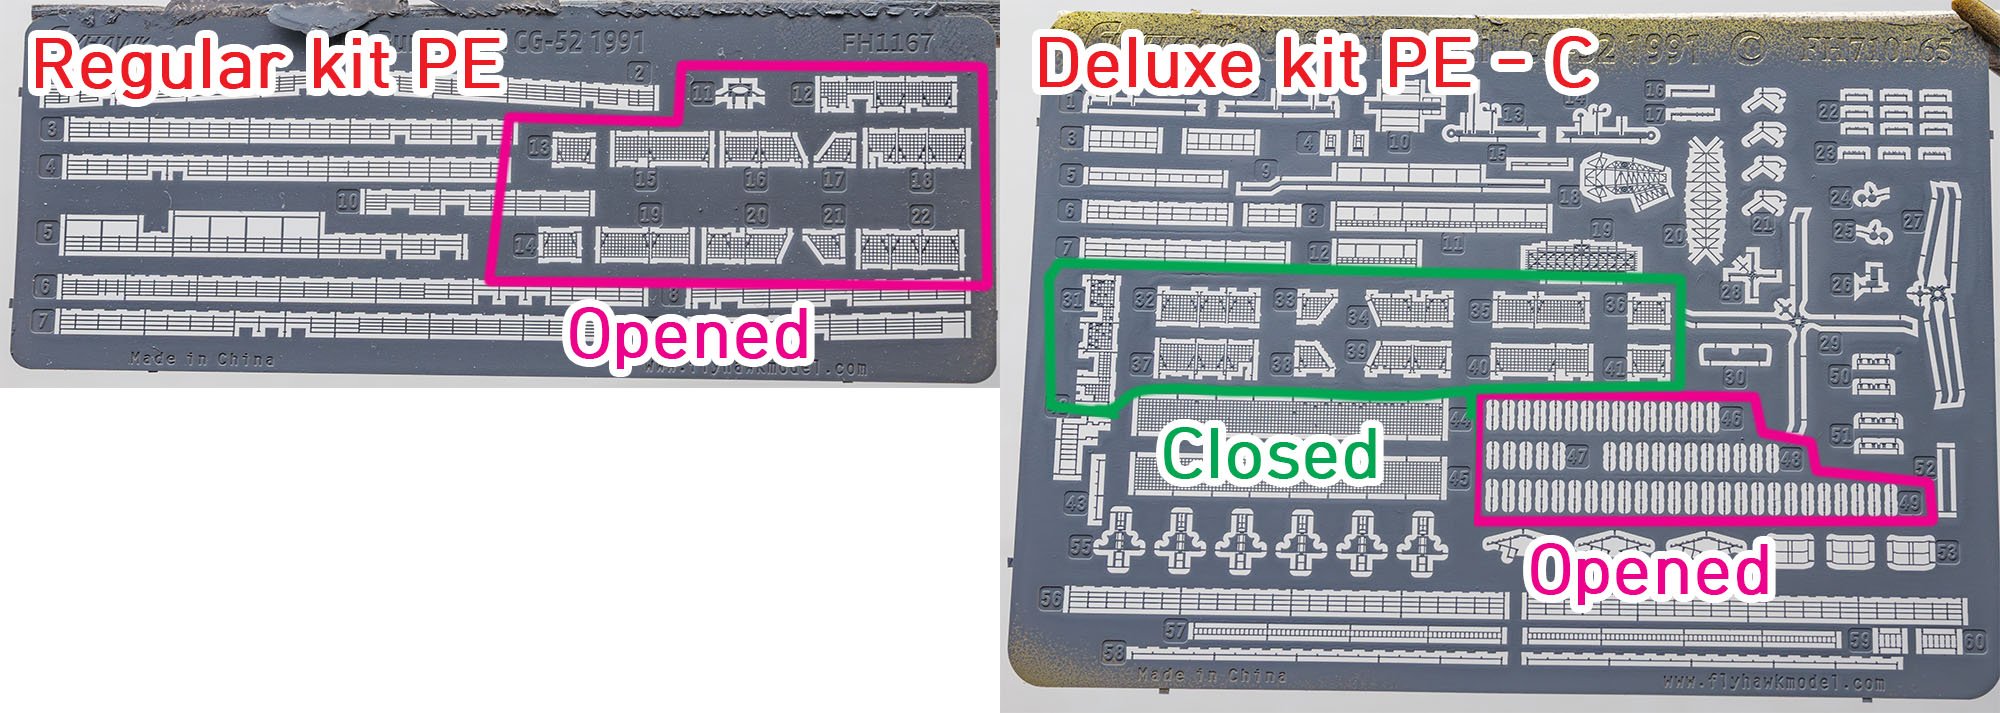
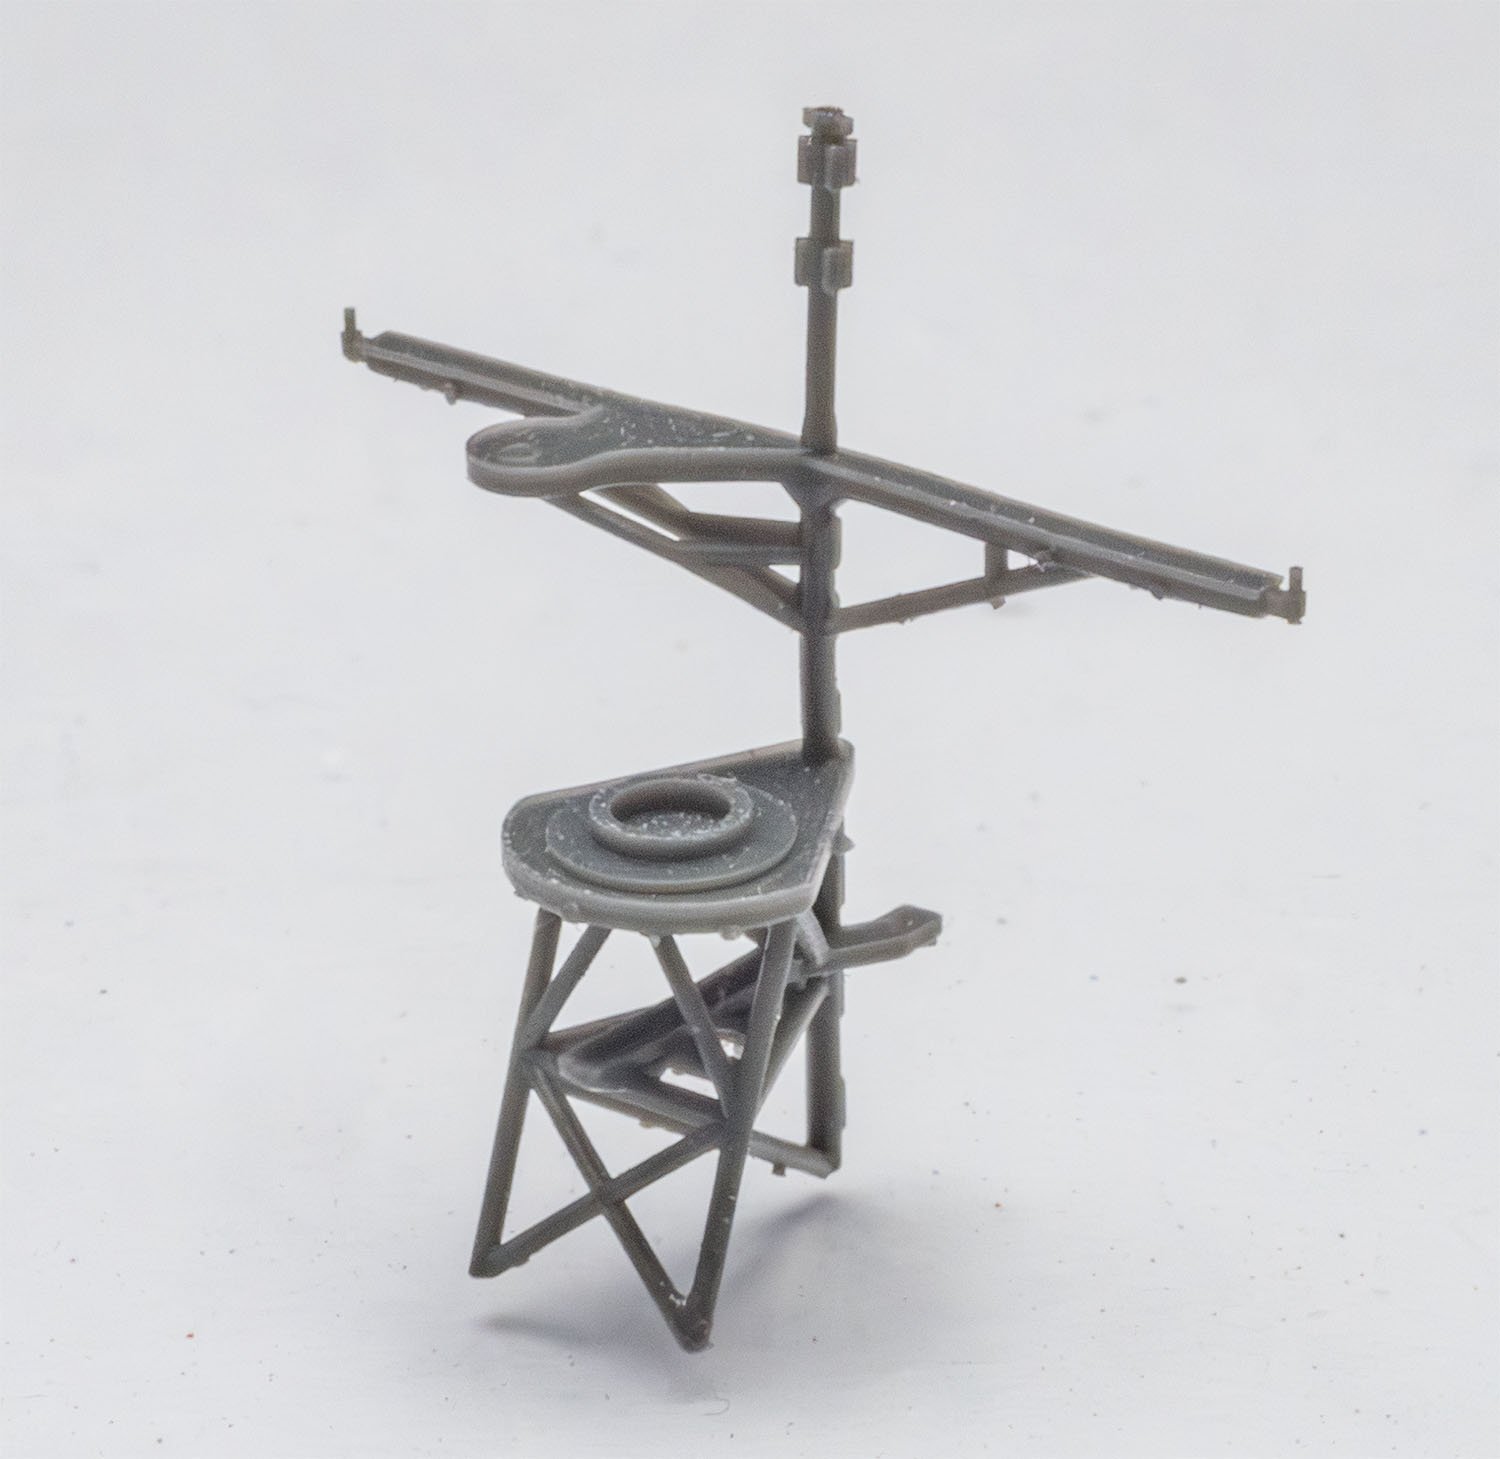
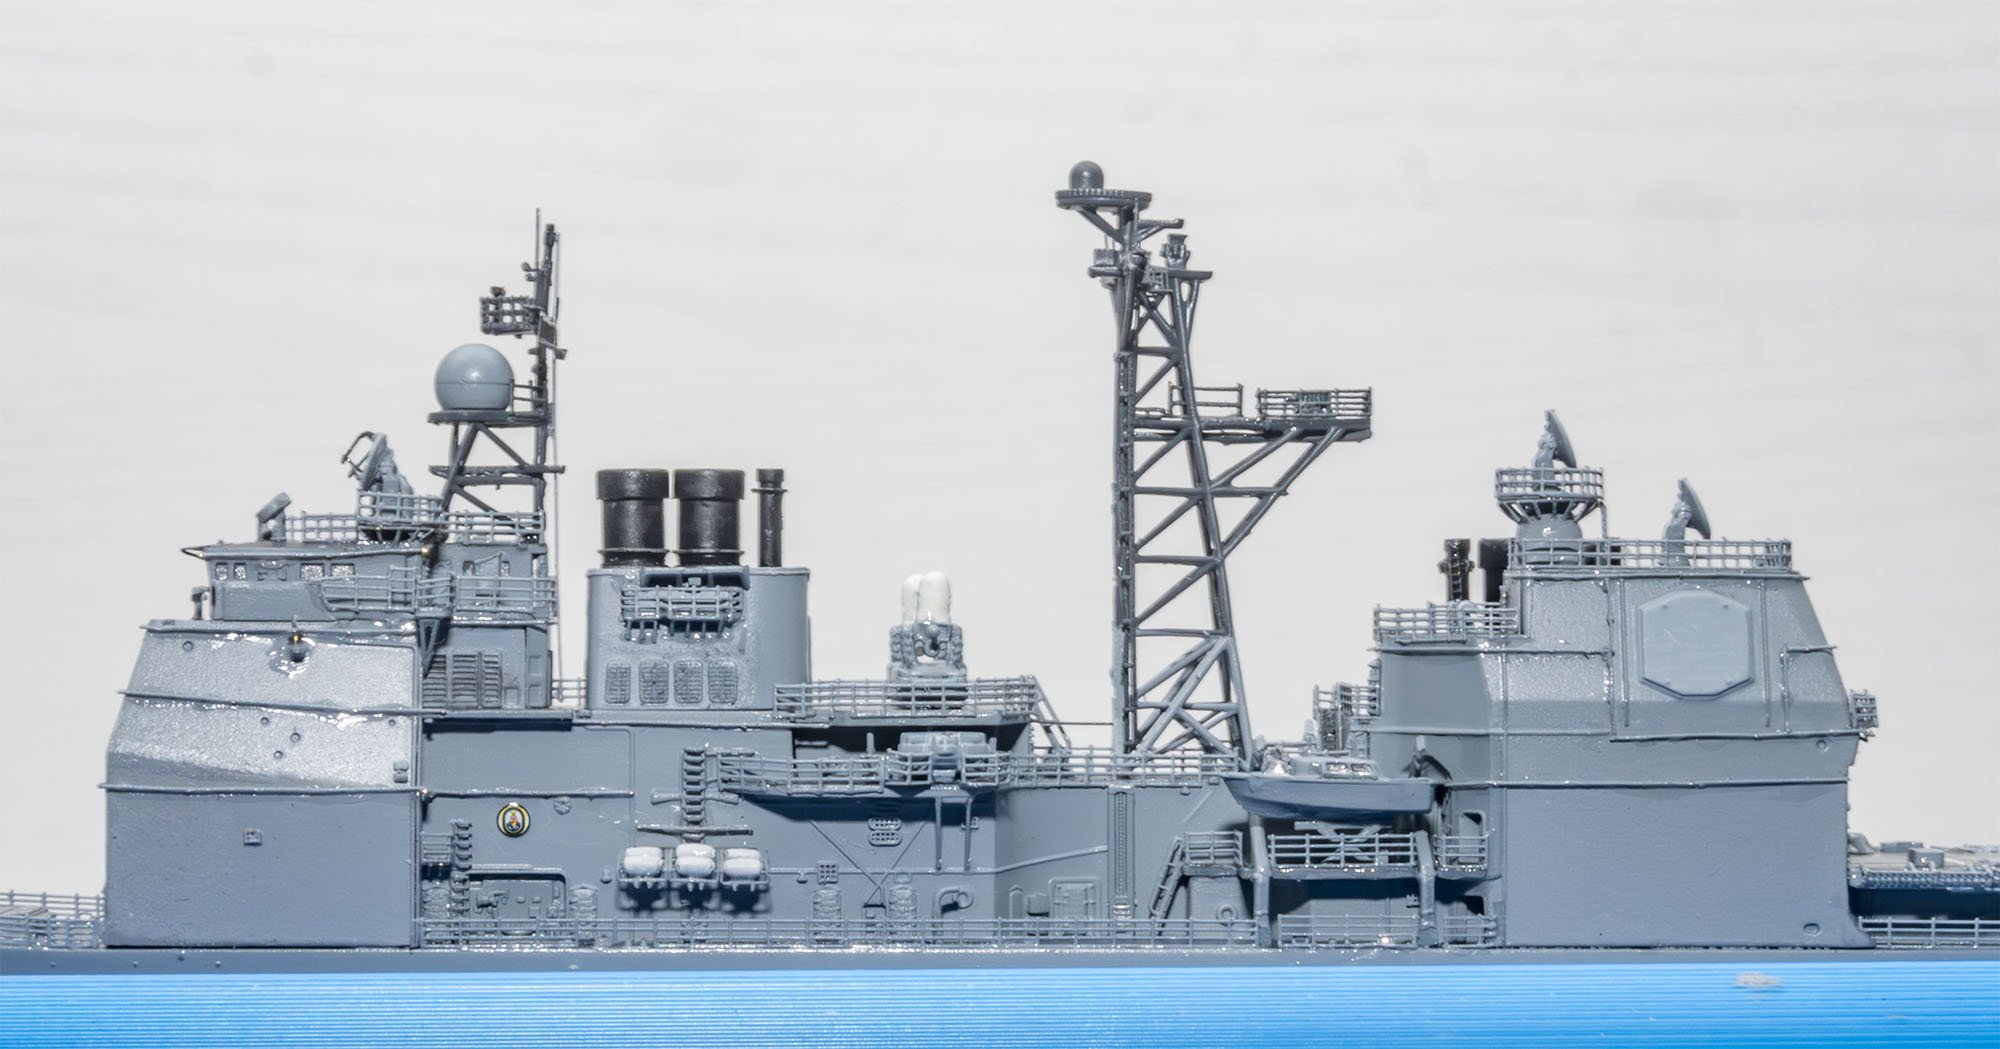
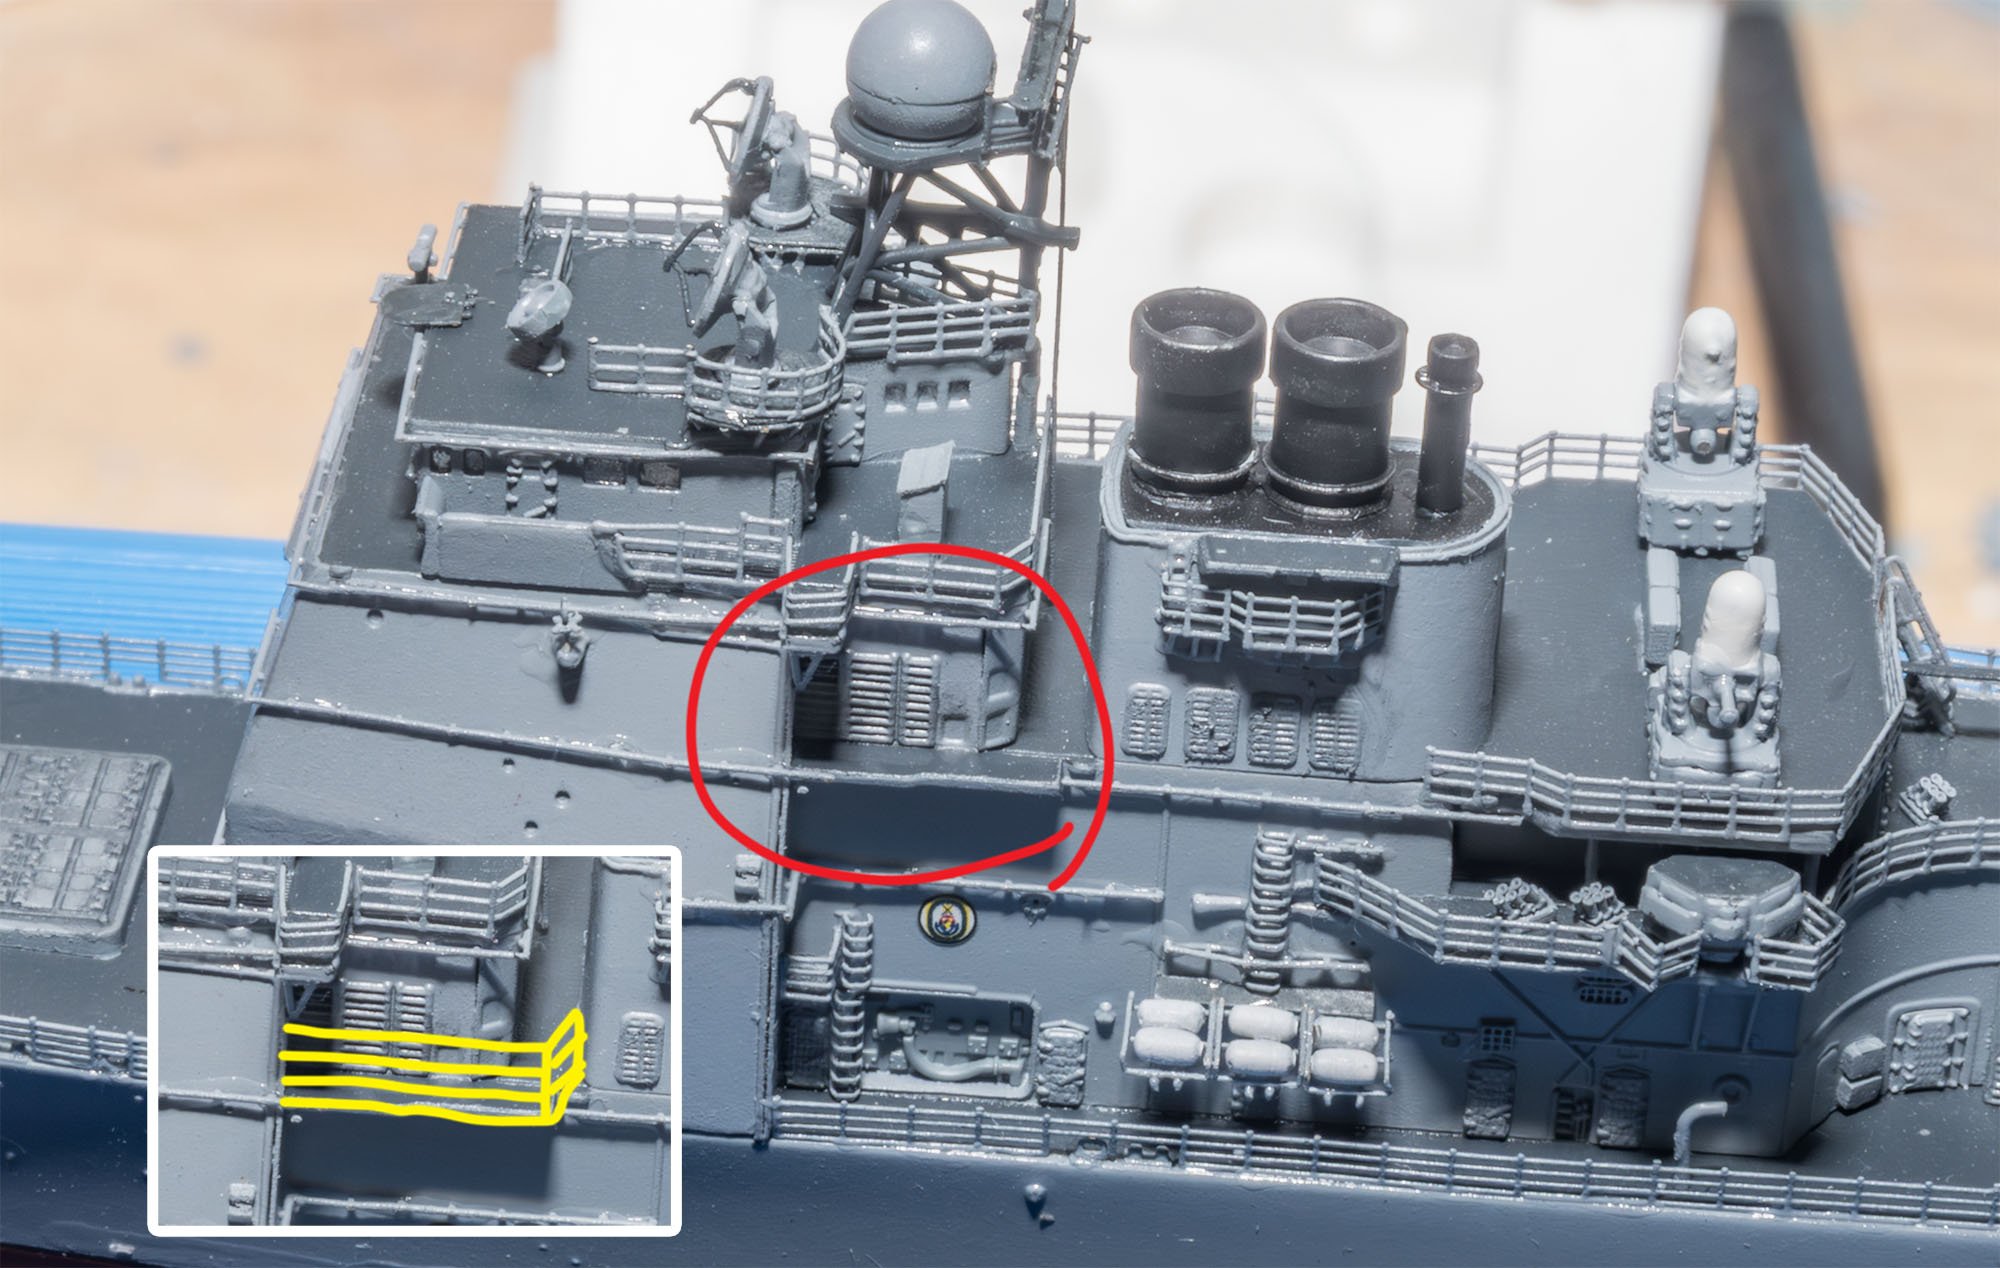
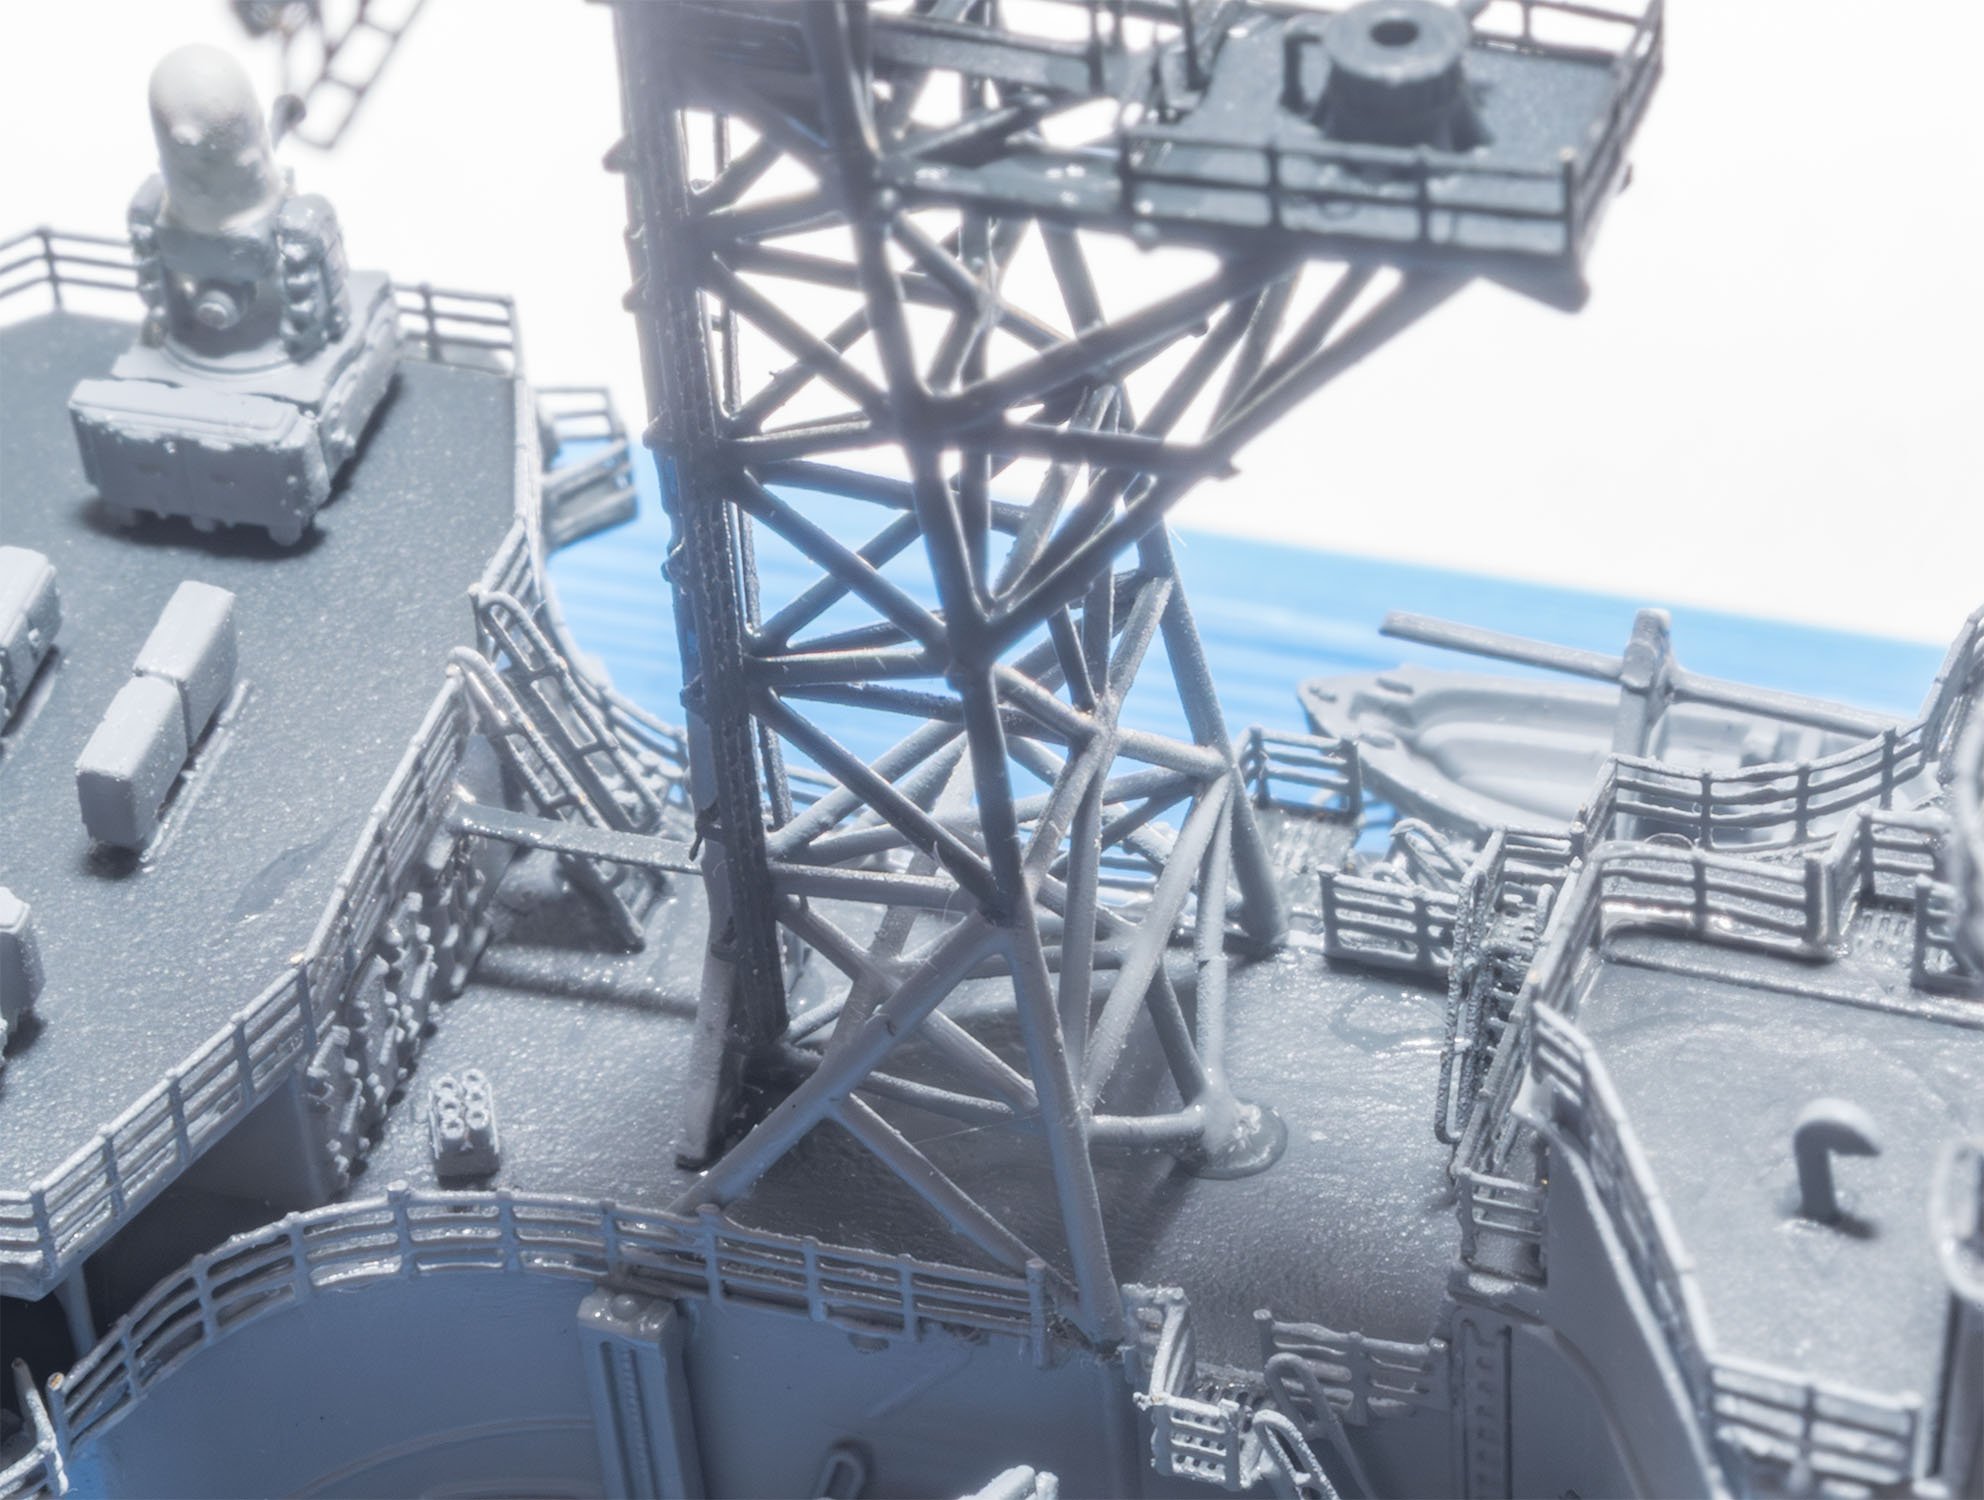
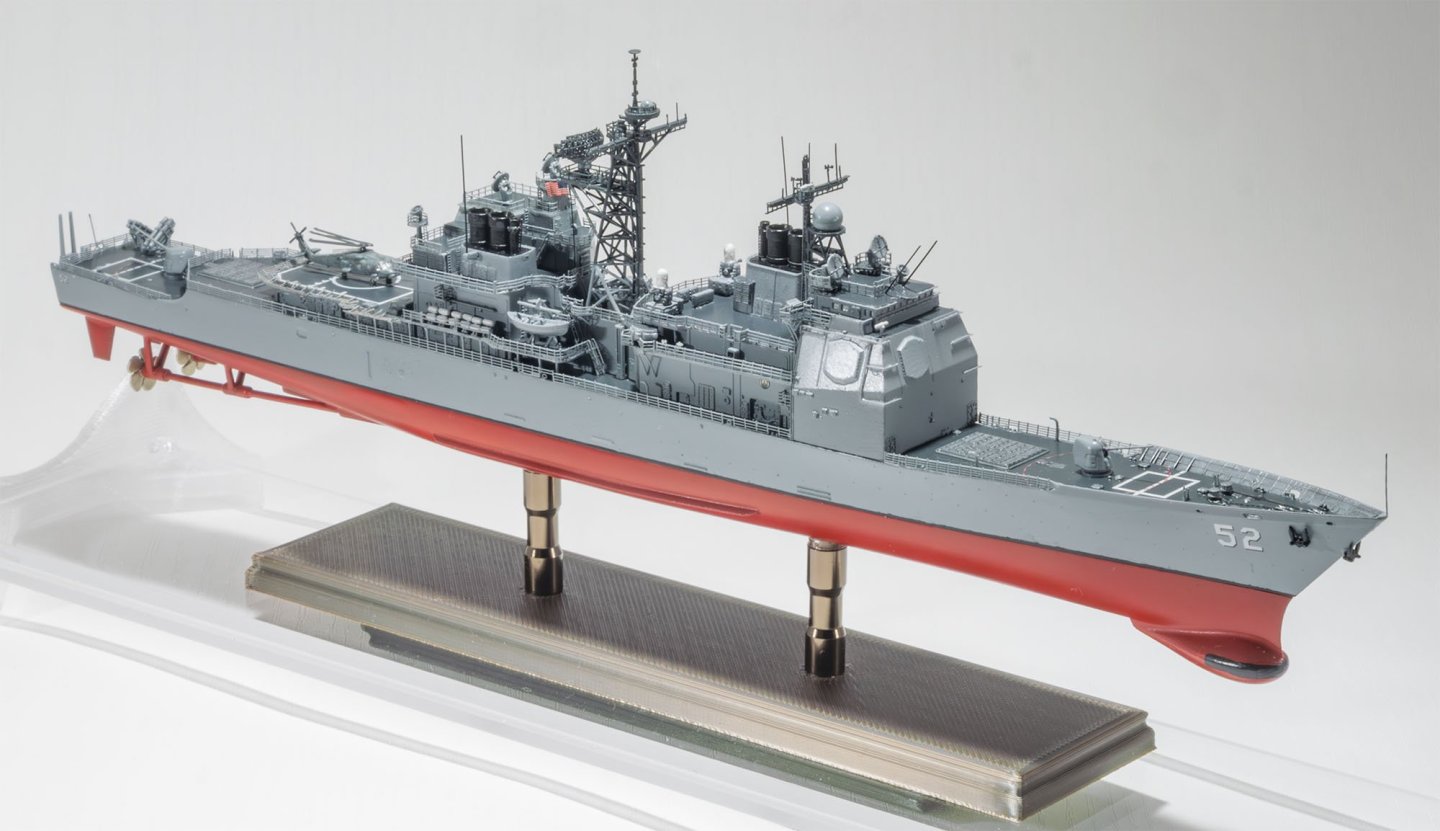
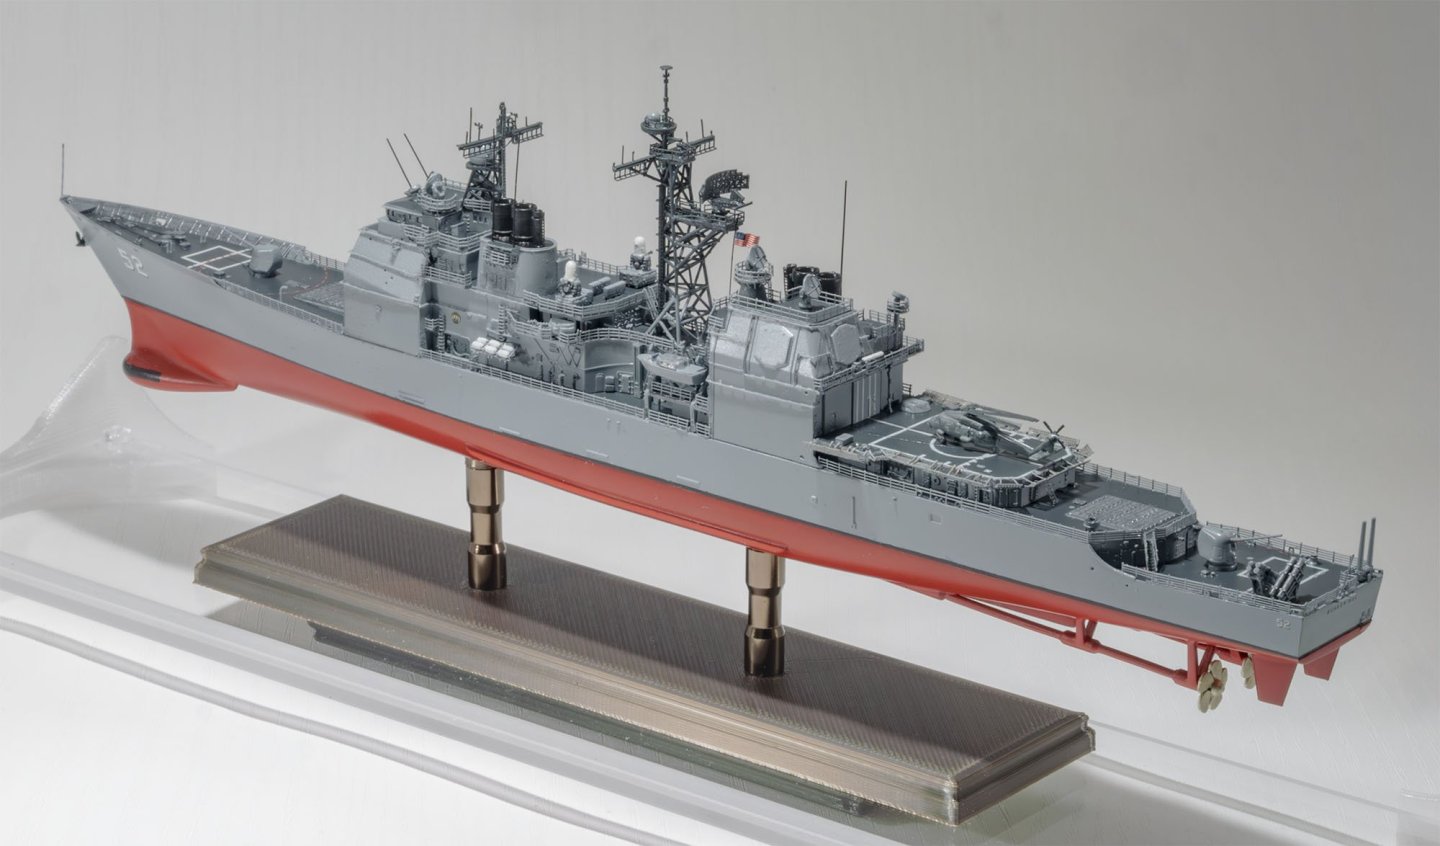
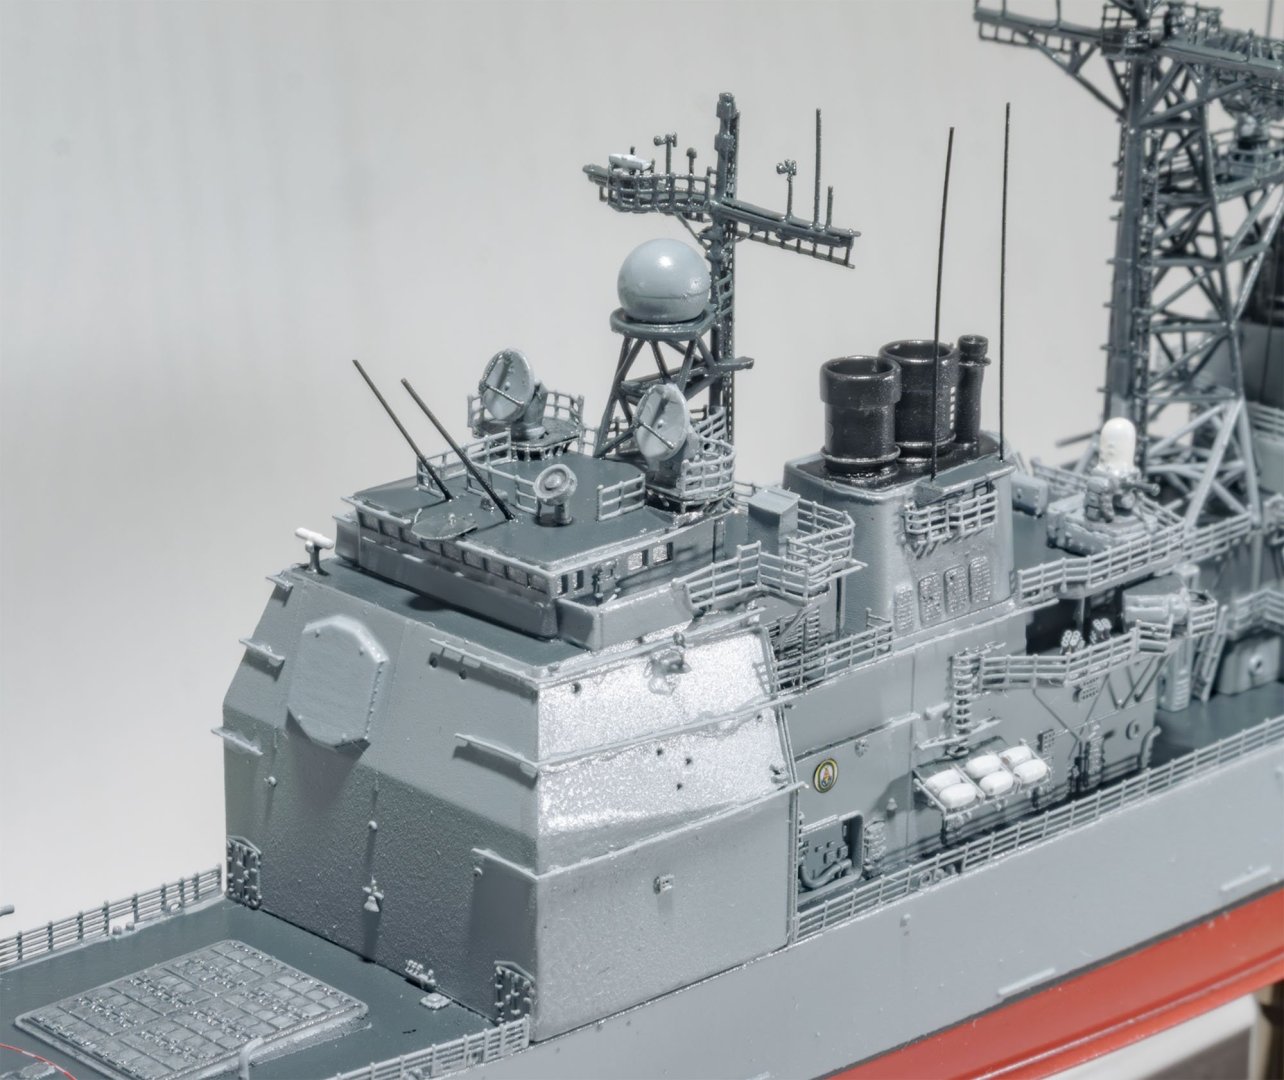
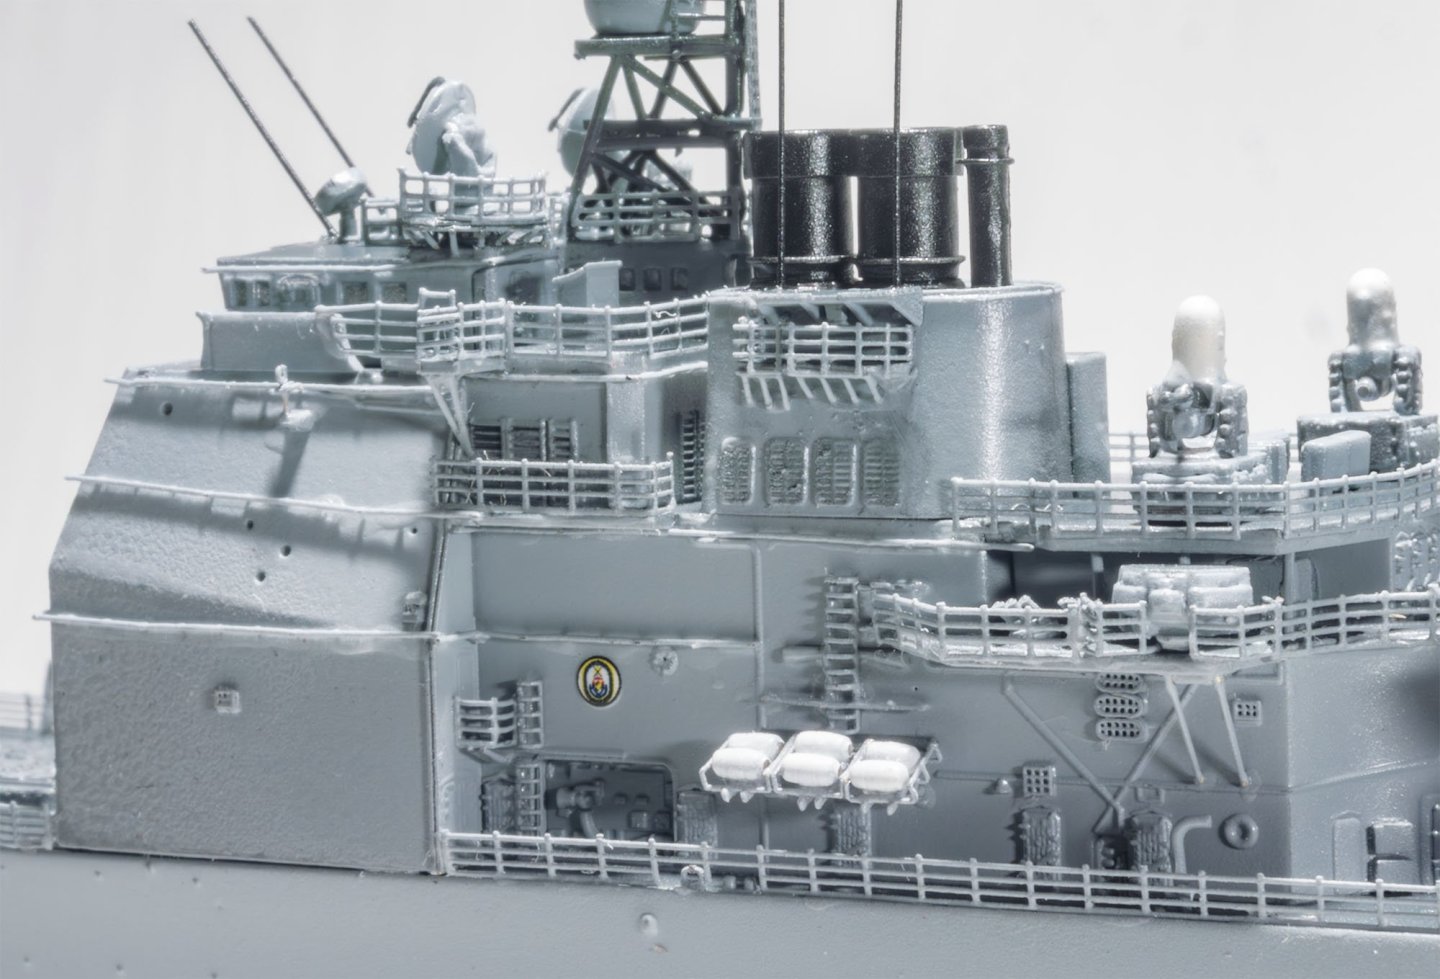
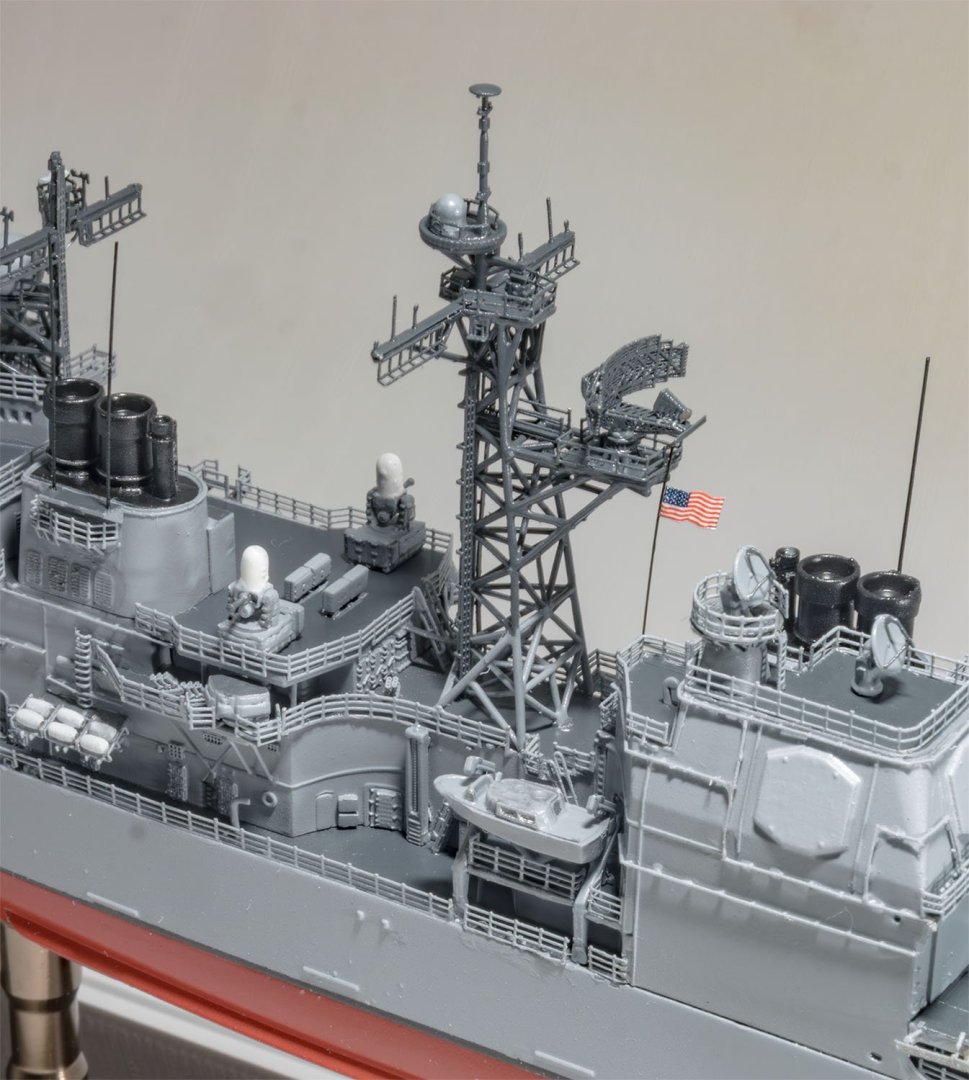
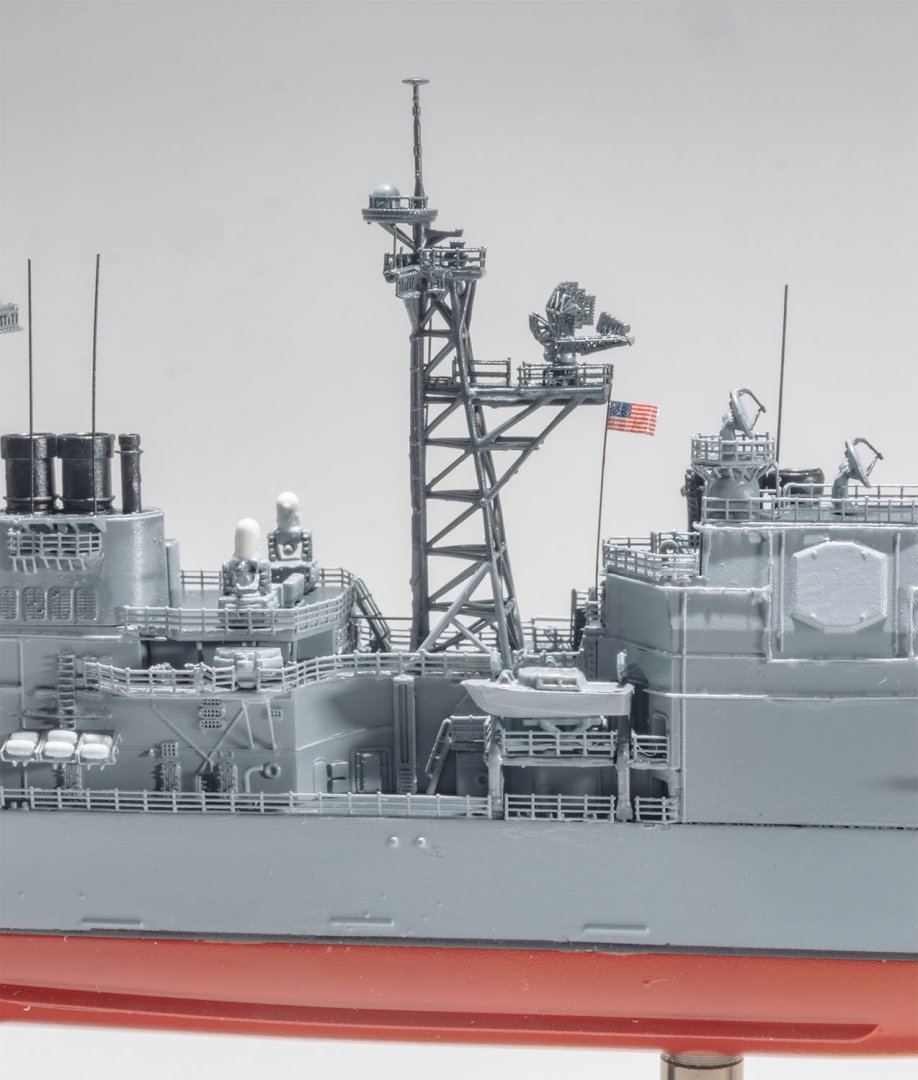
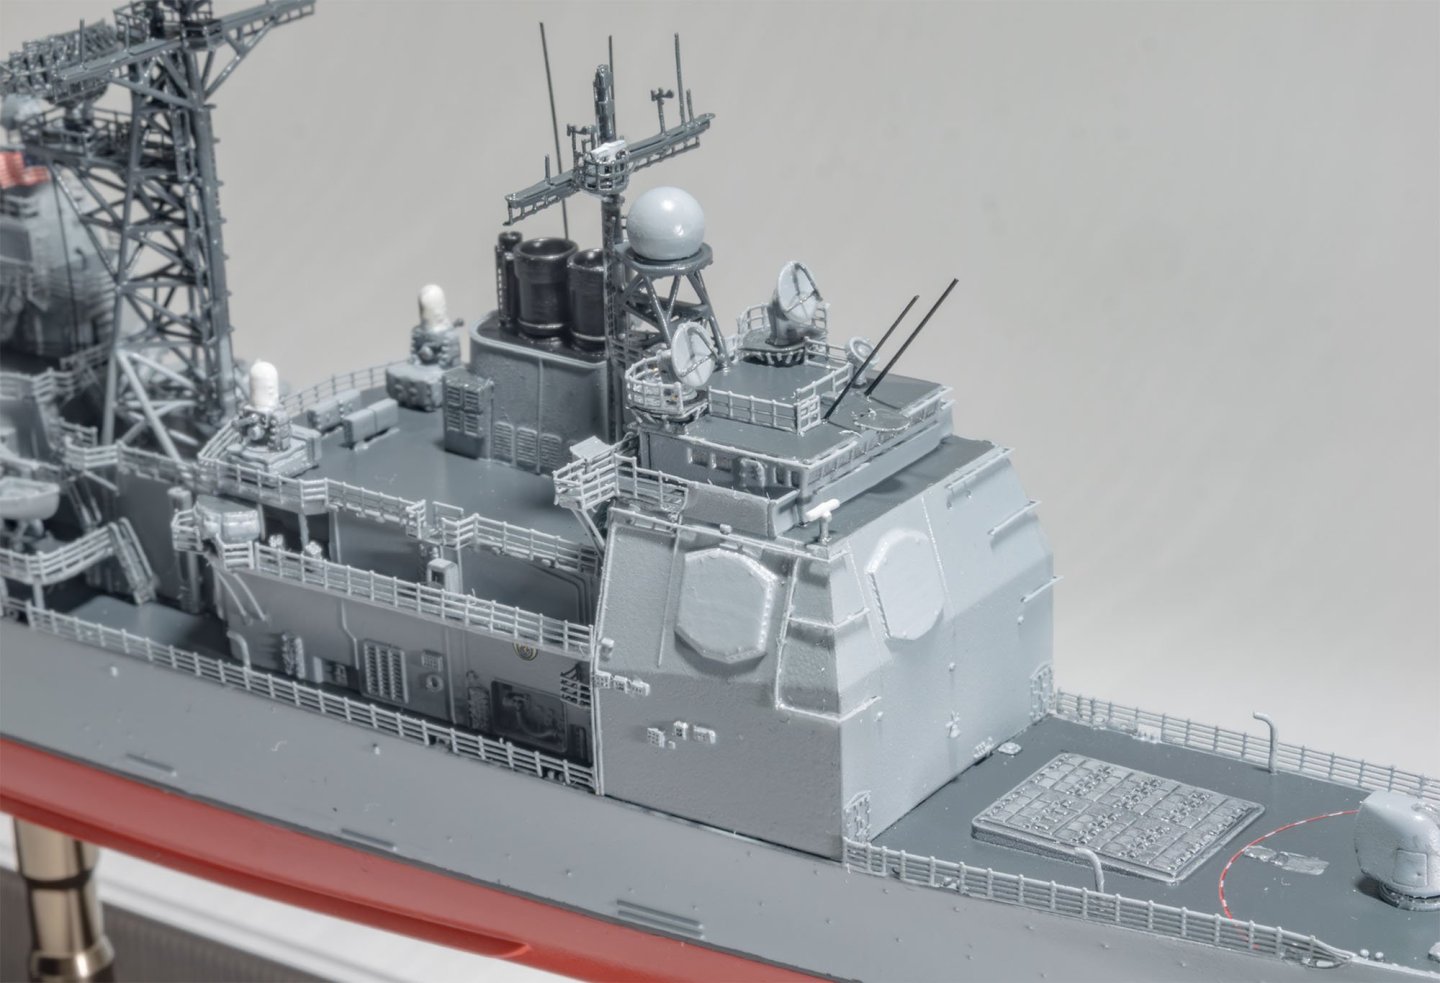
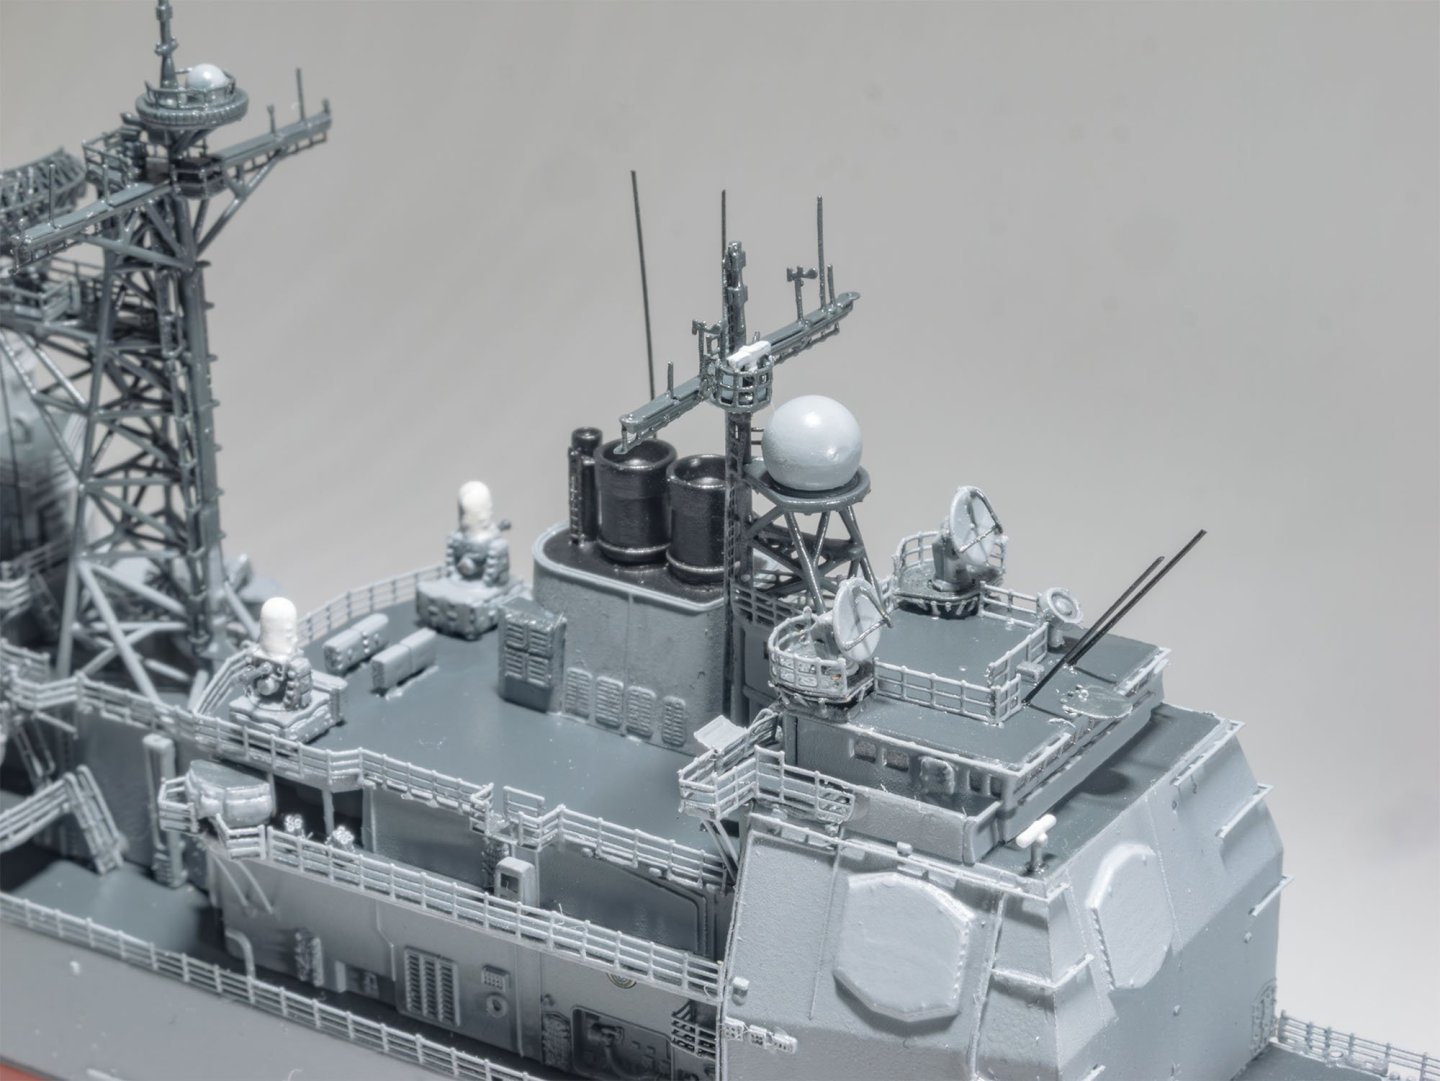
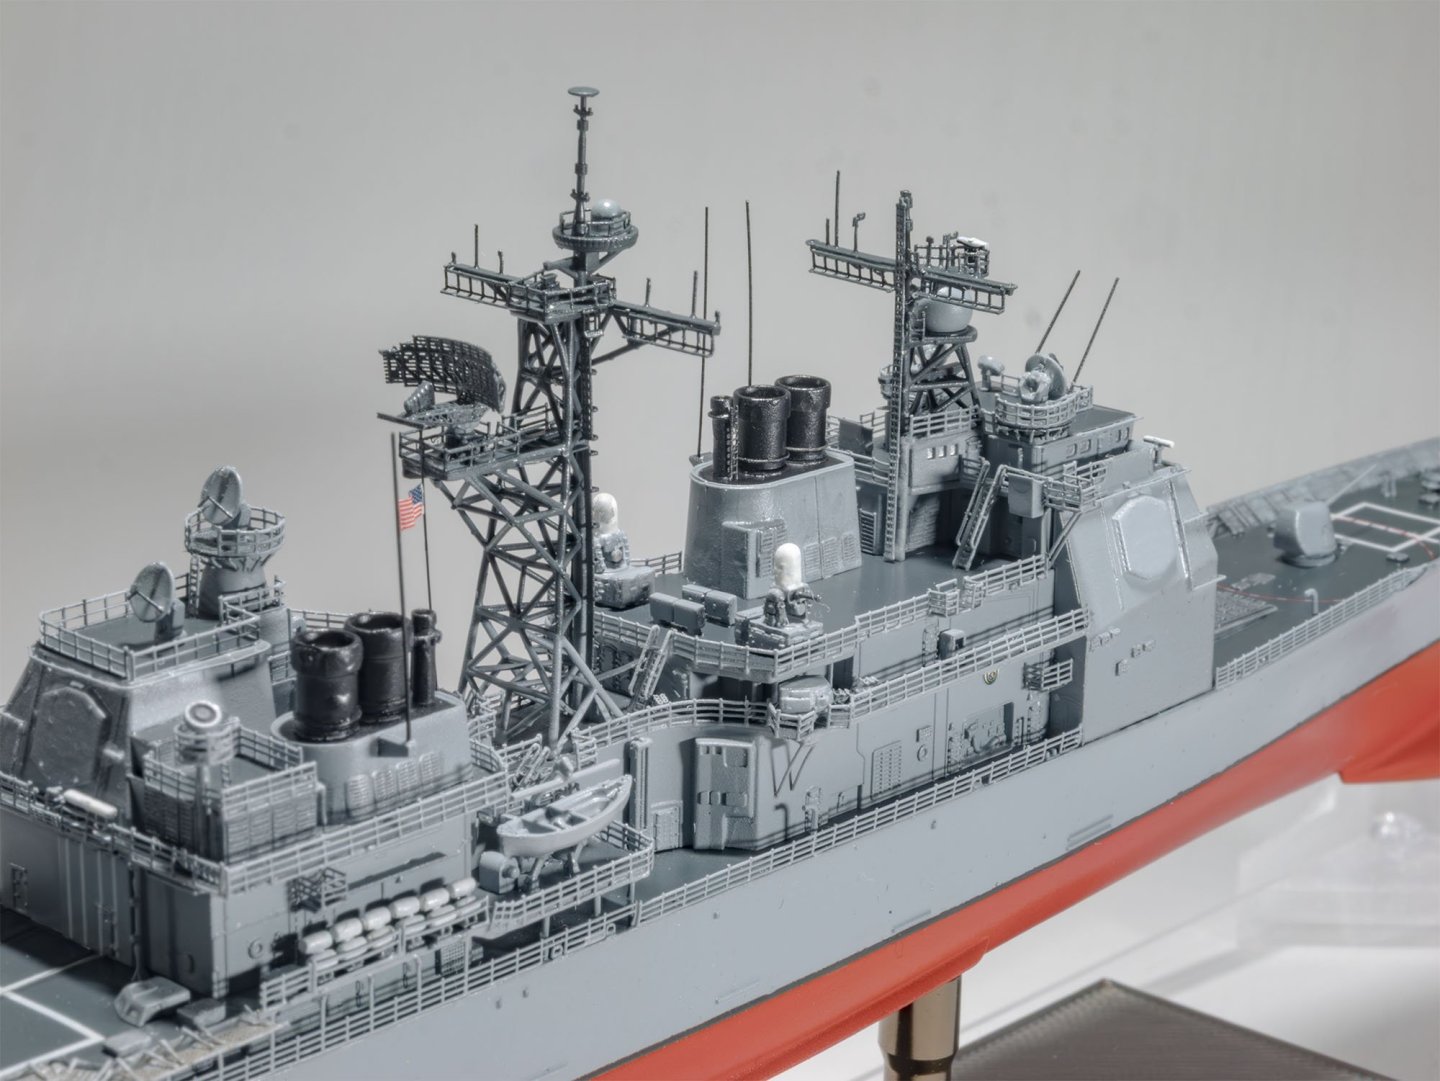
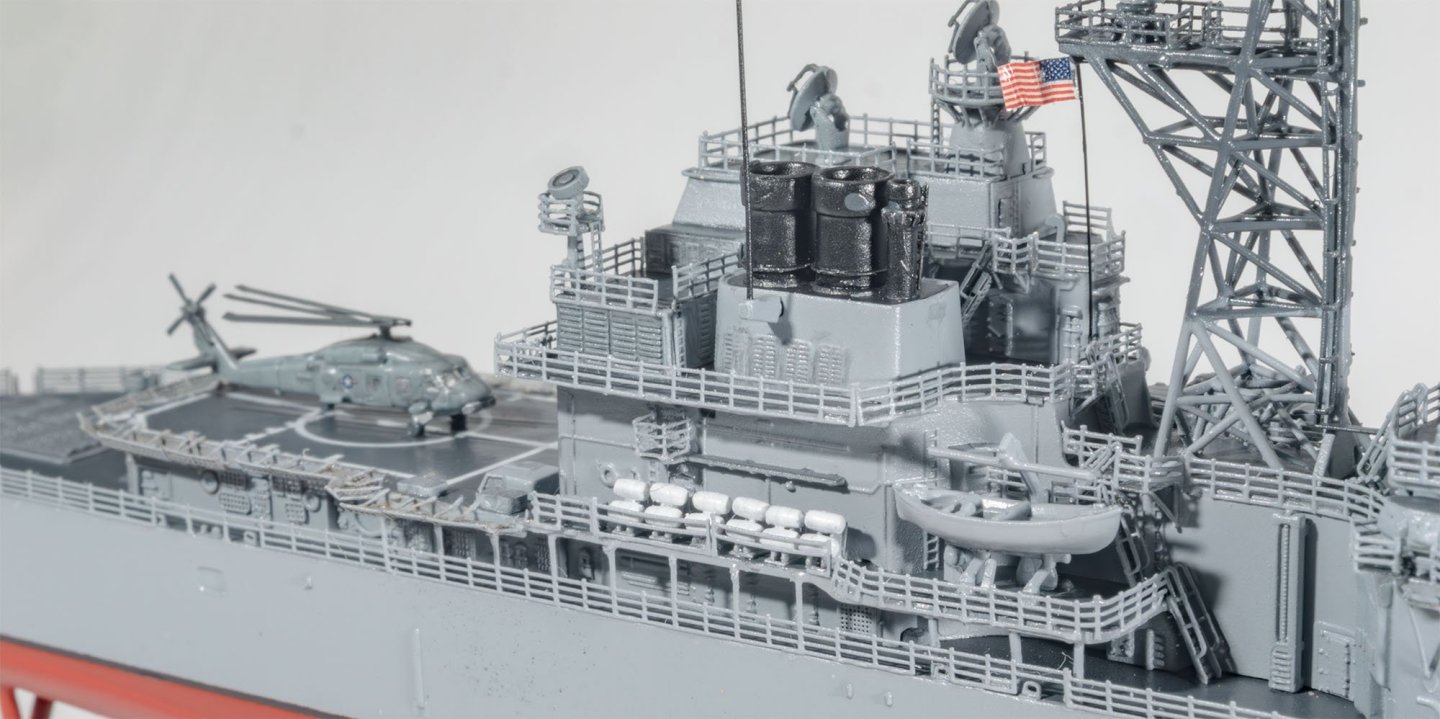
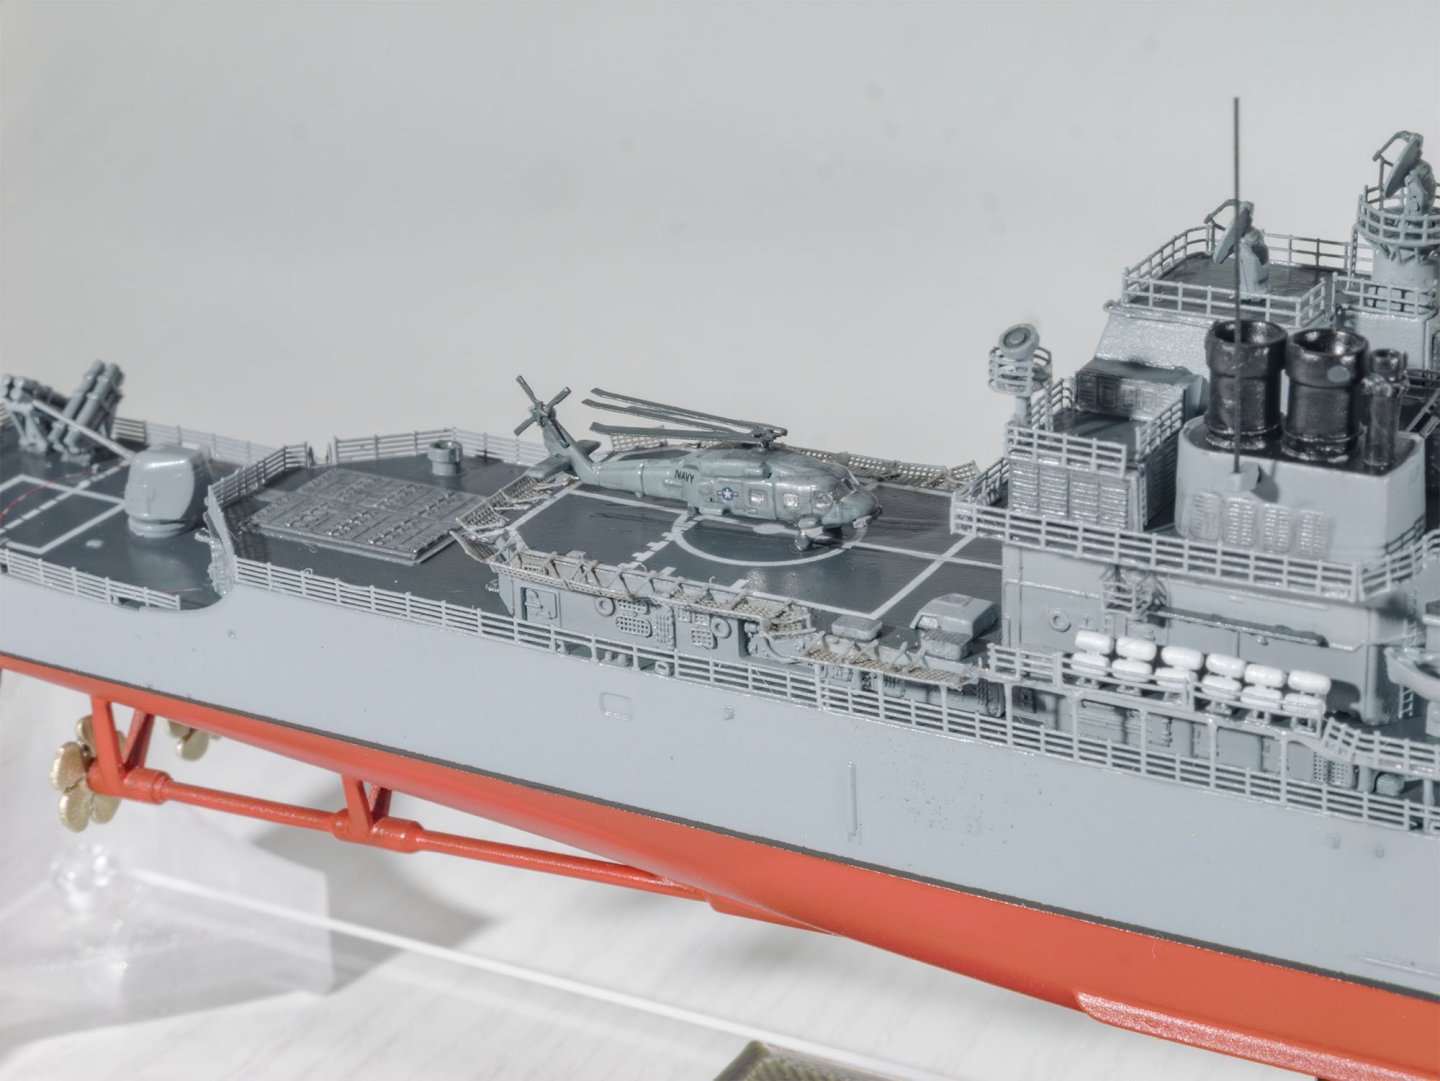
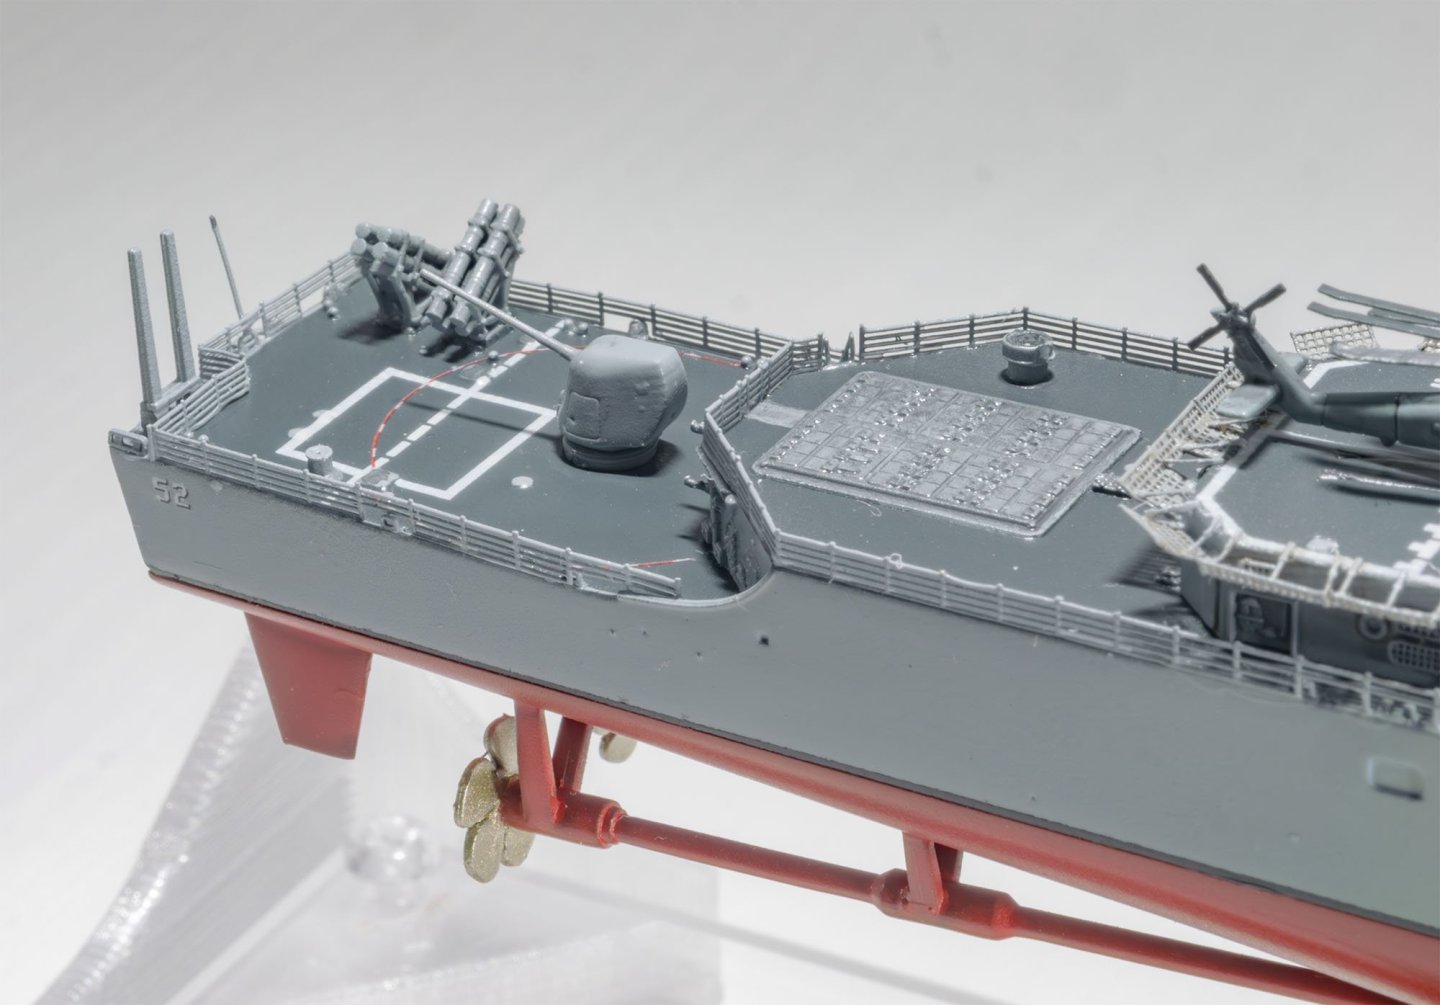
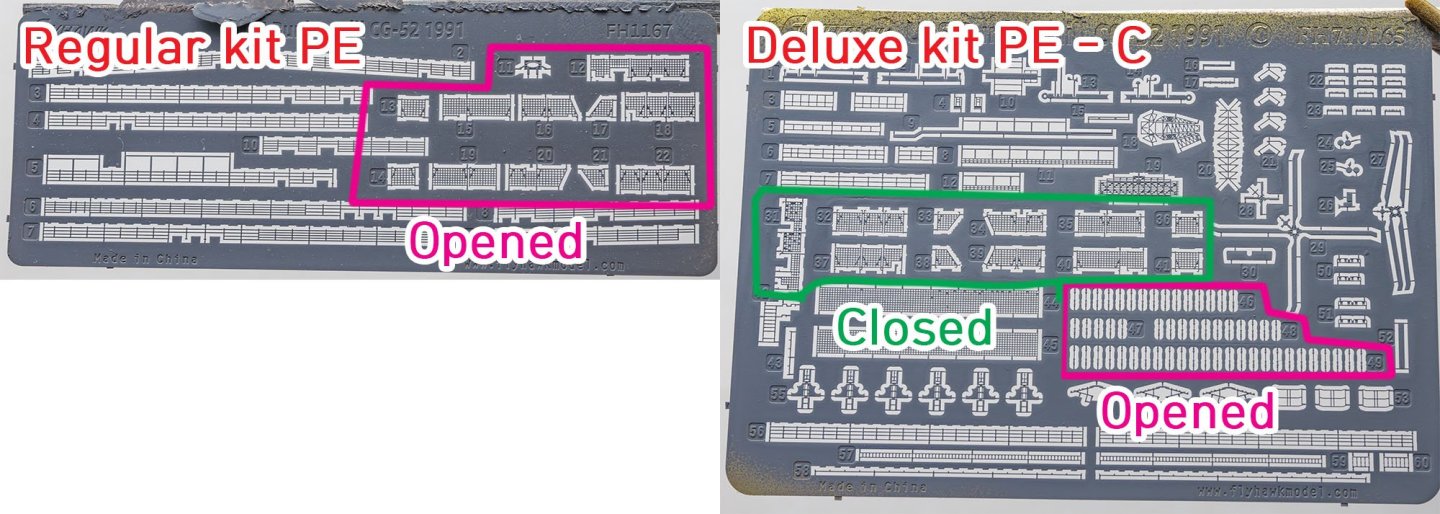
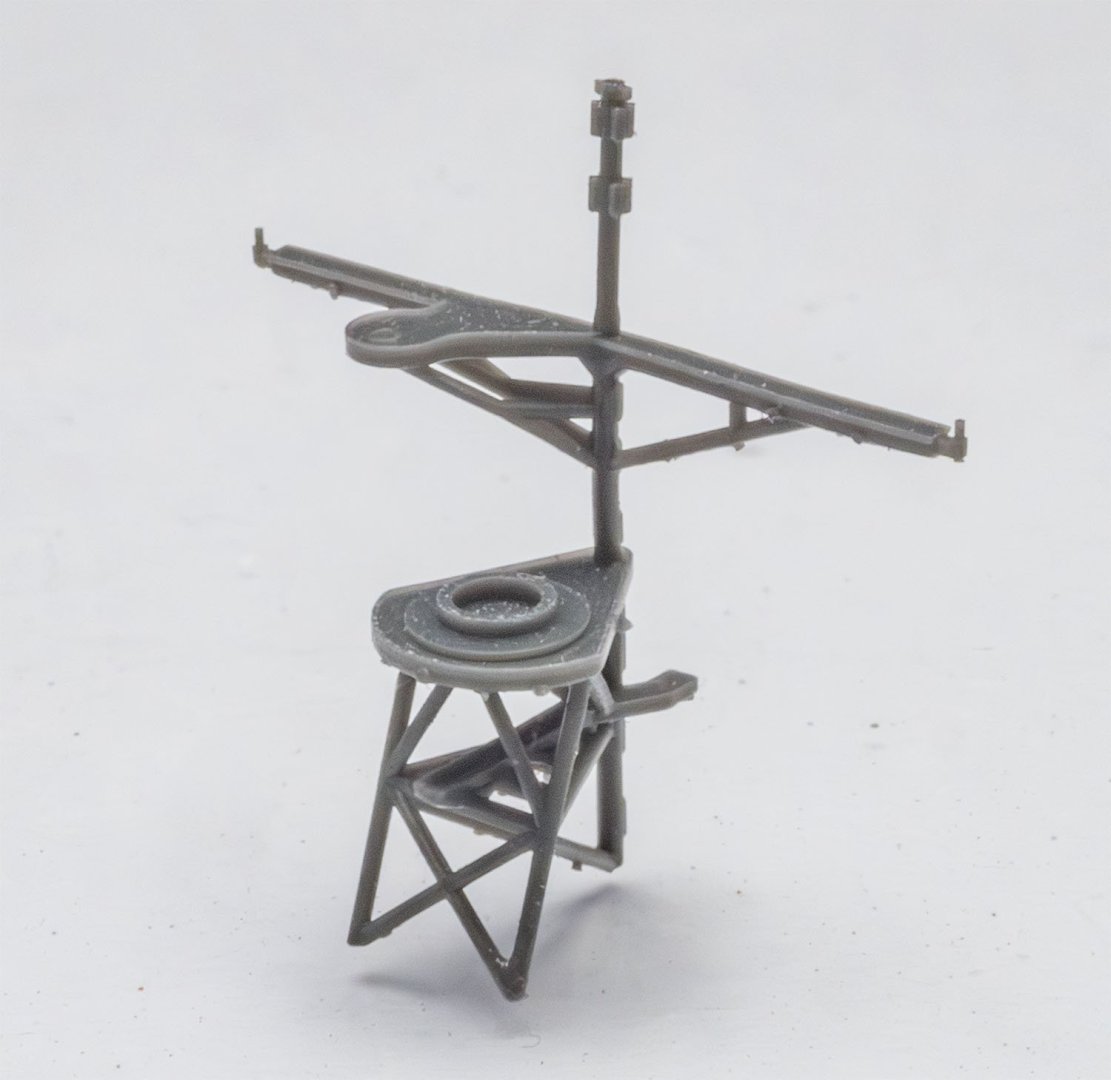
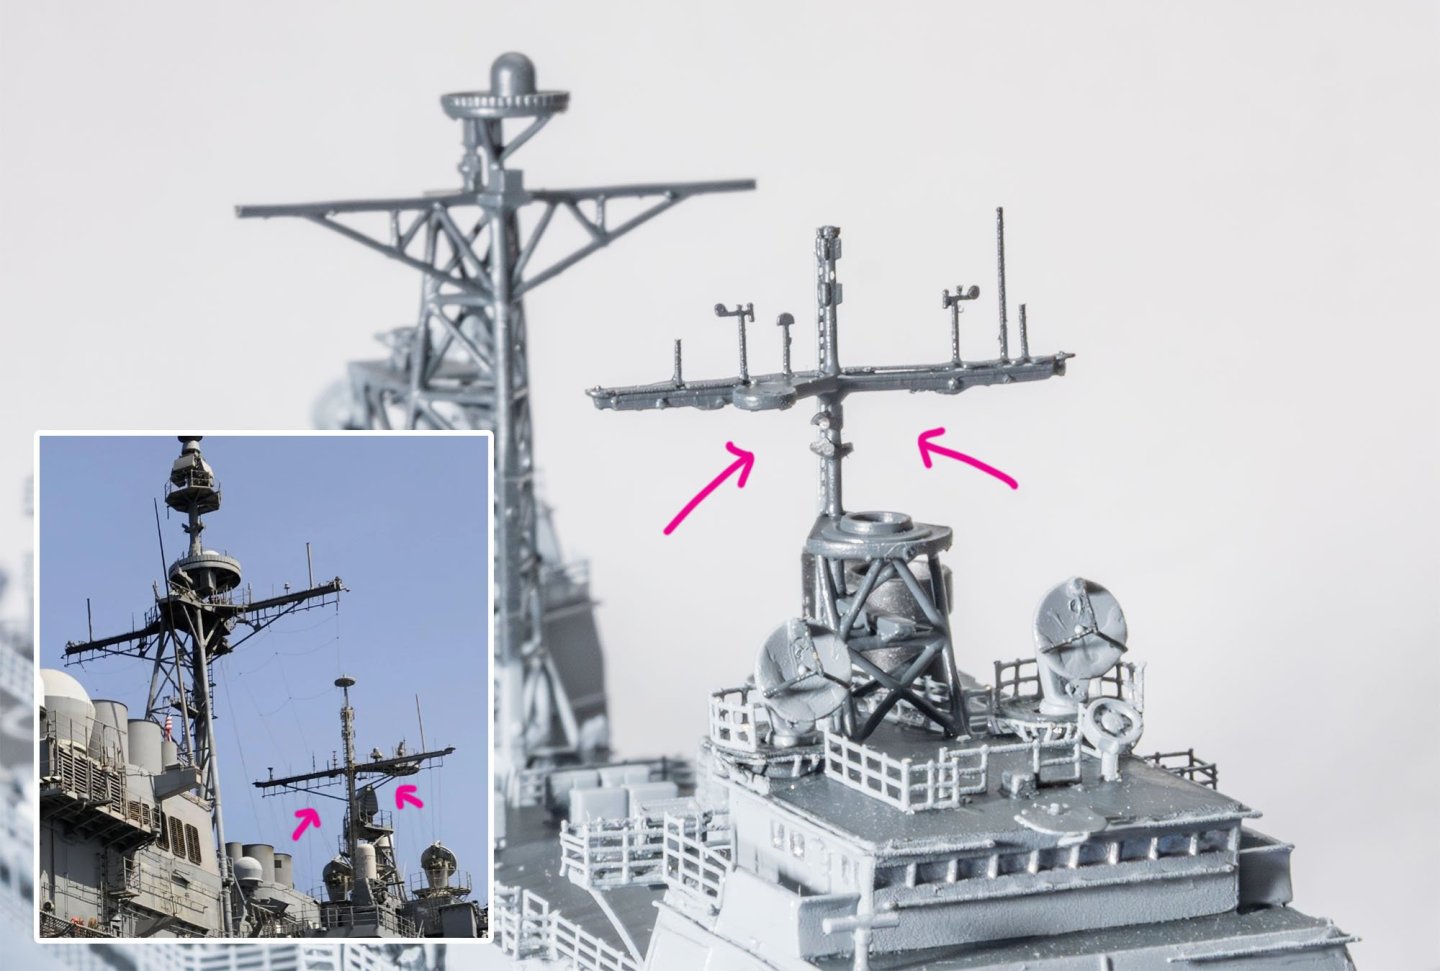
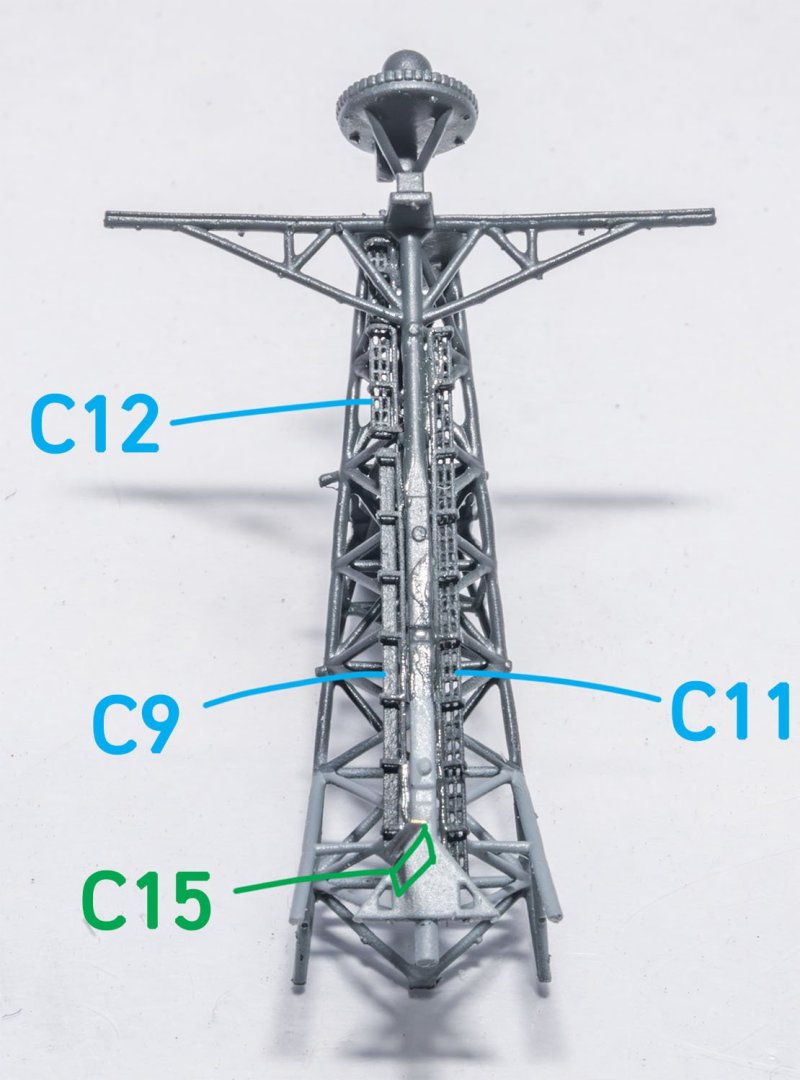
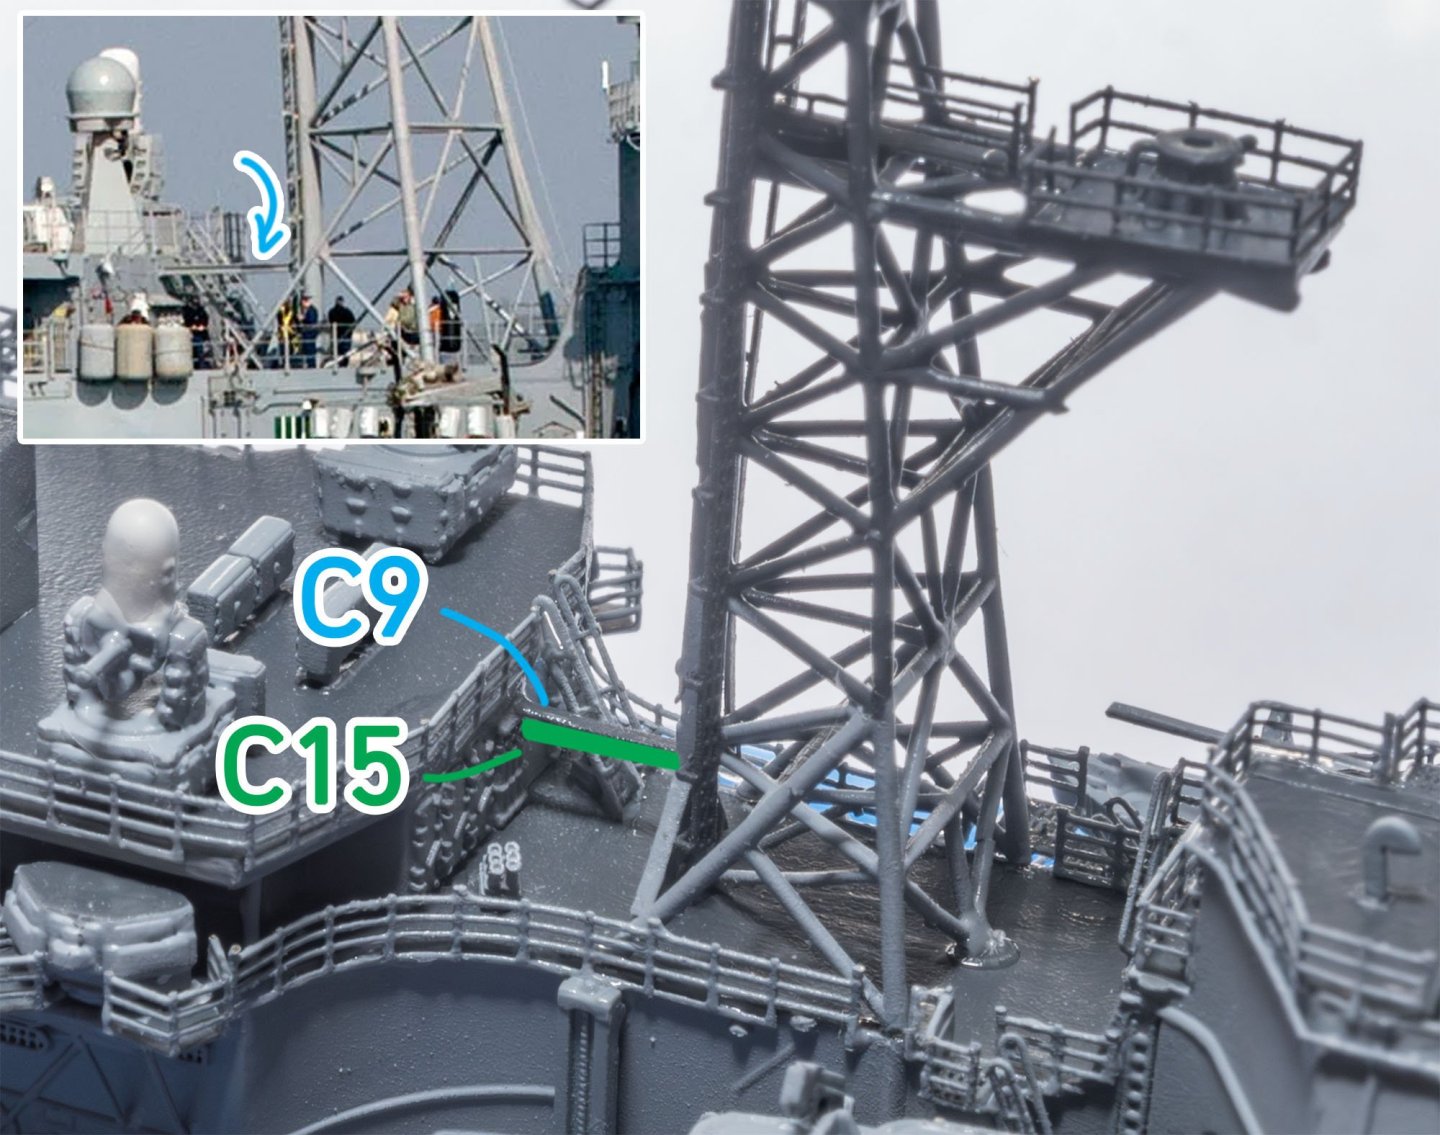
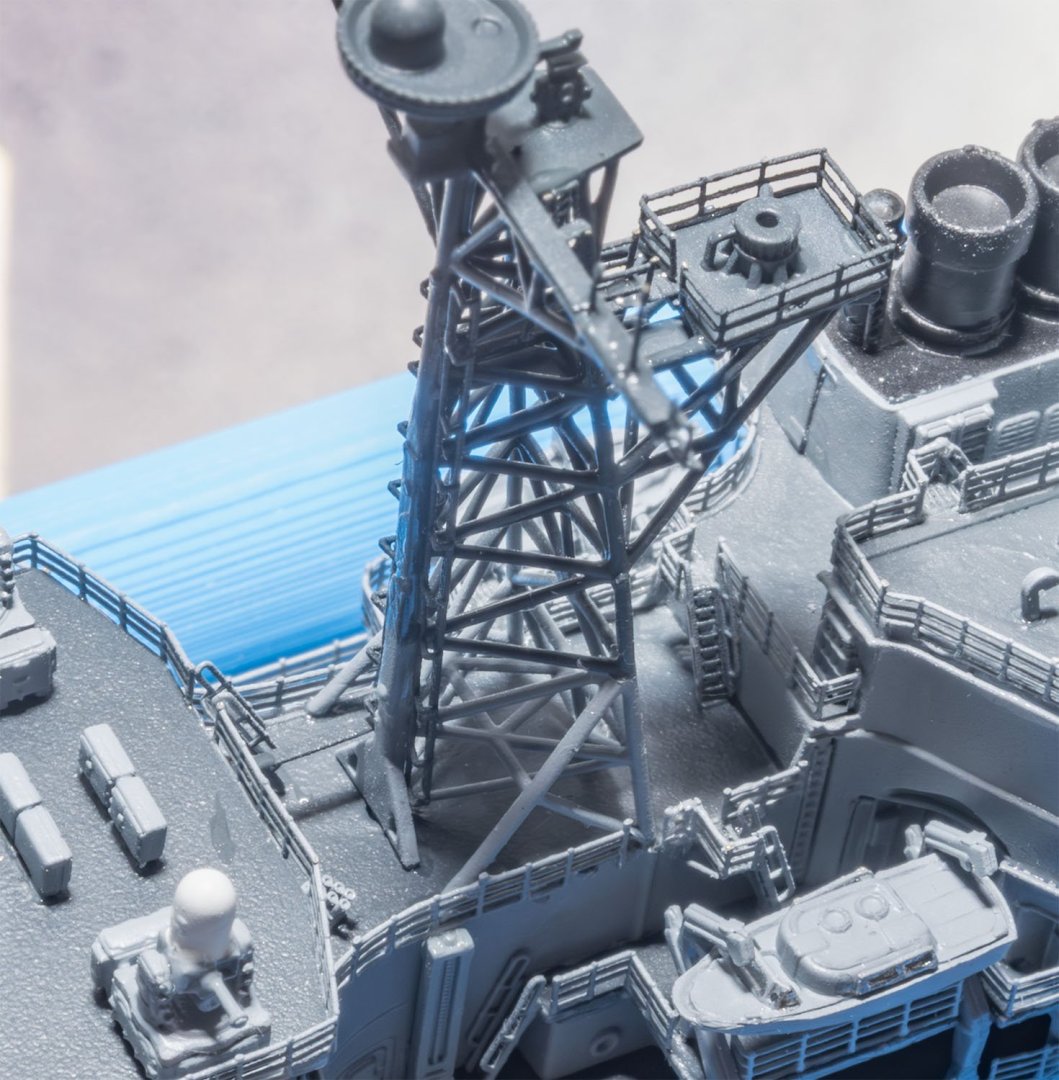
There are some confusing points in the manual. It is better to check real photos everytime. The deluxe kit has two different sets of helipad net fences. Their shapes are a little bit different. Add this railing. It isn't in the kit. The two antenna masts are the most delicate and complex part in the kit. The 3D printed resin parts are flexible and vulnerable, so I had to be very careful. Don't forget the masts are straight when you attach ladders. This is my 2,094th mistaek... Not all the supports are removable. Always check real photos. The second mast is more complex. I forgot to add the C15. Ok... the last part is the radar assembly. 😬


- 9 replies
-
- 7
-
-
- Bunker Hill
- Flyhawk
- (and 2 more)