modeller_masa
-
Posts
950 -
Joined
-
Last visited
Content Type
Profiles
Forums
Gallery
Events
Everything posted by modeller_masa
-
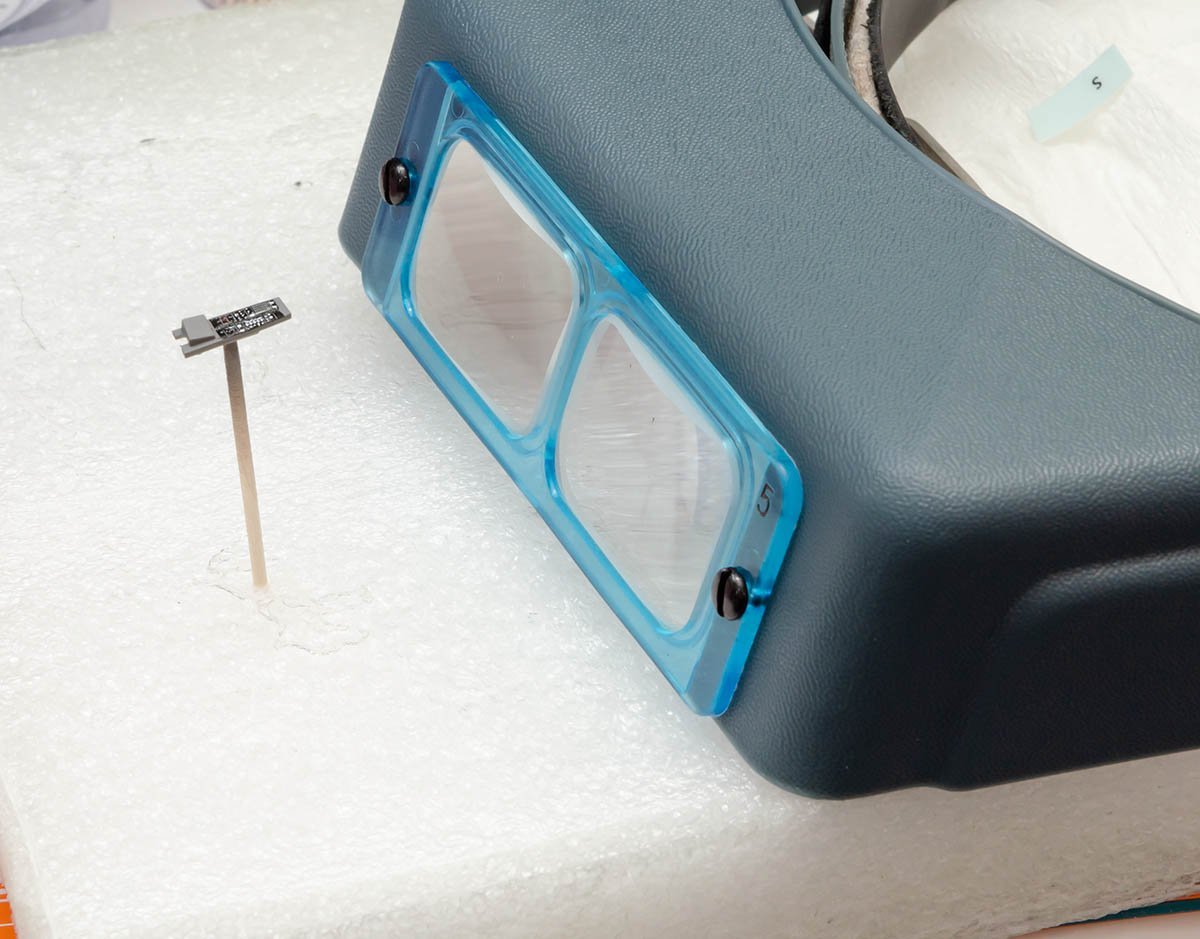
Smartphone digital loupes
modeller_masa replied to modeller_masa's topic in Modeling tools and Workshop Equipment
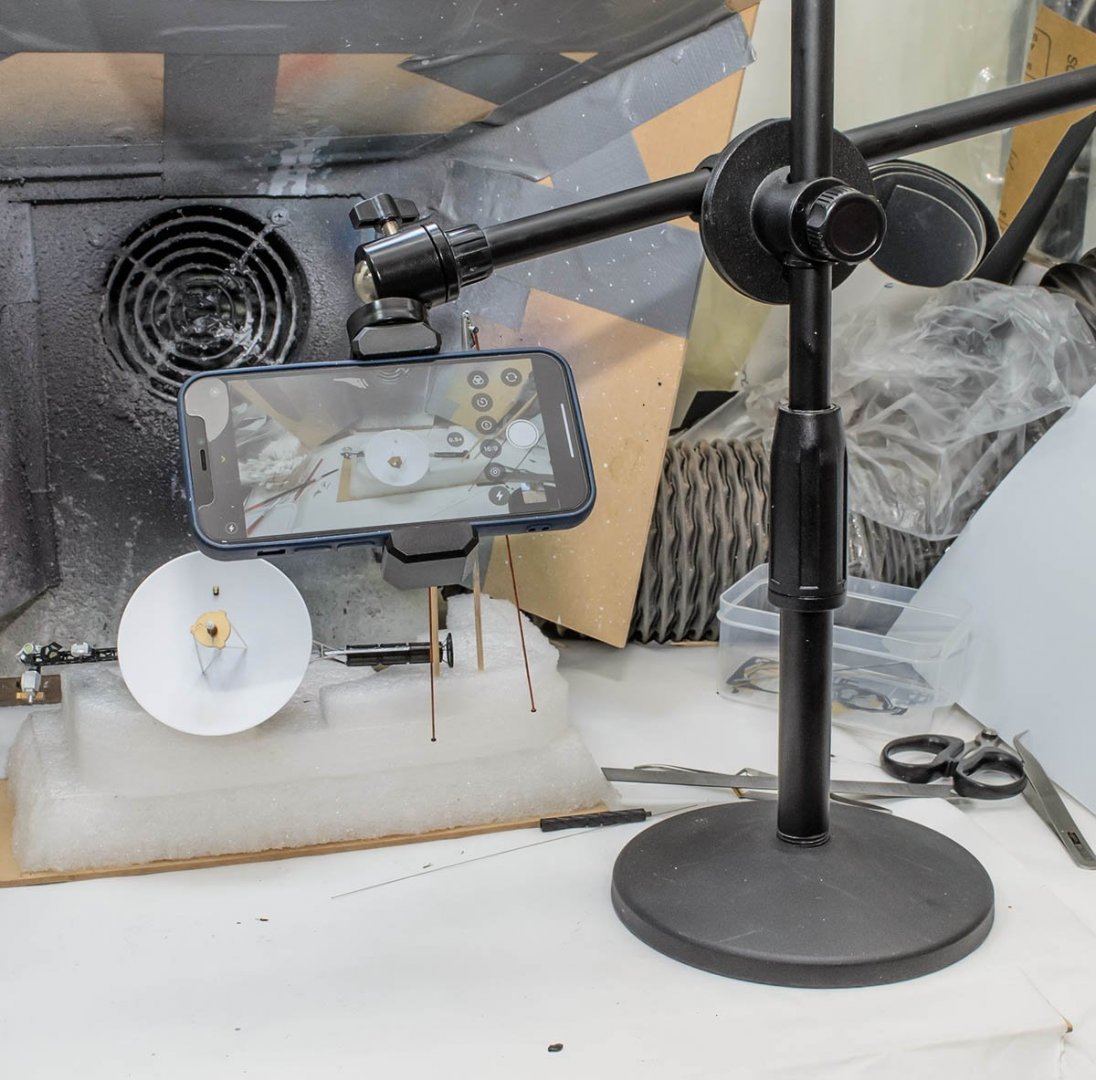
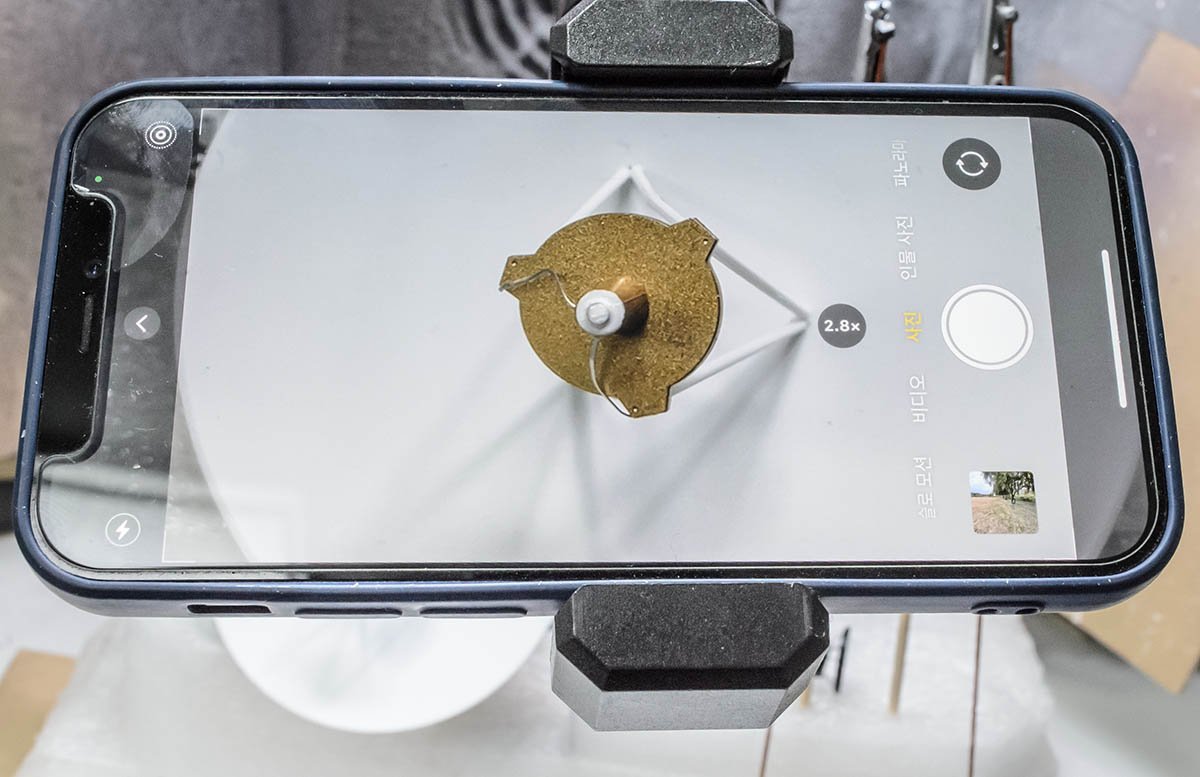
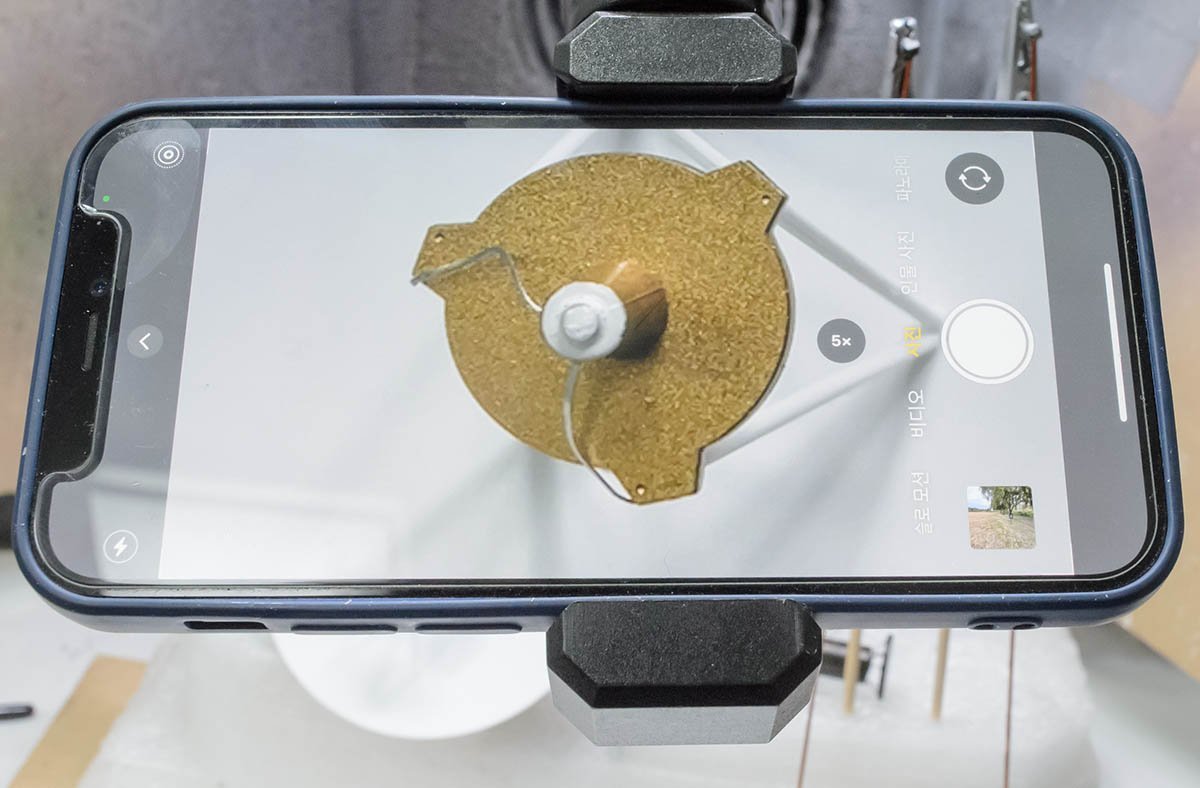
I found critical issue for the digital loupes. The smartphone uses single lens and single screen, so I can't feel a sense of distance. 😭 (I used iPhone's default magnifying tool.) On the contrary, the DA-5 works pretty well and simple. It breaks my eyes due to too narrow focal length, but acceptable for an instant. To make eyes comfortable and improve modelling work, I may need VR headset with 3D-two lens cam or AR glasses. It is way out of this topic, so I won't continue it. I would say that this digital loupes is still great tool for inspection after assembly. It works clearly and doesn't break your eyes.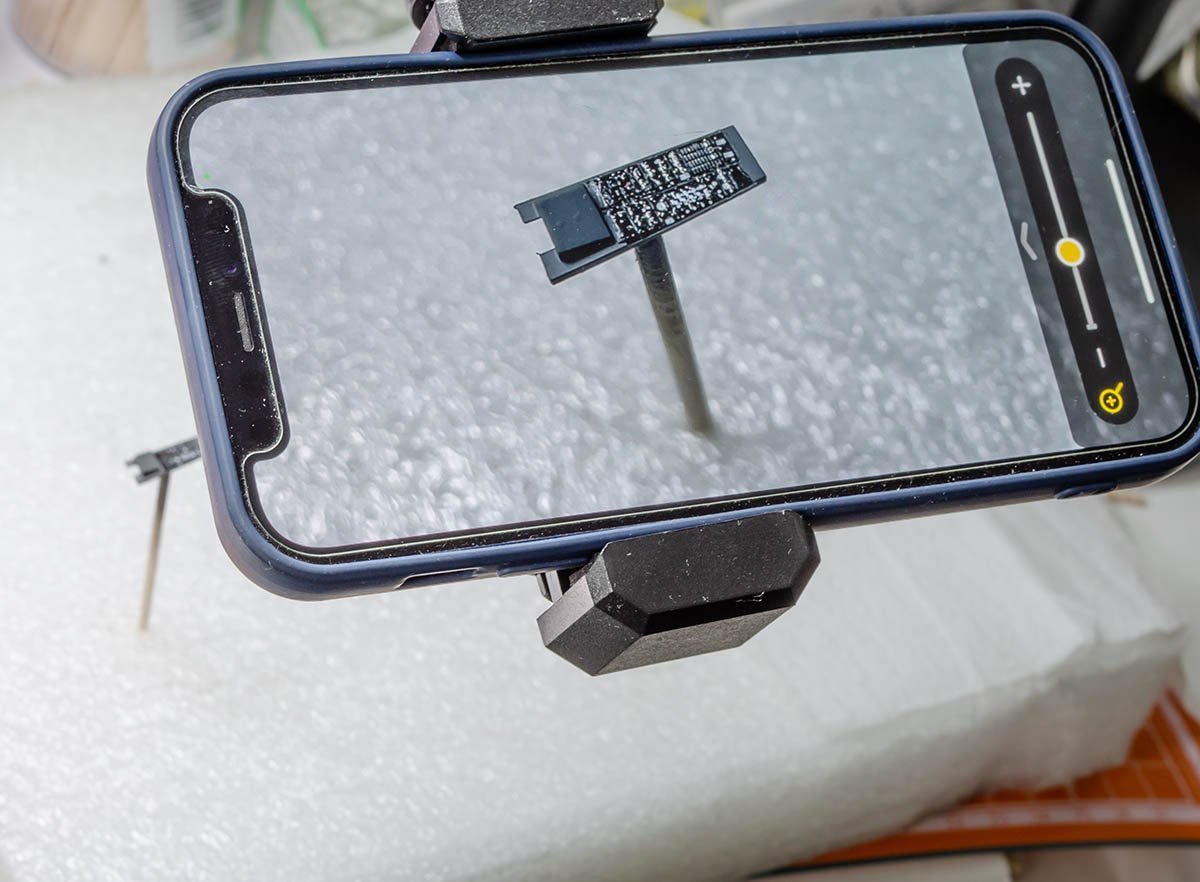
-
No problem, Egilman. It is my pleasure to show the most favorite spacecraft model to everyone. Thanks again for everyone watching my project.
-
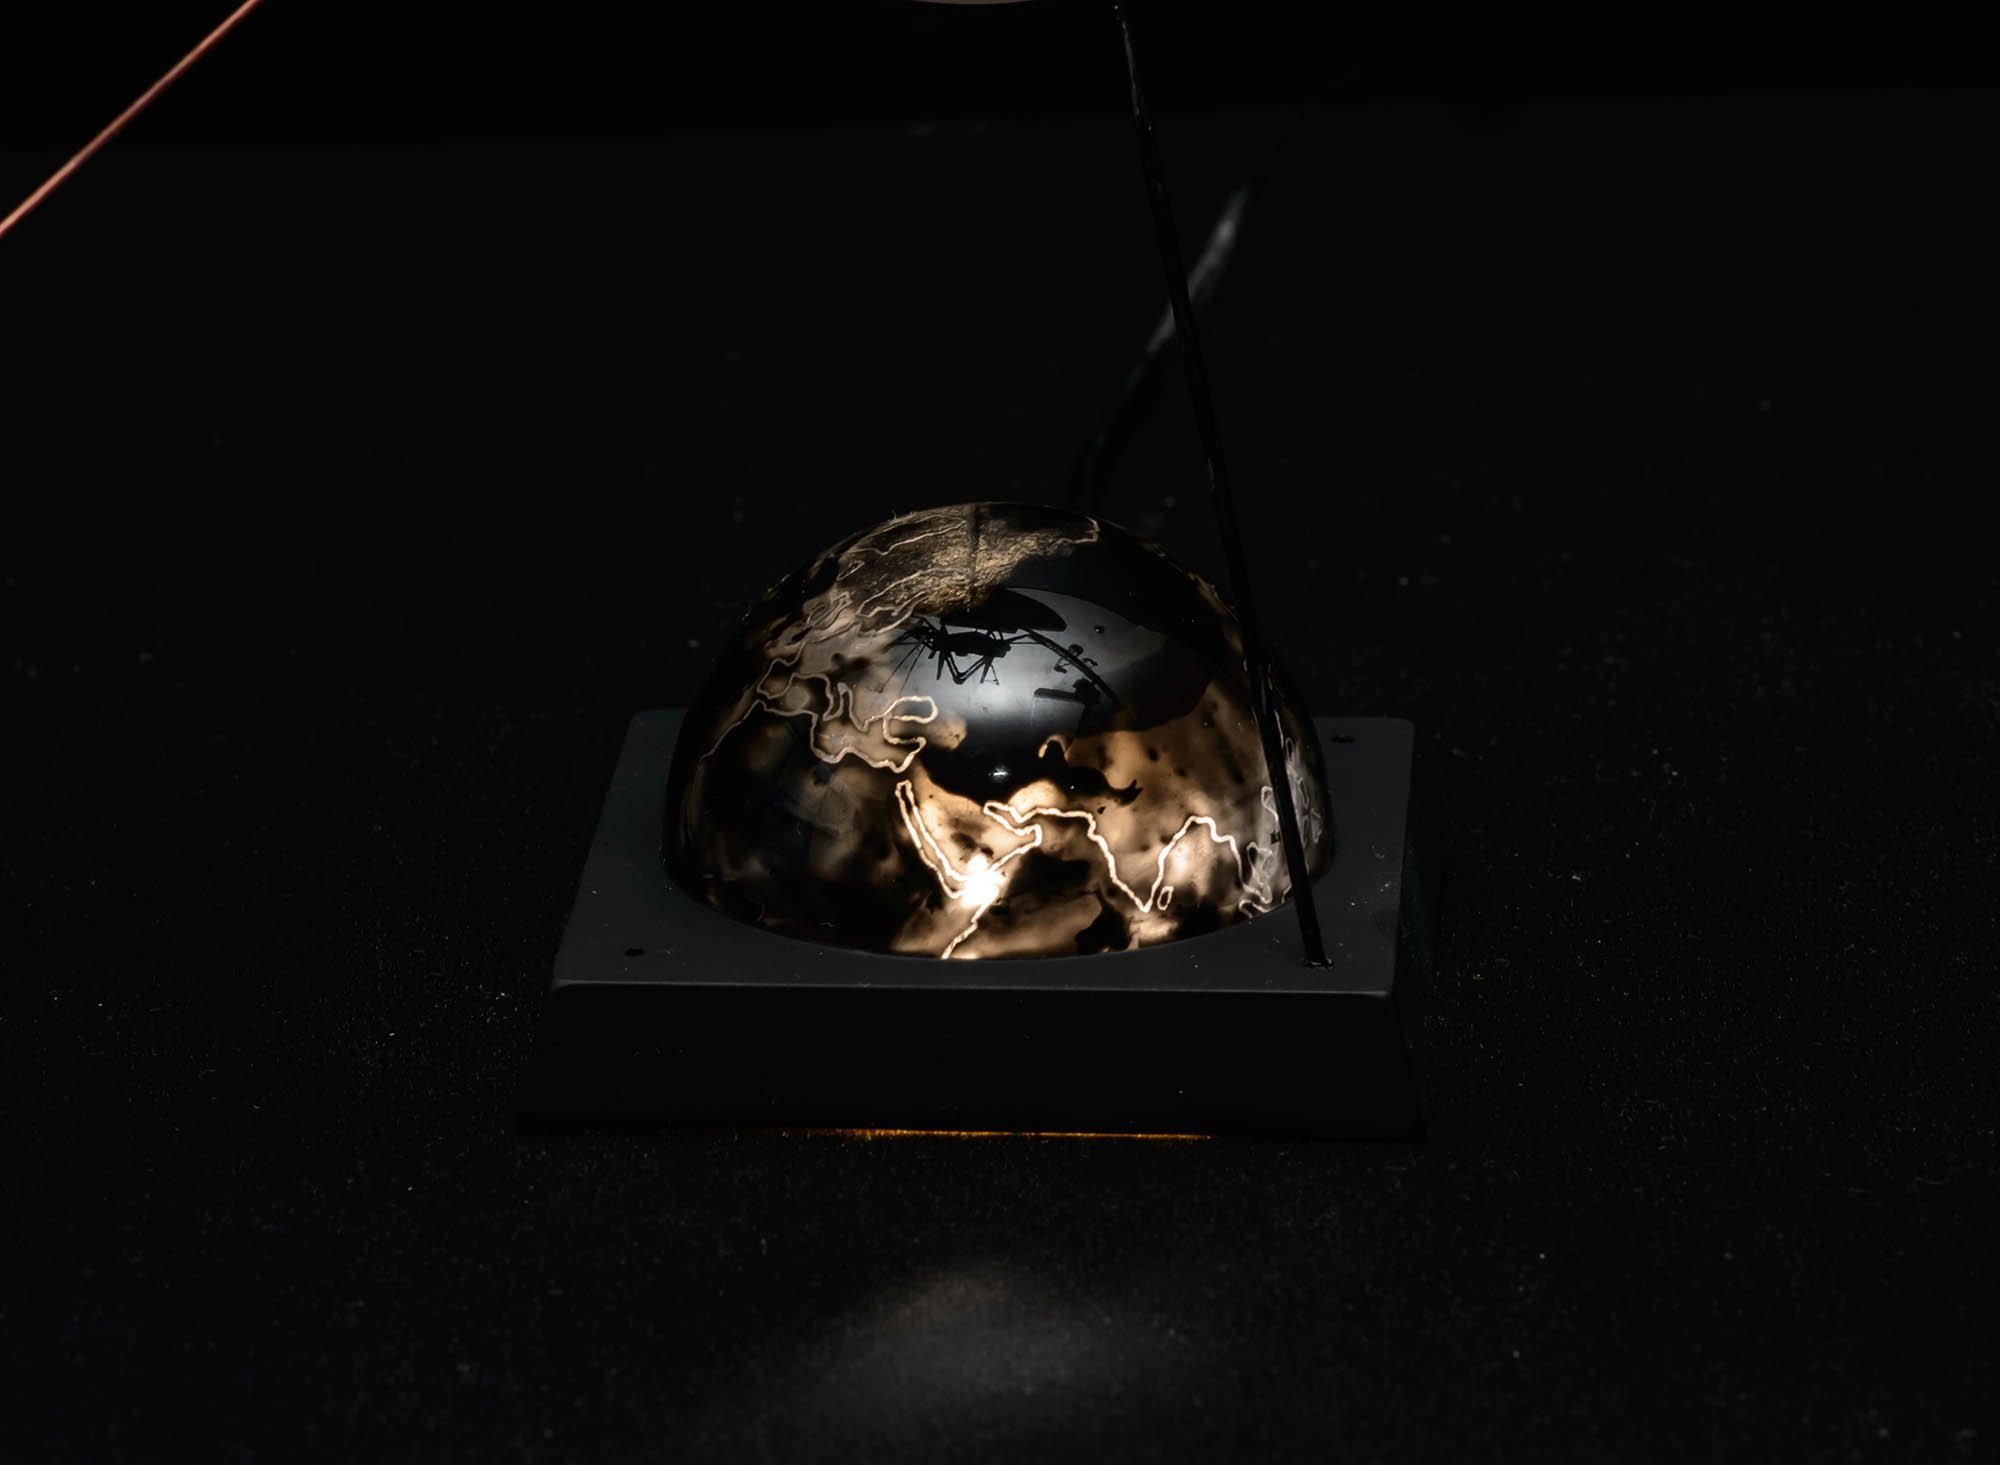
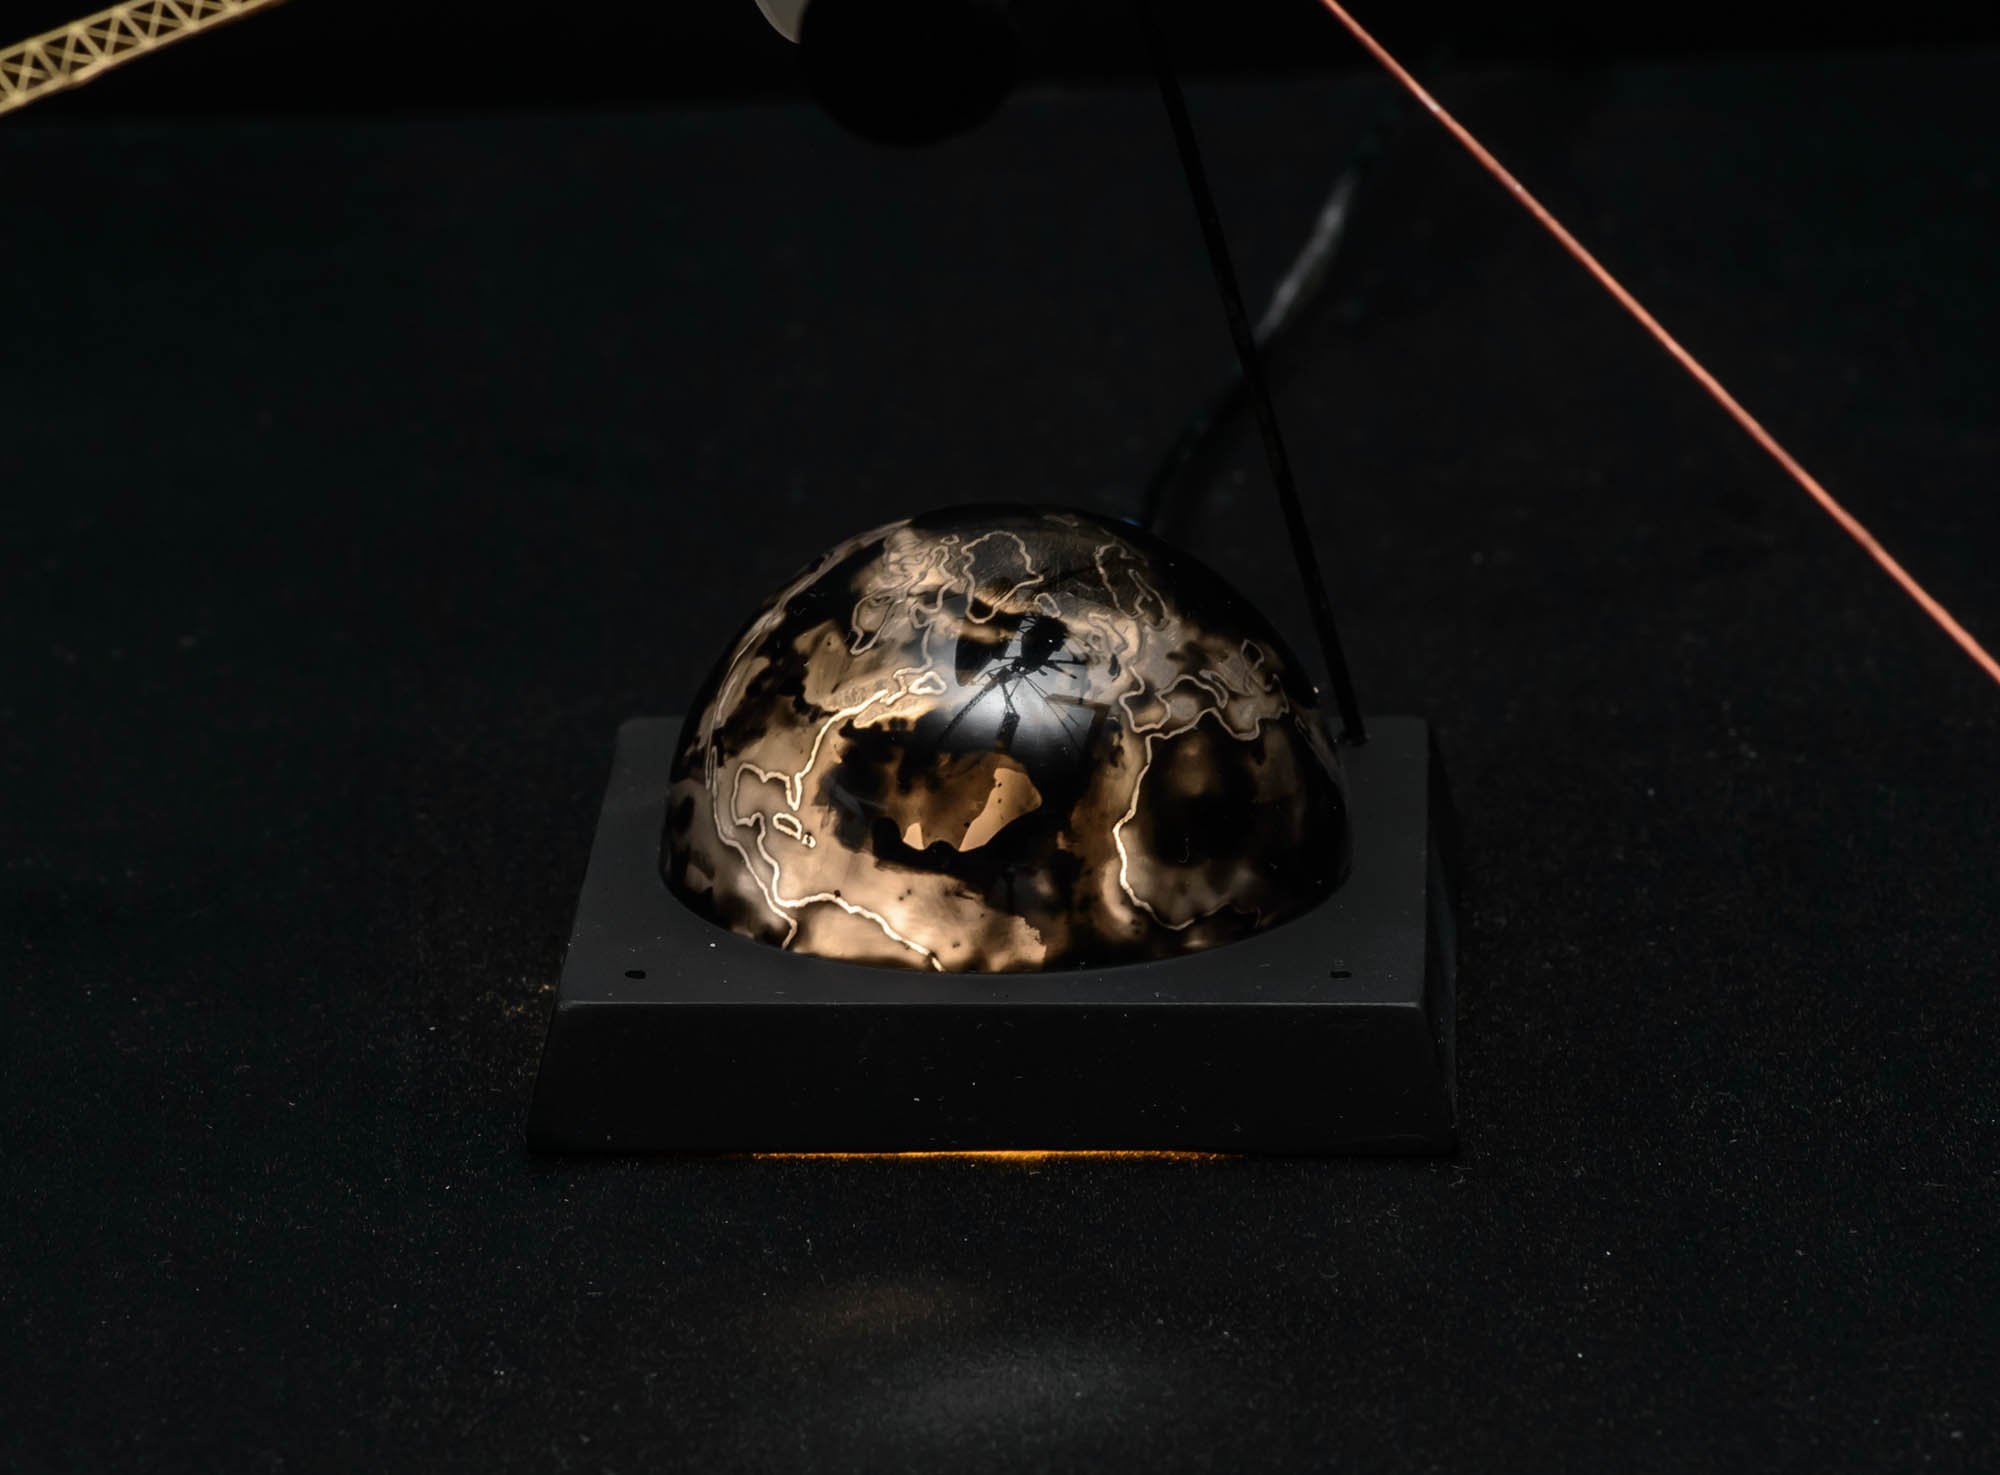
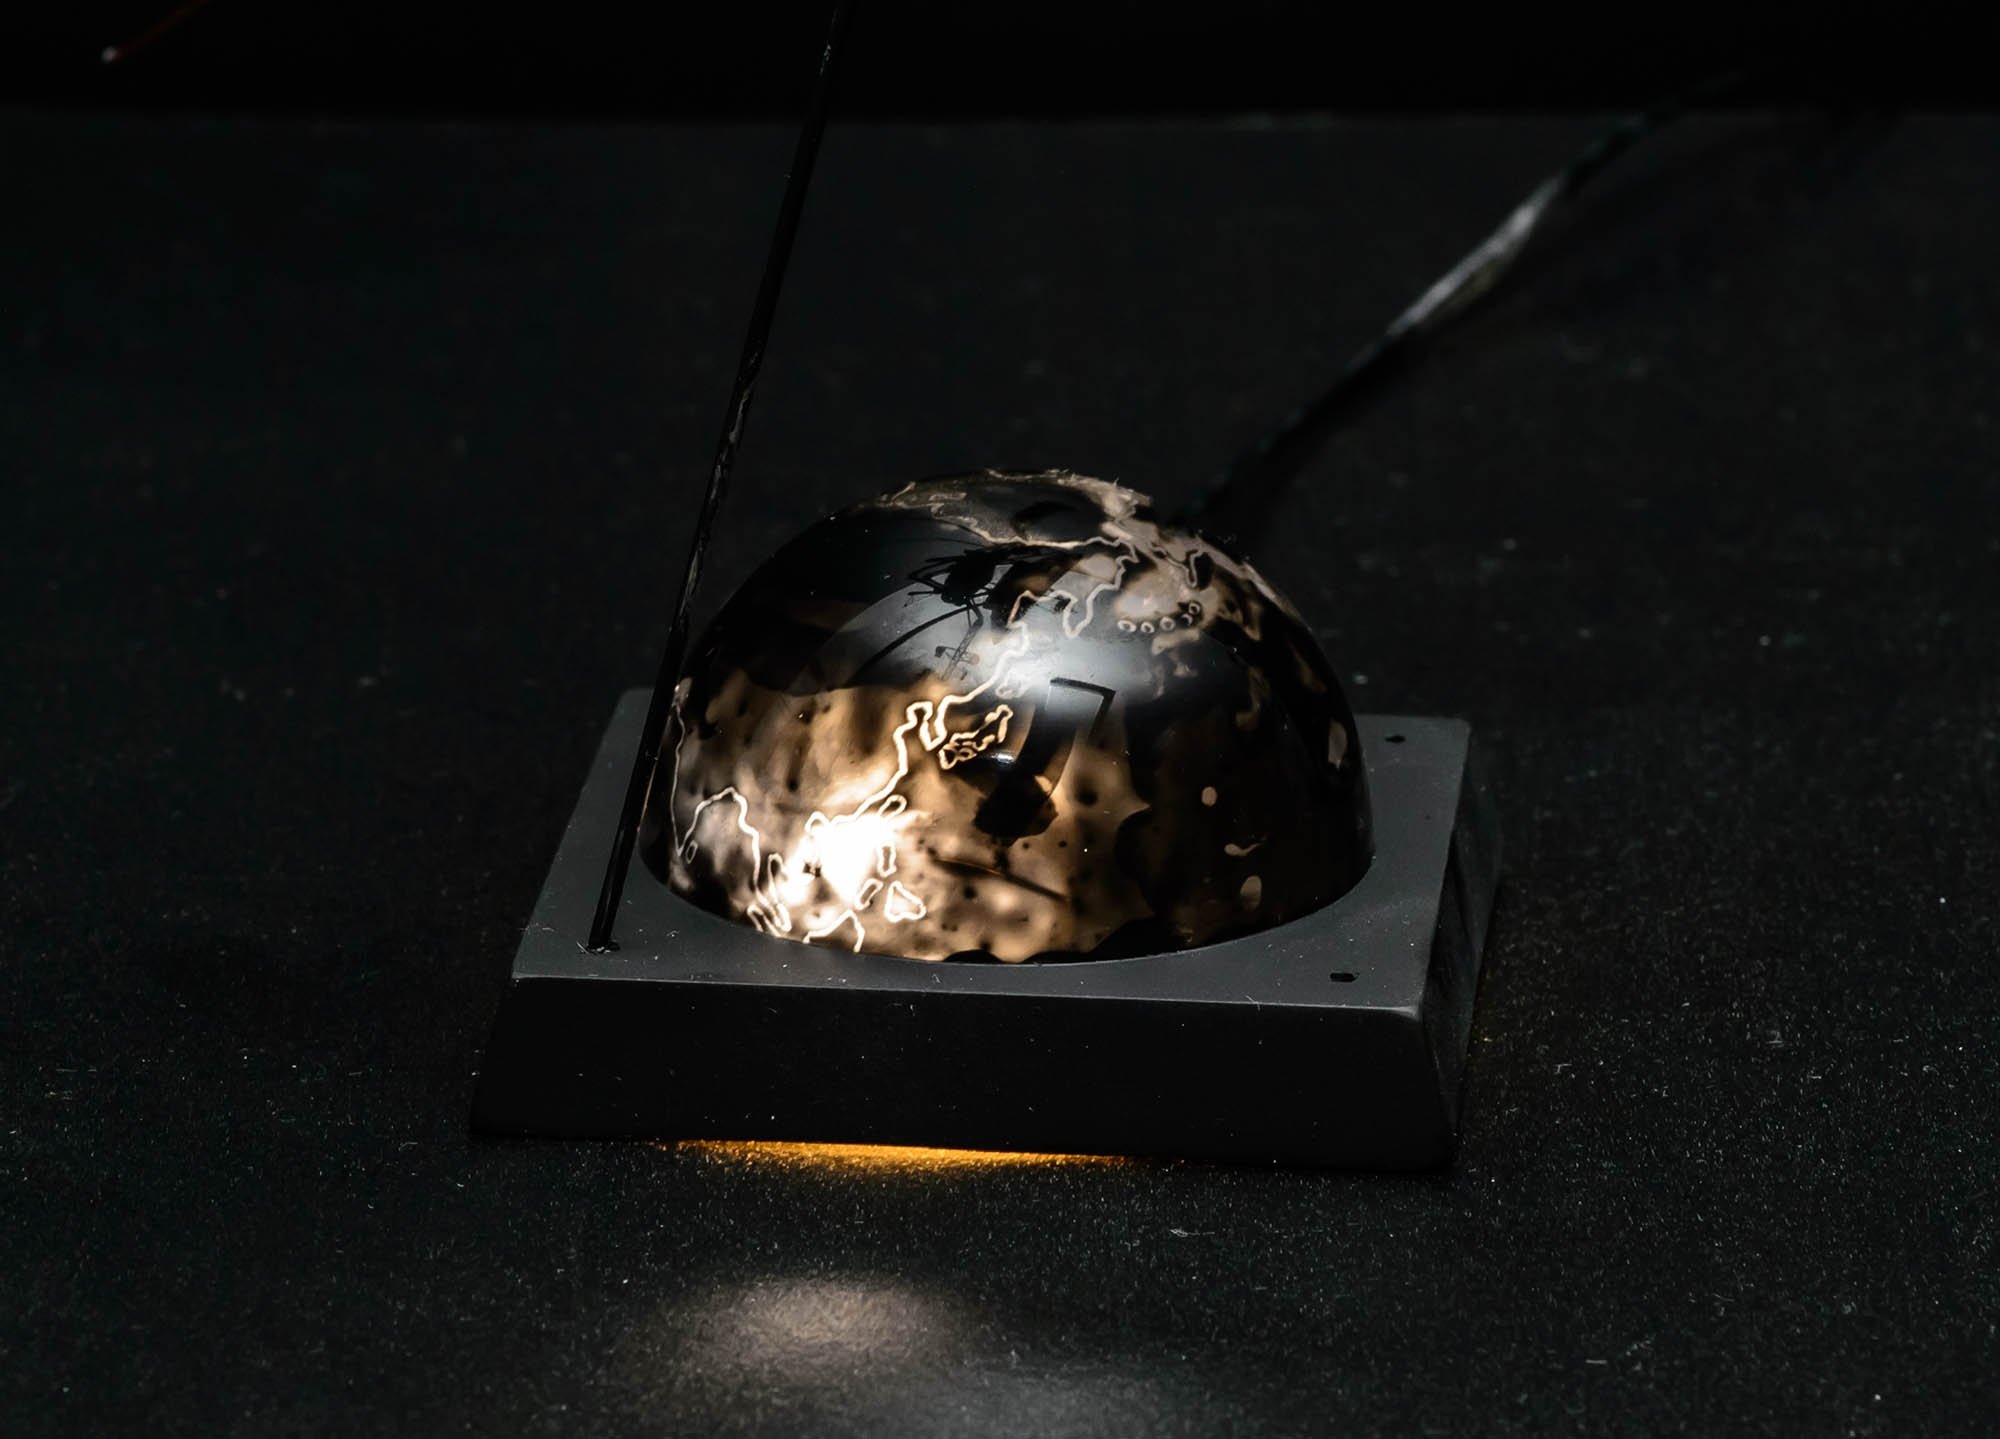
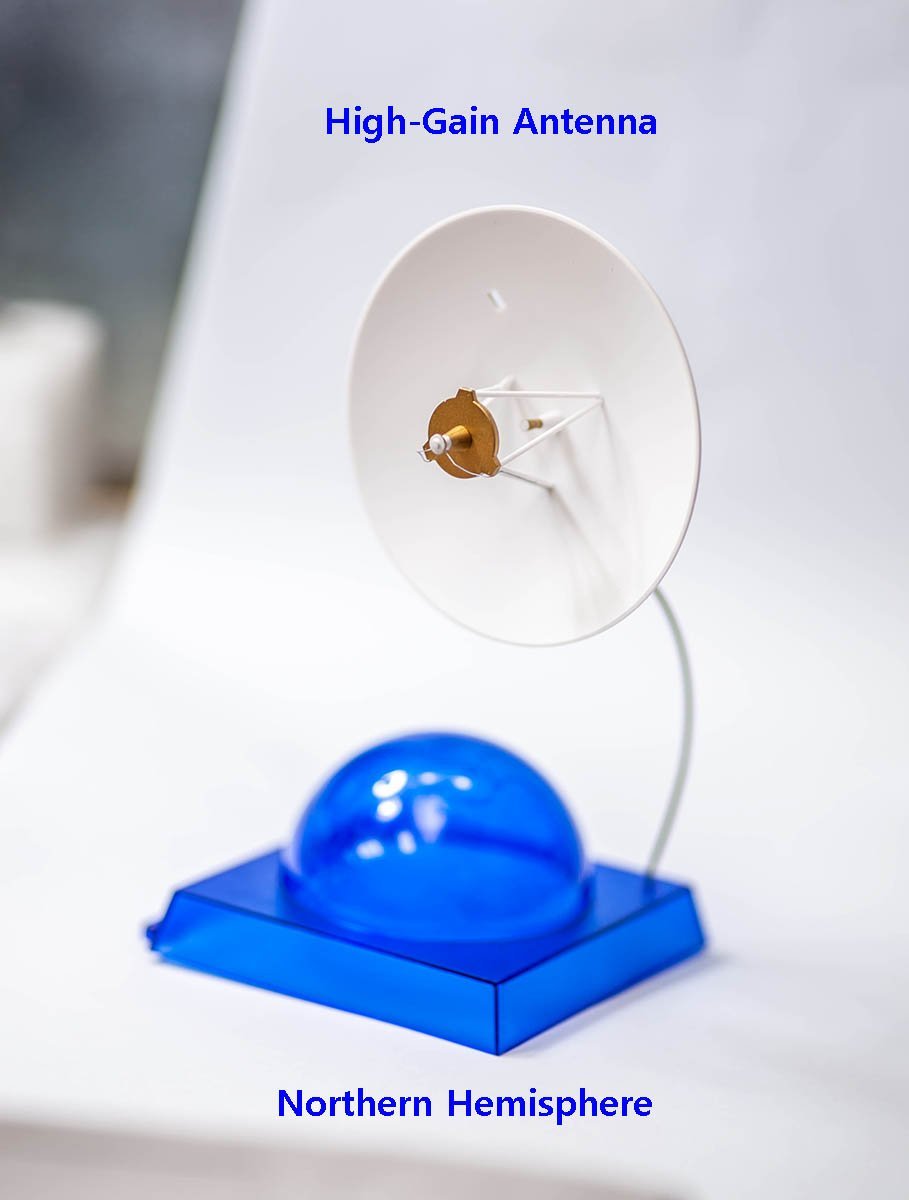
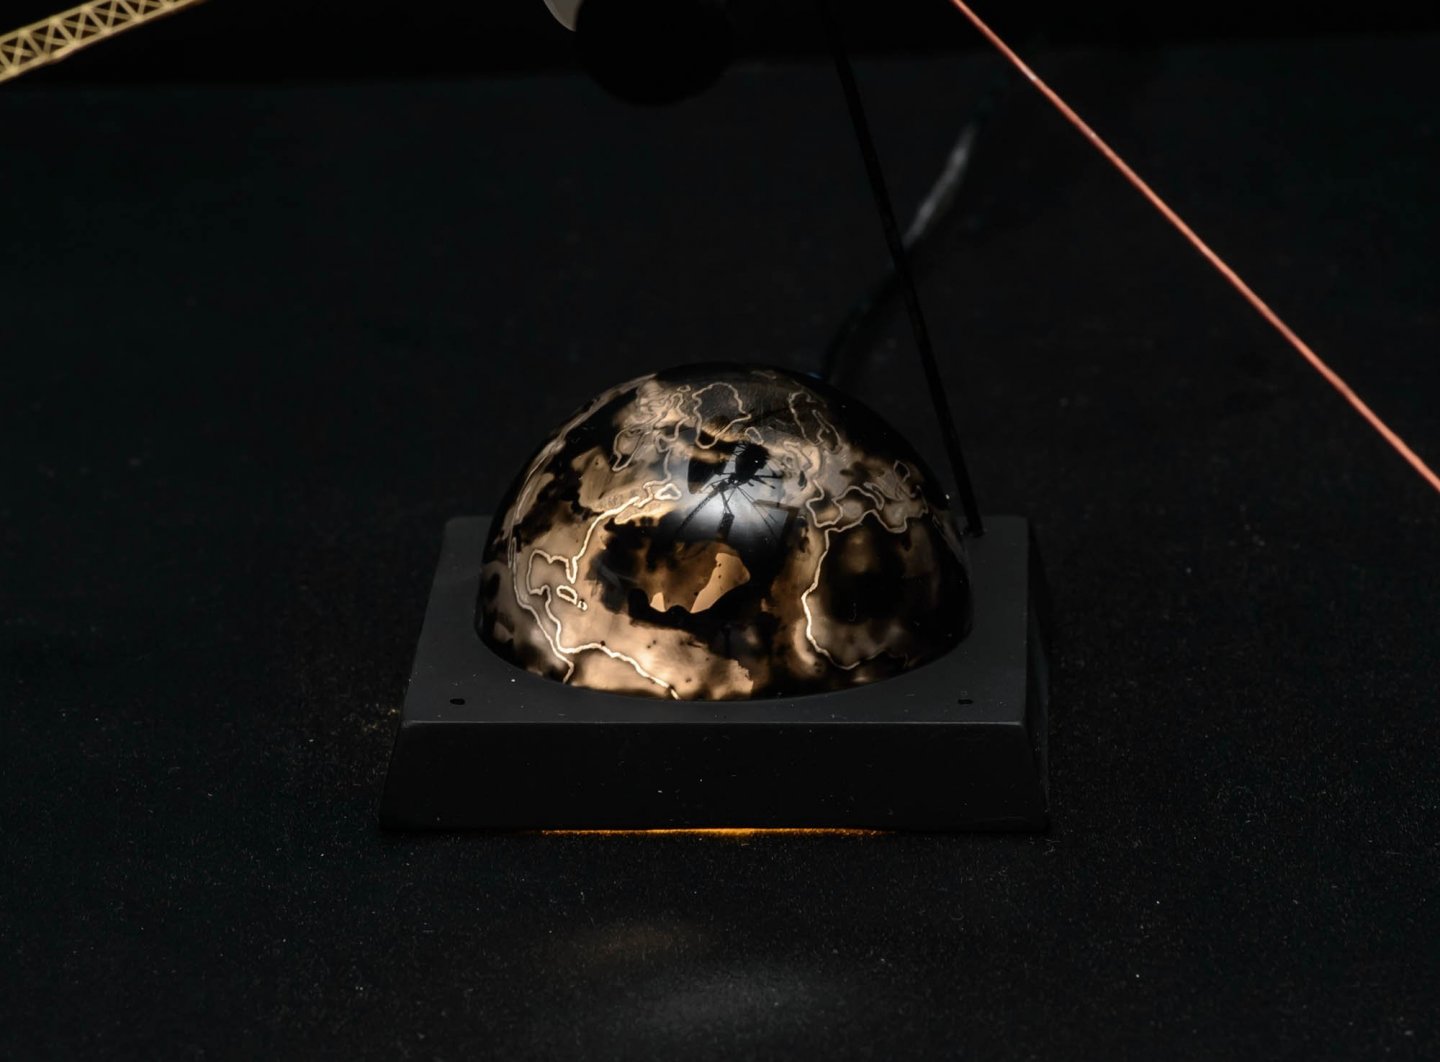
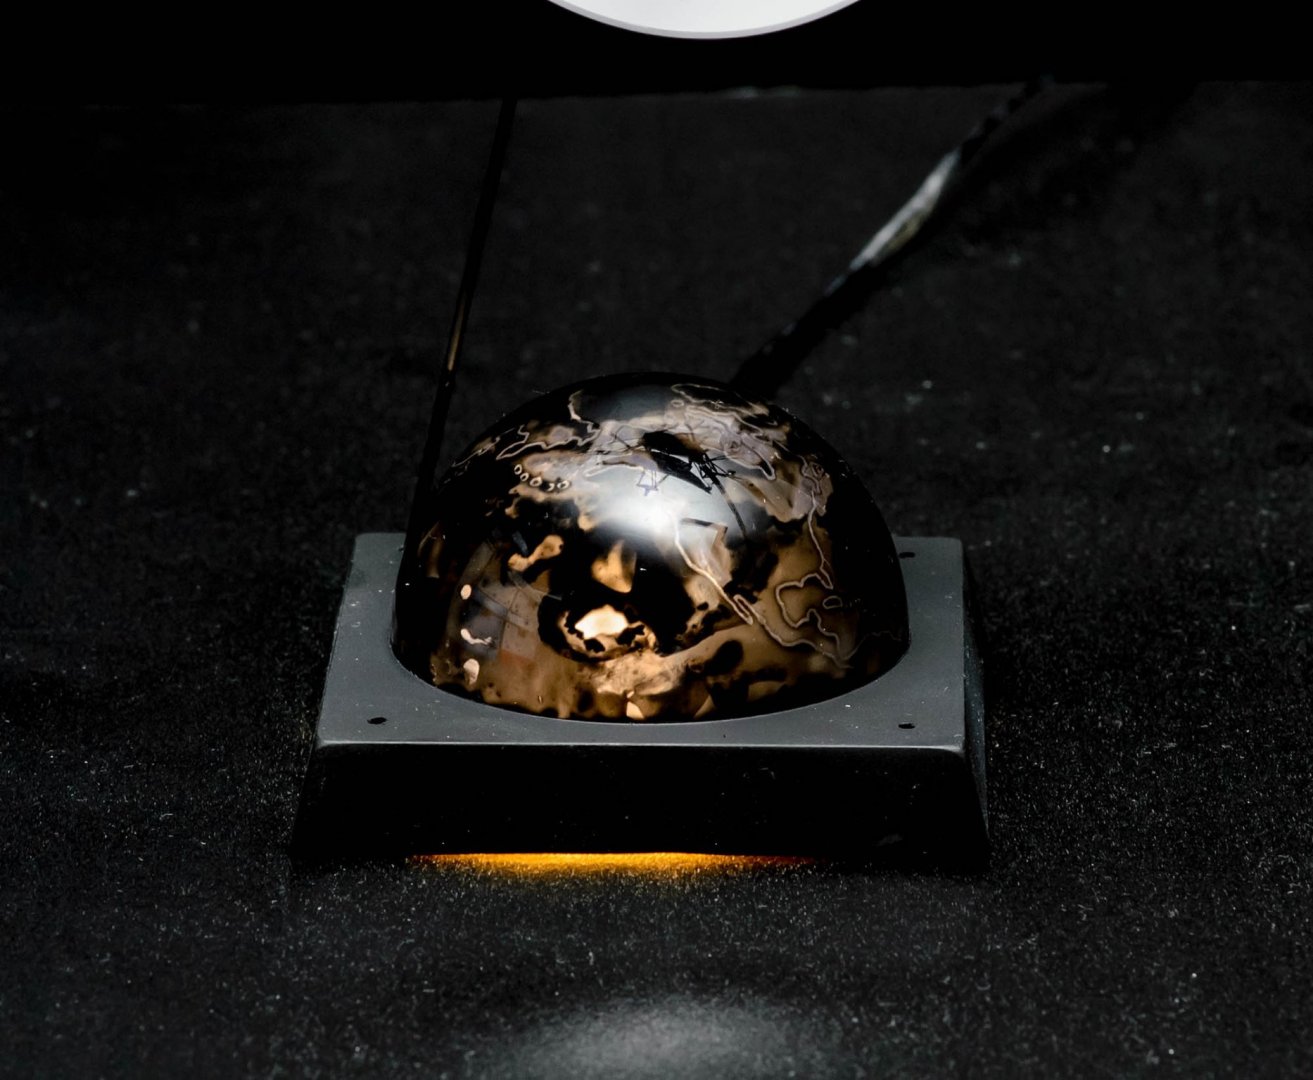
I added 4 holes to show entire northern hemisphere equally. Sorry about southern hemisphere people. There are Portsmouth and Brest. You may be able to see MSW office. And South Korea 😎


- 26 replies
-
- 15
-

-

-
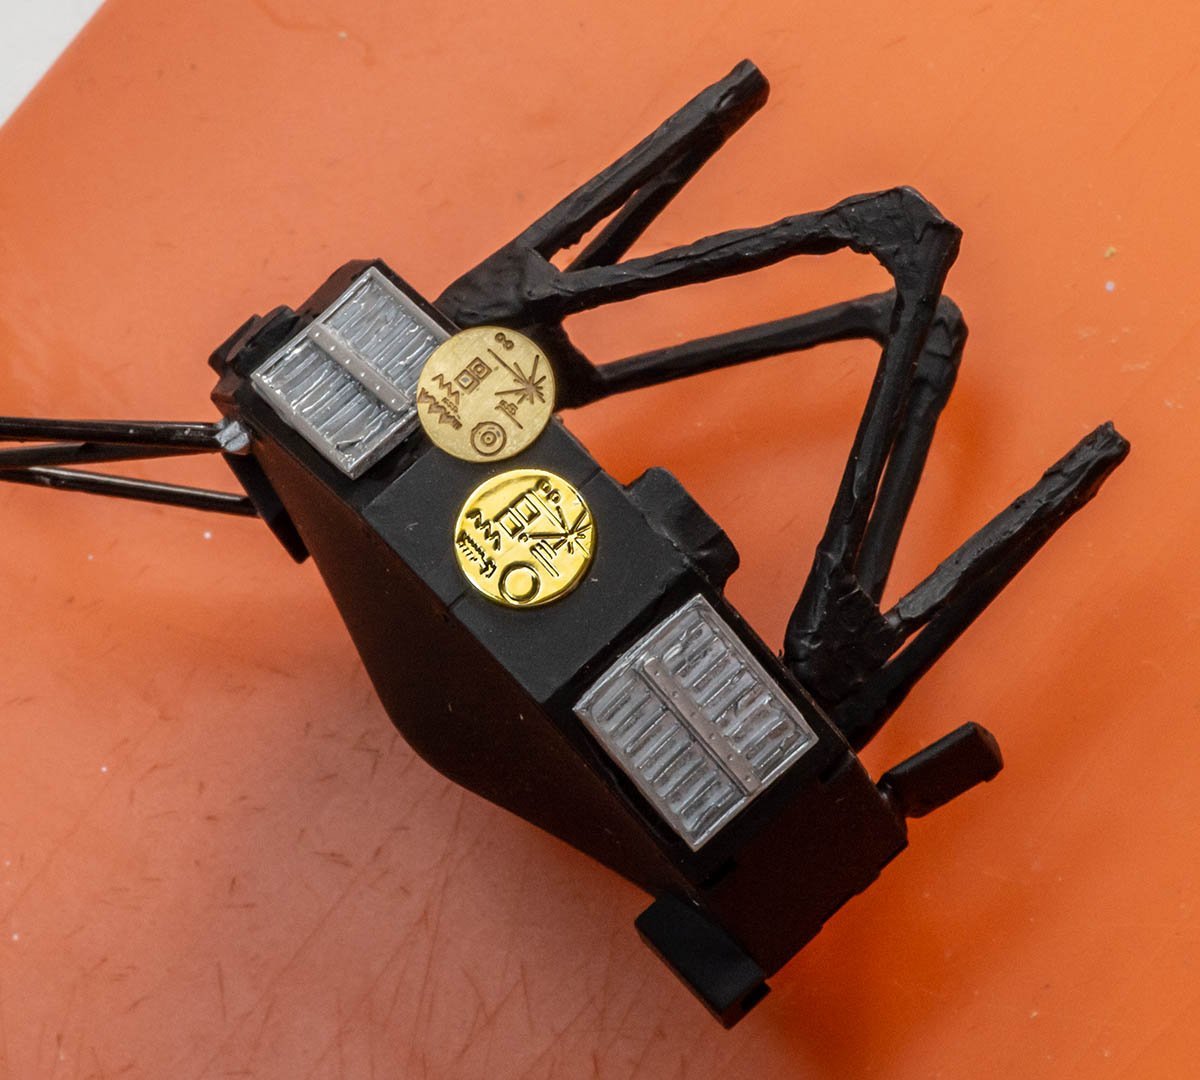
I added 4 magnets to attach acrylic name panel freely. By the way, I asked JPL about an official Voyager mission insignia in 1976 a month ago. Unfortunately my workshop is full, so I wrap up this project and go to the next.
-
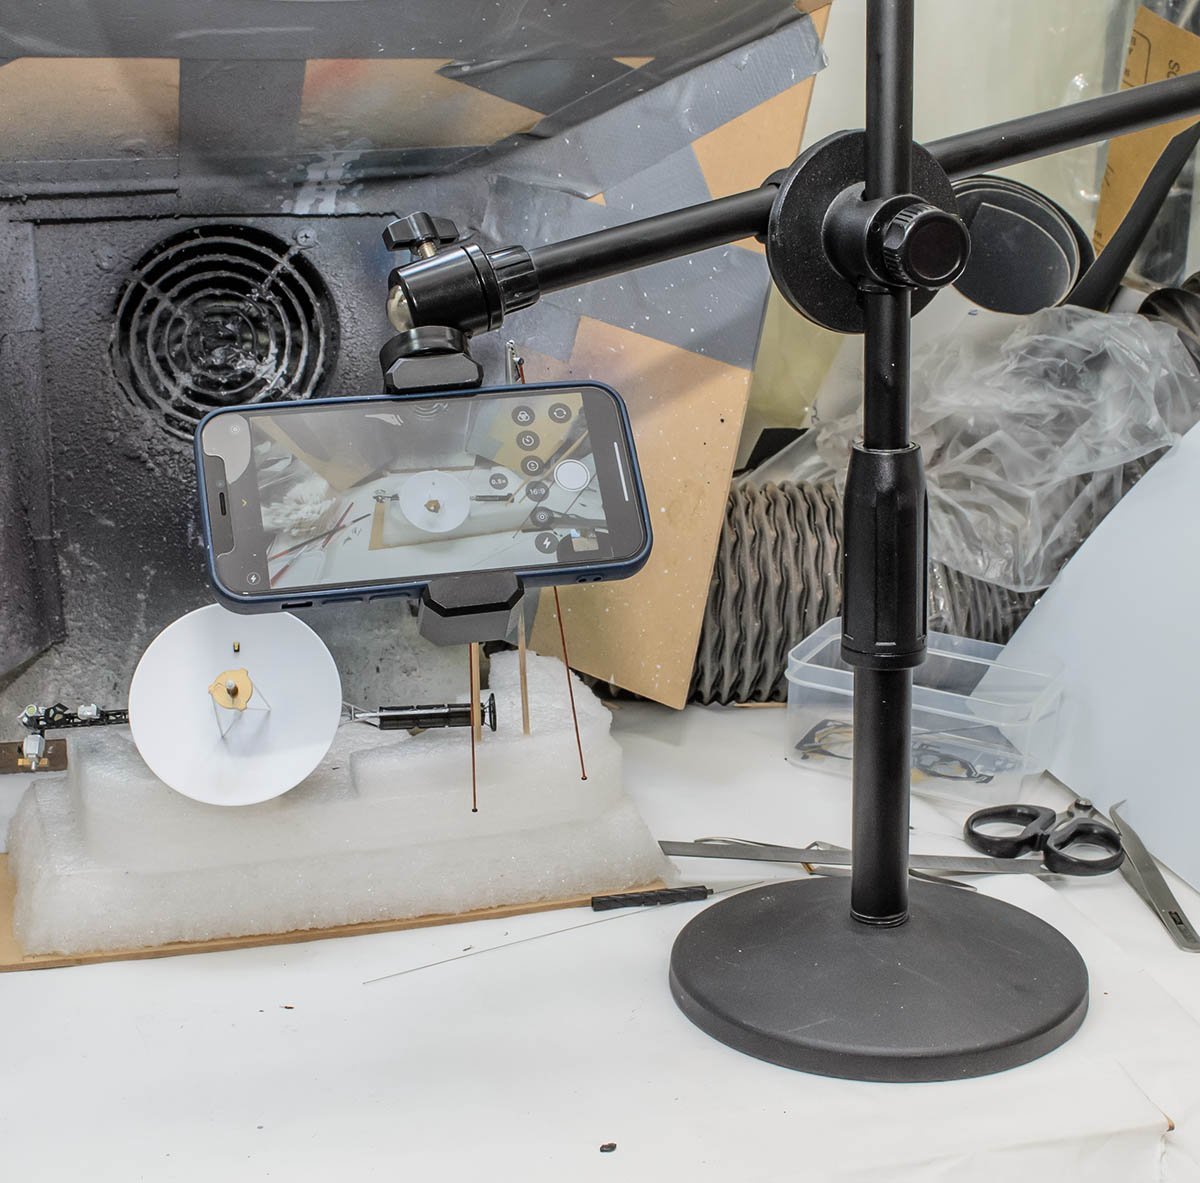
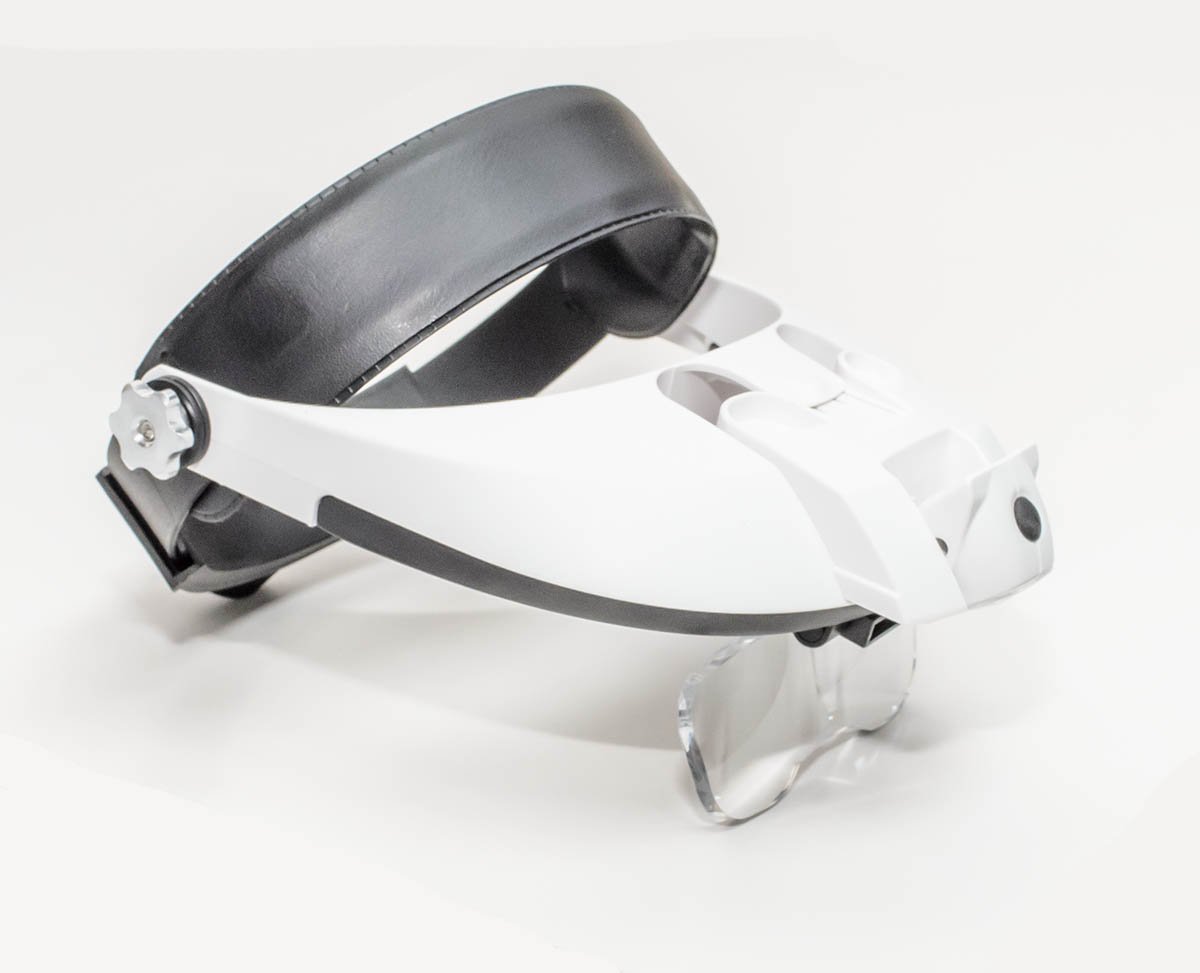
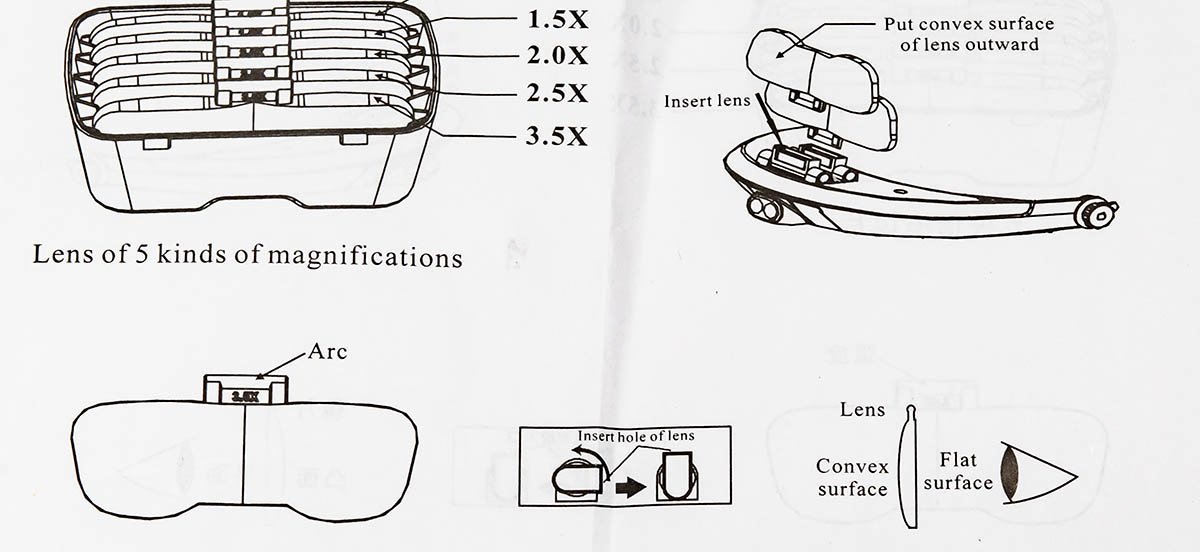
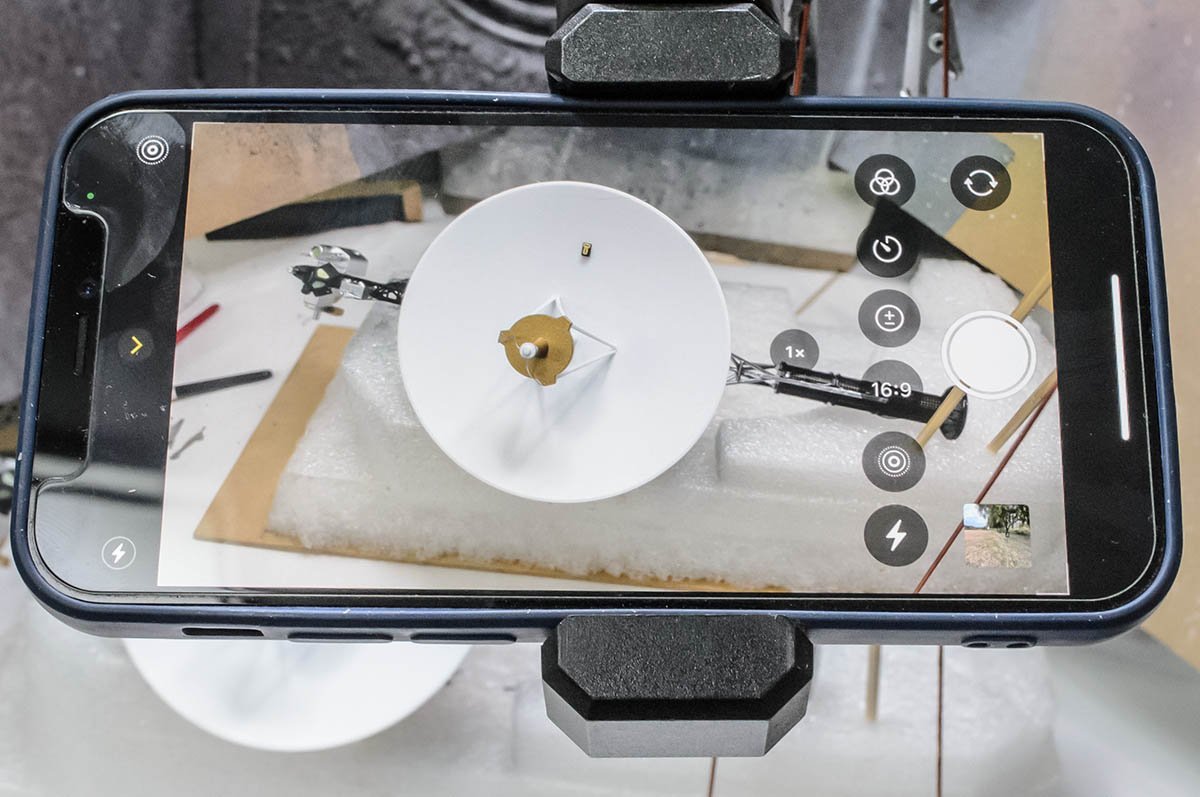
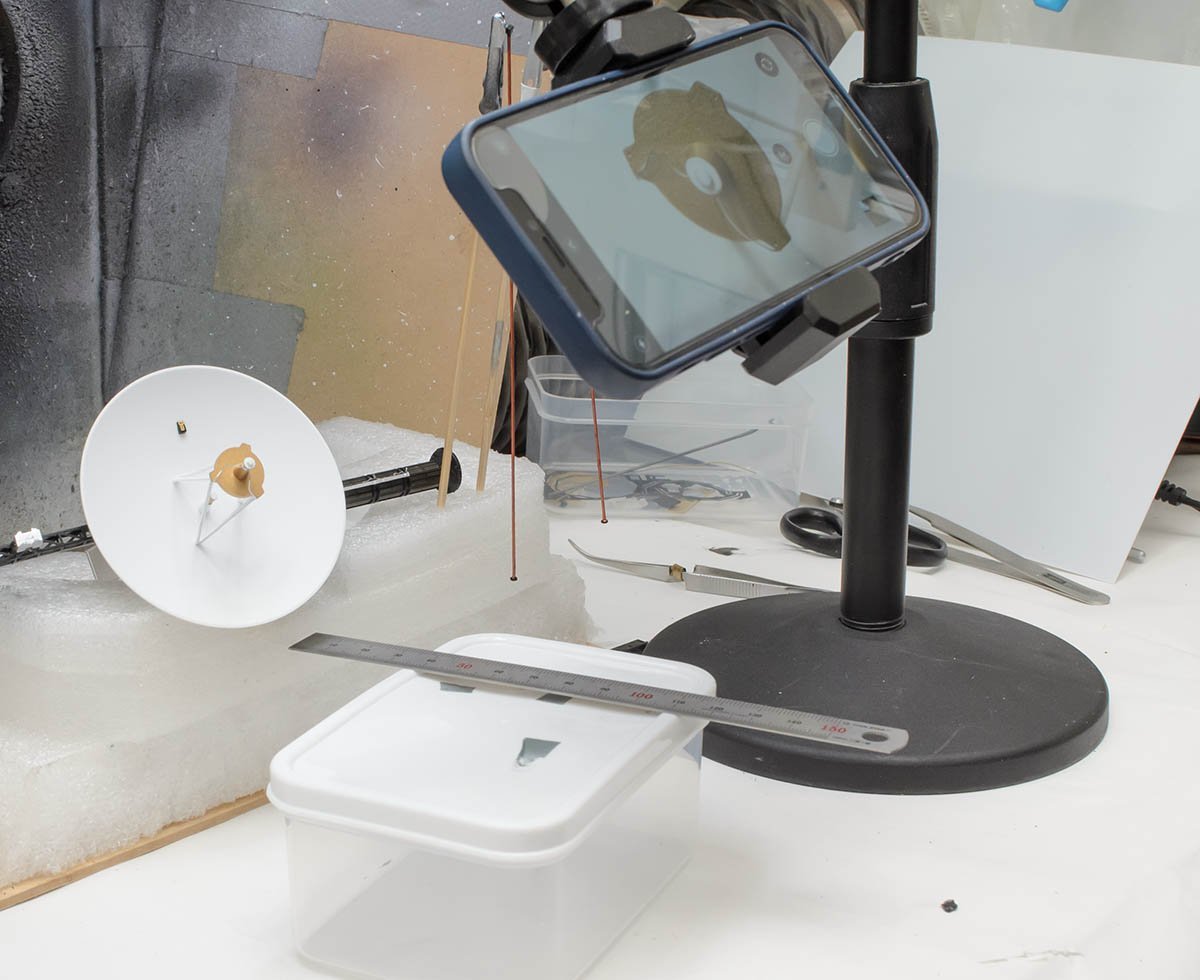
I bought new headmount magnifying device to protect my eyes. The experience is quite dissapointed. I felt that the lens will end my eyes... After some freewheeling brainstorming, I picked up old cellphone stand that a girl used at internet class last year. This is my iPhone 12 Mini with 26mm standard lens. More, and maximum. Nice and clear digital loupes! Additional cost $0 ! Also, I got $1 billion by saving my eyes! The distance between an object and smartphone is more than 15cm. I'll buy polyarticular cellphone stand to save more space for handwork.
-
Hello, If you're still looking for the LST 1-class kit, here is the newest available kit with detail-up set. https://www.scalemates.com/kits/afv-club-se73515-lst-1-class-landing-ship-tank--1169535 AFV-Club 1/350 https://www.scalemates.com/kits/infini-model-im-535016r1-usn-lst-1-class-detail-up-set--1234994 https://www.finehobby.com/FrontStore/iGoodsView.phtml?iCategoryId=1796&iGoodsId=IM535016R1 INFINI Model detail up set There are 3 LST museum ships in South Korea in 2021. I'll compare them and select one of them to build 542-class LST ship. 👍
-
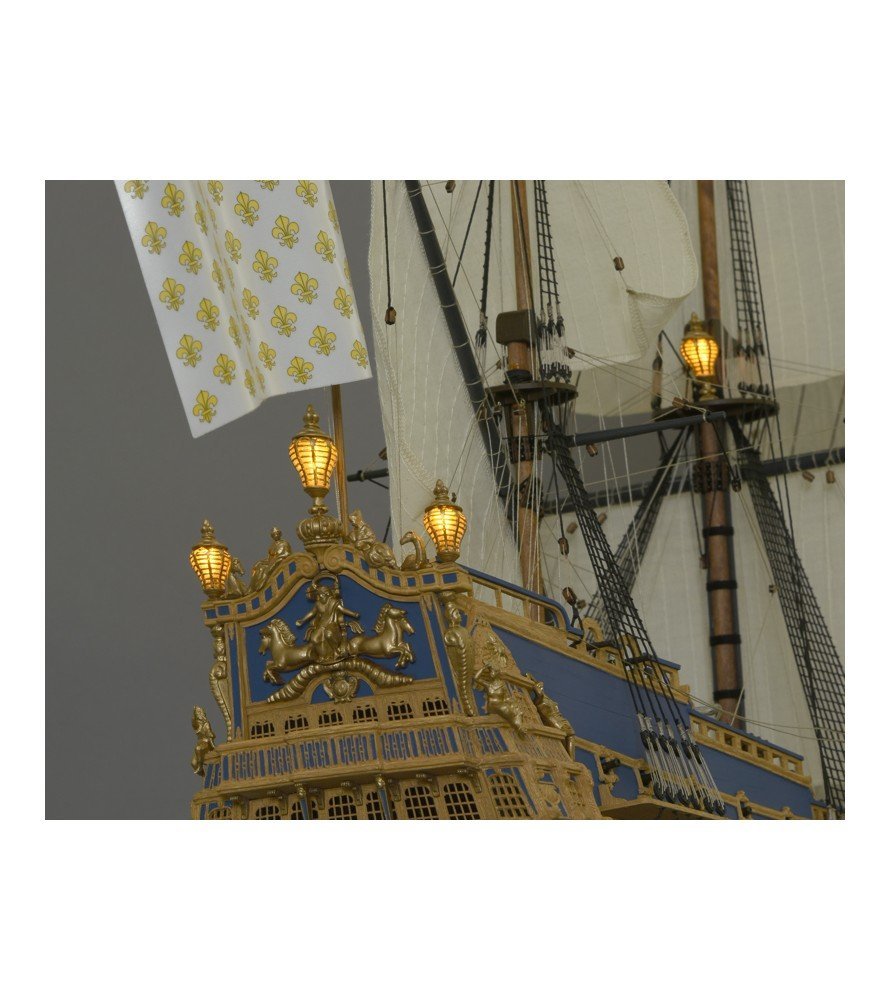
https://artesanialatina.net/en/ships-elite/62356-wooden-model-ship-kit-soleil-royal-172.html Looks like AL is really busy this year.


-
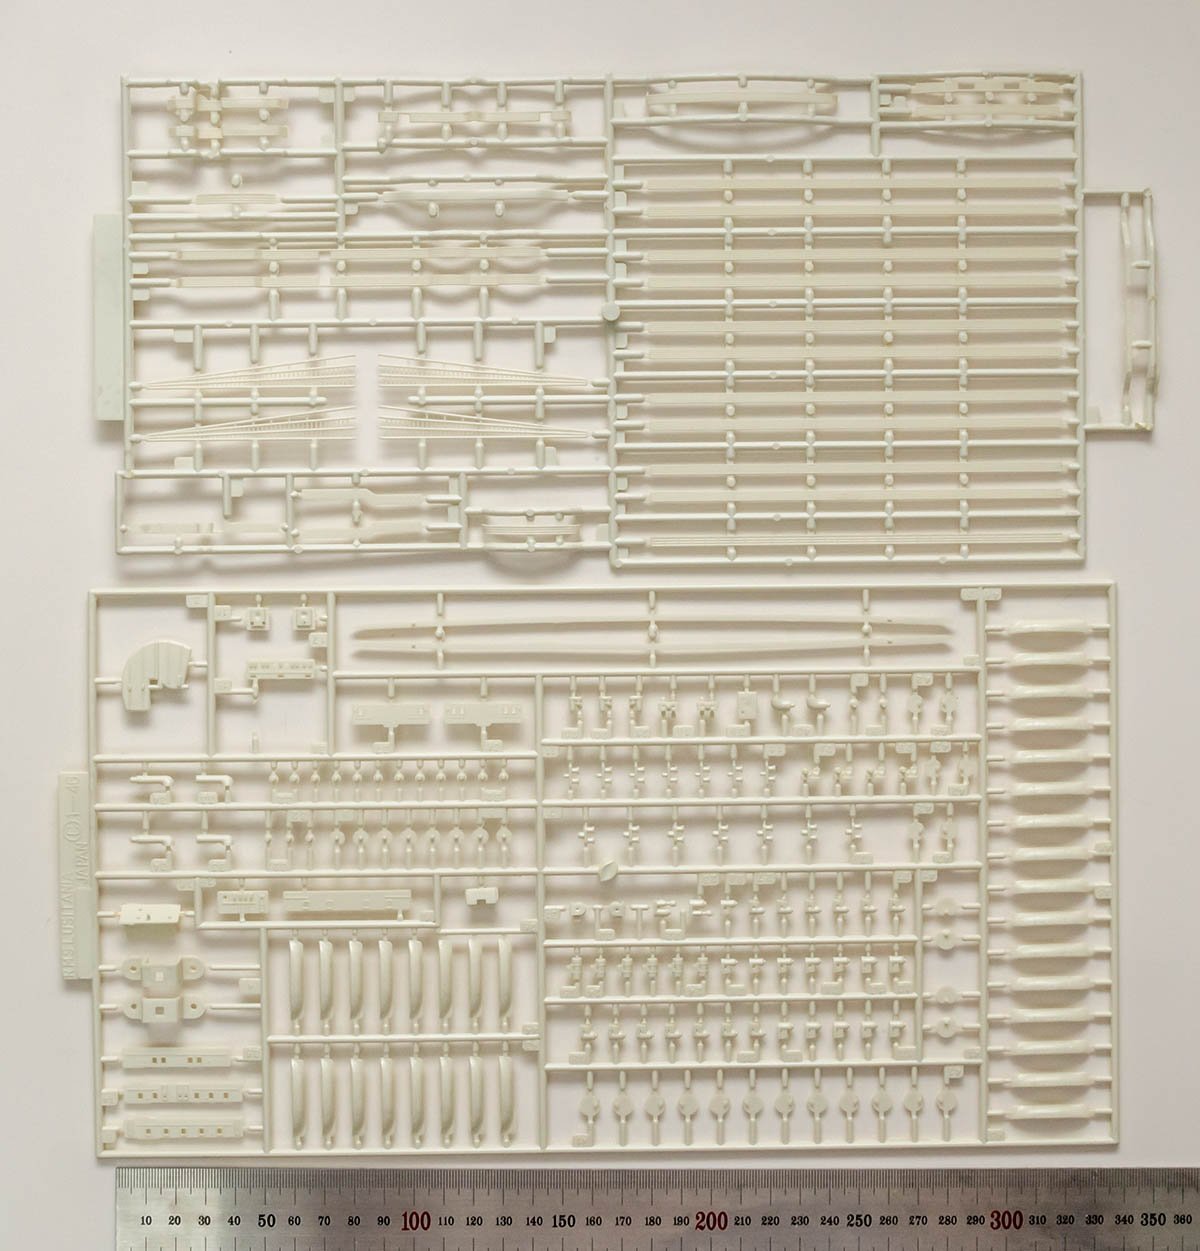
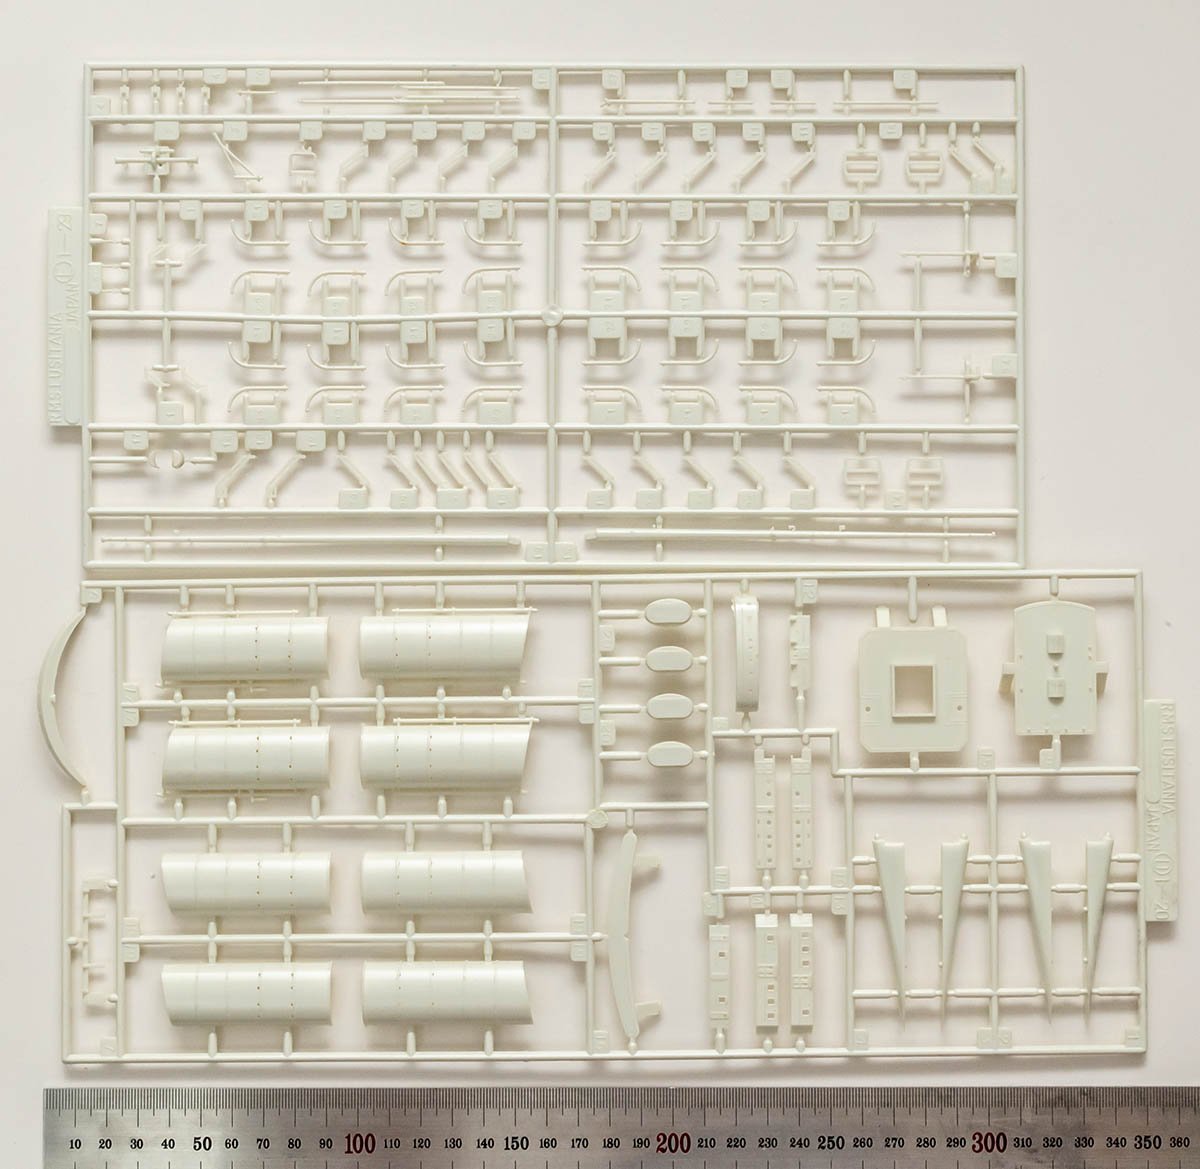
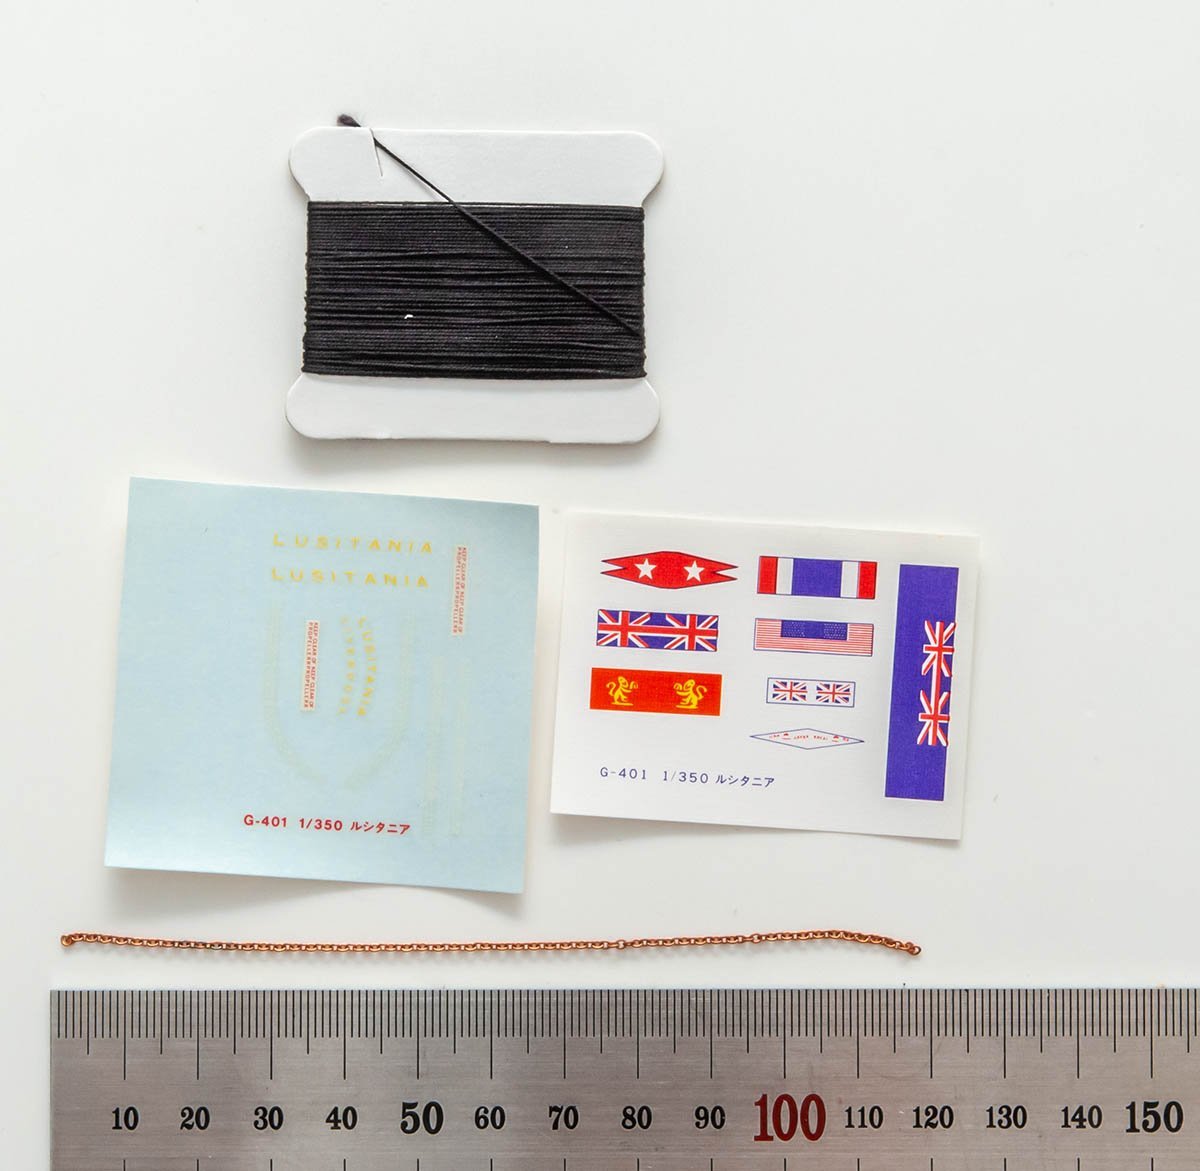
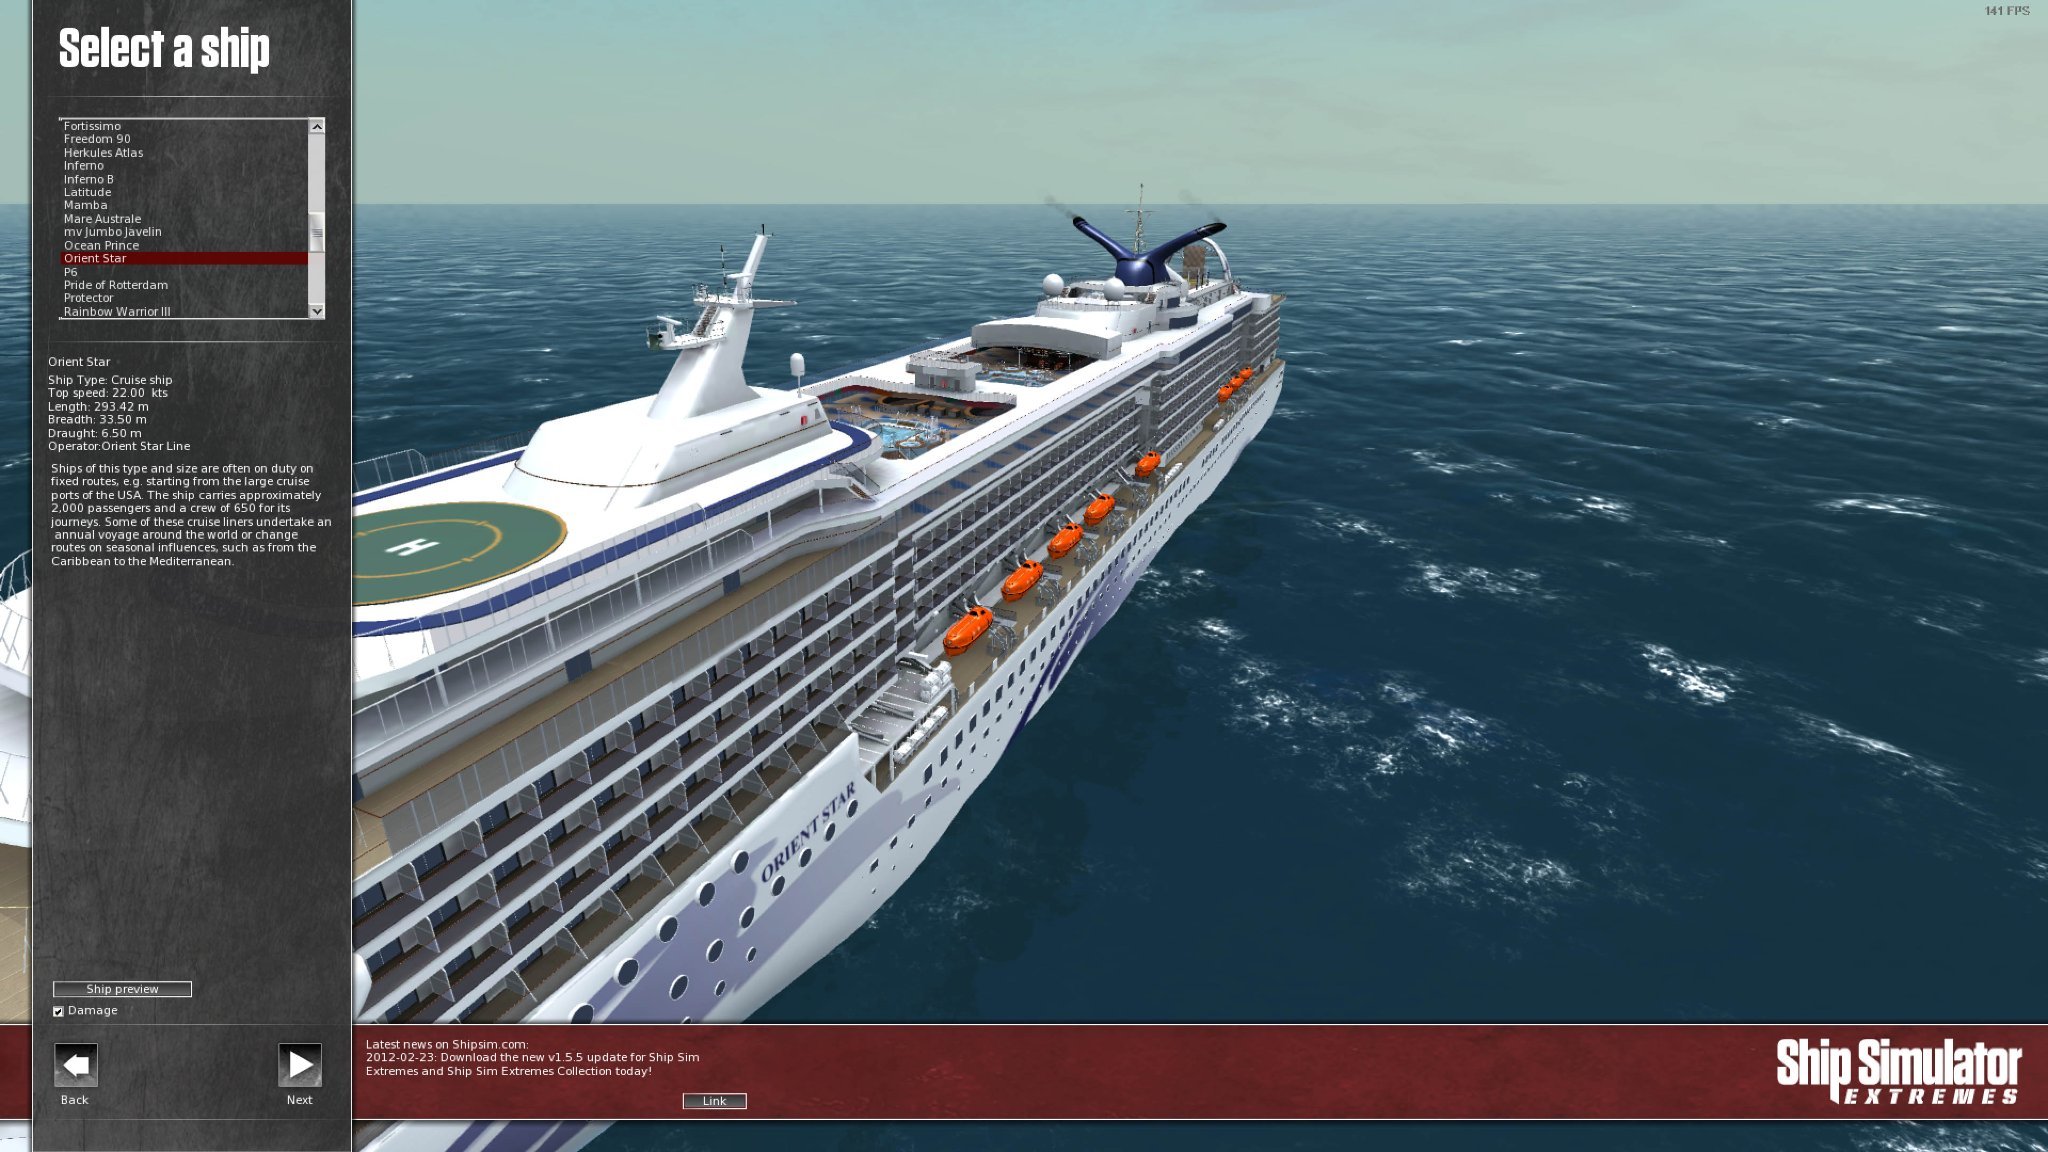
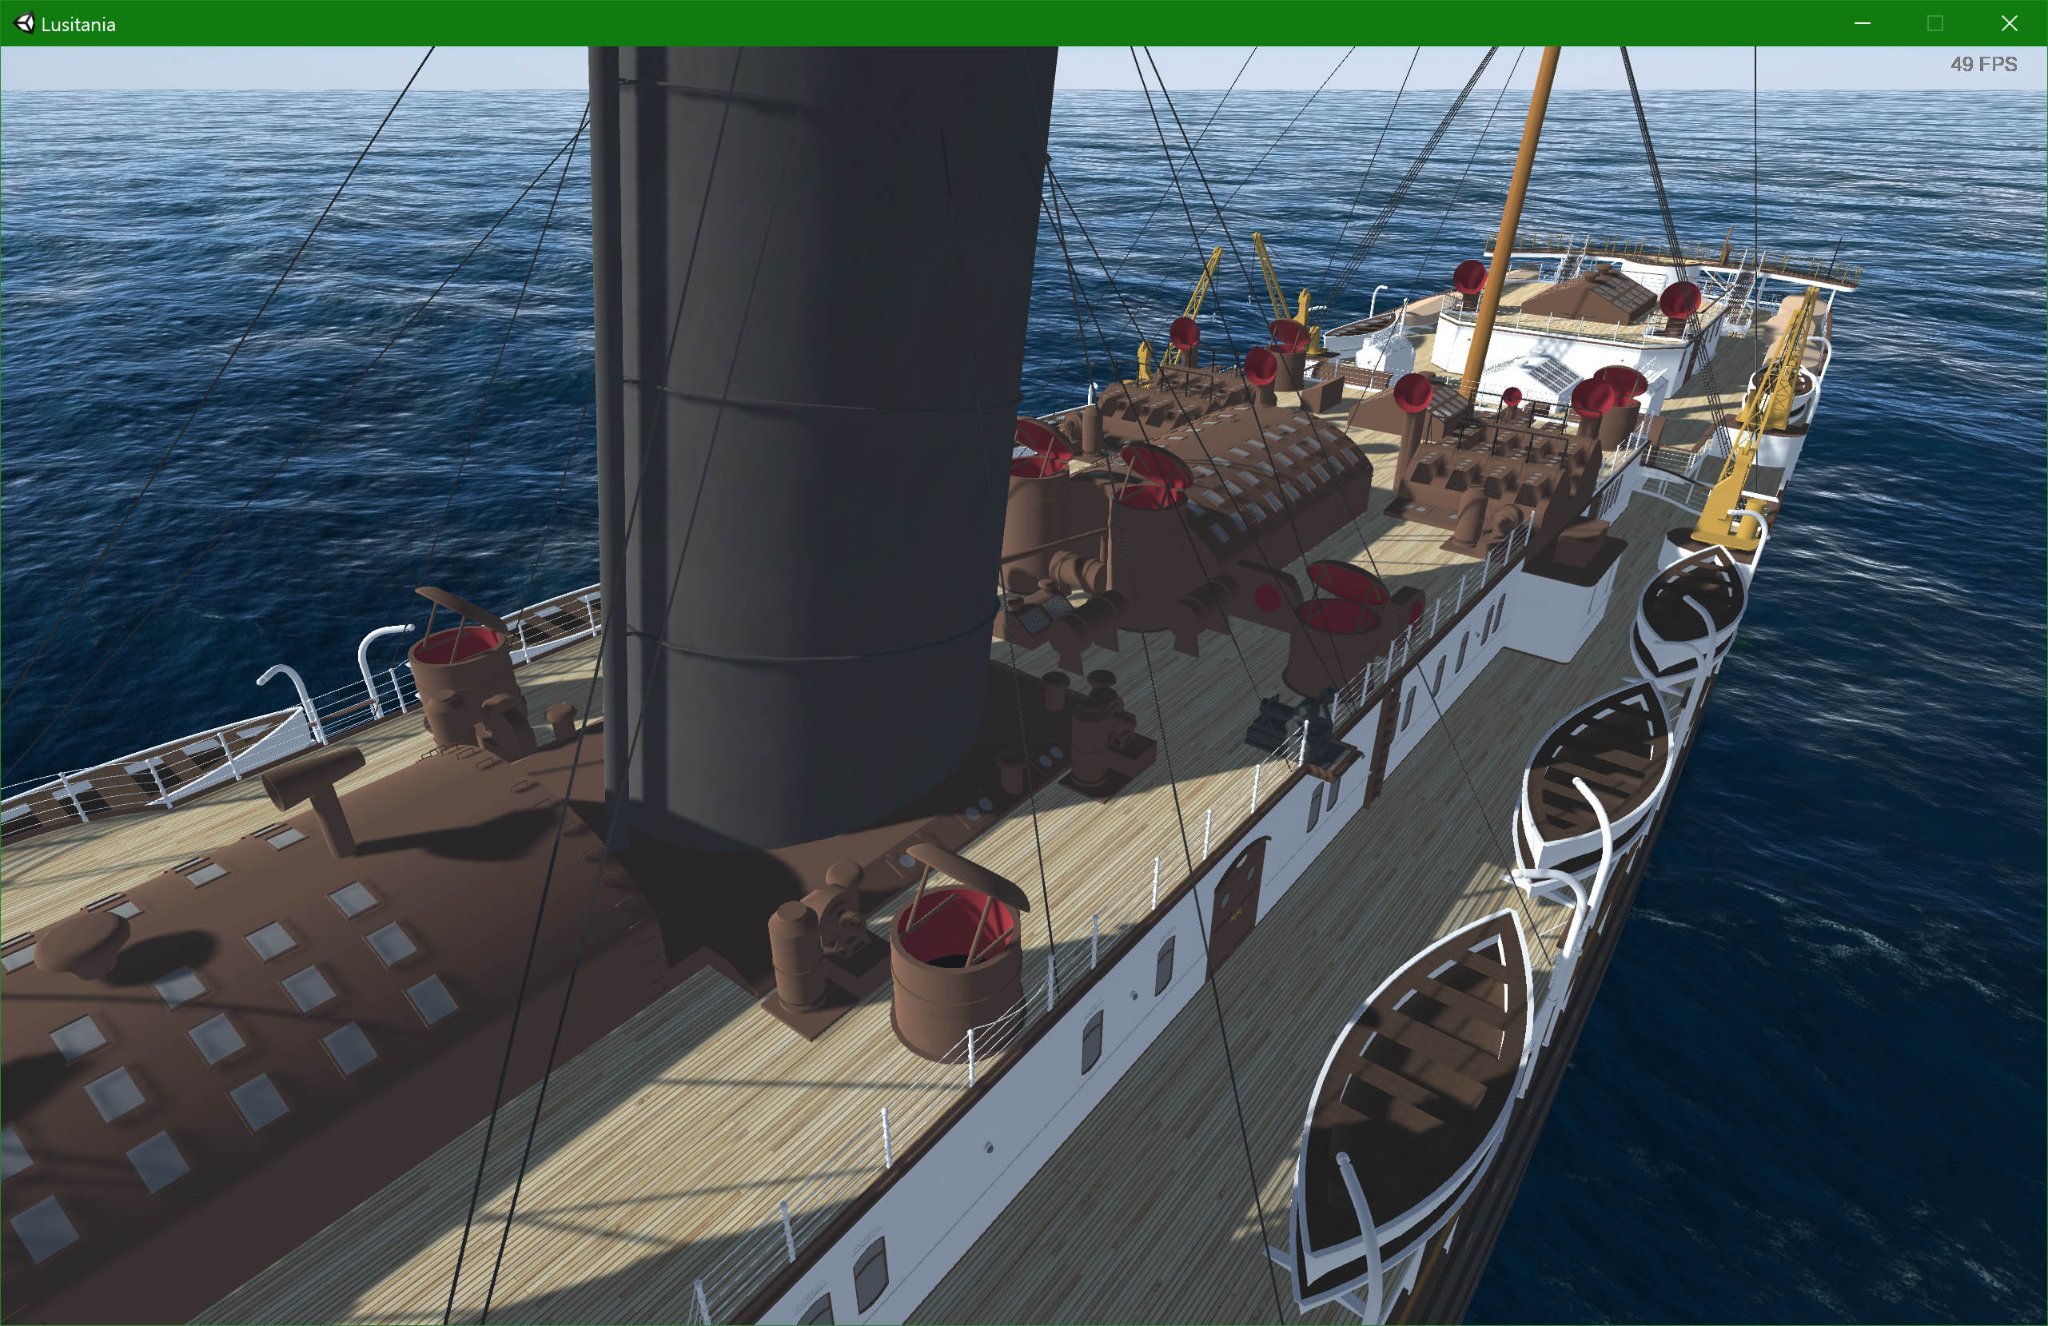
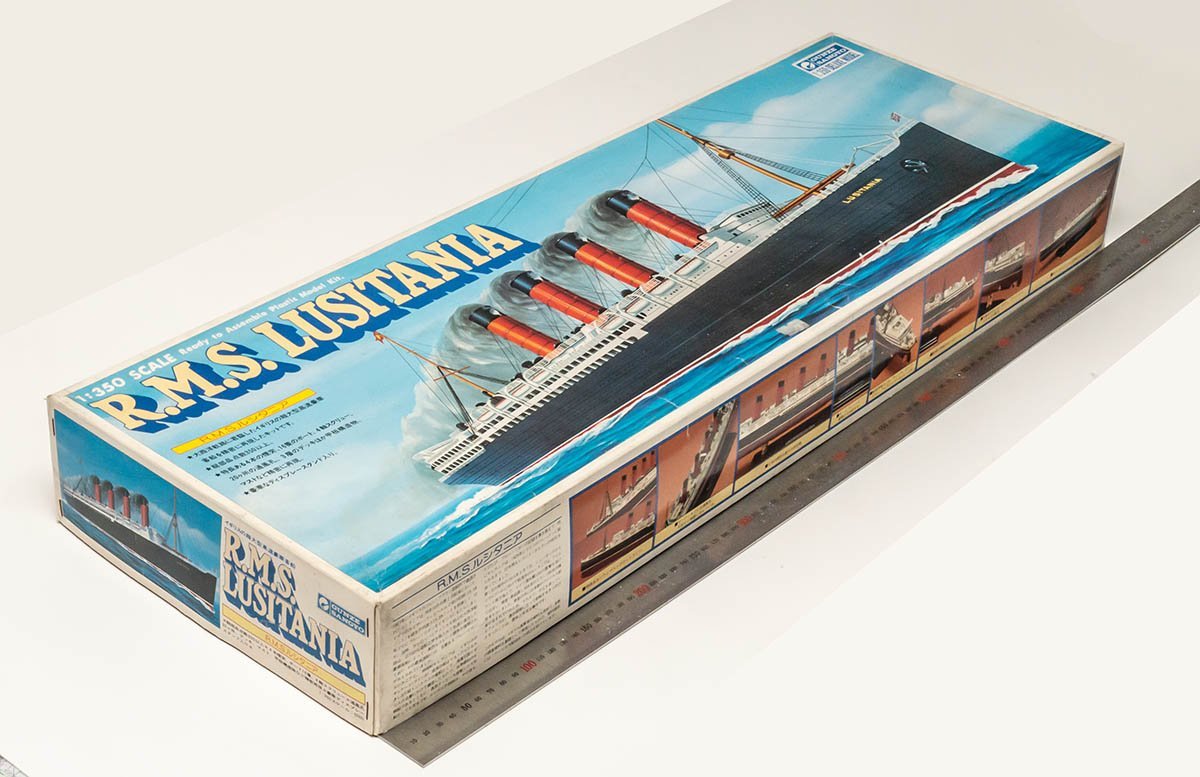
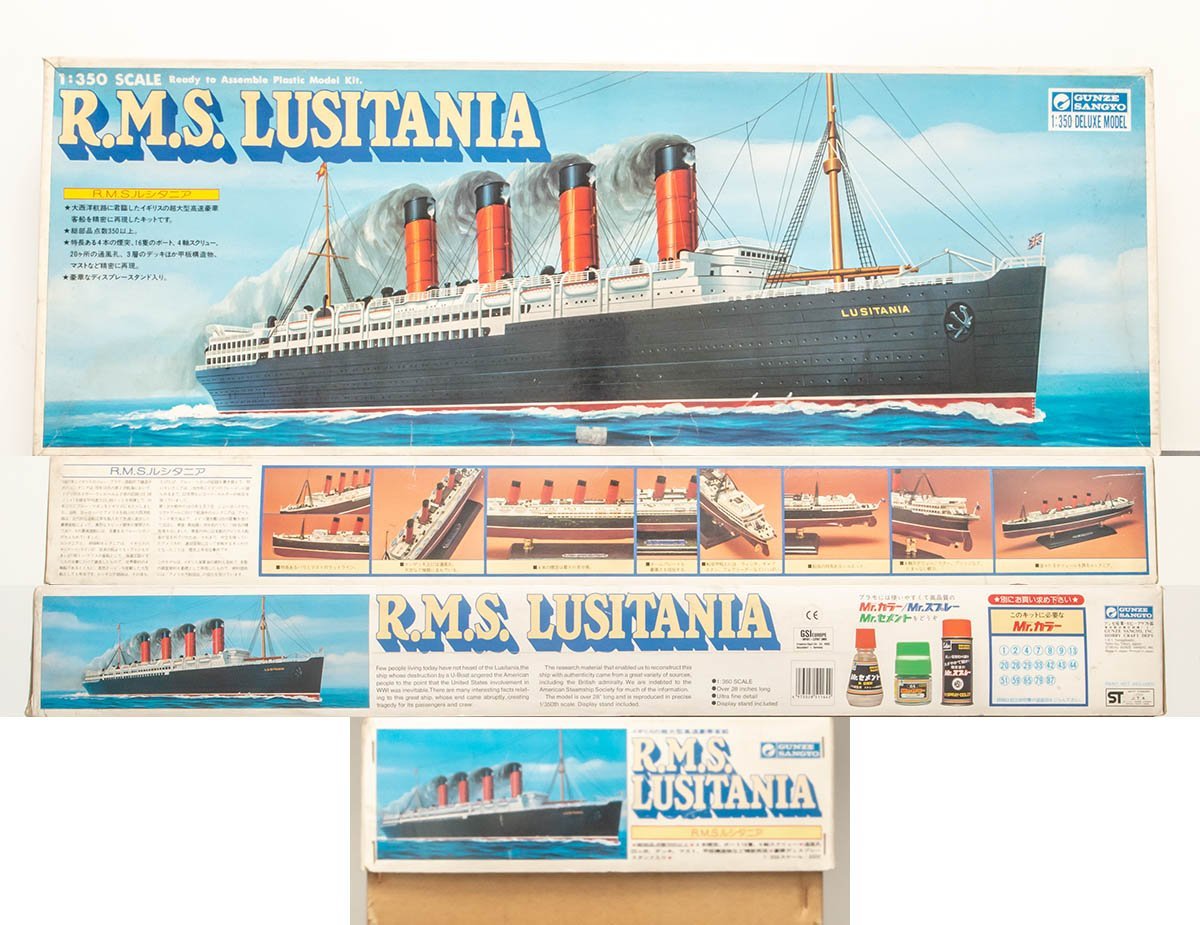
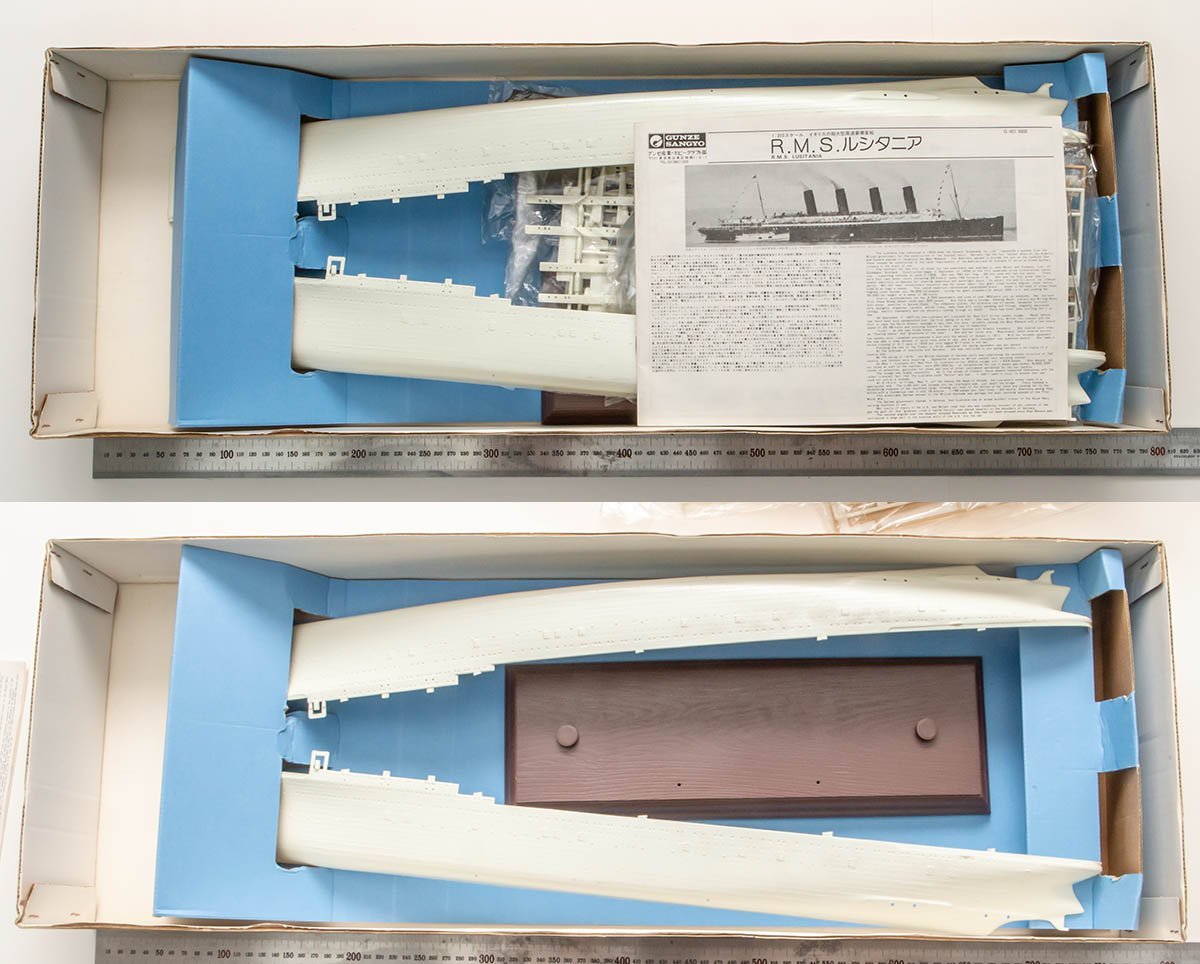
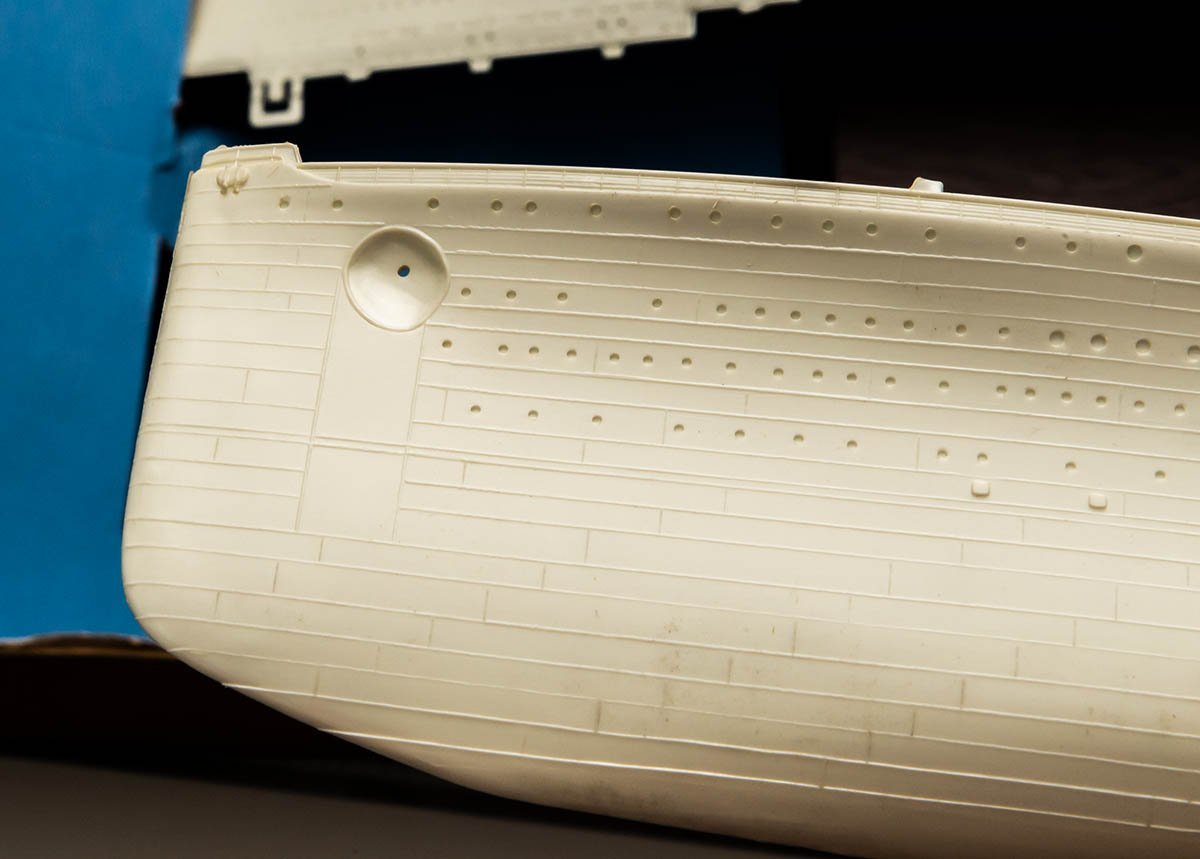
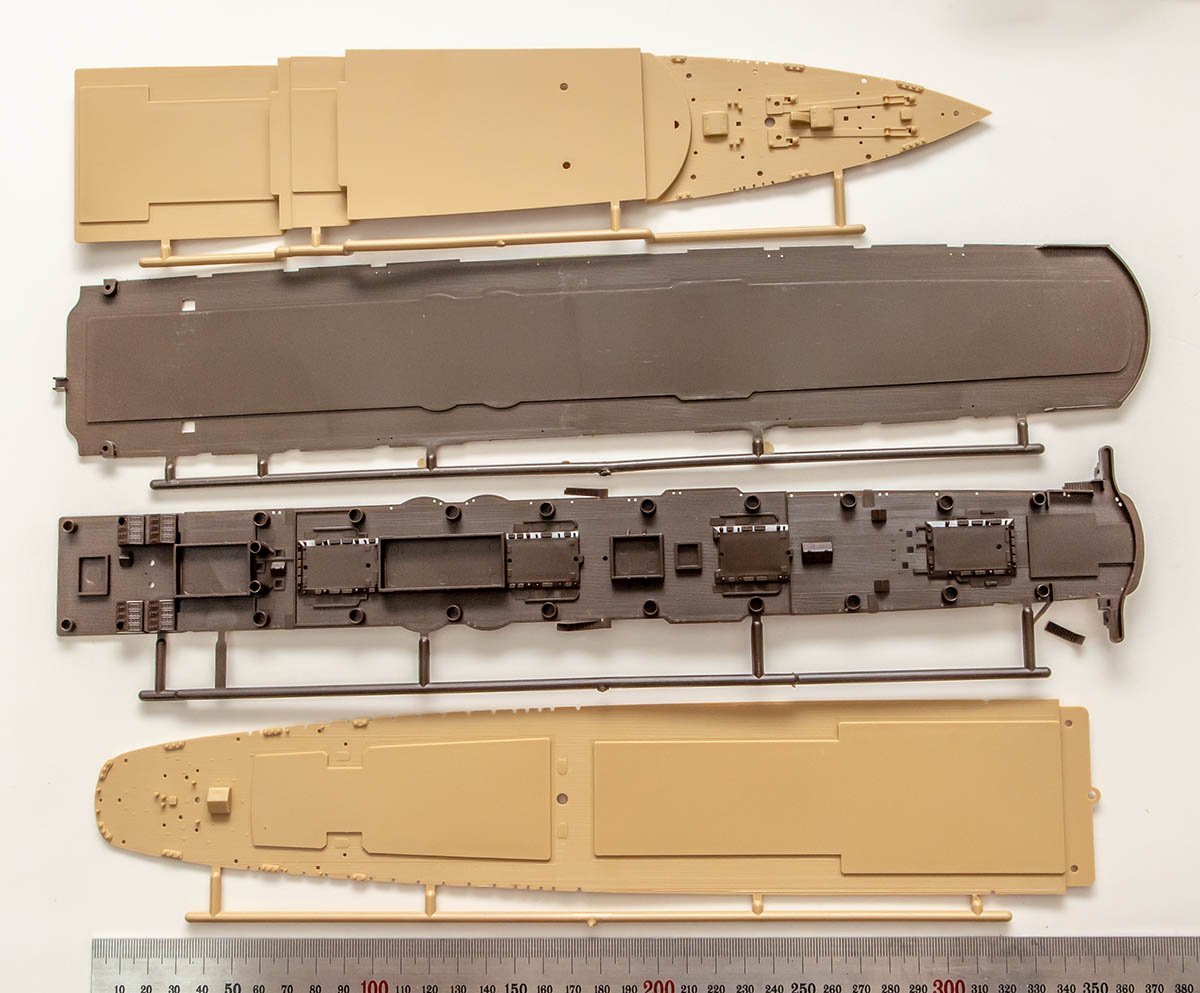
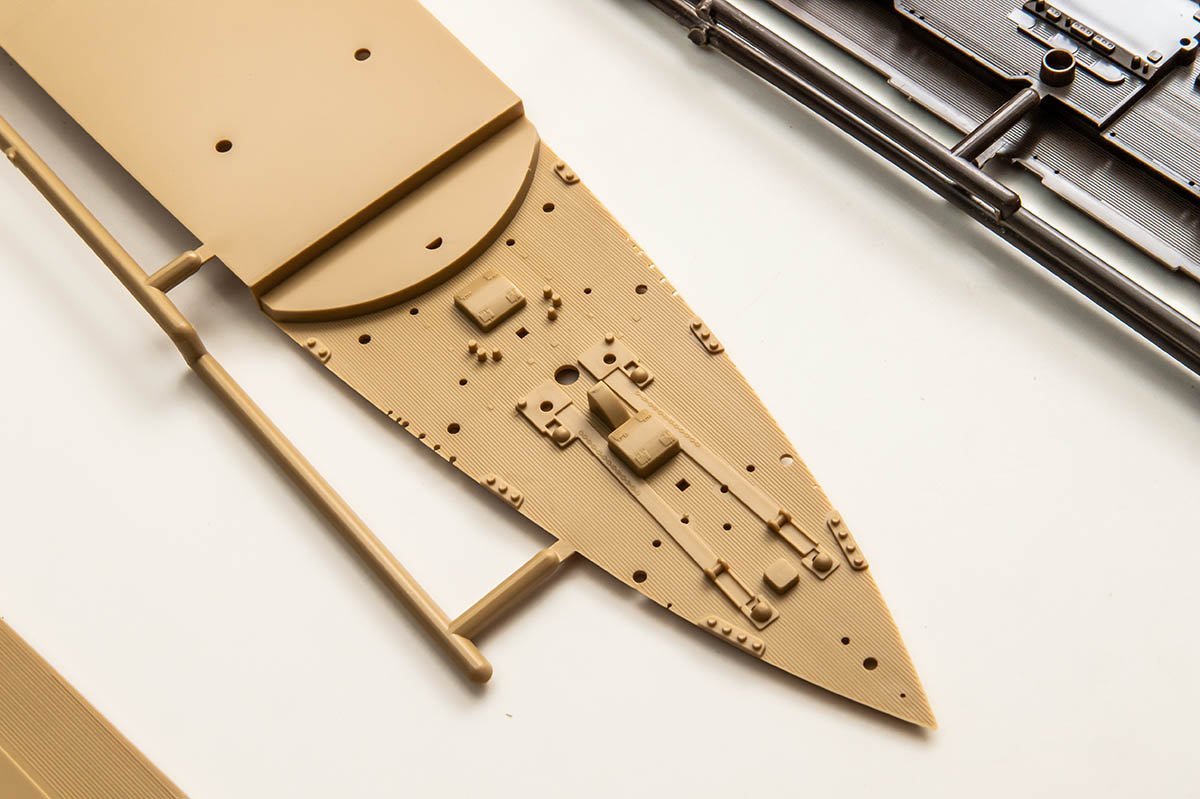
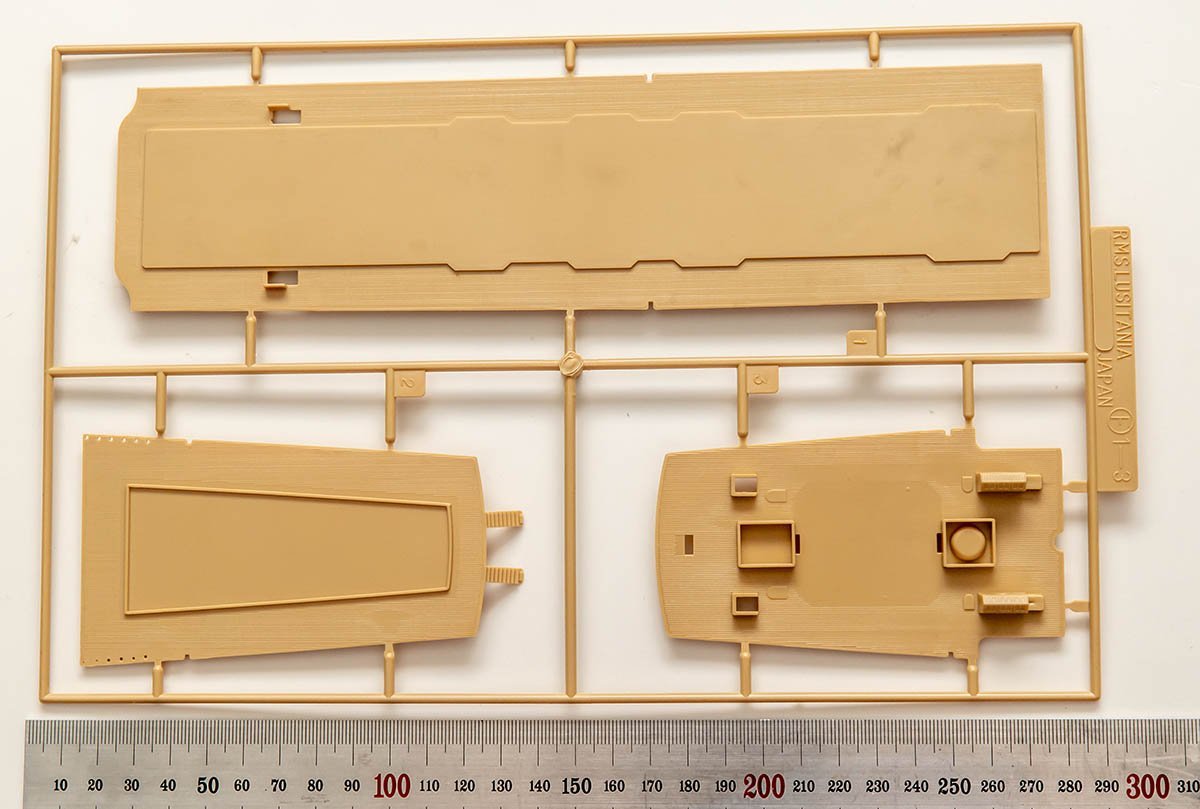
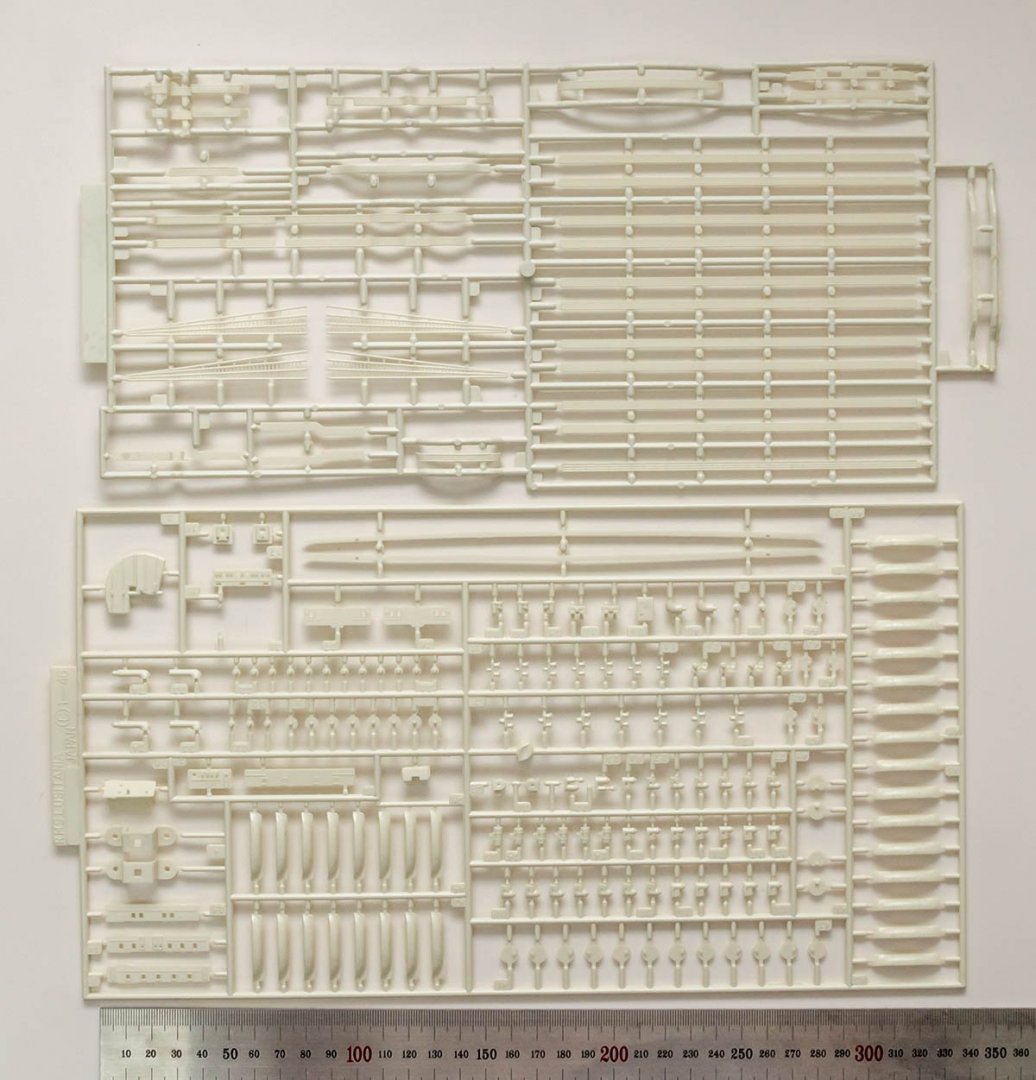
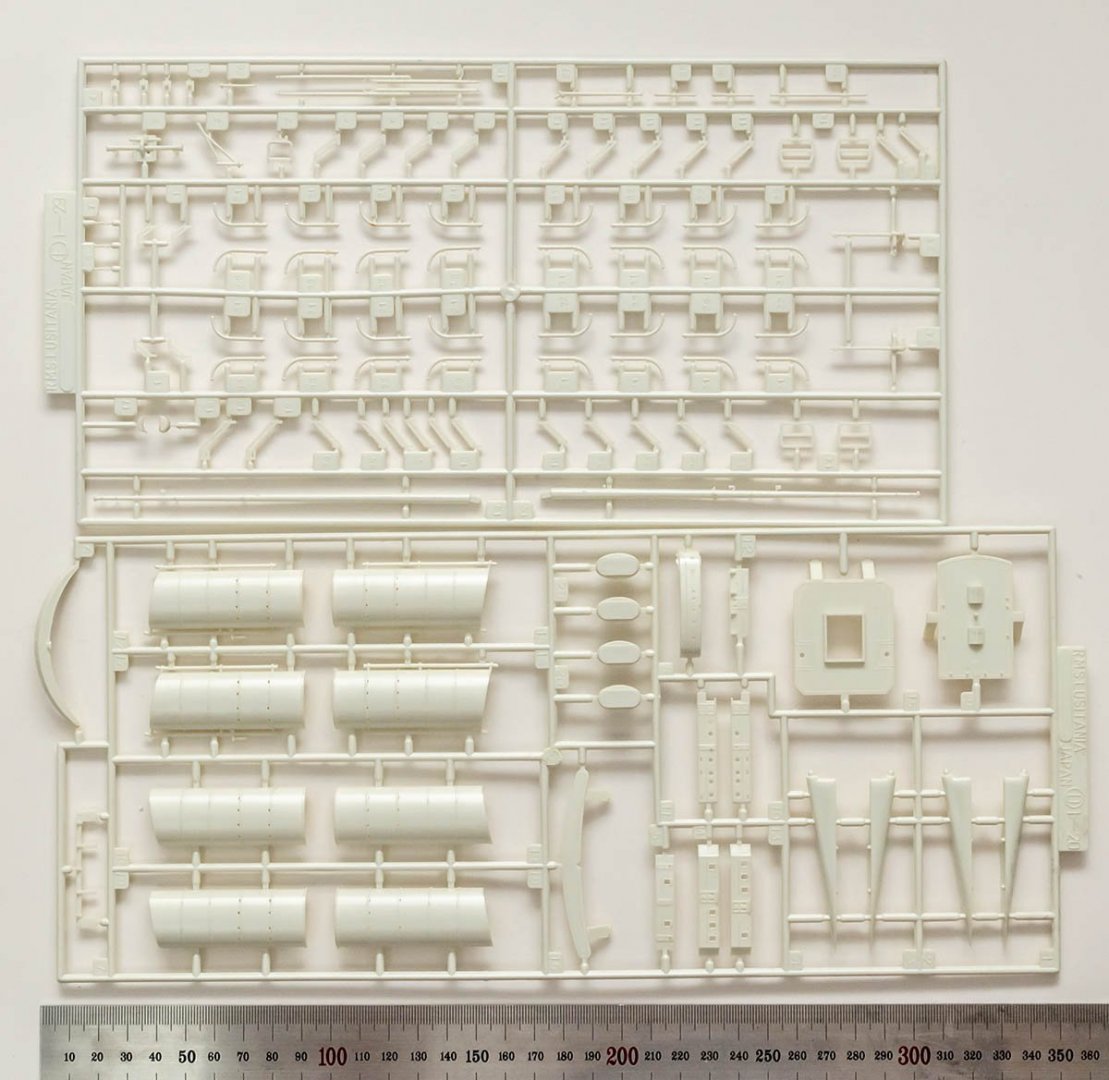
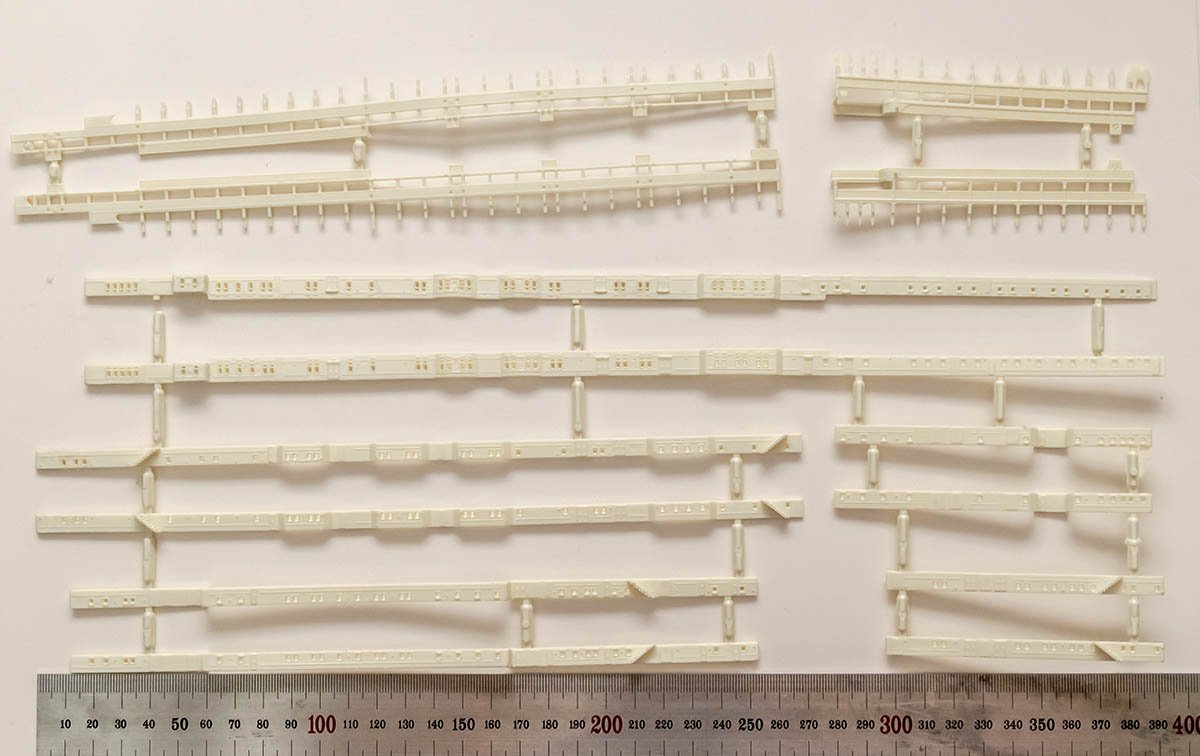
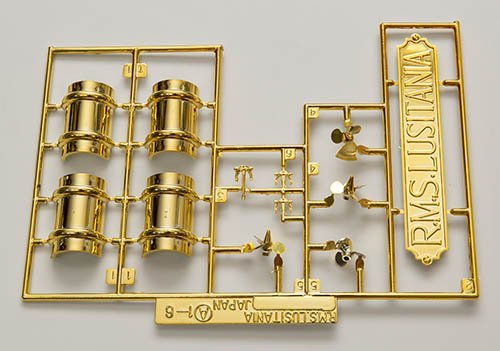
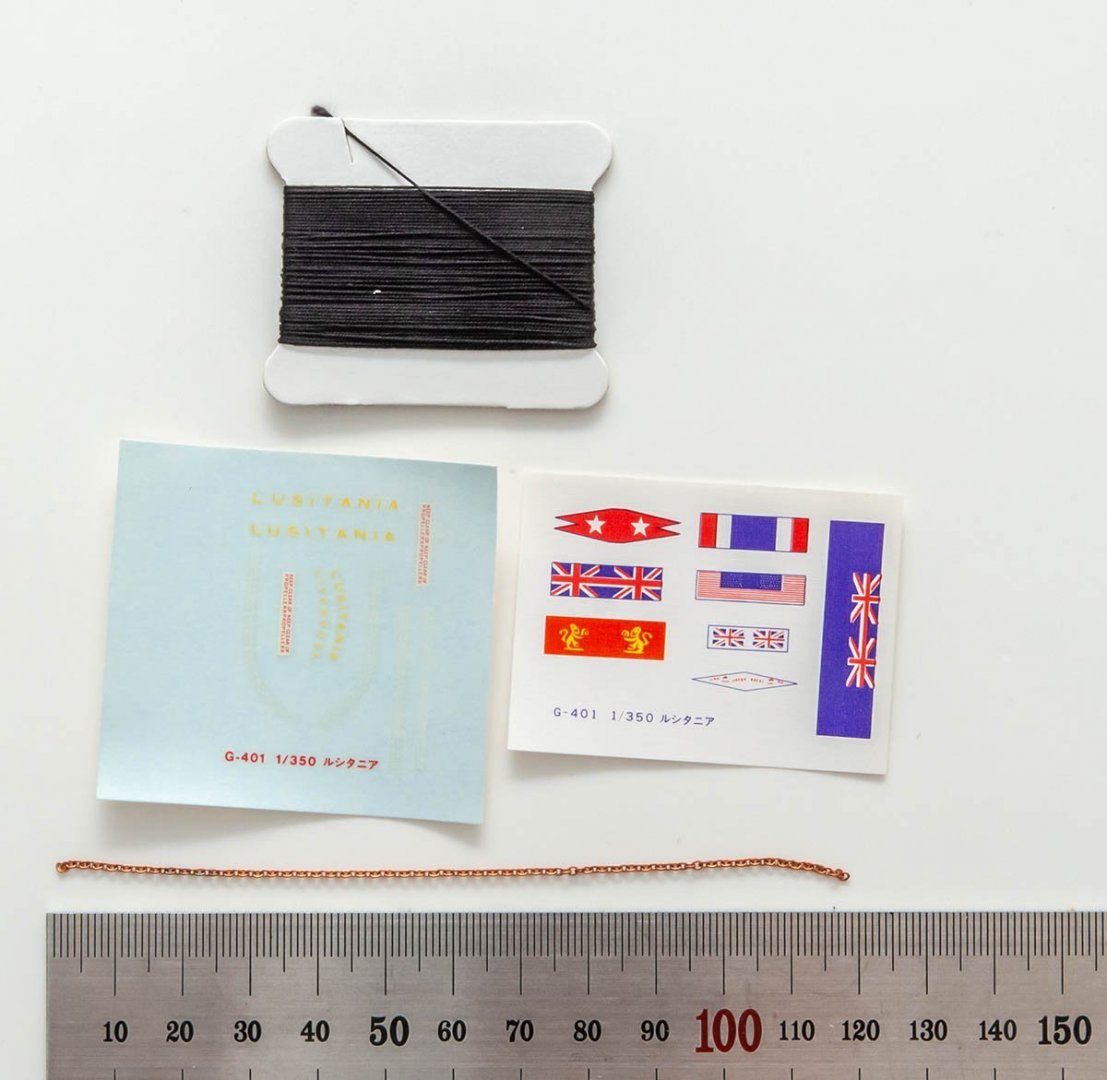
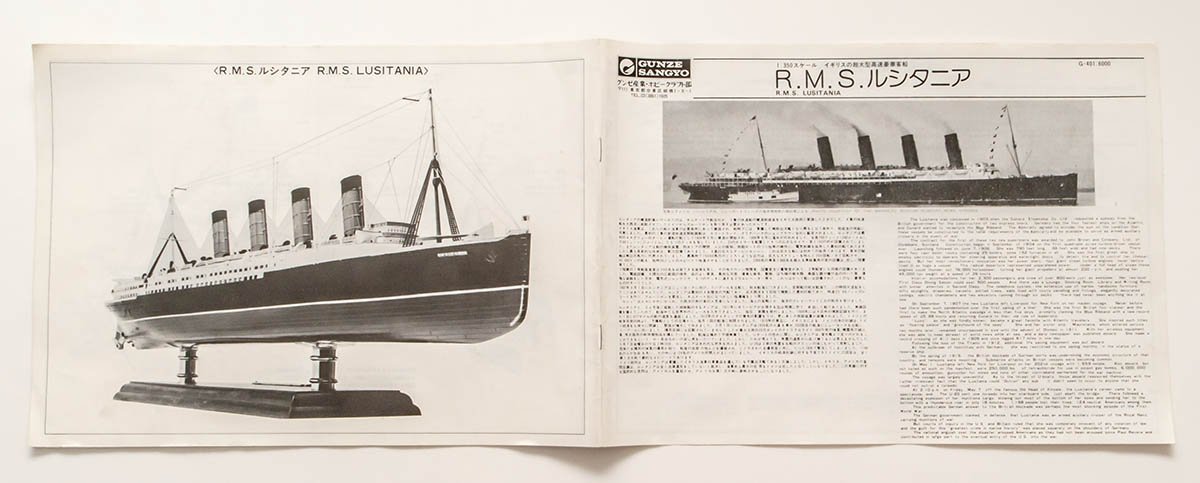
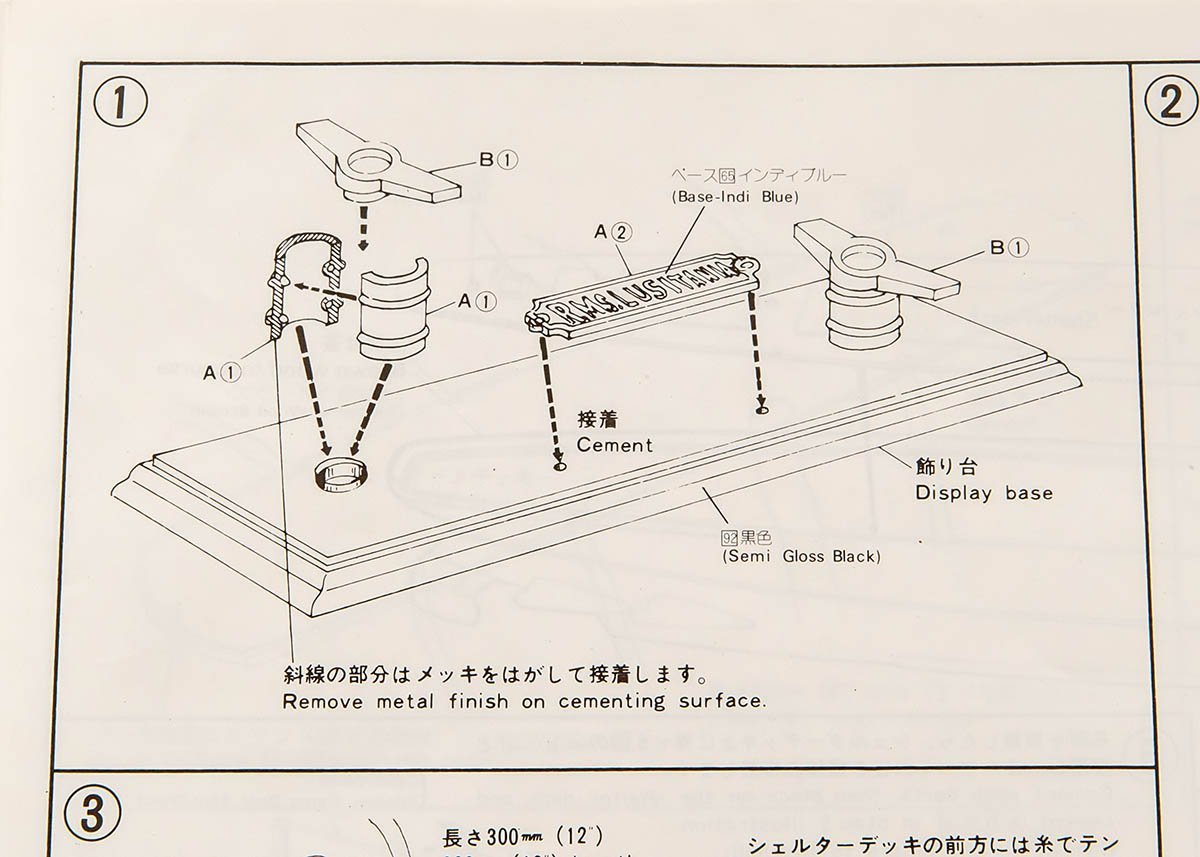
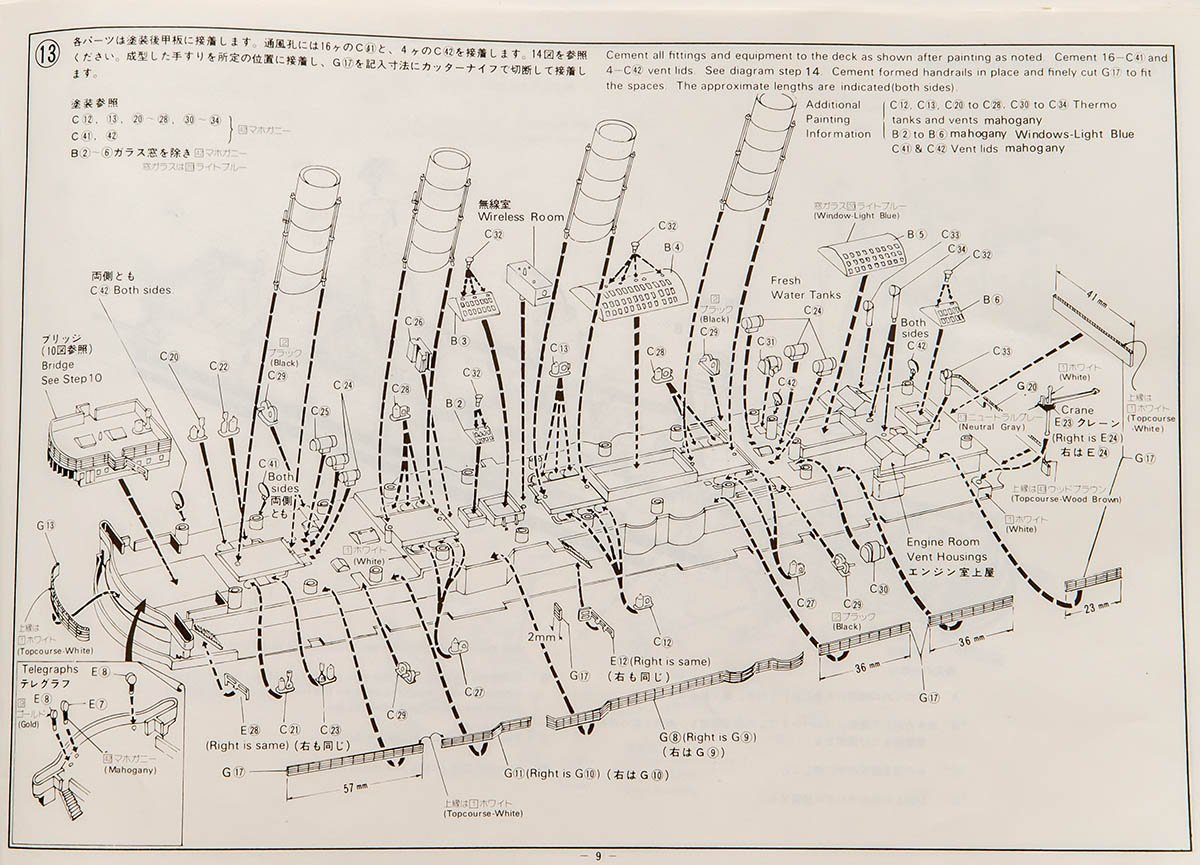
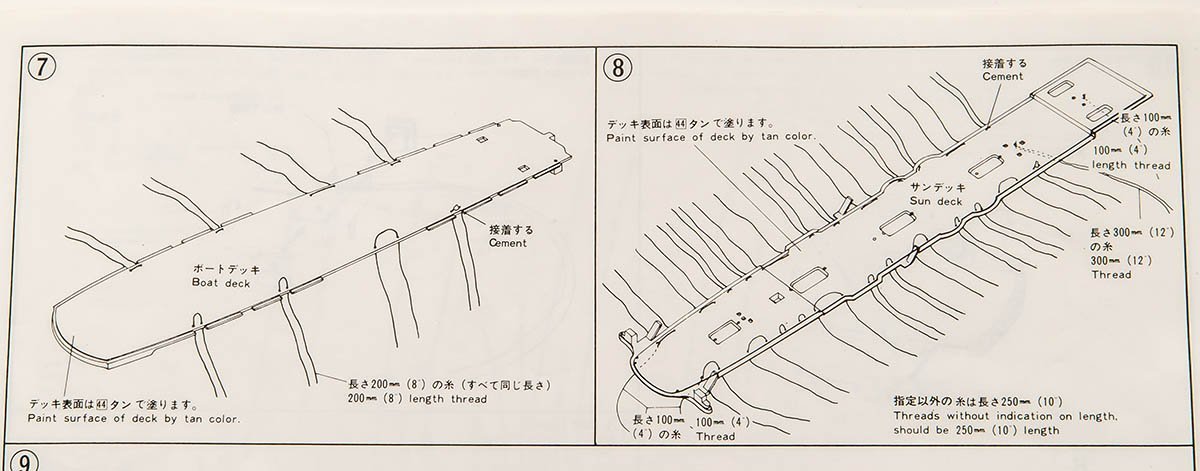
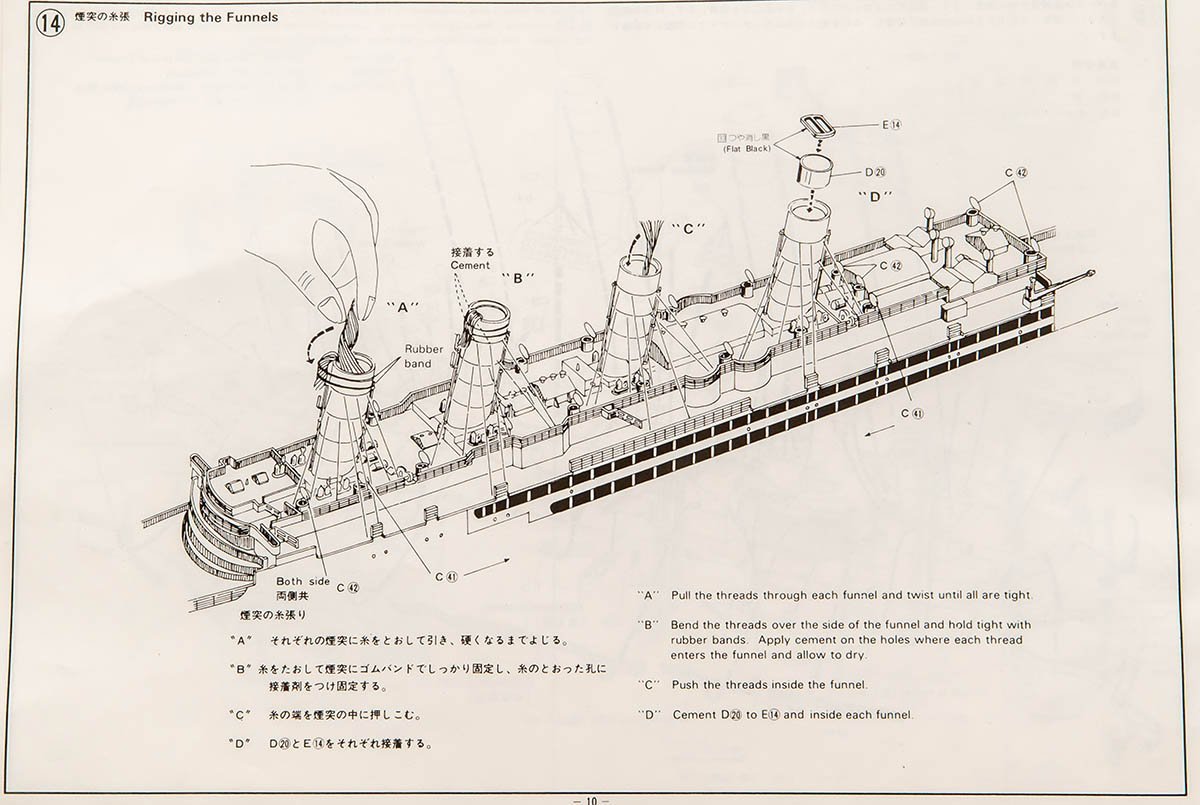
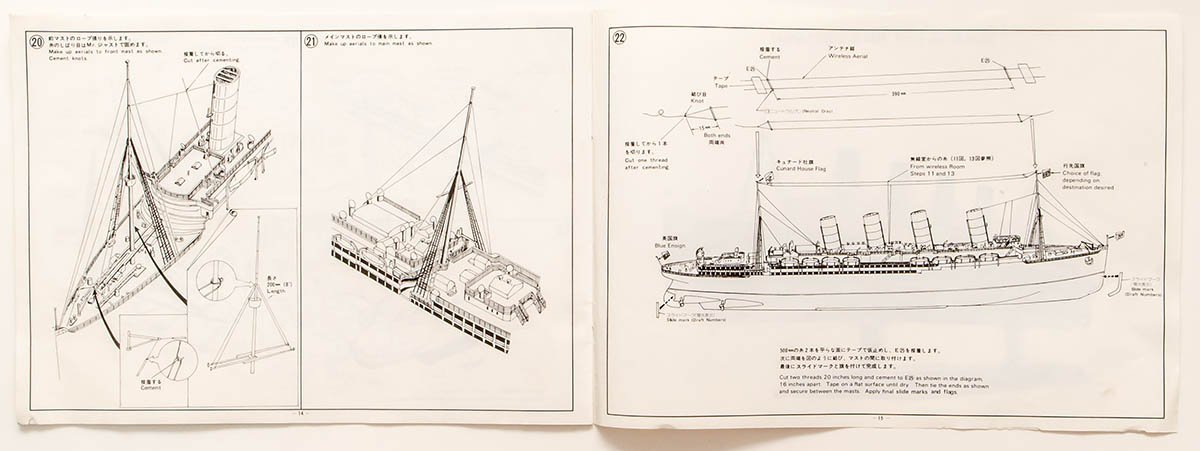
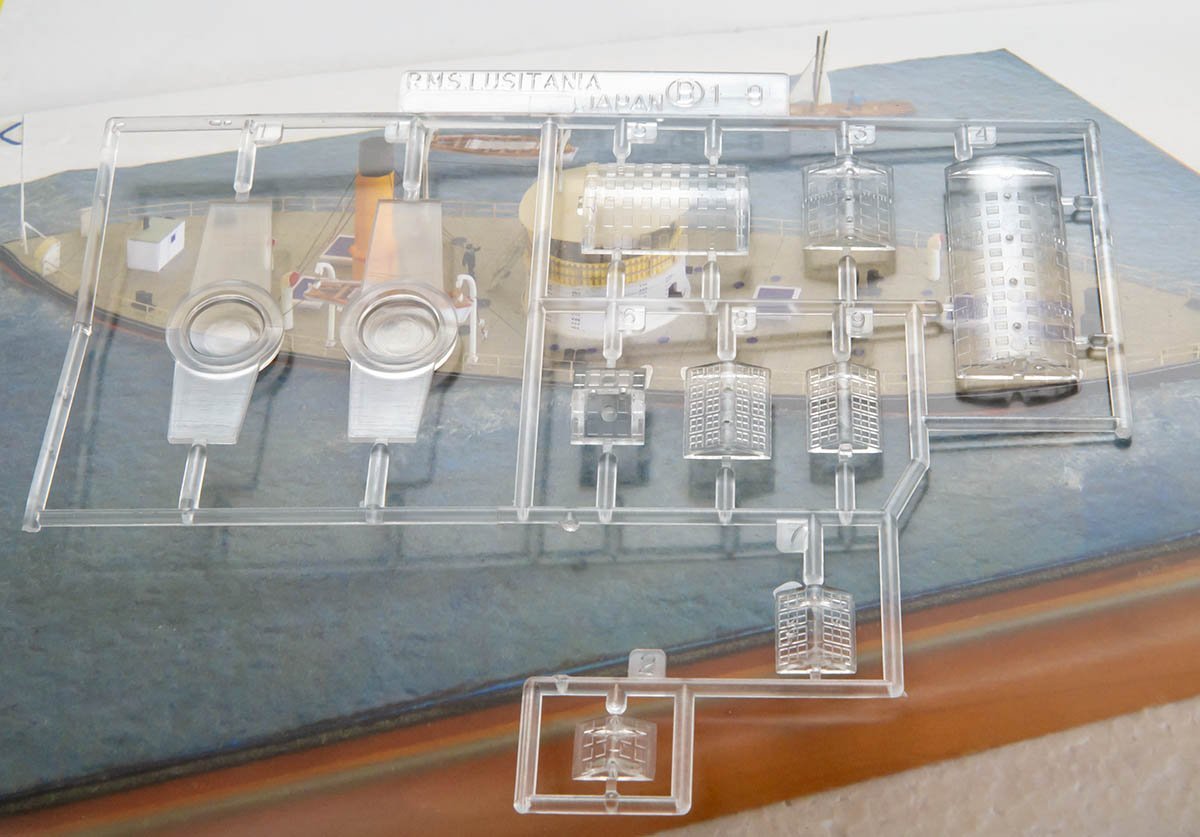
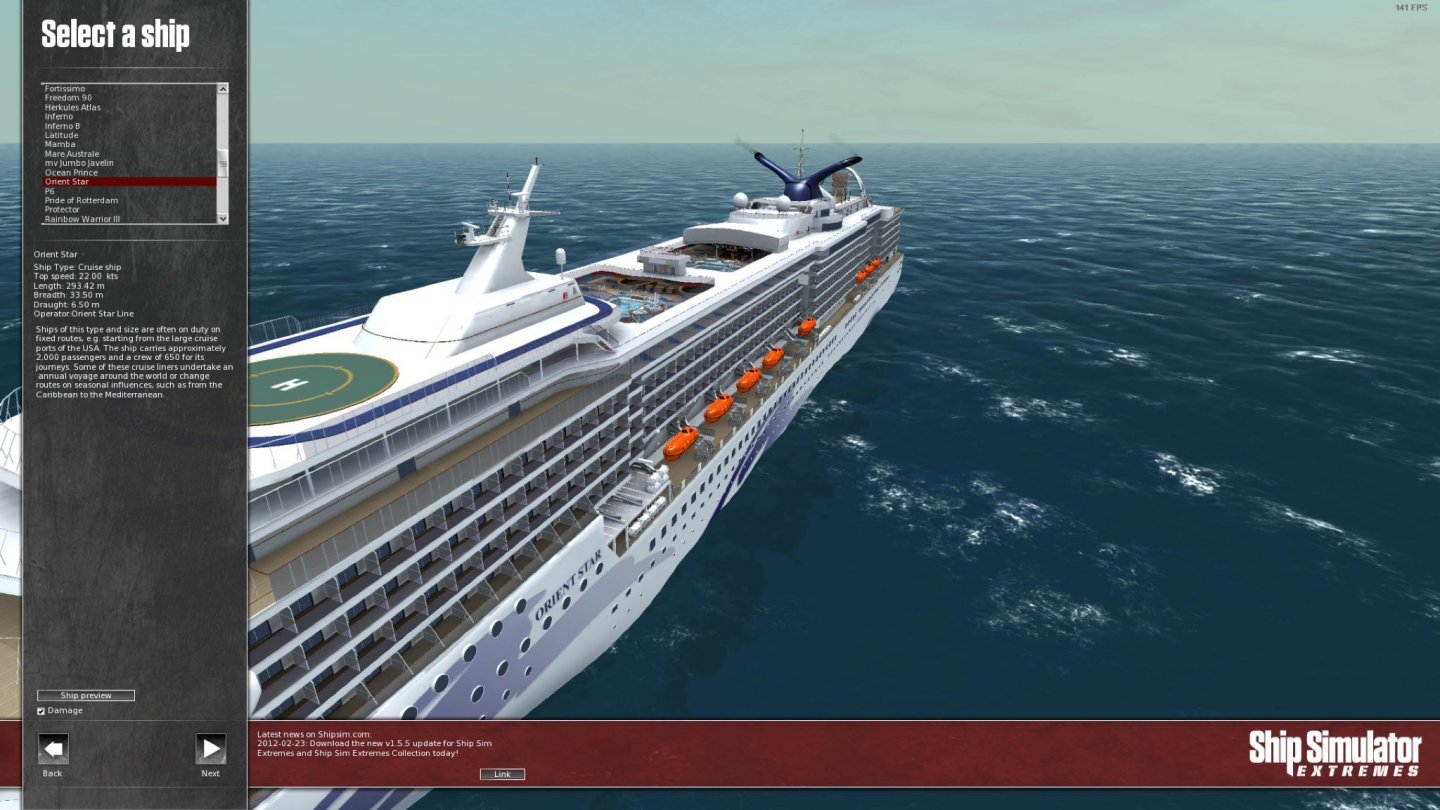
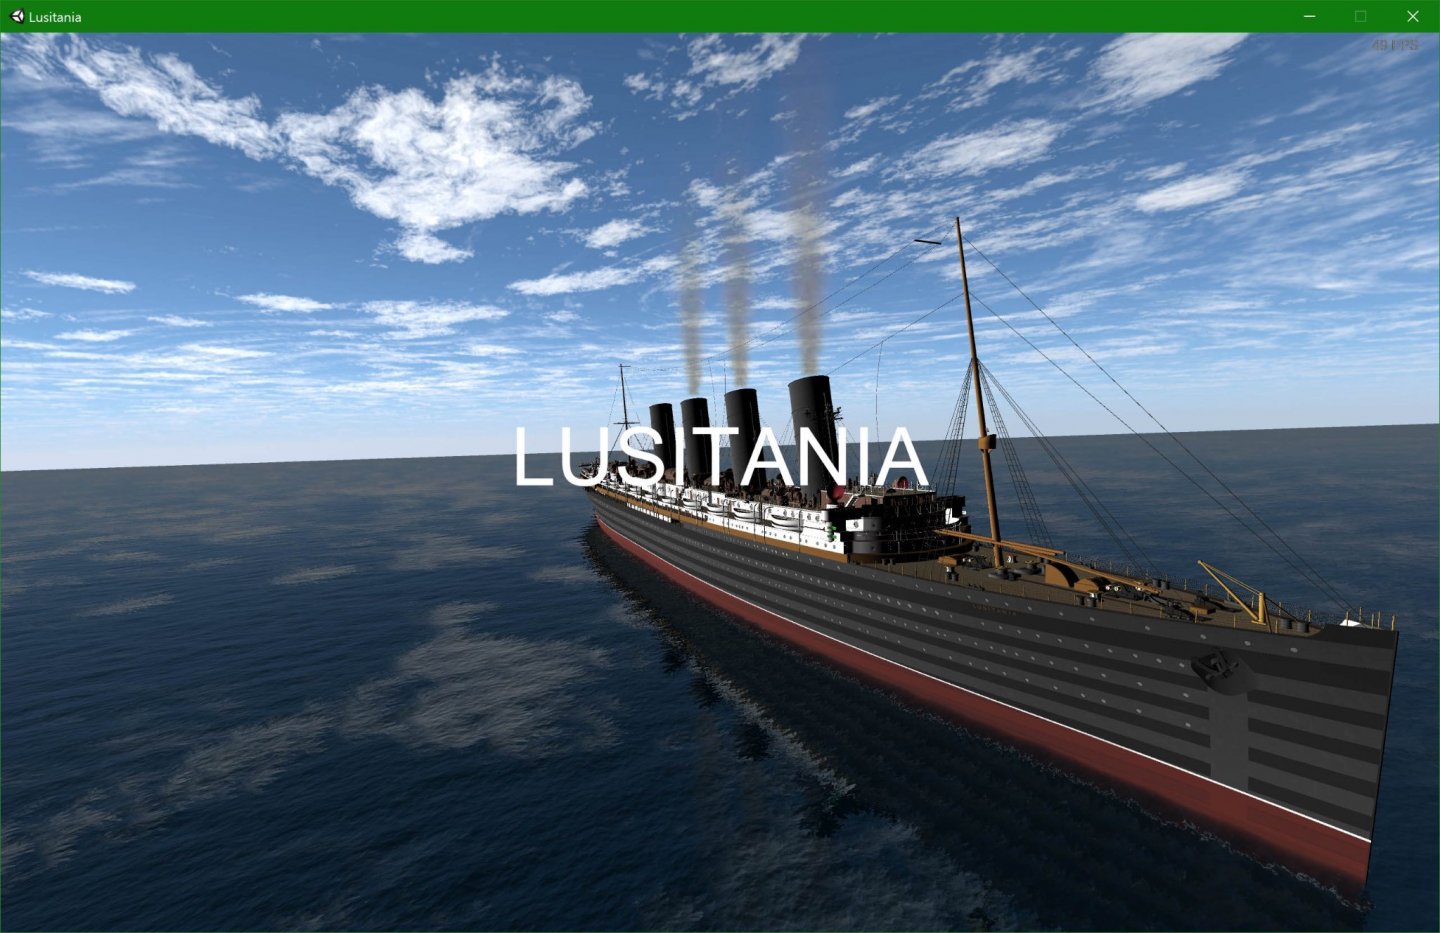
Hello, I bought the R.M.S. Lusitania 1/350 classic kit at a clearance sale. The price was $50 fortunately. You can find more information about this kit from the scalemates. https://www.scalemates.com/kits/gunze-sangyo-g401-rms-lusitania--1018857 The Box size is 780 x 280 x 100 mm. As you can find, this 45 years old kit is pretty much aged, and mold isn't explicit. I may be able to replace railings to PE parts. The left parts aren't chimney. They are stand pillars! Assembly overview... 🧐 Rigging is straight forward. Not bad for the scale and the age. R.M.S. Lusitania isn't more famous than Titanic. If you need reference data, there are great ship simulator games on Steam. The Ship Simulator Extremes is a bit aged and details are not good. 'The Sinking experience' series are super great reference and extremely detailed! And only $3.00 ! If you have PC with good GPU card, there are several ship simulators such as European Ship Emulator, Shipyard Simulator, Ship handling emulator, and Sailing ship builder, etcs. Some games are a bit out-dated and not handy, but their 3D-closed up details are very intuitive and cheaper than reference books in my opinion. (Please don't ask me about accuracy.😂 )


-
- 7
-
-
-
NRG Capstan Project
modeller_masa replied to tlevine's topic in - Build logs for subjects built 1751 - 1800
I thought about real world project again. If I apply deck planking, margins between hatch frame and lower beam definitely help strength of planks. Therefore, Toni's tutorial should be the best hatch size for deck planking I guess. I think it makes more sense, but I'm not sure...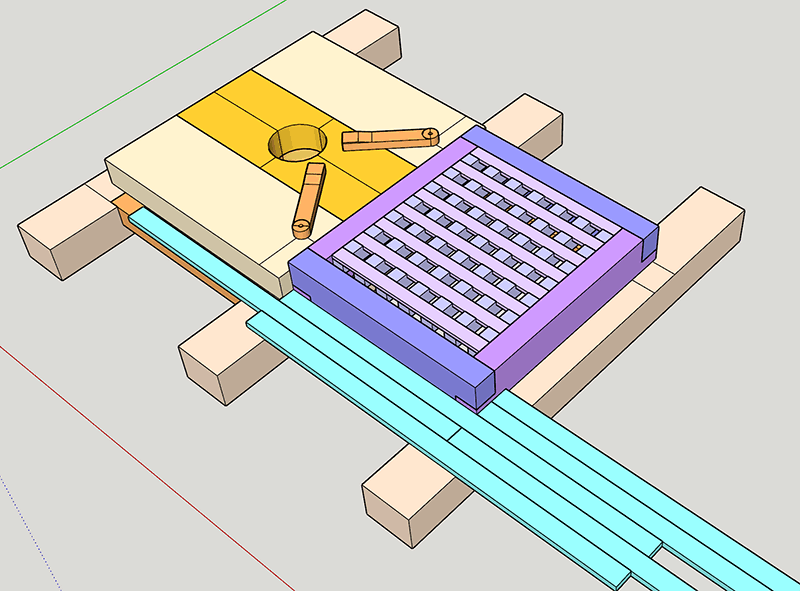
-
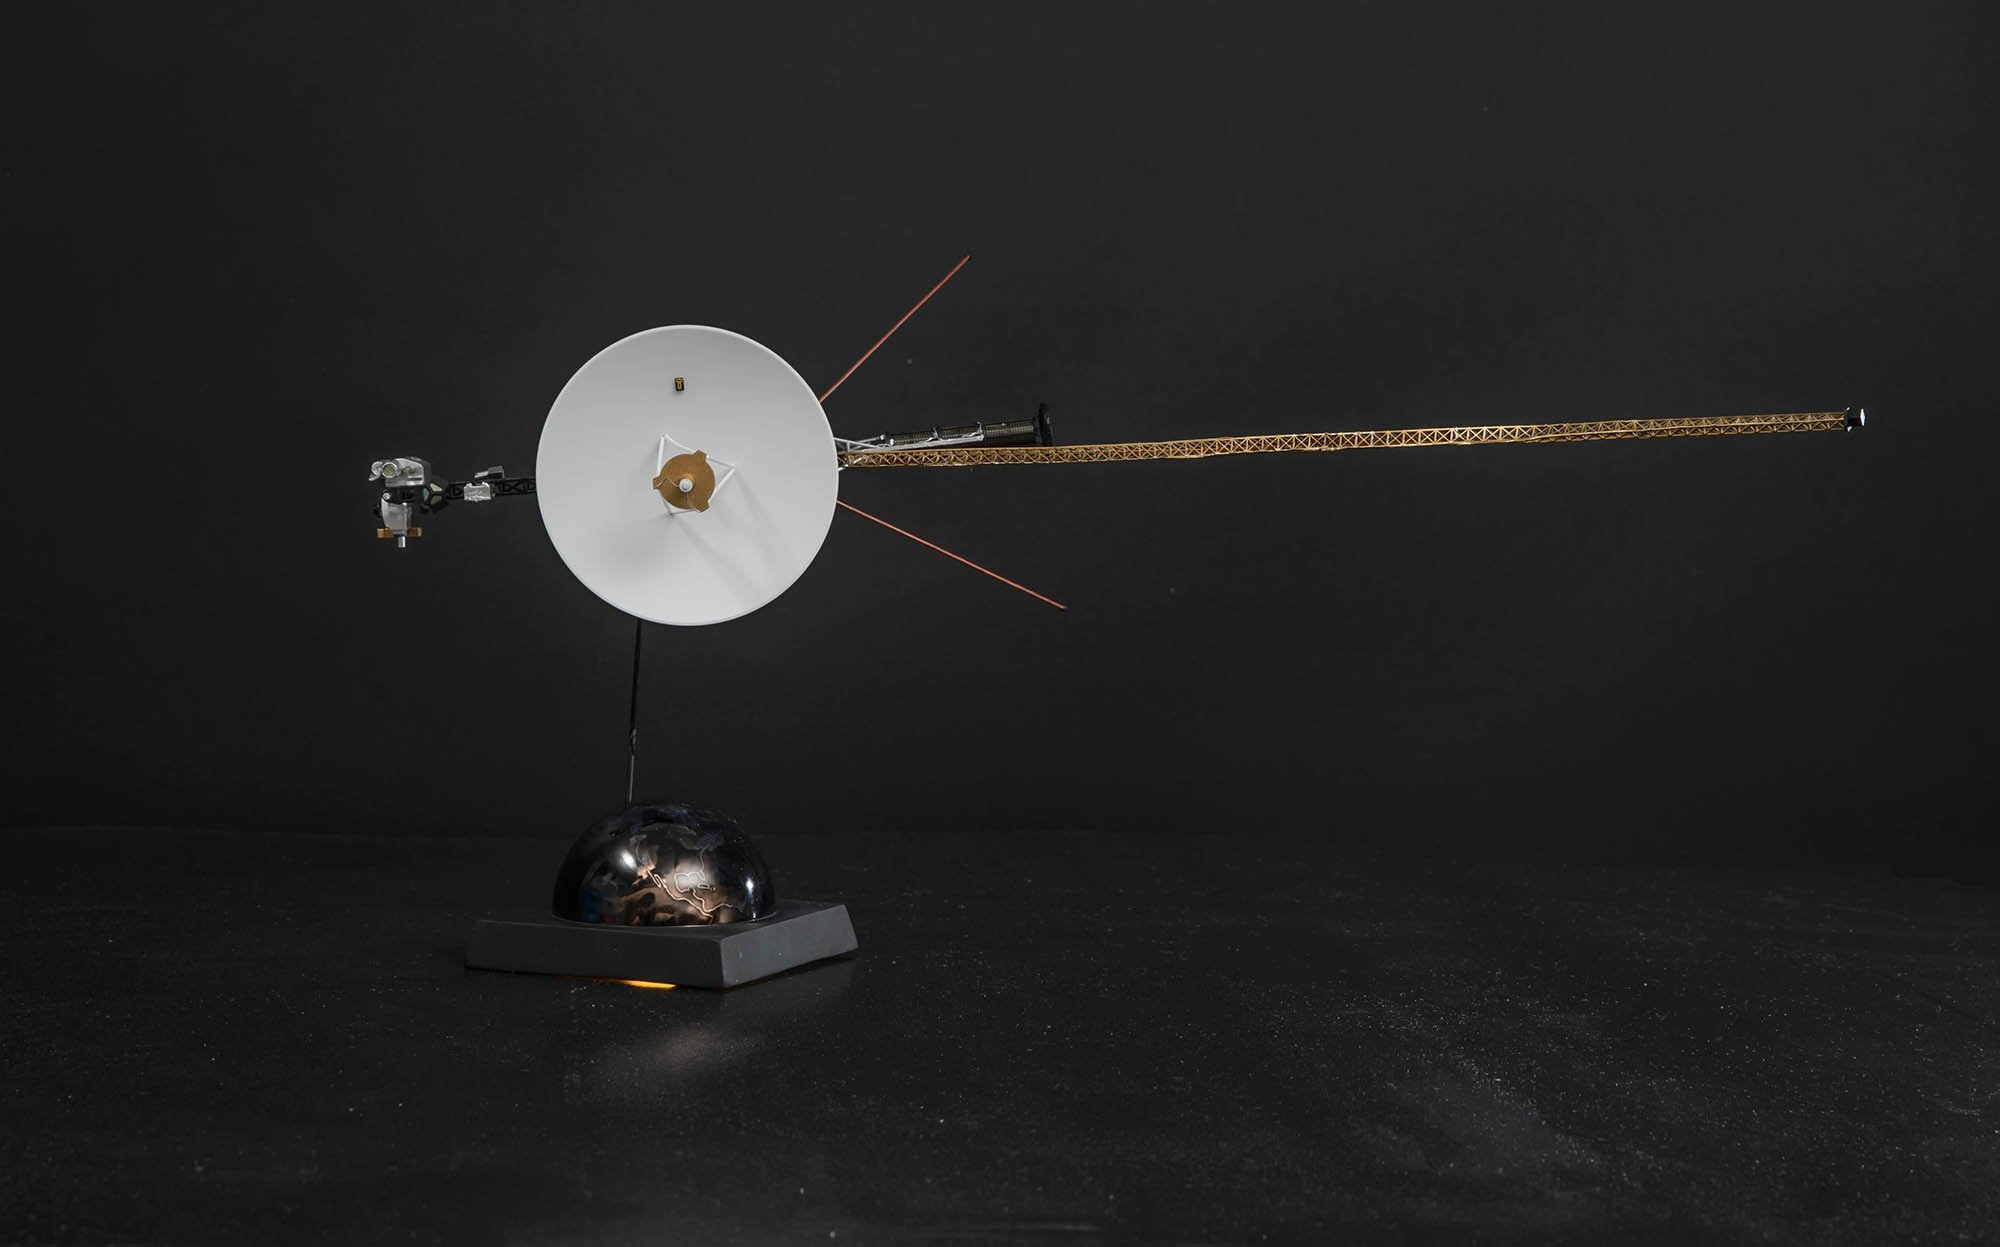
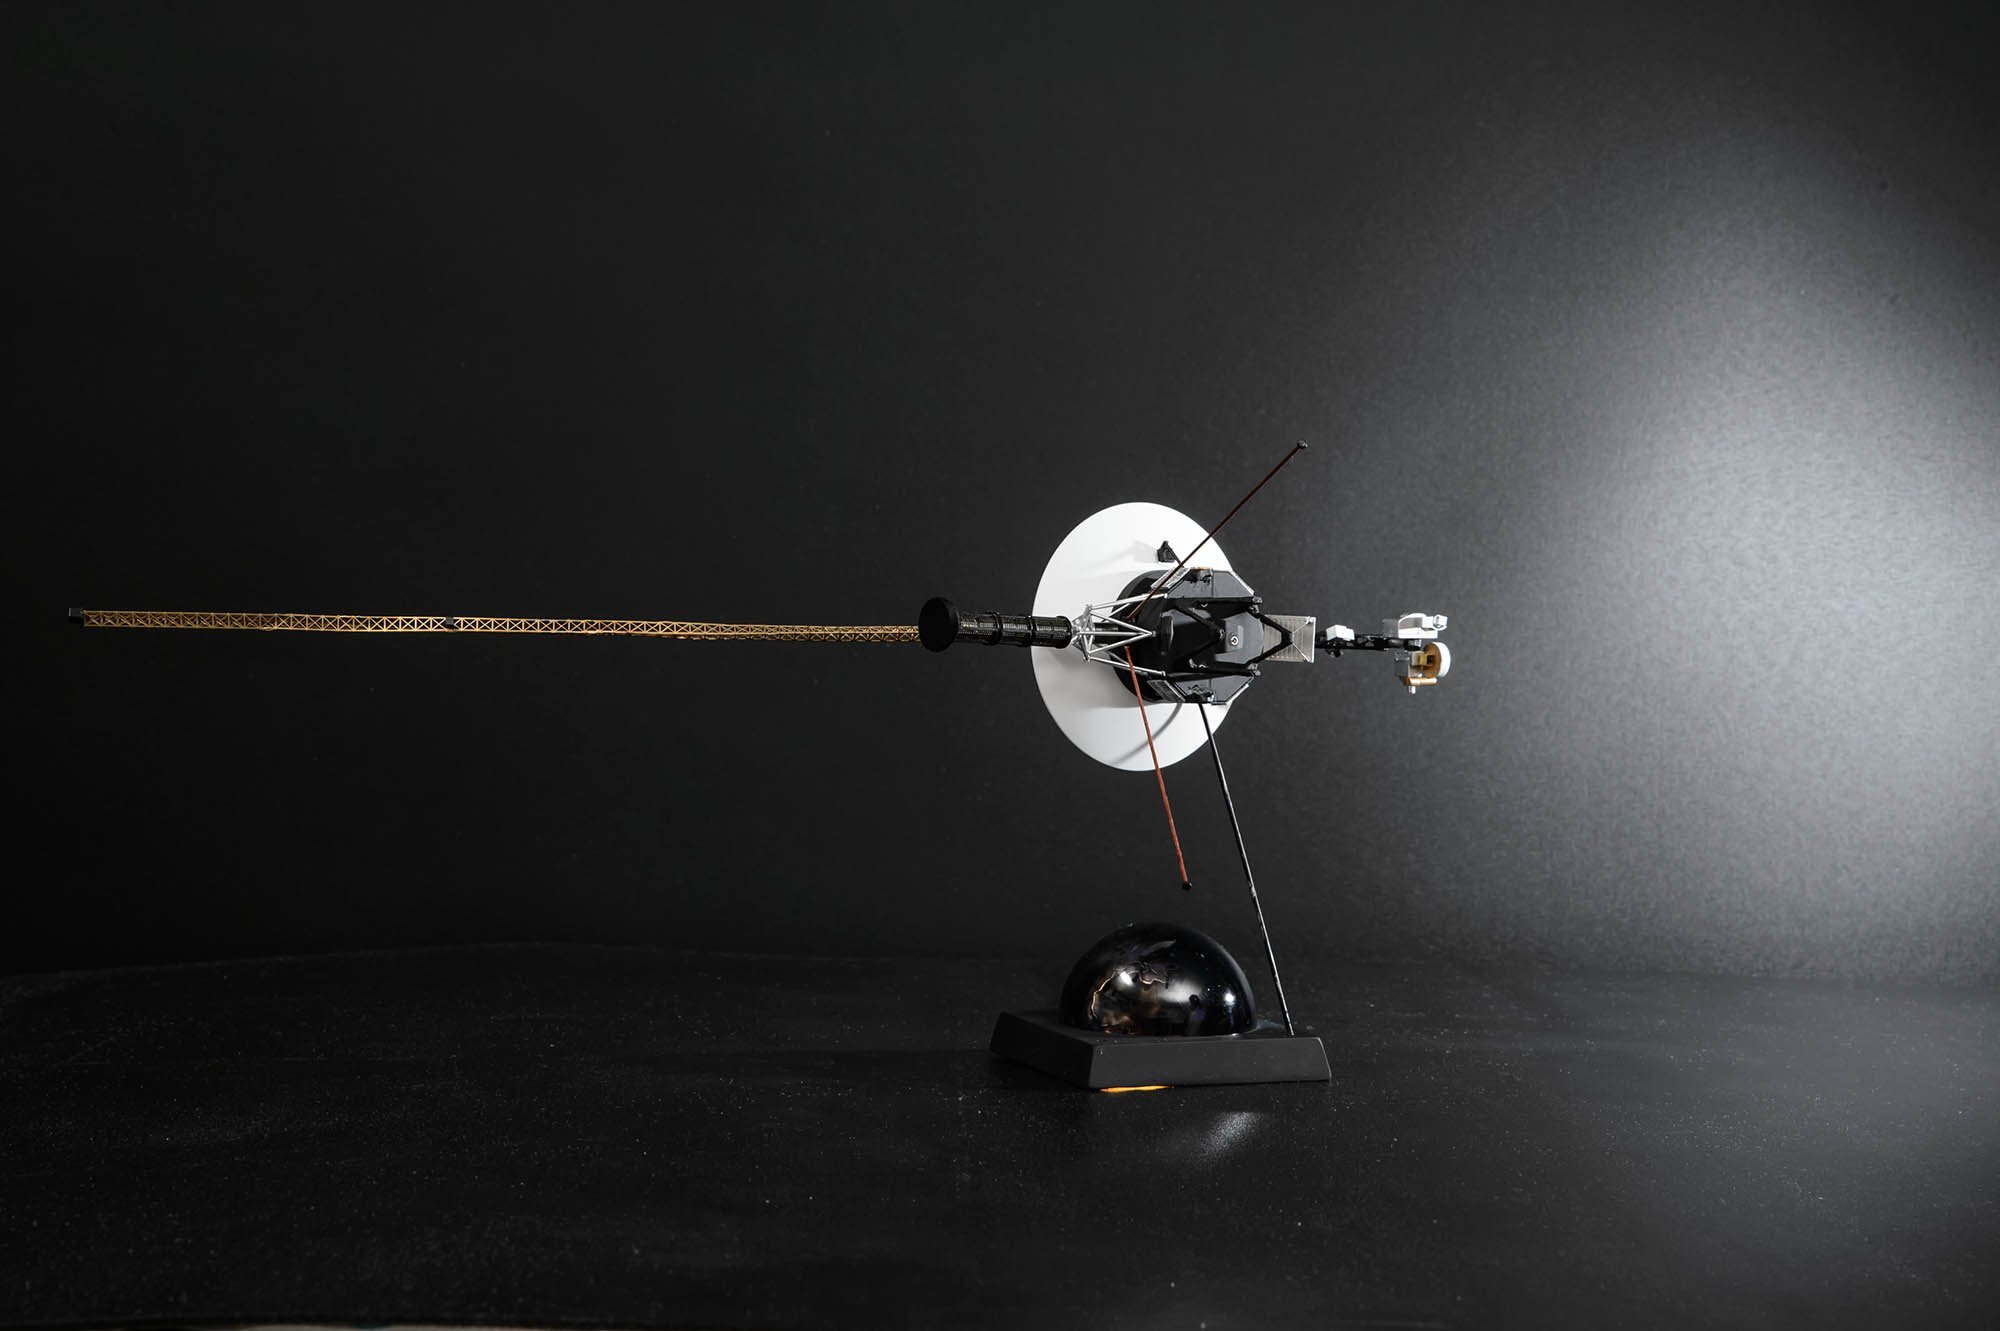
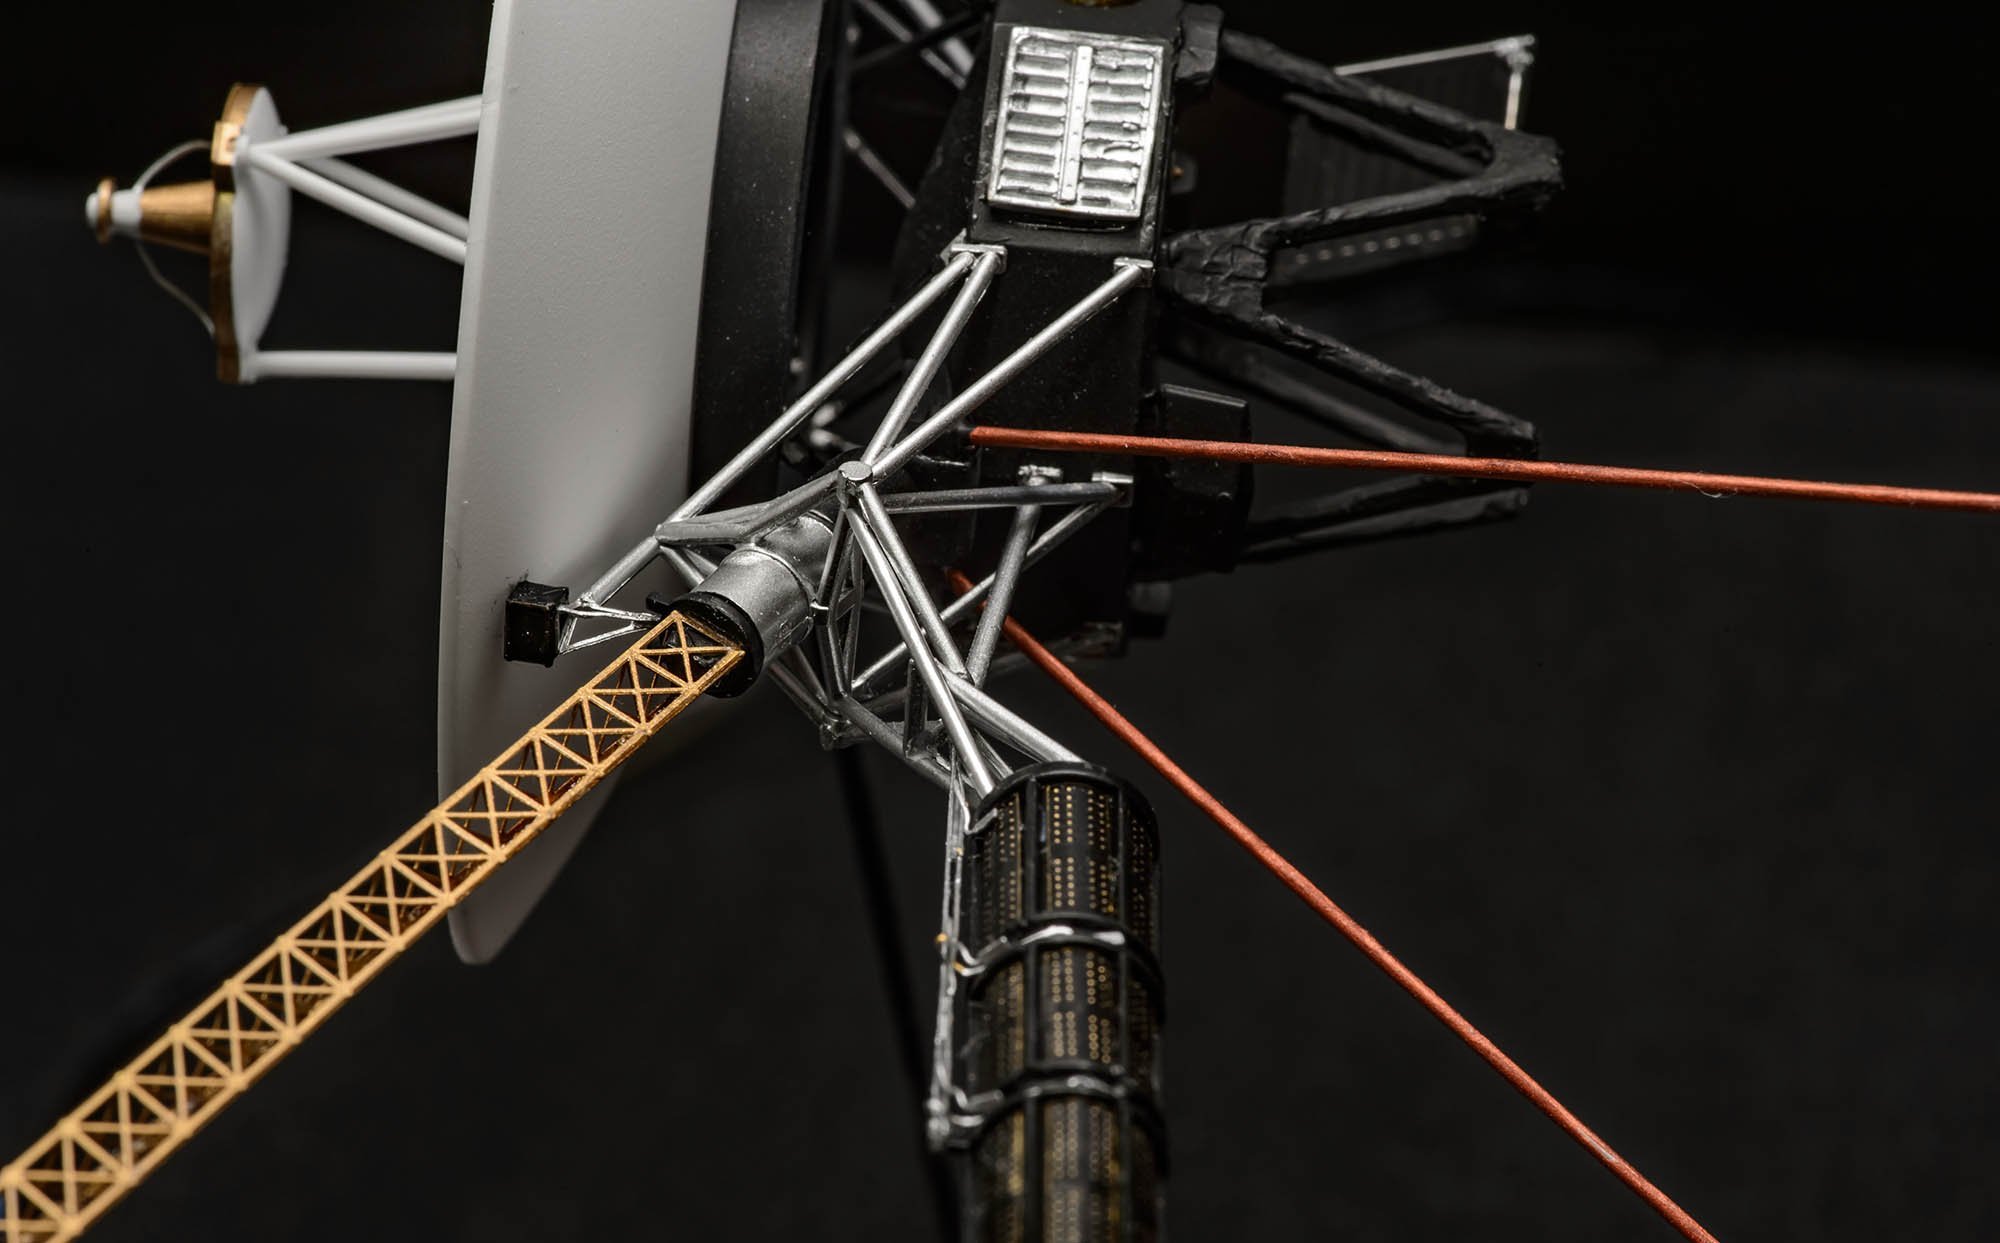
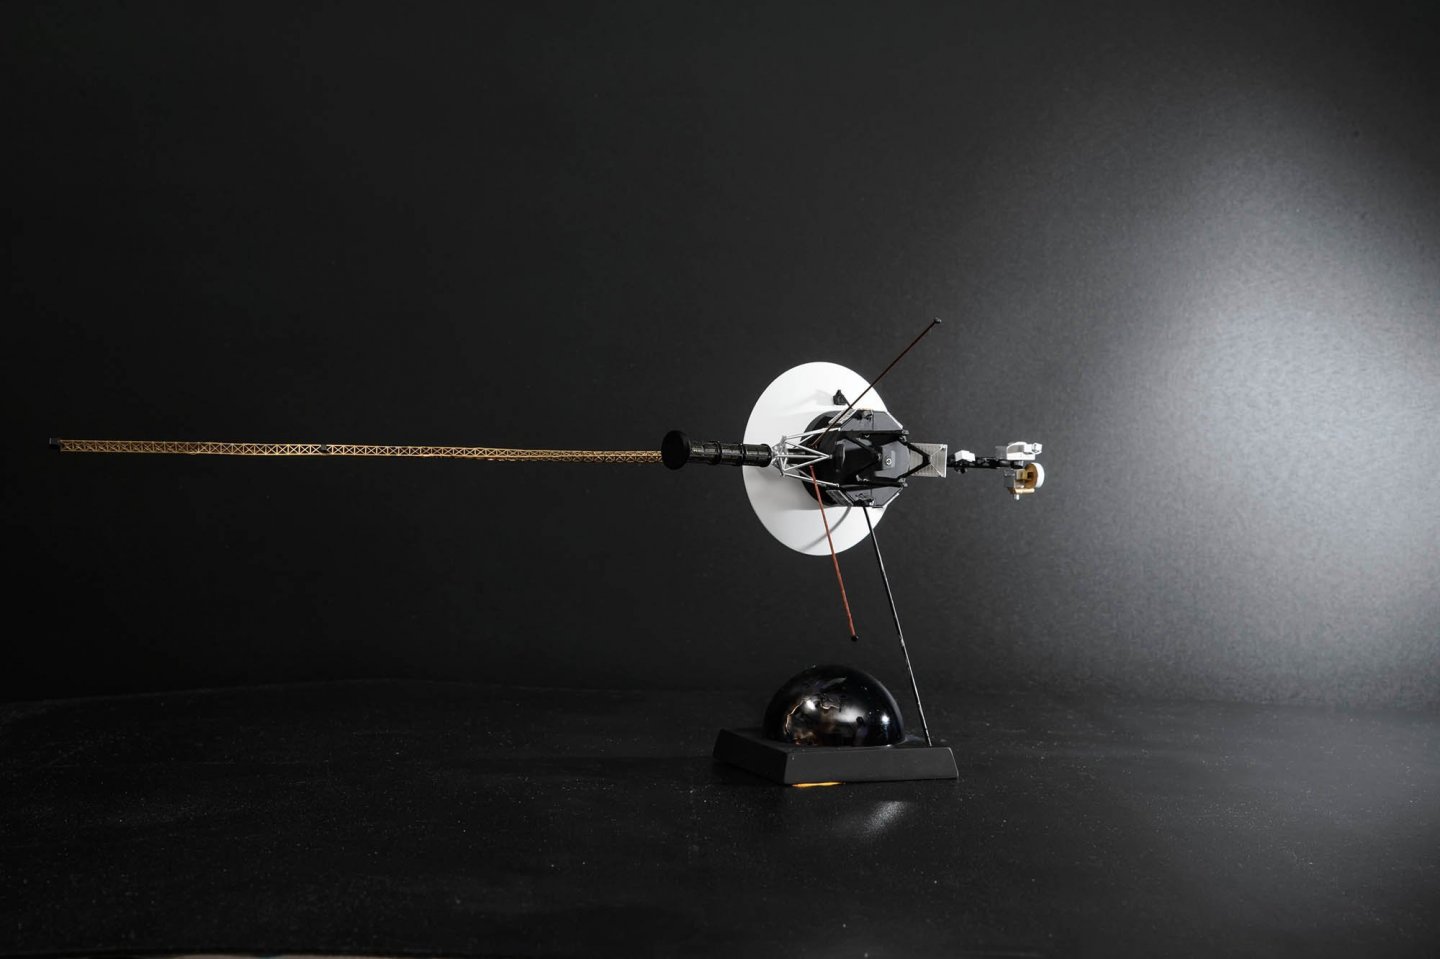
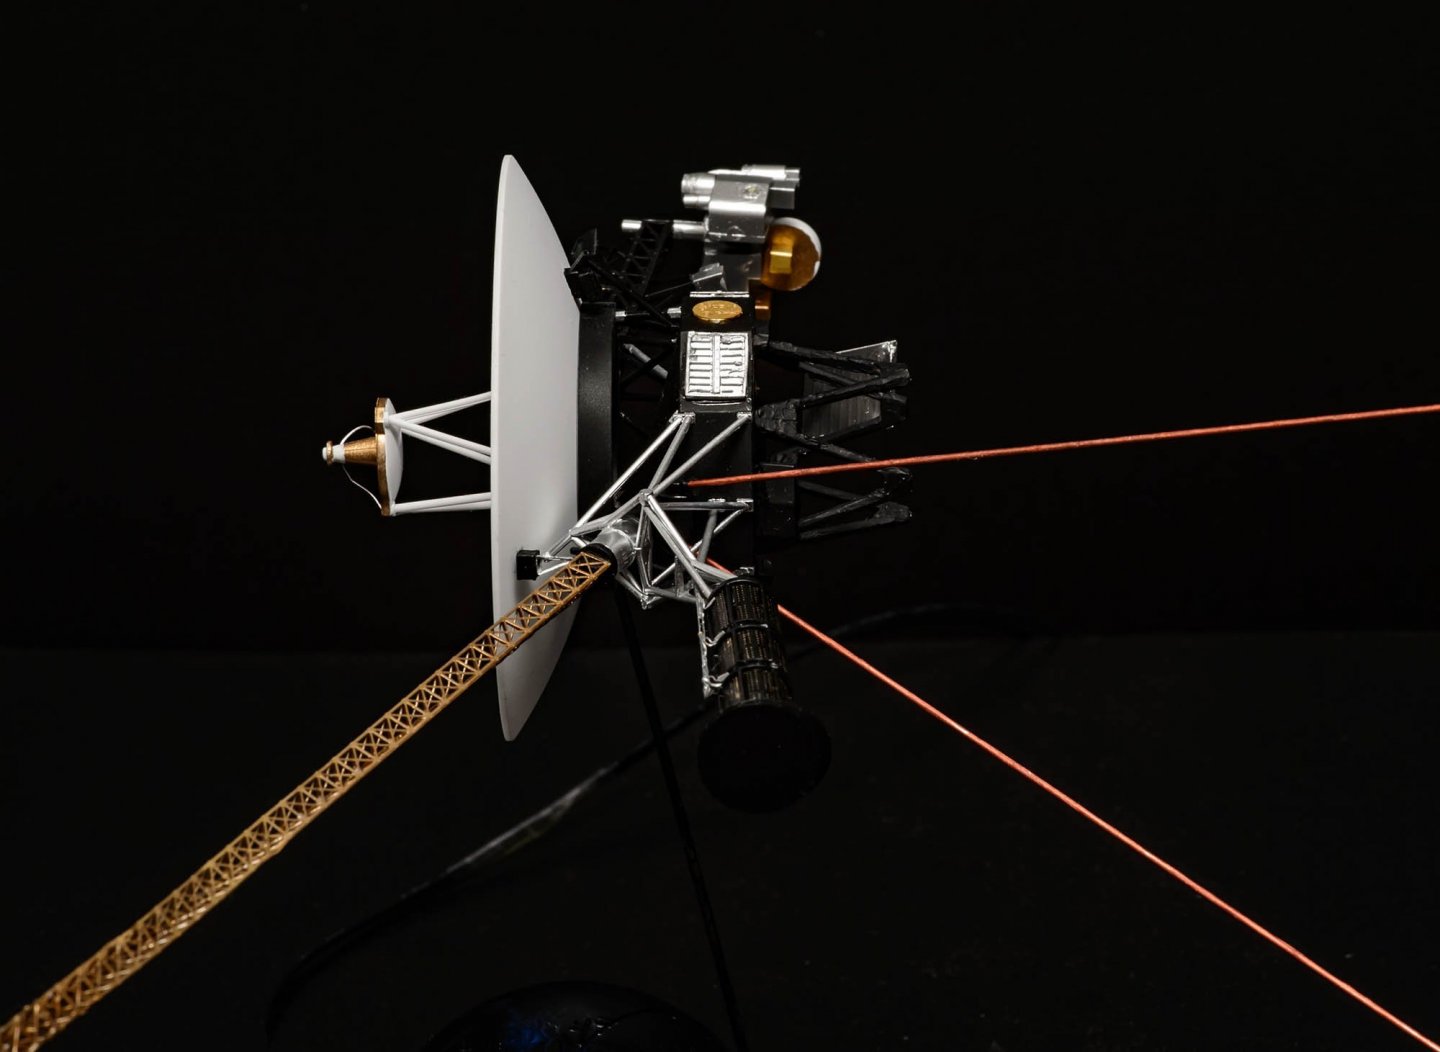
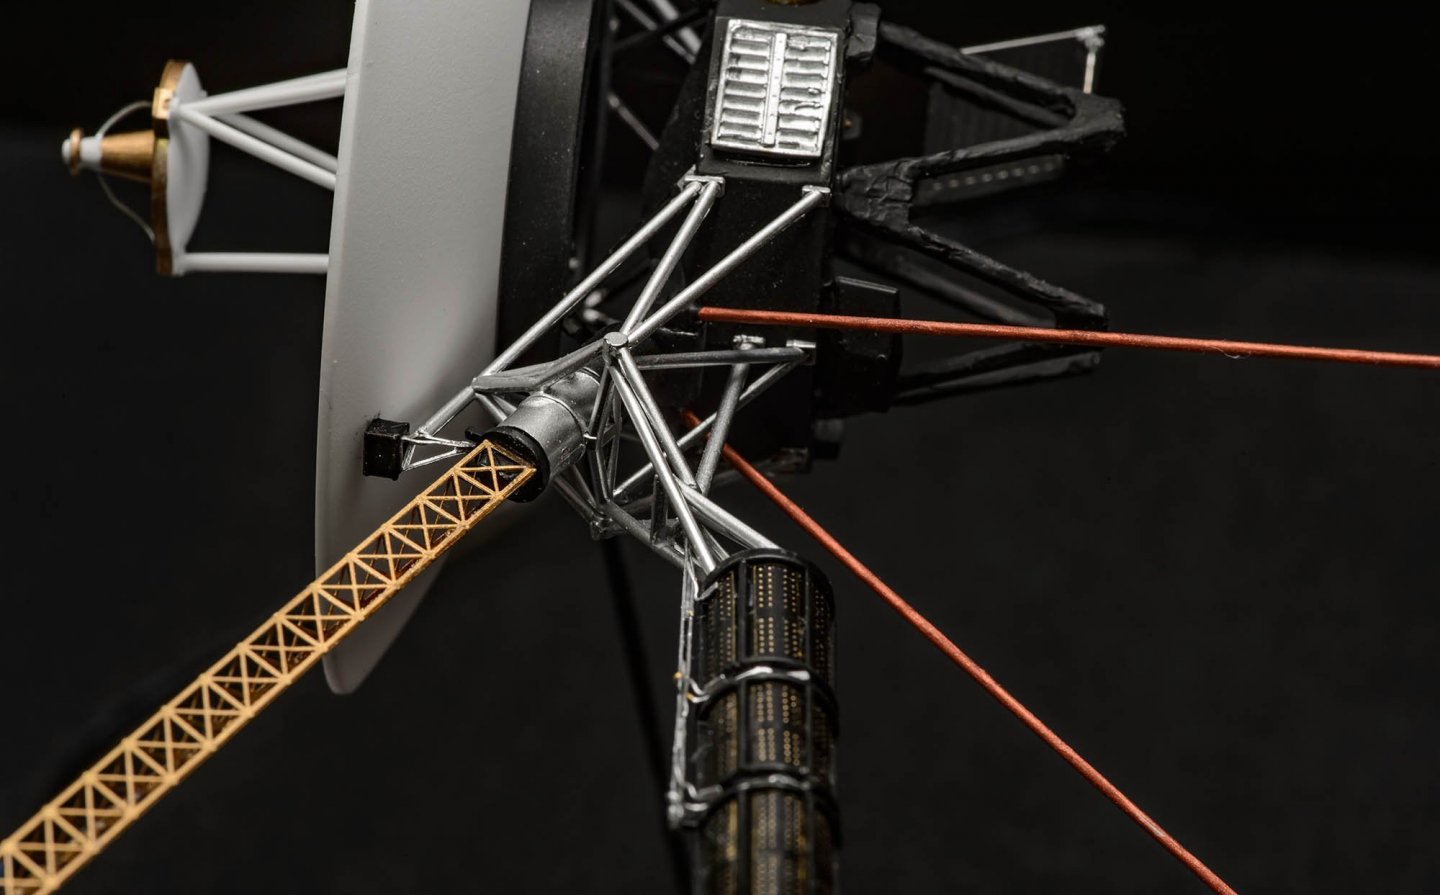
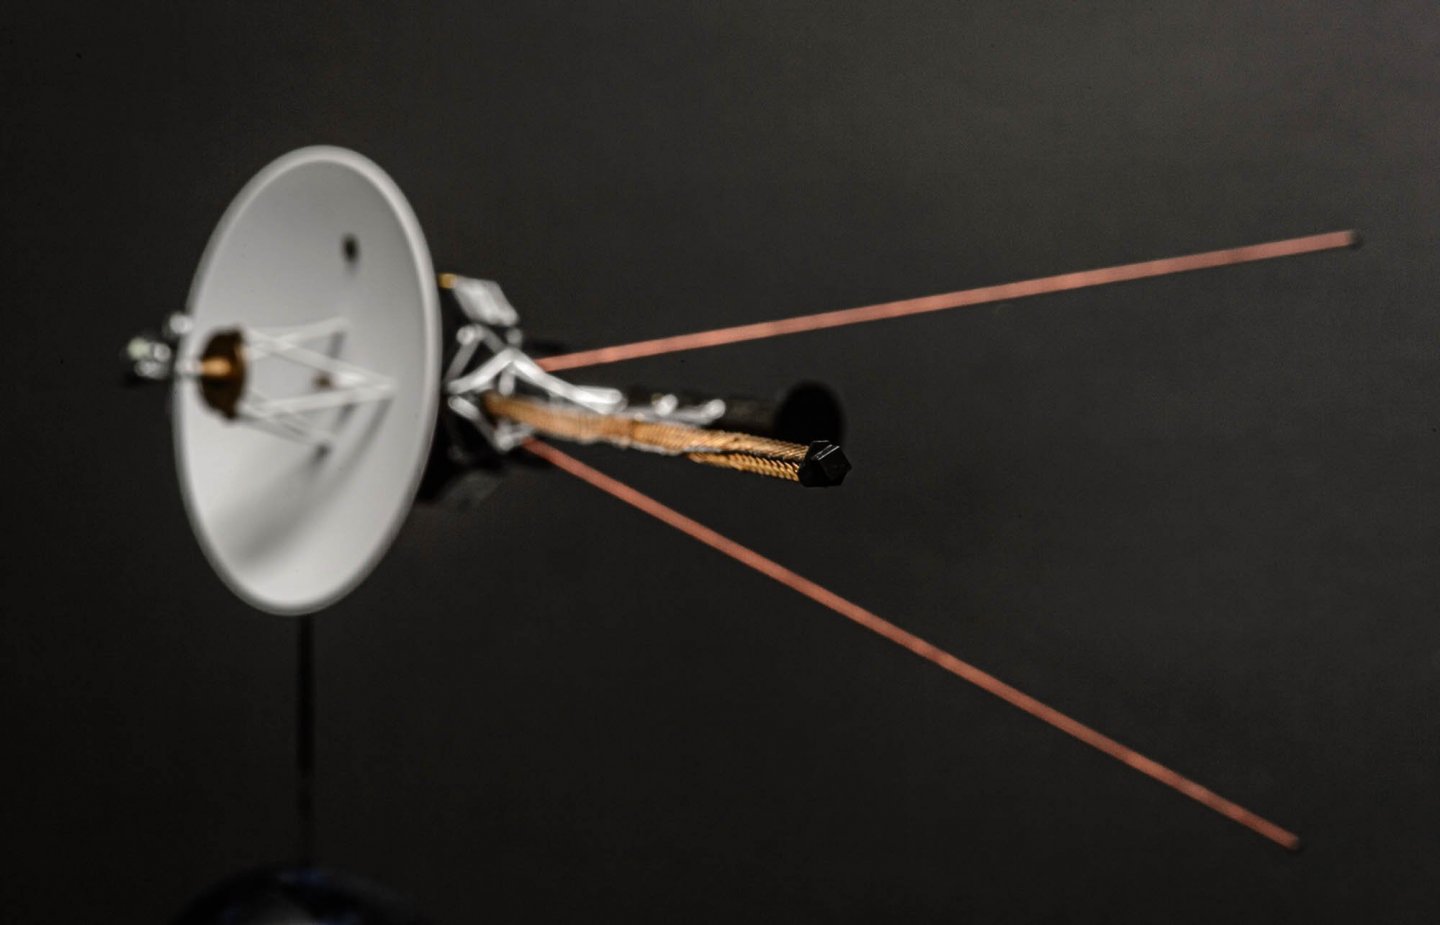
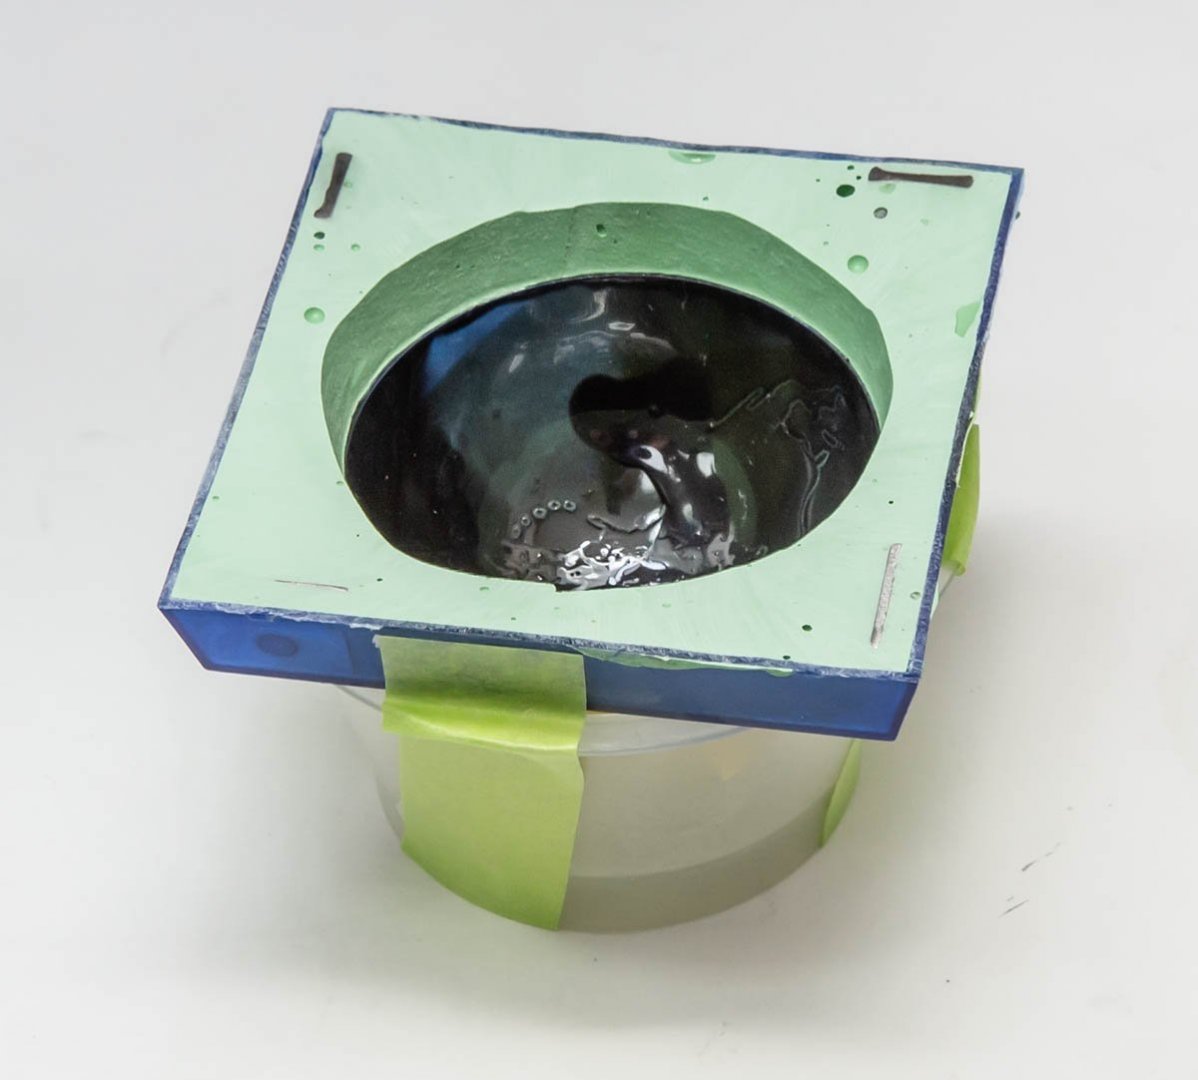
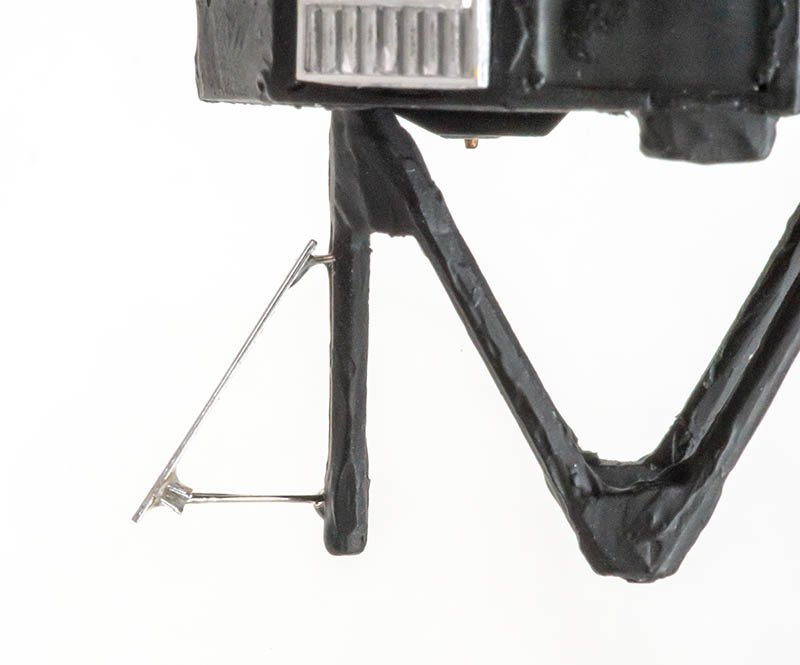
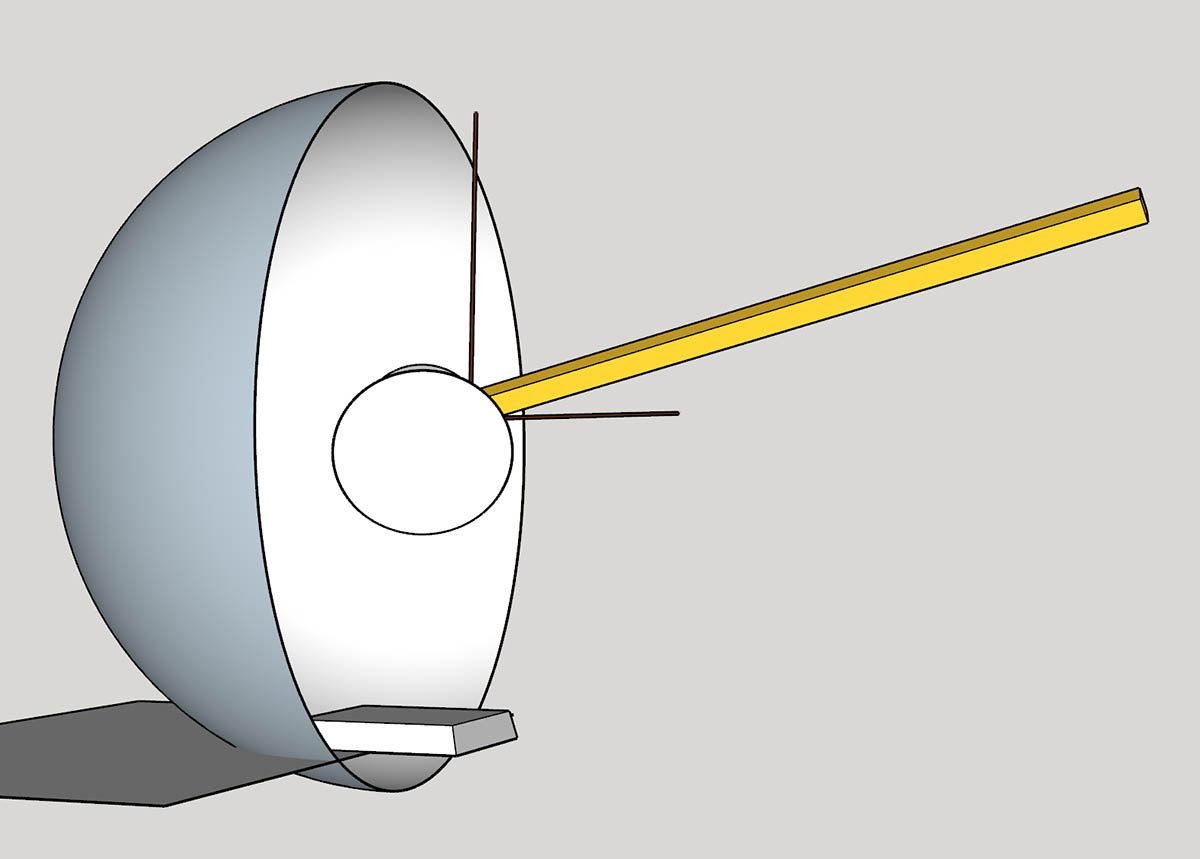
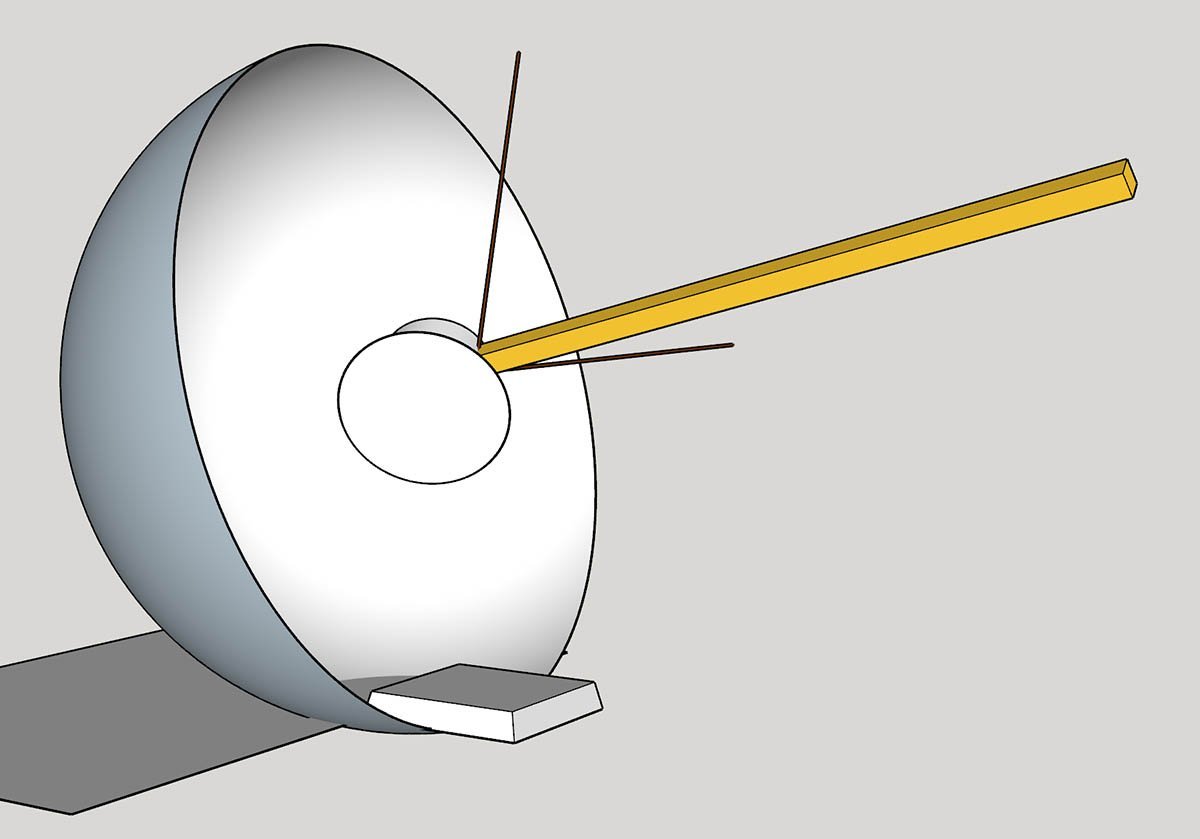
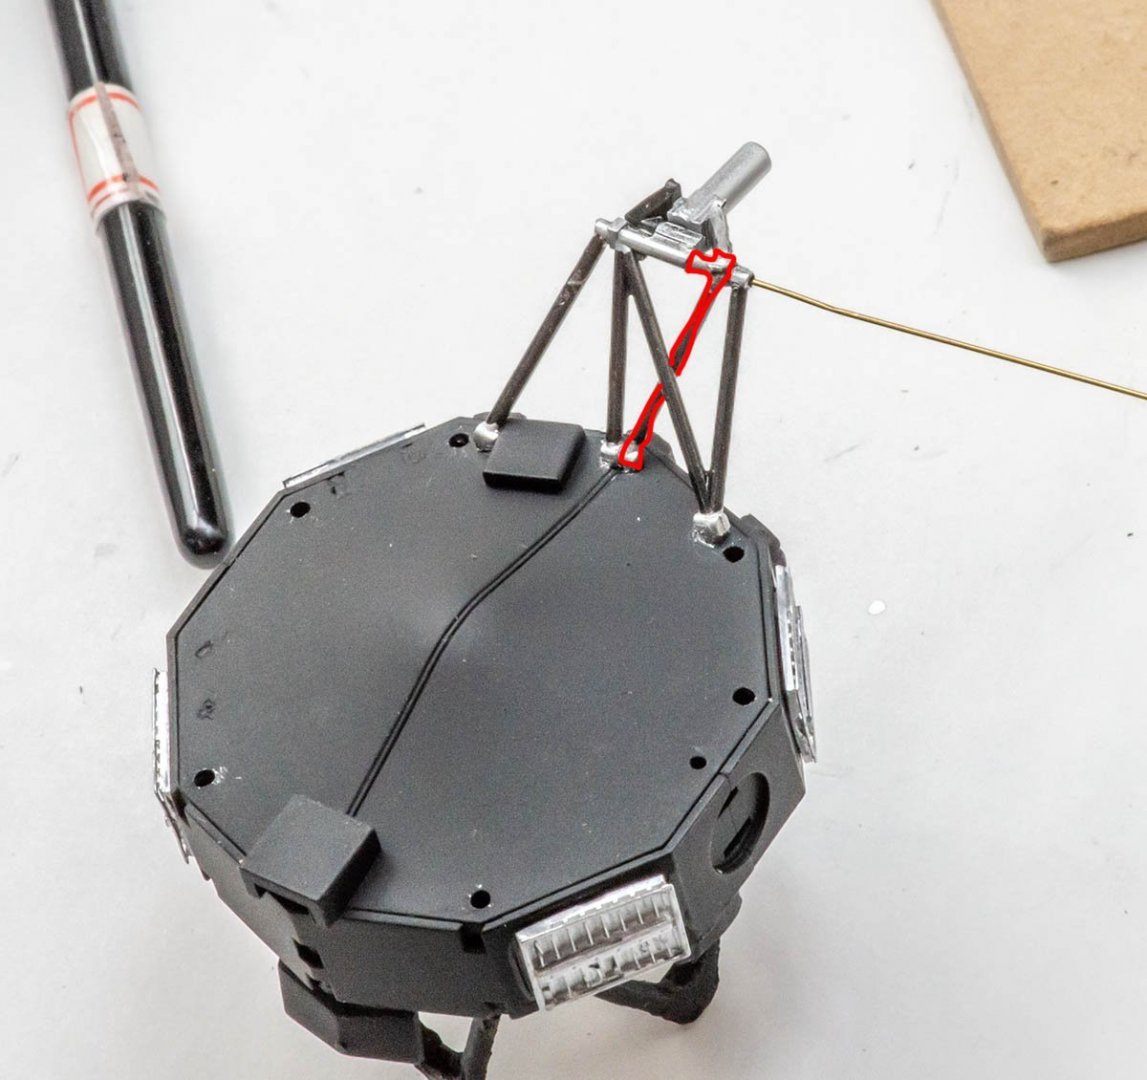
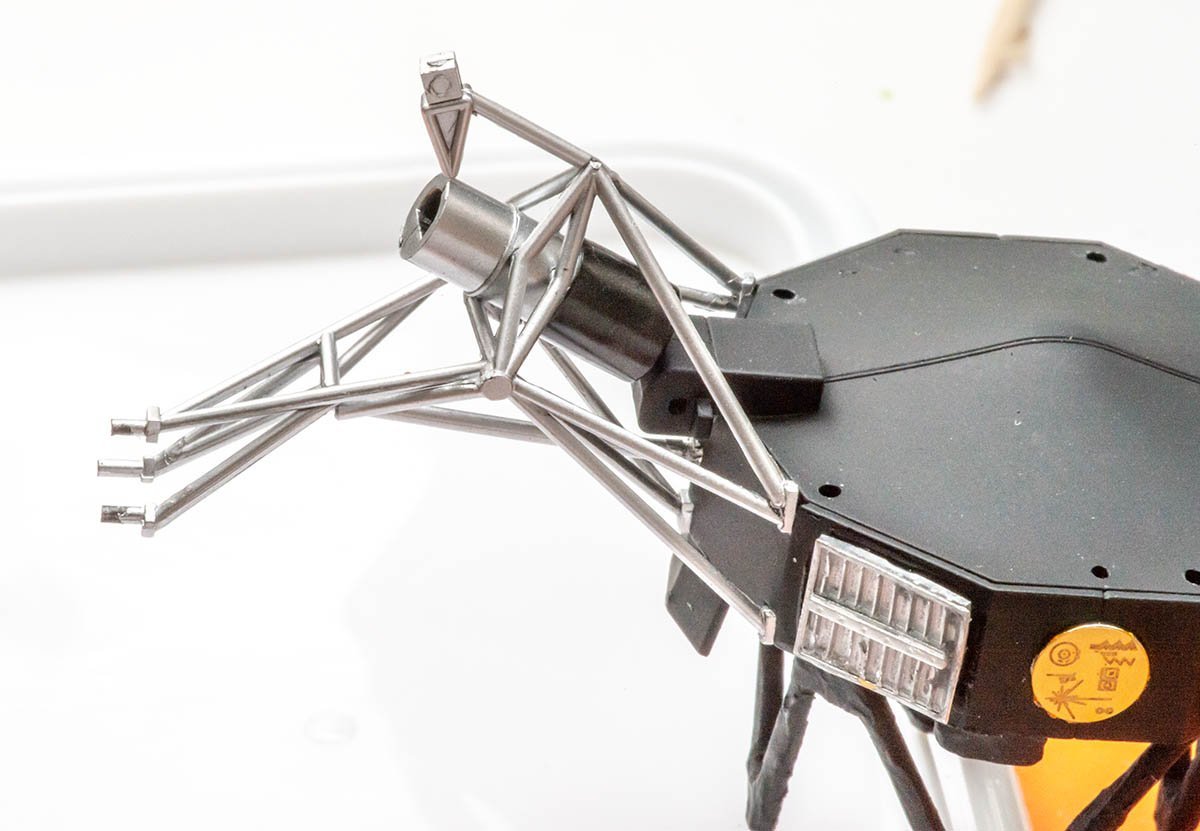
I detailed up Eduard PE parts with stainless rod. I finished an assembly, and am polishing minor details. I gave up my first case plan. It was transparent acrylic hemisphere with circular infographic. I double-checked possibility with 3D model, and found my fault that the case is interrupted by three long range antennas. It also limits good pose. Moreover, it takes relatively large place. My house is not a museum. 🤔 Therefore, I gave up the plan, and am making simple flat acrylic back info panel.
- 26 replies
-
- 10
-
-
NRG Capstan Project
modeller_masa replied to tlevine's topic in - Build logs for subjects built 1751 - 1800
Thanks for kind reply, Justin! I'm using old version of sketchup. Looks like the iPad utility is identical and useful. It is amusing that someone already thought and ran similar idea. 😆 I'm appreciated to hear your advice. I also think minor digit is within tolerance. The third question looks like affecting outfit, but it really doesn't in reality. Therefore, these questions are ignorable and I can advance to the next part for now. If I can get new number from Toni, I will gladly apply it. -
NRG Capstan Project
modeller_masa replied to tlevine's topic in - Build logs for subjects built 1751 - 1800
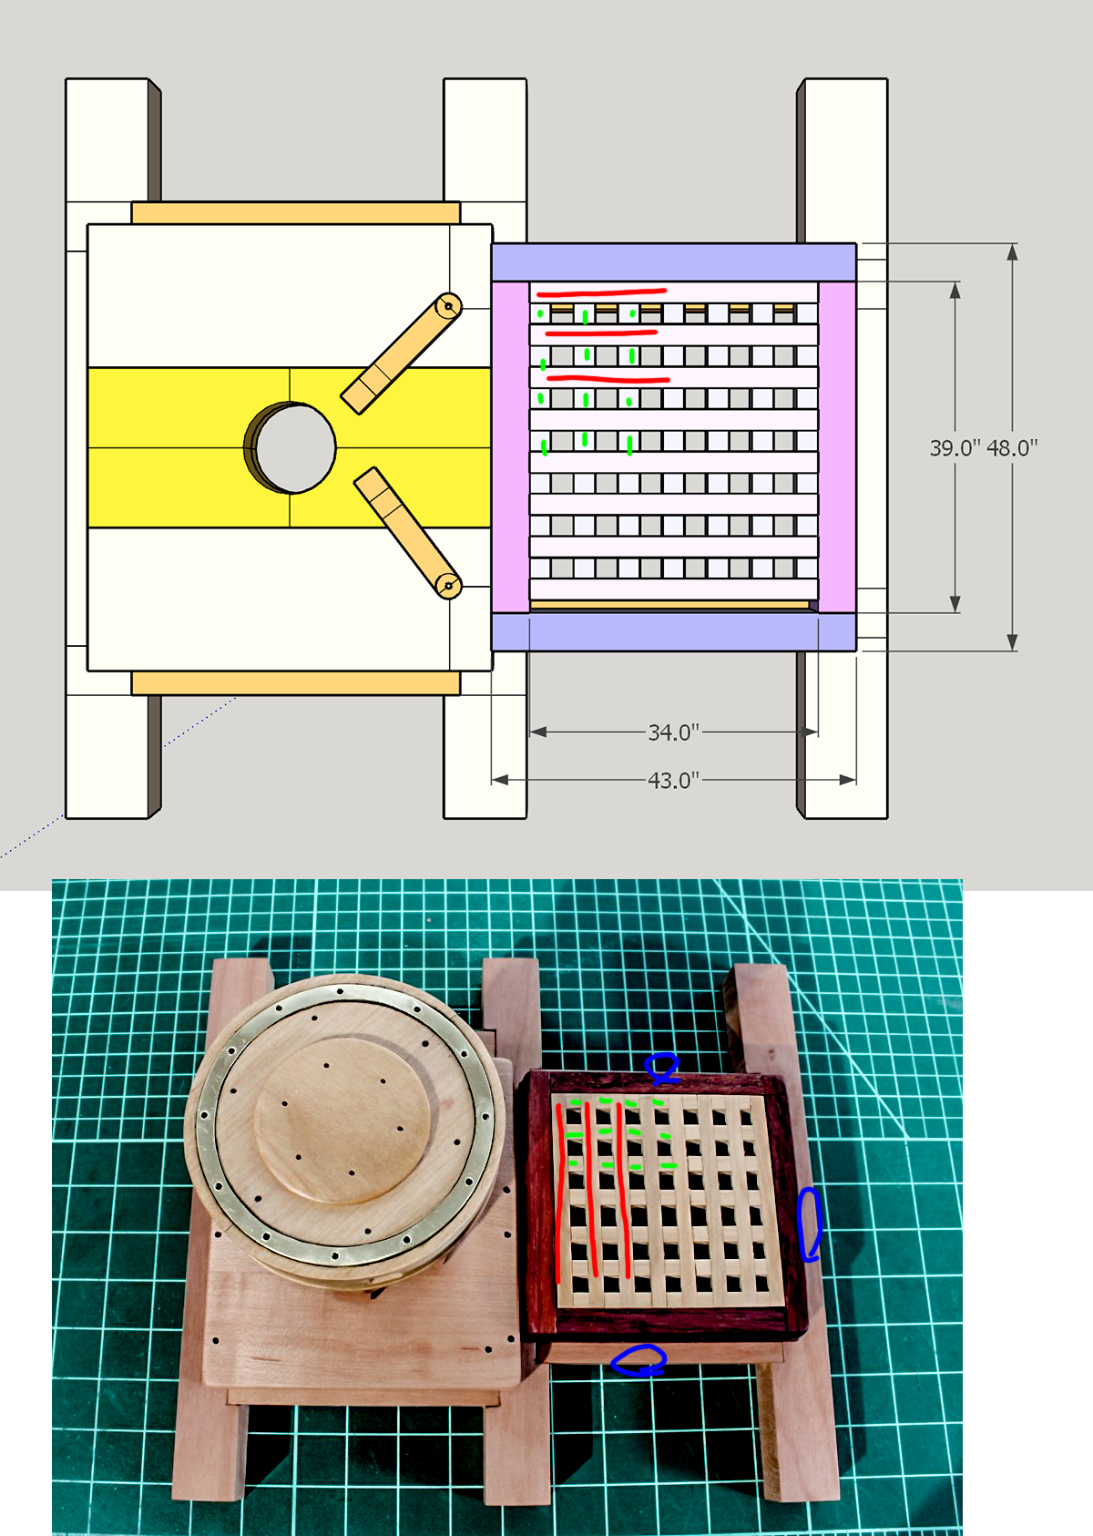
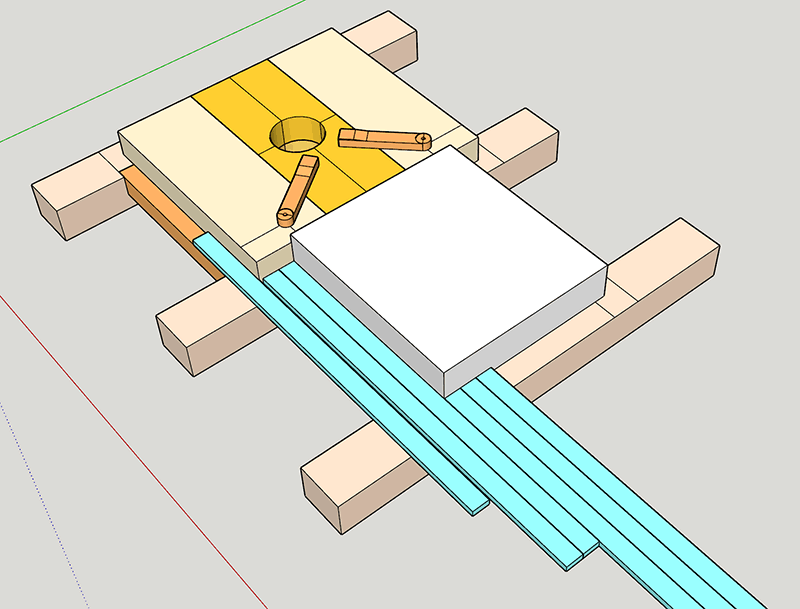
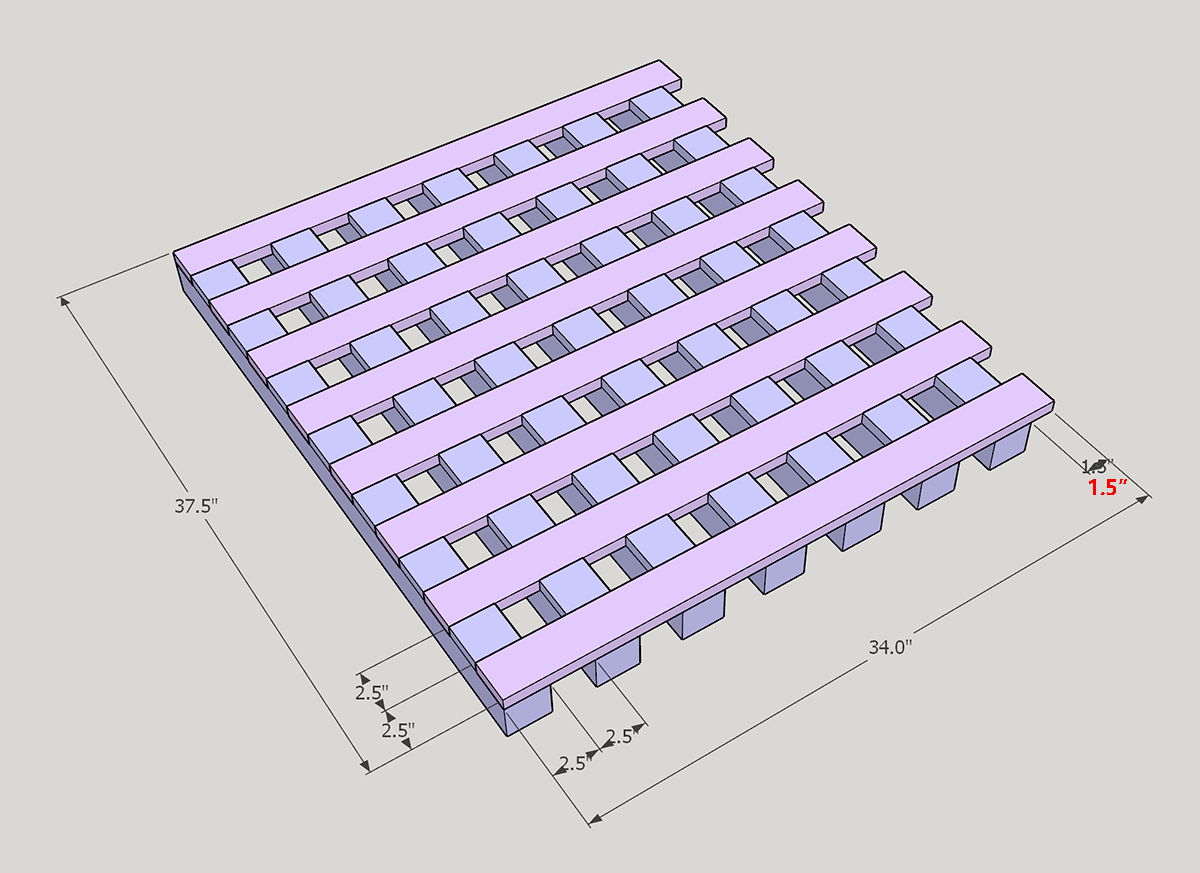
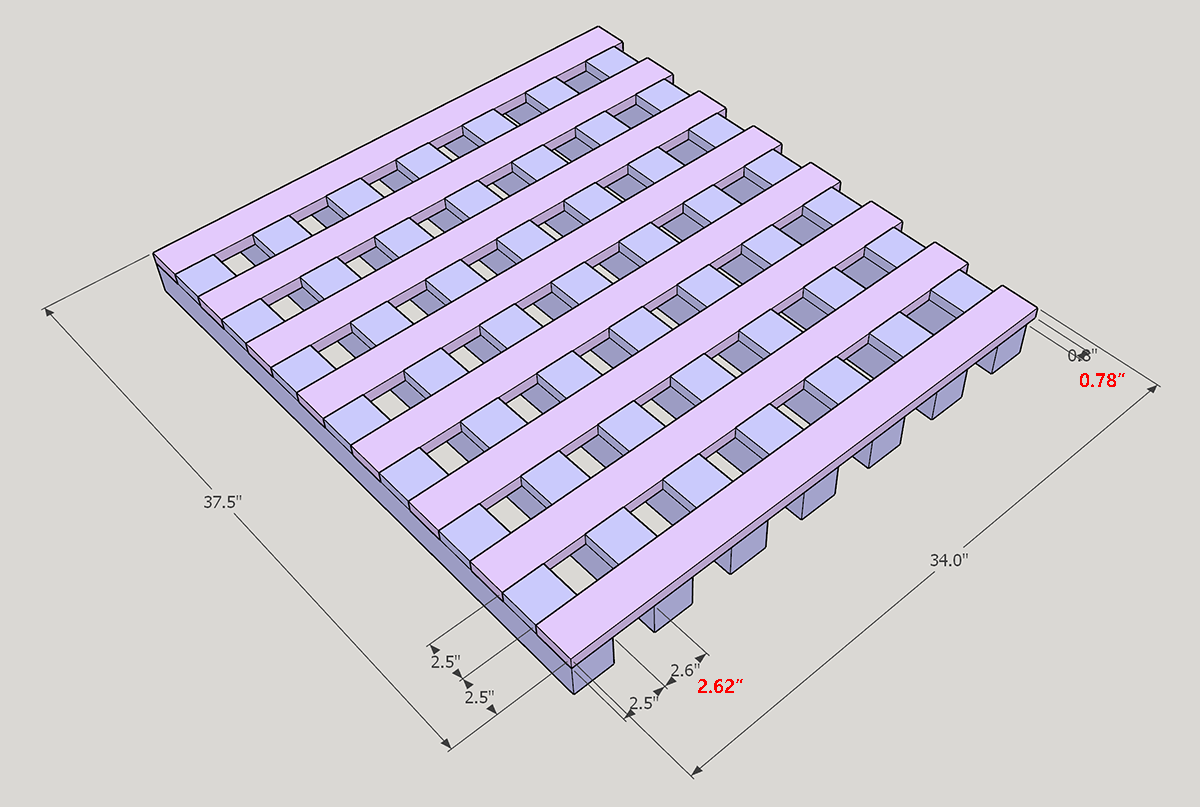
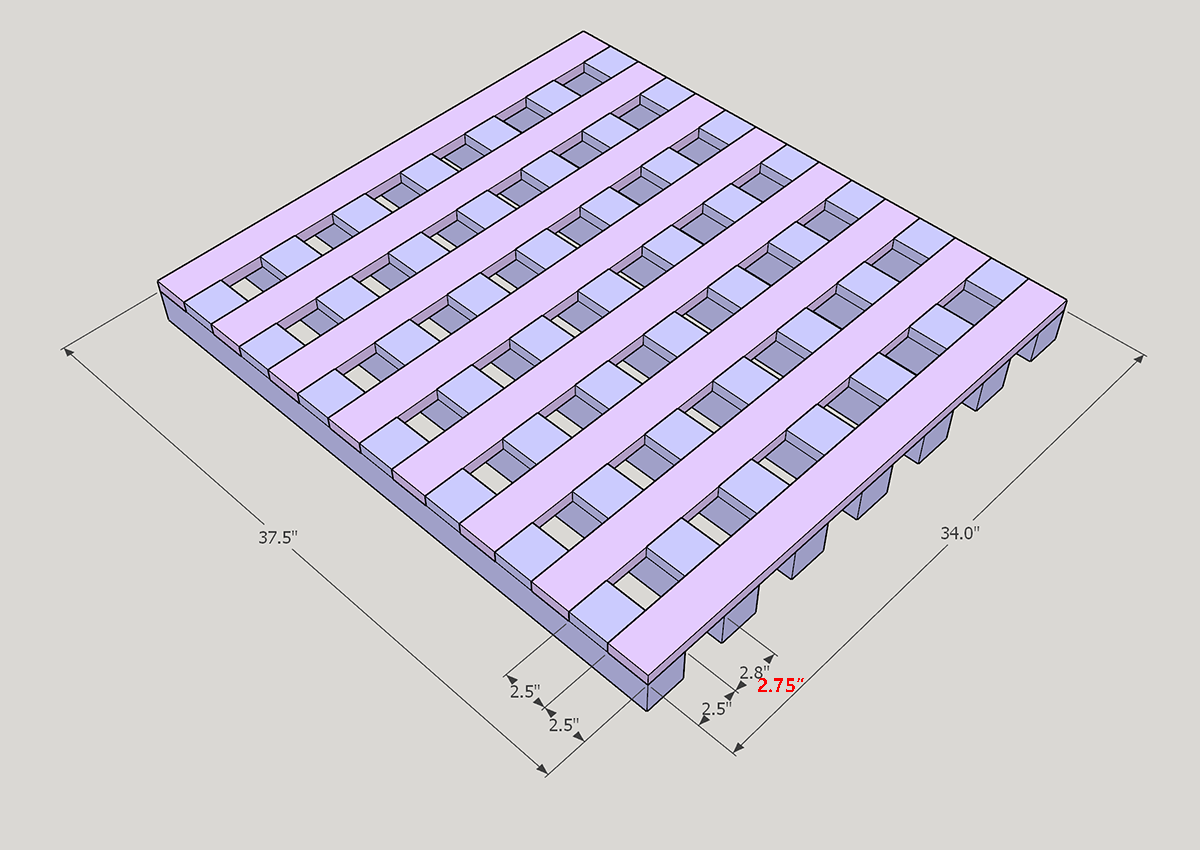
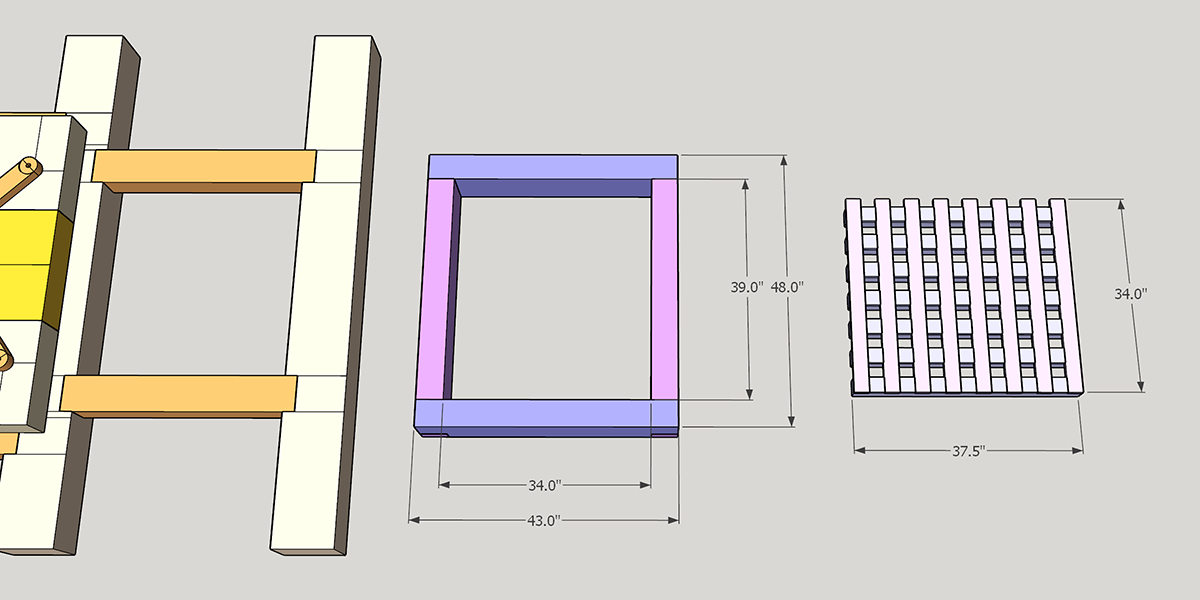
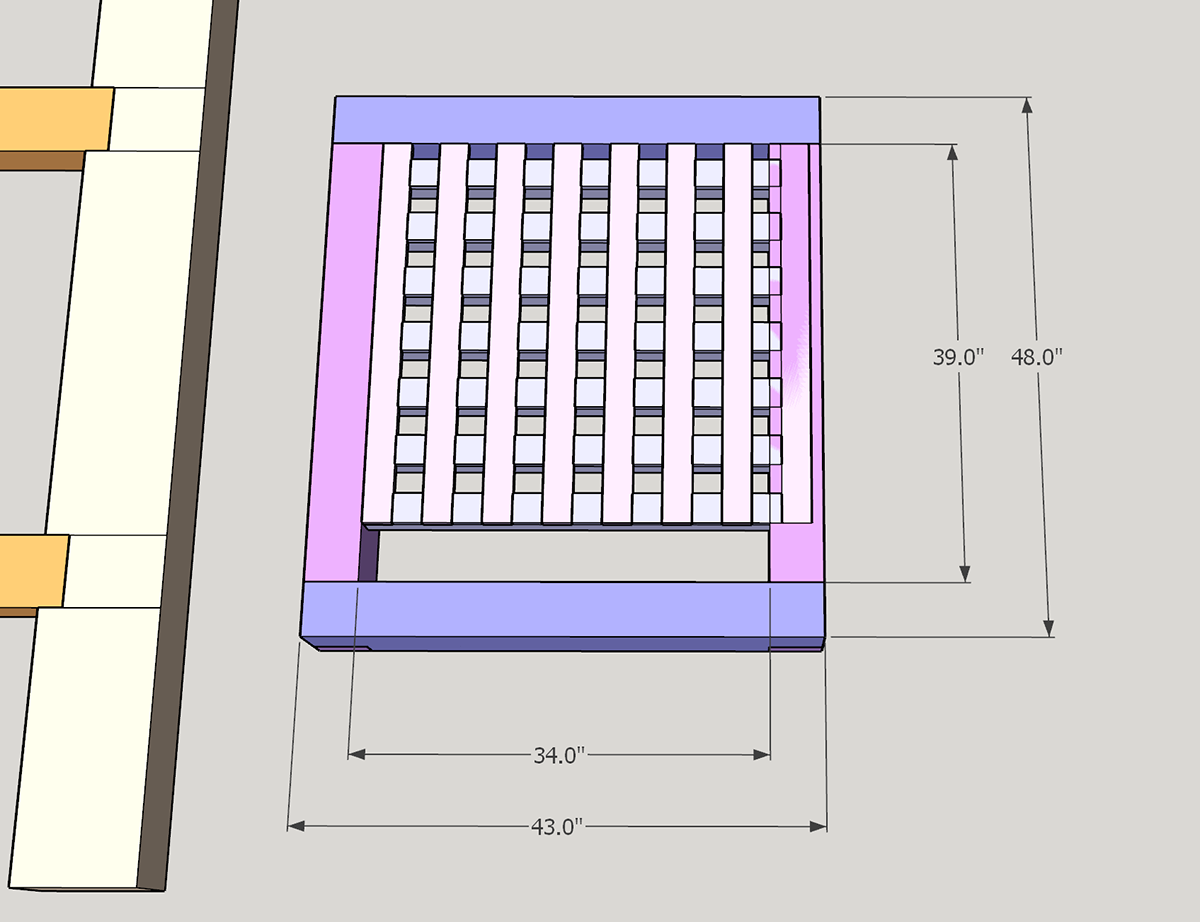
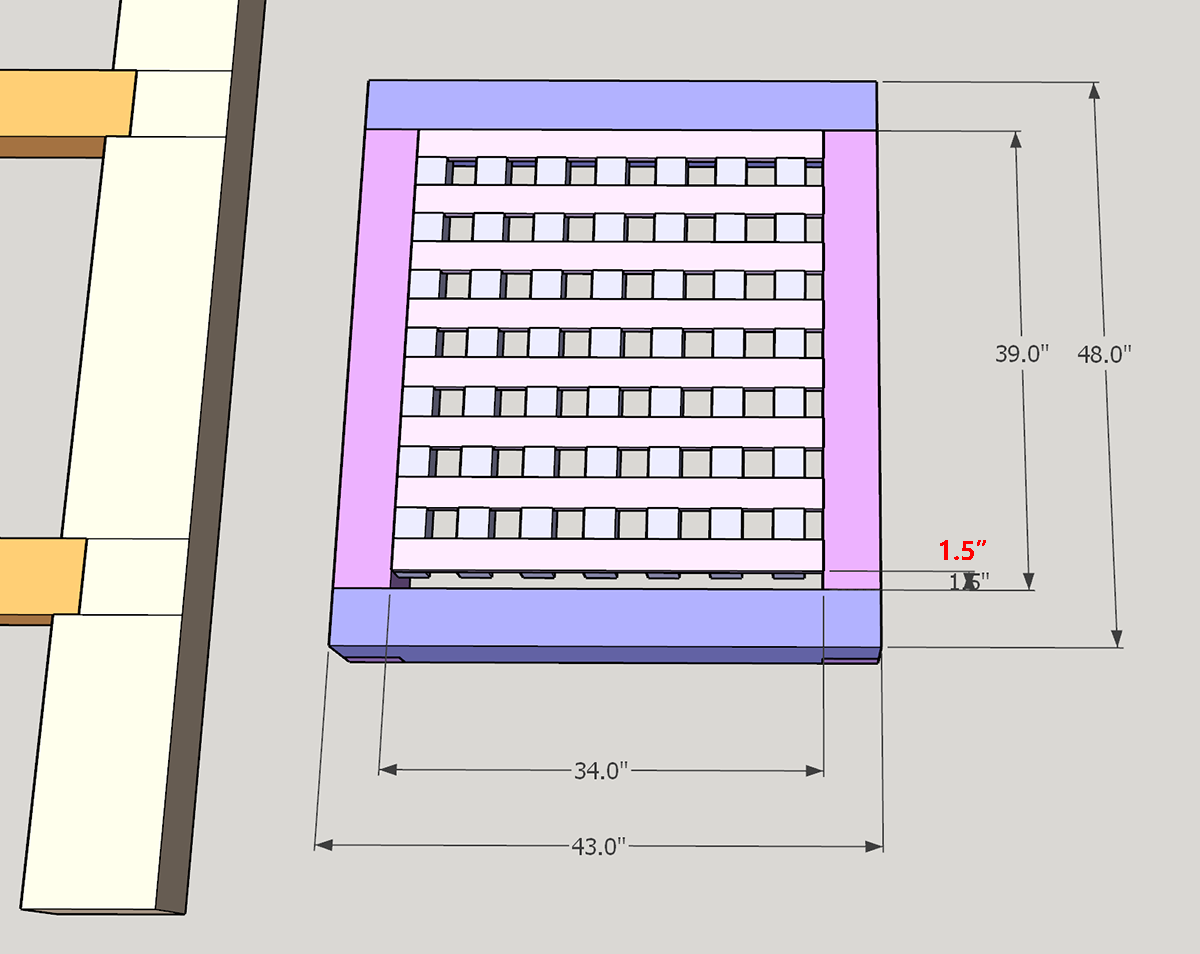
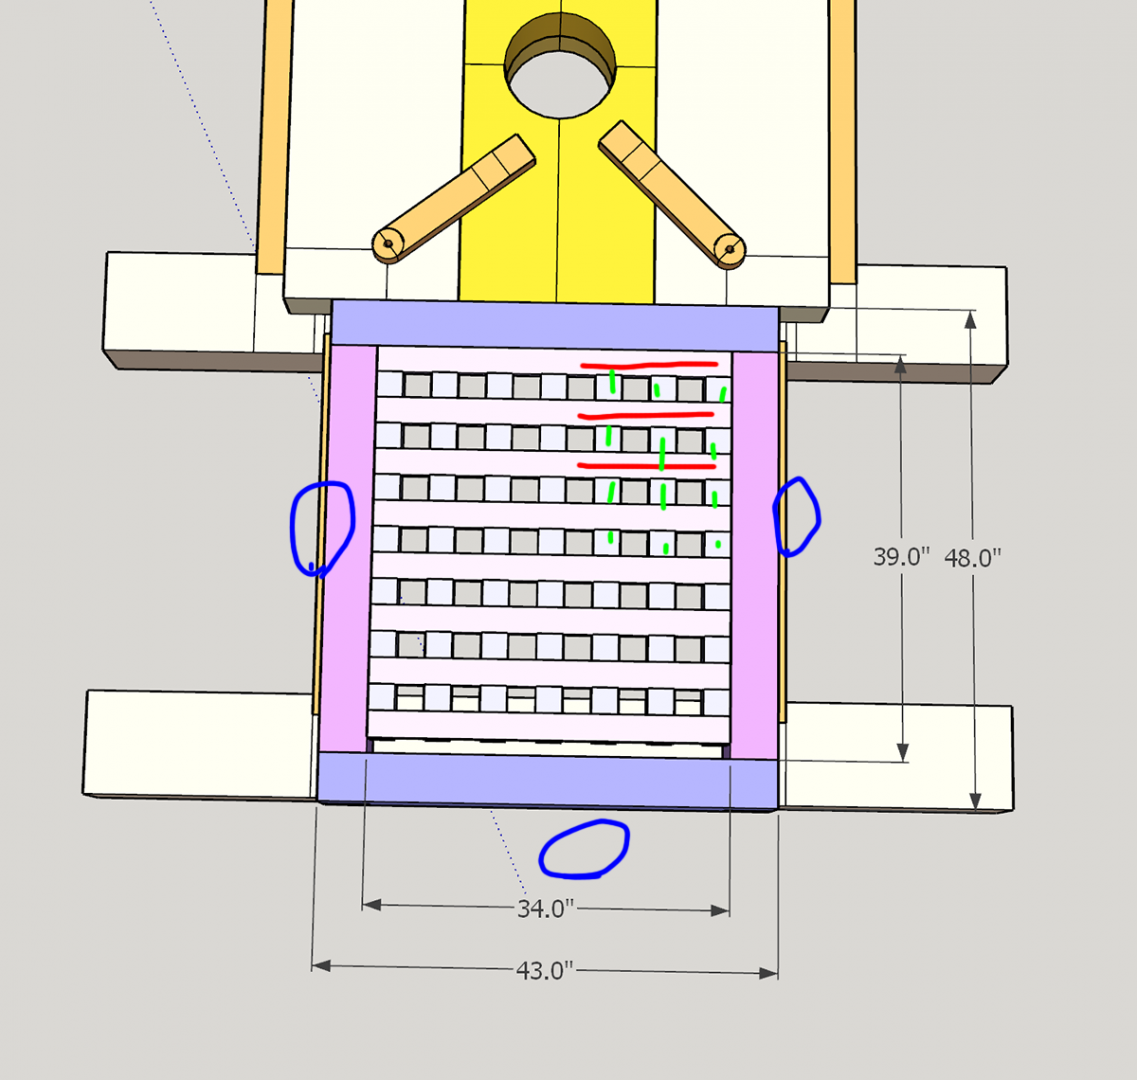
Dear Toni, I'm making 3D capstan model for 3D printer. I don't have any plan to distribute modeling file, but have a plan to upload a simple parts-assembly animation video if you allow. (non-profit) While I was transferring plans on 3D modeling data, I found some suspicious digit errors. This is so tiny that really not a big deal for scale model unless I use CNC or 3D printer. Please consider my questions for curious and light question. (1) When I leave same width (2.5") among part 002 grating ledges, remaining edge is 1.5". It is a reason you wrote 2.62" space. However, there is remaining edge when I let 2.62" spaces. I recalculated and optimal number is 2.75" Of course, it is not important because we will make 1/16 or smaller scale model and 0.01" difference is negotiable. (2) Lets put a grating in a frame. I'm following an intermediate plan. I also checked the advanced plan, and an inner size of the A plan is 34.0 x 38.0 which is slightly smaller than I plan. Therefore, I rotated grating, and encountered the next question... (Ignored the gap due to scaling) From the tutorial picture, grating's direction and margin between frame and beam is quite different from plan. It is already proved that I can't follow the plan at question 2 (grating is rotated 90 degrees.), and now different size of grating frames (Part 004s and 006s) between tutorial and plan is confusing. If I rotate it again, it overlaps beam(part 009). I would say that the grating frame on plan is a bit oversized. I checked other member's work. usedtosail didn't rotate frame (3), but rotated grating(2) unlike the tutorial. You can see the grating frame (part 004) overlapped beams. (part 010s) It proves the project faithfully followed the plan. To sum up my questions, (1) Really minor number error report. Gaps between grating ledges may vary on inner size of grating frame. (2) Is the direction of grating important in reality? I think it is removable and direction can be changed anytime although the grating's holes aren't exact square. (3) Should the grating frame (part 004) overlap lower beams as plan directed? Which grating (tutorial or plan) is more accurate historically? (+a) Could I upload an animated assembly video of a capstan project? (non-profit, neither modeling file nor video scene file, baked video only) Thanks for reading. Best regards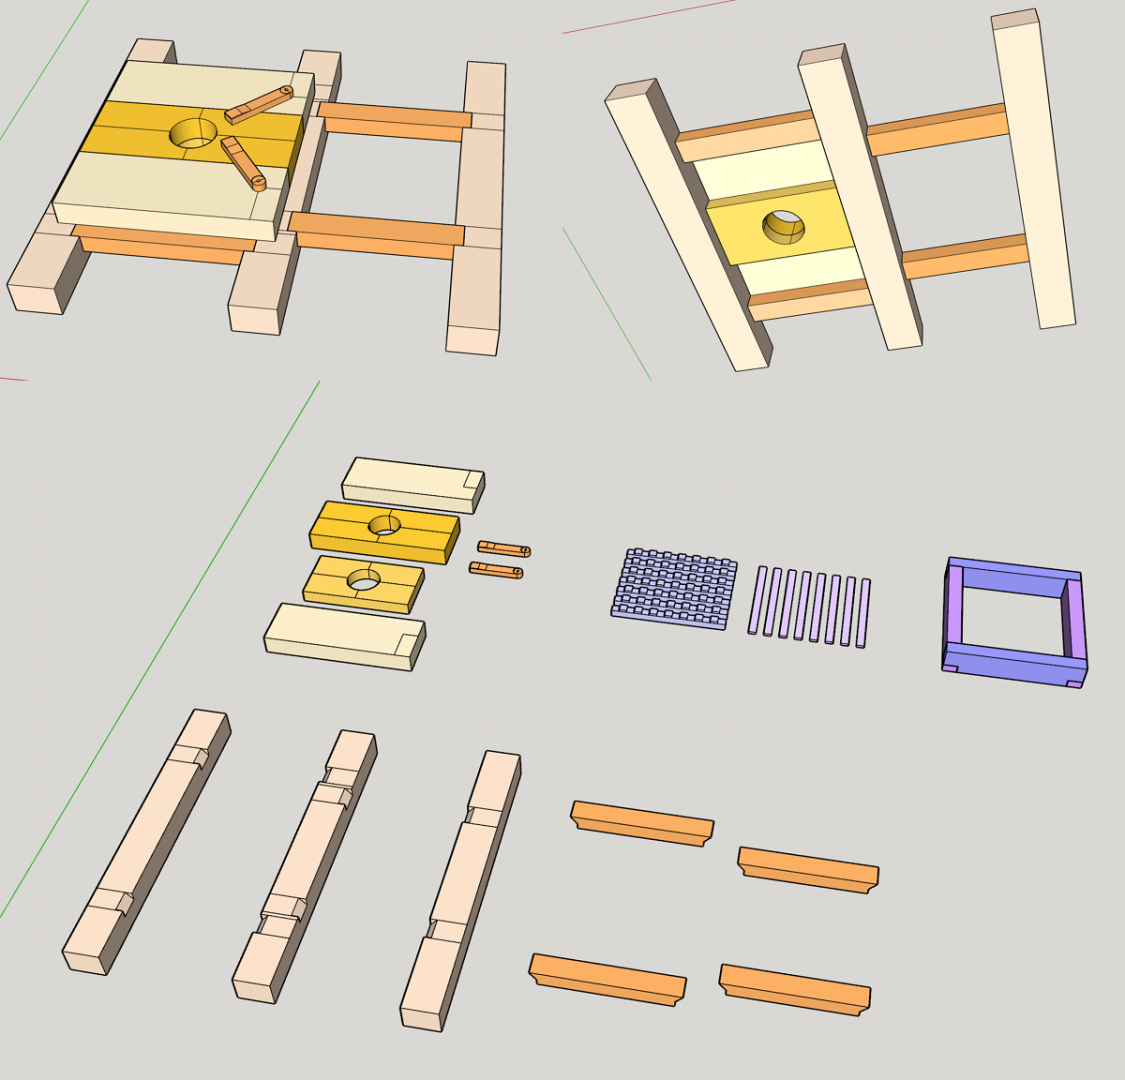

-
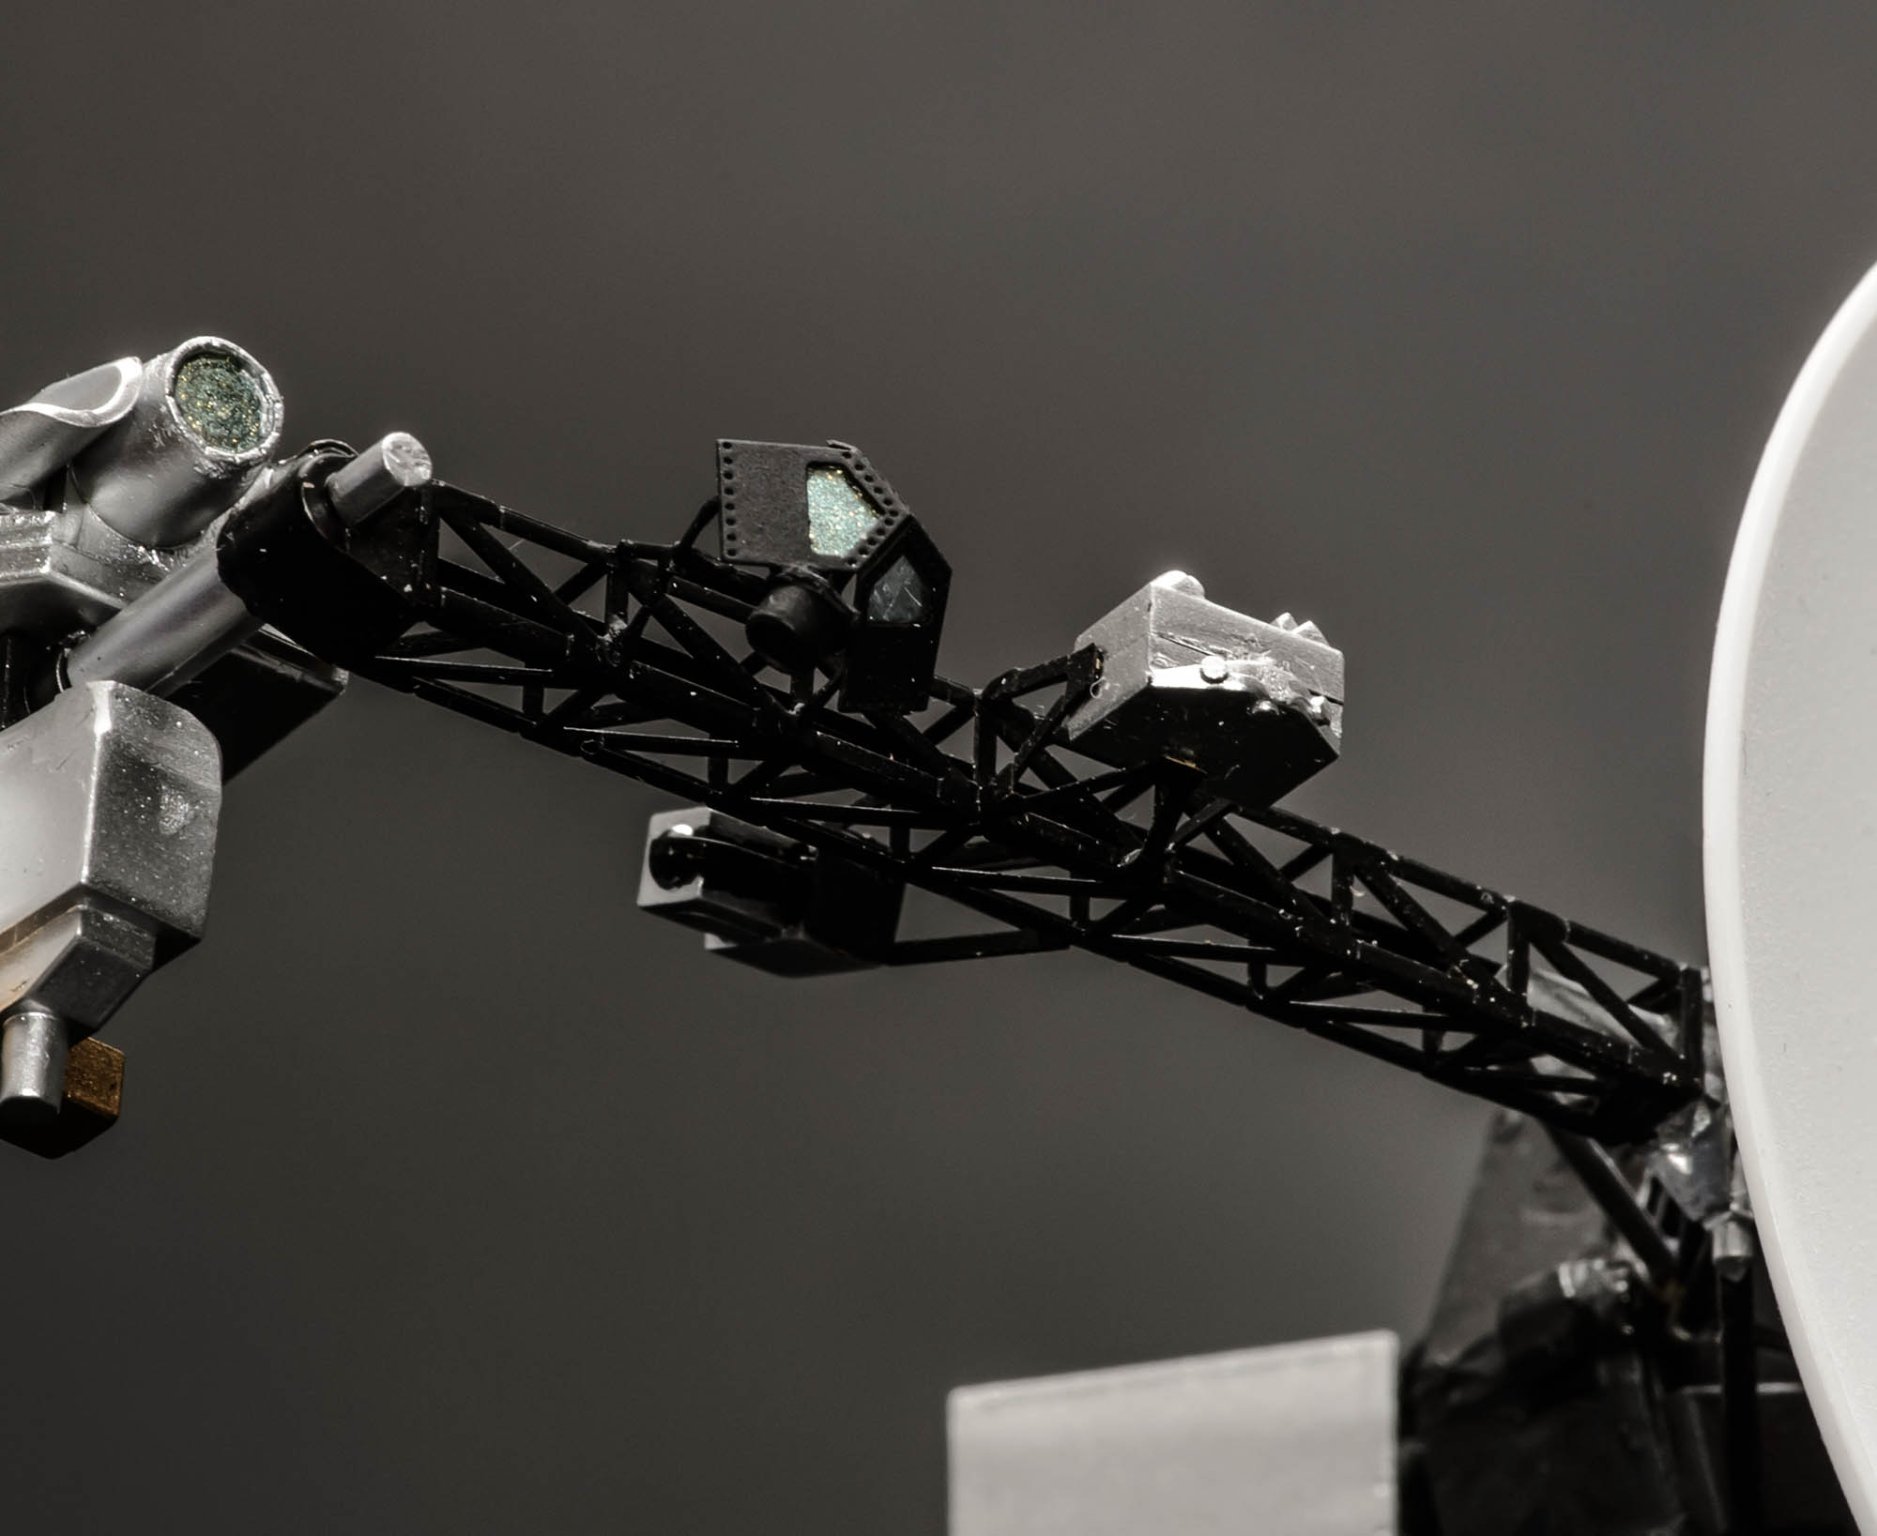
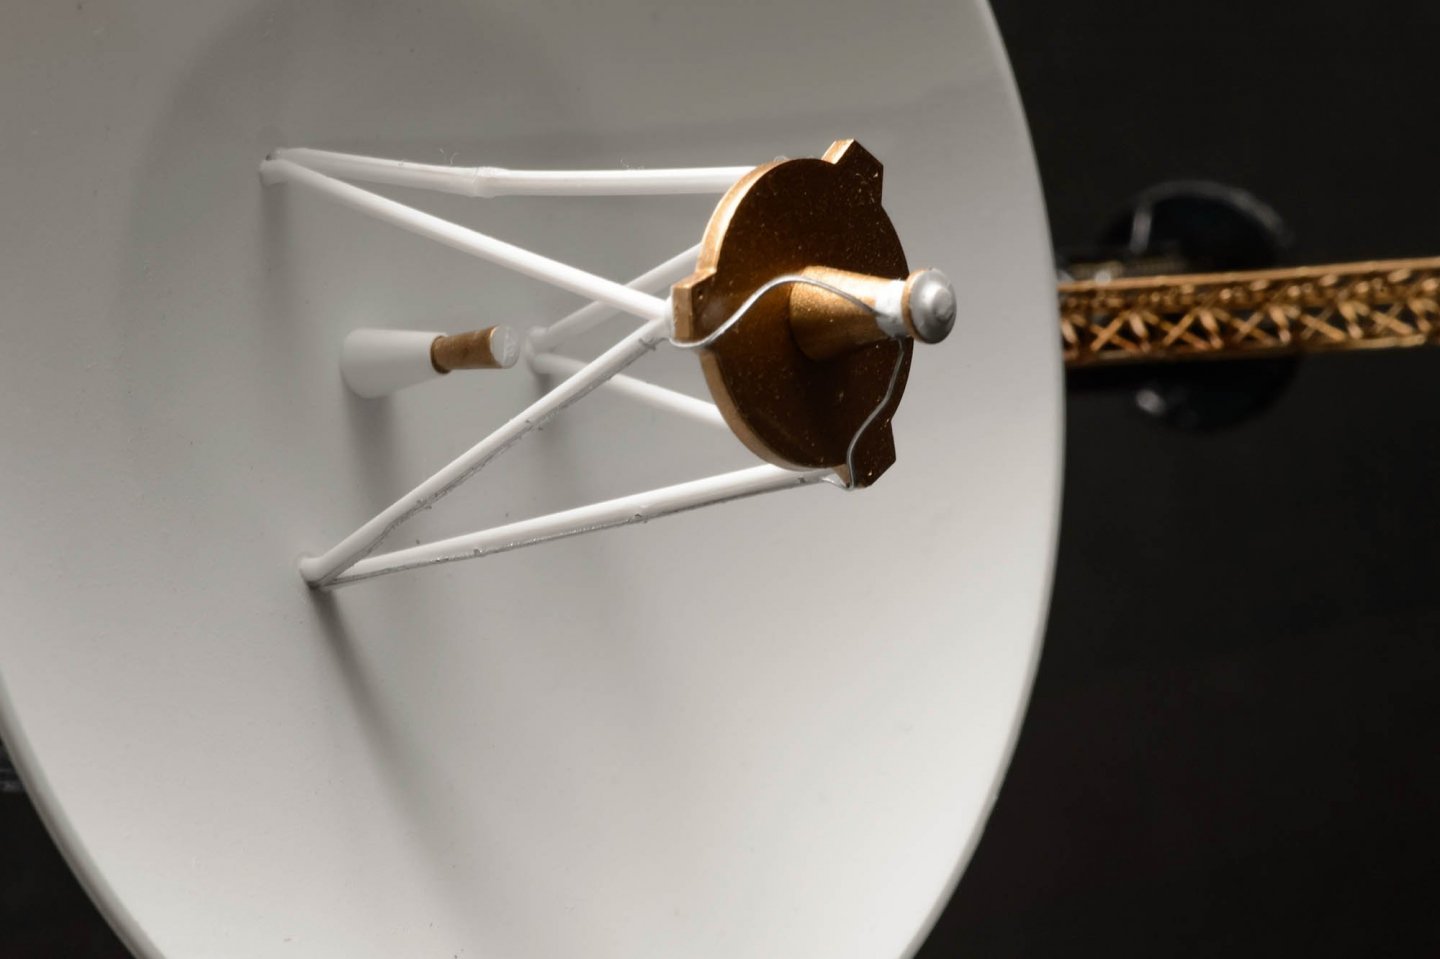
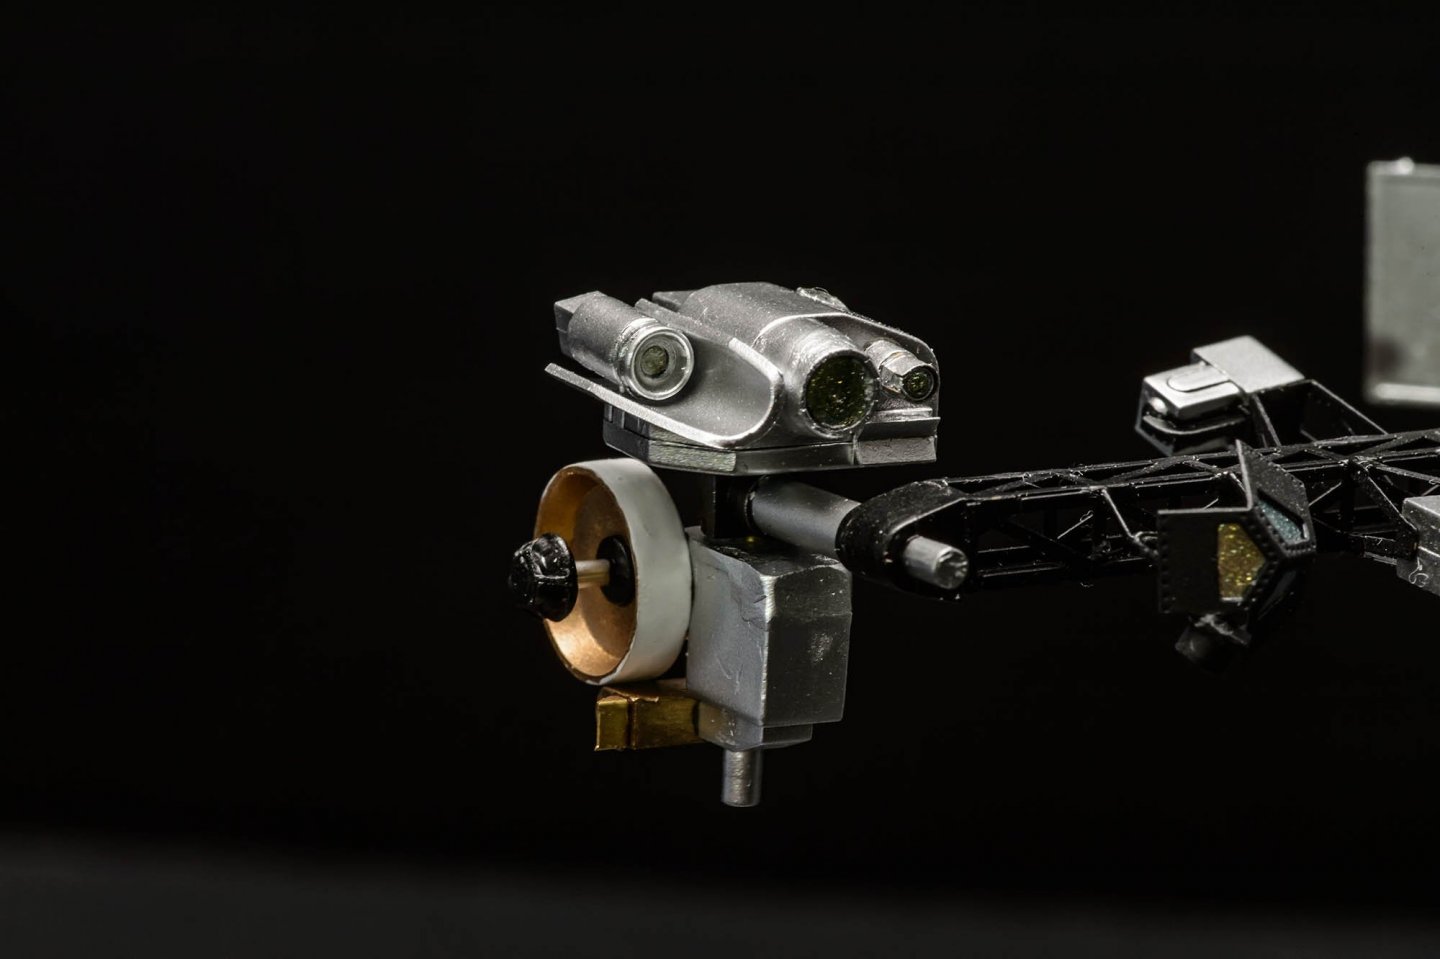
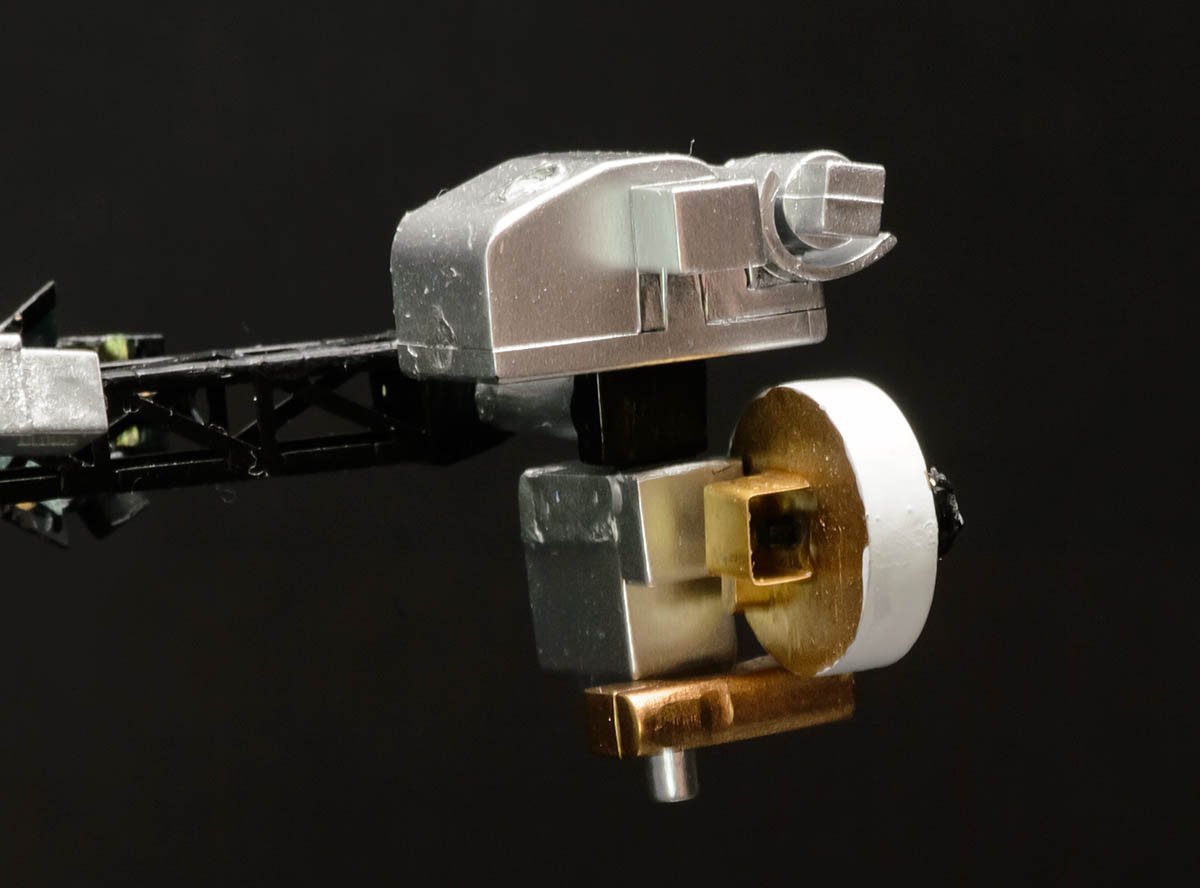
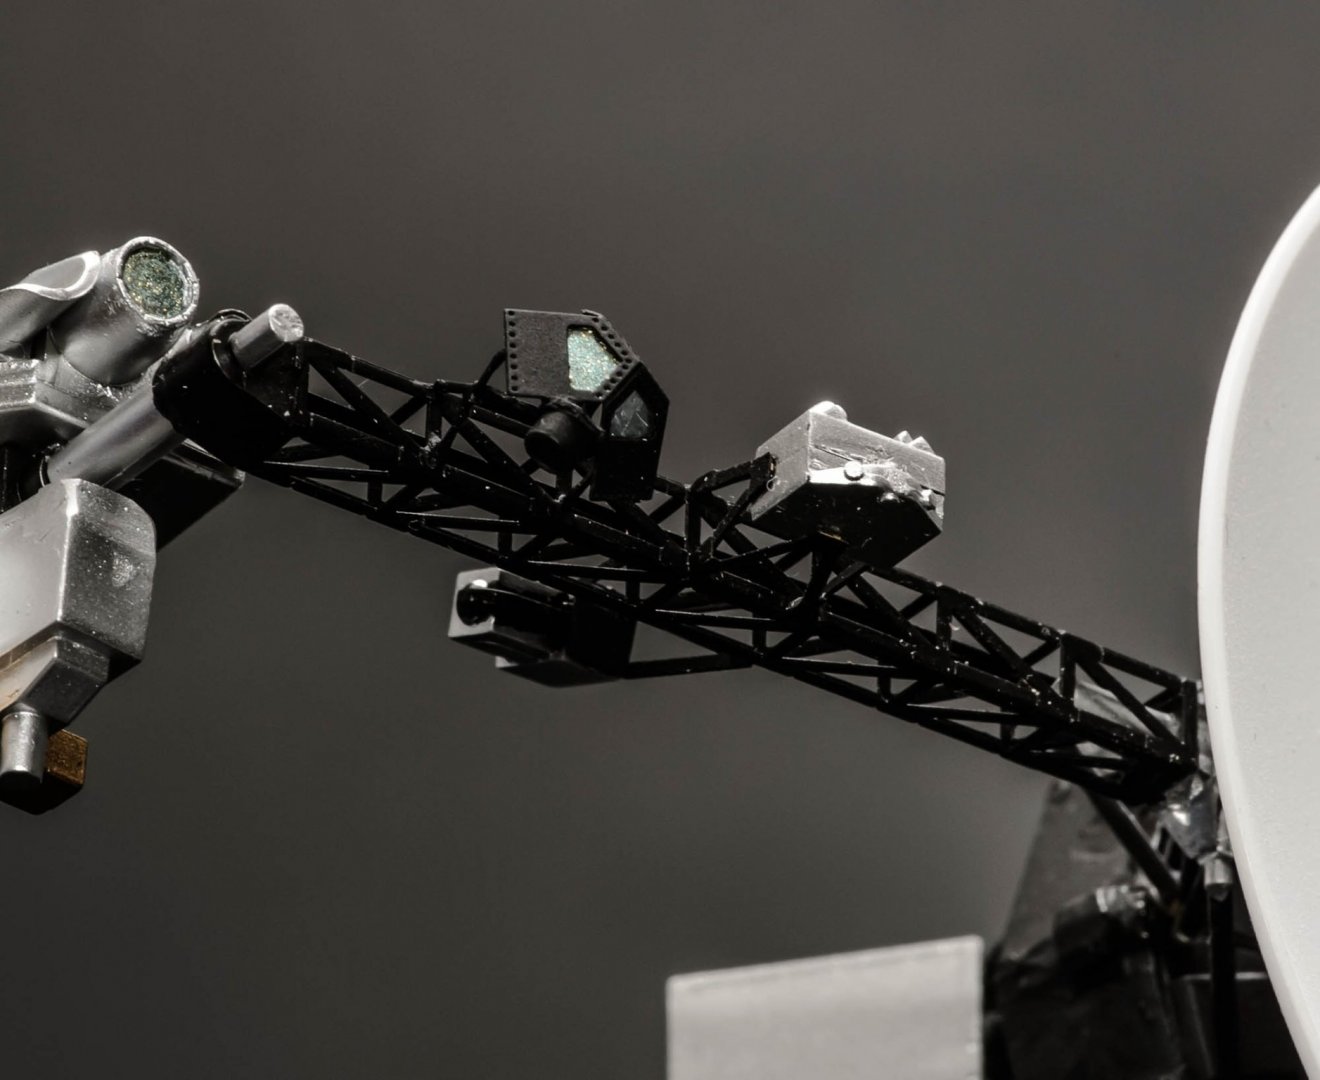
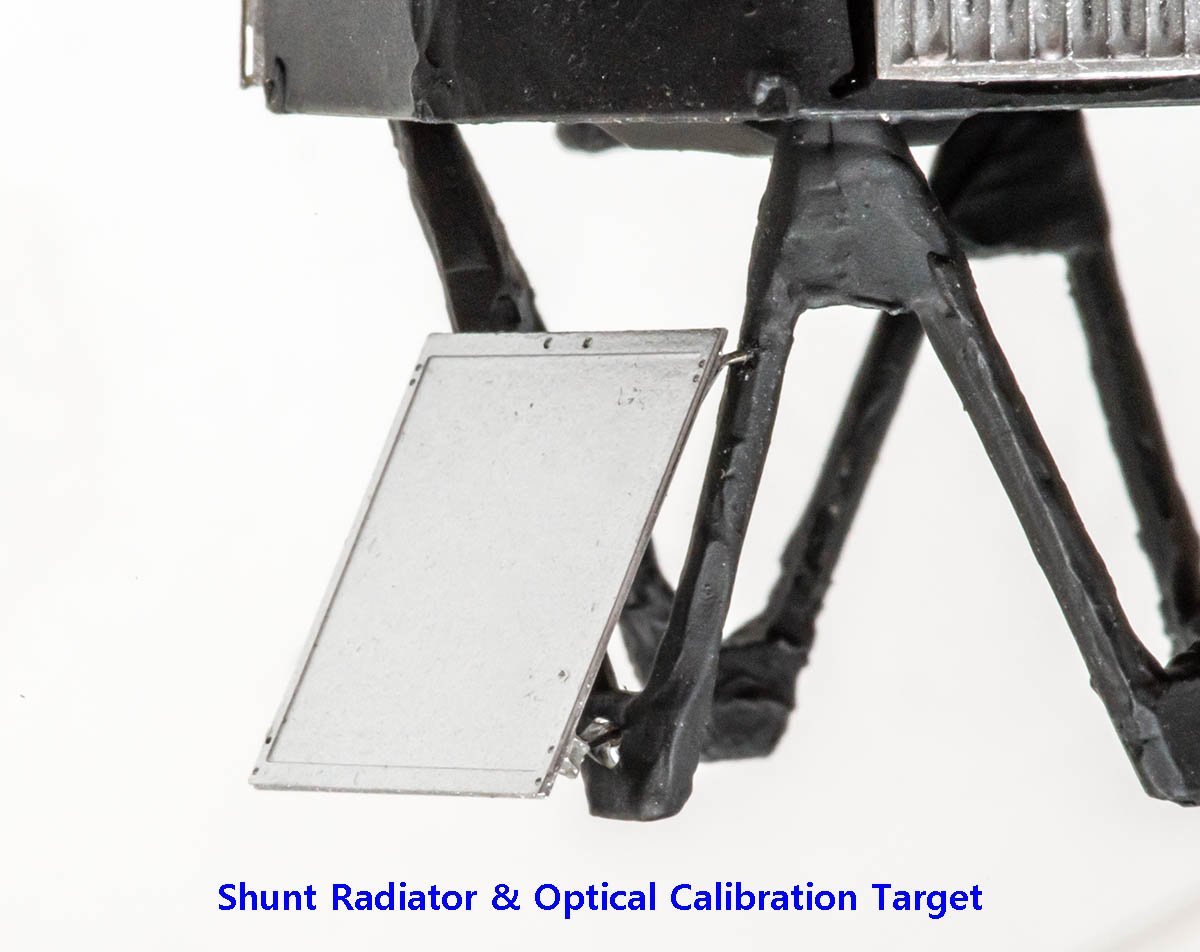
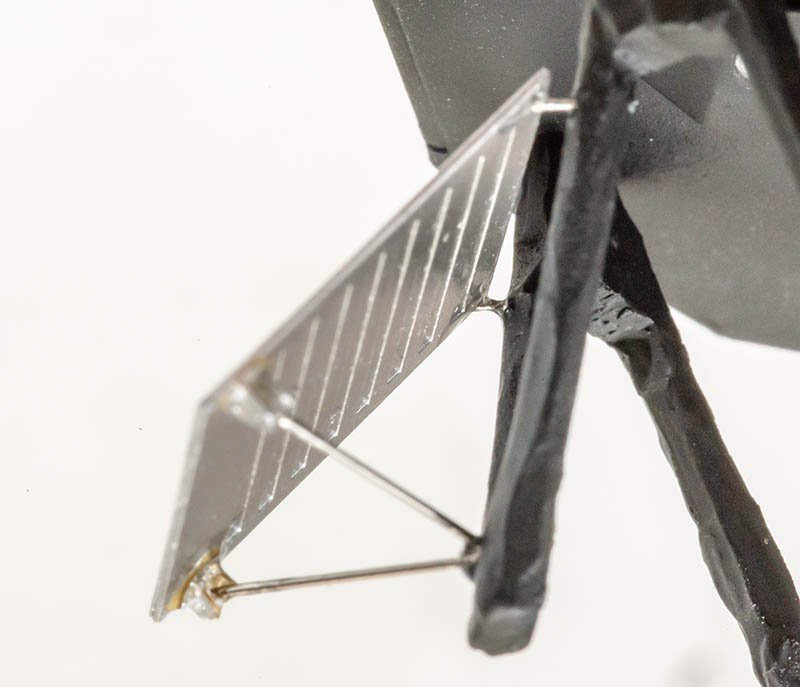
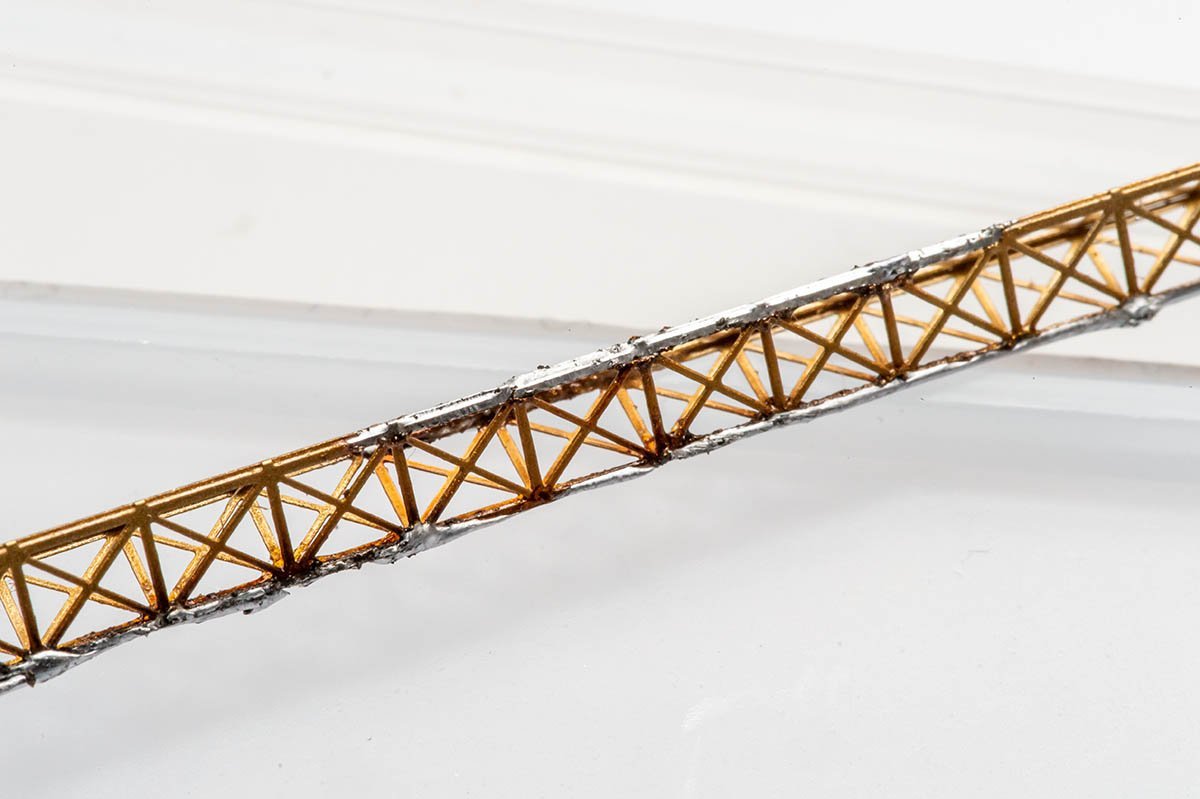
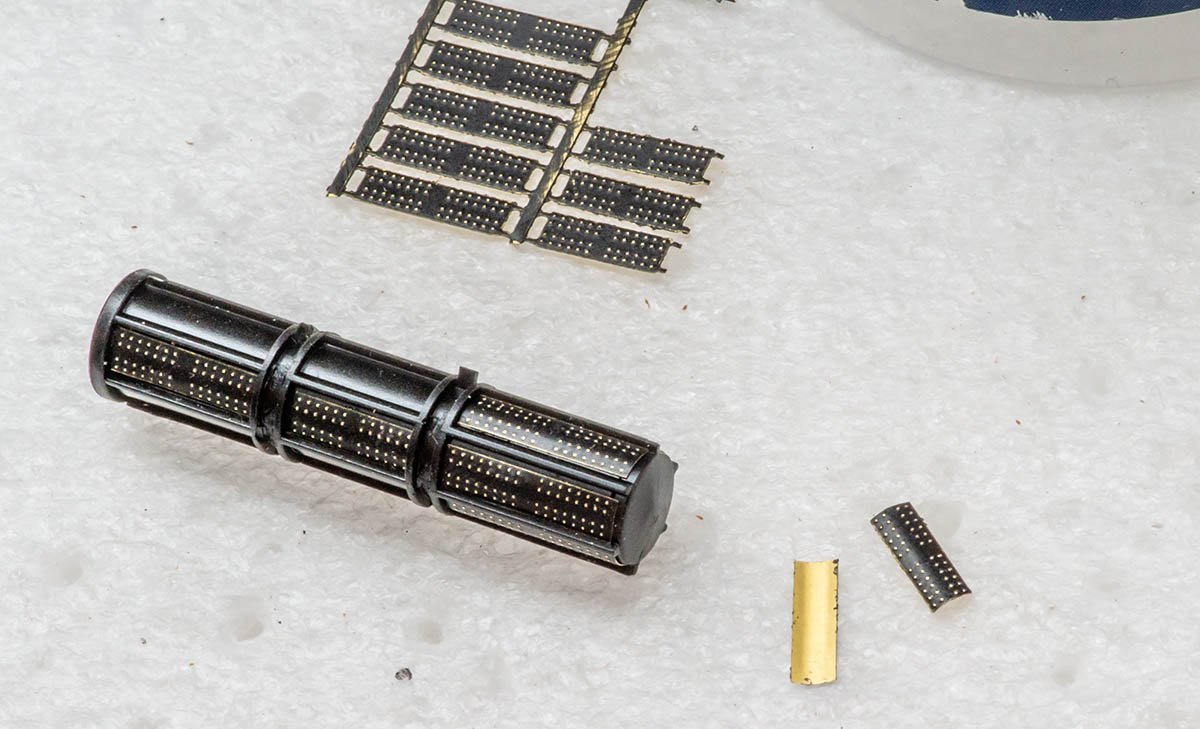
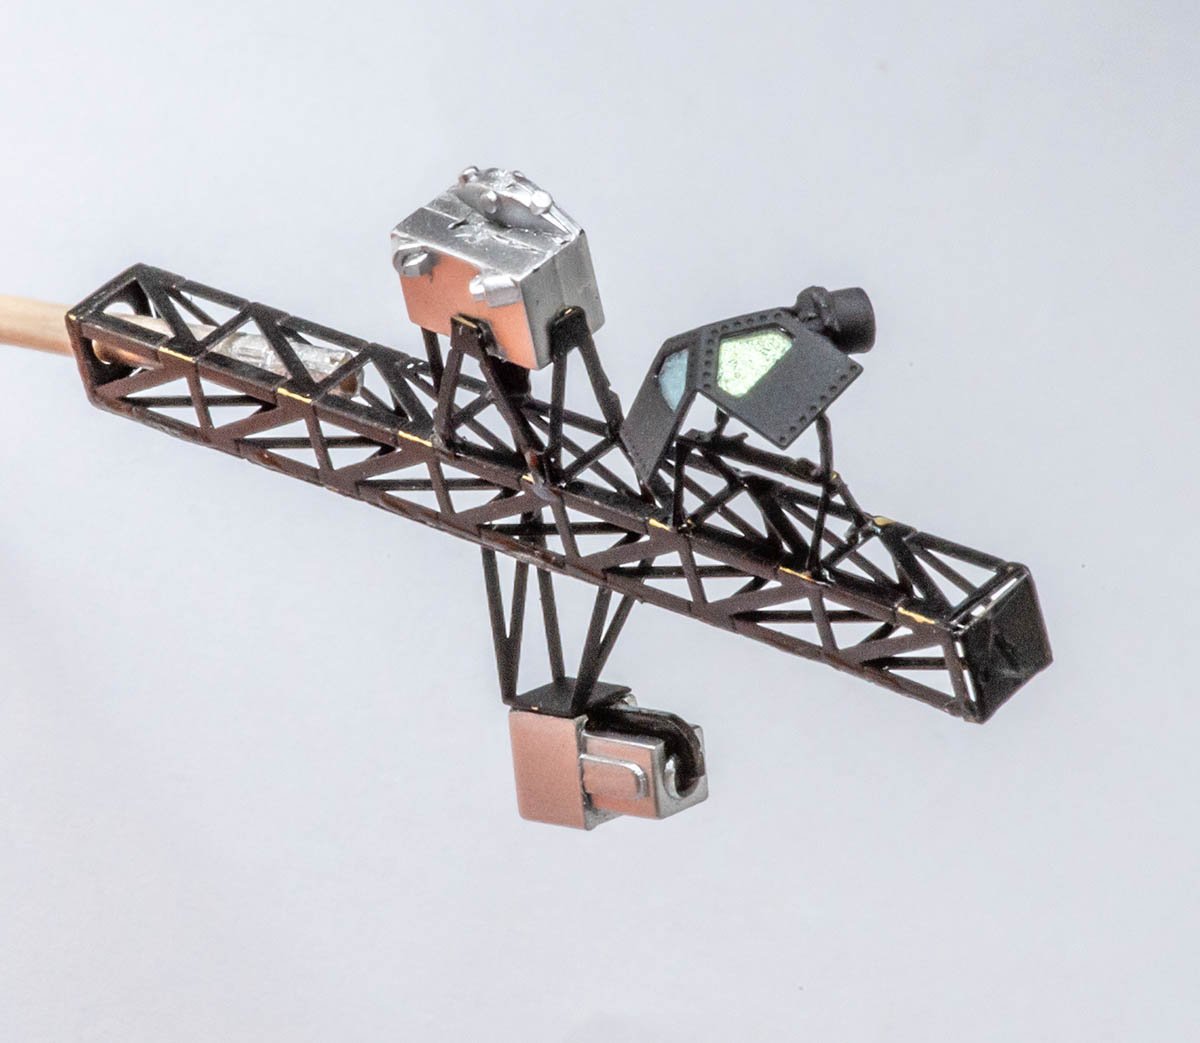
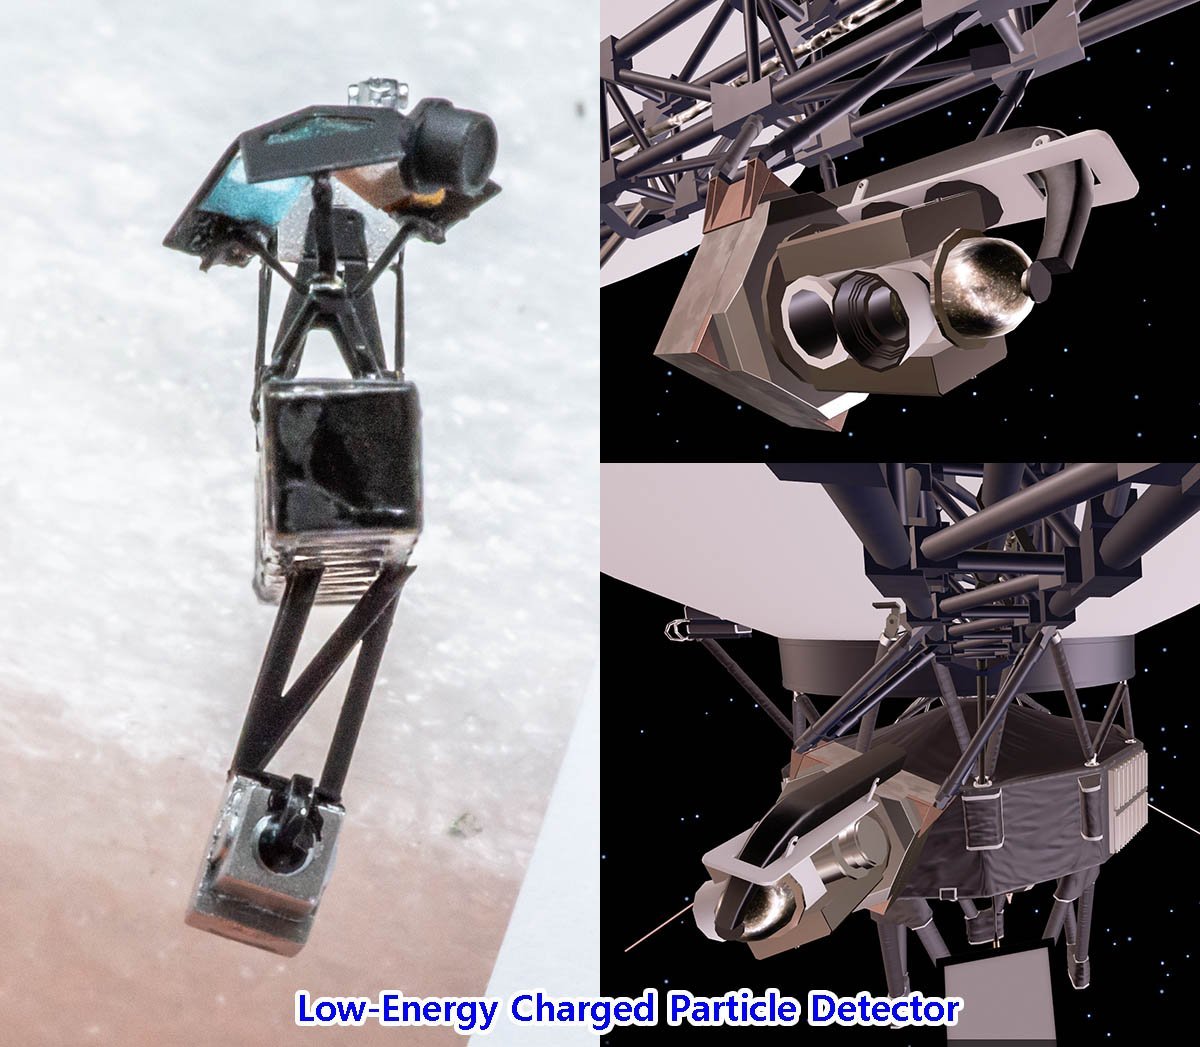
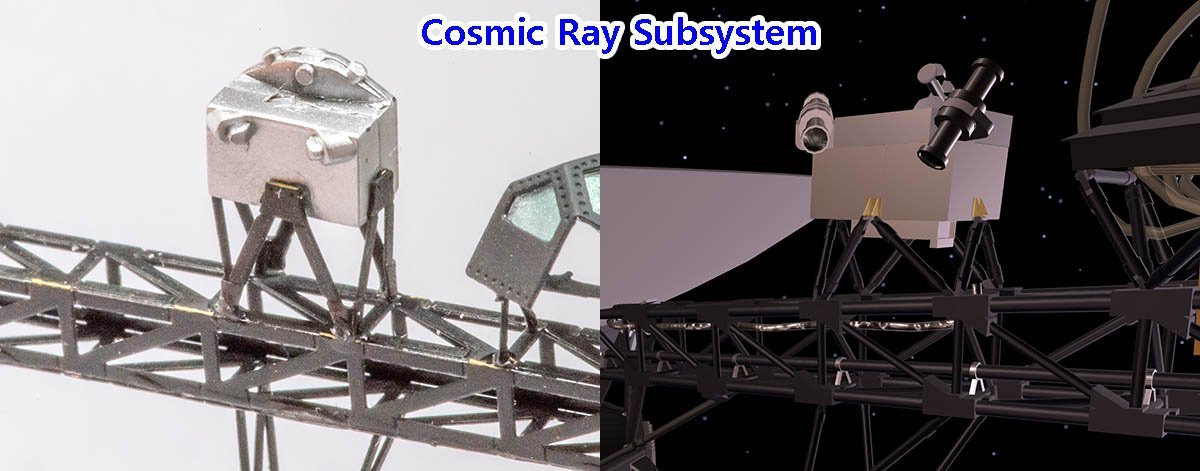
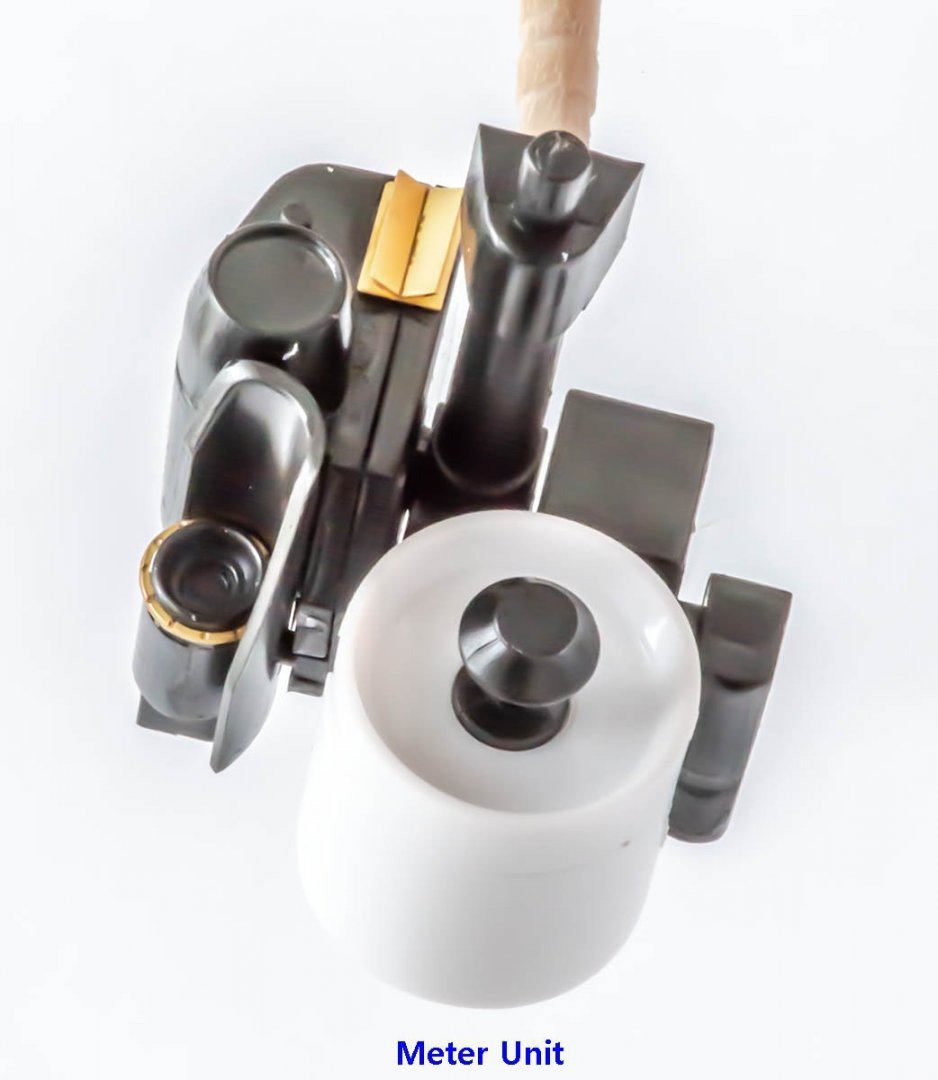
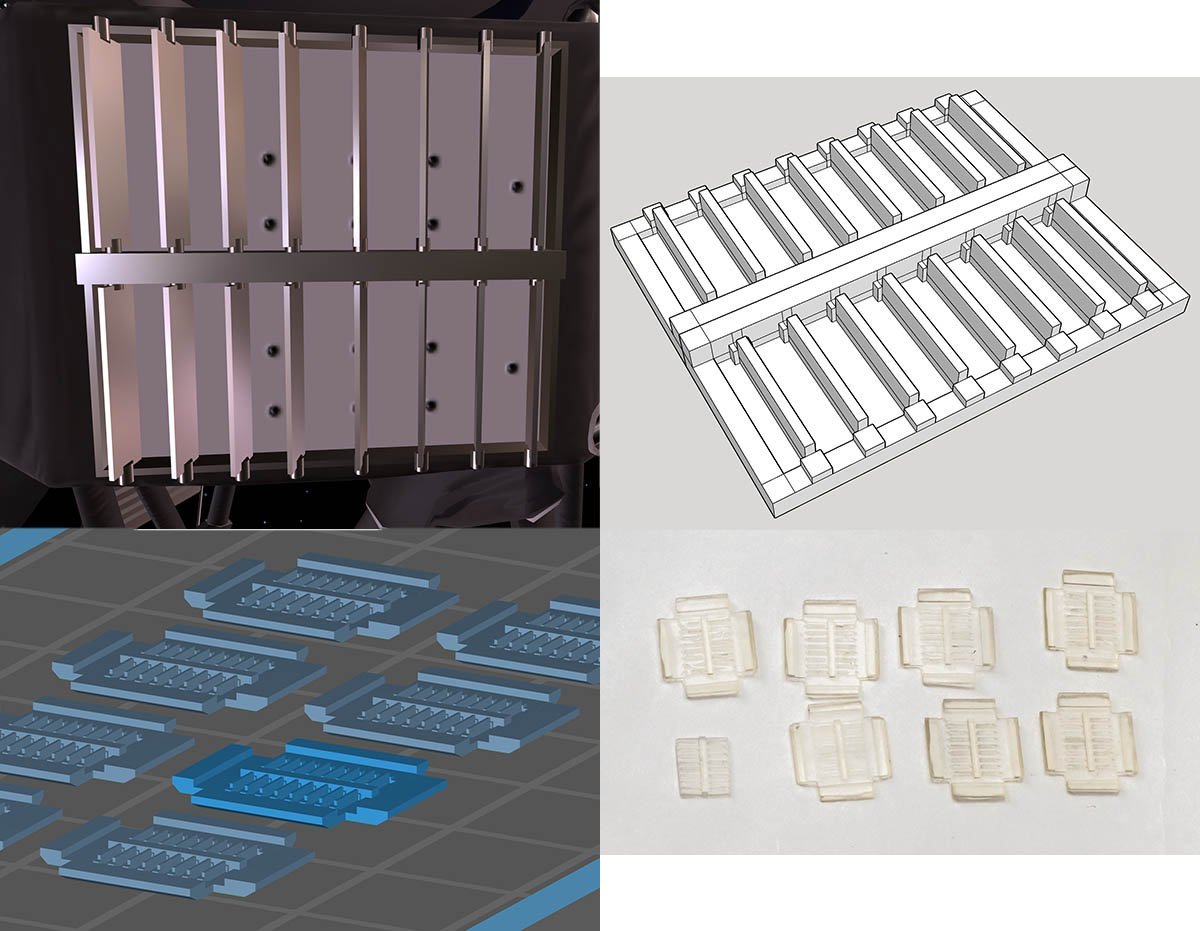
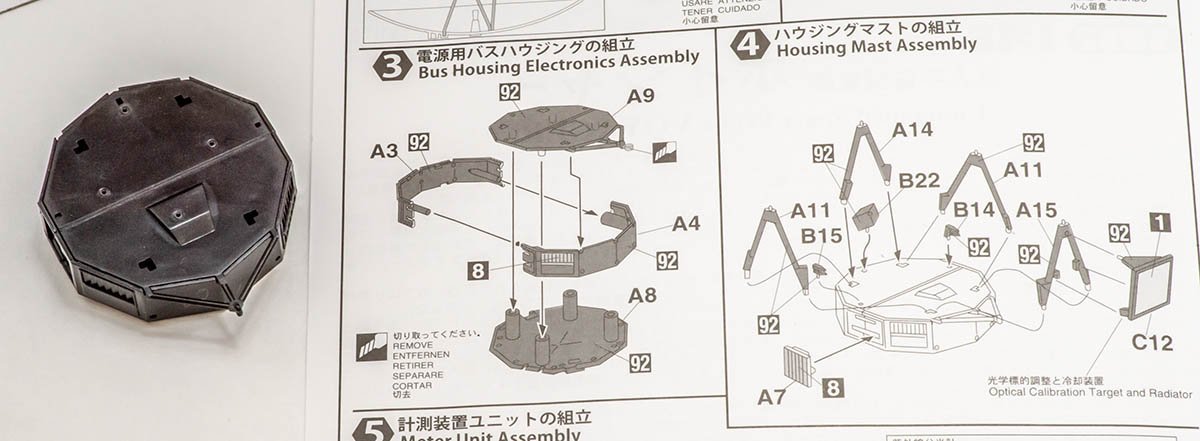
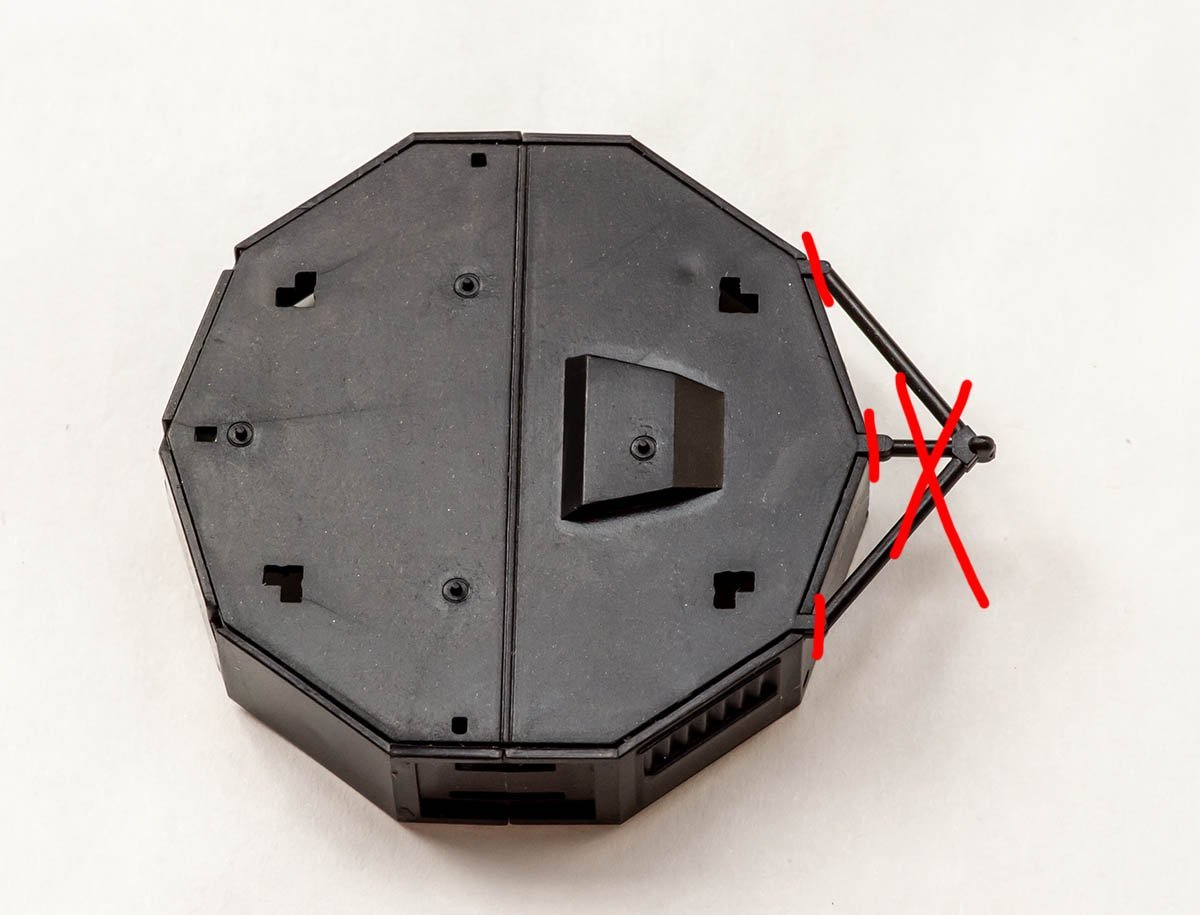
Before I began, I couldn't be sure that how strong the 26cm long magnetometer stick is. Therefore, I soldered them, especially joint point in the middle. When a truss structure was completed, it was surpringly strong! I even couldn't bend or twist. Yes... I couldn't twist it. I tried to twist it 120 degrees, but the truss structure was so good at spreading power, that it began to collapse rather than be twisted. My fault was work sequence. (1) Cut and fold PE parts (2) Soldering (Completing truss structure) (3) Connecting 2 PE parts (4) Twist 120 degrees - NOT WORKING Here is better process in my guess. (1) Cut and fold PE parts. (2) Twist each PE parts 60 degrees (3) Slightly hold it with CA glue (4) Connecting 2 PE parts (5) Soldering tightly In addition, I would recommend to reinforce joint in the middle. (e.g. overlapping one block) It is really weak point. I would say that Eduard had to make one solid PE stick part. This is a difference between stock golden disk and Eduard golden disk. This is a meter unit arm holder. As you see, this part is a bit hard to hold metal Eduard PE part. I strengthened it with brass rod. On the contrary, this part is really strong and funny. It looks tricky, but very durable and stable once completed. I already finished most of assembly and left only one part. I can finish everything tonight, but won't finish it today. I have an idea to decorate poor stock stand, so I'm waiting for a package. See you next week.


-
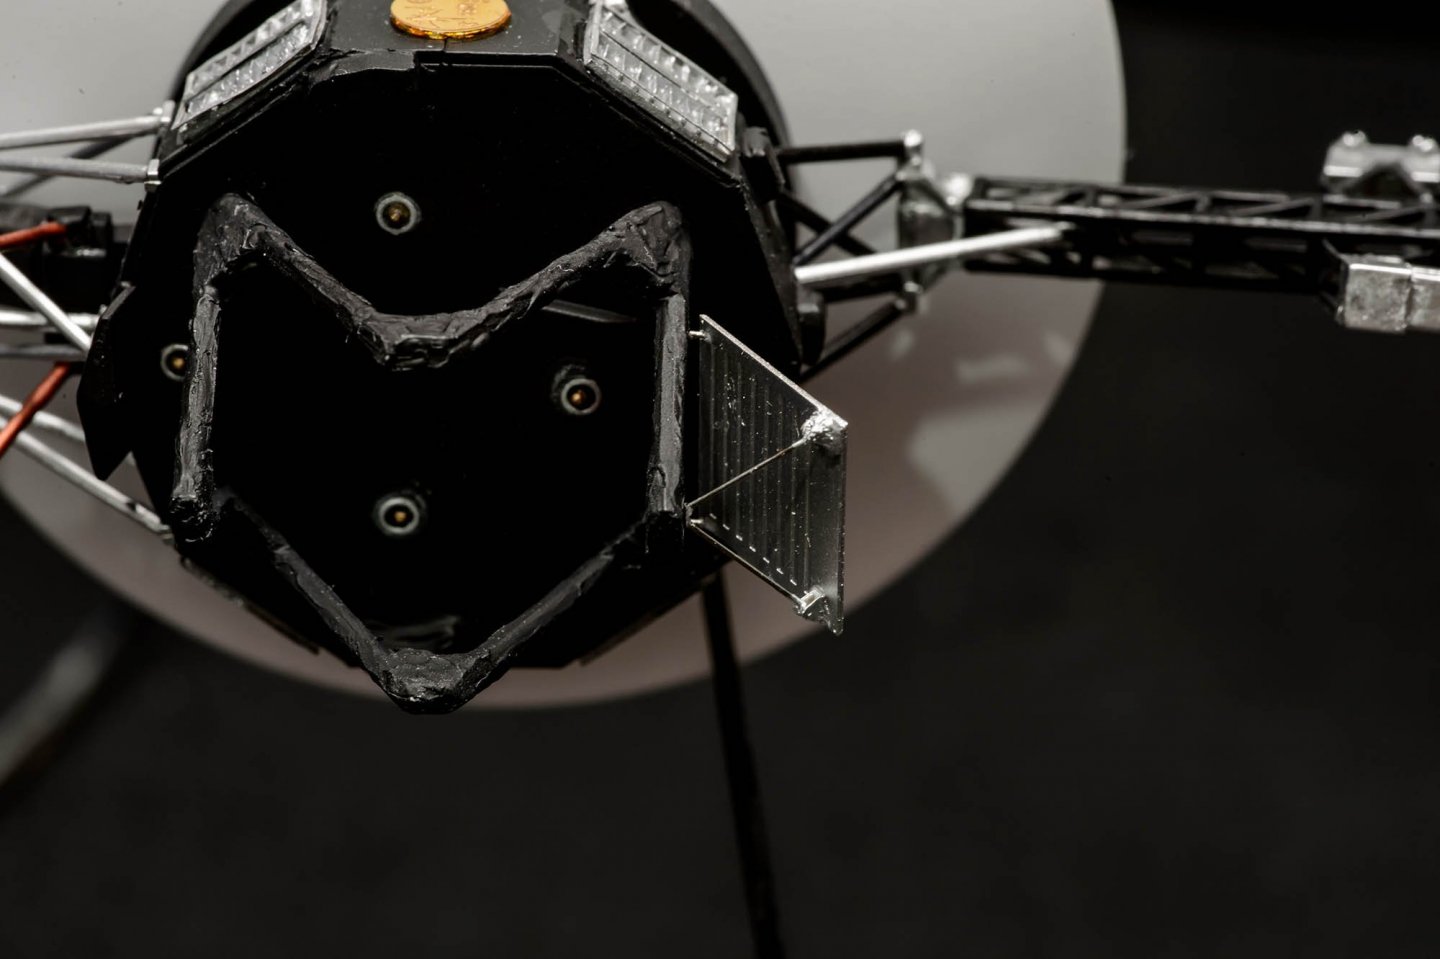
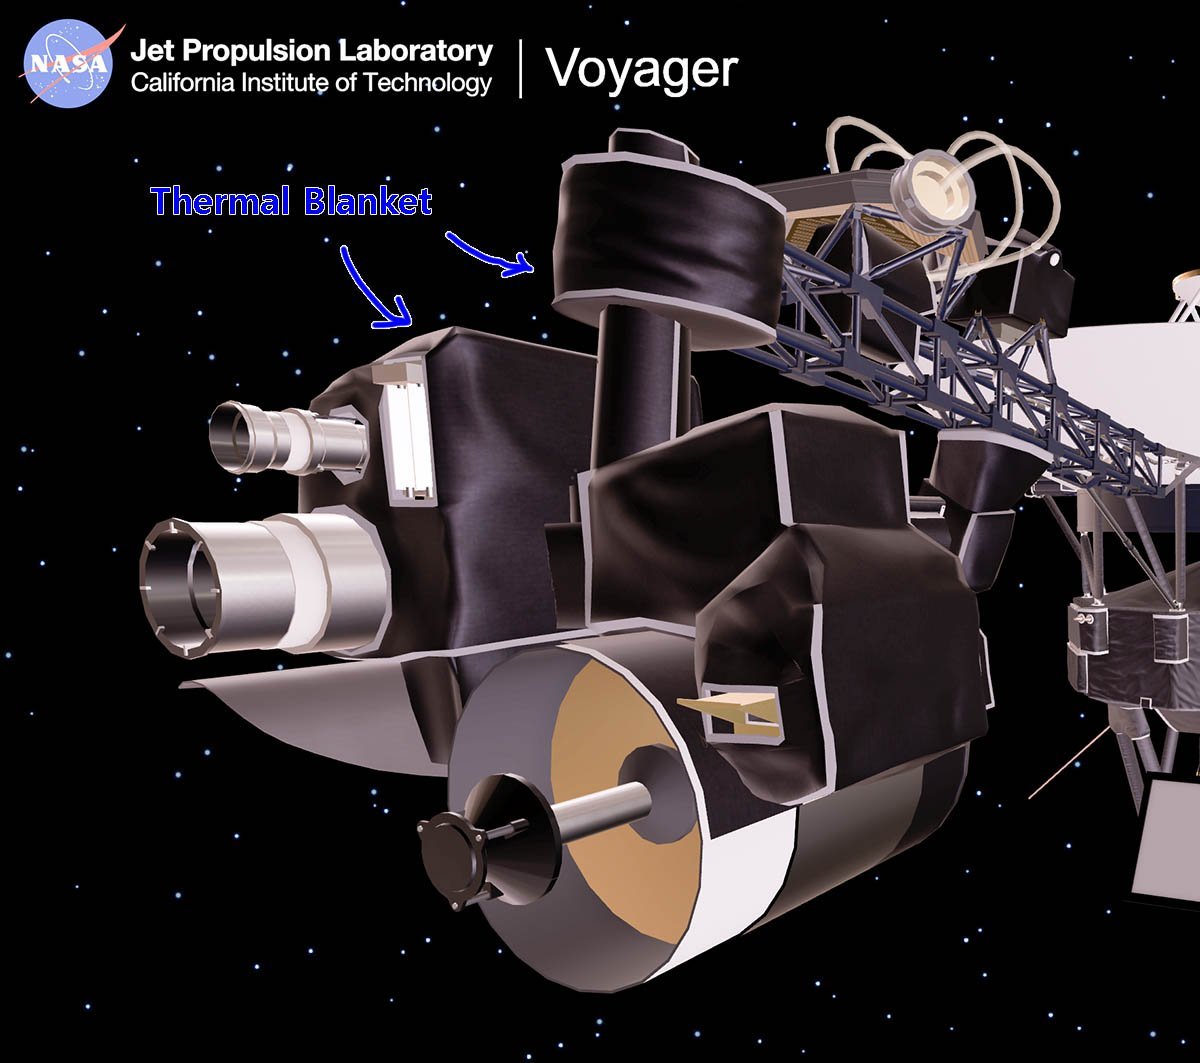
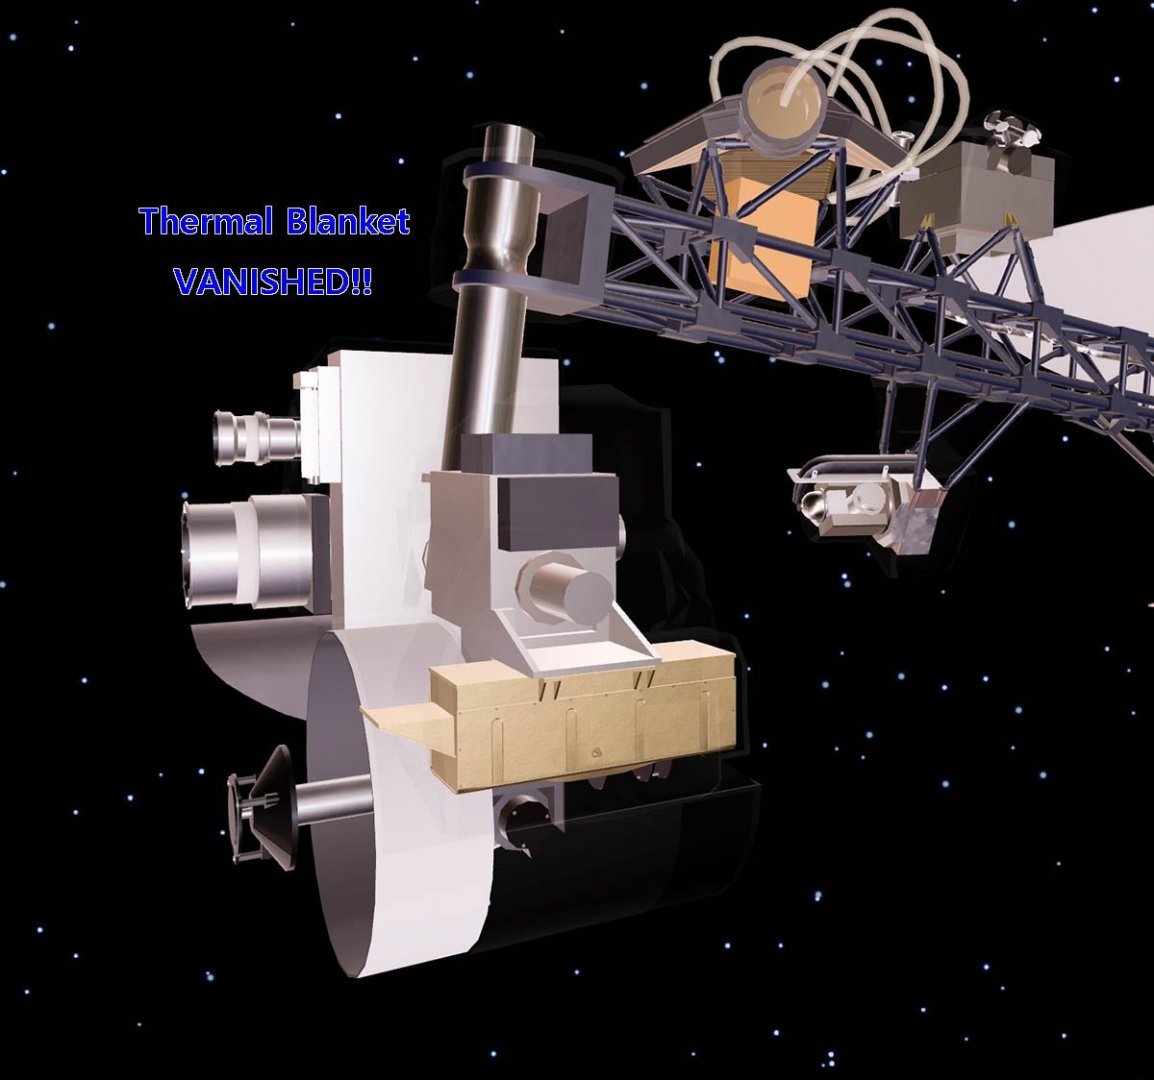
When I reboot my computer and reopened the NASA site... Thermal blanket was there! Wow! NASA updated new contents! However... When I close up to the units, the thermal blankets go away as I've seen so far...... I considered that partially applied thermal blanket is one of defect of 2018 NASA model. Nope. It was just function that the shy thermal blankets run away when I get closer. They return when I pull camera far away. Thus, I'm making half clothed-half naked voyager. 😂

-
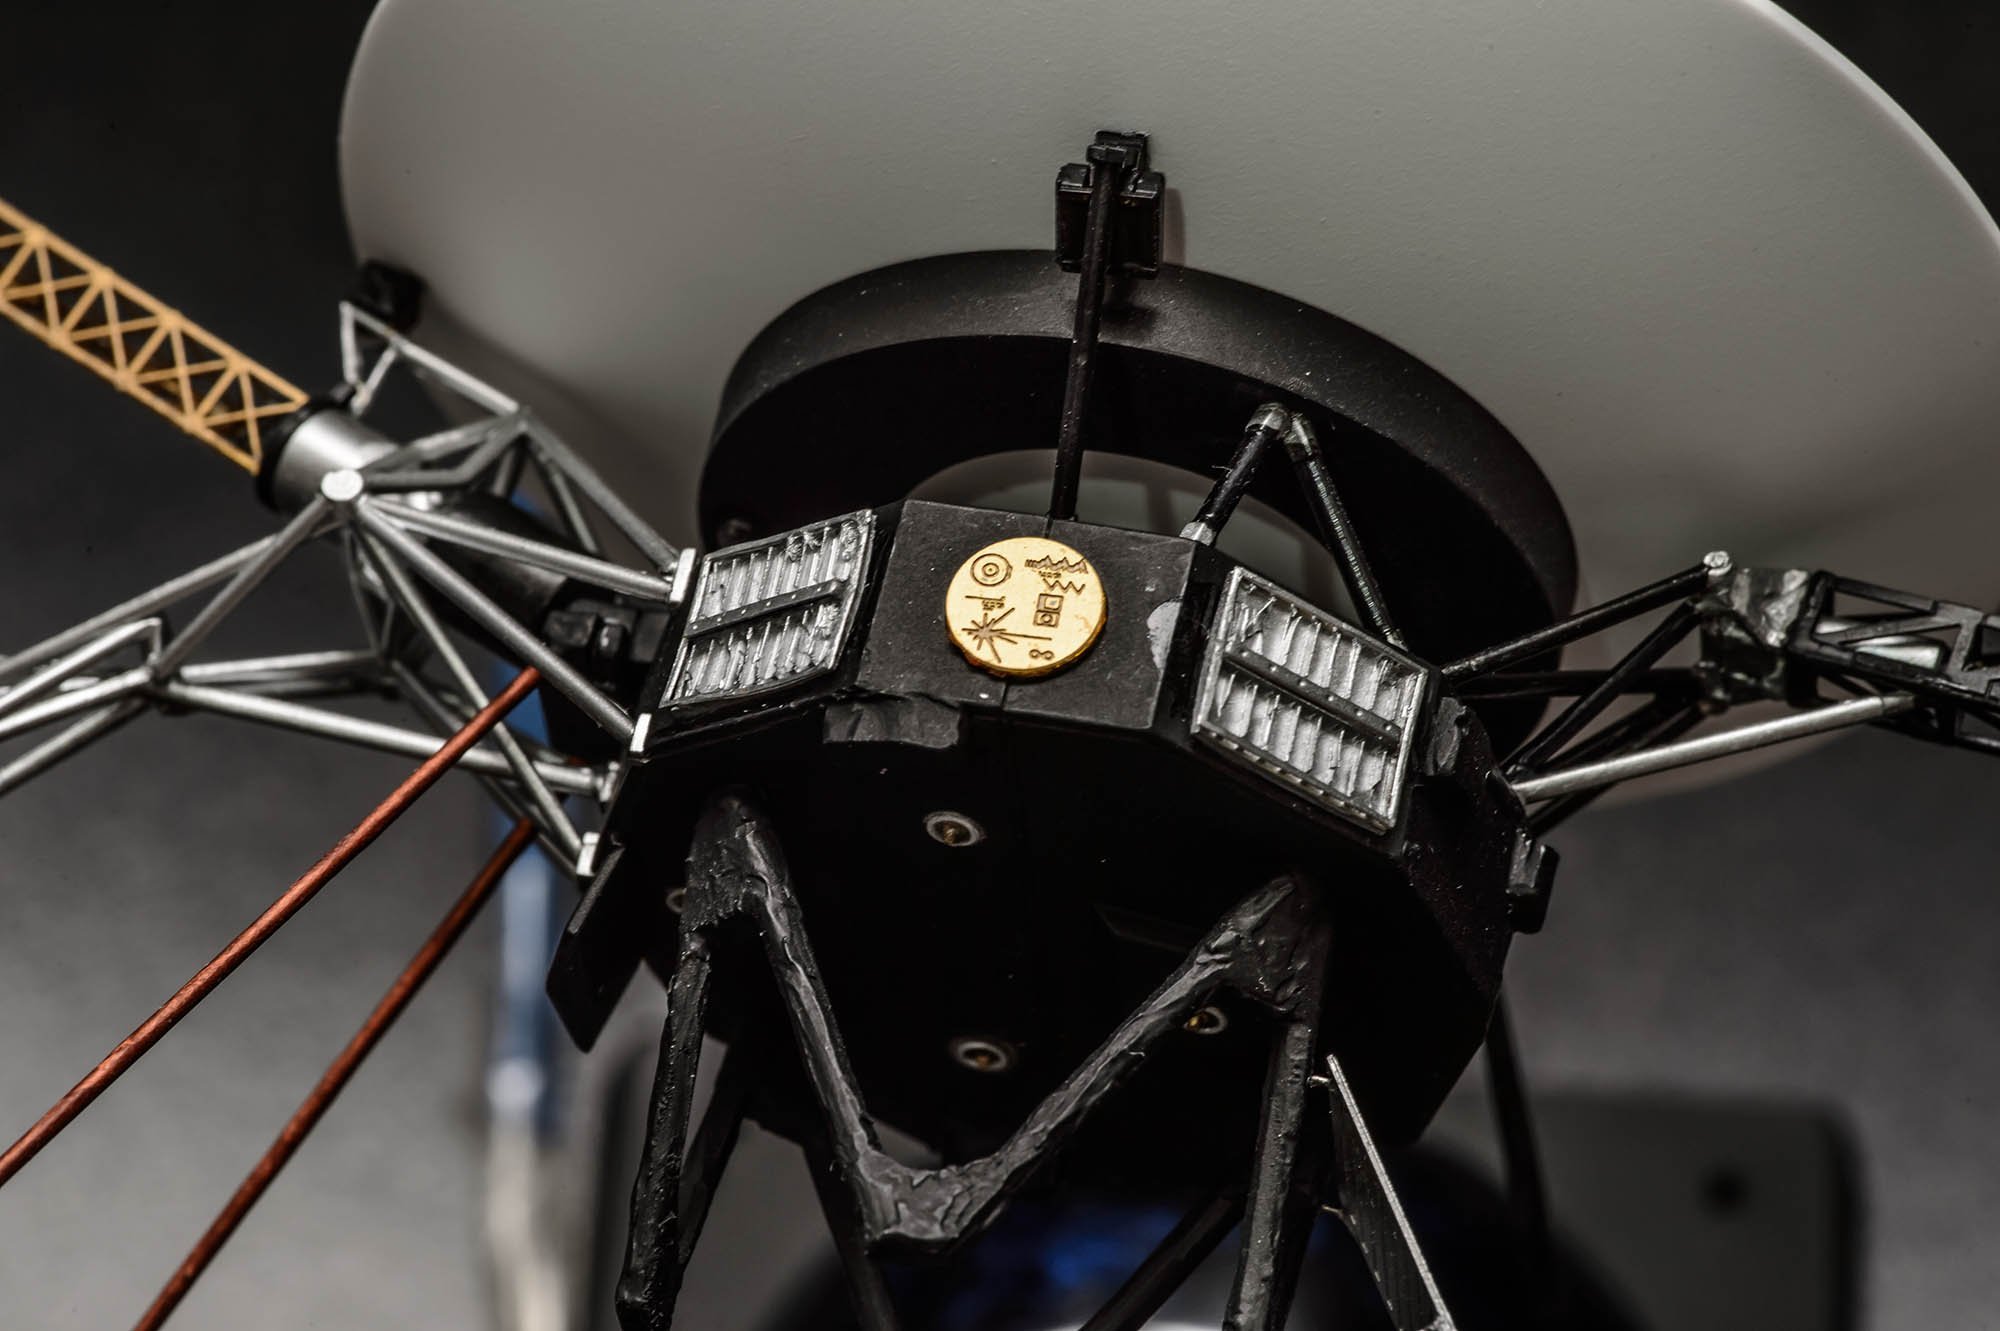
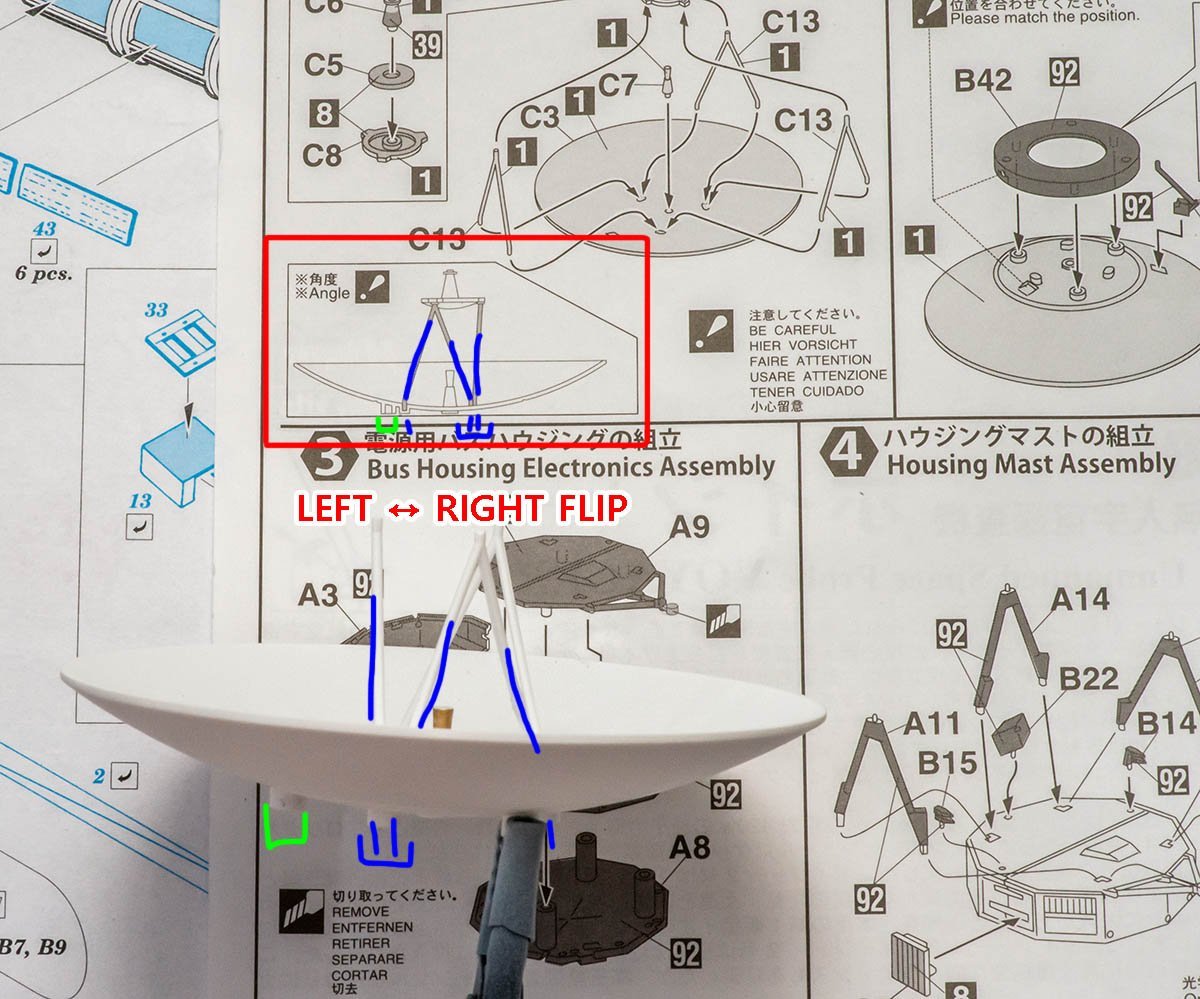
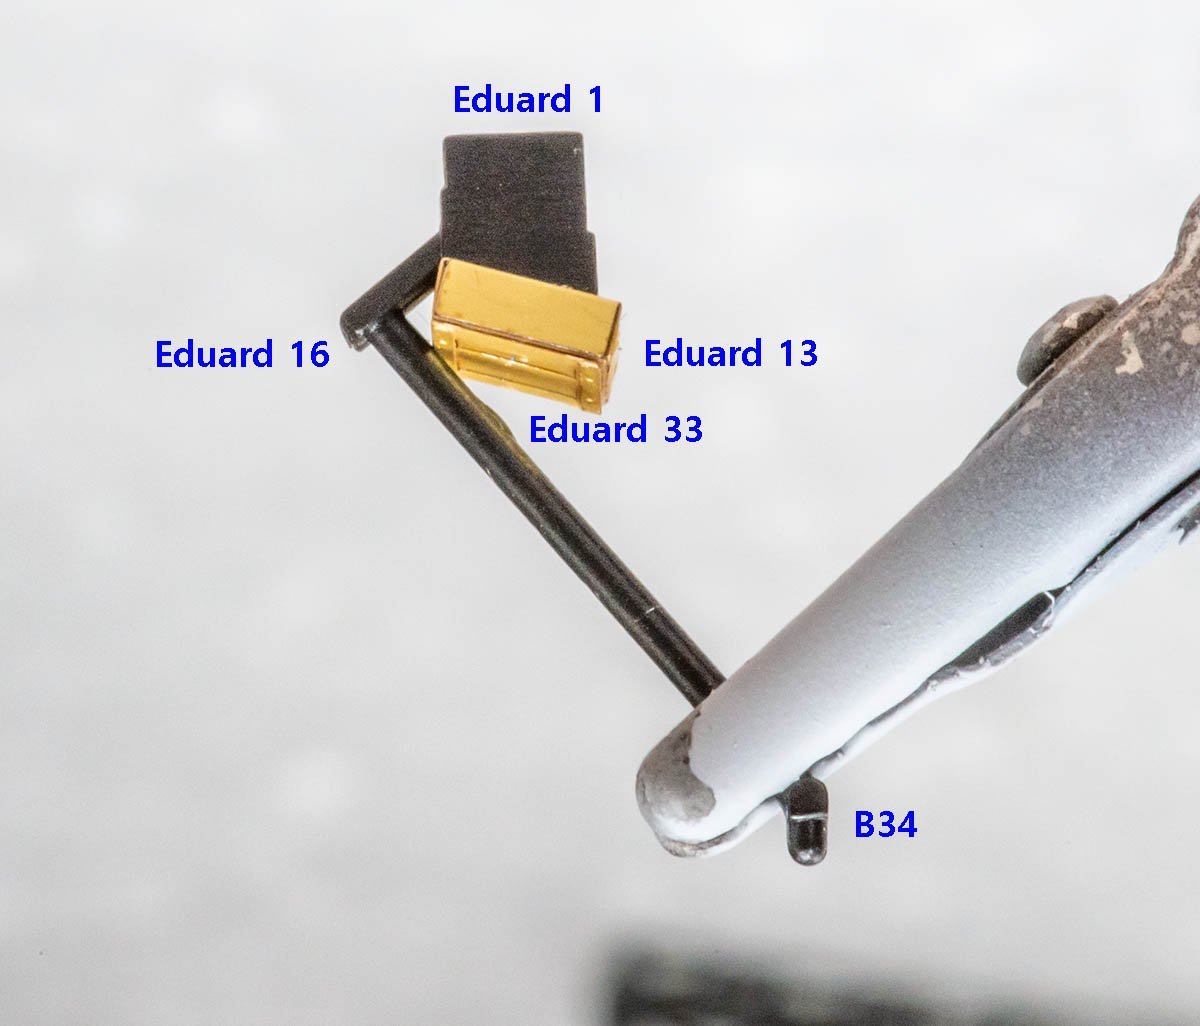
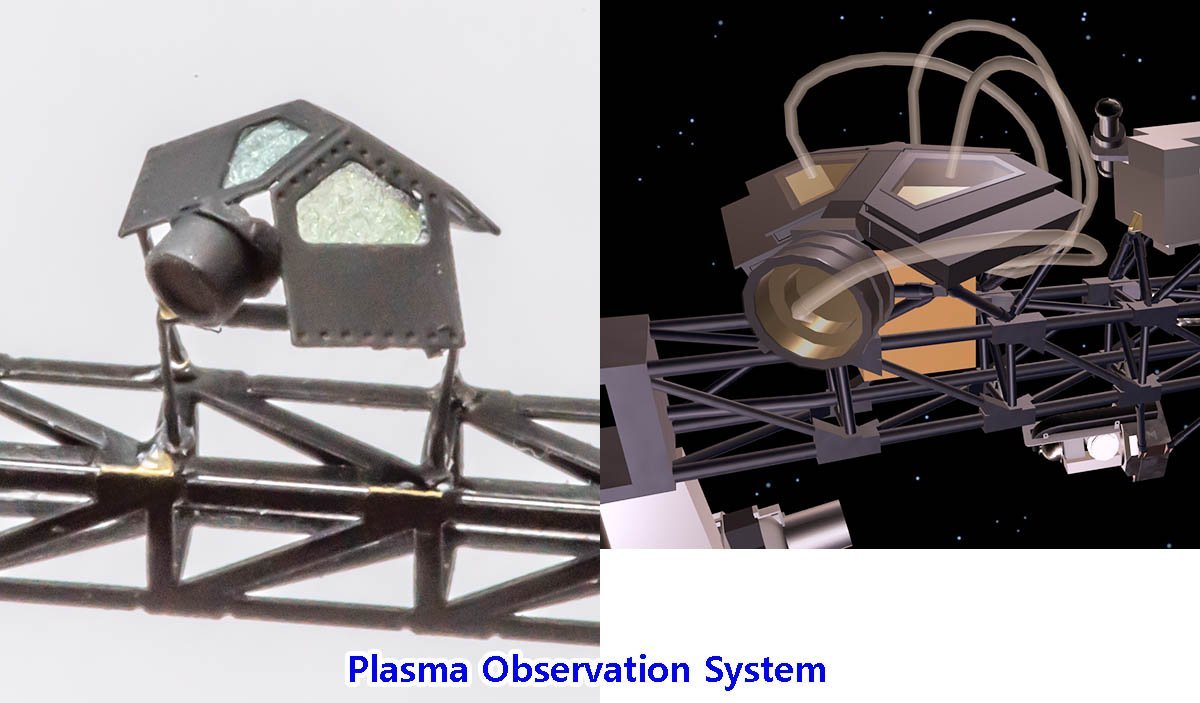
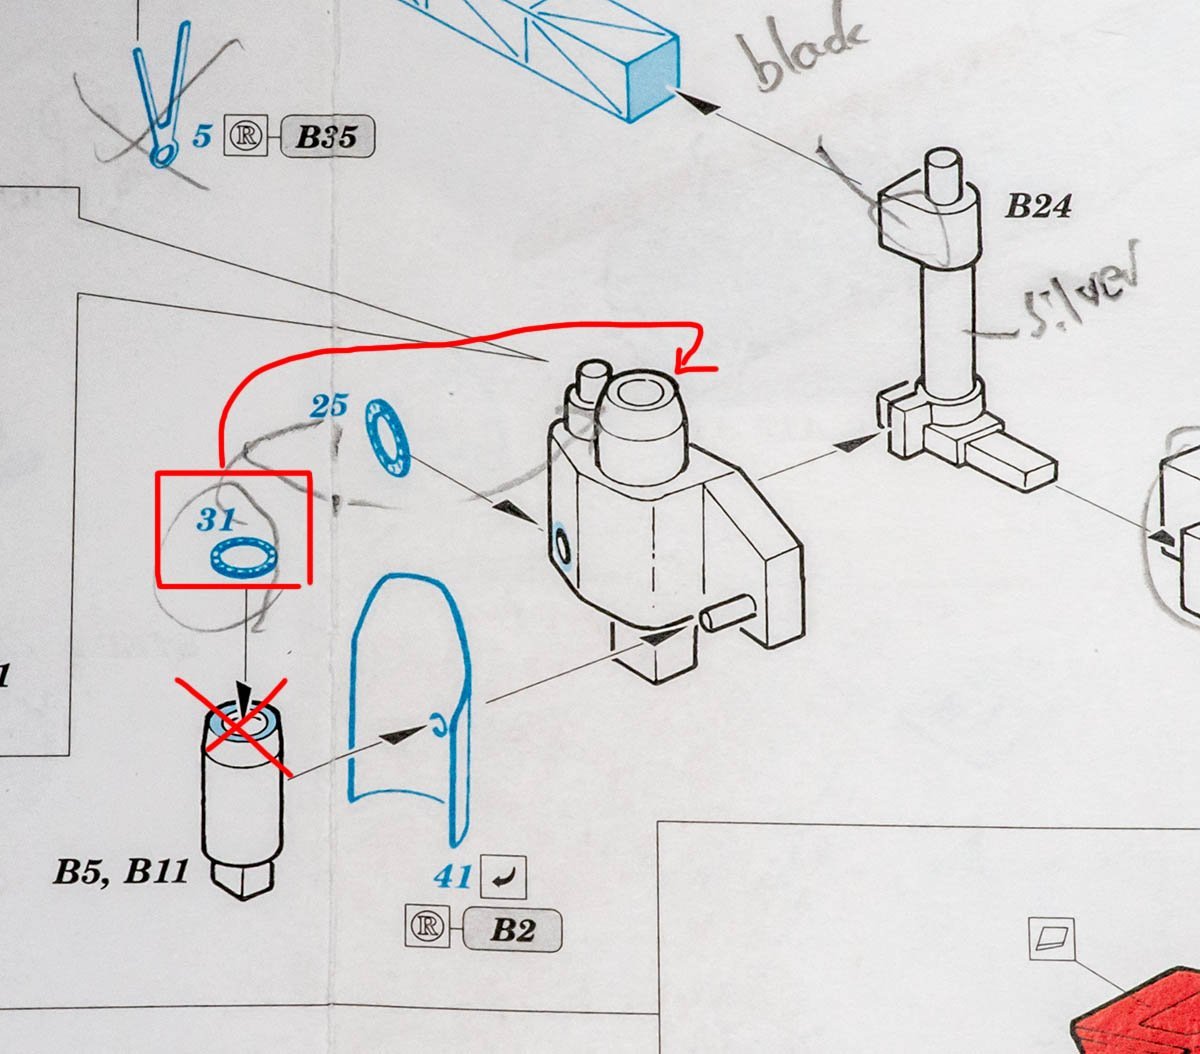
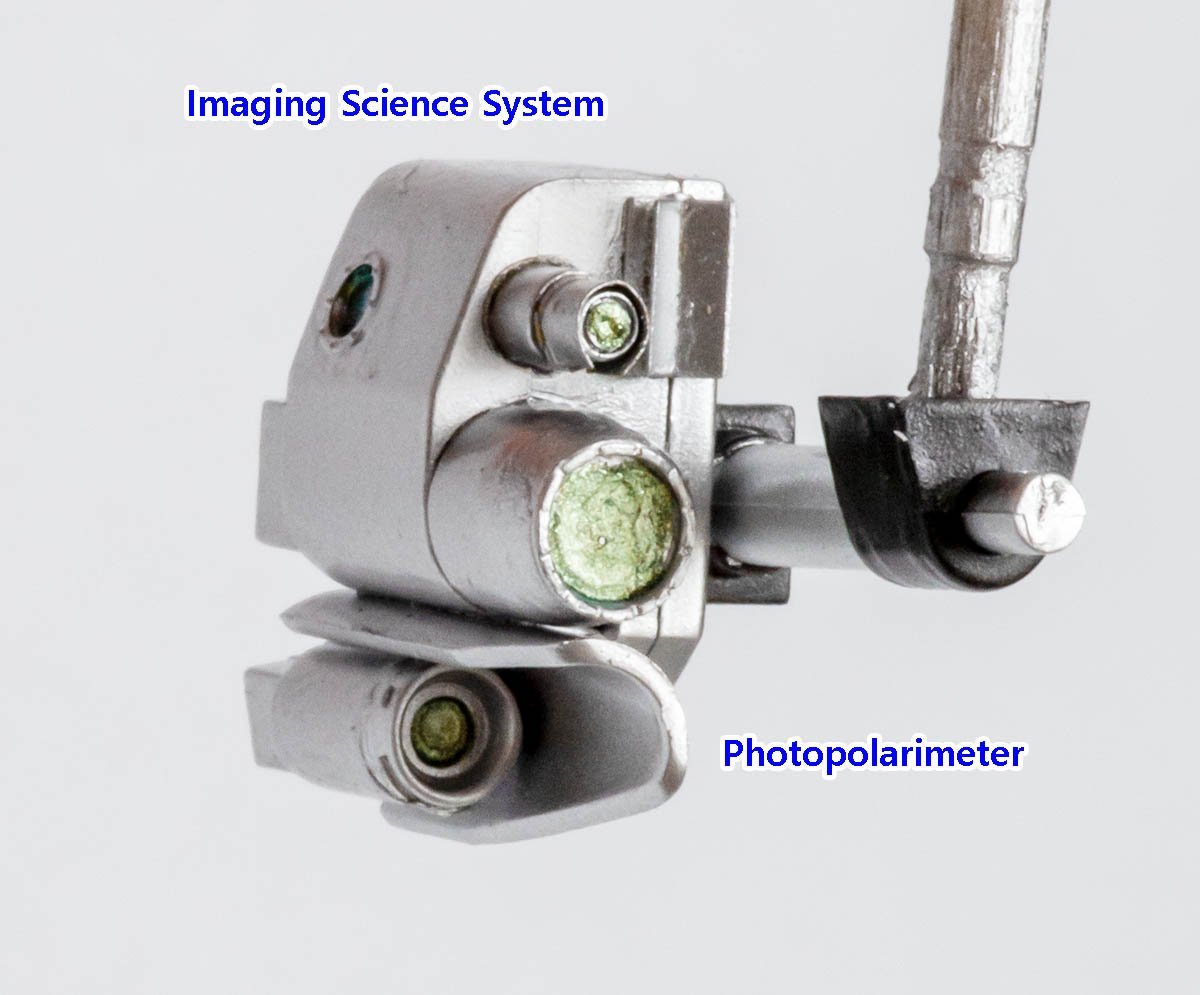
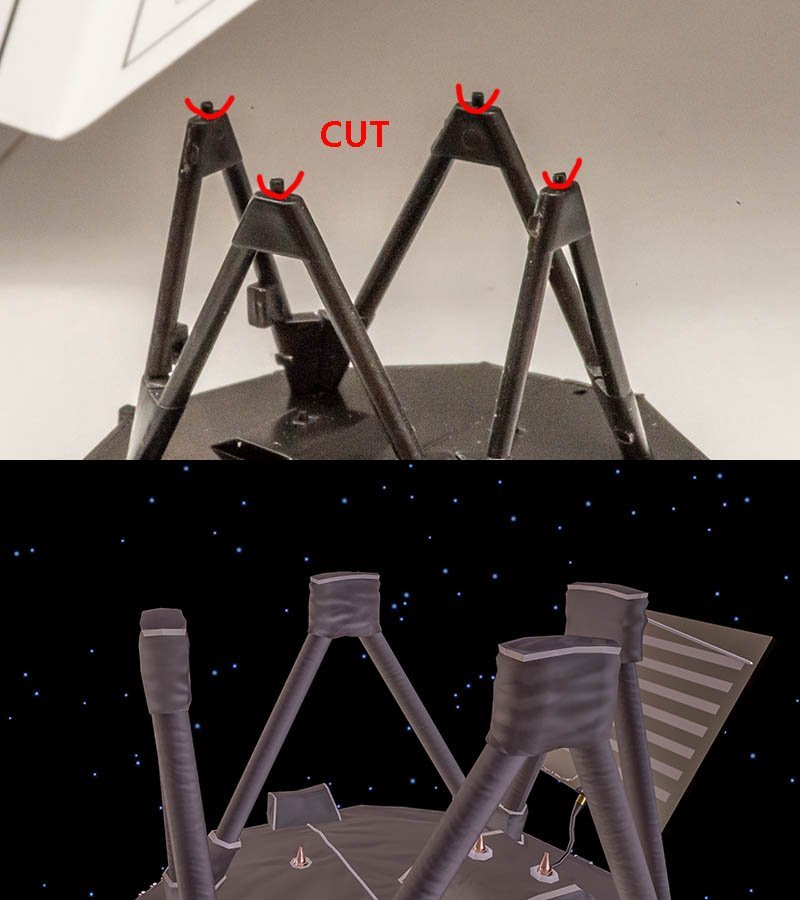
Here is a bug on Hasegawa manual. The dish legs are very weak. If the joints are tight, enlarge a hole with a drill or cut the tip of the legs. For people confused by the Eduard manual... Flat-Earth-Theory 😆 One of the easiest and funniest part. I cut supports among plutonium batteries. I used a default cap (A19) and Eduard 9 part. It is too tiny and difficult to bend circularly. The Meter Unit Mast is fairly twisted. I paid many time to correct them. A skewed angle is Interesting. I want to add lenses. Looks like microscope. How do they collect data and send bytes to Earth? What are those hoses? I can't see them at Voyager replicas. NASA must be hiding alien crews... This is complete mess of fact. Just mechanically impossible. Hasegawa invented this unit and this part doesn't match with 2012 NASA 3D model. I cut every parts and reconstructing each units. Here is another bug on Eduard manual. Eduard 31 parts should go there. Two units fixed. The other two units are under construction.


-
I'm sorry. I interpreted data in wrong way. I can't judge that both Smithsonian Voyager and JPL Voyager are different before I go to there and check with my eyes. The Hasegawa kit based on 2012 NASA 3D modeling data has many issues; mechanically impossible and lack of details. The NASA's interactive 3D modeling data since 2018 has relatively fewer issues that Hasegawa kit didn't have. Neither Hasegawa kit nor 2018 NASA site are 100% correct. Egilman is correct... NASA's accomplishments are amazing, but their publications are vulnerable. 🤪 I won't improve current work because I can't sure everything before I check with my eyes, so I stick to 2018 NASA site.
-
Bad news is that every chapter on Hasegawa kit and JPL Voyager is different, and good news is that I found source that Hasegawa got the modeling data. There is two Voyager replicas on earth. One is in the JPL building in CA, and an another is in the Smithsonian National Air and Space Museum in Washington D.C. https://www.wired.com/?p=1602985&preview_id=1602985 The JPL Voyager is workable machine and not opened to public. https://voyager.jpl.nasa.gov/mission/spacecraft/interactive.php And it looks exact model of my reference 3D model site. https://airandspace.si.edu/collection-objects/voyager-spacecraft-mock-full-scale/nasm_A19772728000 The Smithsonian Voyager is exact model of the Hasegawa kit with Eduard PE kit. Therefore, neither cold war conspiracy nor modelling perfectionism exist. 😉 Hasegawa selected the Smithsonian Voyager in 2013, and it was the best available source. In 2021, JPL Voyager is the most accurate and realistic source because NASA published the 3D model site, and I'm trying to modify the Hasegawa's Smothsonian Voyager to JPL Voyager. Difference? Huge. Too many differences between Museum's Voyager and NASA's Voyager. I'll display them when available. I'm working on it, and taking pictures as much as possible. PS : I checked 4 Voyager models NASA is distributing. https://nasa3d.arc.nasa.gov/models#V 2009 ver : elementary level 3D modeling. student level. 2012 ver : Smithsonian Voyager. Fairly accurate. Medium resolution. Source of the Hasegawa kit. 2014 ver : middle school level 3D modeling. student level. 2017 ver : JPL Voyager. Ready for 3D printing. Very low resolution. Highly deteriorated. Aha...
-
Egilman, I'm OK and I'm appreciated to find deeper sky that I didn't know through you. I was just trying to be a big fish in a little pond, and felt shame at my misjudgement that I could fix every error on this kit. It has happened occationally: out of my ability led longer build time and downwarded motivation. I need to know myself and control it for more constructive hobby life instead of digging into a hole. I thank you for reminding me my break pedal. PS. Thank you for let me know the proper 3D model site! I'll check it.
-
After I read Egilman's comment, I was stunned by perfectionism. There are many reasons to build miniature models by each person. In person, I want to build a special model didn't exist in the world. To make a model special, I used to add special background diorama or find better historical facts than existing models. I'm so arrogant. I'm not a specialist on aerospace field. No matter how hard I study for years, I can't catch NASA's engineers. I can't spend many years for Voyager only, and even years polished realistic Voyager won't be perfect when someone make better Voyager. BUT, should I need to launch 1/48 scale Voyage into the sky and fly it to the Neptune? At least, I have an ability to build non-functional appearance of voyager. Also, I like Voyager spacecraft. I have changed my mind. I won't be afraid of being chased by 'better model'. I'll enjoy a progress of realization of my favorite item, and fix anything that looking legitimate and I can handle. In this model, my reference is the 3D modeling website. There is a replica of Voyager at JPL in LA. It would be the best reference if I lived nearby. 😆 Due to lack of closeup pictures of real thing (23 billion Km away!), This easy access site may be good guide for the next spacecraft modeller. Am I backing down? Kind of. I'm not omniscient and time is limited. If I face tough obstacles again when I build 'models in the other field', I'll find time-saving way. Thus I may allocate more time for wooden ship model with experiencing new techniques.
- 26 replies
-
- 10
-
-
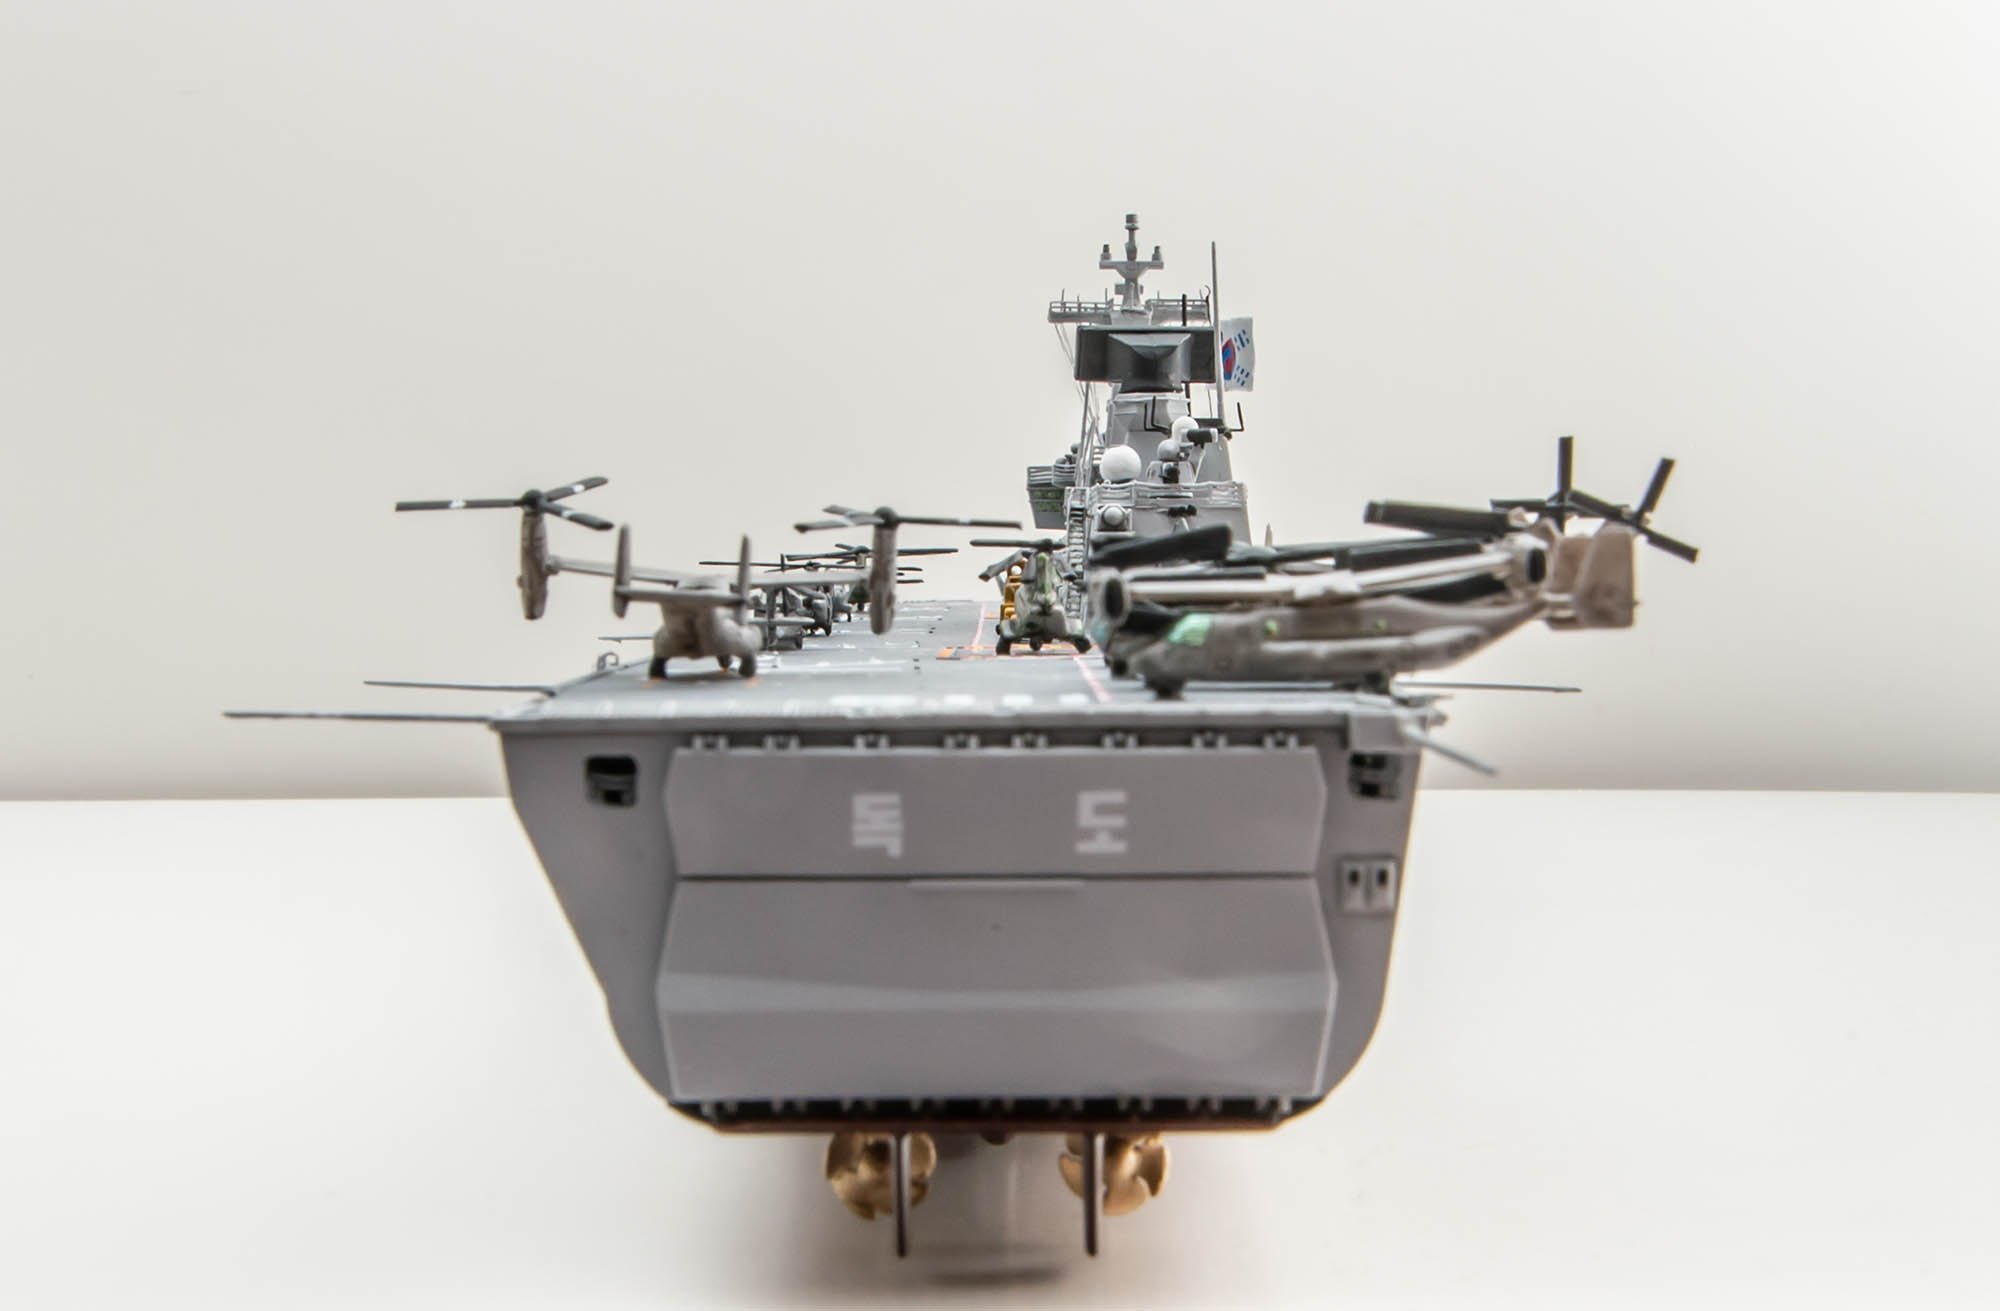
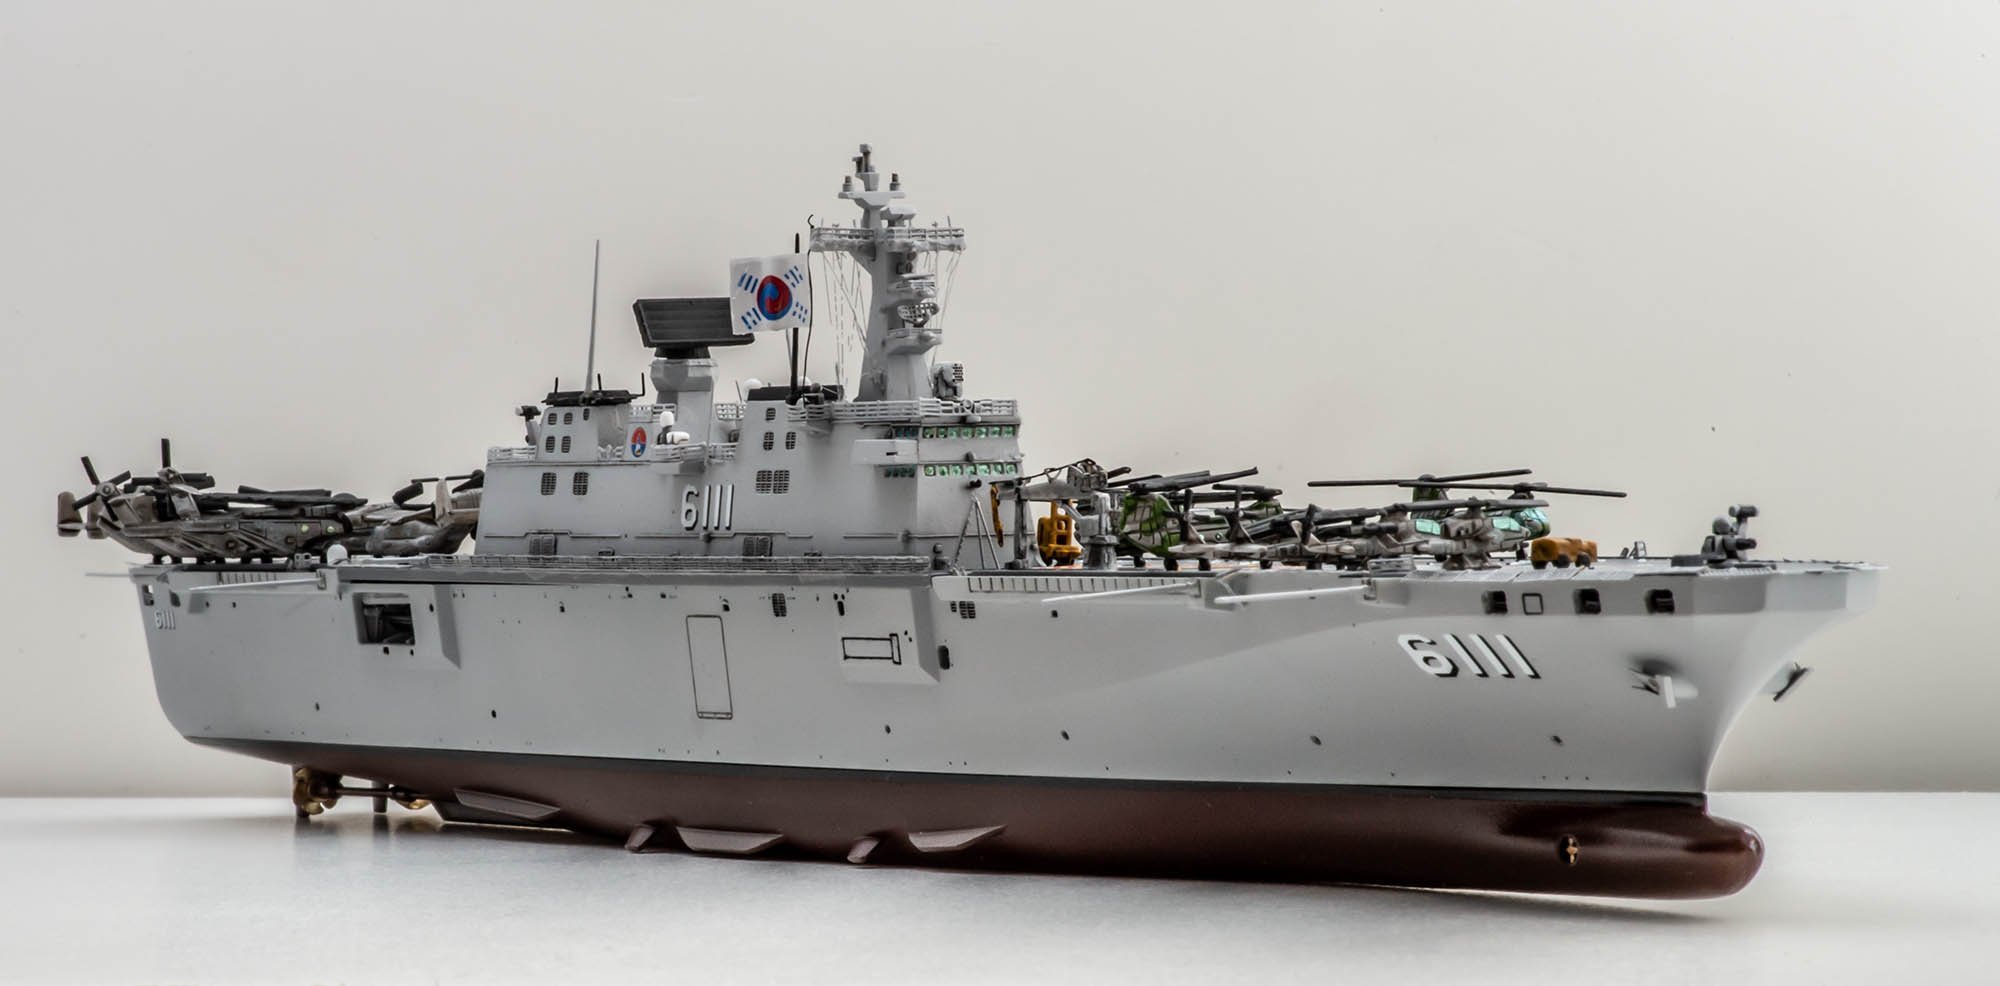
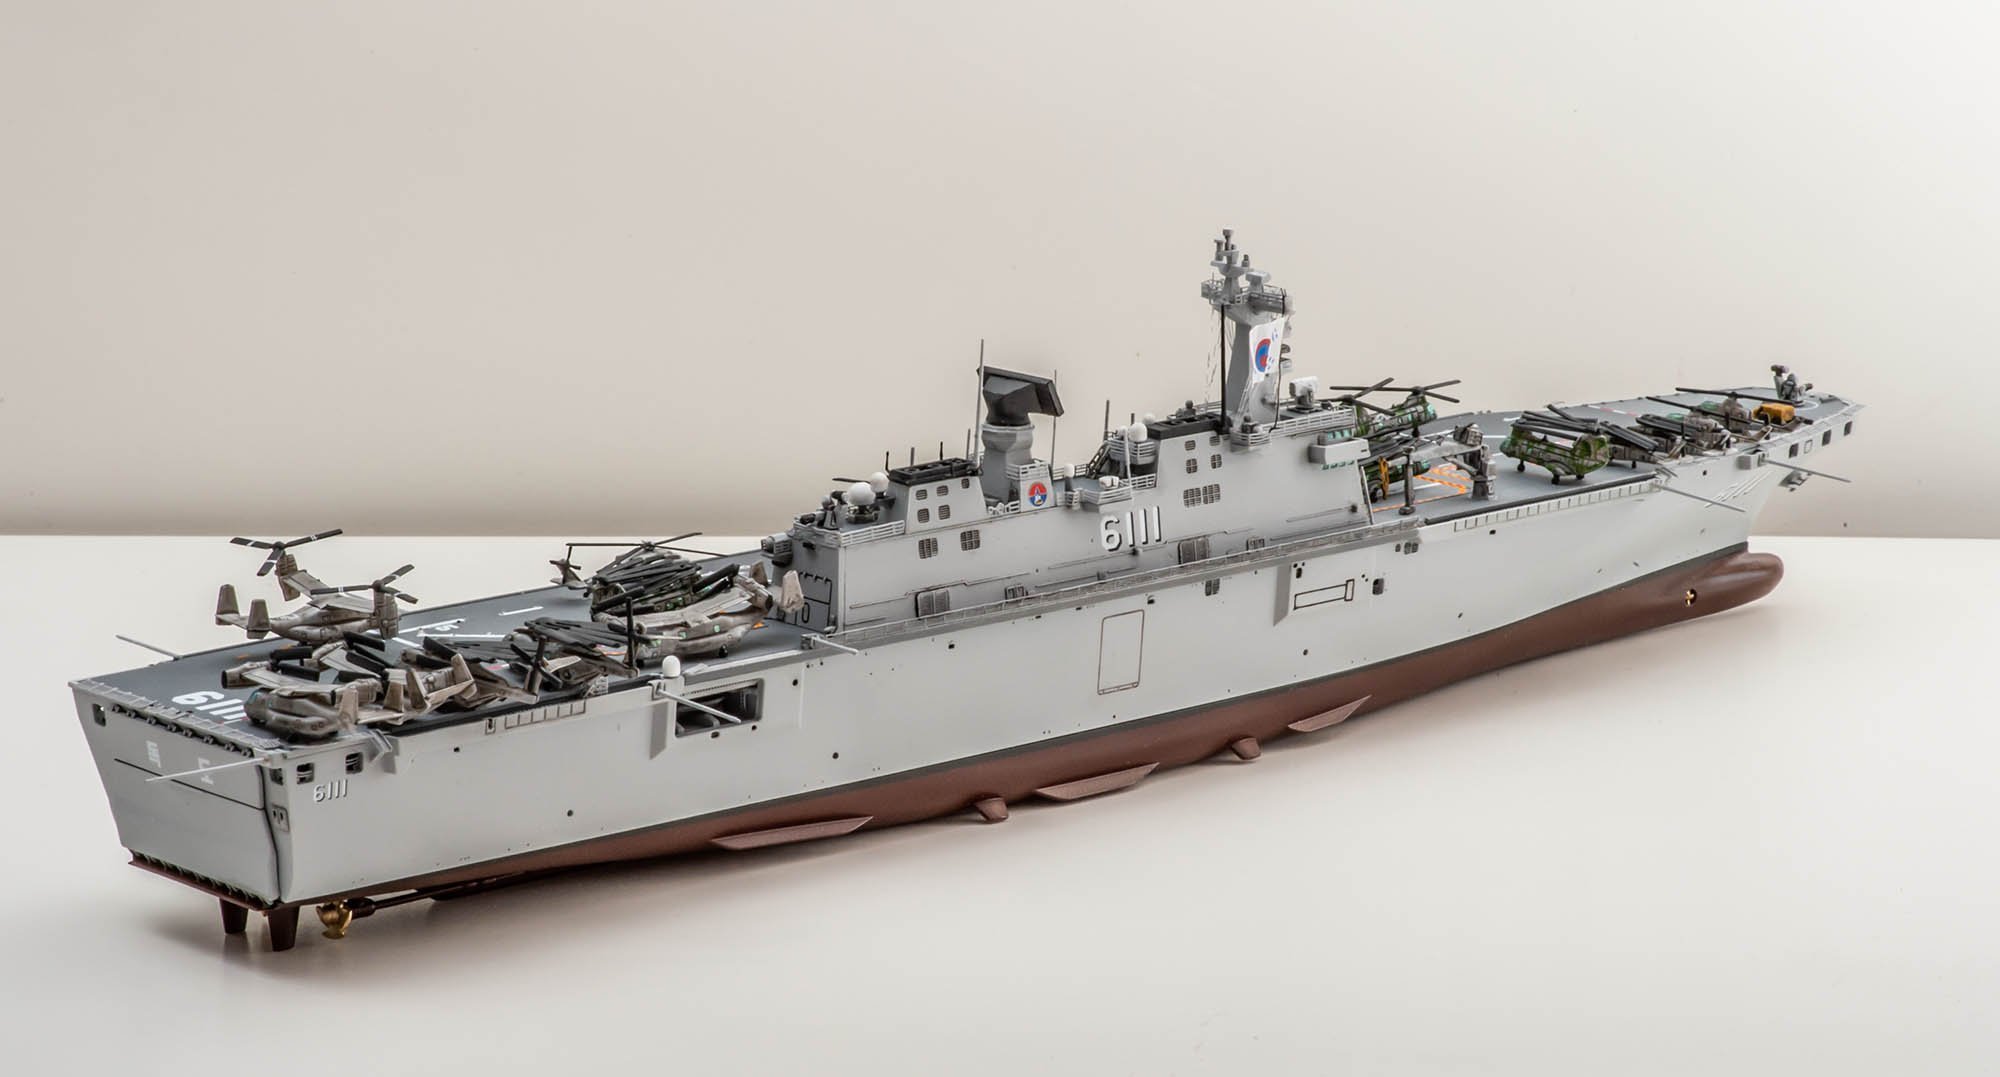
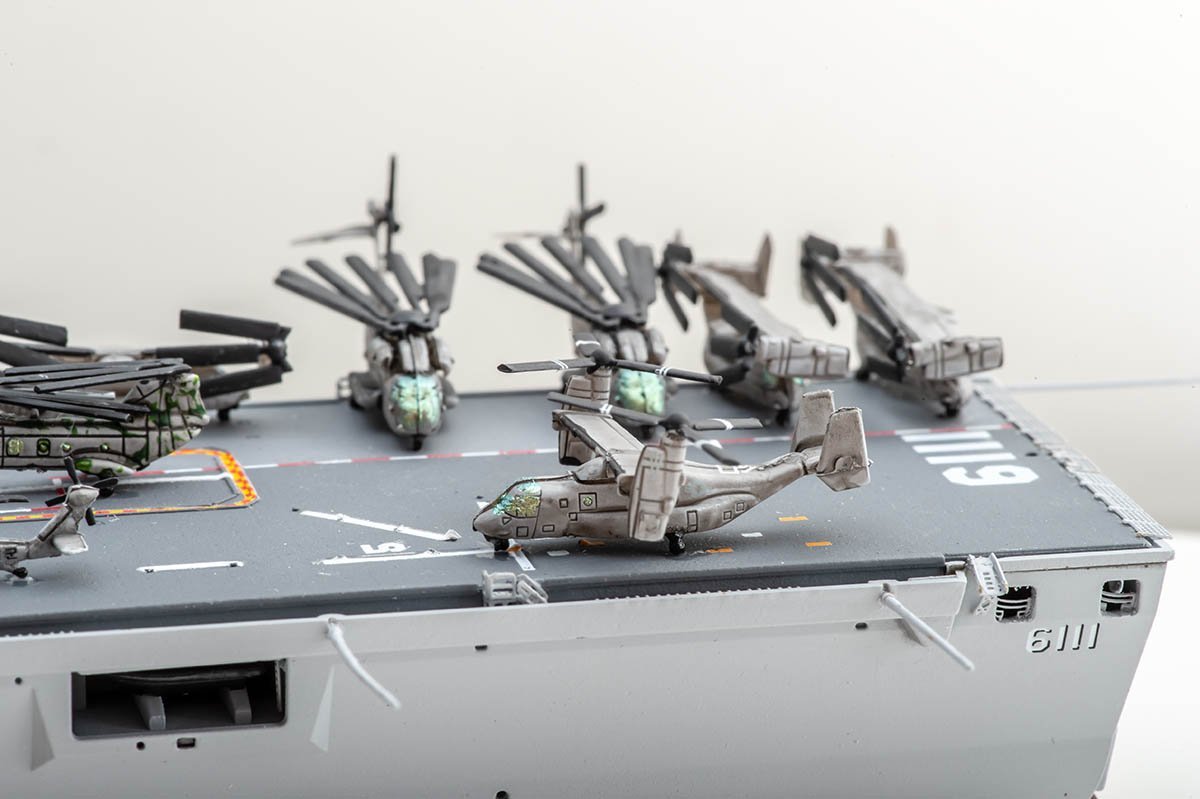
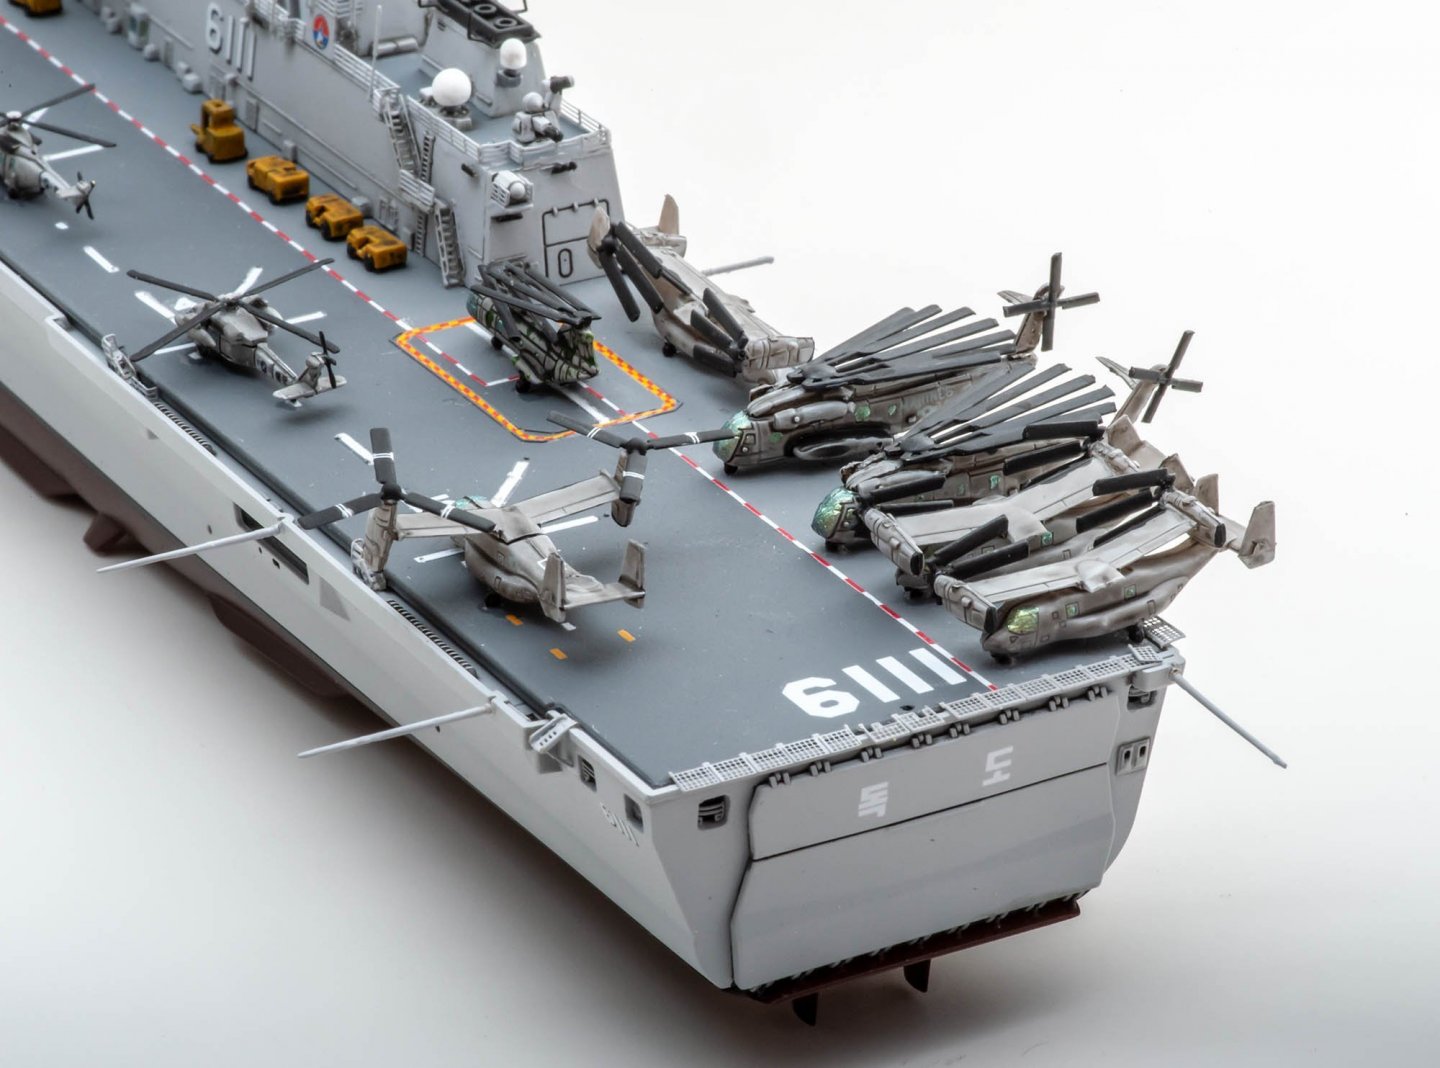
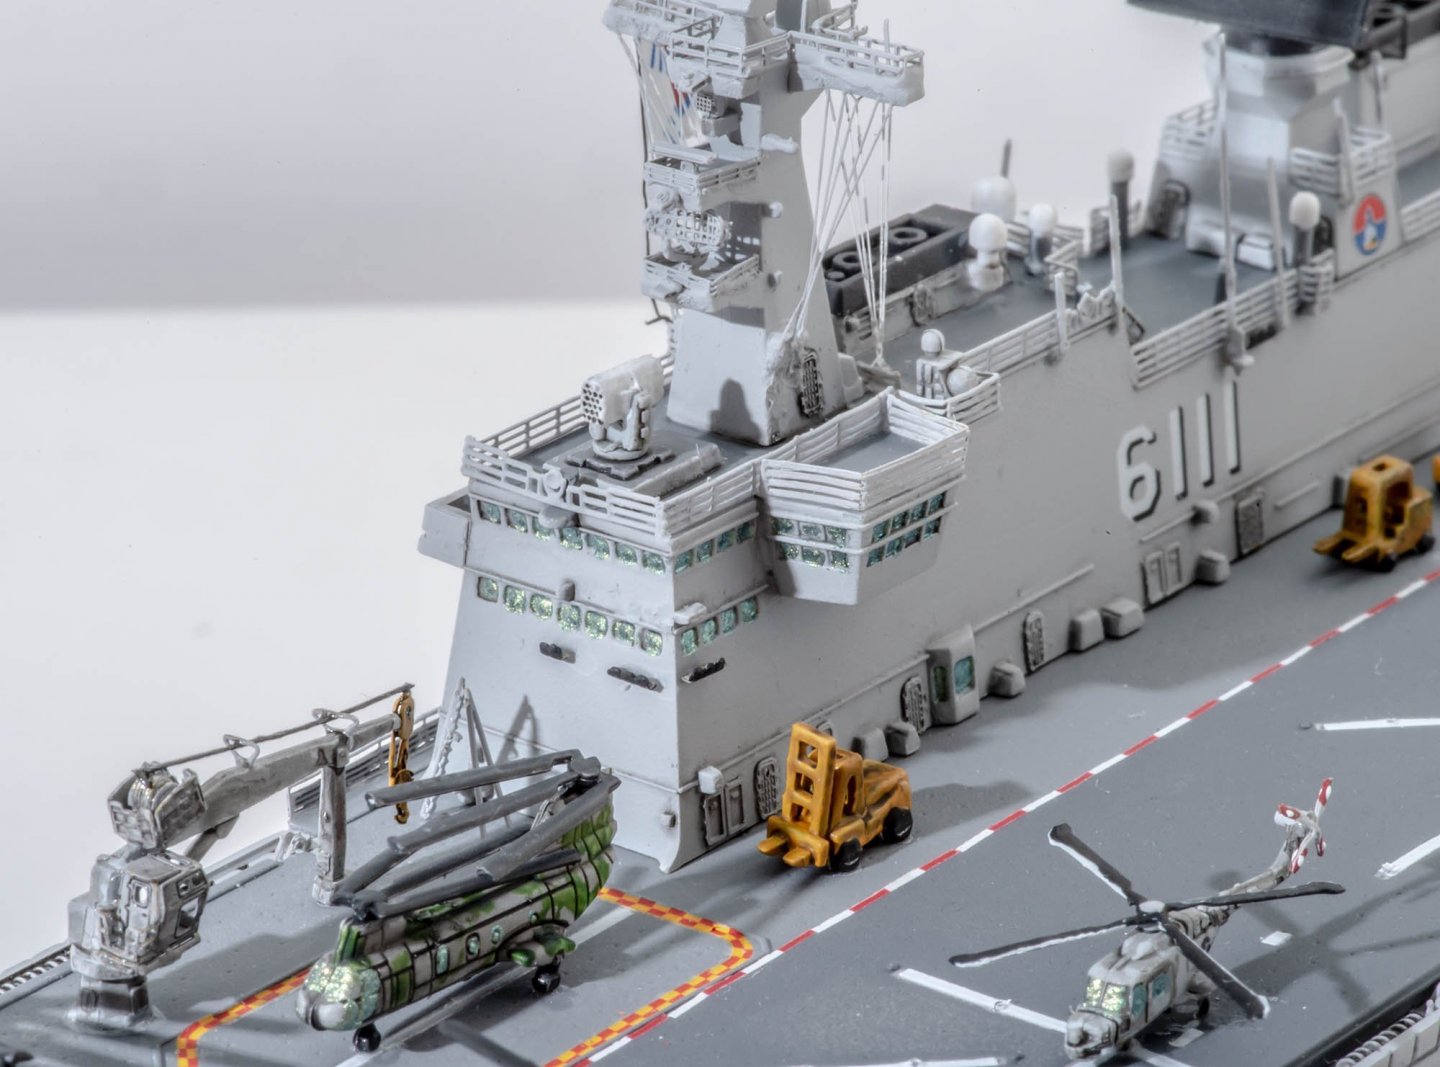
Hello. This is my new side project : Hasegawa Unmanned space probe Voyager 1/48 (second batch, 2019). I also bought Eduard PE kit. It would have been a short term project...... https://voyager.jpl.nasa.gov/mission/spacecraft/interactive.php This is the best reference website I've ever seen. The site shows the best accurate 3D shape and coloring. Therefore, when I saw many differences between Hasegawa kit and the site...... I felt so many bad feeling that this project could be long and huge...... 🤪 From very beginning, I have to cut the useless tri-pod. It is no use literally. More significant and serious issue is that side panels are located in wrong place. The correct position is blue letters. I have to cut panels and paste or fix them with putty. 😨 How did they confuse to allocate side panels...? This is Hasegawa, and this is Science world series. I can't believe that 'the company' did so many mistakes on real wold object model..... This space probe can't reach the Neptune... This is just first corner of manual. I'm afraid of advancing to next chapter... 😭

-
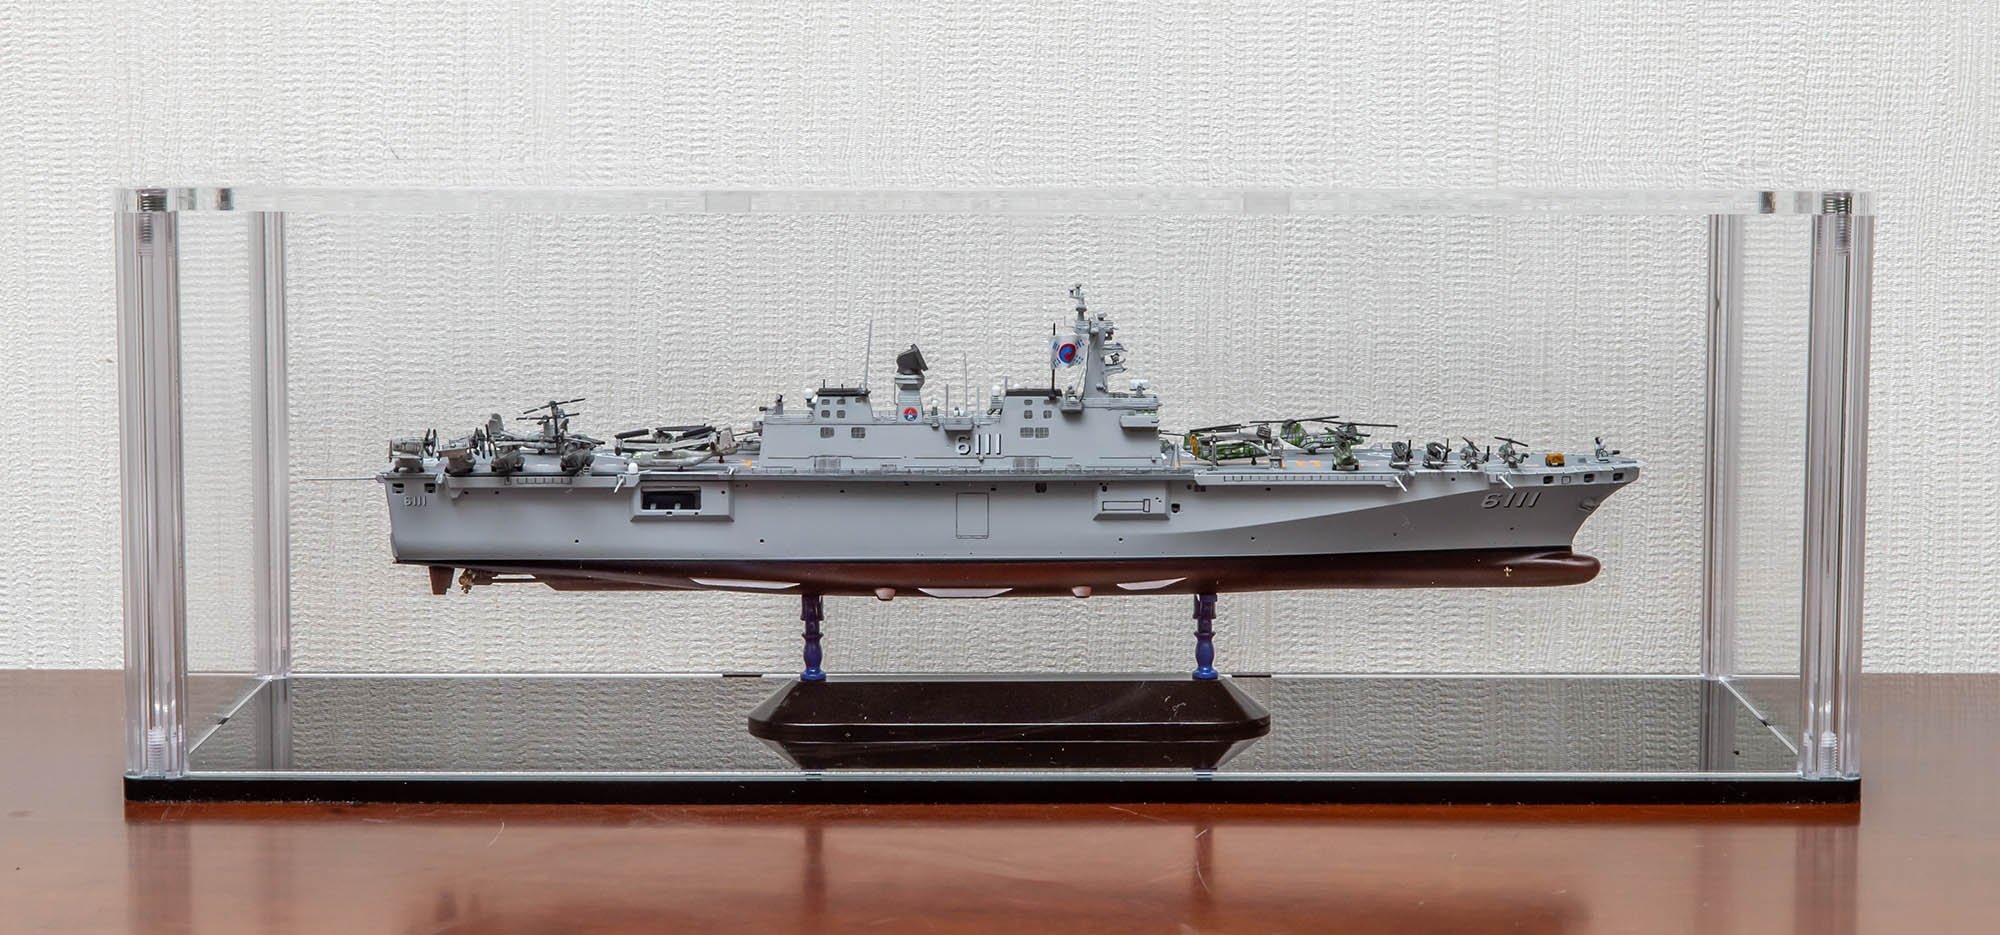
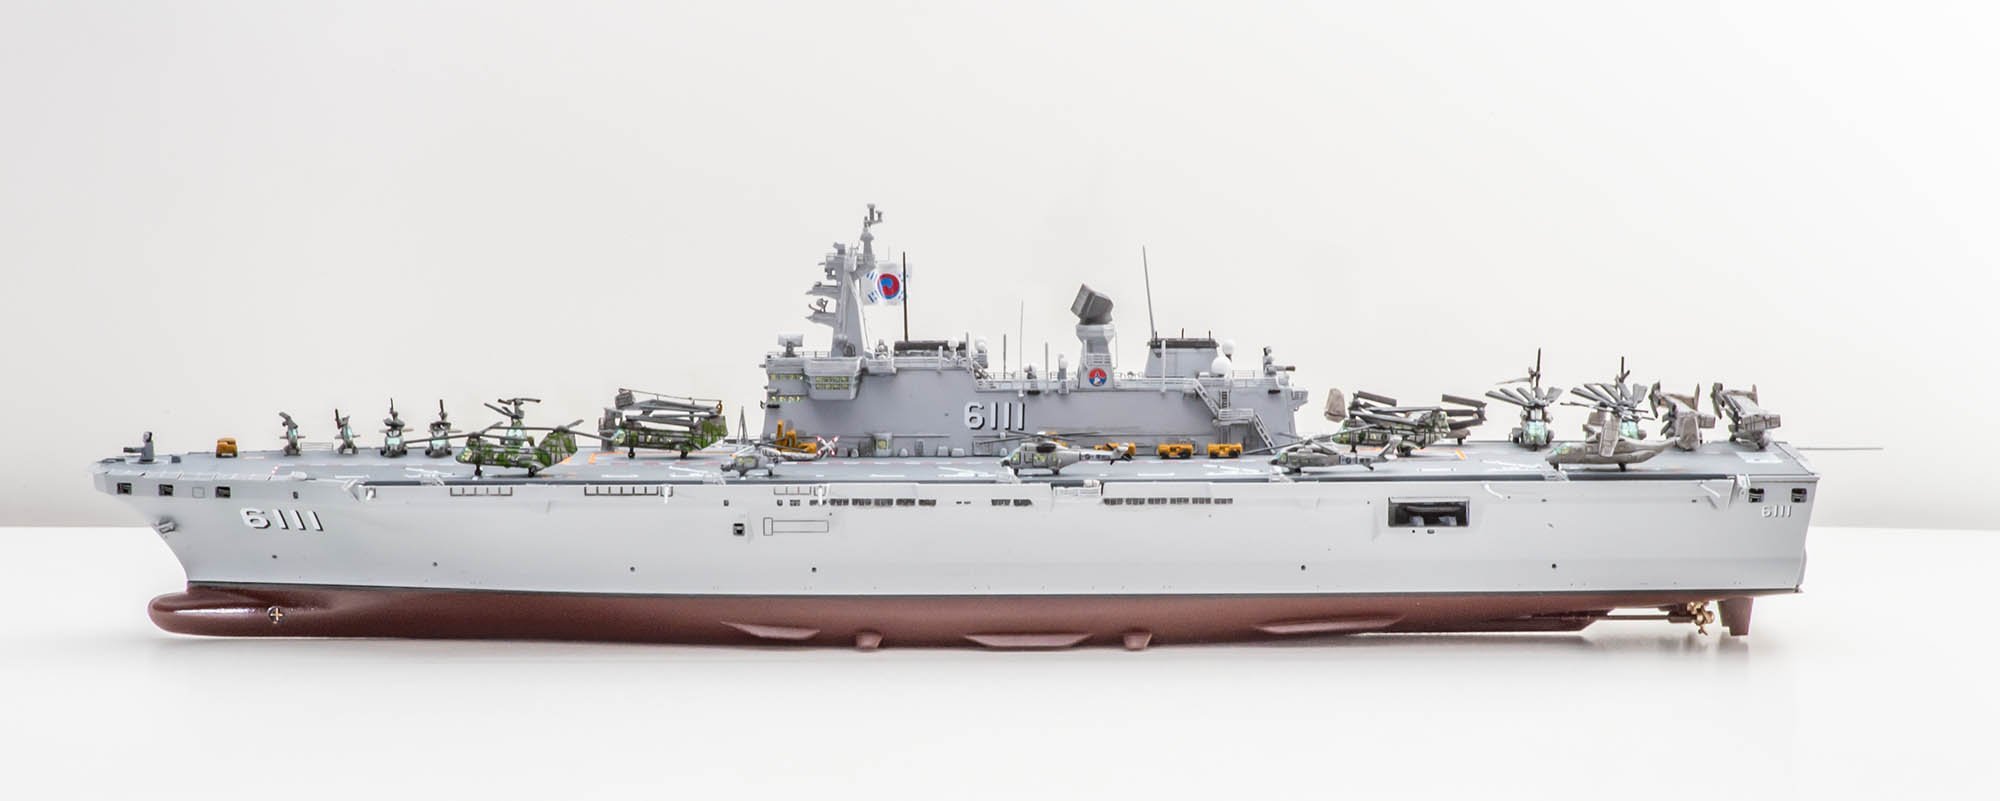
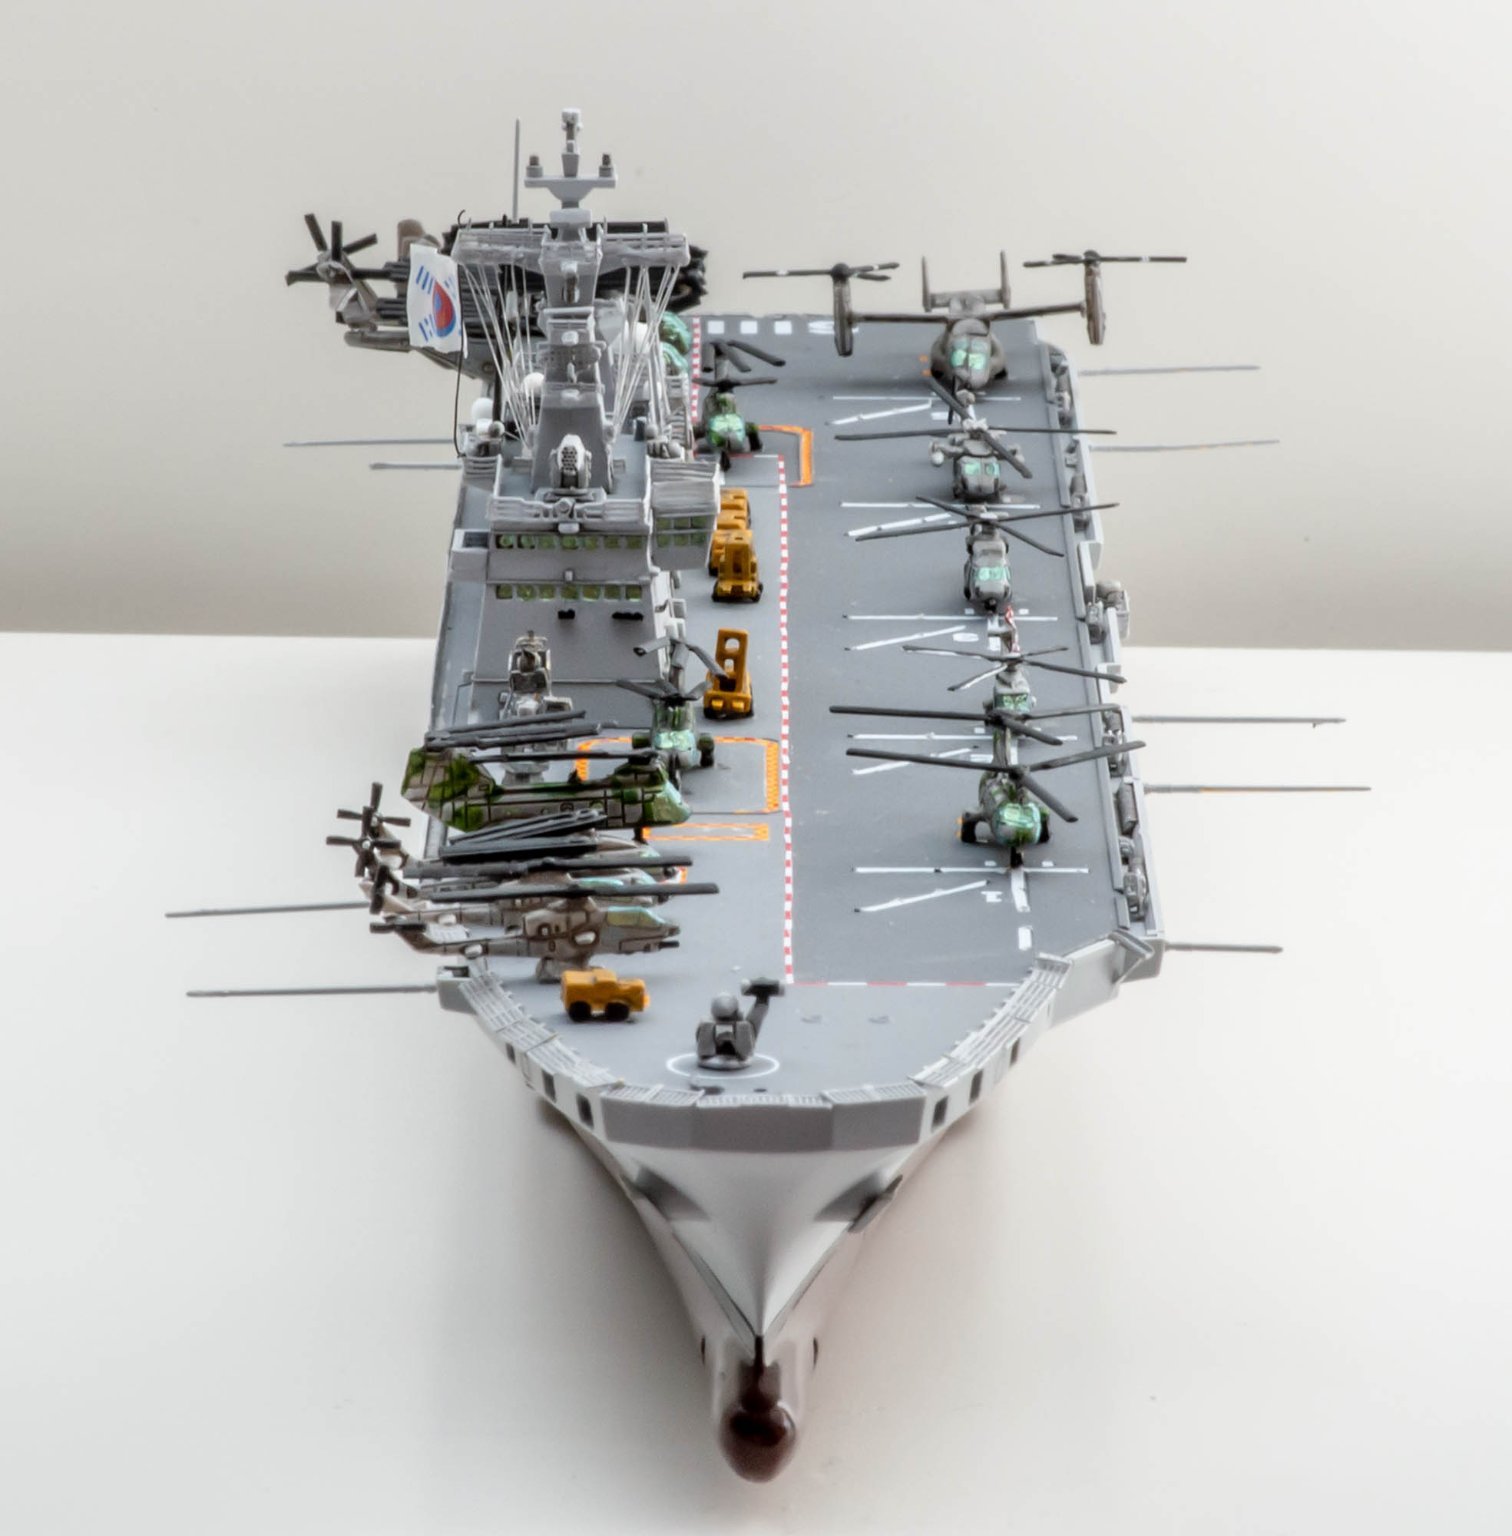
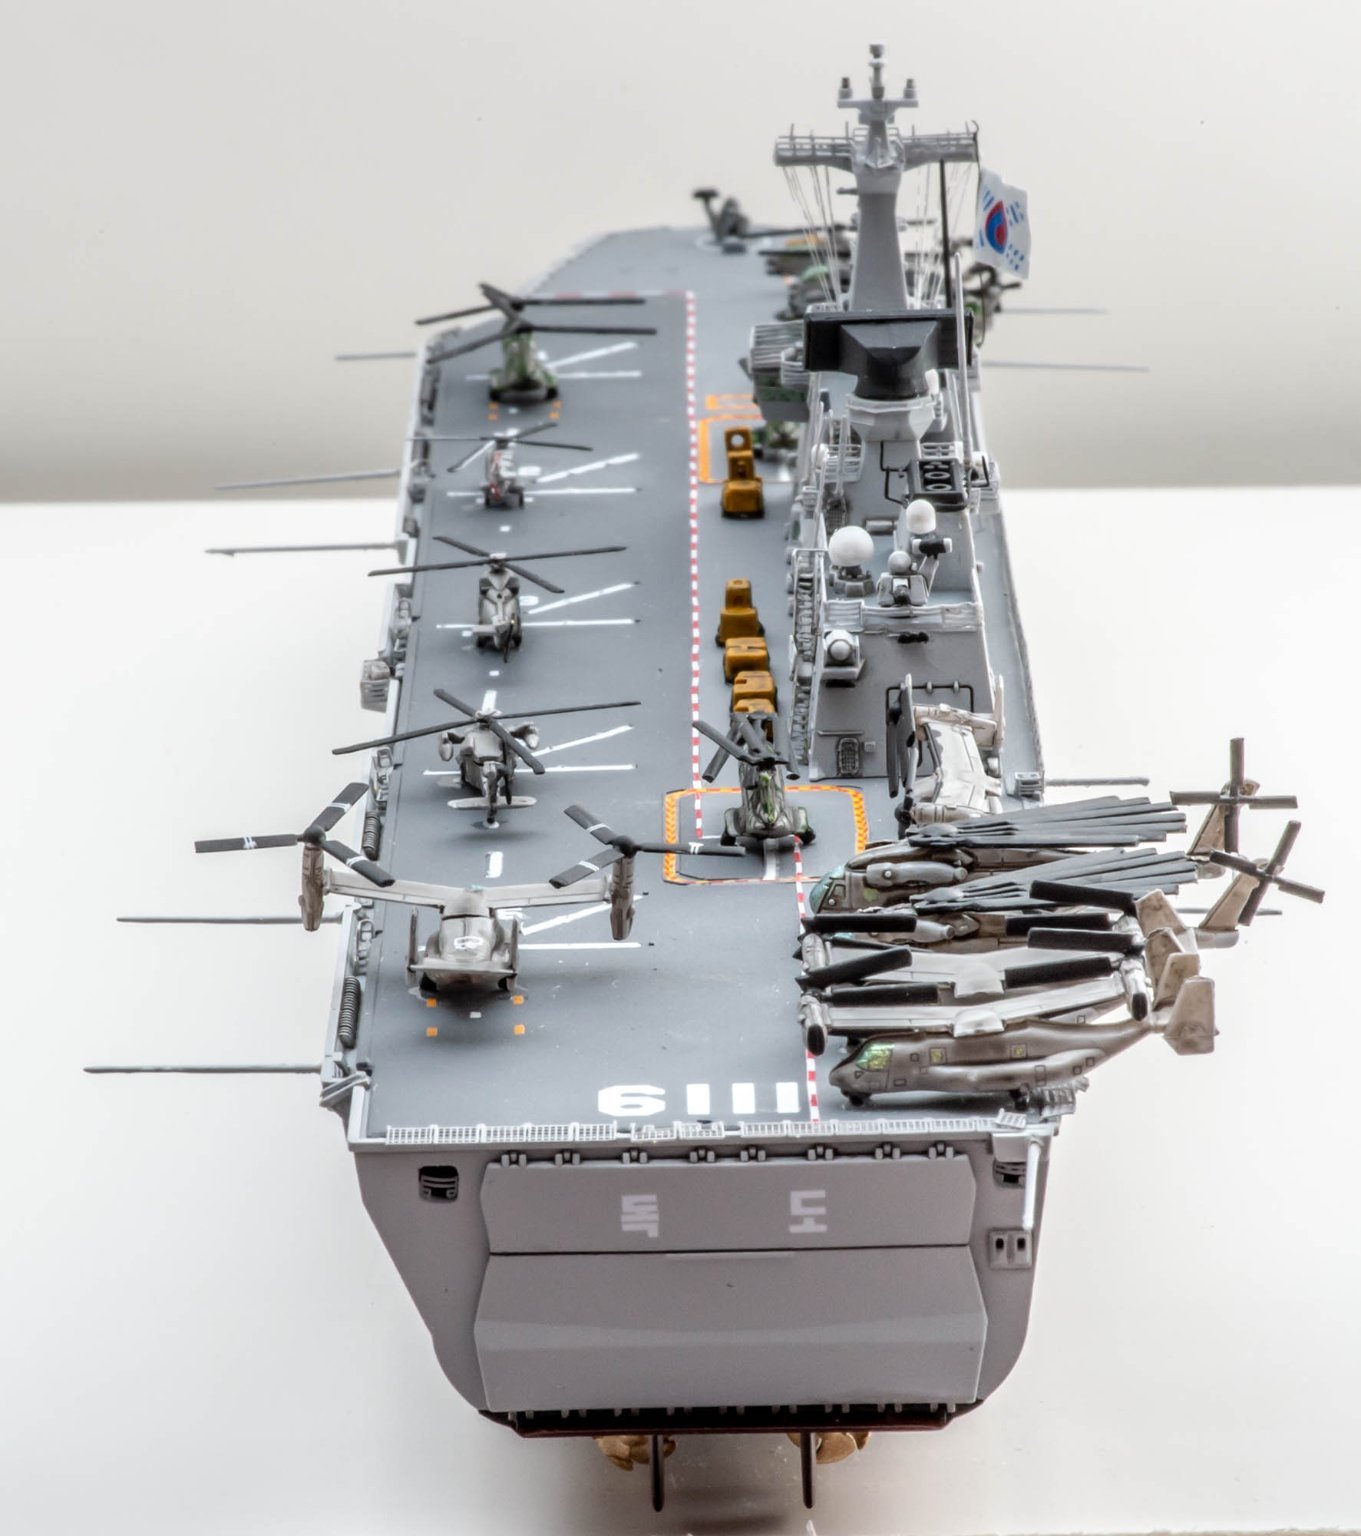
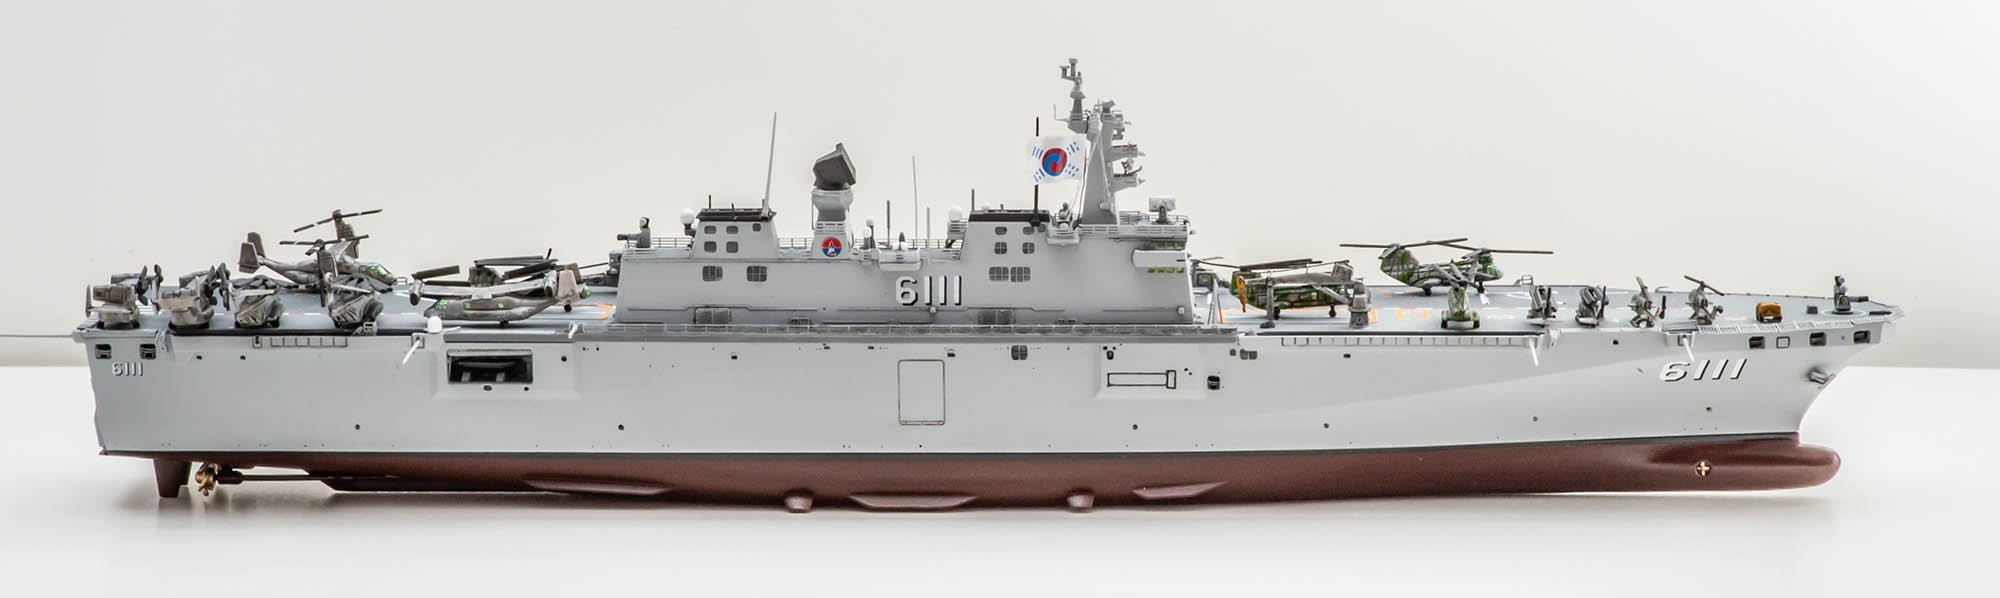
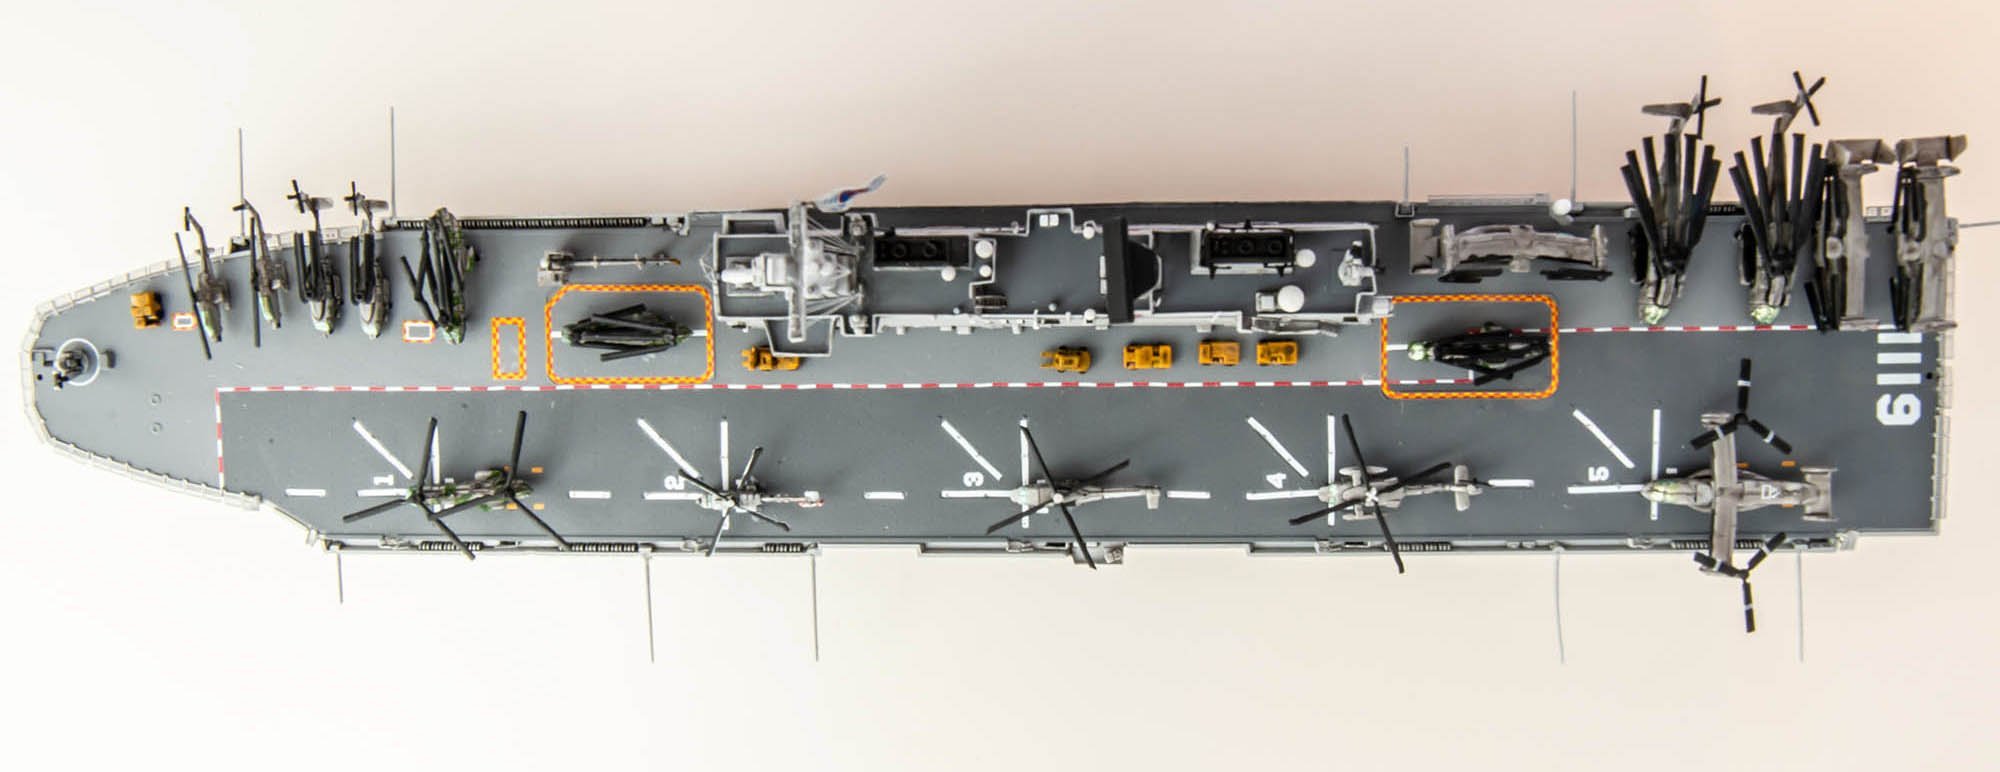
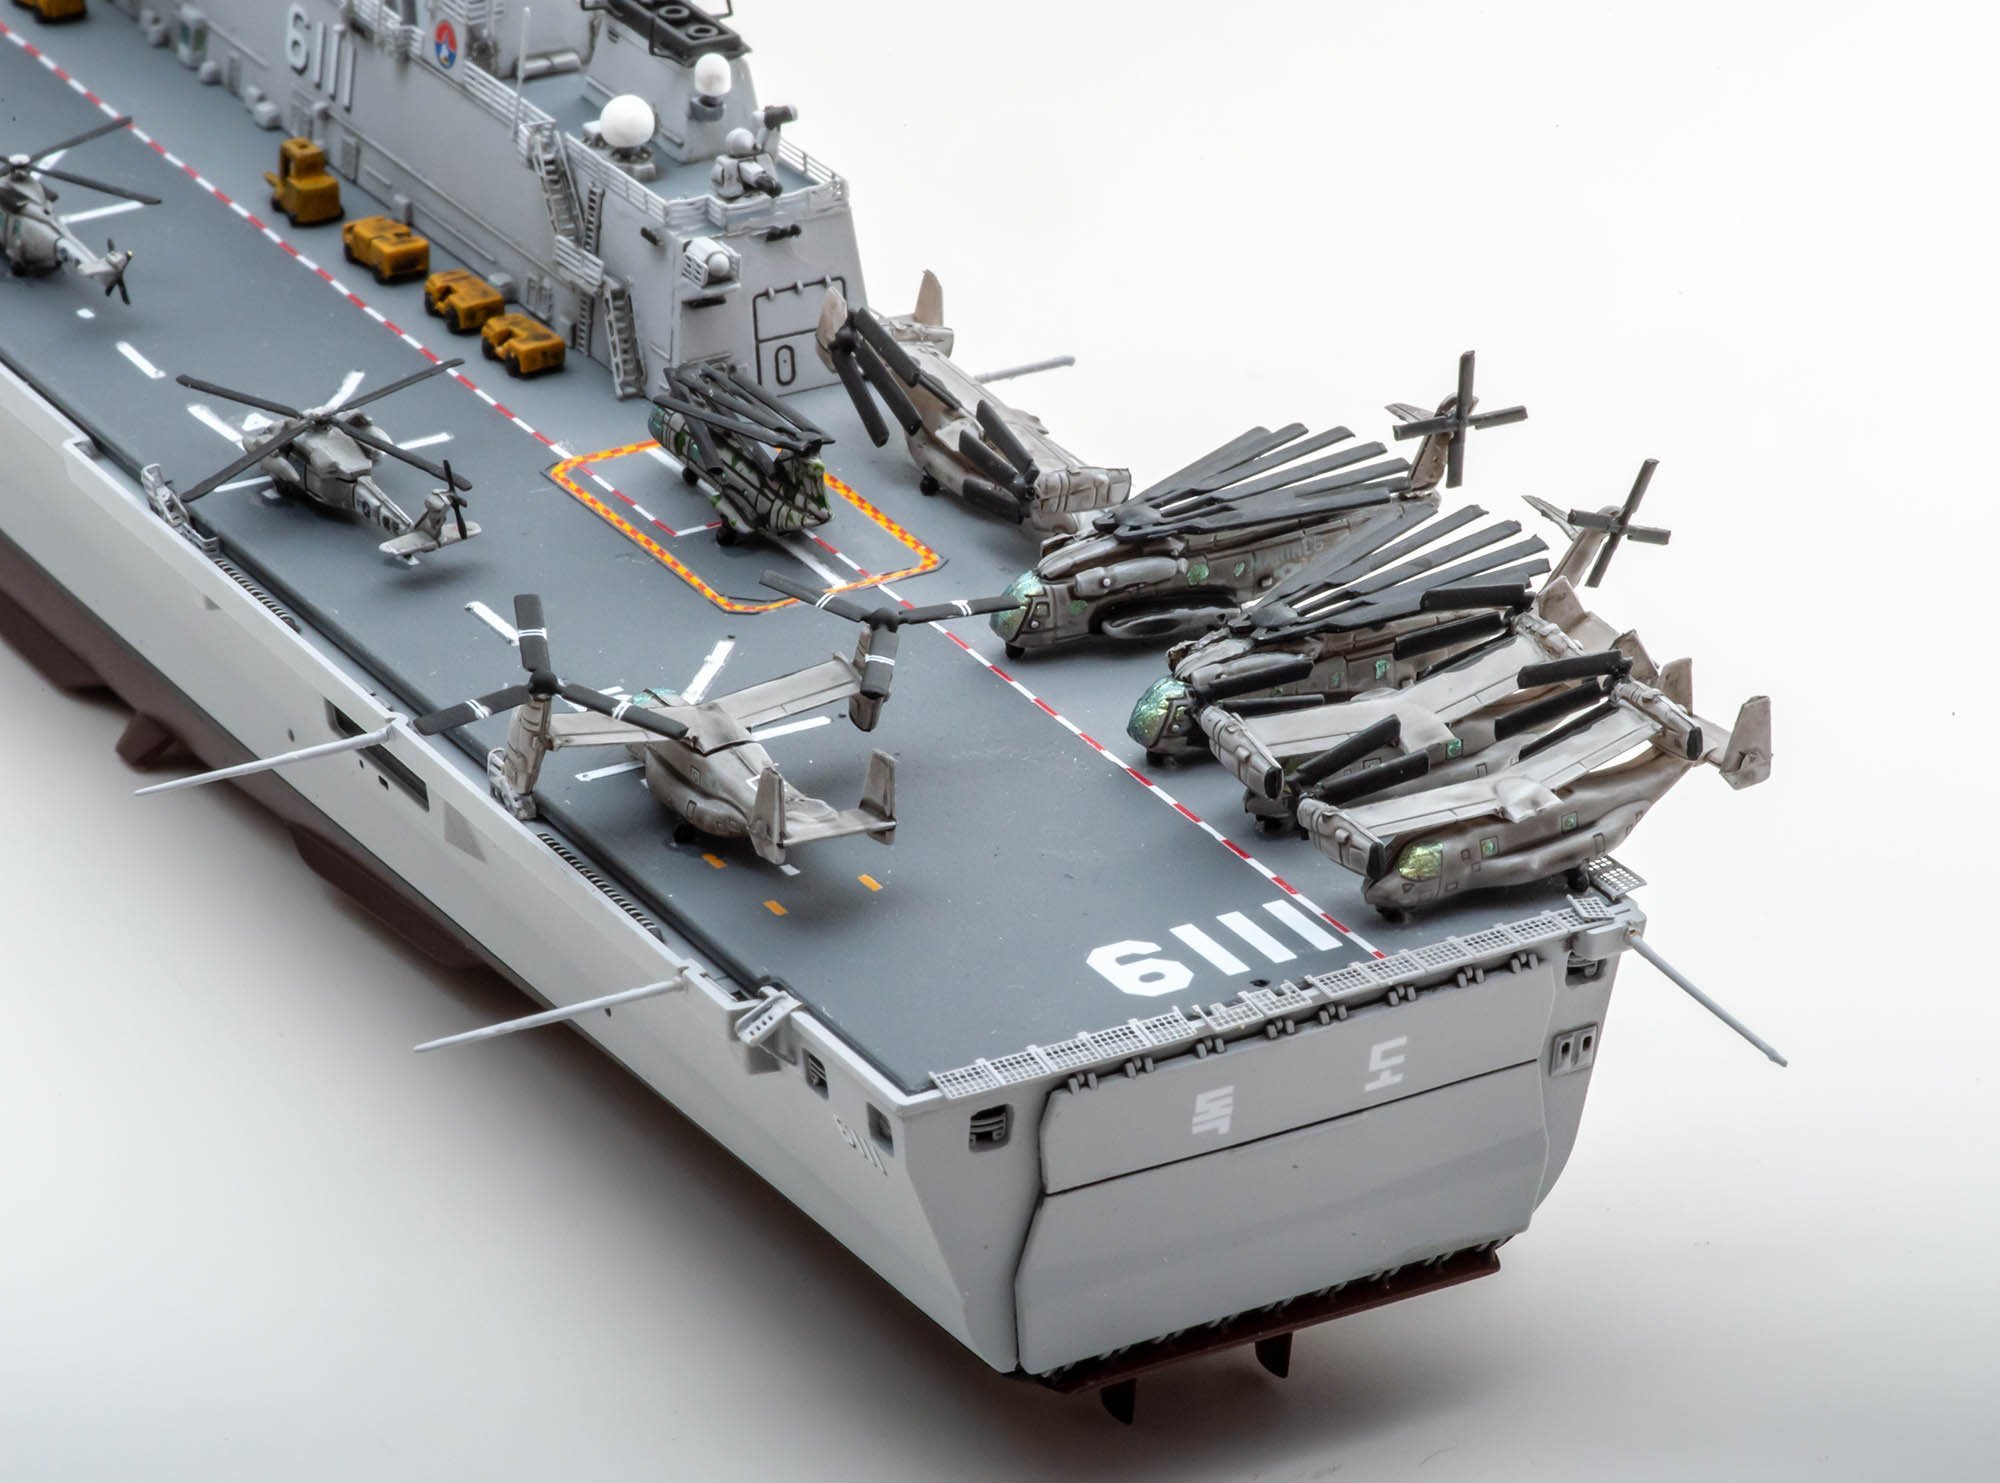
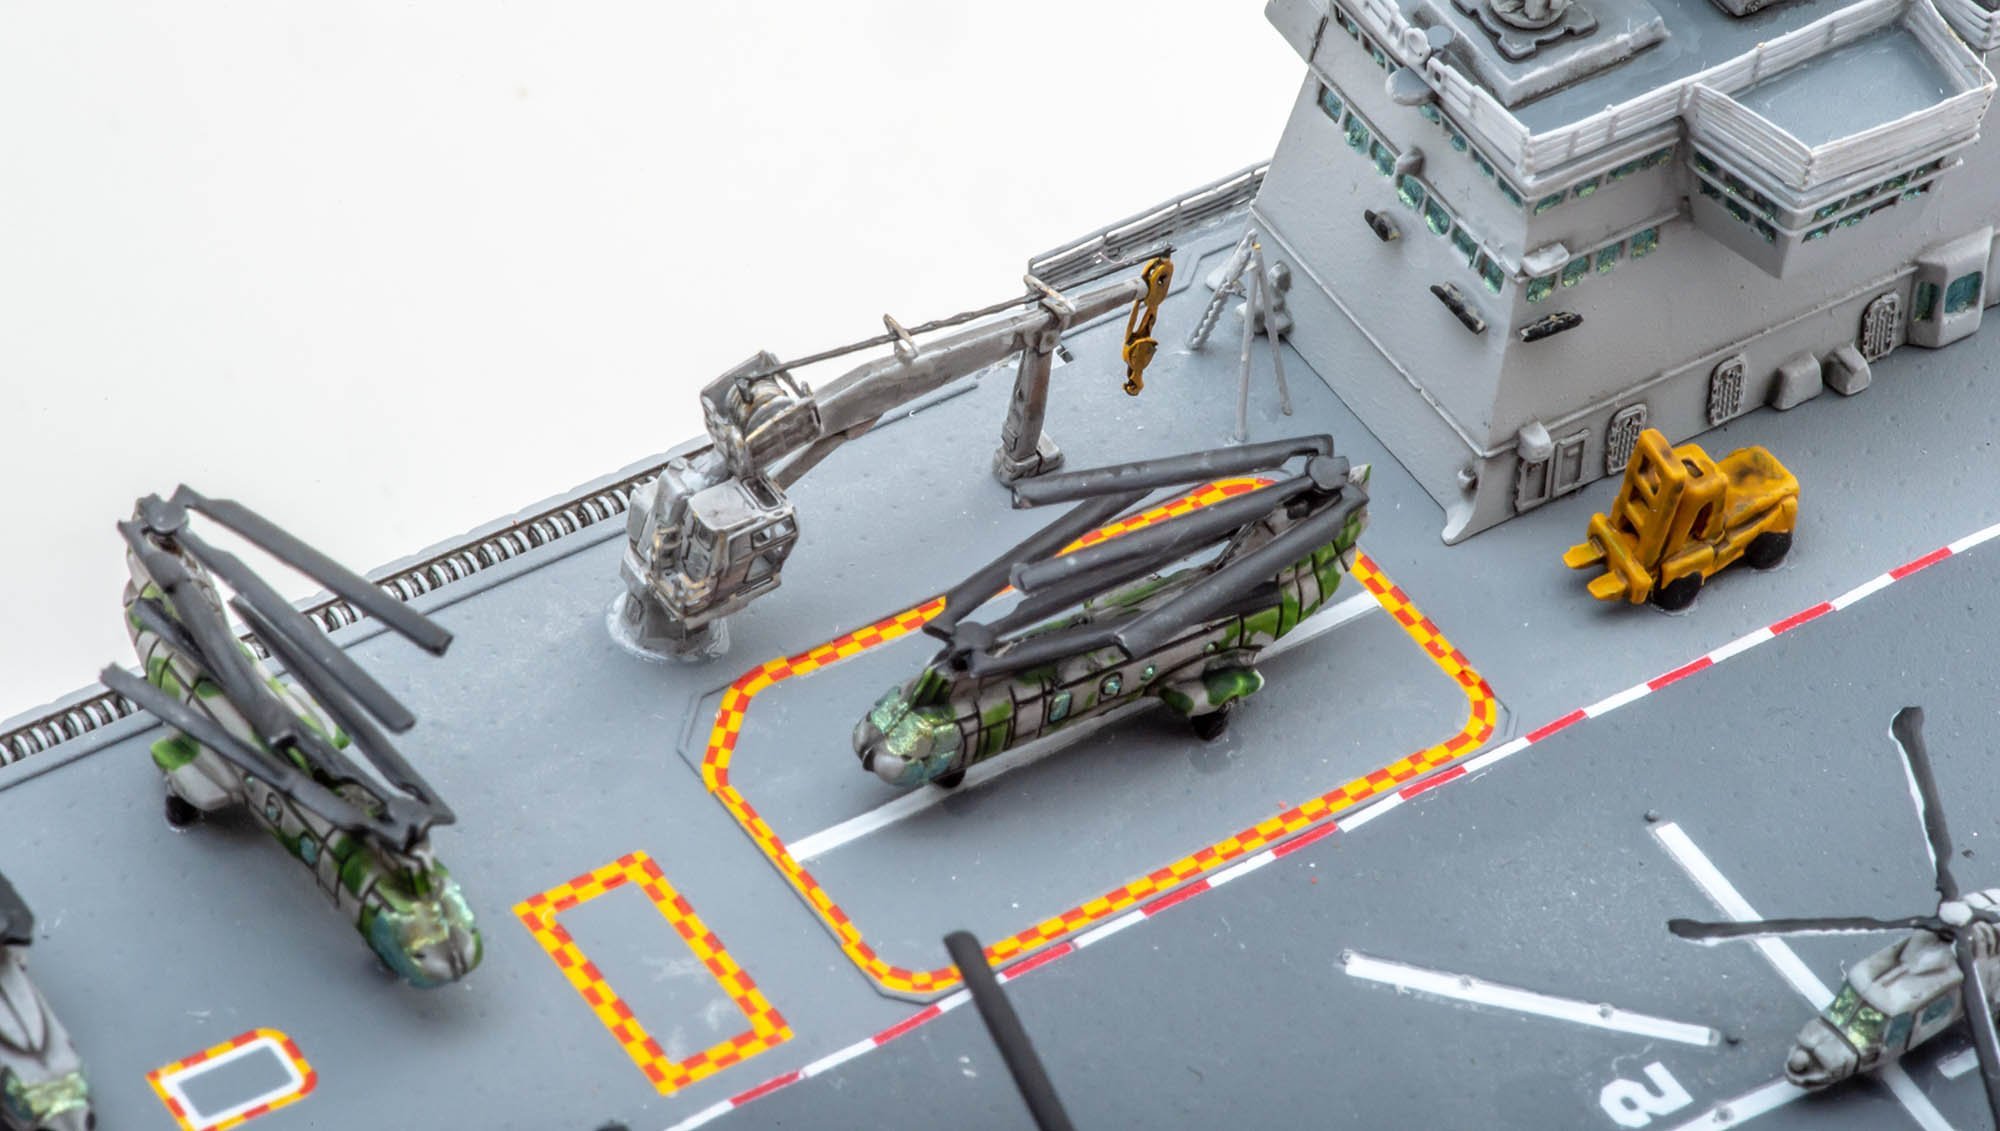
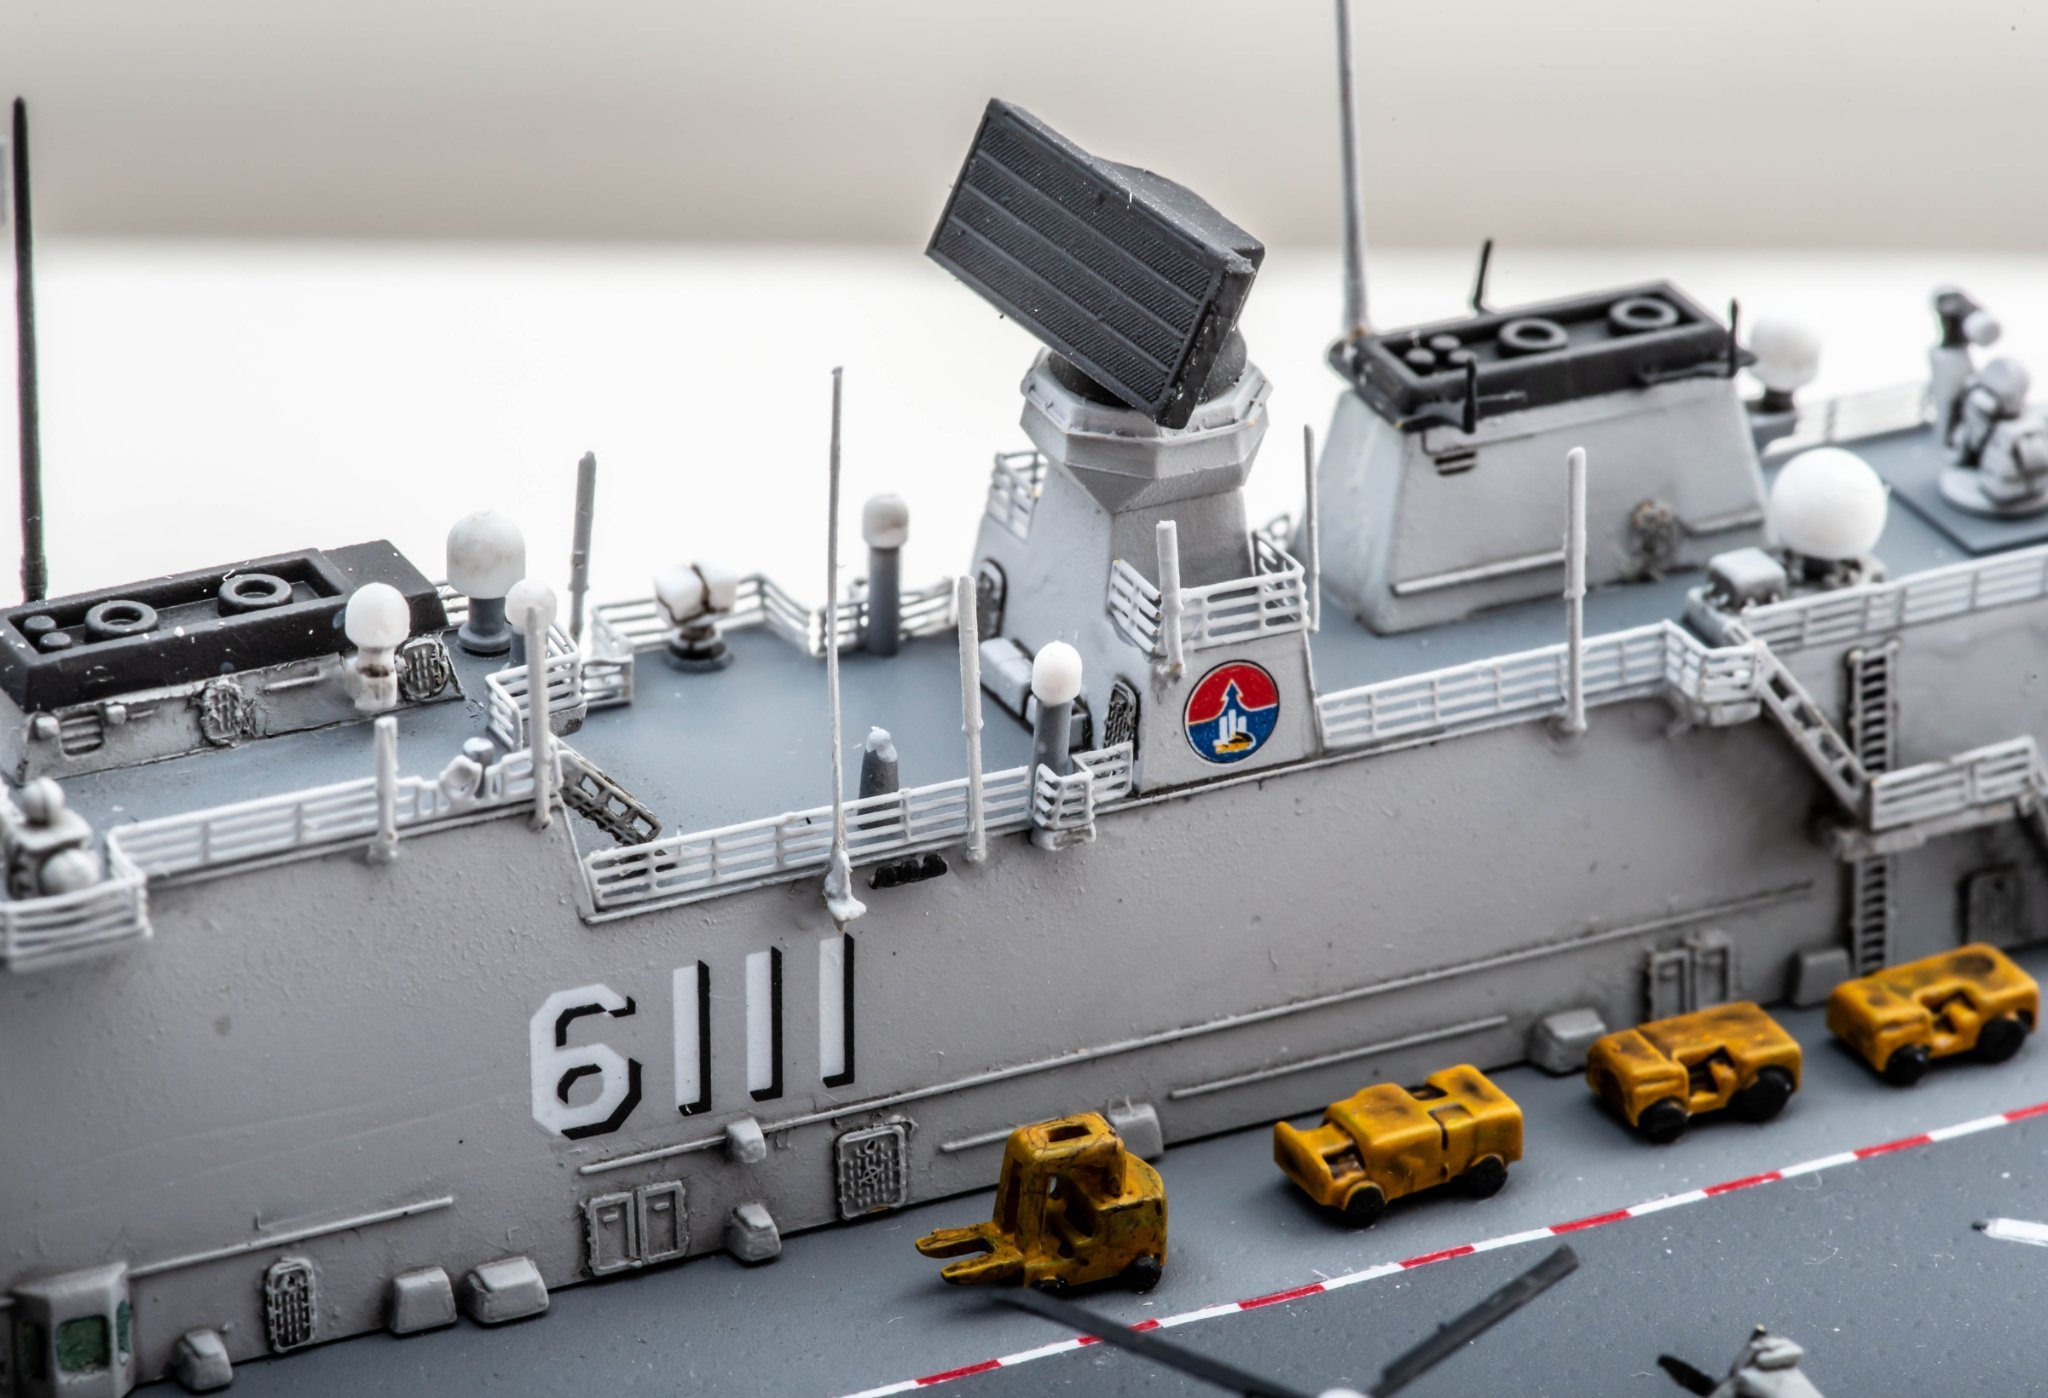
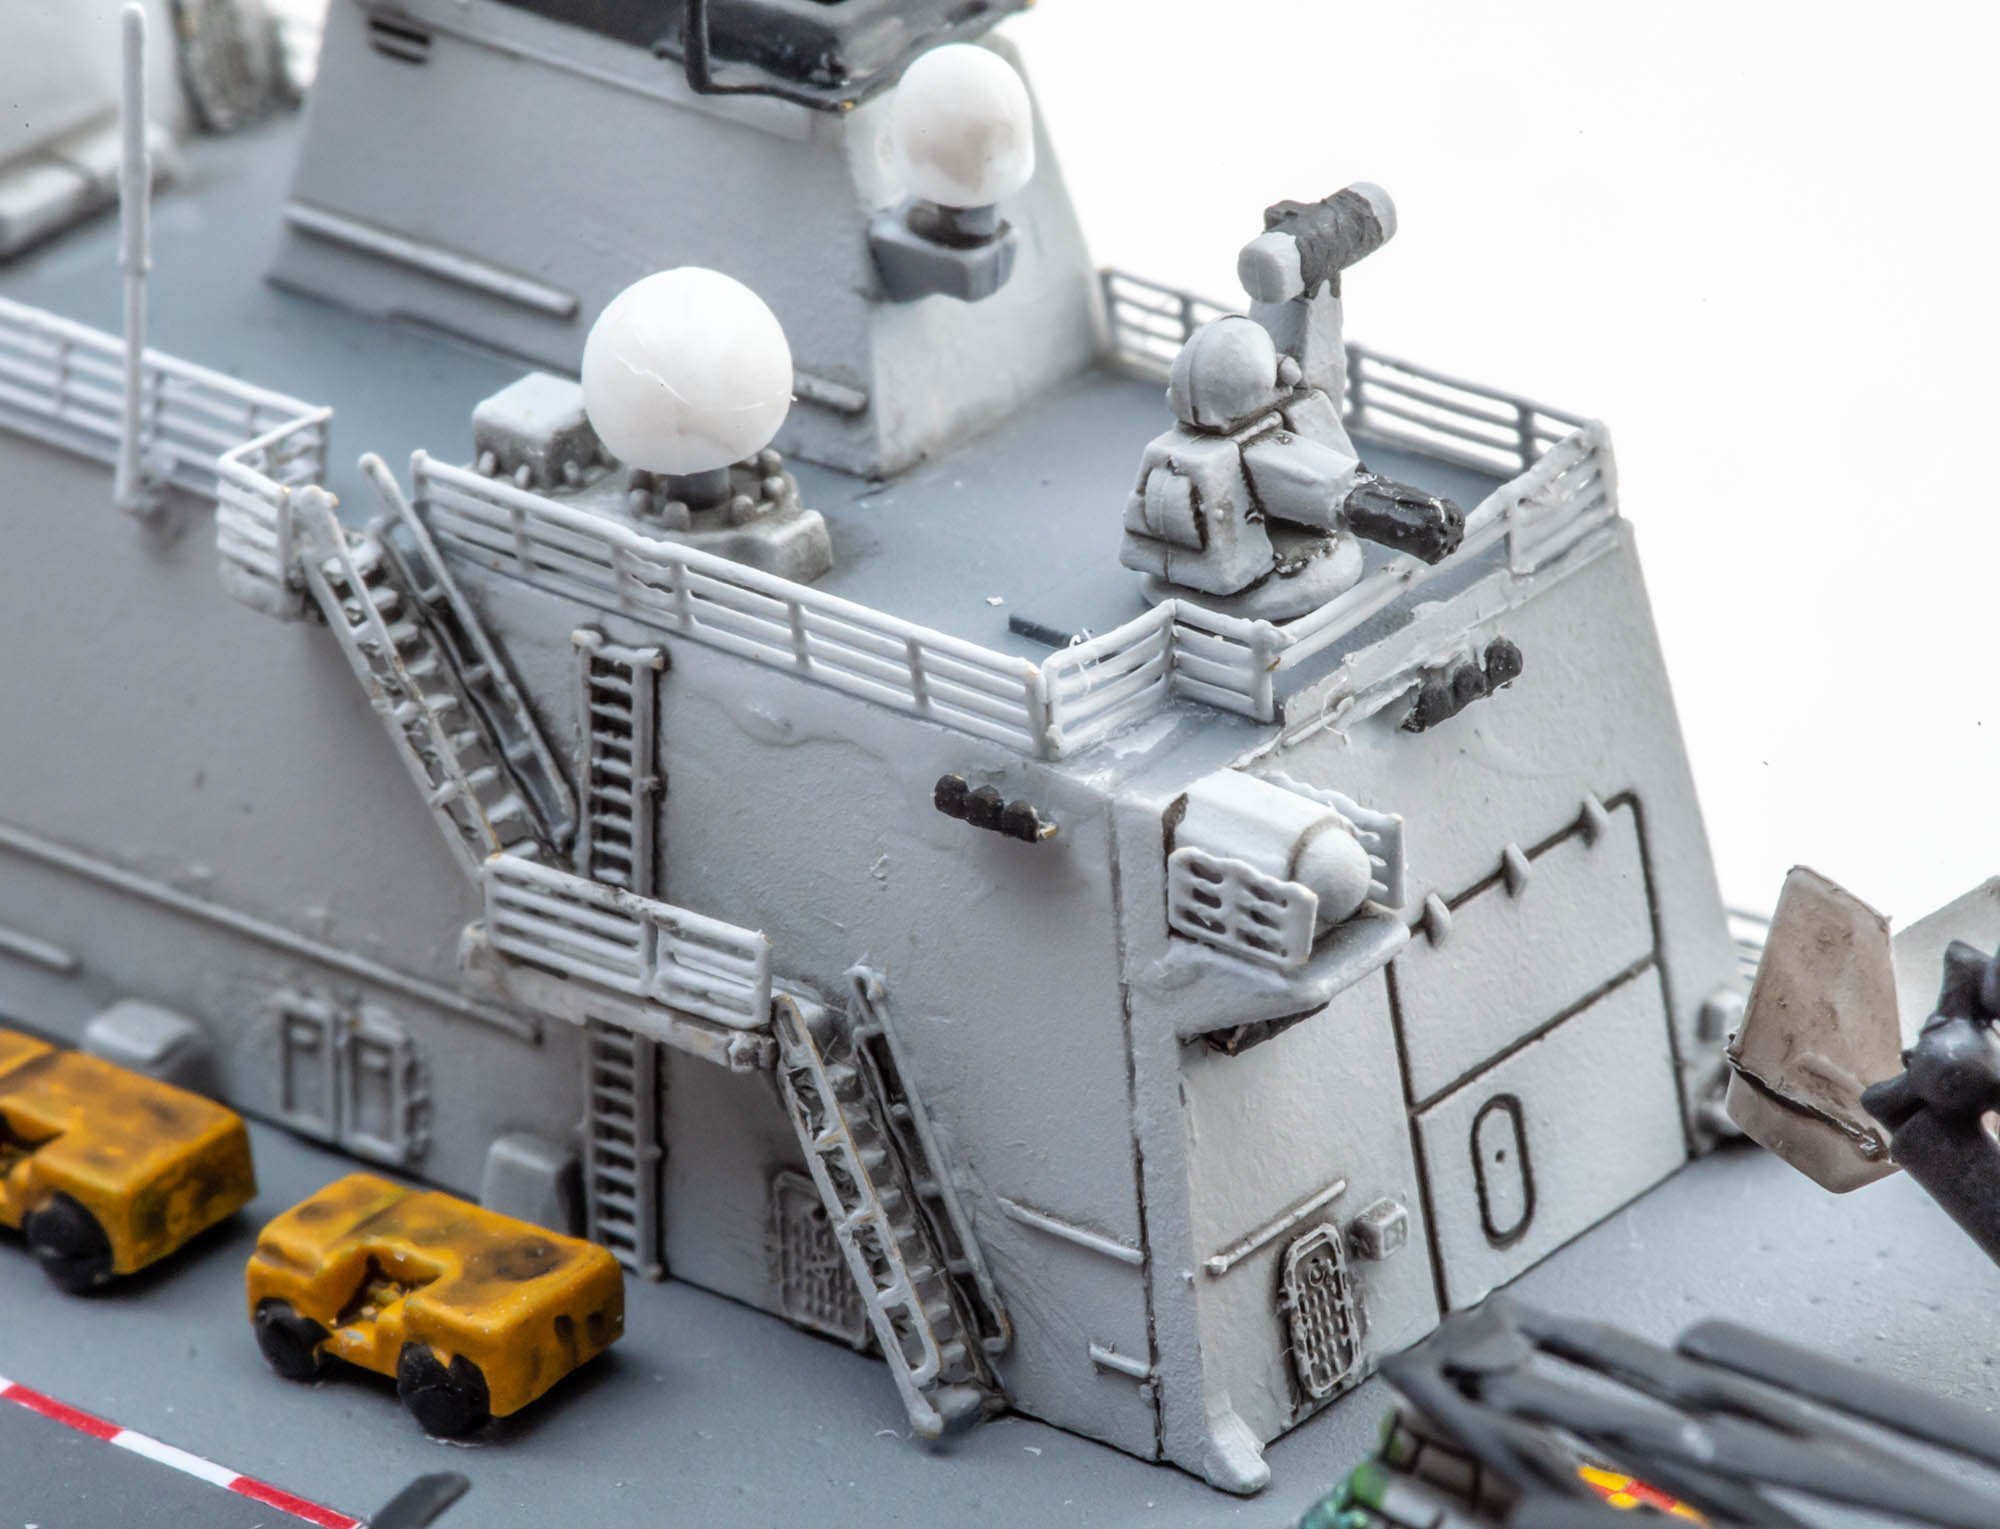
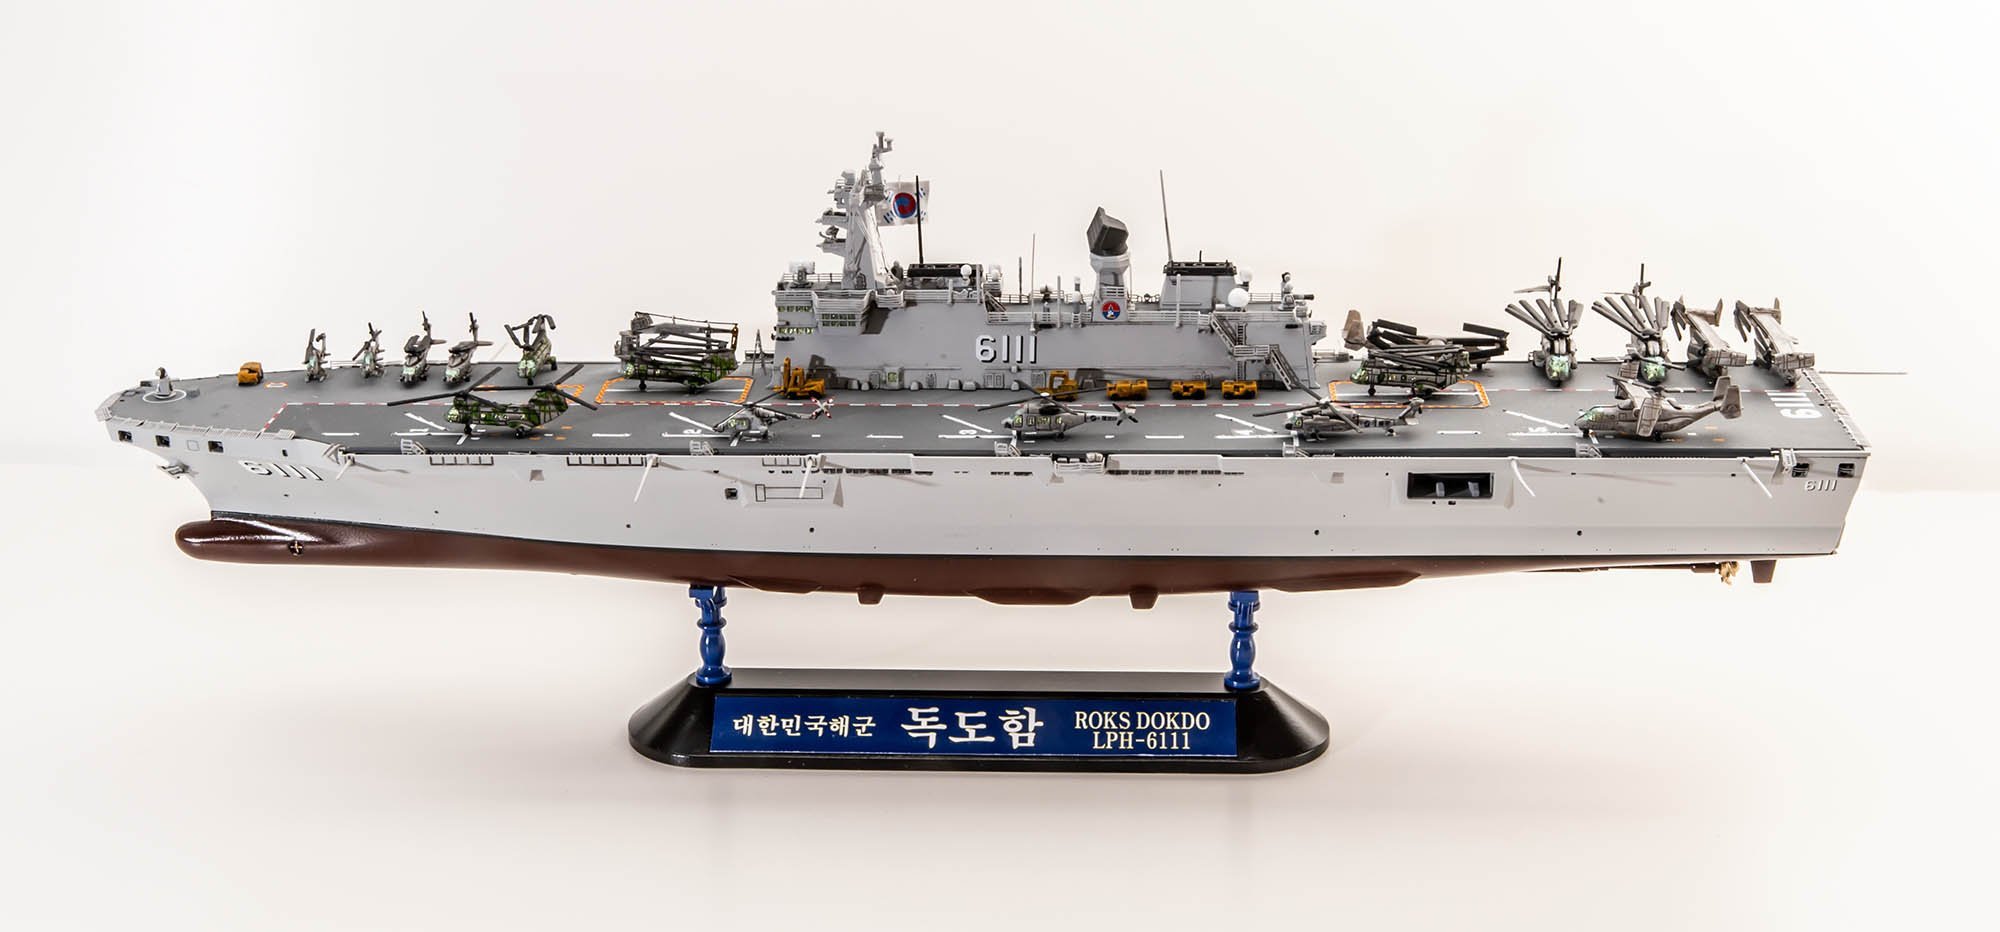
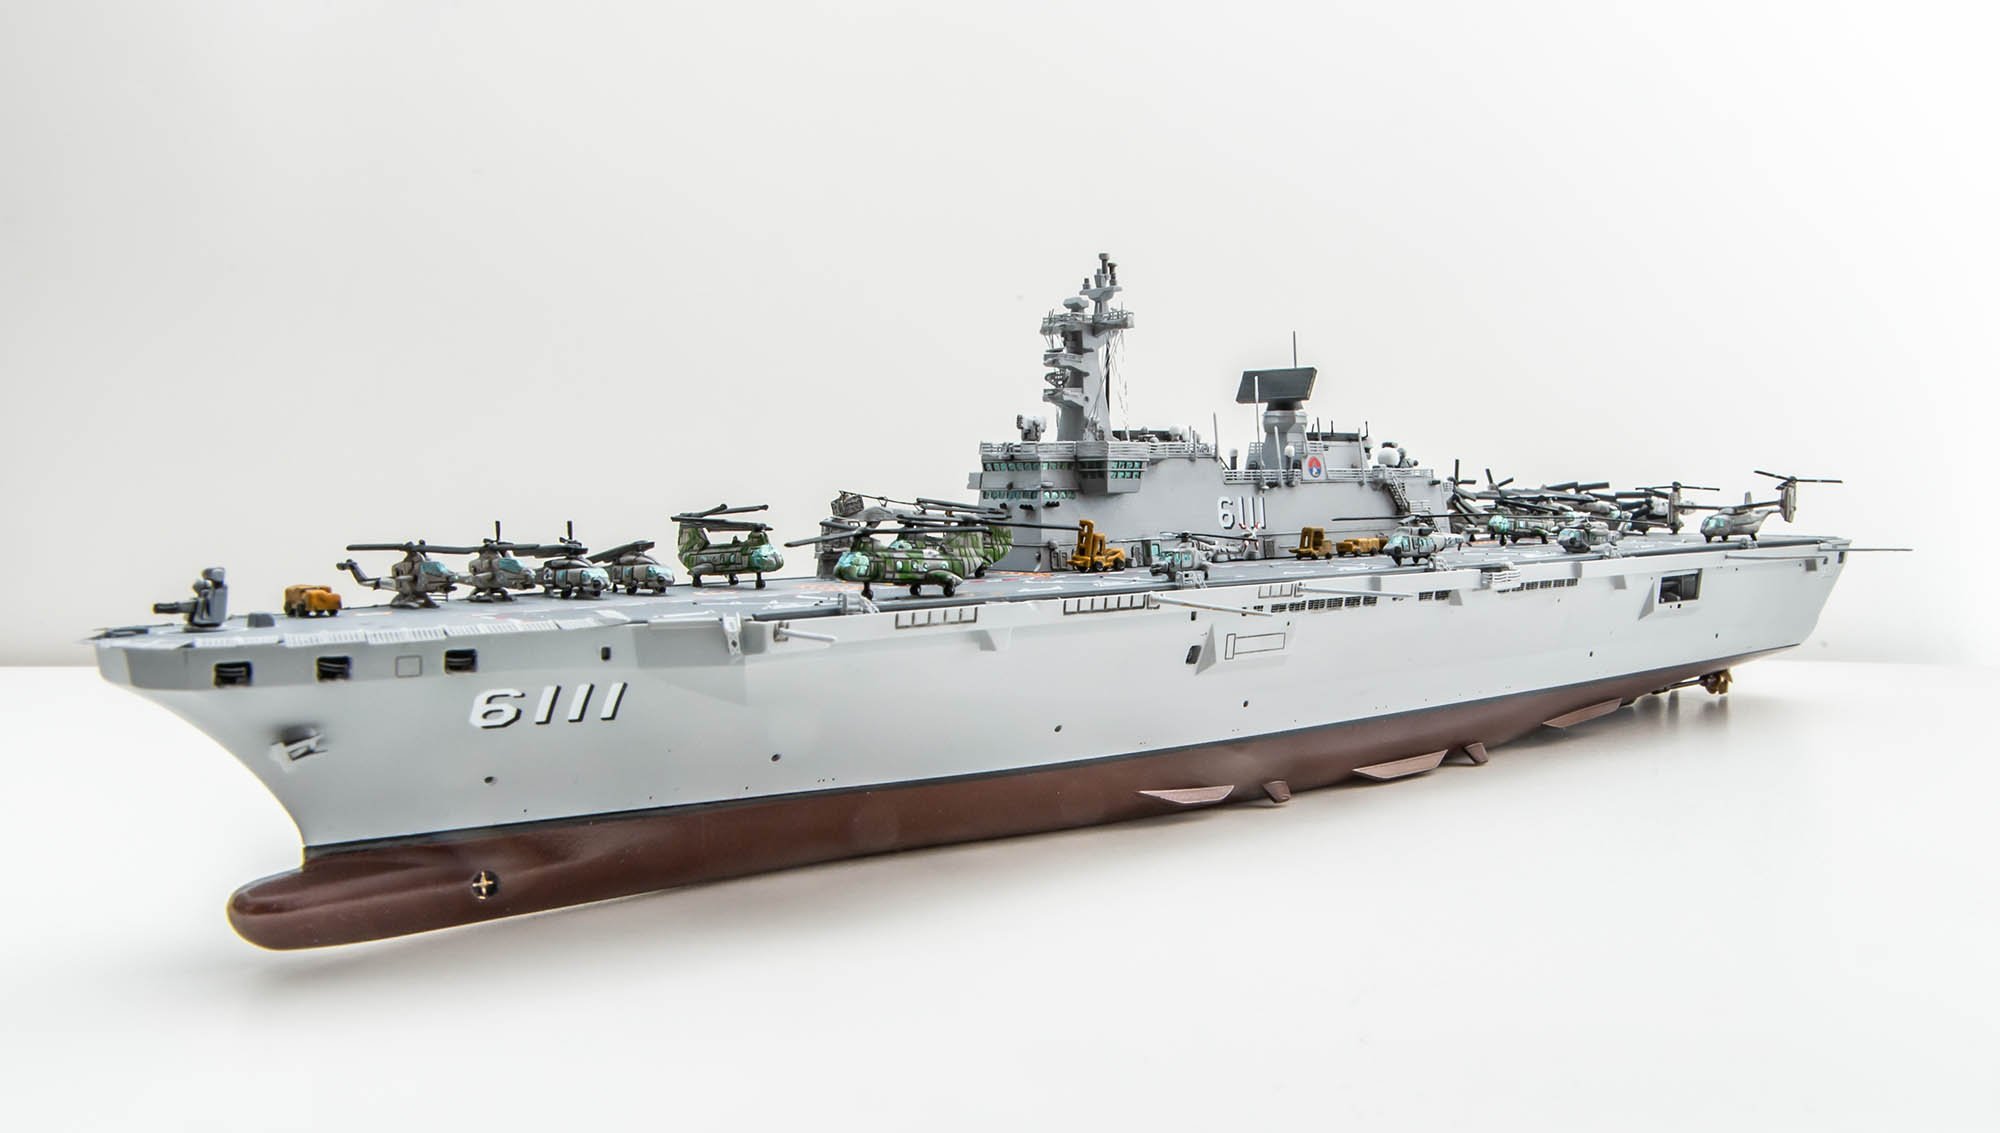
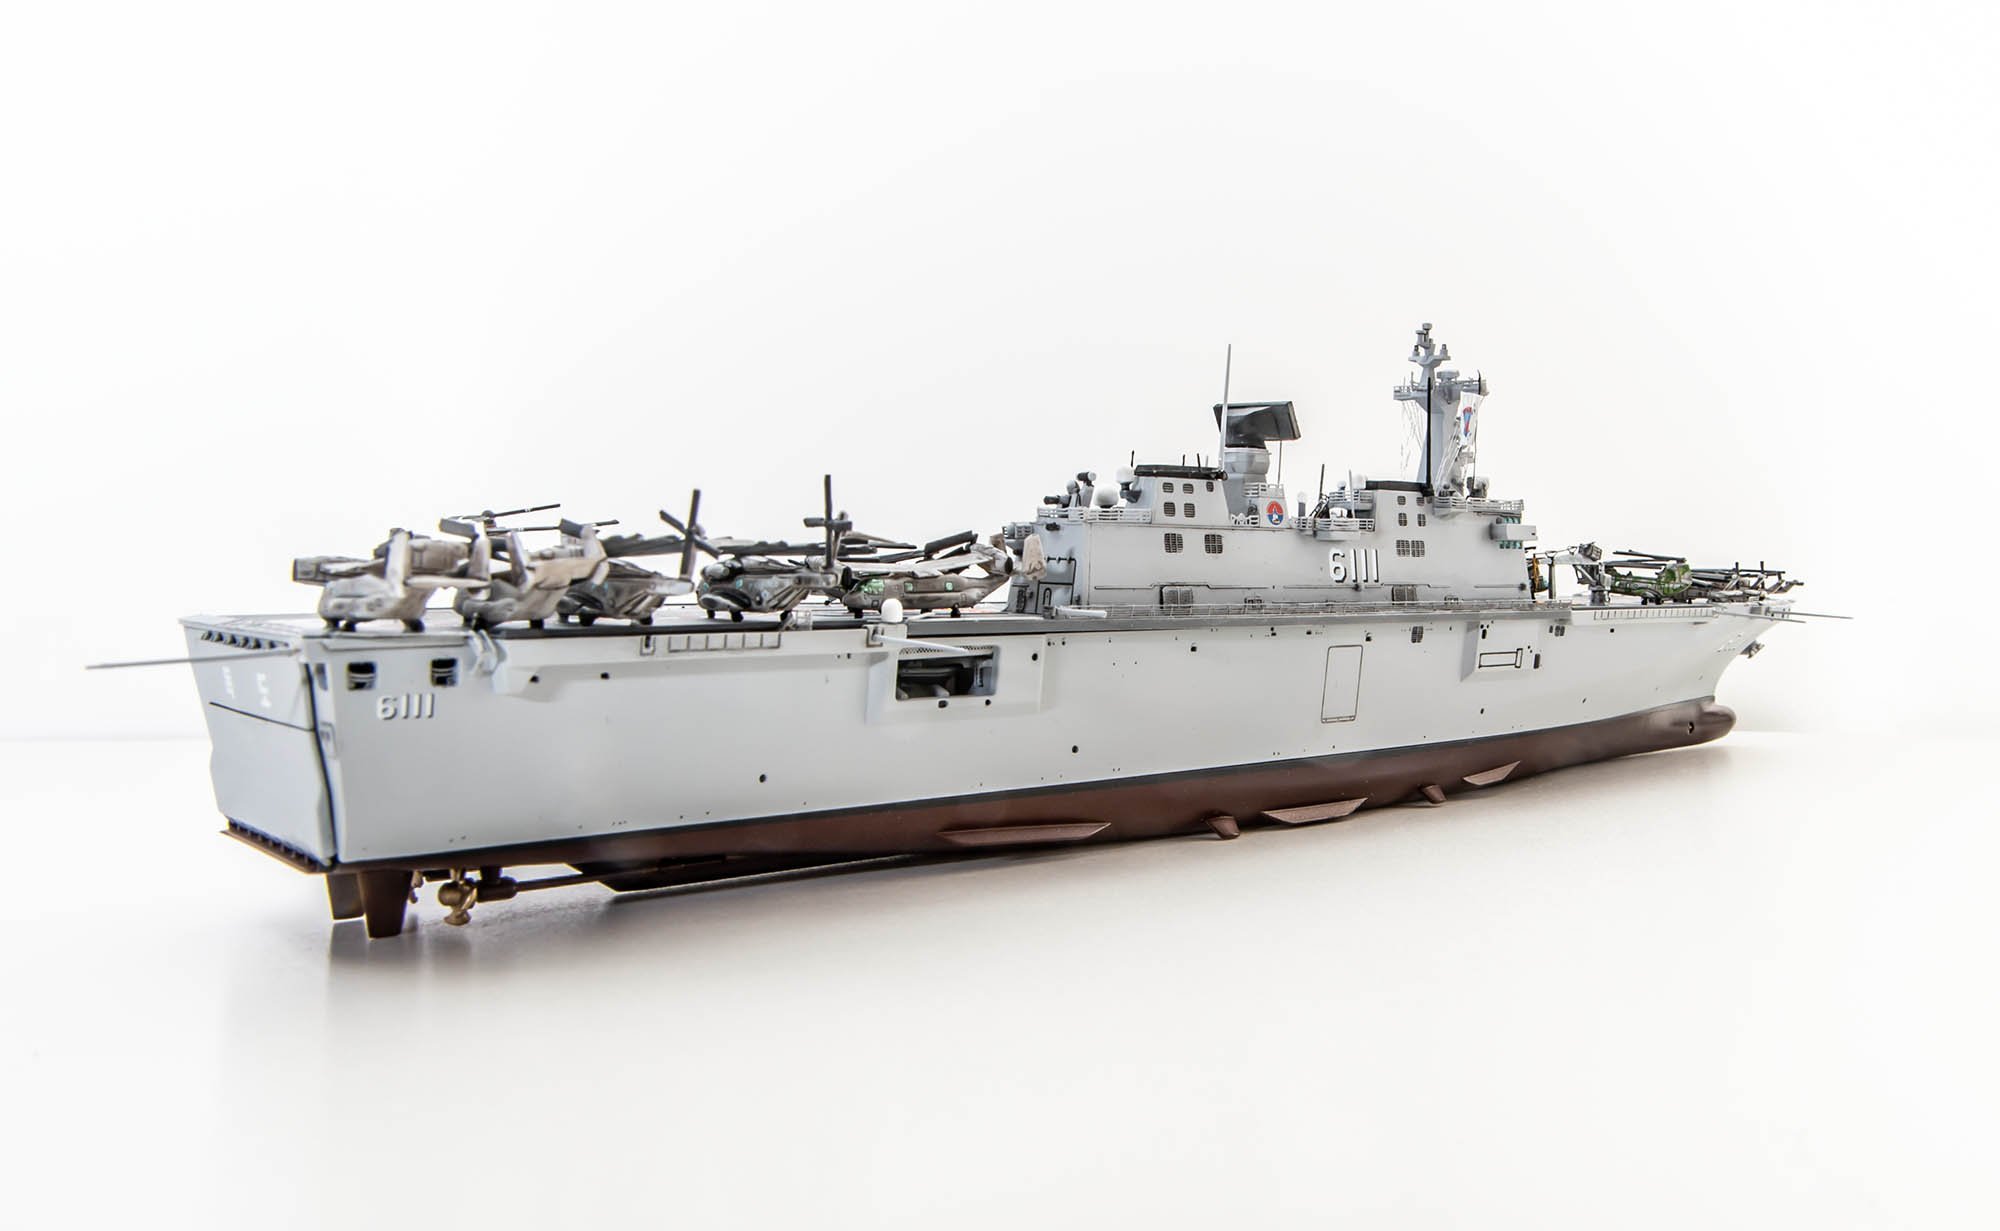
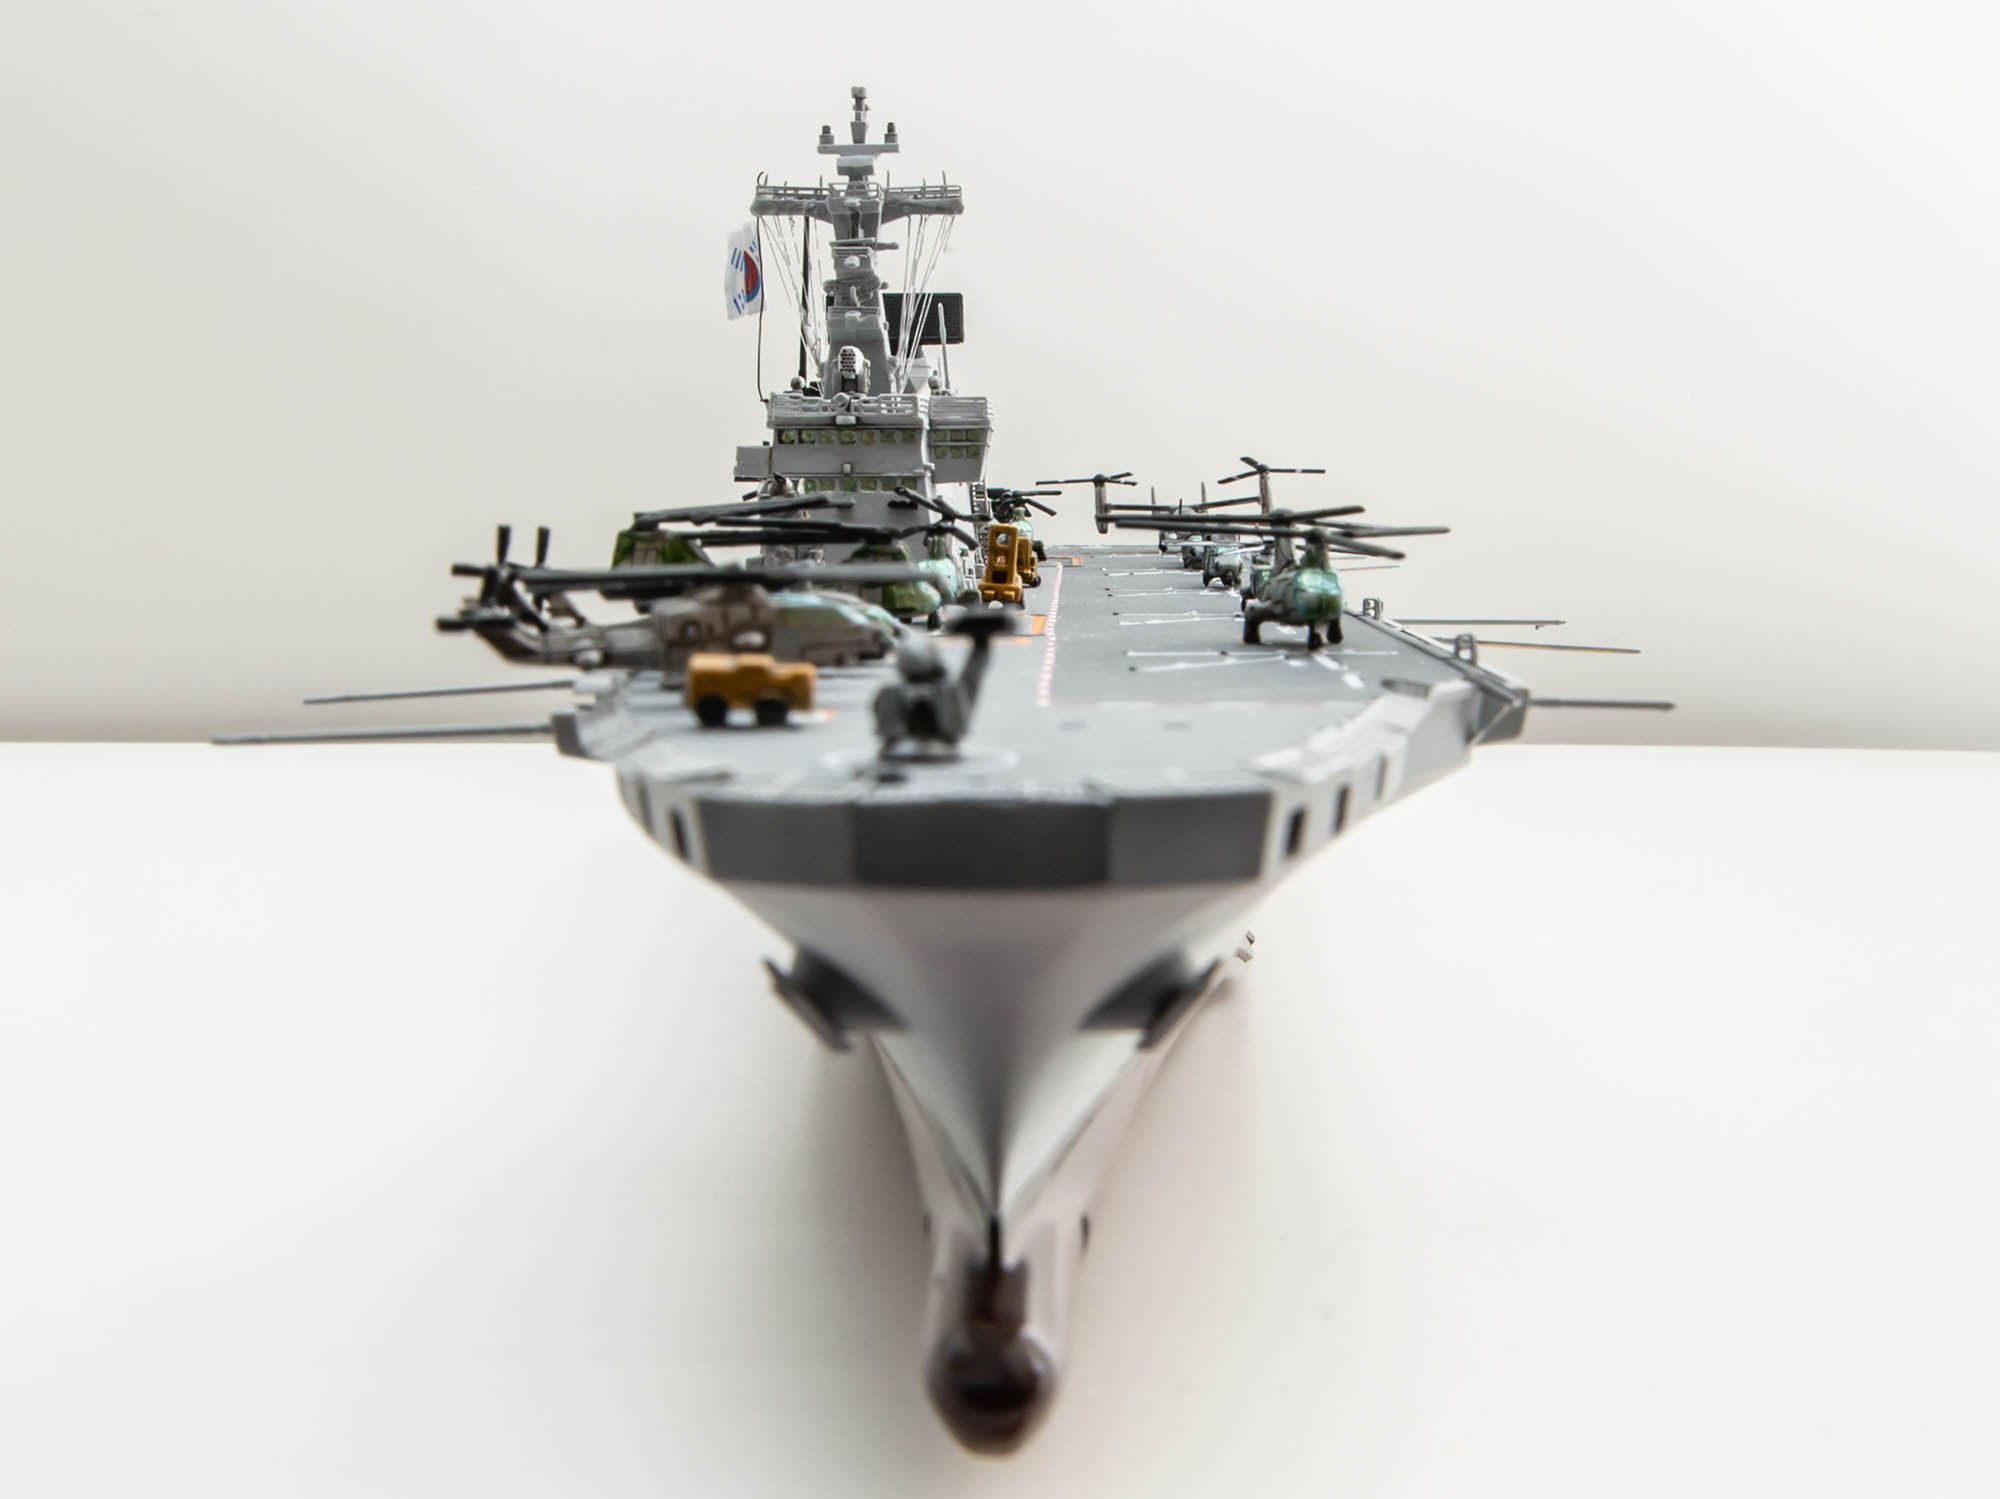
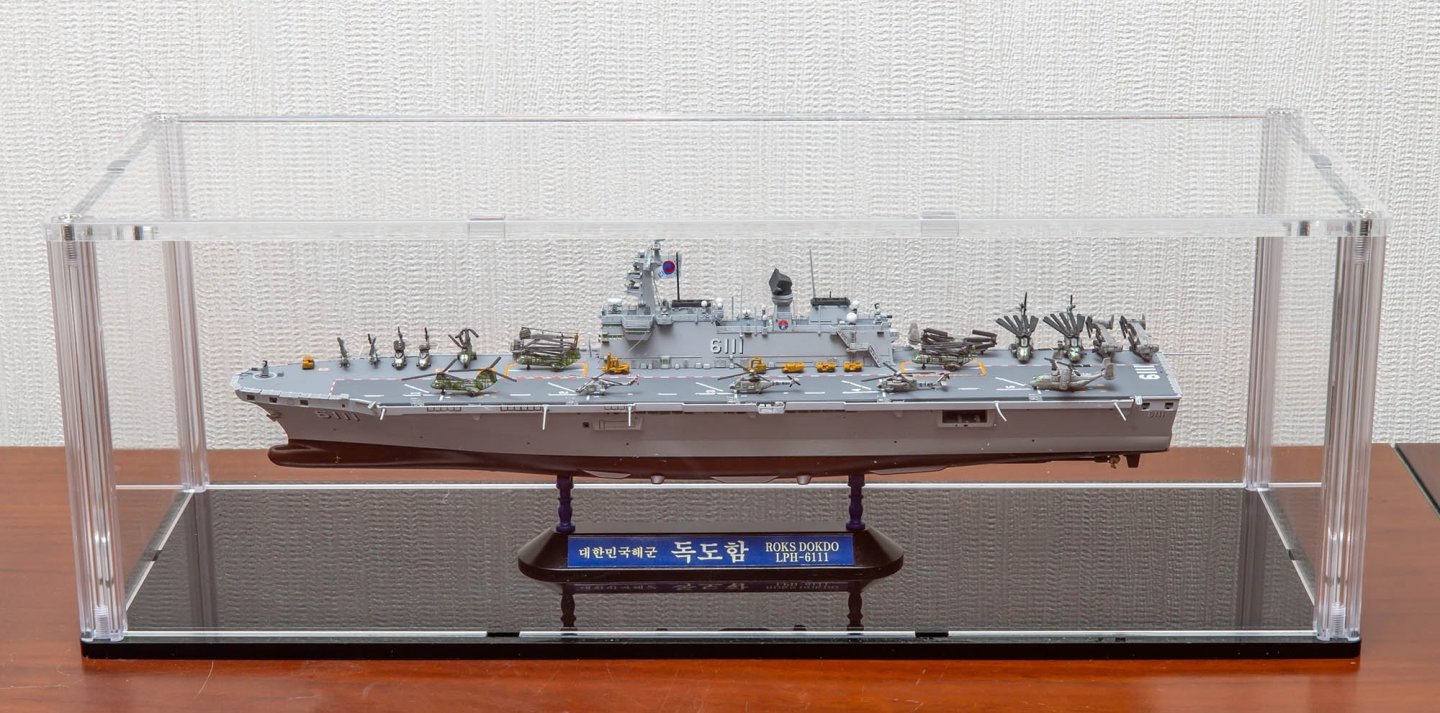
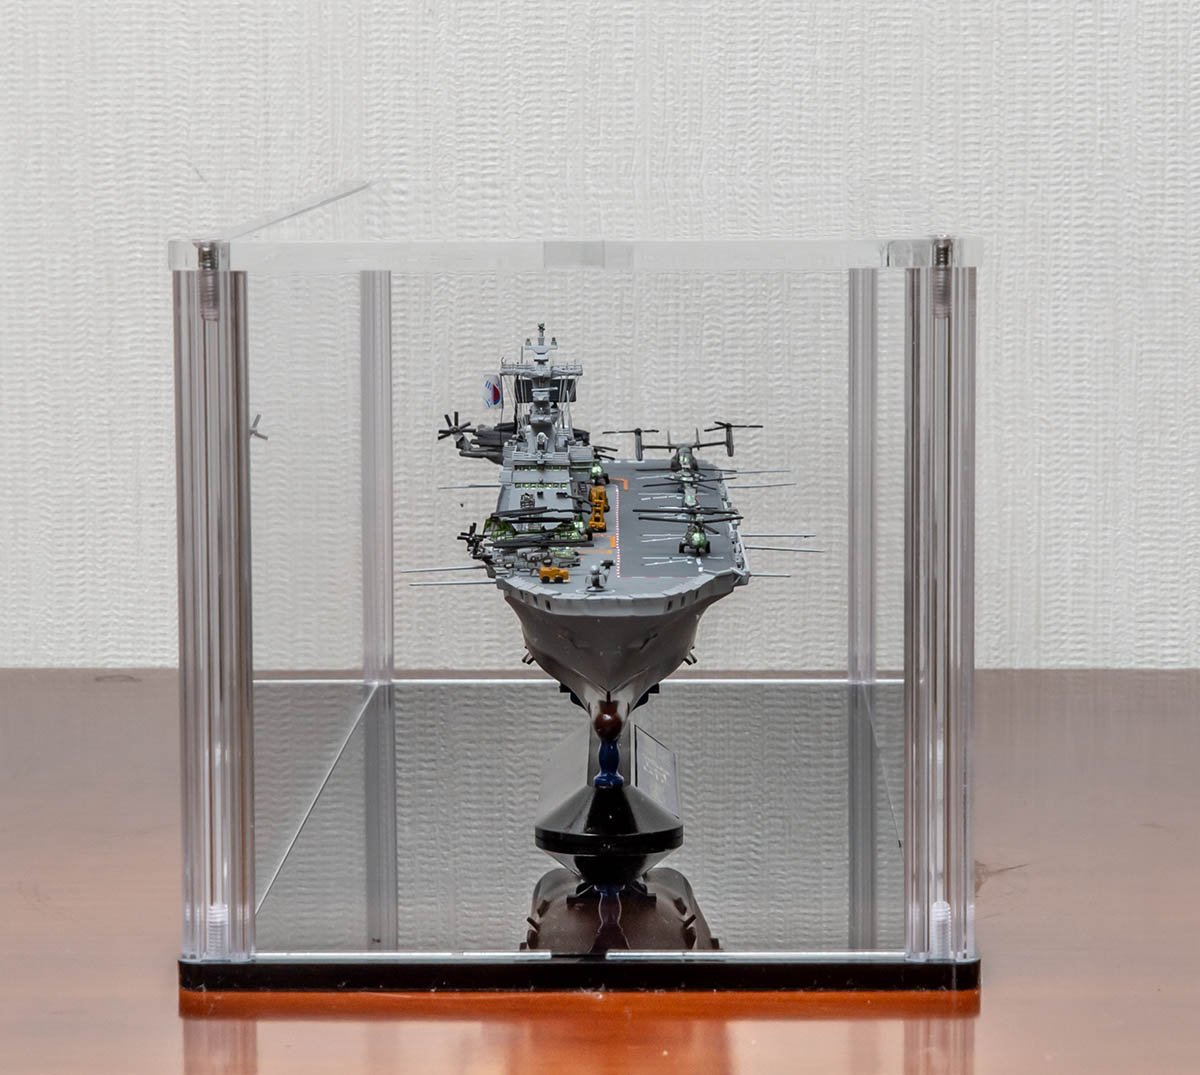
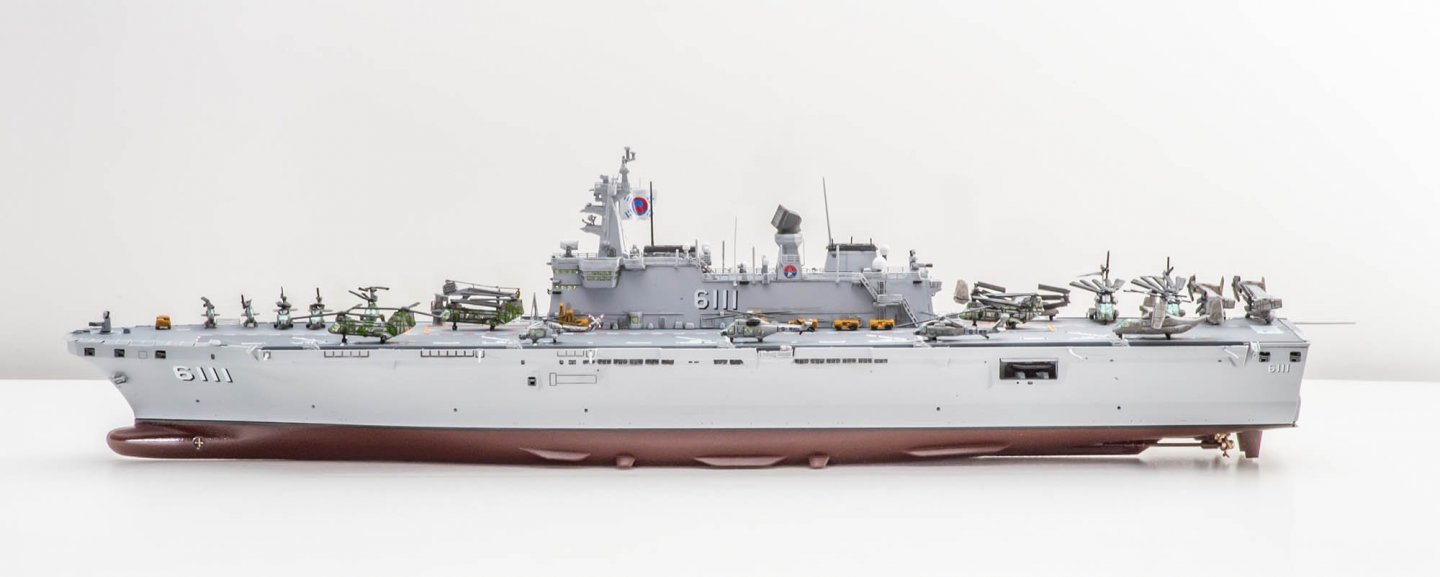
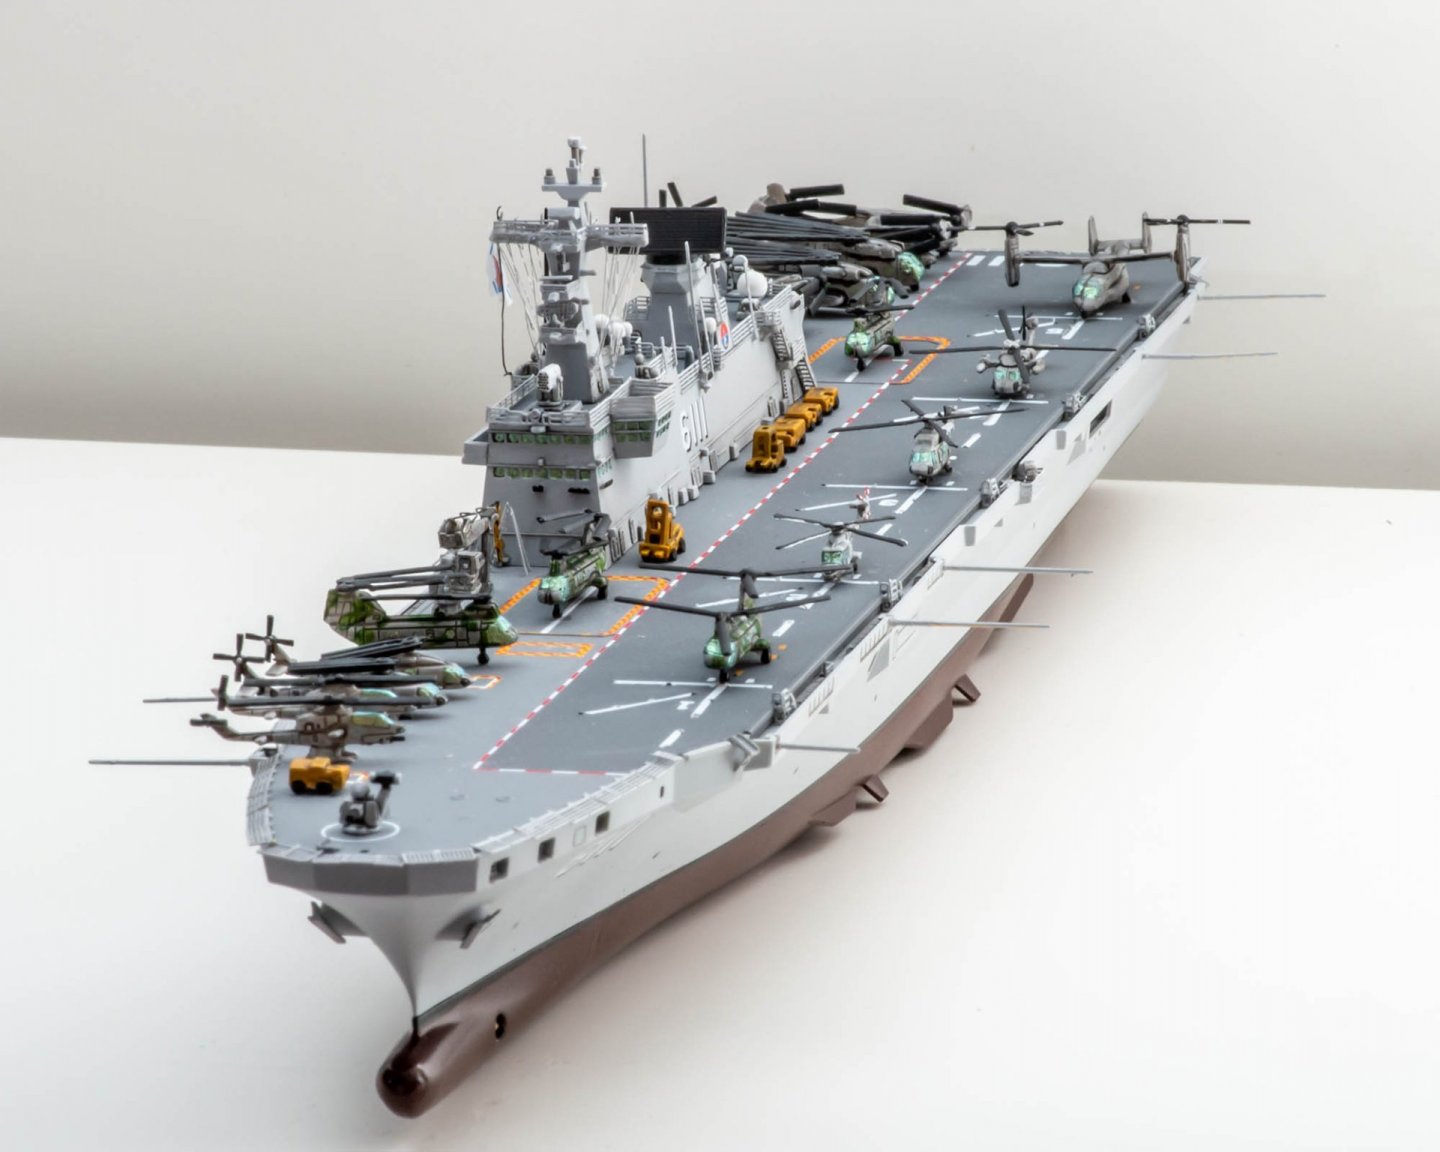
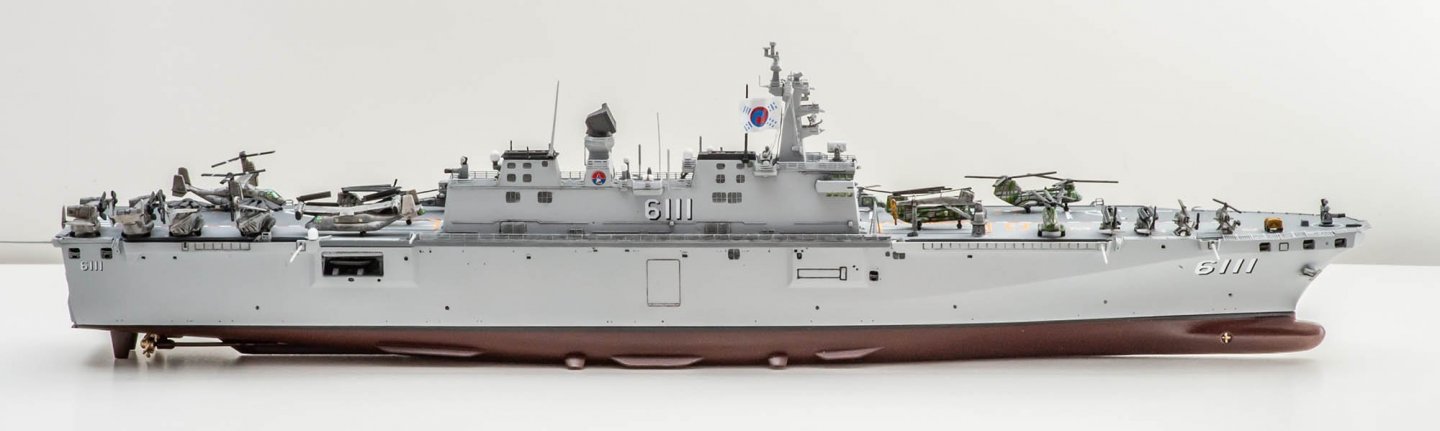
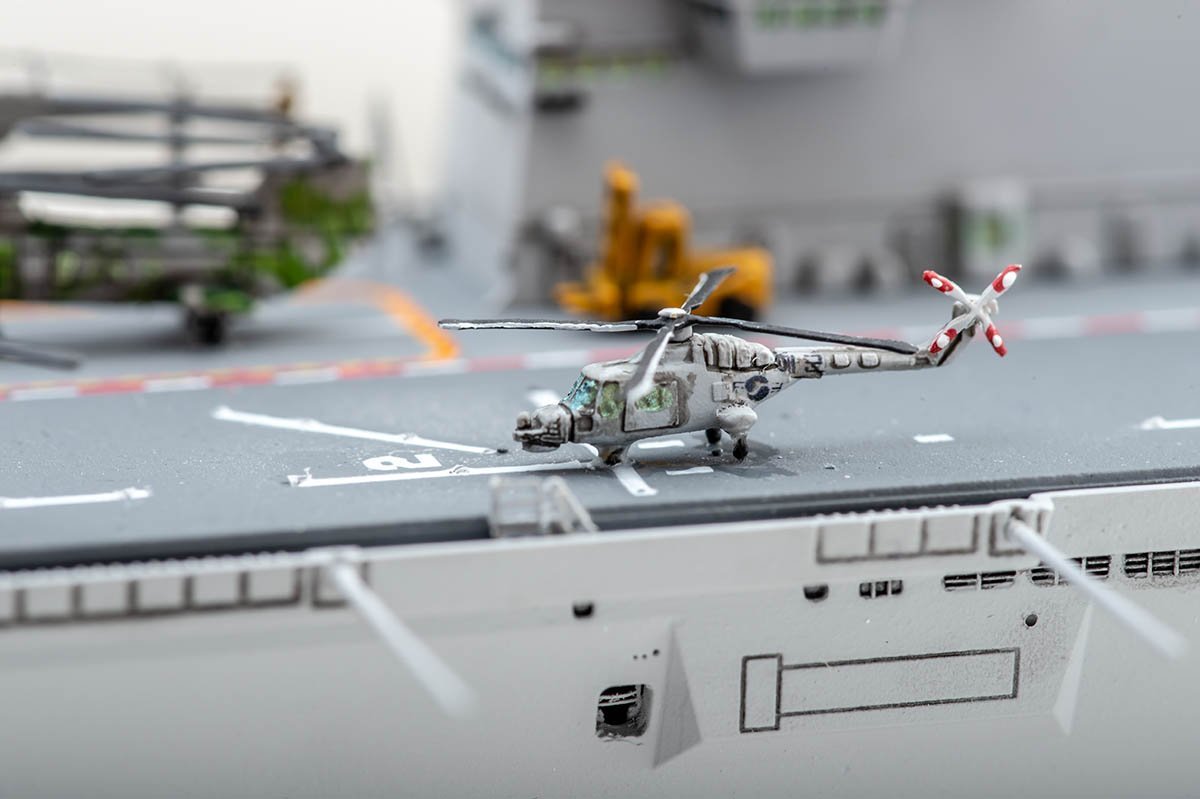
Thanks, Mark! I left enough margin as I used to crop pictures at photoshop. Isn't it weird? ROKS Dokdo isn't the first 1/700 ship I made, but the first ship with PE kit. Tamiya USS hammann was so simple and small that I lost interest quickly. I finally realized that a PE kit is essential for 1/350 and 1/700 battleship plastic models in person. Of course, I can't satisfy with the detail of the PE kit at 1/700 scale. It is just minimum level of detail to enjoy those kits personally. I'm looking for ways to make PE parts for 1/50 scale wooden model ships. I'm eager for more and more details...
-
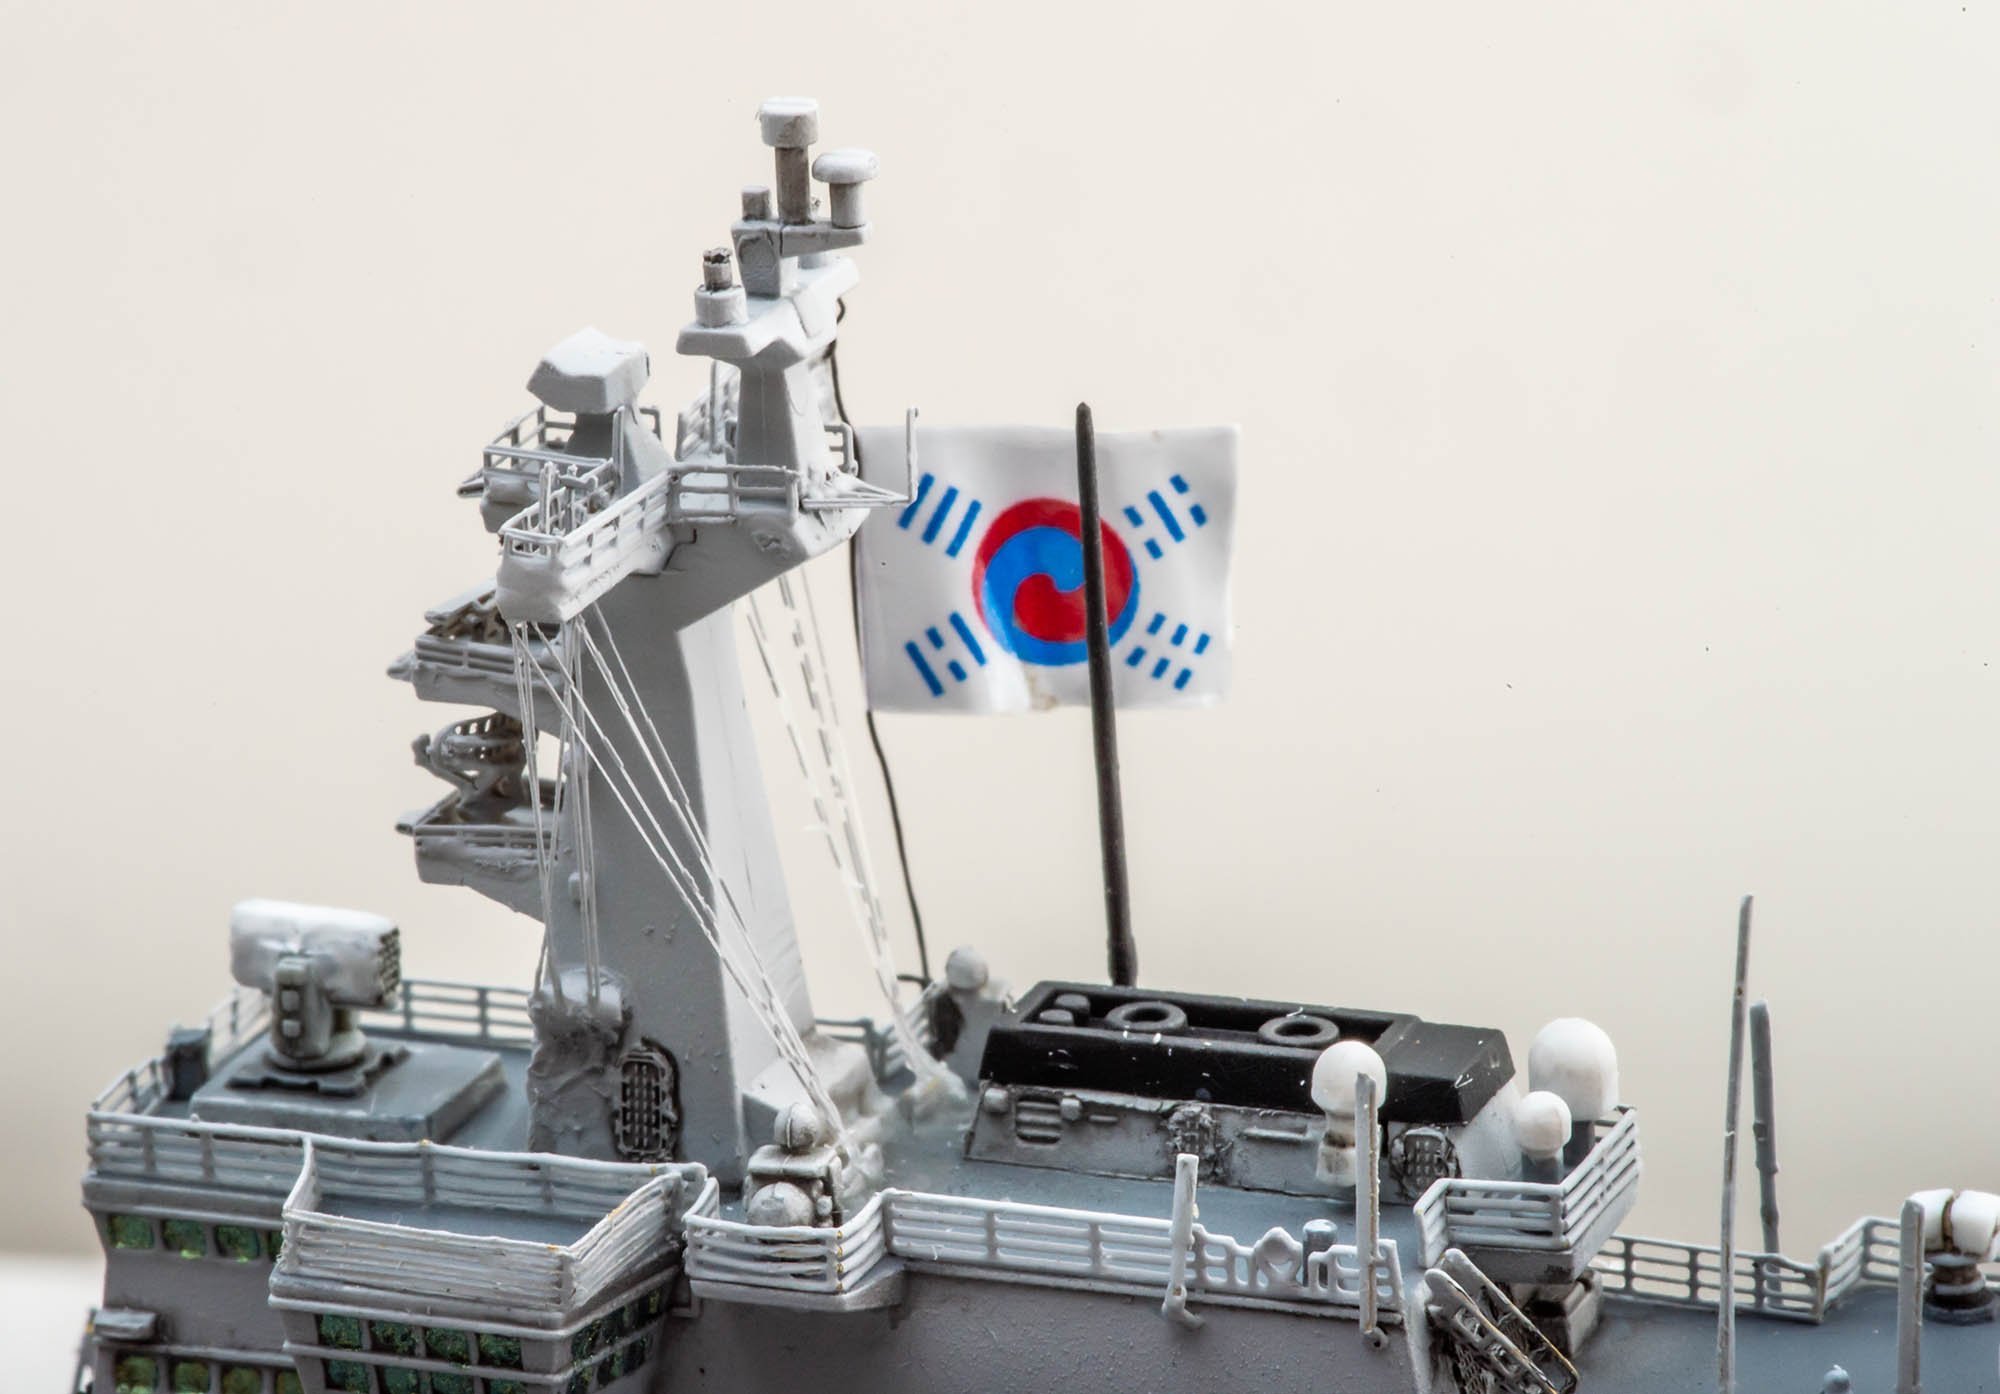
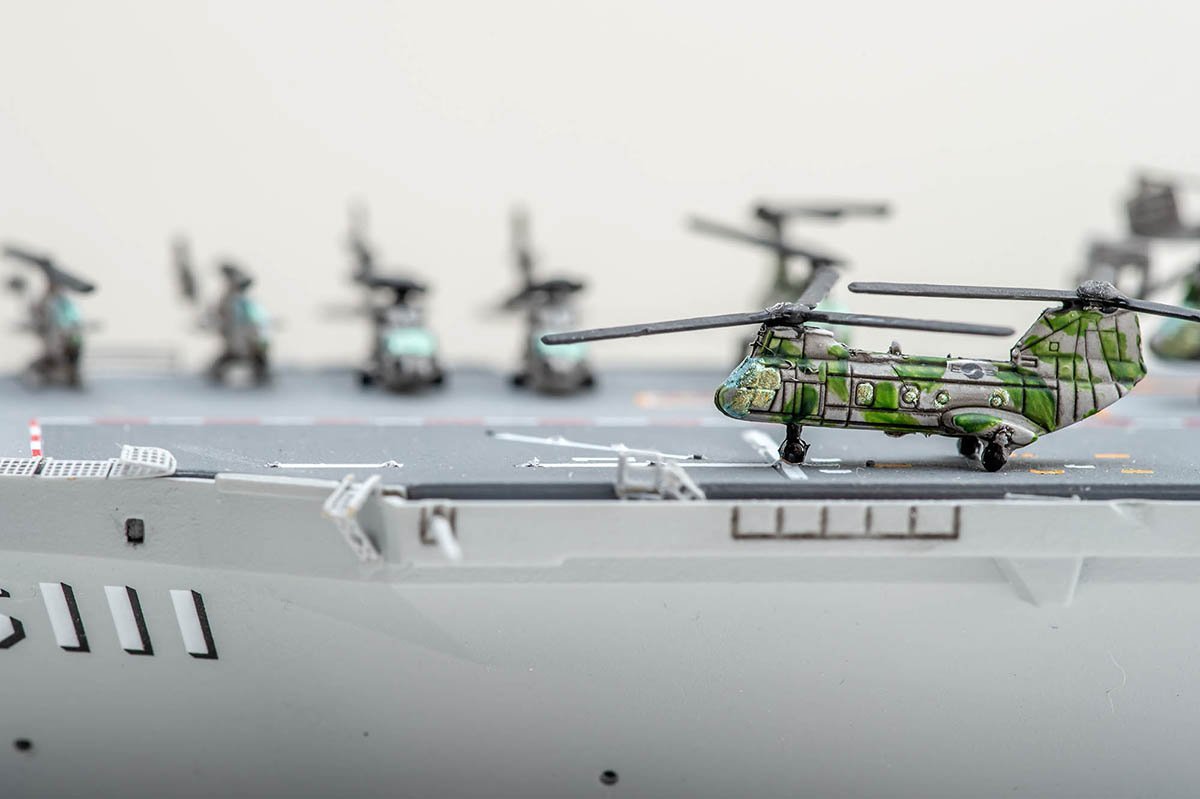
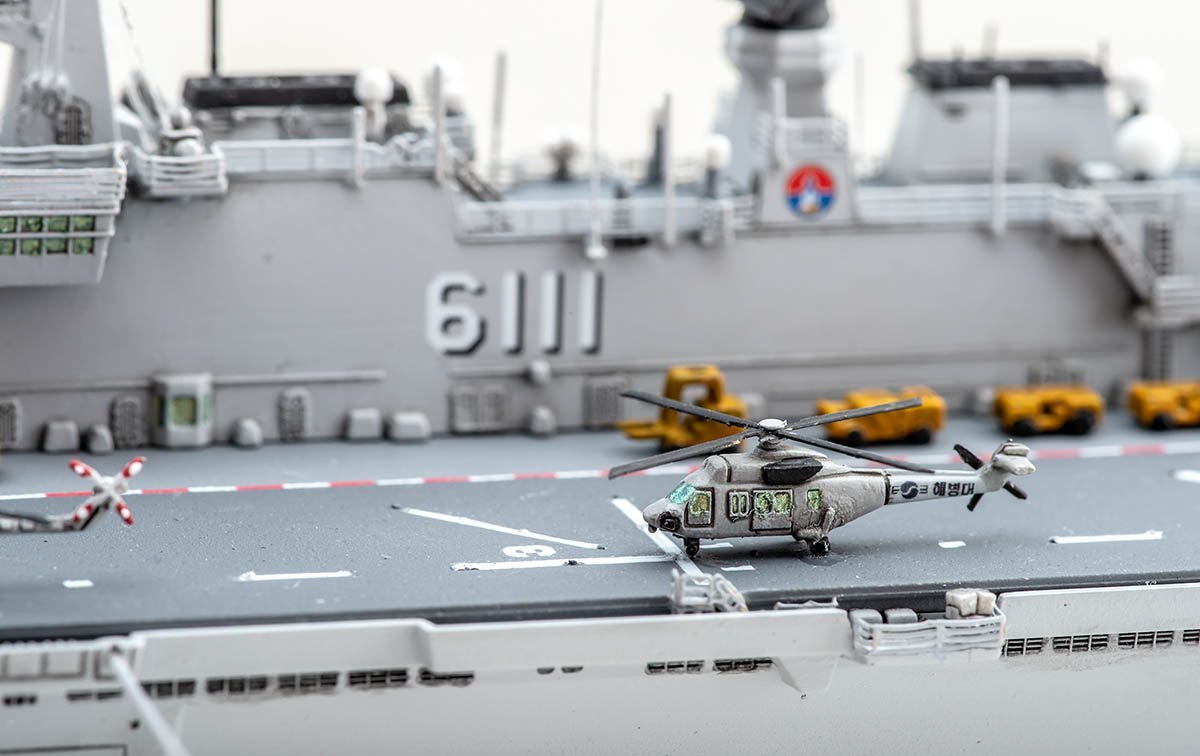
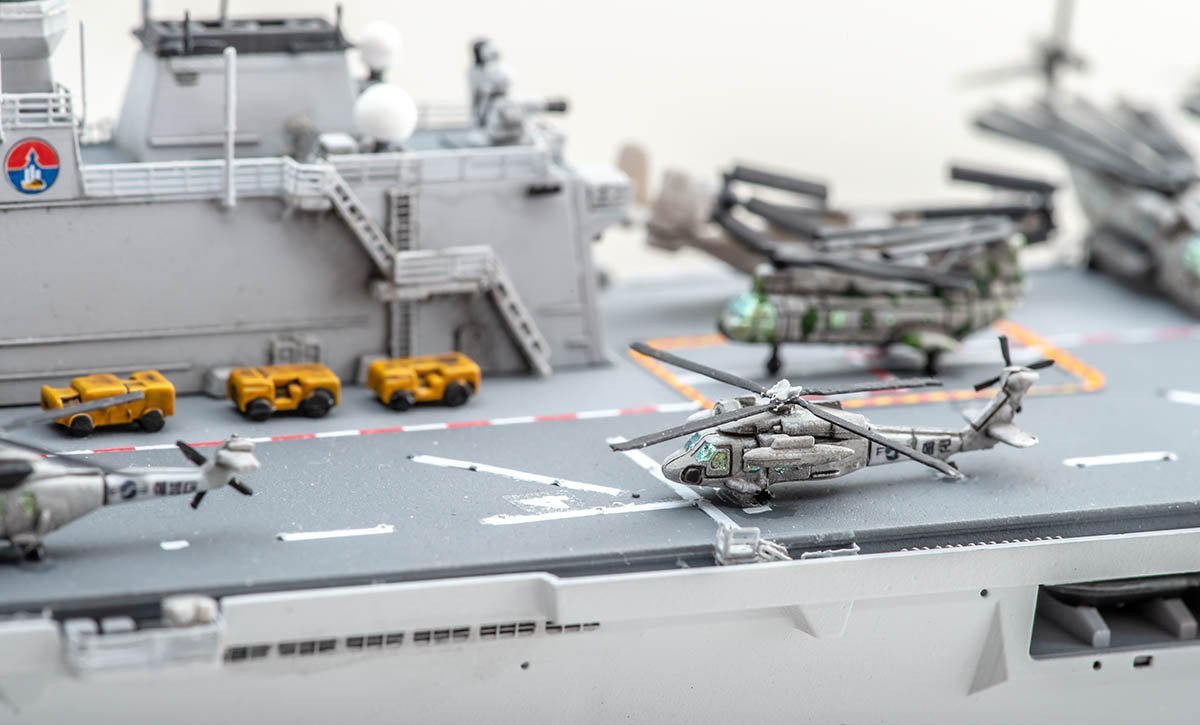
Case shot. And detail shot. I did tons of mistakes on deck planes. I planned to finish all the deck planes within two days... I underestimated them... They need at least same time I spent for bridge... Ths is 'Denny Taeageukgi' which is one of the oldest national flag of Korea in existence. In 1880s, one of last King of Korea granted the flag to Owen N. Denny who was an adviser on foreign policy from the United States. His relatives donated the flag to Korea government in 1981. ROKS Dokdo used the Denny flag at ROK International Fleet Review in 2018. As a consequence, only few of deck planes left for USS WASP LHD-1. I have another plan to fill deck of her. Not this year. 😎


-
Finally arrived! https://www.luckymodel.com/scale.aspx?item_no=BRDBF010 pre-order $600 https://www.themodellingnews.com/2021/09/preview-border-model-bombshell.html Limited quantity, will not produce again.