


modeller_masa
-
Posts
950 -
Joined
-
Last visited
Content Type
Profiles
Forums
Gallery
Events
Everything posted by modeller_masa
-
Hello, Doug. Welcome to MSW. I'm a newbie like you, so my advice may not be helpful for your case. The core contents of this forum is centered on wooden model ship among the 18~19th century ship of the line. Therefore, this board which covers plastic models may help your work. Plastic model kits : https://modelshipworld.com/forum/26-plastic-model-kits/ Also, you can try a liquid masking sol instead of masking tape. It is more tangible and easy to cover bumpy surface.
-
VAC-U-DUCK - Vac-U-Boat by Osmosis - FINISHED
modeller_masa replied to Osmosis's topic in Non-ship/categorised builds
A hawk will hunt your duck if you launch it on river. -
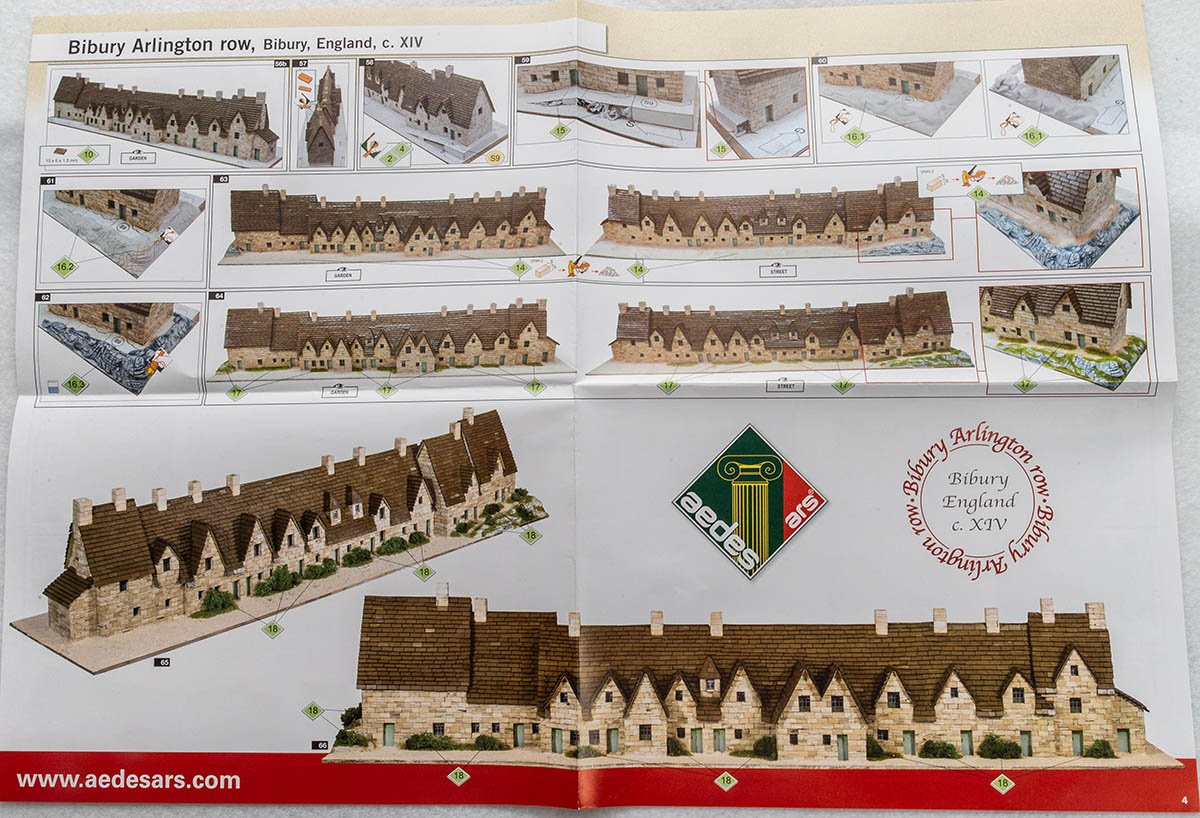
https://www.amazon.com/s?i=aps&k=aedes ars&ref=nb_sb_noss&url=search-alias%3Daps Here is the link. The price is usually from $25 to $99. Please check the full catalog from the manufacturer's site. Only a few of them looks good in my opinion. I'm almost done to make the MDF bones. I may upload the next progress today.
-
Confirmed the first source. He is running a hobbyshop in South Korea. ( https://hobbyall.co.kr/ ) He opened me an information about future import kits in April. 1. Caldercraft - HMS Victory 1:72 - HMS Agamemnon - HMS Snake - HMS Cruiser - HMS Diana 2. Victory Models - Revenge 1577 - Mercury russ. Brigg - HMS Pegasus - HMS Vanguard - HMS Fly - HM Granado 3. Amati - Bireme griech It is the first time SK hobby shops sell wooden model ship kits except from the AL! Also, the Model Shipways, Constructo, Mamoli, Billing boat kits will come after these kits. Moreover, he has more plan to expand import lineup widely. Finally people in SK will know that the wood ship maker is not the only one. I hope it becomes a singularity for SK modellers.
-
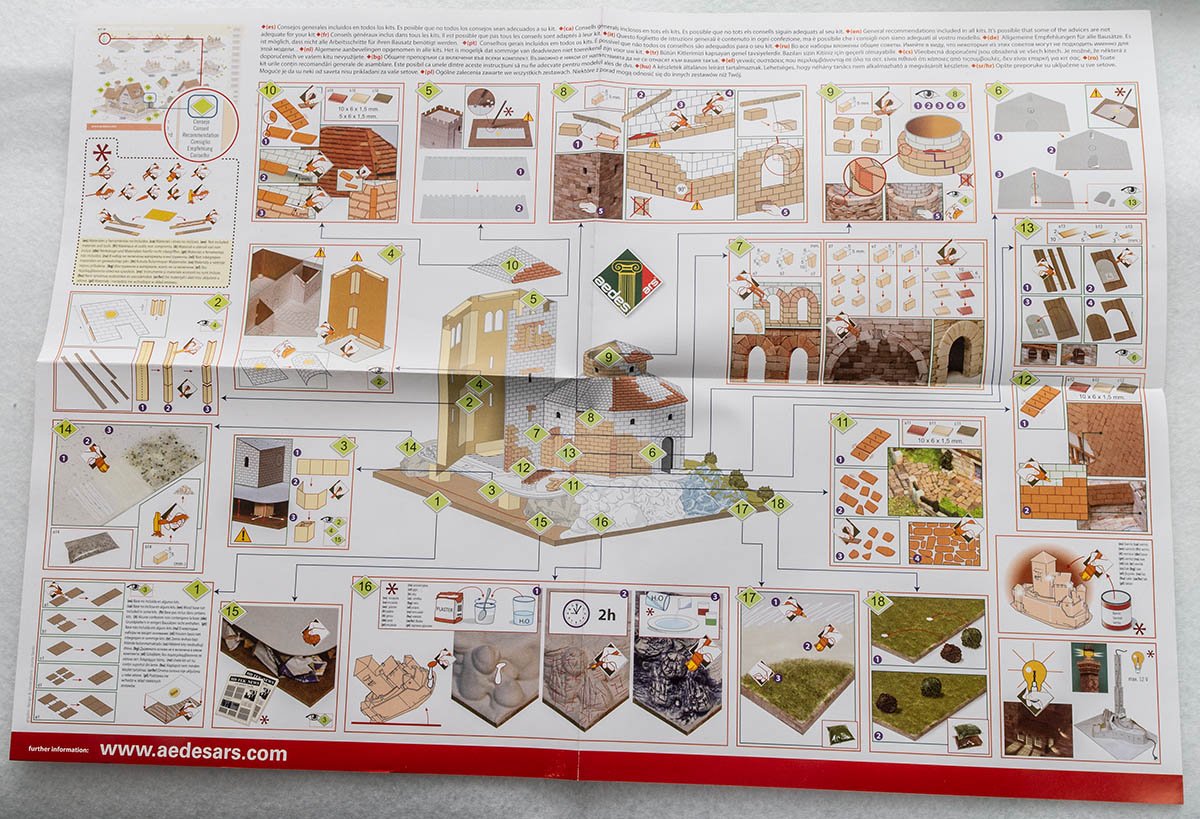
OMG... Is it true? I planned to follow the tracing lines of the stones precisely... To fit the lines, I was making some flatten jig with MDFs, and will cement the gap with modeling paste and white acrylic paints. Yes. The realism is one of my goal. Some youtubers used CA glue with huge gap between blocks, and it looks really... not nice. This is the only part I'll use CNC machine. It's not that difficult job to make me discouraged. I can't make supports like you because it seems difficult to me. Although I'm a picky guy obsesses over a right angle, my handcraft skill is not good to make a right angle. Therefore, I use the computer machine that cut the MDF precisely for me. Please consider it as a beginner's overaction. I really appreciate your advices, and my track will line your route soon.
-
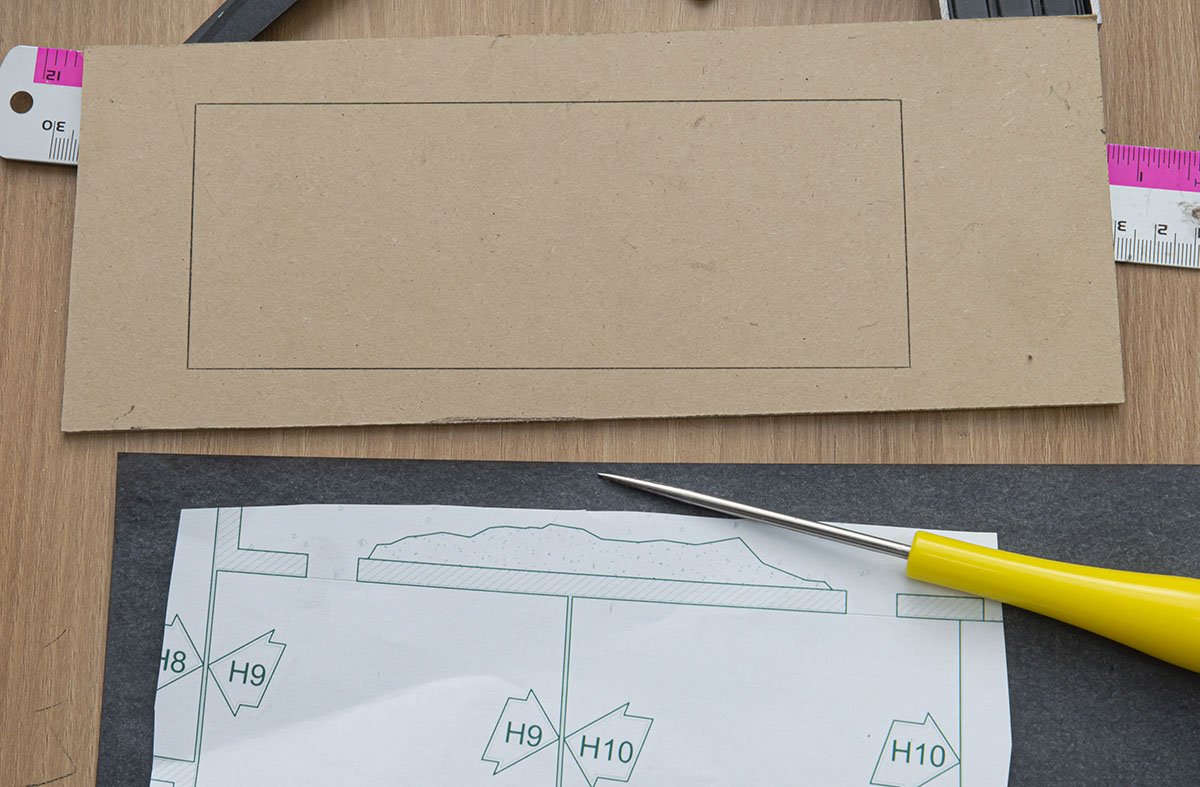
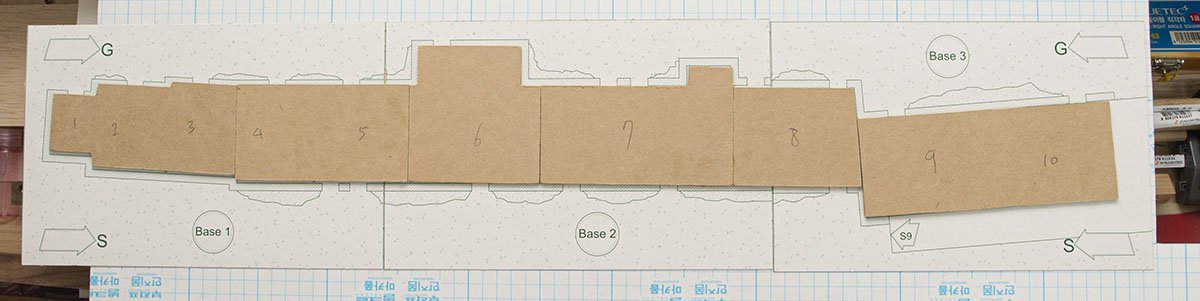
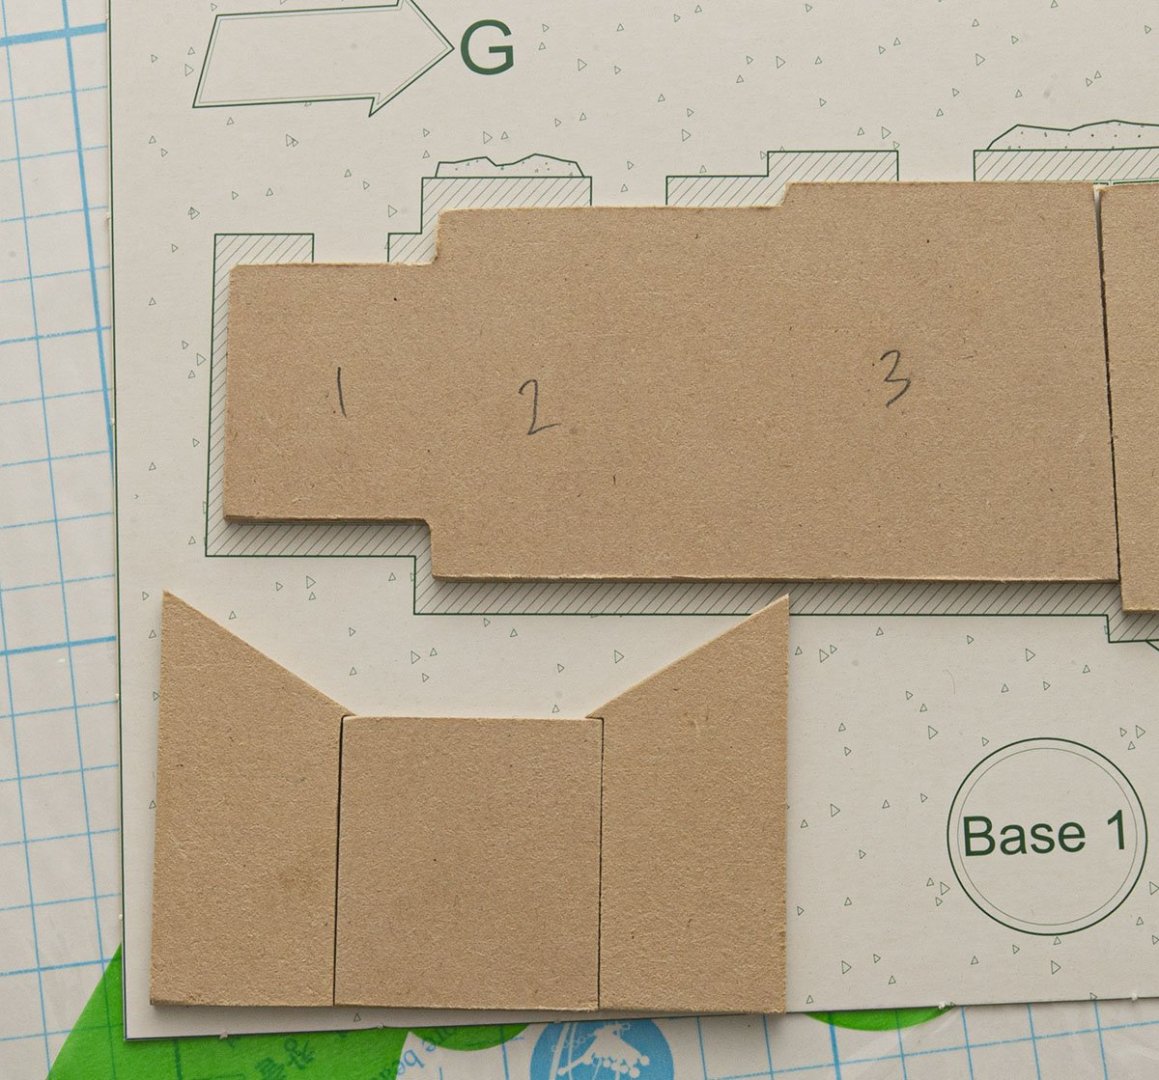
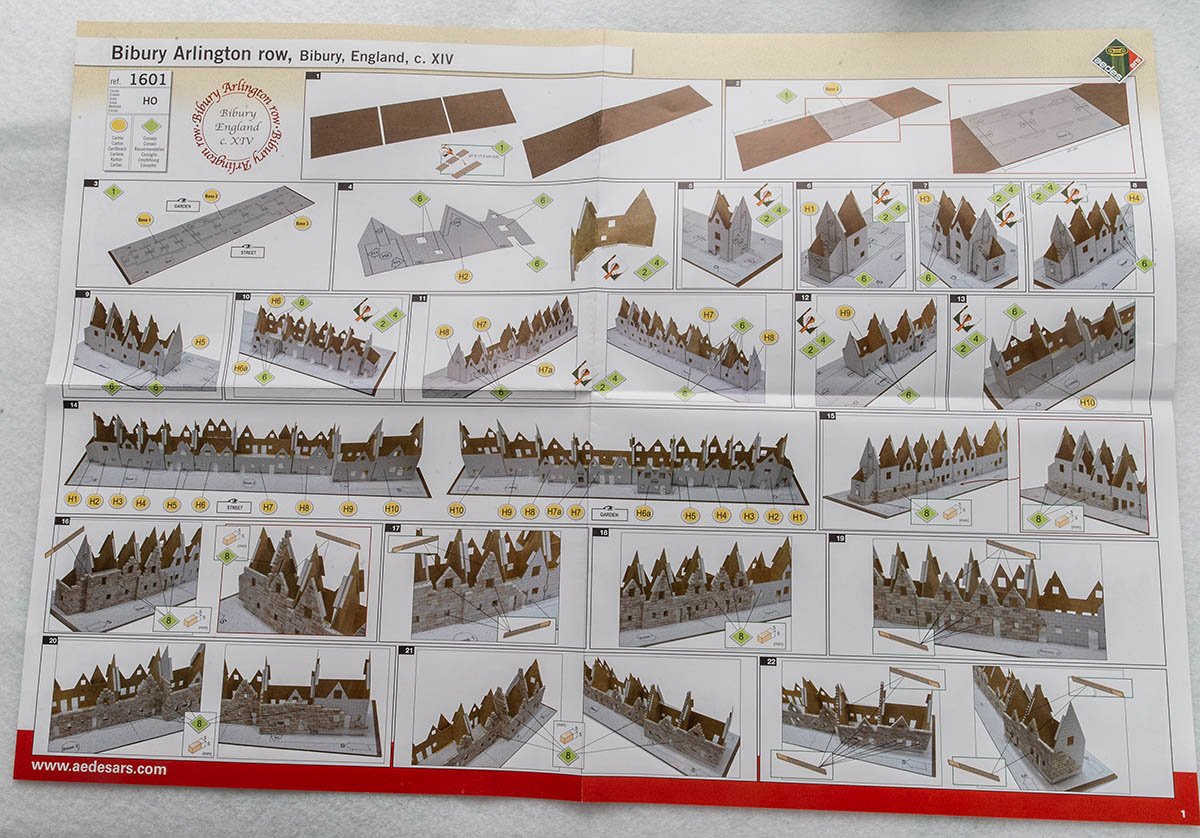
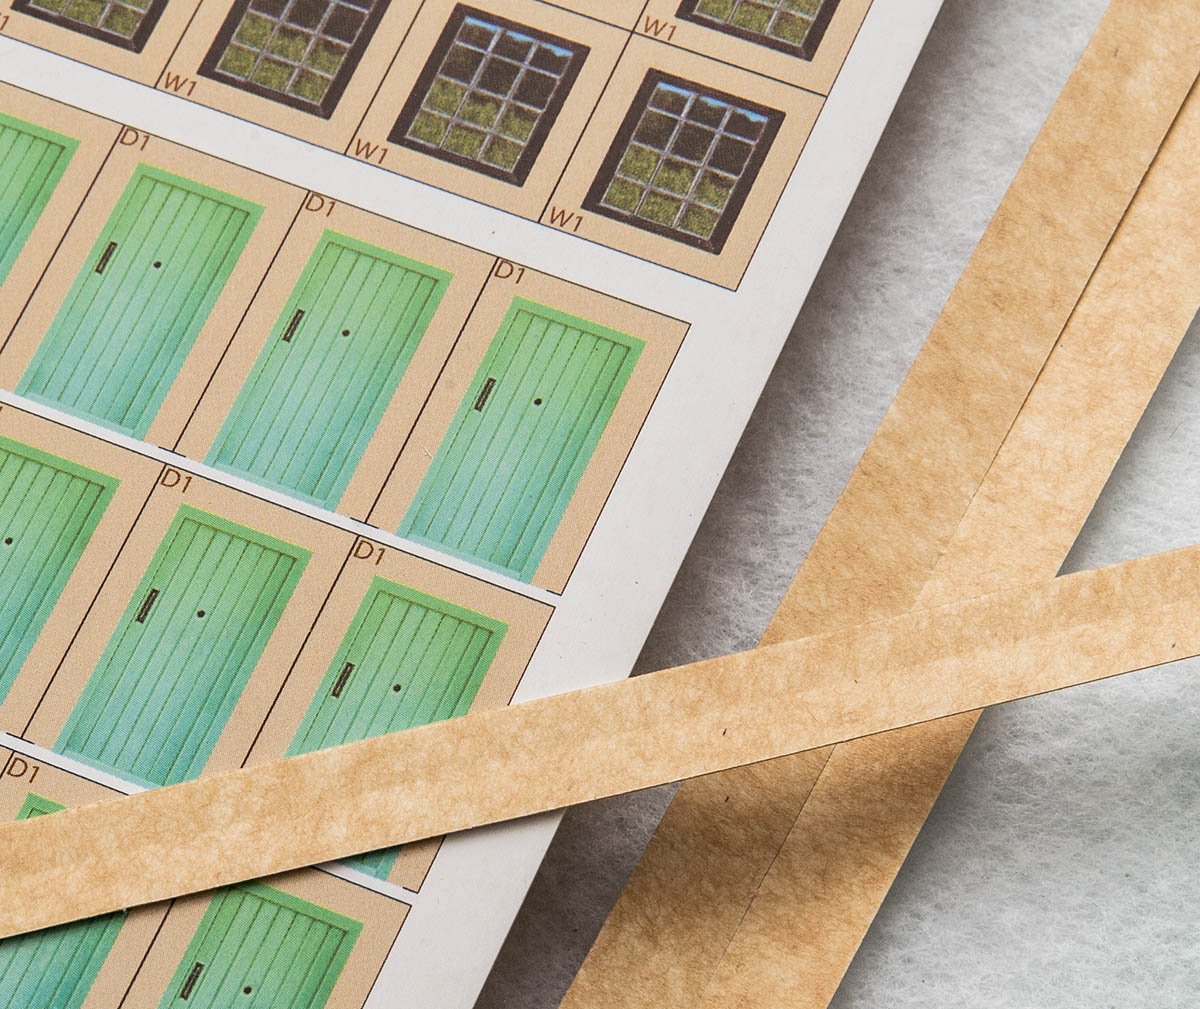
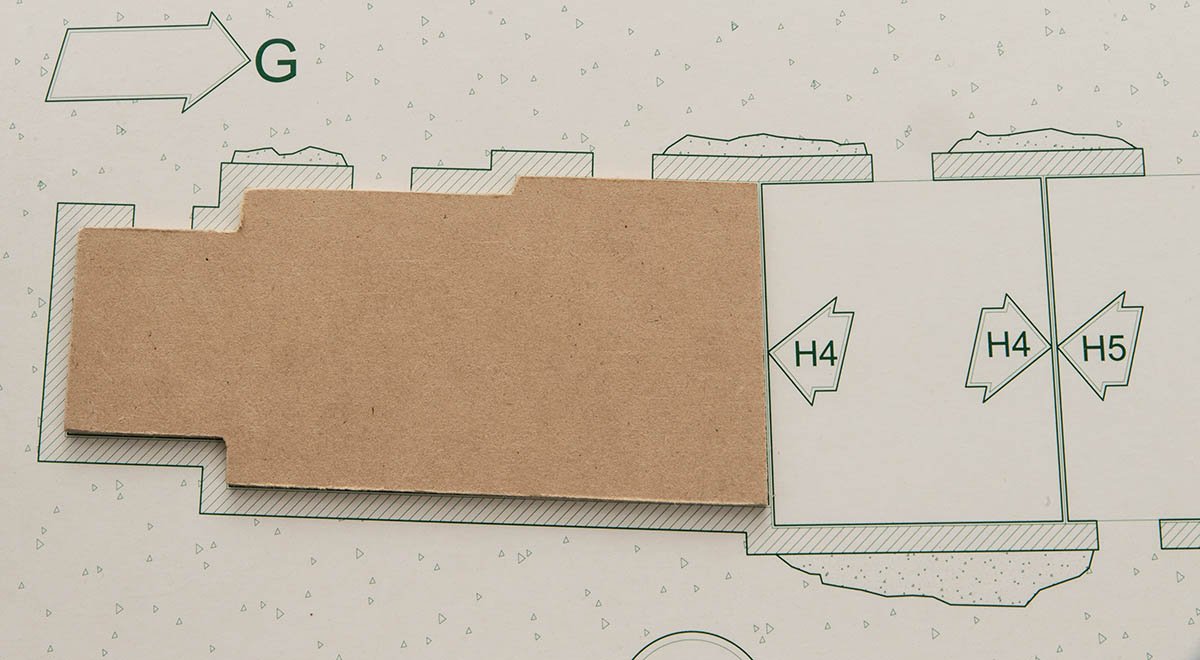
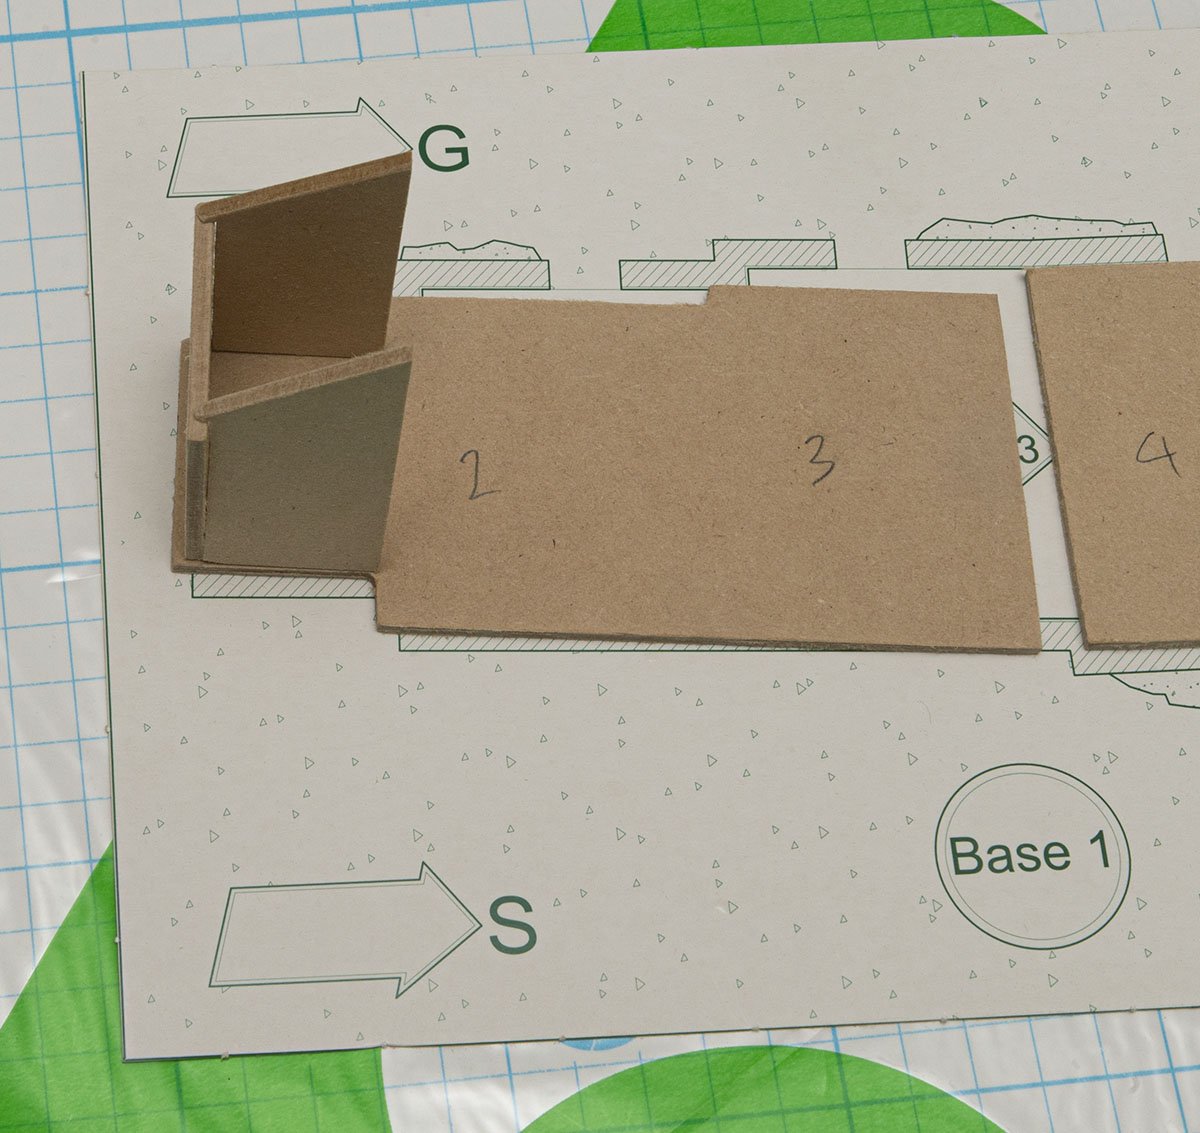
Some base parts are bigger than my CNC coverage, so I copied the line with carbon paper and gimlet. The base parts are easily done. The next is inner bones of each houses. It is a House 1. I had to consider a thickness of the 3mm MDF. I'll draw block guide lines on it with carbon paper. However, not everything ran smooth. The real problem is due to an inaccurate original cardboard itself. The plan's cutting lines are not fairly accurate, the scales of each of printings are slightly different, and each of rectangles' corner is not perfect right angle. There are always 0.2~0.3mm of margins or errors. I can't bunden the fatal errors. I'll fix all of the plan and make them all very sharpened right angle. Oh, you may not need to consider these errors if you use the flexible cardboard instead of thick MDF. -------- OOPS. I just found that the MDF's thickness is not 3mm, but 2.80mm which can cause the serious differences. I may not need to fix all of the plans. I should have check all of materials precisely...

-
Thanks for the advice, Ekis! The tip'll reduce my work. I'll follow your fantastic middle age castle I dreamed. 😁
-
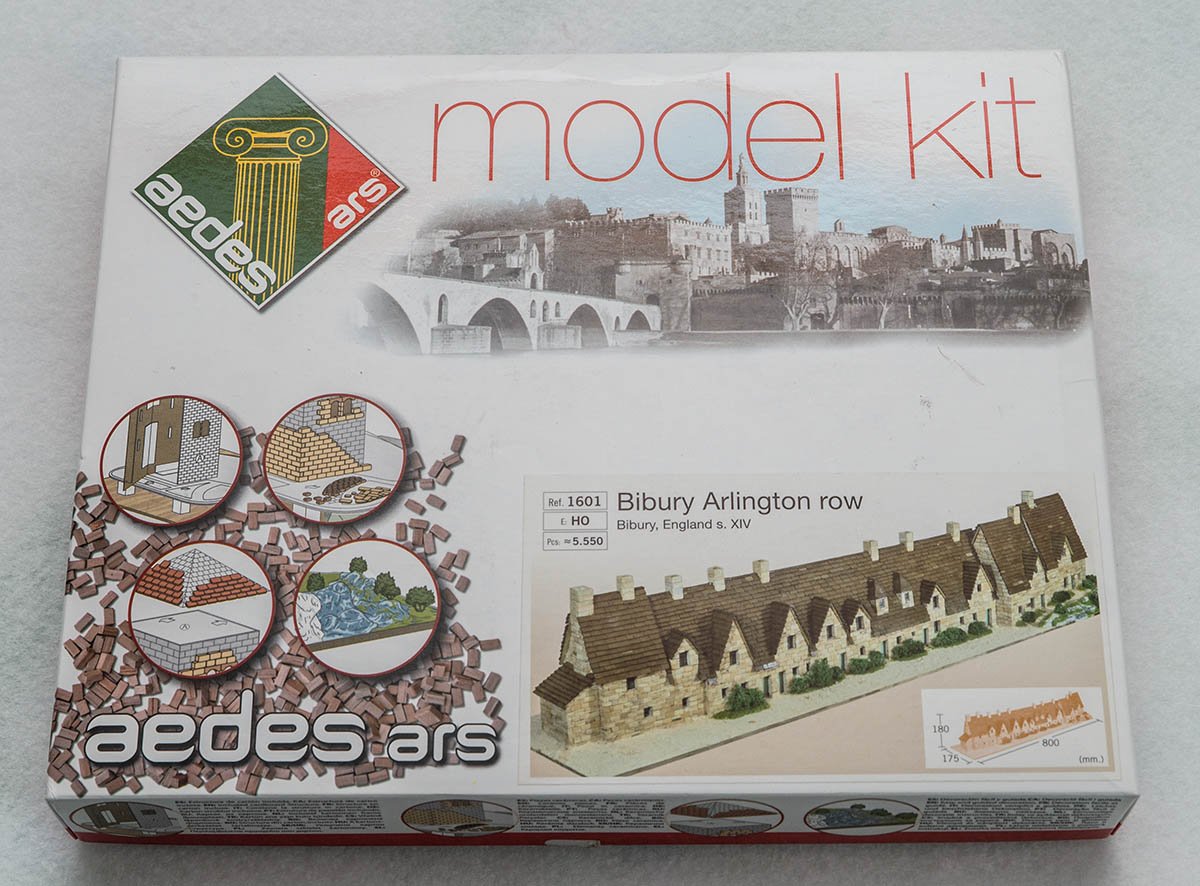
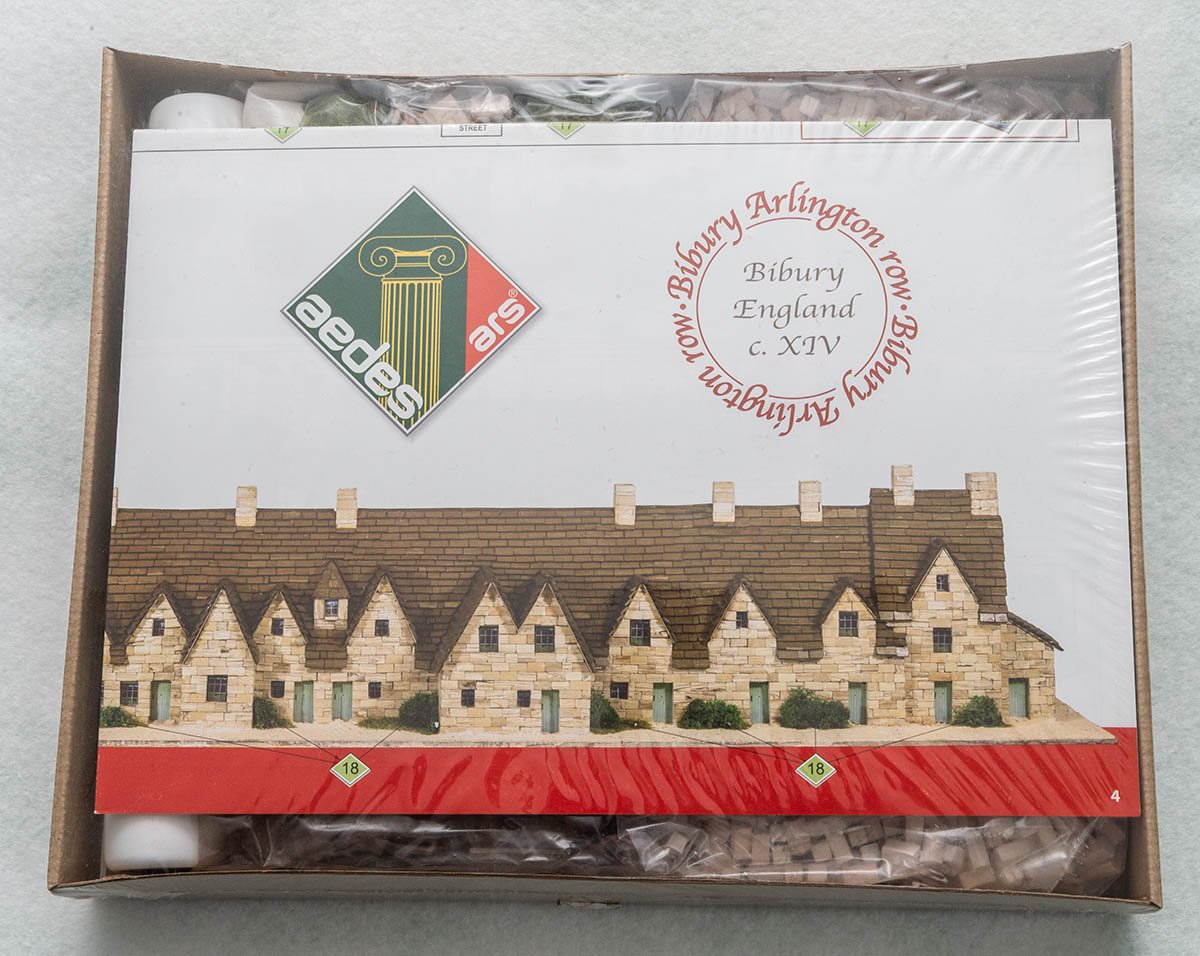
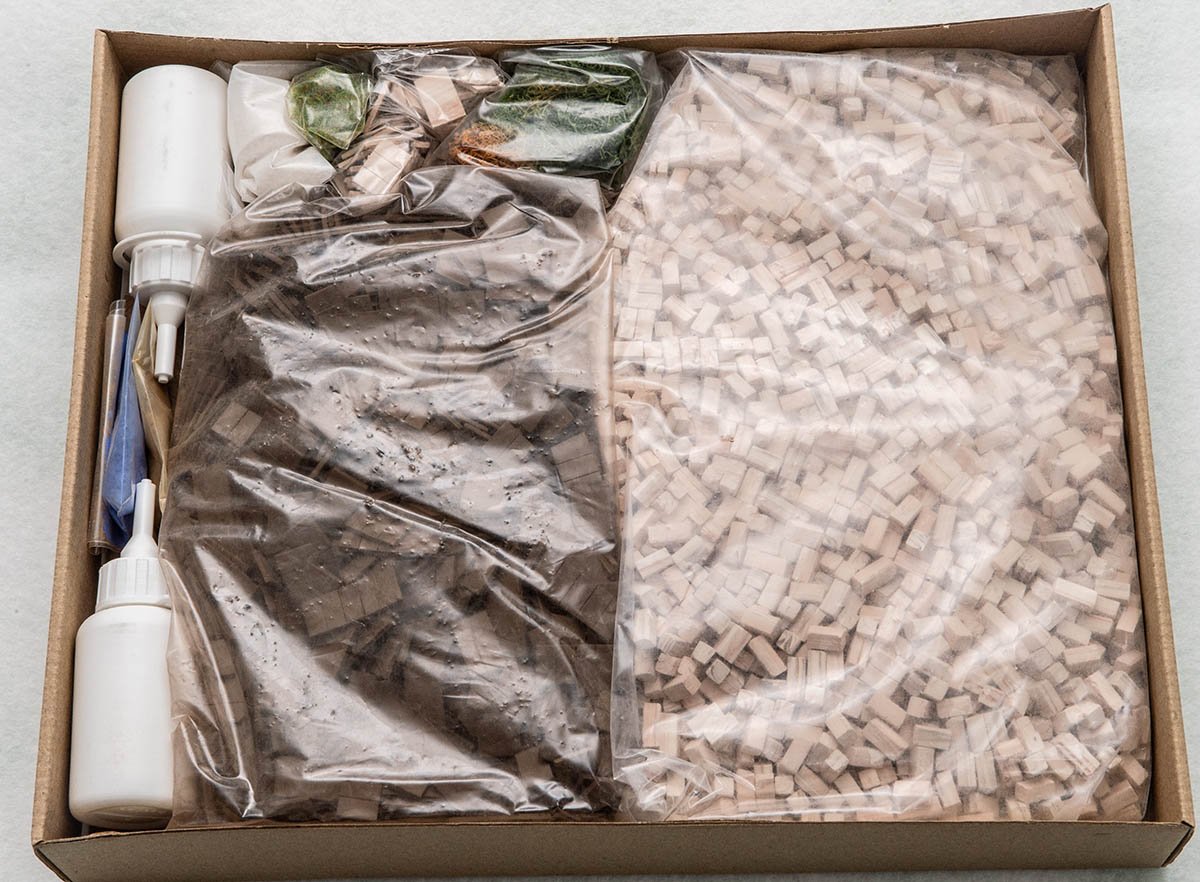
The article inspired me a lot. I've never seen that kind of stone models before, so it expanded my perception. I researched and purchased the most recent stone model from aedes ars. Unfortunately, it doesn't look good to use for port diorama because of Ho scale blocks. I may need 3d printers for 1:90 accurate diorama instead of this 1:20 stone block. I'll finish this beautiful kit, but won't purchase any of them. The wooden model ship is already taking too much time from me. The paper base and skeleton is no joke. I want harder base for decades of durability. I'm making a new base and skeleton of each building with 3mm MDF using my CNC machine.


-
Thickness sander
modeller_masa replied to Bill Hill's topic in Modeling tools and Workshop Equipment
Because of minimum feed thickness of a thickness planer, feeding woodsheet less than 6mm (most of portable thickness planers) or 3mm (the Proxxon DH40) can cause serious kickback injury. I prefer the Byrnes thickness sander for the reason. Not aggressive, quiet, manual feeding, and precision height adjustment. -
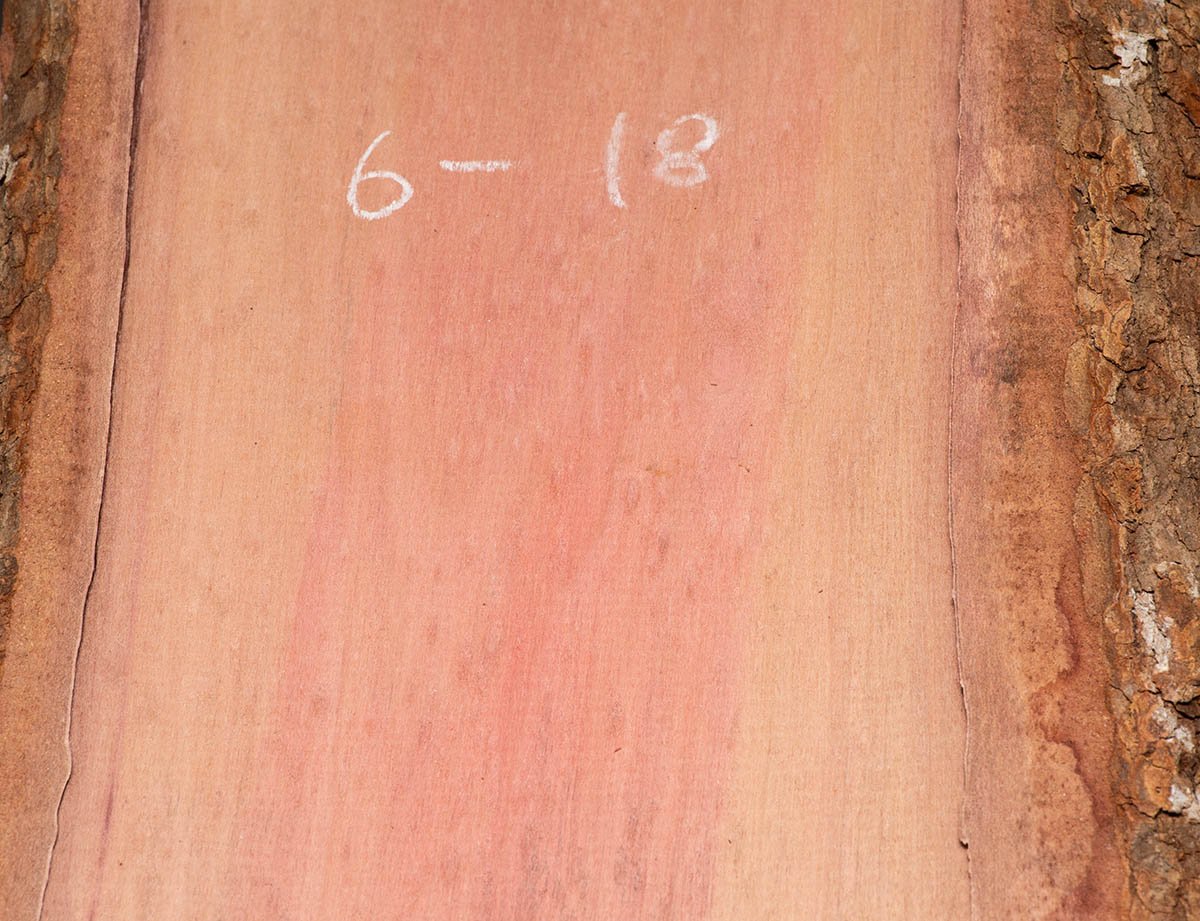
You should have heard about the Pink Ivory wood. https://www.wood-database.com/pink-ivory/ All the informations are here. BUT, I do not recommend this wood. https://www.wood-database.com/wood-articles/preventing-color-changes-in-exotic-woods/ At the article, the Pink ivory is one of the weakest wood that loses original exotic color easily. The above picture was taken after a month I purchased. When I bought this panel, the color was very fine pink color like the center of the picture, so I was planned to make a pinky fancy wooden boat for my little girl. I'm lucky that I didn't make strips from it. If I did it, my little girl might have cried for the ugly color after a month she received. 🙃 It is still good wood like a cherry because of dense grains, but the price is not competitive to the others. I hope my experince may help you to choose exotic woods.
- 1 reply
-
- 5
-

-
I know it is your second ship, and everybody can make mistakes especially when they encounter the hardest thing like the planking. https://thenrg.org/half-hull-planking-kit.php I highly recommend you to buy this education kit. My package is still in a post office, but I anticipate the kit will improve my planking technique significantly. Also, please start the build log! It is much helpful more than I thought. Sorry about no advice on your issue.
-
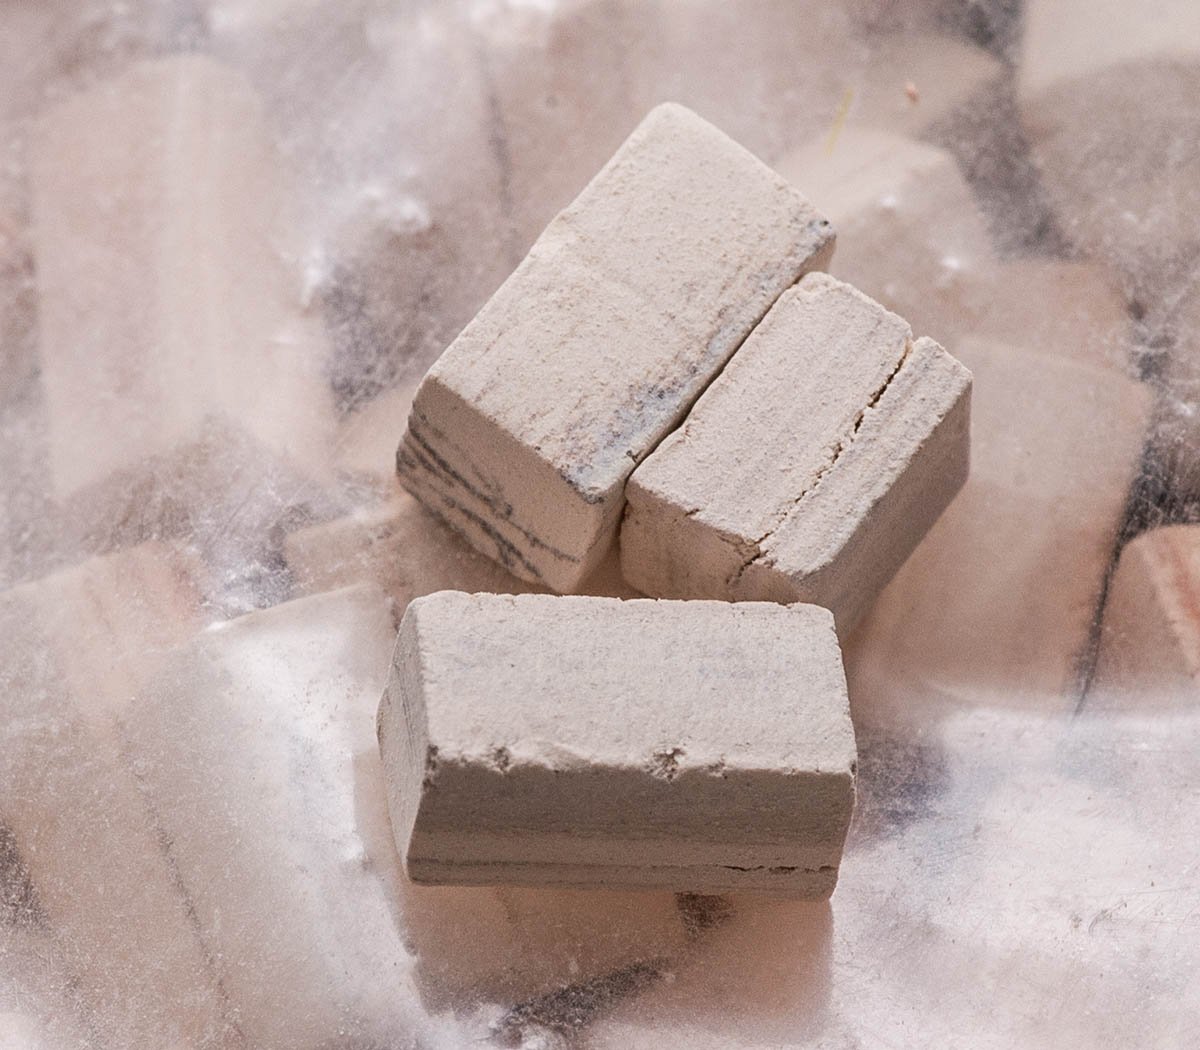
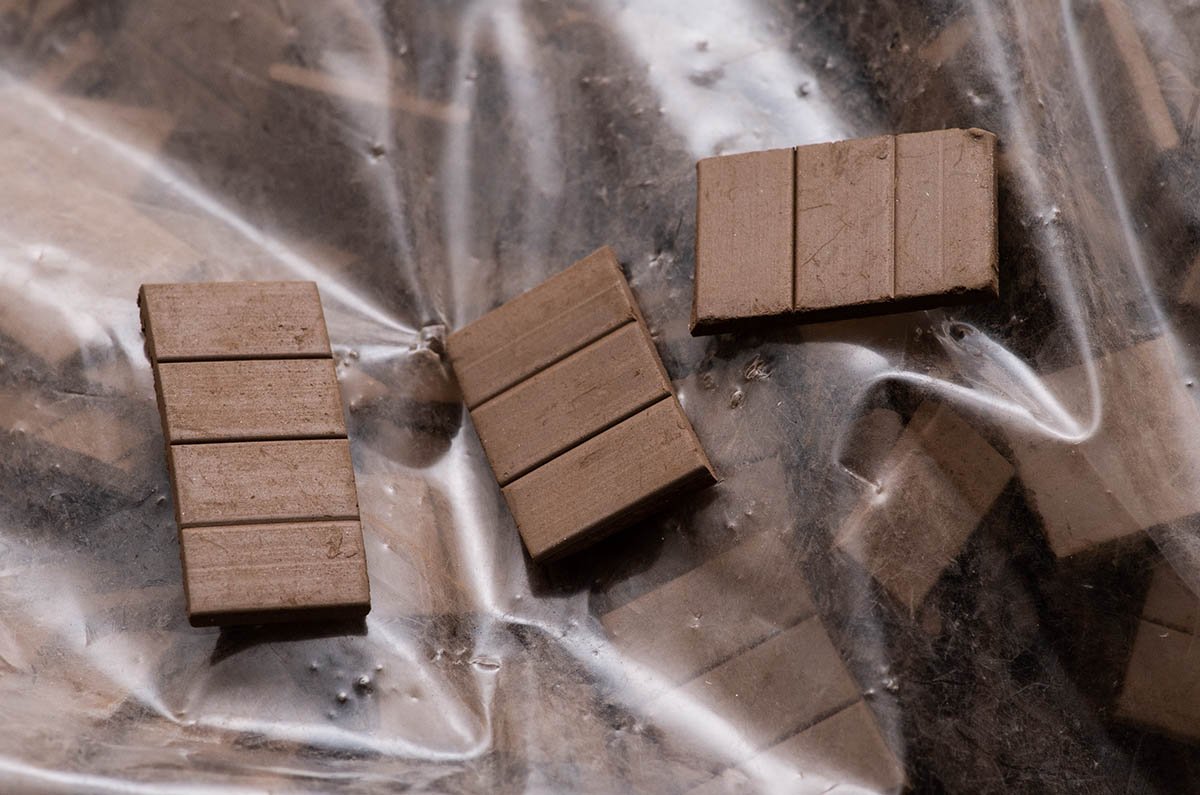
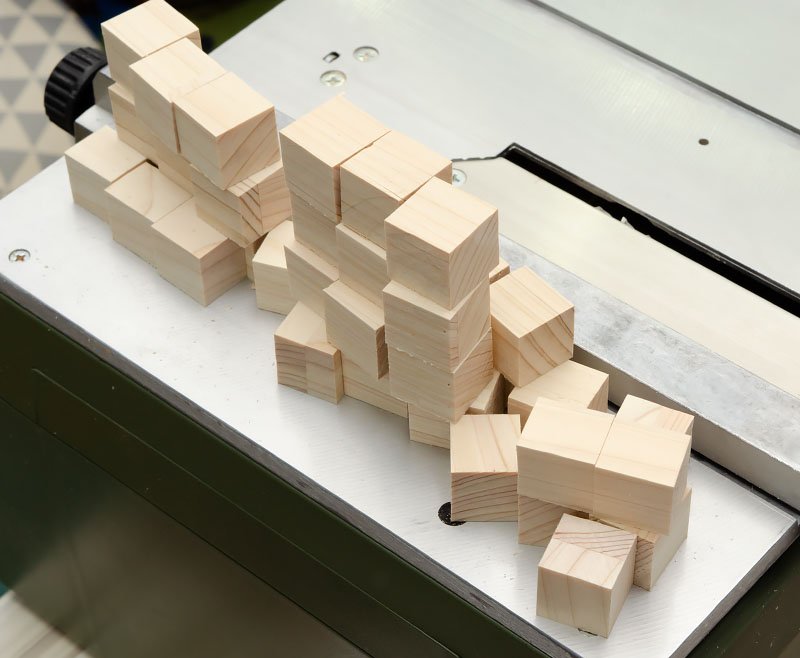
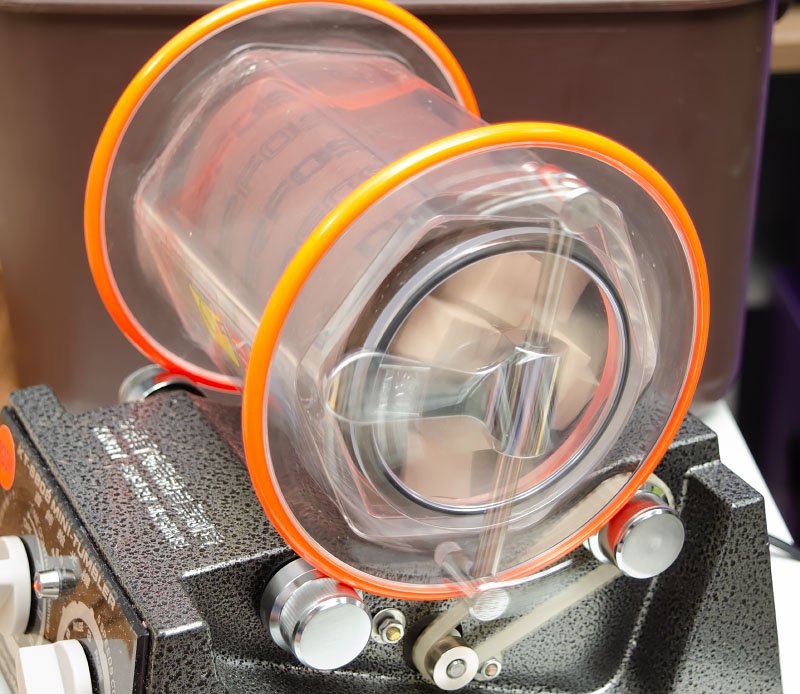
You're right. I've already given up to make blocks with this machine only while I'm testing. The better process should be using microshapers by AL or etc. (1) Shaping both side of the strip with AL microshapers (2) Making the sheaving holes. (3) Cutting the strip. (4) Polishing the block using this machine for an hour. I'll post the final result within a few days, but my current conclusion is that the rock tumbler is a 'polishing machine' as it was designed. It can't shape the block, but It can make the surface smooth without sanding by hand. It would be useful to polish blocks from kit which is considered rough condition frequently.
.thumb.jpg.7ba3cee4d26fe4fbc00238cc74e274fb.jpg)
-
https://www.gracesguide.co.uk/Percival_Marshall It looks like the company is still alive. I think it's not a public domain until 2043 because of 95 years of copyrights in the US. https://en.wikipedia.org/wiki/Public_domain The price of each book at the Amazon is around $10. Your books are really in good condition. Thank you for impressive photo!
-
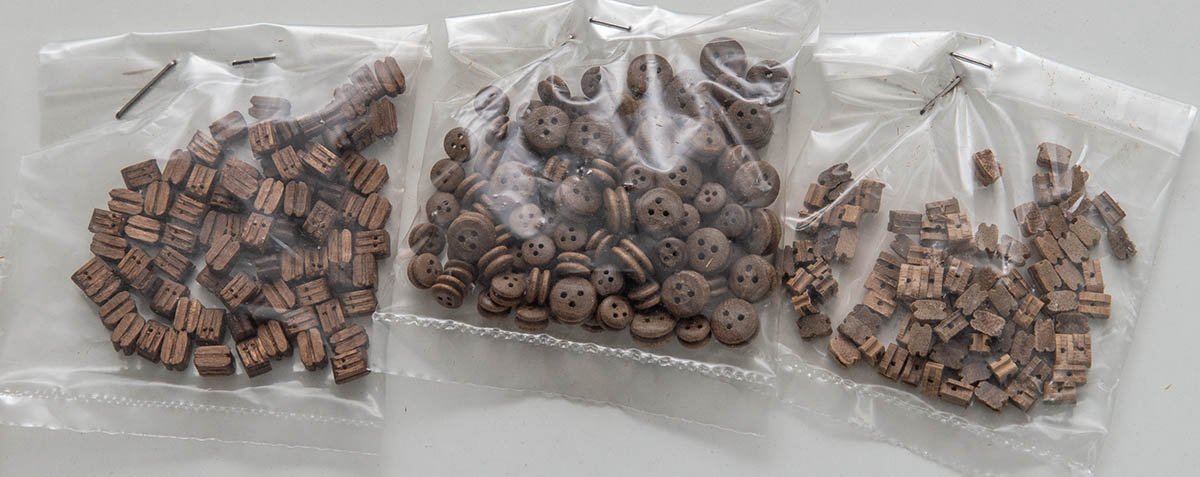
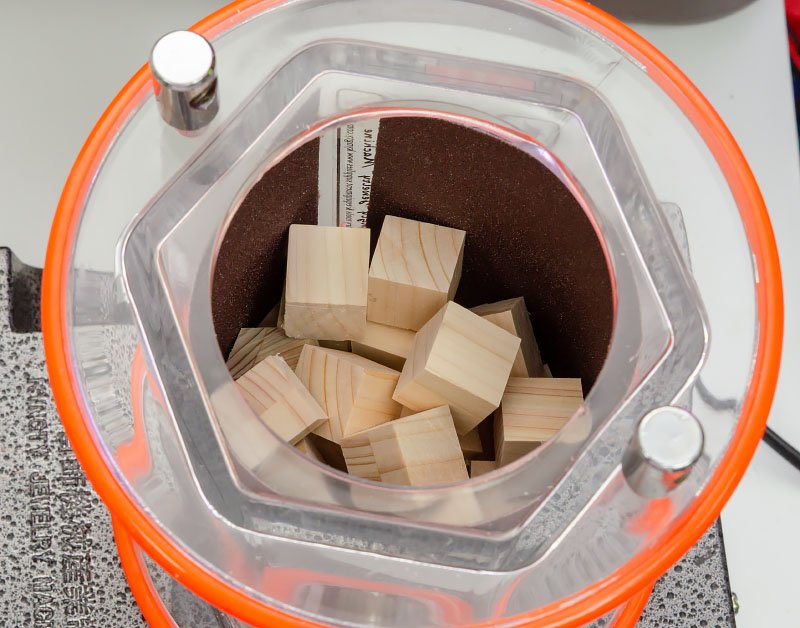
These blocks are from HMS Bounty kit by Mantua Sergal in 1973. I honestly say that this machine may not be able to handle the center deadeyes, so I'll test both of blocks only. I think the blocks are walnut. The kit used lime, walnut, and birch plywood only. Here are dimensions. - Left : 3.5 x 3.5 x 5.5 mm - Right : 3.2 x 3.2 x 4.8 mm To show a quick result, I'll make walnut pieces rather than a full block. I'll show you flatness and scratches on the block as much as possible.
-
I figure out it is called a 'rock tumblers' in the western. You may be right. I tested an inch cubic block of hinoki cypress, which is considered a softwood. The condition I tested was here. - The fastest speed at 5 - An inch cubic hinoki cypress - An hour - 180 sandpaper It can take lots of time like you said when I use a hardwood. The structure of it is little bit different from the block sander. (less contact surface) I'll update a result using walnut block soon. (May be next week)


-
https://www.linkedin.com/company/artesania-latina-s.a.?trk=public_profile_topcard_current_company I checked the AL's Linkedin page and their employees, but found no updates since 2019. They've already disposed a factory in Hongkong. https://www.tradeindia.com/Seller-280331-ARTESANIA-LATINA-HK-LIMITED/ The AL Hongkong Ltd. was established in 2004. One of hobby shop claims that they had the office in 2001. Nothing new...
-
It is a 'rumor' level. The reason I translate his comment is that his are not in conflict with some posts about behind of the AL story on MSW in the past. Also, I want people do cross check his comments to make everything clear. I'm not the first source, and nobody completed cross check yet. Therefore, it is still a rumor that there is no reason to believe everything in this article, but it could be a true that may solve people's question 'What the AL is doing now?'.
-
Hello. Have you heard about a jewelly polisher or bead polishing machine? When I saw the above article about a blockbuster, I quickly reminded this machine. I purchased it from Aliexpress at $64 includes shipping fee to South Korea, and it works really well. You may know better way to make deadeyes. I hope my experience helps you if you wanted this kind of machine.
-
When I was discussing about piracy kits with South Korean modellers, a person who may be an importer or retailer claimed that the Artesania is not dead! To clarify between my assumption based on his text and his testimony, I will use two kinds of color texts. (1) He may be a retailer or importer in South Korea. I don't know him, but all his text shows that he is working on distribution channel. (2) Artesania Latina didn't go bankrupt. (3) He met the president of the AL last year, and this year's meeting was cancelled. (The expression is not clear.) (4) The spain branch of the AL was run by the president's son, and he moved the company to Hongkong in China last year. (5) The president's wife is from Hongkong, and it is the reason they moved to Hongkong. Also, they moved stocks to Hongkong. (The reason doesn't represent main reason to move to Hongkong.) (6) The site is under construction. The site was ran by the Spain branch controlled by the president's son. The reason they closed the site is that (1) they closed the Spain branch (2) nobody manages the site anymore. The AL will reopen the site after renovation and etcs. (7) According to him, many plastic model kit companies and wooden model ship companies related with Asia region prefer facebook more than websites, so it may be difficult to reopen the site. (8) The AL doesn't have a new product. The sales of wooden model ship is not good, so they are renovating business model to the other. (The expression implies many meanings.) (9) If stock of some model is empty, retailers may not be able to restock them because they stopped production line for a while. (10) He got a request for order this week from the president of the AL. (11) "It is ridiculous to hear that the AL went bankrupt. They are just changing business model." (12) Some of the AL wooden model kits will be warehoused next month in South Korea. (Maybe, he could be a distributor agency of the US region, but I definitely think he handles Korean hobby shops.) (13) The company really went bankrupt was Revell USA (Monogram). They sold molds to Revell and Atlantis. (14) The president of the AL told him that they wants to go to the wooden aircrafts and toys rather than wooden model ships. He or they hold the wooden model ship business temporally. (15) The Hasegawa which is one of famous plastic model kit maker holds developing new aircraft model. The sales of aircraft is not good, so they want to concentrate on character fancy toys which is the trend in here. (16) Like the many other model companies such as Revell and Miniart, the AL also has lots of divisions like tools, doll house, and wooden toys. The AL will return to wooden model ship business when more people come back. (17) Now the headquarter of the AL is in Hongkong, and all the stocks are also in there. The shipping cost from Hongkong to Europe and the US is huger than before, so distributors of Europe and the US may give up to handle the AL kits anymore. Because of the same reason, he and many importers in South Korea also gave up importing famous kits in Europe and the US. 😉 (18) Because of the geological reason, he may continue to import the AL kits to South Korea. (19) The Hasegawa was almost dead, but they succeed to revive by the Macross goods. Companies sometimes encounter crisis, and they can fail or find a way to life with new products. The AL also can go bankrupt anytime if everything goes bad, but we don't know the future yet. and... (20) He is looking for wooden model ship kits from the other companies. I hope the companies are Model shipways, Caldercraft, and other exotic companies!
-
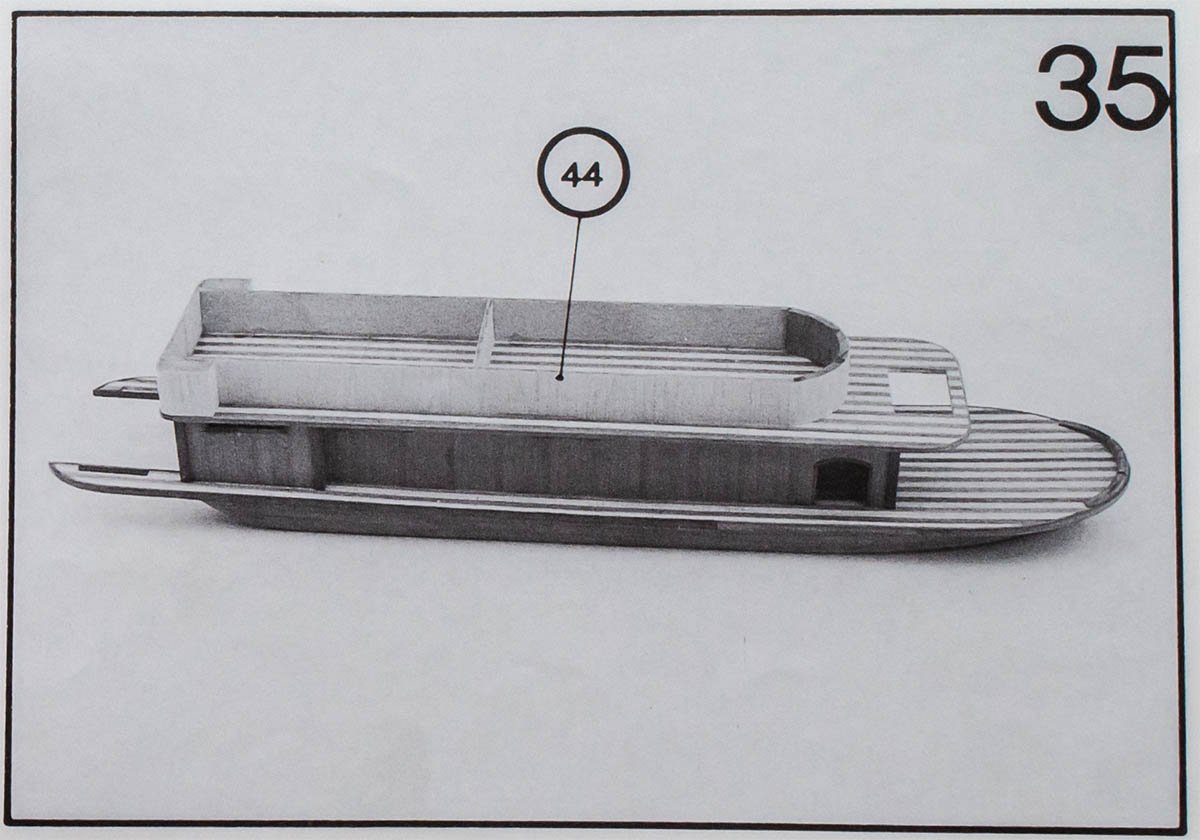
Many things are different from my kit I built. I thought the deck pattern is your unique idea. The reference number is same (#504), but looks like your one is older than mine (1987). I like this version of KotM more. Keep going on this beautiful steamboat!
-
Those are interesting facts. I want to go more serious discussion, but I may need to stop talking about off-topic on this board. Thank you for your knowledges, Imagna. It looks like a similar issue of the 'SMALL' 😗 By the way, I have a plan to post about miniature models of traditional Korean furnitures. Looks like I found a suitable place to post them. Thank you for replies. I should have researched site map carefully before I asked.
-
I bought the pirate kit when I was building the first kit an year ago. I didn't know this forum at that time, and the first time I read the post about banned makers was when I joined this community last month. It is common that South Koreans buy chinese products from aliexpress, and I also found the kit when I was researching the next ship. As a consequence, I had to buy additional parts at $100 after I purchased the skeleton $20 kit. Unfortunately, SK modellers communities are super thin, and most people don't know about pirate issue. Only a few communities banned posting the pirate kit of 'GUNDAM', which is the most famous modeller's hobby in SK. When I bought the pirate kit, and was frustrated by the splitting sales strategy, some of modellers were building one of the pirate kits. At last, I stopped to make the kit because of horrible wood quality. It stinks really bad like strong chemicals. That's my story. I think I need to spread about the pirate story to SK modellers. I'll translate the article and let people know what brands are wrong and why they shouldn't make the mistake I did.
-
Thank you for heart warming reply. I thought it is shame to post easy ship with poor skill on this board, but I changed my mind to that my post may help beginners. 🙂 Your post really helps me to keep interests on the next ship. If you did your best at that time, I think that's enough. Your trail of anguish will lead you better in the next time. Unless you're making the best thing in your life, I hope you don't stop your hand and brain. I believe that you will be happy when you remind series of works you will have done after years. Thanks again to watch my post, and I'm really appreciate to hear that you enjoyed!
- 19 replies
-
- 1
-
-
- providence
- artesania latina
- (and 2 more)
-
That's really serious question! How about a flying boat like the Hindenburg? This topic may be a serious question beyond my expectation. 🤔
-
Yeah. I found them, and they are really interesting! But they are more popular than wooden model ship in South Korea, and I want to concentrate on this area. 🙂

.jpg.7cad3484330e45b186908d9816879c27.jpg)