HOLIDAY DONATION DRIVE - SUPPORT MSW - DO YOUR PART TO KEEP THIS GREAT FORUM GOING! (89 donations so far out of 49,000 members - C'mon guys!)
×


John Ruy
-
Posts
1,579 -
Joined
-
Last visited
Content Type
Profiles
Forums
Gallery
Events
Everything posted by John Ruy
-
 This viewer can certainly see the difference. Excellent work Kieth! IMHO Cheers 🍻
 -
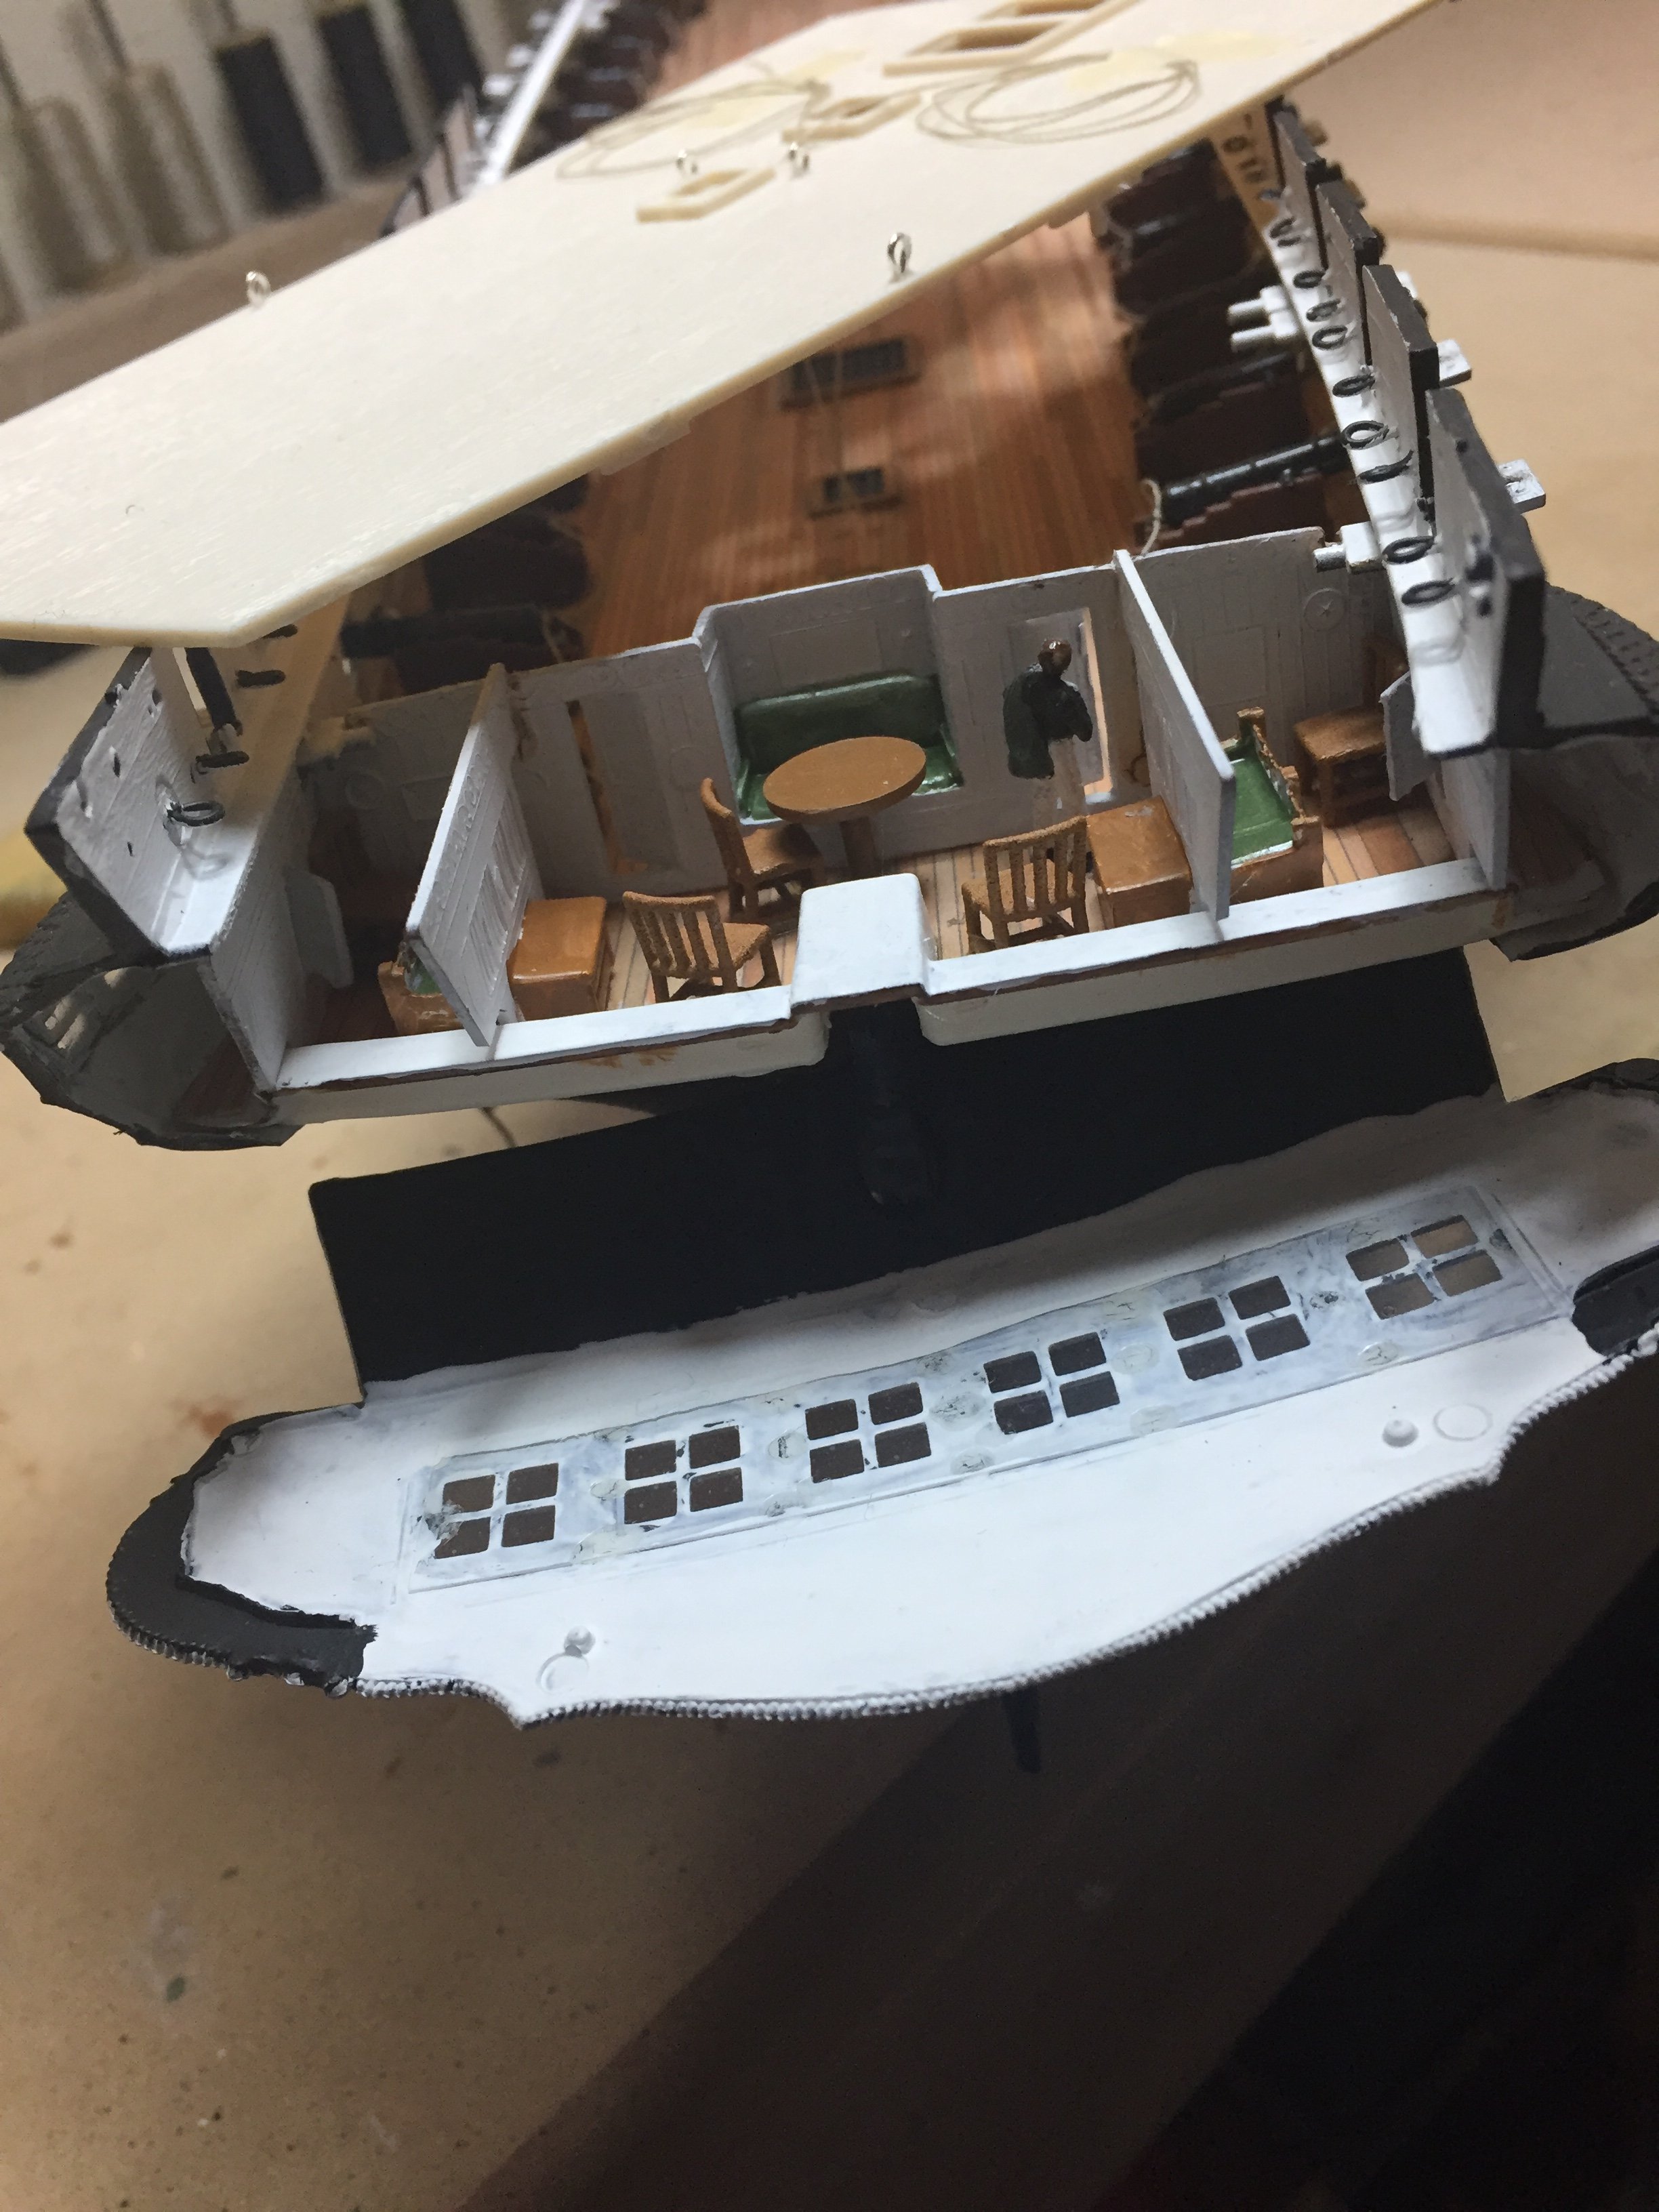
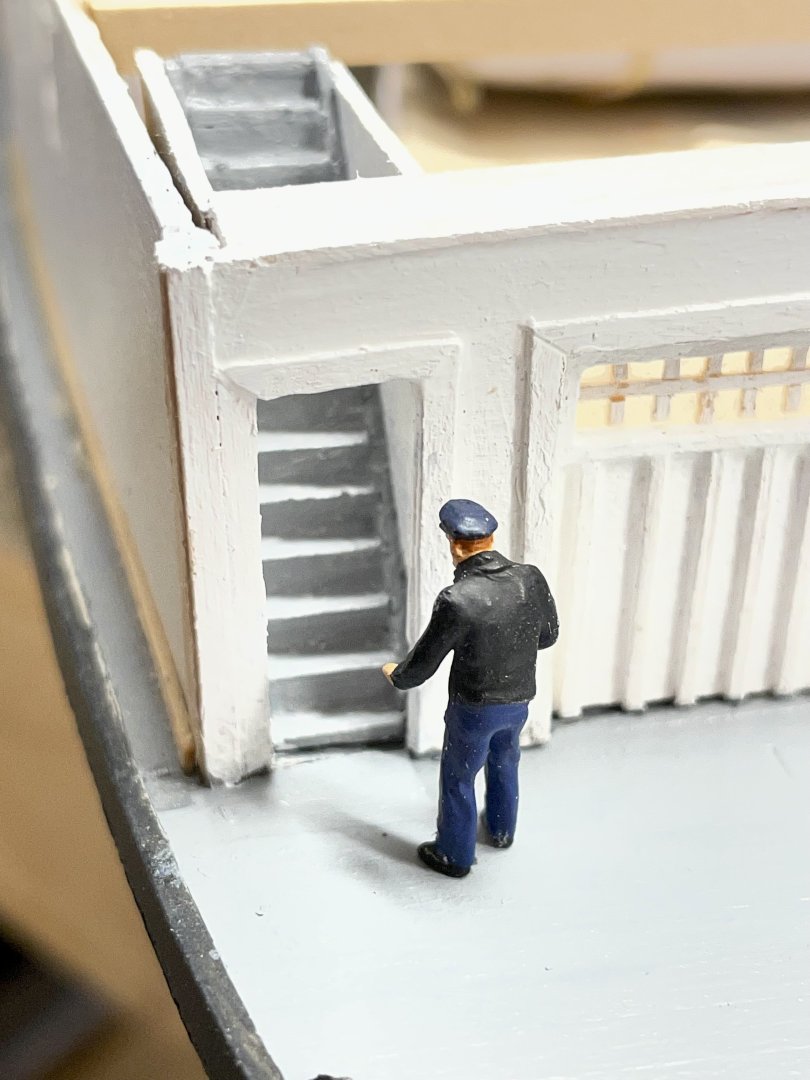
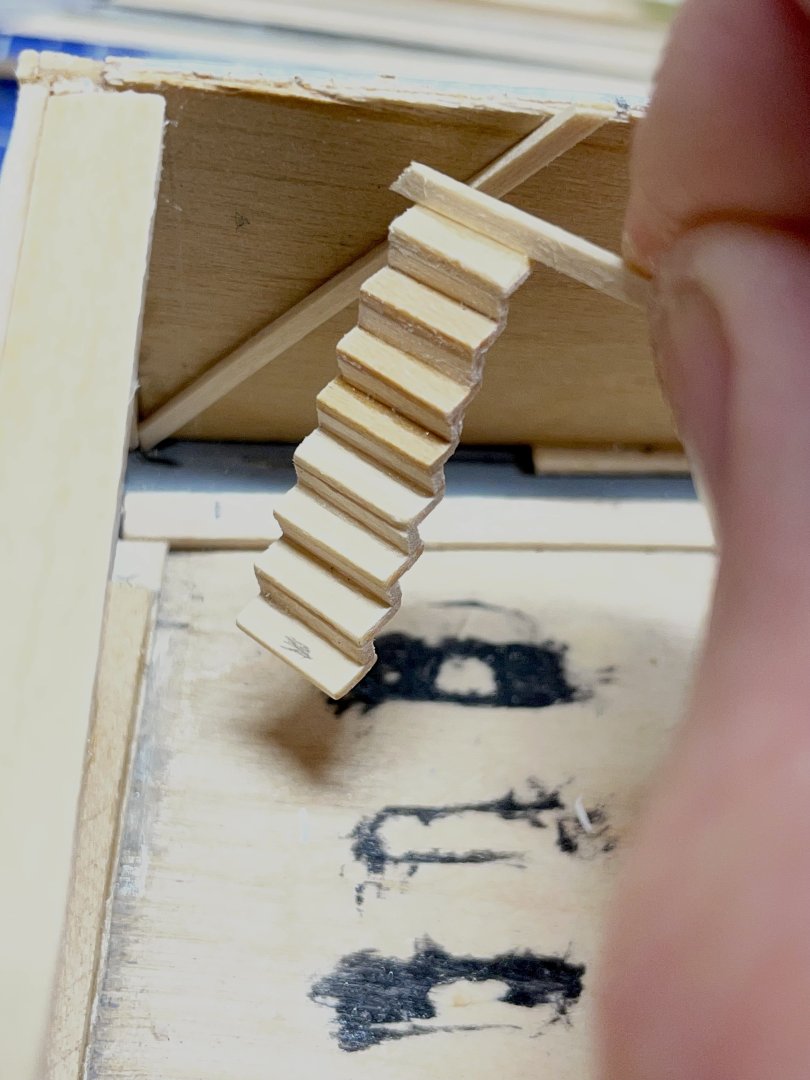
Second staircase… Time to finish the lower deck lighting and painting… Cheers 🍻

-
Wow… I love your staircase, glad I popped in to follow this build can’t wait to see your paddle wheels on this build. I thought my 1/96 scale staircase was difficult, your work is certainly an inspiration. Well done. 👍
-
Thank you Jon, I am find challenges at every turn. I only post my final successful version. LOL 😆 This micro carpentry can be tough. 🤪 Merry Christmas 🎄 Thank you. Kieth… Merry Christmas to ALL CHEERS🍻
-
Thanks Kieth… Here’s a close up of the stair construction. Kinda shows the step by step method I use. LOL 😆 I have got to go look up your latest build and follow along on that one too. John PS… 1/96 is really close to HO Rail Roading. If you know what I mean. 😉
-
Sorry Ian… Not likely LOL 😆 Last time I did furniture at 1/96 was on my USS Constitution. Hasn’t been seen since I finished her.
-
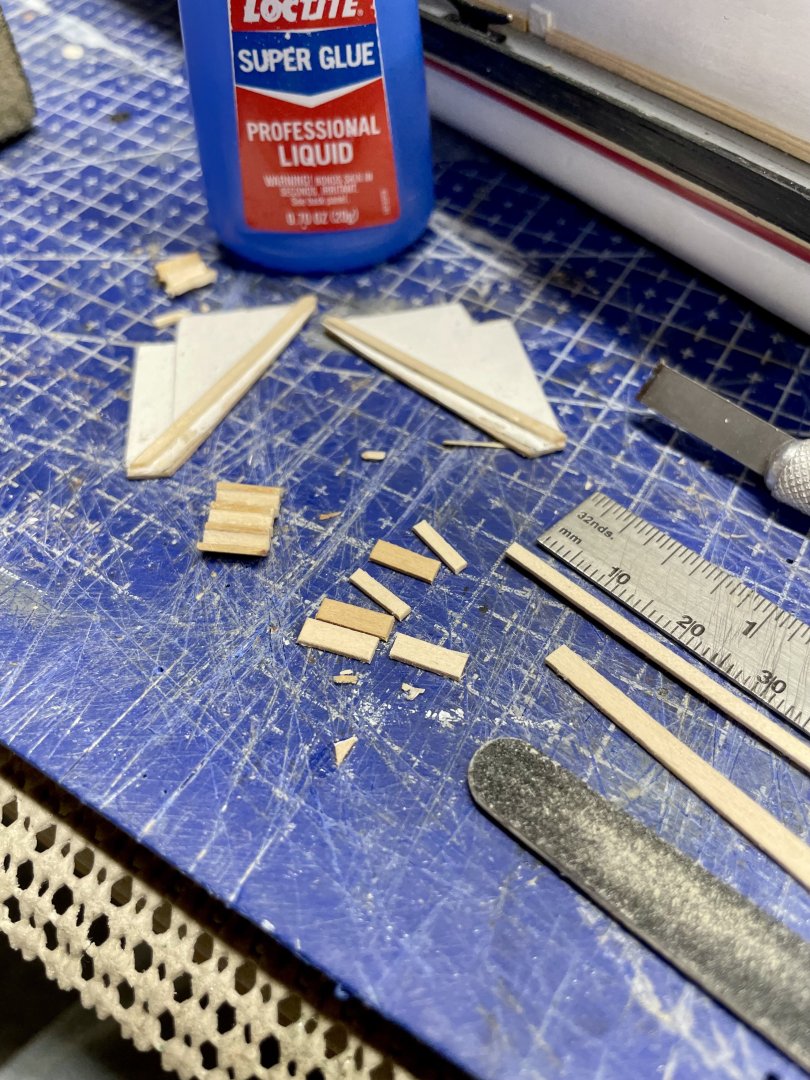
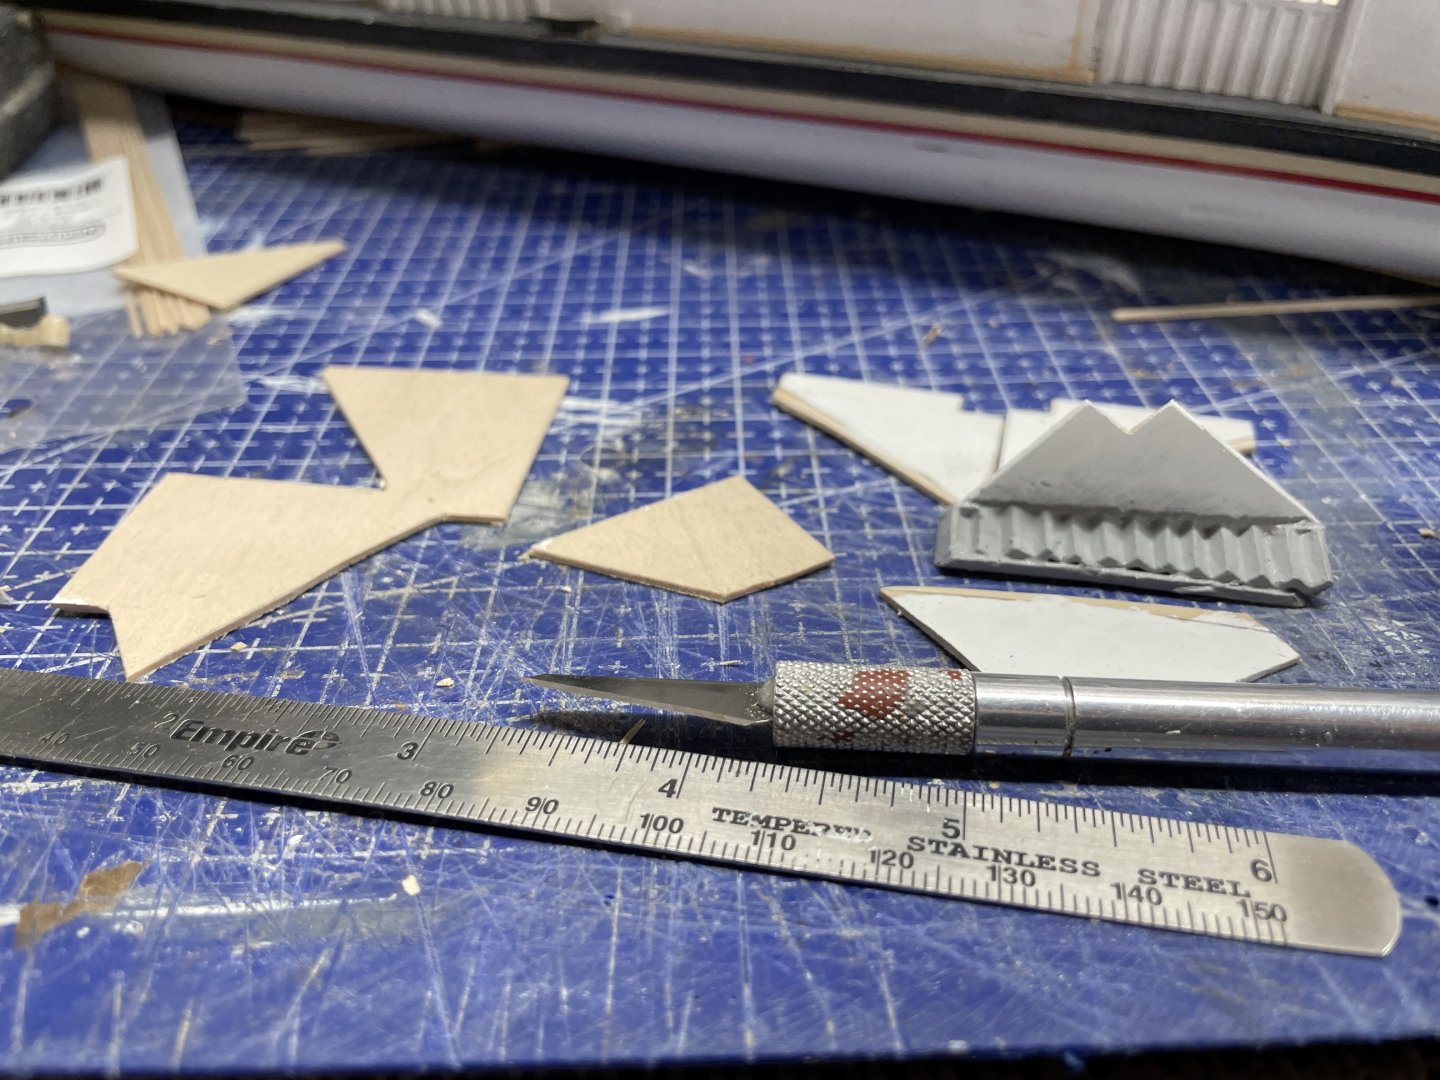
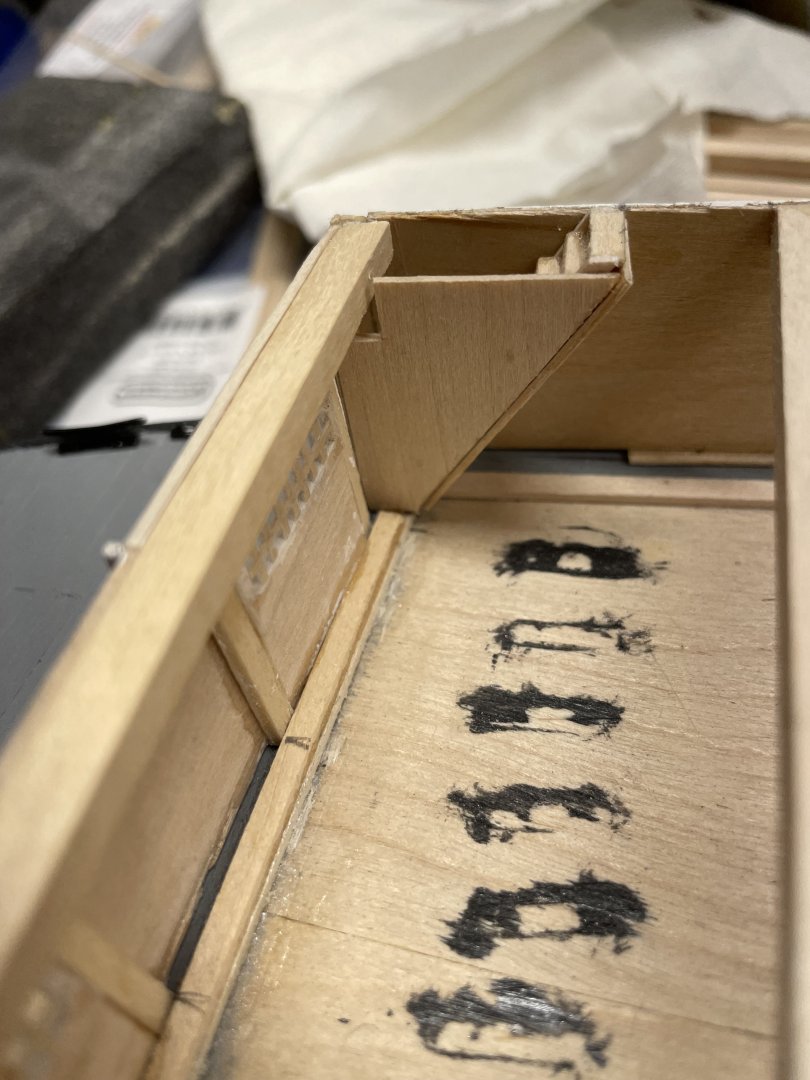
Painted staircase and templated walls for second staircase… Cheers 🍻
-
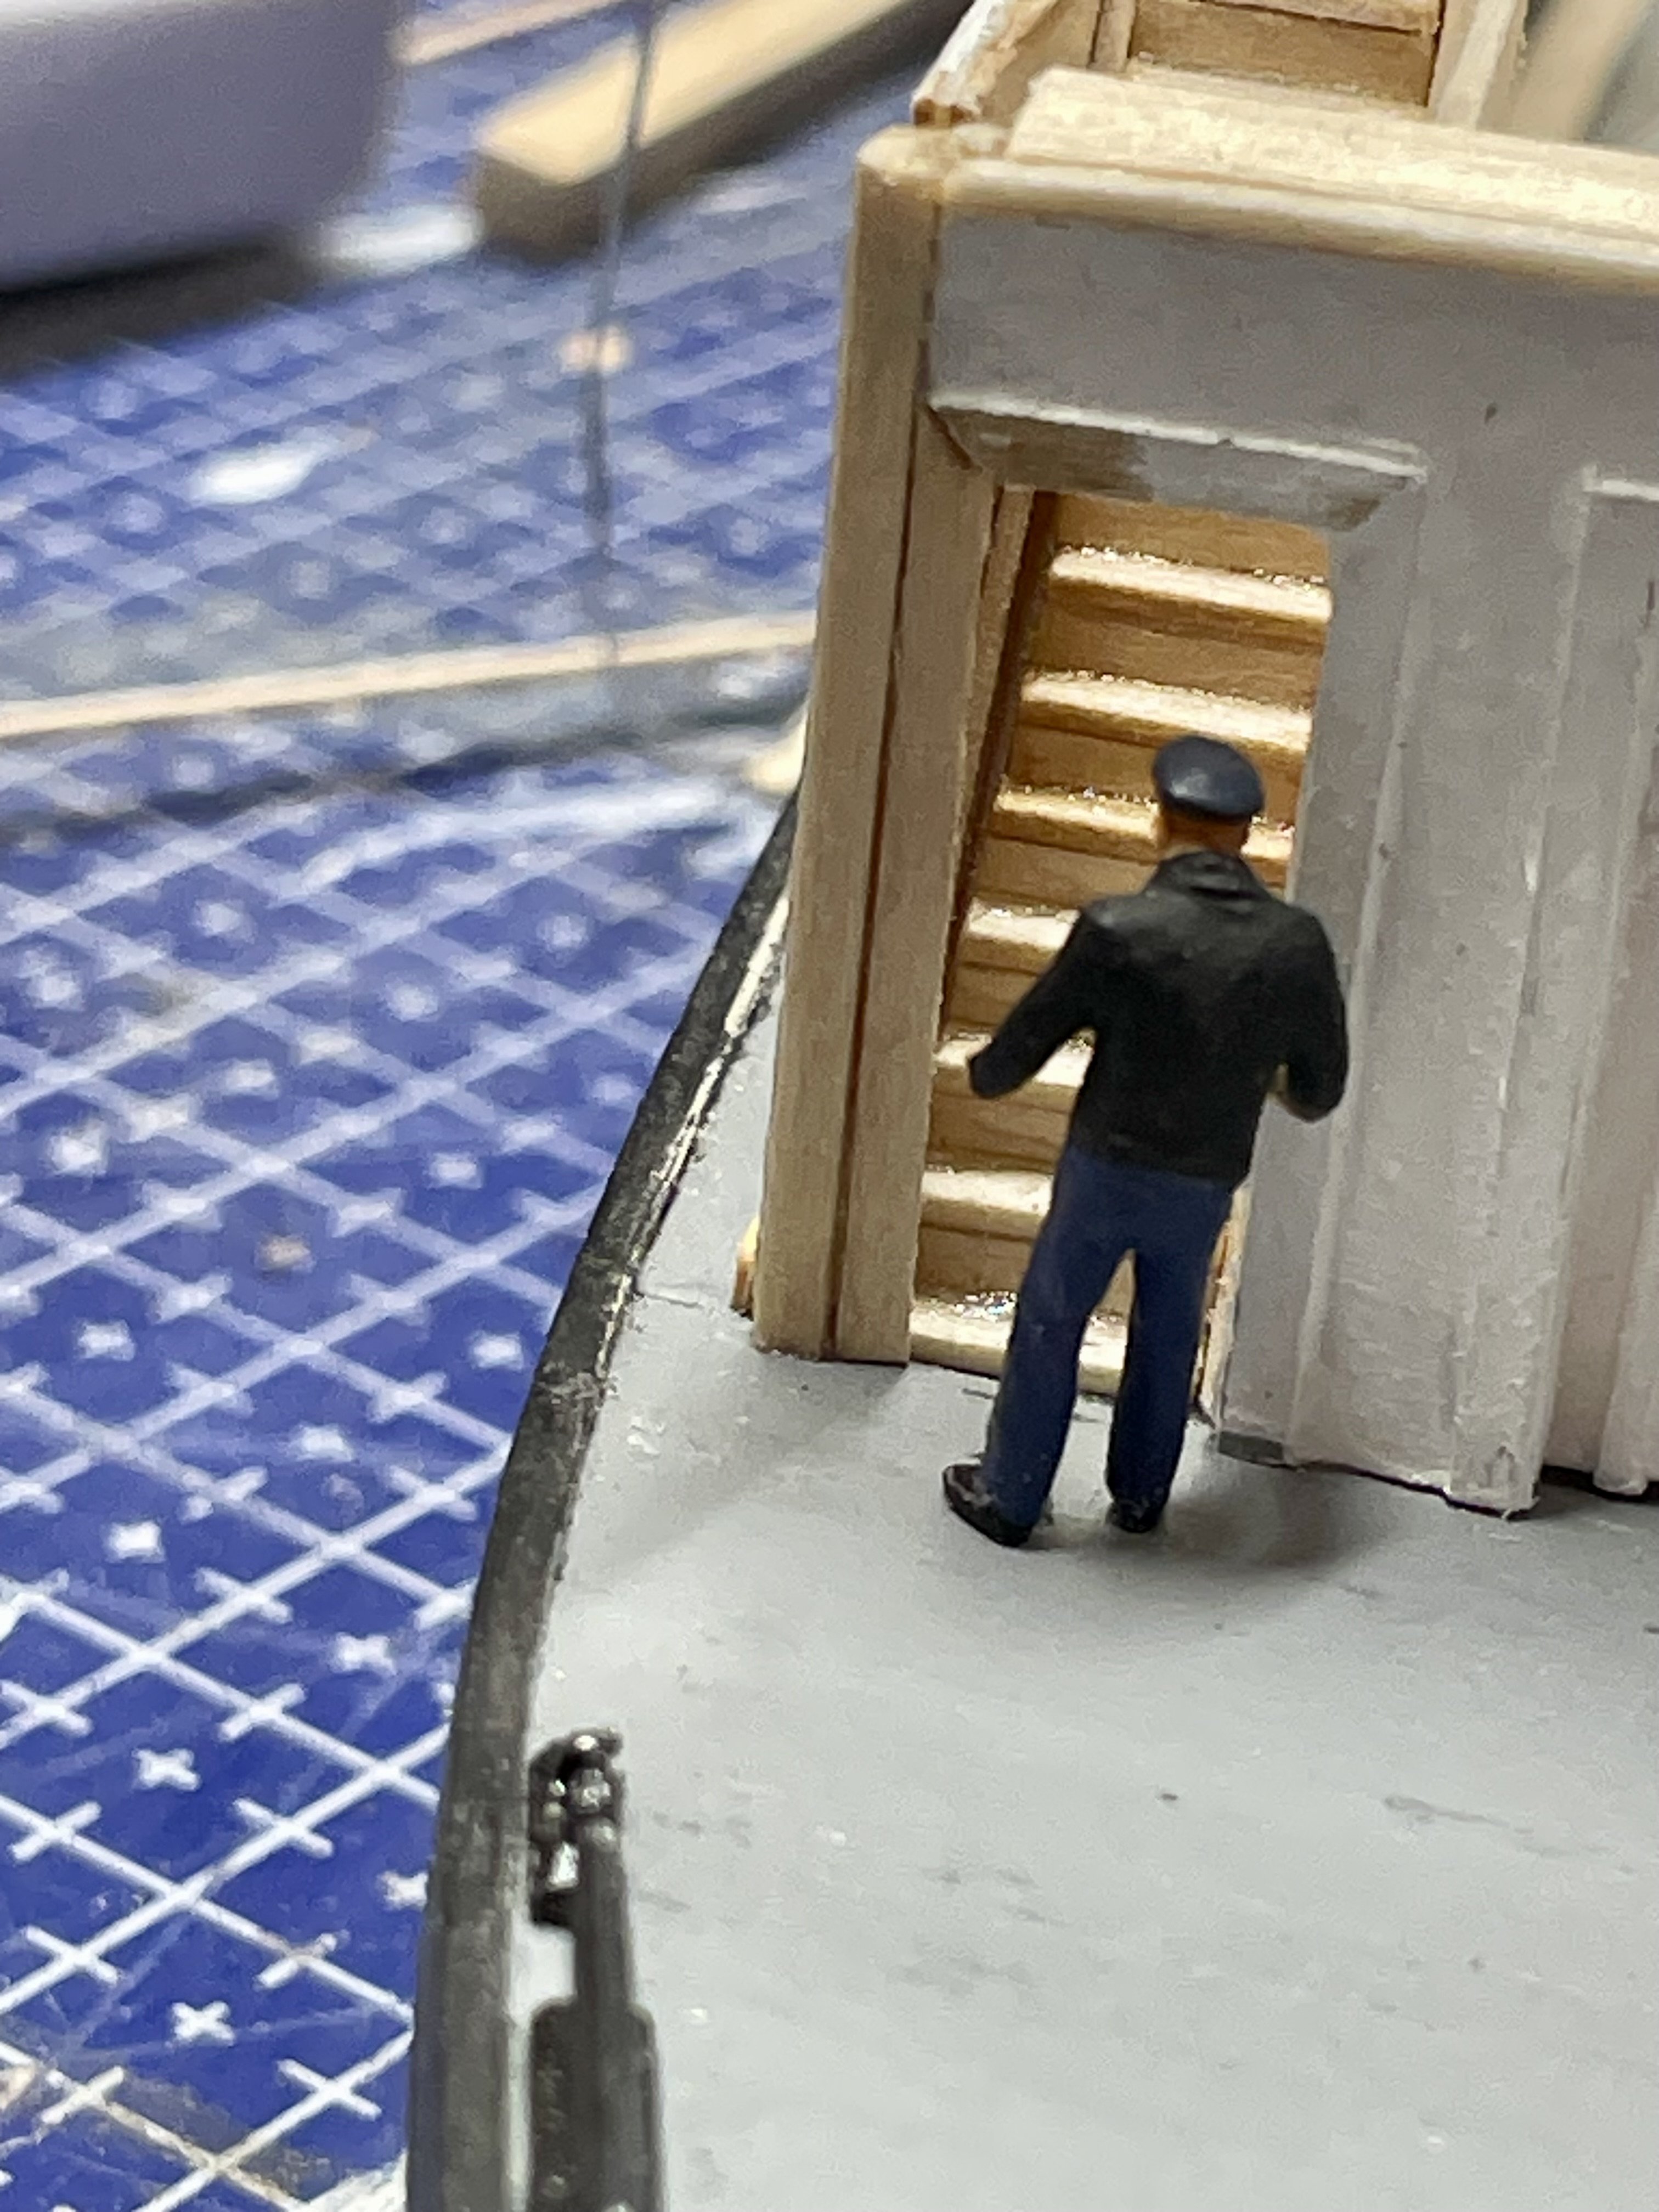
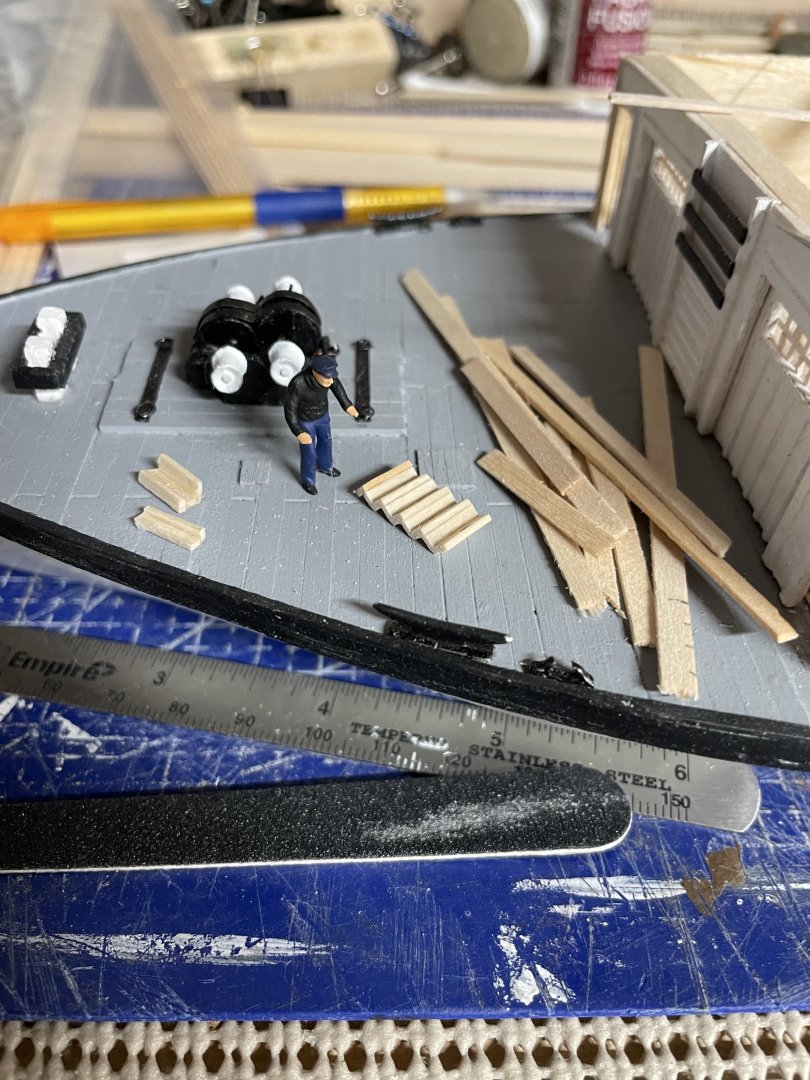
Stairs to the Saloon Deck… 1 of 2 stairs done… Cheers 🍻

-
Thanks Mike I do appreciate you being my guy on the scene. You can keep an eye on my build and let me know how I am doing. I really don’t think I will need any more photos until maybe we see some progress on the restoration efforts, which I am sure won’t be until spring. Meanwhile a drive by would be sufficient, stay in your jeep. 🥶
-
As she should… No worries, I think I have the pics I need. Maybe next spring, when it gets up to Zero 😆 BTW… those pictures were great, they got me to this point. Thanks I have been in -40 degree weather on Indian Moutain in Alaska at an Air Force Radar site. What are your windchills? We had signs posted that said exposed flesh would freeze in 5 seconds. No body was making any yellow snow. LOL 😆 Frosted my bronchial tubes snow showing into a radio beacon shack. Fun times, stay warm my friend.
-
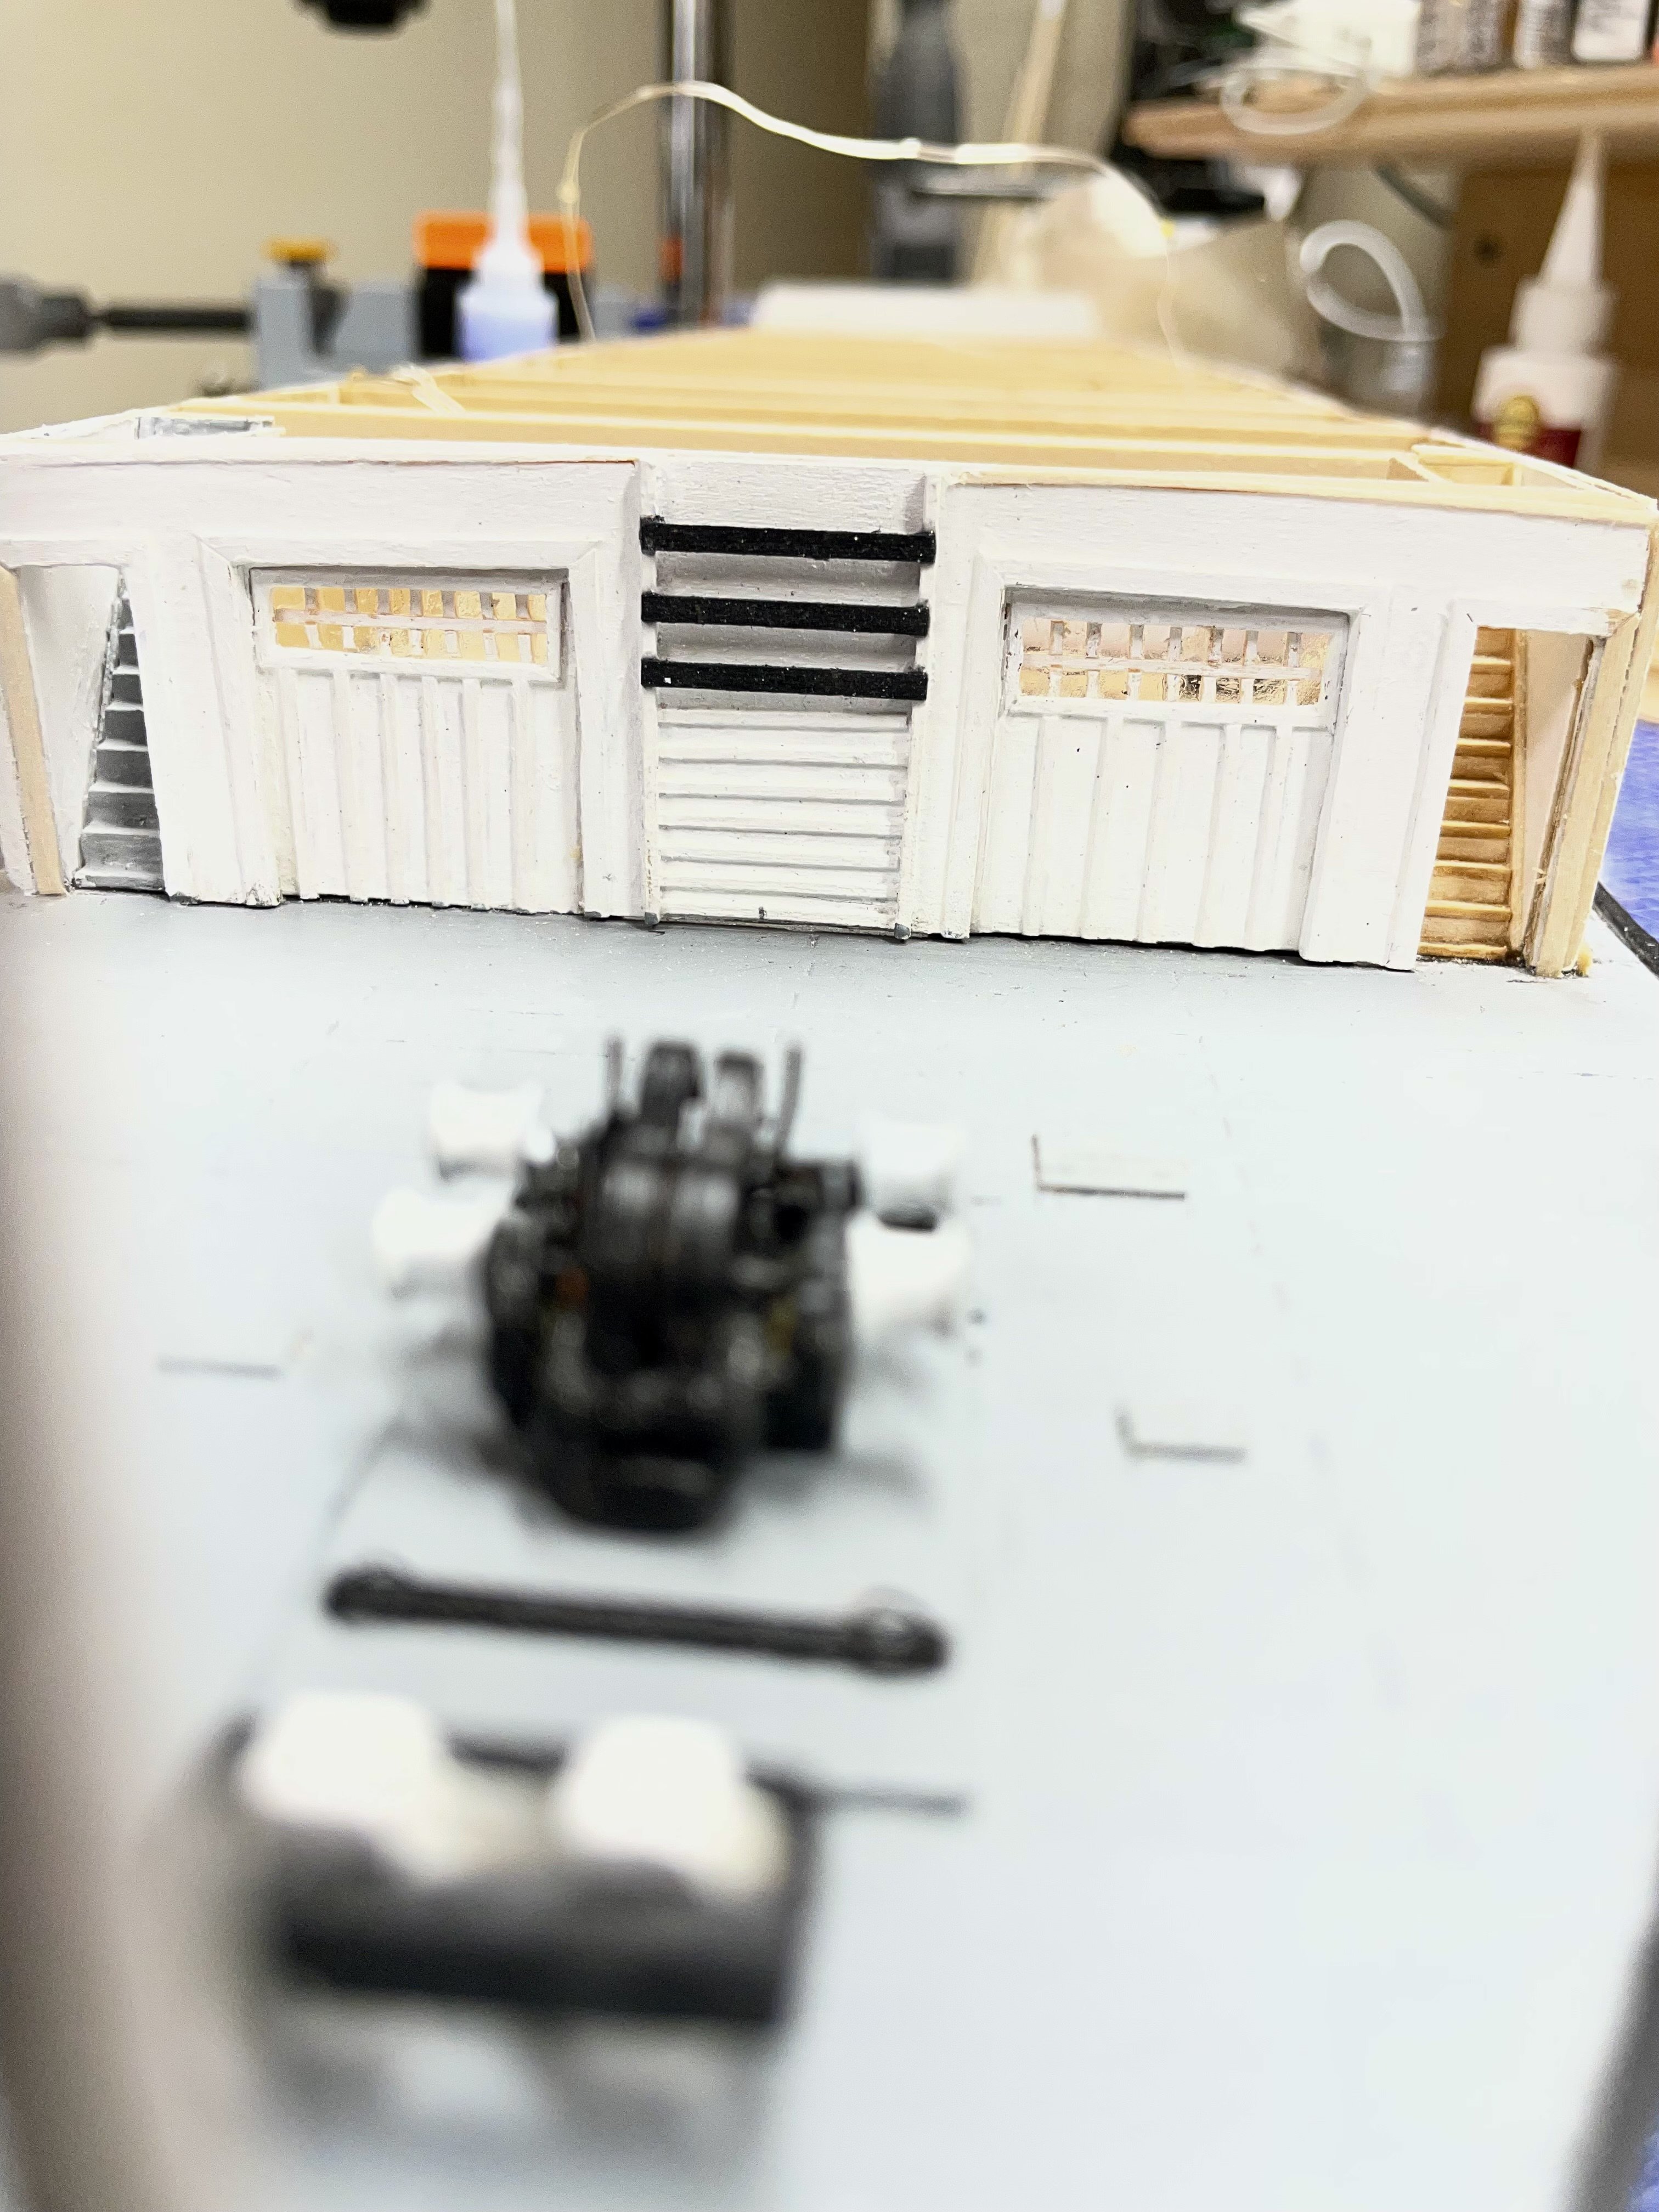
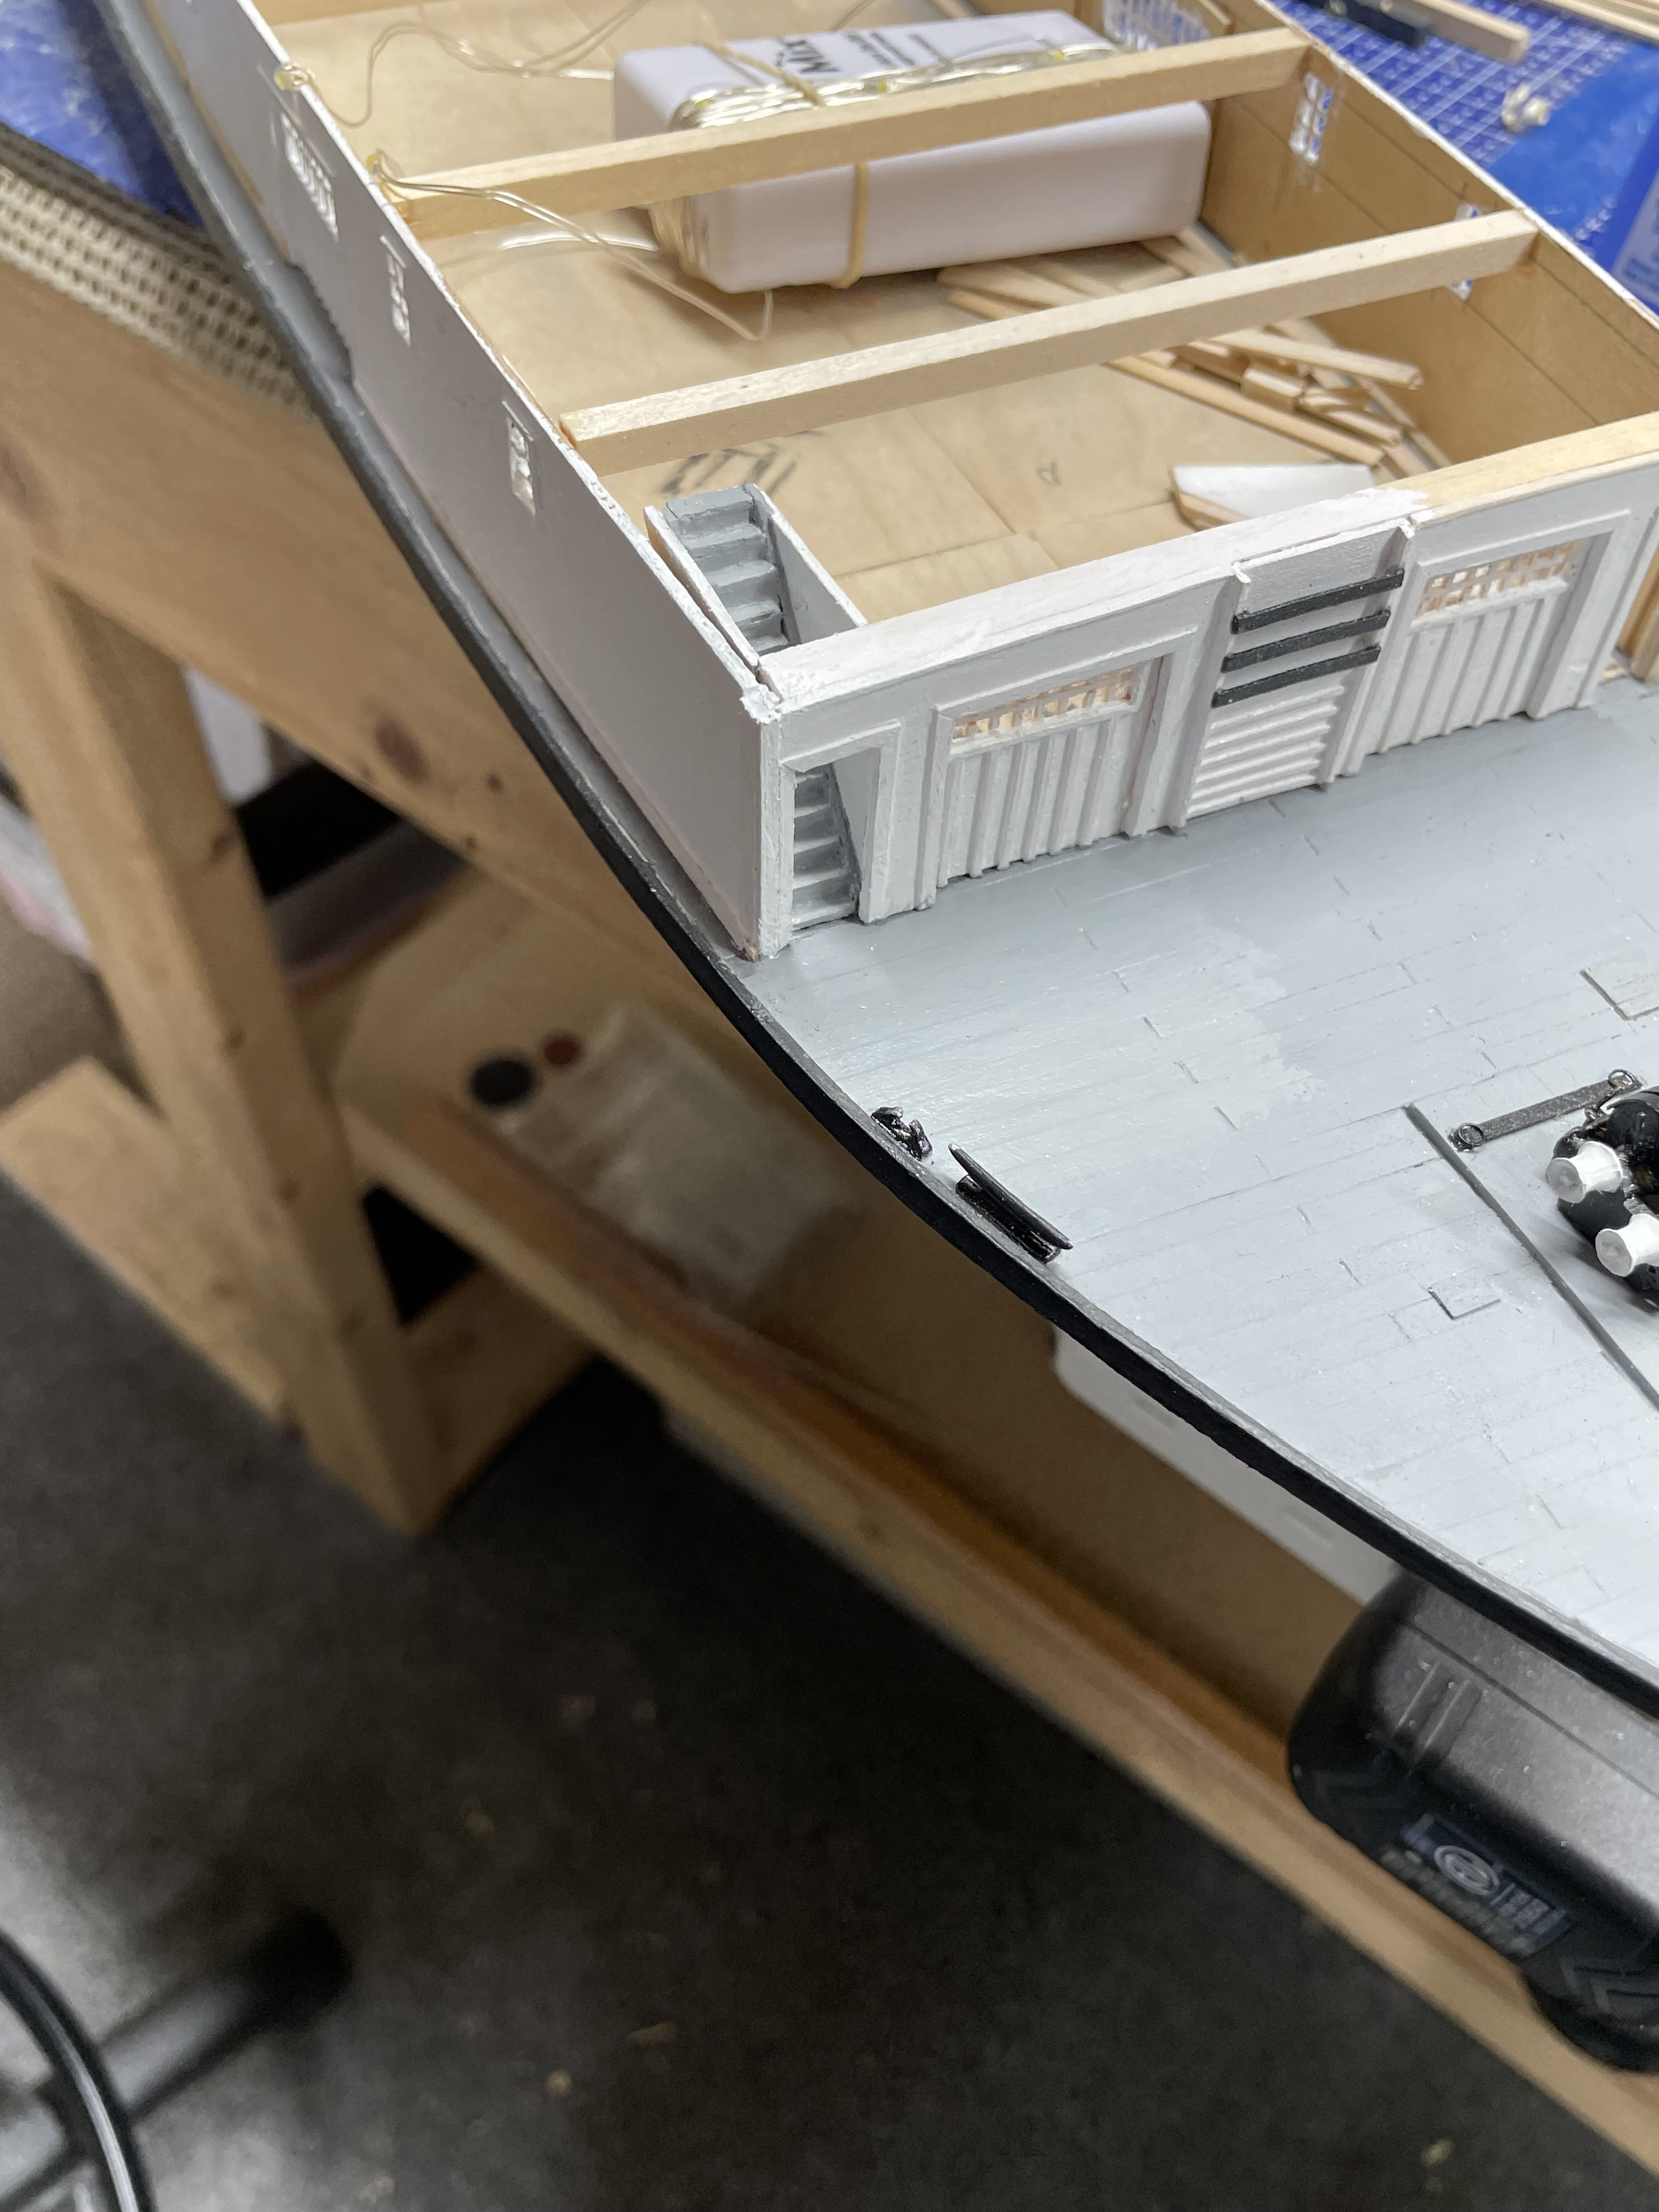
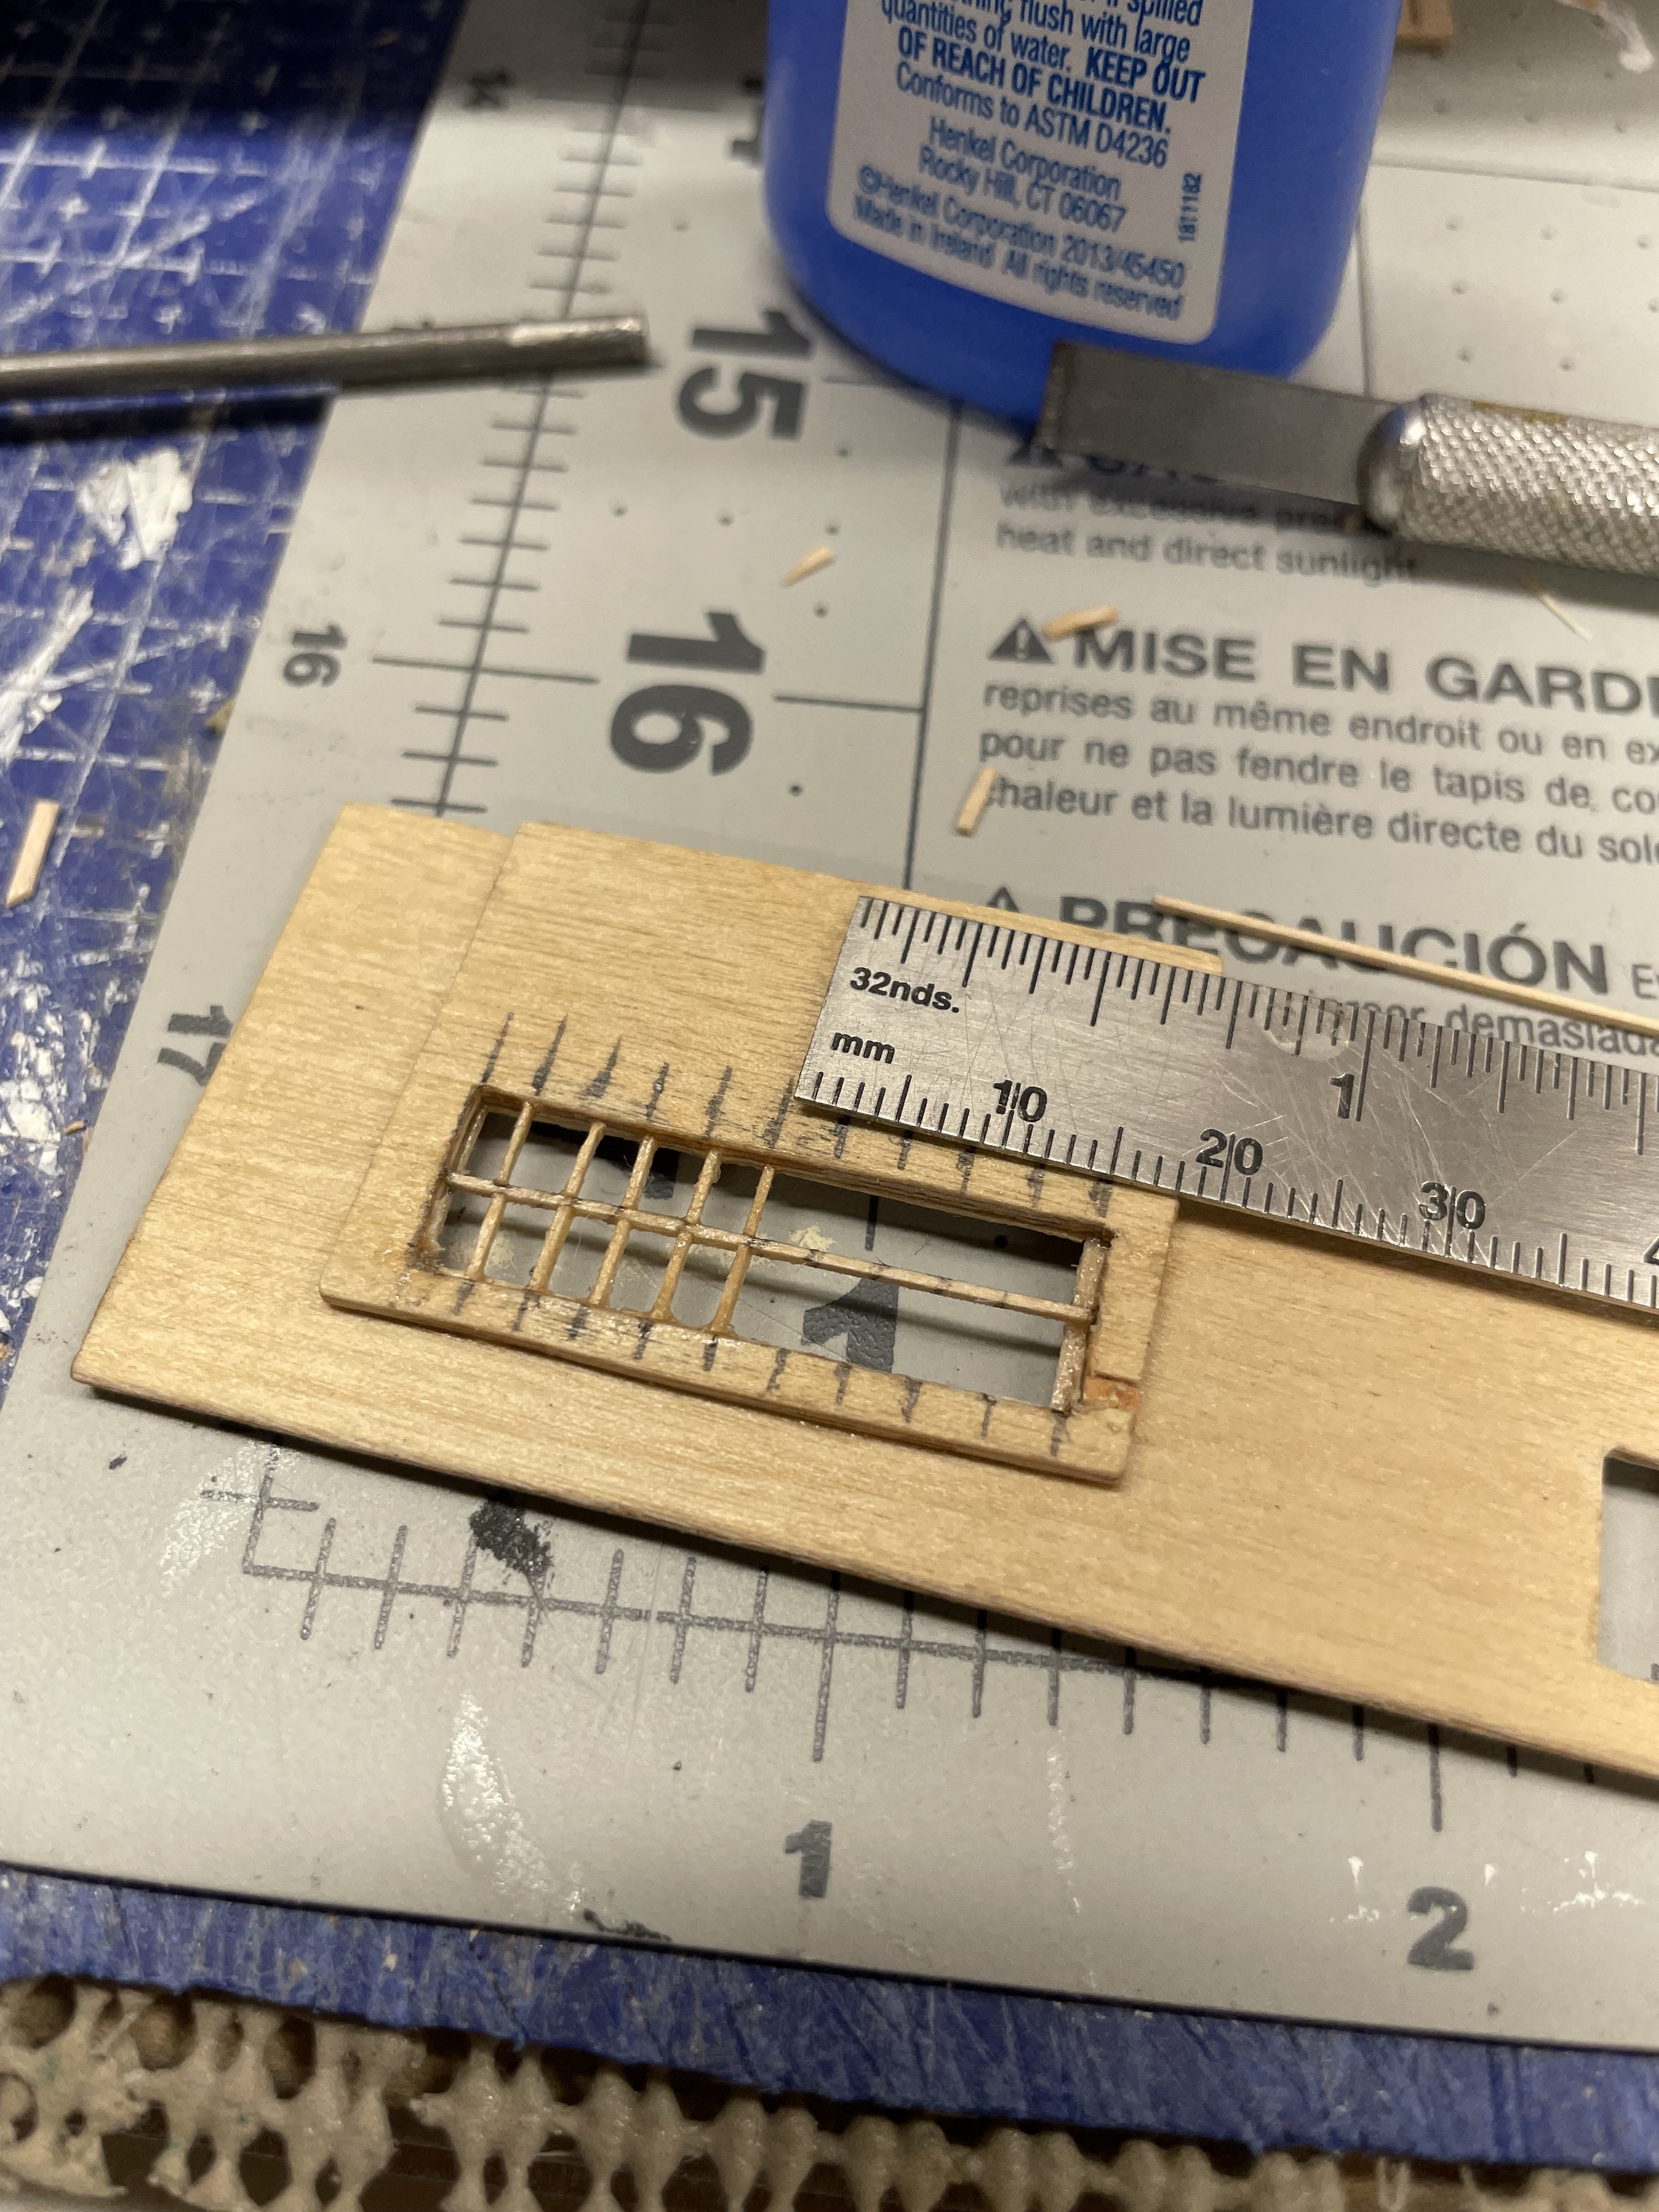
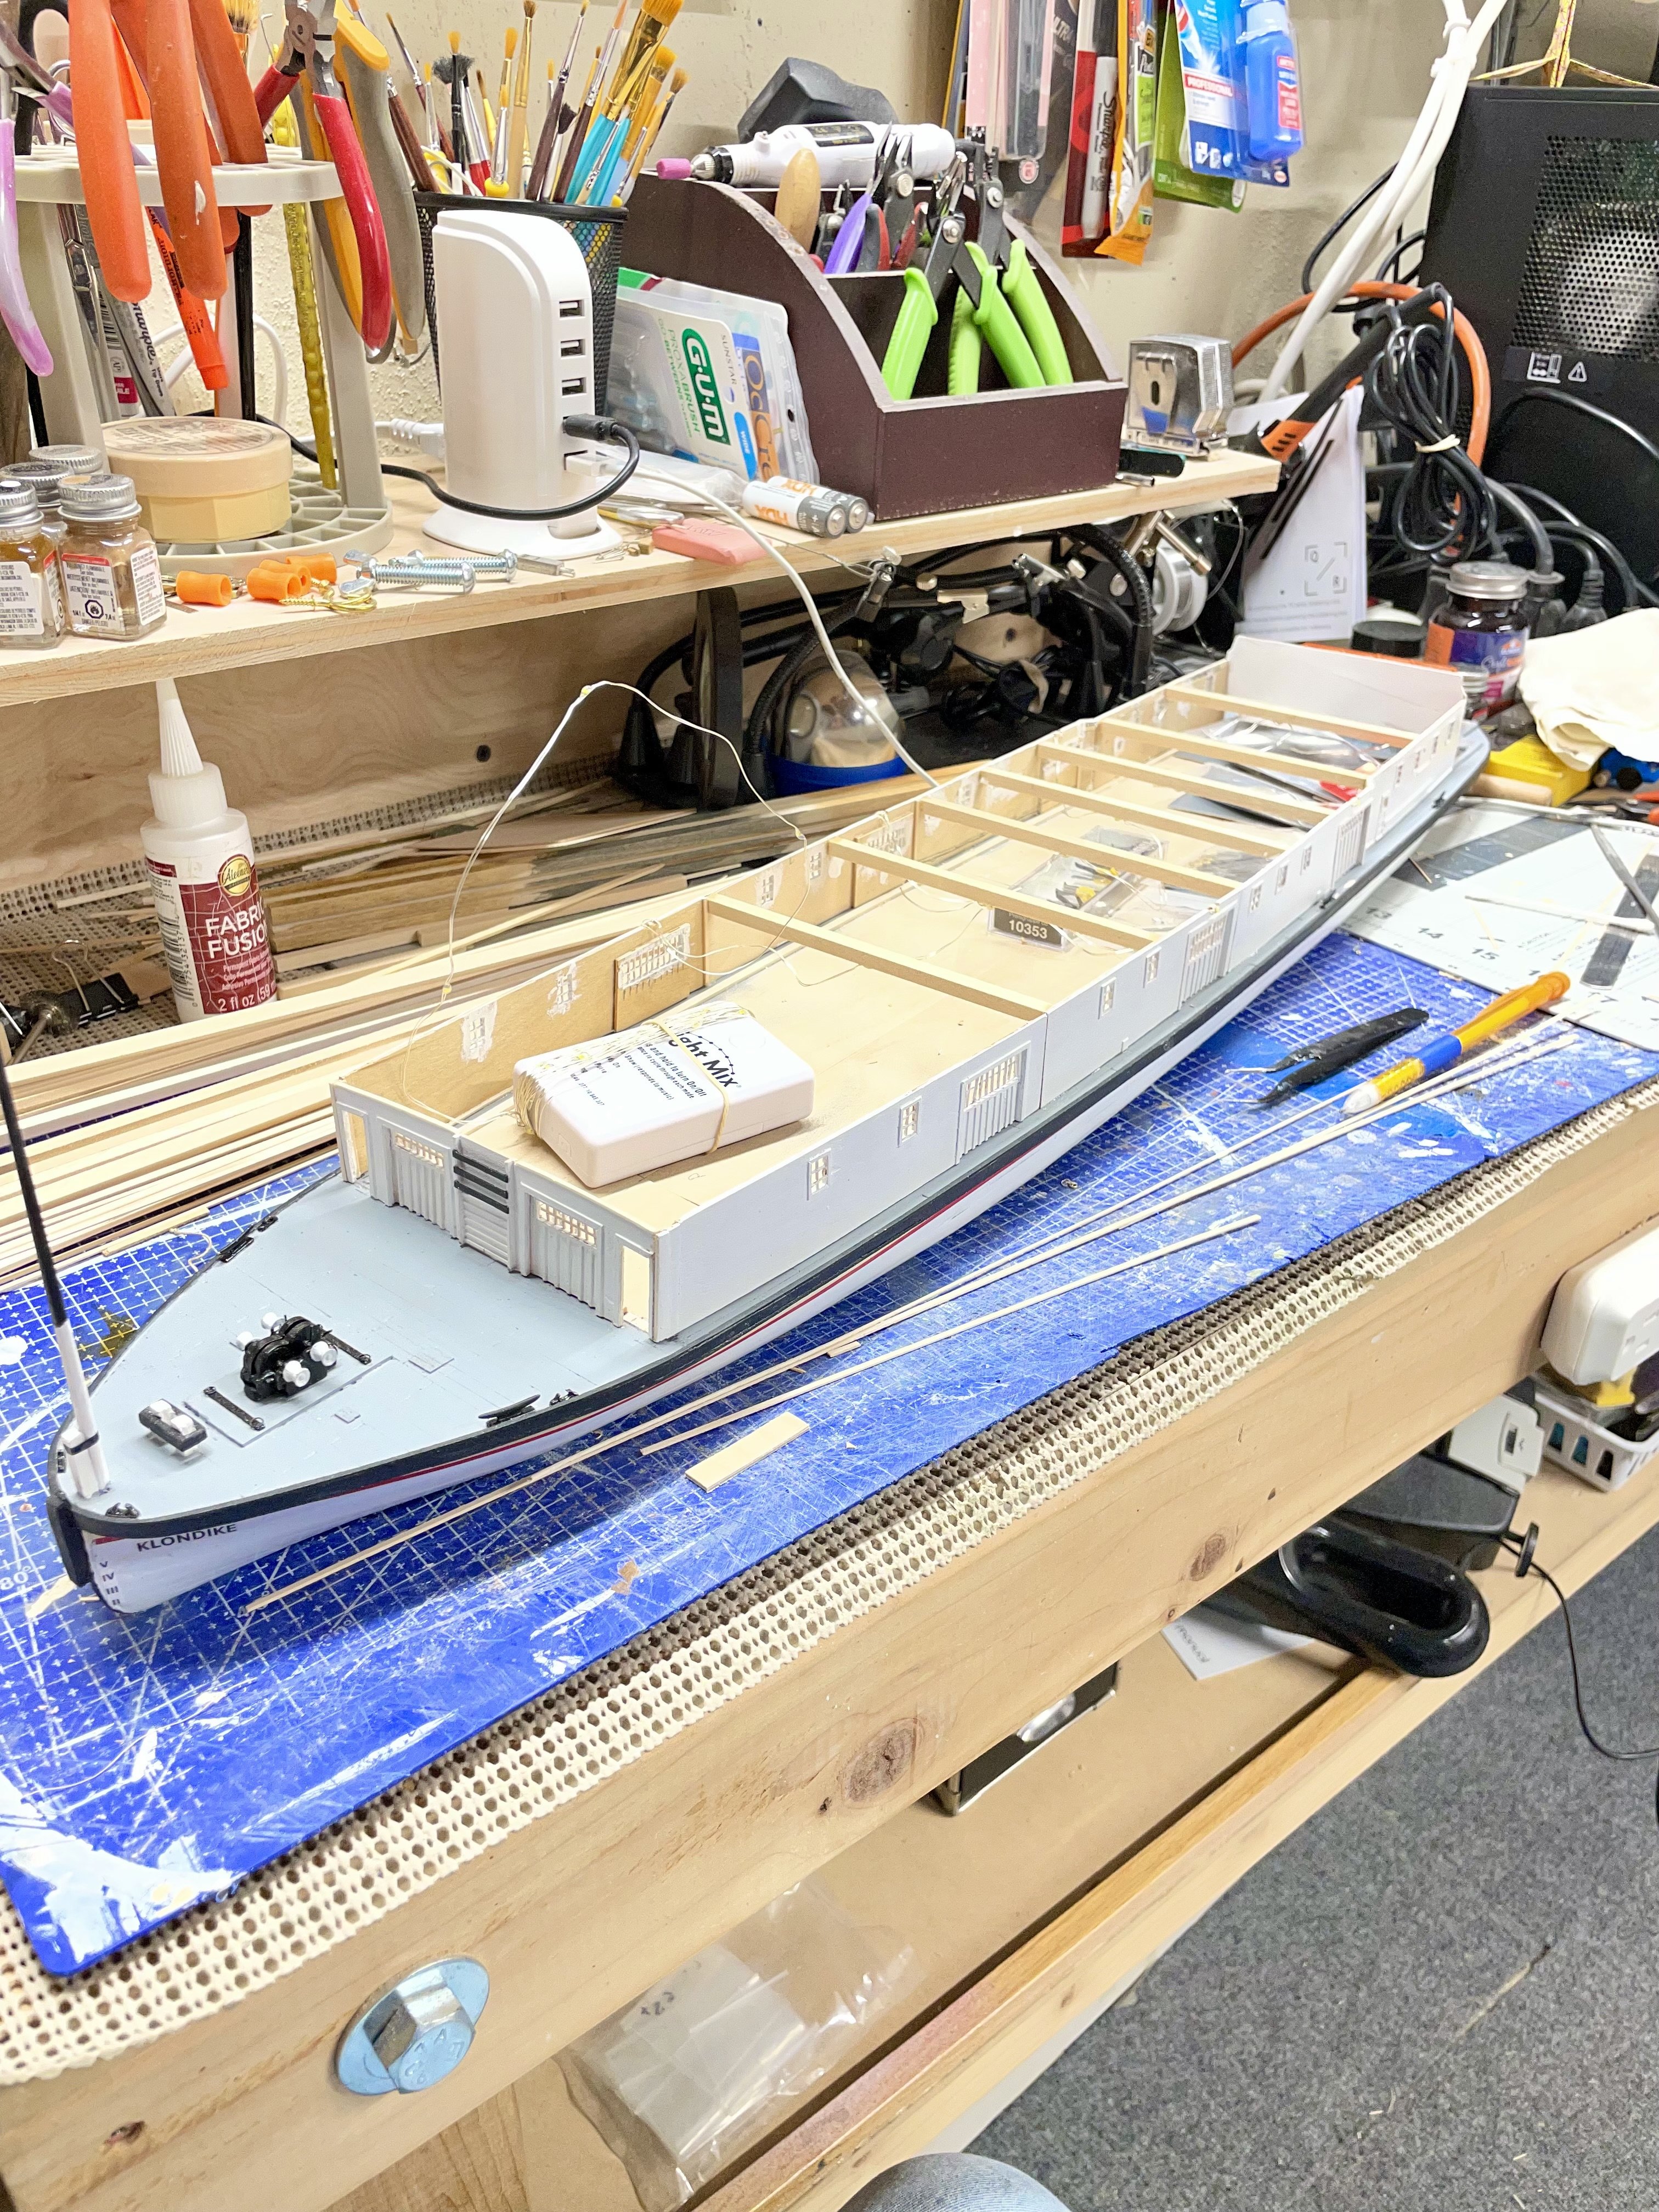
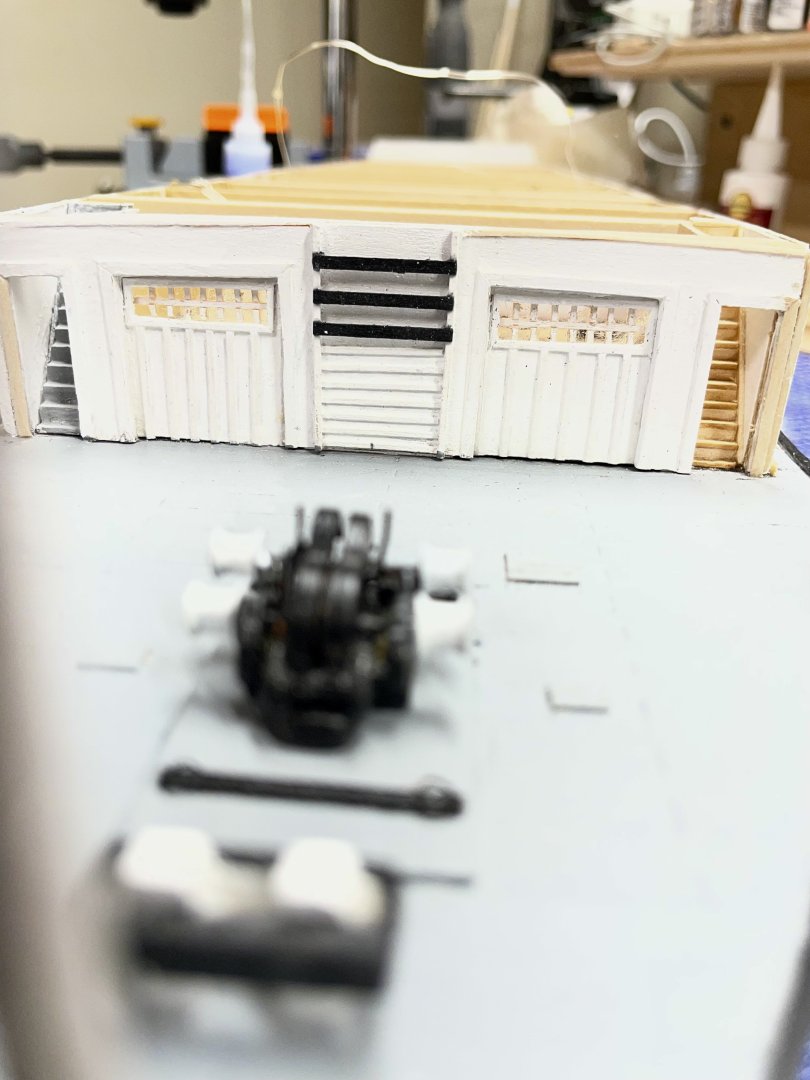
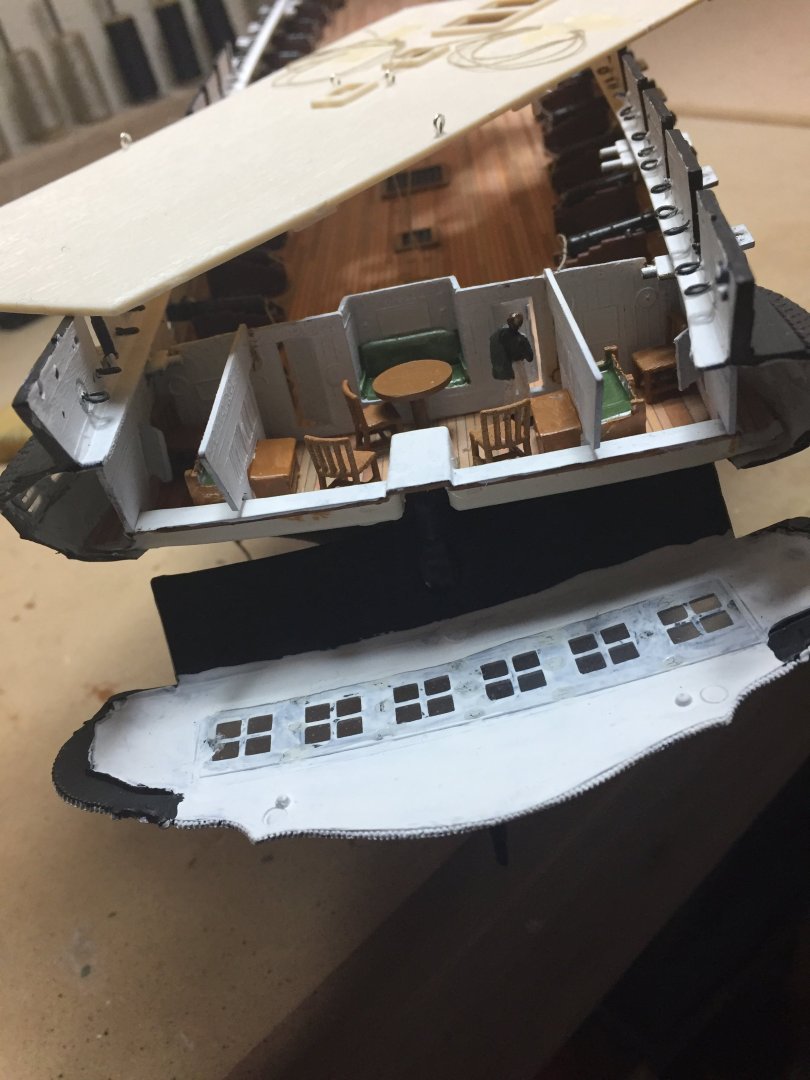
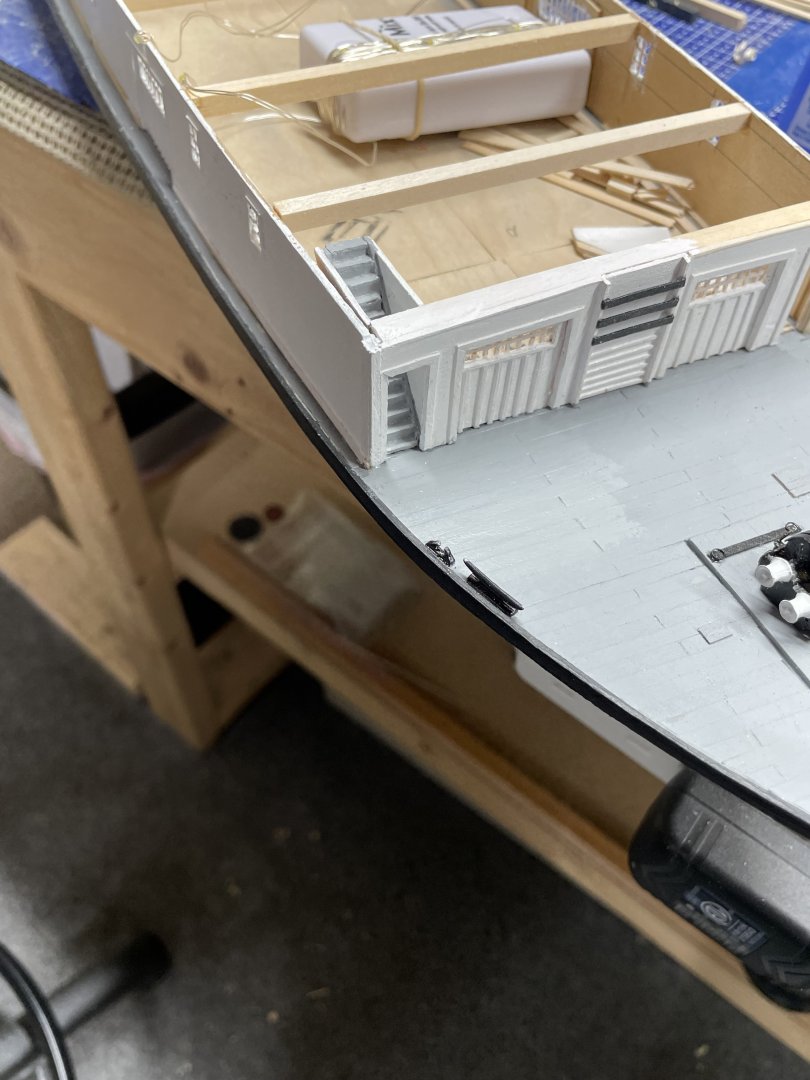
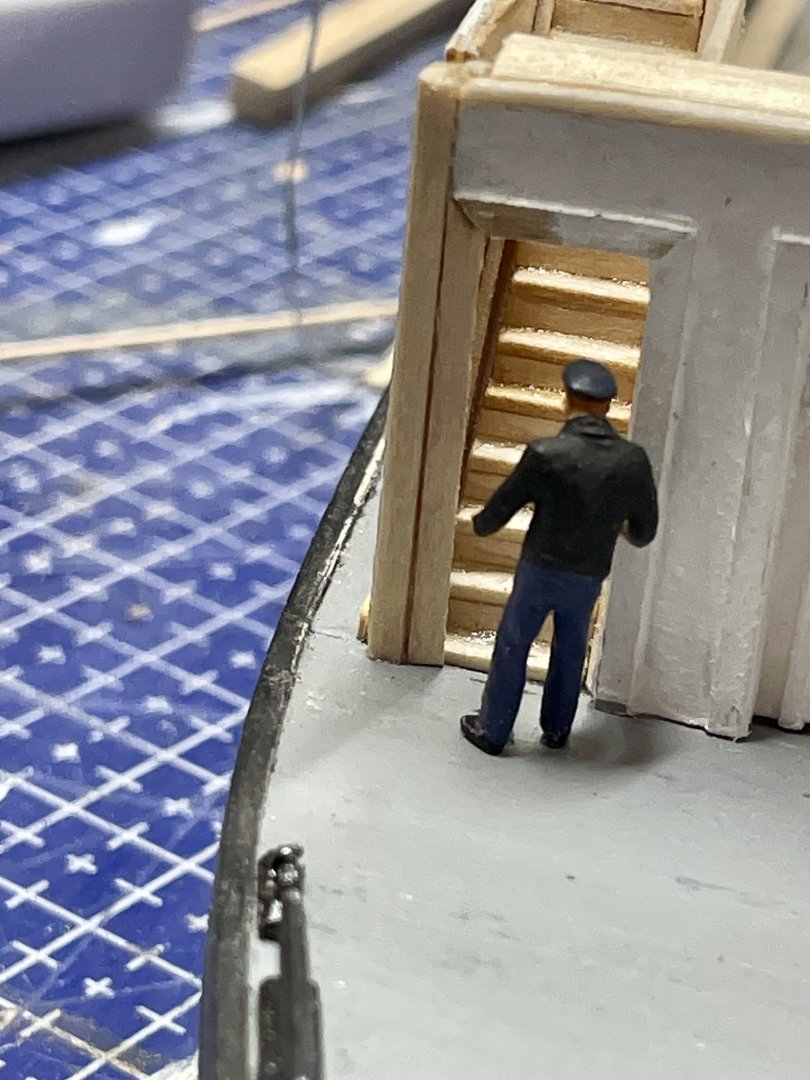
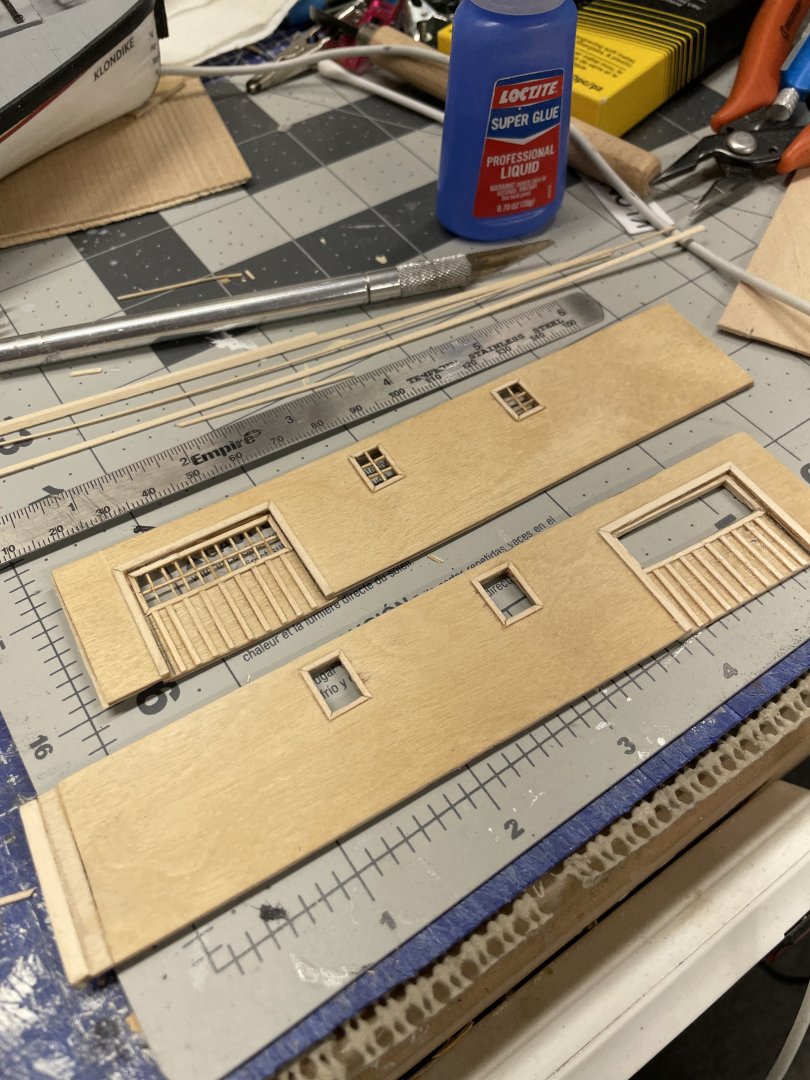
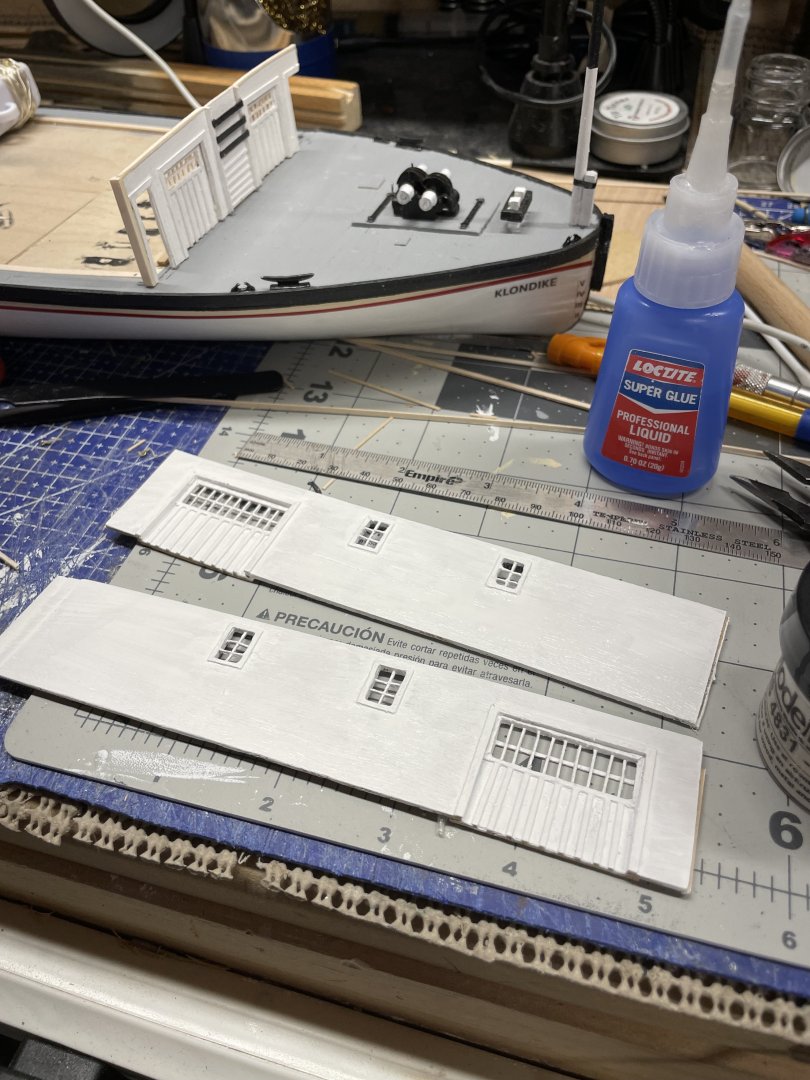
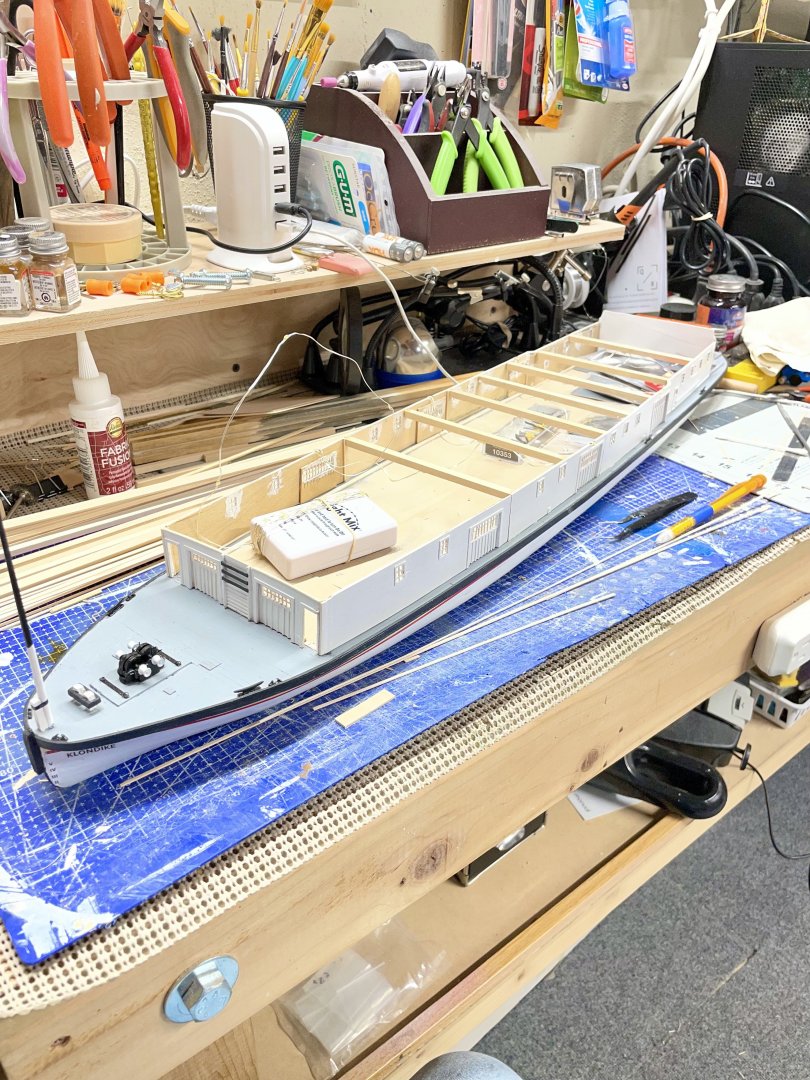
Back on the Klondike… Main Deck walls, windows and doors completed… Cheers 🍻

-
Hi Bob, Looks great… You have done that kit justice. Nice 👍 FYI… I’m building one of these kits for a friend who bought it 50 years ago for her father’s birthday. He never started it before he passed and she kept in the attic untouched until now. No pressure LOL 😆 I used Model Expo Hull Red… It’s a lot darker.

- 44 replies
-
- 3
-

-

-
- Scientific
- Billings Boats
- (and 1 more)
-
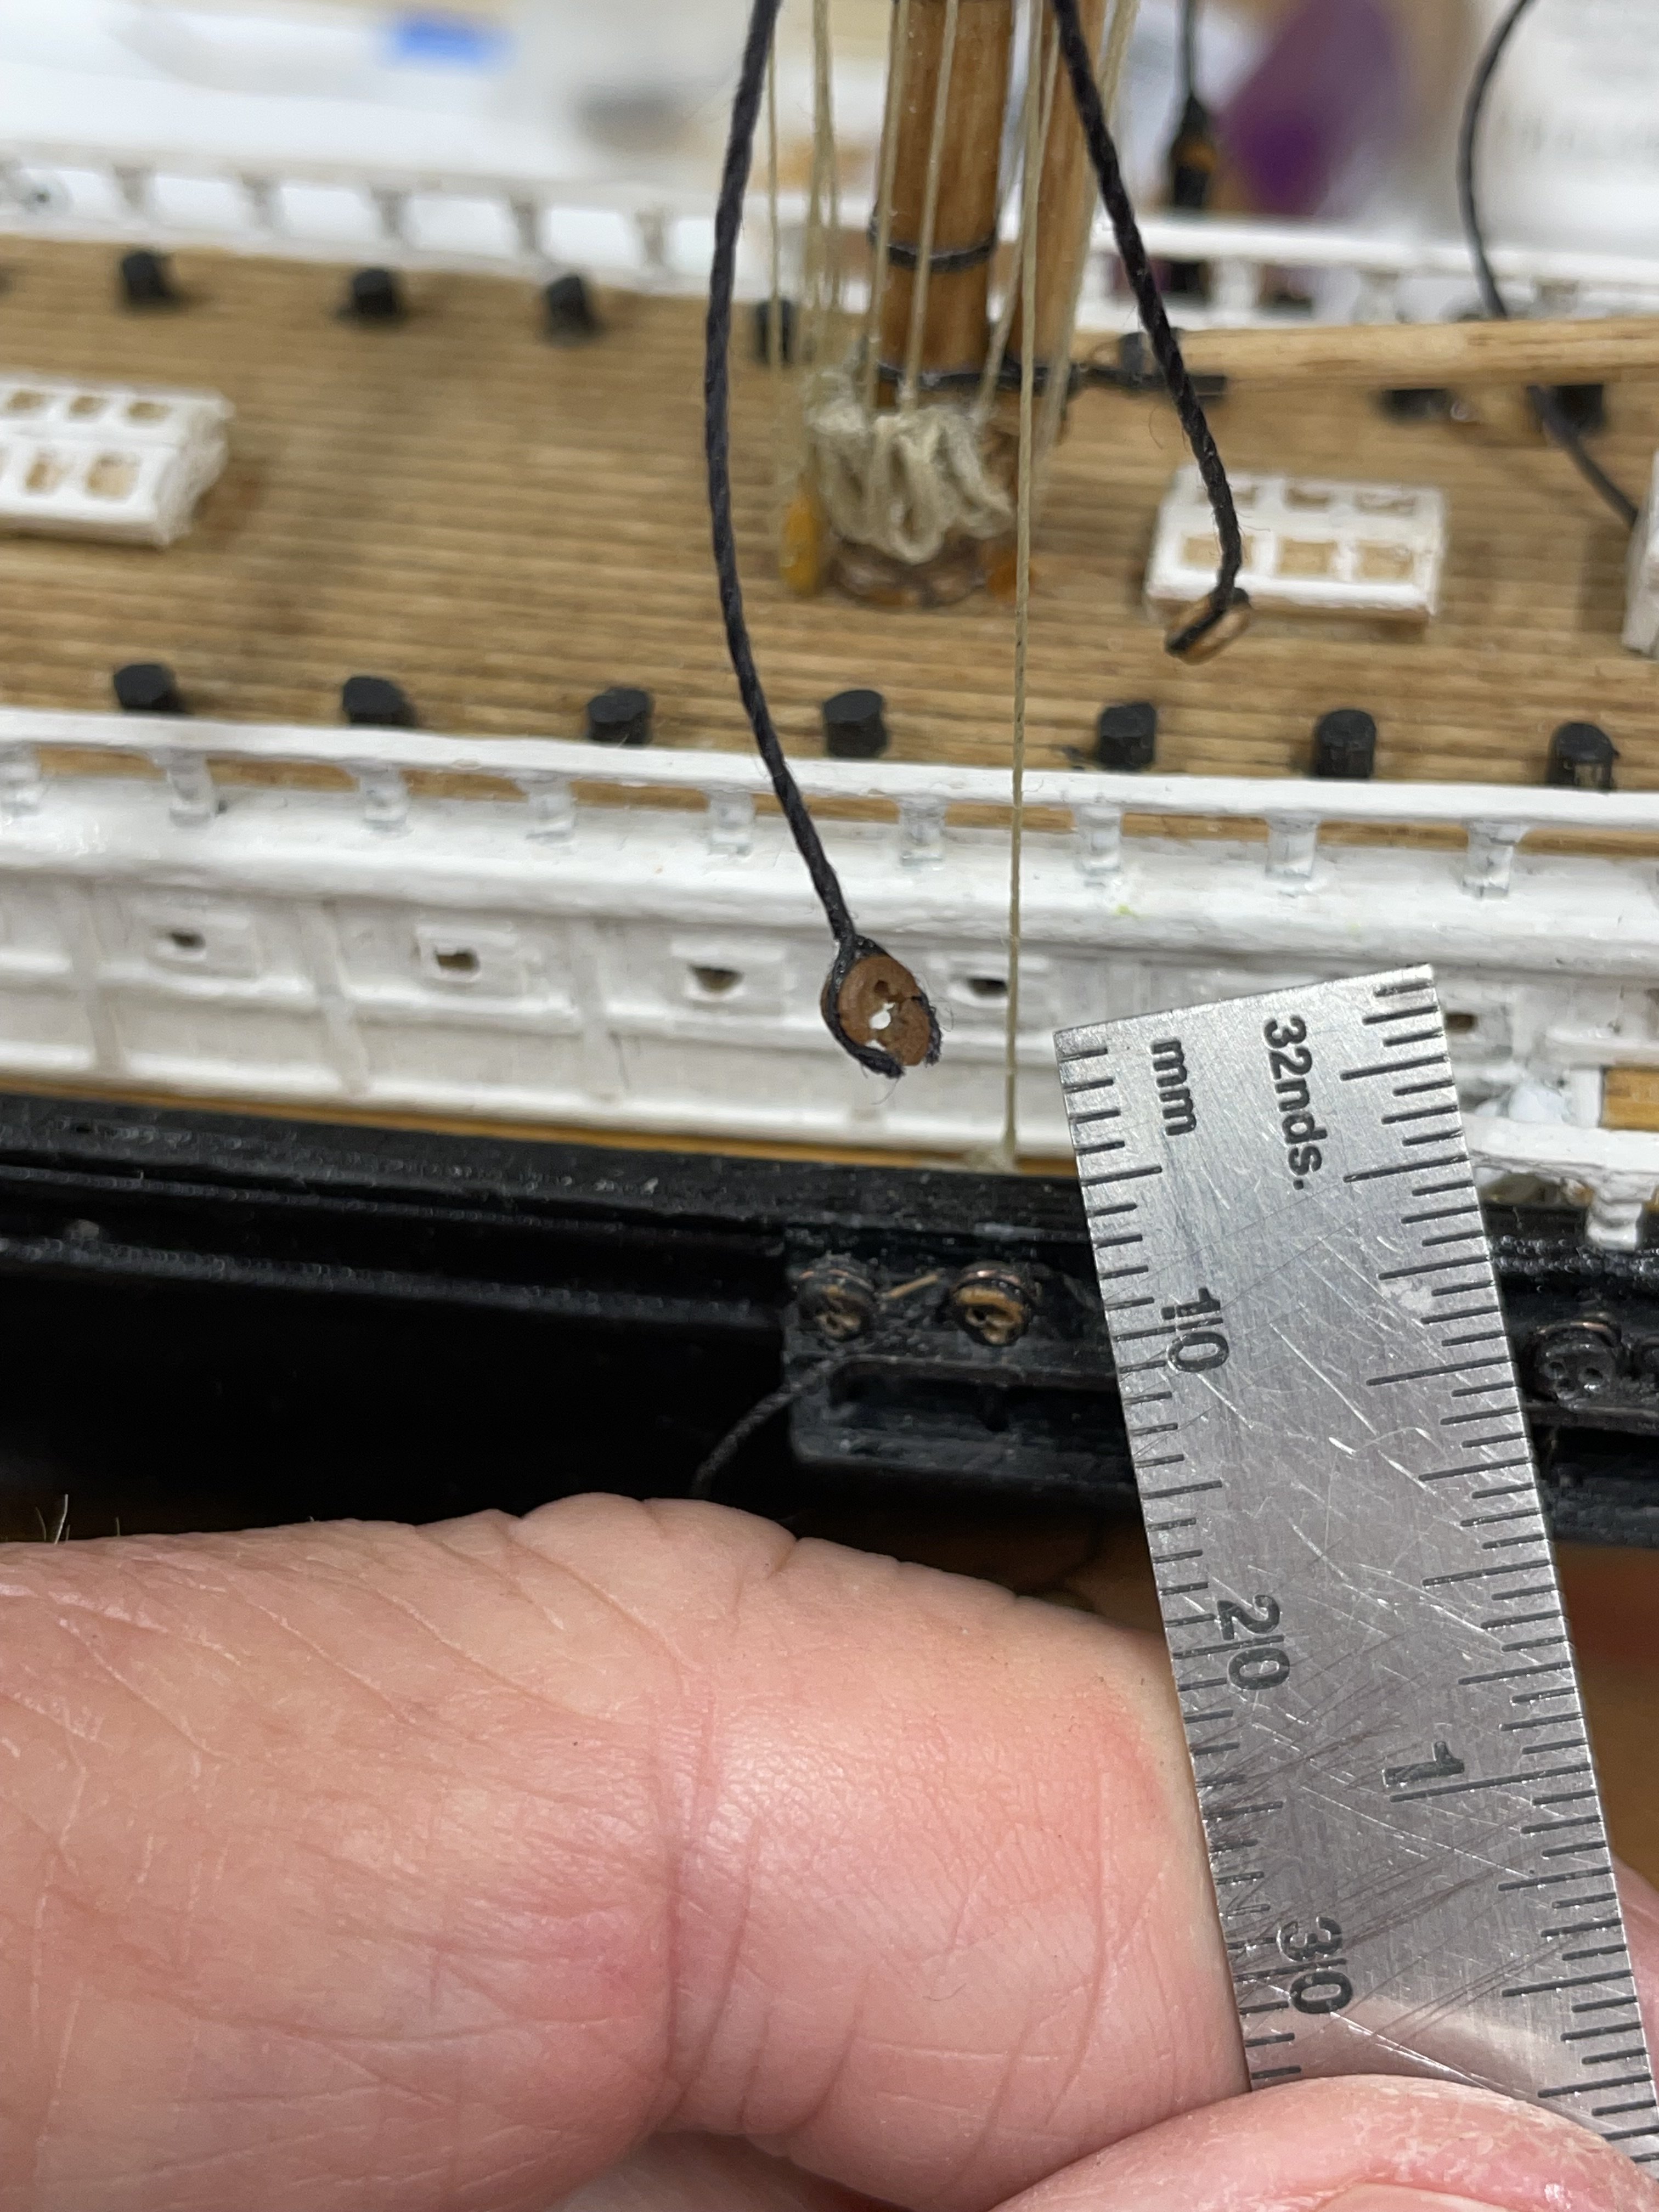
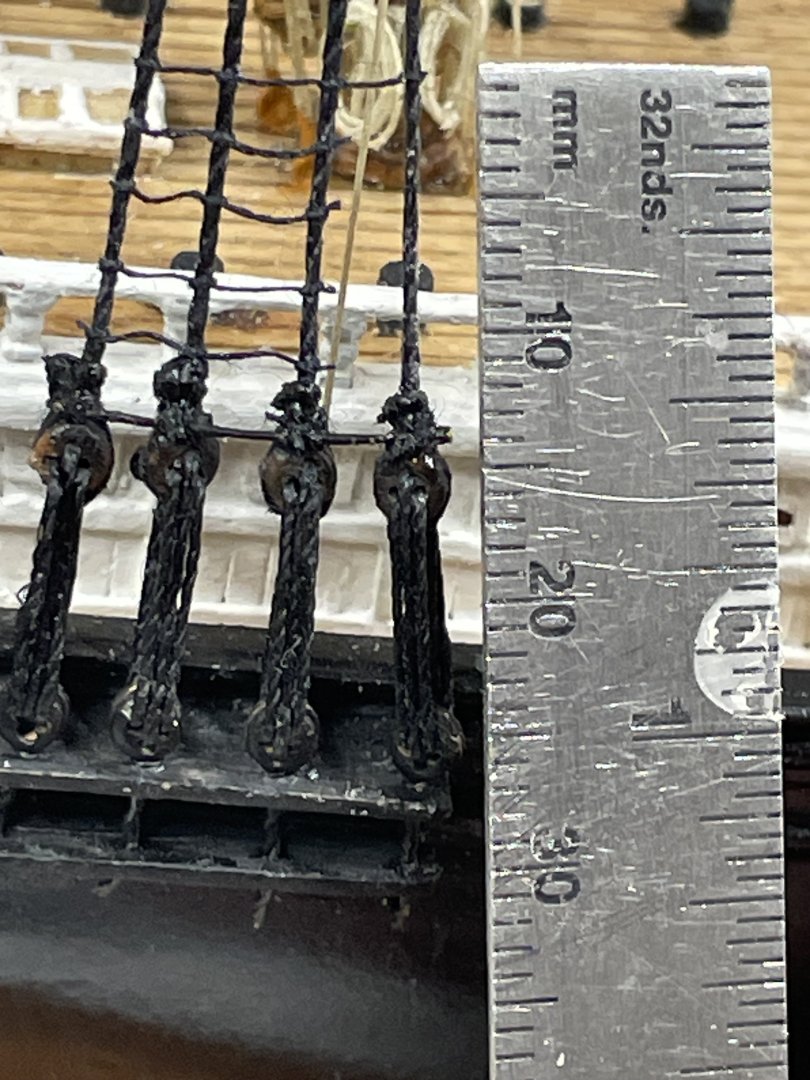
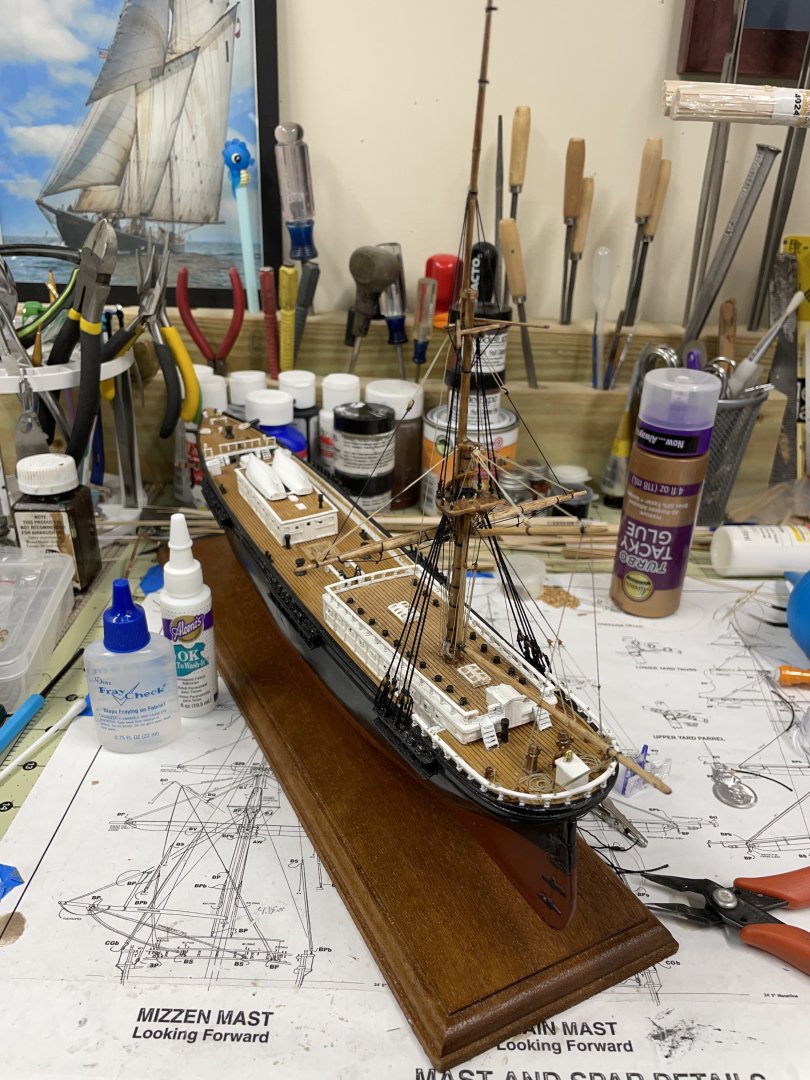
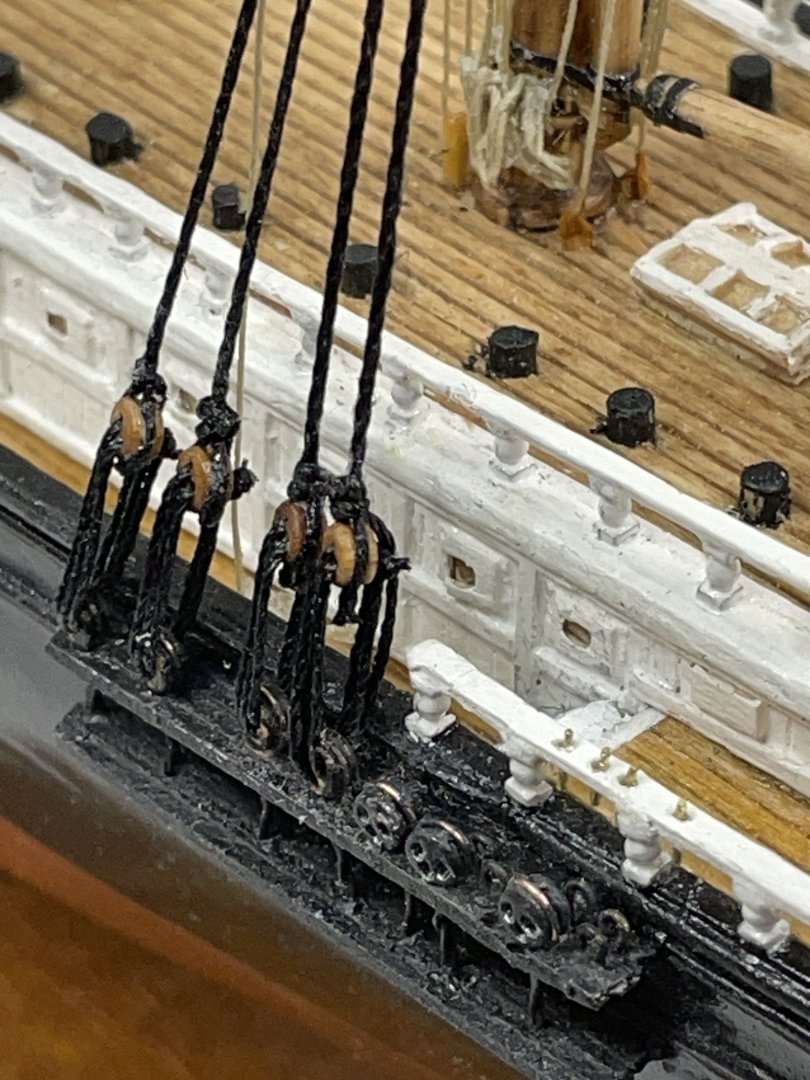
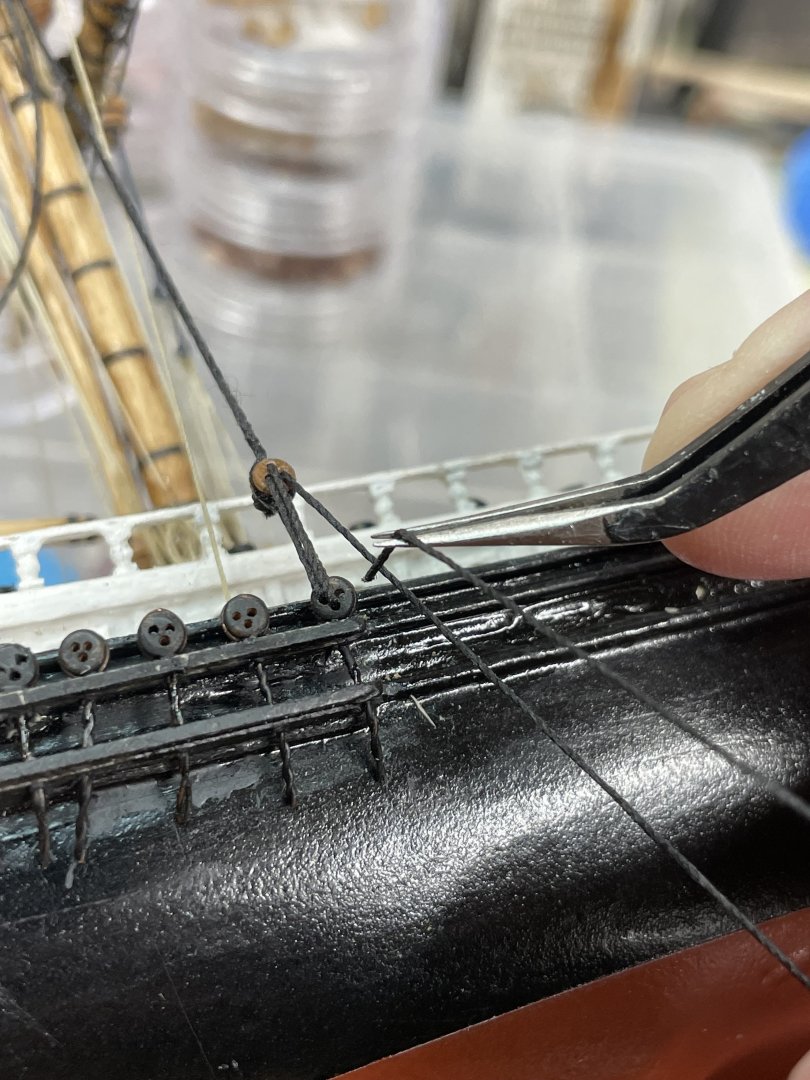
Mizzen Lower Shrouds continued… Mizzen Lower Shrouds Starboard completed w/ratlines. Cheers 🍻


- 165 replies
-
- 6
-
-
- Red Jacket
- Marine Model Company
- (and 2 more)
-
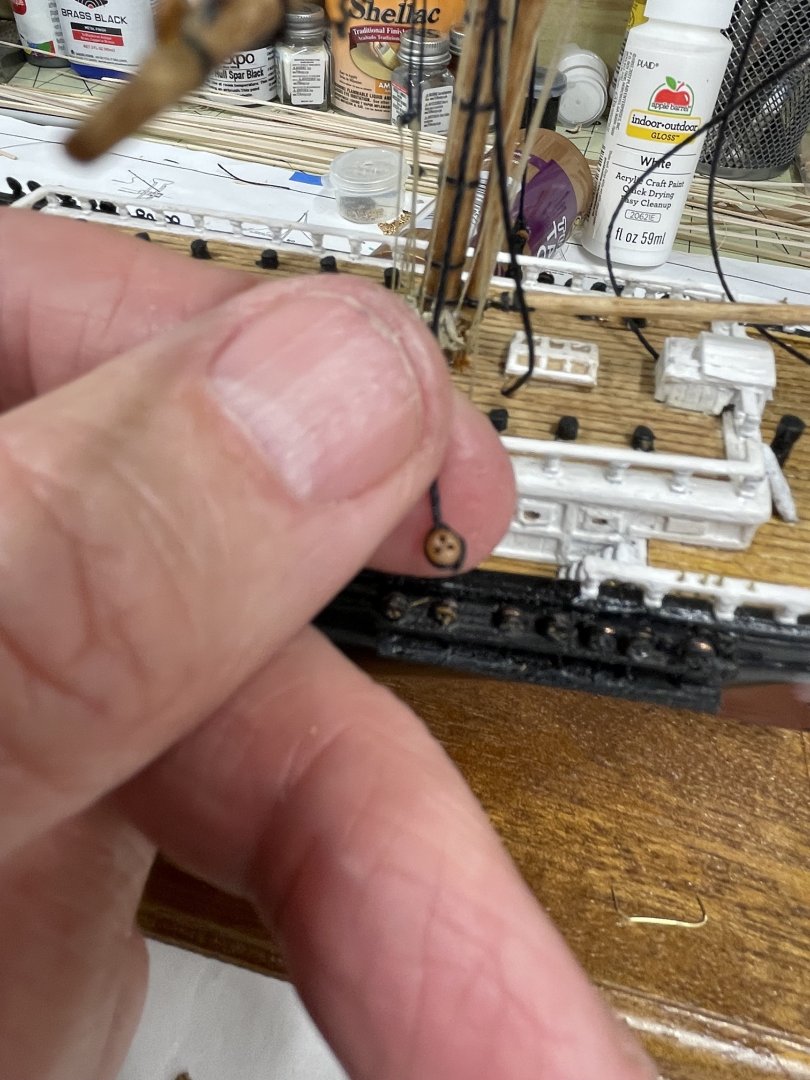
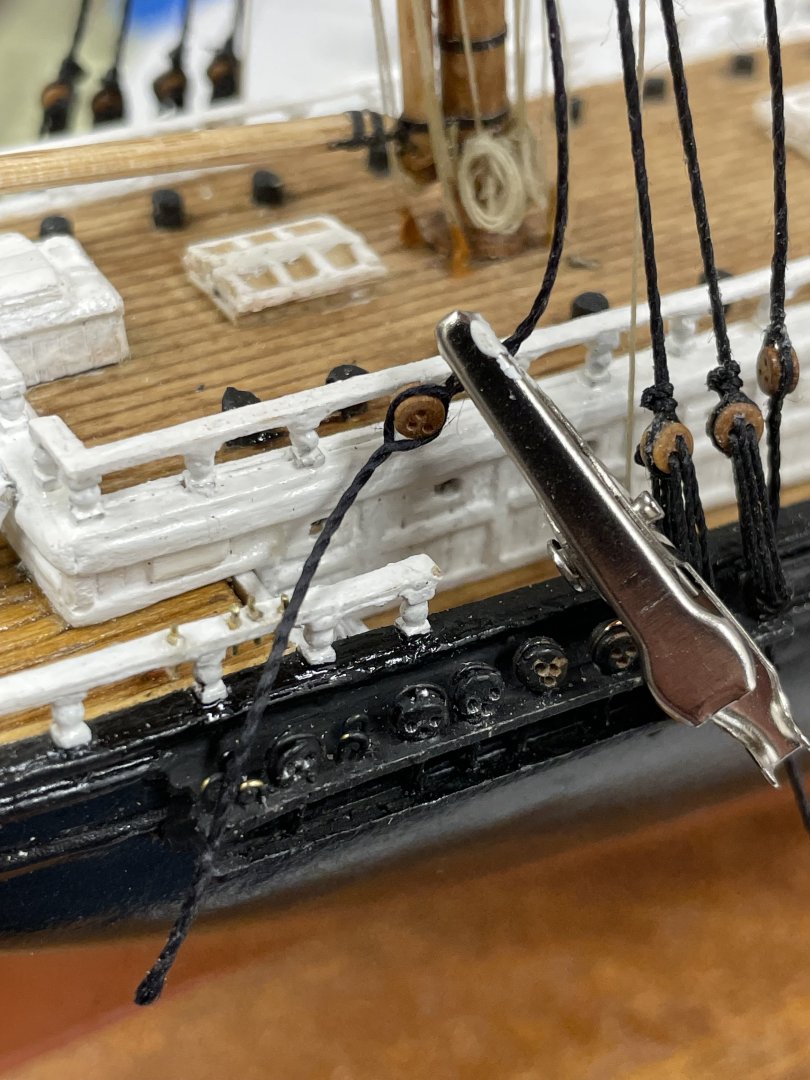
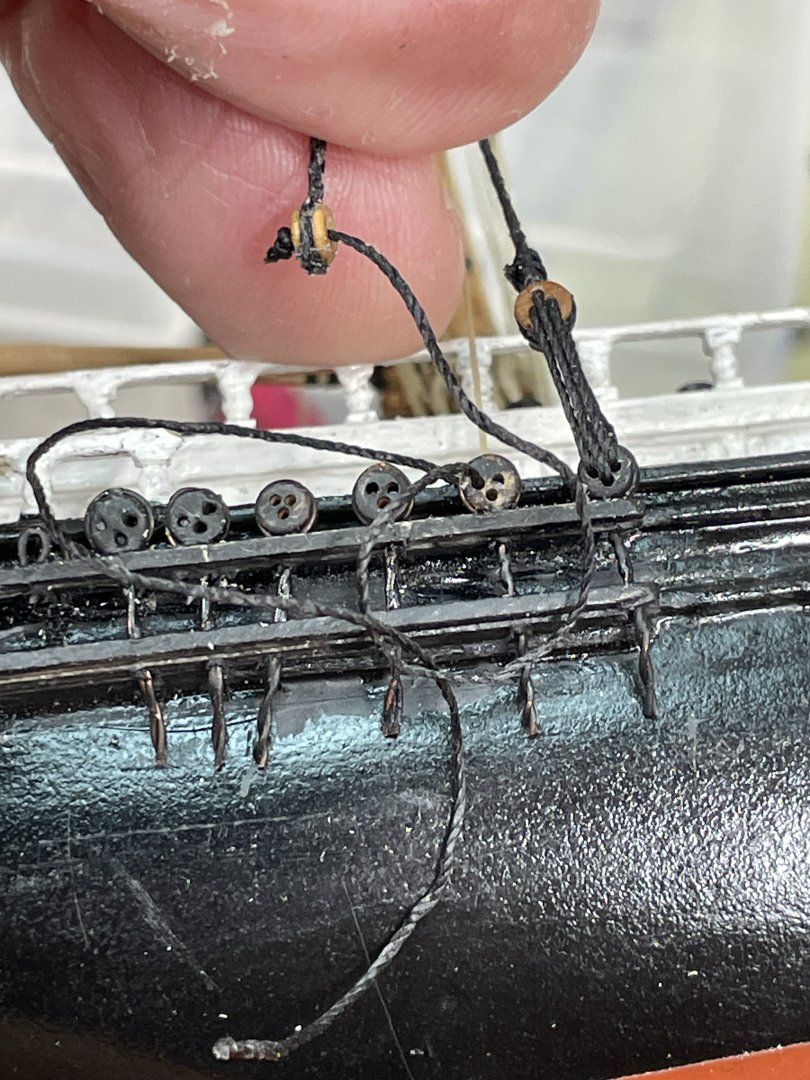
Ian, just some vintage black thread from an old kit. (Sewing thread) Use single half hitch knots only and ‘fray check” to keep it from bing fuzzy. https://www.michaels.com/product/dritz-fray-check-liquid-seam-sealant-10112538 Cheers 🍻
-
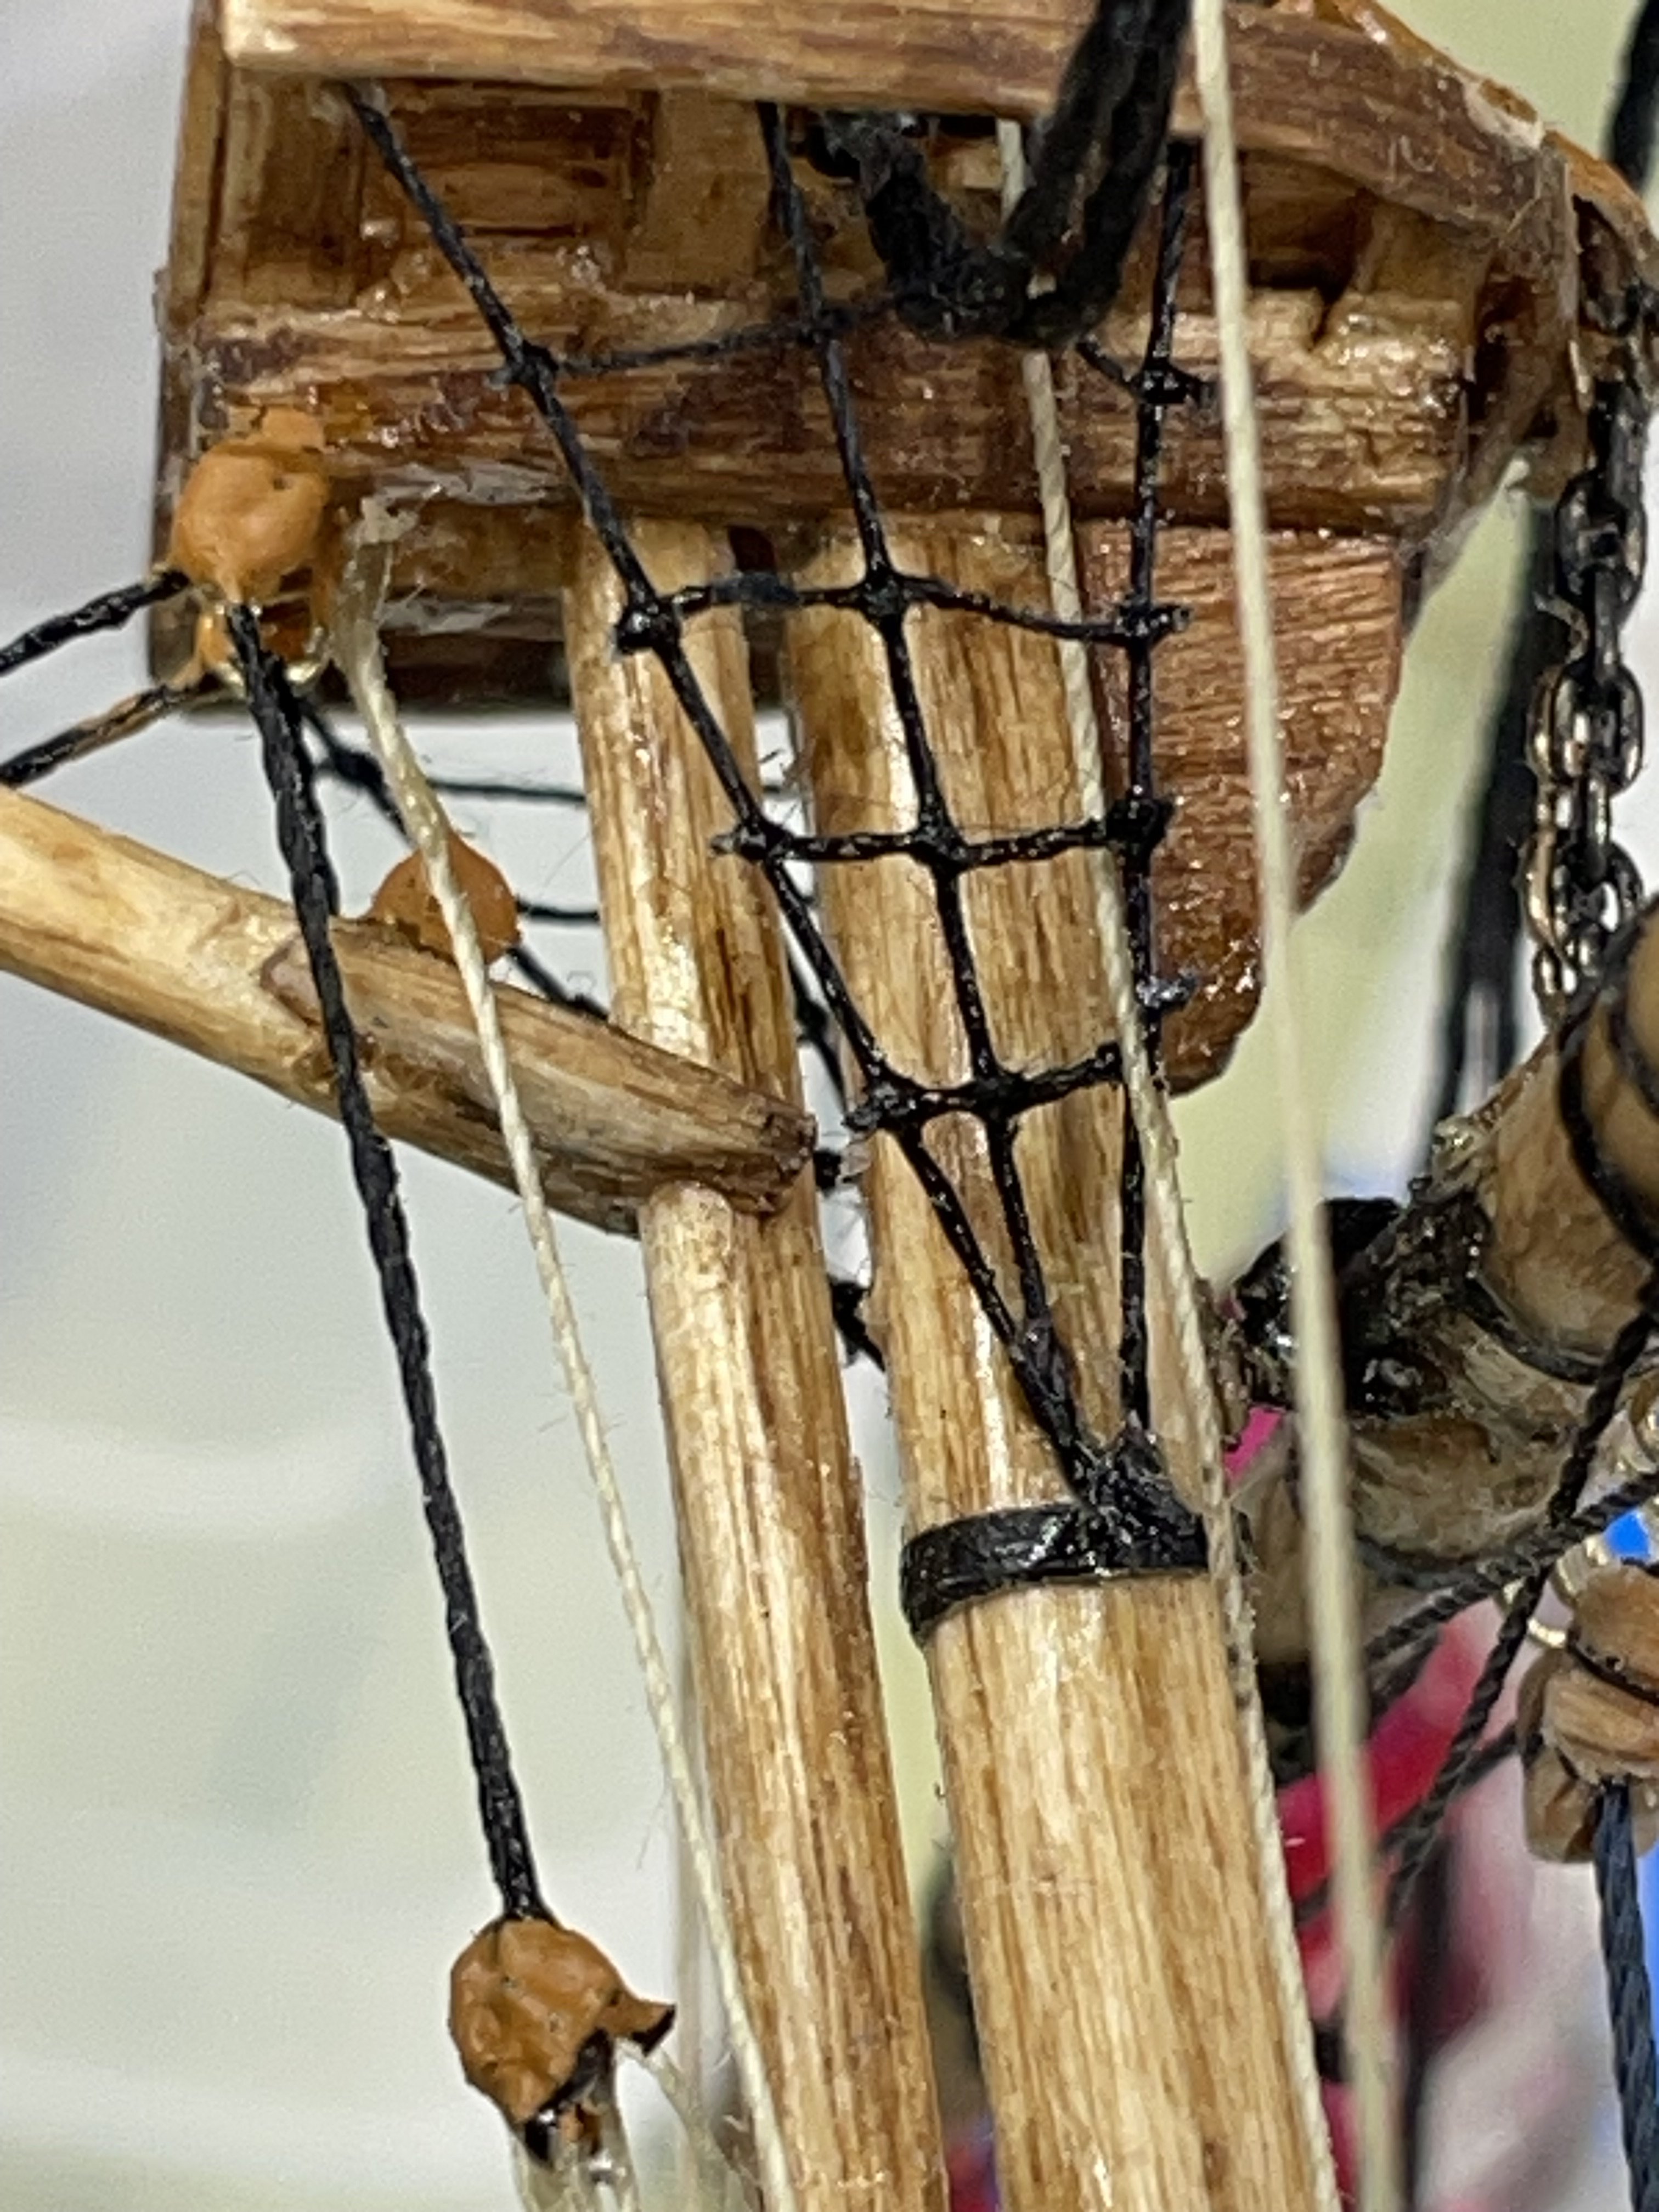
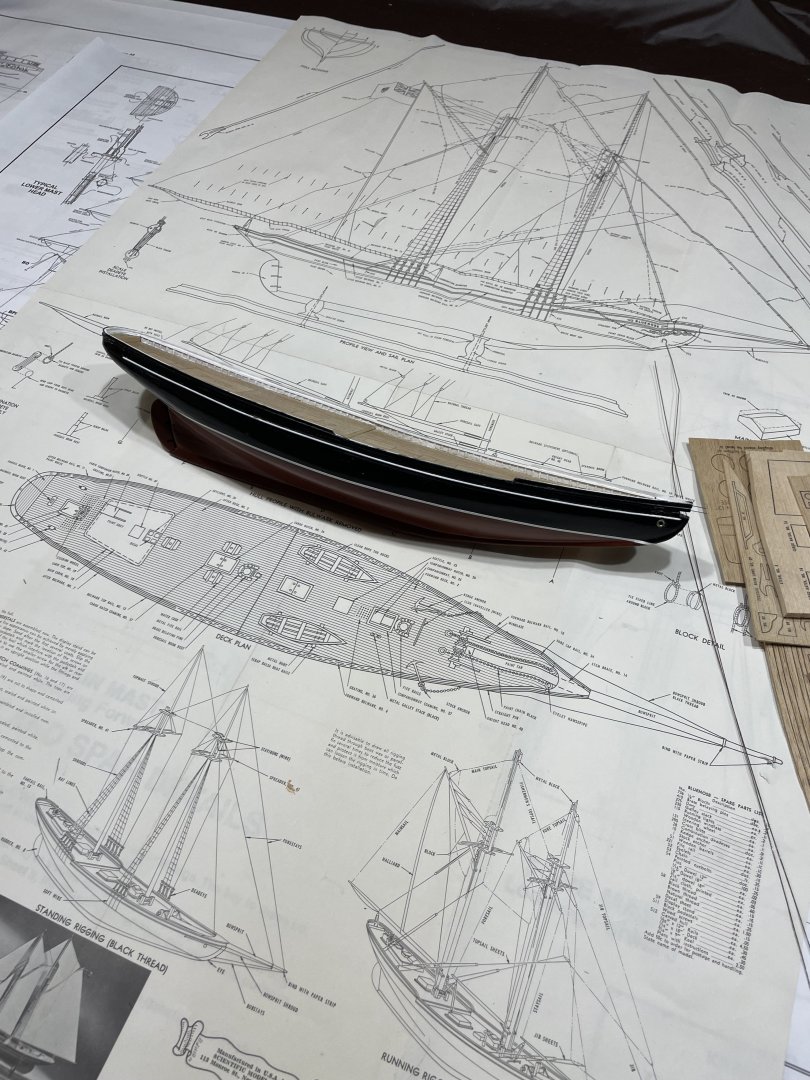
Dare I say it, “Ratlines”… …and so it begins. Cheers 🍻

- 165 replies
-
- 3
-
-
- Red Jacket
- Marine Model Company
- (and 2 more)
-
Looking Great Jon, I like leaving brass belaying pins brass, too. Helps highlight the details. Like rope coils. 😎 John
-
Great job Bob! Another great build under your belt. It’s been a pleasure watching you improve and mastering your ship building skills. Carry on , Sir. 🍻
- 258 replies
-
- 4
-
-
- Victory Models
- Pegasus
- (and 3 more)
-
Steady Bob, you know you get a bit ahead of yourself sometimes. LOL 😆 Take your time, looking really good. 👍 John
- 258 replies
-
- 3
-

-
-
- Victory Models
- Pegasus
- (and 3 more)
-
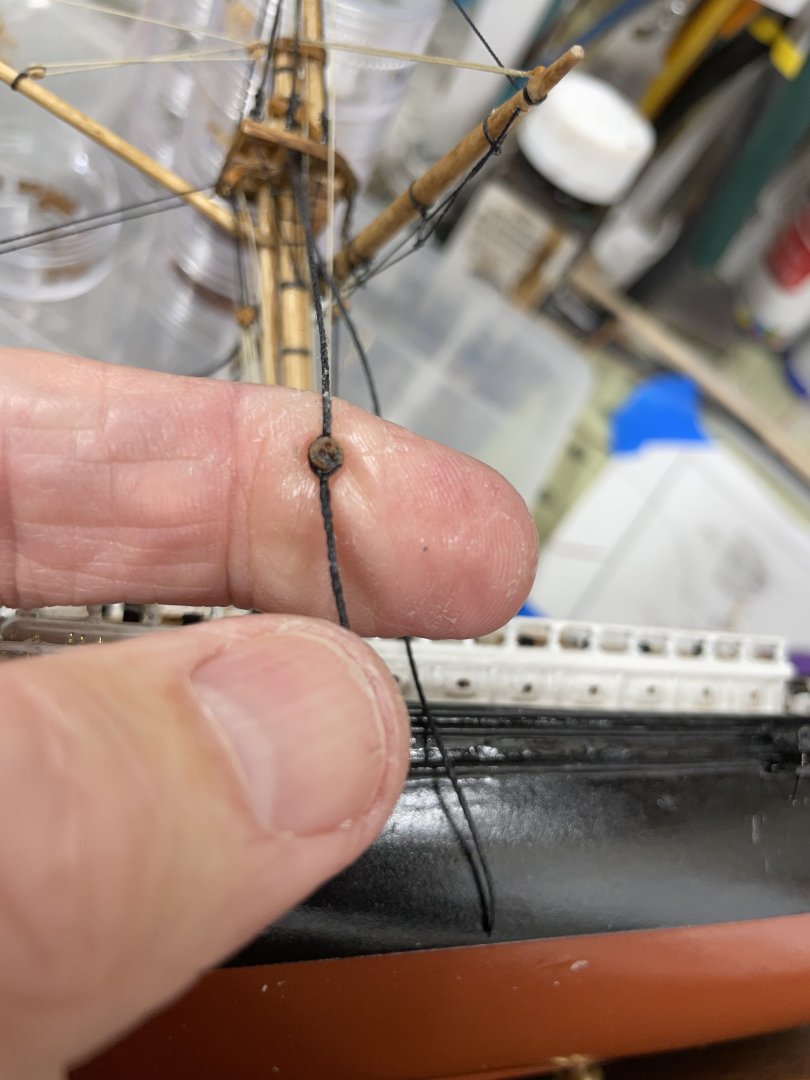
I have had those too. Pulled a bit too hard on the lanyard, tightening things up. John
- 165 replies
-
- 1
-
-
- Red Jacket
- Marine Model Company
- (and 2 more)
-
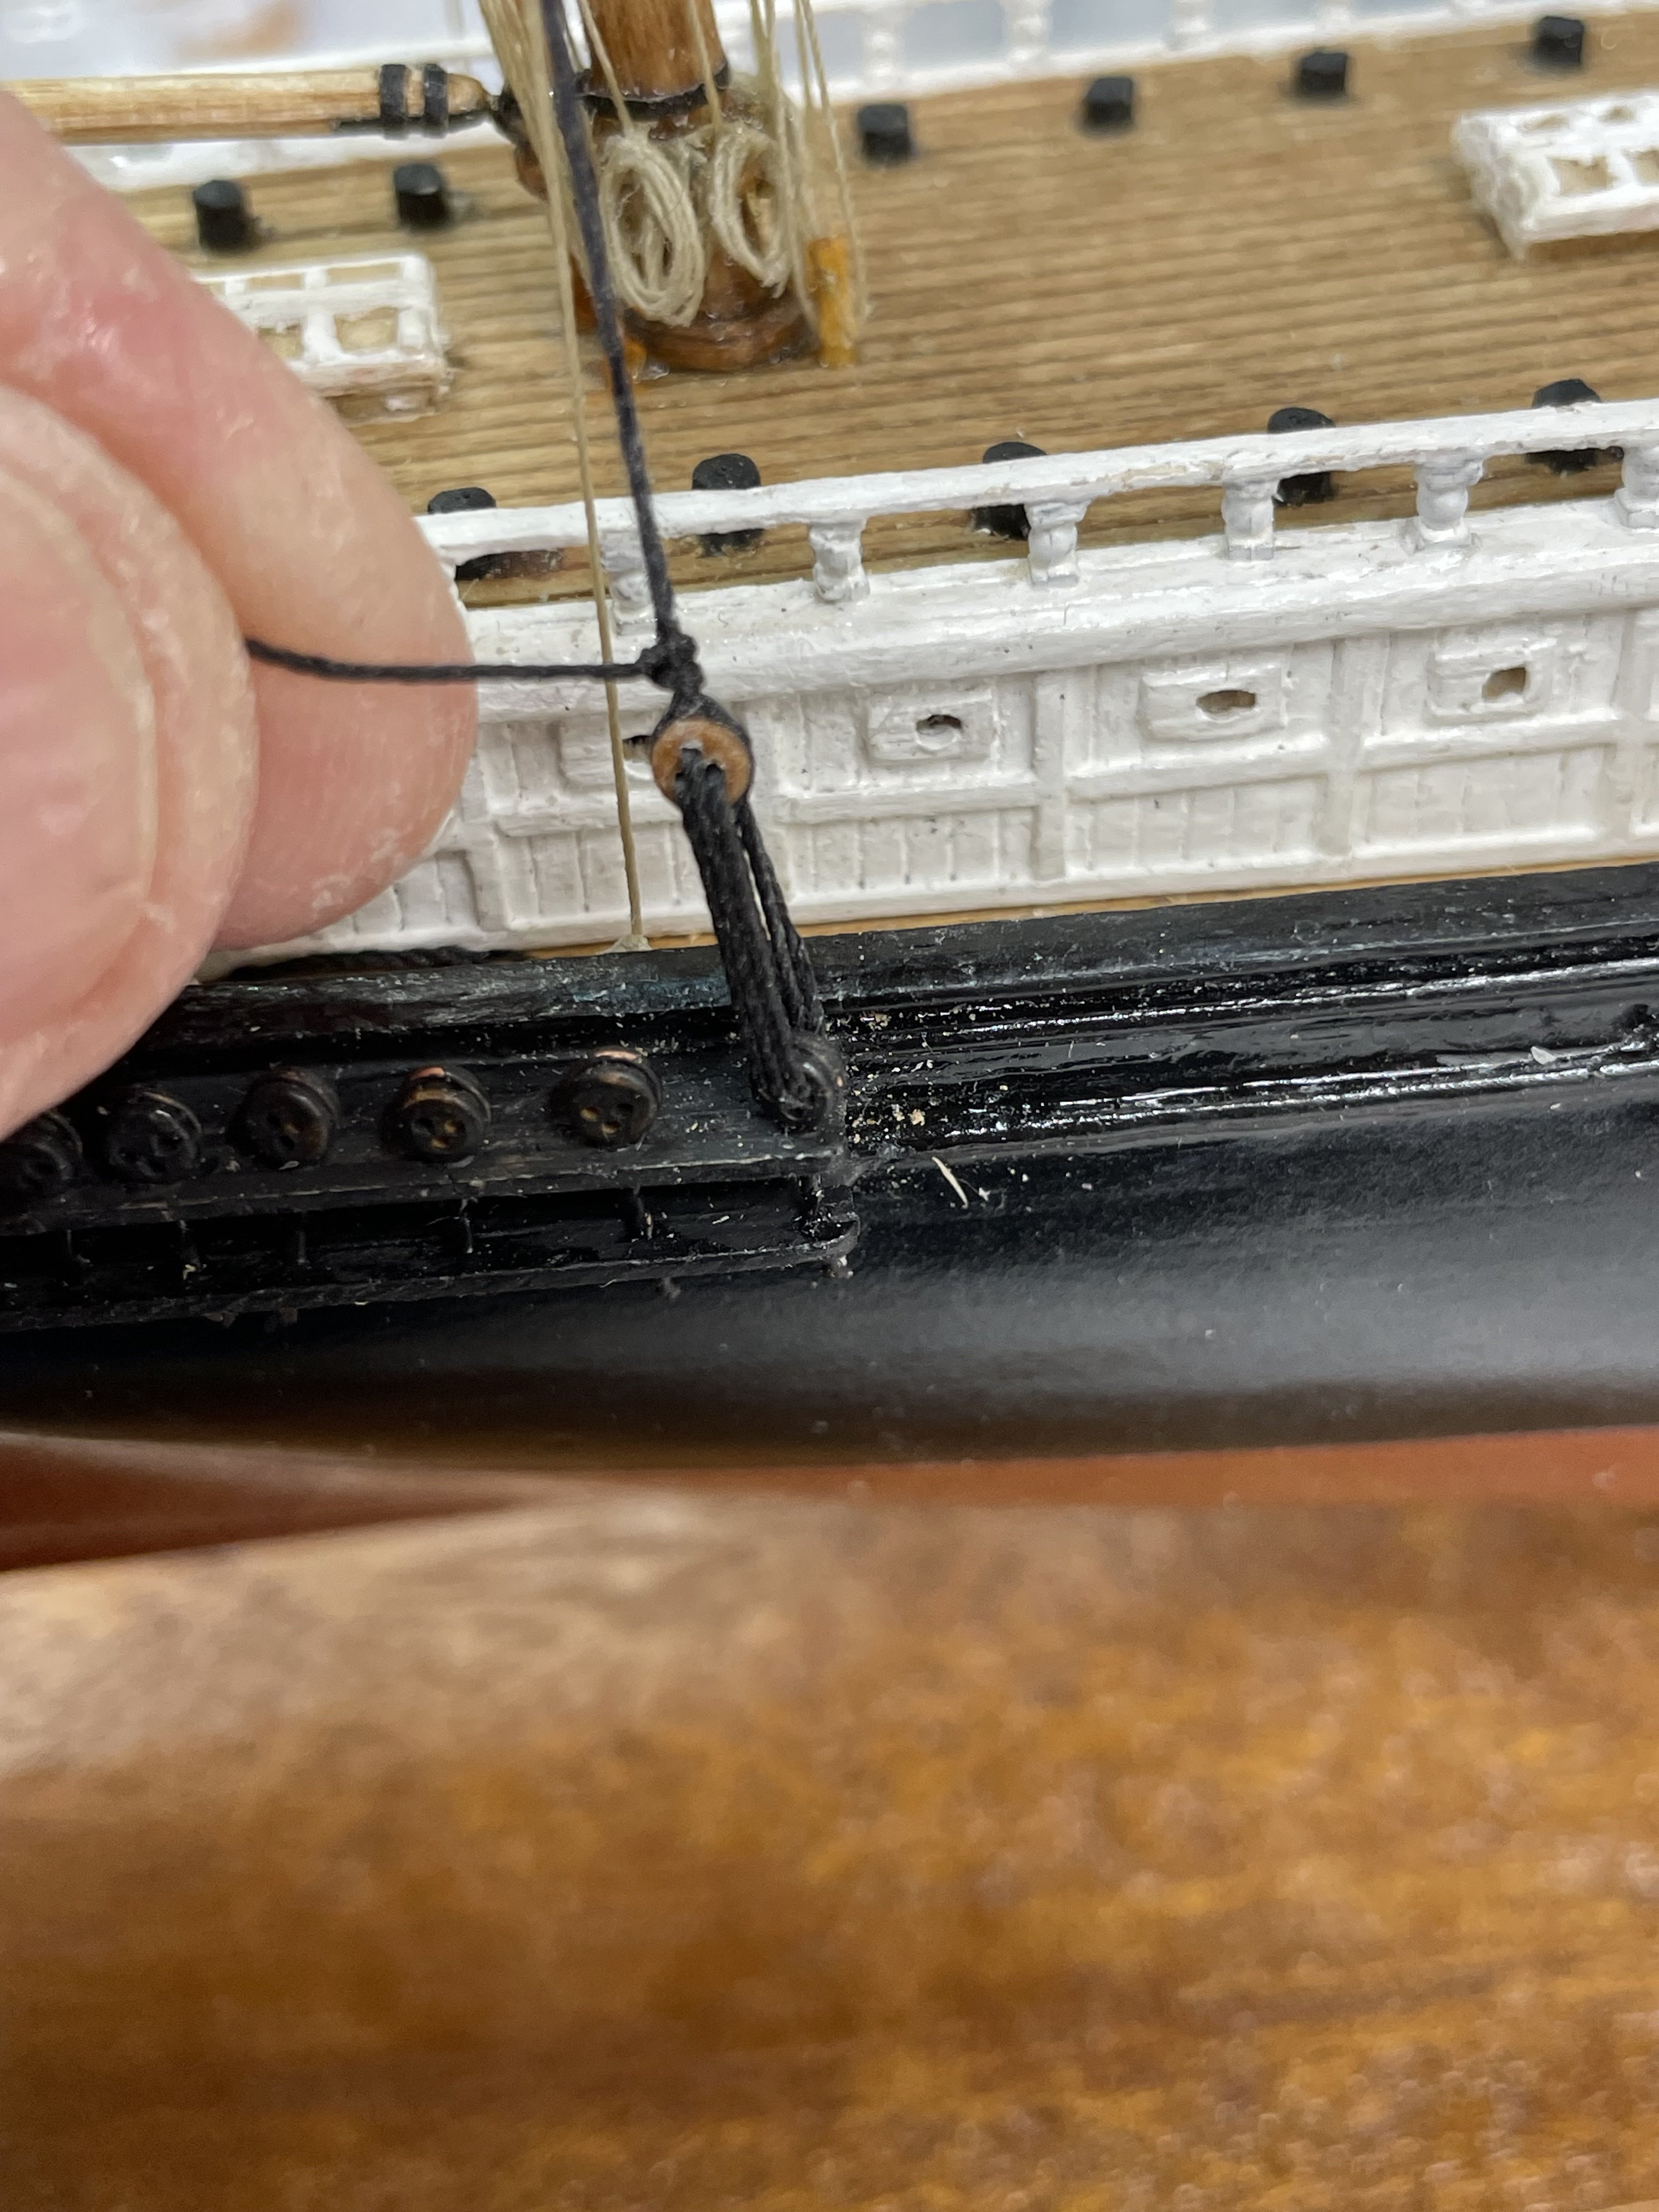
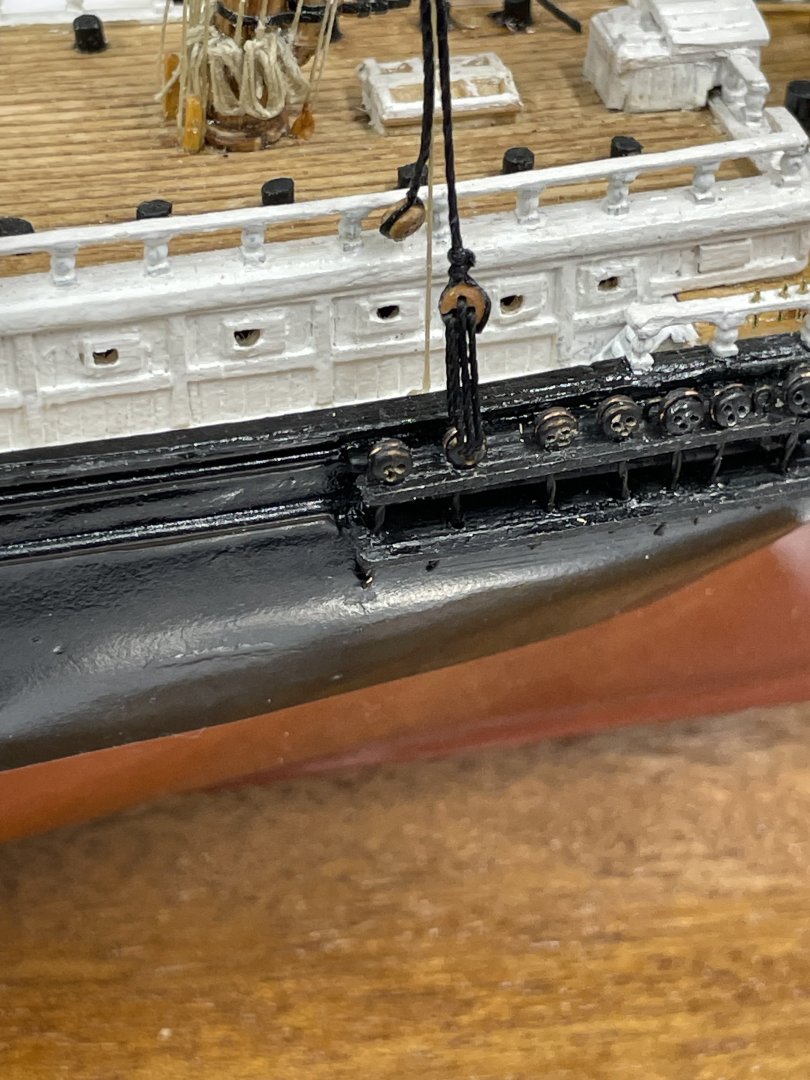
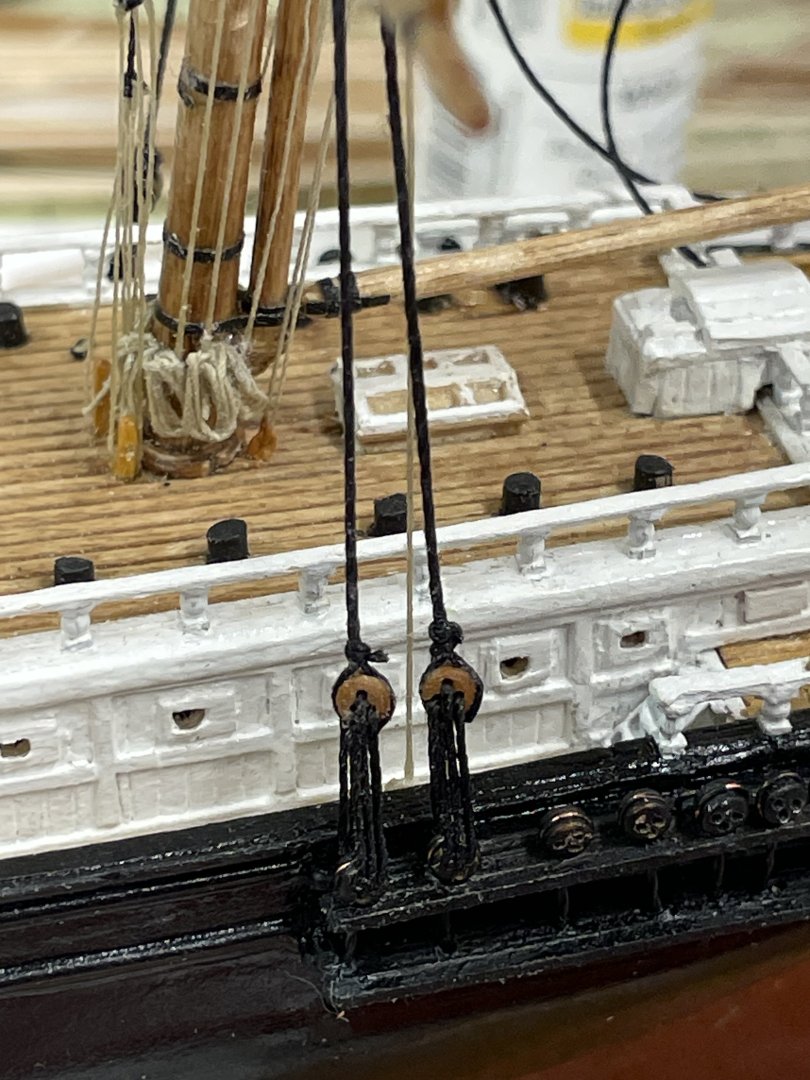
Mizzen Lower Shrouds continued… Did you ever blow out a deadeye? Mizzen Mast Lower, Upper and top shrouds completed ✔️ Cheers 🍻


- 165 replies
-
- 6
-
-
-
- Red Jacket
- Marine Model Company
- (and 2 more)
-
Nice work on the Bulwarks. I like your method of aligning the scuppers. Better than drilling them out, after planking is completed. 👍
- 48 replies
-
- 2
-
-
- Northwest passage
- Norway.
- (and 2 more)
-
Mizzen Lower Shrouds continued… …and then there were two of eight completed. Onwards 🍻

- 165 replies
-
- 4
-
-
- Red Jacket
- Marine Model Company
- (and 2 more)
-
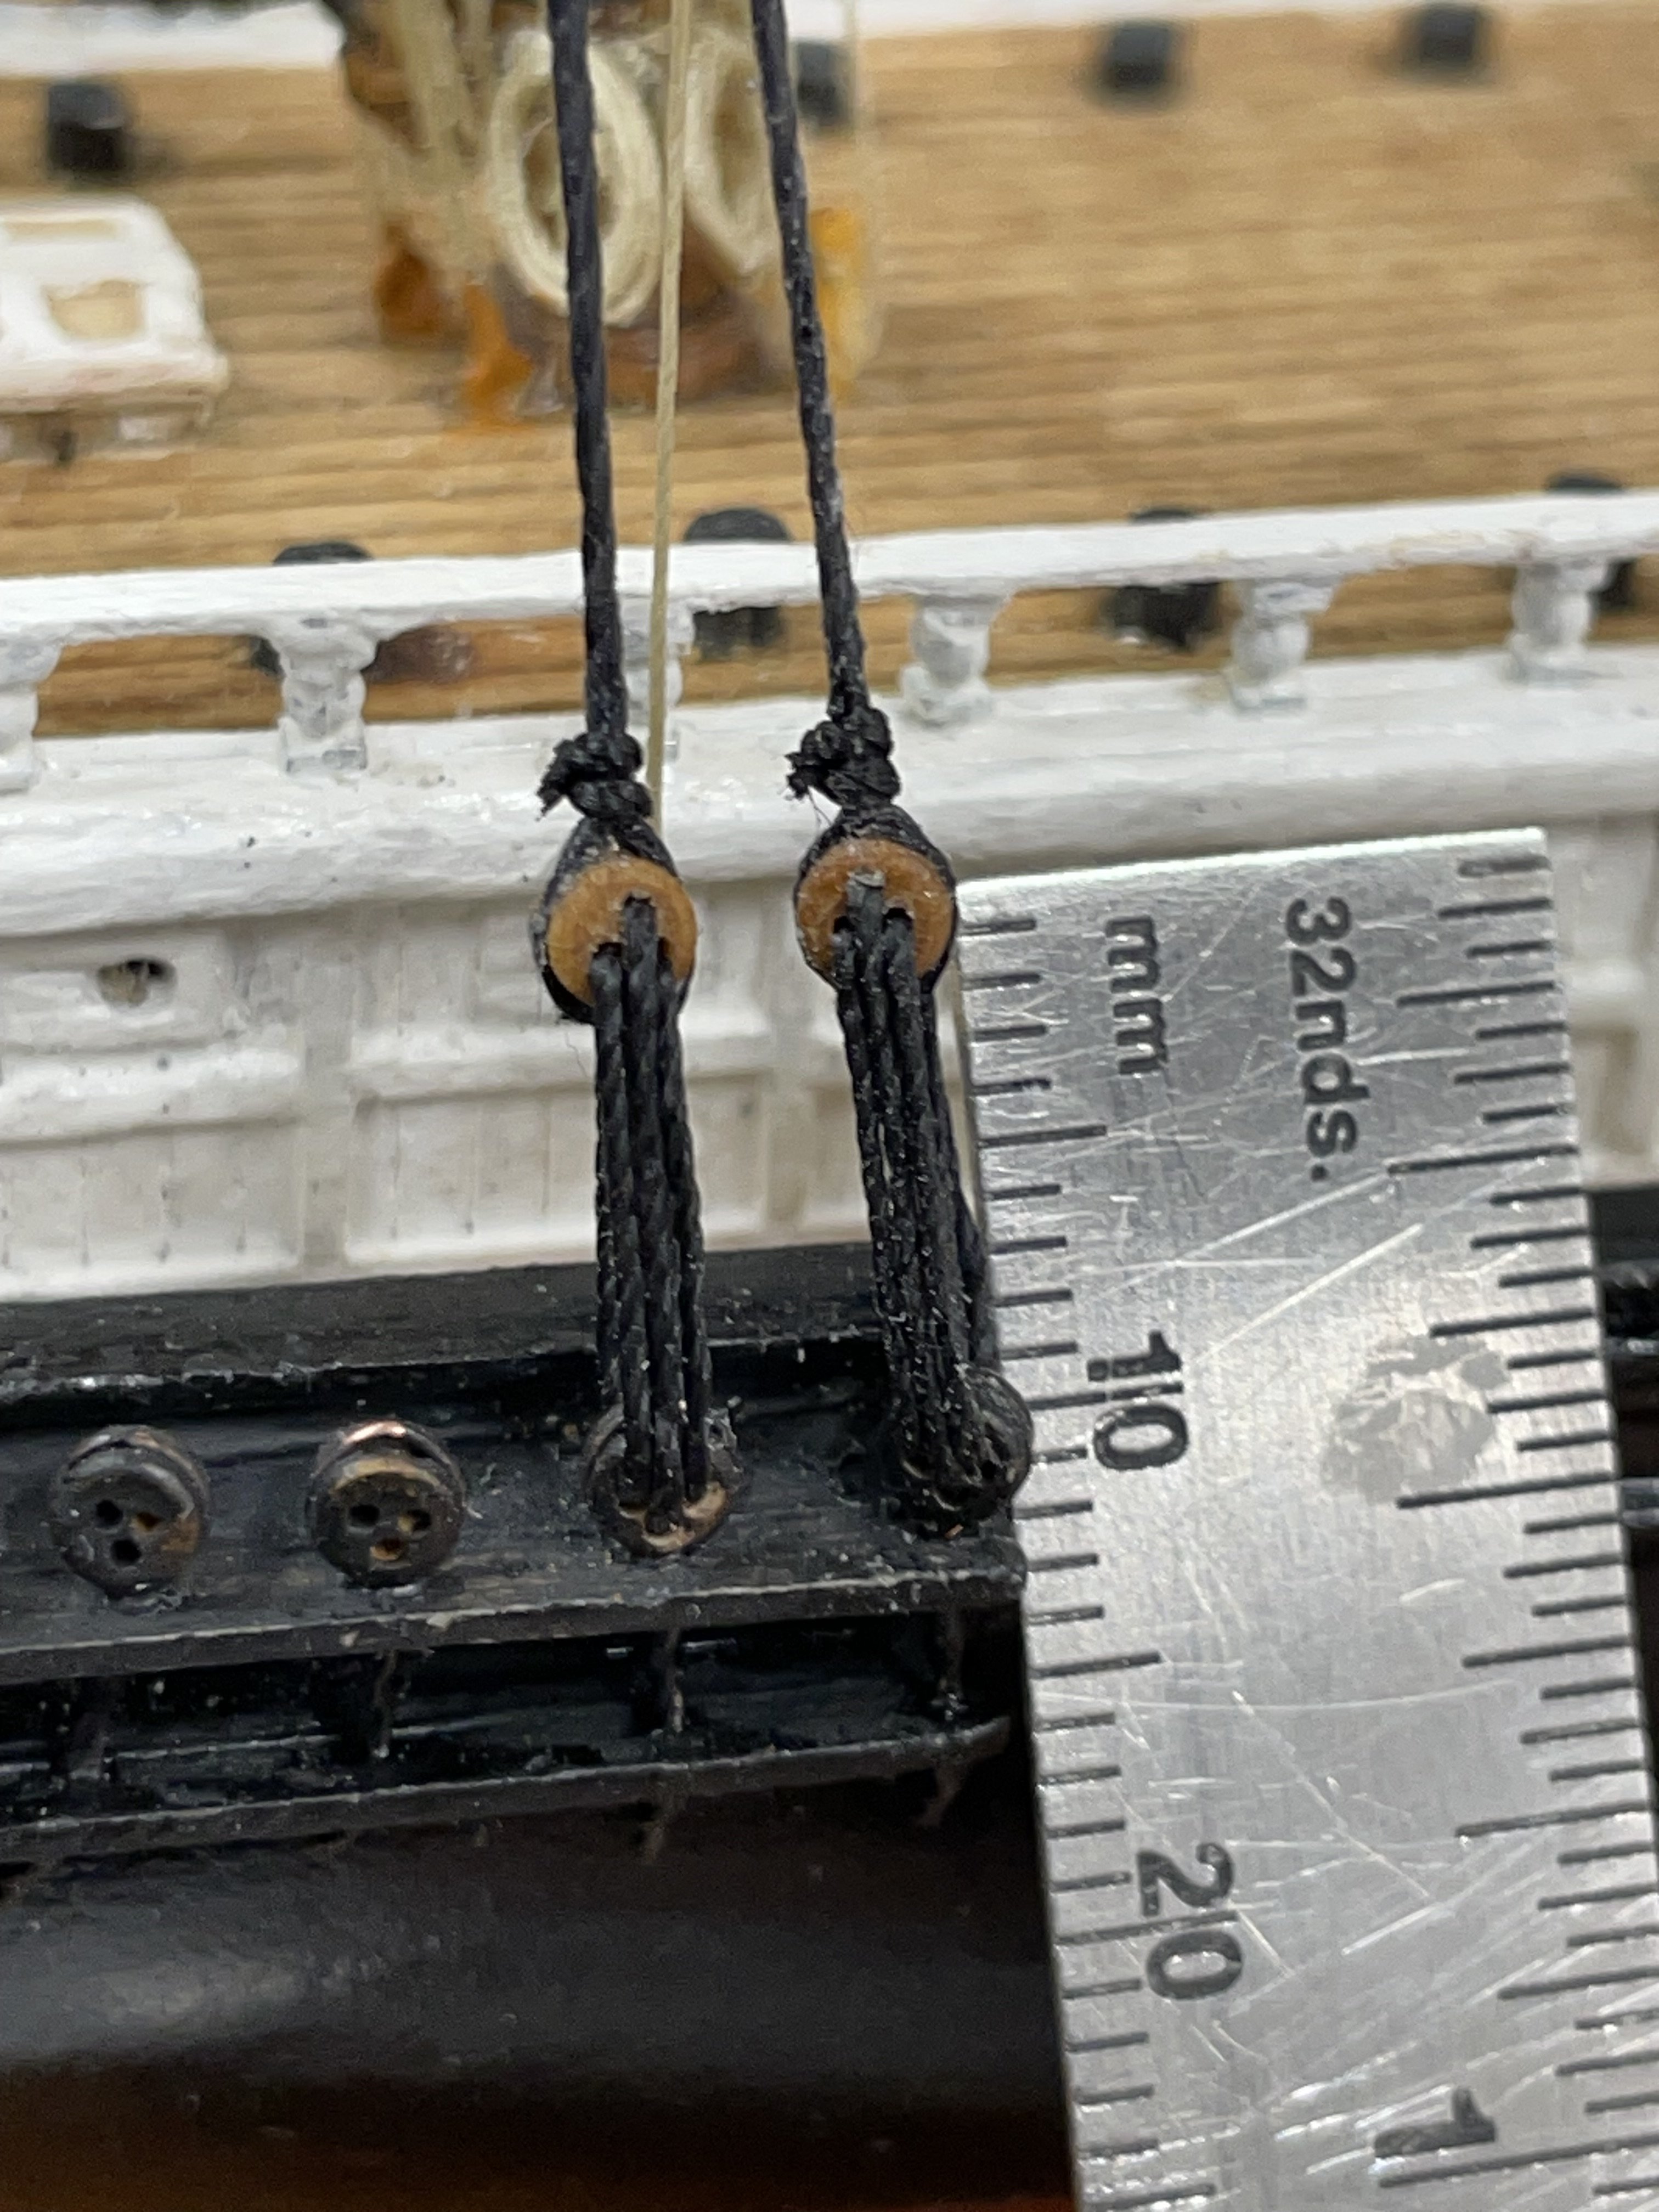
Mizzen Lower Shrouds… First 3/32”deadeye laced… Cheers🍻


- 165 replies
-
- 3
-
-
- Red Jacket
- Marine Model Company
- (and 2 more)
-
May feel frustrating now, but that’s where the experience comes from. You’re doing a really great job on the rigging, Bob. I would say the best I’ve seen yet. 👍
- 258 replies
-
- 2
-
-

-
- Victory Models
- Pegasus
- (and 3 more)