John Ruy
-
Posts
1,584 -
Joined
-
Last visited
Content Type
Profiles
Forums
Gallery
Events
Everything posted by John Ruy
-
 Another fun fact… Mississippi River water was promoted as a healthy (full of sediment) and served with those fancy dinners on board the Robert E Lee as you cruise from New Orleans to St Louis in Luxurious Accommodations. LOL 😝
 -
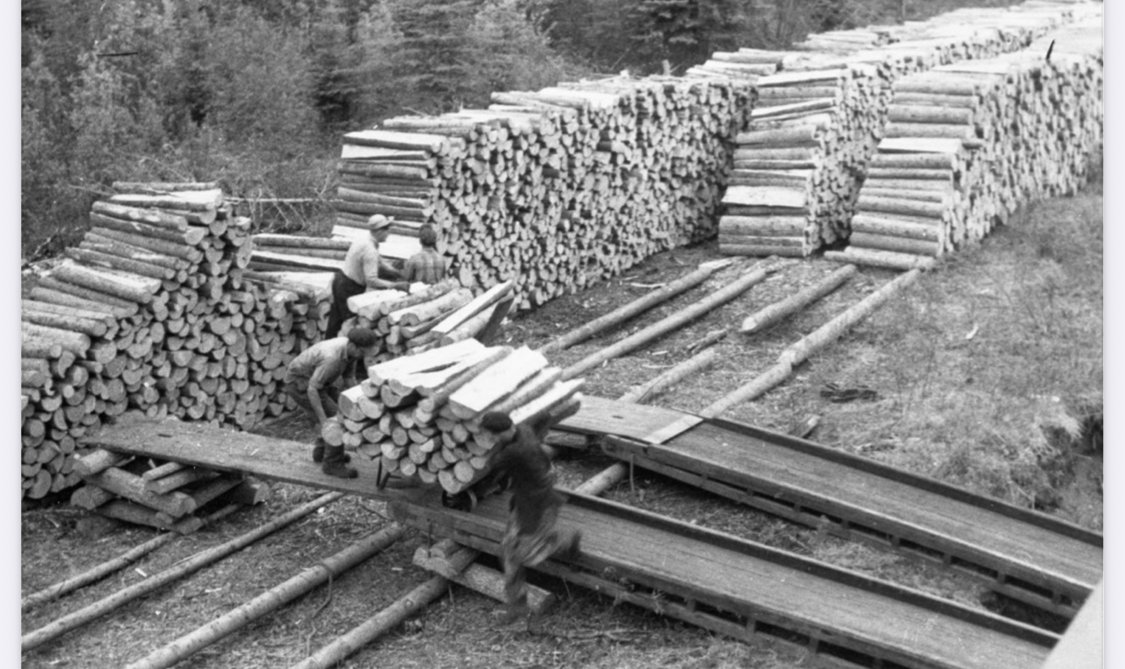
I would say both, they were stripping natural resources and polluting the environment. Smoke was belched into the air ashes dumped into the river. The good old days.
-
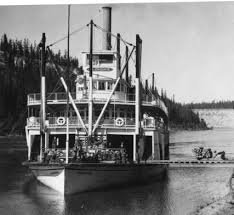
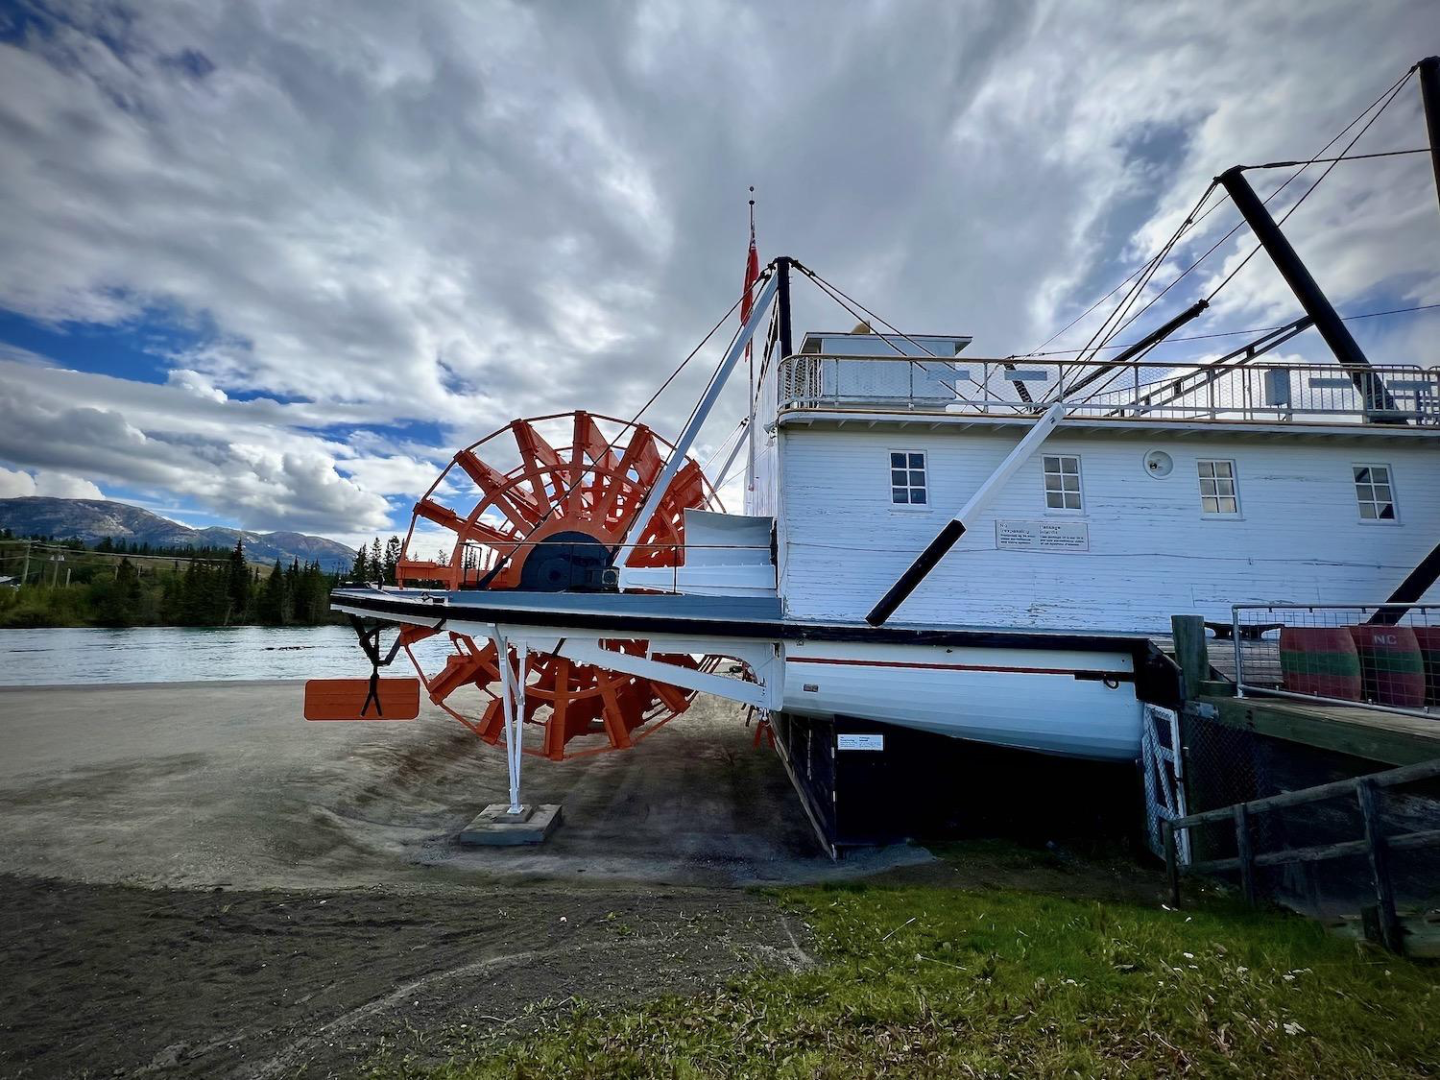
Just like the Robert E Lee, the SS Klondike was another deforestation machine.
-
Not this one, Bob. Been there done that with The Robert E Lee.

-
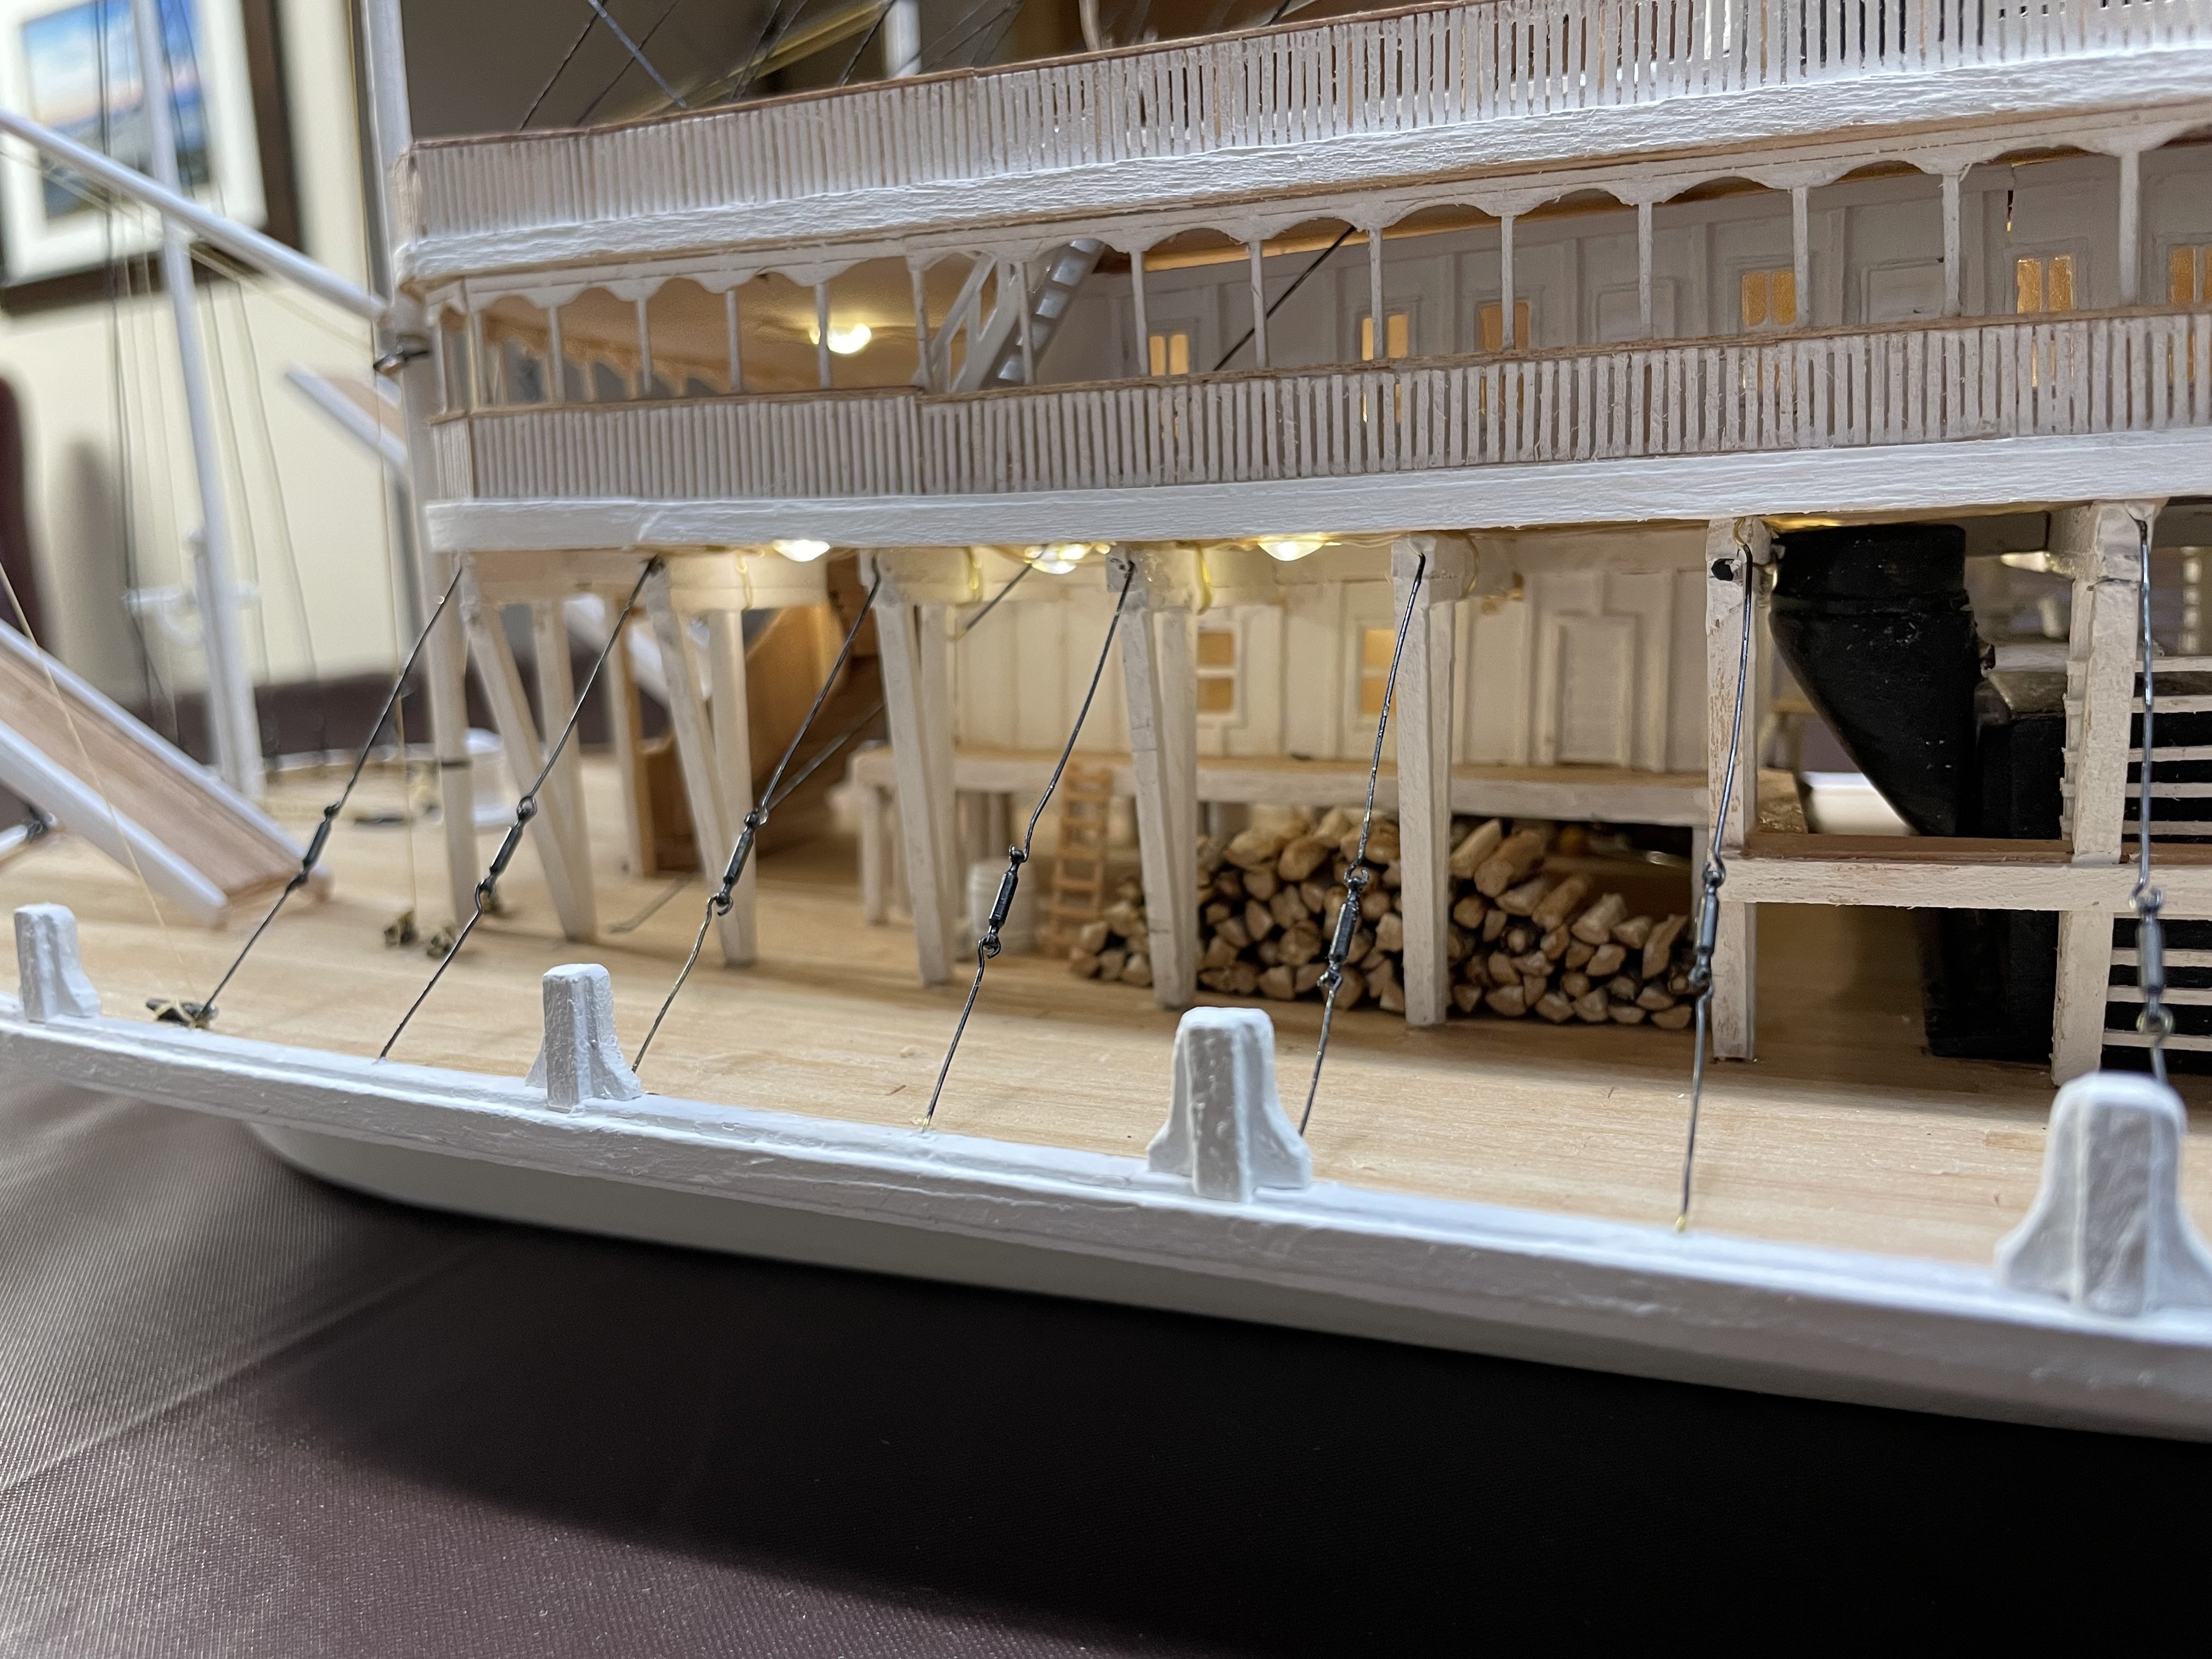
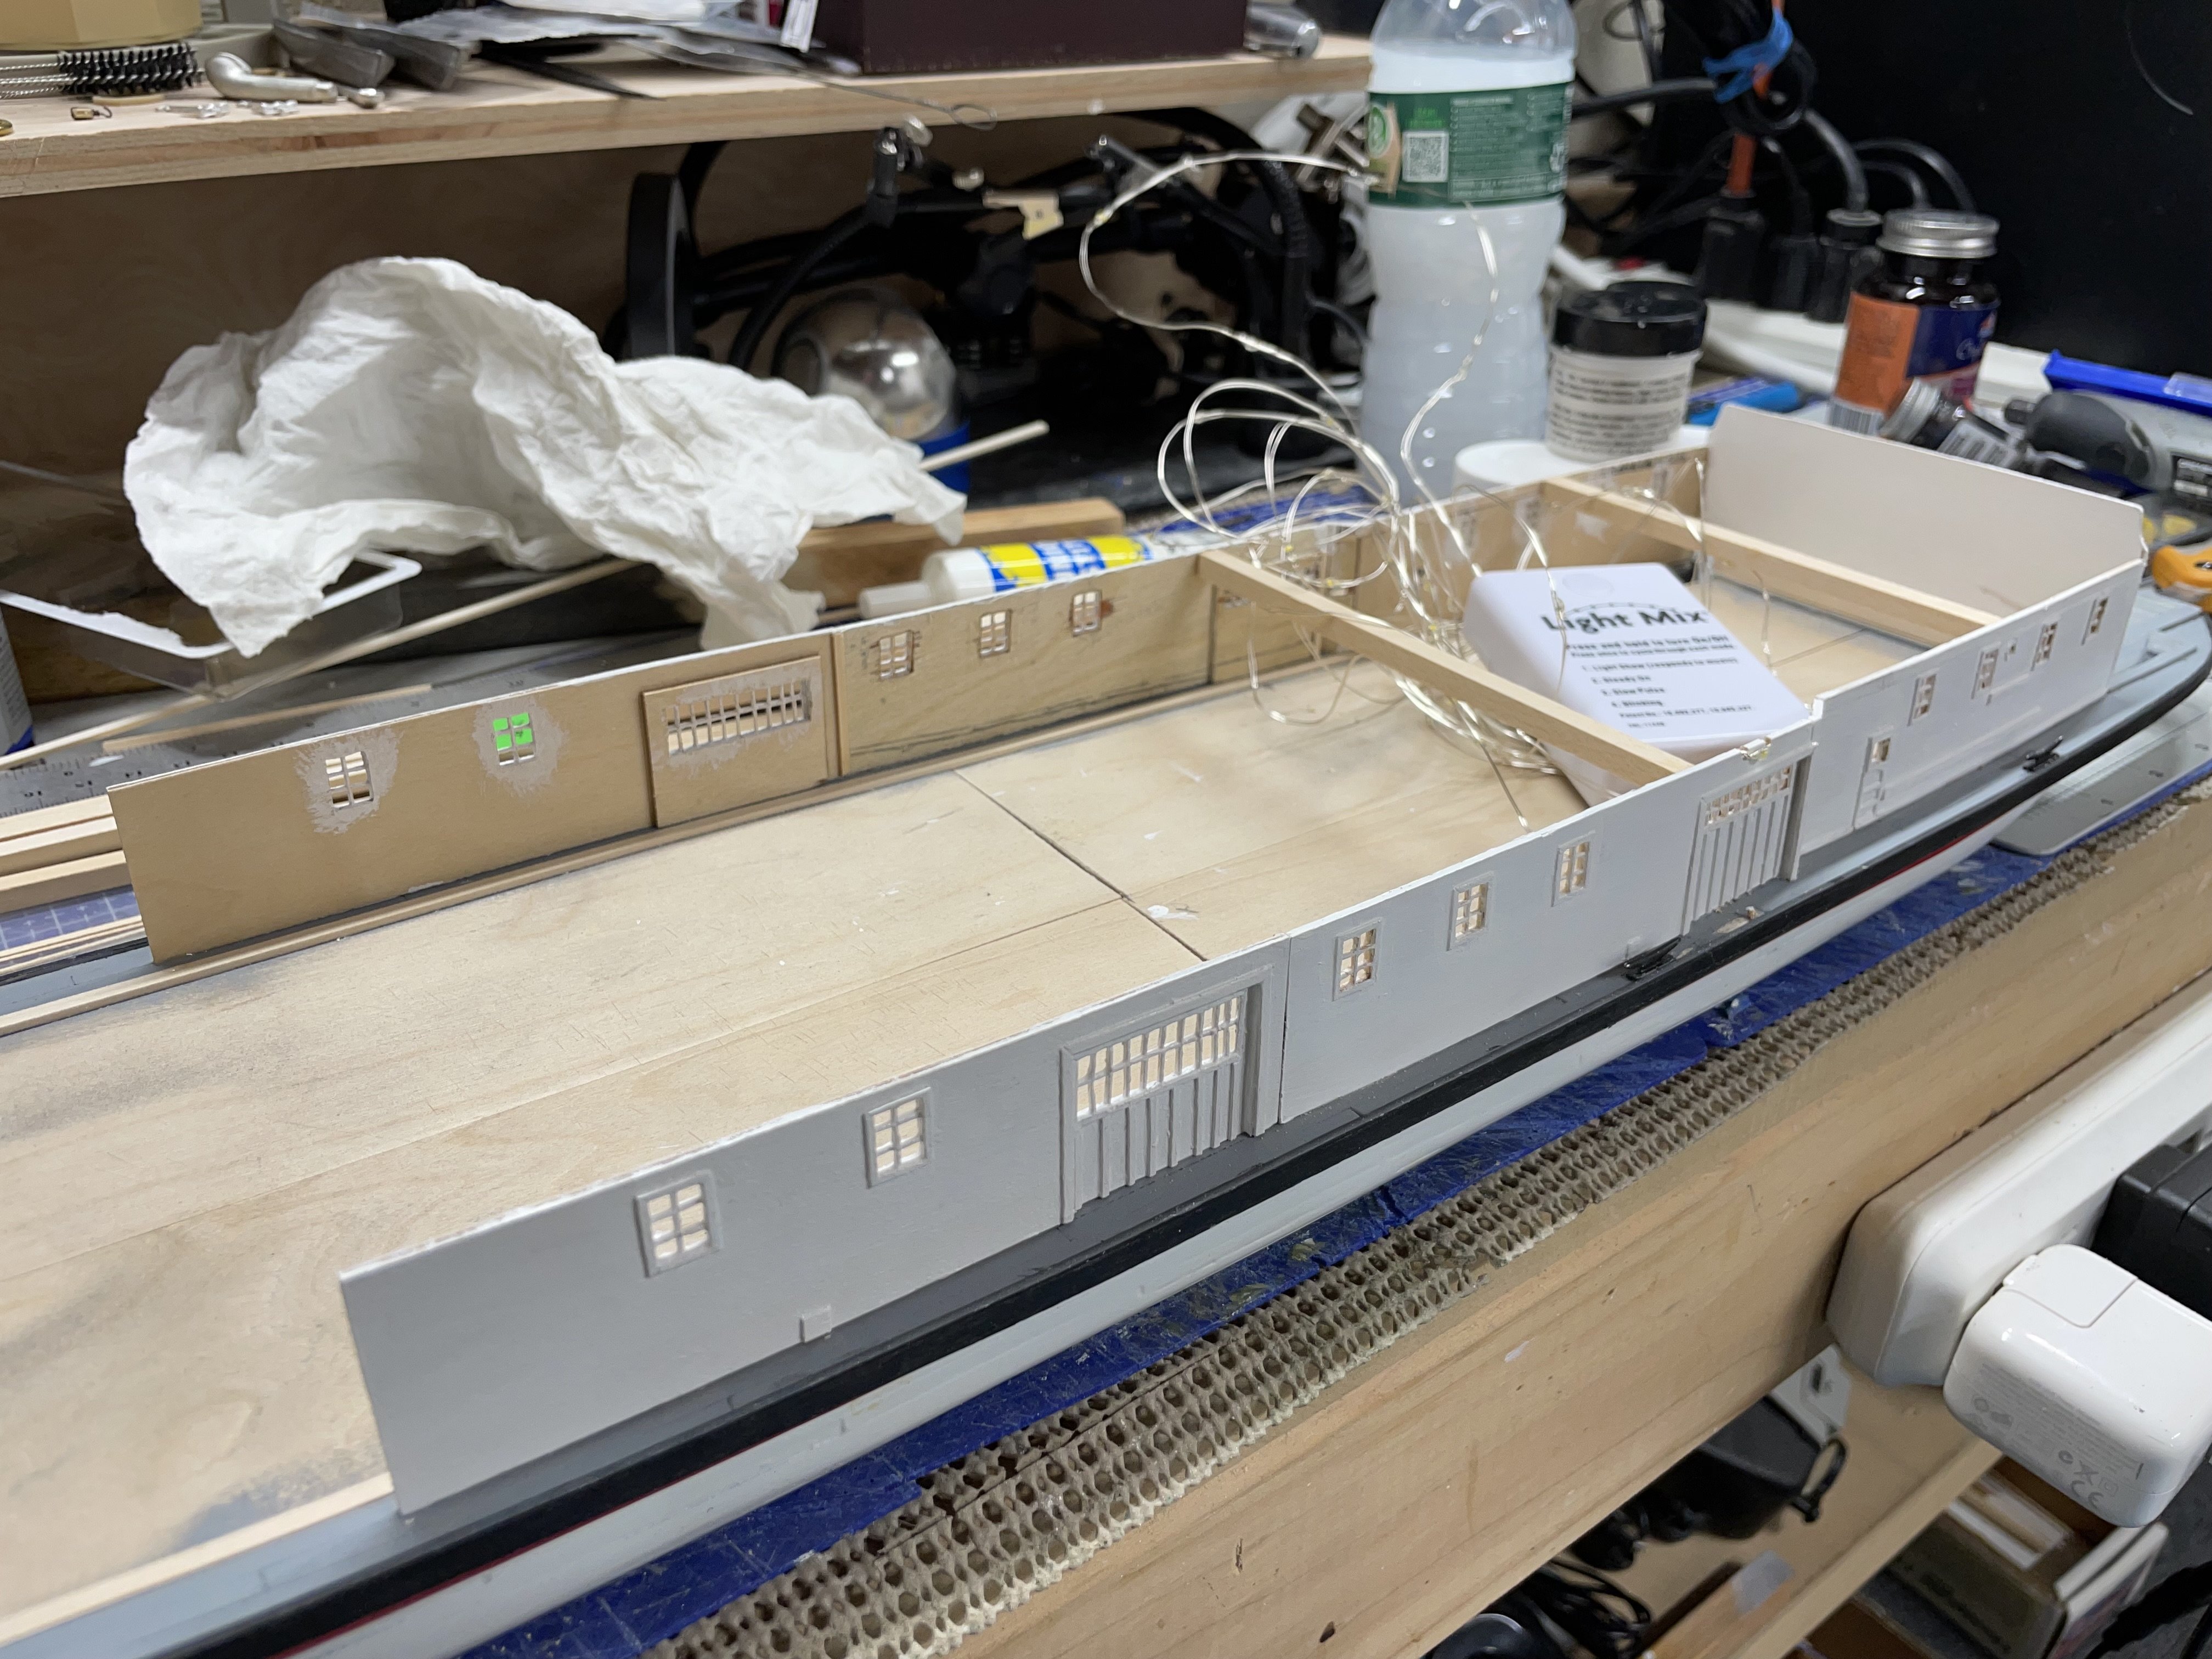
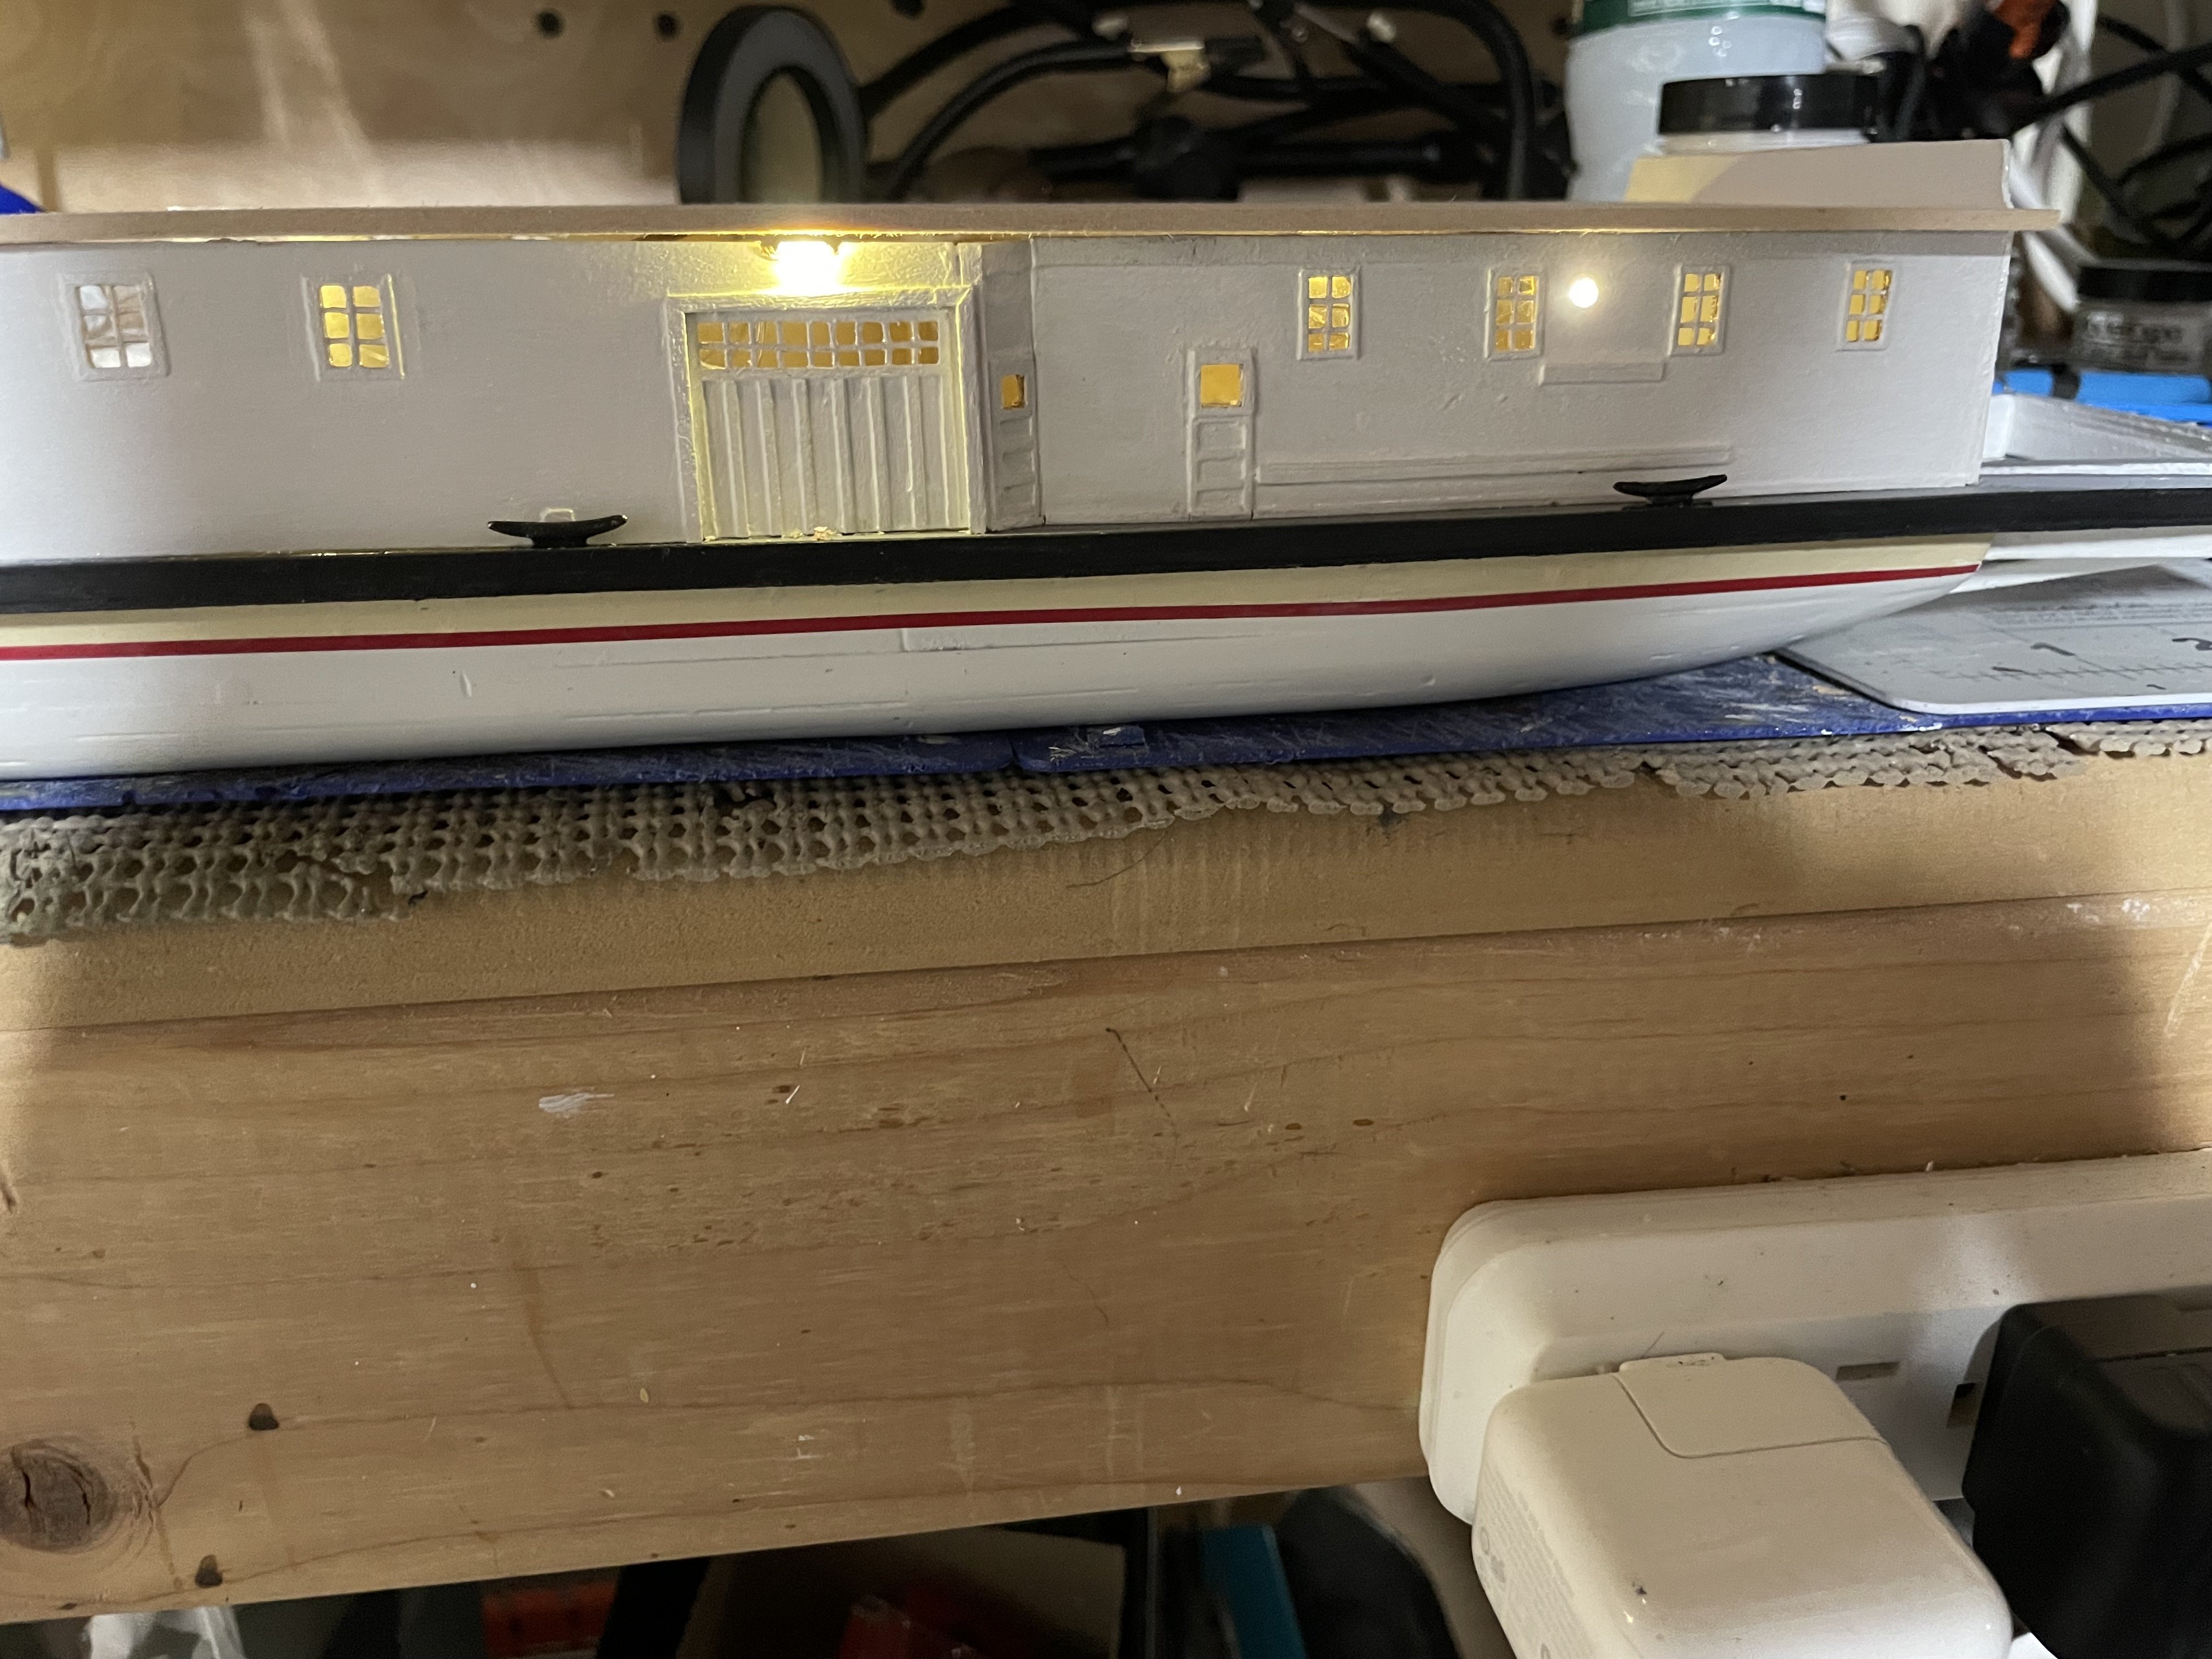
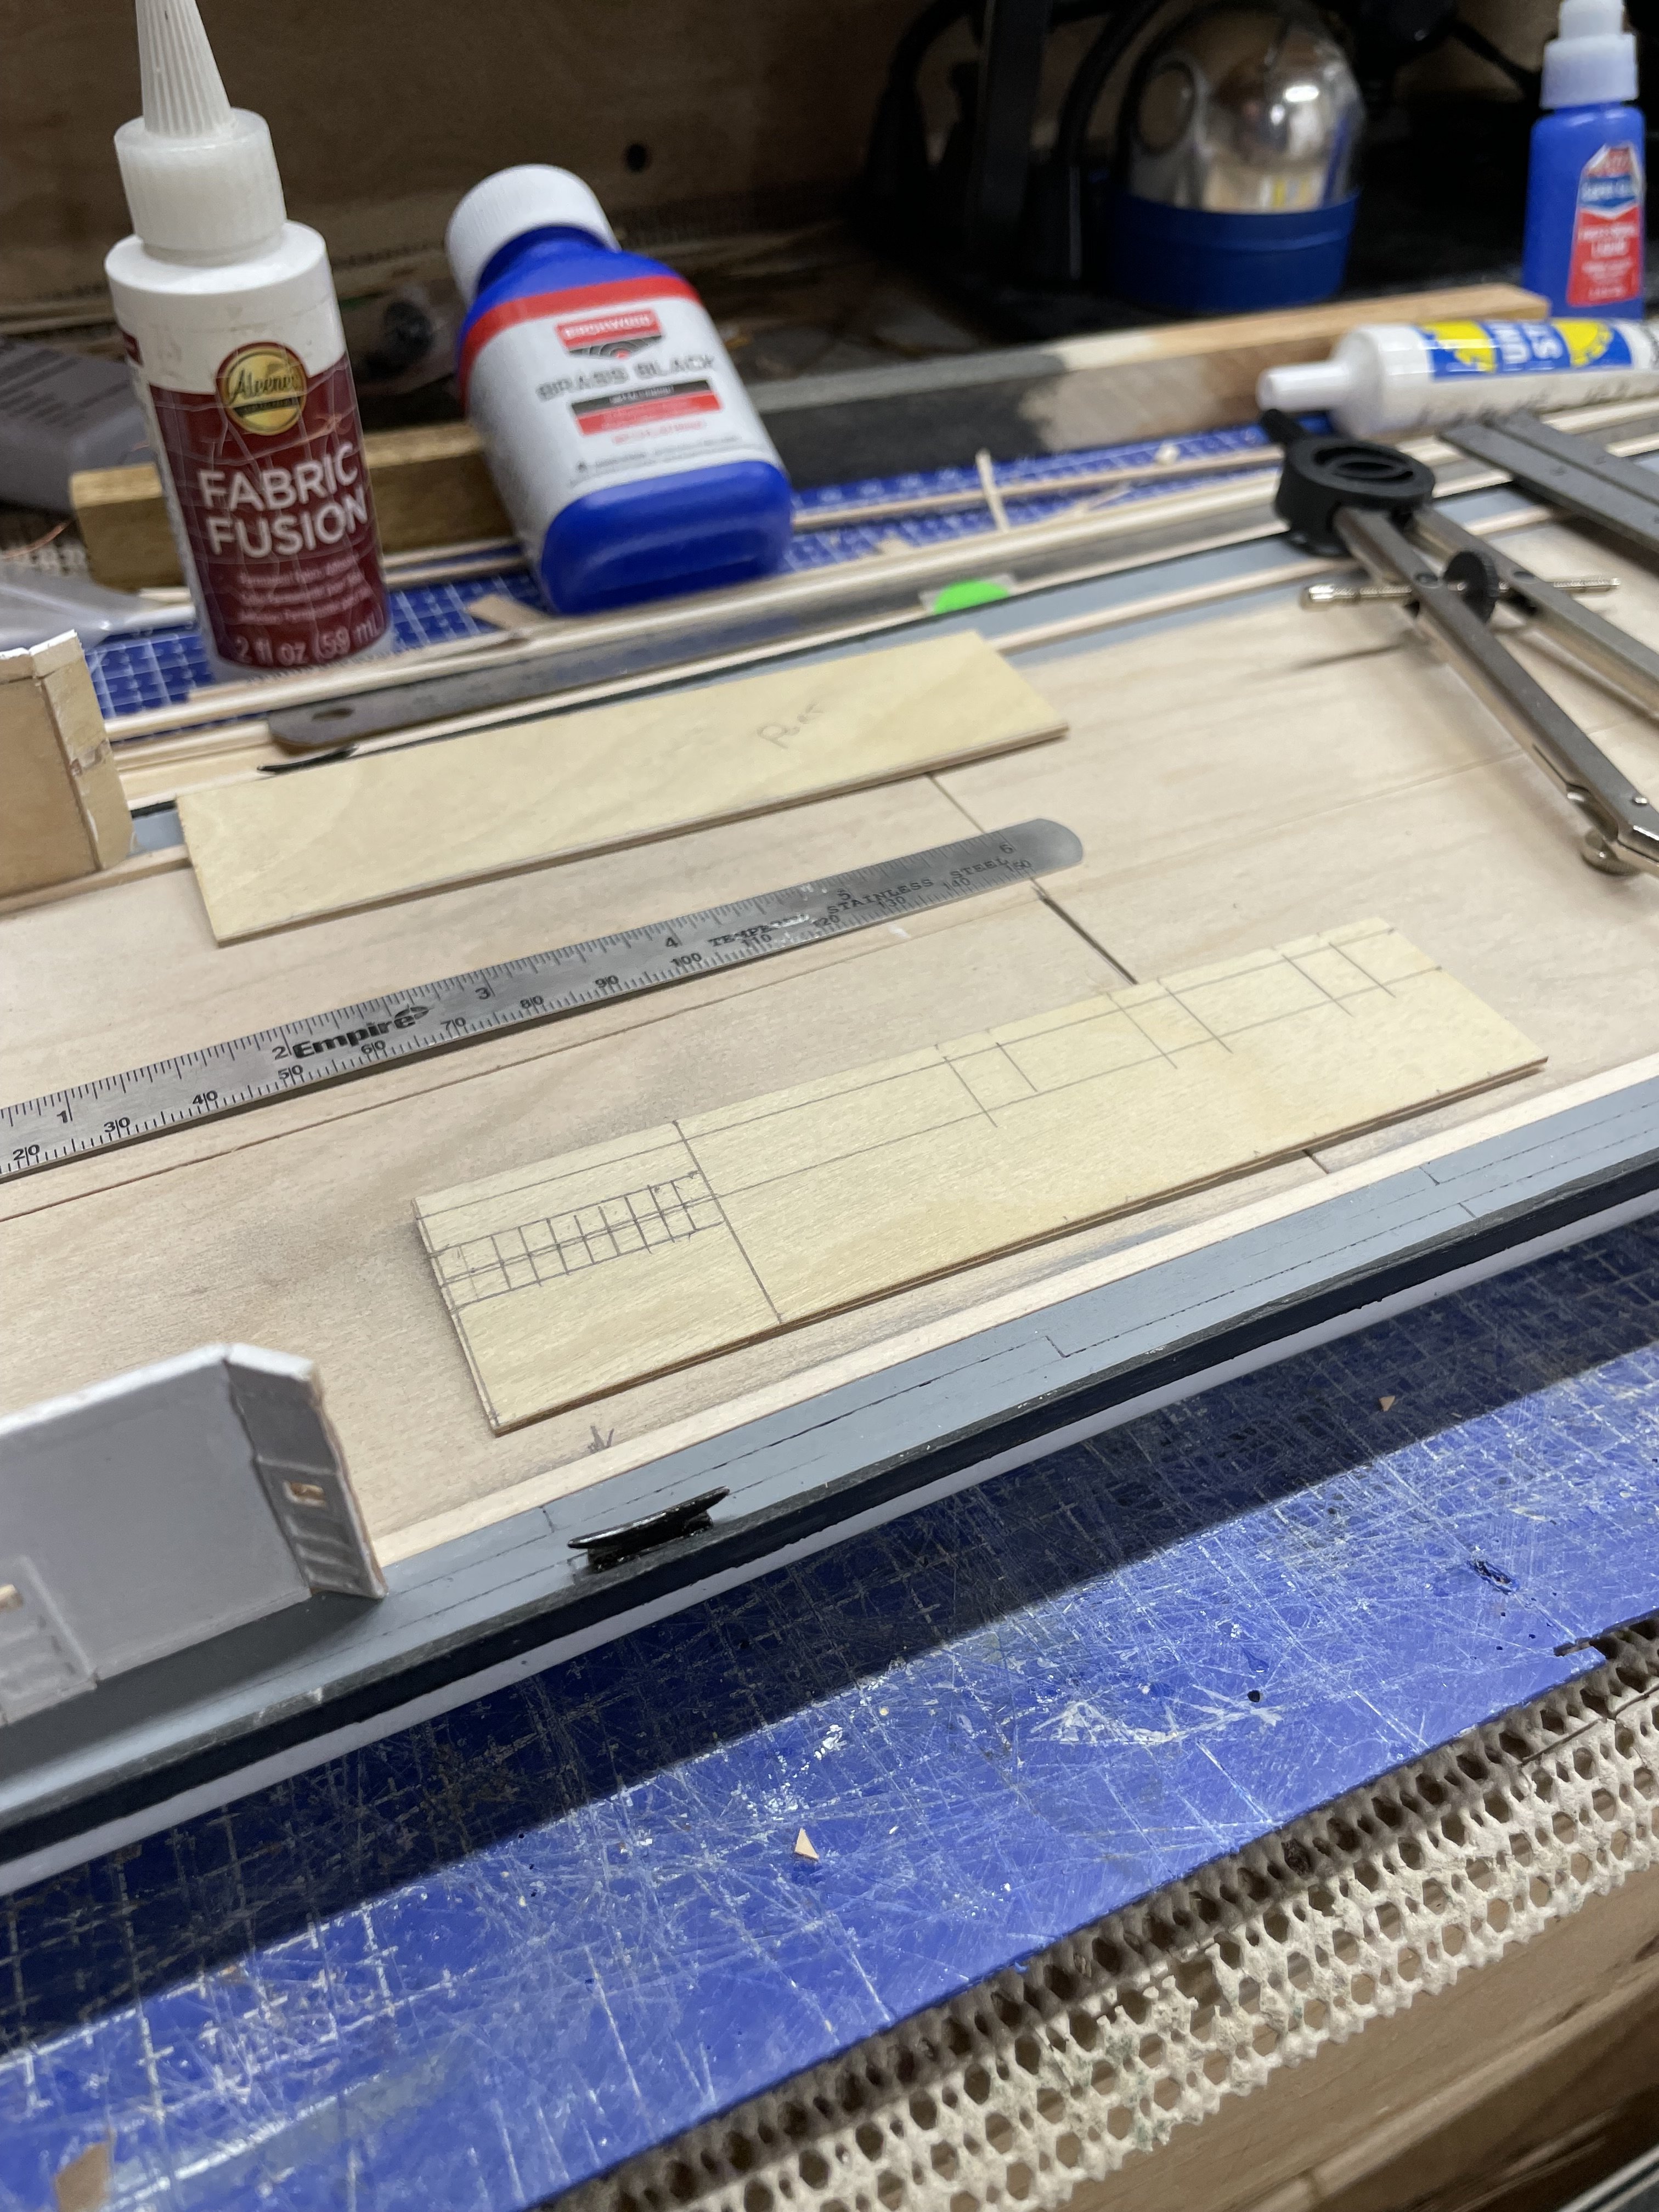
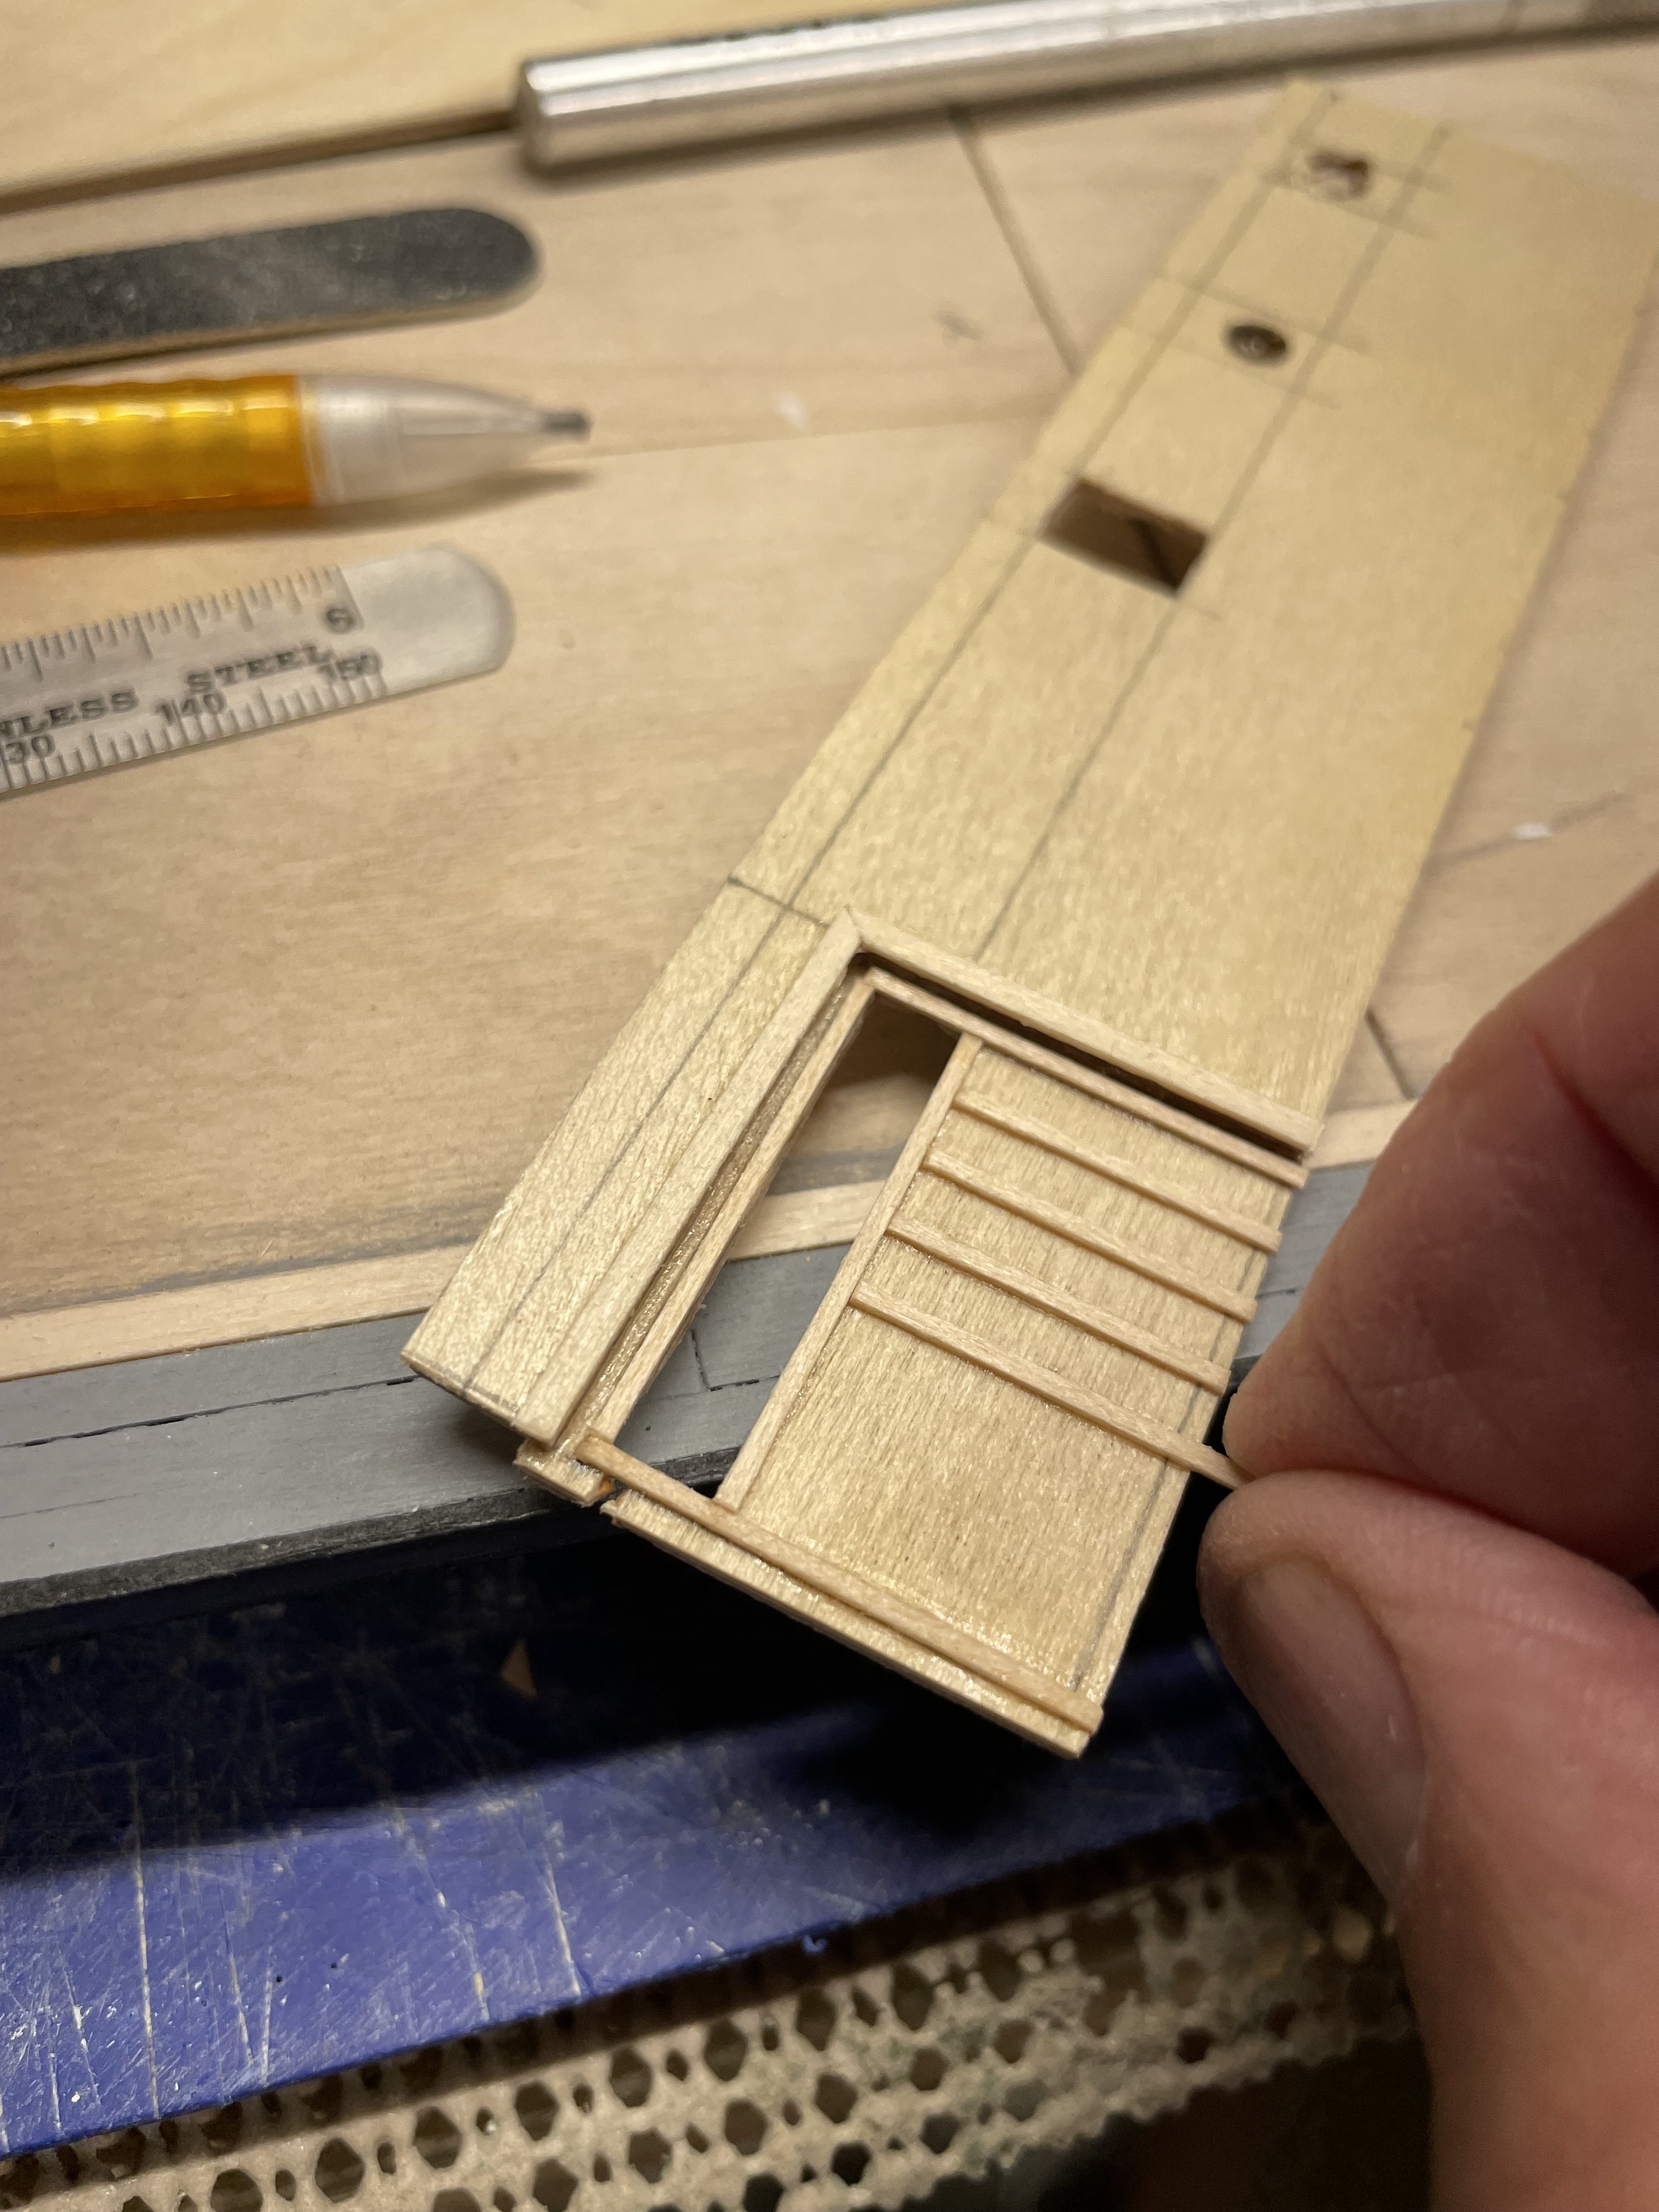
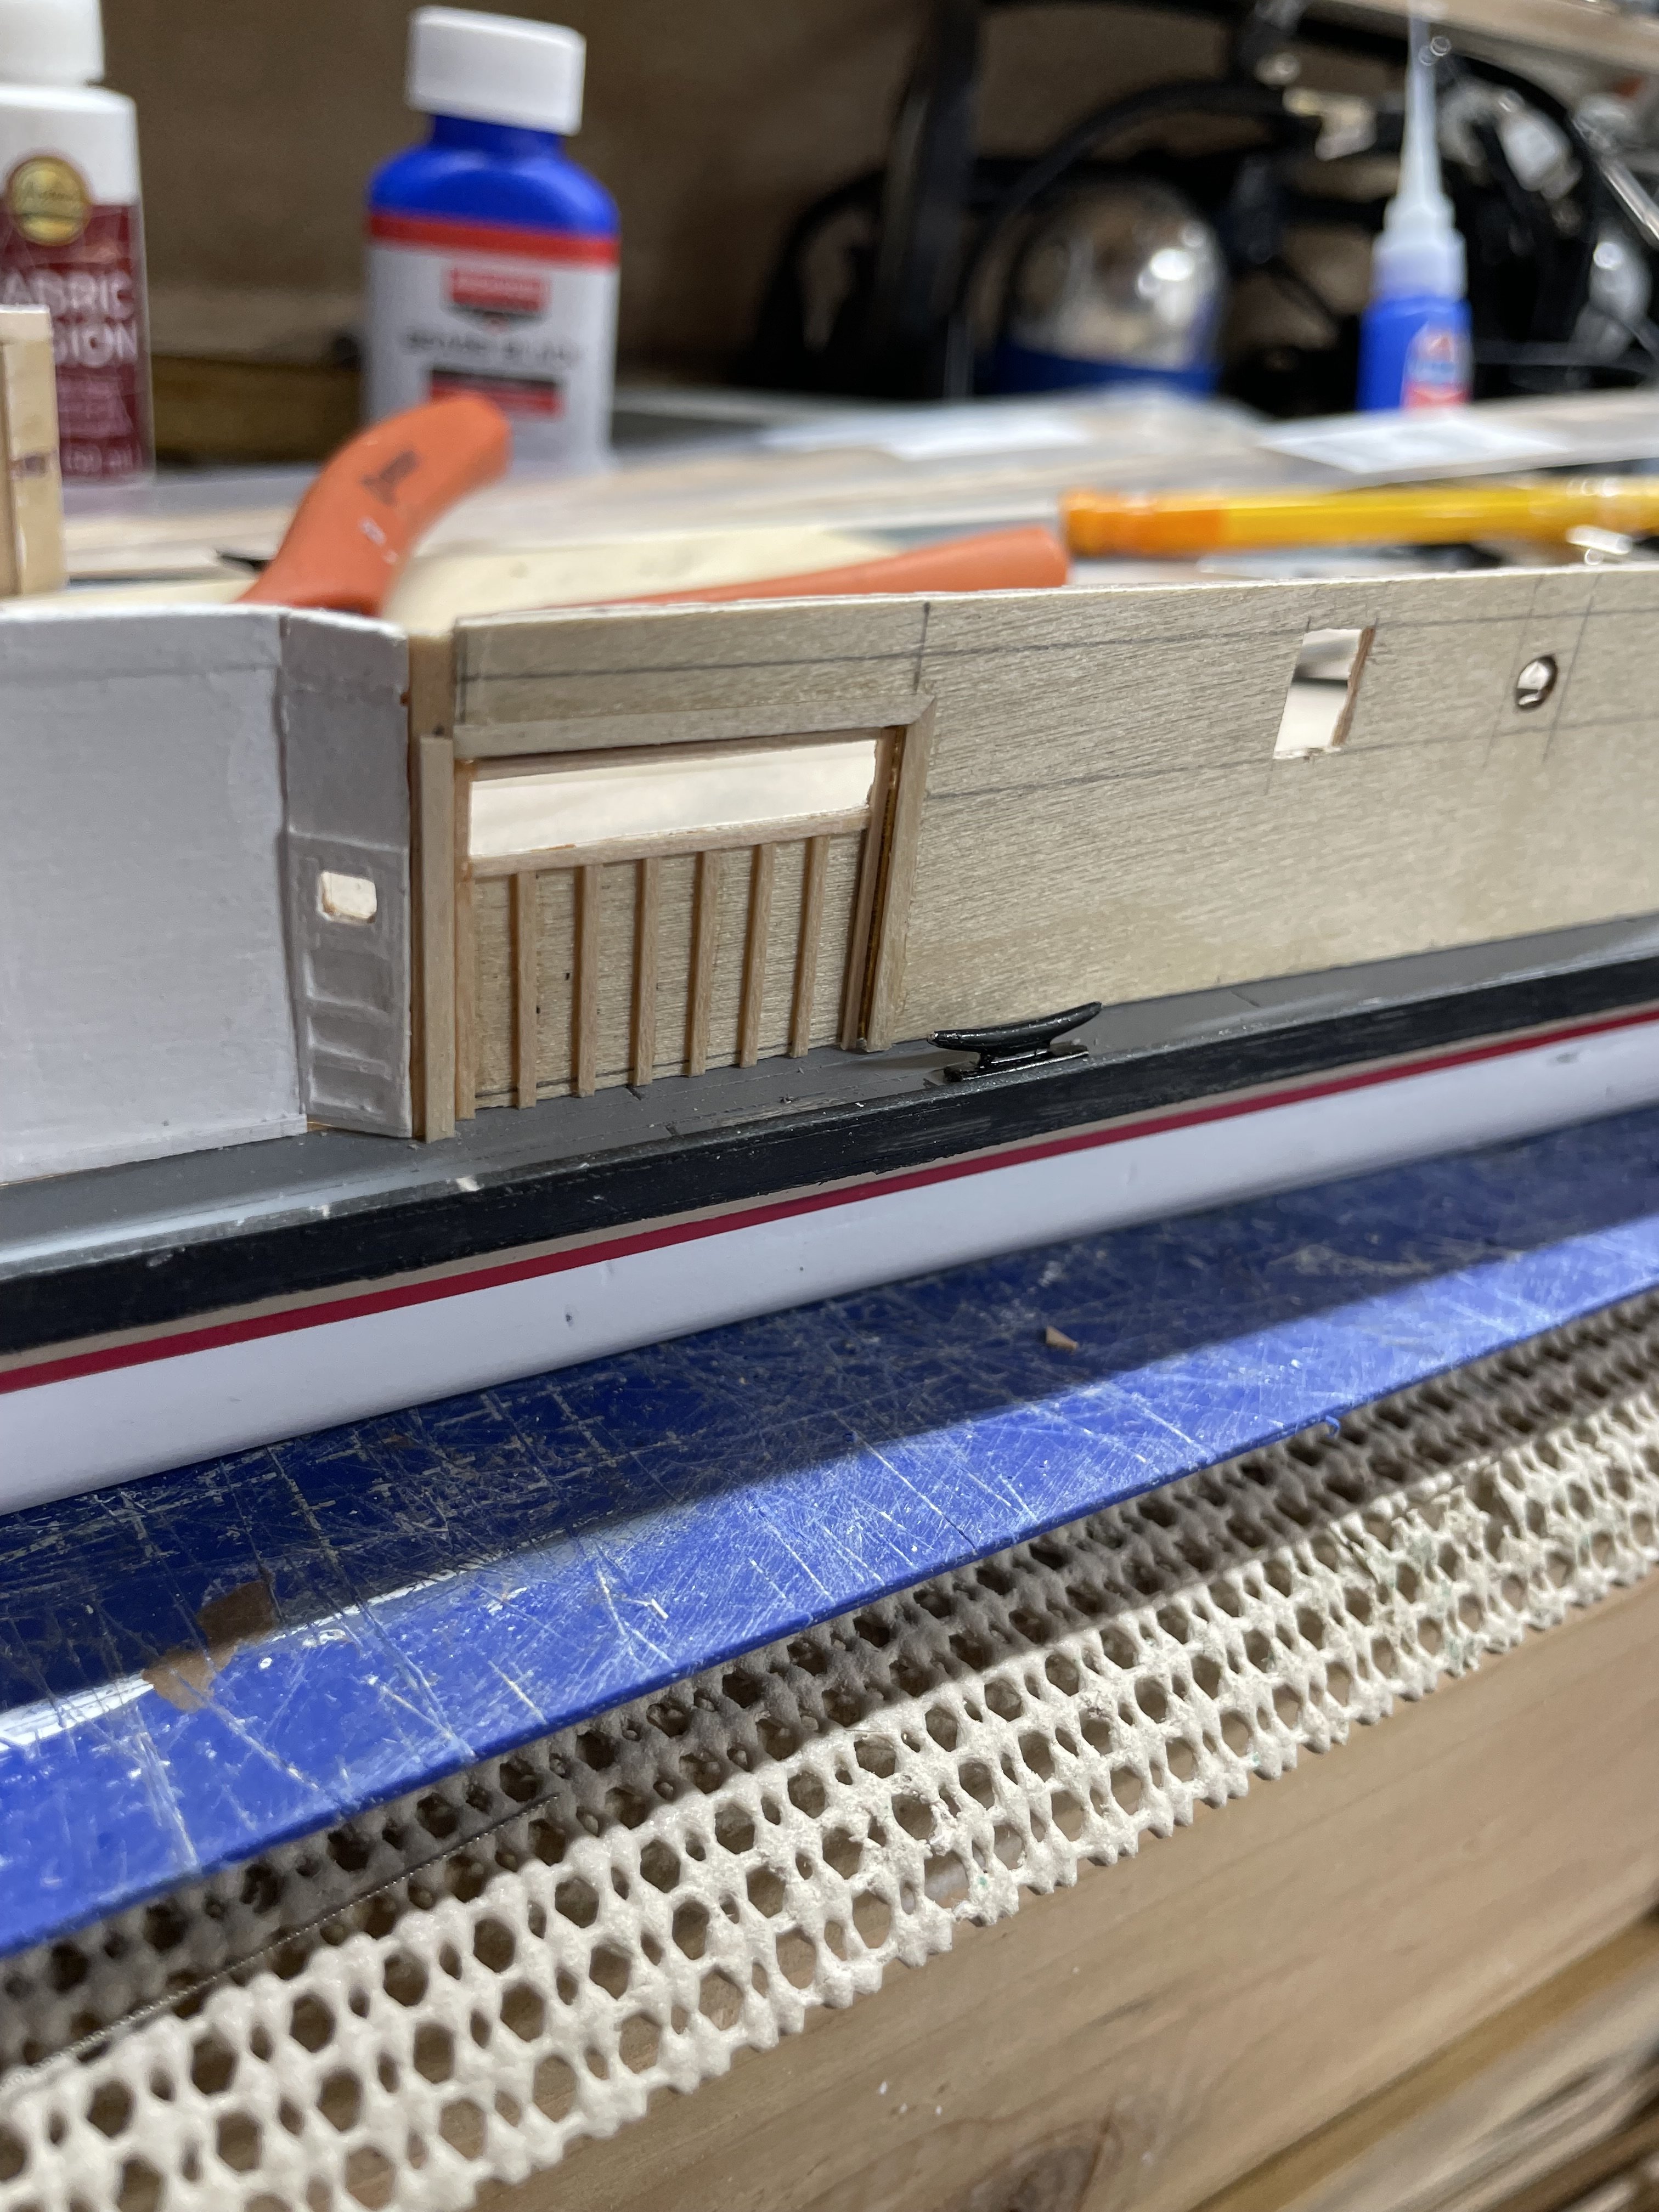
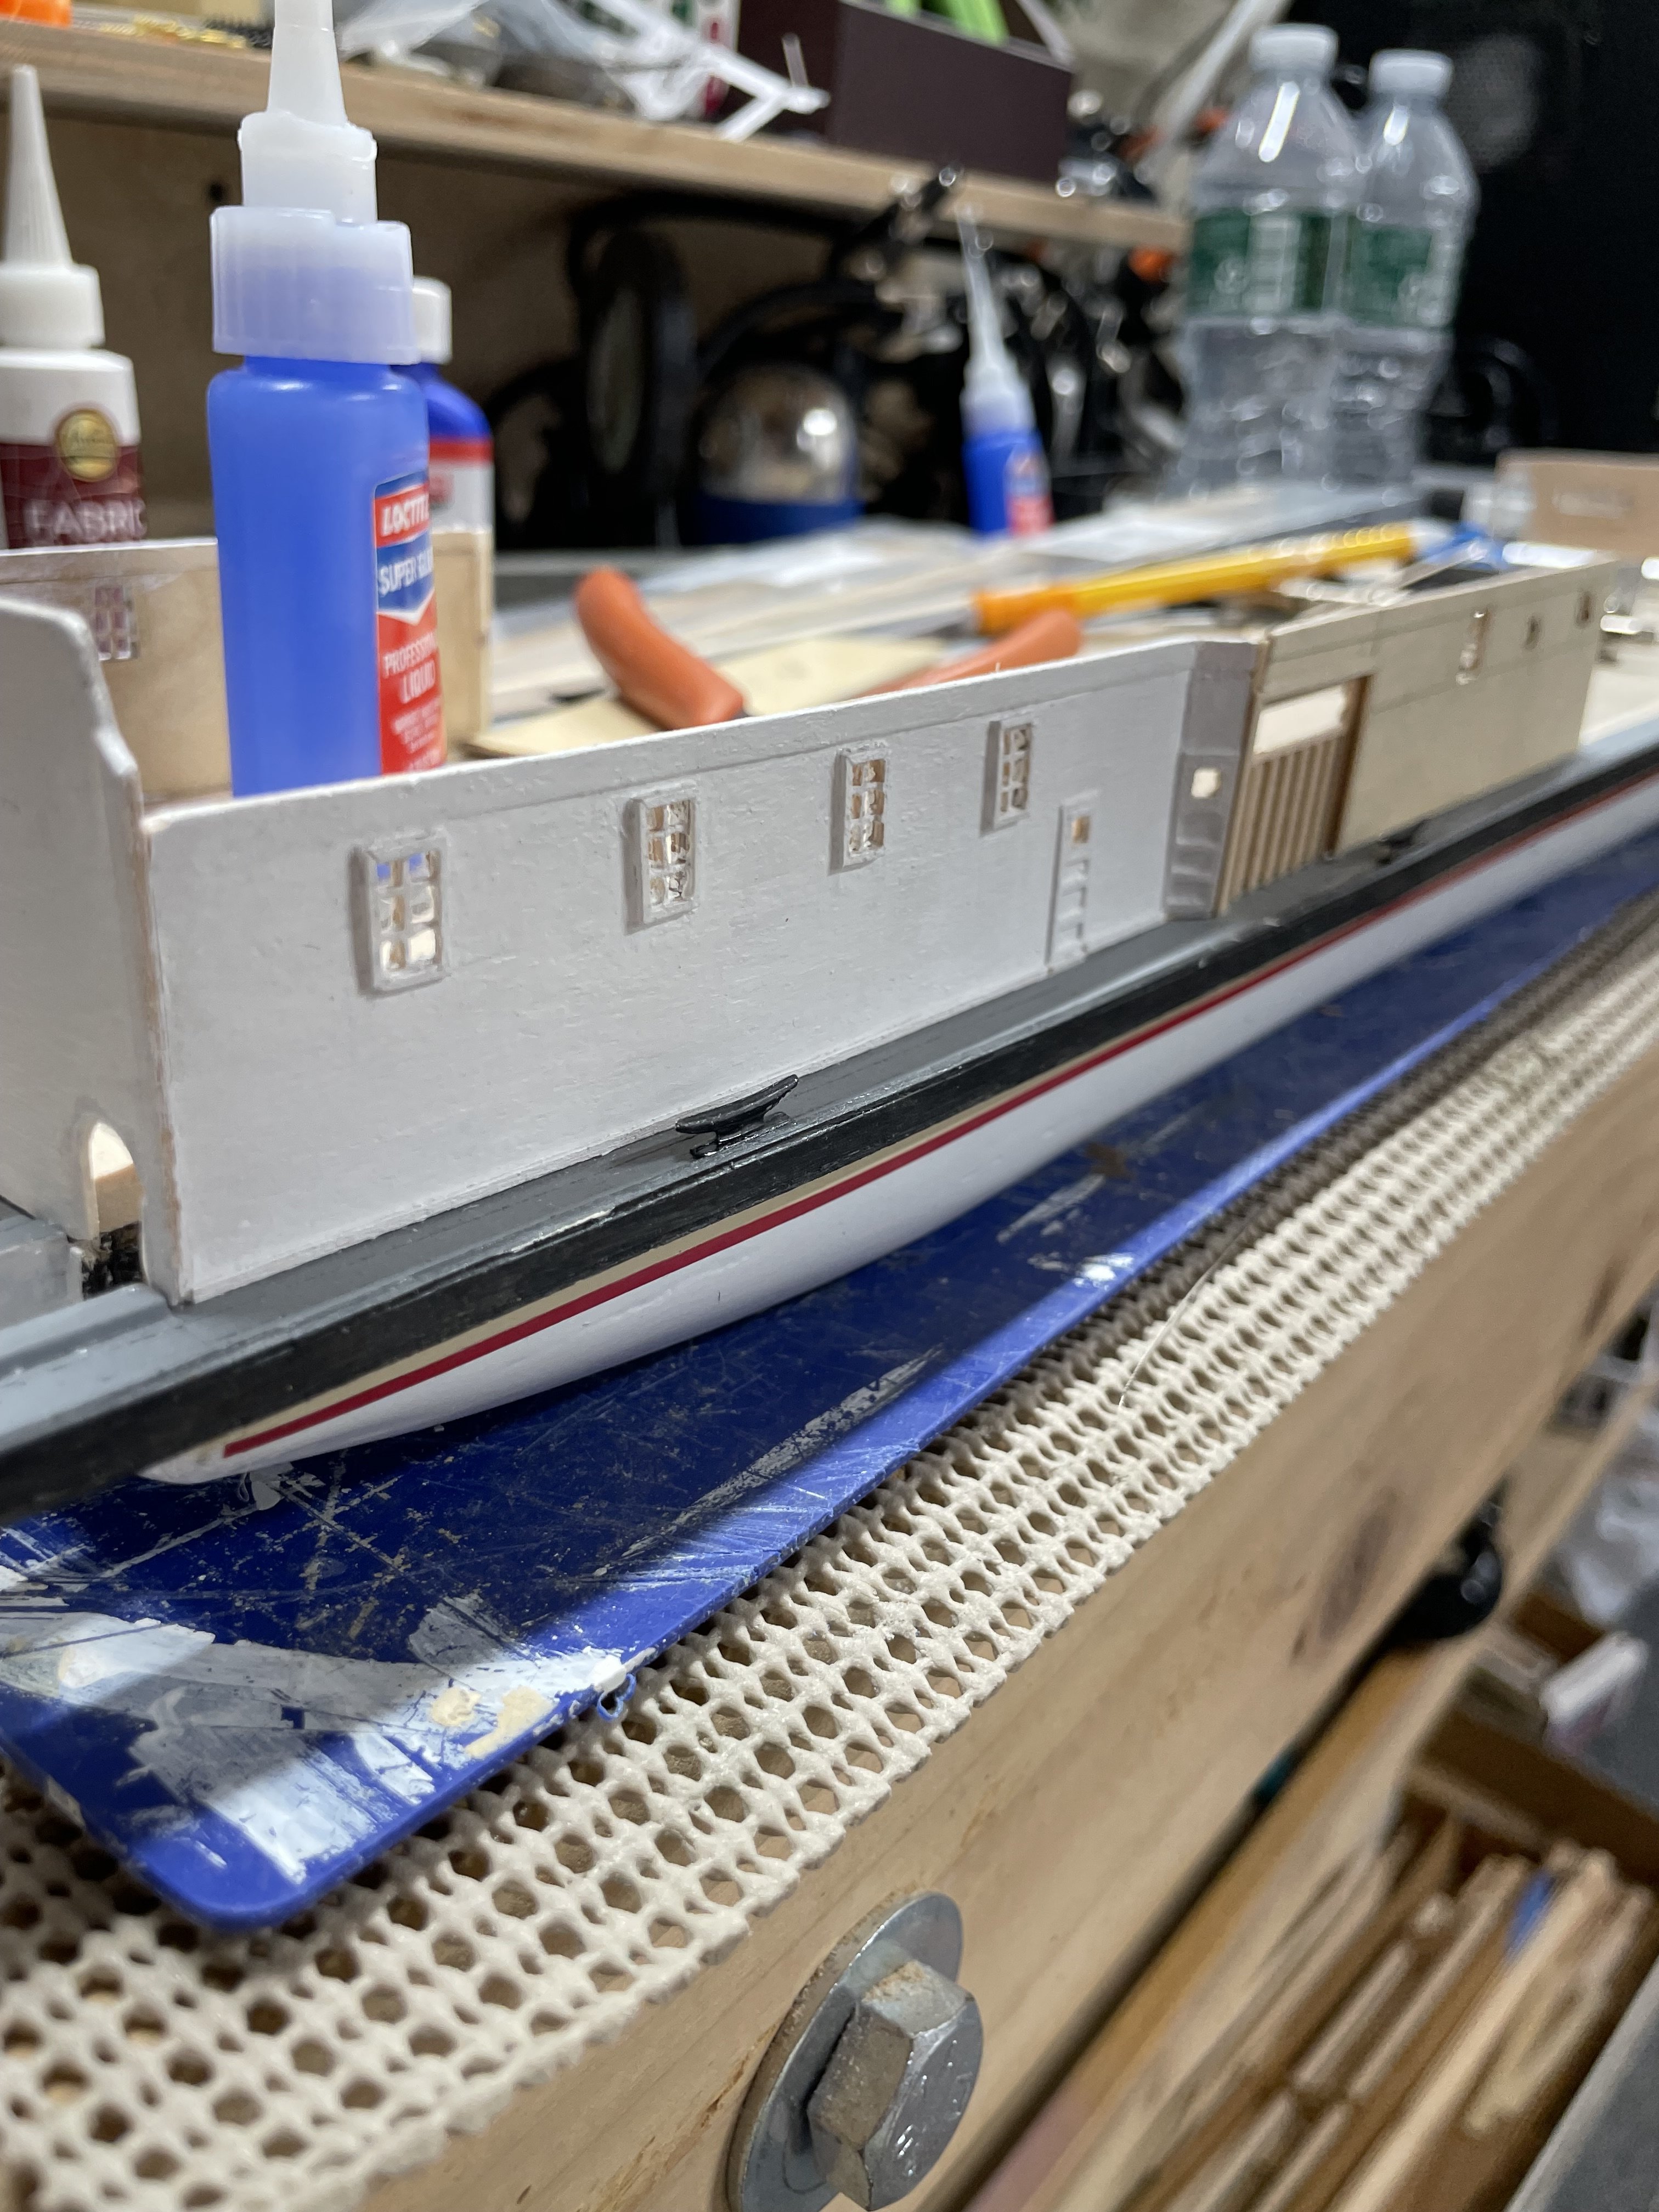
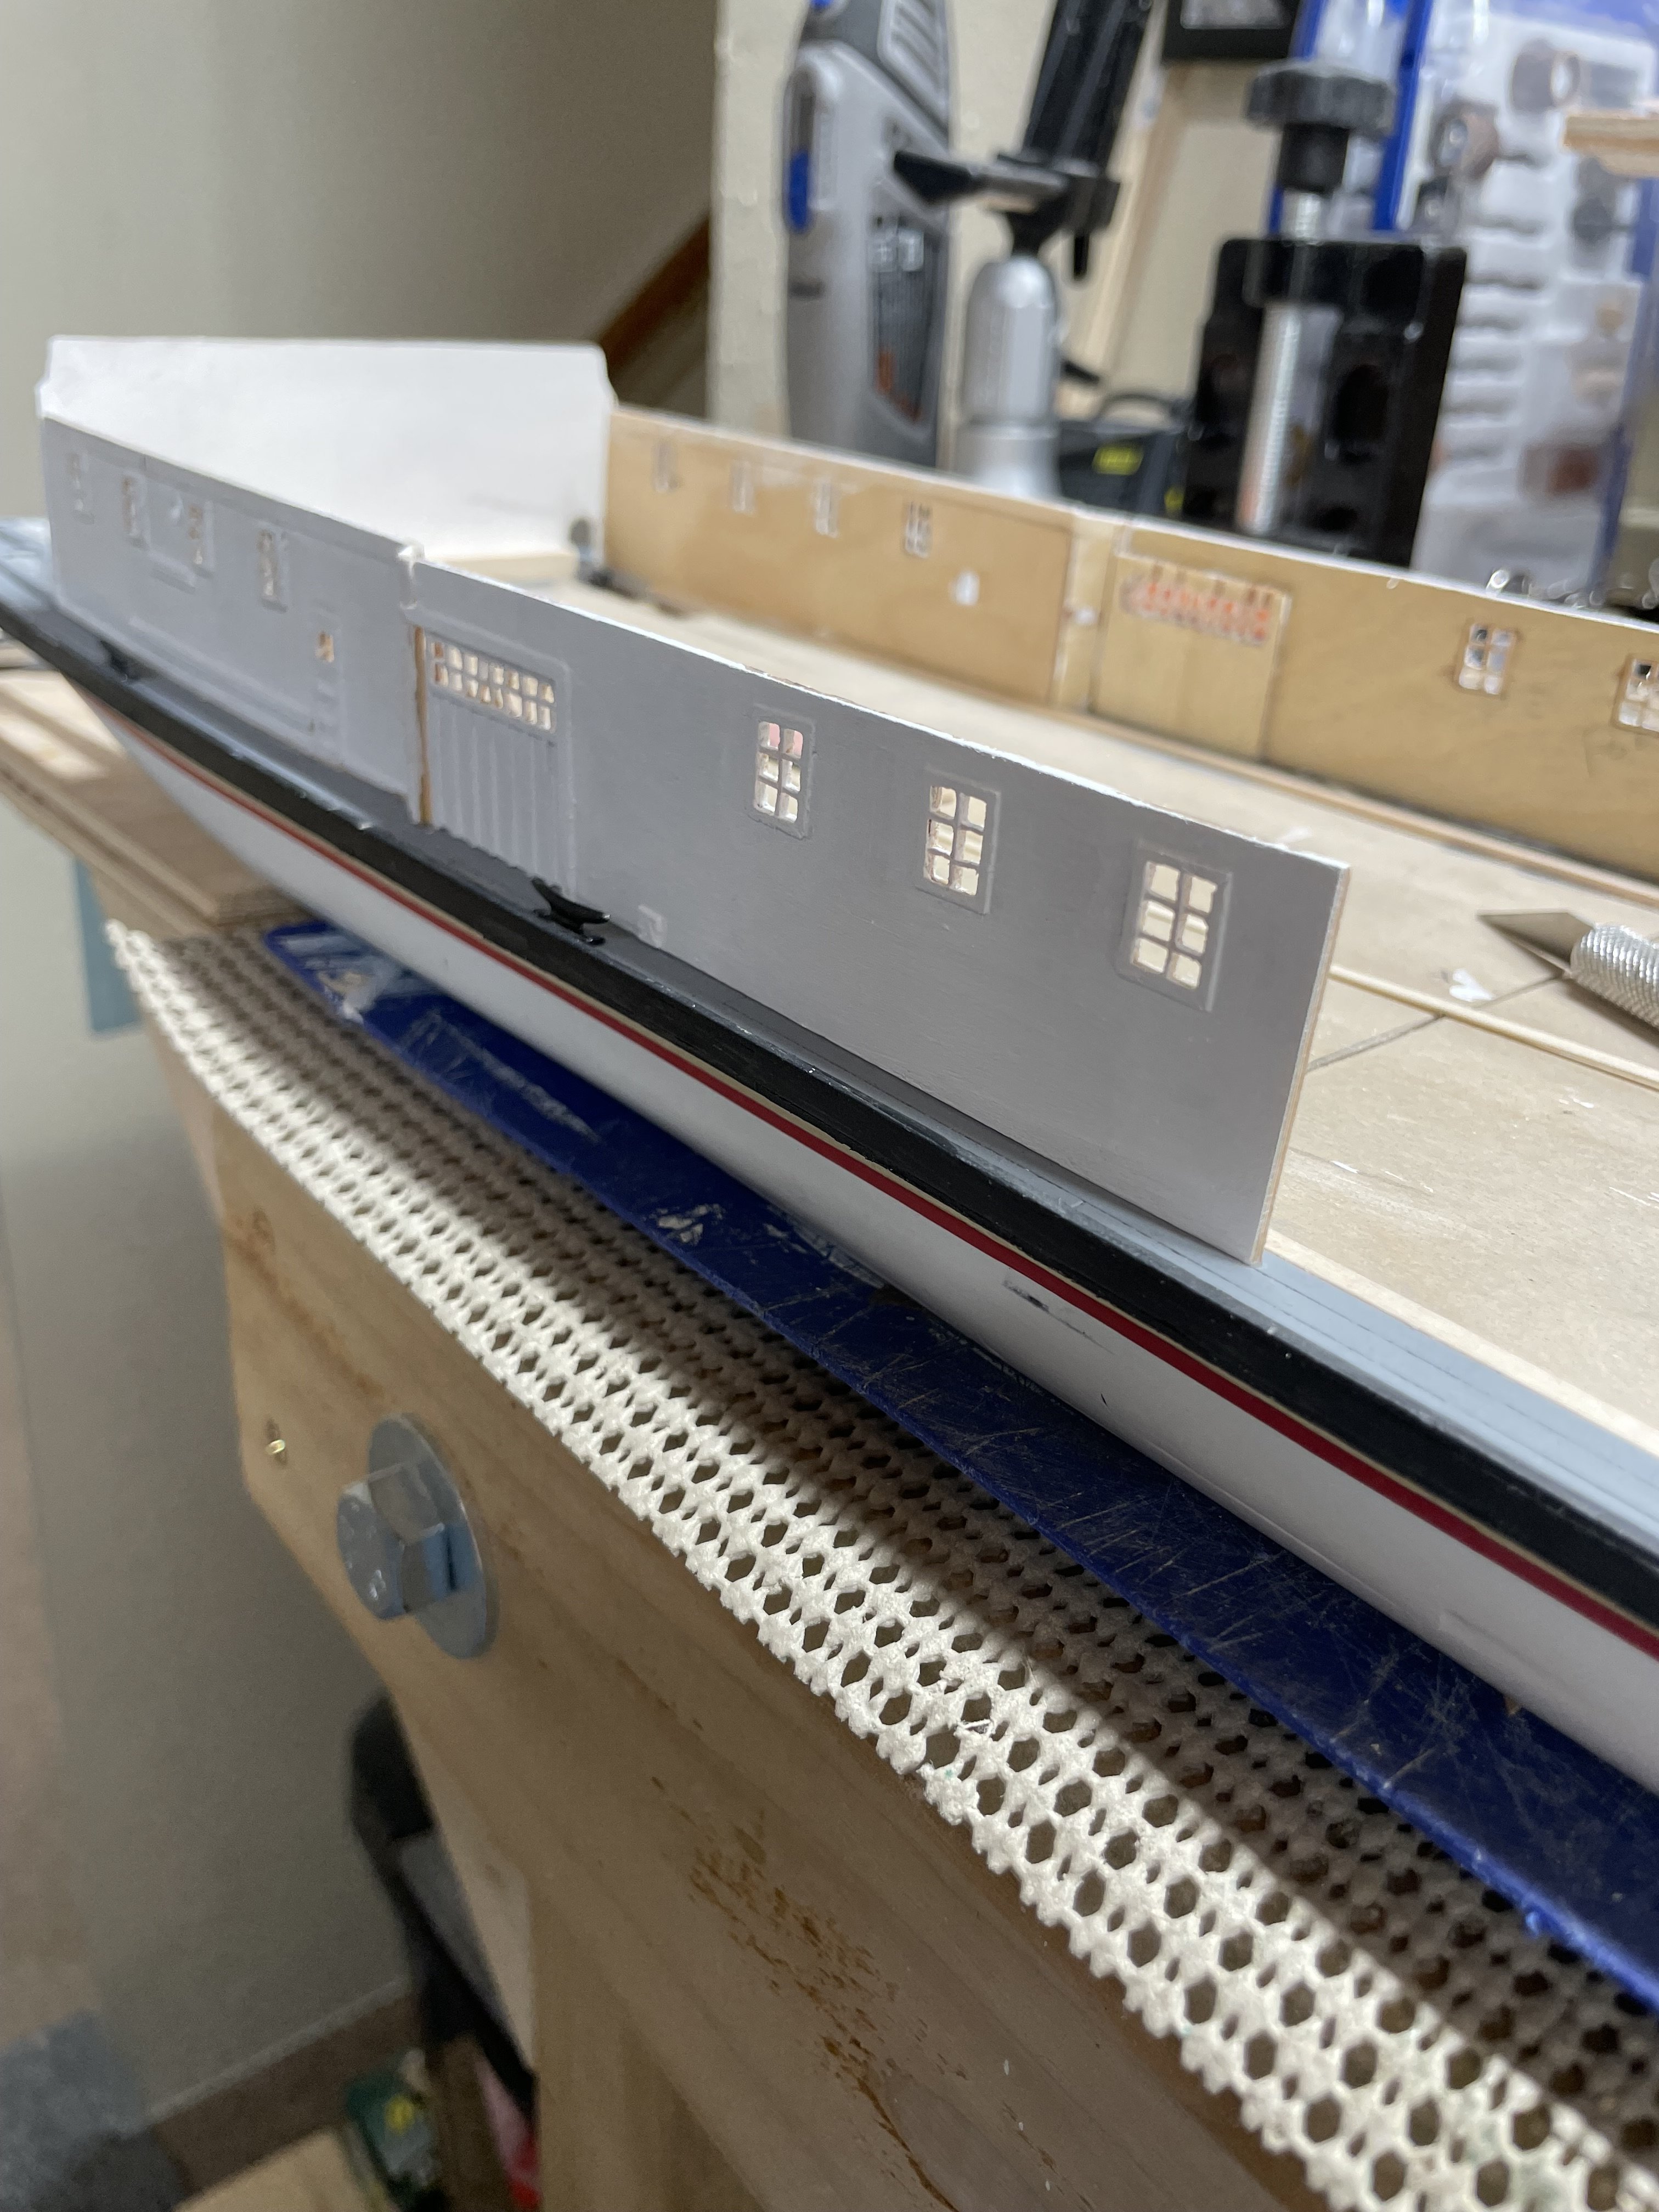
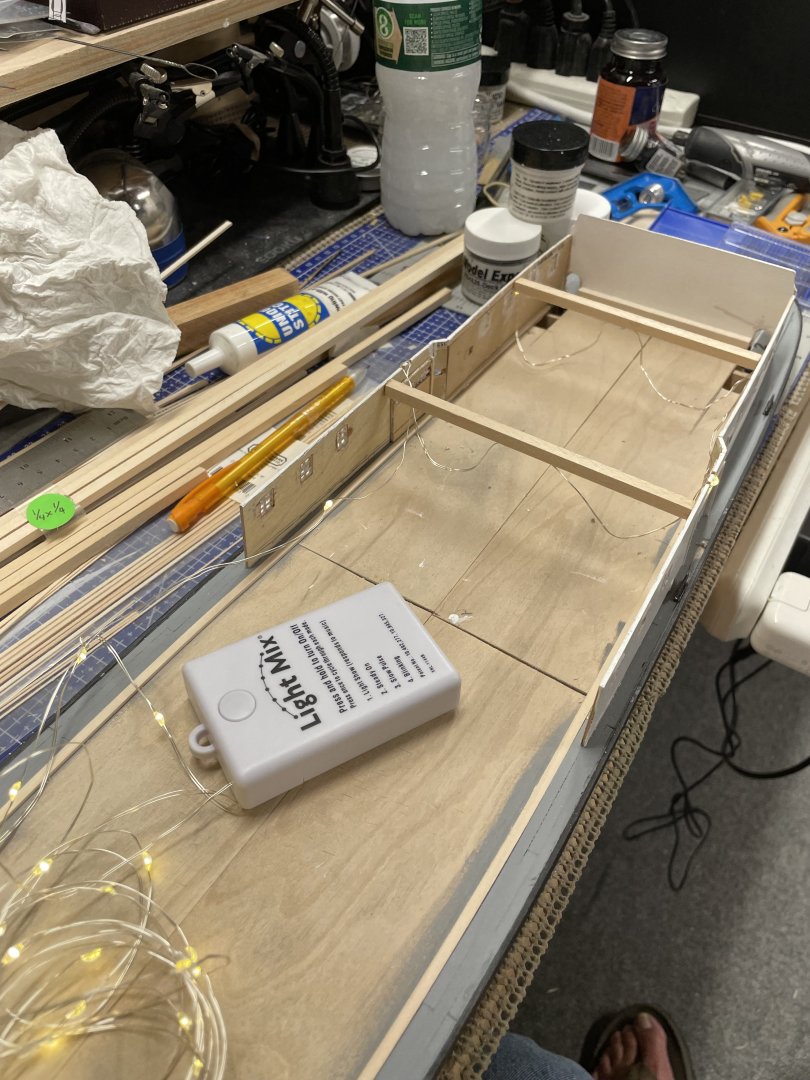
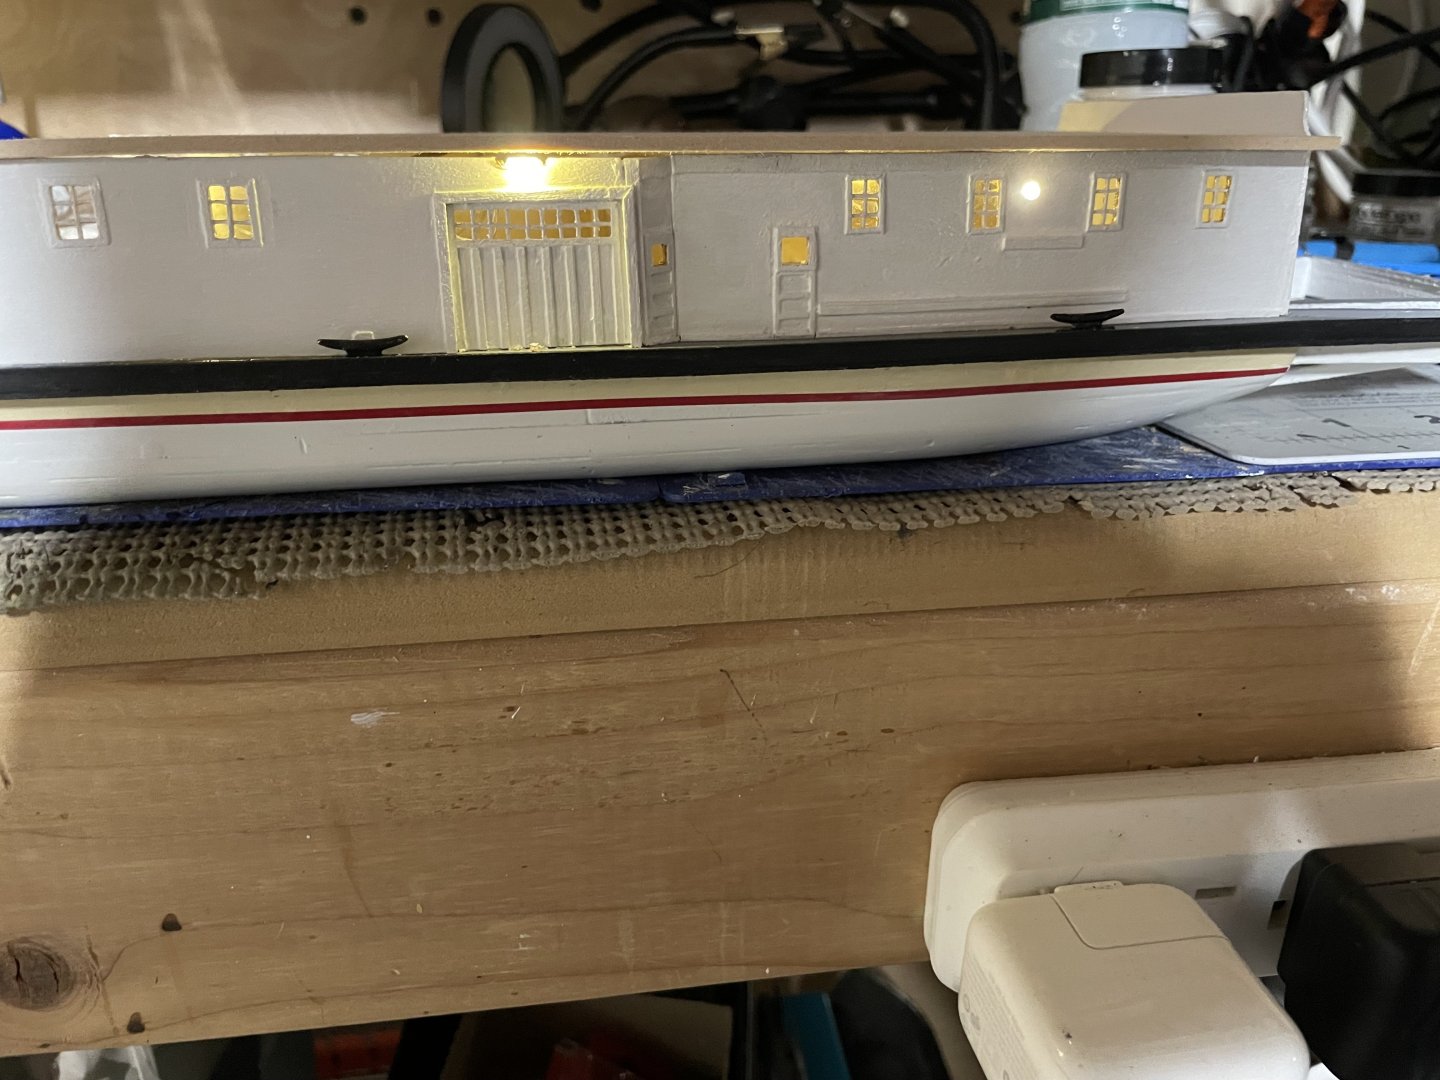
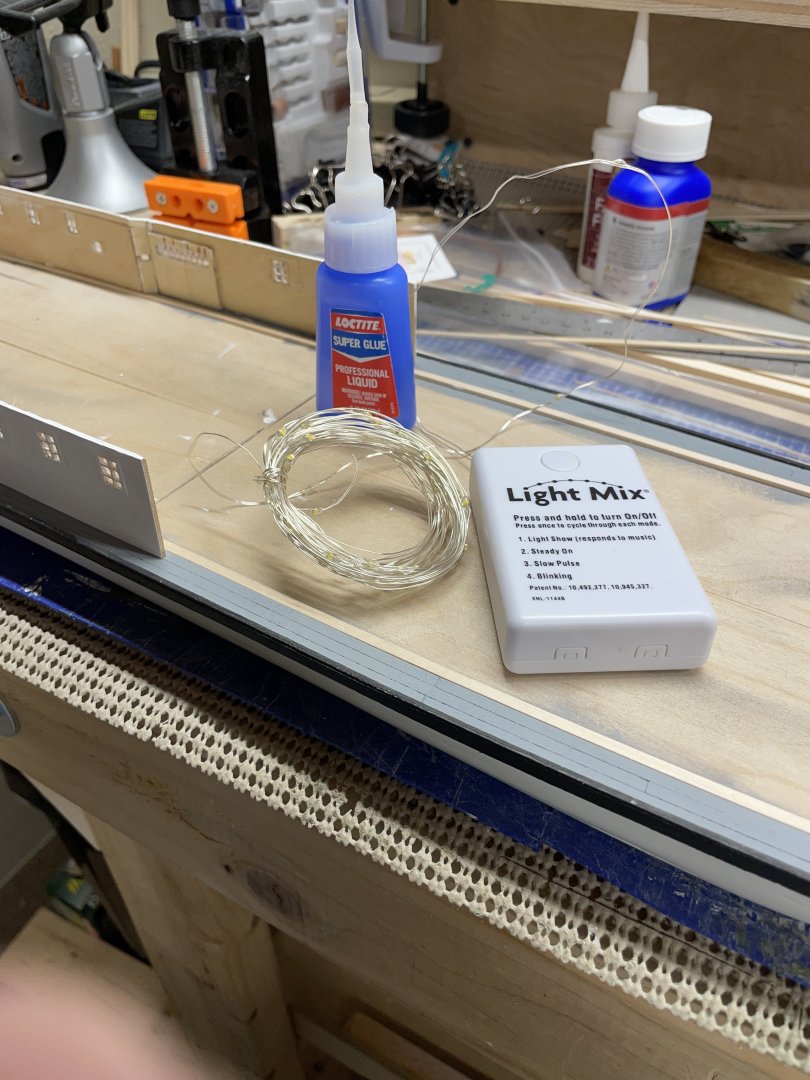
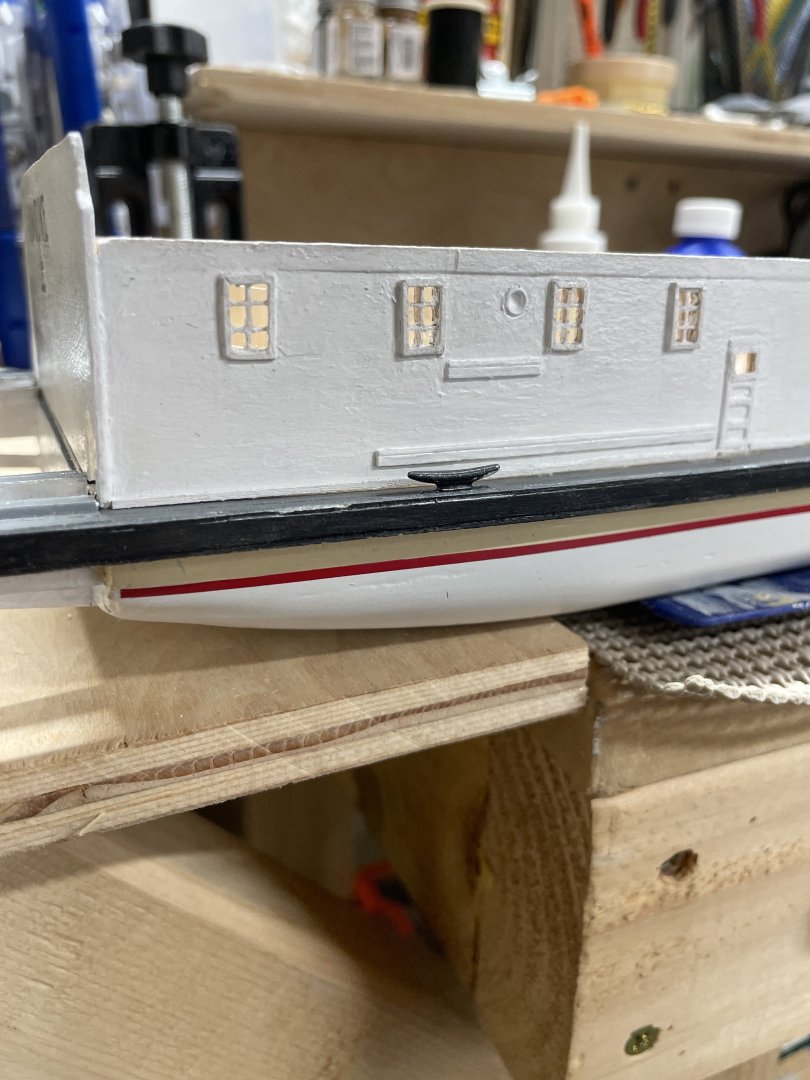
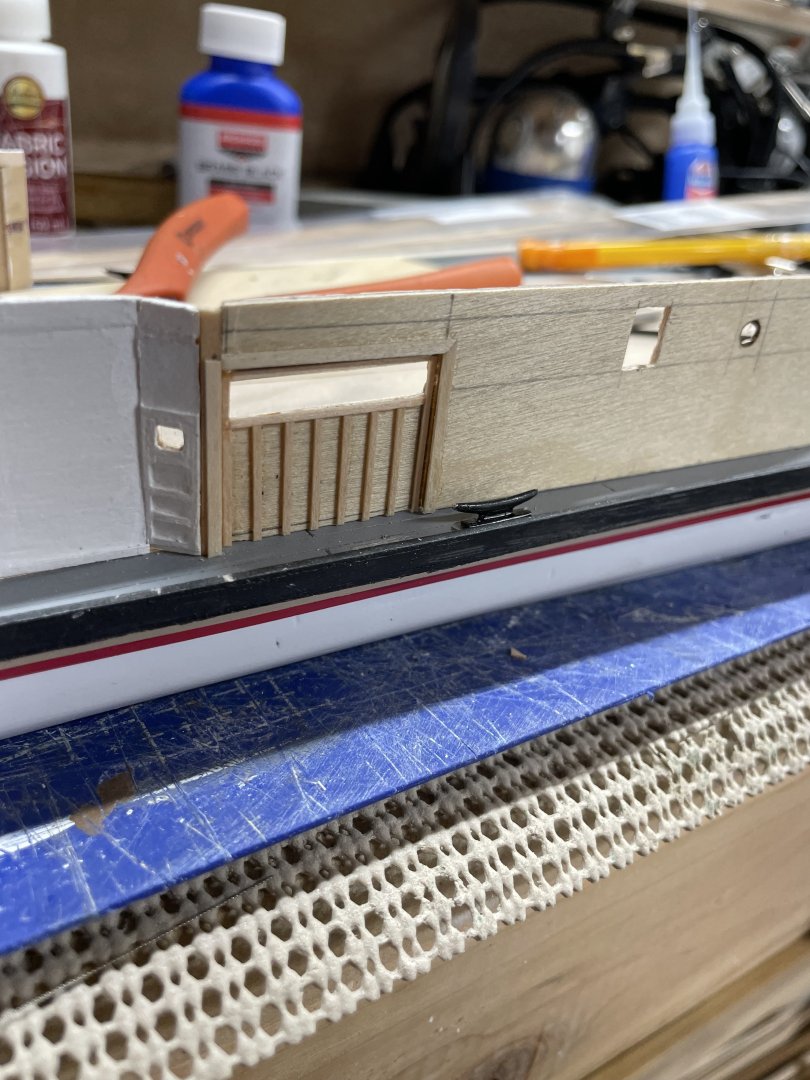
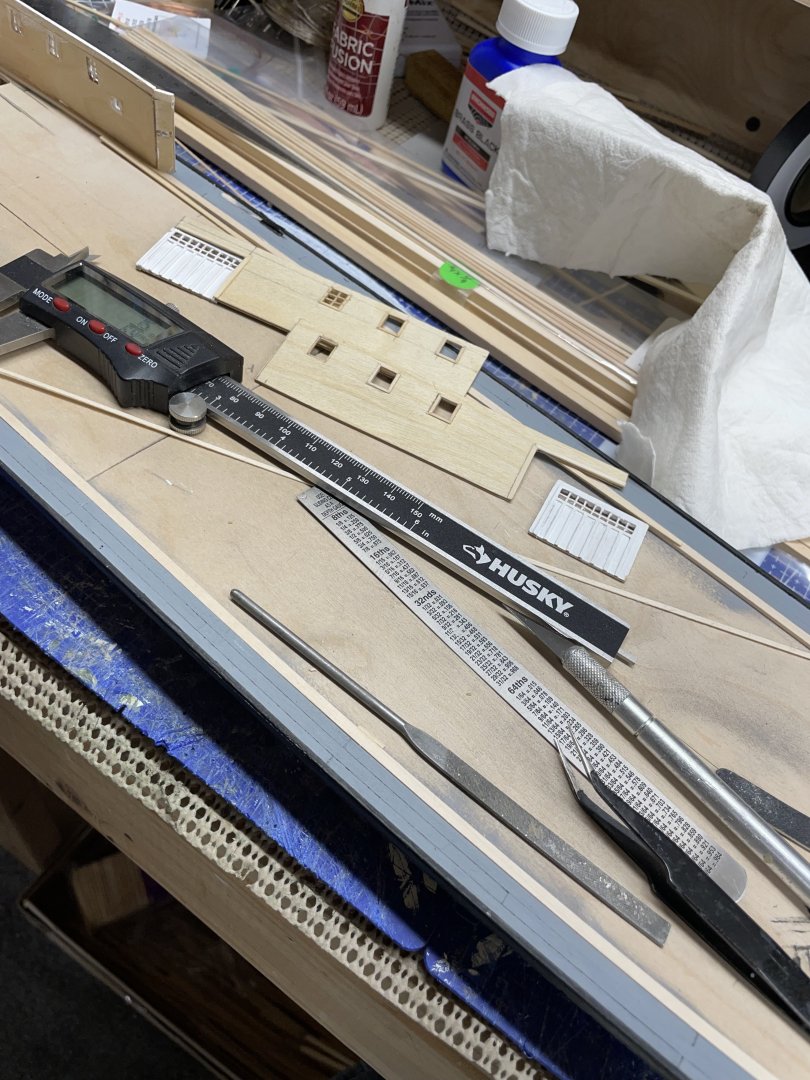
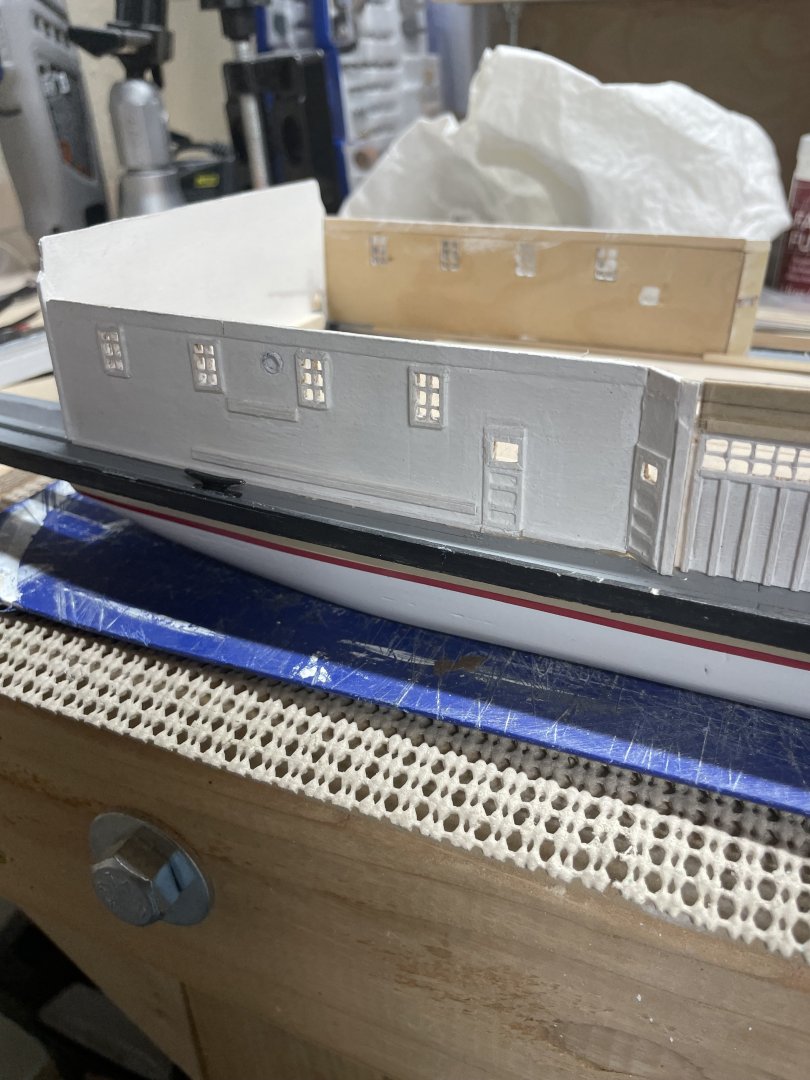
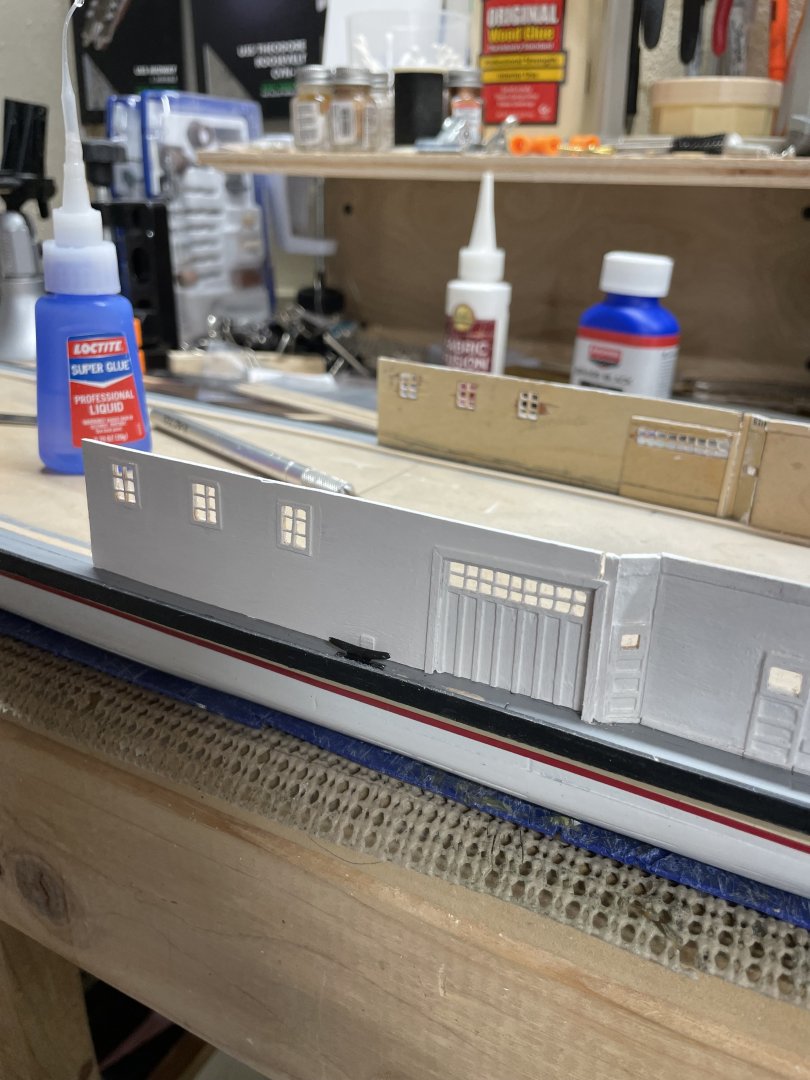
Doors and Windows continue… I have also started wiring for lights. @Kusawa2000 Mike, note the deck lighting in the last pic. 😉 Cheers 🍻 Steady as she goes…

-
Thank you Bob… Favor? Anytime my friend…
-
@Kusawa2000 Looks like winter must take its toll on her. She looks be in ruff shape requiring constant maintenance. John
-
Thanks Mike, Great shots of the lighting. Good confirmation of the type of lighting. My research has shown the use of a Dyno for electricity on board. I will be placing an LED in those cavities along with the inside lighting and over cargo doorways, staircases, etc… John
-
Keith, Amazing miniature work, steady as she goes… I am glad you could get some answers from your new provider. Continued Prayers my friend. 🙏
- 457 replies
-
- 4
-

-

-
- sternwheeler
- Hard Coal Navy
- (and 1 more)
-
Interesting research… Klondike II was launched in 1937 and was retired in 1952. The S.S. Klondike II by W.J.McBurney.pdf Cheers 🍻
-
Mike, that was my thoughts as well. Some sort of flood light for the shore line makes perfect sense. Thanks for running it down. John
-
Thanks Mike… My intention will be to build all of the exterior lighting. John
-
Keith, I’m not sure when they were added but I do intend to build her as she appears today in her restored museum ship state. I am going to light this model. I am finding references in the manuscripts of all the lighting. I am going to try to build her with exterior and interior lighting. 😎 My OCD won’t let me not do so. LOL 😂
-
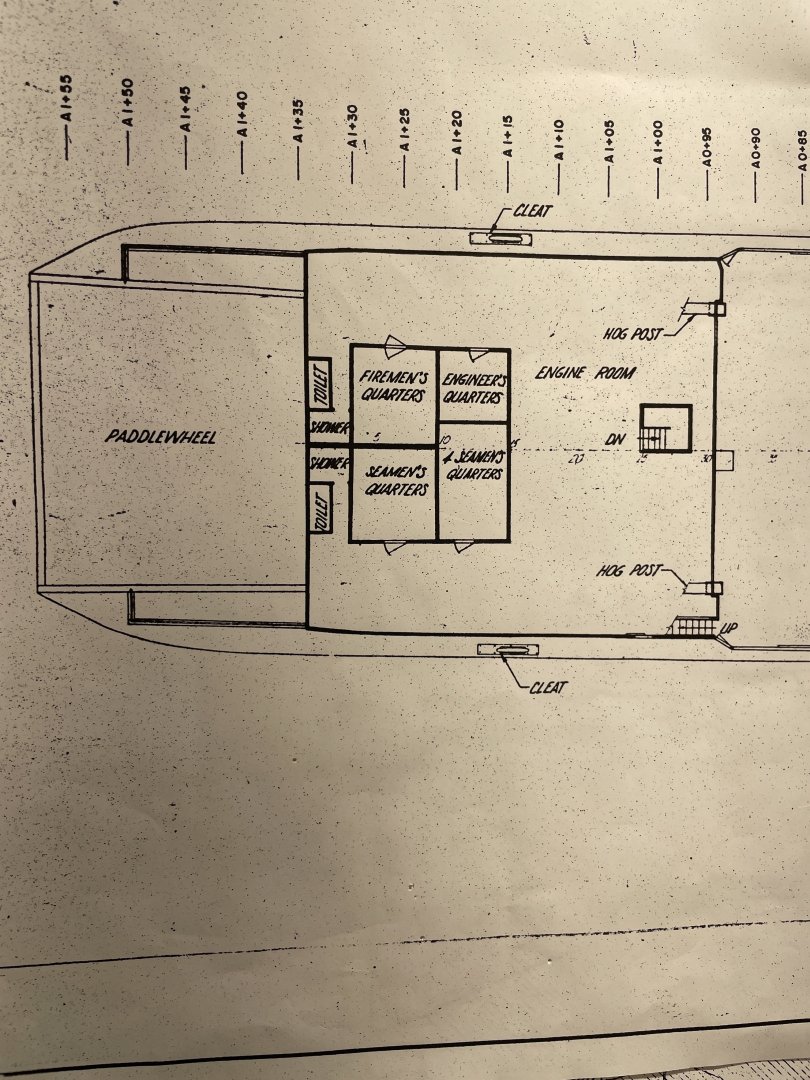
The S.S. Klondike, 1937-55: A Structural History by Arnold E. Roos Volume III http://parkscanadahistory.com/series/mrs/342-3.pdf Excerpts from this document of nearly 400 pages shows promise of amazing detail and confirmation they are lights. It also describes in amazing detail other exterior lighting. 😎 The light sockets located near the aft running lights on the port and starboard sides may have been added at a later date. The problem with these is that they do not readily show up in photographs, as they were white on a white background; however, it appears fairly certain that they were not in place by 1943. Running lights- center line is 115 feet 6-1/2 inches aft of reference point- set in a 1 foot 4 inch diameter hole- held in place by 3 metal clips Update there are 6 volumes of description 4 of which can be downloaded. Woo Hoo! Manuscript Report Series / Travail inédit 342 Roos, Arnold E. The S.S. Klondike, 1937-55: A Structural History. Vol. I. 1979. 342 Roos, Arnold E. The S.S. Klondike, 1937-55: A Structural History. Vol. II. 1979. 342 Roos, Arnold E. The S.S. Klondike, 1937-55: A Structural History. Vol. III. 1979. 342 Roos, Arnold E. The S.S. Klondike, 1937-55: A Structural History. Vol. IV. 1979. 342 Roos, Arnold E. The S.S. Klondike, 1937-55: A Structural History. Vol. V. 1979. 342 Roos, Arnold E. The S.S. Klondike, 1937-55: A Structural History. Vol. VI. 1979. There is still Gold in the Yukon Cheers 🍻
-
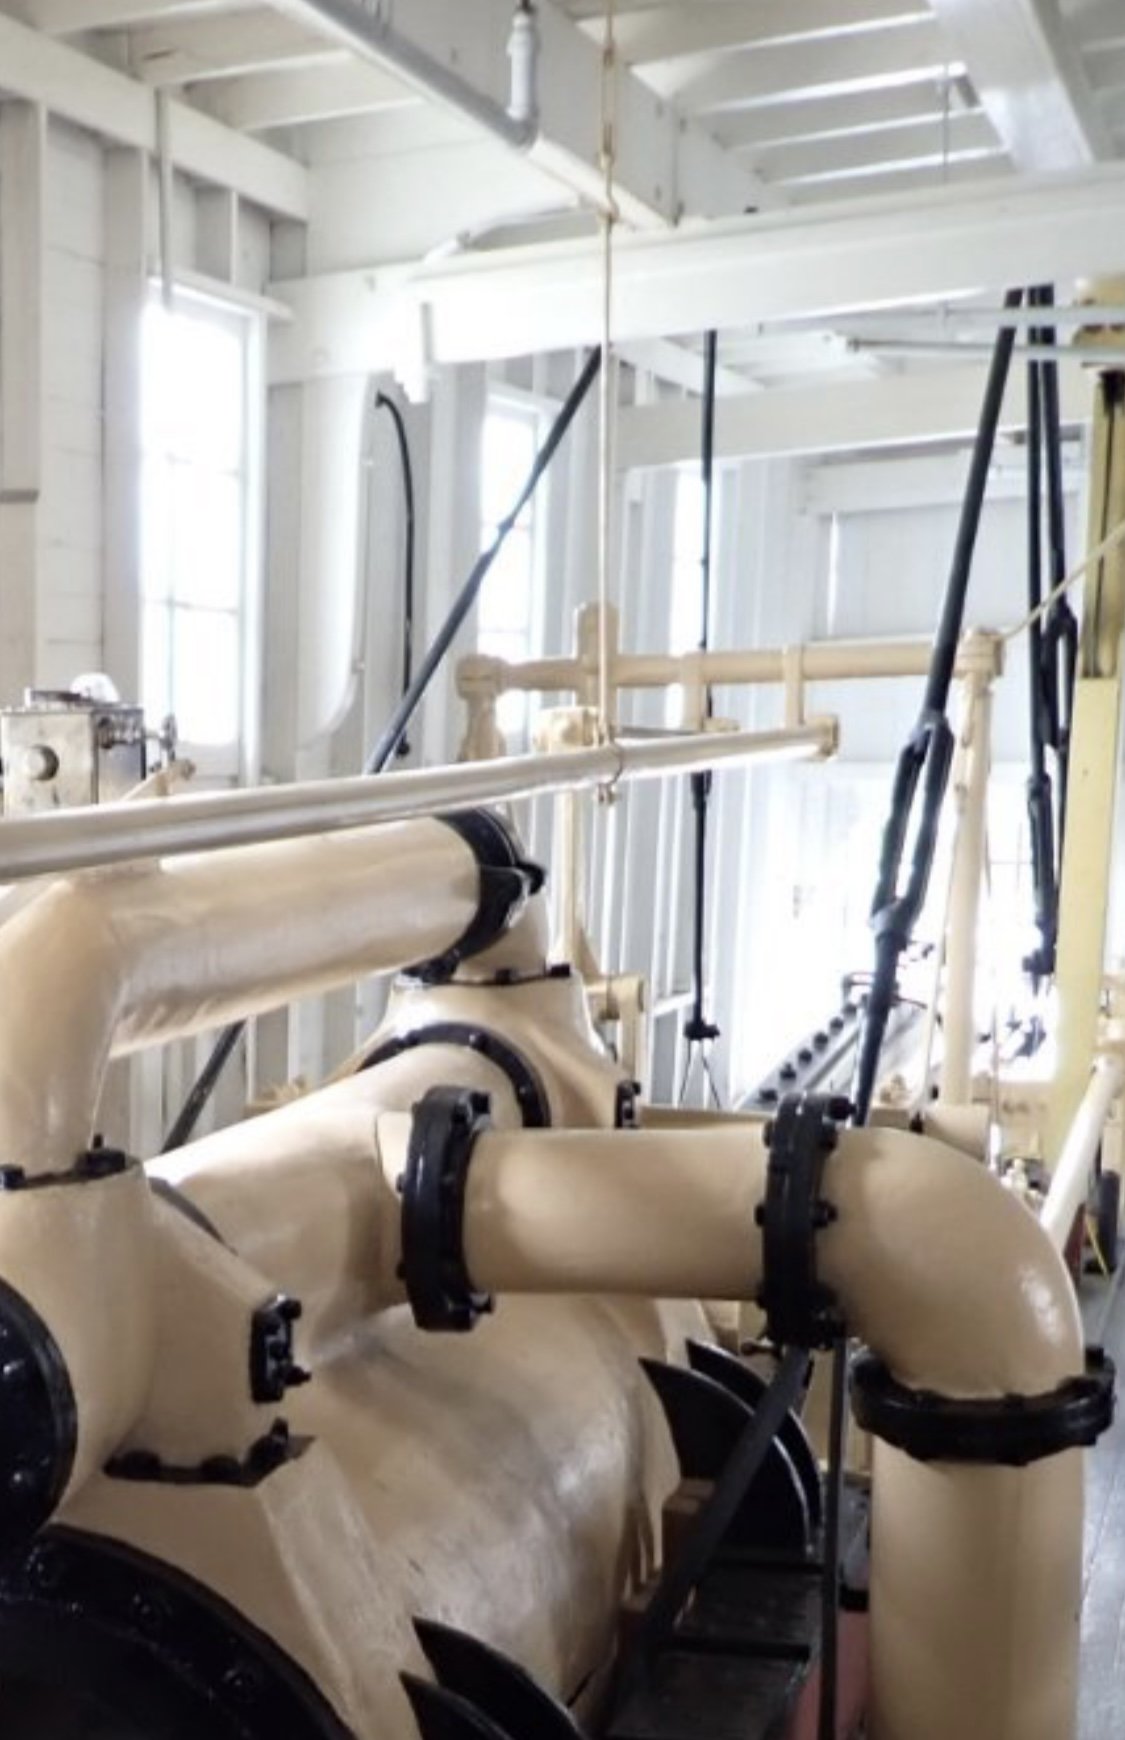
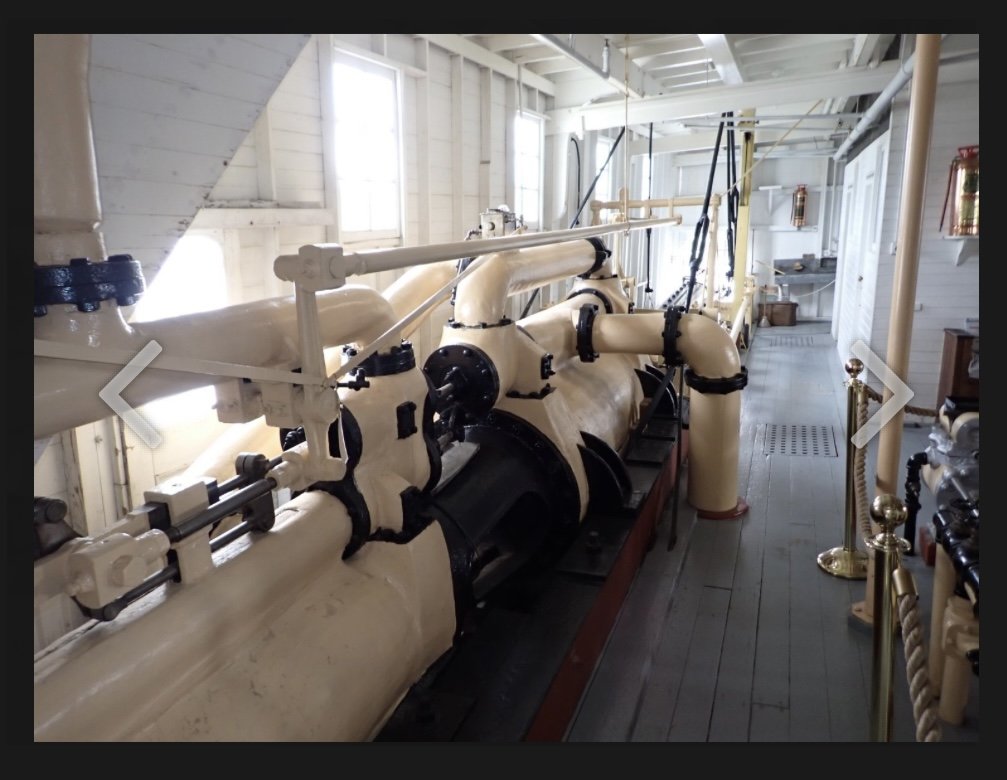
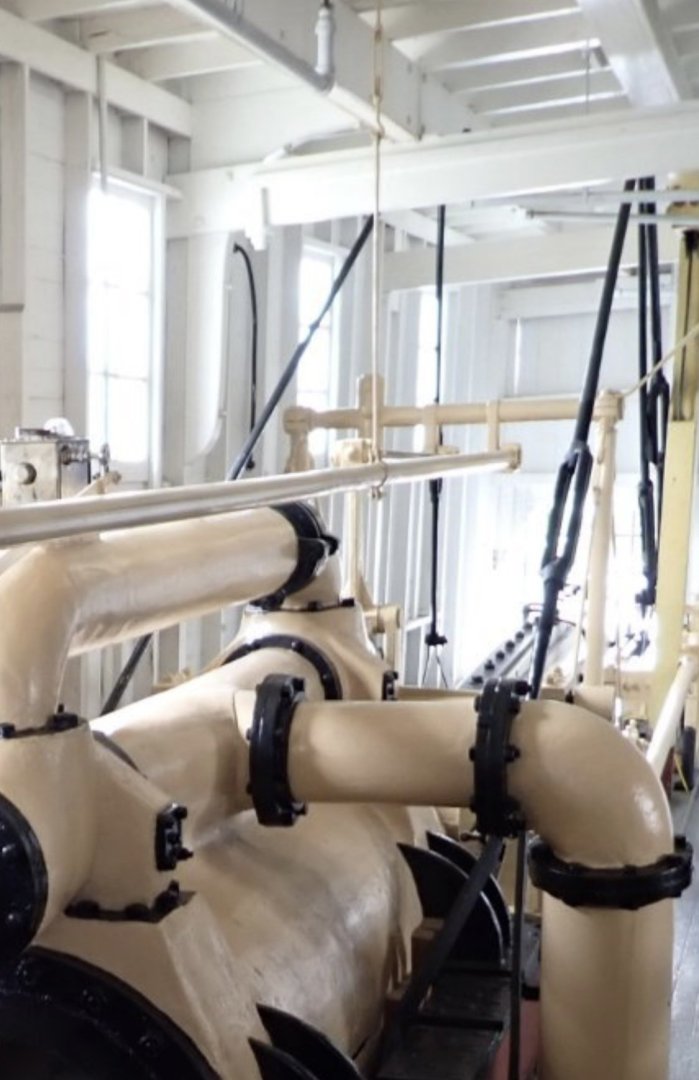
Most likely a light… Here is a photo of the engine room wall from the inside. @Ian_Grant posted this photo during our original discussions on building the Klondike. Here is an enlarge view… Looks like wiring to a light to me. 😎
-
You might be right, I’m still thinking some kind of work light.
-
Pm has been sent…
-
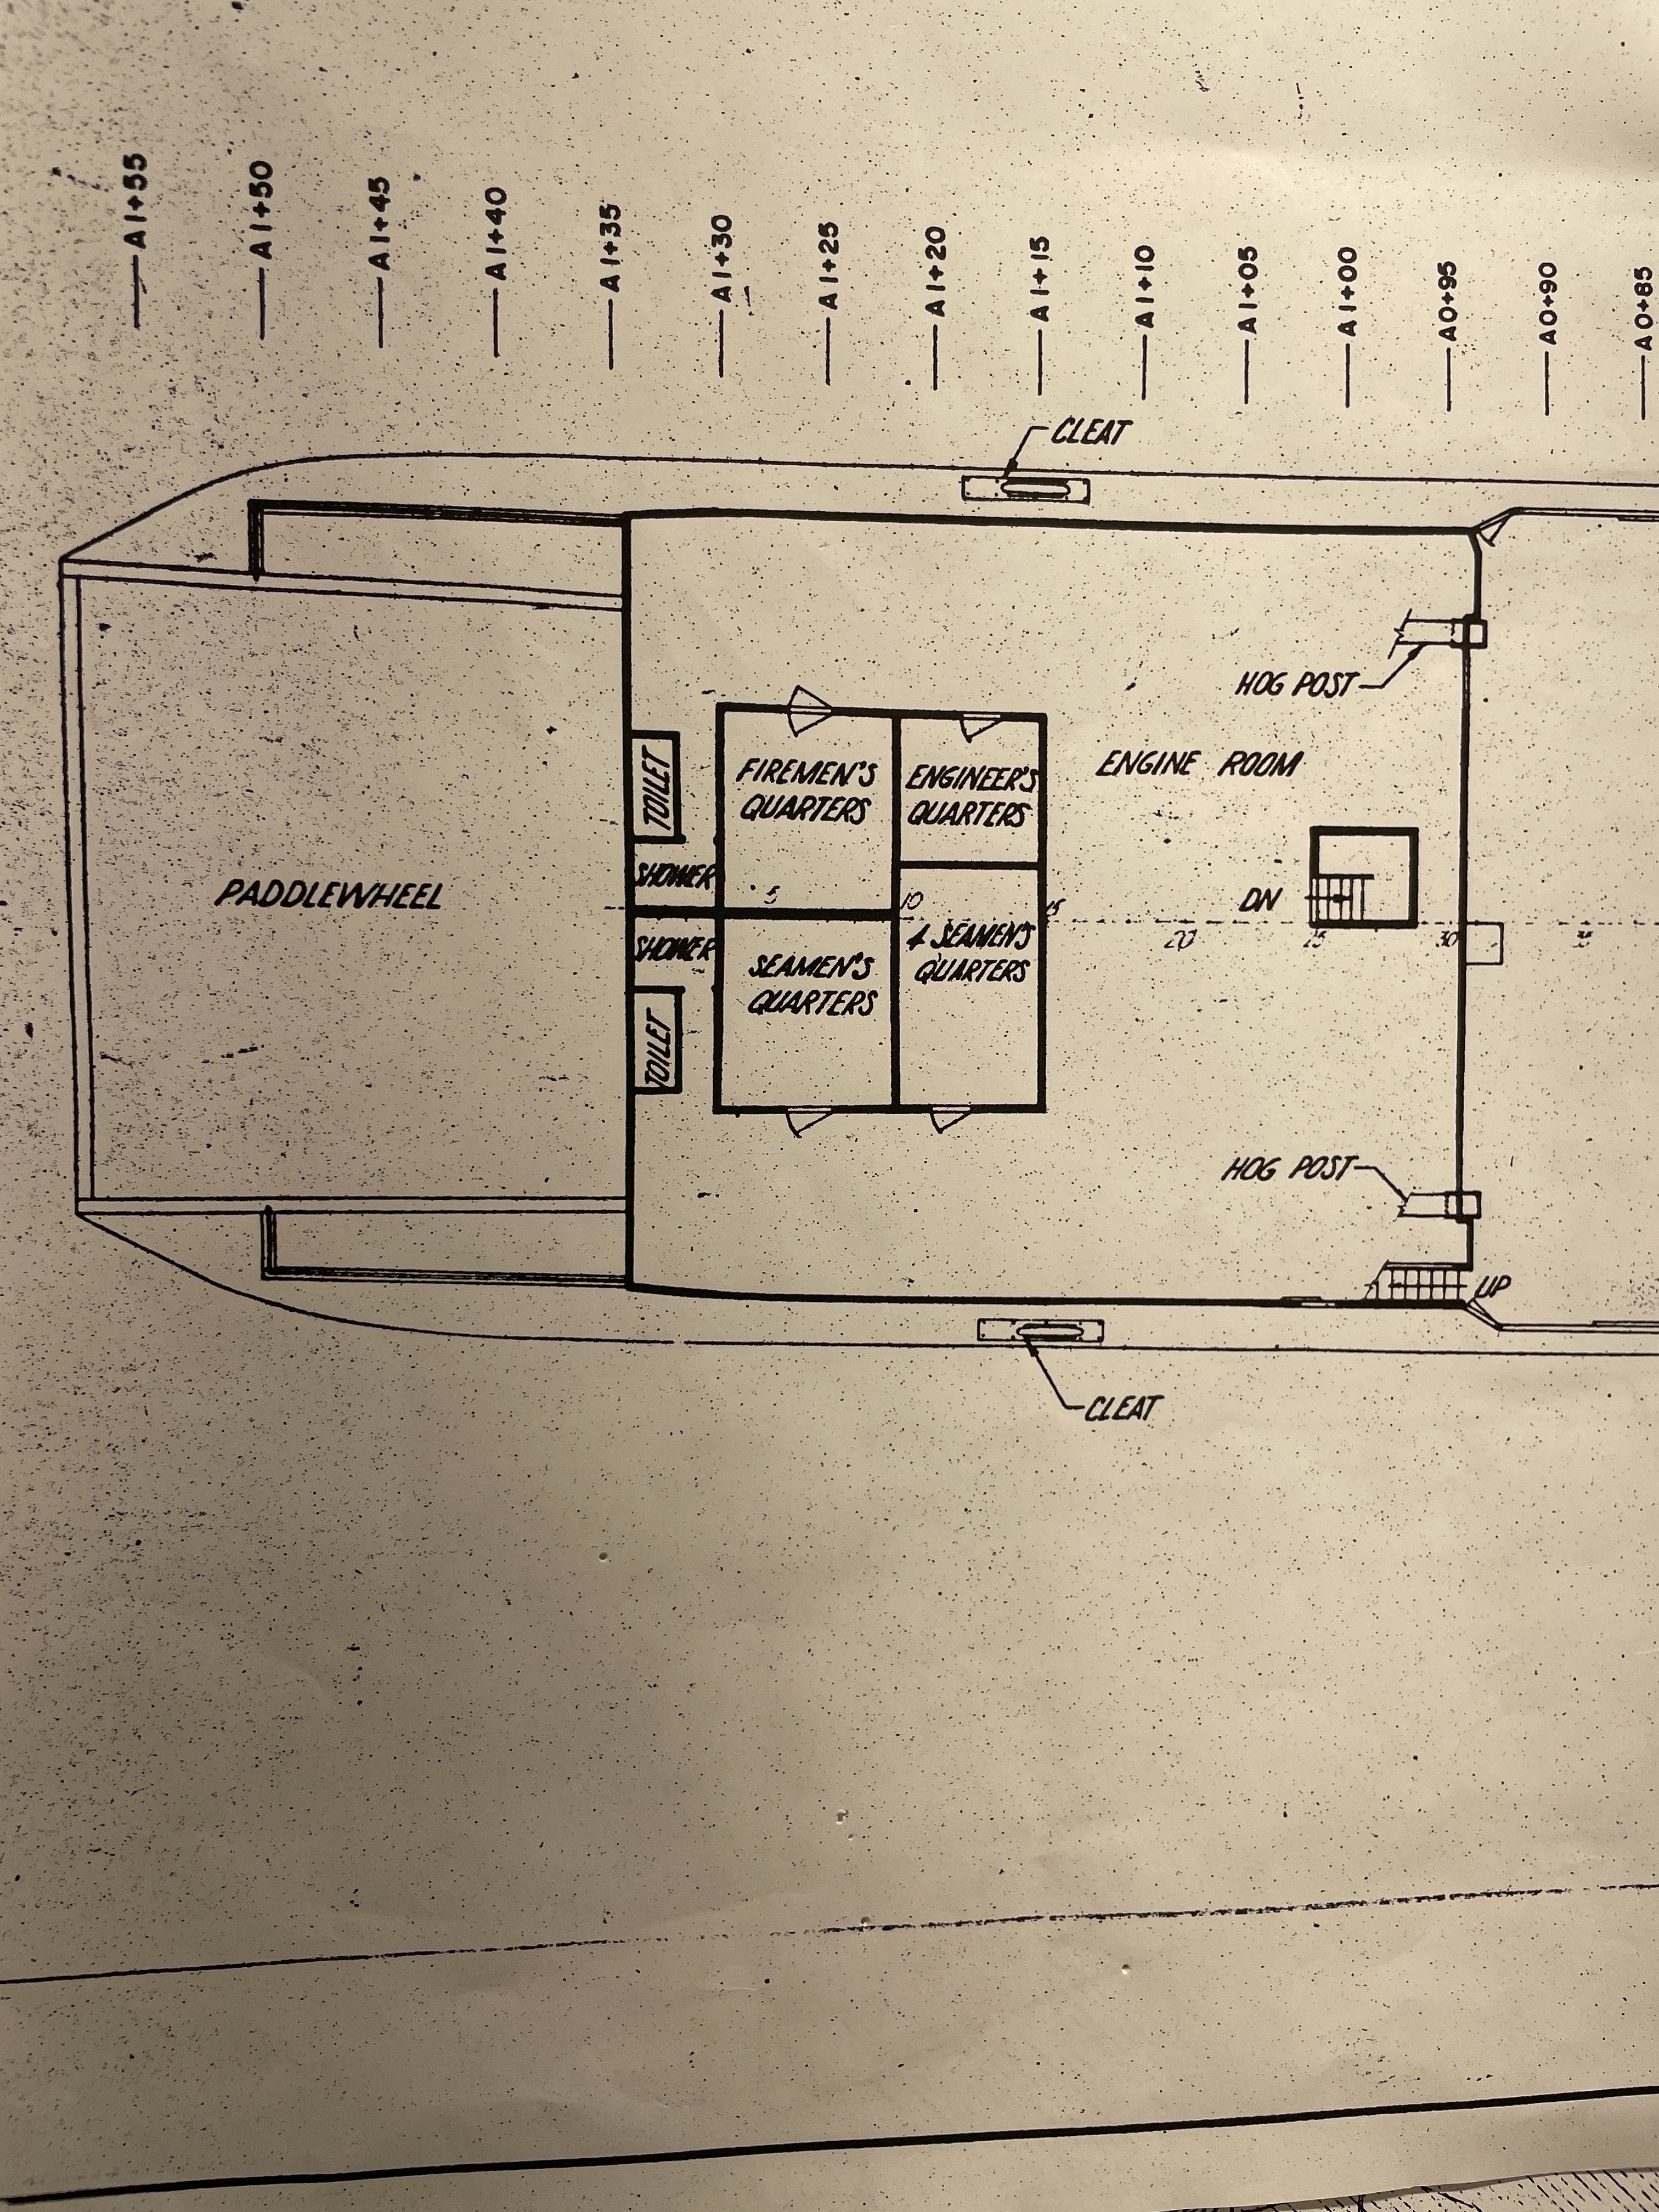
I do Have this drawing as well.
-
Here is a photo of the port side. Looks like it might be there?
-
The drawing only shows the starboard side. I have been assuming the port side is a mirror image. It’s not identified on the main deck drawing. I thought it might be a flood light. Are you saying Nav lights?
-
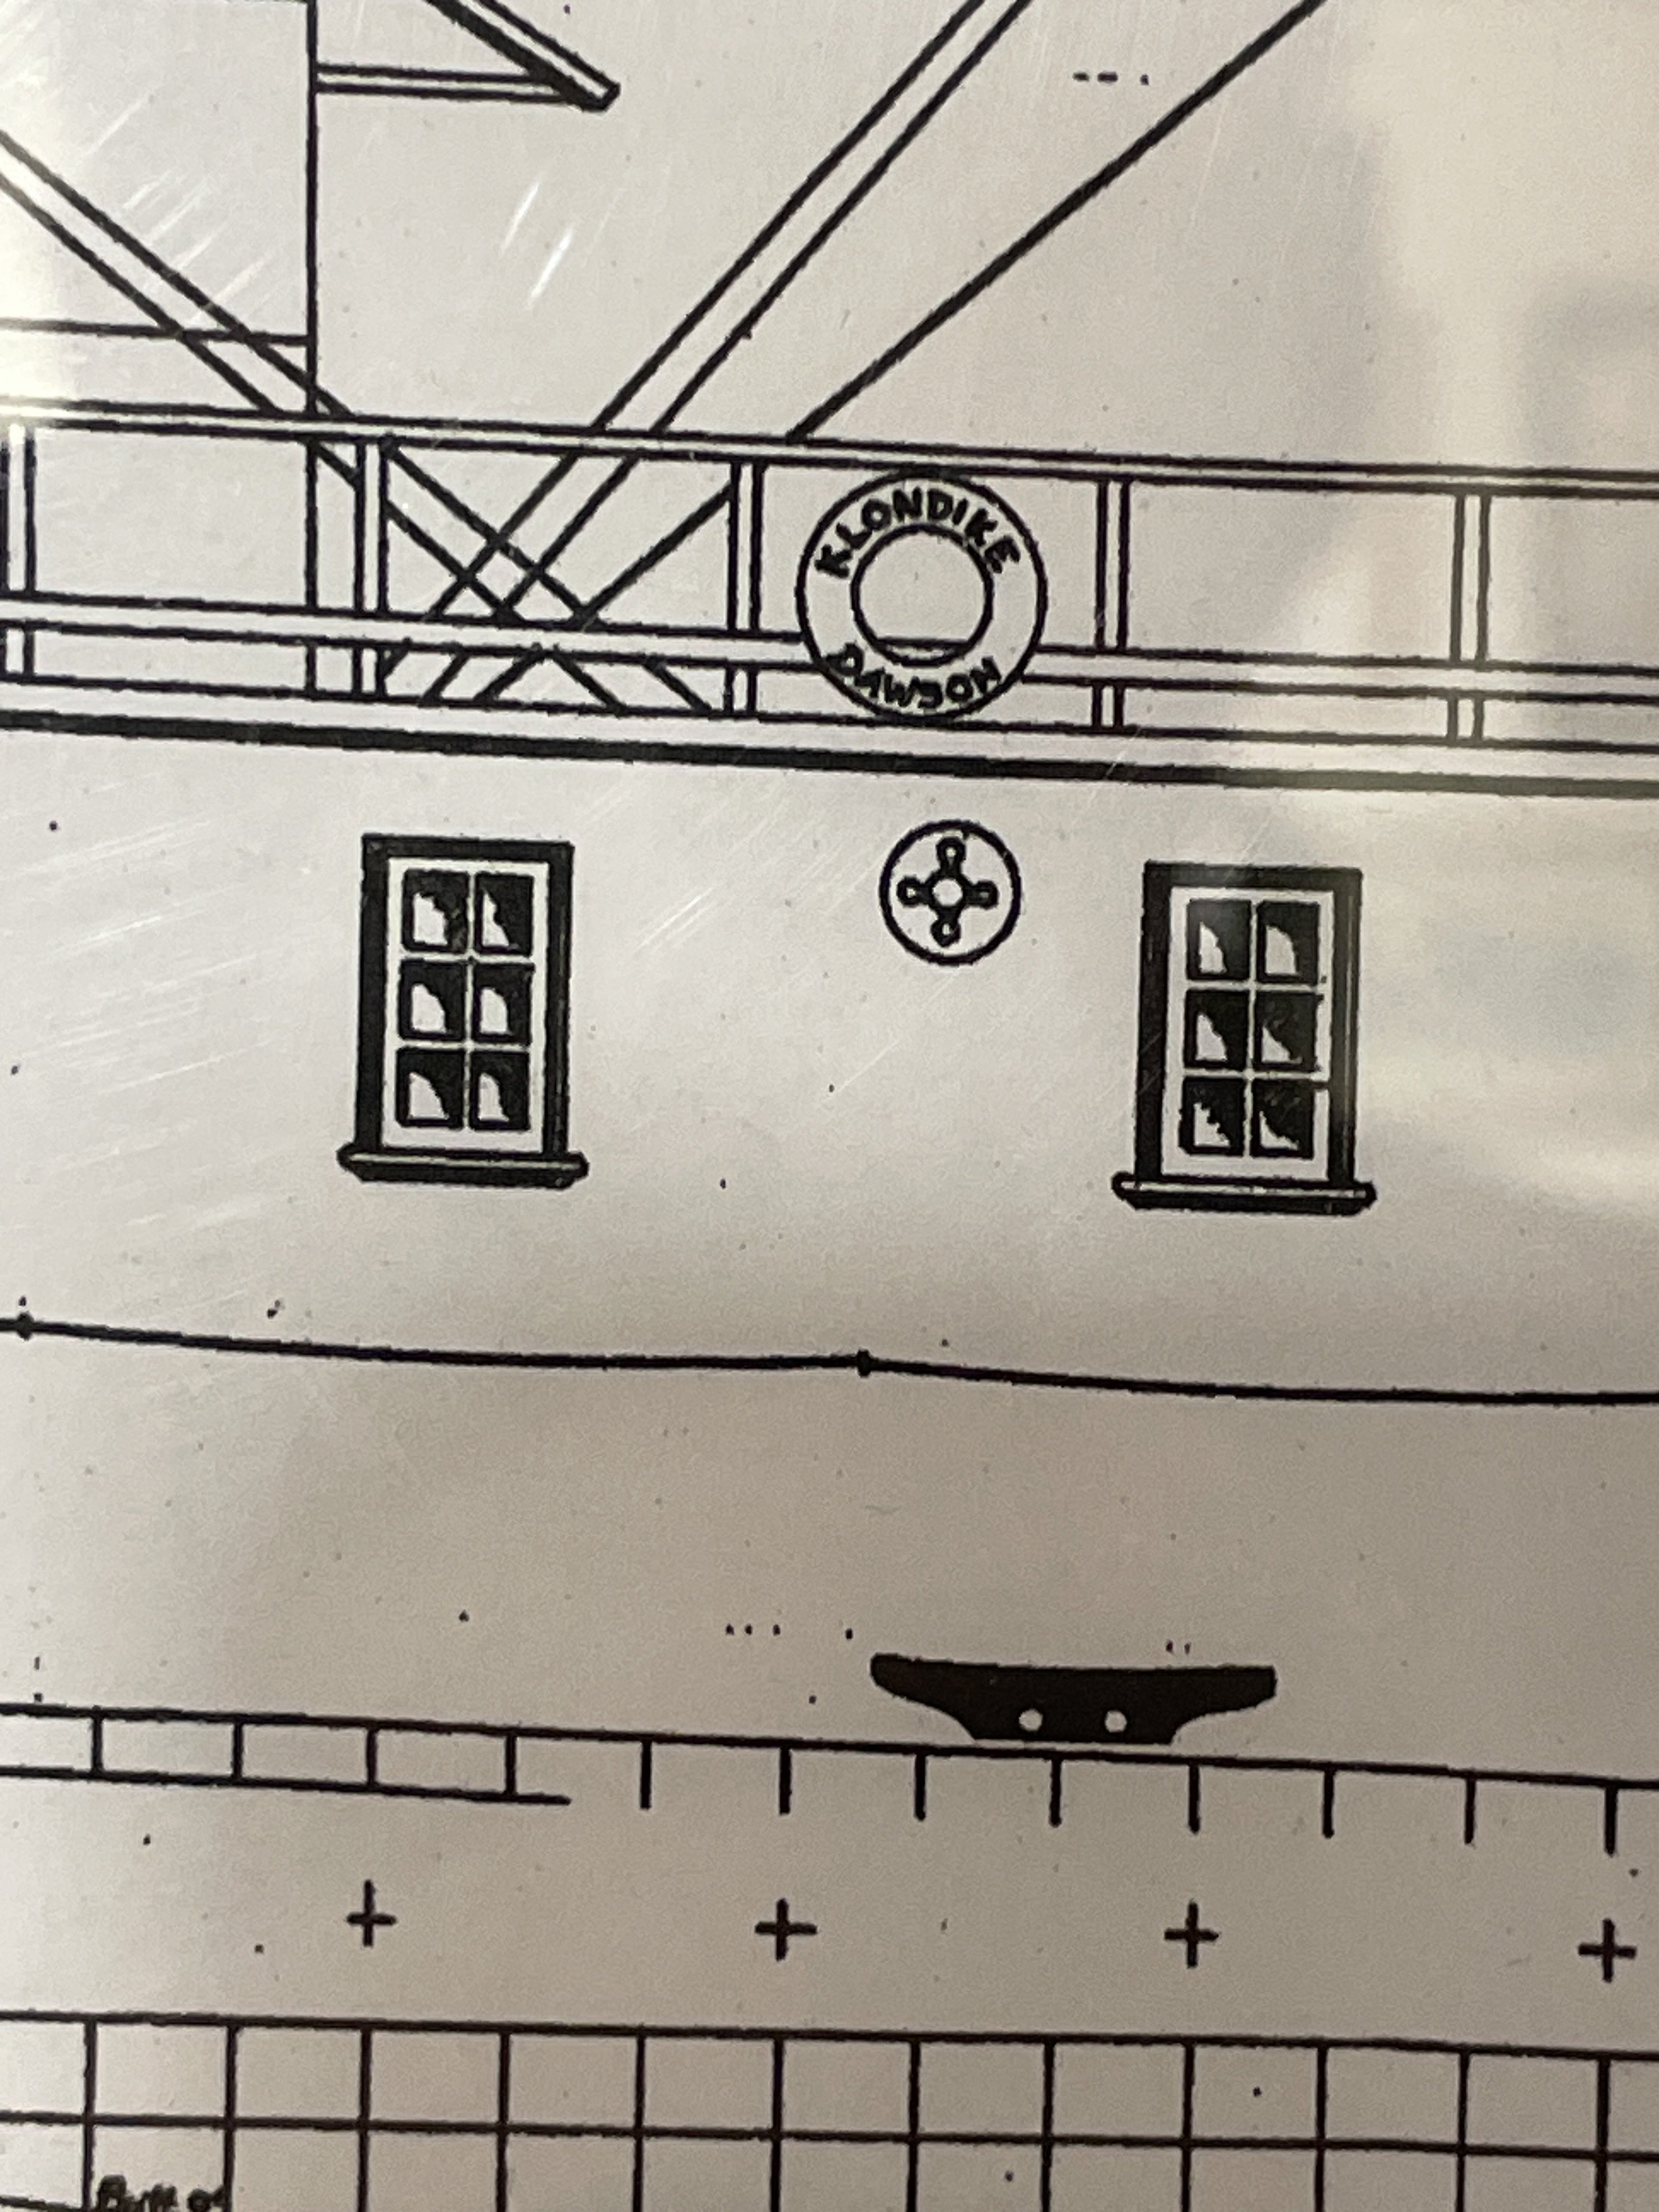
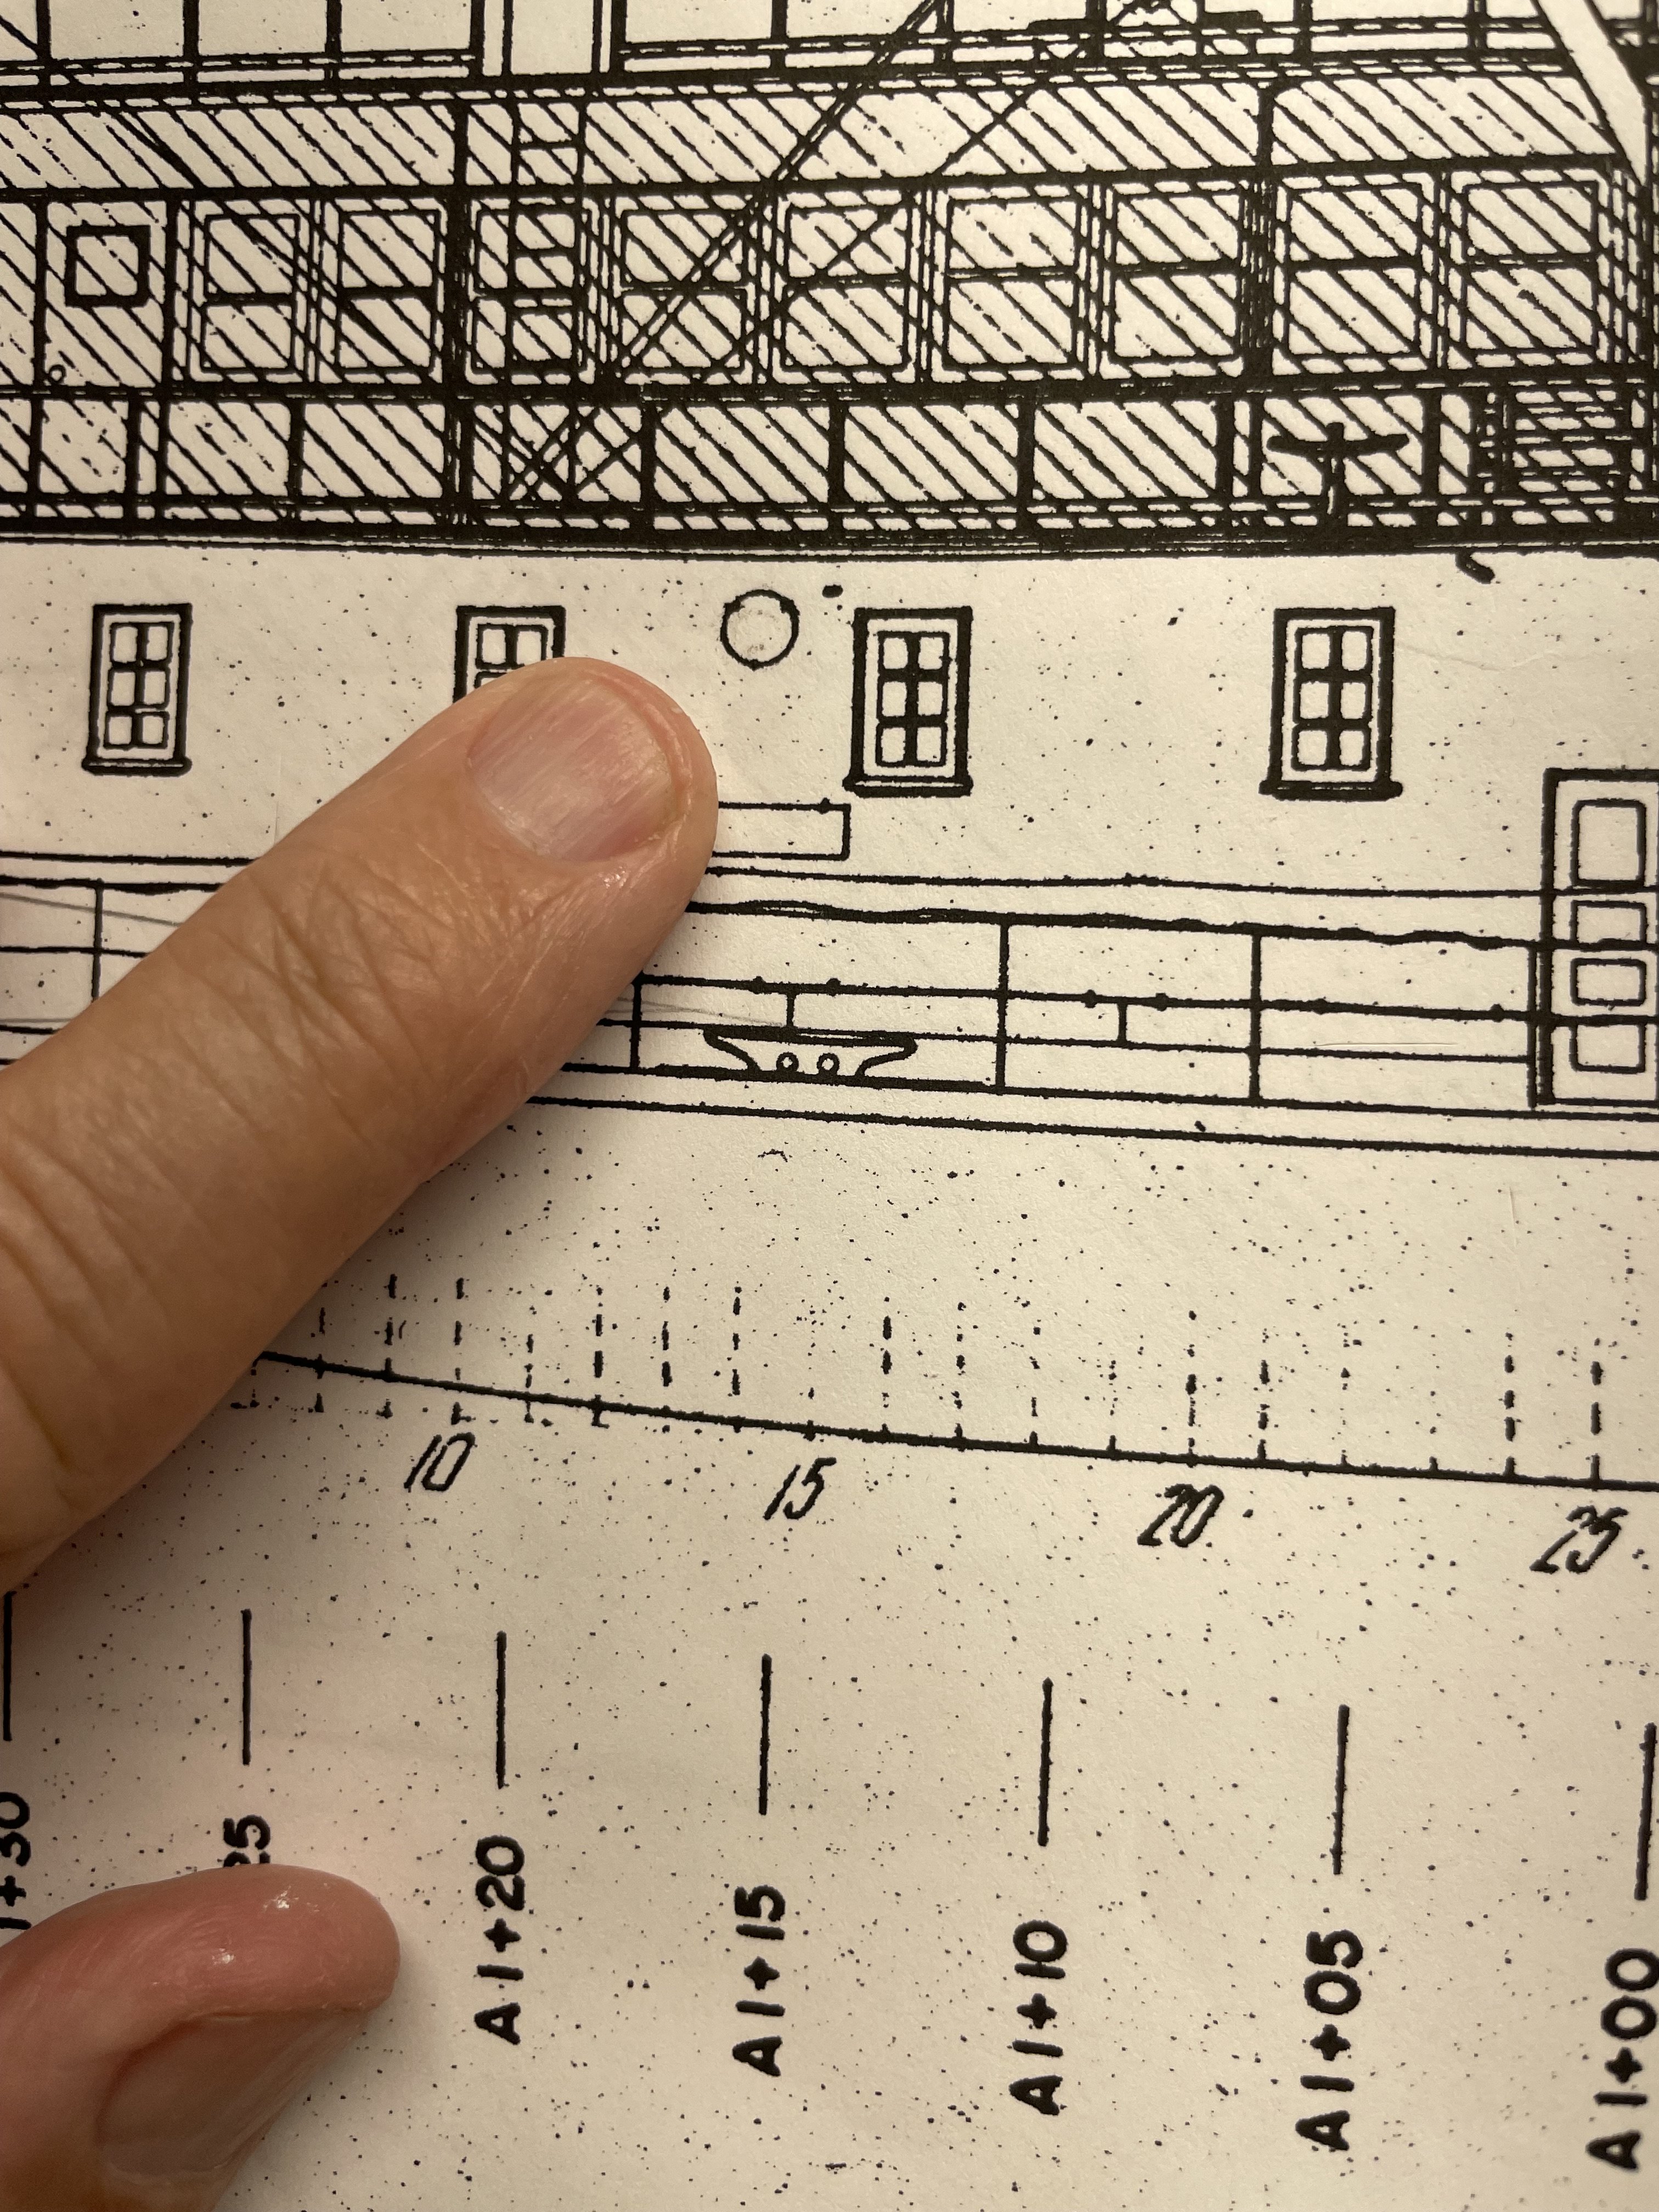
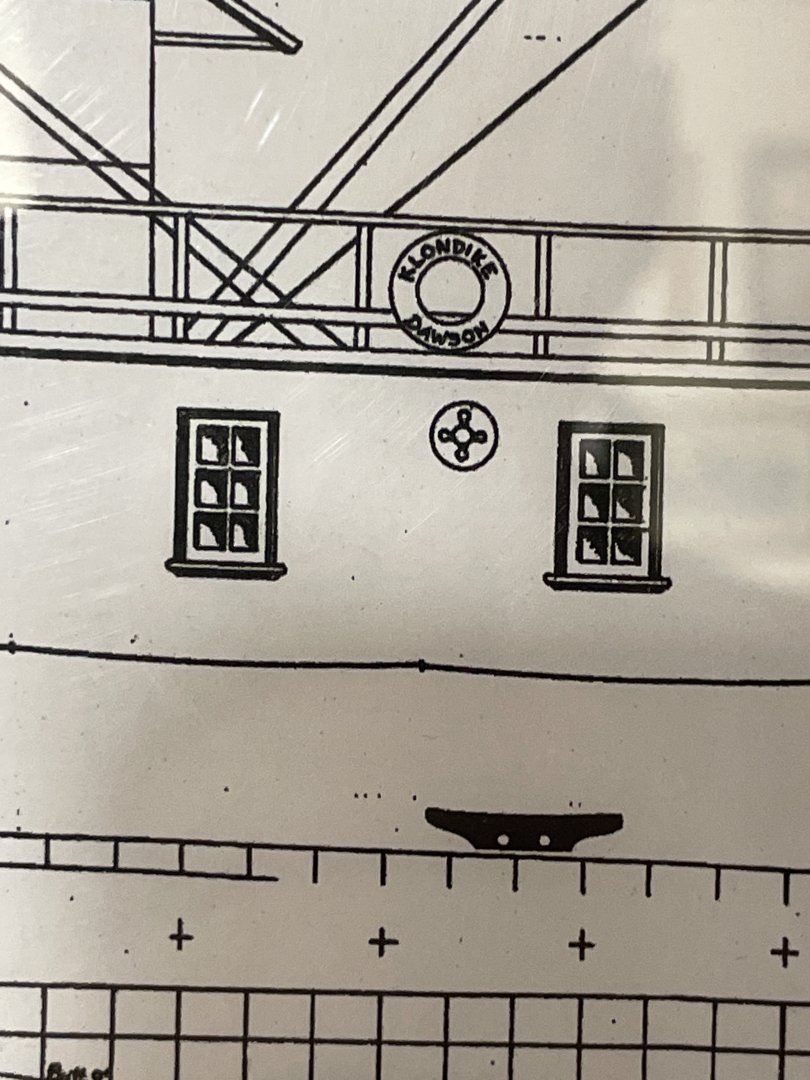
Does anyone know what this circle represents? Here is the best photo I have of it. Cheers 🍻

-
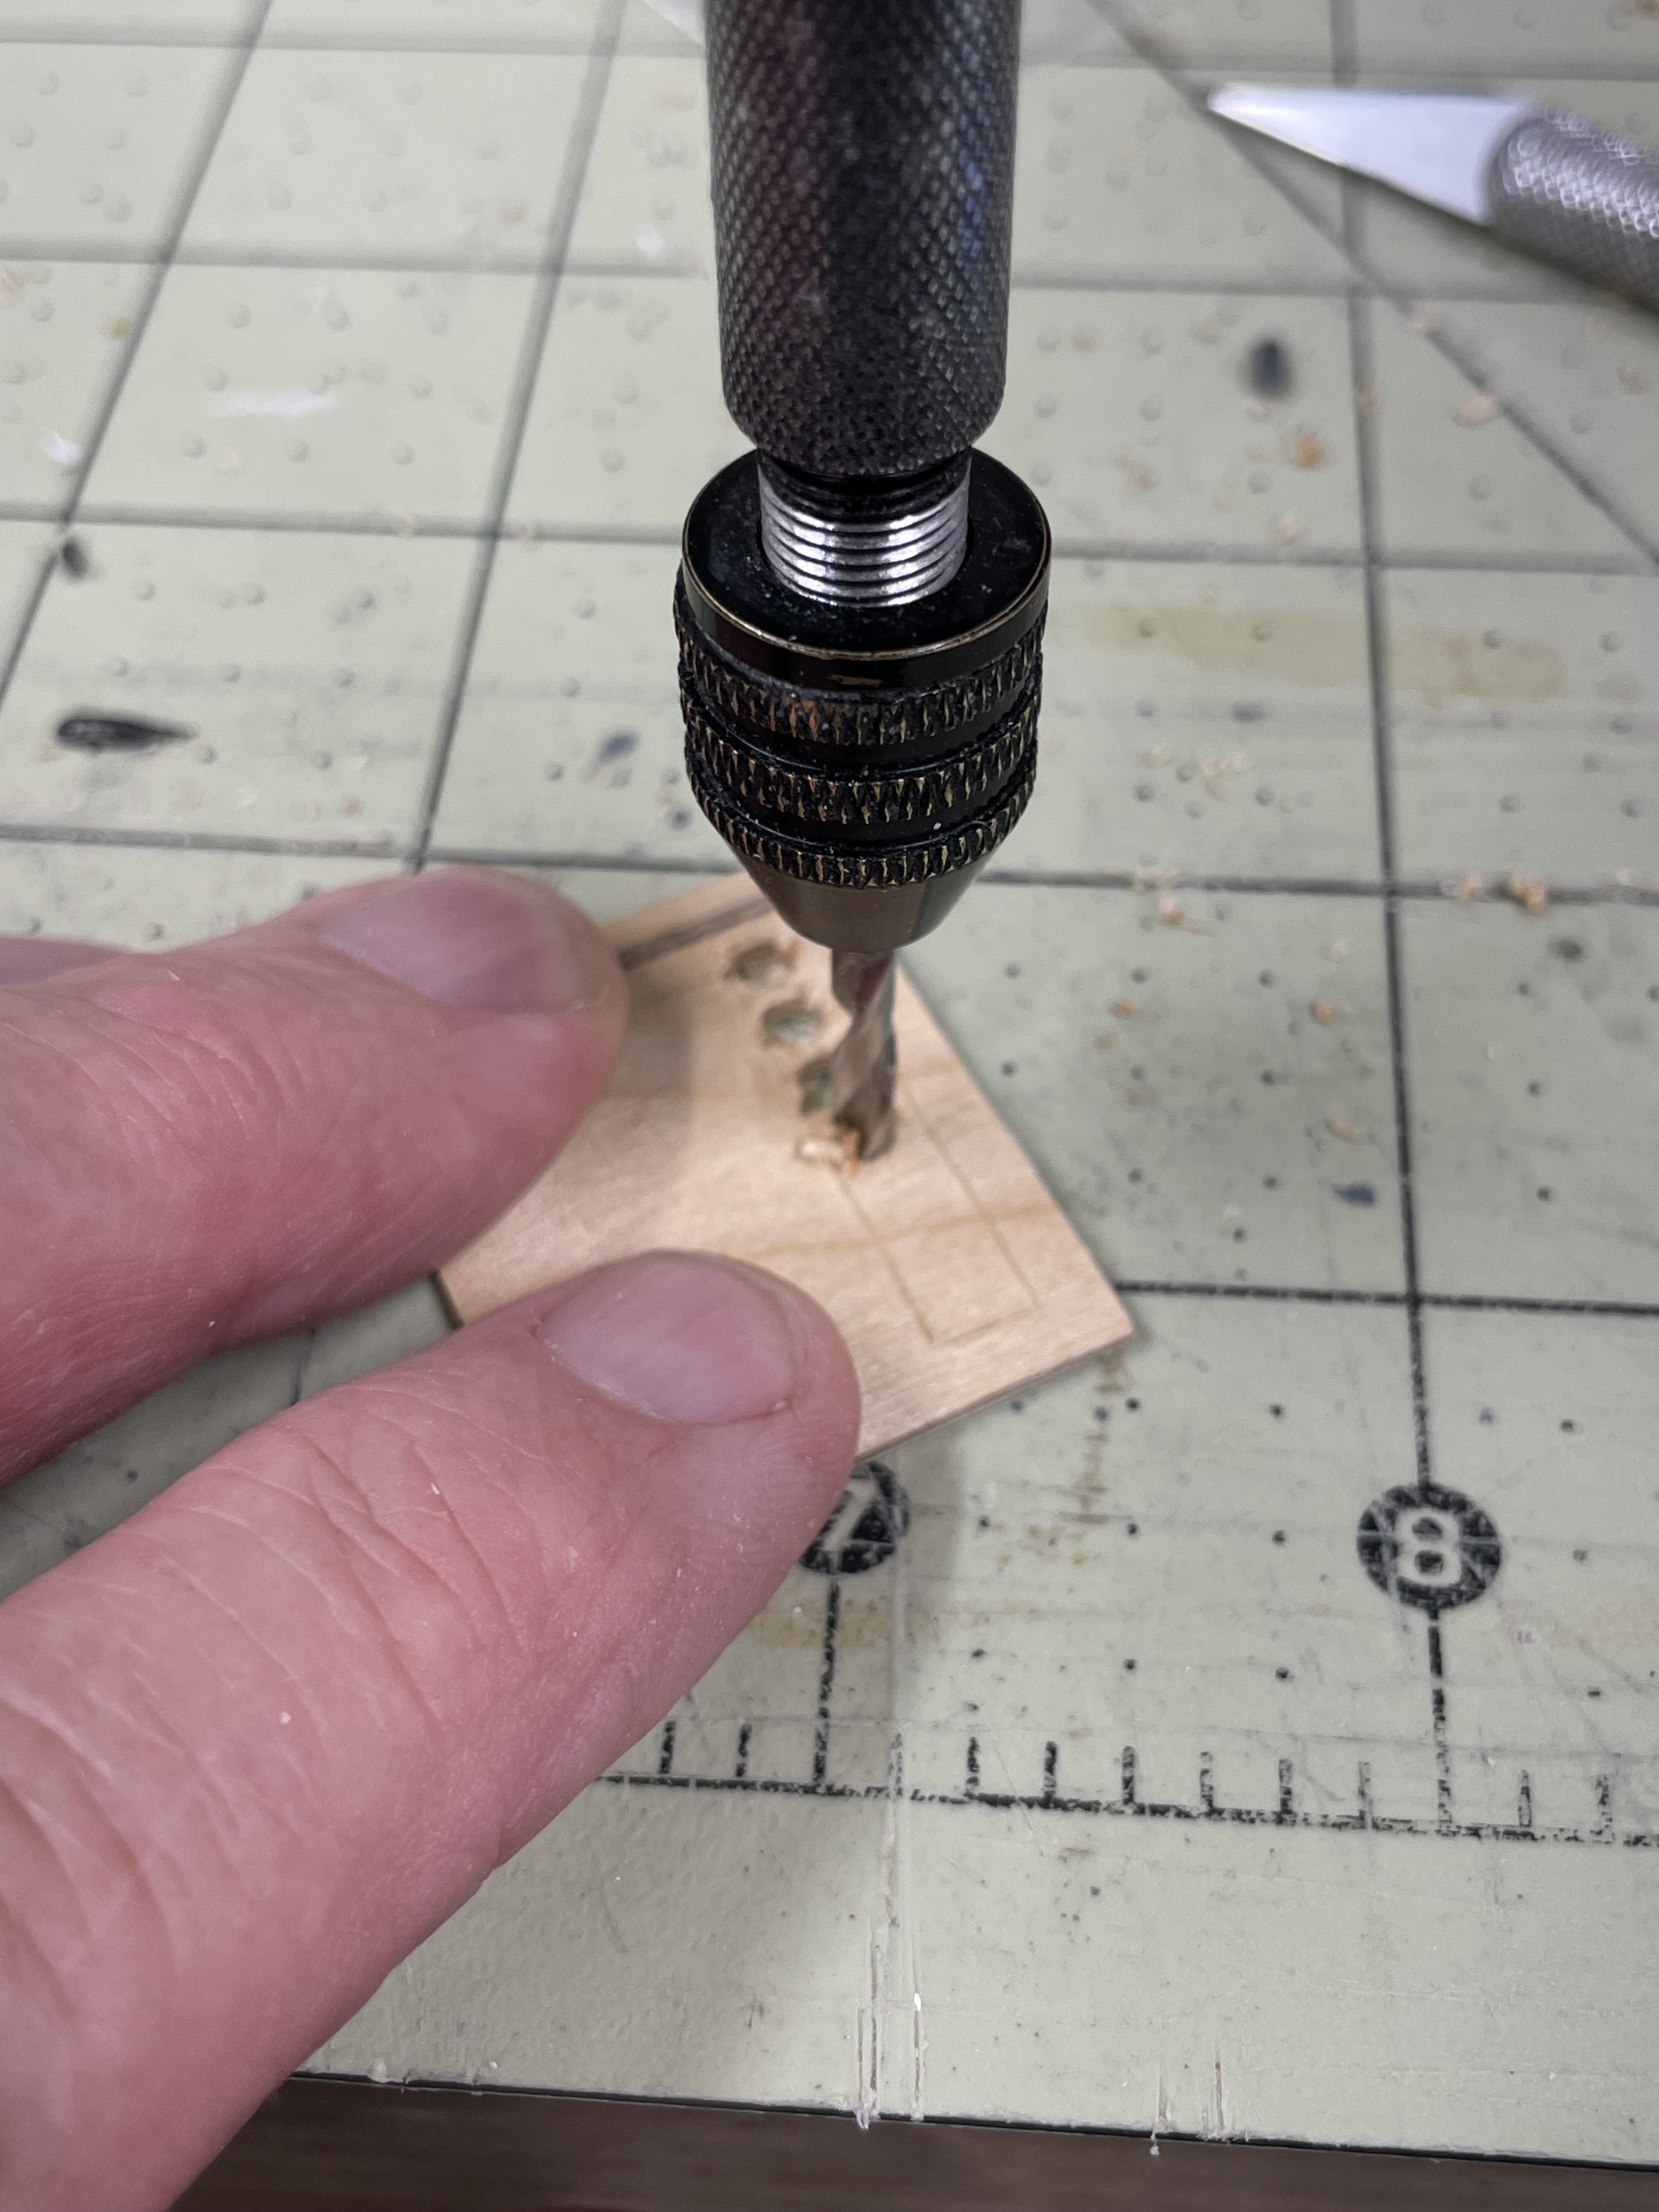
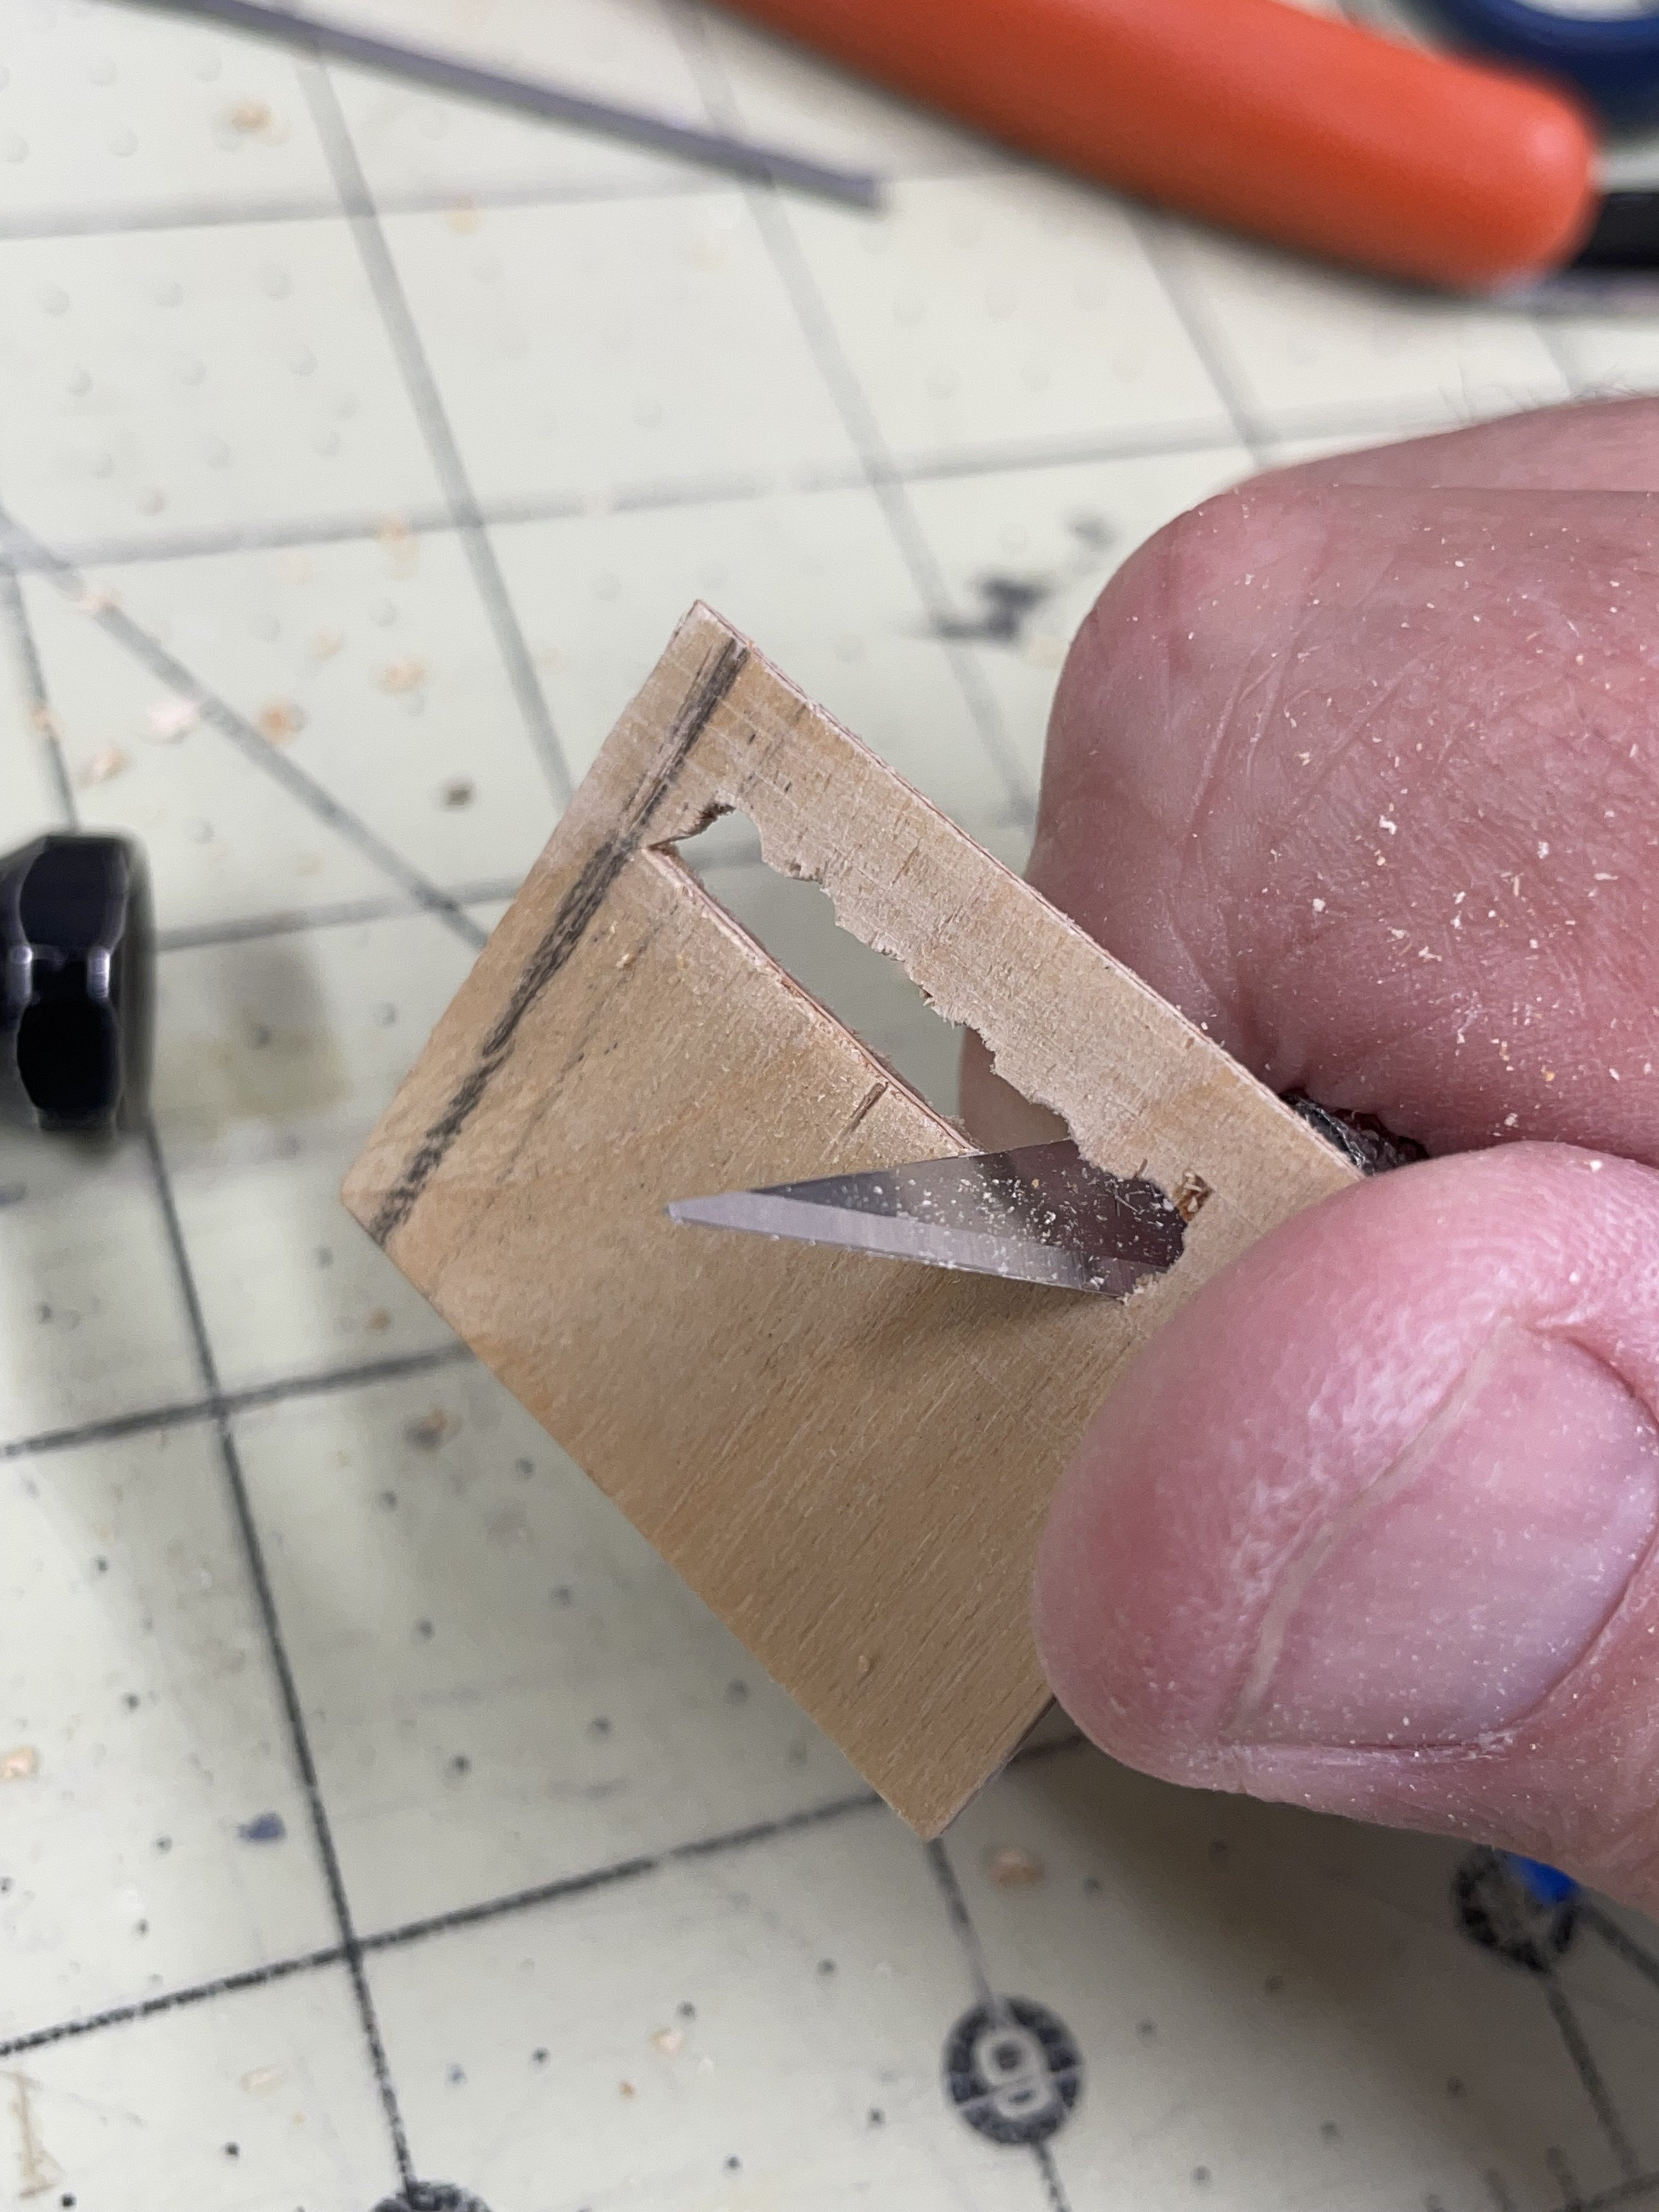
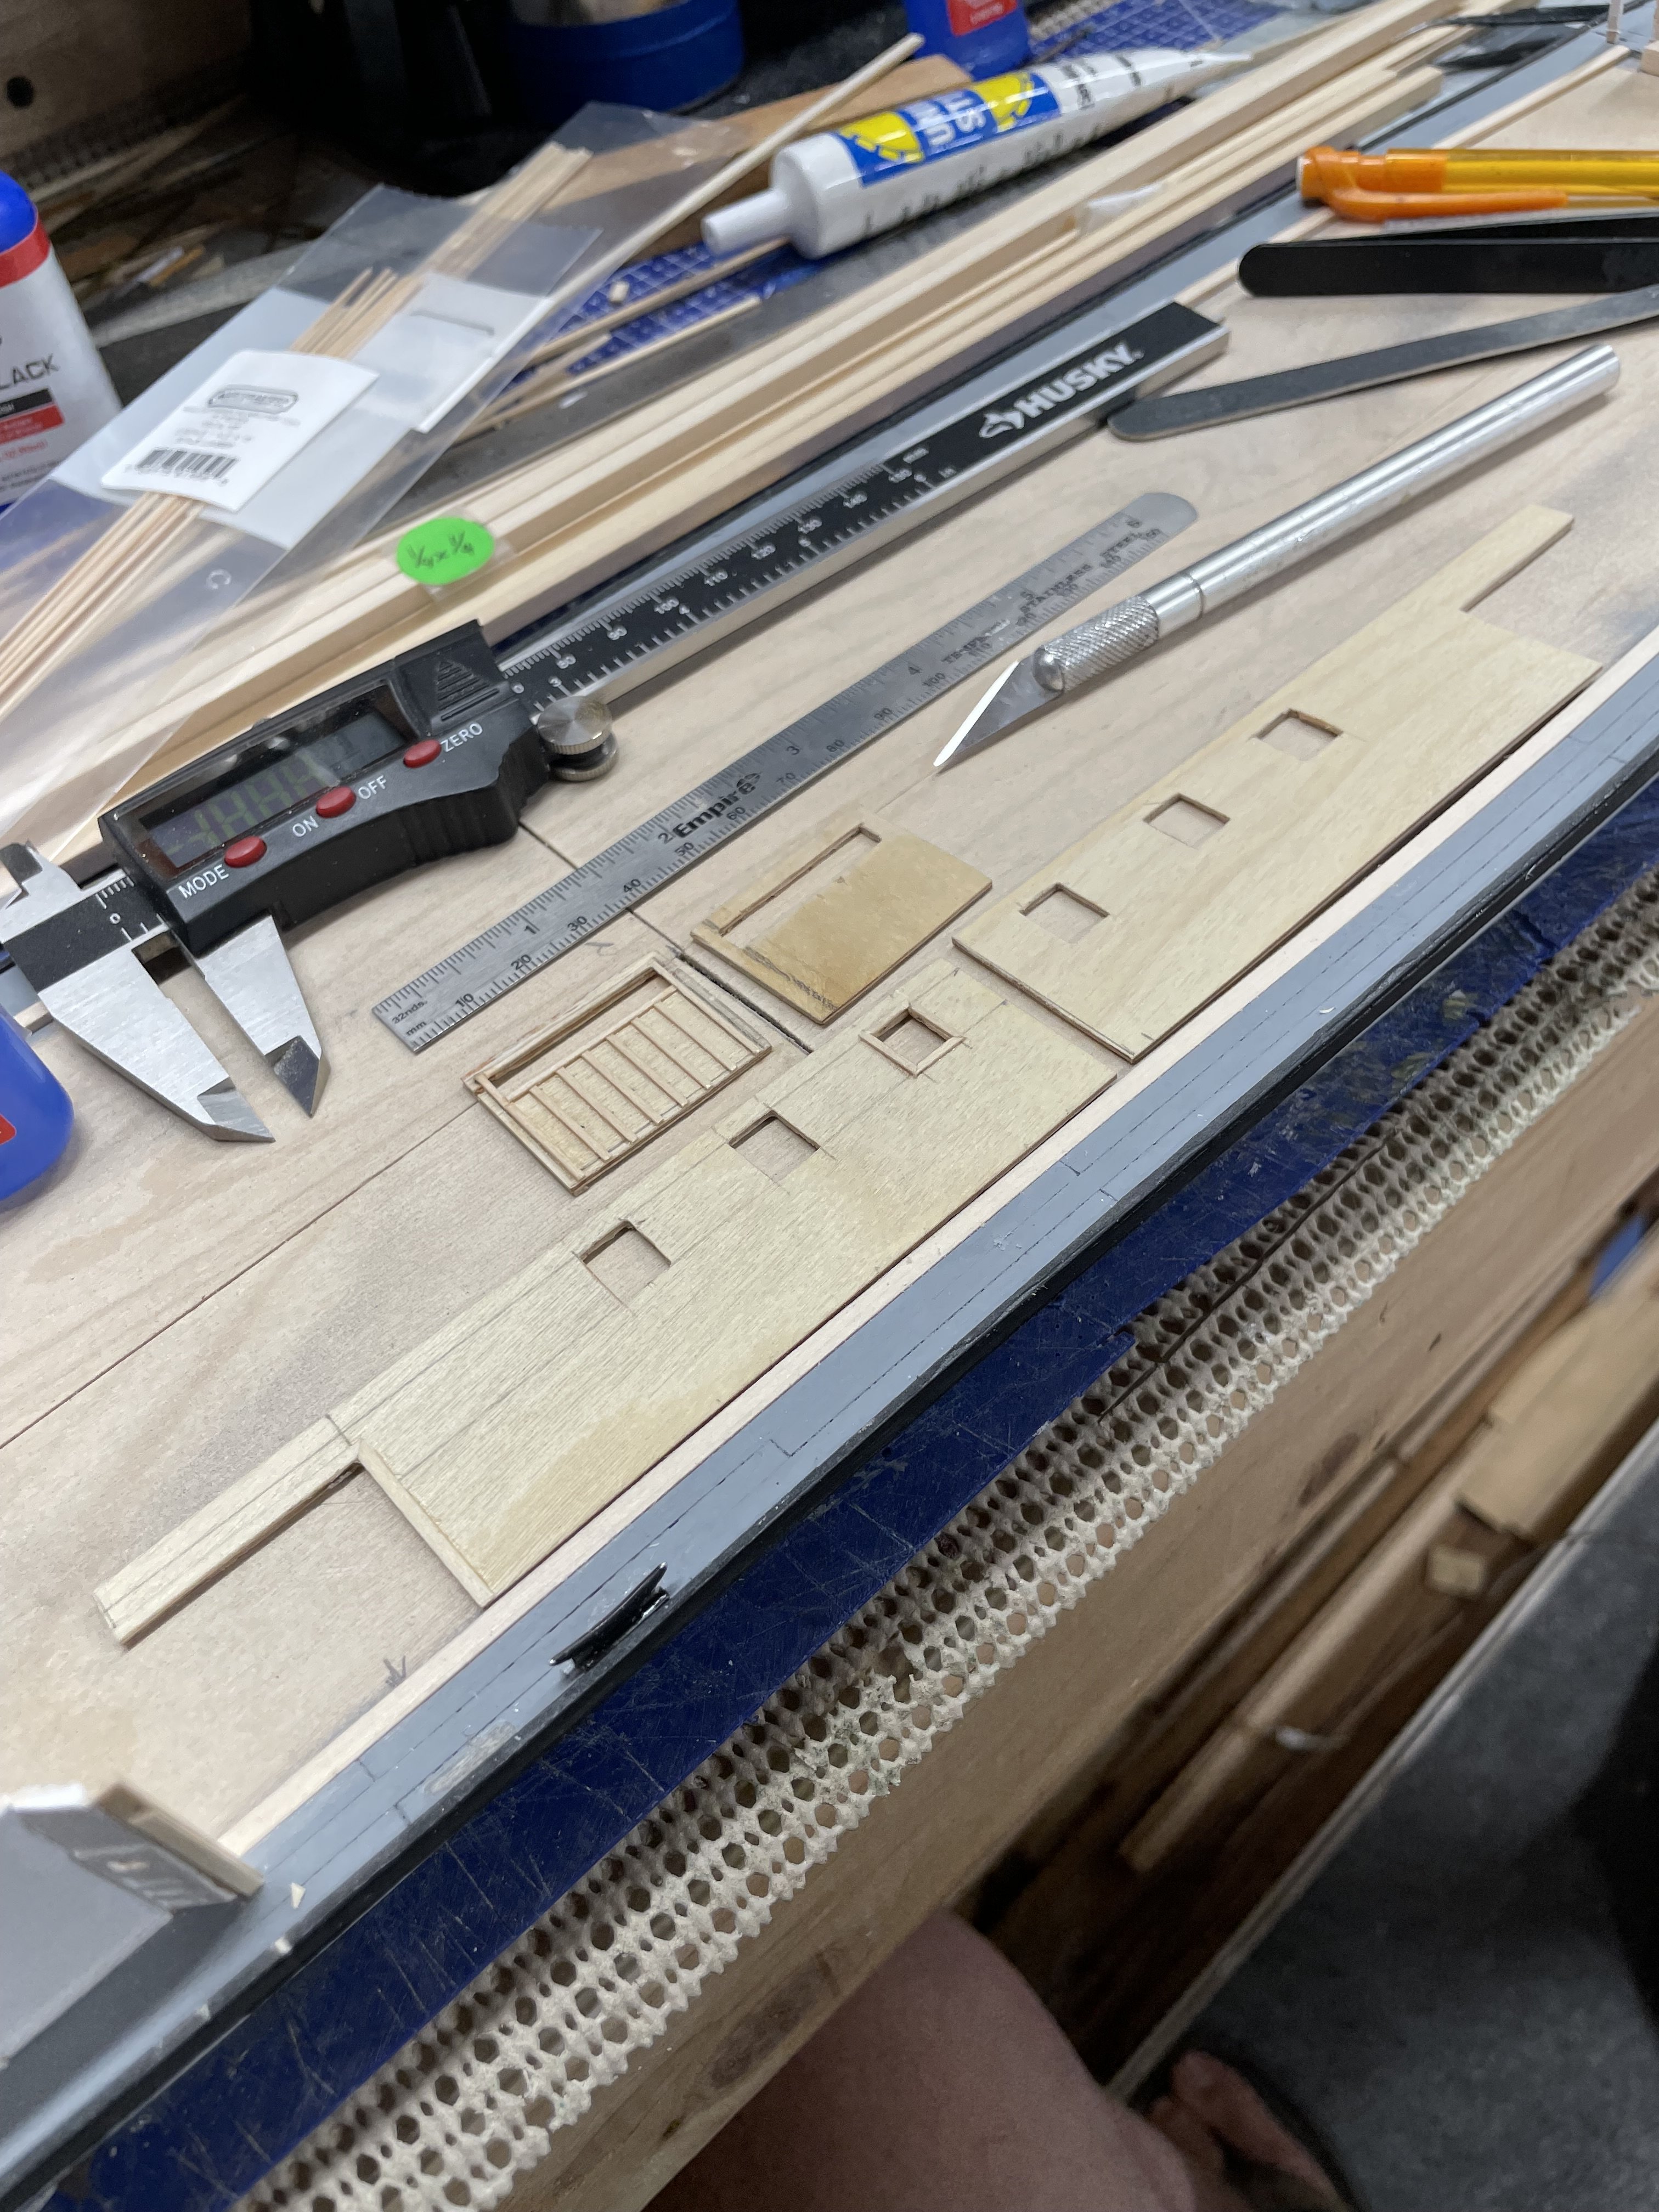
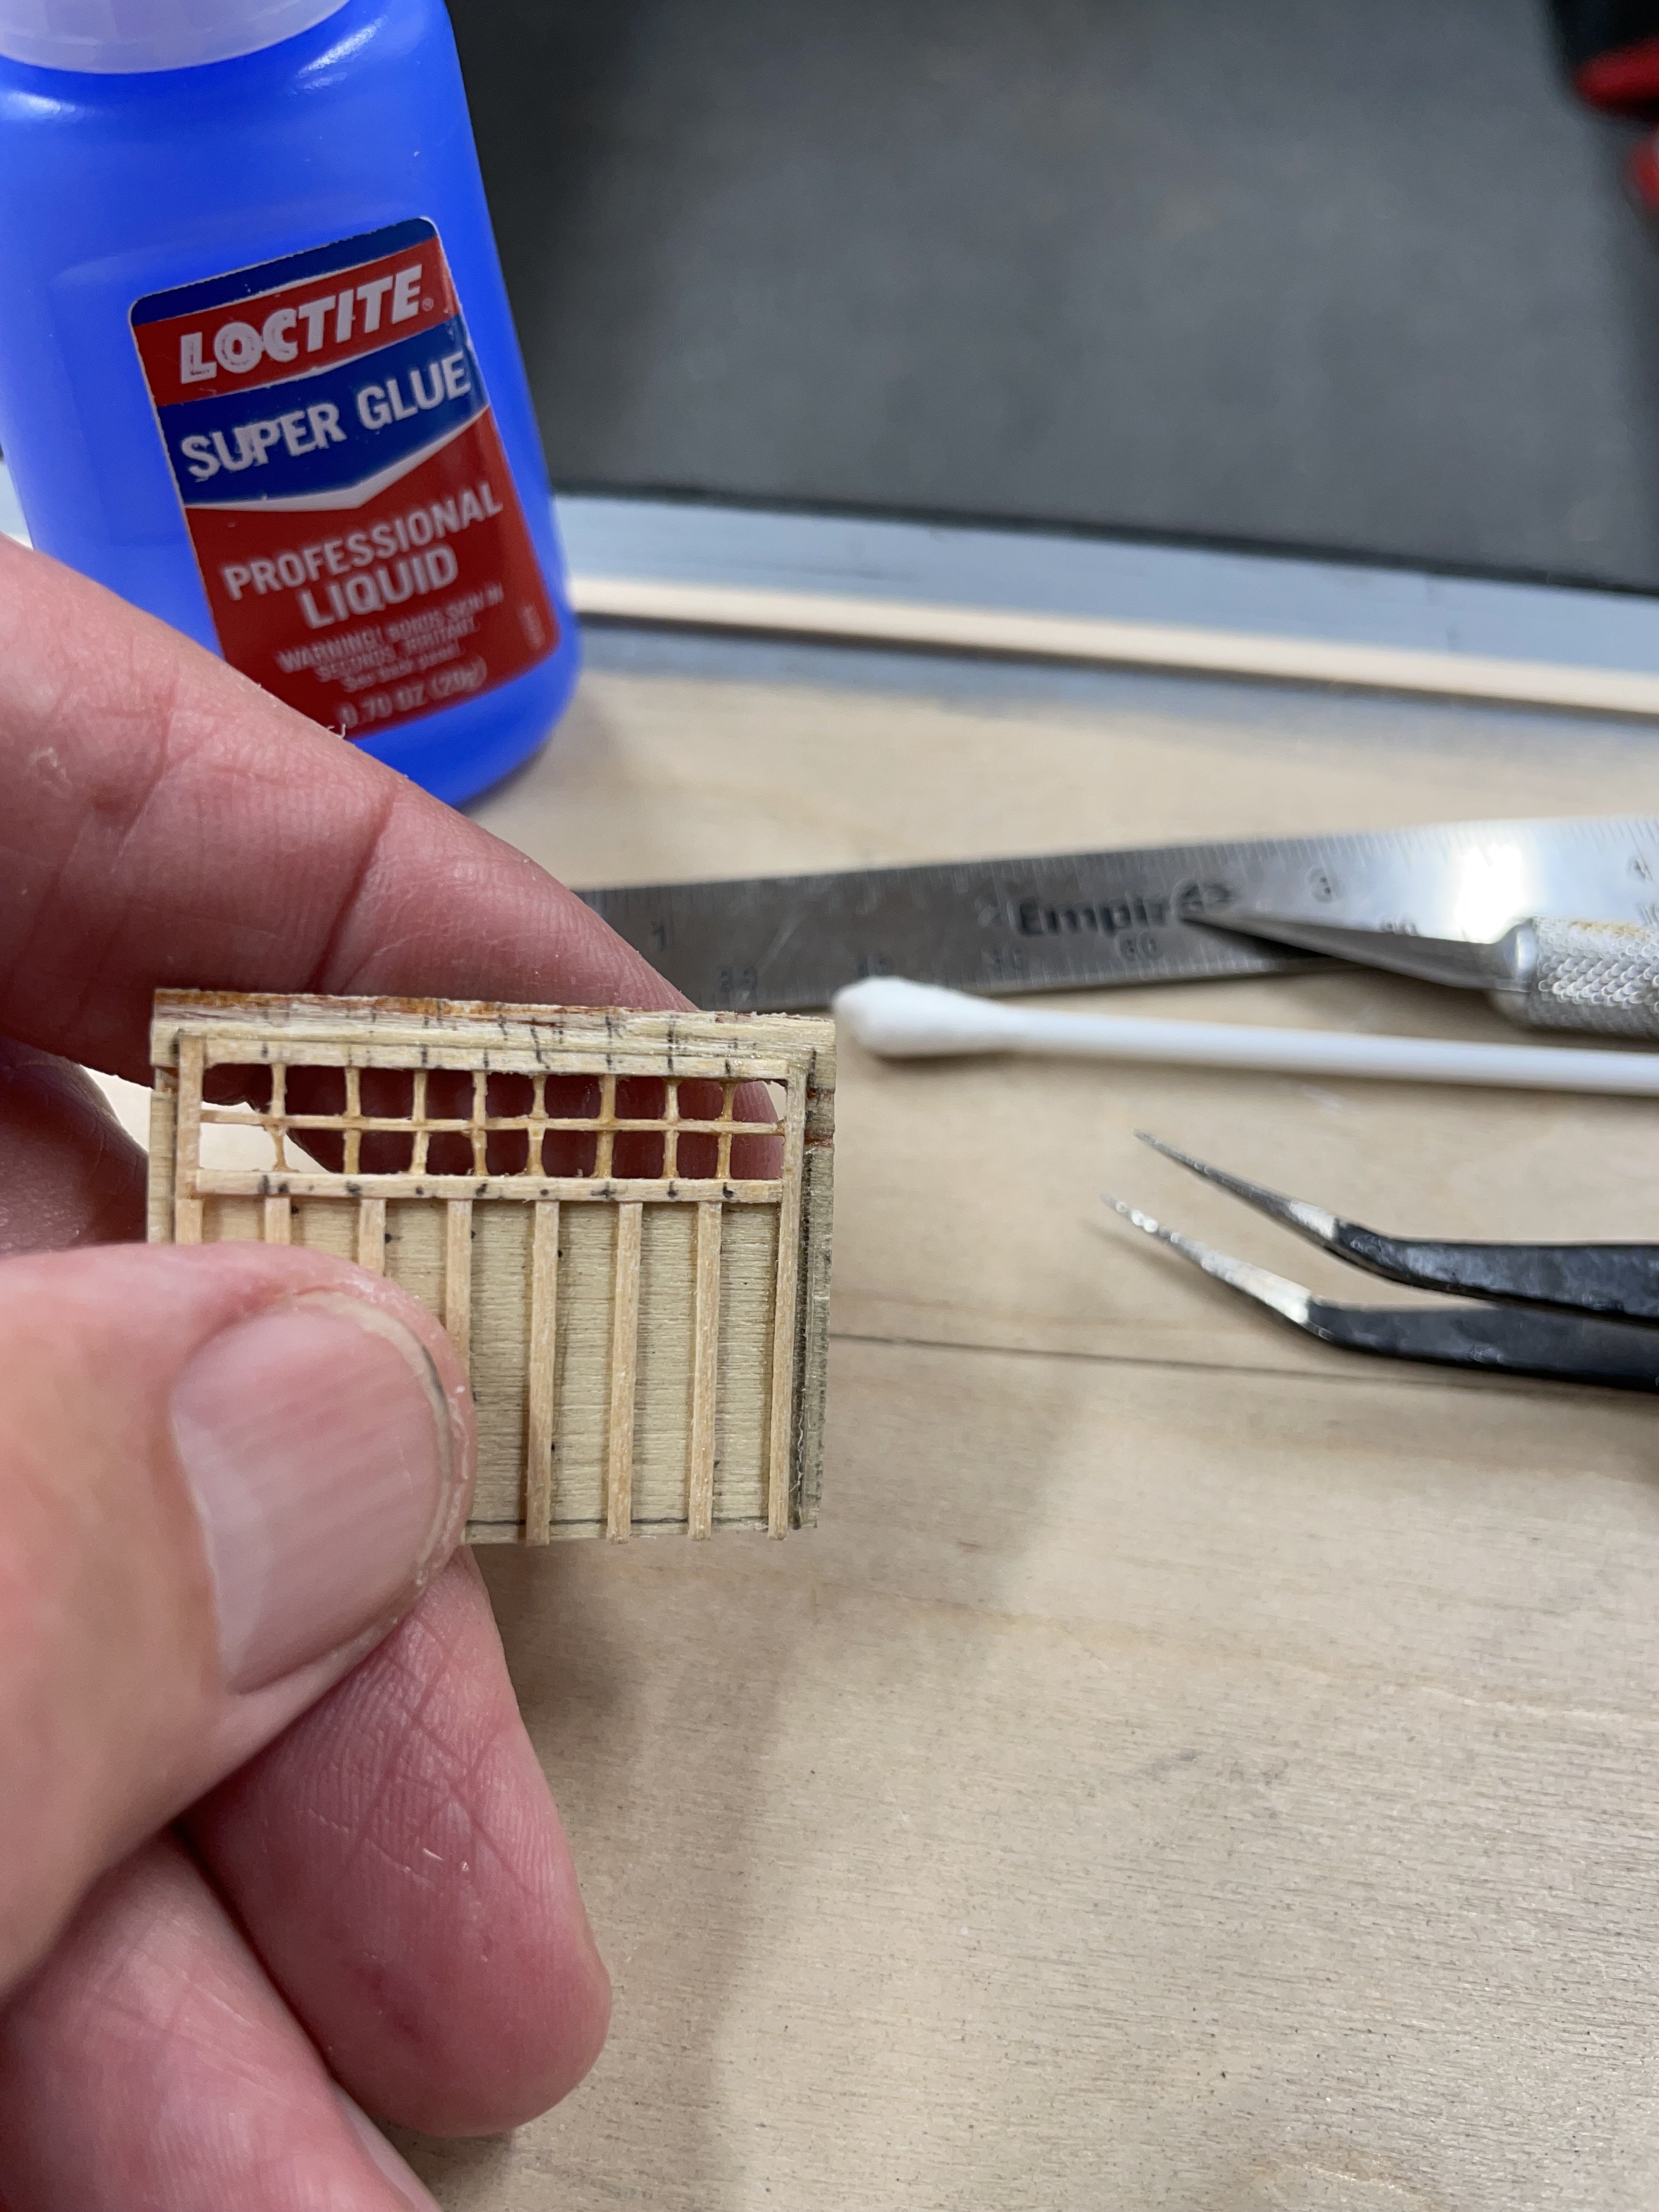
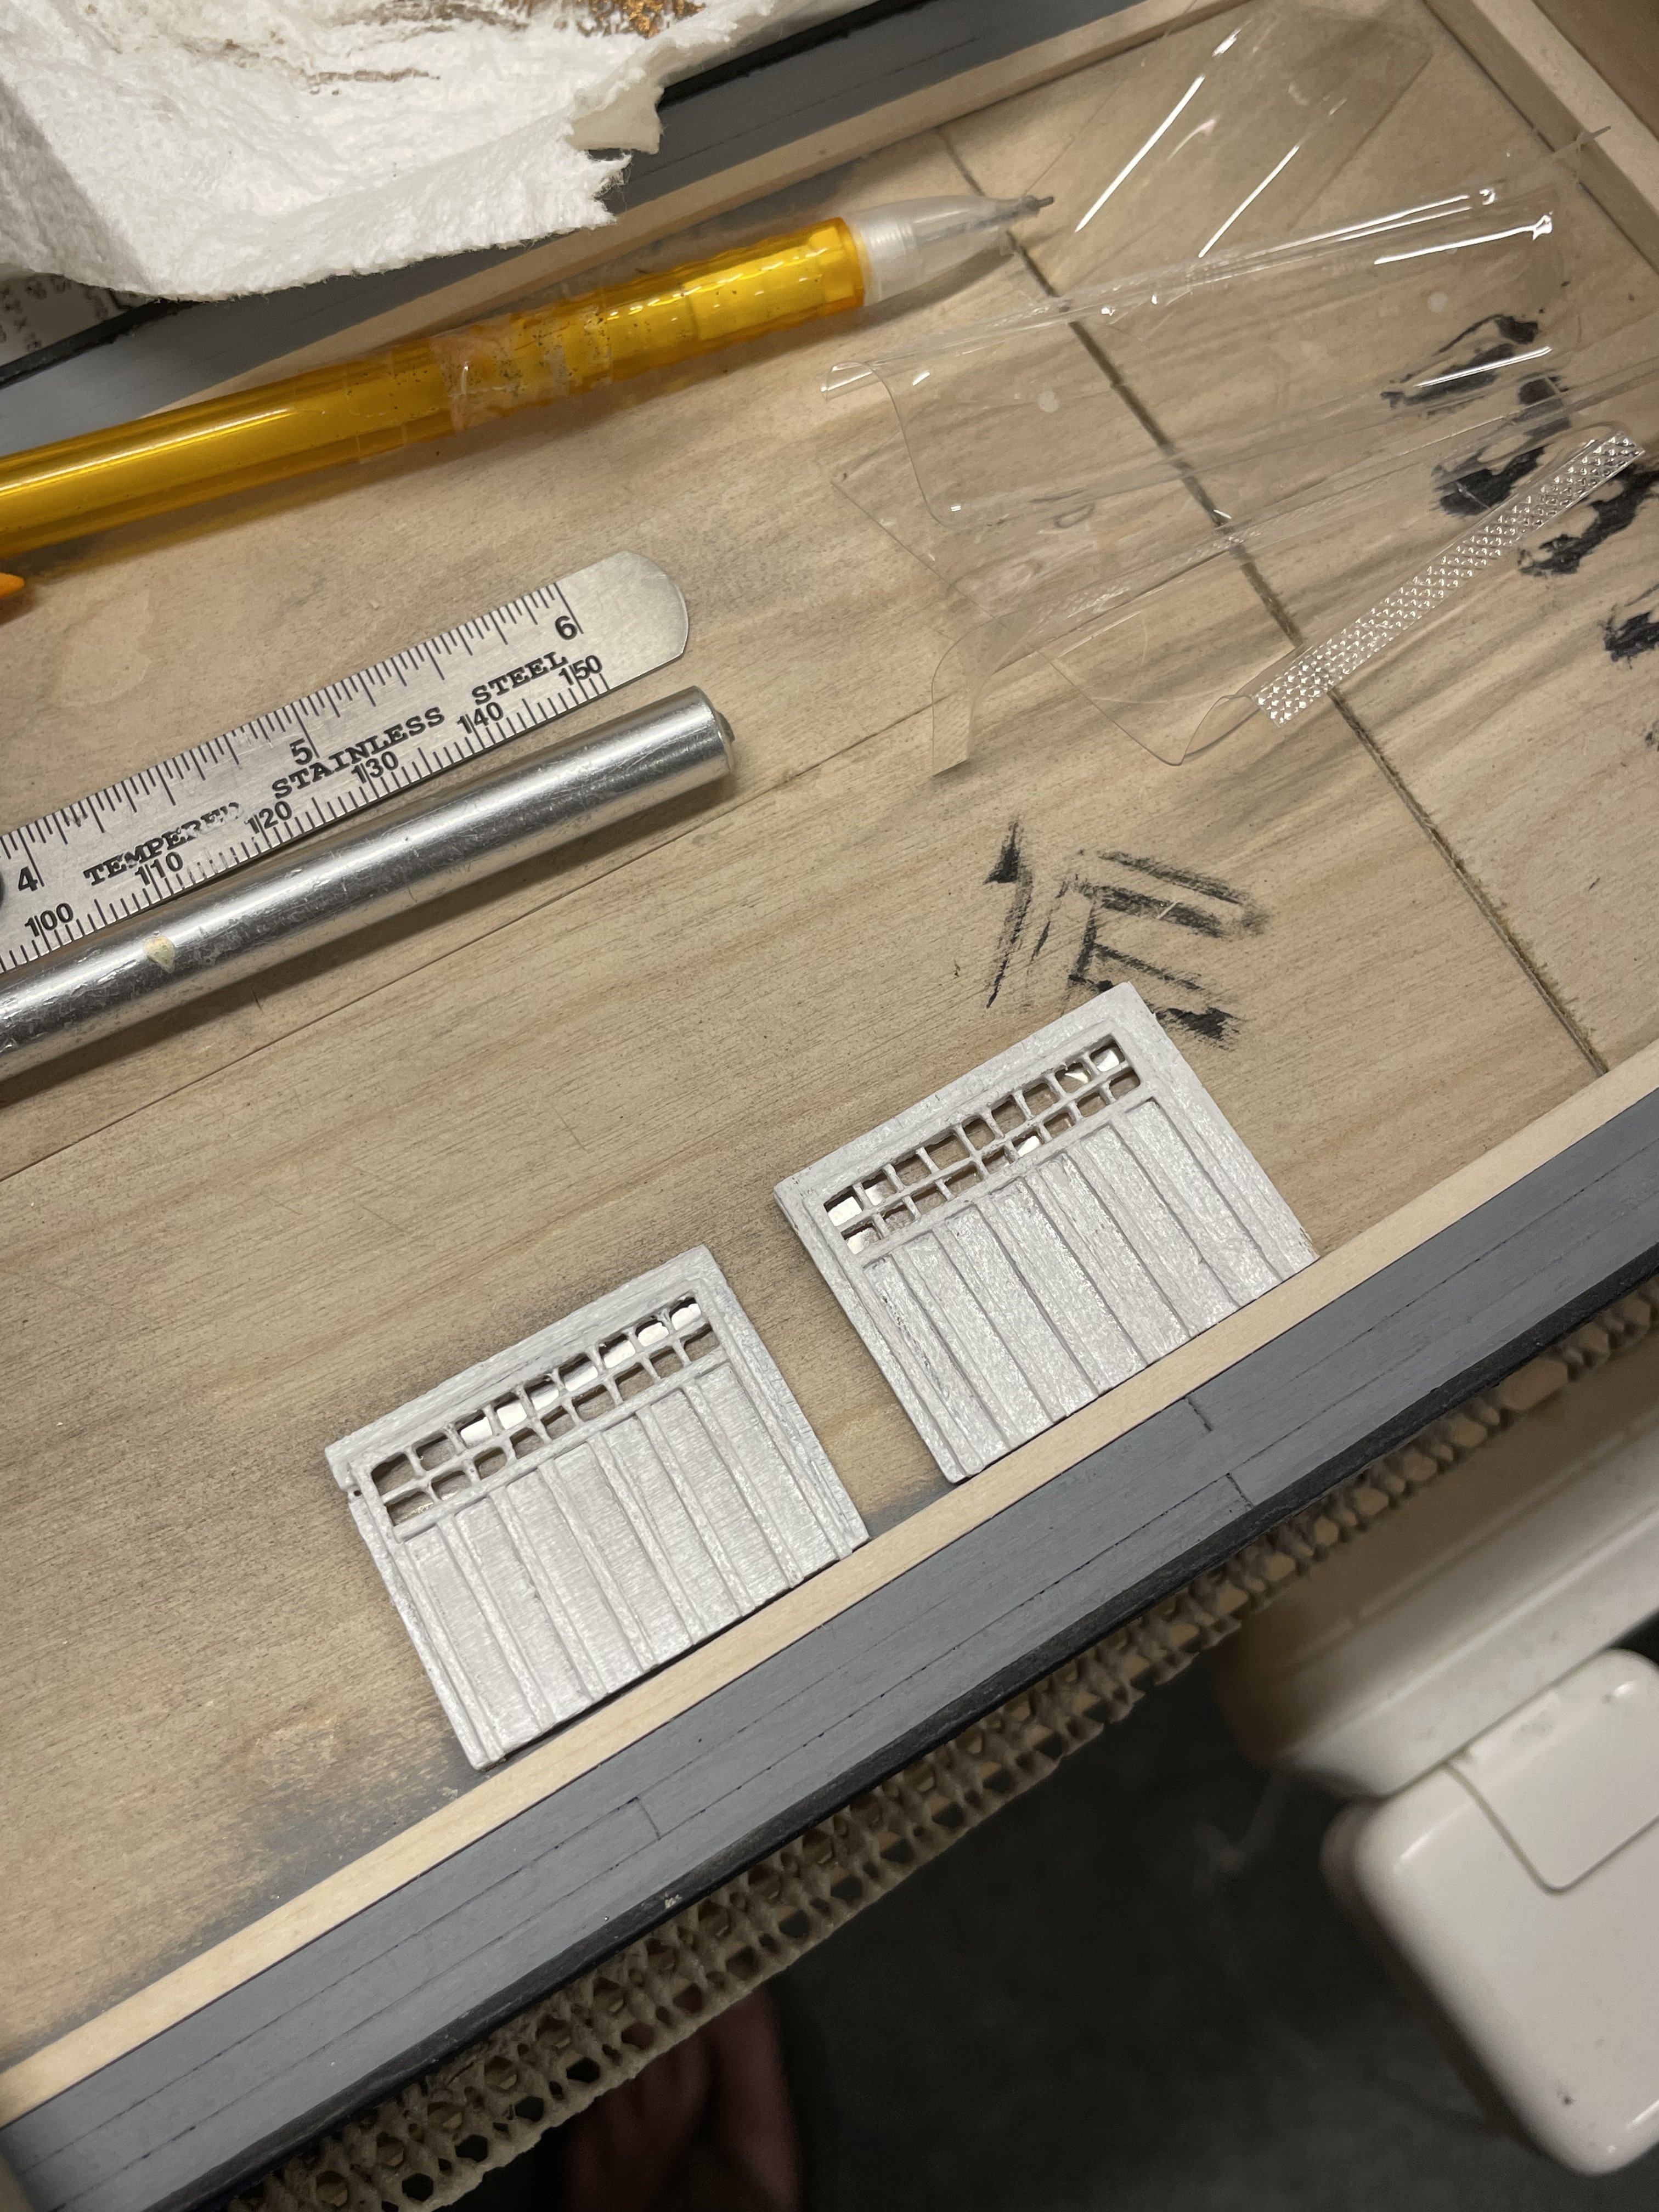
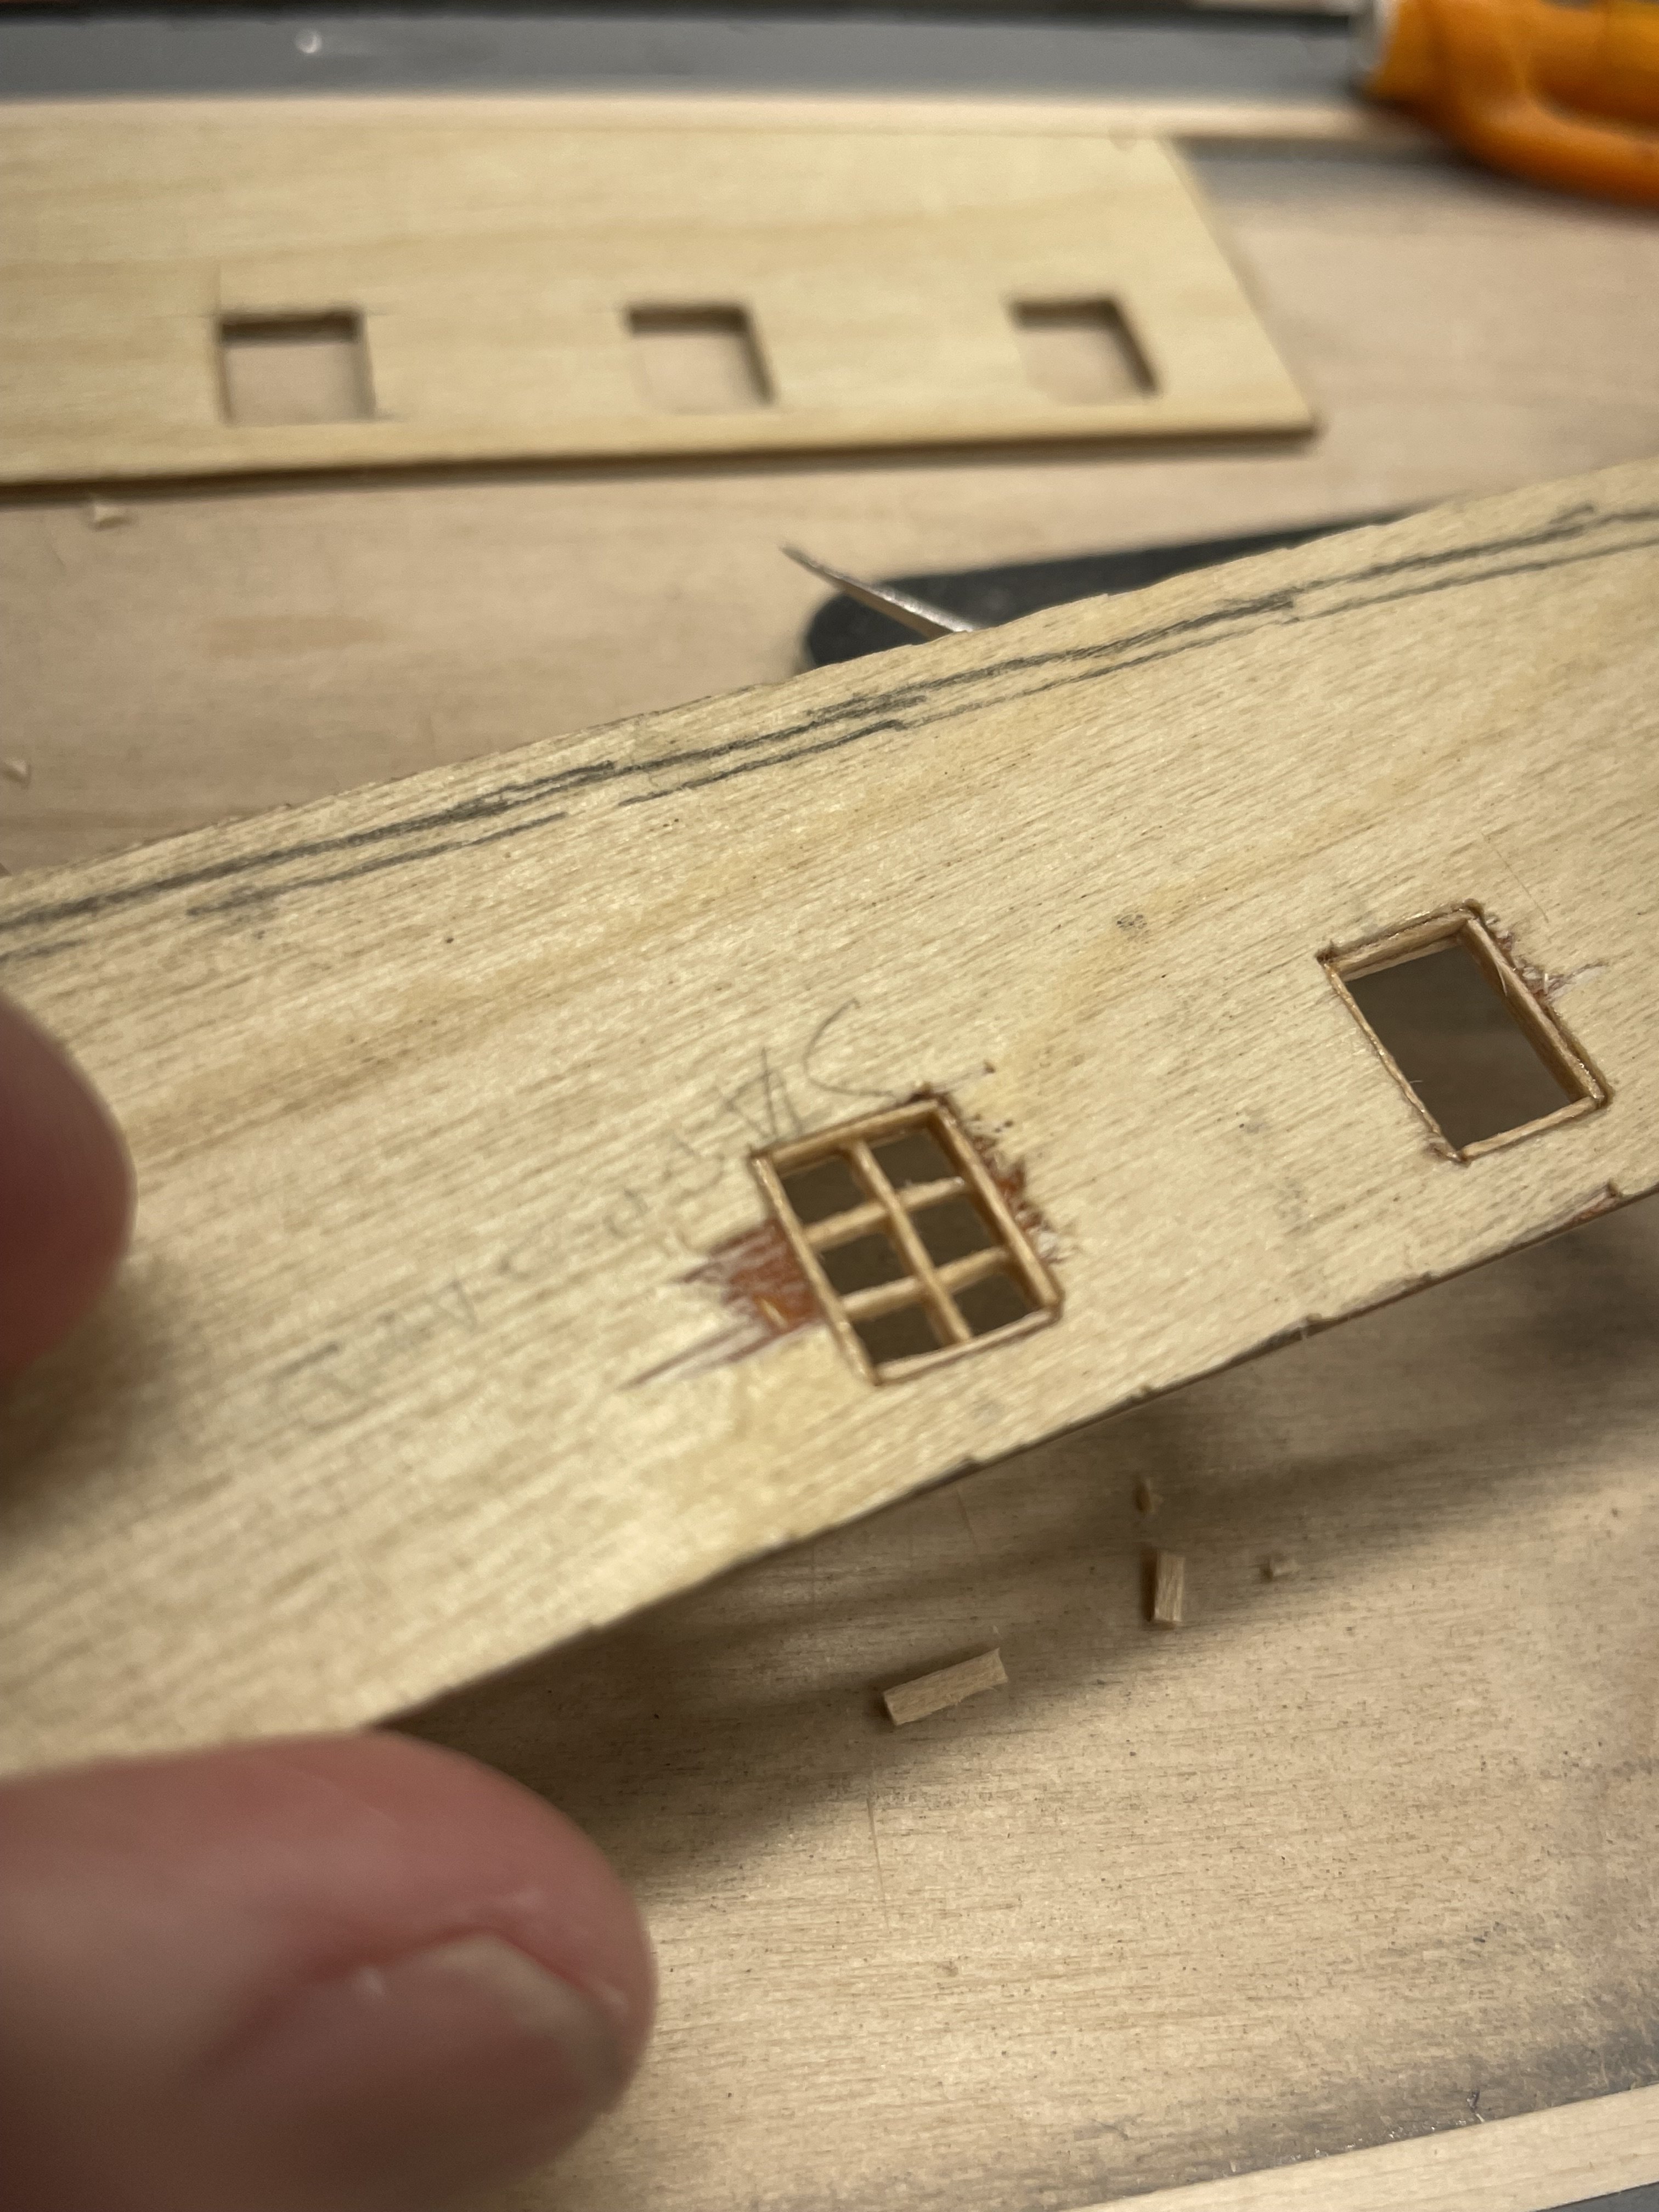
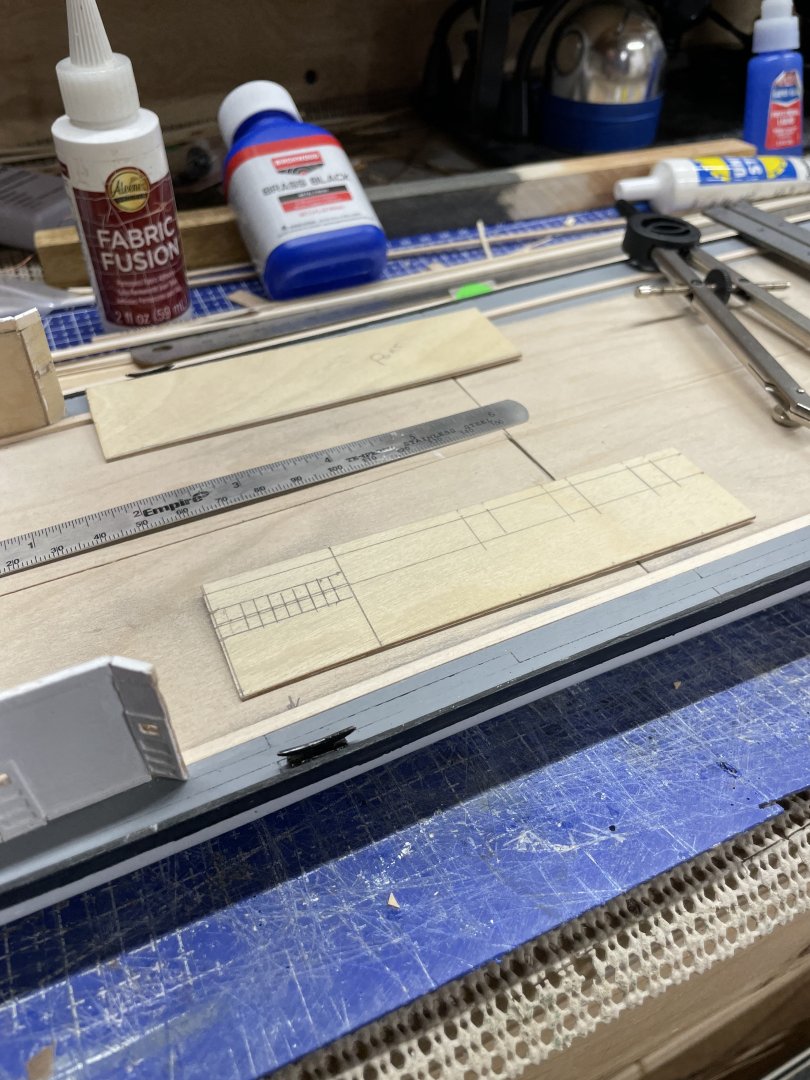
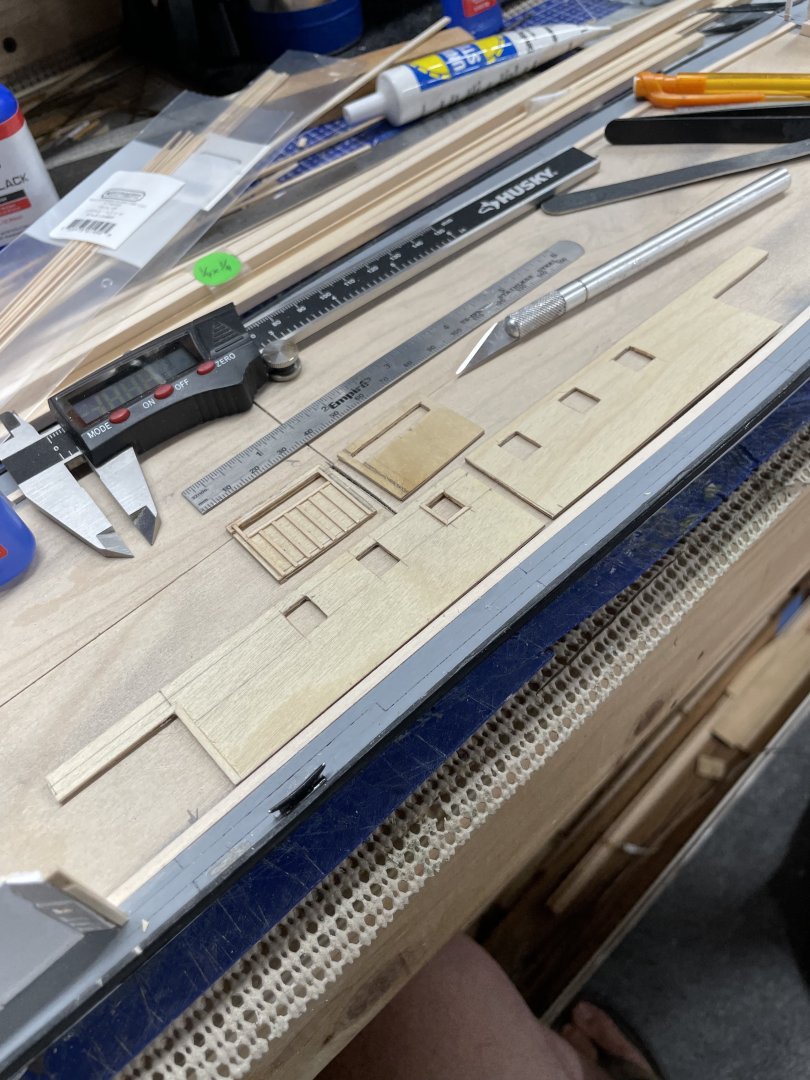
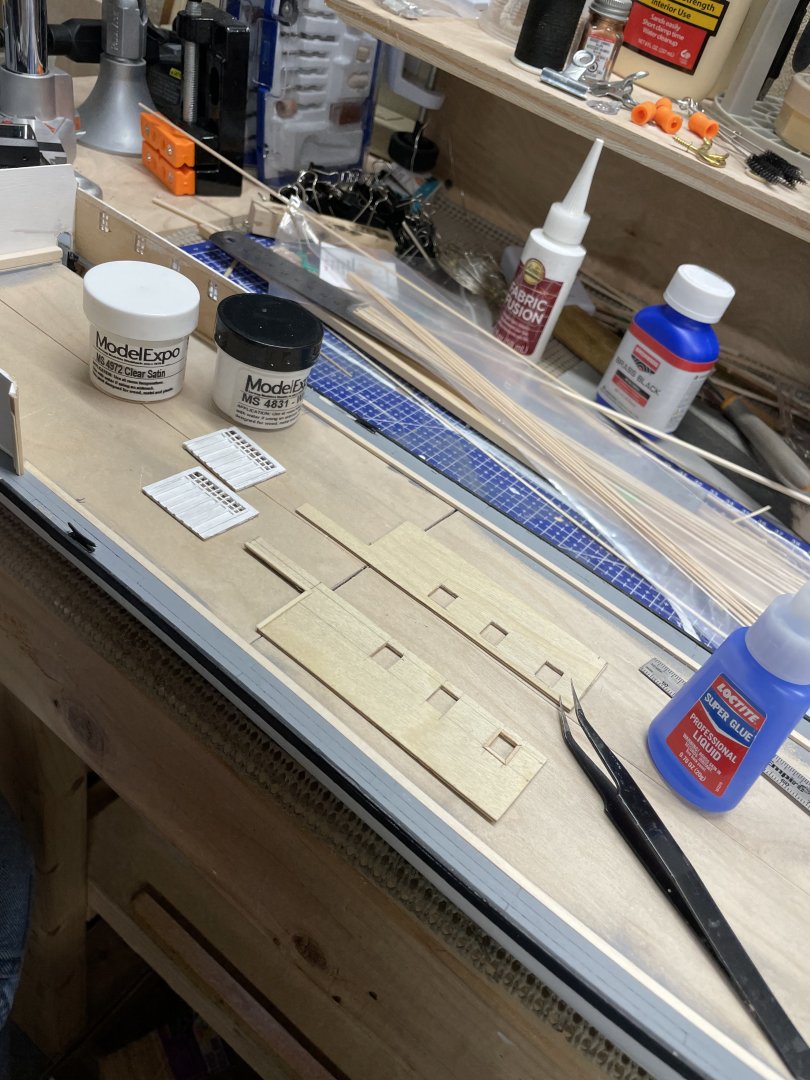
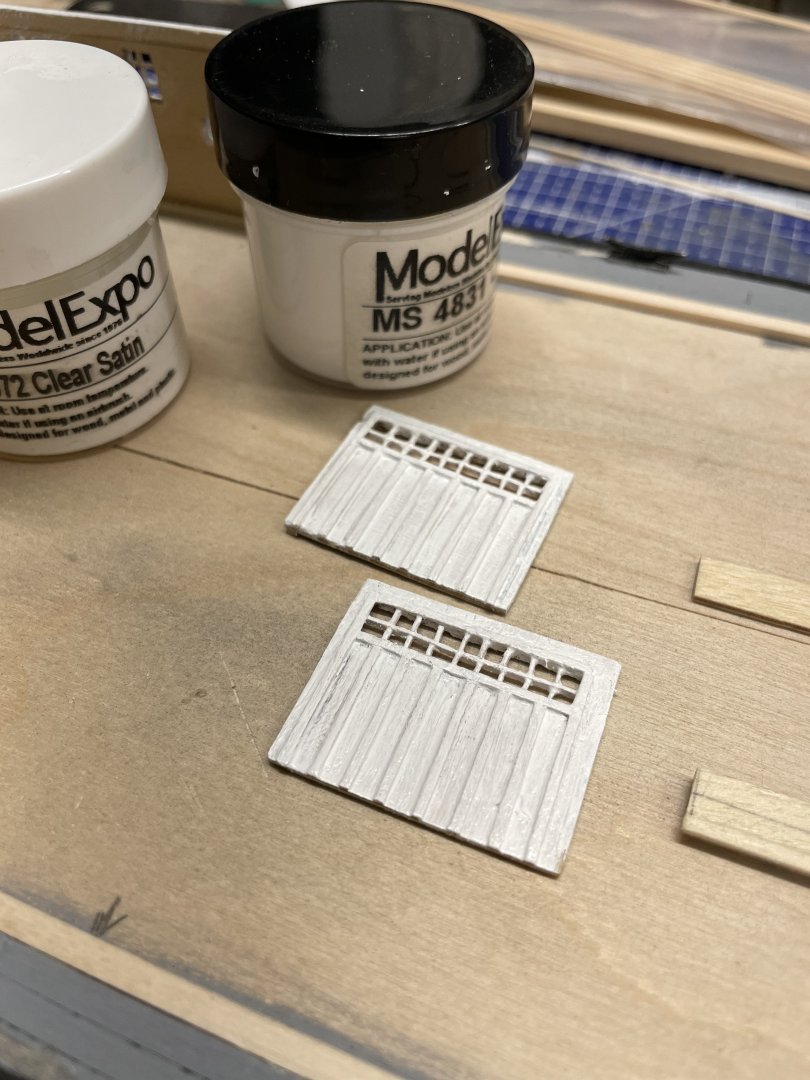
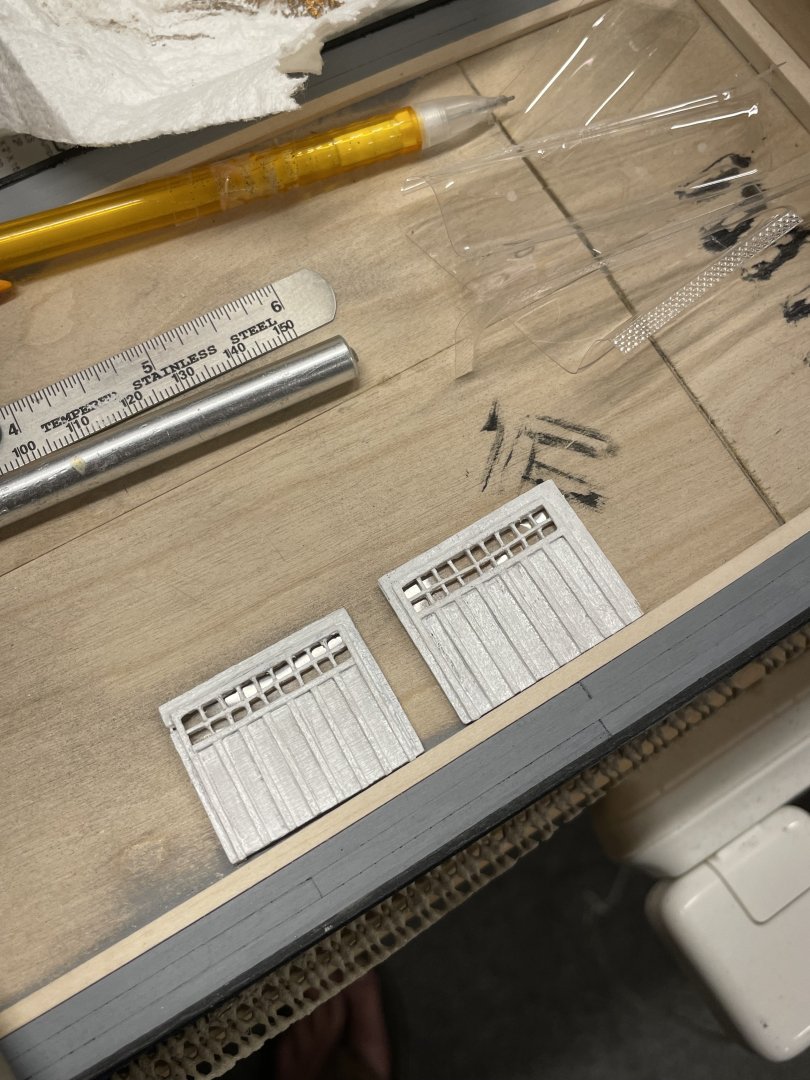
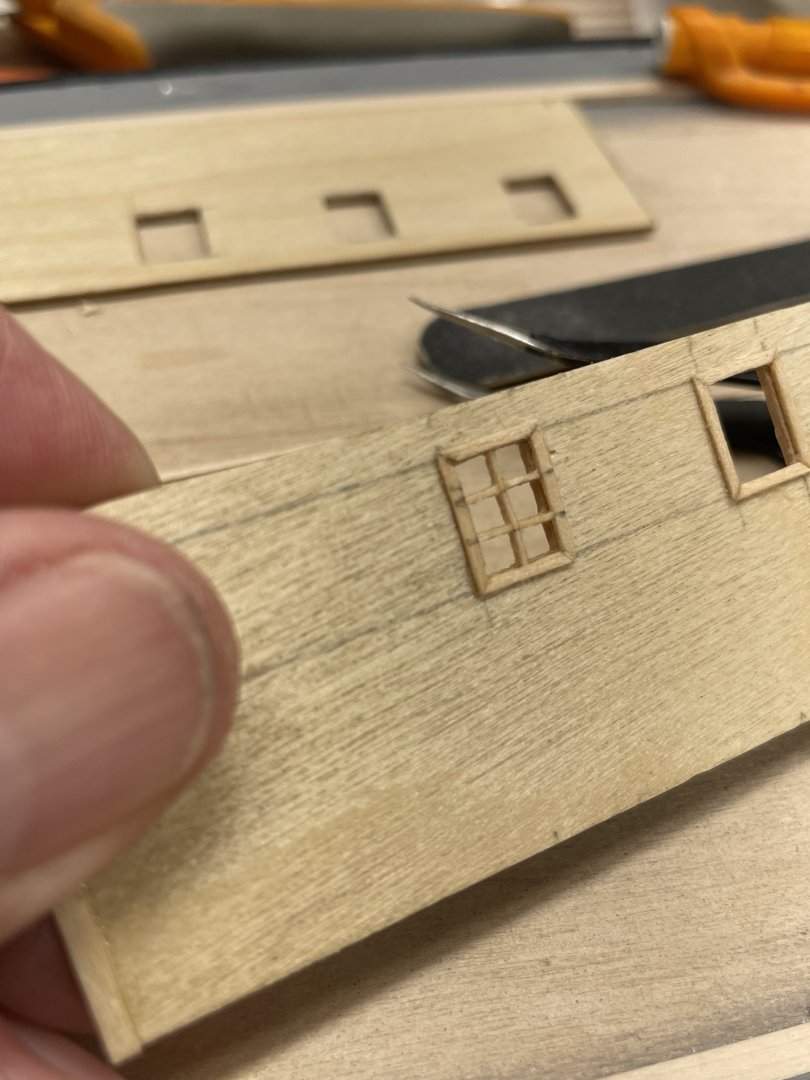
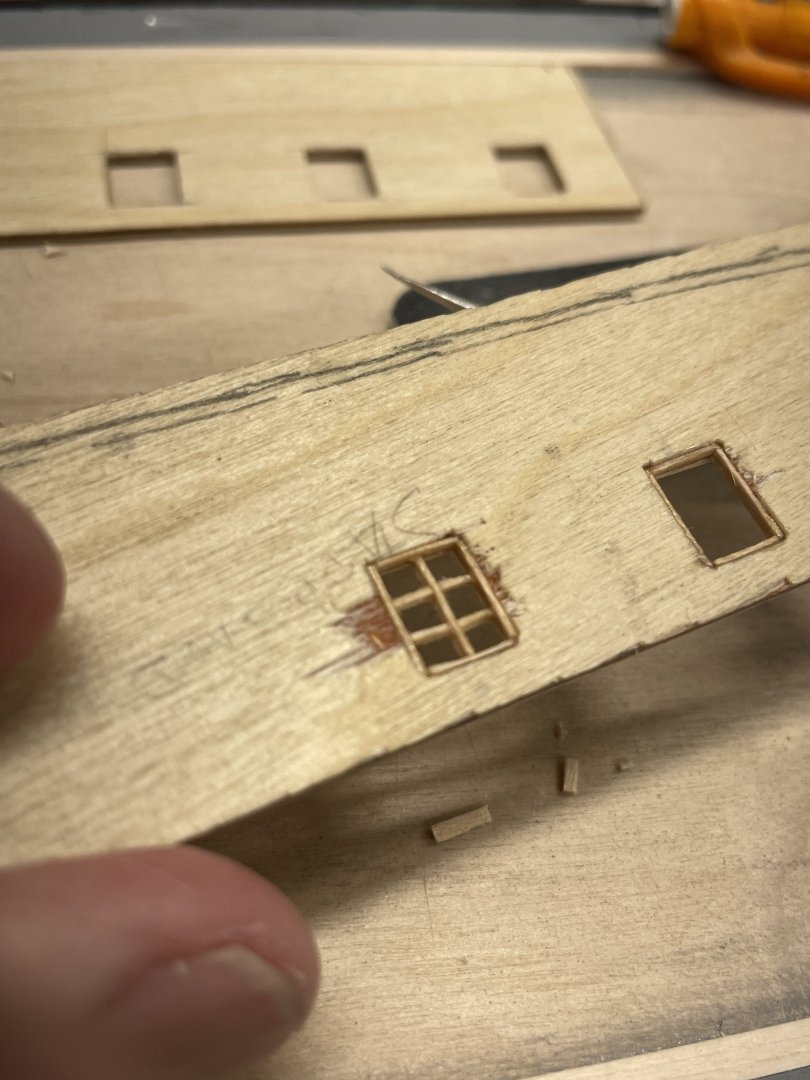
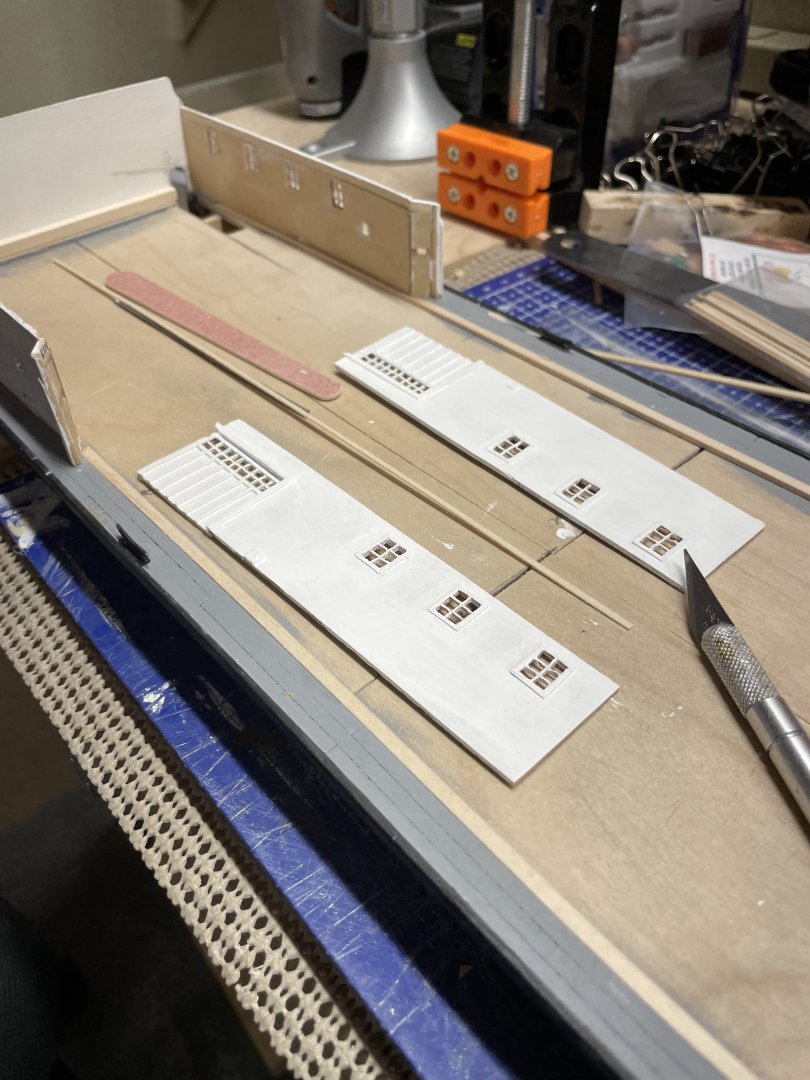
More Main Deck walls with Windows and Doors… Getting the hang of it… Steady as she goes… Cheers 🍻


-
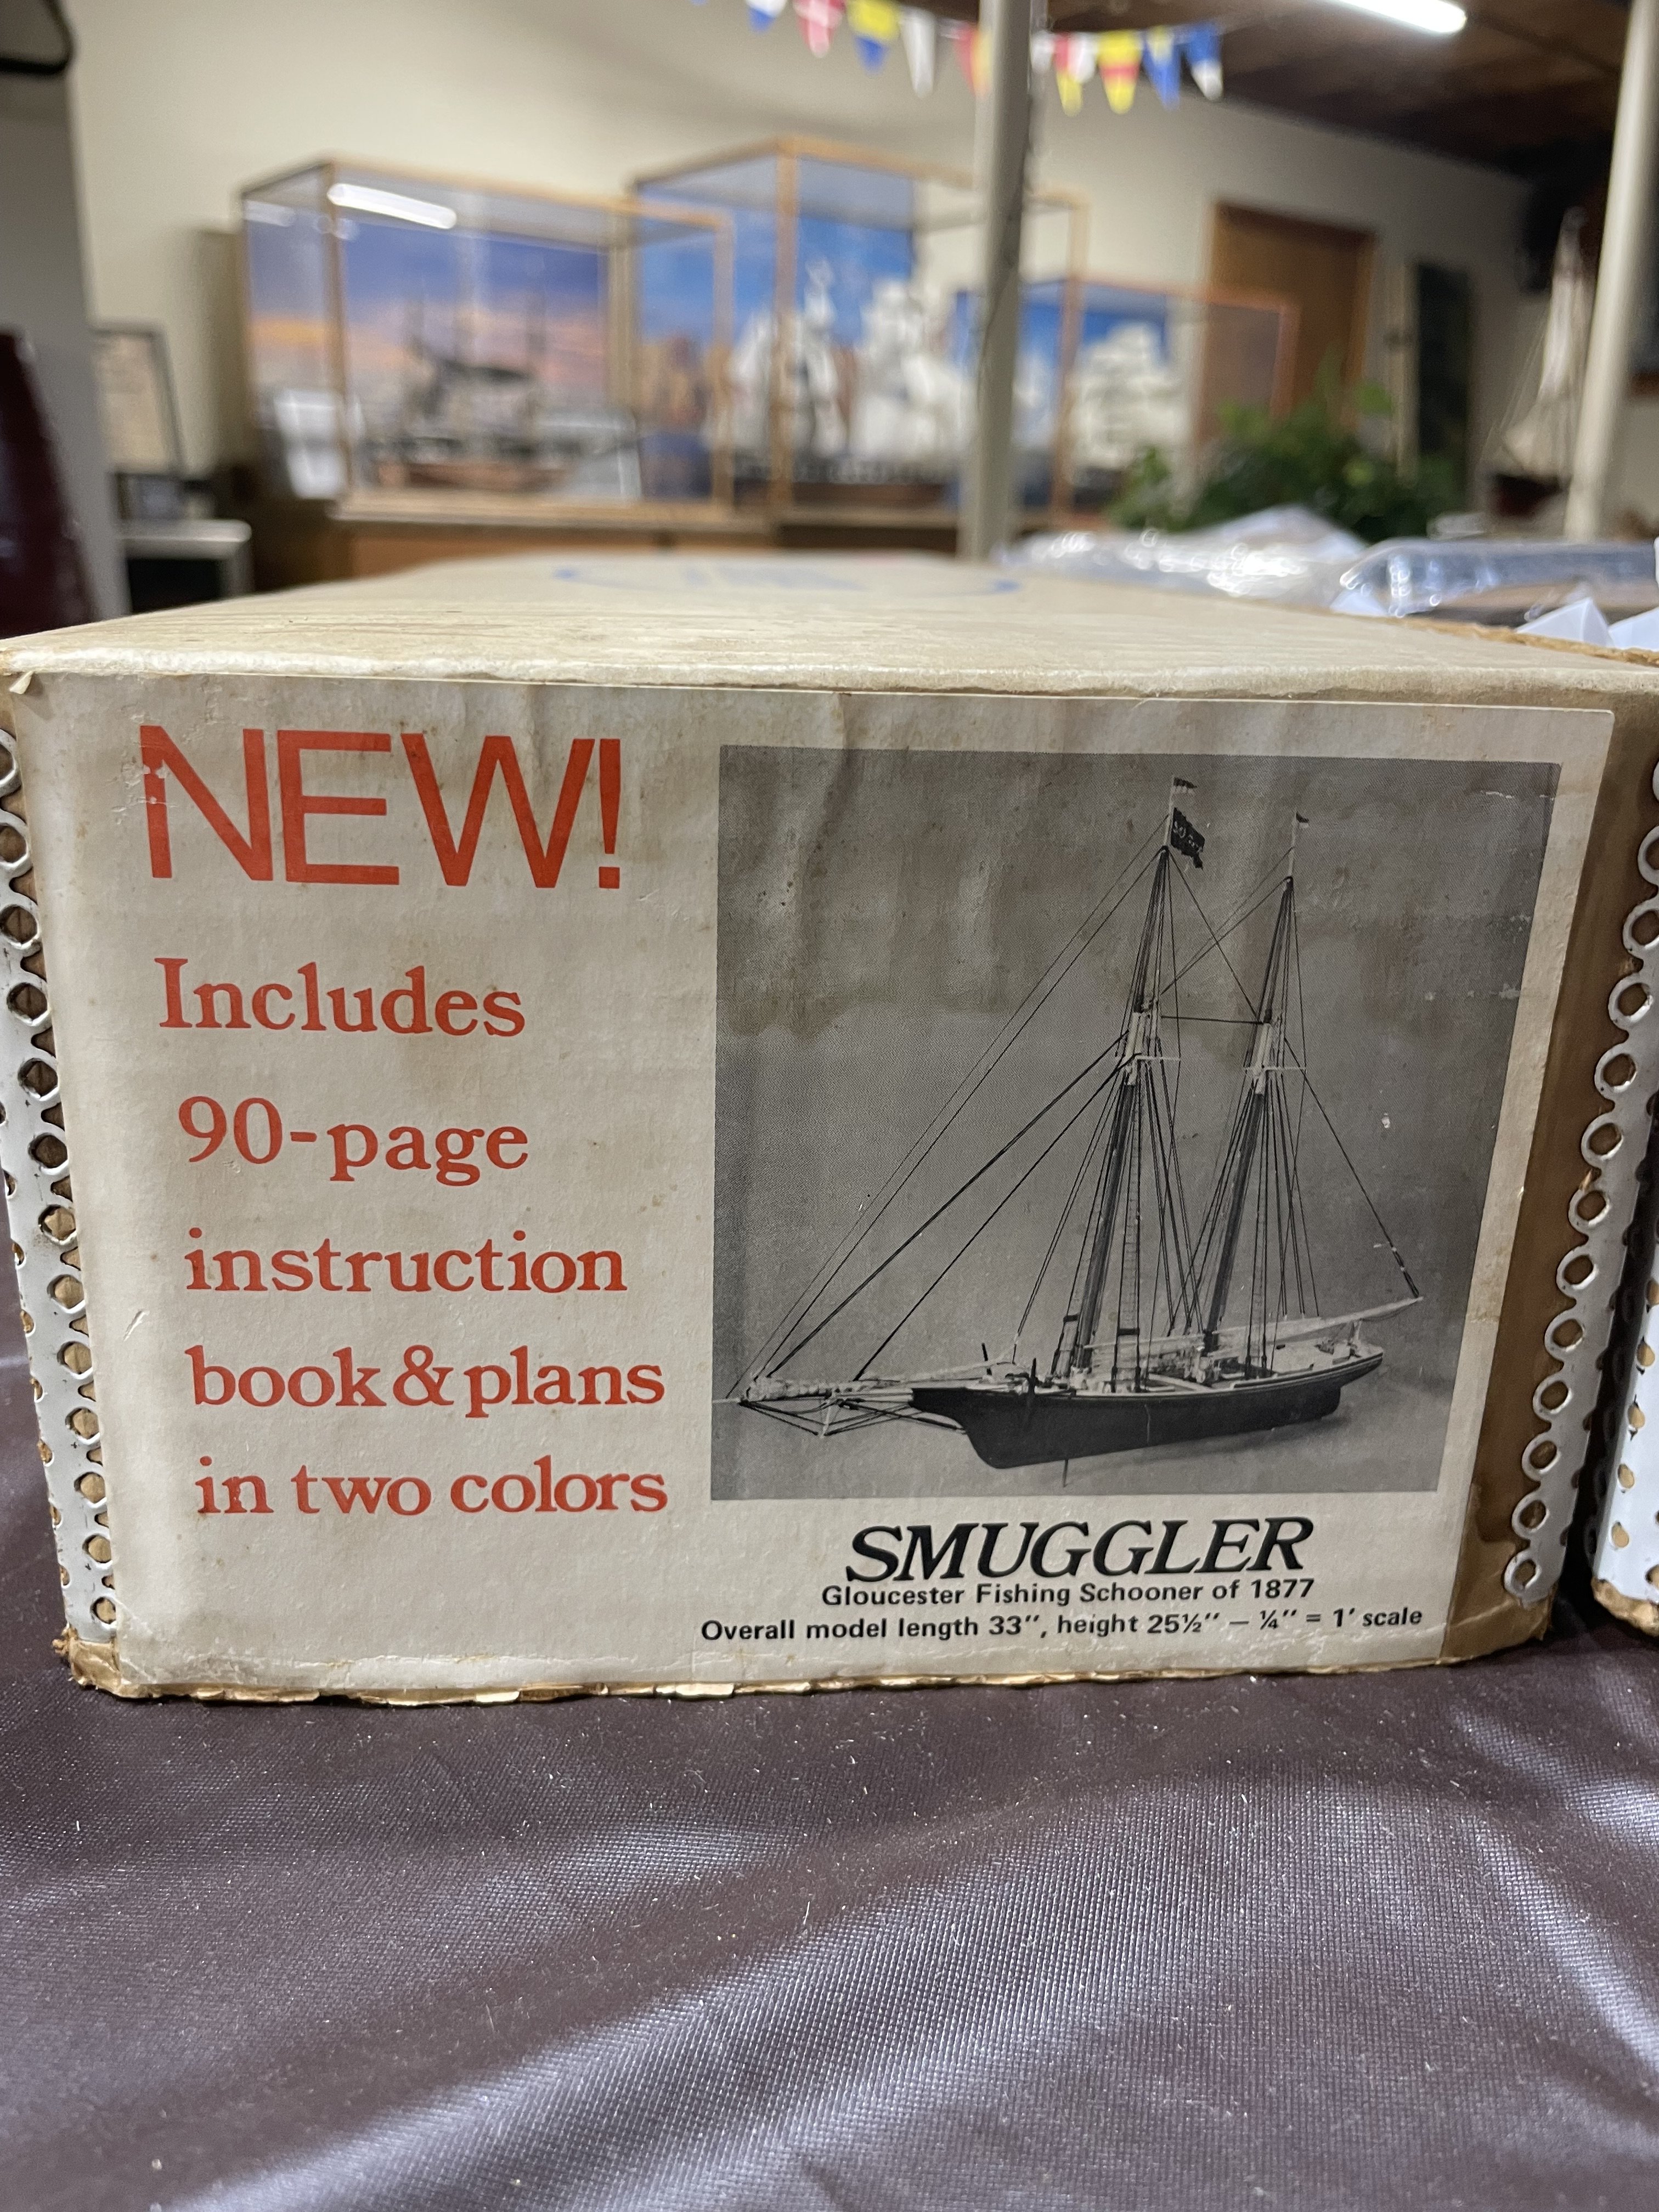
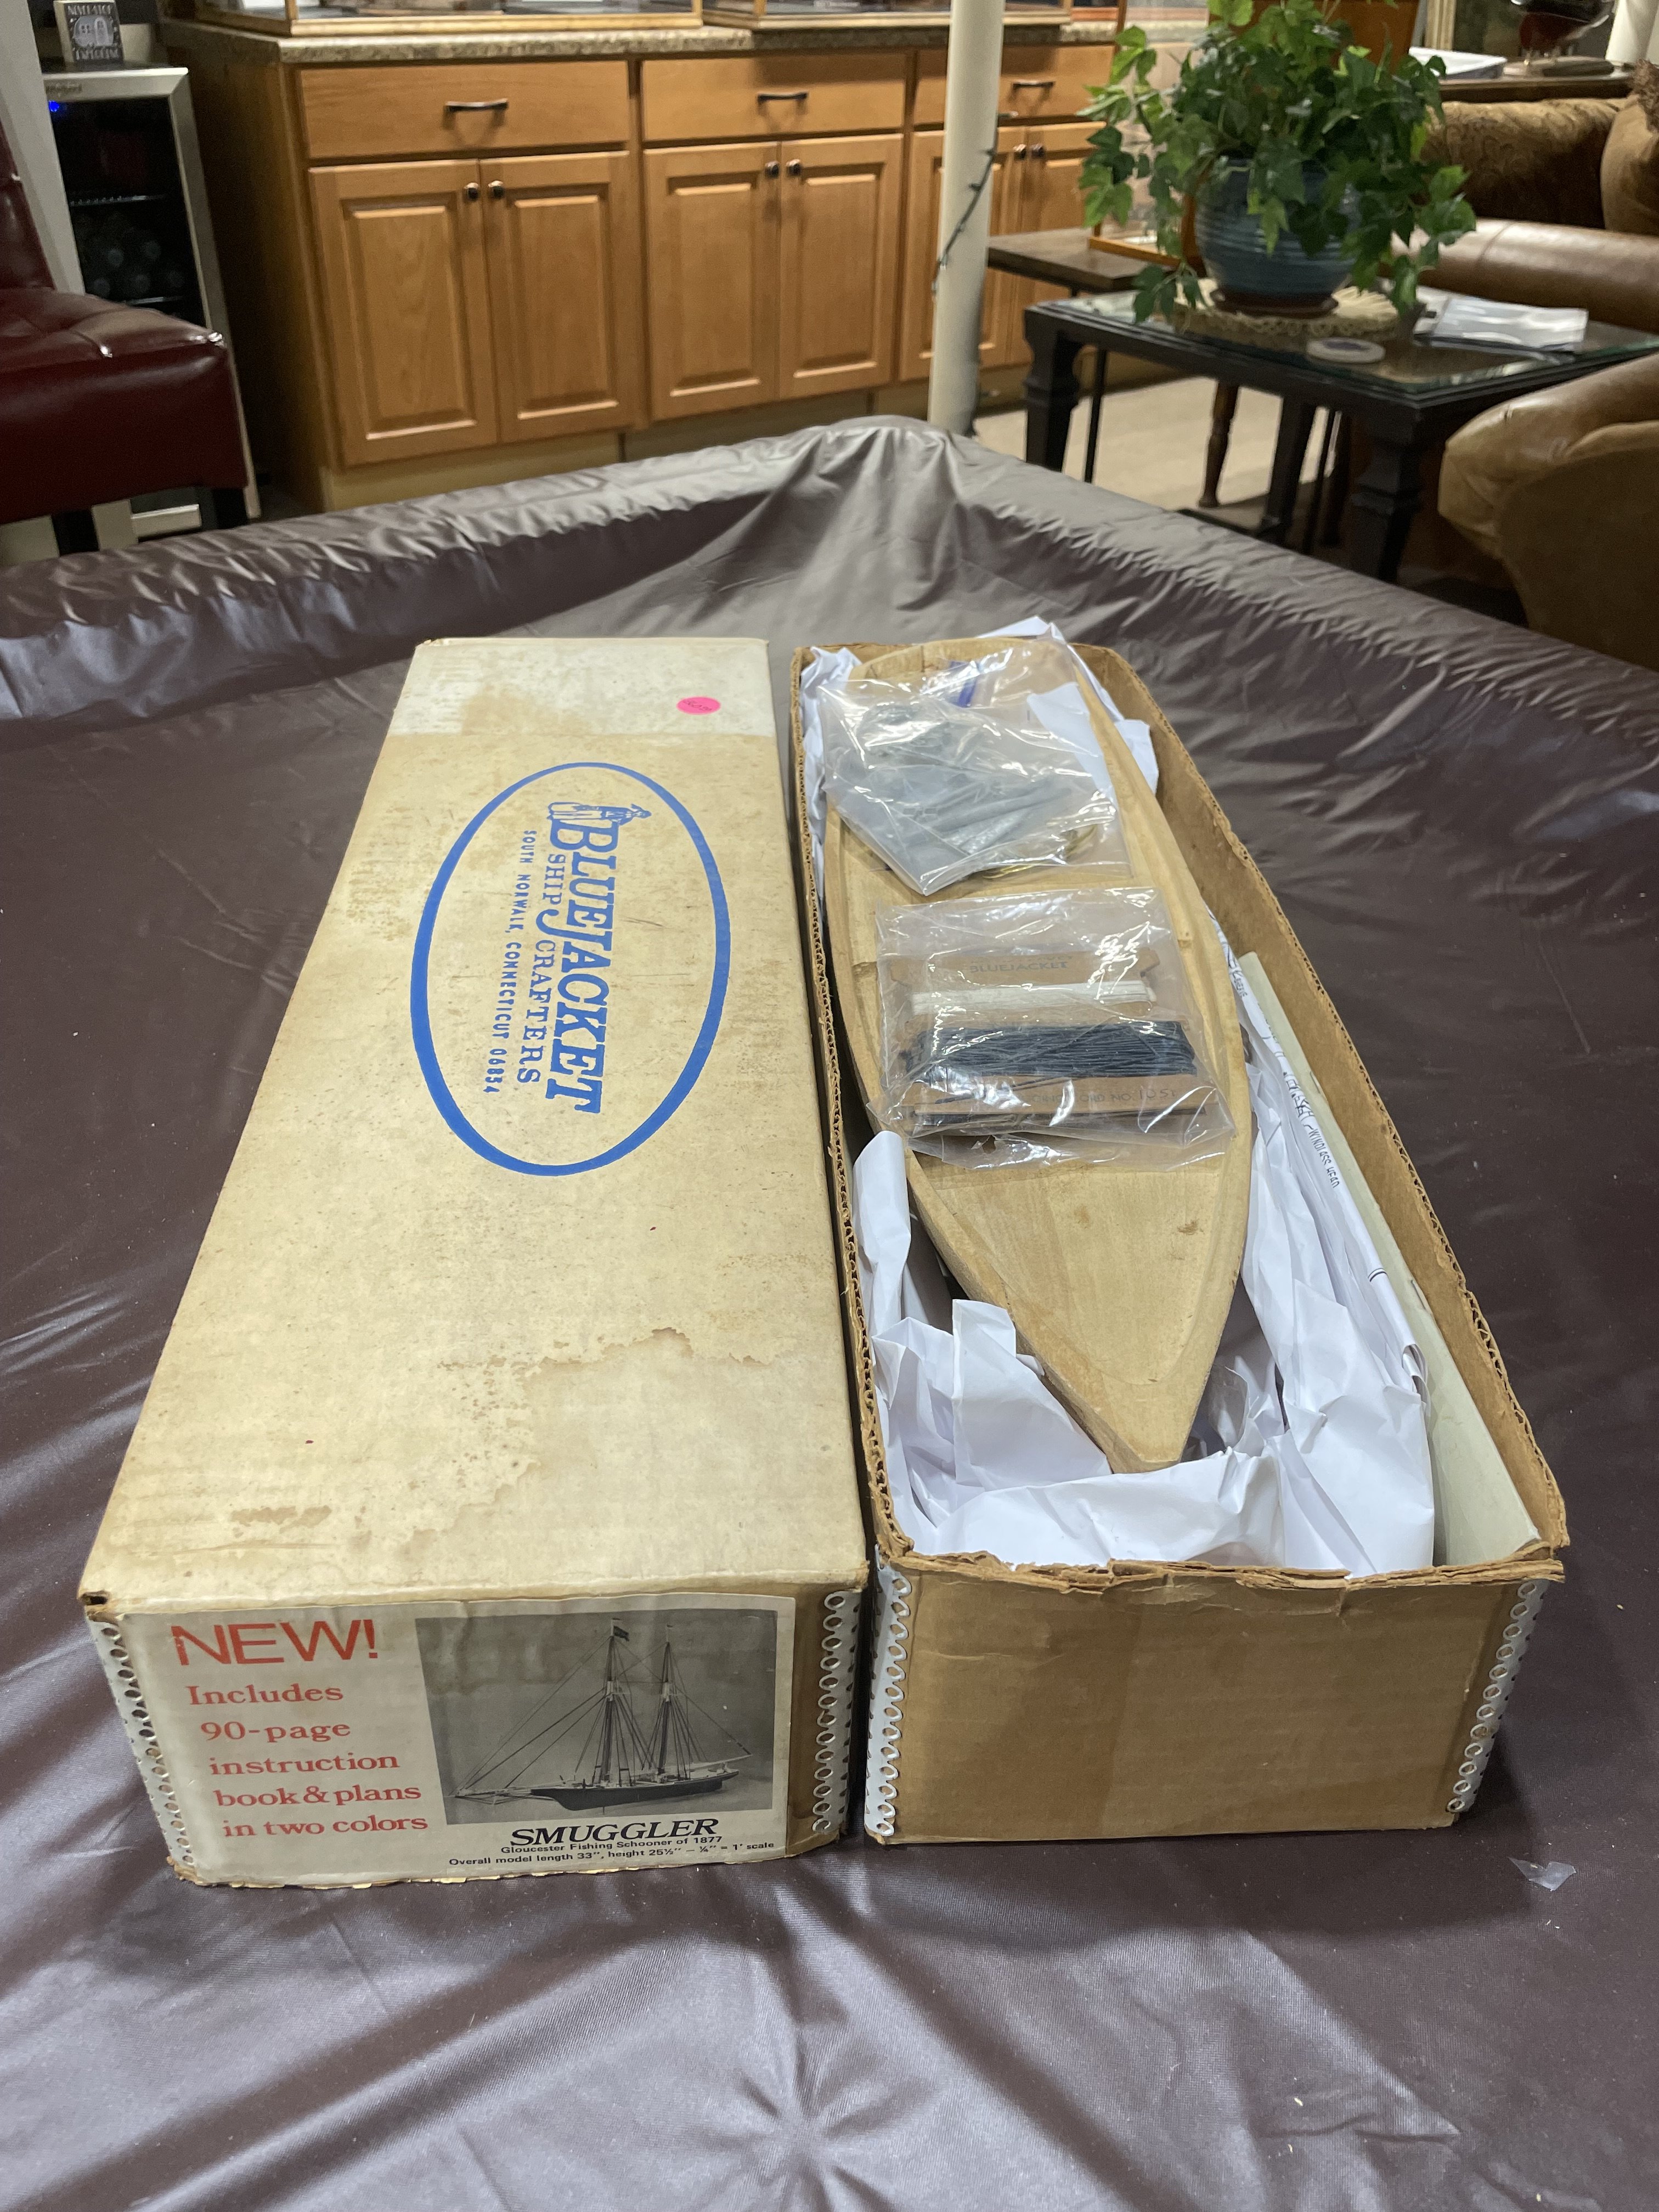
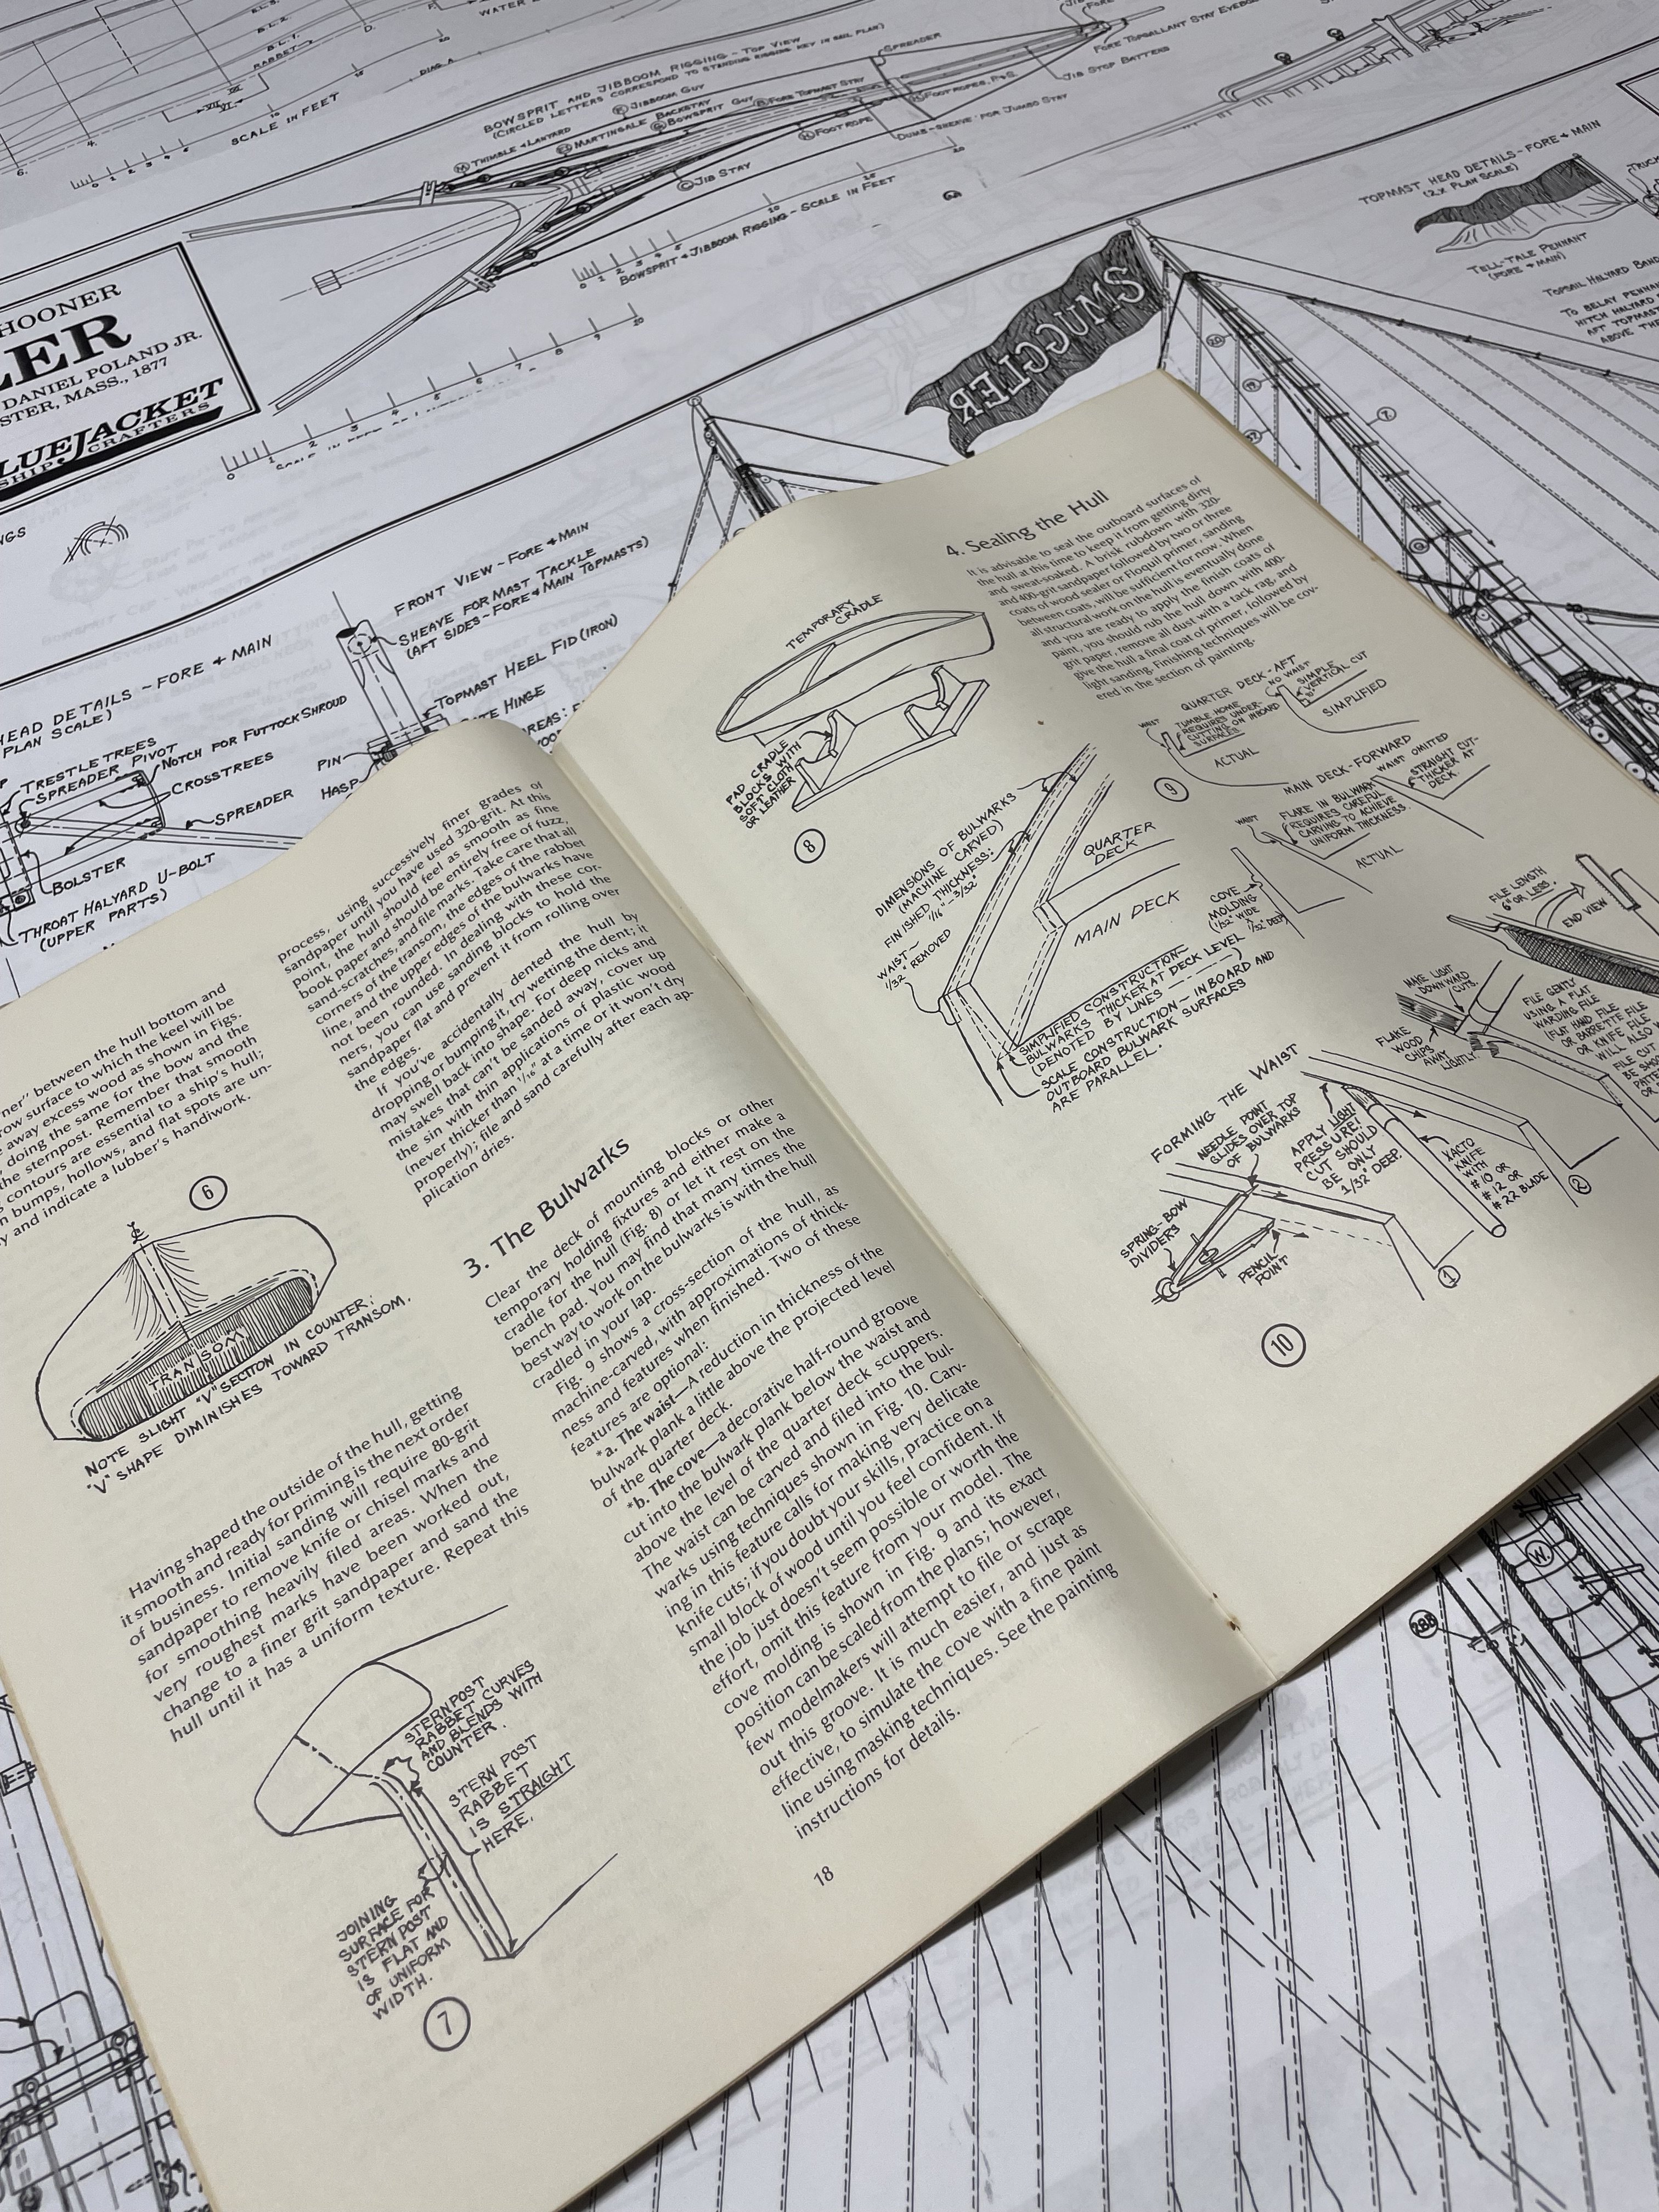
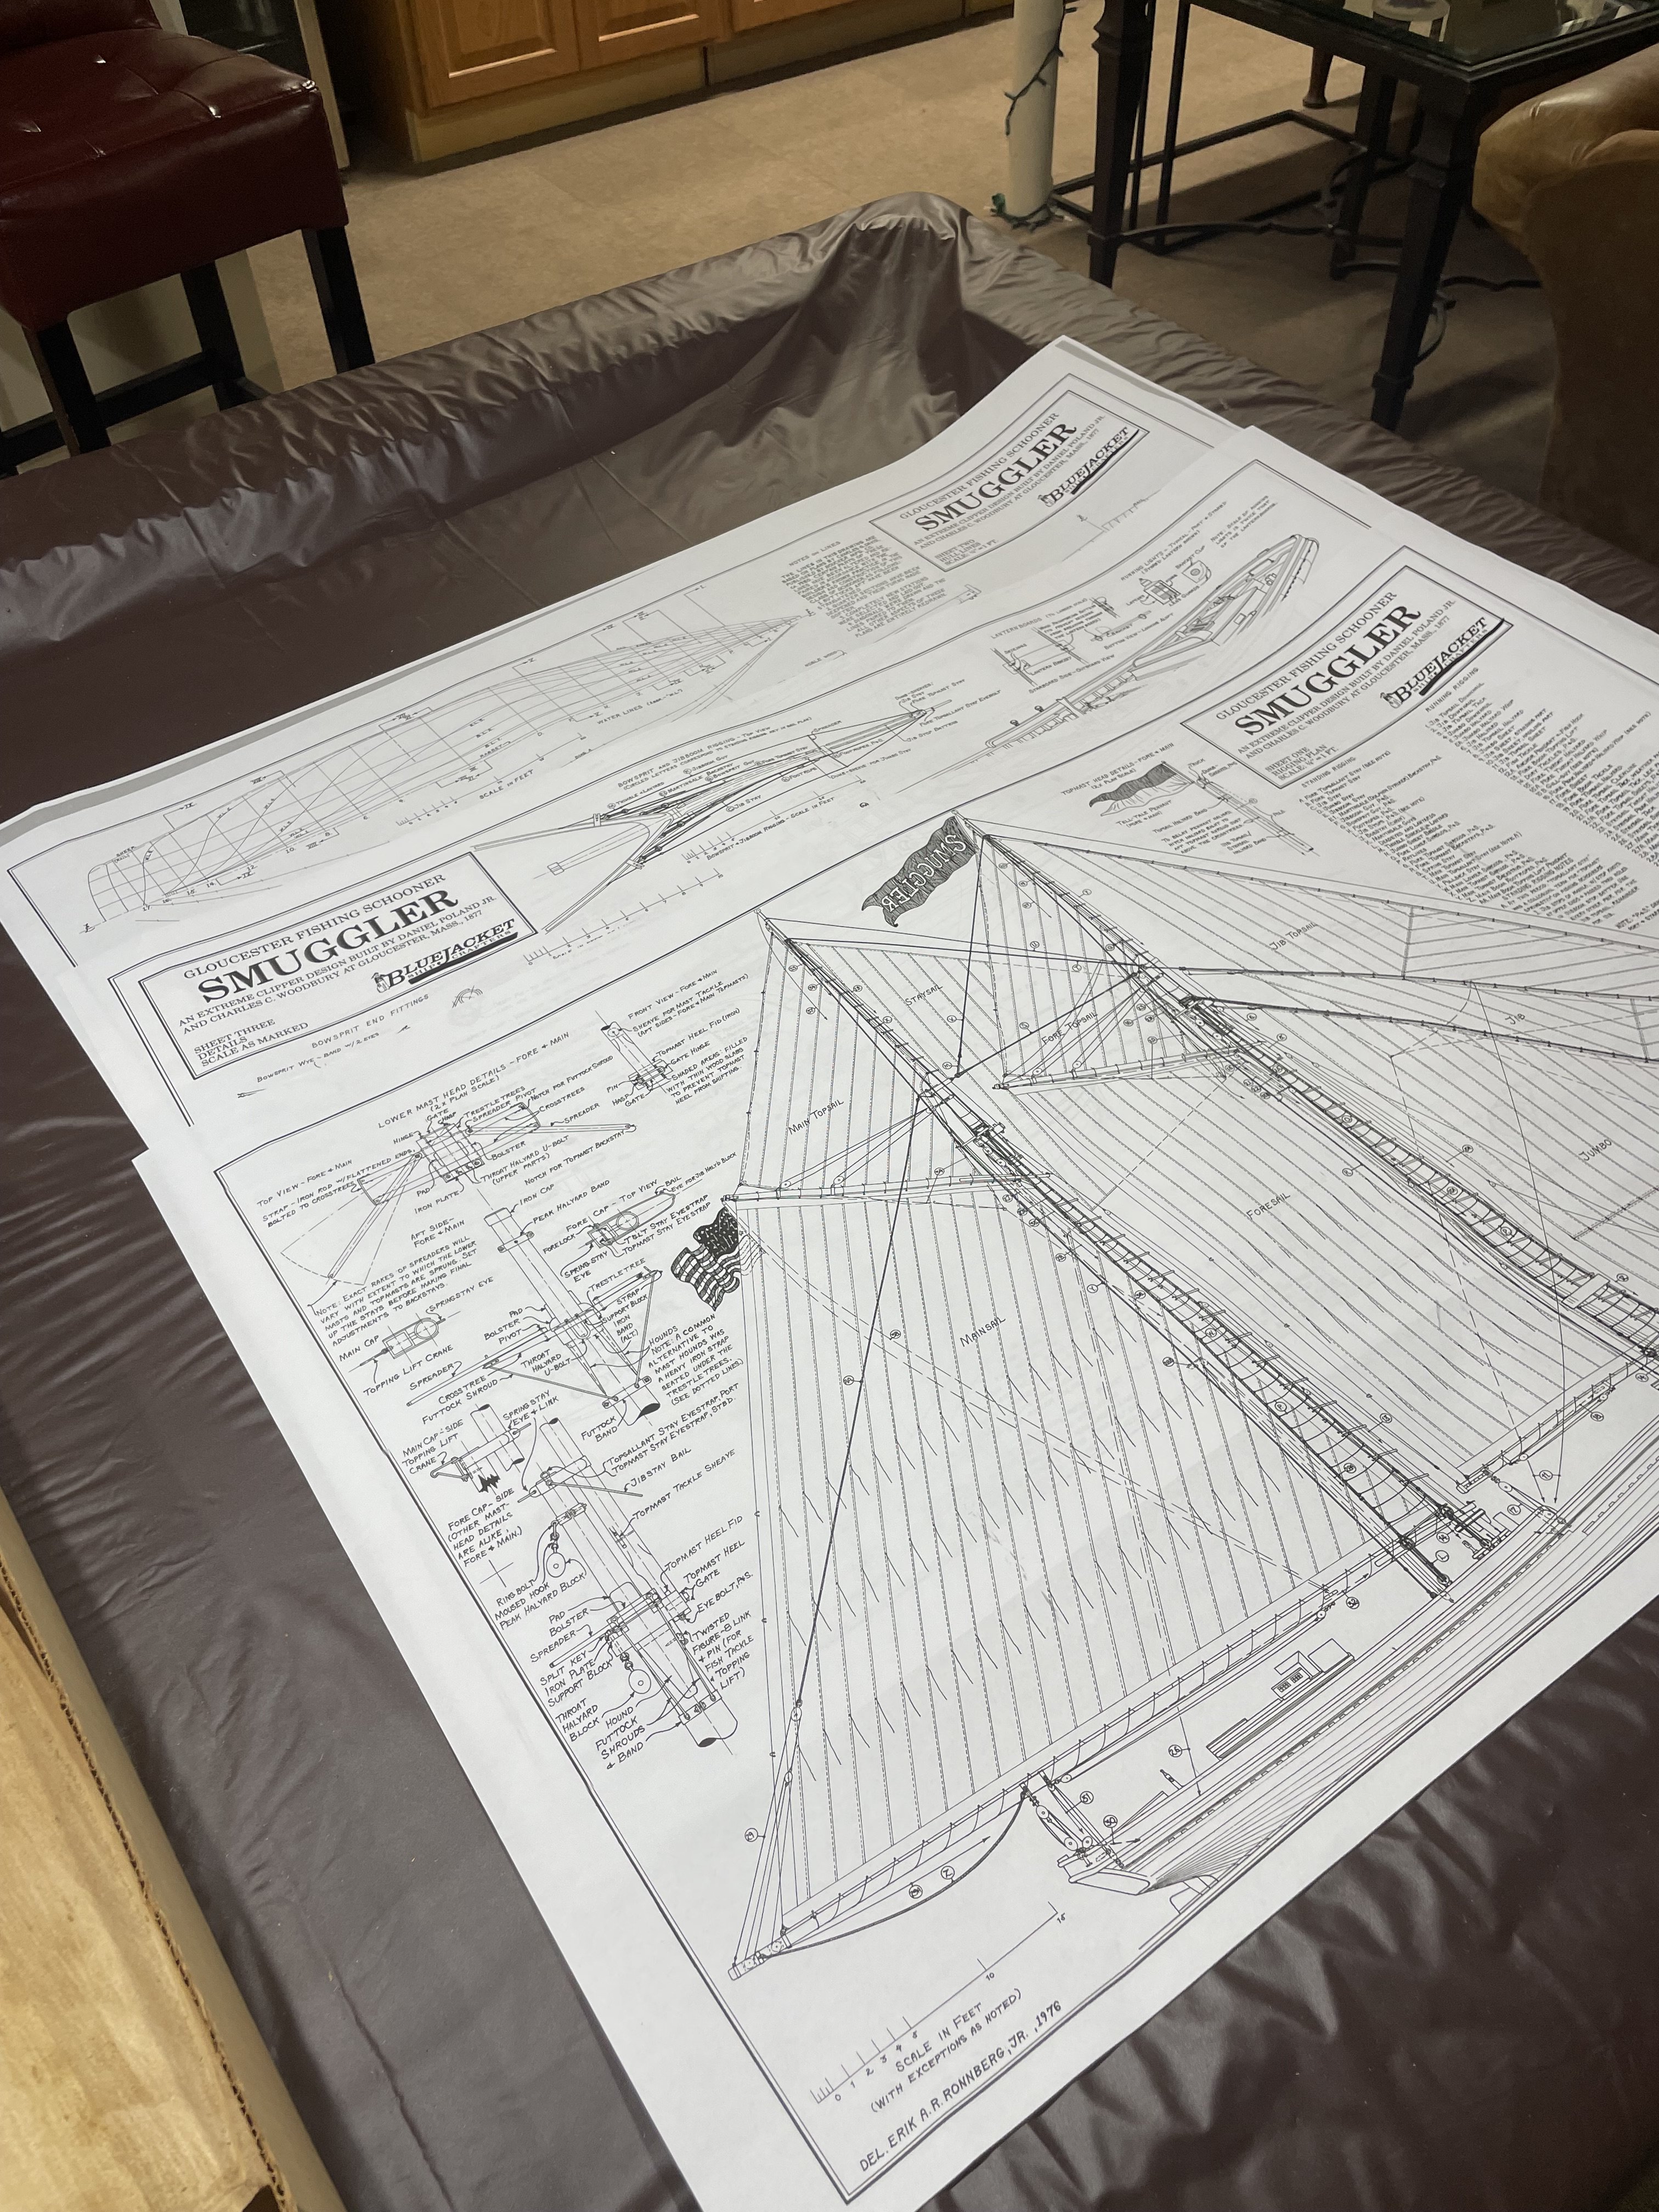
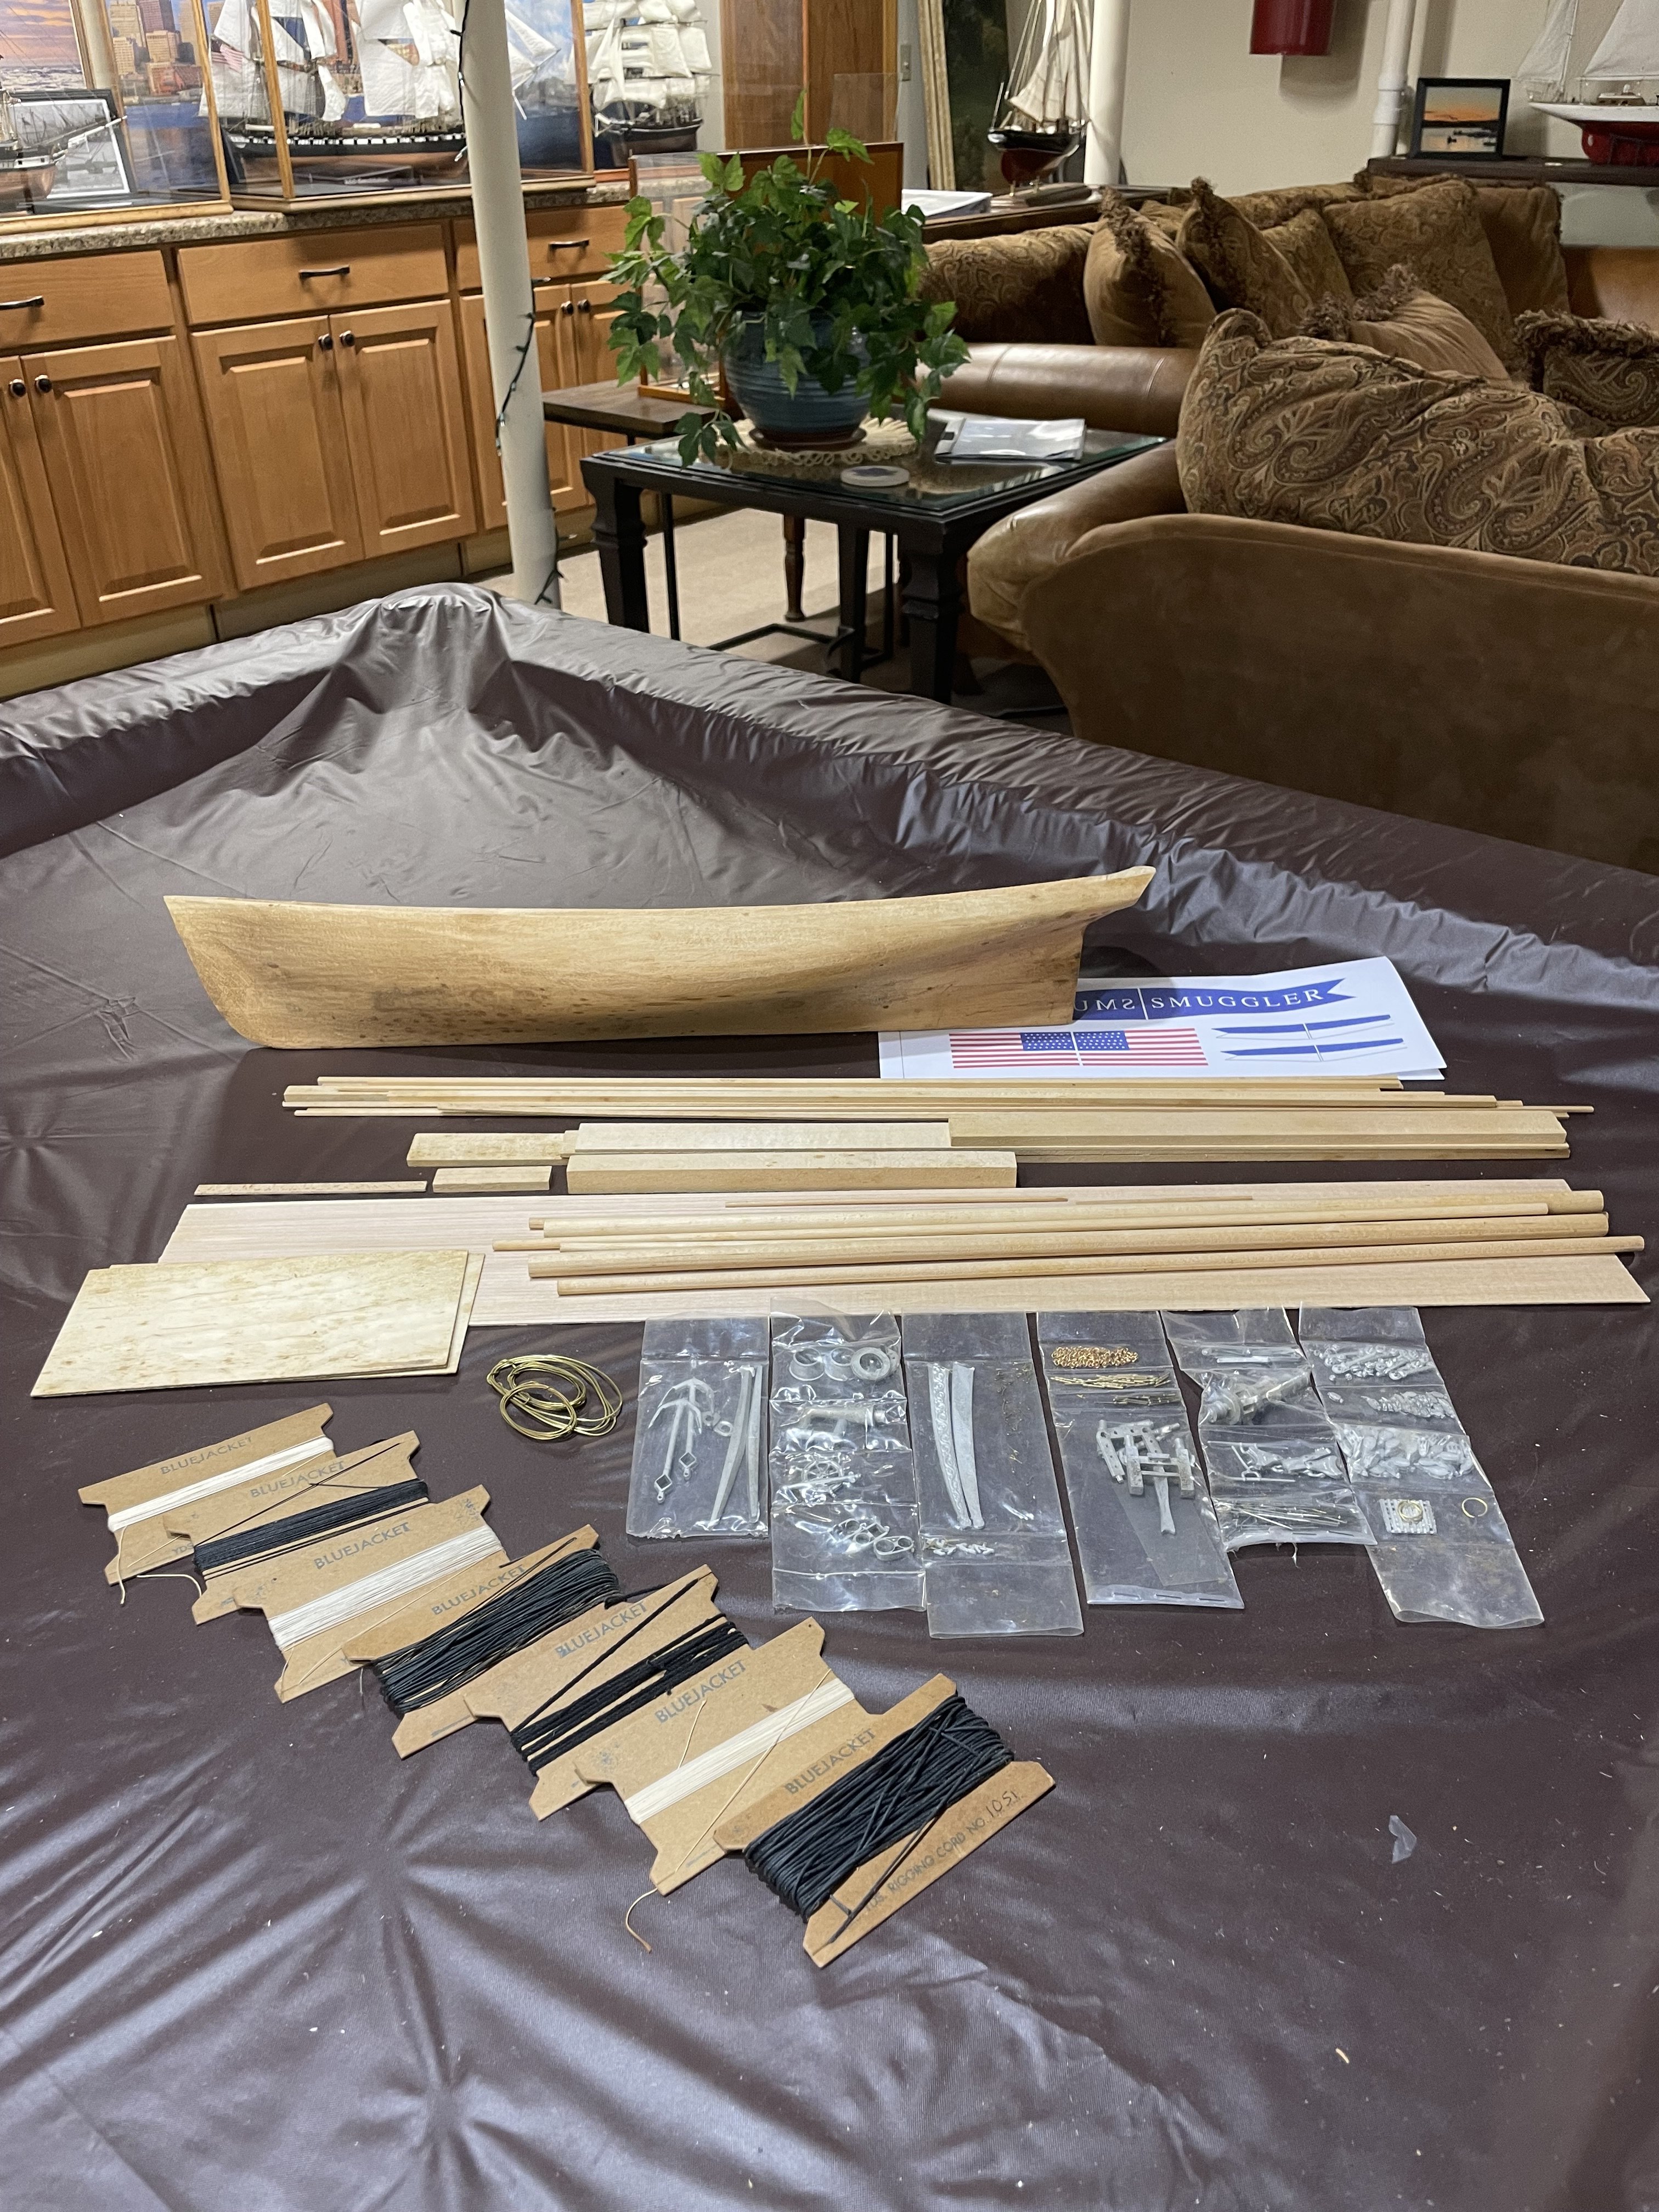
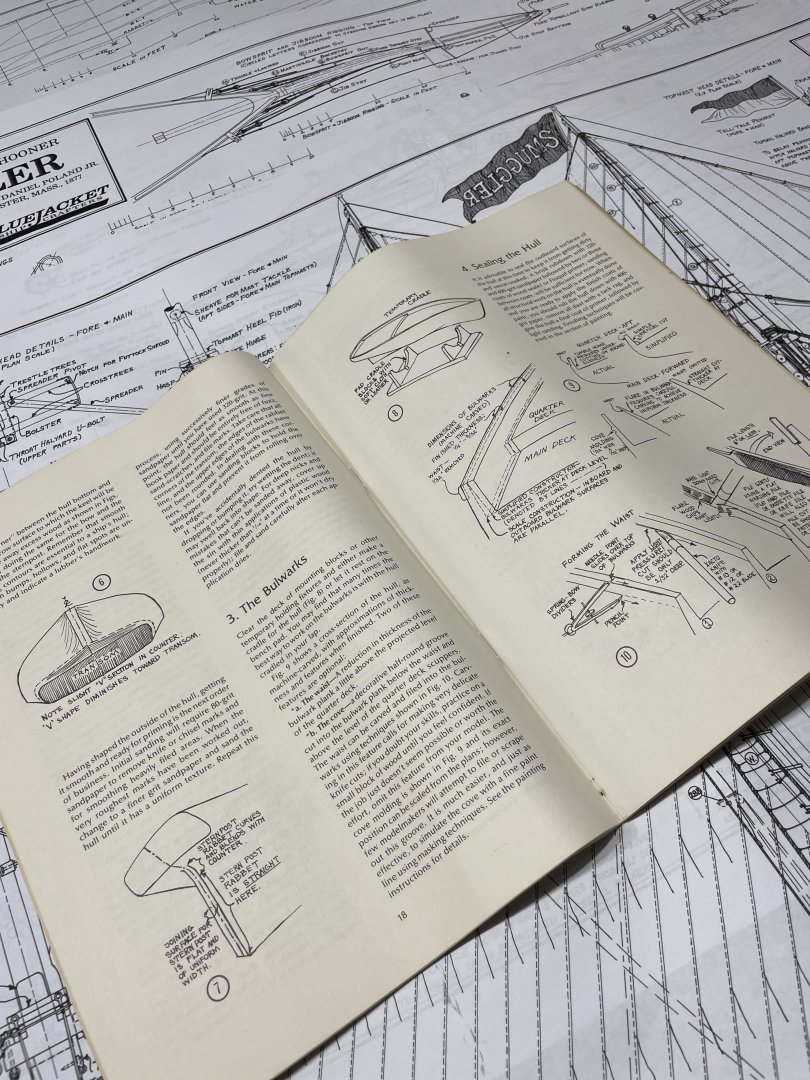
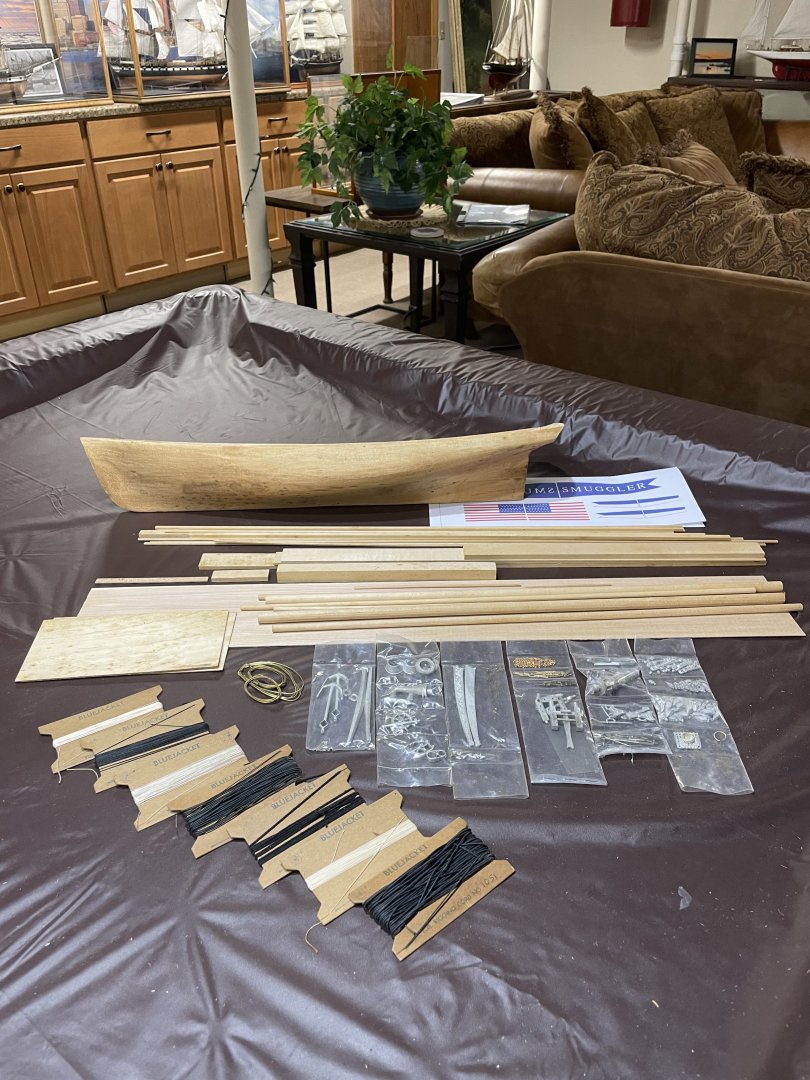
This Vintage Kit is complete. All parts have been inventoried. Instruction Booklet and 3 sheets of plans are included. Kit not started 200.00 (or best offer) + shipping from 04005. Shoot me a PM If interested I use PayPal. Cheers 🍻


- 1 reply
-
- 4
-