John Ruy
-
Posts
1,584 -
Joined
-
Last visited
Content Type
Profiles
Forums
Gallery
Events
Everything posted by John Ruy
-
 That said, I am headed back over to The Red Jacket for a while. She is begging me to pull together those masts and spars. If you all would like to follow along, here is a link. https://modelshipworld.com/topic/35629-red-jacket-by-john-ruy-marine-model-company-116”1’-1192-scale-vintage-solid-hull-clipper-ship-kit/ See you back here soon… Cheers 🍻
-
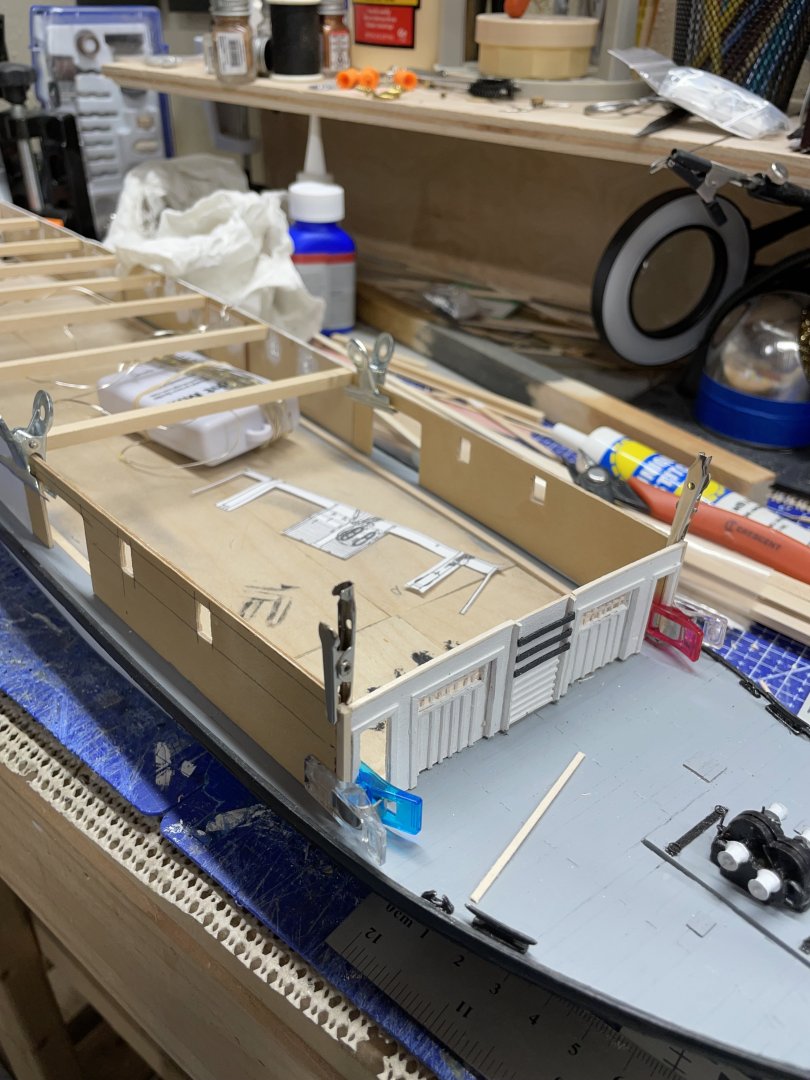
Thank you all for your comments, likes and wows. @gsdpic your right, every piece is another project in and of itself self. Now it’s back to the windows and doors on the Main Deck. Remember those? Seems so long ago, but these models don’t finish themselves, do they? Steady as she goes… Cheers 🍻
-
It’s always a pleasure to see what you have done, Bob. I’m happy to be 1 of 49,000 to stop by. You are doing a great job on The Pegasus. John
- 261 replies
-
- 3
-

-

-
- Victory Models
- Pegasus
- (and 3 more)
-
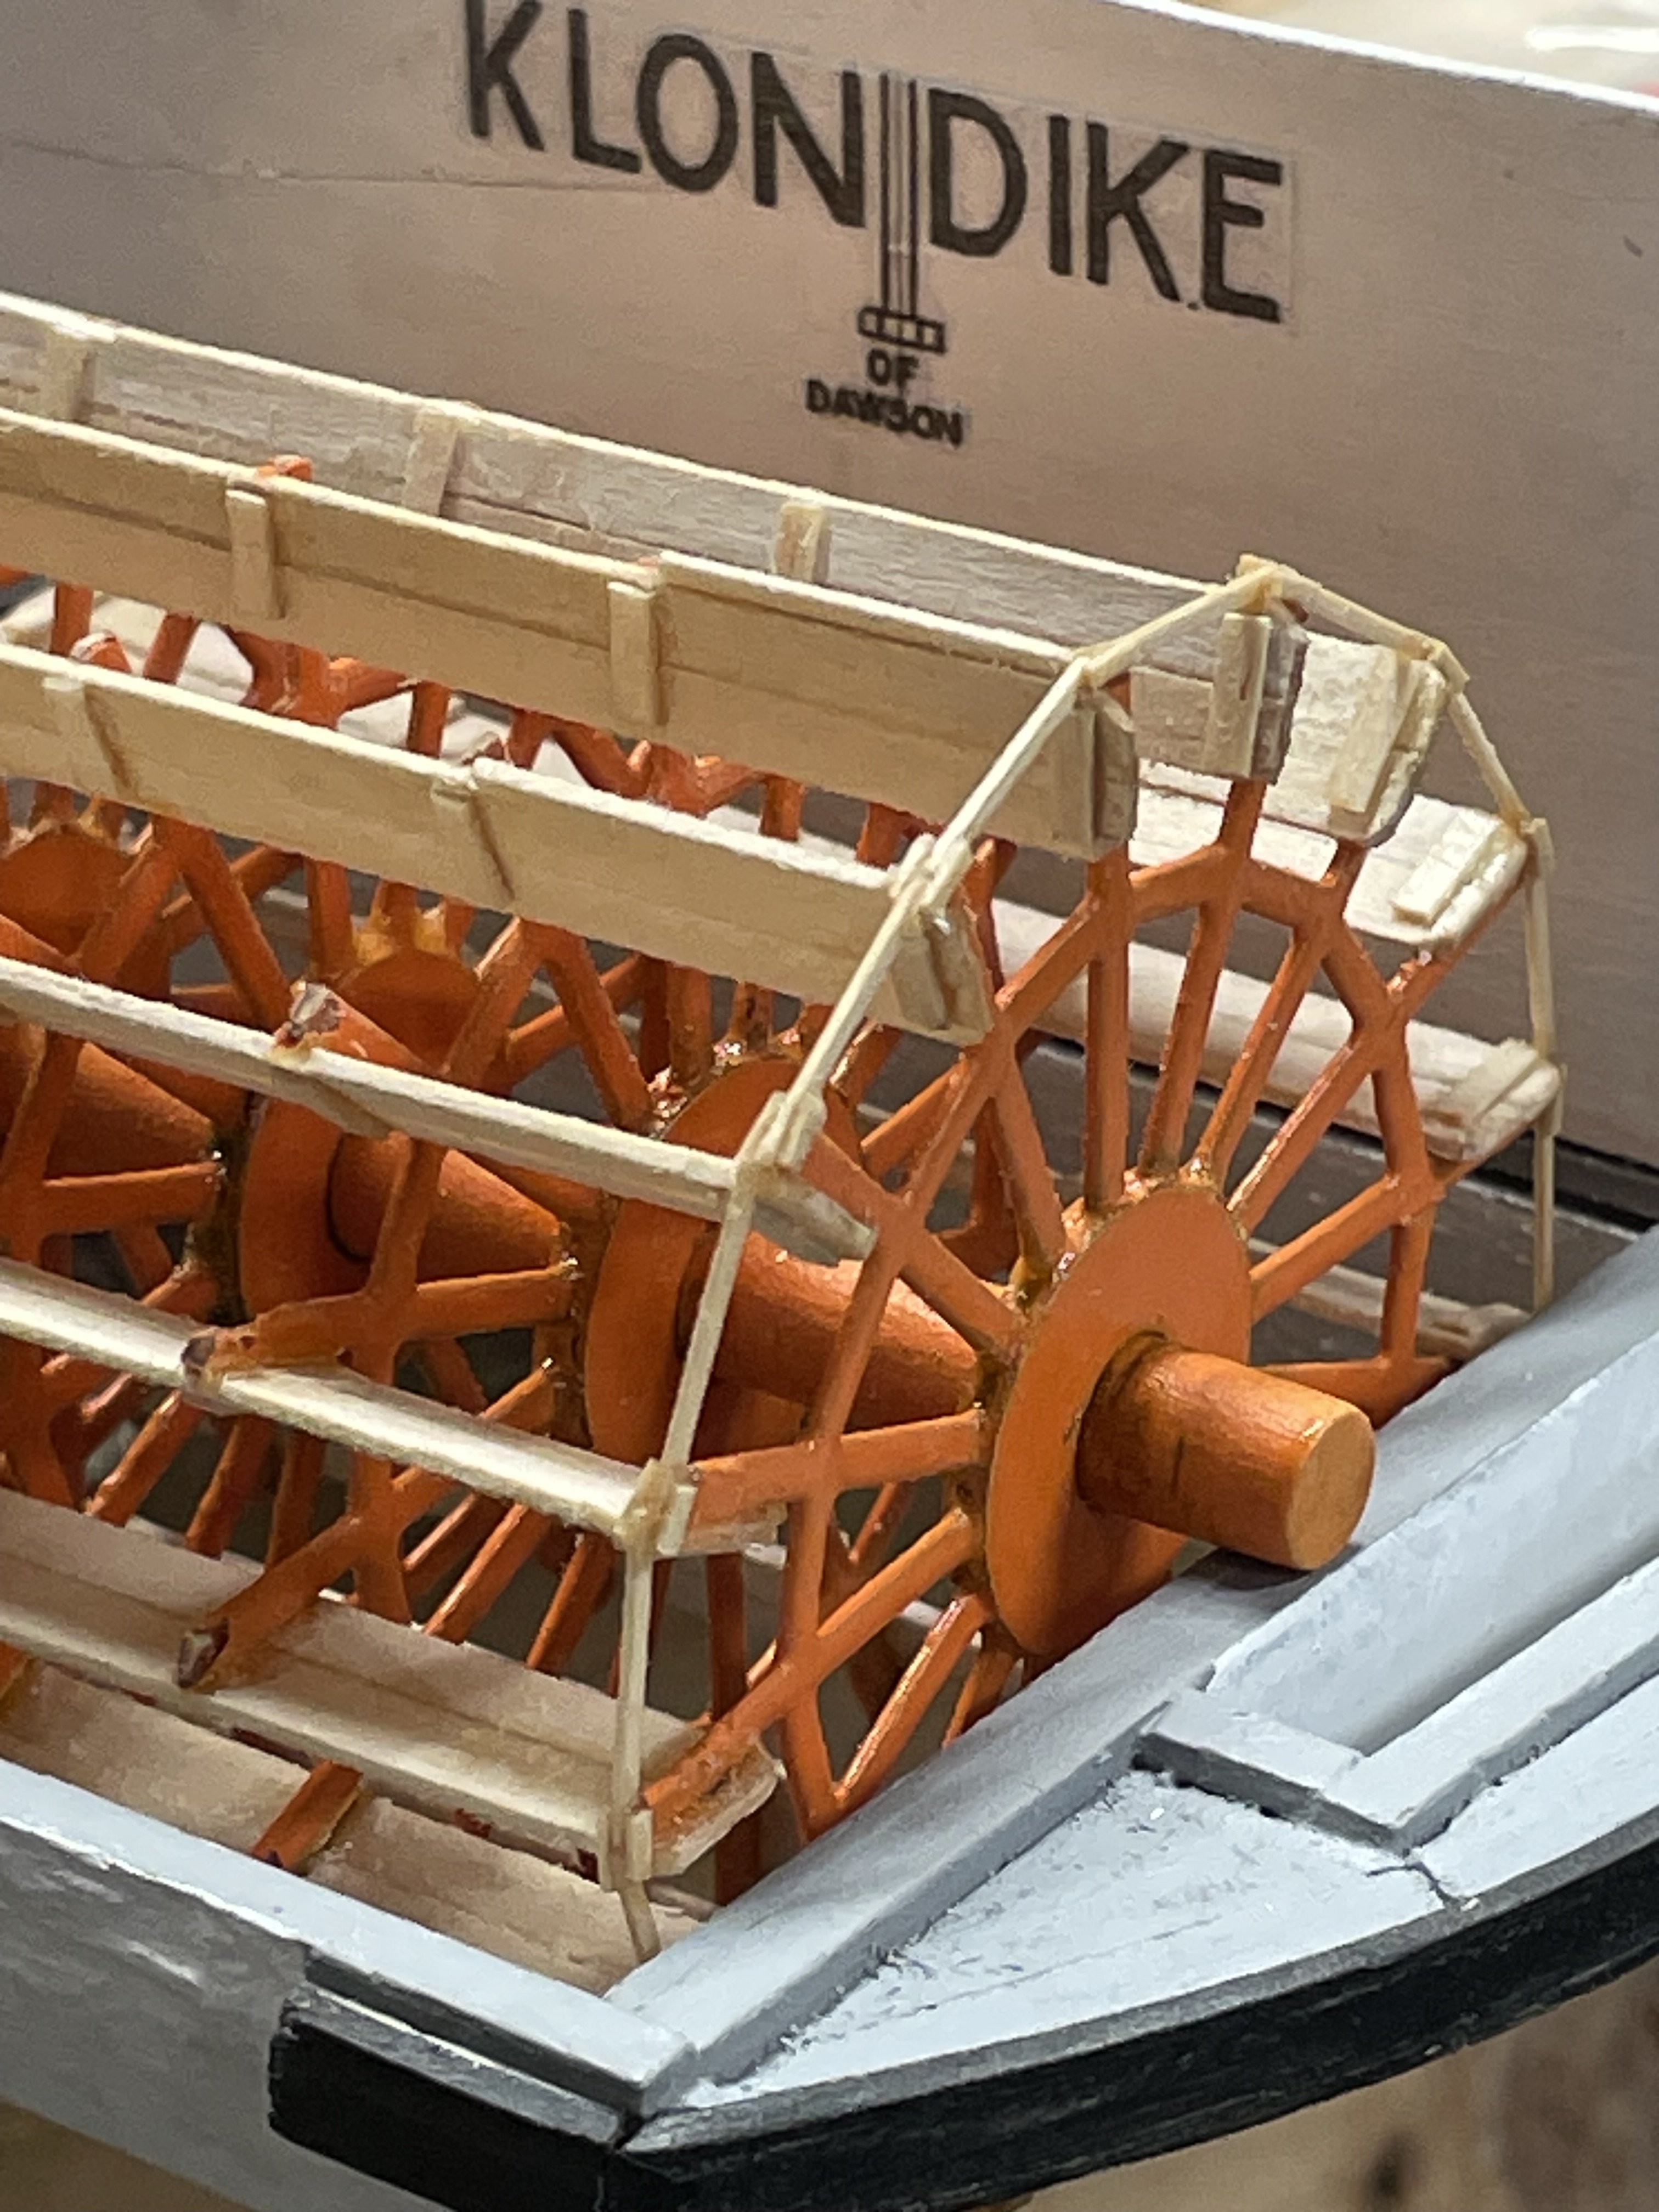
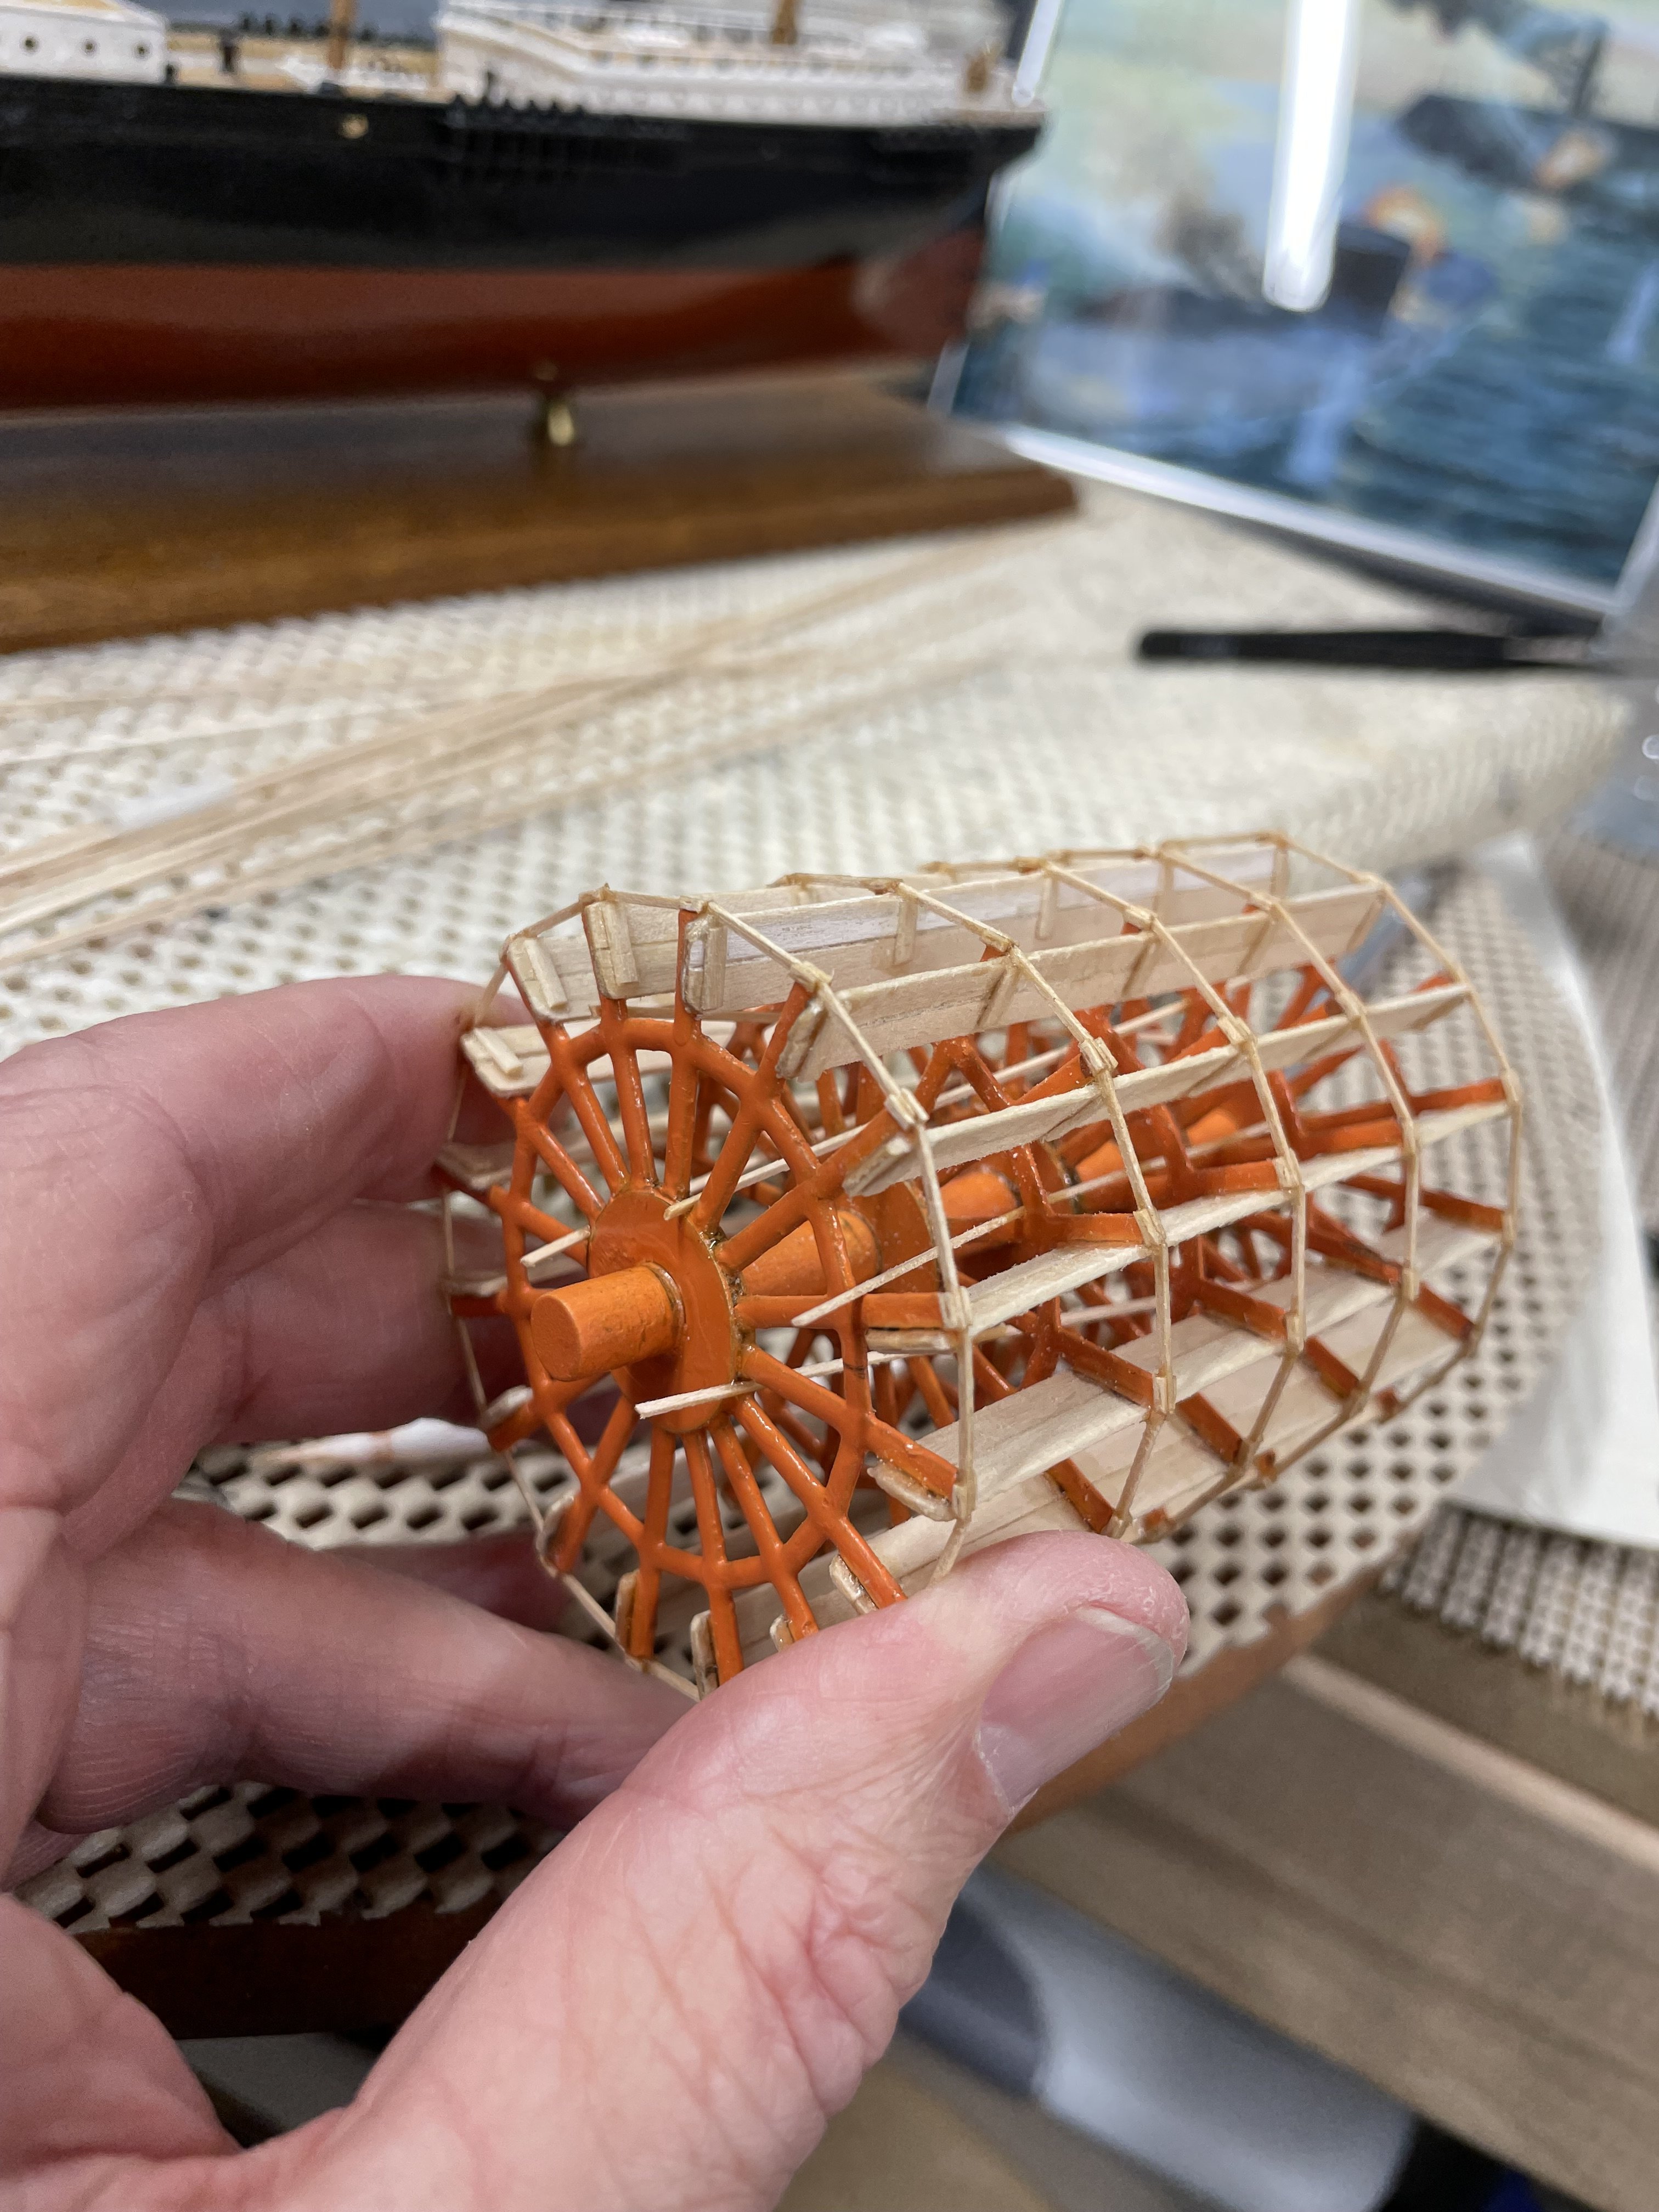
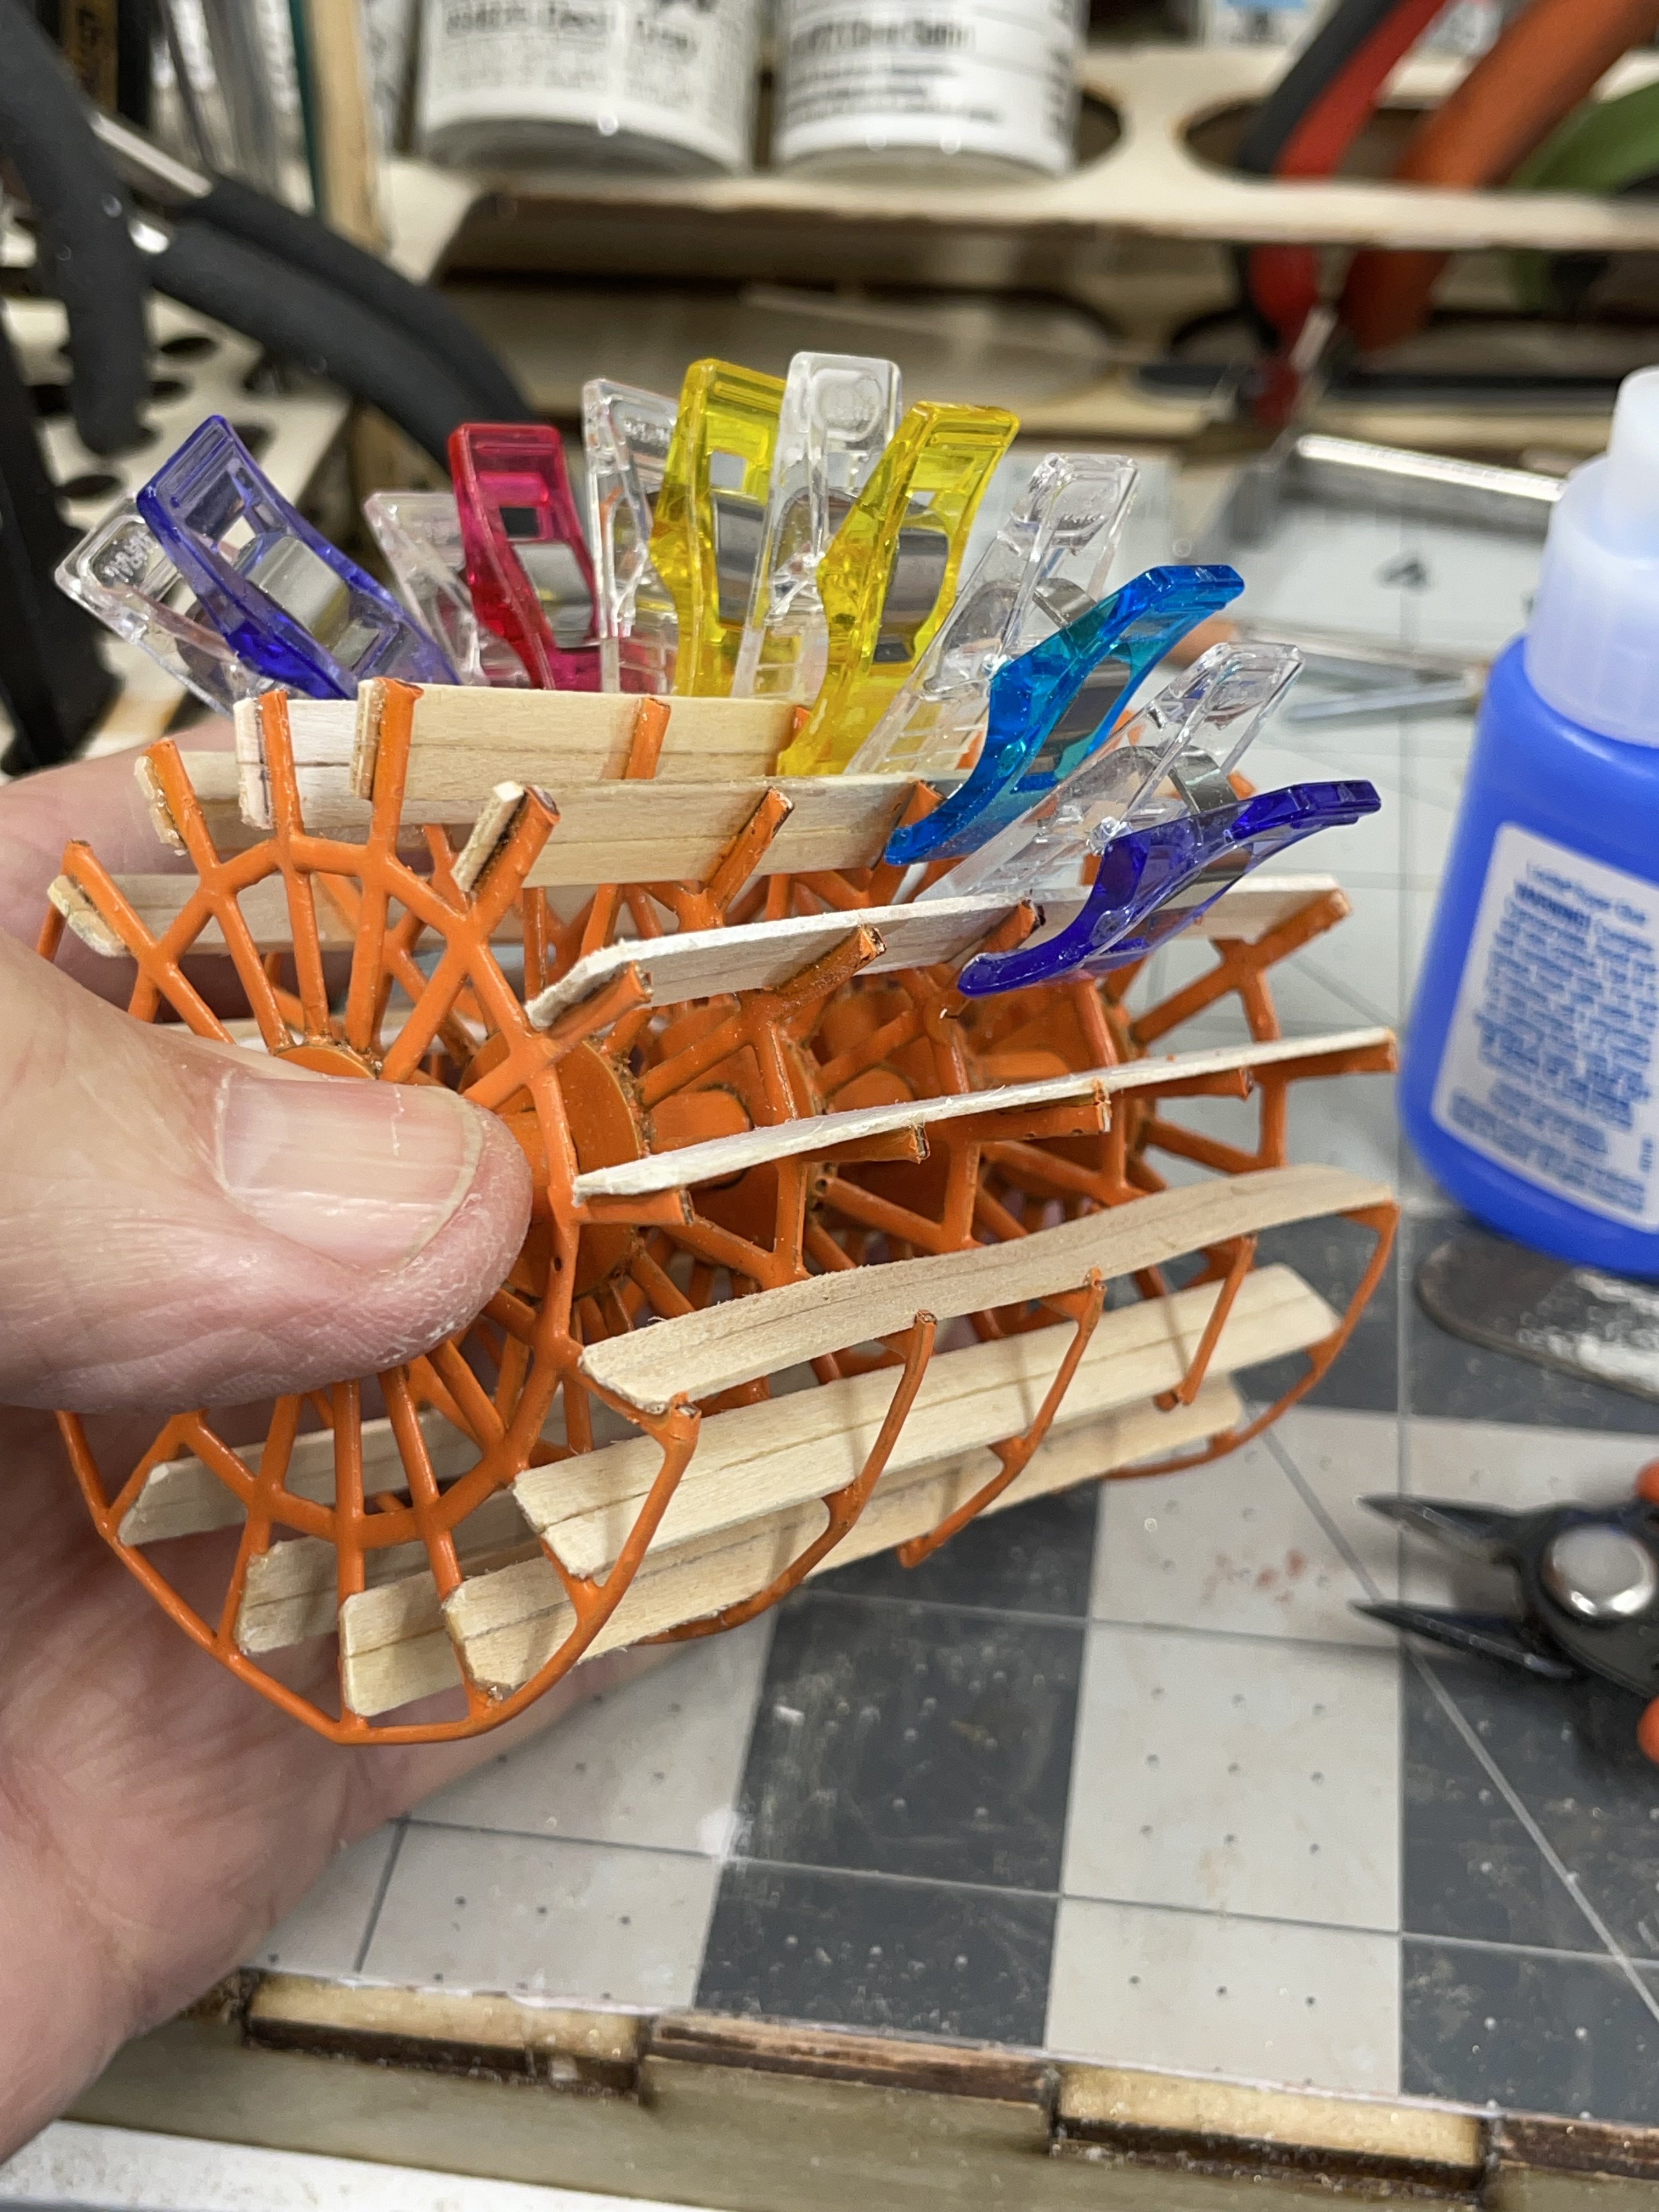
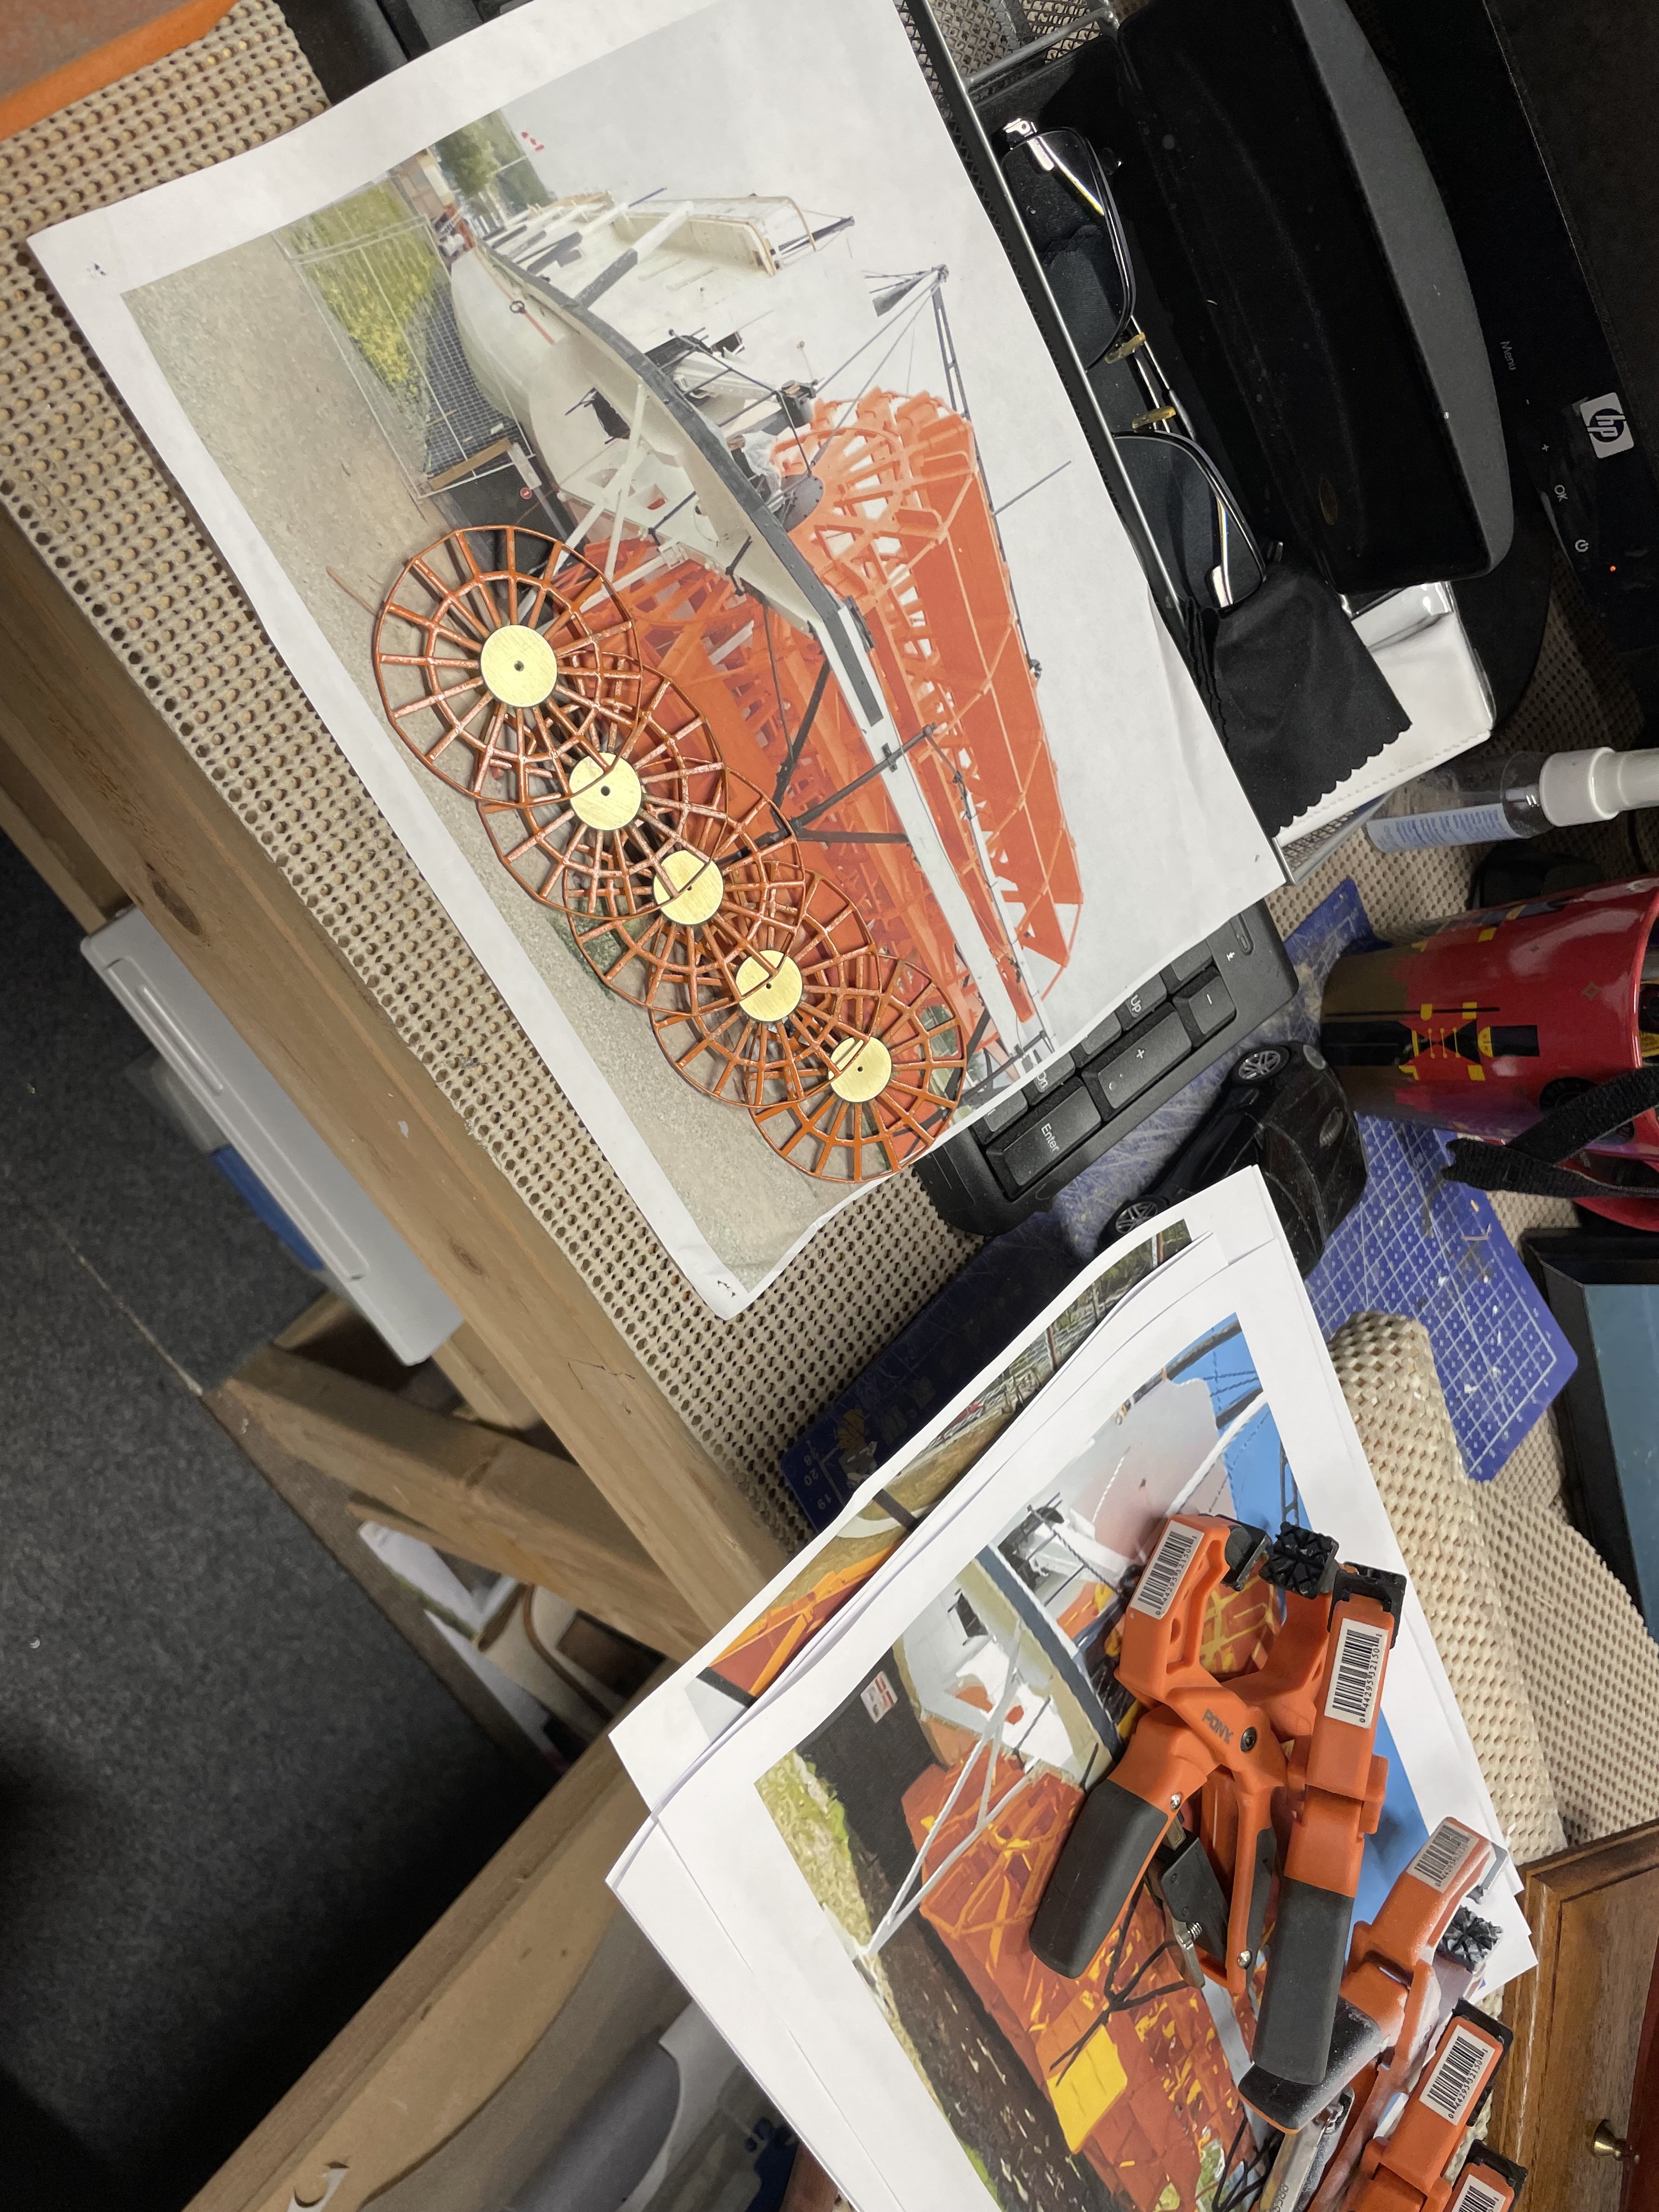
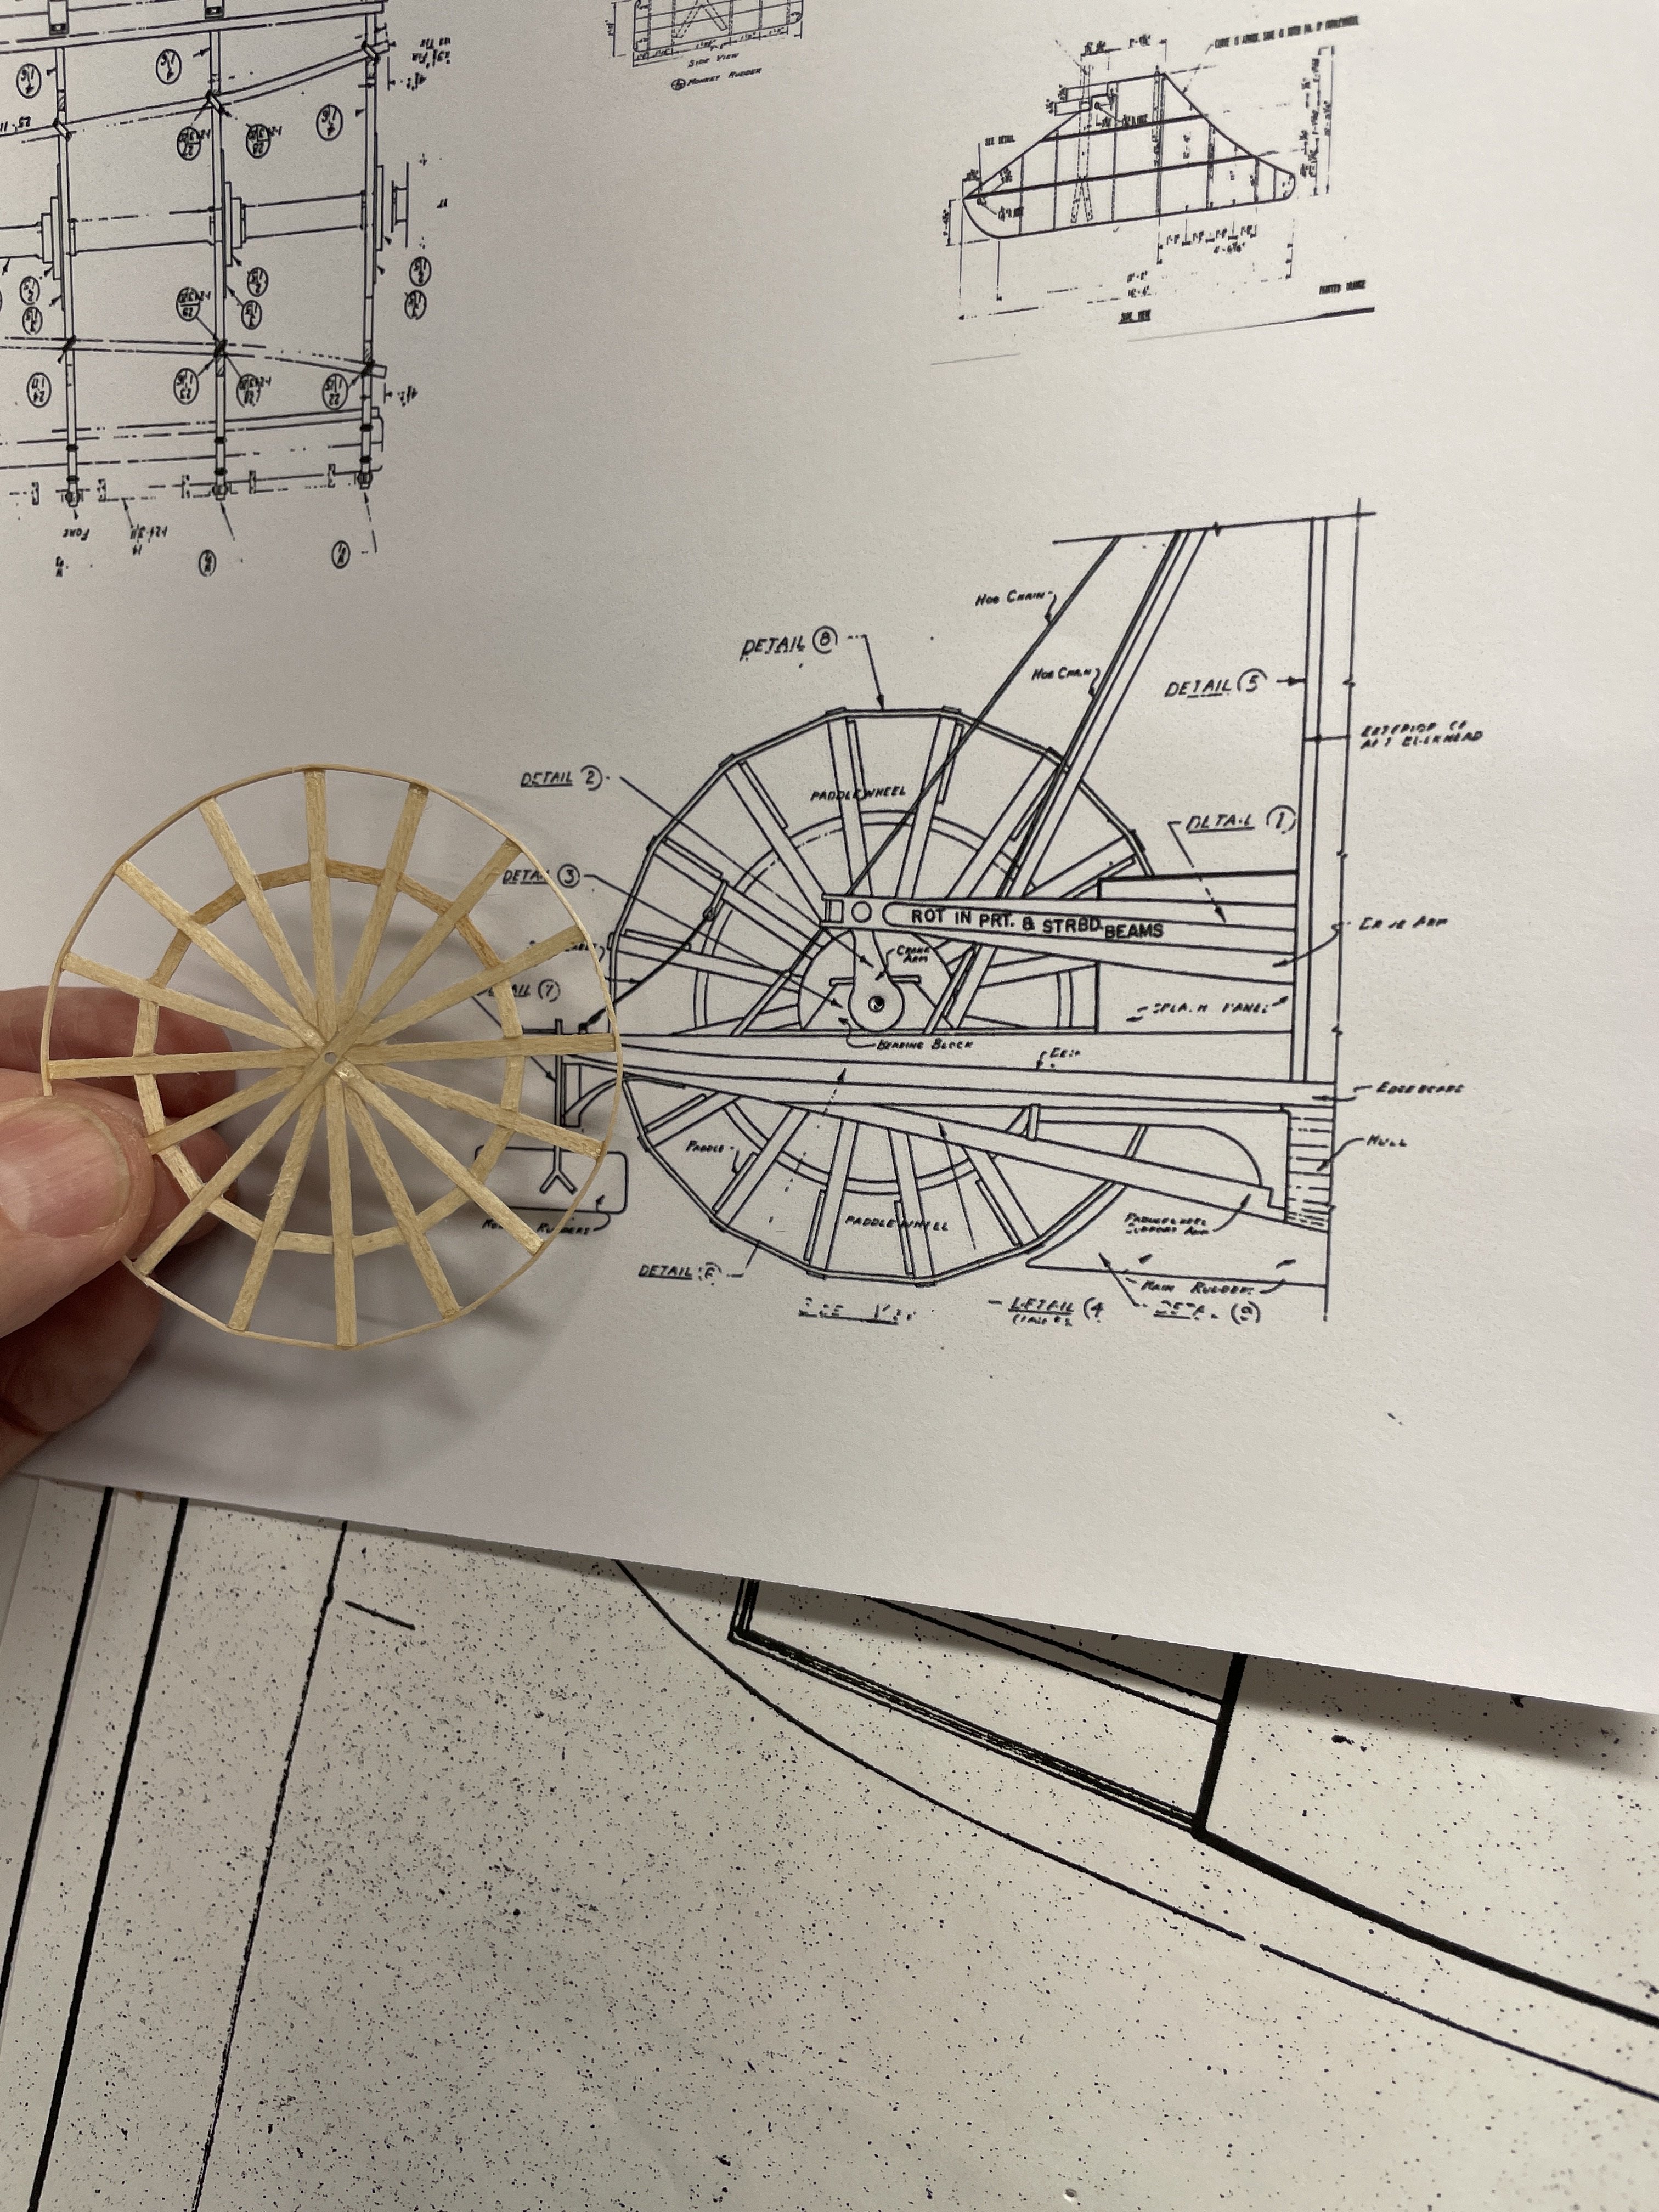
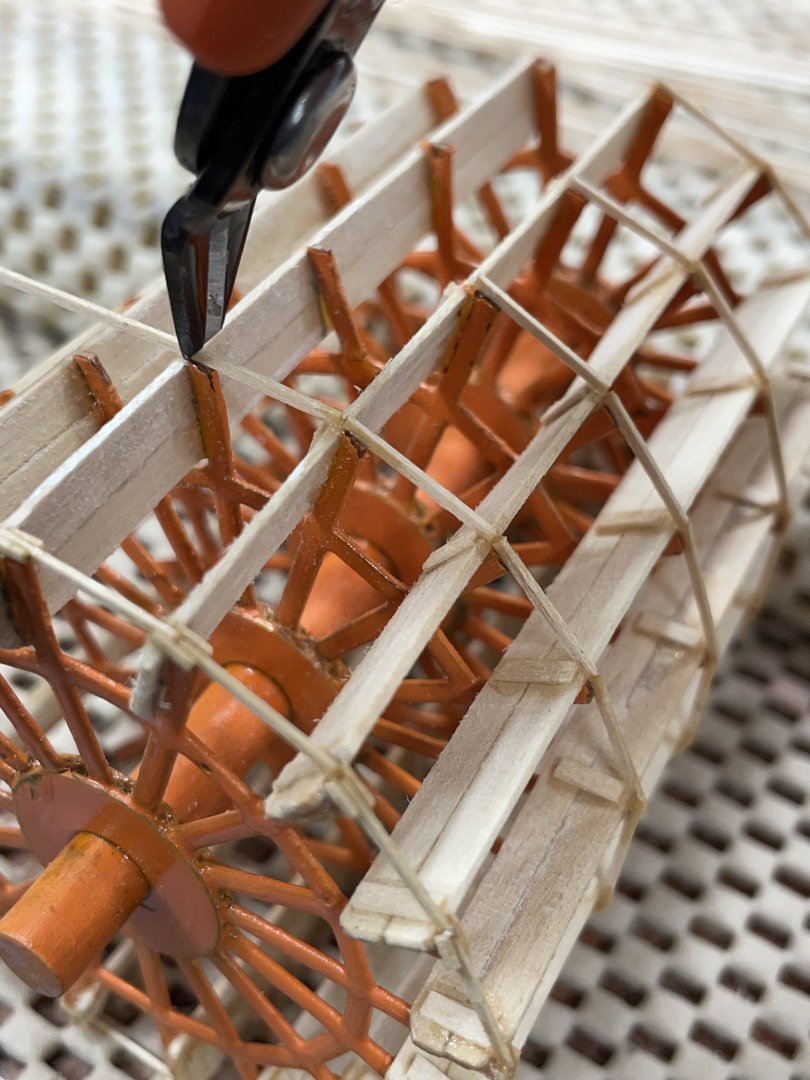
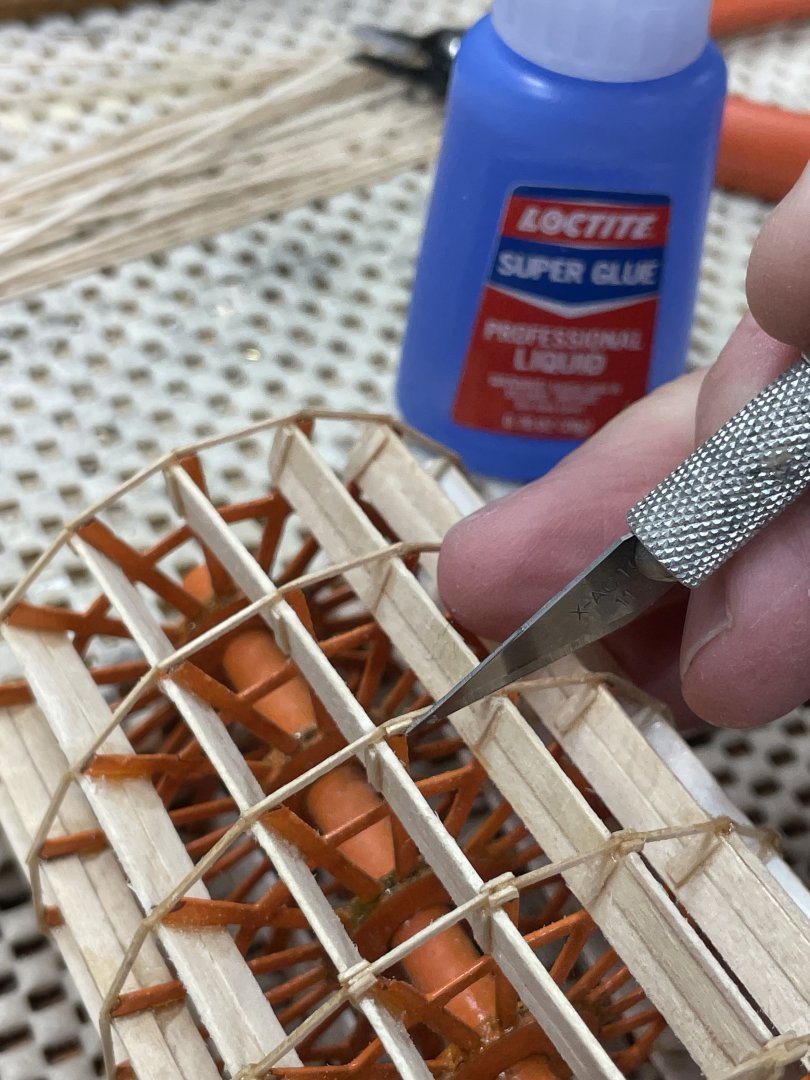
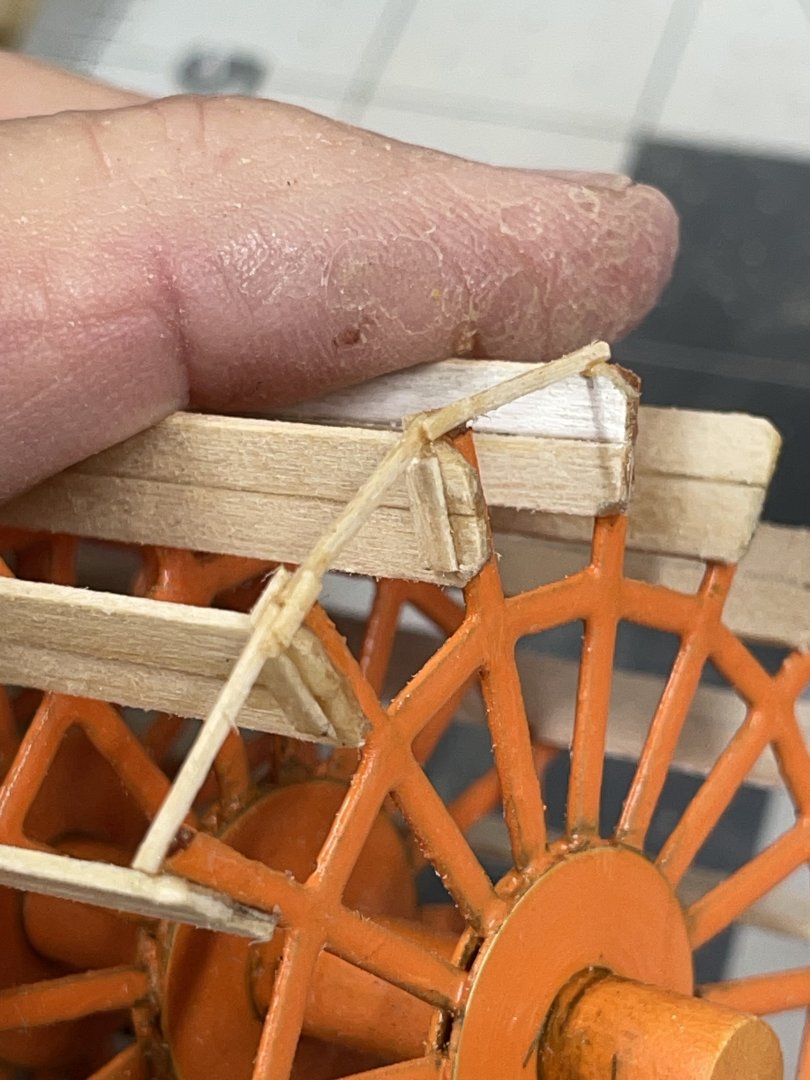
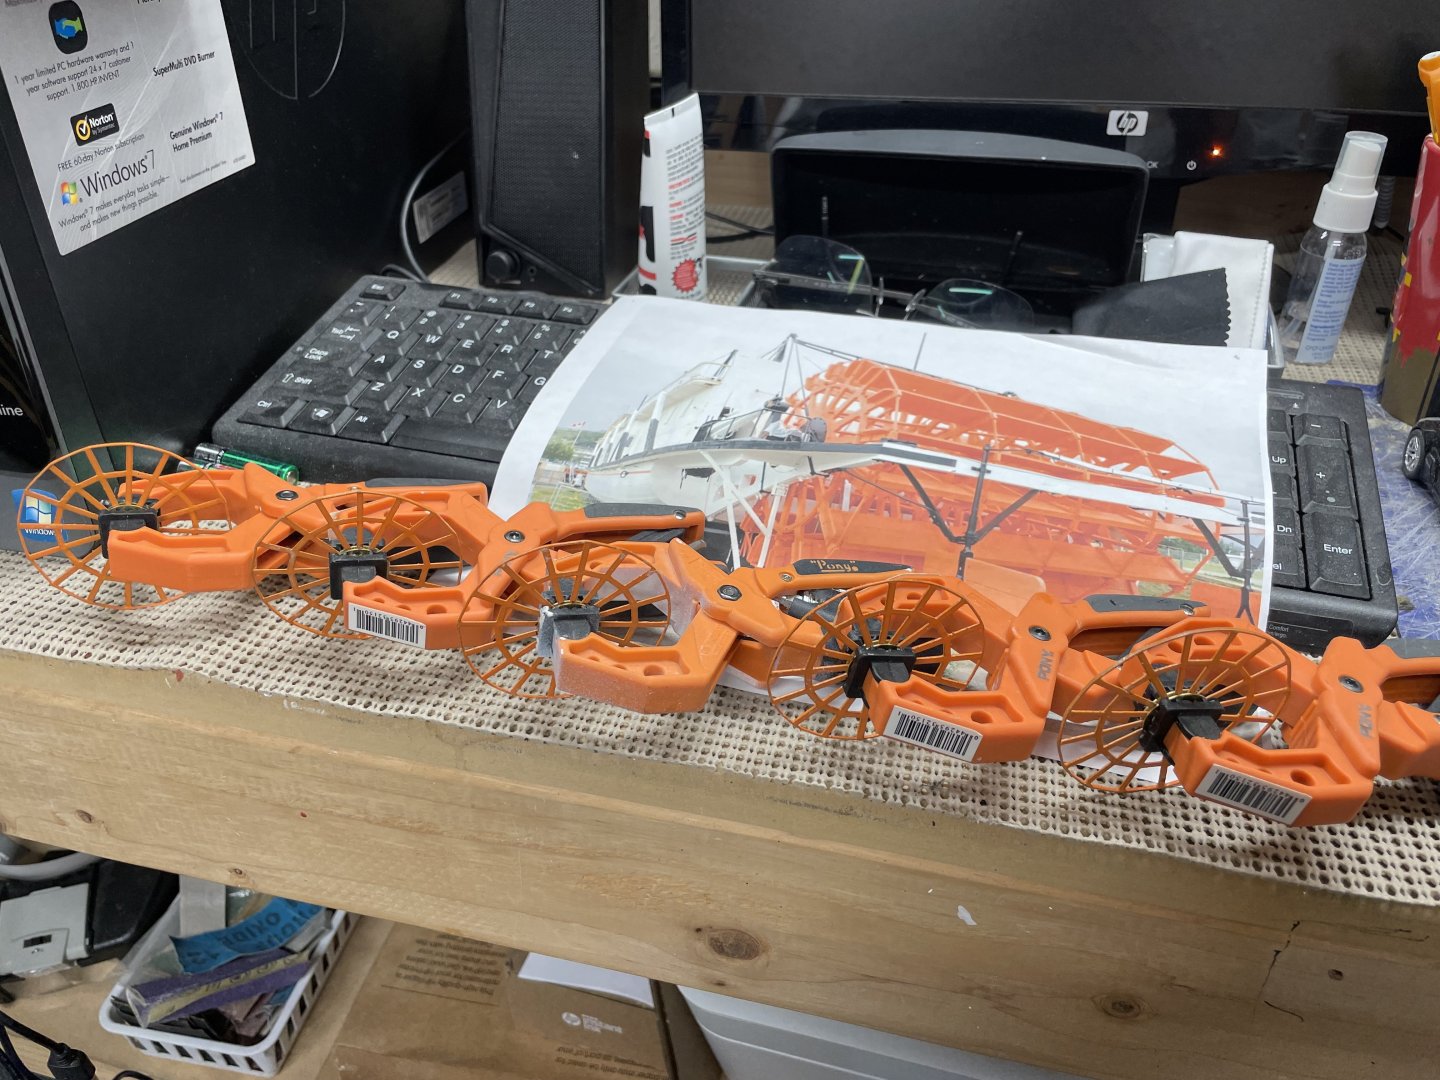
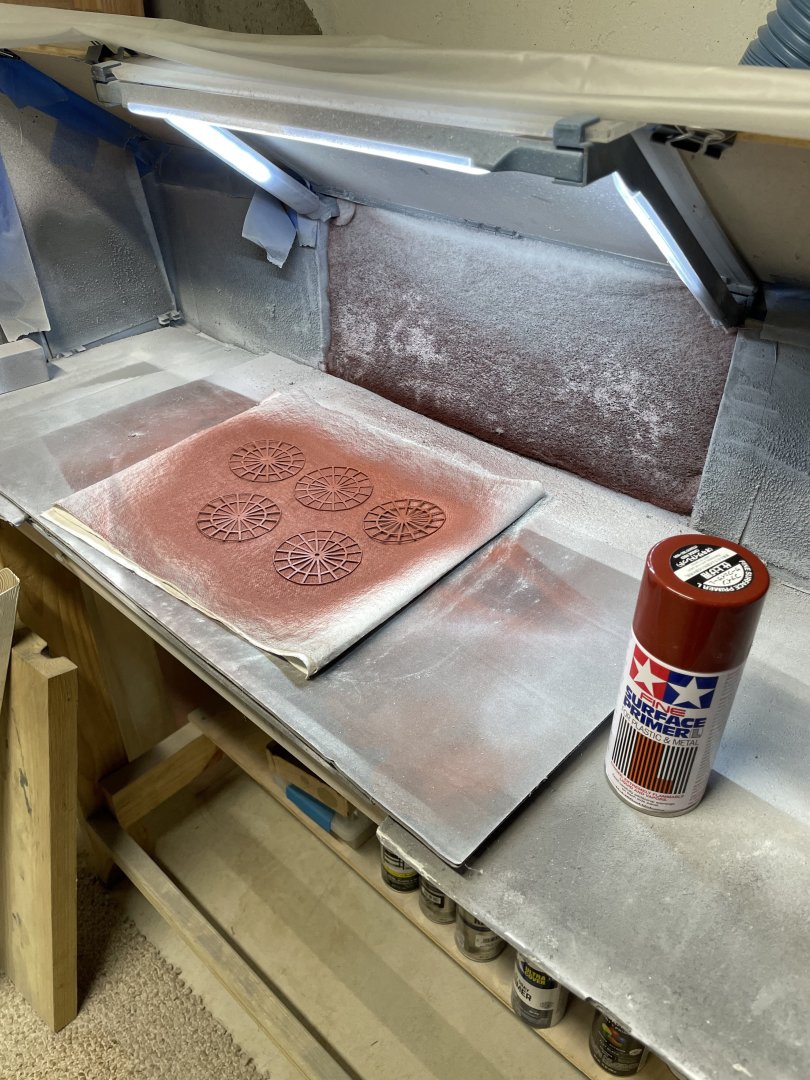
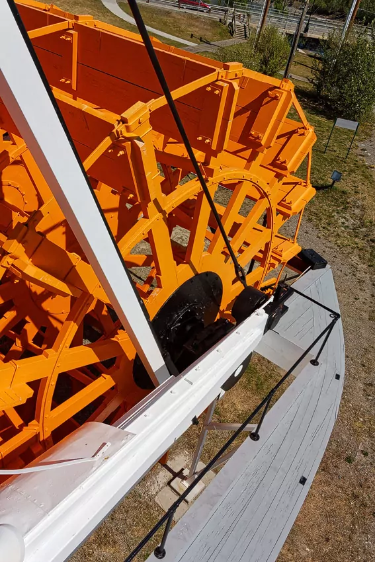
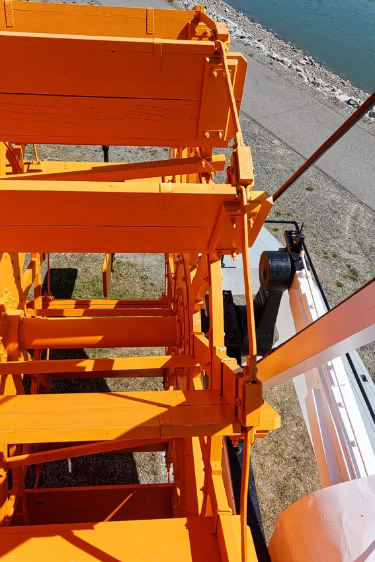
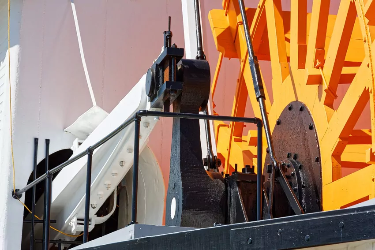
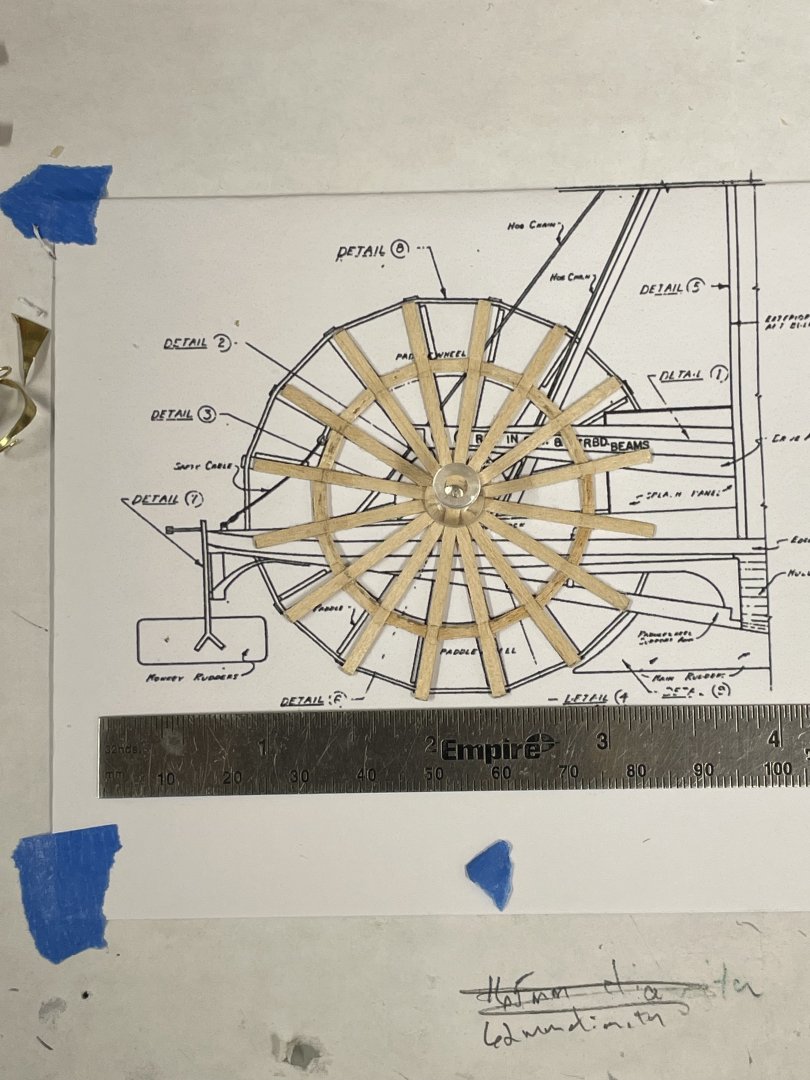
Paddle Wheel continues… Paddle Wheel completed. Cheers 🍻


-
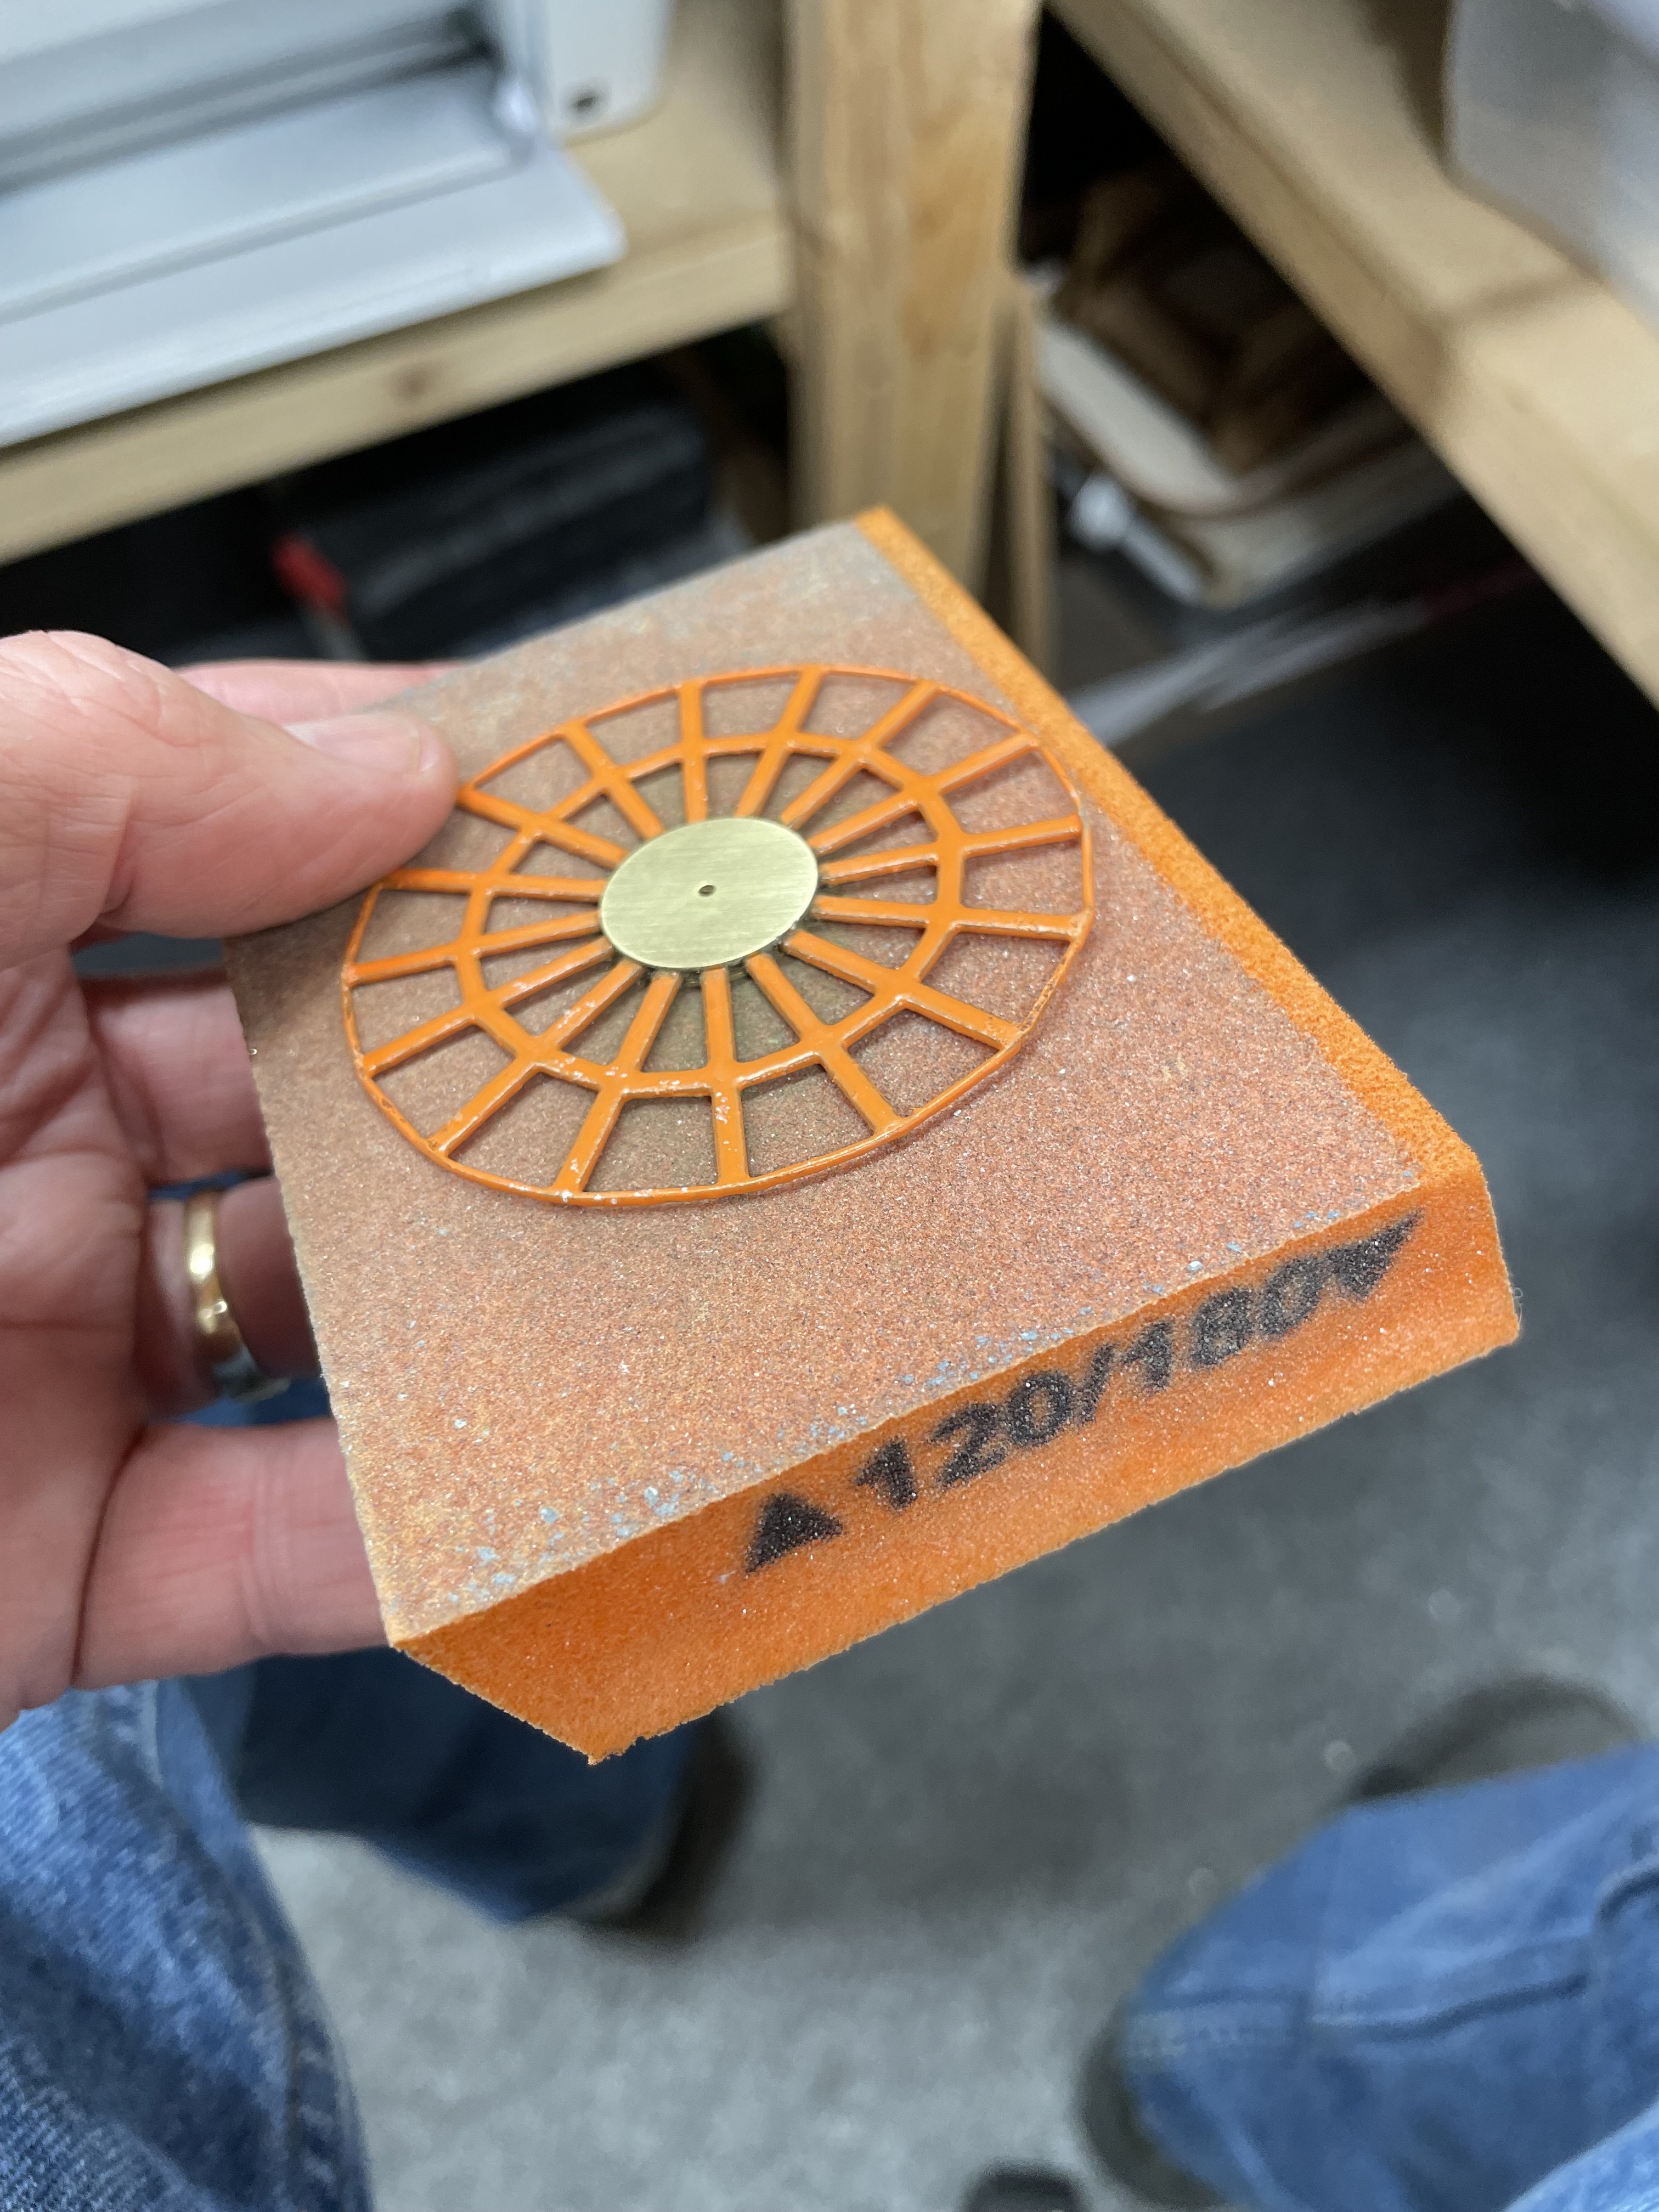
Paddle Wheel continues… DETAILS… It’s all about the details, right? Cheers 🍻


-
My mind is blown 🤯 wow!!! A great work of art Keith. Congratulations, excellent work. Cheers 🍻
- 457 replies
-
- 2
-
-
-
- sternwheeler
- Hard Coal Navy
- (and 1 more)
-
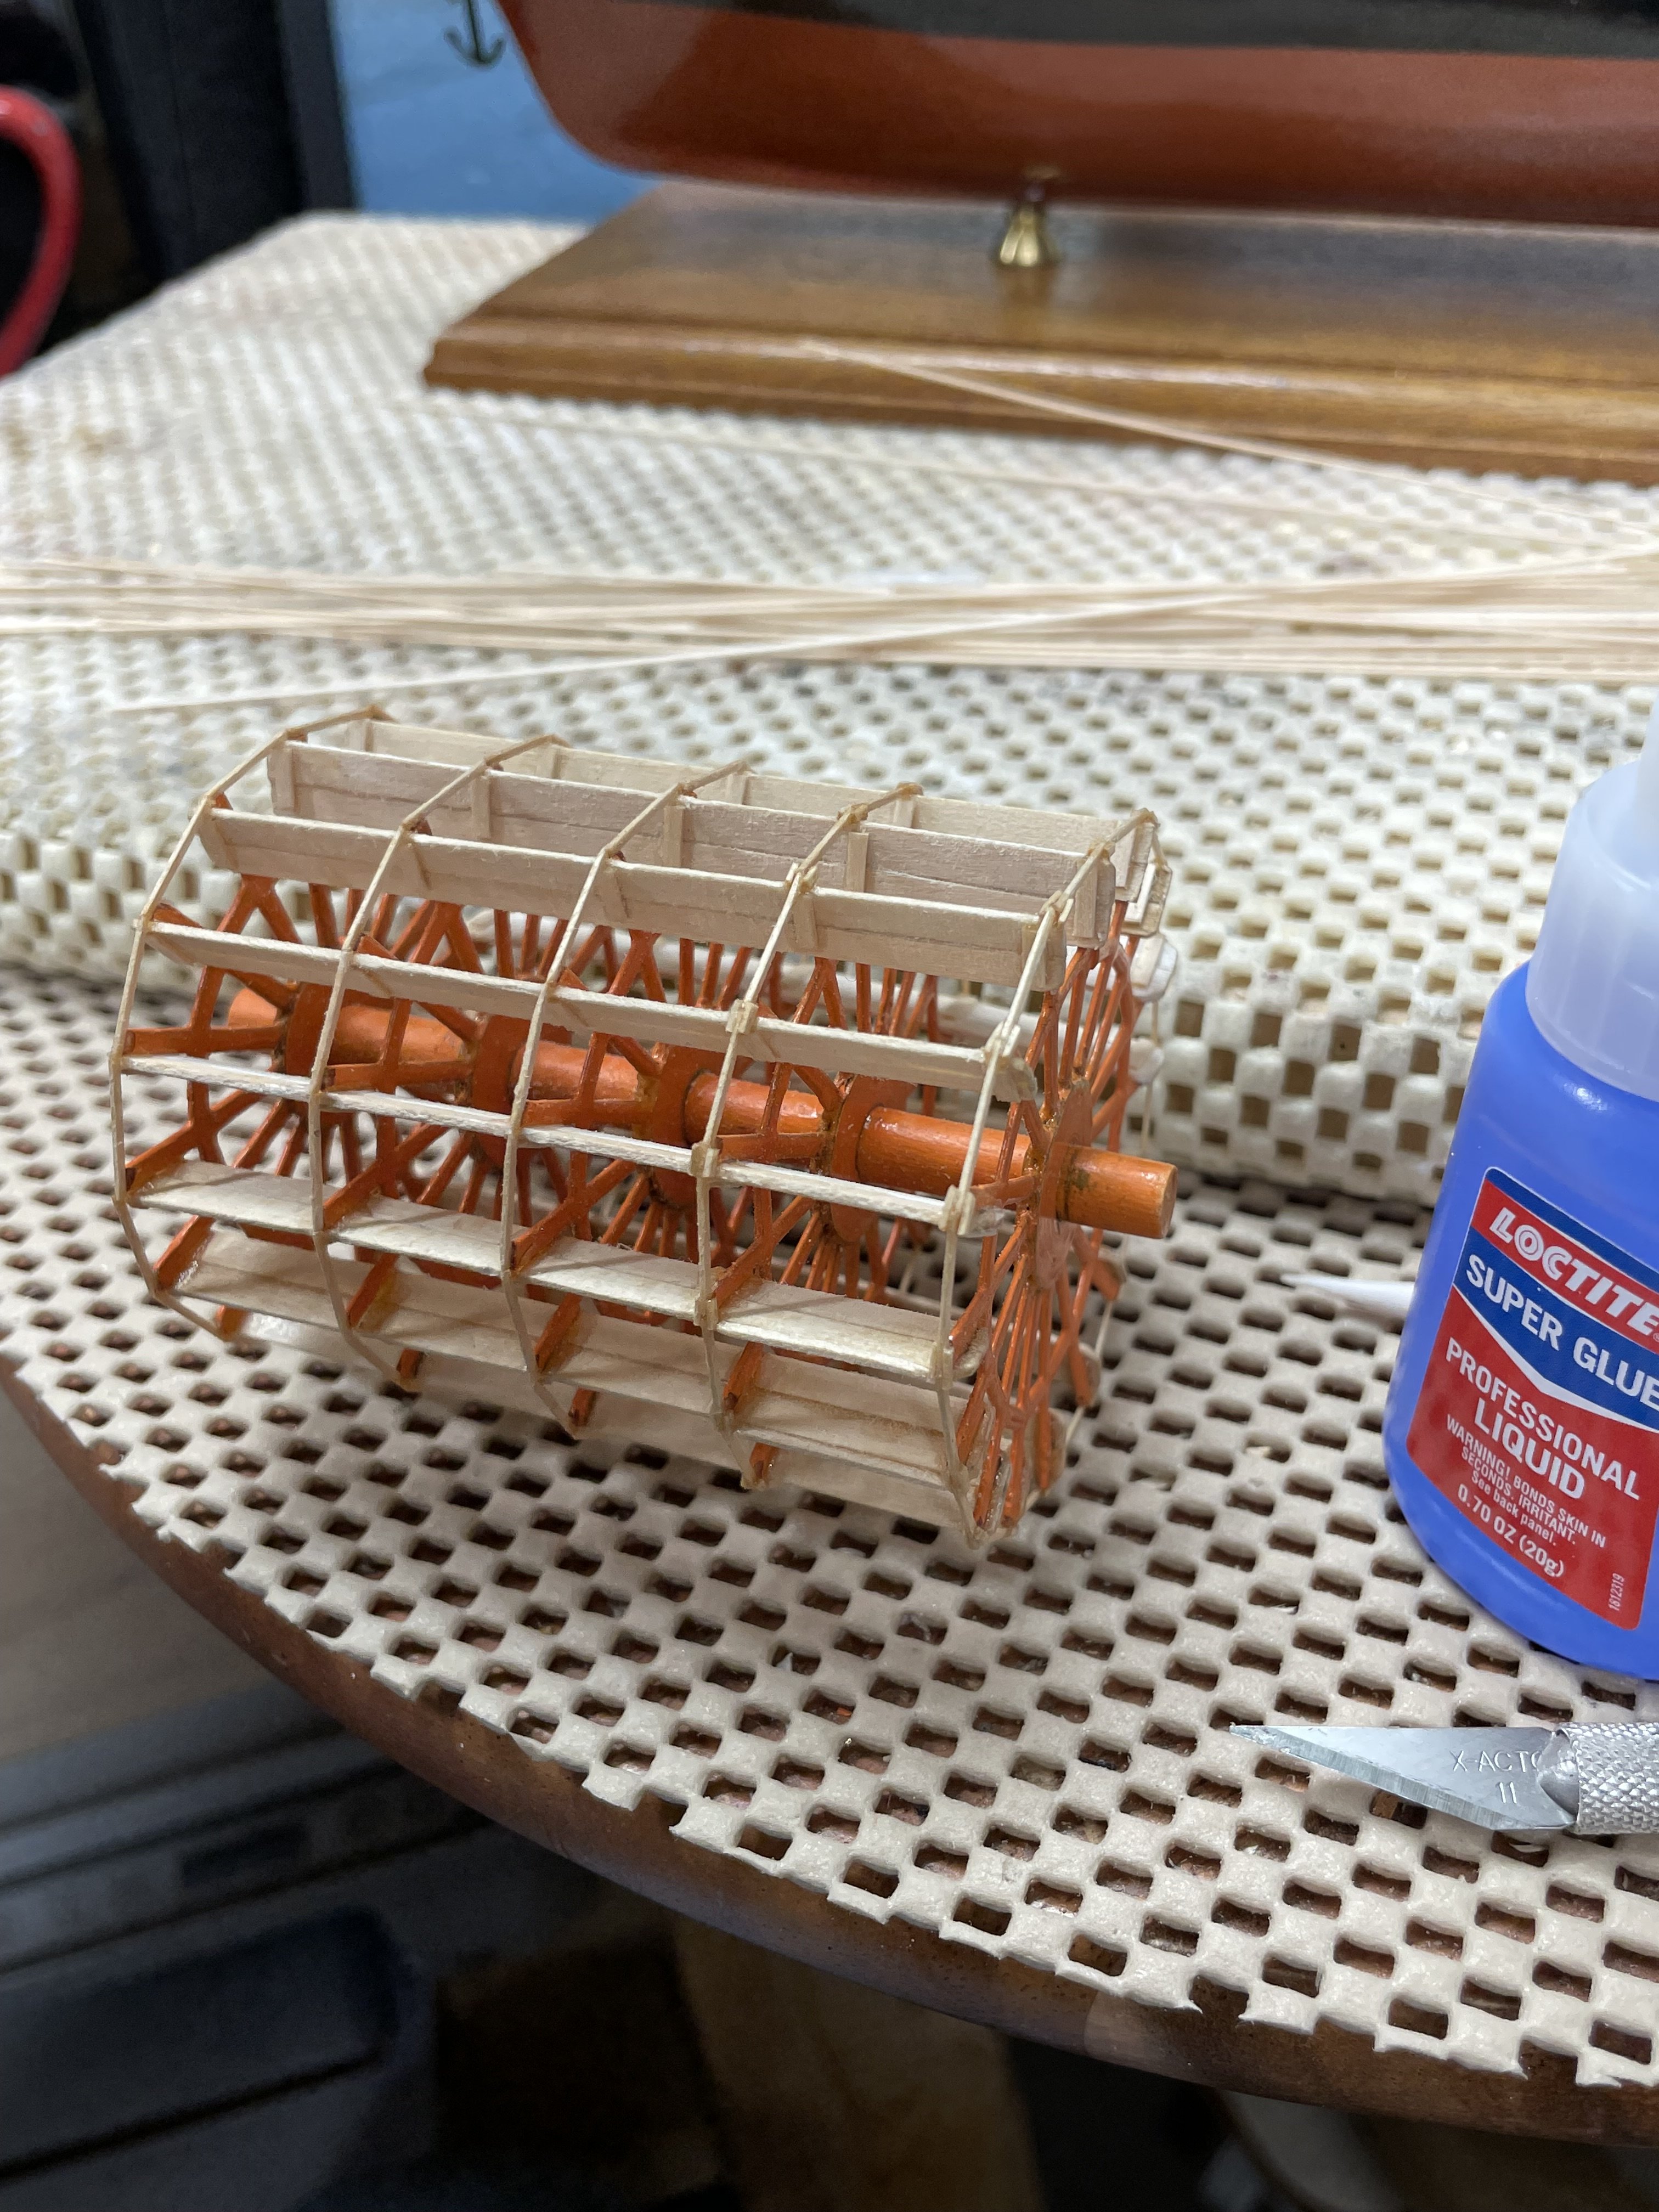
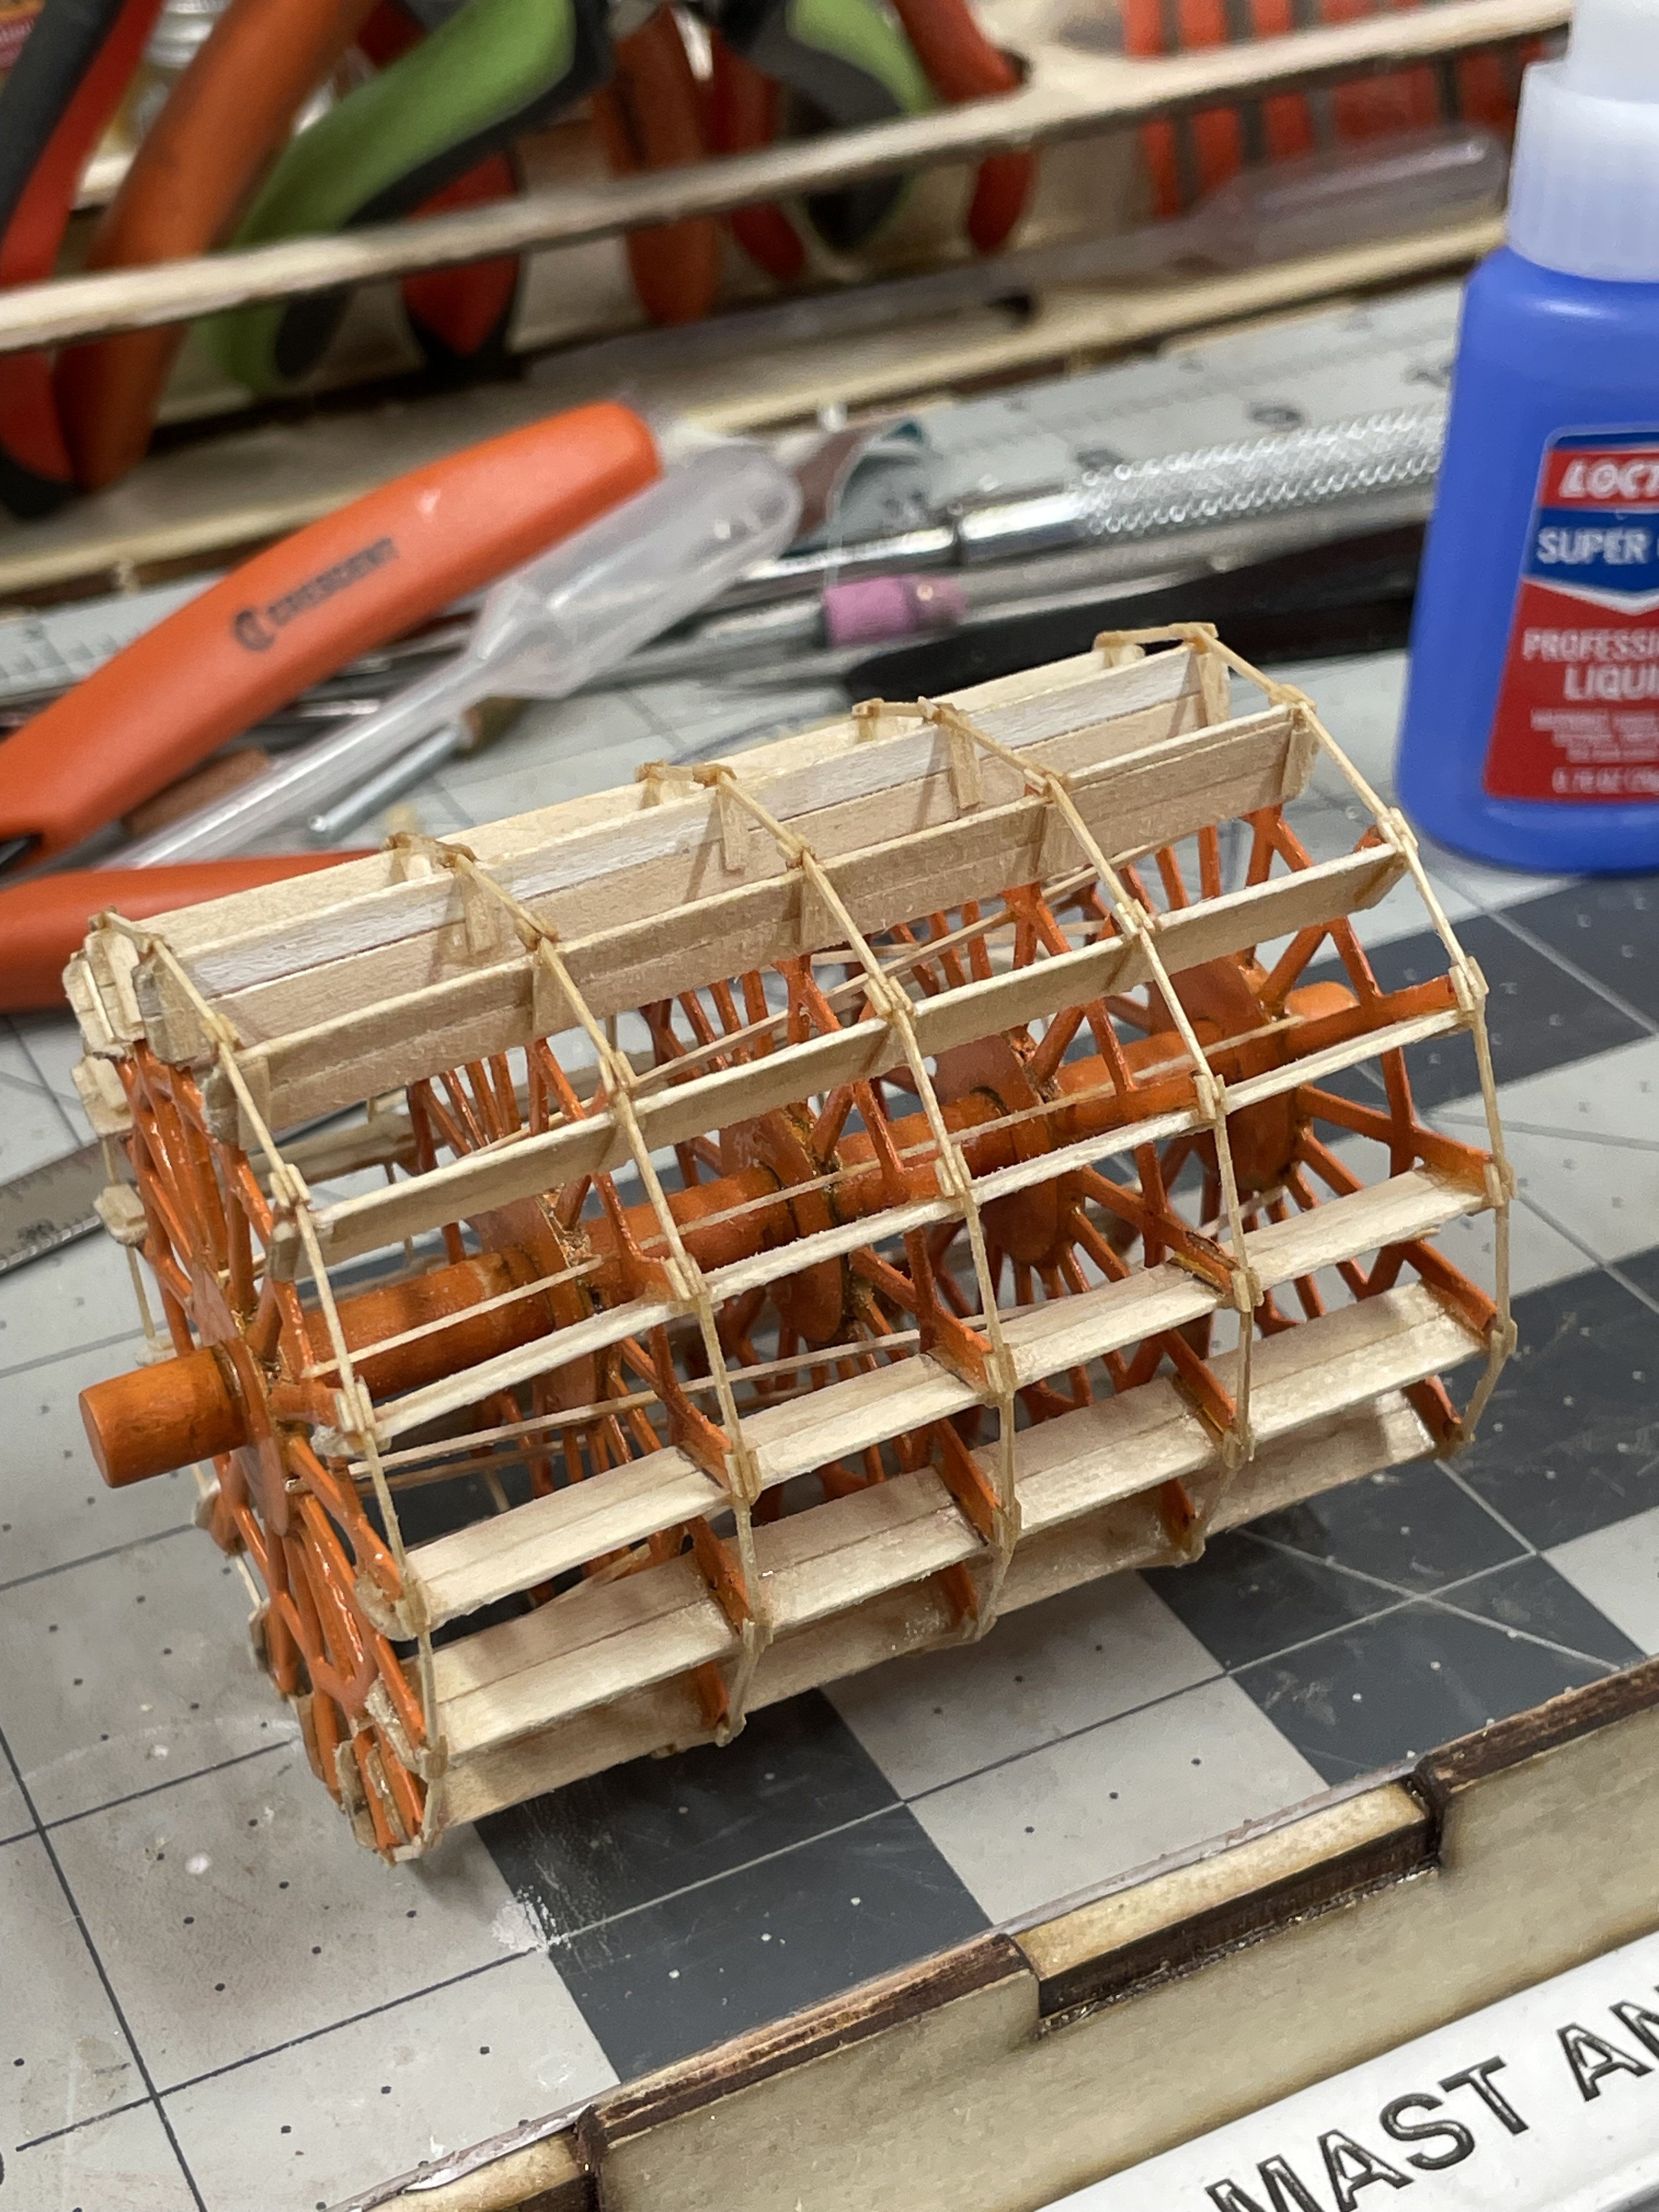
Paddle Wheel continues… Progress… Cheers 🍻


-
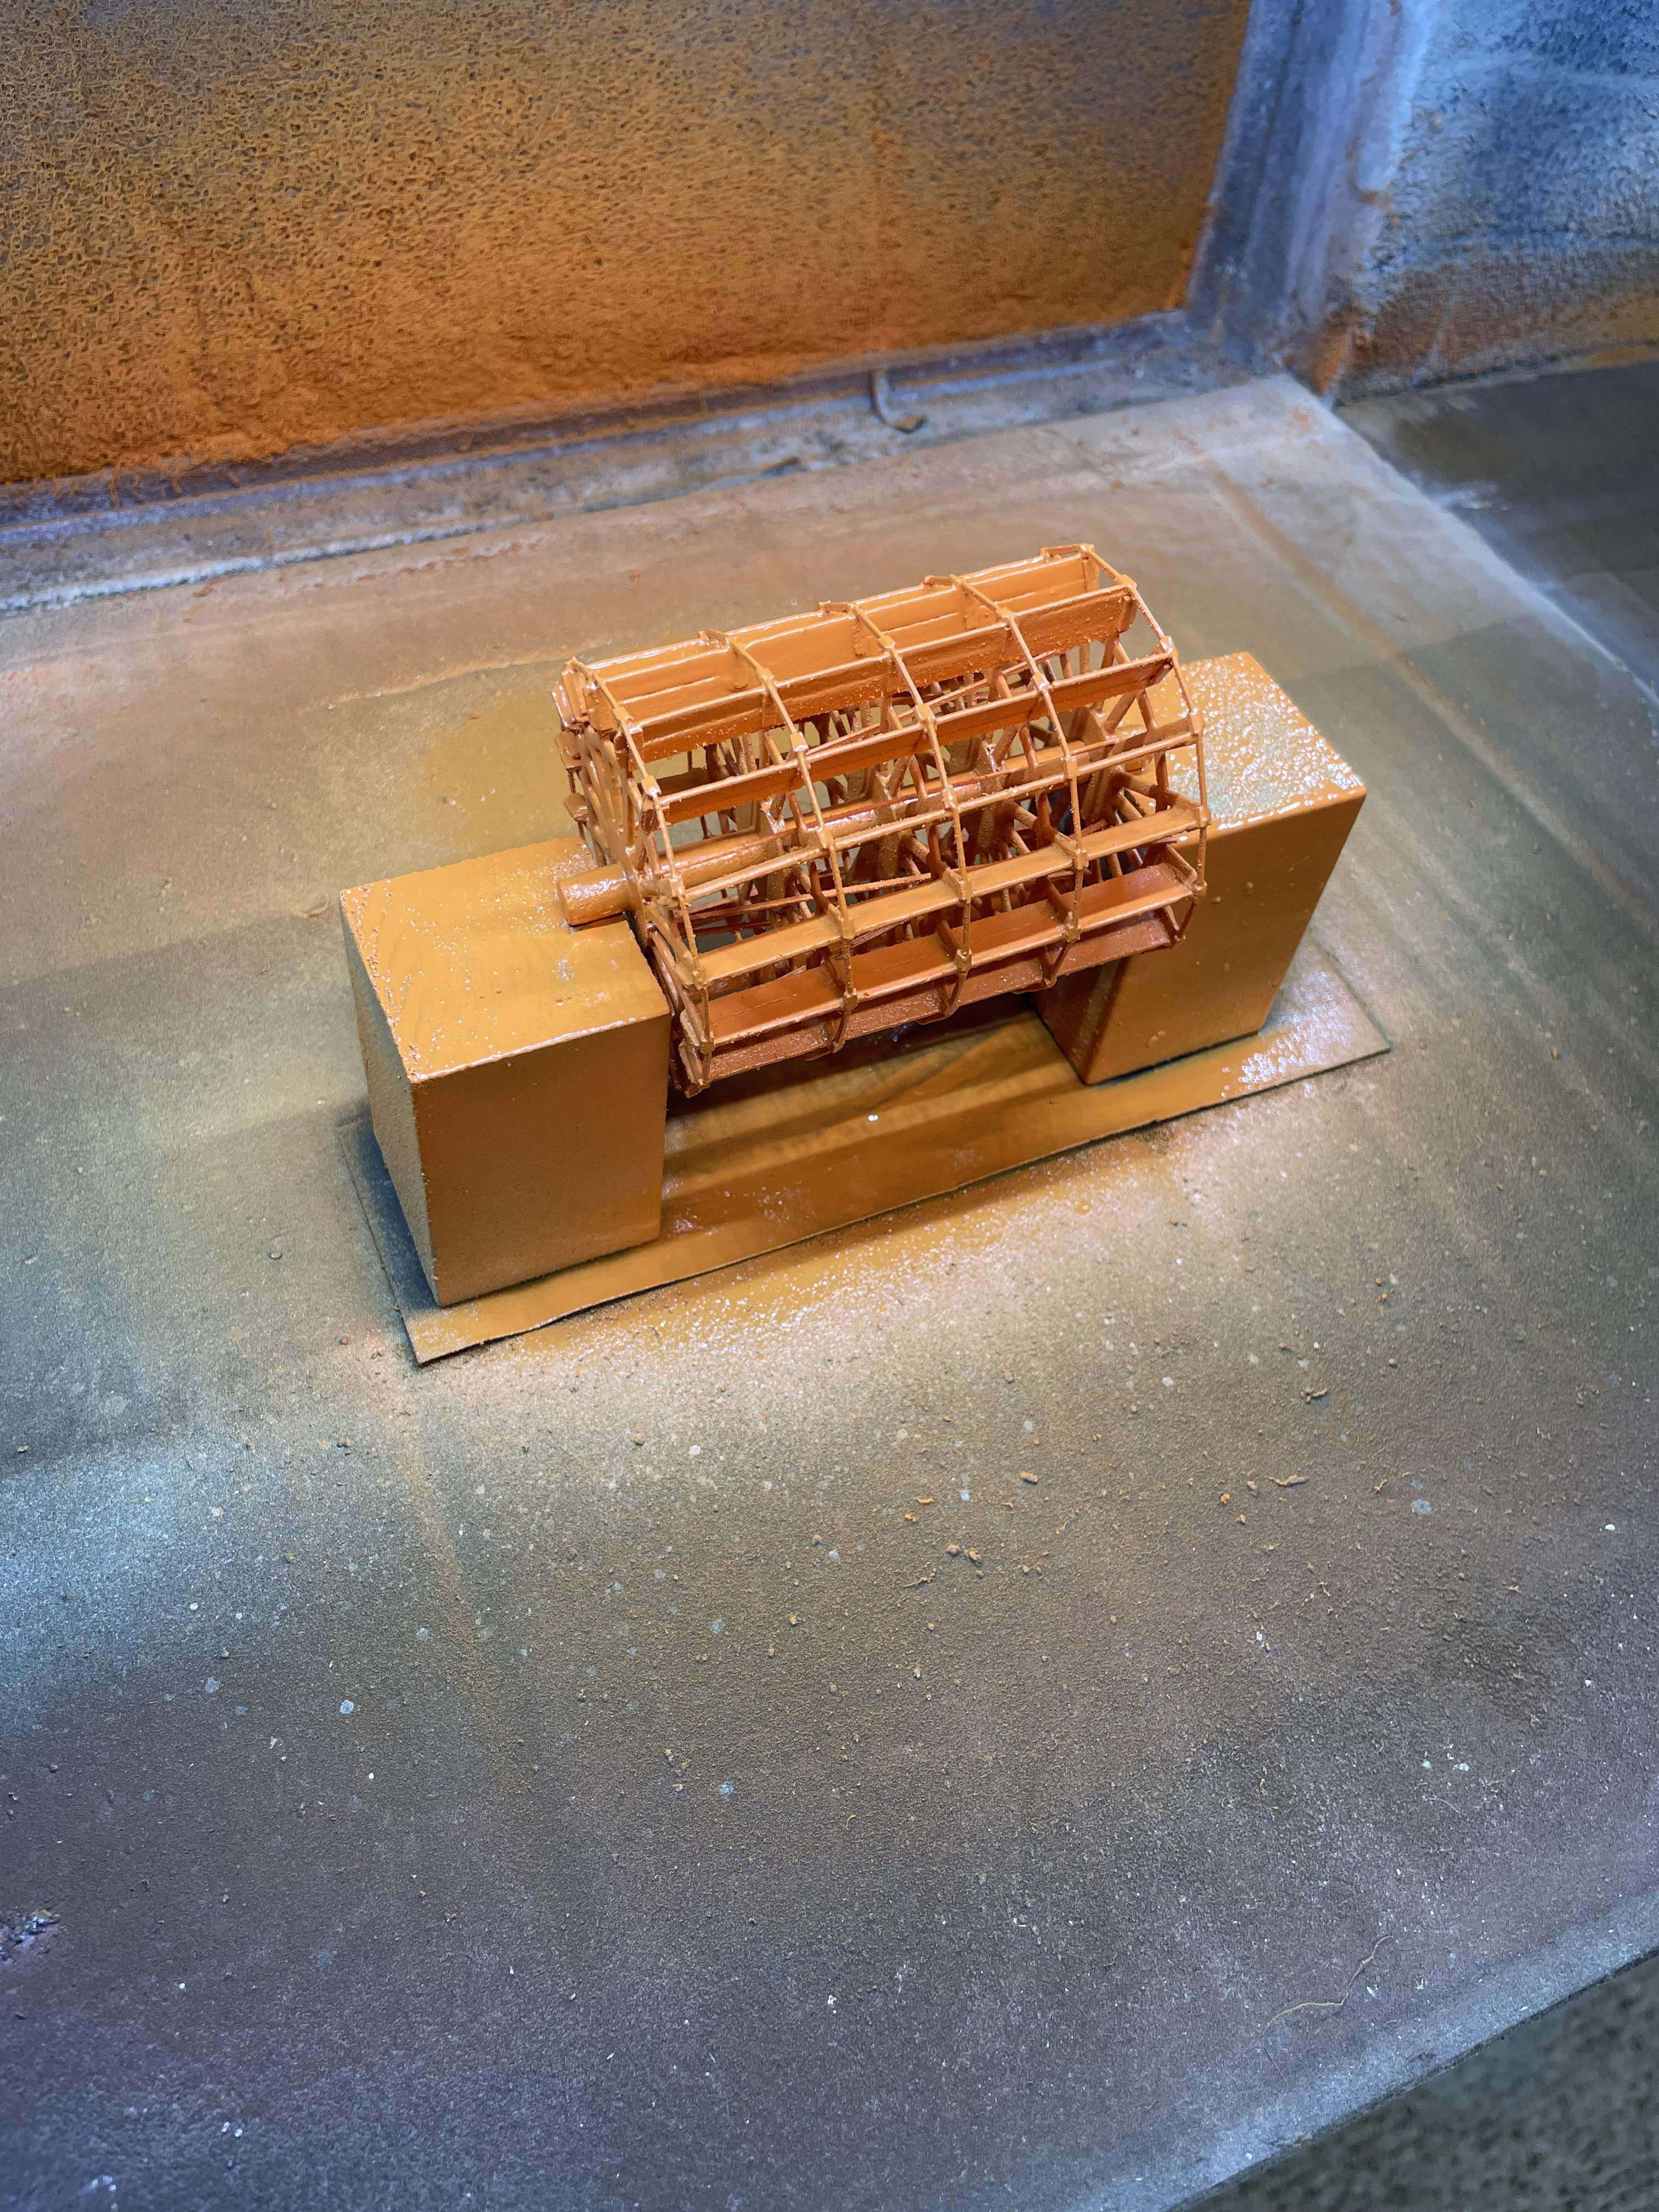
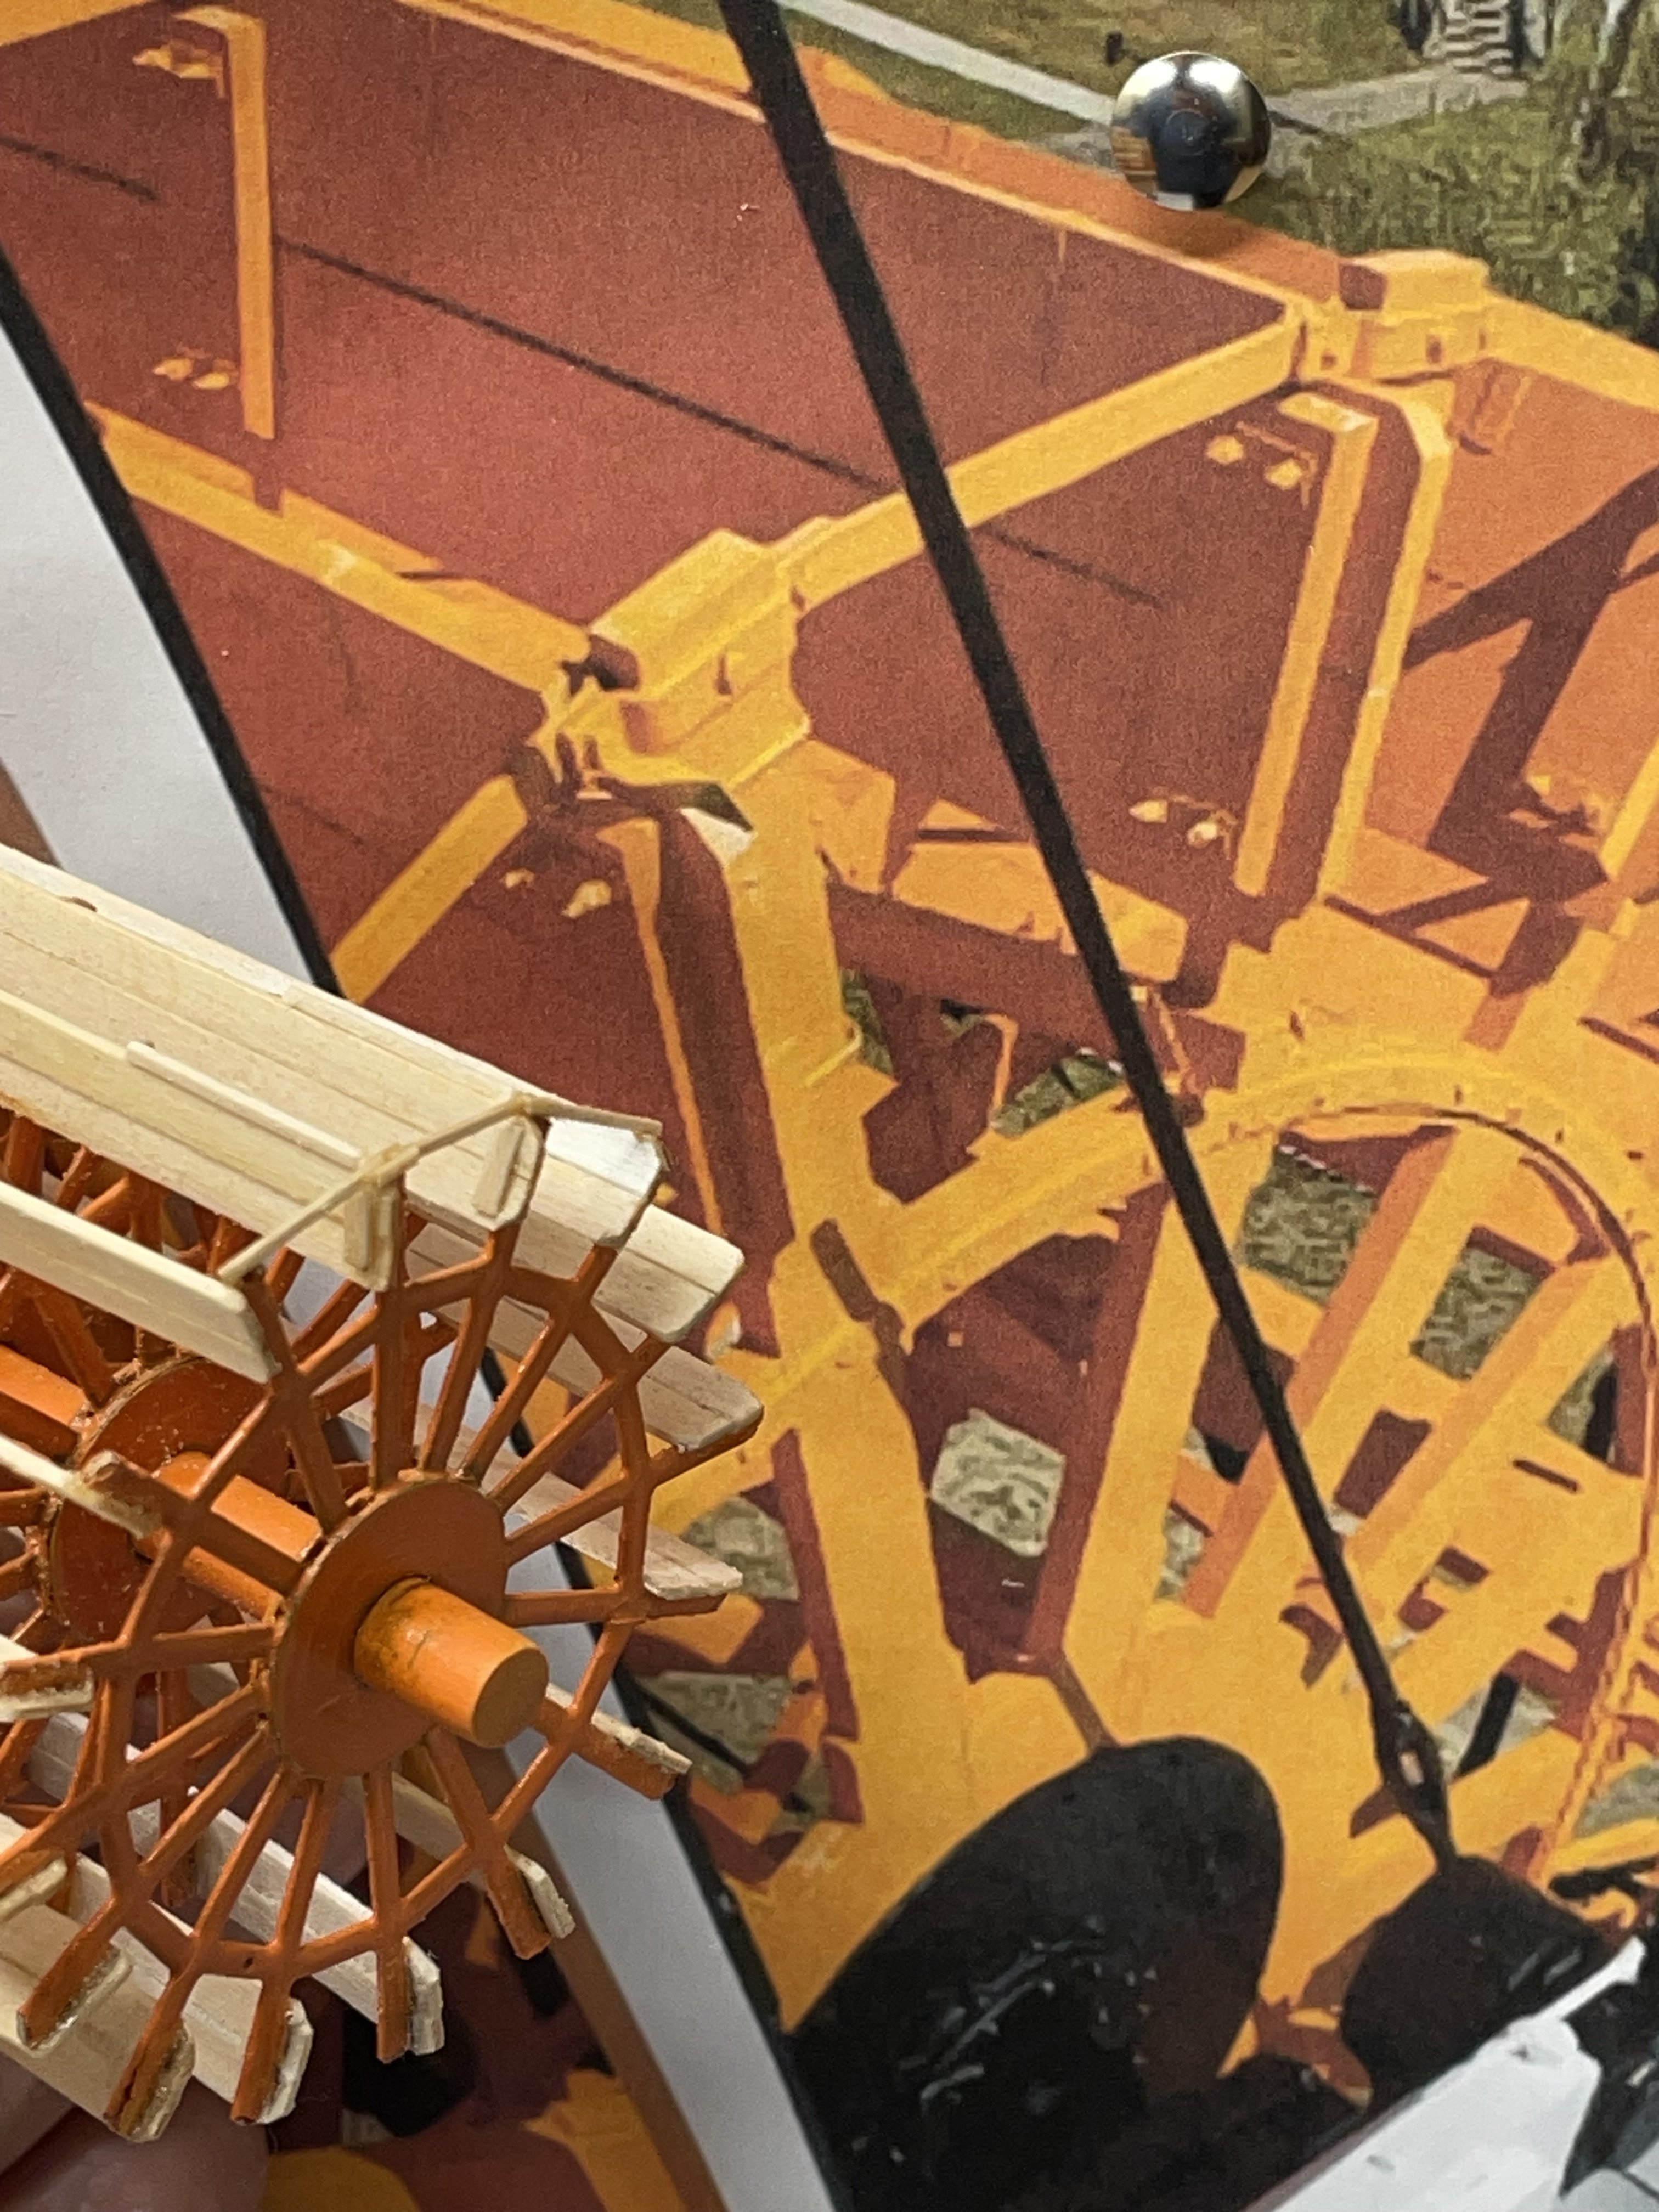
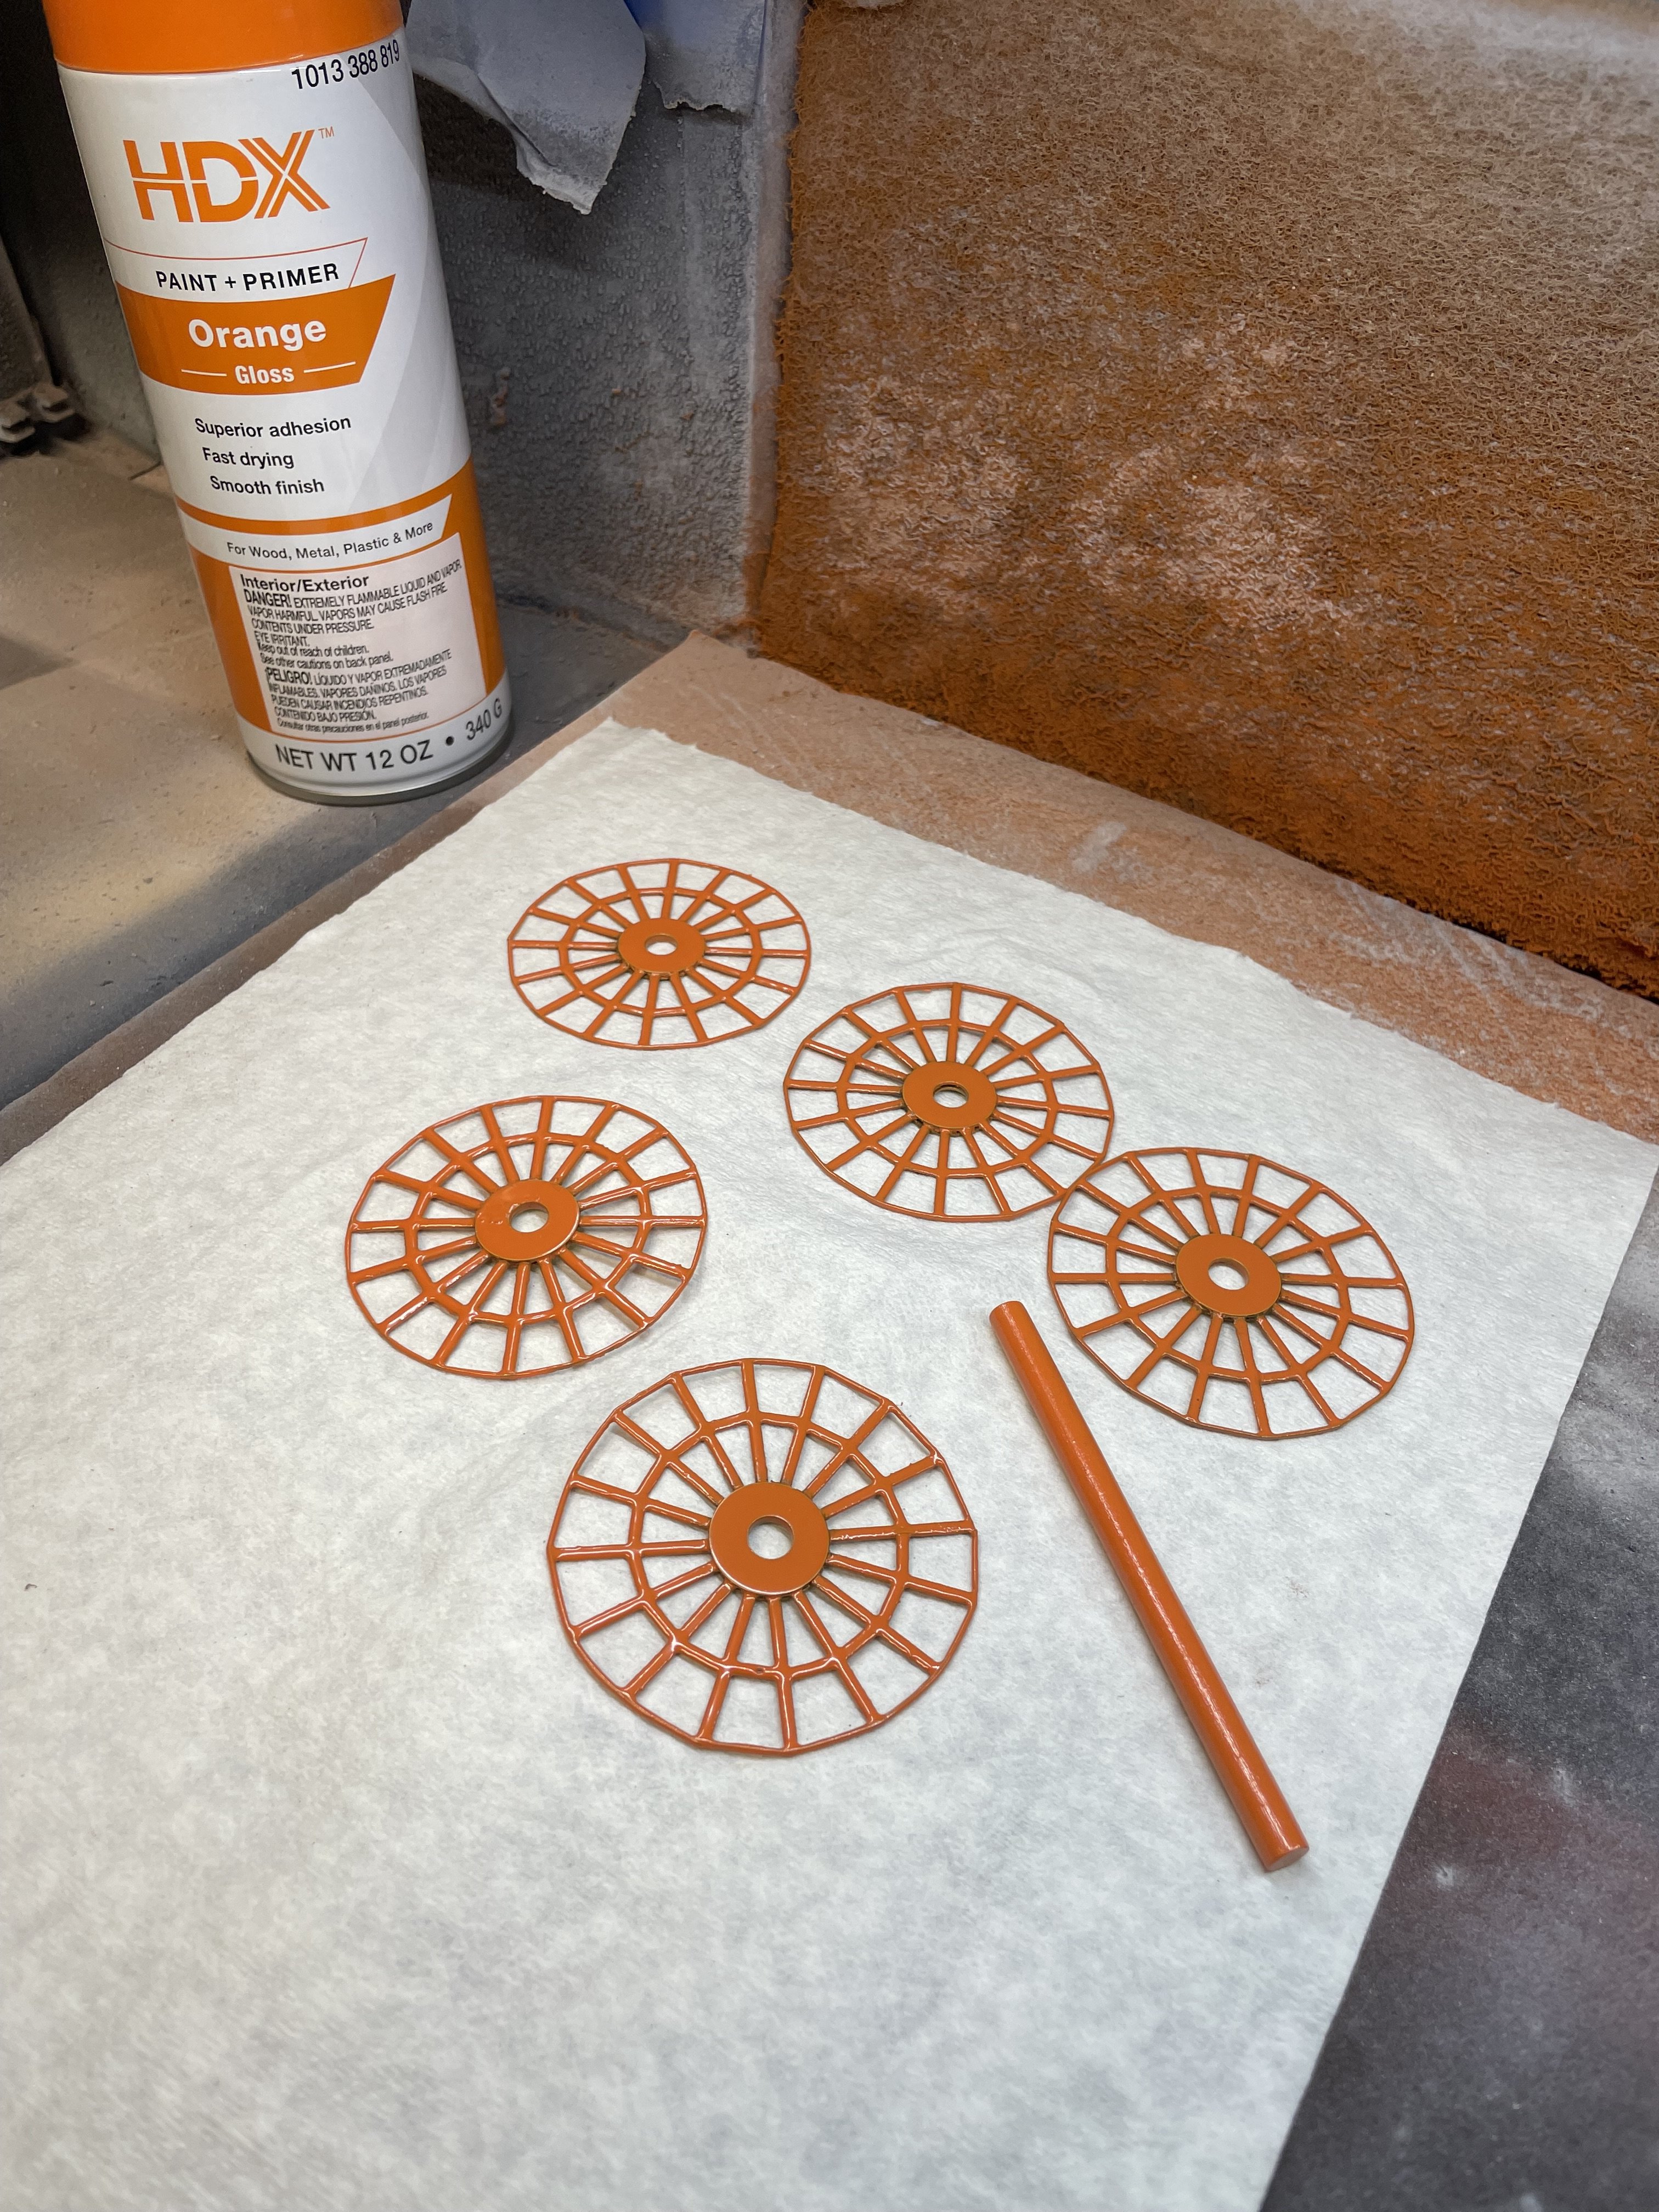
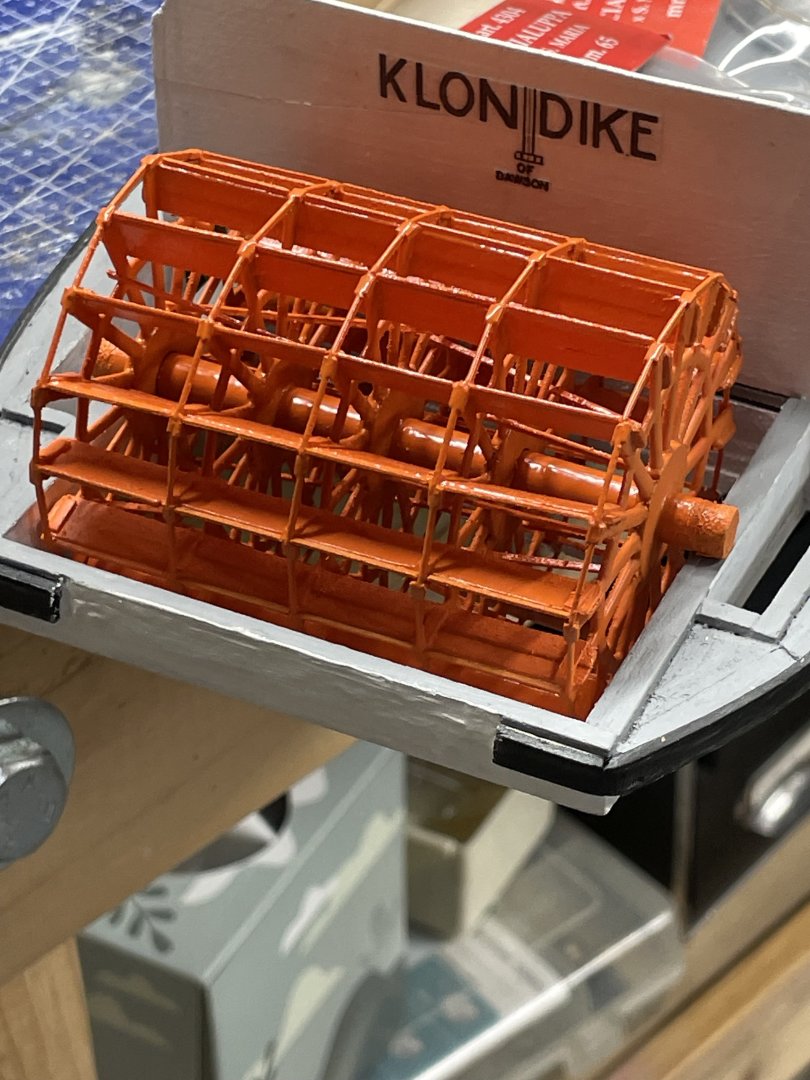
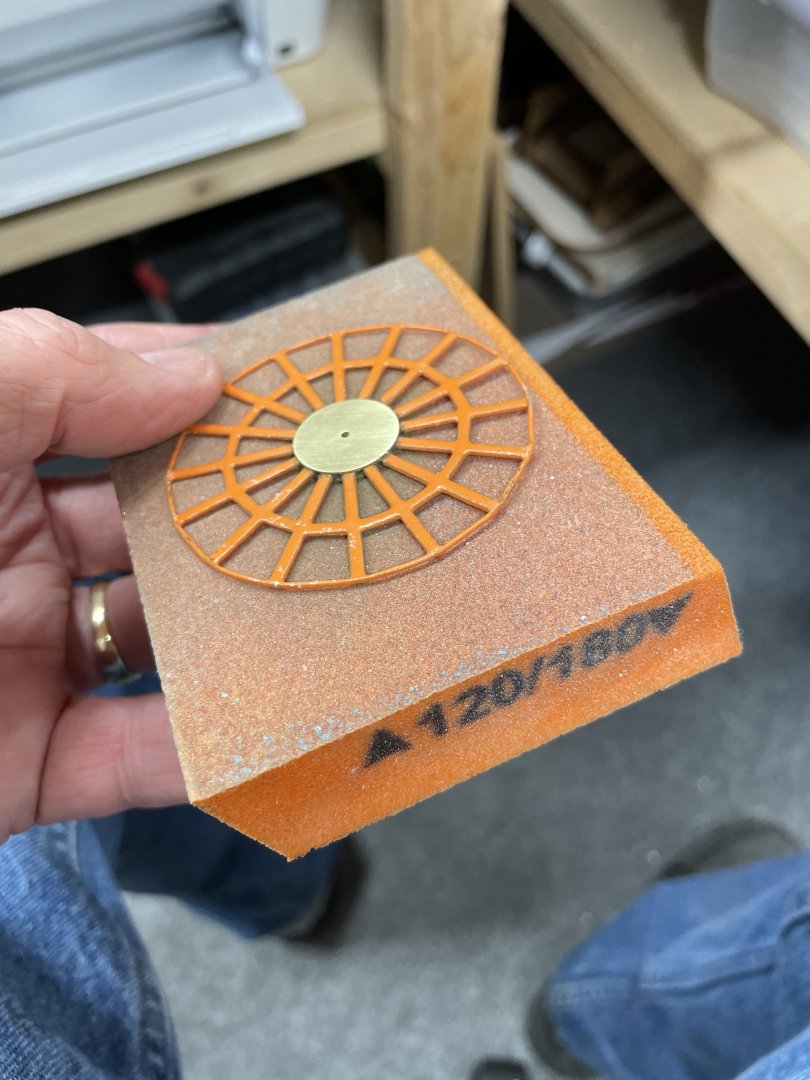
Prime and Paint… Home Depot HDX Gloss Orange w/semi gloss clear coat. Cheers 🍻
-
Not bad, your work doesn’t look like a “shaky old man” to me. Carry On, Sir. Cheers 🍻
- 261 replies
-
- 4
-
-
-
- Victory Models
- Pegasus
- (and 3 more)
-
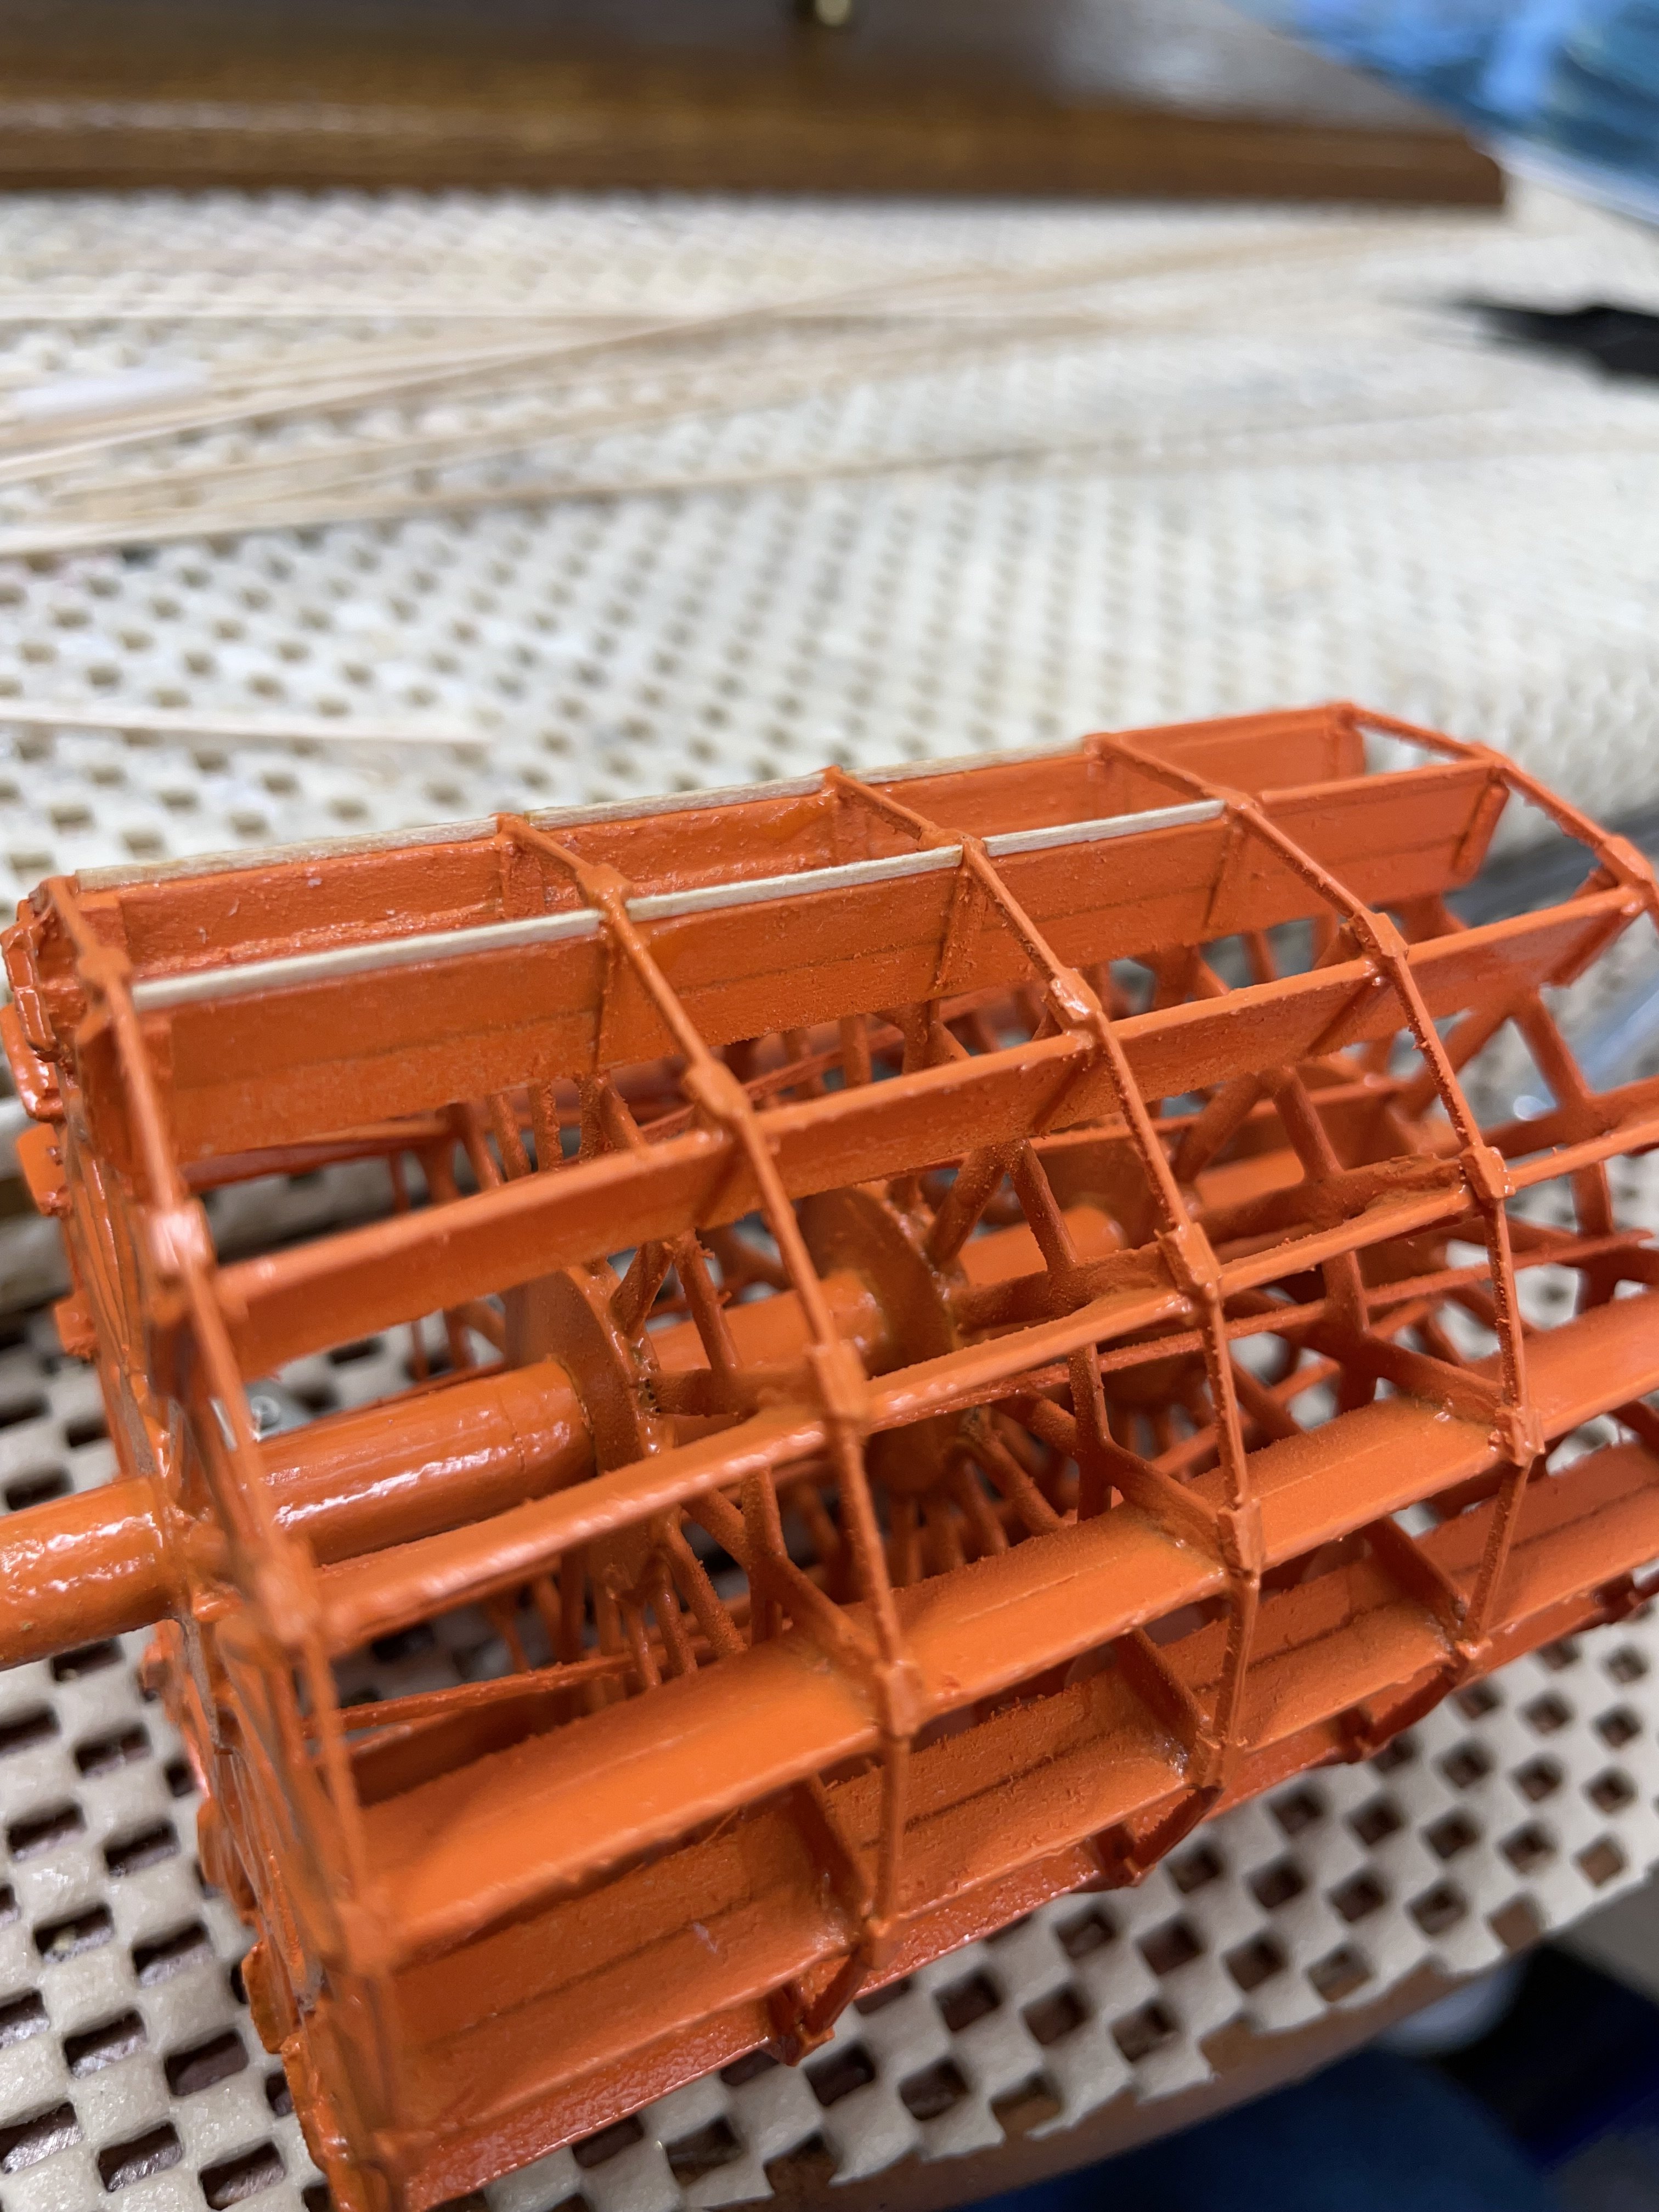
Great job Keith… Holds up to closeup photograph. Very cool! 😎 Cheers 🍻
- 457 replies
-
- 4
-
-
-
- sternwheeler
- Hard Coal Navy
- (and 1 more)
-
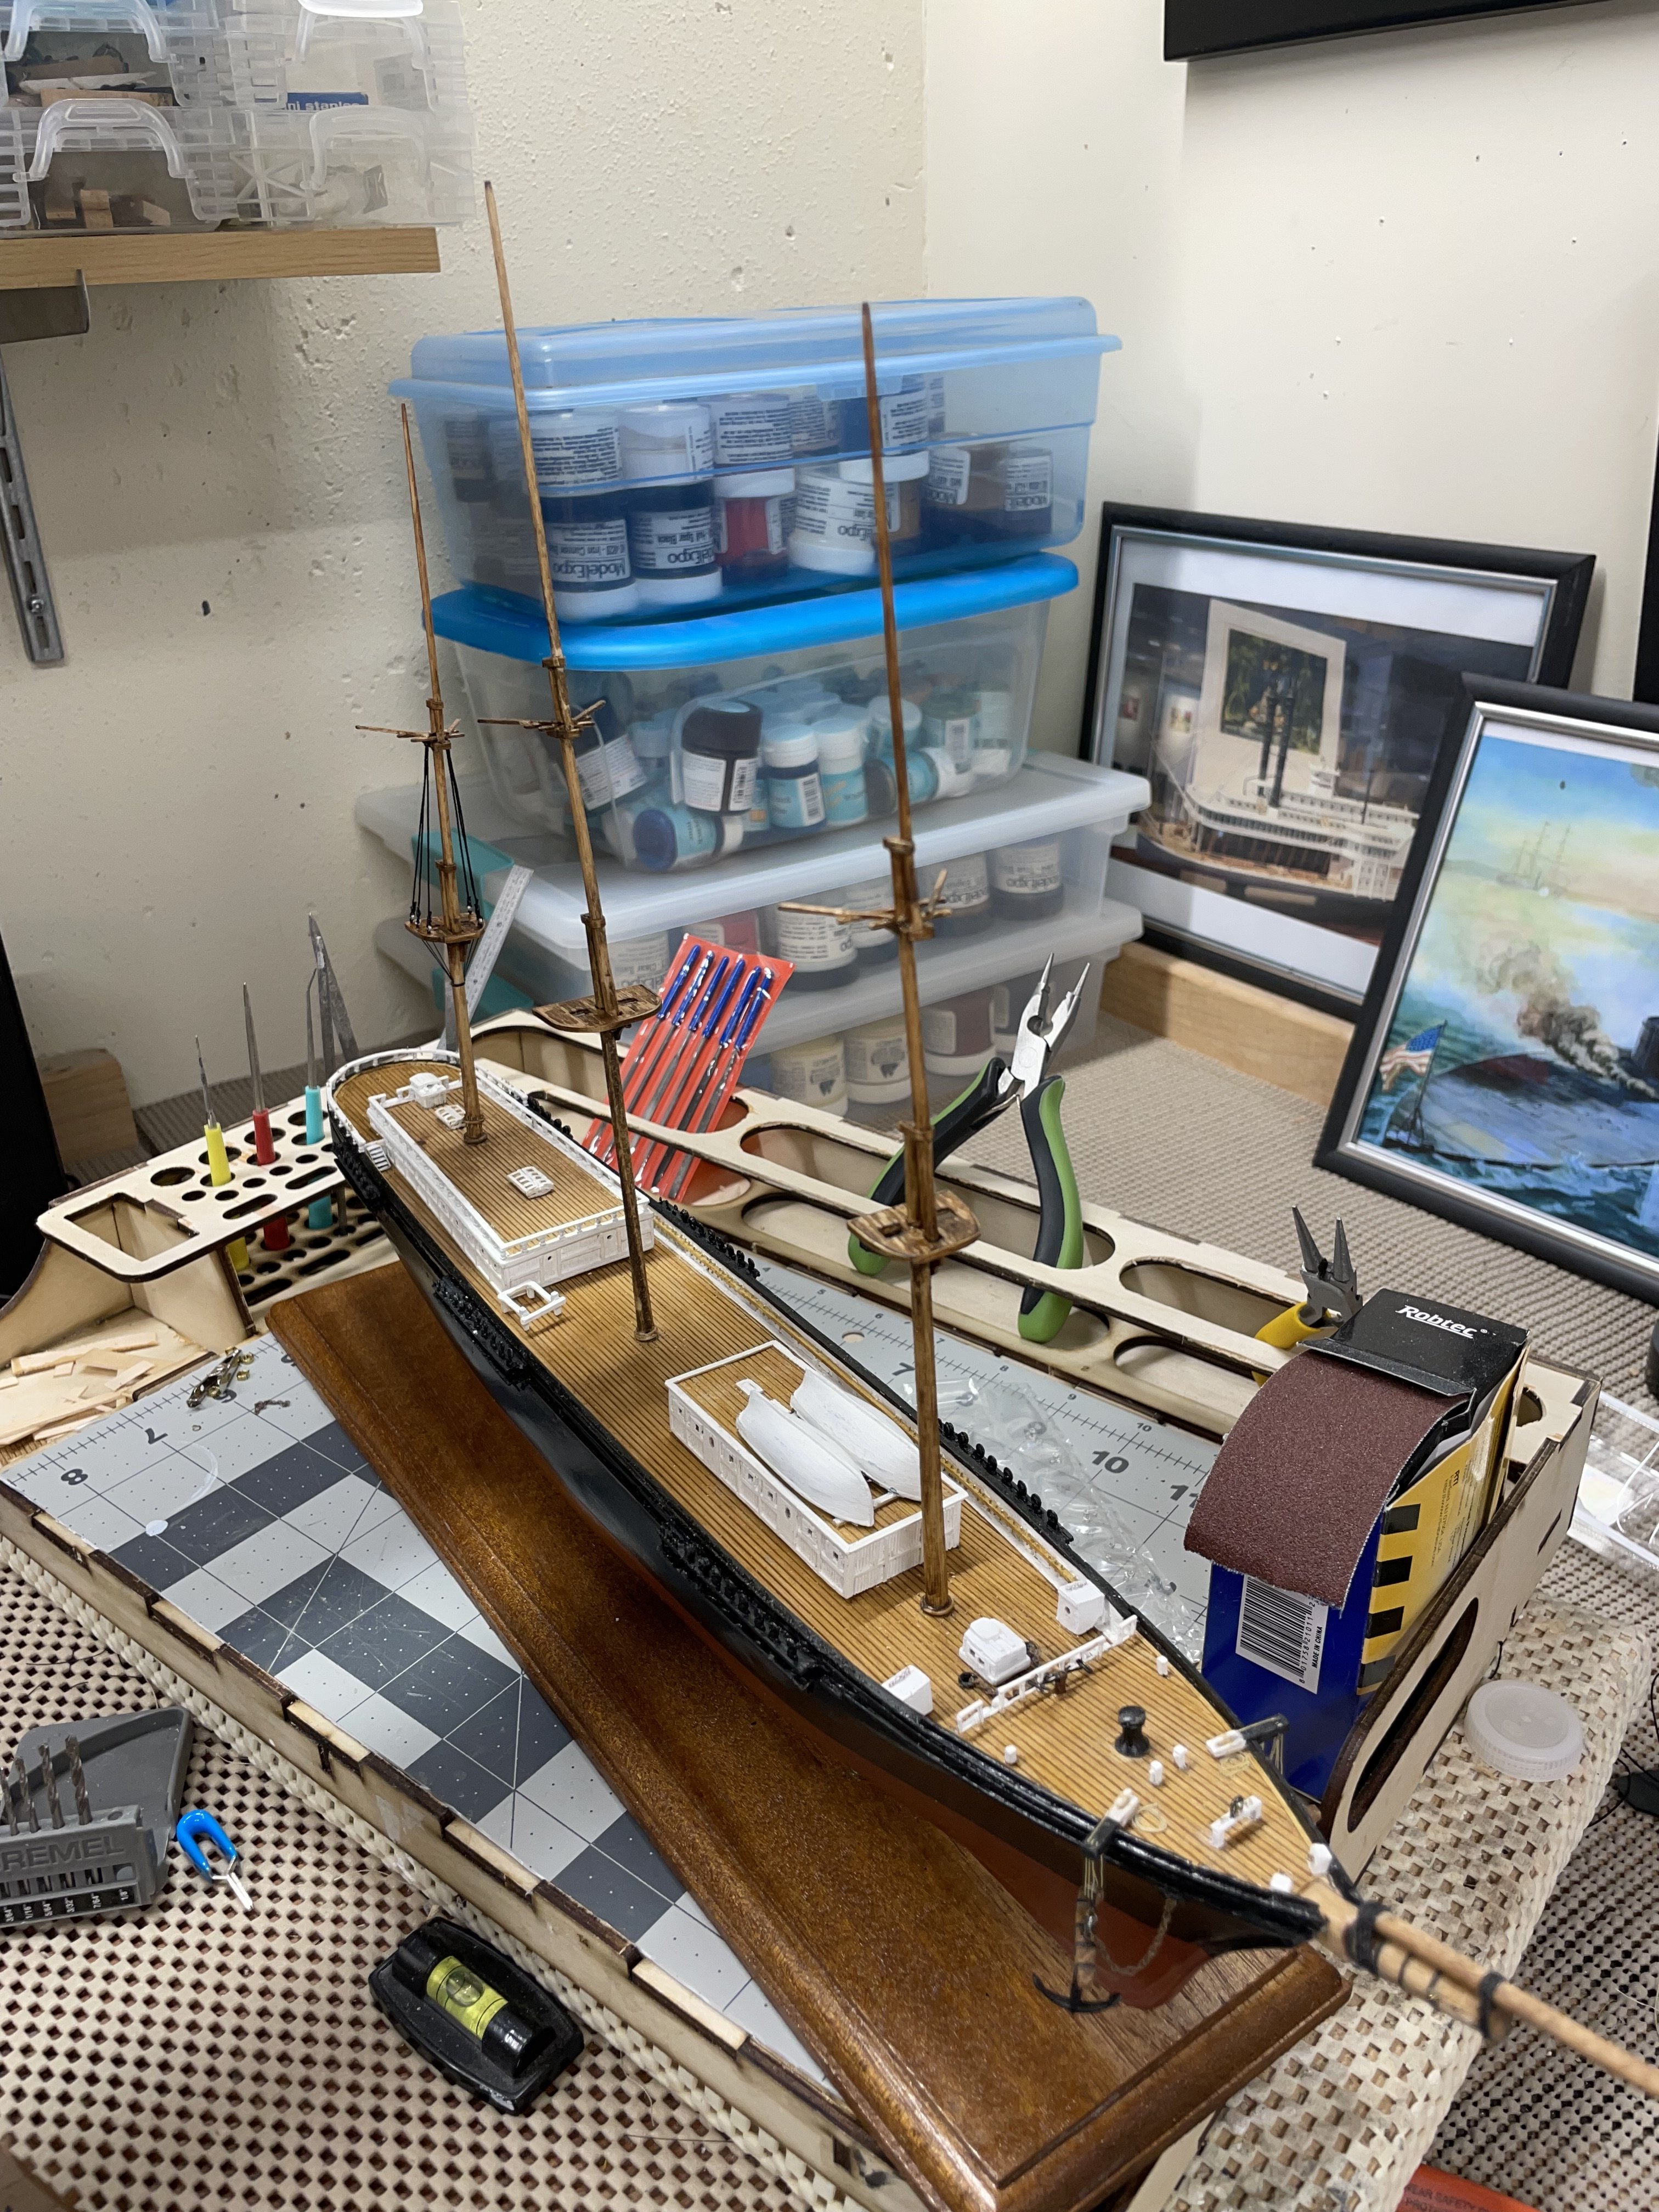
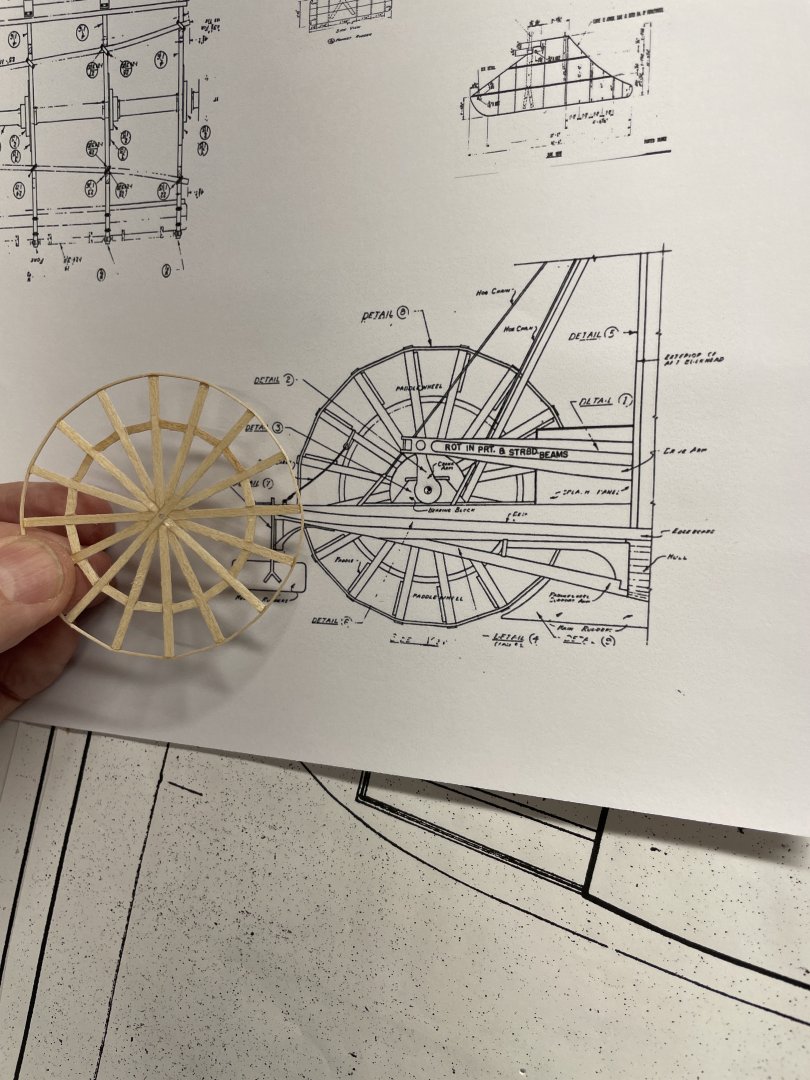
Of course the more detail I can get into her the better. Here is what I currently have. Closeups of the rudder systems would be great. 👍


-
Glad to hear you are back at it. The shrouds are looking great. Ratlines are always a good way to put a grin on one’s face. Painting penguins with your niece is a good start. 😆 You’ll be out of the dumps in no time, praying 🙏 for you. Taking a walk through my gallery always works for me. 😎 Cheers 🍻
- 261 replies
-
- 3
-
-
- Victory Models
- Pegasus
- (and 3 more)
-
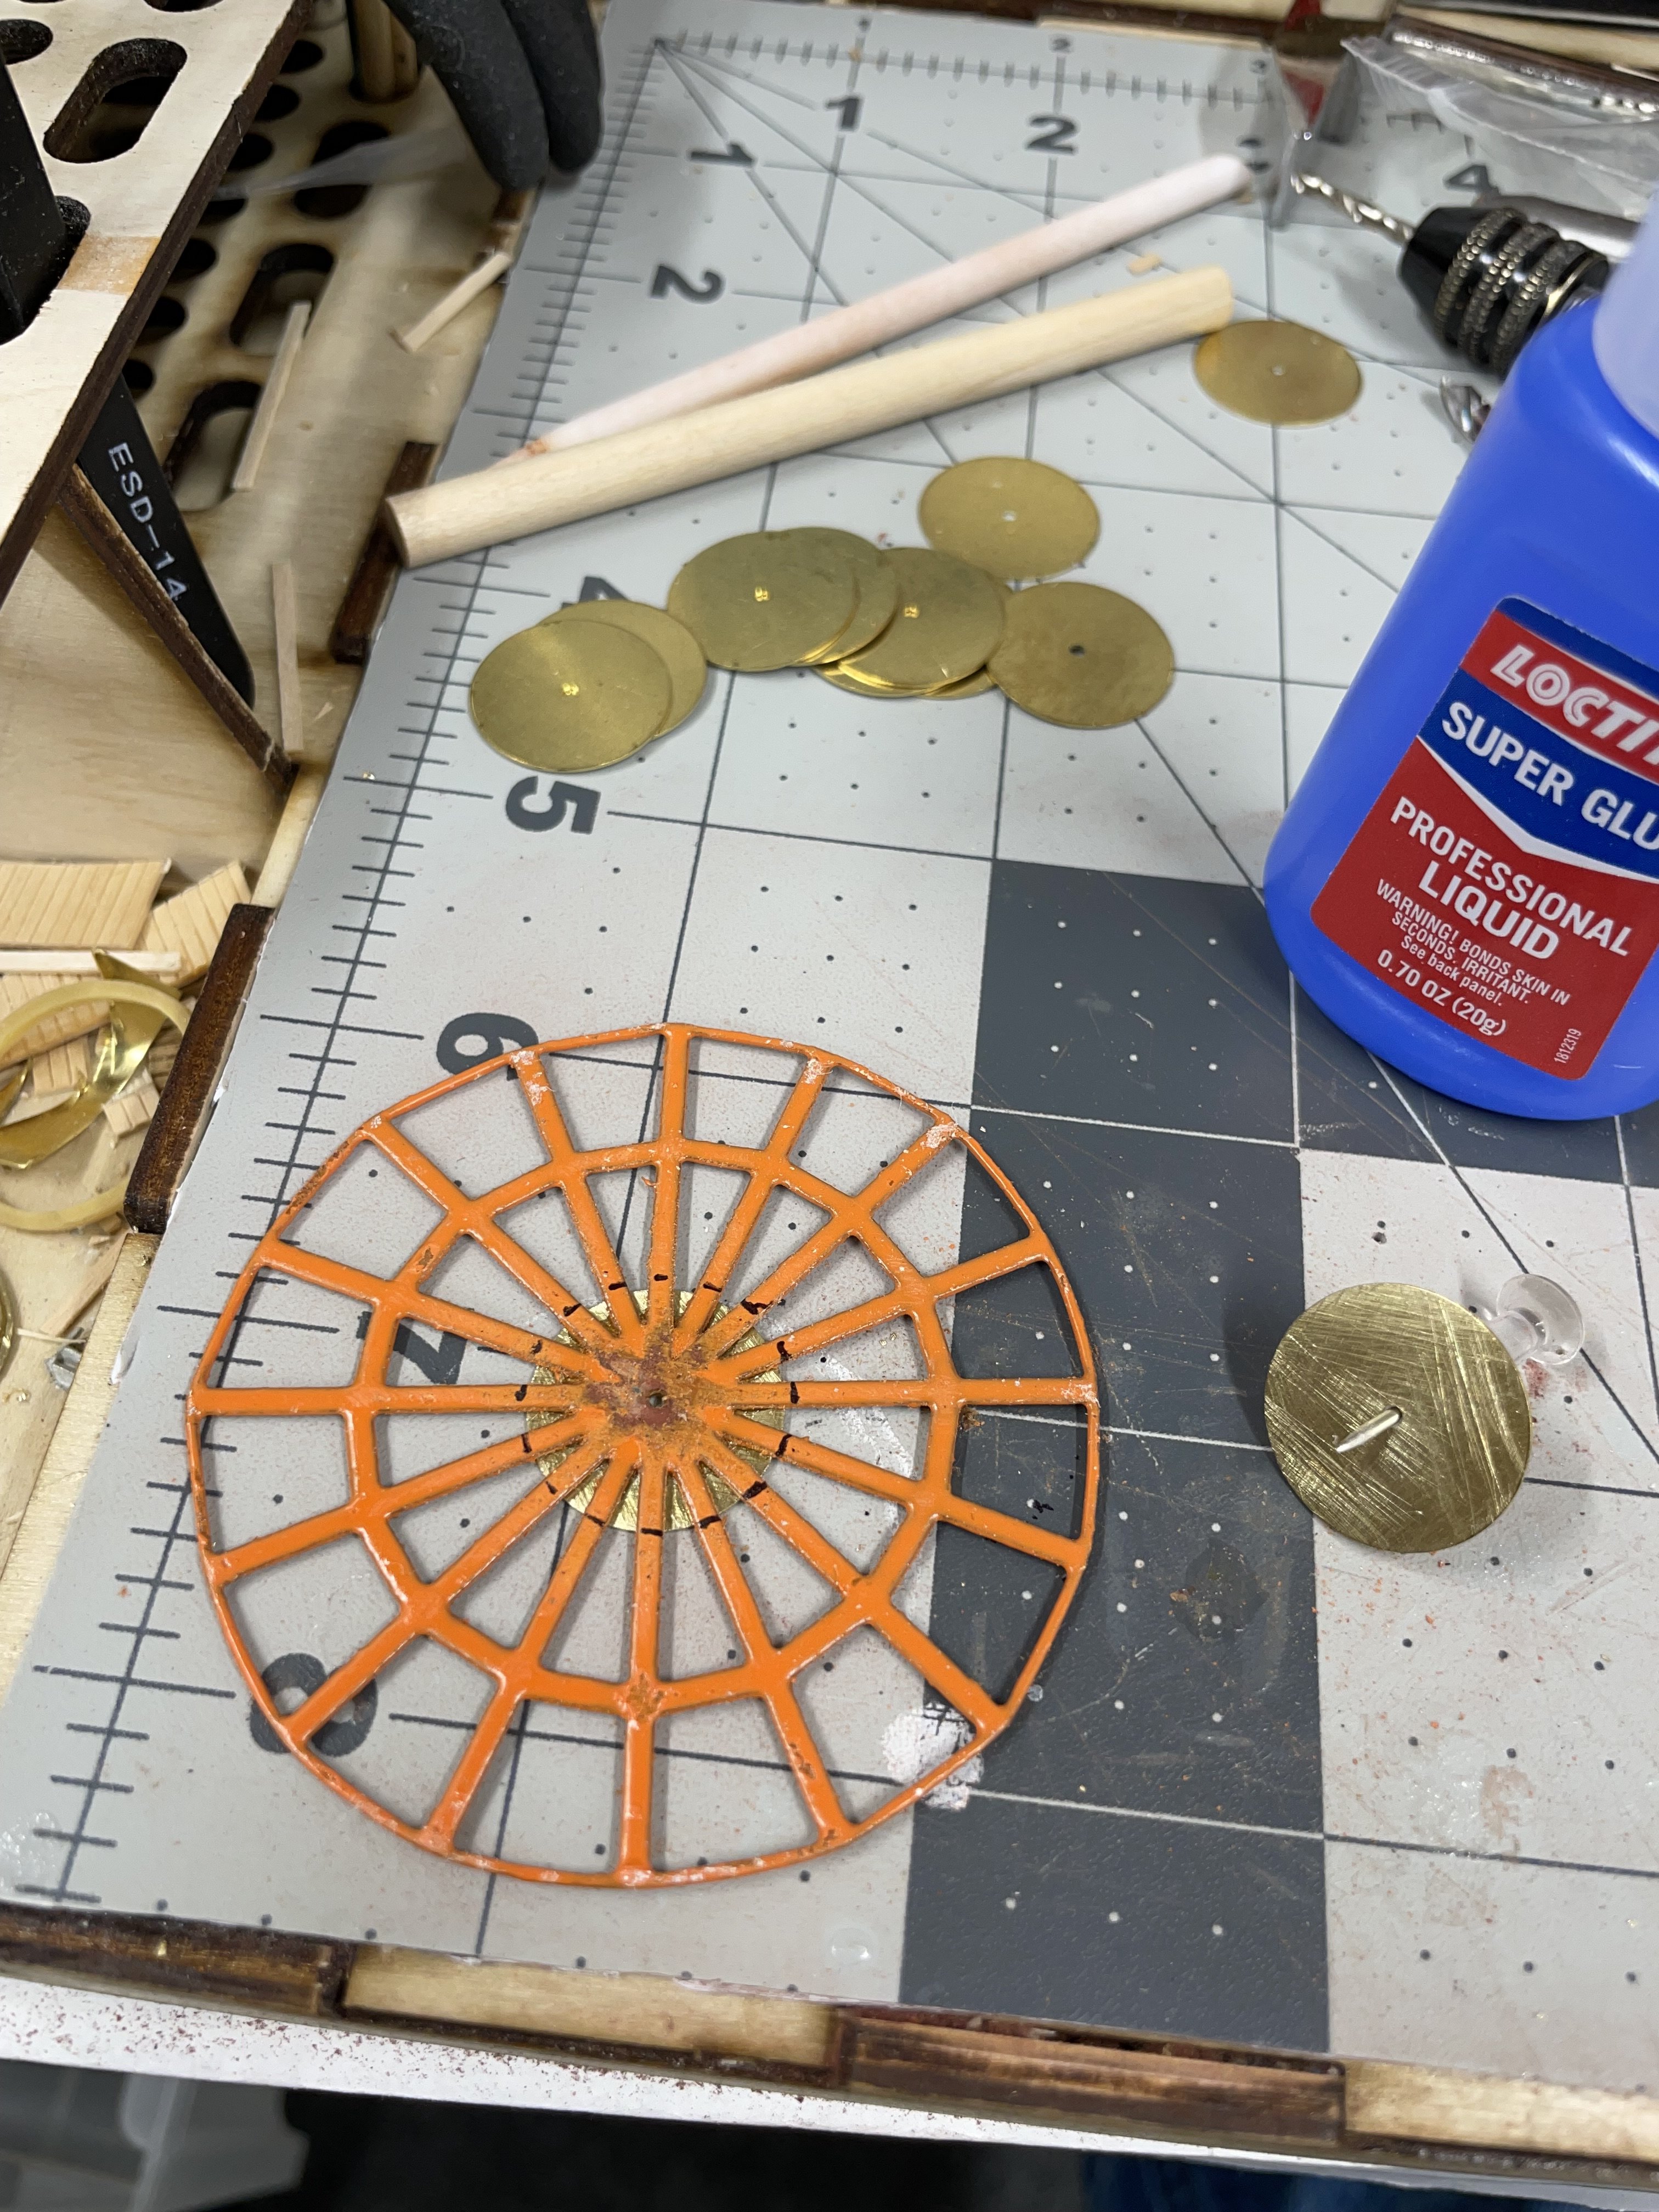
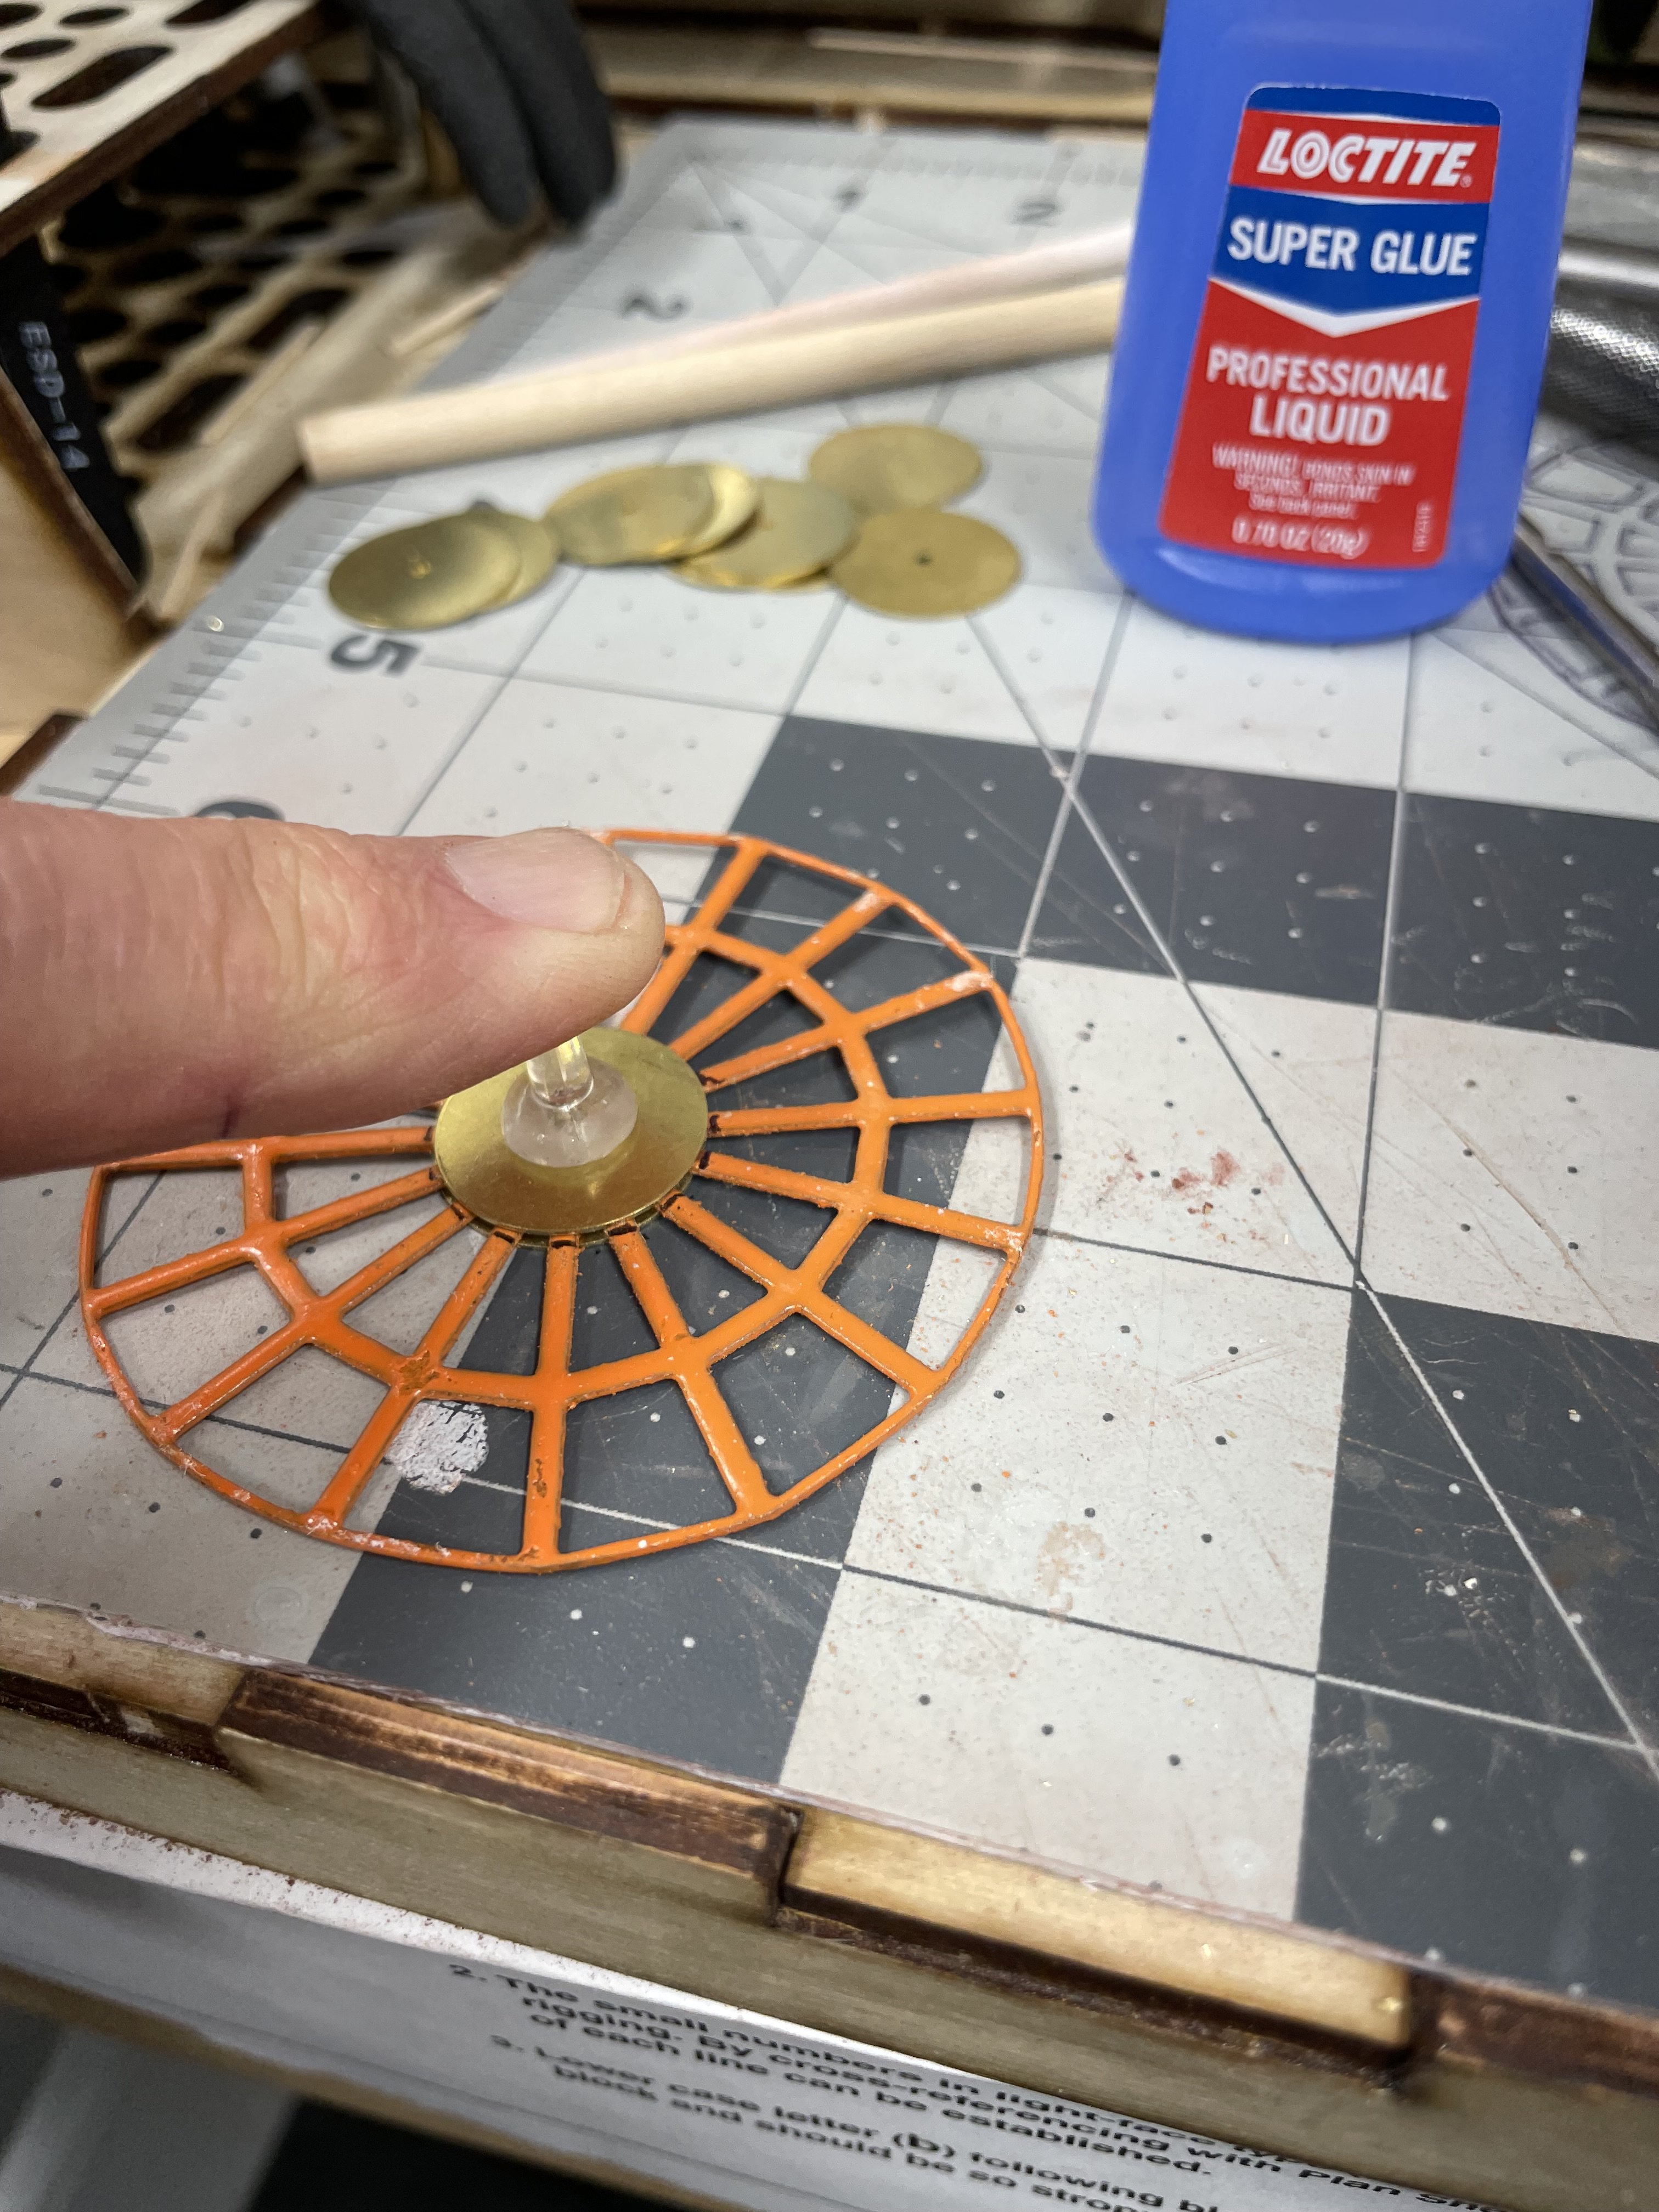
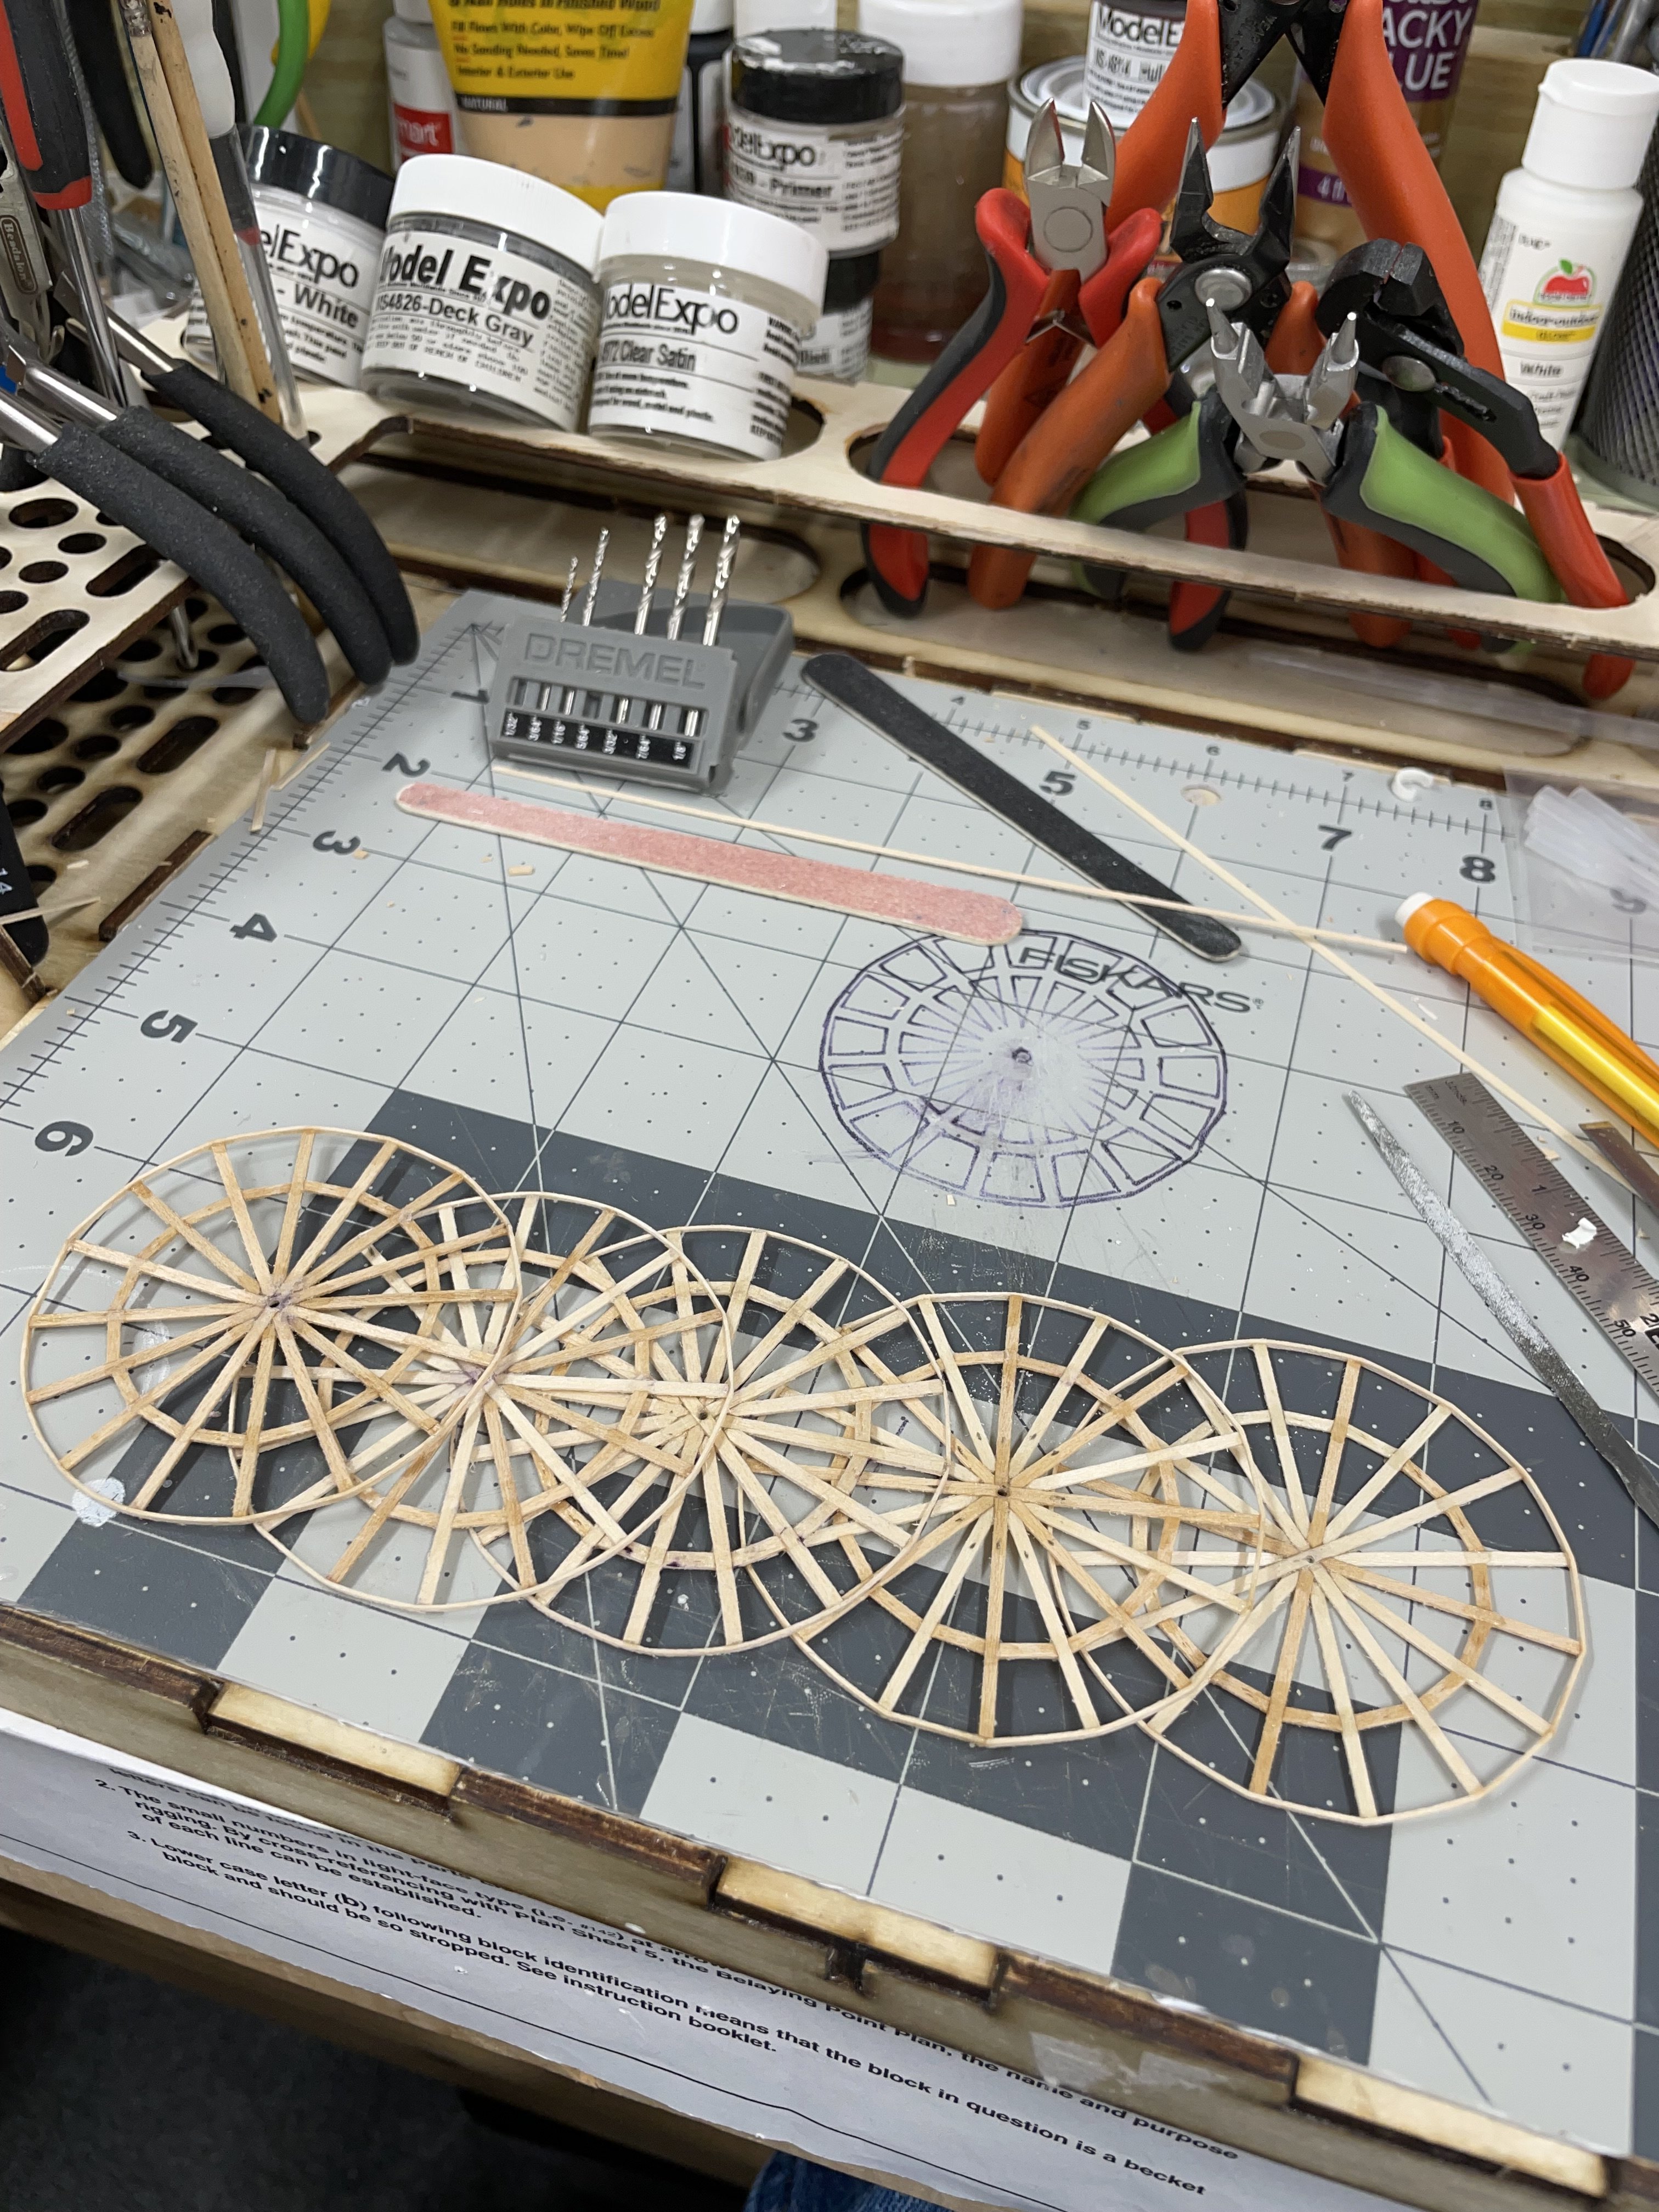
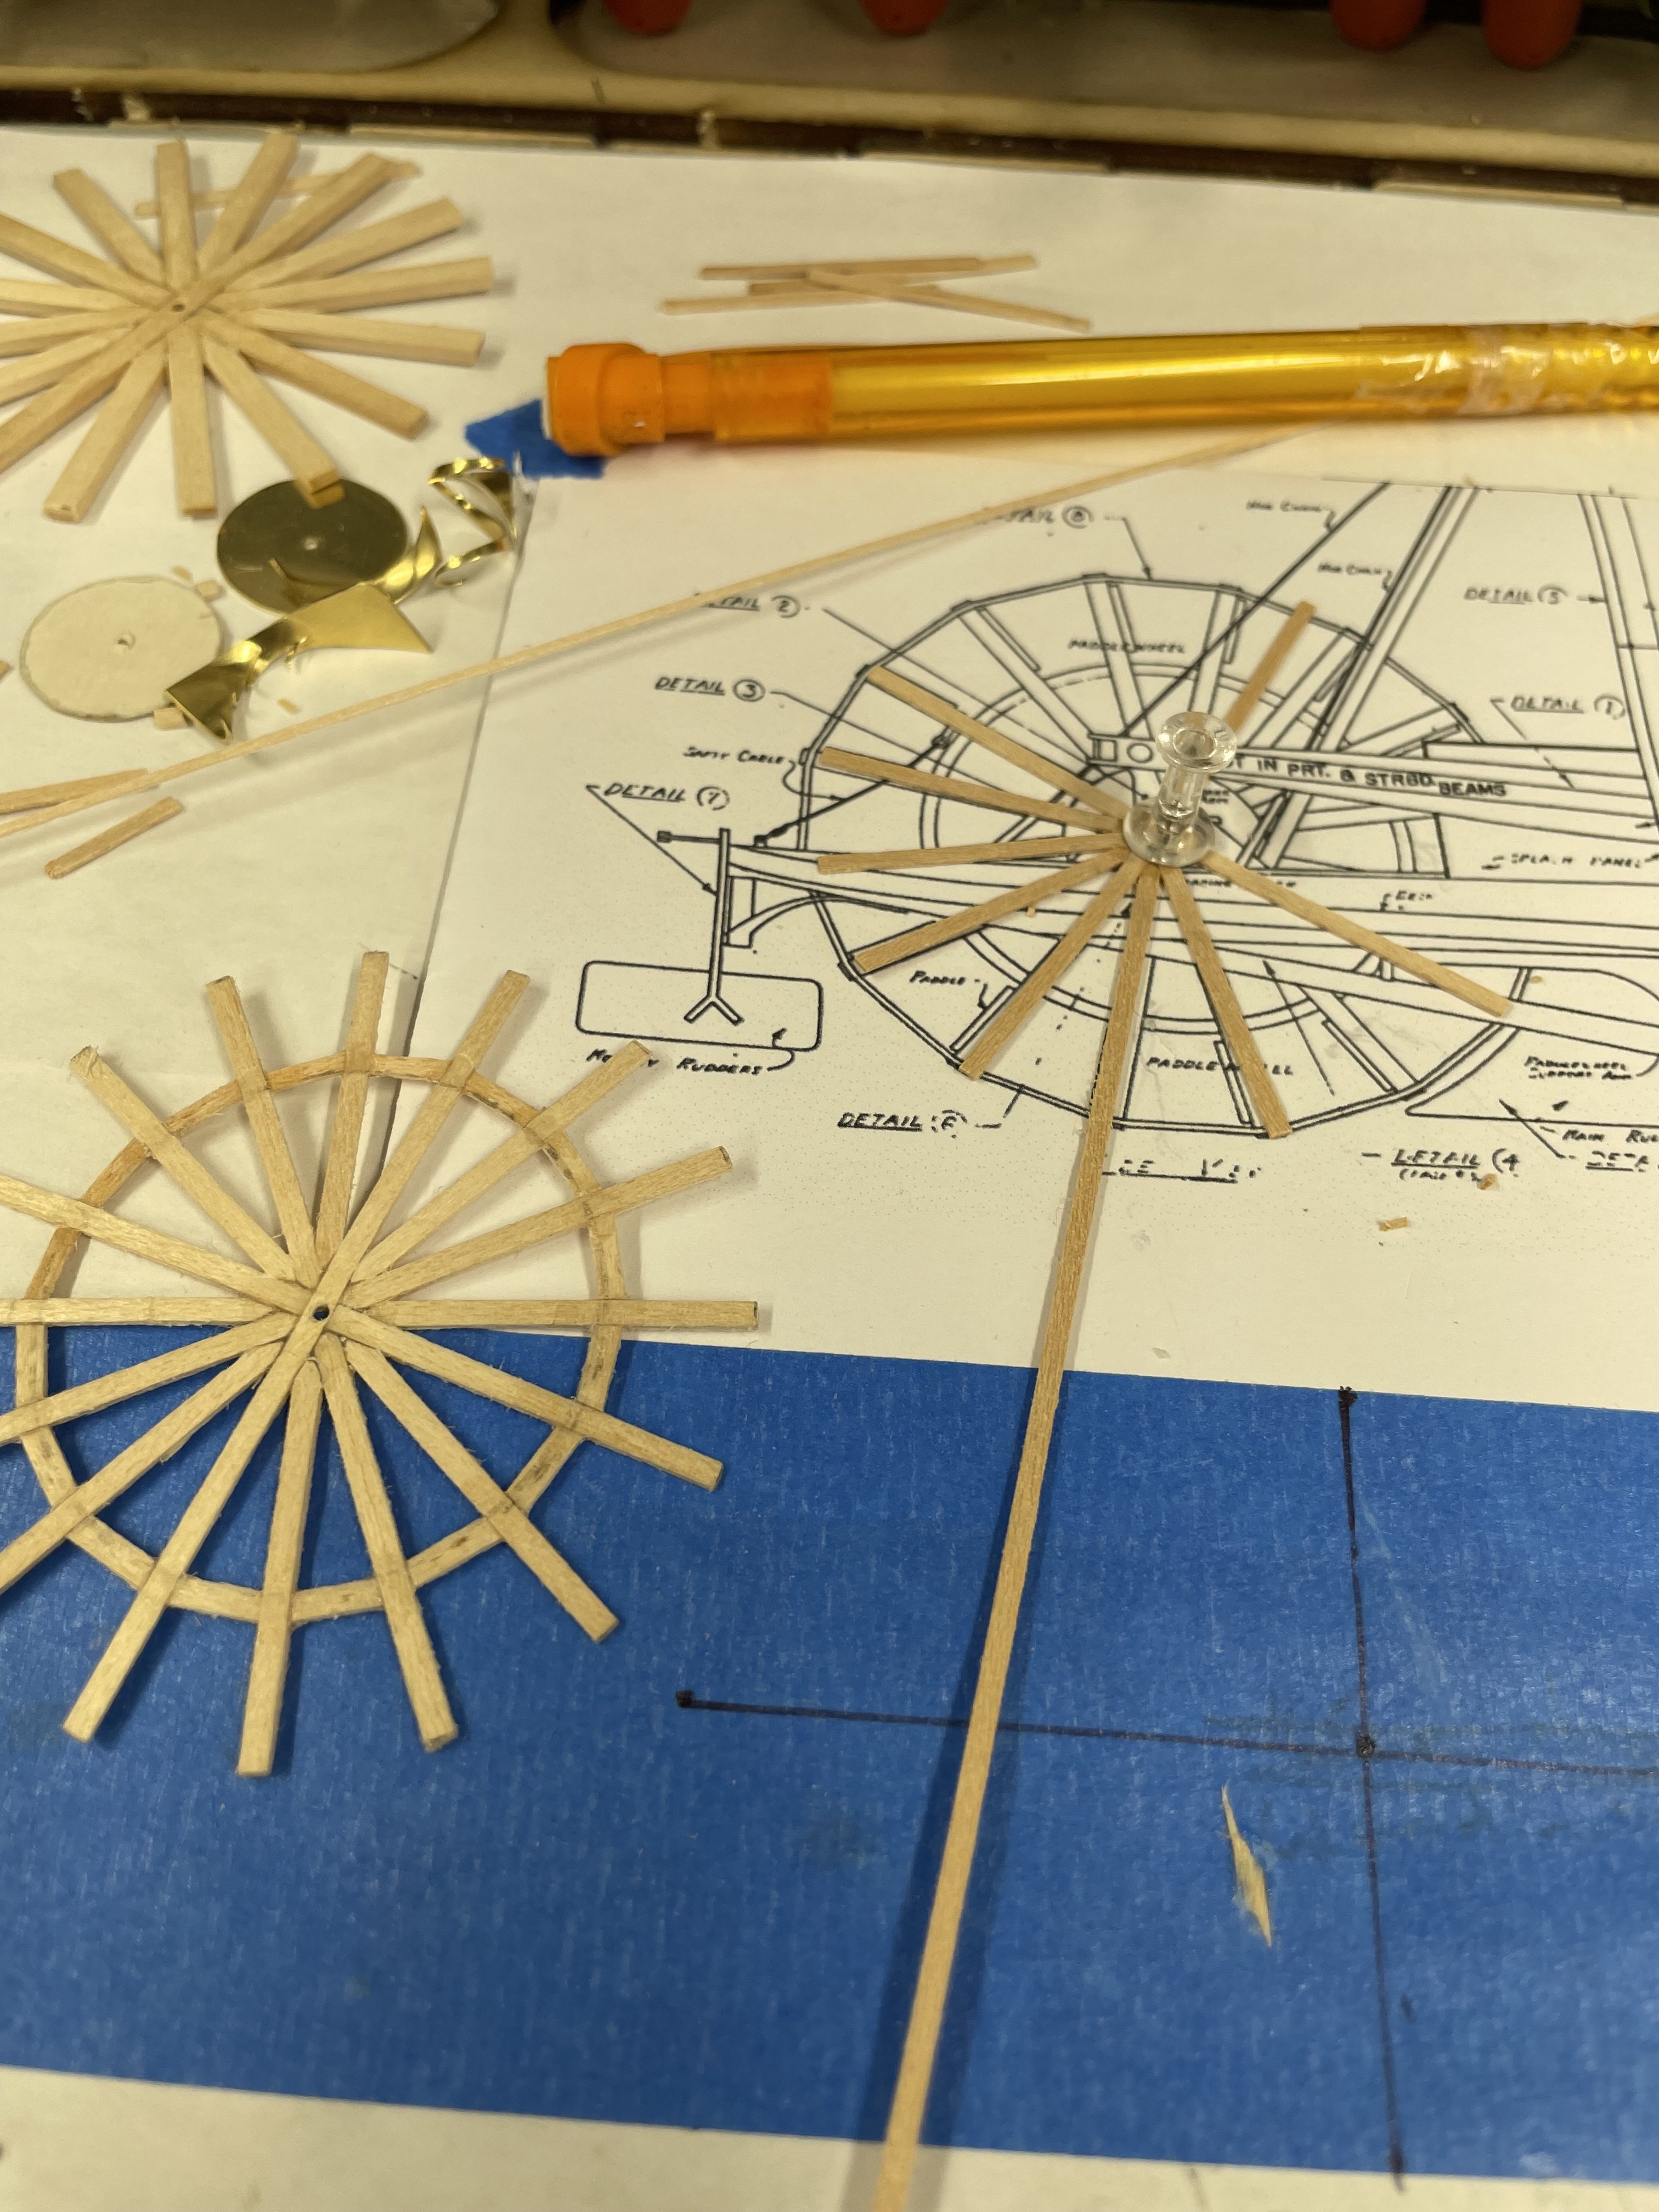
Paddle Wheel continued… …and then there were 5 of 5. Cheers 🍻 @MrBlueJacket You are correct Nic, there is satisfaction in building it yourself.

-
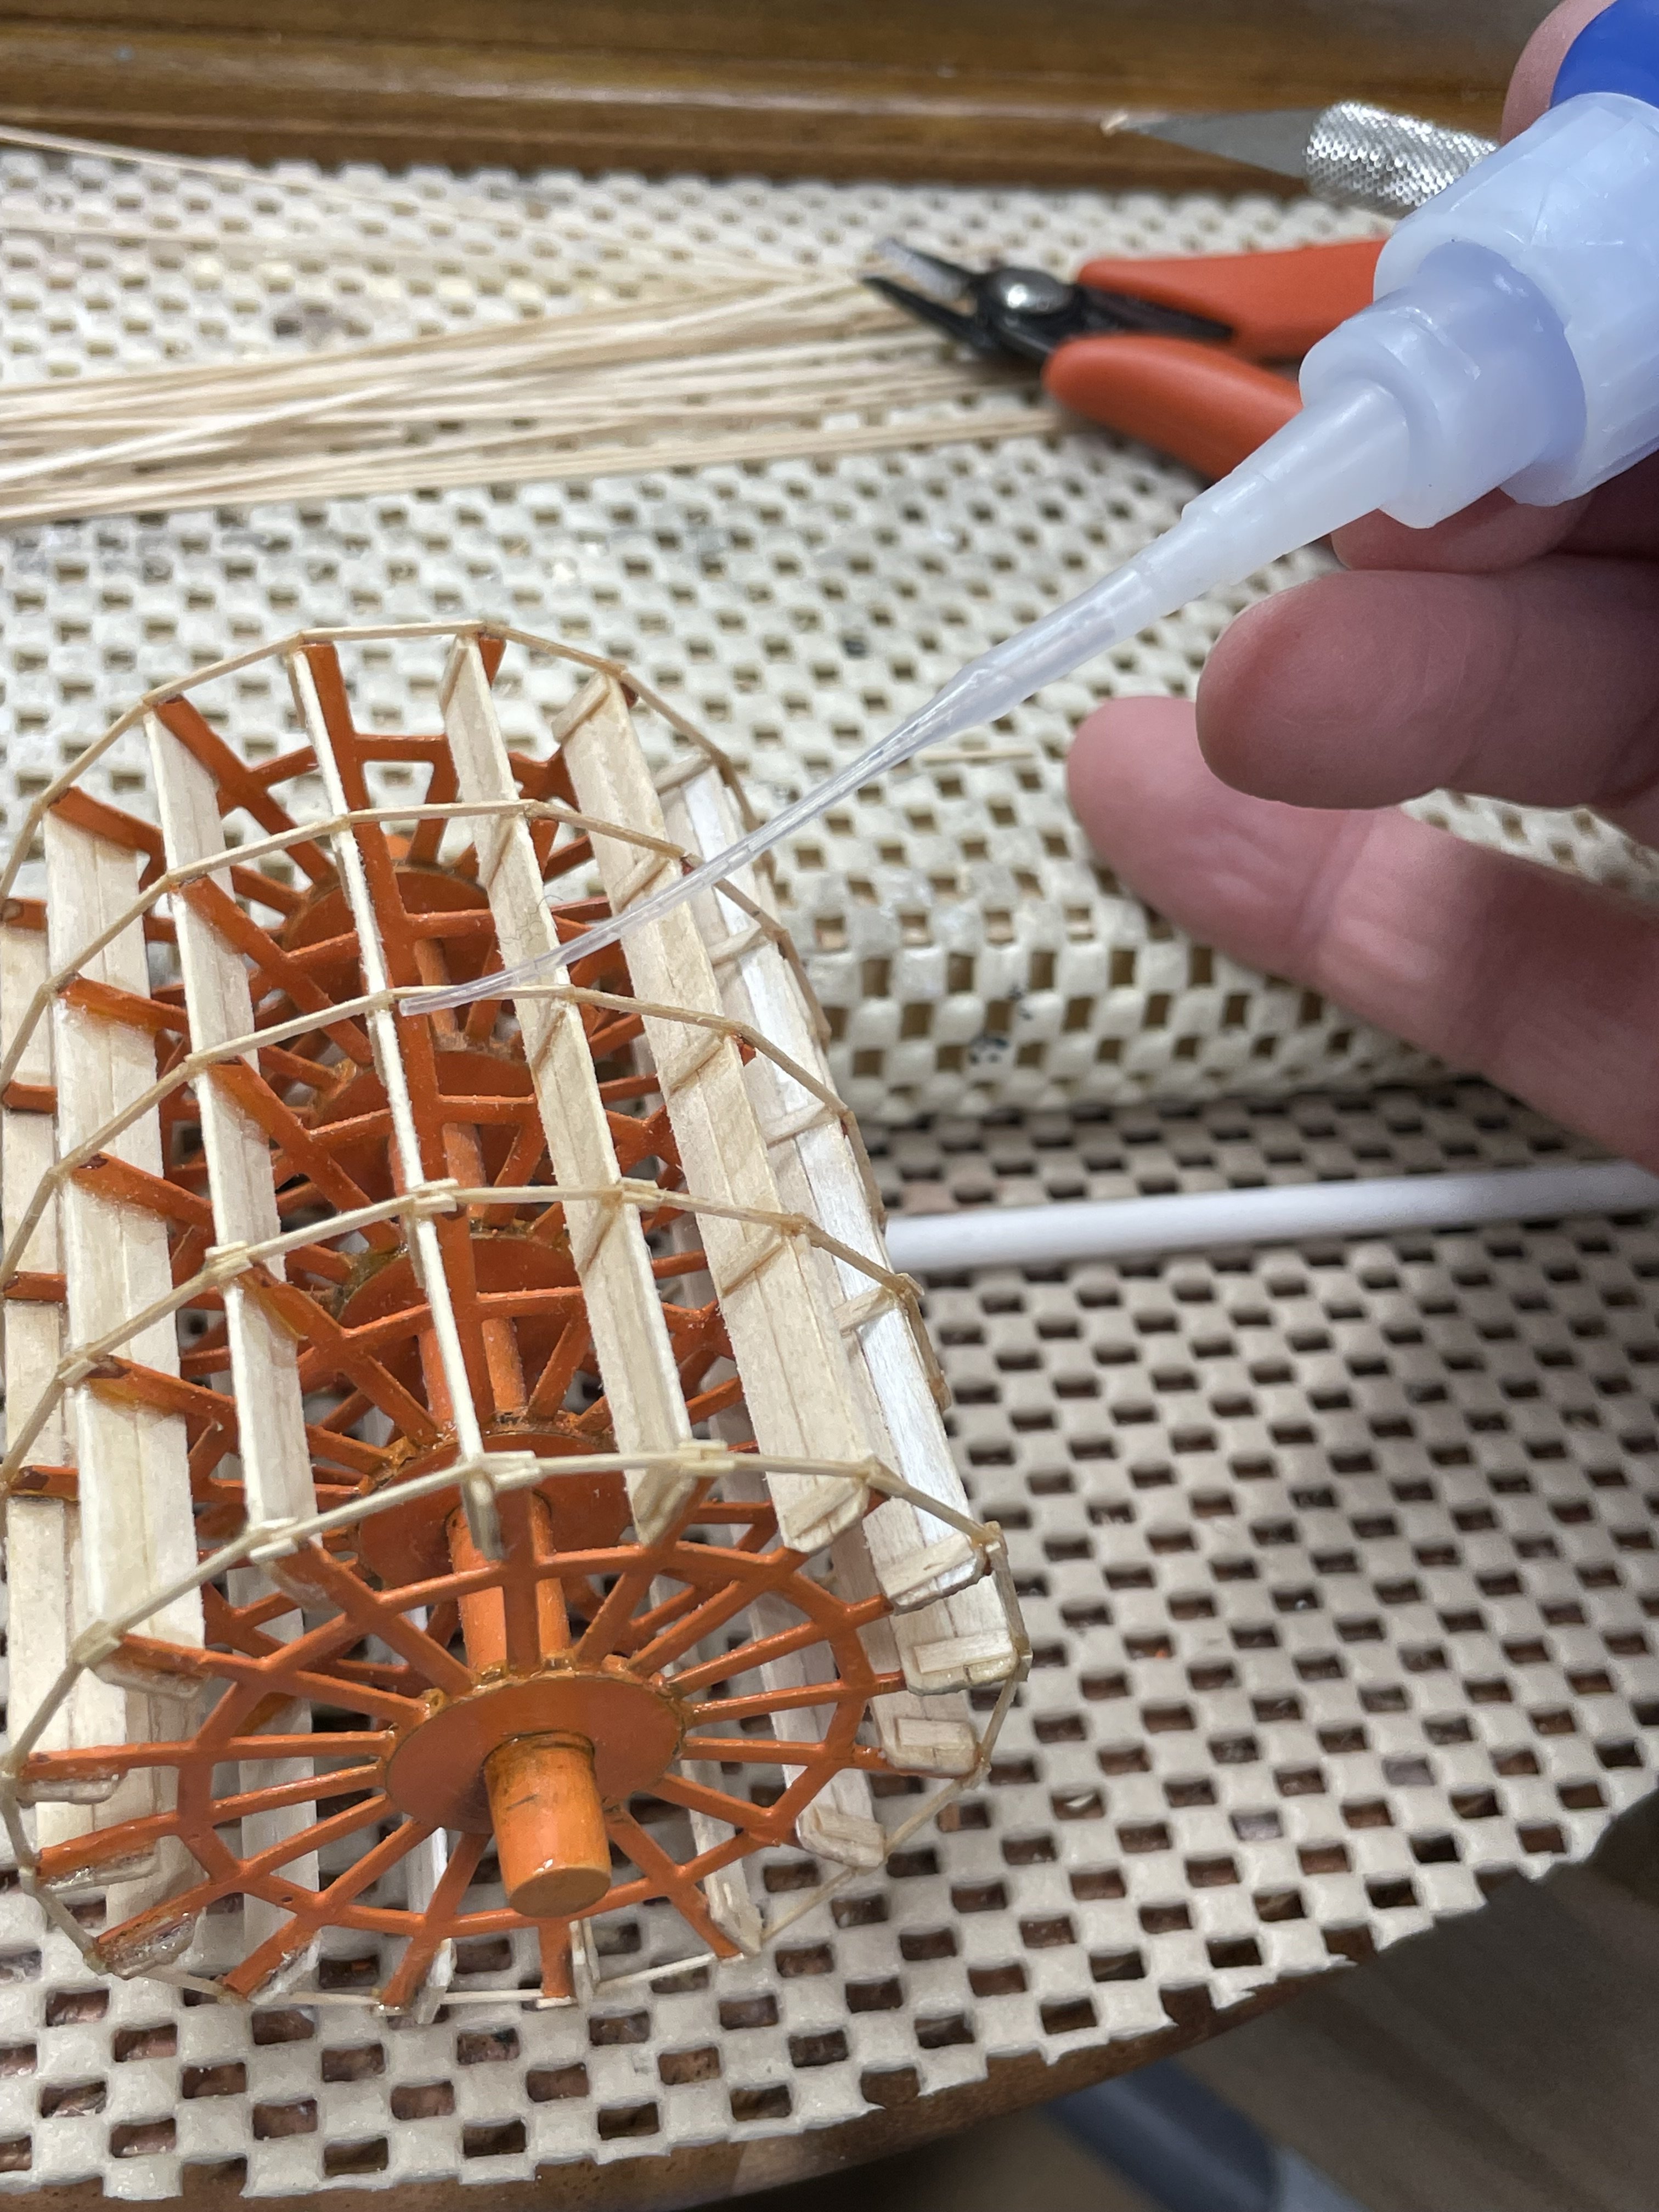
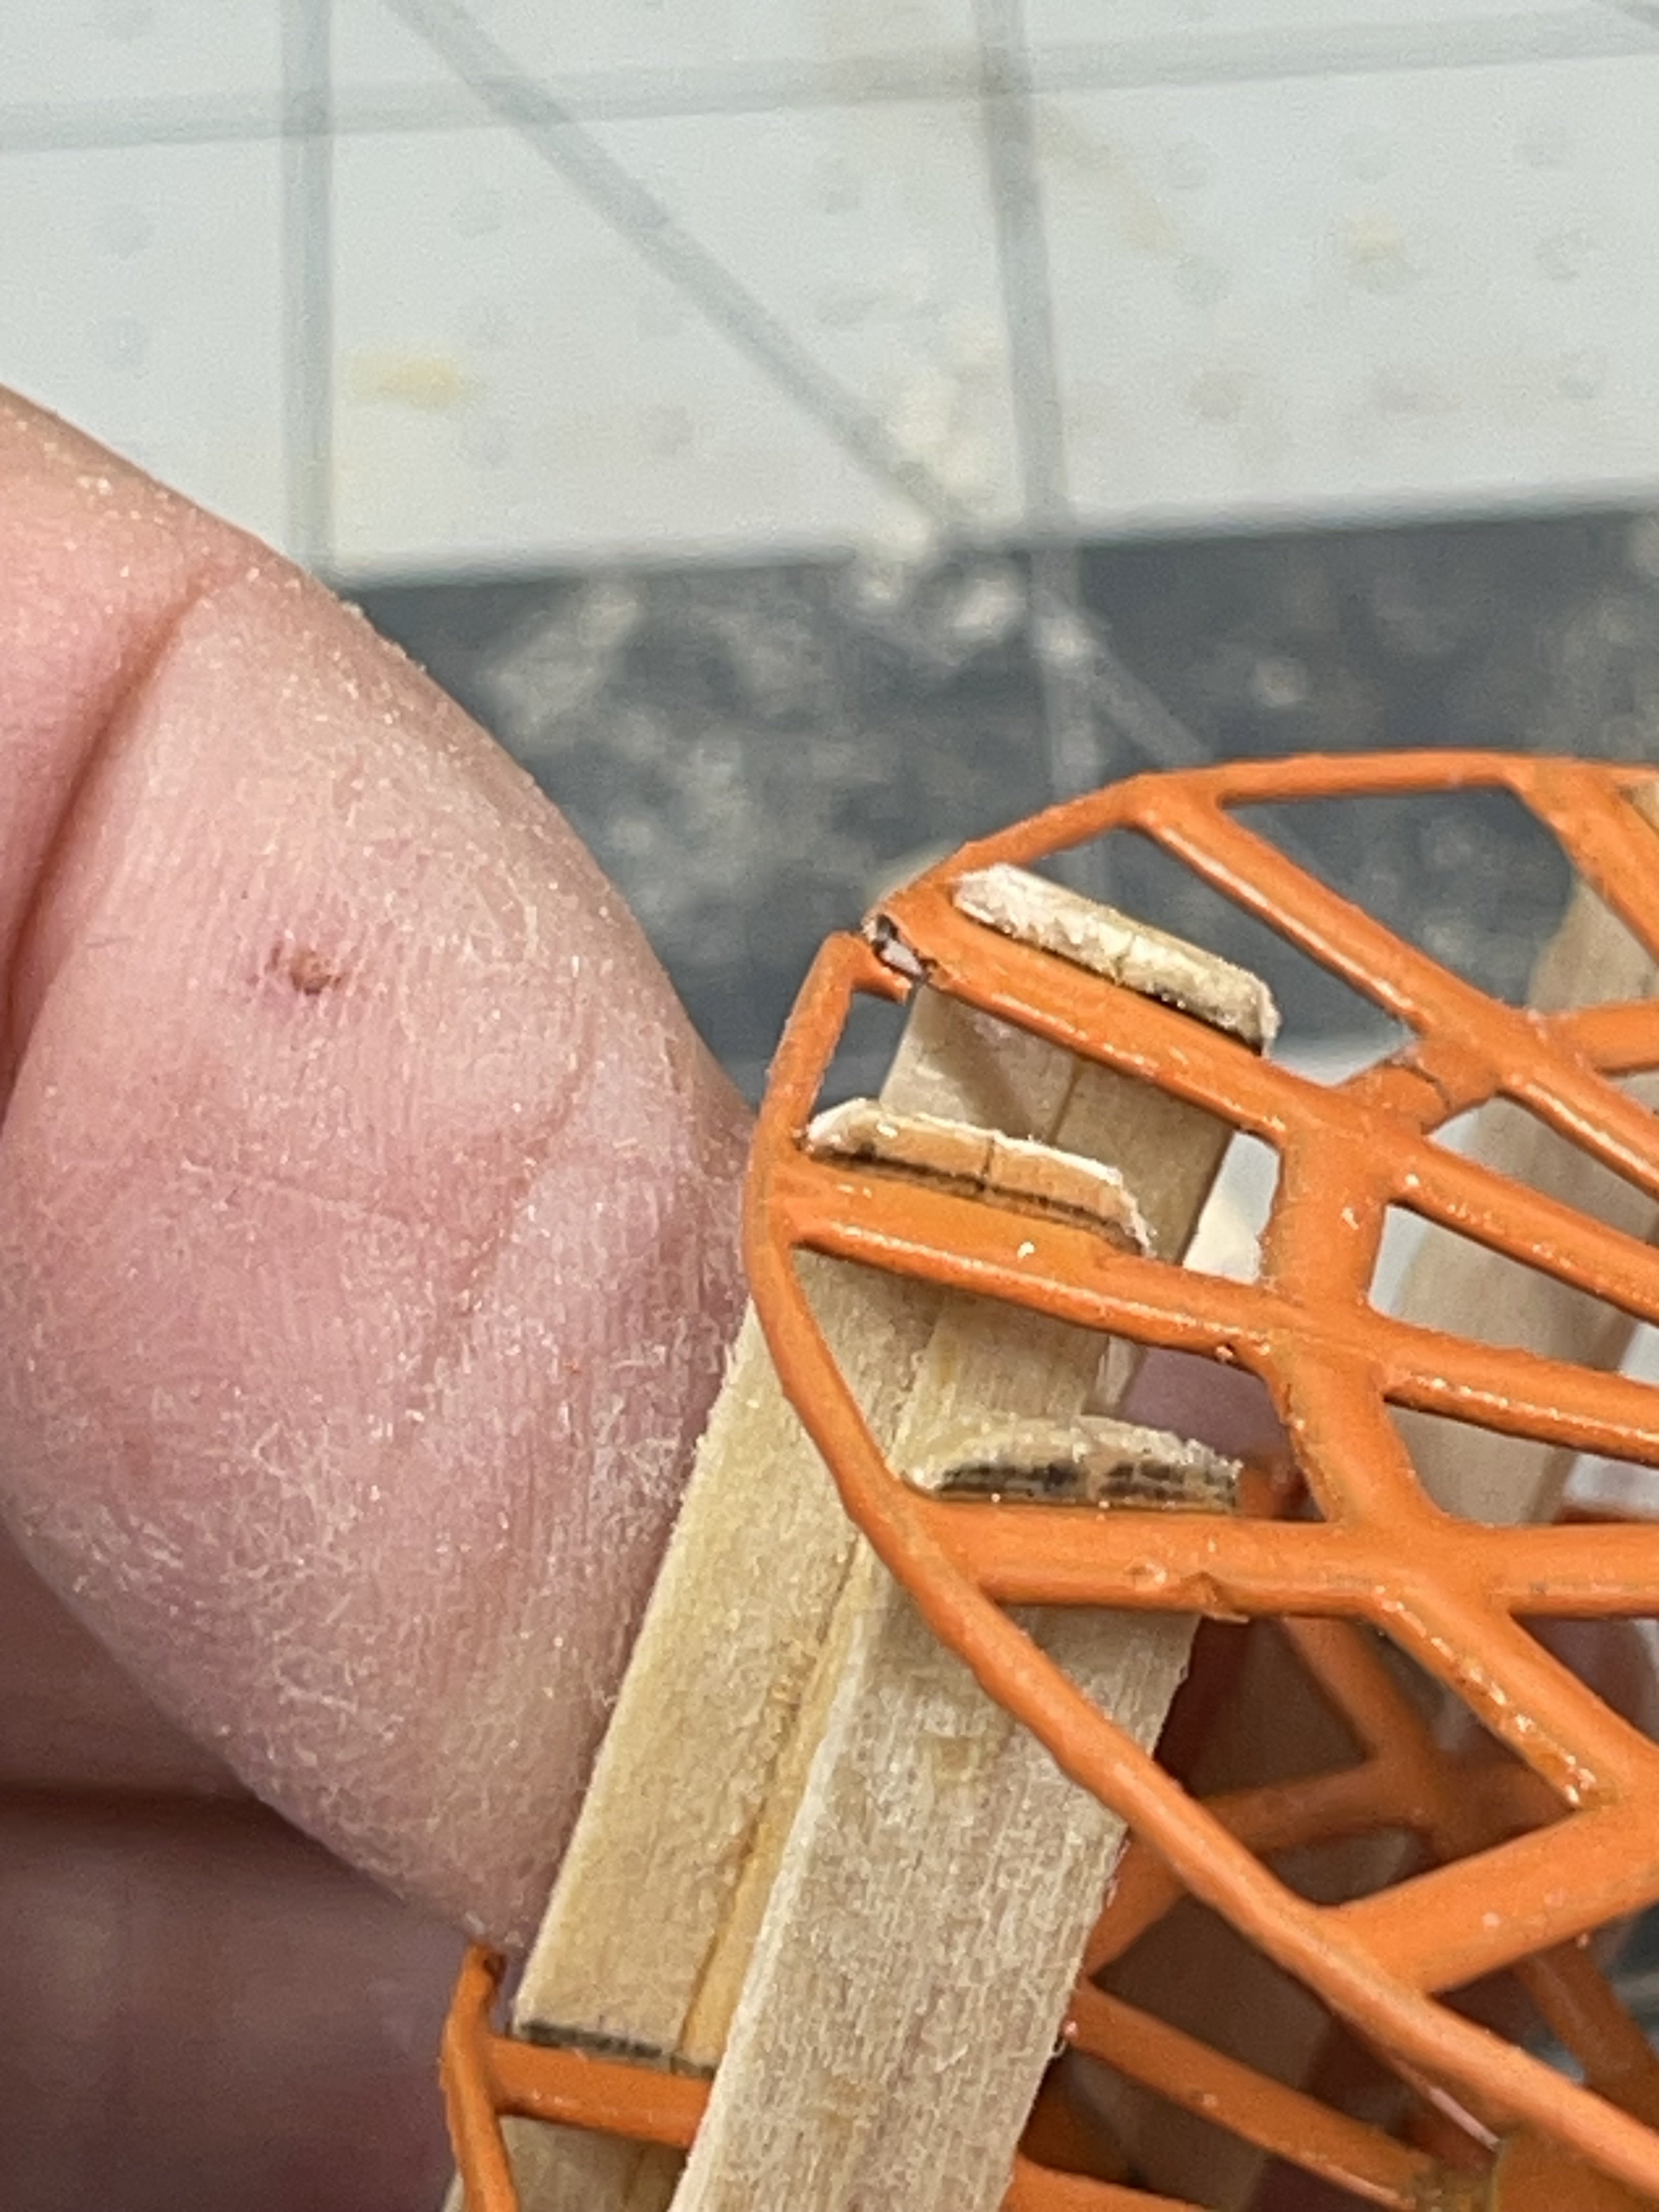
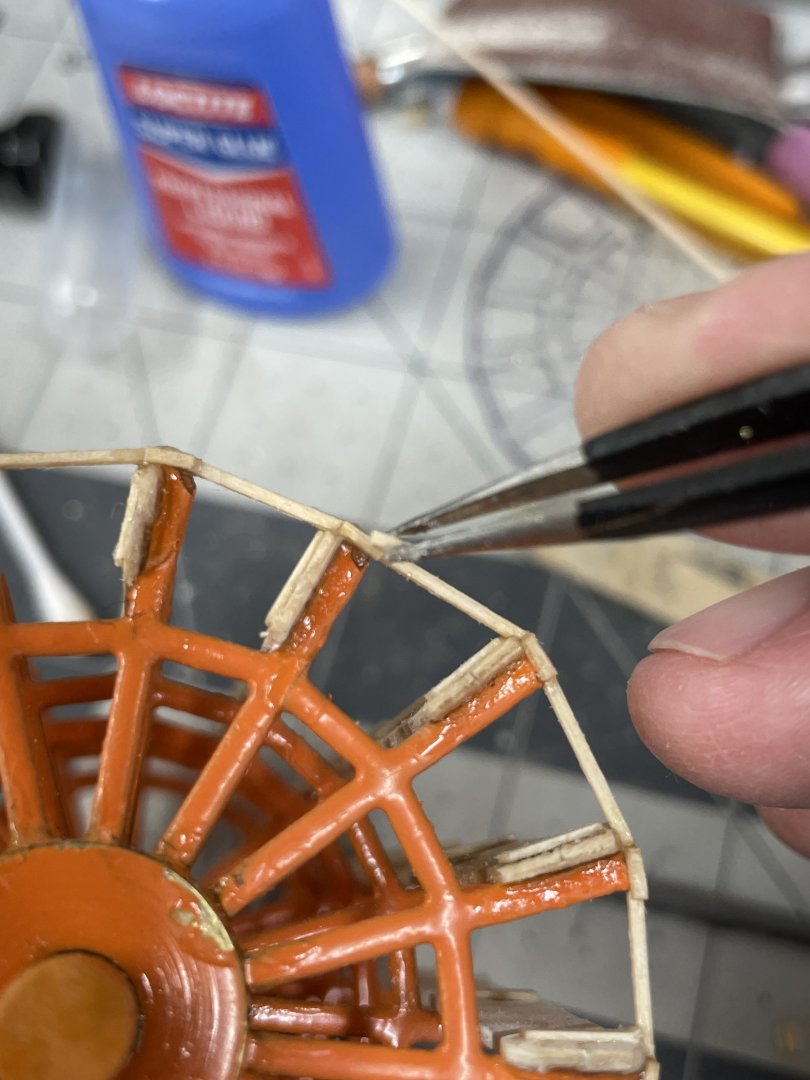
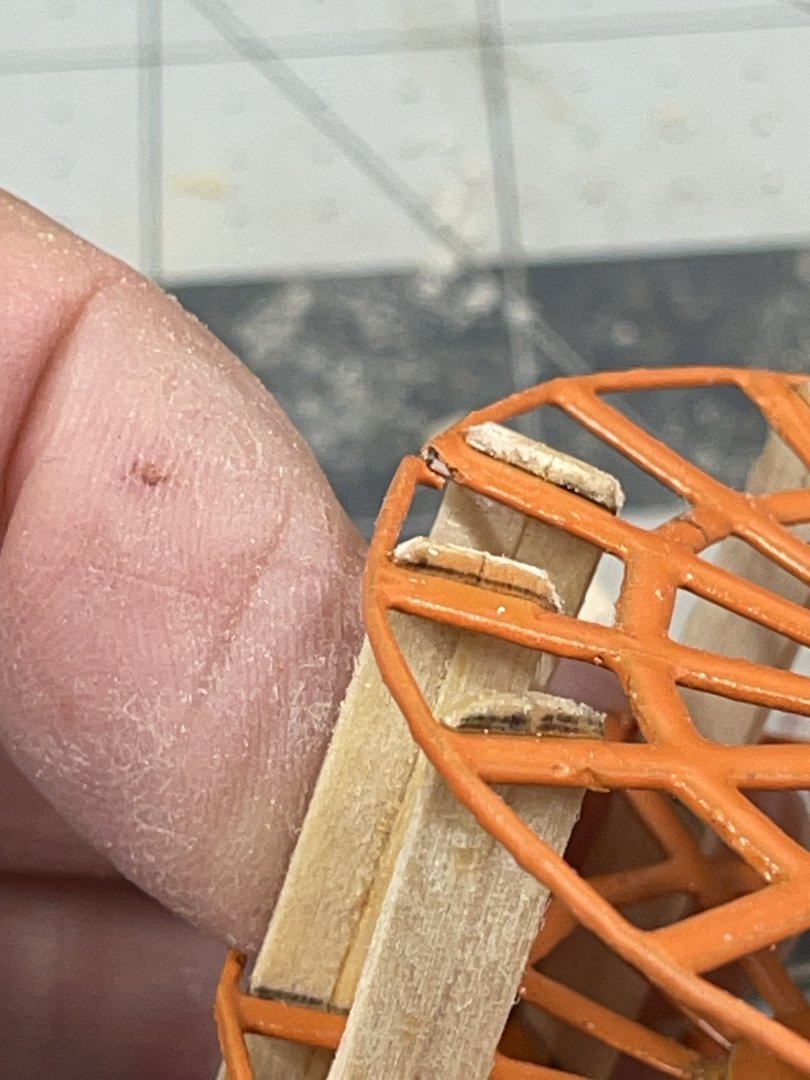
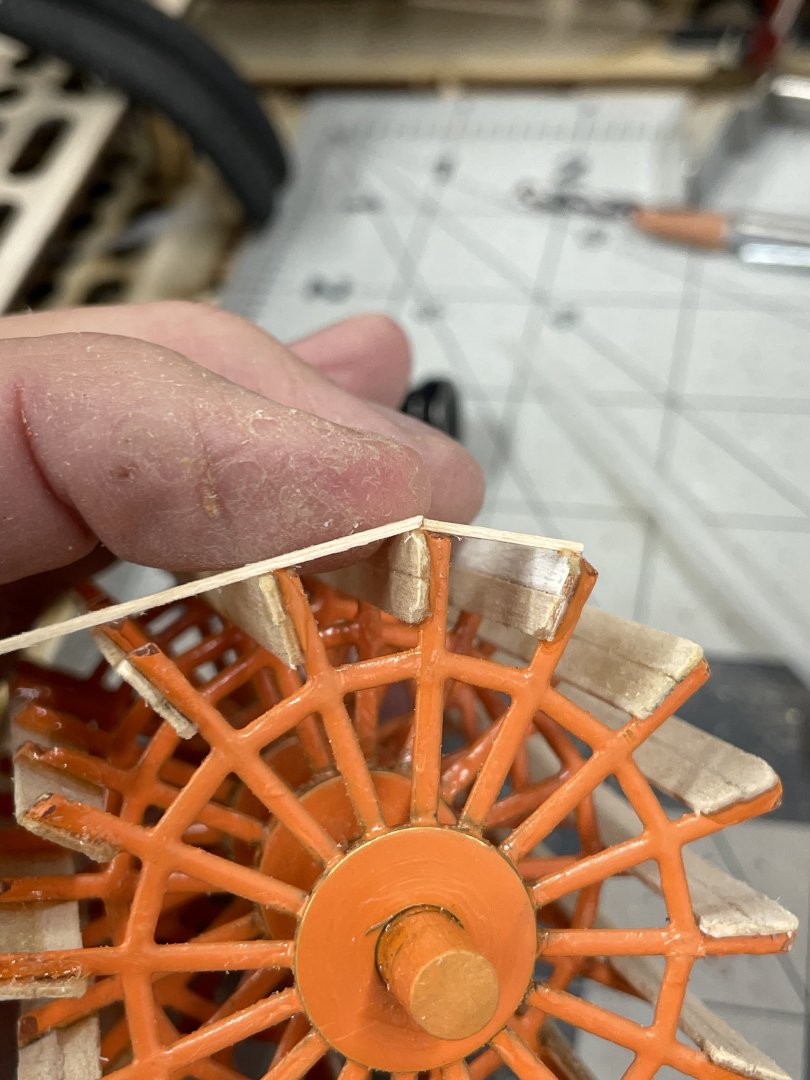
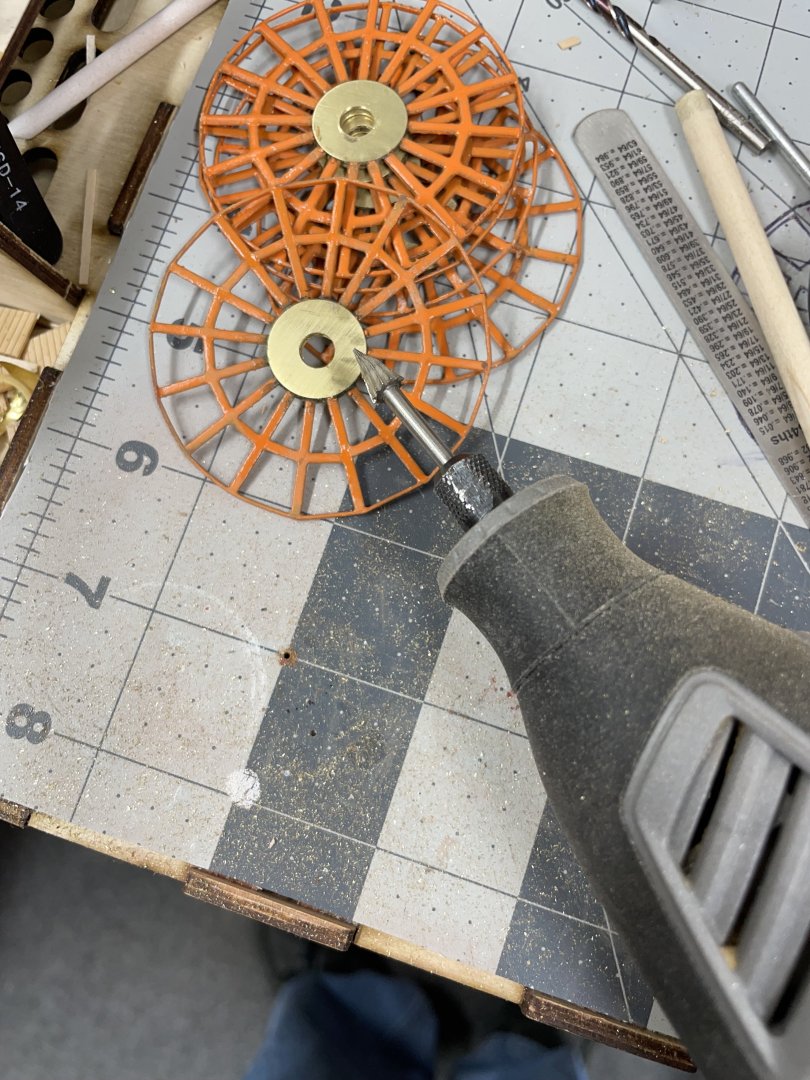
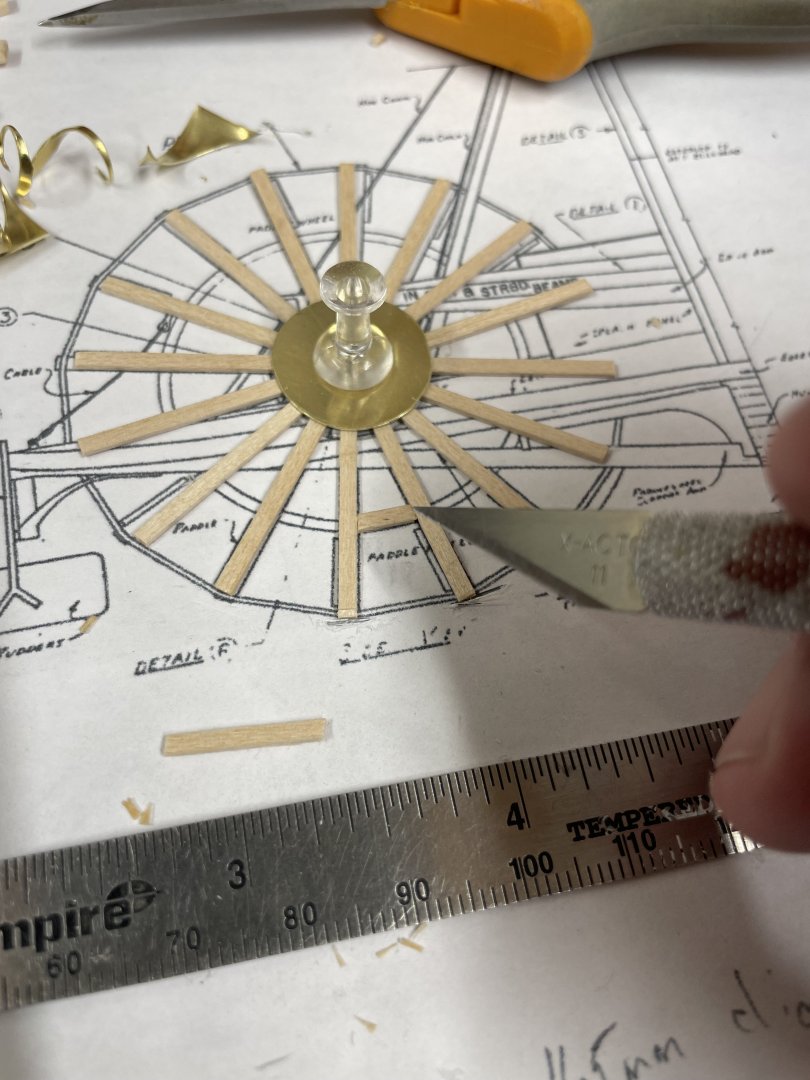
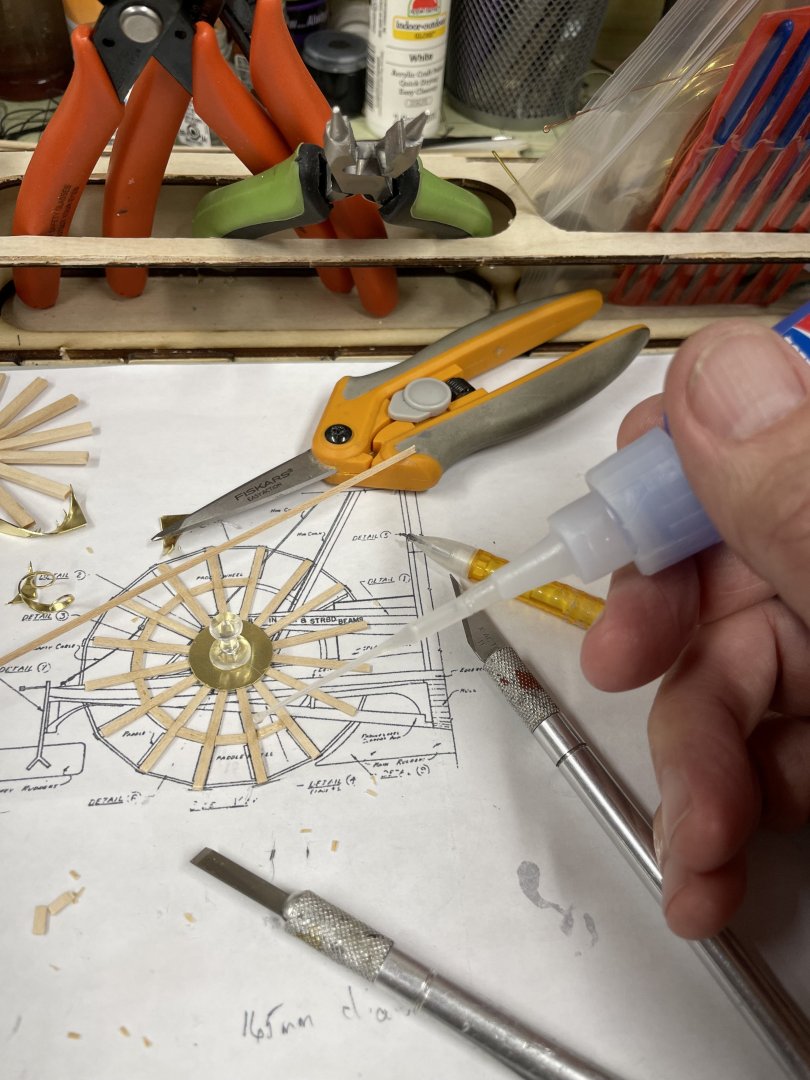
Ian, I agree… However, as my friend Nic@MrBlueJacket would say, “Yes we can Laser cut those wheels for you, however there is a lot of pleasure and satisfaction in building them yourself.” I’ll keep telling myself that… LOL 😂 Keith, You are correct, but a 1mm gap in the spoke @ 1/96 scale is not tolerable. As for the other imperfections, Darn OCD! LOL 😆
-
Corrections to #3… 3 of 5 now completed… Cheers 🍻


-
Paddle Wheel continues… And then there were three… Cheers 🍻


-
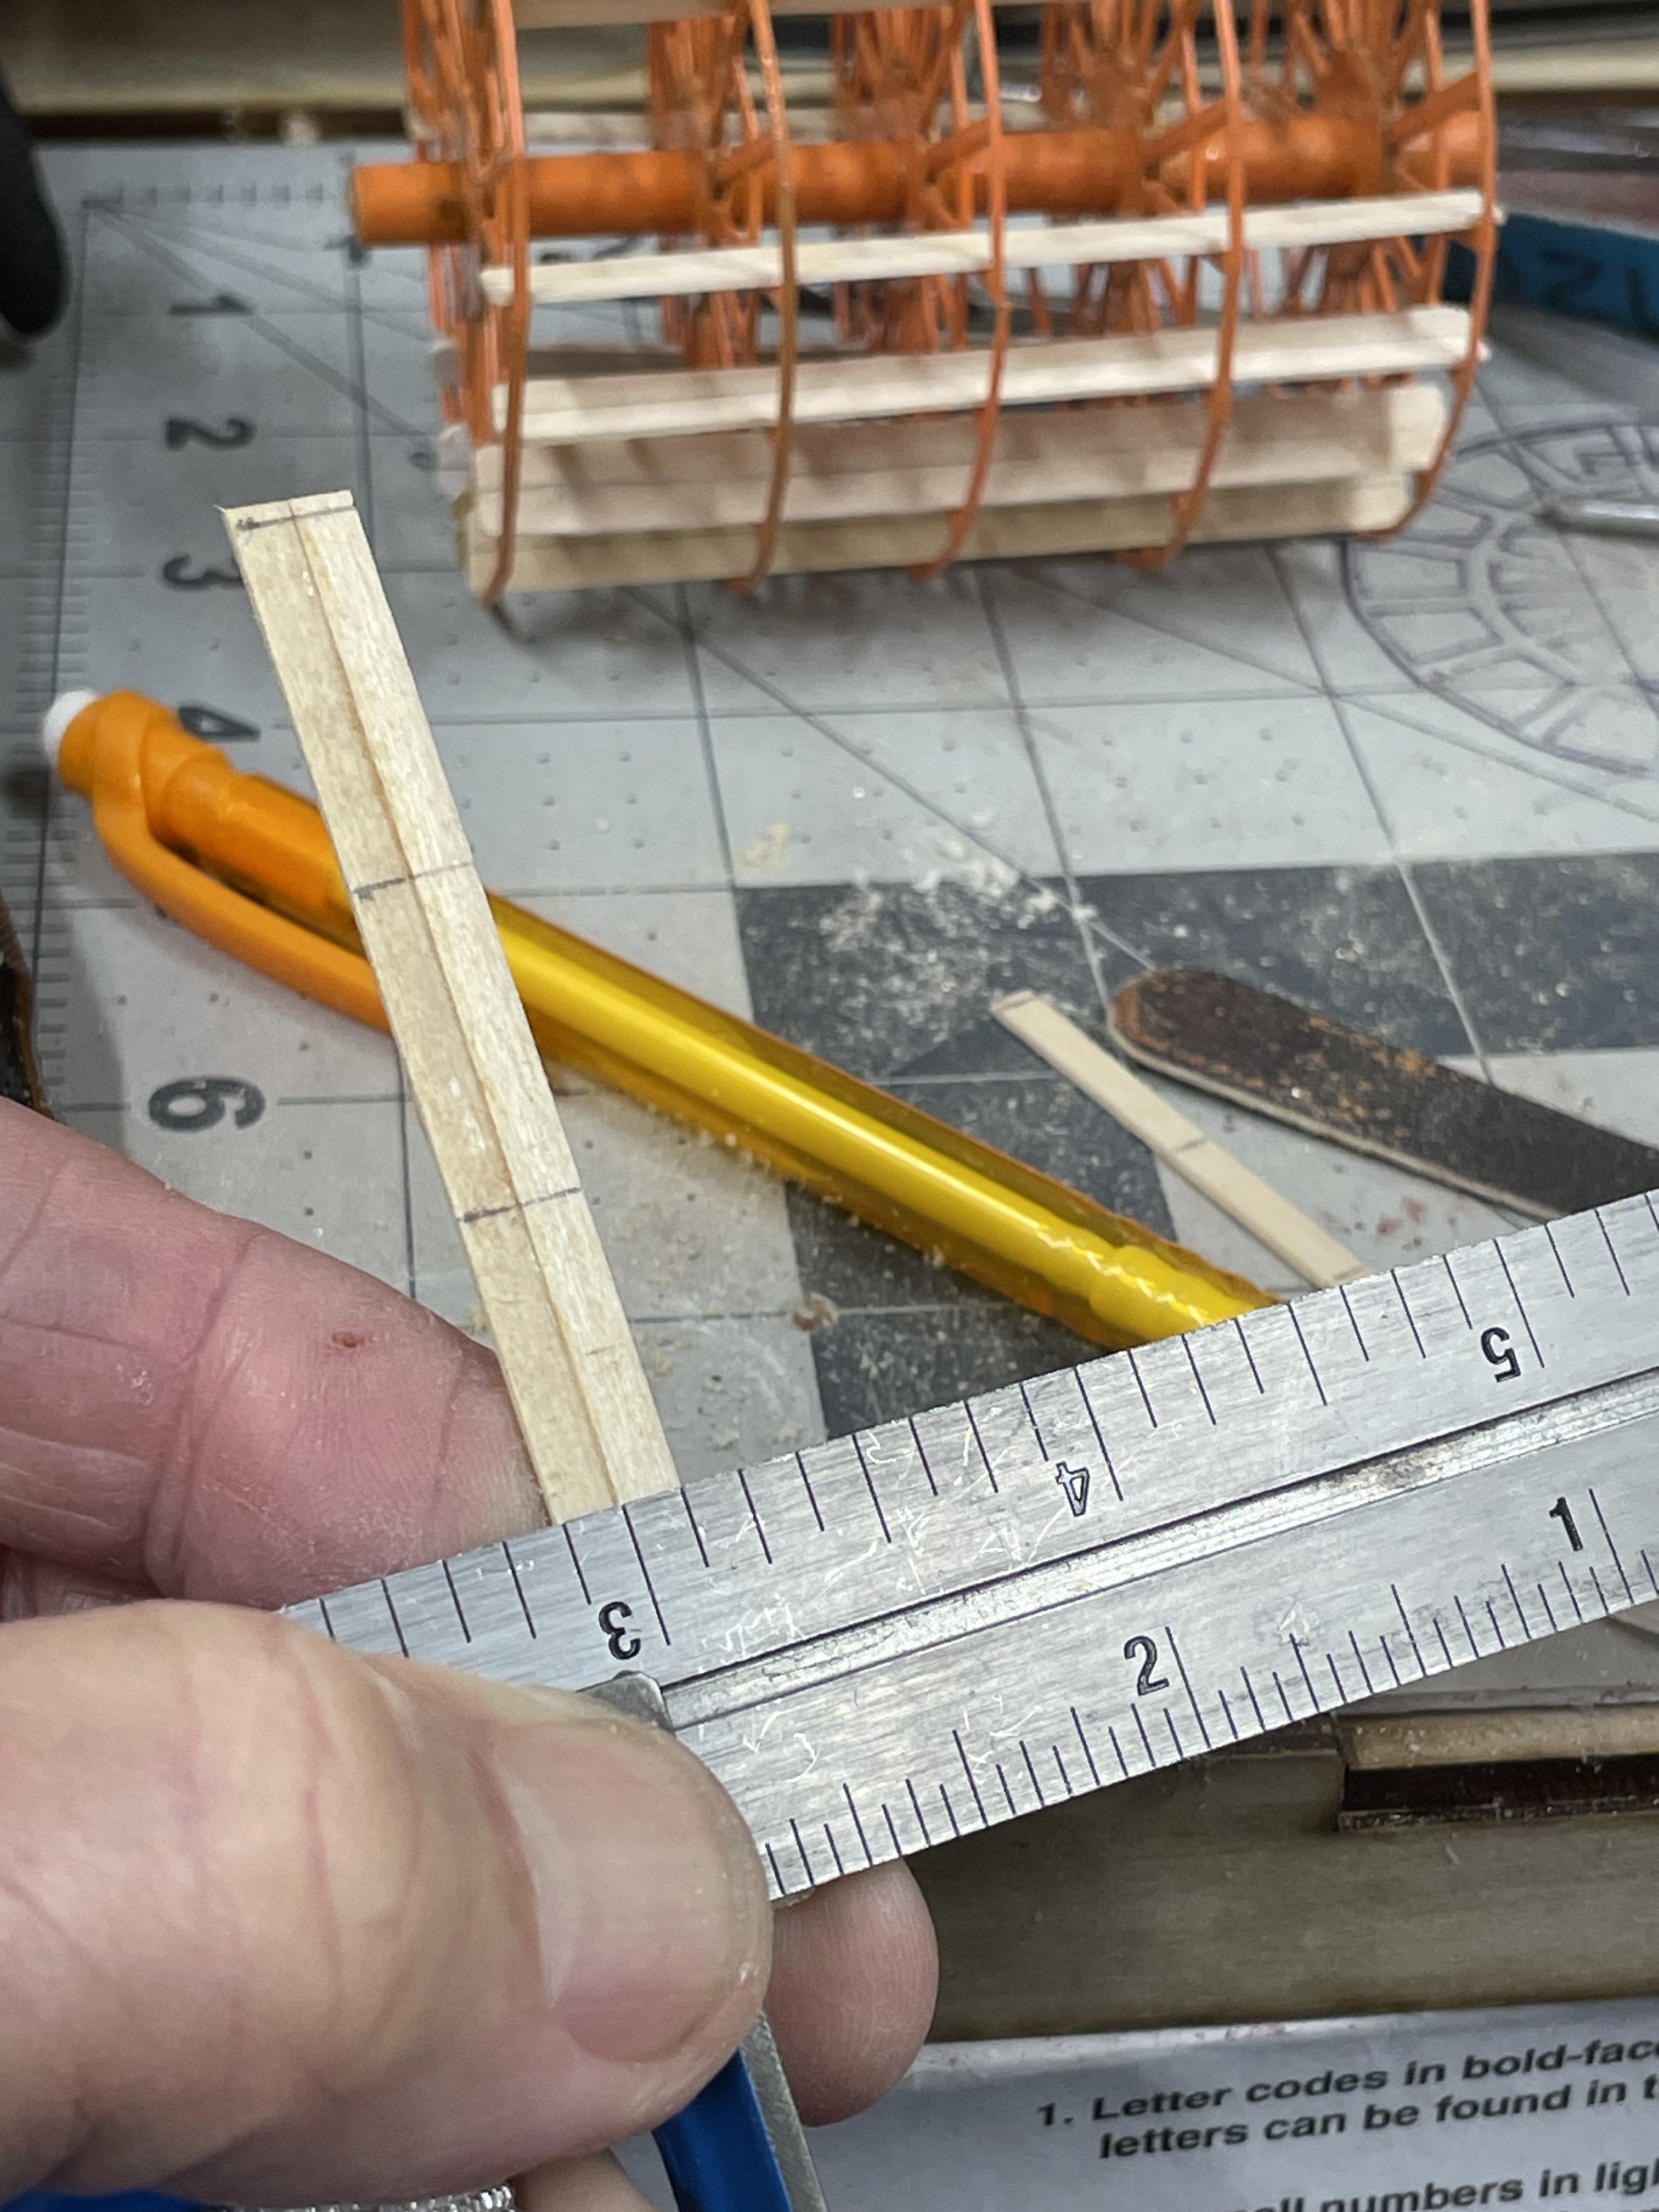
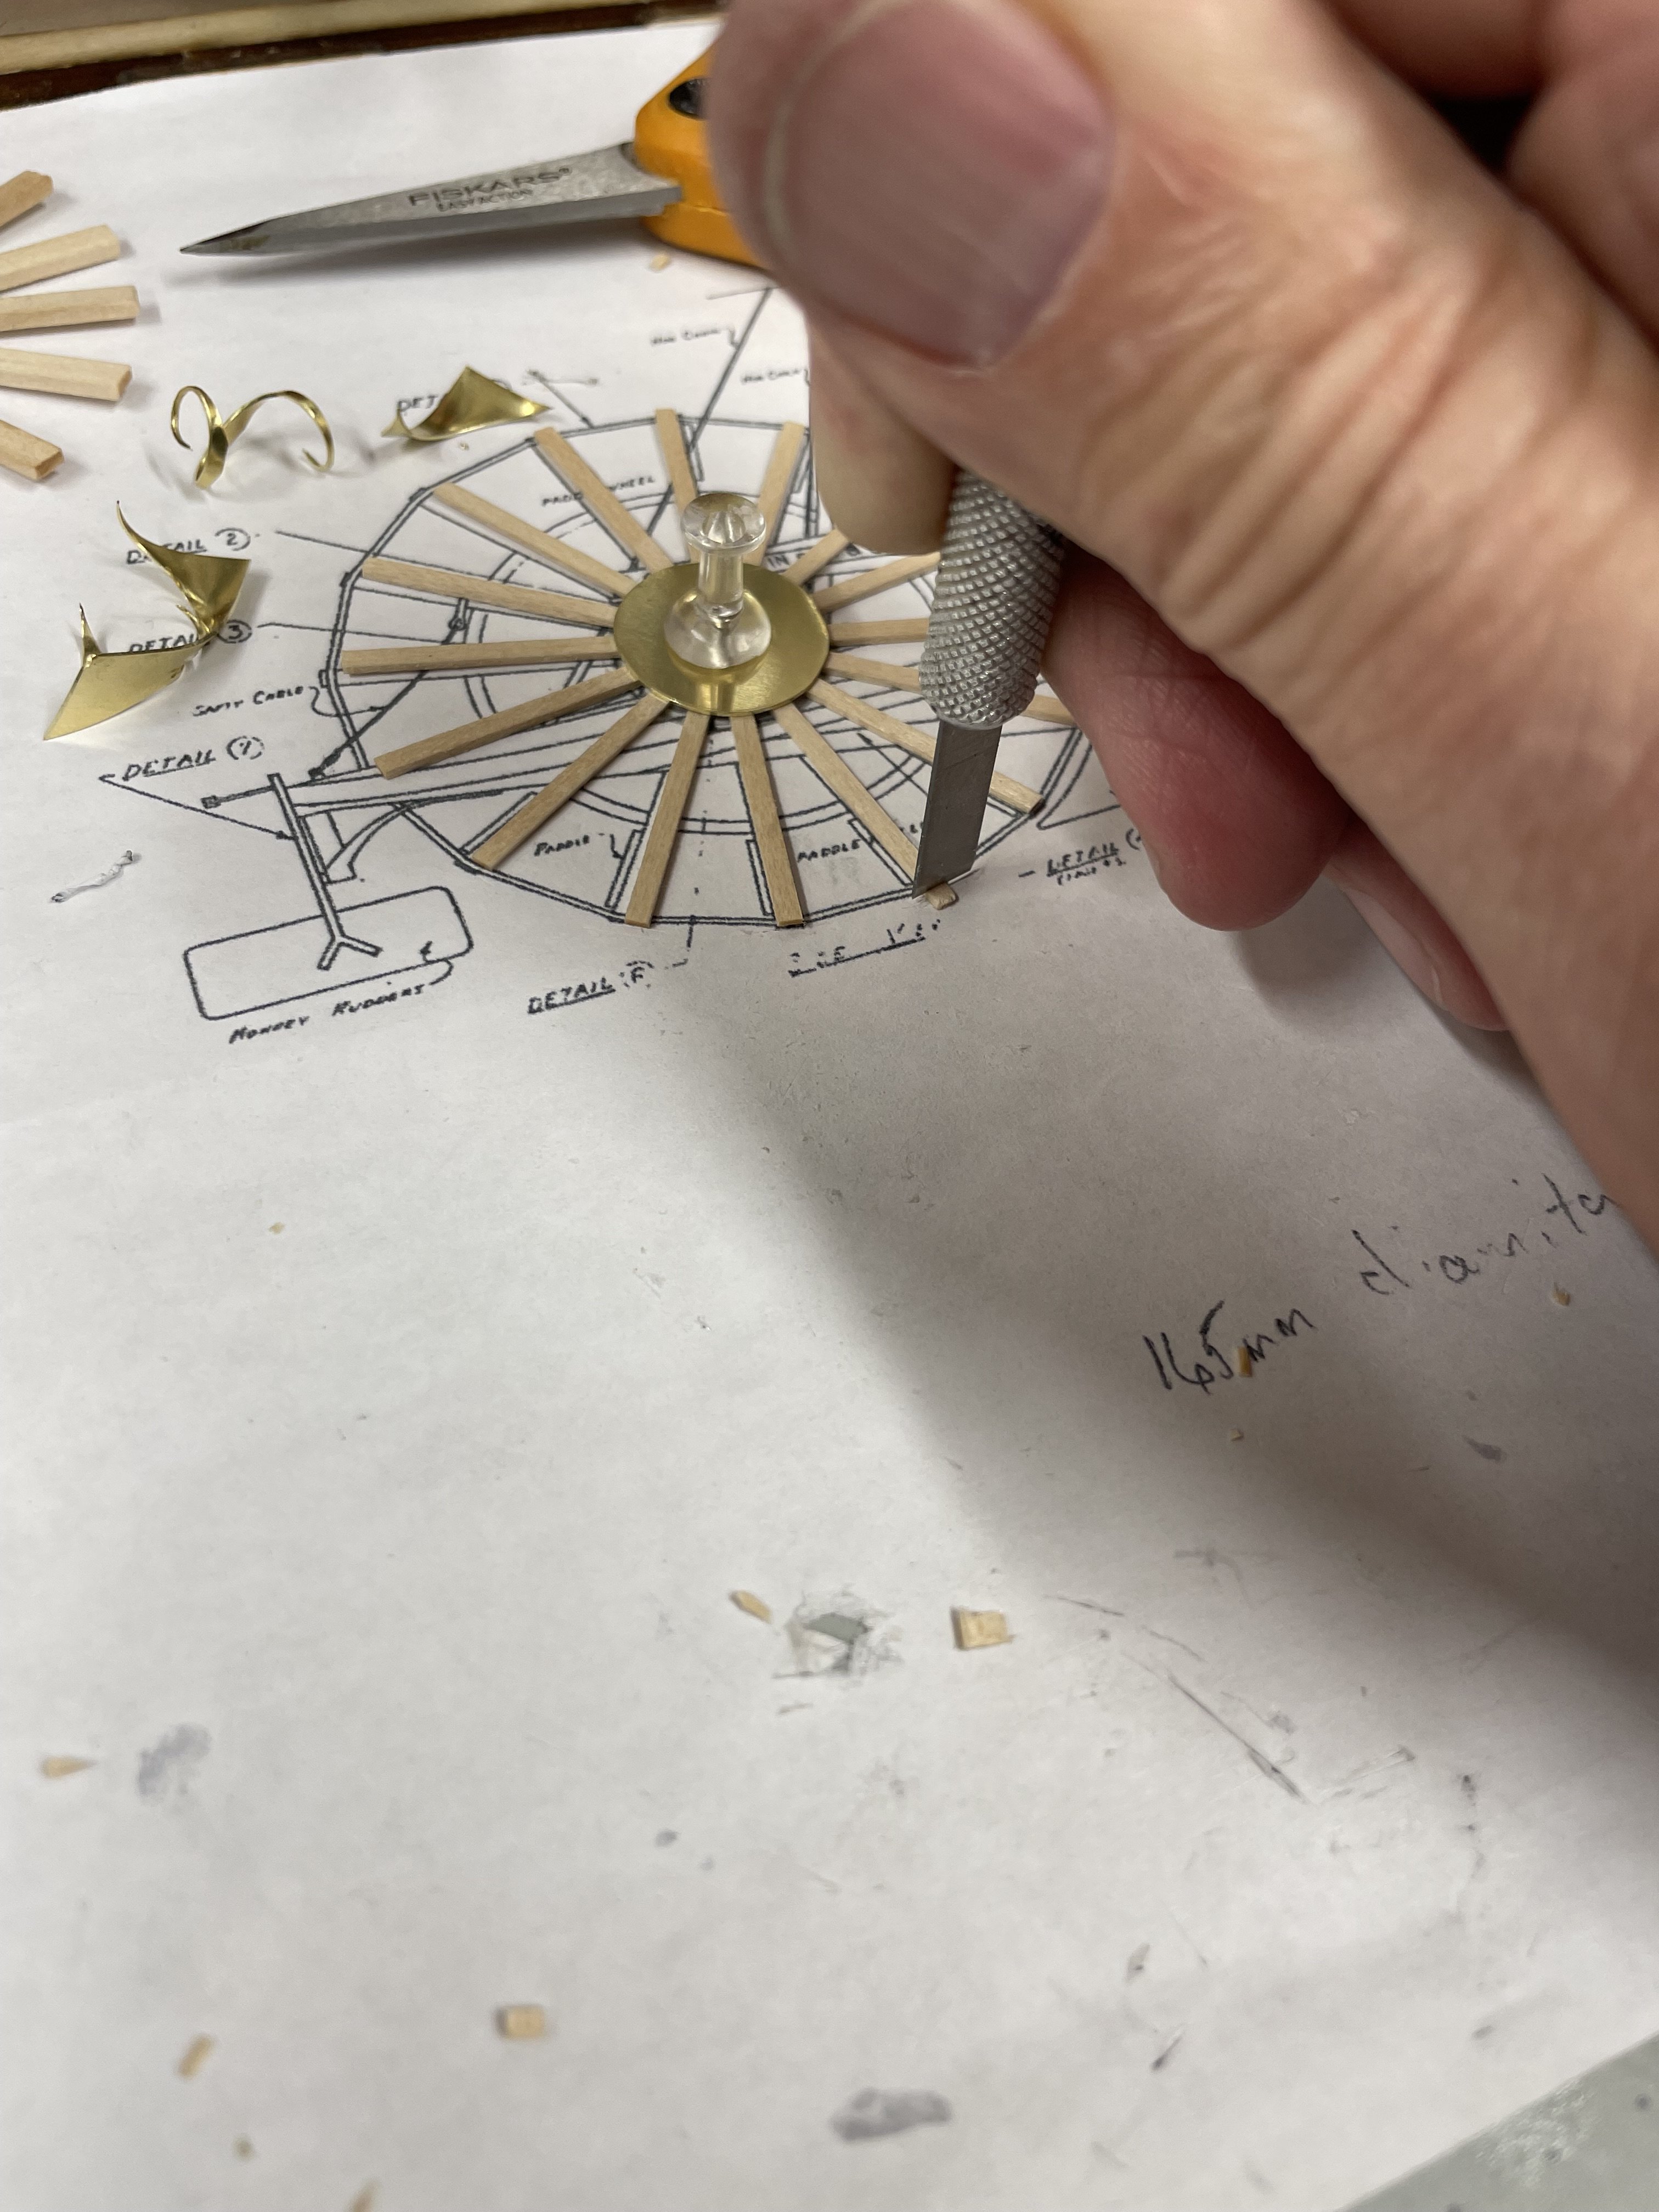
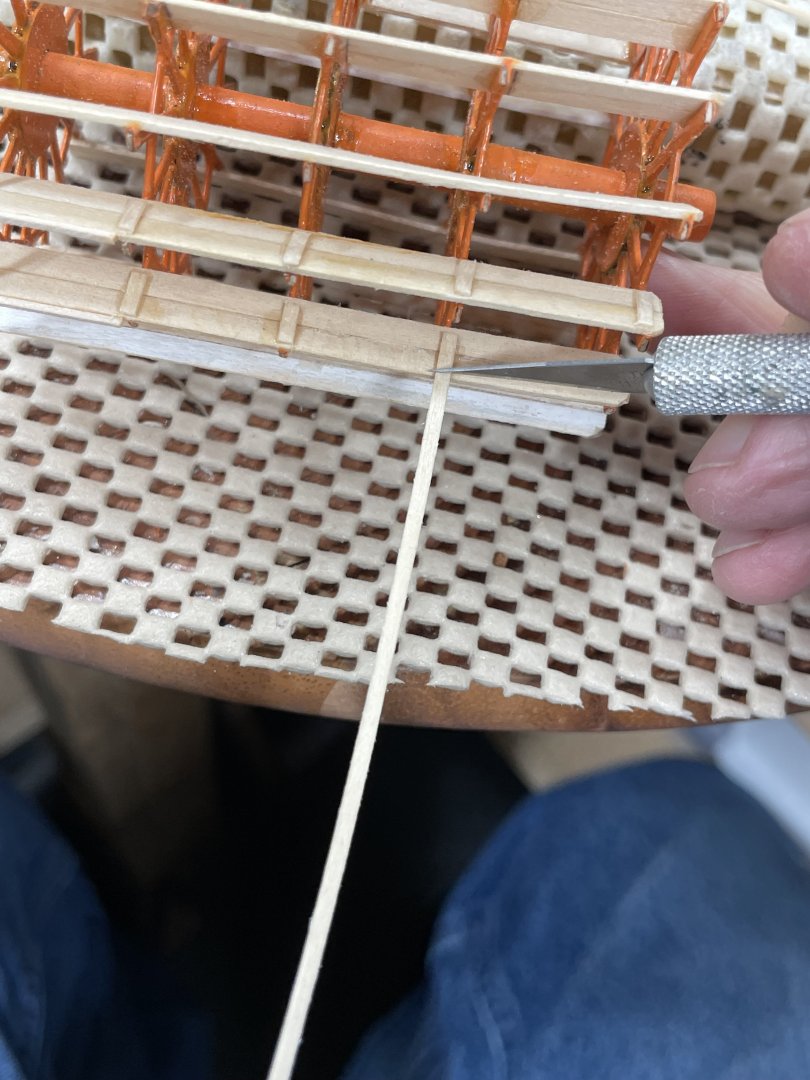
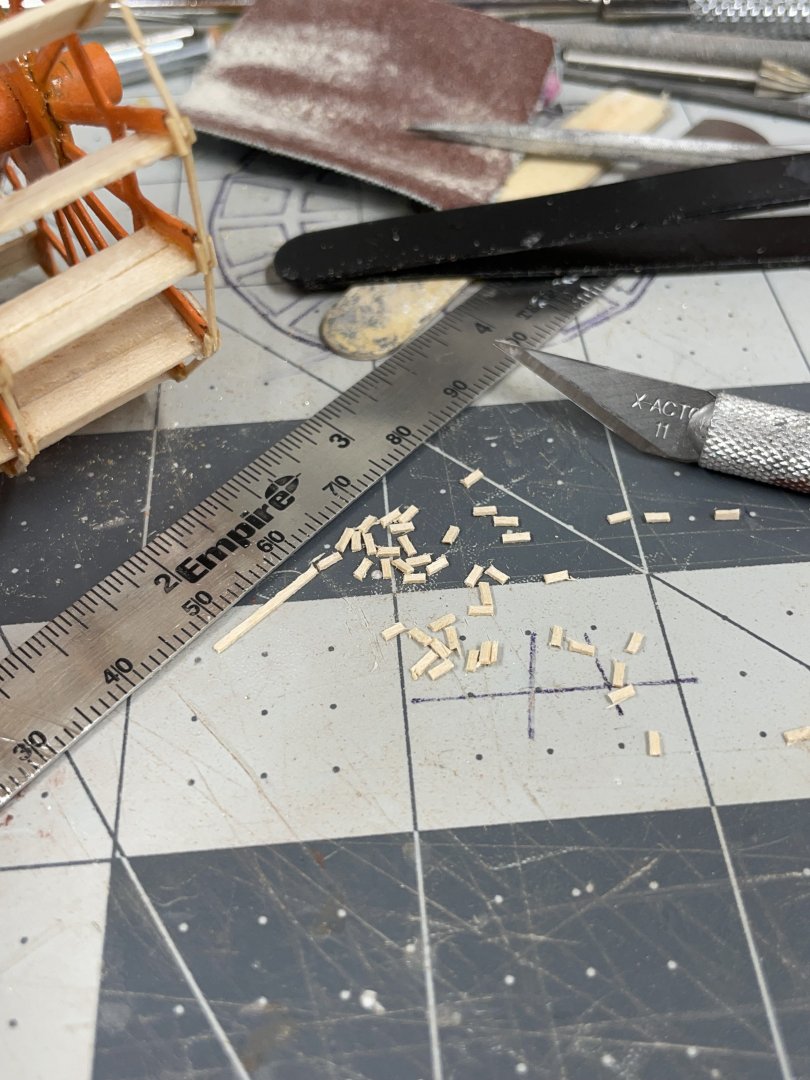
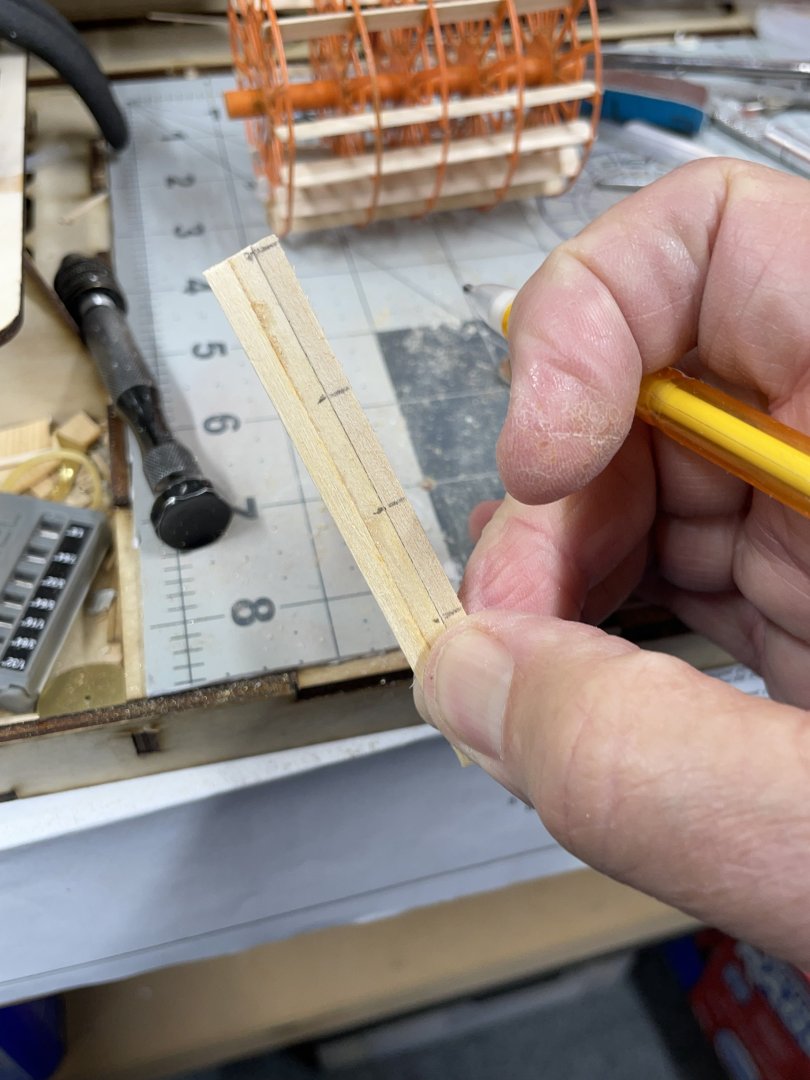
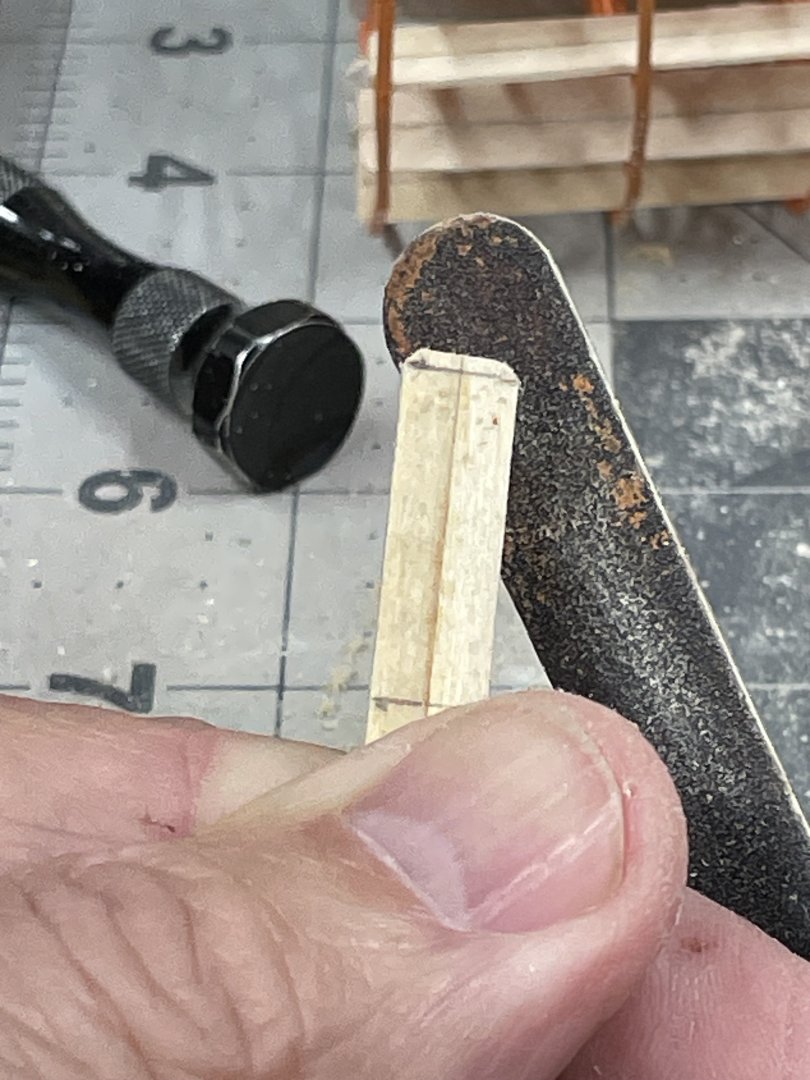
As a matter of fact, tracing out #1 on the cutting board works better than using the original drawing. Building #2 required two attempts. I am starting to pile up my fails, as you can see in the photo below. 👇 LOL 😝 #3 on the board… BUT, yes it’s getting easier. 😎 Cheers 🍻


-
Paddle Wheel continues… 2 of 5 completed… Cheers 🍻


-
Sorry to hear about your cough, Bob 😷 I know how a cough can really set in on me. @Keith Black is right stay in out of that Canadian air, eh. Get better soon. 🙏 I like 👍 that case too. Your is looking proud next to your Duchess of Kingston. Cheers 🍻
- 261 replies
-
- 2
-
-
-
- Victory Models
- Pegasus
- (and 3 more)
-
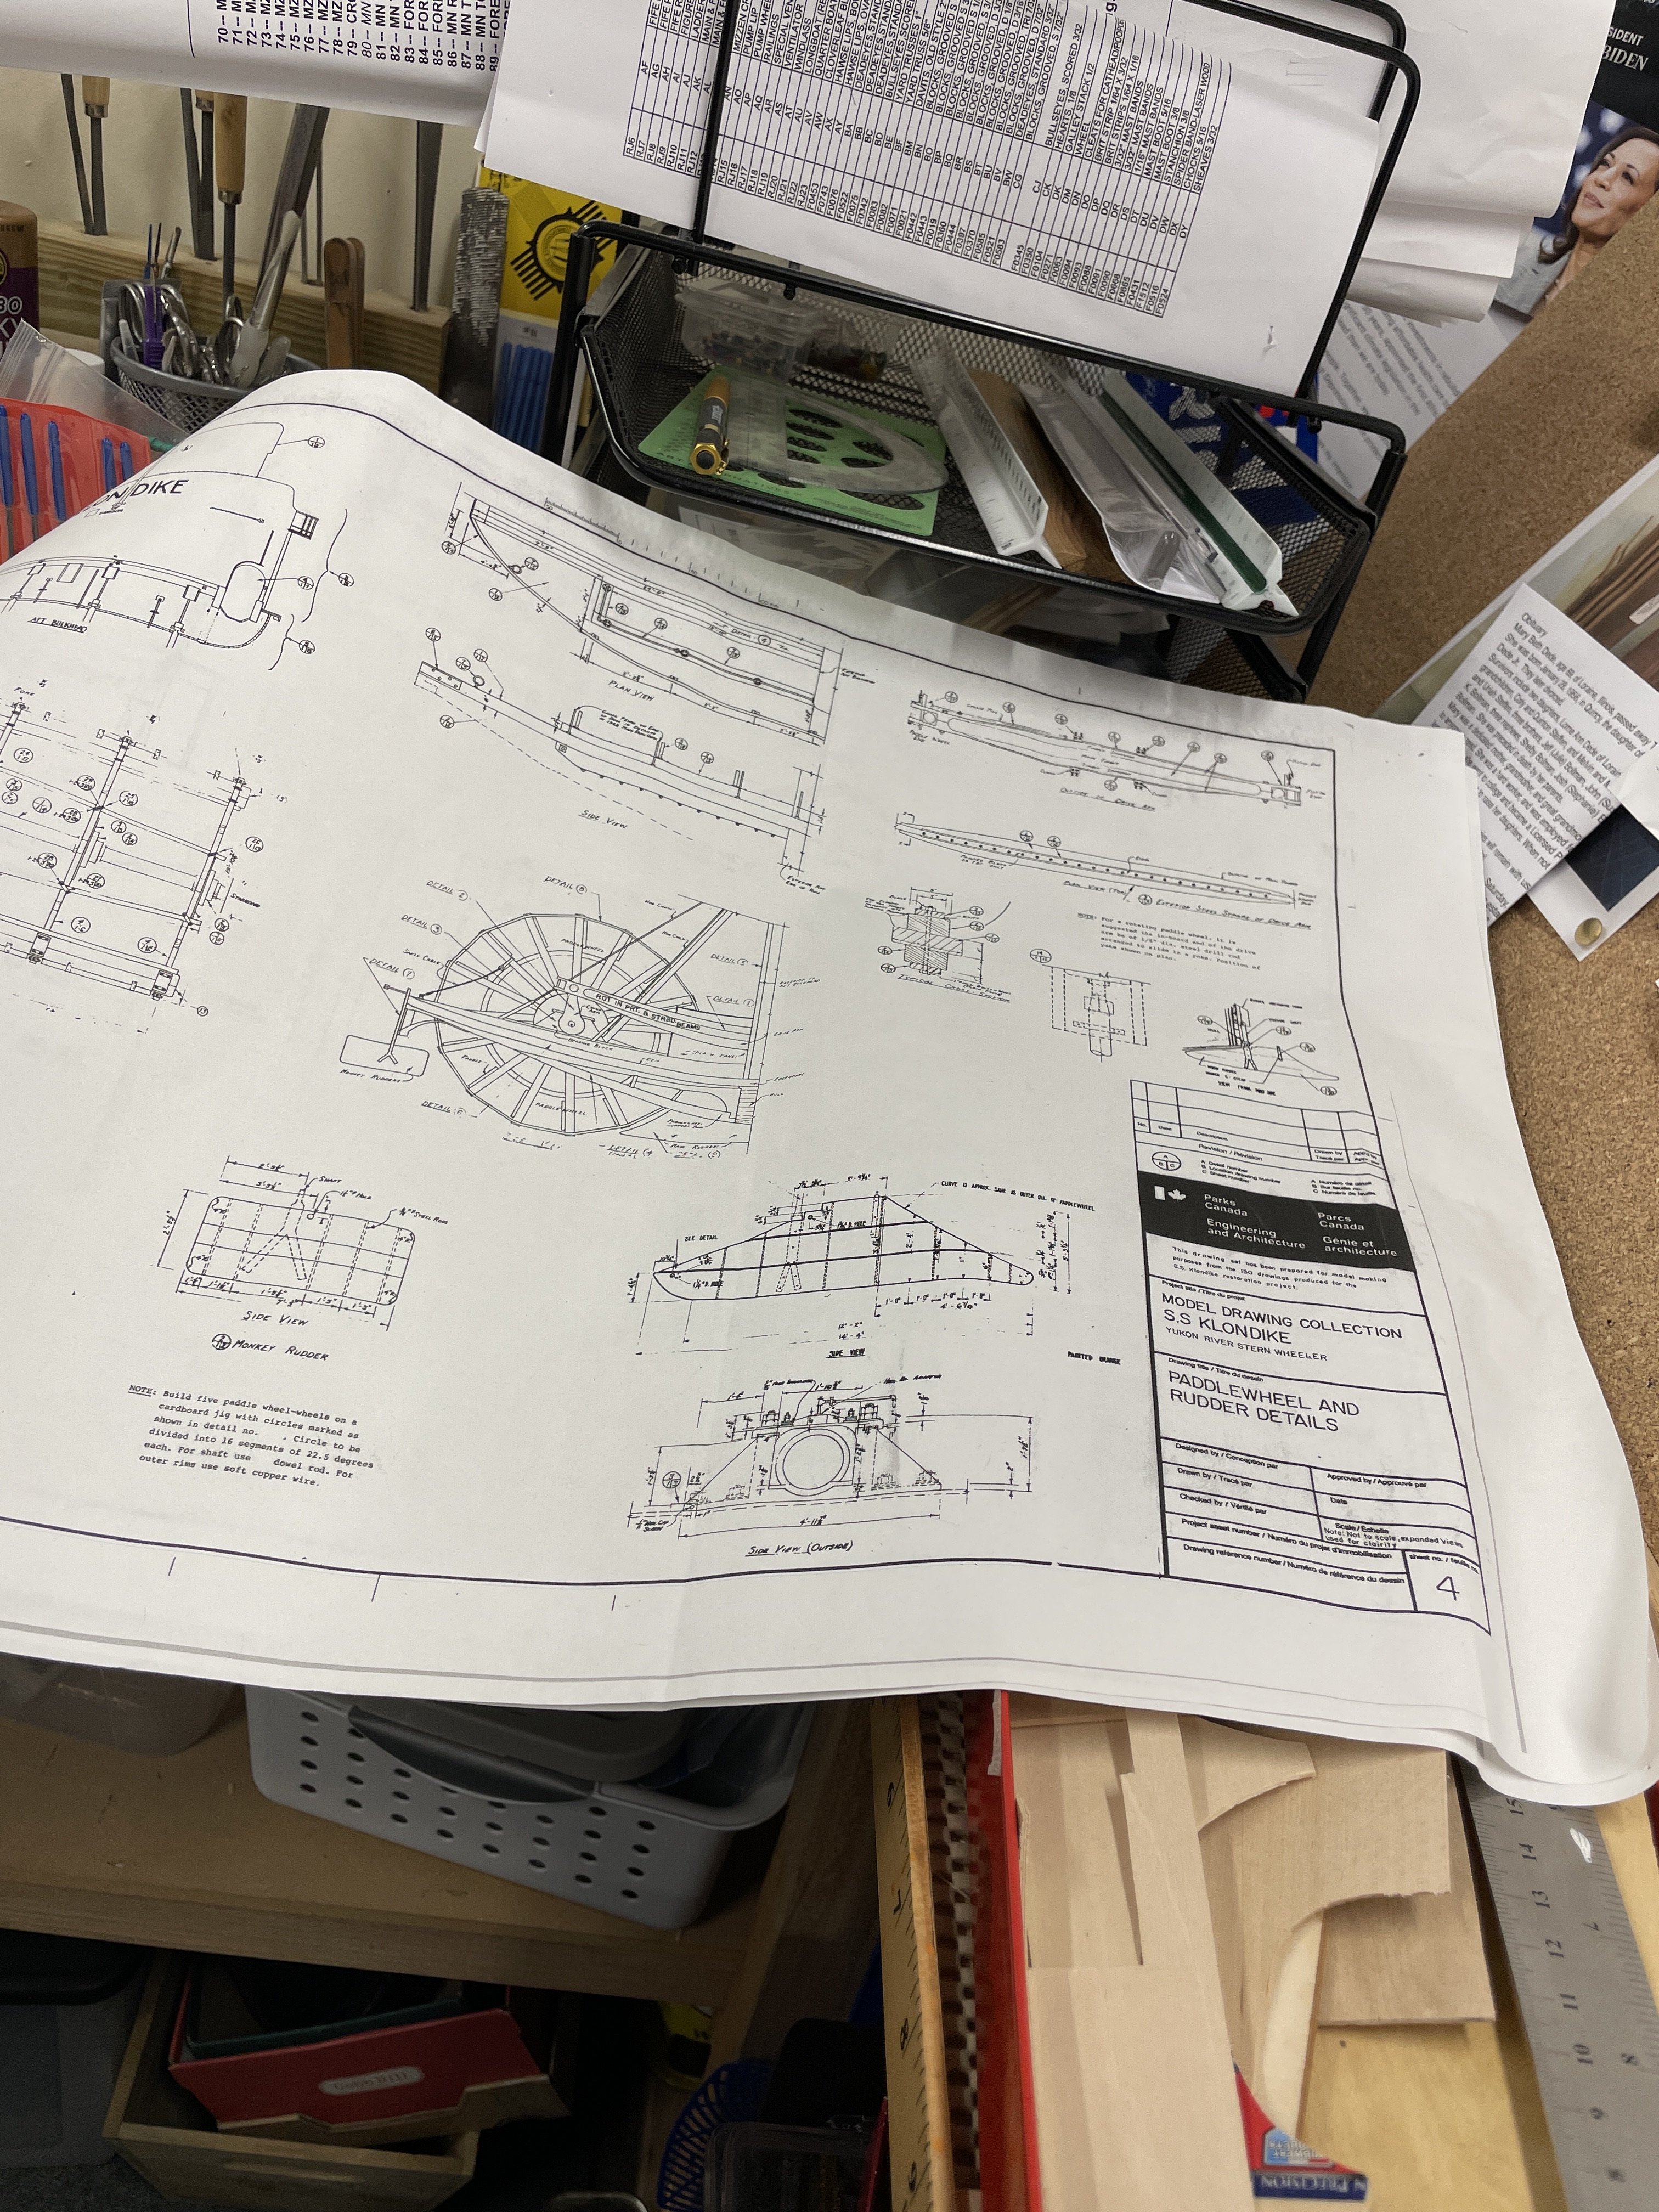
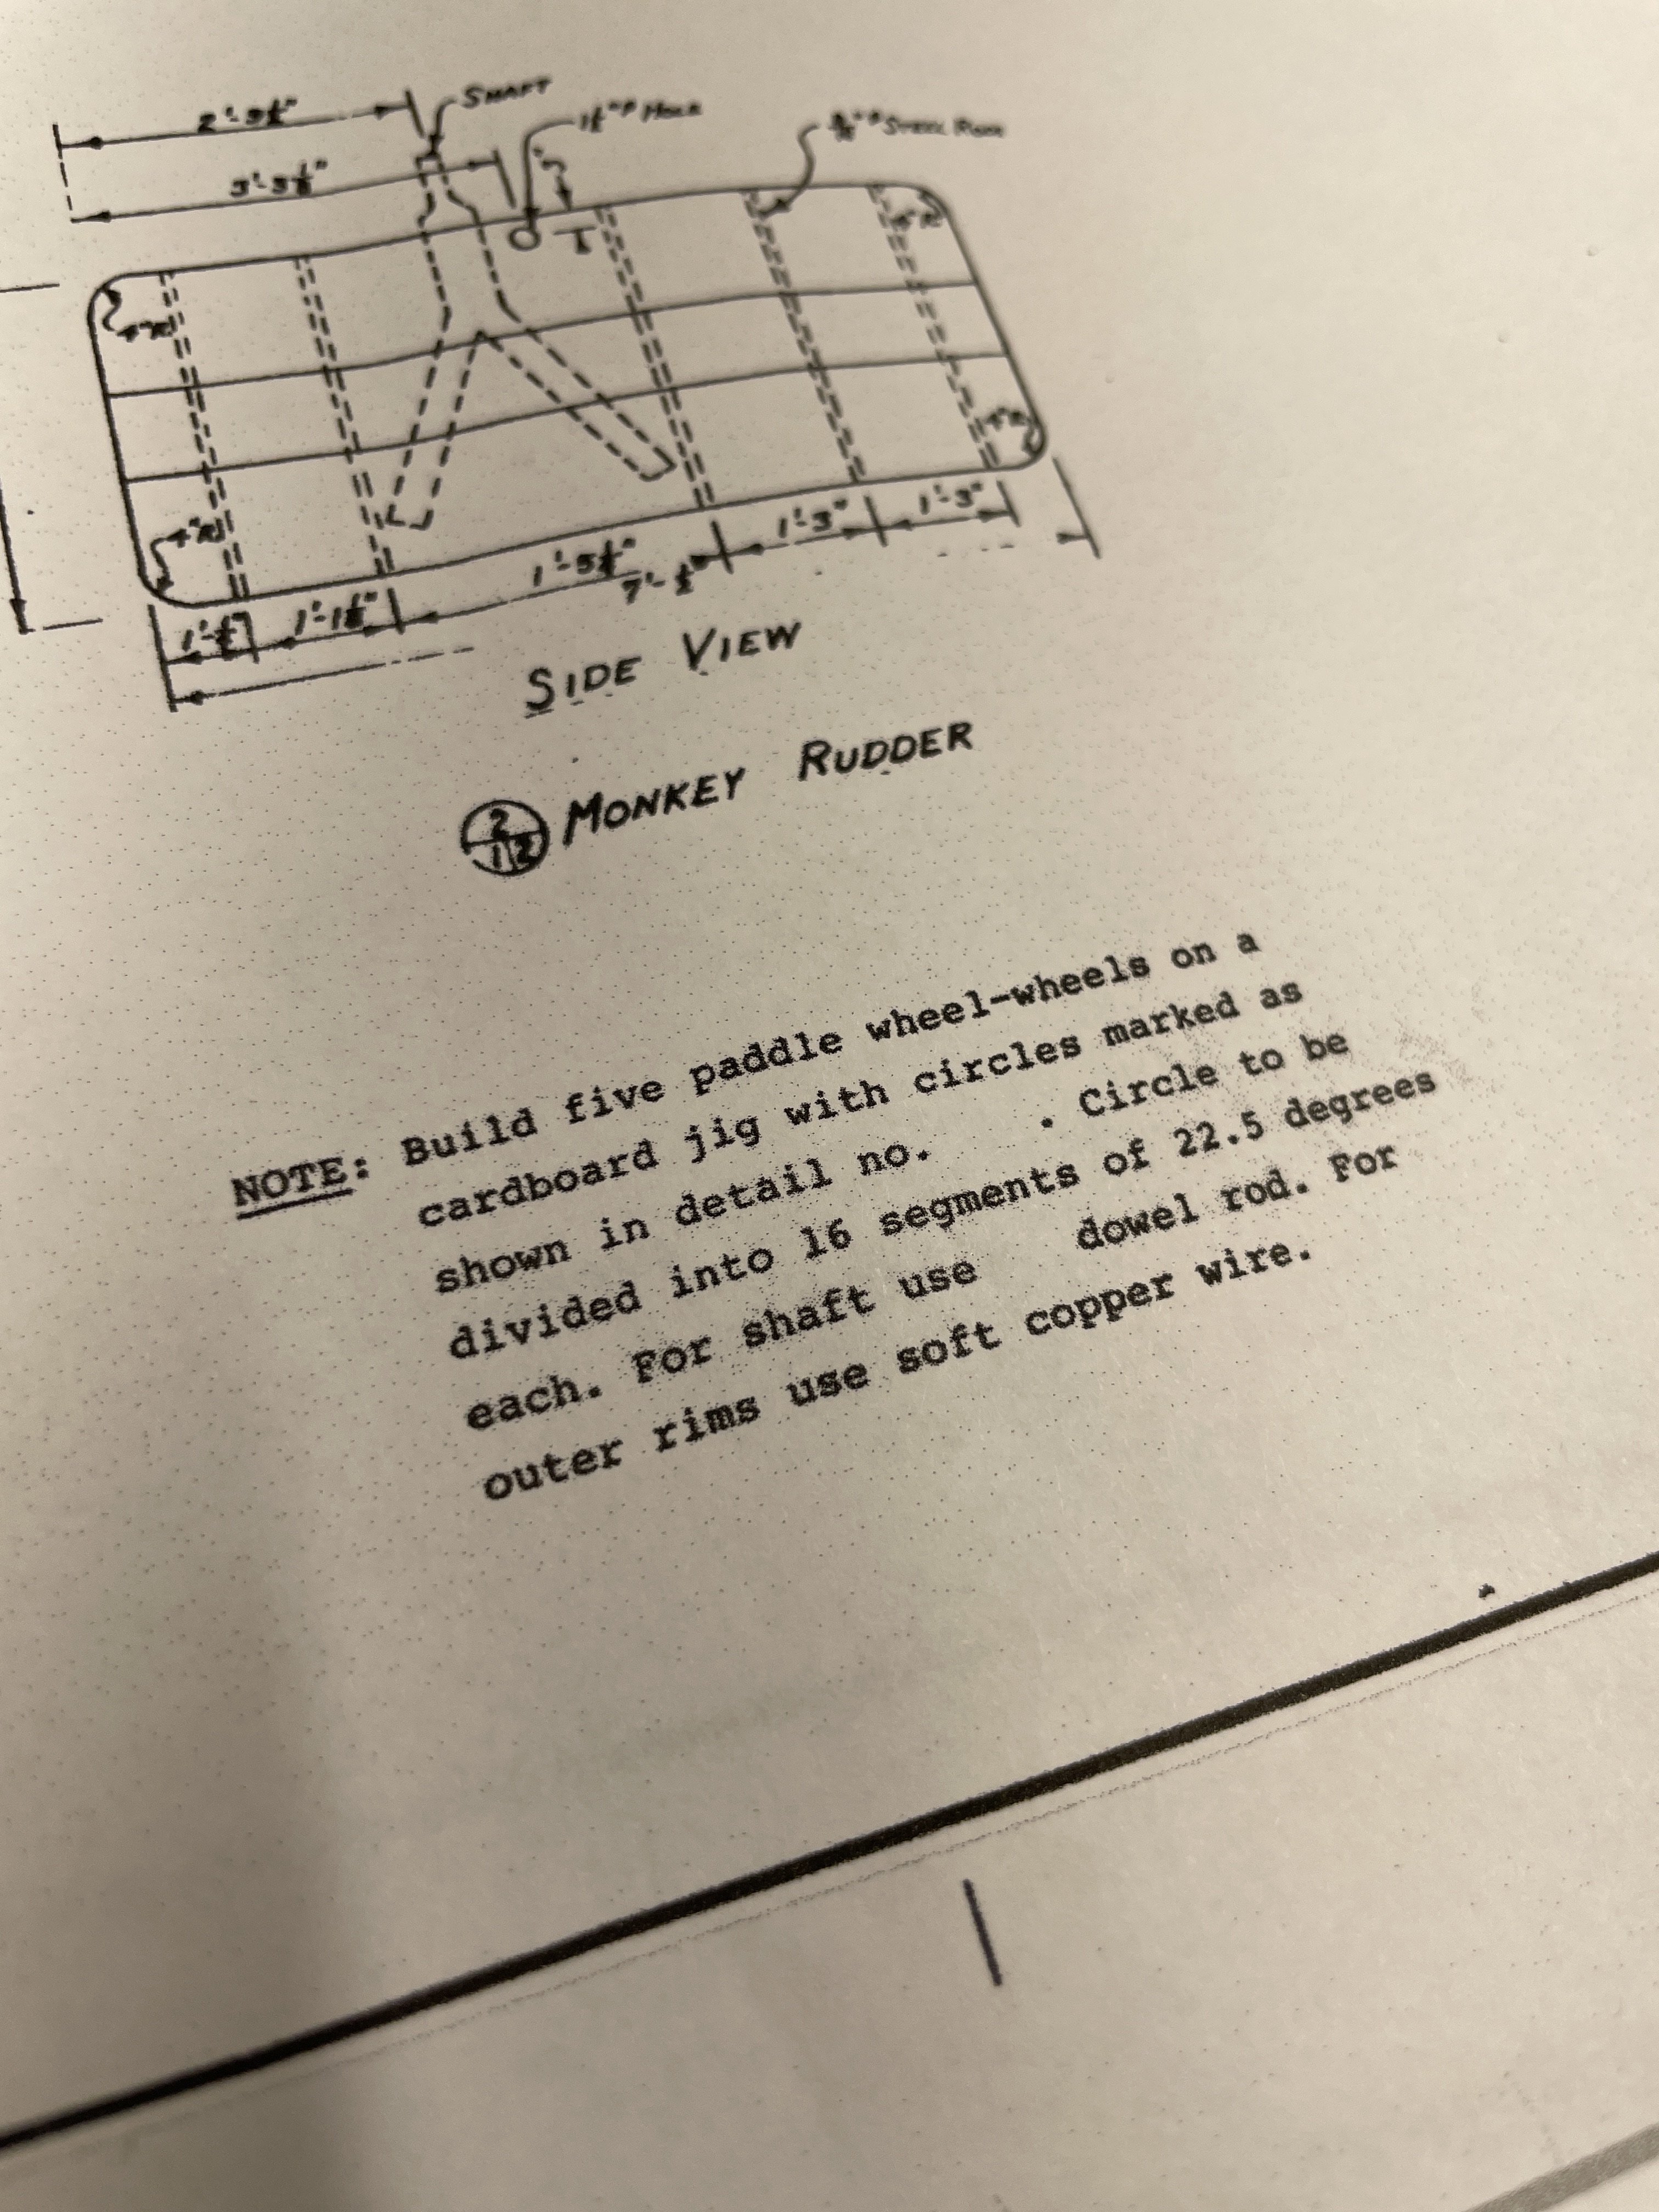
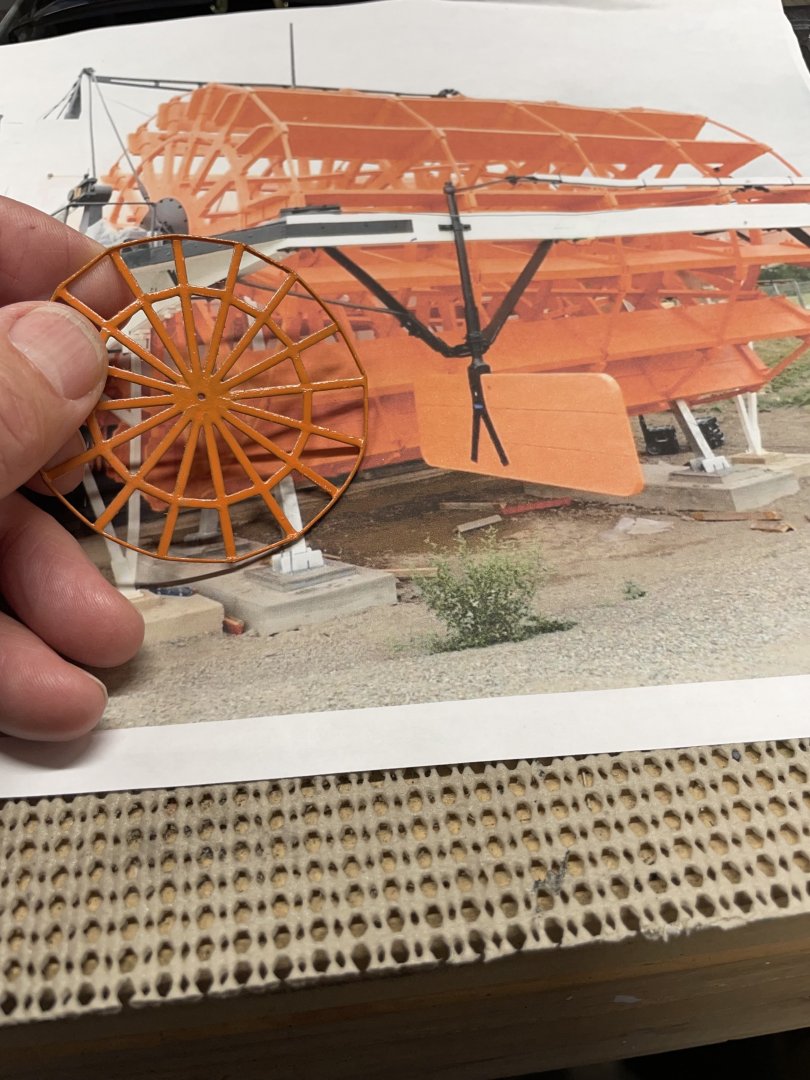
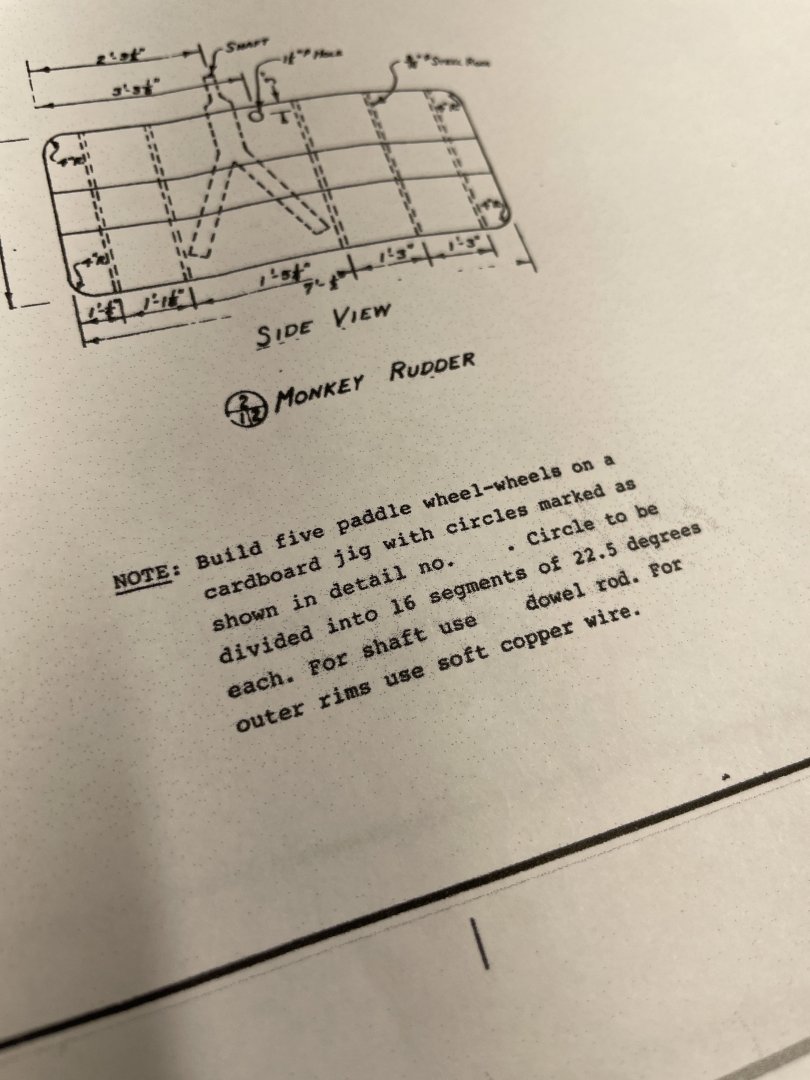
Thanks Keith… Great detailed drawings from Parks Canada 🇨🇦 I did have to rescale the drawing to create the templates to build on. Onwards… Cheers 🍻

-
Paddle Wheel continued… 1 of 5 completed Cheers 🍻


-
No, Thank you Keith for taking us on this journey. Astoundingly Incredible work.
- 457 replies
-
- 5
-
-
-
- sternwheeler
- Hard Coal Navy
- (and 1 more)
-
Unfortunately No, had to leave it there for the guys who build real boats. LOL 😆