Egilman
-
Posts
4,385 -
Joined
-
Last visited
Content Type
Profiles
Forums
Gallery
Events
Everything posted by Egilman
-
 I'm sorry Carl, I was just trying to get through it as fast as possible, then show the individual steps as I apply it to the model itself..... Didn't mean to get less than scientific, or not take the time to spell out each individual test. Was just trying to get through the testing as fast as possible by combining as many different steps as possible Painting, application, overcoating, re-application and now at final overcoating..(I hope) I"ll try and rearrange things and break it down more if you think it will help in understanding what I was doing.... Again my apologies for trying to get there as fast as I could and not being clear... EG
 -
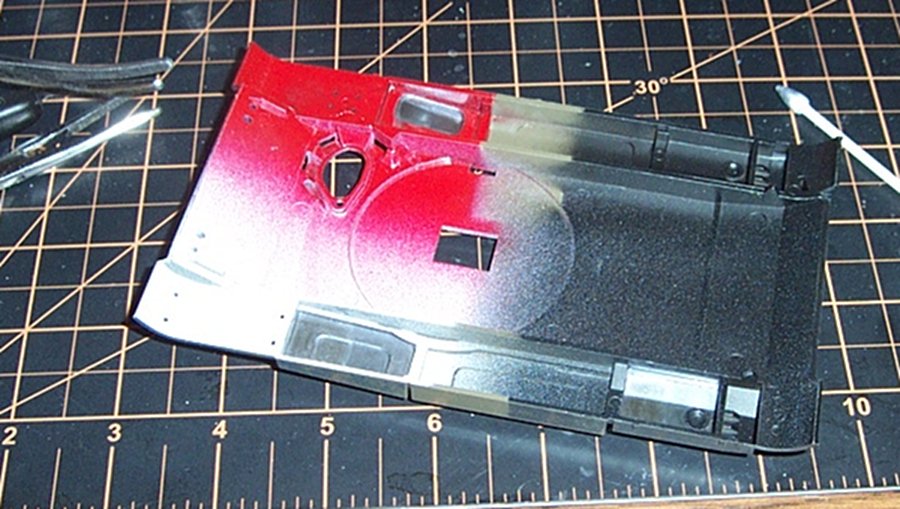
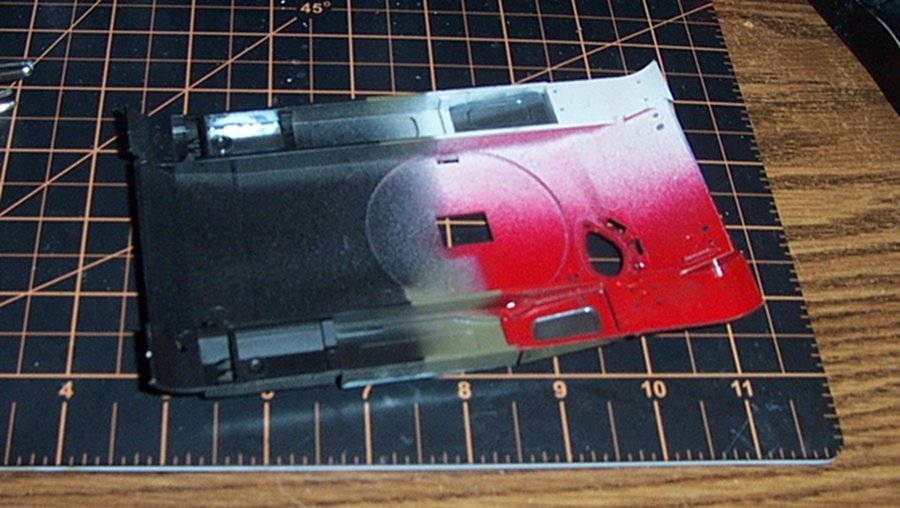
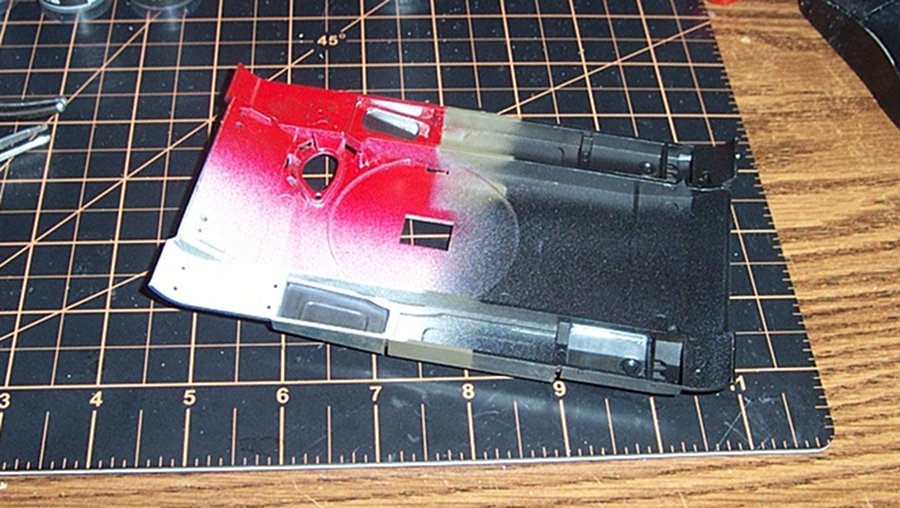
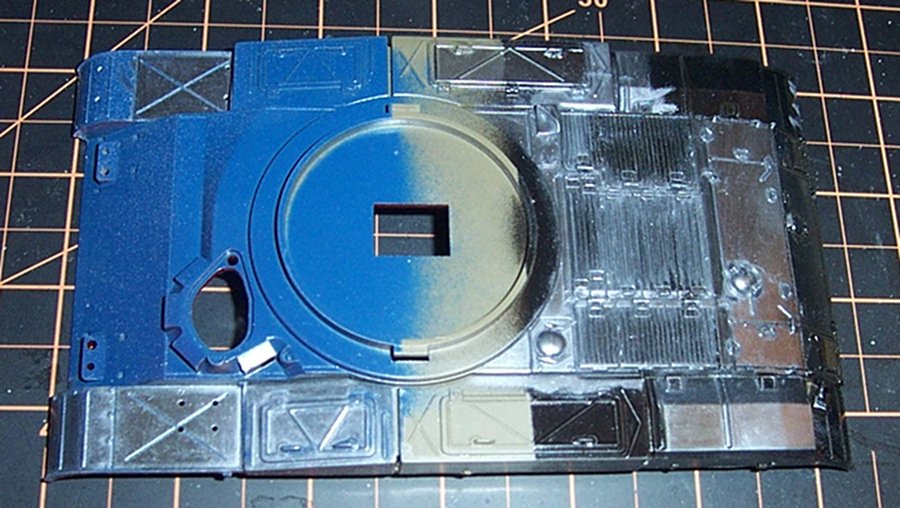
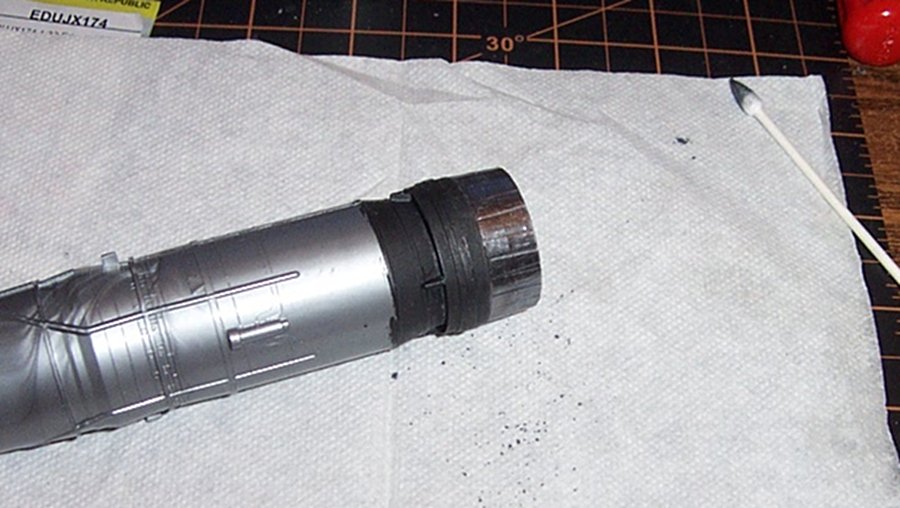
Ok finished the next test, powder over Testors high gloss.... Started with the darkened metal over the dark blue.... I went right up the center of the front glacis plate, you can clearly see the sheen come right back, in fact it looks even better than the original application, it looks like polished metal... The black end.... Here you can see it even better I did the rear plate over the fuel tank and the sheen stands out very well I also did the rear half of the left muffler cover to illustrate the difference... this looks like polished aluminium! Very good... So a base coat of color, a gloss overcoat, and the application of metal powder gives the effect we want.... Flipping it over to check the future side.... I did all three applications that were darkened by the future but just half cause I wanted to show the difference... The red came out mirror finished very reflective.... you can clearly see the difference.. On the grey section the luster came back even better than before but the color remained darkened.... definitely looks like polished steel.... And the flat black at the bottom corner, looks almost identical to the gloss black side... you can see the difference from one end of the test section to the other... the sheen comes back.... So I now know how to get the effects I want, now to seal it so it doesn't get damaged.... Onward..... more to come... EG
-
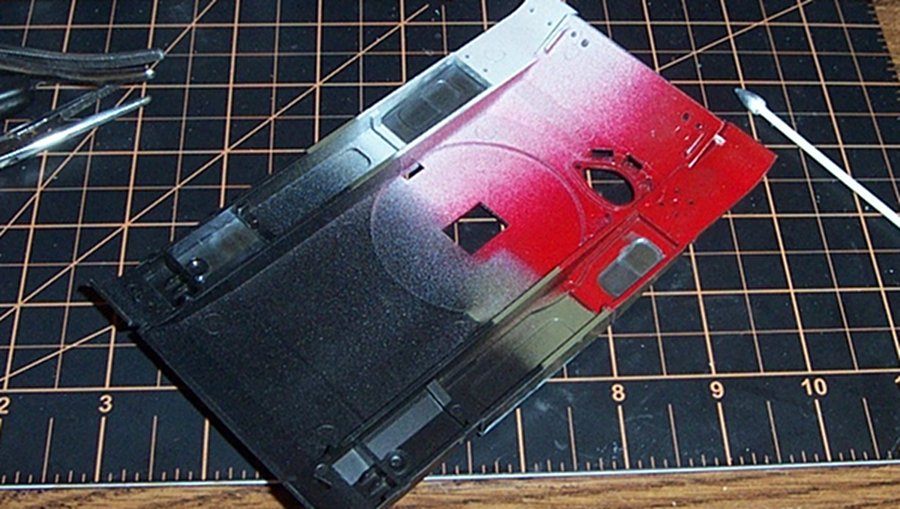
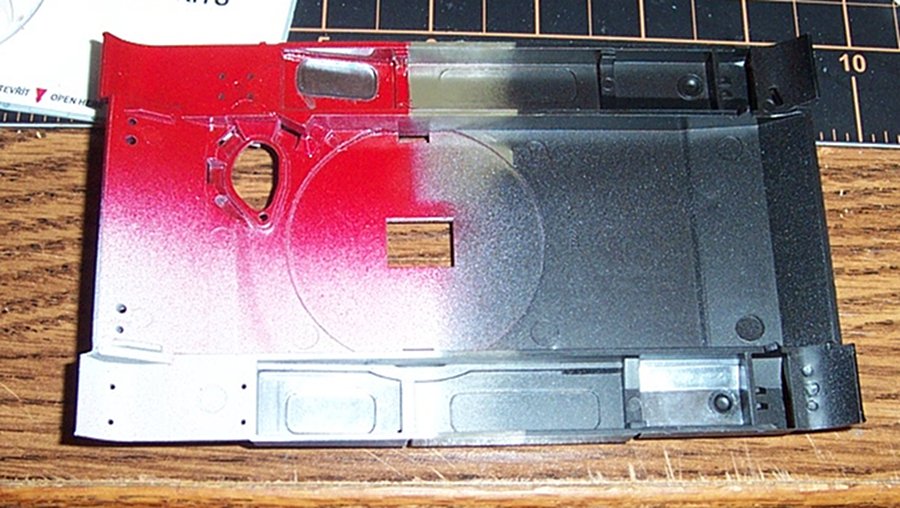
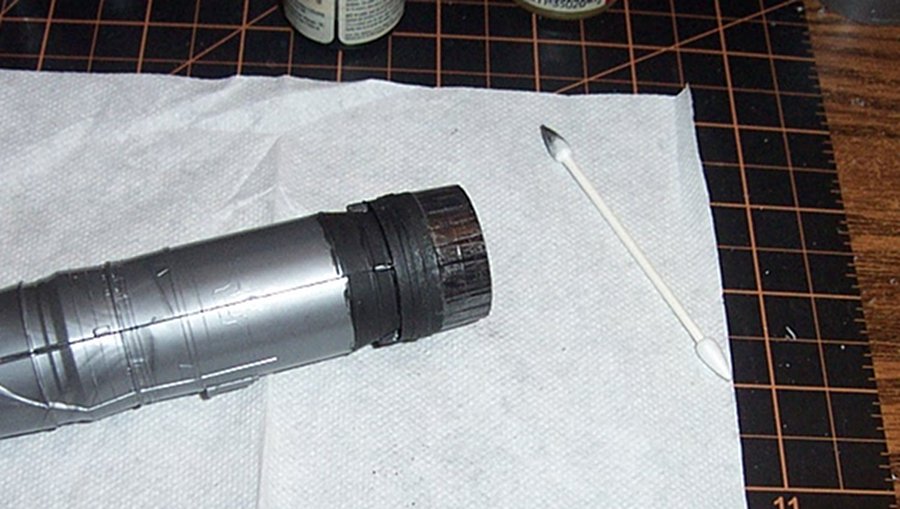
Thank Kevin, I discovered very quickly that finger oils darken this immediately so yeah they will need sealing... and yeah individual panels have to be treated differently right down to the base coat of paint..... It is definitely the base coat of paint that creates the different shading effects.... not much different than masking for different airbrush effects..... Sealing, I went ahead and tried my Testors ultra gloss topcoat over this like I did on the Packard, this isn't the same stuff, very poor results... Clearly darkened the color... And at least half the brilliance is gone... (don't be fooled by the bright flash reflection, it's actually quite dark in natural light, too dark) So testors gloss coat is the wrong product to seal this with..... So I burned a few brain cells and thought I would try Future acrylic which we use to seal decals under... The underside tests coated with Future, they also turned dark, very dark although they did hold most of their shininess, Future would work if you want a darkened steel surface but not polished aluminium..... I did some research looking for application reports of using this and finishing for it on models specifically..... I found one report that says not to use a base coat or cover your base coat with high gloss automotive grade sealer, then when cured, use these powders, and after you have your desired look overcoat them with Liquitex high gloss artists acrylic finish/sealer.... they will retain the bright metallic finish and be protected from damage, Archival grade protection, according to Liquitex.. (non-yellowing, UV proof, scuff and mar resistant finish) Gonna run another test, now that I have Testors ultra gloss on it and future on the other side, I'm going to put some powder over those and see if the original applied sheen returns.... If it does, I will run to michaels and get some Liquitex high gloss varnish and see if what the manufacturer says is actually true and the sheen is unaffected by it... Stay tuned... more to come... EG
-
Hi Ken, I'm figuring it out I guess, I see that the gloss aircraft grey shows a little different, (lighter) than the gloss black does... The Gloss Blue shows no difference. They are dry pigments that go over paint.... The pepper red gave a nice almost mirror finish.... still experimenting.....
-
Hi Lou, heck I'll take any opinions at this point my friend... It's a very simple product and goes on very easy and gives a very natural metal finish no matter what I put it over..... That being said, I'm not seeing the color variations claimed, they all seem to buff down into the same basic color no matter what they are put on... so I'm wondering right now about the different panels situation as I do have a section where that is prominent enough to be a feature.... Gonna do more research...
-
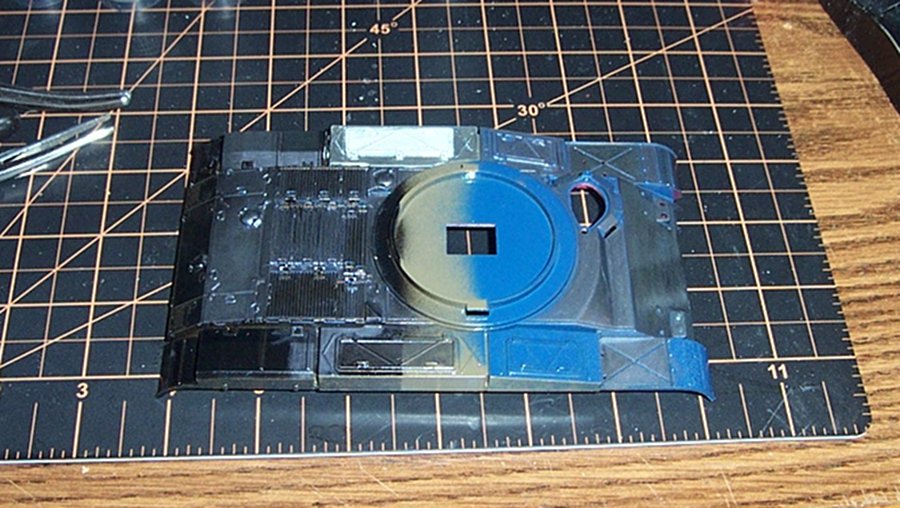
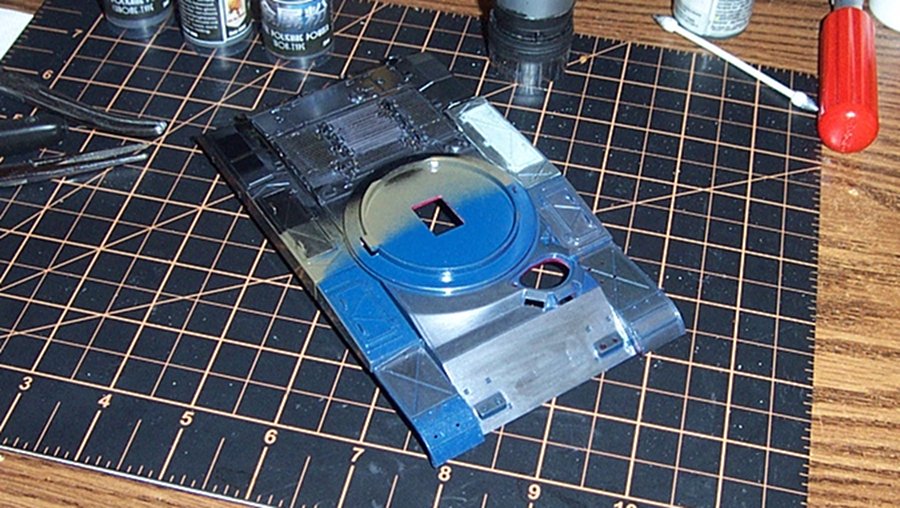
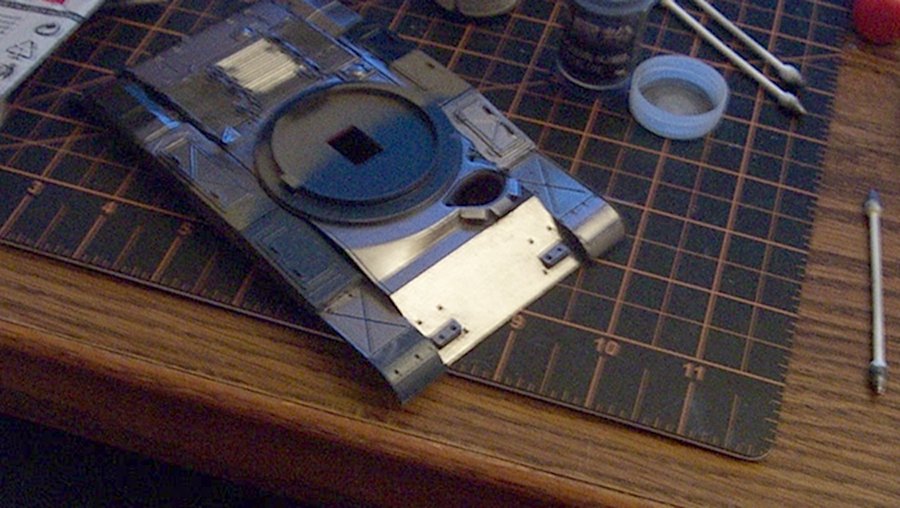
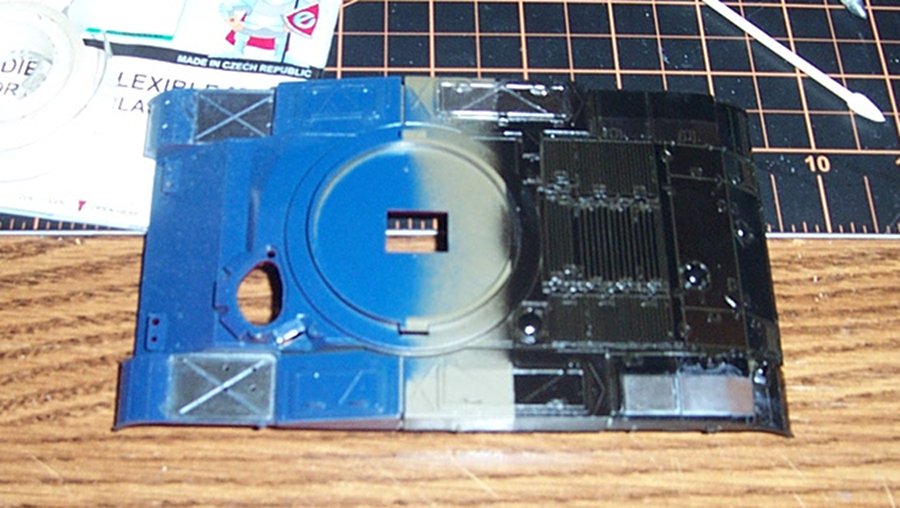
Ok I did a little bit more... Front hull over gloss blue.... Under natural light... And the bottom side showing this over the aircraft grey where you can see it.... They look darker and deeper with more depth to the color on a flat base than a gloss base, but on the other hand on gloss they appear brighter and shinier... Well, I showed it to the Admiral to get her opinion and she like the coverage over the gloss black better than any of them.... Opinions? EG
-
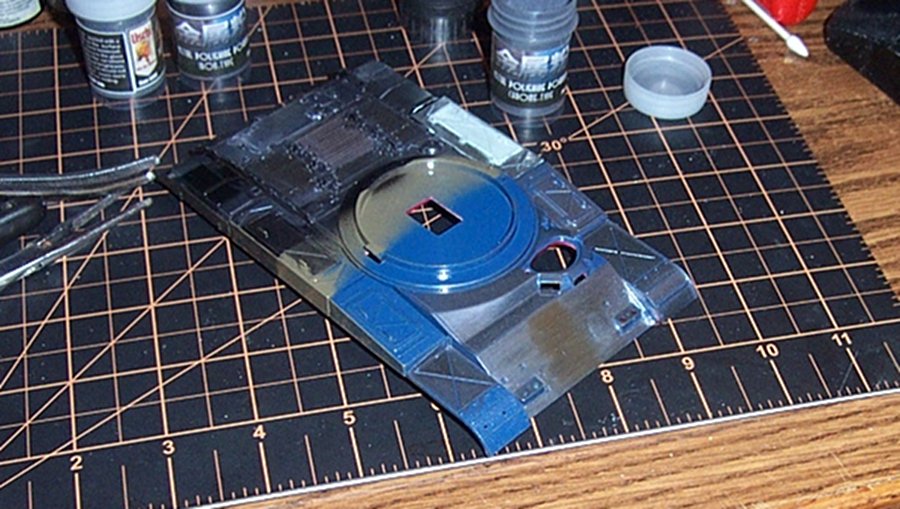
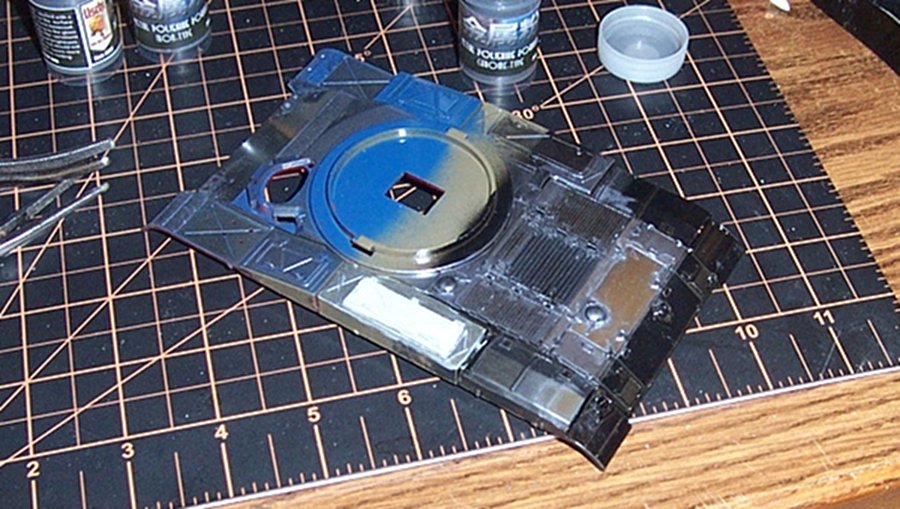
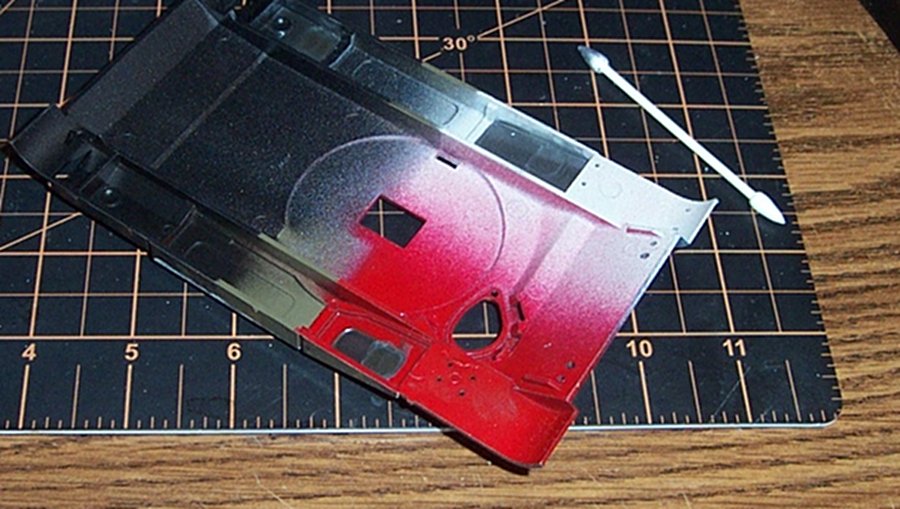
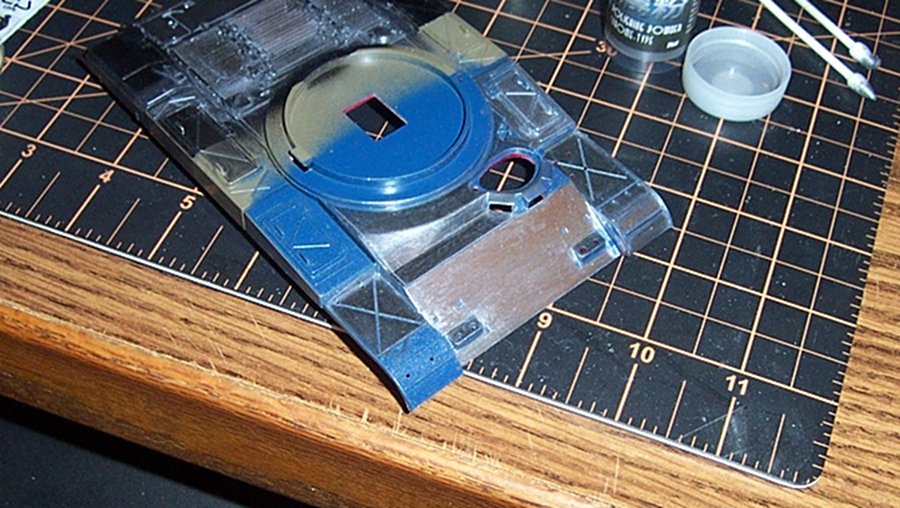
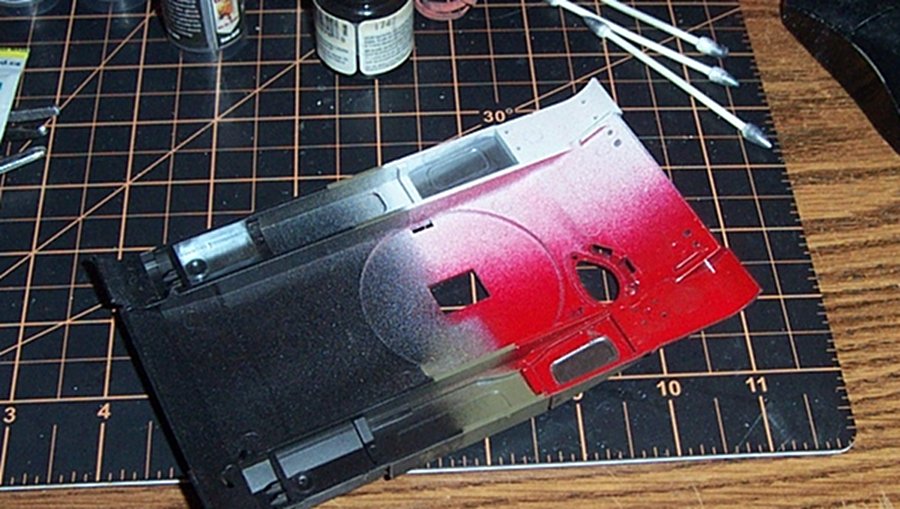
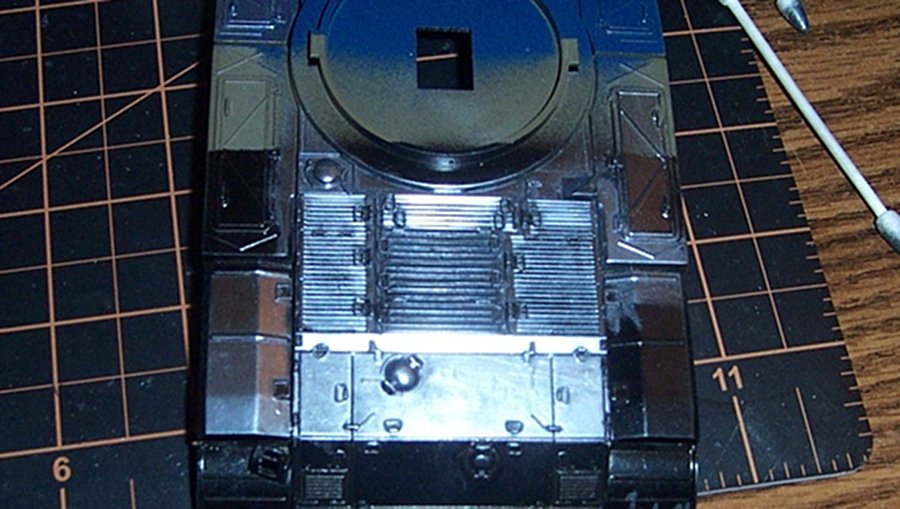
Yeah I like the steel over gloss black also.... But I figured that I would do a test and see if what I've been told and seen actually works out for real.... What I'm going to be using is Uschi's metal polishing powders... essentially using a Q-tip you take some of the powder onto the Q-tip and polish it onto the painted surface So what I did was take a part from the junk box and put various paints on it.... This just happens to be the upper hull of an M-41 walker bulldog.... On the left end is Testors Gloss Blue Angels Blue under intense flash (looks more like ford blue here) and the right end has gloss black.... You can see where I've applied a little of the powder to various details on both ends.... Flipping it over.... Lower left is testors flat light aircraft grey, above that is gloss pepper red and on the right is good old testors flat black. On the red you can easily see where I have applied some of the powder in a recess in the fender well it came out almost like a mirror chrome.... In the opposite fender well I did the same recess over the flat aircraft grey. (but it's hard to see, I will take a shot in natural light and see if it comes out better) and on the left over the flat black in the lower recess.... Seems to give a very realistic metal effect but I'm not seeing a lot of variance except over the gloss red which is really super shiny.... On the upper surface again I went ahead and polished more of the surface over the gloss black....... Like I said it gives a very effective metalized surface... Taken from the end, the shine is pretty decent. but I"m going to try a few more things and see if I can get some variation in coloration... More in a bit.... EG
-
Well keep watching brother, if this turns out as easy as I've seen it done, the difficulty level of a BMF will be long gone, well within the ability of the average modeler.....
-
She is definitely that my friend skinny and carrying a lot of sharp edged things around with her.... (pretty quick too if I"m not mistaken and doesn't like you not paying attention to her either) My set was Eduard, and full on brass while the restraint webbing was also Eduard from their fabric line..... made for two different kits as well along with the Brassin seat made for another different kit as well.. took me about two and a half days and a lot of that was modifying the kits cockpit to accept the parts..... The concentration required to assemble the eduard PE seatbelts was intense to say the least, it gave me very real headaches.... (even though the process was a simple one the sheer micro size was the issue) I may do it again, but not until I do a lot more research.... Airplanes aren't my main line of interest though, so it might be a while...... EG
-
This is what I was talking about, the first pic...... Burnt Iron over gloss black... Steel over gloss black.... I like the steel finish better... All of this was done over one coat of brush painted gloss black, no spraying needed at all... What I've seen is you can use whatever color/finish you want under this stuff and it will change the tint/shade of the metal finish opening up a much much wider range of bare metal finishes than you will ever get with paint alone... I've watched it done enough to know this is where I wanted my first attempt at BMF to be...... I have that much confidence in this technique...

-
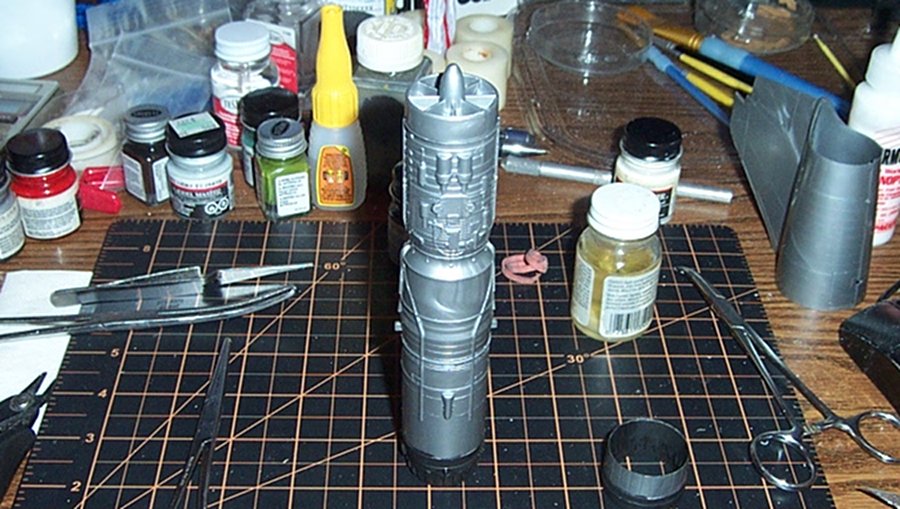
Kevin, Yeah I checked out Alclad thoroughly before rejecting it, there are easier ways I found out. I also checked out the various metallic paints and bare metal foil, most of which require an airbrush to apply which I don't have... I was looking for an easy way to apply metal finish that works for a rattle can guy..... Easy is always better IMHO... {chuckle} Ken, I know that for sprayed on metal finishes a perfect High Gloss black finish is the key to the sprayed on bare metal finishes. I'm not doing a spray on finish. and the undercoat can be any shade or grade I want it to be... I have to make a few tests first before I go to apply the finish to find the best base coat. But once I do that I will cover it in detail as I apply it to the model....... What I'm going to do is supposed to be so easy that anyone can do a bare metal finish even if they have never done one before.... The afterburner exhaust on the engine picture above (previous post) is burnt iron over brushed gloss black. I'm going to do it again in steel cause the iron looks nice but it a bit too dark..... This is going to be a learning experience and experiment for me, I've always wanted to do a BMF and this is going to be either a great success or an abject failure... It's is also a different approach, if it works, I will never shy away from a BMF ever again.... and no one else should either...
-
Yeah I'm fairly certain it's an airplane, although is does kinda resemble the tip of a pike...... {chuckle}
-
Thank you Ed, wish me luck....
-
Workin' at it brother, and it's my first NMF as well....... Gonna need a bit of luck..... Thanks....
-
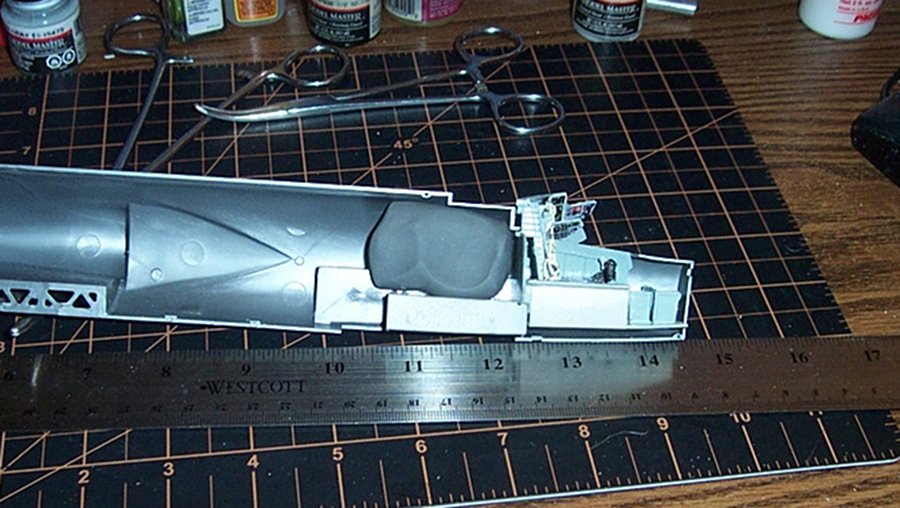
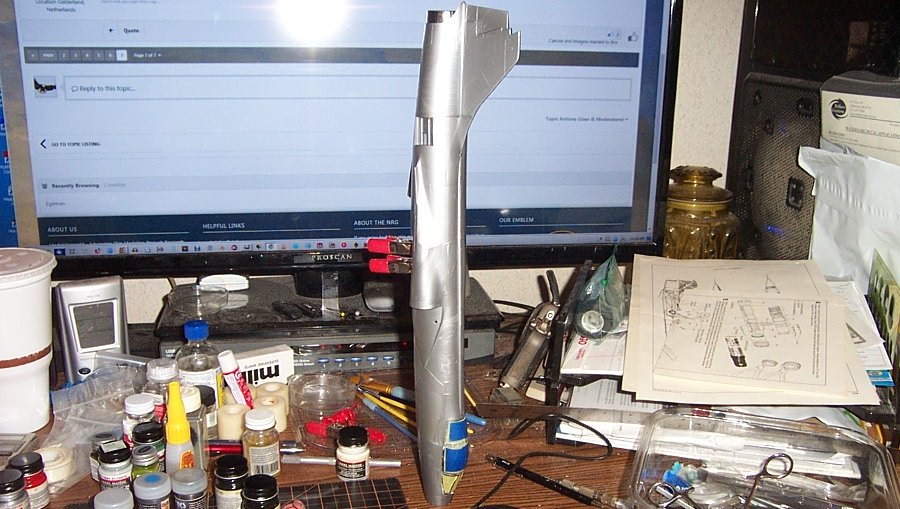
Yep, paint is the big thing with these monsters... I"m doing an overall metal finish on this cause that is the way most of them in US service was and the subject was.... First step is a base coat and prep is everything.... Engine, the engine has to be installed to fill the tailpipe which shows..... And the afterburner peeks out from the tail... Blackened burnt iron color looks good to me..... Next is getting a complete fuselage together.... Canopy masked and in place engine and tail is in place. Man, that is one long model airplane.... The tail isn't glued yet as I still have some fitting to do.... once done, a shot of primer, to check for fixes needed, then a coat of flat black..... this should result in a lustrous finish that will be clear coated to make it shiny once the metal finish is fully applied... The Canopy is glued with canopy glue so it's removeable after painting. Besides I'm considering an open canopy to show off what you can see of the cockpit.... Anyway making progress to painting an NMF on this big bird... EG
- 518 replies
-
- 11
-

-
They have one, (Signal Corps #1, the first military airplane ever) and it's a reproduction not an original... The original Signal Corps #1 is at the Smithsonian's NASM along with the original Wright Flyer (Kitty Hawk Flyer, as restored by Orville) after 50 years being on display in London cause the Smithsonian refused it. Wright Flyer #3 (the first practical airplane), is restored and on display at Carillion Park in Dayton Ohio. The AF museum also has a replica of Signal Corps #2 the first Curtis biplane the army bought. (and the second military airplane ever, the original was scrapped in 1912) The original 1901 wind tunnel is also a replica, but it was built by Orville Wright for donation to the museum prior to WWII.... They do have Orville's 1916 wind tunnel, original, on loan from Miami U, Oxford, Ohio They also have an original 1916 Wright Model "B".....
-
Nice recovery brother... Anyway you go it will be a nice B-17.... there were thousands of schemes to choose from..... Praying everything turns out fine with the doc...
-
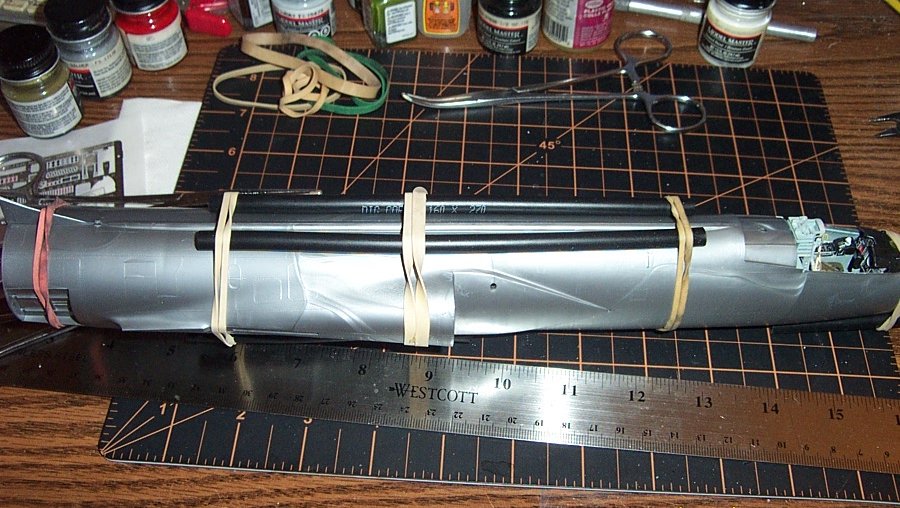
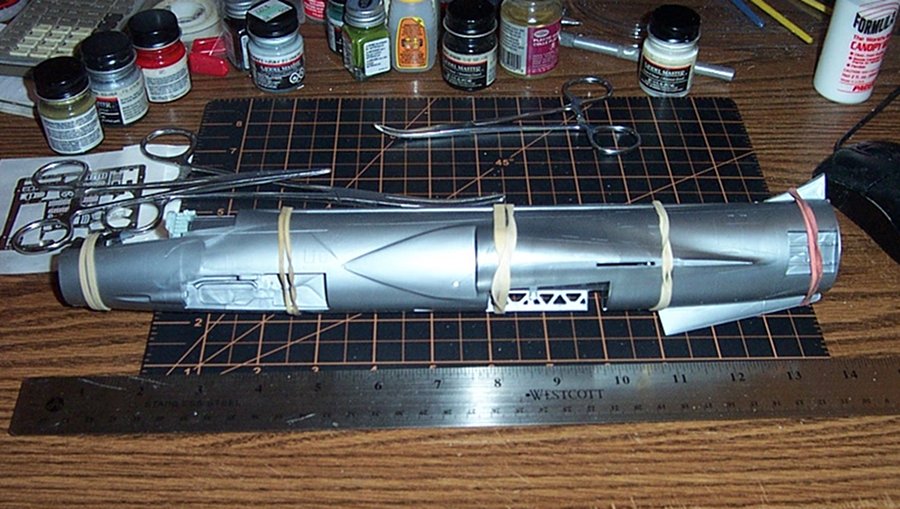
I've got clamps big enough to do the job, it's just that in my experience with a fuselage this large they tend to spread it at the seam lines. The bands provide equal pressure all around and hold it in proper shape while the glue dries. the issue is like you point out, the glue will wick along with the bands marking the surface..... There is a solution which keeps the even pressure of the bands and get them off the joint....... Those are 1/4" polyurethane tubes slipped under the bands on each side of the joints. it keeps the pressure pulling into the center while lifting the bands off the surface of the joint...the rear band is resting on the upper and lower stabilizer fillets which were molded into one side so there is no joint along the edge... Bottom side... Now the girder for the main landing gear will probably have to be clamped after the fuselage is joined, but this affords even tight pressure all around without distorting the shape.... Should be minimal filling needed, the two sides fit very well together... (but there is a slight ridge that will need to be dealt with) Ready for glue... EG
-
Thanks Brother, yeah it's a dry fit getting ready for glue and yeah the modified cockpit tub fit in perfectly....
-
Well, I'll have to wait till the guys putting it on display are finished polishing it up before sending it over, as long as the pilot is happy with his wicker seat.... Thanks Carl, yeah it's a big'un, but it's actually a fairly simple build, I just complicated the heck out of it with my conversion.... it will move a bit faster now that I'm past the cockpit....
-
Well you don't know what is happening outside of the scene, the battery cart and browser will probably show up in time.... Have faith my friend, the RAF usually got it together just in time...
-
You need a battery cart, and maybe a fire extinguisher, a fuel browser for topping off or an empty bomb cart leaving the scene would be nice as well.... give those figures of yours something to work with.... It's gonna look great brother.... preparations for a mission.... The most important time, everything had to be just so......
-
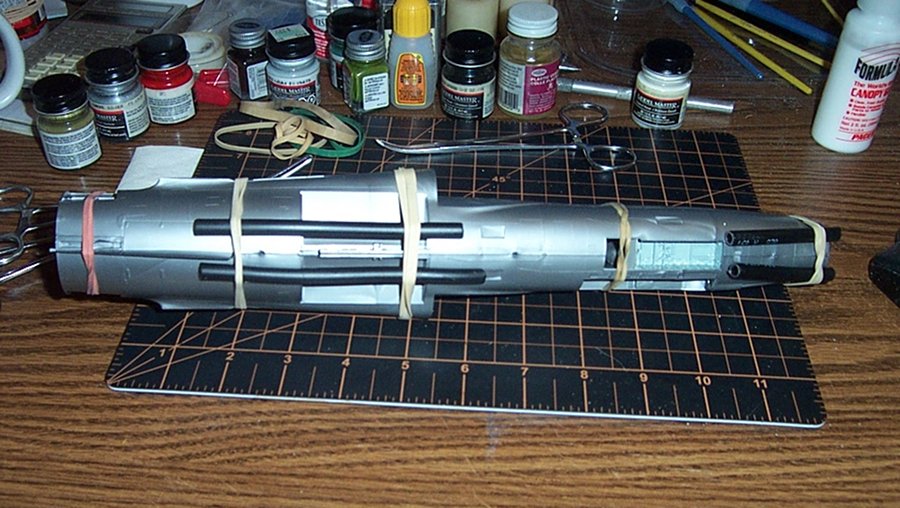
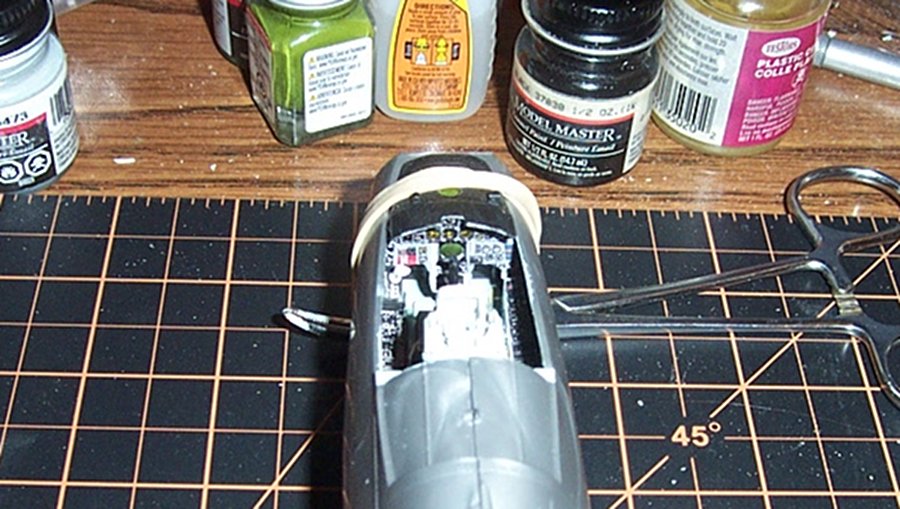
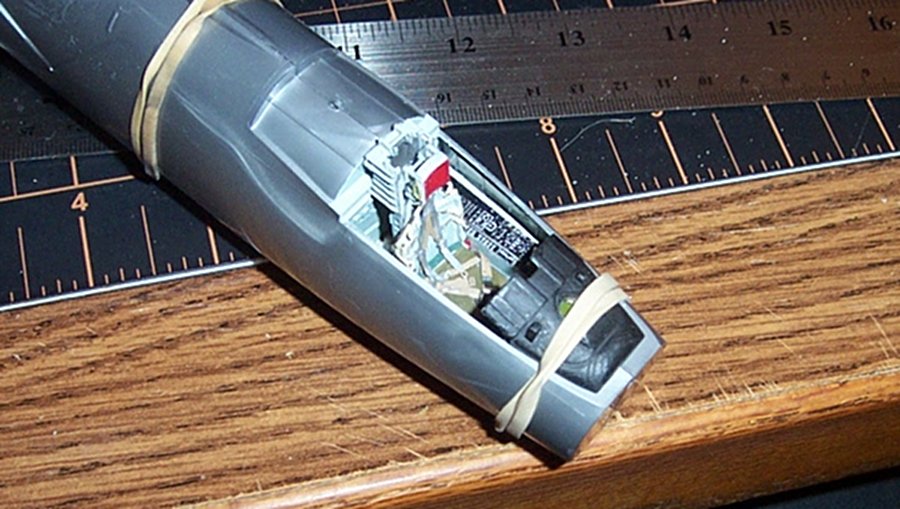
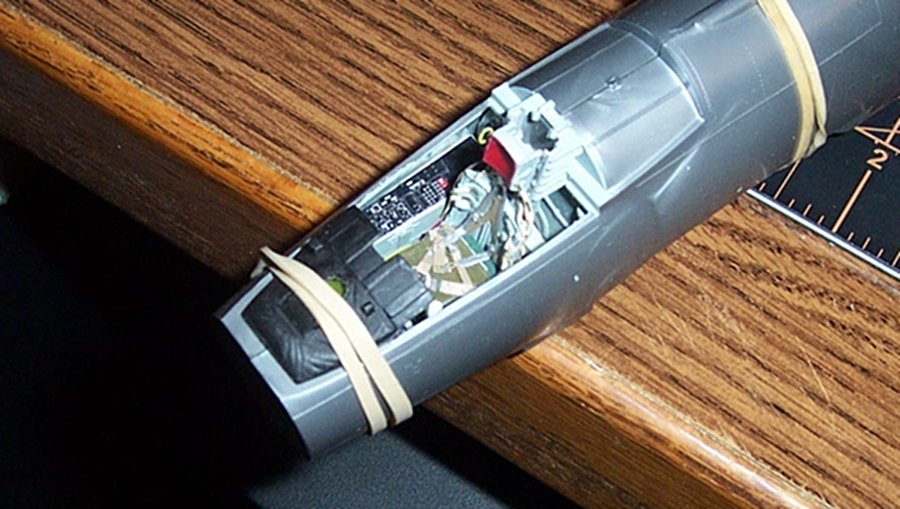
Ok it's buttoned up waiting for glue... Still gotta get the rubber bands off the joints..... And the cockpit in the fuselage... Right side... Left Side... Instrument Panel..... I think it fits well .... EG
-
Yep, Otto Lilienthal was the first to figure out that it was the curvature of a birds wing that caused lift, and the physical principle of air movement over that curve that caused the lowering of air pressure over the wing. He also deduced that the center of air pressure buildup is what caused the air to accelerate over the wing.... his only mistake was to calculate the curves that caused the buildup of air pressure too shallow, which reduced the lift the curve was capable of.... This principle of flow over a curved surface was known to those who designed ship propellers, (and the Wrights tried the table of pressures for ship propellers in their calculations after figuring out that Lilienthal was wrong then deciding that they needed to create their own table) but was thought not to apply to wings flowing through air... So what Lilienthal actually discovered was that air acts as a fluid when under pressure. But this wasn't fully understood until the Wright's fully clarified it with their testing. (and corrected his calculations in the process) In fact the only reason the Wrights built the Flyer was to prove their concepts and they built it in such a way that it was unflyable without human input.... They discovered the principle of angle of attack increases/decreases lift and the point when a certain curve will stall at too great an angle also. Which lead to their engineering solutions to control and efficient propeller thrust in air. All revolutionary discoveries yes, but based upon much of what was discovered before them. I could go on, like the truss design they used for their wings was a lightweight modified pratt truss designed by Octave Chanute... The Wrights took what was available from the common aeronautical literature of the time and developed their own solutions using the info in different ways to solve the problems others were having on making it work, In the process they made hundreds of discoveries that no one else was even considering... But it was all built on what came prior.... they didn't invent the airplane, they invented a control system for airplanes by learning and understanding the information that was already there, and correcting for the previous errors and testing for what actually worked. Their solutions were and still are, pure genius....
-
Thanks Jack, I thought about that when I couldn't find my stash of modeling clay, so i went to HL and bought a new pack... (Hobby Lobby is now open here) Don't need much just enough to balance out the engine weight in the tail.... there is plenty of room behind the cockpit bulkhead and I'll keep the gun compartment open and radome off until after the landing gear are installed just in case I need to add a bit more.... One ounce of modeling clay behind the cockpit that should be sufficient... Onward....