


Egilman
-
Posts
4,384 -
Joined
-
Last visited
Content Type
Profiles
Forums
Gallery
Events
Everything posted by Egilman
-

F-86F-30 Sabre by Javlin - FINISHED - Kinetic - 1/32
Egilman replied to Javlin's topic in Non-ship/categorised builds
Yeah, I'm going to have to do the same thing in the future, take a break from plastic for wood and glass... Probably after the Bandit is done.... Definitely need the space...... -
You mean you found a char wagon and some NAAFI girls? {chuckle} Gonna be interesting at what you've come up with.... I"m sure it will fit in your tribute....
-
Very Nice Dennis... Anticipating it being finished........
-
Tiger 1 by marktiedens - FINISHED - Dragon - 1/35 scale
Egilman replied to marktiedens's topic in Non-ship/categorised builds
It would be Panzer Grey either way with or without the turret "bustle" I've seen that pic that Backer has posted also... it was obviously mounted before the whitewash...... An issue tank before it saw combat, that's cool and how I like to do mine.... -
Yeah, that was definitely a convoluted conservation history there.... Full of personal ideals and politics... Along the way they forgot about actual history in trying to preserve history.... Or any semblance to factual historical research.... A perfect example of what agendas do to facts...... The real sad and unfortunate part, is the need to repair what was done to build a false narrative no matter the motivations once the real historians finally get their evidence recognized... But it is a beautiful period ship as best as it can be restored into one.... and the only example representing an important part of naval history......
-
Tiger 1 by marktiedens - FINISHED - Dragon - 1/35 scale
Egilman replied to marktiedens's topic in Non-ship/categorised builds
If it did actually exist on a combat vehicle, it's a major rarity for sure.... The rear storage bin was a fairly common field adaptation taken from worn out Pz III's, but the side "wing" bins were not..... -
As long as you don't repeat it 6 times like he did.... Enjoy brother, we all need a floaty thingy in our background...... It's good for the soul...
-
Tiger 1 by marktiedens - FINISHED - Dragon - 1/35 scale
Egilman replied to marktiedens's topic in Non-ship/categorised builds
Yeah I saw that when Mark posted the pics and said "What the heck???" but not being sure I didn't mention it, but it is what brought out the idea for me that the manufacturer might not have his accuracy quite up there where we would like it... -
Tiger 1 by marktiedens - FINISHED - Dragon - 1/35 scale
Egilman replied to marktiedens's topic in Non-ship/categorised builds
Hi Patrick, Got the makings of a pretty good armored battalion there my friend... Ready for parade... My german armor interests died down a couple of decades ago... but before that I had every Accurate Armor Panzer Truppen kit in my stash..... Never got to build a single one of them though... For a while I dropped off the modeling scene and there's a huge gap in my studies.. lost time... but it gives me more to learn now, I only remembered that bit about the DunkleGrau and Tiger tanks from a very memorable argument a gent an I had over just such... you like grey PZ IV'S there are a ton of examples same with Pz III's, but Panthers and Tigers... that's another story... I knew they had painted them but until today never thought one actually went into combat... Personally I thought the troops serving them would have been smarter..... Citadel took everything as far as armor.. that is one thing about the german forces they were moving tanks around so much that many broke down before they could ever get to a battle... I read about one example of a Tiger that was mustered up battle four times but never fired a shot in anger... it would break before they got to the assembly point..... It's why the Russians put a premium on destroying railways..... Now I'm into American Armor.... which has as many devoted followers as German armor does...... But from building interests, I"m modeling anything that strikes me fancy at this point..... Got a few things I want to do and focusing on one small part won't get that done... Nice collection...... Nice to actually converse with someone who likes the history as well as I... I'm not alone.... EG -
Tiger 1 by marktiedens - FINISHED - Dragon - 1/35 scale
Egilman replied to marktiedens's topic in Non-ship/categorised builds
So then there were actually 4 of them that made it to the front before they were repainted, no longer speculative.... Nice to get that cleared up.... If you don't mind me asking, what book are you picturing there,,, I would like to obtain a copy.... MotorBuch-Verlag? or something of that nature? -
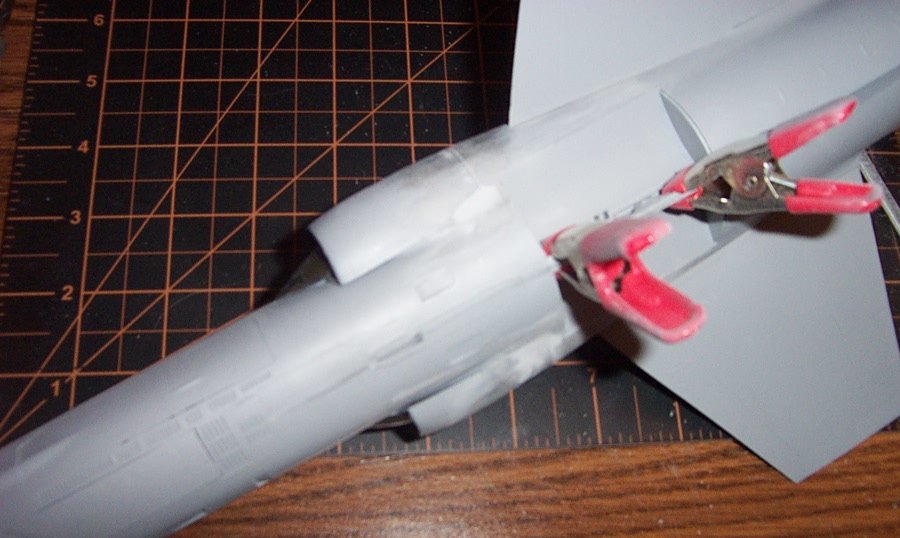
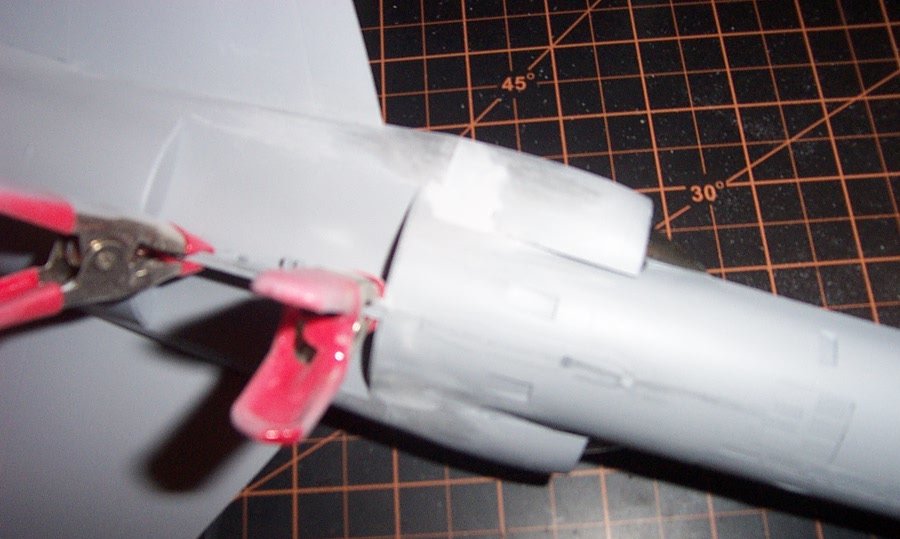
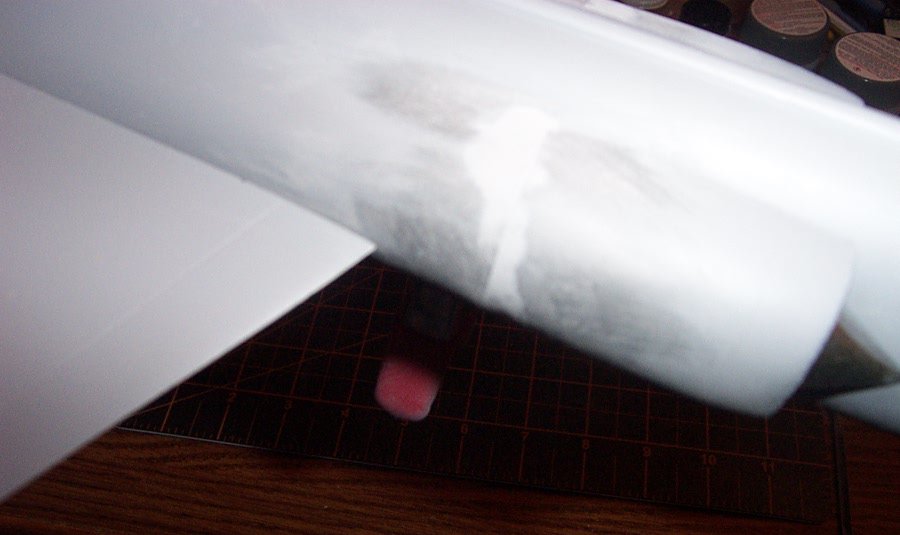
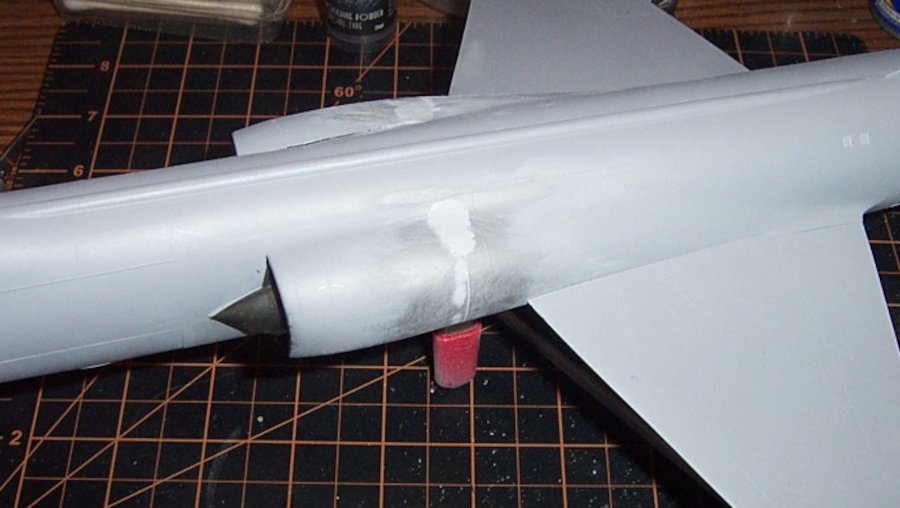
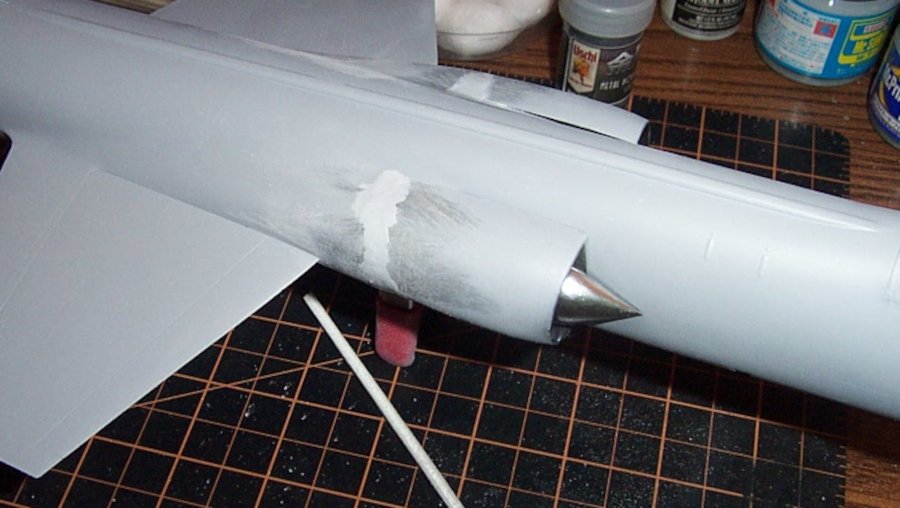
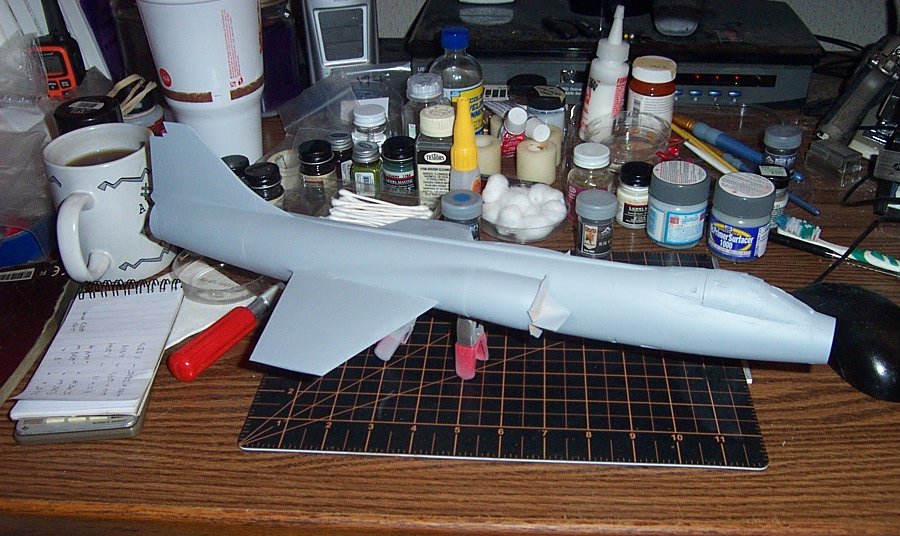
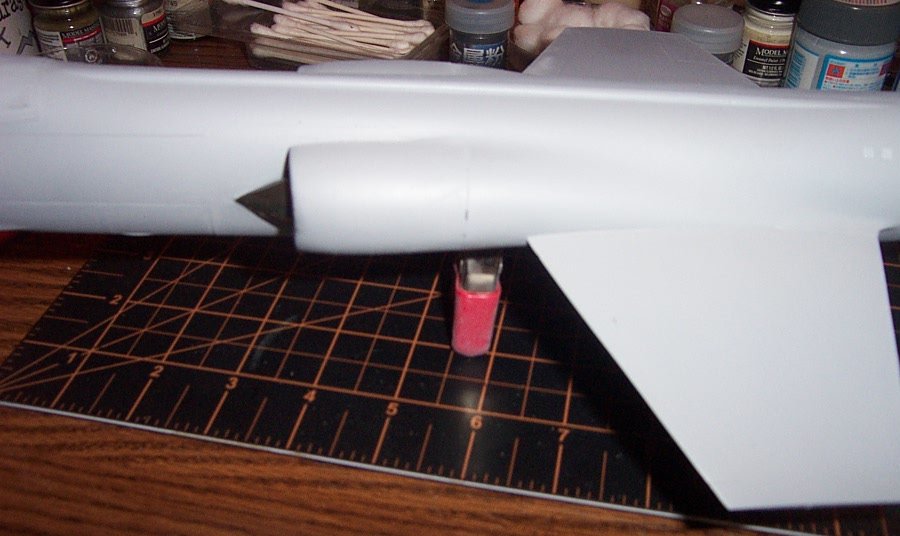
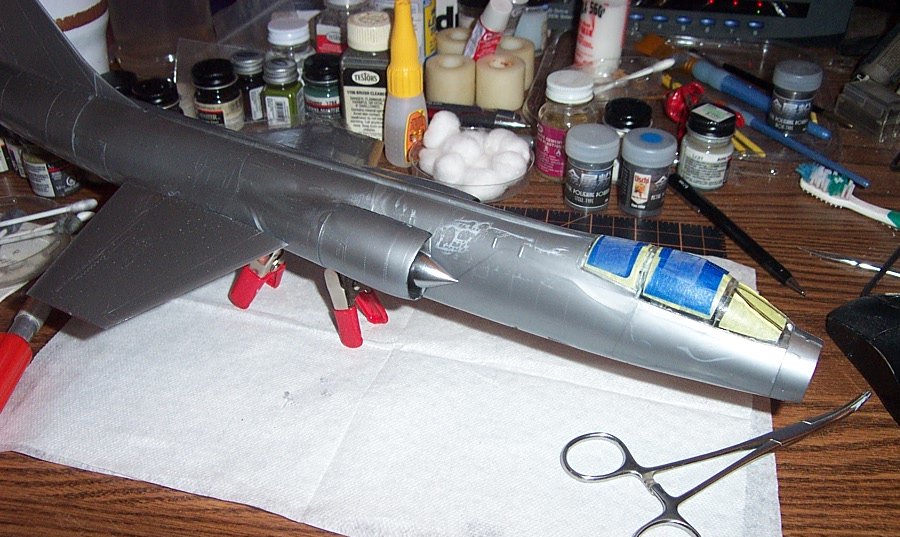
Another filling update.... (moving towards a tastes better solution soon) Port Side... Port Side bottom... That filled out nicely feels smooth to the fingers sliding over it... ready for a primer coat.... The Starboard side is a different story.... The starboard bottom Clearly gonna need more fill here, it was a deep dislocation of part.... Starboard Top.. I'm gonna wait for the next round of primer before I will say it's done.... But it looks good.... The pic is a little grainy but you can still see the hump that needs to be reduced/built up..... Another application of Mr Surfacer.... One thing I REALLY REALLY like is the rapidity I can get to sanding with this stuff..... using putty, I would still be waiting for it to cure.... The difference? I'm almost done with filling long before I would be even able to give it a first sanding.... Mr Surfacer, A must have tool in the box IMHO.... (especially if your doing smooth compound curved surfaces like aircraft) And the obligatory disclaimer, I get no recompense from Mr Hobby, this is just my individual opinion based upon the usage displayed above... EG
- 518 replies
-
- 10
-

-
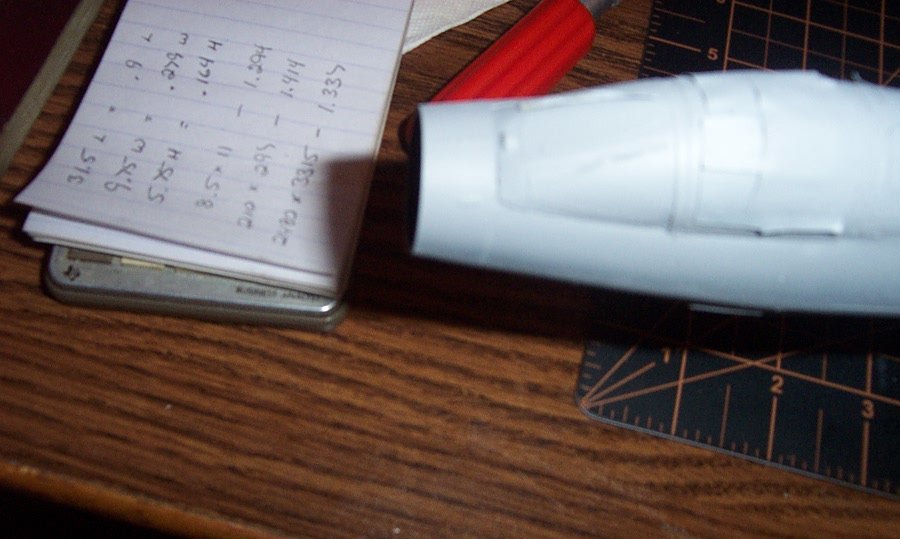
I'm using 500 for this Ken, straight out of the bottle. It is the thickest and has the body to stand up while if hardens. The others are too thin for this kind of work.... As it is it's going to take several applications before the surface is smooth...... But, I'm only going to have to wait an hour between fills, it dries to sandable that fast..... The rest of the joints were paint it on, let it quick dry and use Mr Color leveling thinner on a q-tip to clean off the excess... Really a quite fast process.... I like it... (wish they had something like this 30 years ago) EG
-
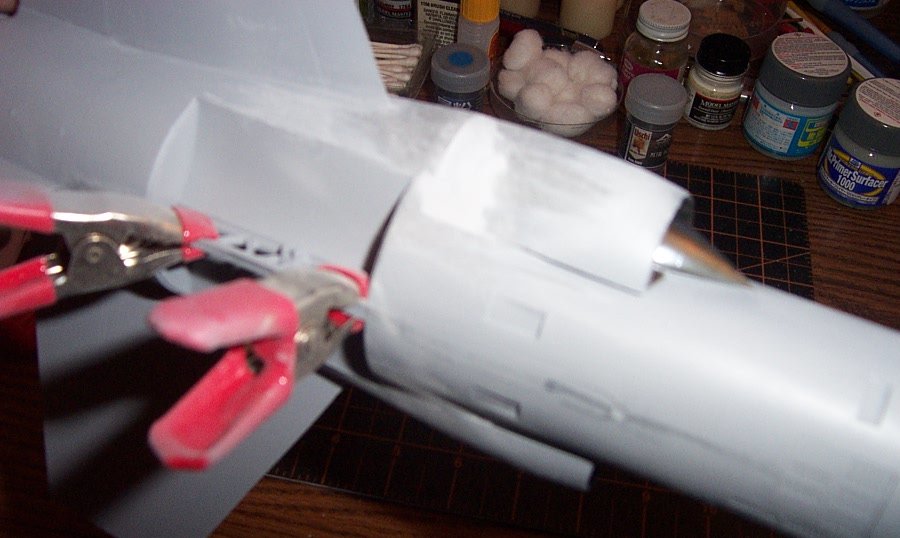
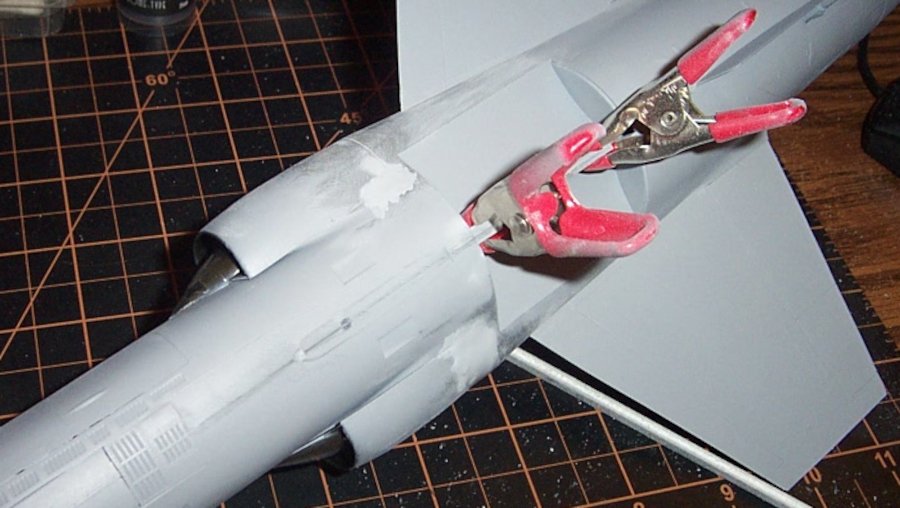
I do too brother, it's perfect for not only showing you where to fix but how your coming closer to fixing the problem.... I'm beginning to feel the same for Mr Surfacer as well... just paint it in, let it dry/cure and sand away.... makes an excellent shallow divot/dent/fine gap filler.... Starting the second application of Mr Surfacer...... It fills the divot rather easily A compound curve into an edge, the edge can't change as that is a landing gear well... One of the more difficult fills for putty... Mr Surfacer 500, no sweat... Almost done on the port side, After this application, a re-spray with primer as a check for smoothness... The top starboard side may be done next time around also.... the split off from the outside surface to the air ramp? no sweat, Putty would have been difficult to keep out of the gap between the splitter plate and fuselage.... Mr Surfacer as a liquid filler handles it easily.... I'm impressed... I'm used to products not being as advertised, and having to make them work or come up with an alternative, this just plain flat works..... Simple and easy, even on the difficult spots... That's what I like... Onward.... EG

-
Bentley 4.5 litre (altered version) by kpnuts 1/12 Airfix
Egilman replied to kpnuts's topic in Non-ship/categorised builds
Absolutely fricken unbelievable!!!! Well done my friend!!! Nice rebuild! -
Porsche 934 by kpnuts - FINISHED - Tamiya - 1/12 - PLASTIC
Egilman replied to kpnuts's topic in Non-ship/categorised builds
Sir, your finishing skills are phenomenal!!!! I hope that someday I can get that skilled.... Beautiful work..... EG -
Tiger 1 by marktiedens - FINISHED - Dragon - 1/35 scale
Egilman replied to marktiedens's topic in Non-ship/categorised builds
I would lay my money on the kit info being incorrect. The only way it would be possible is the tank was in action the entire time. Initial production paint scheme as shown on the box ended sometimes in late '42 when paint stocks ran out and all field tanks were ordered to be repainted into yellow based camo I believe in February of '43...... So it is "possible" but I believe improbable.... and, a very important point, my opinion... of course not knowing what their info was when they designed the kit, it hard to know what they based their artwork on, so I would say it is their opinion also... Anyway, it is a possible paint configuration for a tank that was unavailable for repainting due to operations in early 43... -
Tiger 1 by marktiedens - FINISHED - Dragon - 1/35 scale
Egilman replied to marktiedens's topic in Non-ship/categorised builds
By '43 at Leningrad it would be in yellow with red-brown and green blotches or stripes. (there wasn't any Panzer Grey tanks anymore) Panzer Grey over Dark Yellow could still be found in that area in mid to late '42... (but it would be a sitting duck for soviet 76.2mm anti-tank guns in that dark color) That's the reason they made the full switch to yellow camo, the Russian winters and summers were a killer in more ways than just cold....... -
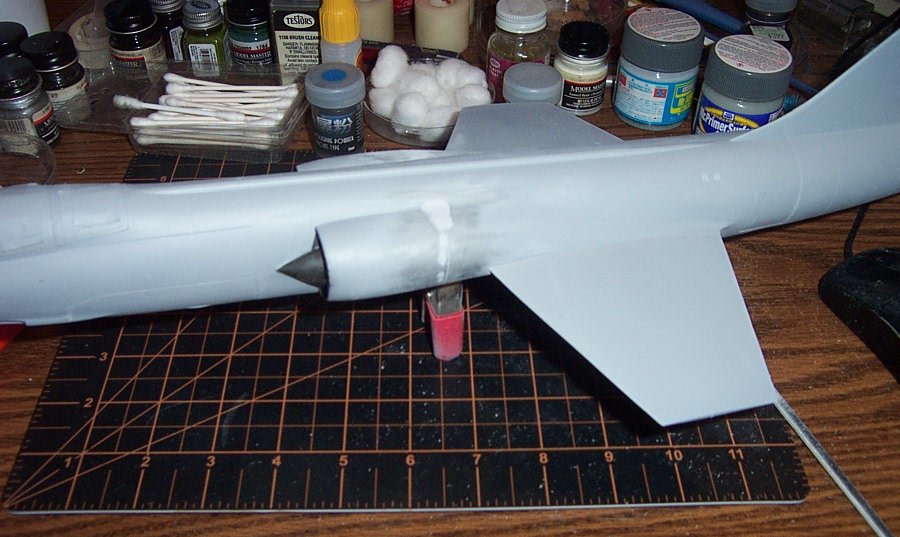
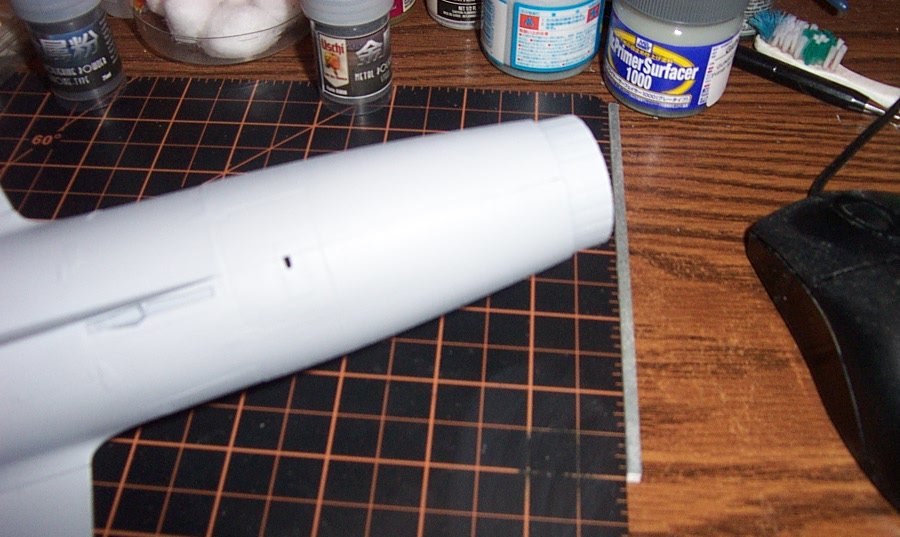
Next update... Out of the paint shop and back on my bench... One coat of Tamiya fine grey primer, lets see how well I did filling the gaps.... Starboard side.... Bottom..... Looks pretty good, most of the panel gaps are gone just a few minor fixes needed, that's what we primer for... Clearly there are issues with the intakes, I knew this was going to happen from the assembly process. It's just the way the parts are designed... Starboard intake... Larboard intake.... Fuzzy, but there is a ridge in the middle ahead of the canopy, small but noticeable... The tail cone has a gap that I guess didn't completely fill.... And the gun bay cover edges didn't completely fill either..... Overall I would say she came out of the initial assembly in excellent shape.... a few minor issues to deal with and the worst one being a slight smoothing to a compound fuselage curve behind the intake plenums.... And the metal finish made it through the masking and spraying very well. I had to take off the masking to work the intakes cause I would have knocked it off anyway... Easy to re-mask when needed... Coming along, initial assembly turned out better than I thought it would.... Onwards... EG
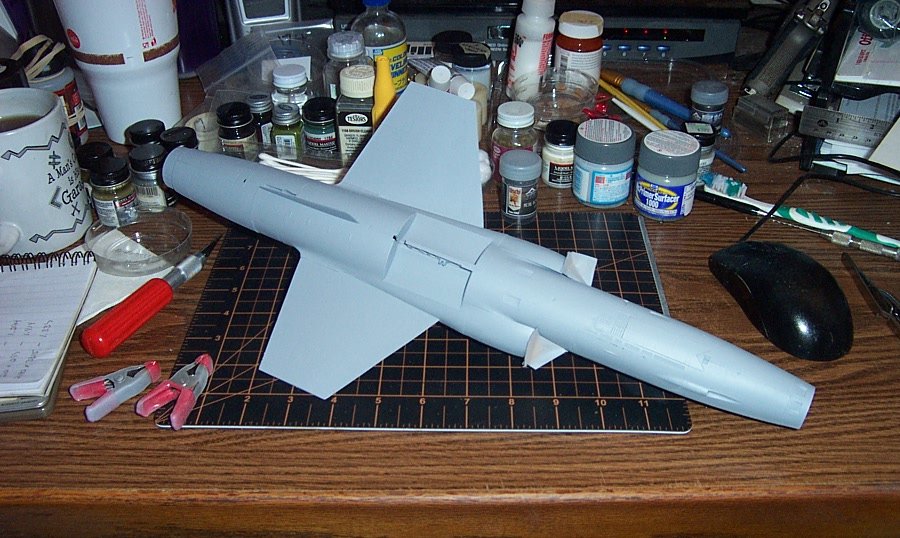
-
Probably designed to get girls into modeling, but the real worth is a father modeling something for a special loved one...... A beautiful job..... EG
-
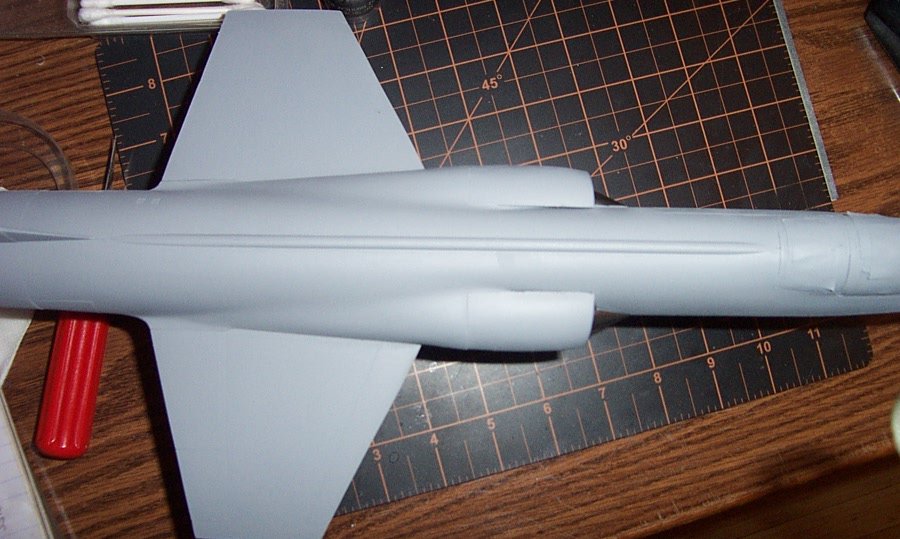
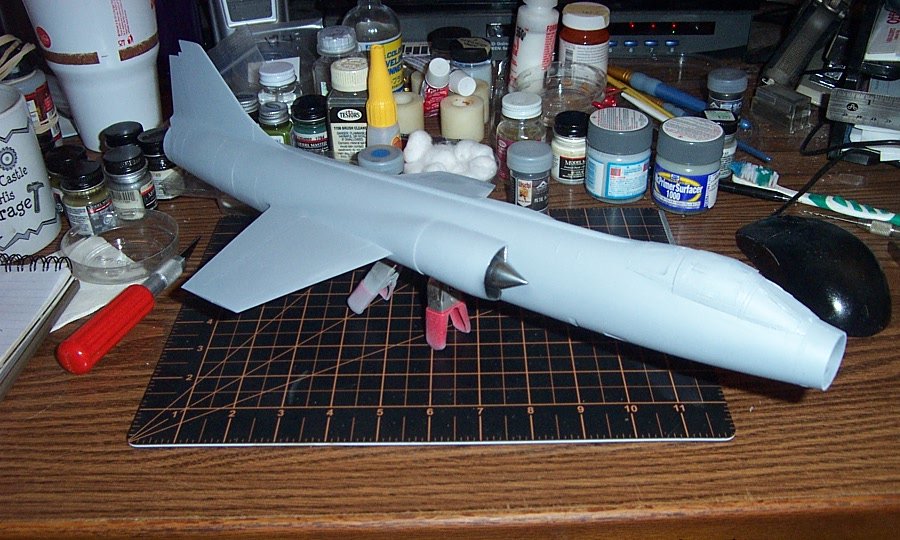
Well I plan on being around long enough to finish the Bandit as long as the man above agrees... It might be a few days yet for the eye protection. She is currently in grey primer, (drying) and shows some serious work still needing to be done to smooth everything out before I can put the base coat on.... I suspected that the intakes were going to be problematic from the way they were designed, I was right.... But other than that, the engineering is surprisingly good with everything joining and matching up very very well.... I'll post pics before I start sanding and shaping.... Thank you Carl....
-
Tiger 1 by marktiedens - FINISHED - Dragon - 1/35 scale
Egilman replied to marktiedens's topic in Non-ship/categorised builds
The big problem with accurate panzer colors is the photography of the period.... there is very little in the way of photographic evidence of what they actually did... RAL was the organization that decided how military vehicles were painted... Reichs-Ausshuss für Lieferbedingungen (RAL) (Reich Committee for Terms of Delivery) established all the conditions under which vehicles were accepted for delivery.... Early German prewar armor between 1927 and the middle of 1937, tanks were painted in the Buntfarbenanstrich (colorful paint pattern). The pattern used three colors: RAL Nr. 17 Erdgelb-matt (matte earth yellow), RAL Nr. 18 Braun-matt (matte brown), and RAL Nr. 28 Grün-matt (matte green). The colors were sprayed onto the vehicle in the wavy pattern, with a different pattern for each vehicle. The borders were to be either feathered, or bordered by one to three centimeter wide stripes of RAL Nr. 5 Schwarz-matt (matte black). The above was similar to what you saw from french factories on Renault FT-17's..... In the middle of 1937, it was ordered to change the camouflage pattern to Dunkelbraun Nr. 45 (dark brown) and Dunkelgrau Nr. 46 (dark gray), with feathered edges. Vehicles already painted in the Buntfarbenanstrich were not to be painted in the new pattern, unless they were to be re-painted anyway. Towards the end of 1938, it was ordered that all vehicles were to be re-painted by the individual units. At the same time, it was specified that the pattern should be a base coat of Dunkelgrau, with one-third of the vehicle covered in Dunkelbraun. One should note that The dark brown color during this period was very very dark, making it almost impossible to distinguish the two on black-and-white photographs. Most photographs of the period appear to show the vehicles painted in a monotone pattern which is interpreted as dark grey. In the middle of 1940, units stopped buying paint directly from the suppliers themselves. Instead, paint was issued directly to the units from the Reichs-Ausshuss, with Dunkelgrau being the only issued color. On 31 July 1940, to save paint, it was ordered that armor should only be painted Dunkelgrau. On 10 February 1941, the RAL colors were re-numbered, with Dunkelgrau Nr. 46 becoming Dunkelgrau RAL 7021. Shortly afterwards. during March 1941, it was ordered to paint all vehicles in North Africa a base color of Gelbbraun RAL 8000 (yellow-brown), with one-third of the vehicle covered by Graugrün RAL 7008 (gray-green), with feathered edges. To save paint, the areas covered by Graugrün were not to be covered with the Gelbbraun base color. Small items should only be painted in one color. On 25 March 1942, Gelbbraun and Graugrün were replaced by Braun RAL 8020 (brown) and Grau RAL 7027 (gray), once existing paint stocks were depleted, with no change in pattern. There are examples of vehicles in Europe in 1941 and 1942 with a two-tone pattern. The most likely explanation is that vehicles intended for North Africa, and painted at the factories, were re-routed to European units. Early 1943, all vehicles were ordered to be painted in a base coat of Dunkelgelb RAL 7028 (dark yellow). Only small pieces of equipment were to retain their previous color. On top of the Dunkelgelb base coat, stripes of Rotbraun RAL 8017 (red-brown) and Olivgrün RAL 6003 (olive green) was applied. The Rotbraun and Olivgrün paint was delivered to the units in tins, which were thinned with any available liquid. It was then applied by the maintenance section, which allowed the pattern to match the terrain. This also resulted in a wide variety of patterns, from elaborate sprayed camouflage, to patterns that look like they were smeared on with a broom and rag. To standardize and improve camouflage patterns, in late 1944, it was ordered that all vehicles were to be painted at the factory. The pattern, Hinterhalt-Tarnung (ambush camouflage), still used a base color of Dunkelgelb, with Rotbraun and Olivgrün stripes. On top of each color, small dots of the other two were applied. This pattern was created to give the appearance of the sun shining through forest foliage. In late 1944, vehicles started leaving the factories in their red oxide primer, with only sparse camouflage. Even later in 1944, more elaborate camouflage in Dunkelgelb, Rotbraun and Olivgrün began being applied at the factories over the red oxide primer. Furthermore, Dunkelgrau could be used if Dunkelgelb was unavailable. Despite this order, there has never been any evidence that Dunkelgrau was actually used. In December of 1944, it was ordered that a Dunkelgrün base coat, with a hard-edge pattern of Dunkelgelb and Rotbraun should be used. I lifted this info from Panzer World, it is a basic compendium of what we know about Nazi Germany's Armor colors and paint schemes.... In general, by 1942 the german army stopped using Dark Grey to paint their tanks, Dark Yellow becoming the primary base color in 1942 especially for armor going to africa. (becoming official policy in 1943) They could go back to using dark grey in late 1944, but there is no evidence that they actually did this... In essence, field commanders were responsible for having their equipment painted in the specified manner, which usually descended to the tank crew to decide what they were actually going to do. (that was beneath the consideration of german officers) So Dark Grey over a base of dark yellow would locate and date place this tiger during the invasion of Russia, 1941-42.... Everywhere else being in Dark Yellows and browns.... And nowhere else..... -
I hope so brother, this is the first model in a long time where I really don't know how it is going to turn out beforehand..... As a result, I'm being particularly careful, but the preliminary results are both impressively exhilarating and glaringly flashing worrisome warnings of have patience and go slow.... I REALLY don't want to muck this one up.....
-
Thank you Ken, it's gonna take what it's gonna take, time is my friend here....
-
Well, they do yes, that being said, if it has to do with drying paint, drying decals, or drying anything else on a model, it is best to let nature take it's course..... (I learned this a number of years ago, read as decades ago, that all heated forced air does well is melt and deform plastic or hard shell and crack paint and split decals.... But then that is only my experiences, others may have different experiences..... One thing and one thing alone works well on model finishes... the old standby, time and patience..... If you can brother, lay off the blow drying as much as possible.... (preferably eliminate it, your modeling will be better off for it my friend)
-
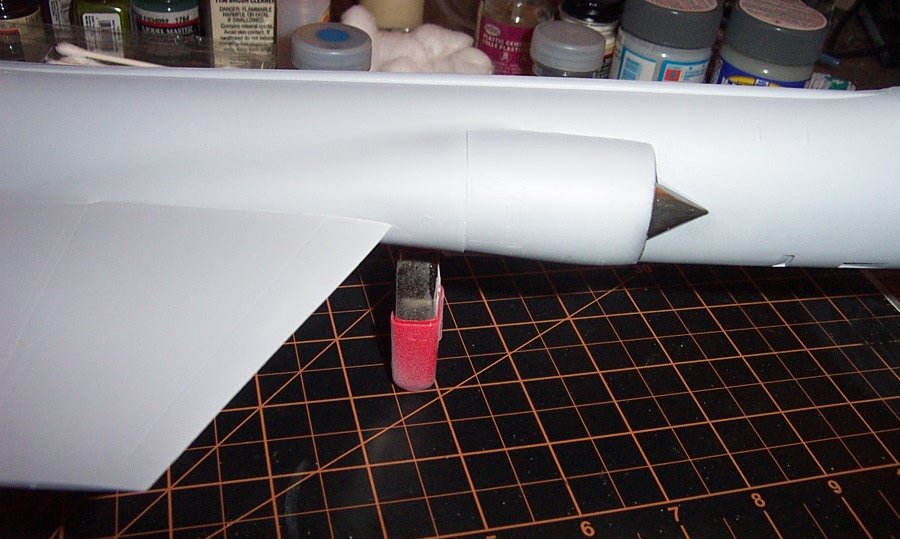
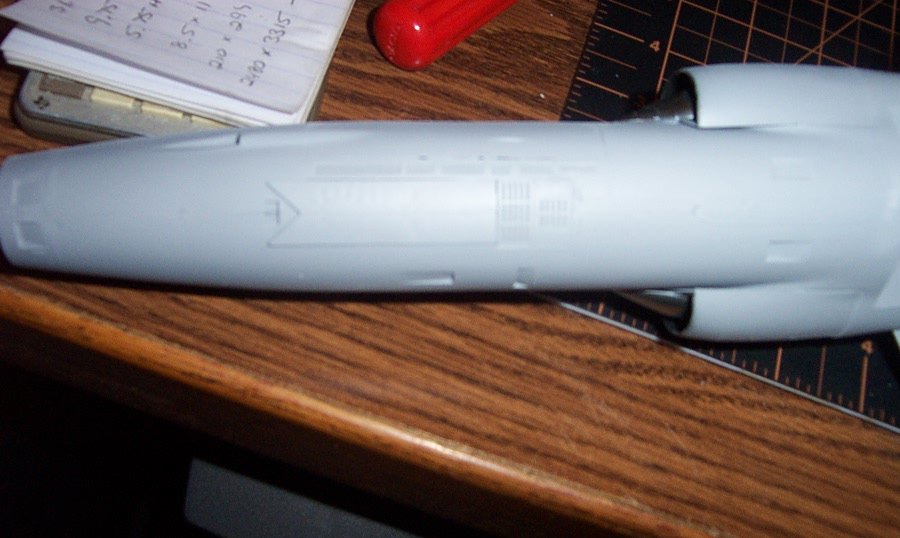
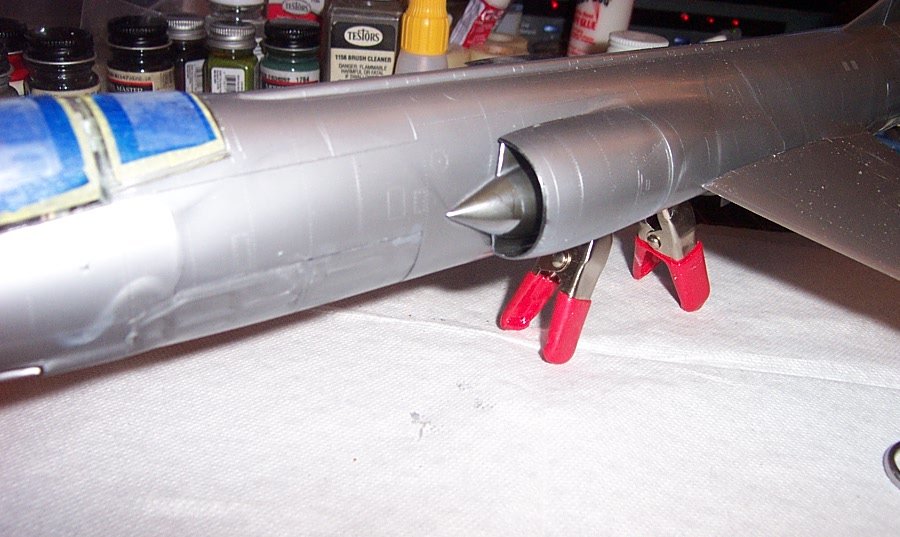
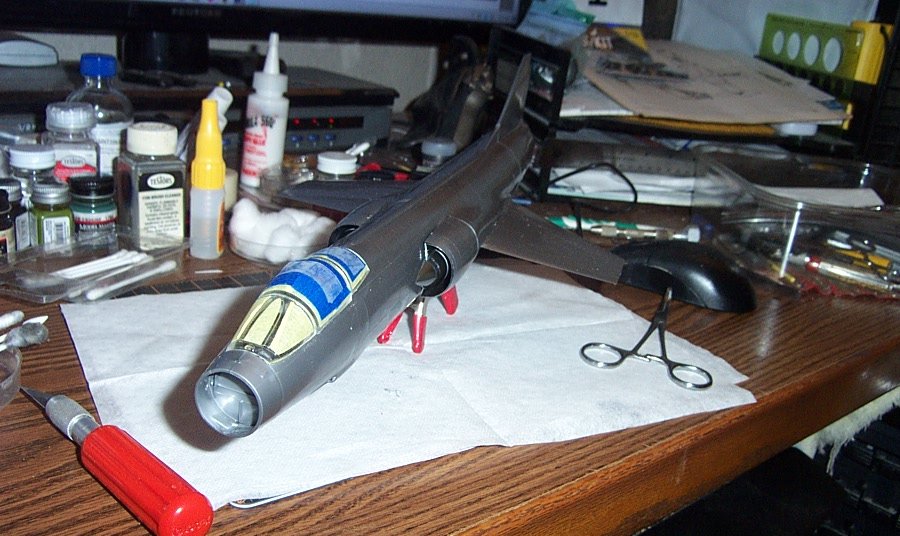
Intakes mounted..... wanted to get a few shots in before I turn it all shiny black.... Personally I think they look the part... Starboard side... That crinkly look above the shock cone is actually in the plastic the kit is molded in... you can actually see how the plastic flowed through the mold..... Anyway, I think they look the part... Port side... I definitely want to mask them suckas off before I do anything else... they sure look the part... Now comes the big step, repeating that on the entire fuselage..... Time to go to work filling and prepping.......... EG
- 518 replies
-
- 10
-