


Egilman
-
Posts
4,384 -
Joined
-
Last visited
Content Type
Profiles
Forums
Gallery
Events
Everything posted by Egilman
-
 Except for the D7 & D8, Fokker actually wind tunnel tested both of them and the results showed in their performance during 1918....... They were virtually undestroyable in the air unless you killed the pilot/engine or somehow set it afire... After the war when the germans turned them all over to the allies, the US army took one of theirs, (D7) and had the smithsonian test it in their Wright brothers designed wind tunnel. they found that the airframe could withstand 13 g's of force without breaking and it didn't shed fabric under 200 knots... It was a revolution in aircraft design.... They were getting around to building better airplanes driven by the needs of the war....
 -
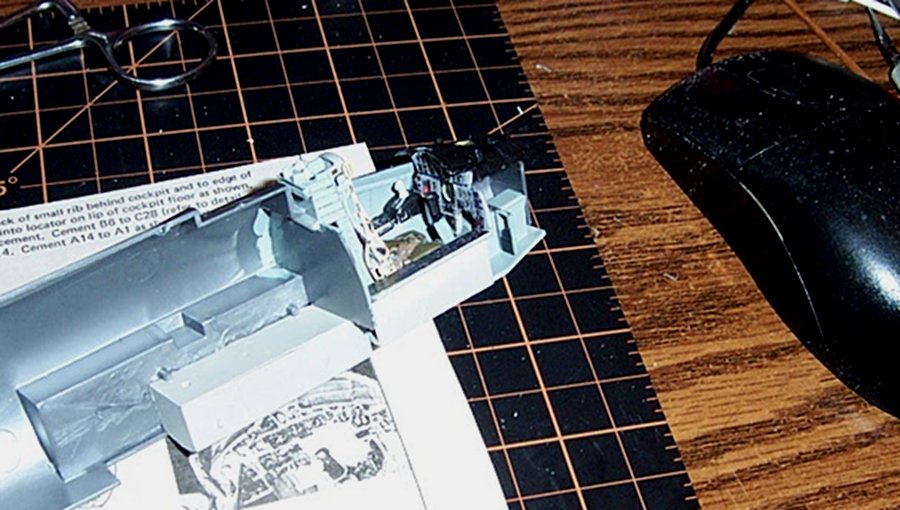
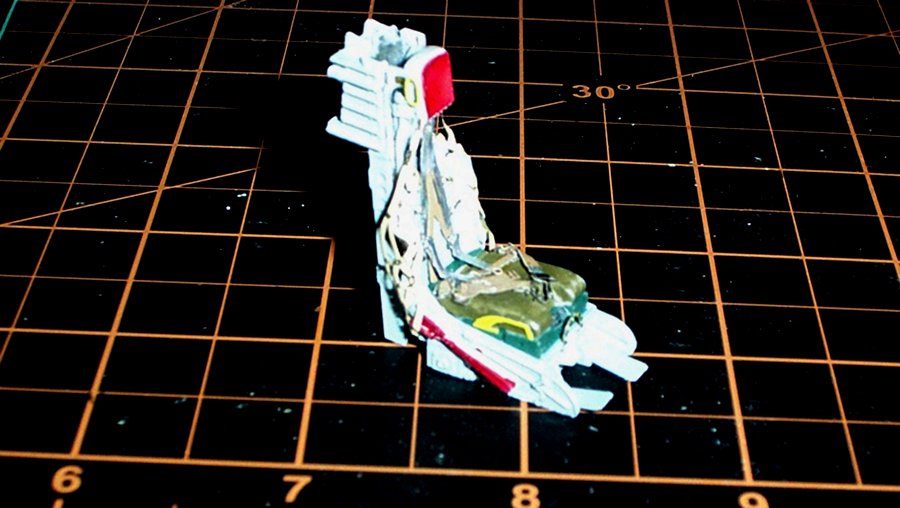
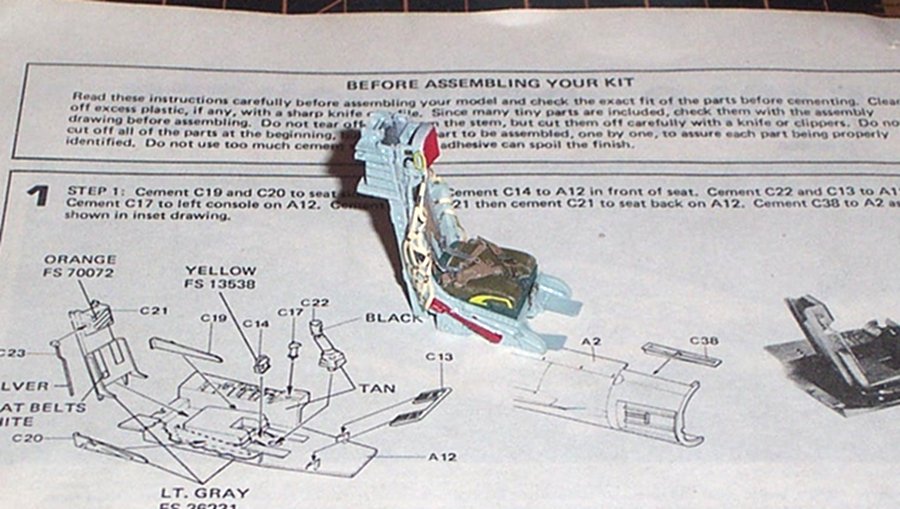
Ok next update, a very tight cockpit..... It barely fits in there, I had to alter another couple of parts to make it fit properly......... Now I gotta figure out how much weight to add, this is a tail dragger of a kit especially with that engine back there in the tail... Any suggestions before I button it up..... (I already know I'm leaving the radar out and filling the nose with modeling clay) EG
-
Thank you Mark.... Well, I guess we could throw a wicker basket seat in there like the olden days, get a little "Seat of the Pants" flying in? Put the seat in a display case and just tell the pilot that we had to polish it for the next photo op.... I mean it IS a government operation isn't it? {chuckle} Really, Thank you, It's appreciated....
-
Thank you my friend, yeah it was a challenge. I also think that most are done just to prove to oneself that you can do it. The usual budget conscious modeler puts his money in what shows off the skill and artistry. And the guys that do it again and again for the magazines get paid to do it... PE or Resin on a ship or aircraft exterior improves the look especially in the larger scales so there is a viable reason to add those skills to the tool box, but on interiors or areas that will never see the light of day again? Hard to justify....
-
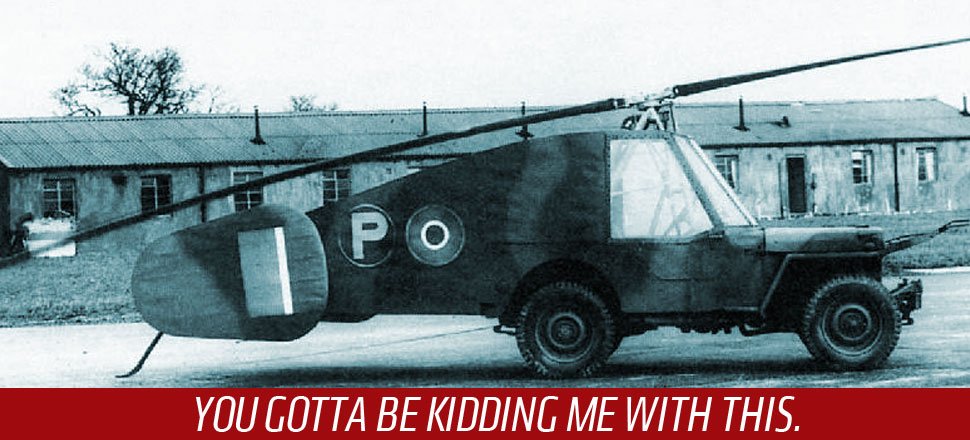
Yep.. The Hafner Rotabuggy officially known as the Malcolm Rotaplane and as the "M.L. 10/42 Flying Jeep" was a British experimental aircraft that was essentially a Willys MB combined with a rotor kite, developed with the intention of producing a way of air-dropping off-road vehicles. Hafner also did the "Rotatank" using a valentine chassis. As soon as the Waco and Horsa gliders were available in numbers, this was dropped...
-
You have to wait till he's done with it.... Yeah, the RAF made a jeep actually fly...
-
I'll second that....
-
I believe that the average life span for a fighter pilot towards the end of the war was 6 missions..... Most of the aces gained their victories not by dogfighting but by stalking the lone straggler. (including the red baron) That new young pilots were often set up as bait to attract the enemy where the more experienced pilots would wait to spring upon them..... WWI aviation was far from the glamour and chivalry we often read about.... (yes they buried the Red Baron with full military honors and dropped notice of such over a german airfield) you read this and get a picture of one ideal, but in reality Richtoften was descending on a helpless brand new Camel pilot looking for his 81st kill. All Captain Brown managed to do was scare him off and in the loss of concentration allowed himself to sink too close to the ground and the Aussies on the ground shot him out of the sky... (although the RAF still credits Capt. Brown with the victory) It was a particularly nasty, vicious type of warfare... Richtoften likened it to being the hunter or the hunted no quarter offered....
-
MRAP ATV by CDW - FINISHED - Rye Field - 1:35 Scale
Egilman replied to CDW's topic in Non-ship/categorised builds
Have a safe trip brother, enjoy yourself, we will be here when you get back...... -
Thank you Lou, They can be torture that's for sure, (and I put three sets together all made for different models) Your's isn't done yet brother so finish comparisons aren't valid at this point. Besides we have to look at the overall model when making such judgment calls and mine isn't done yet either... Thank you for the compliment, It means a lot my friend......
-
It's part of the fun.... My wish is that kit manufacturers go just a little bit closer to what is actually smoothly buildable instead of absolute detail.... Leave the absolute detail for those that are willing to put in the work and want the pain..... But learning how to model does not make model companies any money....
-
Now that is a job, but I've seen them done, as I'm sure you have... I'll be there.... {I like watching masters at the craft work)
-
Thank you Jack....
-
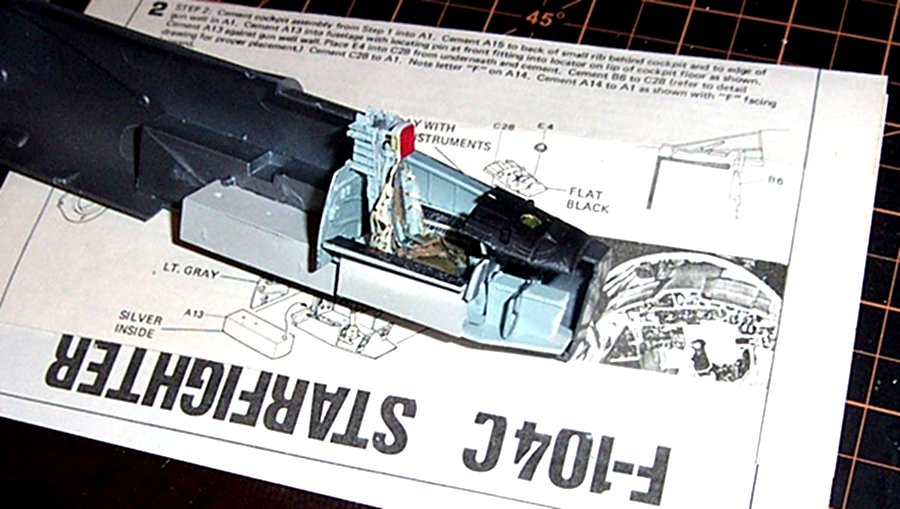
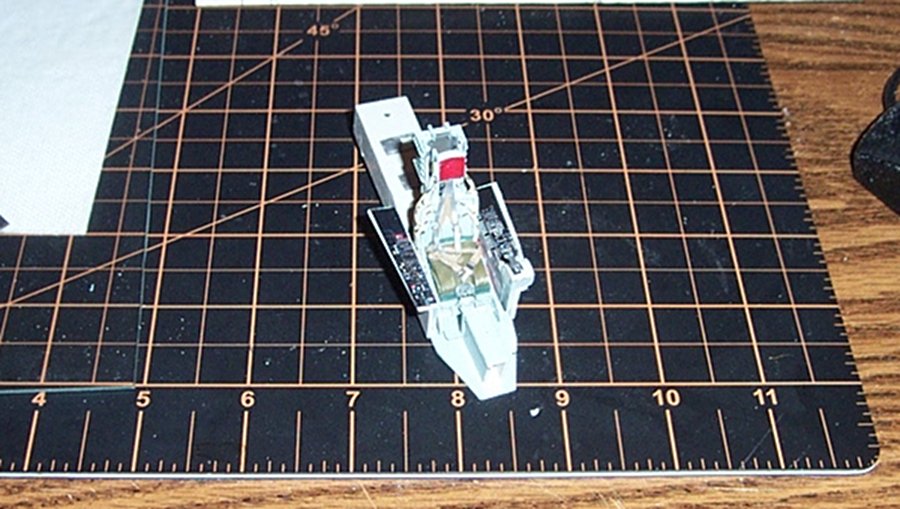
Oh yes, I remember when Accurate Armor started producing complete tank interiors and getting crazy money for it... My thinking was why would I want to paint a Mona Lisa, then put it in a closed box with a pinhole as the only way to view it? I've avoided such up till now... So I've had my taste of super detailing, and gotten my fill.... And as far as this kit, it needed the cockpit work, no doubt about that, but the seat was quite presentable as it was. I really didn't need to swap seats. So I have a magazine cover shot sitting right here on my desktop and I did it..... The true feeling is relief that it is done... (and a slight sense of pride creeping in there which I hate to admit) Thank you all for the likes and compliments and discussions..... They were definitely motivational..... Now on with the rest of the build....
-
Thanks Craig, I always wanted to do one of those super detailing jobs. But I should have known better..... But when the miniature pilot and crew chief show up, they can adjust all the seat straps as needed, cause all the individual adjusters are there... (don't know how they will like the brass straps, but I'll let them figure that one out) Thank you very much....
-
Thank you Nick, At least one thing I know now is I can work at that level, but someone is going to have to seriously pay me a lot to go there again... Masochism is the word, and an apt one as well...... It's when dreams of fidelity to accurate details meets reality..... {chuckle}
-
Messerschmitt bf 109G-6 by cog - Eduard - 1/48 - PLASTIC
Egilman replied to cog's topic in Non-ship/categorised builds
My pleasure Carl, I try to help when I can. They are out of Poland, I hope it works for you... EG -
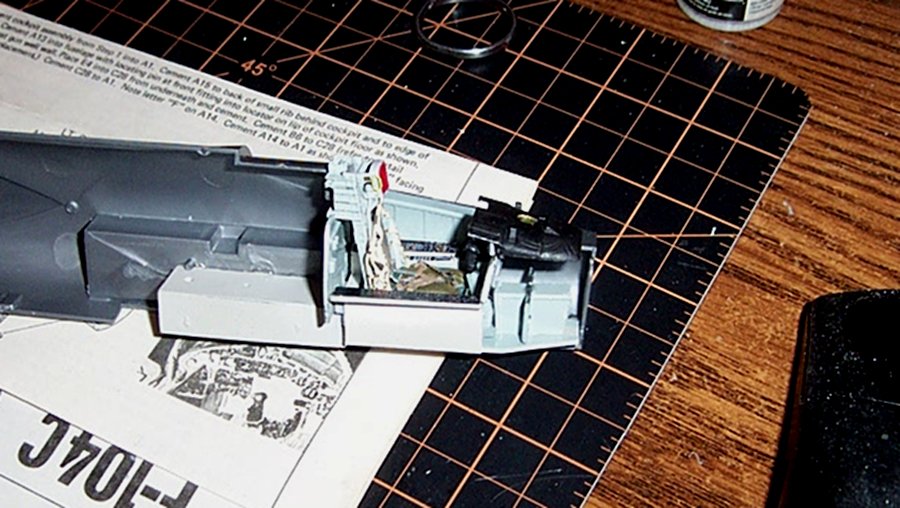
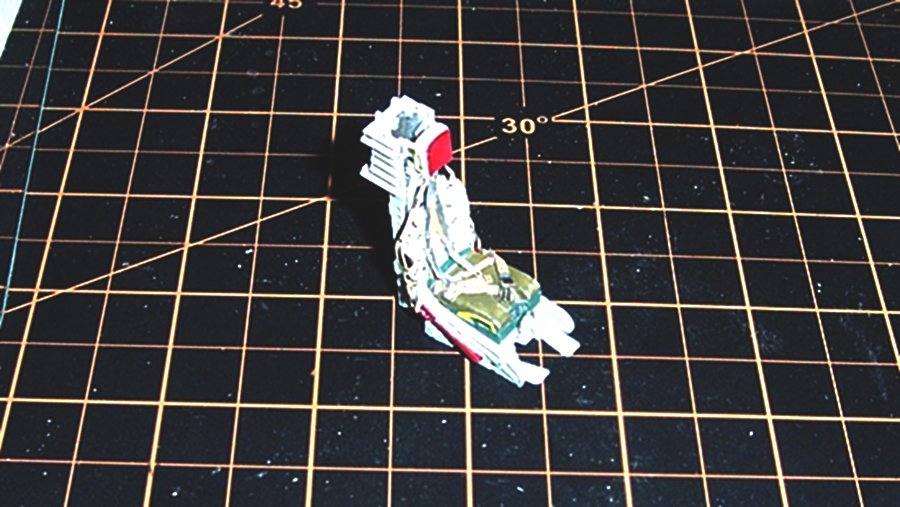
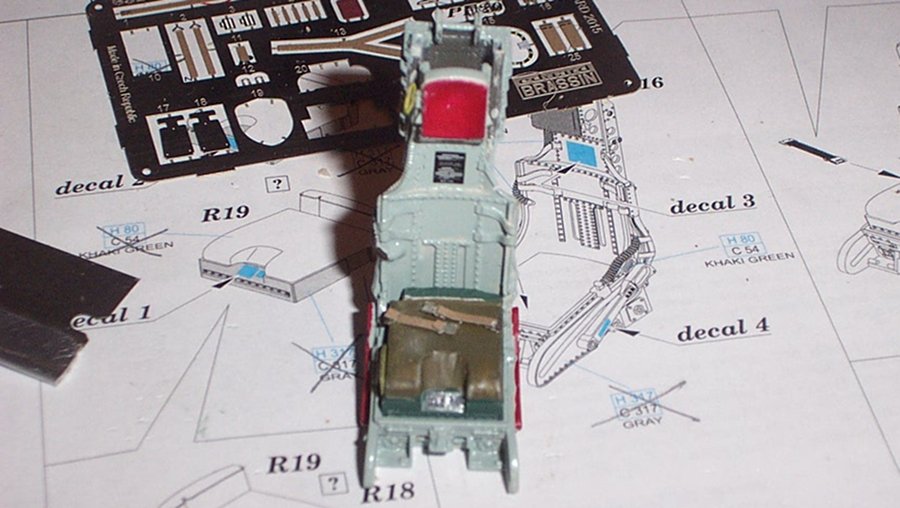
Ok Brothers, I think I'm done with the seat.... Most of that isn't going to show but it's there... I know it is.... {chuckle} Gonna take a bit of a days break for recovery here and then start assembling of this bird.... As an aside, I will not do this level of detail again, once was enough, most of what was just done will never ever be seen.... I went ahead and took a shot under natural light. the limitations of my camera are apparent... Anyway, Onward... EG

- 518 replies
-
- 12
-

-
Messerschmitt bf 109G-6 by cog - Eduard - 1/48 - PLASTIC
Egilman replied to cog's topic in Non-ship/categorised builds
https://www.super-hobby.com/products/Bf-109G-6-Swiss-HASEGAWA.html 1/48th scale And according to the site they are in stock... And the set has aircraft 705, which is the scheme for the eduard kit... (it also comes with gun barrels and canopy masks, both inside and outside, a real deal if you ask me) -
Thanks OC..... Fiddly?, you said Fiddly? they are way beyond fiddly into don't breathe on it while assembling territory.... My mind is already considering other options for seatbelts/harnesses in the future... These look nice but are a whole lot of headache to assemble right and if you lose a part? forget it they are done.... There has to be other easier options....
-
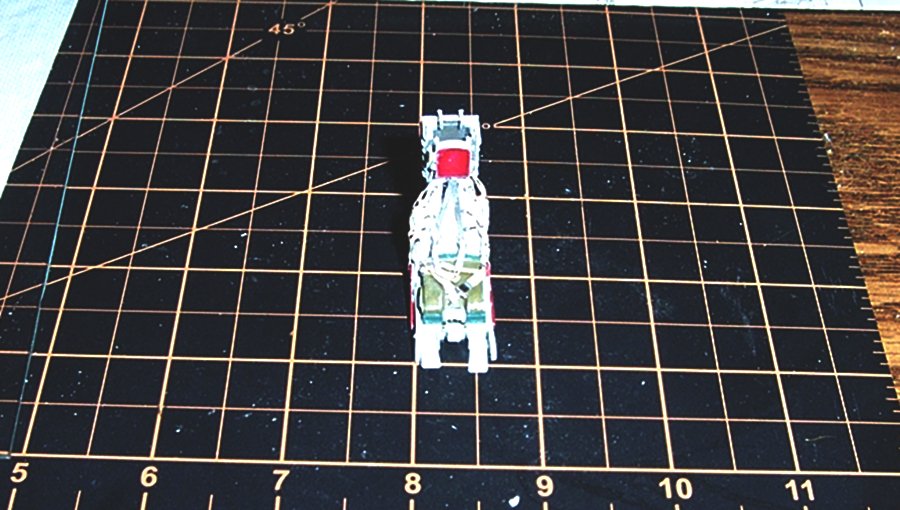
Been kinda busy today, so I figure that I would sit down for a relaxing build session. Give her a bit of time.... Doin seat belts.... (relaxing, right) That is six parts..... I think I lost the clasp for the right side three times before I finally got the strap through the buckles web loop... And yeah, they had to be folded as well, no glue.... Now that they are done, they get glued to the seat..... Give a new definition to relaxing.... a few seconds of absolute concentration, an instant of OH CRAP!, and 40 minutes of searching for this microscopic part of which there is no spare.... Now that we have defined relaxation, (modelers edition) we need to get a memo off to Webster's right away... (got to get it in the next edition) But, I'm making progress.... EG

-
Ah, we can't have the workin' people milling around now, there's a war on you know........ I have a feeling they will find something to do.....
-
Oh yeah, dedication is the name of the game.... Nice jeep color also btw...
-
Well we know better Lou.... (and there is always hope for the relations, at least that is what momma used to always say) {chuckle}