


Egilman
-
Posts
4,384 -
Joined
-
Last visited
Content Type
Profiles
Forums
Gallery
Events
Everything posted by Egilman
-
 Amen Brother...
 -
From Middlebranch, Ohio to Graham, Washington; Ordered March 11th arrived June 4th almost 8 weeks? they must have sent it by pony express.... I think the virus has attacked the mail service worse than anything else.... My F-104 wheels are still in customs in NY....
-
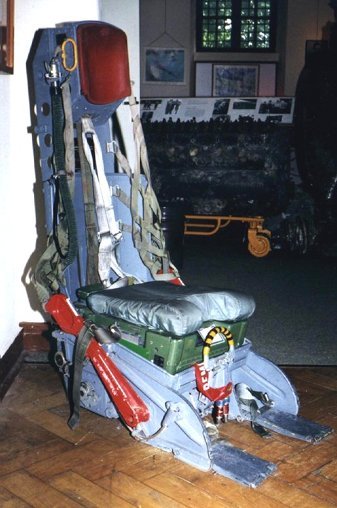
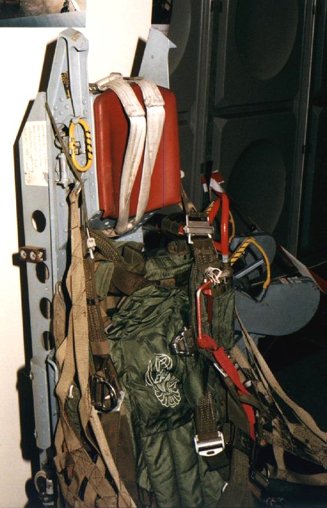
Thank you brother, I's working on it.... And an unplanned update. Sometimes despite all the research and effort that goes into making good accurate parts, they flub one... Here they flubbed one.... The seat on the left is an optional one in the Brassin kit for the Lockheed C-2 ejection seat and is untouched. It represents what they think it should look like... Except that the protrusion sticking up an 1/8th of an inch, (4 scale inches) doesn't exist on the real seat.... As you can clearly see , the emergency kit only rises to the height of the seat at the back end....... So I had to modify the seat to be accurate... The seat on the right represents the corrected kit part..... I figured I would post this for those that believe that the resin AM offerings are the end all and be all of accuracy, I say that although they usually are very accurate, sometimes they can be wrong in their representations..... It pays to do your research I always say, this is a good example..... The seat is now corrected to match the actual item..... EG
-
Single color cars or anything for that matter, especially when scaled down generate a monochromatic effect. Like an all silver car, all the details get lost in the color. It happens more with lighter colors than darker colors... It's why manufacturers use trim and other exterior parts in other colors complimentary or contrasting to breakup the monochrome effect.... bumpers in black chrome, bezels around lights, door trim etc etc... It's a lighting effect problem that has been around for ages and will not go away ever. (especially for what we do) It's just the nature of how light/colors work..... You fight against it on shiney car bodies, you accentuate it in camouflage.... Find a scheme you like that looks good to you and replicate it....
-
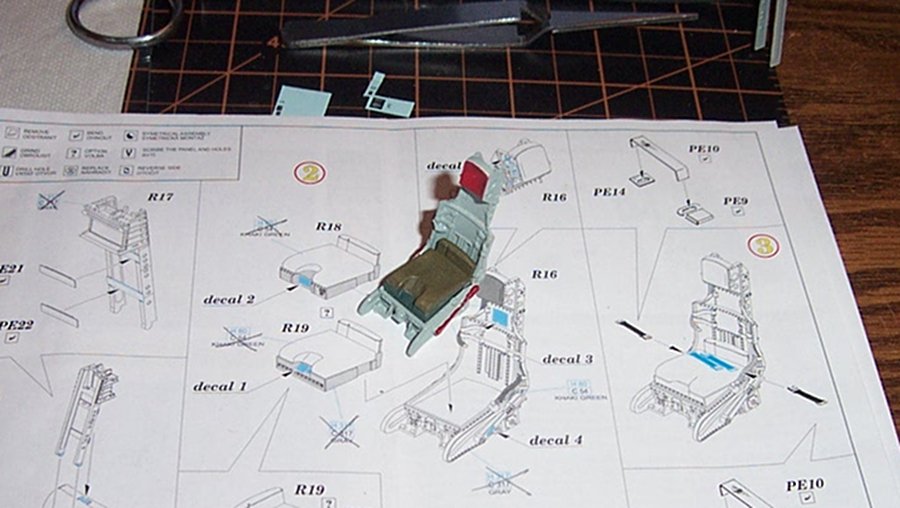
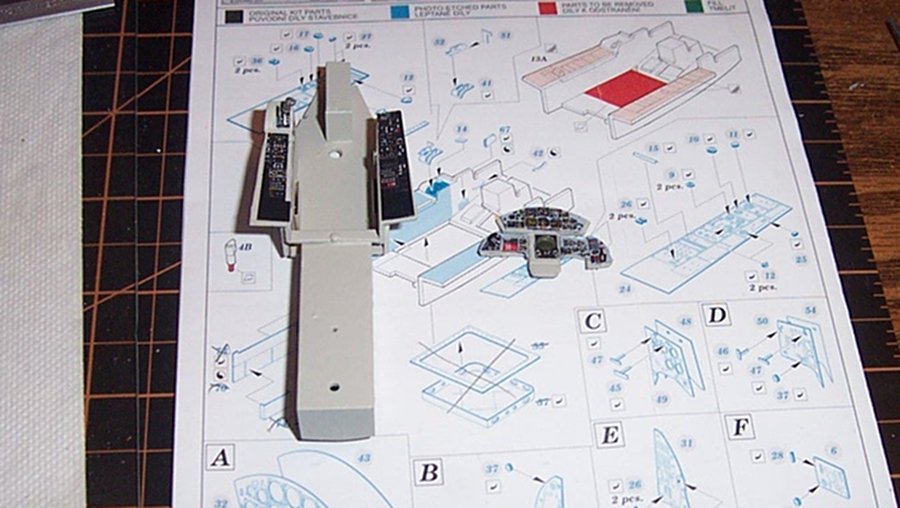
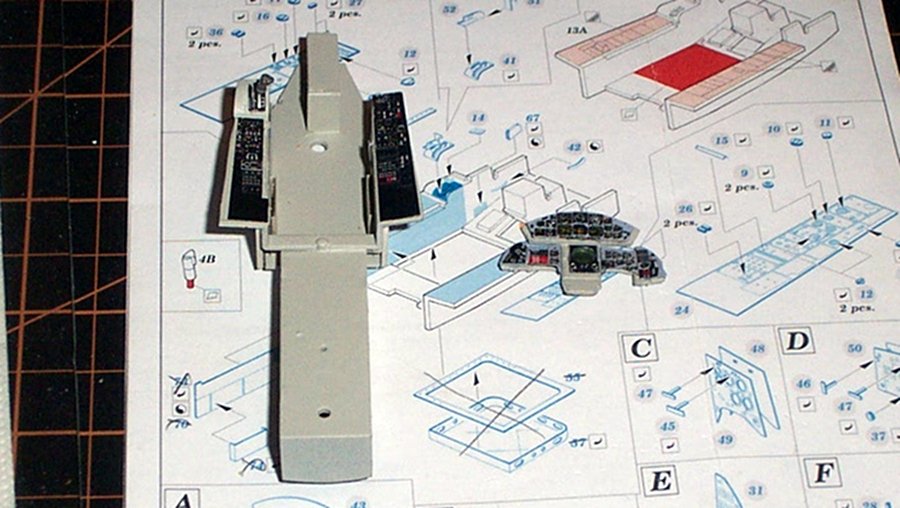
Ok an update, basic painting done..... As you can see the grey has taken on a bluish tint, that is cause when I started looking at colors I realized that the light aircraft grey was just too light, almost whitish in appearance. so I went and bought a bottle of plain aircraft grey, gloss and repainted, the gloss helps with the decals and is a much more accurate color and flattens out well... I used olive drab for the seat cover and dark euro green for the survival pack. the Red is Insignia Red slightly darkened.... Anyway, decals up next then the PE, then we get to figure out the paper retaining straps.... Onwards....
-
Yep, they were great, problem with them was two fold... making them for every kit that has been released in 4 different scales, and how many you had to go through before you learned to use them correctly..... It was a full time job all by itself keeping up with the kits, modeler inexperience, and with prices to reflect what they are actually worth in materials and time and then make a profit? It doesn't surprise me that they went away.... Great idea, very practicable for the modeler, impracticable for a long run product.... In fact you see this market effect manifest itself in kit aftermarket products all the time. New kit, New PE & Resin, after the initial pressing run and sales the Aftermarket guru's are all over it until the sales slow down to normal and the aftermarket products for that kit start disappearing from the marketplace...... The old classic kits and the kits becoming classics remain covered but the initial runs fade away fairly quickly.... I still have resin parts for some tanks from companies that have been out of business for 20 years... About 6 months to a year after a kit release the AM will have matured and that is the buy point. But, when you buy you buy it all, if you time it right you can get everything you need for about half the initial asking price. Take the Trumpeter Hornet for example, $225.00 when initially released, (I got mine as a christmas present from the Admiral she paid $205.00. I purchased enough b-25's to do a full flight deck and several AM sets for it for another 250 ish bucks... Today, you can get the kit for $85.00 and most of the aftermarket has gone away, just the essential PE sets remain.... I"m at 450ish for what I have and today you can purchase most of what I have for less than 200.00. Some of what I have you can't find anywhere.... or was produced by one company, they went out of business and is now made by another company (for a bunch more money)... Like anything else sometimes it's just not worth buying early.... Of course some of us wind up doing what I'm doing here, converting a kit to use current AM... Not my first time, but I only do it with models I really want to look good.... Ah, the life of a modeler.... EG
-
Who said you need PE to build a nice cockpit? (of course it helps having a cockpit in the kit that looks like the real thing) Nice Job Brother....
-
I get that Mark, I know they are there, but to be honest, I won't go through the very real excedrin headaches of doing it again.. I reached my limit on how far I will go with this one.... Can I do it? yes..... Will I do it again? emphatic NO....
-
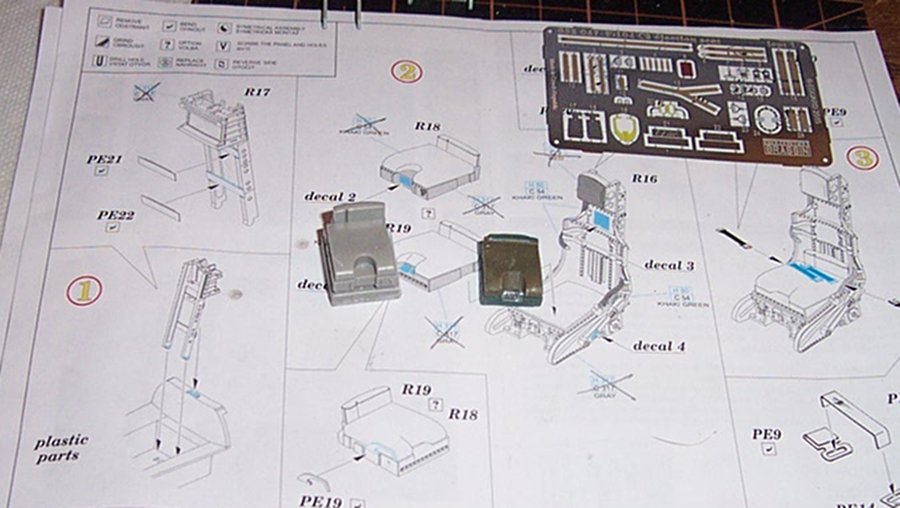
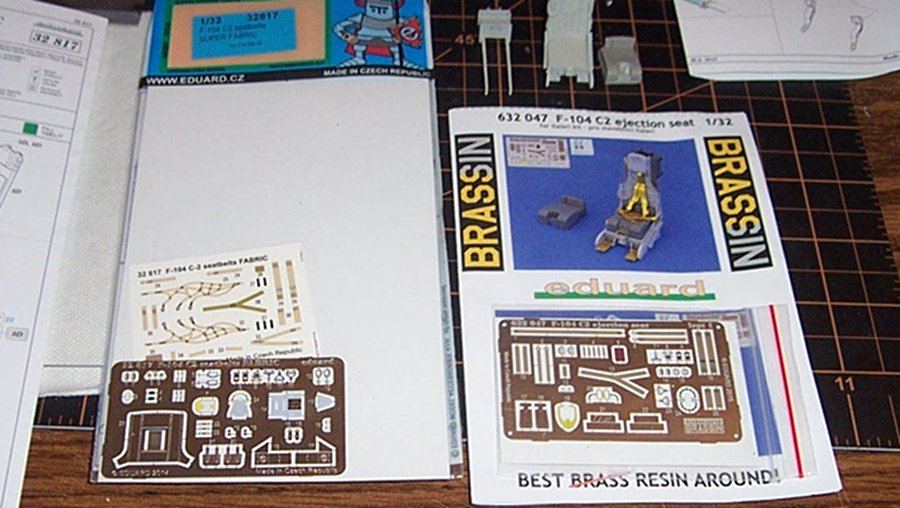
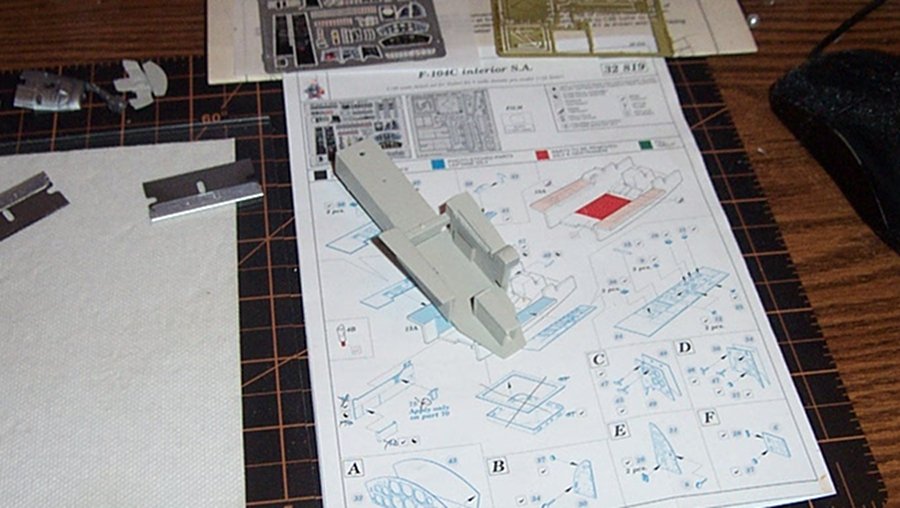
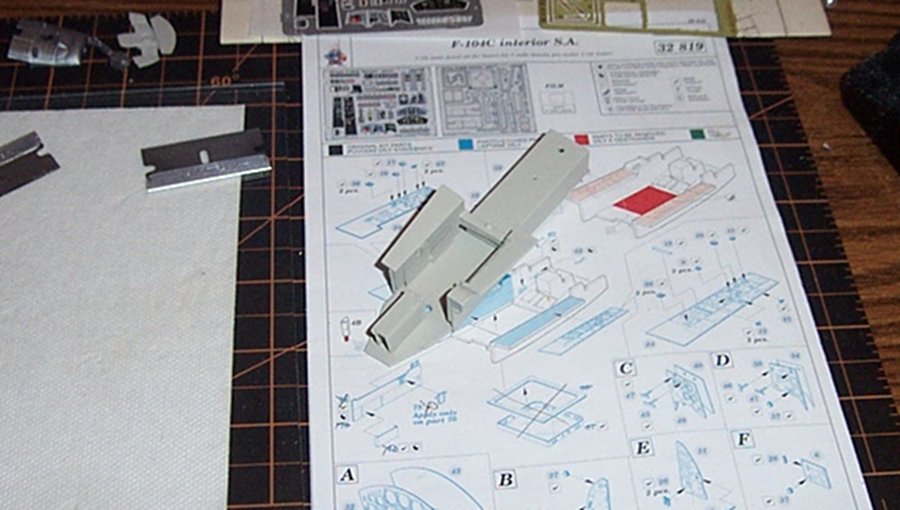
Next step is the seat... I have the Brassin seat from Eduard, it comes with decals and PE but it doesn't come with all the harnesses that were used on the Lockheed C-2 seat... For that I aquired the Eduard Super Fabric cause it gives you those harnesses. and along with it's own set of PE... Pretty much all the harnesses are included in brass in the brassin set there is a couple of small PE details in the fabric set the brassin doesn't have along with the restraint netting... So, what I"m going to do it primarily use the Brassin PE (cause it is a complete kit and the parts just fit) and augment it with the Fabric set for those few parts missing..... Anyway onward with the seat.... once this is done I can go back to the main aircraft, the Hase F-104C has the cockpit assembled as subassemblies which come together when the fuselage is assembled. So, as a result I won't be able to give a complete shot of the finished cockpit until it's in the aircraft..... Unfortunately that is the way it was manufactured.... Onwards...
-
Great idea Lou, That would be a great addition to aftermarket materials for modelers especially in the bigger scales, then the canopy PE would have a better scale appearance. But then there are techniques for working with ultra thin acrylic plastics that many modelers have tried and didn't do well... But it's like anything practice makes perfect....
-
Yeah brother!!! Bluejay four shouldn't take that long once I get past the cockpit.... just a little longer my friend... (I'm with Willie... "On the road again...... can't wait to get on the road again.....")
-
Hey brother, yeah they do make attractive cockpit panels, much better than I could paint and at least are laid out accurately for the most part... they do work...
-
I agree Harley, the technology of PE and Plastic Injection Molding has reached the point where what is the point? some of this is way past practical. But as long as people see a value in it, they will spend the bucks for it..... Great modelers don't need it and the average modeler can't install it... But, they sell the idea that you the average modeler can build the things you could only dream of before... and they get paid for hyping that dream... Thank you re: the research, I do like accurate info even if I can't possibly model it all..... EG
-
Thanks Ken, (when I find the cupholders then I'll know I'm in first class) The tiny tiny details are what's slowing me down, thankfully, they provide extras in the PE sheets, but when folded they look like black grains of sand, (yeah, they need to be folded as well) and against the black panels? I really don't know how much they add to the look. the pre-painted panels add a lot but the rest? I'm not so sure that it's worth the eye strain to add it all.... heck unless you got some super close up setup for your camera, it's plain not seeable.... And that is with the cockpit out of the airplane.... (in the airplane, you ain't seeing any of it) Just a little advise to us half blind older modelers out there, you have to decide with some of this stuff if it is worth it..... to me IMHO? nope.... the panels are nice and add a lot to the look, but skip the 2 to 3 thousandths of an inch wide switches, knobs and lights... it just isn't worth the headache for what you can actually see. (and the color paint on them doesn't help, they are too small for the eye to pick it up) EG
-
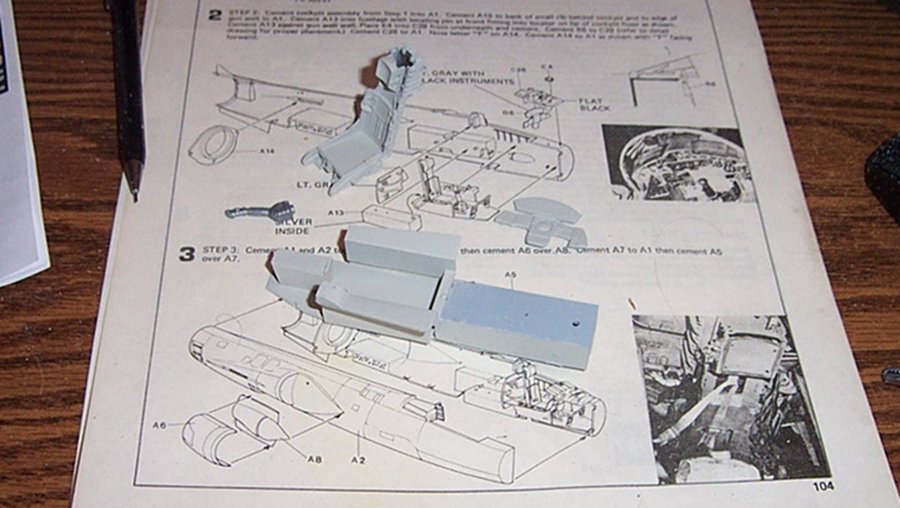
Well, part of the way done... Port and Starboard panels on throttle quadrant on and instrument panel mostly done... A little closer. I did the radar screen in gloss dark green, looked to be close to what I saw.... A few pull handles remain and a couple of switches but to be honest with ya, I can't see them. even in 1/32nd scale individual switches are so tiny you can hardly see them to install them much less photograph them.... Anyway I"m past the cockpit panels on to the seat and seatbelts.....
- 518 replies
-
- 11
-

-
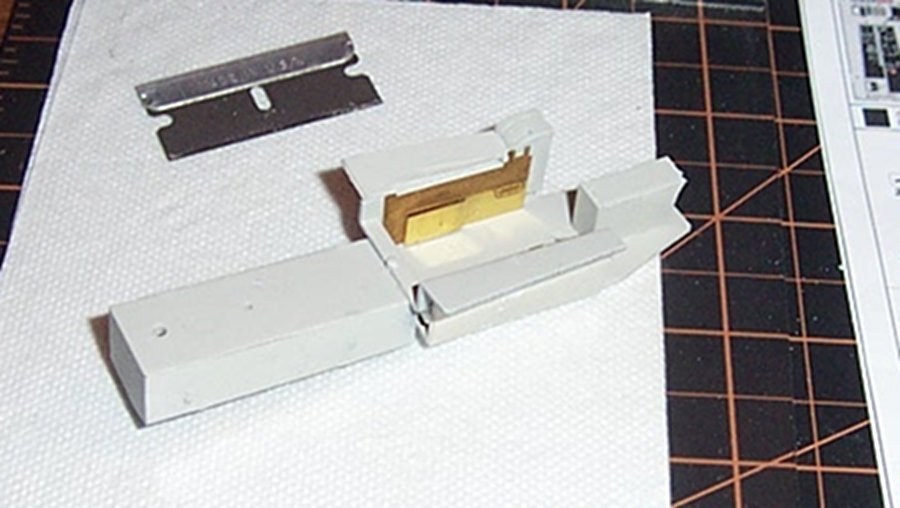
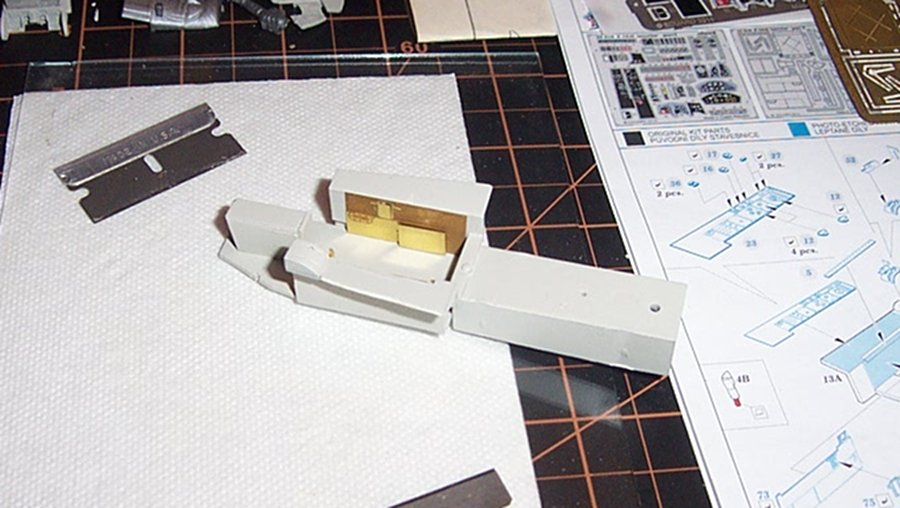
Ok the base PE is on cockpit sides. this was critical cause they HAVE to fit... Left side Right side A total of five parts... bottom edge sits on the floor and top edge meets the corner of the side consoles... Perfect fit, I guess I got lucky for a change.... Painted.... I guess they are the first class magazine holders.... At this point I"m going to continue on with the PE and will post again when the tub is almost done. then we move on to the seat.... PS: I'll let you know when I find the ashtray and cup holders...... EG
- 518 replies
-
- 10
-
-
Tiger 1 by marktiedens - FINISHED - Dragon - 1/35 scale
Egilman replied to marktiedens's topic in Non-ship/categorised builds
You must be an expert now at painting road wheel tires.... {chuckle} I still have friends that argue with me when I tell them there are 24 wheels/tires per side on a Tiger I.... Good Job, getting them to look right can be a task.... these look right.... Well done Mark.... -
Those invasion stripes can be a pain, but they make the rest of the finish just pop. It was striking and adds an element of contrast besides being quite attractive... Beautiful job.....
-
It's just part of the journey brother.... it's interesting to us non-stick and rudder fellas.... (but no requirement my friend, some L&D situations are difficult for some to recount, we understand) Just a reminder of what many put themselves at risk of for the rest of us..... Thank you sometimes is just not enough, but thank you anyways
-
As the two examples of a mach 1+ ejection from a starfighter proved...... But when your at the point of pulling that handle, it's the only path away from certain death.... last option type stuff. (and the F-104 got there very very quickly)
-
The B-58 had ejection capsules.....

-
Yeah that's what I thought, the silvery green nylon of the chute, the kahki of the restraint net, all look like examples of military equipment in those materials I've seen with my Mk1 eyeballs also... I think that "Cushion" was actually the drogue chute used to slow down the pilot after separation... but I could be wrong... Some of the stuff they could pack into relatively tiny compartments was amazing, just the material engineering boggles the mind......
-
Yeah there are a lot of them out there about our favorite aircraft..... some of them are great, others stretch the truth a bit, but that's part of the fun of this. Drives me to learn more about it....
-
Well parts are painted in light aircraft grey.... I painted the upper surface of the wheel well (hidden when assembled) in light ghost grey to give the contrast of the two colors I have.... The issue is this, one seat I have pics of appears a very blueish grey, the other appears a neutral grey..... Either color will work I suppose and of course the lighting on the two shots is completely different.... To me, the neutral gray seems to be the more natural color as the bluish tint comes from intense white light.... (learned that on the Bandit trailers grey paint) Intense white light flashes tends to show distance background detail in darkened backgrounds as well which you see in the blue tinted pic... Where in the "normal" light pic the backgrounds are just dark like they should be.... Any one else have an opinion? both pics look good.... and I know we have an airplane driver from this era here.... Suggestions? I'm leaning towards the natural light neutral grey....... EG

-
Your a stick and rudder guy so I'm not going to argue with actual experience and knowledge brother, Thank you for your service.... On the other hand facts are facts... The F-104 had a downward firing ejection seat when originally designed true, but, it didn't last long. (I think only the first 70 or so had them) The issue was the speed of the aircraft and not having a powerful enough catapult motor to clear the tail fin at the speeds the aircraft was capable of flying..... so downward was the order of the day... The evolution of the seat started with the Stanley "B" model, There is this story from a test pilot of an ejection from a YF-104 over Rodgers Dry Lake.... Anyway the entire history of the F-104's ejection seats is here.... (it's where I got the pics from) The "C" model was the first model intentionally designed with an upward firing seat, ALL the "A" models were upgraded to the same seat the "C" model had the (Stanley designed/built) Lockheed C-2.... Chuck Yeager also describes his experience with the C-2 system during flight testing his YF-104A..... The europeans didn't like the failure rate of the C-2 system so had a Martin Baker Seat system similar to your F-4 system retrofitted to the Lockheed rails....