-
Posts
4,377 -
Joined
-
Last visited
Content Type
Profiles
Forums
Gallery
Events
Everything posted by Egilman
-

F-86F-30 Sabre by Egilman - Kinetic - 1/32nd scale
Egilman replied to Egilman's topic in Non-ship/categorised builds
Your right roger, I went ahead and researched USAAC & USAF fighter cockpit colors WWII to post Korea... prior to WWII cockpit colors were generally ZC Yellow in the USAAC with black panels, (but it was all over the map as far as manufacturers using whatever they wanted) As WWII progress this changed to a mix of ZCG & ZCY and by 1943 an official directive was issued making the official cockpit color scheme Interior green, (a very dark form of ZC Green) and Matt Black from the lower edges of the instrument panels up... But still with the numbers of aircraft they were building per month, the manufacturers used whatever formulation of paints they could get as long as it held to the scheme... Post war, the USAAF retired virtually all it's fighter aircraft not tagged P-51 and turned over many existing deployed aircraft to allied nations... Along about 1947, the USAAF decided to change it's cockpit scheme in it's now F-51 aircraft to everything the pilot could see in the cockpit being black, everything else would be interior green except for the seat pan which would also be green... Of course this was of serious import to North American Aviation who was producing all these F-51's, their derivatives, and the soon to be F-86... 1948 the change in cockpit color scheme became official for all USAF fighter planes, with one change, Flat Black overall.... So NAA went to producing the F-86 with completely flat black cockpits. the change was easy for them as what they were producing was 99% black anyway... This lasted until November '53 just after the war ended, when they changed the scheme to Black panels over Grey Structure.... The orders also clearly laid out what to do with existing aircraft... When an aircraft came in for IRAN, the scheme would be changed to the new one anything less and they would leave it alone... There were probably aircraft in different schemes, rare but true... It usually took several months for a new scheme to be devised and tested and reported on and approved so I suspect some Sabres were painted Black over Grey in the cockpit prior to the end of the war, but not many.... Given the closeness to the end of the war the orders were issued making the change, I suspect this to be absolutely true... So the statement that 99% of the Sabre's built pre November '53 had all black cockpits is as far as I'm concerned completely true... Kevin, in 1943, the RAF and the USAAC got together and unified the color schemes for exchange aircraft, the AAC decided on what they were going to do with input from the RAF with the RAF agreeing to accept the aircraft as produced to make the production and delivery of thousands of aircraft under wartime condition more efficient... The RAF was using black in the cockpit from the start of WWII and the reason the AAC went to it could very well have been the suggestion or requirements of the RAF, I've been unable to find the smoking gun on that one though it does appear that it was a mutual decision and when the RAF started taking delivery of F-86's they accepted the all black cockpit as well.... In essence it was to ease fighter aircraft production issues during the war was the reason and it wasn't a complete adoption of British practice, kinda a compromise... That's the story as I've been able to piece it together, not definitive at all in any manner, just my opinion based upon the research I've done over the last day and a half... (although there are still many peeps that will argue the hell out of it, the preponderance of evidence say it was so) I hope that answers all questions as best as can be done... {chuckle} (I love to do research into such esoteric subjects as well) EG -

F-86F-30 Sabre by Egilman - Kinetic - 1/32nd scale
Egilman replied to Egilman's topic in Non-ship/categorised builds
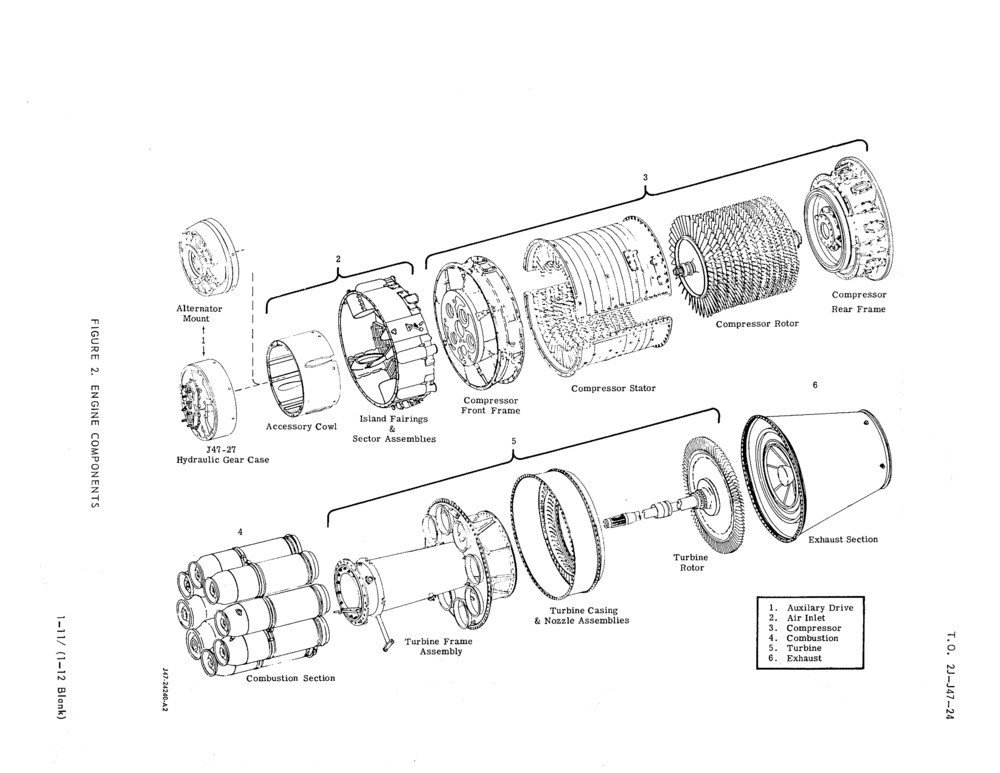
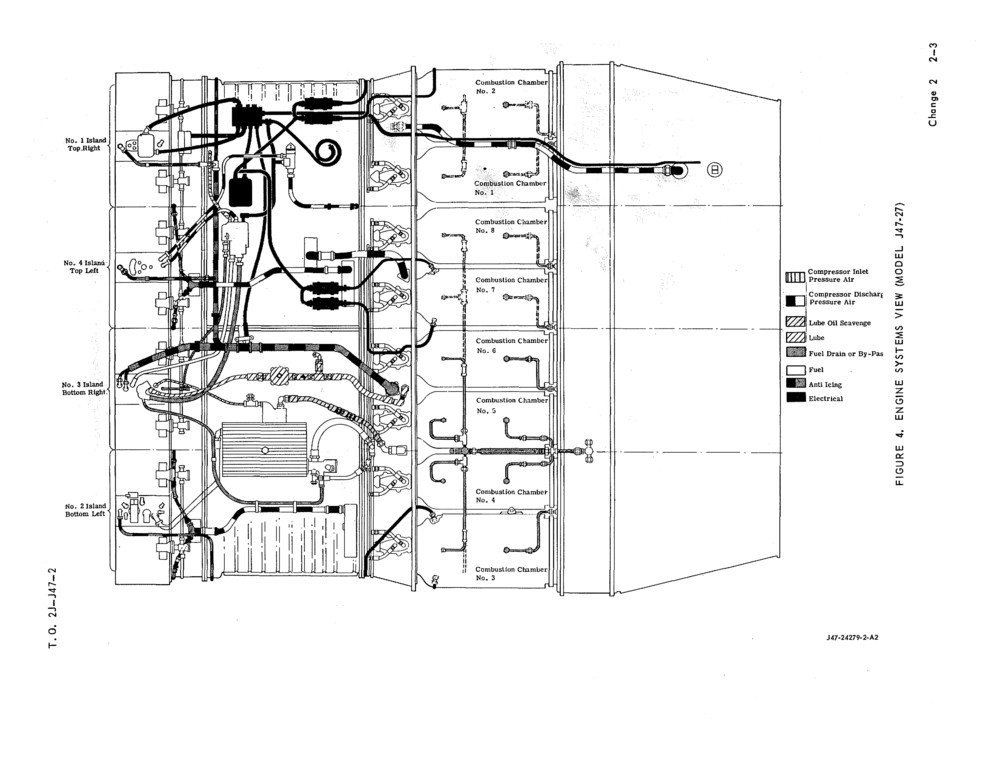
Yes Alan, it's a real disappointment I'm sad to say, not up to the quality of the rest of the kit unfortunately... The only parts that look useable are the compressor section and the exhaust section, the rest is going to need some serious re-working to come even close... I'm going over my options.. one of the things I do have is the complete T.O. 2J-J47-24 which is the complete illustrated parts breakdown updated to 1975 and Field Maintenance & Replacement, Turbojet Engines, covering the J-47-GE-23 to J-47-GE-27, essentially the USAF's Chilton's manual for the J-47 engine, T.O 2J-J47-26 updated to 1974 as references..... If I had an actual engine I could rebuild it using that info... For example... Component Exploded View.... Surface Accessory Systems Routing Wrap... (shows the routing of all exterior tubing & wiring and where they connect) I have complete details on every part, and how they are supposed to fit together... I'm mulling over in my head if I want to take this alternate path and use that 3D printer I have.... If I can draw up the basic parts in Solidworks, (don't know how long that will take) I should be able to print up a complete engine overnight, the parts won't be that big... I know it will look one heck of a lot more realistic than anything I do with bashing the kits plastic afterthought of an engine... So I'm asking for opinions, I'm pretty sure I can do it better, but I've never done this 3D work before in an actual model creation environment... I have all the materials and tools needed... Wanna take this detour along with me? (I pretty much figure the parts I have coming will all be here by the time I'm done) What do you think Brothers? -

F-86F-30 Sabre by Egilman - Kinetic - 1/32nd scale
Egilman replied to Egilman's topic in Non-ship/categorised builds
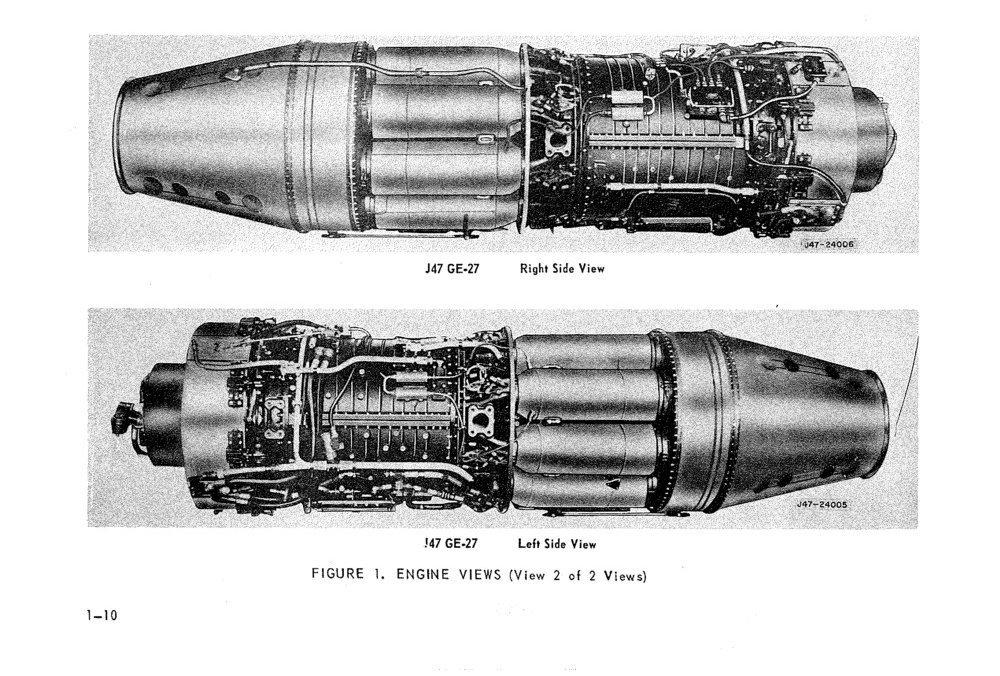
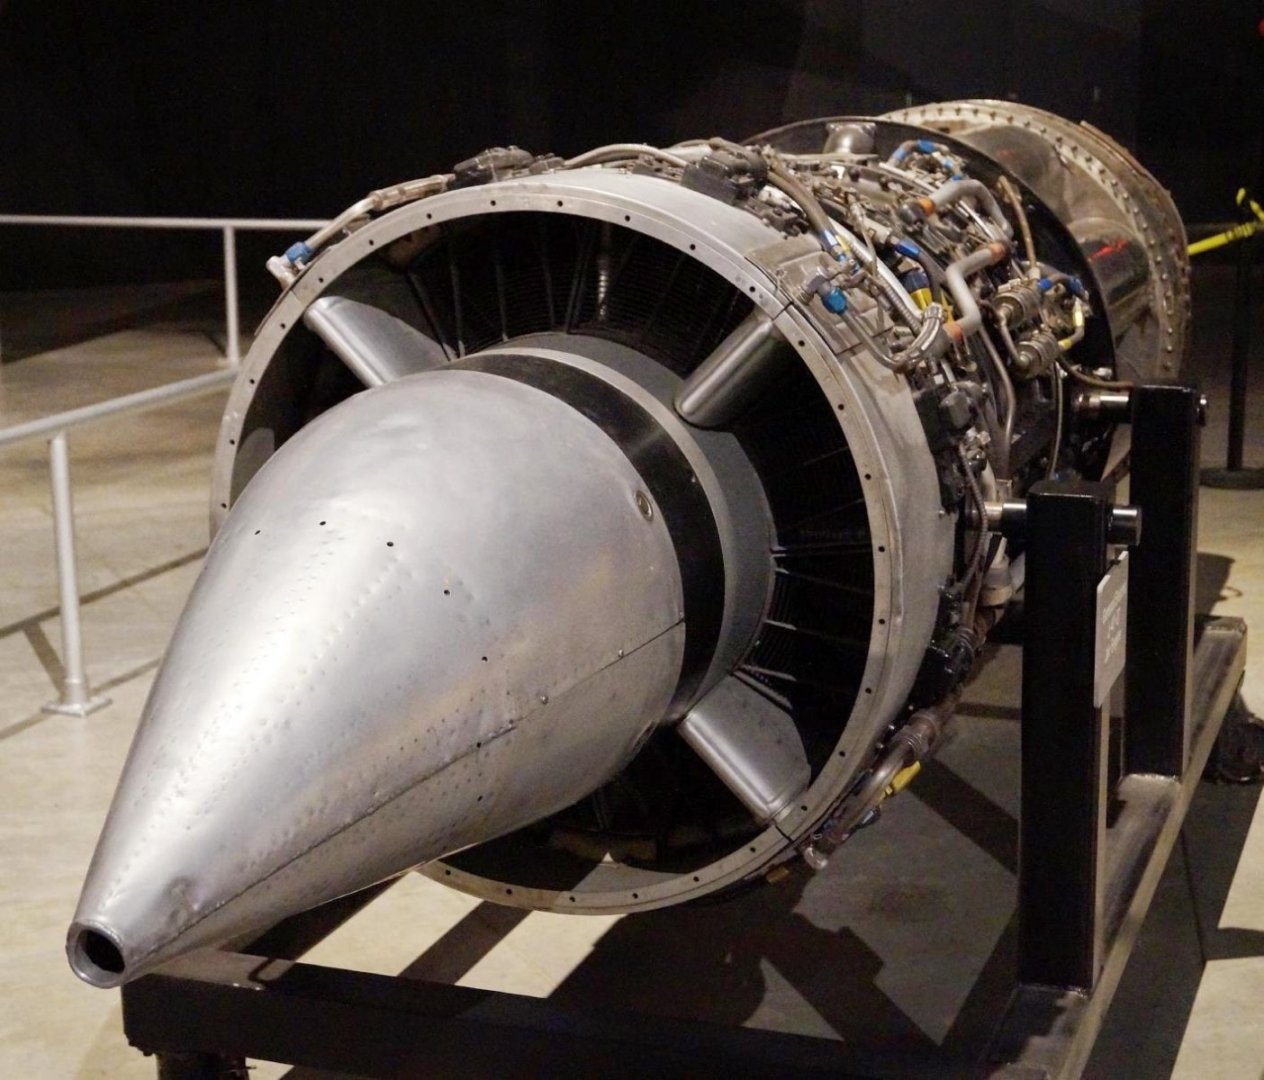
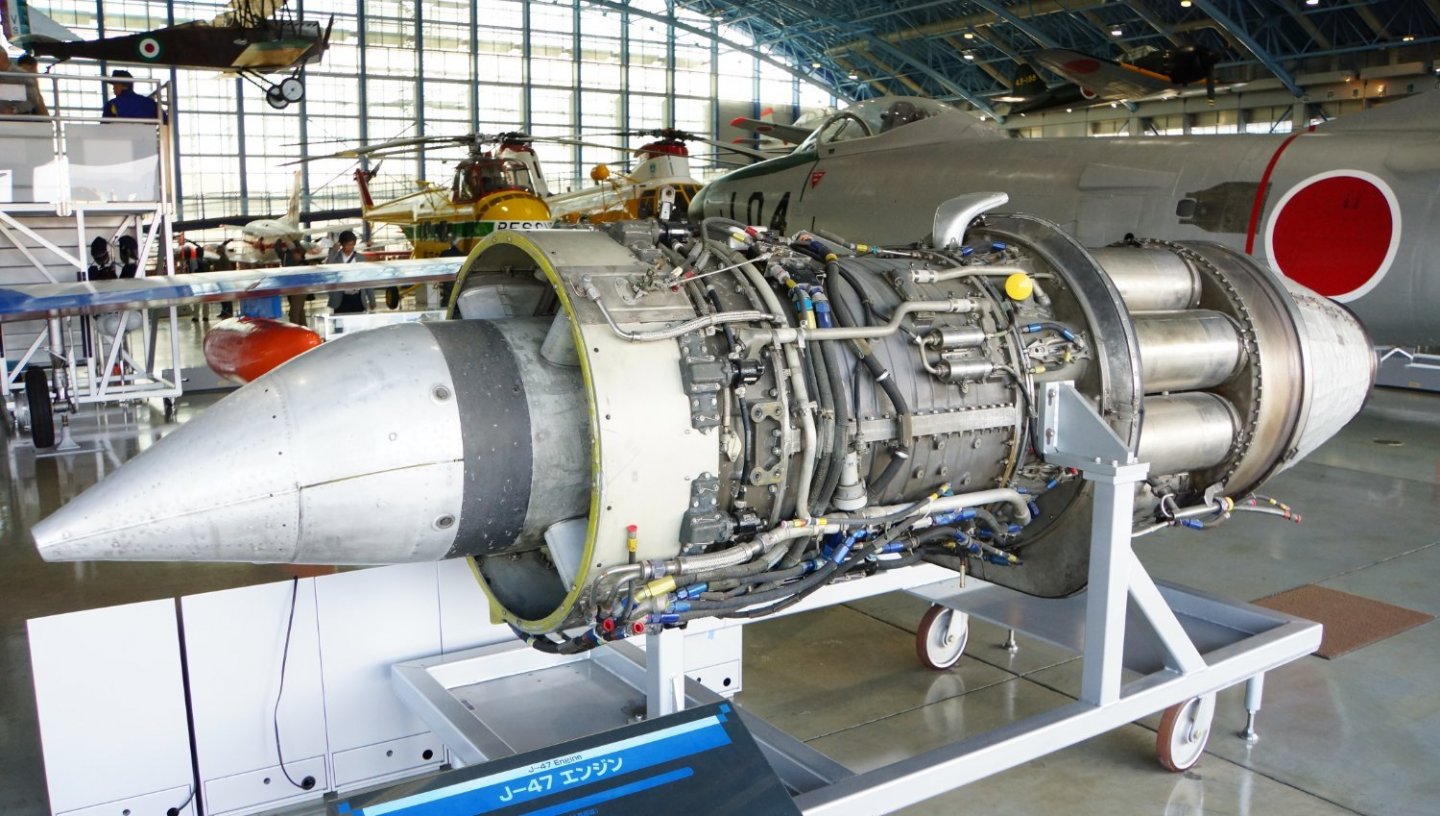
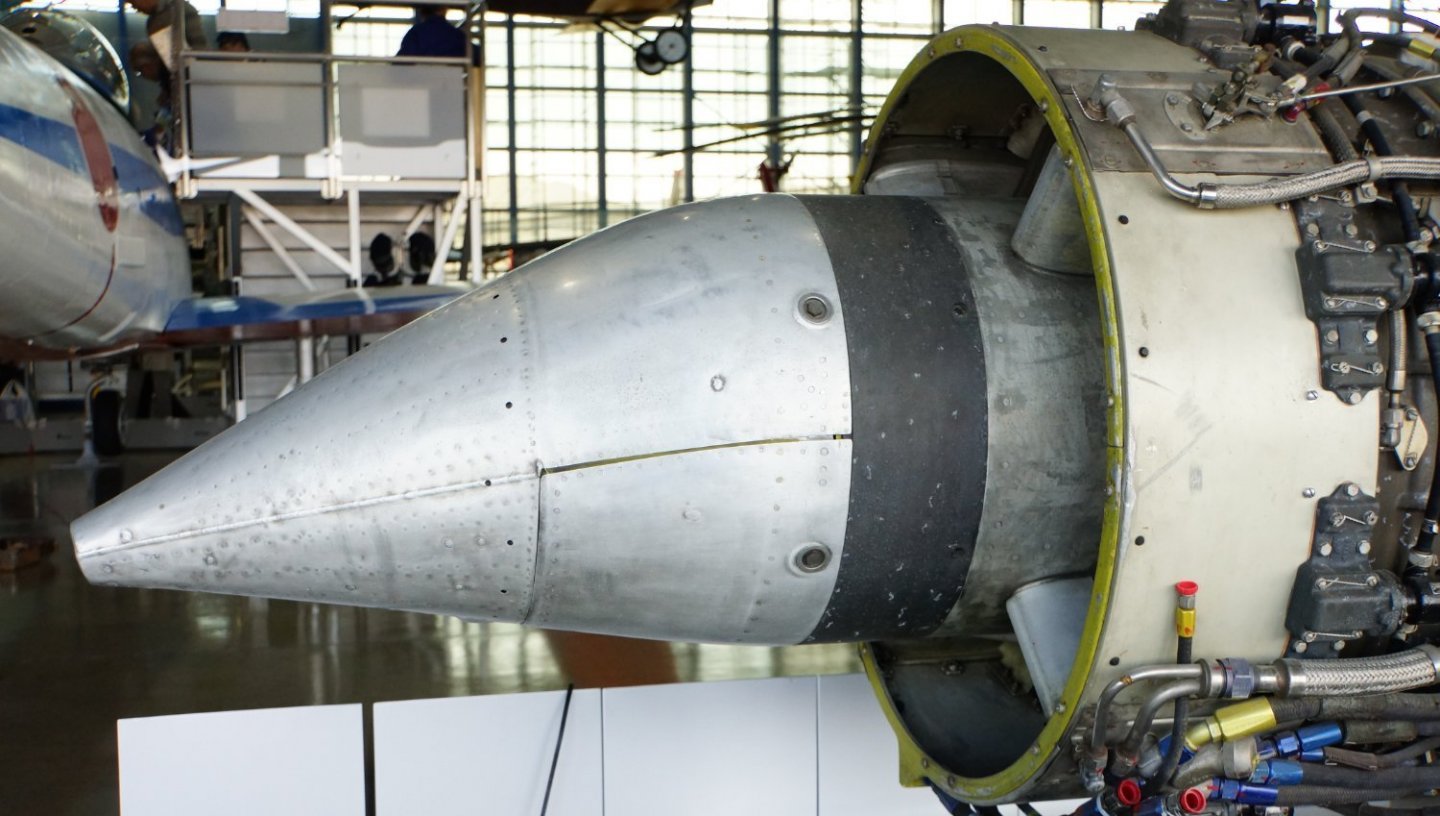
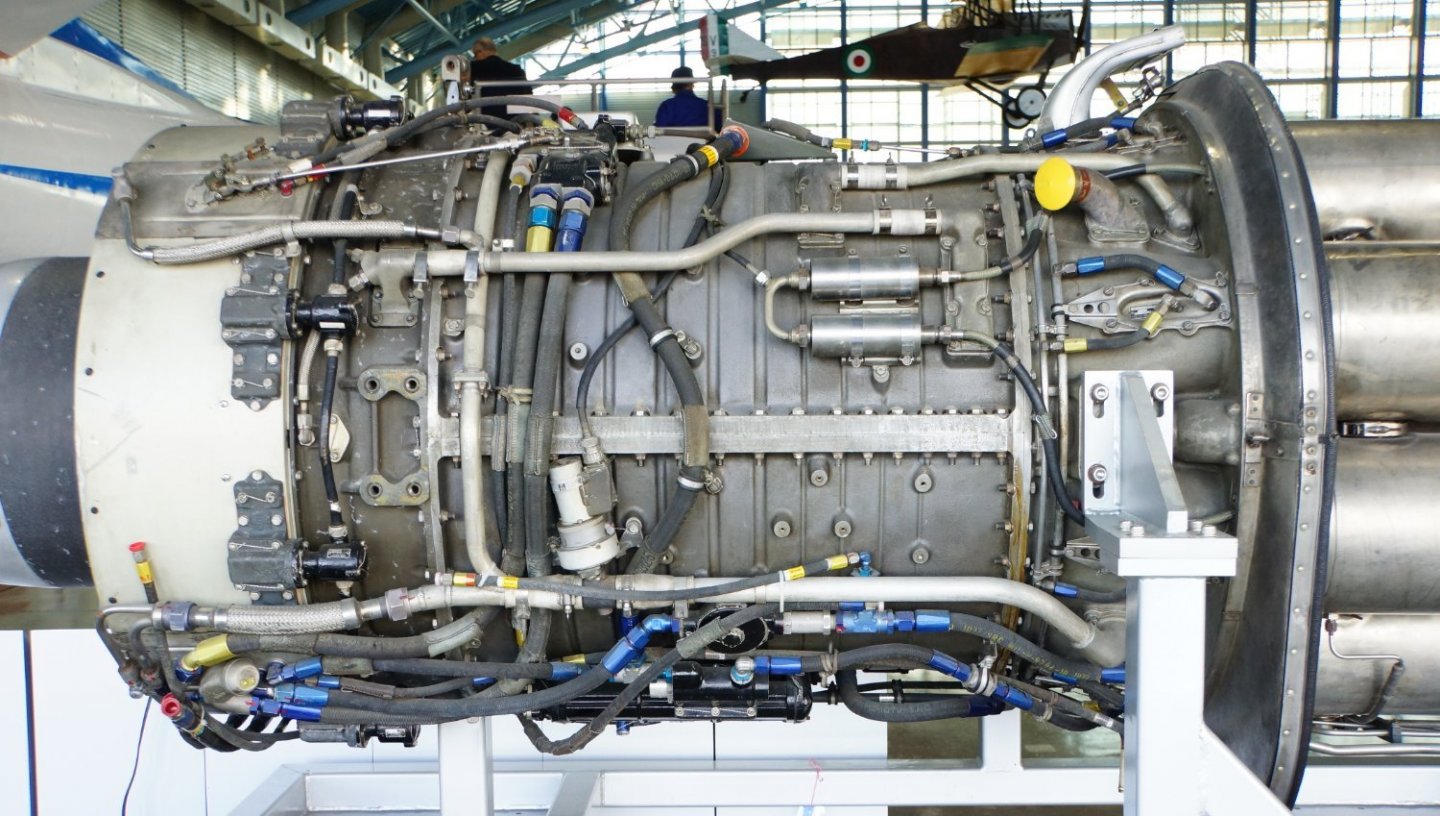
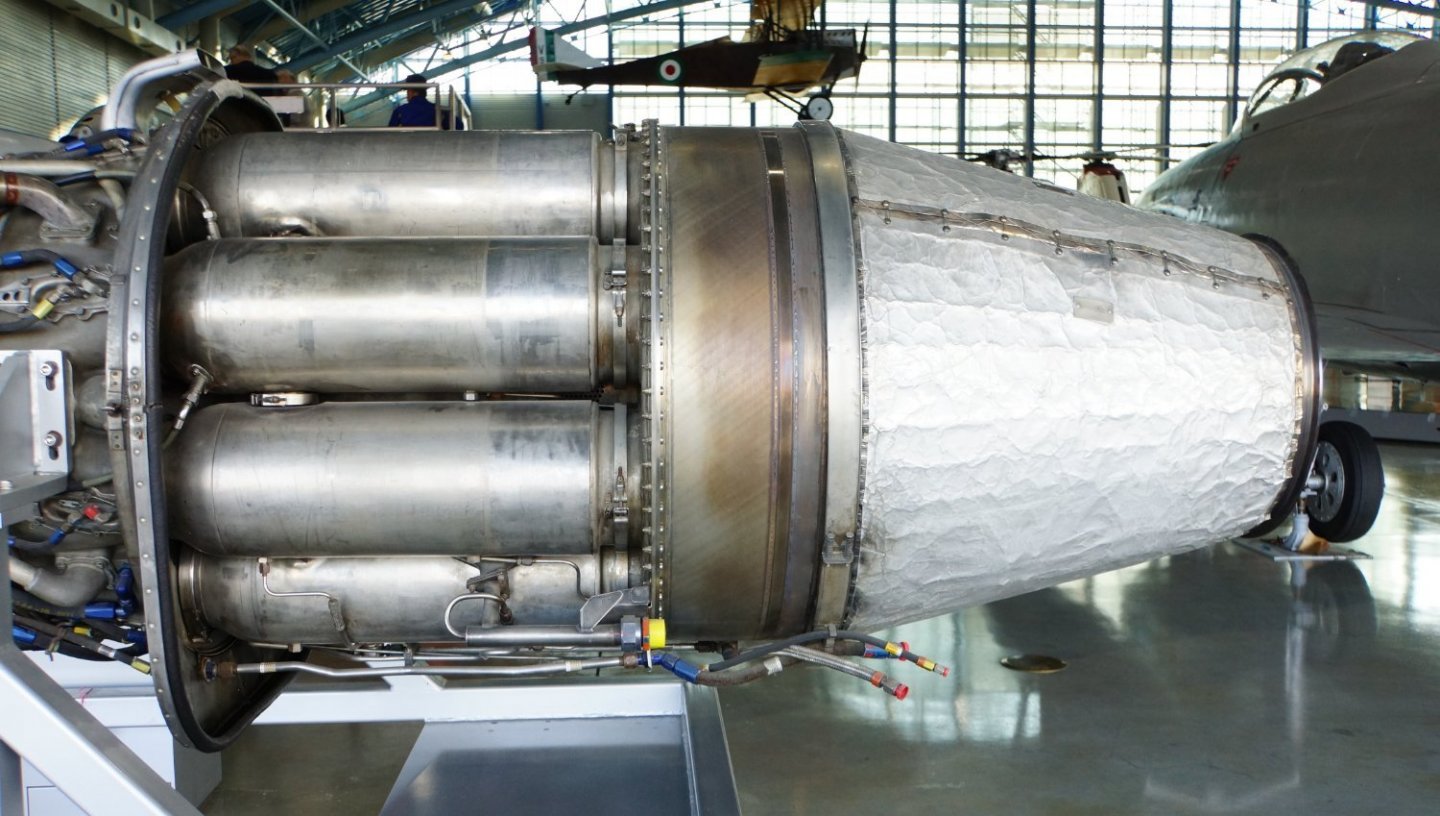
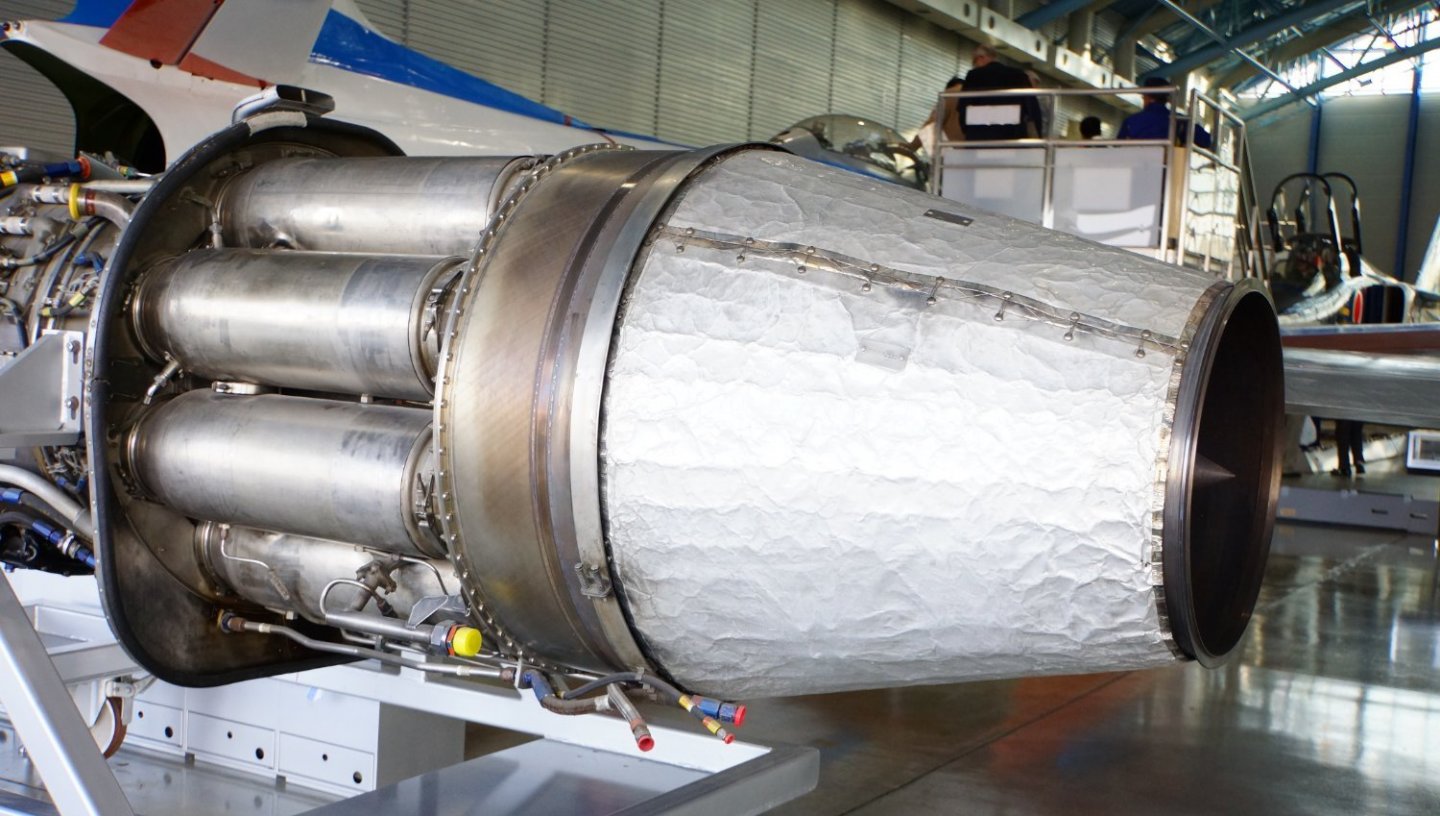
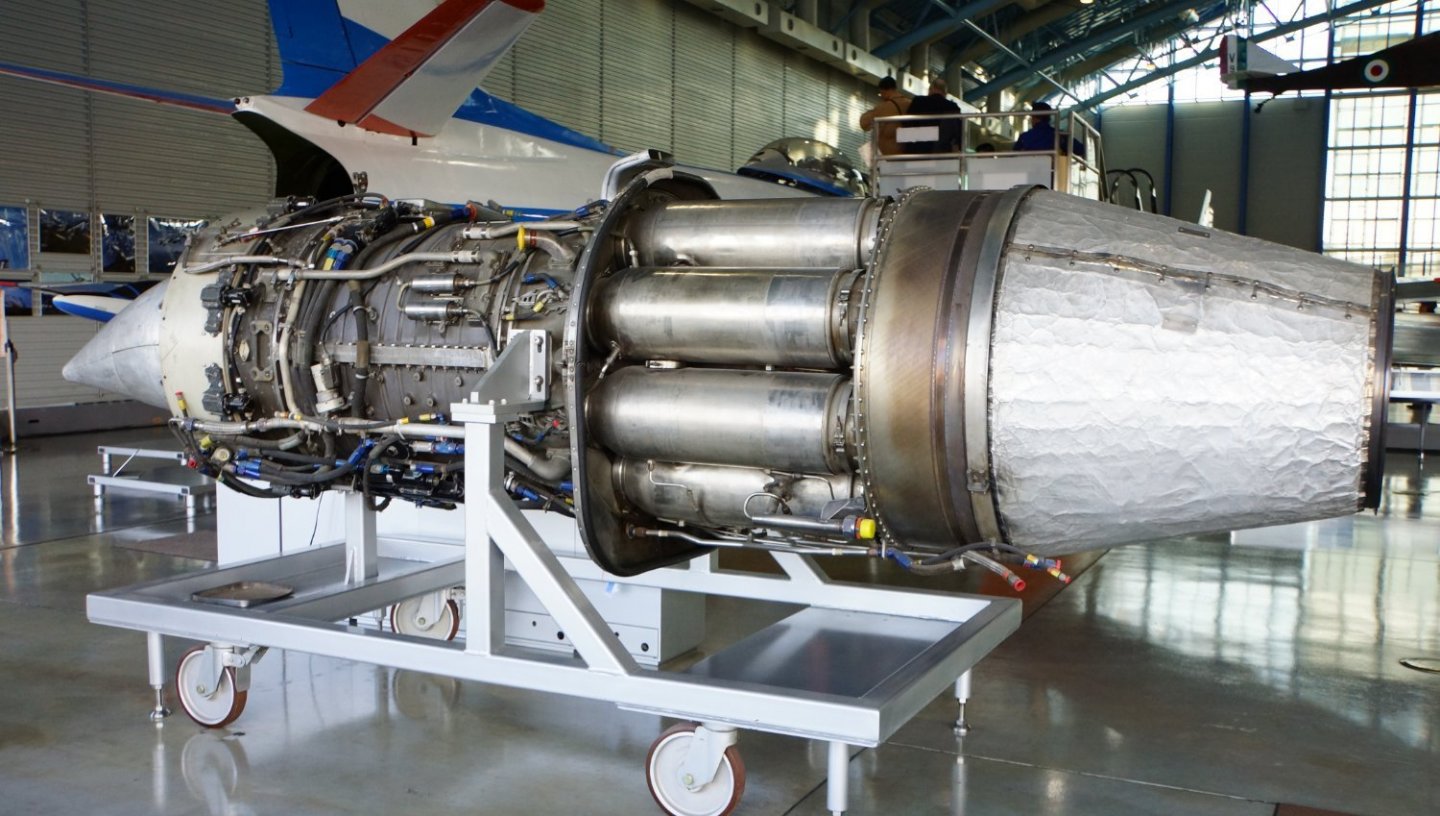
Ok, research update here.... GE J-47-27 Engine, as fitted to almost all F-86F's.... The kit engine.... Not glued together, just stacked to show what comes with the kit... The best thing I can say for it is that it resembles a J-47.... as you can easily see it is soft on detail and it's a bit out of scale on the larger side.... the real engine has a length of 145" (without tailpipe) and a diameter of 36.75" in scale that would be 4.53125" long (4&17/32nds inch) and 1.148" in diameter... So I'll have to work with what I got.. first off the real engine... (from TO 2J-J47-24 Illustrated Parts Breakdown J47-ST-25 to J47-GE-27 1969) And actual engine pics from a museum in Japan.... And finally the intake end... where the major issues are... Just several things noticeable... 1. The intake casing is too narrow should be about double it's length... 2. The intake has four flow vanes for the anti icing system which are completely missing... 3. The accessory drive cover is too short and starts angling downward almost immediately, it should protrude from the intake casing twice the true width of the casing before it starts angling downward... 4. The accessory drive cover has a flat nose with hole for cooling air flow to access the accessories.... 5. The eight burner cans do not taper and are woefully underscale... 6. The tailpipe is not part of the engine... It looks like I can save most of the compressor, at least I can work with it... (probably add some details as well... Now, working out how to go about fixing it.... Onwards Brothers... -

Martini Porsche 935 by kpnuts - FINISHED - Tamiya - 1/12
Egilman replied to kpnuts's topic in Non-ship/categorised builds
Ahhhh, the master is at work again.... You still amaze me with your skills at replicating real life.... -

Porsche flat 6 boxer engine by kpnuts 1/4 machine works
Egilman replied to kpnuts's topic in Non-ship/categorised builds
WOW! that is some transformation! Nicely done.... -

F-86F-30 Sabre by Egilman - Kinetic - 1/32nd scale
Egilman replied to Egilman's topic in Non-ship/categorised builds
No Spanner in the works.... The SAAF flew two different versions of the Sabre in Korea, the F-86F on loan from the USAF and their own purchased Canadair Sabre 13 Mk. 6's (F-86F's built by NAA in Palmdale for the Canadian AF) those Mk. 6's had grey cockpits, the SAAF Sabre's of 2 sqd, on loan from the USAF had black cockpits.... Read here where where it is directly discussed... (By SAAF historians and modelers) -

F-86F-30 Sabre by Egilman - Kinetic - 1/32nd scale
Egilman replied to Egilman's topic in Non-ship/categorised builds
Yep, every single one of those, if owned by the USAF, is post November 1953... Postwar... I'll see if I can dig up the references and post them... Pretty much everyone restores them to the Black over Grey standard today, it's a pure flyability issue, but only historically accurate postwar when the Airforce converted to it... (also note that most of the flyable F-86's today were built postwar so a grey cockpit would be accurate for those as built) The wartime F-86's were transferred to other airforces or retired as the US airforce upgraded or replaced theirs... I understand that Taiwan got over 200 wartime F-86's just as one example... (Japan got around 100 as well before manufacturing them under license) In fact the aircraft I'm modeling wound up being wrote off by the Chinese (taiwanese) Airforce I believe in the 70's... (I believe my research shows that there is only one wartime F-86 in flying condition in the world today and it's an "A" model) Forgotten Warbird resource groups listing for 51-2910 Scroll down to 51-2910... Taken from official USAF records... Now, Airport Data claims that Yanks Air Museum is restoring 51-2910 but they aren't, and Wiki claims that 51-2910 is on display at the USAF 51st Fighter Wing area, Osan Air Base, South Korea, but it isn't... (they also list it as an F-86D which it wasn't) The USAF armaments museum has an F-86F in Capt. McConnell's livery and they acknowledge that it isn't 51-2910... UPDATE: the Yanks Air Museum F-86F has been identified as 52-5513.... That solves that mystery... You can research individual military aircraft and what is known about their fates, it's not complete but what they do have is very accurate all you need is their initial registration number... -

F-86F-30 Sabre by Egilman - Kinetic - 1/32nd scale
Egilman replied to Egilman's topic in Non-ship/categorised builds
Never said there weren't, the USAF had to get the idea from somewhere... Once the Aircraft were made available to the allied nations, they were free to do with them as they pleased.. Not everyone thought flying slow cookers were a good thing... {chuckle} -

F-86F-30 Sabre by Egilman - Kinetic - 1/32nd scale
Egilman replied to Egilman's topic in Non-ship/categorised builds
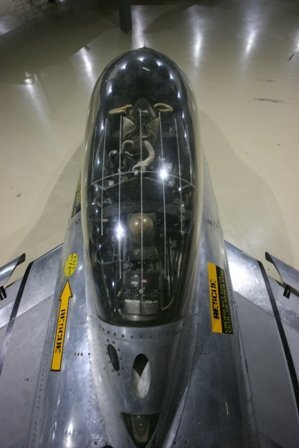
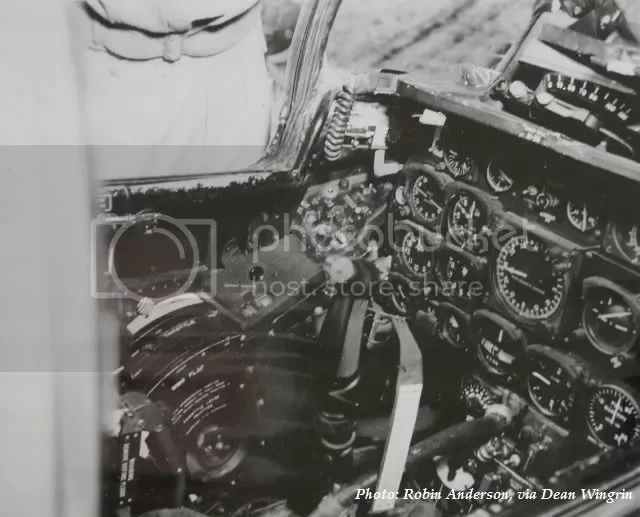
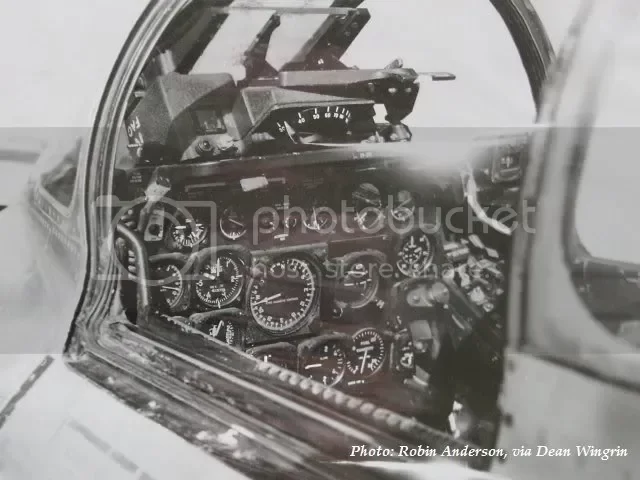
That's the million dollar question Andy, I won't know until the fuselage is almost completely assembled and the finish is applied... That's why this is another test build... And with needing the second fret of PE parts for the seat which is going to take at least two weeks to get here from eduard, I'm looking at moving forward on other things right now... the only image I have of a real life cockpit for an F-86F from the outside is this... And it's a Canadair Sabre Mk. 5, (in the Korean War configuration) So I'm flying by the seat of my pants/experience as to what to do and where to go with it... it's a nice clean look if I can pull it off.. Thank you, I think I'm on the right track and it is a good time to shift to something else right at the moment... I have other parts and alterations that need to be made to the fuselage first before I can assemble it and finish it... (like the ammo bay doors which are opened to double as the first step to climb into the cockpit, they need to be added to the model before I can close it up) The gun barrel ports need to be replaced as well cause as molded they don't represent anything of reality... There are some issues with this kit that need correcting... And I just learned about the engine... Normally the engine would go inside the aircraft and that is how it is usually built or they give the option of having the tail on a work stand with the engine hanging out the back... (not a good look for me) I'm gonna put it on an engine dolly to display it so I have the option of making it look like a real engine rather than something to just stick out it's tail... It's a nice kit, accurate if built as just the airplane sitting on the runway waiting to take off, but it can be made into something real special if one puts in the work... That's my aim here.... -

F-86F-30 Sabre by Egilman - Kinetic - 1/32nd scale
Egilman replied to Egilman's topic in Non-ship/categorised builds
Welcome aboard Roger! It's one of mine as well, it's simply a strikingly beautiful airplane... -

F-86F-30 Sabre by Egilman - Kinetic - 1/32nd scale
Egilman replied to Egilman's topic in Non-ship/categorised builds
Though of that Ken when I started... Most modelers lighten the flat black by adding a couple of drops of white to it in a mixing cup then dry brushing all the edges to make them stand out before doing the decals and PE... Kinda like the technique used to highlight the nooks and crannies on ship models but in reverse... That was the point of the grime wash give the edges some definition so they don't get lost... It worked sufficiently to allow something to show in natural light.... The eduard set appears as black in natural light but obviously shows up as green under intense flash light... I'm sitting here looking at it from 3 feet away under natural light and it looks good... Under high flash, without the white background this is what I get... Much better although the panels still show as greenish... Under natural light without the white background... Now that looks like a cockpit... some of the green tinted panels do show but loosing the stark white background helped quite a bit... Looks much better... And with the Mk 1 eyeball it looks good.. Still need to finish some detailing before I set it aside to go on with the kit... I probably should have gone with Andy's suggestion and did the postwar cockpit easier to do and although not historically accurate, would have been simply easier... I have to set this aside for the moment, my eduard set when I opened it had an error, fret 2 was the wrong fret from another 1/48 scale model.. I've been in contact with eduard support showing them the packing error and they got back to me this morning... They will be sending me a correct fret 2 within the week... That will allow me to dress up the seat and radio shelf in the canopy.... (understanding that this set has been discontinued for over a year, they are making a fret up just for me, for free! That's great customer service) I think this will work once it is all said and done and out in the natural light it will look the part... Next step is the engine and it's scratch built dolly, and we run into a spot where the manufacturer got it wrong, the engine... More to follow.... -

F-86F-30 Sabre by Egilman - Kinetic - 1/32nd scale
Egilman replied to Egilman's topic in Non-ship/categorised builds
Thanks Andy, Yeah it kinda does beg the question doesn't it.... So what we want is something that shows when you look at it directly under high light levels yet disappears when at a distance..... What I did was install the eduard cockpit panels I have... lets see how they react under heavy flash and natural light... They should show up well and distinct and defined under bright light and disappear under natural light... Bright Lights...... Natural Light... They virtually disappear at 18" away, but under closeup with good light they show up well... I think I'm going to go with that..... I have a complete Aries cockpit set that I'm hoping to save in case I want to do the -40 variant of this aircraft, or possibly recoup some of the cost of this kit in the future so unfortunately I have nothing to show another option... I think this looks good enough for what I'm doing... It will look the part when buttoned up... -

F-86F-30 Sabre by Egilman - Kinetic - 1/32nd scale
Egilman replied to Egilman's topic in Non-ship/categorised builds
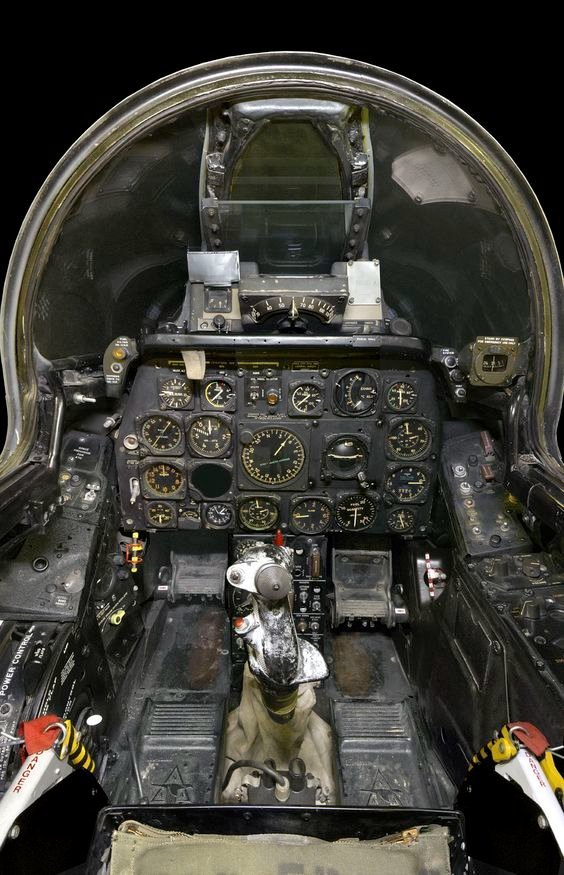
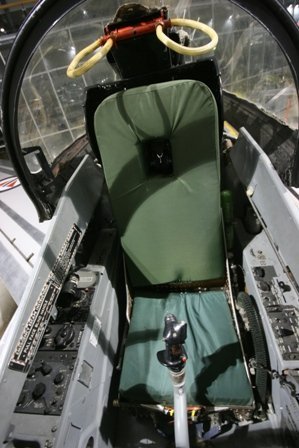
Yep I have considered that Andy, problem is except for a few milk runs, 51-2910 was a brand new aircraft when issued to McConnell, every shot I have of the aircraft shows virtually no wear at all... (with the original black headrest and seat pads from NAA as well) Not even chips in the paint... There's a lot of things I could do to make it a lot easier like beat it up a bit show some wear and tear, but McConnell's last bird was clean very little wear and tear, and her crew chief kept it that way... Much like this pic... You see no edge wear, quite a bit of dust and some interior green floor is beginning to show and I believe all that white on the stick is leather polishing of the bakelite grip showing as flash reflection from the camera.... Your not even seeing wear in the NAA emblems on the seats foot pans... Just a modicum of dirt, (although the rudder pedals are showing wear on the tread sections where the pilot does most of the pushing... (first place it shows up) A line aircraft with a new seat I would say, a couple of months service is all... I figure the original seat would look like the rest of the cockpit, beginning to show signs of serious usage but nothing that stands out... My feelings is this is a close representation of what Capt McConnell's every day office looked like, it's why I'm trying to replicate it.... Exterior pics thru the canopy show nothing, just a black hole under glass, but open canopy pics show essentially what you see above... (pic was clearly taken with high flash to bring out definition of the surfaces, in some places your seeing reflection from the flat black surfaces.. The seat looks almost like gloss paint) The funny thing is, I'm learning how difficult it is to do a clean cockpit as compared to a fairly well used one... Especially flat black with black dials.... Definition is hard to come by... -

F-86F-30 Sabre by Egilman - Kinetic - 1/32nd scale
Egilman replied to Egilman's topic in Non-ship/categorised builds
I promised pics... Under natural light cause that is where the detail; disappeared in the black hole.... You can at least discern the panels and edges while it still looks blacker than black... But, it doesn't look right to me, the technique is good, my detail picking, not so much... I think I'm gonna take a different approach here something that adds more detail... Stay tuned my friends.... EG -

F-86F-30 Sabre by Egilman - Kinetic - 1/32nd scale
Egilman replied to Egilman's topic in Non-ship/categorised builds
Well the idea is similar to black basing, since the base is pure black like the real aircraft, that's what you use.. Then take some dirtifying stuff, (Mig streaking grime for example) and wash it without sealing it, you want the flat black and grime to really adhere to each other... Once dry using clear clean thinner, wash it again, yes it's going to knock down the paint on the high spots, but it will move the rest around making it dull and splotchy, but still discernably black... Then you go back over it sealing it with future before dry brushing gloss black enamel over the high spots you washed the paint off of before... Then pick out the details with your colors and overcoat it with flat clear... Pictures soon... -

Martini Porsche 935 by kpnuts - FINISHED - Tamiya - 1/12
Egilman replied to kpnuts's topic in Non-ship/categorised builds
I'll be here brother, got a '66 Mk 4 in the stash in the same scale... Get yourself well my friend, it's no fun being sick... -

F-86F-30 Sabre by Egilman - Kinetic - 1/32nd scale
Egilman replied to Egilman's topic in Non-ship/categorised builds
Agreed on the not being seen not being done as well.... My skills are what they are no need to hone them on useless endeavors... Yep the F-84F Thunderstreak, completely different aircraft from the F-84 Thunderjet it was derived from... It's is also a BMF bird in USAF livery... (the 3 color SEA scheme looks good as well) You should do a build thread on it... -

F-86F-30 Sabre by Egilman - Kinetic - 1/32nd scale
Egilman replied to Egilman's topic in Non-ship/categorised builds
Ok small update... Cockpit assembly... The kit gives you full intake ducting, no I'm not going to be cleaning up and metalizing the insides of the intake like some have tried, I don't mind a little self abuse, but torture, especially for something your never going to see? nah... Basic black, you can already see the details fading to nothing... I actually went and looked for everything I could find on this specific aircraft to see if there was ANY variation of color... Nope McConnell's aircraft was an almost new F-86F-1-NA and yeah the cockpit was black as night... (even the headrest and seat pad) so I'm forced to give it the shadowbox treatment. (slightly off shade washes in the hope of highlighting shapes) Maybe a very light dusting of pastels to highlight the nooks and crannies.... As you can see it's pretty bland, would be much prettier in black over grey, but it just wouldn't be accurate... Below a sample of it in the fuselage under flash and natural light for an idea of what I'm describing... Detail just disappears in a black hole.... Oh Well.... Next up the instruments and side panels, hopefully the colored PE will add some pizzazz to it I will be picking out some switches and lights as well, there just isn't much you can do with an all black cockpit... Onwards.... -

F-86F-30 Sabre by Egilman - Kinetic - 1/32nd scale
Egilman replied to Egilman's topic in Non-ship/categorised builds
No Kidding, can you imagine sitting in a black tub in the Korean summer sun, under glass for four to five hours at a time? Sweltering... An oven on slow cook... It was reported that occasionally a pilot would pass out from dehydration once they climbed out of the cockpit... Amazing men every single one of you.. -

F-86F-30 Sabre by Egilman - Kinetic - 1/32nd scale
Egilman replied to Egilman's topic in Non-ship/categorised builds
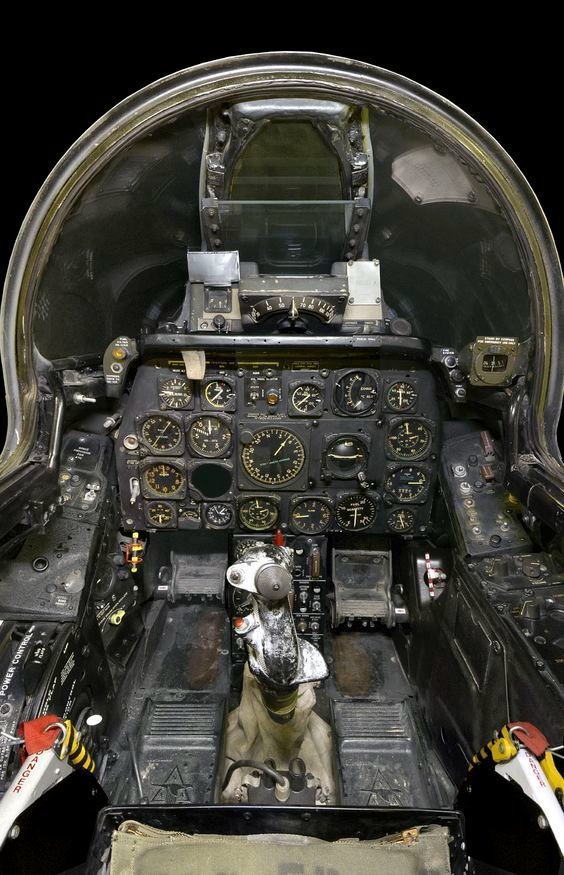
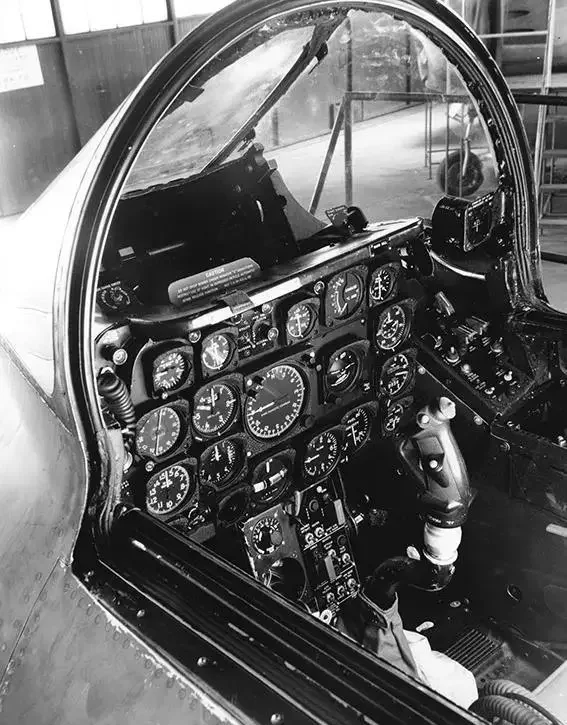
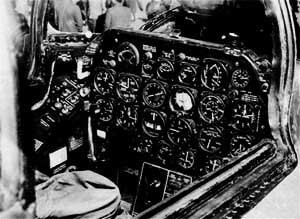
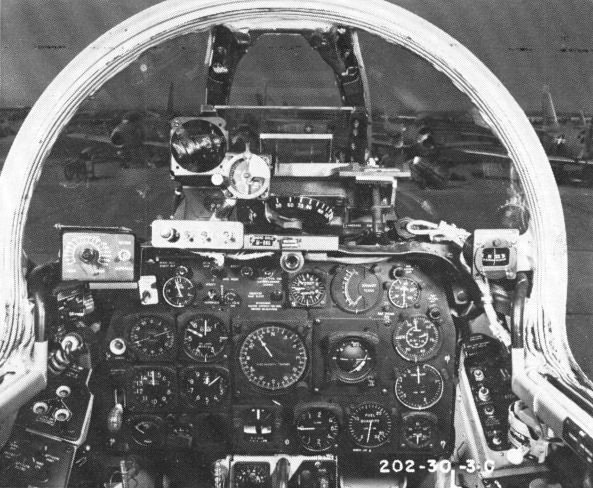
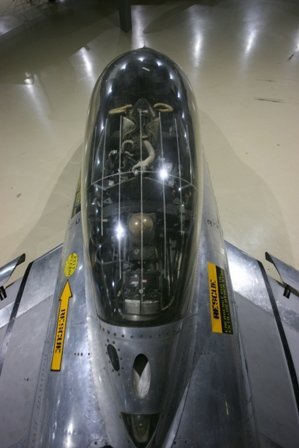
Ok first step on most model aircraft is the cockpit.... (usually the instrument panel) On this model, I'm blessed, (or cursed) with options... Two from the kit and two aftermarket.... The upper left corner shows the two kit options, A decal sandwiched between clear plastic panels, or a raised plastic panel... they are close to the actual instrument panel layout as shown from the flight manual page but not exact... The next option on the lower left is the Aires cockpit set for this model the instrument panel is a lot more accurate compared to the picture but not quite perfect... the last option on the right is the eduard set of which I only have the instrument panel portion... It is perfectly laid out matching the flight manual image... of course with all the switched levers and buttons you need a microscope to see much less install... the Aires set gives you seatbelts and harnesses that need to be assembled as well where the eduard set gives you simpler ones much easier to install... (the eduard set also gives you a brass panel to replace the kits decal with, you can see the detail differences between the kits representation and the eduard representation clearly there) Before making this decision we also have to realize another situation.... Somewhere in the time after the end of WWII and the start of the Korean War, the Airforce decided to go to an all black cockpit... F-86A F-86F The last image is a Palmdale (North American Aviation) built Sabre Mk 5 that is still in it's wartime configuration... This illustrates the black cockpit better than anything I could describe... Postwar, the Airforce decided that they were going to the aircraft grey cockpit with black panels (November '53) and all aircraft were to be switched to the new scheme upon the first IRAN (Inspect and Repair As Needed) so you will be very hard pressed to find any sabre aircraft with a black cockpit today, all of the currently flying refurbished/restored aircraft have a grey/black cockpit... Given this fact, I'm loath to do a ton of mods and AM upgrades to a cockpit you aren't even going be able to see... Non-updated Sabre Mk 5 cockpit... Even the grey cockpit doesn't show up that well from above... I'm probably going to do the Eduard instrument panel and pick out the rest of what kit details there are and call it good... There is just, in my humble opinion, no point to hacking and slashing a cockpit that no one can appreciate..., the eduard set has the most accurate IP and I'll leave it at that, I may dip into the Aires set and update the cockpit aft panel and canopy frame as the detail on those parts is better than the kit and it will be seen so that is a plus.... But other than that, I think I'm going with the basics..... A wartime aircraft Next up, paint and glue to plastic.... EG -

F-86F-30 Sabre by Egilman - Kinetic - 1/32nd scale
Egilman replied to Egilman's topic in Non-ship/categorised builds
Welcome aboard Ed, good to see you... Enjoy the journey...
About us
Modelshipworld - Advancing Ship Modeling through Research
SSL Secured
Your security is important for us so this Website is SSL-Secured
NRG Mailing Address
Nautical Research Guild
237 South Lincoln Street
Westmont IL, 60559-1917
Model Ship World ® and the MSW logo are Registered Trademarks, and belong to the Nautical Research Guild (United States Patent and Trademark Office: No. 6,929,264 & No. 6,929,274, registered Dec. 20, 2022)
Helpful Links
About the NRG
If you enjoy building ship models that are historically accurate as well as beautiful, then The Nautical Research Guild (NRG) is just right for you.
The Guild is a non-profit educational organization whose mission is to “Advance Ship Modeling Through Research”. We provide support to our members in their efforts to raise the quality of their model ships.
The Nautical Research Guild has published our world-renowned quarterly magazine, The Nautical Research Journal, since 1955. The pages of the Journal are full of articles by accomplished ship modelers who show you how they create those exquisite details on their models, and by maritime historians who show you the correct details to build. The Journal is available in both print and digital editions. Go to the NRG web site (www.thenrg.org) to download a complimentary digital copy of the Journal. The NRG also publishes plan sets, books and compilations of back issues of the Journal and the former Ships in Scale and Model Ship Builder magazines.


