HOLIDAY DONATION DRIVE - SUPPORT MSW - DO YOUR PART TO KEEP THIS GREAT FORUM GOING! (Only 13 donations so far - C'mon guys!)
×


Egilman
-
Posts
4,377 -
Joined
-
Last visited
Content Type
Profiles
Forums
Gallery
Events
Everything posted by Egilman
-
 I though about it Lou while I was down with the crud, and for the reasons explained elsewhere I'm gonna just duplicate the Italieri tail boom, Strip sanding like you describe would work, eventually... {chuckle} and it is that brittle Revell dark olive plastic... But I think it will be easier and fast to redo it.... I think you right, a #11 or #2 xacto blade to knock down the corners then the strip sanding to round them over.... it's probably what I would do if I didn't have the materials to rebuild it... but it's a darned fine suggestion to make a tedious job less tedious.... WE gotsa talk to someone over this inflation crap, that 1 cent is now down .9 cent in just the time it took to write this... Now we all know us old peoples opinions aren't really worth anything to anyone anymore, but docking us a tenth of a cent a day just for still being around, THAT's going too far...
 -
I hate wasting things too Dan, I have boxes and boxes of sprue saved, occasionally I have to throw some away to make room for other savings.... Soldering group nodes can't be anymore difficult that gluing the same, it's just a matter of choosing a course of one step at a time and following it one part at a time.... like building any framework the outer frame carries the load and the inner parts steady and stiffen/strengthen the outer frame... there is that one point where 9 tubes all come together at the same point on the model, on the real thing it is four tubes on one side and five on the other with the connection joint in between them.... much easier to do... in this case I'm only replacing the rear half with the five tubes... Whirlybirds was a favorite of a lot of people I'm finding out all over the world.... Don't worry brother chime right in with anything you might think of, I'm no expert by any means and need all the help I can get...
-
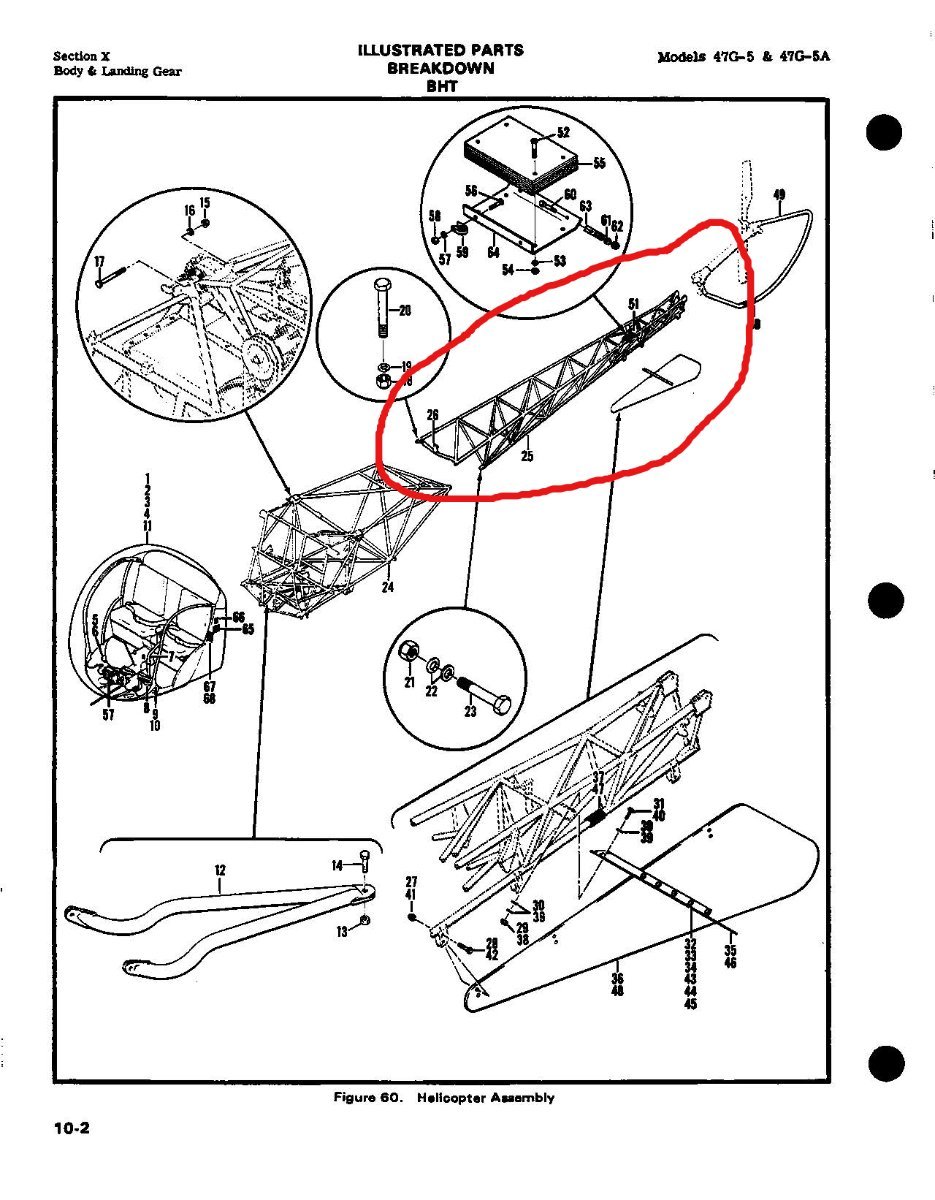
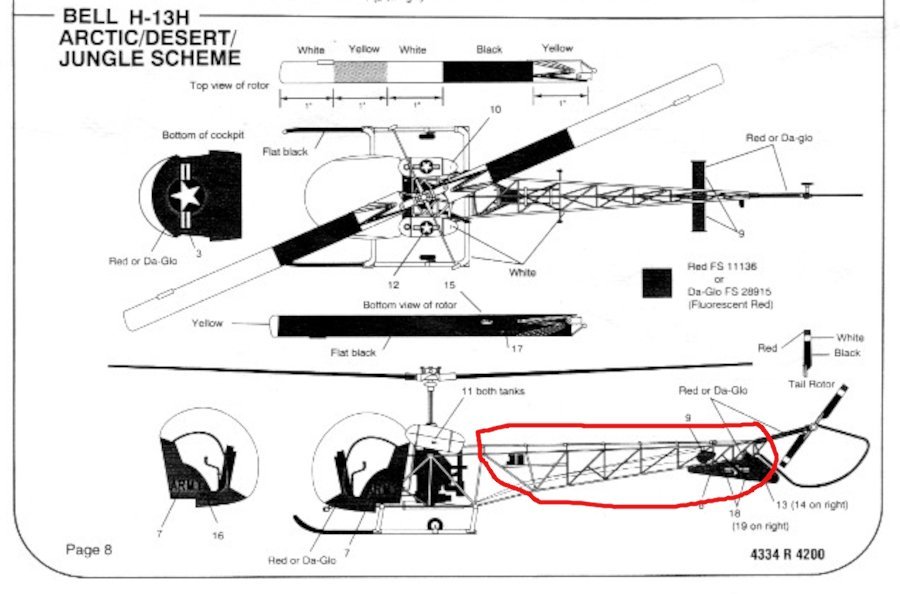
Well Sorry for the interruption brothers, somewhere in the last two days I picked up a dose of the creeping crud and have been down for a bit, all is now well... don't know what it was but it laid me out for a couple of days... Anyways I haven't left anyone behind... {chuckle} Yeah Ken, it is a tough decision, brass is out for me as soldering is not my forte especially the thinner the wire is... also .025 plastic is just not going to work, at best it is like working with string you can tie it in knots it's so flexible... I also considered piano wire, it has the requisite stiffness, but have you ever tried to glue the stuff? So I've resolved to doing this in .050 plastic... it's still flexible but has enough stiffness to hold it's shape against a little pressure so it won't collapse the moment I hang another part on it... Construction will be simple... the only part really needing replacing is the boom itself the most visible part.... Circled in red, the forward part of the frame is going to have so many other parts grabbing attention the inner flatness will not be as noticeable.... Essentially it is a flat top surface, trapezoidal in shape with triangular frames pointing downward to a single straight keel... a simple flat tapered box structure with cross bars and diagonal braces... Side bars vertically matching each cross bar down to a single bar keel with diagonal bracing as well... fairly easy as long as the initial frame is square... so I'll approach it building it upside down starting with the top frame first then while flat install the cross bars and diagonals, just like a balsa airplane keel... An interesting thing to note, only three bolts hold the boom onto the frame with this machine. Roughly 3/8th of an inch in diameter and an inch long.... two on the top and one on the bottom... But they are made of aircraft grade steel rated at 140,000 pounds tensile strength... The boom itself will break before the bolts do...

-
M29 Weasel family 1/72 (scratch) by Backer Finished
Egilman replied to Baker's topic in Non-ship/categorised builds
EXCELLENT! My Father had a pic of one just like that at Buna... -
Excellent find!!!
-
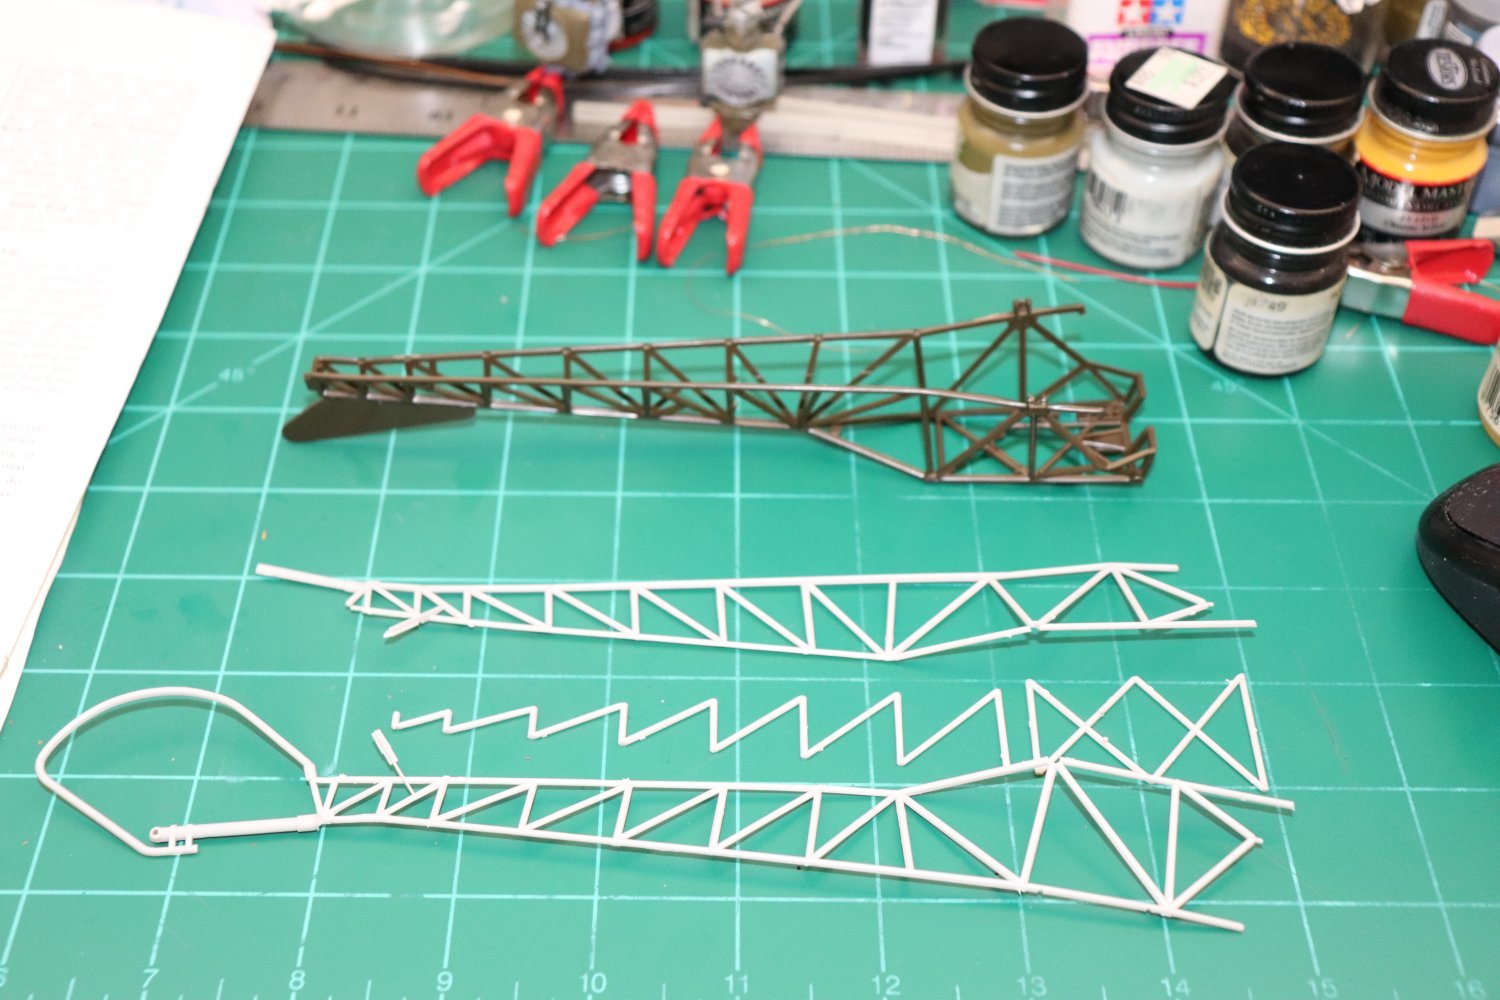
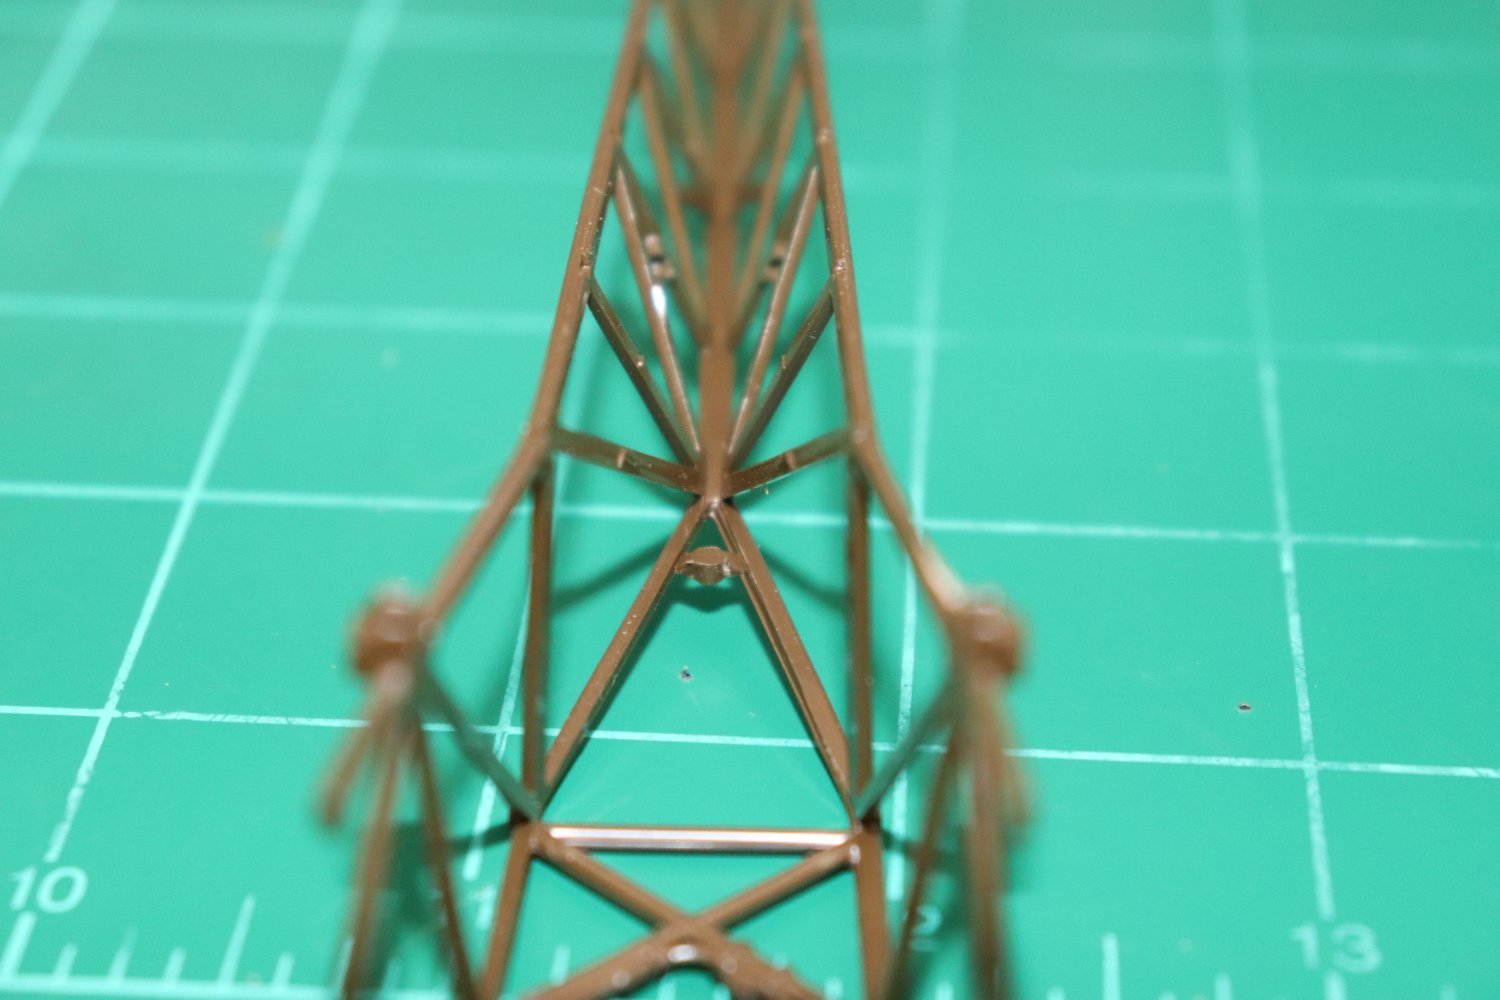
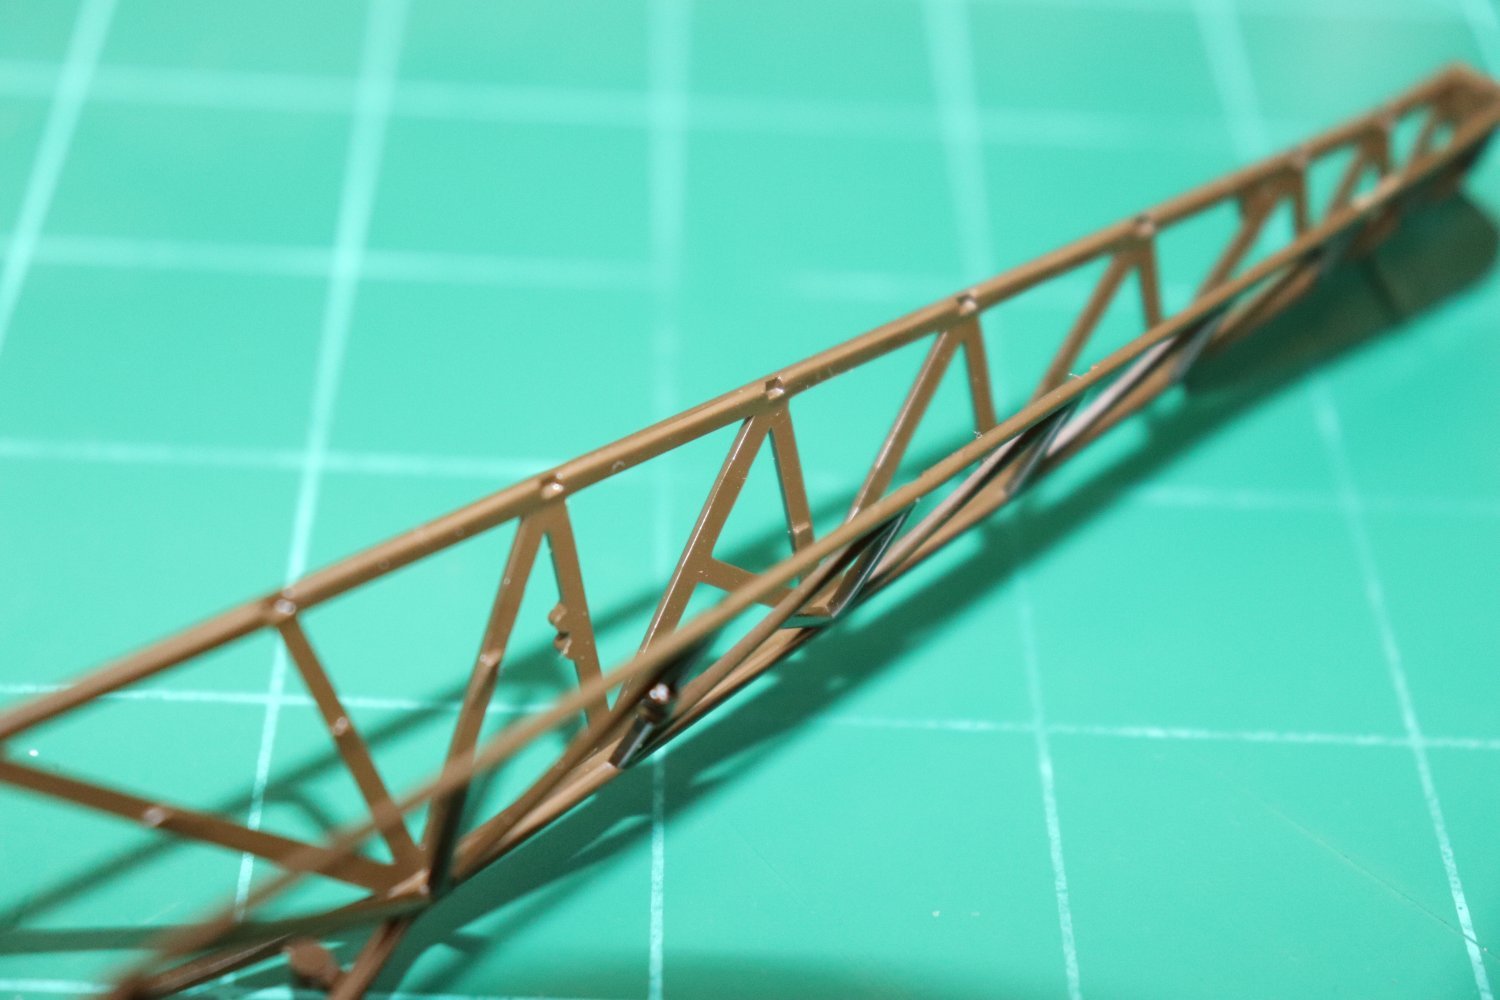
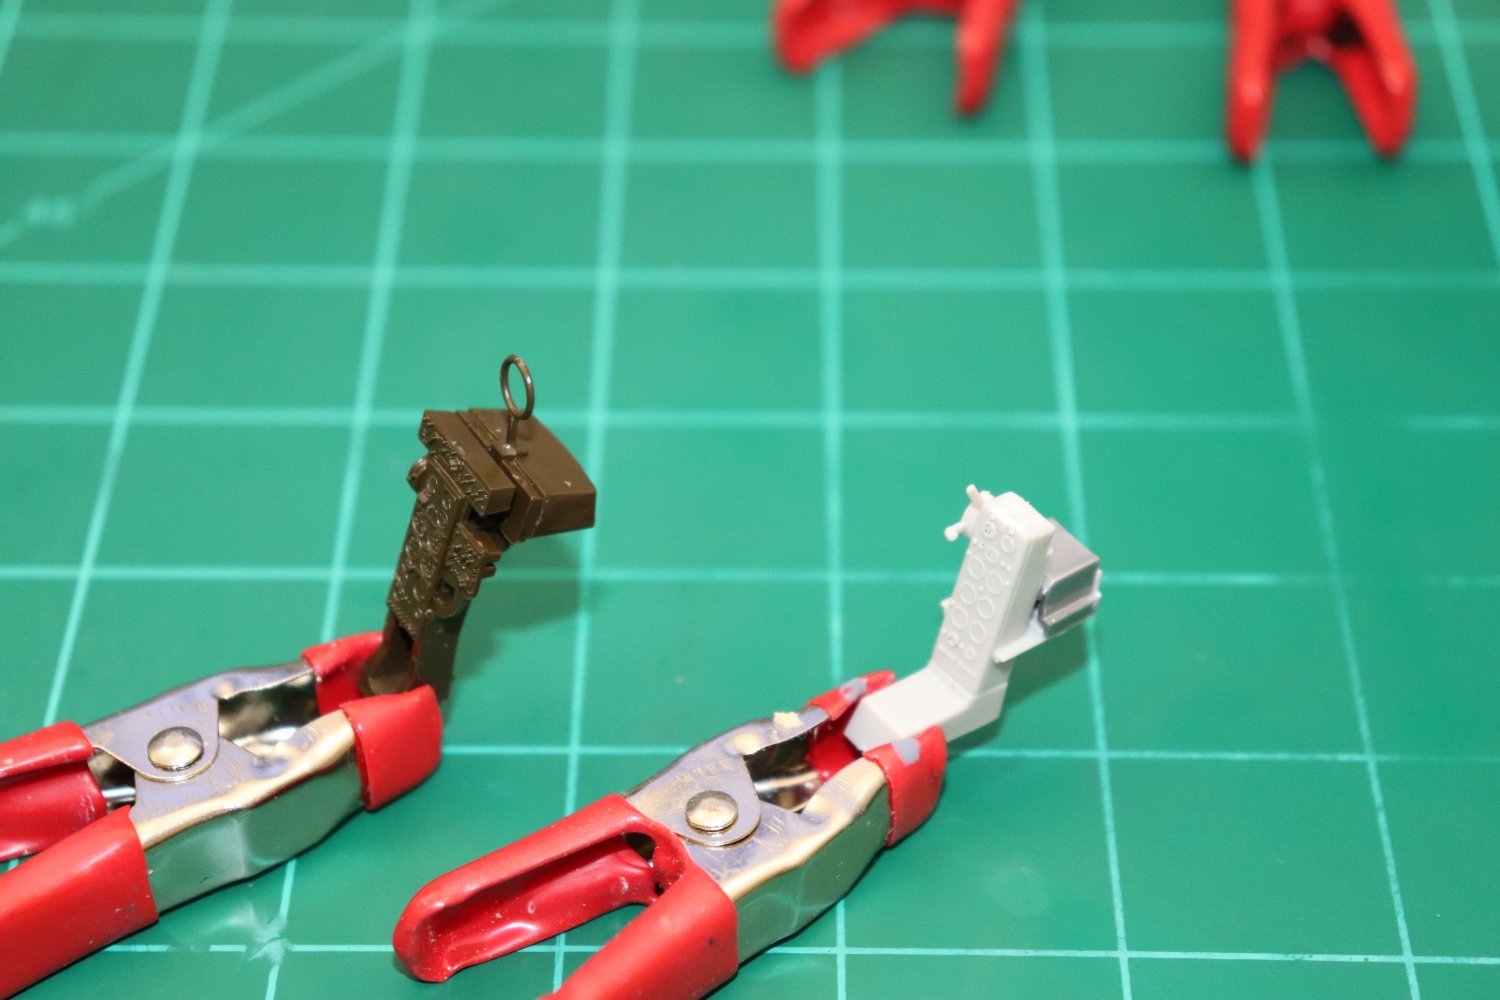
The tail booms on these two aircraft models... Of course the white plastic one in the foreground in four pieces is the MRC/Italieri one and is the Boom for the H-13D/E... In the background in olive drab plastic is the Revell tail boom essentially a single molded piece... that is an issue with the kit... Essentially the boom is made of round steel tube on the aircraft to save weight this is easily seen in the MPC/Italeri kit and it appears the same on the Revell kit but it really isn't... They are really triangular shaped with a pretty substantial flat inside the boom, and it is readily noticeable on the assembled model... Looking thru the online repository of build reports there are three ways to fix this... First, sand them all round with a needle file.......... right .... Second, buy a second italieri kit and replace them.... yeah ok for that one as well... Third, build your own replacement tail boom out of round stock.... Most of the boom was built with 1" welded steel tube, .028" in scale.... Yes, they do make solid round stock styrene that small... Problem is building it in scale would make for a very delicate fragile boom out of 1/32" stock... Looking at the Italieri kit they molded it in .050 size give or take a few thous. Scaling up would make a two inch tube size on the real thing... I have .020, .025, .050 & .062 so I can do either true scale in .020 & .025 or Italieri scale at .050 & .062.... There is one last option, build the Revell out of the box... My common sense tells me to build it OOTB, the easiest way... (which I really didn't intend to do when I started this) Purchasing another is not applicable here... So the choice would have to be rebuild it either in common with the italieri scale for strength or in true scale for realism.... To be honest I haven't decided yet... I would have to strip off all the specialized parts off the Revell frame and adapt them to any new frame I construct, and figure a way to do it without gluing it all down to the bench... lots of cutting and fitting... I guess I could make the attempt in real scale, just to see if I can do it in that size plastic, and if it doesn't work do it in the larger sized plastic using what I learned from the first... I would still have the complete untouched Revell frame to fall back on as OOTB if neither of those works out well..... Gonna think about this for a bit.... Anyways I'll be doing the MRC/Italieri H-13D bird first so that will prepare me a bit for working long hair skinny thin plastic that needs to be kept straight... Wish me luck...


- 169 replies
-
- 12
-

-
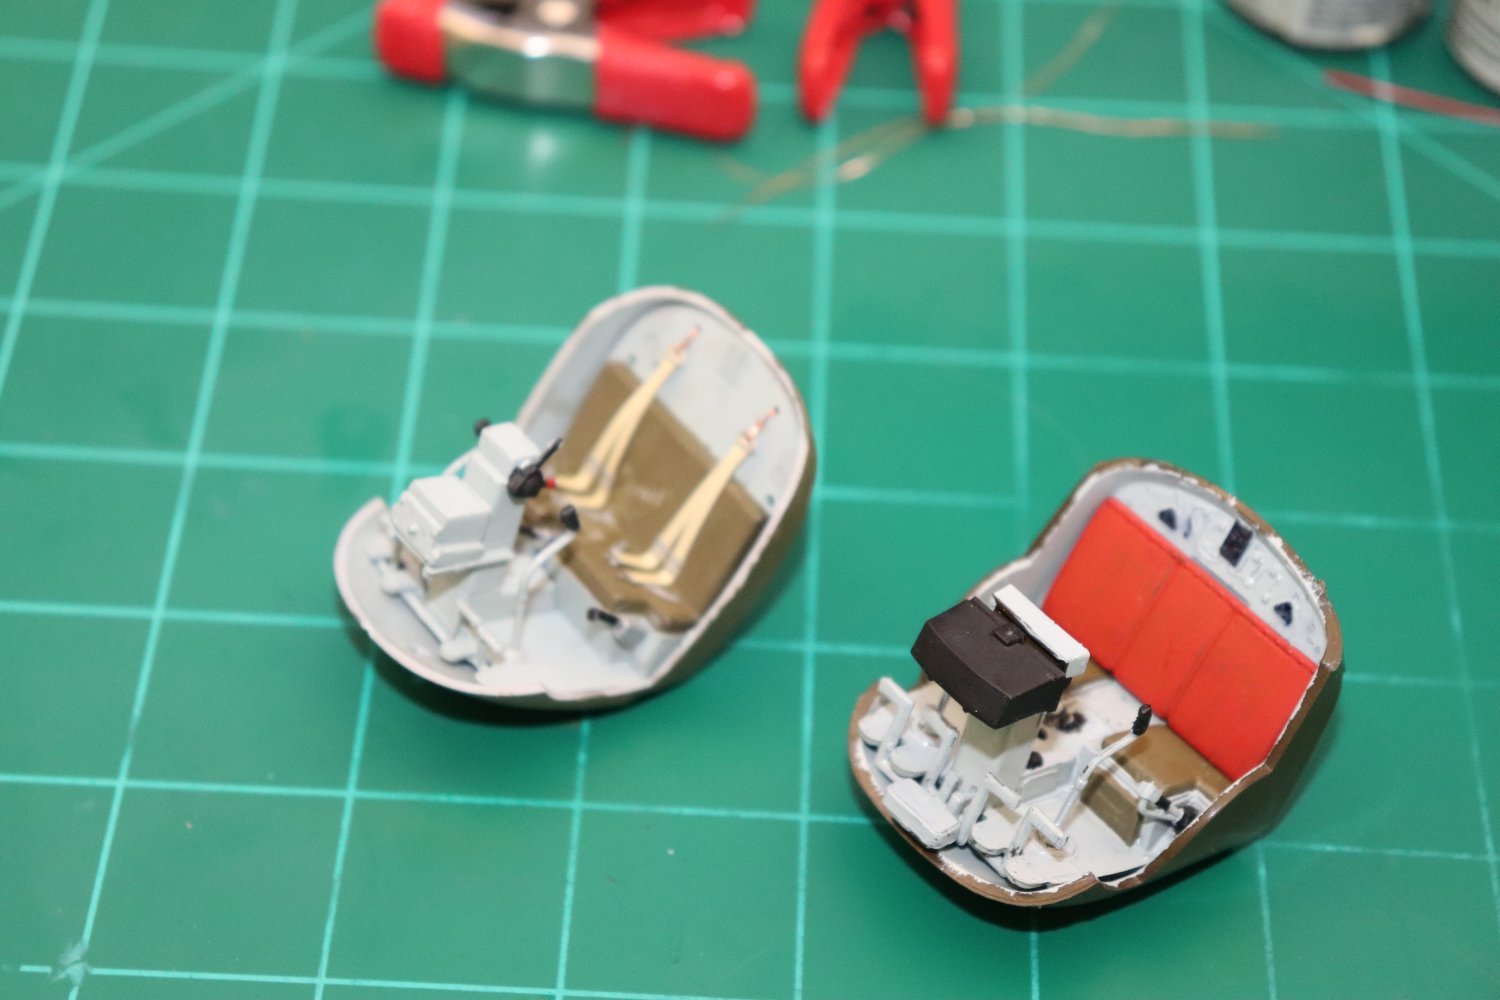
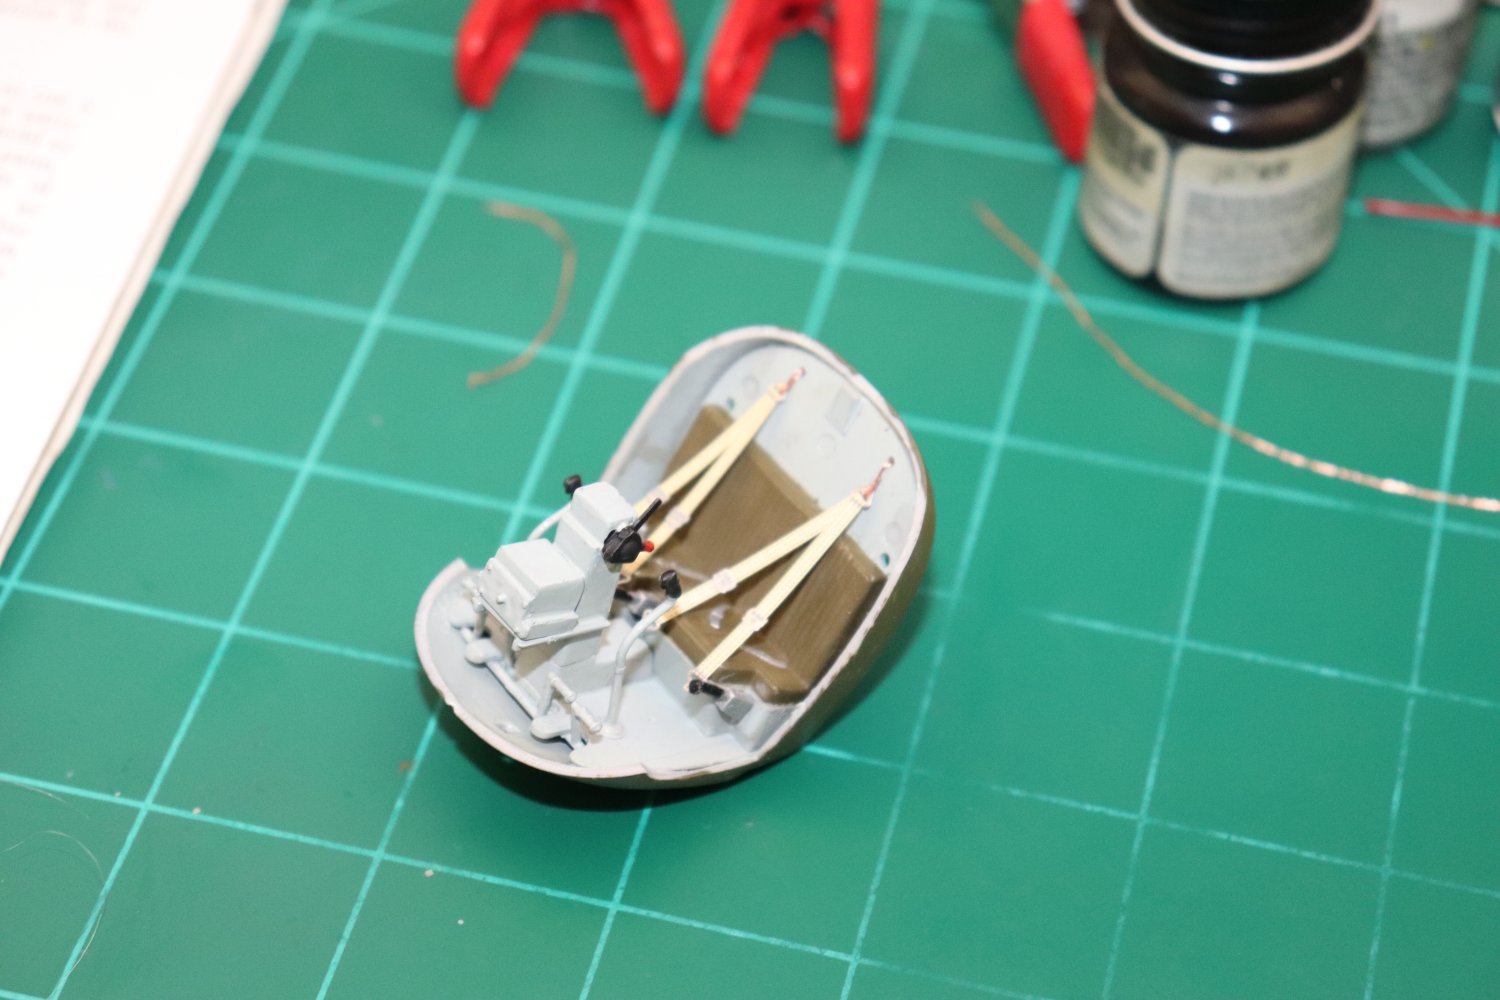
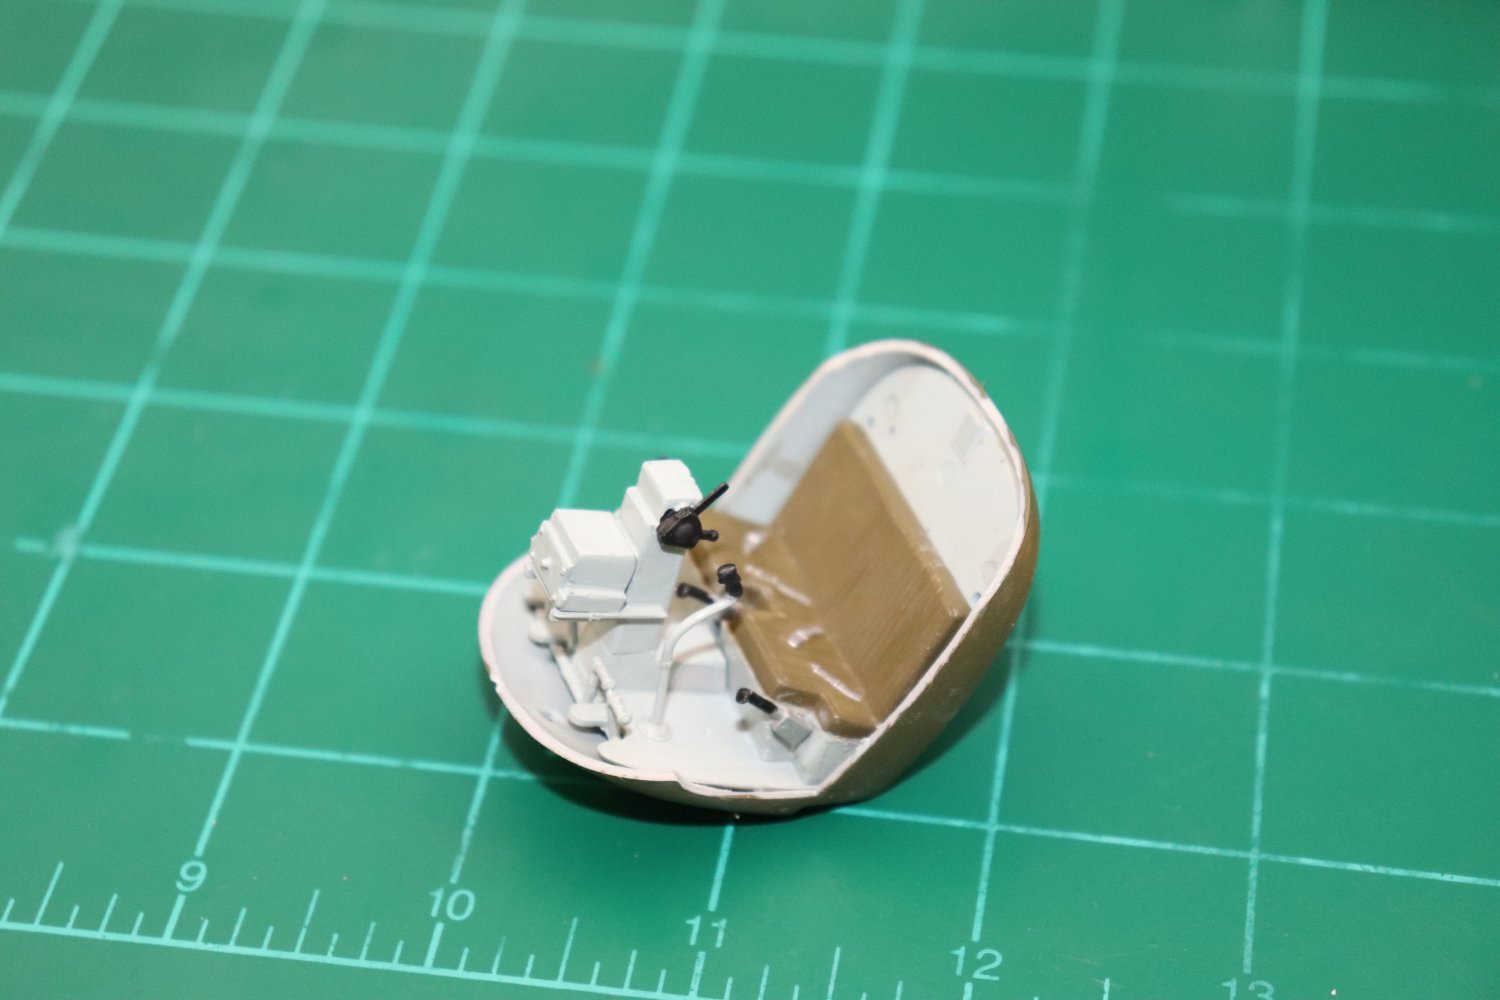
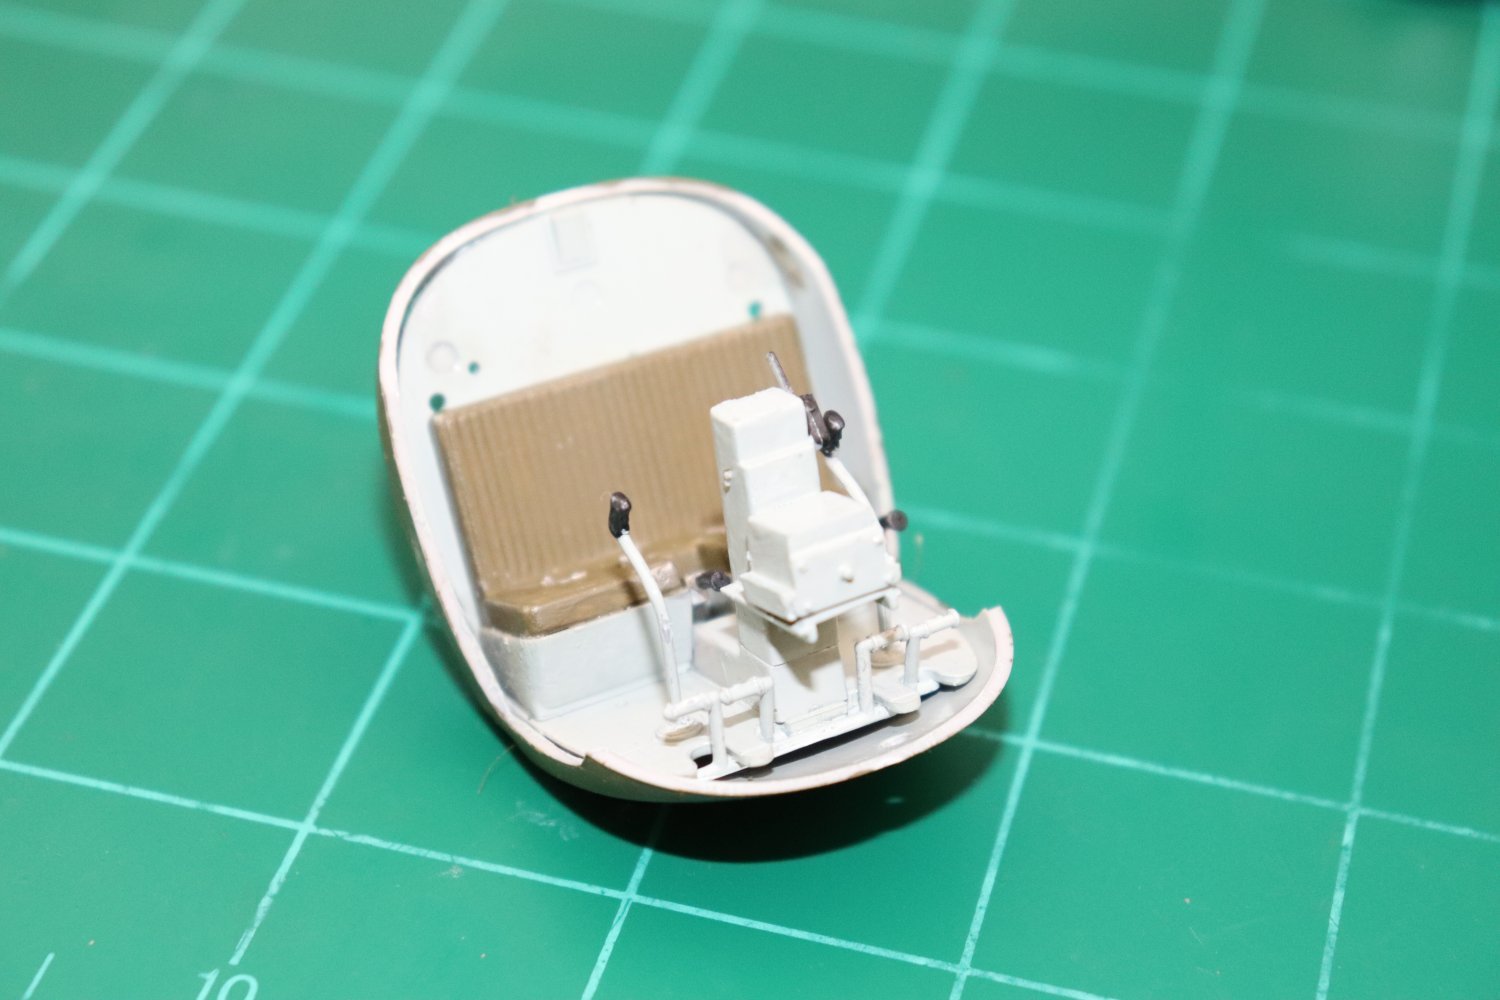
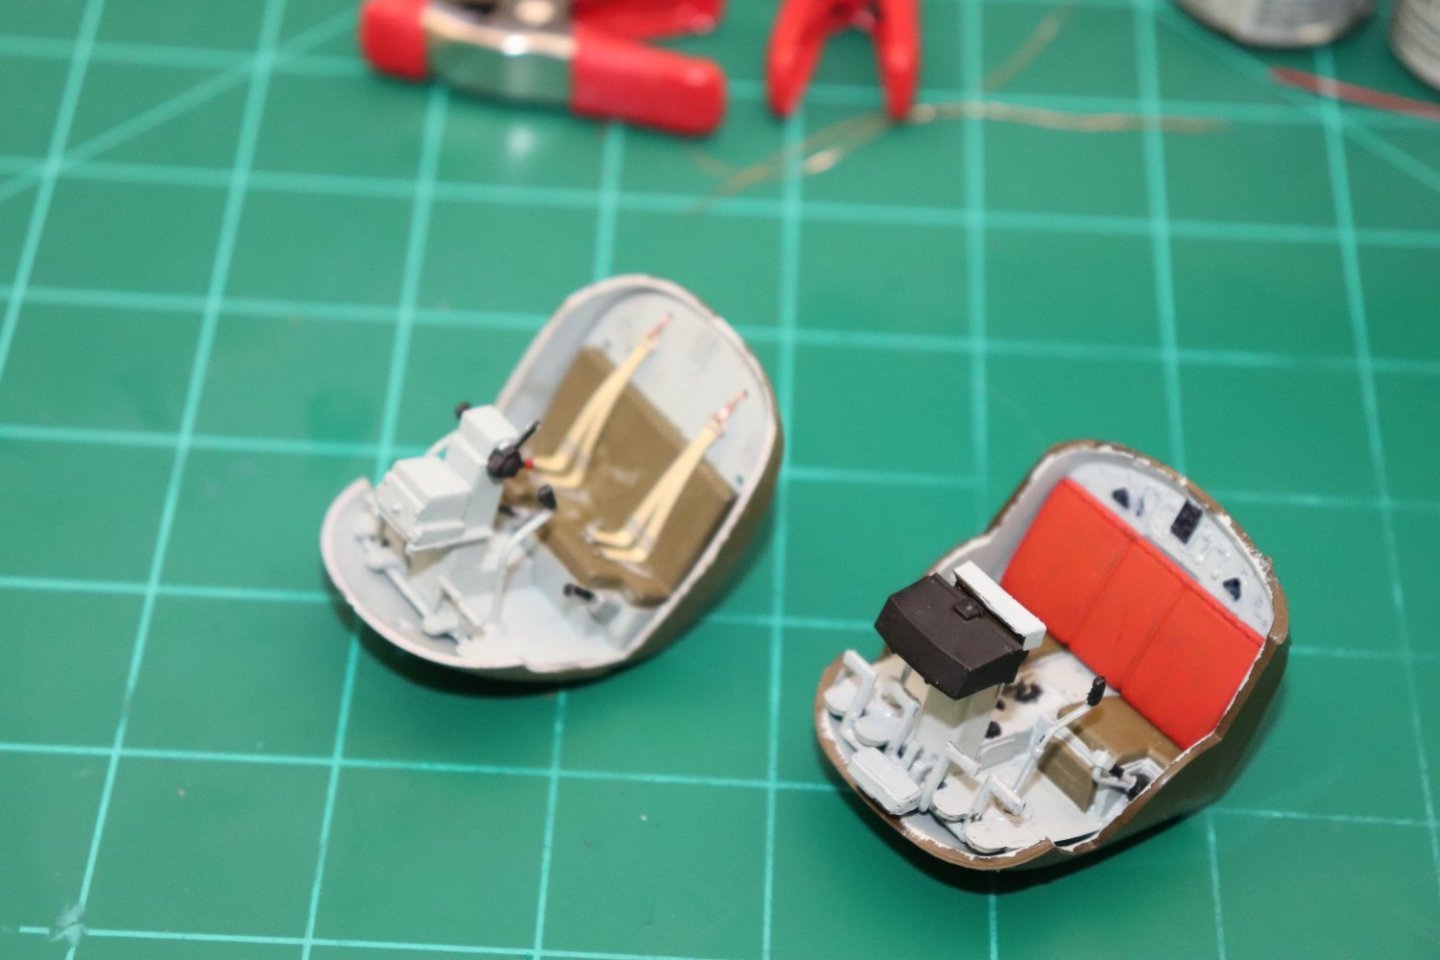
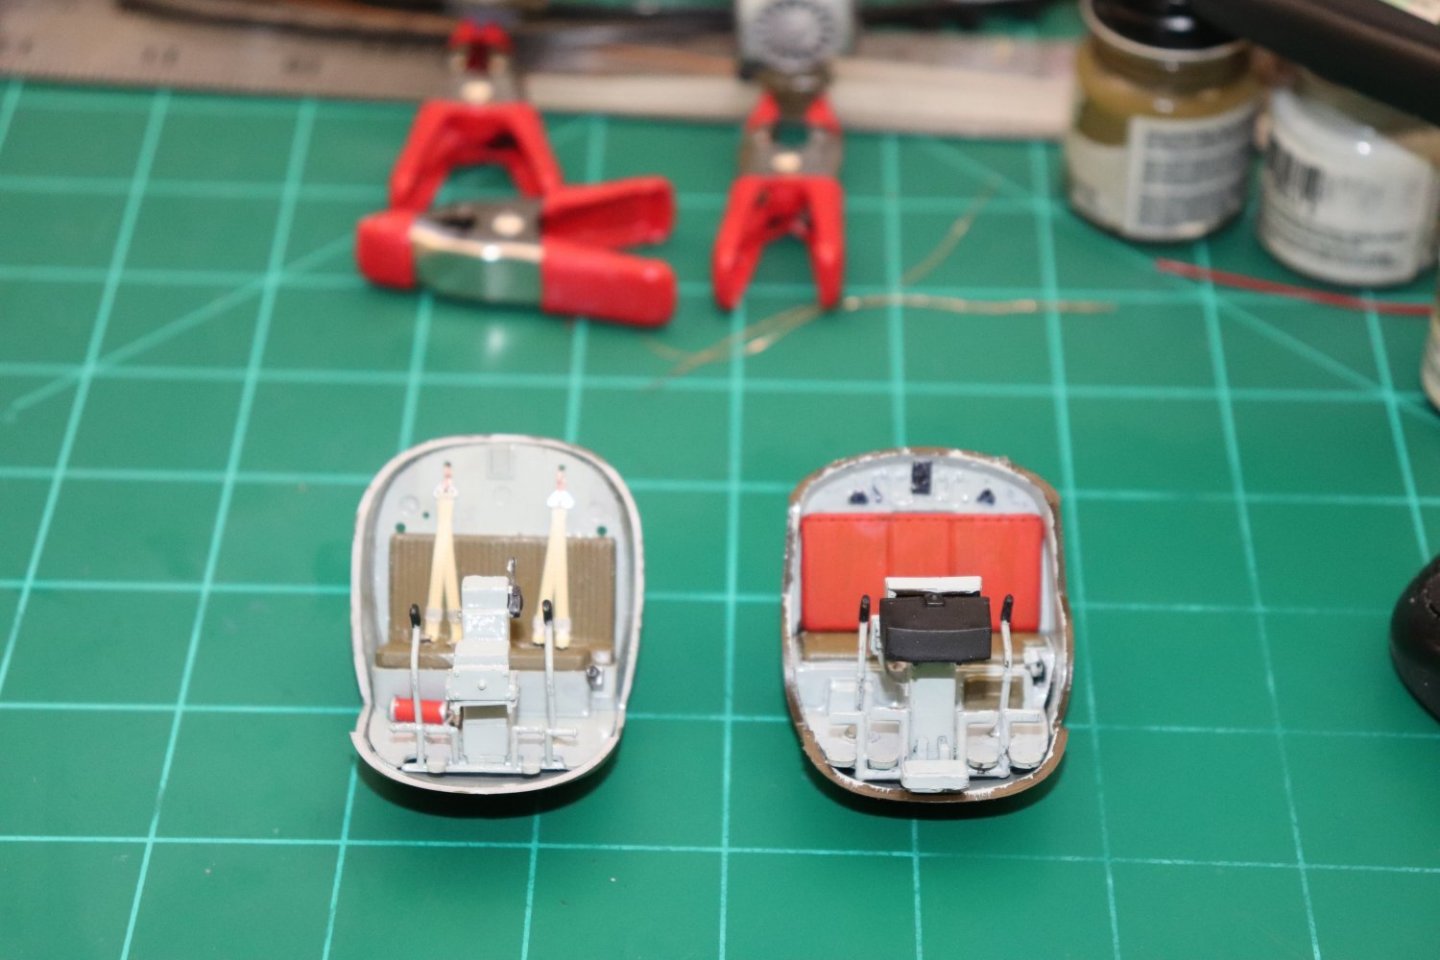
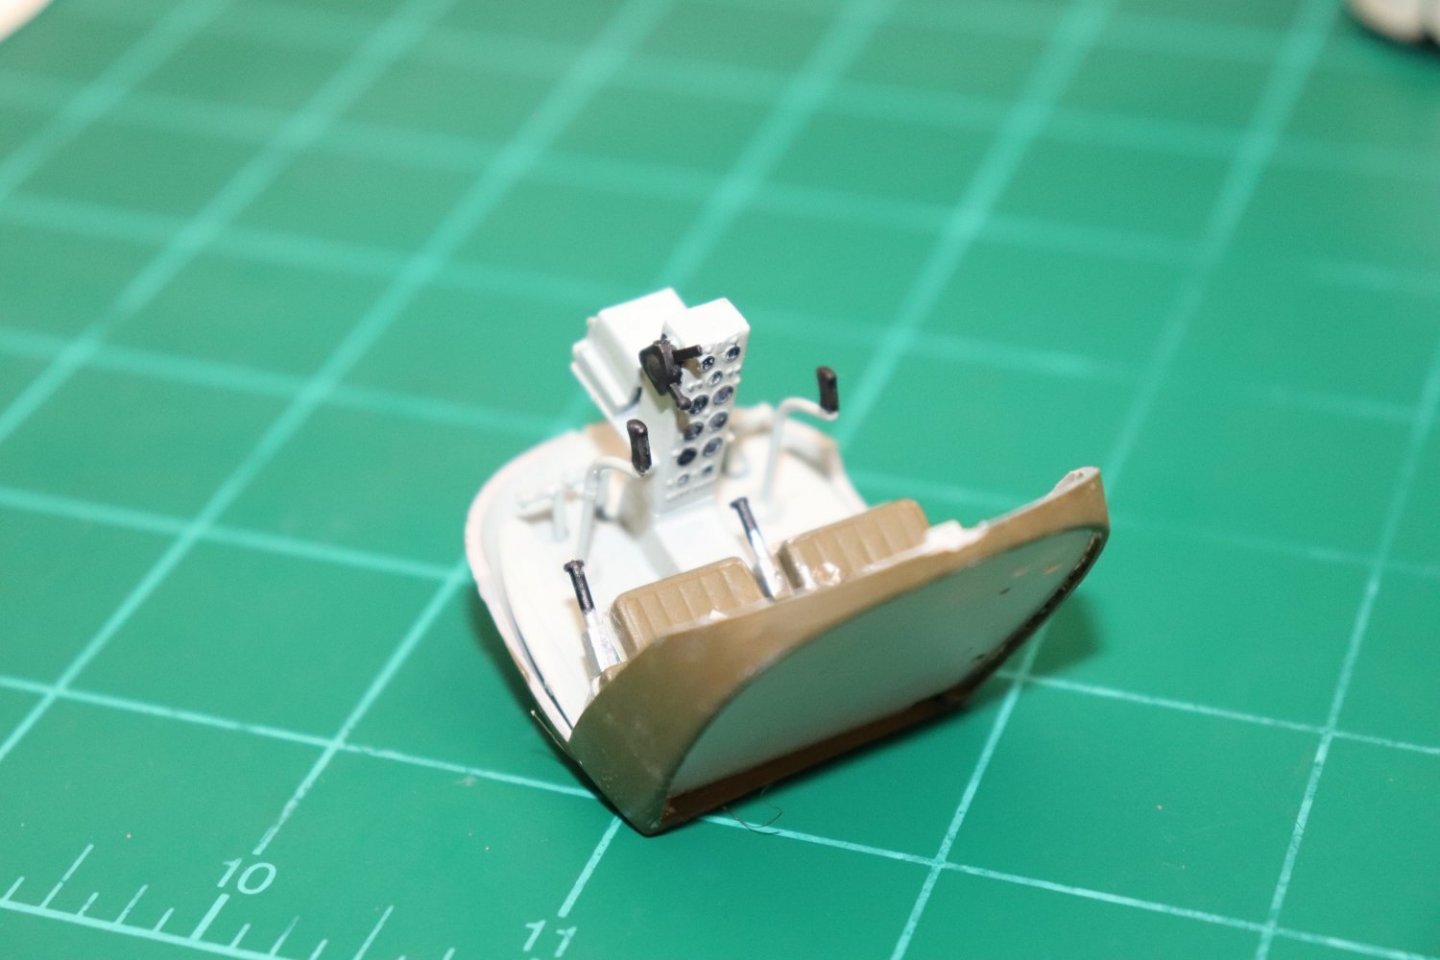
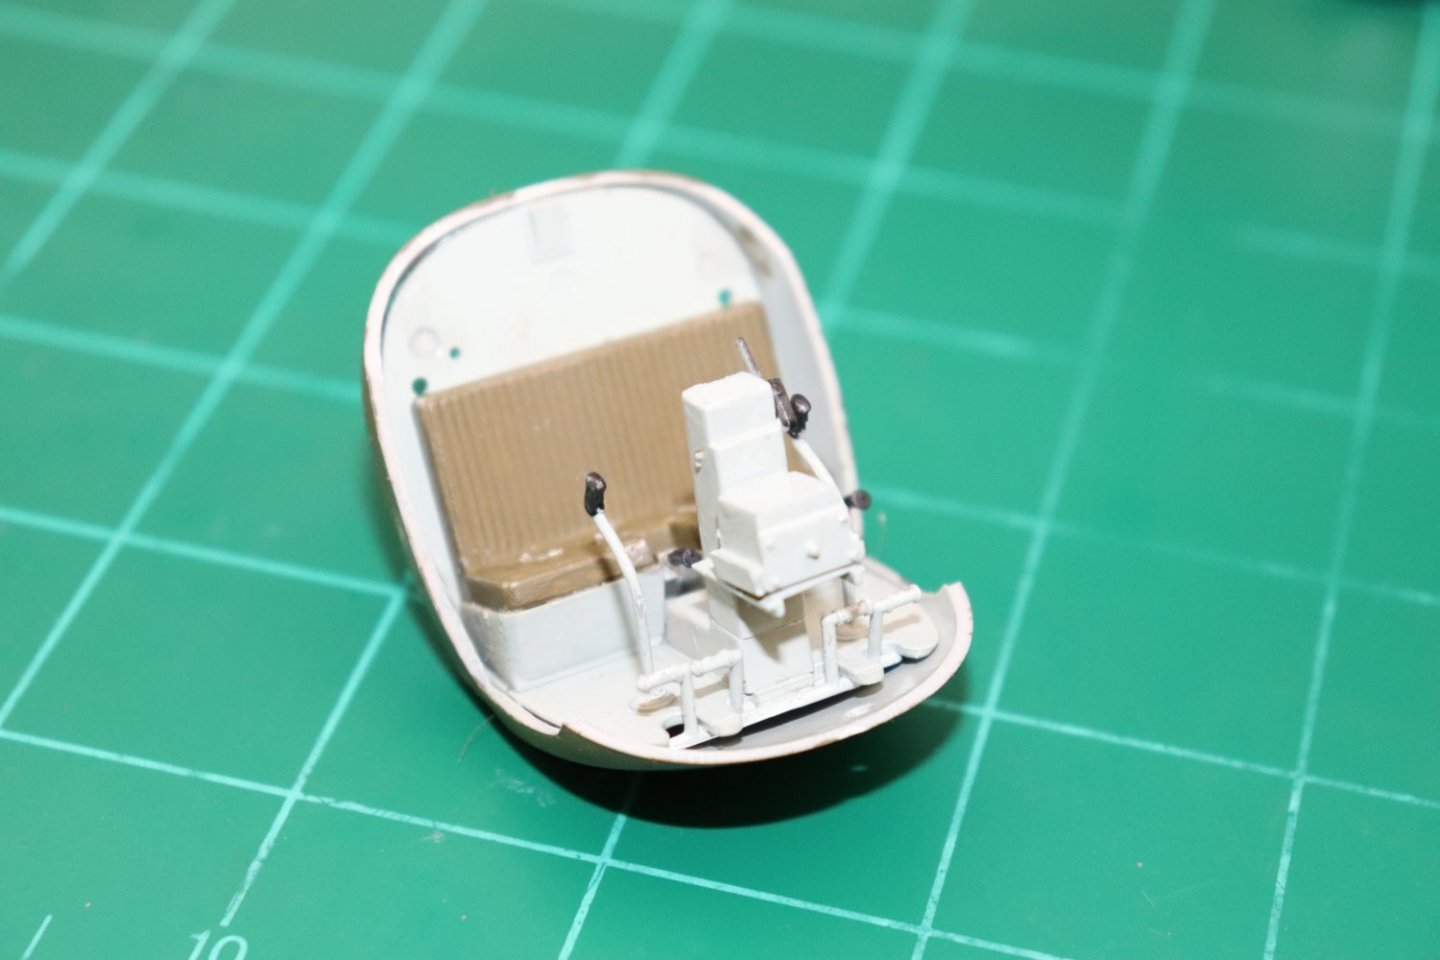
Ok I've decided to put the cockpits aside for now until paint and supplies arrive... This is where they stand at the moment... Notice one of the things captured in the different models? The shape of the cockpit... Lower and squatter in the "H", model (on the right) than the "D"/"E" model on the left... And quarter panel door cutouts for the "H"... A lot of design advancement in just a few years represented here... And accurate model design as well... Next up is the tail booms, first the "D" model then a huge decision on the "H" model boom, do I correct the biggest deficiency of the Revell model or build it as is... (the overscale triangular shaped booms) A ton of work... Onwards my friends...
- 169 replies
-
- 11
-
-
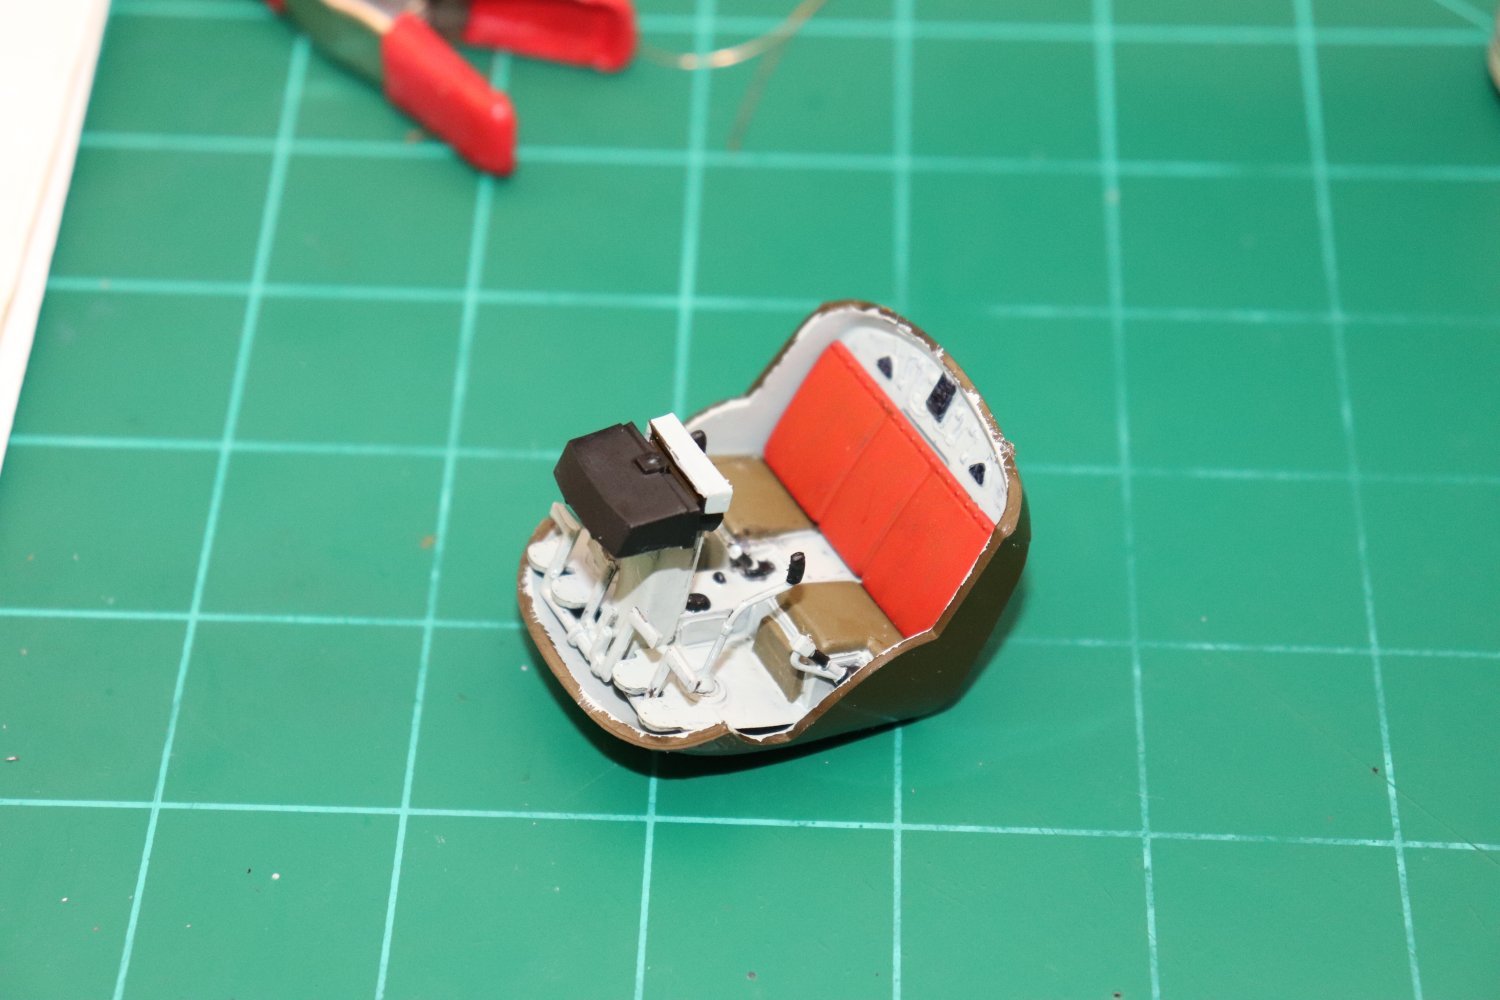
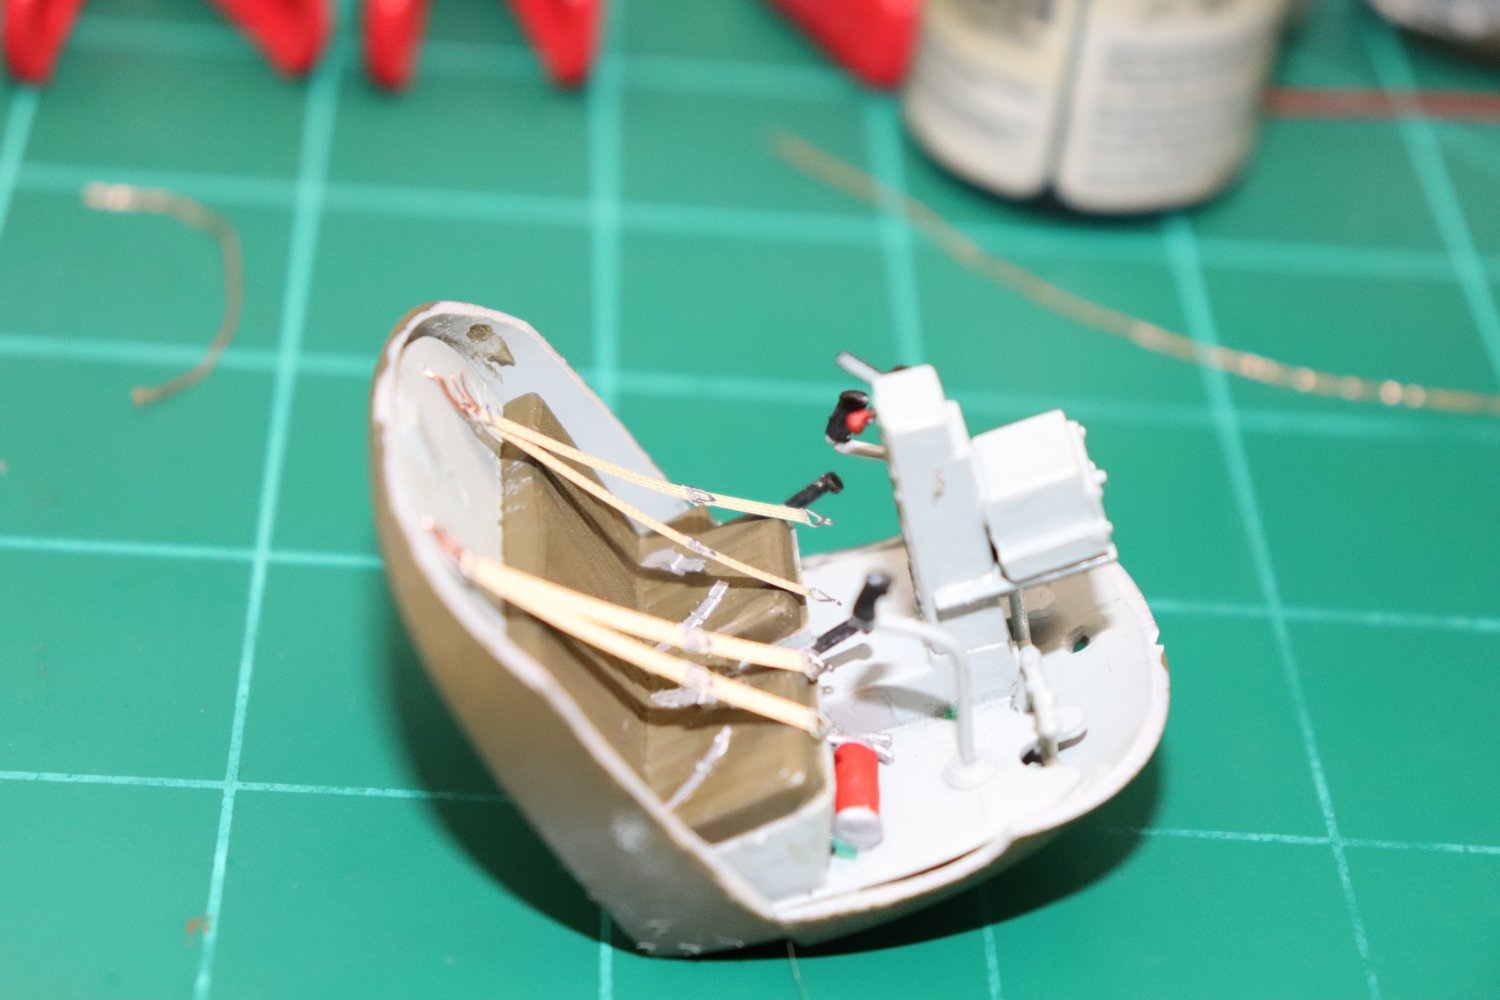
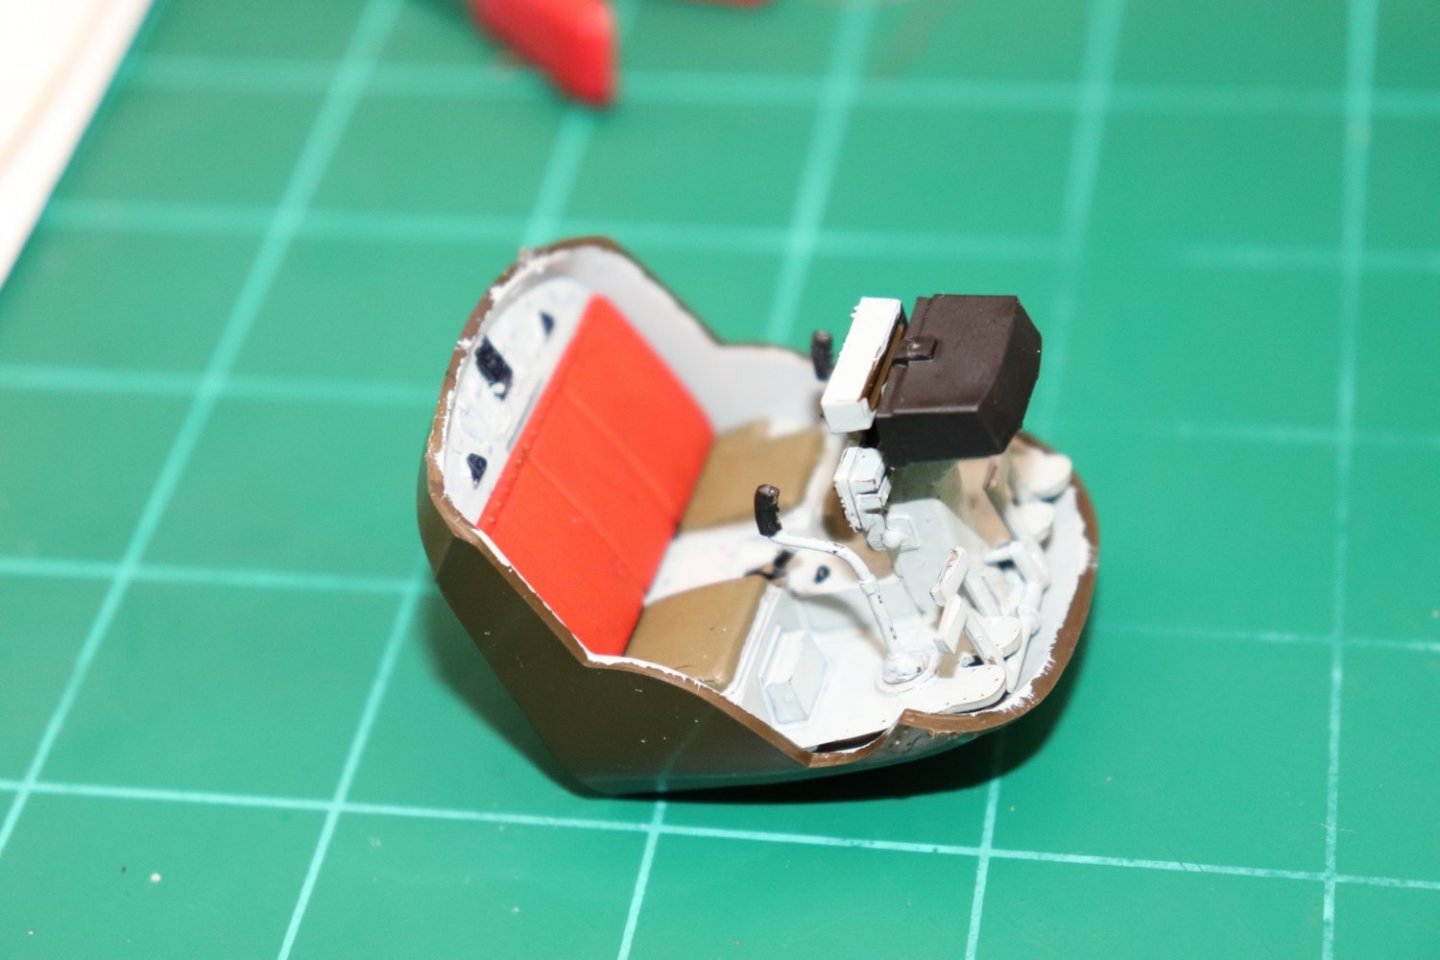
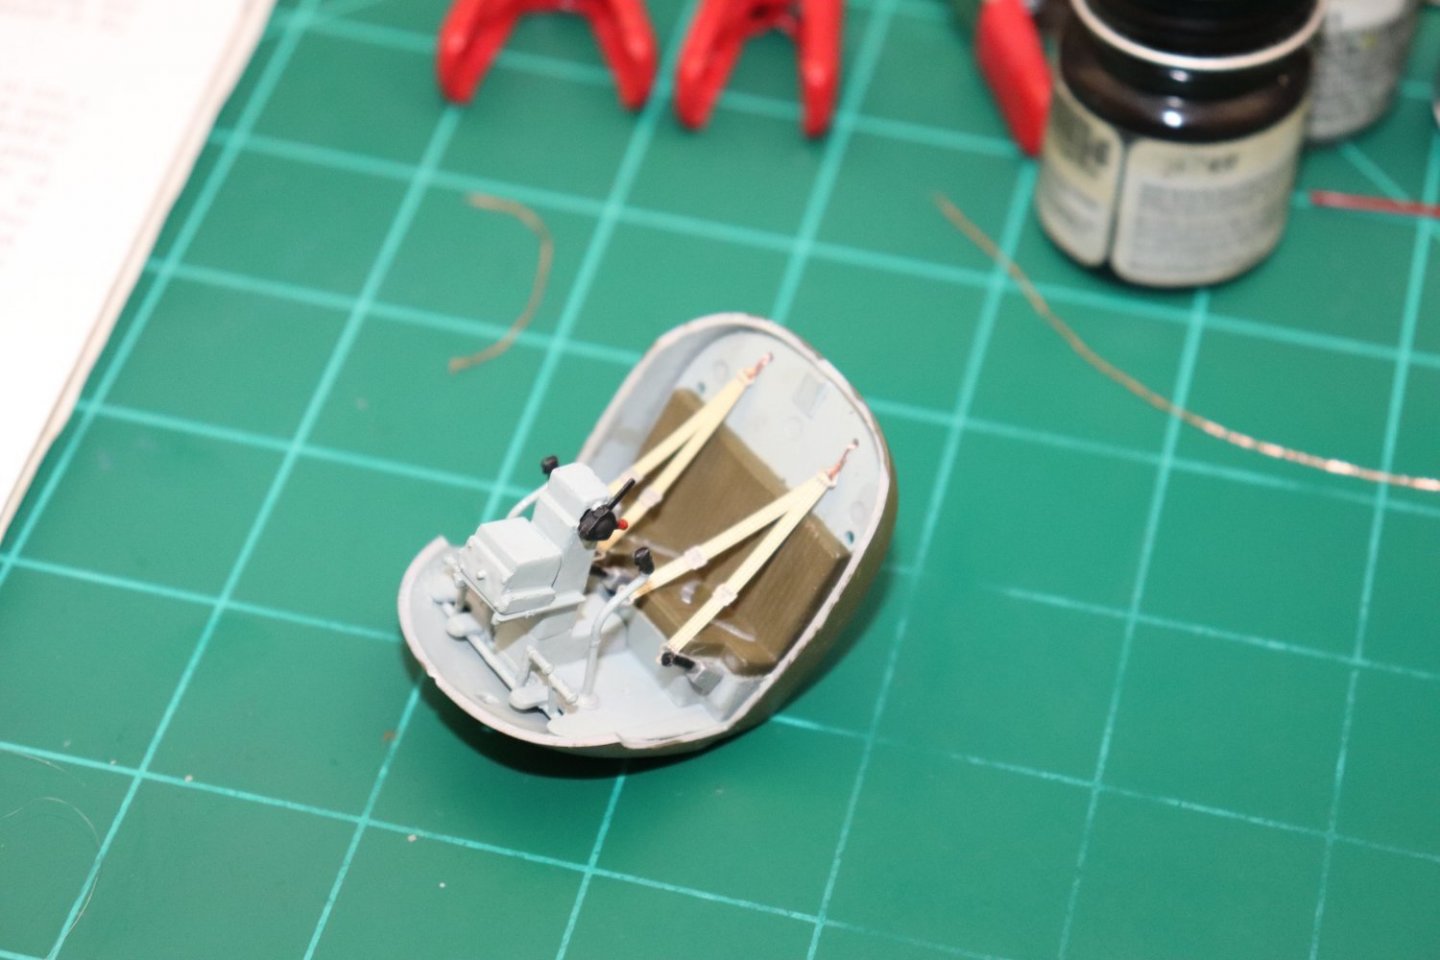
The H-13 H cockpit almost finished.... Seatbelts, a few touchups and waiting for some international orange to paint the outside with.... Onwards..


- 169 replies
-
- 14
-
-
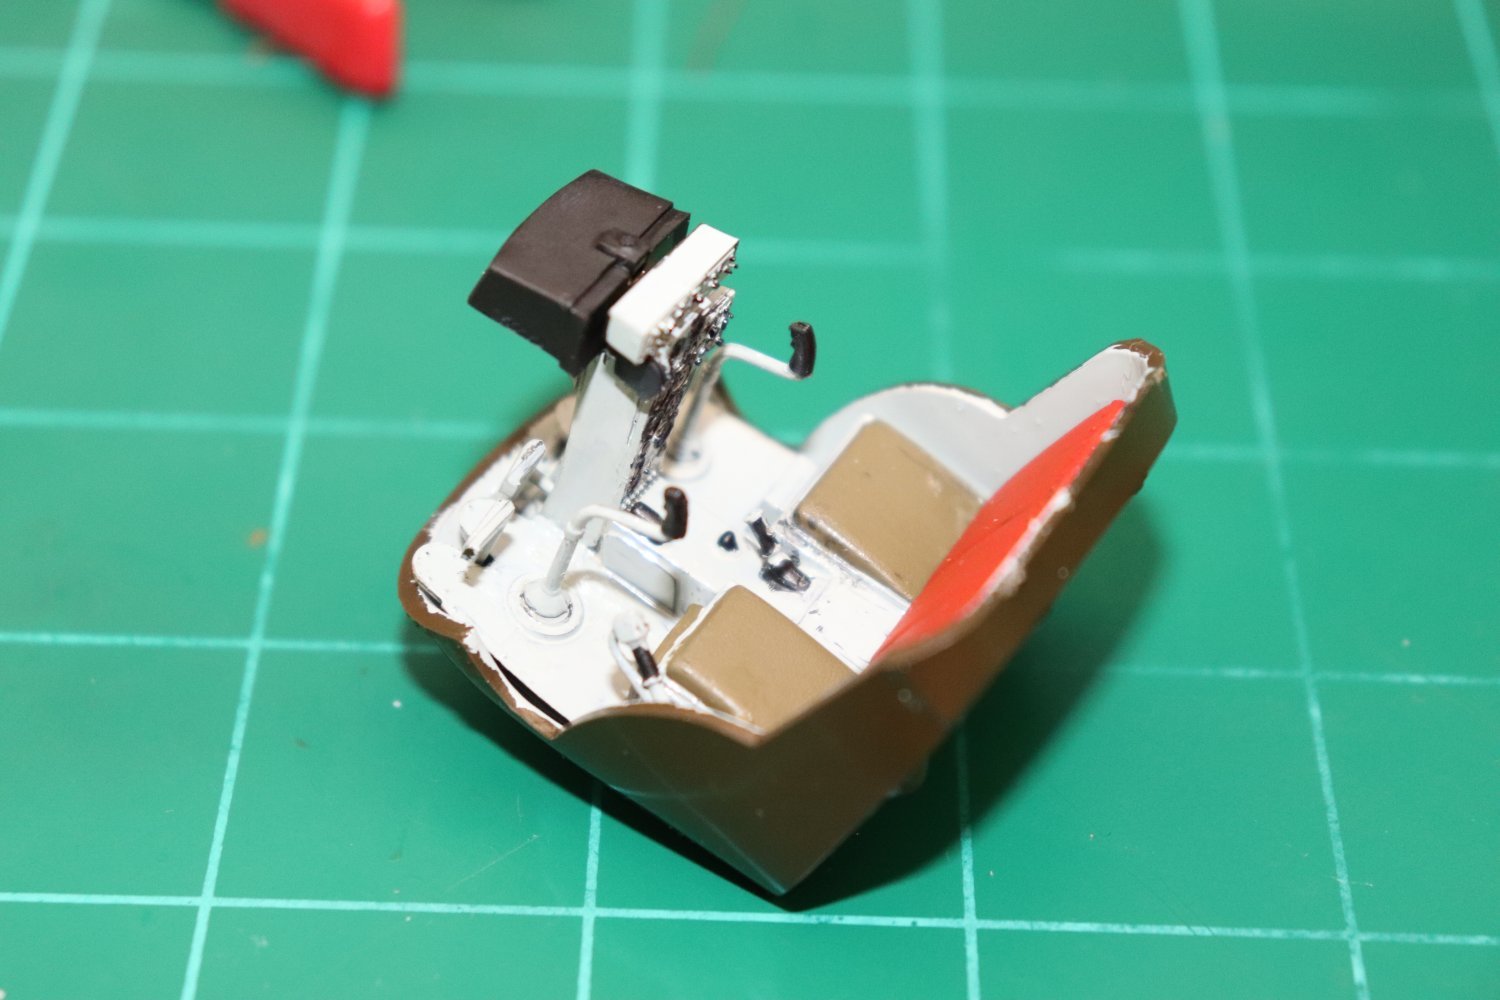
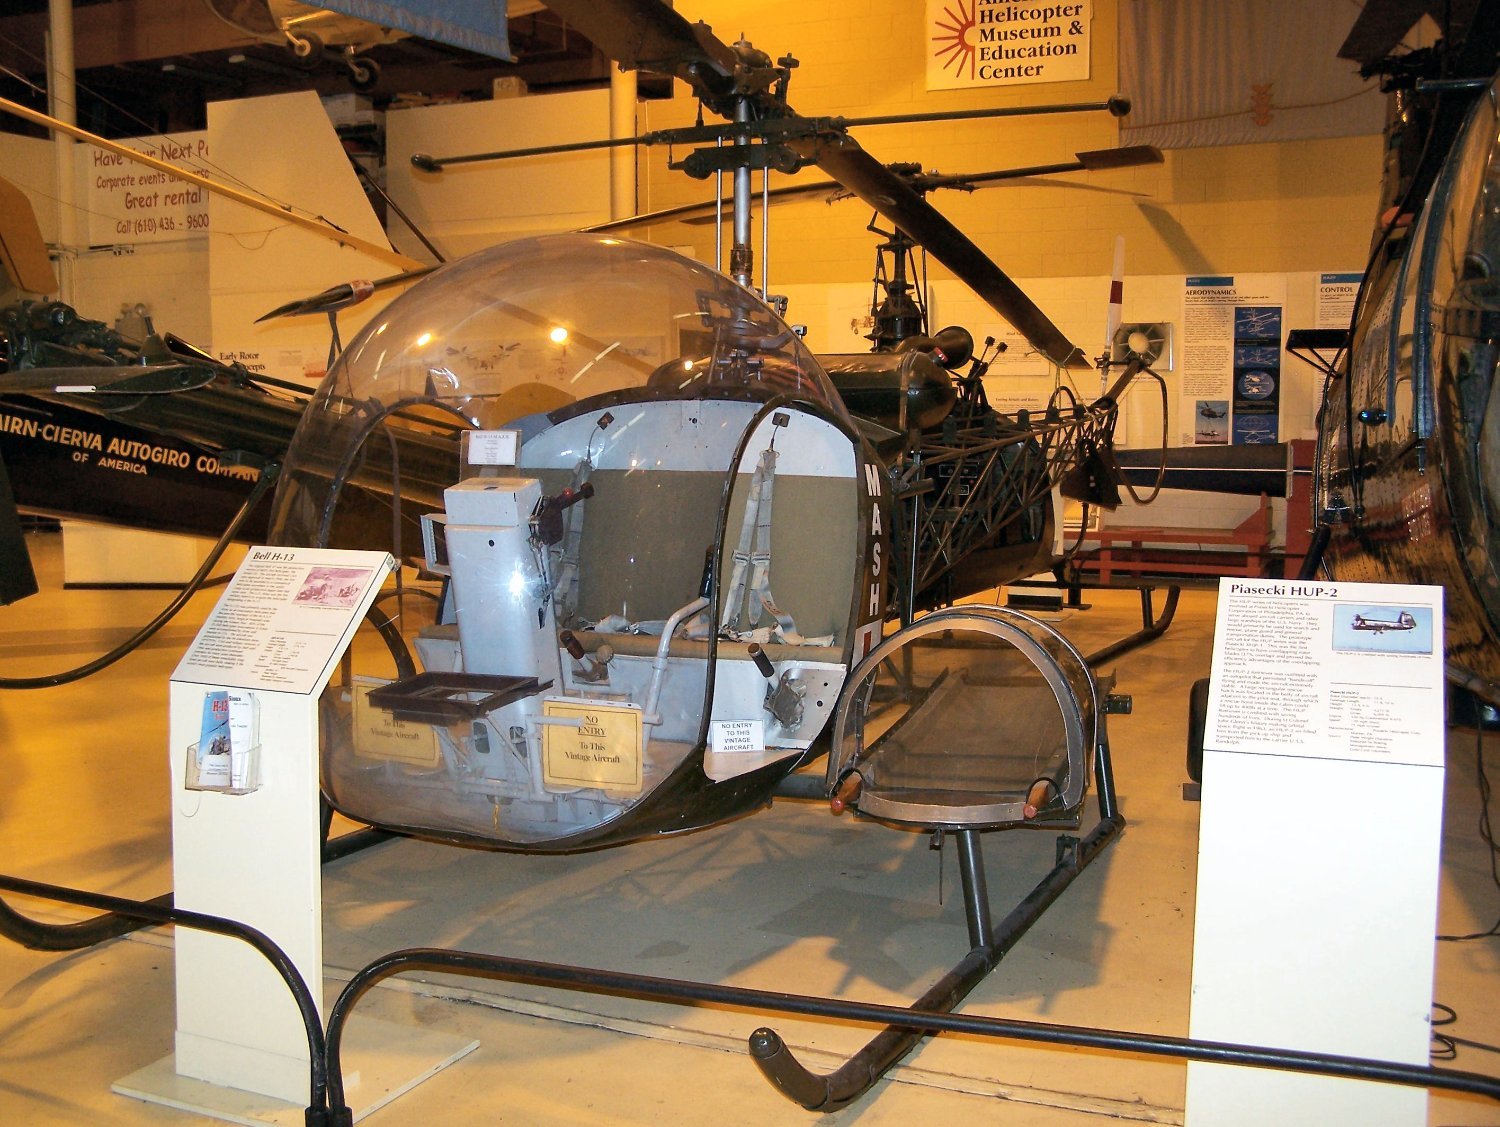
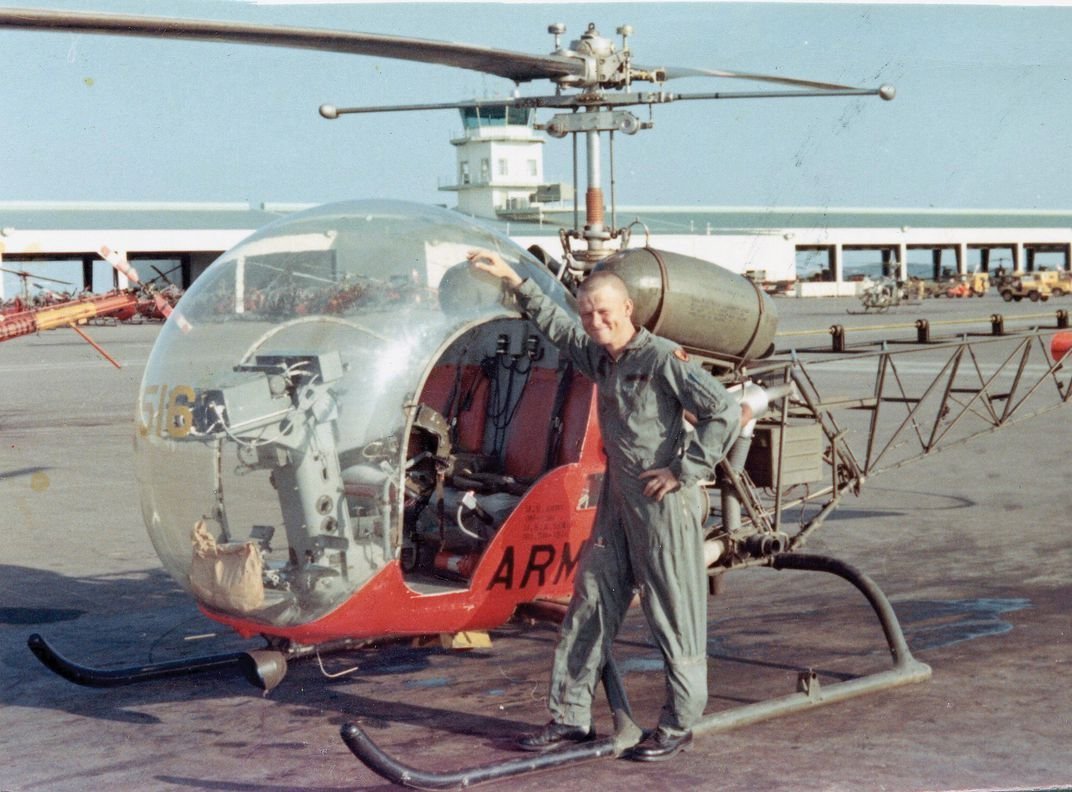
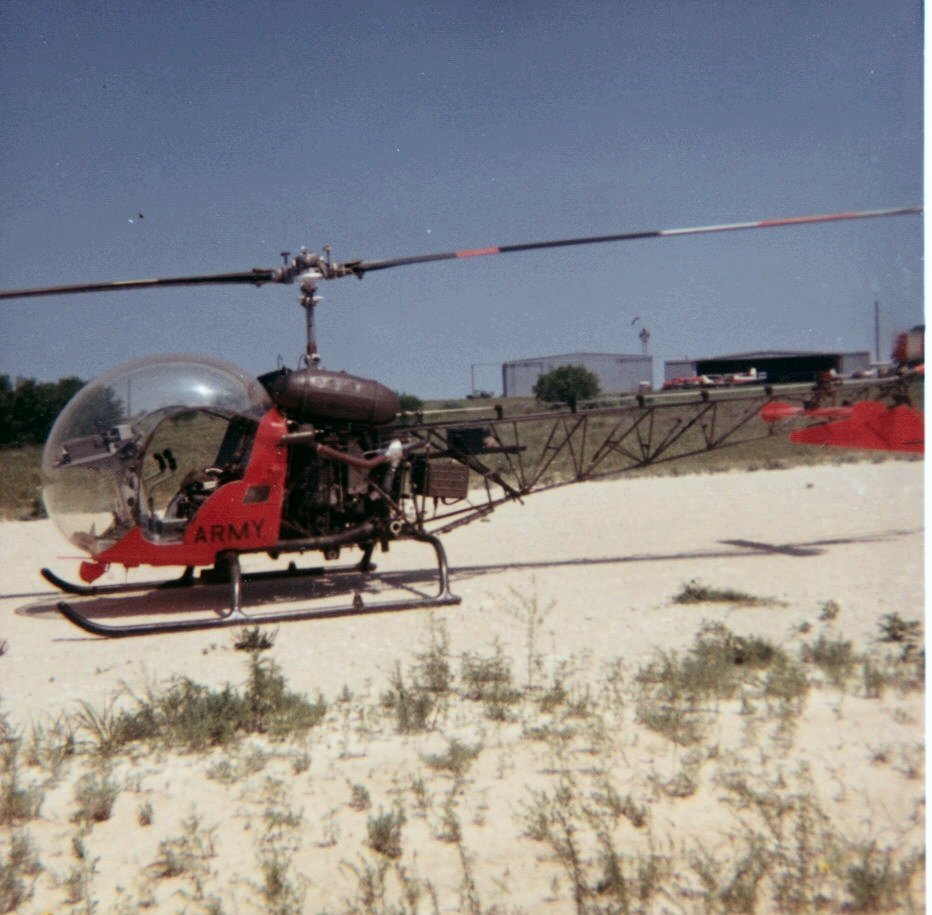
The start of the H-13H cockpit... This is my exemplar... I know this a Ft Wolters bird on the main apron.. That is the main field control tower in the background with a whole bunch of TH-55's hanging around. I'm not going to put the gap in the middle of the seat like in the pic cause I wouldn't have a way to mount the seat back if I did that so it will be a full red back... but other than that, this is my color pattern... And this is my start.... Rough painting.... But we will get there eventually... Onwards My Friends...

- 169 replies
-
- 10
-
-
Thanks Mike, still a bit rusty but they did need something to hang over those bare seats... Perfect? I could only wish, I'll leave the perfection to you guys, still just a plastic hacker... {chuckle} Thanks for following... and the words of encouragement...
-
Thanks Gary, it was time to get back with building, will keep plugging along... {chuckle} Thank you very much for the support.... (coming from you wow, much appreciated)
-
You can get the trailer (the Budwieser trailer is the 40' Fruehof) on EvilBay for less the KW 925 is a conventional, it will work but the Bud decal setup uses a Peterbuilt SWB Cabover. Trucks and trailers are interchangeable (there are exceptions)
-
That is a beautiful rendition of a working engine.... Very well done...
-
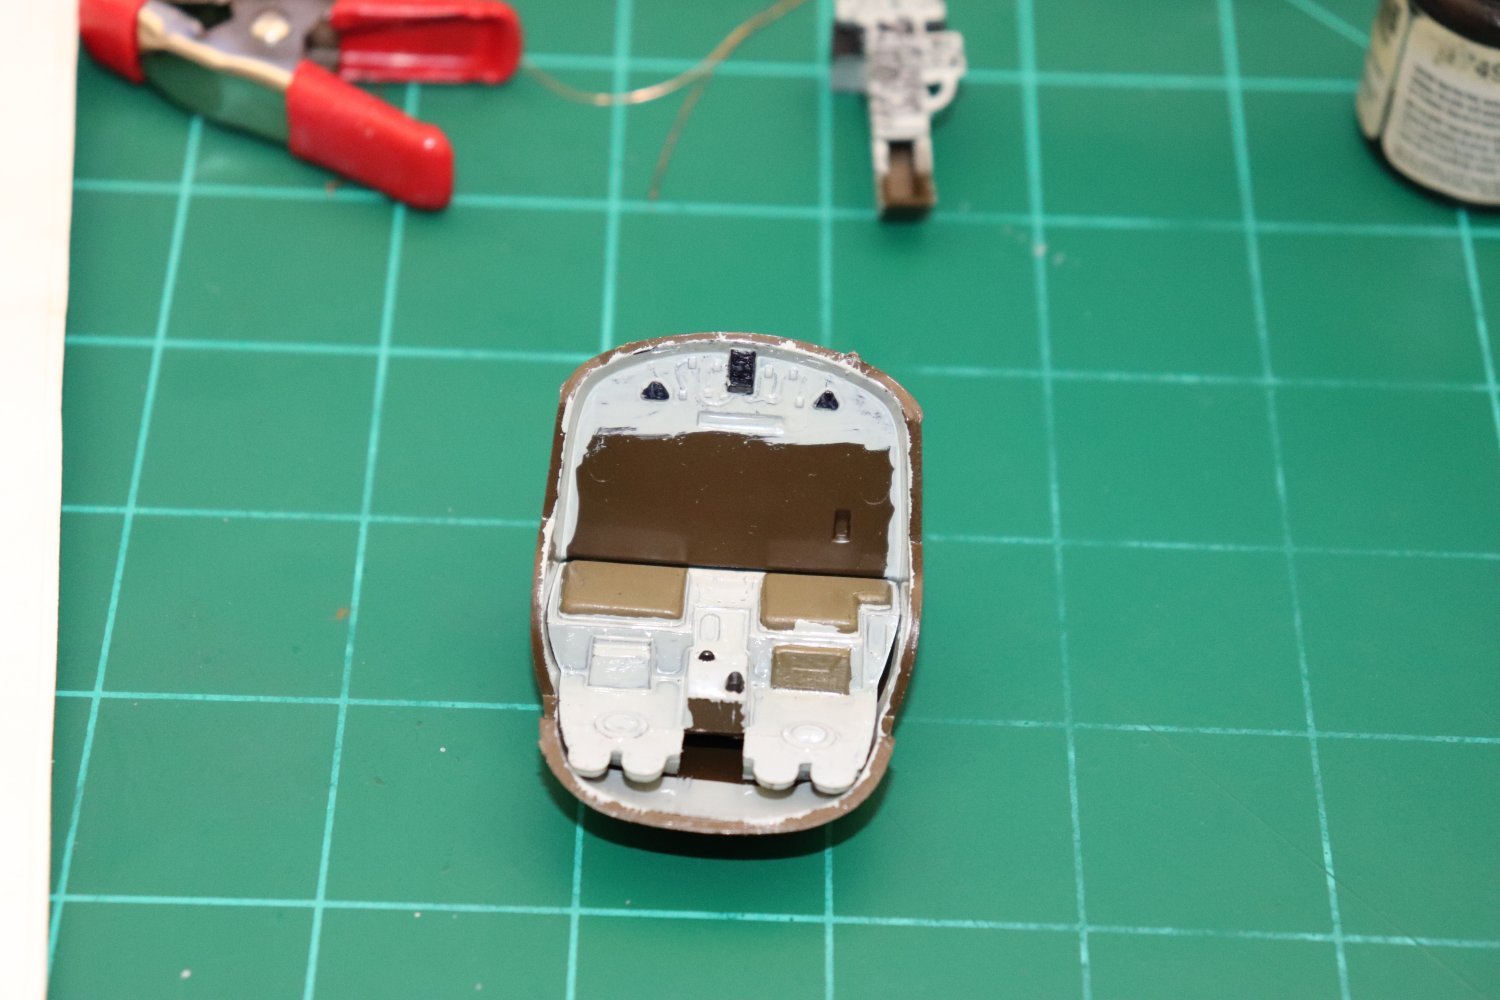
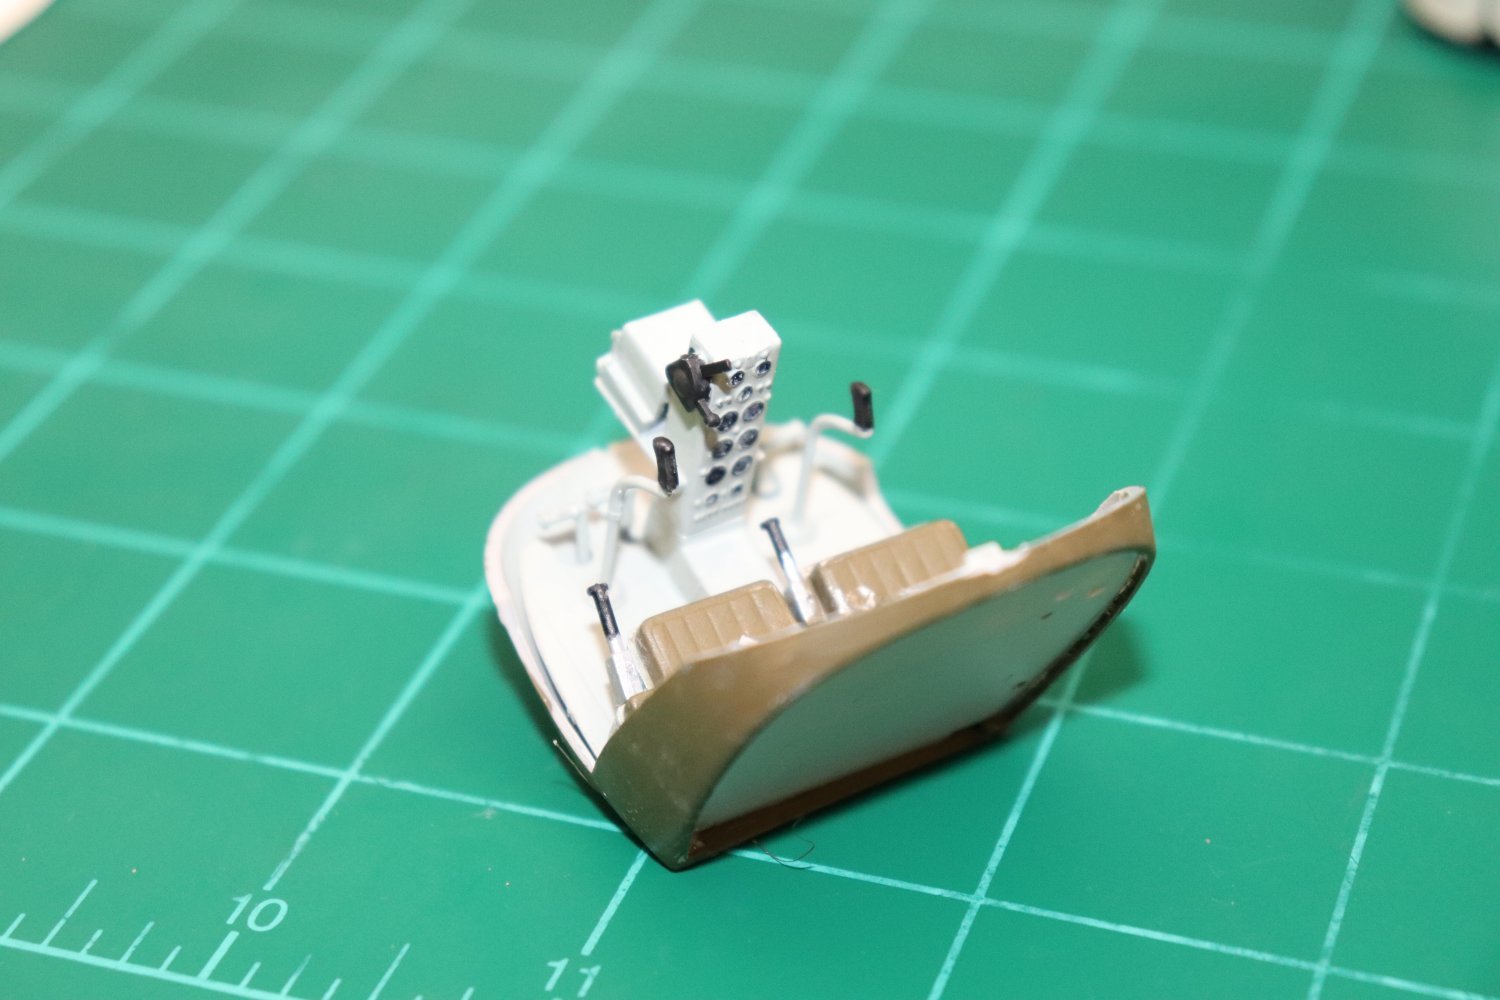
Haven't been able to get a lot done the last day or so... but the H-13D Cockpit is almost done...

- 169 replies
-
- 13
-
-
Well, you know it's not complete till it has a gun camera.... How else will we know what it's been flying around with?
-
Part way through the H-13D/E cockpit assembly.... A little more detail painting some touch ups and some shoulder belts.... It's pretty plain jane... But that's what they were in the early Korean war.... Essentially they were considered as nothing more than air jeep's, many had only single controls, they would send one out to some coordinates on a map, pick up your passenger, (if you could find them) and come back to base... Radios were quickly added to them as they made the job a lot easier... But for the first ones out there in the first few months of the war, it took a lot of courage to do air evac missions... If you went down, you were on your own...

- 169 replies
-
- 10
-
-
Thanks Dan.... (although I'm a bit rusty with the paint) probably should have used a marker...
-
Neither have I Alan, I suspect they didn't mark them for some reason probably cause they weren't used in mass formation so they really didn't need it... (most military vehicle markings were for unit identification on the battlefield.... Using the kit supplied markings would be a non-sequitur for an SDF vehicle....
-
Ok Instrument columns.... I added the battery box to the H-13D column, it was missing from the kit.... Next up, the cockpit floors/cabin interiors....


- 169 replies
-
- 13
-
-
Thanks Greyhawk... Yeah there is a lot of those missed roads in everyone's life.... everyone could write a book about them.... {chuckle}
-
There was a lot of field expediency going on that's for sure, substitution was the word for mission critical equipment, whatever it took to keep it going... Yep, illegal beer, (according to my father) but that was overseas, Korea and Japan... He said there was many a time the seniors got together with some of the more promising young troopers fresh from the states (particularly the young "shavetails" ie. gold bar generals as he called them) to pass a few cases around and "Instruct" them on how the military "Really" functioned out here... {chuckle} great stories even if some of them weren't exactly completely true.... I suspect your right, My father told a lot of stories, but the real serious ones he would get all silent and refuse to talk sometimes... There was a lot of therapy in those stories...
-
Thank you Mark, I certainly hope so... there wasn't a lot of that during WWII or Korea, The WPB was still in effect until 1956 and all military production and procurement went thru them, there wasn't a whole lot of shopping around to fill shortages, they always had at least two suppliers for every critical part... it was required in the contracts... After that was another story though... the WPB was shut down and open bidding was established much like it was prewar... And of course the typical contractor shenanigan's that brought with it... Those old guys were the best weren't they, they would just love to, as they would put it, bring the young guys along on how it really is.... (and was) a lot of veteran experience was taught and great stories told... (while disposing of prodigious amounts of illegal beer I've been told, gotta teach the young'uns right you know, according to my father)
-
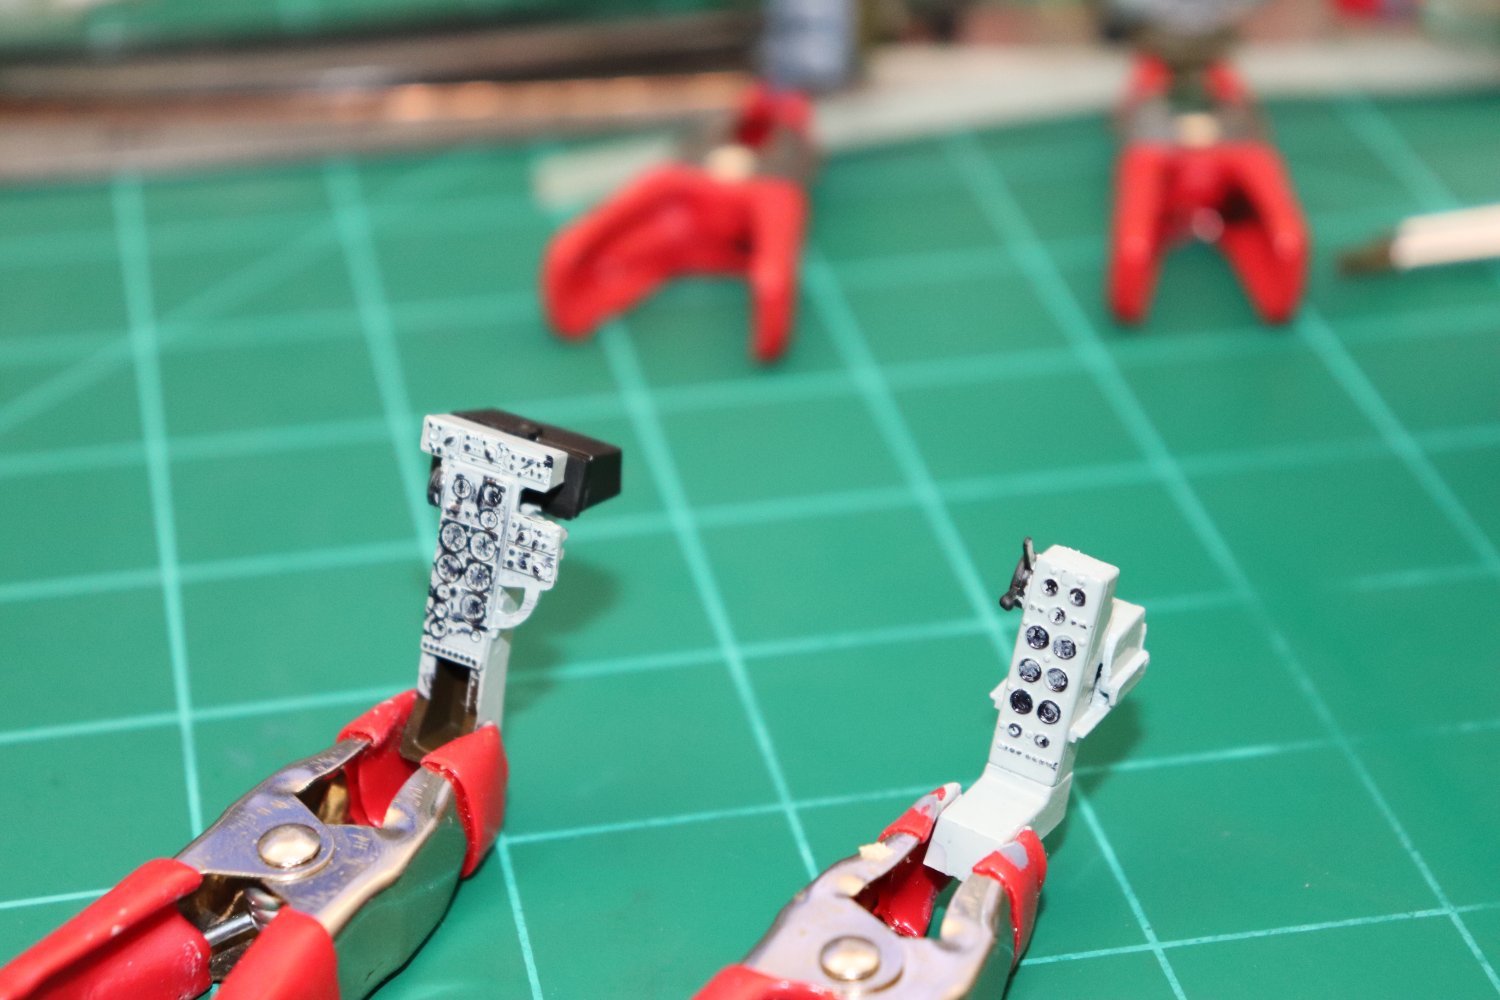
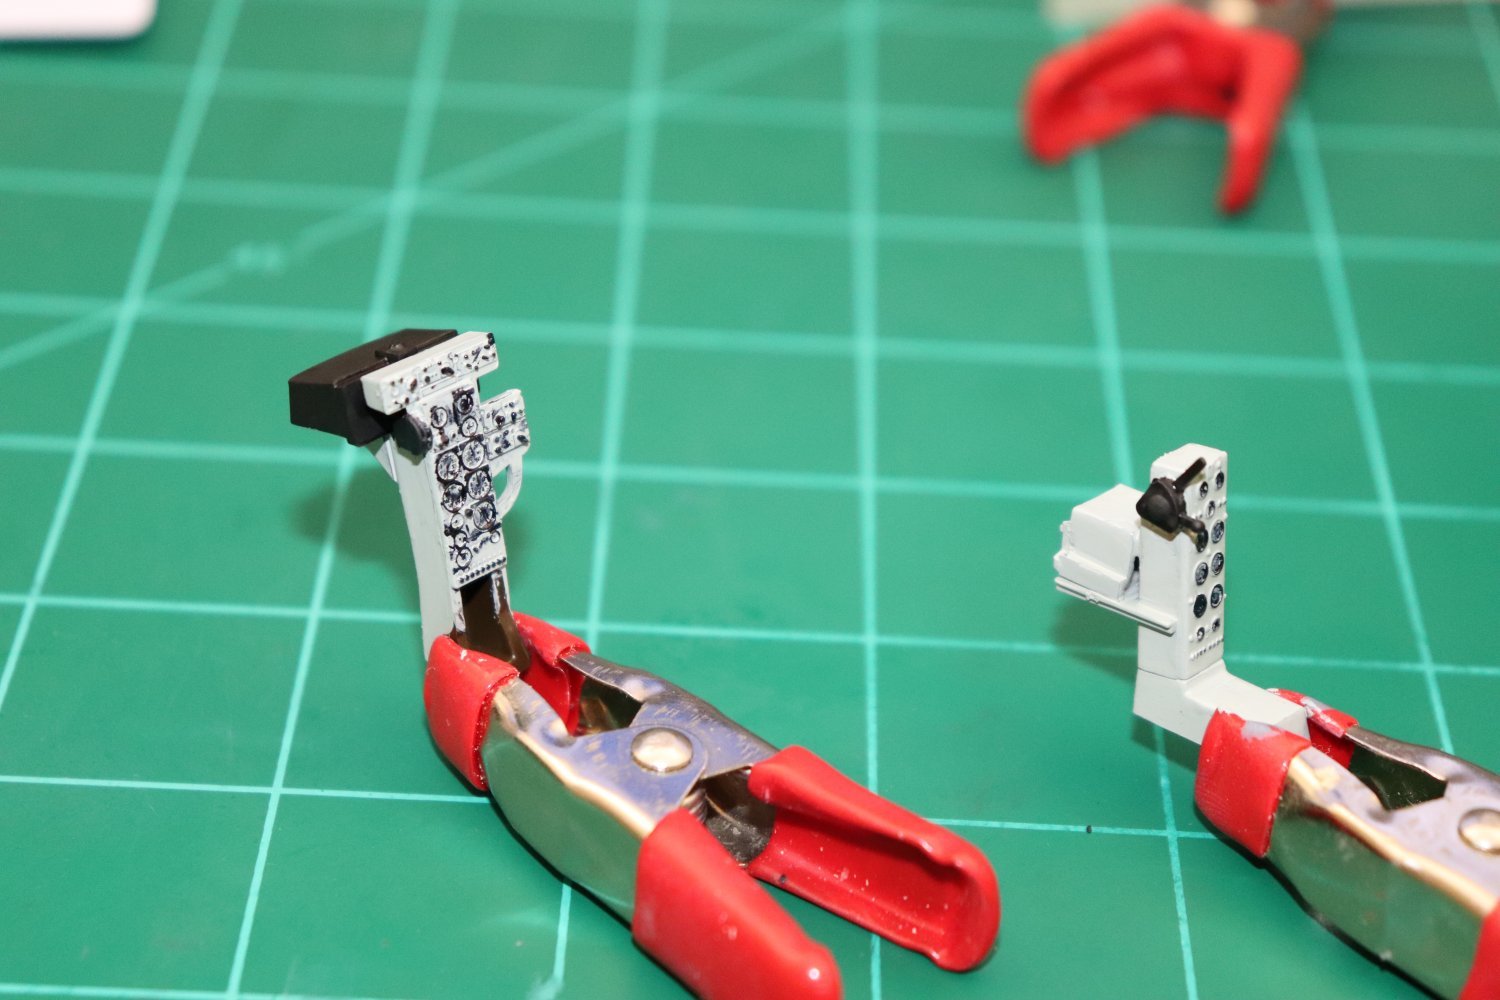
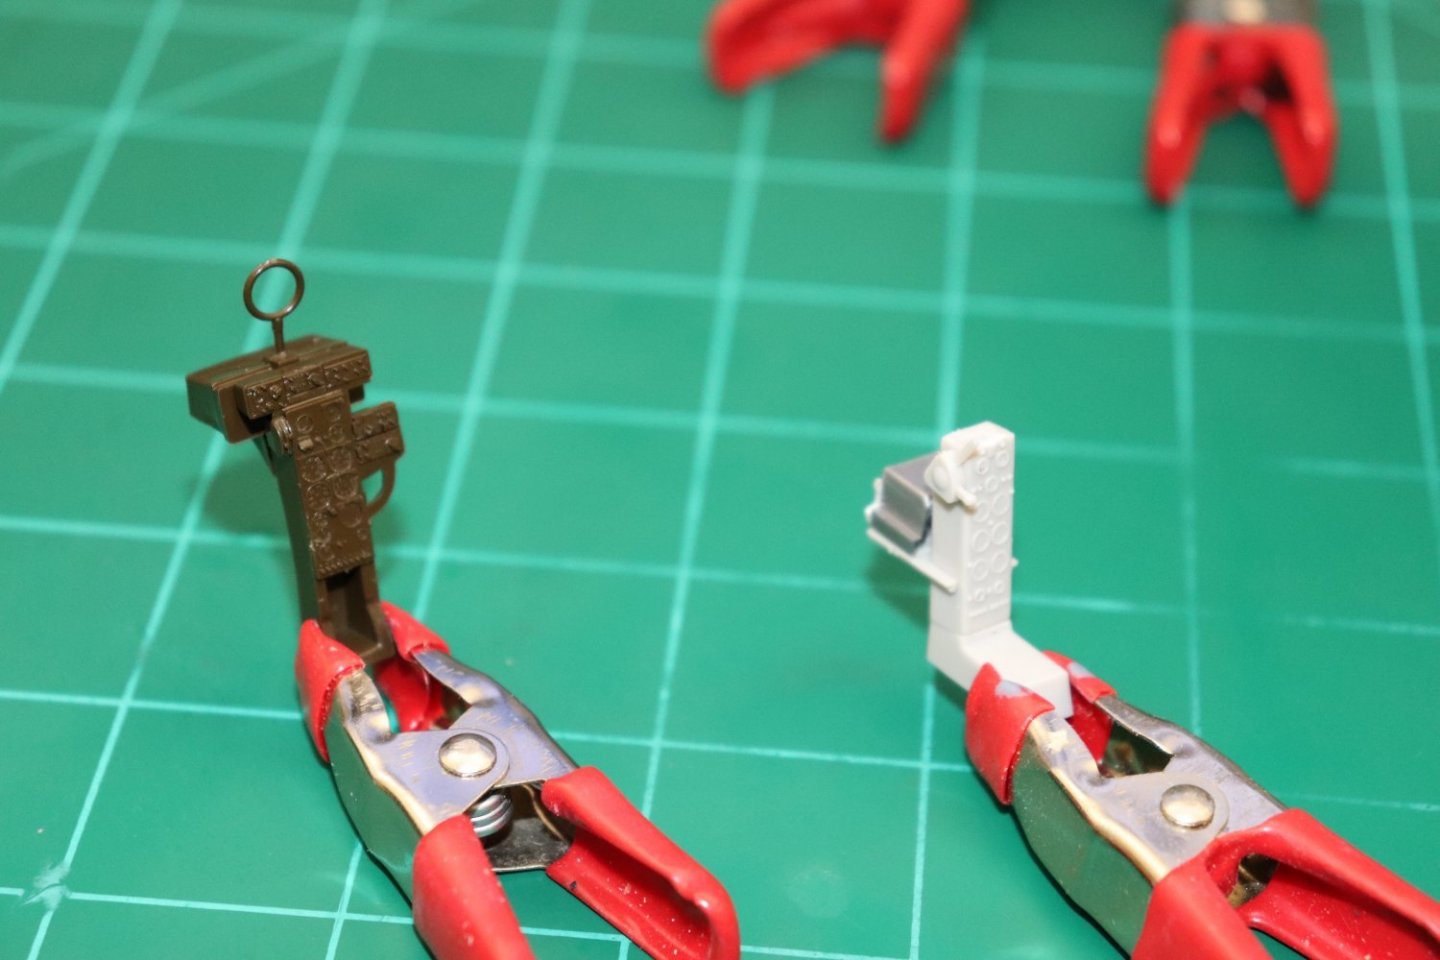
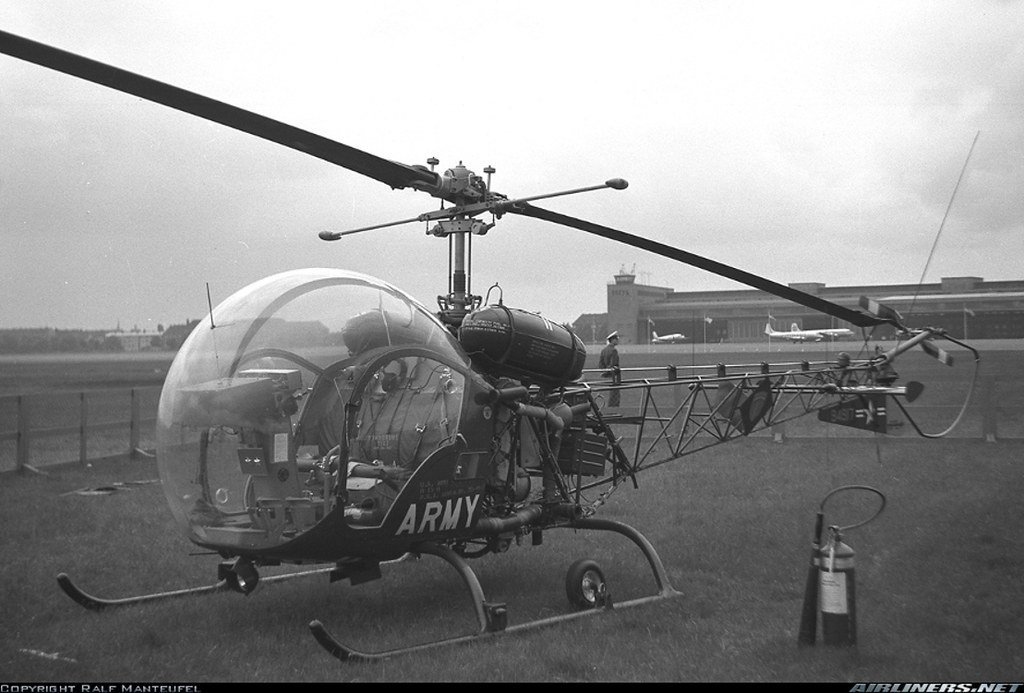
Instrument Columns... The kits different columns... Of course the H-13H's column is on the left and the H-13D's is on the right.... Now the H13H's has the radio direction finder antenna (the loop on top) which is going to have to come off... The basic training birds generally didn't have such equipment, the H-13D's I added the battery box, the kit had the shelf but not the box, notice that there is no radio mounted to the column.... The early air ambulances didn't have a radio.... You can easily see as time went on the avionics for this bird were in a constant state of upgrade and retro fitting... Early 1950's H-13D Bell built Air Ambulance, no radio at all... Below, an early 60's H-13H A USAEU Major Generals taxi.... note everything they could possibly carry as an extra accessory is on this bird.... And of course below, a Ft Wolters H-13H... It carries the big radio in black with the grey column, (notice no direction finder antenna) avionics box behind the engine and battery installed out on the boom as a balance weight... They did a lot with these birds, constantly upgrading them... So the columns will be Aircraft Grey with black instruments and one big huge black radio on the "H" model.... Onward..


- 169 replies
-
- 10
-
-
I suspect your right Mark, the chrome rocker covers come directly from civilian production as the engine was a direct descendent from their four cylinder light commercial aircraft engine... The black radios, that exact style of electronics package appears to be black in all variants I've come across, retro-fitted to "D"'s up to new installs in "S"'s so since that is what the kit has that is what it will get painted... One of the problem of researching this aircraft is that there are very very few that are in their original issued condition... 6500 were built over 40 some odd years and when the military were finished with them they were scooped up in the civilian market quickly... Of course having to be type certified and upgraded to get their flying certificate, not very many retain their actual military look... Good military service pics are hard to find... Museum restos are easy to find but then they are restorations... Hopefully they will be presentable when done and look something like the real in-service machines...
-
Thanks my friend, I'm trying to make them as authentic as I can... Interesting stuff there at Reskit, nothing to help here, but they have some very nice stuff for a few others in my stash..... And in the correct scales as well....