
Geam
-
Posts
67 -
Joined
-
Last visited
Content Type
Profiles
Forums
Gallery
Events
Everything posted by Geam
-
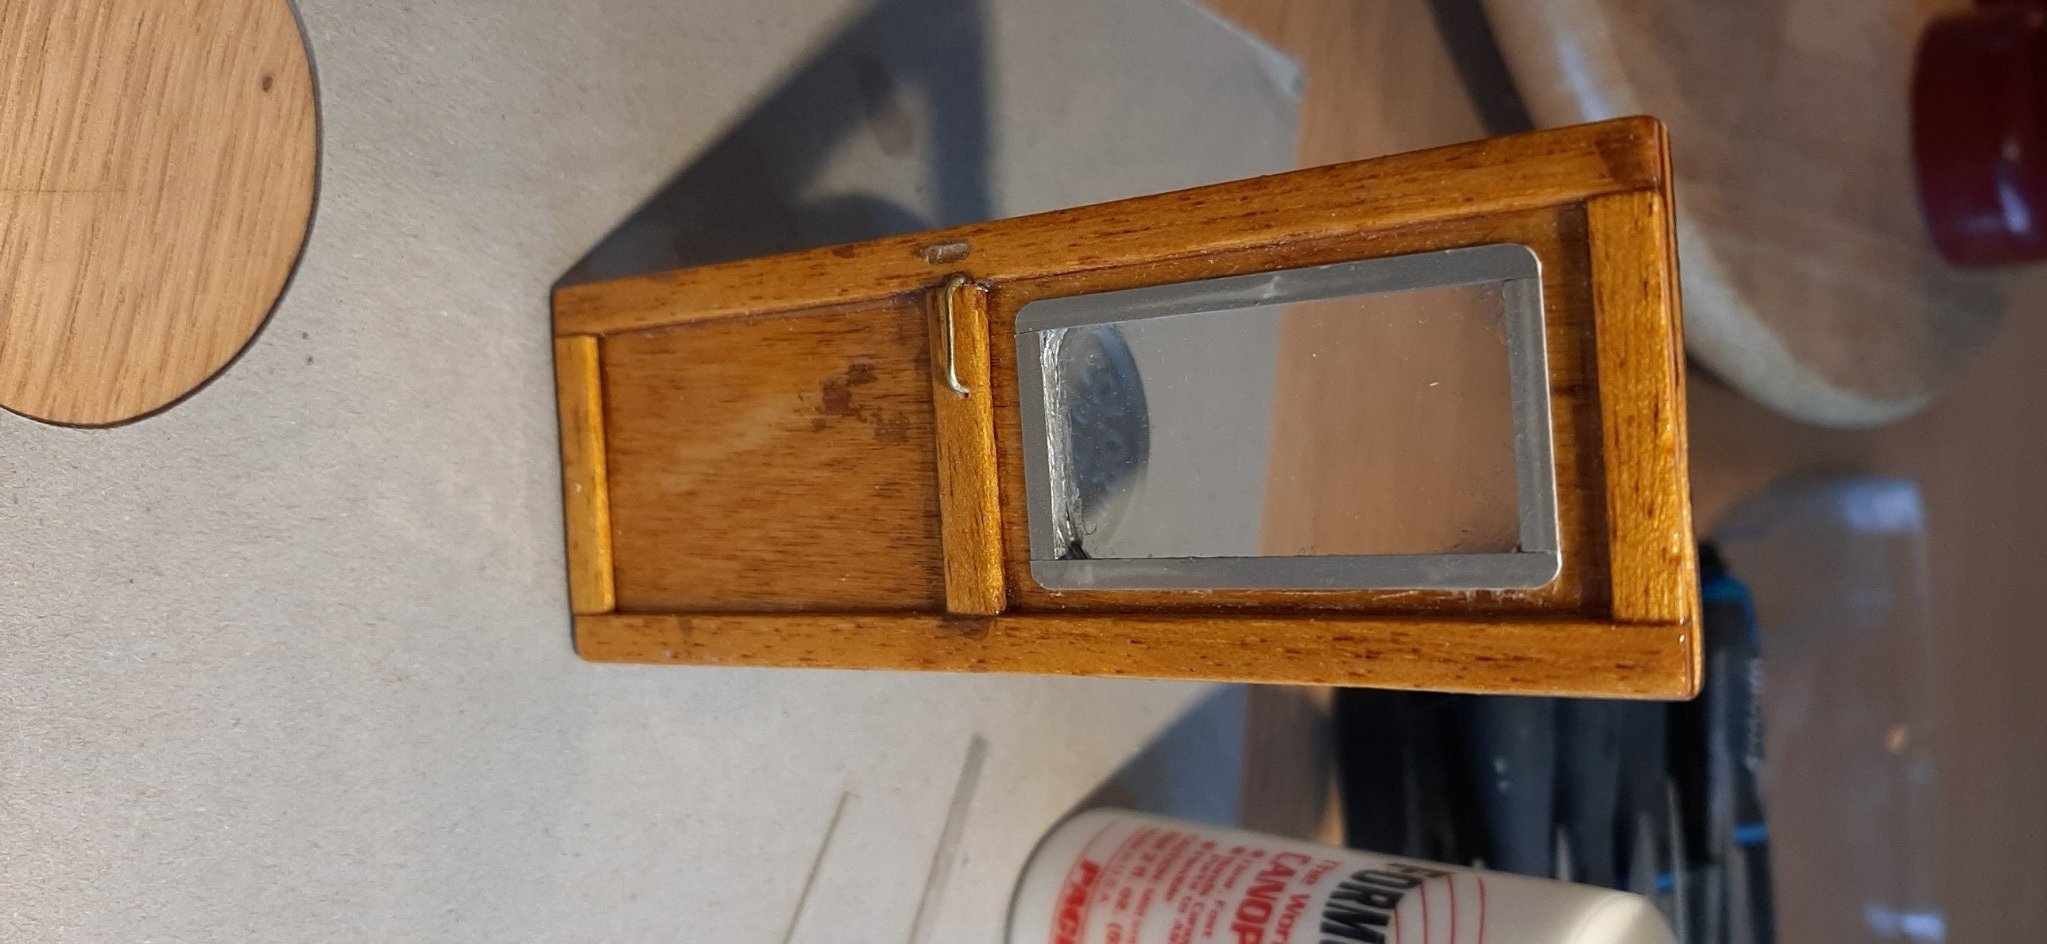
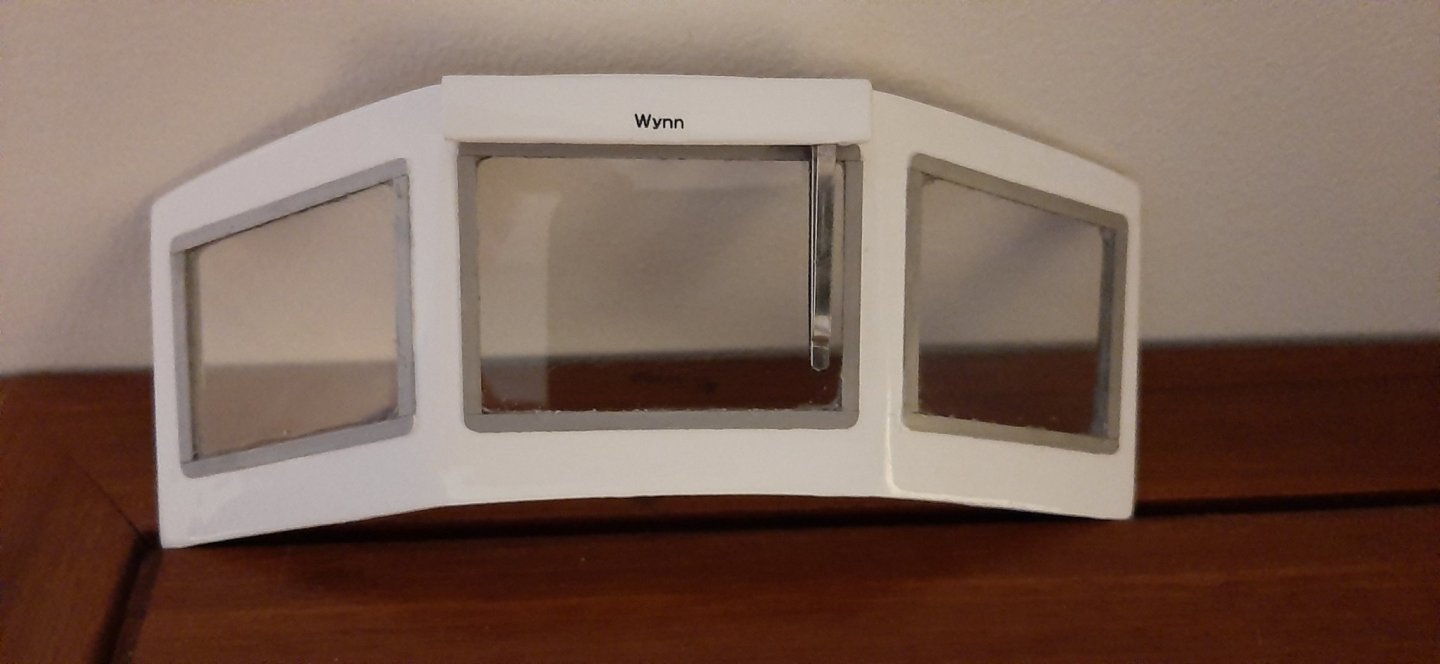
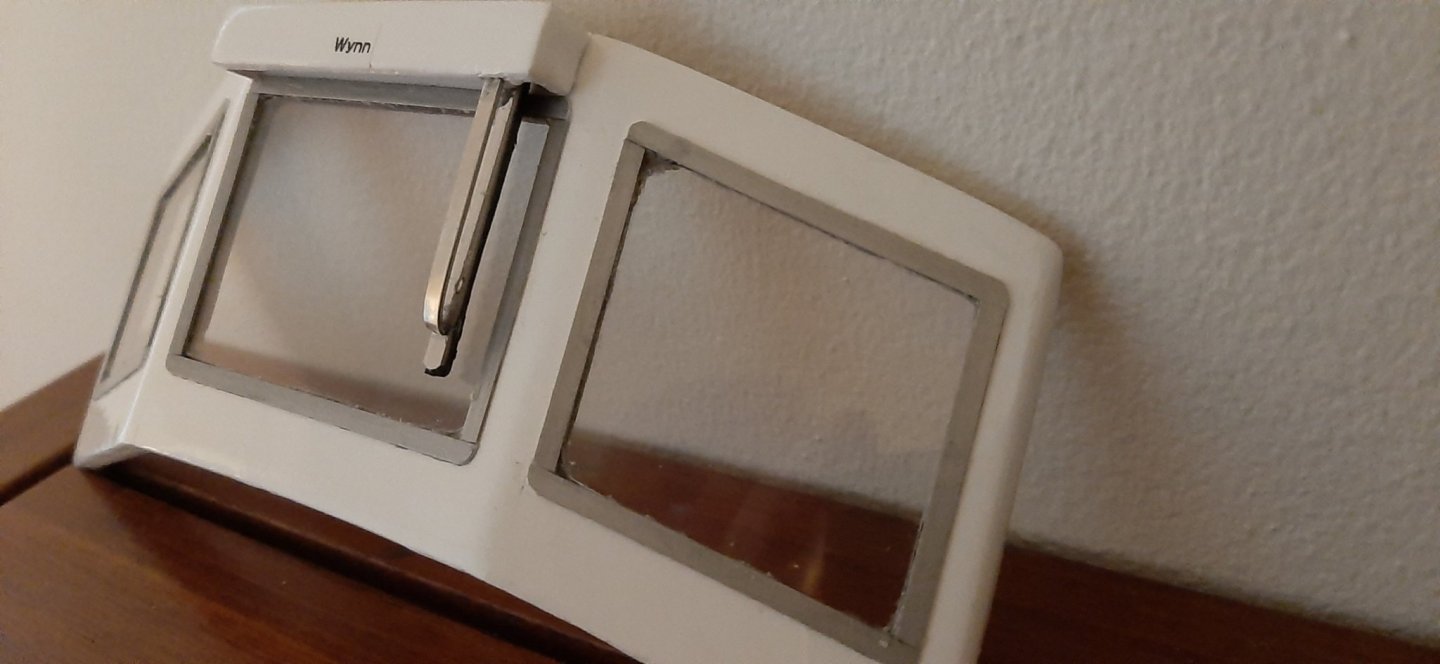
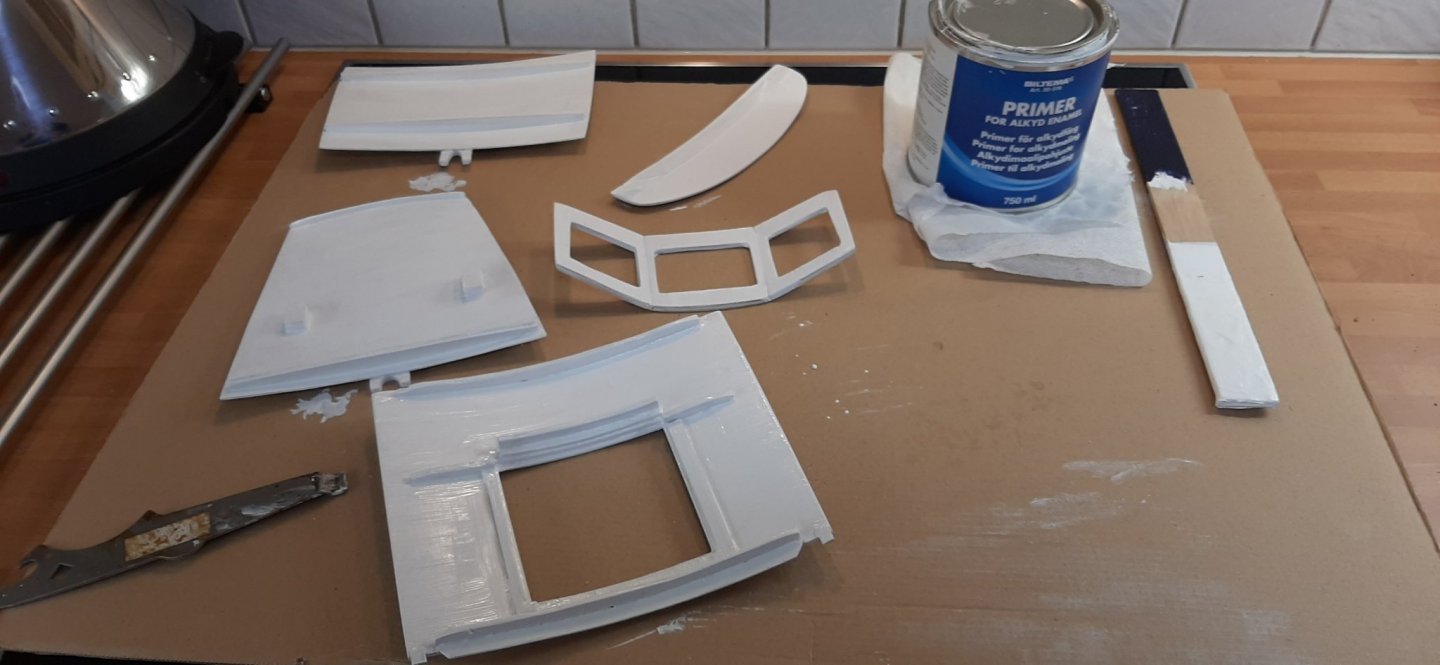
Finally managed to produce the FWD window unit complete with a Wynn linear windscreen wiper. I see now (too late) that I should have used slightly wider strip to make the 'aluminium' window frames. This would have made it easier and tidier to glue in the window glazing. Any way, this weekend will hopefully see the whole wheelhouse section looking more complete.
Next is the coach-roof sections.
George
-
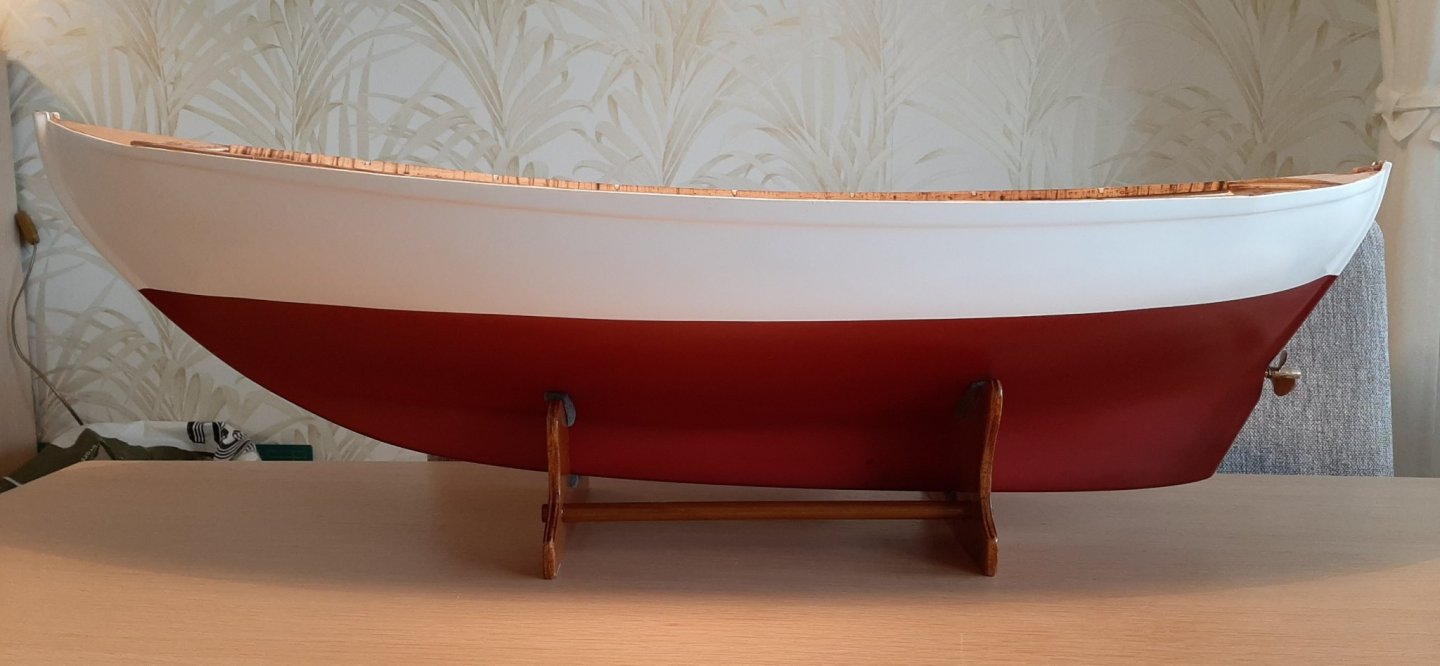
Happy New Year to all, many thanks for kind comments. I see that I have are two threads here on my Fisher project. Haven't quite worked out how that happened but definately my fault! I have also posted info and photos on the Model Boats mag. forum -which is where I started in late 2019. The Fisher is not 'super' true scale but reasonably close. There are a few places of 'artistic diversion'. To answer vaddoc's question ; the paint was a long chapter in itself! The hull has different layers of paint due to not being pleased with the first painting attempts. What is now visible on the hull -above the waterline- is sprayed-on white acrylic with sprayed-on clear acrylic gloss topcoat. Below the waterline is dark blue cheap-ish yacht paint. It did not self-level well and produced a slightly hammer finnish which I accepted as looking like real anti-fouling ie not perfectly smooth. Painting of the coach roof sections has been going on for several weeks now. After much trail and error, I have found a top coat gloss which will resemble a gel-coat finnish. This is a Norwegian made enamel paint called Bengalack. It's BRUSHED on, selv-levels very well and gives a good hard gloss finish. I have known about this paint for years but not thought about using it until I saw a mention in this forum by 'Carsten' in 'Andreas Sundt's' Colin Archer model build. Pitty it took me so long to find the 'right' paint. It would have saved a lot of time and money if I have used Bengalack -or a similar good quality enamel from the start. The last gloss coat went on last night 04.01.2021. ! The rubbing strake and the bulwark sideplanking is mahogany strip which has been oiled/saturated a few times with 'Owatrol D1' then varninshed a few times with 'Owatrol D2'. "Owatrol" is Norwegian but the equivalent 'oil-and-varnish' treatment is certainly available in other marine-wood treatments. The bulwark capping rail is light ply, stained teak then oiled/varnished as above. Grab rails on the coach roof sections is obeche strip given the same treatment. It all takes ages to do😬 Hope this reply wasn't too long-winded, George
-
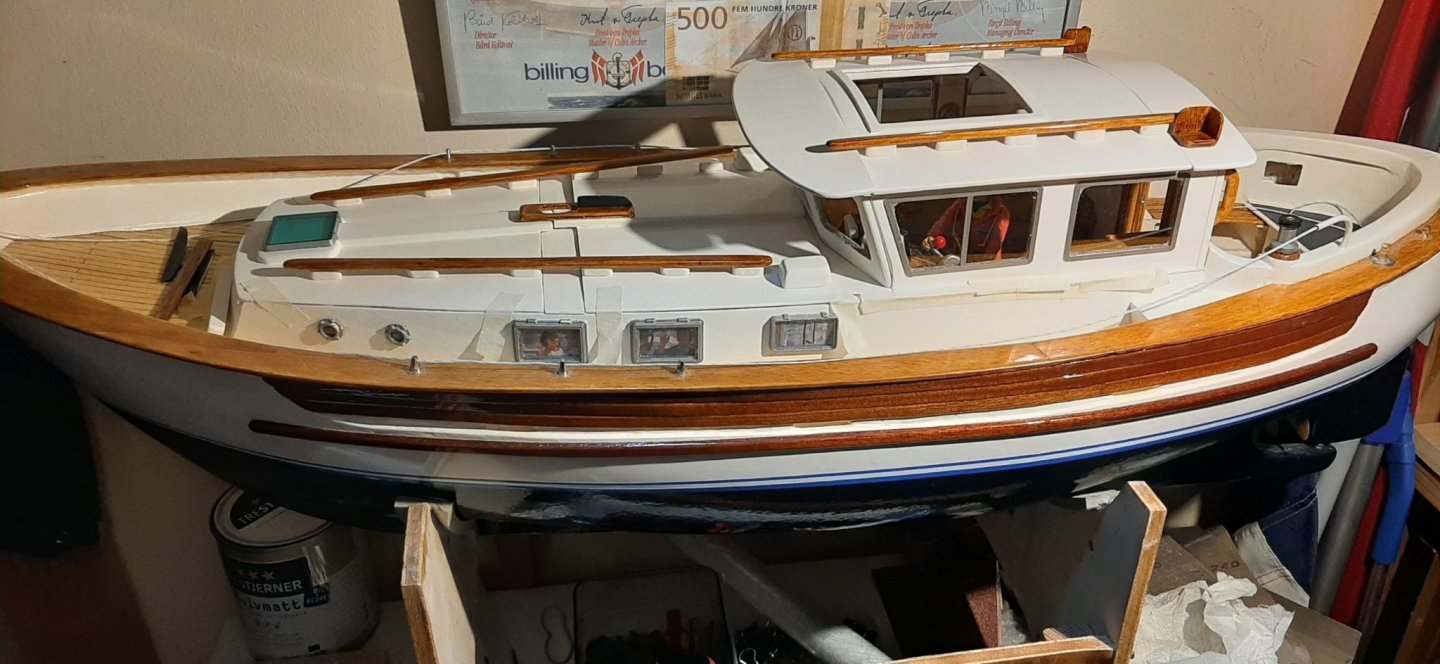
I've been planning building sequences and doing some small jobs on the Fisher but I can't say there's been much noticeable progress. I've been 'hovering' around the fact that I have to get going with gloss paint on the coach roof and wheelhouse roof sections. Made the grab-rails and 22 small stand-offs/bases. The grab-rails will be glued onto the bases after the coach rooves are glossed white. The requirement for removeable top sections is causing some head-scratching as to where to cut for the joins to be least noticeable, but generally all joins/cuts will have to be abeam the main mast P&S.
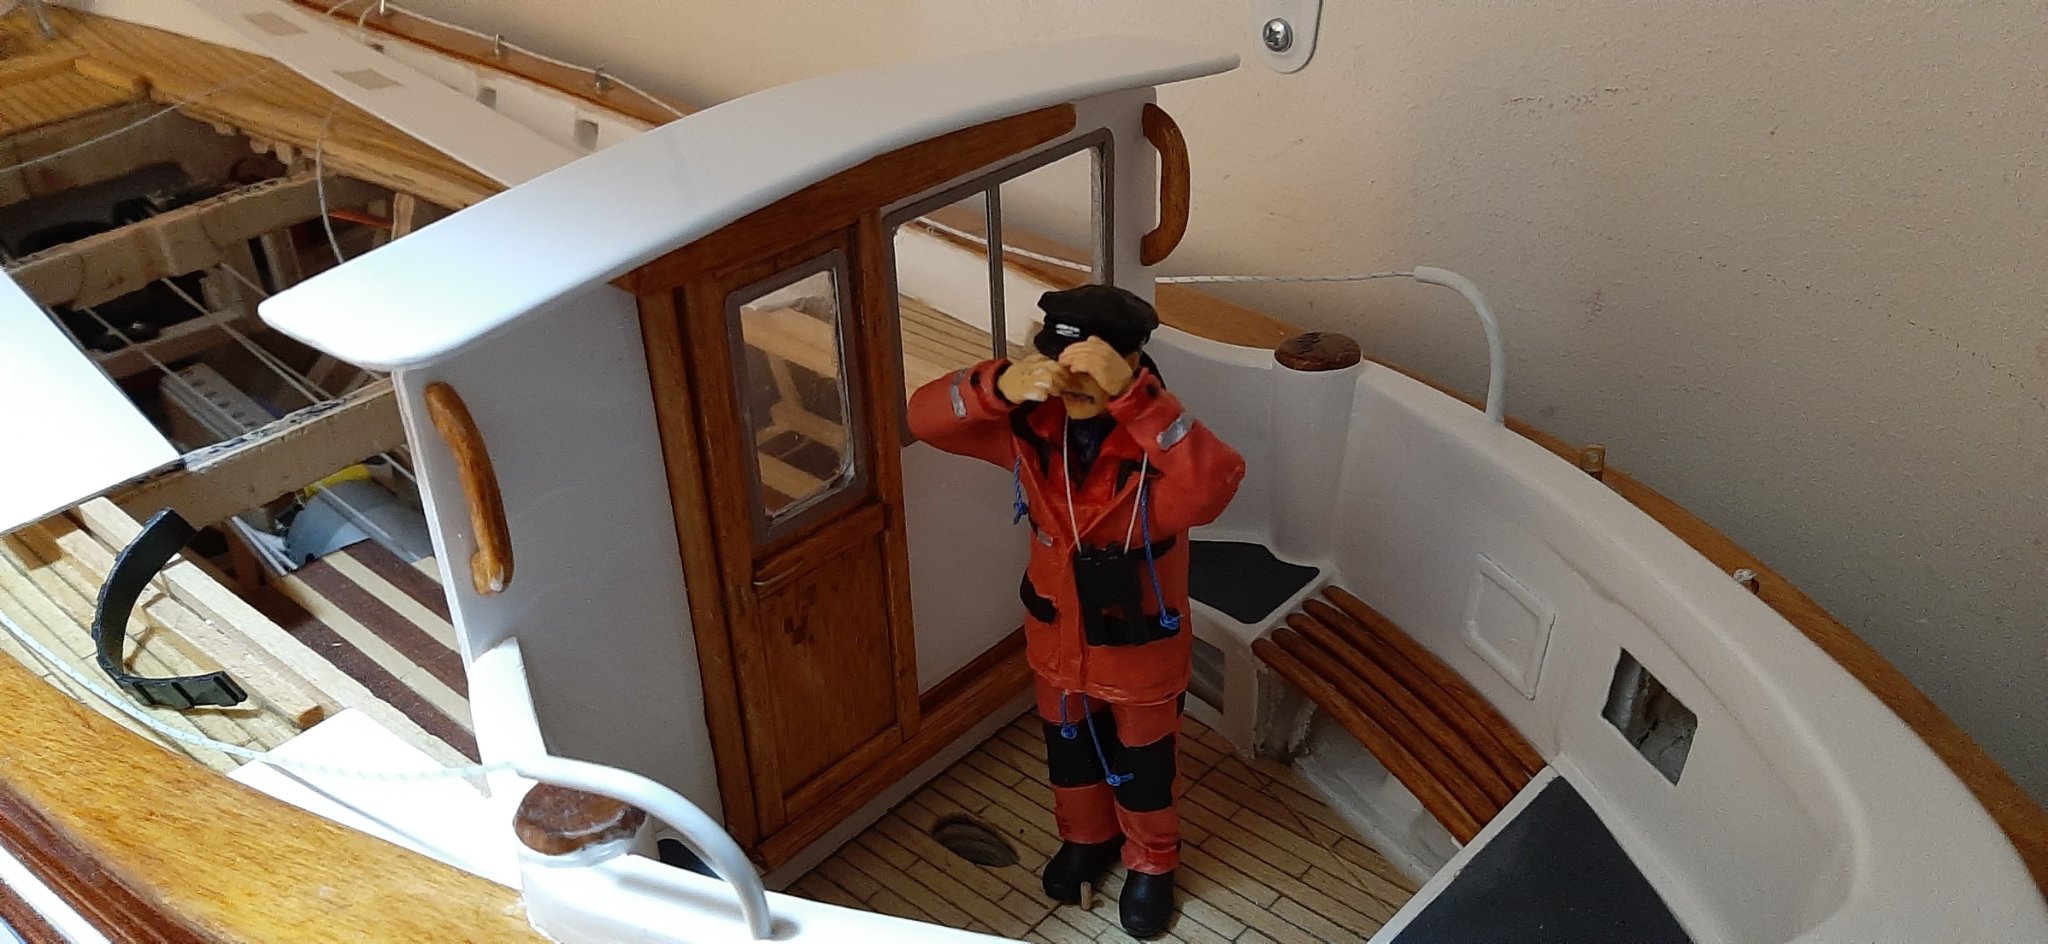
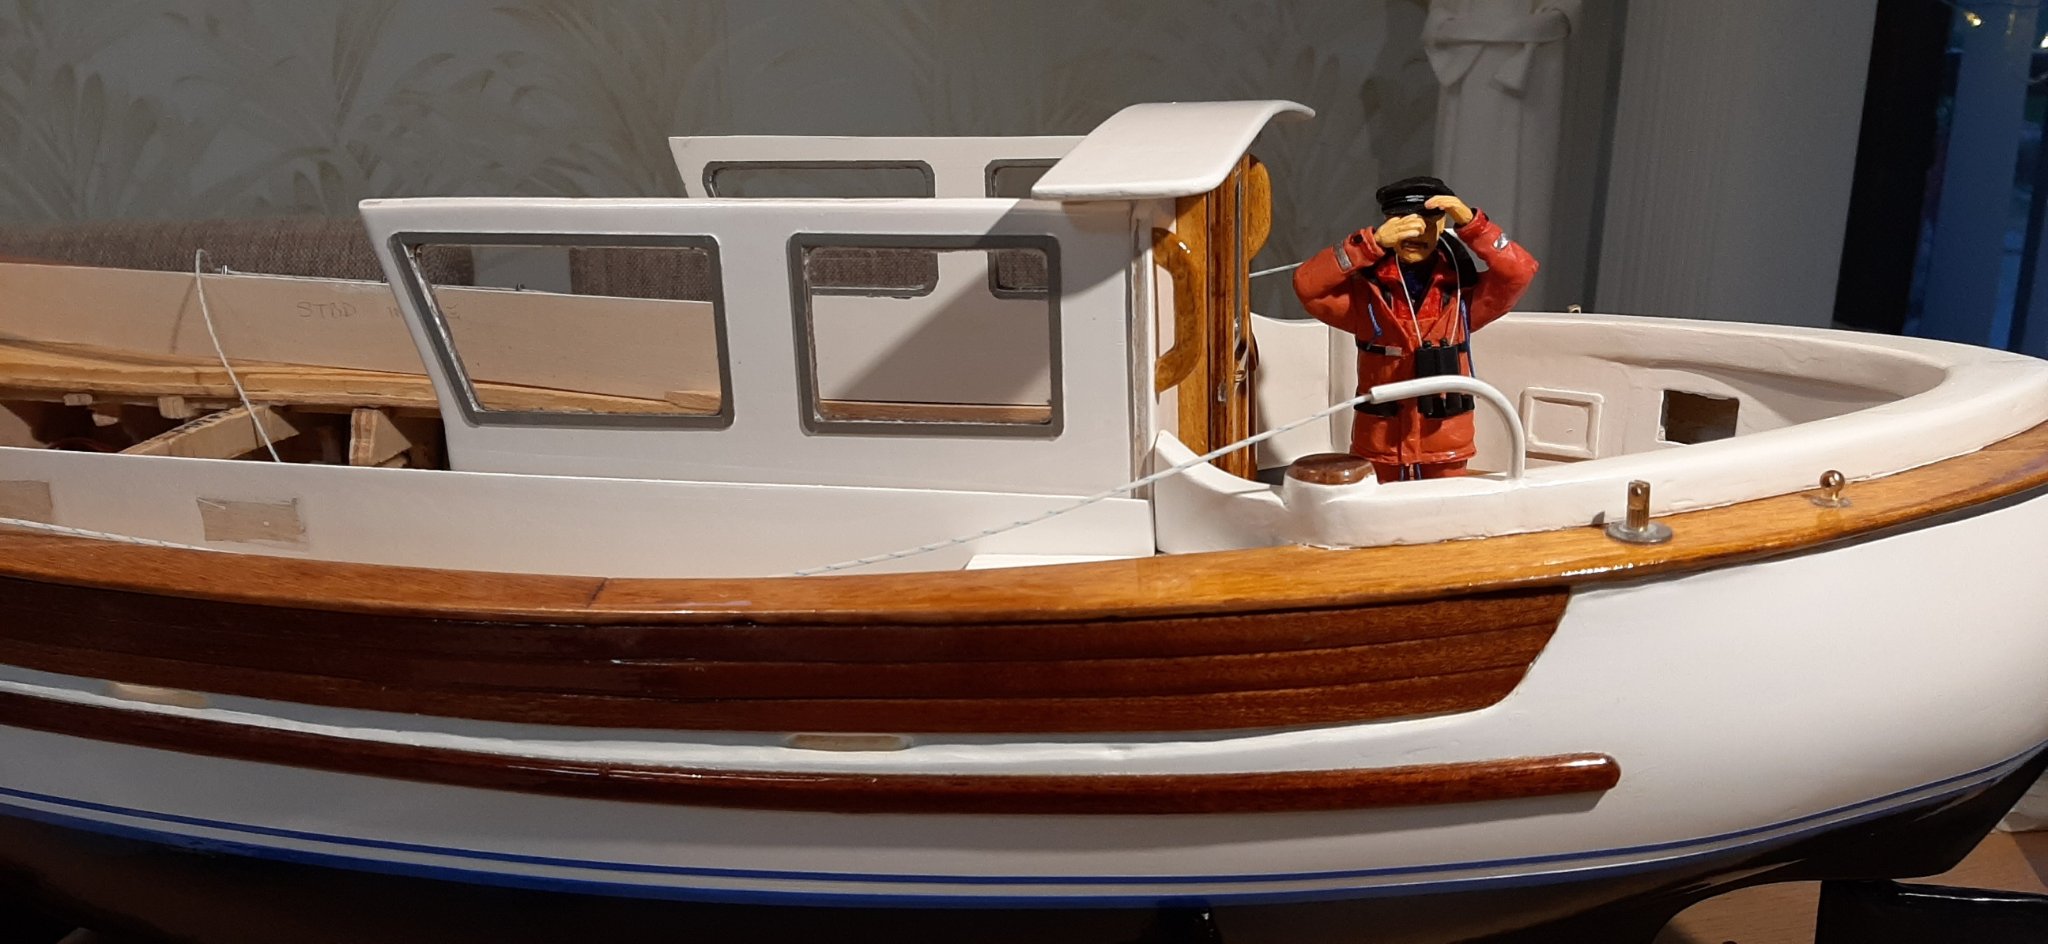
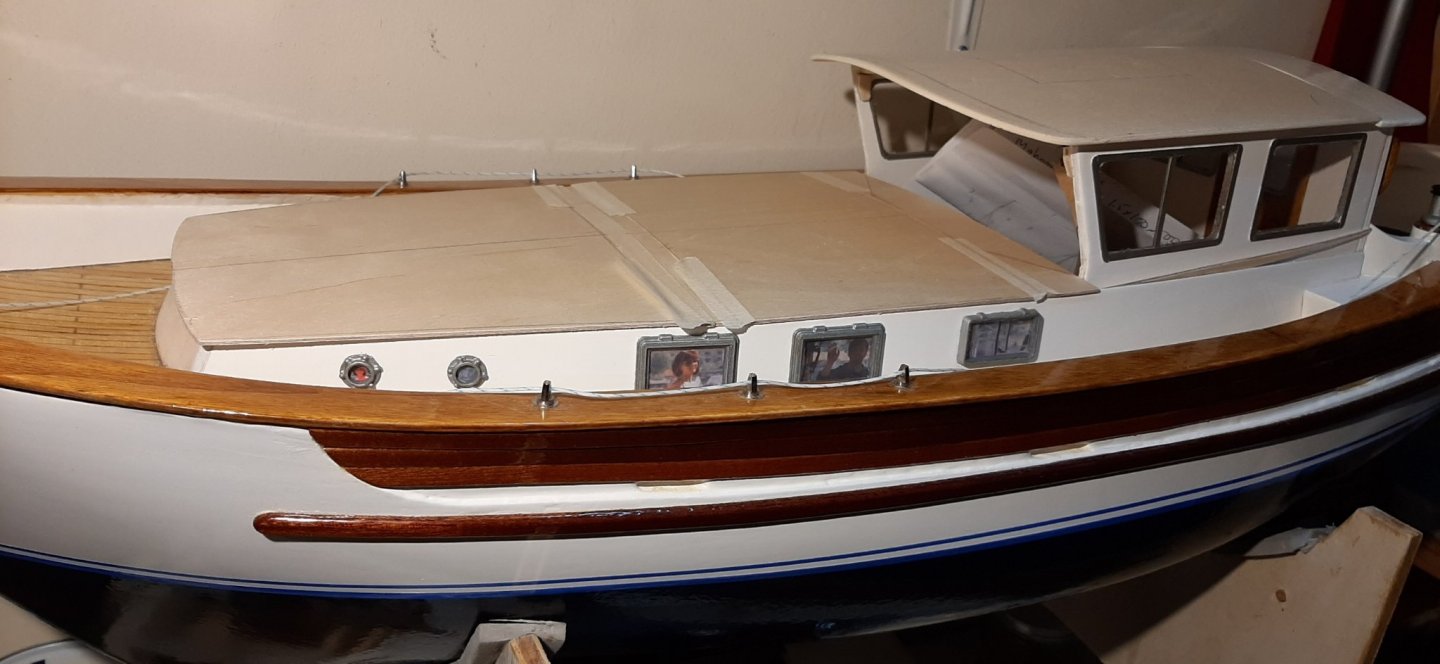
The photo shows the grab-rails just loosely placed on top of the bases. The wheelhouse FWD window frame is also just 'placed' -not glazed yet nor faired/glued in place
George
-
Build progress:
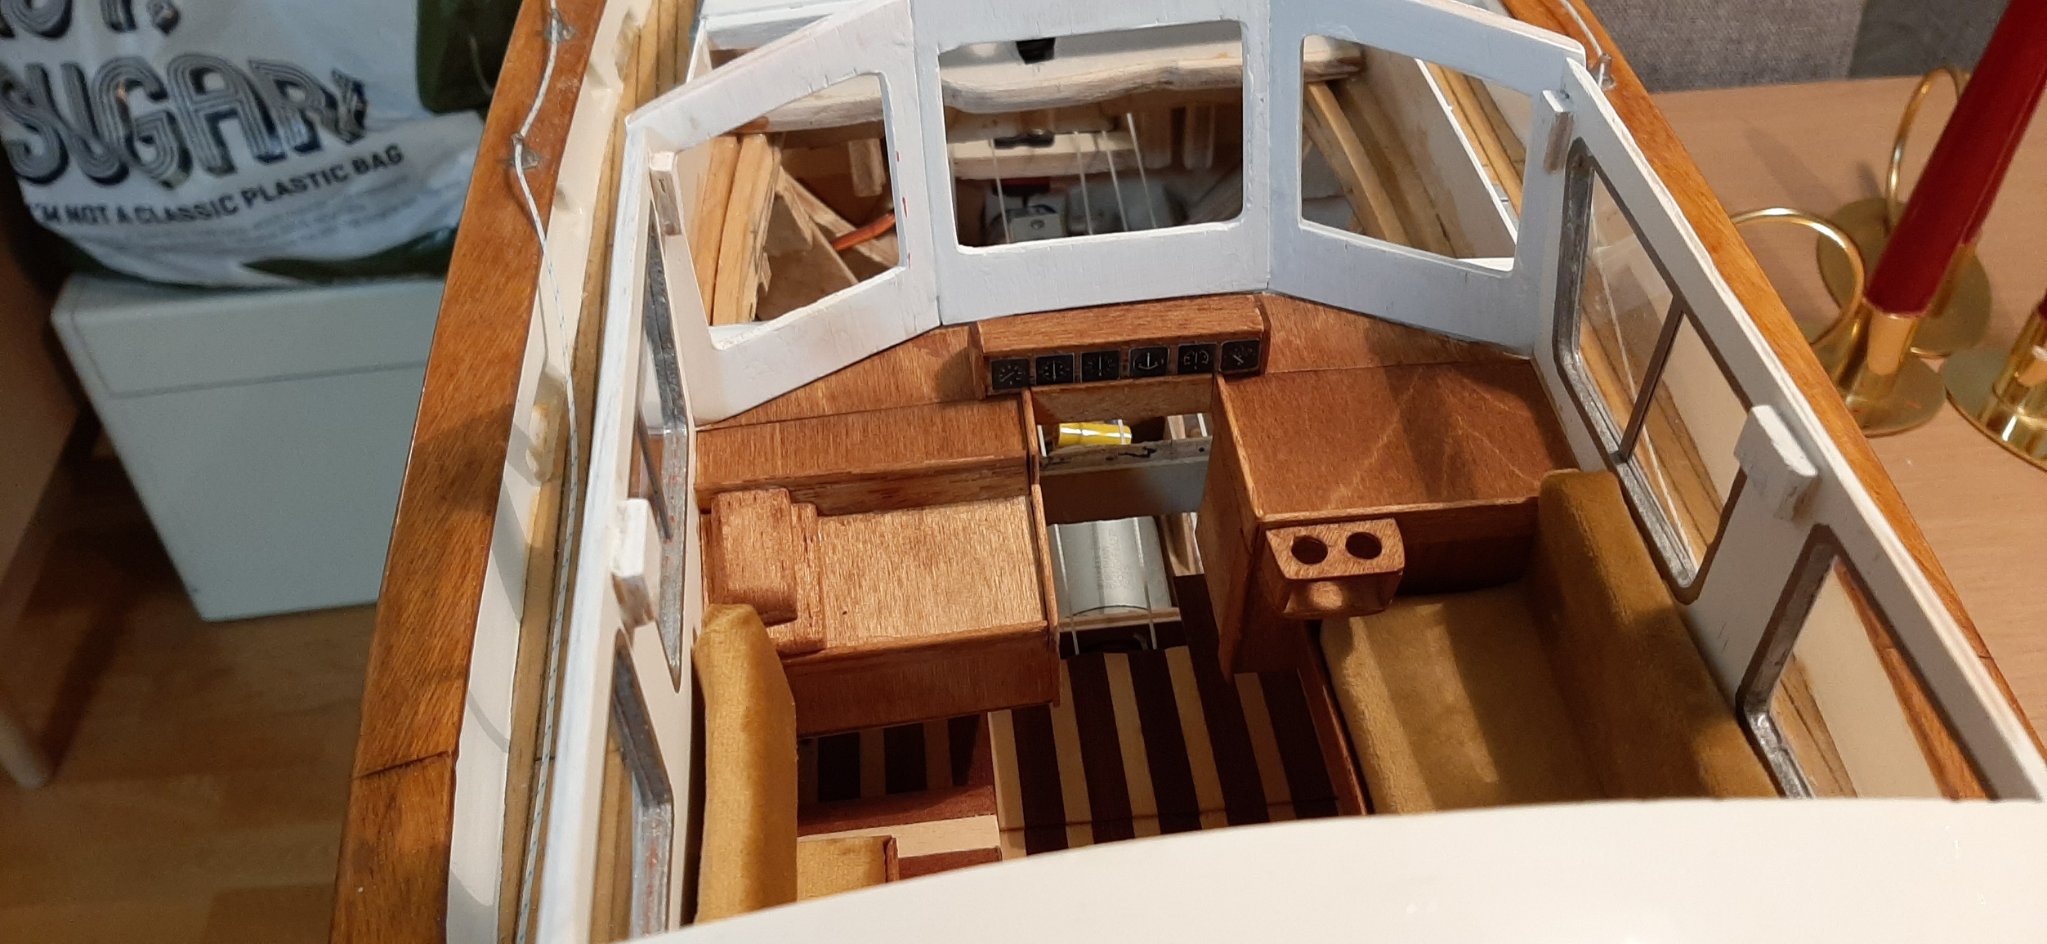
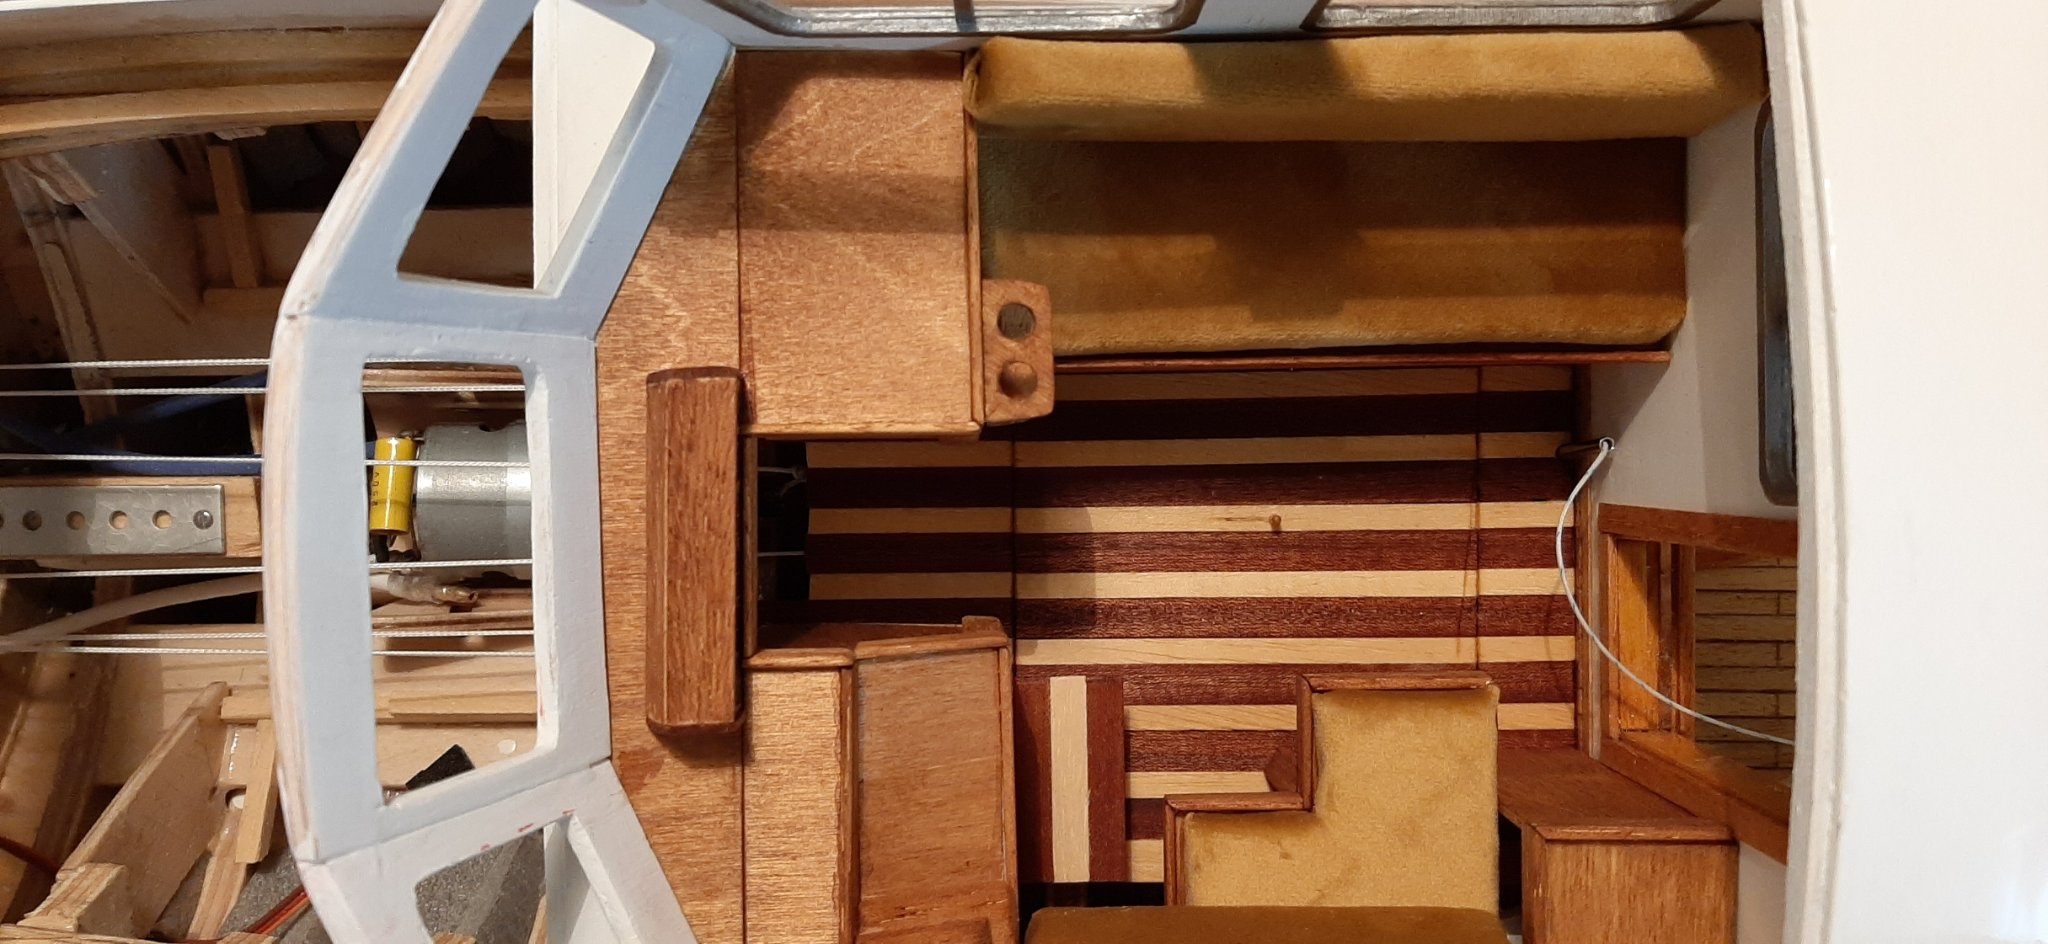
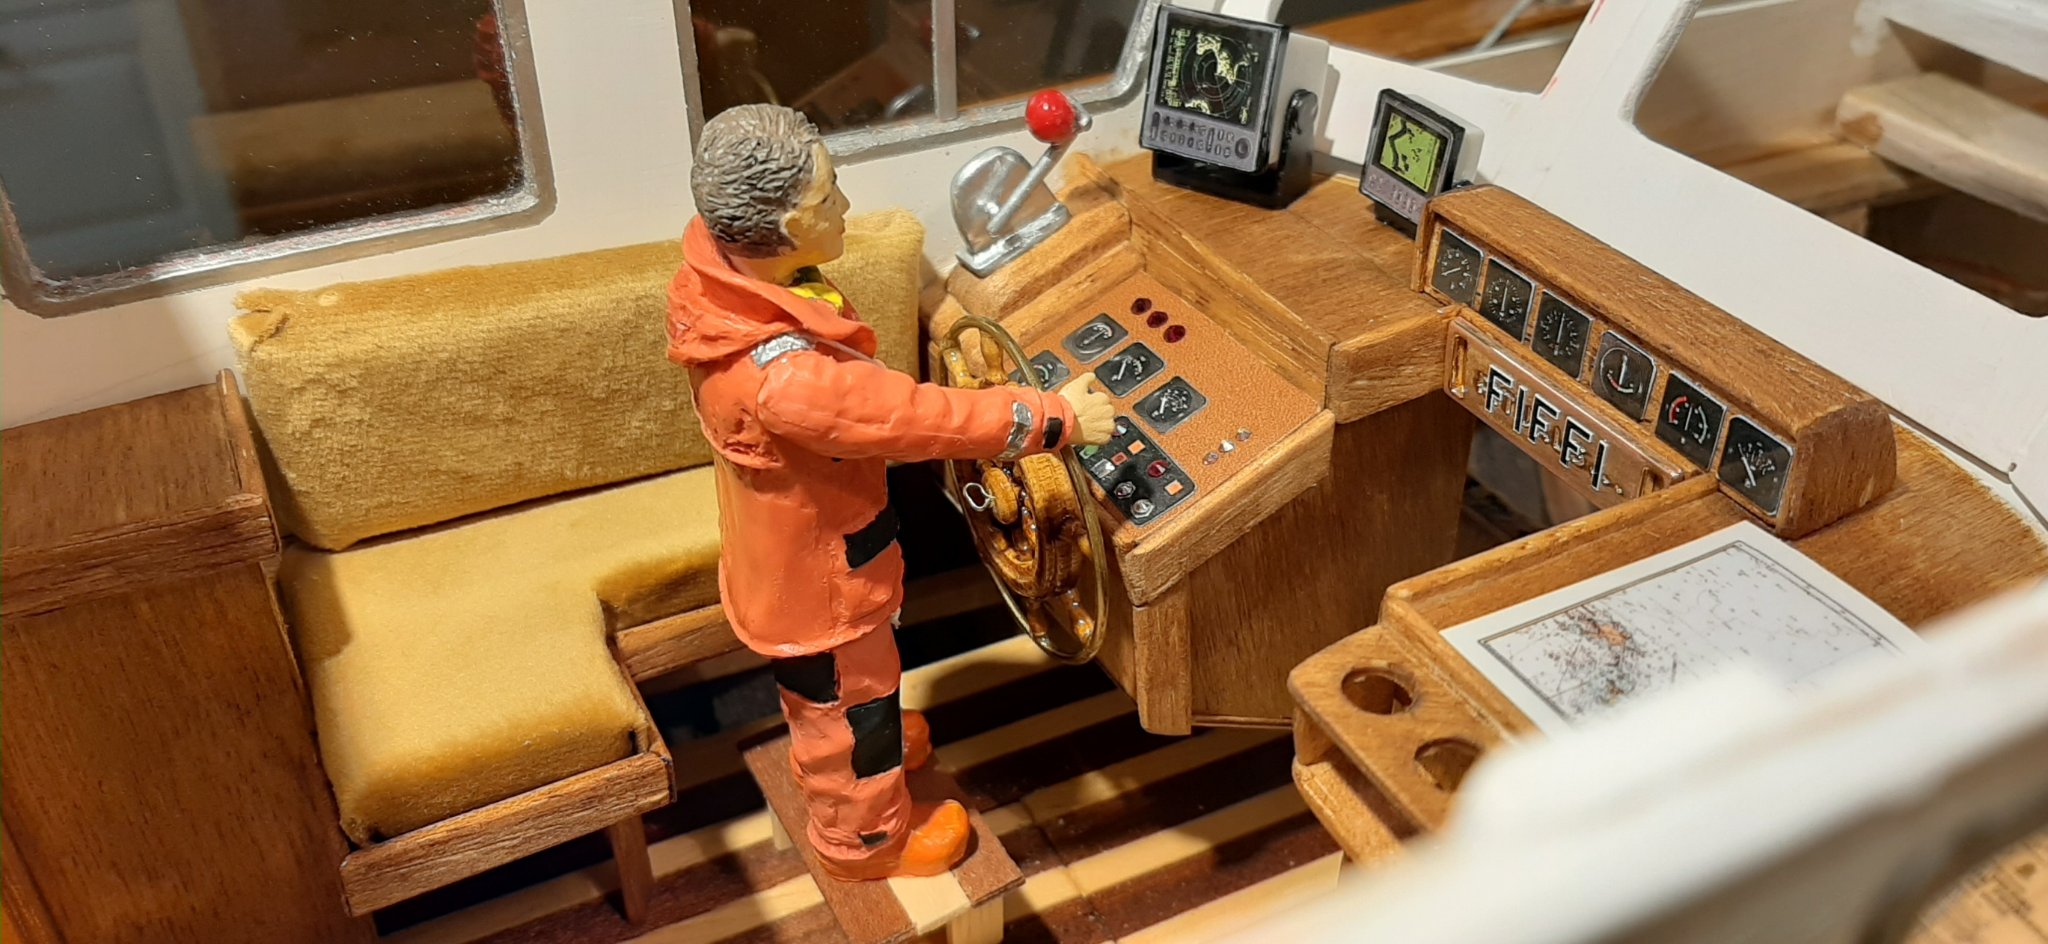
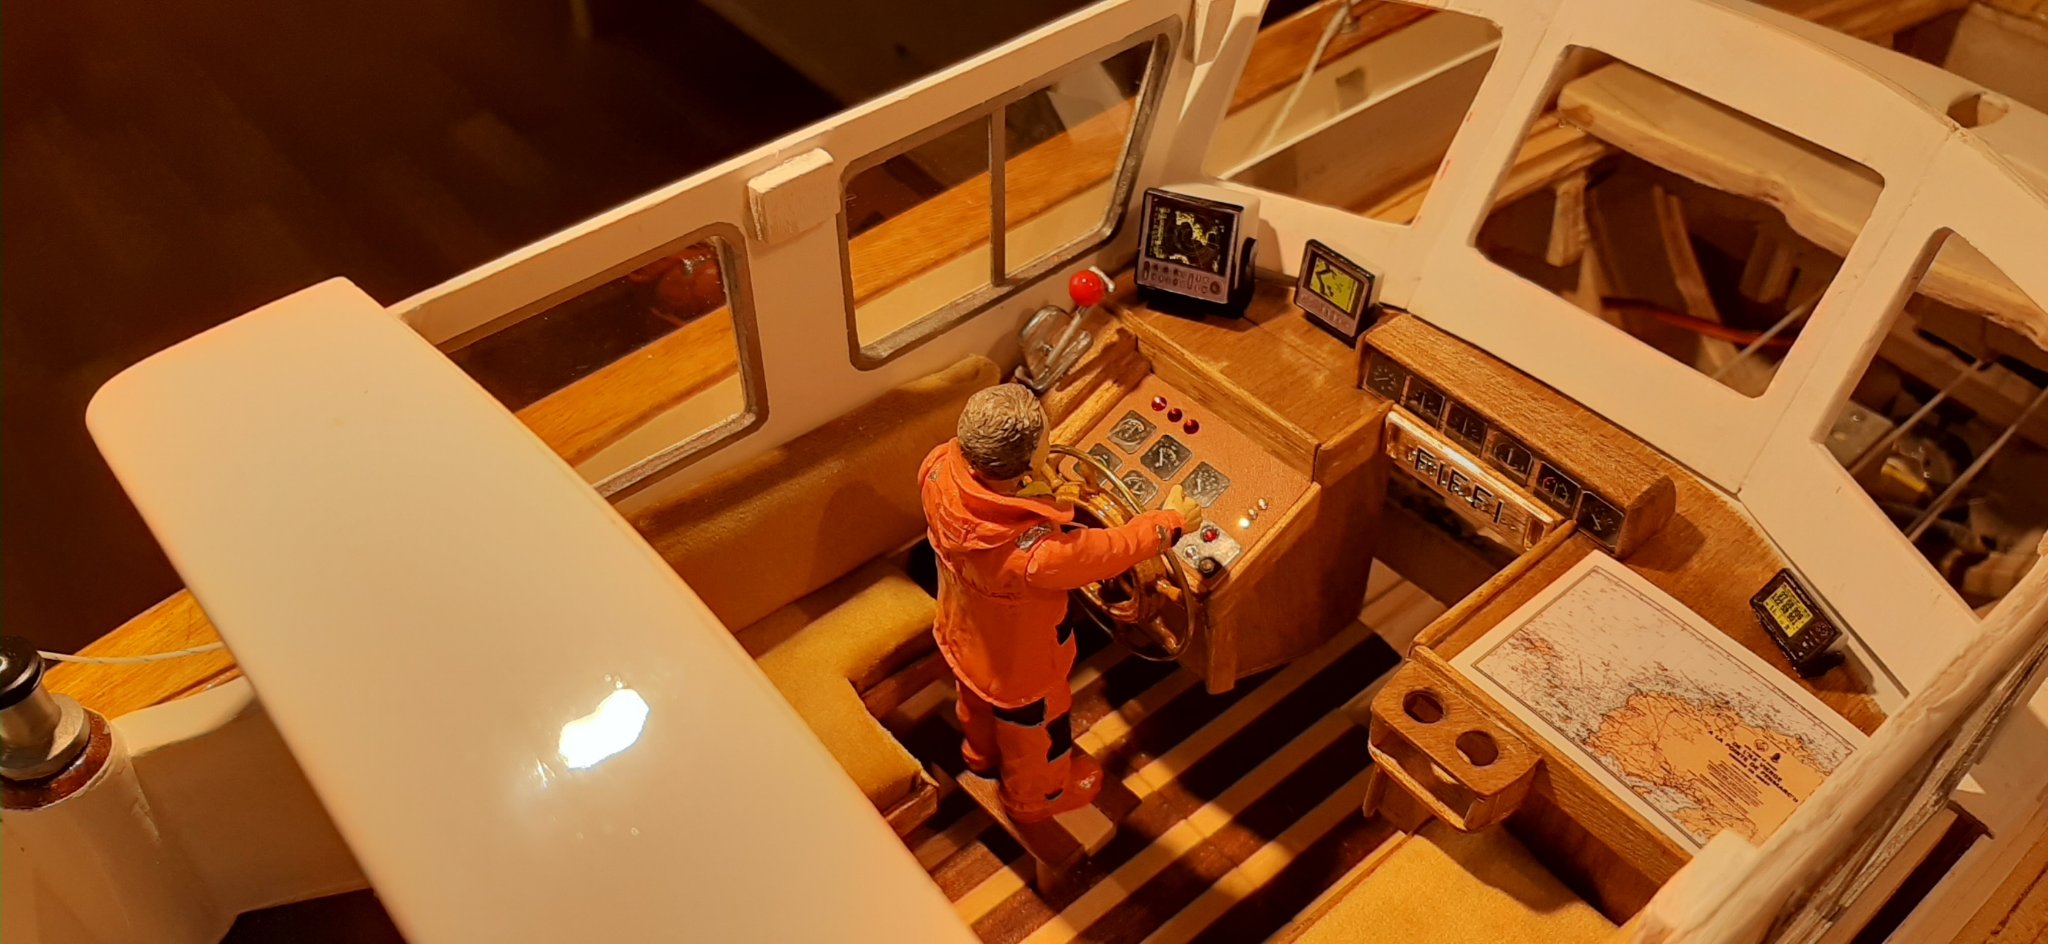
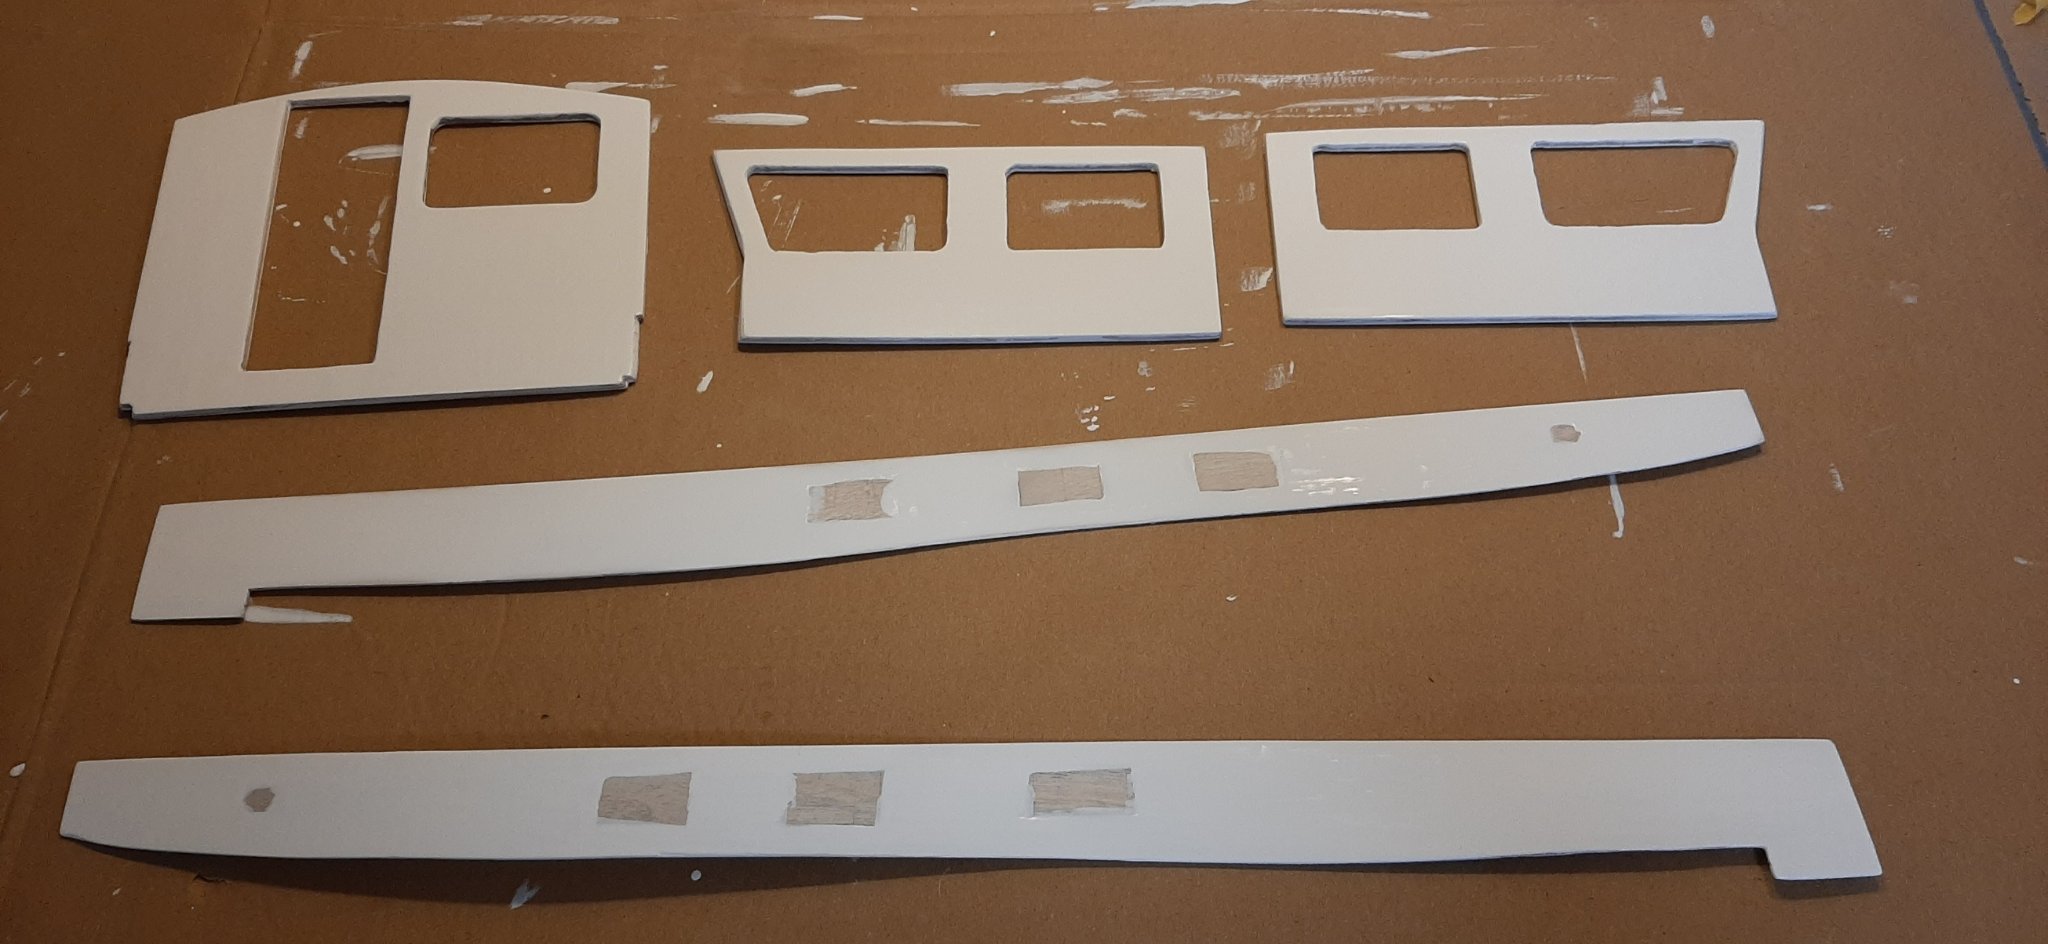
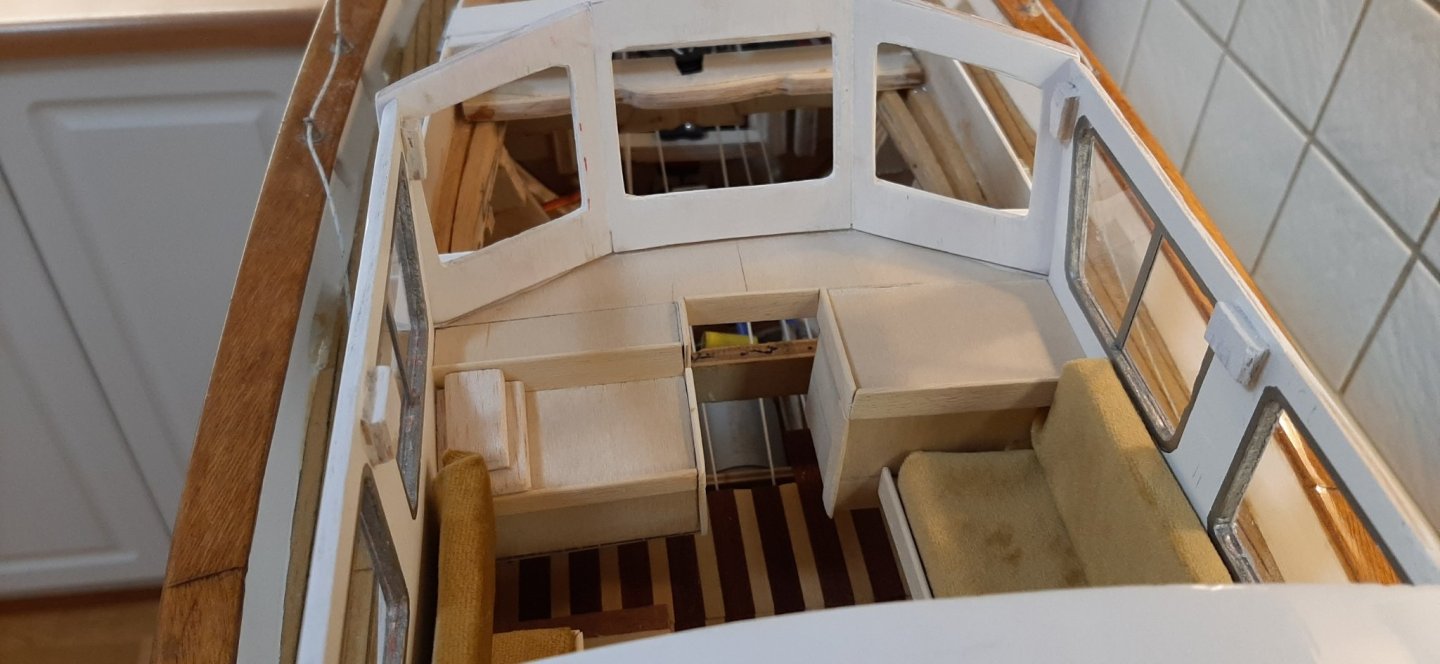
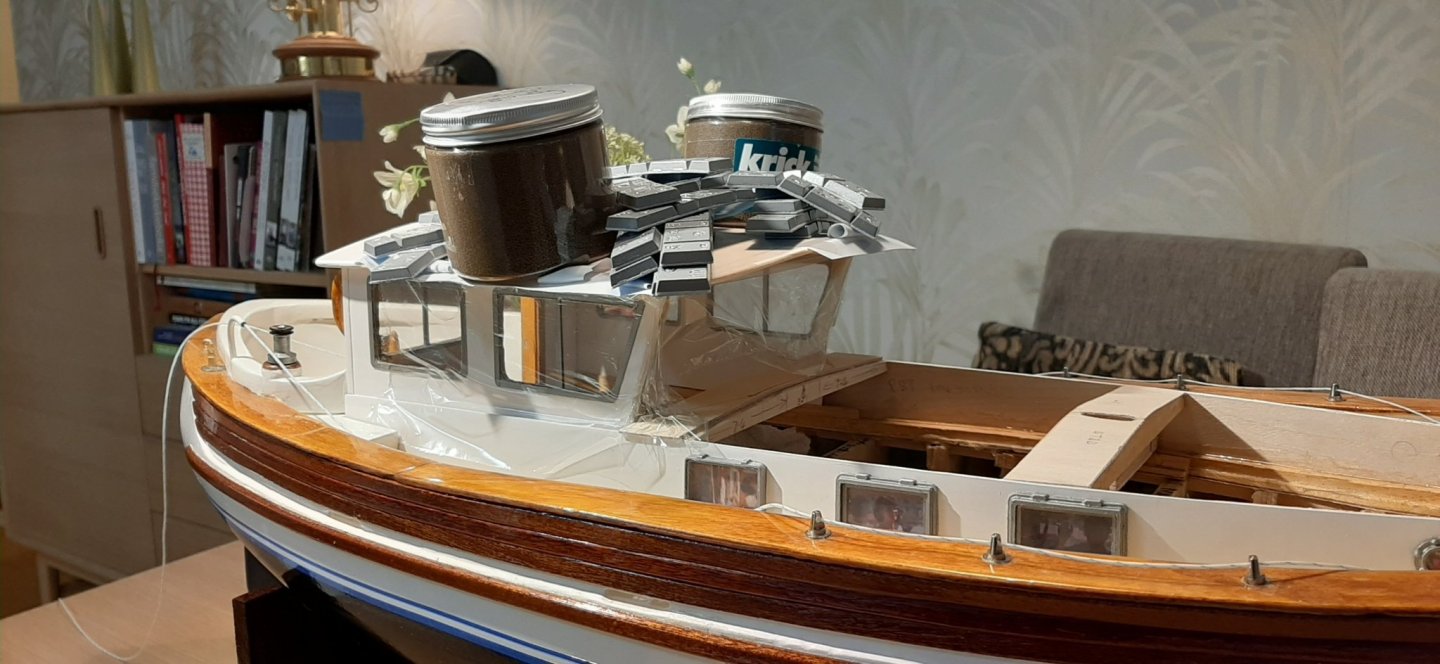
Started getting tired of painting white cabin-roof panels! Just one more undercoat to apply then sanding down for the gloss finish. Gone over to an attempt at wheelhouse interior furnishing and upholstery. Curtain material used on the cushions is a bit thick -which resulted in untidy corners. Will tidy it up a bit later. I wanted to try making the 'dolls-house' furniture and fittings for a while before going back to painting. Wheelhouse interior now with upholstery and teak stain on the woodwork. Front window frame is not glued on yet -just sitting loose.

-
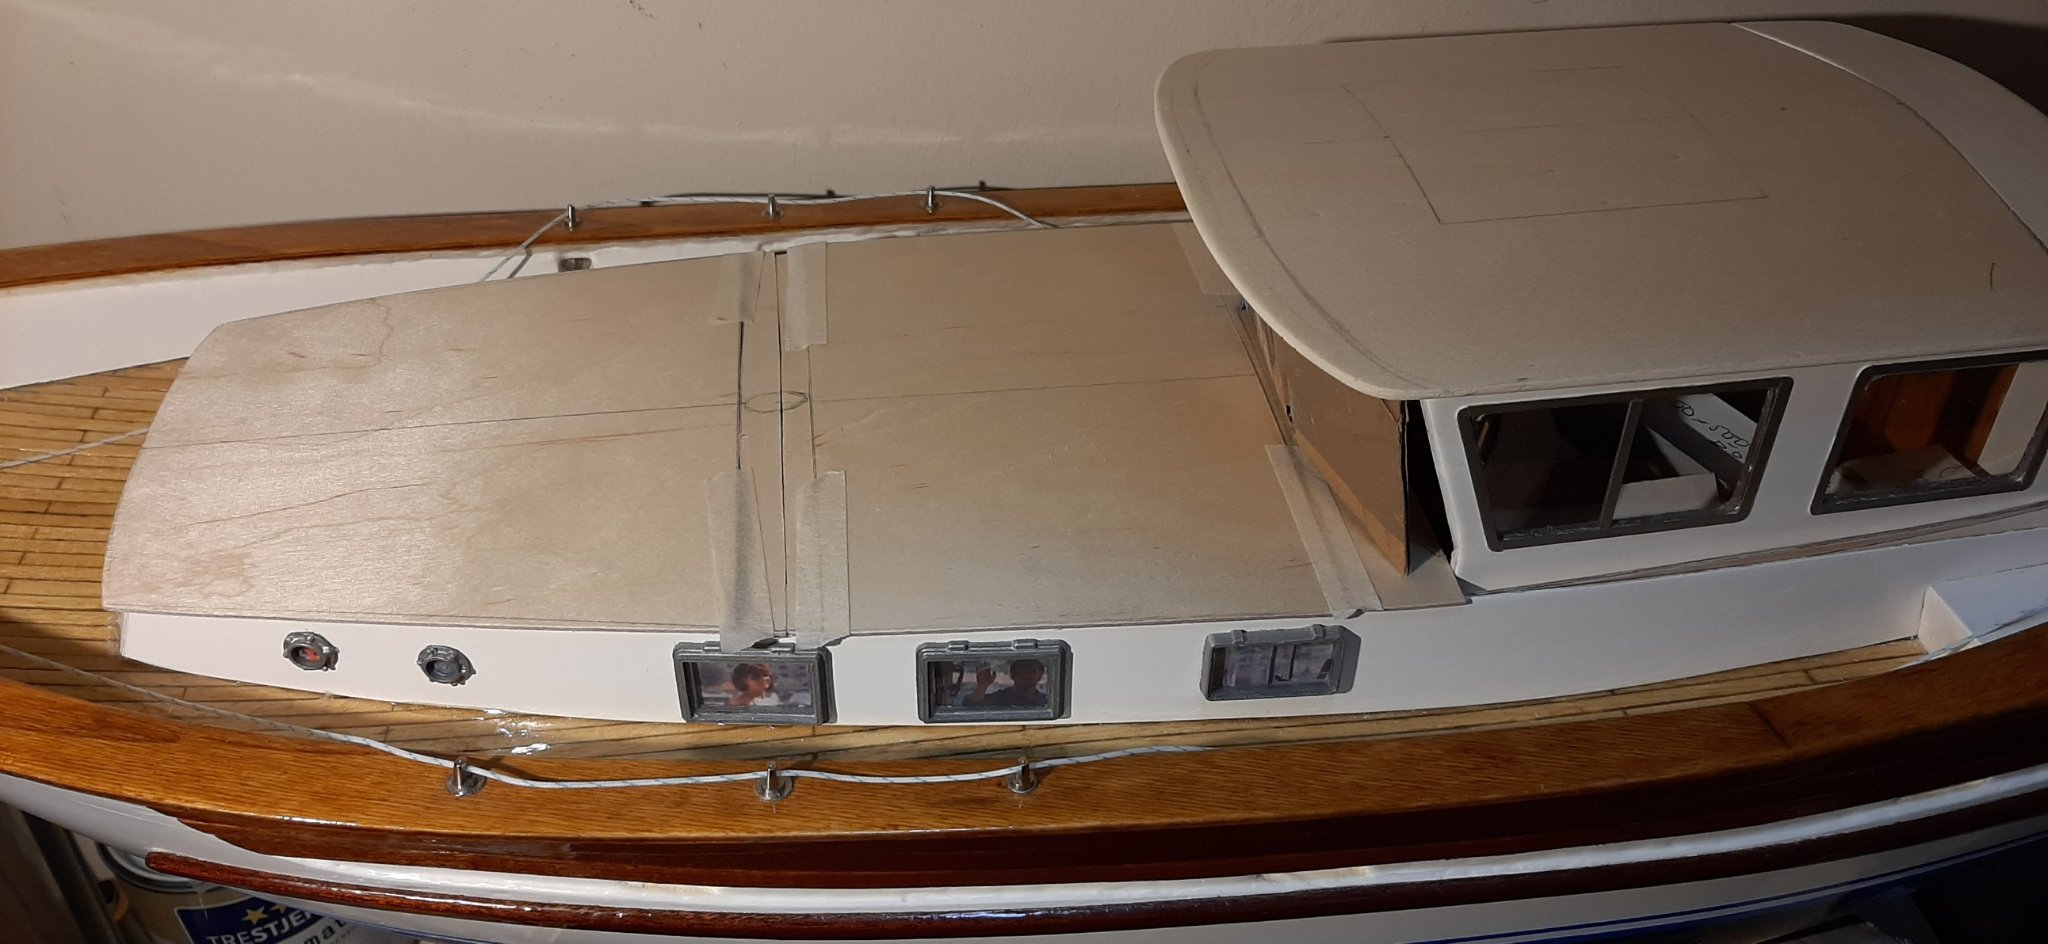
Roof-top sections have now been shaped to the cabin sides and have received curved beams below to form the slight convex shape required. Masts are keel-stepped and have been loose-fitted as a test and to help locate roof tops. Some detail features still need to be added to the roof-tops...dorade vents, support posts for the teak handrails etc. All 3 prepared 'tops' will soon receive sanding sealer, undercoat and gloss. The method of holding the removeable cabin-tops in place will probably be small hatch-latches and/or strategically placed deck fittings. Wish all a Merry -and safe- Christmas, George
-
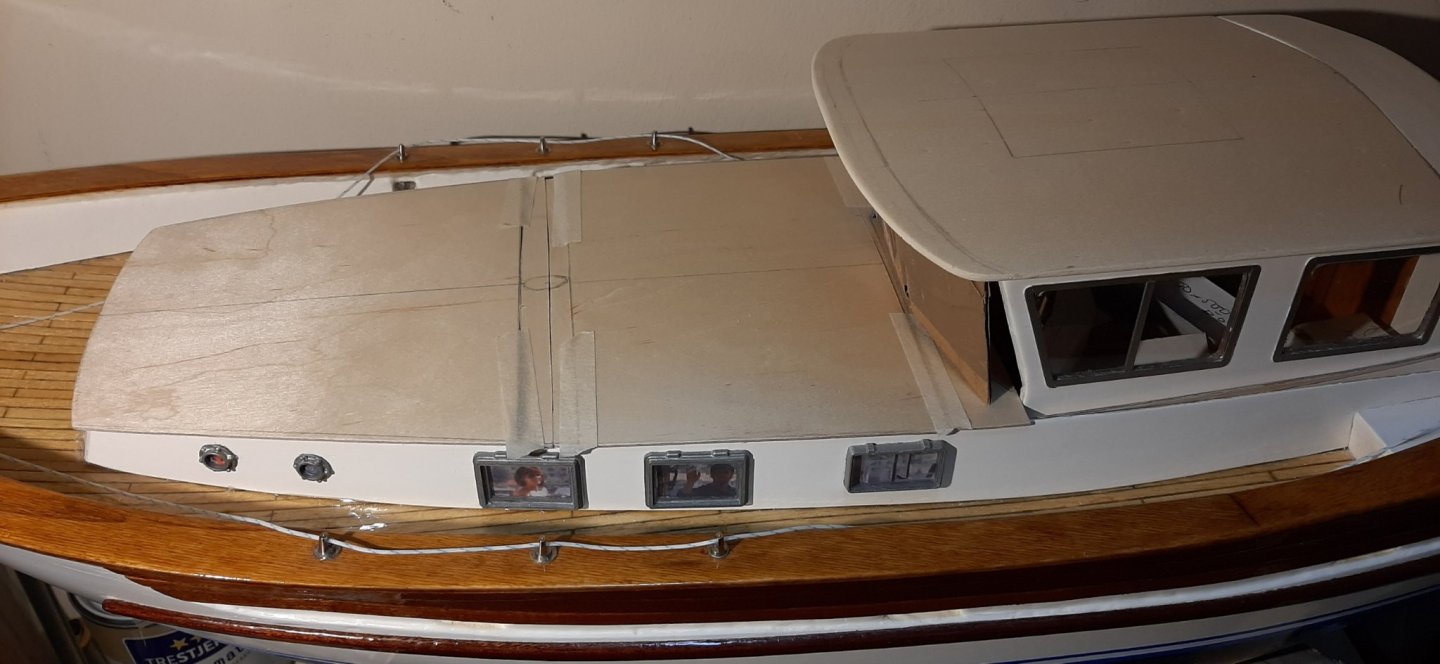
I see that there are two different places where I have written info about my 'activity'. Did not realise this until this morning! The build of the Fisher is coming along slowly. A lot more detailwork than I first envisaged -which is usually the case! Posting a few more photos here just to prove that I have not given up. Present phase of construction is preparing and painting the wheelhouse front windows, removeable wheelhouse roof and cabin top sections. This process will take until the end of the year I expect.


-
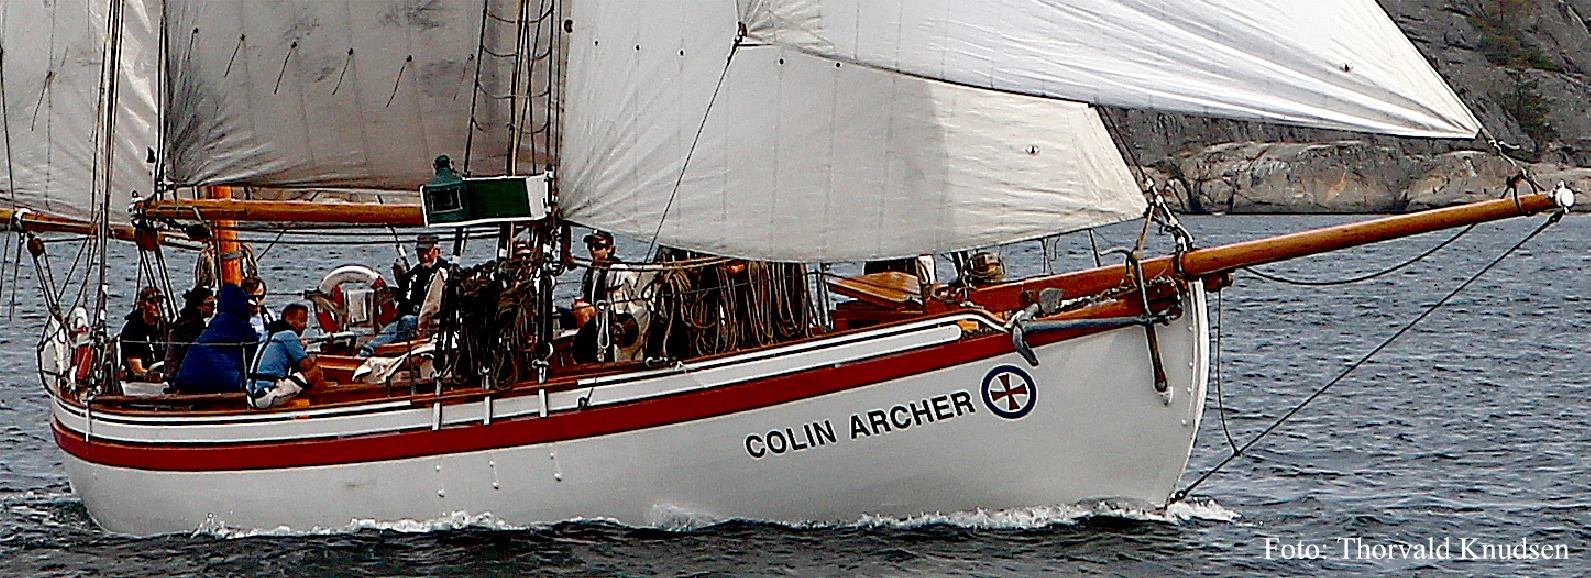
Received info' from the Maritime Museum about the Colin Archer RS14 'Stavanger'. Also a reference to the book by Bjørn Foss about the rescue ships -'redningsskøyter'- .
RS14 was the 2nd of the 'Svolvær' type vessels. RS 12 "Svolvær" was the 1st of these. The Svolvær types were 35 cm longer than the Colin Archer type (RS1, RS 6, RS8 and others) and were 5cm narrower and 5cm less draft. The masts and sailplan were not changed from the original RS1. There was also a lager (heavier ?) keel. The bow shape above the waterline seems to have a bit more rake -looking slightly more 'streamlined'. Ref; a drawing in the Bjørn Foss book.
In my mind there should be no real problem to use the Billing Boats RS1 kit to produce a model of the newer (from 1897!) Svolvær types vessels.
It will be interesting (for me anyway) to hear from Andreas Sundt later when he has visited the RS14 at the museum in east Norway.
George
-
I have been advised by a Colin Archer rescue boat expert that the RS14 version was not the same hull shape as the RS1. So to be authentic, the second Colin Archer kit will have to be built as one of several other versions: RS6, RS10 or about 3 other build numbers. Not very important actually. So long as the correct number is on the sail hardly anyone would notice the difference...Oooops I should not be saying such things on this site!
-
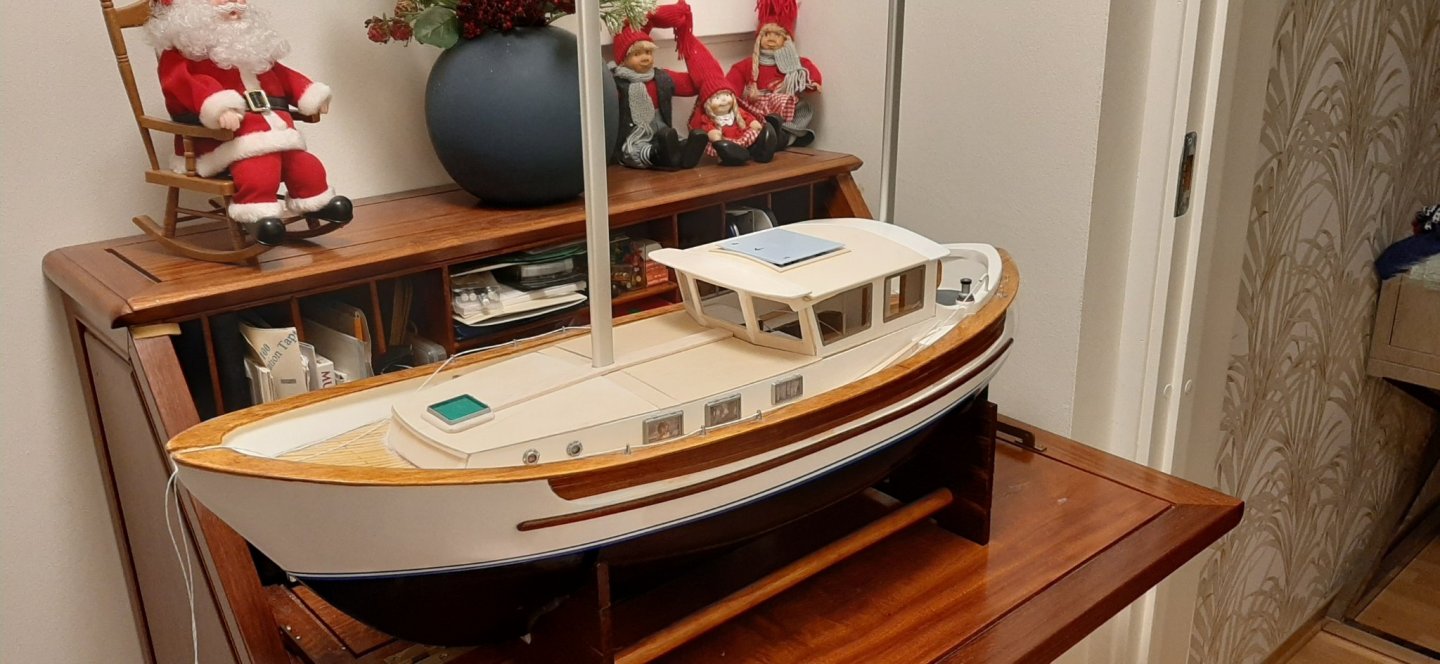
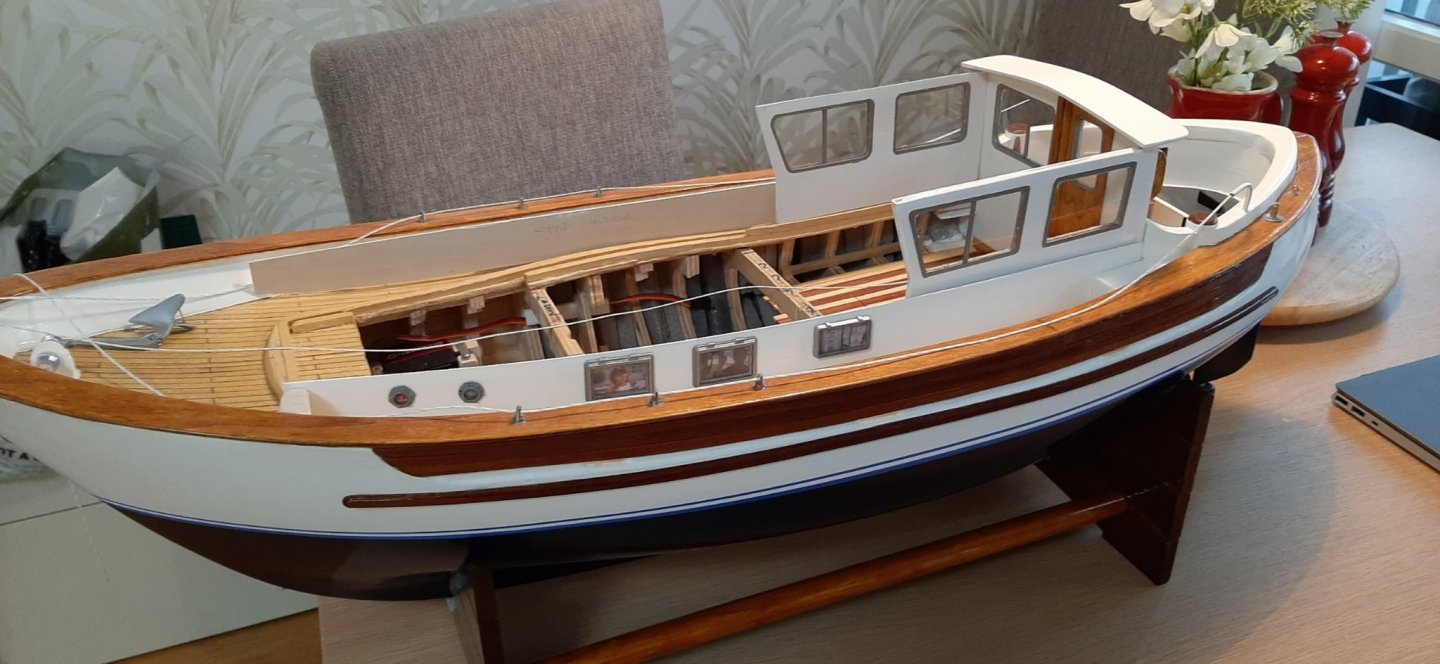
Fisher 34 is progressing slowly. Working out how to fix the cabin-top hatches so that they will be easily removeable and at least a little bit watertight.
-
I must confess......I was quietly browsing on the local 'for sale' site here in Norway -actually looking for a book on the old Colin Archer rescue skips when....suddenly.... there was a Colin Archer 414 (ABS hull) kit for sale. It was only 20 minutes drive from me so I when to see it.
Some mildew (jordslag) on the sailcloth, the wood didn't smell too fresh either so I bought it😬! Did not take the original box though, that did not smell good at all.
Once home, I sprayed the sailcloth with 7% vinegar and sprayed everything else with Cavicide (a surface antibac spray) to kill the mildew bugs.
This new (old) Colin Archer will be built as the RS14 which was launched in 1901 and named 'Stavanger'. It's 1' longer than the RS1 -don't know why yet. The full size RS14 is on land at the Colin Archer museum in Larvik east Norway.
There, I've confessed,
George
-
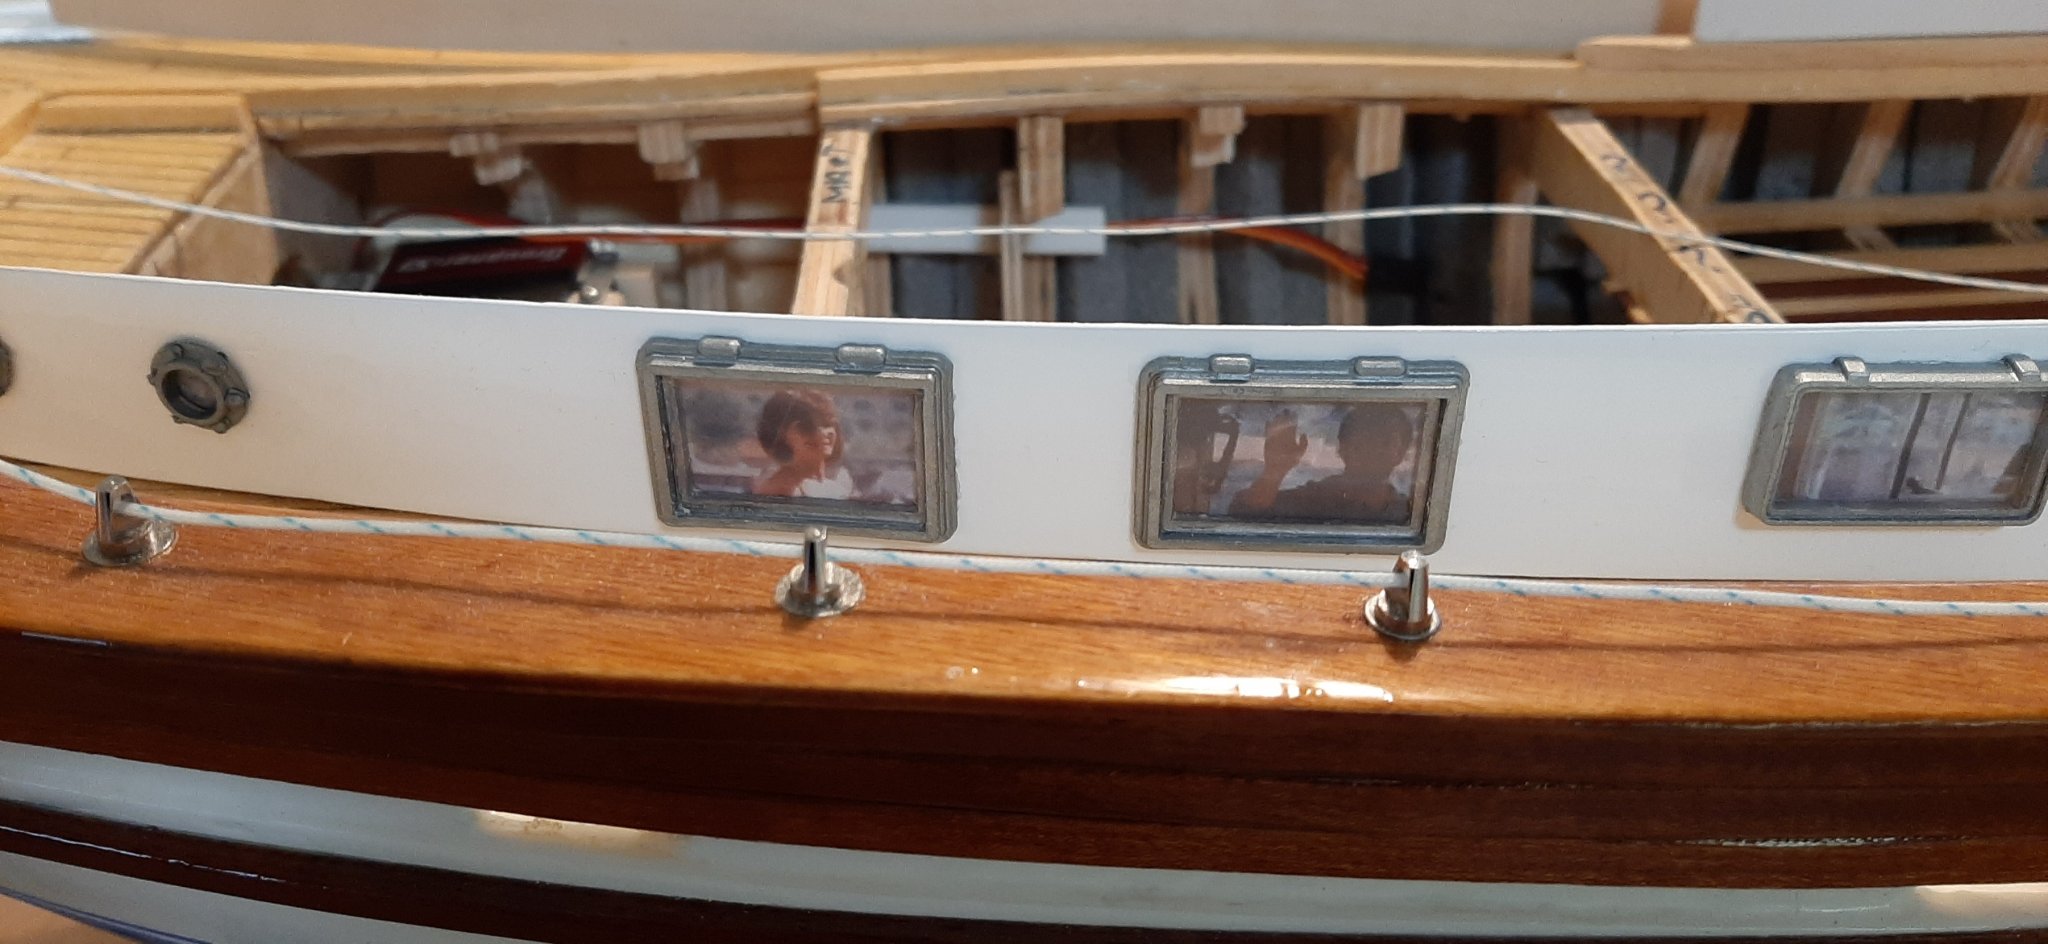
I was a bit unsure when I woke up this morning about using the ready made Cap Maquettes window frames on the cabin sides instead of cutting out holes and framing as with the wheelhouse bulkheads. But they got glued onto the cabin sides yesterday so it was a bit late to have doubts this morning!
I loose fitted all the parts this afternoon and took many photos just evaluate the 'look' of it.
Still not sure,

 so I will leave well alone and think about it this weekend.
A bit 'harry' to have photos of the Admiralty and I peering out through the windows on both sides simultaneously...but it seemed like 'novelty' idea yesterday!
Wish all a peacefull and safe weekend.
George
-
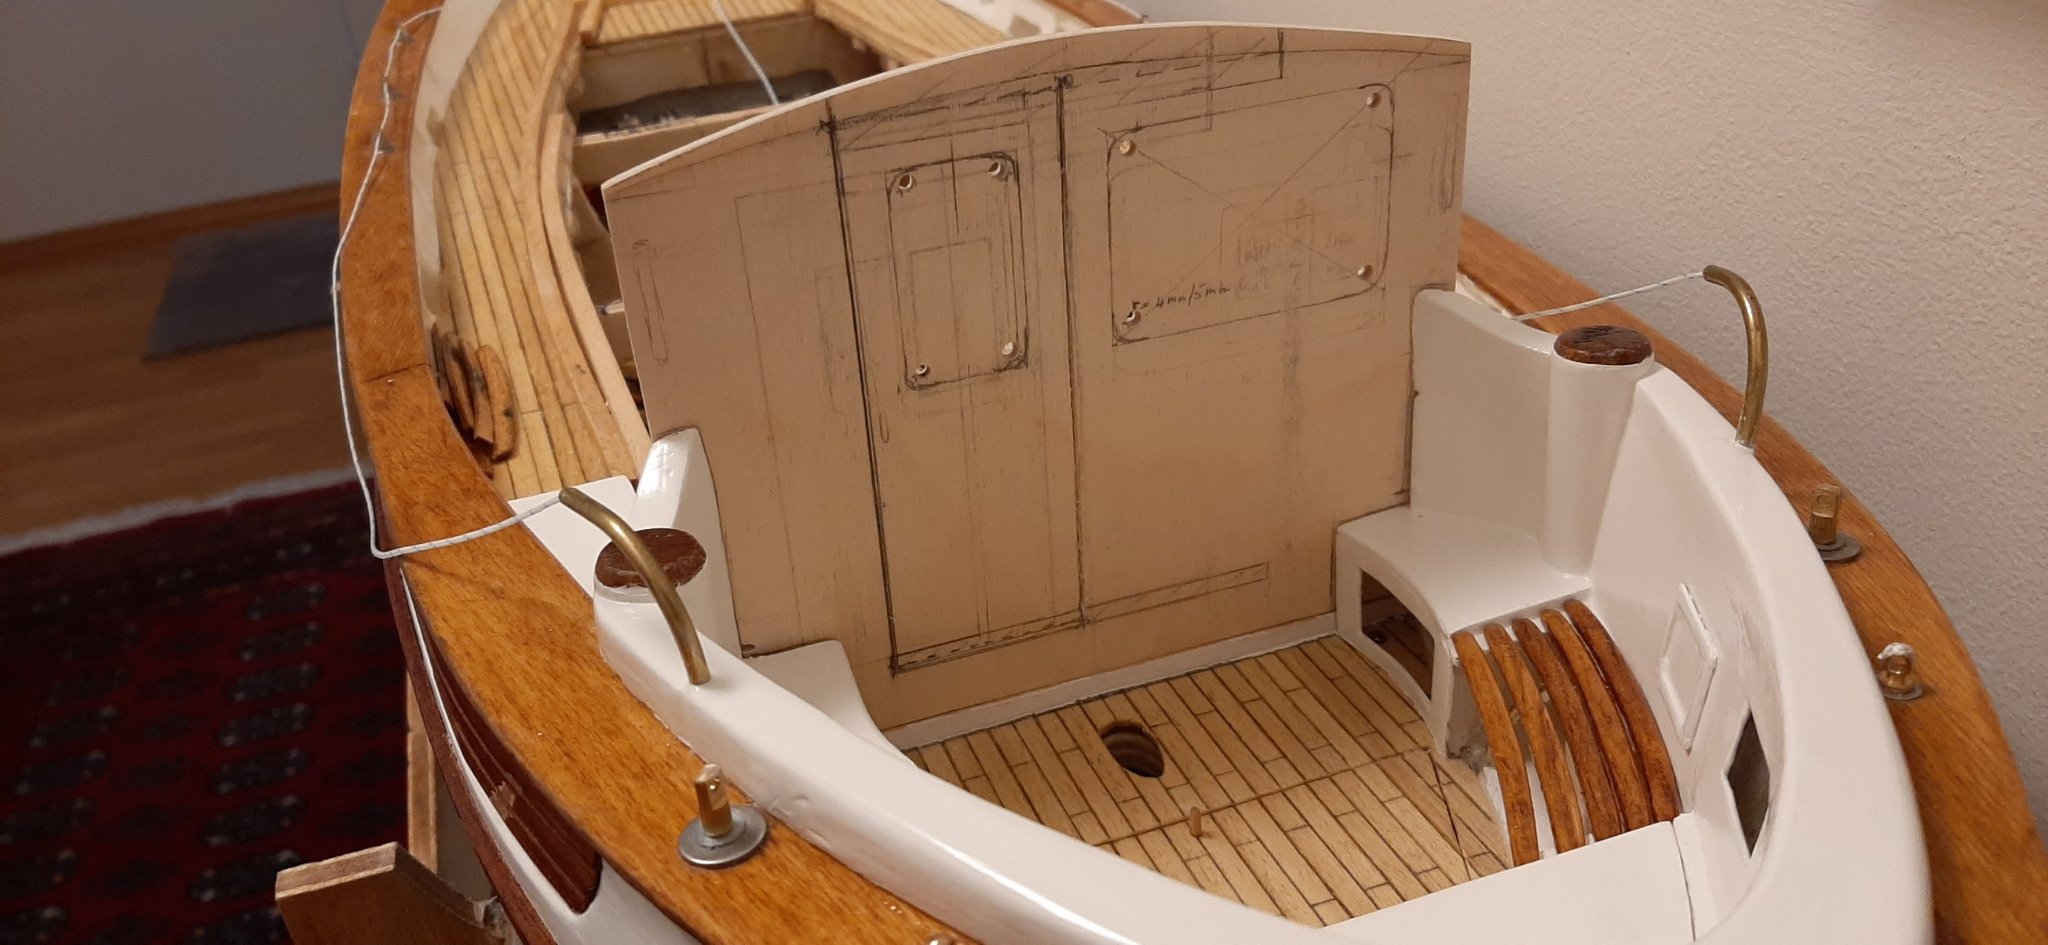
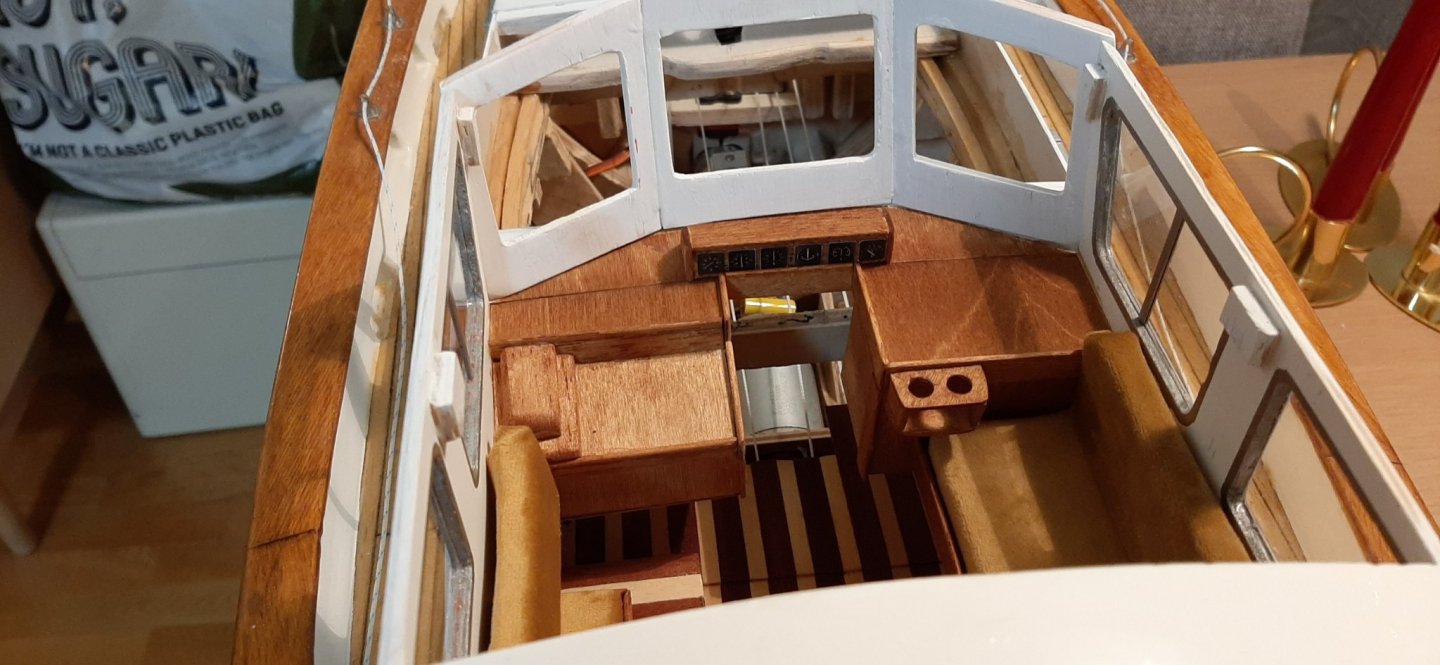
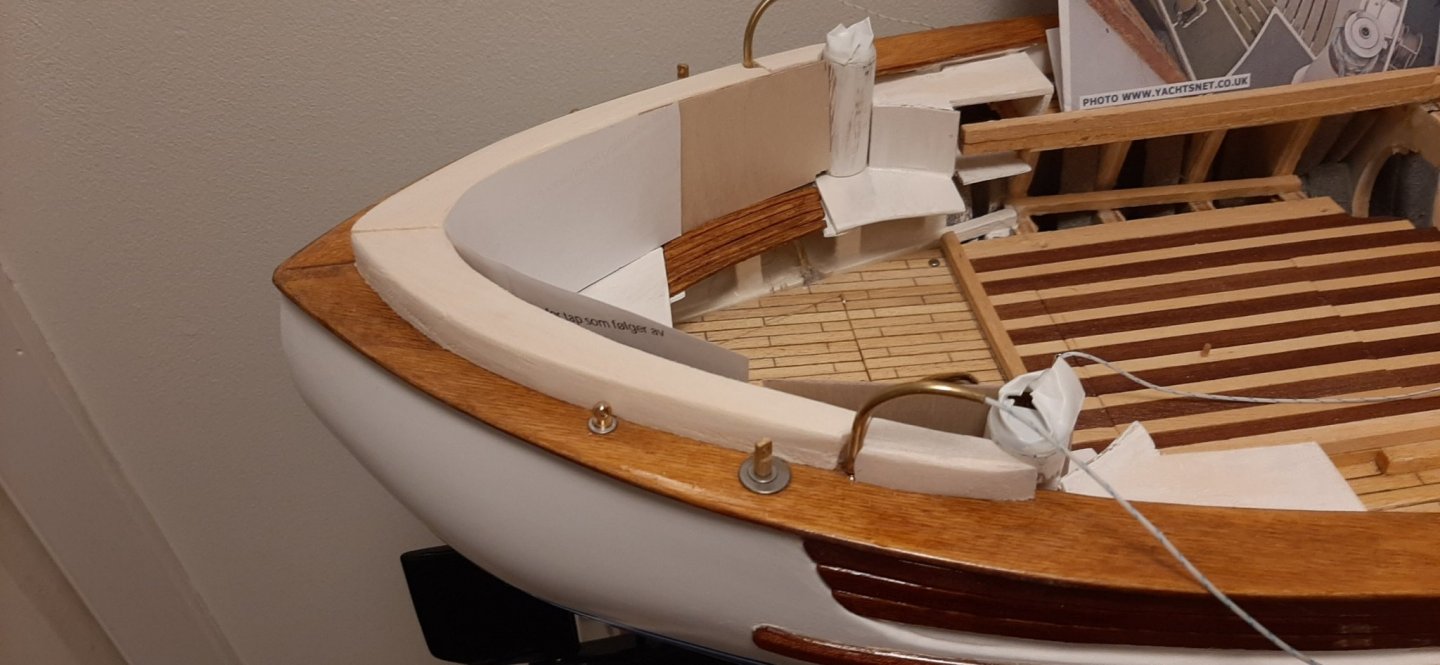
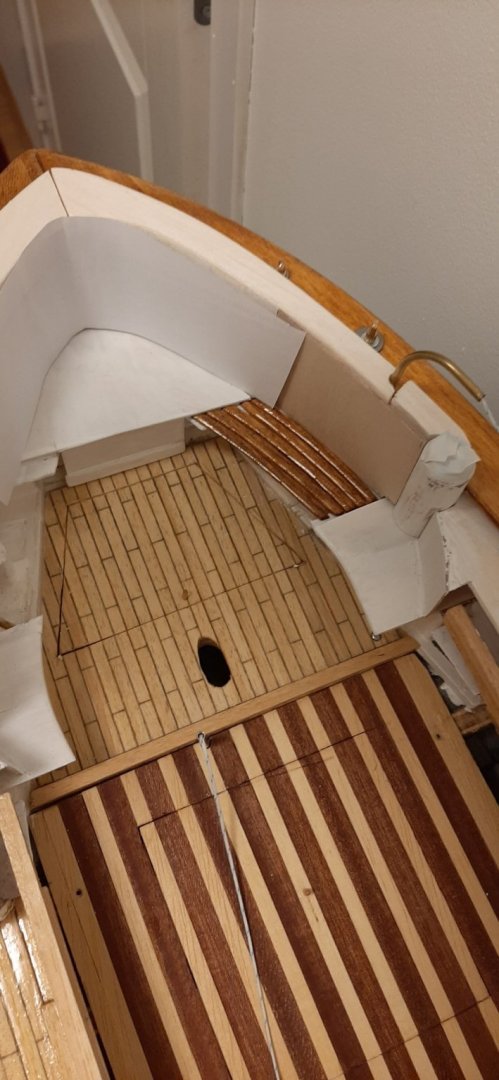
Components of the wheelhouse aft bulkhead have now been glued in place and test fitted to the cockpit. The aft part of the roof-top is only 'balancing' on the top of the bulkhead. It will be fitted after the whole rooftop is prepared.
Wheelhouse sides were produced yesterday -but no photos available yet.
George

-
Had a long pause recently due to working on my daughter's car. It failed the 2-yearly "EU- control" check, and needed some serious attention.
Done some re-painting of the wheelhouse and cabin-top sides due to very poor topcoat finish. Sanded down with wet&dry ready for a new topcoat AND a new paint. Carsten's recommended (?) Bengalack! in gloss white. Hope this will flow out better and give a smoother finish than the previous 'full-size yacht paint'.
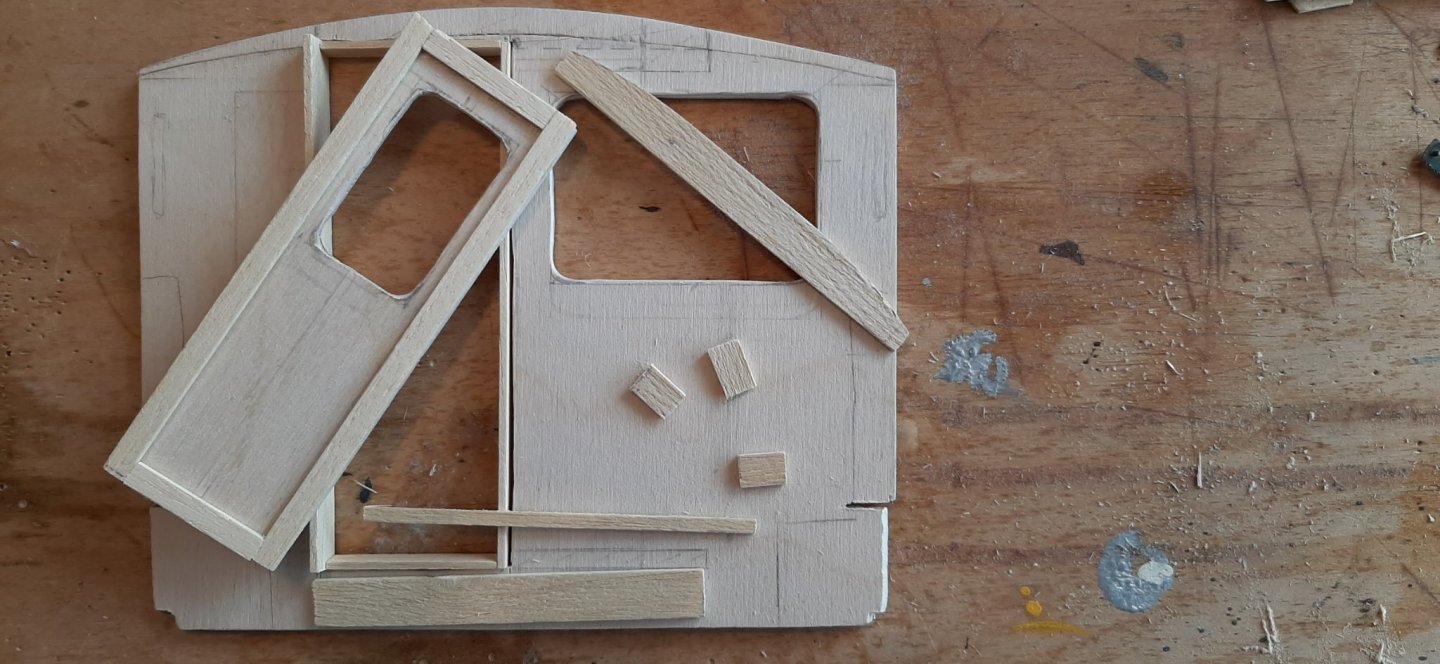
Tried glazing and framing the wheelhouse sliding door. Not great, but it will have to do. My eyesight is not quite up to the required standard for a really fine detail work. Framing the windows in 2.5mm strip is a bit ambitious and I had to drop the plan of inside curves around the corners!
George


-
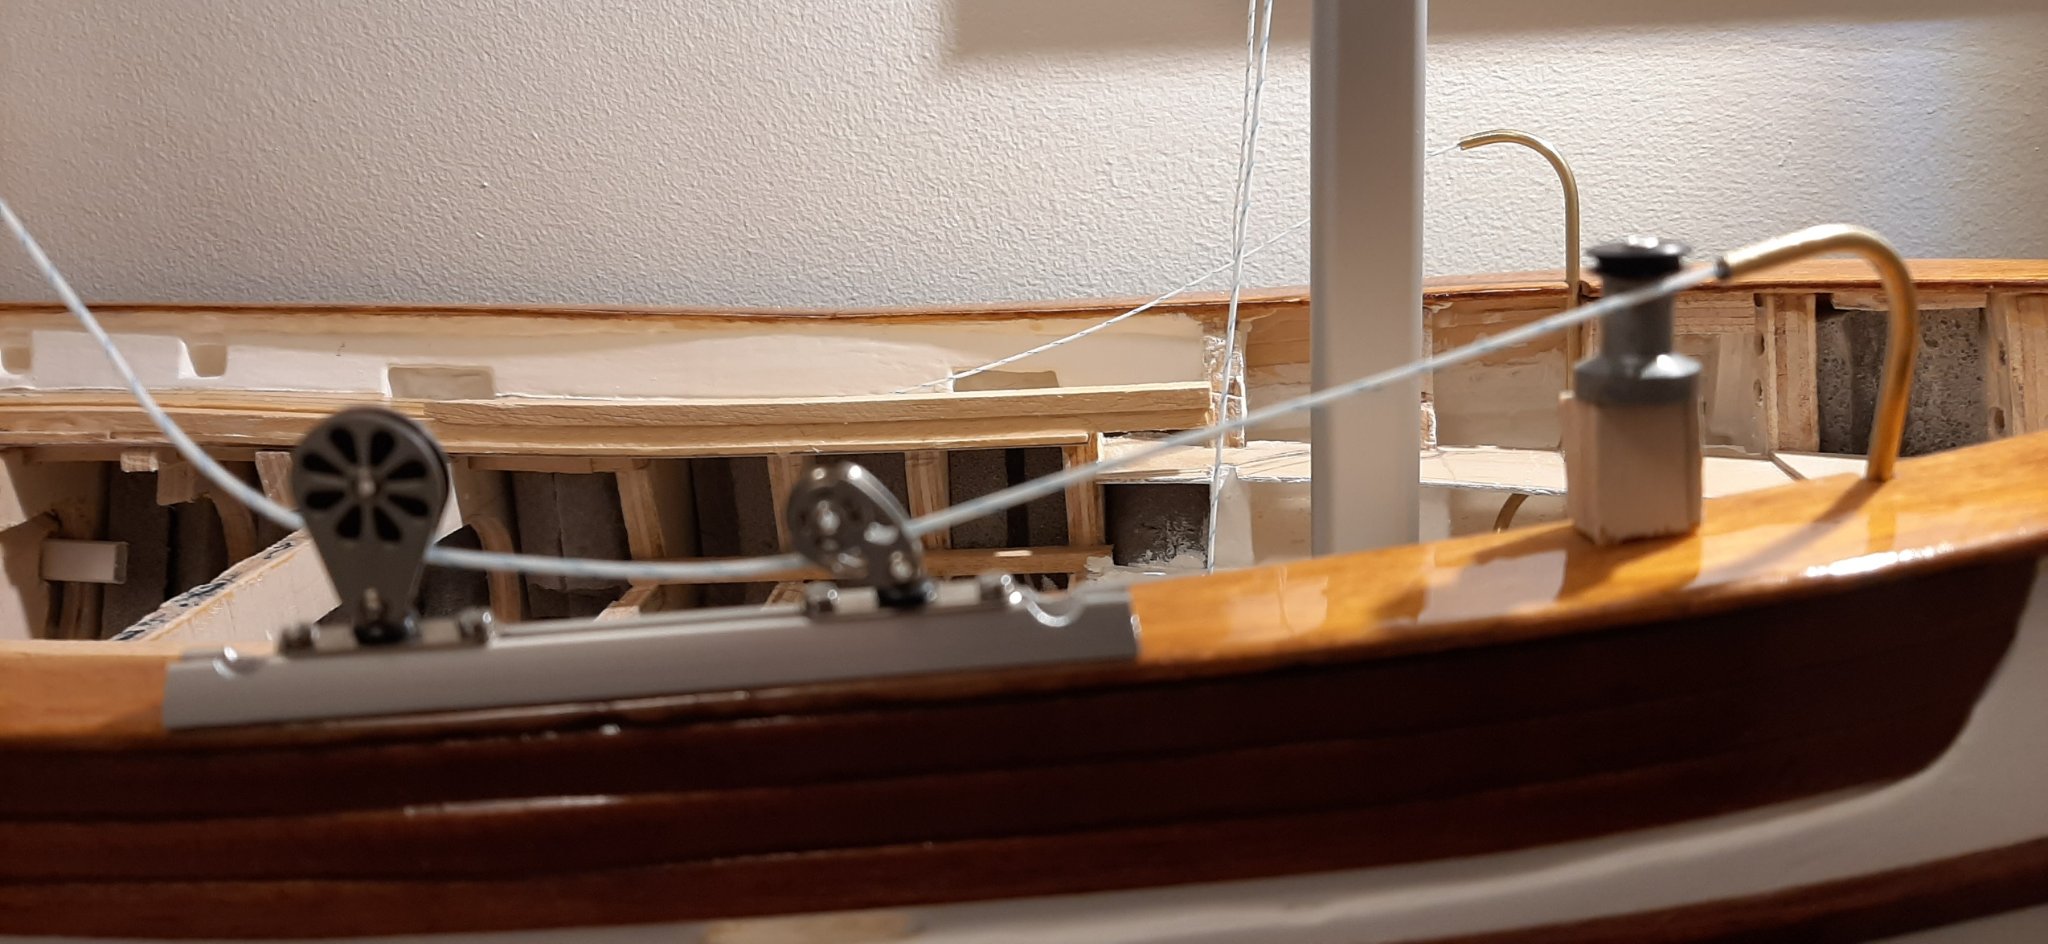
Hi Andreas, answered your question about brass tubes below your posted question. Should have written it up here so you could see it easier! Included 2 photos. The plan is to control the large genoa with 2 servos, one for port tack and one for starboard tack. Hope it works!
George
-
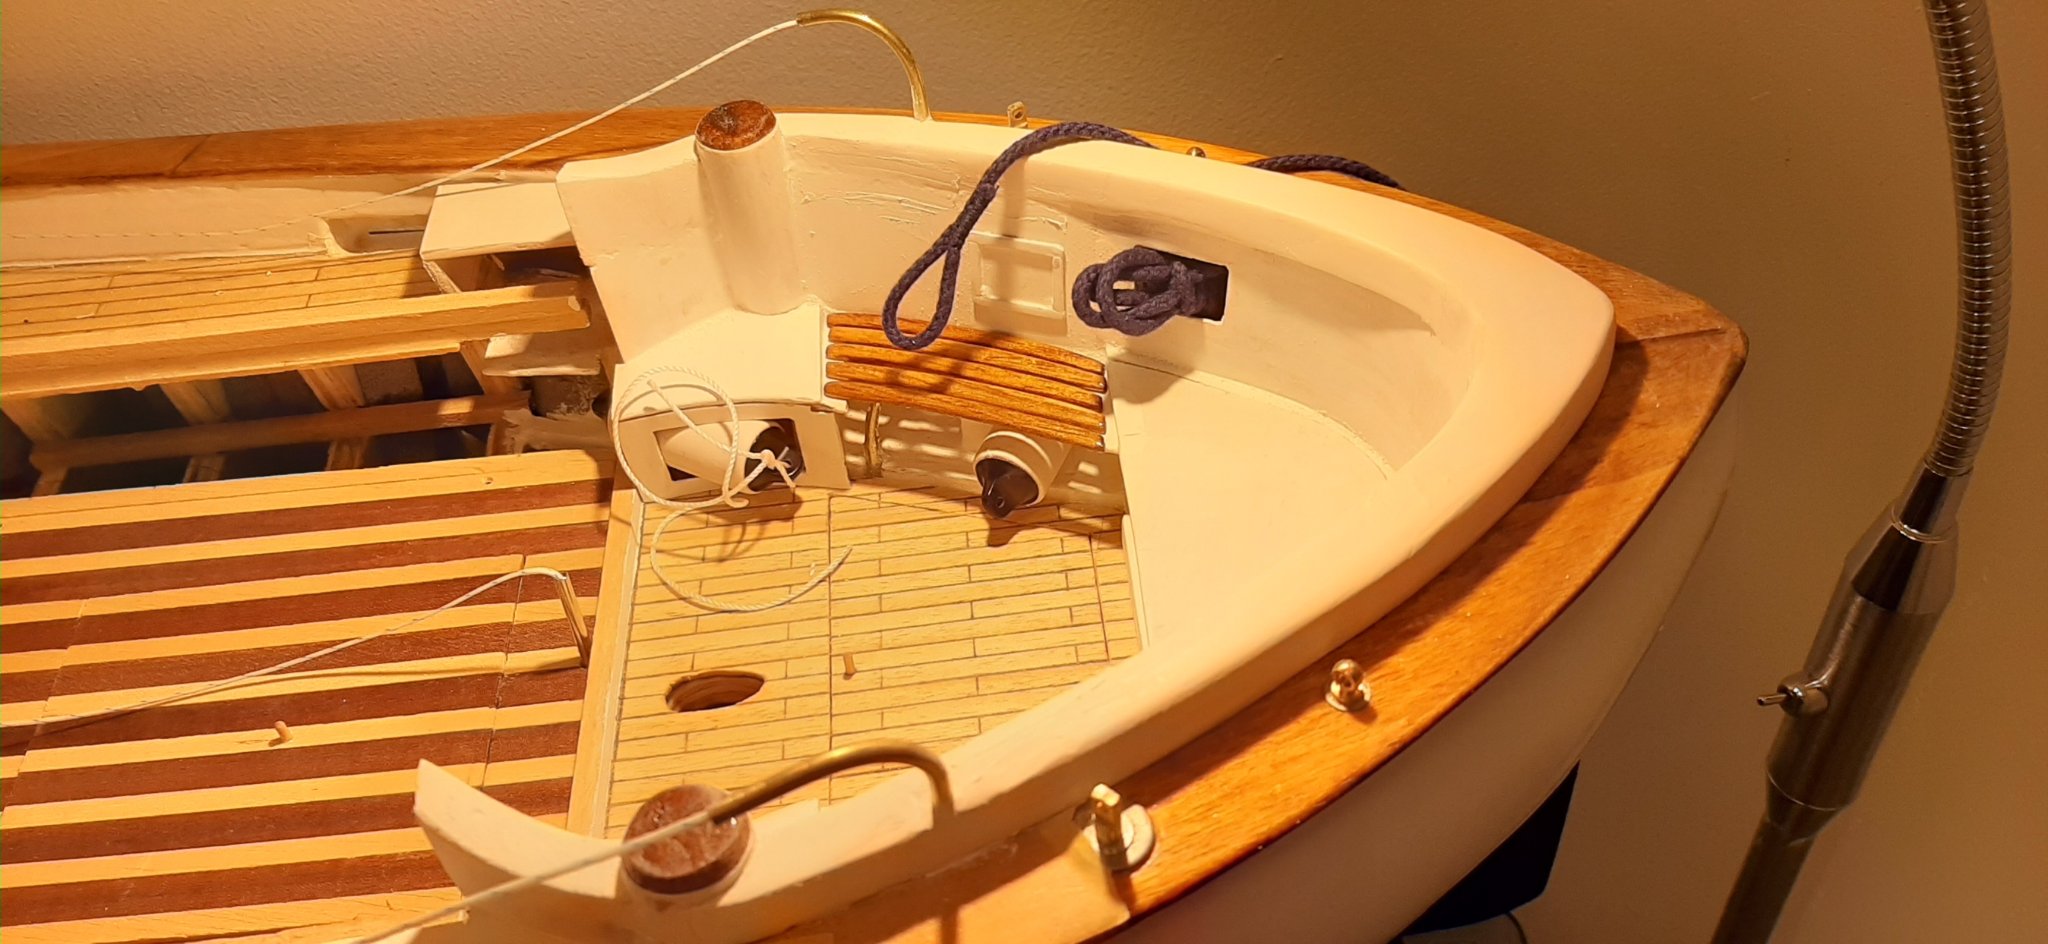
I've been working on the Fisher 34 since the Colin Archer went into storage. The cockpit area on the Fisher has a lot of curves and has taken time to get right. It's now been brush-painted with one coat of gloss -on top of all the other coats of 'stuff'. Started yesterday on the wheelhouse aft bulkhead and sliding door arrangement and produced what I think is a 'sliding door kit' which will be stained 'teak' and added when the bulkhead is prepared and painted white.


-
.thumb.jpeg.ee4d205046163acd786c8b7e92026d43.jpeg)
-
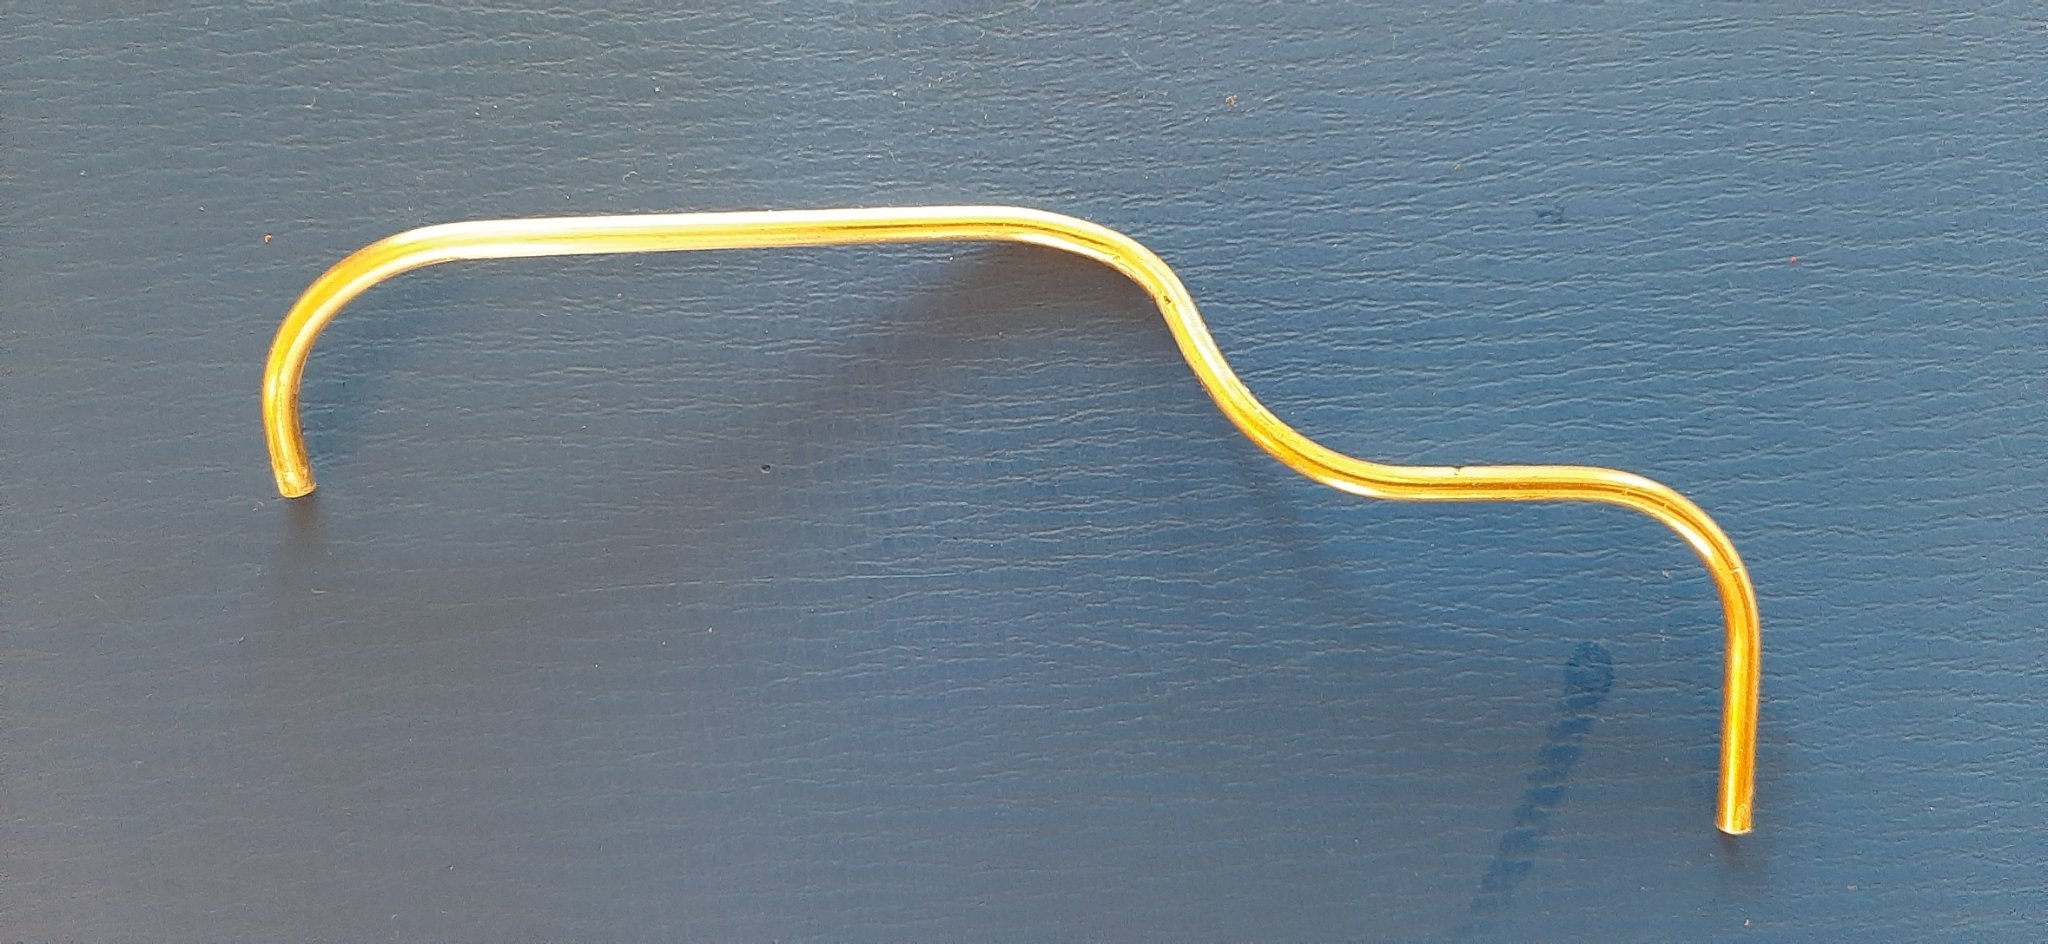
Hi Andreas, did not see your post until this morning. The brass tubes are guides for the sheets to the clew of the genoa sail. They were planned and installed very early during the build process and are a bit too long but I could not see that until the cockpit combing was shaped and glued on. The tubes bend and curve all the way down to the turnpulleys in the bilge so hope there is not too much friction. Posting photo of one tube. Also photo showing sheet exiting from guide tube to pulleys on genoa track. Don't know if this system will even work properly ! 🥴


-
-
My Colin Archer is now 'airbrushed' as much as I dare until the rest of the boat is completed. I expect that I will have to give it more coats later as there will certainly be some damage while handling during the build. I wanted to test the whole 'airbrush thing' and ended up using the CA as the extended testbed. The finish so far is silke-matt. It's now going down to the cellar storeroom until I get more progress on the Fisher 34.
George

-
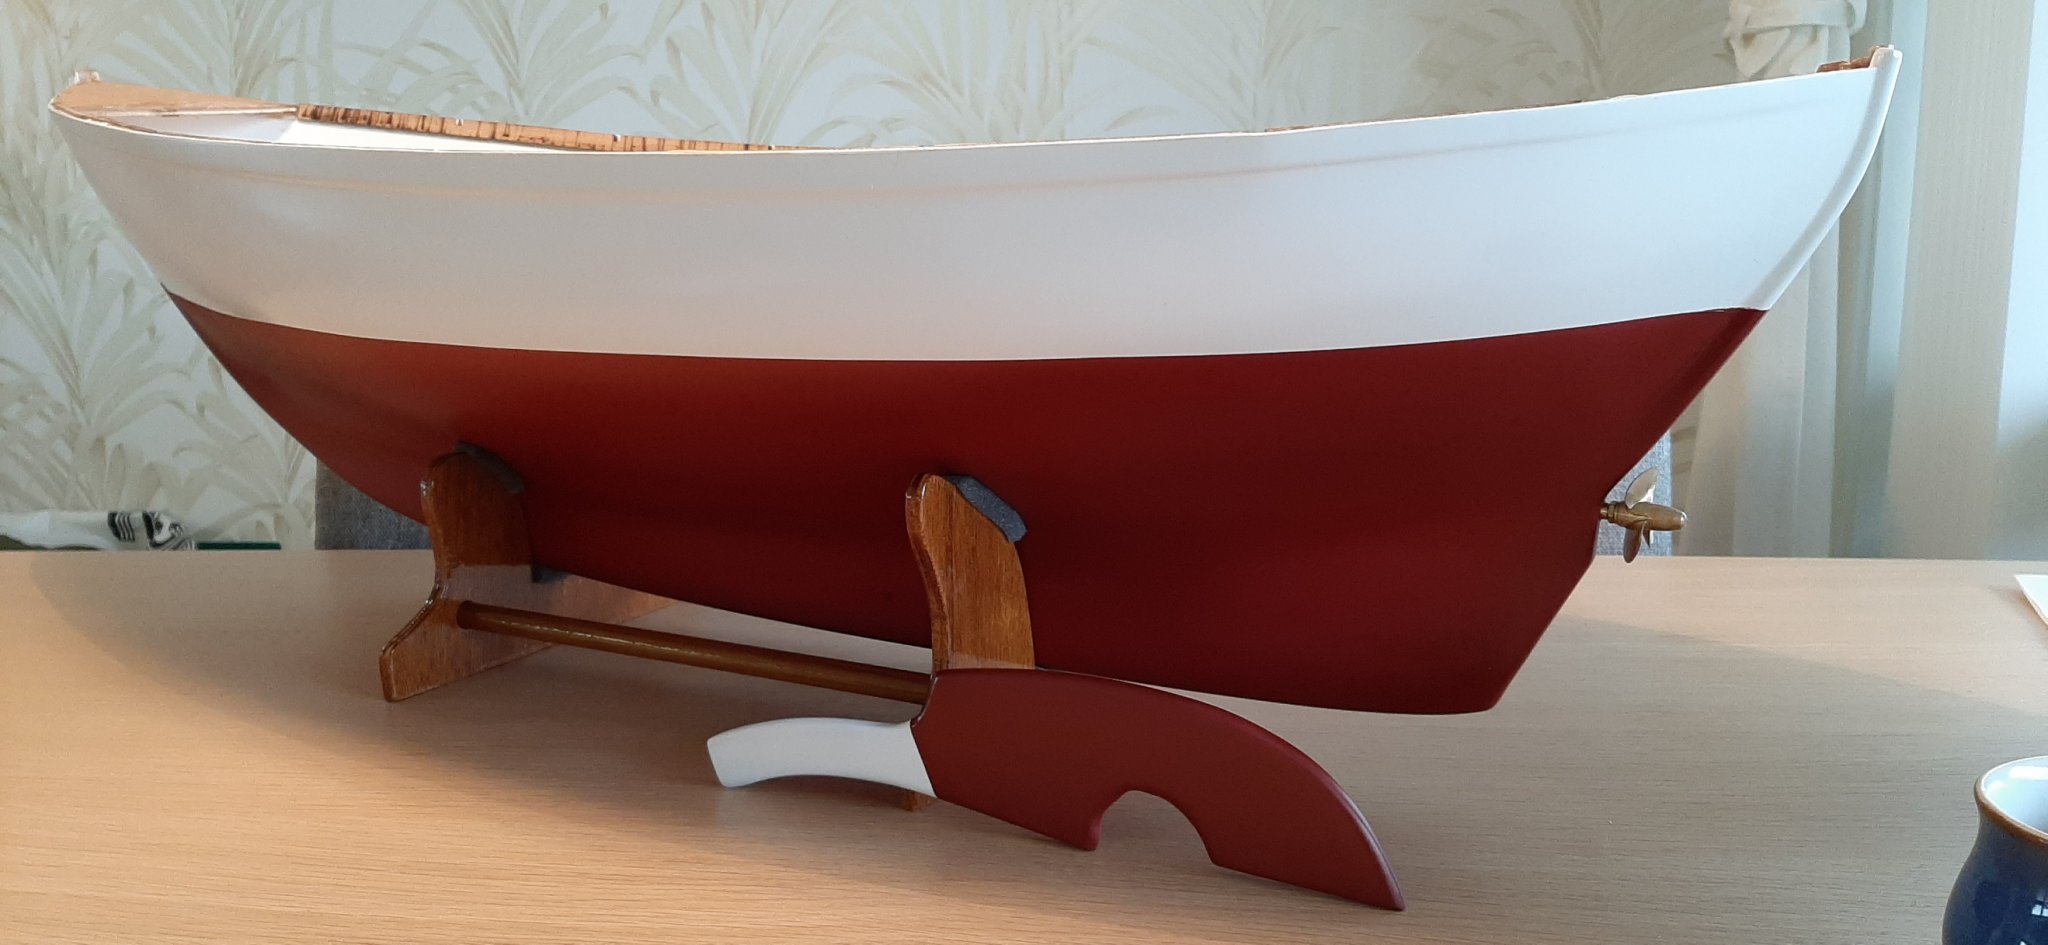
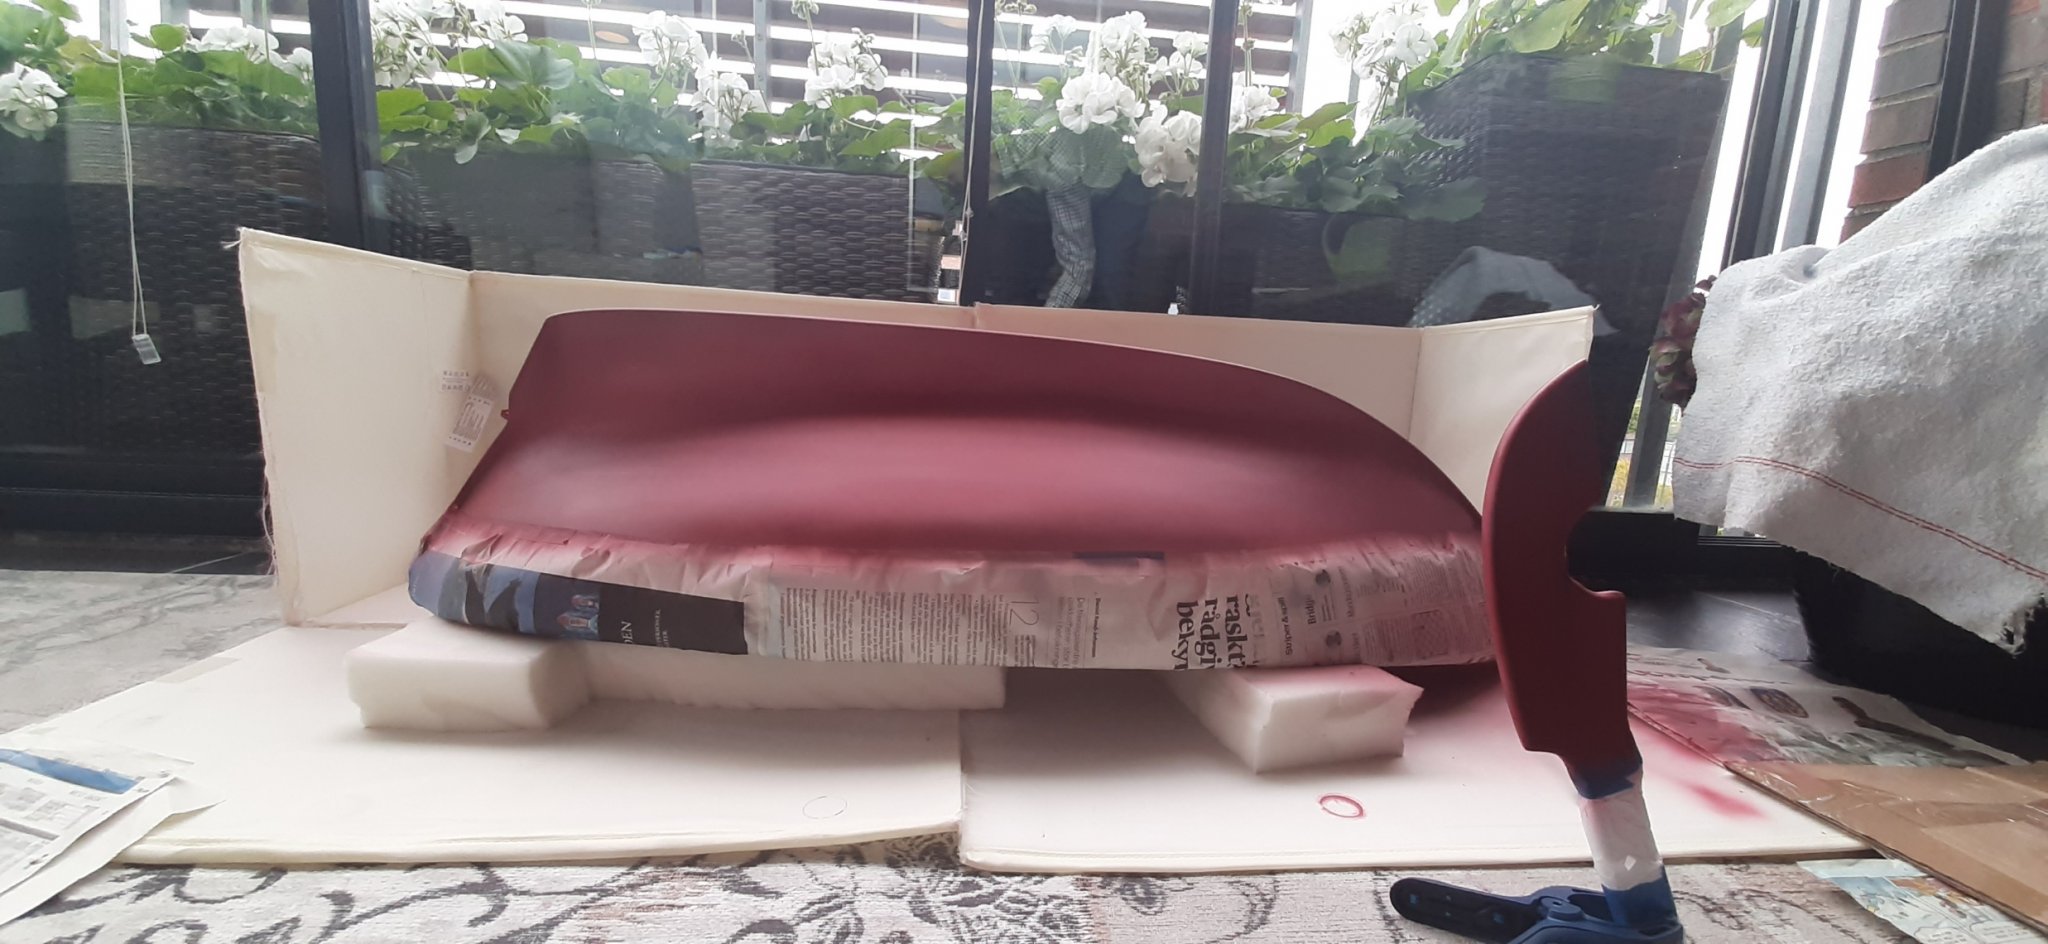
Colin Archer hull on the balcony today for airbrushing. Using standard Billing Boats "hull red" antifouling and white topsides.
Wish all a safe weekend,
George

-
Regading the RUBY air gun (not RuDy as I wrote earlier!). The compressor I have now would not produce enough air pressure to blow through the wider nozzle 0.8 mm. It's OK for my small airbrush 0.3mm nozzle but not the 0.8mm Ruby gun. I do not want to buy even more gear for this (ie larger compressor) so I have returned the Ruby to the dealer.
Had another go at airbrushing the Fisher hull with my small airbrush -this time with added 'paint retarder' to the thinned clear gloss. Got a reasonable silky-gloss finish which I think is acceptable.
Next job is to try to repeat the process with the next hull: the 1/15th scale Colin Archer. Don't need a glossy finish on that so should be able to manage a reasonable result with the smaller airbrush. I'm going for Bob's info regarding a varnished top-coat to give a bit of resilience to the surface. Without retarder it'll probably dry fast enough to give me a silk-matte finish.
I find it a bit stressful trying to do things which I can't do 😬 but before too long it'll be one more thing I CAN do😁
Regards
George
-
Very good, thank you for sharing the info' -very kind. Nice photos too! I'm sure that Andreas and Carsten will agree. And now I know what a 'cathead' is too ! Regards, George
- 90 replies
-
- 2
-

-
- billing boats
- colin archer
- (and 1 more)
-
Can you explain what is wrong with the shape? Too long? too wide? etc. I won't be that far in the build until next year but the other guys probably will. Regards, George
- 90 replies
-
- 1
-
-
- billing boats
- colin archer
- (and 1 more)
-
Hi again Carsten and Andreas, I hope I wasn't misunderstood. My comment about 'selling paint' was supposed to be humorous. Carsten was kindly showing the paint he used to get a good gloss finish. I was planning on asking him what he used. Bengalack gives a very hard, gloss finish and it flows out very well. Kind regards, George
- 90 replies
-
- 1
-
-
- billing boats
- colin archer
- (and 1 more)
-
Further to the last info about the Rudy: as half the world will already know, the Rudy can be adjusted to spray in a fan shape as apposed to round spray. This gives a better chance of laying down enough paint on larger surfaces to achieve a glossy finish -I hope! I'm very new at this, so I apologise if I'm stating what every body
else
 knew years ago 🥴
I'm working on the aft combings of the Fisher 34 motorsailer. Have been unsure as to how to construct the combings. Started off with a plan to construct in 1mm aircraft plywood but that seemed to be very fiddly. As the photos show I'm going for carved balsa block. Won't get a perfect finish but we're talking 'stand-off-scale here' not 'microscope viewing'!
-
Picked up my Hobbynox Ruby airbrush and two jars of Tamiya clear gloss acrylic today. Instructions for Ruby were encouraging by confirming that it's good for larger hulls and aircraft projects. As I mentioned earlier, I think that may be why I could not get a glossier finish on my Fisher hull. But the present finish is not too bad and like some others suggest, it may be smart to leave it as it is. I'll need the new airbrush for the next hull -Colin Archer RS1- anyway. Maybe I will test it out by trying gloss on the Fisher silk-matte finish. Maybe I will chicken out, we'll see.
Regards, George
-
Andreas, I think Carsten is selling gloss paint on your thread😬. But it's for a good cause so I suppose it's OK. Yes, a gloss finish will be easier to keep clean and nobody will say that it's not the right 'look'. Carstens hull looks good I think. Andreas' RS1 has 'gloss-look' right out of the box! I have started a scratch build log in this forum so I can show my present scratch build project. Also because I have exchanged info with BobG about airbrushing. I will also show some photos of my RS1 progress when I get it up from the cellar storage. I will not even try to compete with Andreas' excellent photo-build-blog of the RS1 which will soon be in 'full swing' again. Hope we will see 'formation sailing' of two RS1 next spring? Kind regards to you both, George
- 90 replies
-
- 2
-
-
- billing boats
- colin archer
- (and 1 more)