
Geam
-
Posts
67 -
Joined
-
Last visited
Content Type
Profiles
Forums
Gallery
Events
Everything posted by Geam
-
They are called 'telltales' 🙂 George
-
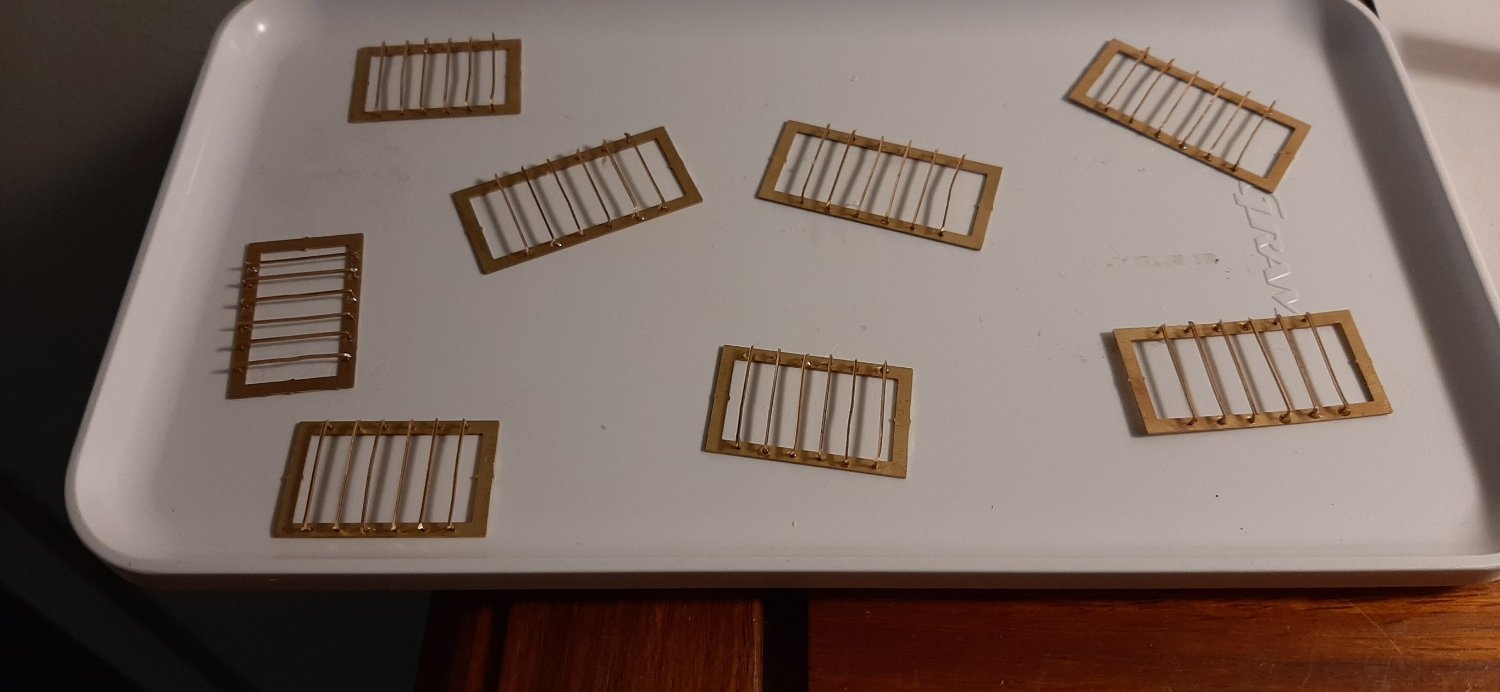
Nearly went nuts today trying to attatch 48 tiny brass bars to the window frames for the deck skylight.

-
Your main cabin oil lamp looks superb NP! I plan to make mine with a ready-made oil lamp and solder/epoxy some brass tube here and there. It'll look a bit skinny compared to the real one...and a bit big at approx' 1/12th scale, but I can live with that. Thanks for the tip on staining 'rope'. You are quite right, staining with wood-stain produces less flexible rope. I'll try to mix some 'brown wash'. George
-
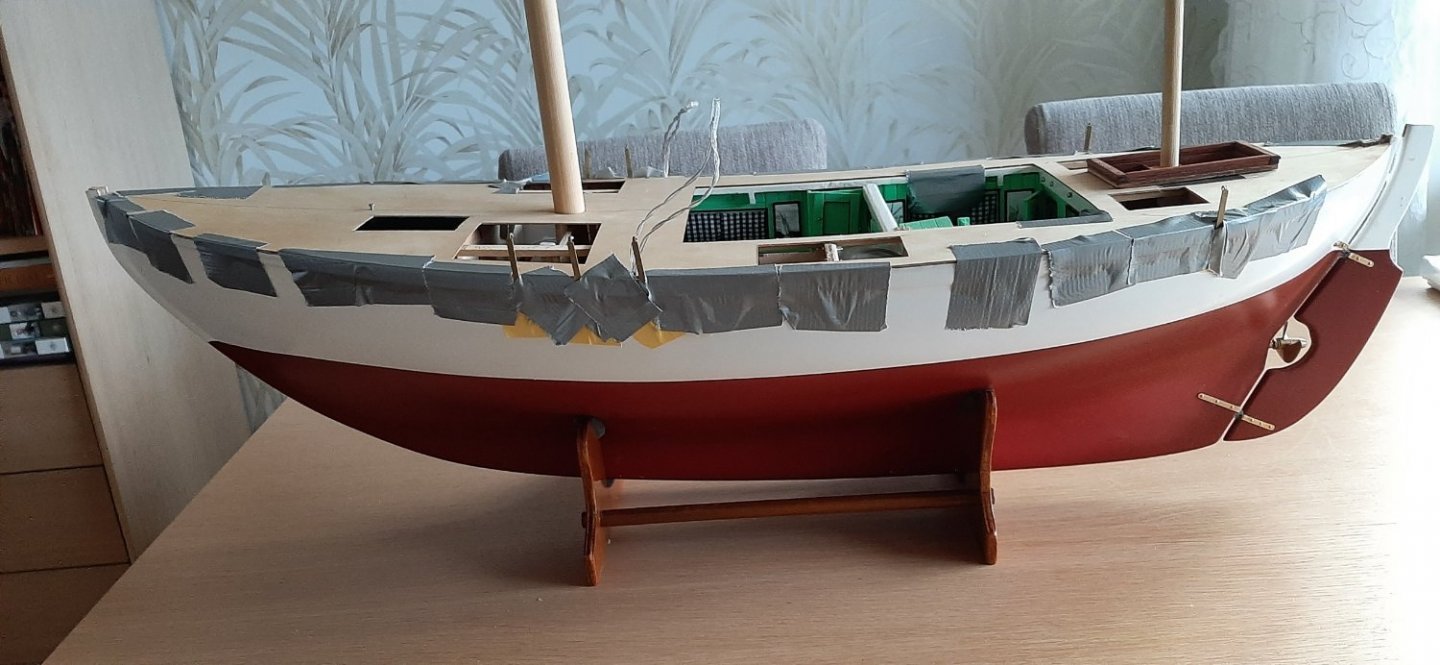
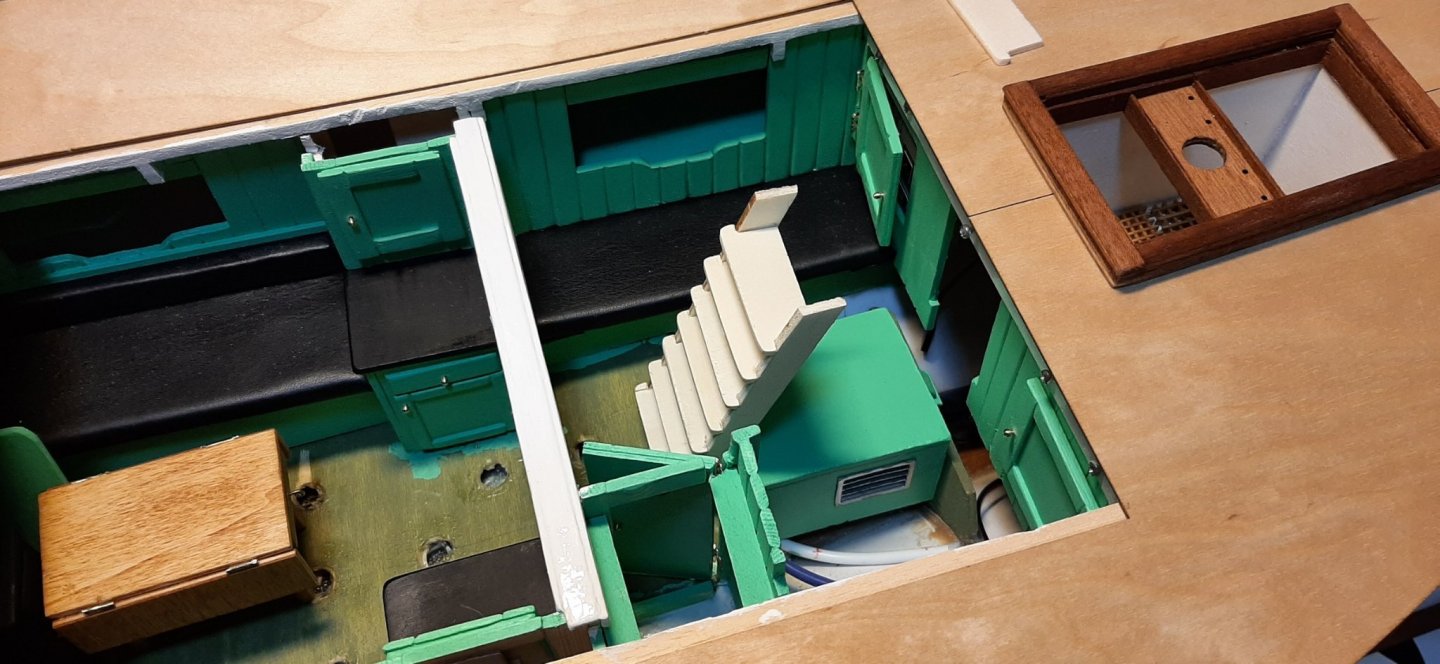
Glued on the gunnels and cut the 32 railing posts and dry-fitted them to the gunnels. Deck/hull joint has been filled with Tamiya white putty ready for sanding. Glued the main hatch deck onto the frame.
Not sure about the best sequence for the next steps but I think I'll paint the red hull hull stripe and then stain the gunnells in teak. Made a helmsmann's seat and instrument panel for the steering well this afternoon.
-
There is another guy called Carsten in east Norway who has postet a photo of his RS1 on Sundts thread. George
-
Just realised...shouldn't be posting photos of my build on your thread! Sorry! You can ask the editor to remove them or maybe you can do it yourself? Not sure. Are you going to build a 'Nordlandsjolla' to go with the CA? I made one from a plastic dinghy hull. I'll stop bothering you now, and get on with my build! George
-
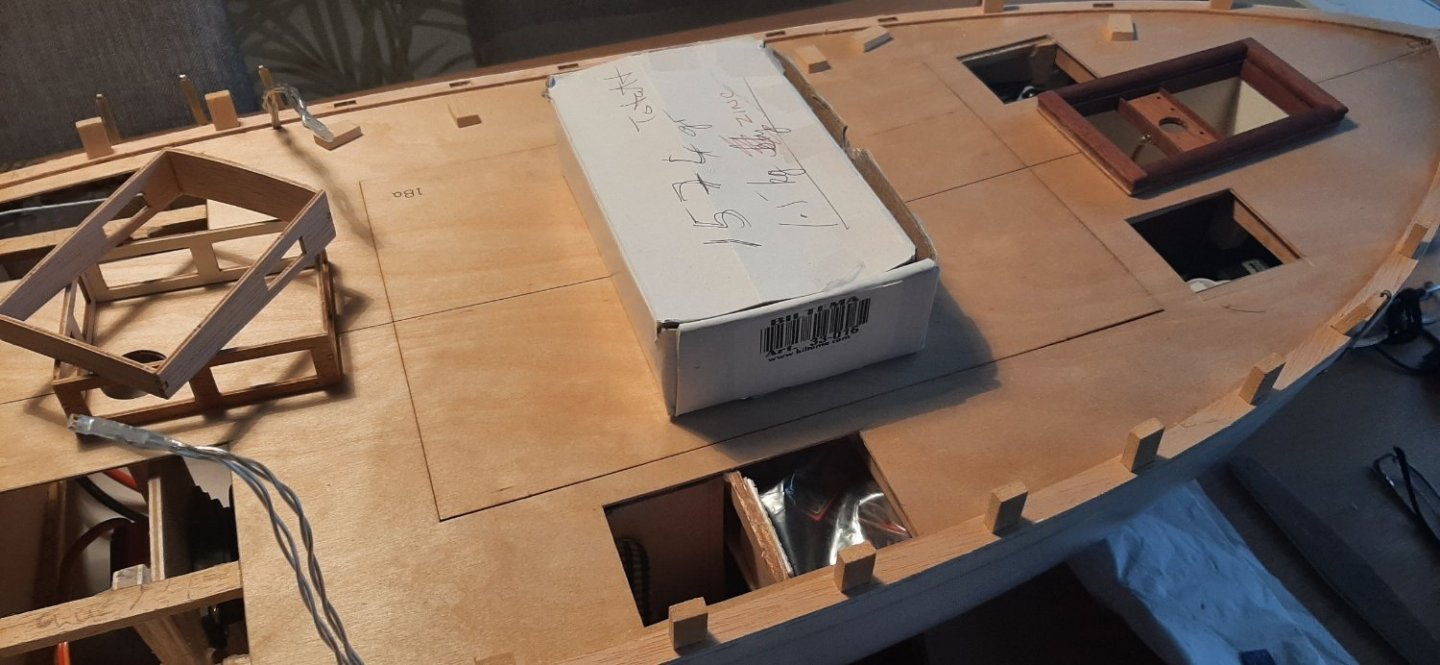
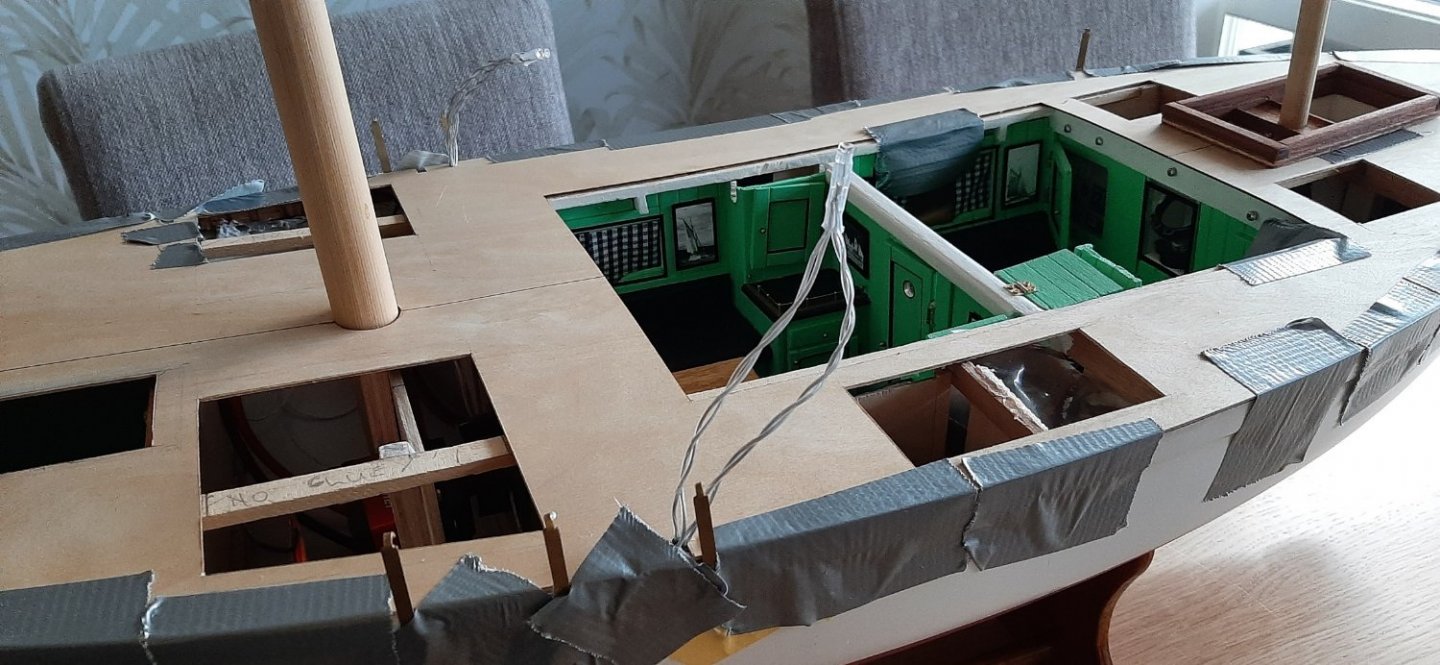
Finally got the deck glued on. Removing tape today. Hope it's well stuck on! It'll be nice to stop glareing down at all the wire and plugs. Hope I haven't forgotten anything. Not everything can be easy-accessed in spite of the extra deck hatches.
George


-
Looks like you will have more space for a hobby room than I do! Nice work on the 'klyver'. What did you use to stain the 'rope'? I plan to use wood-stain. 'Herdins Lackbets' or the like. Those who don't intend to sail use tea /coffee ! George
-
Either do nothing and not look at it any more or, add another brass strap ABOVE the exisiting hull strap. Then it will look like an extra strong hull pintle fixture. George PS. deck plate went on this morning!
-
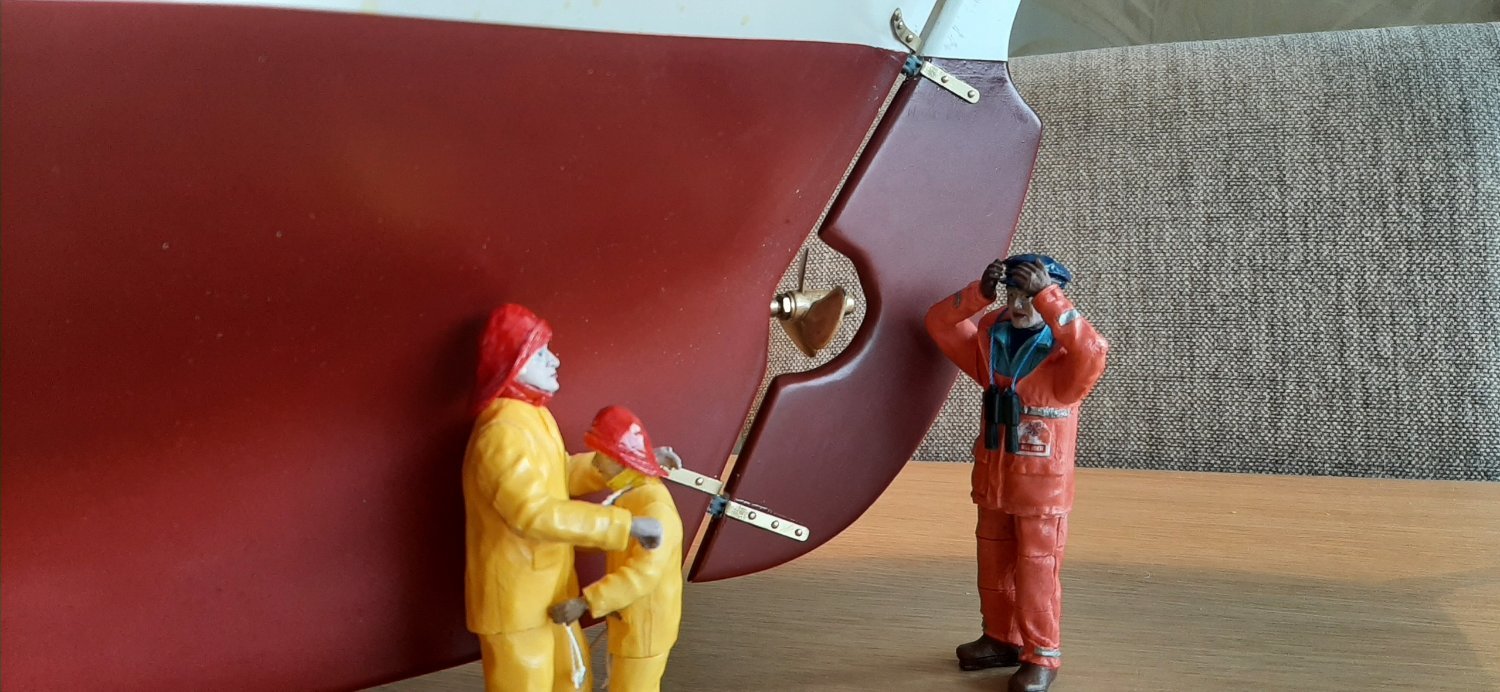
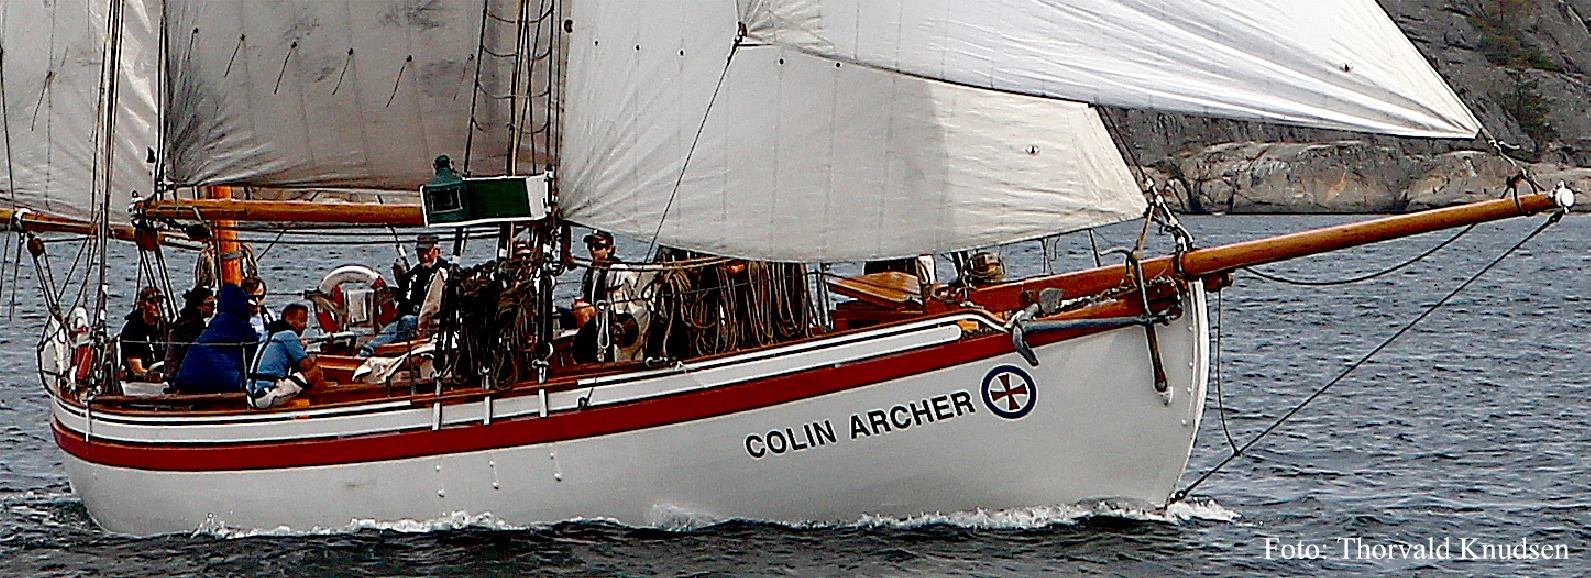
It's a great inspiration to see all this fine detail NP! It has revived my interest in getting on with the build. My deck will deffinately go on this week! I see that your crew members come from the same country as mine! I put my rudder pintles on the wrong way and here is a photo of the crew together with an inspector (watchman) crying over the mistake! George

-
I can understand that NP. I have been very keen to get the deck on but each time I think I'm ready, another detail comes to mind which MUST be done before the deck makes sections unaccessible. The deck will go on during this week....I think! You have many very good detail photos on your build log. I liked the Tamiya clear green on the deck 'lights'. I've often wondered how to make them show a hint of the light green interior below. I did not know that 'clear green' existed! George.
-
Hei NP! I have not been much on the forum recently and have not seen your build until now! Very nicely built CA RS1! I have made a scale interior on mine and that has taken a long time. I have tried to hide the RC gear inside all the furntiure and lockers. I am soon ready to get the main deck (nr18) glued onto the hull. I also have an old '414' kit which came with warped cross-beams etc like yours! Very impressed by your work, George
-
Very good photos Andreas. A great help to those of us who are interested in all the detail. George
-
Happy new year to all,
Work -or play- on the Colin Archer has been stopped by the production of an Xmas train set under the tree. All that is now packed away and the CA is in focus again. The R/C gear has been installed and mostly obscured beneath seating and inside lockers. A number of extra hatches (6?) had to be opened up on the deck to give access to main R/C components. It will be interesting to see if I can make all of these watertight later. The ready cut deck sheet will be epoxied onto the hull during the next week or so. Before that, the rudder servo has to be connected to the rudder via a pushrod through the hull. Also the two winch drums need to be loaded with sheets and
 led to the main boom and to the foresail. The foresail sheet needs to be led through the deck via sheet guides. Sounds like I know what I'm doing, but I don't; I just know what has to be done😅


-
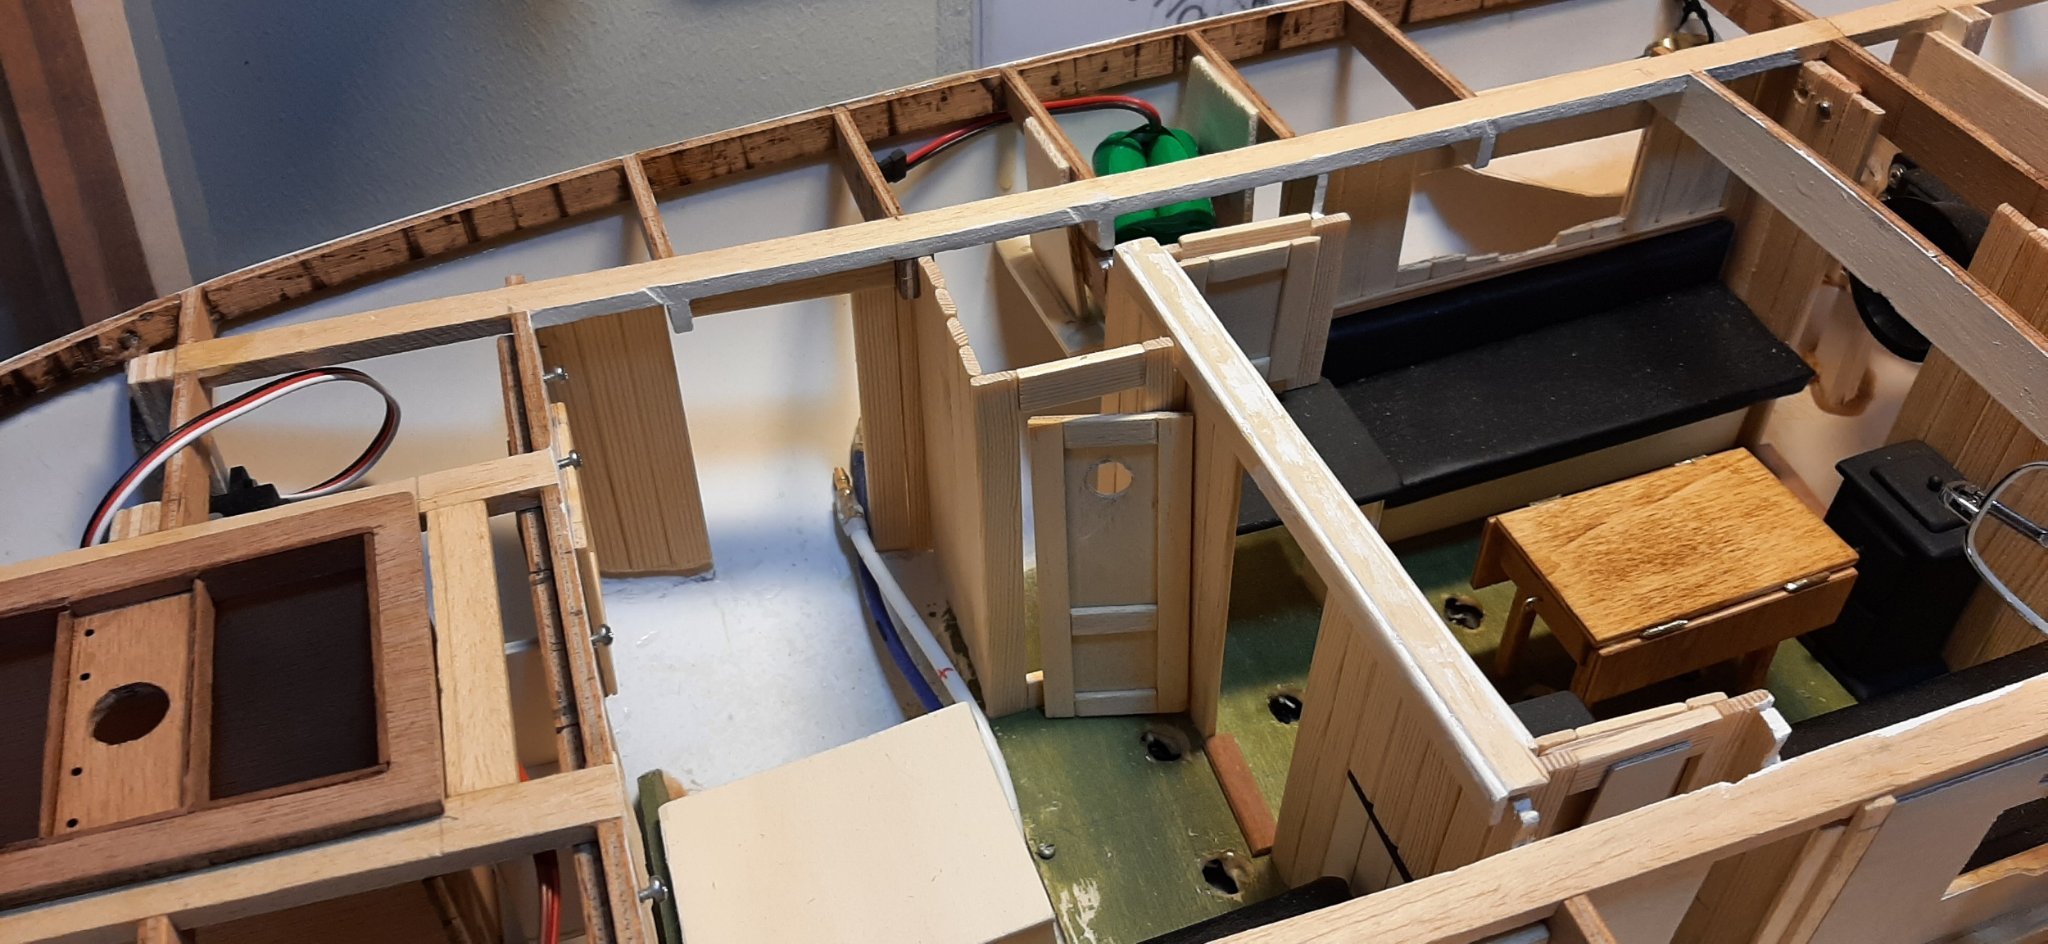
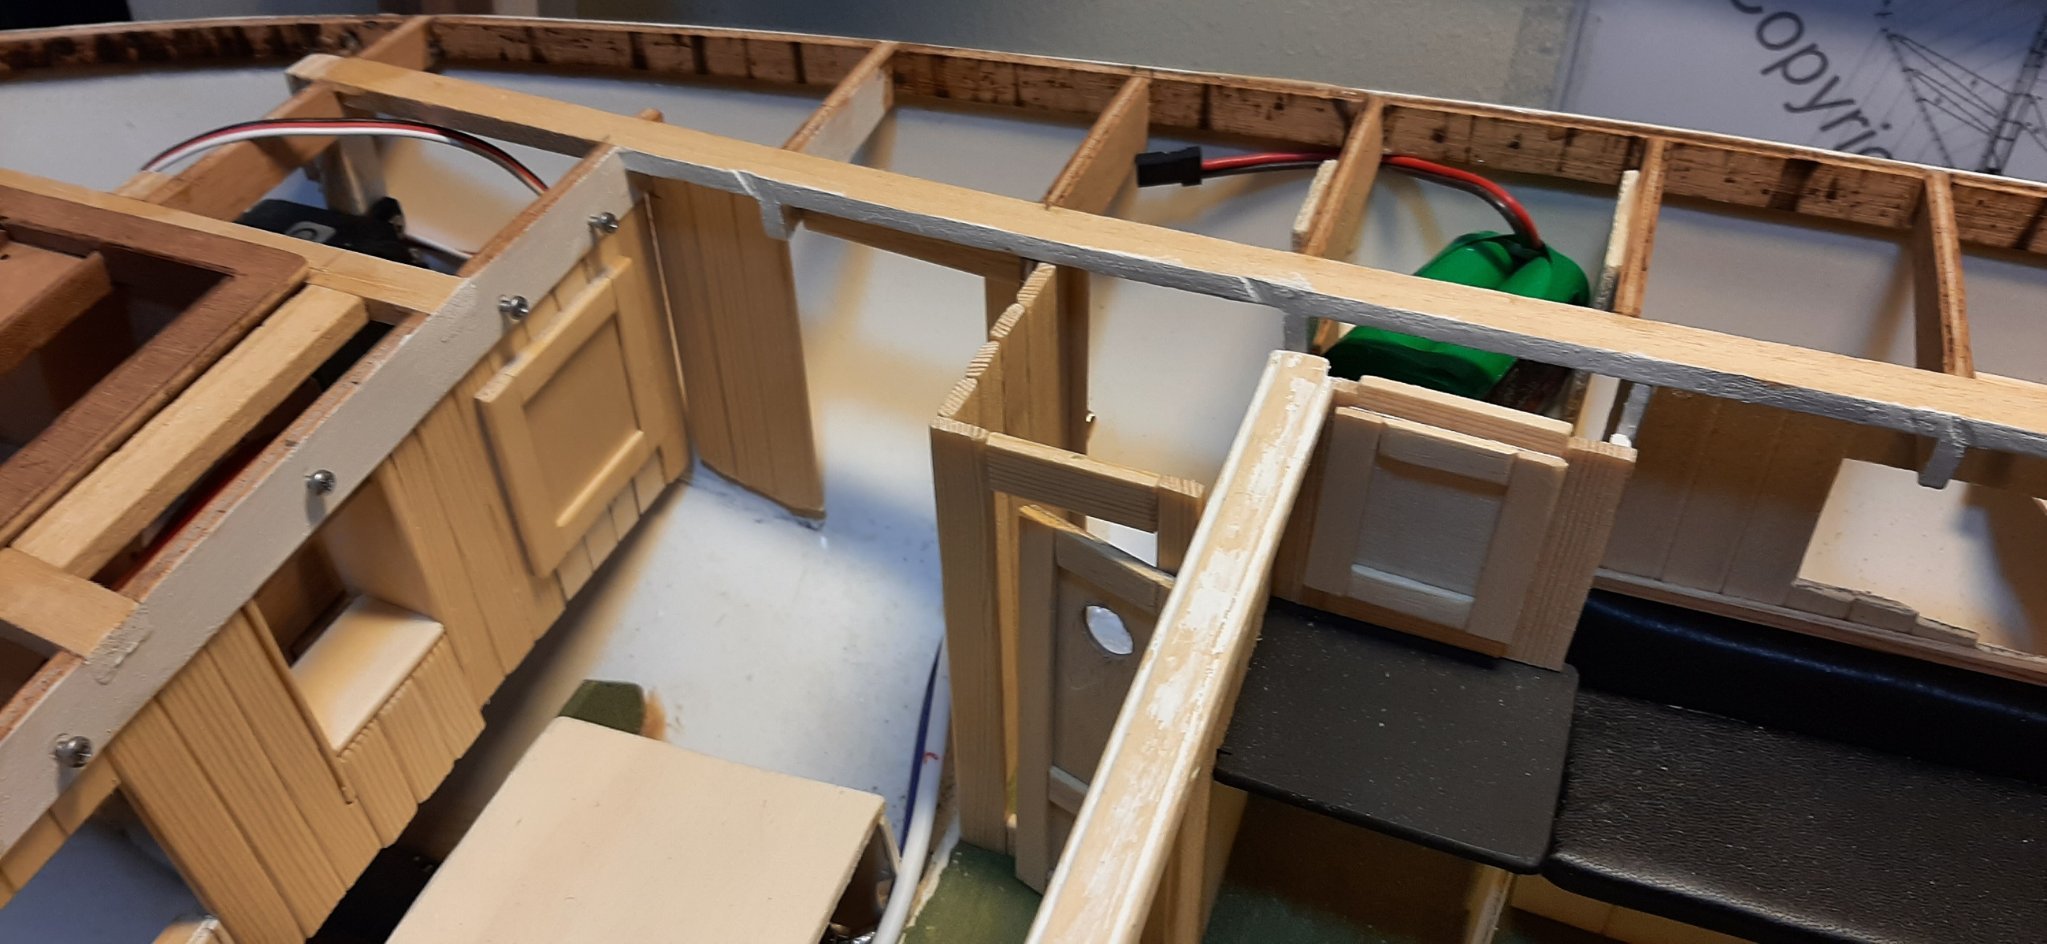
As usual, recent progress has been slow. More interior details have been completed and the R/C installation will start soon -ish. A lot of wiring to be threaded though the outer bulkheads and under the seating etc. Doing some head-scratching over the position of switches and fuse. A bit crowded due to trying to keep the R/C gear hidden from view, but accessable enough for maintenance.


-
Hi Mark, I thought I had a build log. I did say early on though, that so many have built a Colin Archer that it's not very interesting to note every build detail. Obviously something that has passed me by here. I thought that I initiated a build log in the 'kits from before 1900' section. I also have some stuff on the modelboatsmagazine.co.uk forum. George
-
Hello again Arjan, thanks for the info. I had a look inside the Oseberg kit box last week. Not much in there for 250 Euro I feel. I will consider it a bit more while I get on with the Colin Archer build. I might build my second CA kit as a static model with full interior, and not just two cabins as the one I'm building now. The interior details are taking me a long time to do. I have not seen any sailing photos of your CA, is it finished? Regards, George
- 23 replies
-
- 5
-

-
- oseberg
- billing boats
- (and 2 more)
-
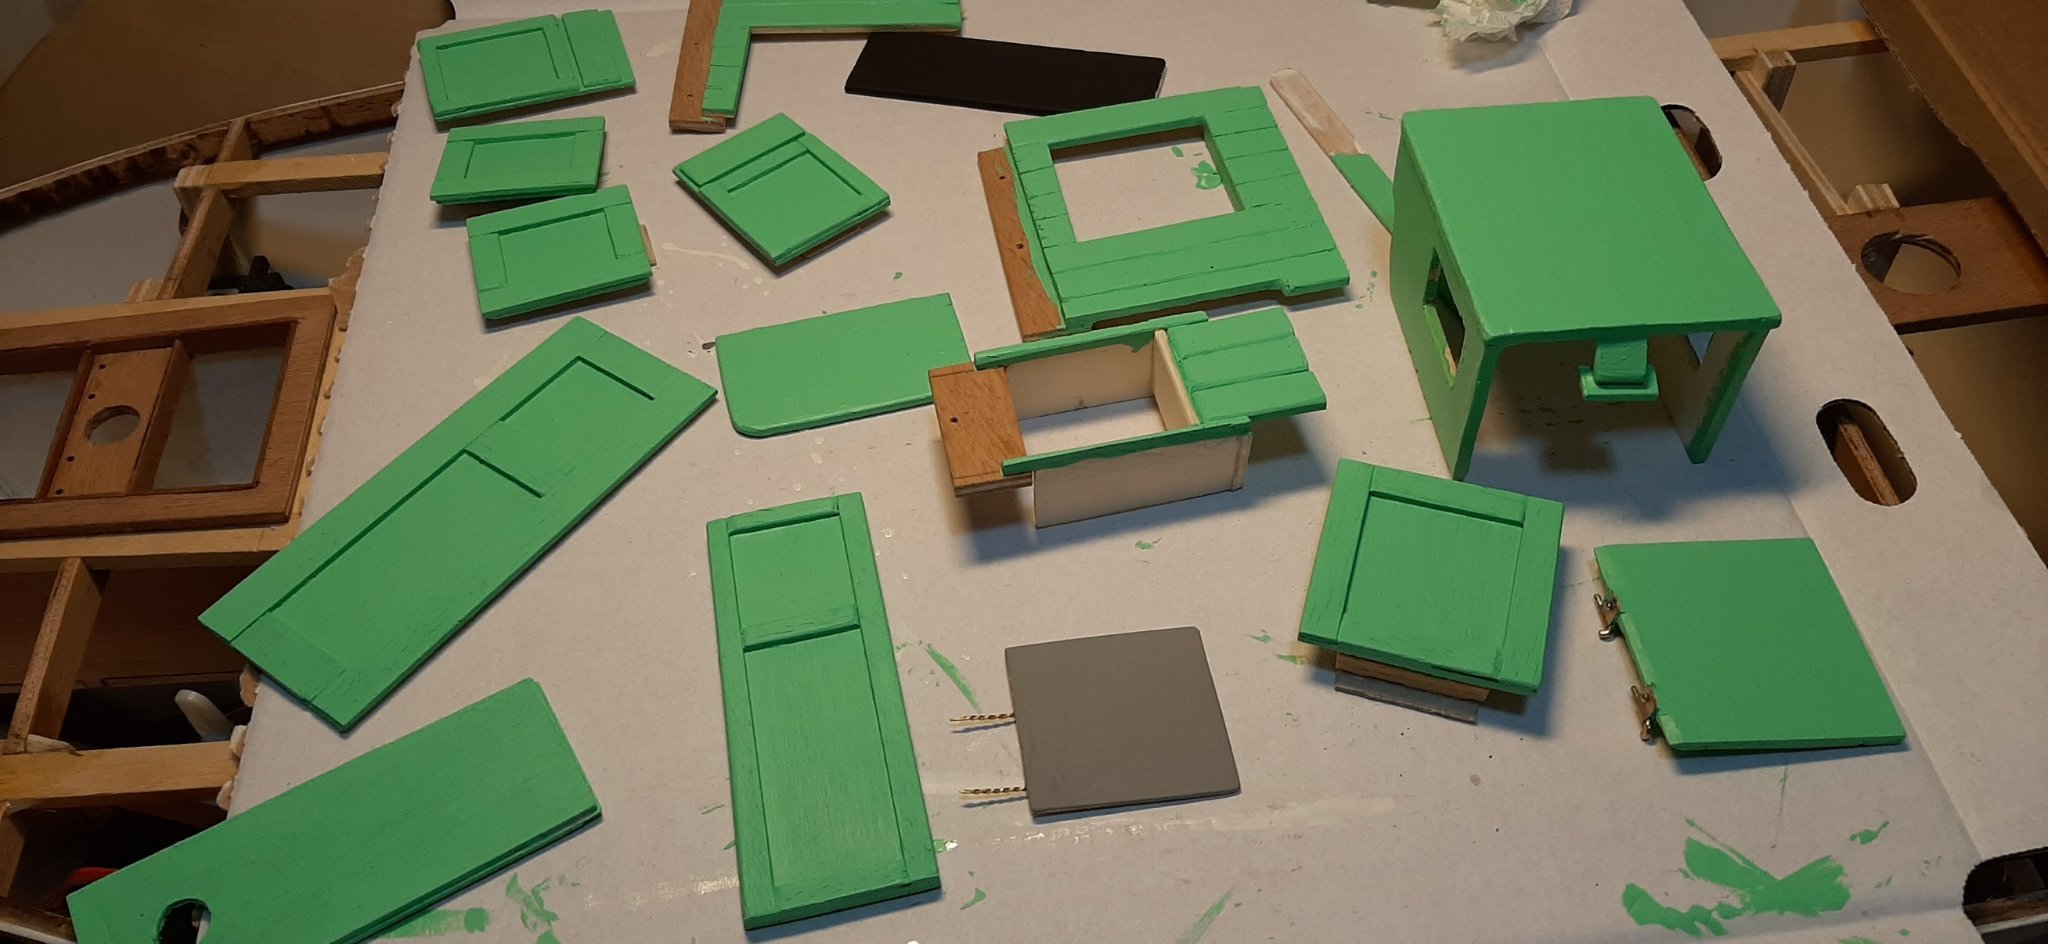
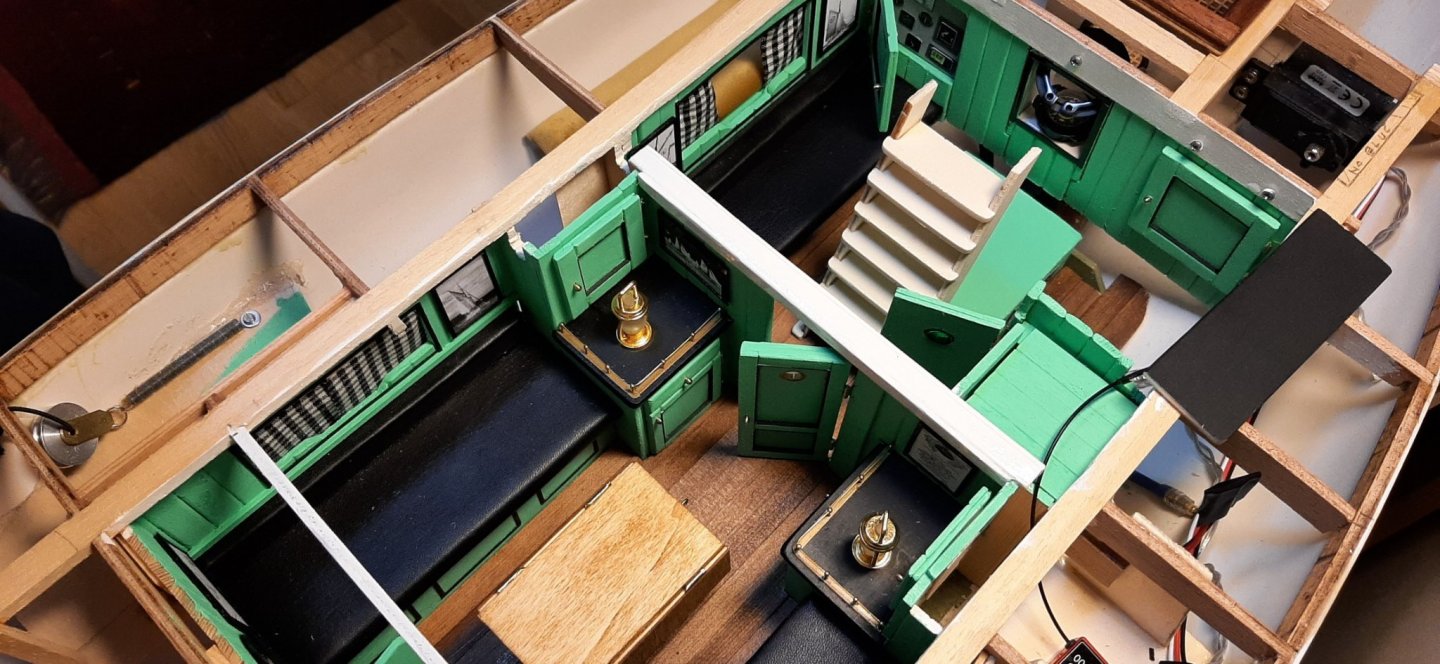
Been doing a few fiddly jobs recently. Matt black stripes applied to the lockers, door frames and seaberth surrounds. Soon have to dig out the soldering iron and get the R/C components hooked up. When all that works, the deck will go on. I hope.
George

-
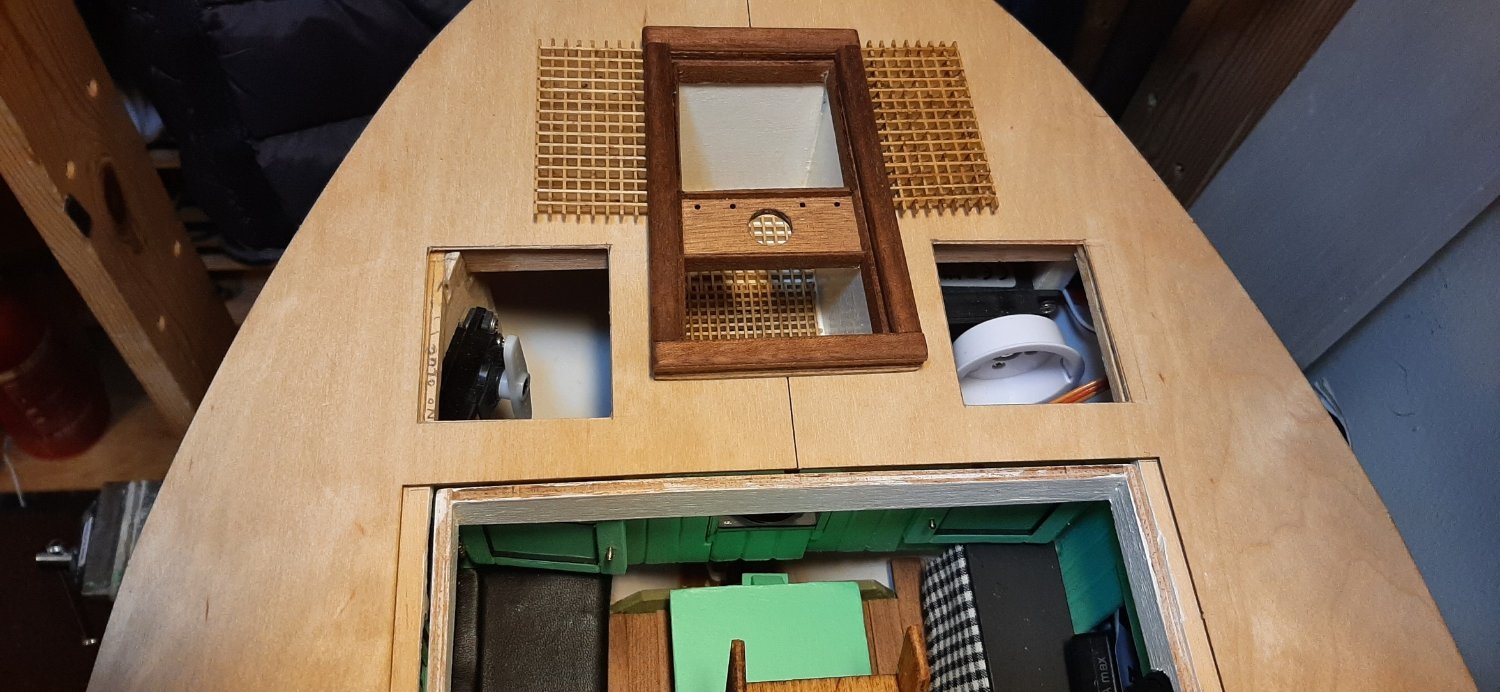
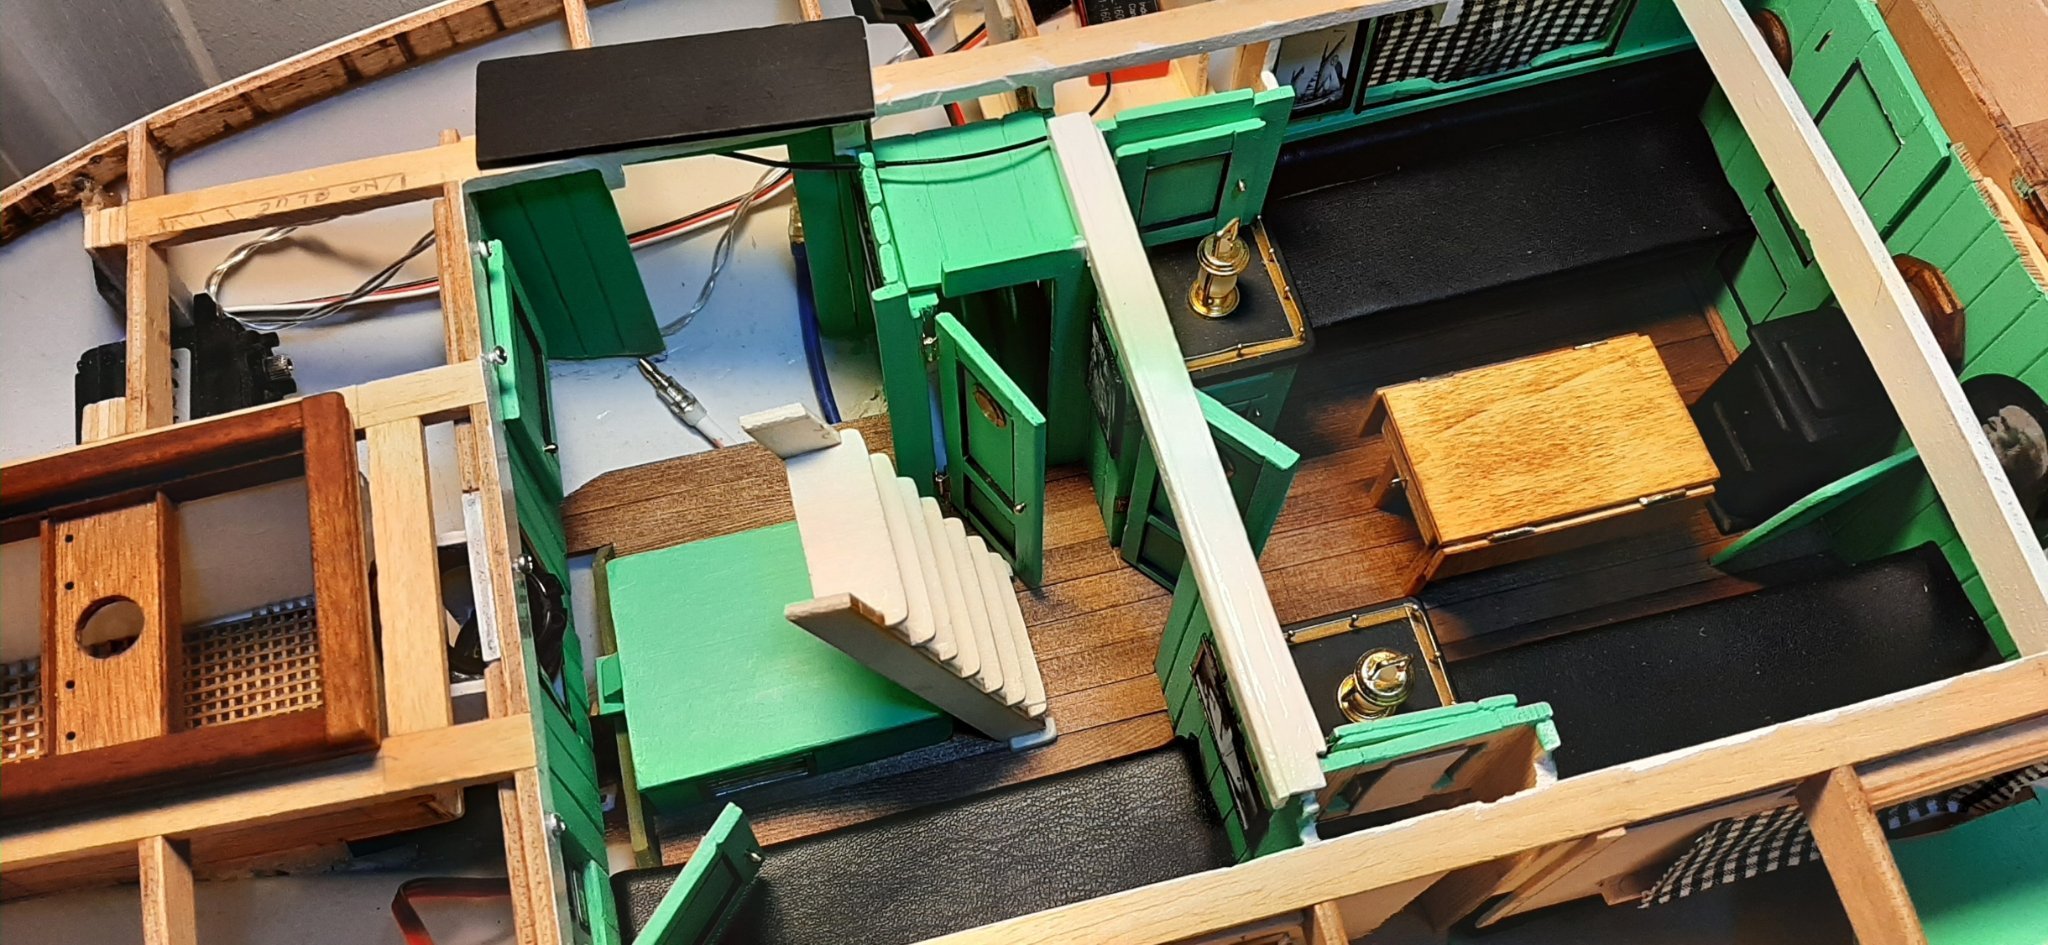
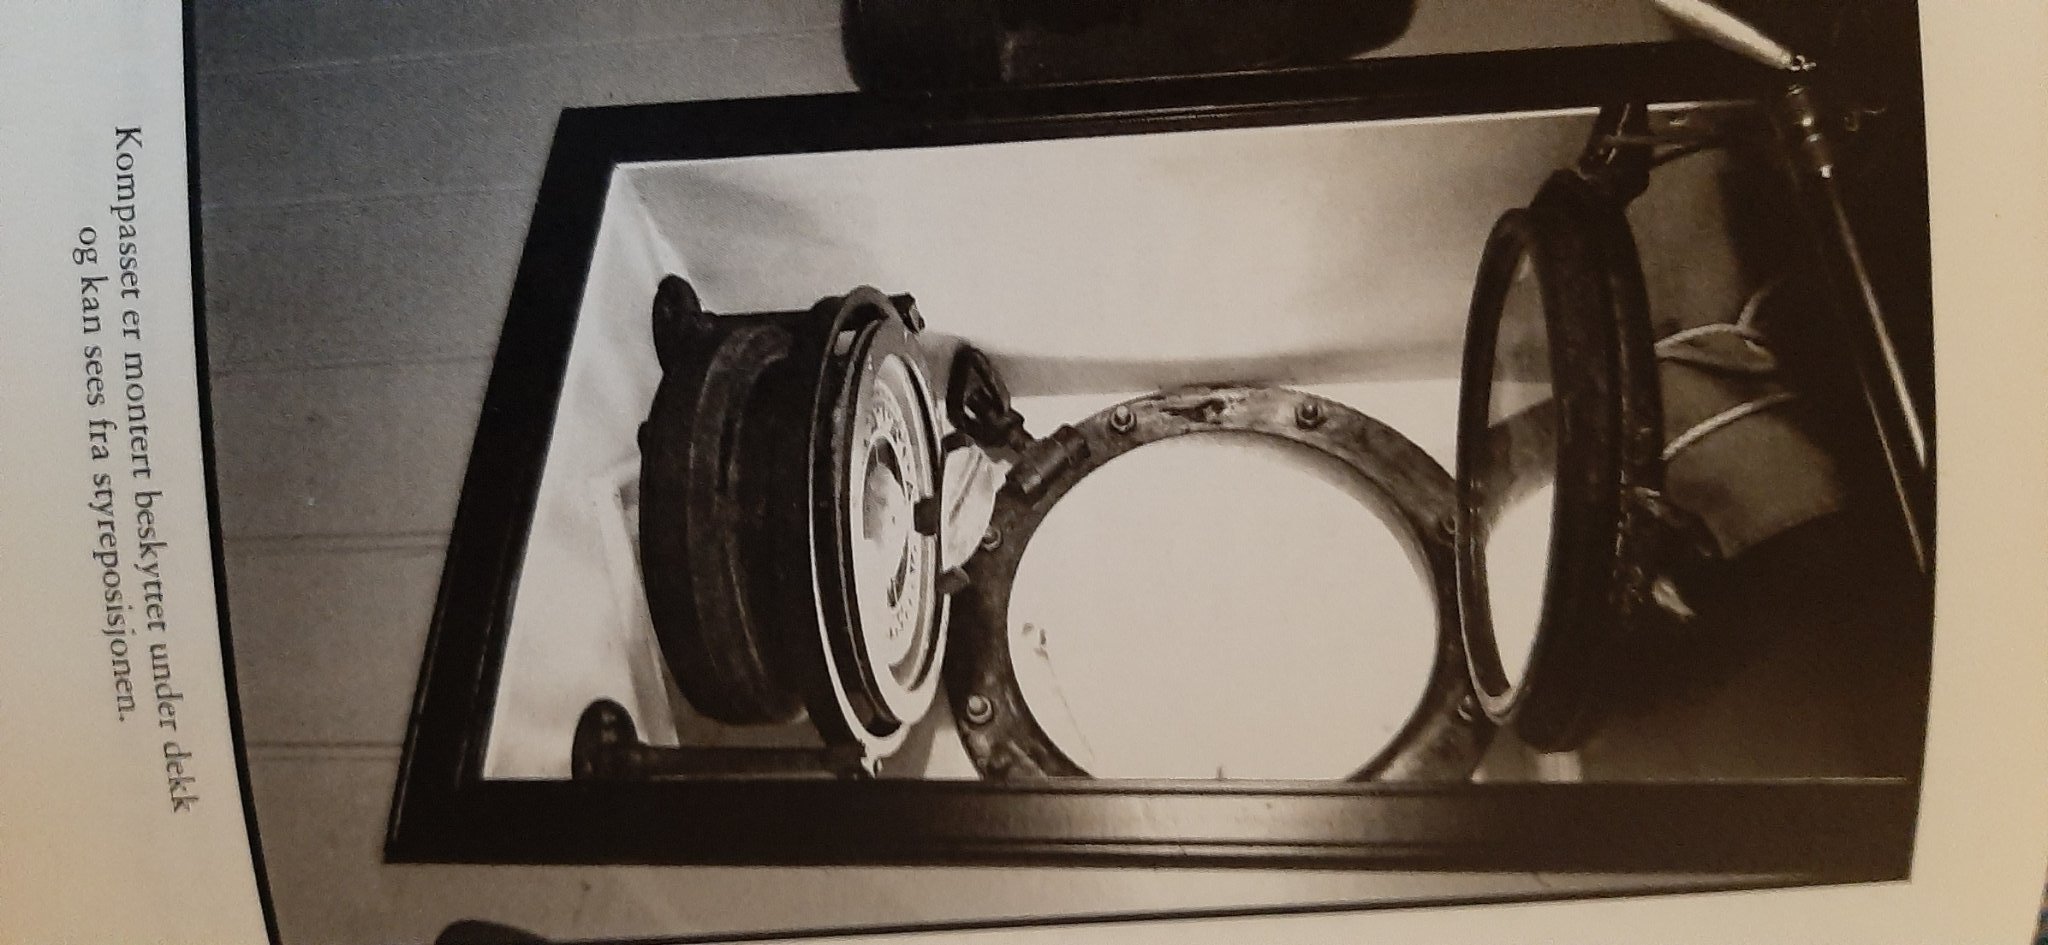
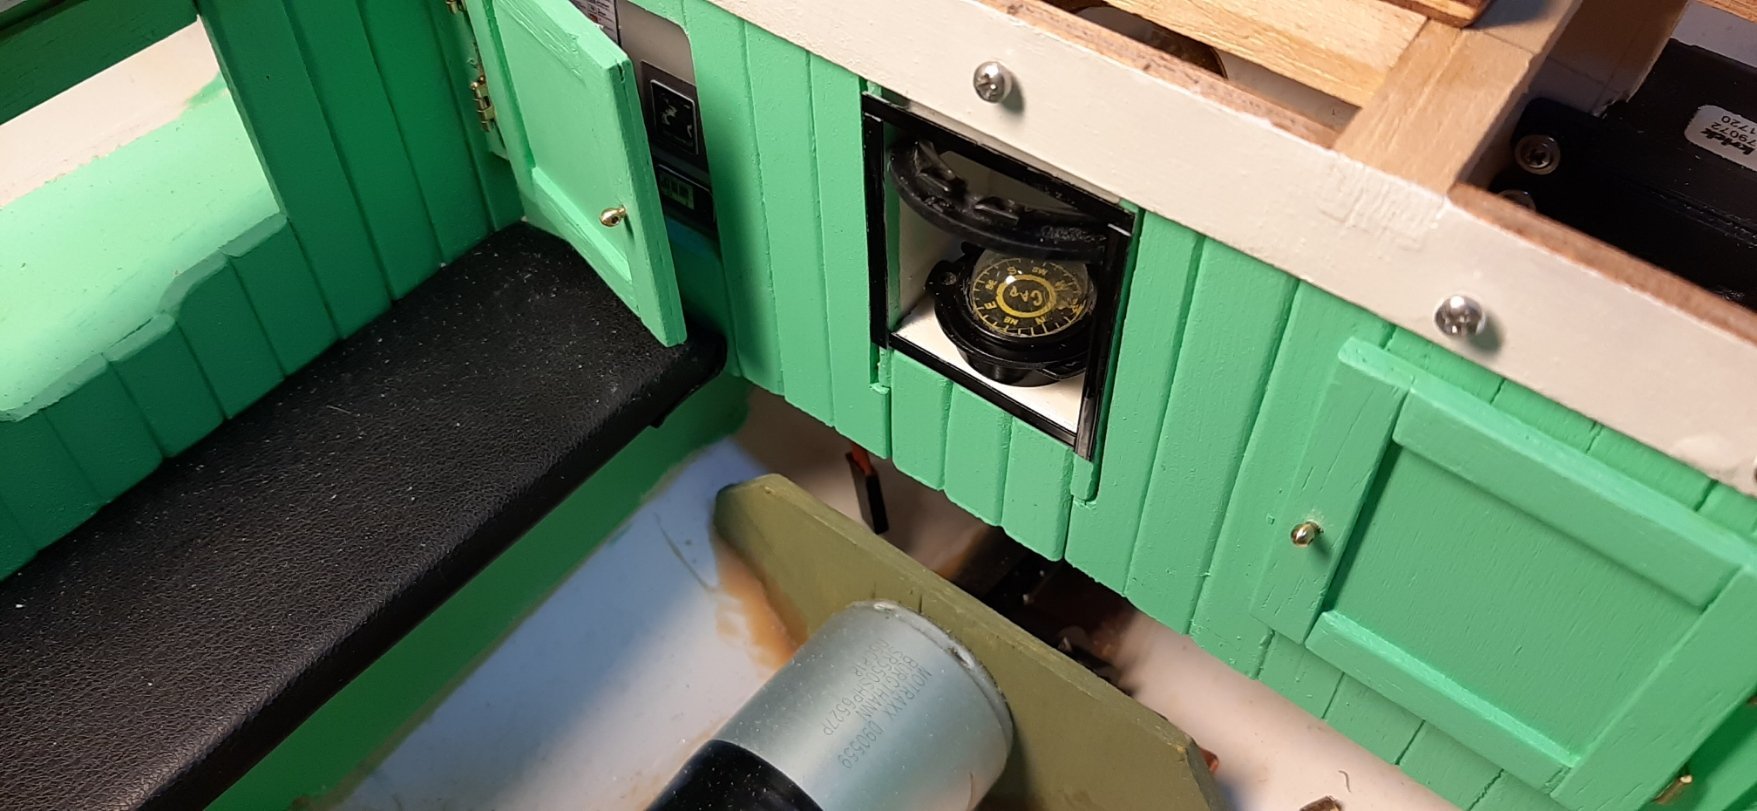
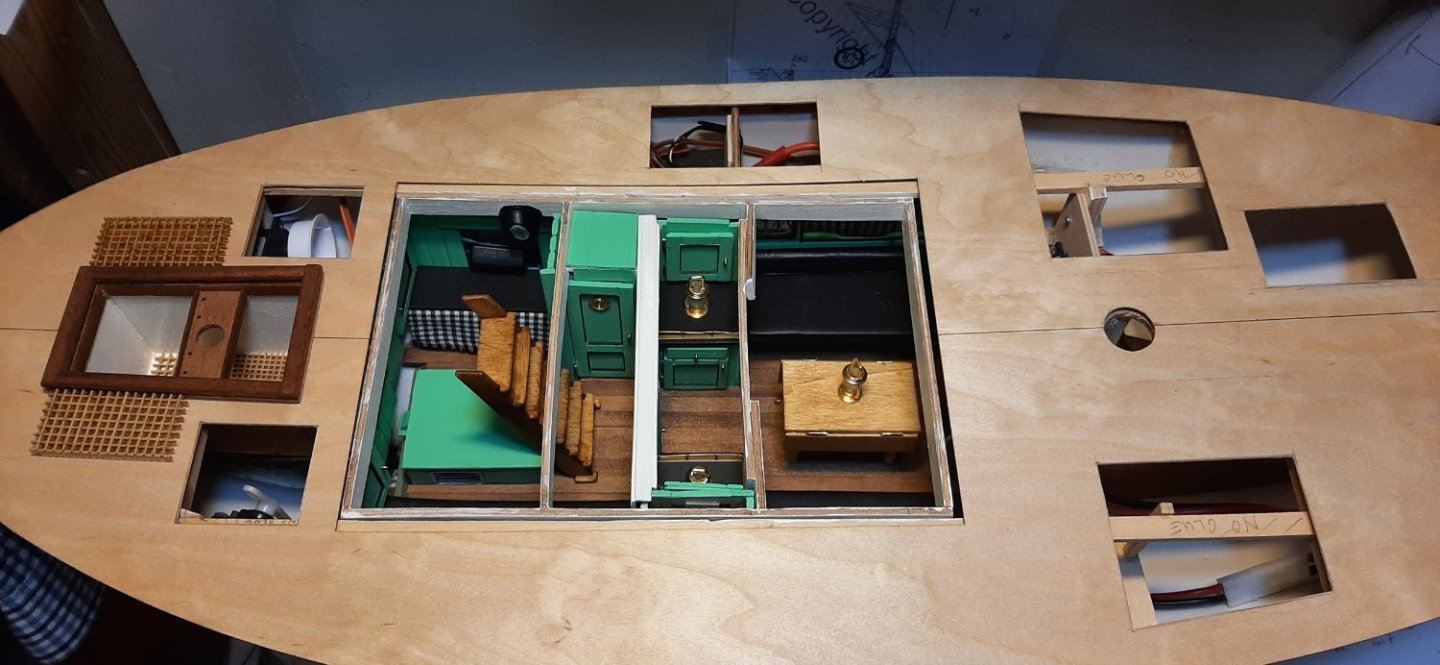
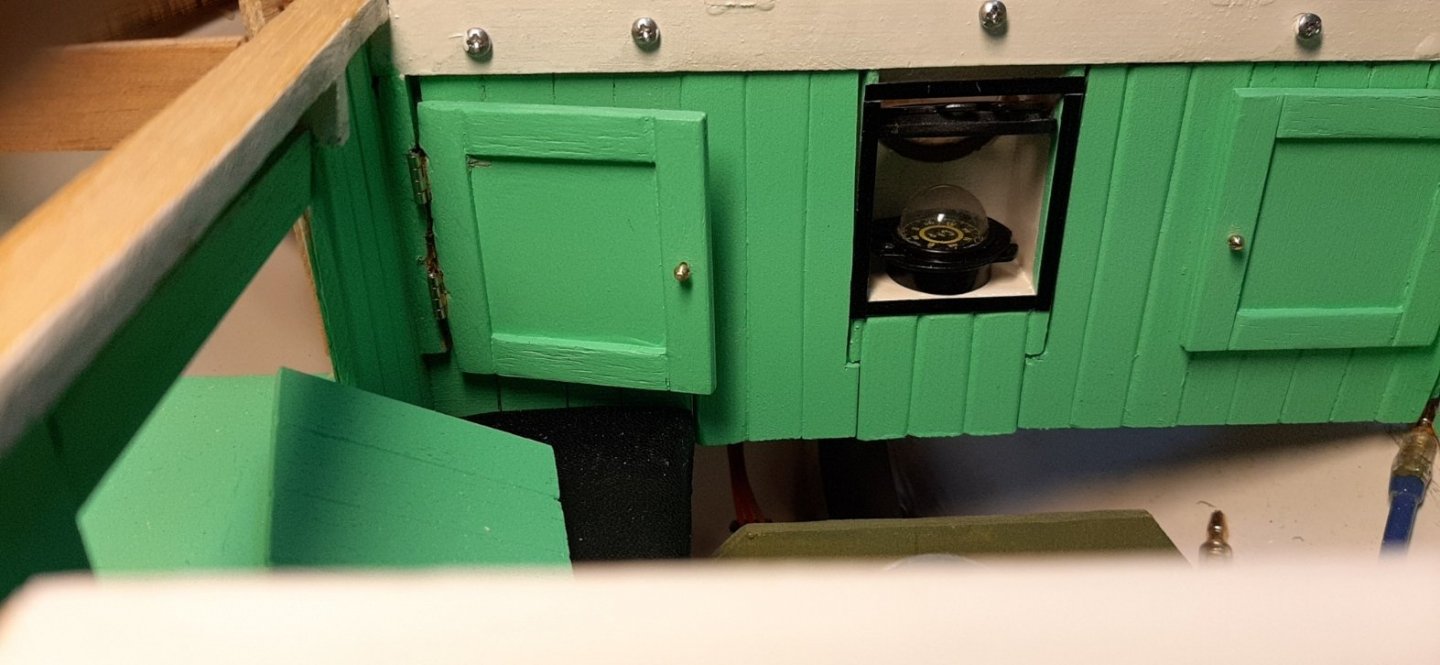
The long-awaited compass arrived in the post at last. It will hardly been noticeable through the open deck hatch. The importance of this detail grew out of all proportion after I incorporated the porthole in the steering well. Anyway it's there now. The open porthole surround is a bit too big but again, will hardly be visible later on. The real one is shown...sideways!


-
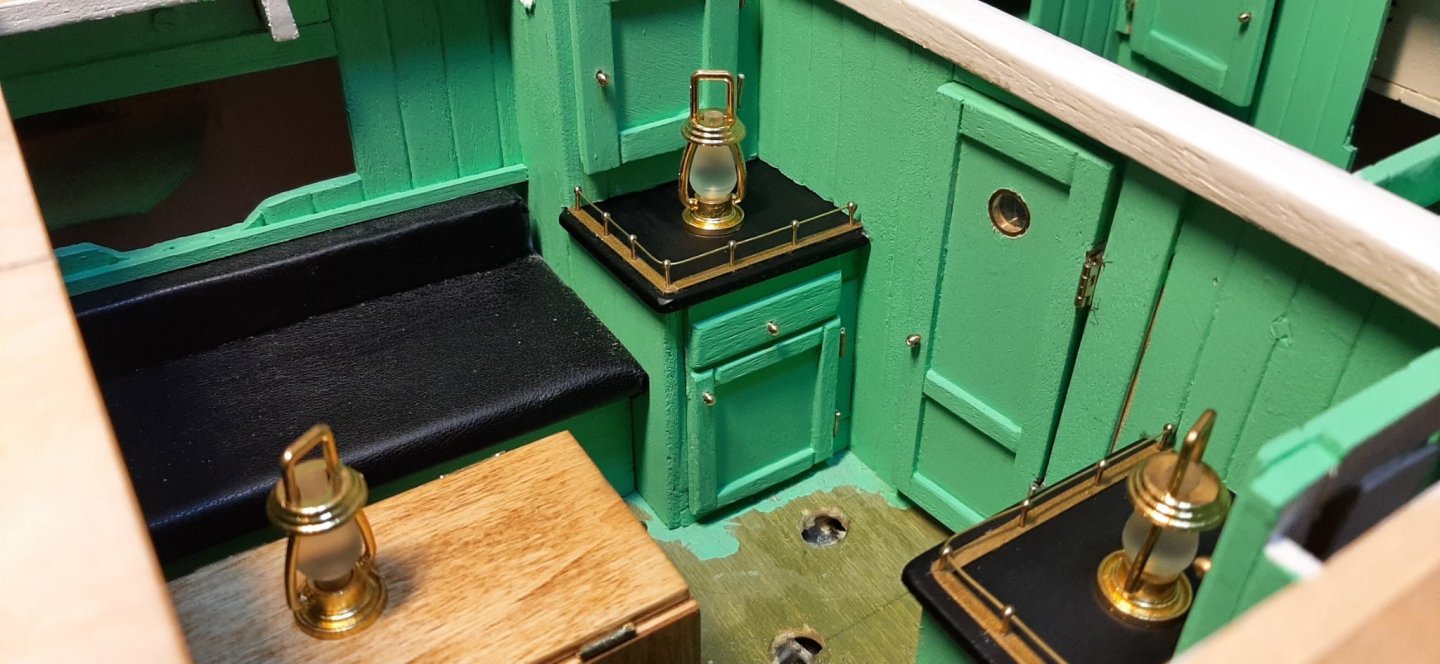
Added some (non-working) door and locker hinges and made the brass fiddle rails on the locker tops. The companionway steps are also in production.
-
Hi Arjan, very impressed by your Oseberg longship. I see there is one in my local modelshop ...which is tempting me! Did you use any ballast in the keel of yours? In which case, how much weight? I am still plodding along with the interior details of my Colin Archer. I have another CA kit waiting in the cellar store room. but I think I will try to sell that and buy the Oseberg kit. George
- 23 replies
-
- 2
-
-
- oseberg
- billing boats
- (and 2 more)
-
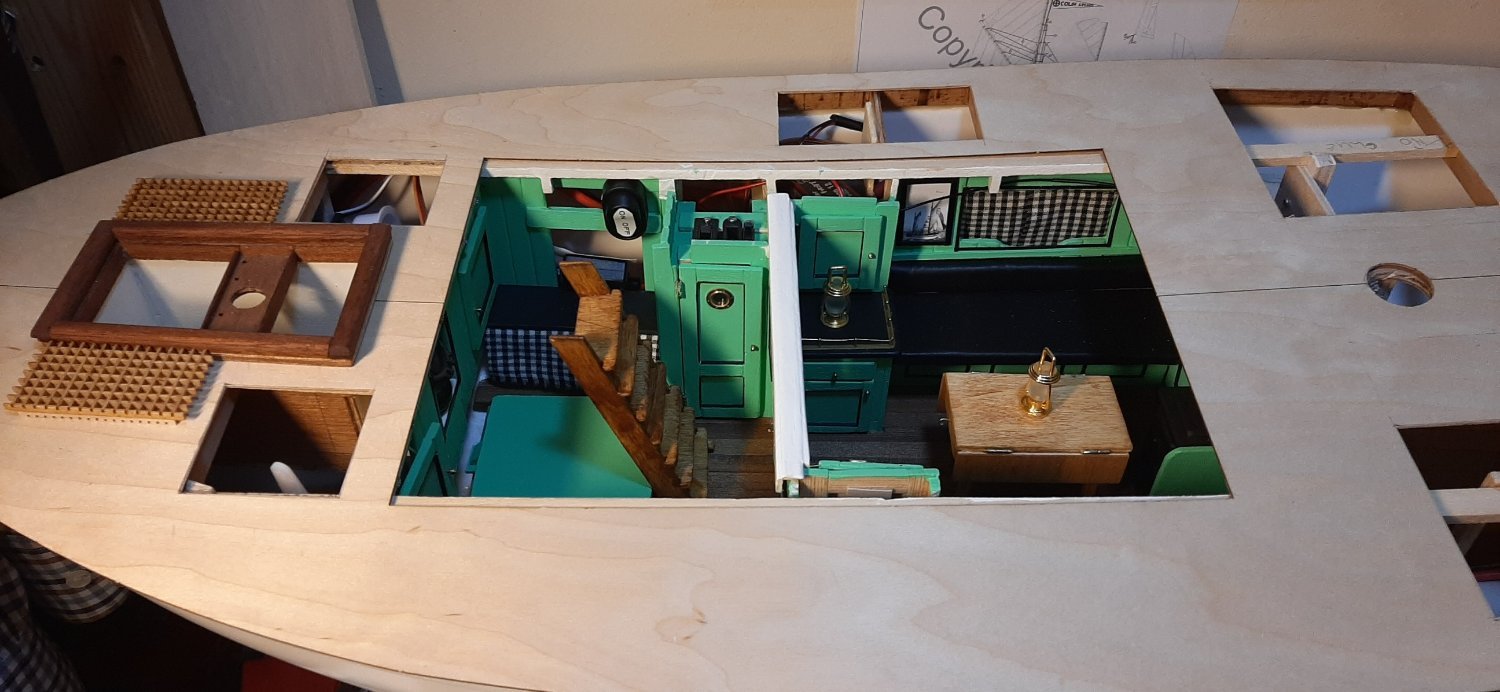
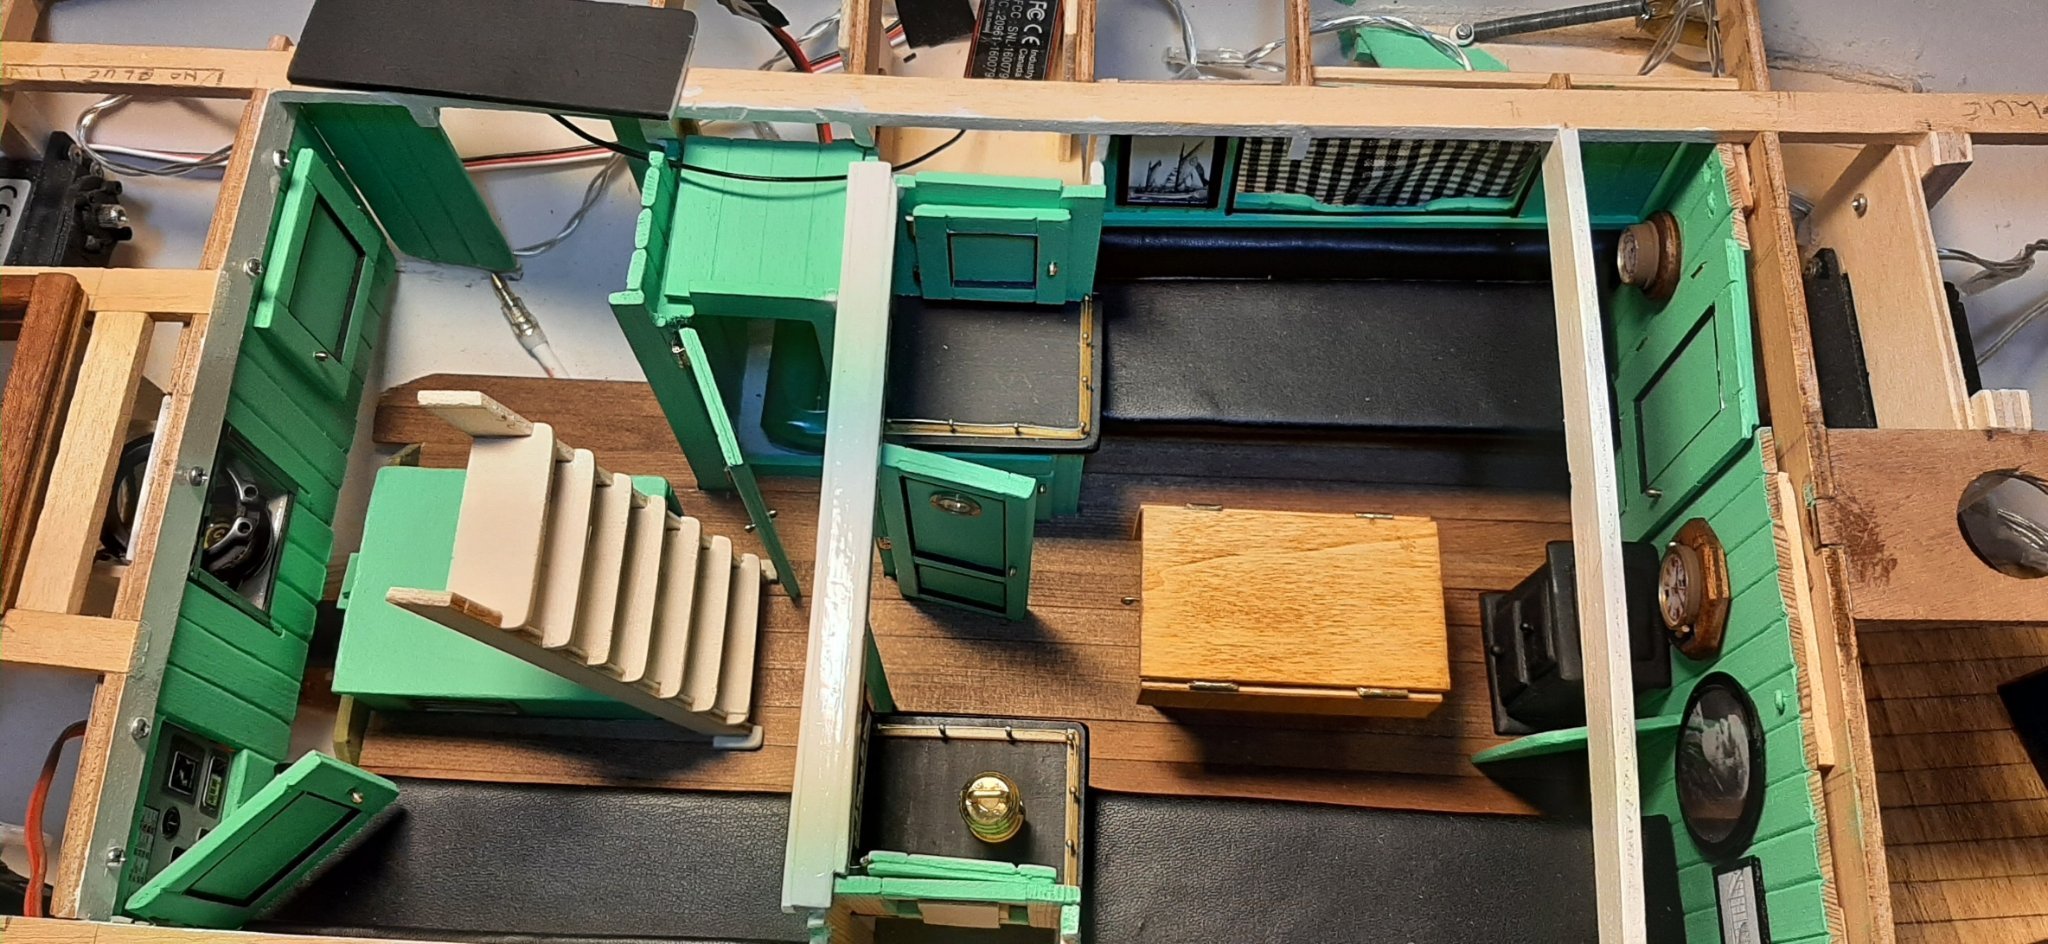
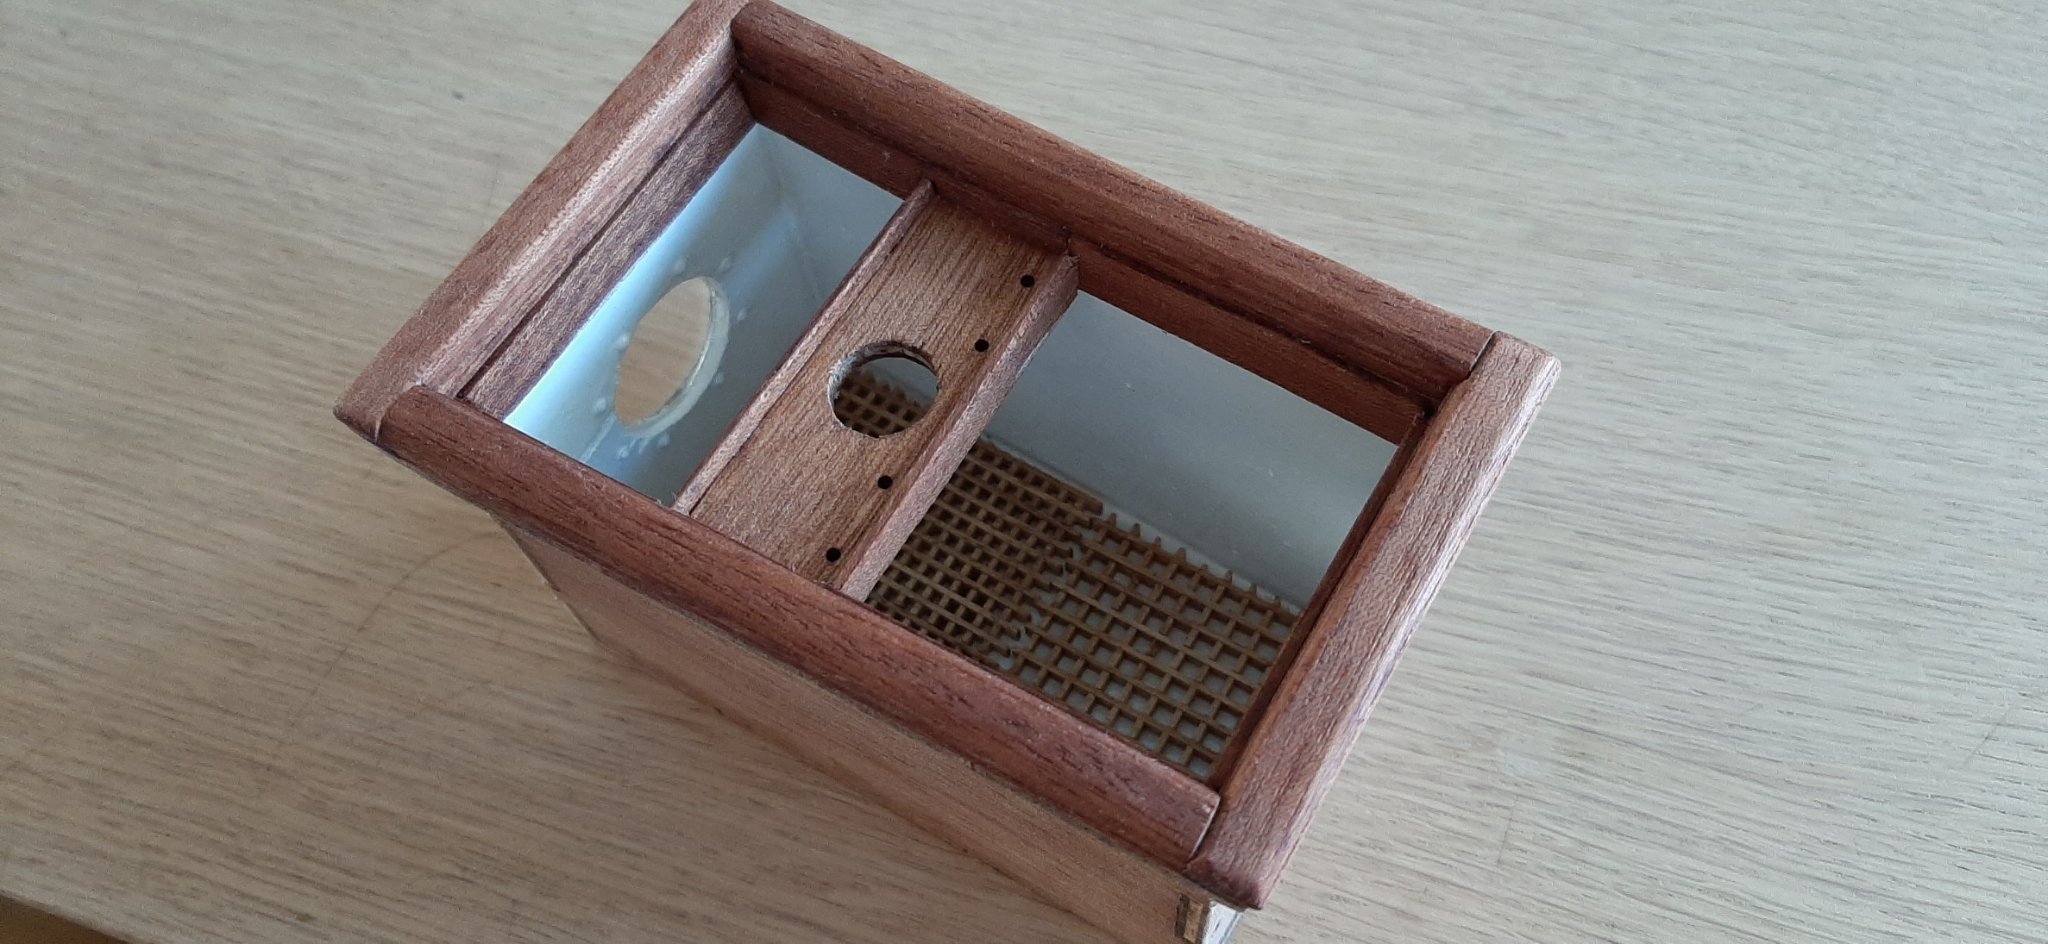
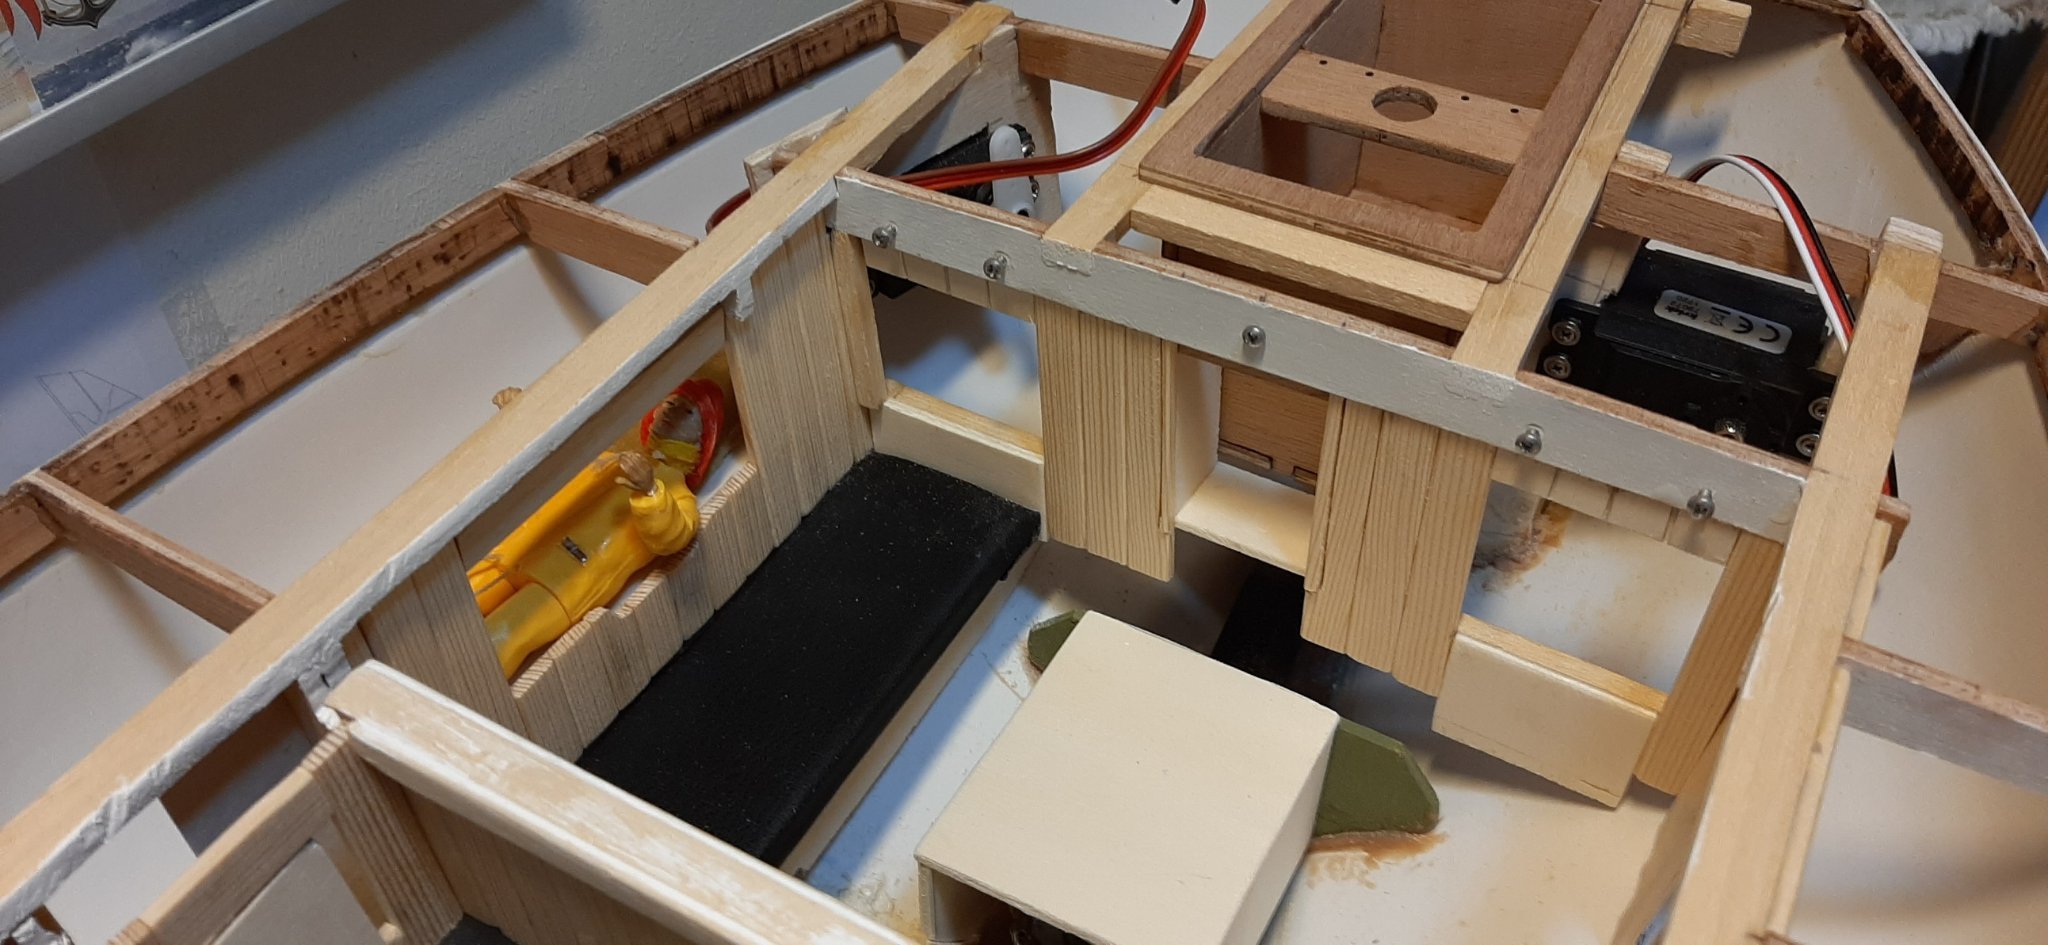
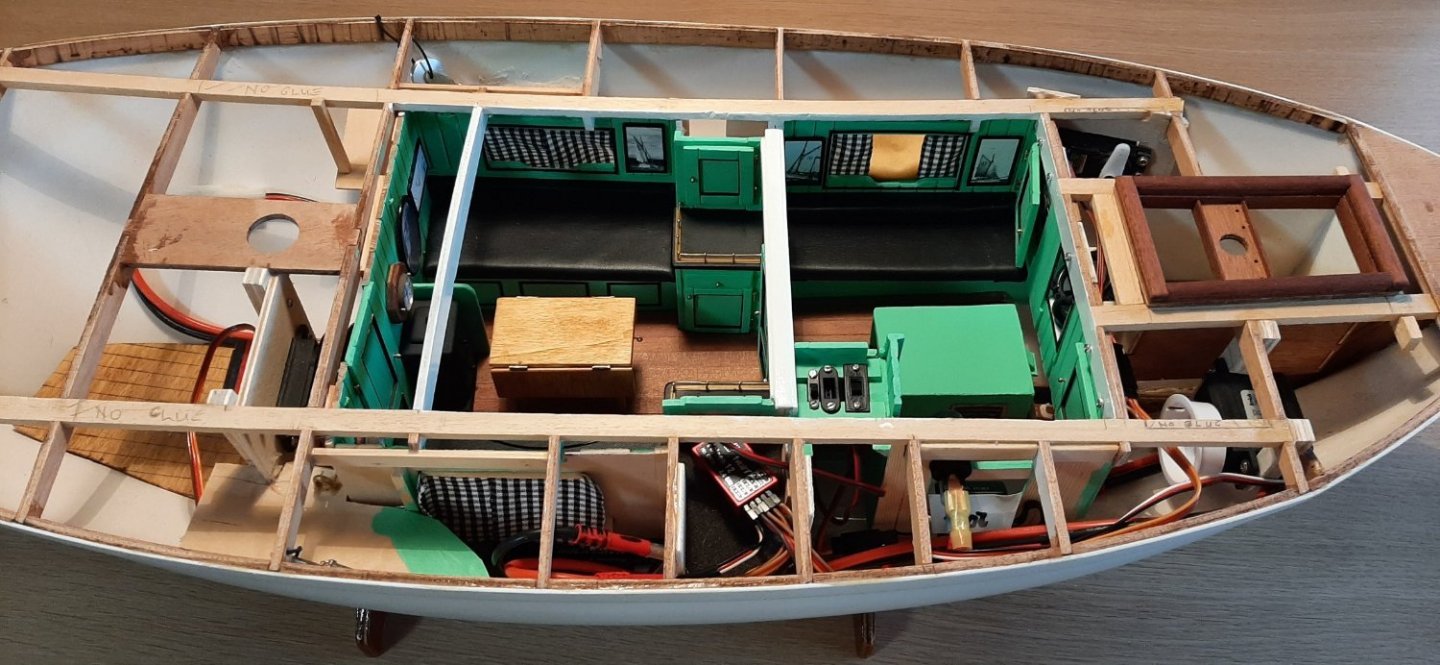
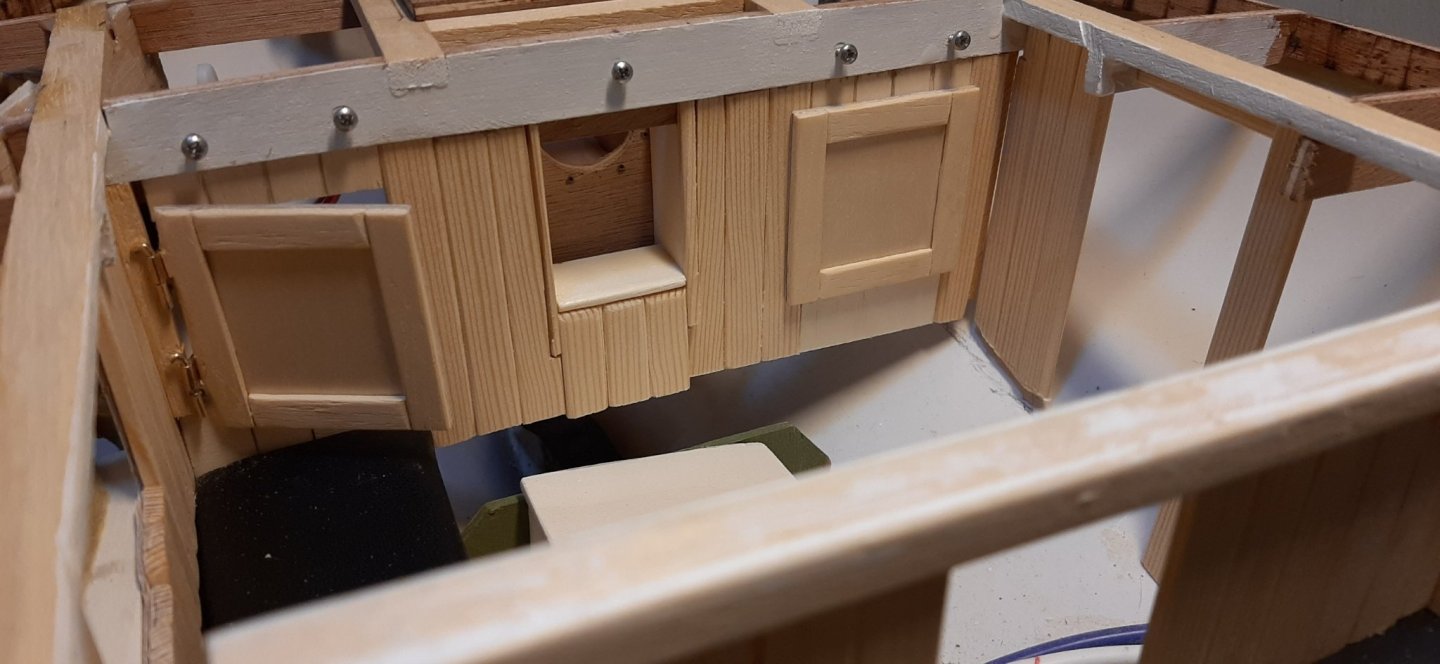
Trying some test-assembly of interior components. The aft cabin bulkhead with an
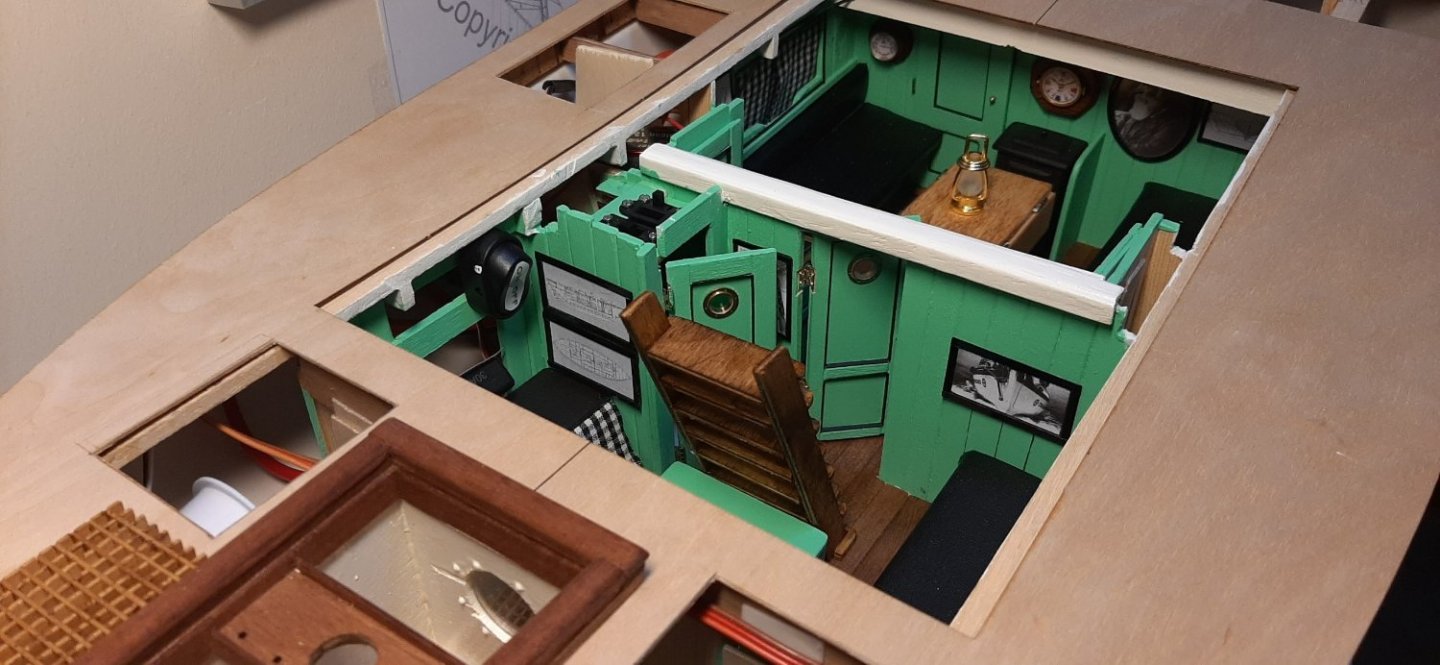
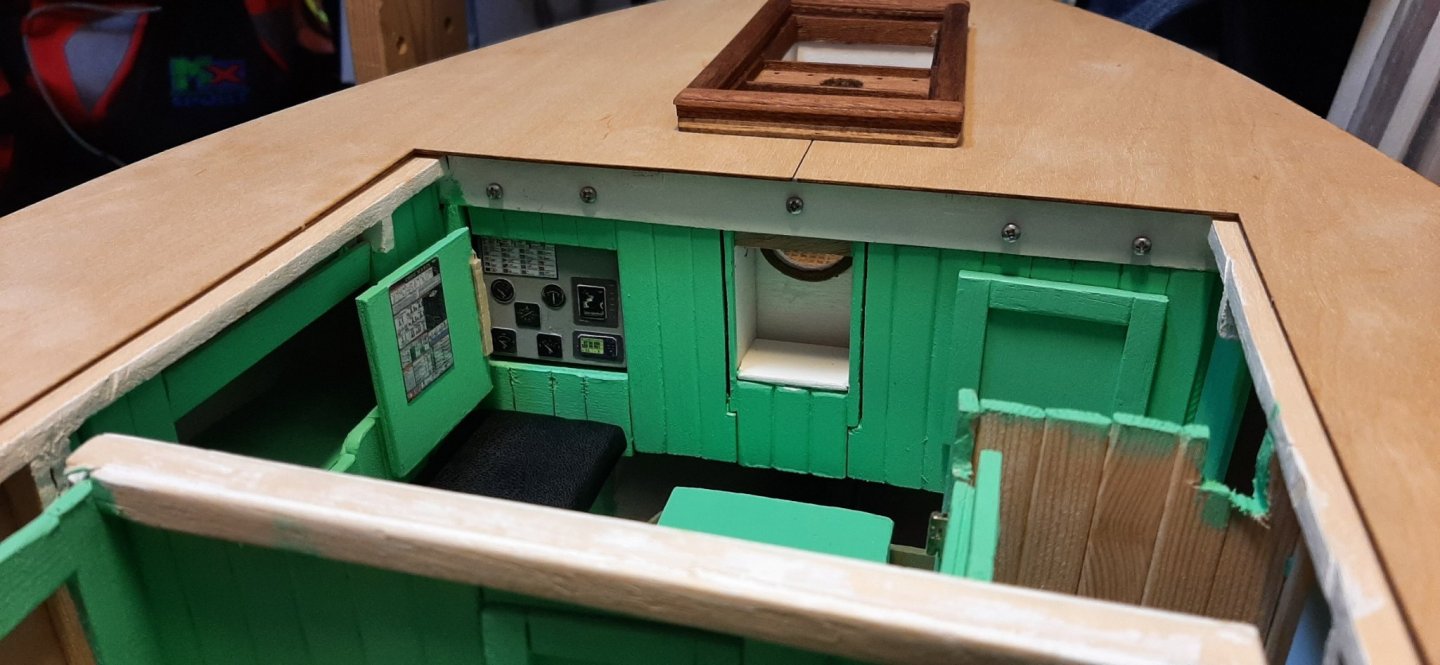 in-locker navigation station is in place. The bulkhead is removeable to give access to the 2 servos behind. The pigeon-hole/shelf in the centre will house the compass which can be viewed by the helmsman through a large porthole in the steering well. The well has been given higher sides than shown in the plan to help keep water out when sailing.
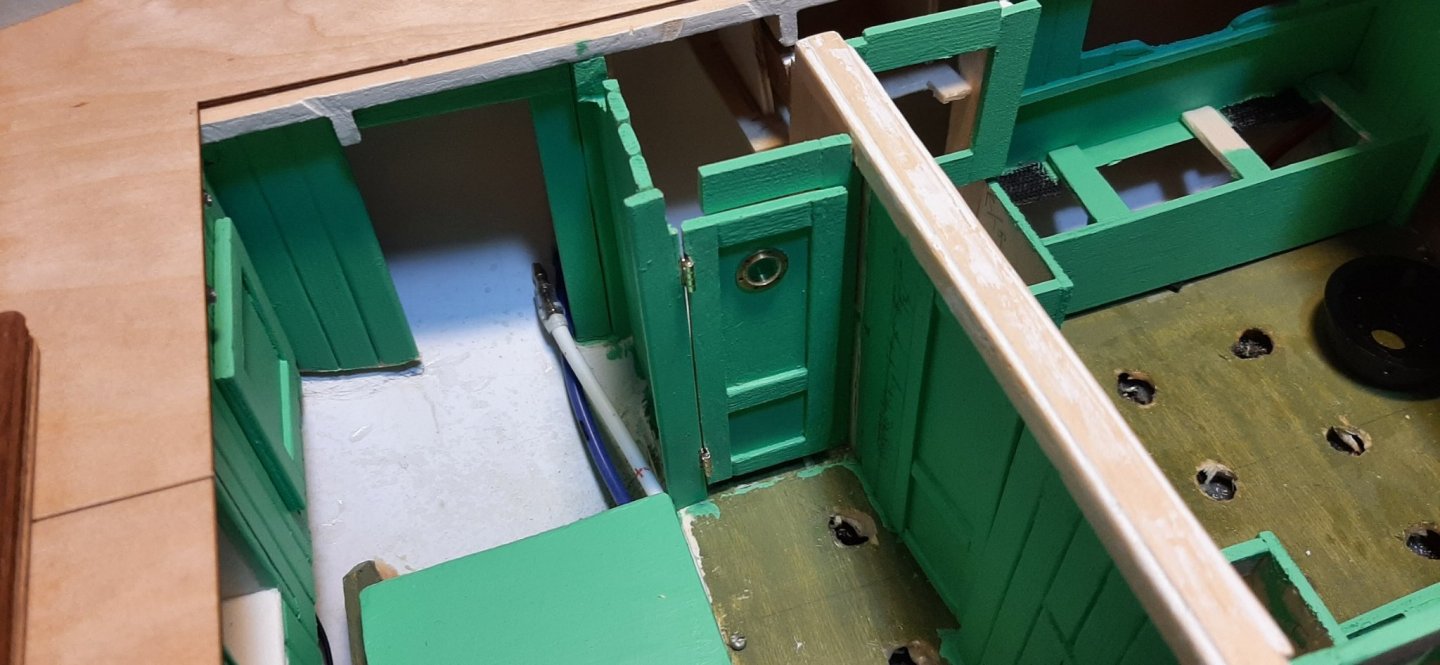
The door to the heads has been fitted with a (slightly kinky) frosted, green-glazed, porthole!
George

-
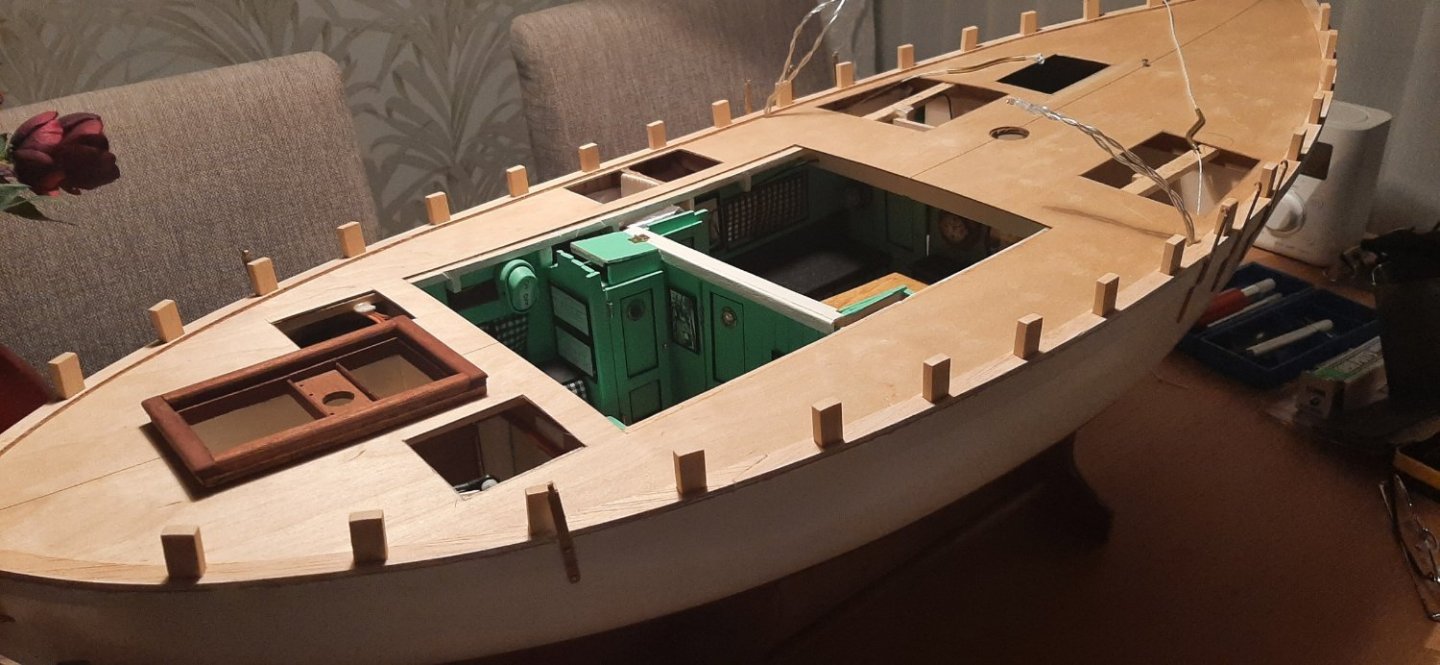
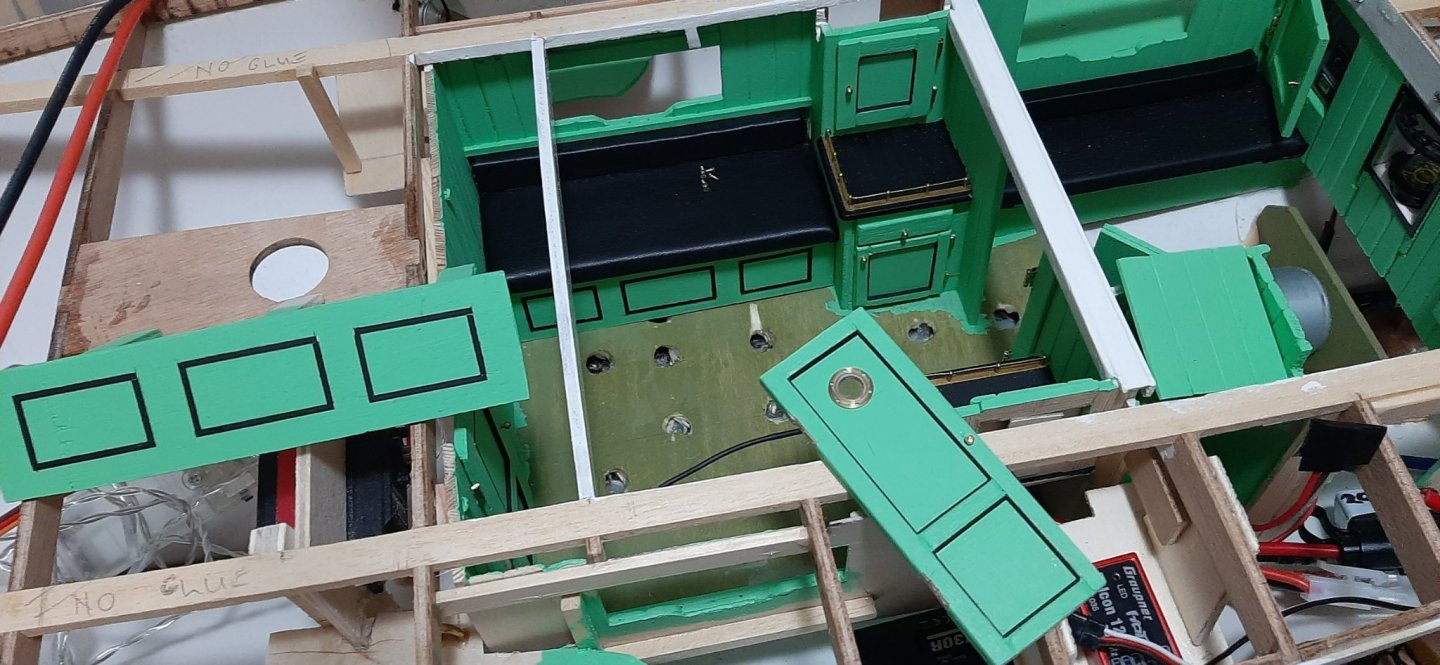
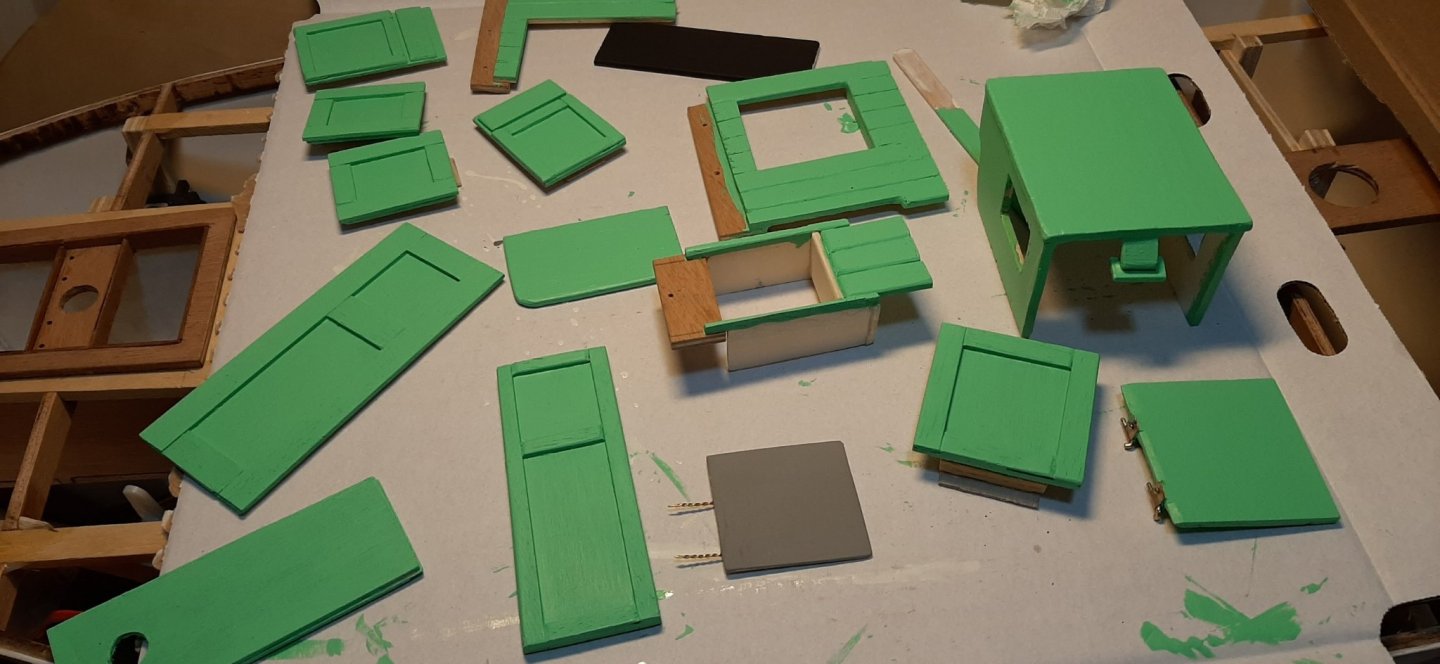
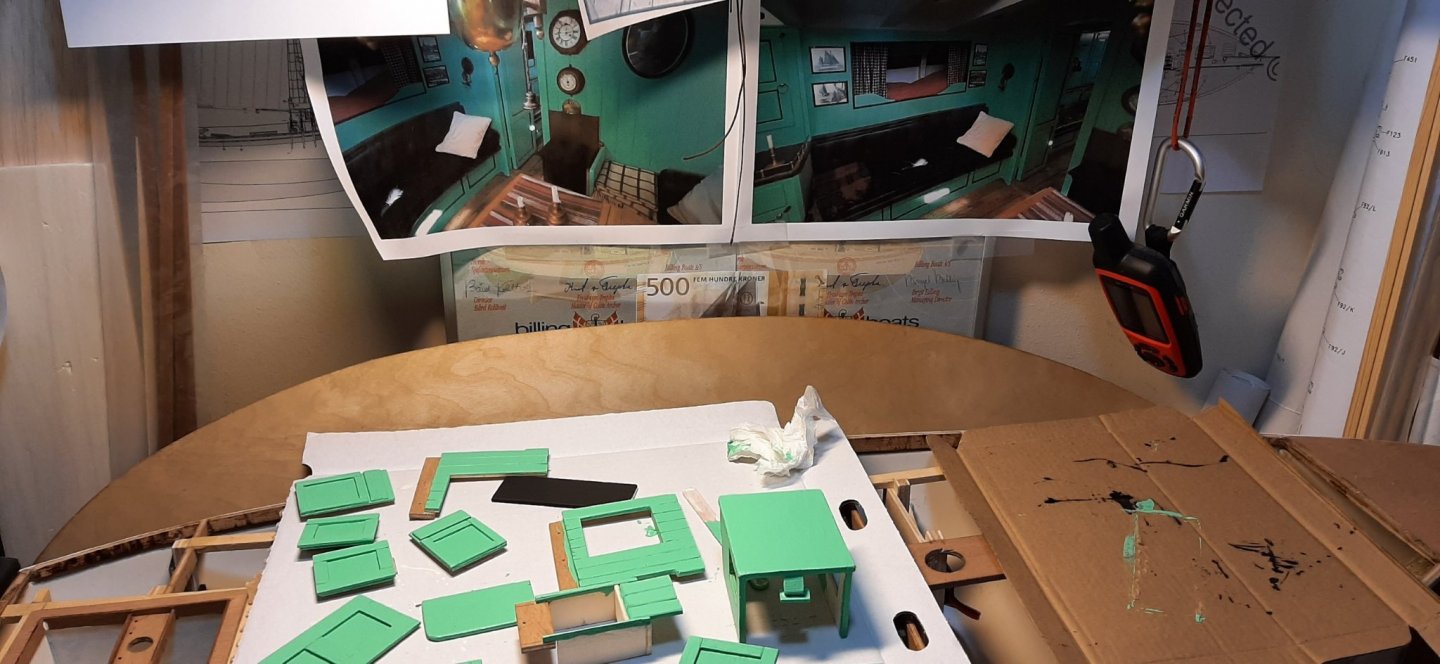
Starting to paint some interior sections now. This is the actual green colour used in the present Colin Archer RS1. Don't know if the original was this green, because all the old photos are in monochrome!
George
-
Progressing slowly with the different components of the interior. Now rounding the last 'corner'. Not too happy with the home-made hinges on the stbd locker door. Only one or two of the locker doors actually need working hinges. I have found some miniature brass doll's-house hinges in the UK -which are now in the post to Norway.
The workshop area, aft to port, and the adjacent 'heads' are also in progress. The opening for the compass-viewing porthole in the steering well has been drilled.
George


-
Aft bulkhead in production now. A locker on each side and a space to house the steering compass which can be seen by the helmsman through a porthole in the forward bulkhead of the steering well! The porthole and compass are not in place yet but they will appear eventually.
George