HOLIDAY DONATION DRIVE - SUPPORT MSW - DO YOUR PART TO KEEP THIS GREAT FORUM GOING! (83 donations so far out of 49,000 members - C'mon guys!)
×


HakeZou
-
Posts
325 -
Joined
-
Last visited
2 Followers

-
 JacquesCousteau reacted to a post in a topic:
Sloup by HakeZou - Corel - 1:25
JacquesCousteau reacted to a post in a topic:
Sloup by HakeZou - Corel - 1:25
-
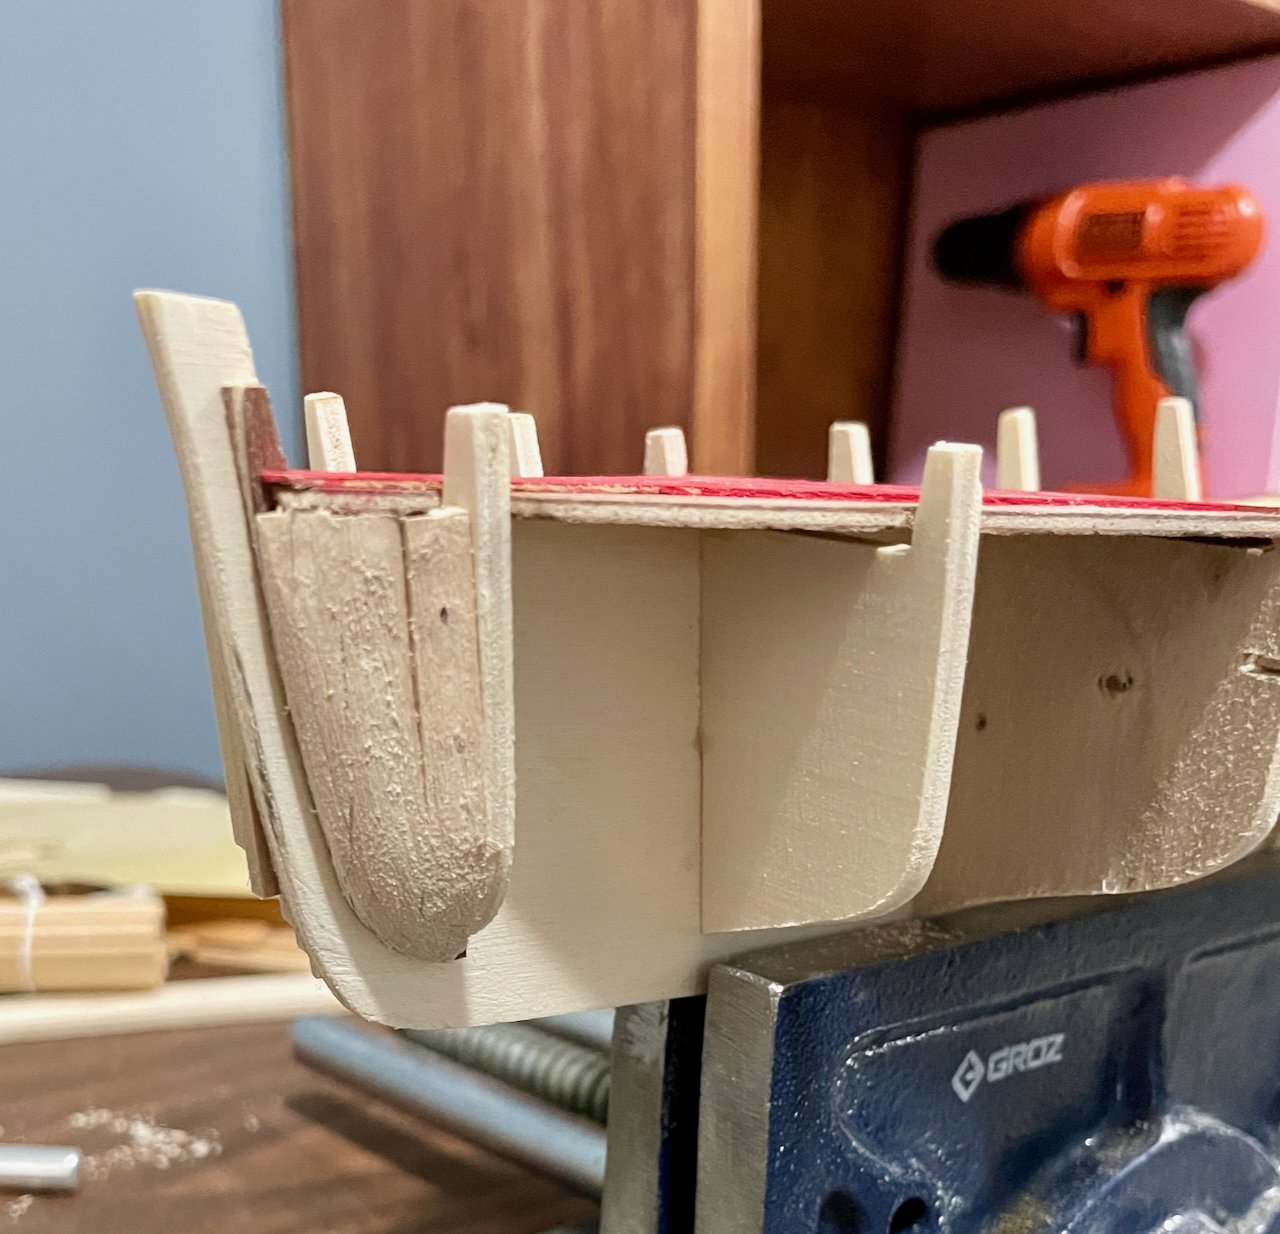
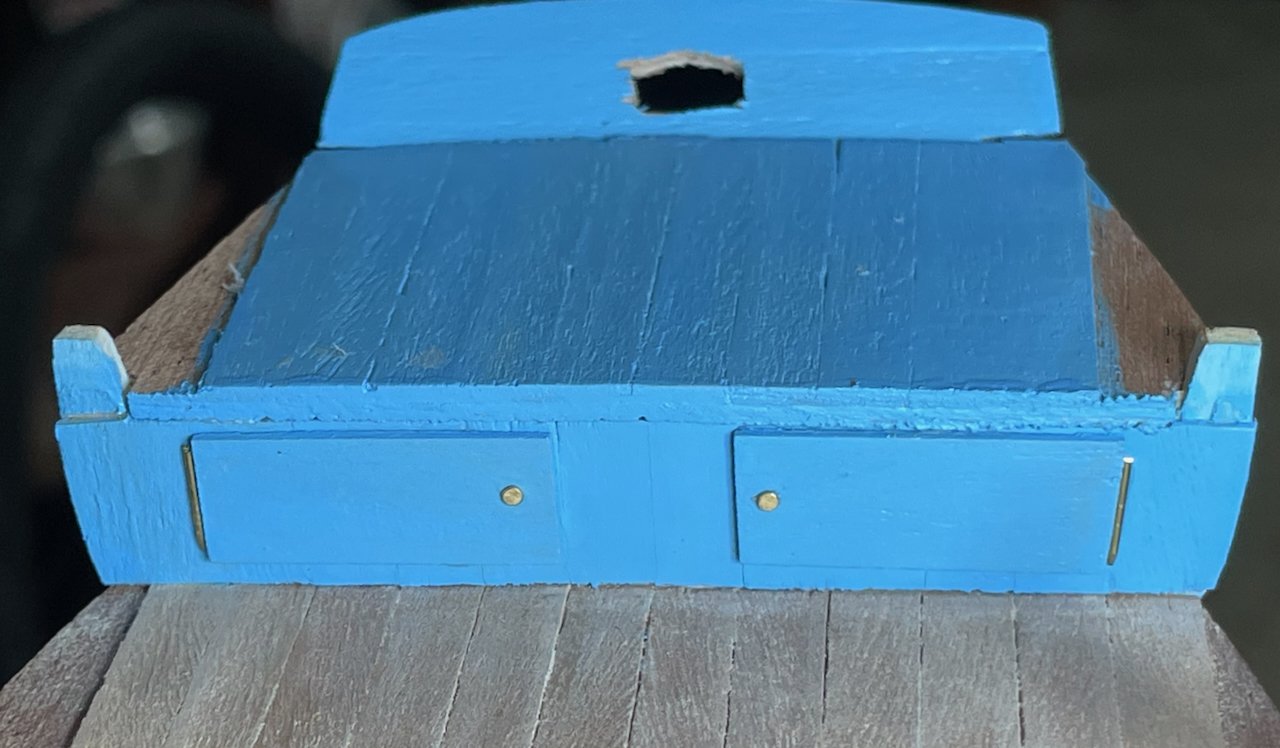
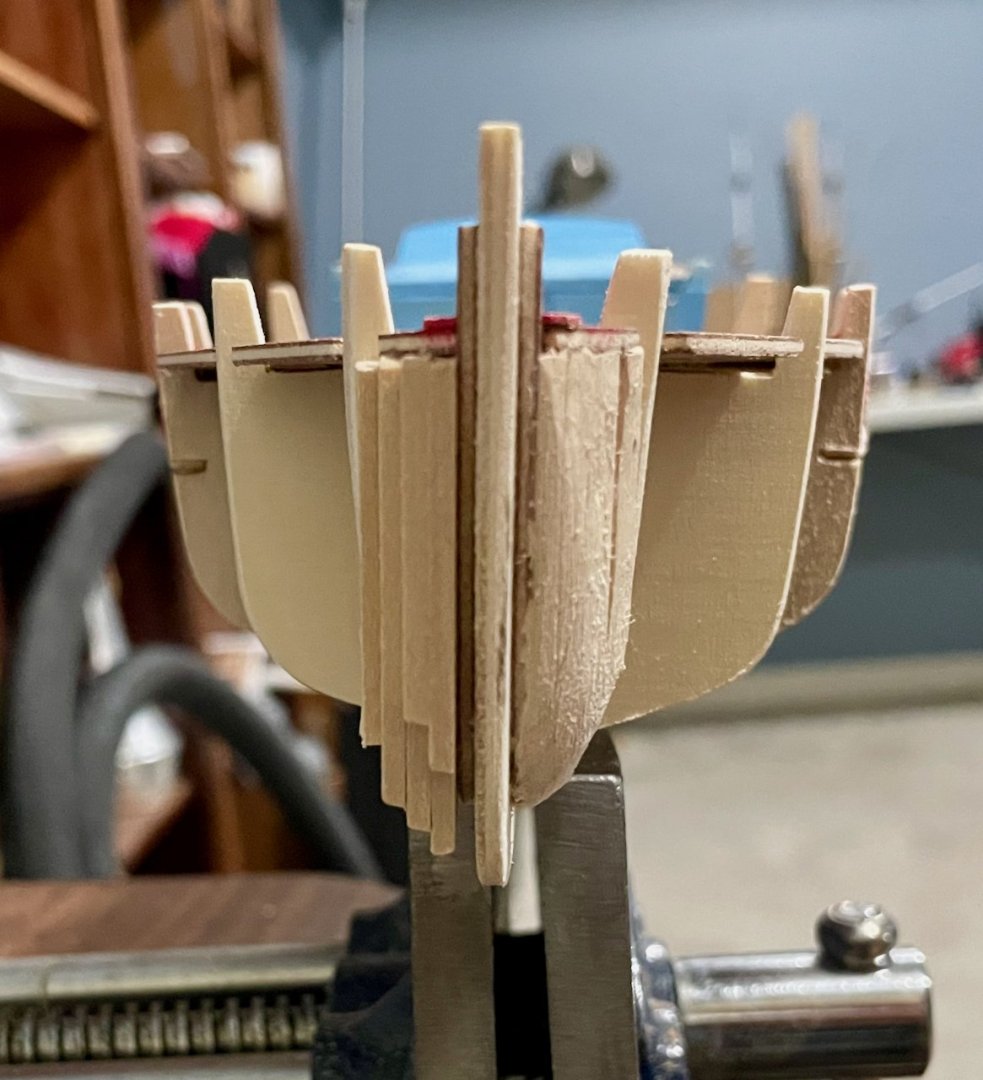
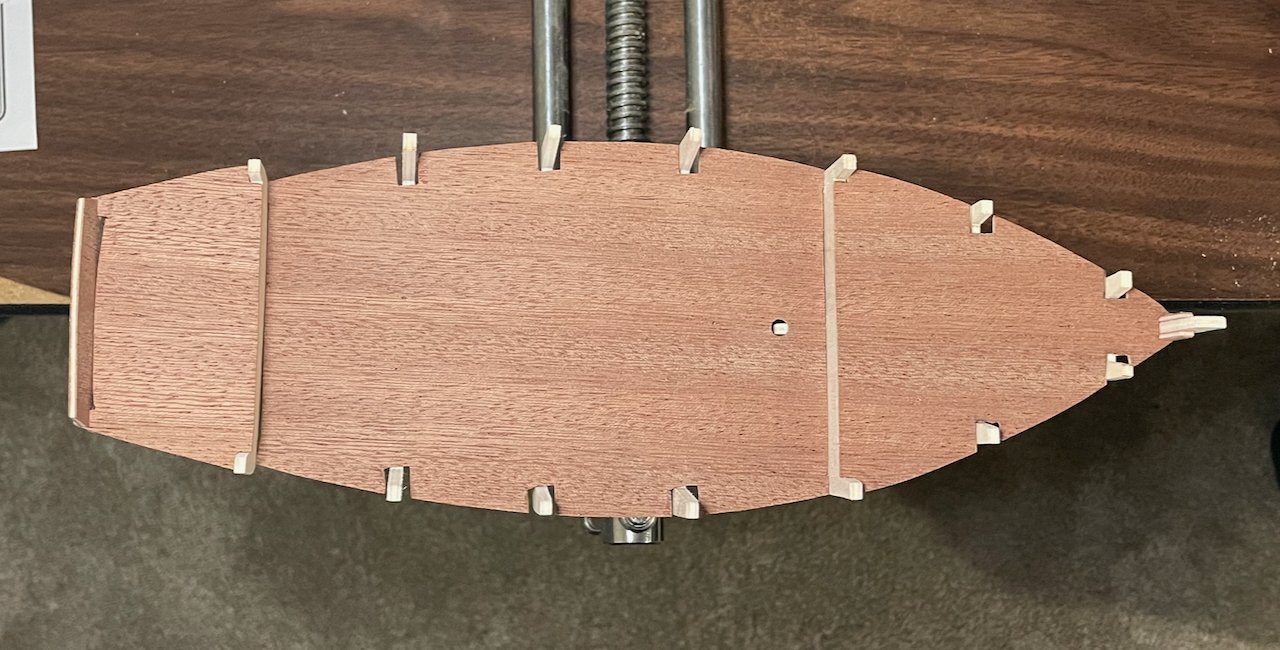
Another update after making some good progress. I painted the fore and aft decks and bulwarks, just so I could get that taken care of when it was easier paint them. I've also installed the decks. As a little touch, I added two hatches into the aft storage compartment. I simulated the hatches as having hinges and swinging outward. After reading DeeDee's post on planking the hull, I decided to build up some blocks that will give me more surface area at the tricky spots. Since I have a TON of 2x5x300mm planks from other projects, I just cut pieces of those and stacked them forward of frame 1 and between frame 7 and the transom. It has taken a lot of sanding, but the port side is looking pretty good. Now, I just have to get to work on the starboard side. Next steps: sand down the filler blocks on the starboard side, plank the hull.


-
ccoyle reacted to a post in a topic:
Sloup by HakeZou - Corel - 1:25
-
vossiewulf reacted to a post in a topic:
Sloup by HakeZou - Corel - 1:25
-
JacquesCousteau reacted to a post in a topic:
Sloup by HakeZou - Corel - 1:25
-
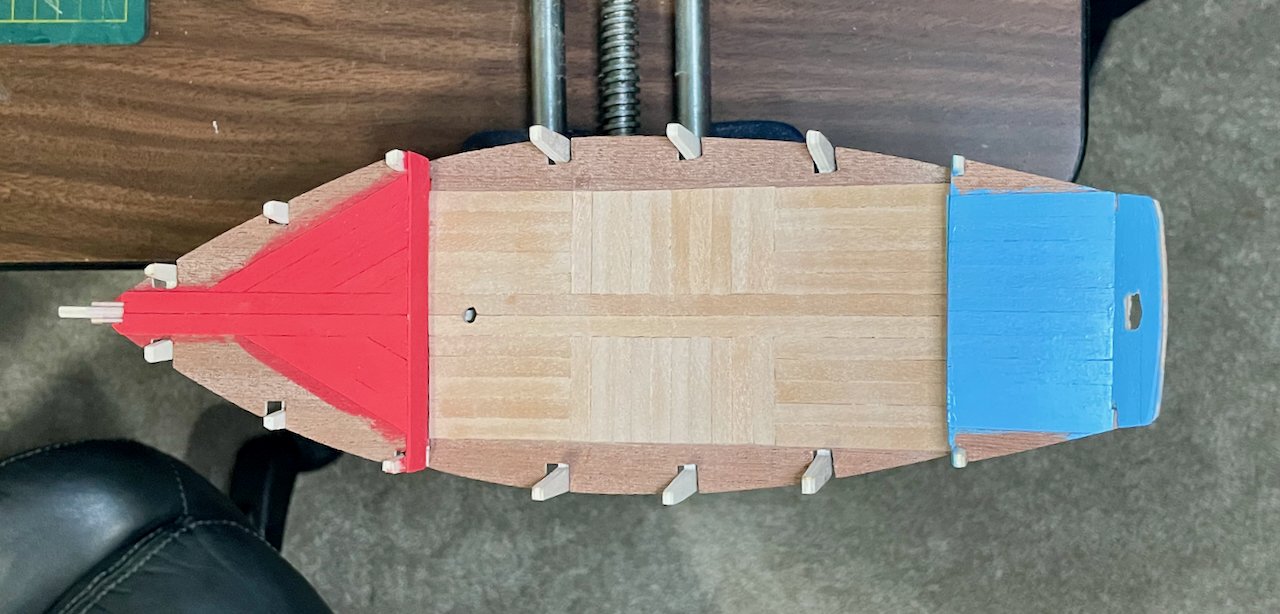
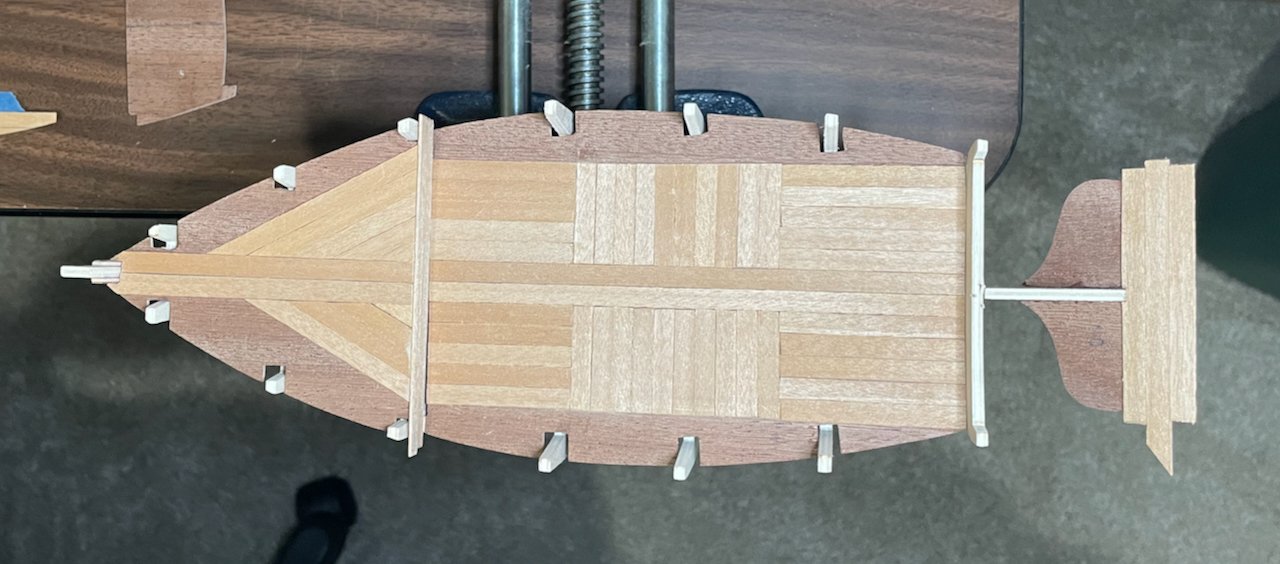
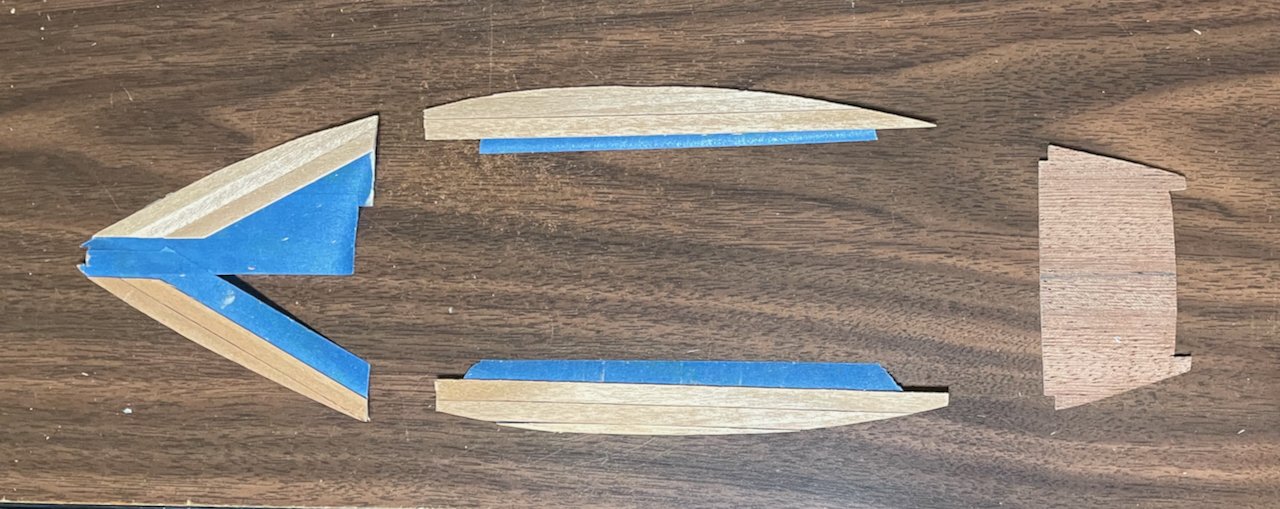
Thanks for following along, Jacques! I'm not intending to do too many modifications. That said, the instructions and plans with the kit are limited enough that there's a lot of room for experimenting in each step along the way (something the instructions do encourage!). As far as the rig, I'm not planning to overthink that. The kit comes with a gaff and a single staysail. I've seen plenty of photos of sloups coquillers under full sail (with a top sail and two staysails); they look great, but I'm not sure that I want to invest time in making my own sails this time around. On to the progress report. With a bit of travel and lots of noodling time, my progress has been slow. The key challenge is that I've been thinking ahead to some of the challenges of getting deck and bulkhead planking to fit right once the hull is planked. So, I'm trying an experiment in doing some of the work out of the usual order. To that end, I've mostly planked the main and fore decks. I've also planked the short forward bulkhead and the inside of the transom. (Obviously, there's a bit of clean up to do on the bulkhead and transom!) I've adjusted the planking on the main and fore decks from the plans. After watching videos and studying photos of actual sloups coquillers, I thought that the recommended proportions of the sections on the main deck seemed a bit off. I laid two king planks down the center. Forward and aft, the planks are laid parallel to the king planks. In the middle, however, I've laid some perpendicular planks to simulate the hatches down into the hull. I'm not planning to make functional hatches, just to simulate them. As for the foredeck, there are again two king planks, but the rest are laid at a 60º angle. It's aesthetically pleasing to me, but that angle was also a practicality. Working with the decks off of the frames, I've shaped all of the fore and main deck planks. Those along the edges were taped into place, then I trimmed and sanded the edges. (This is where the 60º angles on the foredeck planking were helpful.) Now, once I've planked the hull and removed the futtocks, I can simply lay in perfectly shaped pieces. Laid out like this, the imperfections seem glaringly obvious, but so far, they seem less obvious to me when everything is dry-fit in place. Next steps: Clean up the bulwark and transom planking; drill out holes for mast and tiller; plank the aft deck and aft bulkhead.
-
HakeZou reacted to a post in a topic:
Sloup by HakeZou - Corel - 1:25
-
JacquesCousteau reacted to a post in a topic:
Sloup by HakeZou - Corel - 1:25
-
eatcrow2 reacted to a post in a topic:
Sloup by HakeZou - Corel - 1:25
-
ccoyle reacted to a post in a topic:
Sloup by HakeZou - Corel - 1:25
-
Nirvana reacted to a post in a topic:
Sloup by HakeZou - Corel - 1:25
-
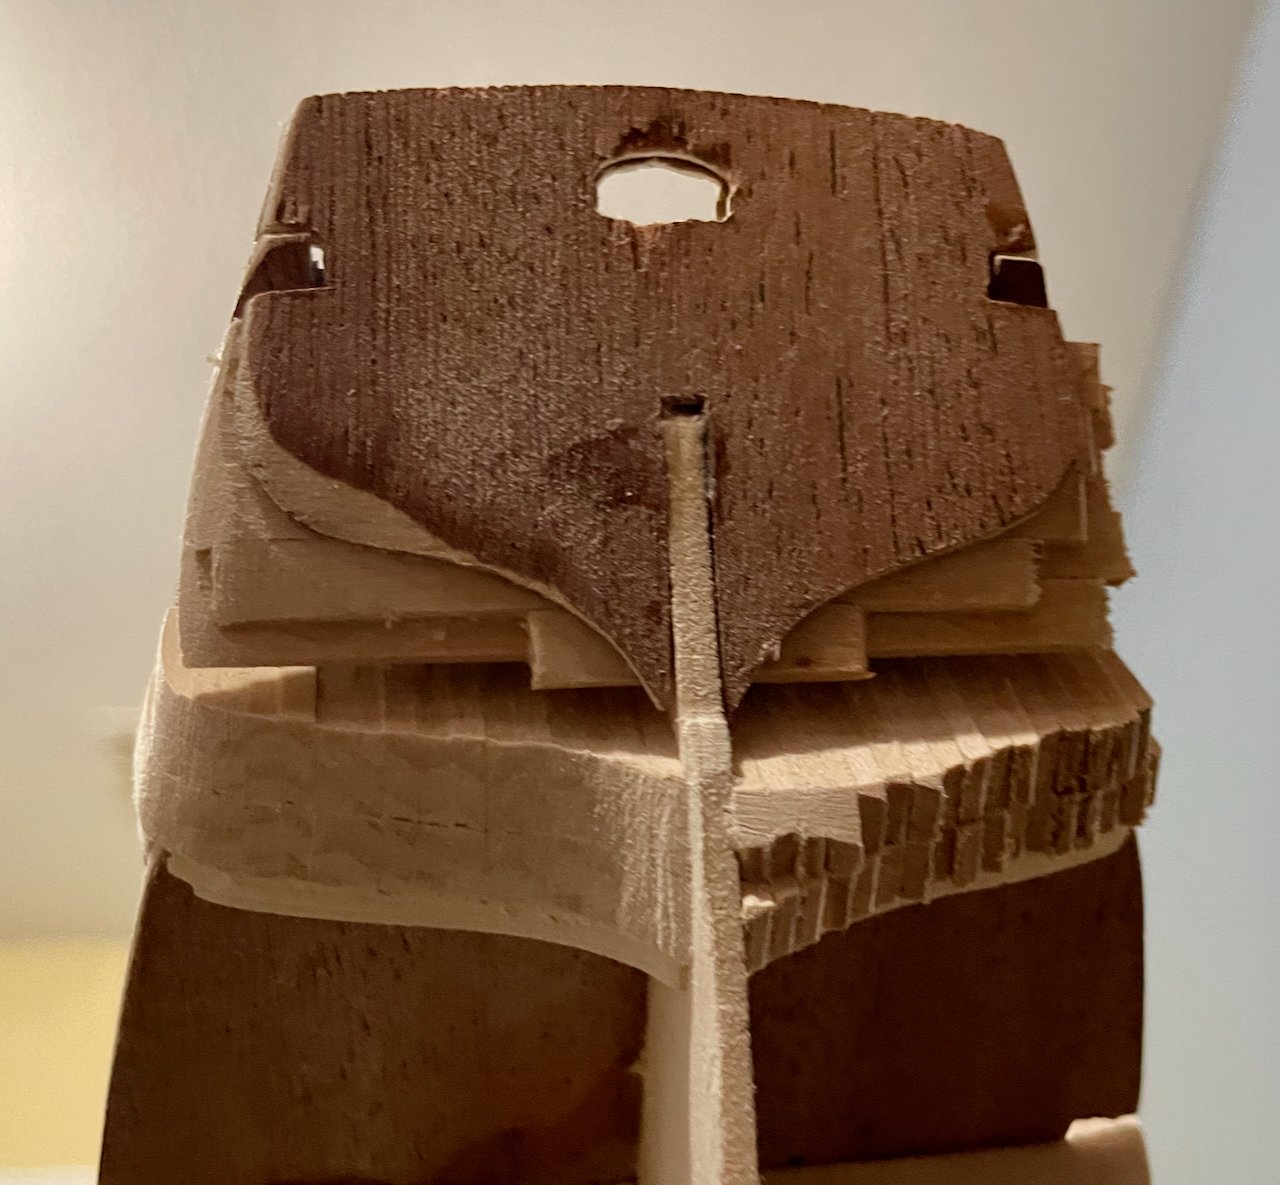
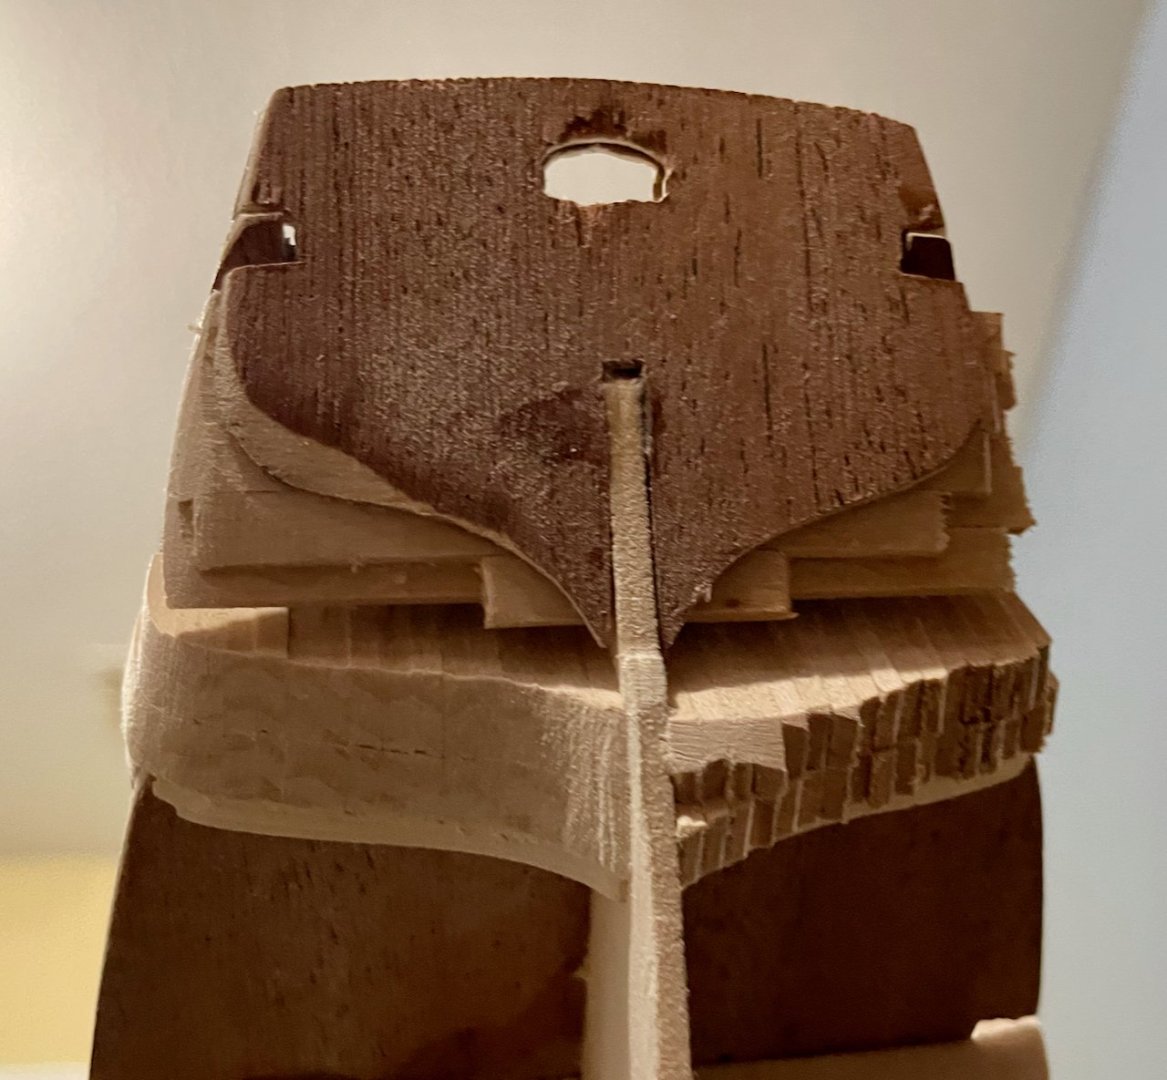
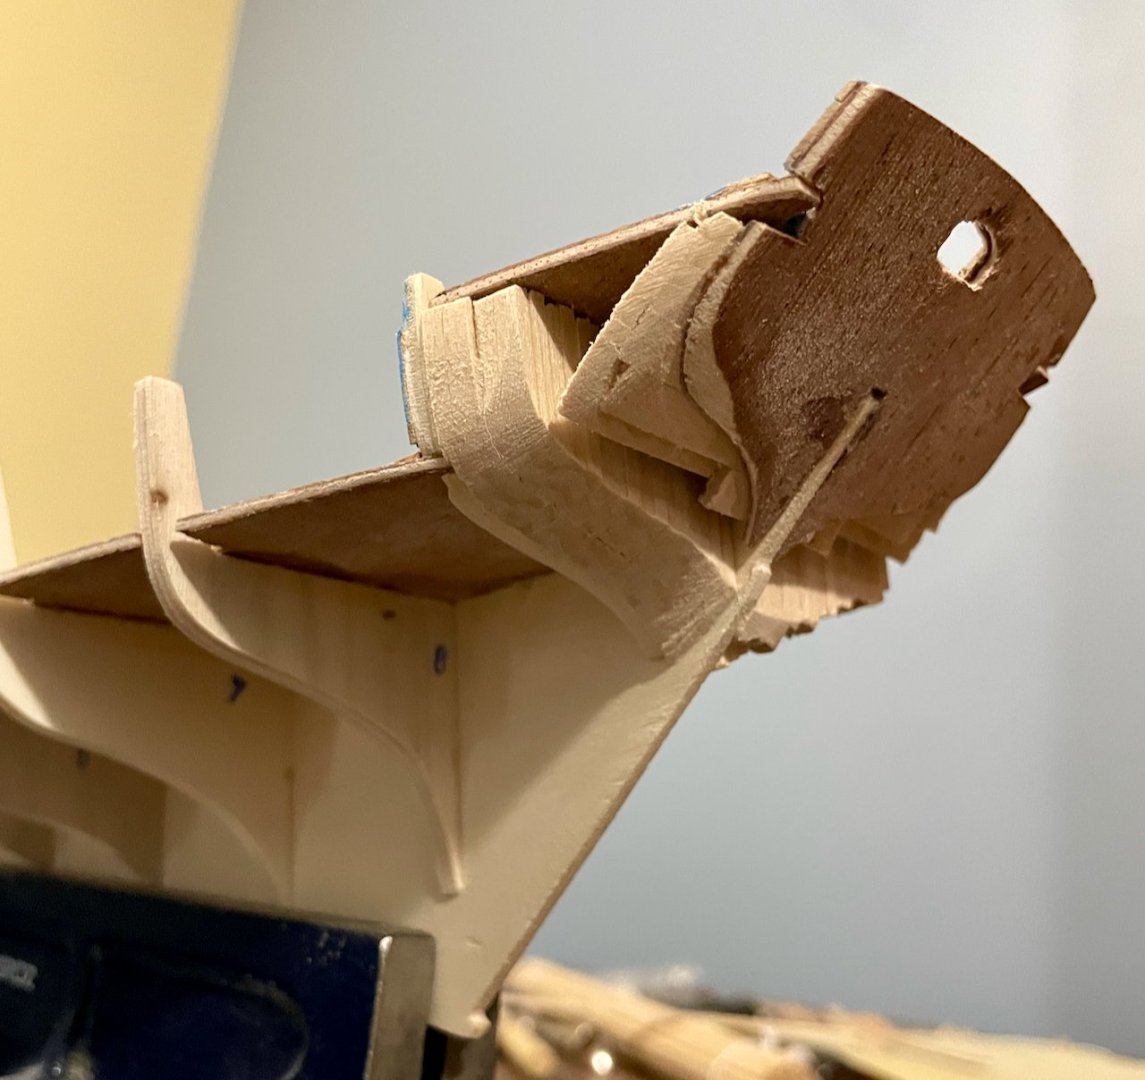
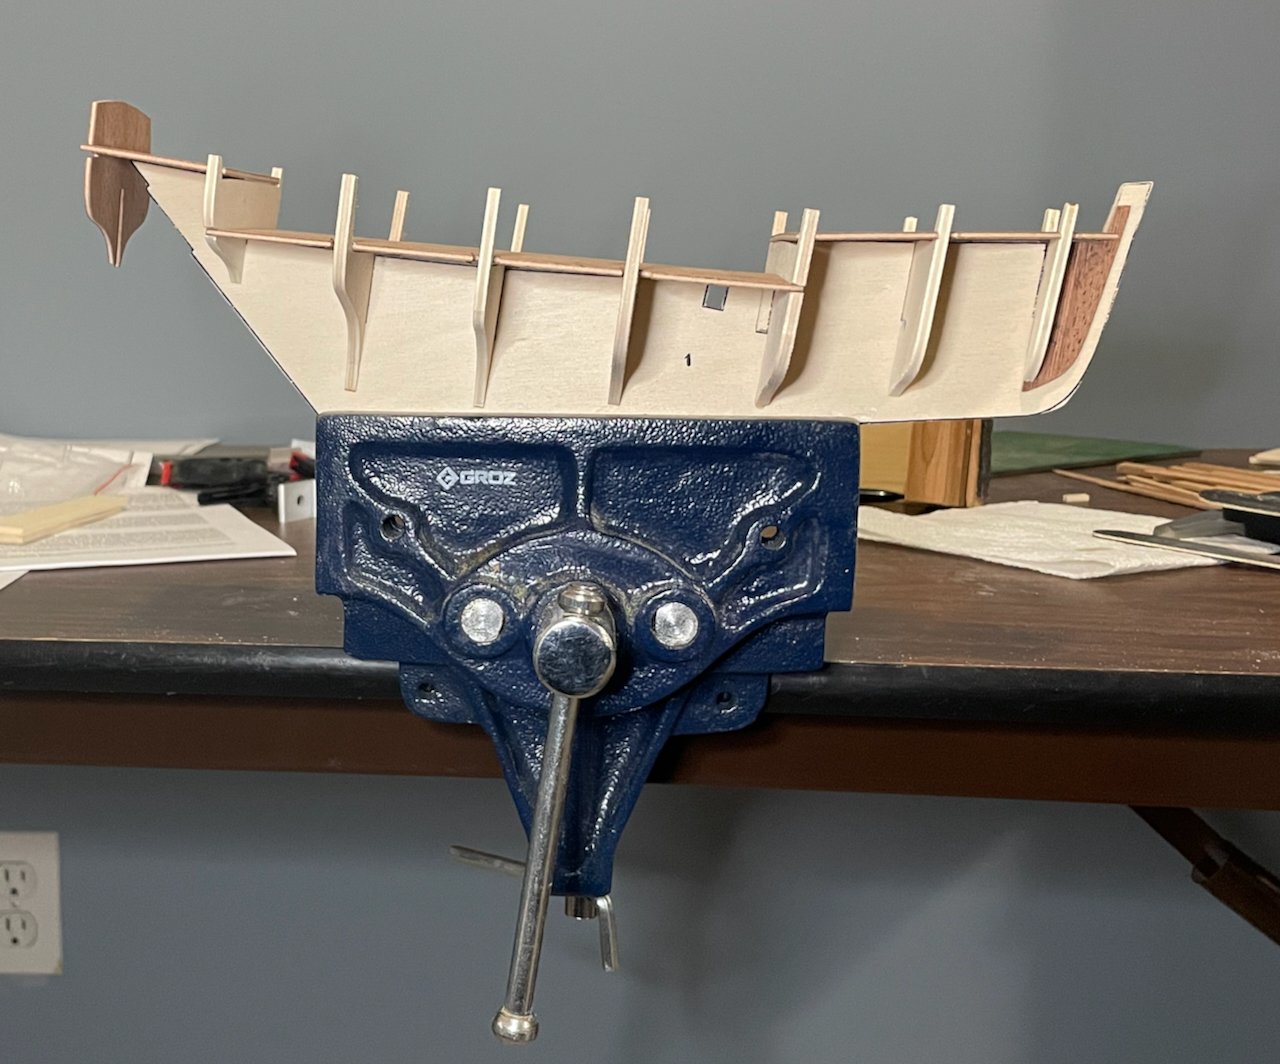
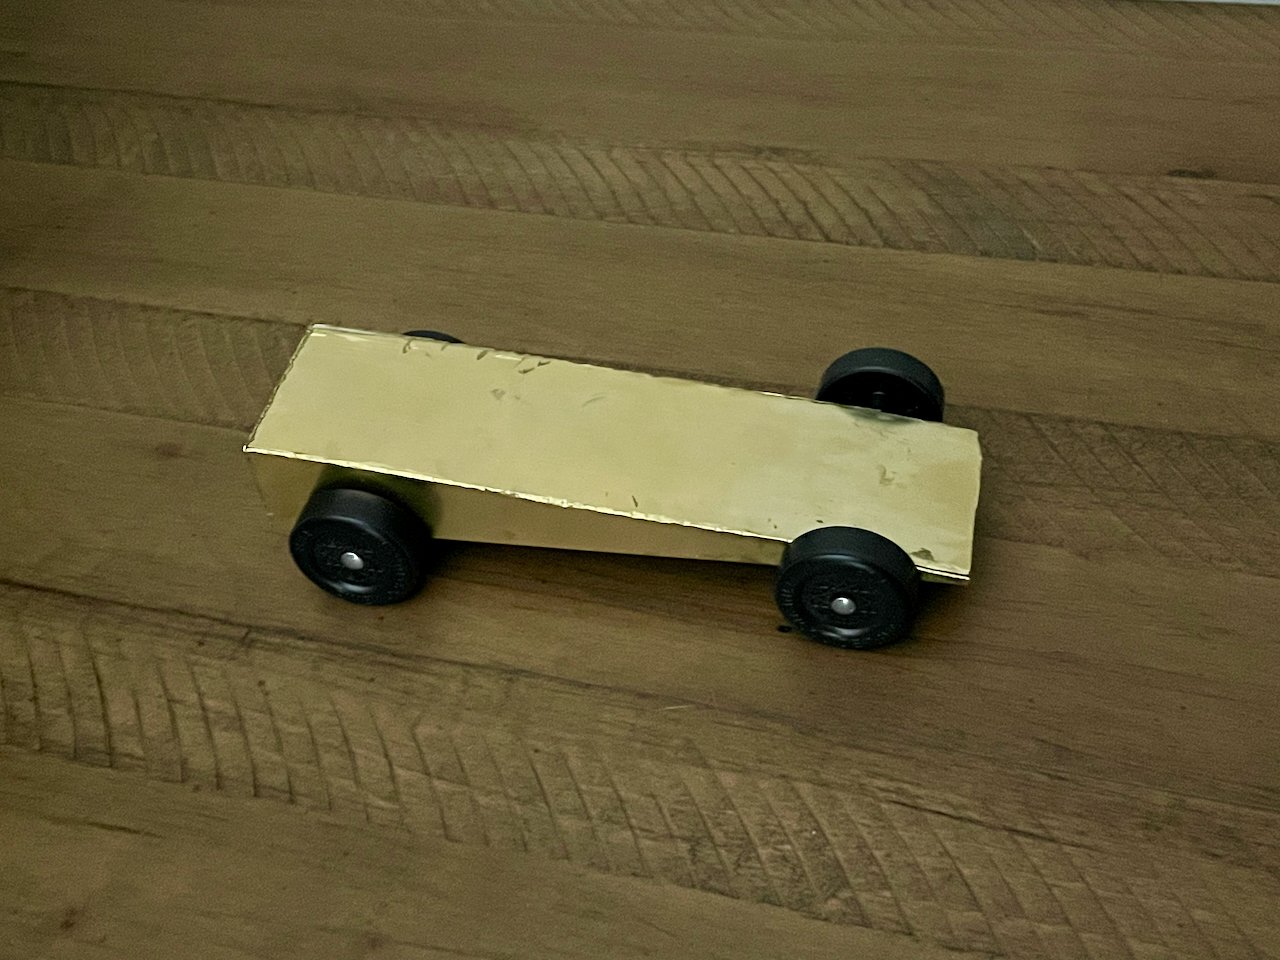
I never intended to have two builds going on simultaneously, but...well...here I am. Life has been pretty wild for several months now, including a bad stretch of work-related burnout. During that time, my Terror build languished, while I procrastinated on the lifeboats and the shrouds. So, in order to get my hands active again, I decided to pull my "next kit" off the shelf and just get started on it. After working on the Terror for so long, I was ready to get back to a small working boat with simple rigging. I had been eyeing Corel's Sloup for a long time, so I picked up a kit when it was on sale a while back. My goals are three-fold here: to continue working on my planking skills; to better understand how to shape the stem, keel, and rudder; and to continue working on my rigging skills. I'm grateful to CaptGino and Dee_Dee, who have also done some great build logs that are serving as vital resources for me. Right off the bat, this kit has presented me with unexpected challenges. I have only dry-fit the frames and the decks (and installed the bow filler pieces); the transom is just dangling for now, since it isn't yet glued into place. But even this little bit has been a fair amount of work. The challenges: Frame 3 was positioned 3mm too far aft. I made this assessment based on the deck pieces. I cut the slot in the correct spot, then ended up gluing that one frame into place, along with a shim to fill the gap that I left. This has implications for the mast, since the hole in the deck does not line up with the slot in the false keel; I haven't decided exactly what to do about this yet, but I'll work that out soon. The bow fillers are oddly shaped and either line up with the slot for frame 1 or with the stem post. Not a big deal, but it took a bit to figure out how best to position them—and then required some trimming and sanding, both on the fillers and on frame 1. The fore deck and the main deck needed much more shaping then expected to sit comfortably in place. (And the main and aft decks still need a little more attention.) All of that said, things are off and rolling, and it felt good to have my tools in my hands again. PS: My son and I got tools into our hands last month, too. It was time for his final Pinewood Derby. He wanted to go all out and, after some brainstorming, we ended up teaching ourselves a bunch of new metalworking skills so he could have a brass-plated car! Some pretty amateur-looking work, but we were both thrilled with how it turned out. The car also ended up being ridiculously fast (averaged 233 scale mph) and easily took 1st place—winning every heat by more than a tenth of a second. Watching him grin throughout all of the races made for a nice way to wrap up Cub Scouting!
-
HakeZou reacted to a post in a topic:
Endurance by Tomculb - FINISHED - OcCre - 1:70
-
HakeZou reacted to a post in a topic:
Endurance by Tomculb - FINISHED - OcCre - 1:70
-
Jond reacted to a post in a topic:
HMS Terror by HakeZou - OcCre - 1:75
-
clearway reacted to a post in a topic:
HMS Terror by HakeZou - OcCre - 1:75
-
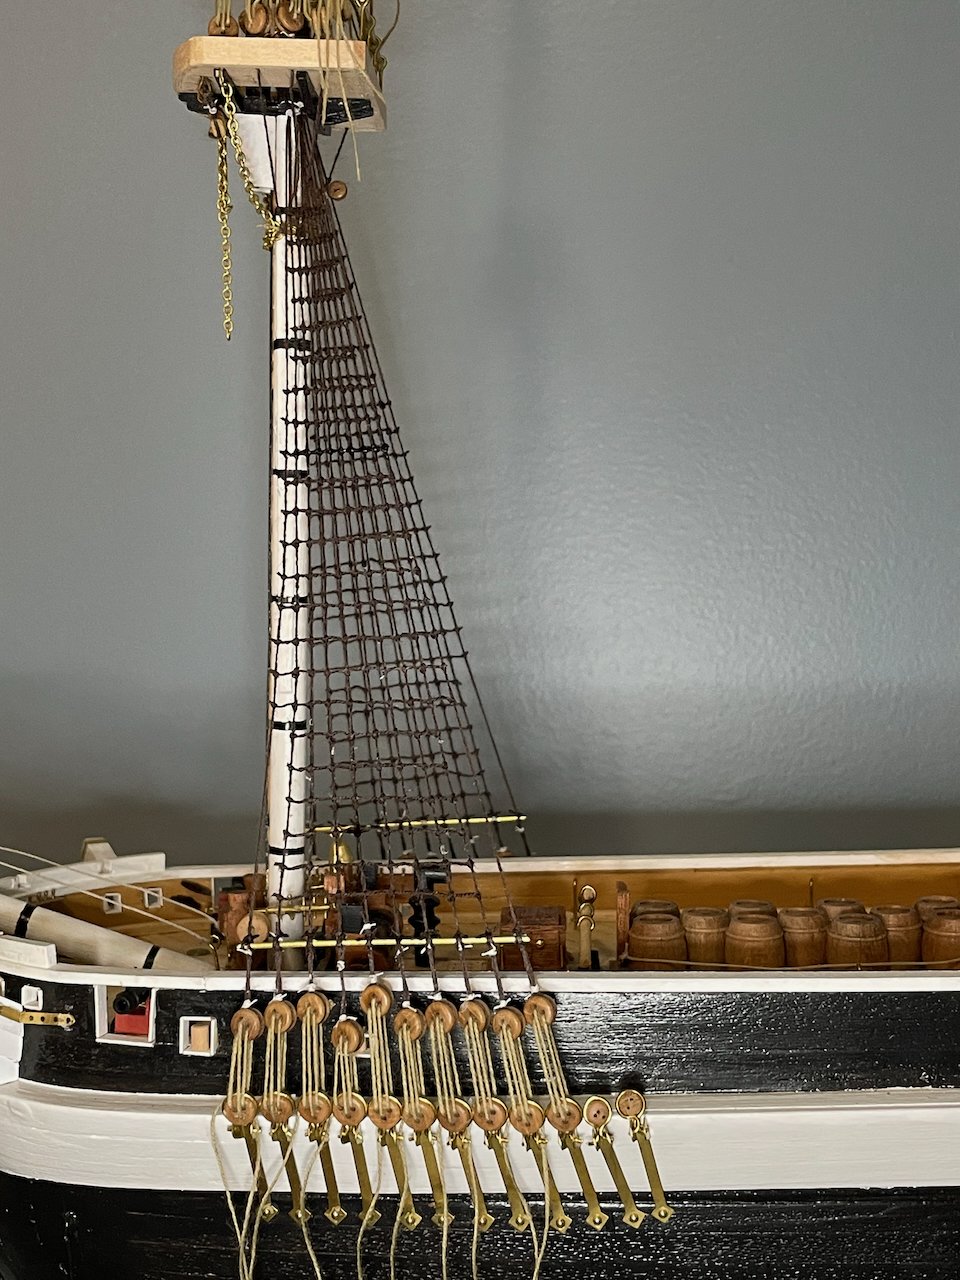
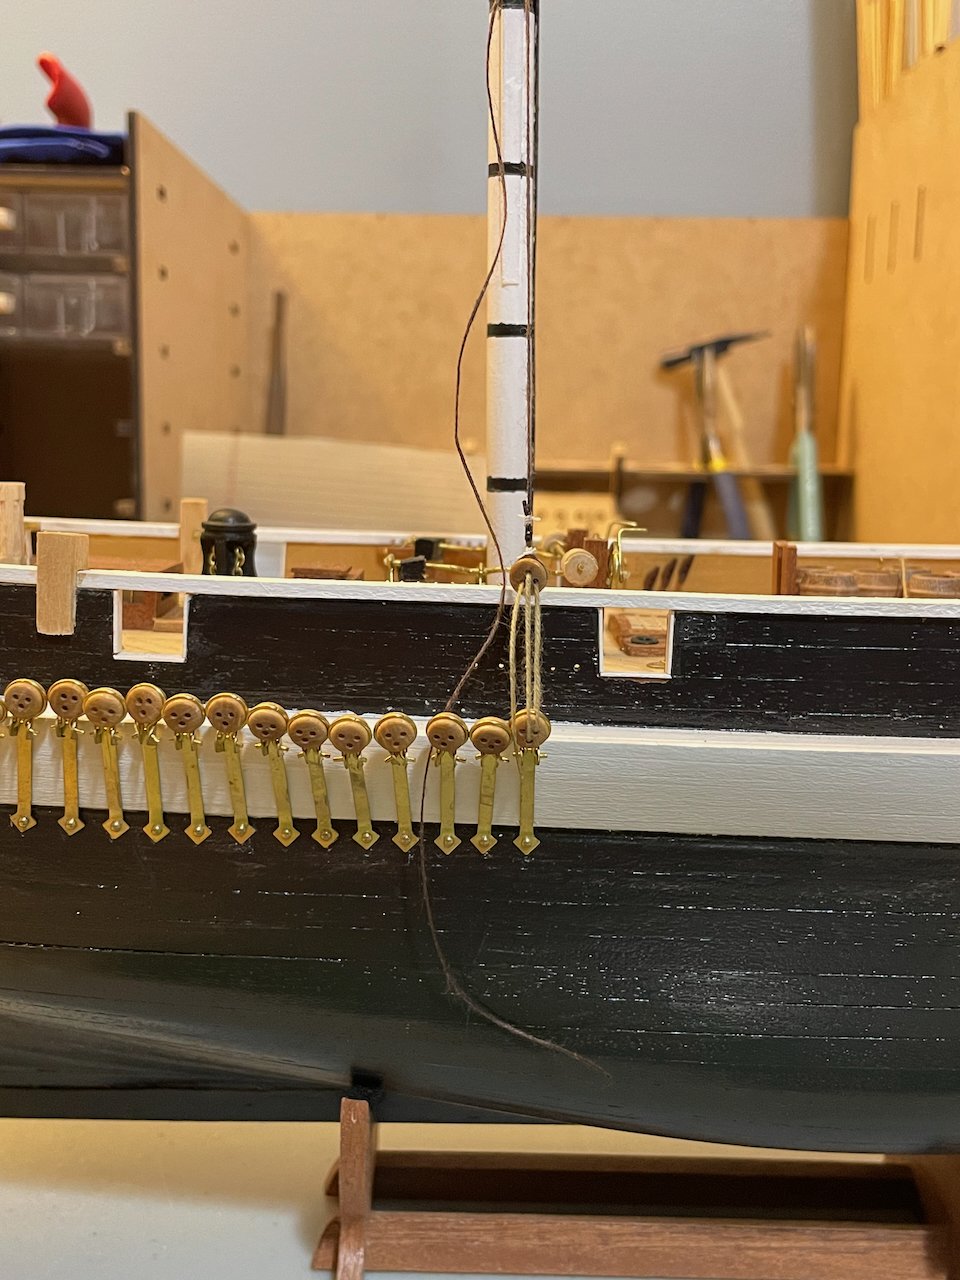
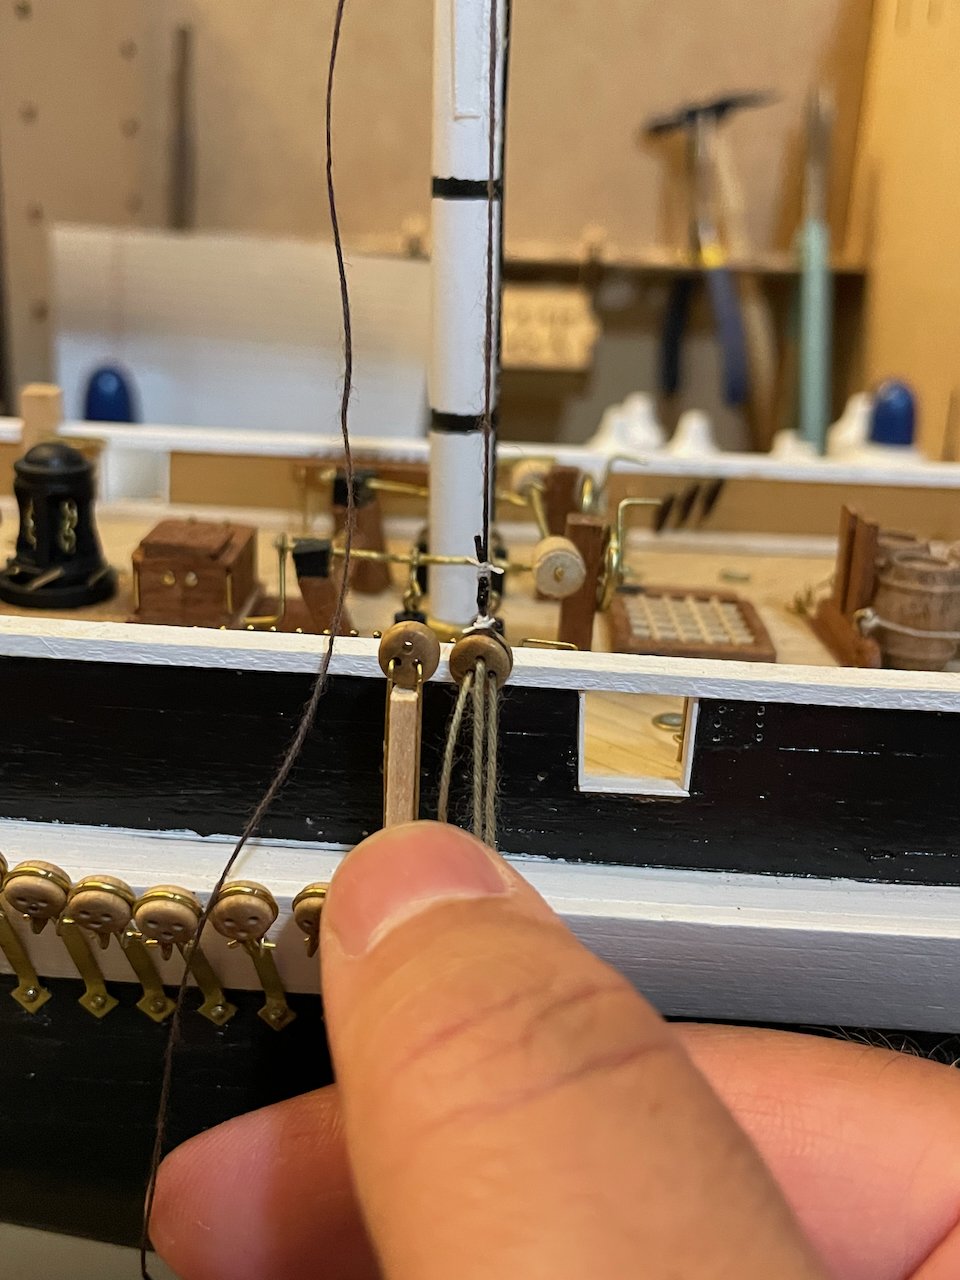
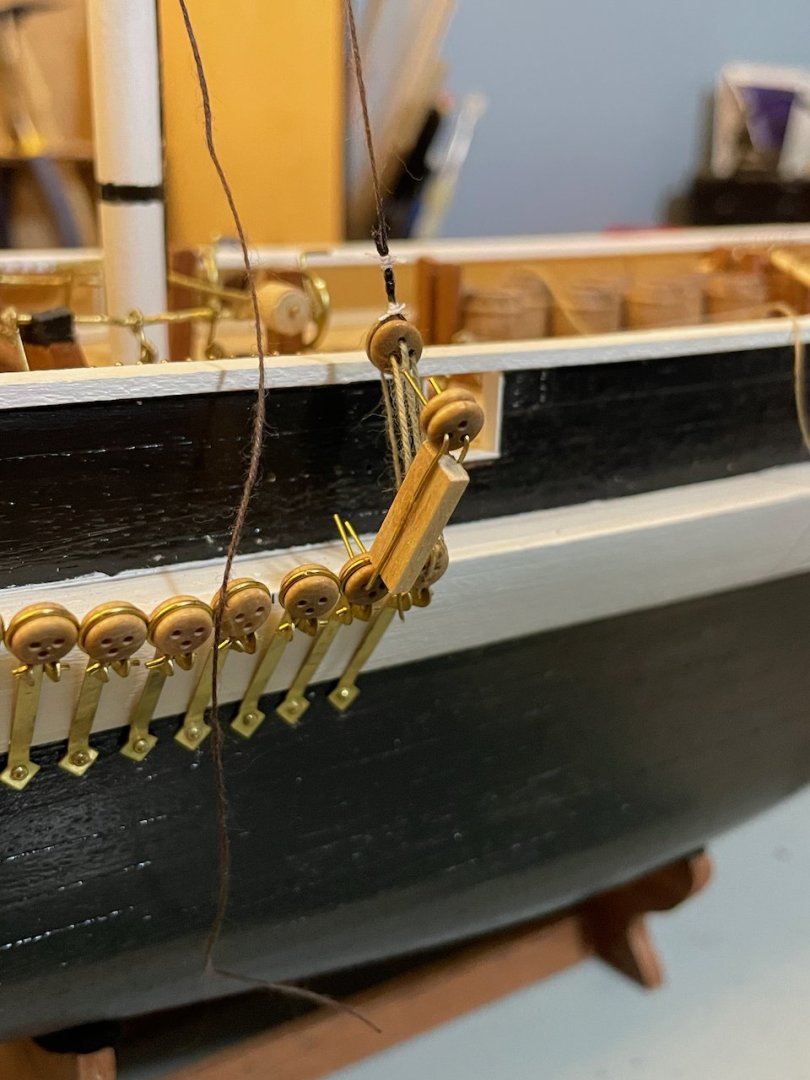
Another week of slow and steady work in the evenings. I finished the lower ratlines on the foremast, then undid the lanyards and moved the foremast back off to the side. I'll come back to the upper foremast shrouds and ratlines later. For now, I'm turning my attention to the lower shrouds and ratlines on the mainmast. I was a bit disappointed in a few things on the foremast lower shrouds, so I'm trying to be more consistent this time. After a bit of experimentation with jigs, I managed to set one shroud before I had to shut down for the night. The jig is a 2x5x15 plank, with grooves cut down the centerline on both sides. I set two pieces of brass wire into the grooves, with angles 20mm apart. I place the upper deadeye onto the brass wires, then run the other end of the wires through the lower deadeye. One nice thing about this solution is that there's just enough play in the ends of the wires that they can accommodate the minor inconsistencies in hole placement in the deadeyes. My chainplates lean out from the hull at the moment, so with no tension, the jig also leans outward. After making the bight in the shroud, though, I bend it inward and tighten it until it holds the deadeye and jig in place. Then I remove the jig and run a lanyard to keep everything in place. (Note: That's the second shroud dangling there. I was too tired to finish that one up this evening.) Next steps: Install mainmast lower shrouds, then add the ratlines. After that, do the same for the mizzenmast.


-
Thanks for the likes and encouragement! Checking in after a week of slow work. Still making my way through the foremast ratlines. I've finished up the starboard side and have started in on the port. Next steps: Wrap up the lower ratlines on the foremast. Fit the lower shrouds on the mainmast.
-
Indeed, Keith. The ratlines are the step that I have been least looking forward to in this project—there are just so many shrouds! I haven't been in a rush though. I periodically head down to the basement and do a couple ratlines, then head back to doing other things.
-
 HakeZou reacted to a post in a topic:
HMS Terror by HakeZou - OcCre - 1:75
HakeZou reacted to a post in a topic:
HMS Terror by HakeZou - OcCre - 1:75
-
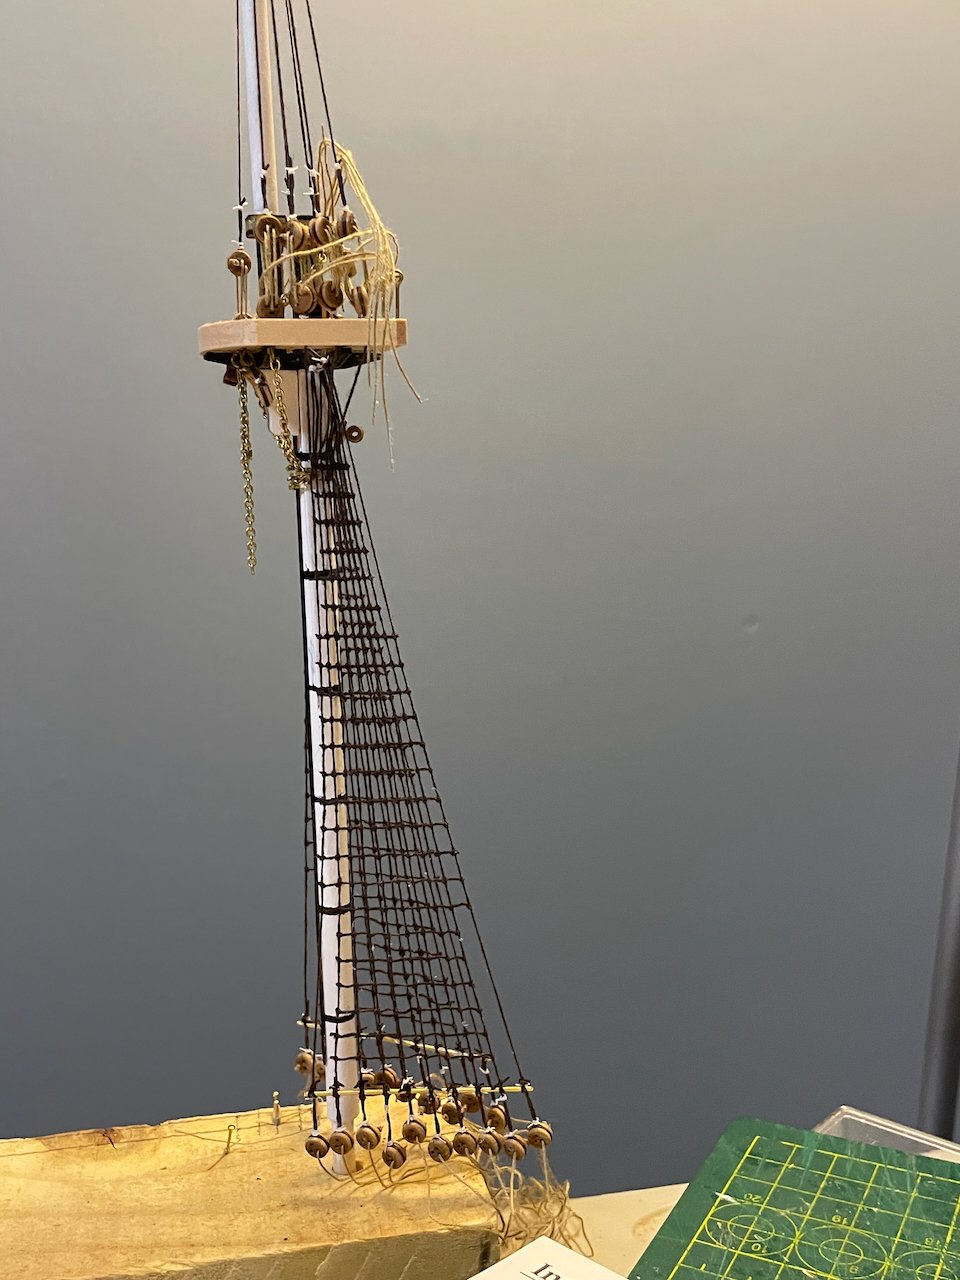
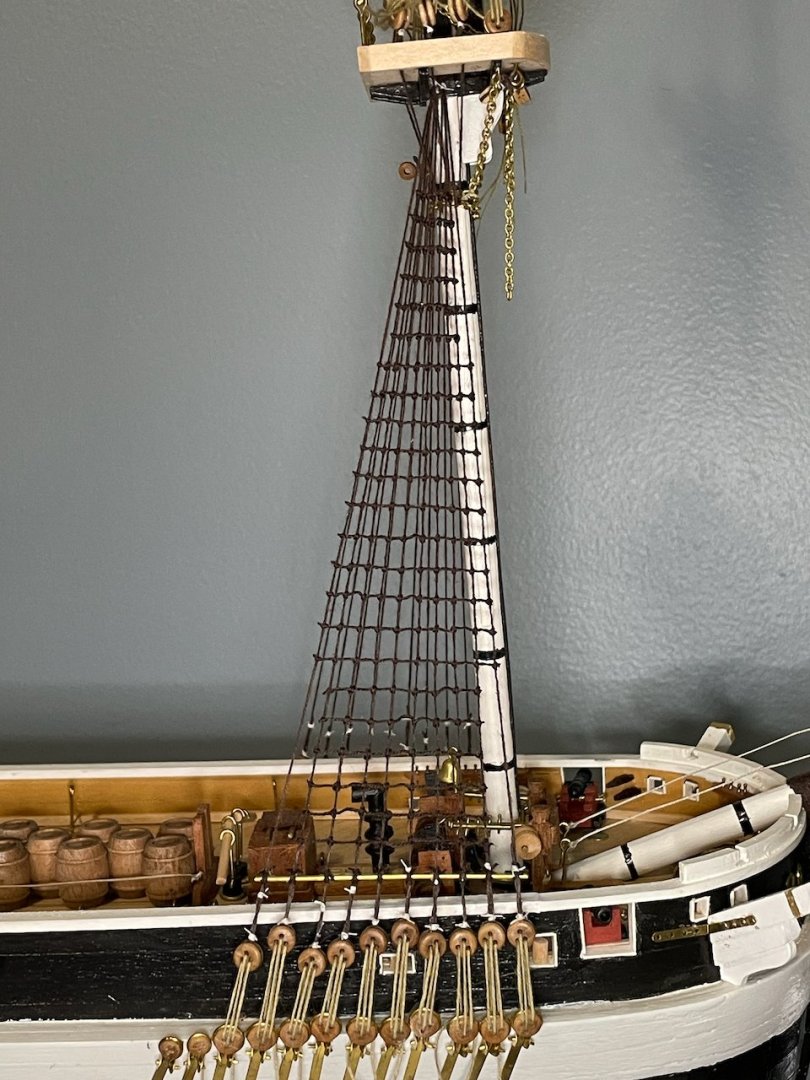
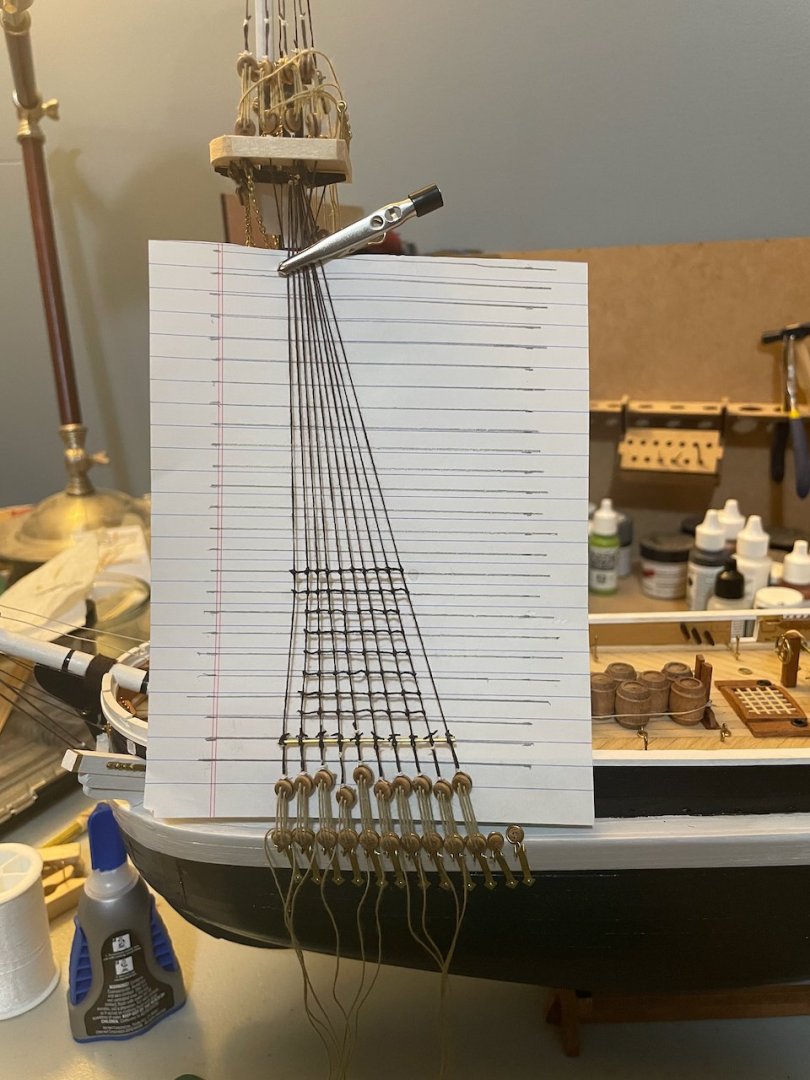
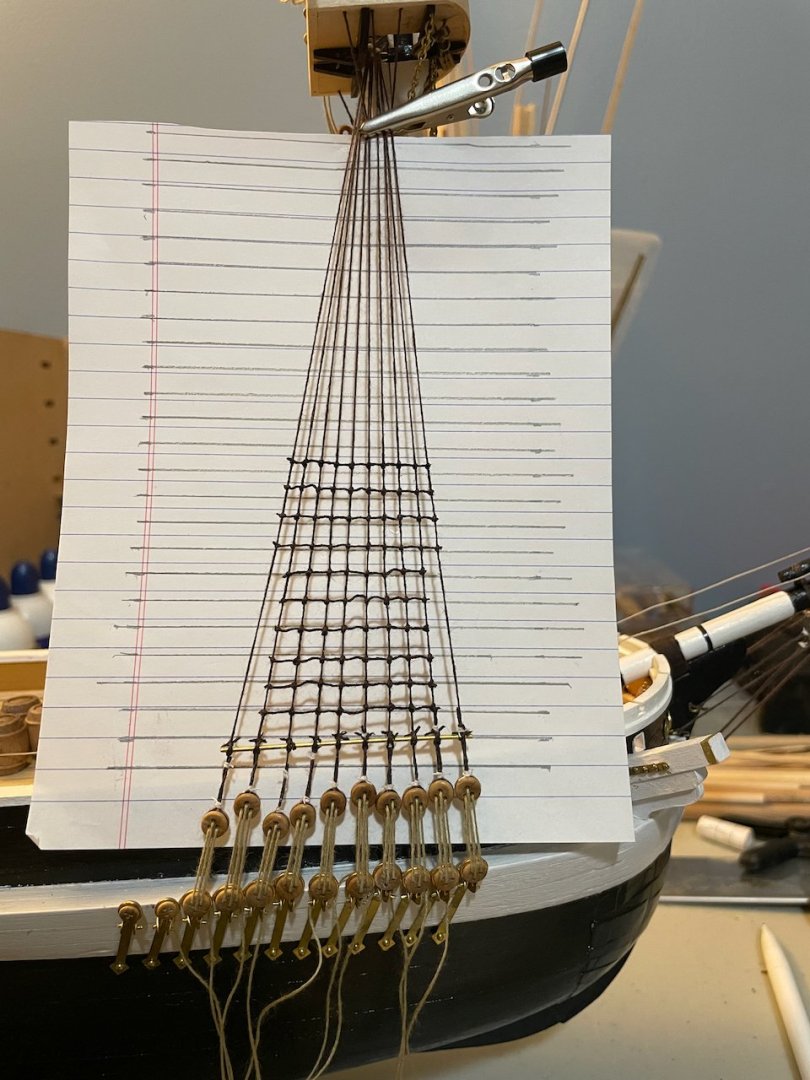
Well, it's been a long time! In those intervening months, I wrapped up a very busy semester, made three trips, and dealt with a bout of COVID. Very happy to finally have a chance to sit down with the Terror this weekend for the first time in three months! Nothing too exciting to share in the update, since I've just been working on the foremast ratlines. I stumbled across a video from RJ Scaleships & Replicas that I found really helpful. This is only the second ship that I've built with ratlines, but they look a LOT better this time around. Still not perfect, but I'm happy to see my skills improving. The sheet of paper is a guide for spacing and alignment. The lines are drawn 6mm apart (18 scale inches; a bit wide for the era, but a compromise I'm happy to make). The sheer pole is 1mm brass, lashed to all 10 shrouds. 10 ratlines down...far too many to go.
-
HakeZou reacted to a post in a topic:
HMS Erebus by clearway - OcCre - 1/75 scale - bashed
-
HakeZou reacted to a post in a topic:
HMS Erebus by clearway - OcCre - 1/75 scale - bashed
-
HakeZou reacted to a post in a topic:
HMS Erebus by clearway - OcCre - 1/75 scale - bashed
-
HakeZou reacted to a post in a topic:
Endurance by theoracle09 - OcCre - 1:70
-
HakeZou reacted to a post in a topic:
Endurance by theoracle09 - OcCre - 1:70
-
HakeZou reacted to a post in a topic:
HMS Erebus by clearway - OcCre - 1/75 scale - bashed
-
I spent more time in the shipyard this week than I should have...but I have no regrets! I've rigged all of the shrouds on the foremast! The lanyards are still temporary installations. I'll rig the ratlines next, then remove the lanyards so I can more easily access the running rigging. The deadeyes aren't lined up quite as evenly as I thought they would be, but they're close enough to be reasonable. Next steps: install foremast ratlines, install mainmast shrouds, install mizzenmast shrouds.

-
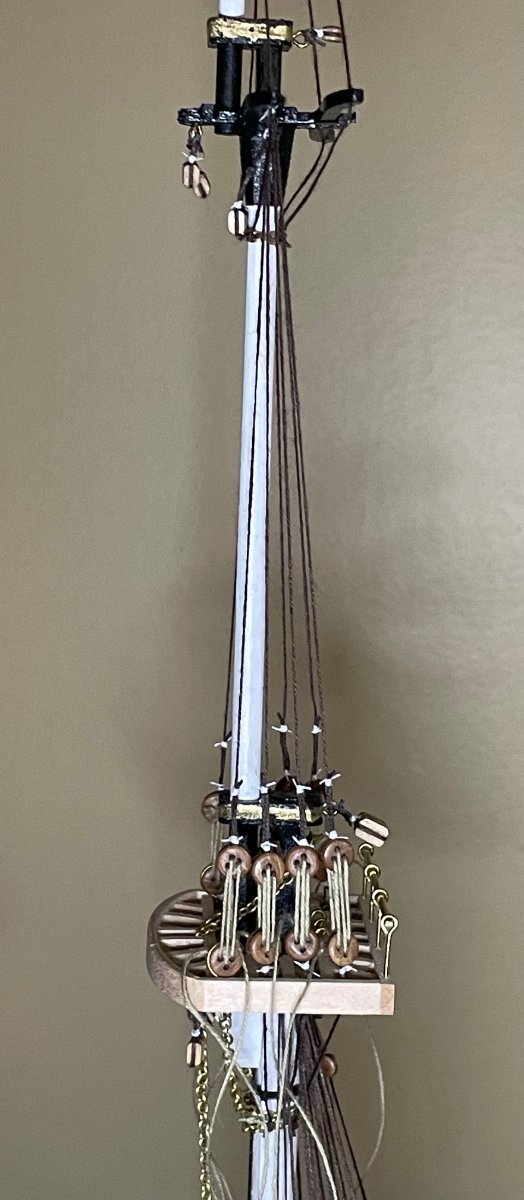
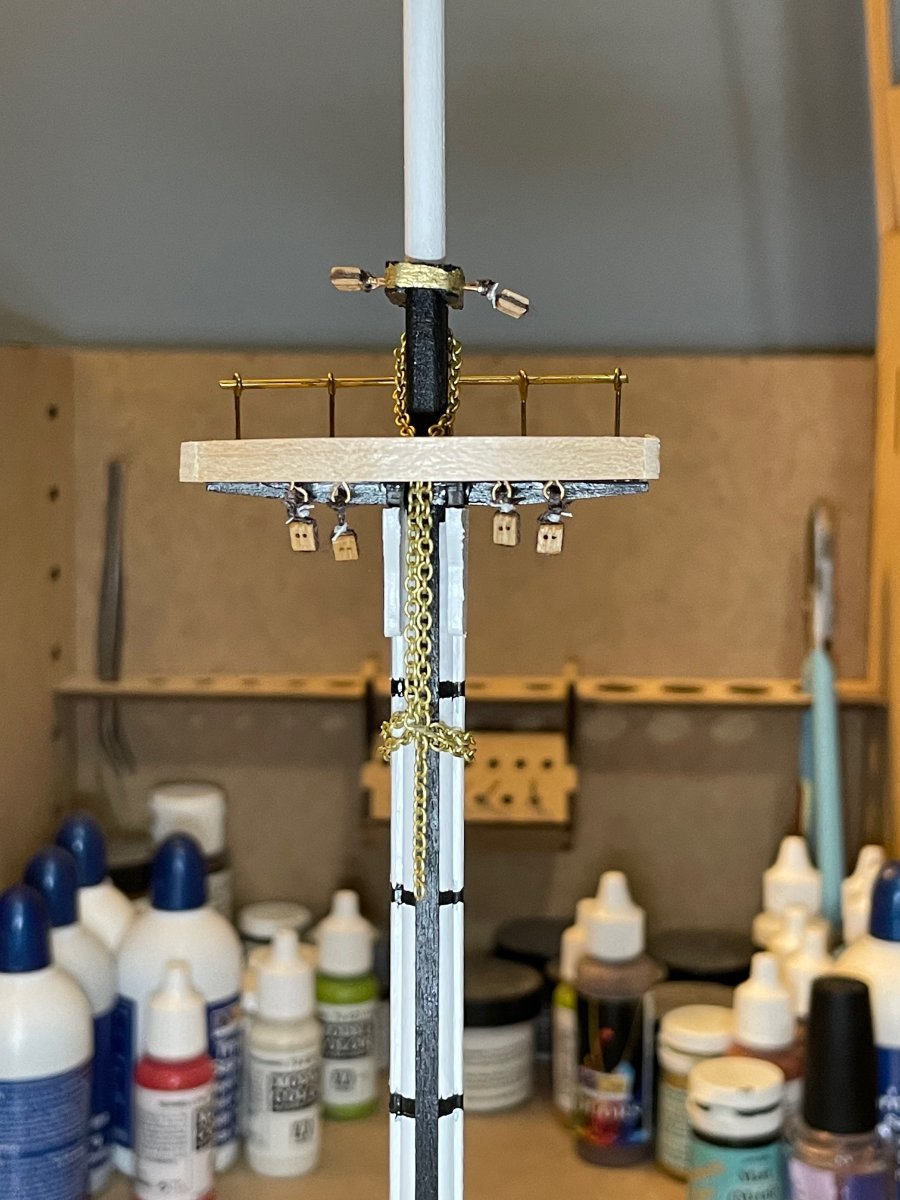
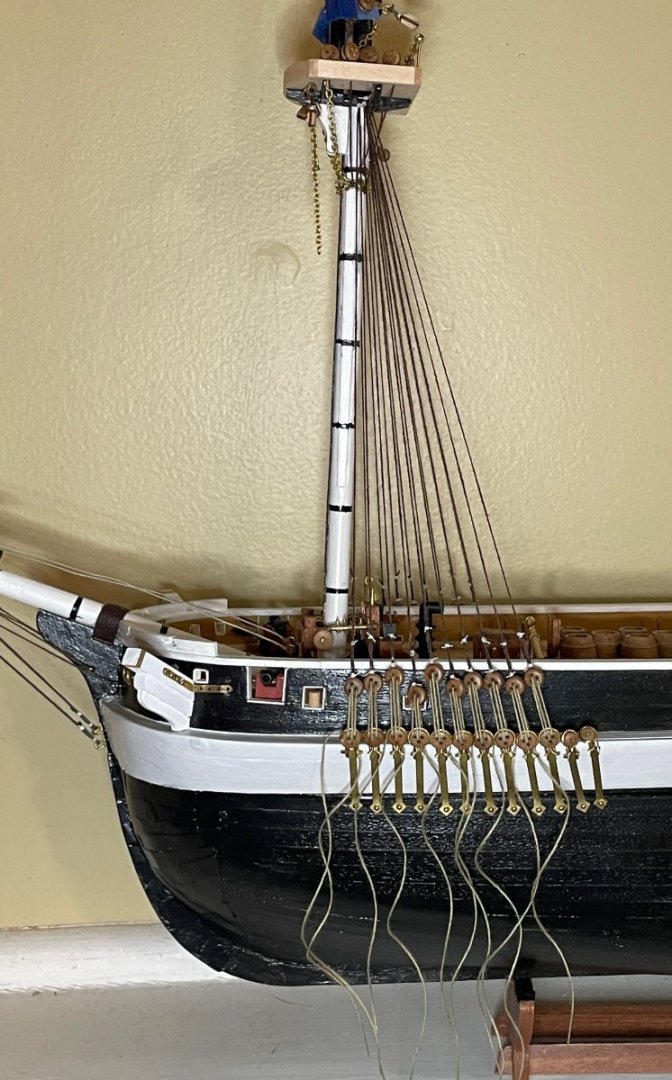
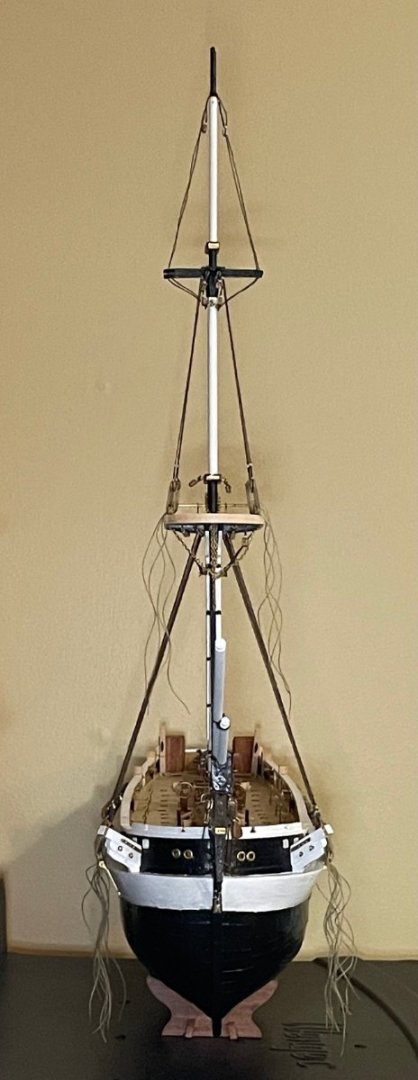
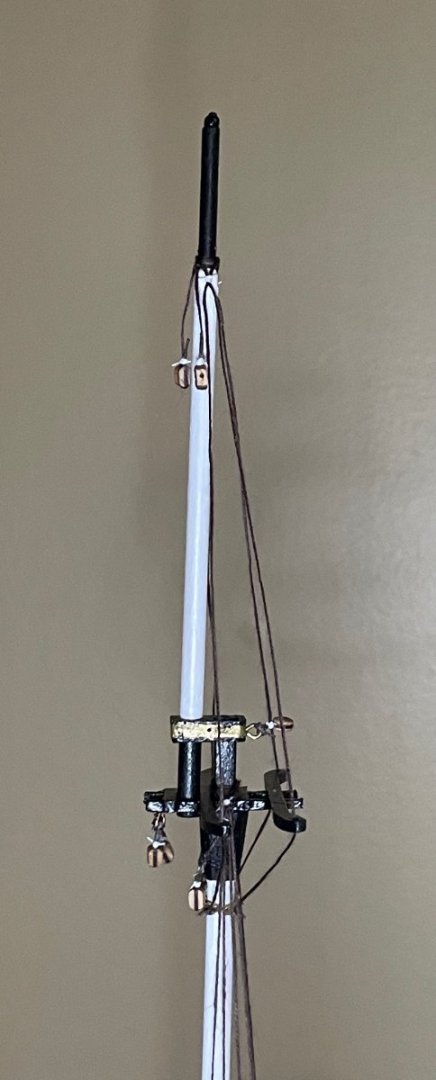
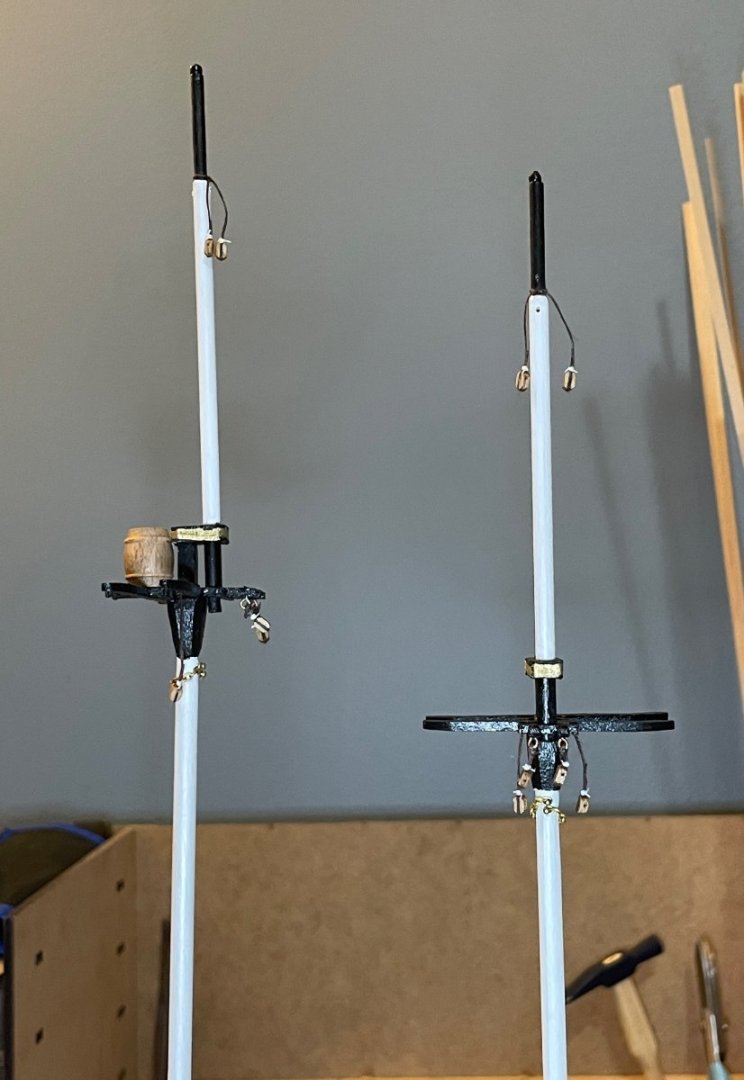
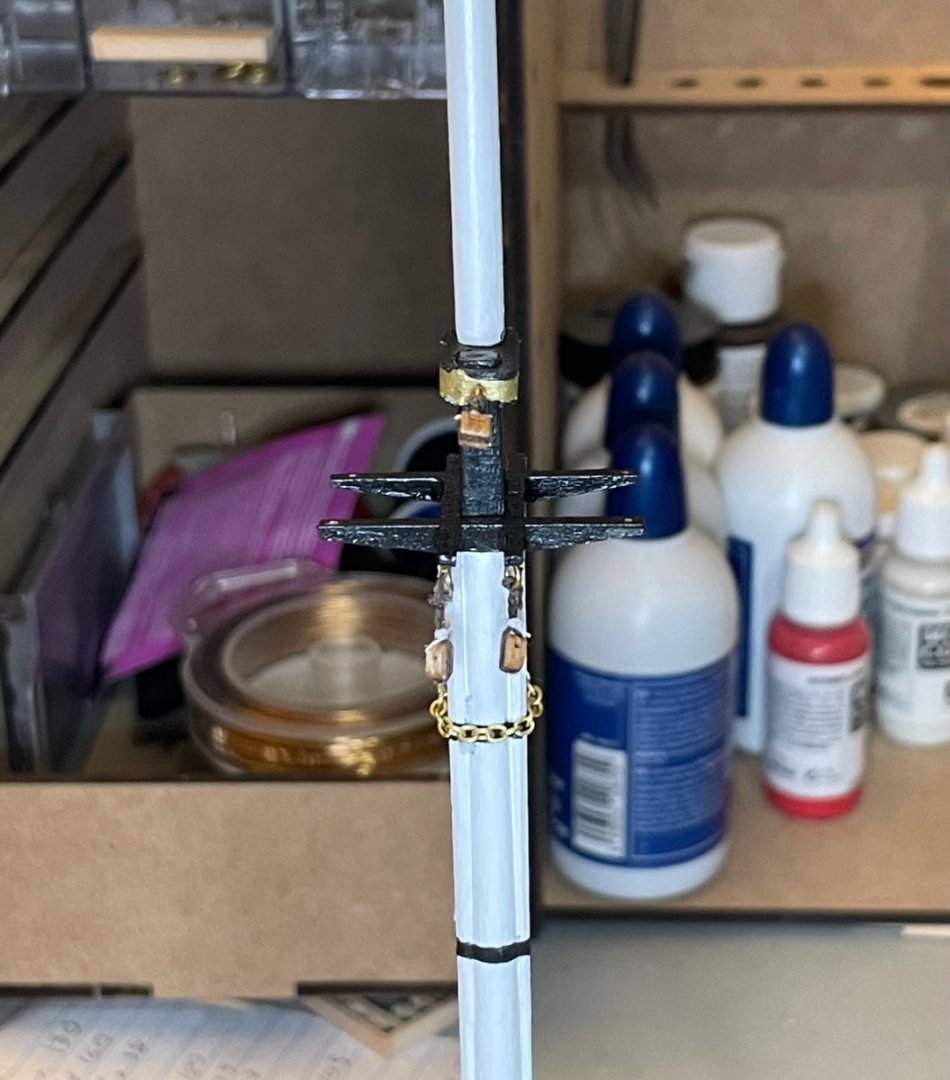
Thanks for looking in, everybody! Spring Break officially ends for me tonight, so I'll be back to slower progress soon. But I'm pleased with where I'm at, since I've just finished installing the various chains, blocks, and thimbles on the masts. Adding detailed notes here in part for myself, since I've already had to go back to earlier notes to remind myself what some of the stray parts and ropes were! First, a couple shots of the main and fore mast tops (viewed from forward and port, respectively). The chains that are visible are necklaces for securing the topmast shrouds and the slings for the yards. There's a row of eyebolts just aft of the fore mast head; these are for securing the main top mast, top gallant, and royal stays. There is now also a triple chunk block installed off the back of the mast cap, which will help in aligning these ropes. The main top mast preventer stay runs to the thimble below the fore top. The other blocks are lift blocks (on the caps) and reef and buntline blocks (under the top). Moving upward on the main and fore masts (viewed from port and forward, respectively): The chains (barely visible in this photo!) are necklaces for the top gallant shrouds. The blocks installed in the trees are lift blocks for the top mast yards. The various pendant blocks are lift blocks for the top mast and top gallant yards. The barrel is there as a crow's nest; for now, just sitting on the trees, but I think I like it enough to install later. Finally, the mizzen mast (viewed from aft). Not as much to show here! A necklace for the top mast shrouds, two blocks under the trees for the boom lift, and a double block for the gaff halliard. A lingering question: I'm not entirely clear on what I'll need to rig the topsail. I think it's just a halliard running through a sheave in the top mast and seized to the yard, plus tack and clew lines on the sail. Next steps: I see three separate next steps. Given the tedium of #1, I'll probably take breaks by working on #2 and 3, too. #1: Prepare the lower shrouds for all masts. #2: Prepare the sails by installing bolt ropes. #3: Prepare the yards for rigging. My plan with the lower shrouds is to install them with temporary lanyards, install all ratlines, and then remove the temporary lanyards so that I can work around the shrouds more easily.

-
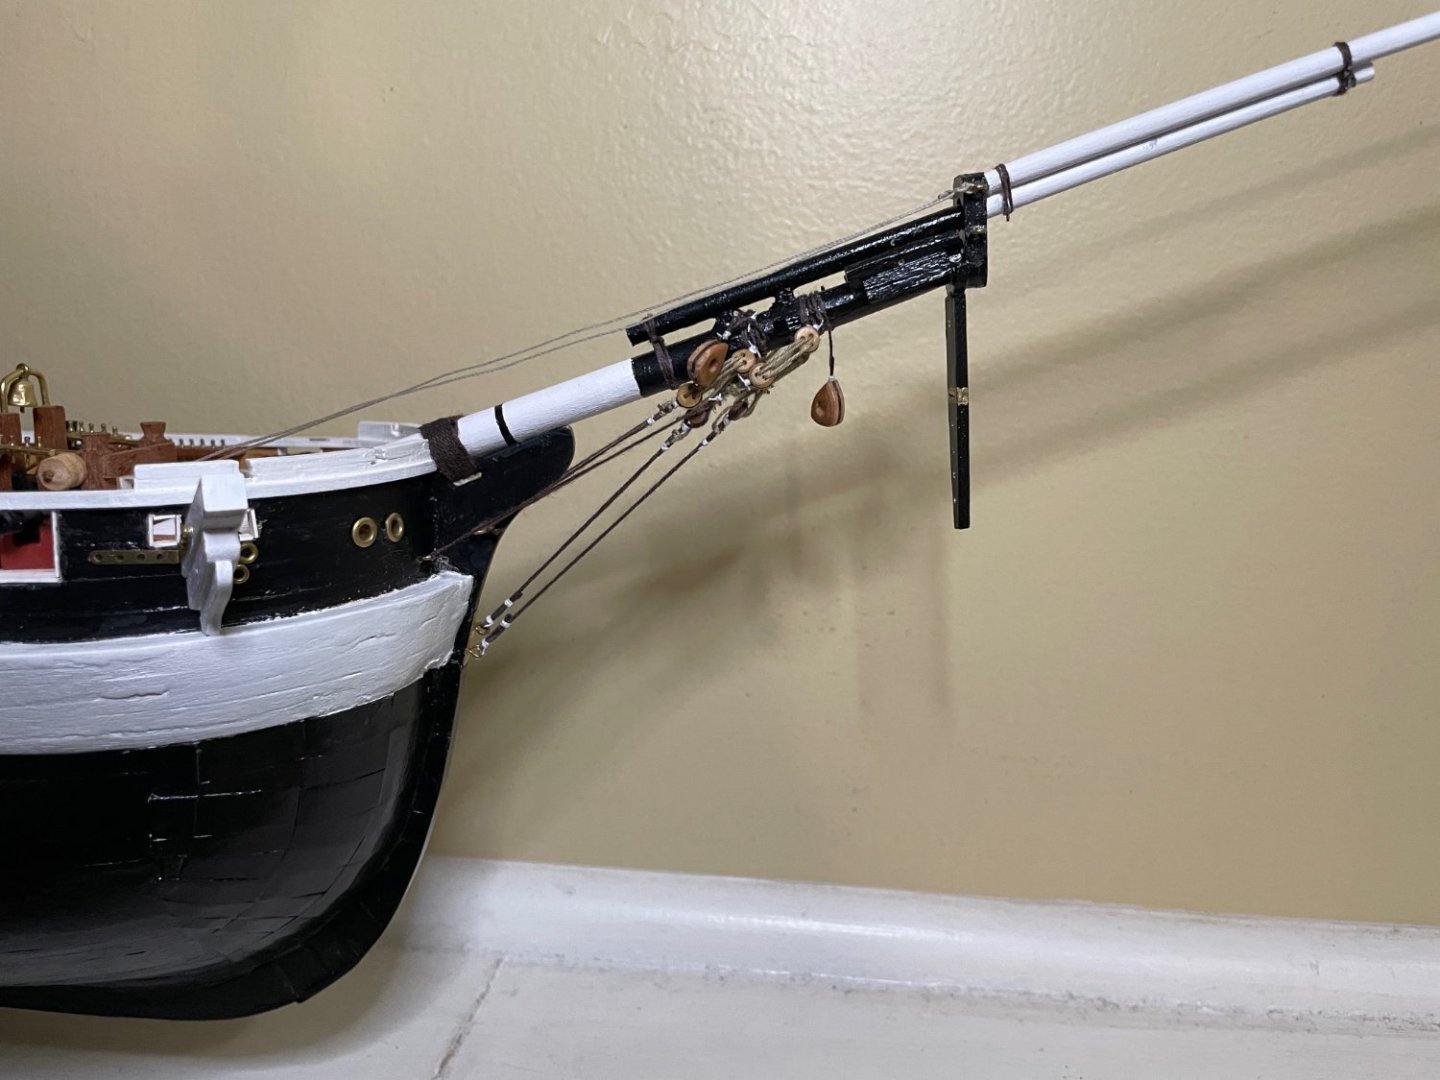
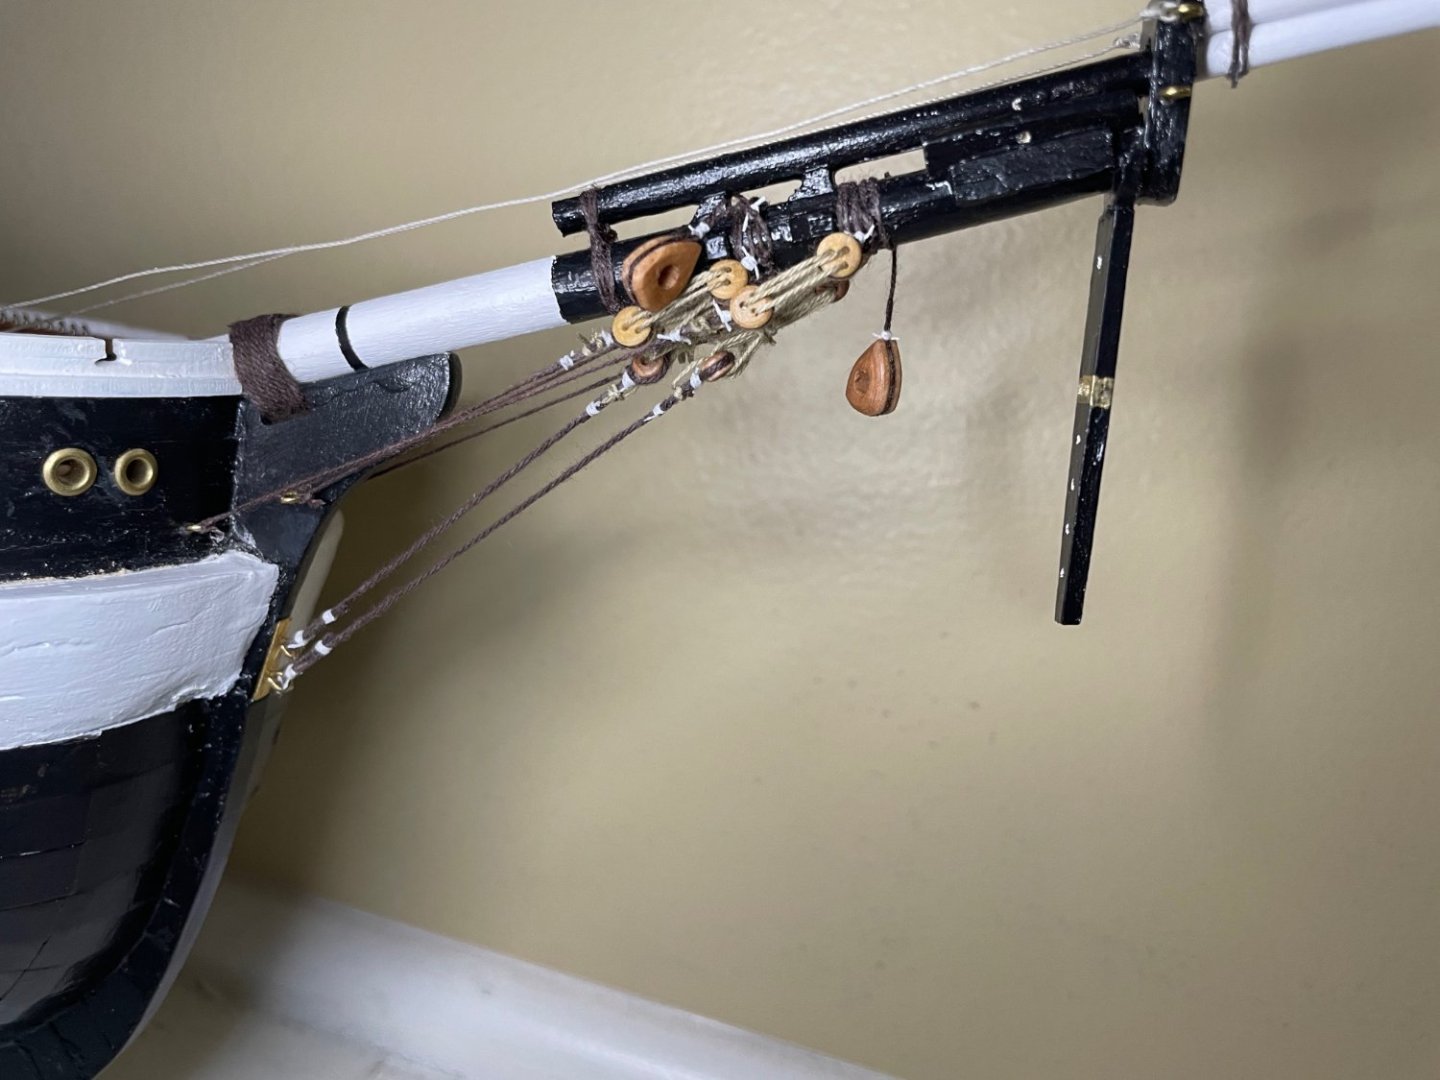
Thanks for checking in! Two posts in two days, but I'm feeling excited to have installed the first ropes! I decided to start by focusing on the bowsprit, since those ropes are pretty well out of the way of other things. So, the bowsprit is now officially installed! I've also installed the catheads and assembled the masts. (Note: The limp hearts are for the fore stay and fore preventer stay.) I struggled for a bit with the gammoning, but once I remembered how to tie a round lashing, that went quickly. There are ten loops laying nicely side-by-side. After that, it was on to the bobstays and shrouds. Unfortunately, I didn't plan this out well enough—I did the shrouds first. I needed some patience due to the tight spaces, but those went easily enough. However, once I turned my attention to the bobstays, I realized my folly! Now the tight spaces were even tighter, since I was stringing lanyards to thimbles that were in between the port and starboard deadeyes! I ended up setting the ship on top of a box, with a ring light shining up from below. That extra foot and the light made all the difference, since I could work from underneath the bowsprit. Finally, I went ahead and installed the horses. I don't think that they'll be too much of a nuisance, but we'll see if I end up regretting that decision. Next steps: Start working out the rigging for the lower fore mast.
-
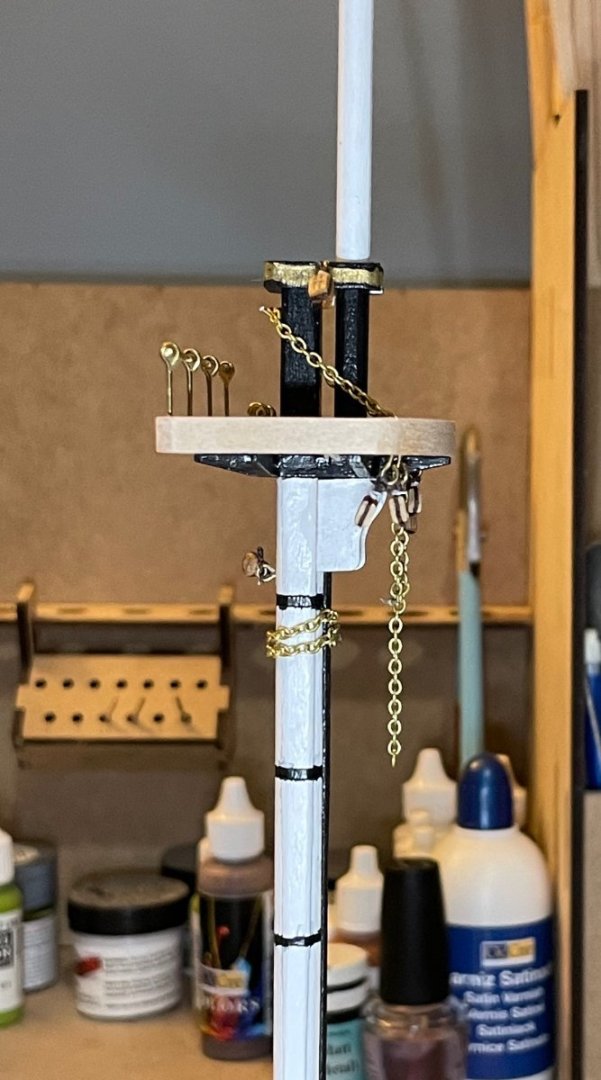
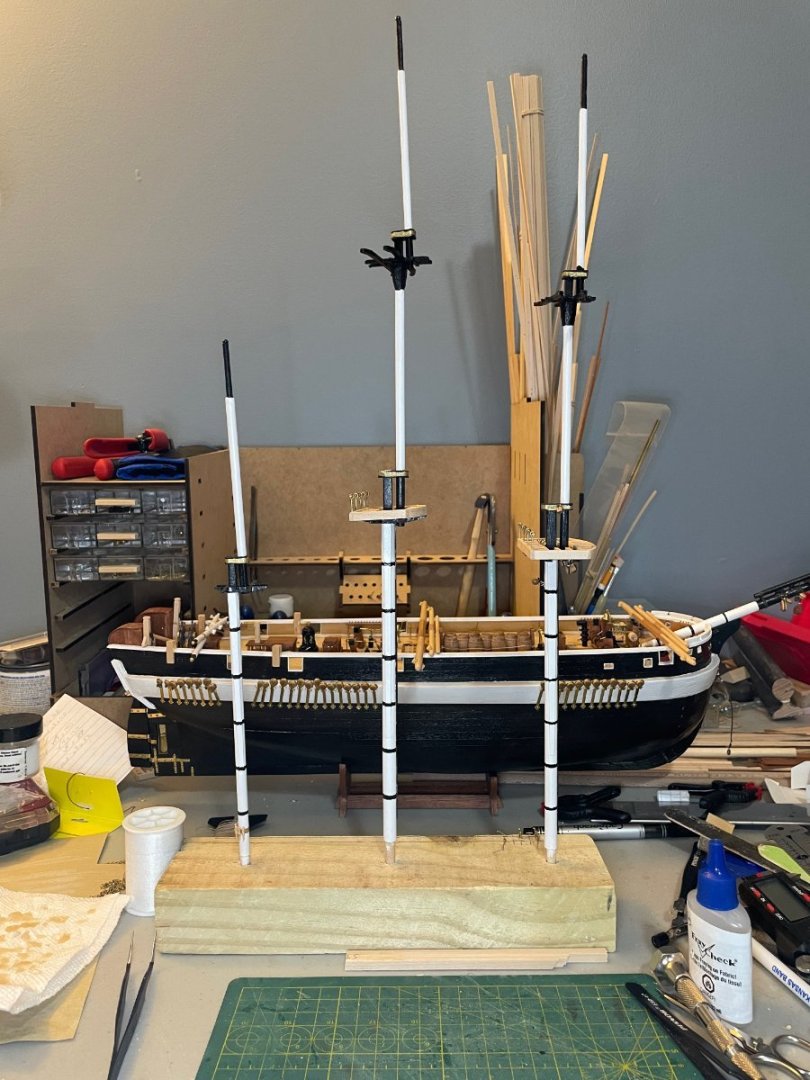
Thanks for looking in everybody! It's been nice to have some more consistent time in the shipyard, which means that the baby steps have continued this week! I've almost finished preparing the masts for rigging and I've also mostly finished the spars! The photo was taken before the last few blocks were attached to the main mast, but it gives a good sense of where things are at. As I've moved toward the final assembly work, I drilled out some holes in a spare block of wood, so that I could have a separate stand for working on the masts. Next up, I need to do some chainwork and then begin assembling the masts (which are still just dry-fit). The spars are mostly ready to go. I need to add jackstays on a few of them, footropes, and some other bits of hardware. I've started to run out of a few pieces of hardware, too. Making my own eyebolts hasn't been a big deal. However, I was hoping to order some more of the cleats that I've used elsewhere on the ship; they're beautiful and just the right size, but they come from Falconet and I can't find them available right now. The homemade cleats on the spanker boom (3rd from the top)...well, we'll see how they look once they have ropes belayed to them. It's probably an unusual choice to paint only the gaff and boom. But my thoughts were: 1) In some of the paintings, the gaff and boom seem to be a different color than the other spars; 2) Lees describes the spanker as a more permanent evolution of the driver, brailed to the mizzen mast rather than reefed to the boom, so these two spars would probably have been worked less frequently than the others (apart from the jaws rotating around the mast). I'm not sure whether my logic is completely sound, but I don't think it will have too much of a difference once all of the sails are hung. At this point, I'm at the point where I'm strategizing about how I'll run the rigging. I expect to bounce back and forth a bit between the bowsprit, masts, spars, and sails as I work forward.

-
@Snug Harbor Johnny offered me some fantastic advice that led me to attach all of the ropes belayed at the bases of the masts as early as possible in the build, before everything got crowded. Once it was time to hang the sails, I just ran those ropes in reverse, which made the process a lot easier. A bit late now for this project, but hopefully that'll be helpful in one of your future projects! In the meantime, everything's coming along really well and looking great! Good luck hanging the fore gaff sail—that looks like a challenge with a bit of extra fun thrown in!
-
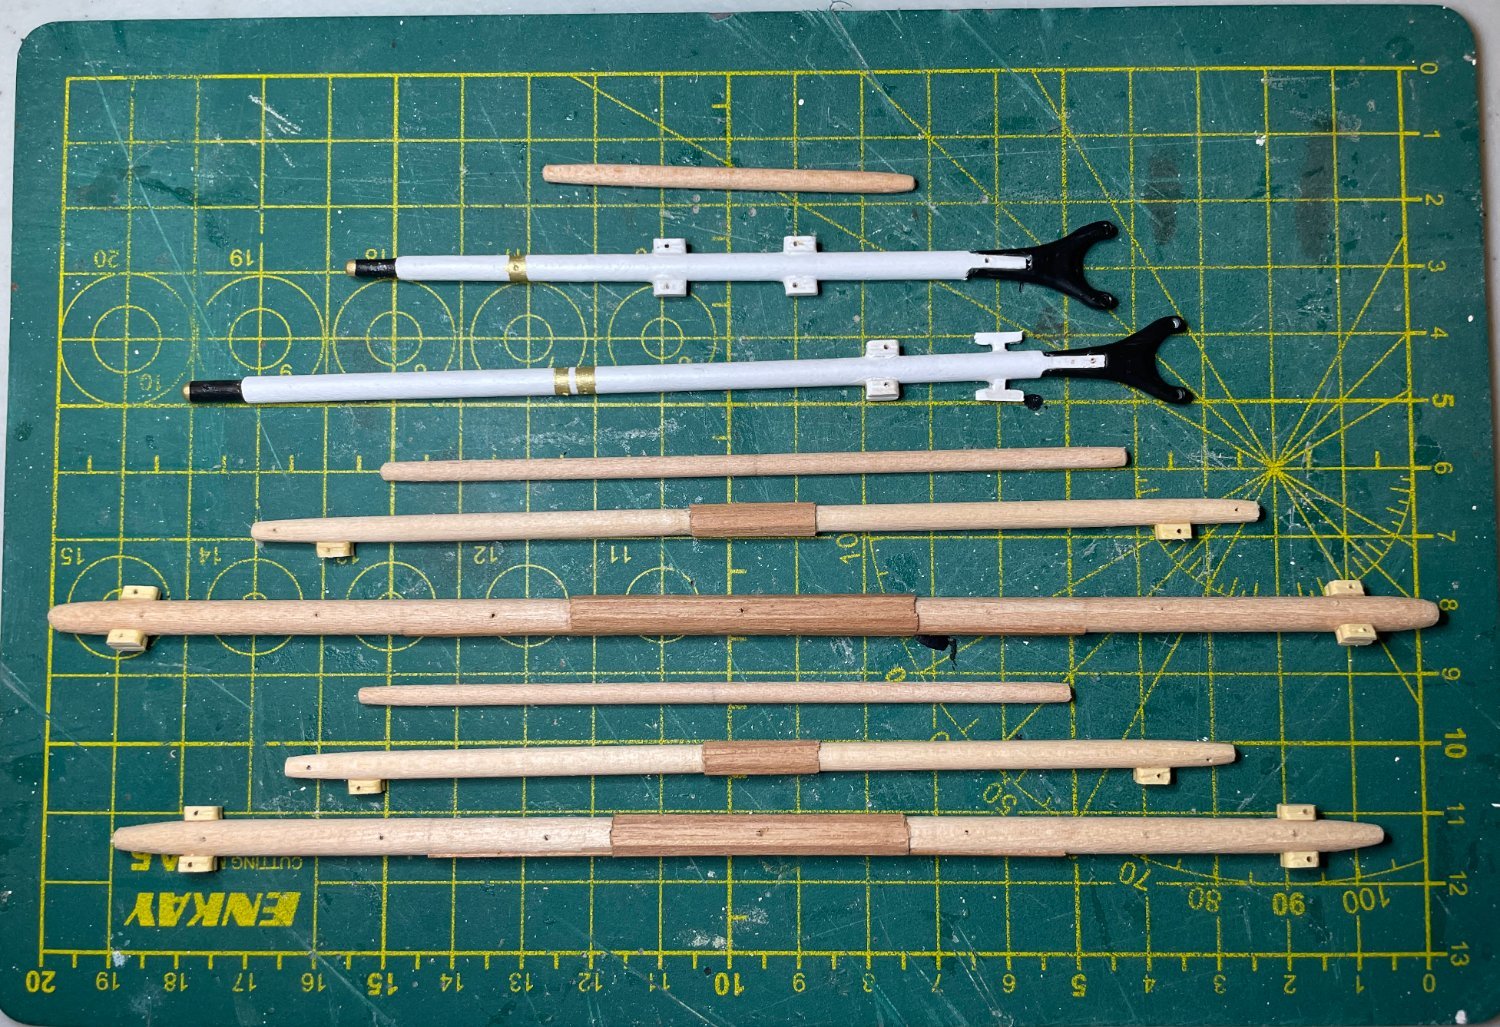
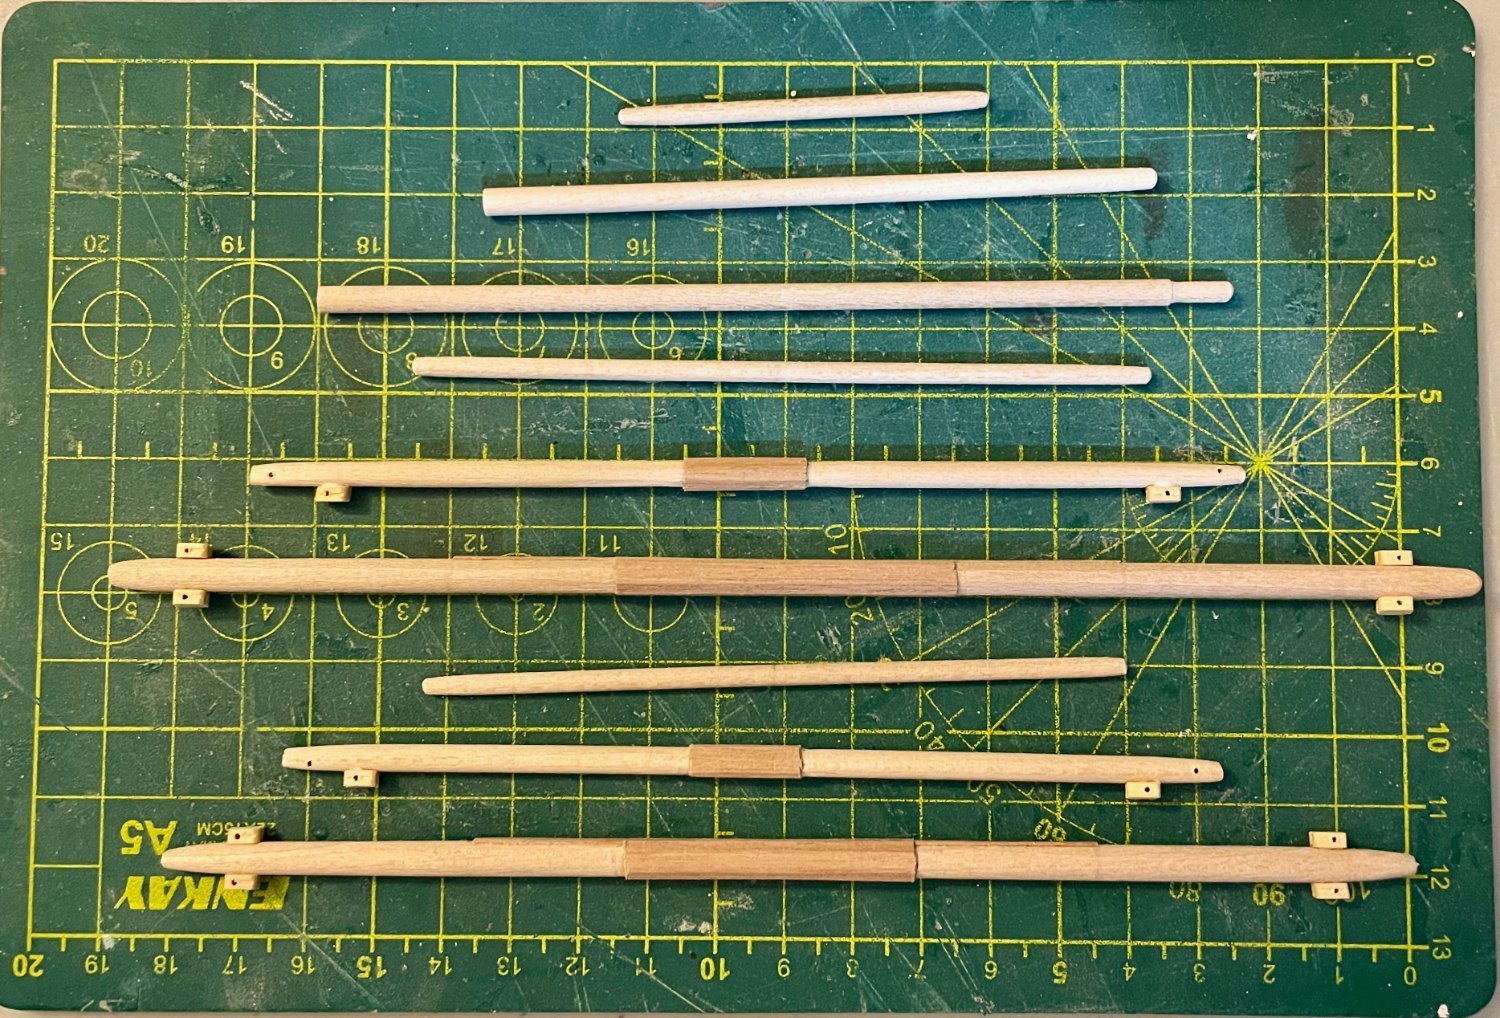
Some more slow and steady progress to report. Spring Break is here, so I'm hoping to make some more time for the Terror over the next week. I'm continuing to work on the spars. I've now shaped all of them, from bottom to top in the photo: foremast yard, topsail yard, and topgallant yard; mainmast yard, topsail yard, and topgallant yard; and mizzen spanker boom, gaff, and topsail yard. The fore and main yards and topsail yards have all been sanded to octagonal in the center, with obeche strips laid on those flat sides. In addition, following Lees, I installed blocks on the yard arms. Next steps: Finish preparing the remaining five spars. Then begin installing hardware on all spars (cleats, eyebolts, etc.).