HOLIDAY DONATION DRIVE - SUPPORT MSW - DO YOUR PART TO KEEP THIS GREAT FORUM GOING! (Only 24 donations so far out of 49,000 members - C'mon guys!)
×


Jeff59
-
Posts
593 -
Joined
-
Last visited
Content Type
Profiles
Forums
Gallery
Events
Everything posted by Jeff59
-
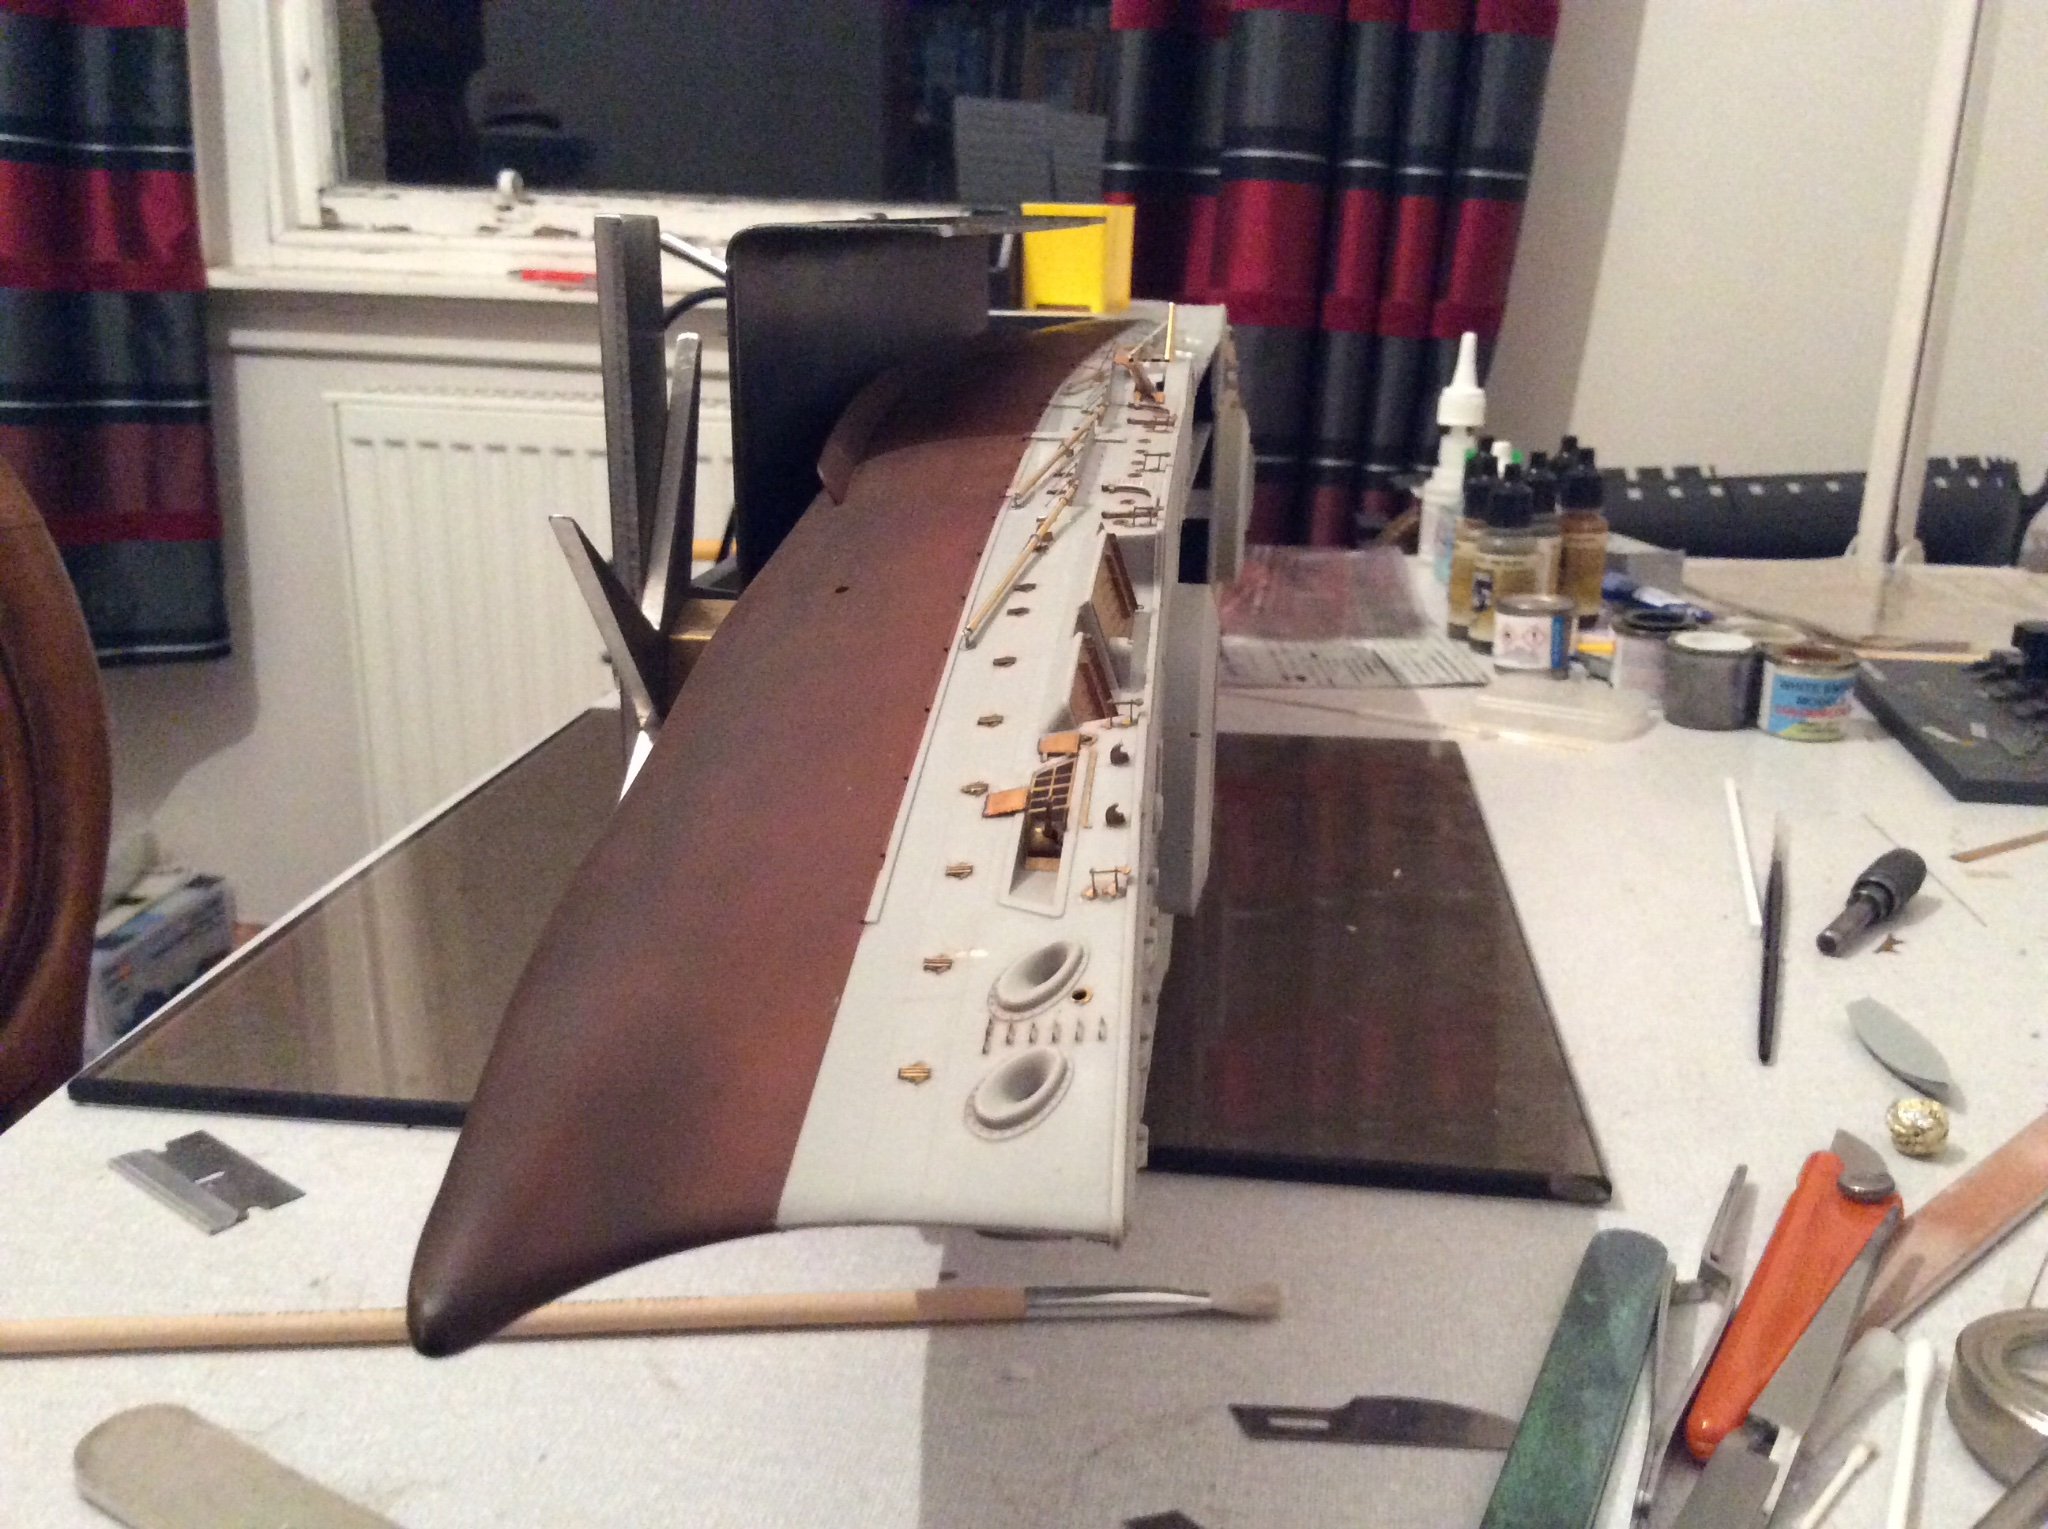
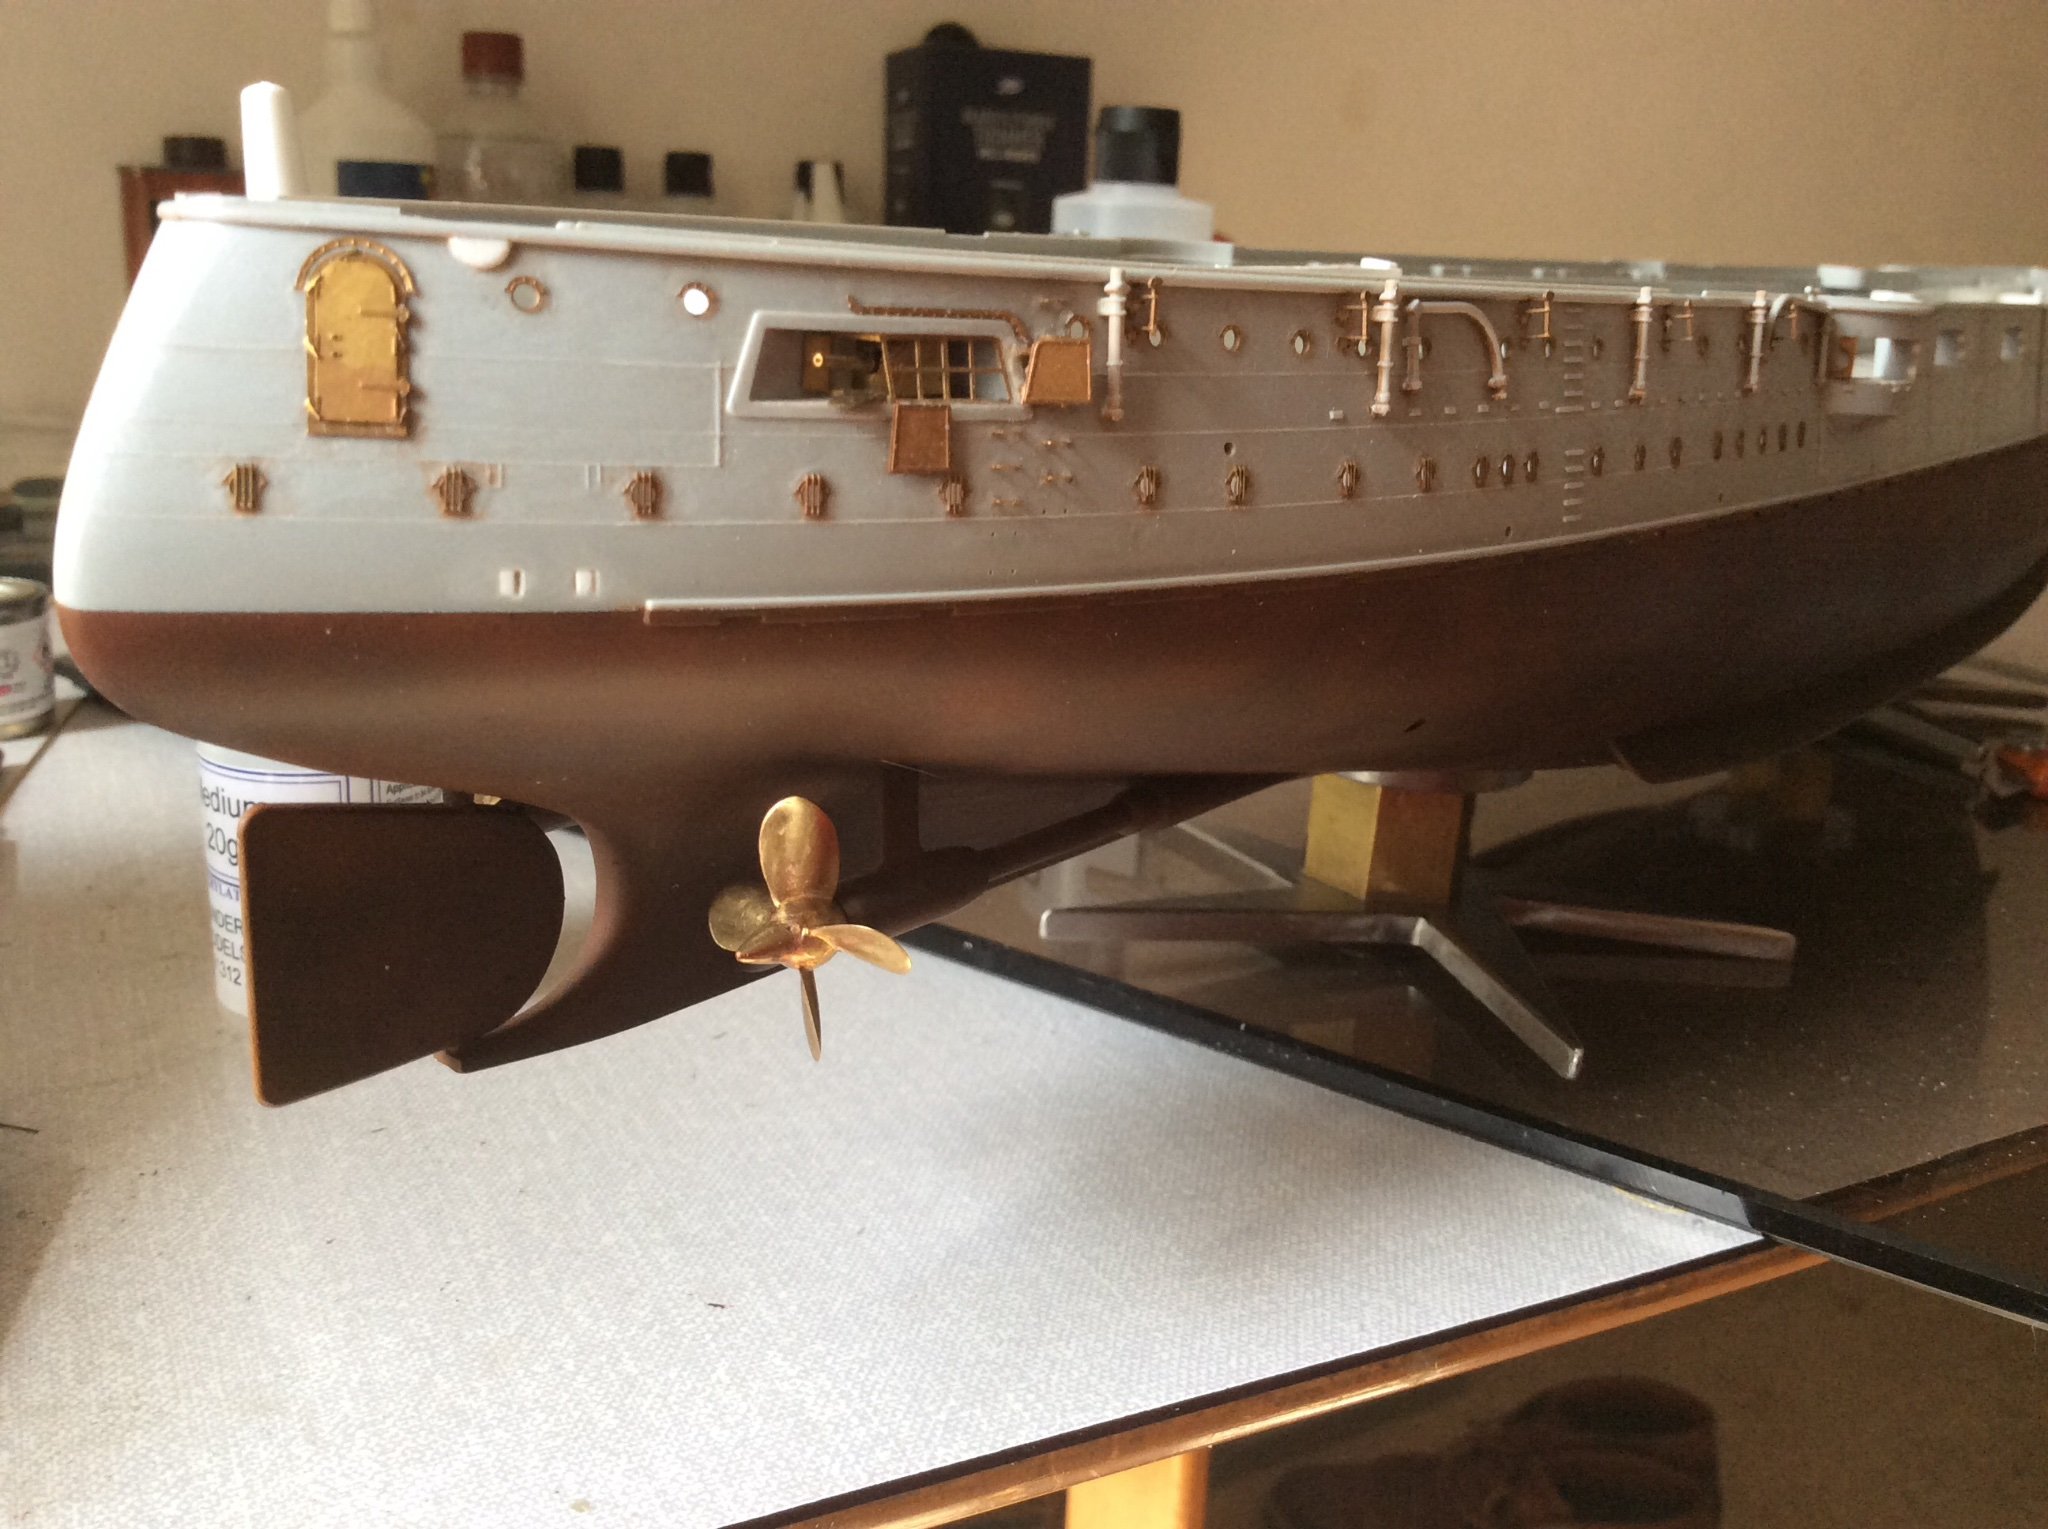
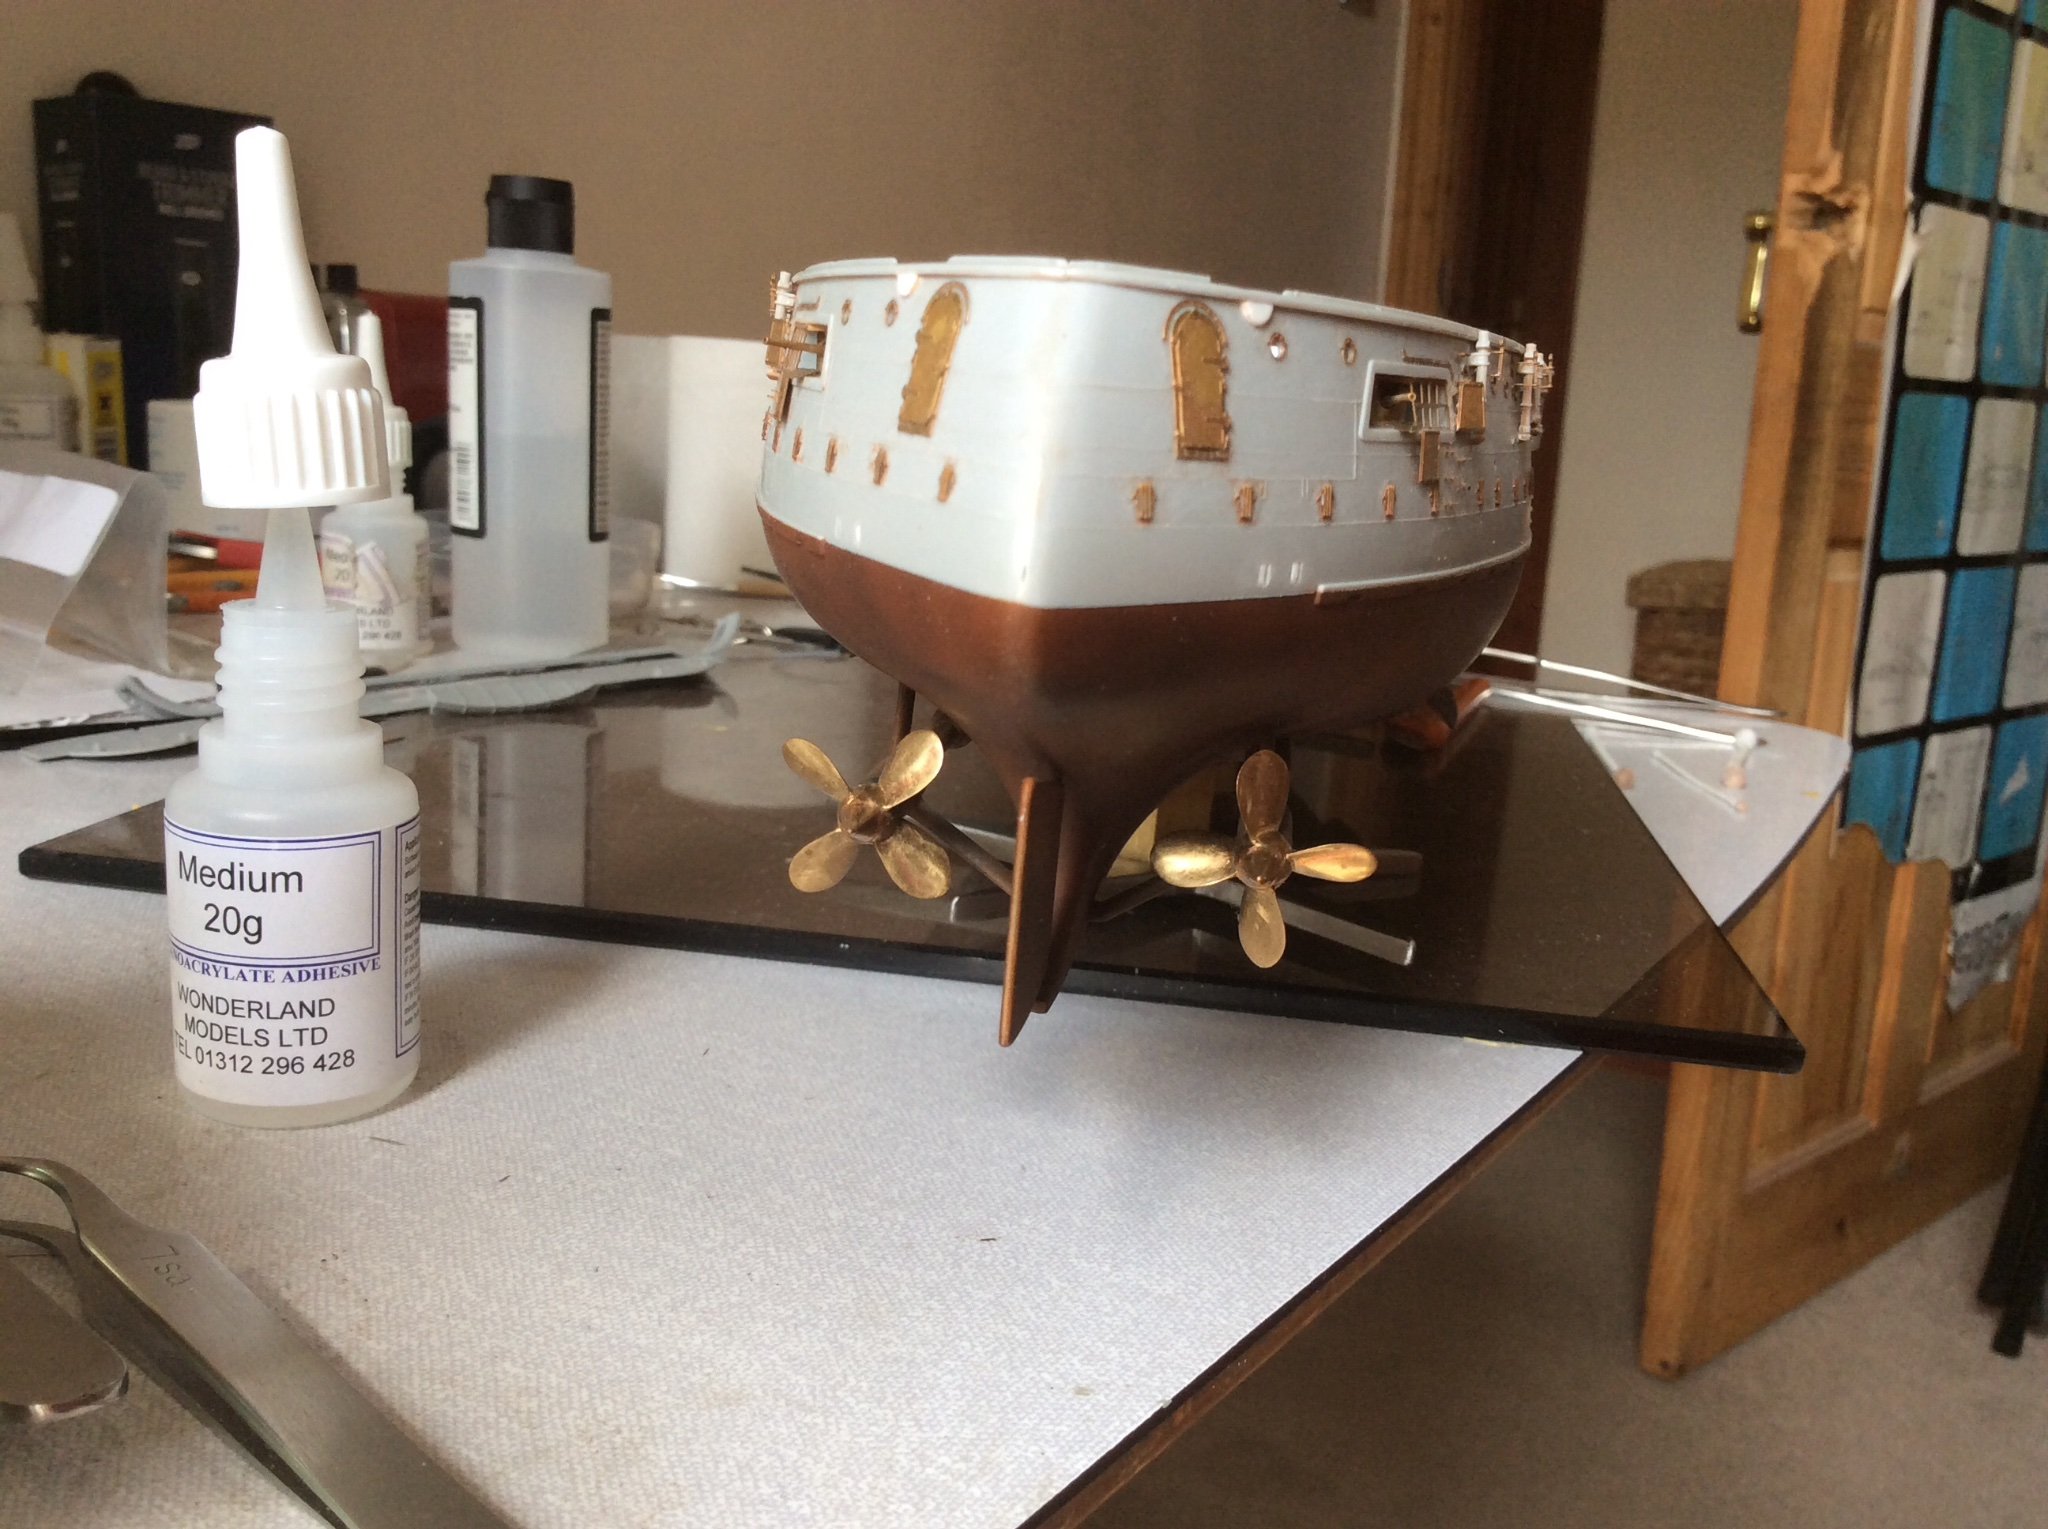
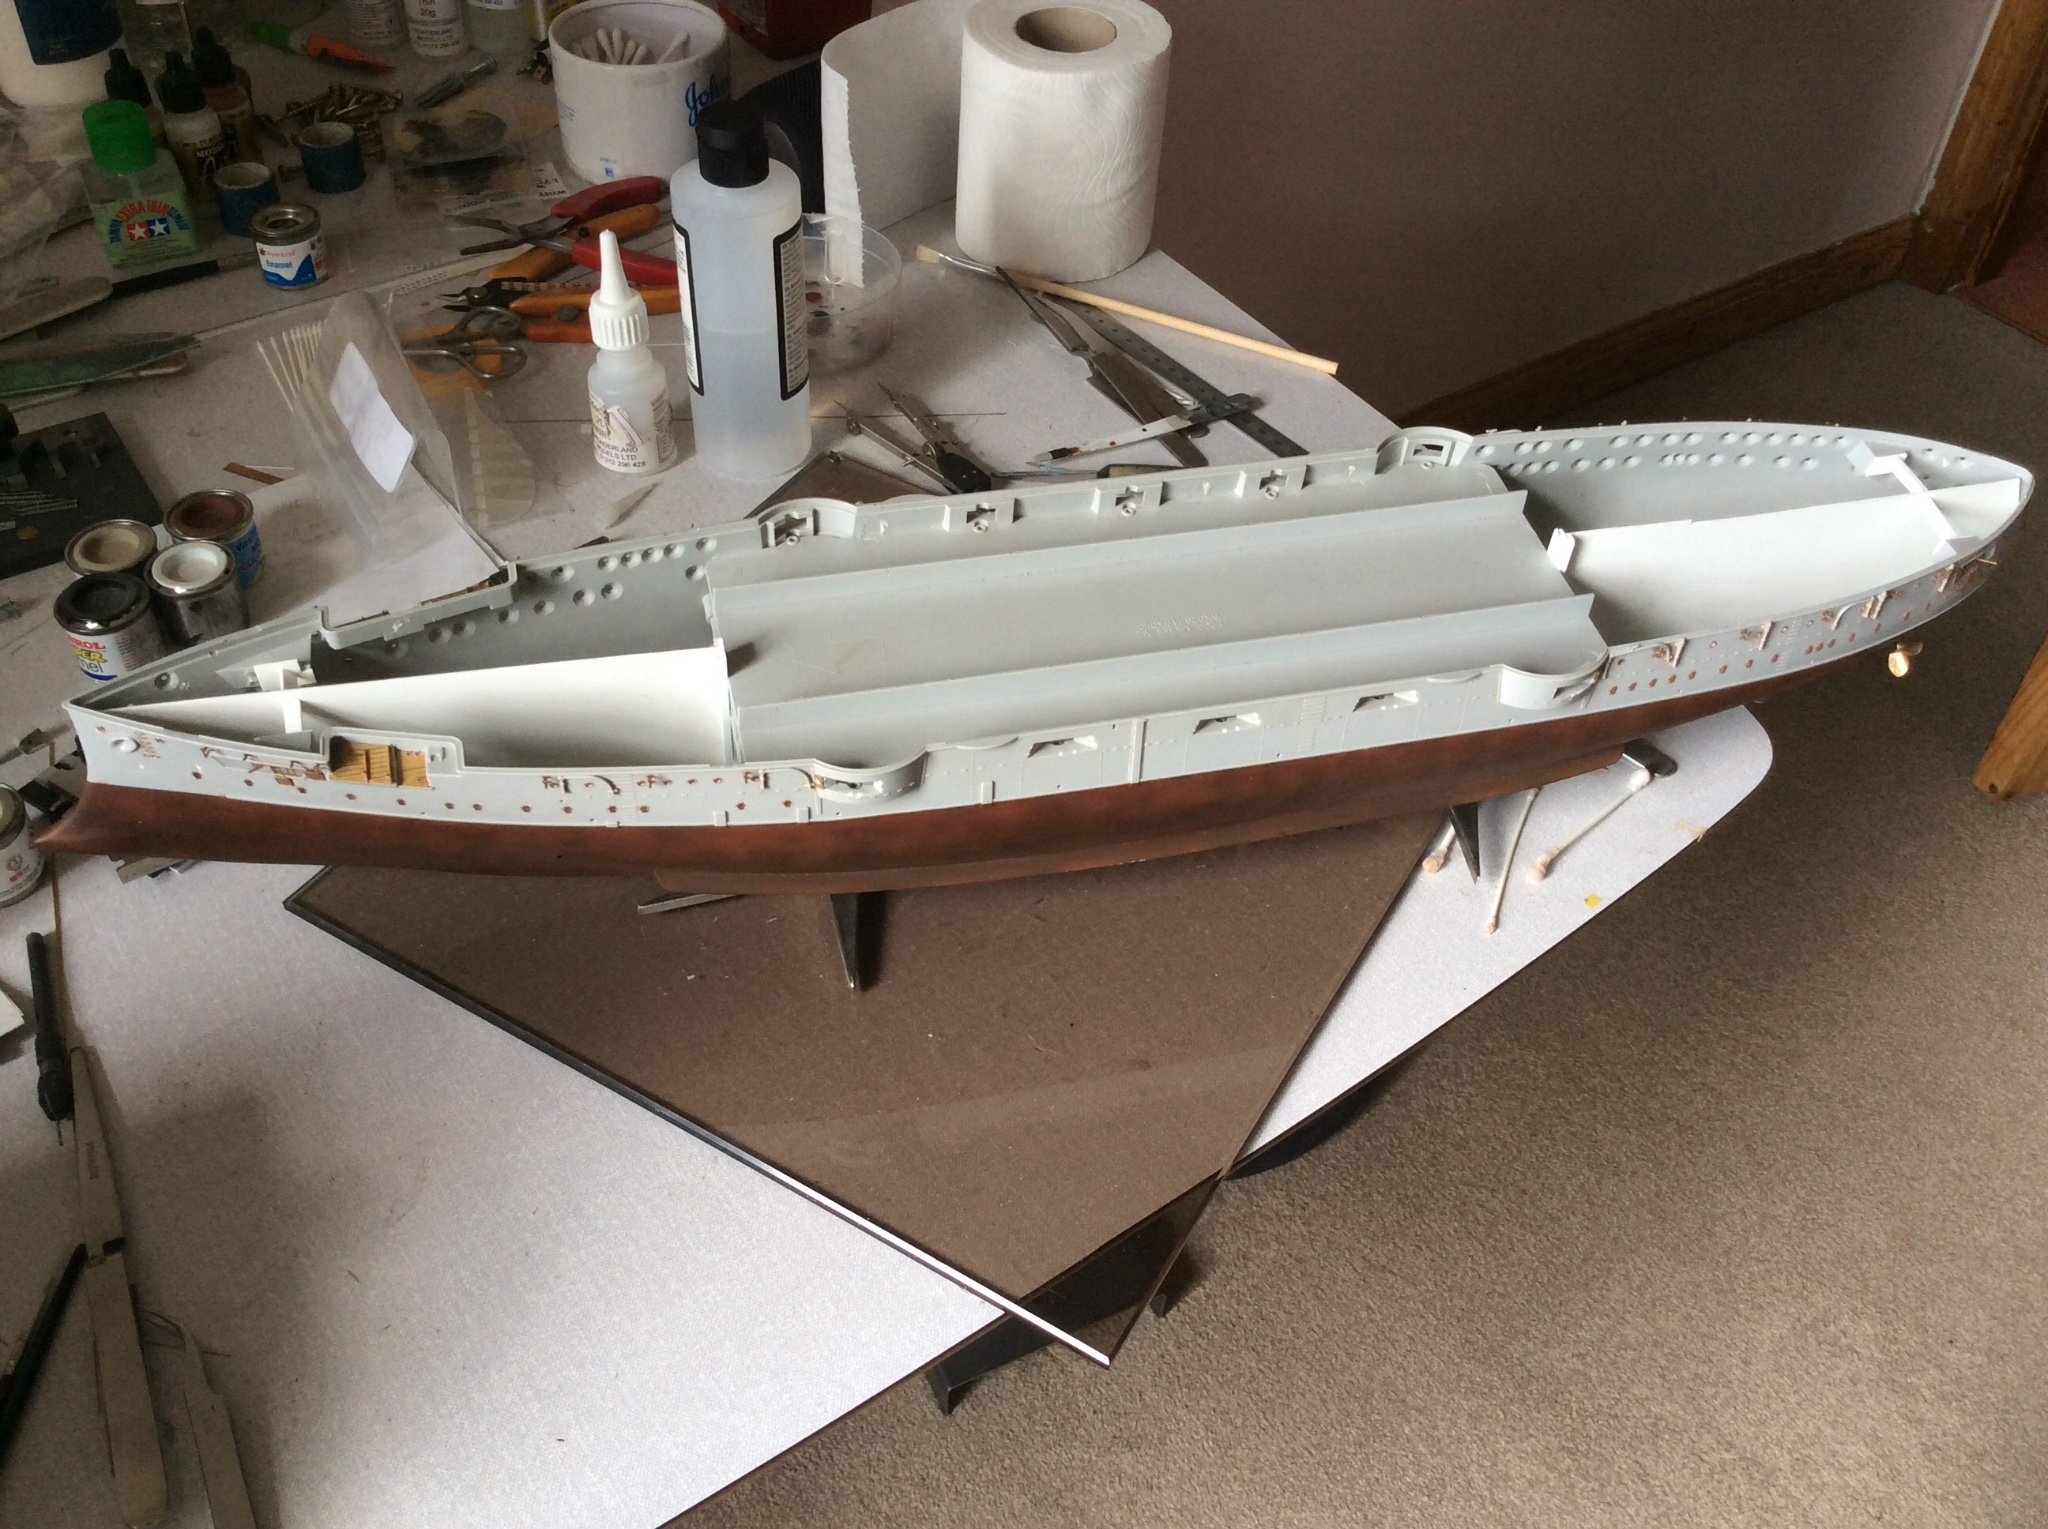
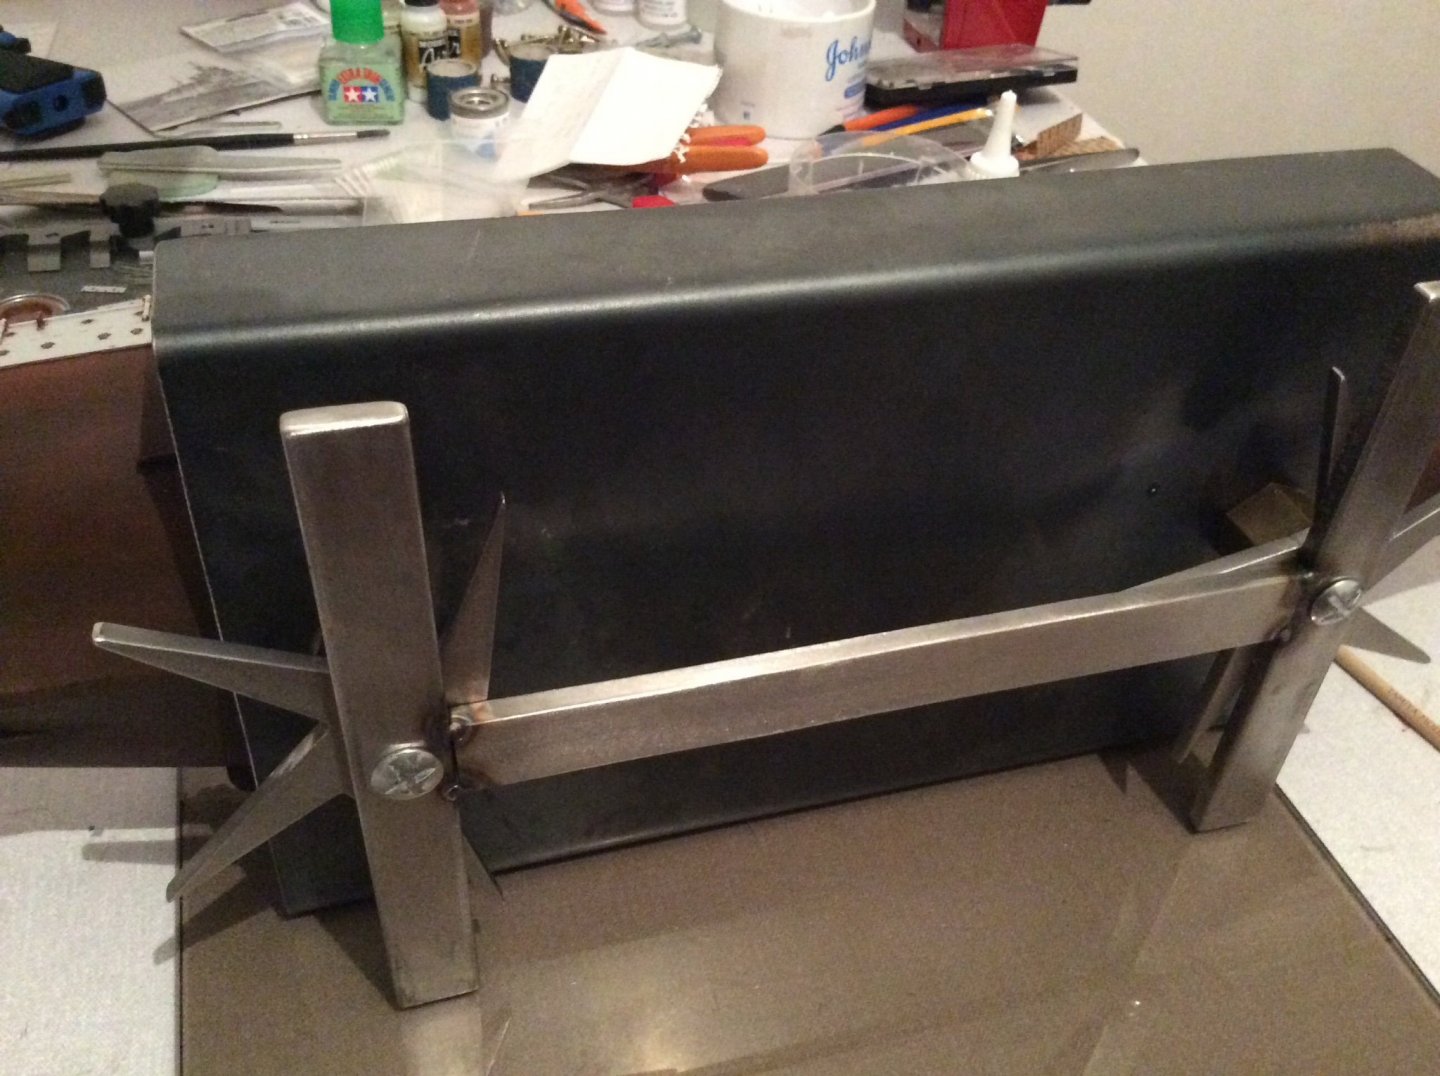
Hi guys, hope everyone is enjoying their modelling, mine is going apace, a slow one.😂 Have managed to alter my jig for holding Mikasa on its side whilst fitting etch, original idea over balanced, so added small frame, now works ok, nice for handling the model as well.

-
Thanks Popeye, glad to see everyone is alive, seams that long since my last post. The overspray was a real pain, won’t make that error again.😂 The tins of paint on table, just moving stuff around. See you are a IJN fan, I also have quite a selection up the attic that I’m sure you’d like, Hasagawa kit of Agagi with all the etch and Nagato just two of many, won’t live long enough to build what I have and I still keep buying. Don’t know if there’s a cure for this. Some people say yeh, it’s called a wife 😂 Can’t wait till I get to my second childhood. Anyway I’m trying to do a bit of etch onto hull of Mikasa, shall post when I get a bit done so you see what I’m up to. Also shall dust down my Arizona and post a few photos for Yves, he seamed quite interested. Again thanks and take care. Regards Jeff.🤛
-
Sorry Mark got your name wrong, you are now alias Mike, wish you could correct mistakes after submitting, really frustrating, again thanks for your advice, appreciated.🤛
-
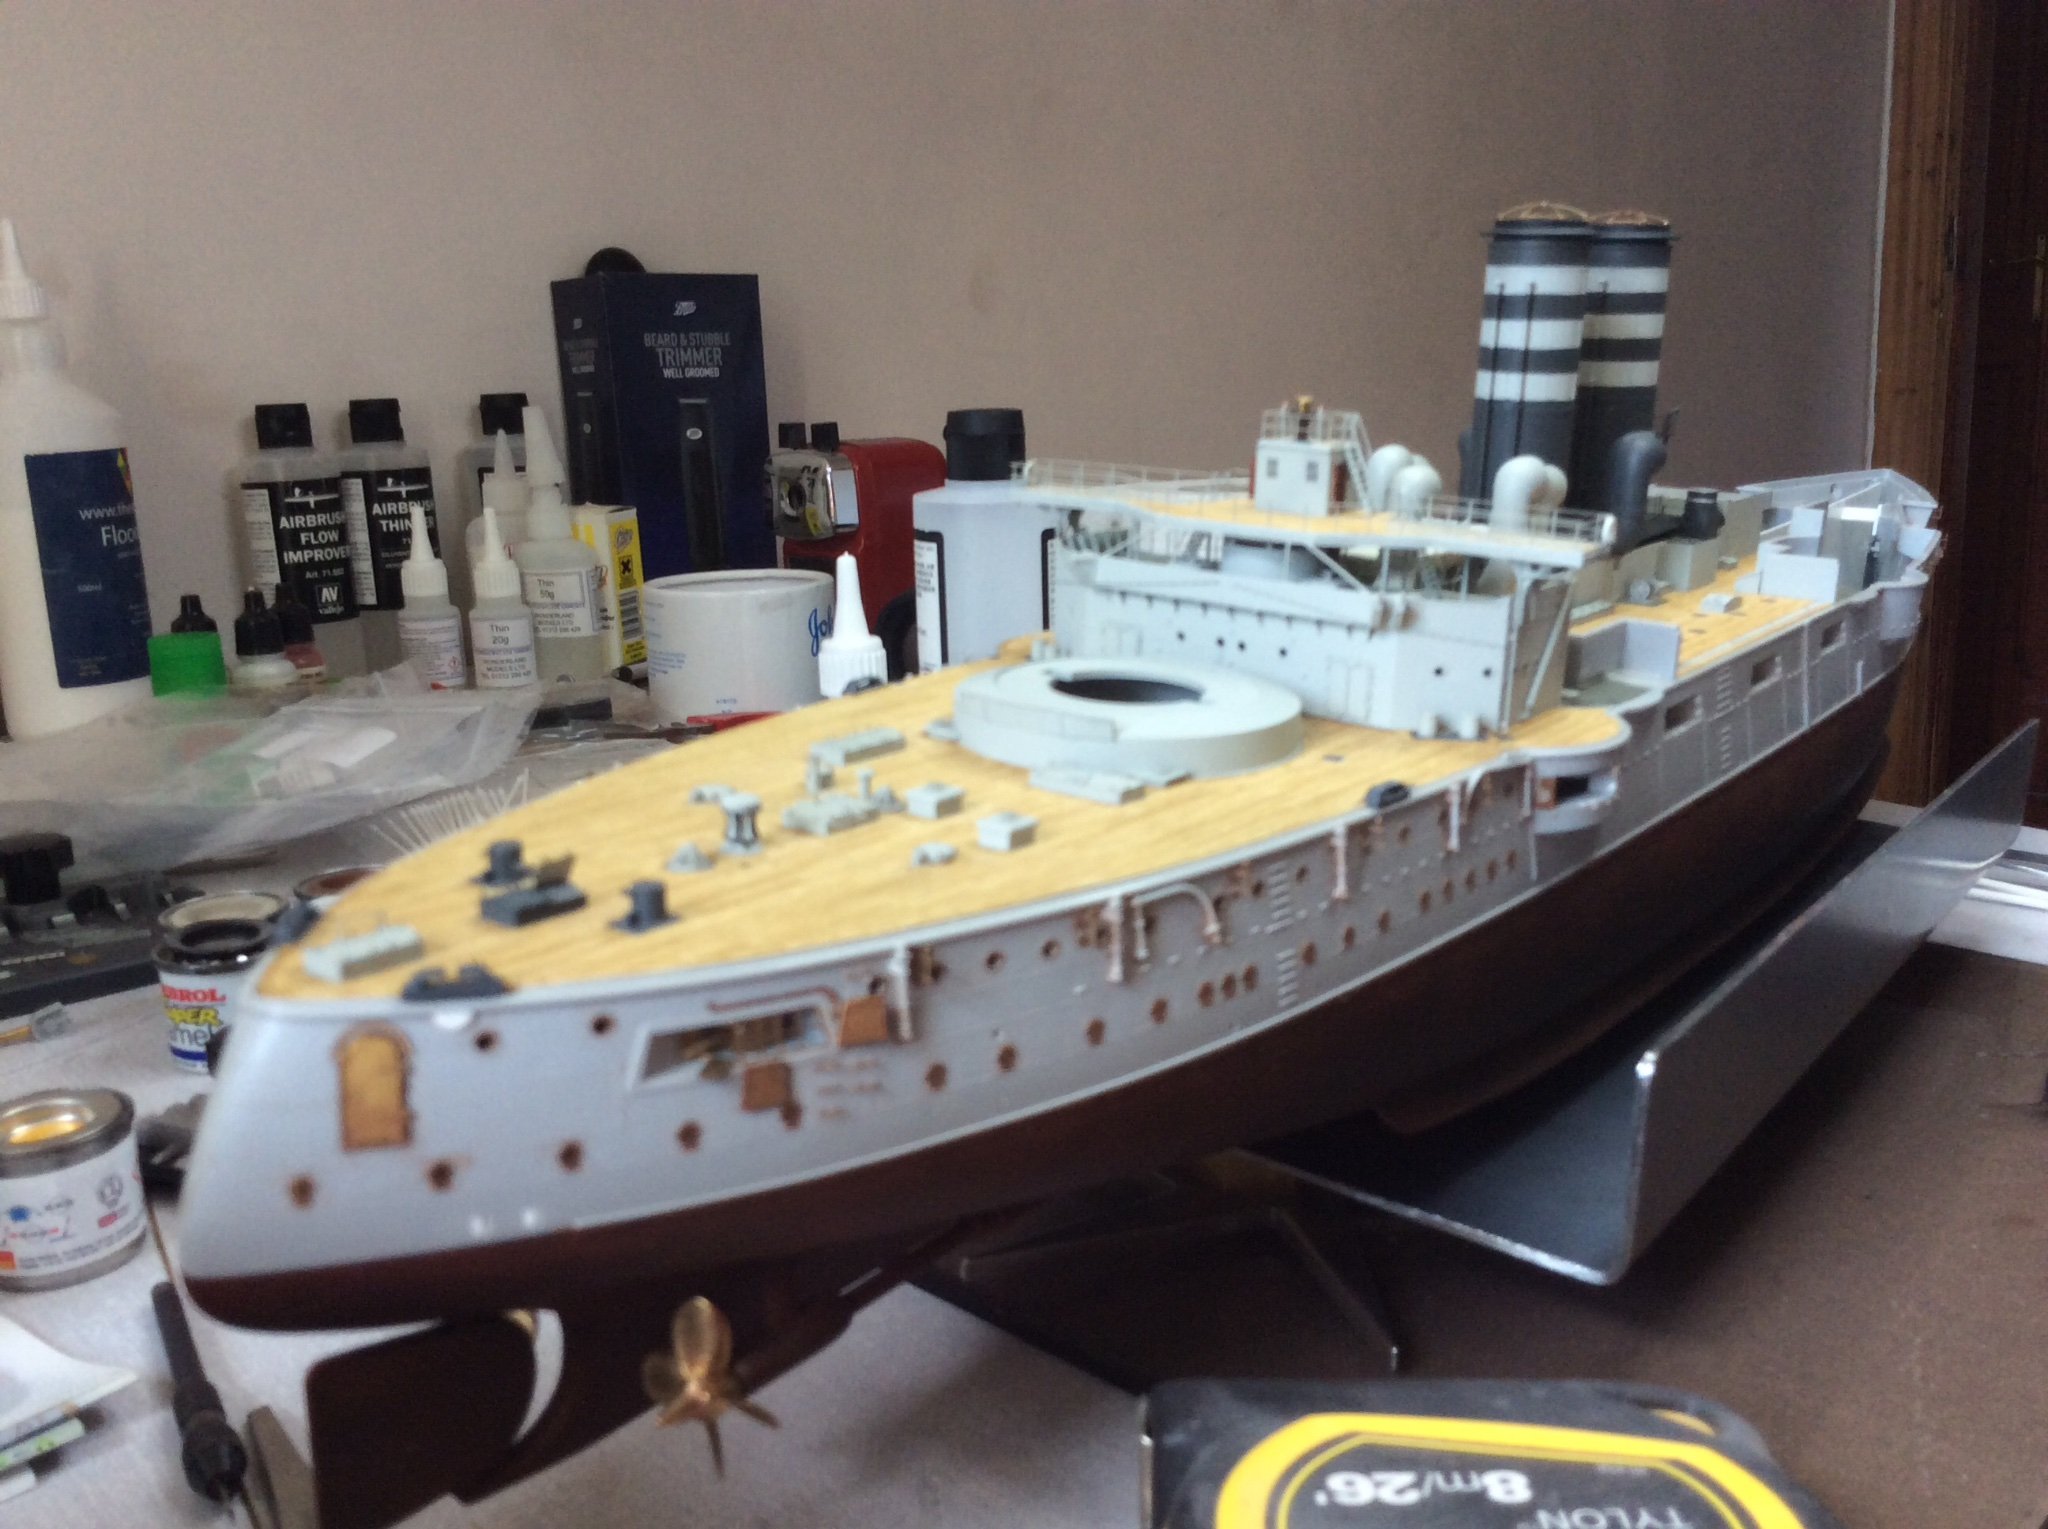
Thanks Greg, at least it’s starting to look like a ship now, bet they just about built real ship quicker than my model. 😂👍
-
Thank Mike, sure I have done this before, just get stupid in my old age and forget, maybe I shall try and post more regularly so it sinks in. 😂👍
-
Yes Yves, it’s Trumpeter’s 1/200 Arizona , wish Pontos would do a detail set for it, still have one to build from scratch, if you want I can dust it down and slip in a few photos if that’s not frowned on?
-
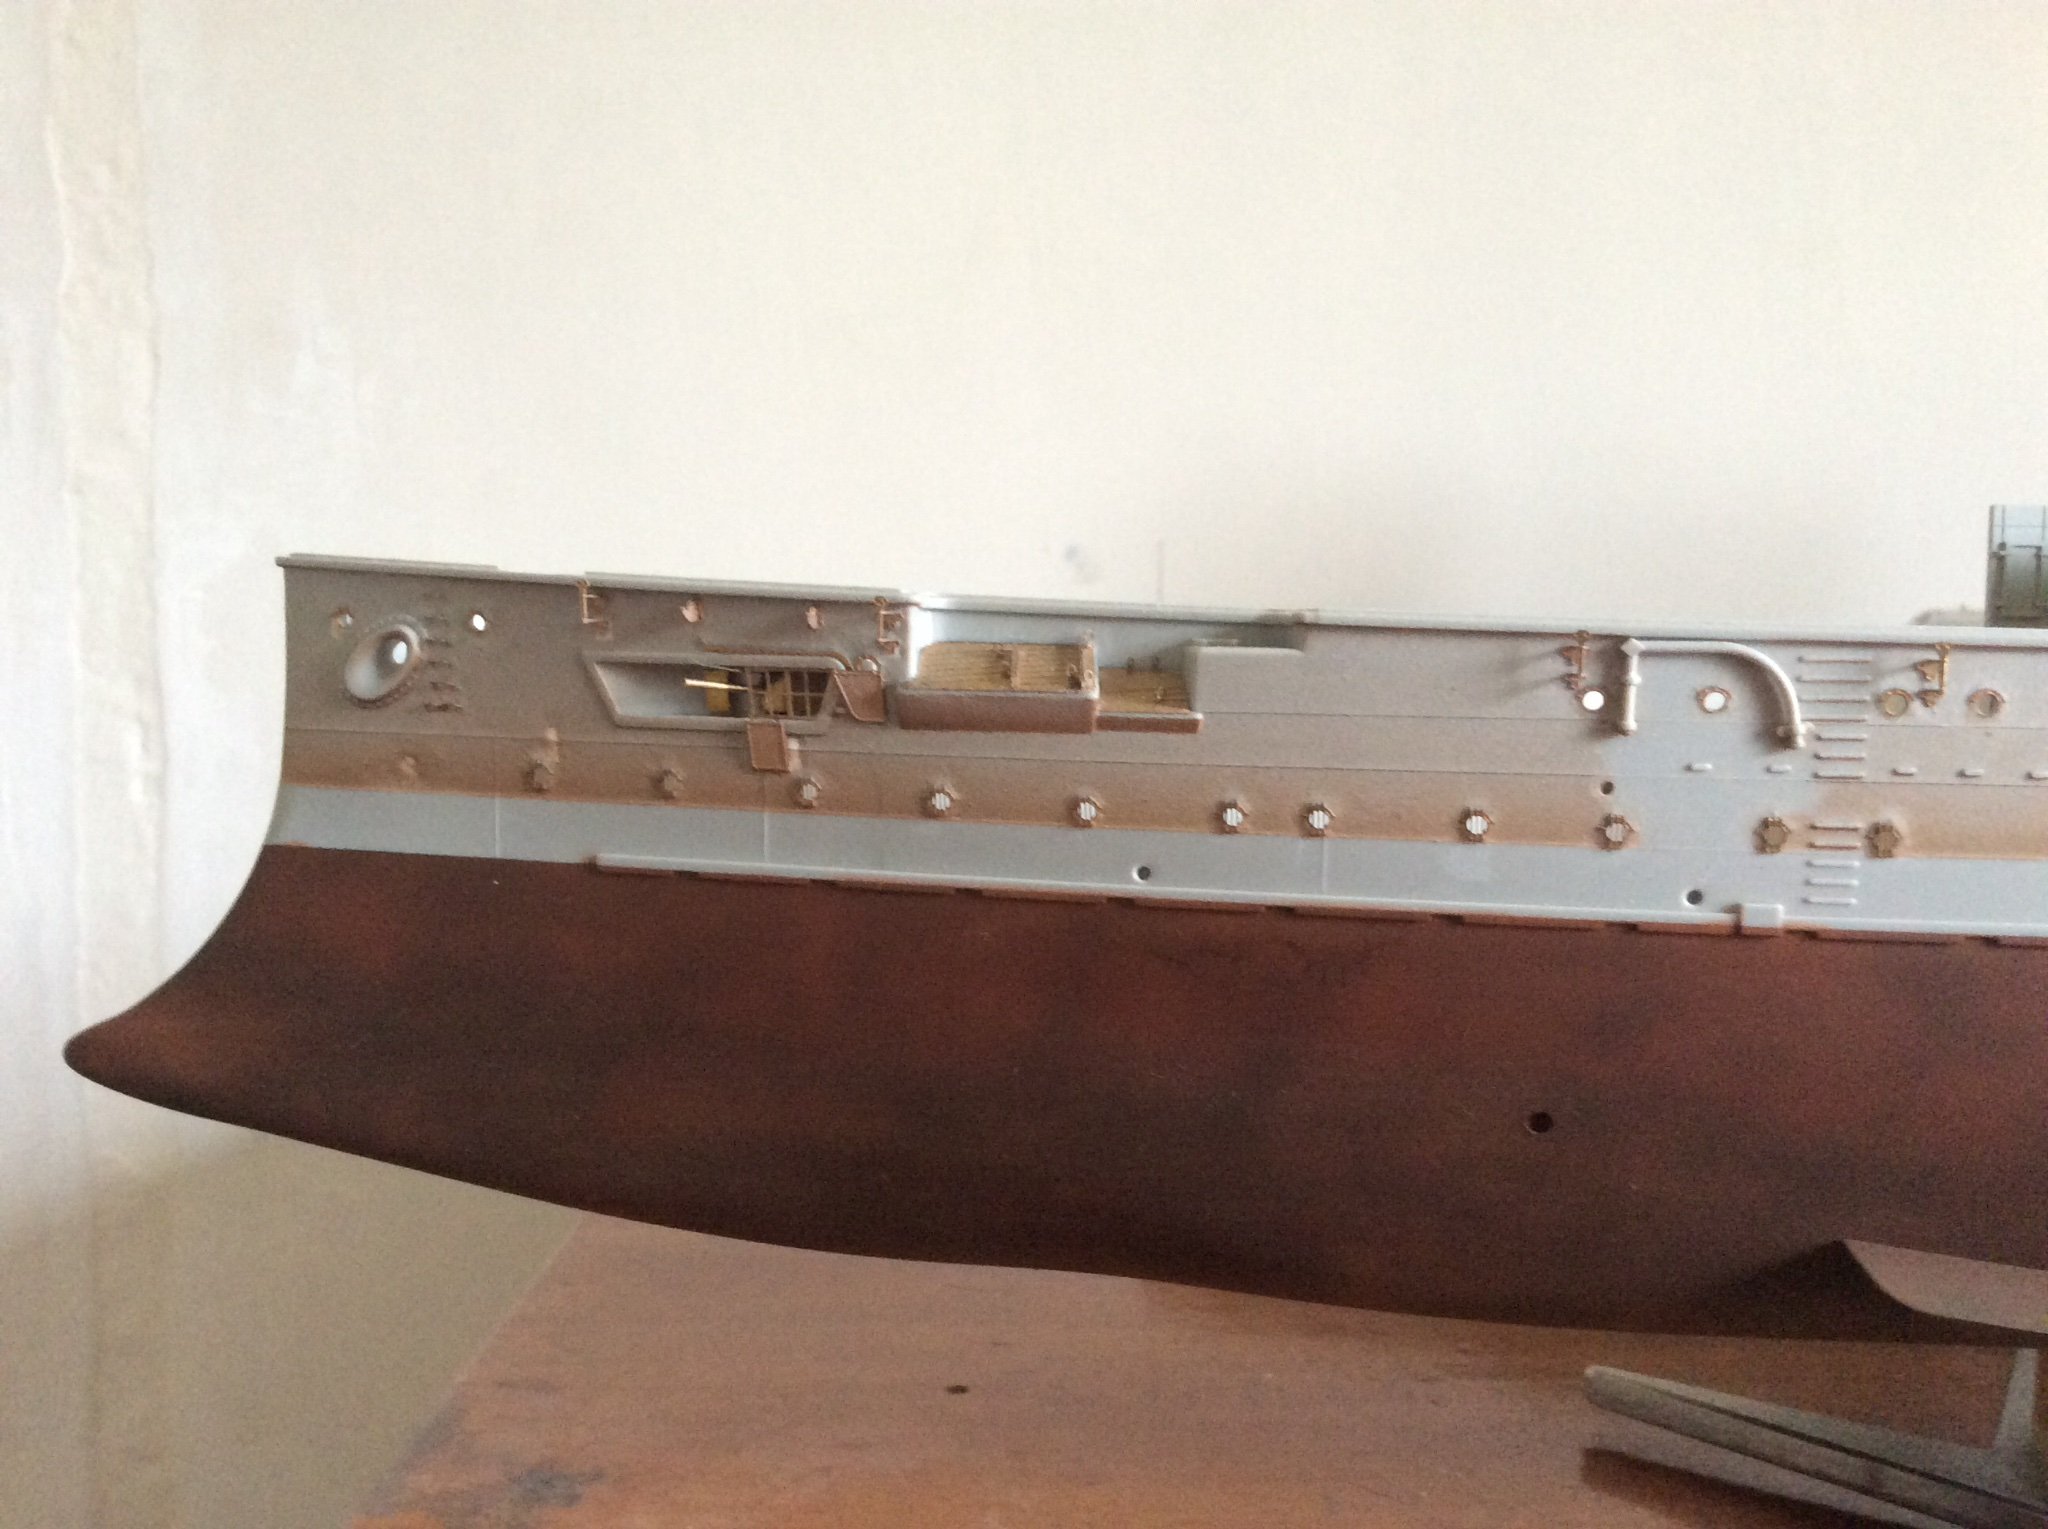
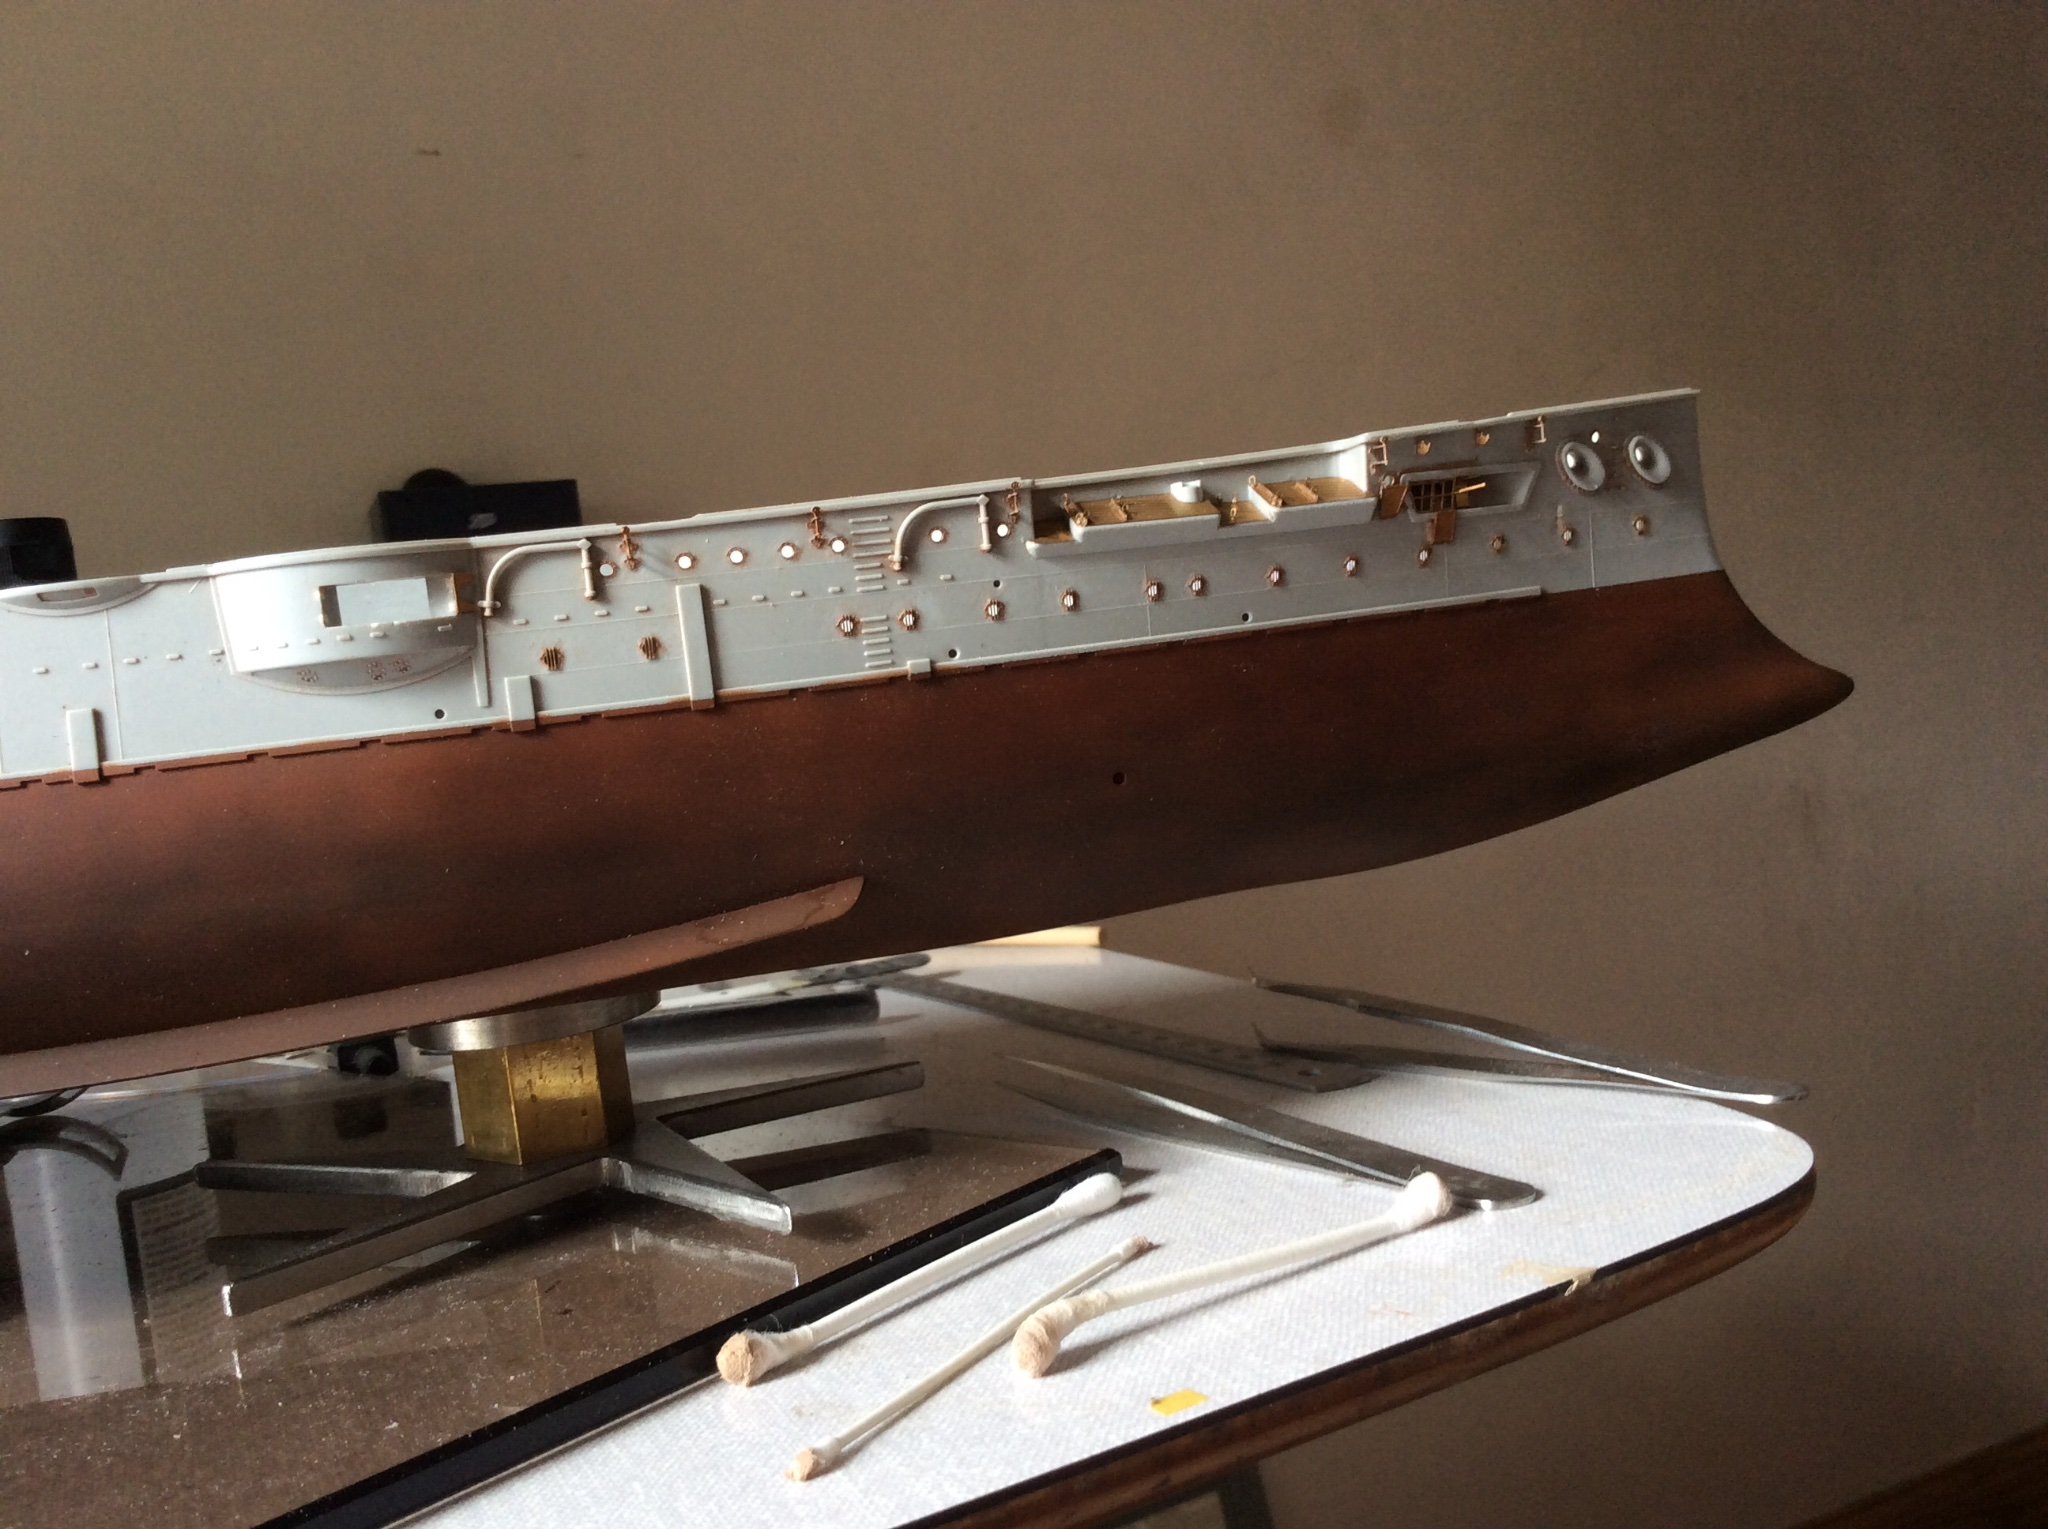
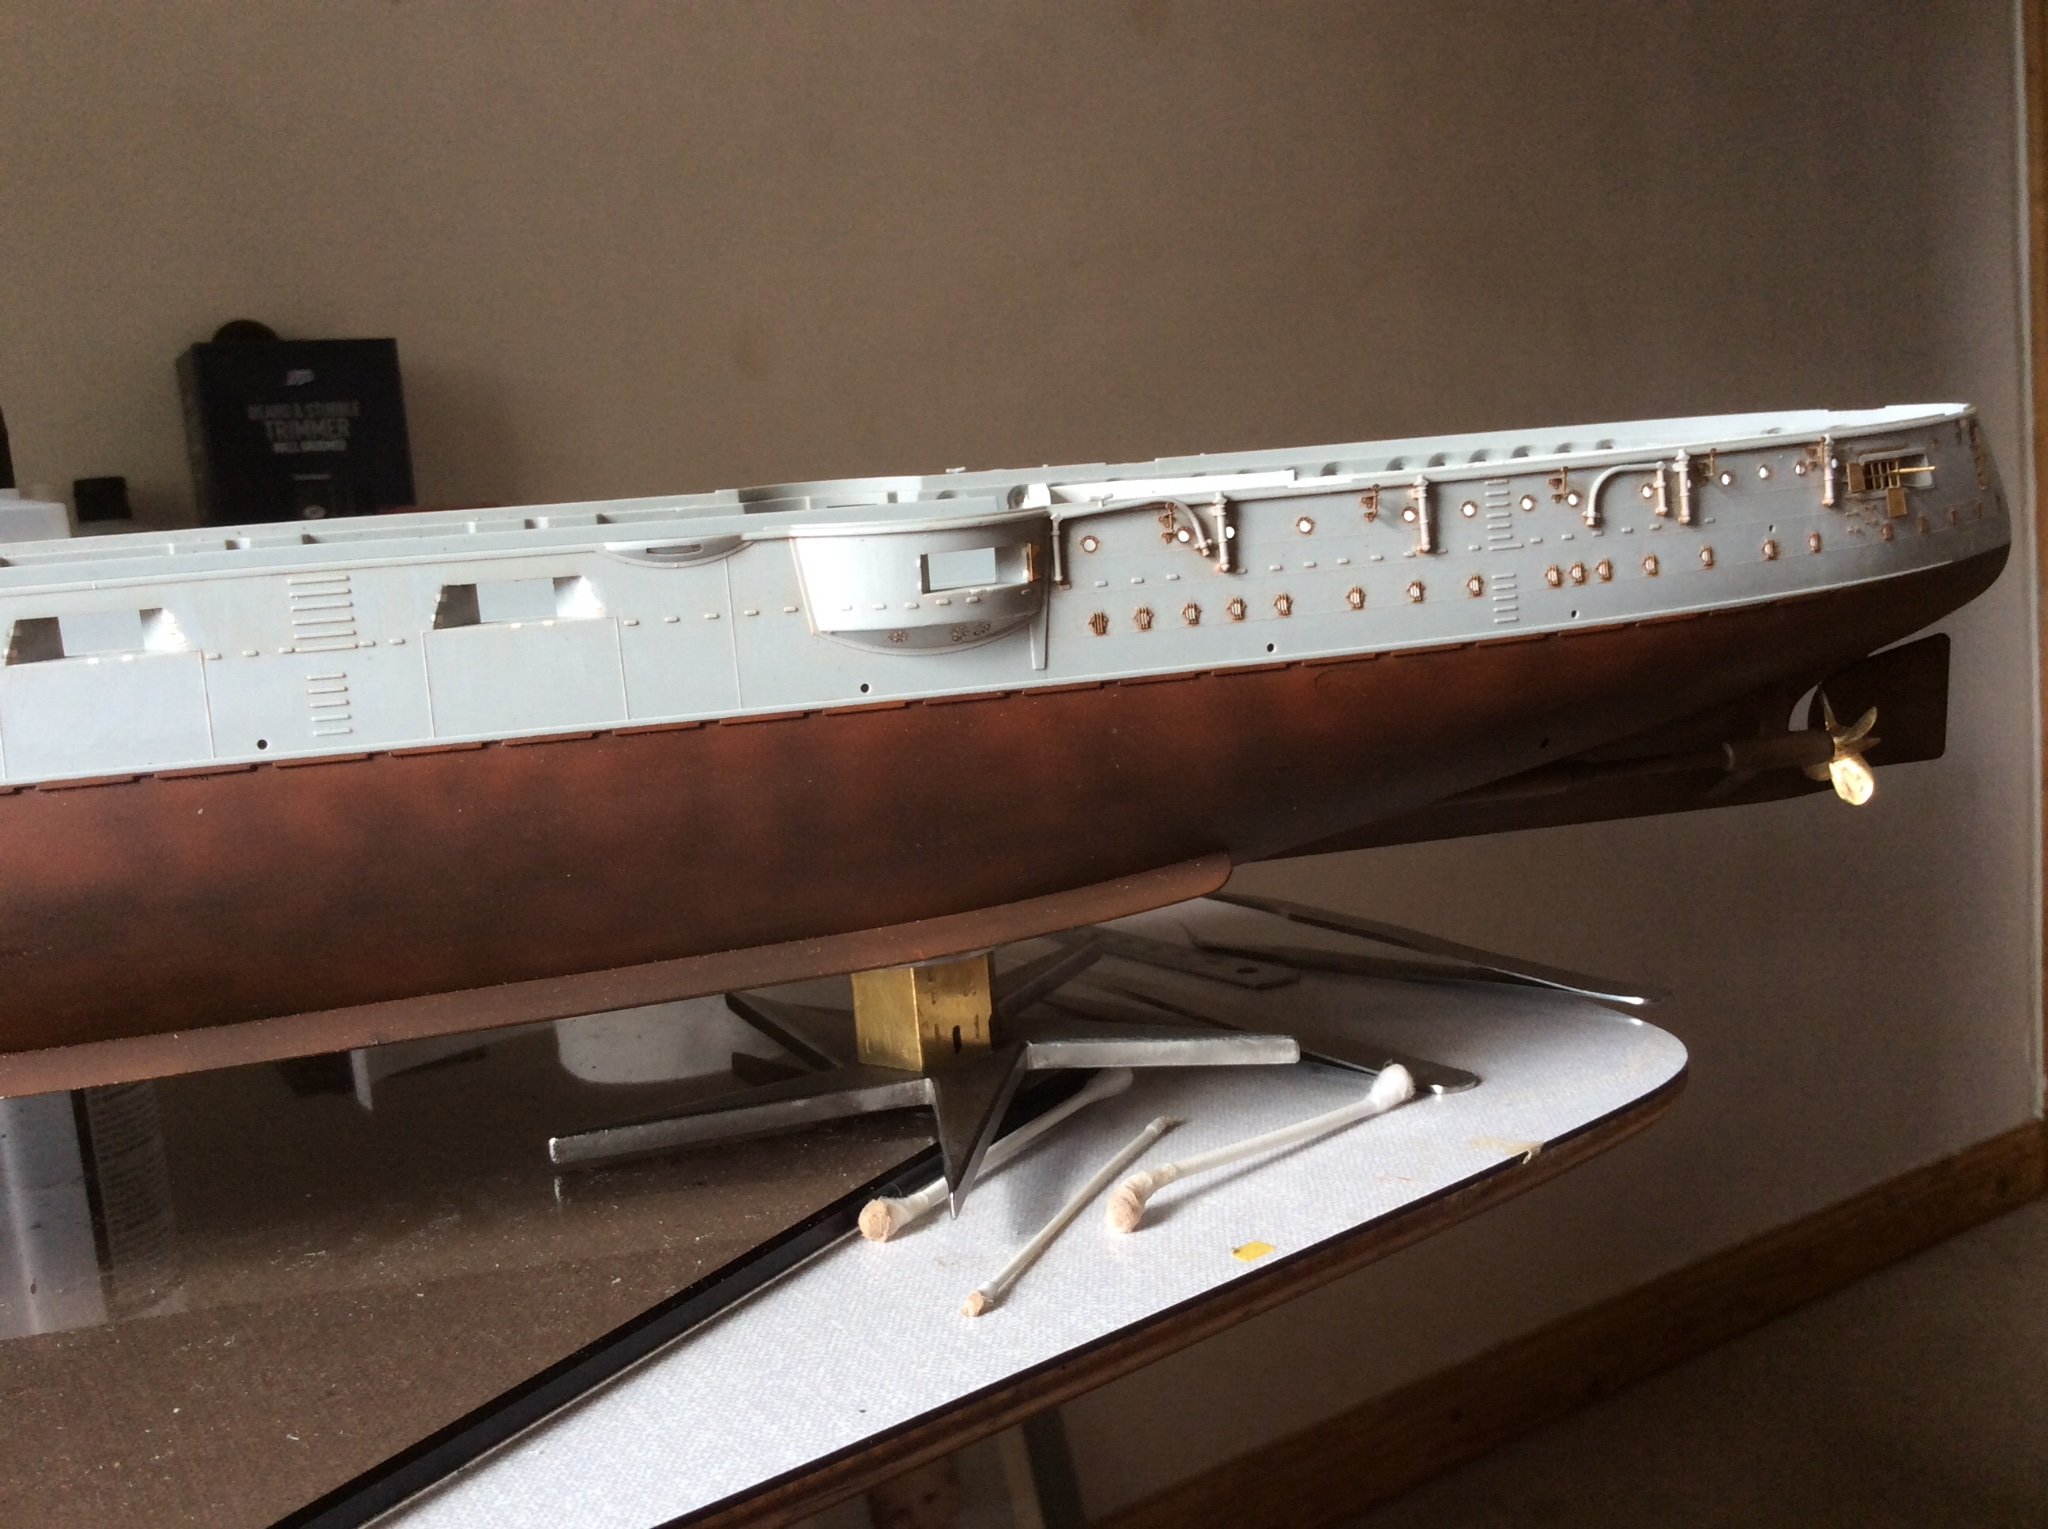
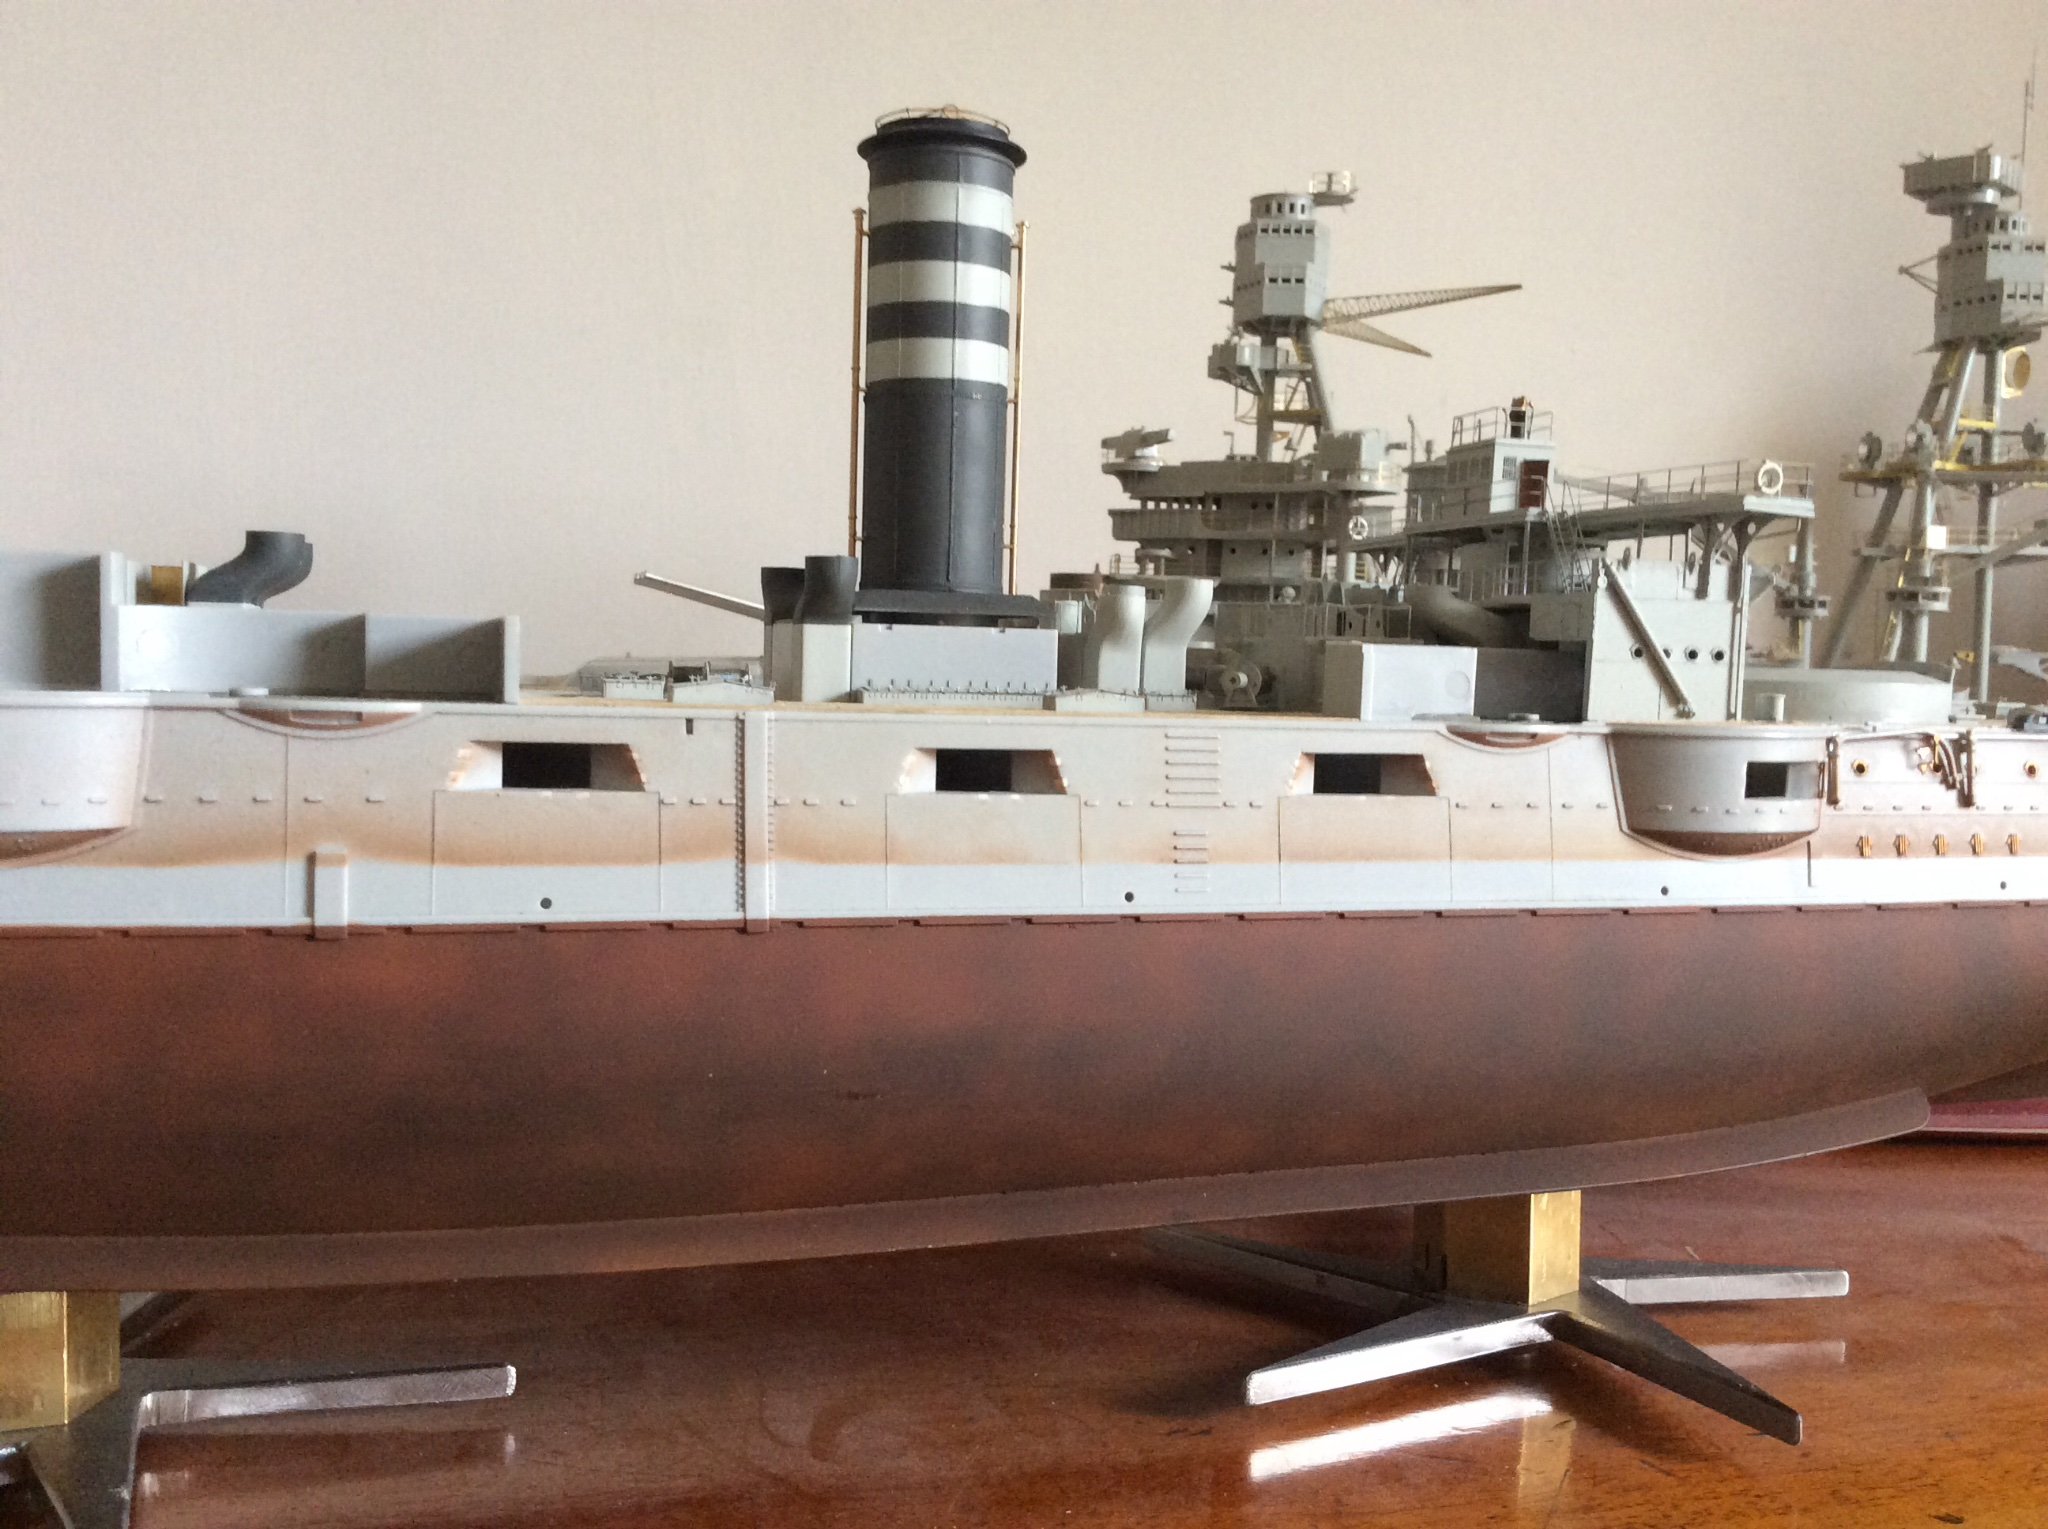
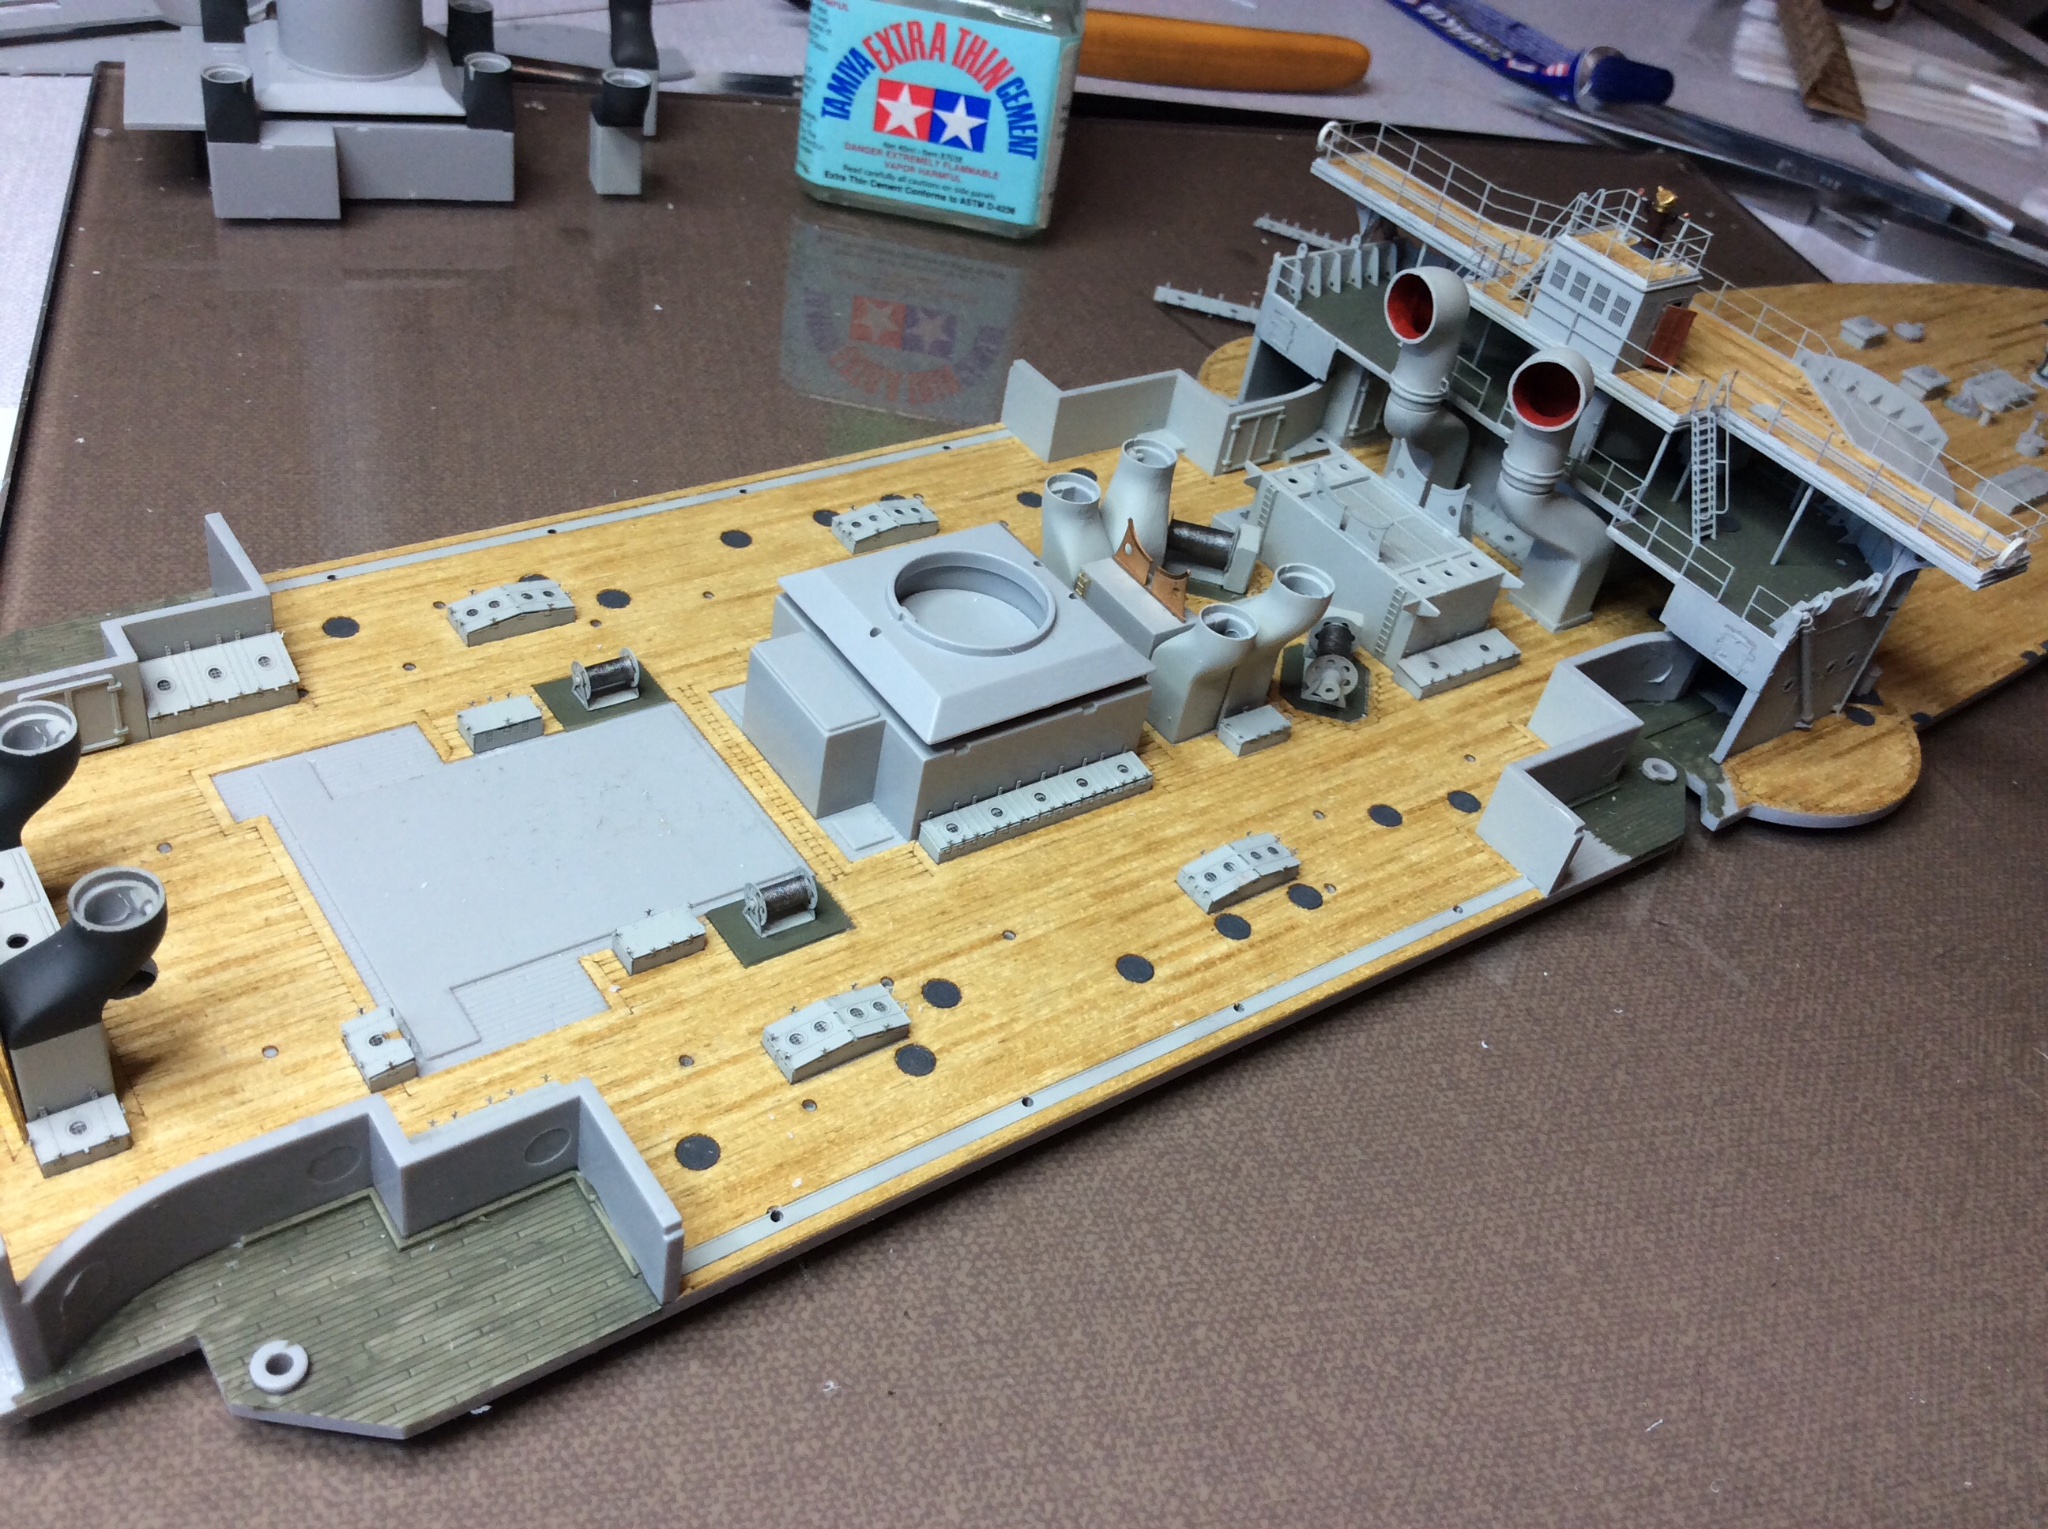
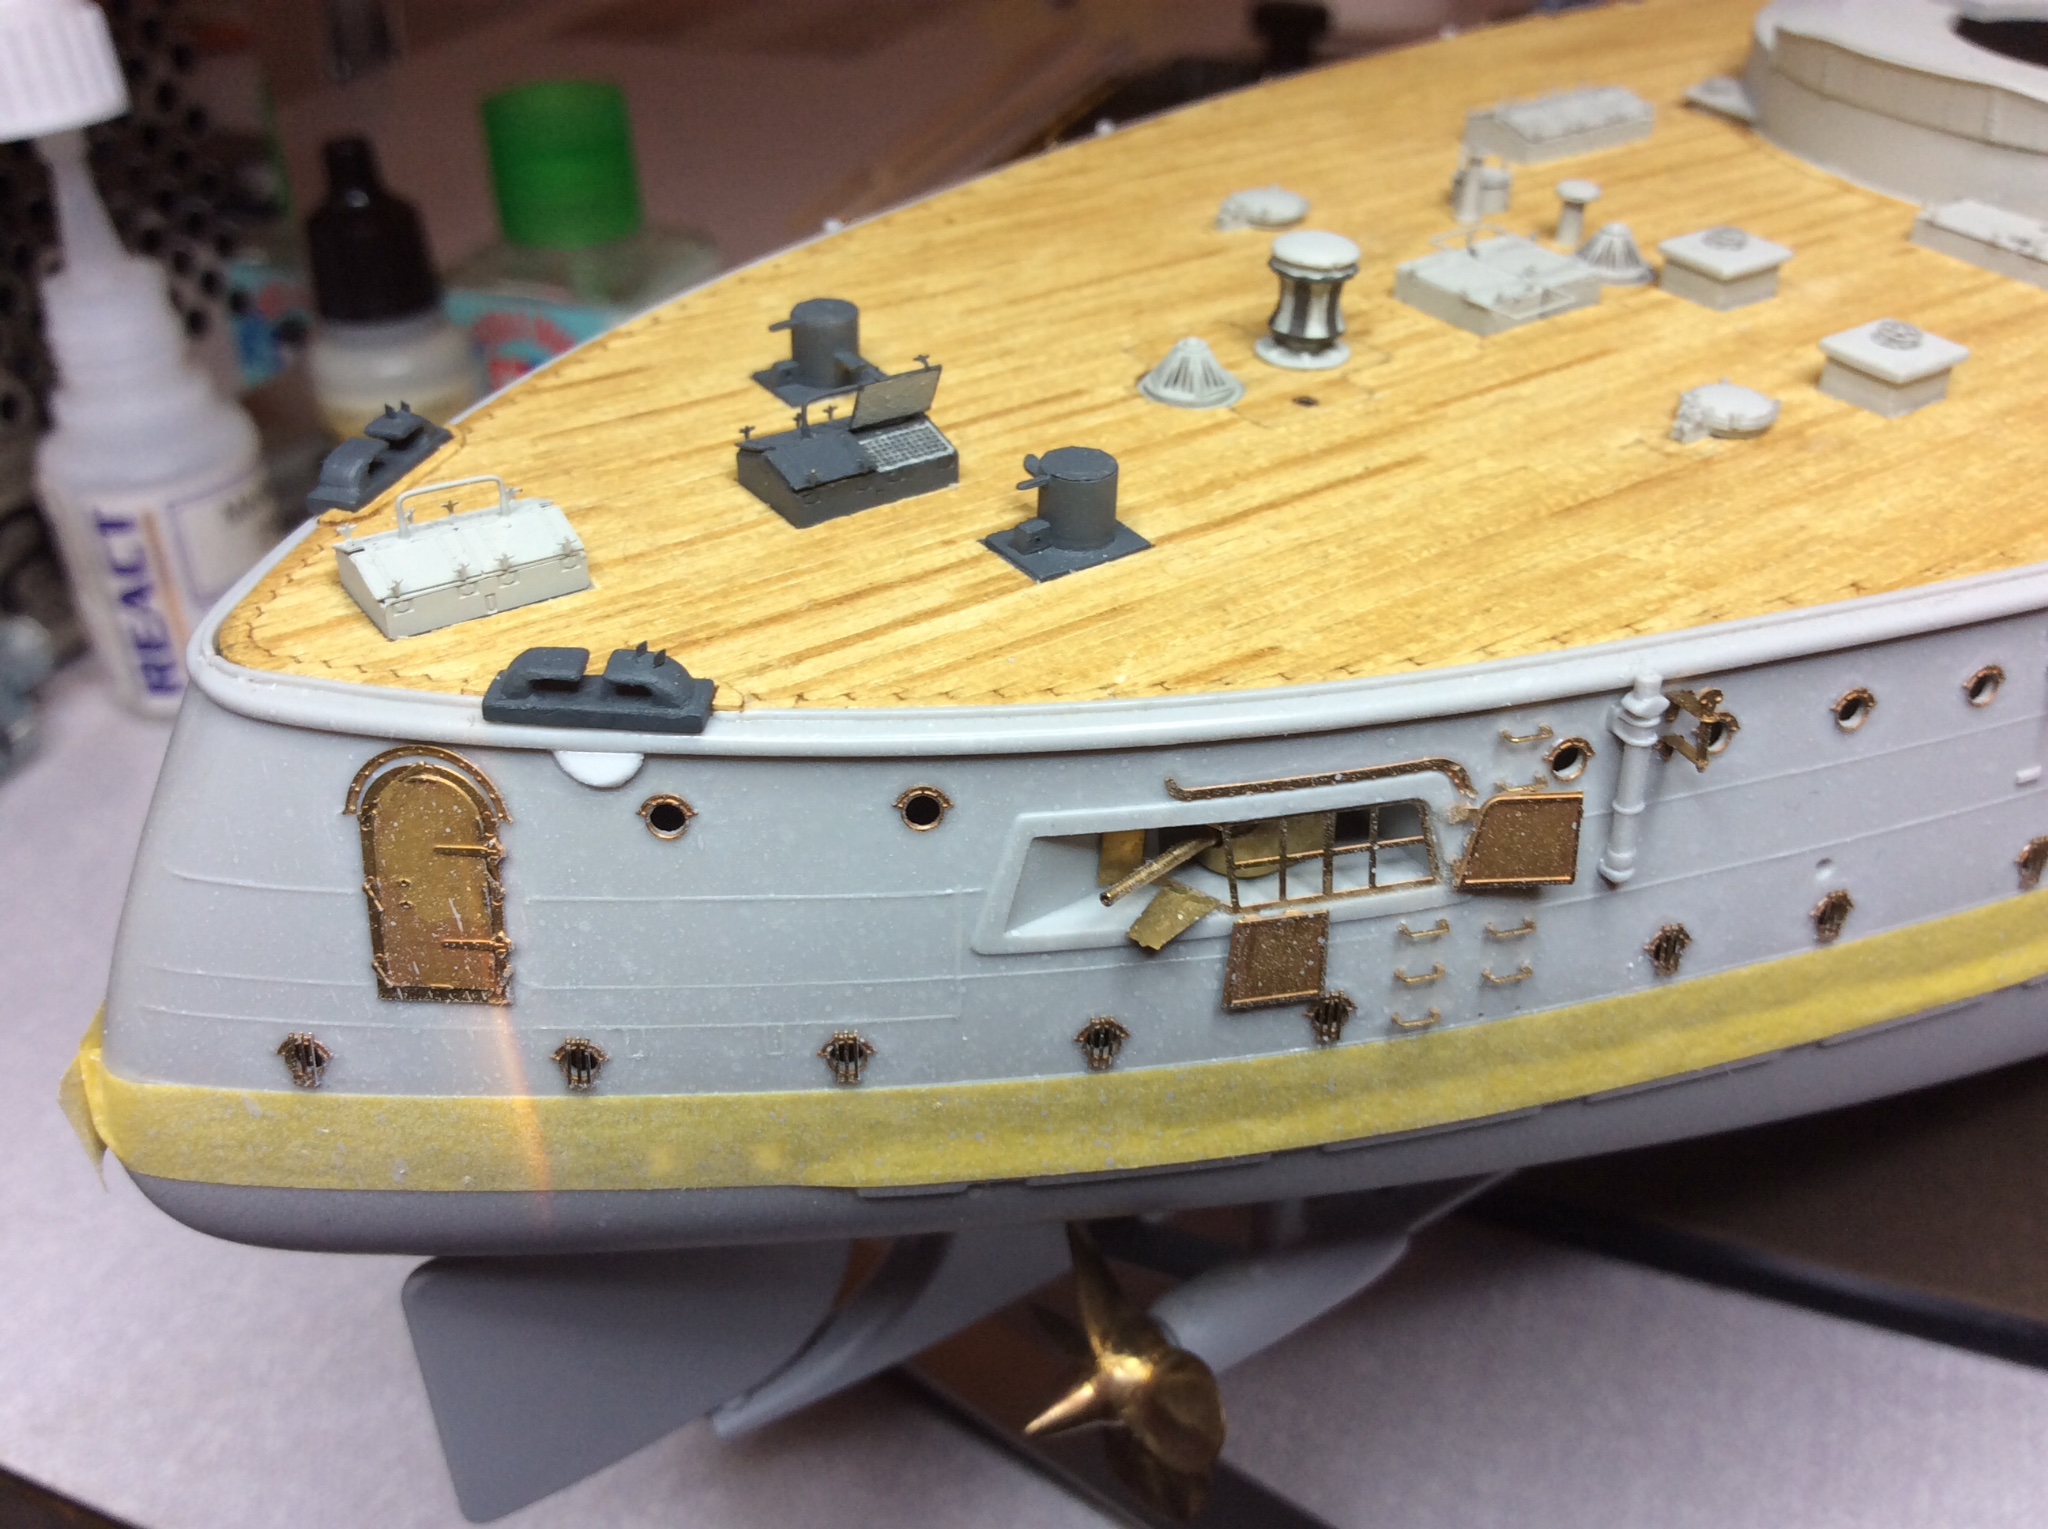
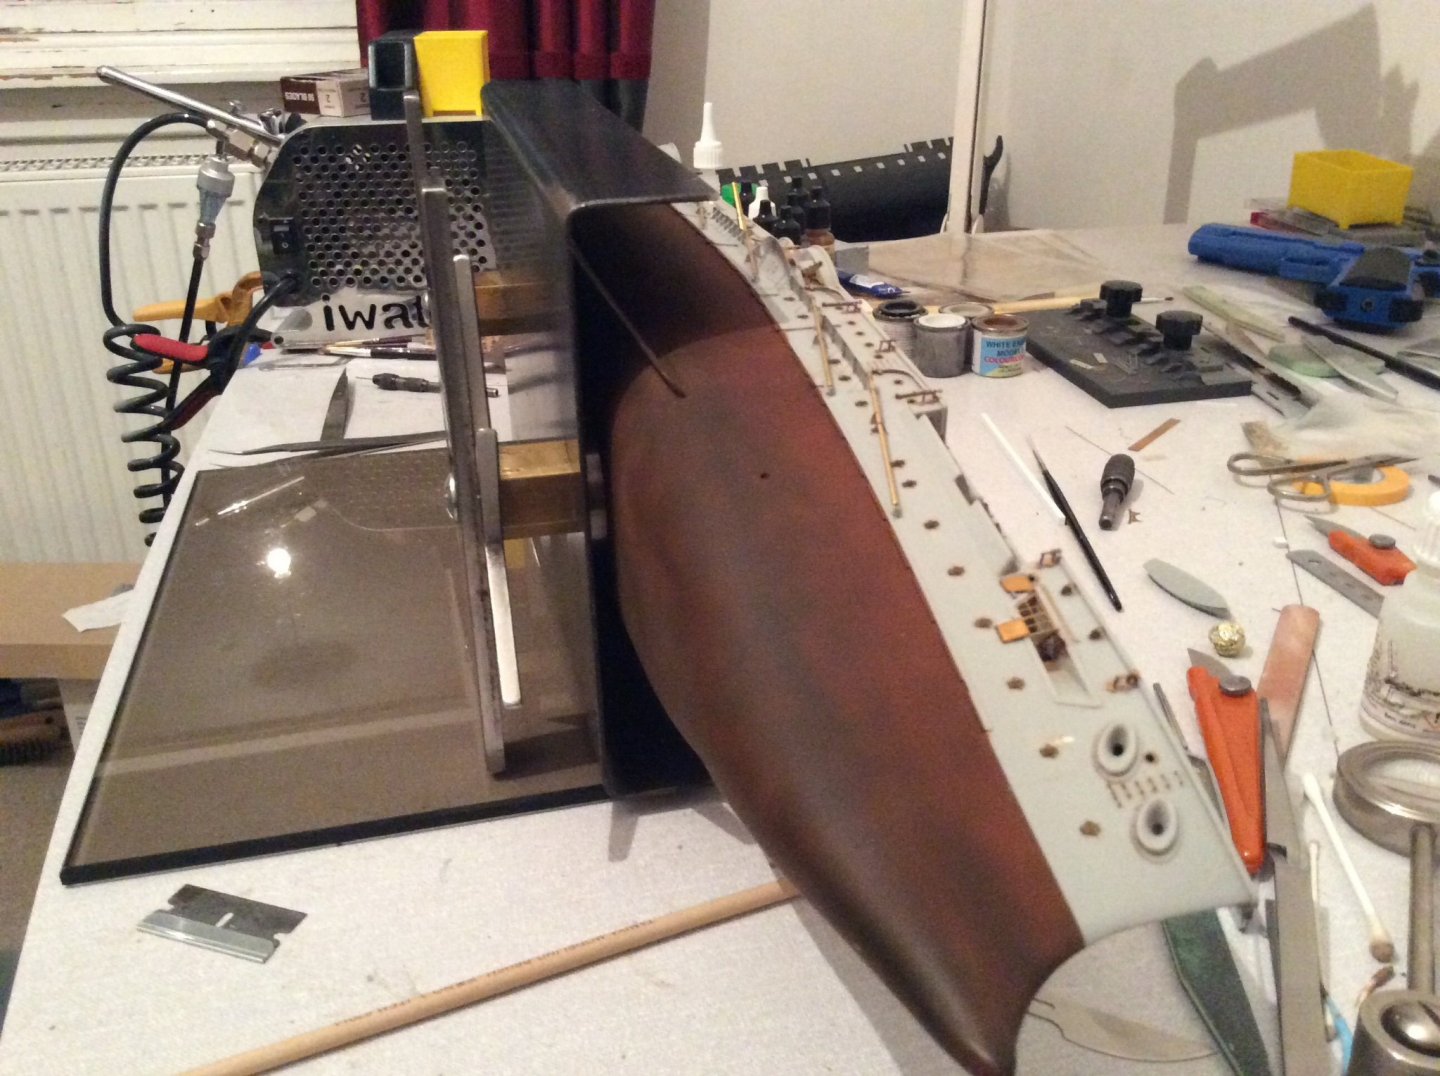
Hello again, thanks Yvesvidal and Mike for your comments, appreciated. Have to confess I am not very clever with operating these printouts, sure you have noticed 😂 my lovely wife Jaqueline says it’s not user friendly and she is a lot sharper than me on websites, just have to hope admin can tidy up behind me, I’ll keep him in a job. Think this will be my last post for a while, whilst I try to make more progress, bit like Groundhog Day, got to start working on forward deck and forward bridge, plus have opened new front on model, having cleaned up all the overspray, my fault, reminds me of as a young boy scraping all the paint of old Dinky Toys using one of my mums sowing needles so as to repaint the toy, this was fifty times worse, only knocked of four parts of etch, that’s using my craft knife not a needle 😂 did say it was my first shot with airbrush, so I am a novice, probably not the best model to learn on me thinks. Anyway with that task behind me I have to make a few alterations on my plate for supporting model on its side, once I have sorted this, shall let me fit the rest of photo etch around the hull, think there is quite a lot to go on. Shall then spray this in one go. The painting that I did on the lower hull is my first attempt at shading, it’s not perfect but I feel sort of satisfied it almost works. The decks are not glued down, just trying to show the direction it’s going in, all be it very slowly. Shall post some photos next. Take care folks and happy modelling. 🤛
-
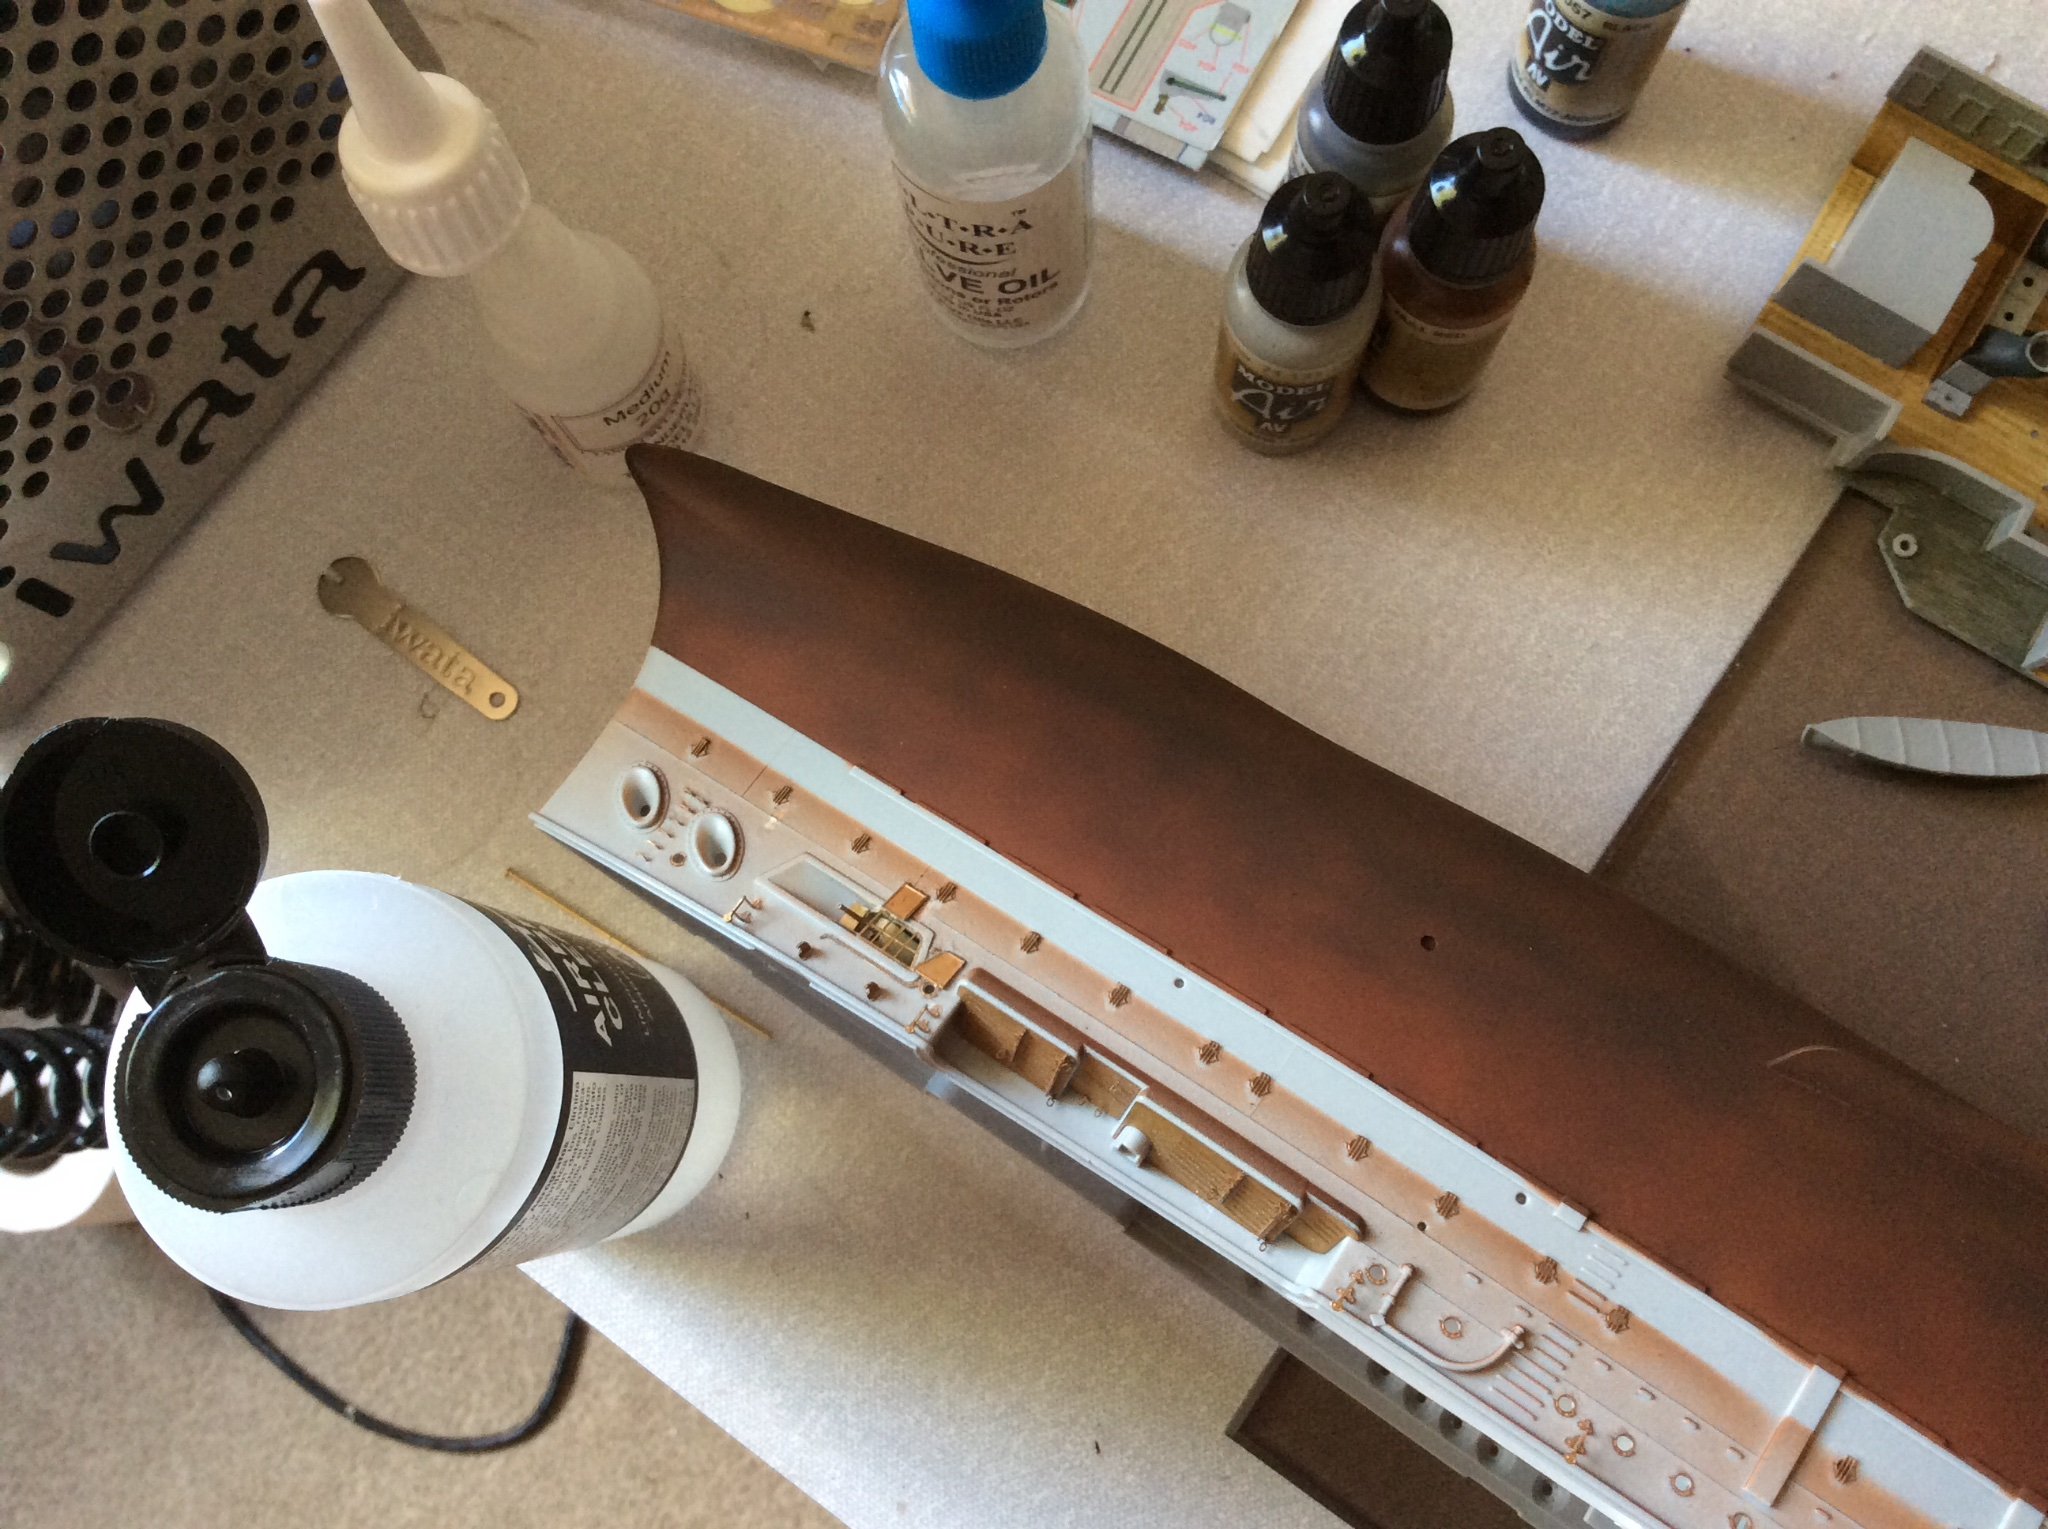
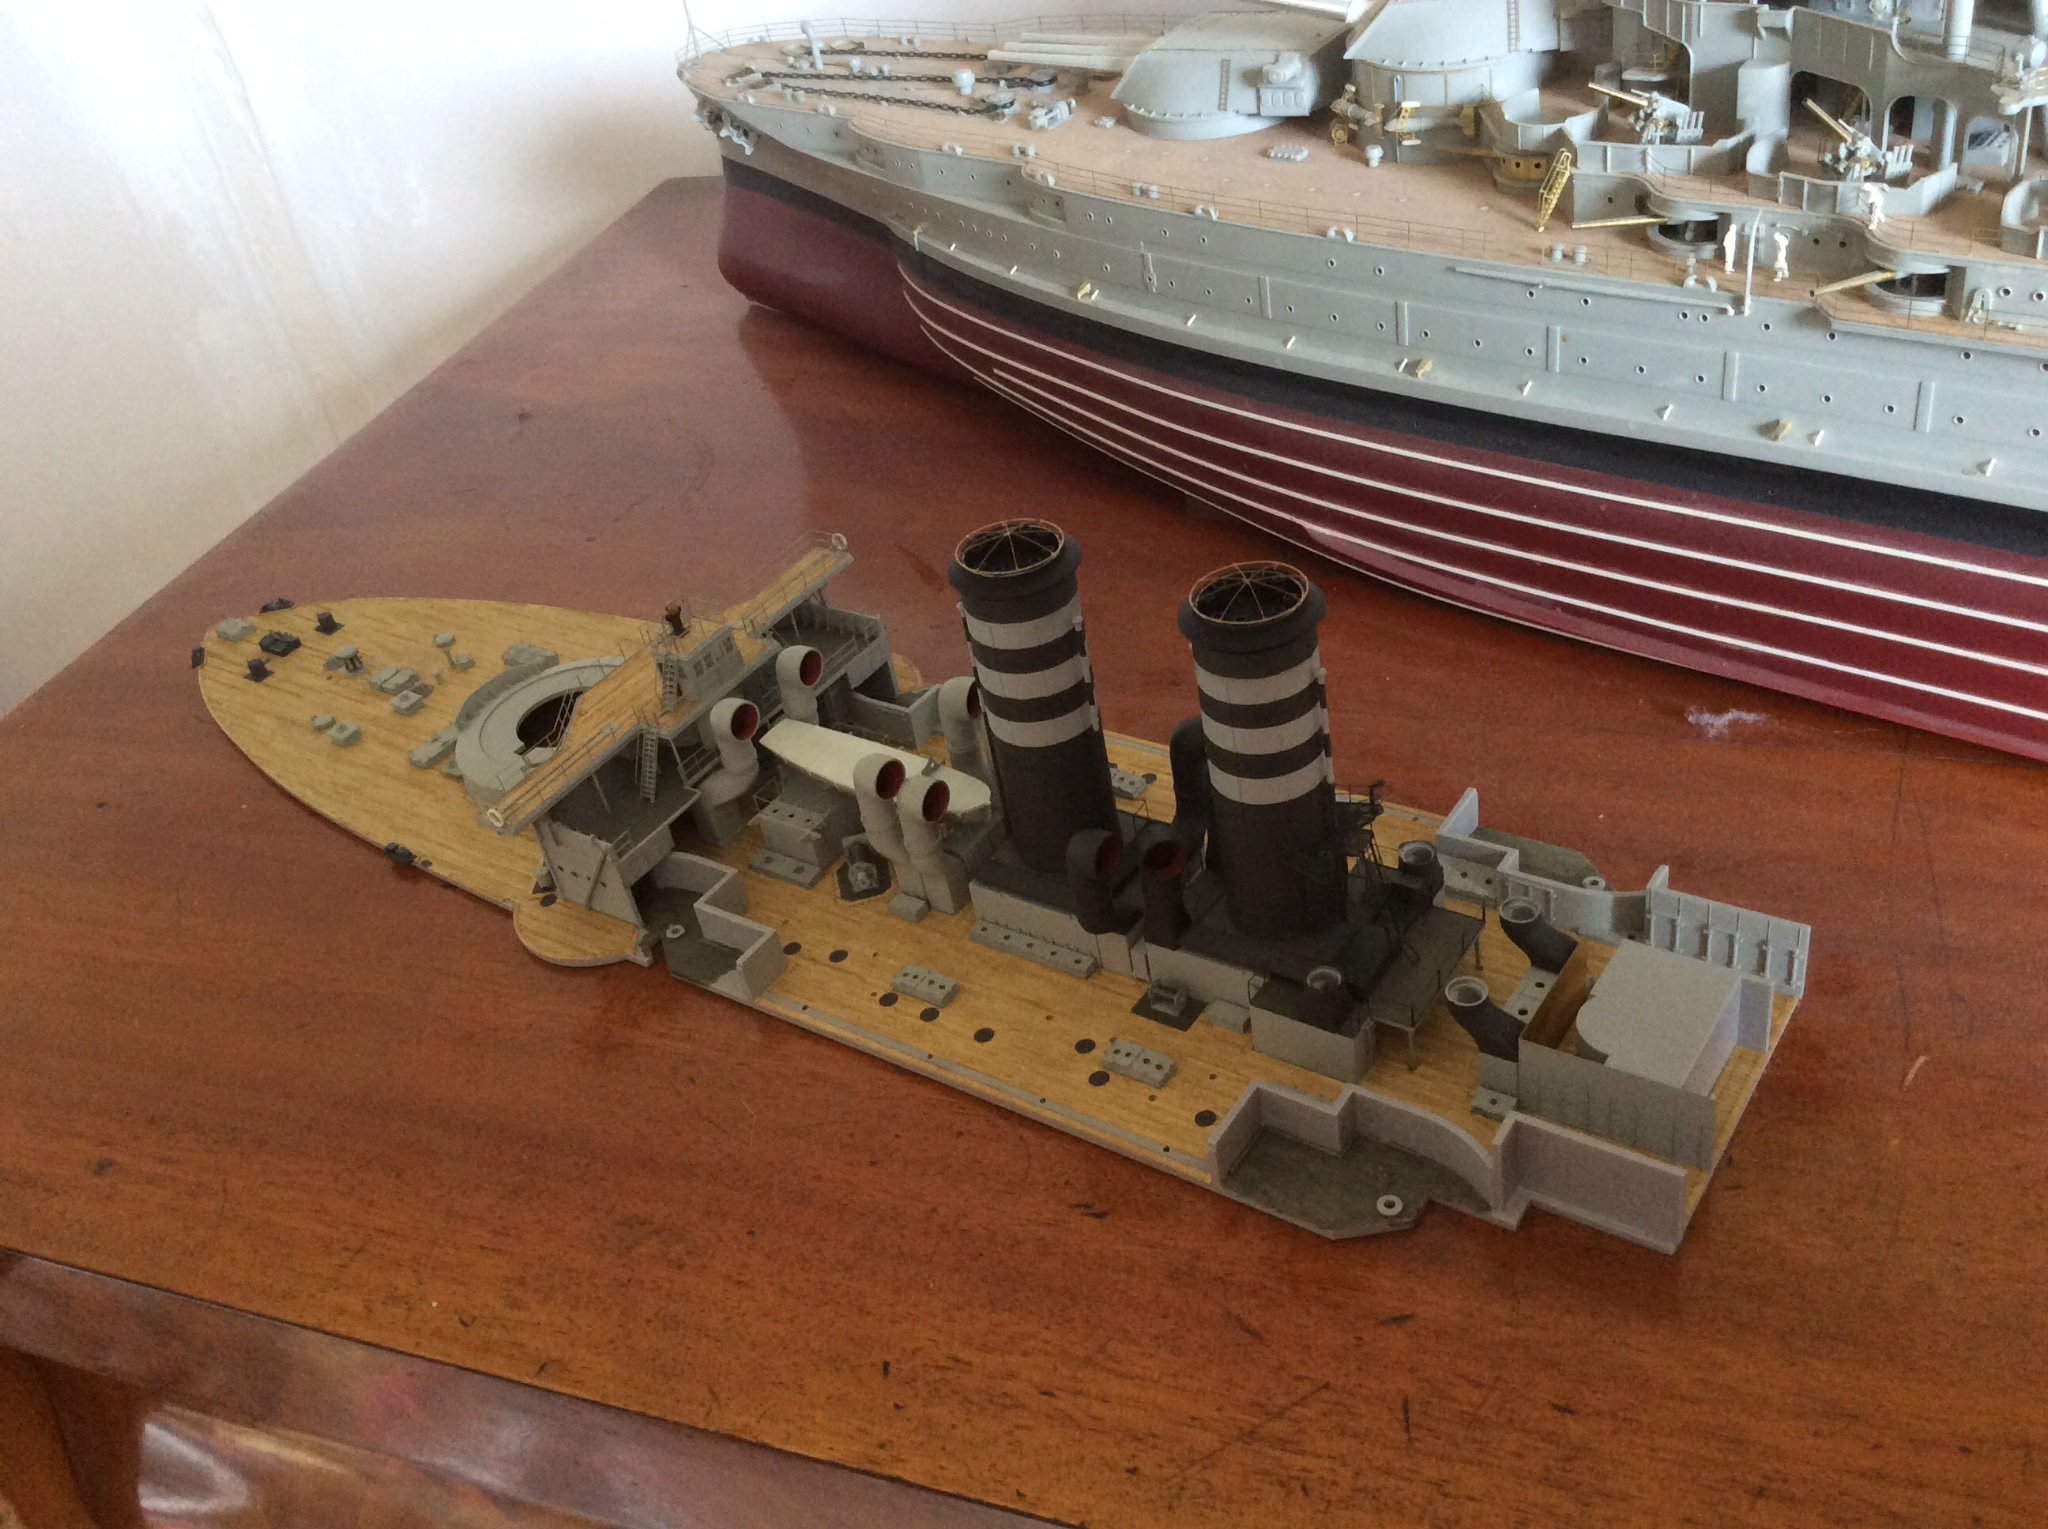
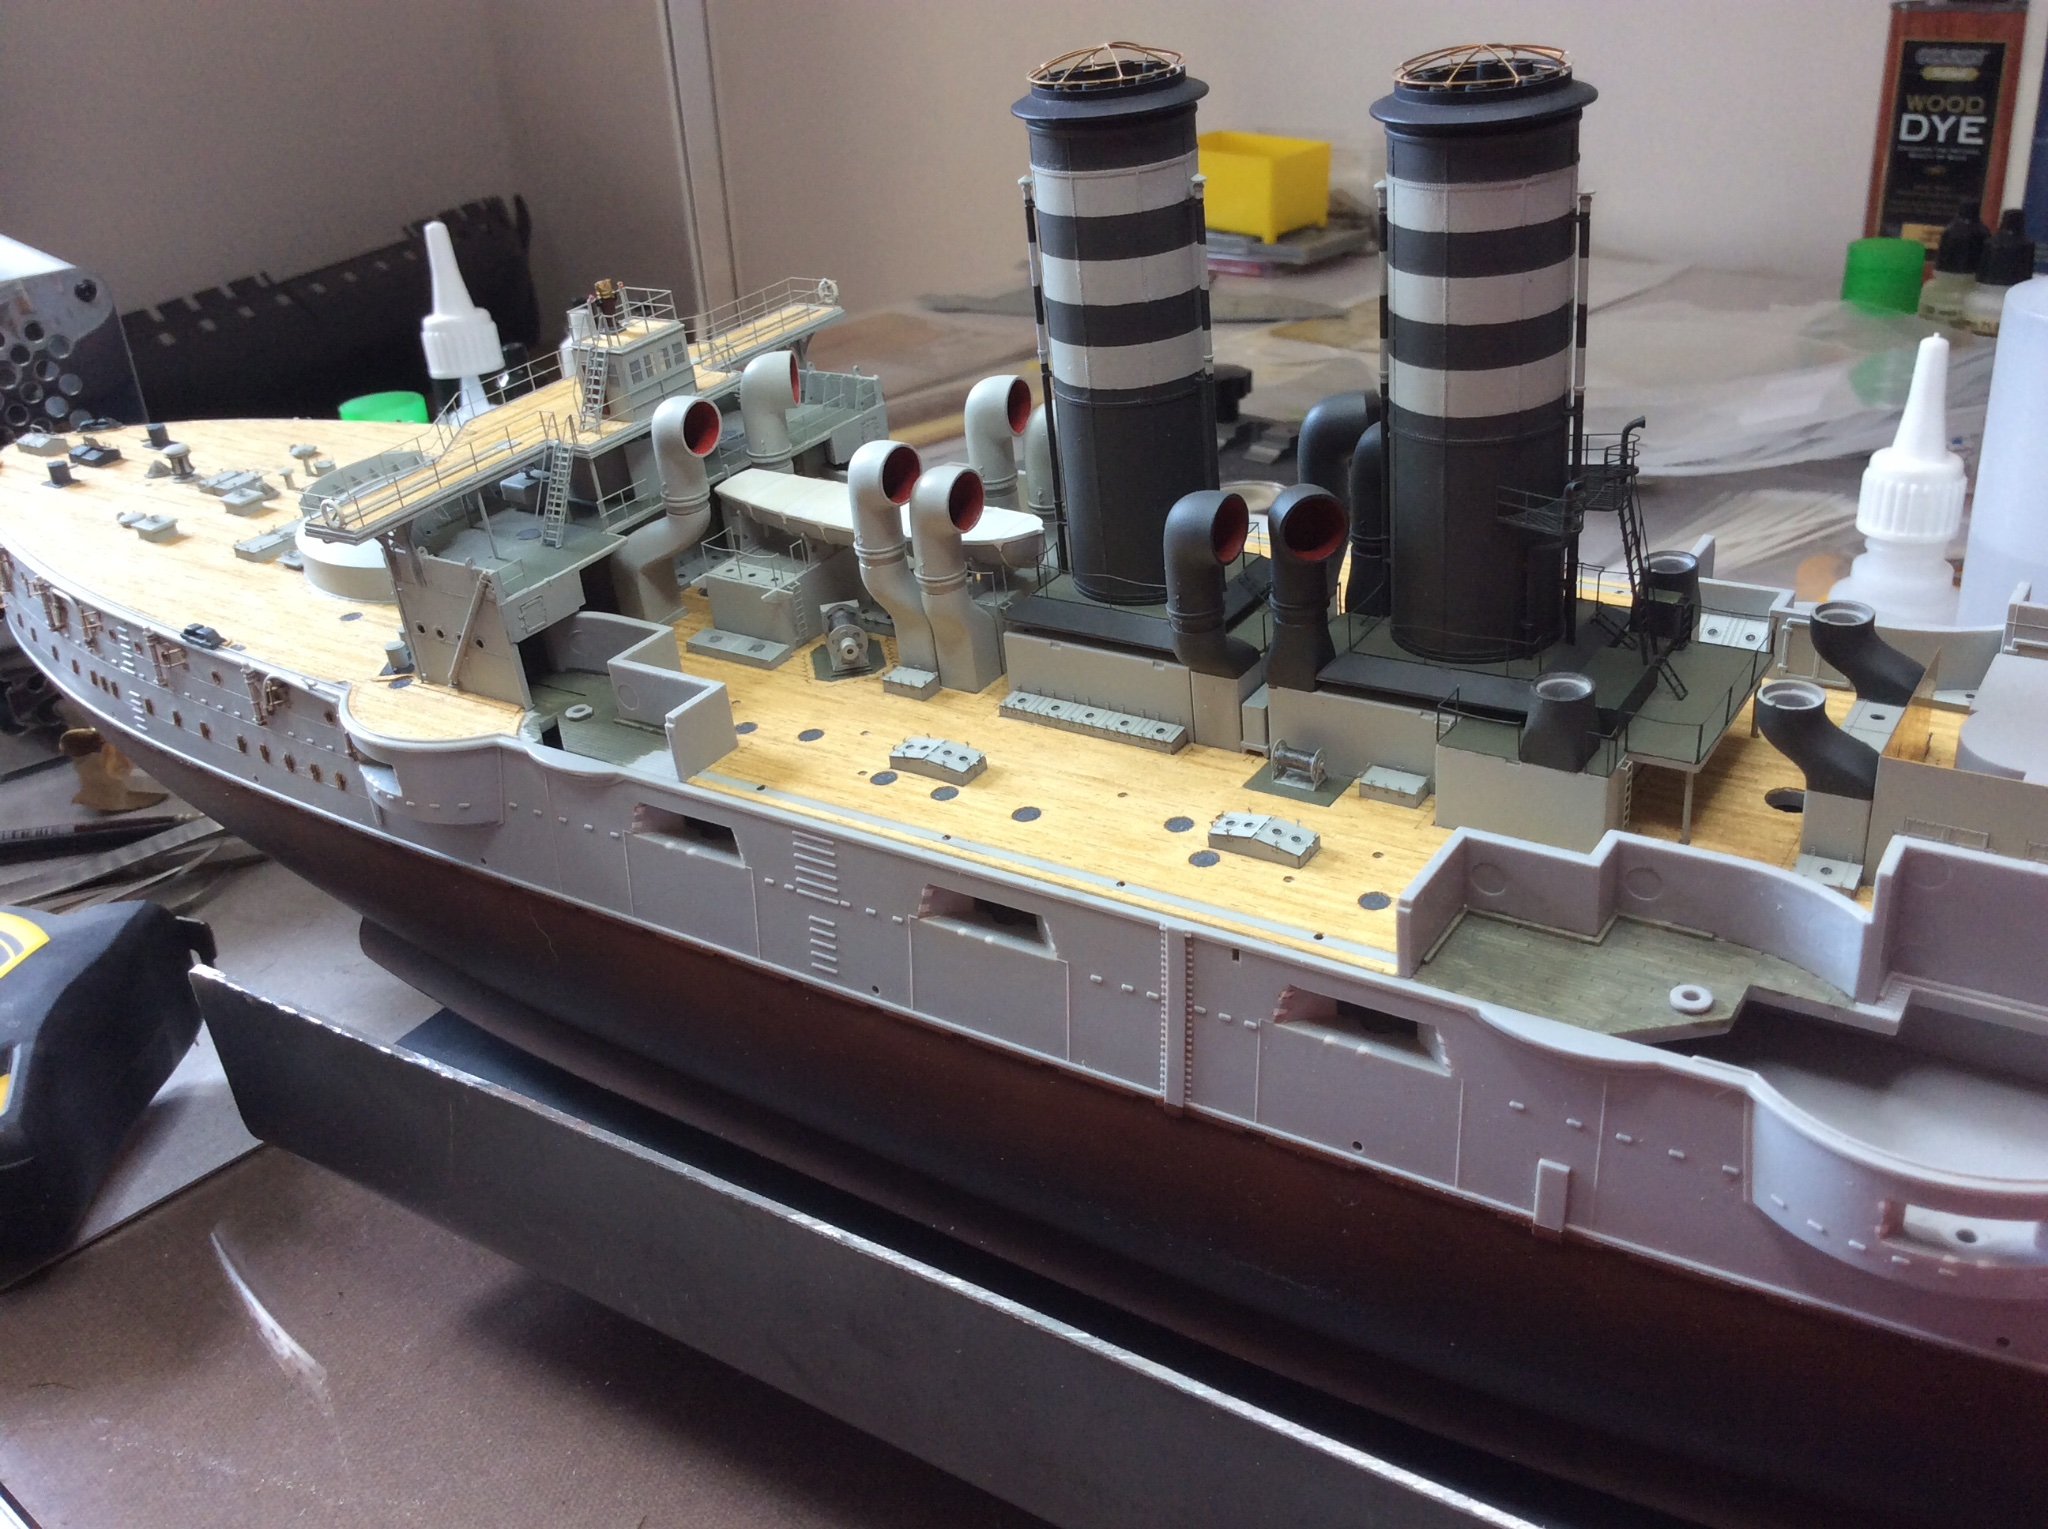
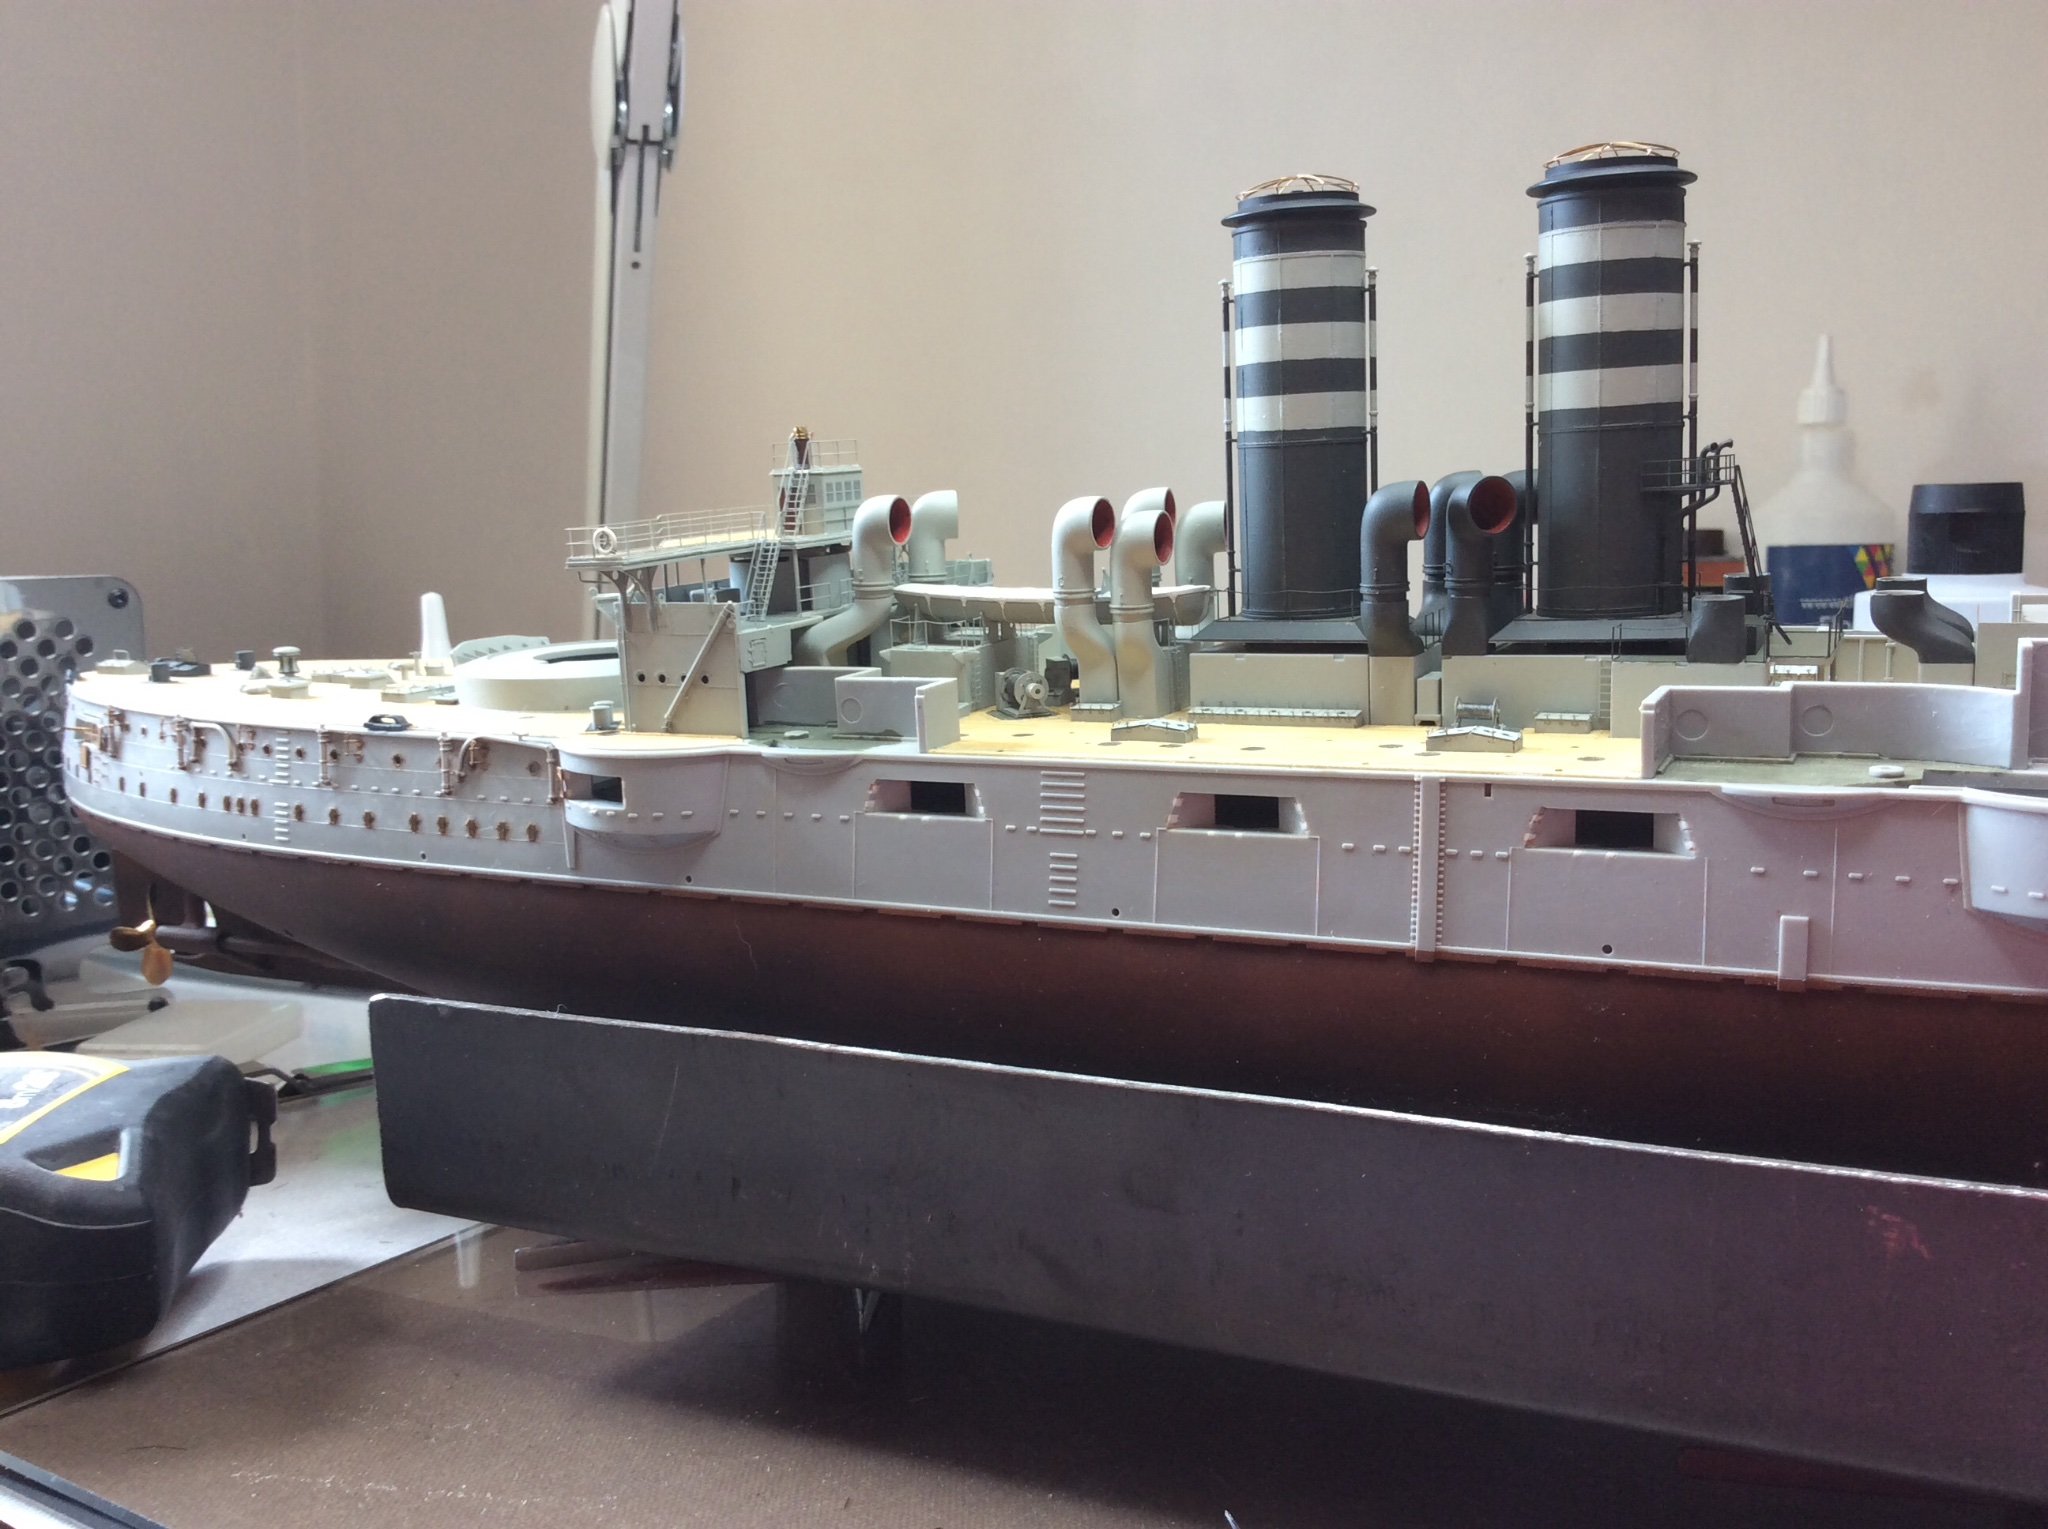
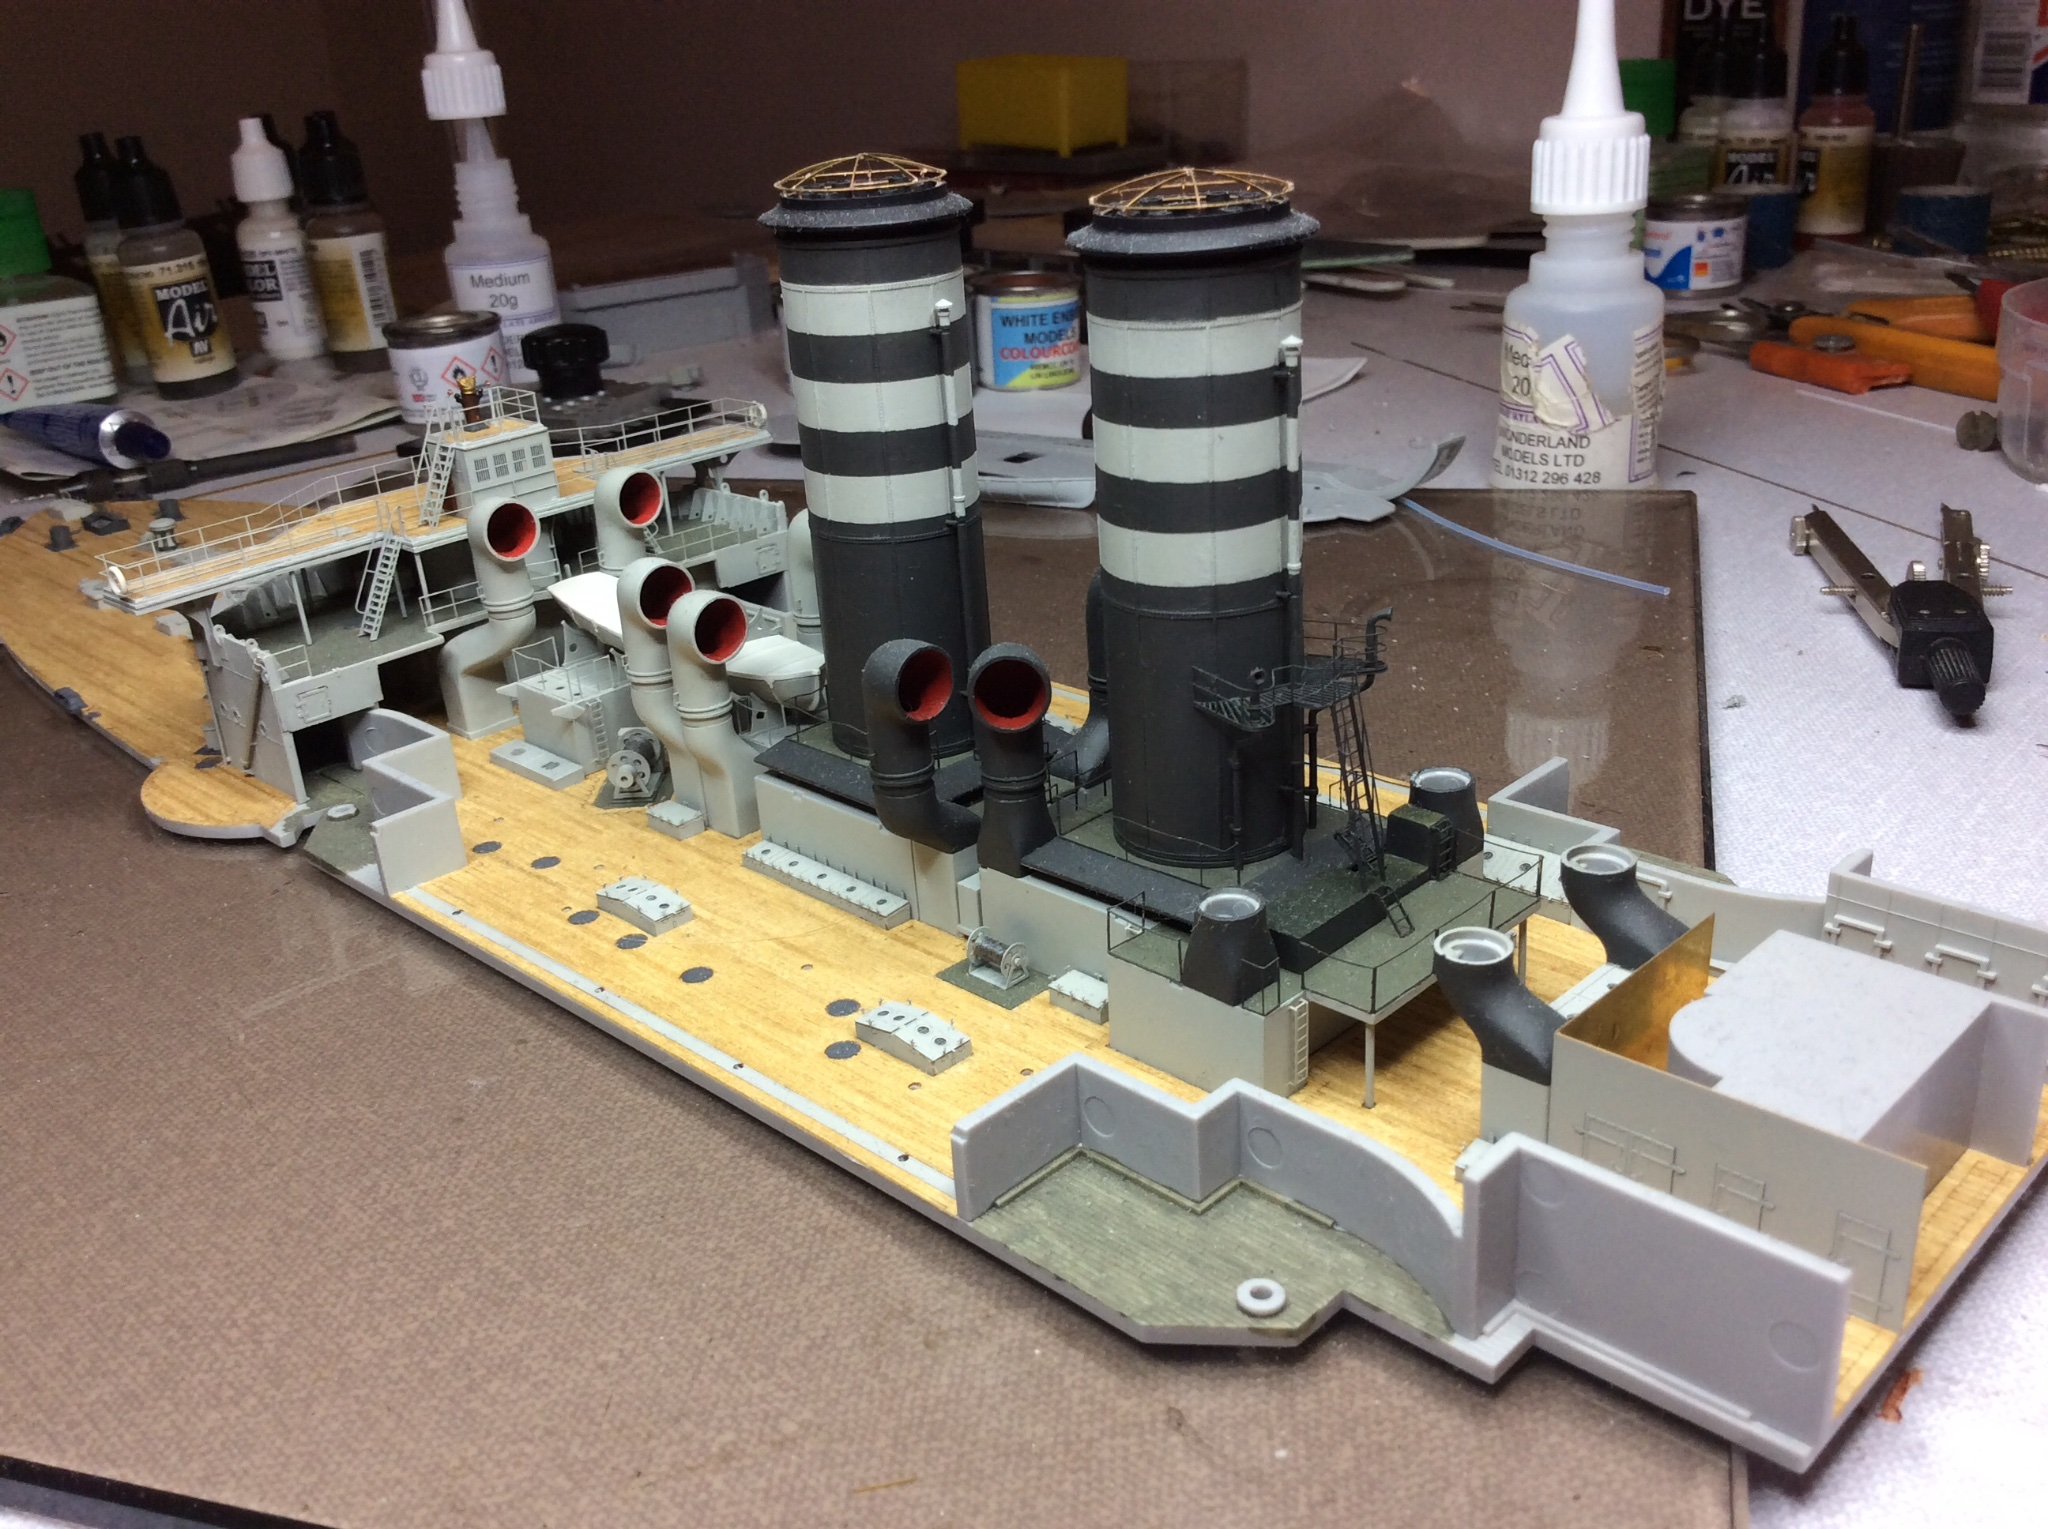
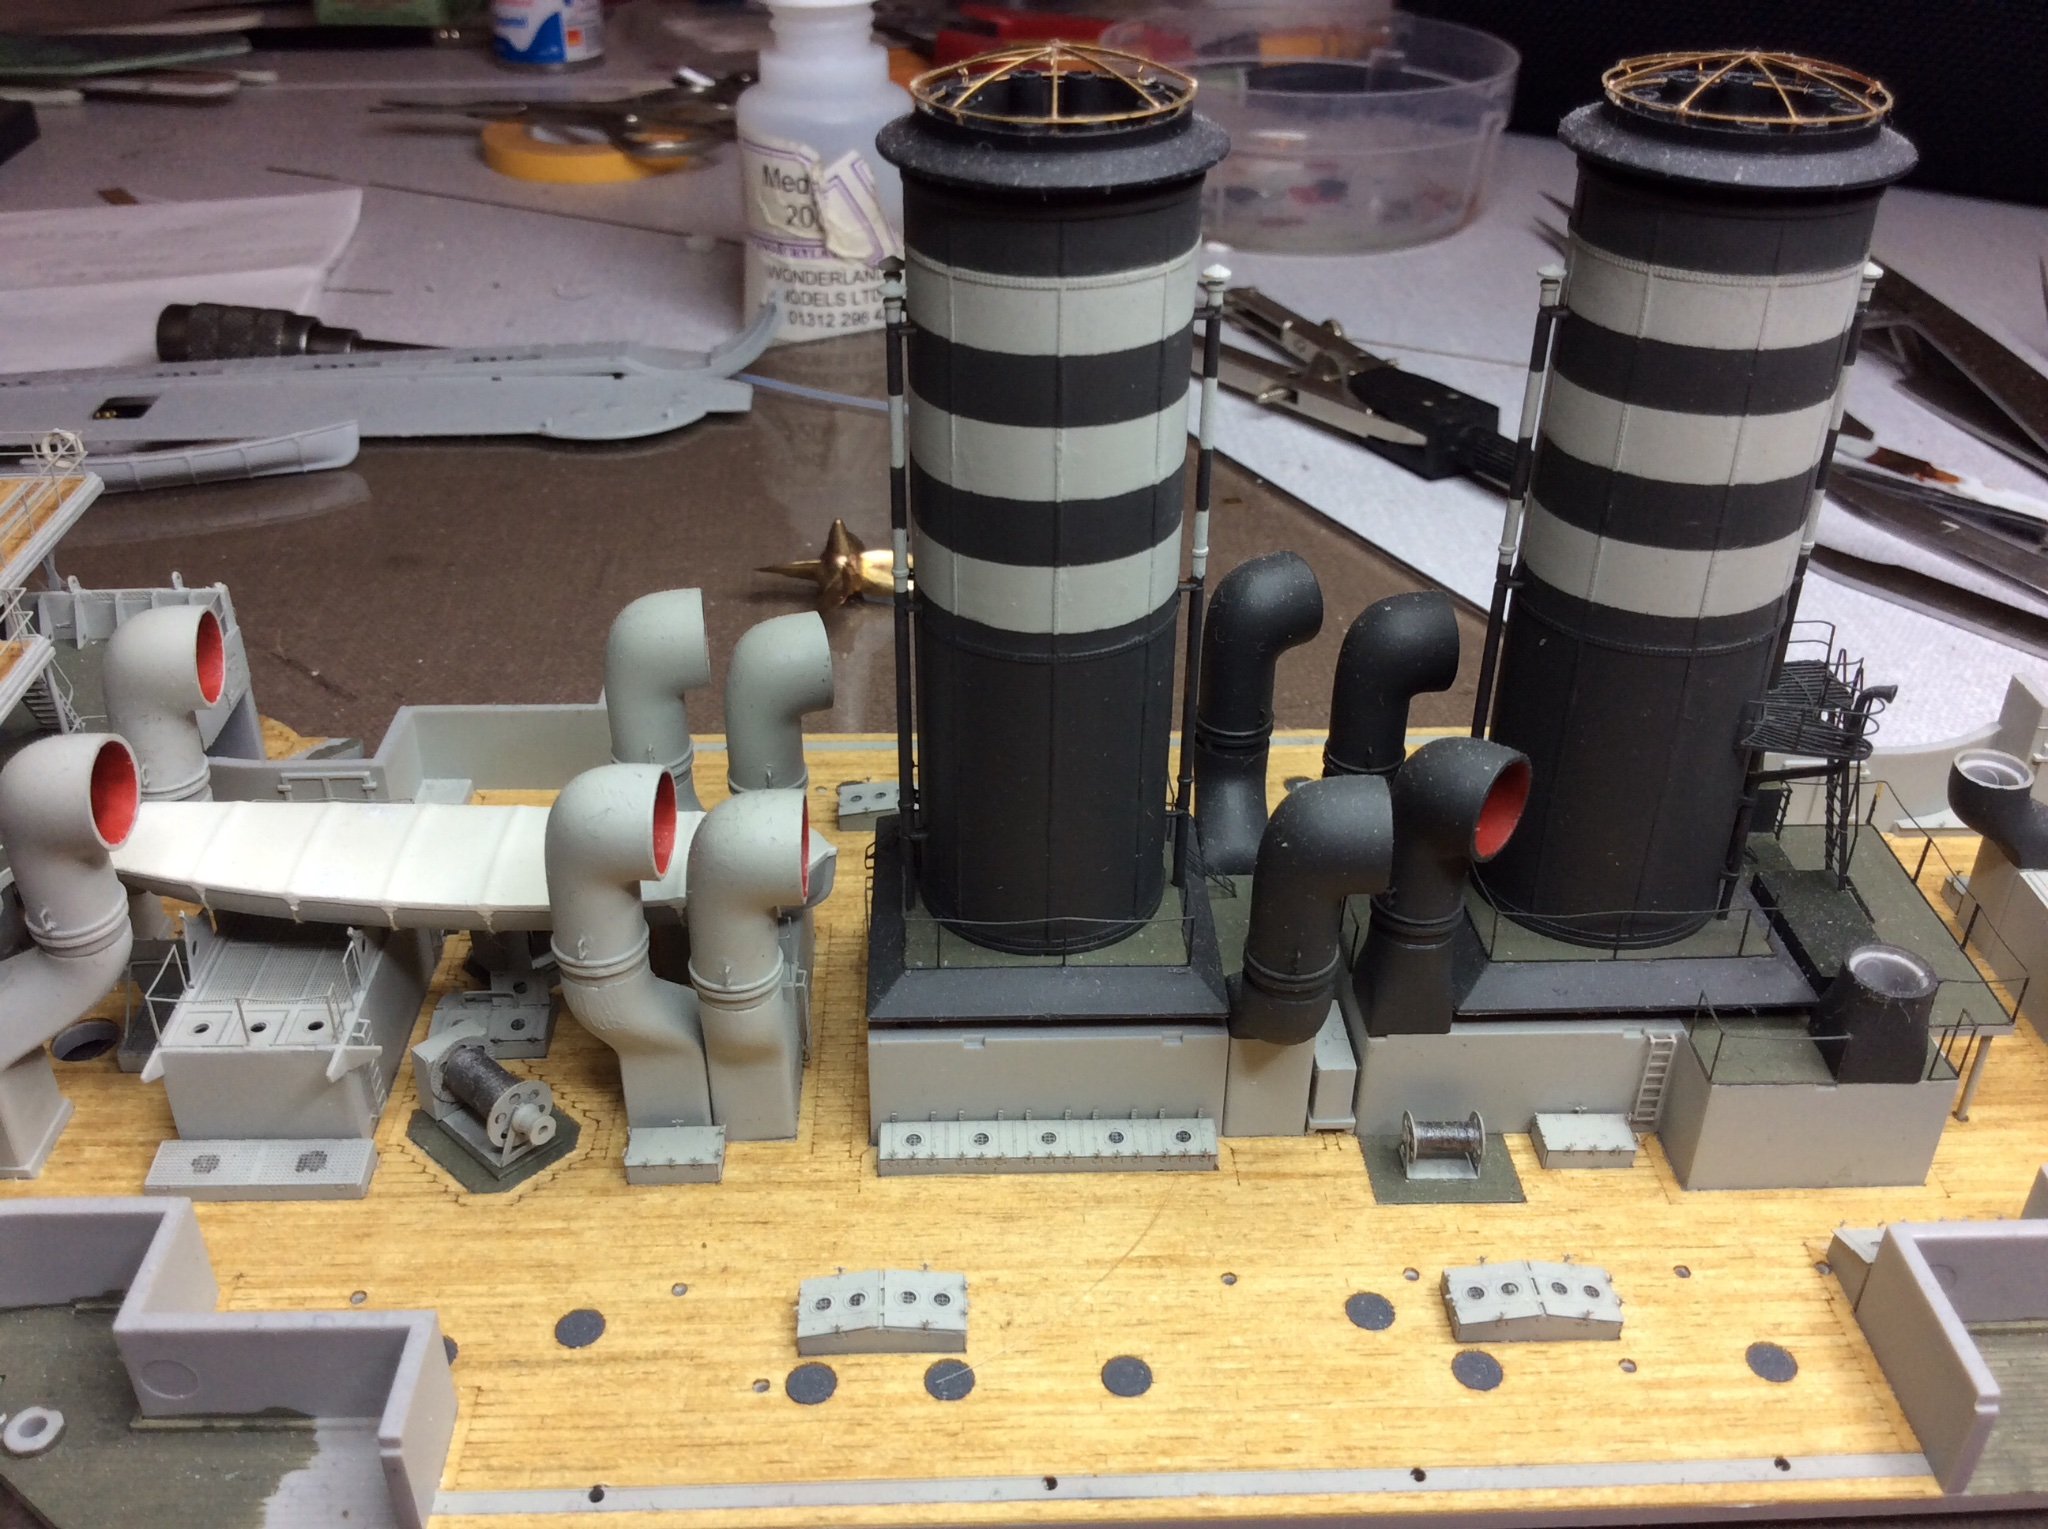
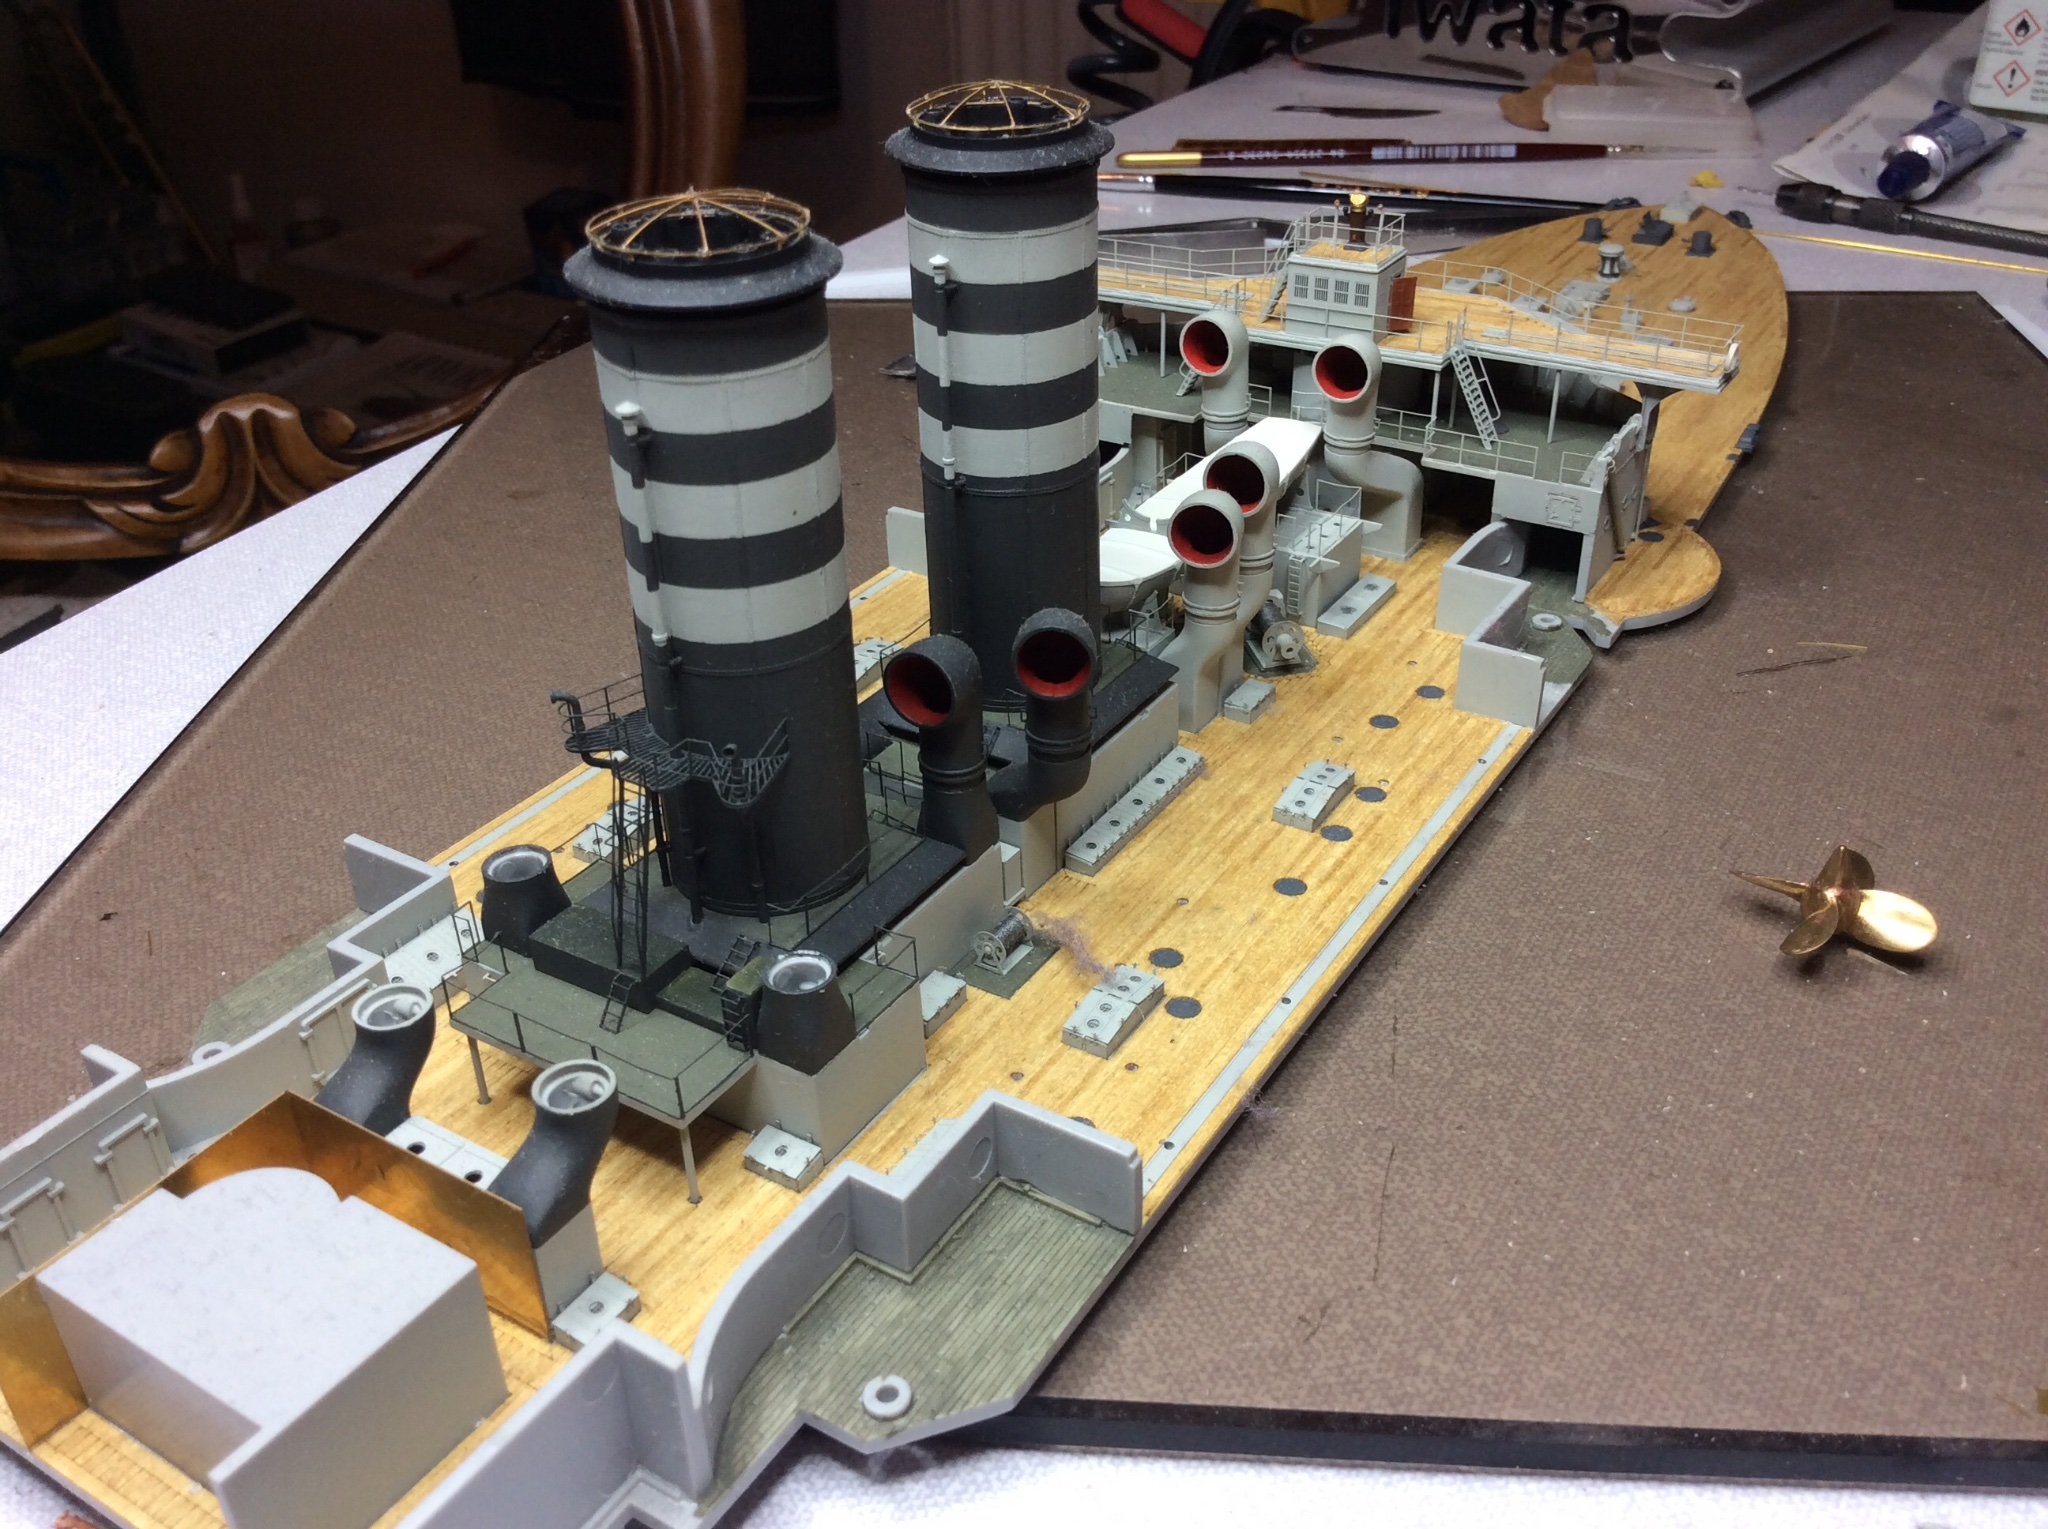
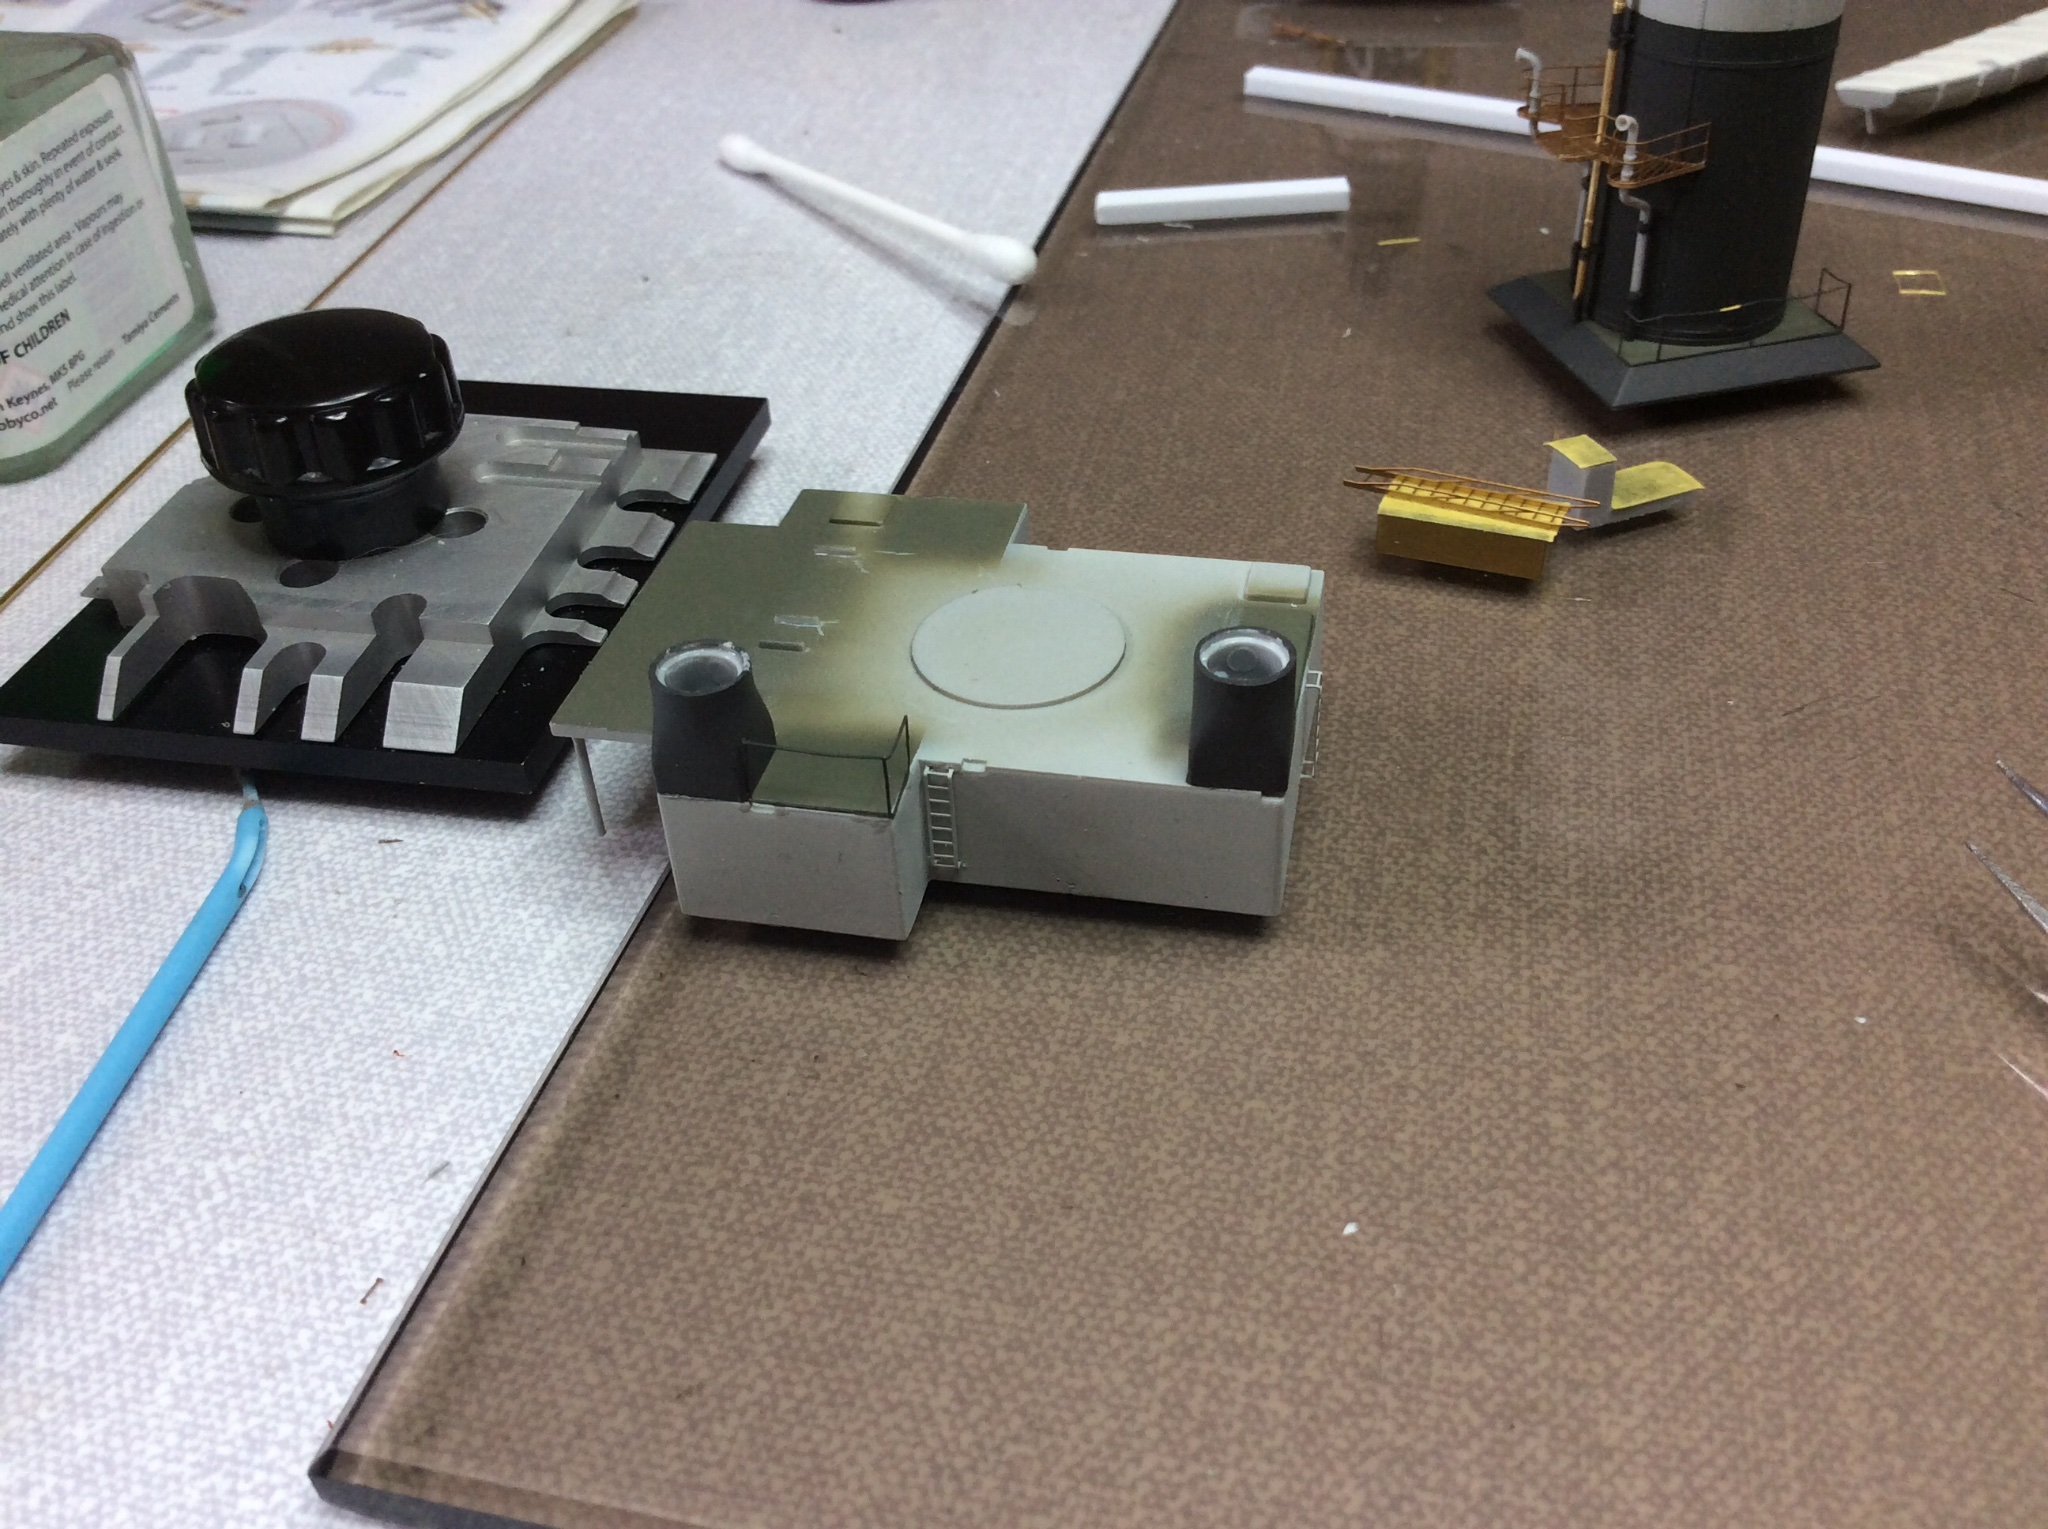
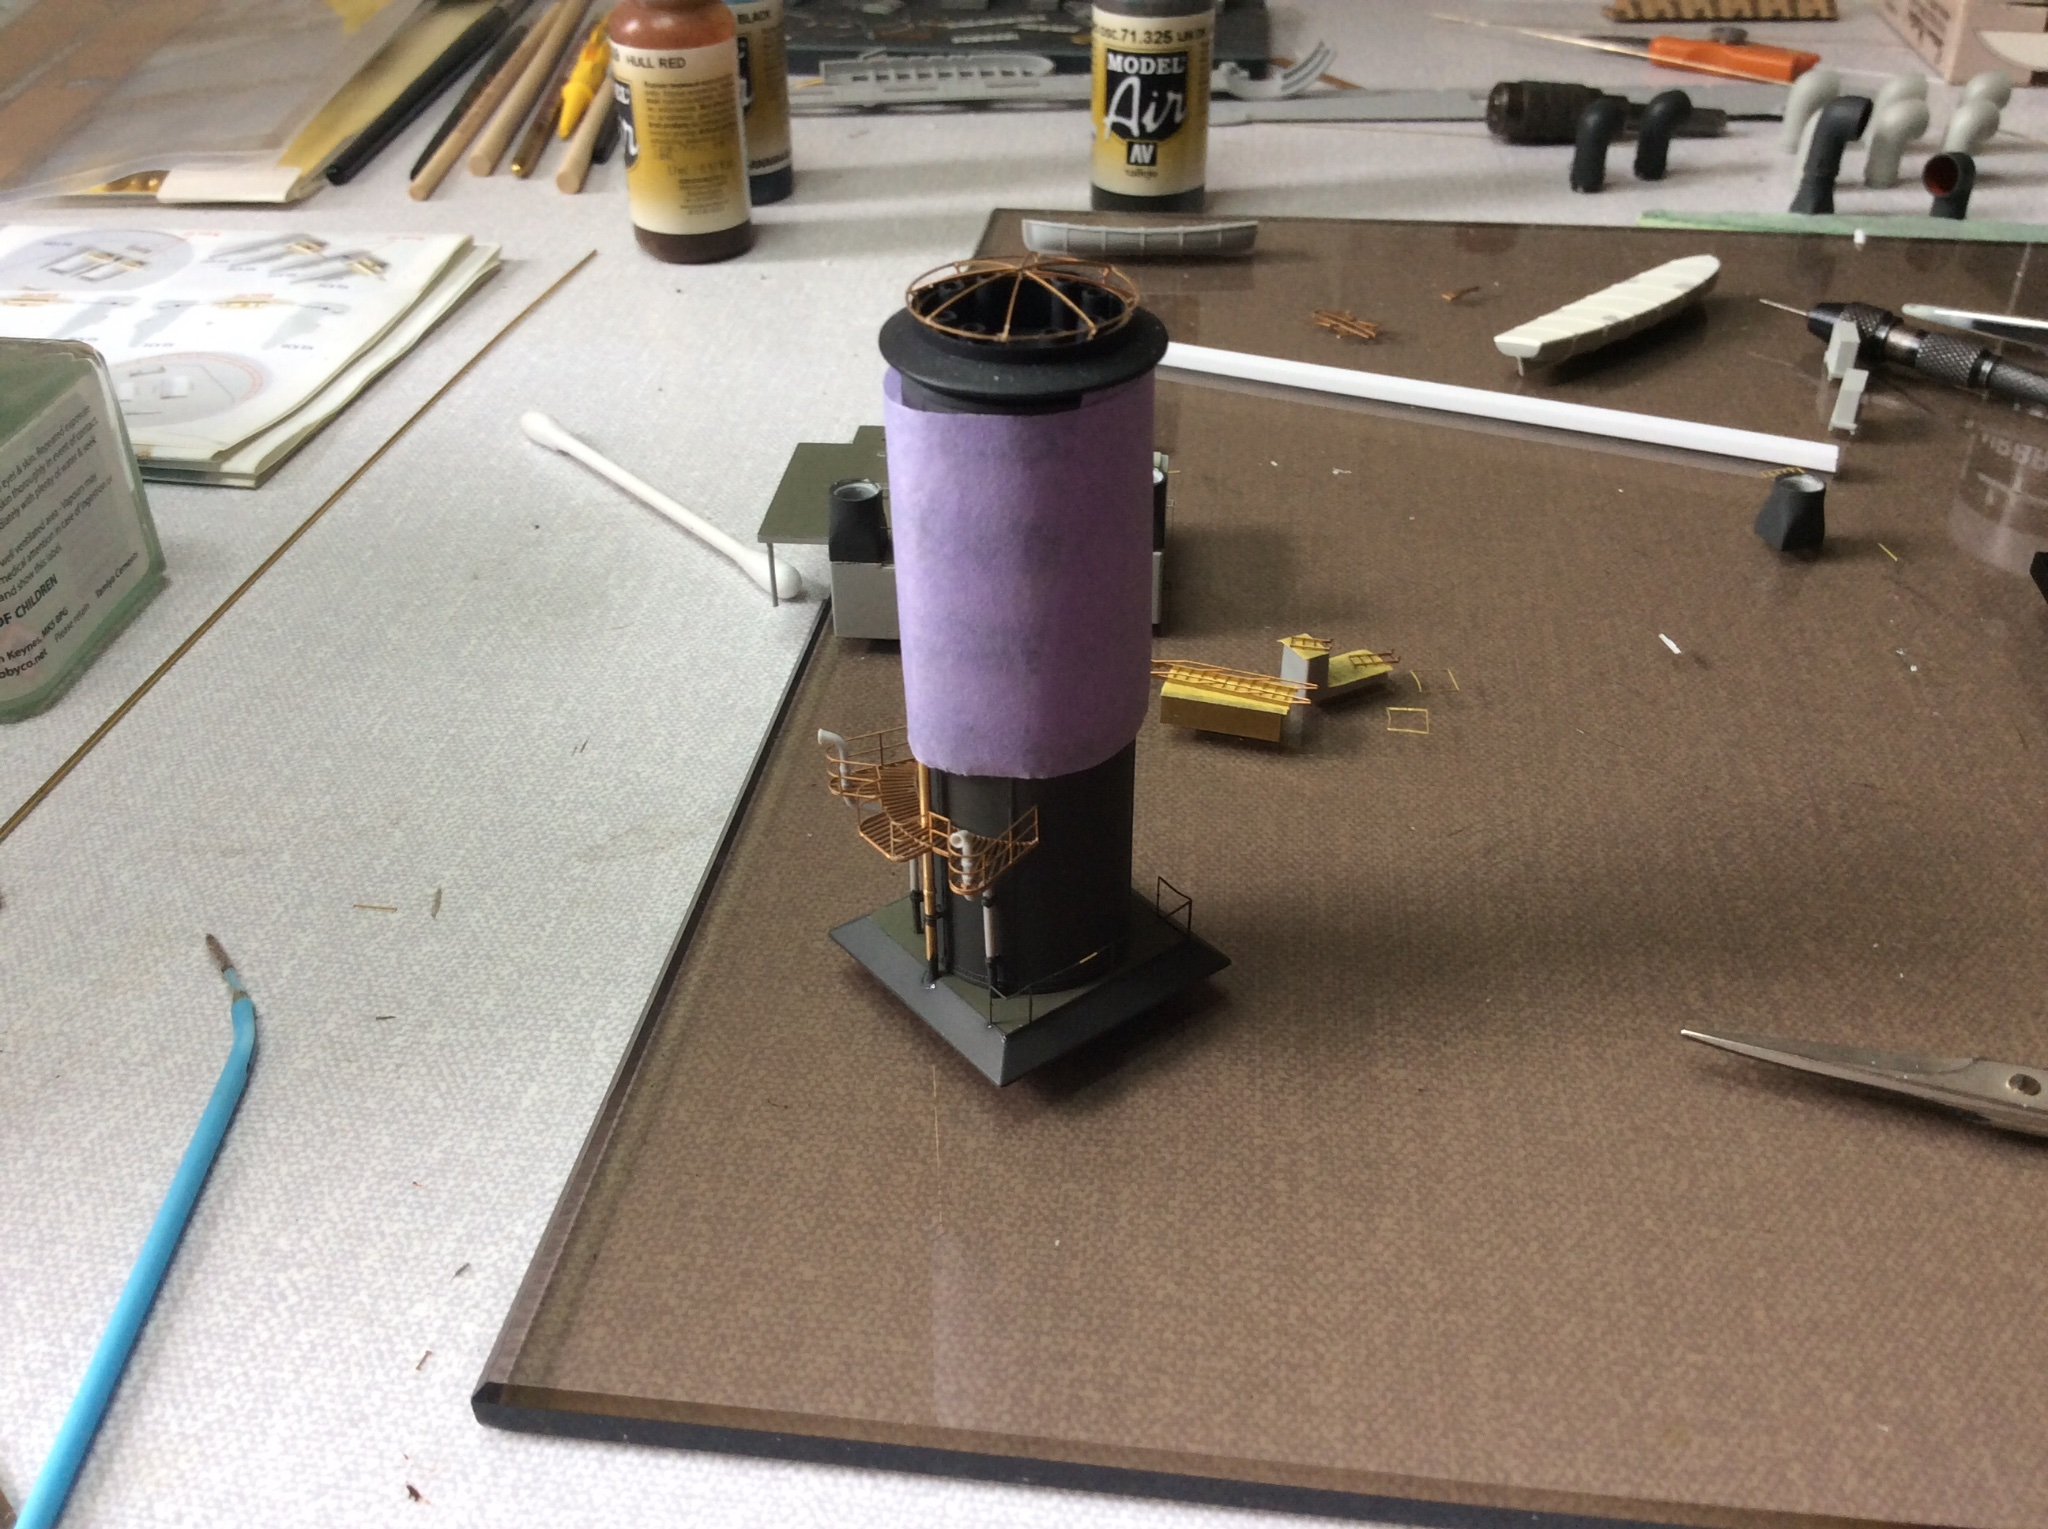
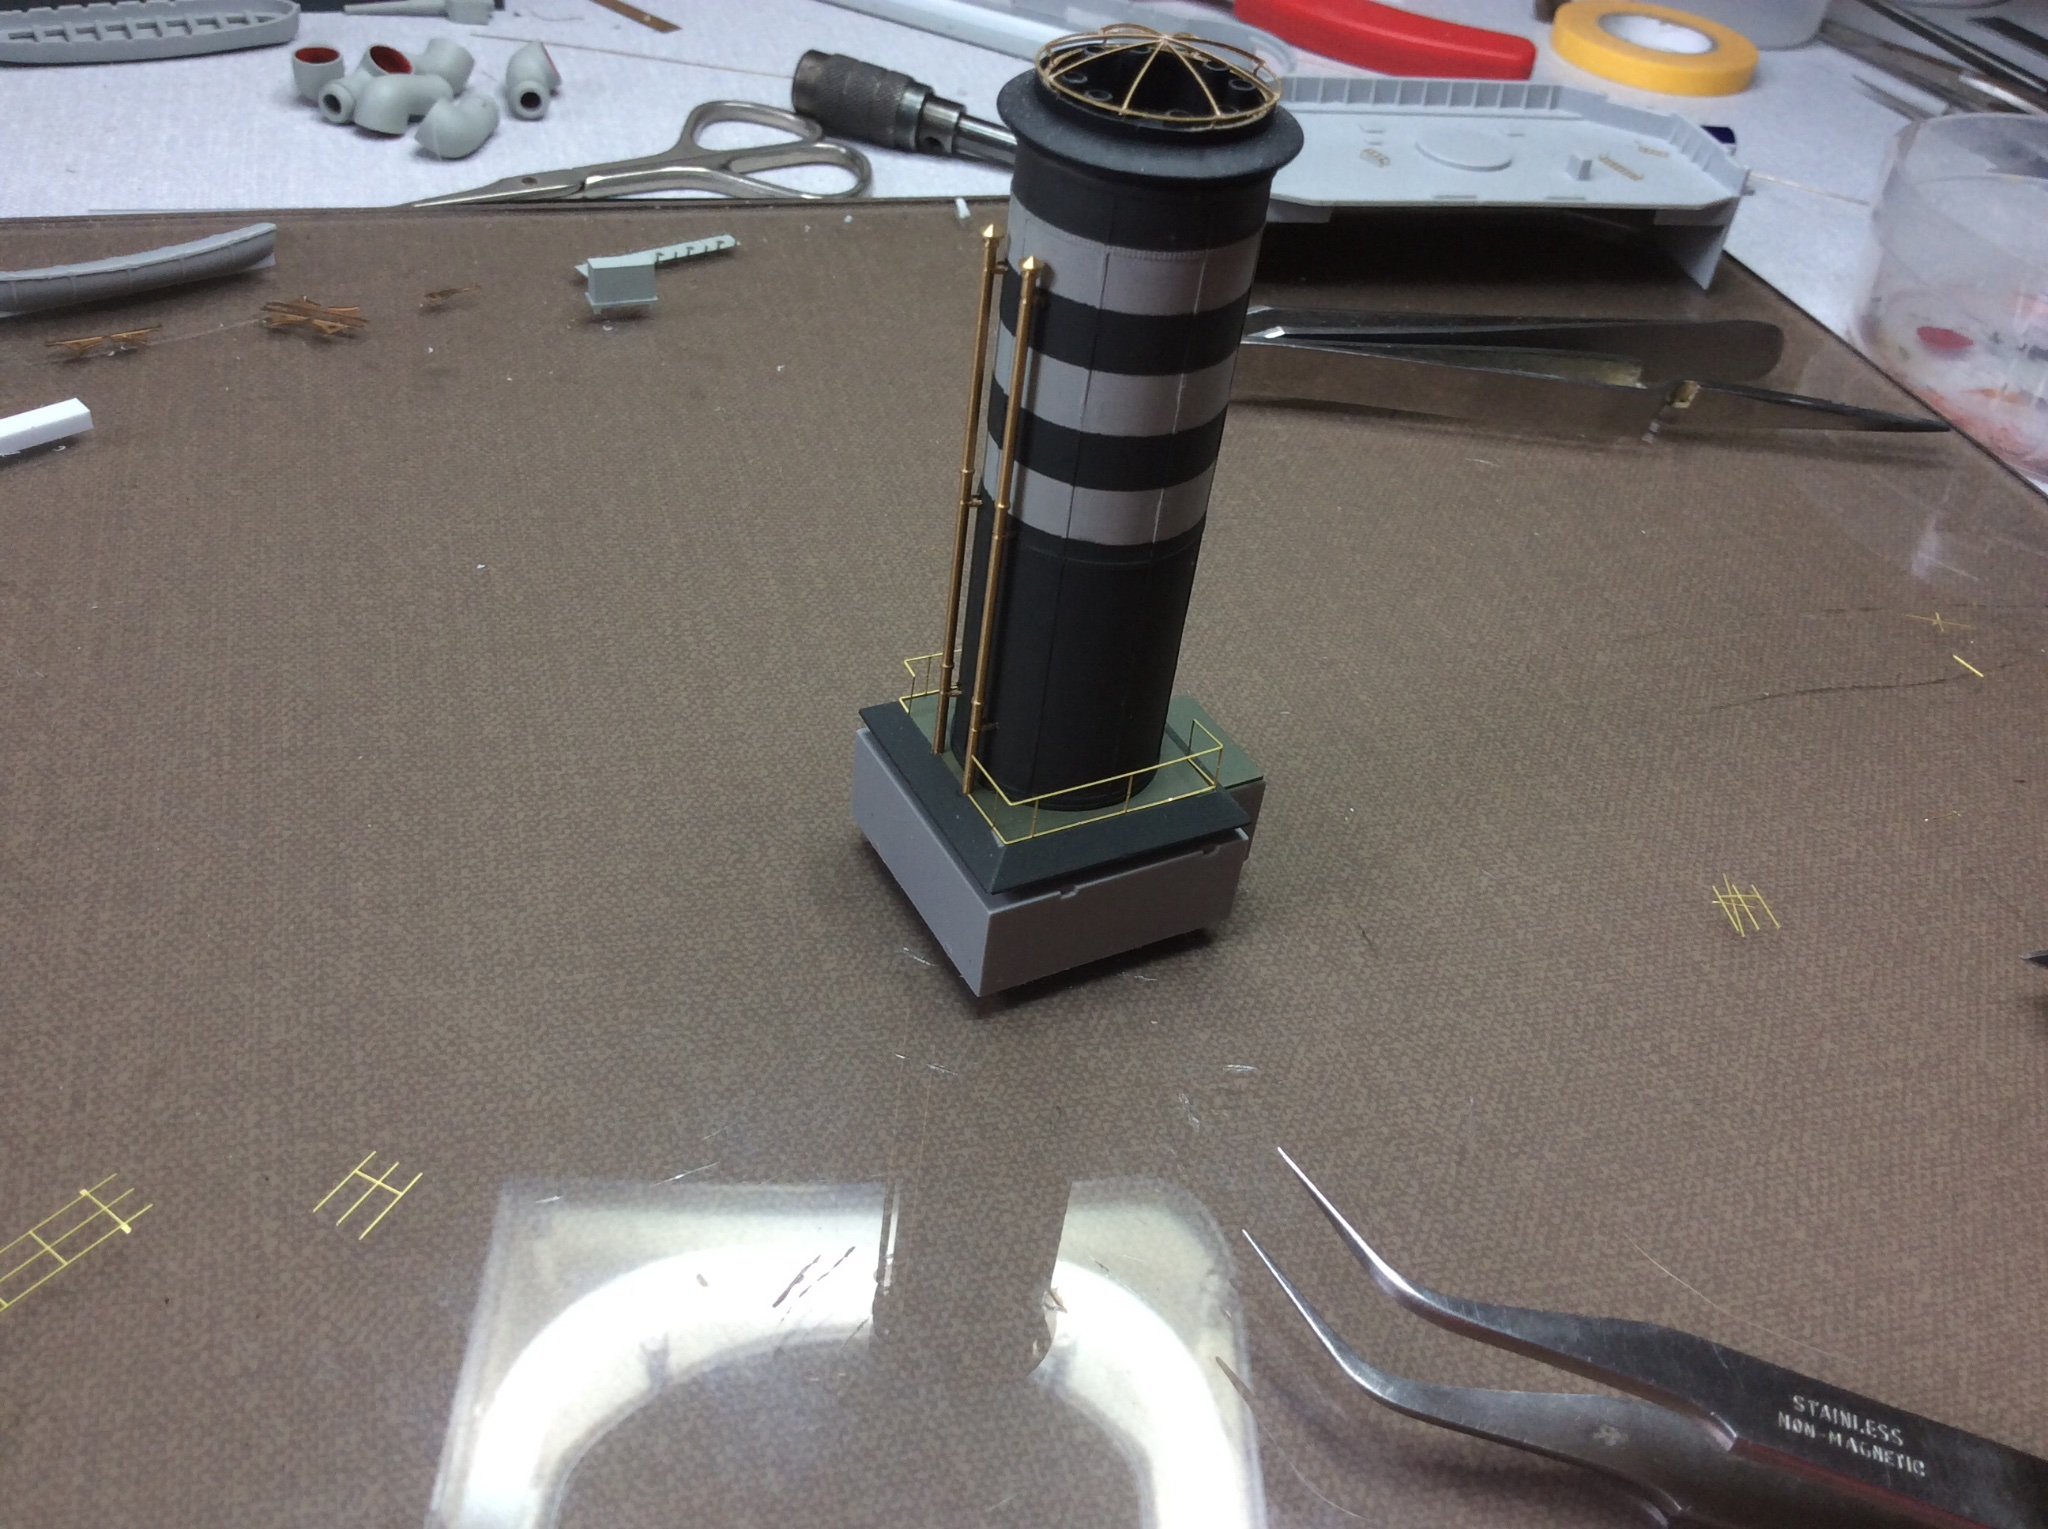
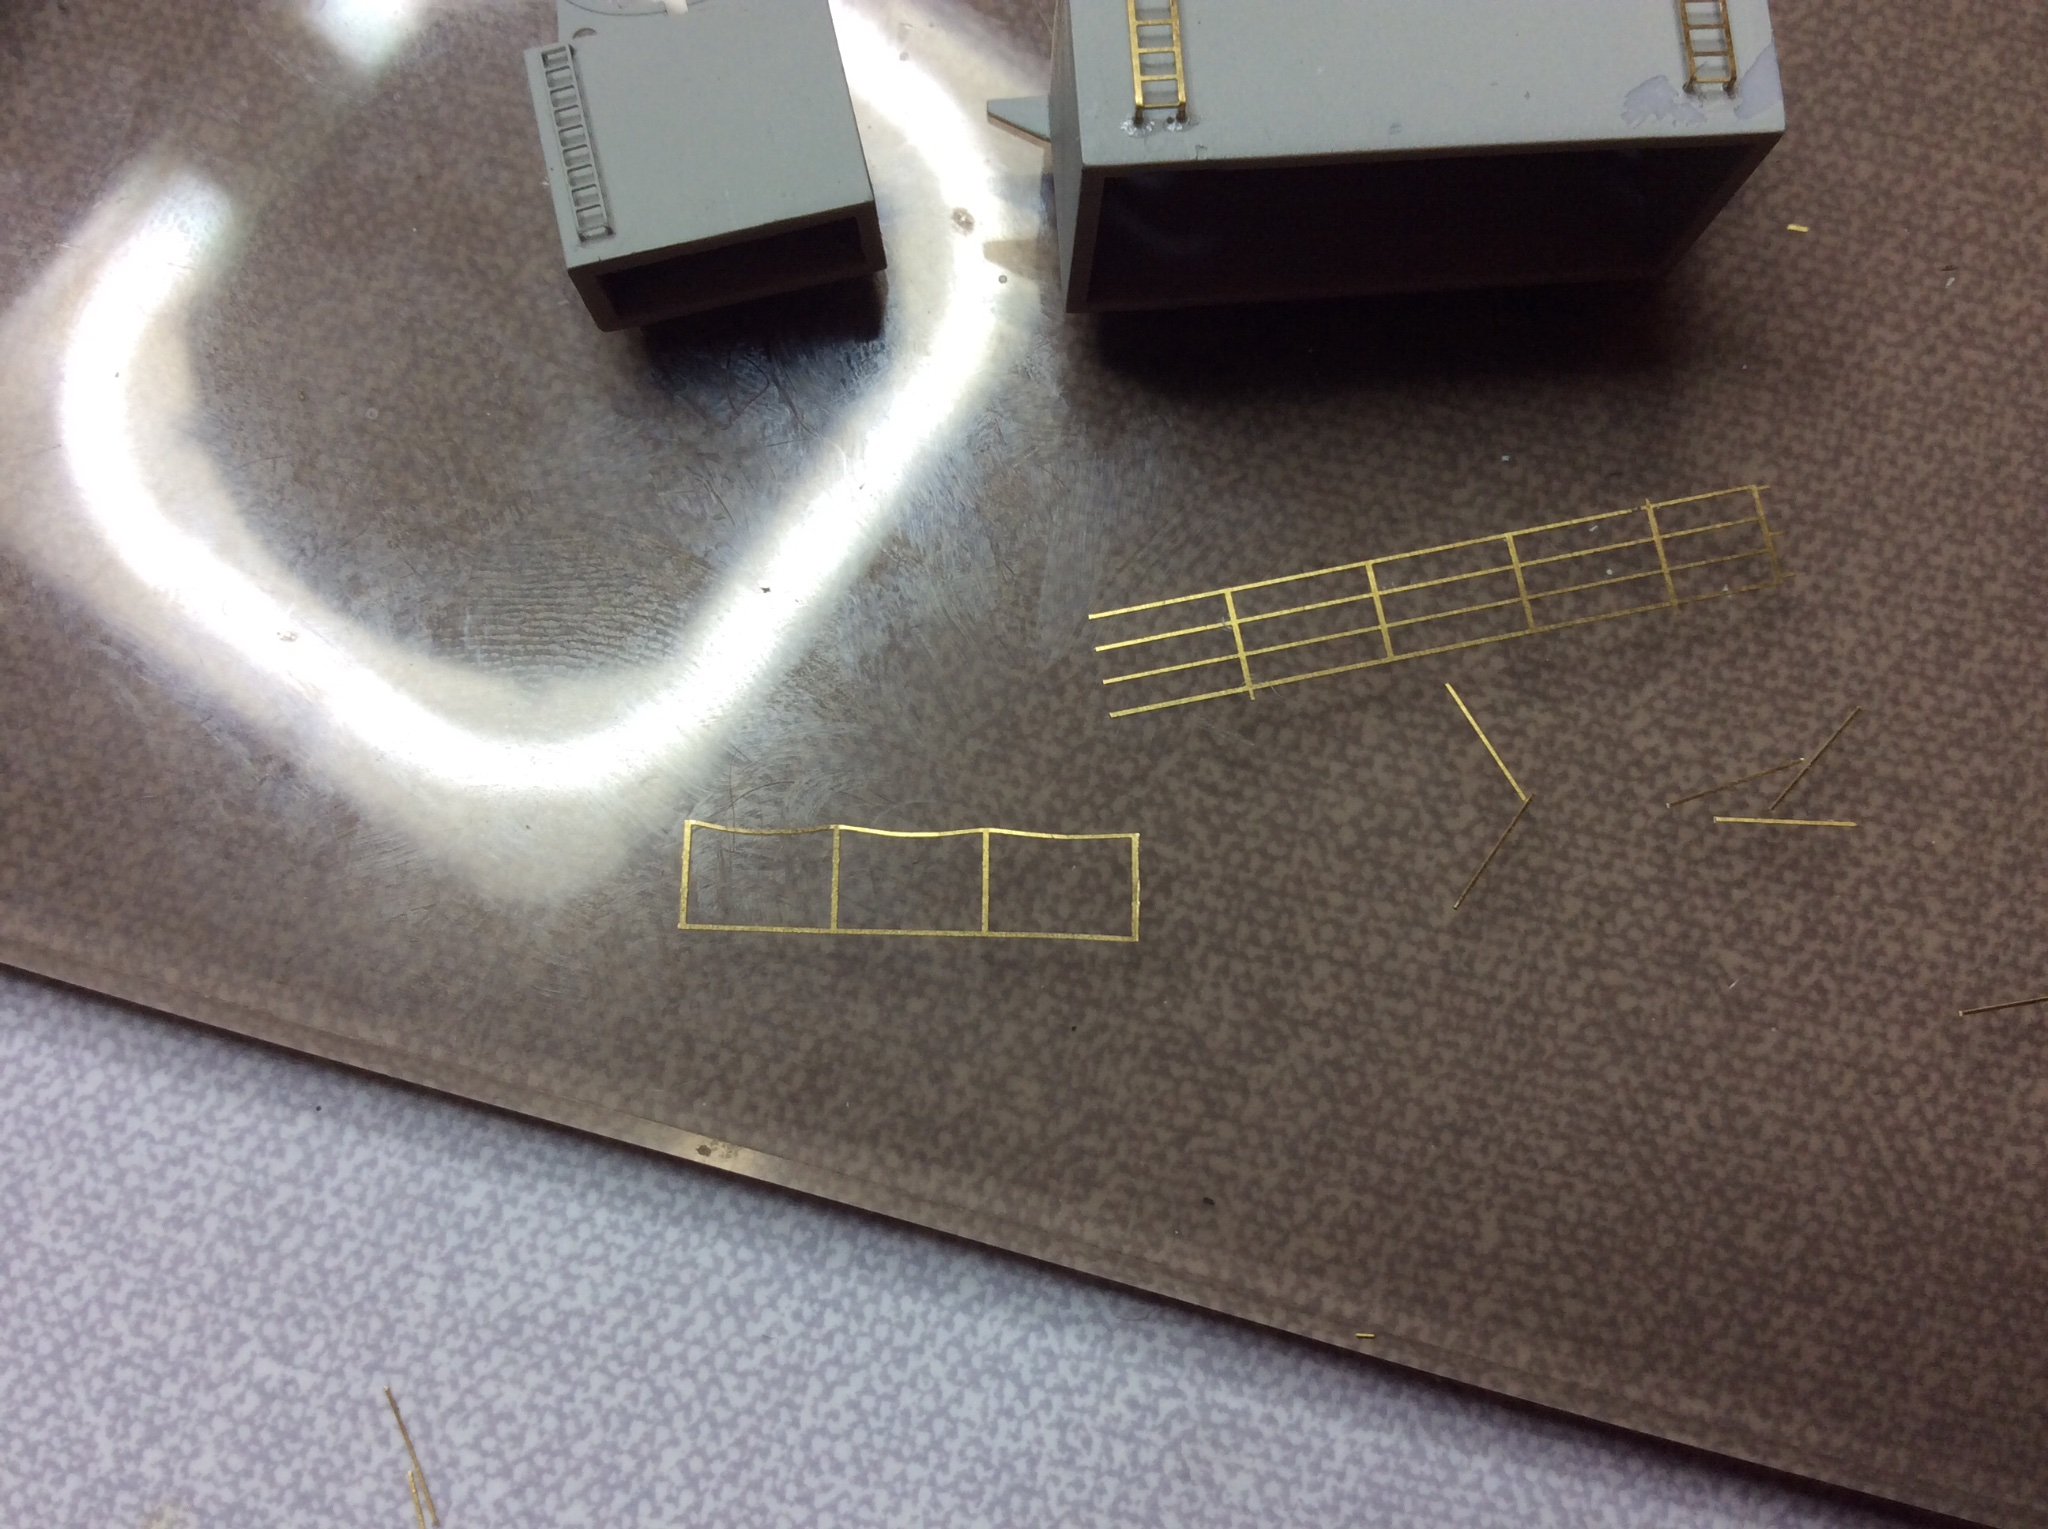
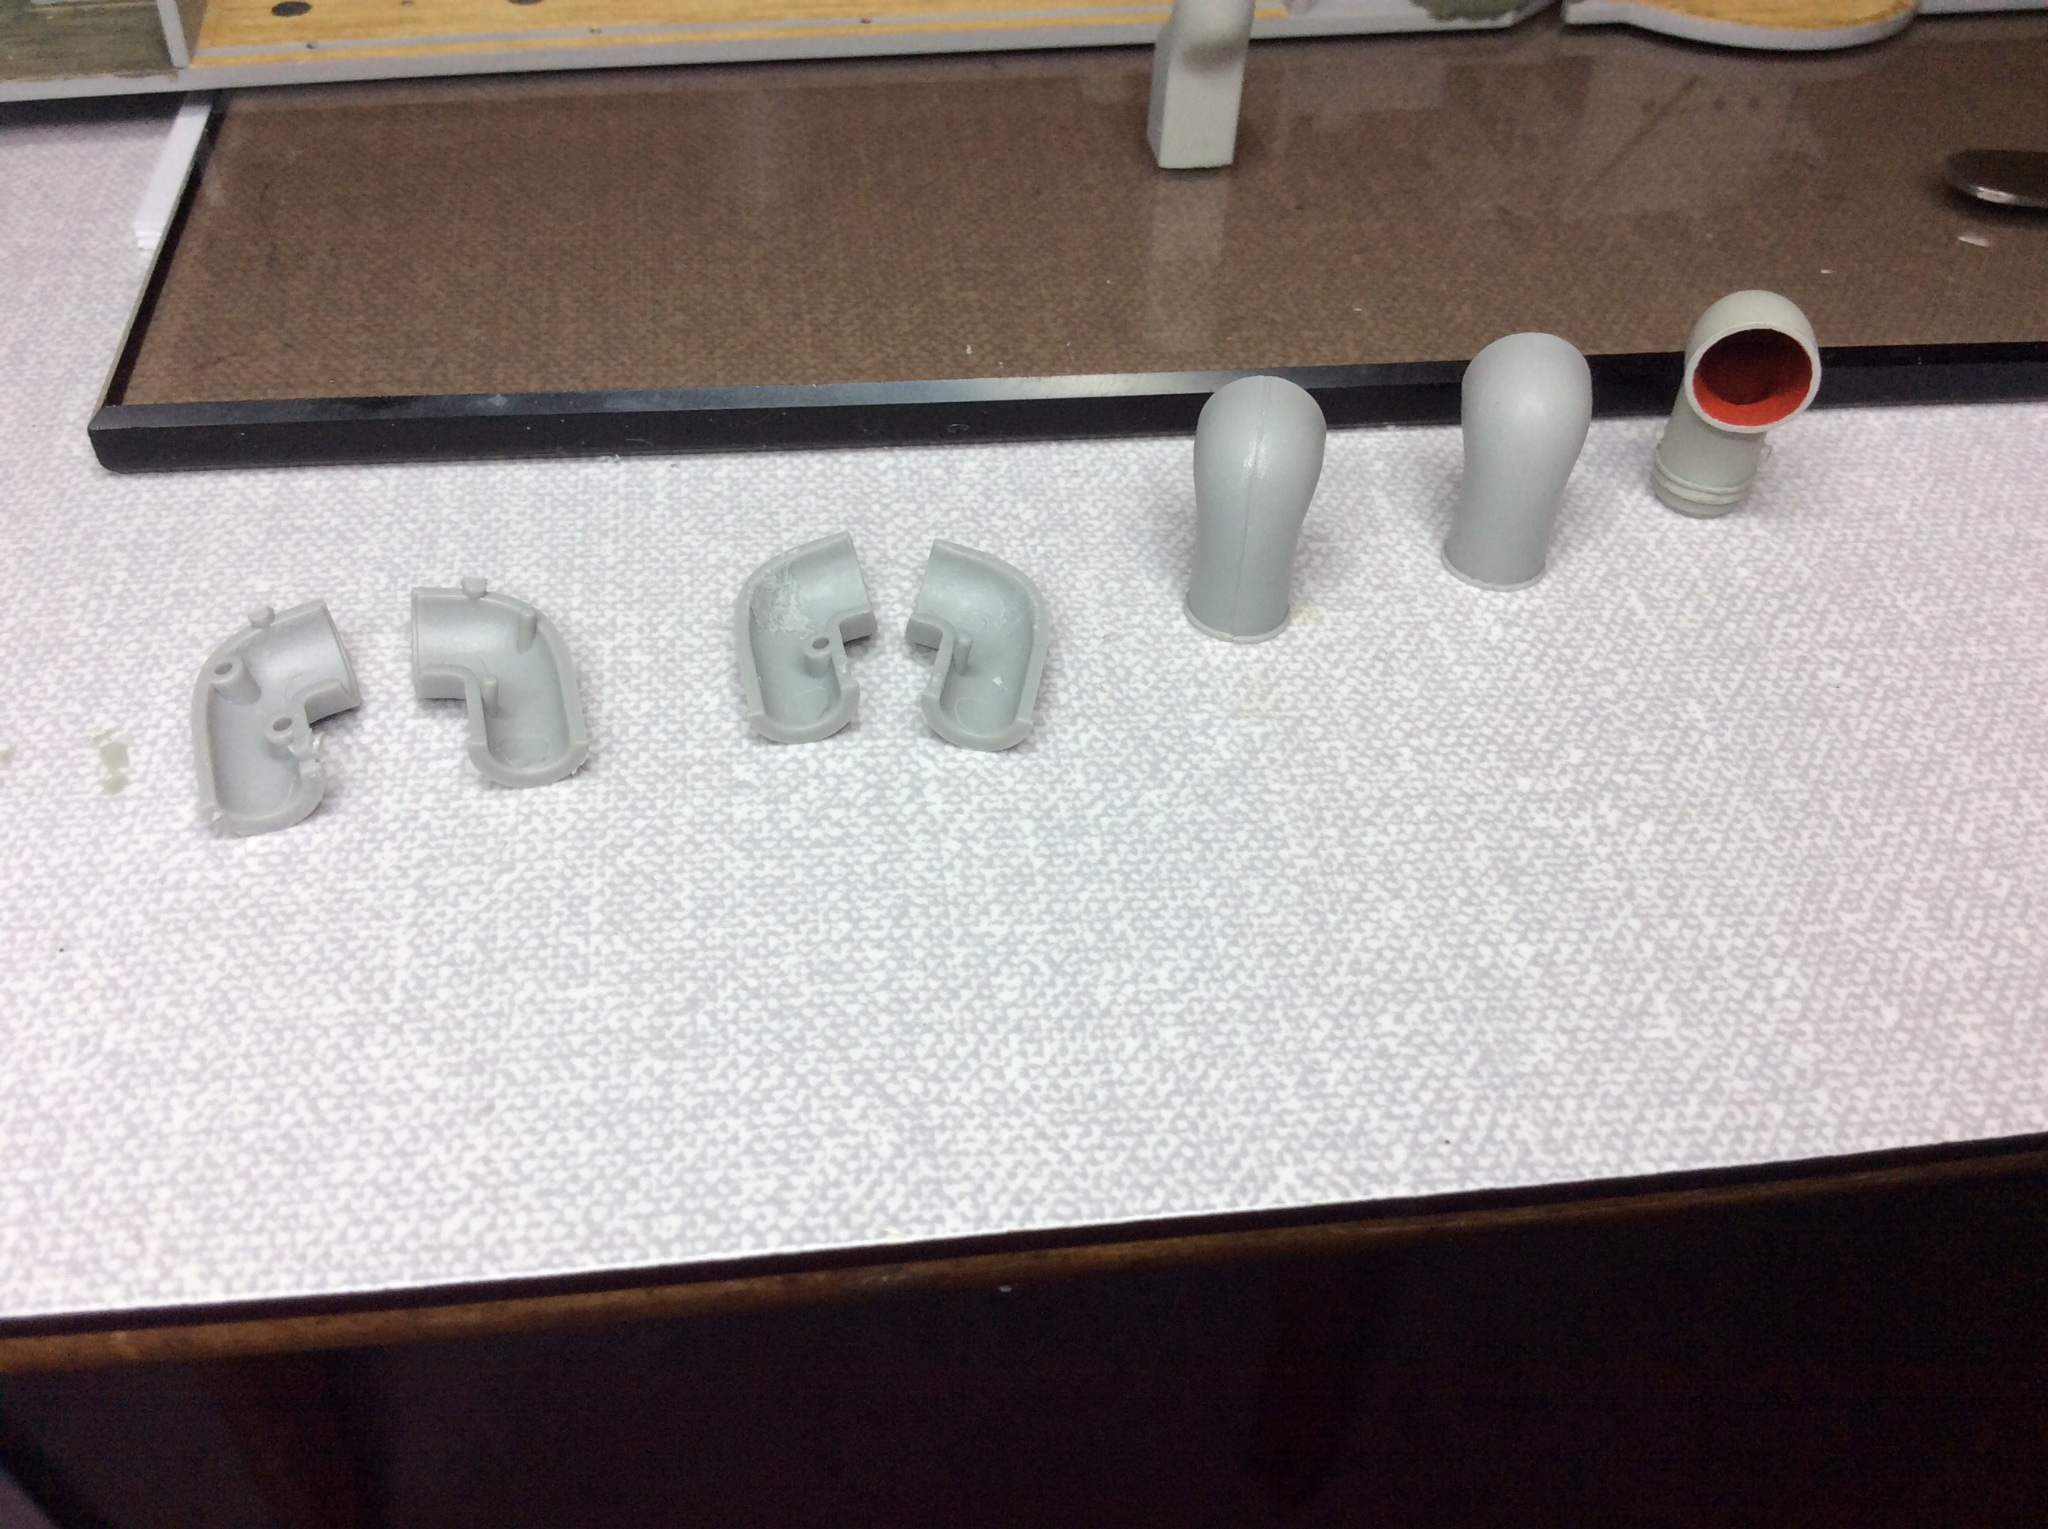
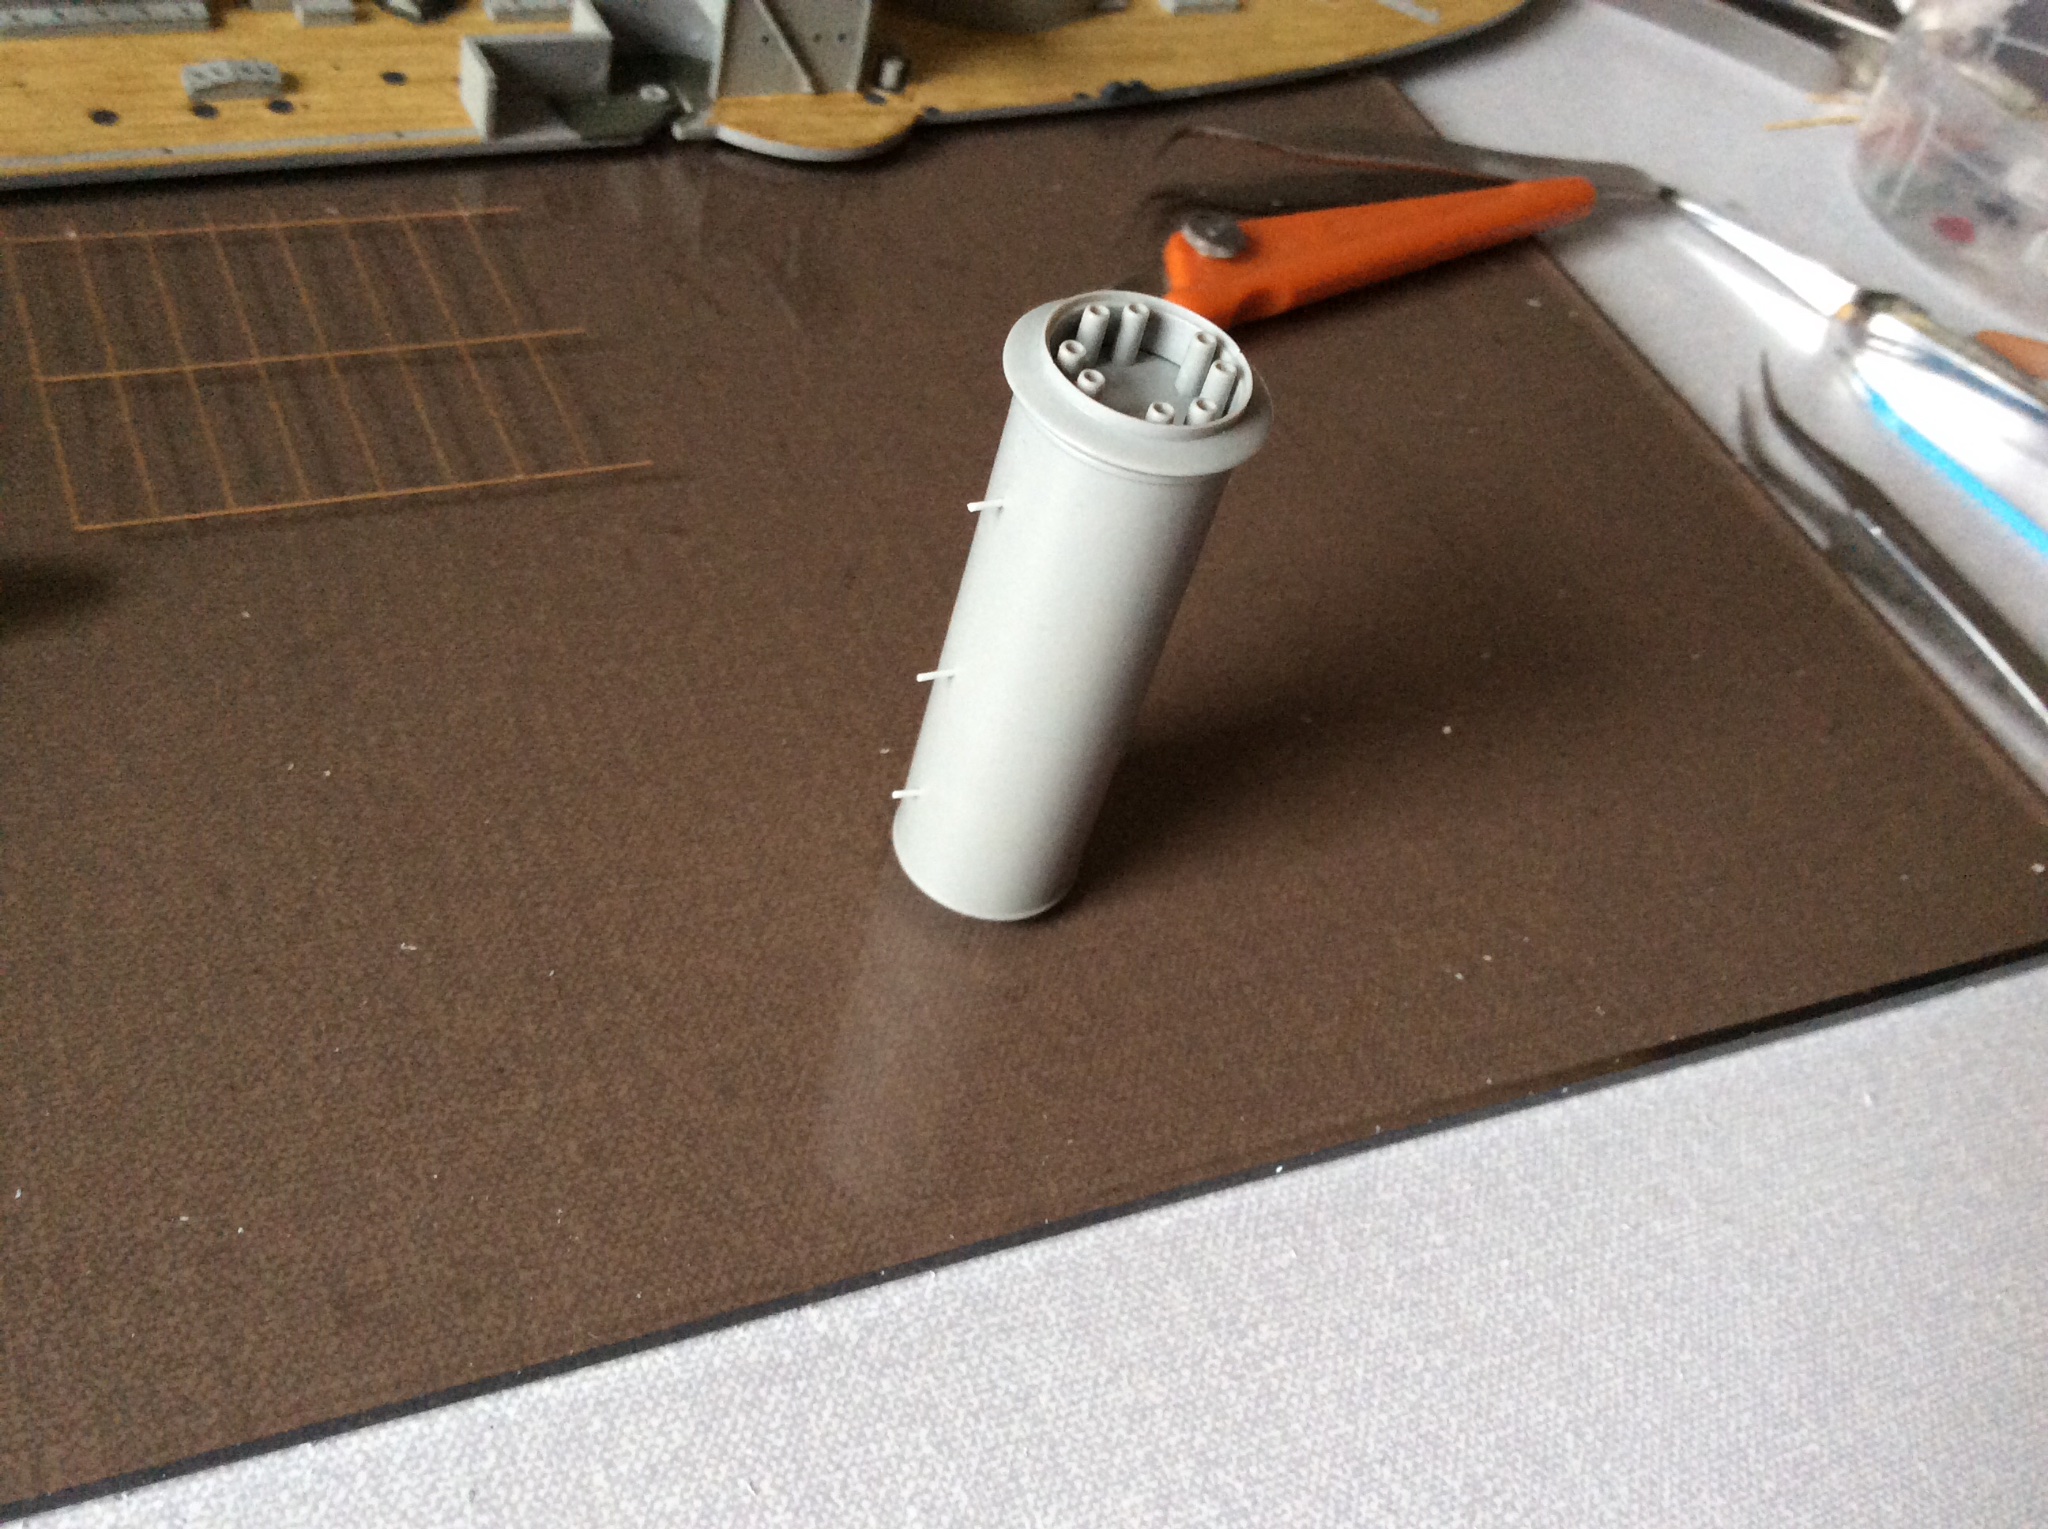
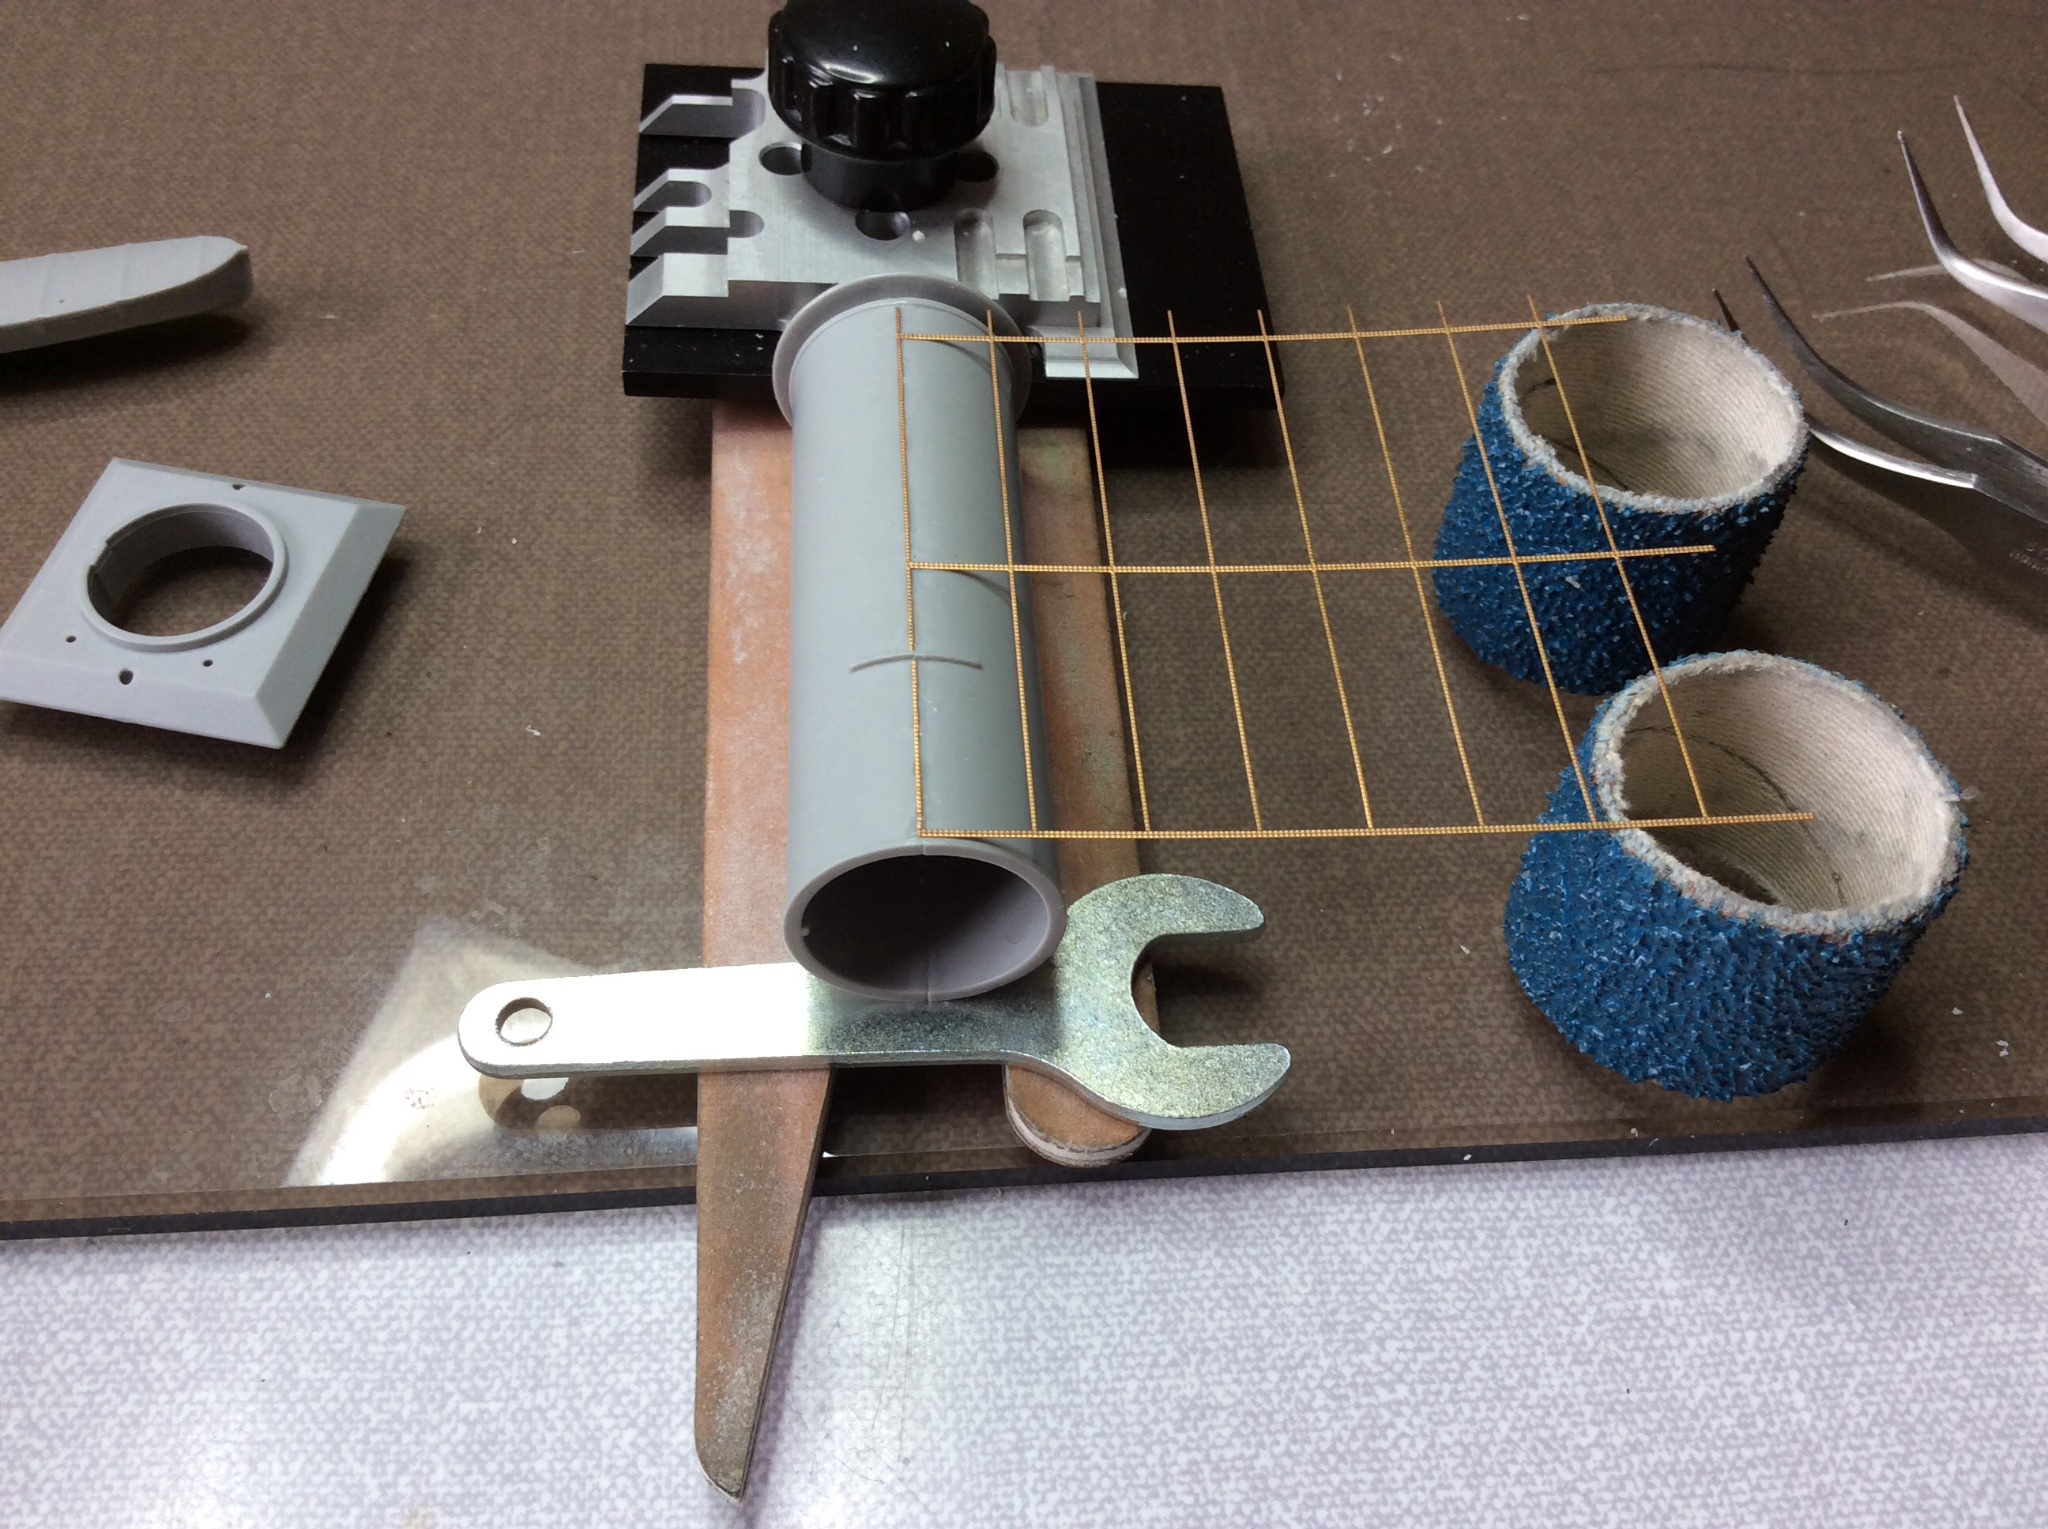
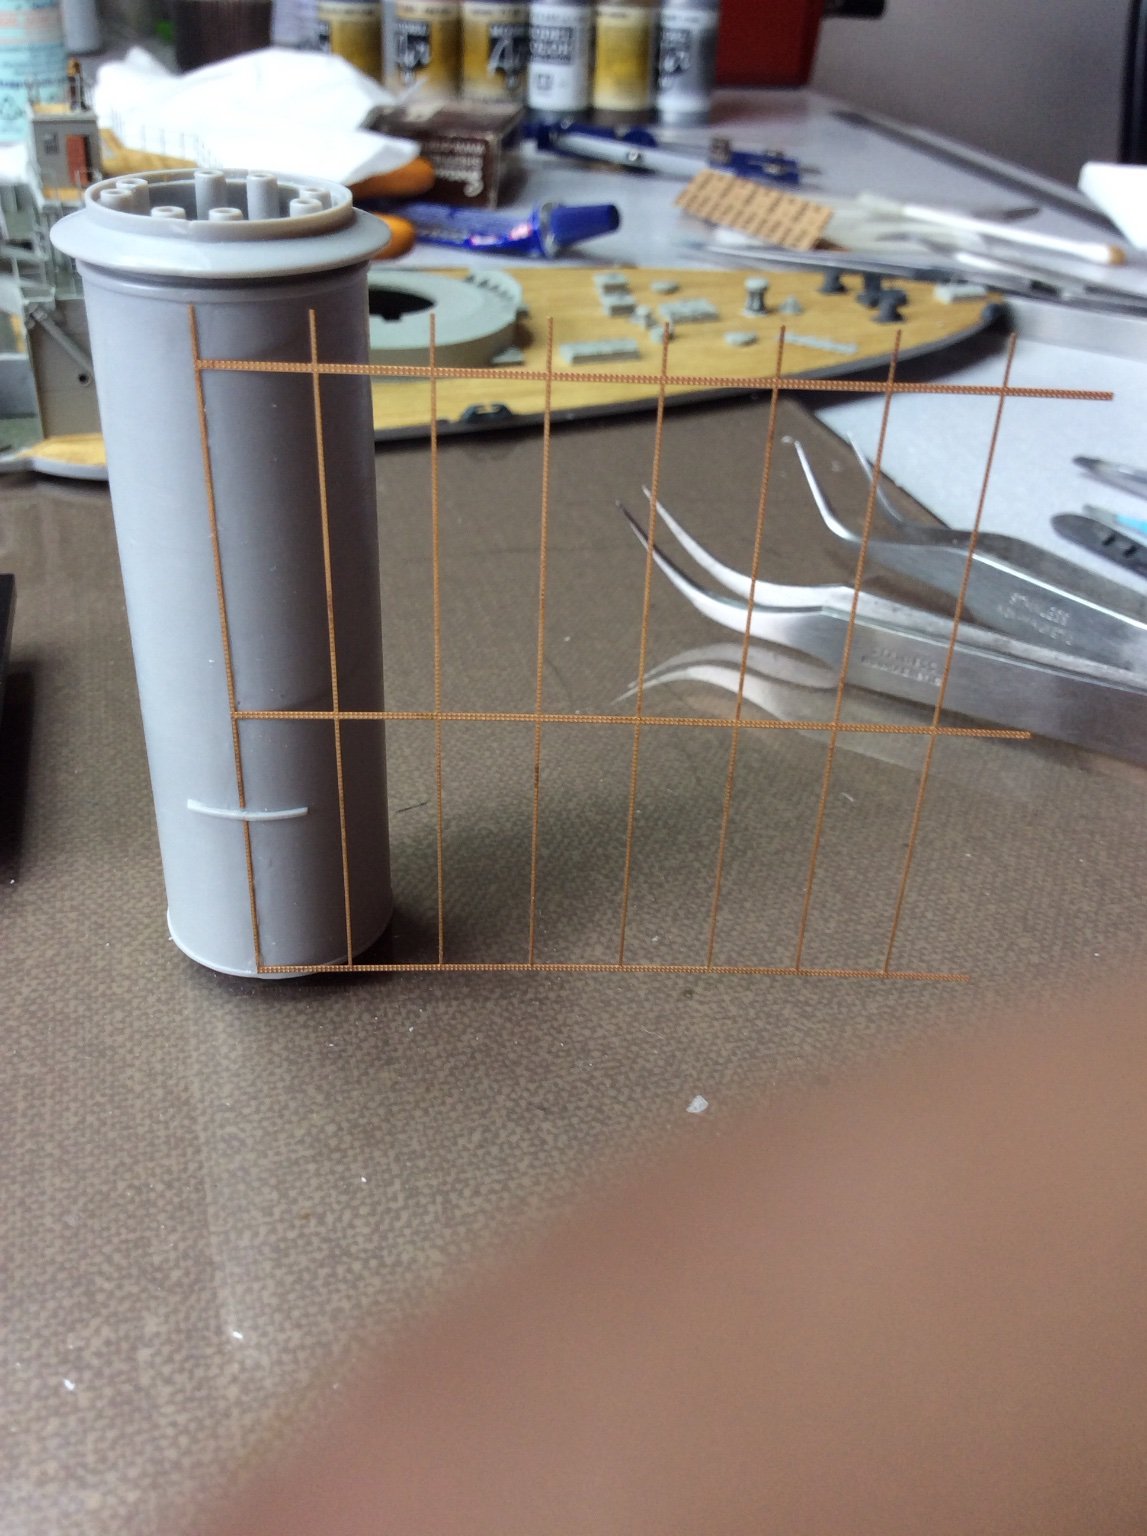
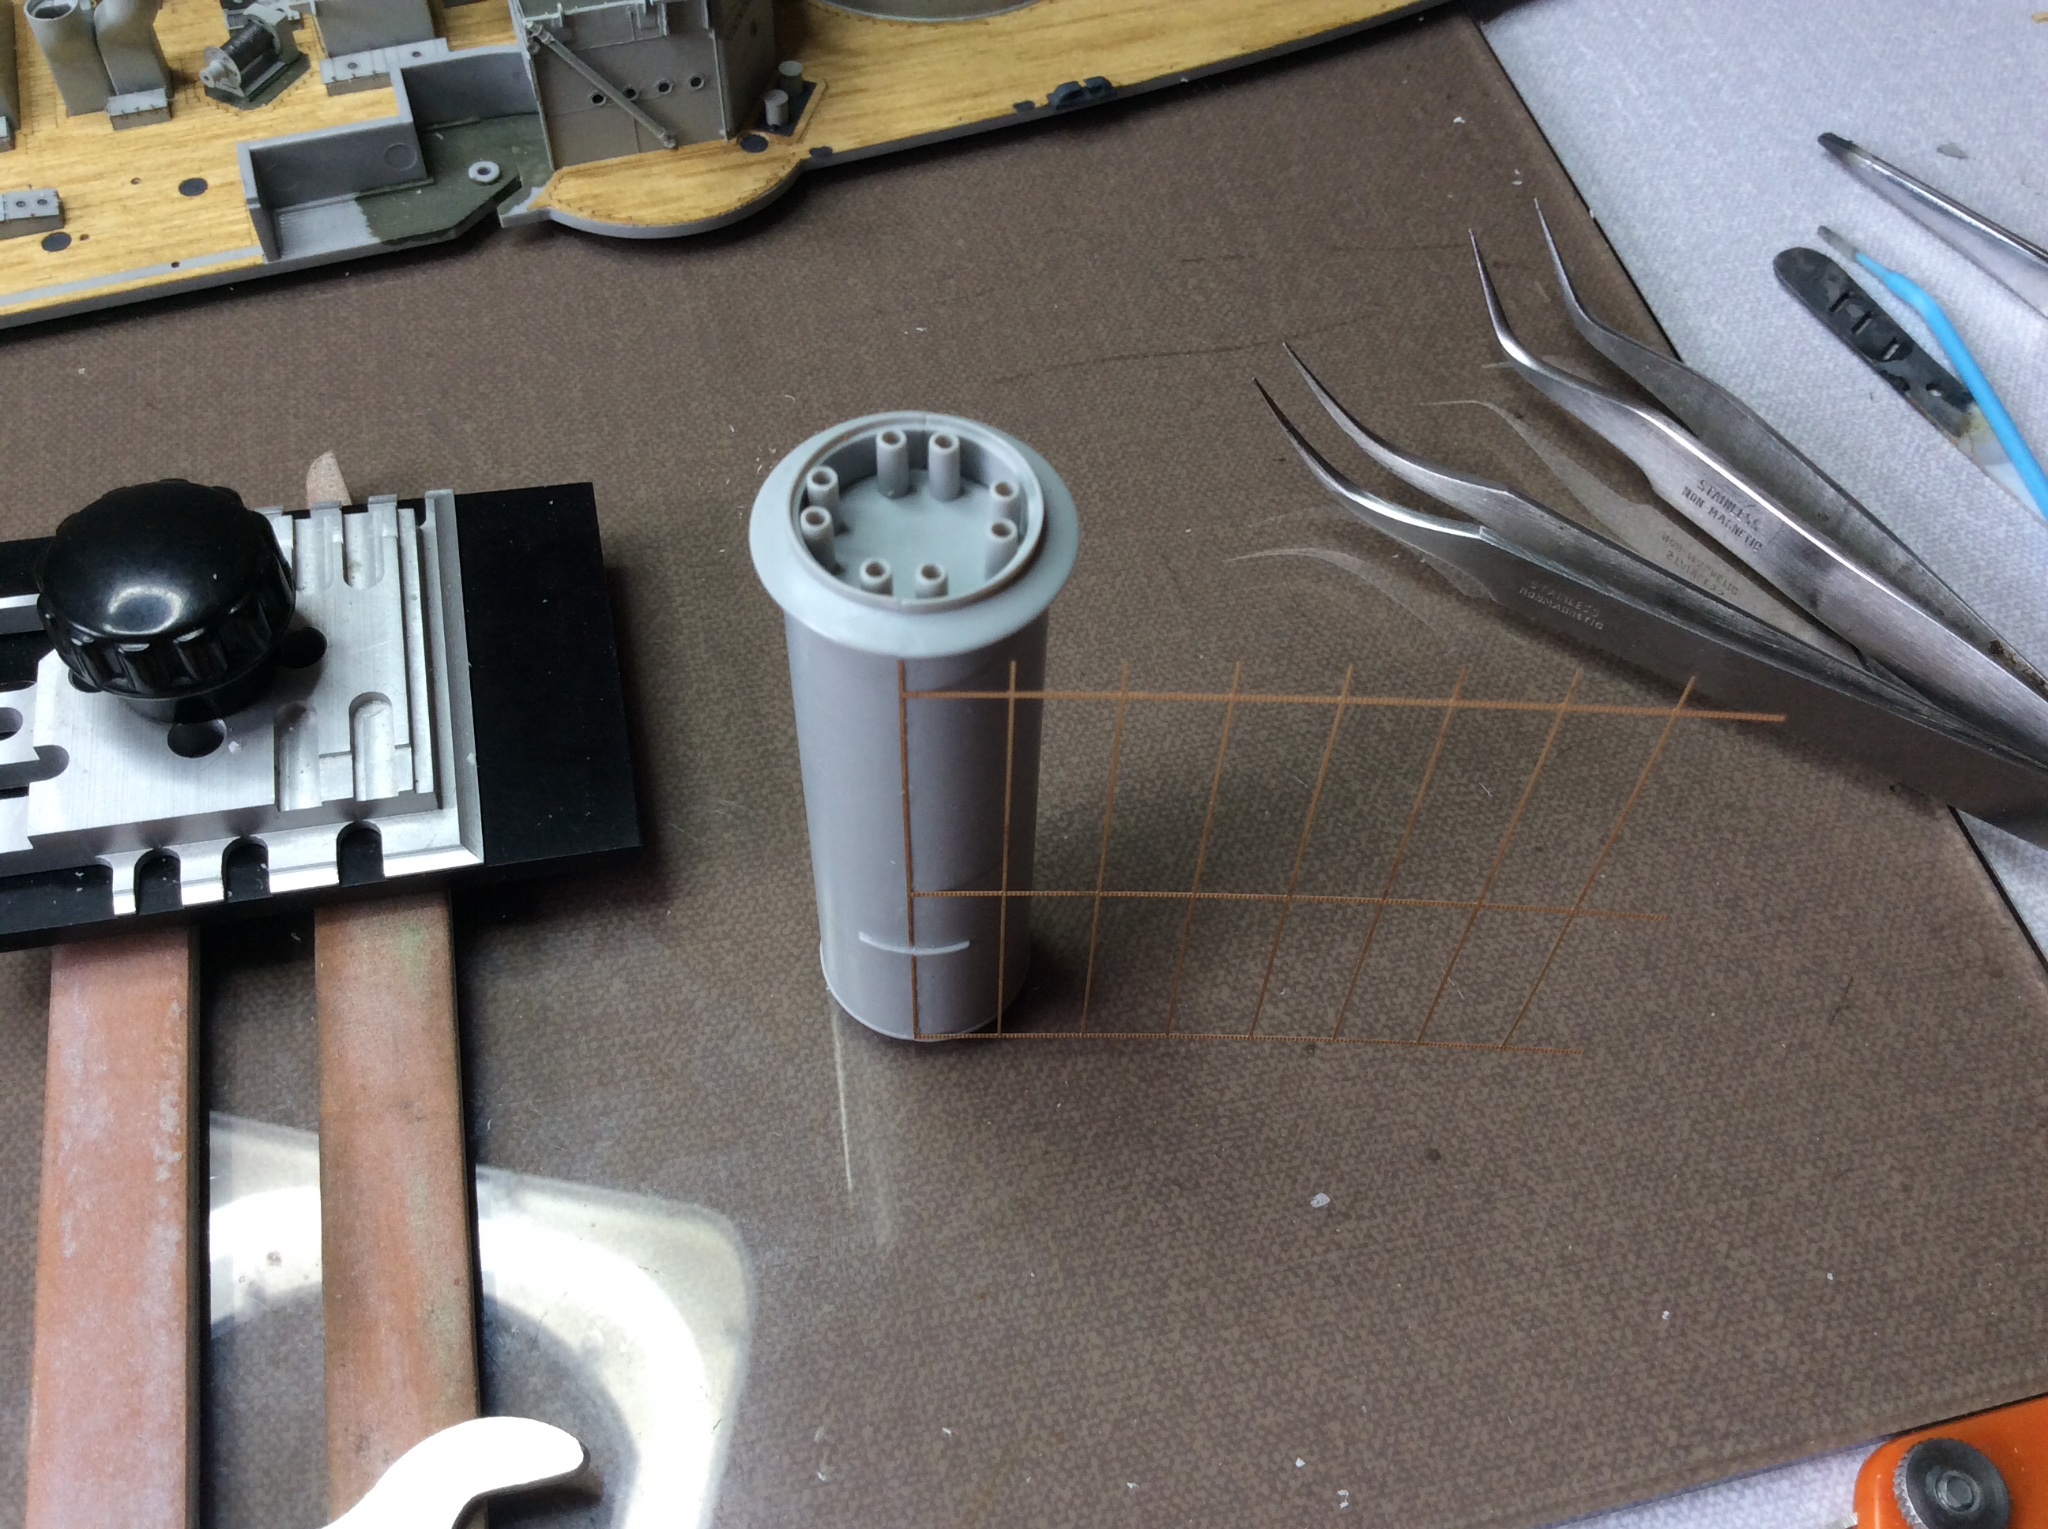
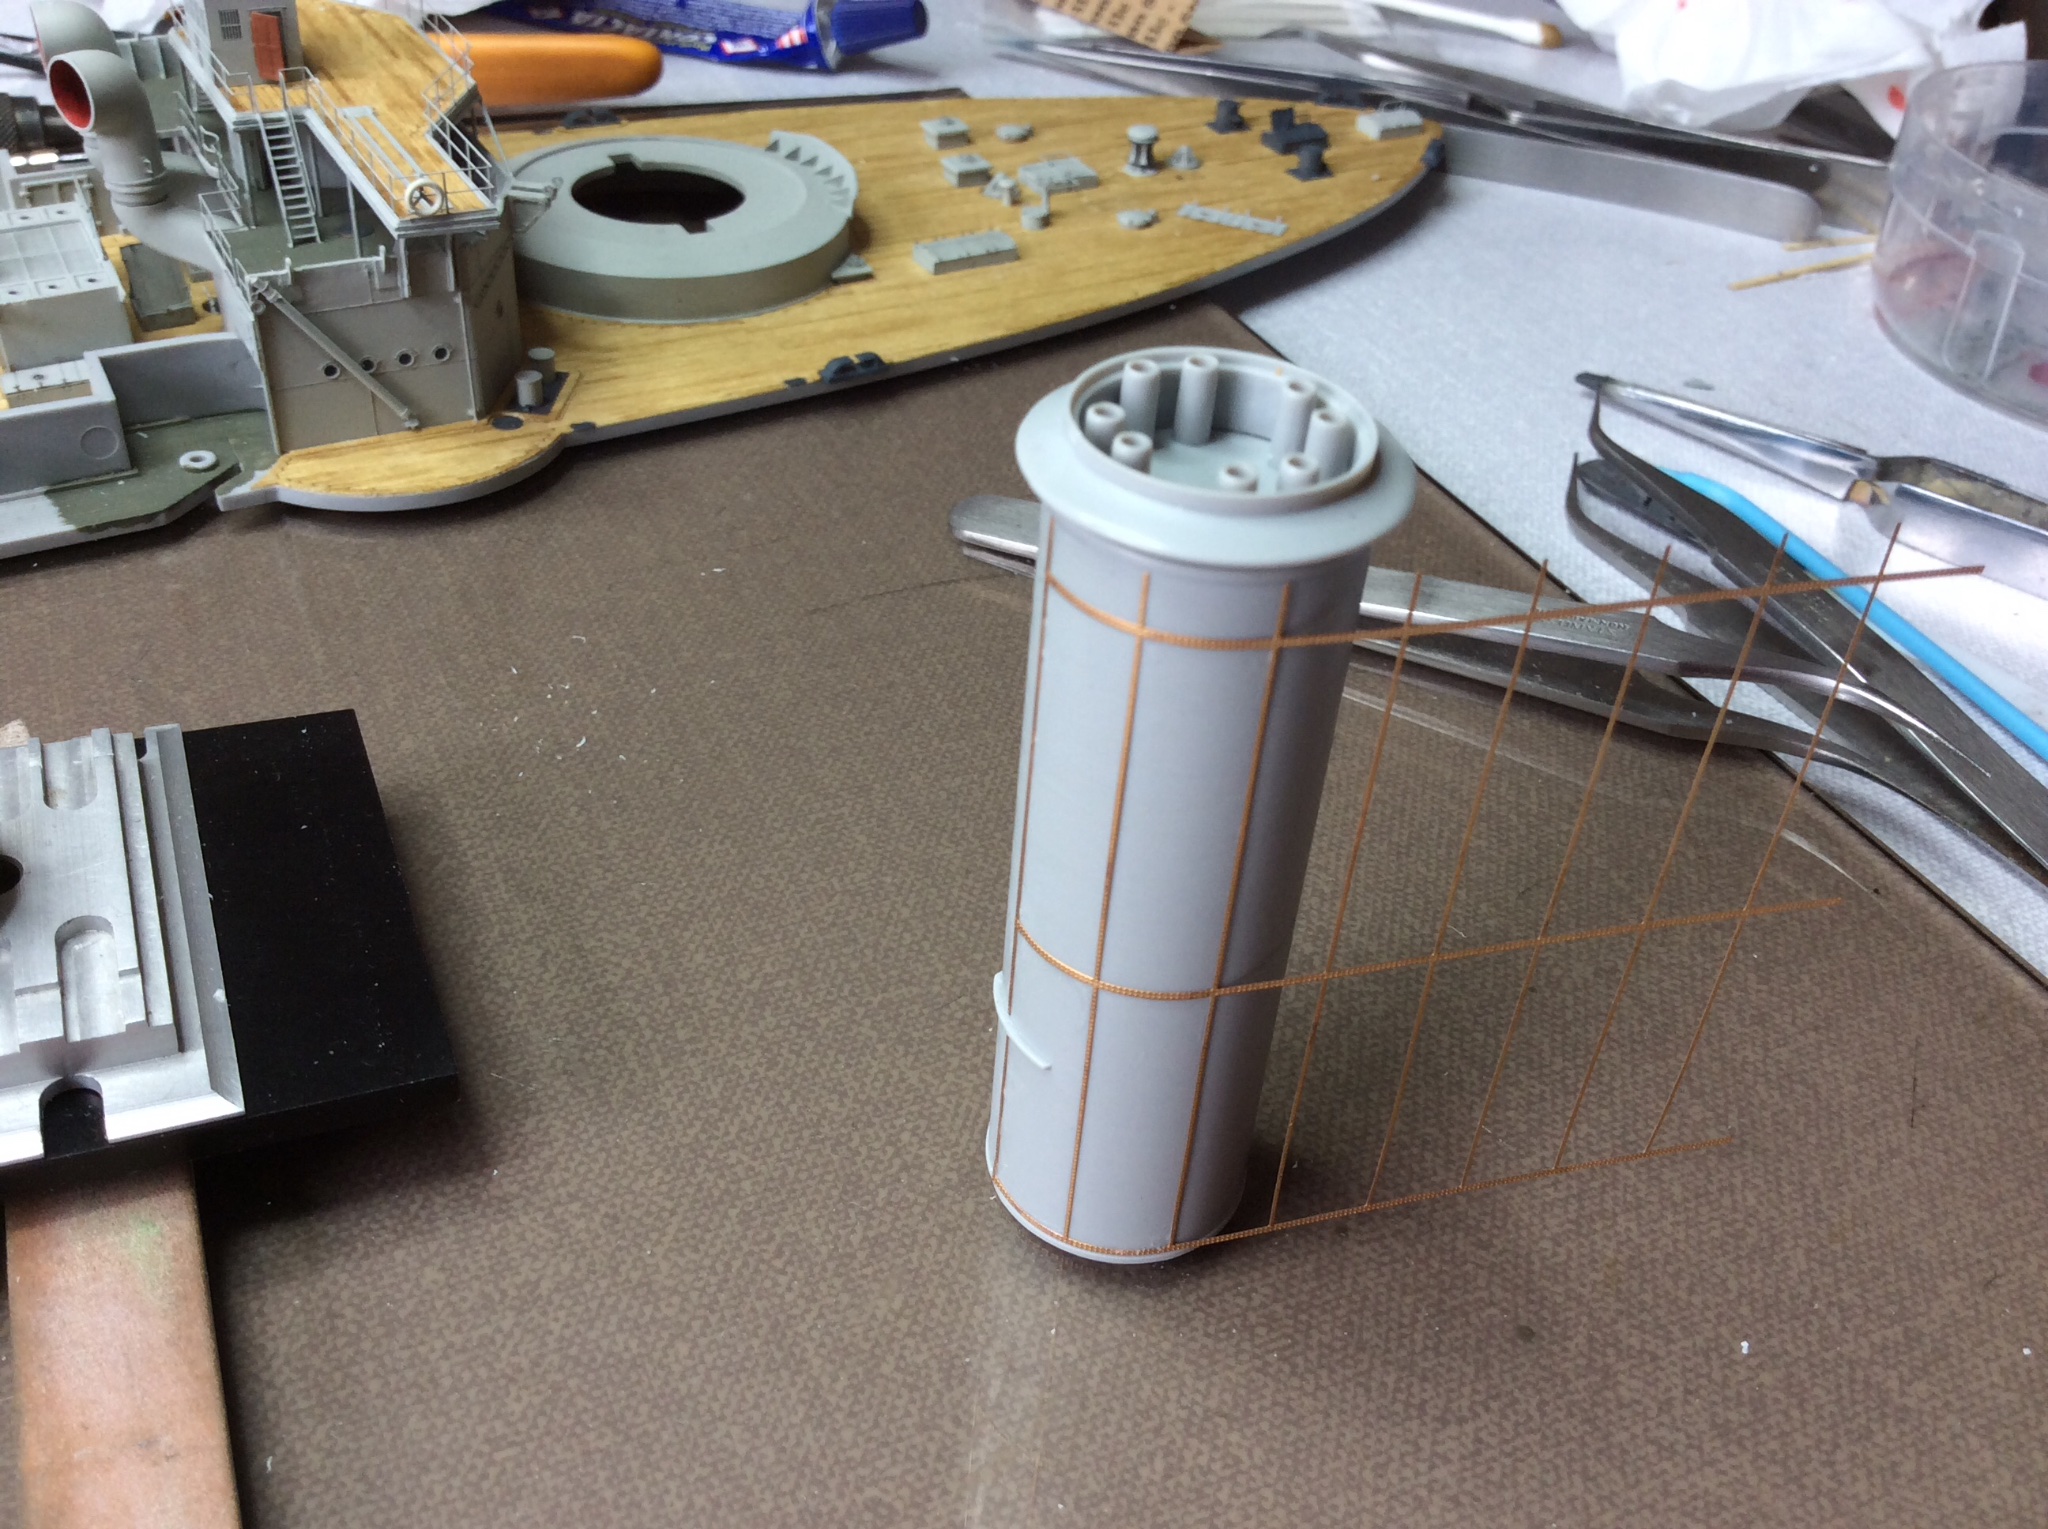
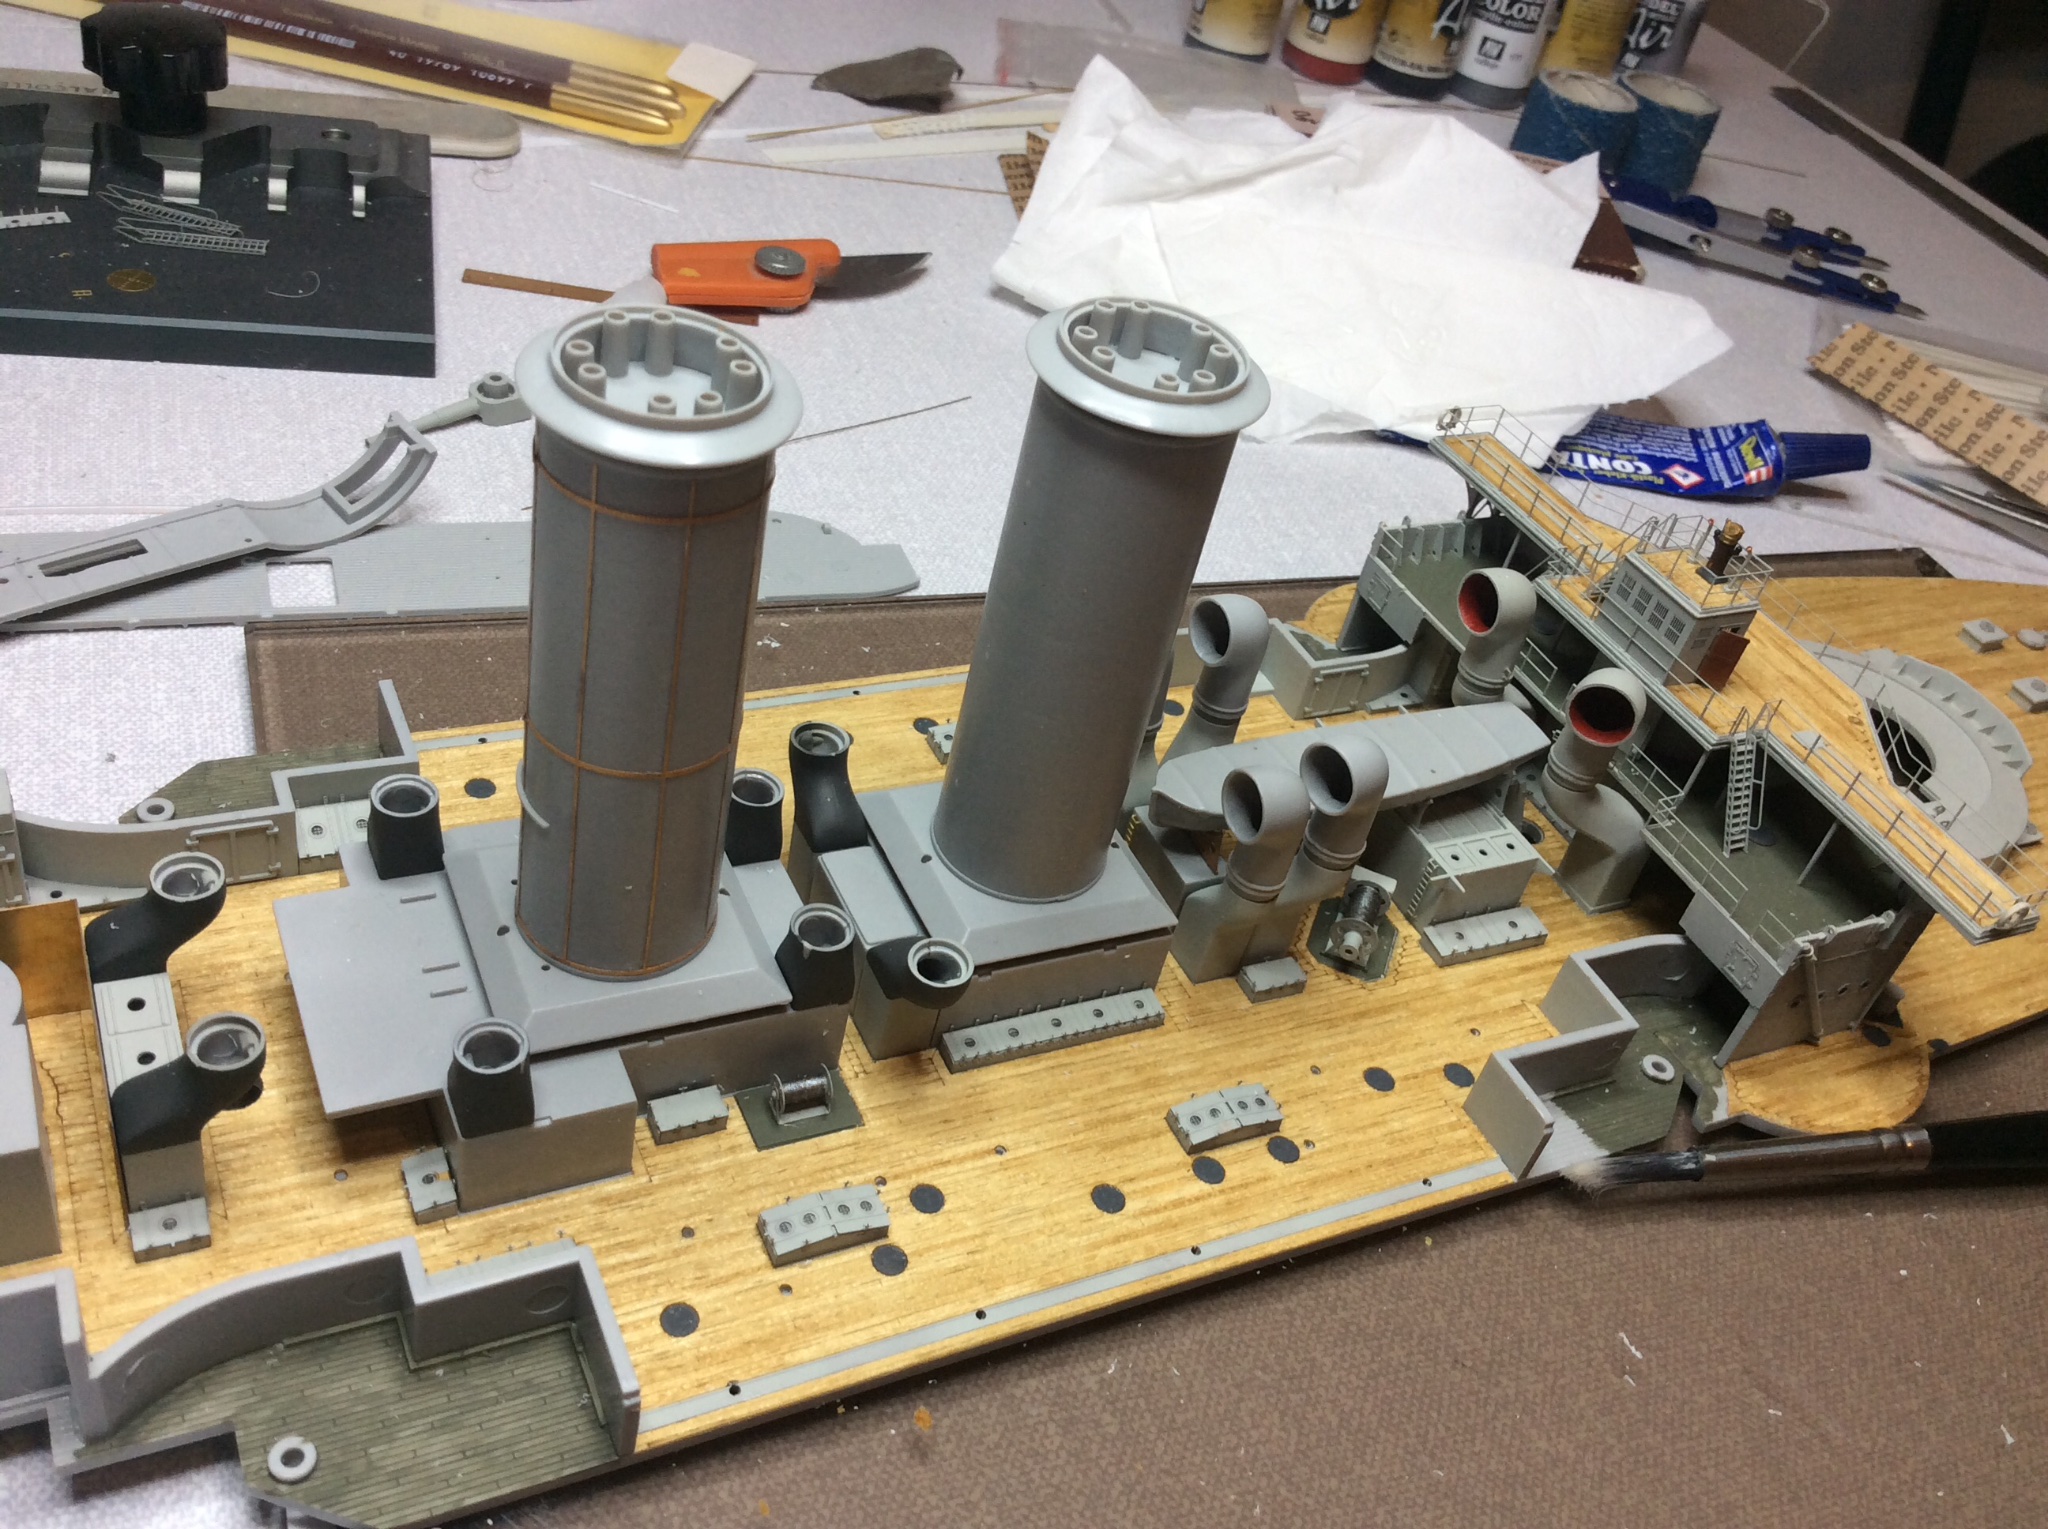
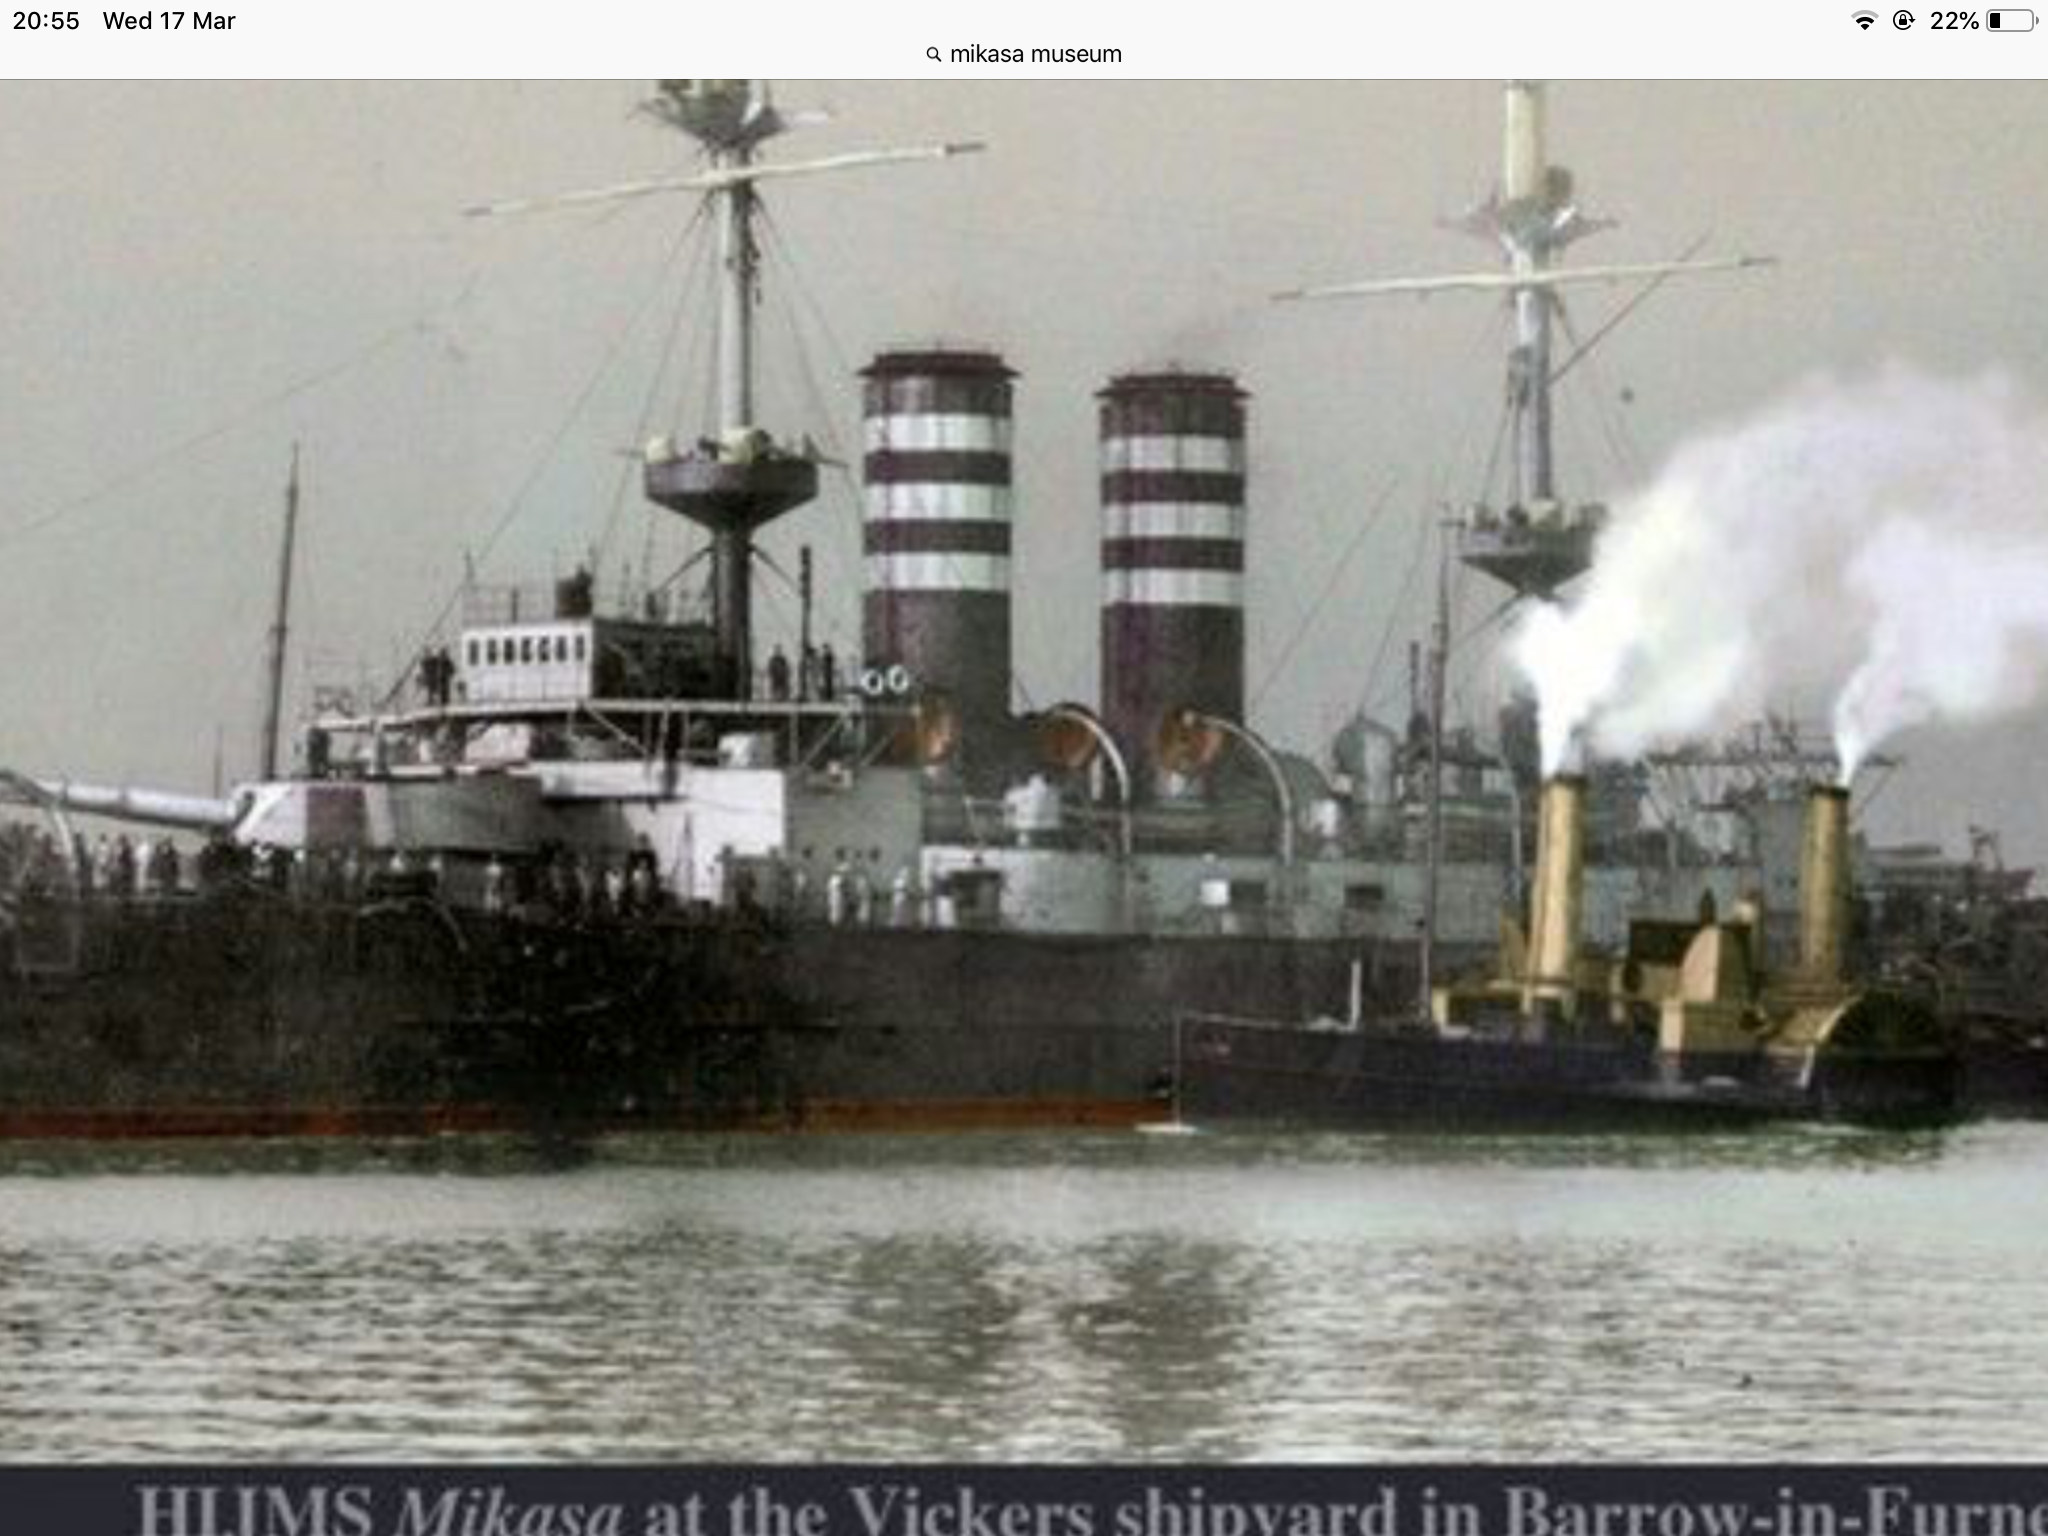
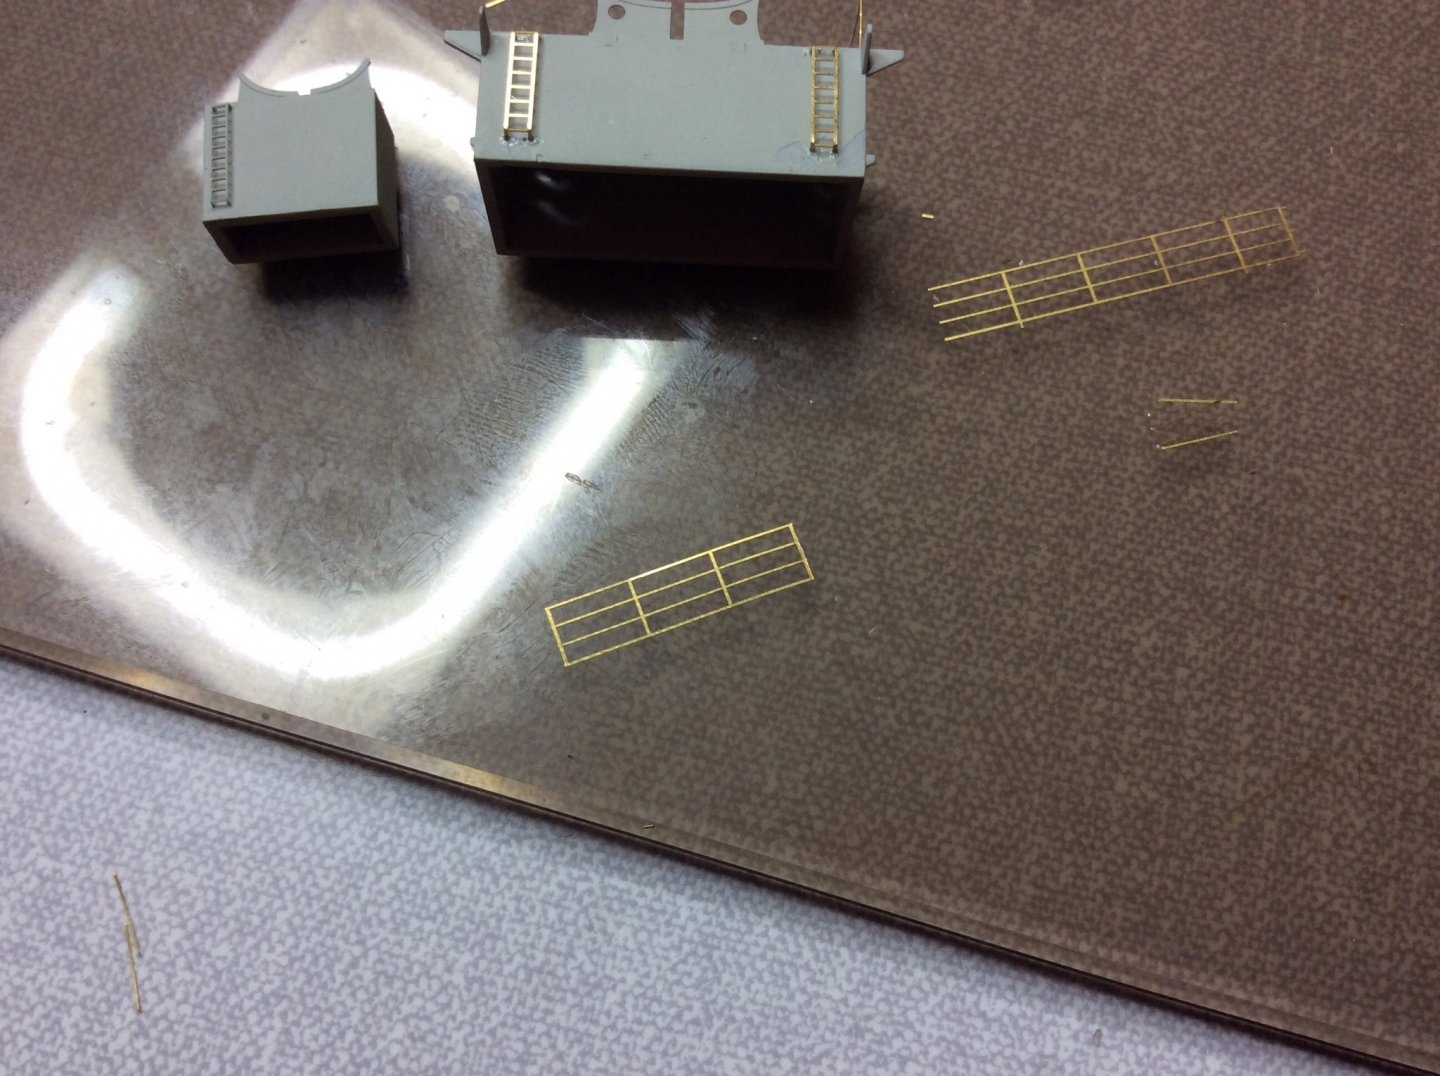
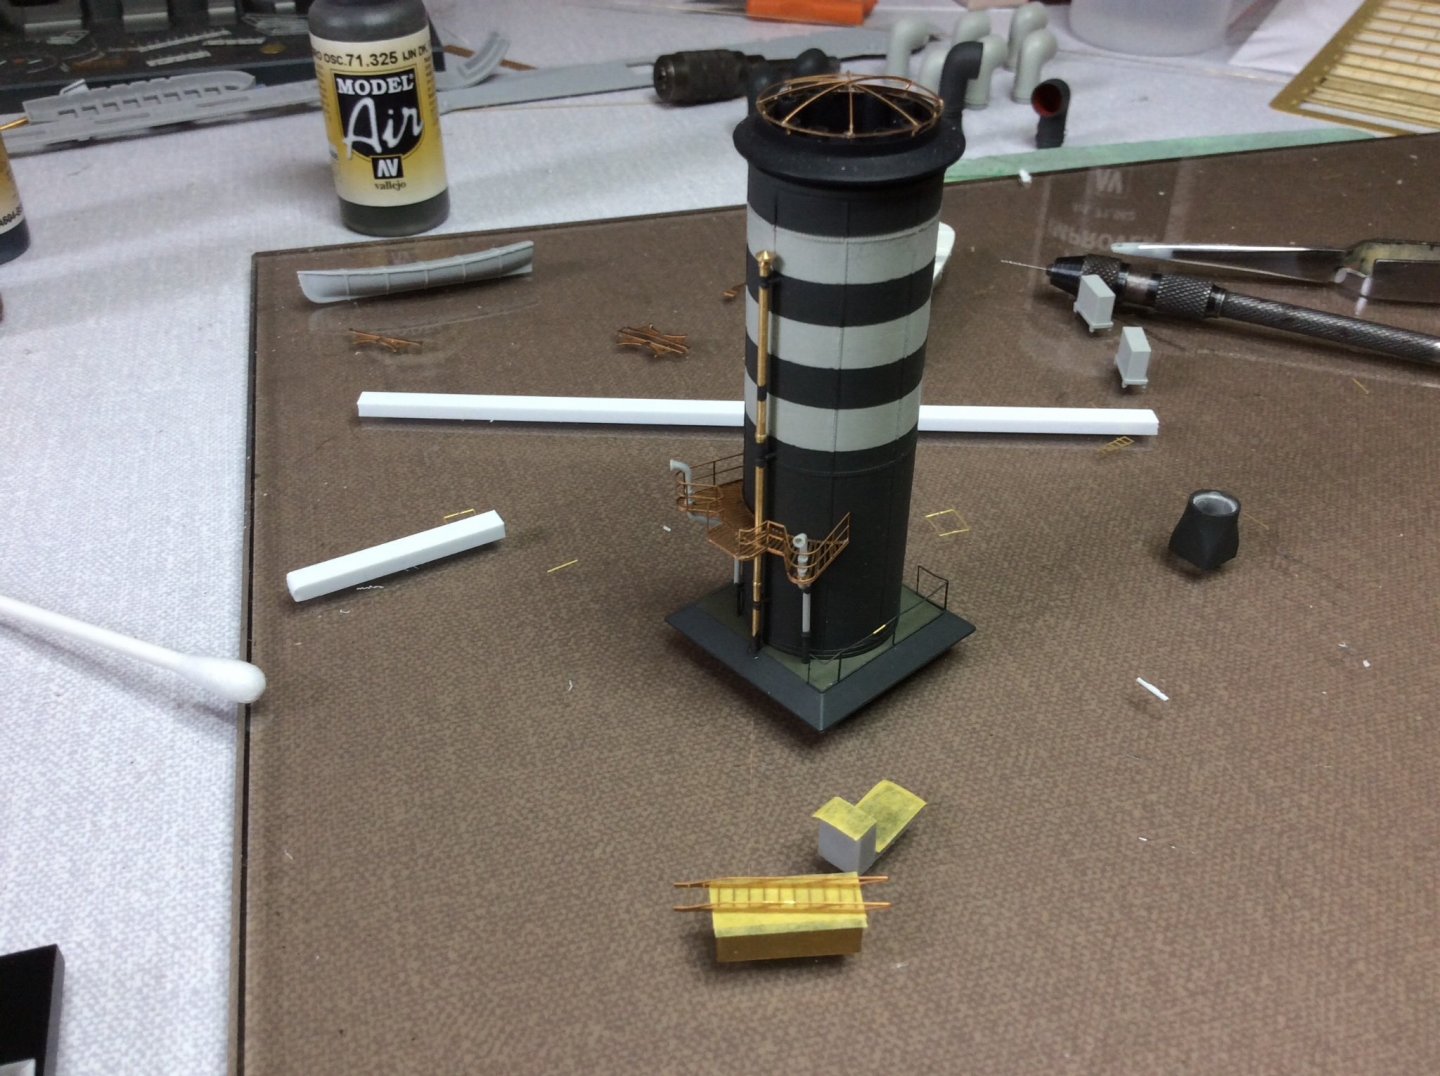
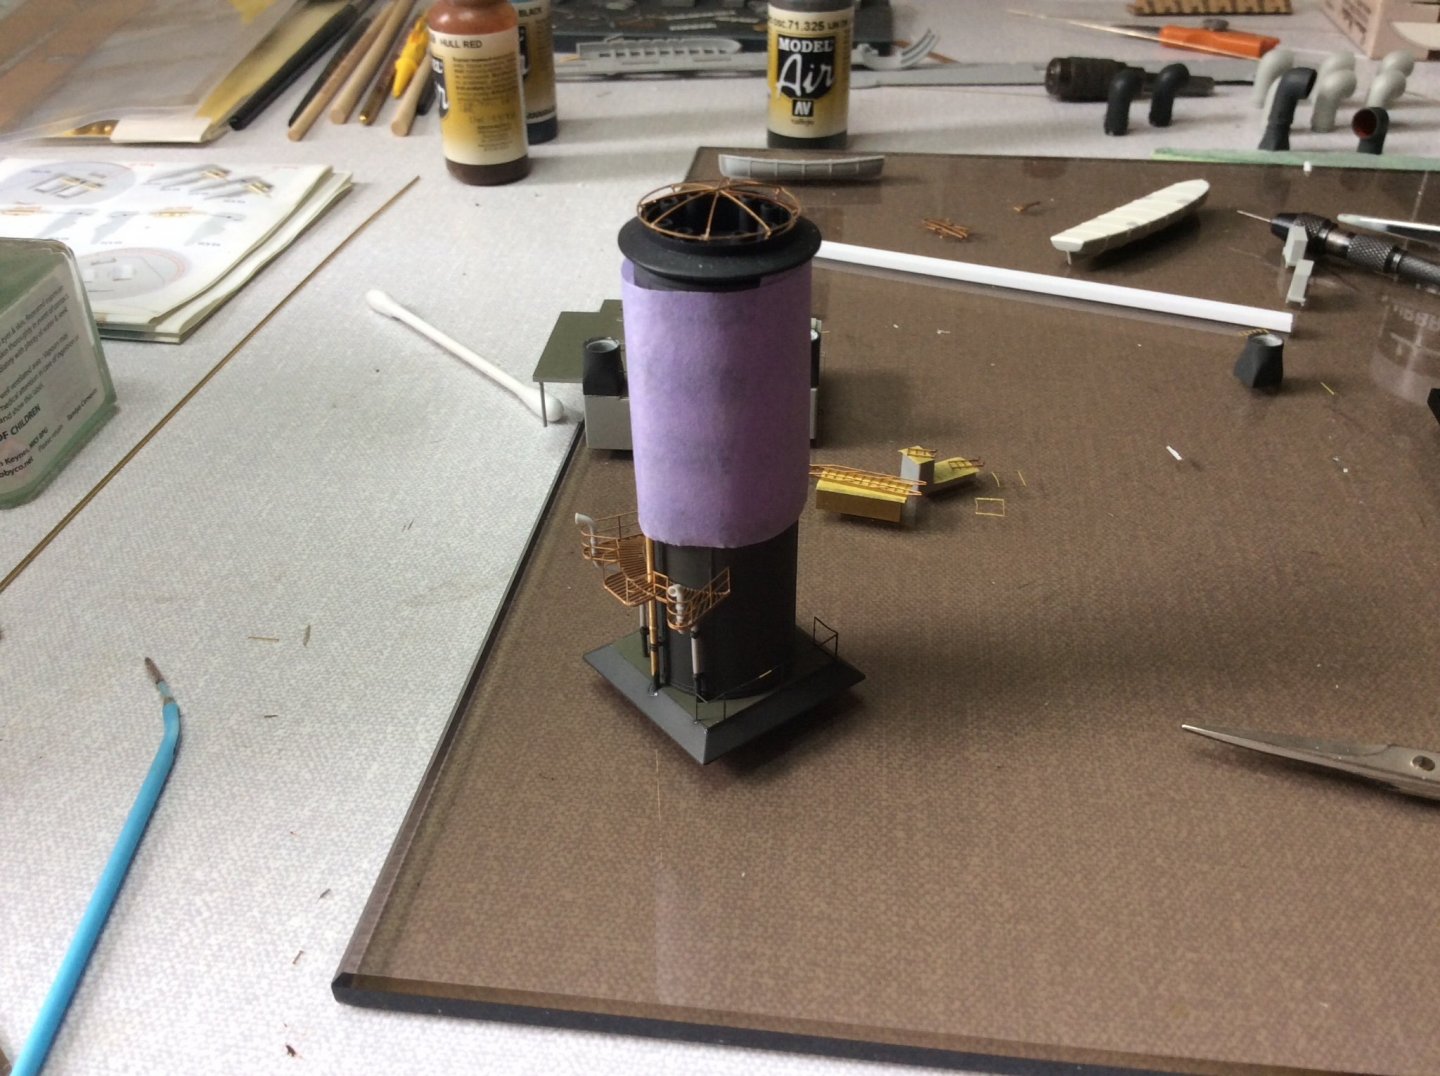
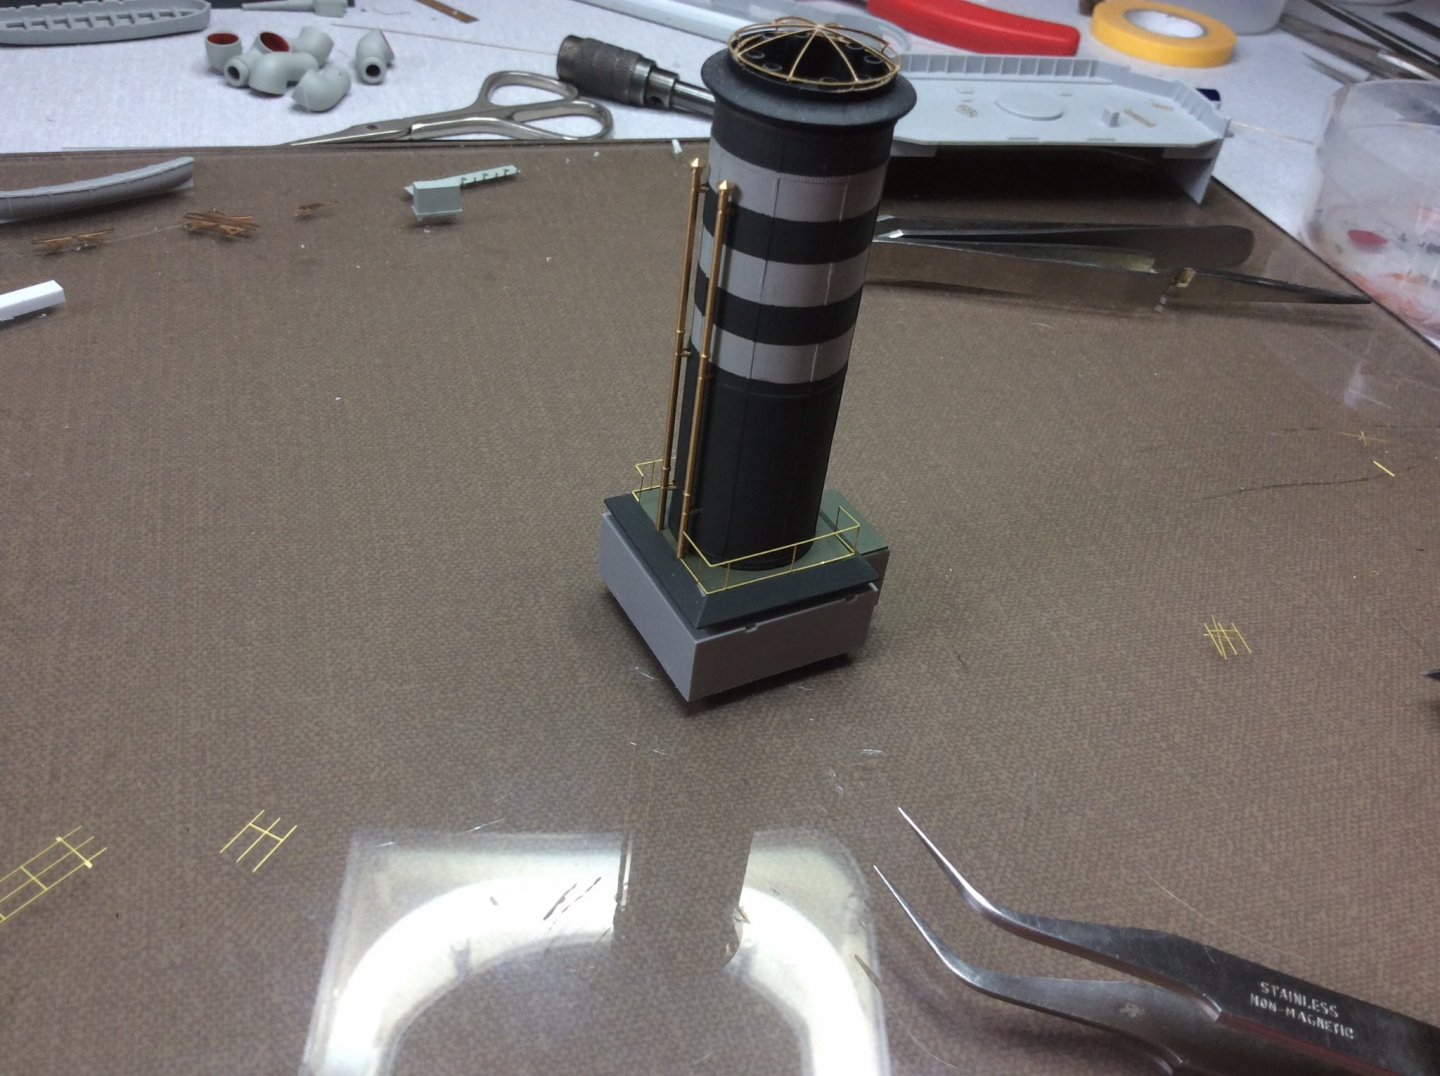
Going for another post, following on with making handrails and ladders around funnel superstructures, plus fabricating ships cowls and trunking, decided to not fit cowl grills, the ones supplied with kit, not confident in their appearance, besides the earlier post showing the Mikasa at anchor she doesn’t seem to have them fitted, so I am trying to base my model on this appearance. So the removal of the top internal location pin was necessary, have shown this process in photos to follow. The funnels also progressed, with the fitting of brass etch and brass pipes, one point to be aware of is the forward funnel has a fine etched open deck fitted, the brass pipe has to fit through this deck before fitting the lower support bracket. Once all glued in place it became a mask and paint job. The fabrication of the upper funnel grills that I thought would be straight forward proved anything but, a lot of patience and trial needed here, but end result worth it. Shall post some photos for you to browse over, next mission is to finish removing overspray on hull sides, another lesson learnt. Take care folks.


-
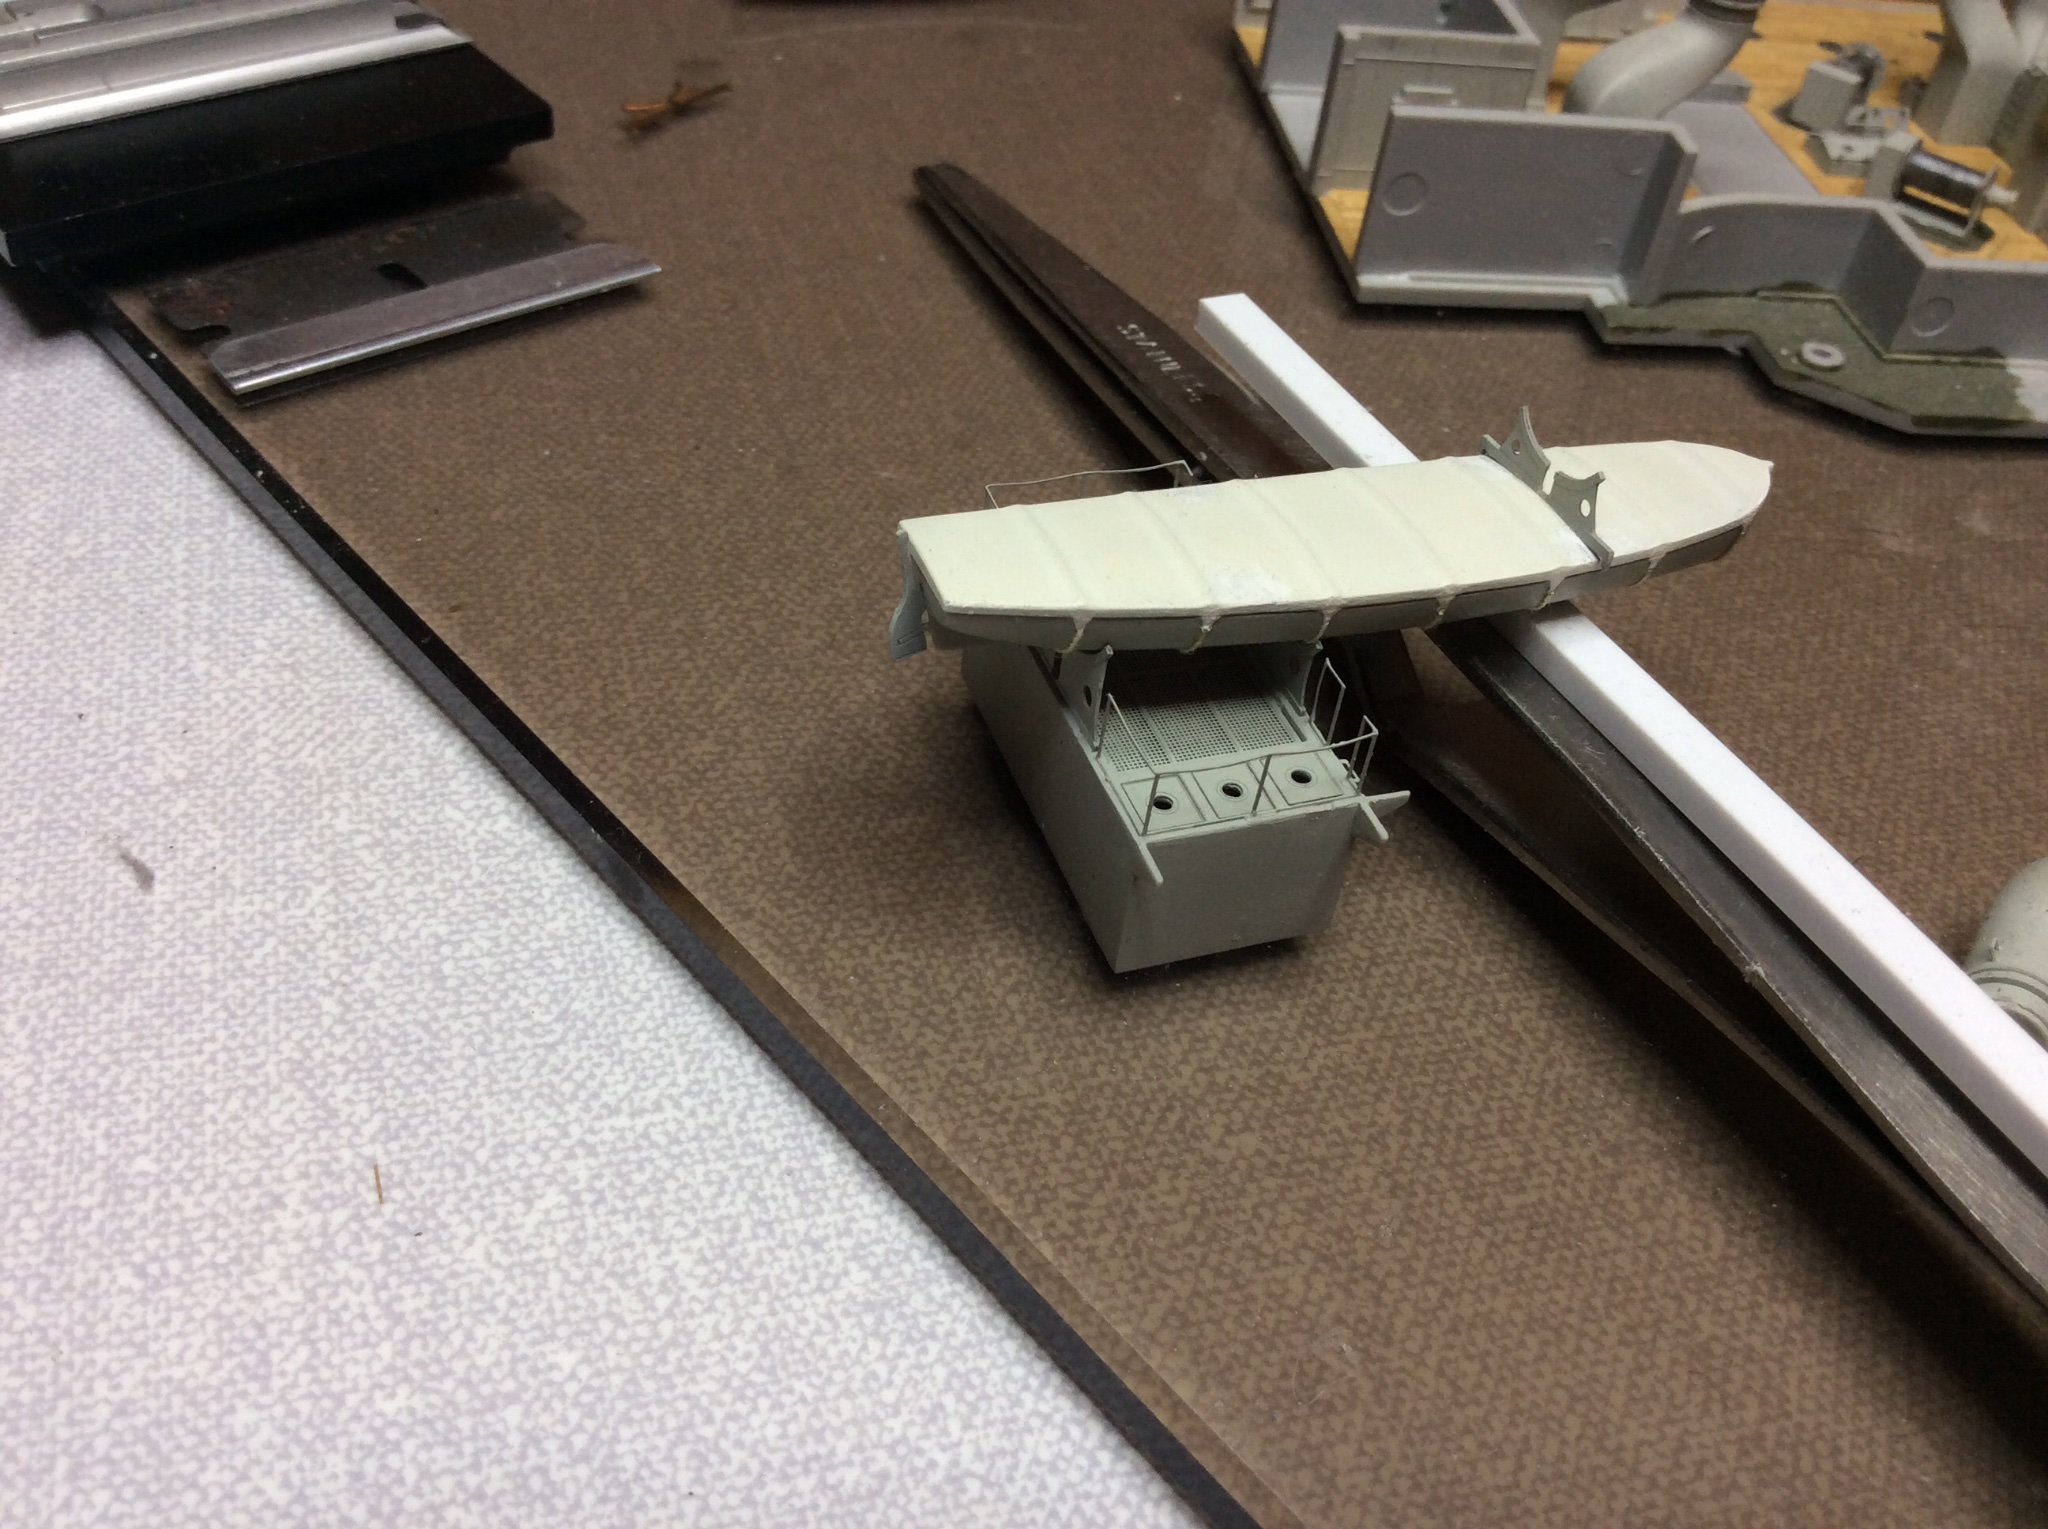
Hello fellow modellers, at long last I have something to post on my build log. Shall try to pick up from where I last posted. The ladders that I fitted to supper-structures supporting the large open boat, decided we’re to small in scale, so removed them, besides needed them for making handles for turning ships cowls, look about the right size. Used ladders from my Trumpeter Arizona etch in same scale, also used handrails from Arizona to make my own take on rails round the inner supper structures on main deck, no etch or references to work from here, just my best guess, but it does add some detail when added. Also managed to get some fine thread to simulate the tie down ropes on boat canvas, managed to find it in light tan, just guessing again. Before gluing the canvas part to boat hull i drilled holes in lower hull to take thread, painted the lower hull then fitted thread, just supergluing the thread on inside of boat hull before gluing canvas onto boat. That shall do for now, shall post some photos for reference to this post, with more updates to follow, take care.
-
Thanks Mike, gives me a lift to keep going, appreciated. Don’t think I could work in 1/700 scale now , my eyesight couldn’t take it, I remember building a triple anti aircraft mount for the Yamato in this scale, what a mission that was, achieved it but the thought of another twenty killed my passion to progress. 😂
-
Wow can’t believe it’s been over three months since I last showed some progress, guess summer time changes priorities with other things taking over, shall try and complete some work on hull before doing an update. Hope everyone is well and more productive than me. Probably be a few weeks fixing my last mistake, overspray on the hull after painting the lower hull, That’ll teach me for shirking on masking the model properly, not my favourite task, can find it tedious. Shall kick myself up the bum and continue soon. Take care everyone.
-
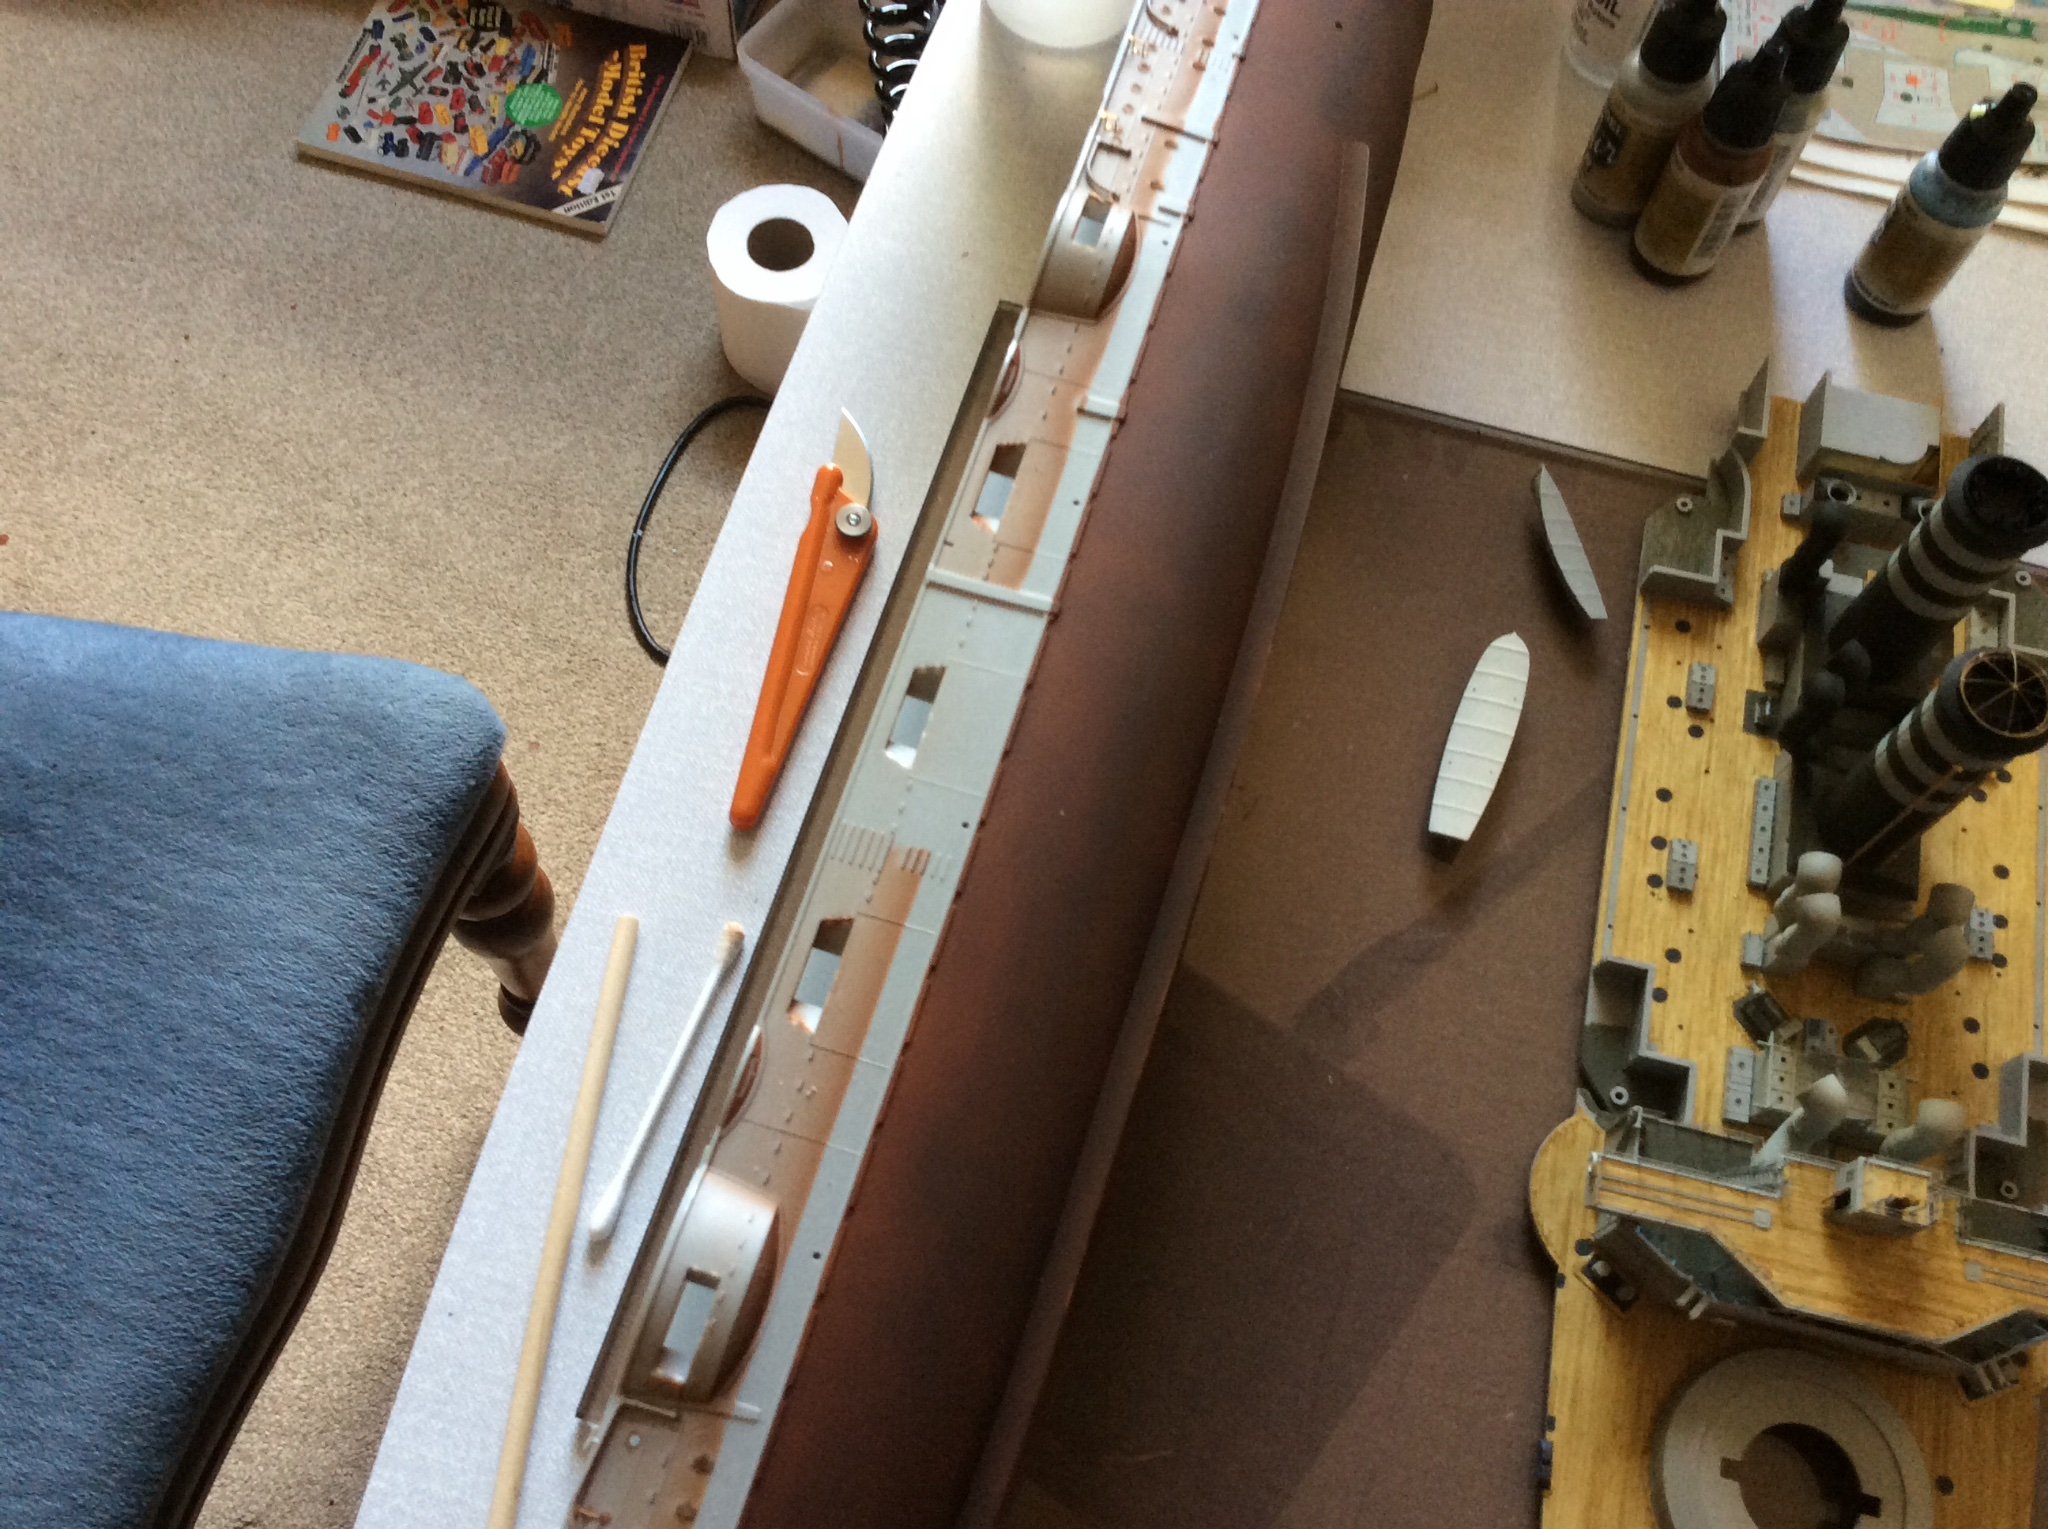
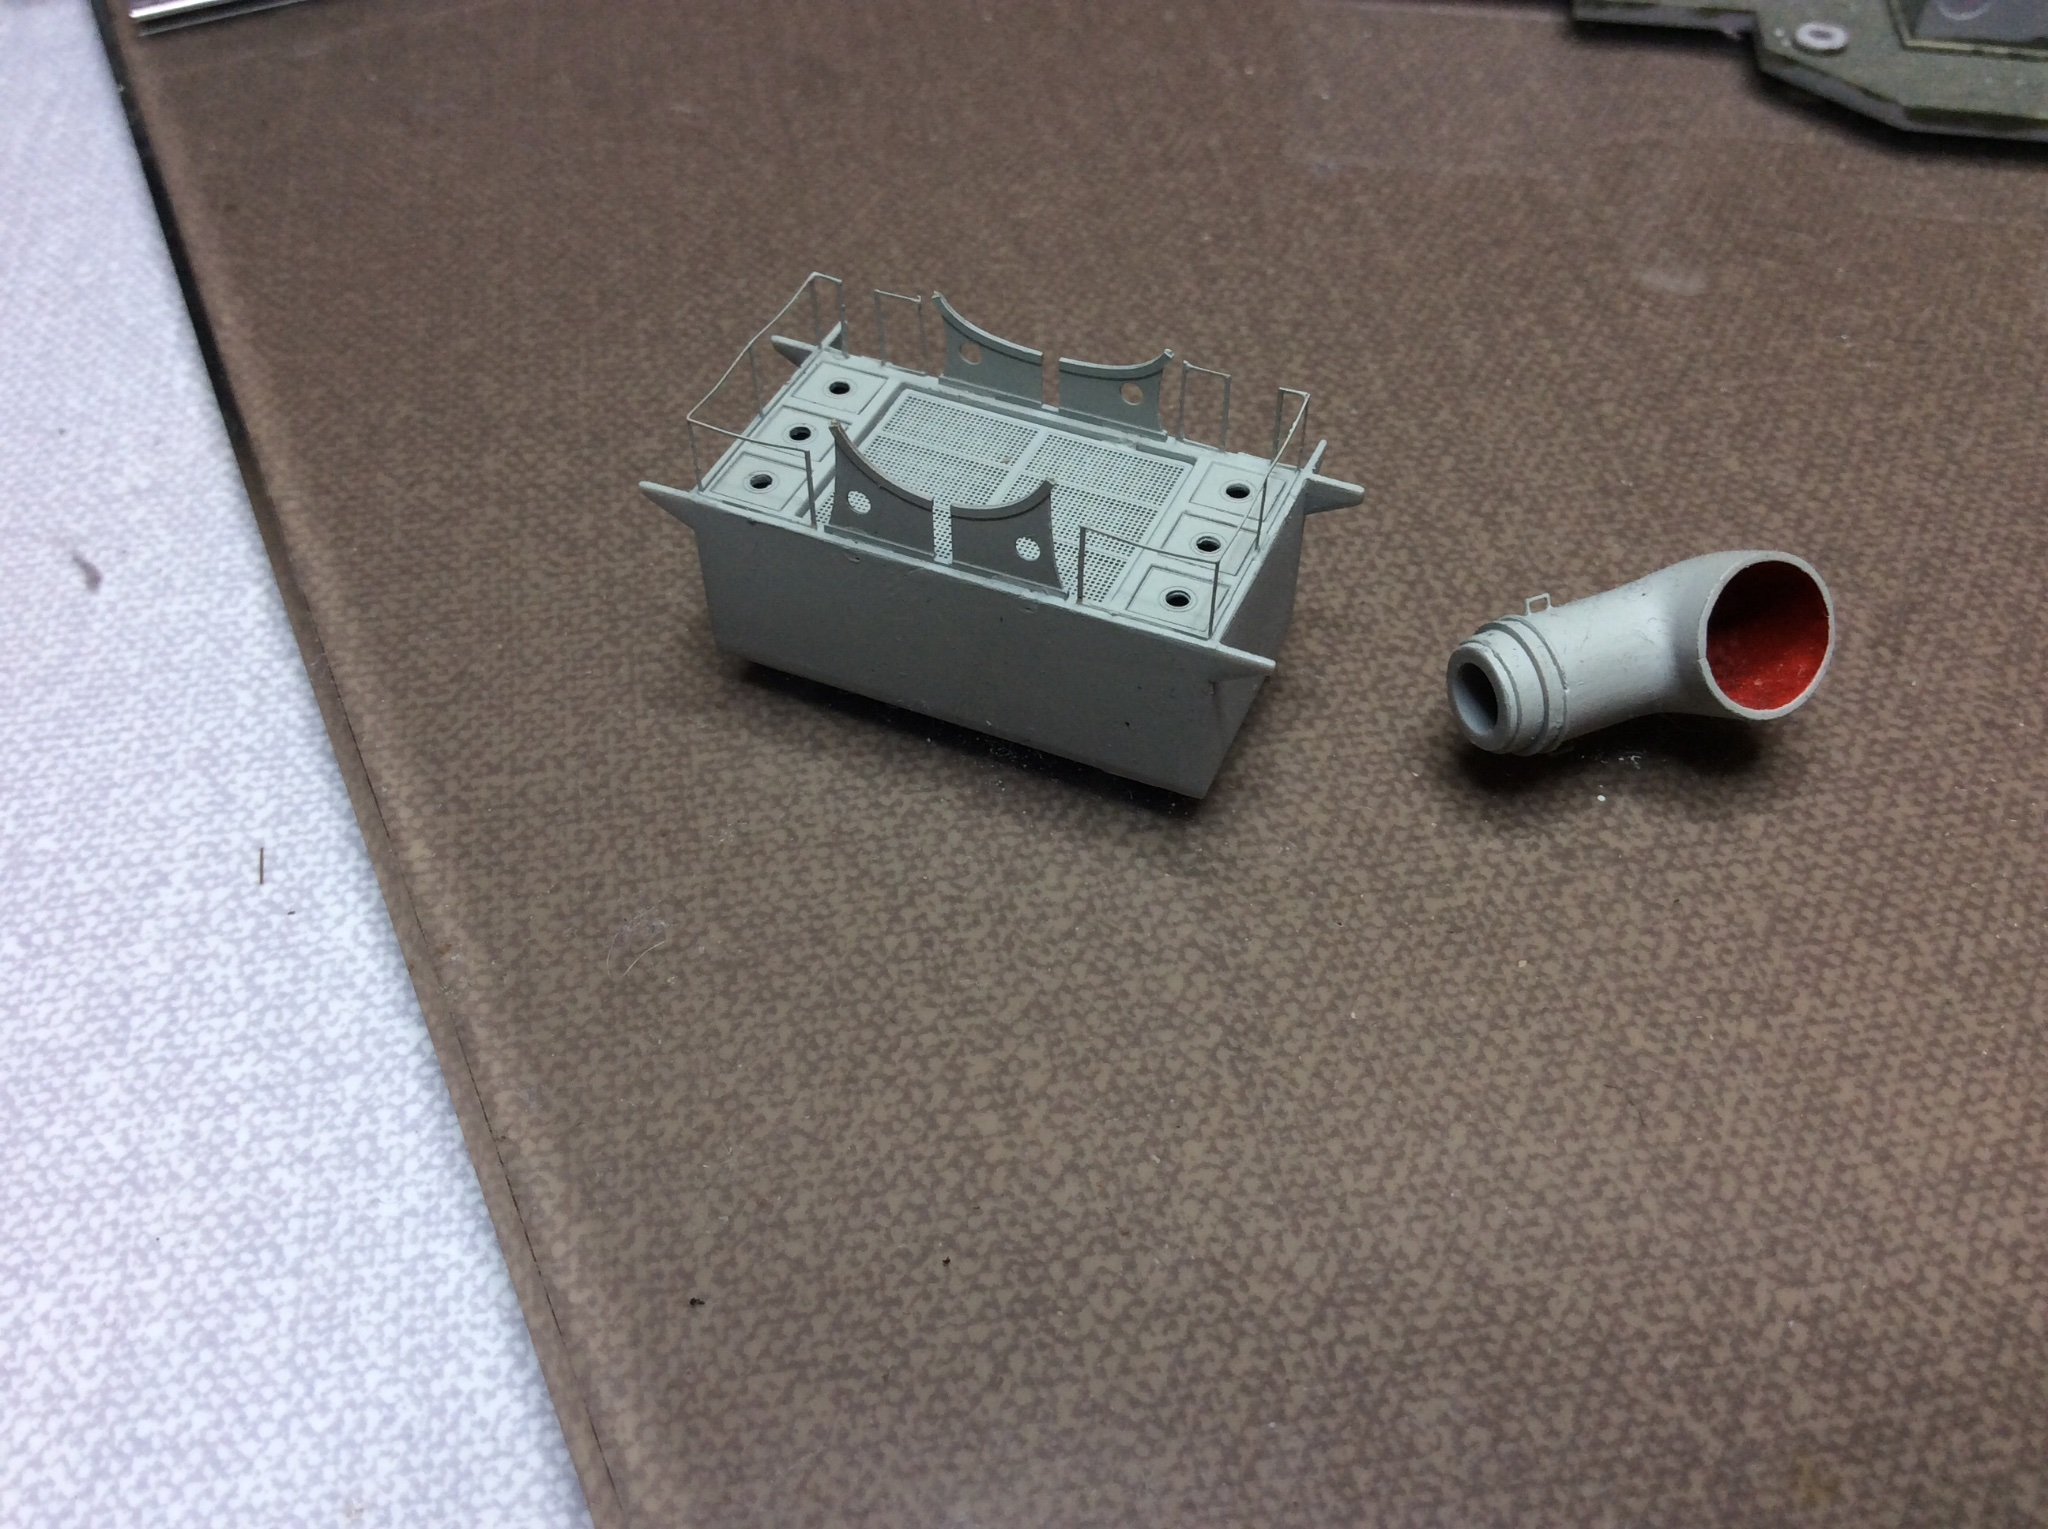
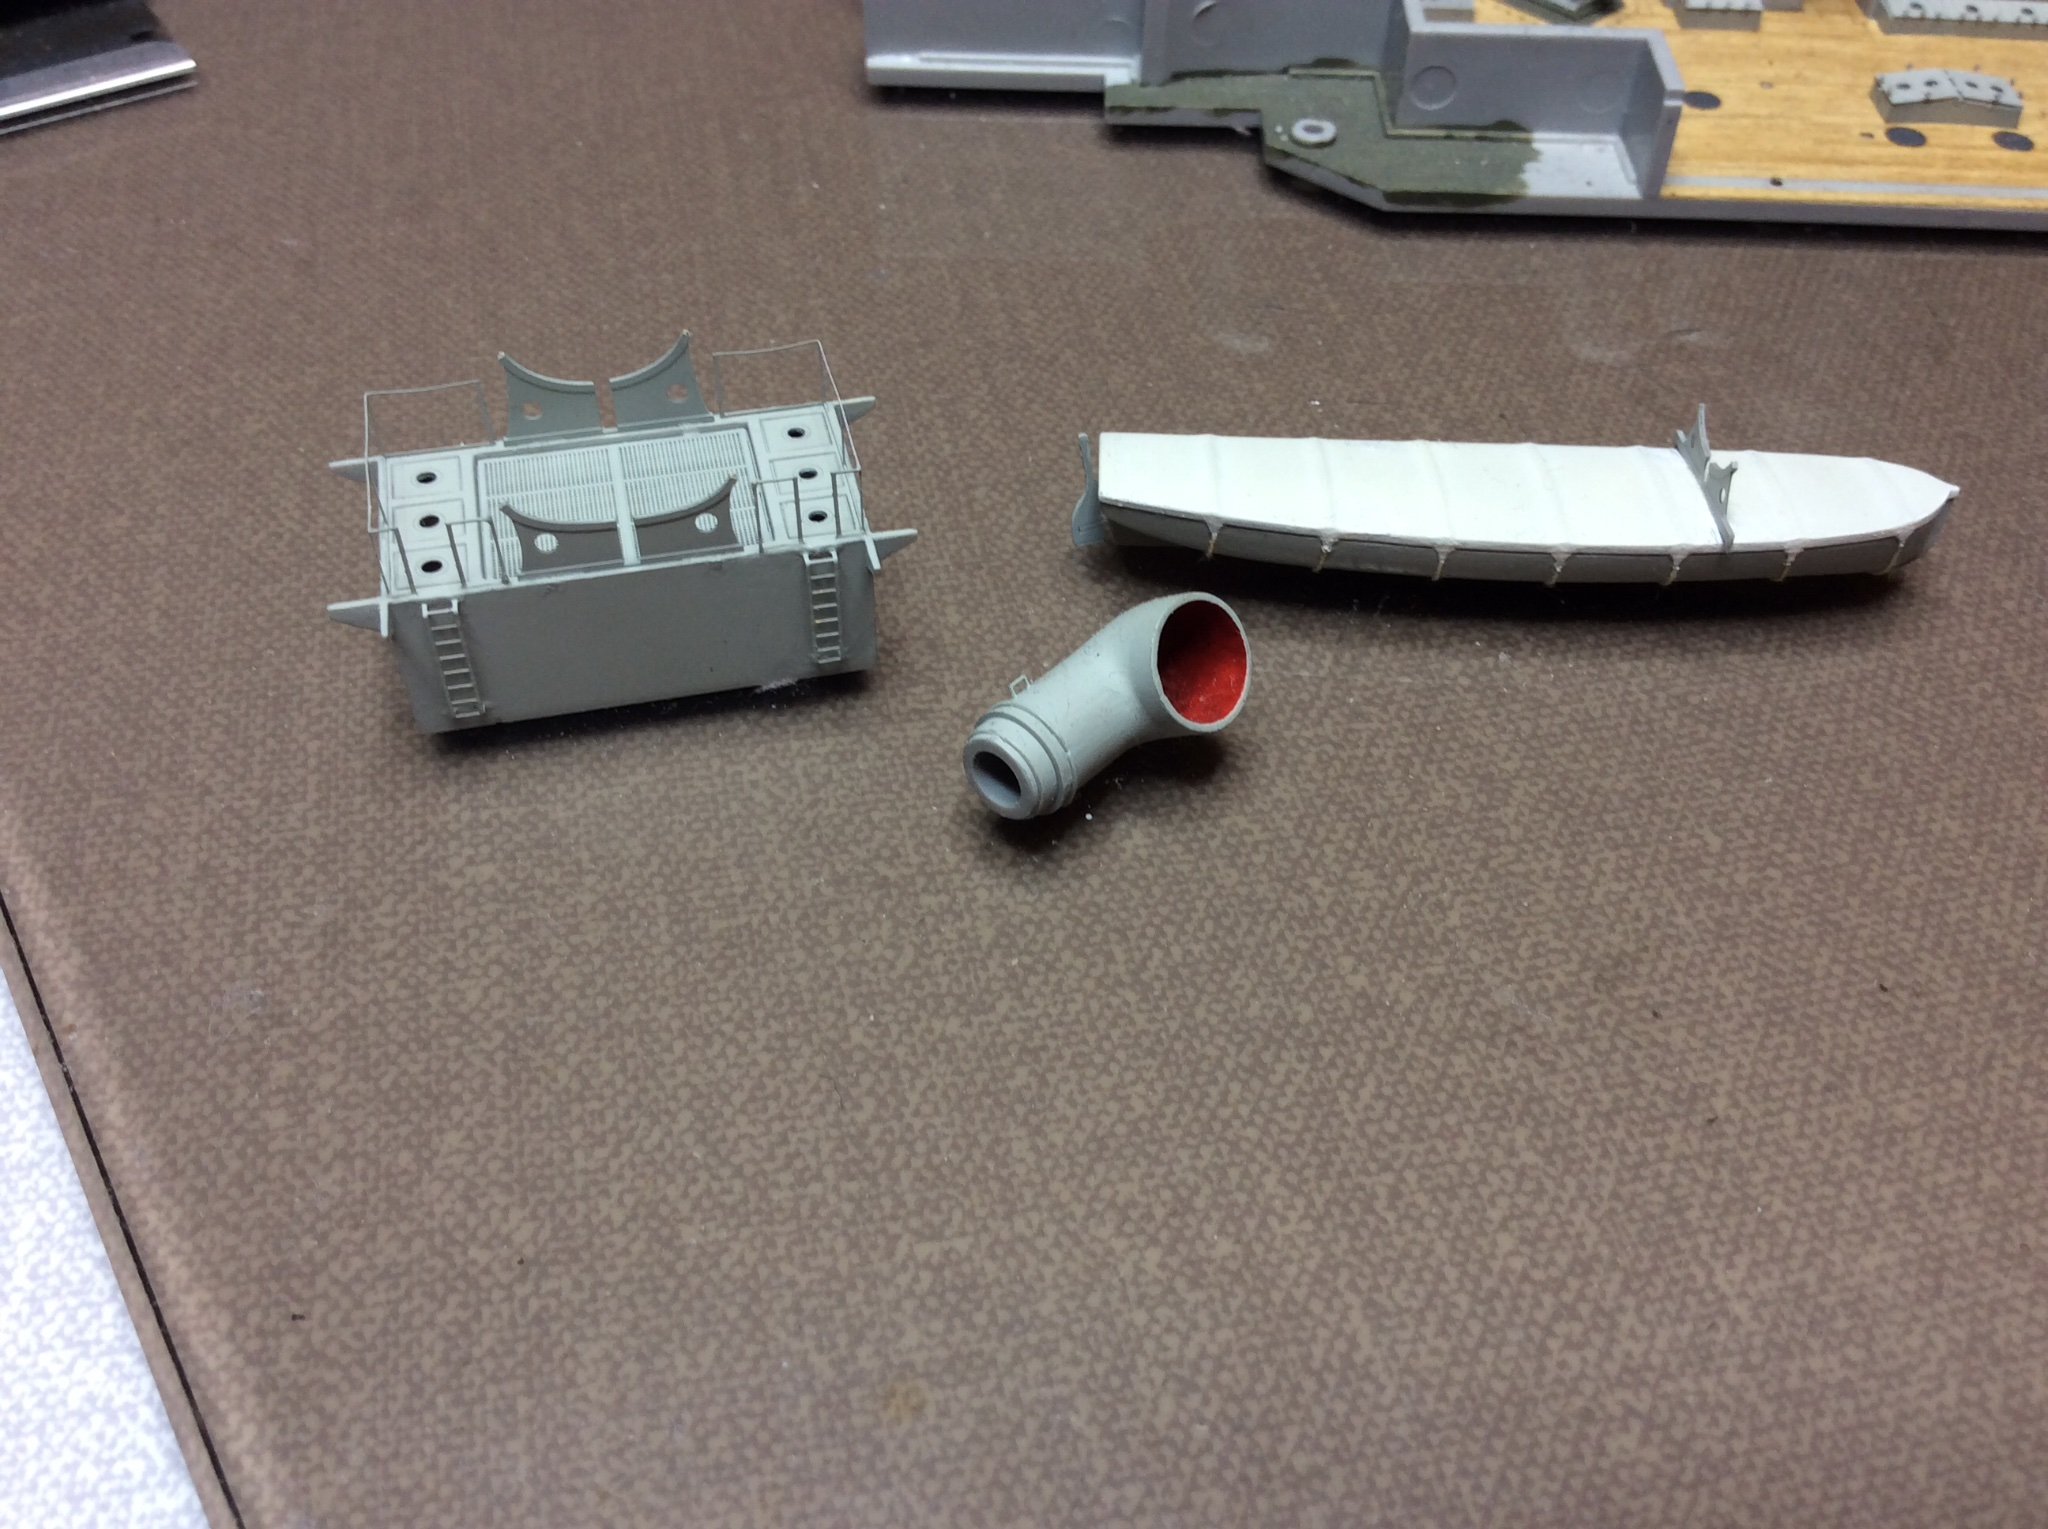
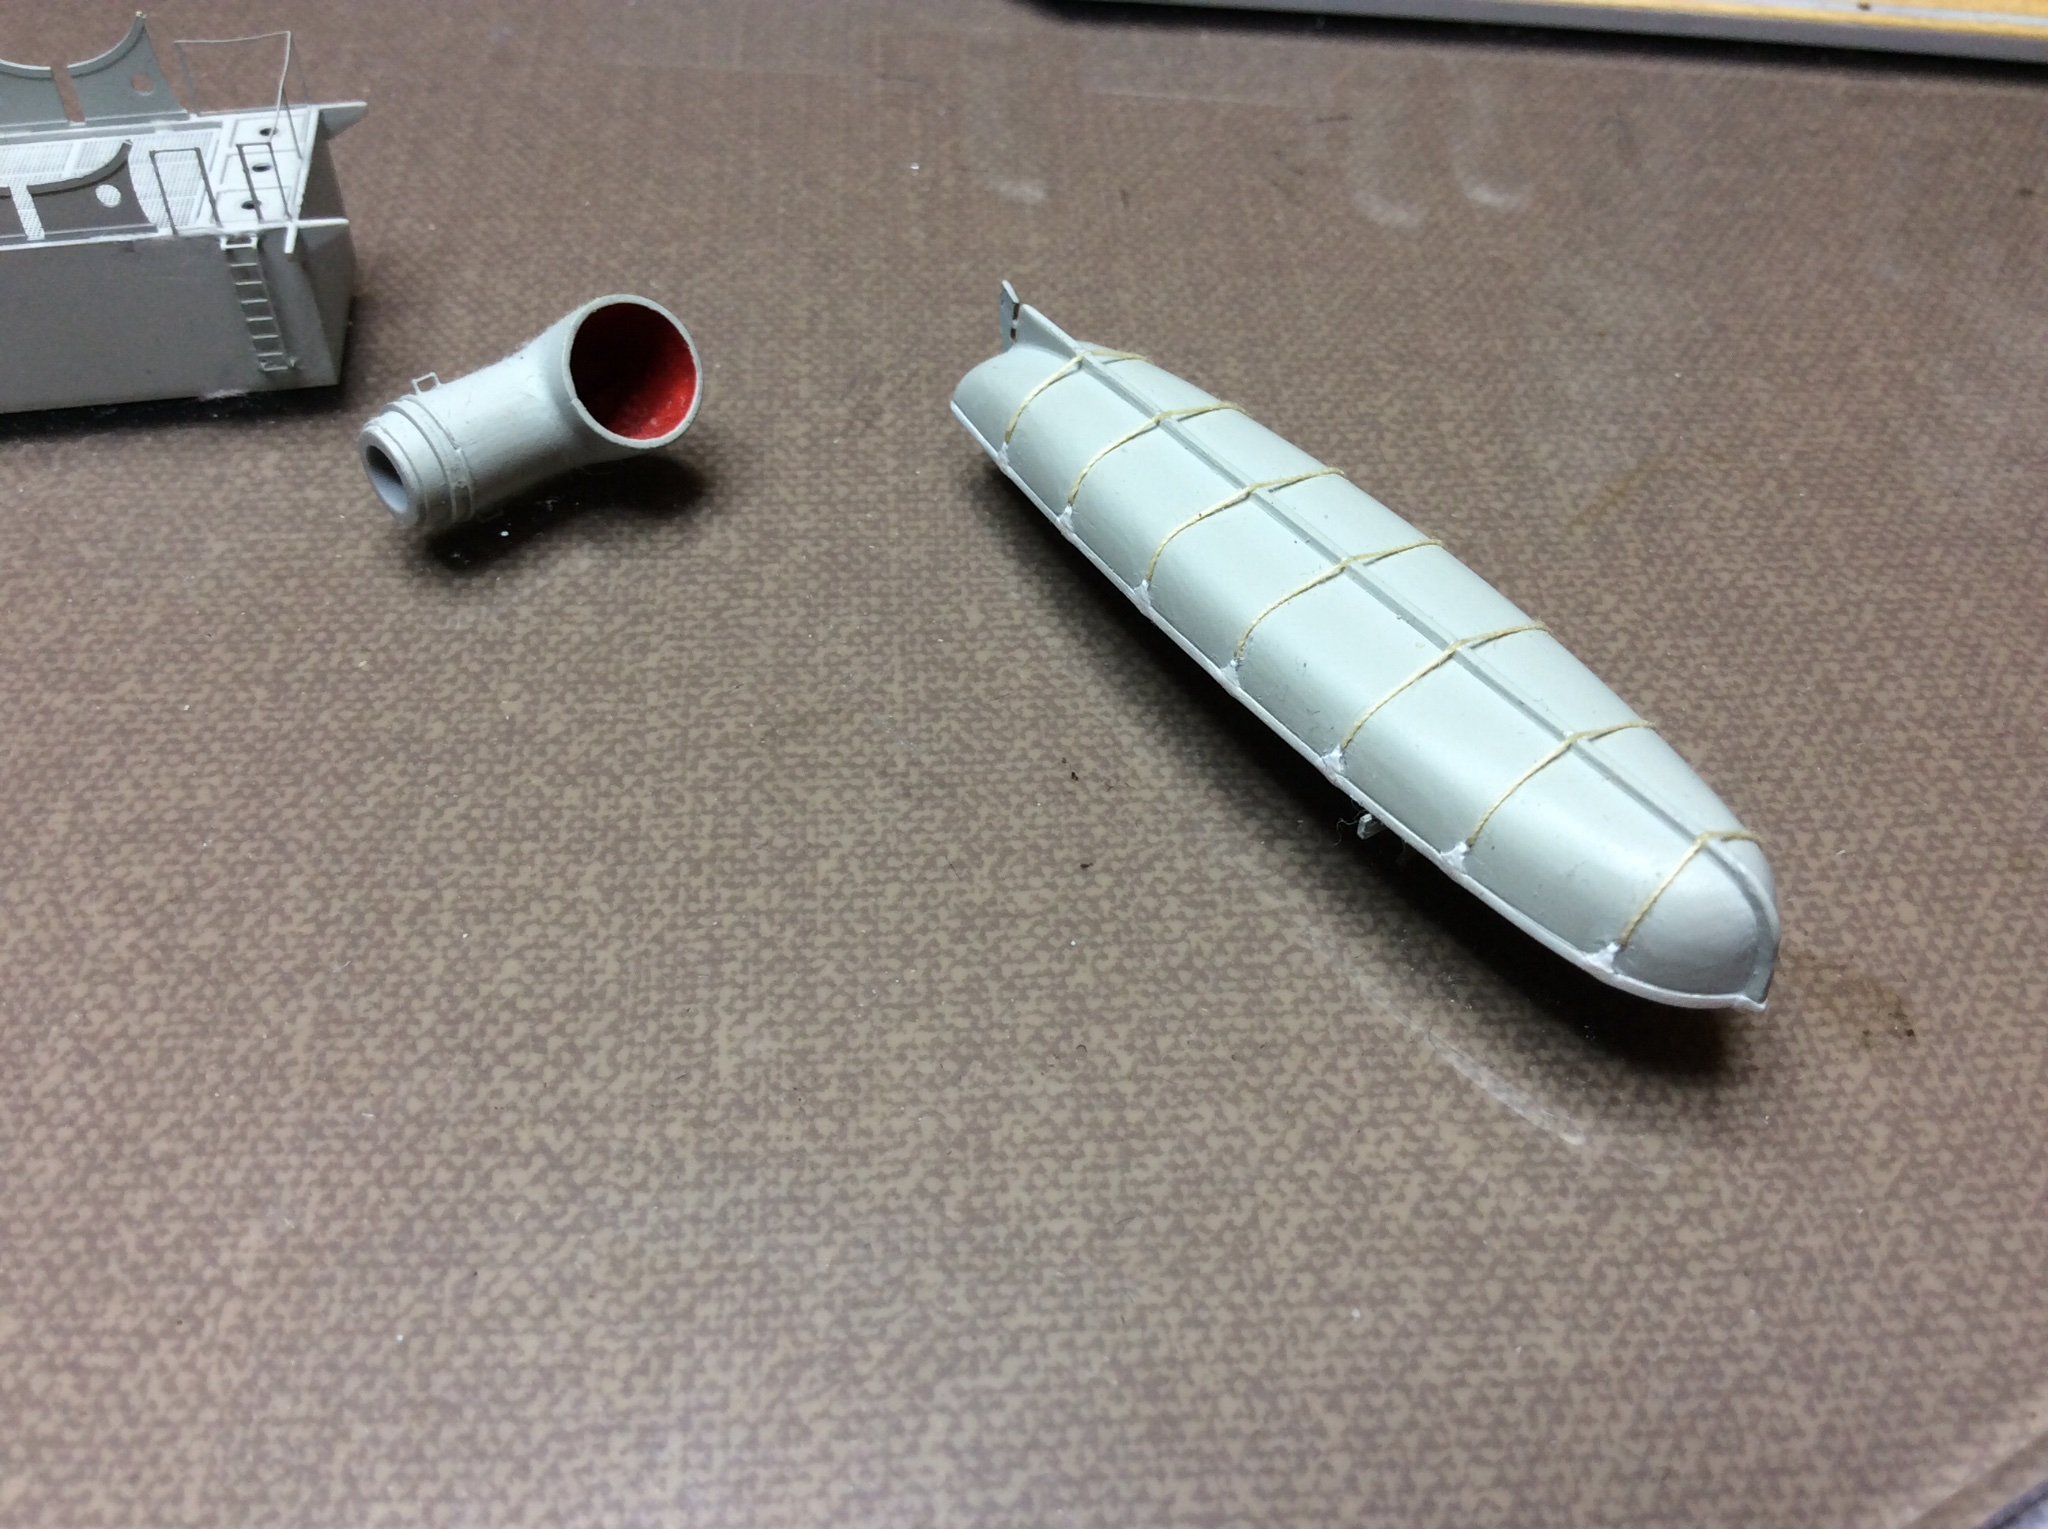
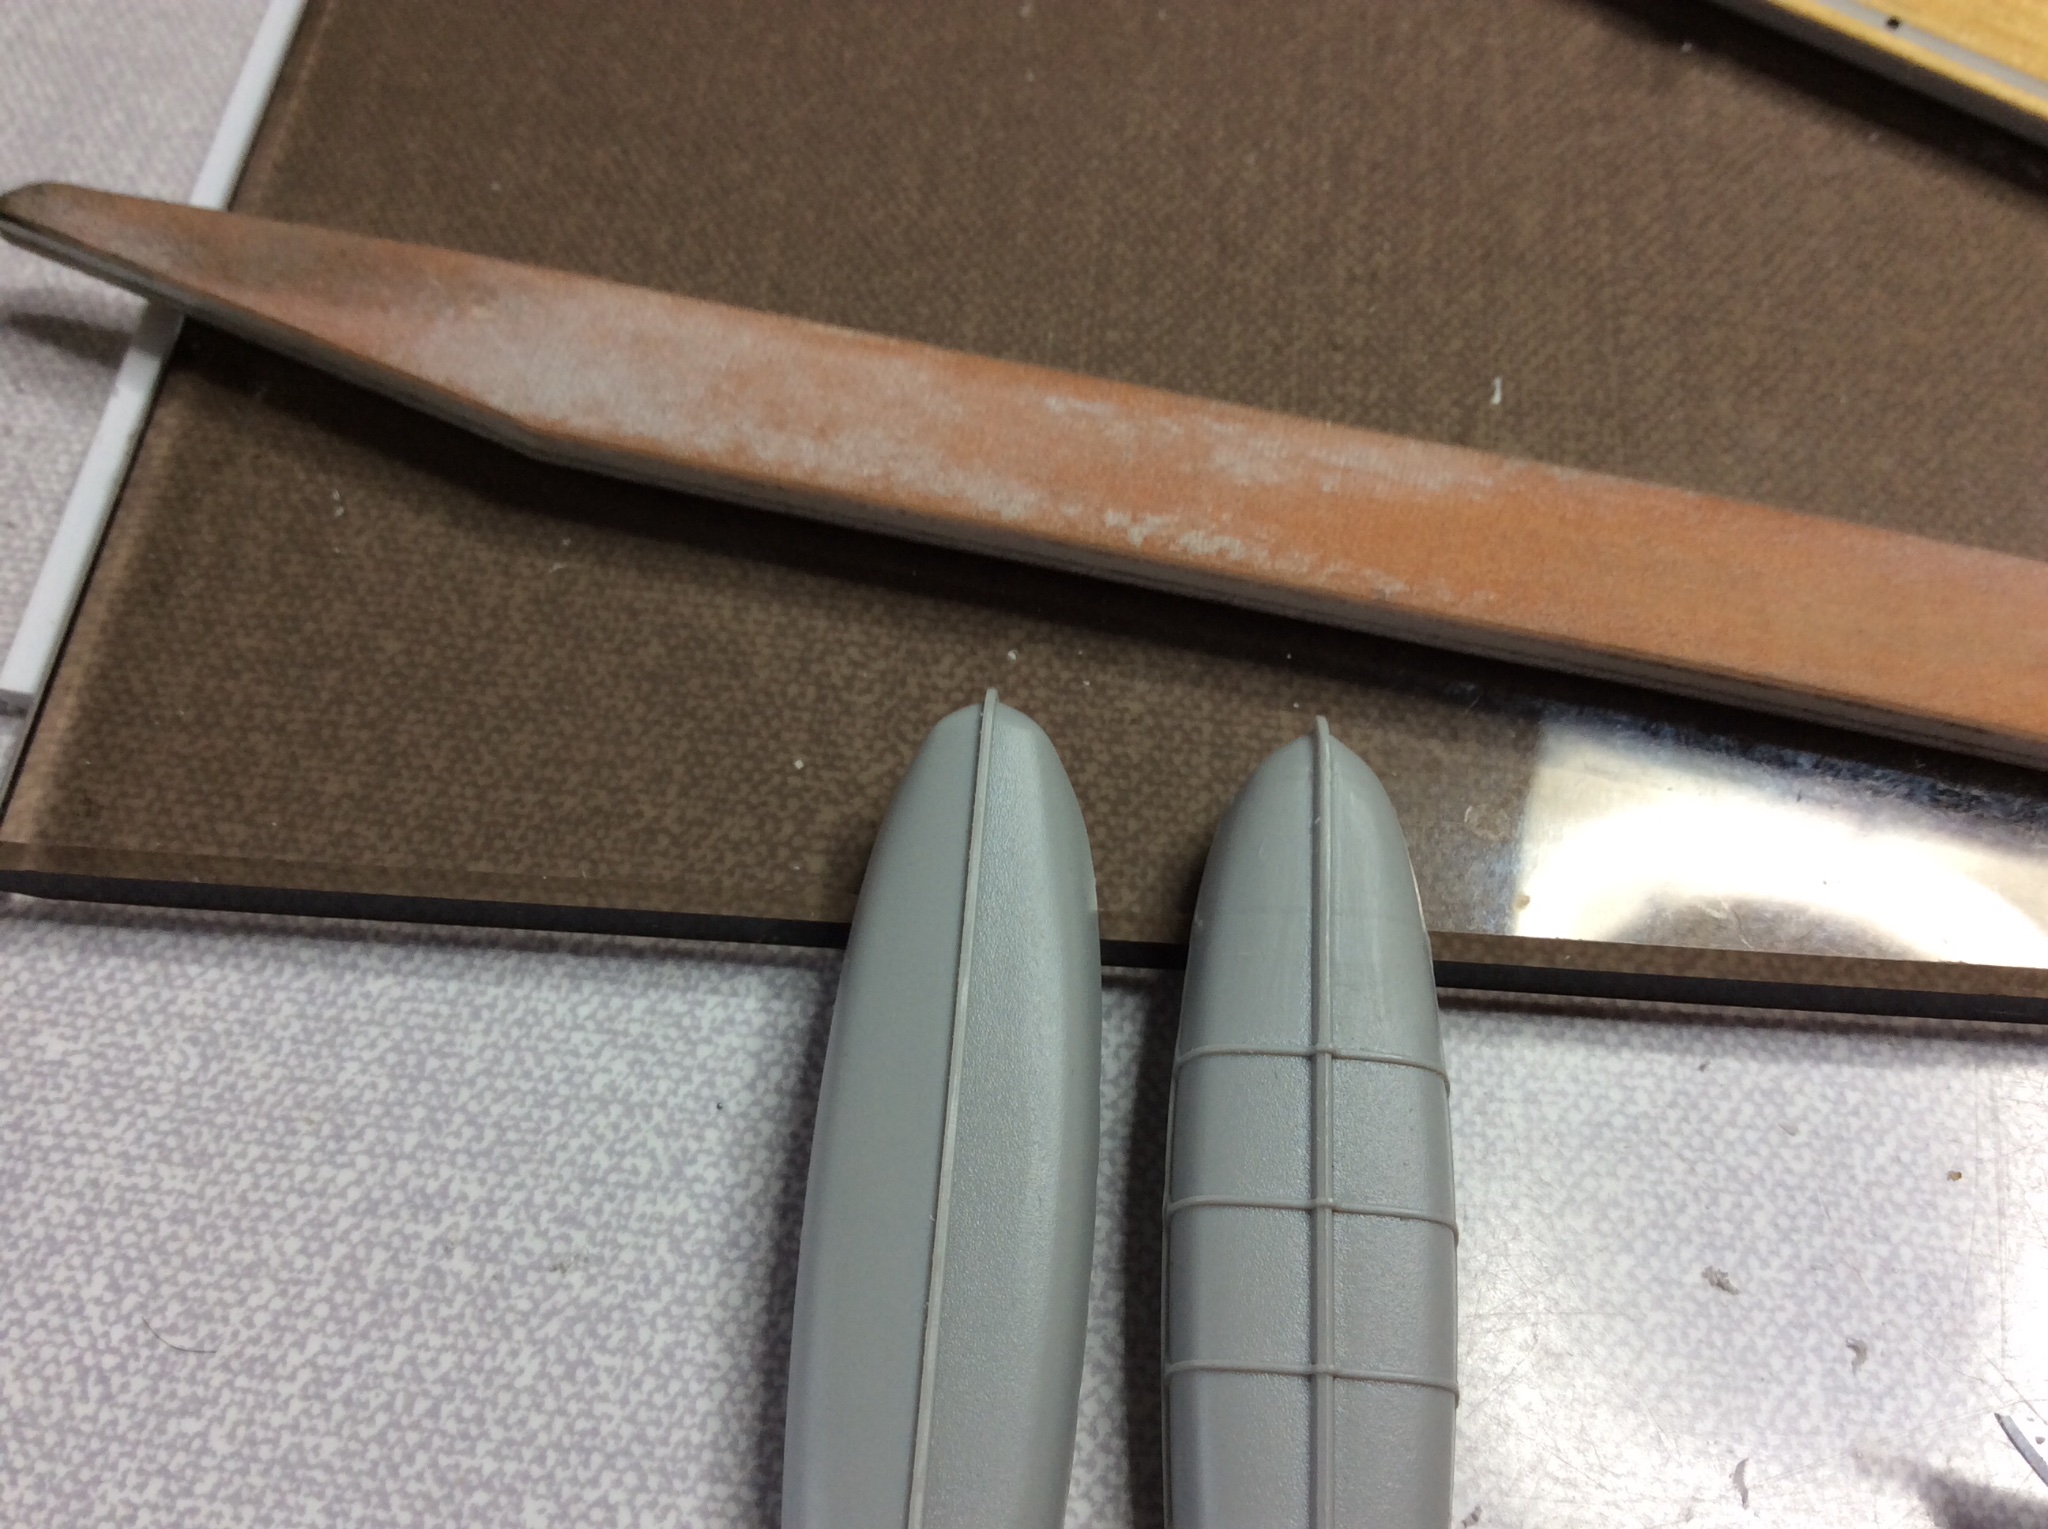
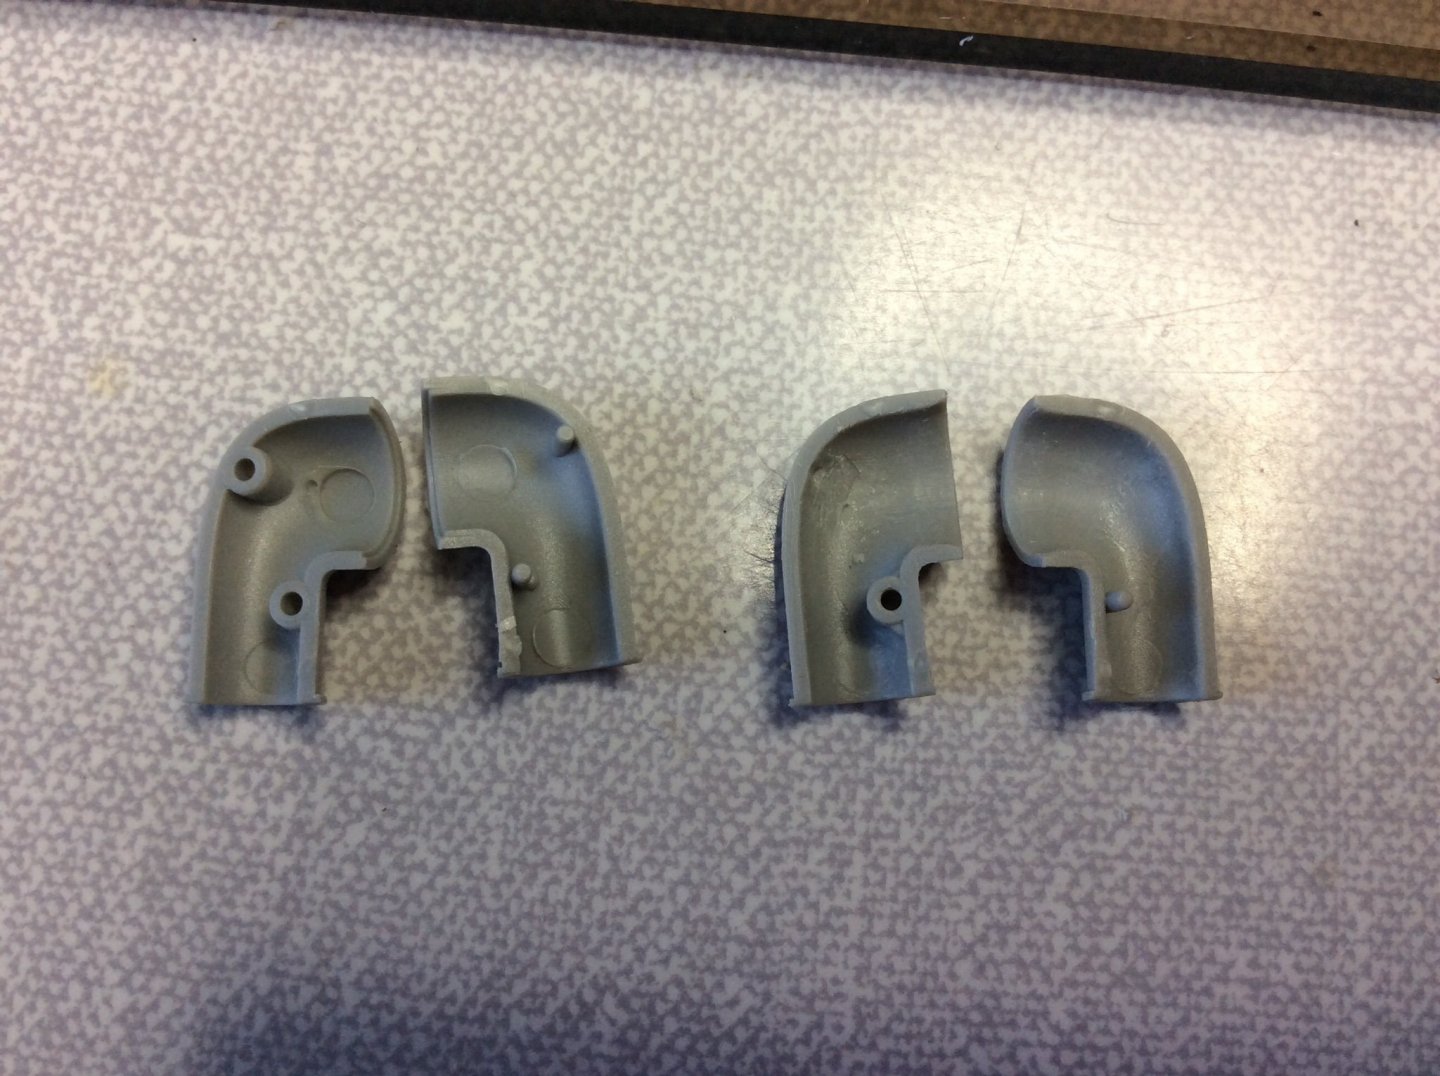
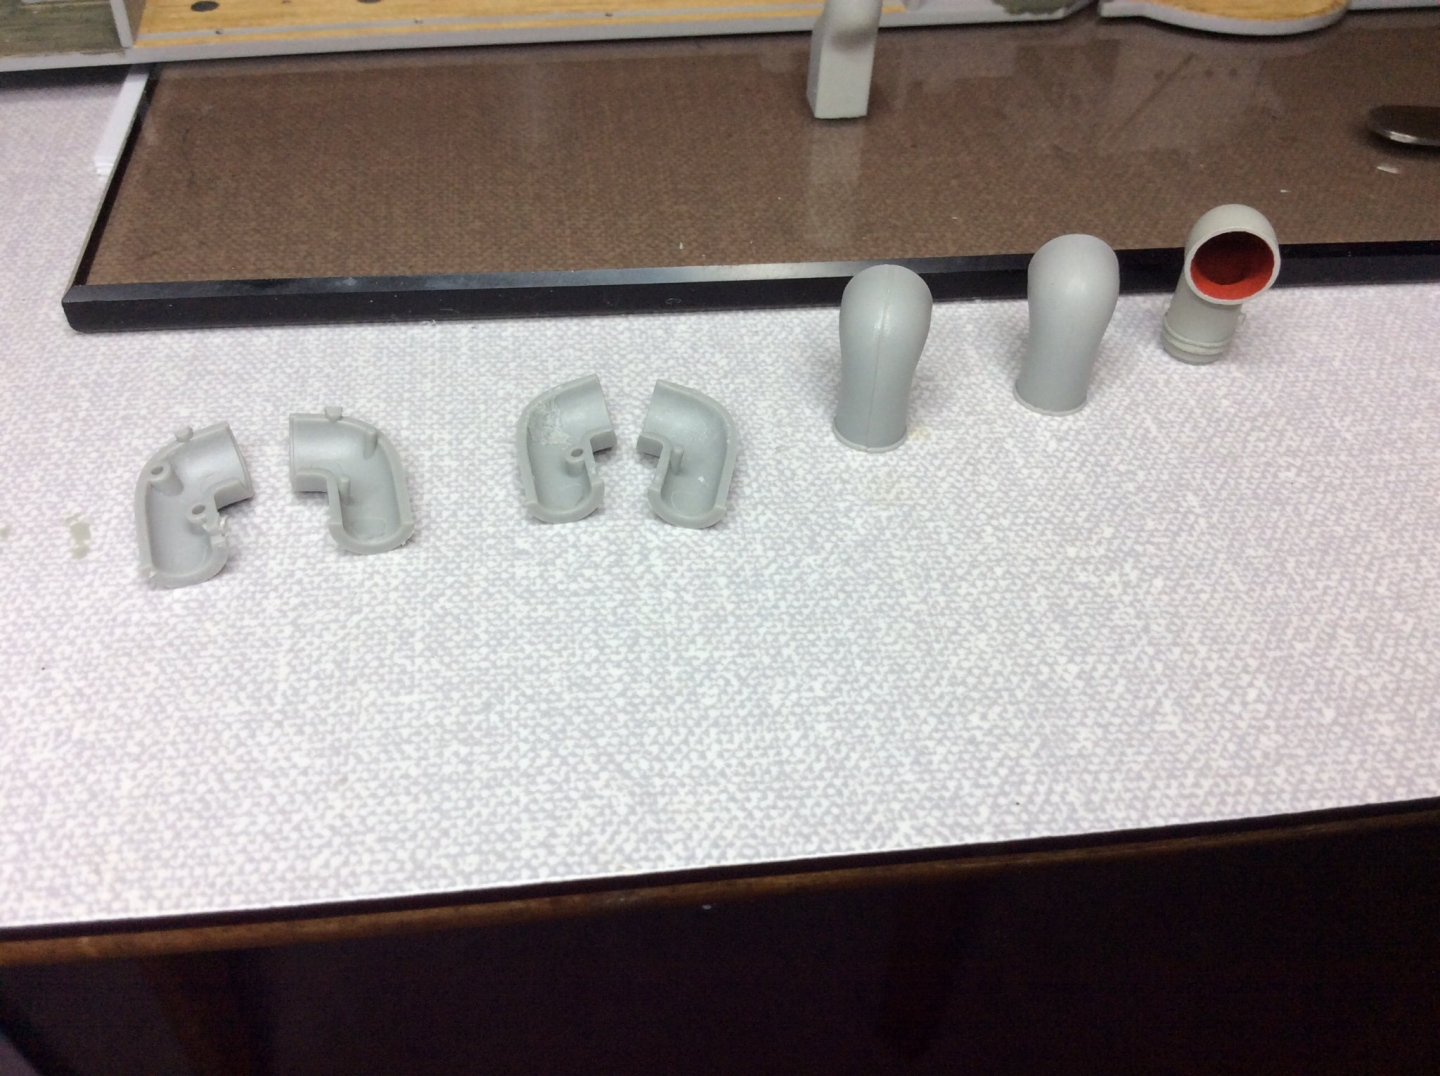
Hello again, shall try to do a final update, shall then be a break while I try to process. Shall start with Mikasa’s large boat, the kit comes with two options, open or canvas covered. Went for canvas option as Pontus don’t have any details for open version. Starting with boats hull shape at the bow, actually think it’s just a poor mould l reshaped it using my craft knife to a more appealing look, also removed the canvas tie down ropes, in this scale they would have been about 1/12 thick, so scraped them all off, then drilled 0.3mm holes in side for taking thread. Show a photo of both boats side by side so you can hopefully see the difference too bow. Also progressed with the ships cowels, since no grills to cover vents in the 1905 Pontos detail set, not going to use the kit etch for this item, besides the early photo off her in colour on last post shows no grills in place. Painting them red works quite well though, just had to use a small chisel to remove the connection pin inside, bit awkward, better done before gluing together. Done a sequence with photos to show this. The small handles at the bottom were cut from 1/200 ladders. One other thing of note, the metal etch trough parts 498, 499 fitted opposite sides to what the instructions show, purely for the hole pitches from bow to stern. Also something I missed was the main wood deck when fitted slightly overlaps the attachment holes for the 3” guns, was a fiddle for me to move over for half a hole. Better to plug these holes with suitable styrene an dress, then re-drill carefully through the metal etch. Finally glued some of the chimneys together, just kidding , funnels, just for a change of scenery, glued together then removed surface details and plugged holes with styrene , the drilled out holes in pipes in top of funnels. Fitting the etch detail around funnels was time consuming but straight forward, just glue it as you go. Shall put some photos on know. Shall return when I have made some progress. 🤛
-
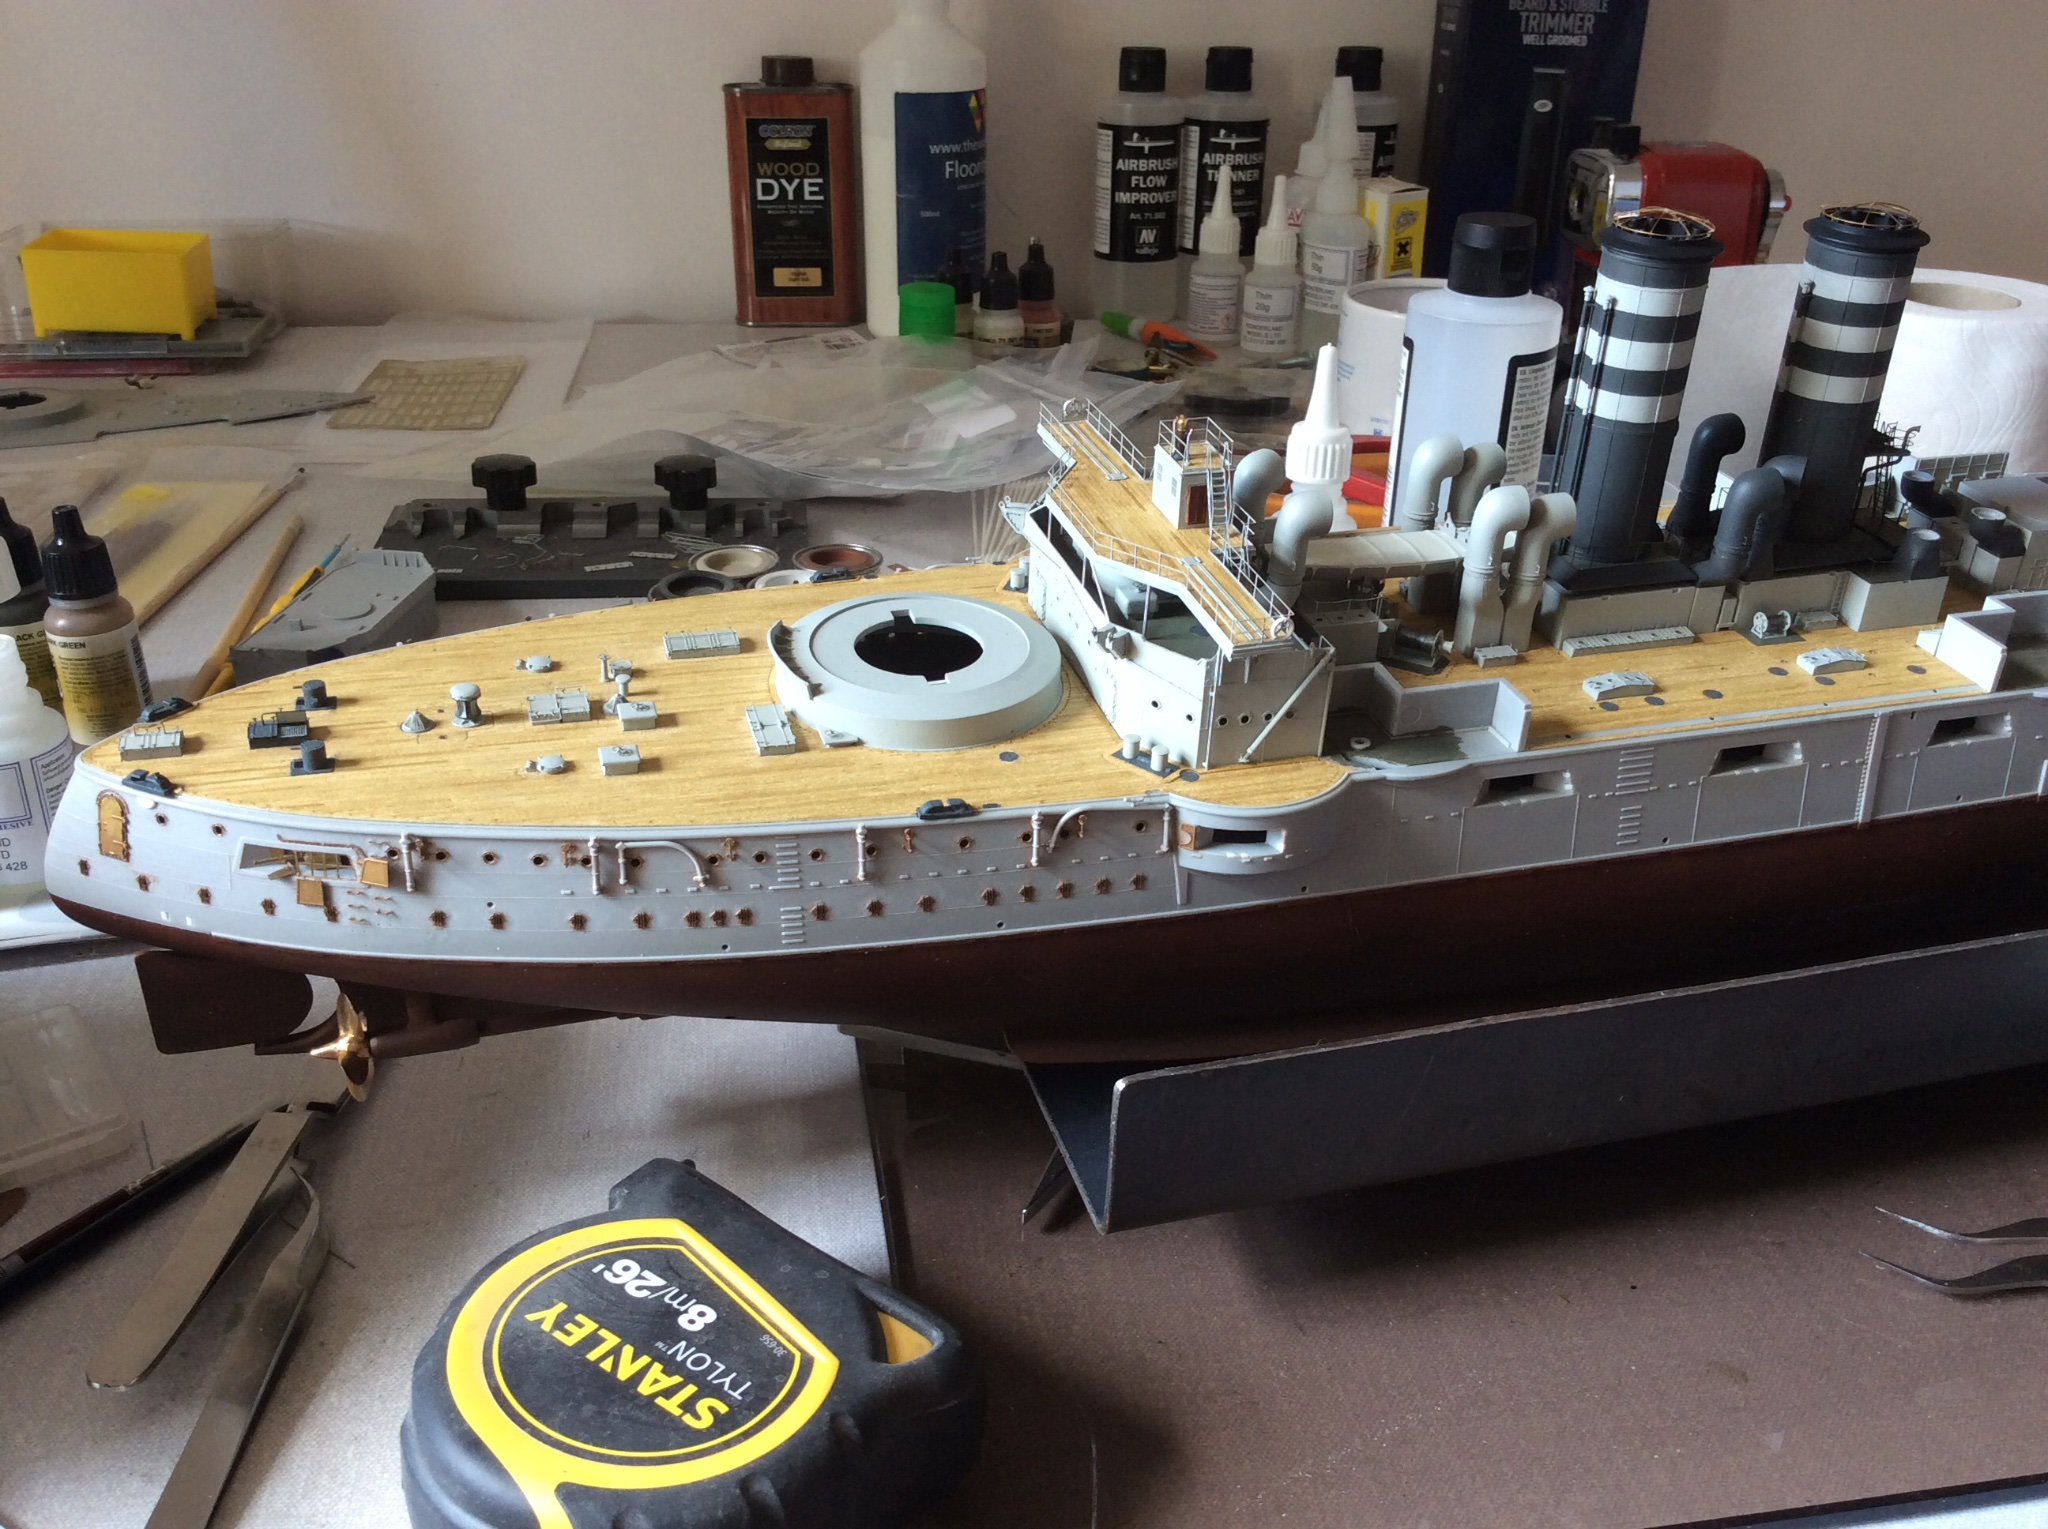
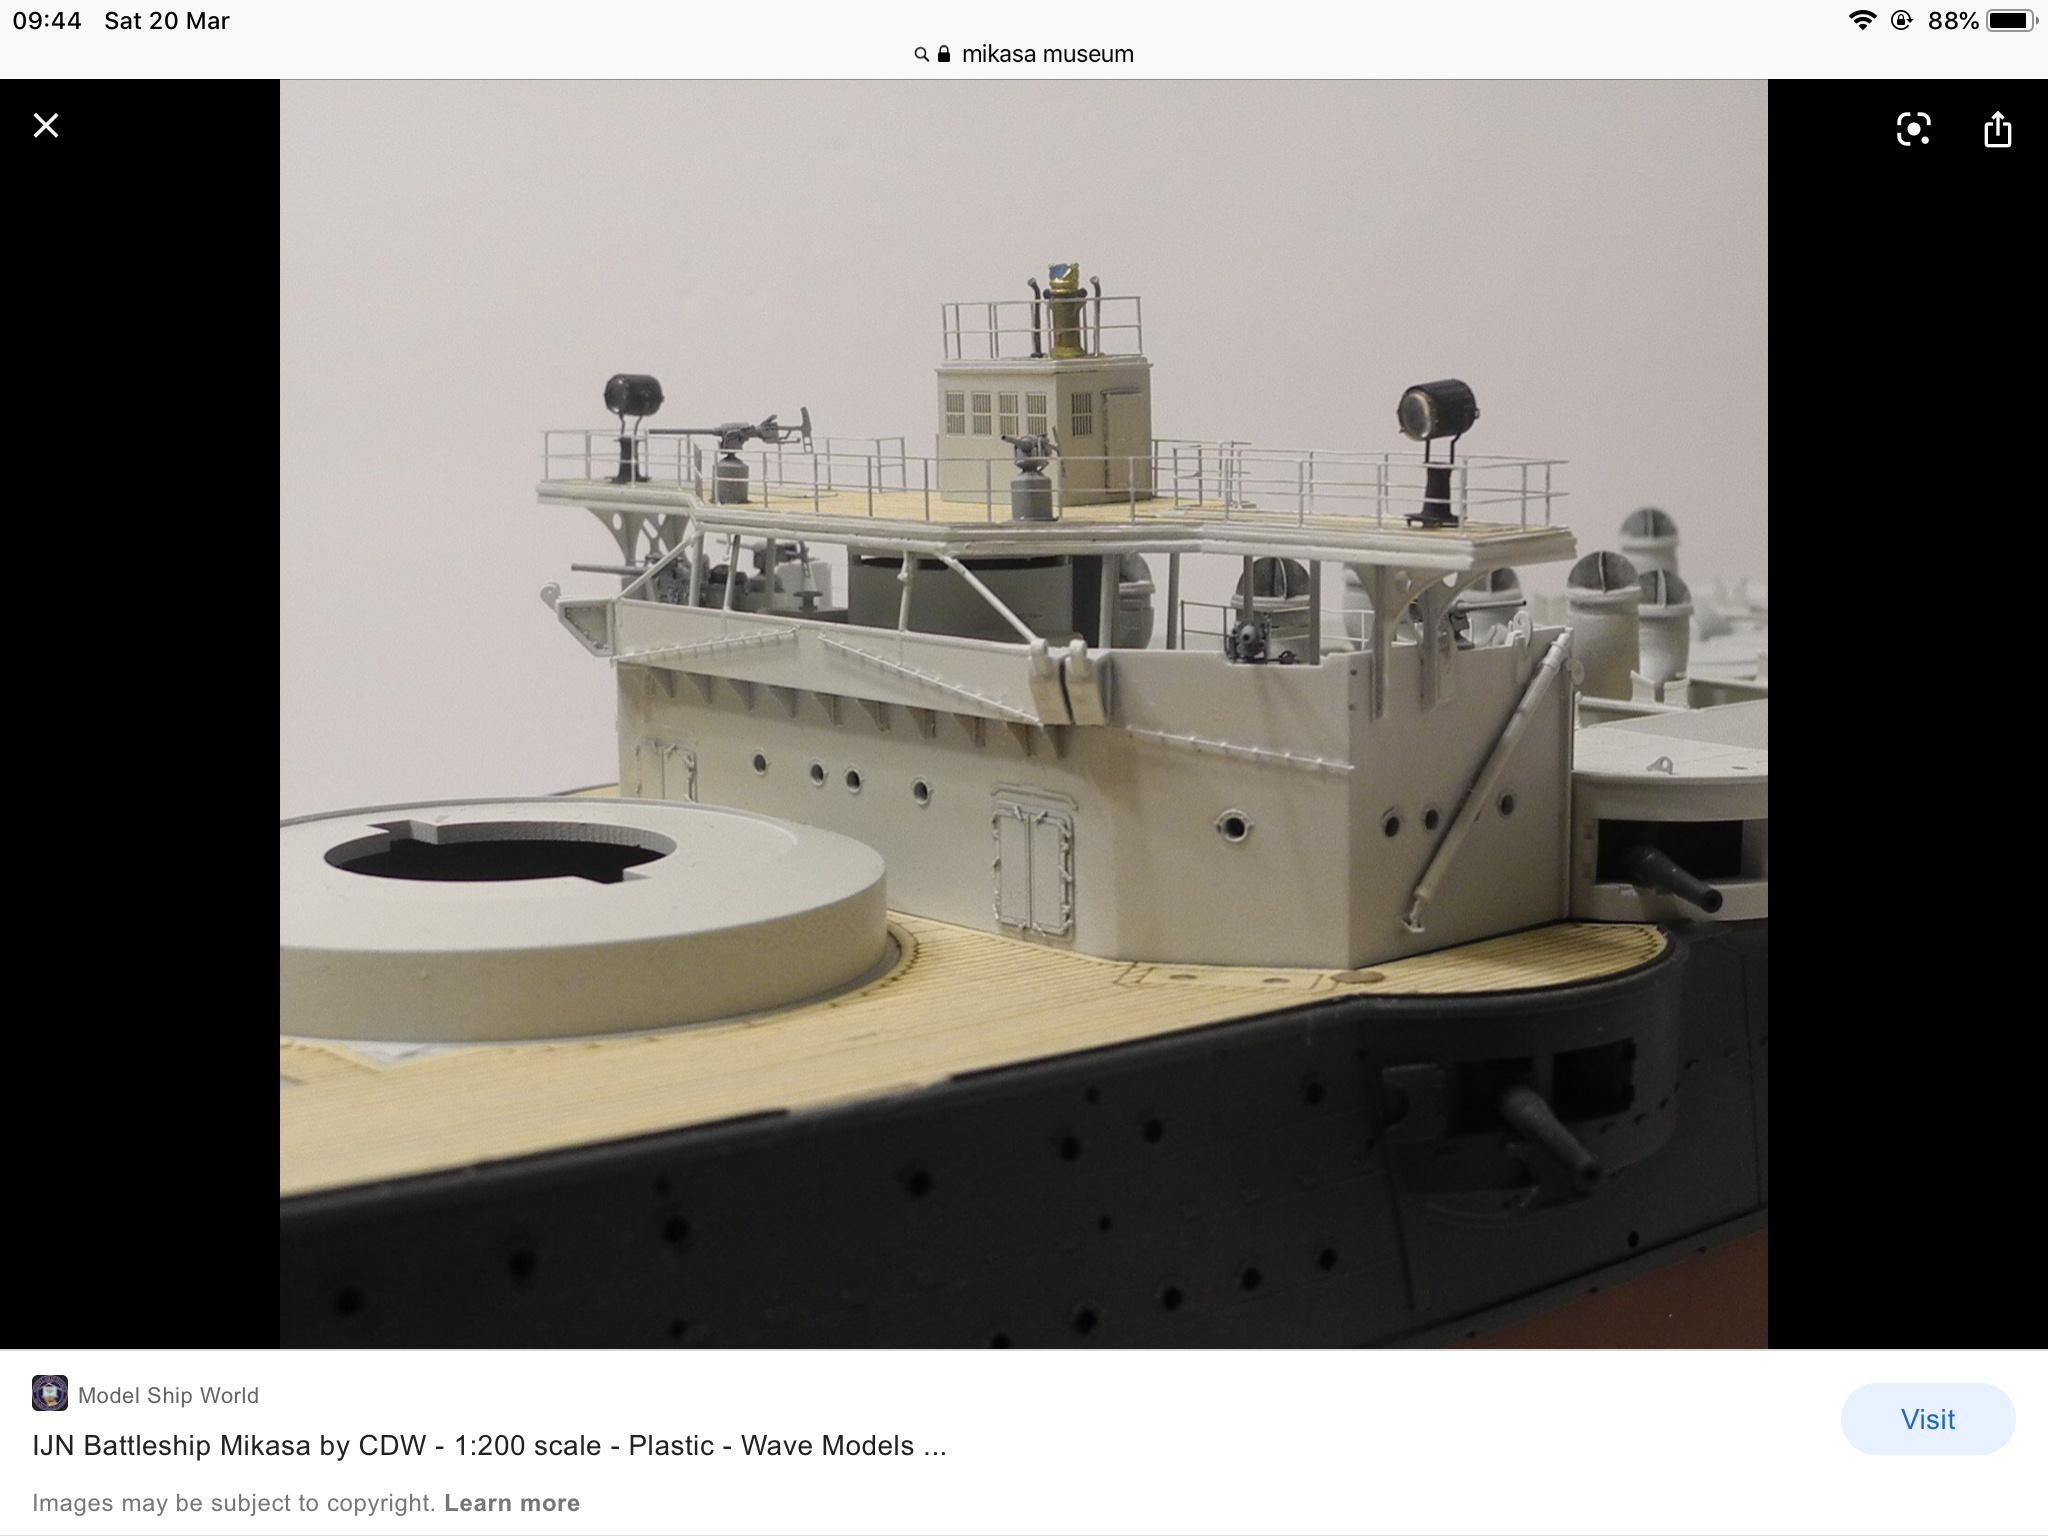
Thanks Yves , The wood deck was the easiest part of the build, with the biggest result, deceptively easy, just treat it like real wood and experiment with what dye works for you. Anyway one other Fupa I made was my belief that the binnacle on top of bridge cabin had to face forward, after all who steers a ship looking back the way, lol. Then thought wait a minute the armoured wheel house looks back the way as well. Oh for a good book on the Mikasa. Looking at it , wondered if the parts would work loose since I used white glue, gently tried to move the binnacle and the whole deck came away from the cabin , turns out I hadn’t glued this, so gently lifted it away, that was a lucky break, turns out I was able to pop the parts out using my fine tweezers, and drill the holes in right place, last hurdle was plugging the holes with suitable styrene rod, then punched out some wooden discs and glued in place, all went well, just had to be gently with the hand rails and ladders all ready fixed in place. You would only noticed the repair if you New it was there. Might stand a couple of figures over the offence. 😂 CDW mentioned the deck lockers, lots and lots of them he said. He was right, but what a difference they make. Since there isn’t any photo etch for the cowell vents? Still hope Pontus do an additional upgrade for 1902 version, needs 3inch gun shields and details for gun platform on masts, here’s hoping. Decided the cowells are open anyway, at least in her early days at Barrow and Furness, photo shows this. Post some more photos now. 👍
-
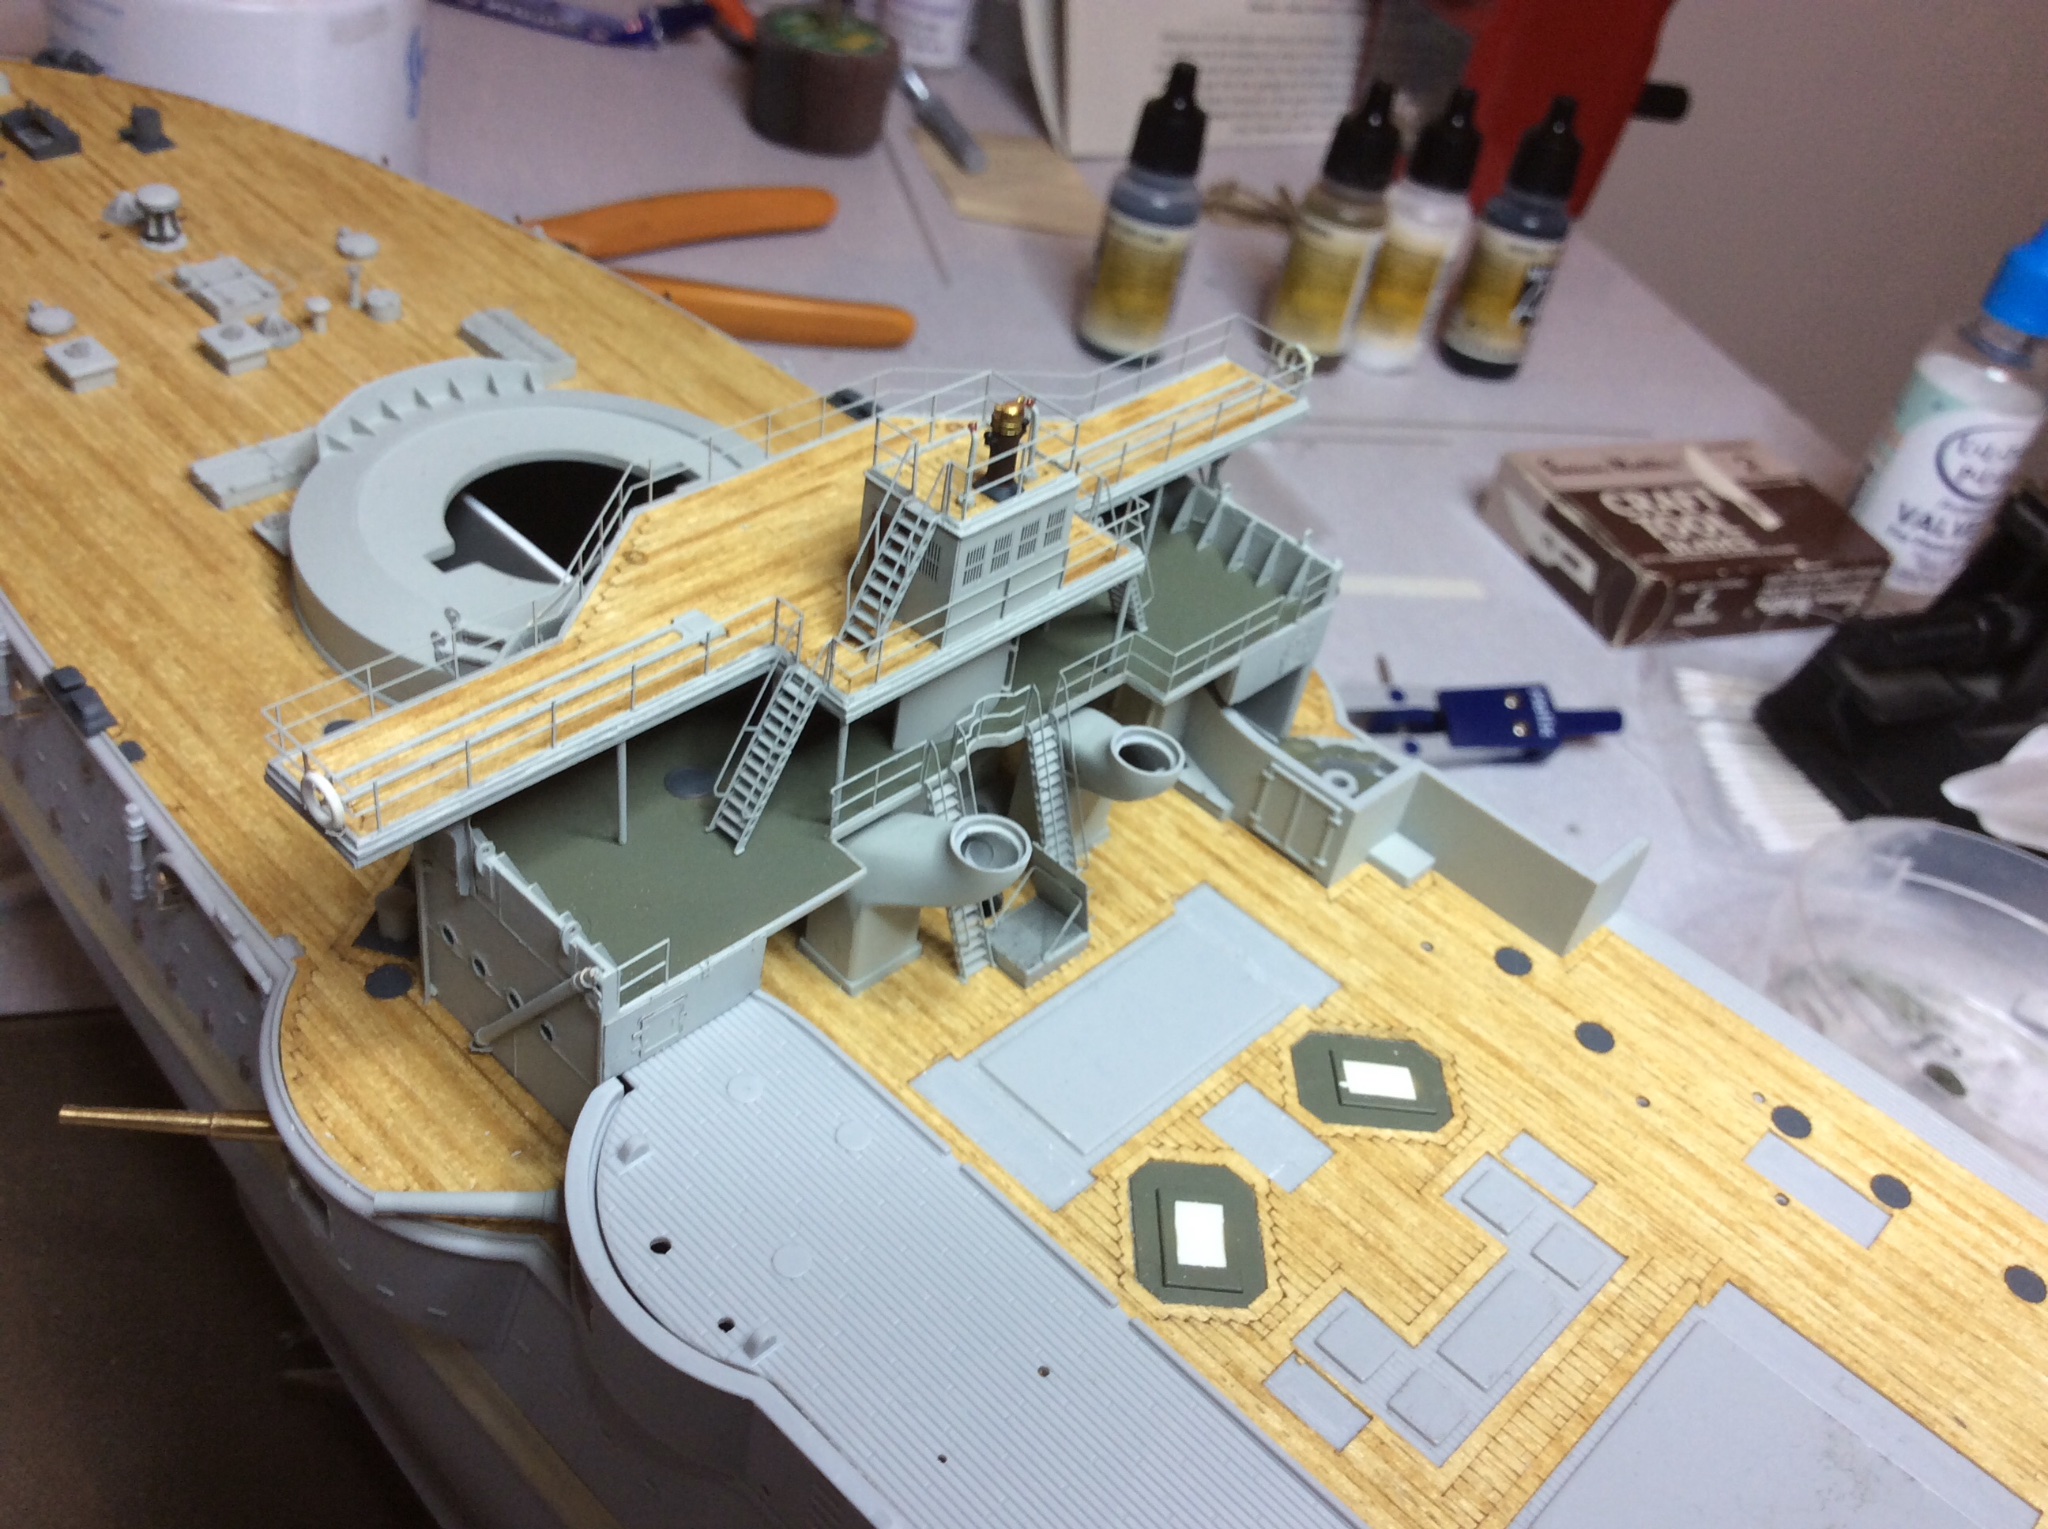
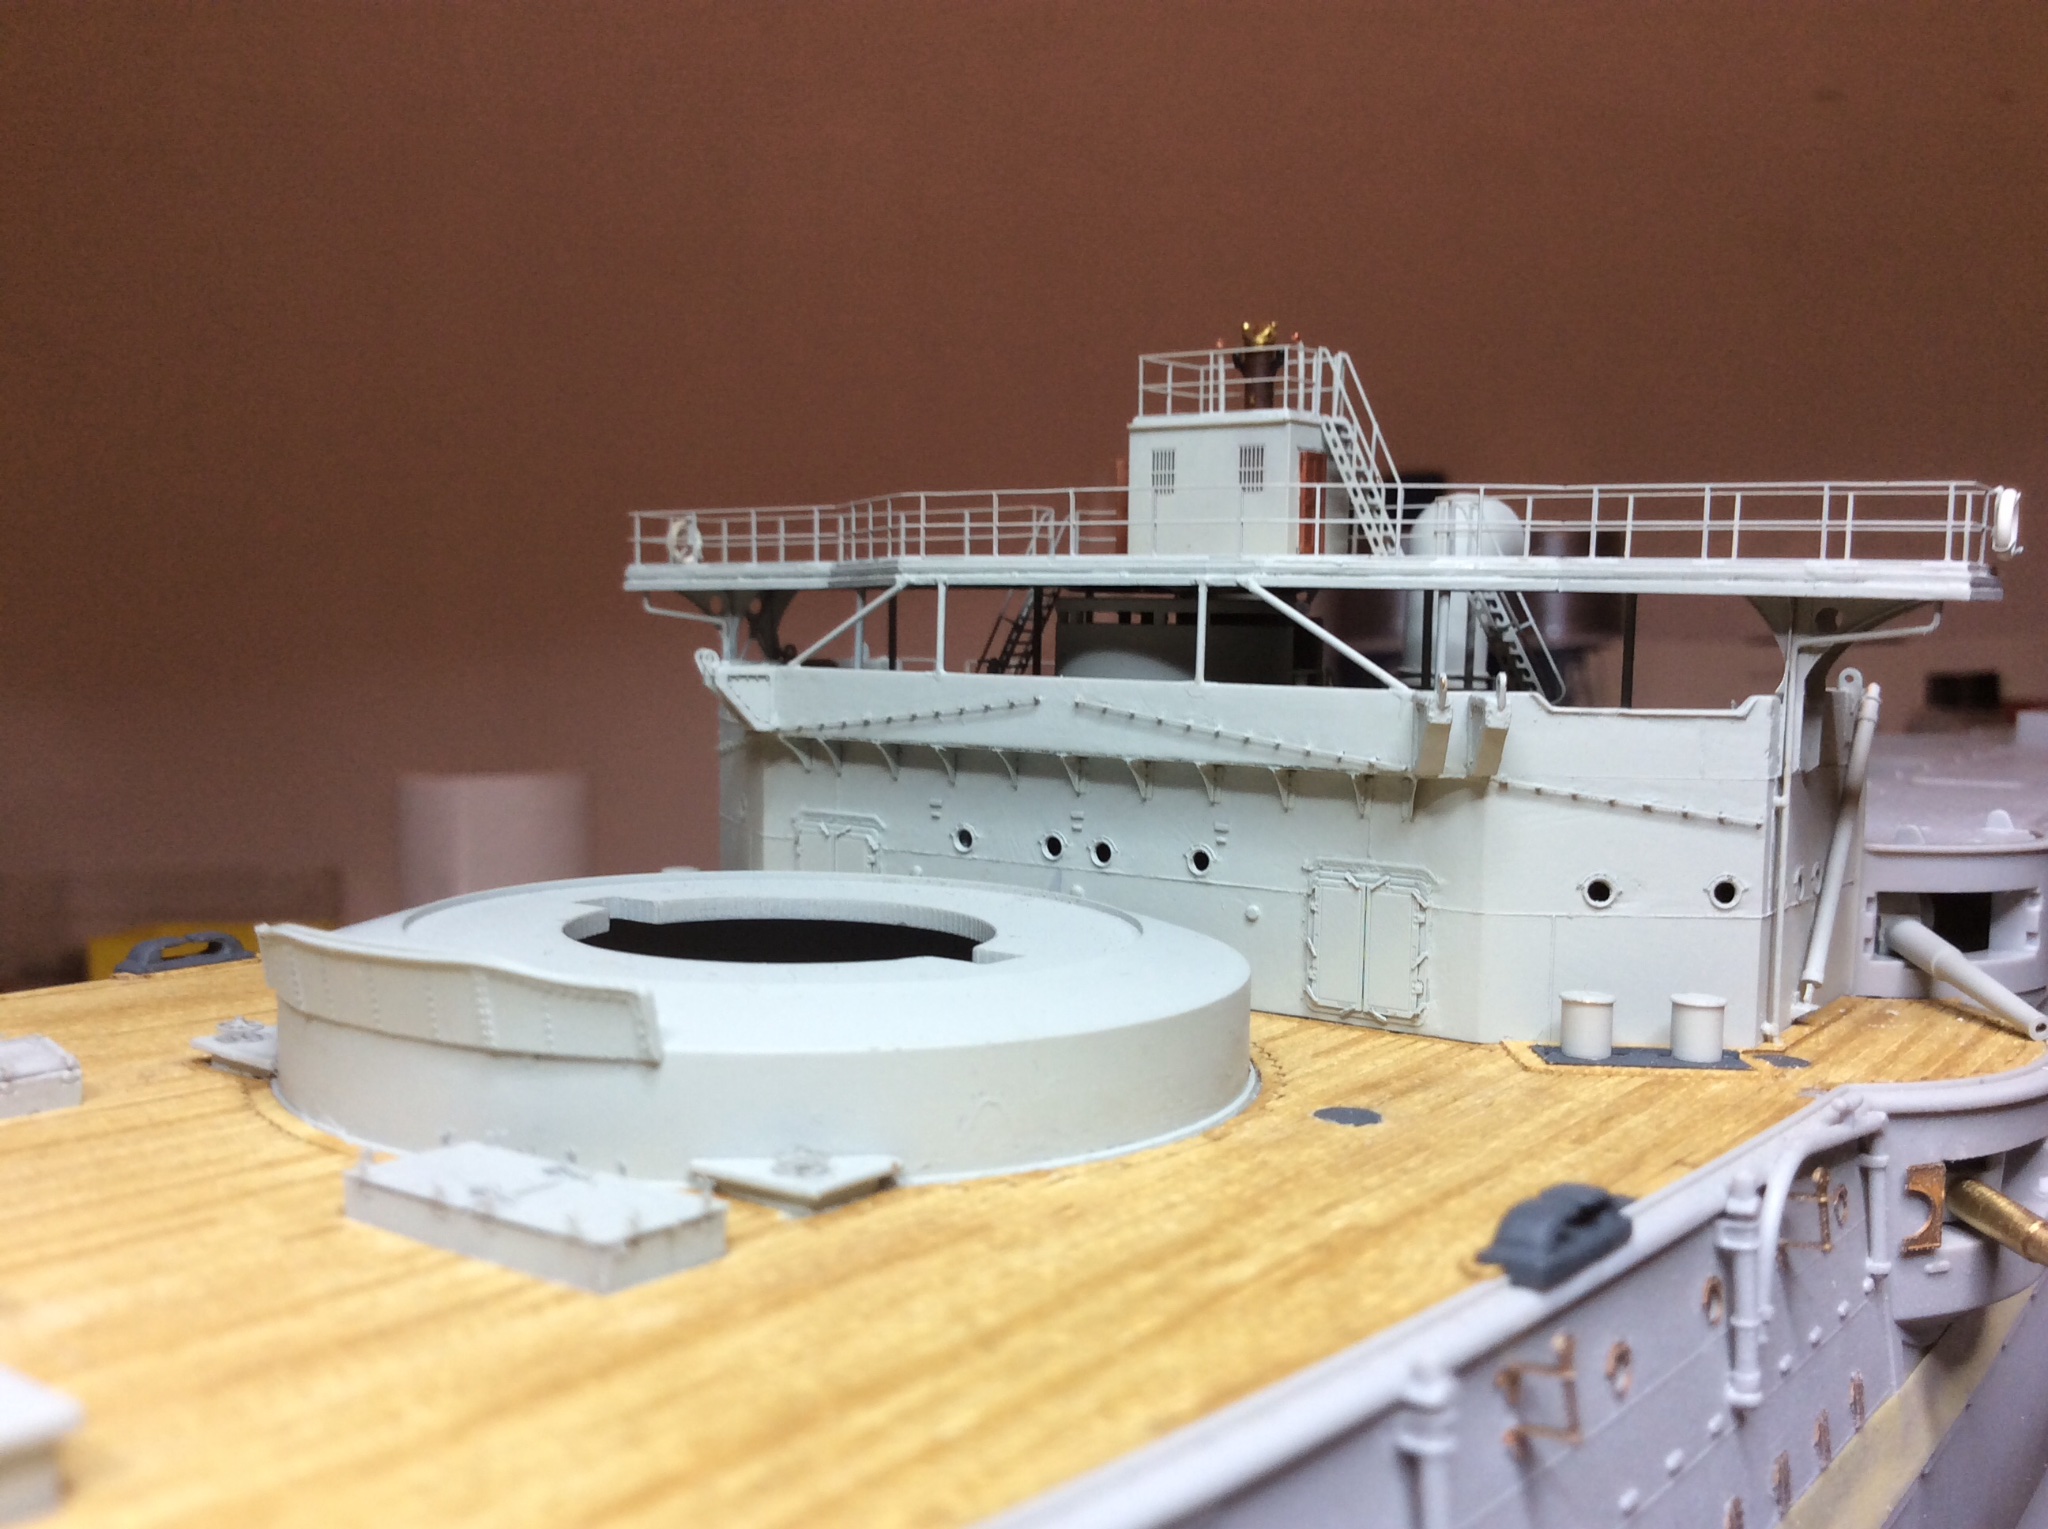
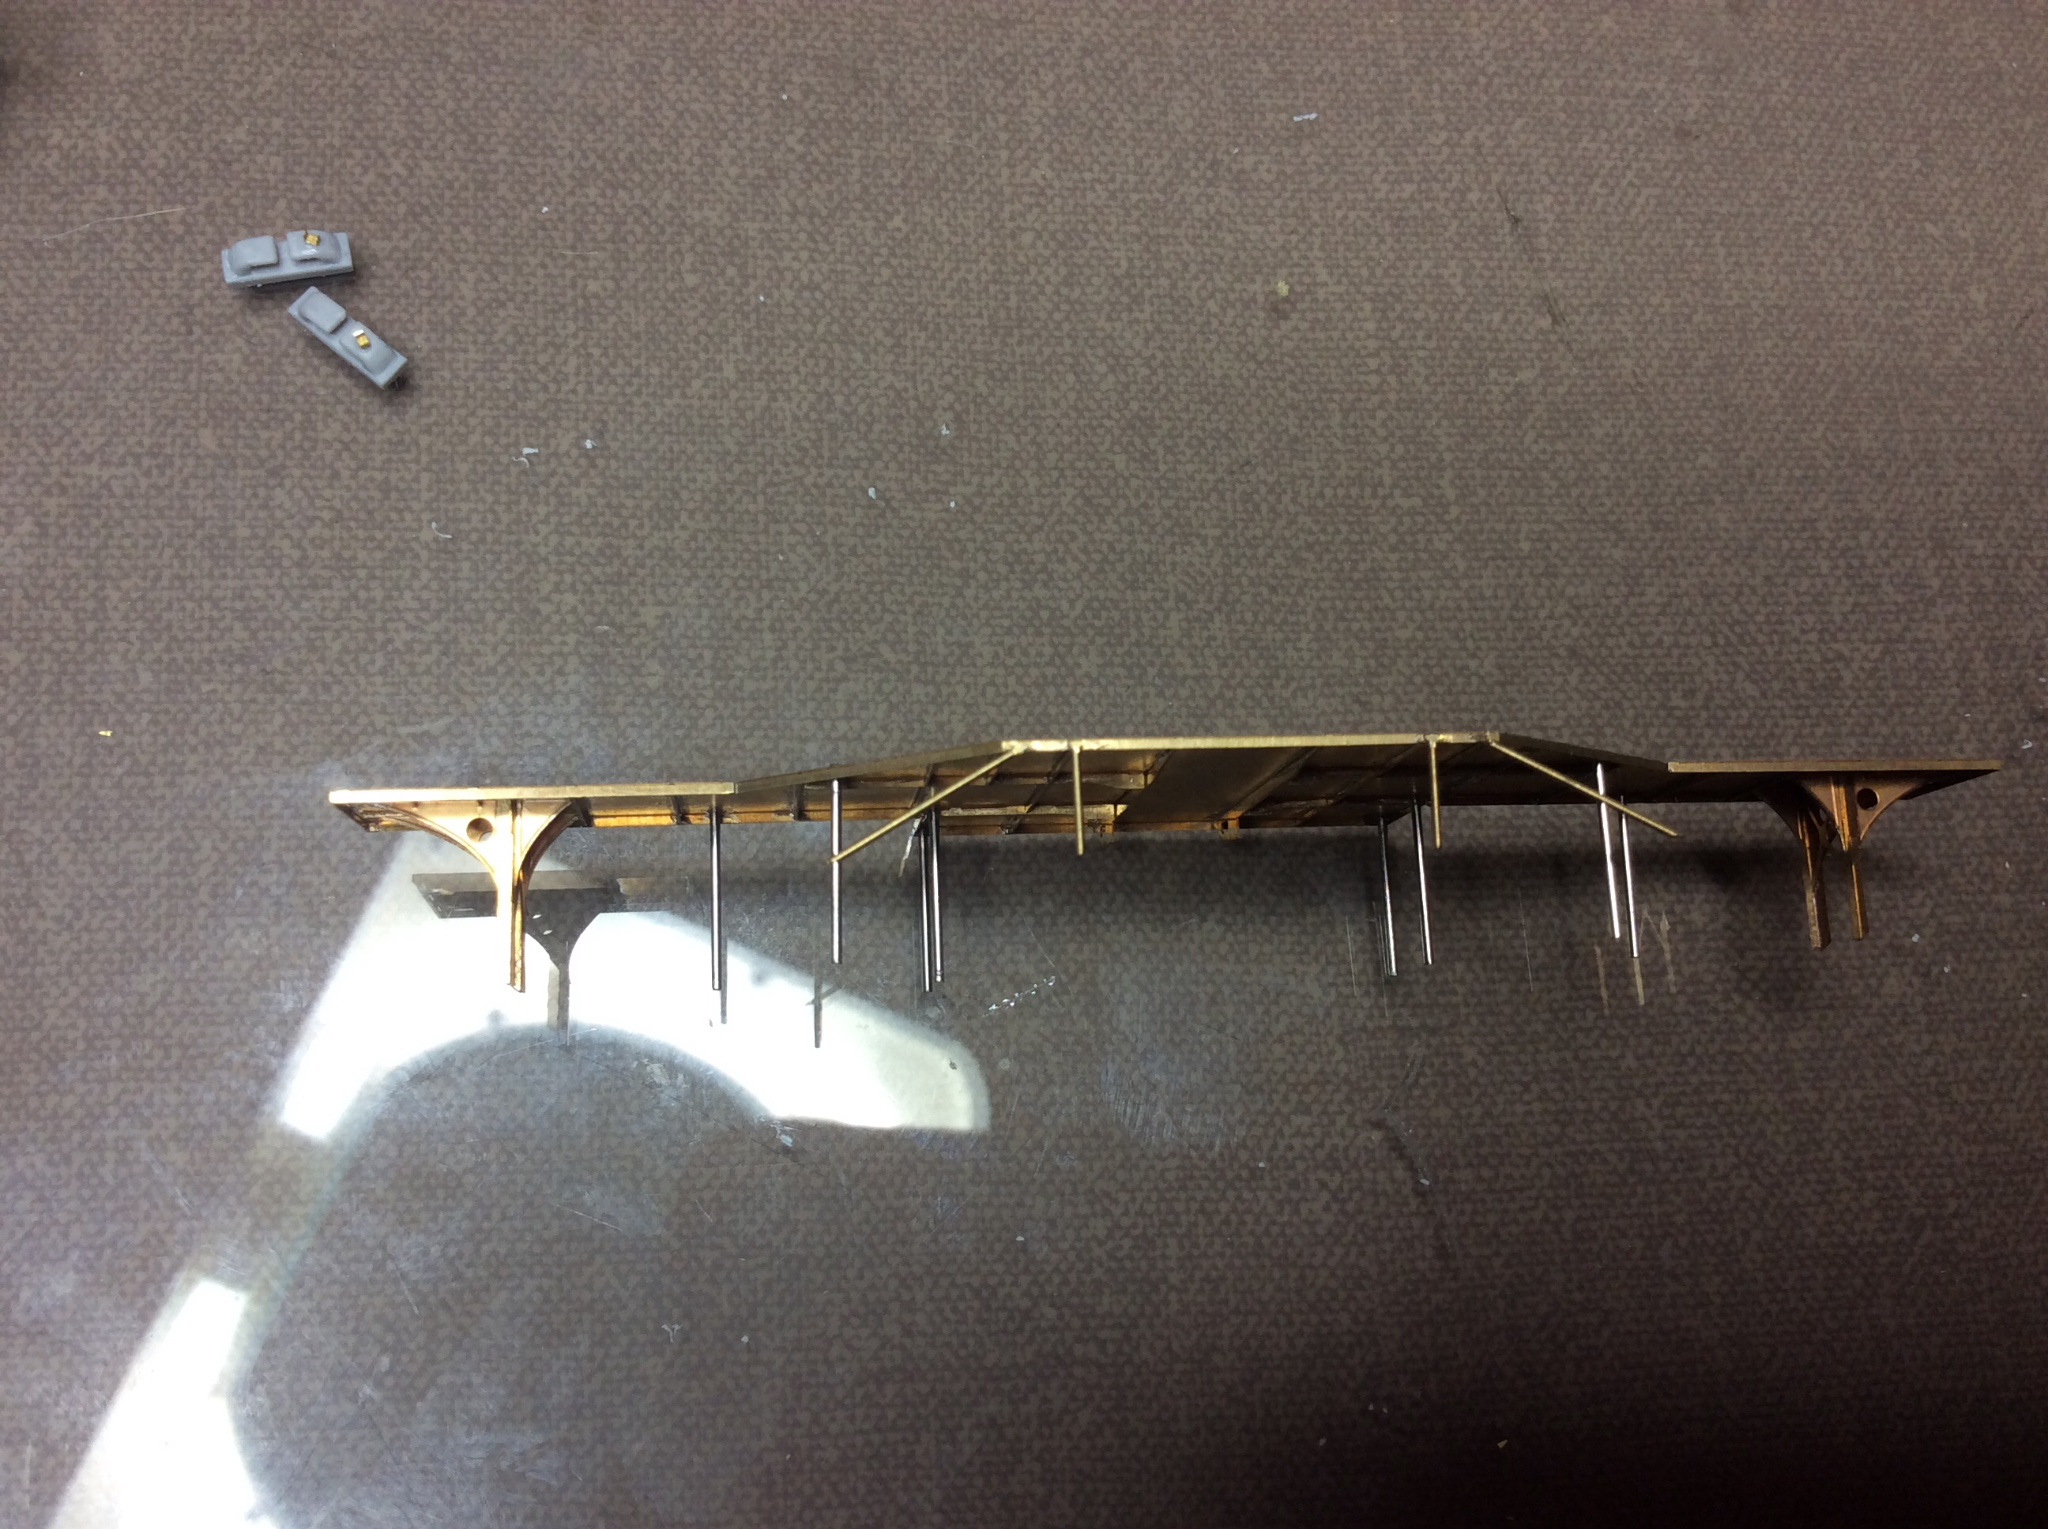
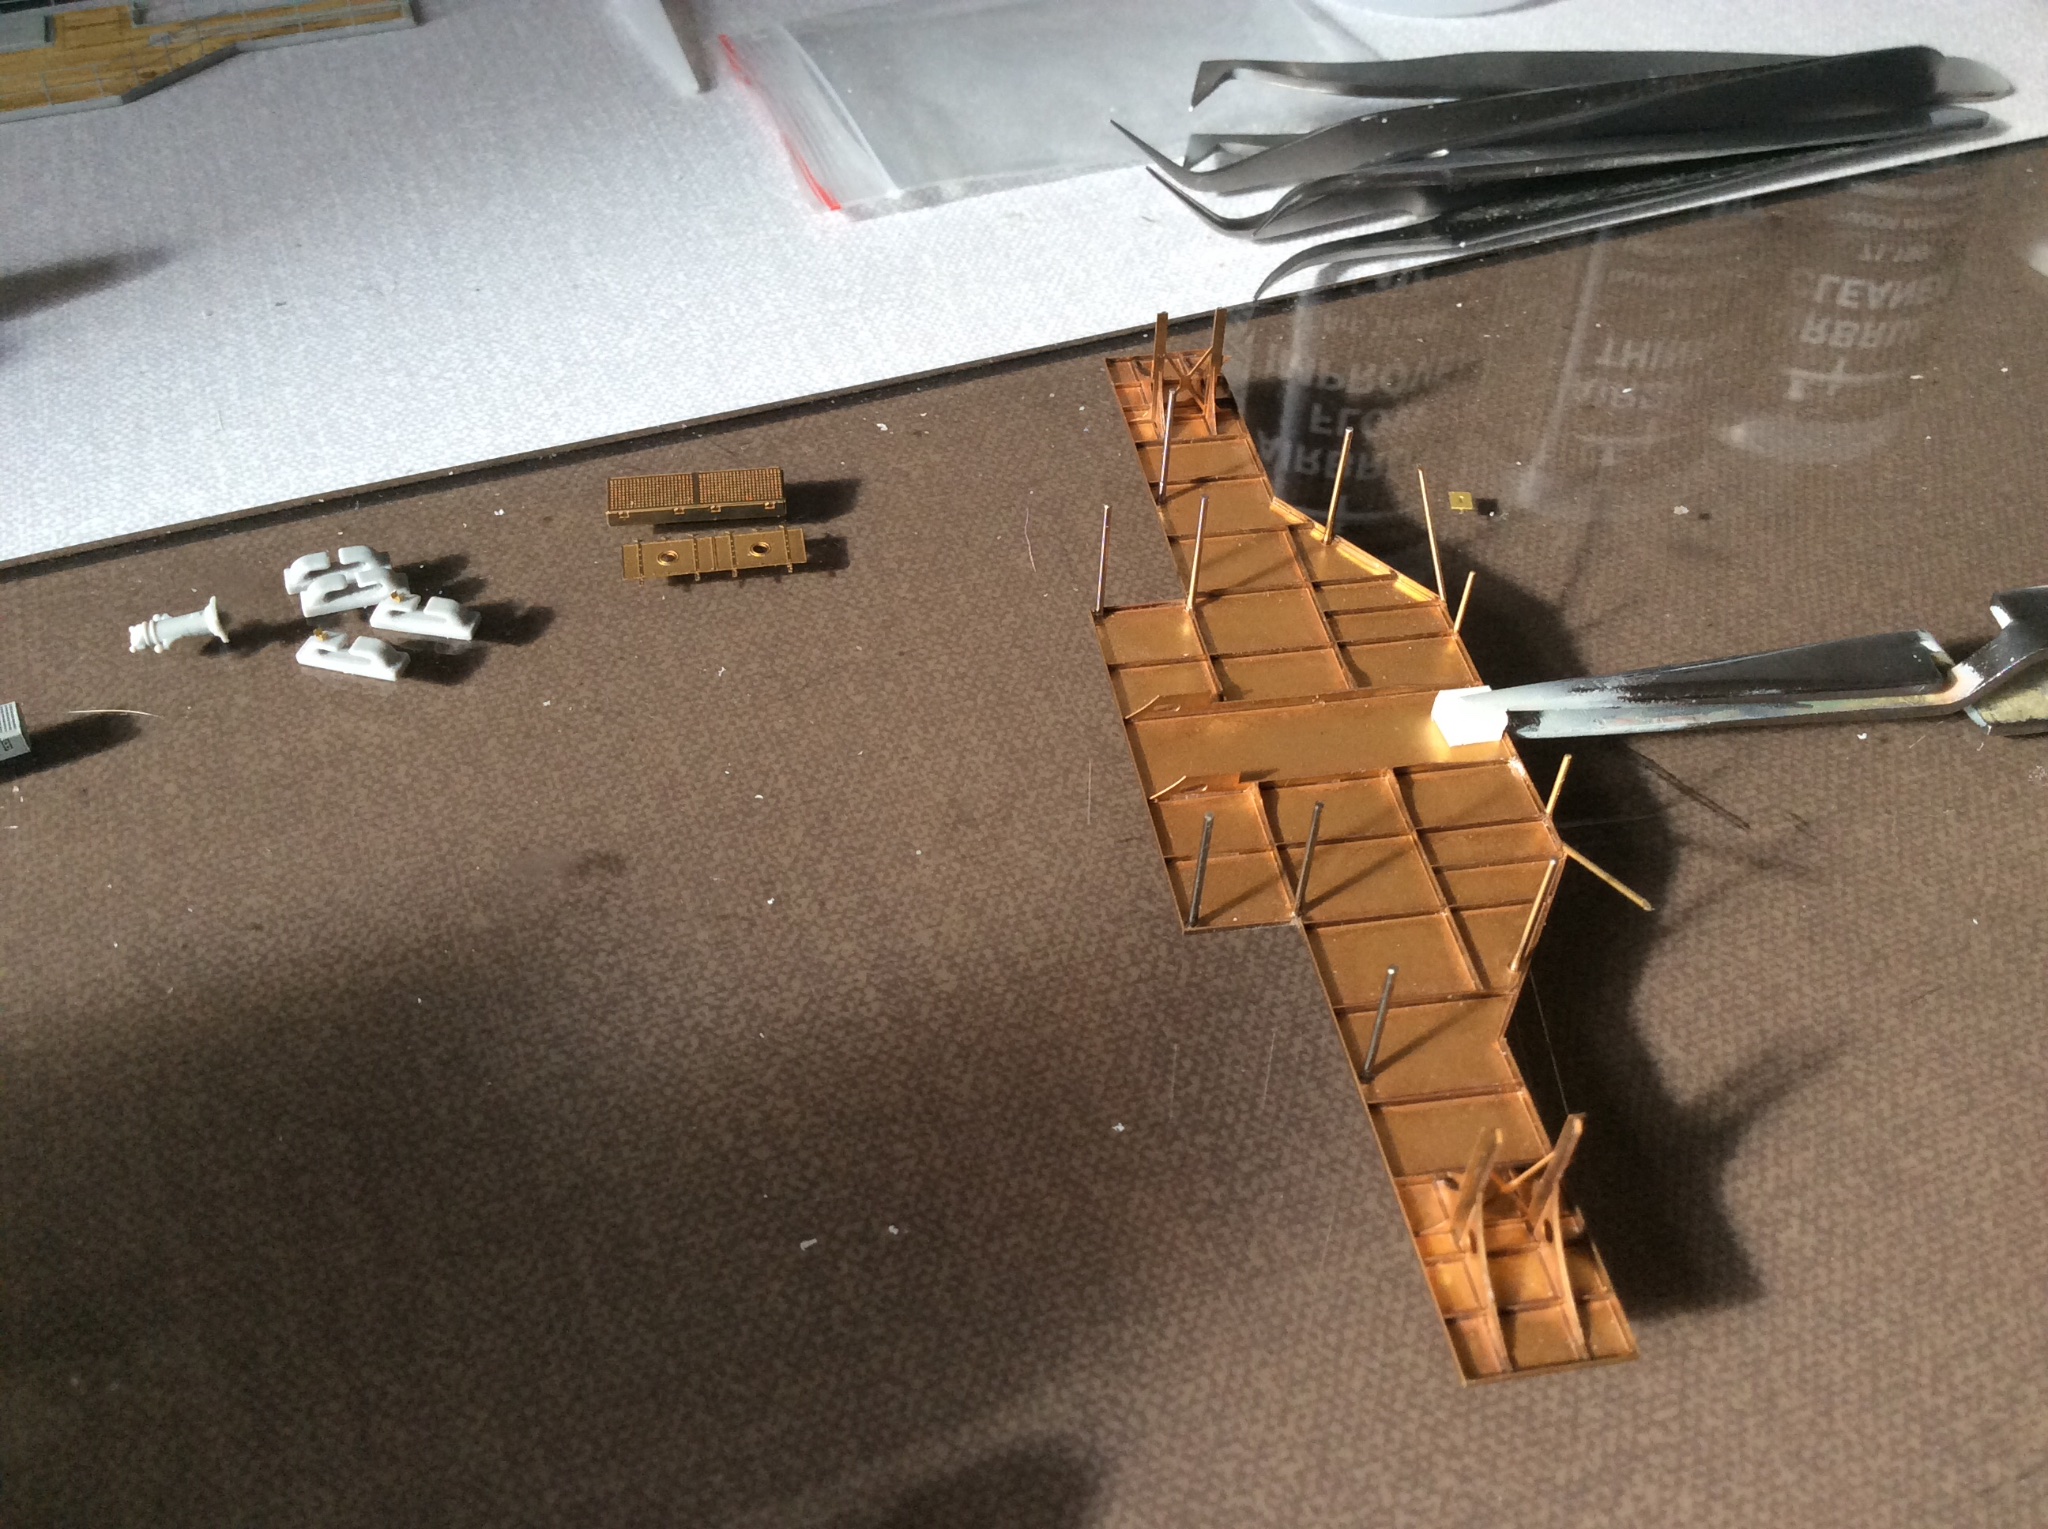
Hello again, going to continue we’re I left of yesterday. Turned the bridge wing upside down with legs pointing upwards, squaring them up so they all look true to each other, it helps the strength if you add a little glue around the support. Once dry and tested against lower bridge superstructure, gave this a spray paint. Now it gets a bit hairy, can’t recommend this but I got it to work, placed the plastic bridge wing section with the wooden deck and hand rails fitted upside down so as it was sitting on handrails, done this on my glass work tile, the top handrail should be touching surface all round if your lucky, now I placed the etched bridge wing onto the upside down plastic bridge wing and carefully line it up, once happy tacked it with supper glue at suitable point, then double check alignment, then tack again, a light pressure can be applied to close small gaps till the glue takes a bite but you have to be very careful or you will end up bending the handrails, you don’t want that. This all worked for me, but I did feel I was at my limits, hope there is nothing harder than this in the kit. I did take some photos of this but can’t find them. When it comes to the forward bridge will make sure I get some photos of this difficult stage. Next I glued the bridge wing to lower superstructure, case of taking your time and lining everything up. Then masking of the small bridge cabin for painting the doors mahogany, then glued this structure in place using white glue. Put some photos on now.
-
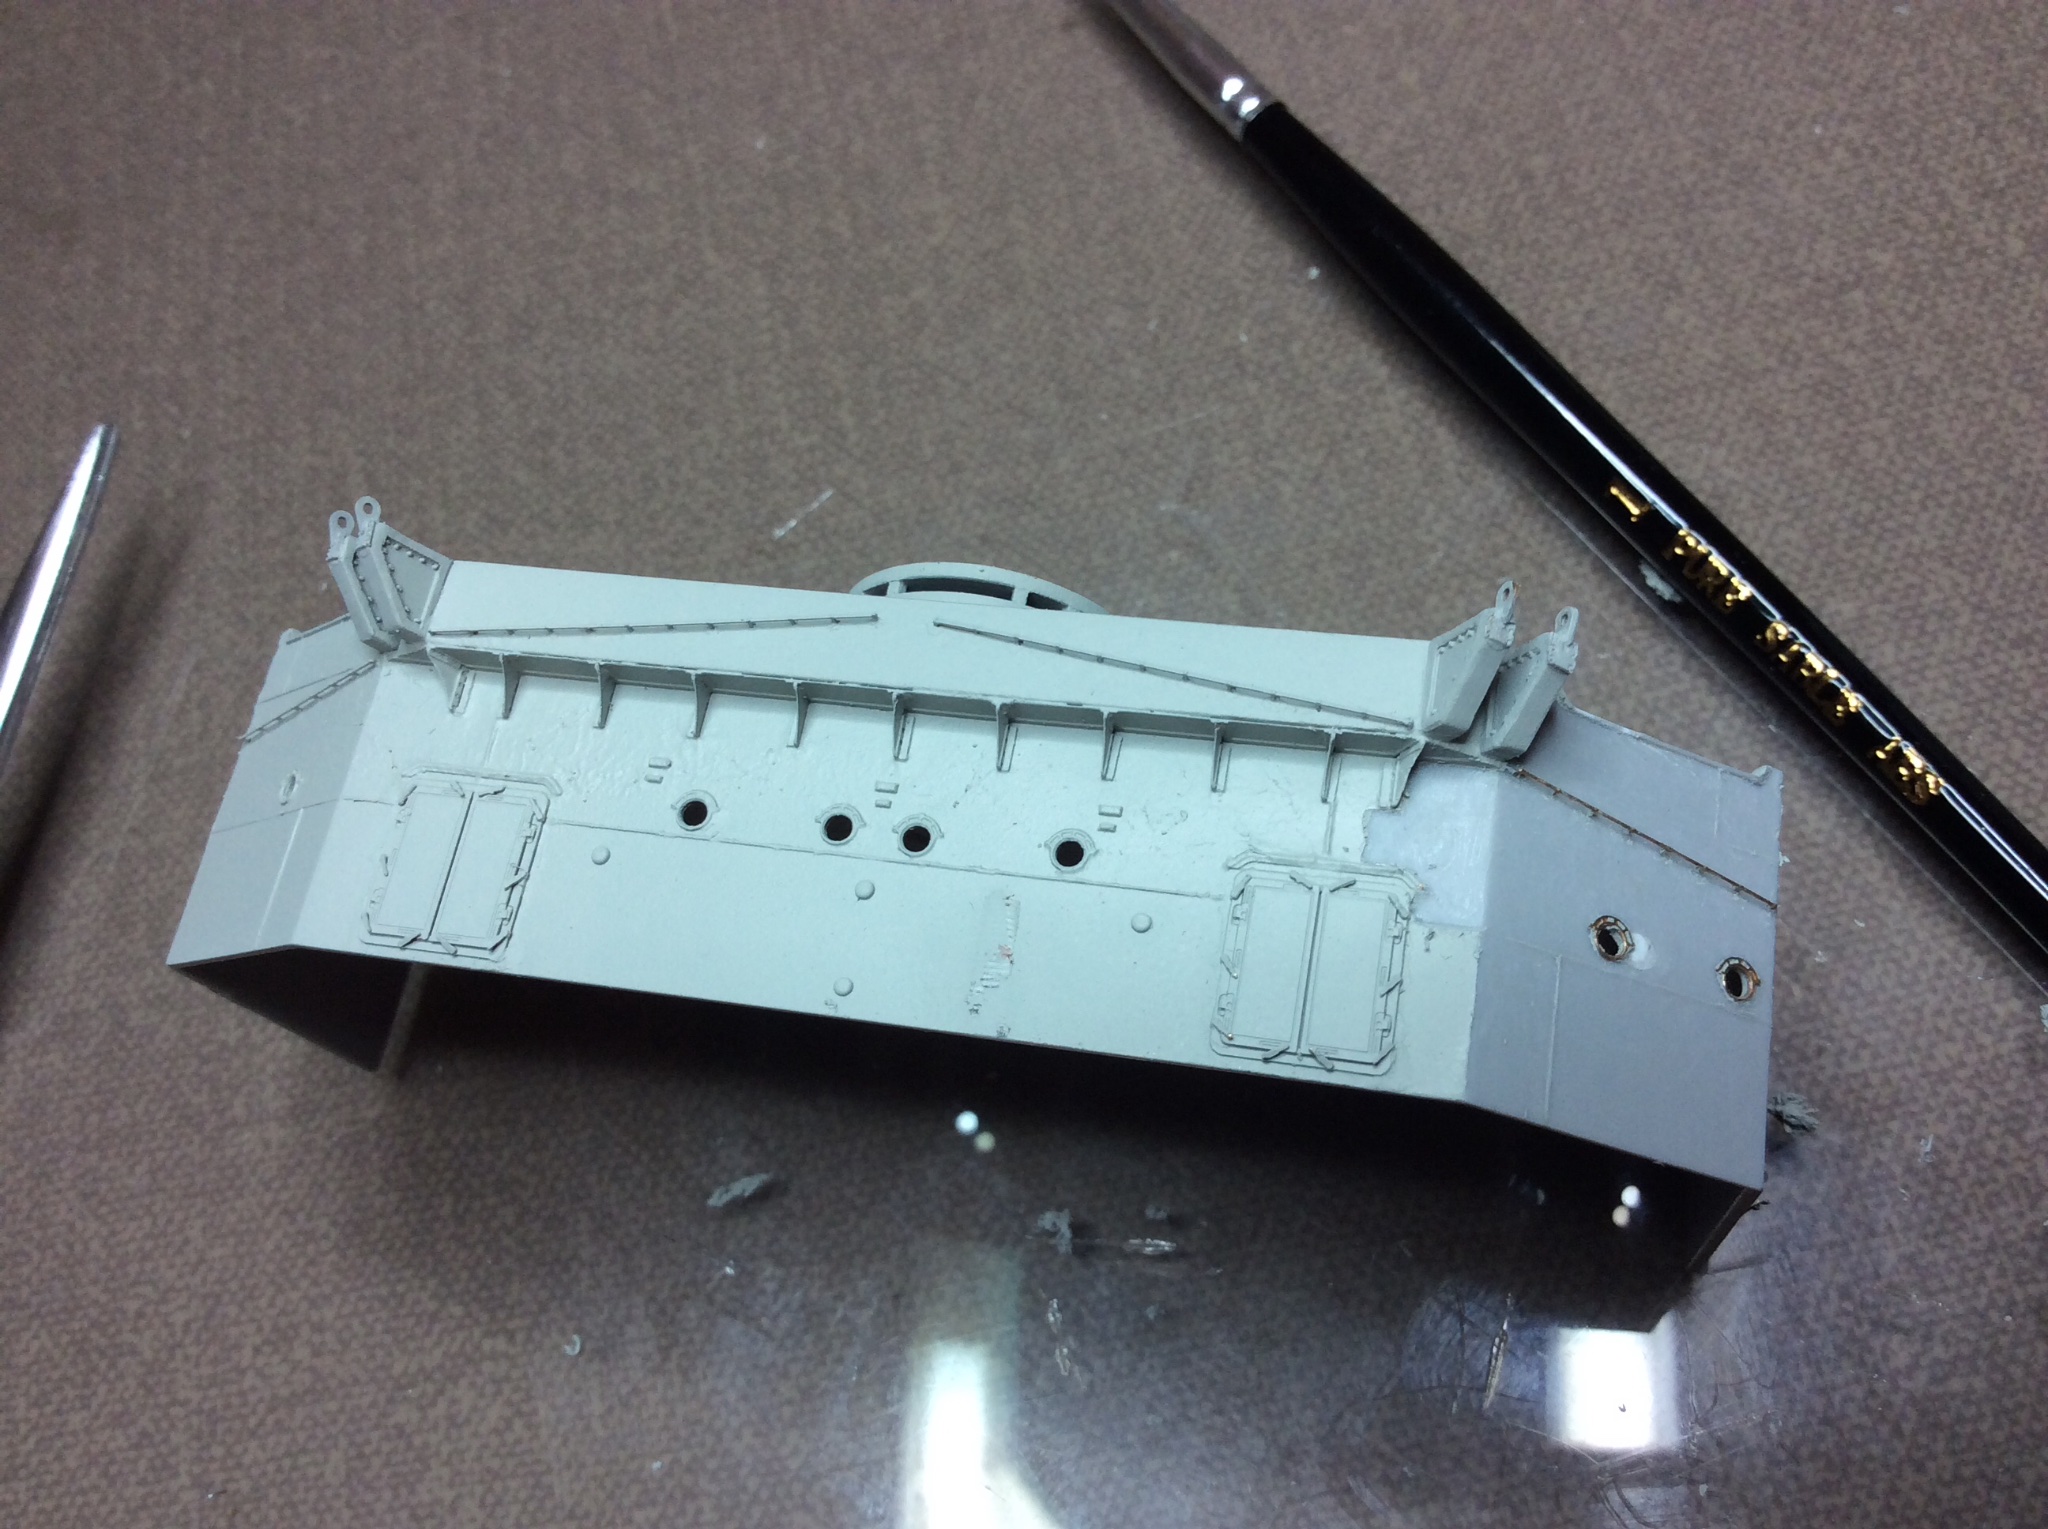
Hello again, hope everyone is well and enjoying their modelling. I have had some ups and downs with mine, starting with lower aft bridge superstructure, all set up ready to spray, started at side then moved to front and while trying to paint etched gusset plates didn’t notice the paint was painting what I wasn’t looking at, Yip runs, not what you want after all the work to get there. Once it was all dry, surveyed the damage, decided to try and scrape the paint down on the runs and respray. Well that was a monumental failure, oh dear or words to that effect. Solution scrape all the paint off, not an easy or pleasant task, damaged one of awning rails in process so had to remove it and straighten it be fore resetting. Used my curved craft knife for removal of paint, it does peel of quite easily when fresh. That was a laborious task. Lesson learnt, be more careful when painting. Used a get out of jail free card there, wasn’t as nice as it should have been but a blind man running from a fire wouldn’t notice it. Next I lined up the etch bridge wing structure on the main superstructure, had decided I wanted to use metal wire for supports, not the kit plastic. Feel I made the right decision, used 0.7 wire, this fits perfectly through the allocated holes, brass wire would be better if you can get it, nickel silver that I had hard to cut. 11.5mm was my size, just want it a fraction above etch plate when dropped through to deck below which has the location points in it. A small amount of glue applied from above is enough to hold it in place, allowing you to square them all up, a good eye and patience necessary. Shall try some photos now, shall follow up later with more updates. Regards Jeff.