HOLIDAY DONATION DRIVE - SUPPORT MSW - DO YOUR PART TO KEEP THIS GREAT FORUM GOING! (Only 24 donations so far out of 49,000 members - C'mon guys!)
×


Jeff59
-
Posts
593 -
Joined
-
Last visited
Content Type
Profiles
Forums
Gallery
Events
Everything posted by Jeff59
-
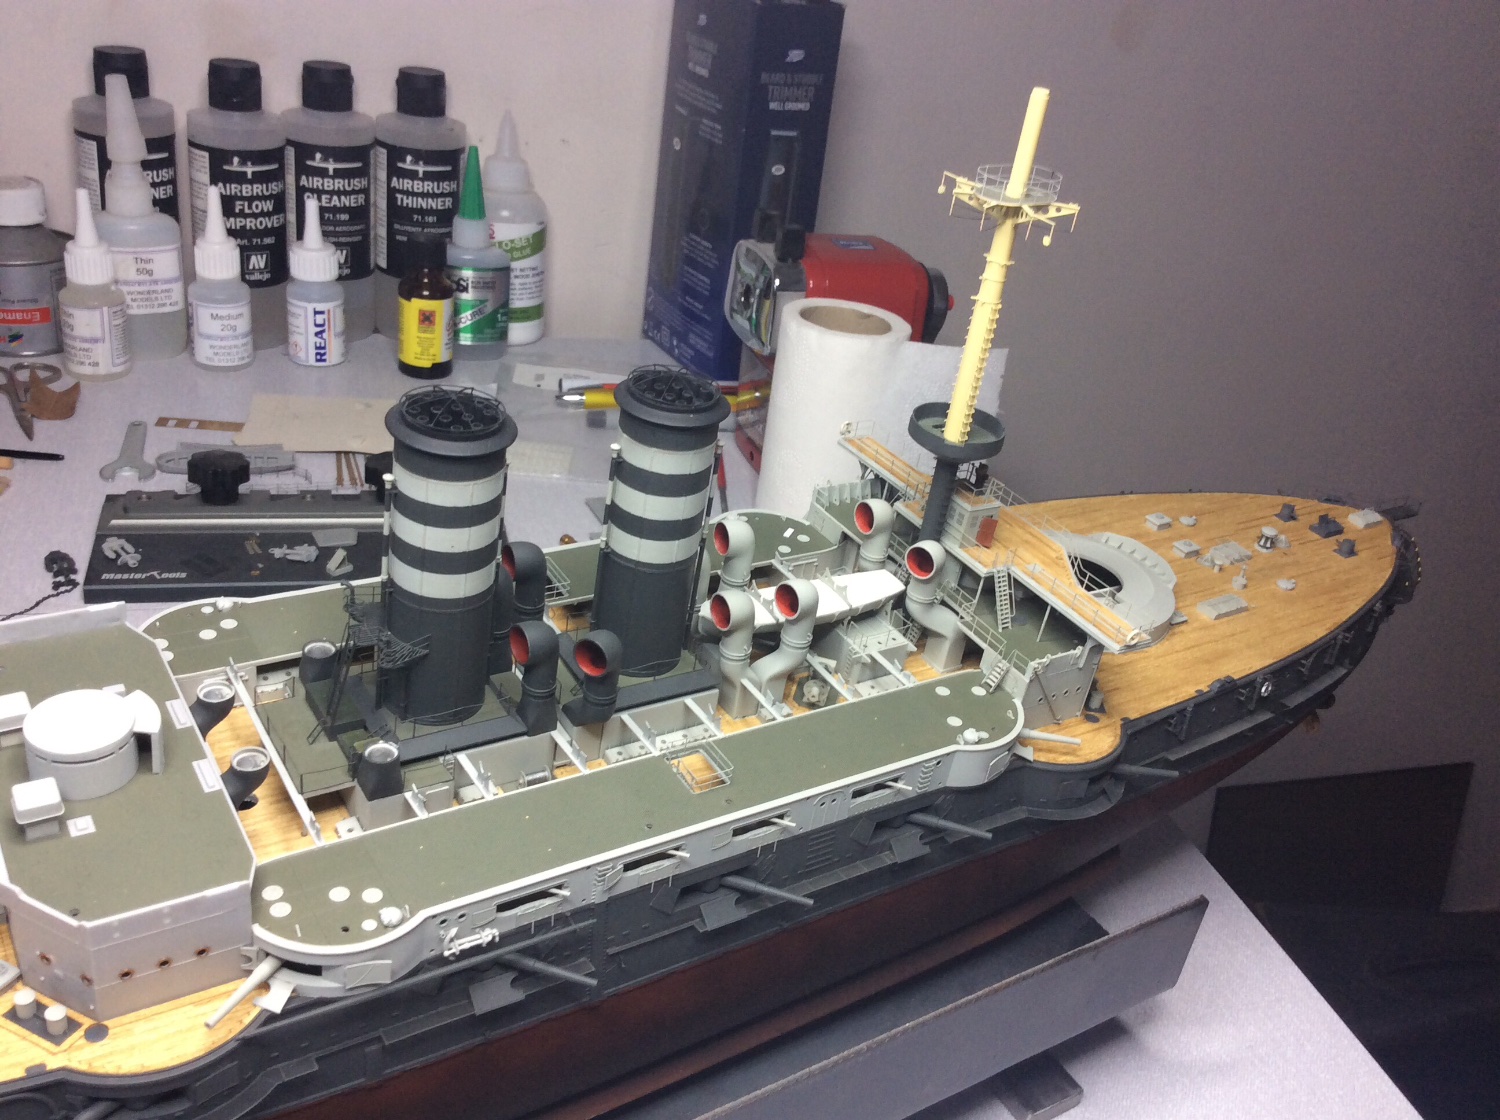
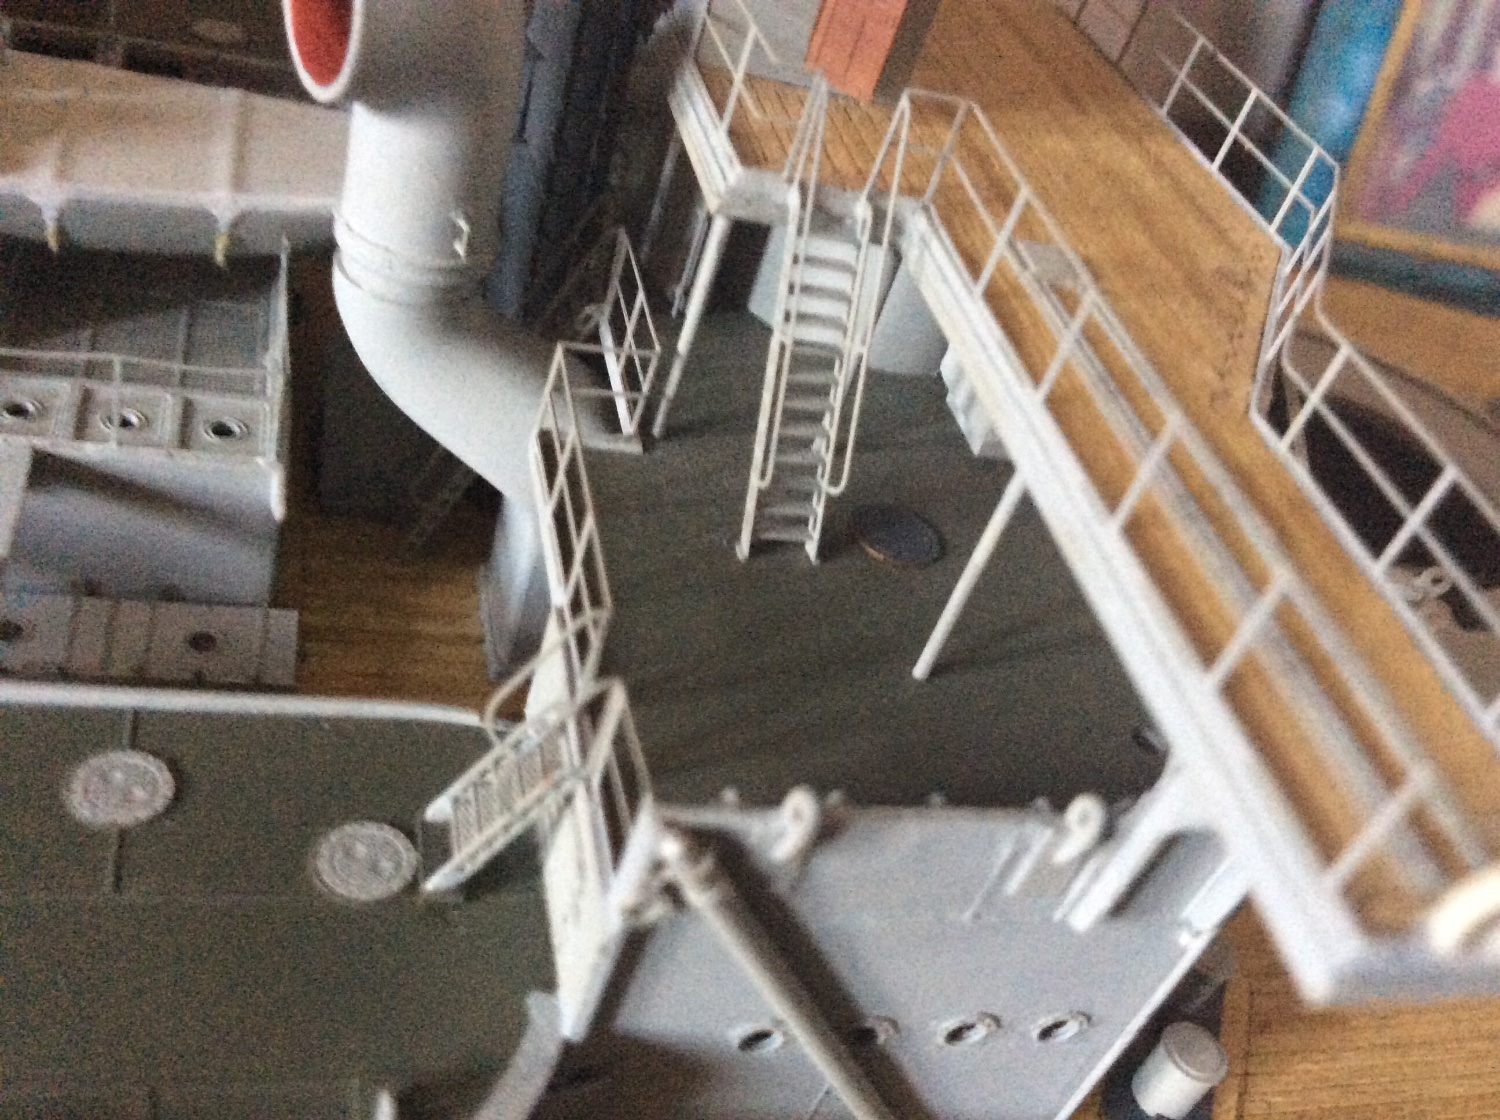
The steps to the boat deck, didn’t fold this plus cut a bit styrene stock thick enough to let the steps sit at desired angle then painted the part as deck colour. Not correct but solved the bigger problem, seems to be a similar problem when fitting the other steps from boat deck down to main deck, except here the part is too long and requires altering again to get a desired result. Think I managed to steal all this. 🤞

-
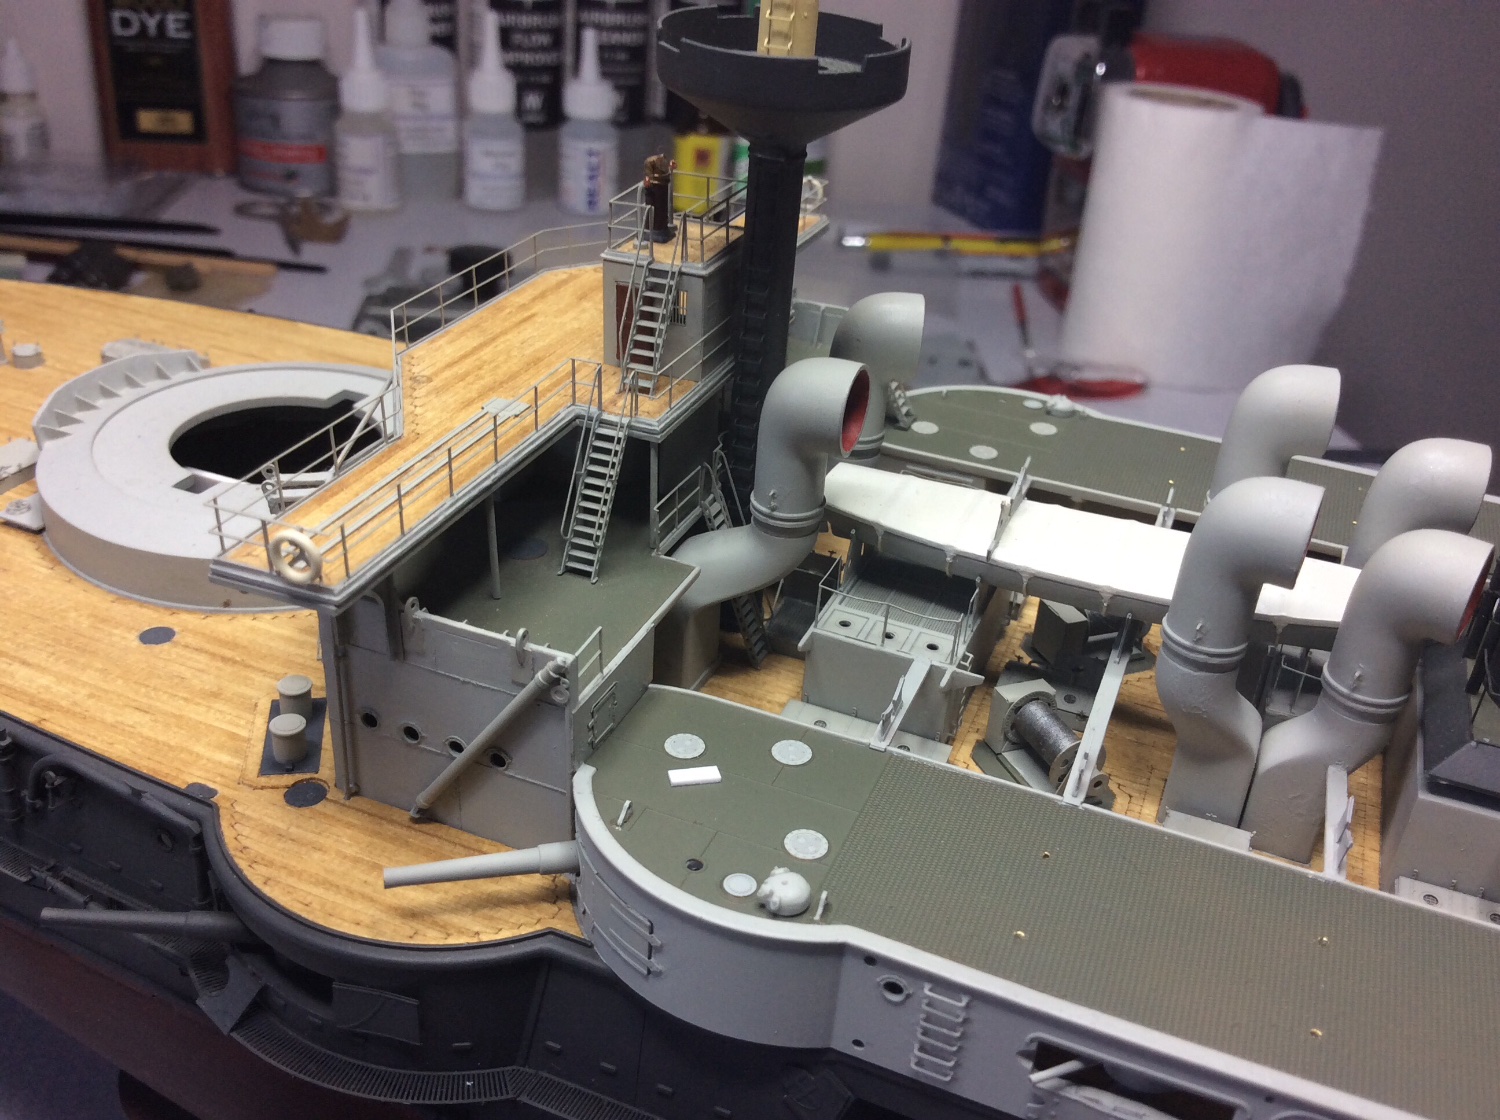
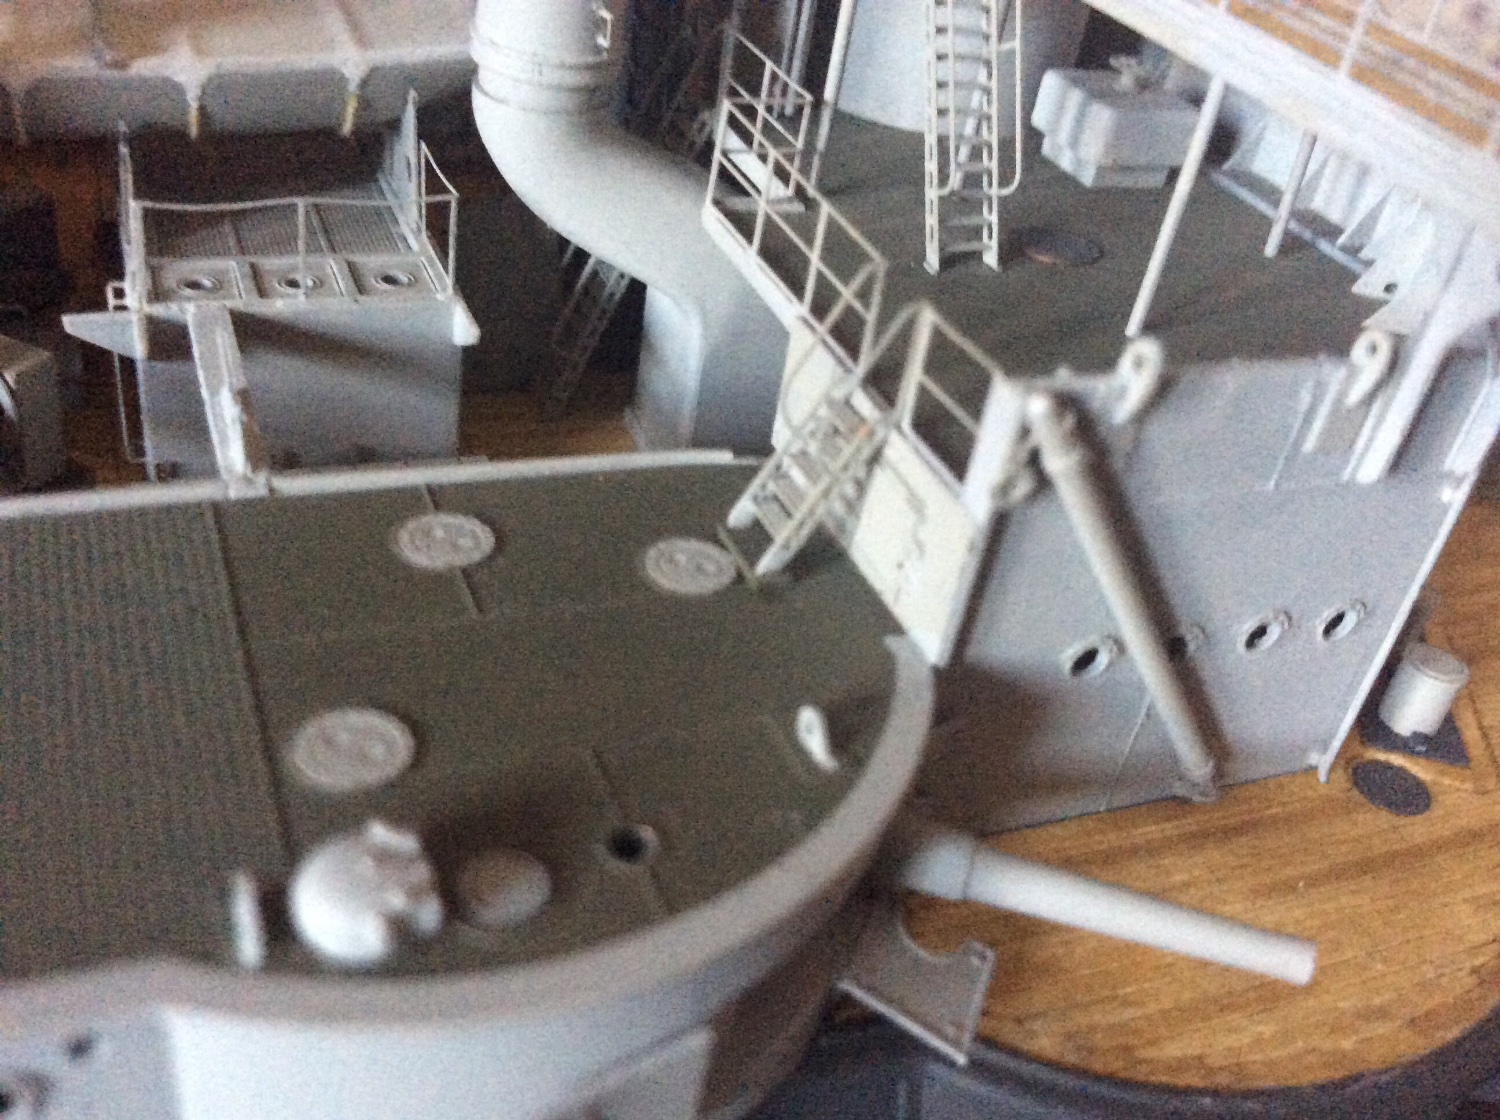
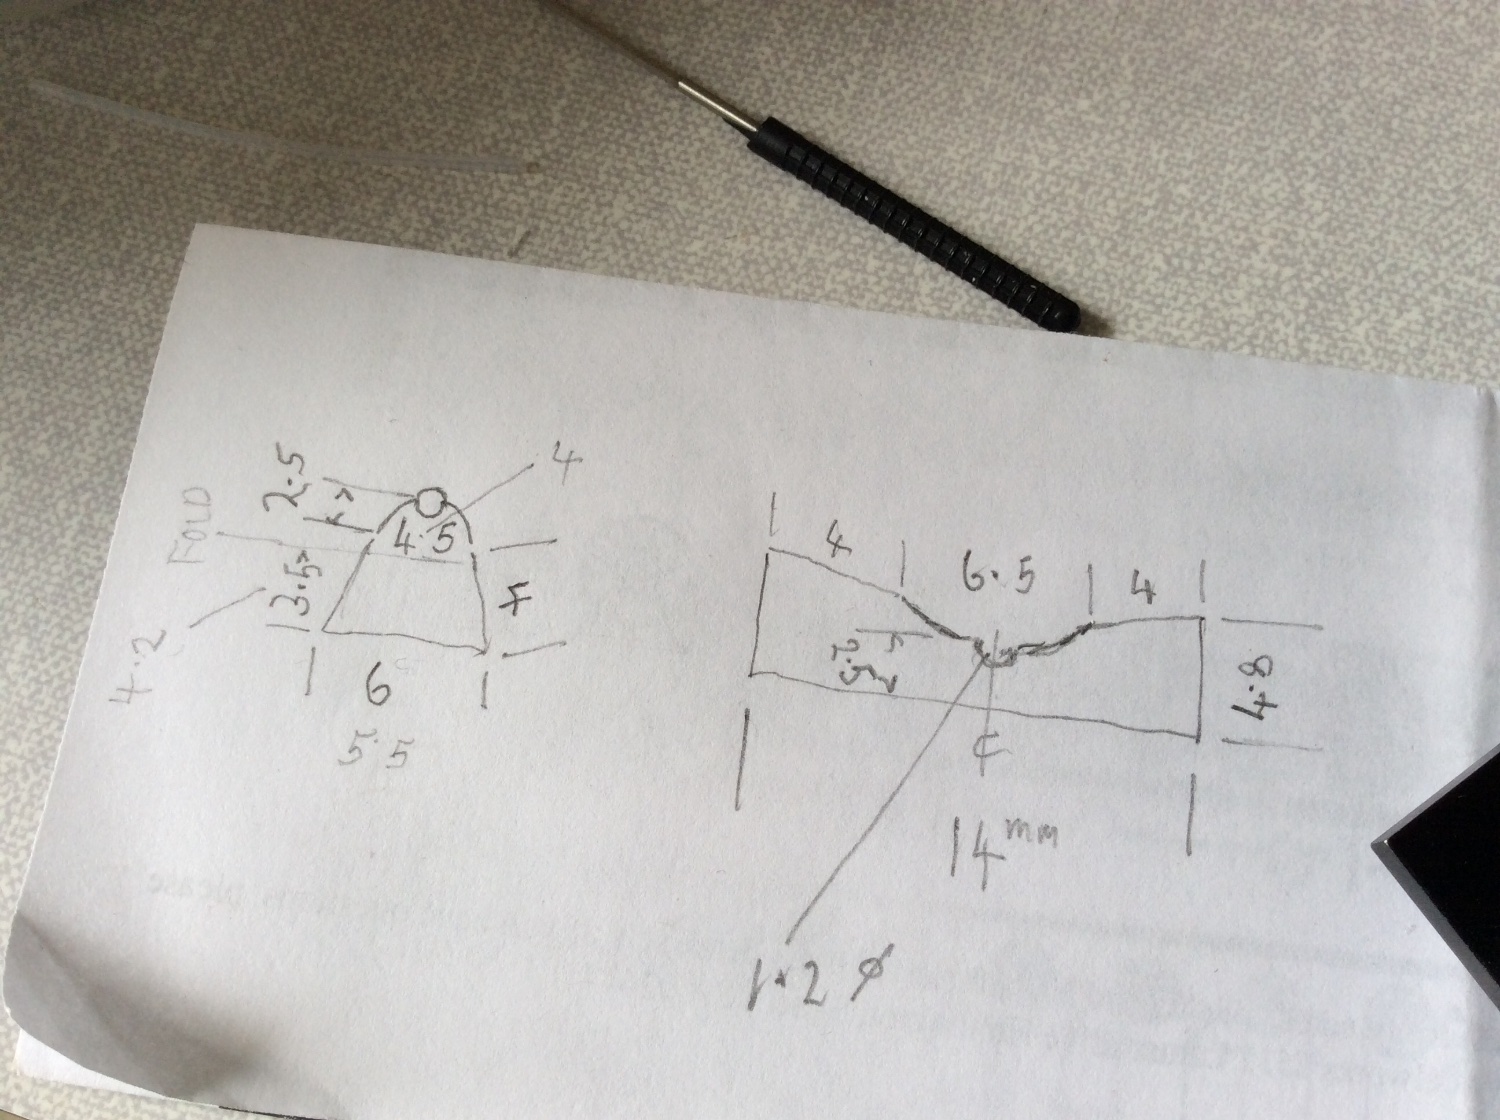
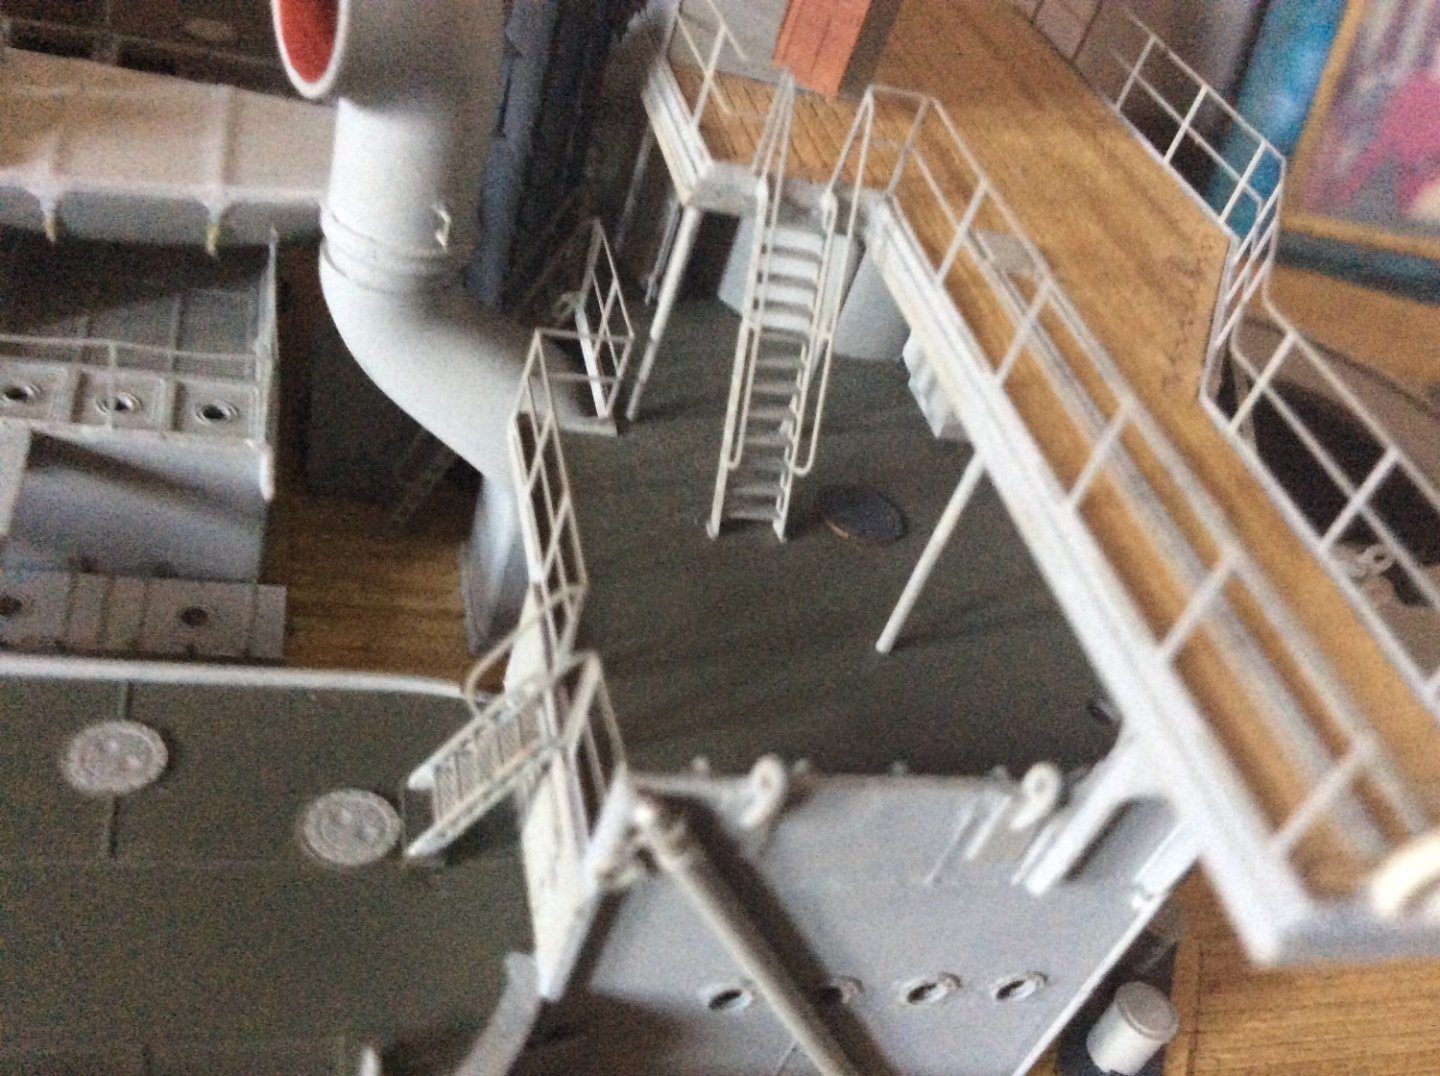
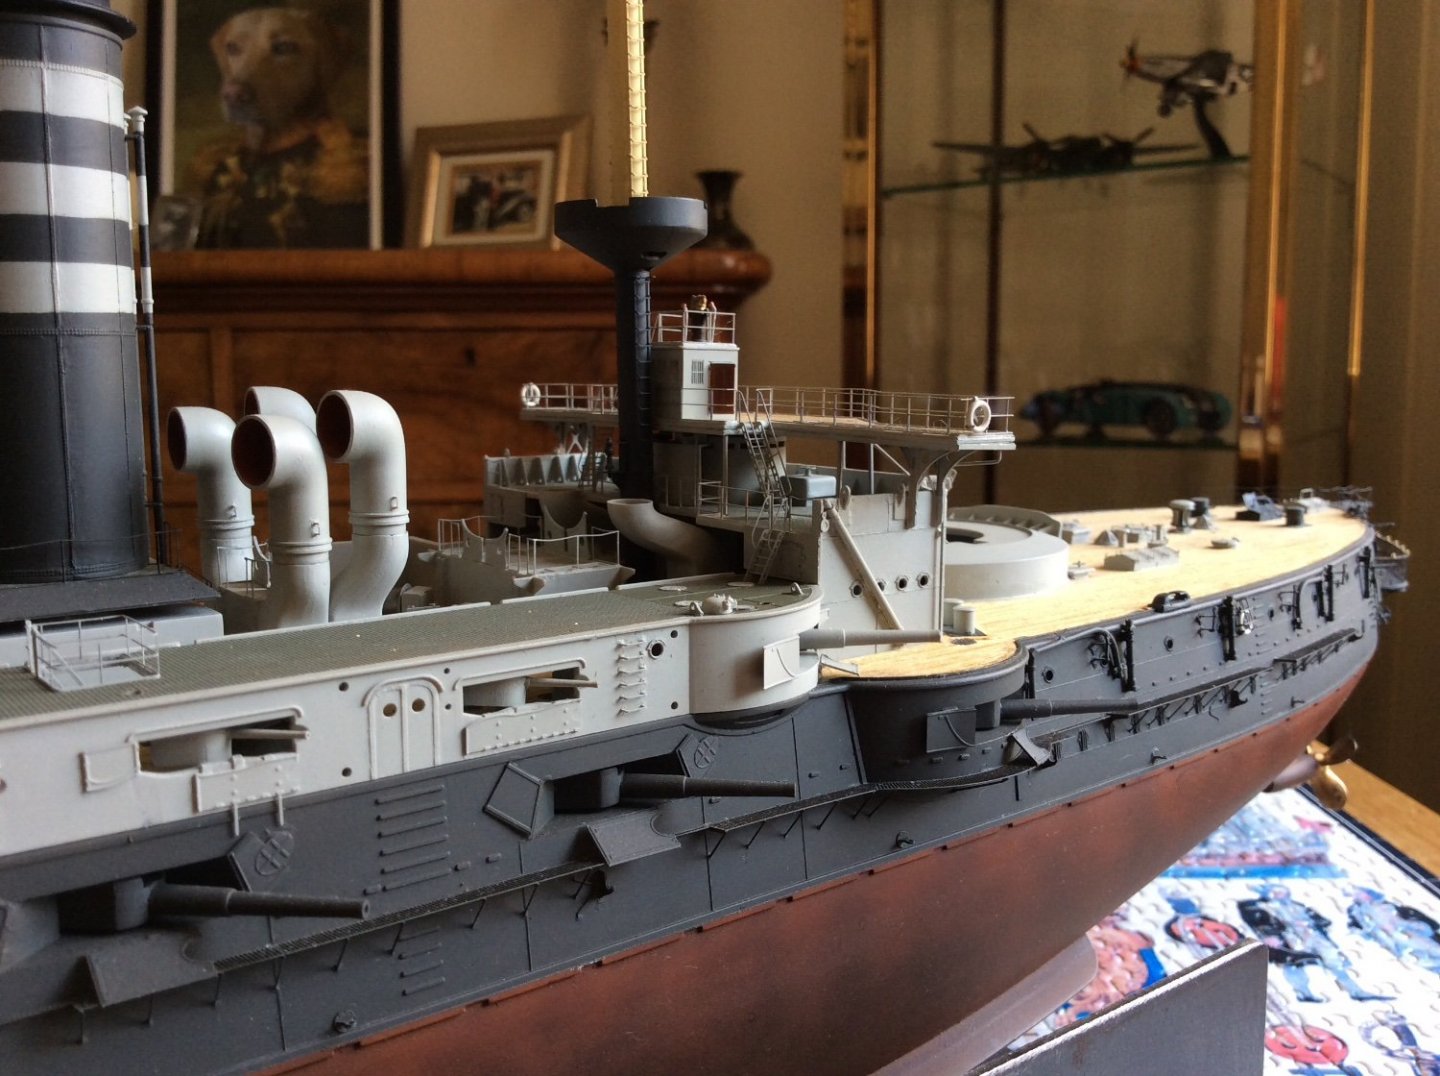
The steps from the bridge structure to the boat deck don’t seem to fit right, don’t know if it’s something I’ve done wrong or not but to get them fitting how I want them led me to doctoring them. The stringers on the outside have a tiny fold mark at the bottom allowing for fixing to deck. Photo
-
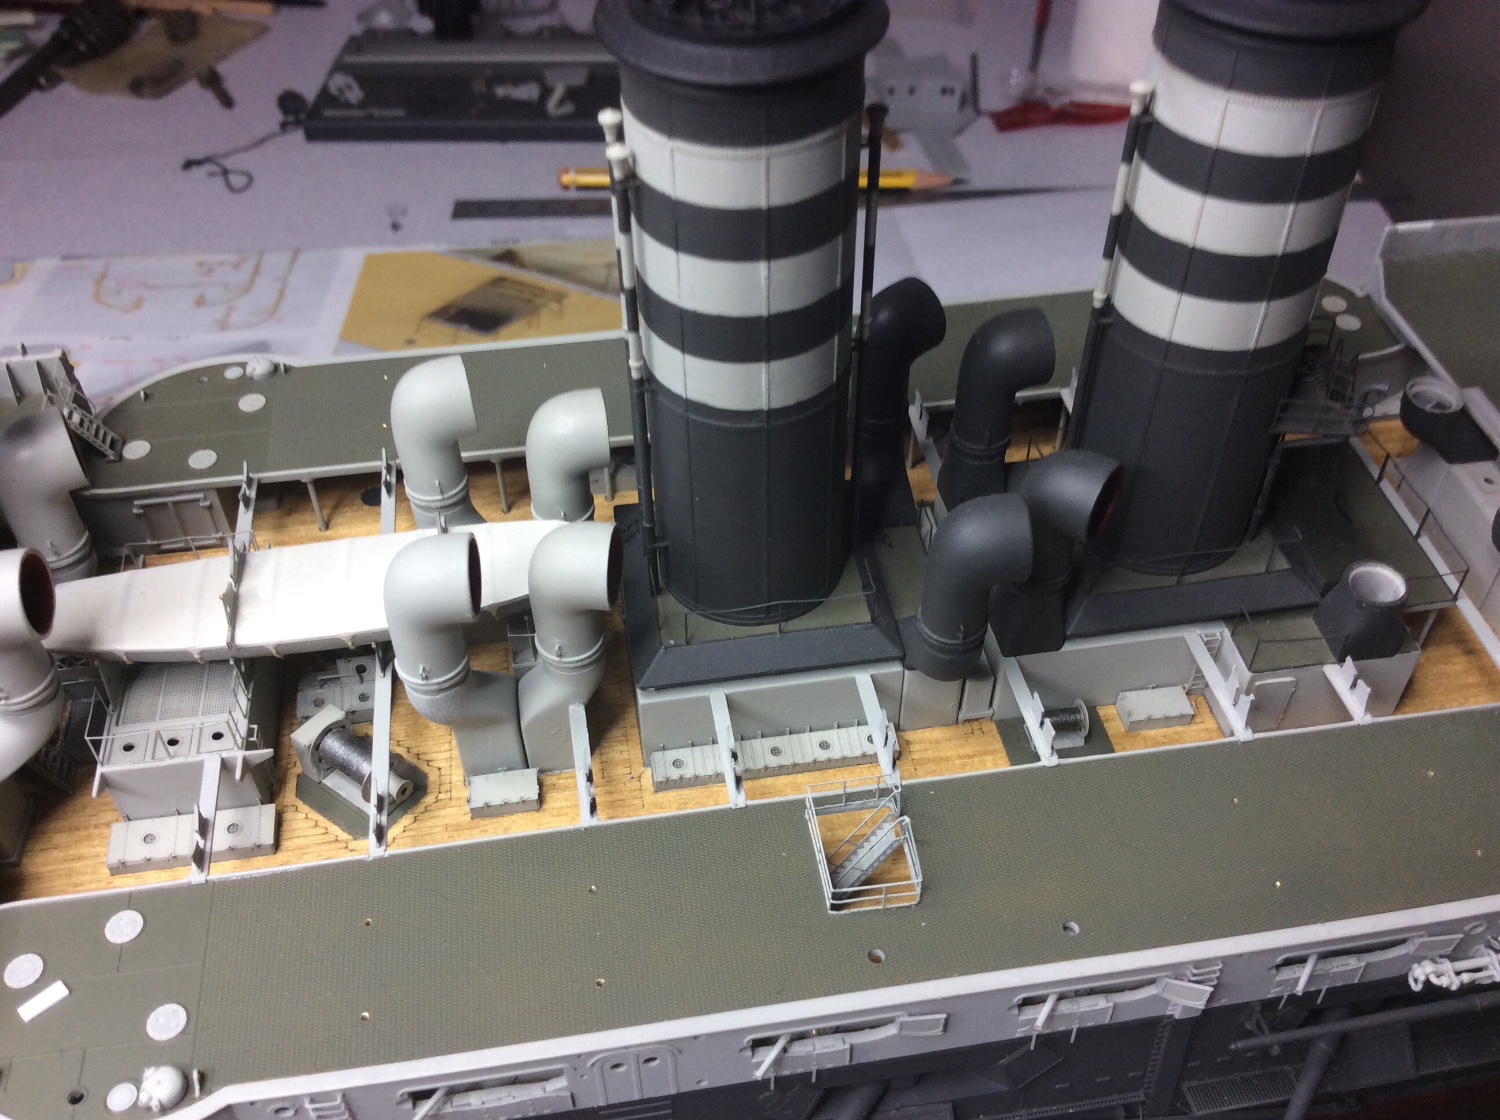
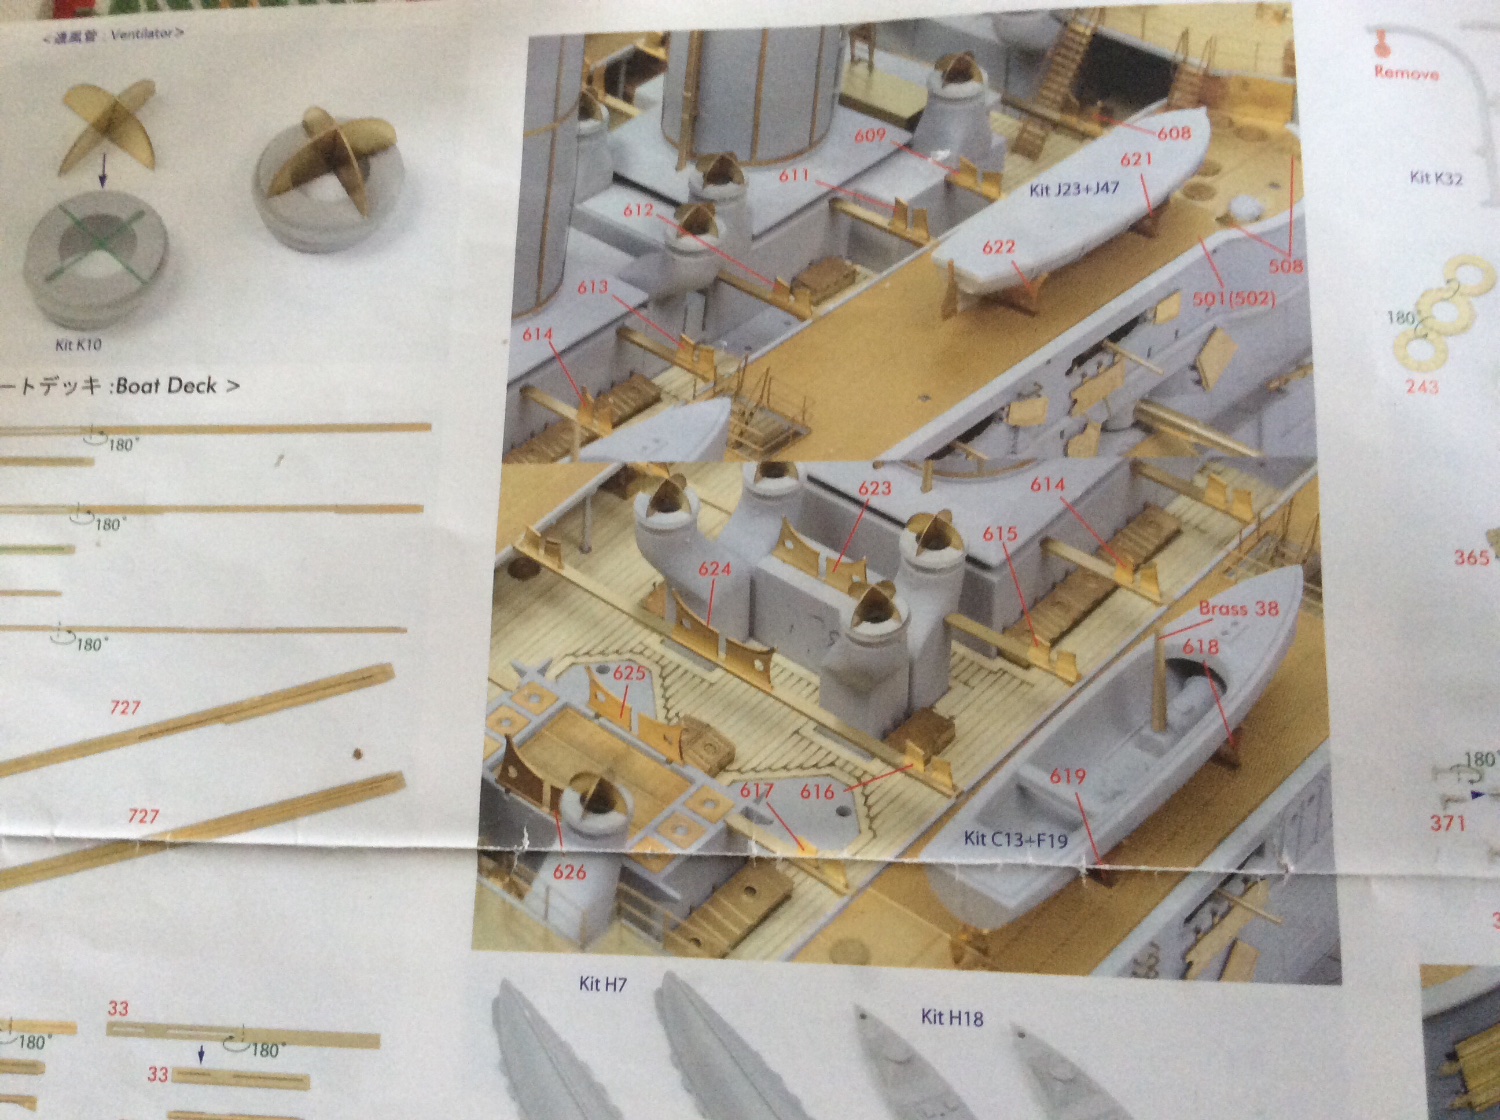
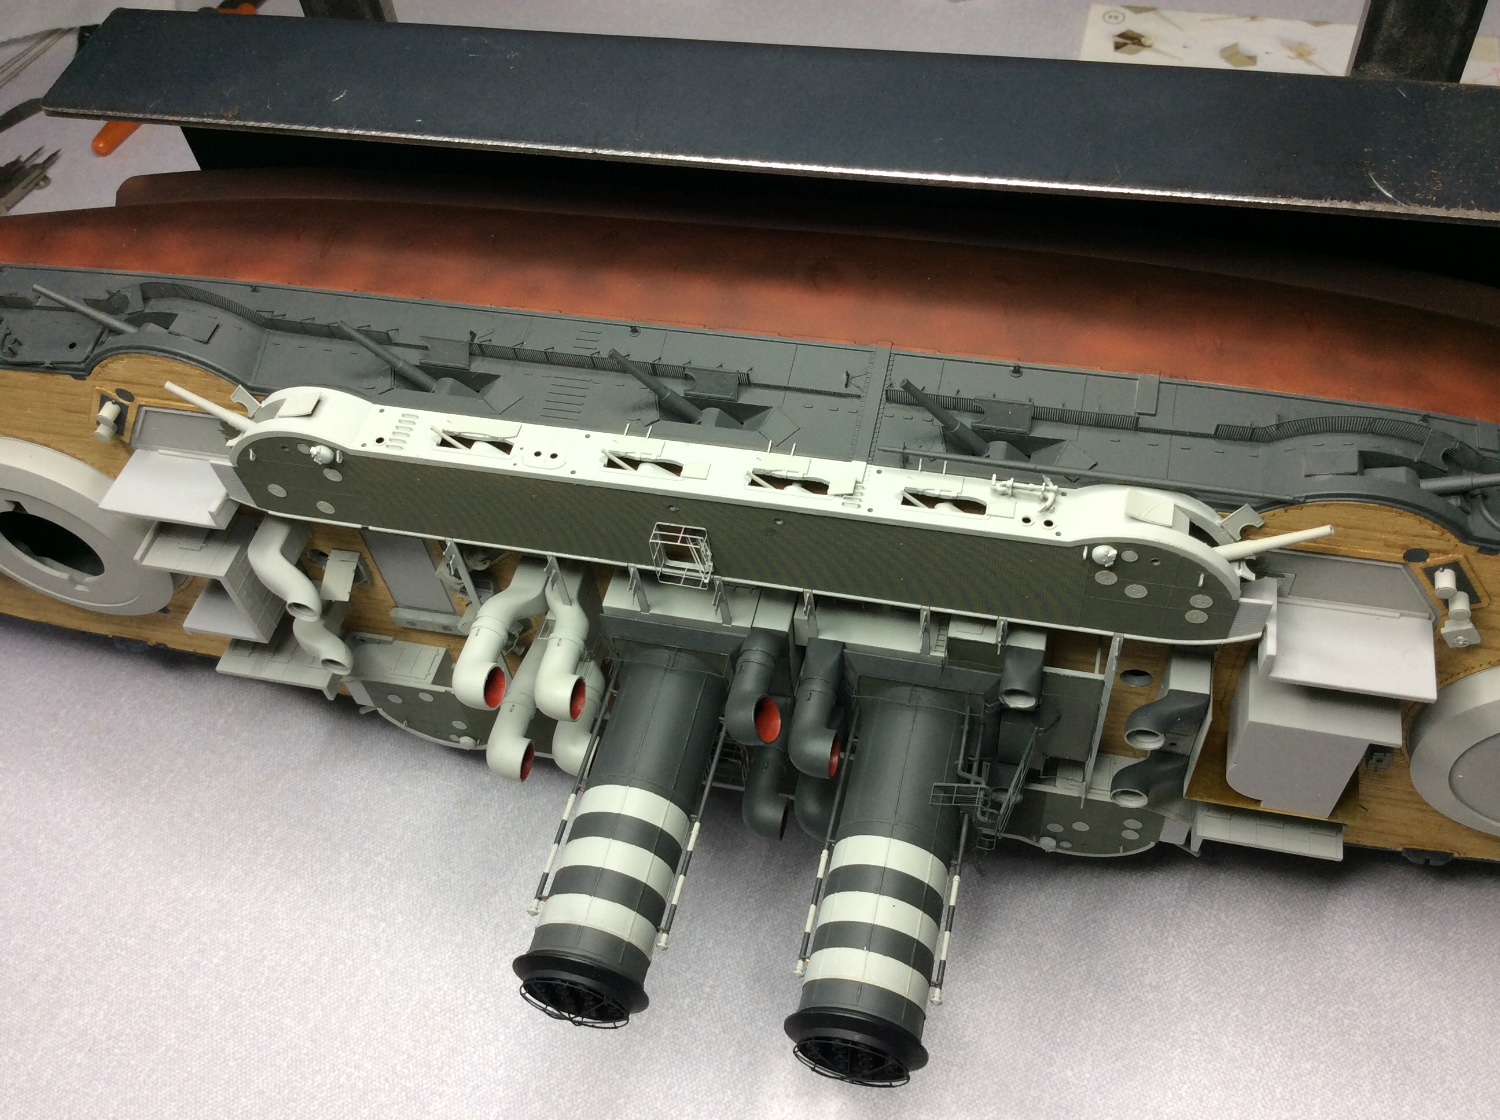
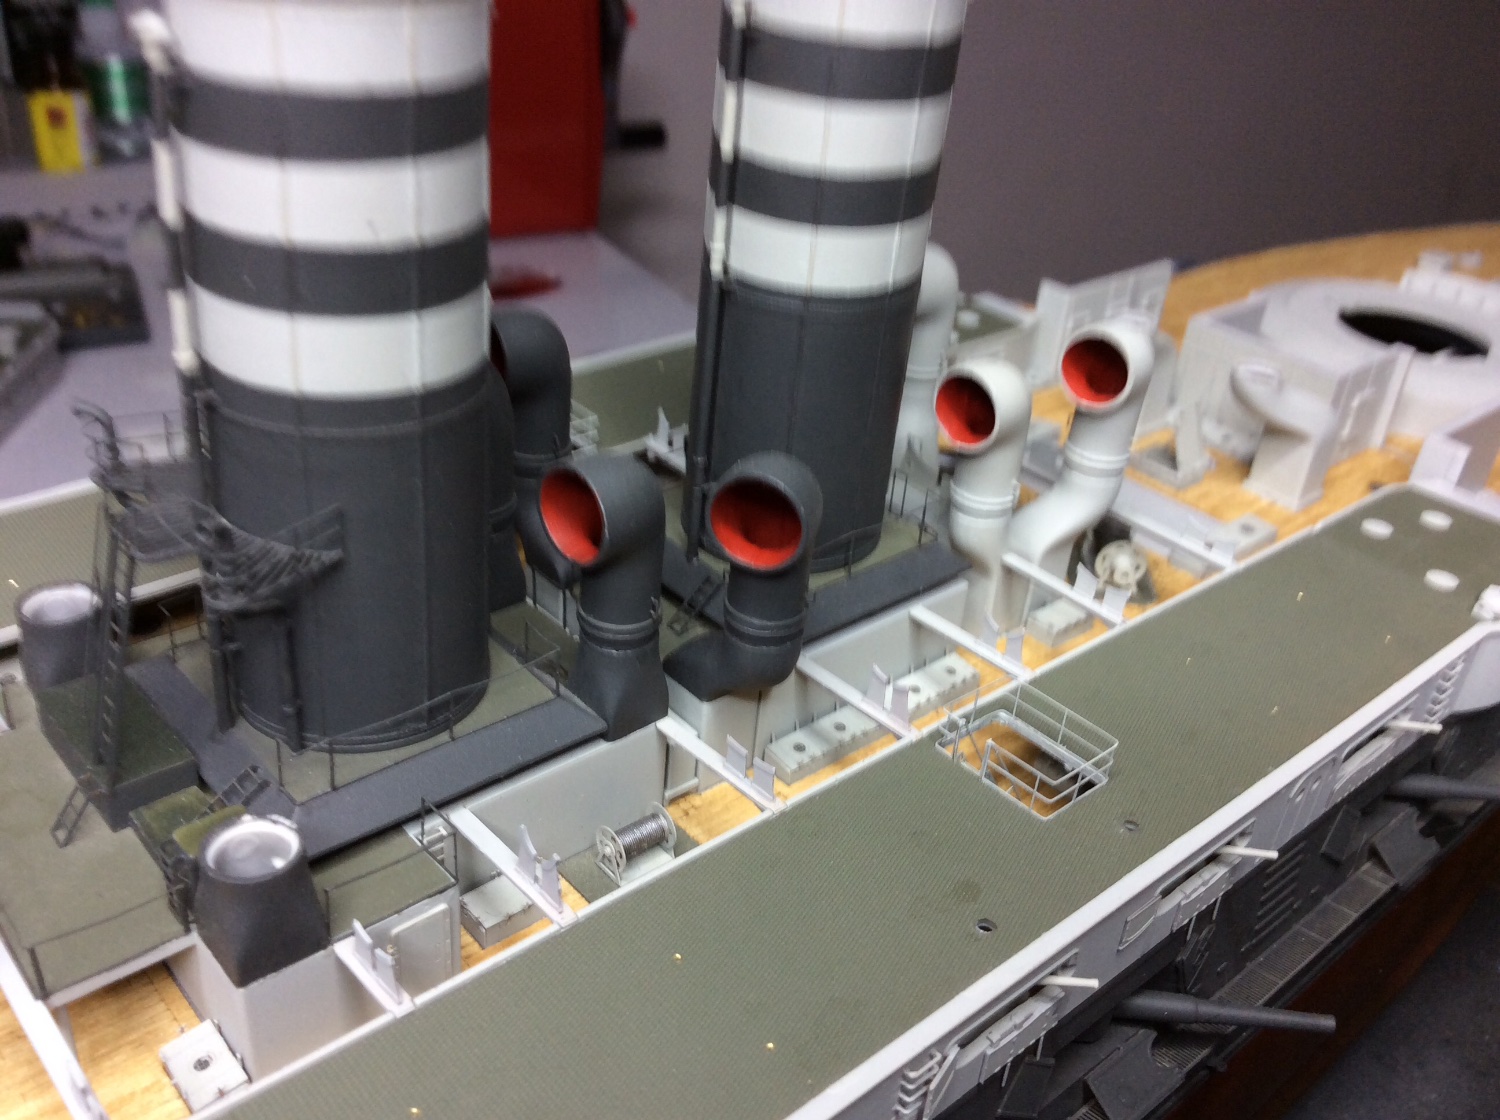
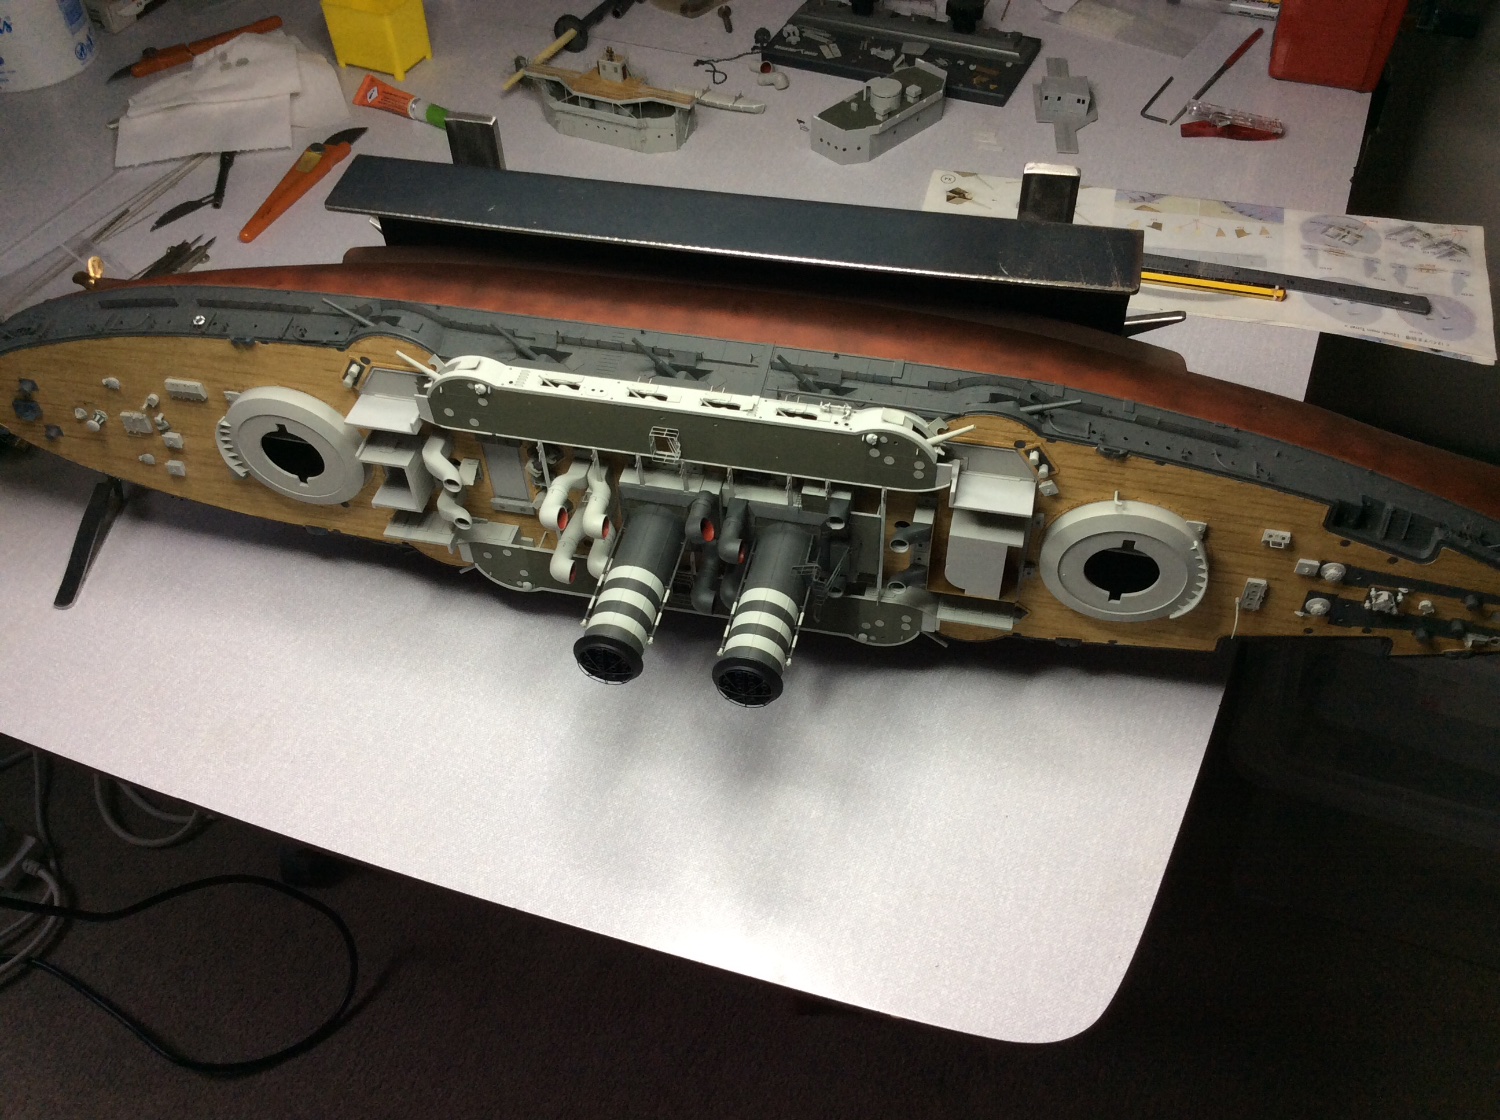
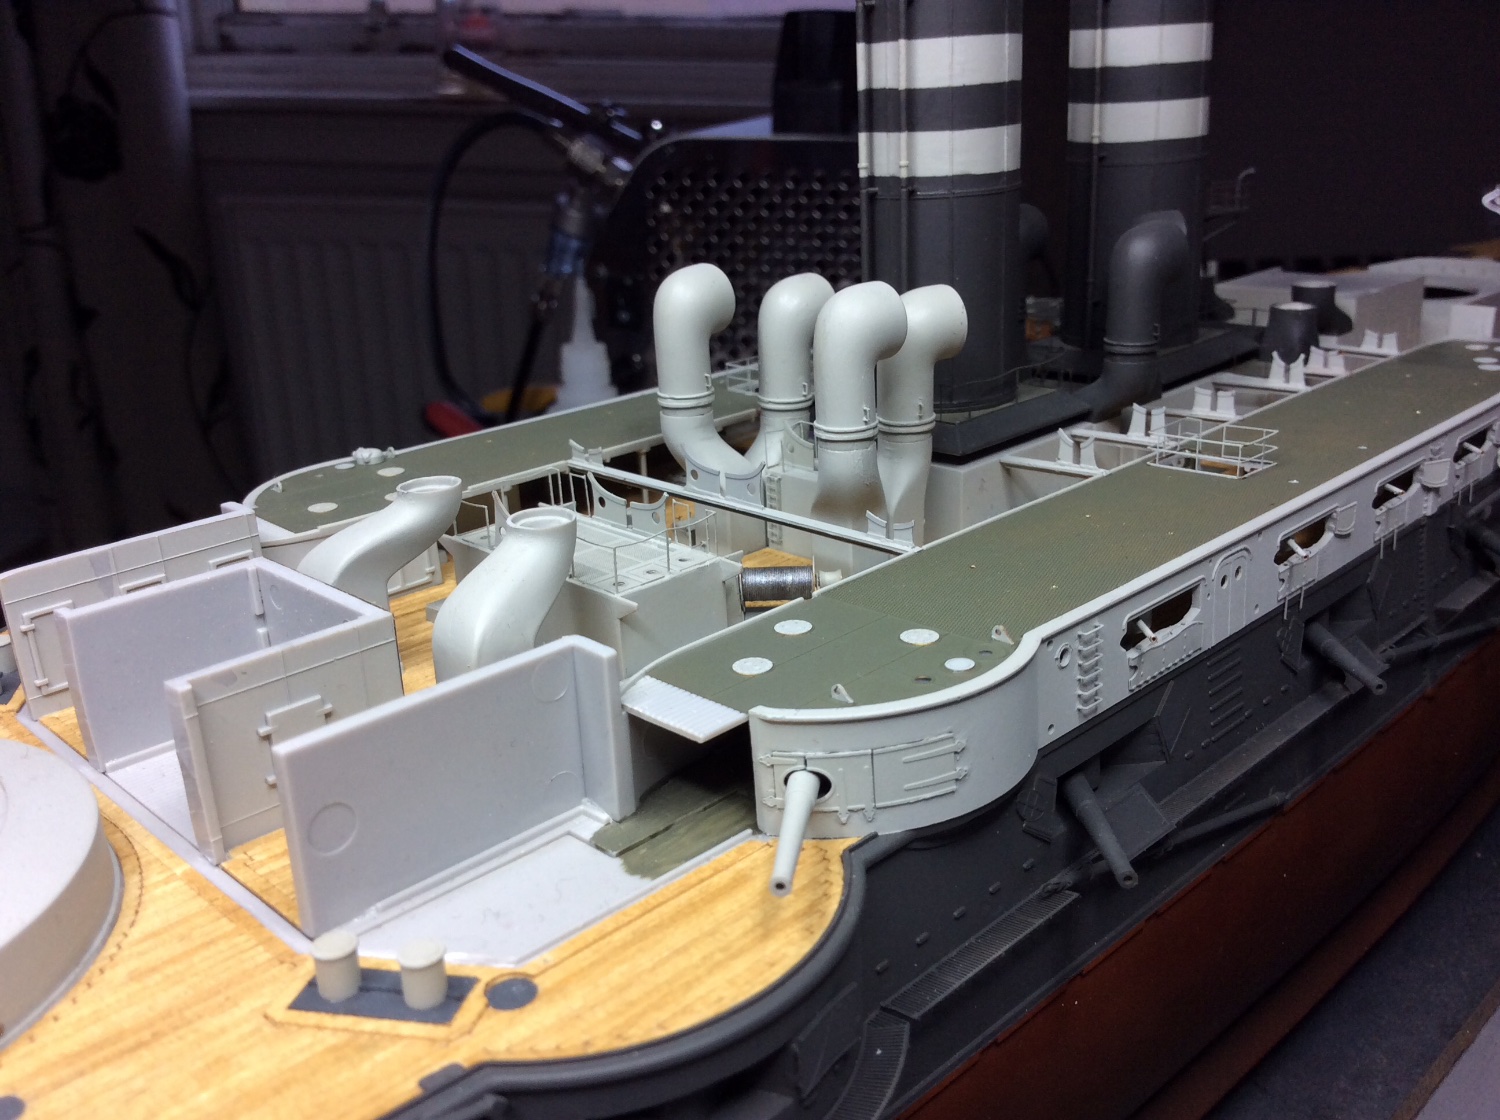
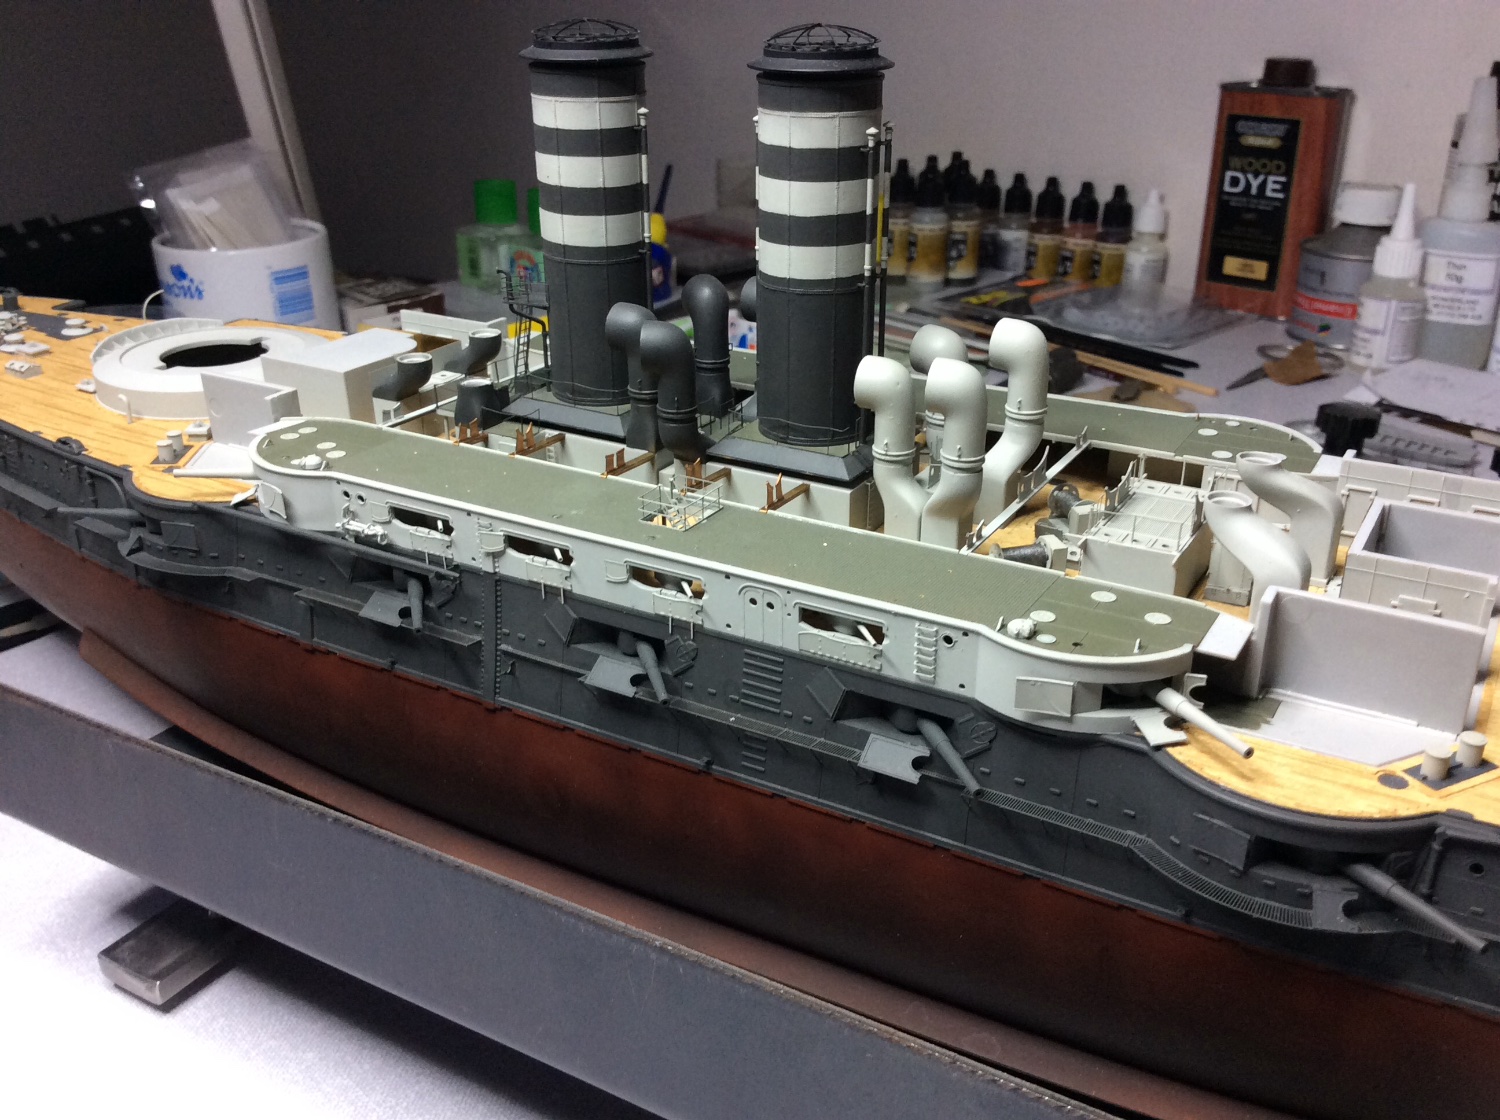
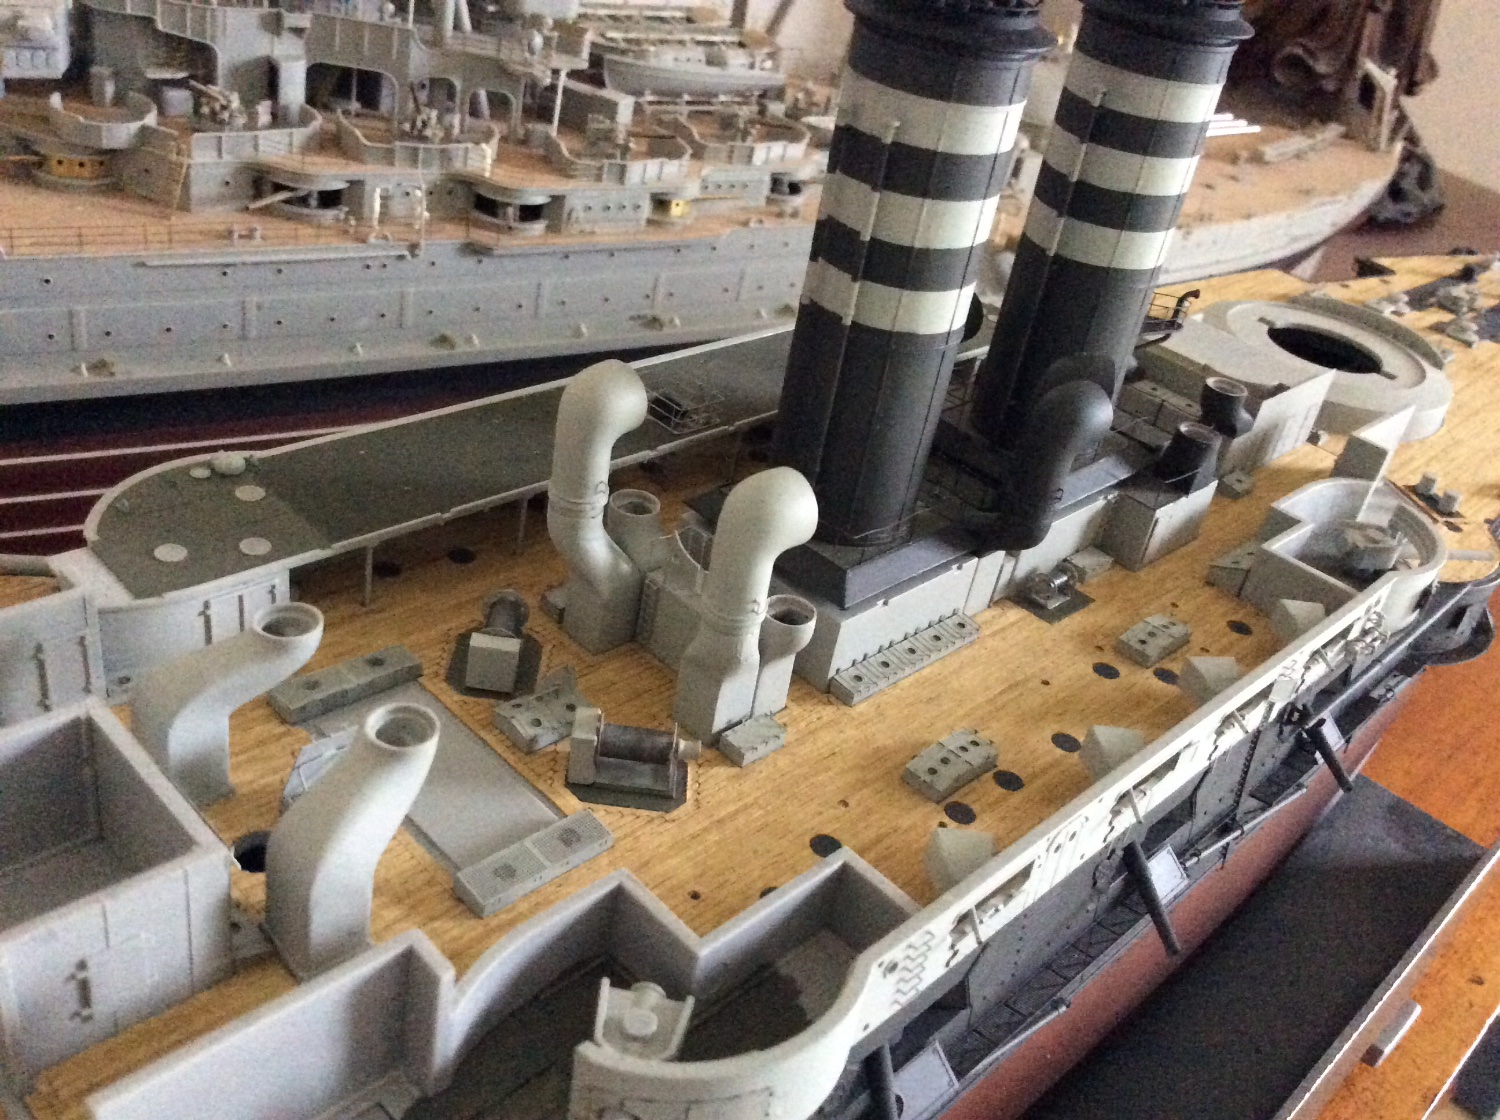
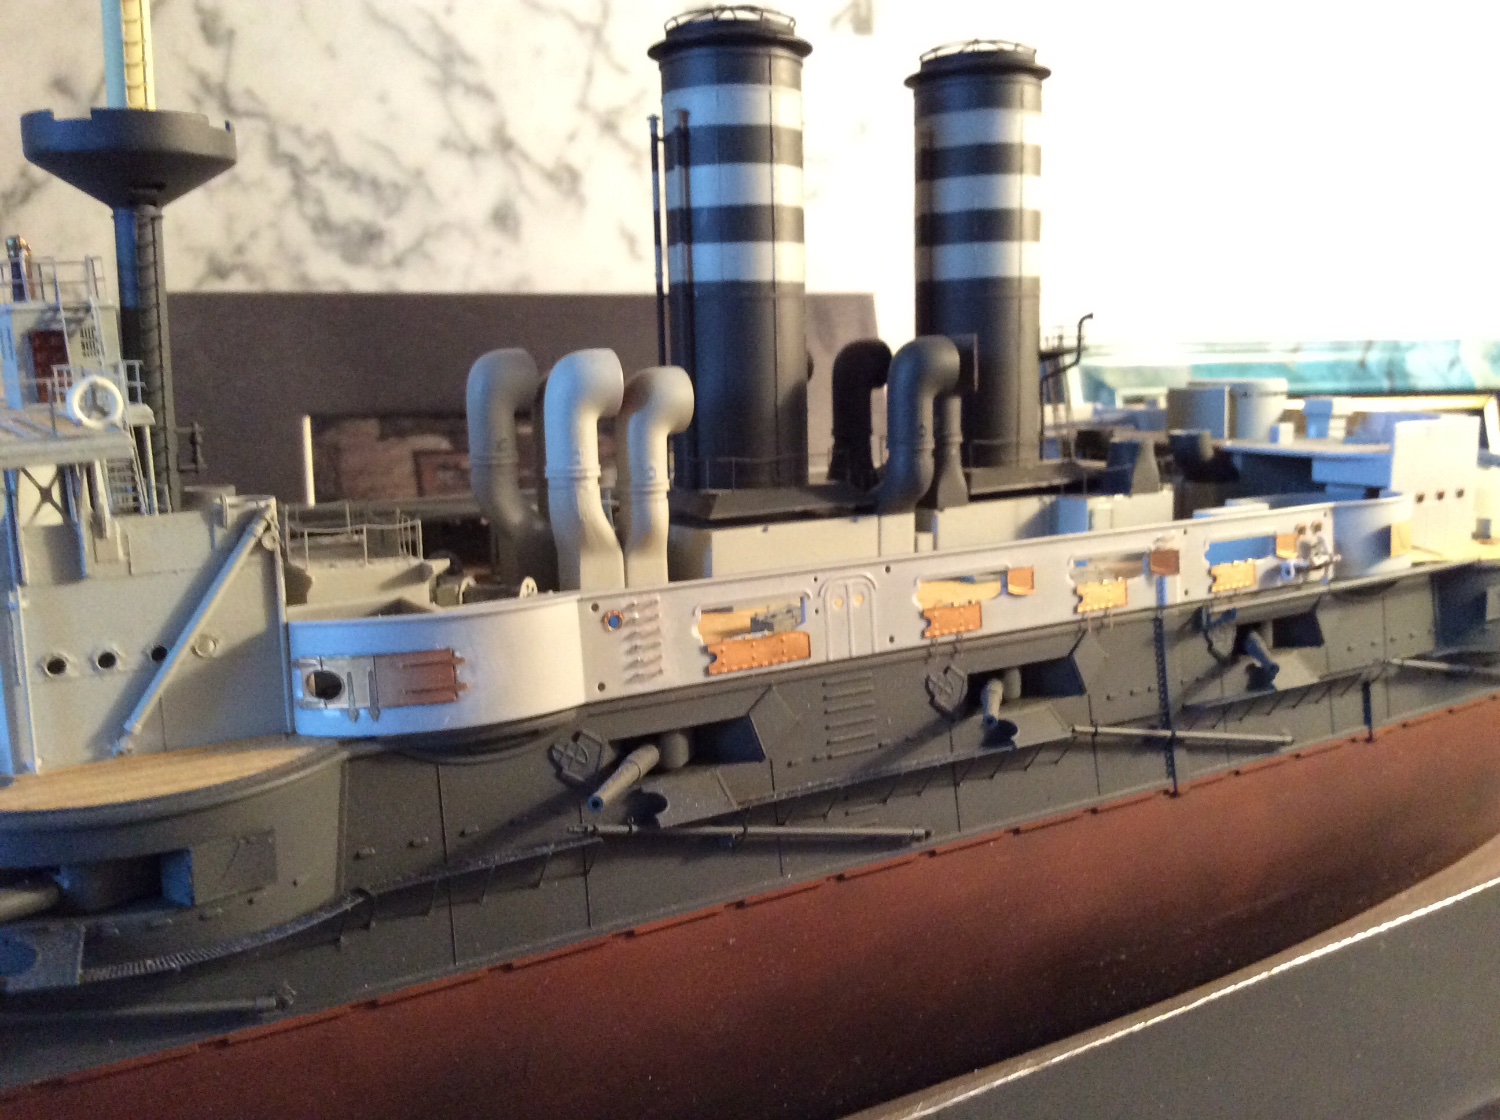
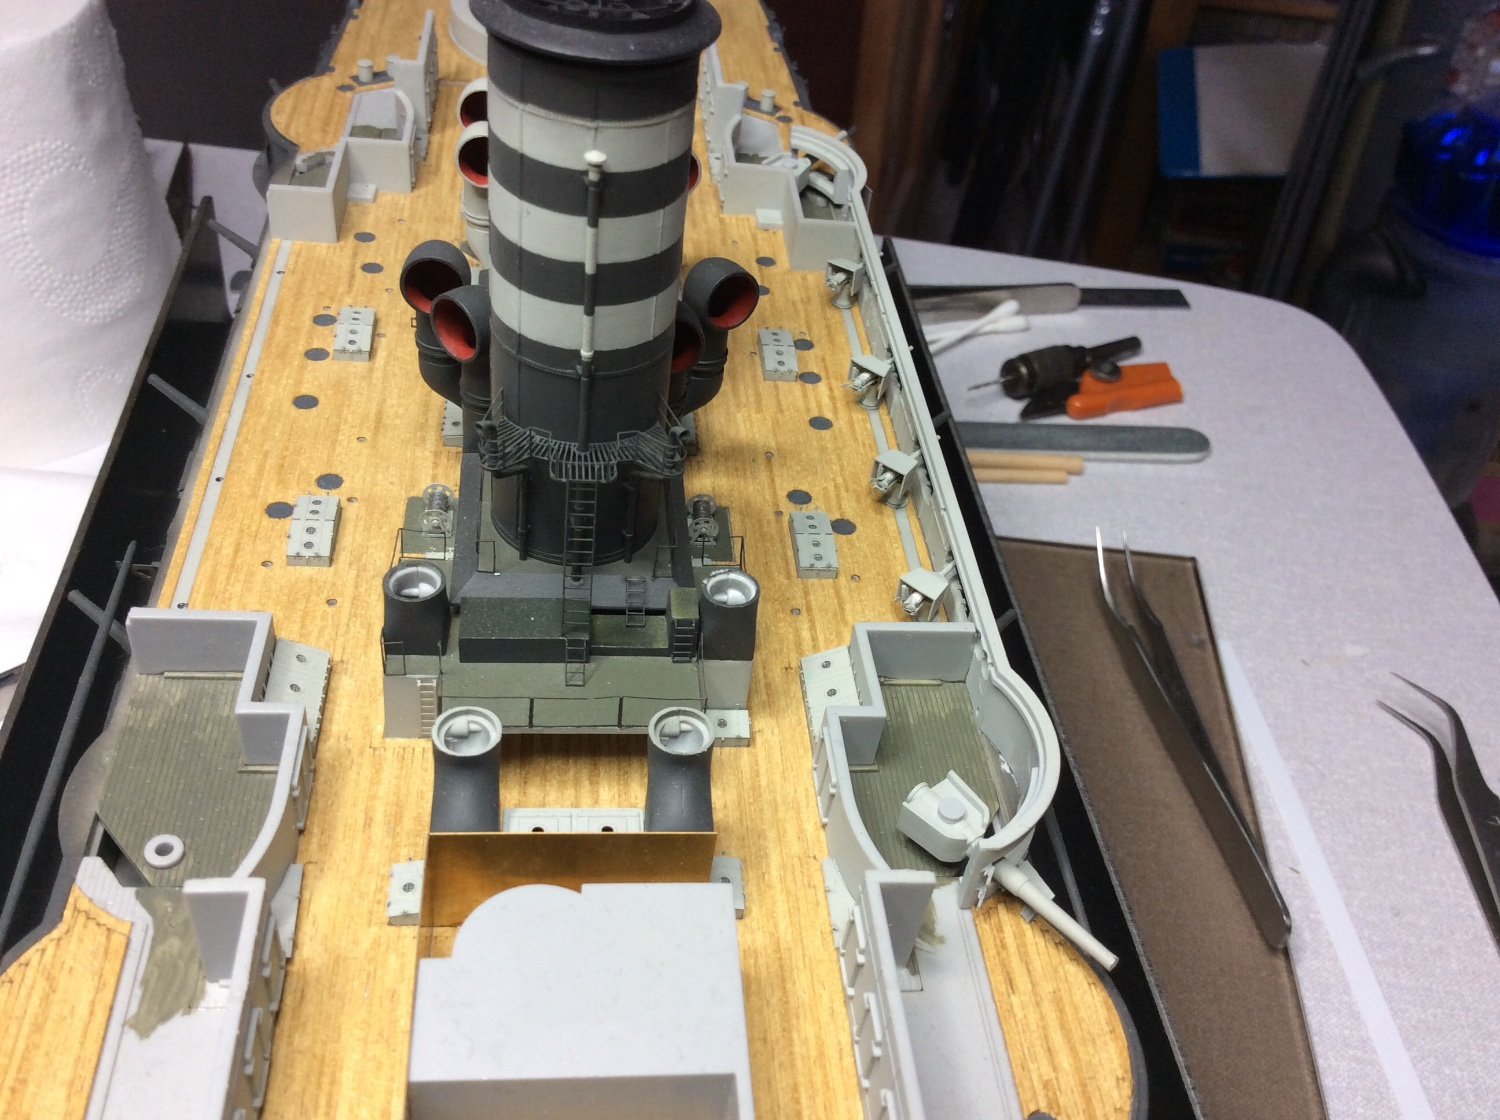
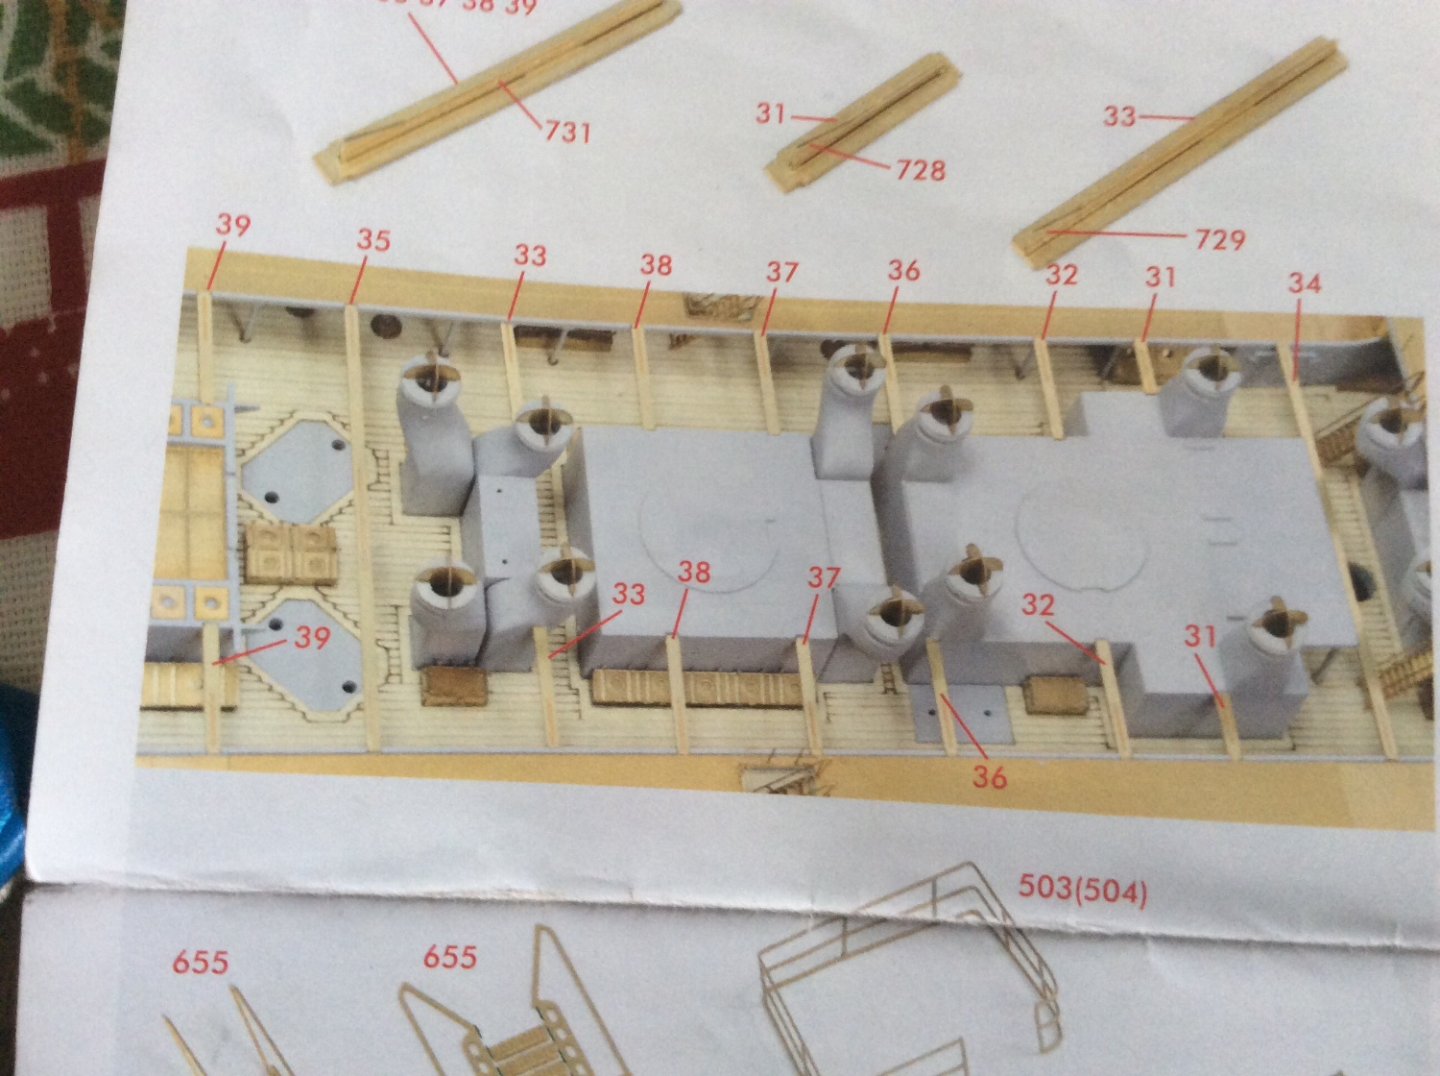
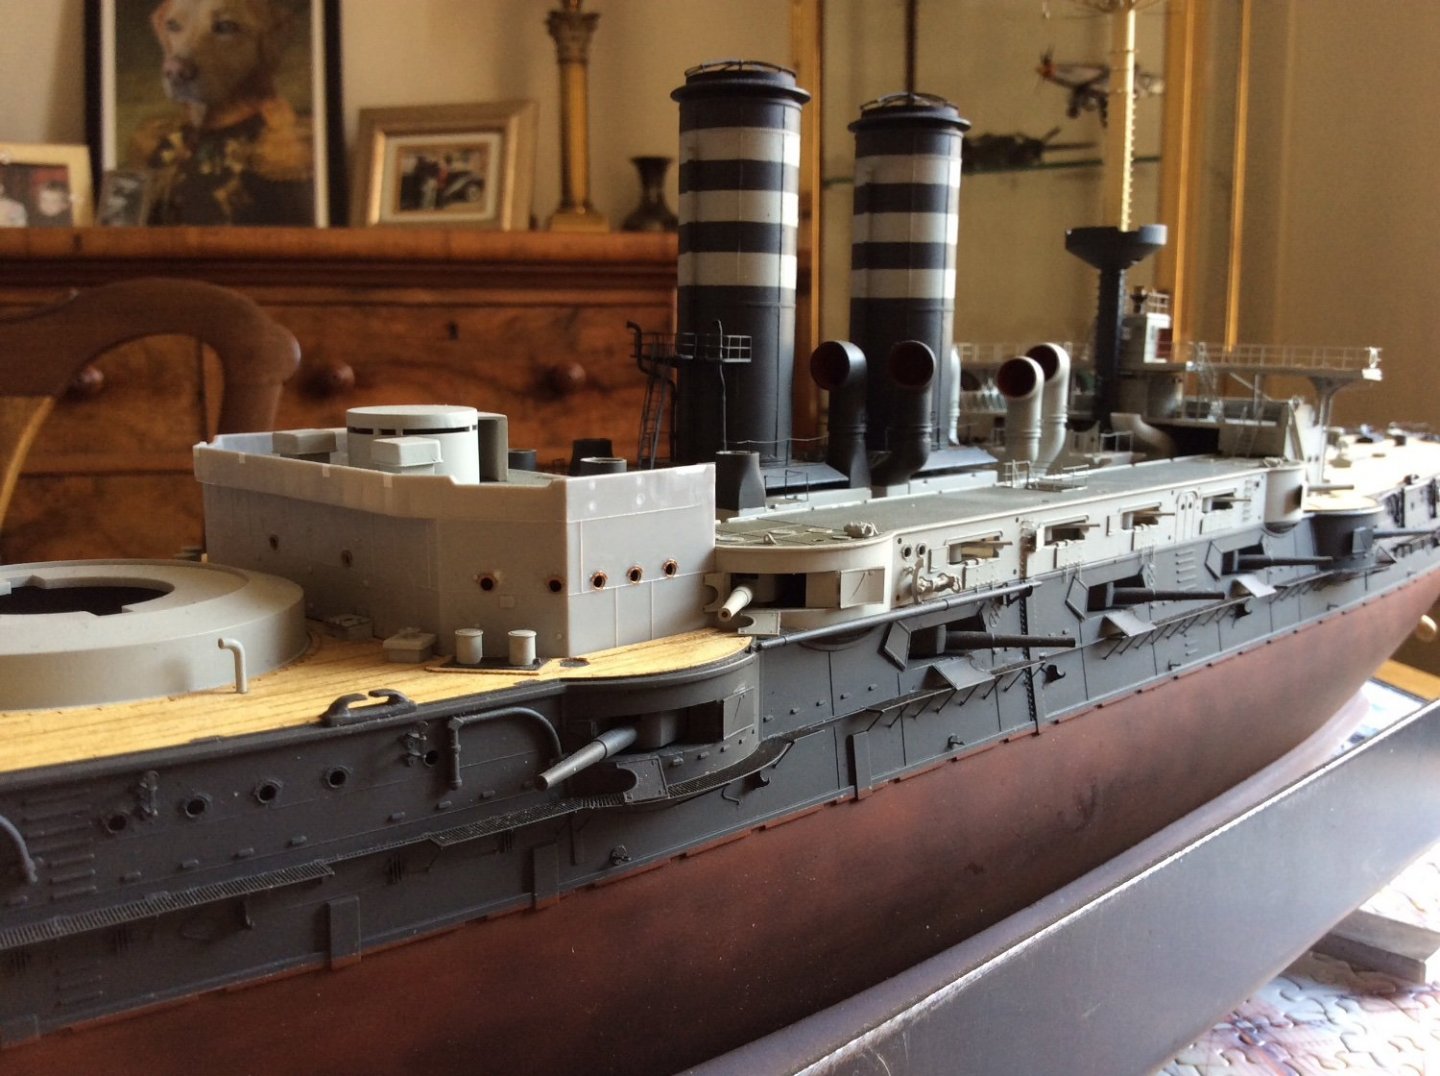
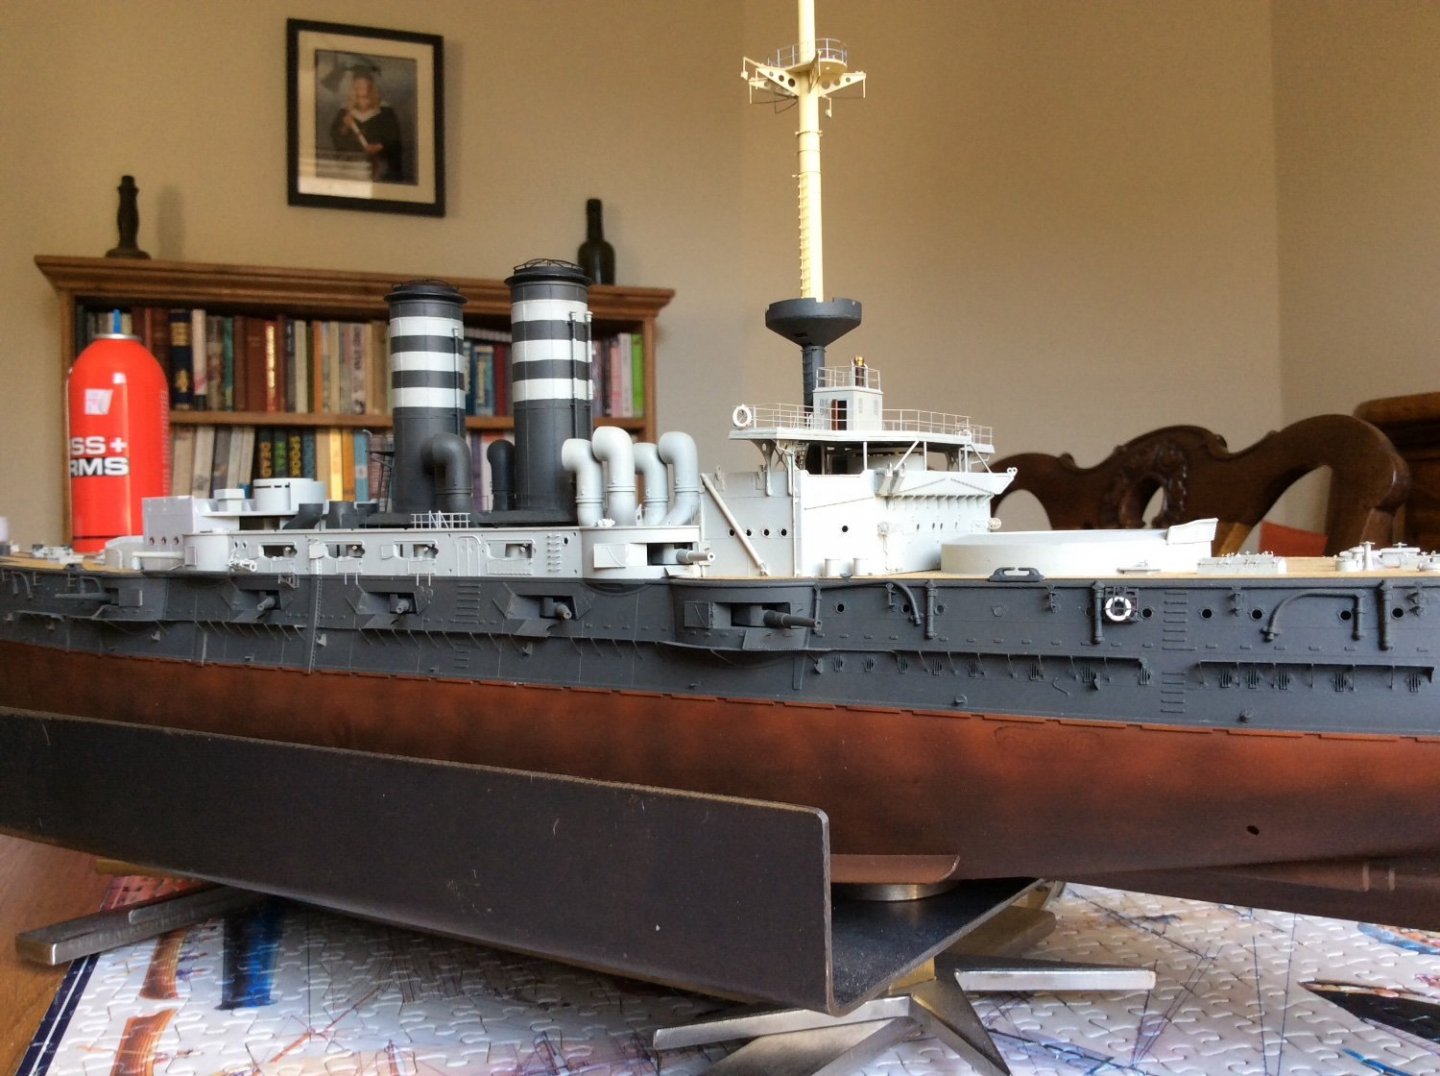
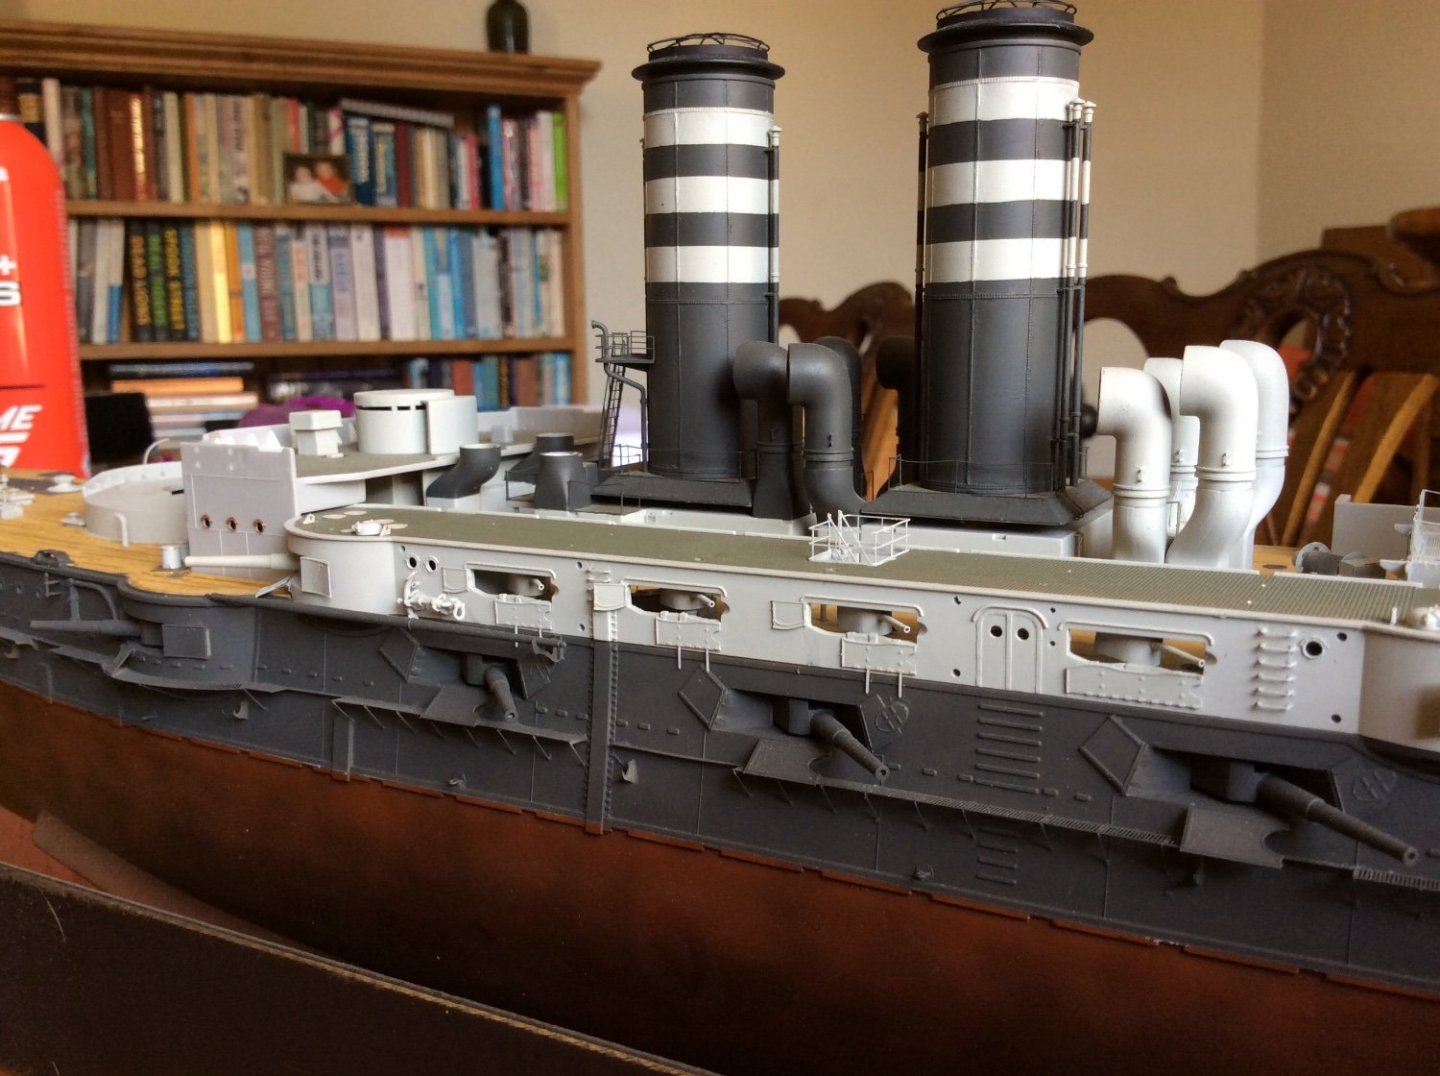
Making these parts takes time and patience, you also have to watch and fit the right parts together and to the right position on ship, this is important for it all to work, that’s when I discovered the cowls were oriented wrongly. So keep an eye on this section. I painted these in batches fitting in place as I saw fit. I did discover that my supper structure that I had fitted previously supporting the boat deck from the hull was very slightly leaning inwards probably by about half a millimetre, this is enough to cause problems so watch for this, I had to lever the boat deck outwards to set the etch parts in place, the ones on the port side dropped in nicely. So advice is to make some of these parts and check this before you fit the hull structures. 👍
-
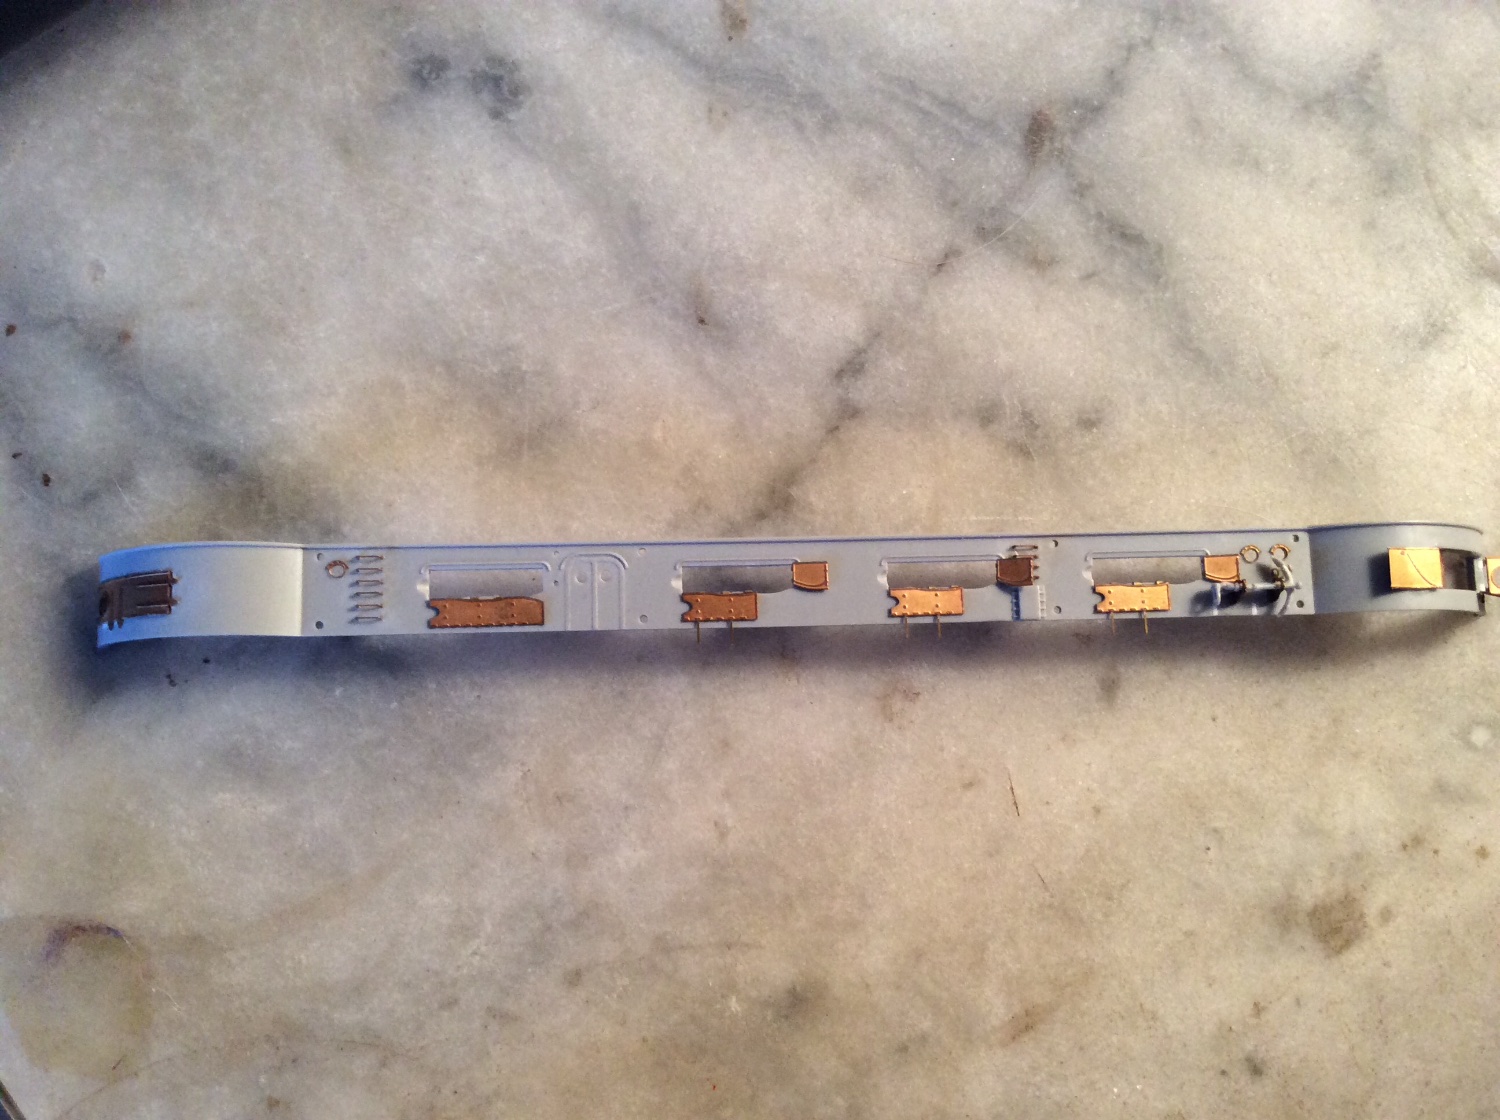
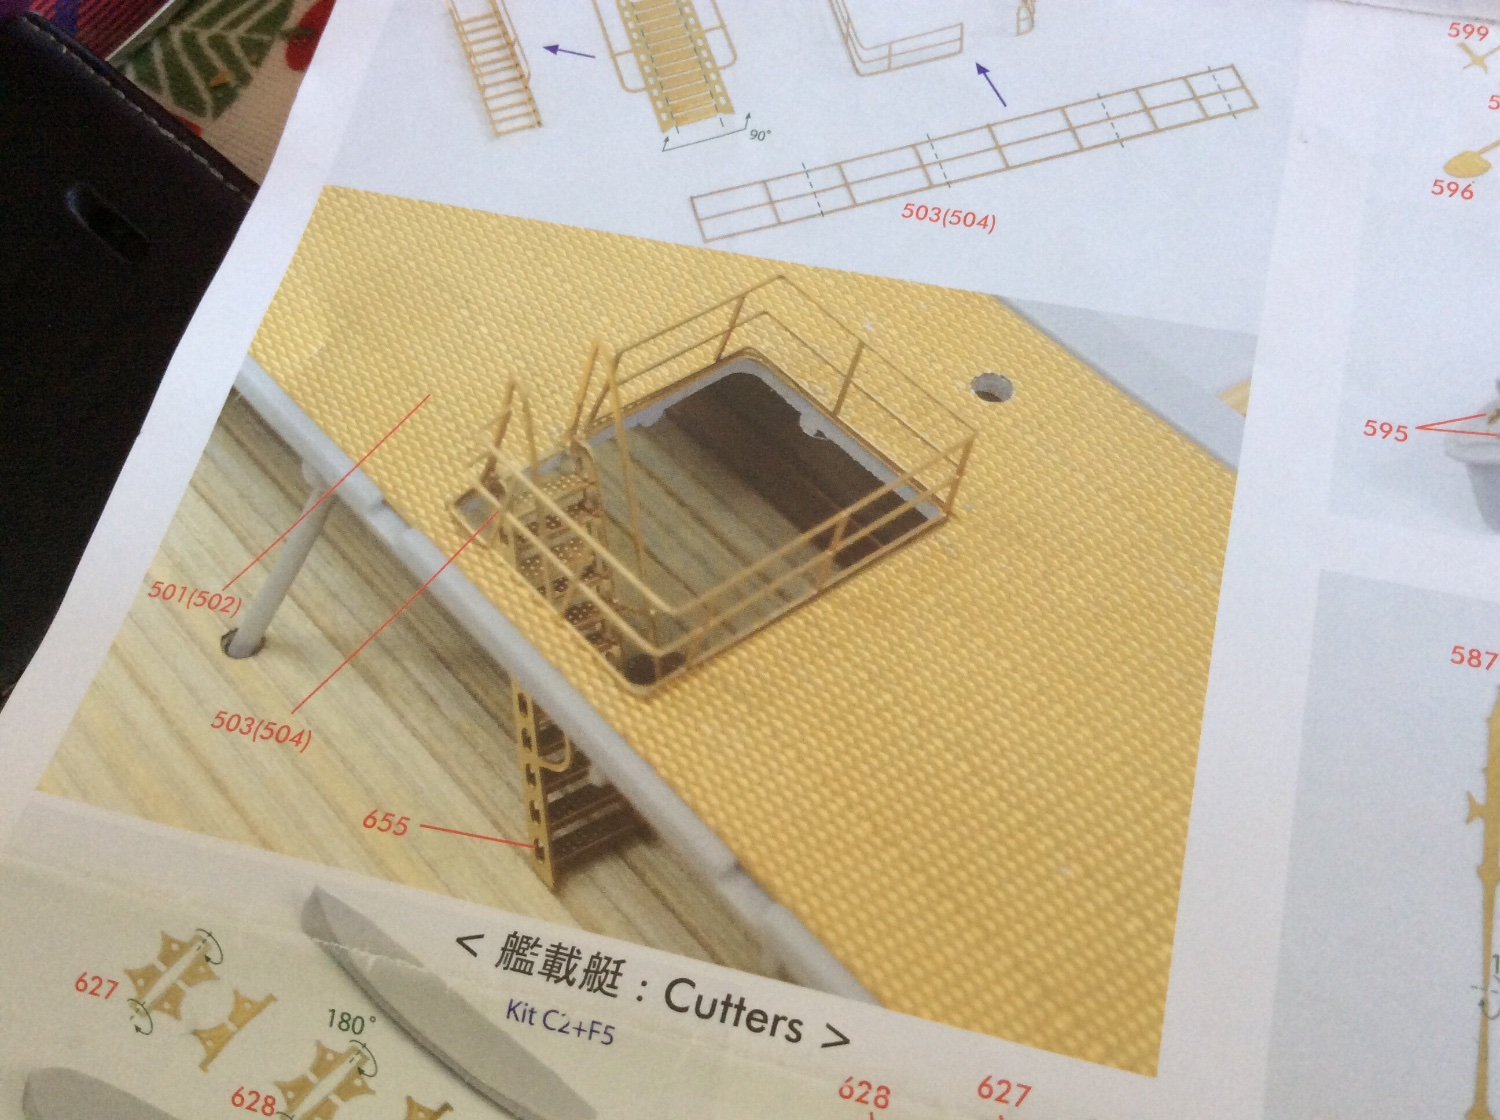
Sorry I forgot to mention the etch steelwork fo supporting the ships boats, do that just now.
-
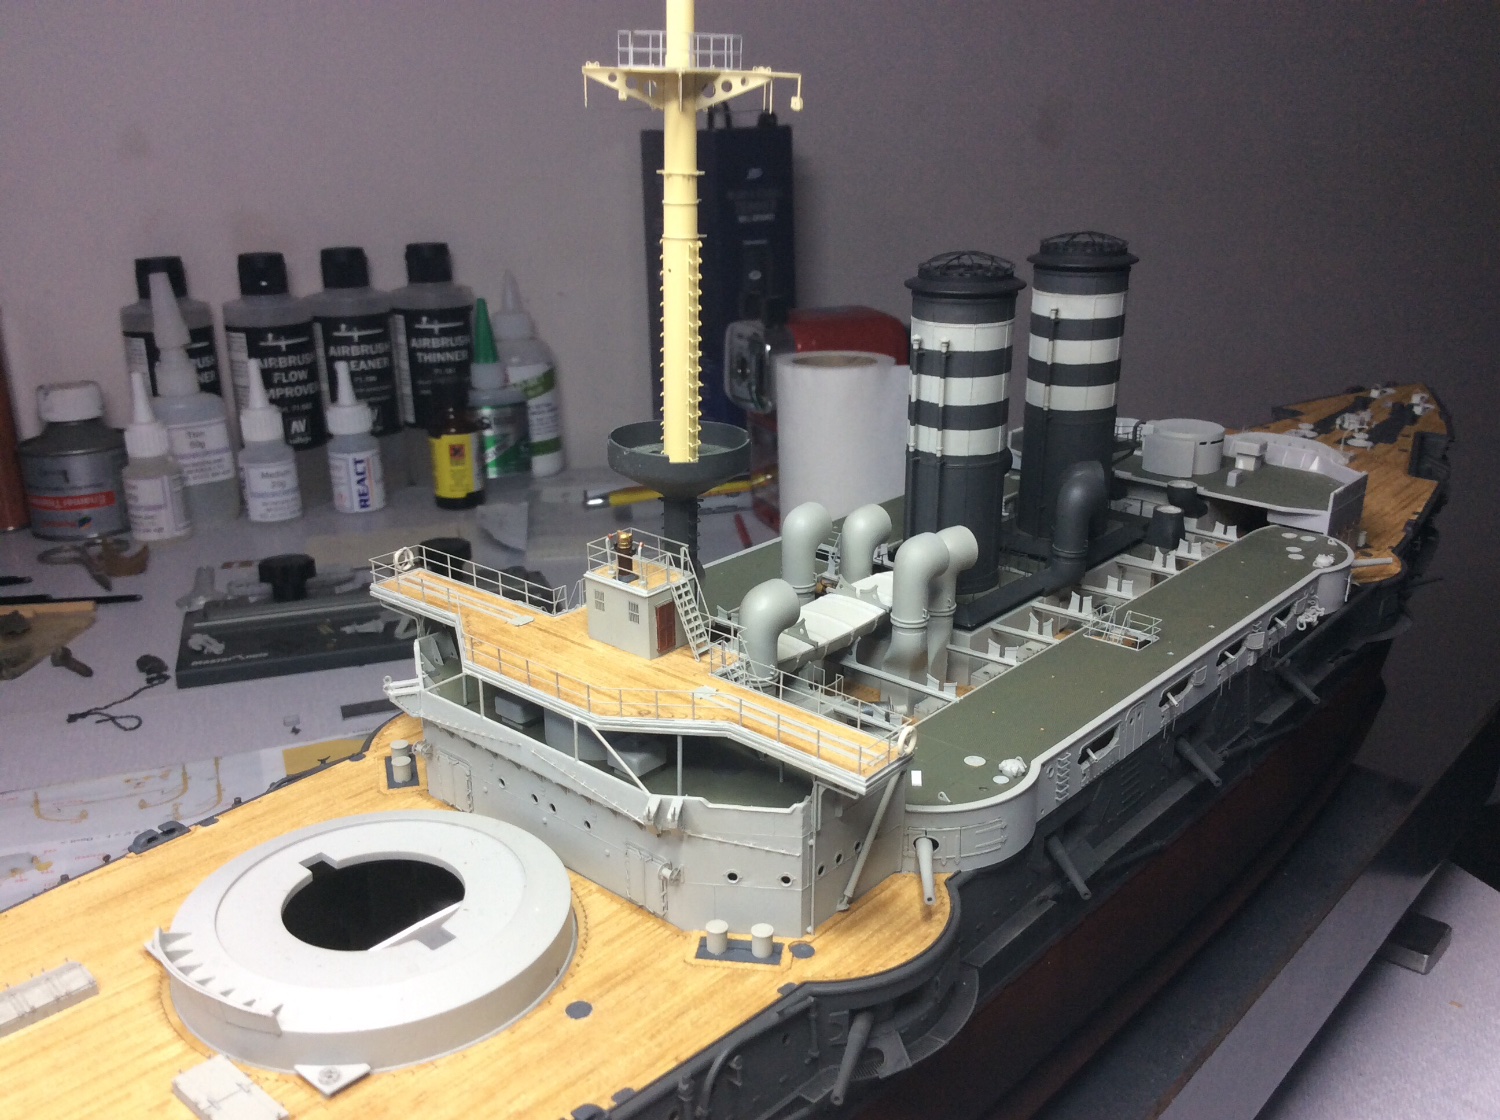
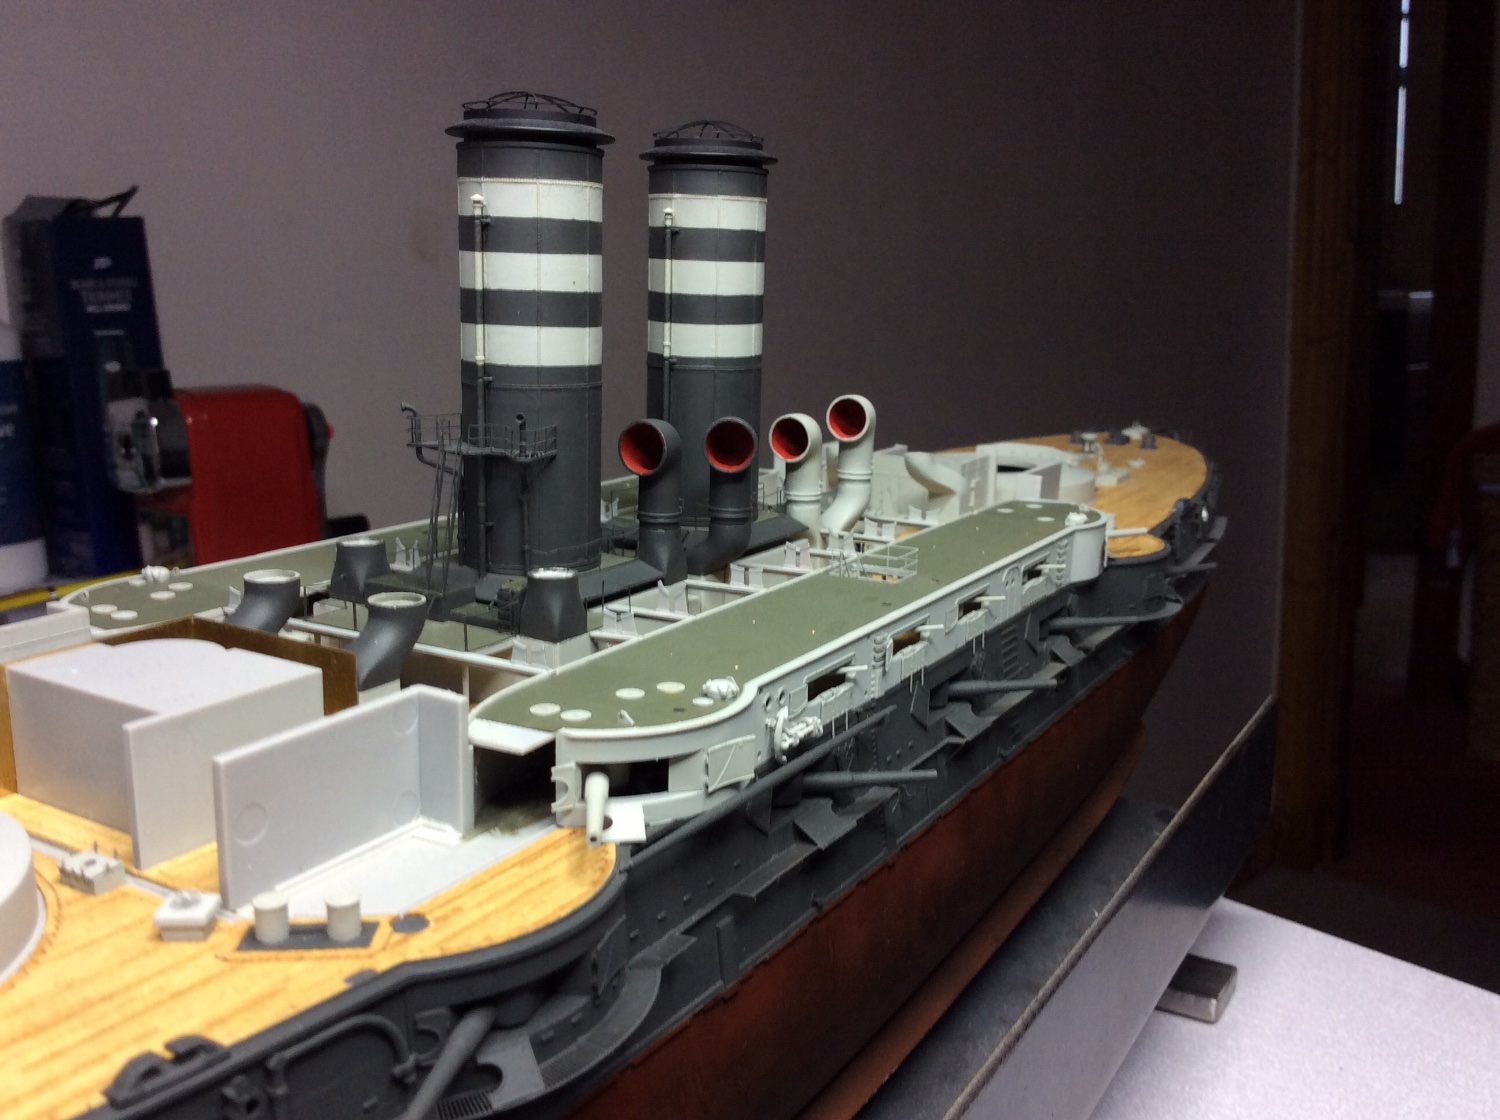
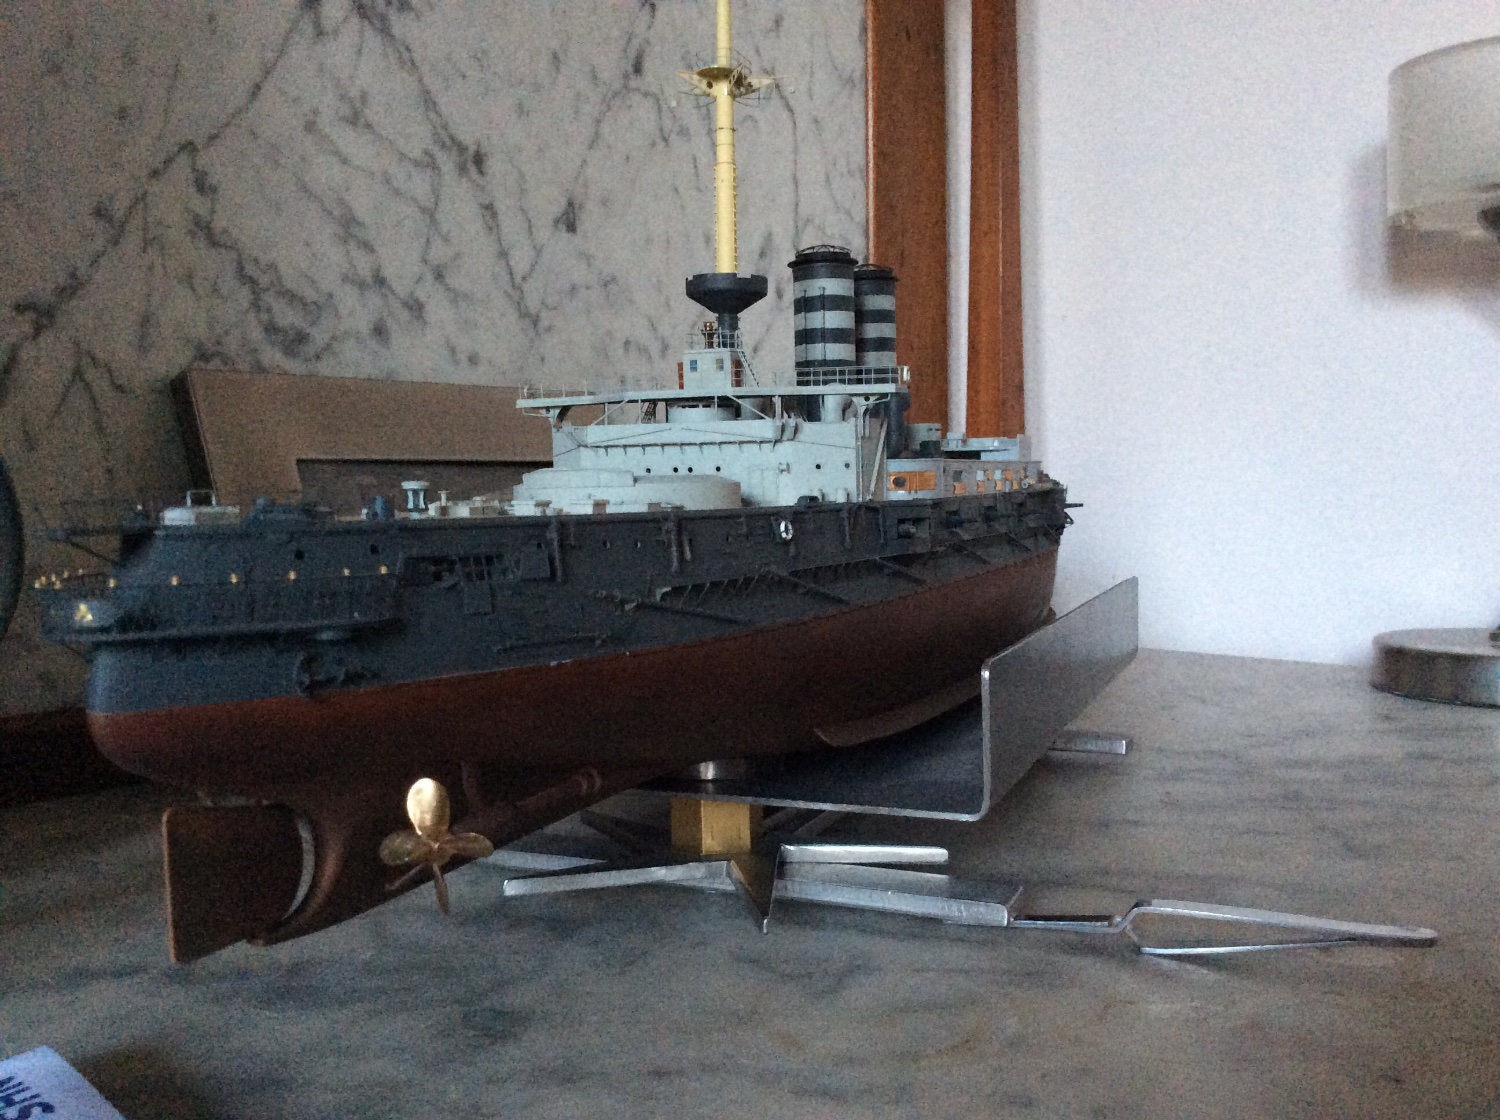
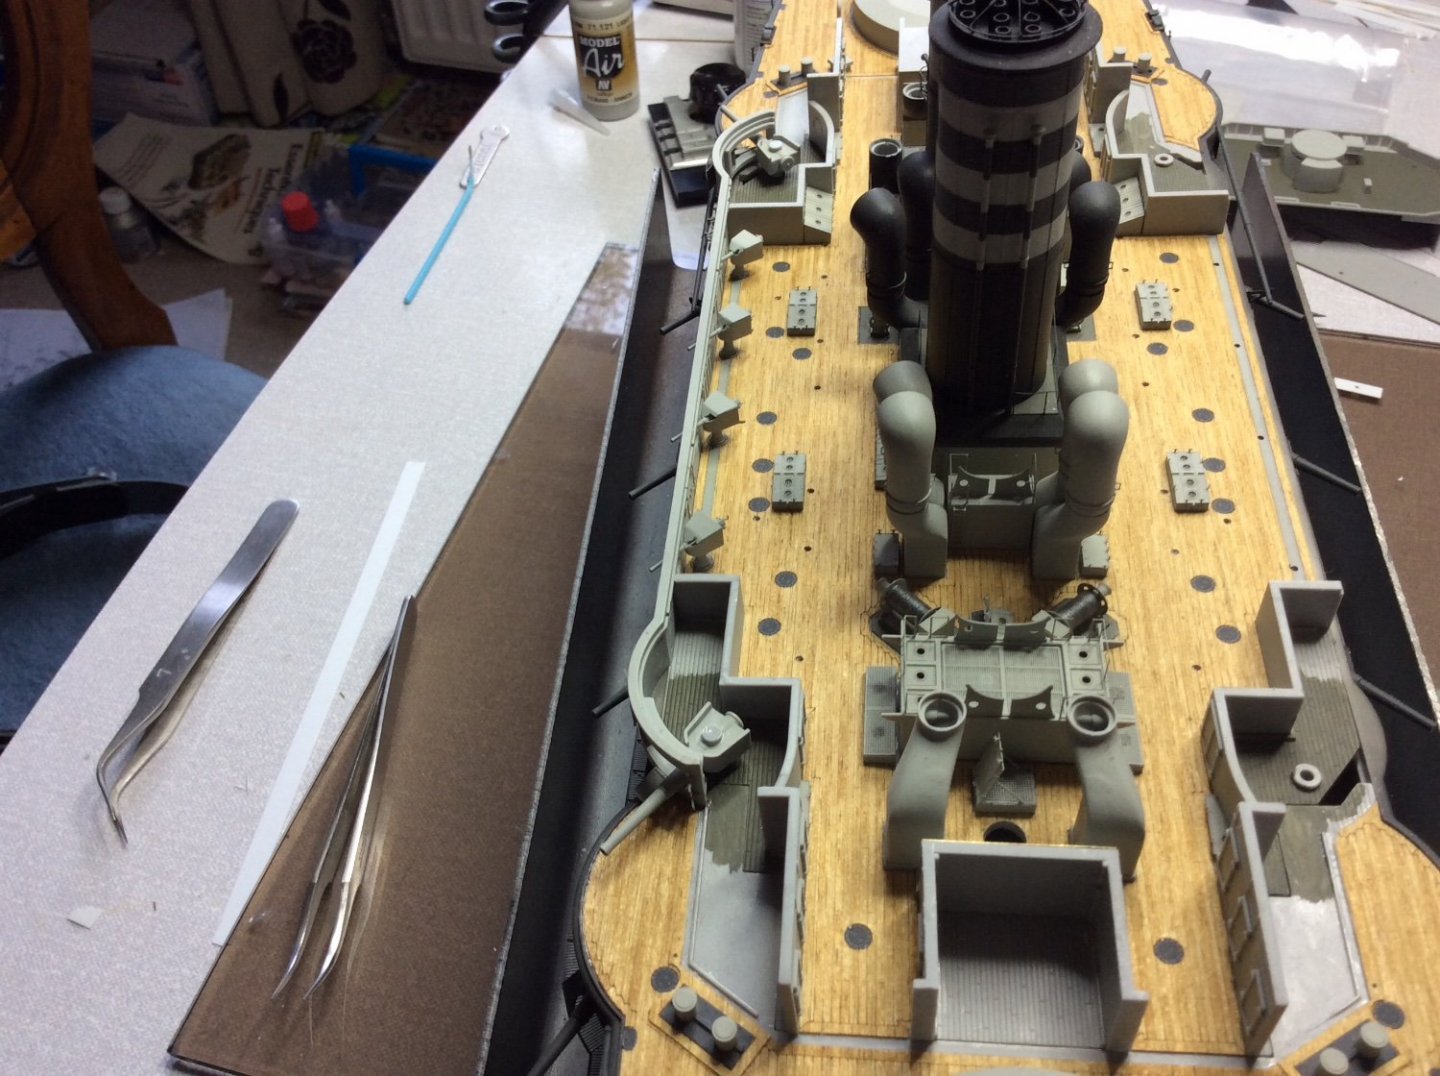
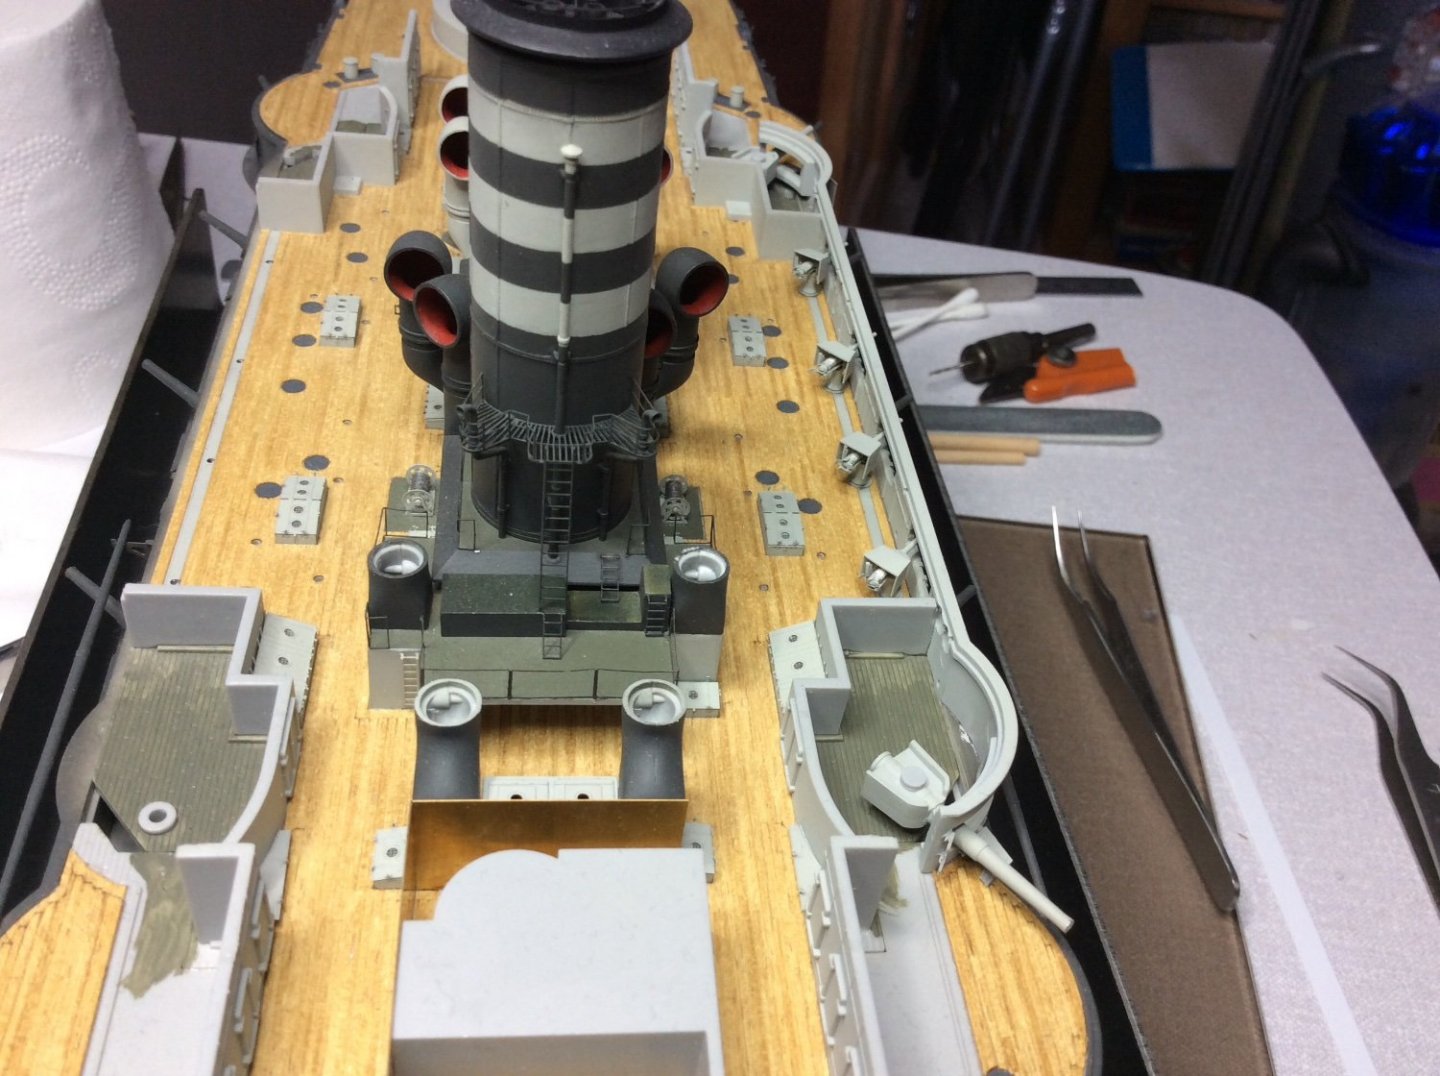
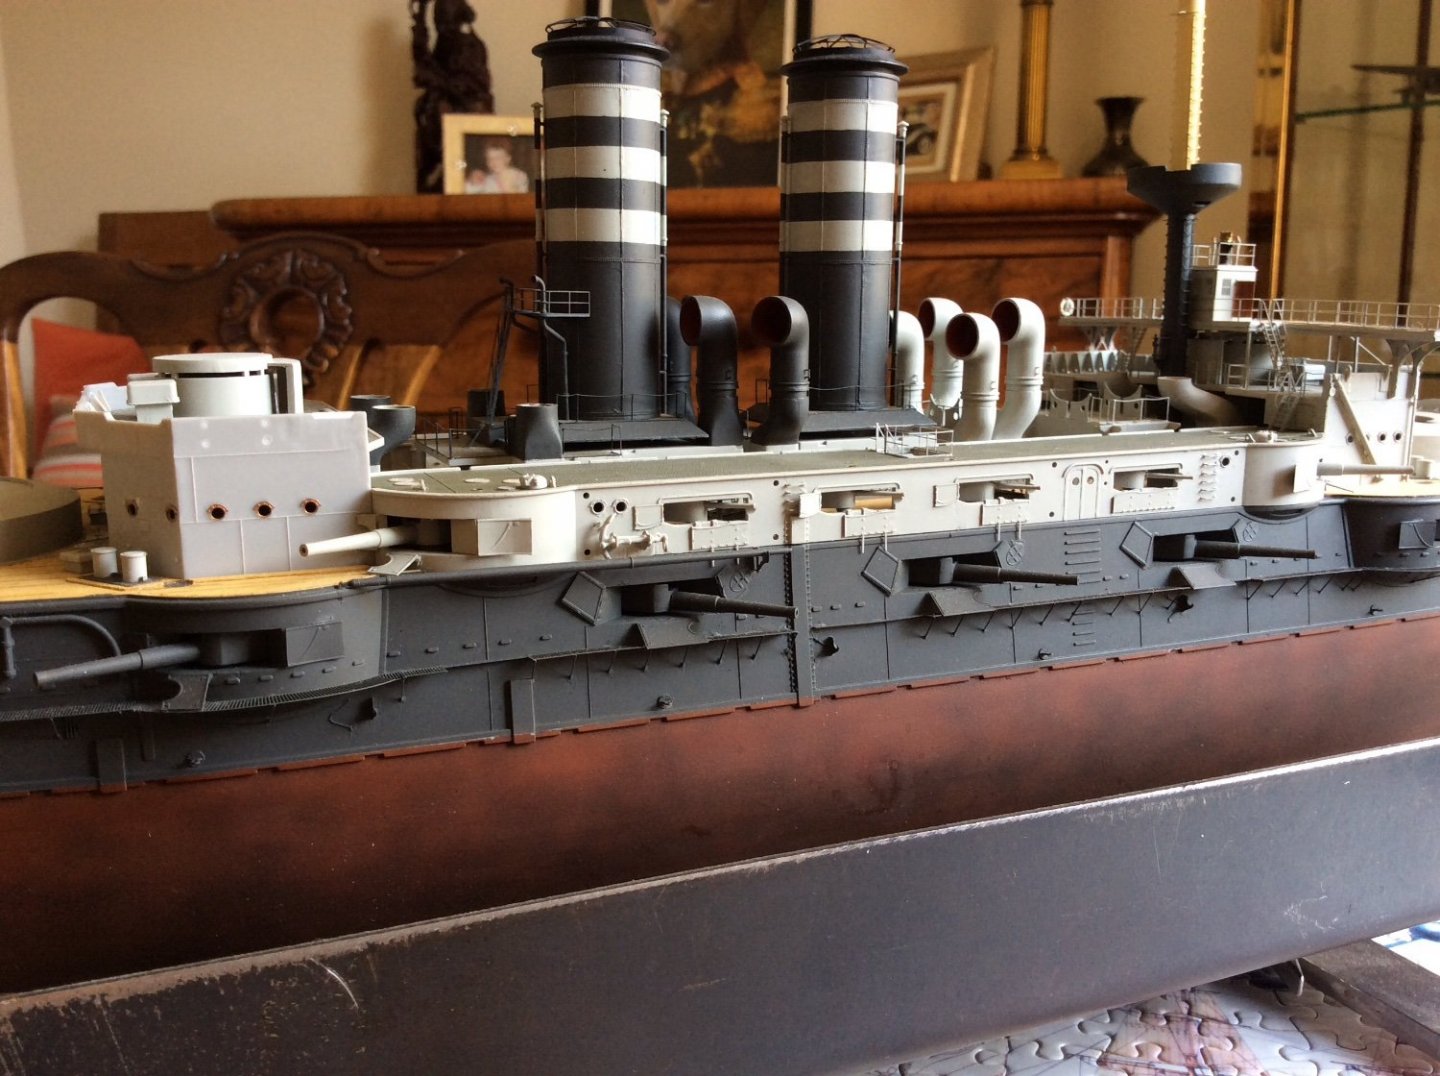
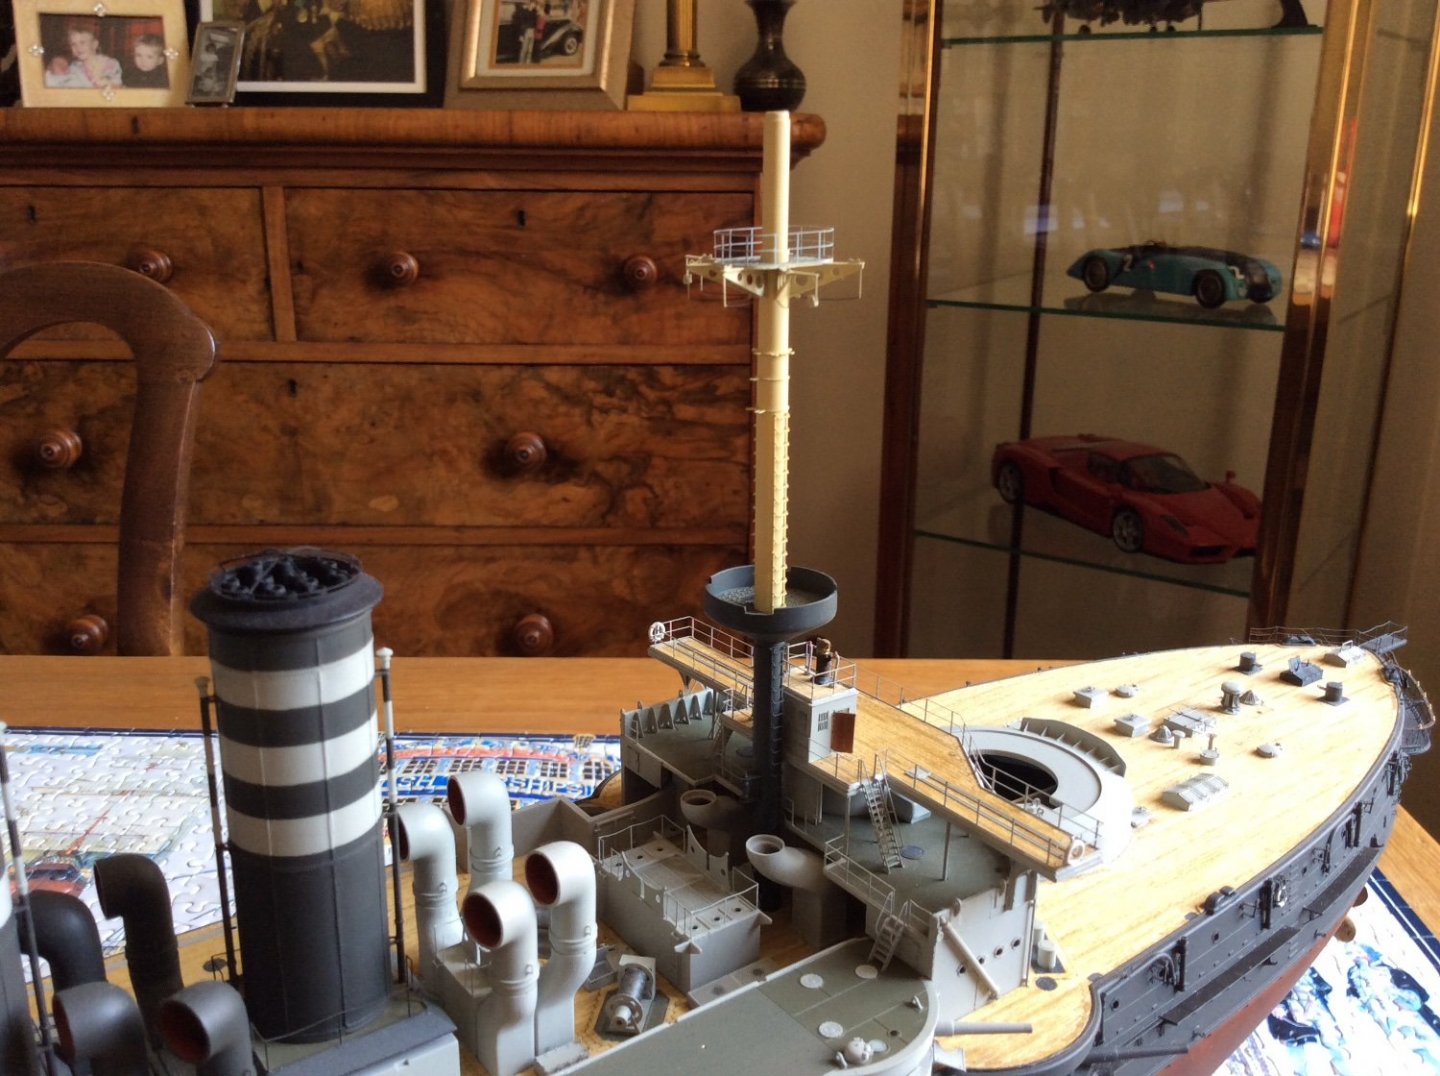
Getting to this stage let me at last fit the rear bridge super structure in place then fit the two ladders from main deck up to bridge structure, the ones mentioned back in stage 2 that don’t have much room for error. Also let me fit the two cowlings, rear deck structure and main mast.
-
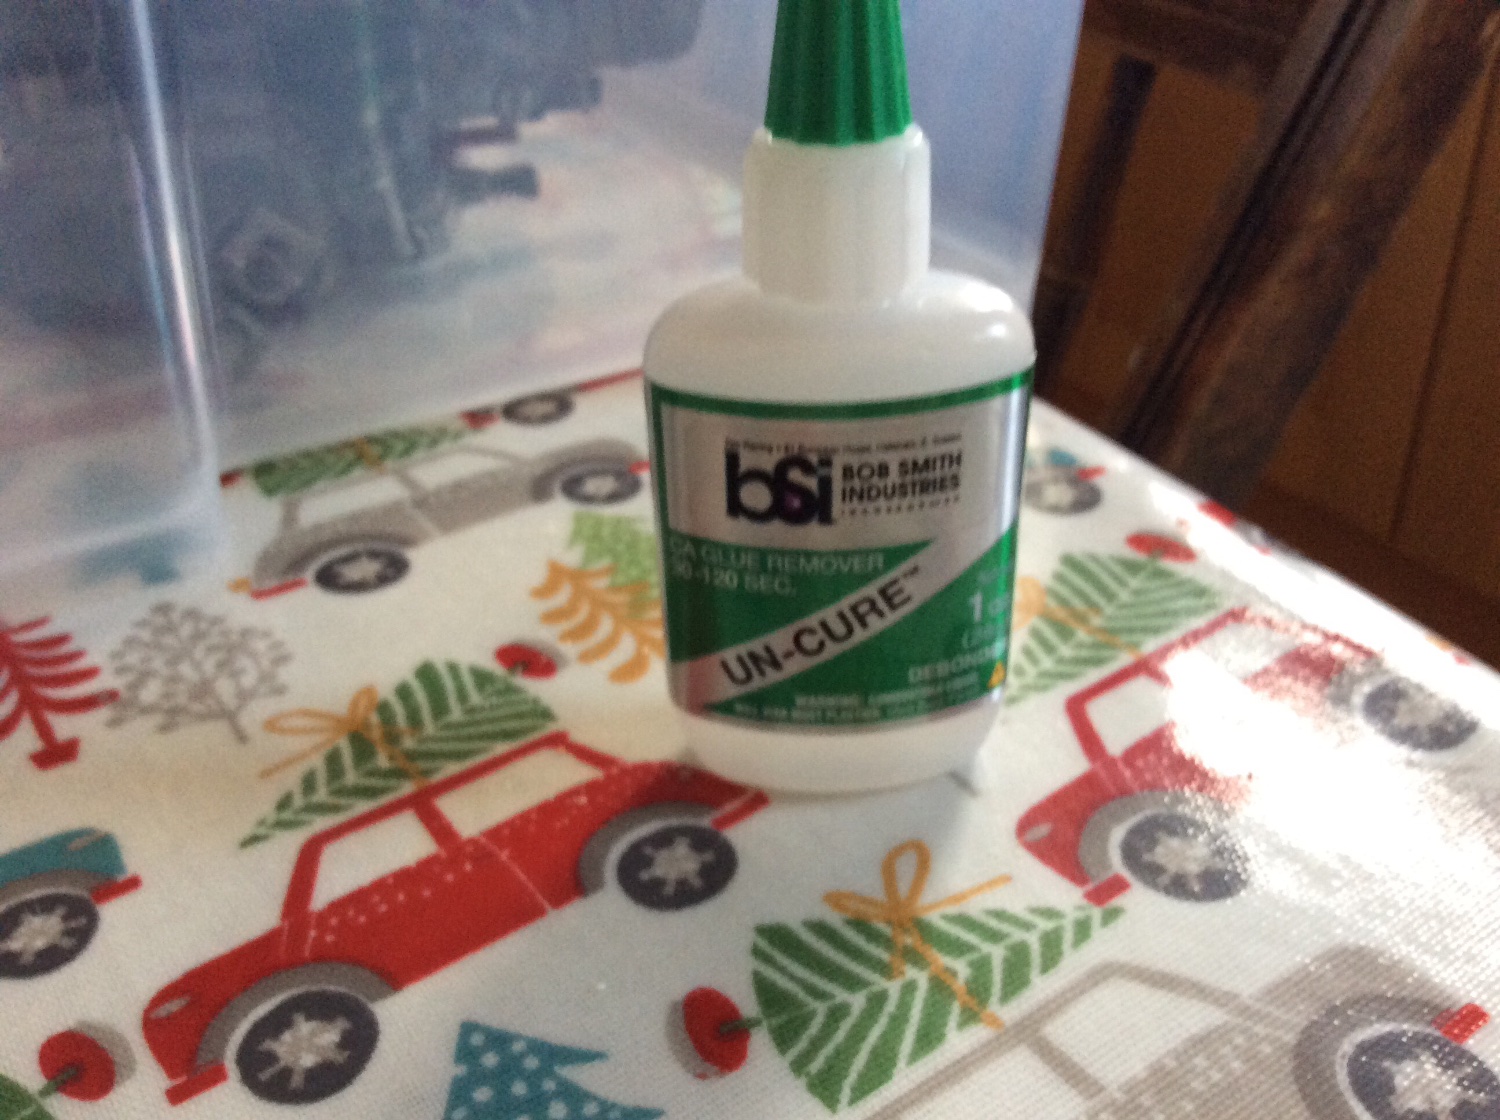
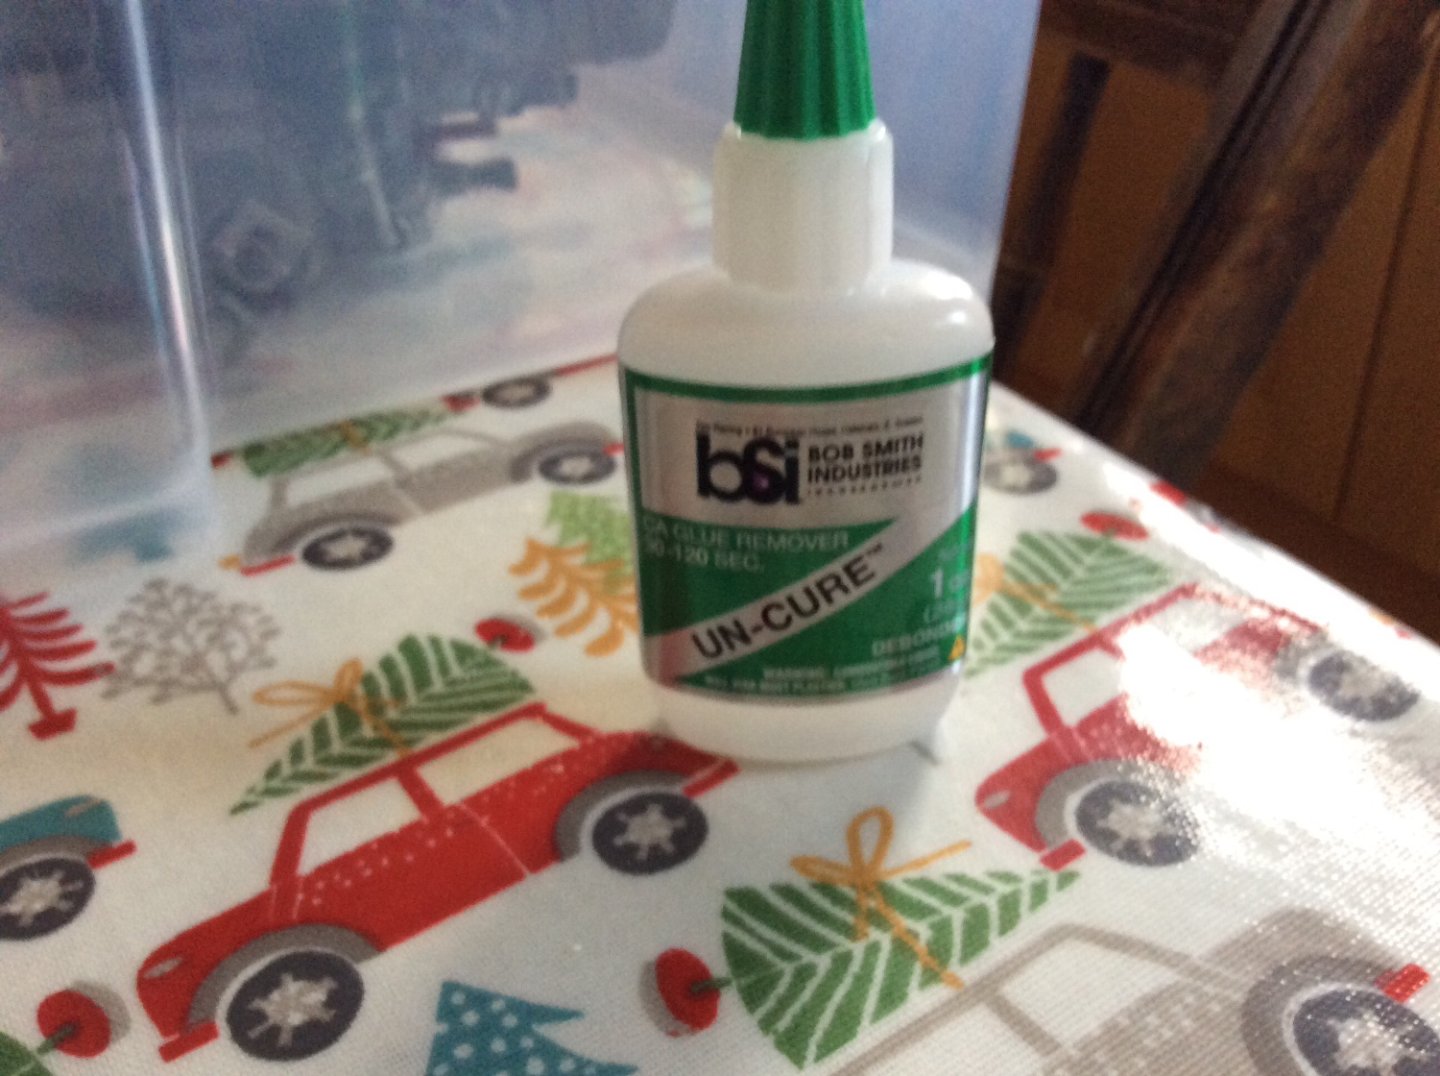
That last photo shows the cowls removed from this piece of trunking, I’m sure I mentioned to watch how you set these, 🤔 lol, think I’ll have to read my own instructions, these two need turned 90 to offset forward, necessary for the etch boat steelwork to fit. Breaking the trunking from the deck was a bit more problematic, bought some debonding glue to help, eventually softened enough for me to ease of by rocking back and forward by inserting tweezers inside and rocking back and forward till it eased off. Dressed the parts as best I could and reset them. There’s a saying amongst tradesmen if you never made a mistake you ain’t made anything. 😂
-
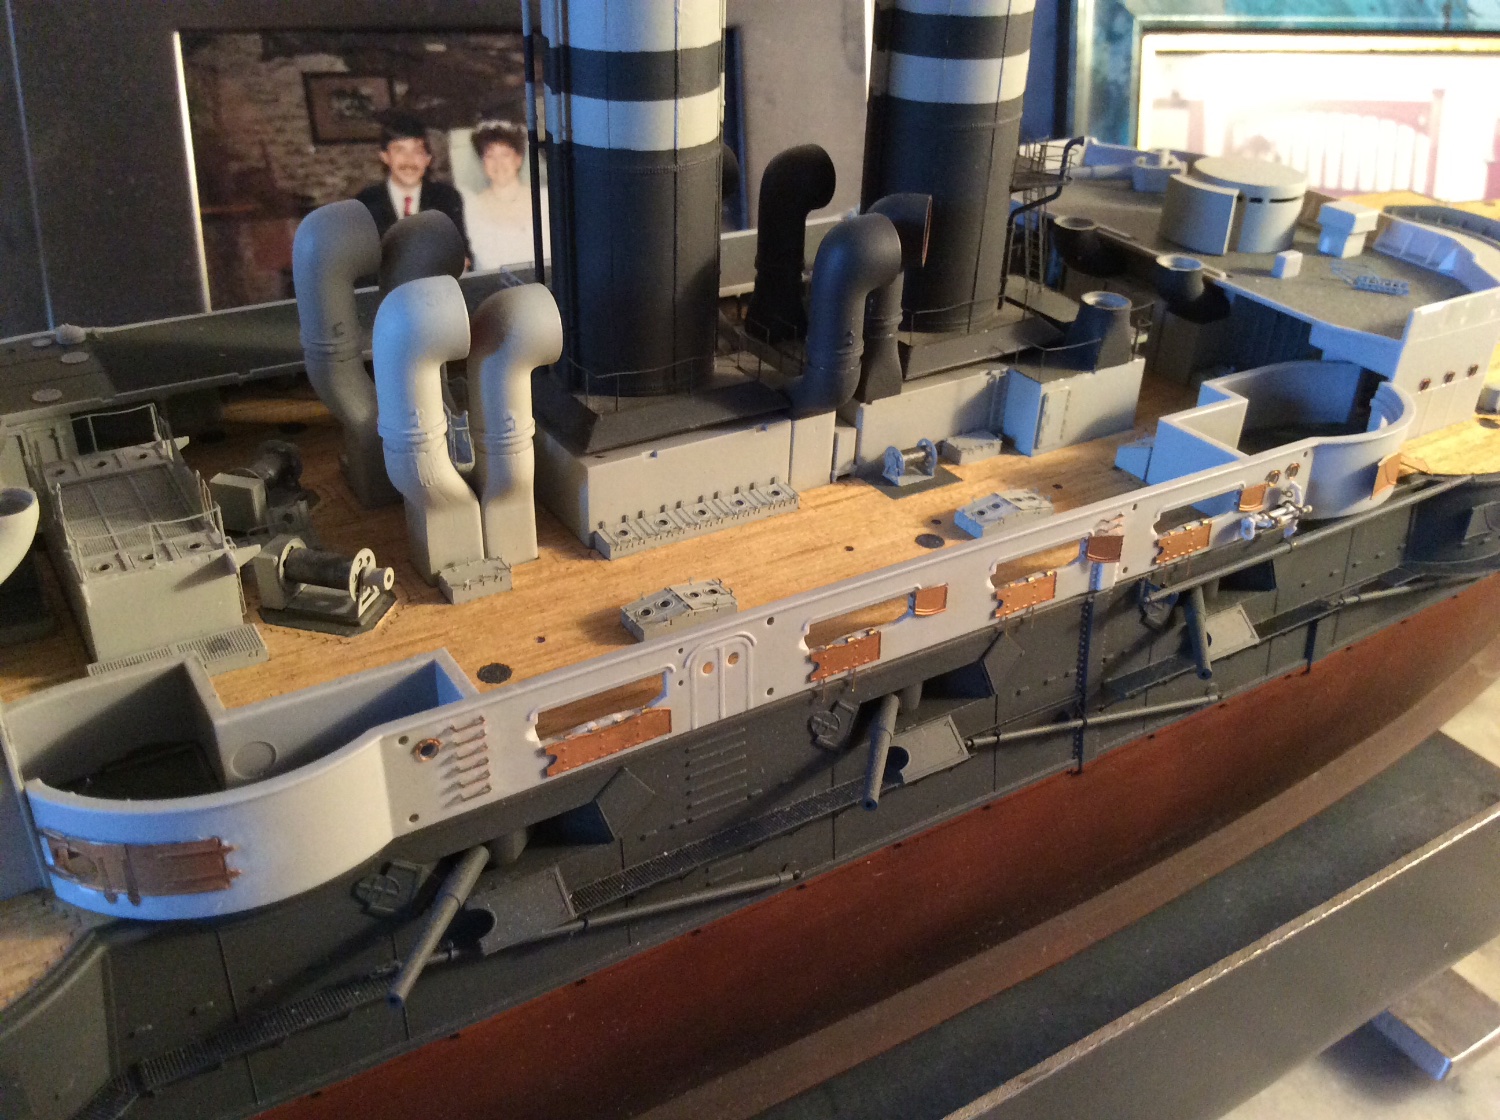
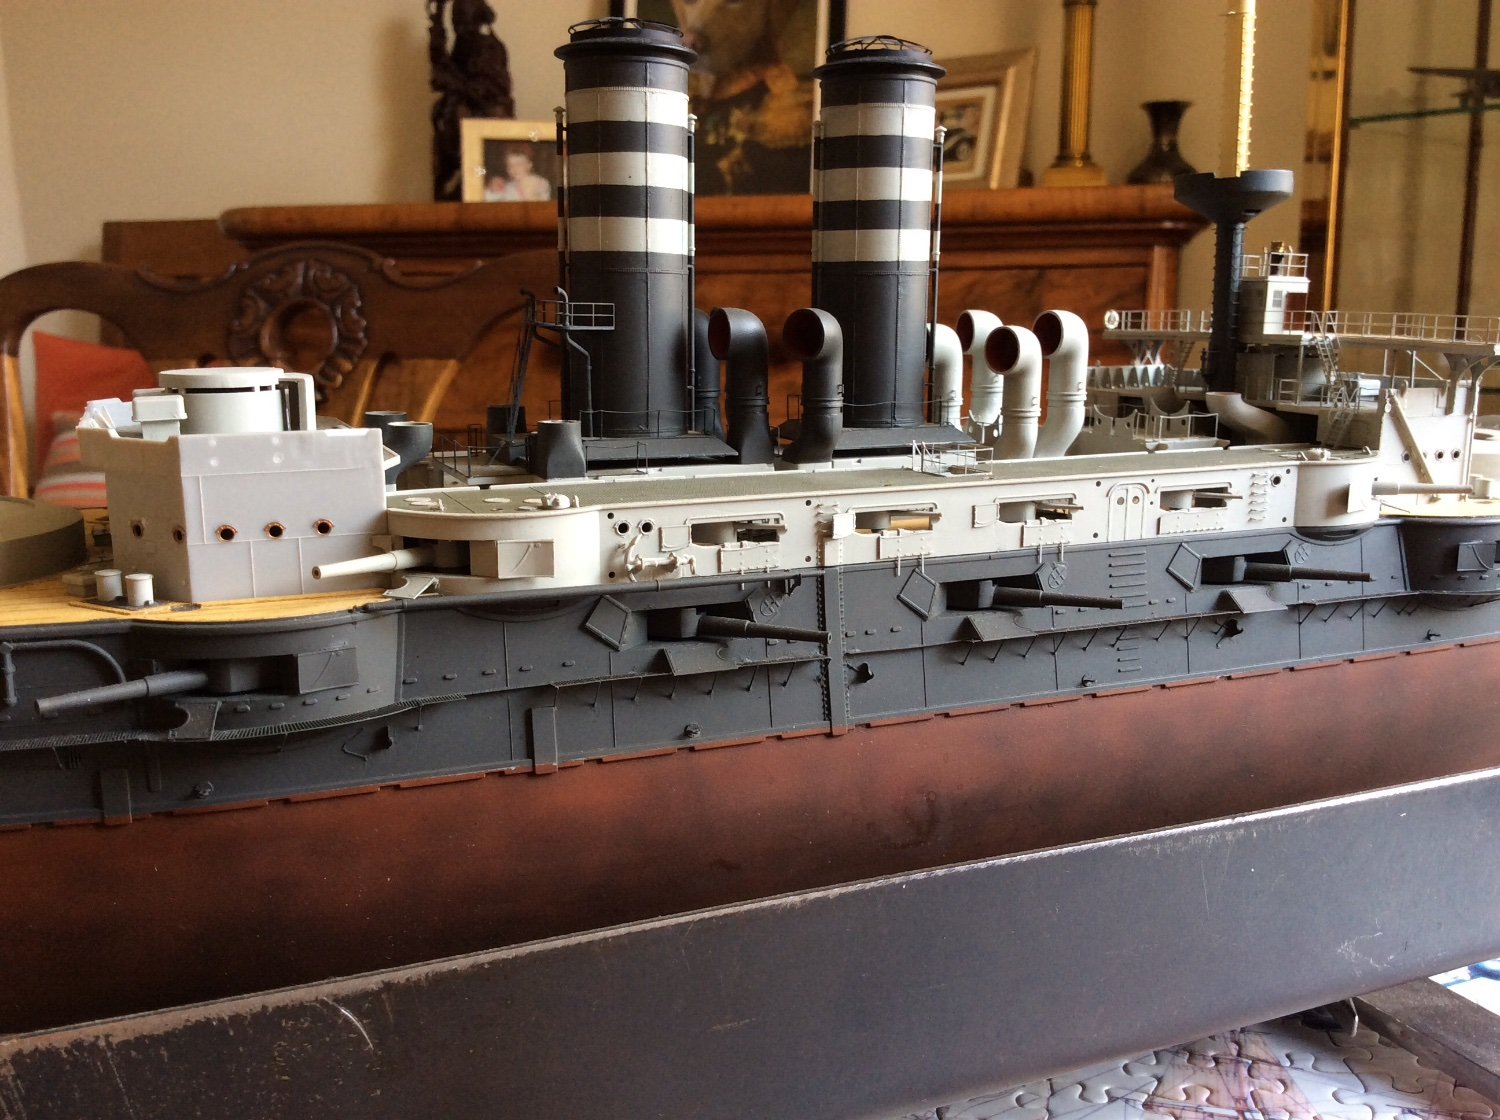
Well at last got to a posting stage, after a long break of inactivity I went to a local model show, first since the Covid restrictions and really enjoyed myself, even ended up joining a local model club who I have to say displayed some magnificent ship models, so looking forward to some expert help with rigging and weathering. Great bunch of guys 👍 Also had my usual spending spree, one kit I bought especially after seeing one built on a display stand was the Yamato’s secondary gun from Takom 1/35 scale, this got me back into a modelling frame of mind and took me about two weeks to build, shall put a picture on beside Mikasa at end of post, might make someone interested in obtaining one. Anyway back to the Mikasa, had a mental block in mind getting past making the 3 inch guns with gun shields but when I made a start got through the next four guns not too badly, omitted some of the details to ease the process since like the build CDW did, he says you can’t really see them that well anyway. The build process was the same process as before on the port side boat deck. A few photos to show some progress, at last🙄
-
Hellow guys, know it’s been a while, modelling been on back burner through summer months unfortunately, but trying to start up again, shall be a few weeks yet, hope everyone is keeping well, regards Jeff. 🤛
-
Wrong sort off model 😂 Will try to freeze it for some interesting views of ship later, might even risk the volume on😂 certainly different.
-
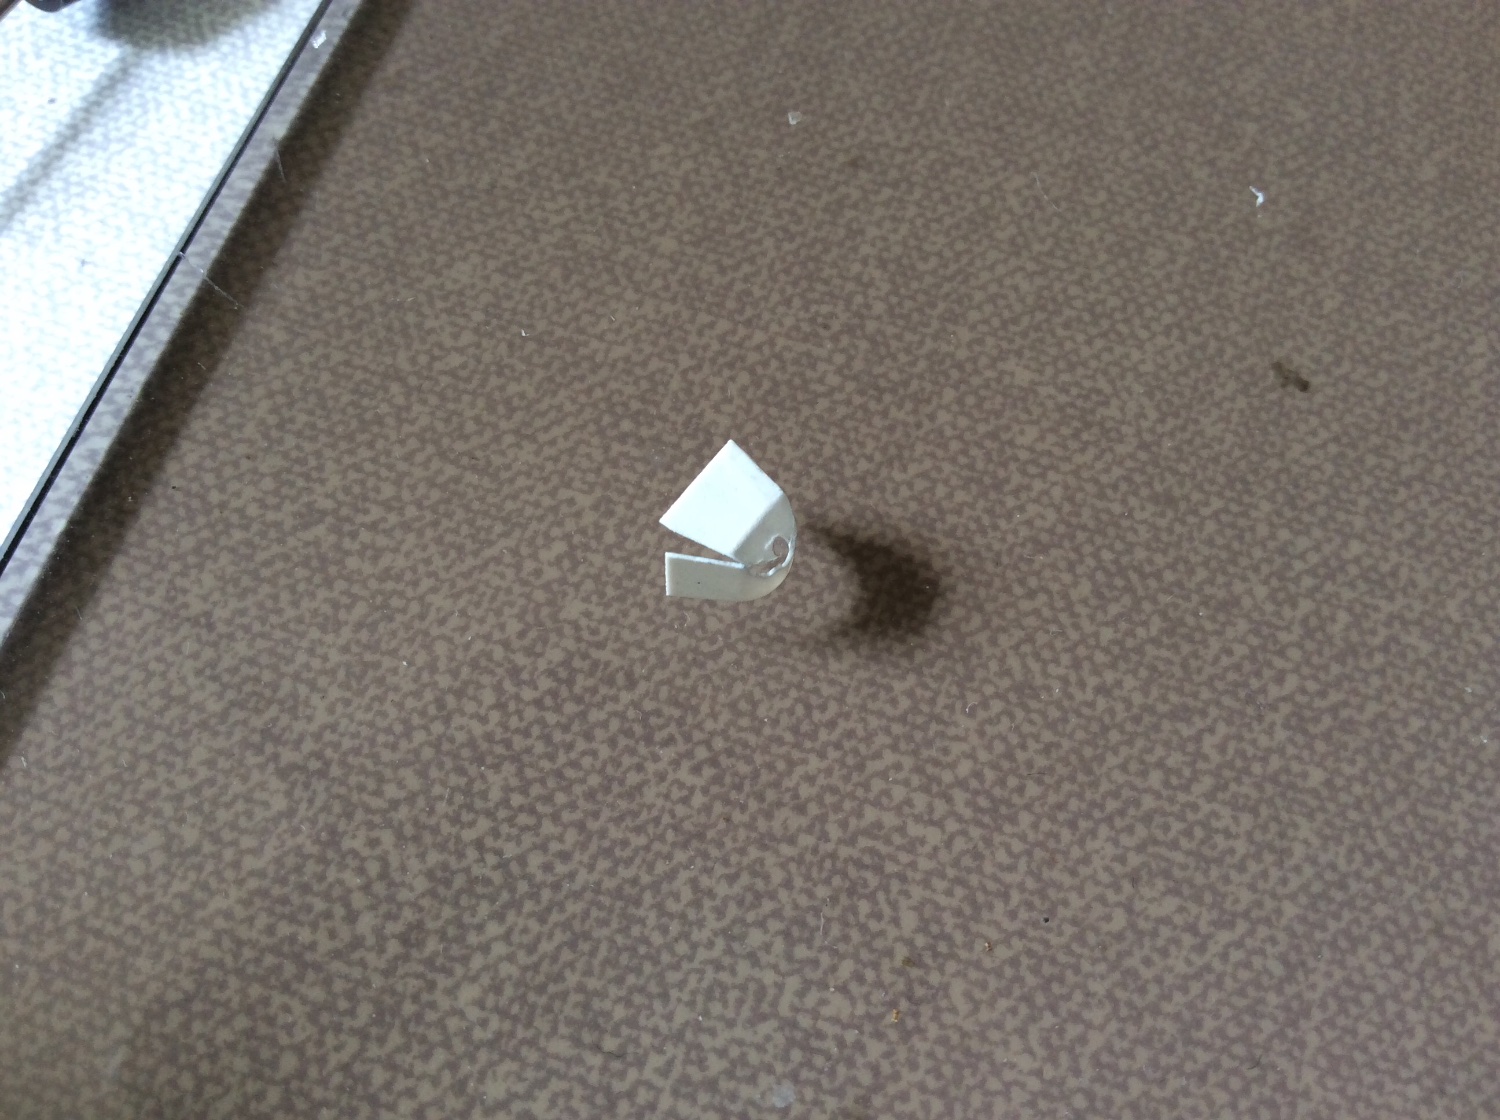
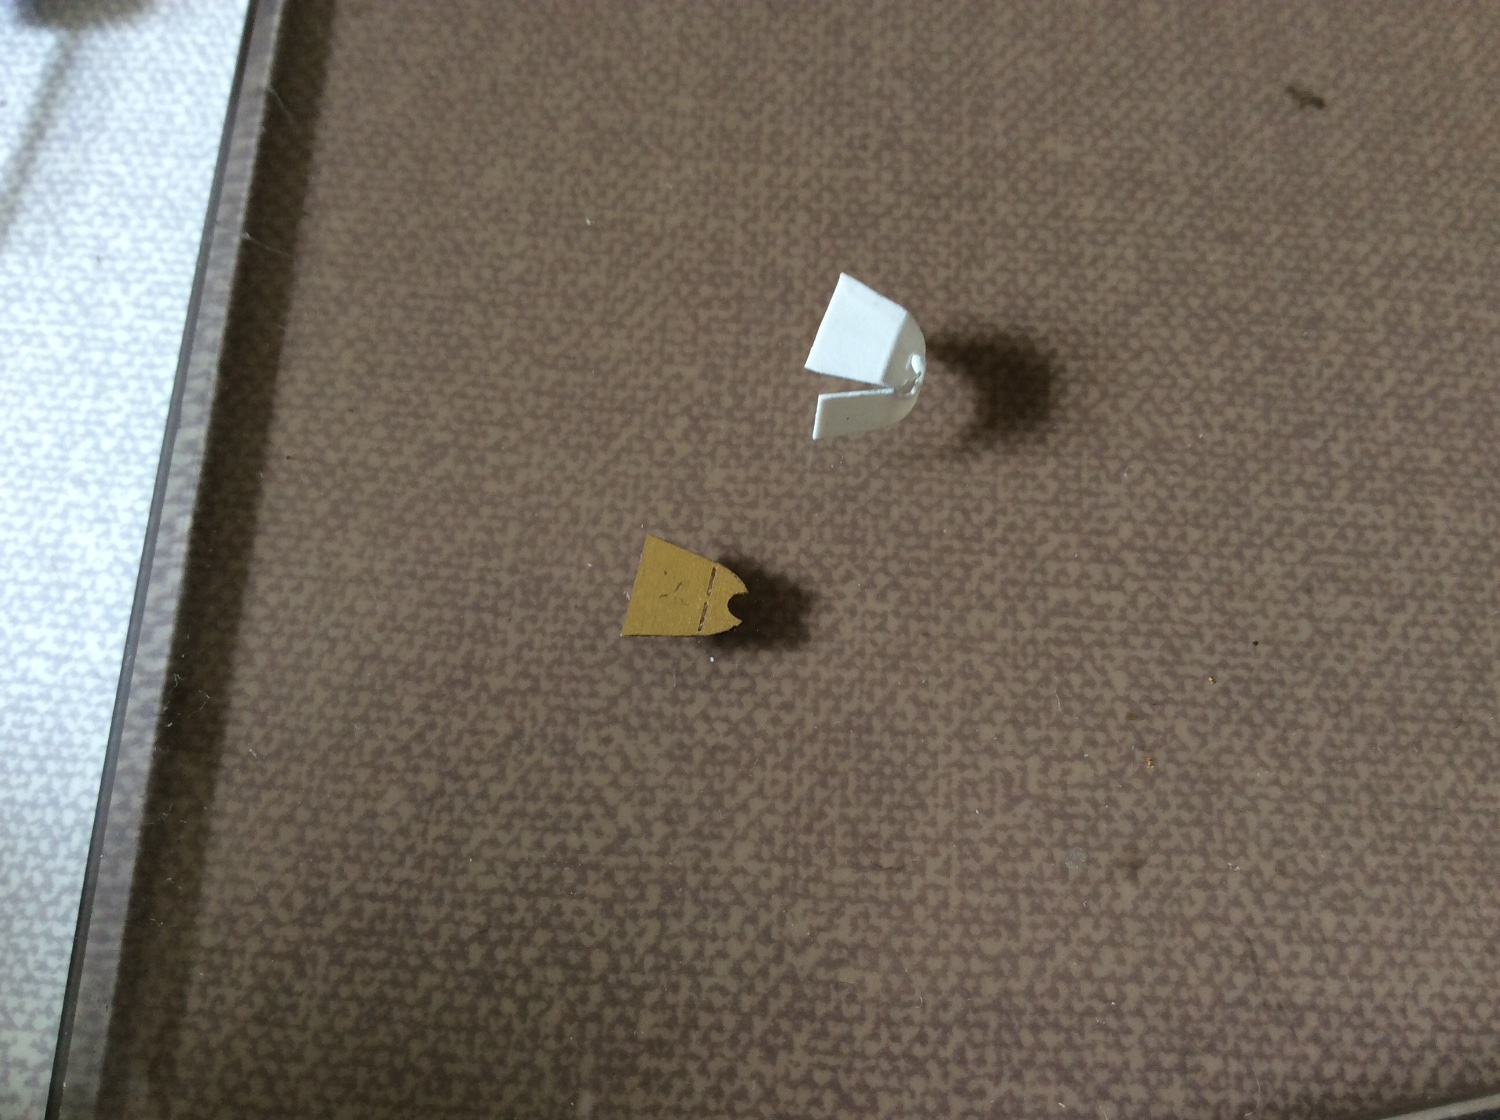
Chris, it’s when they go ping and you haven’t a clue what direction they went, no chance. Even when you catch a glimpse of were it fell you still can’t find it. Must have spent hours in the carpet etch grave.😂 yet some times it happens and you see it right away. Weird isn’t it. Guess it’s a bonus when you have extra parts. 👍
-
Next was making gun shields from plastic stock, absolute nightmare trying to keep going with these, the end result kind of works but can’t recommend it to anyone but the most patient, I had a few crushed guns a tweezer flinging contests, seems you have to be in the mood not in a mood. 😂 Anyway see once the deck is glued into position you can hardly see them. Best advice is people pester Pontos for an additional upgrade set for 1902 version would be a much easier solution. Also did a bit more work on main mast along with some painting, decided to use Vallejo 71.074 Beige. Sat after bridge and mast in position to show how it looks. Well that’s it for now, shall have to do Starboard side now, joy. Put some more photos up. 🤛
- 543 replies
-
- 17
-

-