HOLIDAY DONATION DRIVE - SUPPORT MSW - DO YOUR PART TO KEEP THIS GREAT FORUM GOING! (Only 24 donations so far out of 49,000 members - C'mon guys!)
×


SkiBee
-
Posts
249 -
Joined
-
Last visited
Content Type
Profiles
Forums
Gallery
Events
Everything posted by SkiBee
-

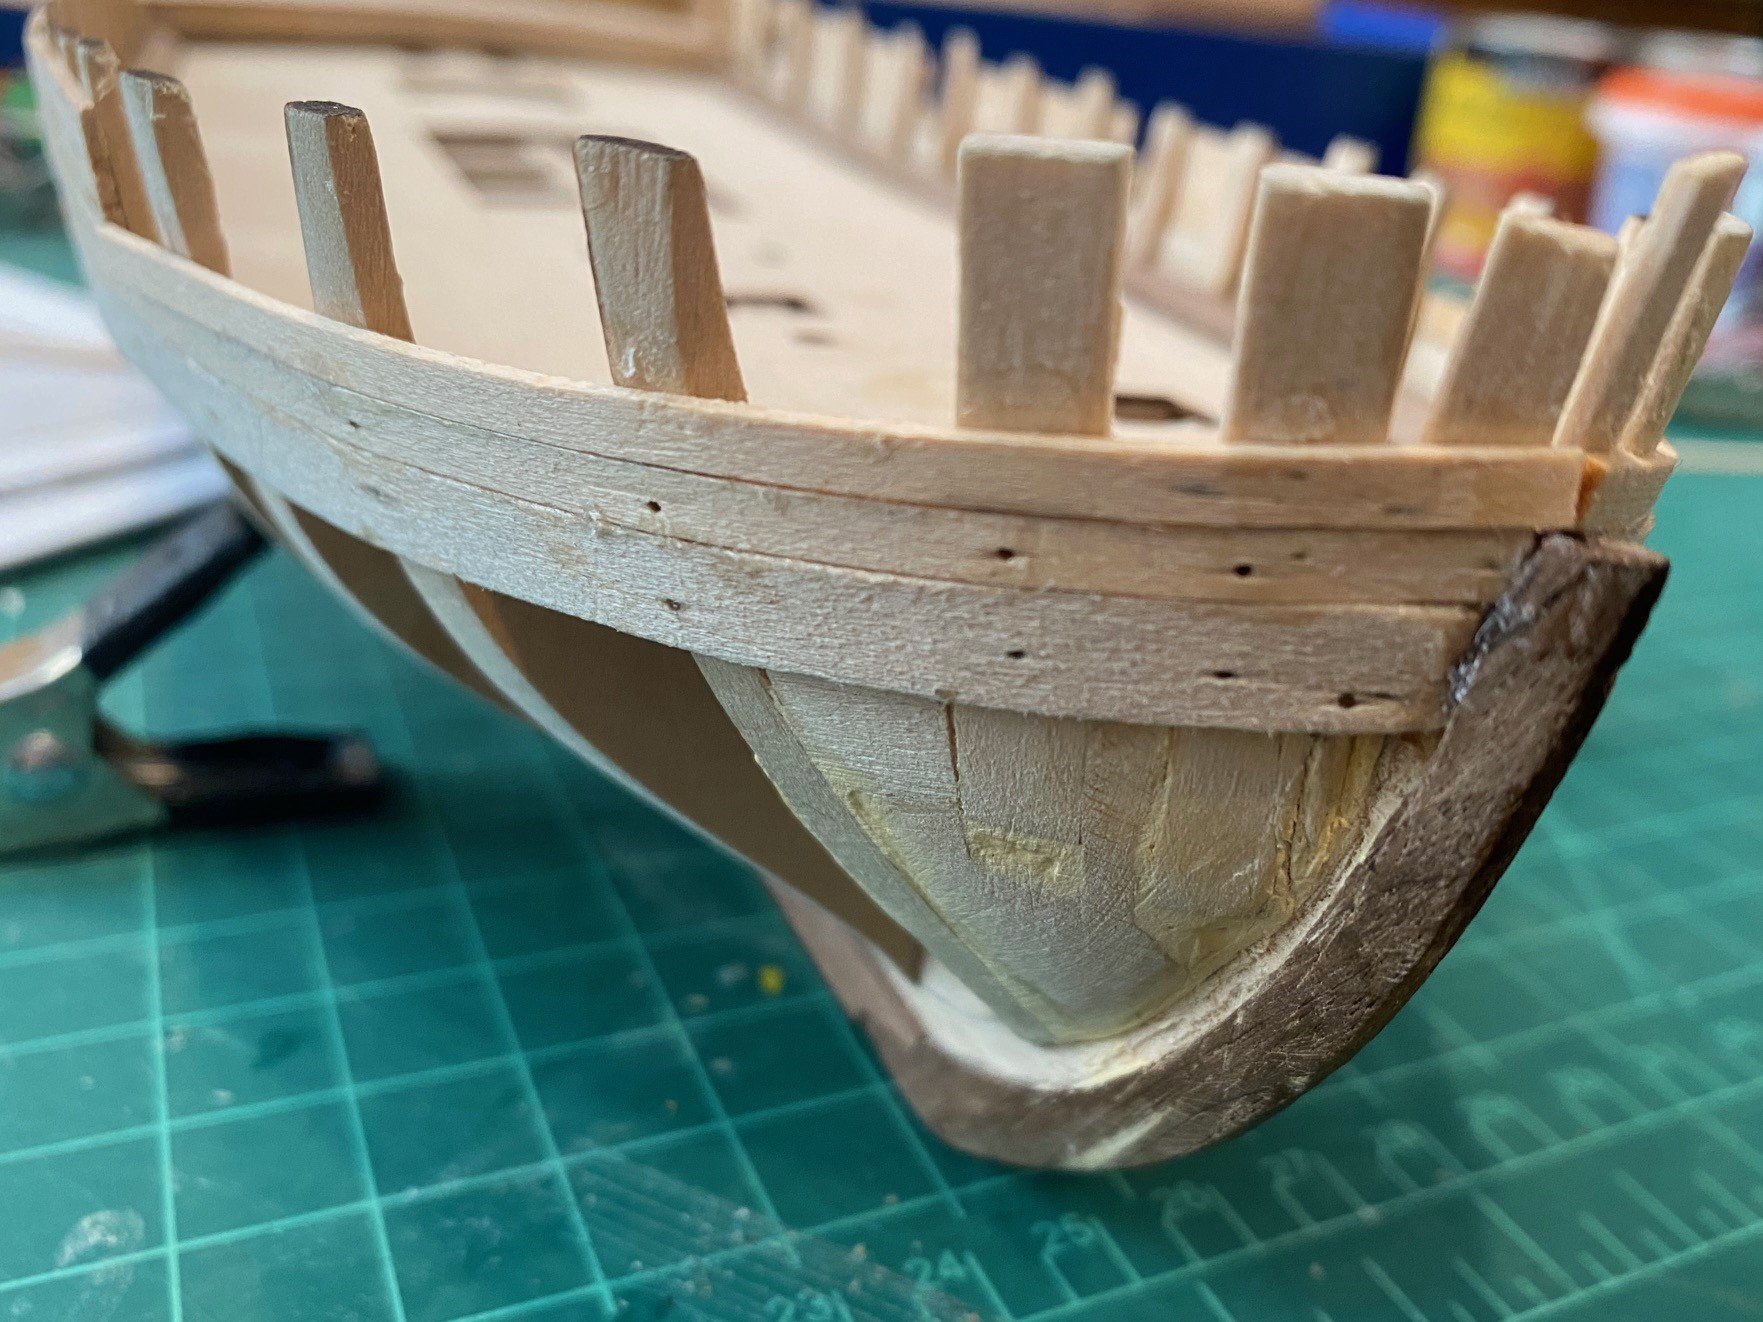
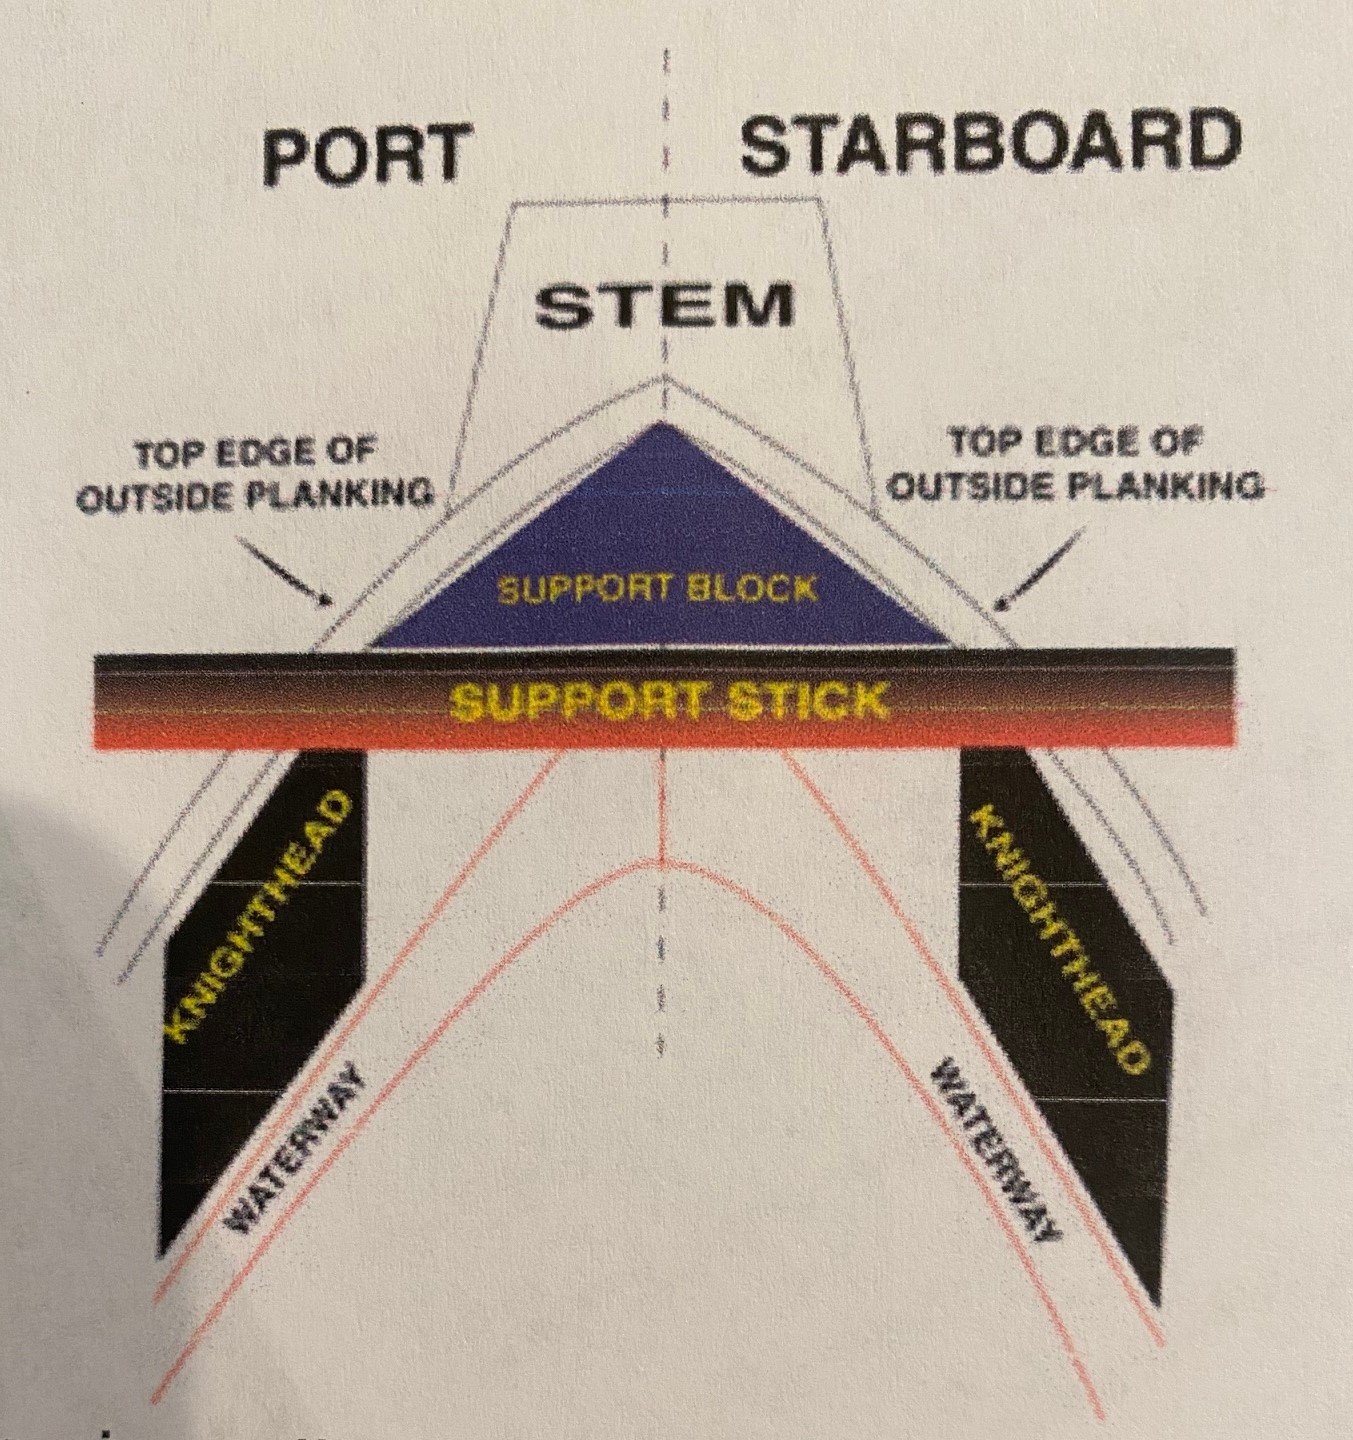
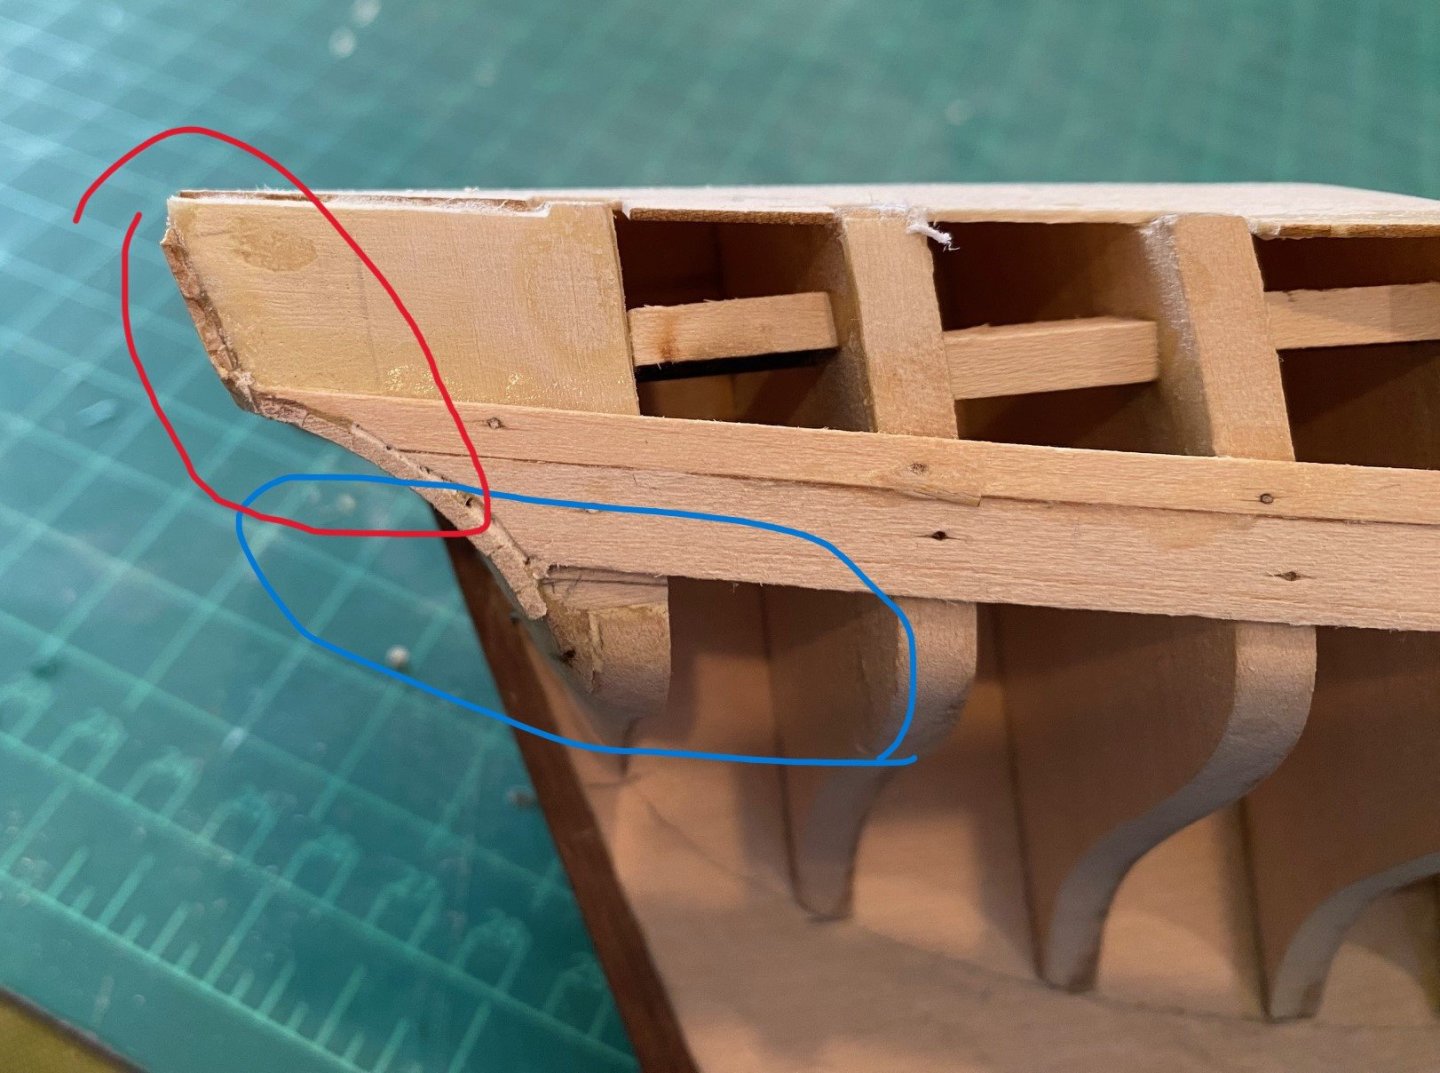
Question about Swift pilot boat stem piece
SkiBee replied to Pastor Wes's topic in Wood ship model kits
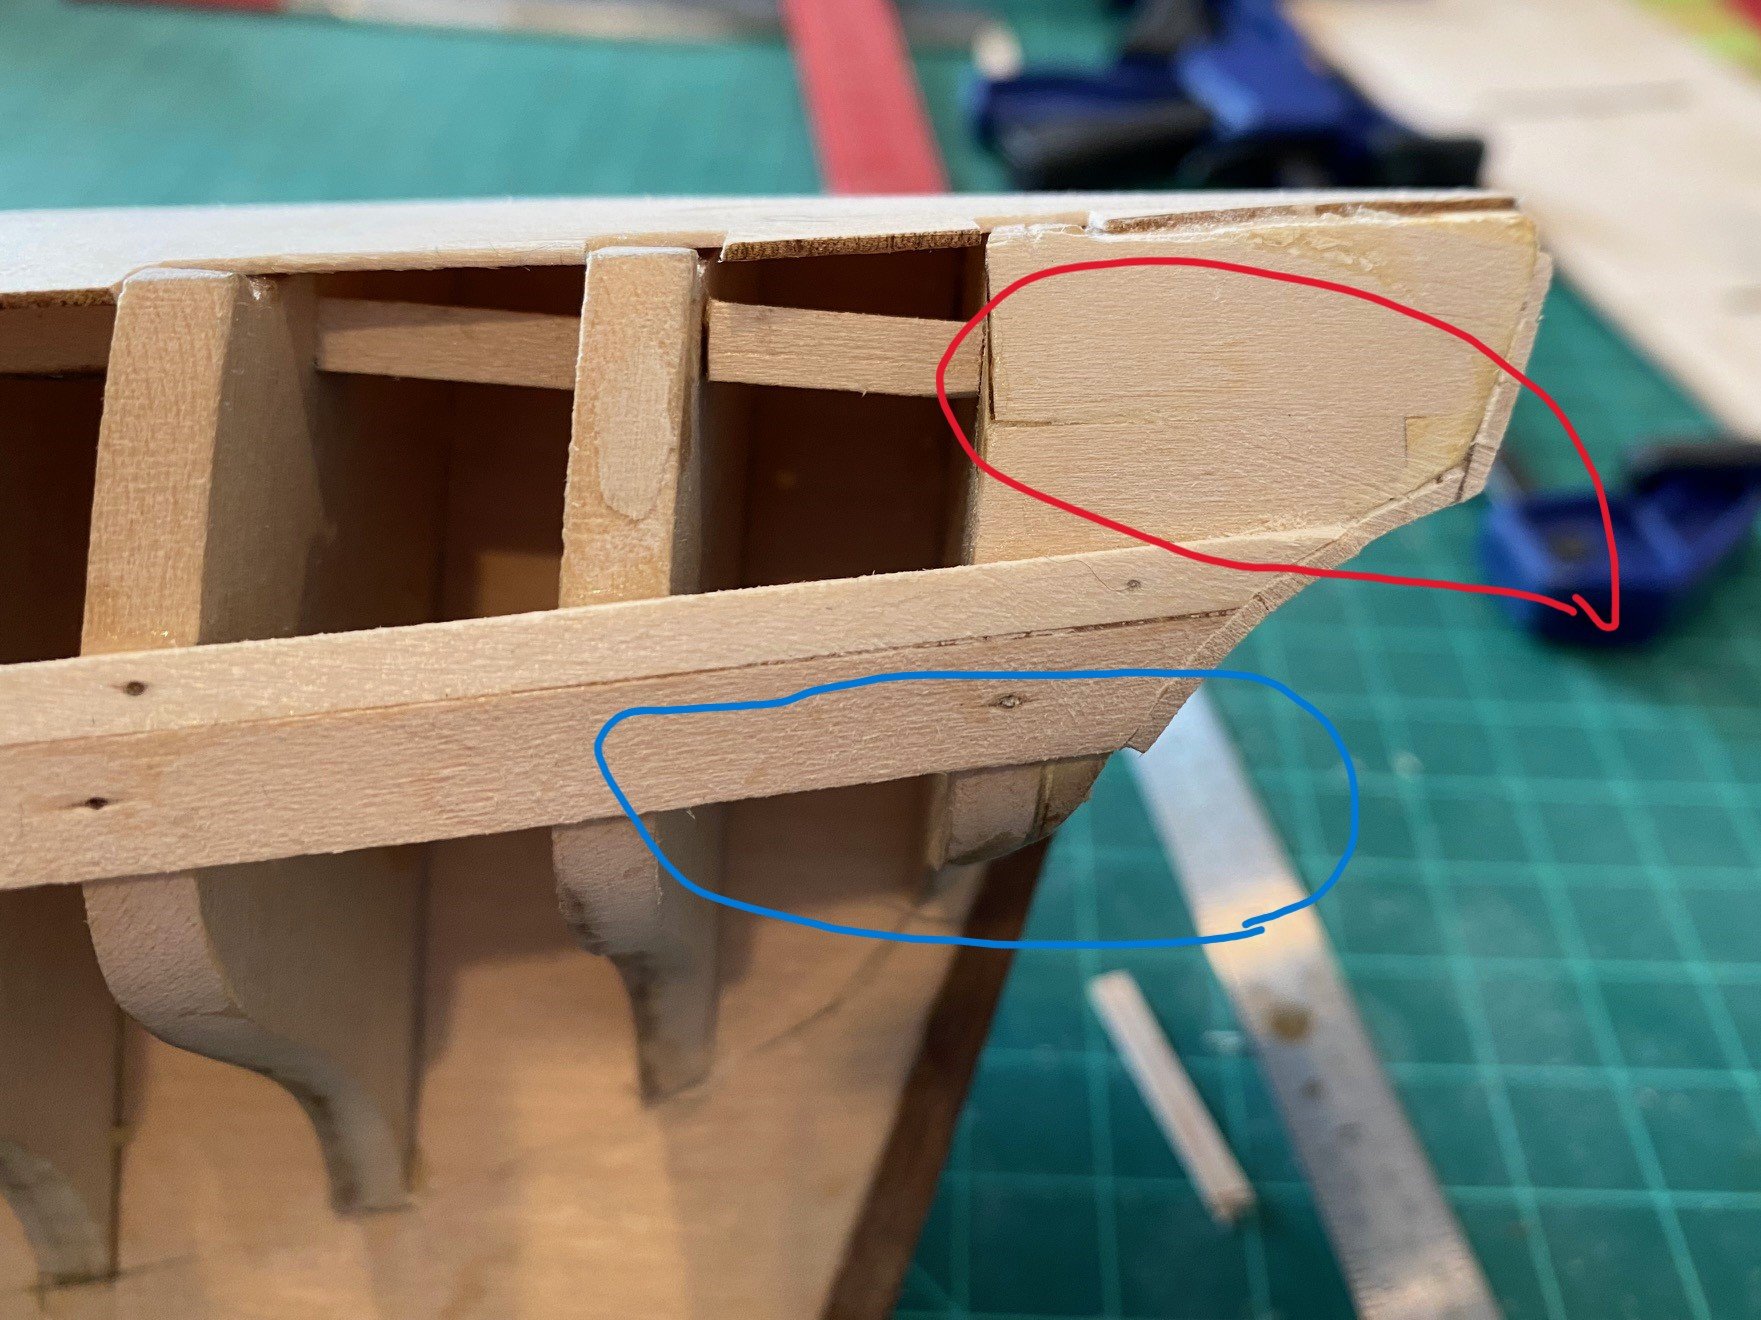
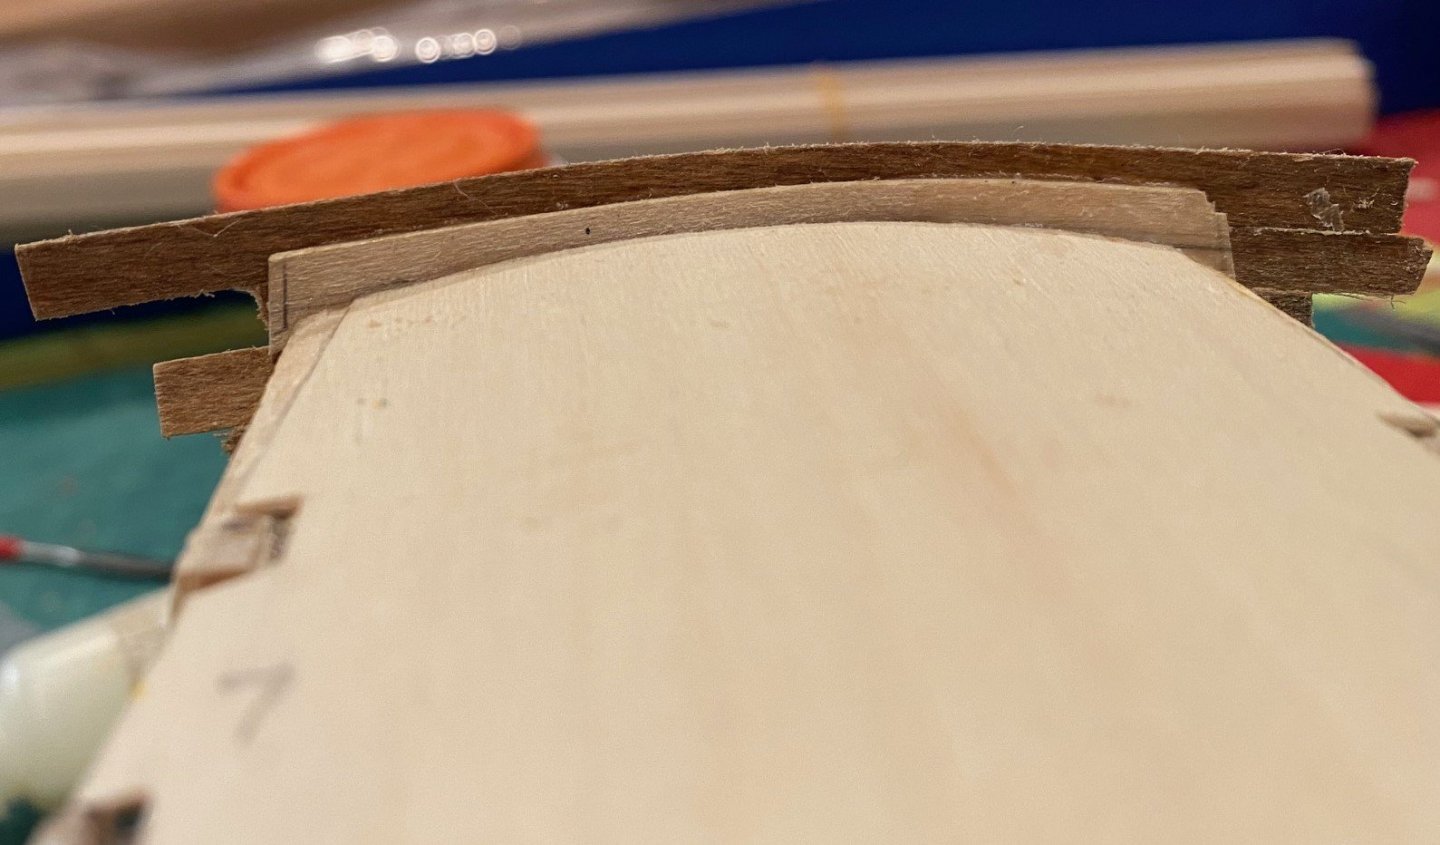
Please send picture of what you are talking about. -
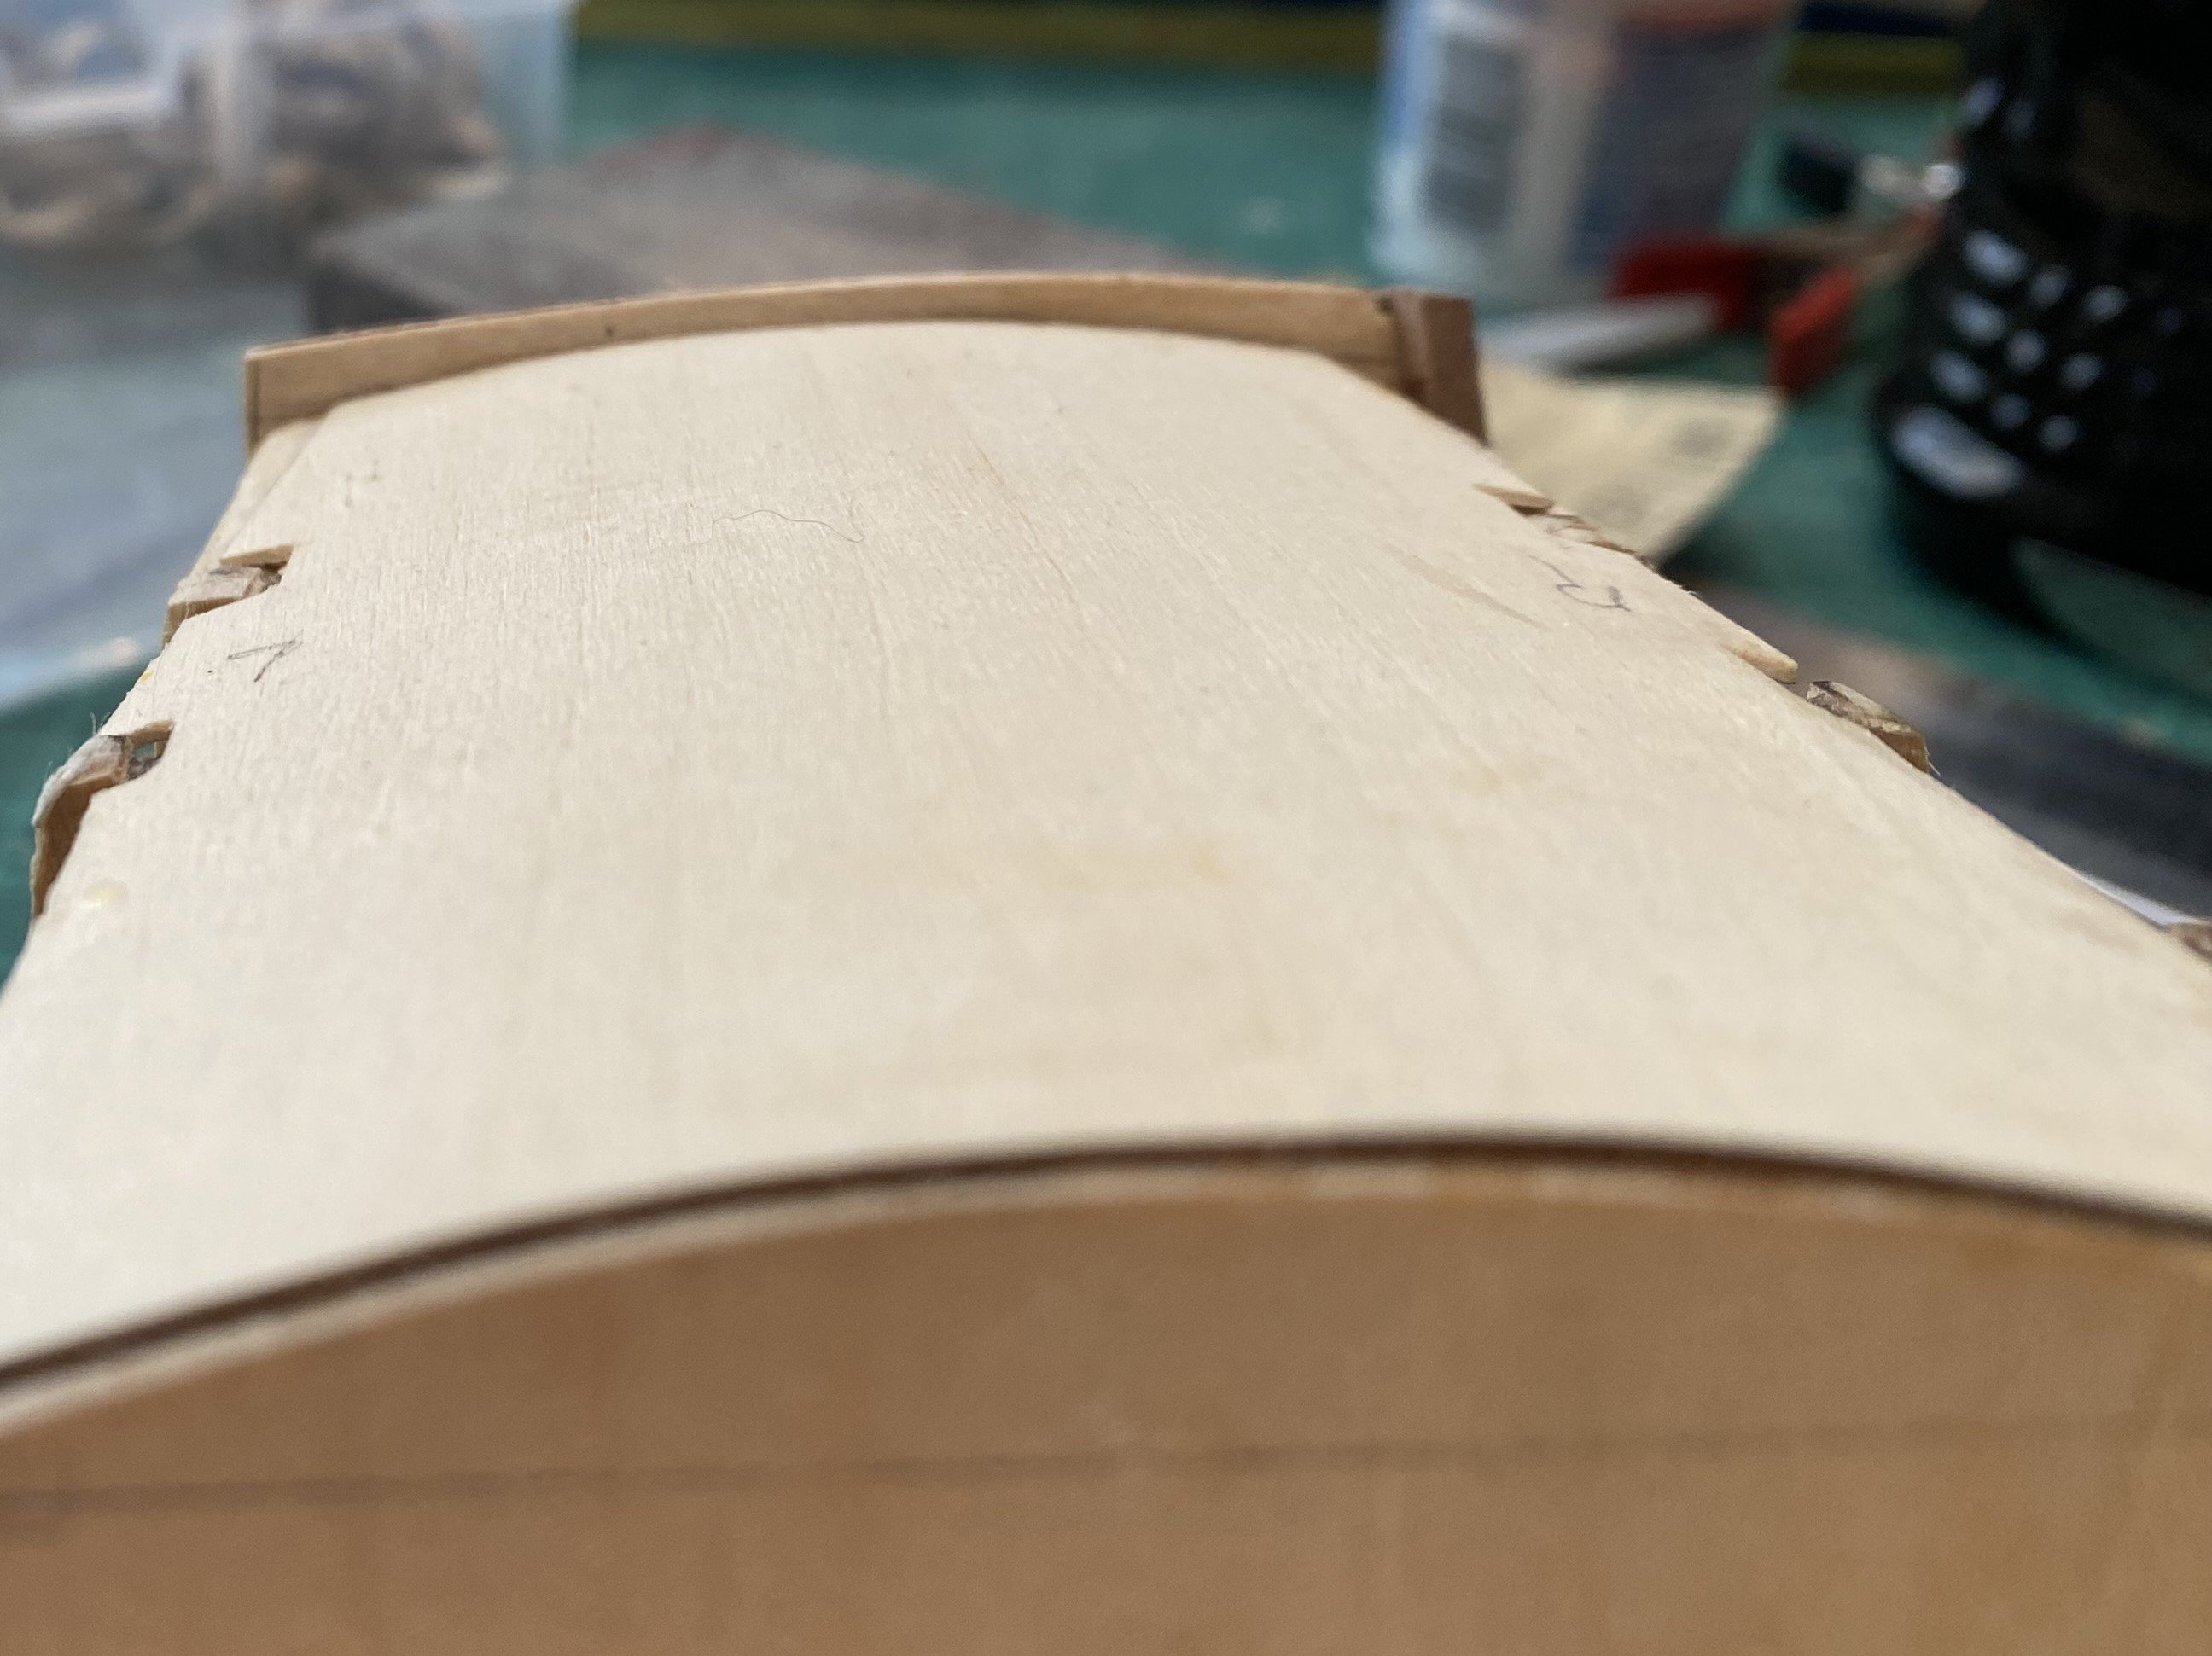
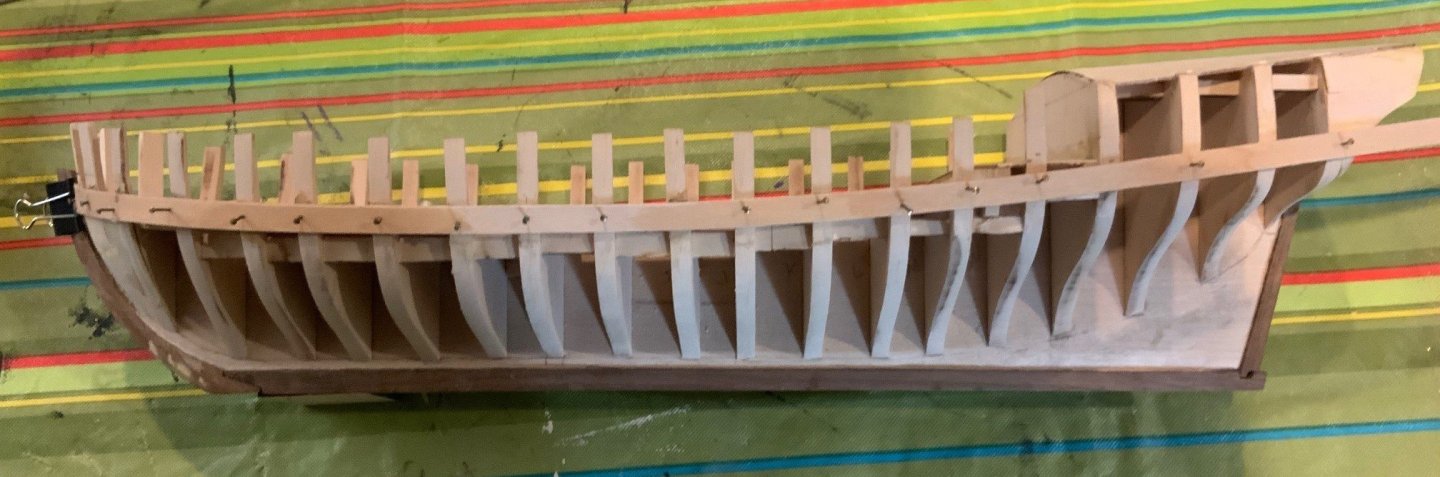
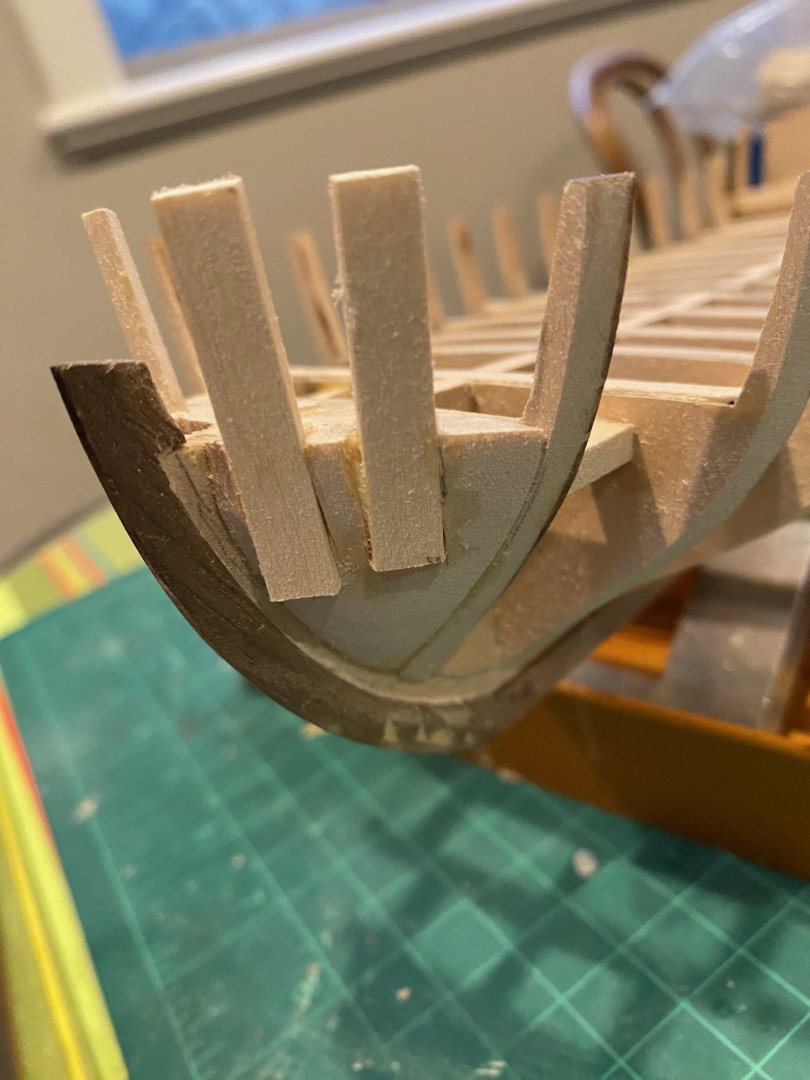
I did use just two pieces of left over basswood strips to provide a glue surface for the bow planks. It worked well for the first plank on each side, but I need to work on removing any gaps between planks on the curved pieces. Finished adding the 3 aft planks that provide the aft gun port side. I can see what CiscoH was talking about getting the aft planks parallel to the edge of the aft compartment overhead. CiscoH appreciate the heads up.

-
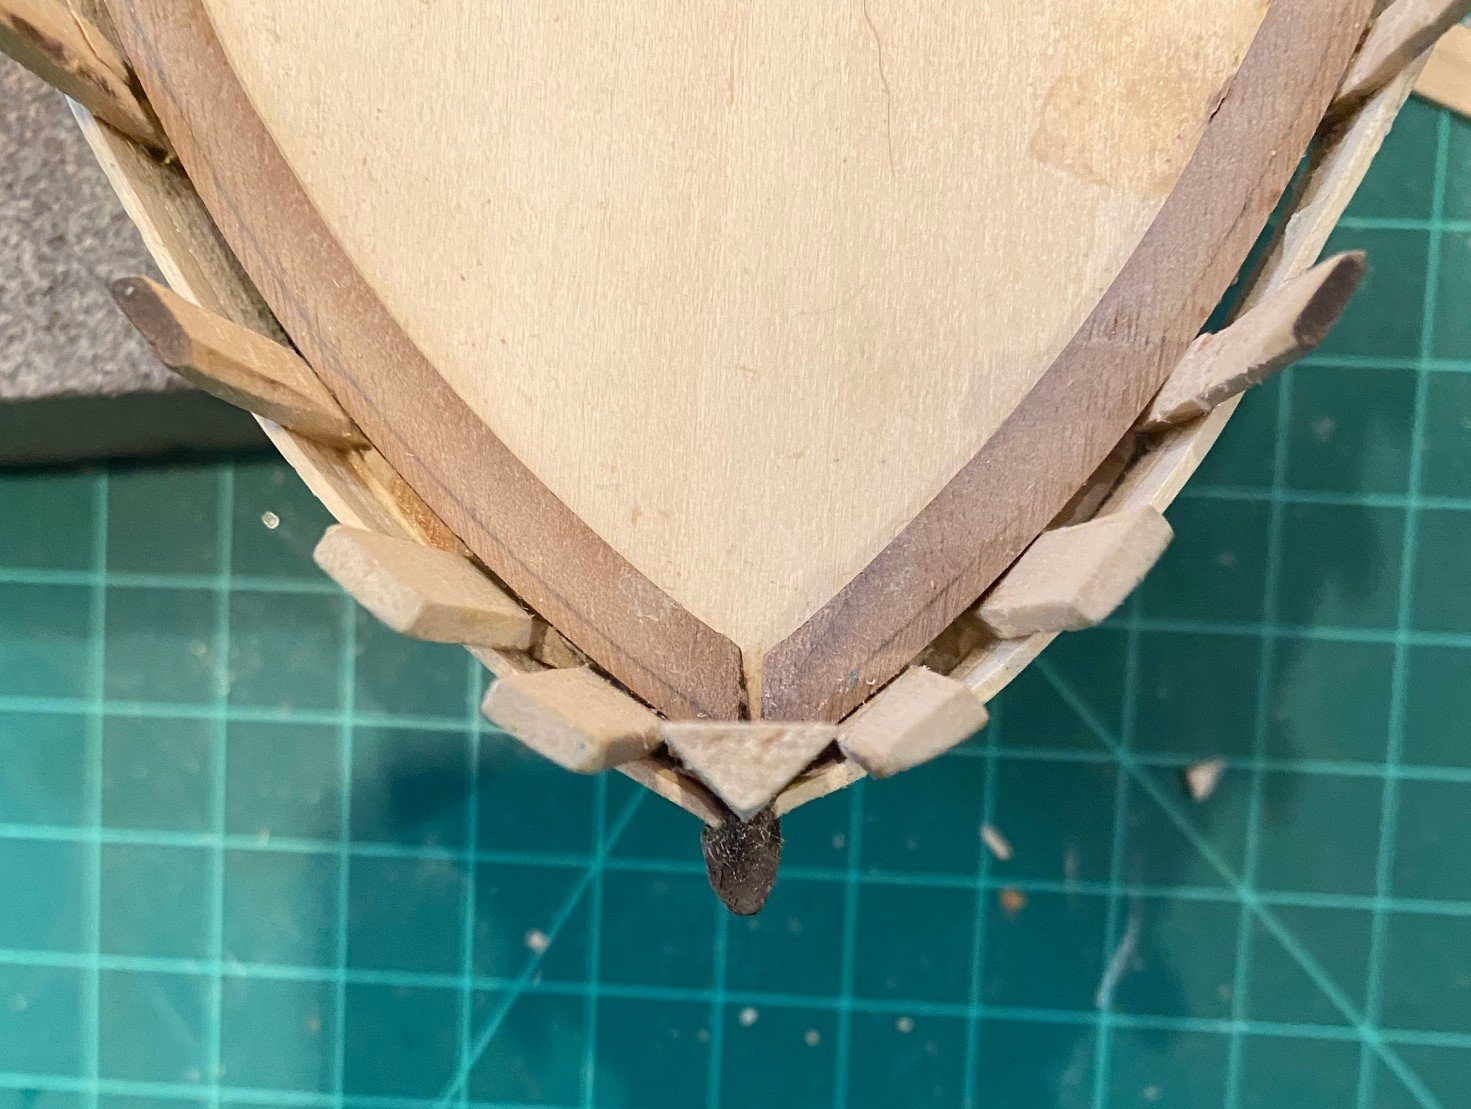
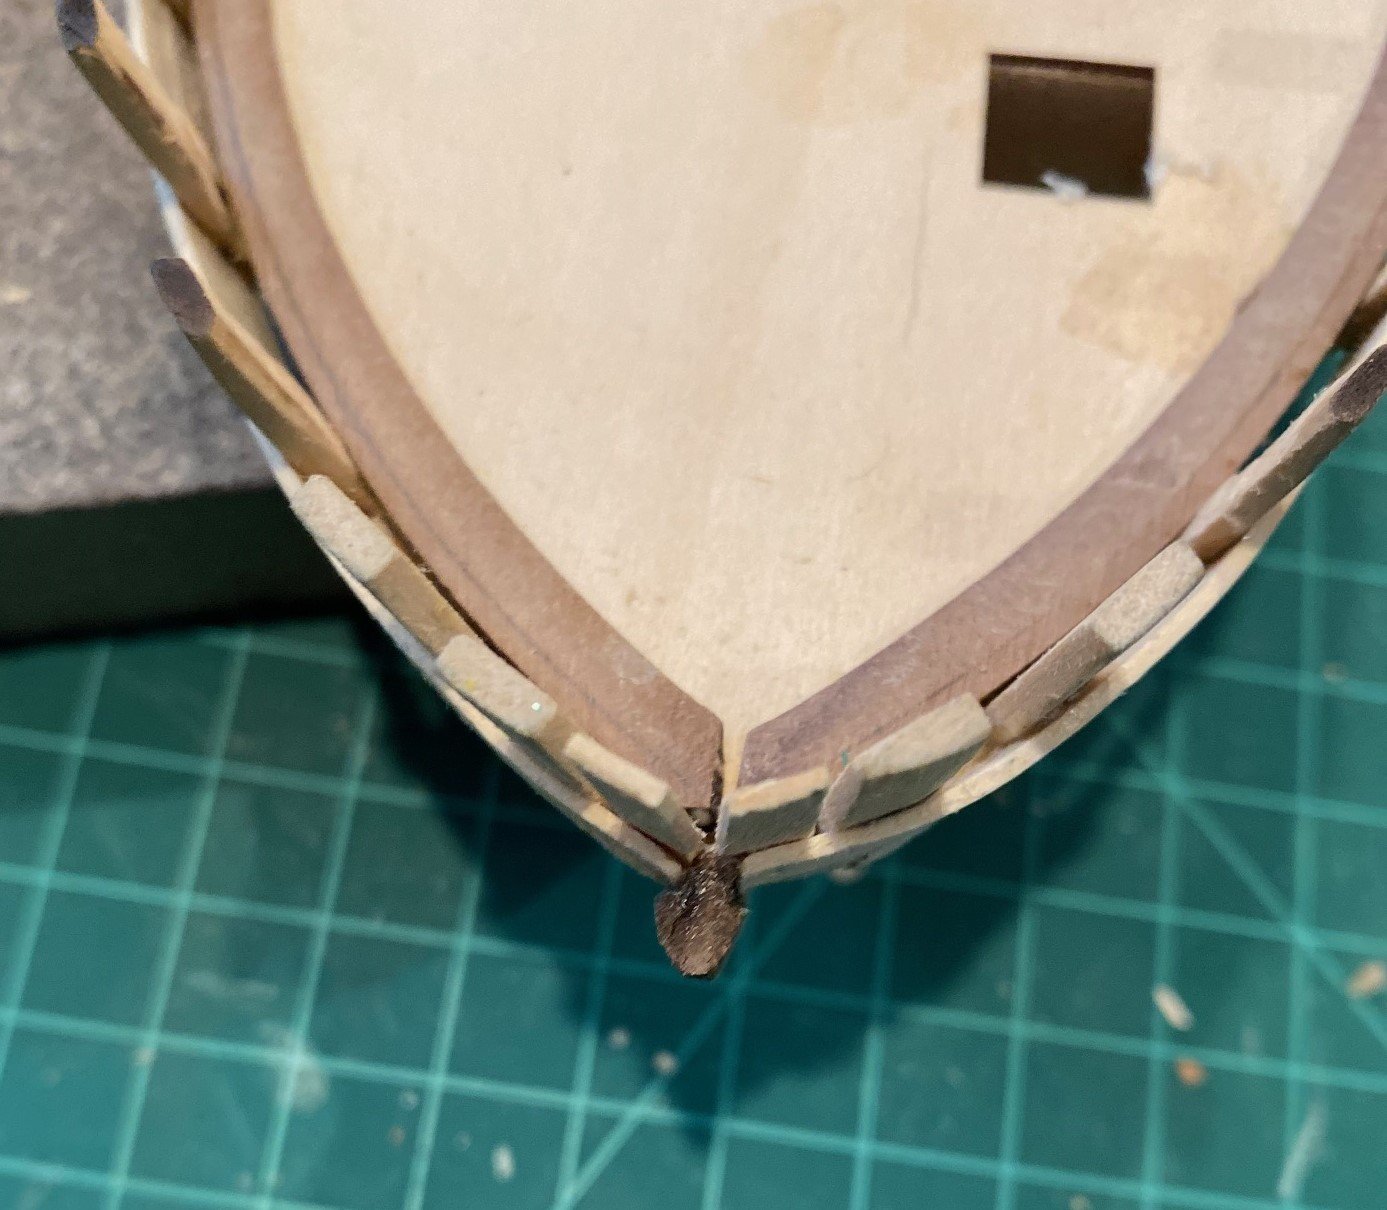
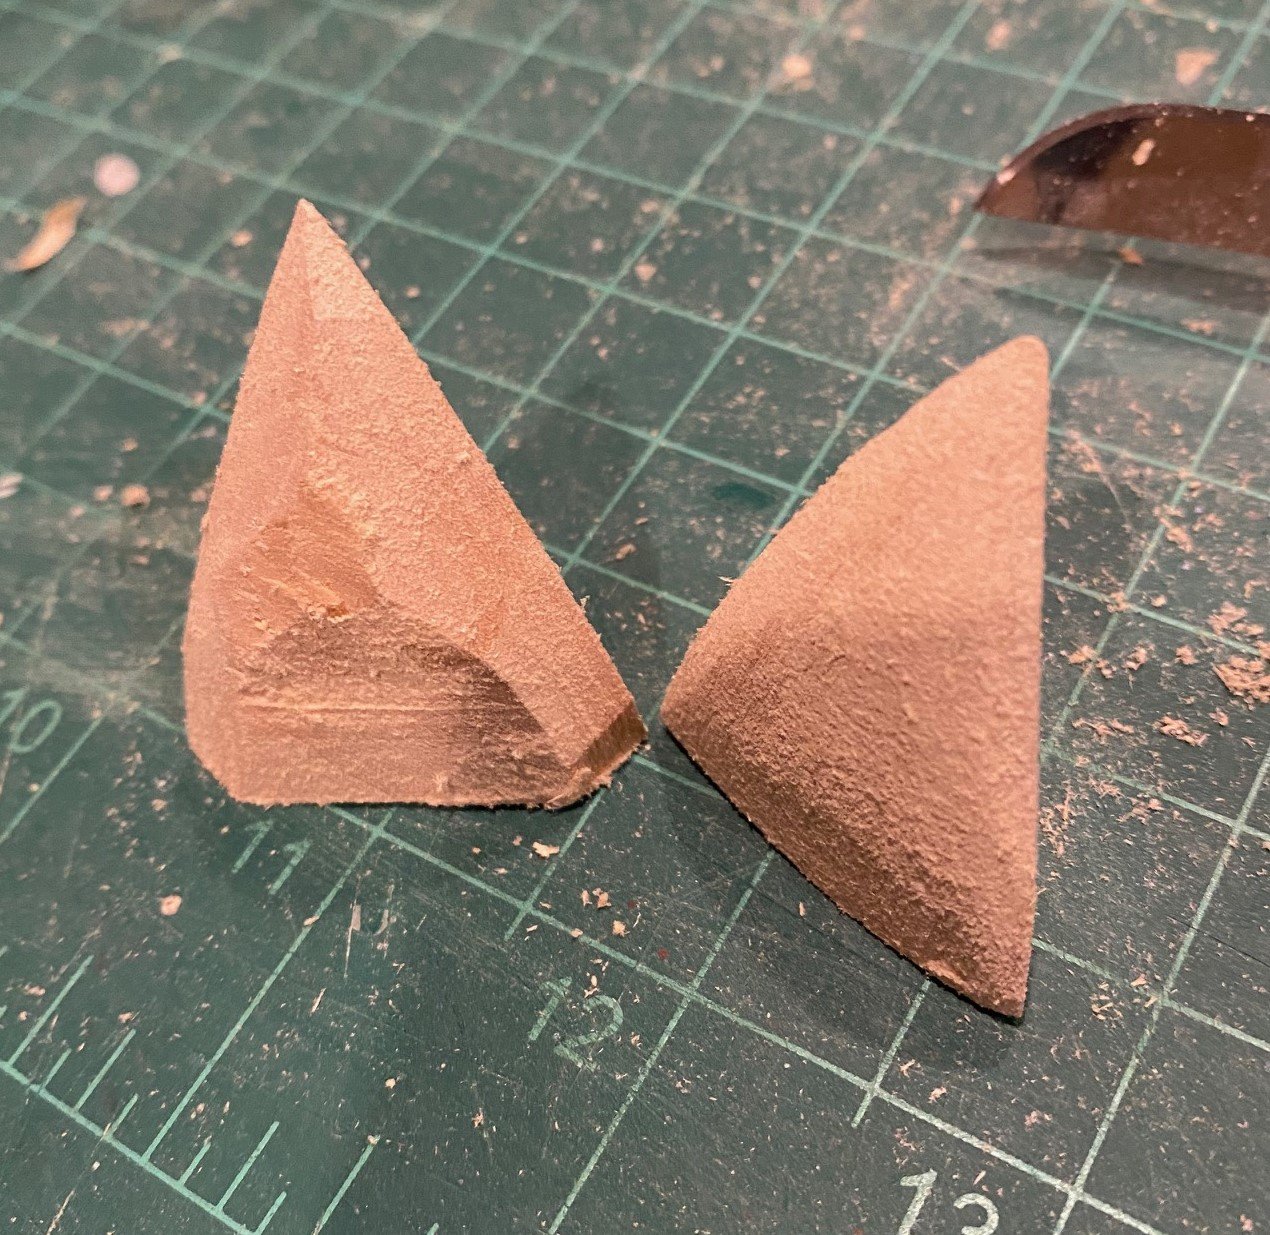
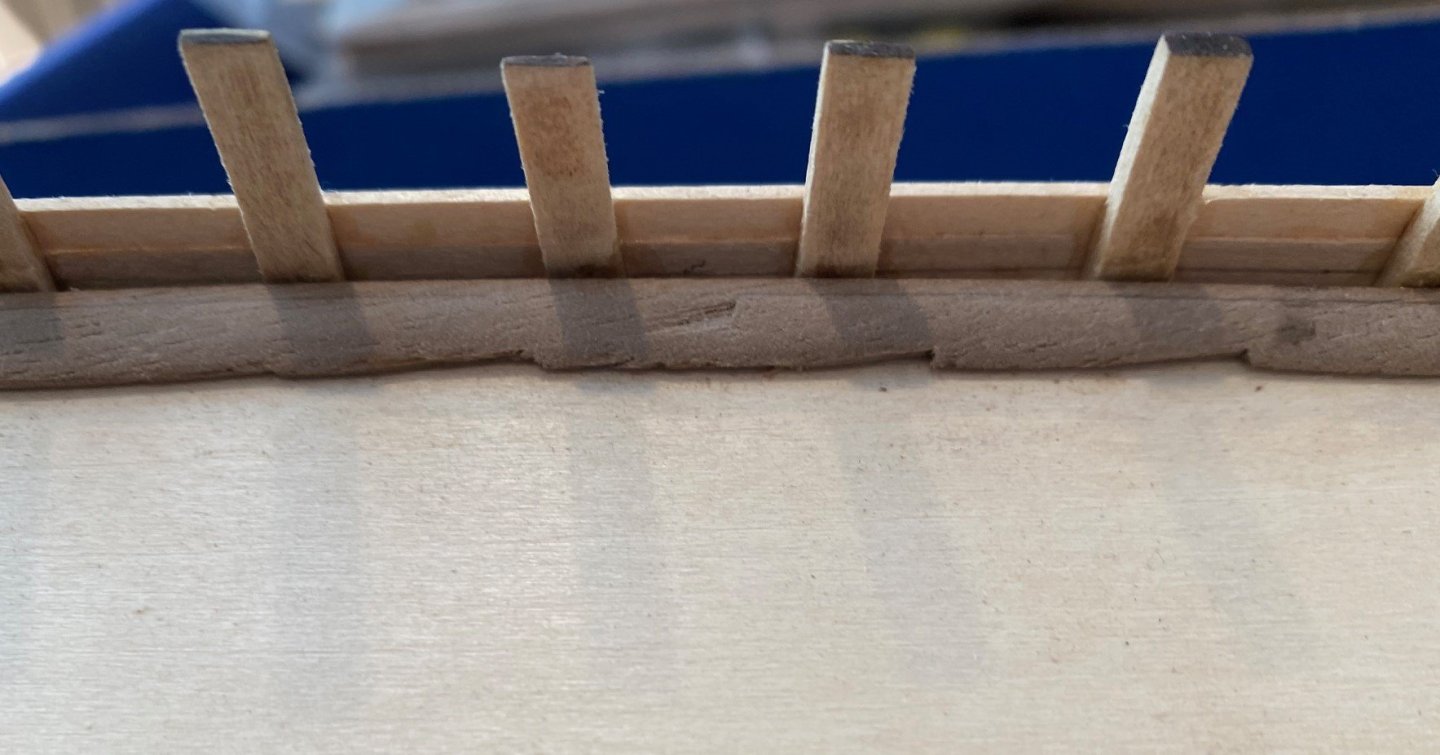
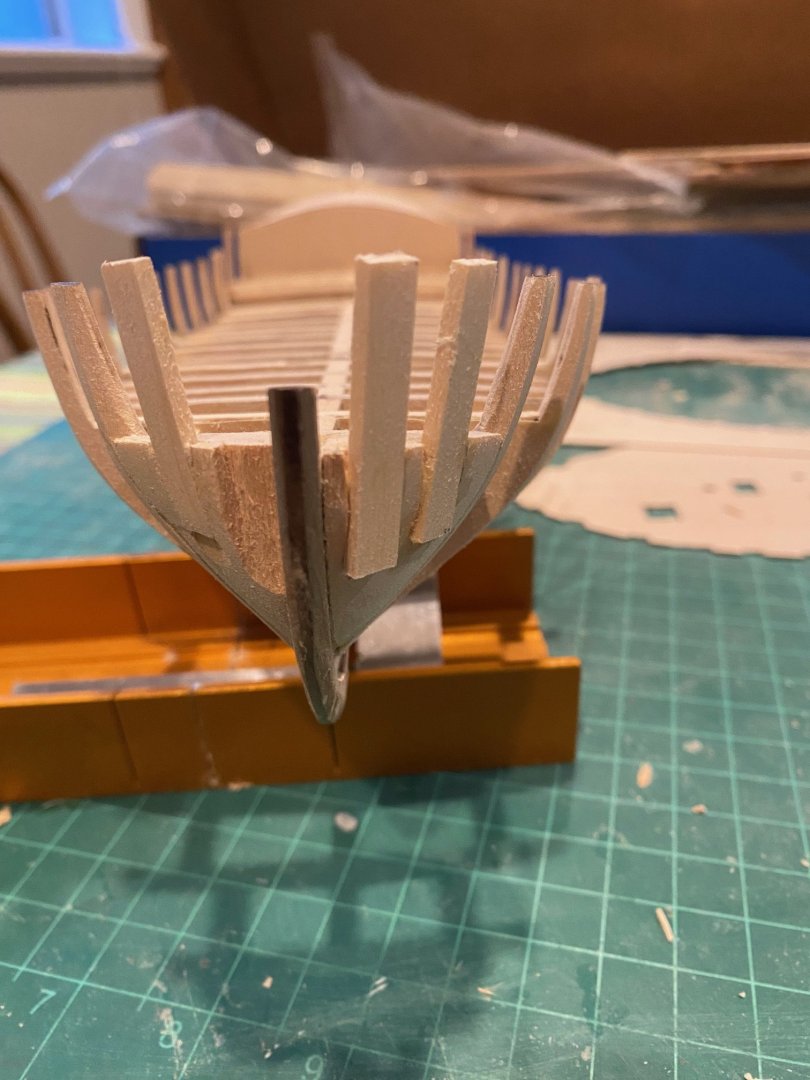
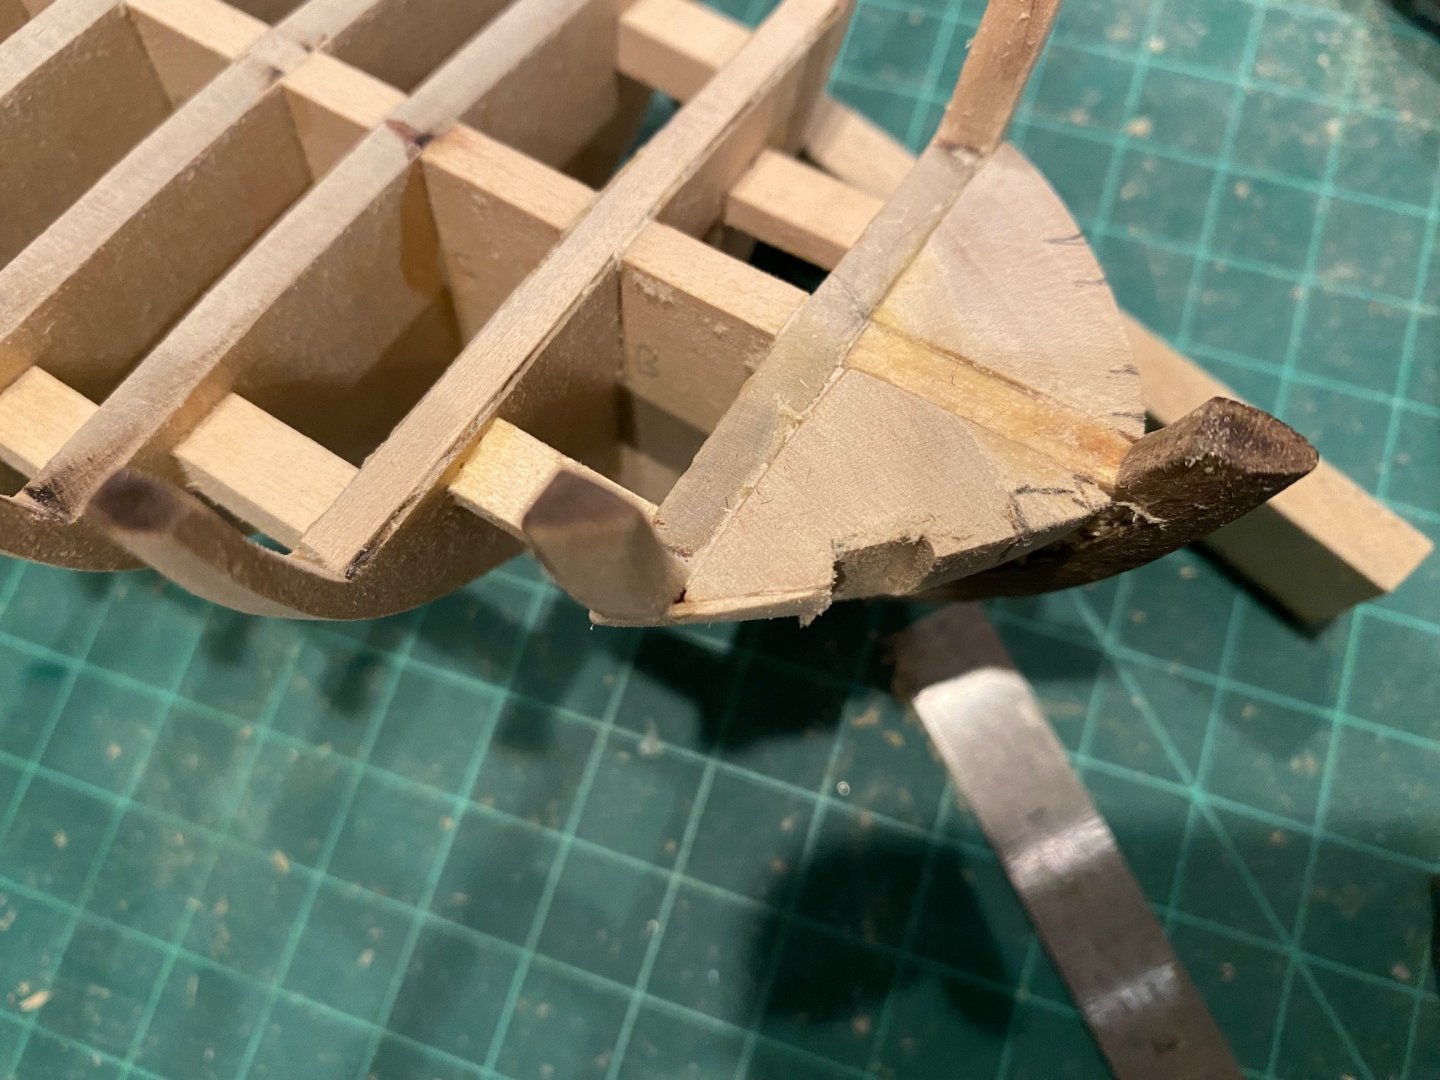
In the Lauck Street practicum by Rober Hunt, it recommends putting a piece of wood in the bow of the boat to have something to glue the planks too at the stem. He recommends taking a piece of ¼ in square basswood and splitting it in half to form a triangle, which I did, pic below. However, my piece really did not give a surface for the plank to glue to, unless I made one with more of 60-degree angle than 45 cut. So, I tried just sticking two pieces of left over basswood between the subdeck and the existing planks at the bow. I think this provides more of a surface for the upper planks to adhere to. Your thoughts and recommendation are requested.


-
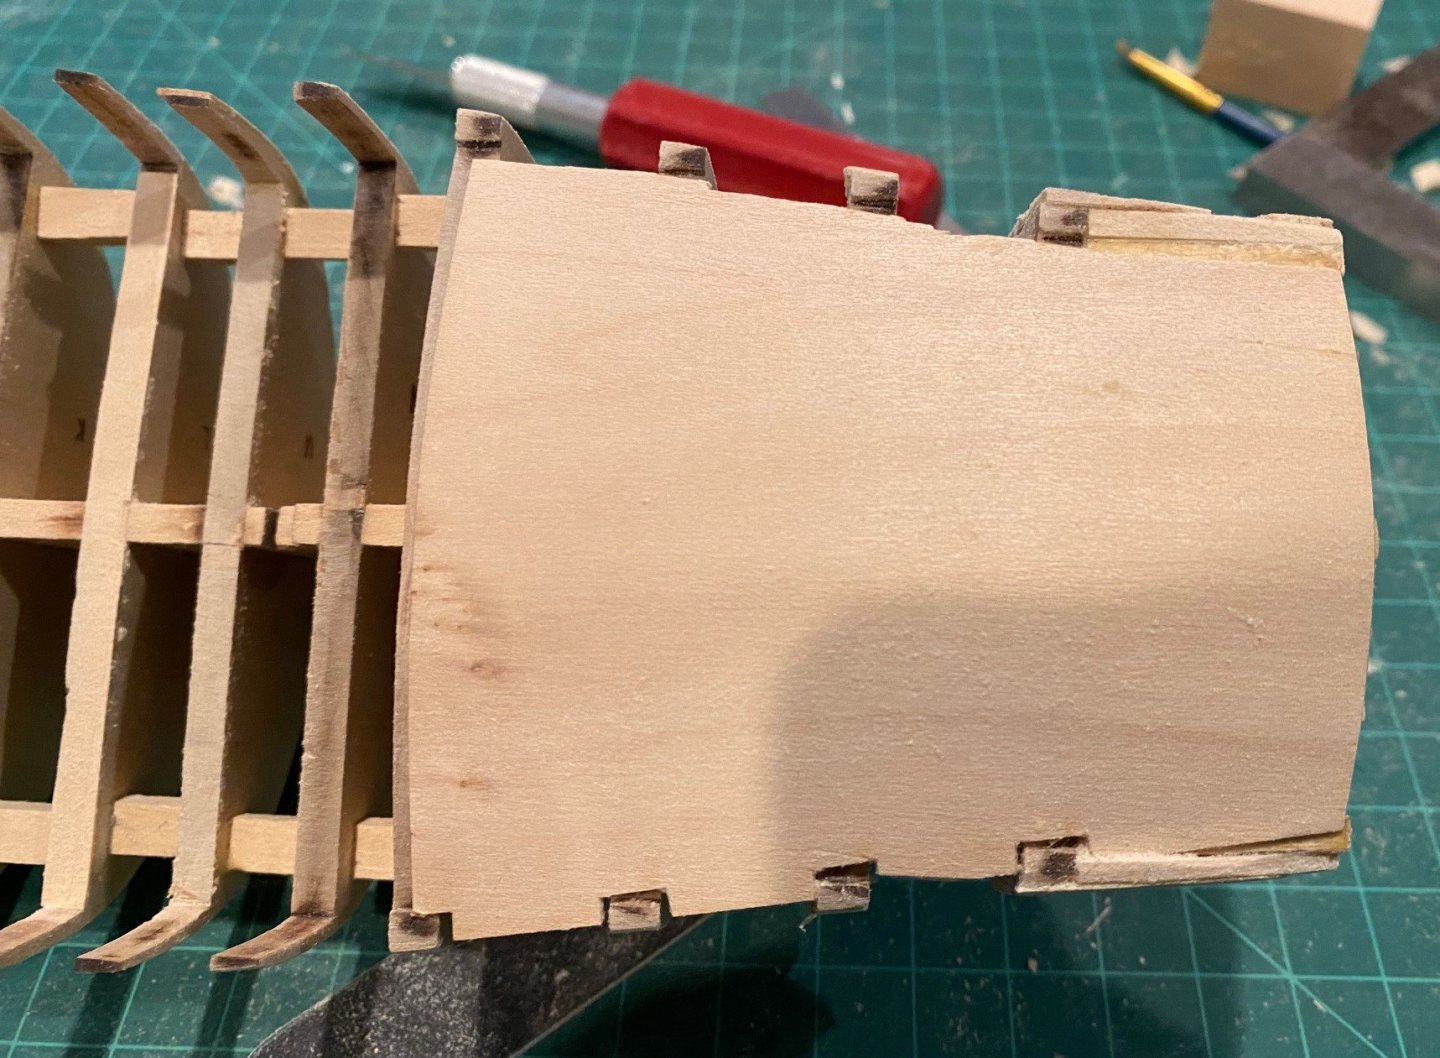
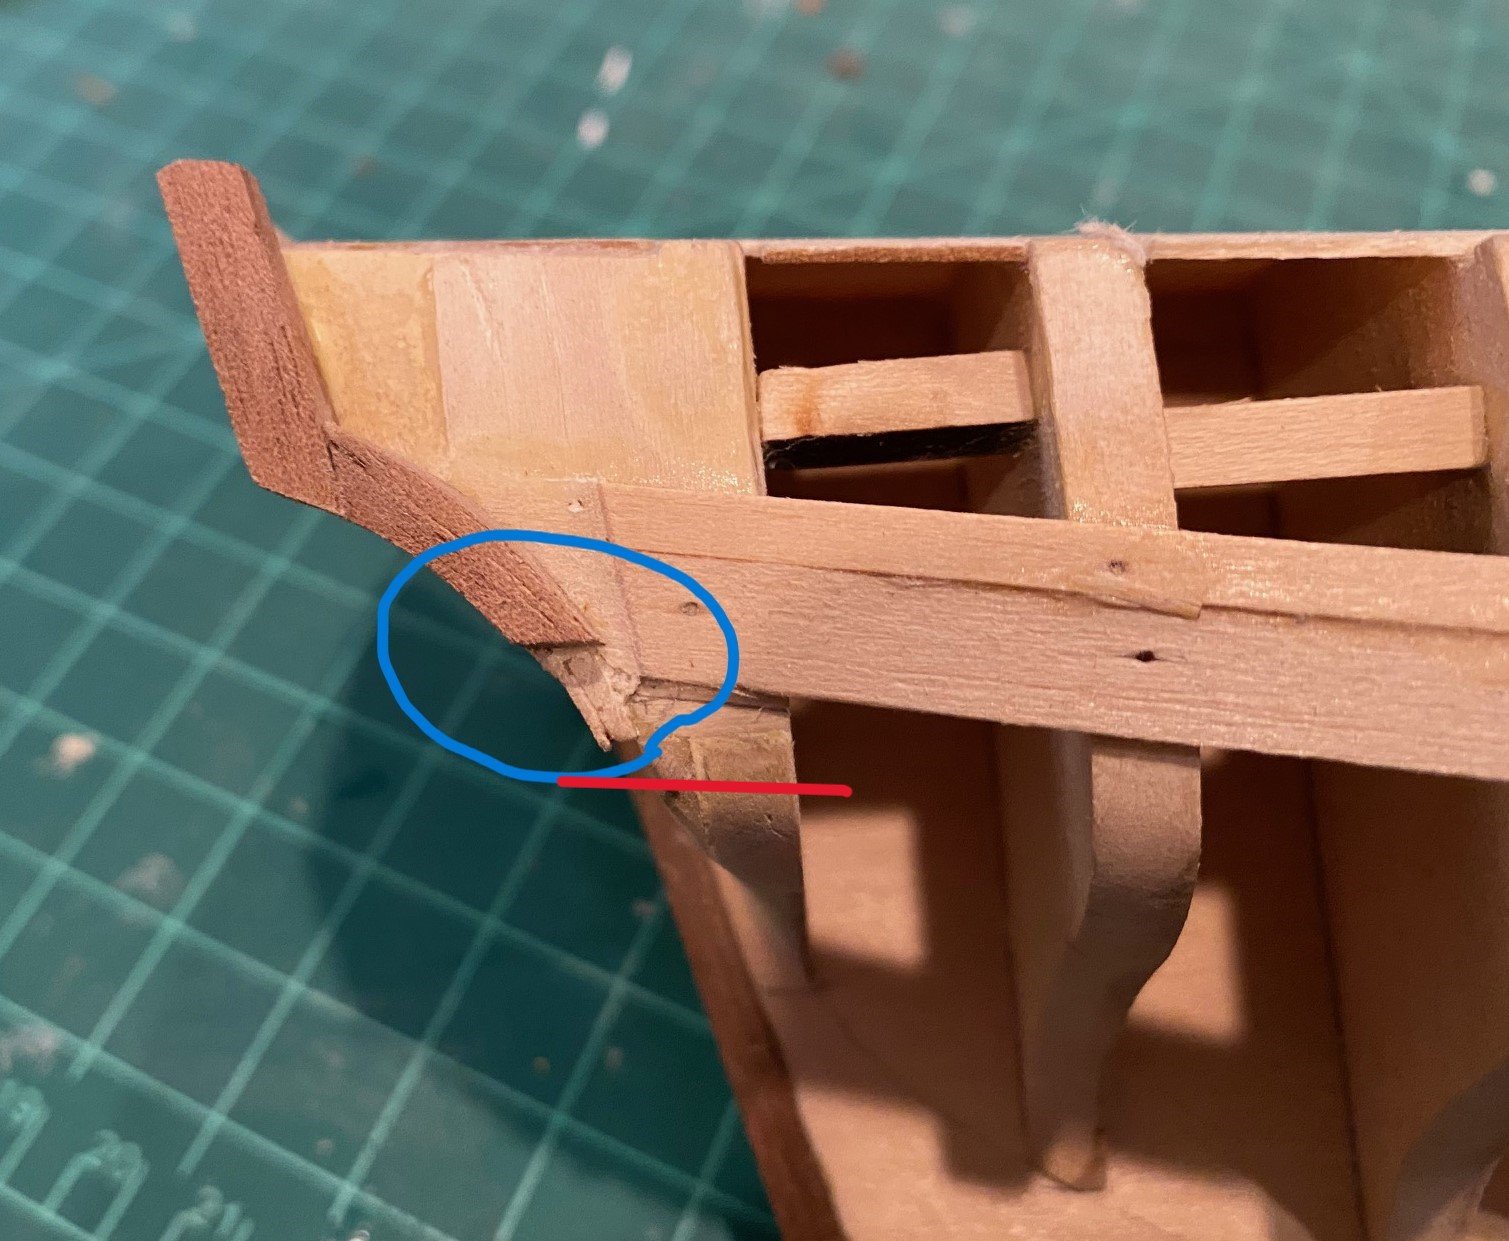
Installed the starboard fashion pieces. I measured the termination of the counter fashion piece from the port side and the drawings, looked at numerous pictures of the starboard counter piece to determine the end of the curved piece. I finally decided to measure from the top of the aft sub-deck to the bottom of the port curved fashion piece and marked it on the starboard side. I did my best to see how that lined up with the top of where the wale would be. Getting the right angle between the two fashion pieces was a challenge, I tried sanding to get the final angle, but I just kept rounding the end. So, I kept using my miter saw and used it to trim the end until they matched, had to start a second curved section since I kept sawing to much off. It turned out that I made the starboard piece longer than the port side curved fashion piece, see the two pictures below. I thought about removing one to make a piece that watched the other side, but I didn’t know which one was correct. So, I decided to wait until I add the hull planks above the wale and one or two below the wale and to determine which one was right. It's hard to see the difference in the pictures, but in real time it's obvious.


-
CiscoH Thanks, you have been very helpful during this build
-
I trimmed the top off of the top most walnut plank to match the basswood plank that extended up above the aft deck surface. I looked through a lot of build logs and it seemed like the right height. Started building the port side Fashion Pices, it was a little tricky to do the bottom curved piece at the counter. Experimented with angles and such, ended up following the Luck Street instructions. The starboard fashion pieces will be more of a challenge since my wale plank is to height (look at pictures a few frames back), but I’ll figure it out.

-
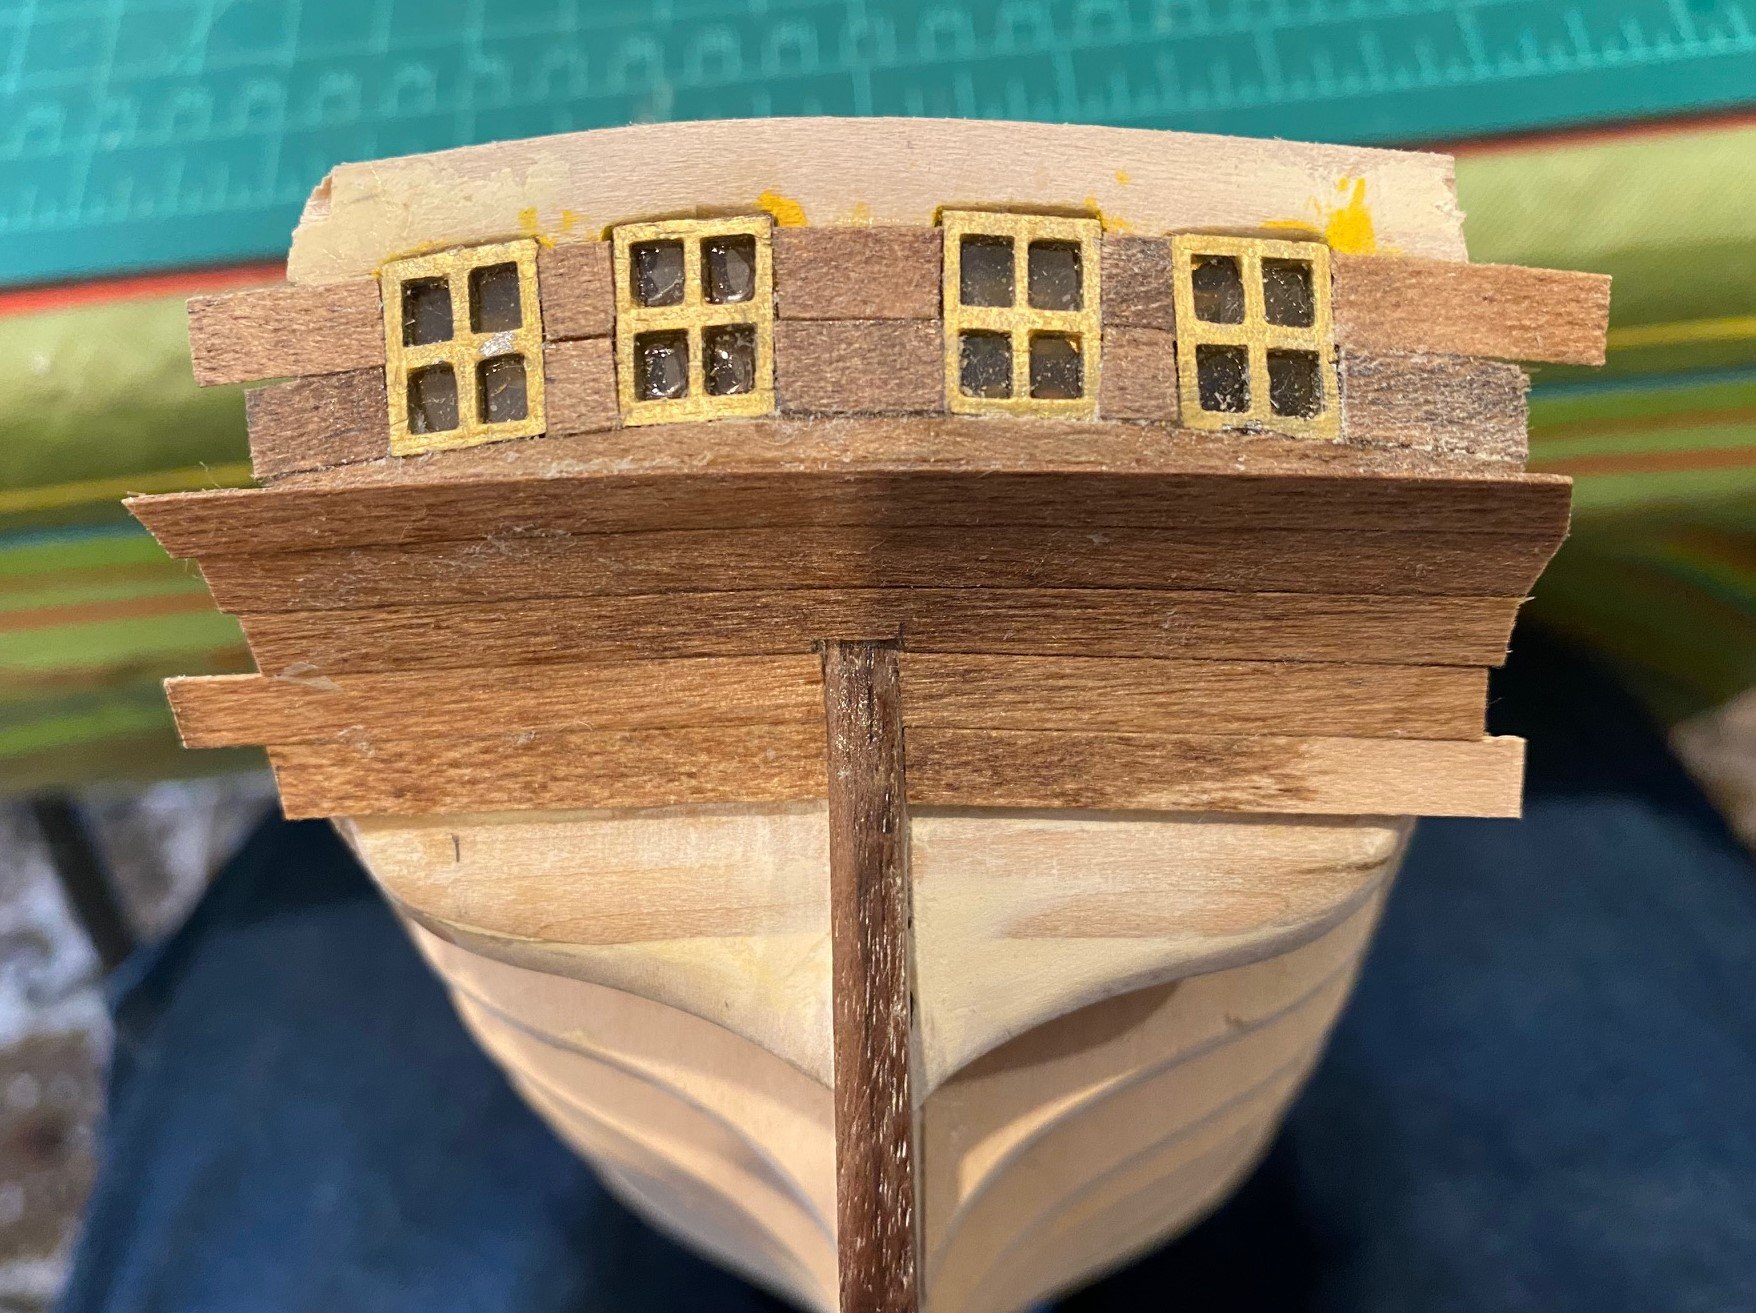
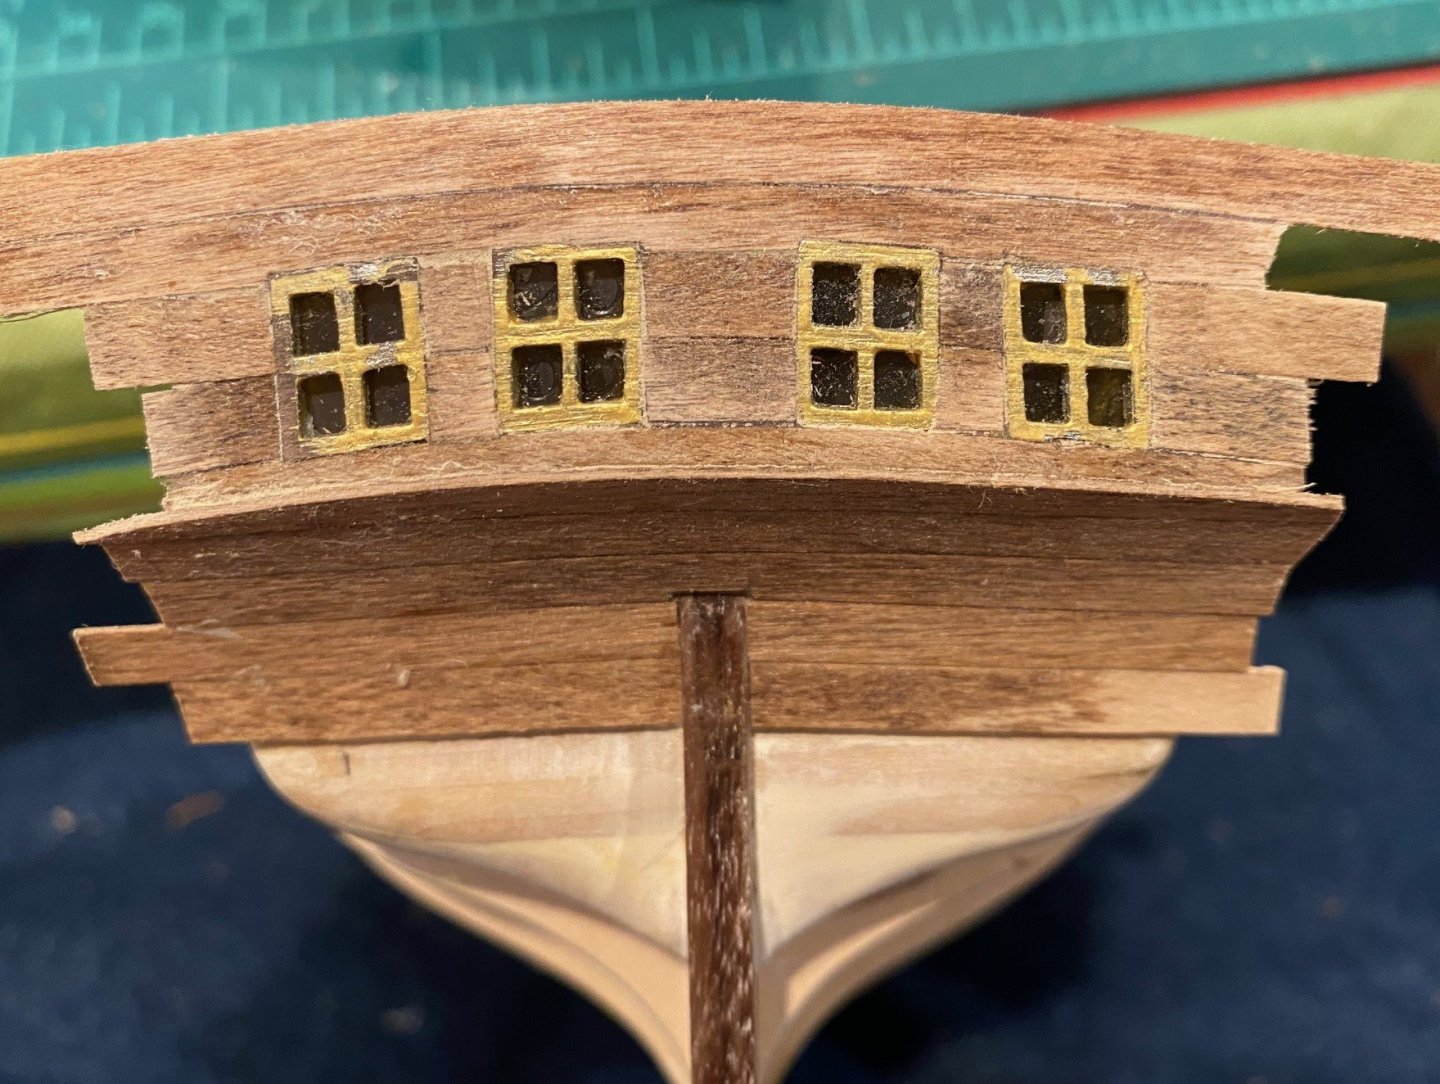
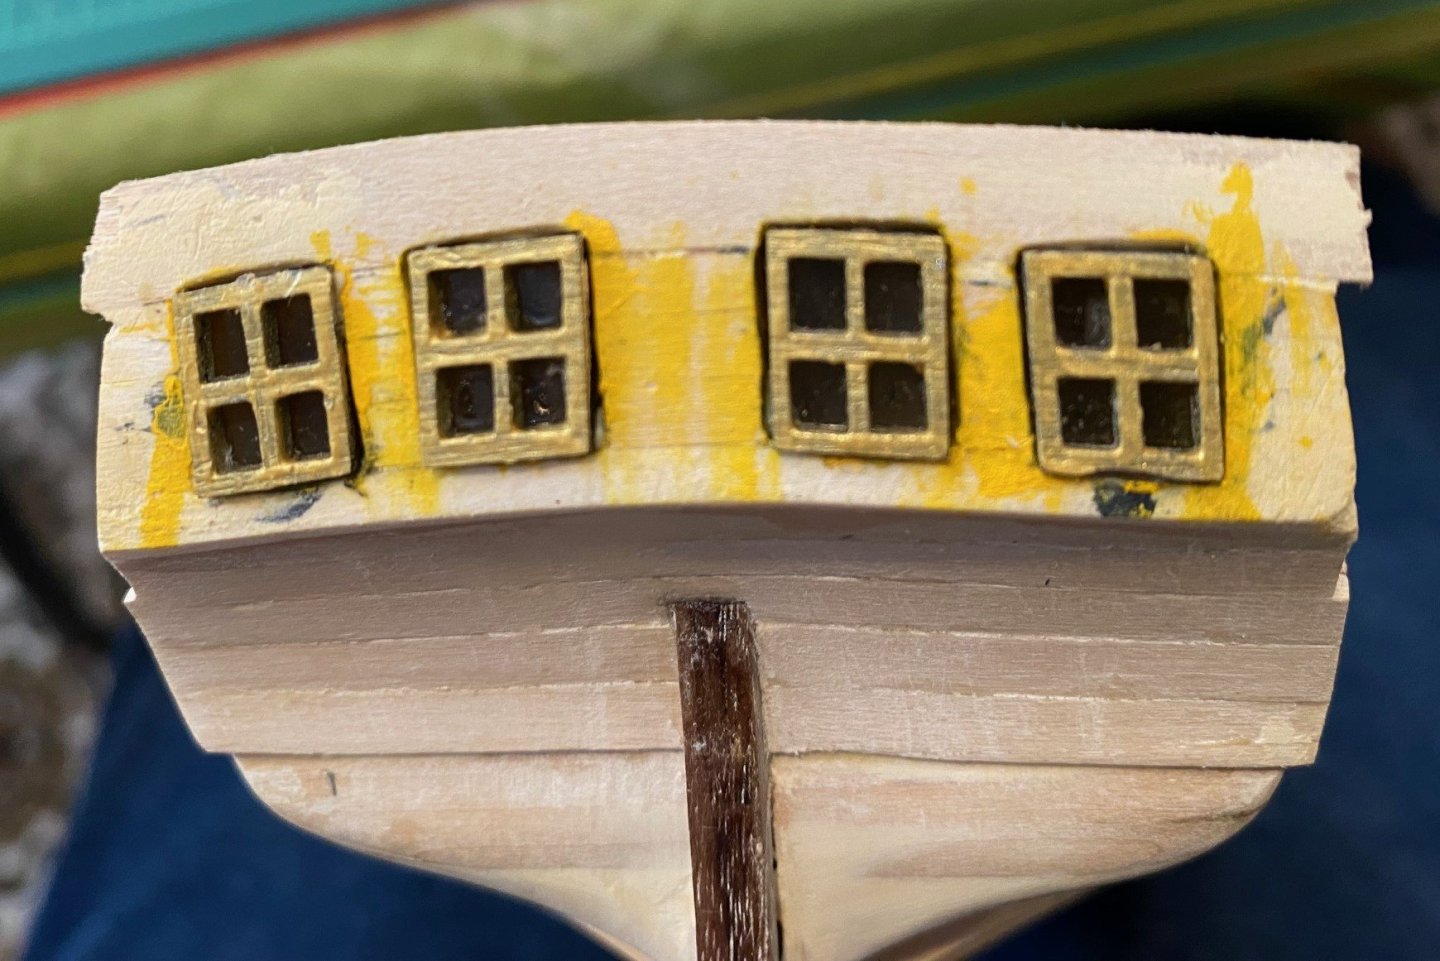
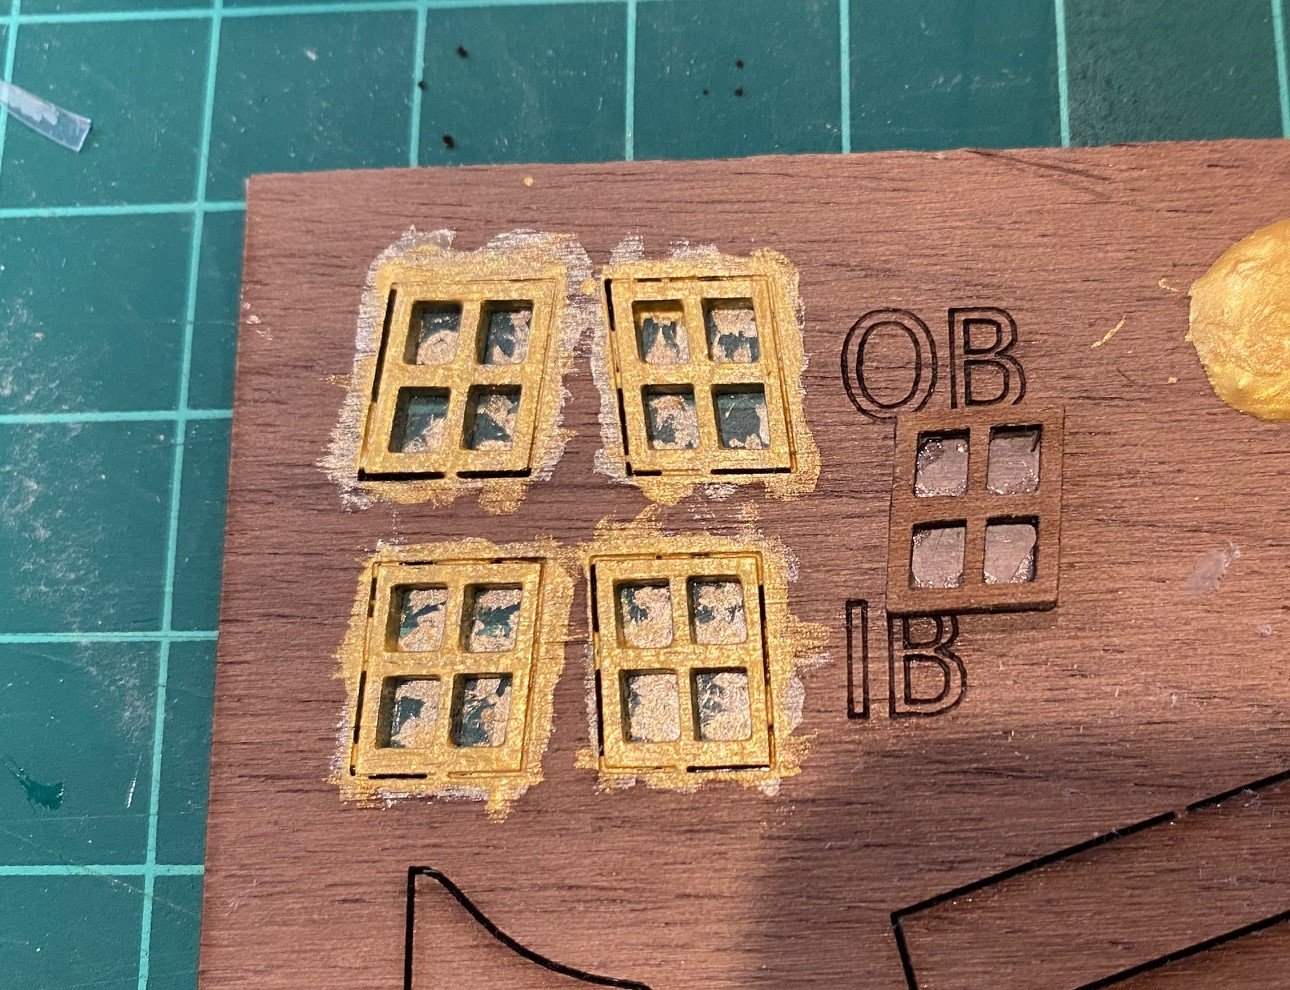
Glue the remaining transom walnut planks until the top of the windows. Next, I glued the walnut planks on the counter, ended just little past the first layer of planks, will leave it like it is until I start the lower hull planks that bend up to the counter planks, and then figure out what to do, trim or leave them as is. Had to give a little thought to the walnut planks above the window, where I wanted the top of the last plank to be in reference to the aft sub-deck. I looked at pictures in both instructions, drawings and other build logs. I chose to put two planks above the windows and then decided how far back to cut the topmost plank. The first plank I carefully cut out a little notch out for the windows by laying the plank on top of the last plank and windows to determine width and depth. Took a little at a time then trial fit and then a little more sanding and cutting, I ended up sanding some of the width of the plank off due to a few mistakes cutting the notches rather than start a new plank. Actually, I think that will be better since I’m sure the topmost plank will end up being shaved down as I but the top piece on. Sanded the transom planks down a little using medium fine sandpaper to clean up the edges. I might have to fill in some small gaps between the planks with walnut colored wood filler. Next, I will clean up the gold on the windows, not sure if I’ll put on some Polly-Ur now or later. {NOTE: The Key is to TAKE YOUR TIME getting the windows in the right place and then planking, trial and error is ok. I'm good with the results but should still have taken a little more time to prevent gaps around the windows and between the planks.}

-
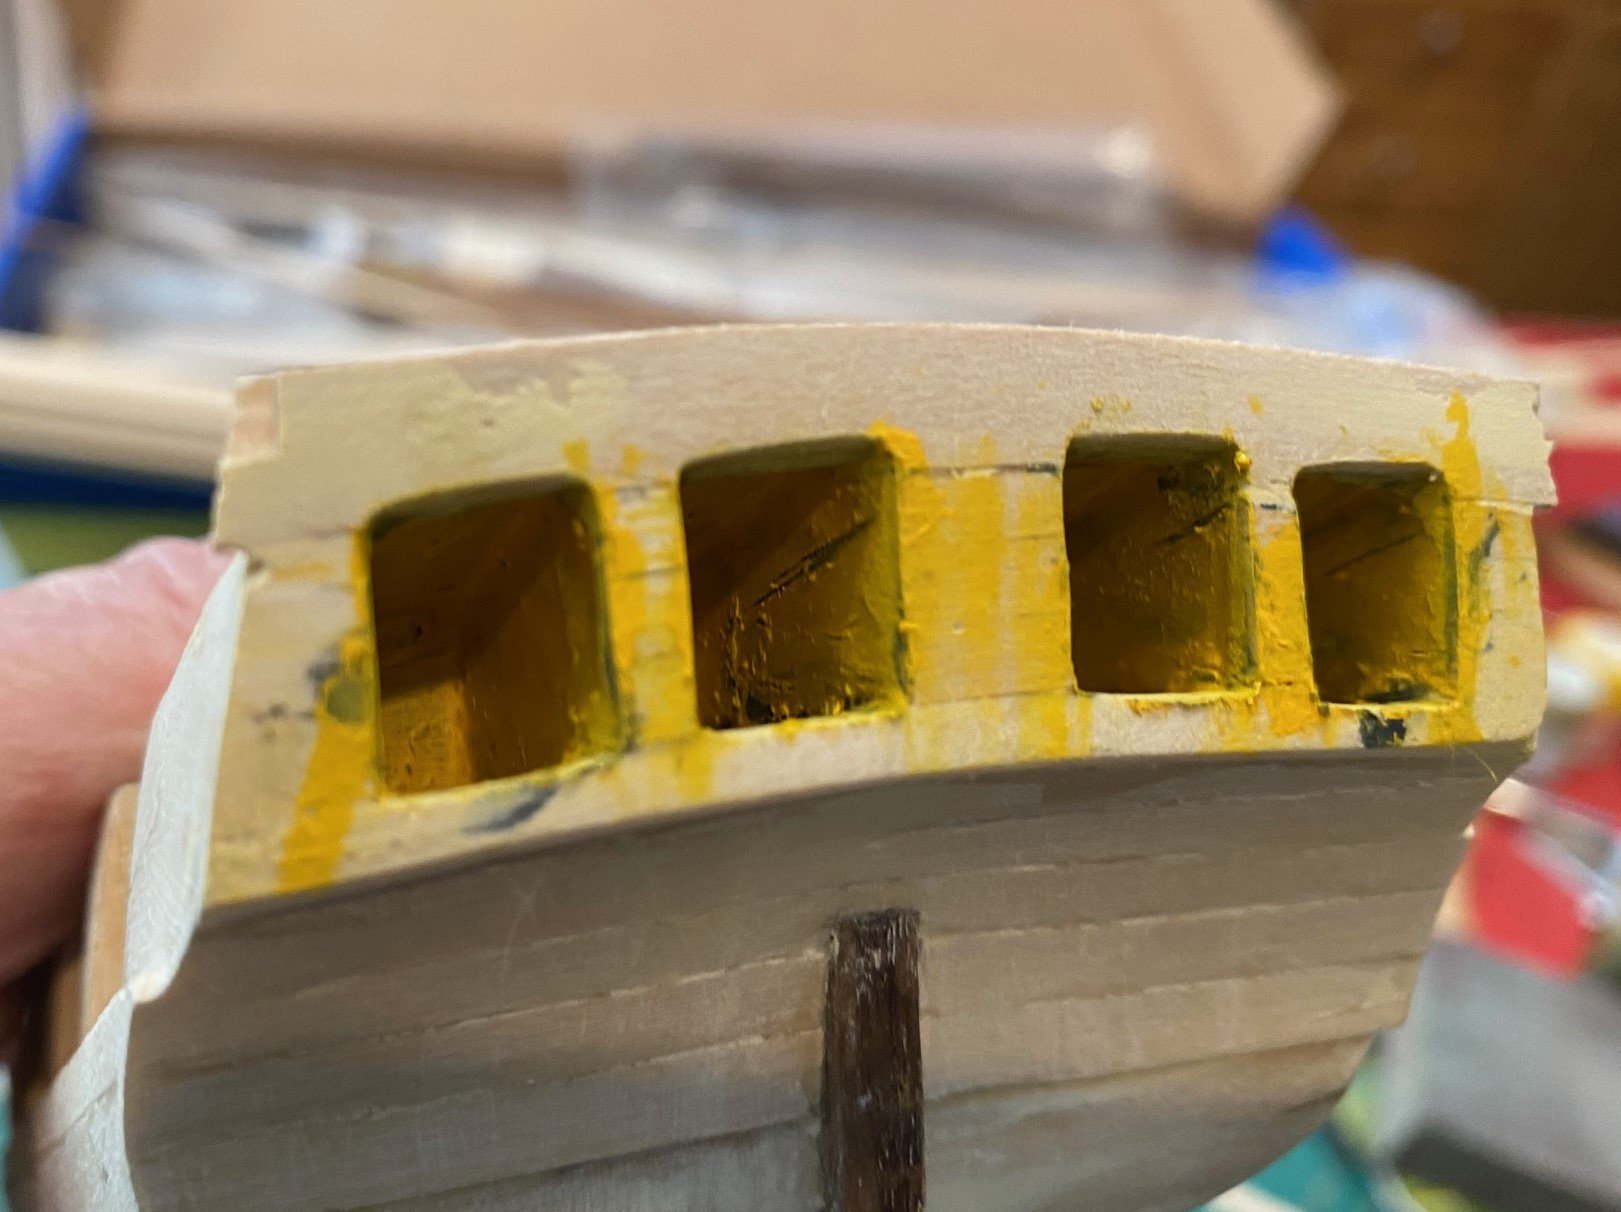
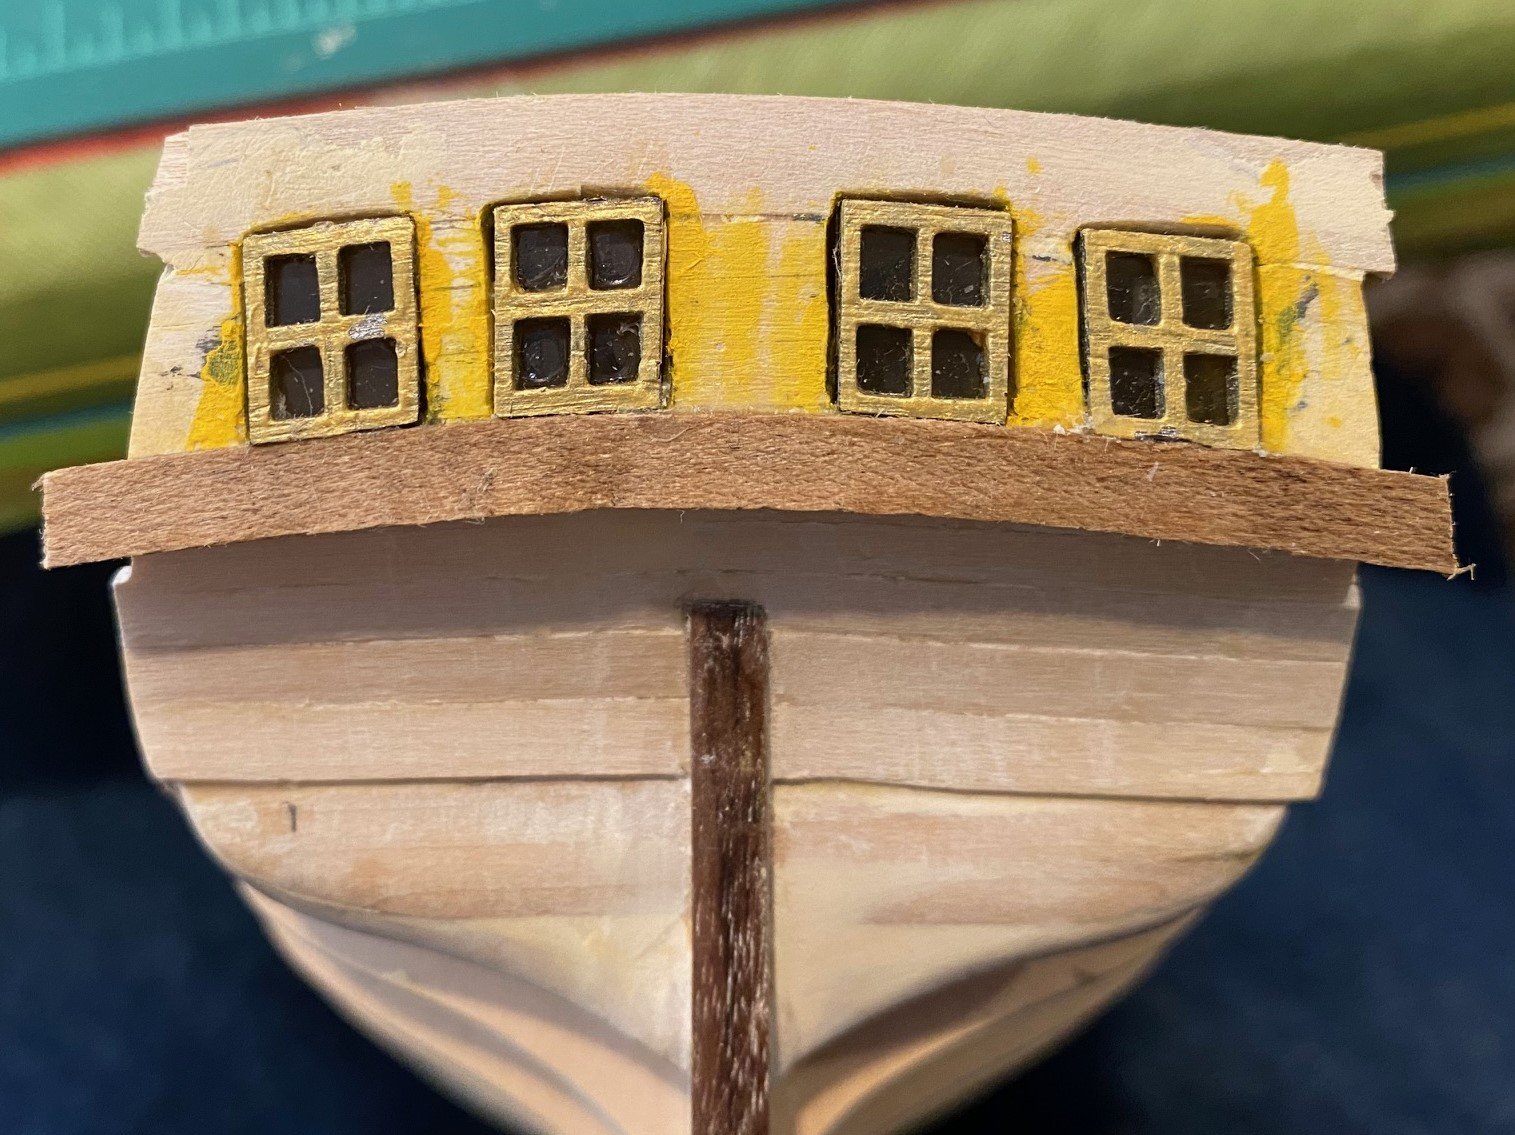
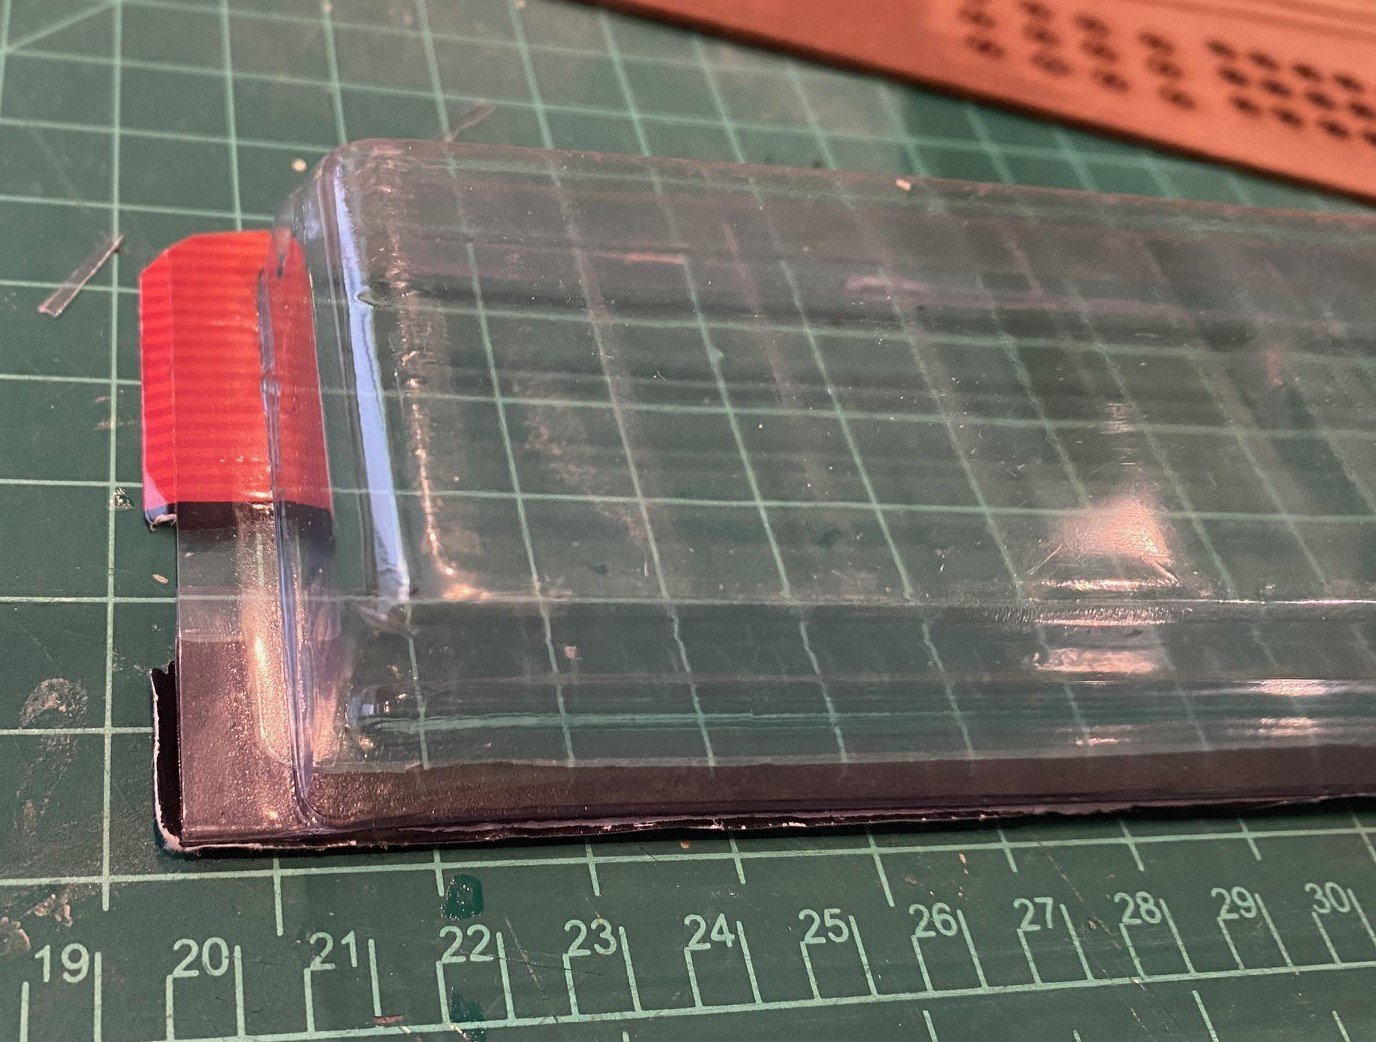
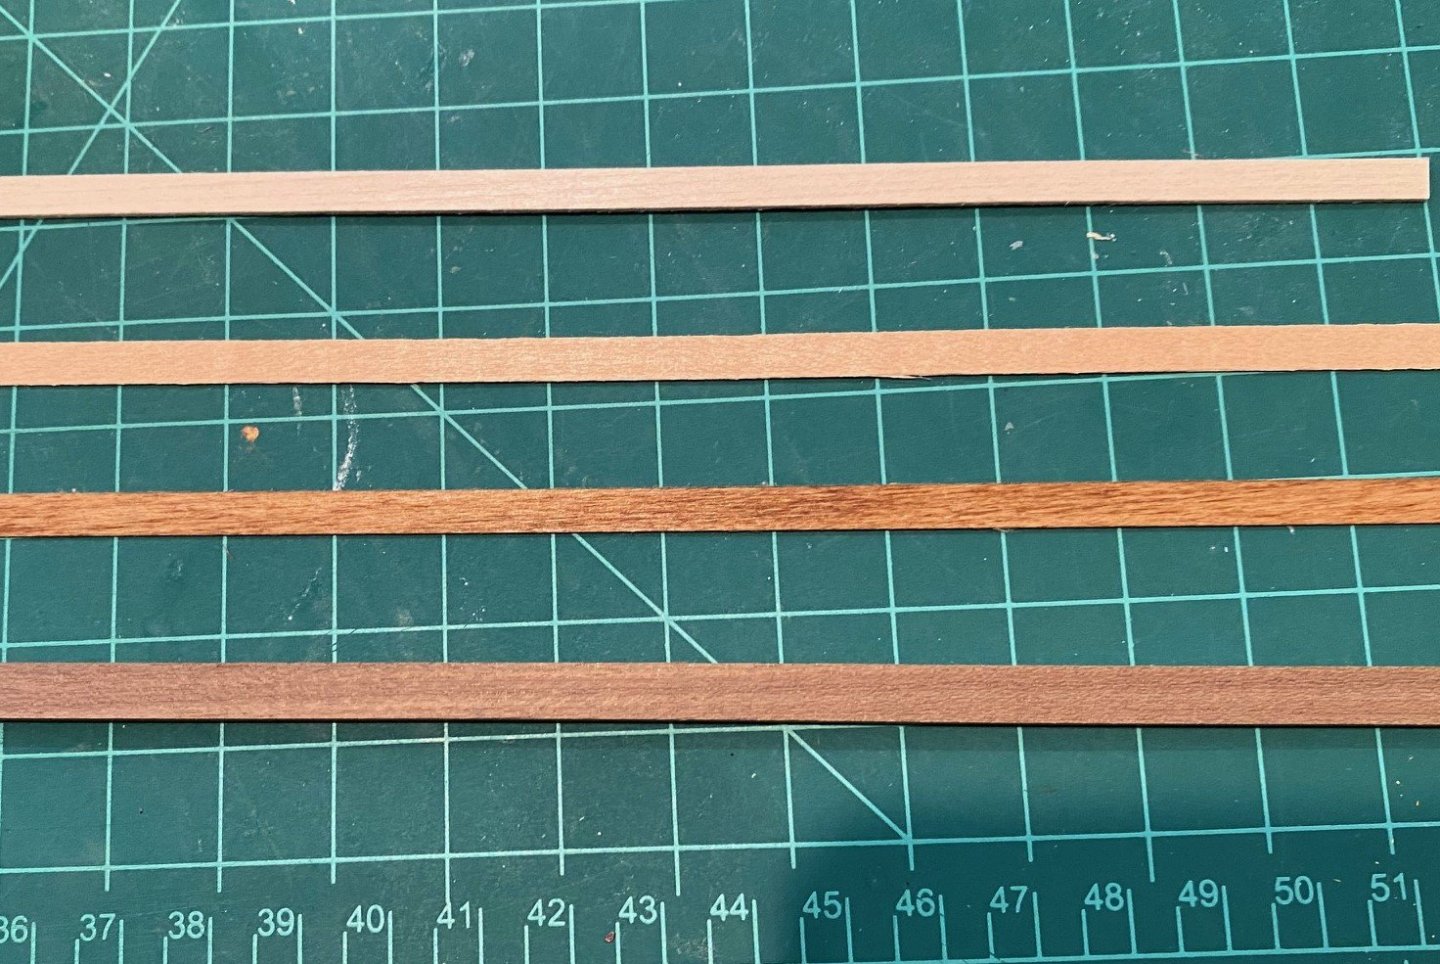
Bending the first walnut plank to fit under the windows on the transom. At first, I couldn’t find the walnut planks, I had put them with the basswood since they were so light. I started to test what stain that I had would bring it closer to the walnut wood color in the kit. The walnut stain made them to dark and hid the wood grain. In the below picture, the top plank is basswood, the second is the walnut plank I’m referring to, the third plank is the walnut plank stained with light Oak, the fourth plank is a thicker kit supplied walnut. At this time, I’m going to stain the hull walnut planks with the light oak stain to bring out a darker color and the grain. Started to work on aft transom windows, I painted the frames gold and then glue a piece of plastic that was the top cover of some tools. Painted the back of the window frame with a light coat of CA glue and clamped the plastic to the frame. Looks like glass. Painted the inside of the window housing black per the instructions, but when I trail fitted the window in the transom, the glass just looked like it had been painted black, there wasn’t any indication of depth behind the window. So, I painted the inside a window yellow to simulate the yellowish color of candlelight. Glued the windows in using wood glue then started gluing the first plank on the transom. Started in the middle using CA glue. The biggest problem was keeping the window to be even with the thickness of the plank. After a little trial and rework, I think I got it. {NOTE: After glueing in the windows and walnut planks, I'm not sure it matters what color you paint the inside of the windows, even leaving them not painted. Looking through my windows, I still can't see anything.}


-
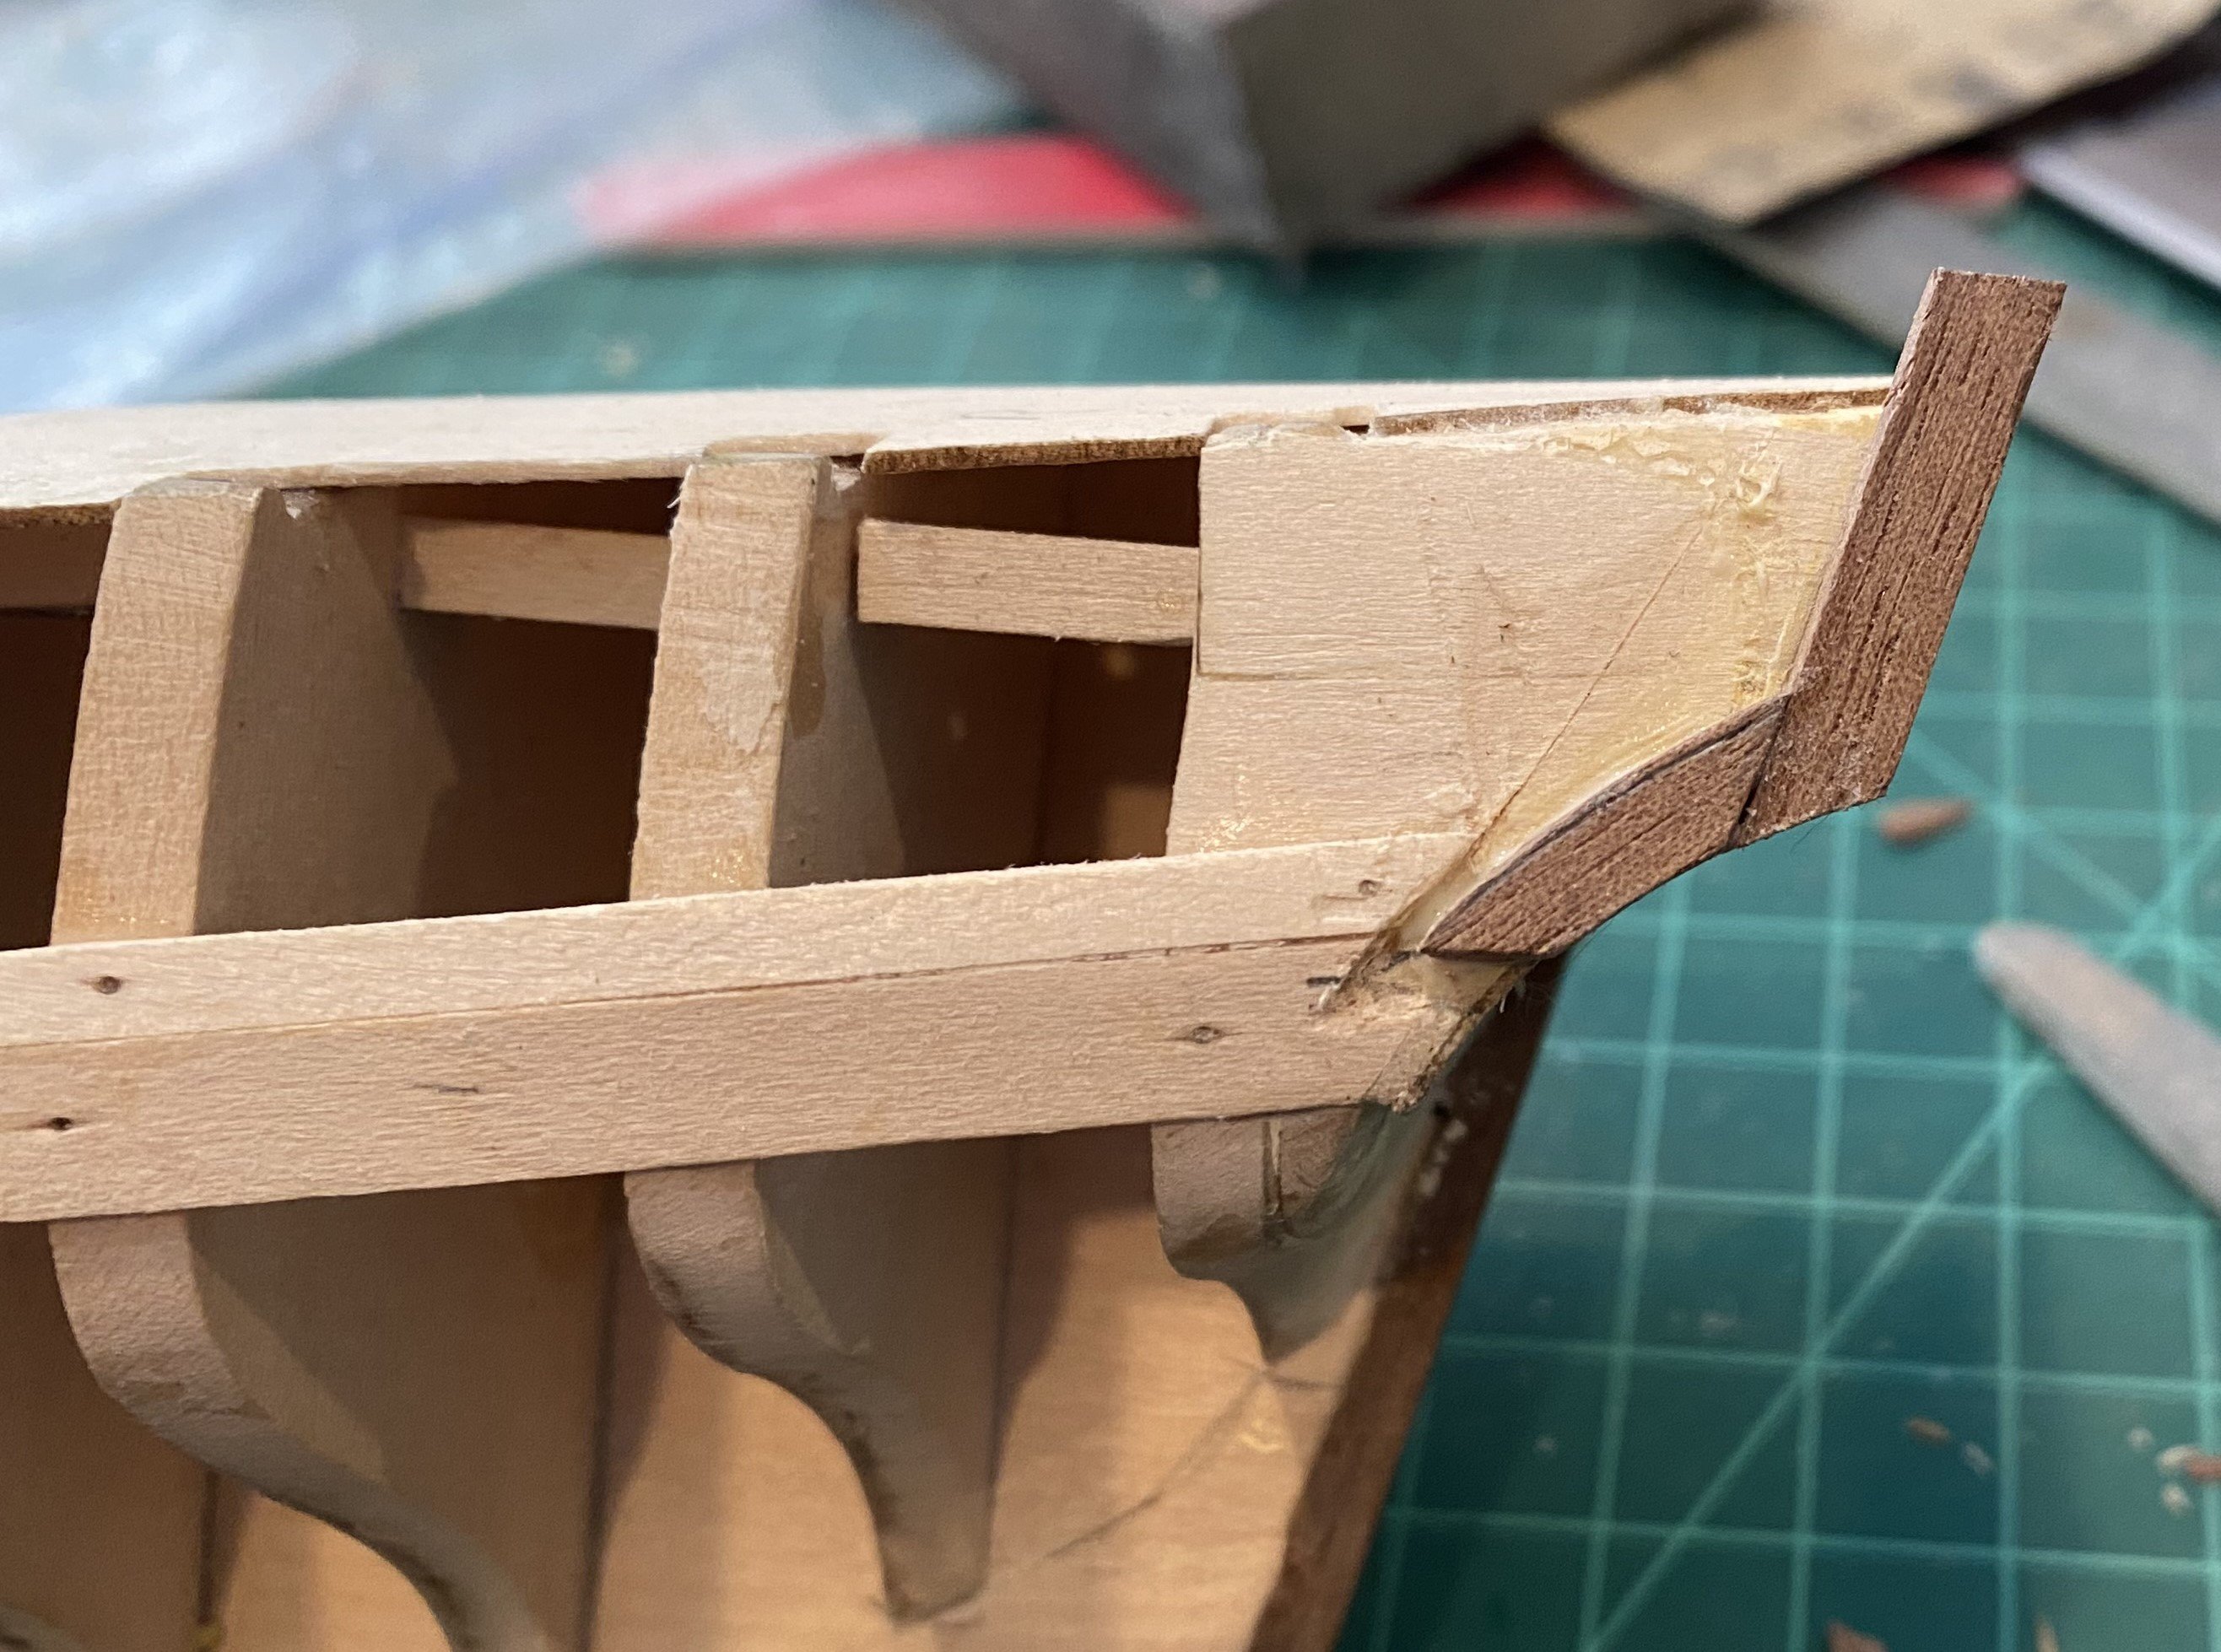
Started gluing the planks on the counter, when I went to glue the bottom plank on it looked like that there was not a straight horizontal line across the bottom. So I trimmed off a bit from the midline to the starboard side. When I glued it on, it did not look right so I glued on the piece I trimmed. You can see it from the pictures below. I whittled and sanded the edges of the transom planks to the to the counter of the transom filler pieces. Two things I noticed as I was looking at the next step, the fashion piece. I should not have sanded the plank edges to the contour of the side of the hull but I should have created a straight cut so that it would match the fashion pieces. The second thing I noticed was that the top transom plank did not extend above the aft deck as the design called for. So, I removed the top plank and will glue in a wider piece that extends beyond the sides of the hull. As noted earlier, the aft ends of the hull planks were not even in reference to the counter filler pieces. At that time, I figured that I could cover that up when I glued the walnut planks on. But it does create a bit of a problem glueing on the finishing pieces. You can see that the Port side comes down to the junction of the two counter filler blooks. Where the starboard side does not, I curved the planks up more than they should have been. I thought about using acetone to soften the CA glue I glued the rear portion of the starboard planks on with acetone, remove and then reglue in the right place, but the more I looked at the drawings and instructions, I still think I can correct it when I glue the walnut planks on. The only thing that I can see that I need to be careful with is to make sure that the bottom of the gun port is even with the top of the walnut Black Strate.


-
Hull Finishing Examples
SkiBee replied to Burgundy's topic in Painting, finishing and weathering products and techniques
If you have a problem with blotchy stain on basswood, try a stain conditioner (usually called a 'Pre-Stain Conditioner). I've used it a lot on pine wood working projects and it works great on any type of modeling wood. It evens out the stain absorption of the wood. Try it on a piece of scrap wood and see if it works for you. -
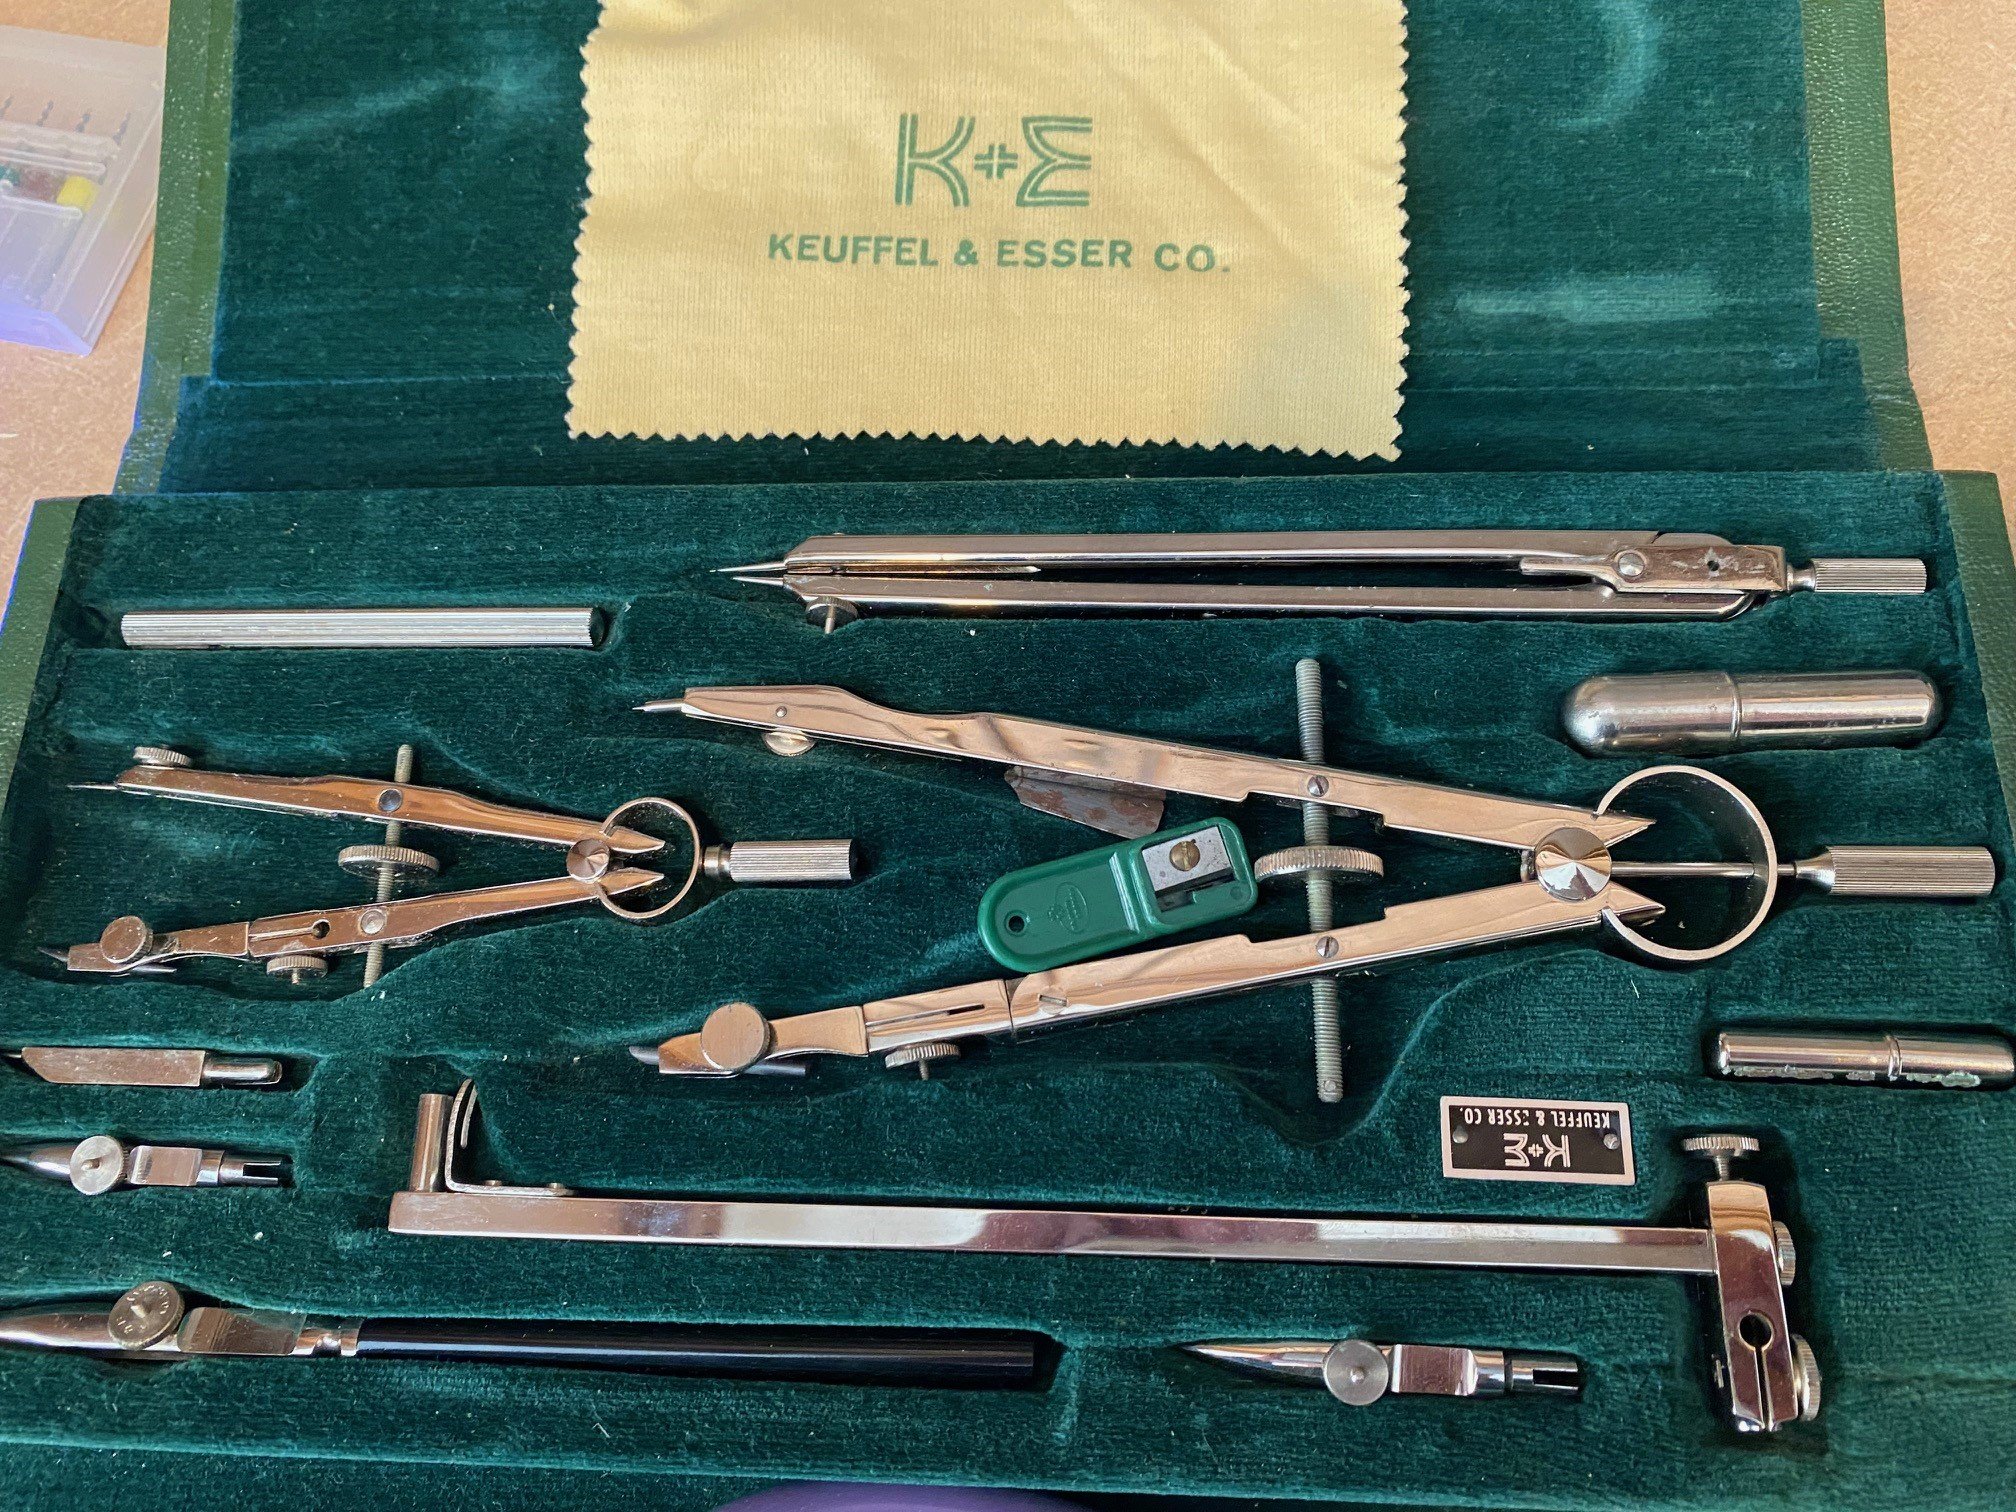
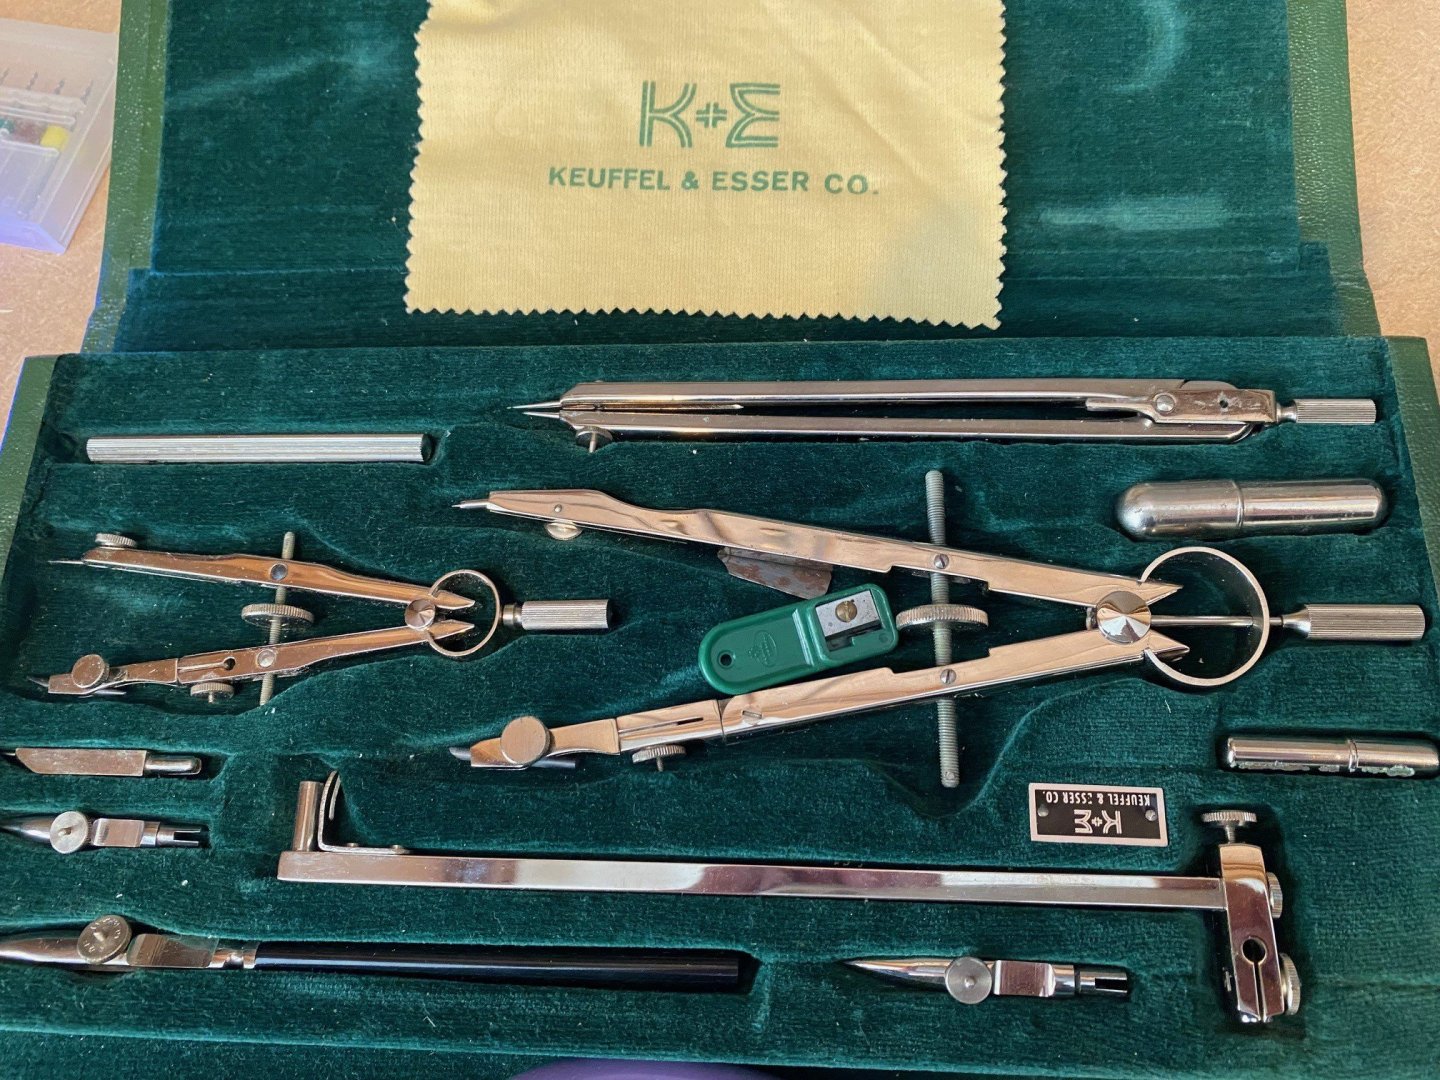
CiscoH The nib ends were for ink, like an old fashion ink pen you had dip into a bottle of ink or fill from an ink bottle. By the time I came around we had what was called a LeRoy pen, a cartridge ink pen, but my father used the nib pens when he was a draftsman.
-
Now for a bit of nostalgia, how many under 40 modelers know what the picture is of? Nothing like a good set of K&E drafting instruments. Since I was going to get a engineering degree, I figured I would by a good set of instruments in my senior year of high school. But by the time I came back from the Navy and started school, my slide rule and drafting tools were becoming obsolete. Bought my first calculator a short time after I started back at school, an TI SR-10, 4 function calculator with scientific notation, It lasted about 18 months before I upgraded and then upgraded again 2 years later to an HP with everything and formula memorization.
-
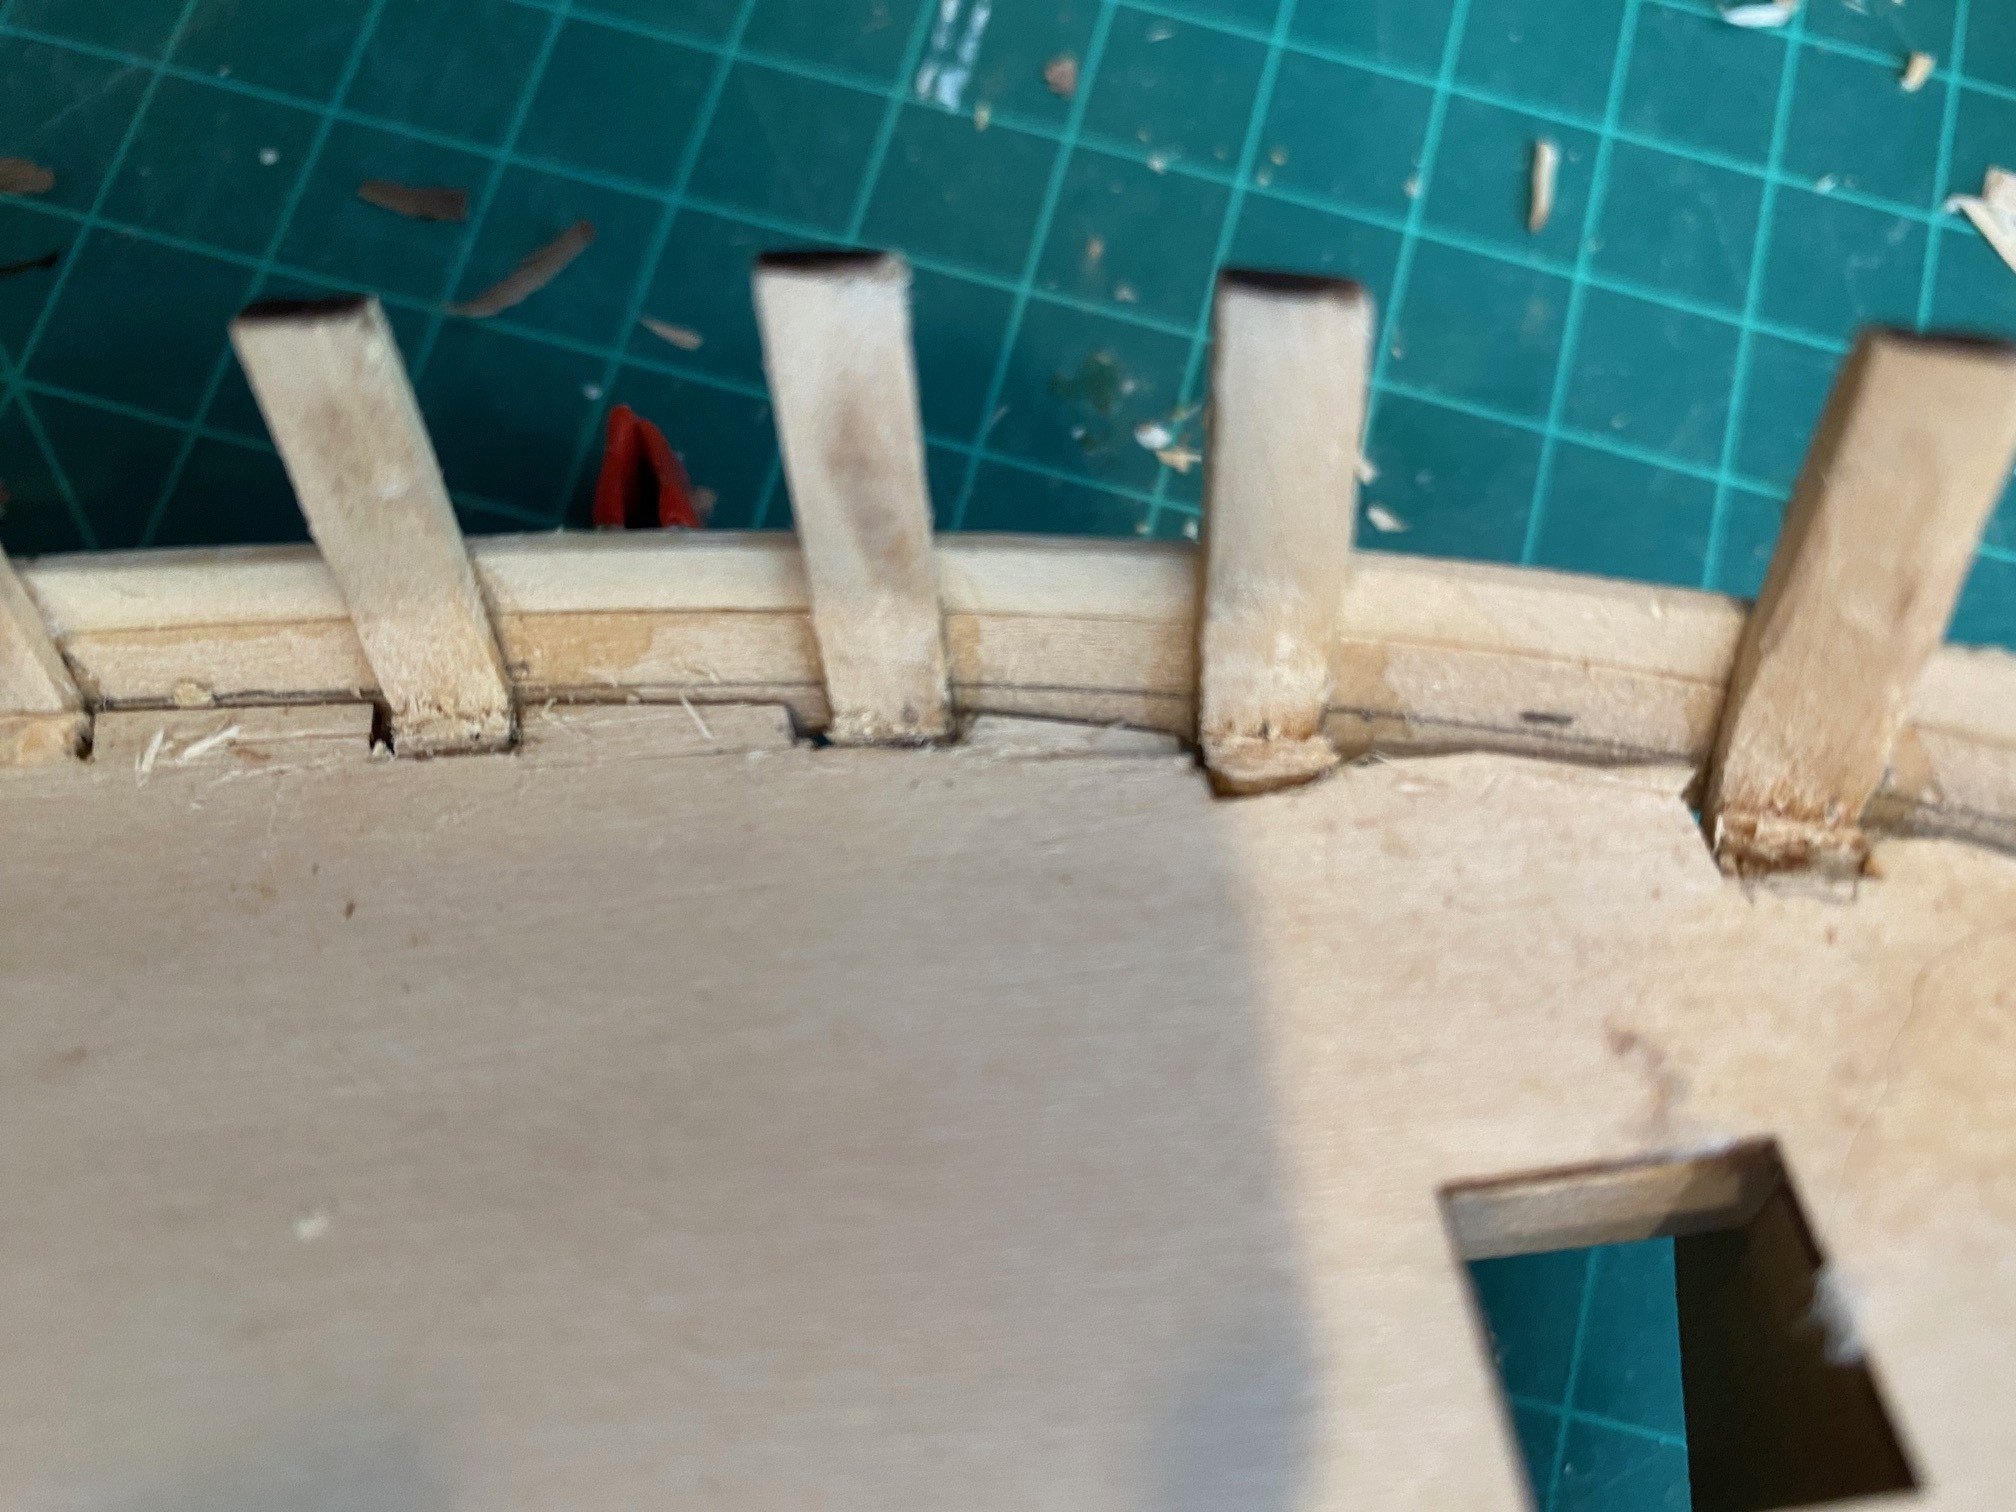
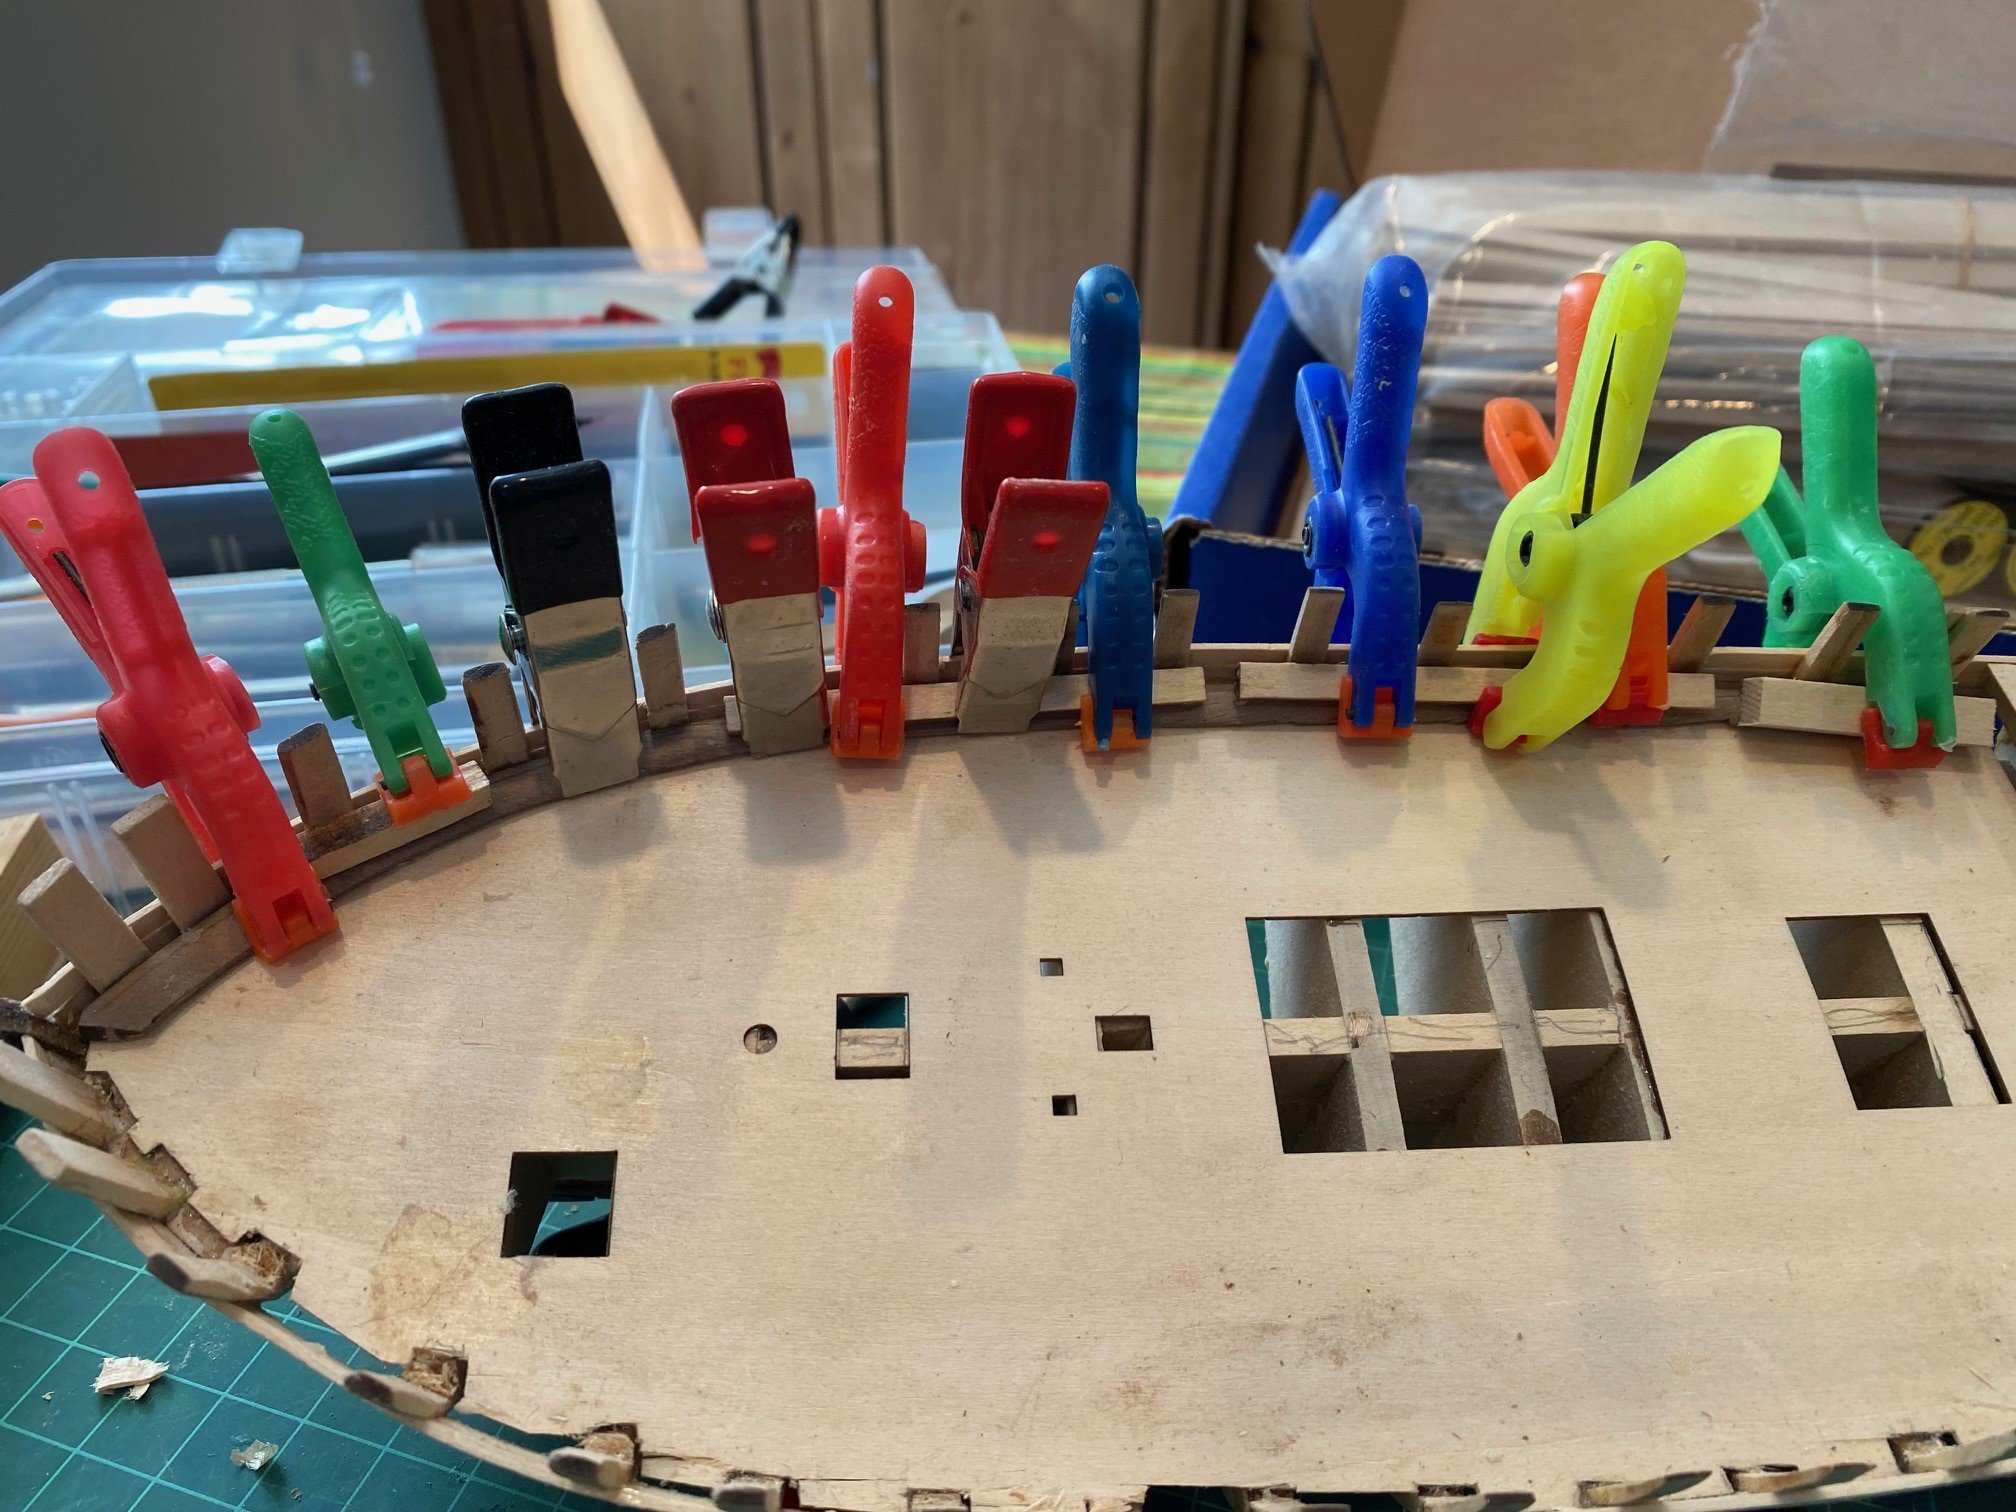
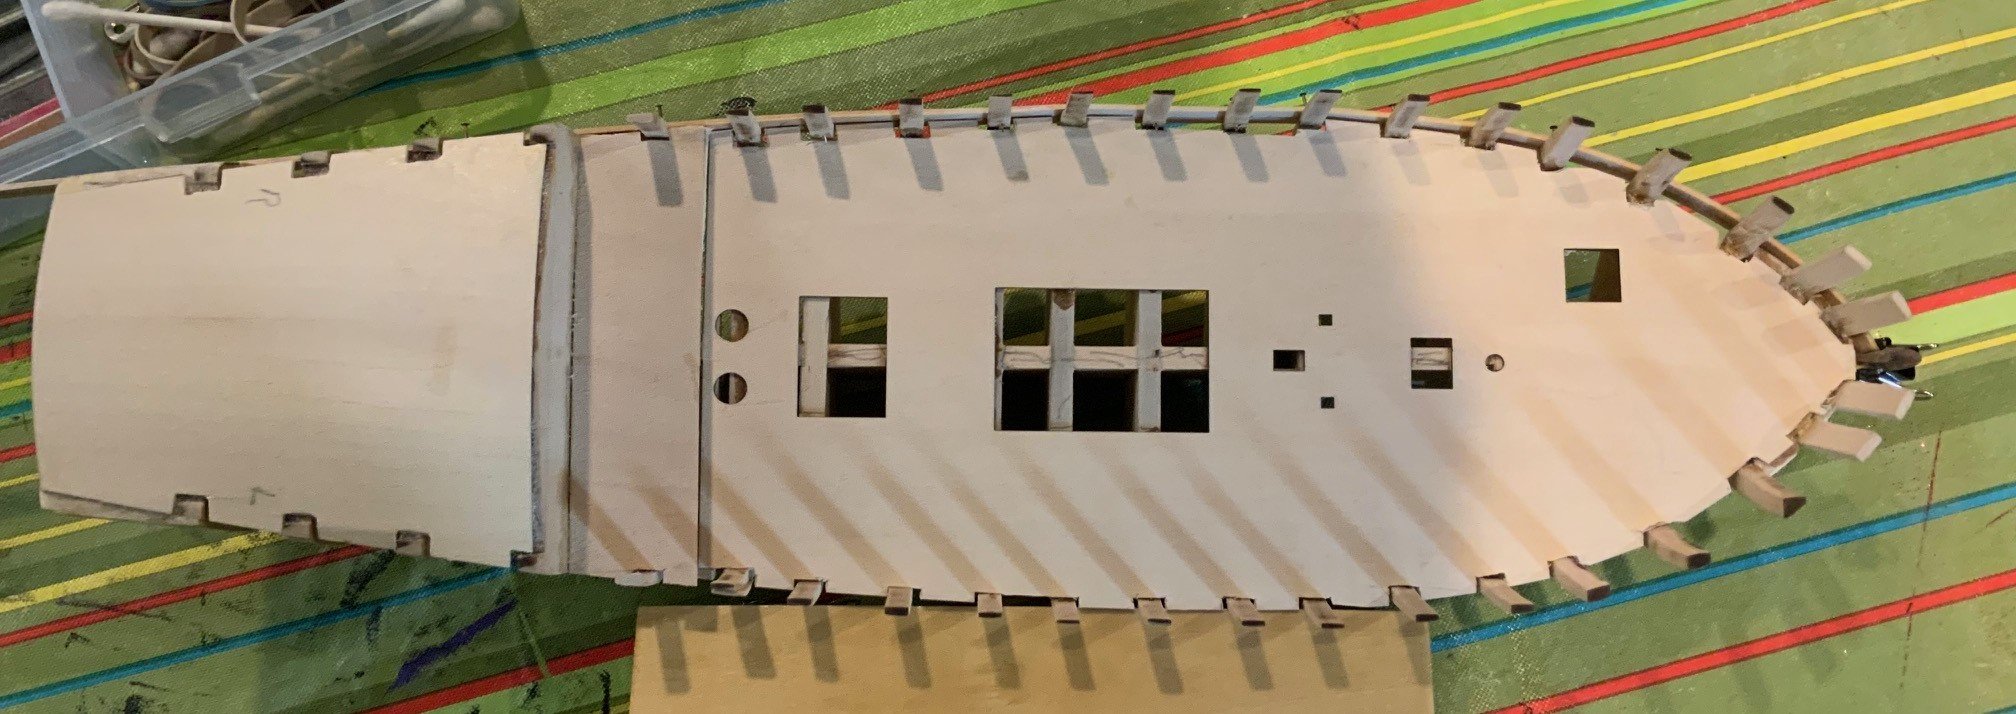
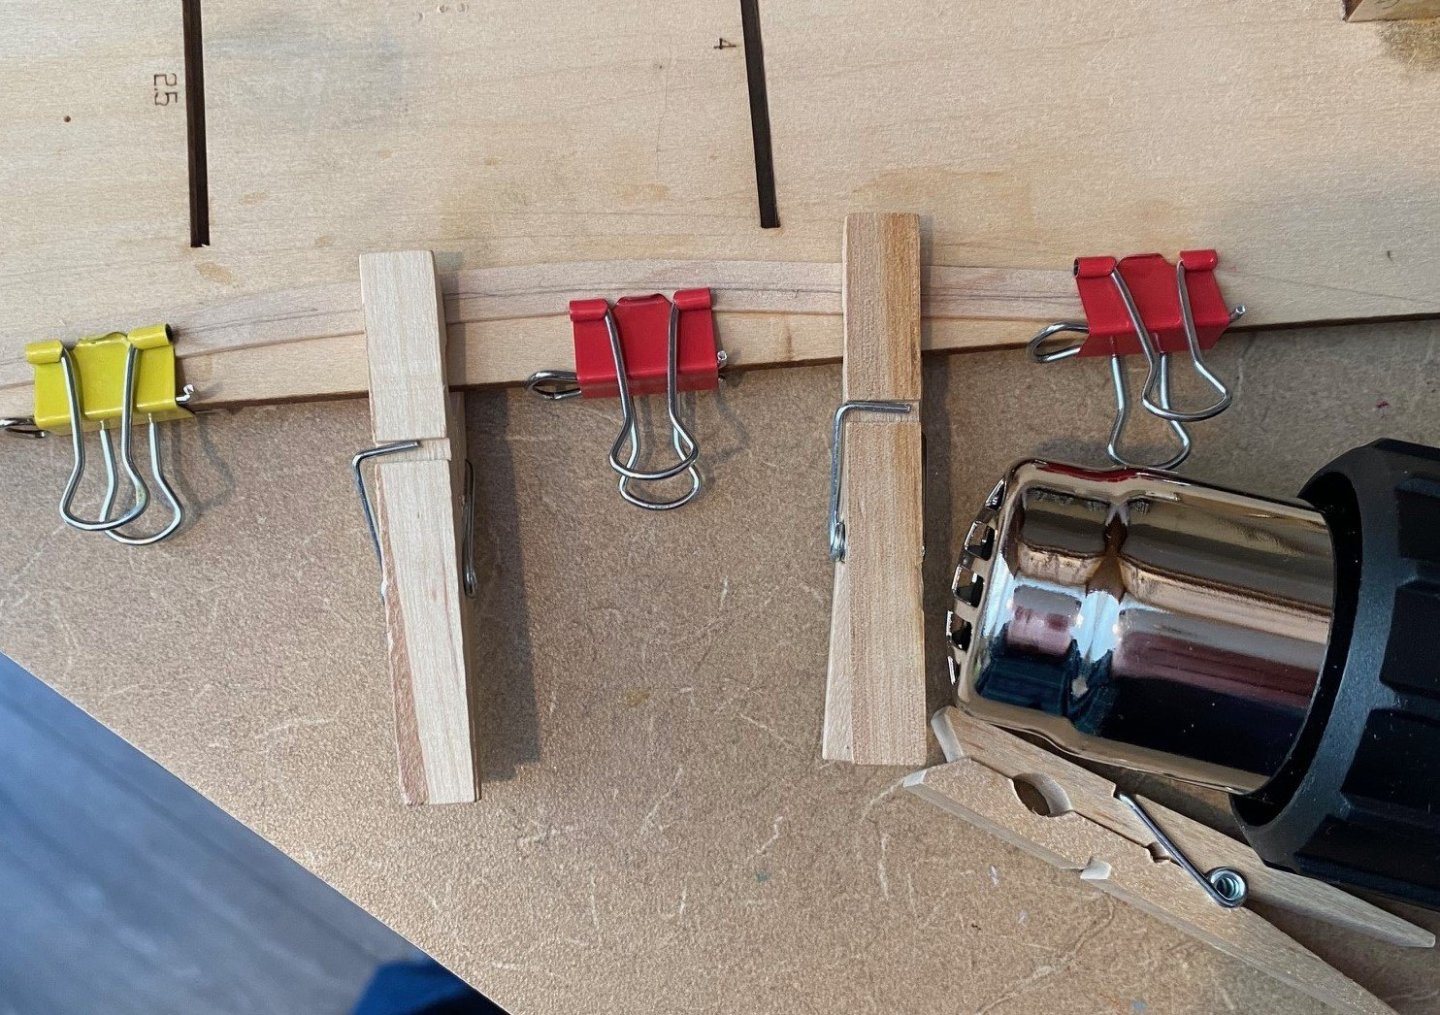
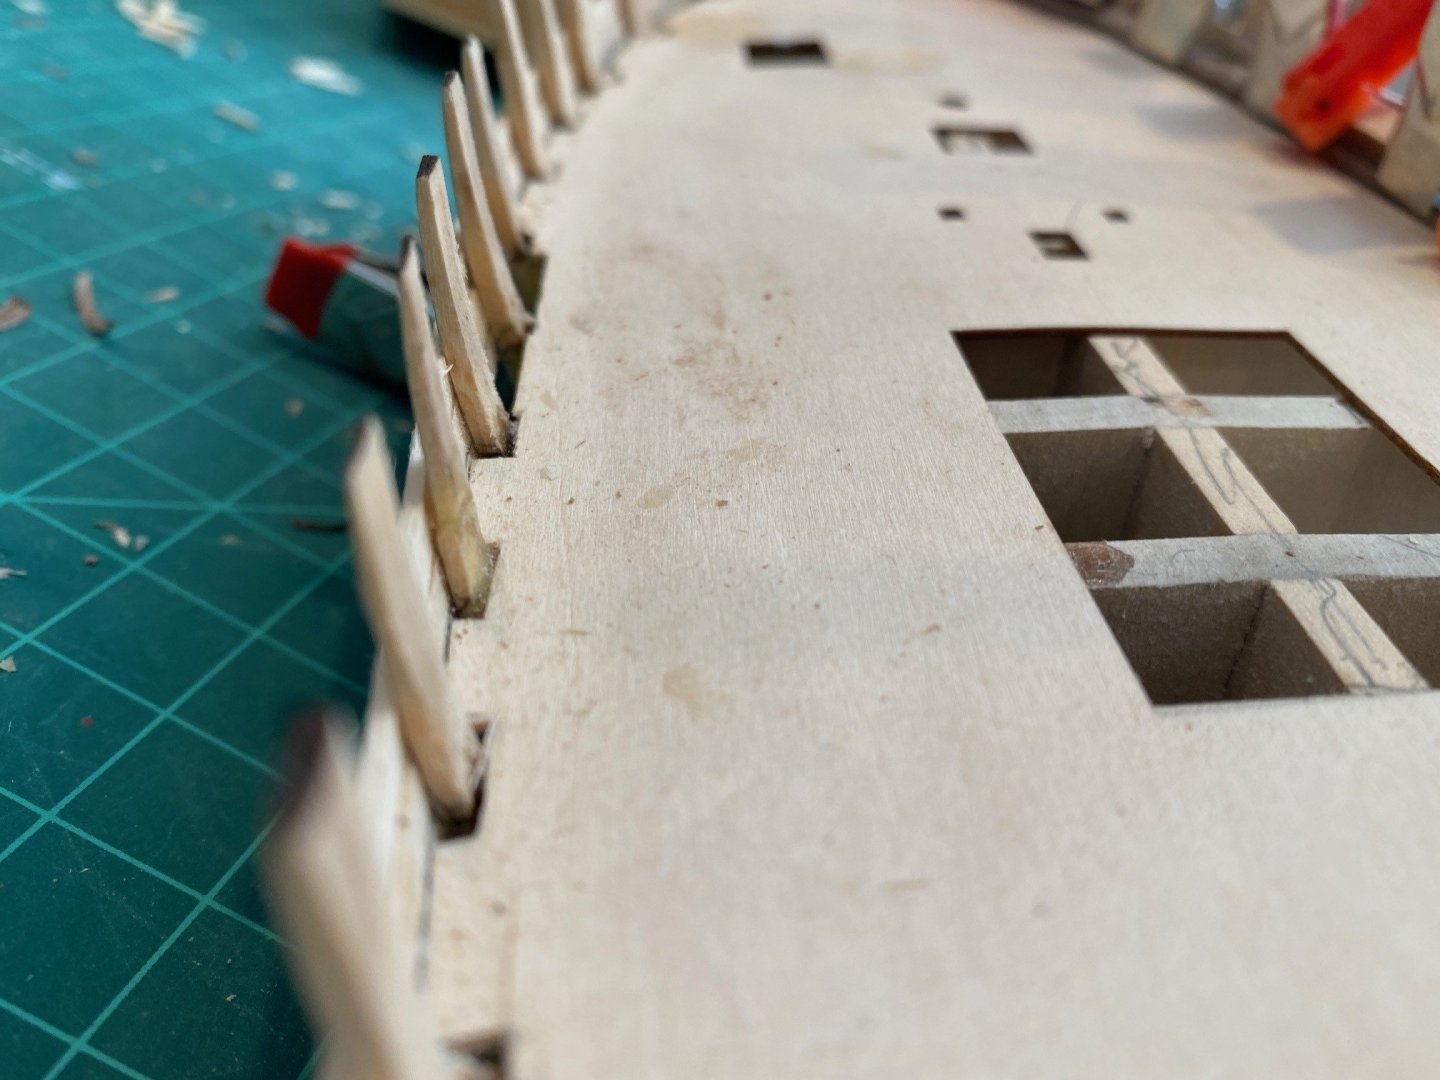
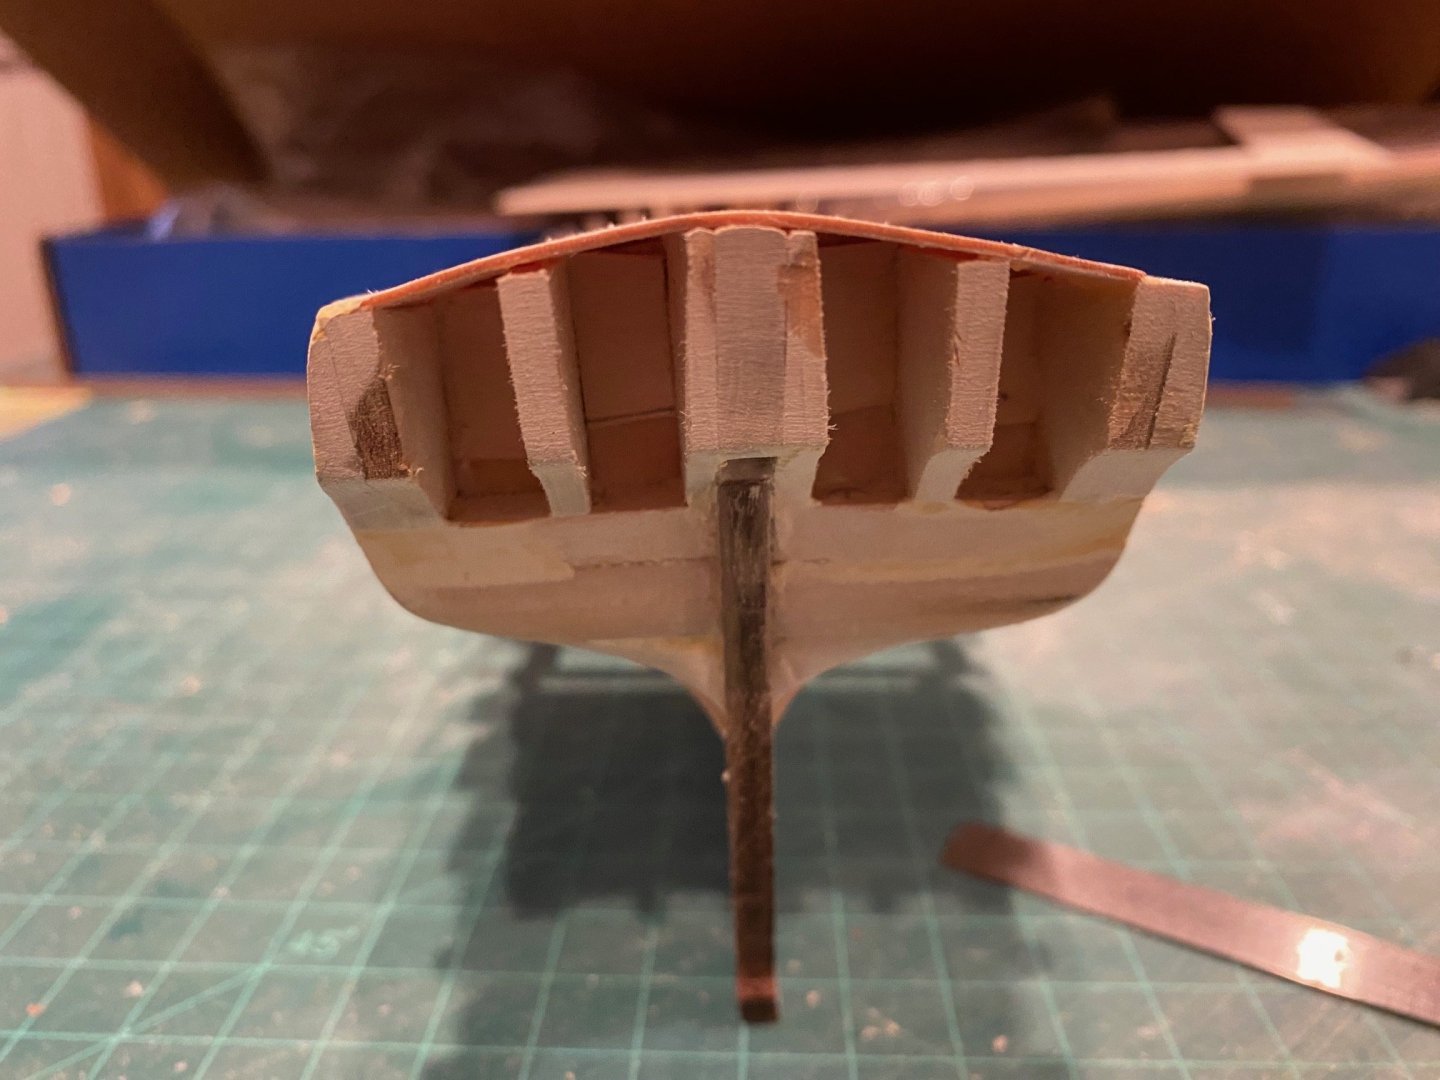
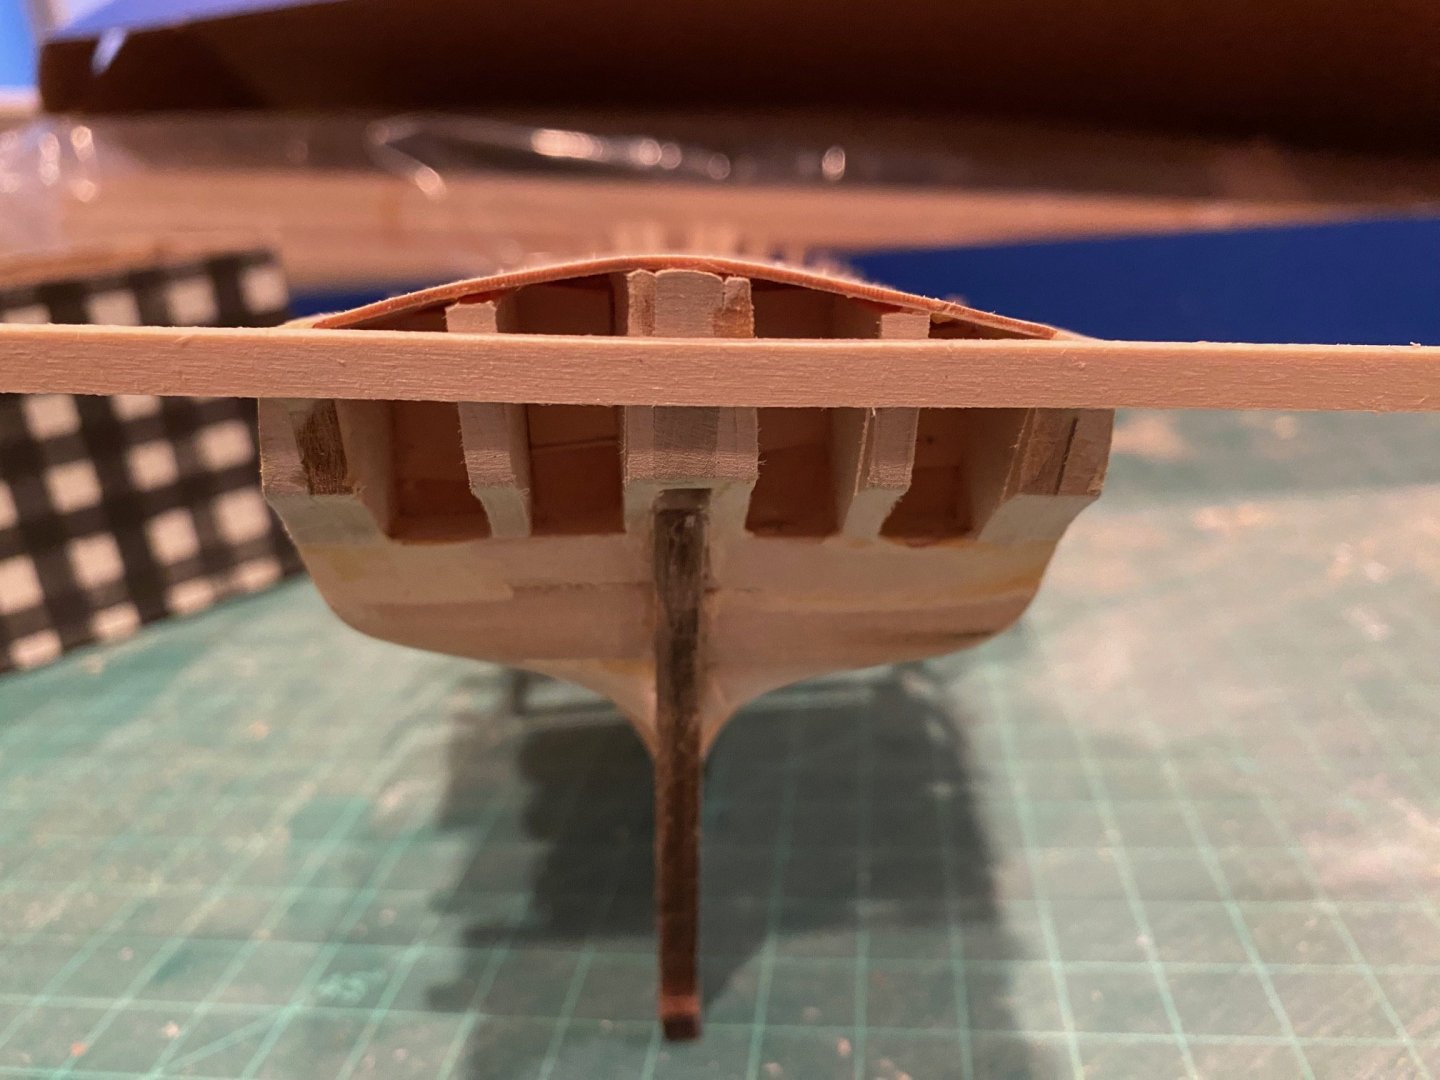
NOTE: I would recommend that you reduce the thickness of the bulkhead extensions before you install the waterway. It was much harder to trim and sand them later in the build. Also, make sure they are verticle and same thickness, saves problems later. NOTE: From my experience later in the build when I was installing the Spirketting plank, I would recommend getting your vertical stations to the desired thickness at this time. Also, I would recommend that you sand and paint the Waterway before gluing on to the model. I wish I had gotten the waterway smooth as I wanted prior to installation. Started to work on the Waterways, using the kit supplied walnut waterways. I whittled down the bulkhead stanchions using a xacto blade and a sanding stick. Focused on getting the bottom part of the station even with the sub-deck. I kept fitting the waterway to see how much more I needed to reduce, there were some I had to reduce more than others. Also, not sure how many stanchions I cracked, since I heard a crack but none of them came loose due to being glued to the planks. I then whittled and sanded down the outside of the waterway be able to get it tight up to the stanchions per the instructions. I wrote bottom on the bottom of the waterways to keep the orientation right, the port waterway went ok, On the starboard waterway I started off right but at some point of time I started to whittle down the inside of the waterway. I’m hoping that the deck planking will hide the scars from whittling. I then whittled and sanded the chafer on the top inside of the waterway to accommodate the cannons getting closer to the side of the ship. Used my old drafting divider to scribe the lines on the top and side. Had a problem with forgetting to whittle away from the grain so I dug some deeper gouges, fortunately the finish sanding smoothed out the gouges. I wish I had a sander that I could set the angle; it would make life so much easier. I think I might try to set my Dremel up to do that. As I dry fit the waterways, I found that the curve in the deck required some force to keep the waterway in touch with subdeck as well as the stanchions. I used wood glue since I could get the fit with only clamping the waterway.


-
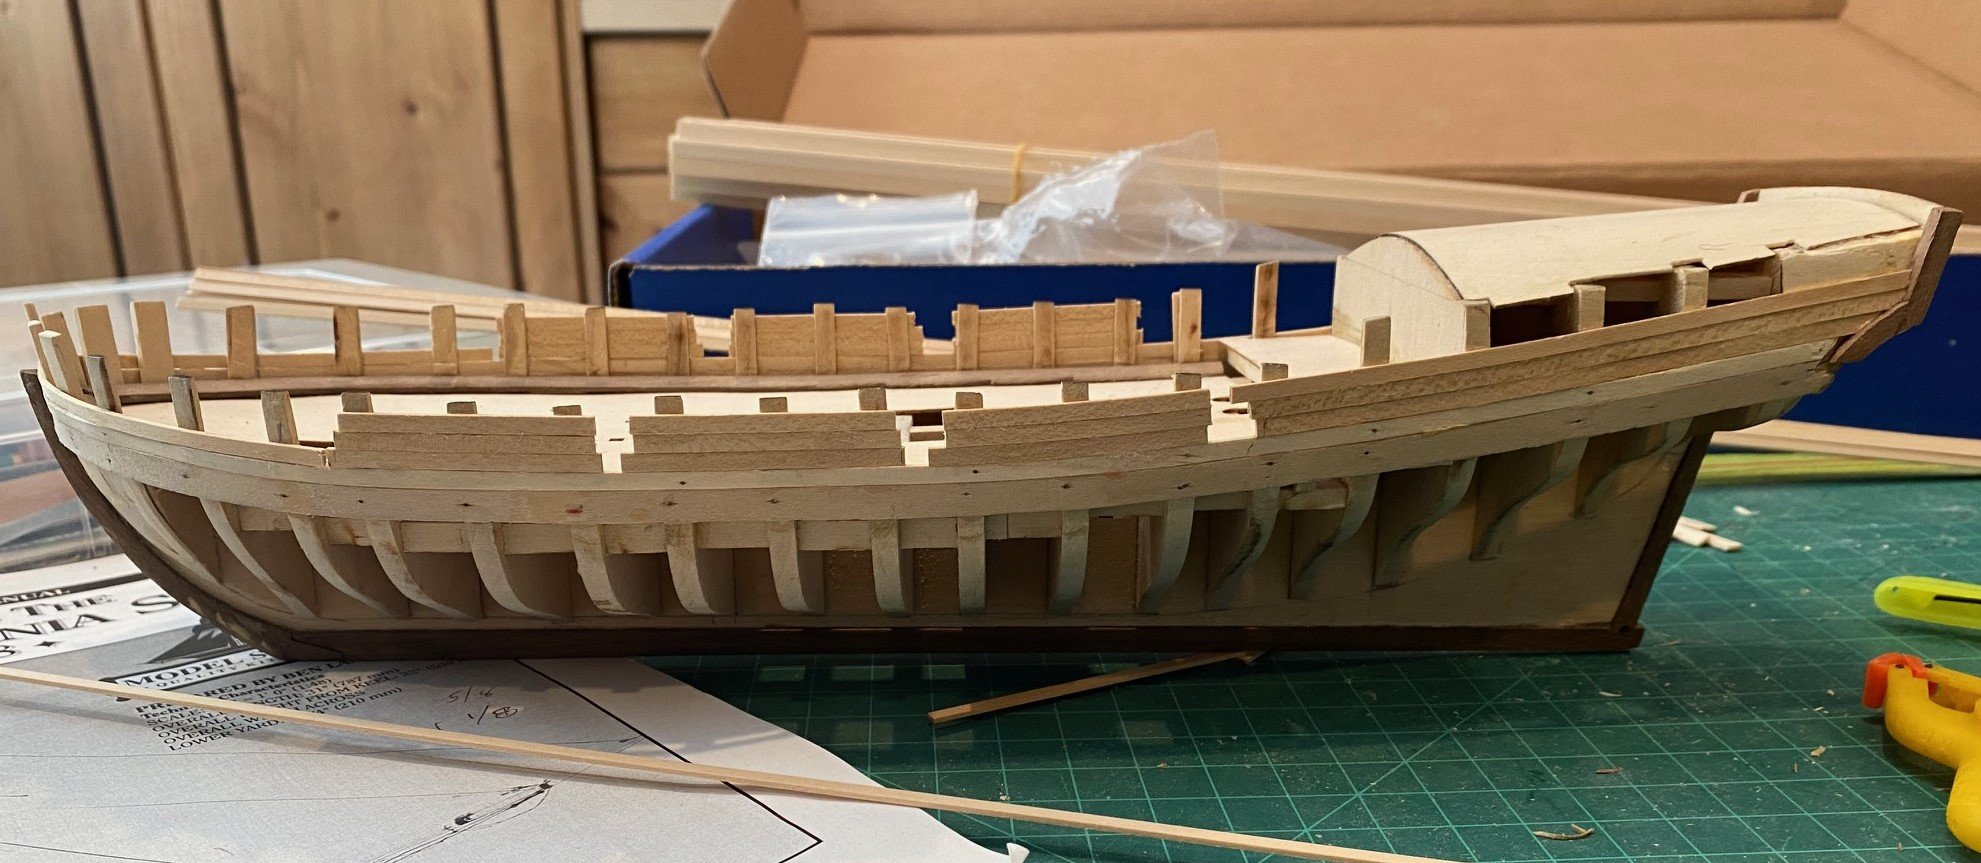
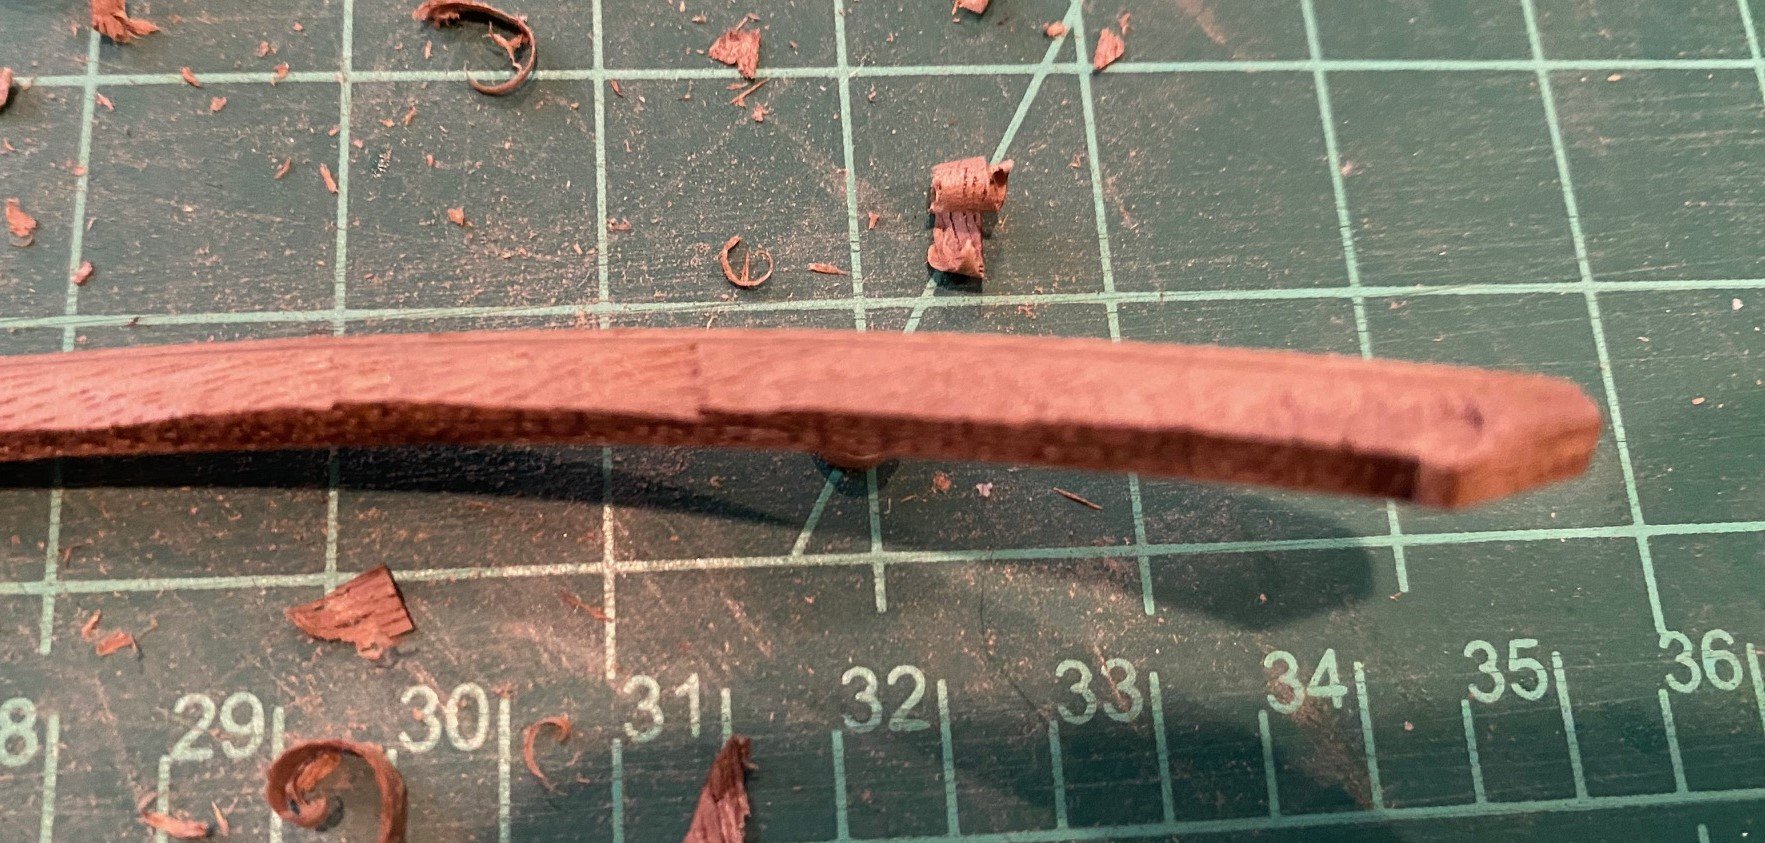
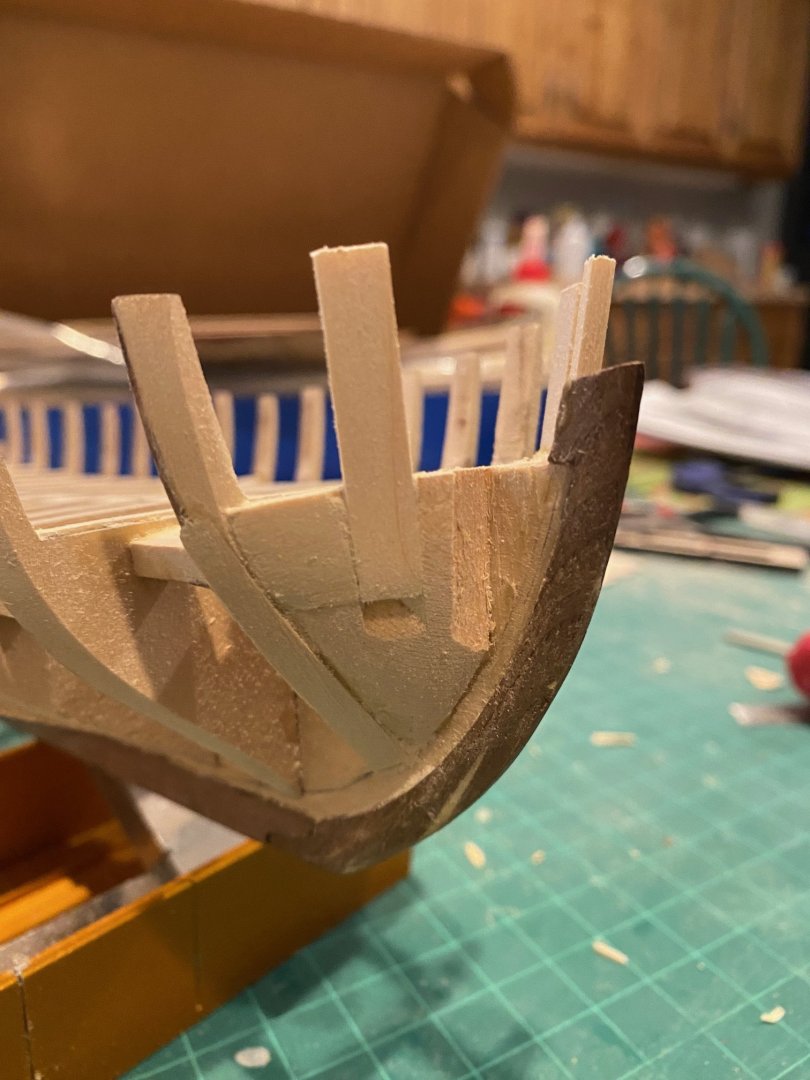
I’m going to follow Robert E. Hunt’s practicum from Luck Street Shipyard recommendations for planking. At this time, I’m planning on doing the 2-layer planking with walnut as the second (outside) layer of planks. I glued in the Knightheads and Timberheads without really reading the details from the practicum, I just cut a channel in the fillers and glued in a piece of basswood. I didn’t angle them as the practicum instructed. I’ll see what difference it makes. Starting the planking on the Port side, drew the line down the middle of the ¼ in plank and chamfered and trimmed the end oof the plank to fit into the forward rabbit. I cleaned up and widened the rabbit for the plank to fit and to accommodate the second layer of walnut planking. Had to adjust the trimming of the plank and the rabbit so the plank fit in as snugly as I could get it. I pined the plank to the bulkhead sides until about bulkhead N. At this time, I spent a lot of time trying to figure out if the ¼ in. plank bent up to sharply or more smoothly to the line from where the wing transom and the filler piece. I finally decided to try and get a smooth bend up in the plank. I then wetted the plank so the bends would set and let it dry overnight. I used CA glue to ensure that the bends glued correctly and then glued the 1/8 in. plank above it using CA also. I don’t like using CA and much as yellow wood glue, it seems that the CA get all over in areas you don’t want it.


-
I’m finally starting back up with my AVS build, after life got in the way for the last 4 months. It’s taken me some time to refresh myself with the build and re-organize all my tools. Before I stopped working on the AVS, I noticed the mast and spar were not in the box. Also, I destroyed my aft deck when I was correcting the aft end. Model Expo was great and sent me the parts. I glued the aft sub-deck on, and it looks so much better after I reduced the stern part of the keel that is what the middle part of the aft sub-deck glues to. But as I start to form the wale plank, I think I sanded aft keel and top of the aft bulkheads to much. On my model the distance from the top of the aft sub-deck to the wale is less then the plans. Not sure what further adjustments I will have to make as I plank the hull. I’ve not glued it on yet, just wetted the plank and hoping it keeps some of the curve memory.

-
Really nice work
-
Spumoni, welcome to a site with great information and help. I recommend that you start a 'build log' as you start your King of Mississippi, it a great place to get help as you build your boat.
-
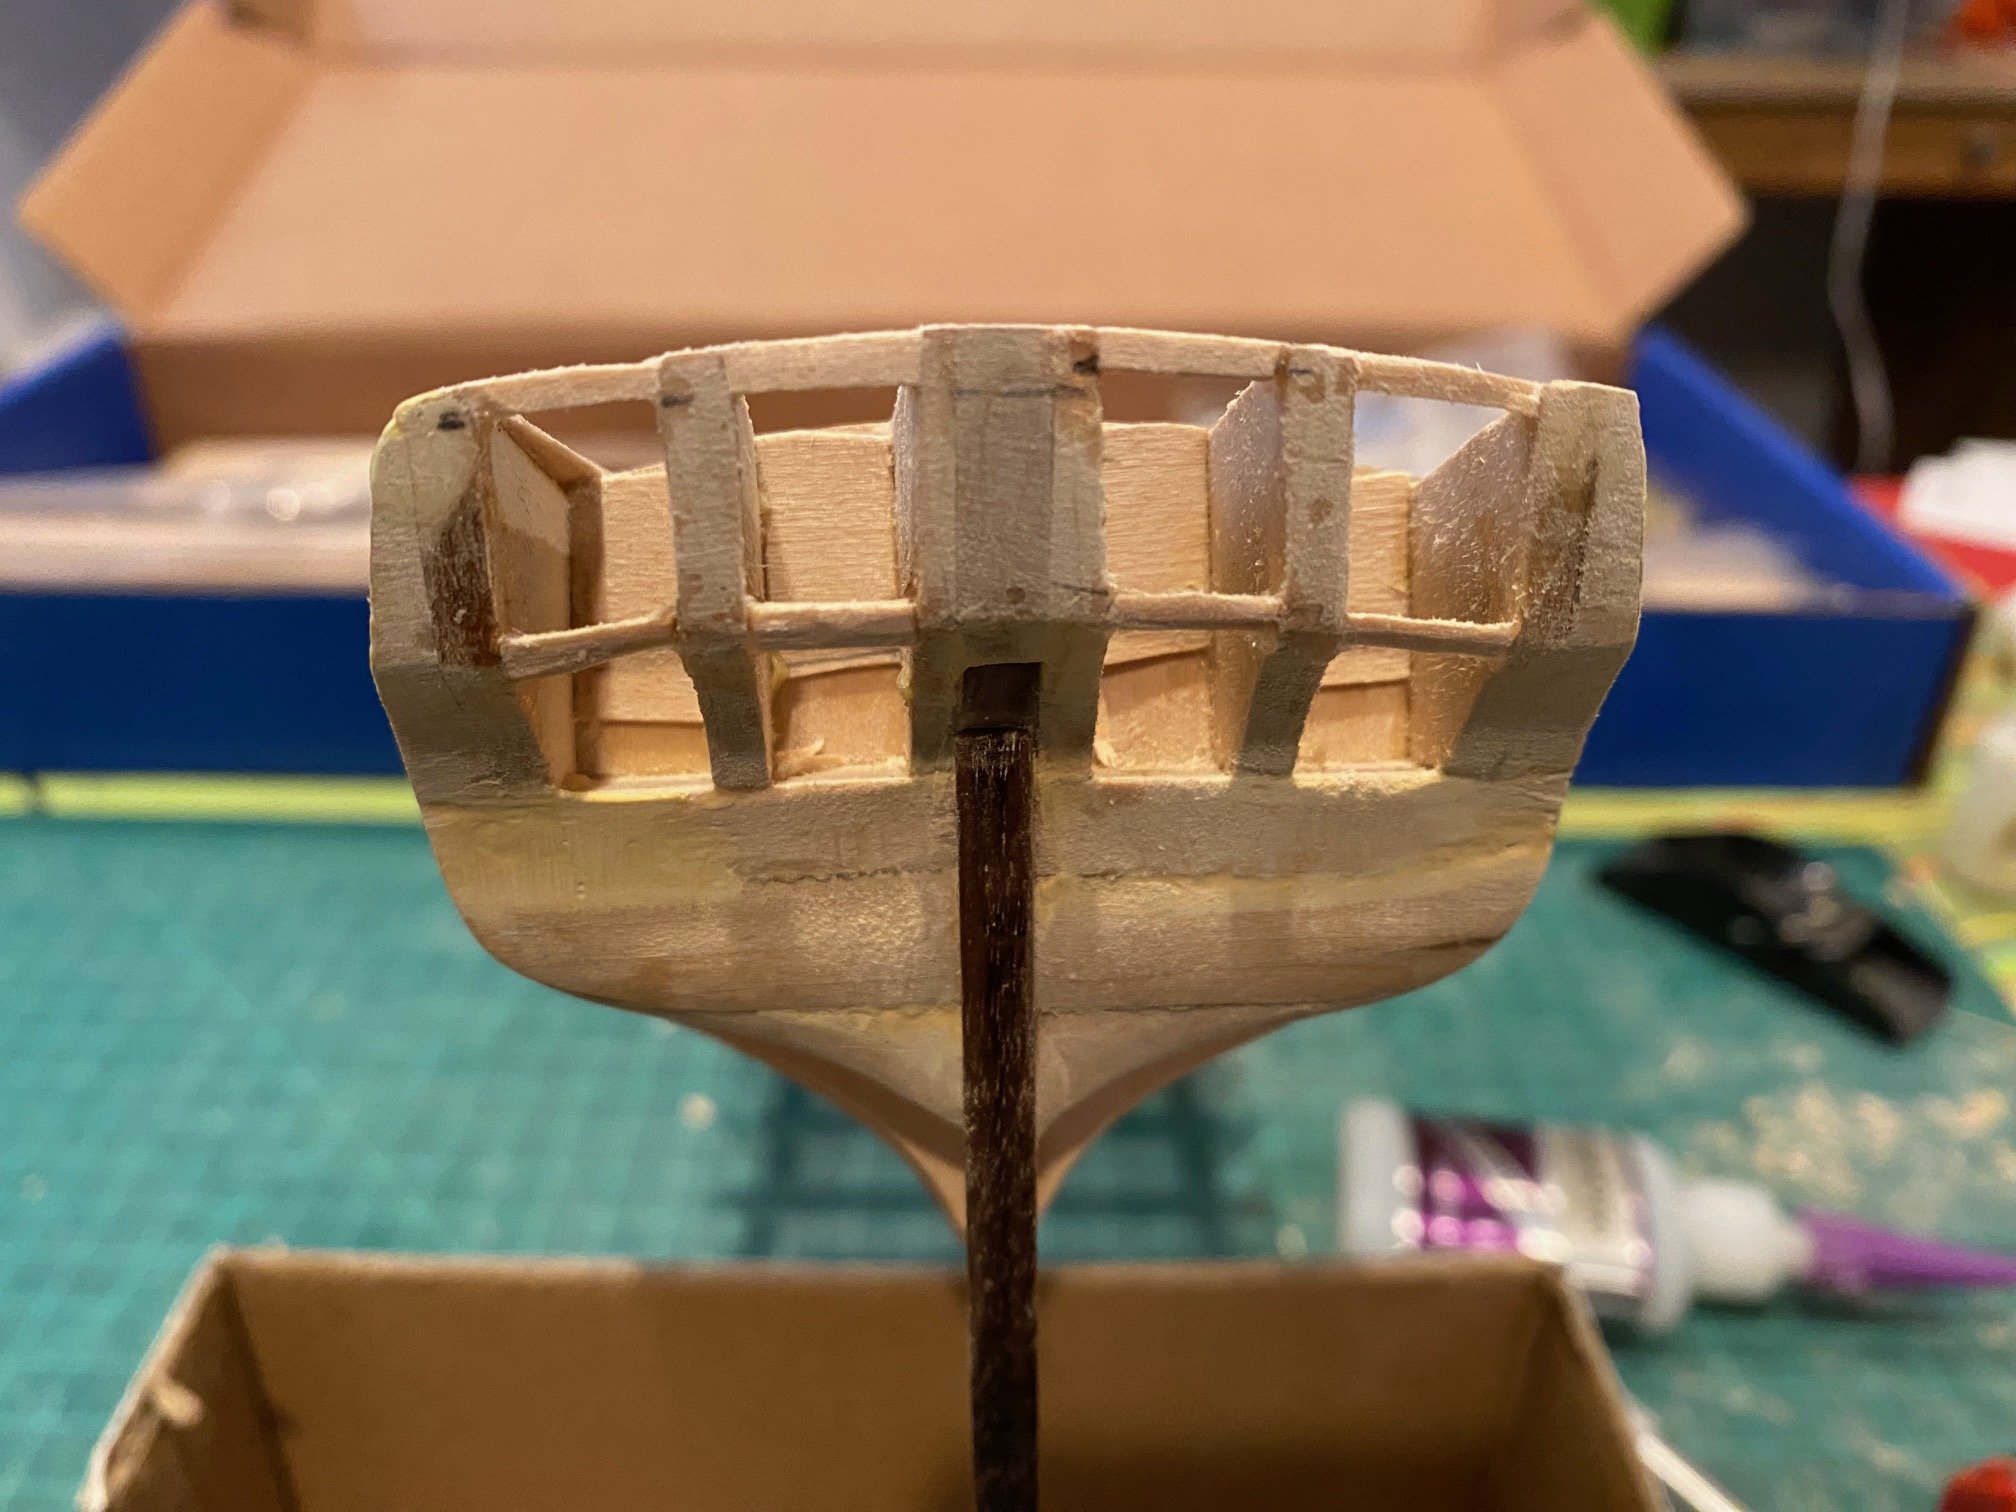
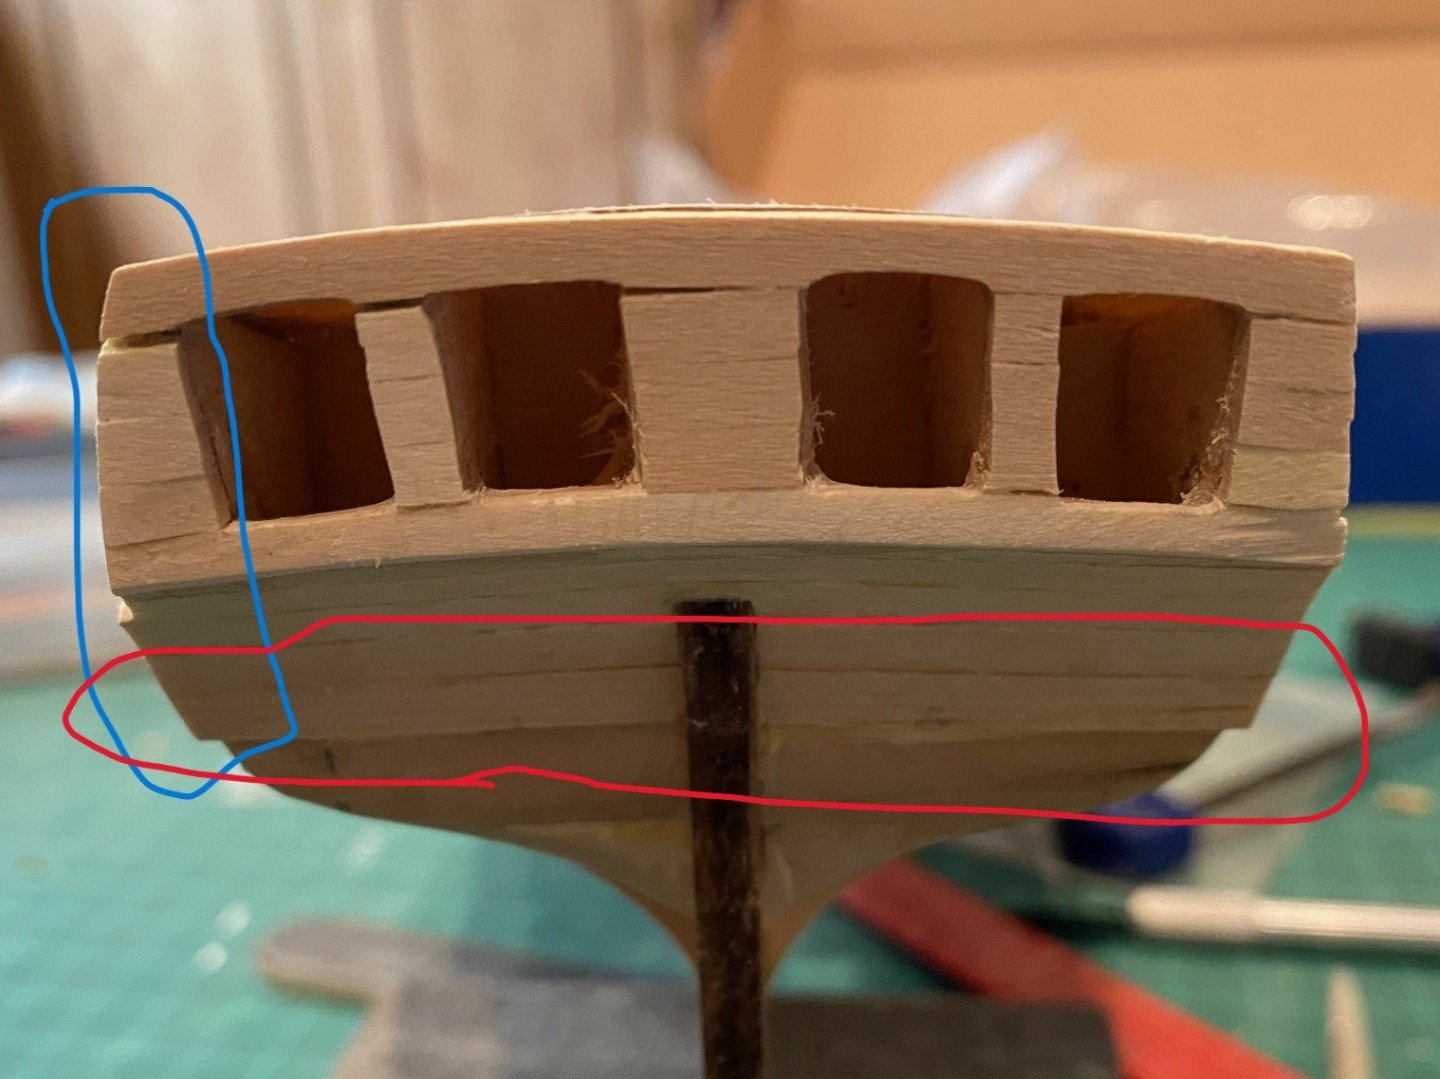
Great Navy Army game, since Navy won, you can see by avatar I'm a Navy man. I installed the window header and sill; you can see from the attached picture that I could not install a full 3/32” thick piece in any of them. This must be from the amount of the center keel that I had to remove to reduce the peak in the cabin deck. I think I had installed the two middle stern frames lower than they were supposed to be and by the time I faired them and keel, the window openings were too short. I started to fair the inside of the stations, but I kept breaking them so I think I will do what Cisco did and fair them after some of the outside planks are installed and before I add the waterway.


-
Go Navy beat Army
-
I removed the Cabin Sub-deck, I first started with alcohol to soften the glue; but as I was trying to remove the deck it broke into a number of pieces. I ordered a new sub-deck from Model Expo, just waiting for delivery. I planed down the center rib (keel) and faired it and the stern frames. I laid an extra piece of decking material over the aft end and better matches the gentle curve of the forward frames. The two pictures below are the before and after. BEFORE AFTER


-
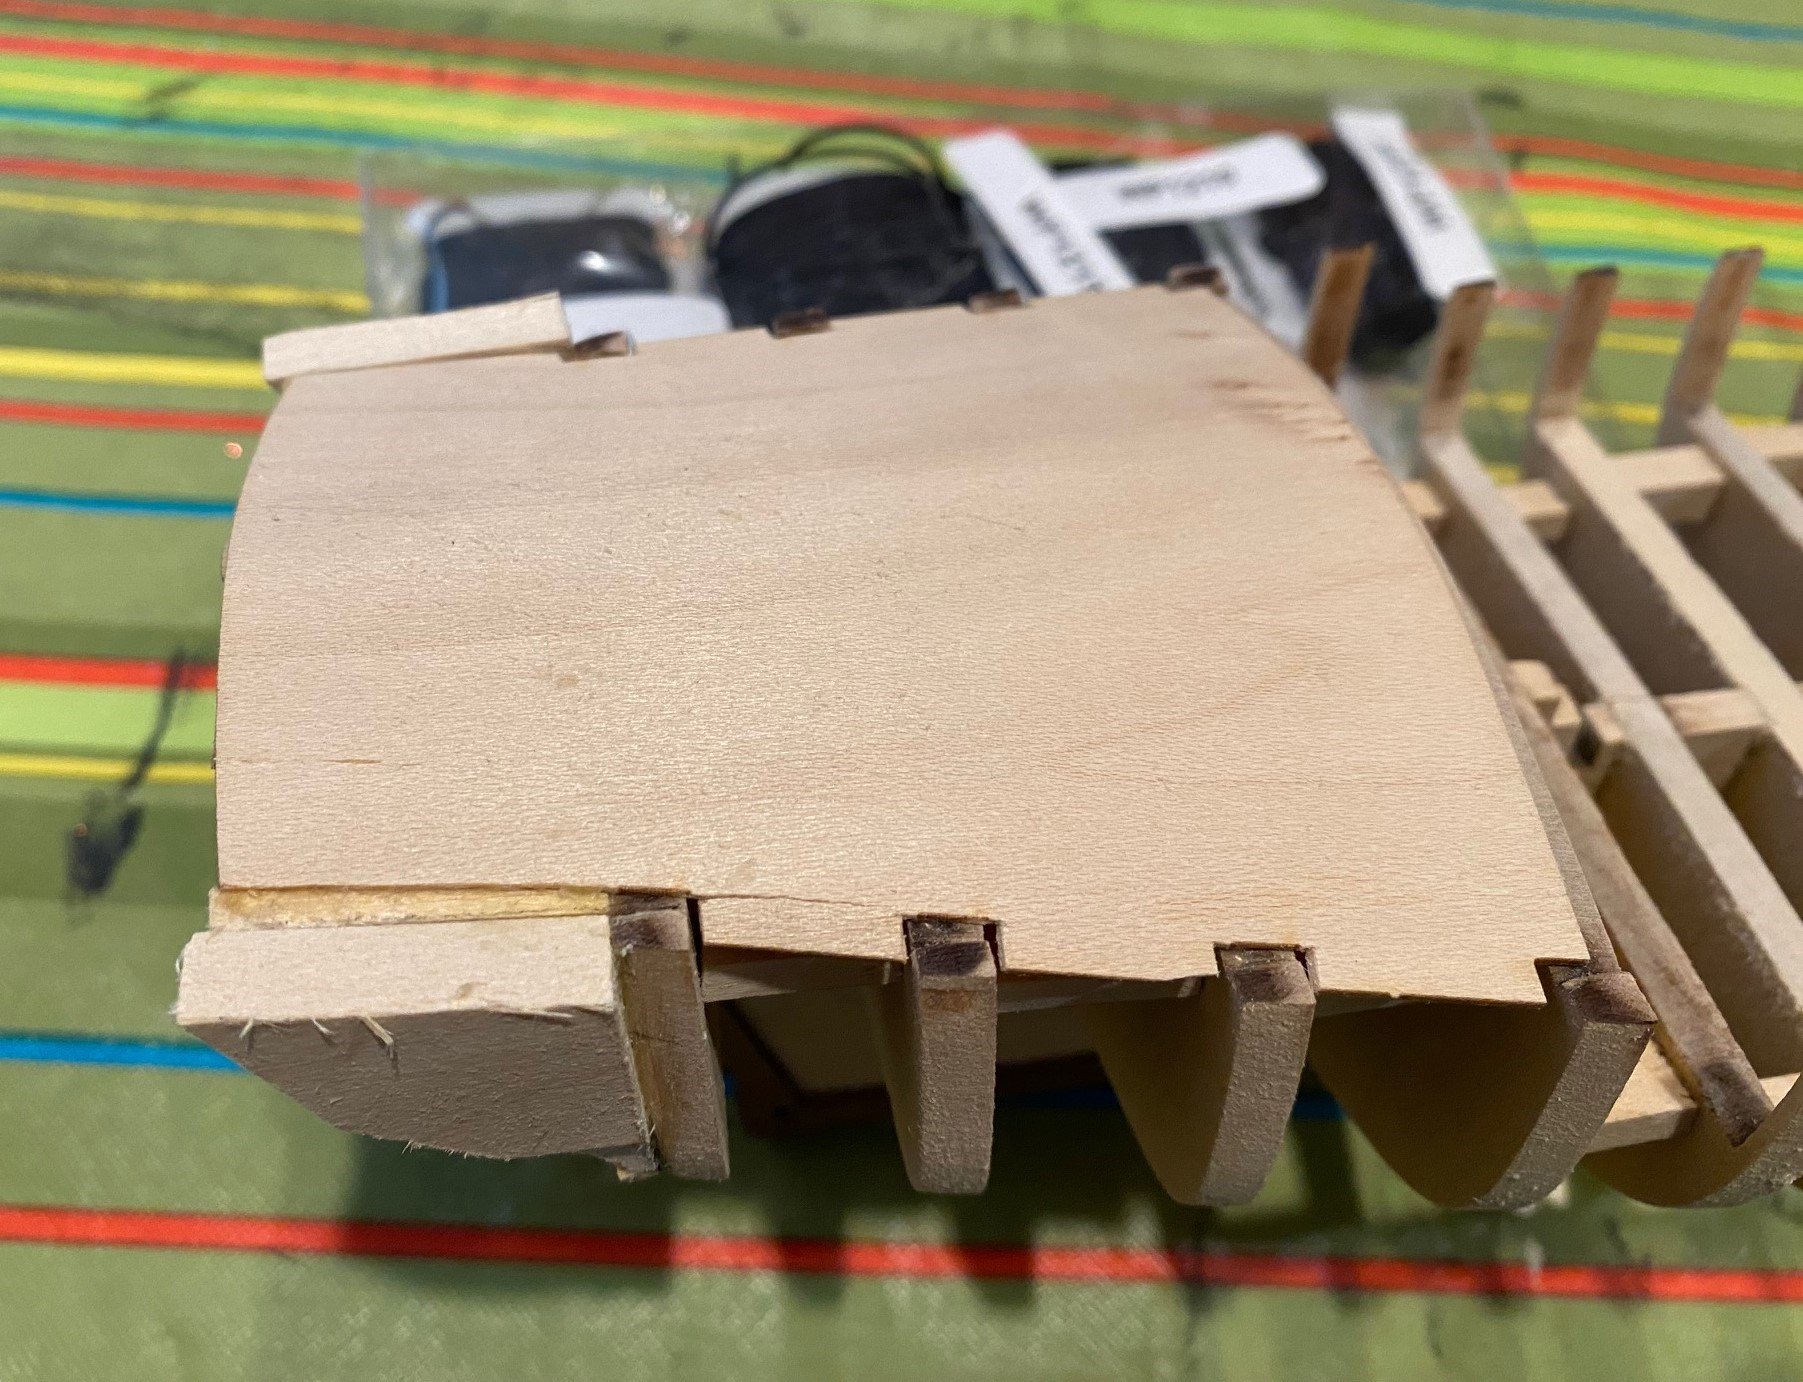
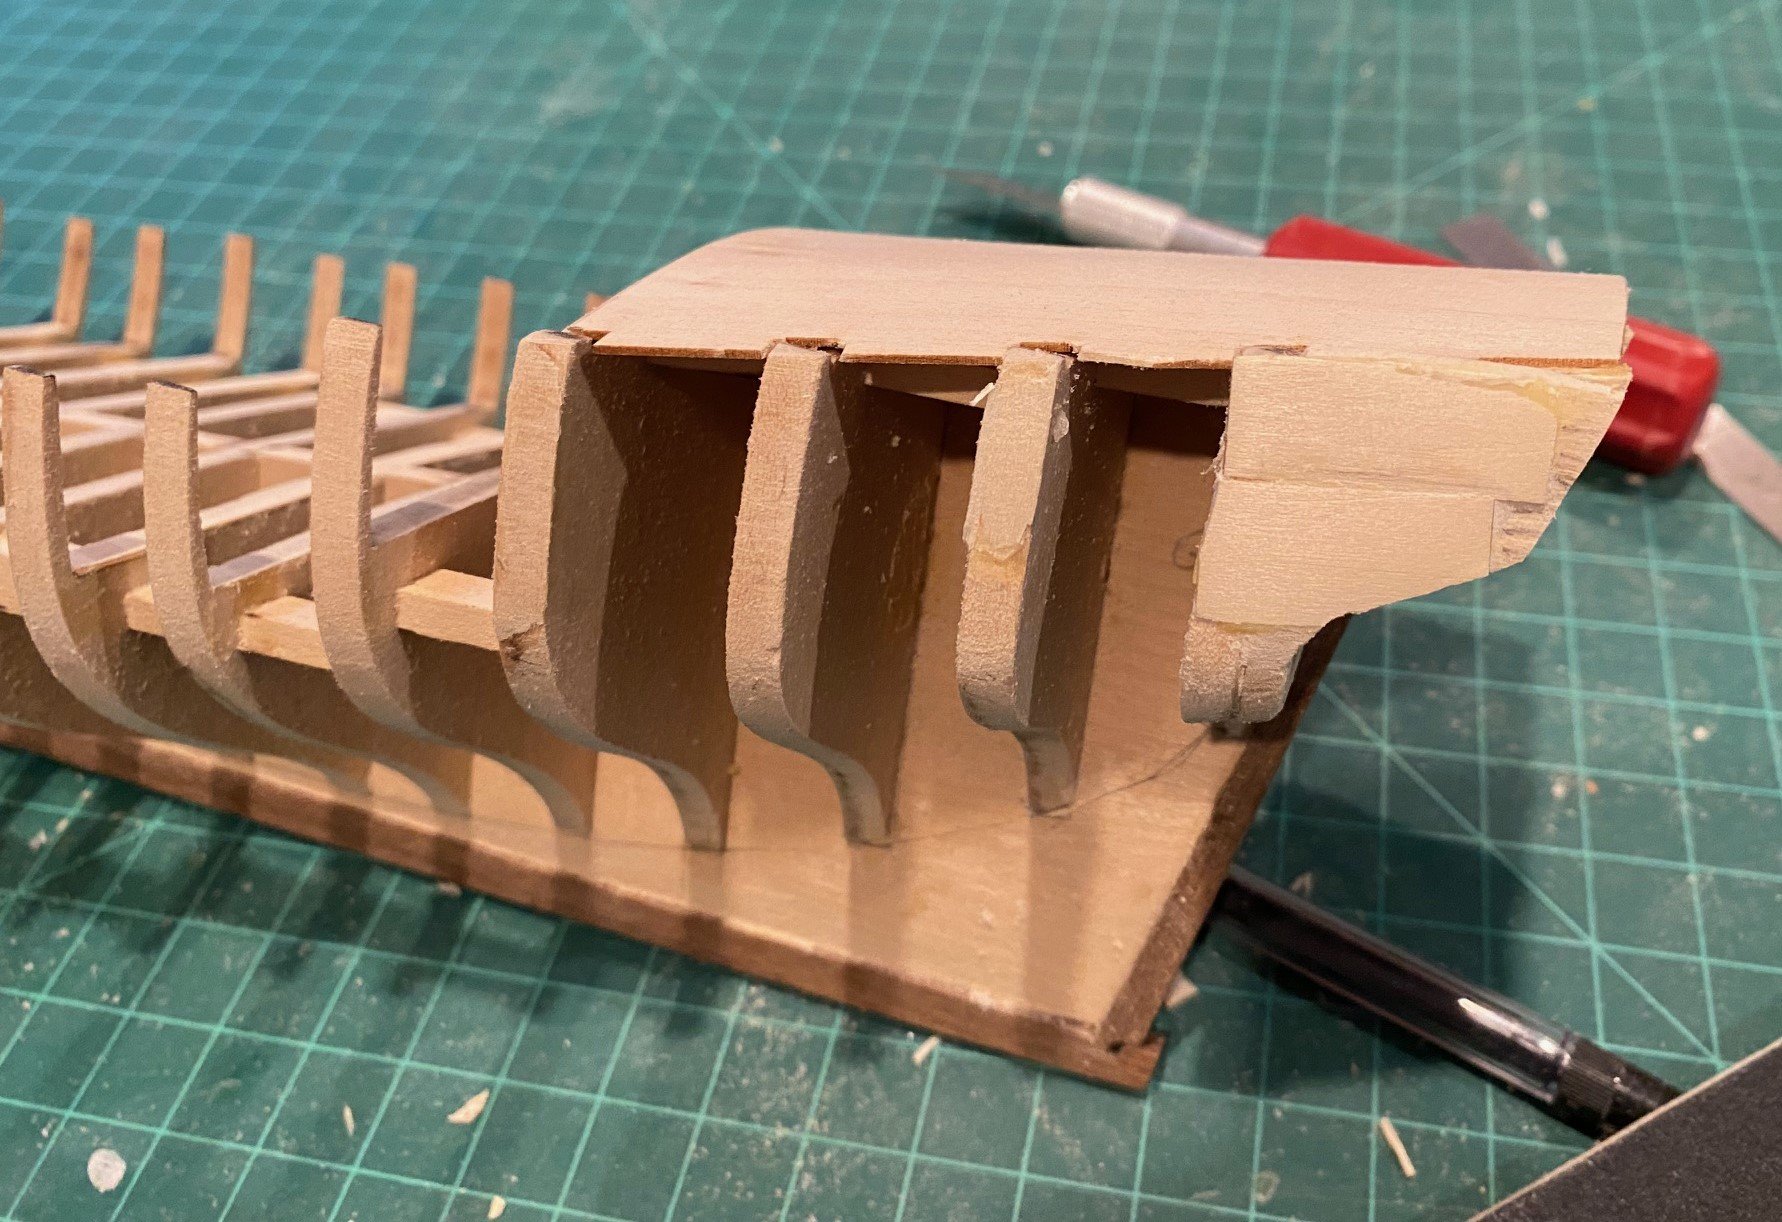
I formed the bow filler blocks by whittling and sanding so it fit the bow space and appropriate curve for planking and then glued them in. I did notch for the timber head and knight head all the way down the filler and then glued in the 4 pieces. Faired them in and had some gaps that I filled with putty. Also, there were some areas that left funny gaps when I dry fitted a plank so I filled them with putty and faired them, so the planking was smooth. Now I’ll use alcohol to soften the wood glue that is holding the back deck to the model so I can eliminate the peak, per last post.


-
Thanks to both of you. Alistair; what color of stain did you use on the deck and the cabin overhead?
-
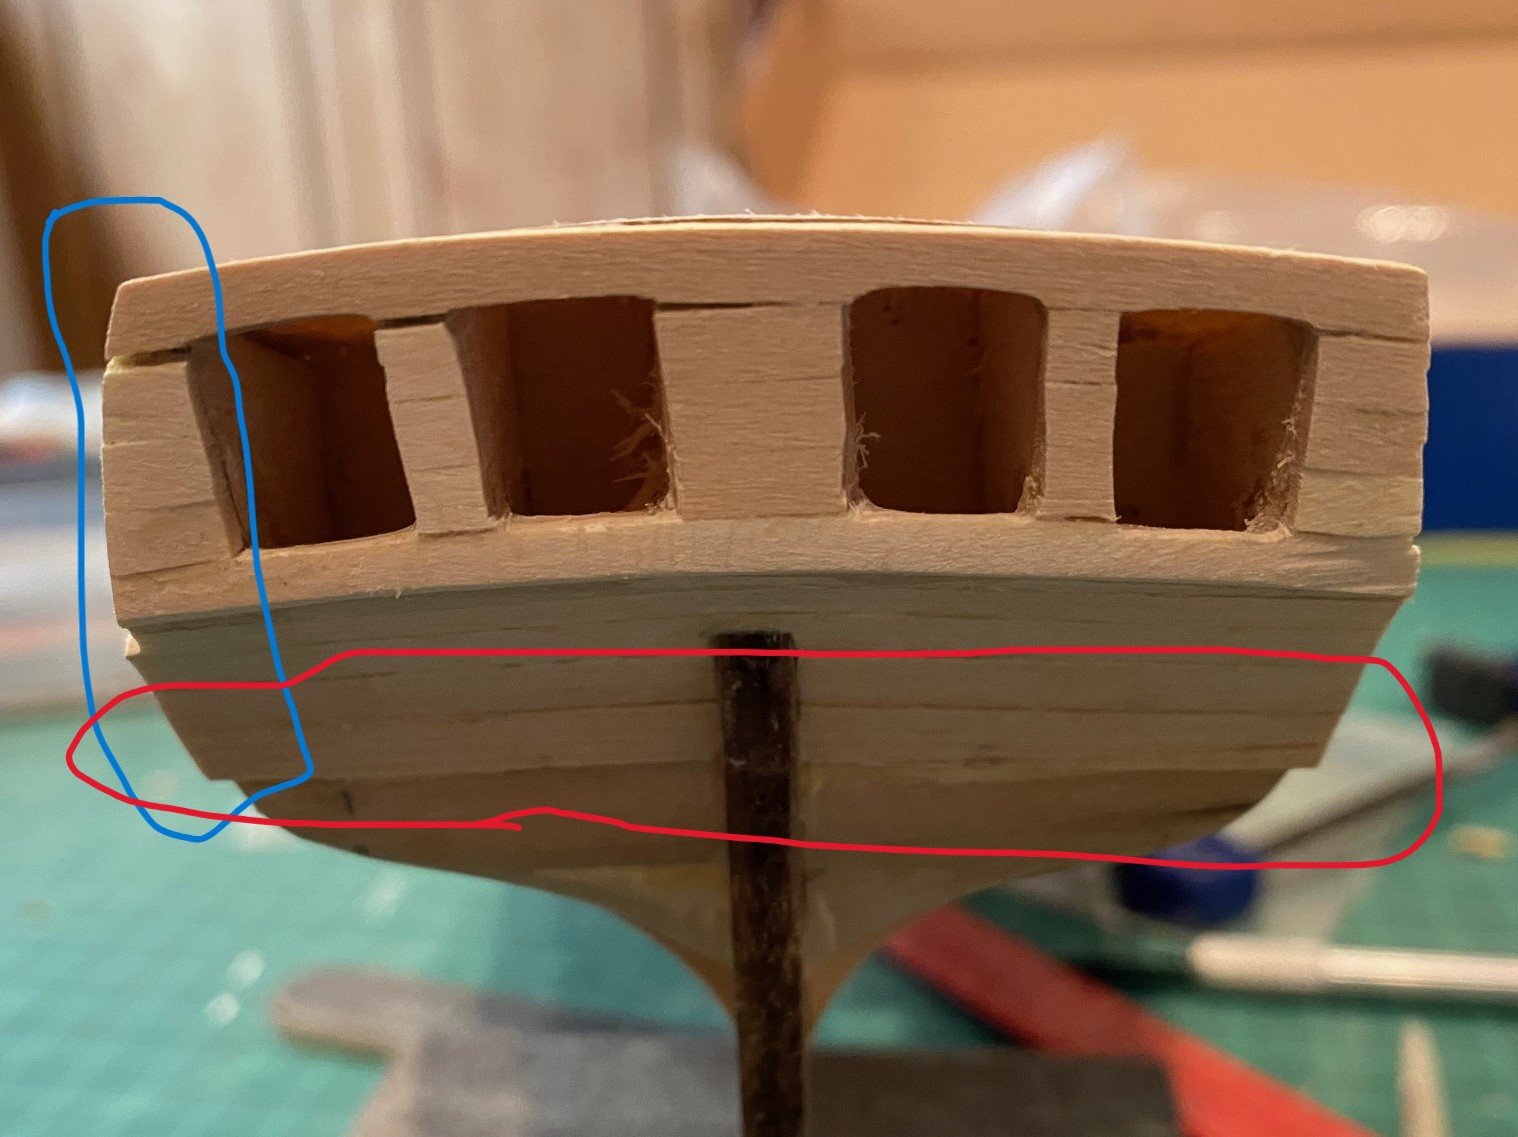
I was trying to figure out how the aft end gets planked, the transom (stern frames) and the counter (curved arch below the transom). As I was laying out the planking it became apparent that center frames and keel piece were higher than the outer stern frames. This cause upper deck to be more of a peak instead of an arch at the aft end, see picture. What I’m afraid of is that the planks on the transom will not flow like a smooth arch. {NOTE: As I went on in the build, I think what caused the below issue is that I faired the transom supports too much on the sides. I should have glued on the aft subdeck before adding the 6 transom frame pieces and make sure I used the right windows to help with the spacing. That is the in-bound and out-bound windows. Getting the transom frames correct now will save adjustments later, especially installing the upper and lower window frames at the right angle. For those using the Luck Street instructions, it is section 1.11.1 The Stern Transom} I don’t know if I should remove the last part of the deck and sand the stern frame and keel piece down about a 1/8 to 1/4 of an inch so the aft part of the deck is more of an arch. Or just leave it and make the top plank more of a peak with a taper to a point as it approaches the outer frames, like a roof truss. Any comments / suggestions.
-
40 years ago I started with a solid hull model and failed to get past step one. I've built a lot of plastic models but never went back to try a wood model, shaping a hull and the rigging intimidated me. A couple of years ago I decided to try my hand at wood models and saw an advertisement for Model Expo & Shipways models. I started with the Model Shipways 3 ship beginners set and they took me step by step and I learned a lot of skills and knowledge for a fair price. So much I tried my hand at a solid hull again and it's been successful so far. I highly recommend the Model Shipways Shipwright 3 Kit Series. By the time you finish the 3rd boat, the Muscongus Bay Lobster Smack, you will have the skills to take on anything. They might be small and appear to be simple, but that's what you want in the beginning and to learn the basic skills, then try the other models. Also, search "new to ..." there are many others that have asked the same question and there are a ton of great recommendations on this website.
-
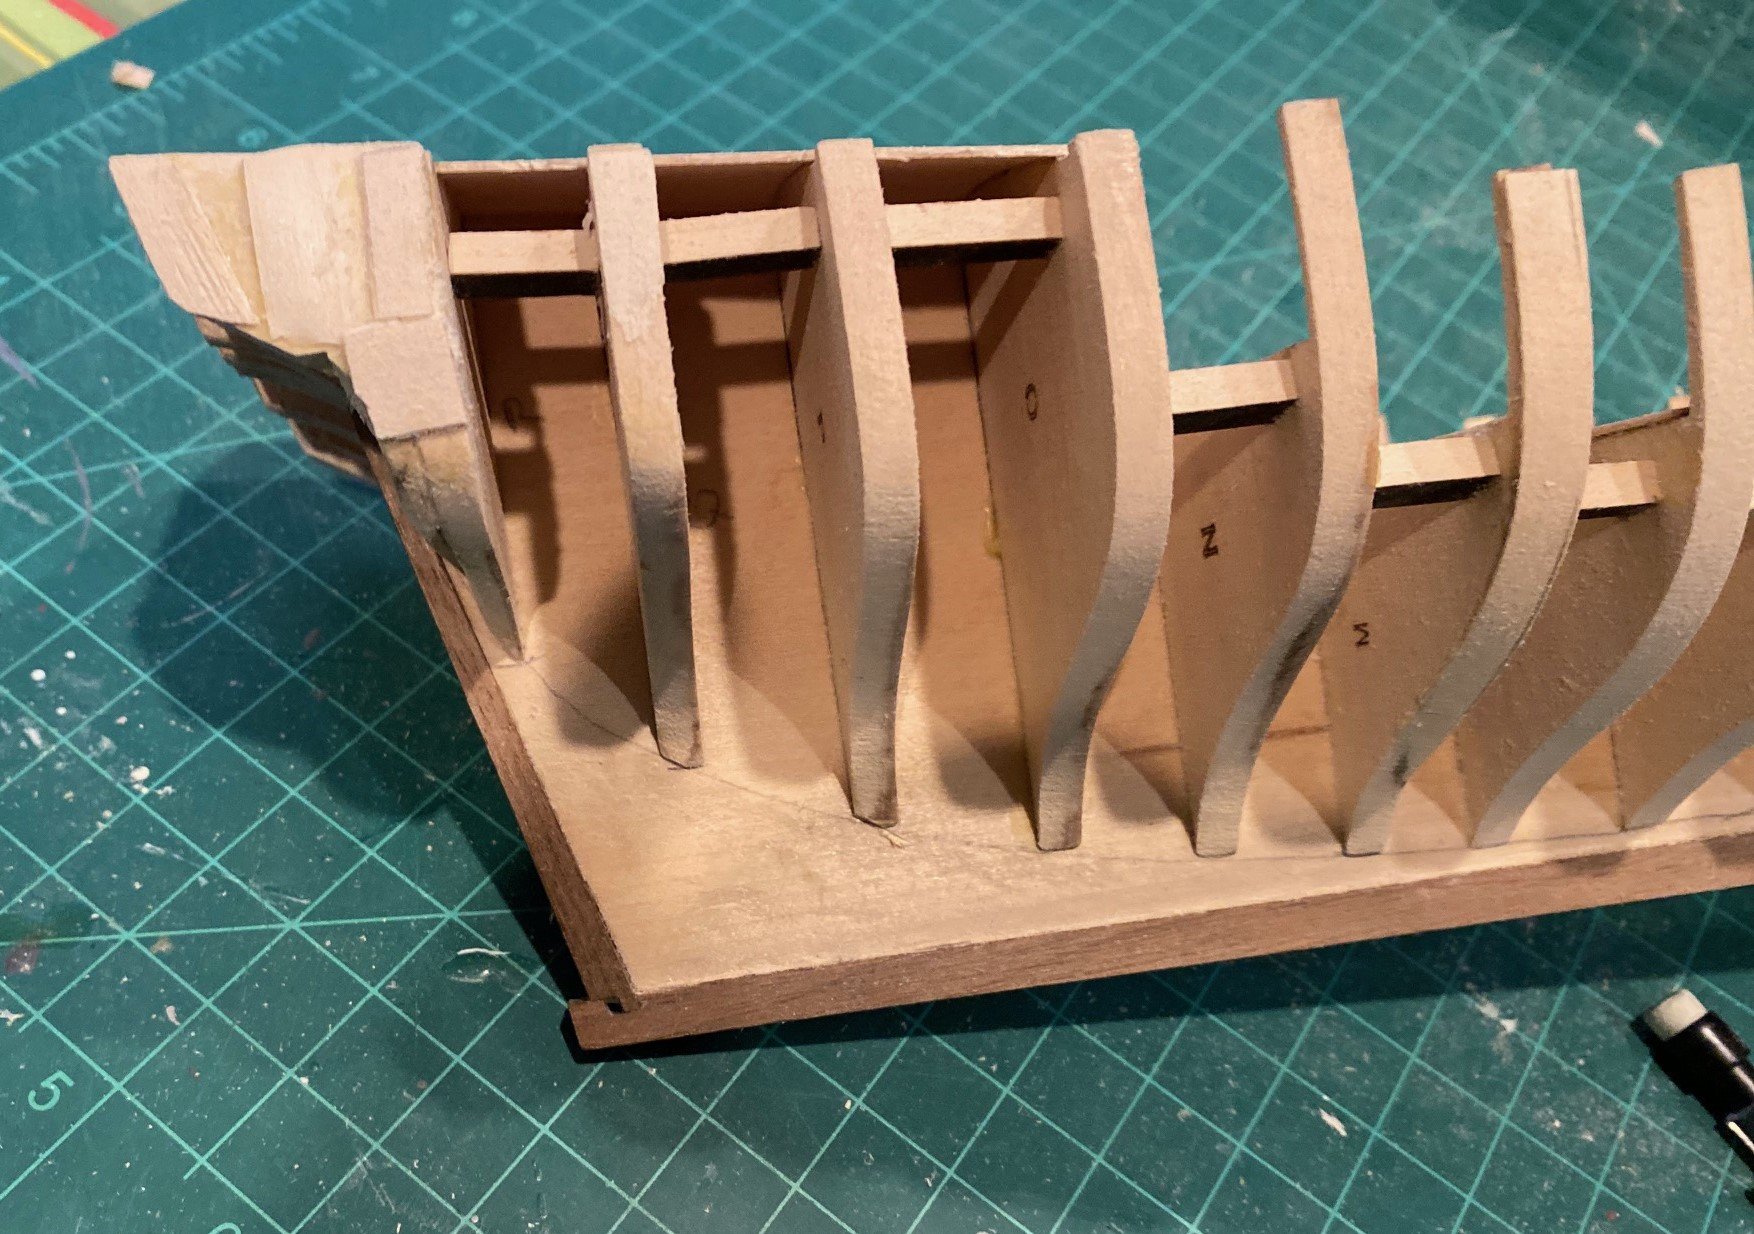
I installed the Stern Frames using the windows as a spacer, then the Transom and Filler Block and tried to blend the transom and filler to flow into the bottom of Bulkhead R , and form the curved counter. Also sanded the top and aft end of the stern frame to ensure they all were even/curved the right amount for the aft deck and such. The sternpost got in the way of evening out everything. Glued in the aft deck. Added the stern frame filler blocks. When I was faired these blocks, I rounded them front to aft instead of continuing the line created by the outside edge of the last 4 bulkheads. After I realized that I should have continued the line from the bulkheads, I had to add some additional wood strips and sand them to correct this. You can see that I broke off most of the aft deck tabs between the bulkheads, glued them back in the best I could. Continued to break those tabs as I built the bow filler blocks and did the final fairing of the sides and top of the bulkheads. NOTE: I wish I had waited until all of this work was done to glue in the aft deck, I’m glad I did not glue in the main deck. Part of this is how I hold the boat by the bulkheads as I work on the boat. I also broke off a few stanchions too. I don’t think adding the deck would have prevented that, I think the block I added between the bulkheads added more stability than the deck would.