HOLIDAY DONATION DRIVE - SUPPORT MSW - DO YOUR PART TO KEEP THIS GREAT FORUM GOING! (Only 24 donations so far out of 49,000 members - C'mon guys!)
×

SkiBee
-
Posts
249 -
Joined
-
Last visited
Content Type
Profiles
Forums
Gallery
Events
Everything posted by SkiBee
-
 @lraymo Mine looked like yours, recommend that you butt the aft template to the keel to guide what has to be removed. I had to sand the area at the top of the stern where it meets the transom first to guide what I removed from the aft end of the stern. Then I reduced the aft to match the schematic. Make sure you flatten the keel before you remove any other material from the hull.
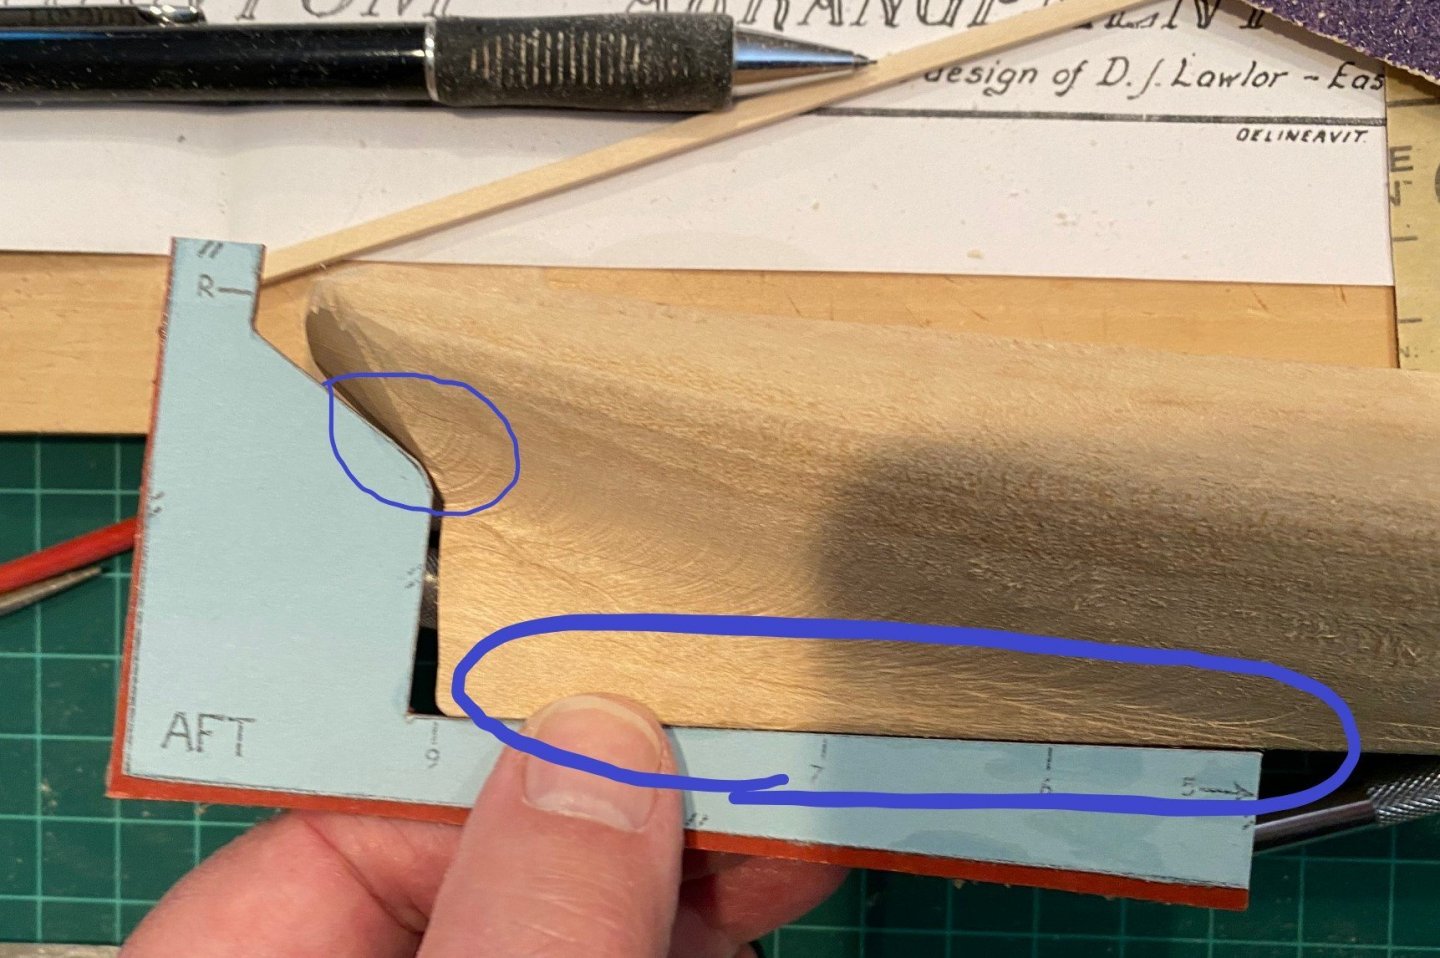
-
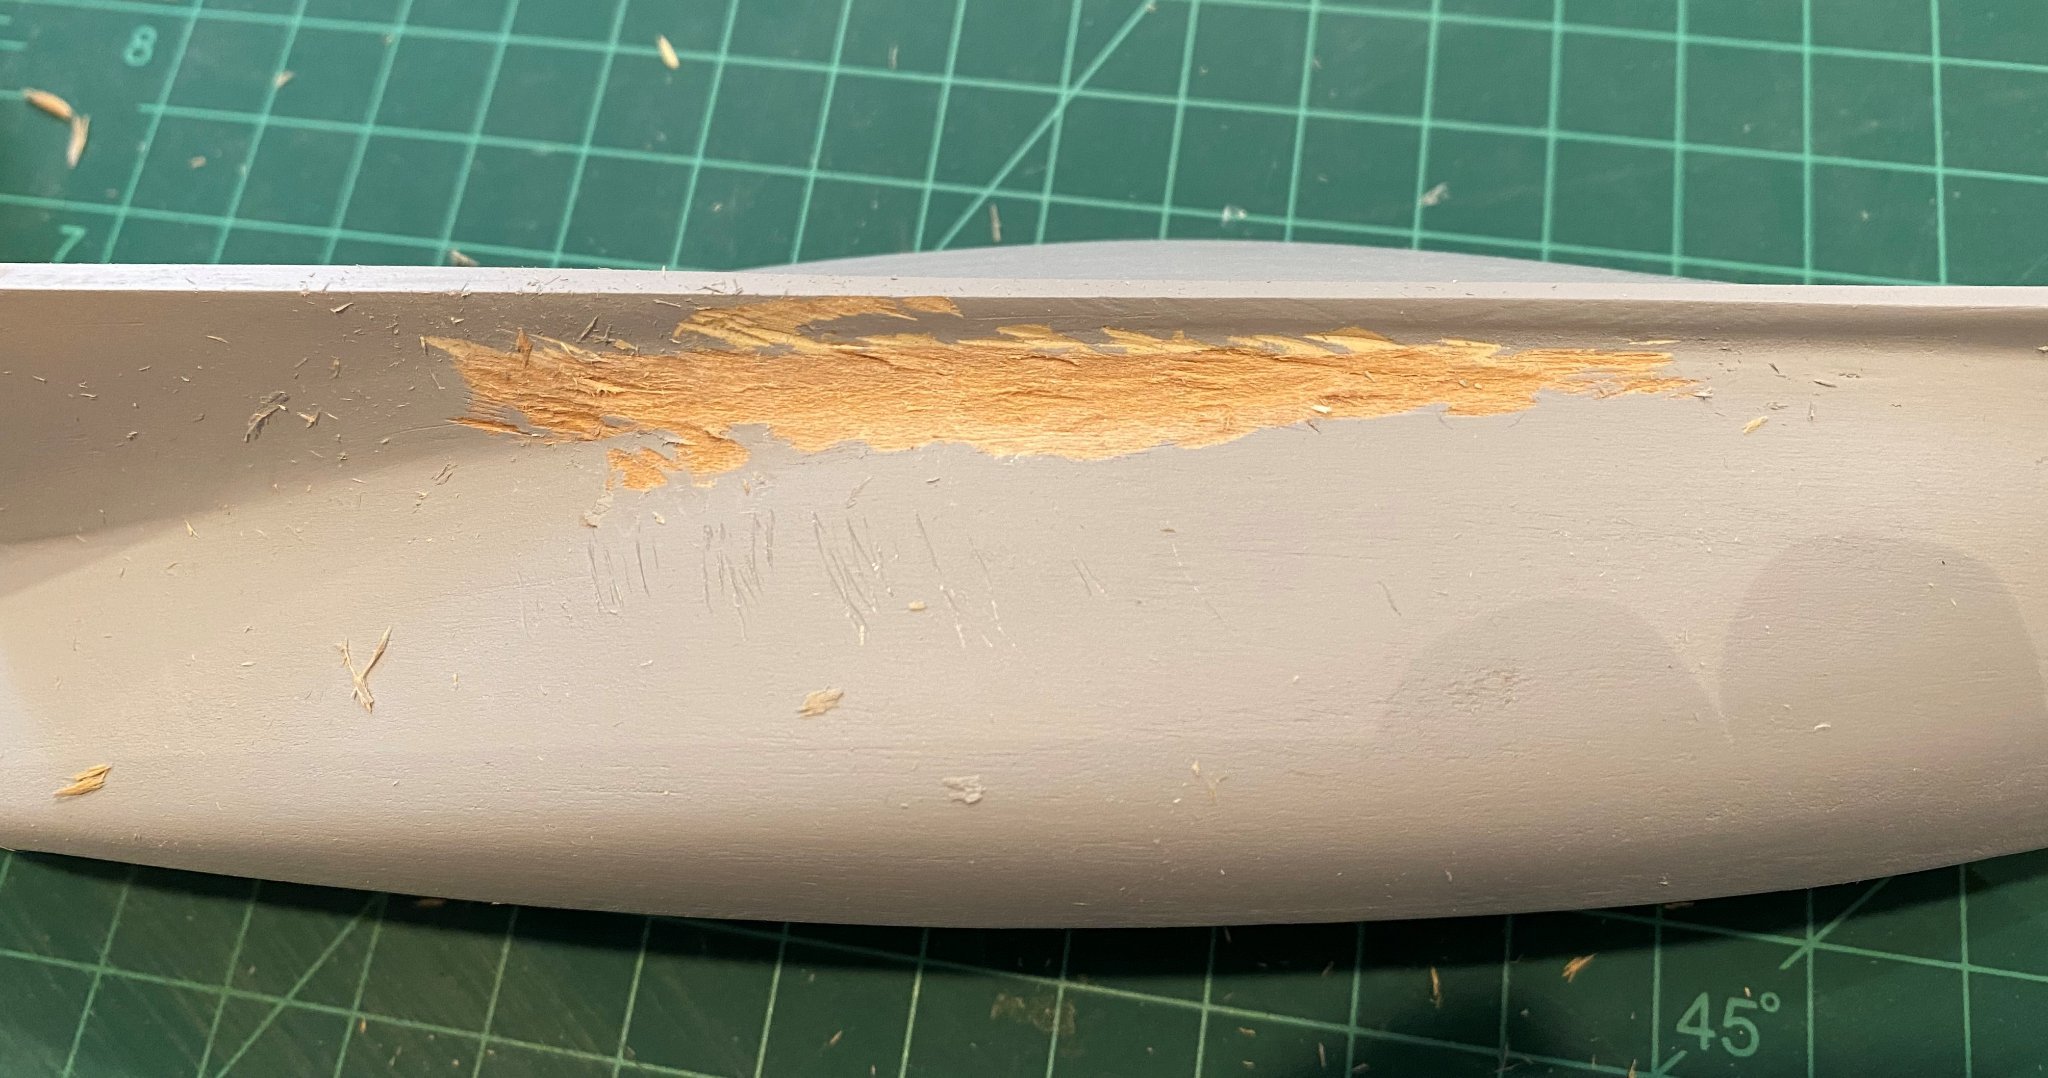
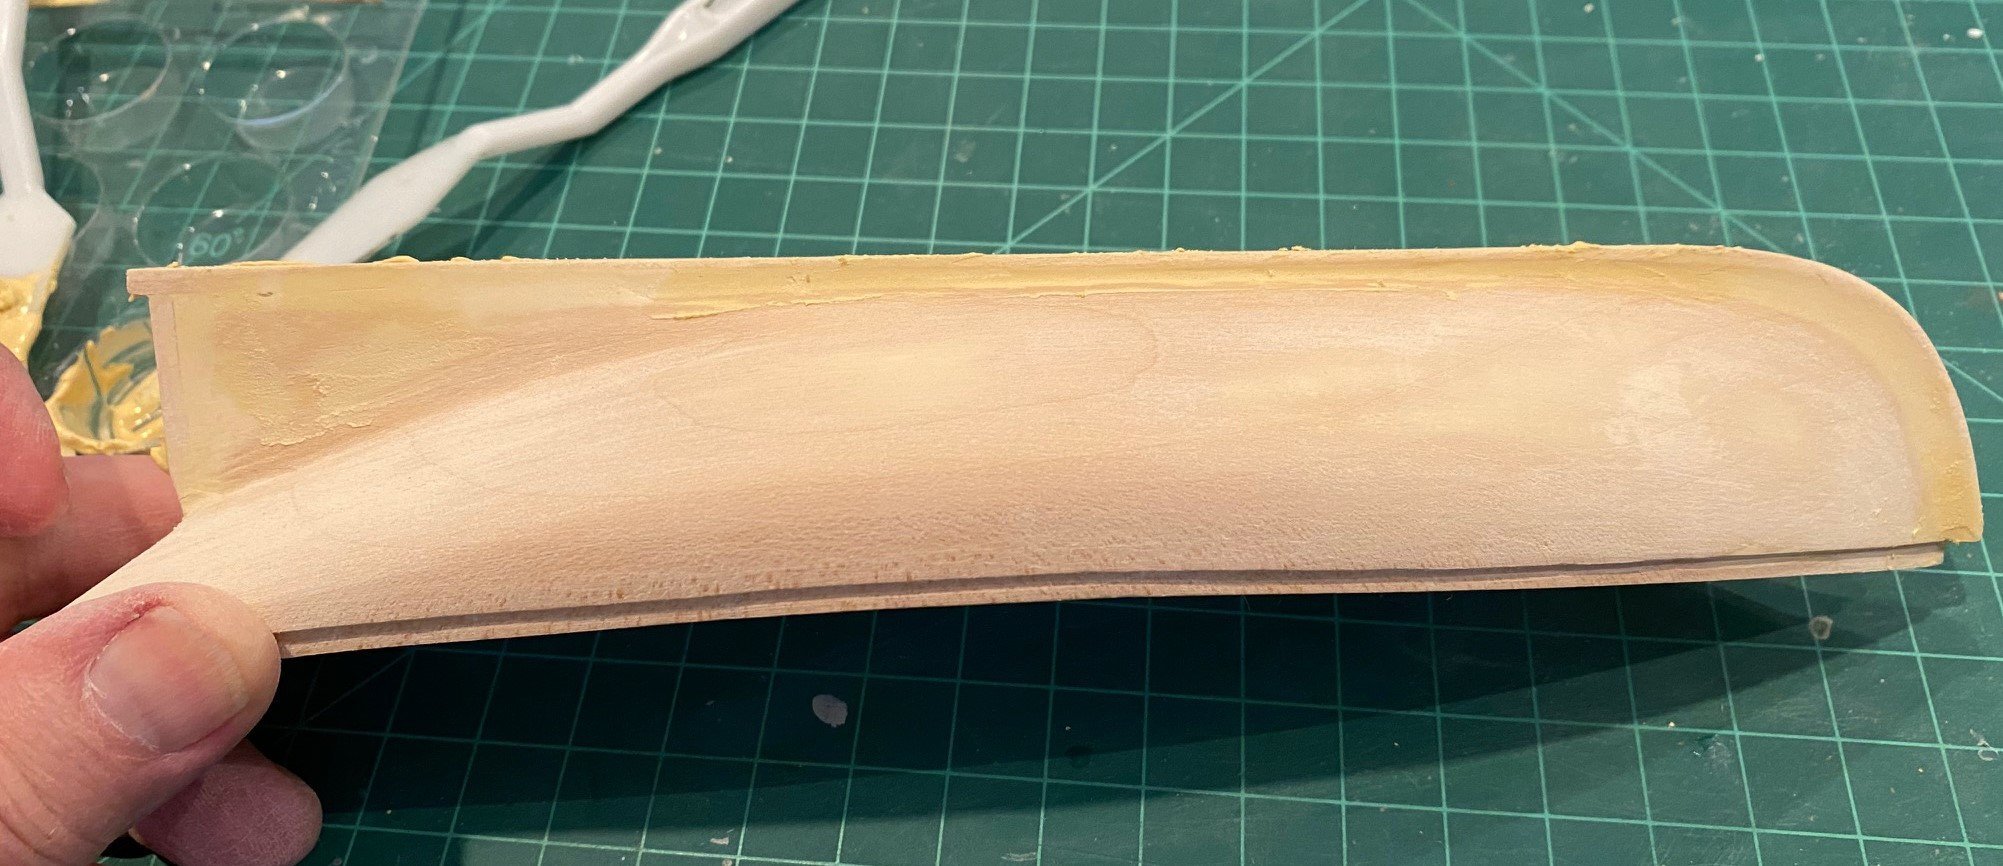
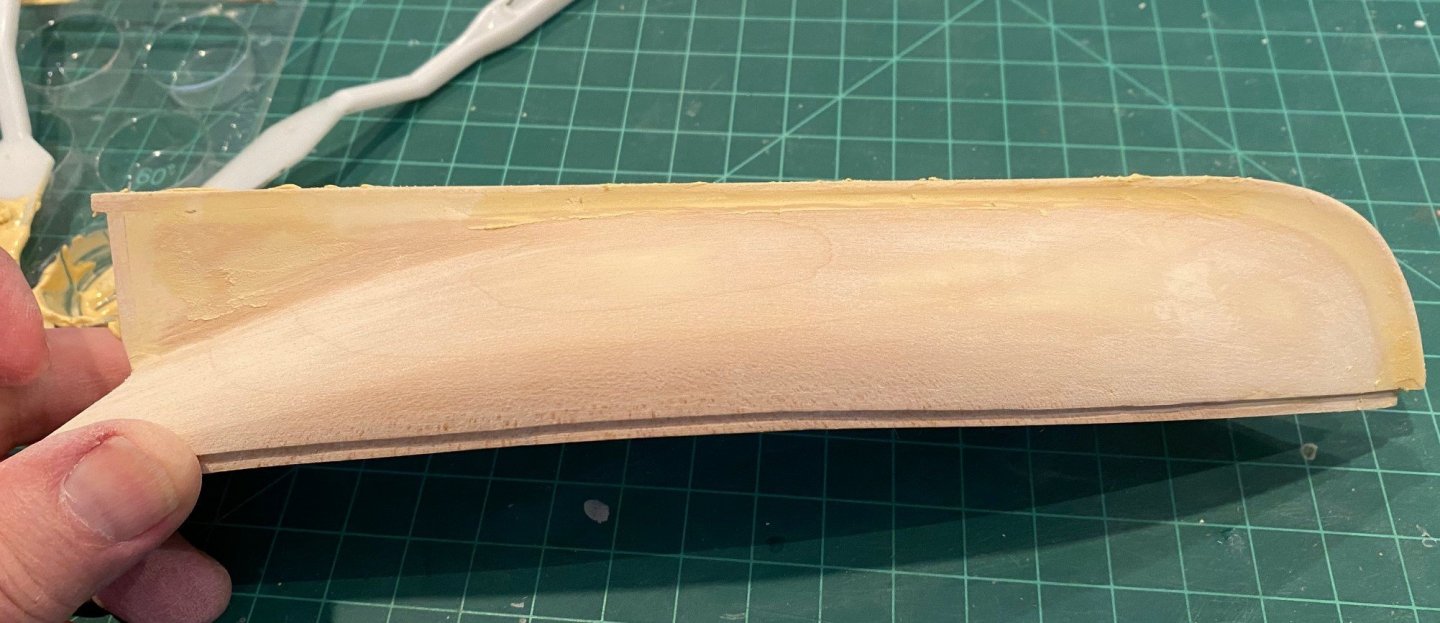
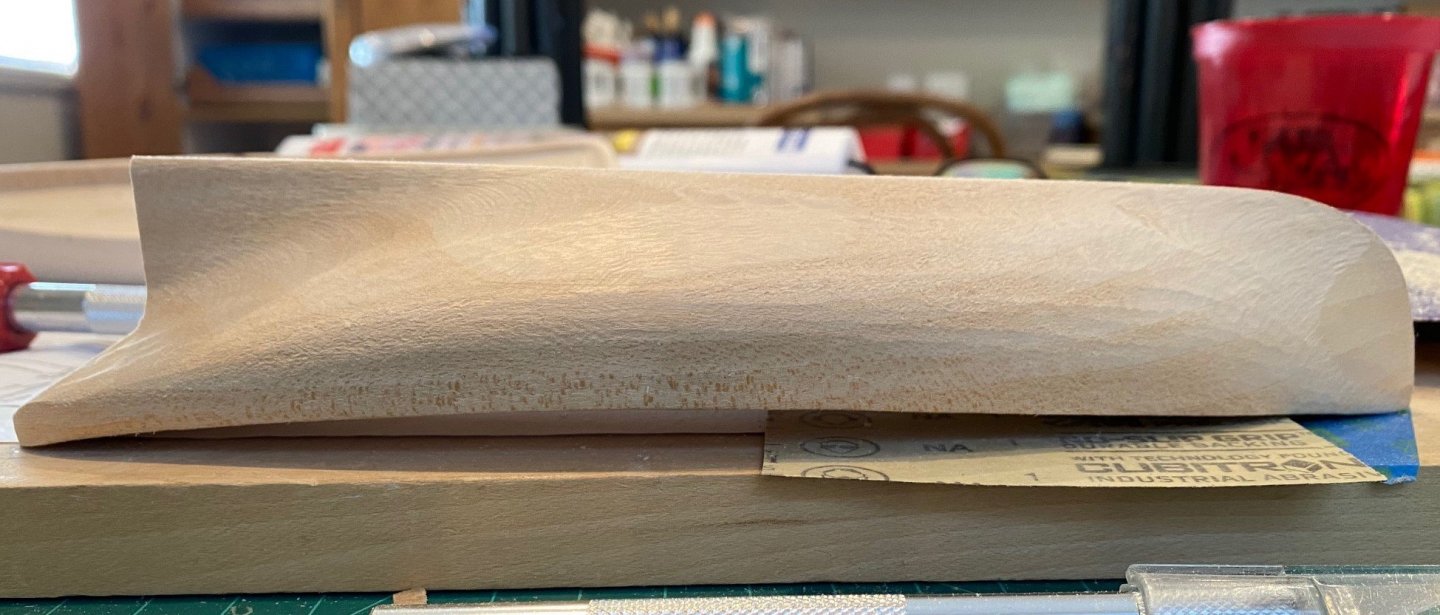
I whittled the hump in the hull rather than just sanding because I thought I would have more control to reduce just in the area that I wanted reduced. Then I sanded the area smooth as I could and then used putty to fill in the remaining knife marks and make a smooth transition from hull to keel. What it looks like after a second coat of Tamiya Fine Gray primer. I will be going through another round of sanding, putty and primer. I don’t like the unevenness of the step.


-
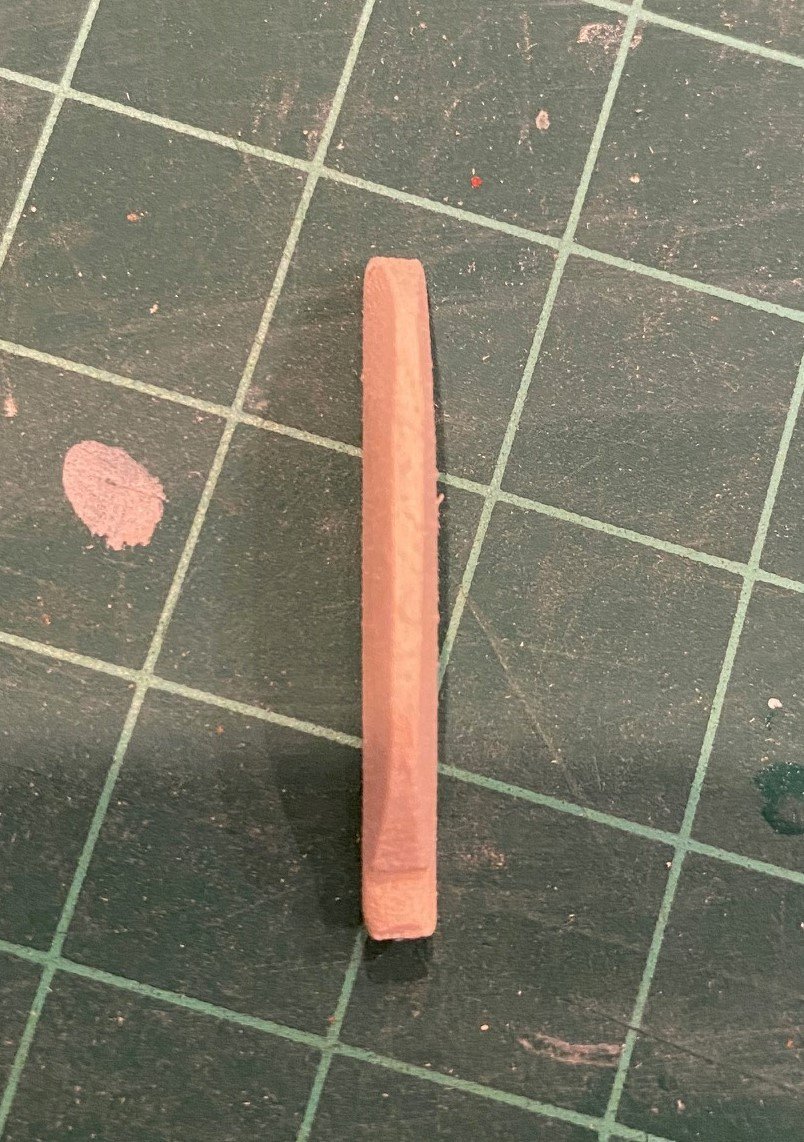
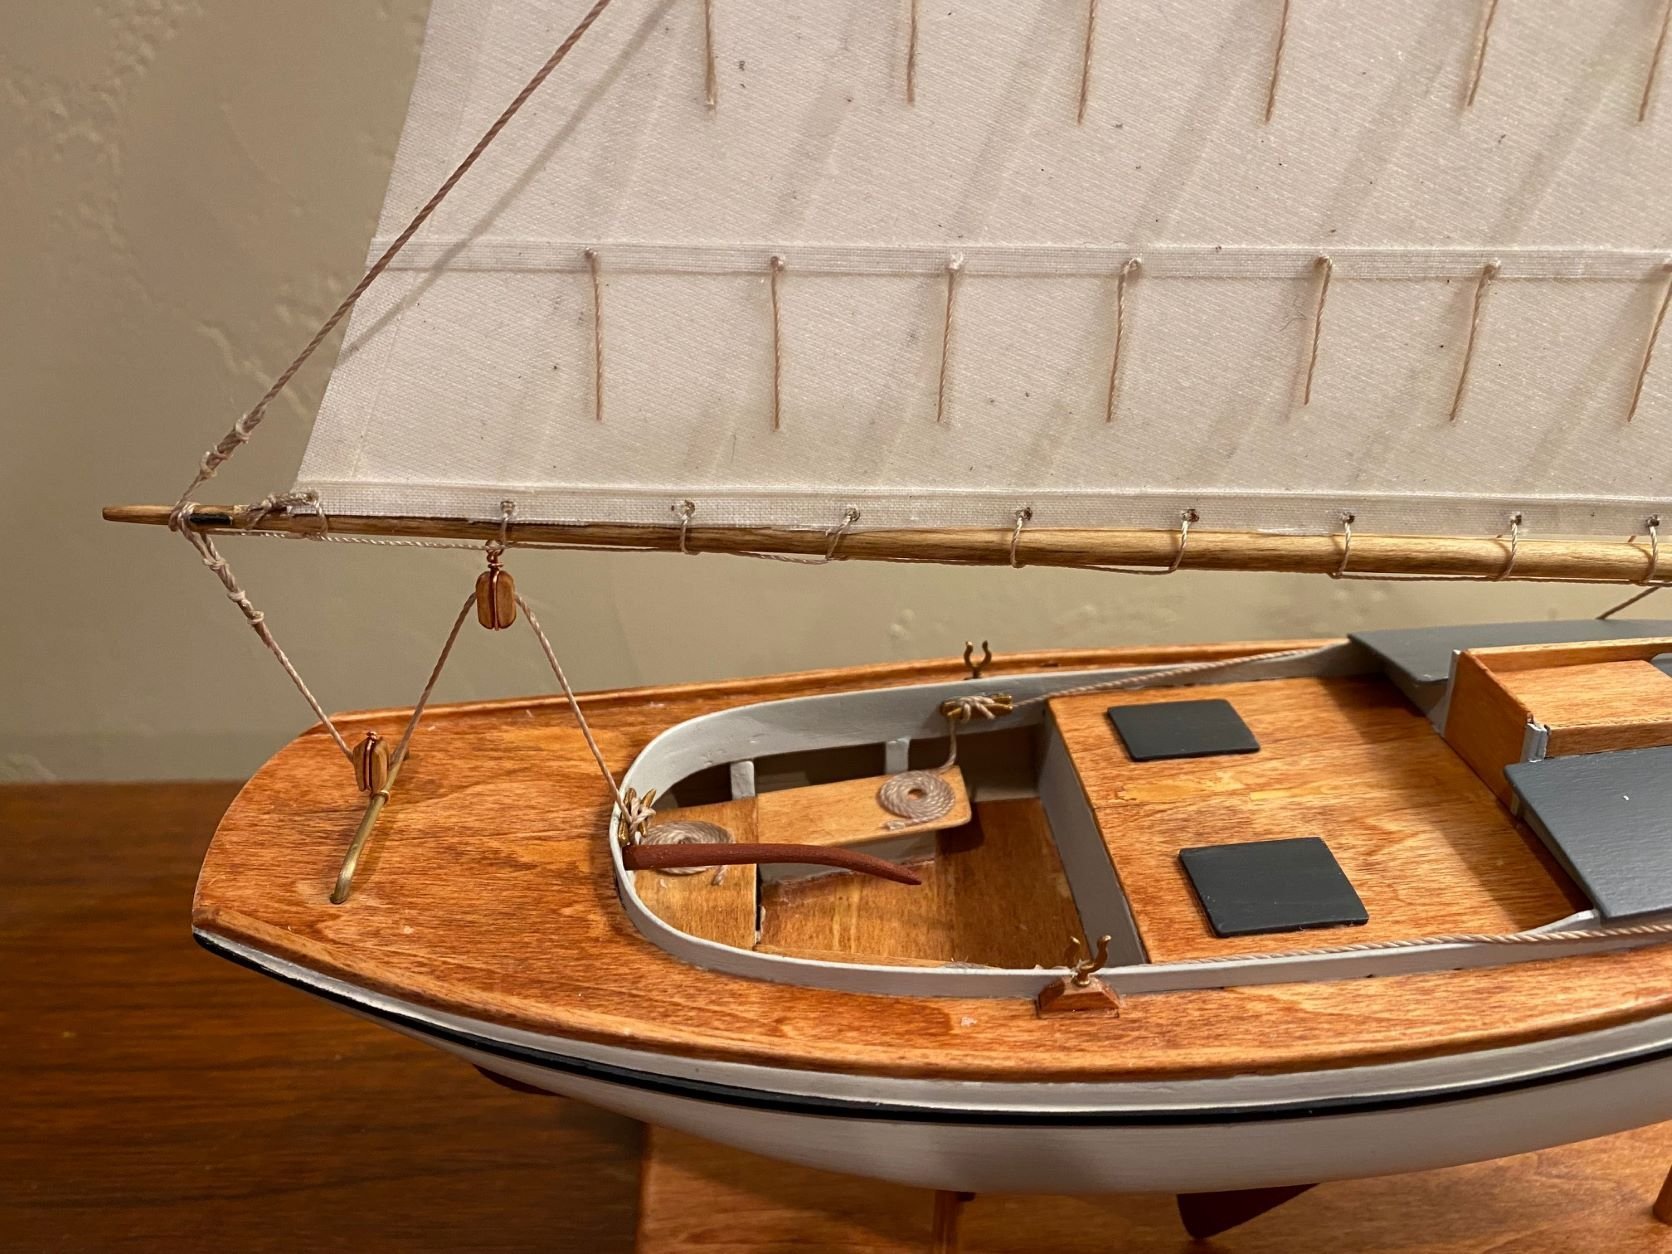
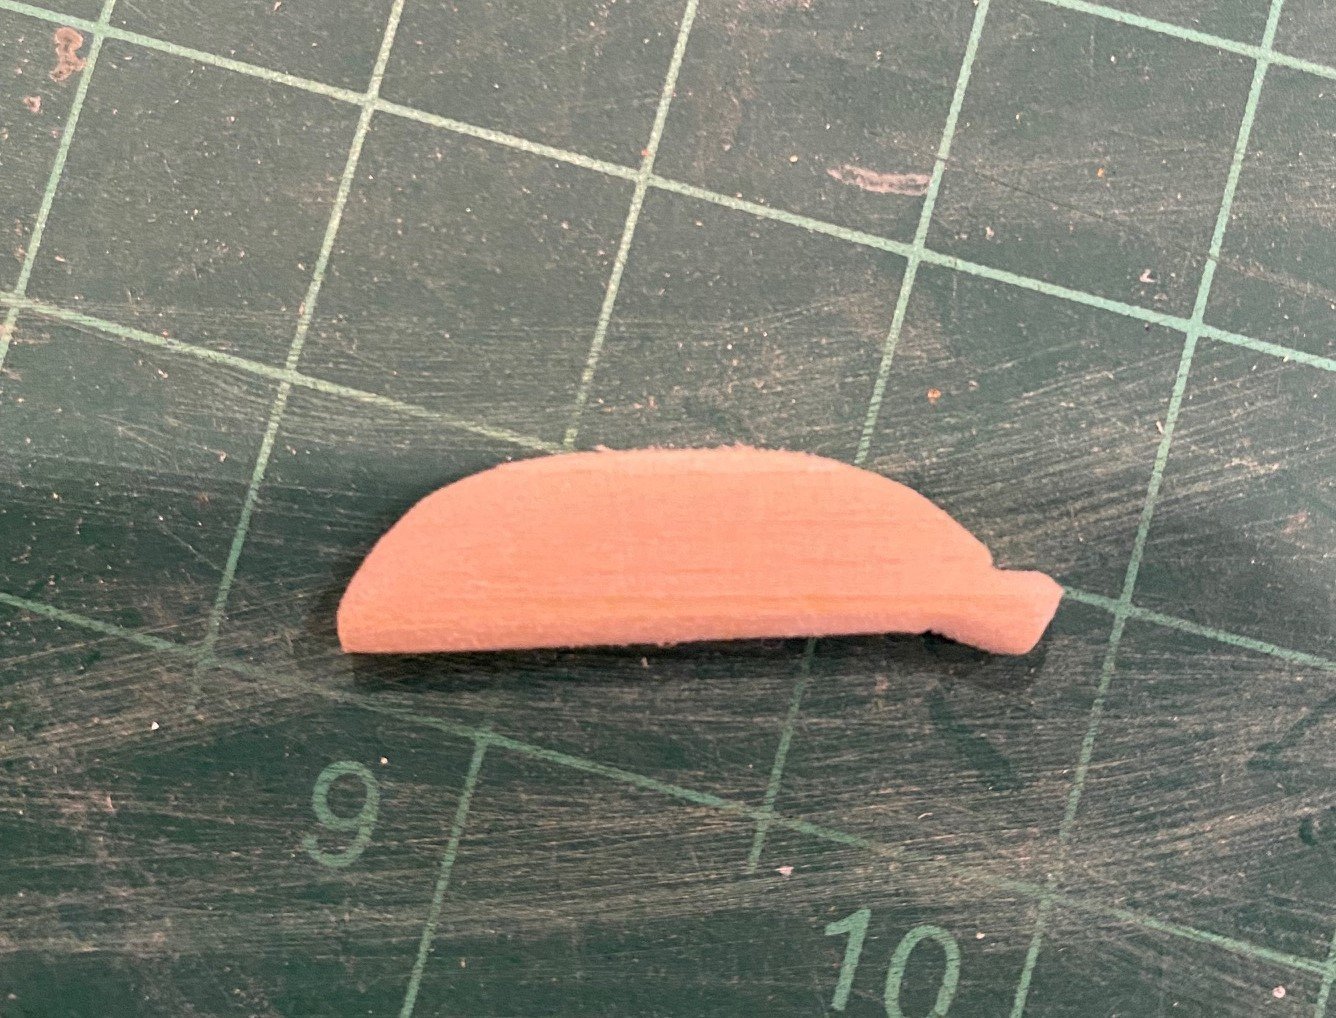
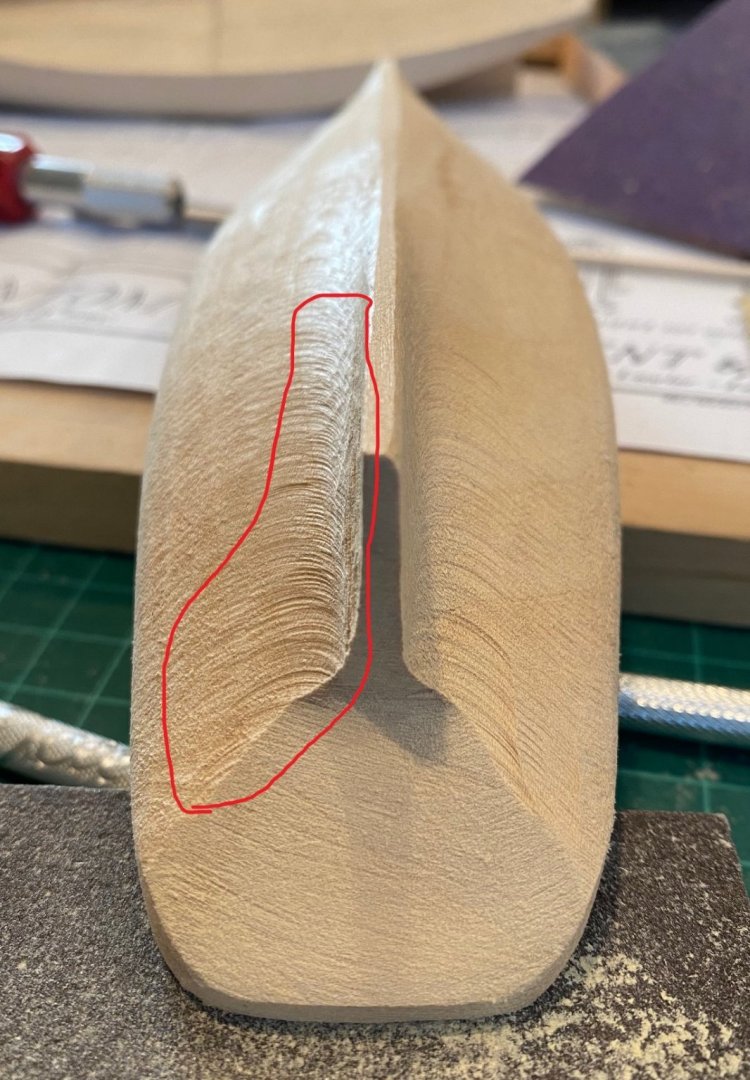
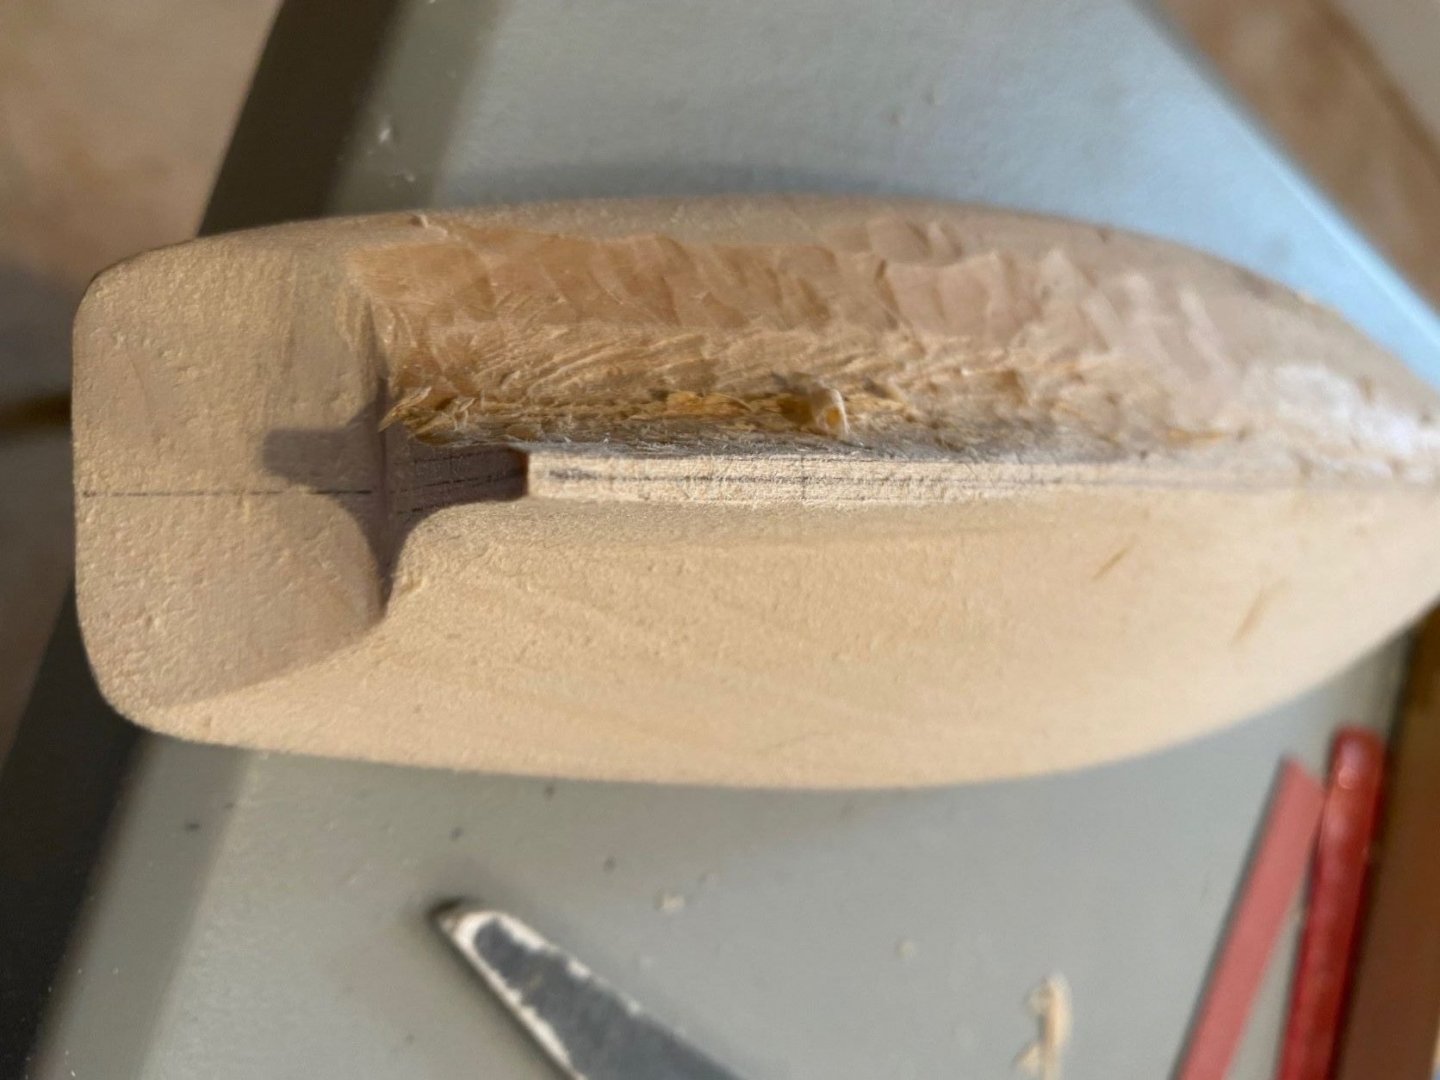
Took a minute to build the rudder, not sure how much tapper to have from front to aft. Also, I think I’m going to put a pin at the top and bottom instead of shaping the rudder stock. A fourth coat of putty and then some move sanding, after that I think I will spray on some primer to determine how much more sanding and filling needs to be done. The primer indicated very little putty work left to do on the majority of the hull. The biggest problem is what looks like a depression at the port keel is actually a hump of wood just above the keel. I think I’m going to have to whittle and sand to remove it. I thought about just filling it but I think that would eliminate the appearance of a keel at mid-ship.


-
Great job, I'm at the start of building mine and your log pictures will be a big help as I go.
-
Before I did anything with the sail material, I wetted it and then ironed it with an iron on cotton. Now that you have put glue on, it might work and might not, but I'm sure it would leave some glue residue on your iron. Your might try it on a excess piece that you have glued before you try on the real sail. Looking good.
- 24 replies
-
- 2
-

-
- Model Shipways
- Norwegian Sailing Pram
- (and 1 more)
-
Thank you all for really good input and history.
-
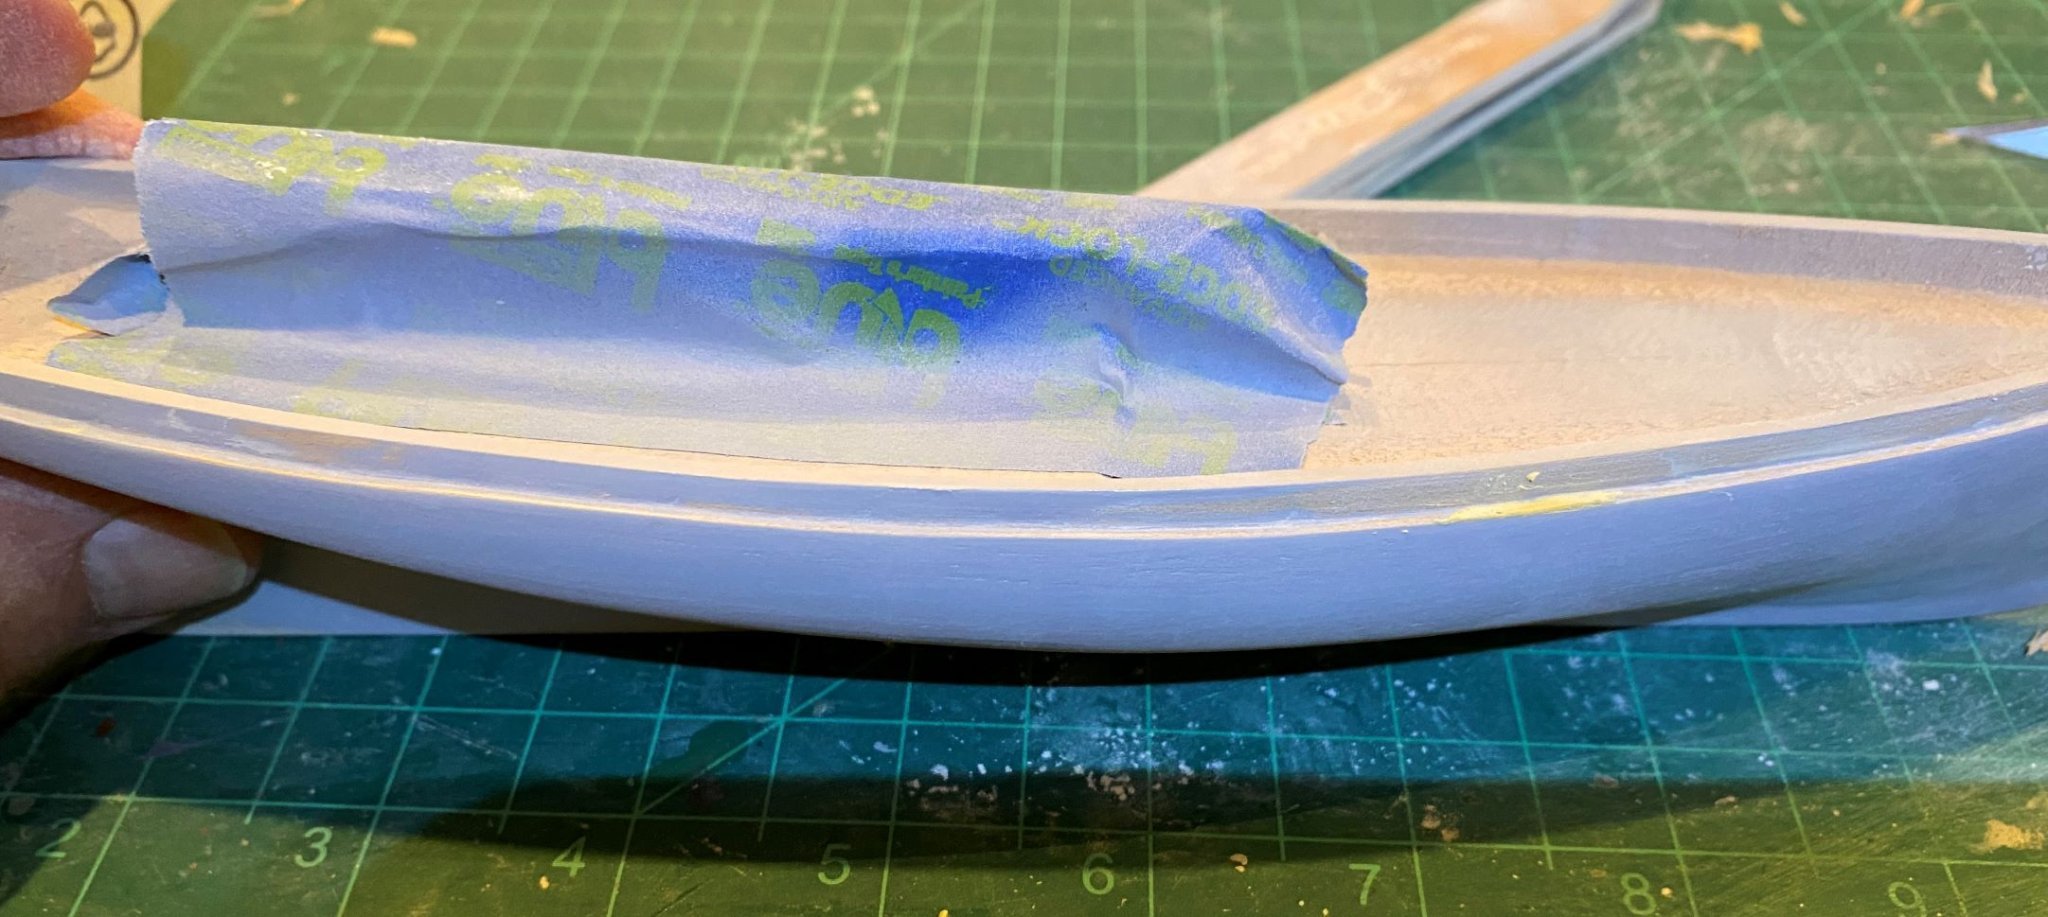
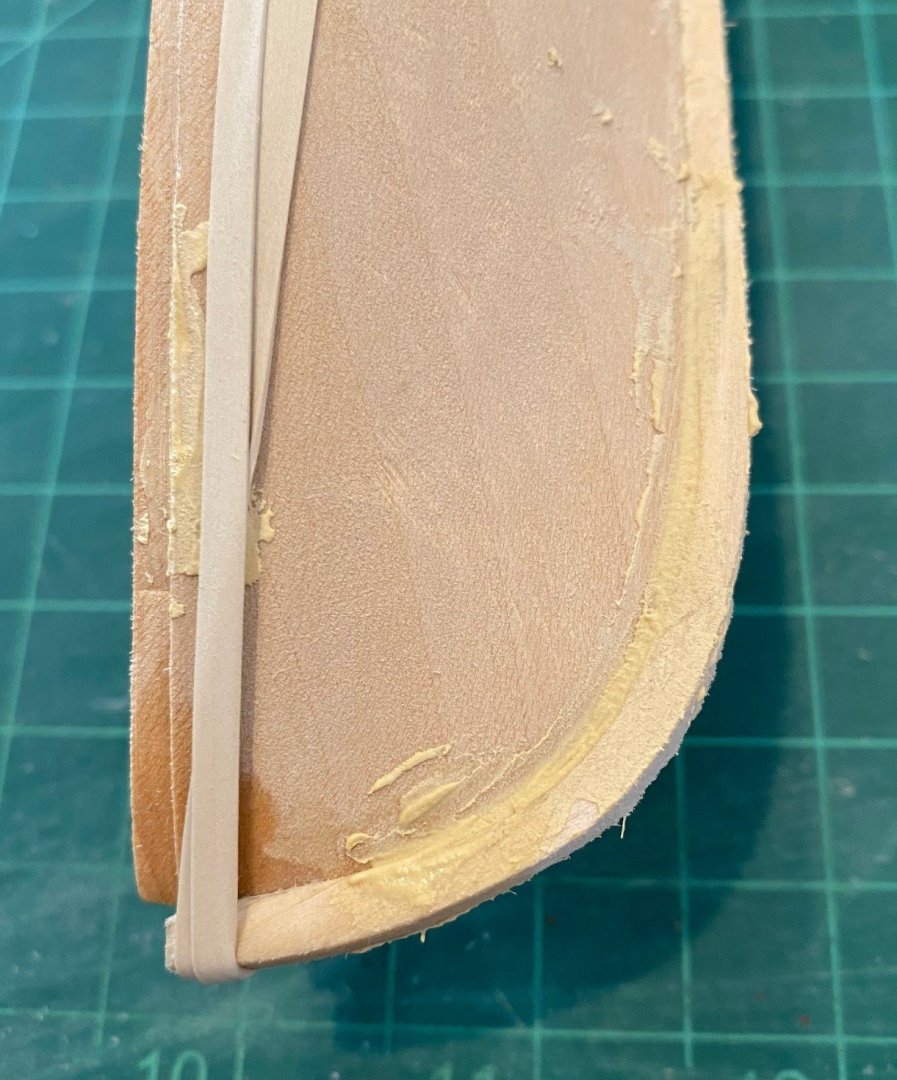
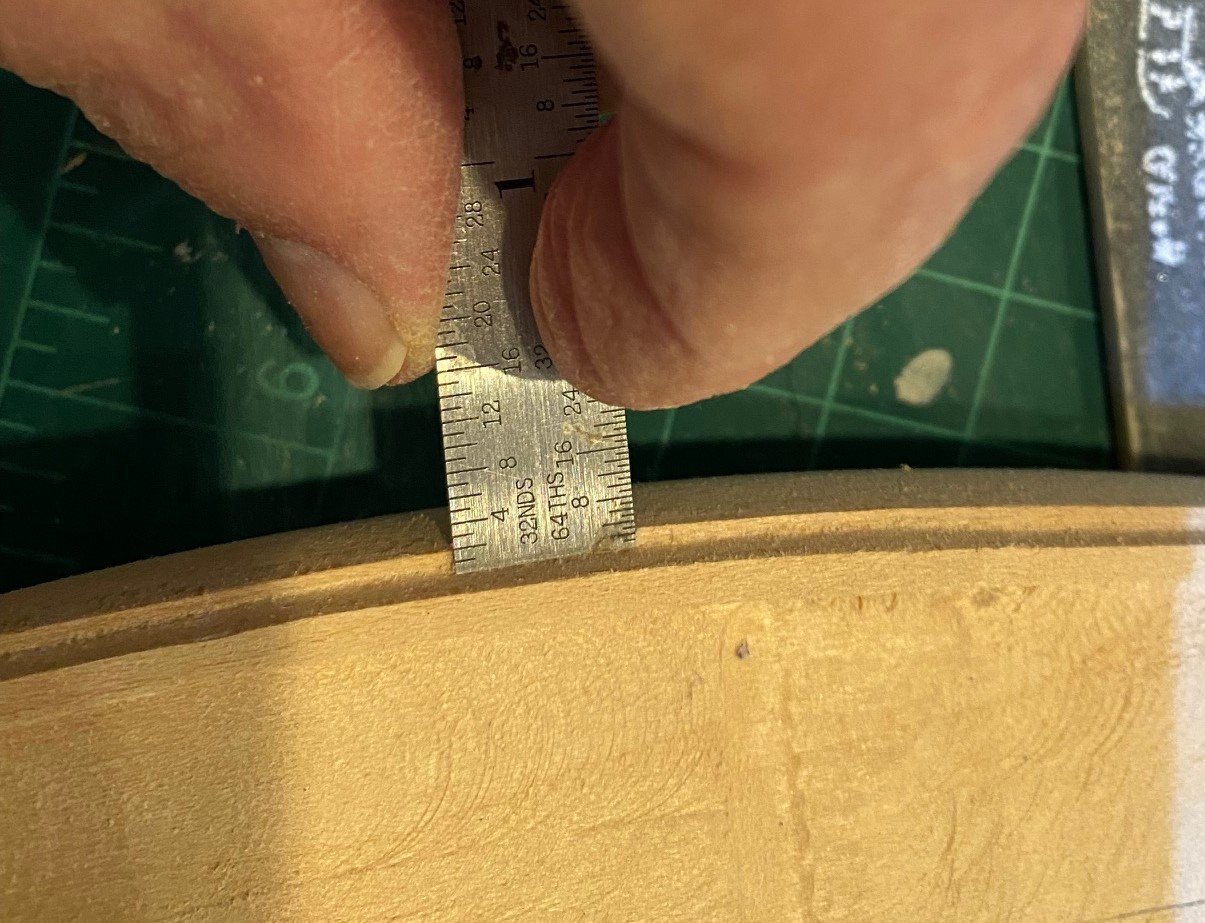
I’ve tried to pull in the top of the stem by wetting it and using rubber bands. It has reduced the gap between the stem and bow by half, still about a 32nd to 16th gap. I will fill the gap with glue and saw dust then putty for a smooth translon. You can see I’ve put on the first coat of putty in the gaps between the keel, stem, and stern post and the hull.
-
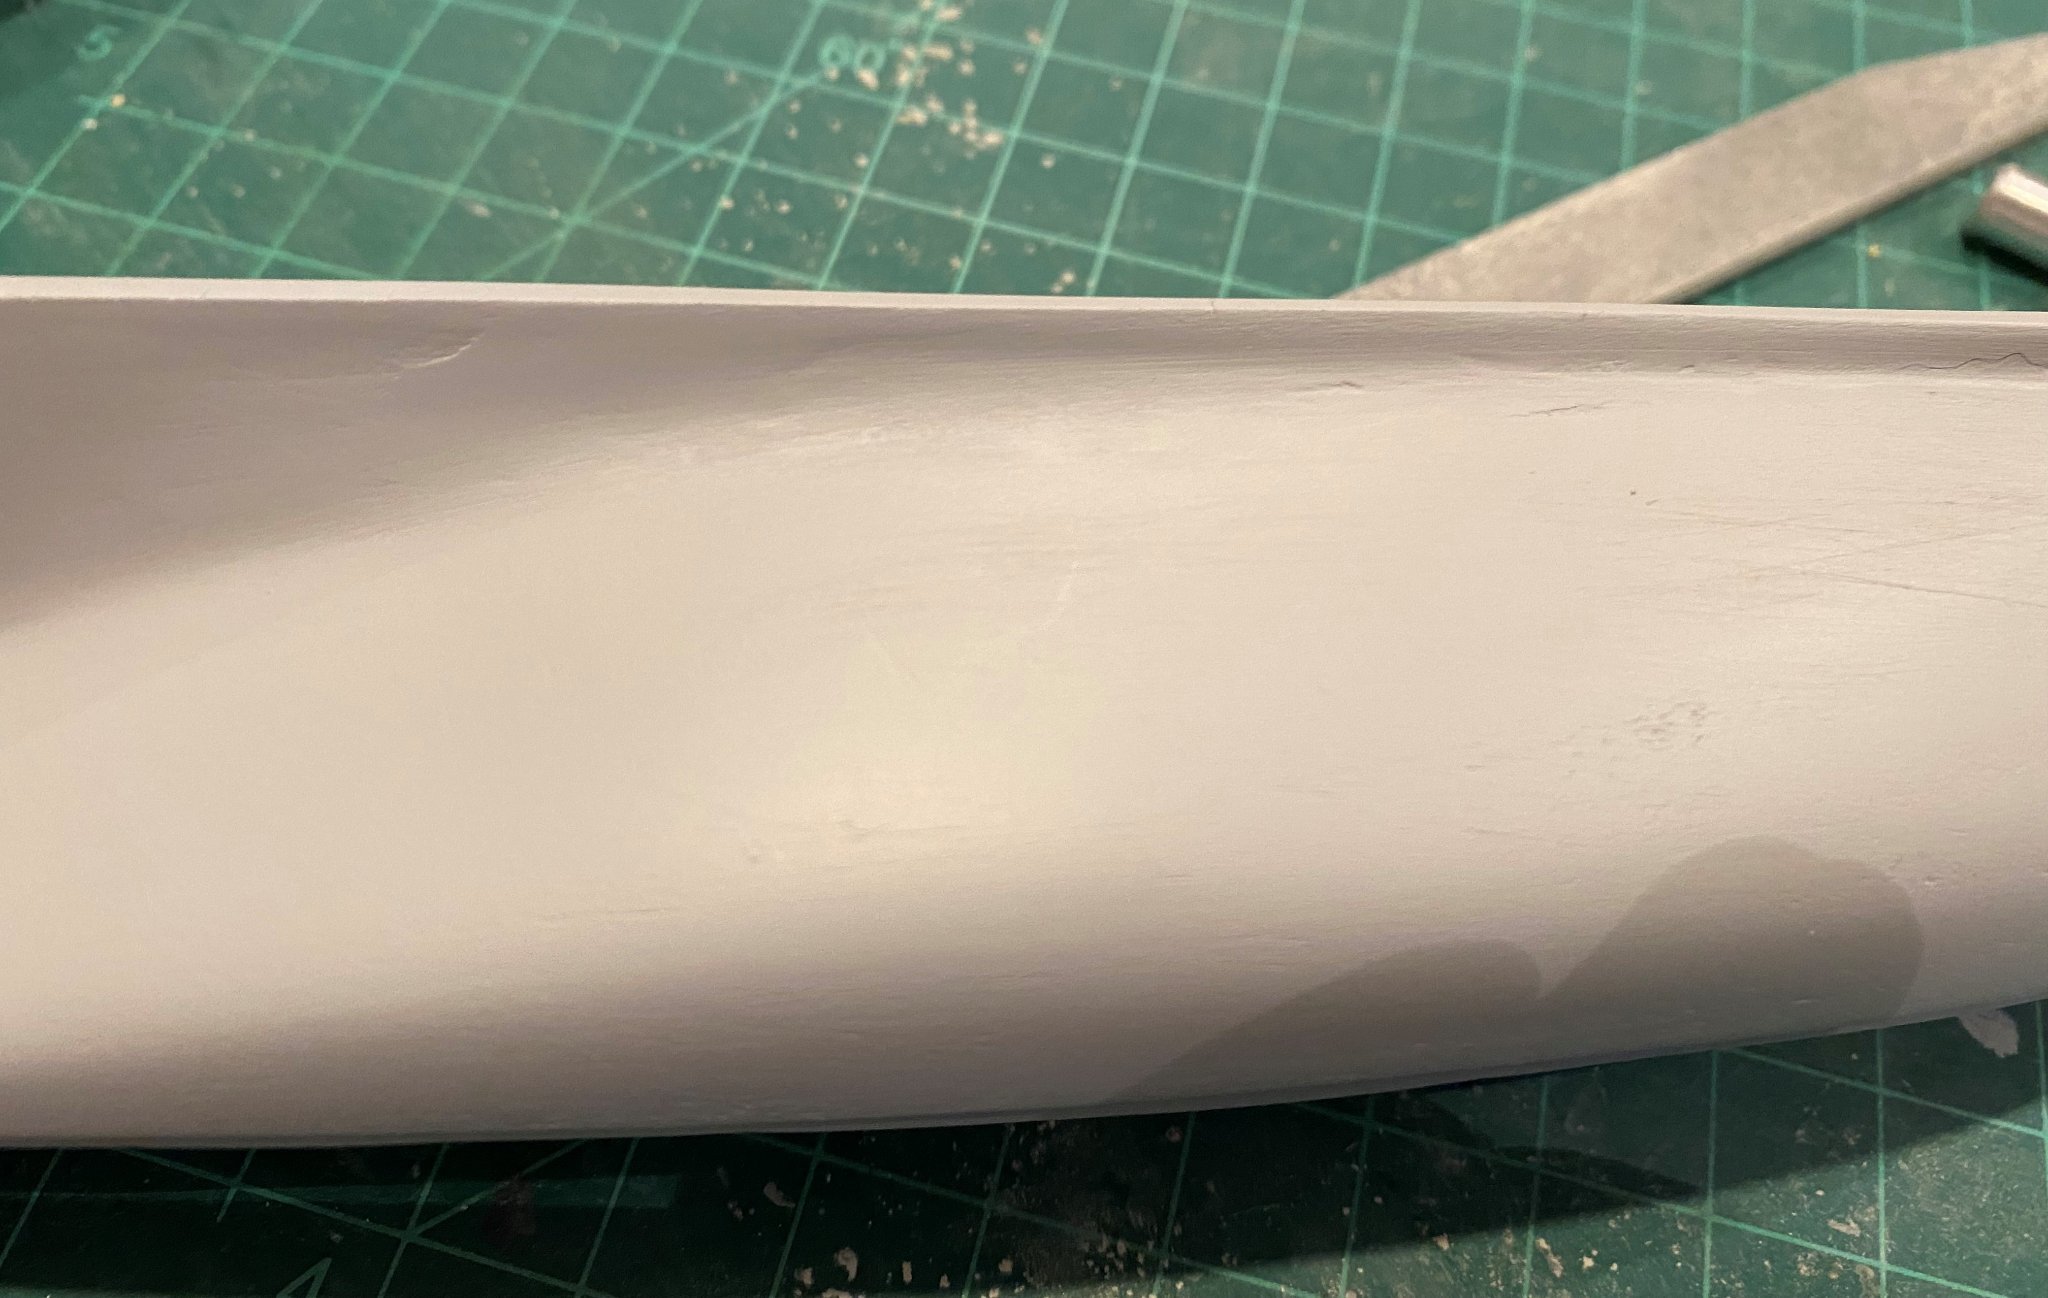
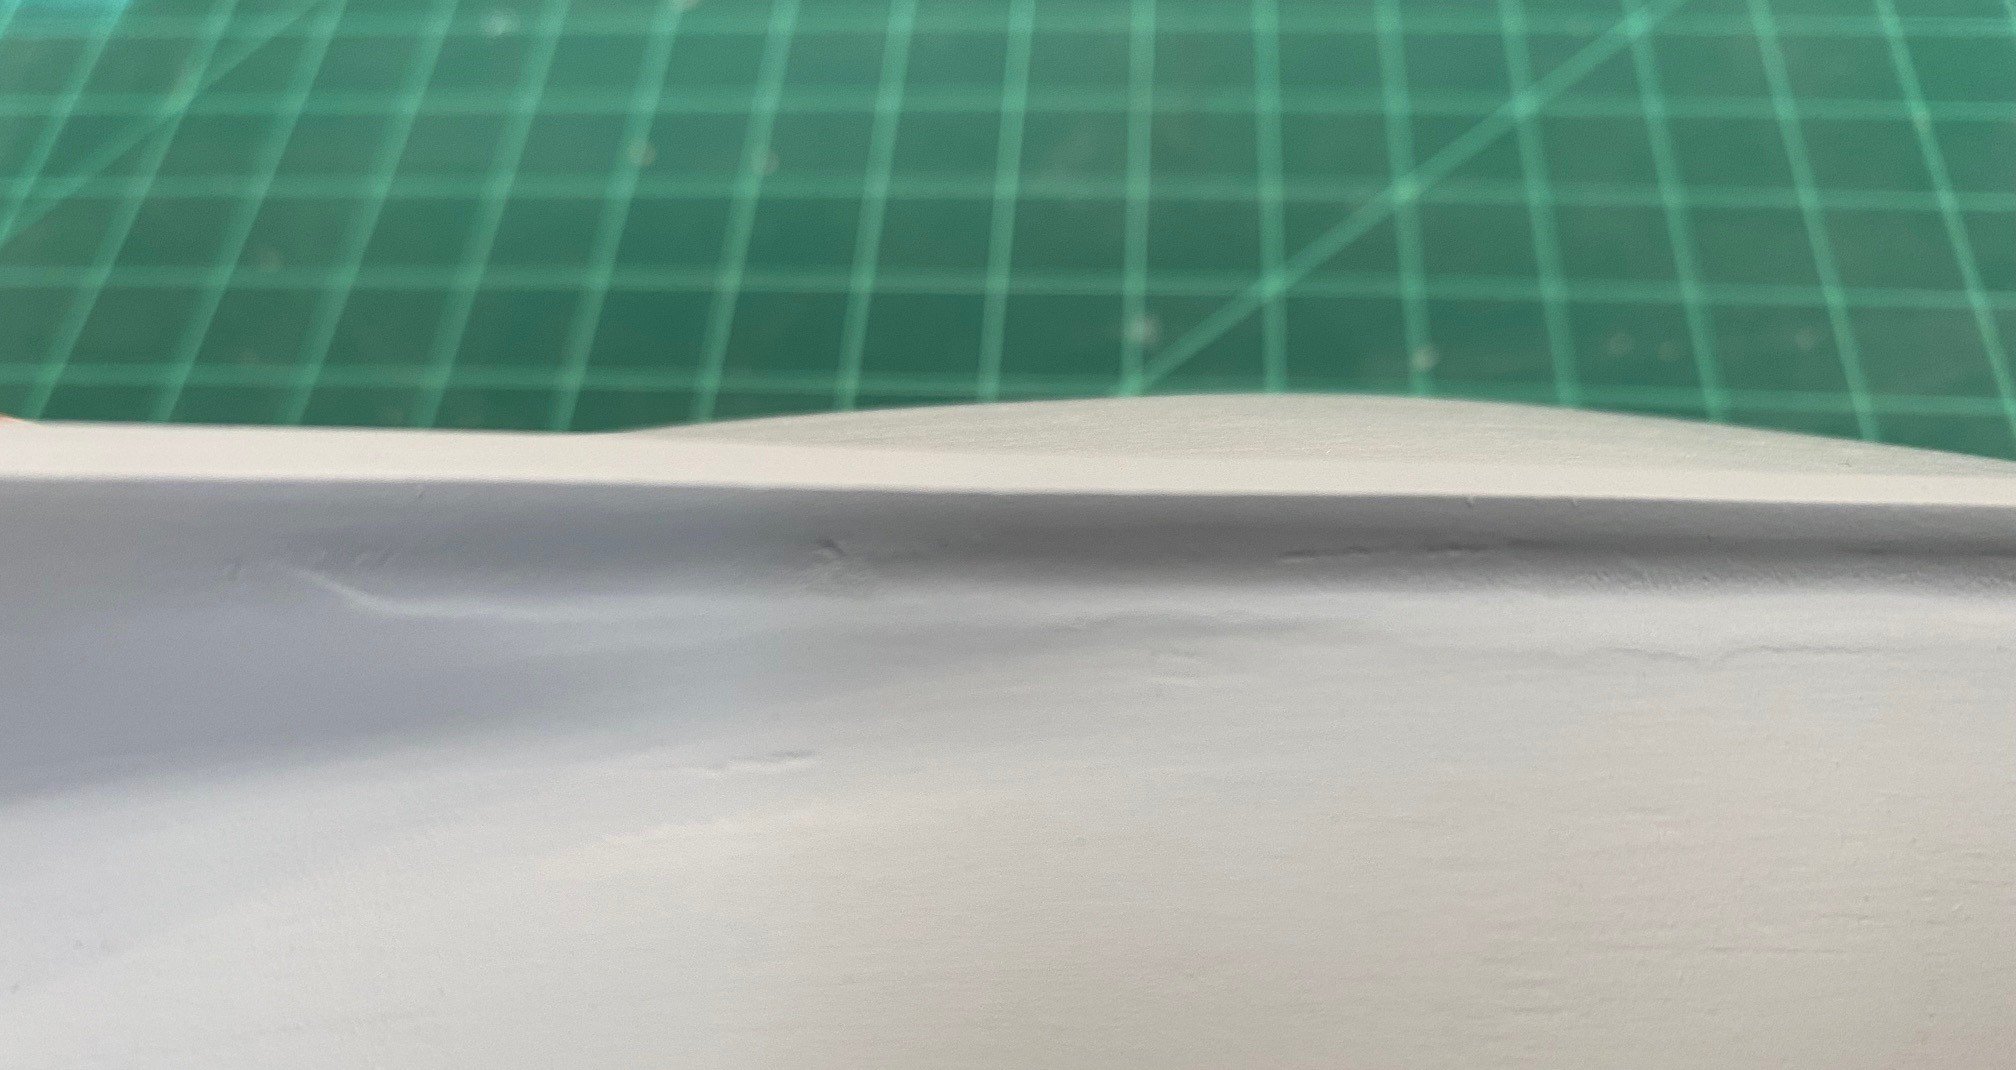
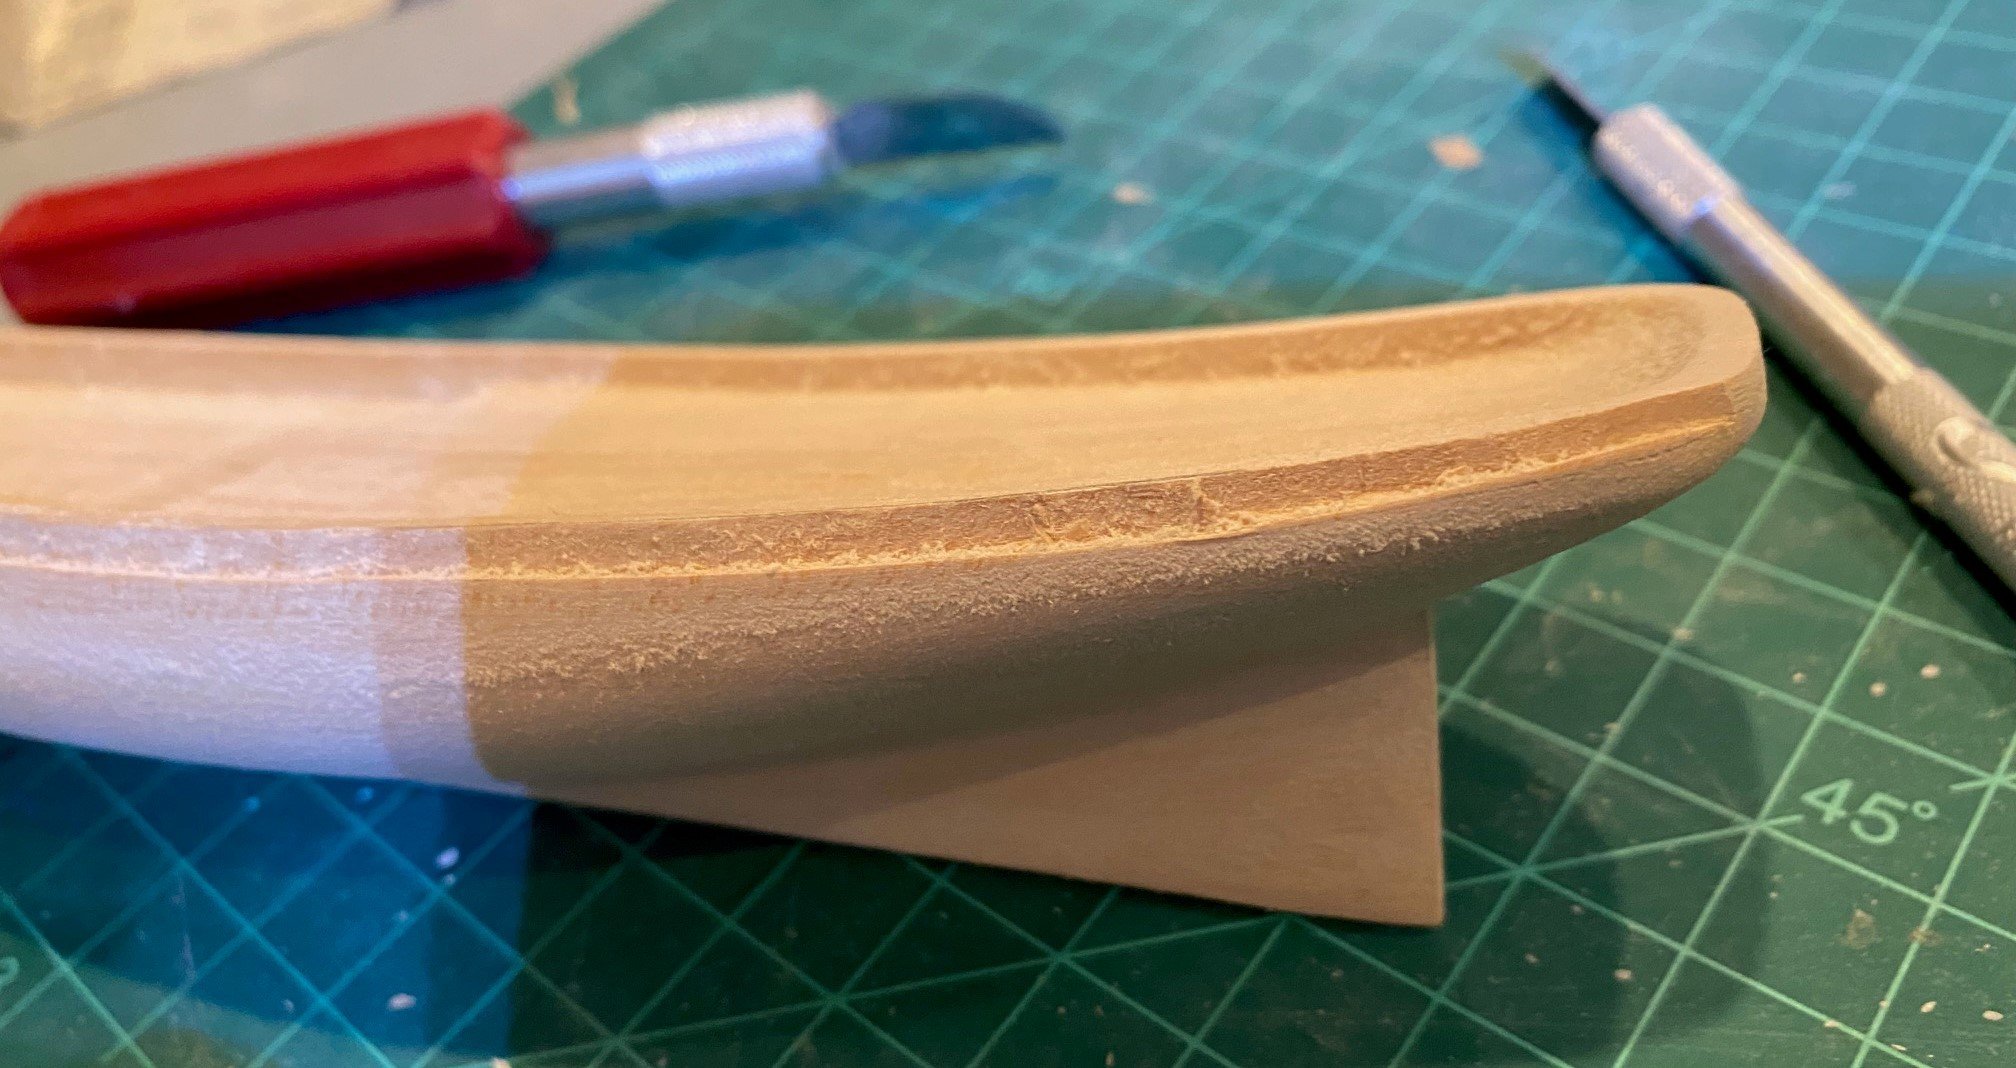
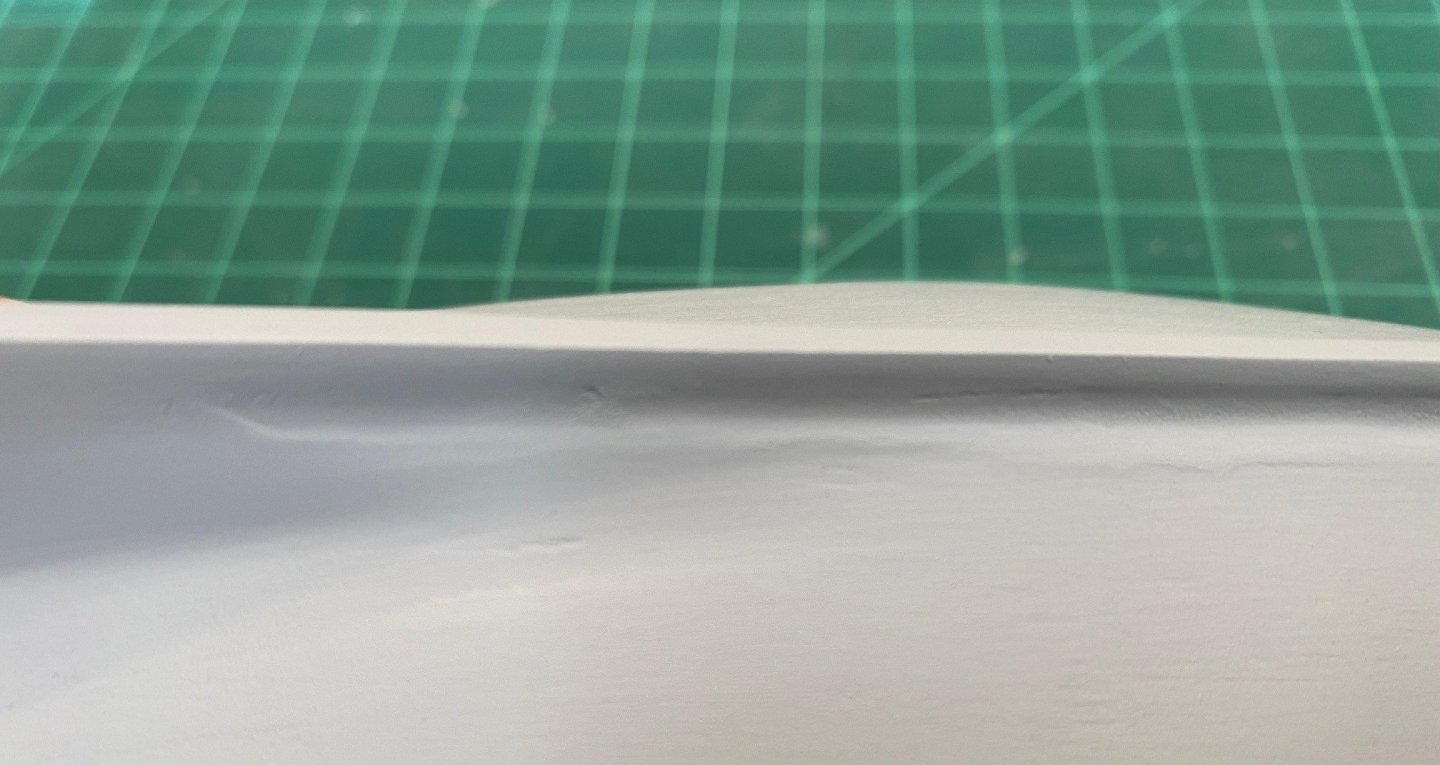
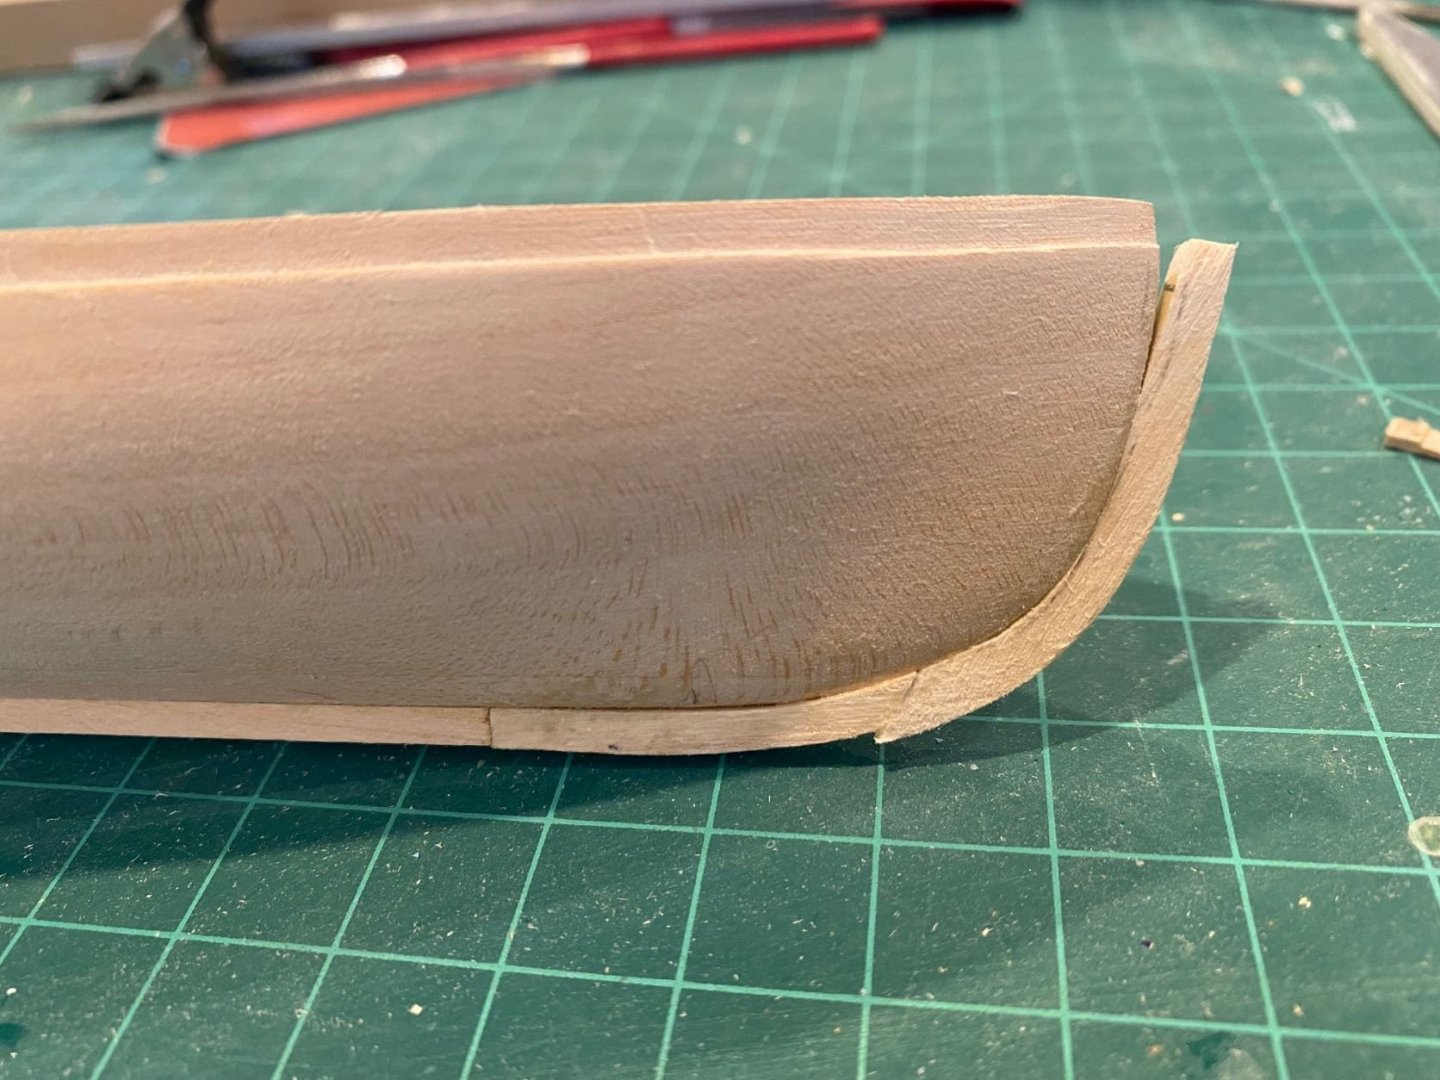
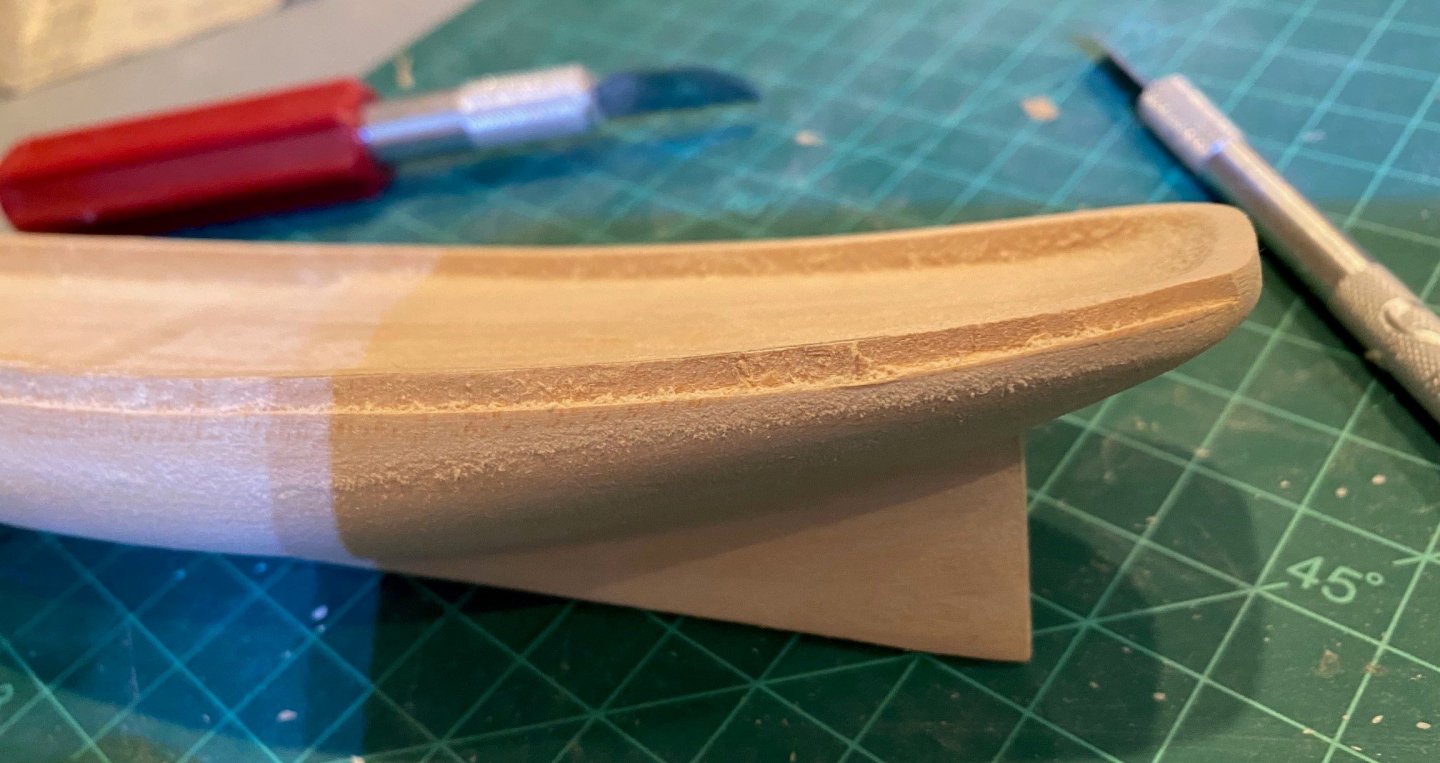
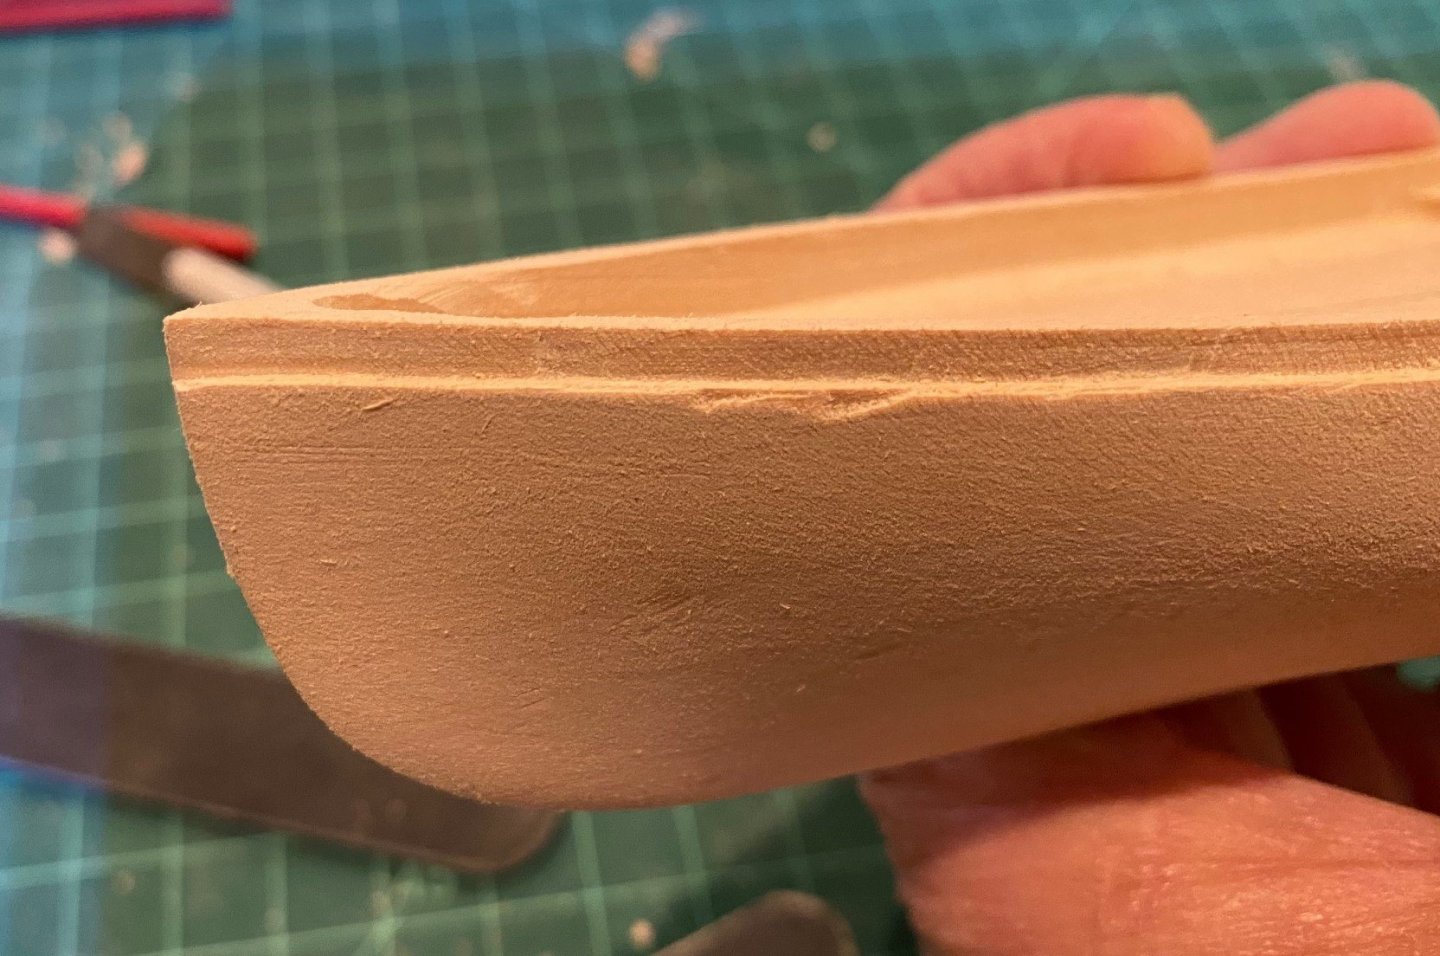
Finished the top step all around the boat, the depth looks even all the way around, about 1/16 in. There are a few dips in the step, maybe a little putty will smooth them out, I do believe in putty. Built the bow stem per the instructions, reduced it down with a jeweler saw, knife, file and sand paper. I did break the stem/keel piece at the joint, and then glued it back together, you can see some discontinuity at the joint at the curve. Also, you can see a gap at the top of the stem, I got to the point that I could not reduce the stem’s curve to allow a perfect fit due to lack of material. Will moisten it and use rubber bands to bend it to fit, and if that does not work, more putty. The main part of the keel when on ok, along with the stern post. You can see in the picture below that I have to fill in the aft part of the hull to match the keel and stern post, more putty.

-
Very nice work, I just started my first solid hull and wished it looked as good as yours. Keep up the great work.
-
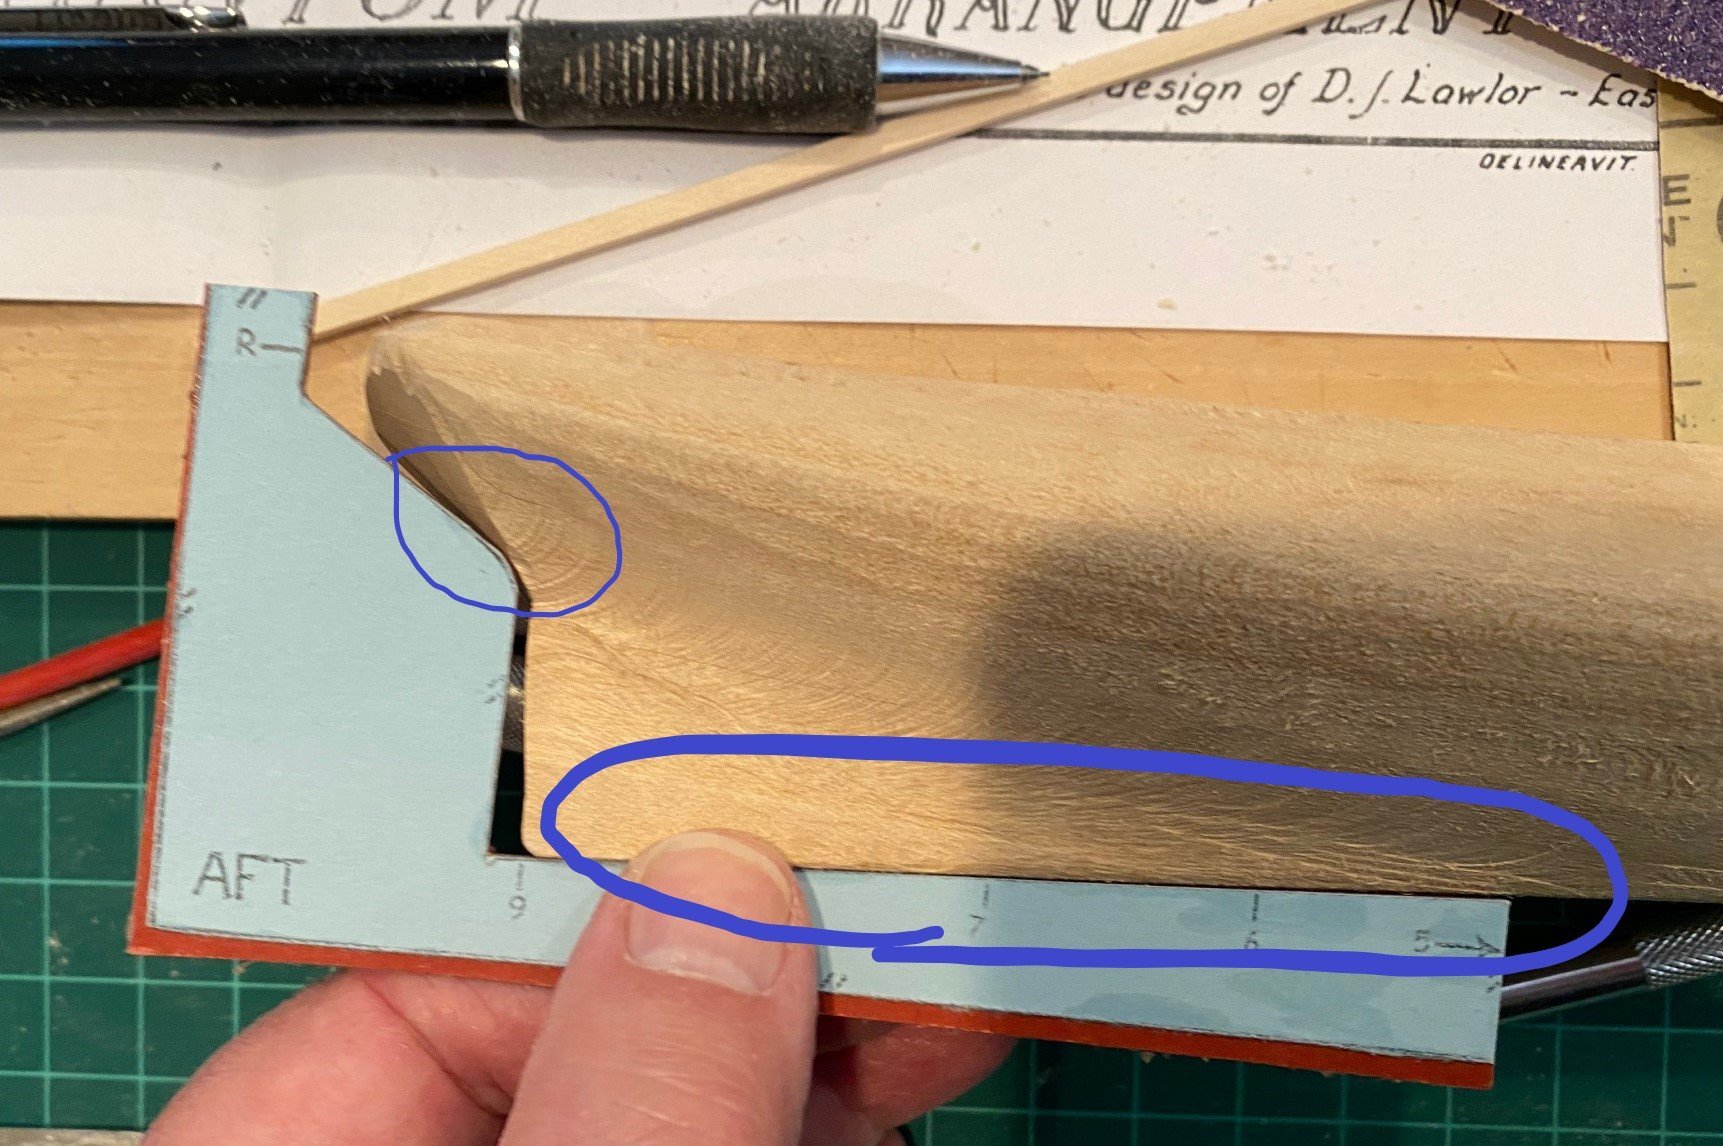
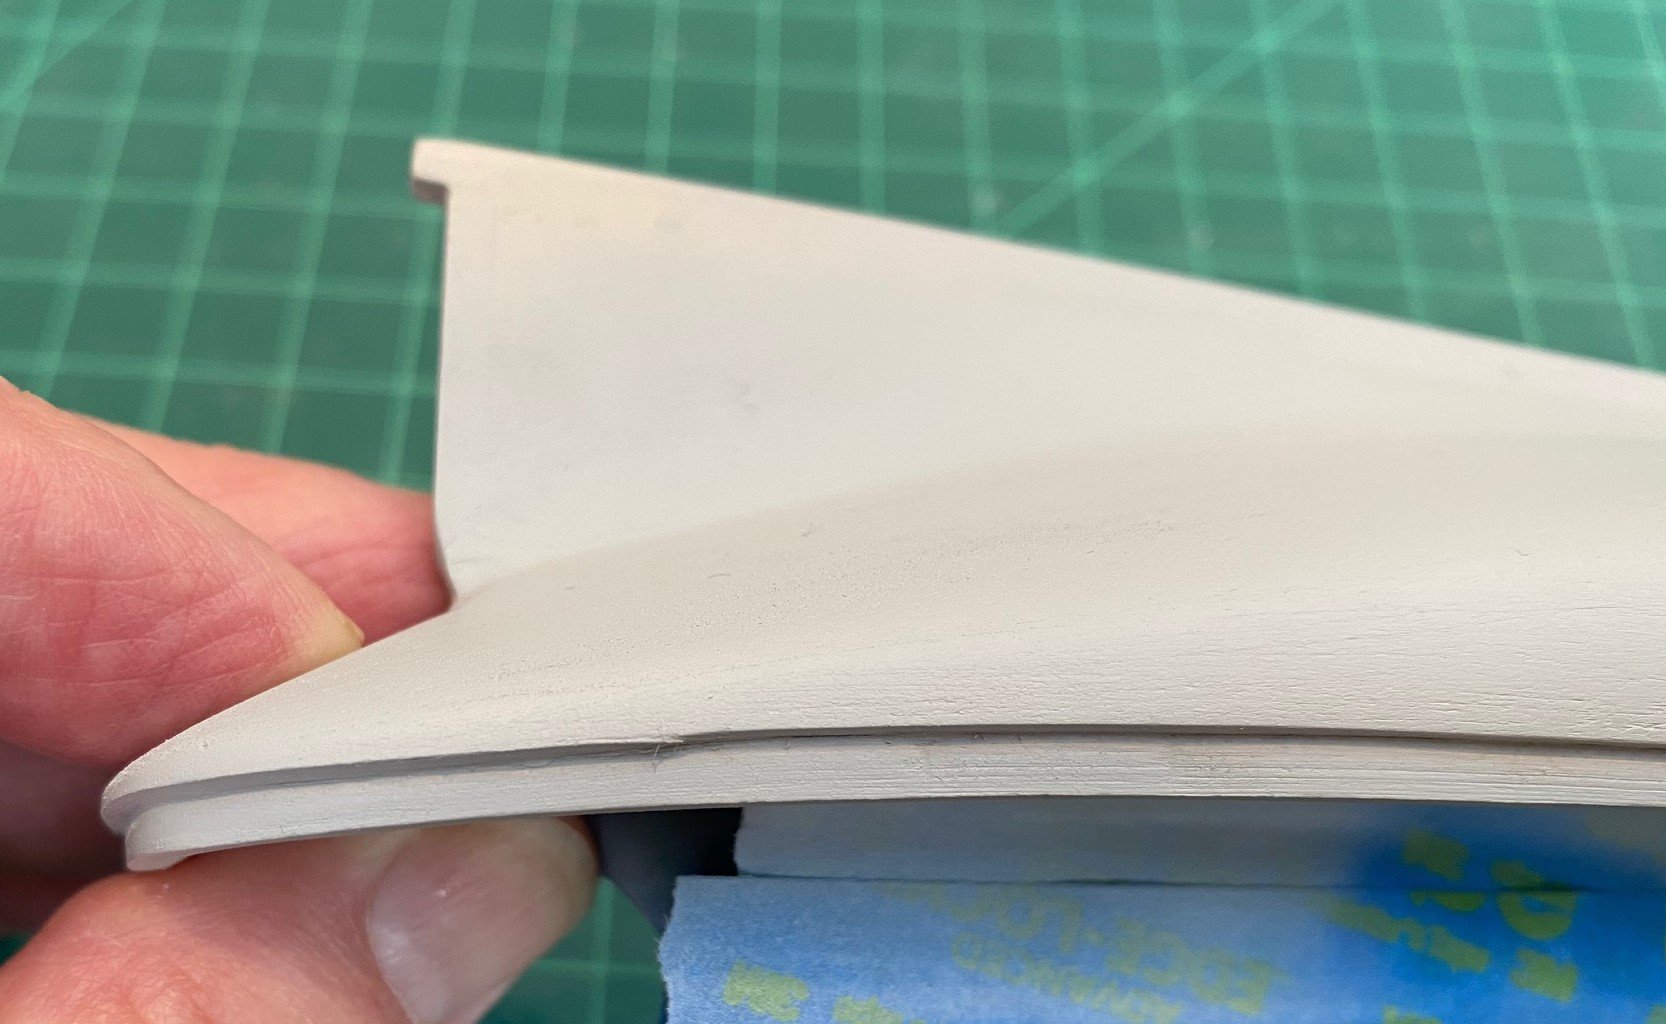
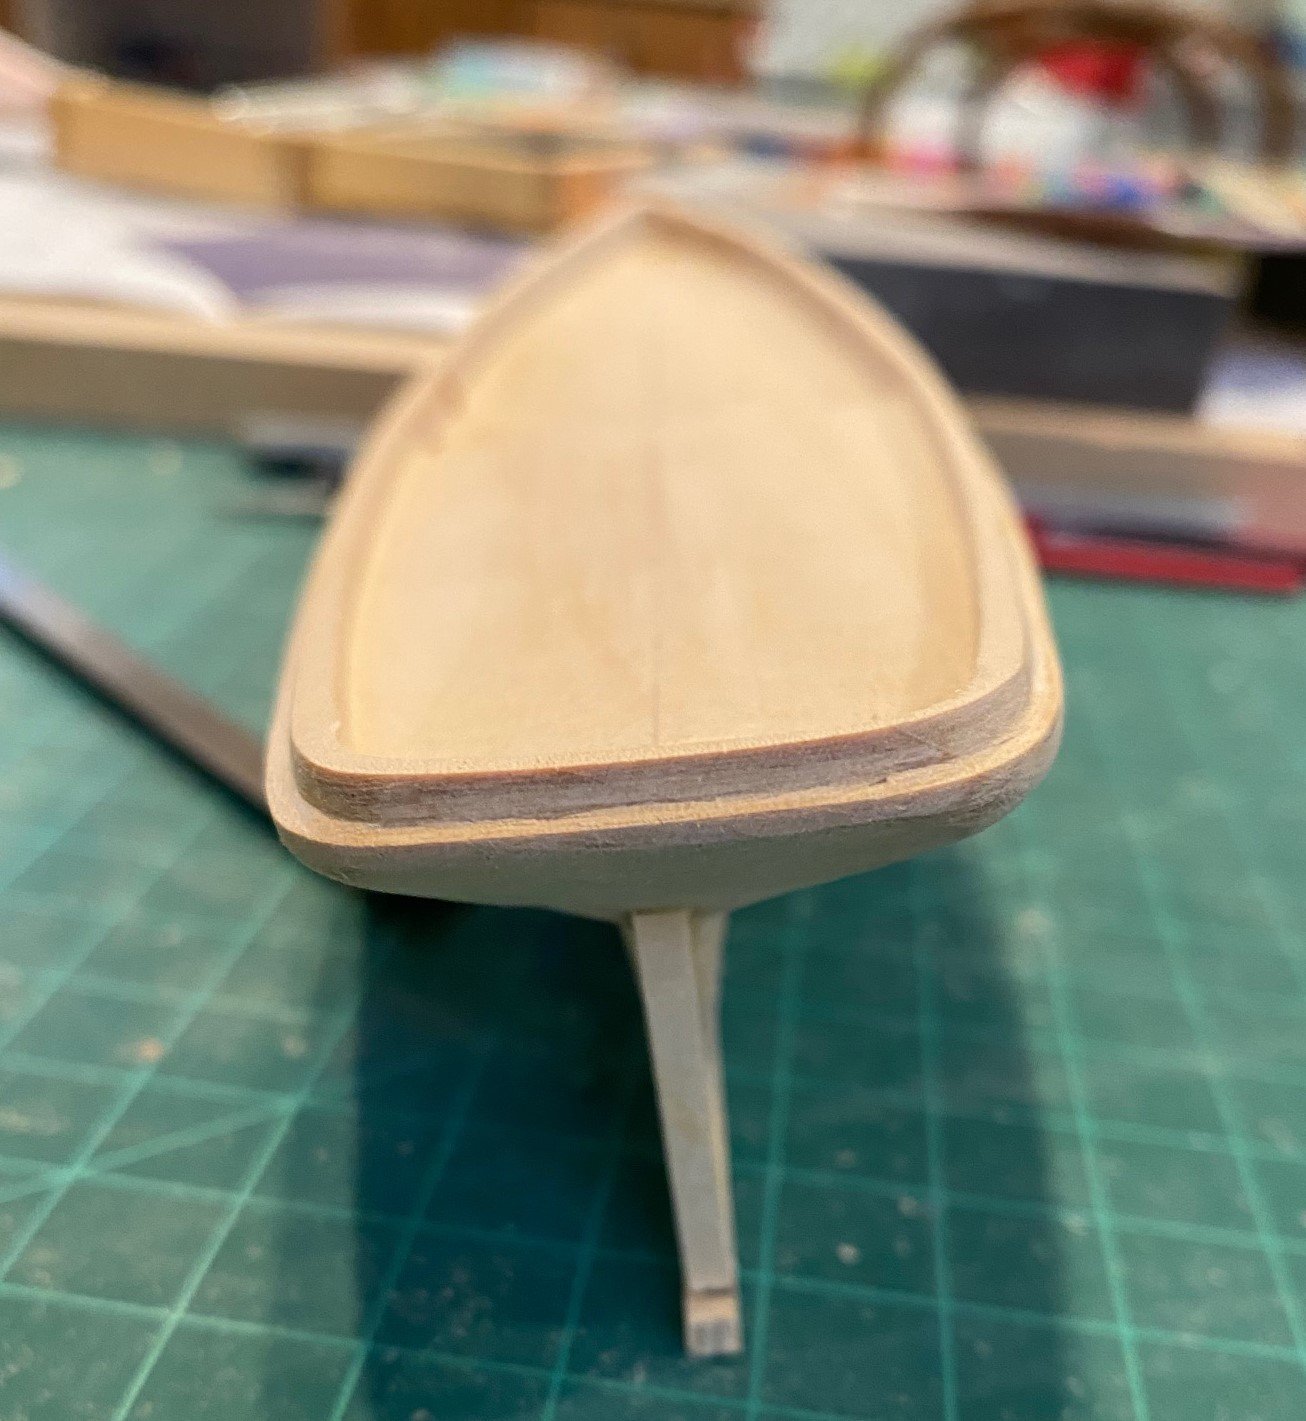
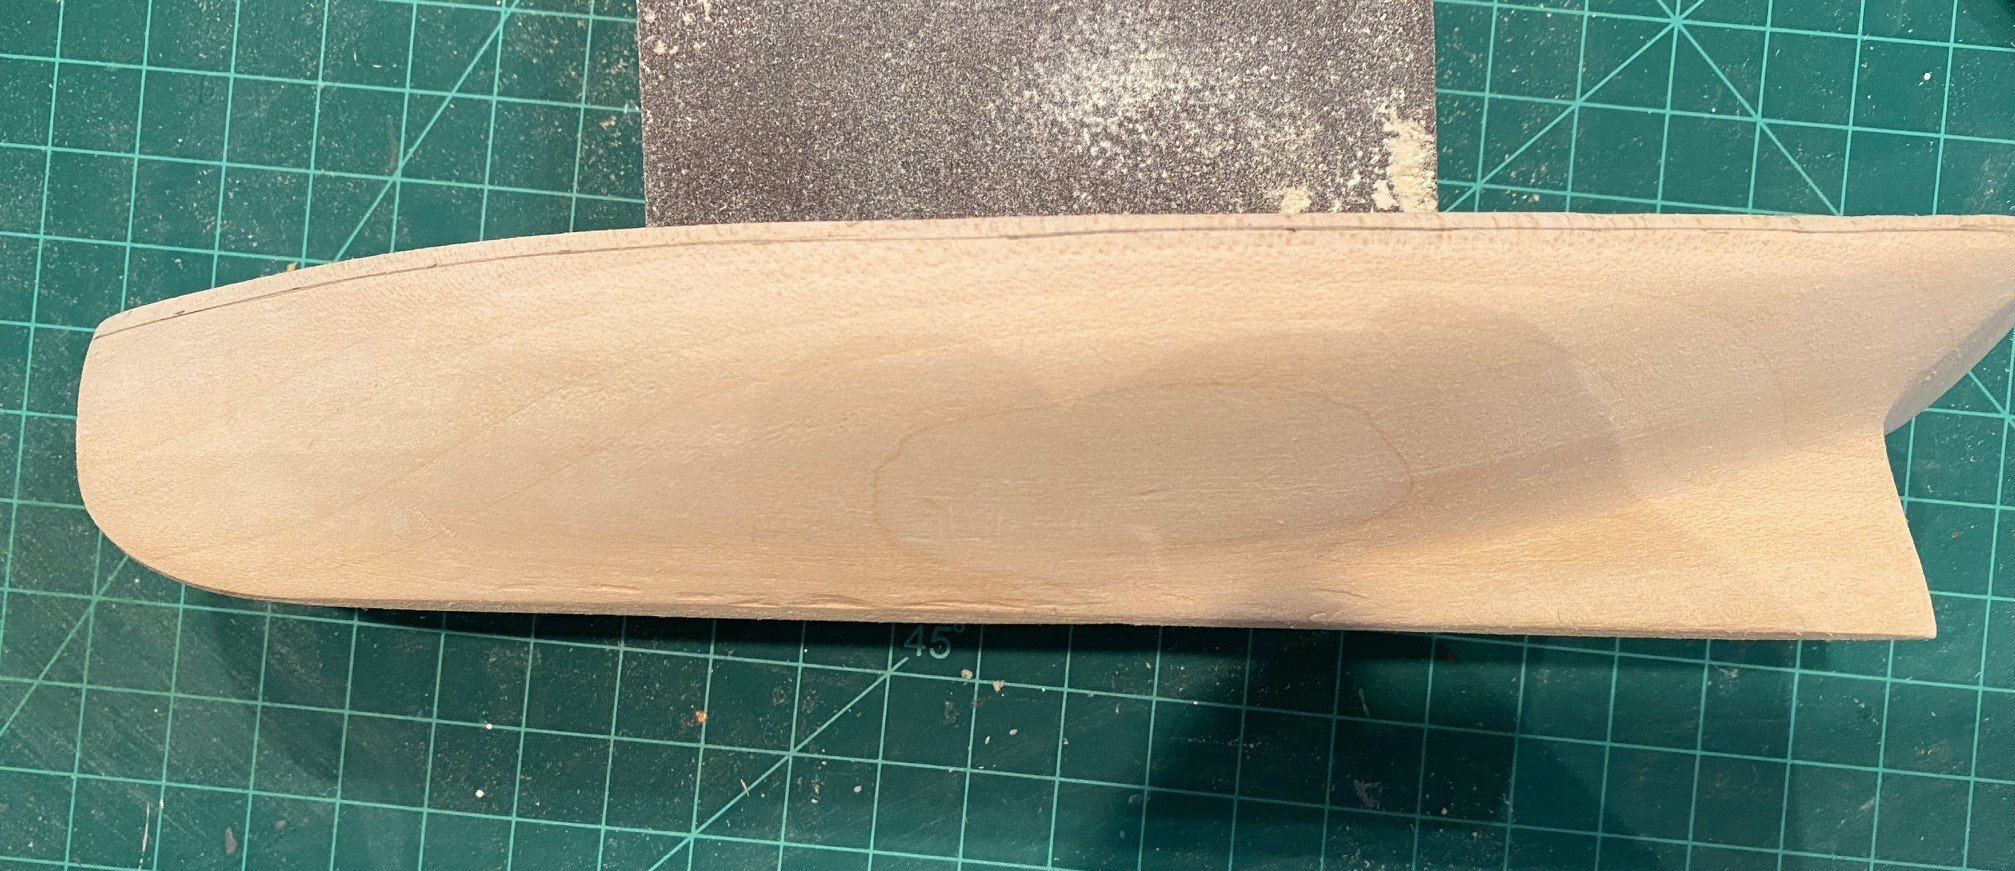
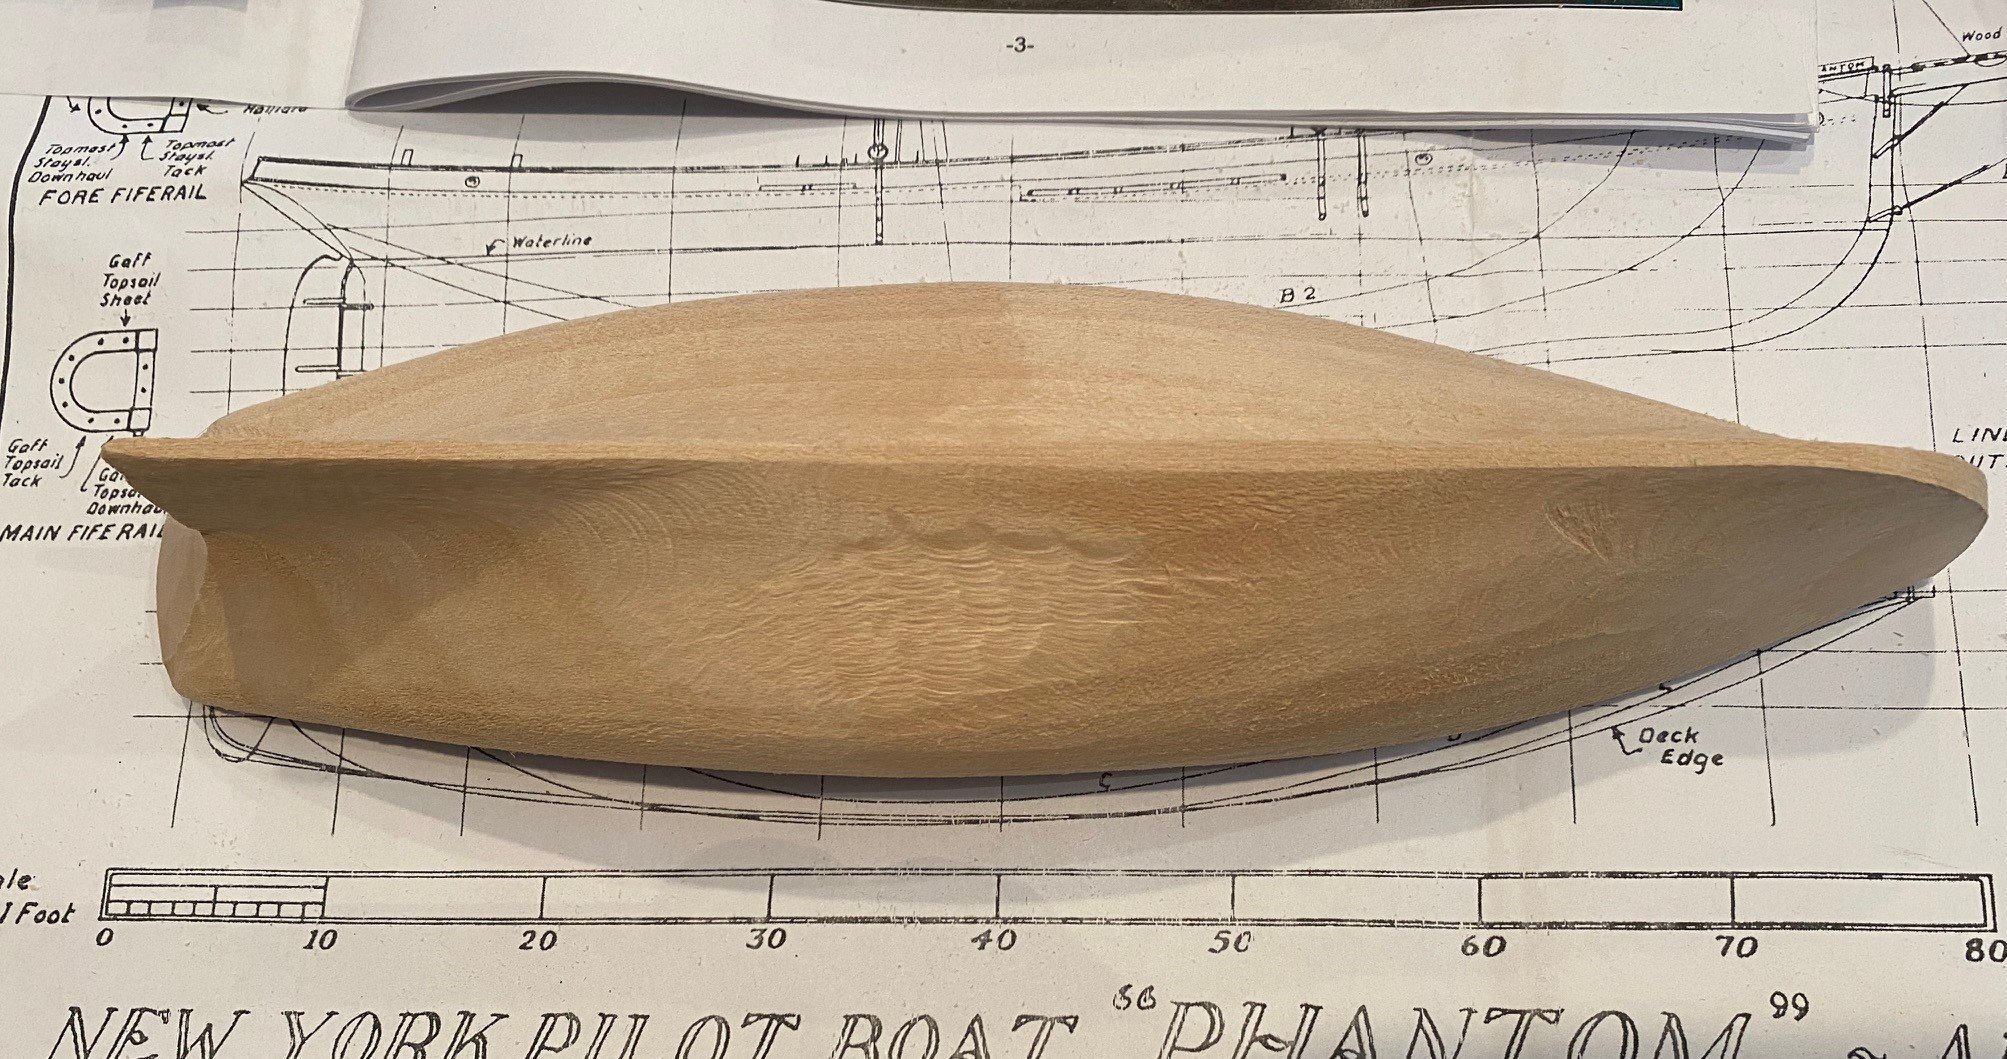
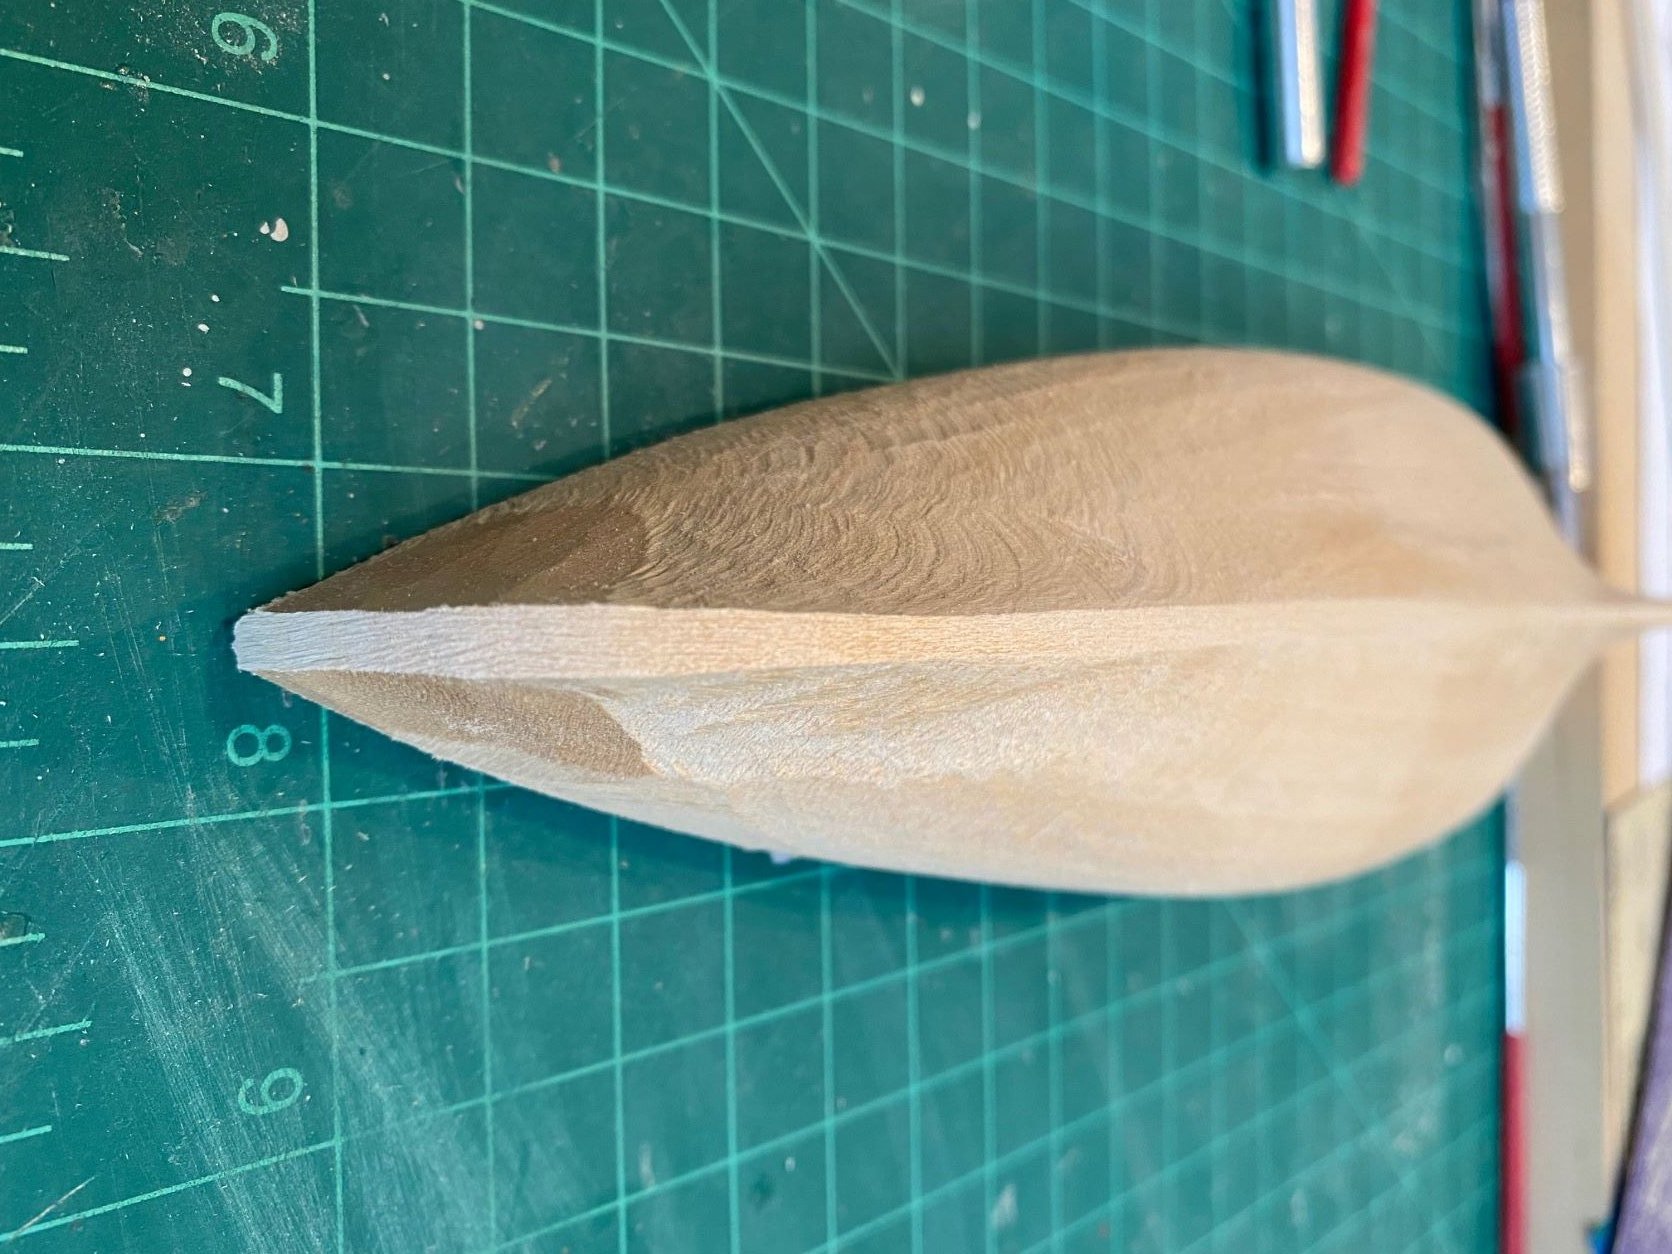
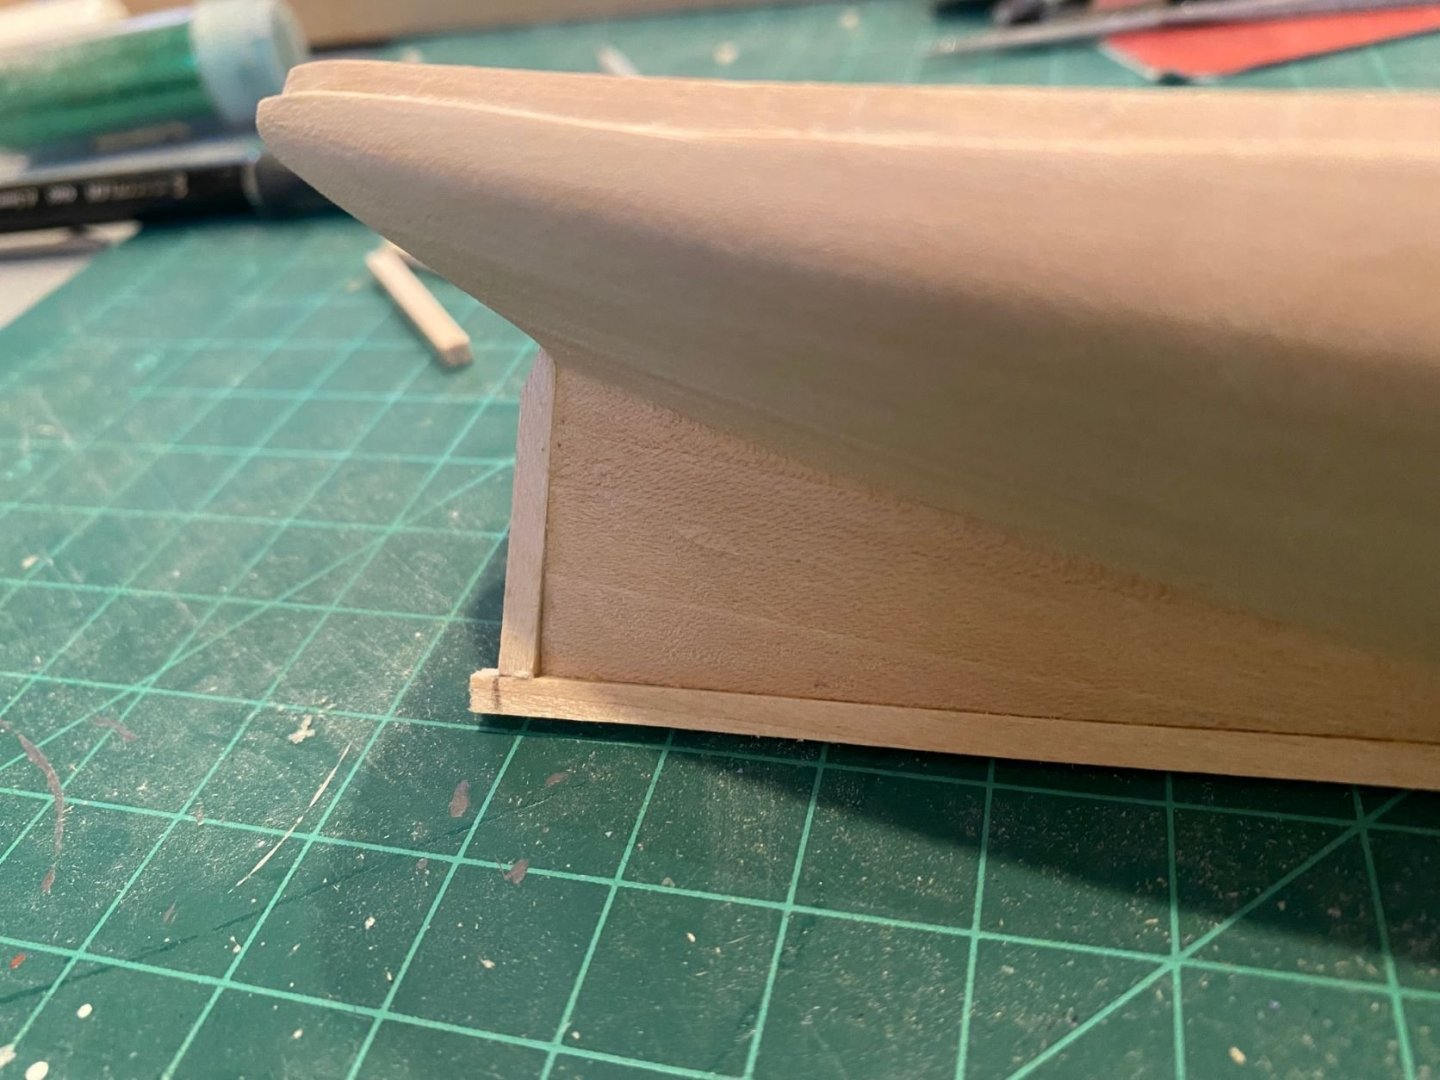
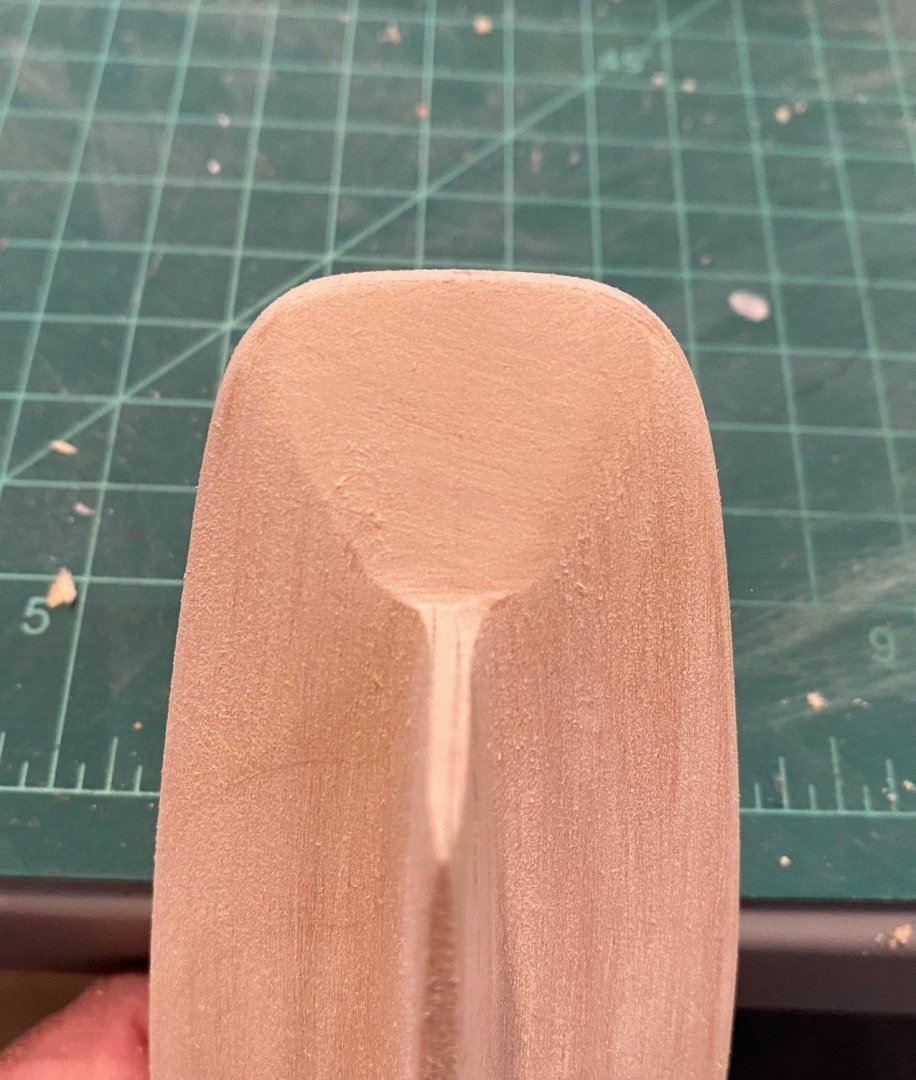
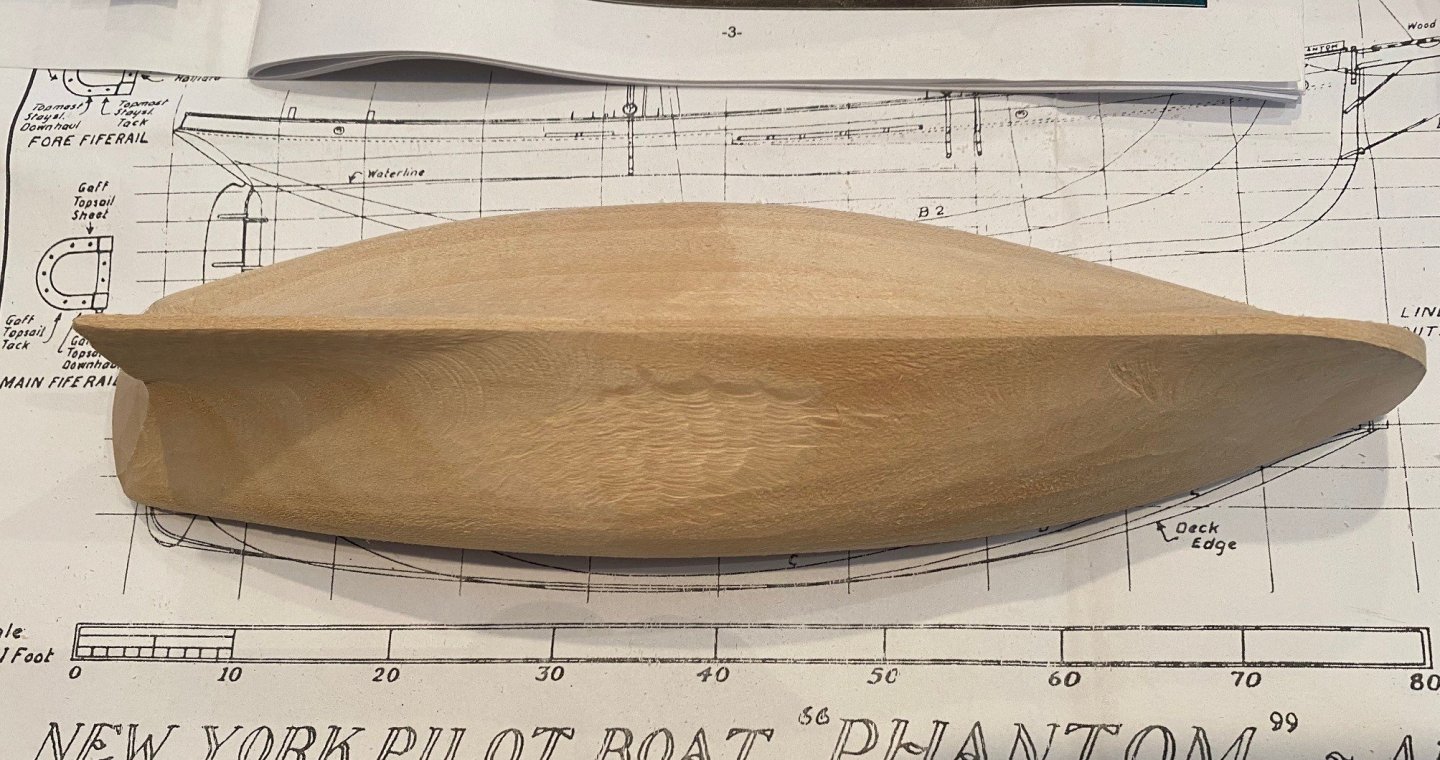
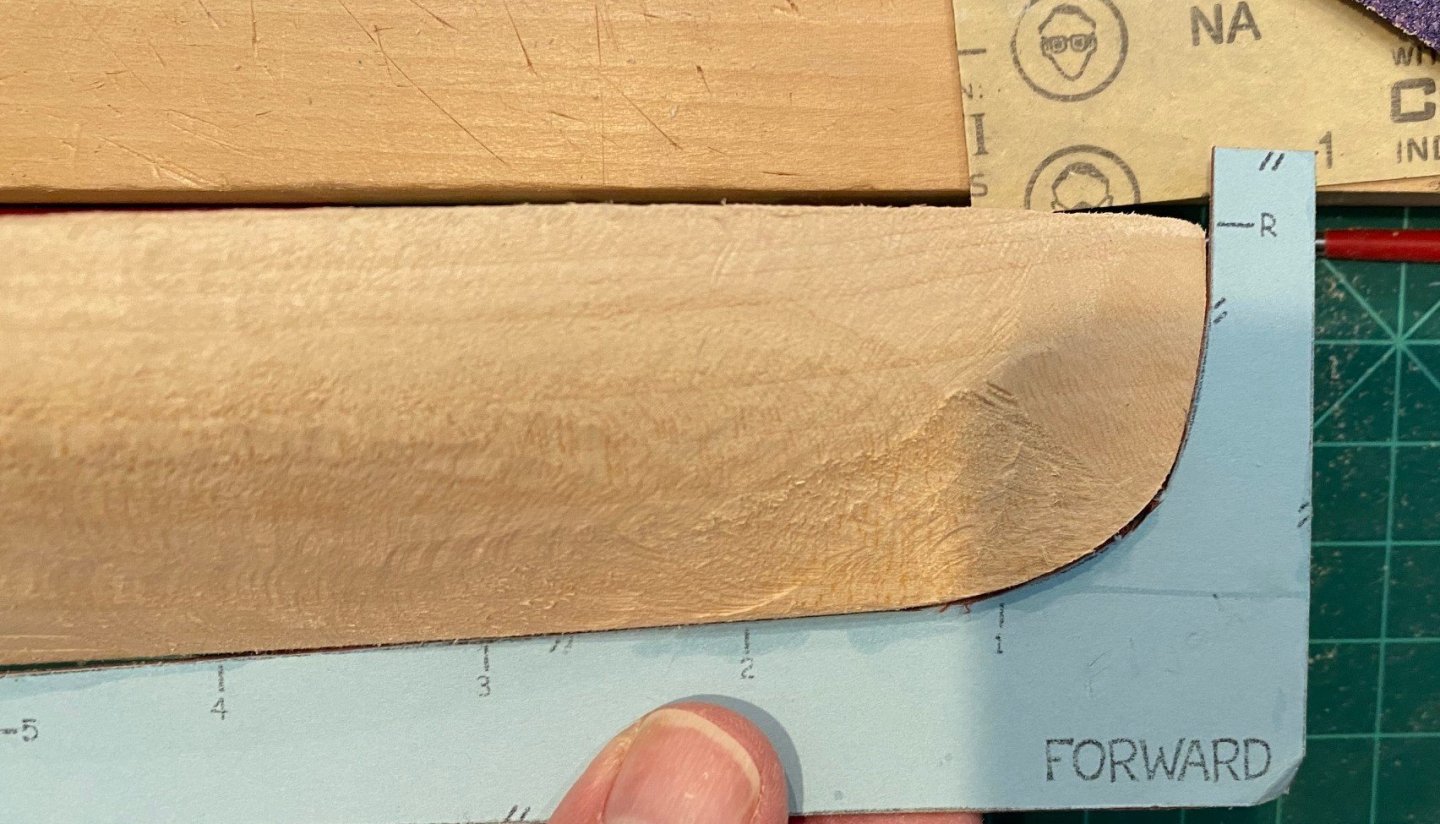
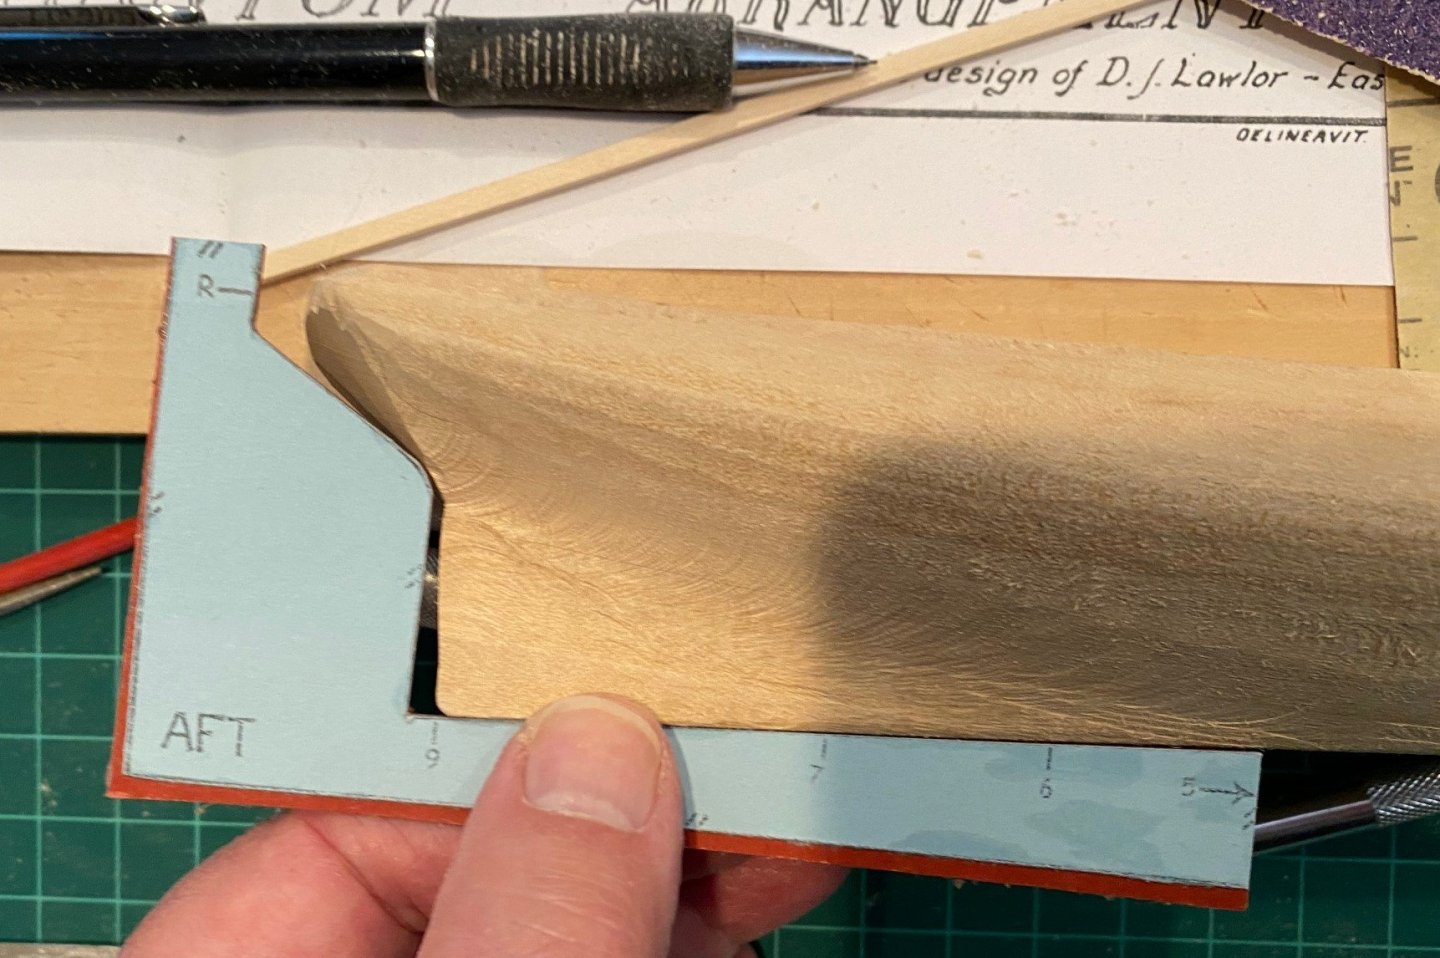
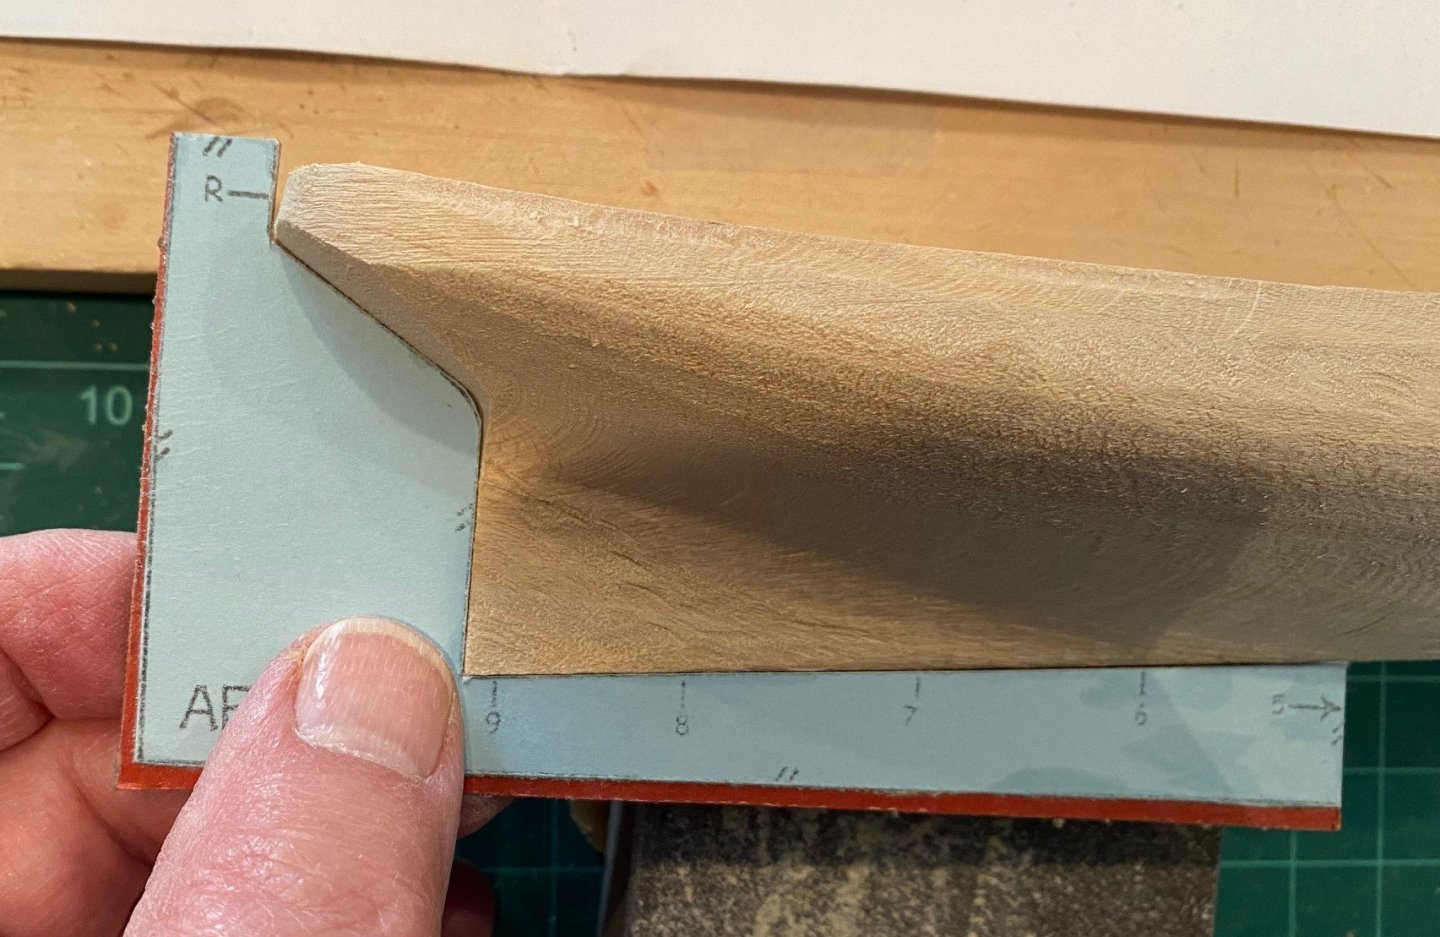
First, I checked the hull to the templates #5 thru #9 on both sides. It appears that I need to reduce the thickness of the aft part of the keel all the way down for the sternpost to fit and deepen the curve in the hull. I used a chisel blade, #18, to reduce the thickness of the keel all the way down the aft end and just taking off a very small vertical notch along the keel from station #5 to #9. Then I used a curved x-acto #22 blade deepen the curve between the hull vertical and horizontal, as well as reduce the horizontal part of the hull from station #9 thru #7. Then I used some 80 grit sandpaper to smooth the areas and checked them against the templates. I had to do this about 4 times so I would not reduce to much at one time. The fwd part of the hull just needed to be reduced a small amount to match the templates #1 thru #5, so I just used 80 grit sandpaper to reduce and smooth the hull transitions. My final hull did not match all of the templates exactly, but I think it was good enough. I was more concerned about getting a smooth hull with acceptable transitions. You can see that some of the gouge areas and the aft part where the keel and sternpost will be glued will require some wood filler, but that is why the sell it. You can see a faint line where I will carve the step at the top of the hull, I also drew a line on the top of the bulwark 1/32 in from the outside to act as guides for cutting out the step. I also had to curve it up at the aft since the aft end of the fantail is only about 5/32 thick. I used a #22 curved blade to score along the line on the hull then I used the #18 chisel blade to take thin cuts down to the score line a couple of times. When I was done carving the step on the port side, I noticed that I ended up with 1/16 th deep step. I don’t think this will cause to much of a problem downstream, maybe with the way the cap rail fits.


-
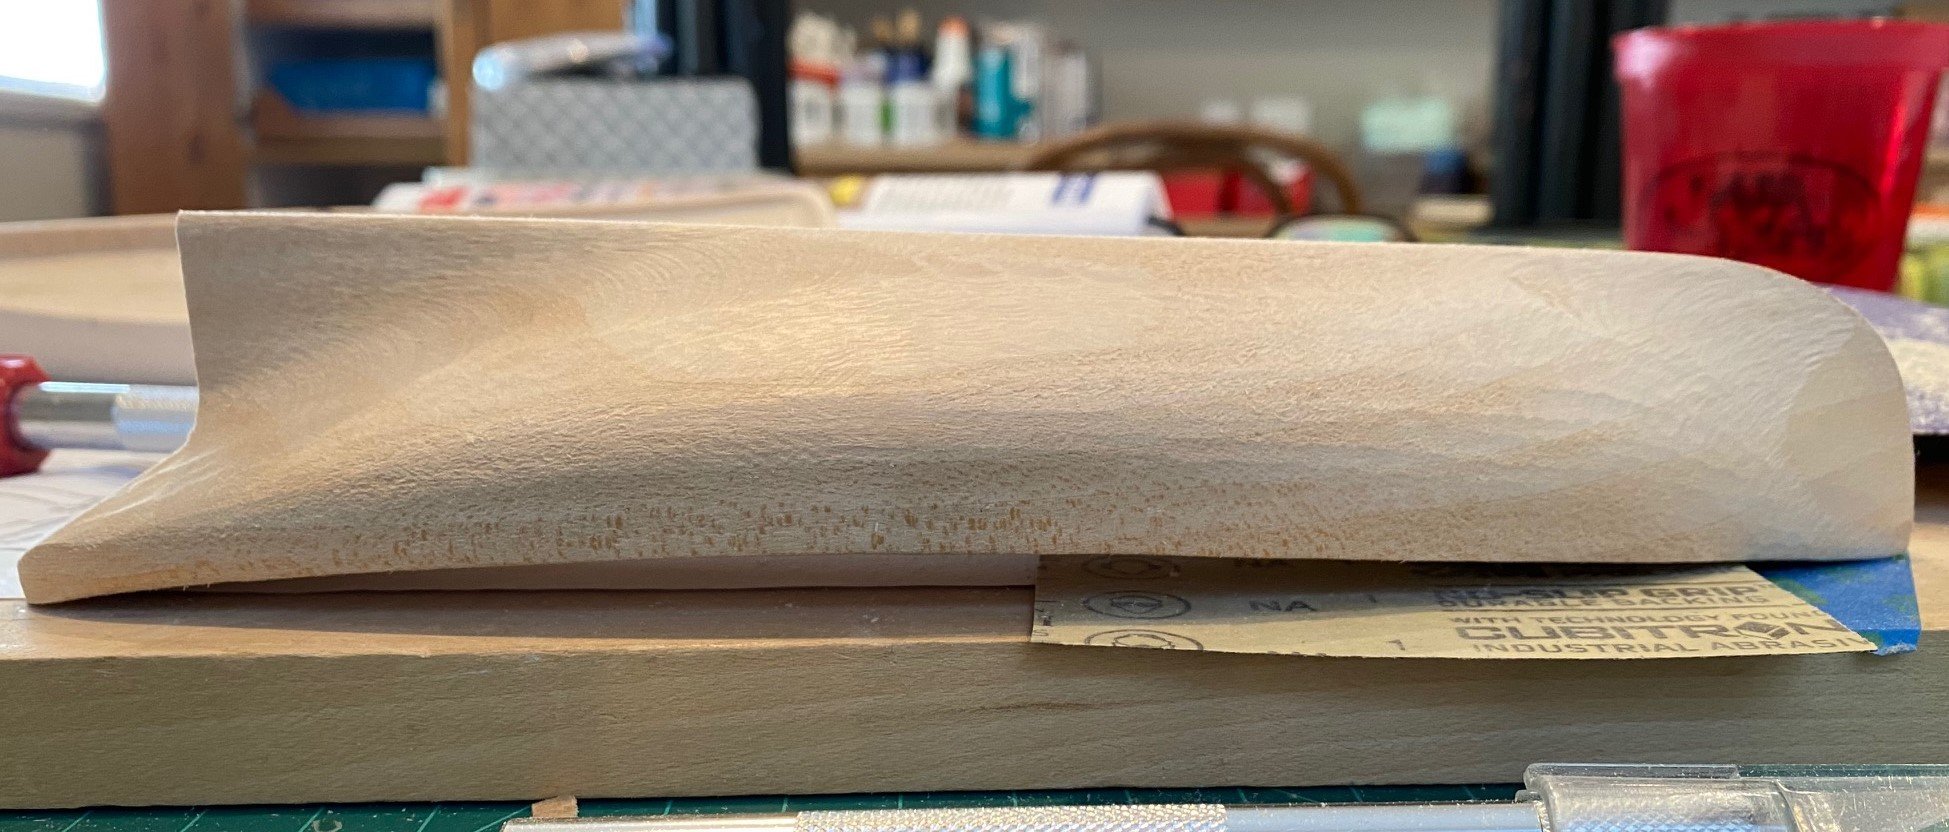
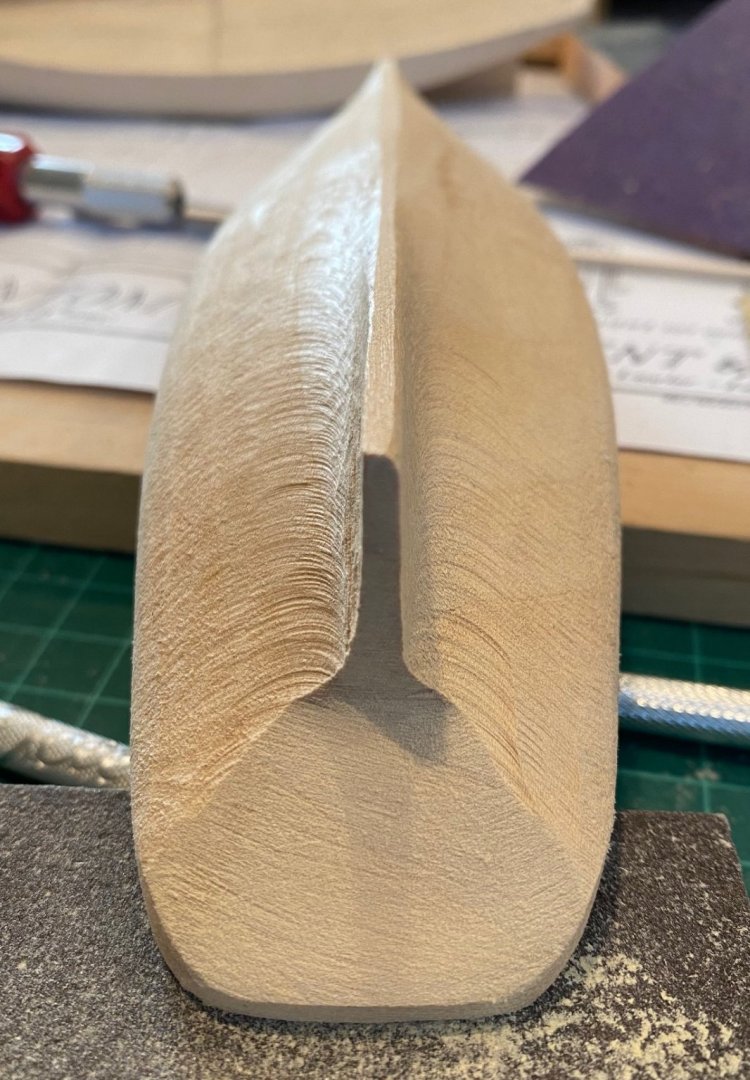
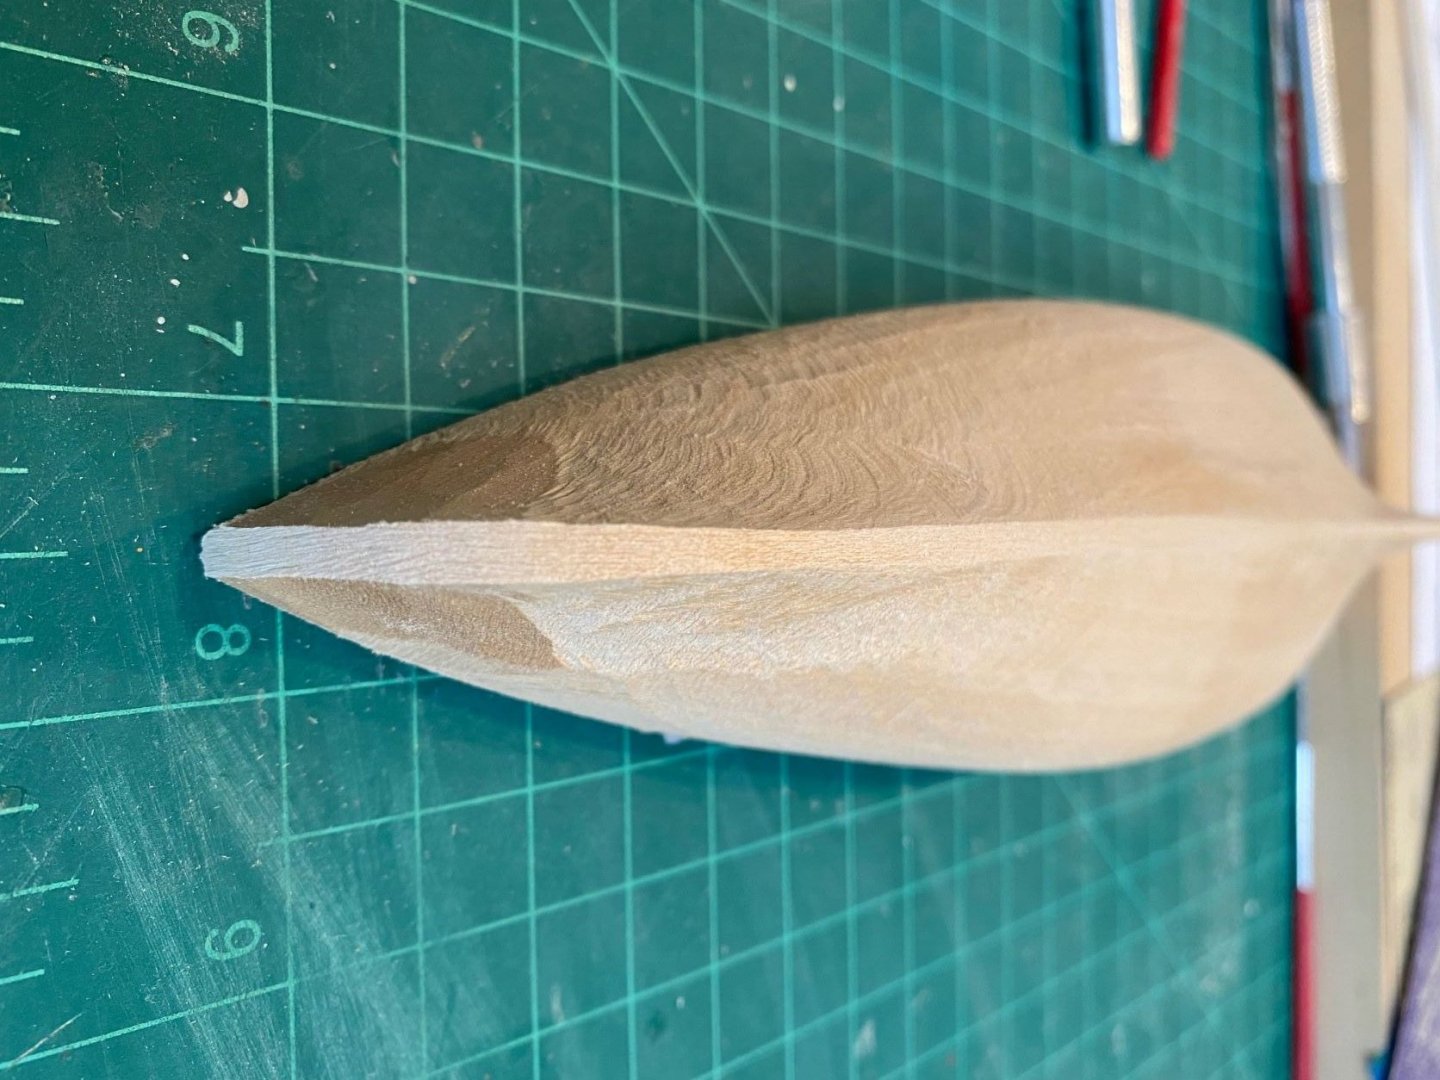
I'm back working on the Phantom after finishing the Muscongus Bay Lobster Smack by Model Shipways. I practiced whittling and sanding the initial hull before starting to shape the replacement hull, good experience. This confirmed that the hull center line was off-center and that one side of the hull was shorter than the other and the plan. But it looks pretty good and I don’t think anyone would notice in the final product. {From this point on I'm working on the new hull} Per the instructions, the first thing I did was to get a flat keel surface and I also did the bow. I laid a full sheet of 80 grit on the work surface and then just moved the boat back and forth on the sand paper, trying to keep even fore -aft pressure as I tried to keep the boat perpendicular to the work surface. I kept checking the overall fore to aft flatness with a rule as I went. I then did the same thing on the bow, dragging the boat on the paper to try and keep a flat perpendicular surface to the center line as I rounded the bow. I’ve been working on the aft end of the boat; cutting, chiseling with a knife chisel blade and sanding with 80 grit paper. I was having a hard time whitling or chiseling with a blade, so I tried to file it with an old wood rasp I had (it was old, over 50 years old) but it was too large for the job. So, I went back to 80 grit sand paper and the knife chisel. The instructions said that you might have to remove about an 1/8 inch from the aft. I only removed about 3/32 inch to get it close to the template. I think I will wait until I have the sides of the hull close to template before I reduce it any more in the aft, as I’m doing for the bow My initial check of the hull evenness with the templates indicates a good hull. Now to move on to drawing centerlines and carving the hull to match the templates.

-
Current Projects:
Phantom New York Pilot Boat - Model Shipways - 1:96
Completed Projects:
Muscongus Bay Lobster Smack - Model Shipways - 1:24
18th Century Long Boat - Model Shipways - 1:48
Norwegian Sailing Pram - Model Shipways - 1:12
Lowell Grand Banks Dory - Model Shipways - 1:24
-
Thanks to everyone for their comments, suggestions and likes. Your support is very helpful.
- 62 replies
-
- 1
-
-
- muscongus bay lobster smack
- Finished
- (and 1 more)
-
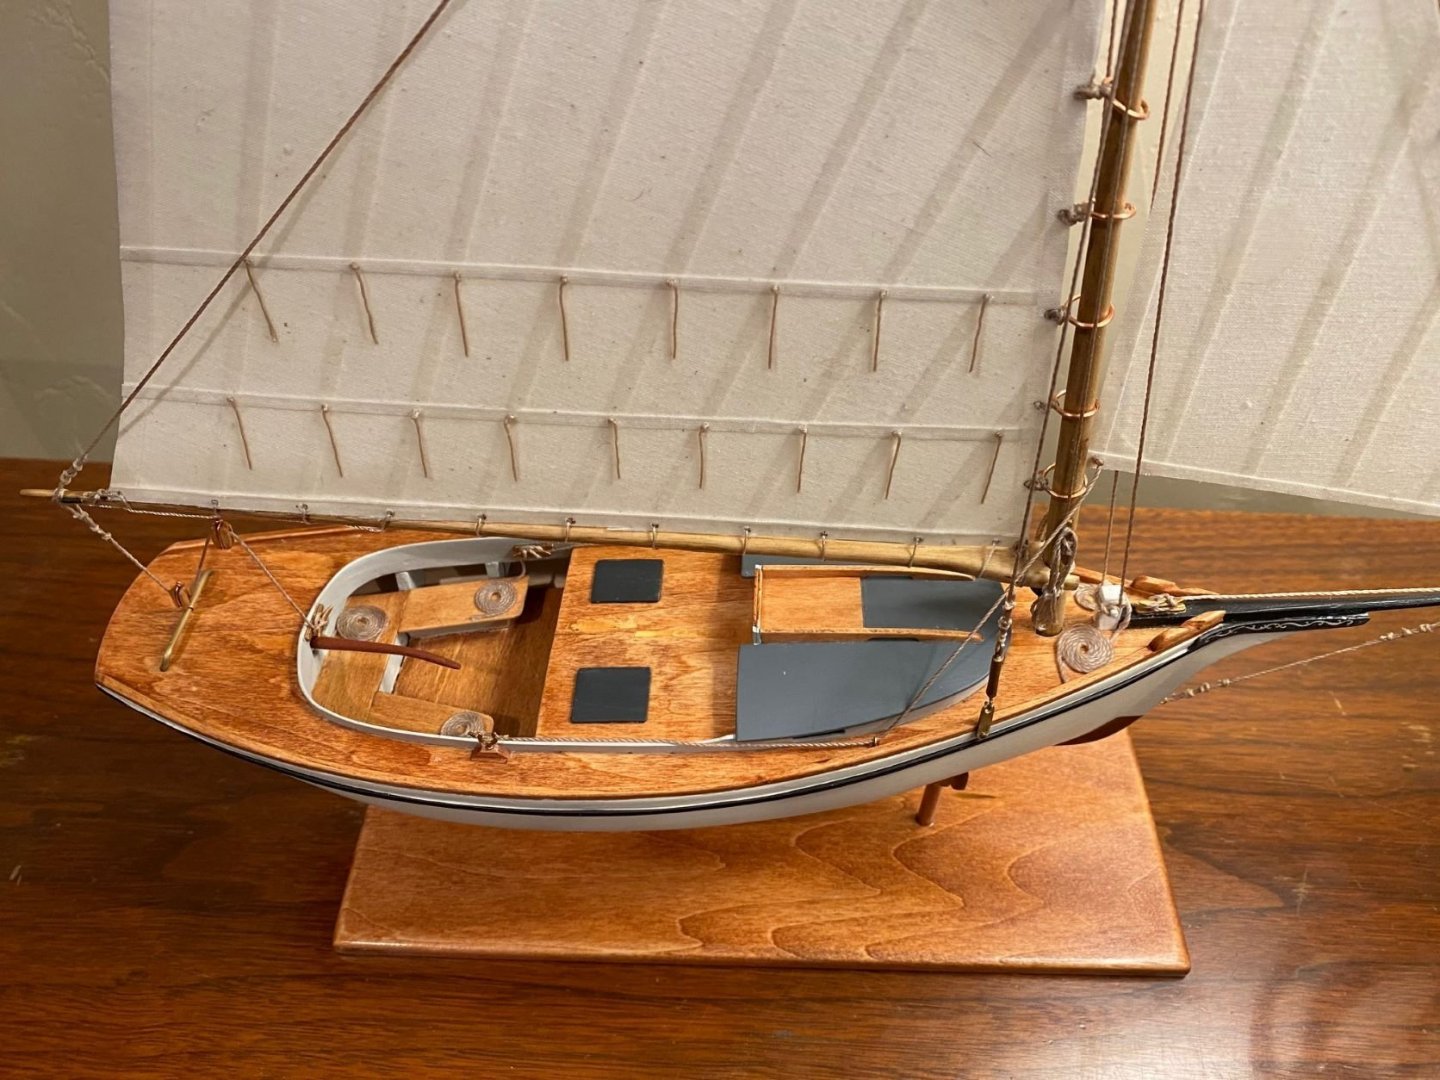
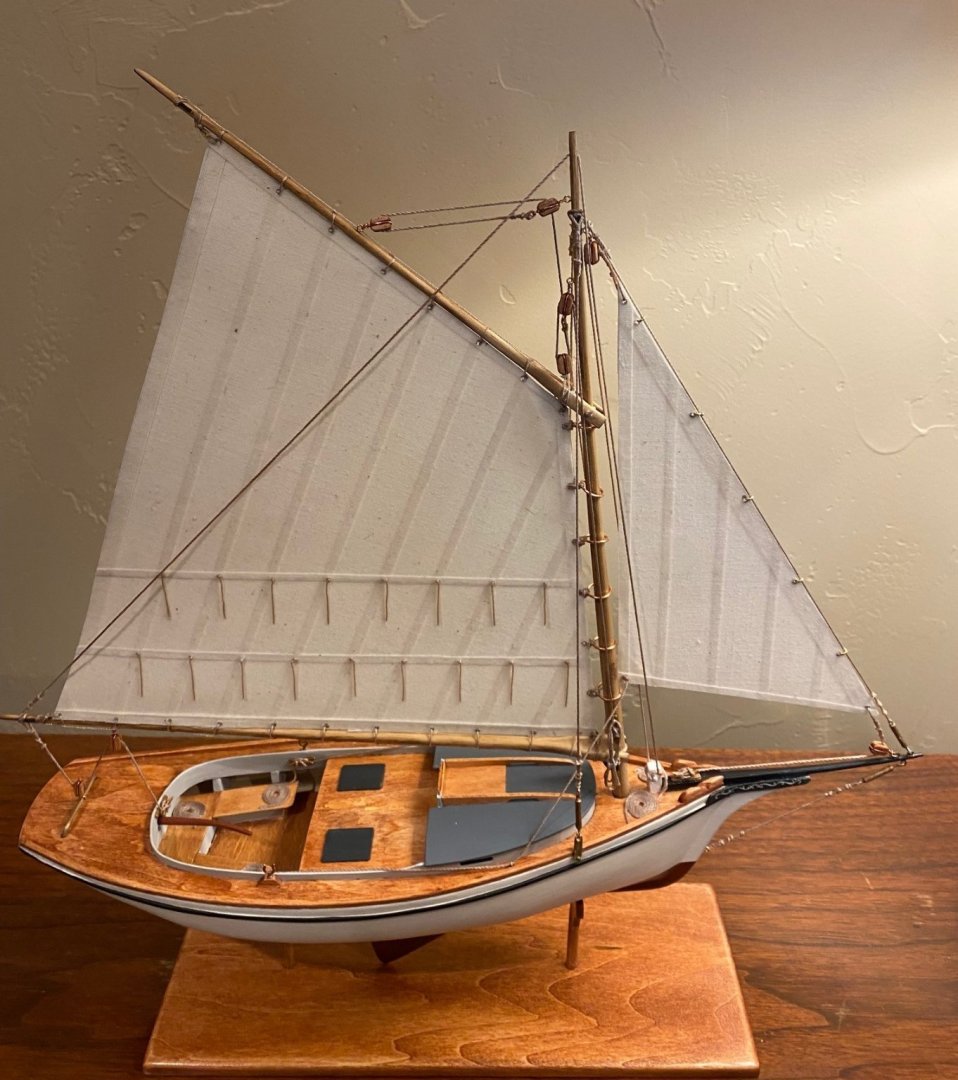
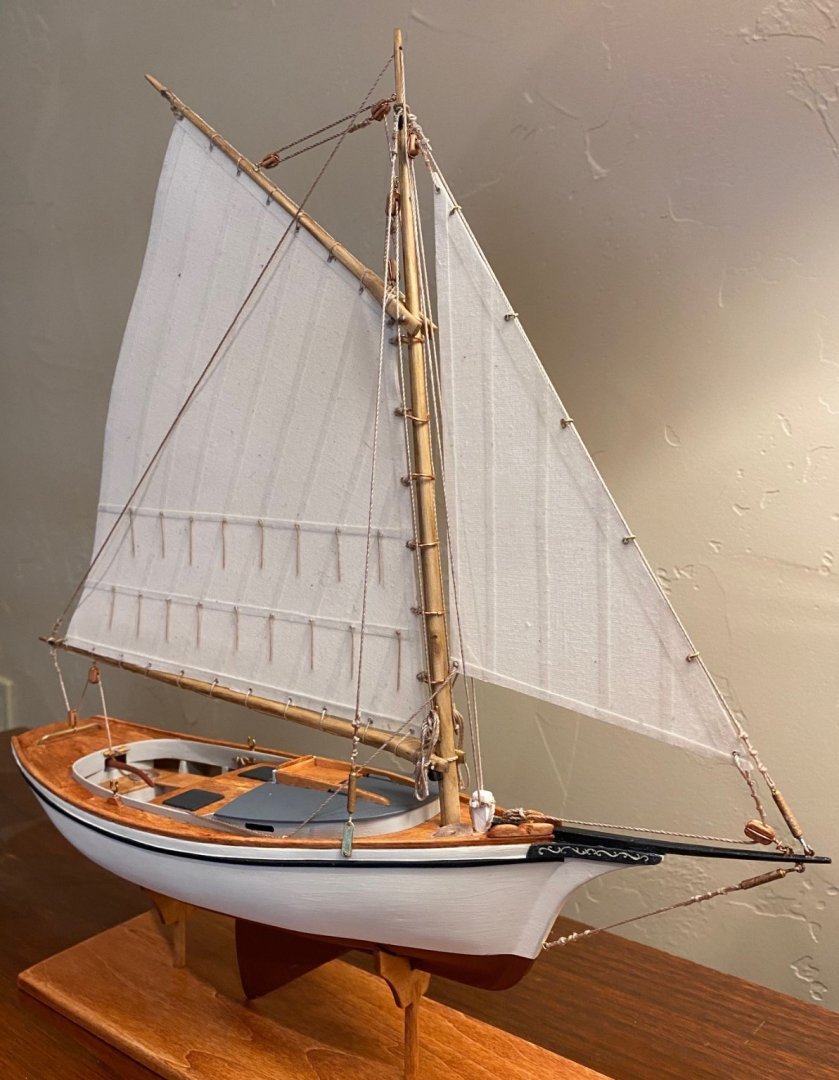
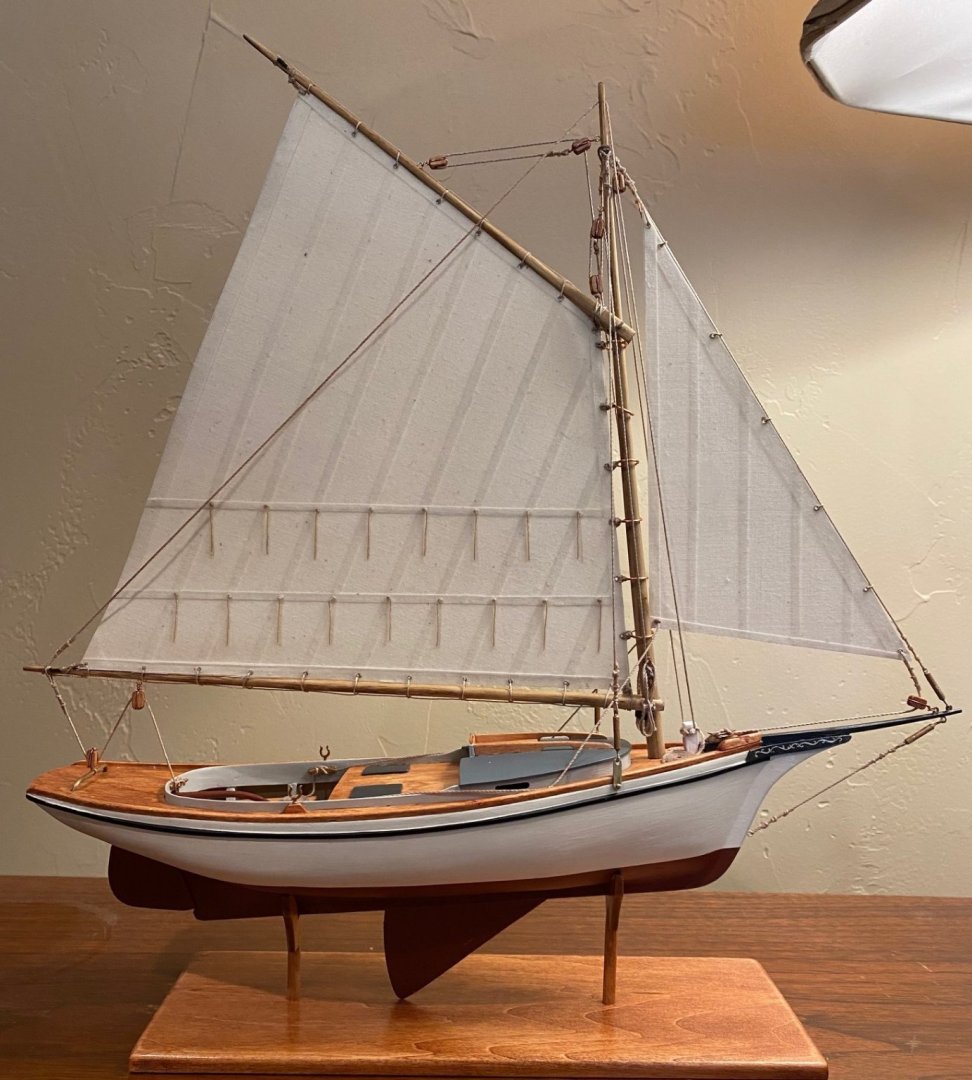
Well, I’m finally done with the build. I have improved my skills and learned some additional things building this boat. Planking of the aft end is definitely a challenge for a beginner builder. I was very glad I had had the planking experience from building the MS 18th Century Long Boat. Besides the issues that we all have had with this new kit, I will get on my soap box again, Model Shipways needs to add a more detail schematic of this boat to include one of how the rigging is laid out, such as the one with the Model Shipways 18th Century Long Boat. The Long Boat plans and instructions by Chuck Passaro are fantastic for a novice. In regard to the rigging, I wish I would have done a single loop & knot on the lashings to make an eye in the rigging. I tried to do a double loop, like a double clove hitch, and it did not look good. Also, I like it with a much finer line to do the lashing. Now on to my next build, I’m trying to decide between the Phantom New Your Pilot Boat, which is a solid hull, and the Armed Virginia Sloop, which is Plank on Bulkhead, both by Model Shipways. I have both and I had previous started the Phantom but shortly into shaping the solid hull, I determined that it had been miss-machined. Model Expo sent me a new hull and it looks better. I’m still a little intimidated by finishing a solid hull, I’ve never been good a carving or shaping small wood. Even in Boy Scouts, I was terrible at whittling. I have to take care of some other work for the next two weeks so I have time to decide which I start first.

- 62 replies
-
- 9
-
-

-
- muscongus bay lobster smack
- Finished
- (and 1 more)
-
I've just been using the rigging lines that come with my kits. It appears that most of the lines are Nylon. What are the different types of line? I've heard of Cotton, Nylon and Polyester/Cotton blend. What is the best type of line and why?
-
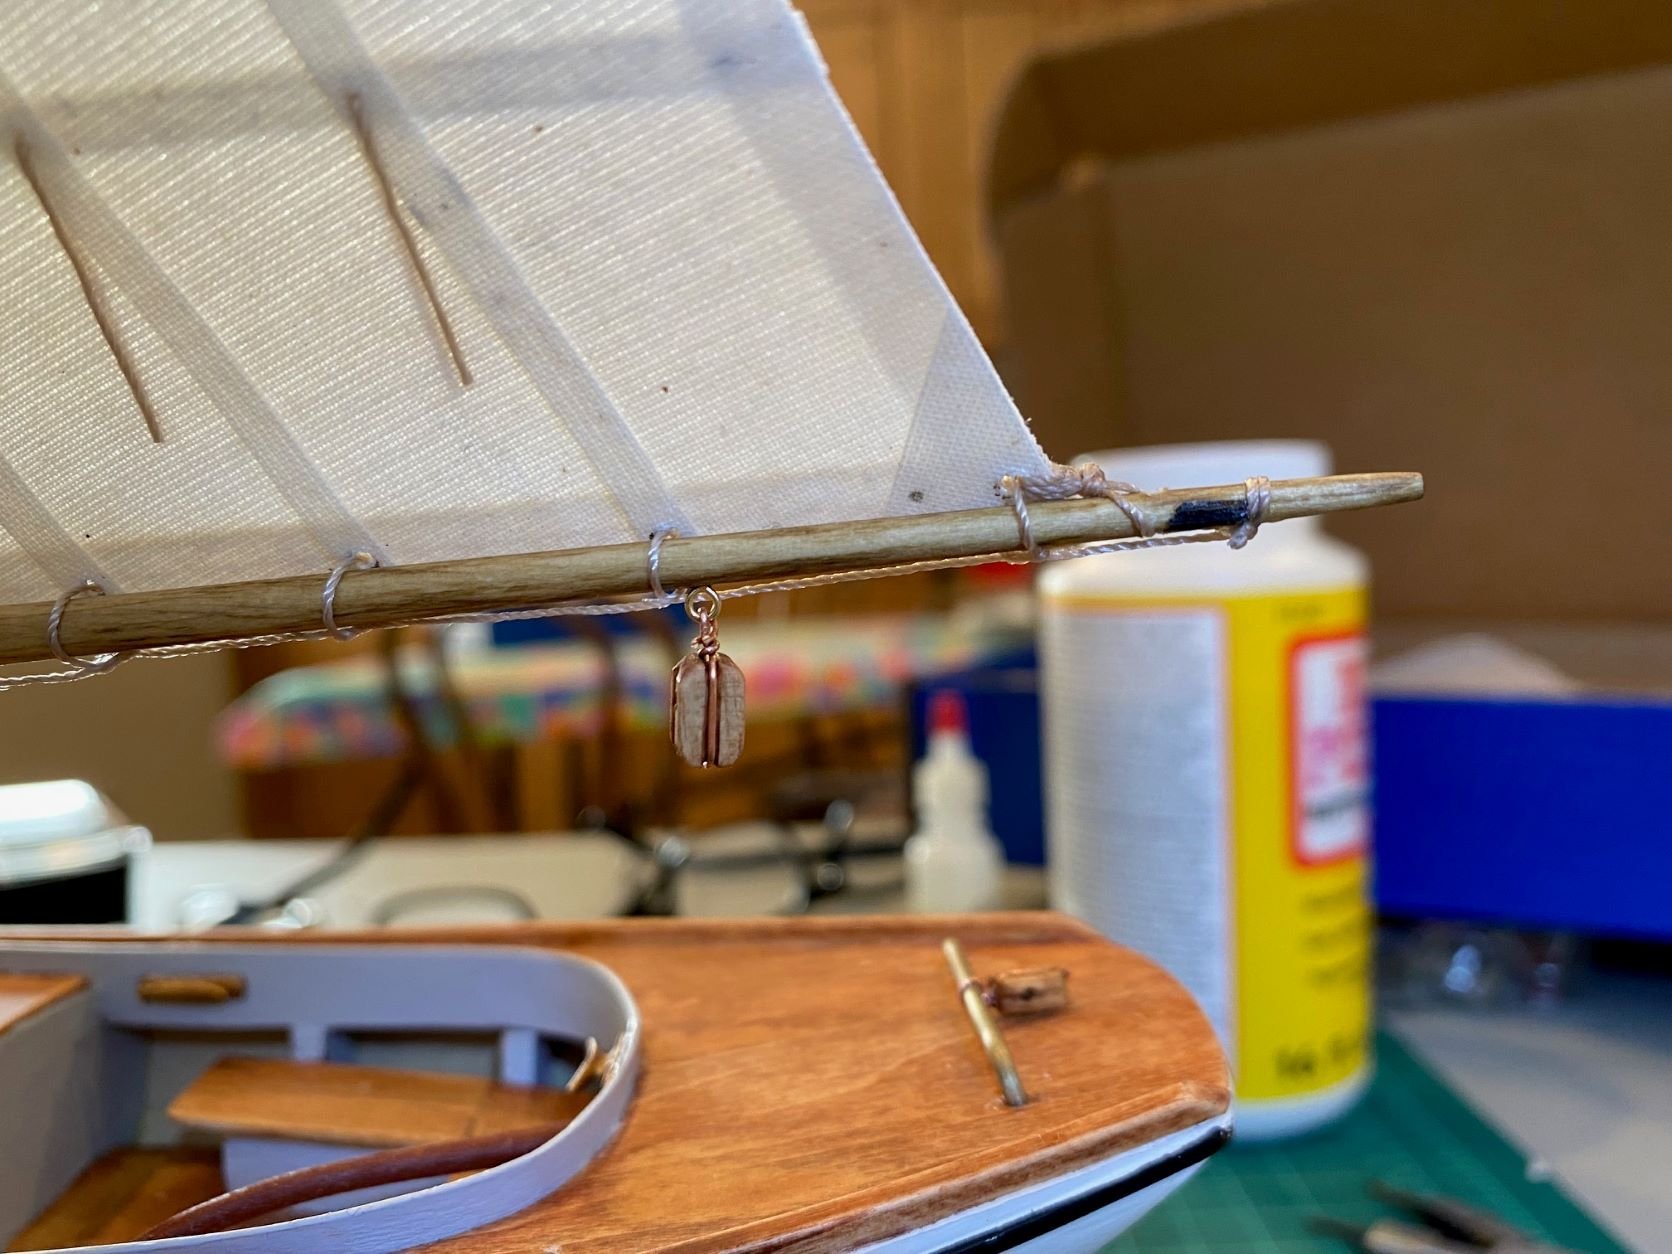
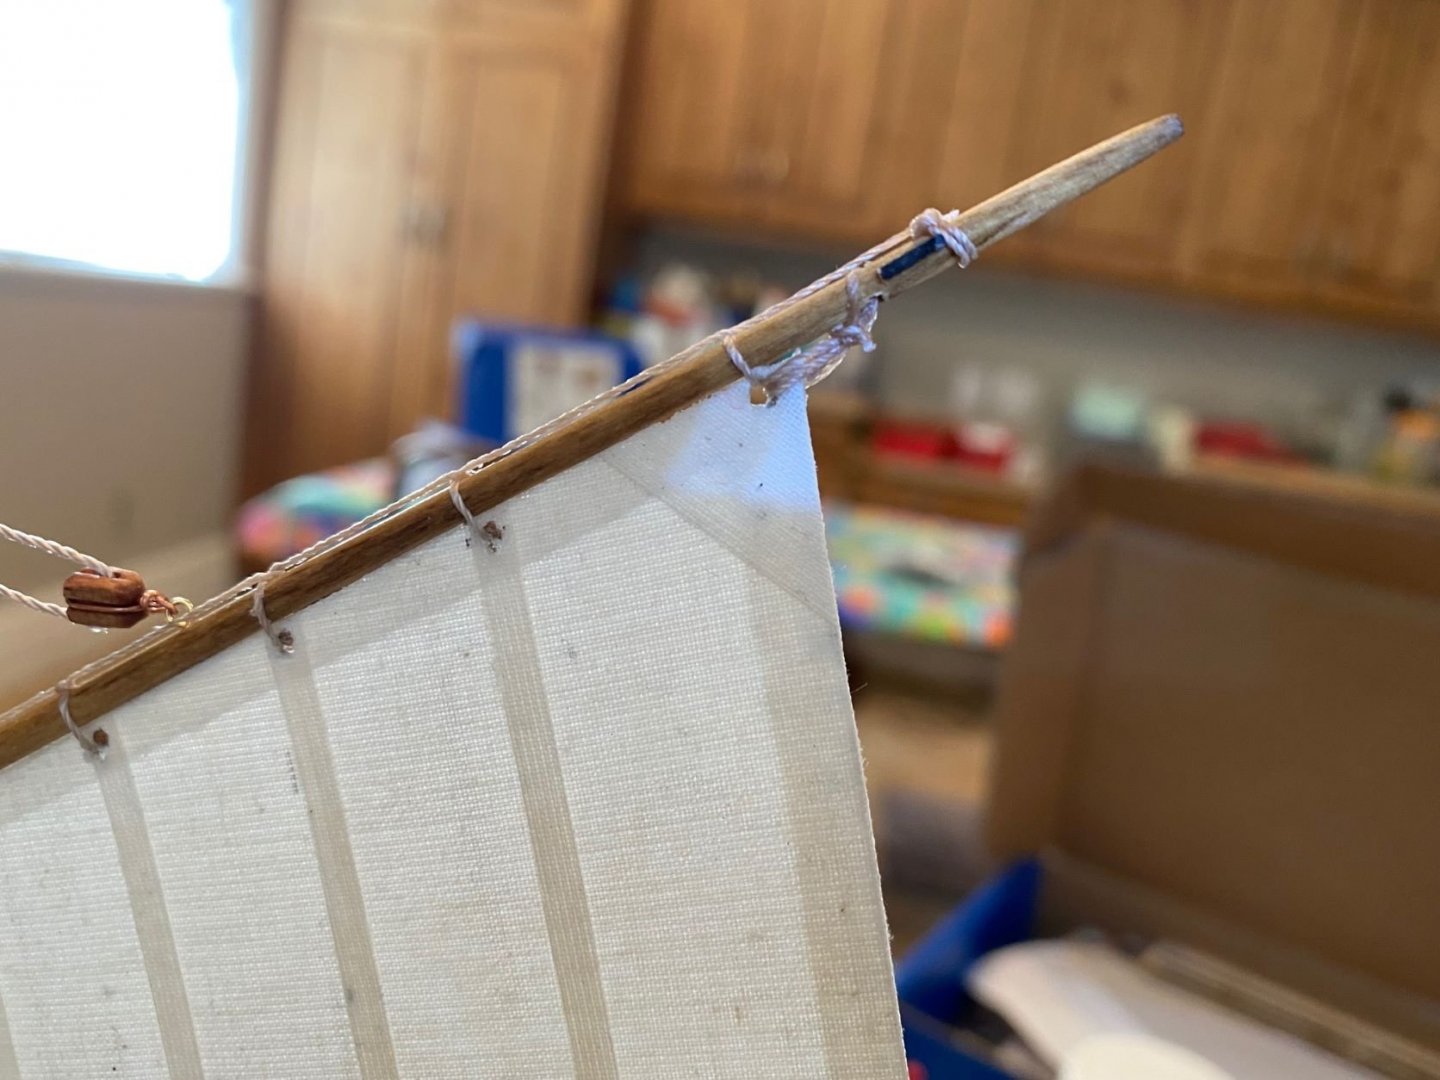
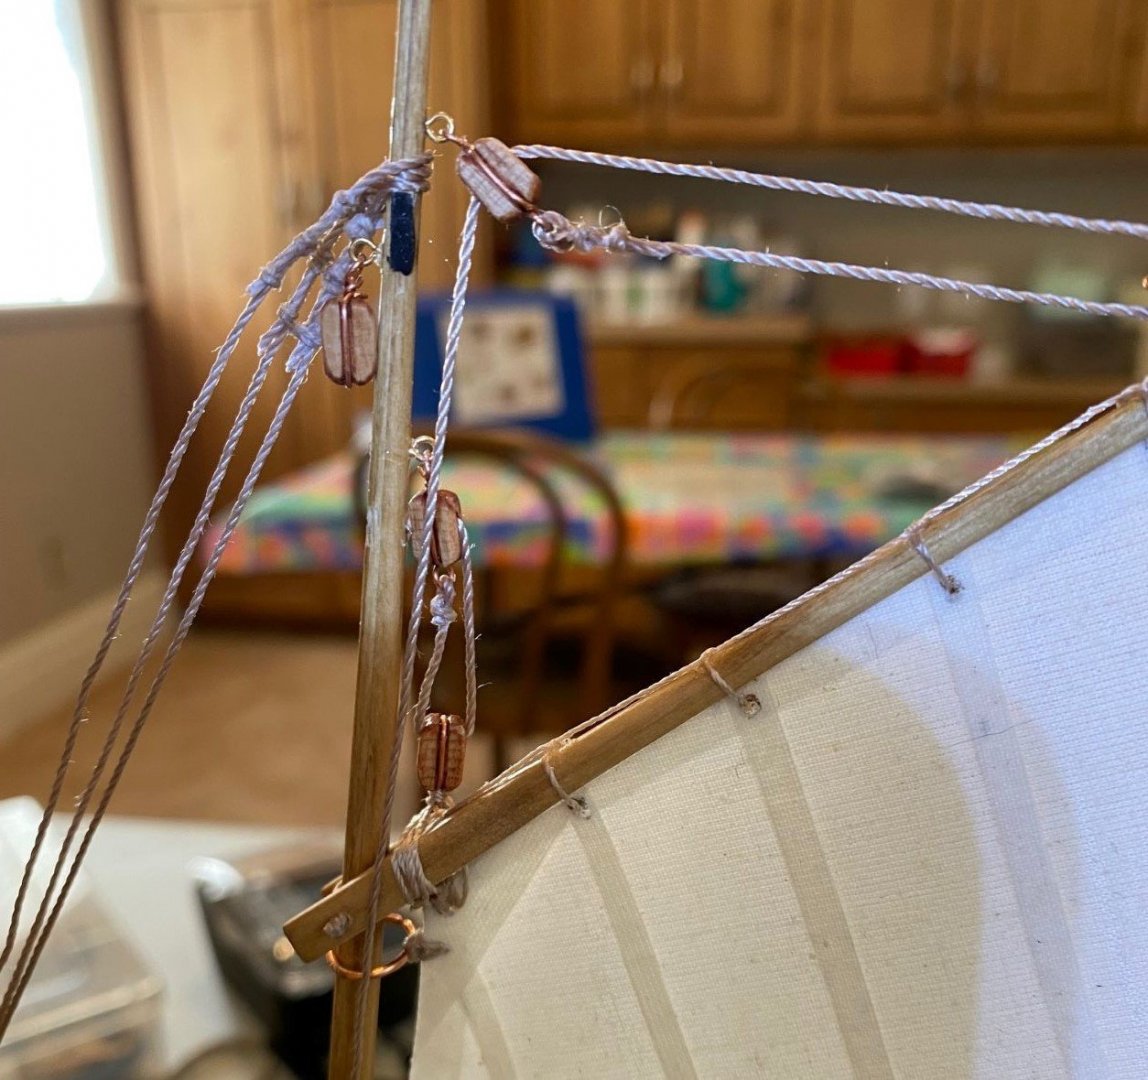
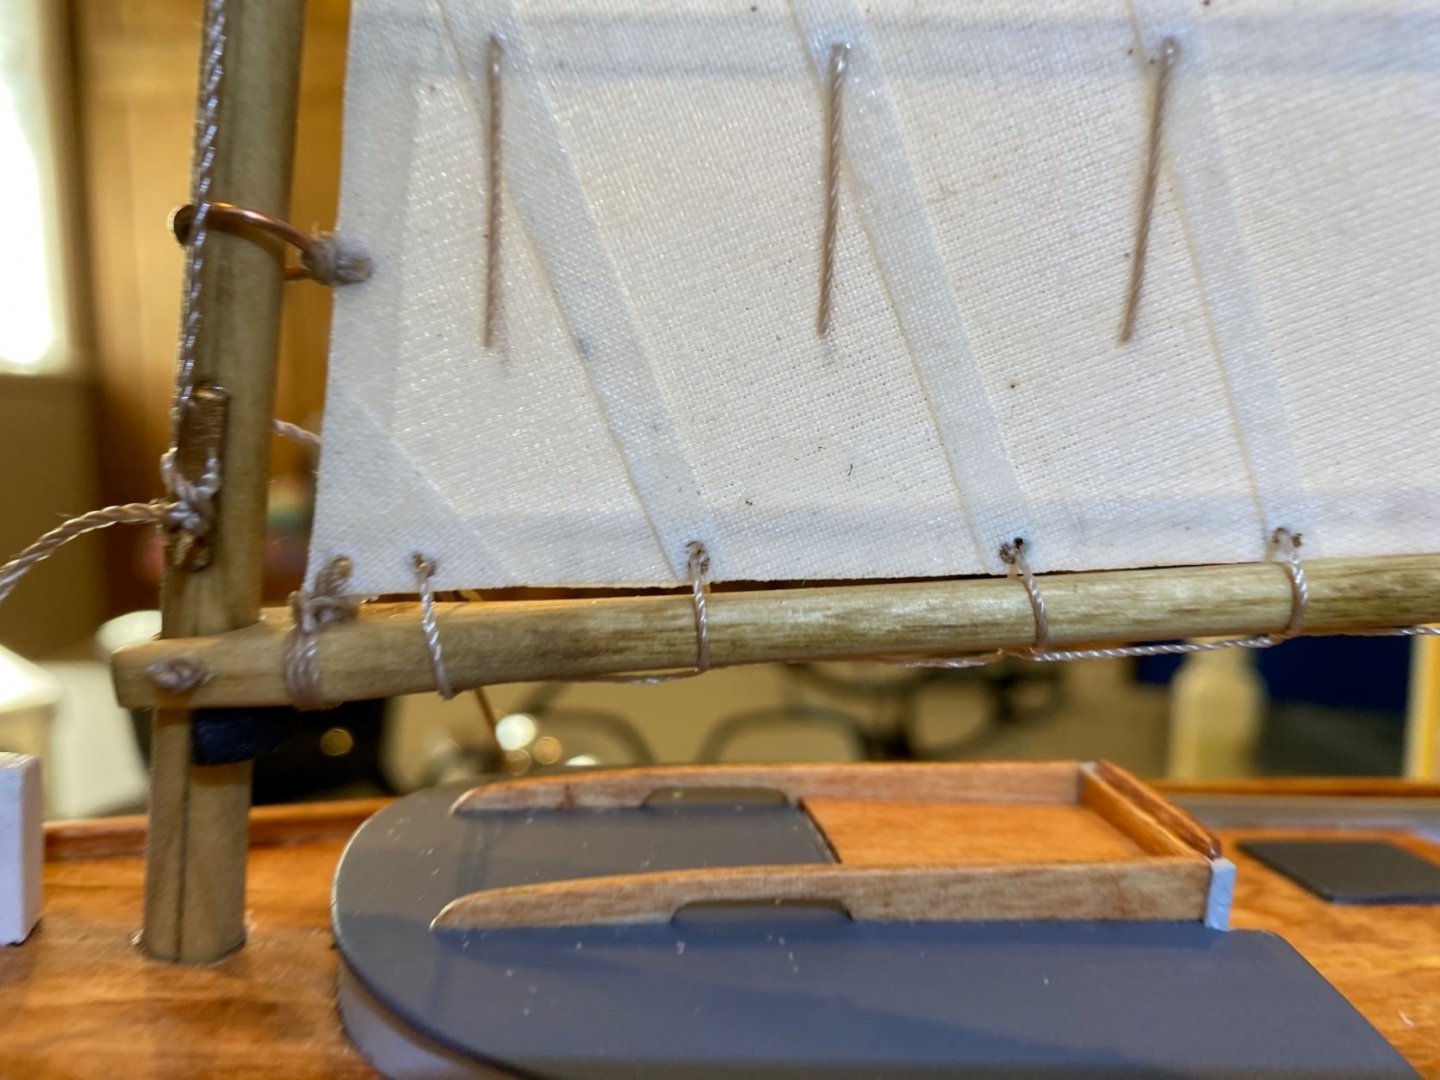
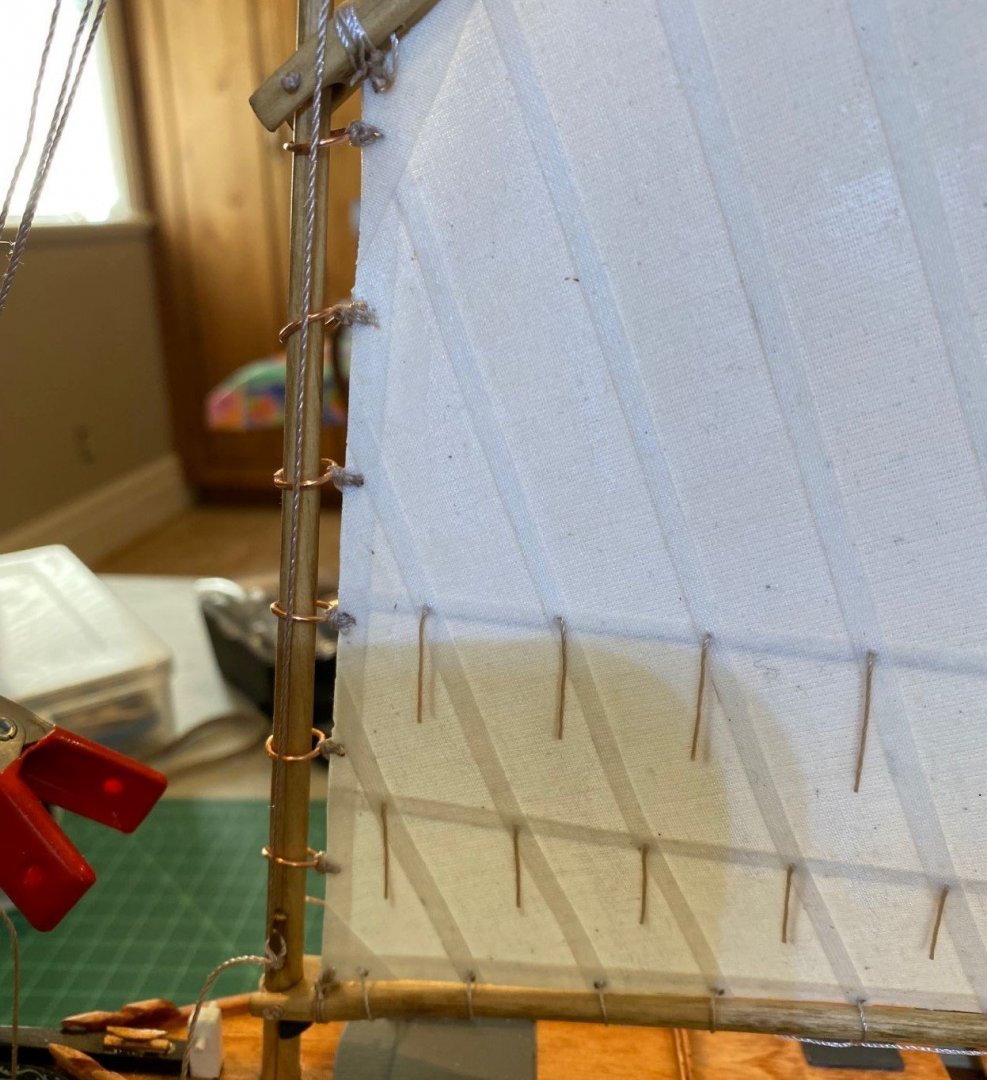
Sanded the edges off the blocks but did not shorten them. Broke a few wires as I was twisting to make the wire tight around the blocks, but had enough wire. I left the hook loop unfinished until I threaded the wire in the brass eye. Making the sails was very similar to the Norwegian Pram. I used water thinned Mod-Podge which is very similar to white glue if not the same material. Ended up with some pencil lines which don’t look so good. Also, might have used to much Mod-Podge, the sail is very stiff, will have to wait and see. I also don’t think I should have tied the brass mast hoops so close to the sail as well as the sail to the gaff. Completed the running rigging on the mast and starting to make the standing rigging. I wish I would have waited to after I put the standing rigging on the mast before I put the upper gaff block so I could have made the standing rigging eye off the mast.

- 62 replies
-
- 3
-
-
-
- muscongus bay lobster smack
- Finished
- (and 1 more)
-
First, I’m a beginner too and you’re doing great on this build. What’s the old saying, “we learn from our mistakes.” Instead of the Muscongus Bay Lobster Smack by Model Shipways look at the Model Shipways 18th Century Long Boat. I built the Dory and Pram like you did, and then I built the Long Boat since the Lobster Smack wasn’t available. I learned a lot from the Long Boat and the instructions were SO much better than the Lobster Smack or the Pram. The Long Boat has a great schematic that showed great details. The planking on the Long Boat was better for a beginner than the Lobster Smack. The Lobster Smack planking has a tricky aft end due to the complex curves and bends. So far my two favorite builds are the Long Boat and Dory. I’m finishing up the Lobster Smack now and it’s my least favorite of the four. I’ve learned a lot and some past learning was reinforced by the Lobster Smack. Take a look at the Model Shipways Muscongus Bay Lobster Smack build logs that exist on this Web site before you choose your next build.
- 160 replies
-
- 3
-
-
- Model Shipways
- norwegian sailing pram
- (and 1 more)
-
Grate start, this was a challenging build for me as it was my second build too. But I learned a lot from this build. Yell if you need help
-
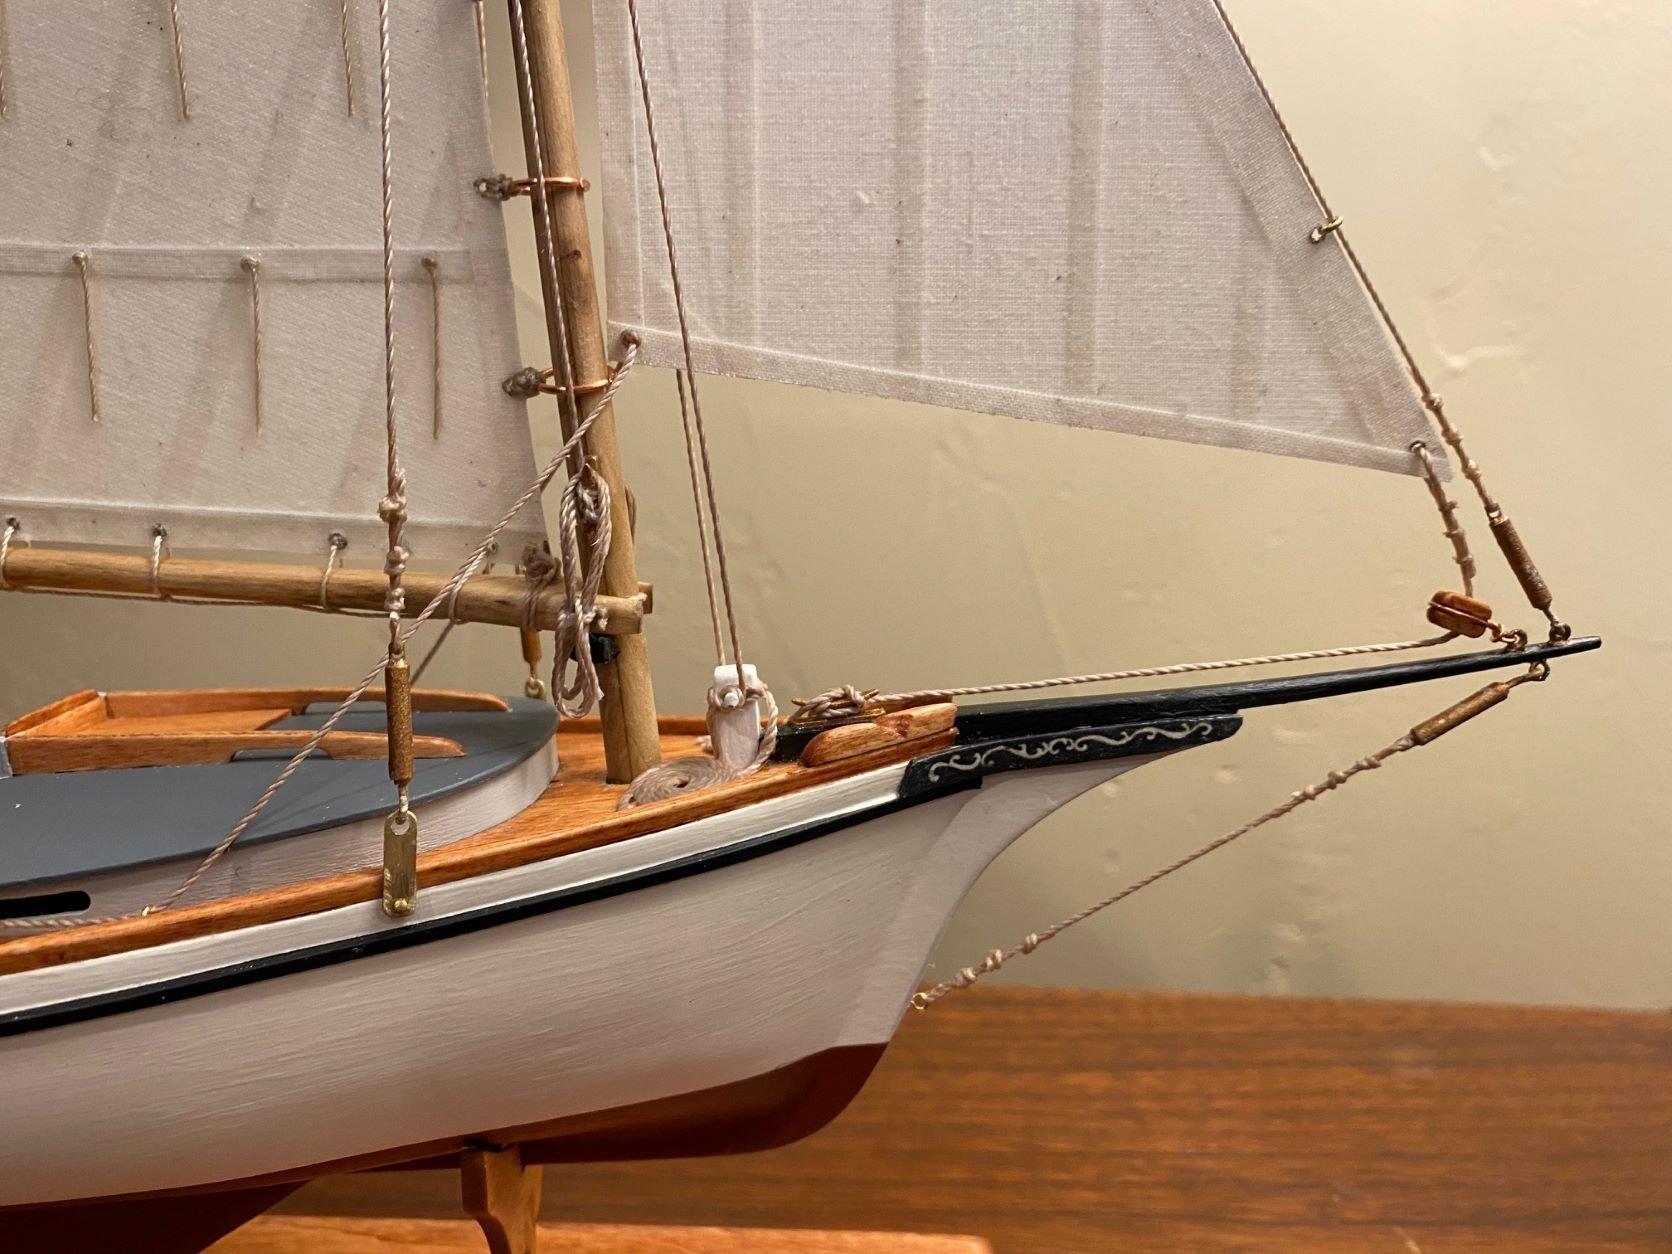
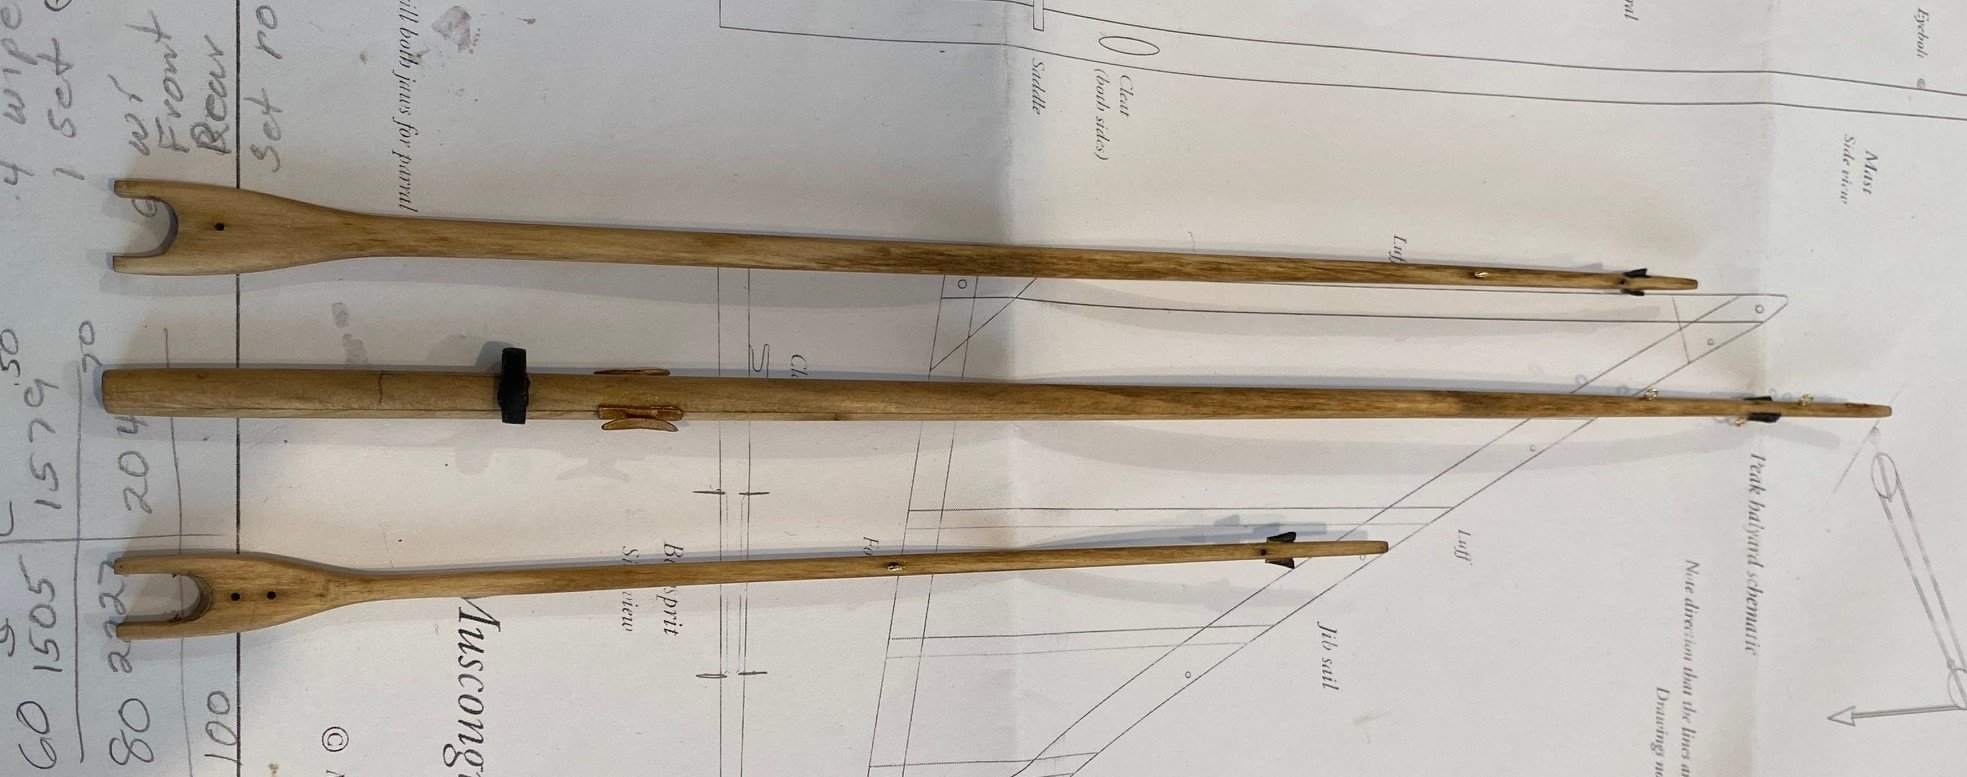
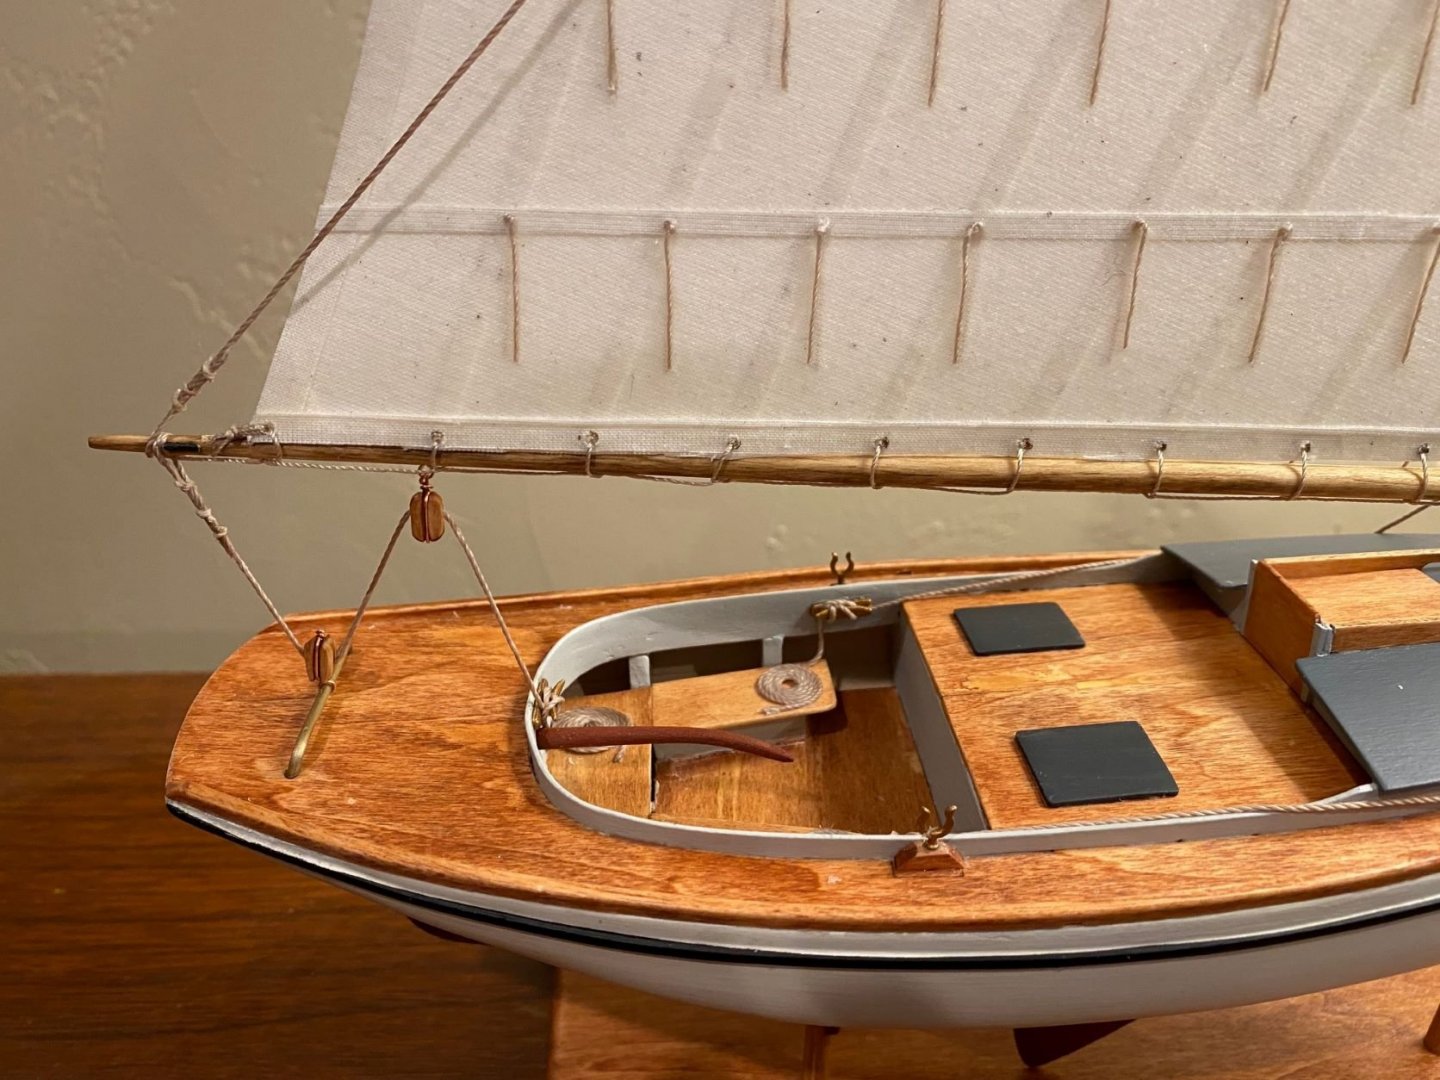
Well after a break of over 2 months, I’ve started back on the build. Installed the rudder and tiller without too much problem. I did make the tiller out of thicker material than the kit, it was just too thin and flimsy to do anything with and I did not want to go through the trouble of doubling it. I had better luck at this mast, boom, gaff and bowsprit; at getting them round than the Norwegian Sailing Pram. The dimensions of my mast were not the same length as the drawing but it should work without a problem. Small goof, I stained the mast, boom and gaff prior to installing the stops. Had to make two small stop cleats for the gaff since I could not find any on any of the sheets in the kit. I used cyano to glue the bowsprit on, had to glue the aft end first then bend the bowsprit a little to align with the beakhead. Drilling the holes in the two brass chainplates was a challenge, even after annealing the brass strip. Need to find some stronger drill bit tips that will cut through brass better and quicker. I painted the cleats and turnbuckles brass with some enamel model paint, had to let them dry for over 24 hours before gluing them on. On to the mast hardware, making the blocks and sails.


- 62 replies
-
- 2
-
-
- muscongus bay lobster smack
- Finished
- (and 1 more)
-
Great job, have one on me before you start another ship.
-
@Retiredpm Great job. I regard to the oars, they look good and the only way to get them round a this point is sanding. Just be careful not to put to much pressure while sanding, they break very easily.
- 12 replies
-
- 2
-
-
- Model Shipways
- Lowell Grand Banks Dory
- (and 1 more)
-
My coaming look just like yours, but I glued it in and used a little filler to smooth it out an it looks good now.
- 52 replies
-
- 2
-
-
- Model Shipways
- muscongus bay lobster smack
- (and 1 more)
-
Fantastic work, I like your lighter deck more then mine. How do you compare this build to the 18th Century Long Boat? I really appreciated the Long Boat schematic, it answered a lot of my build questions. What is you next build?
-
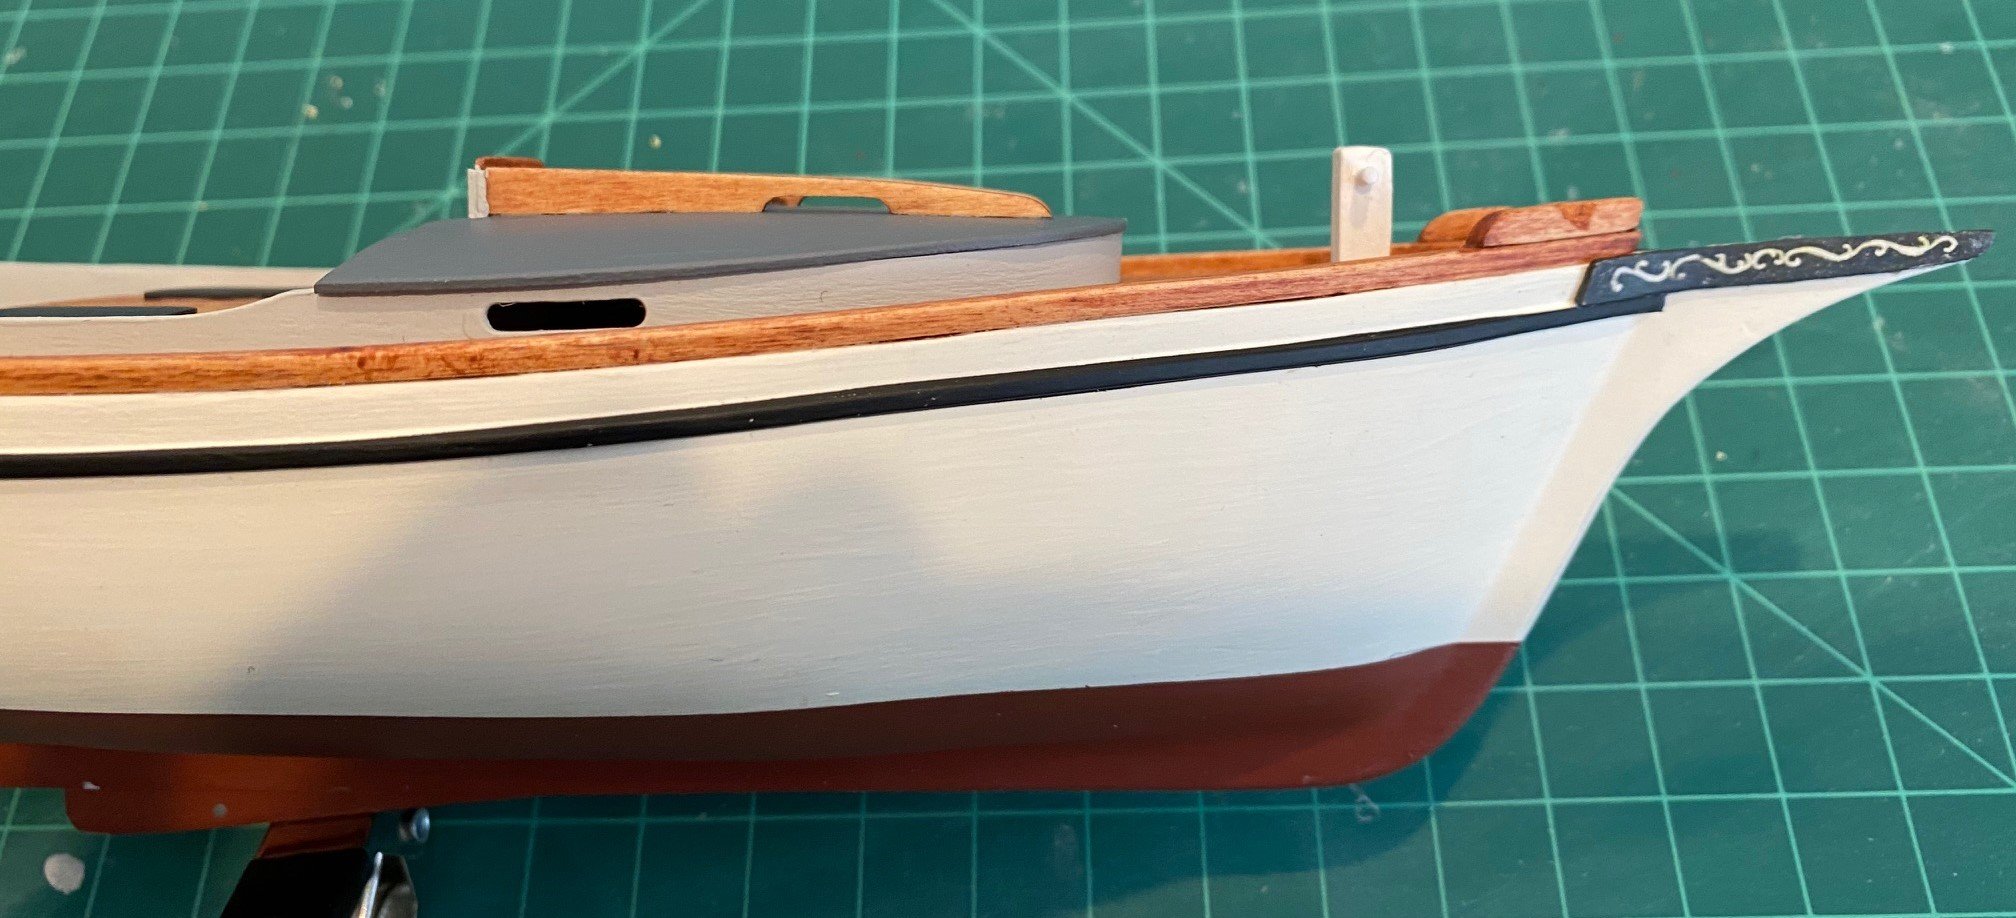
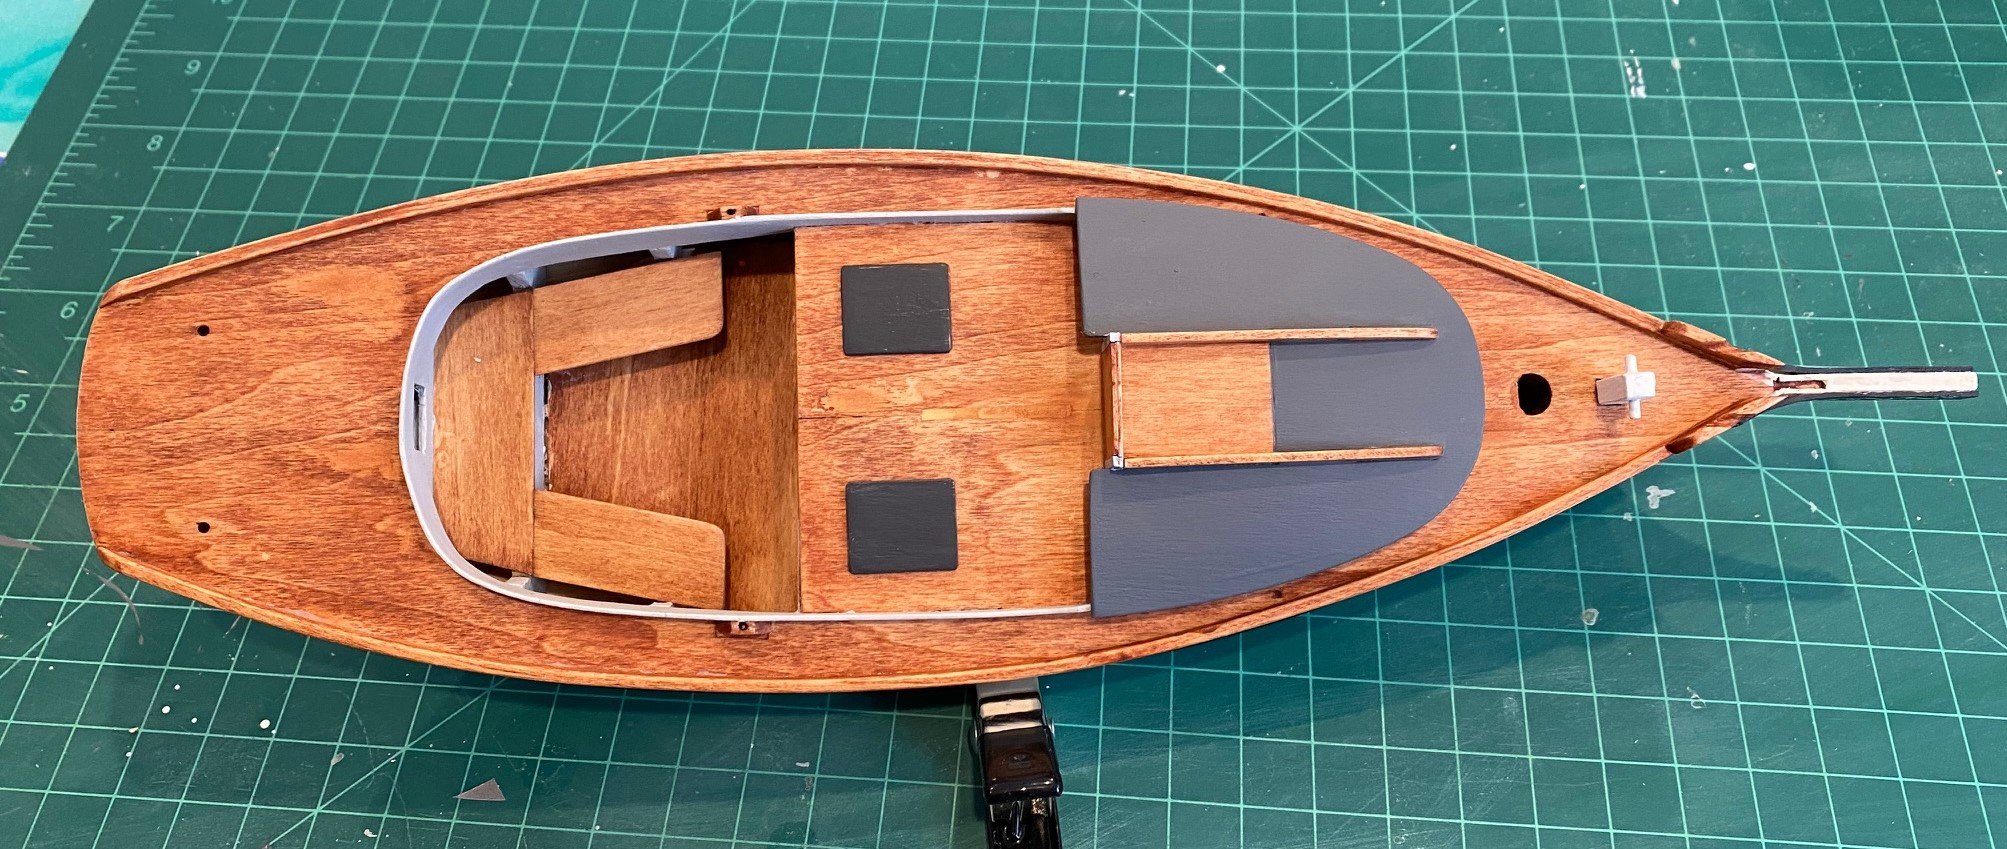
Also, note that the brass rod to raise and lower the centerboard is missing now. It came out while I was painting the model and I couldn't get it back so I just left it off and filled in the slot on the deck for it. I also used Mod-podge to adhere the 'trail board appliques' to the trail boards, I had used this water down white glue to adhere appliques on my 18th Century Long Boat. In both cases it worked grate and dried clear. I did break one of the trail boards in half while I was sanding it.
-
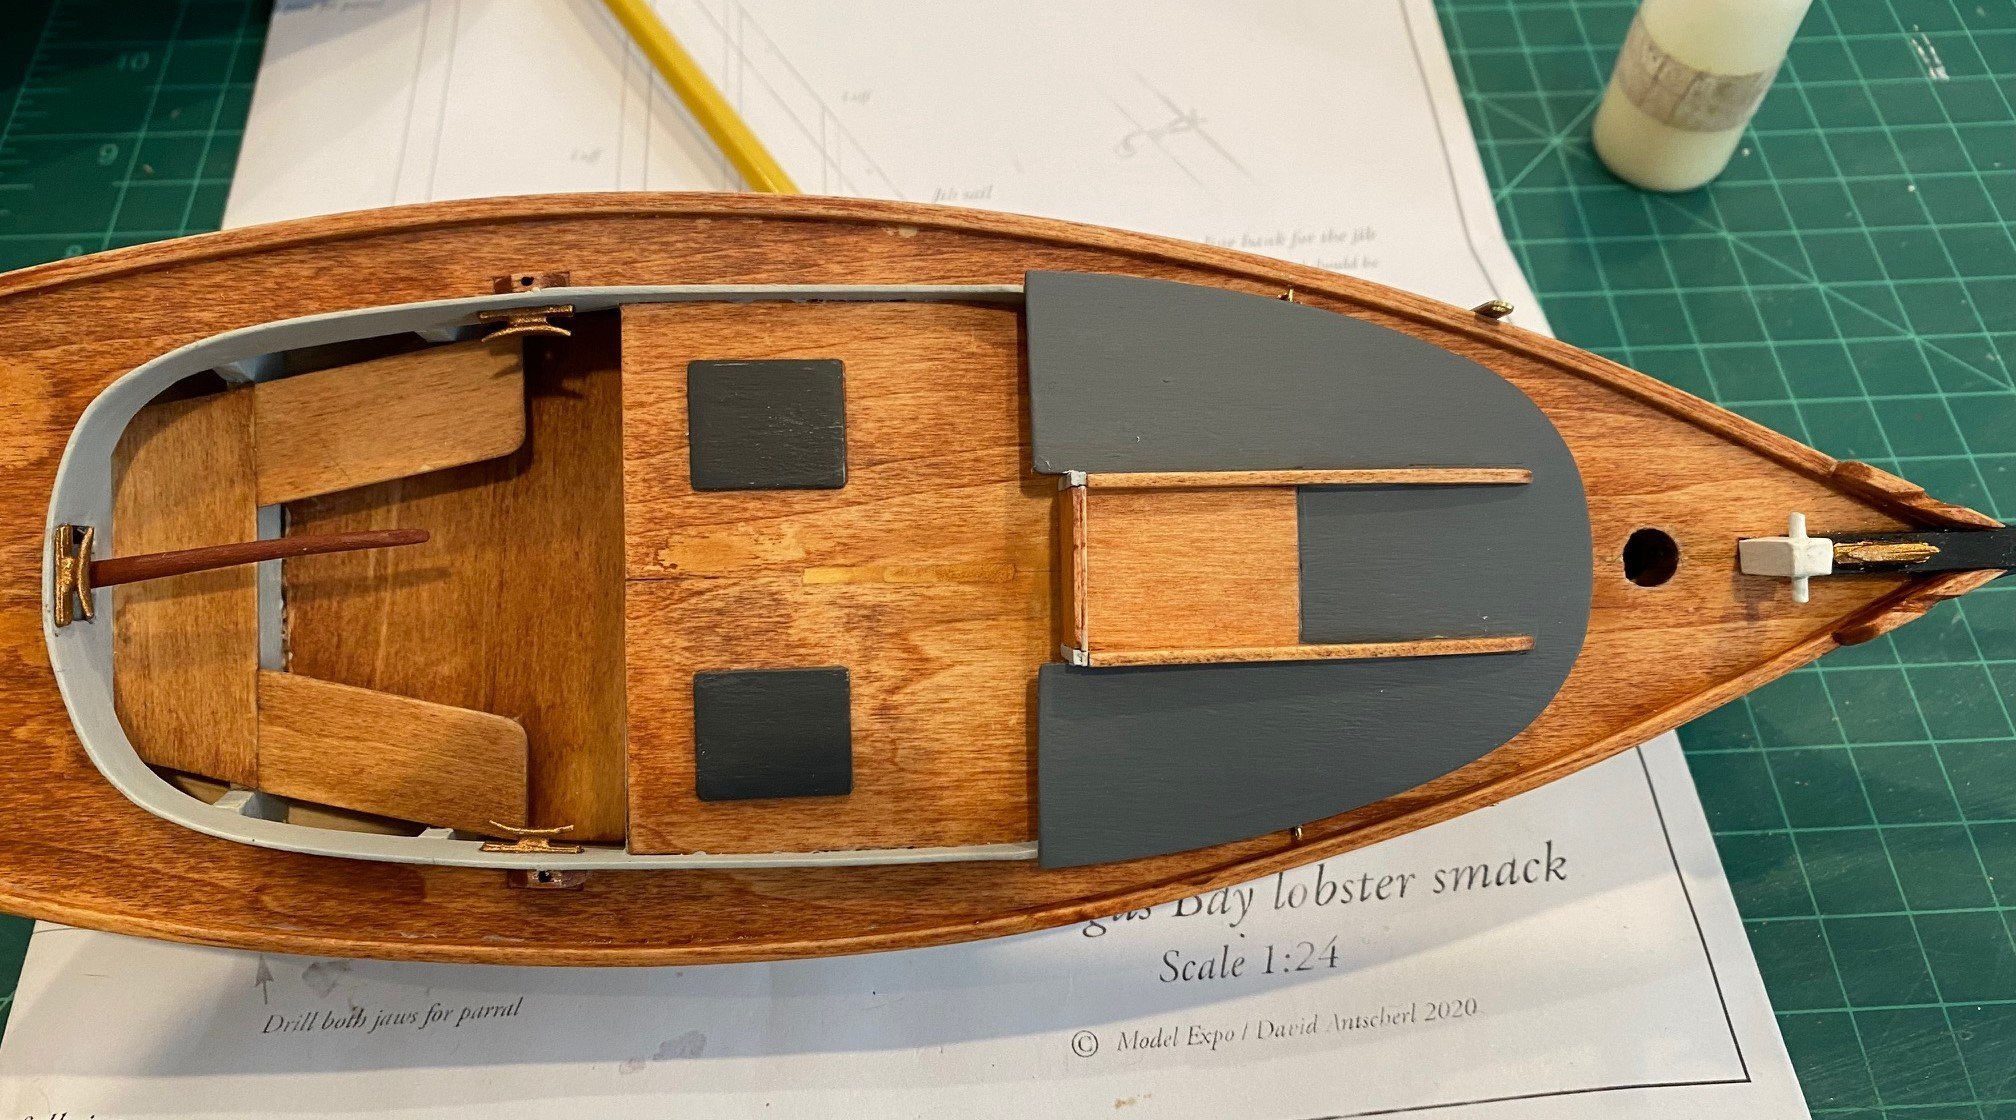
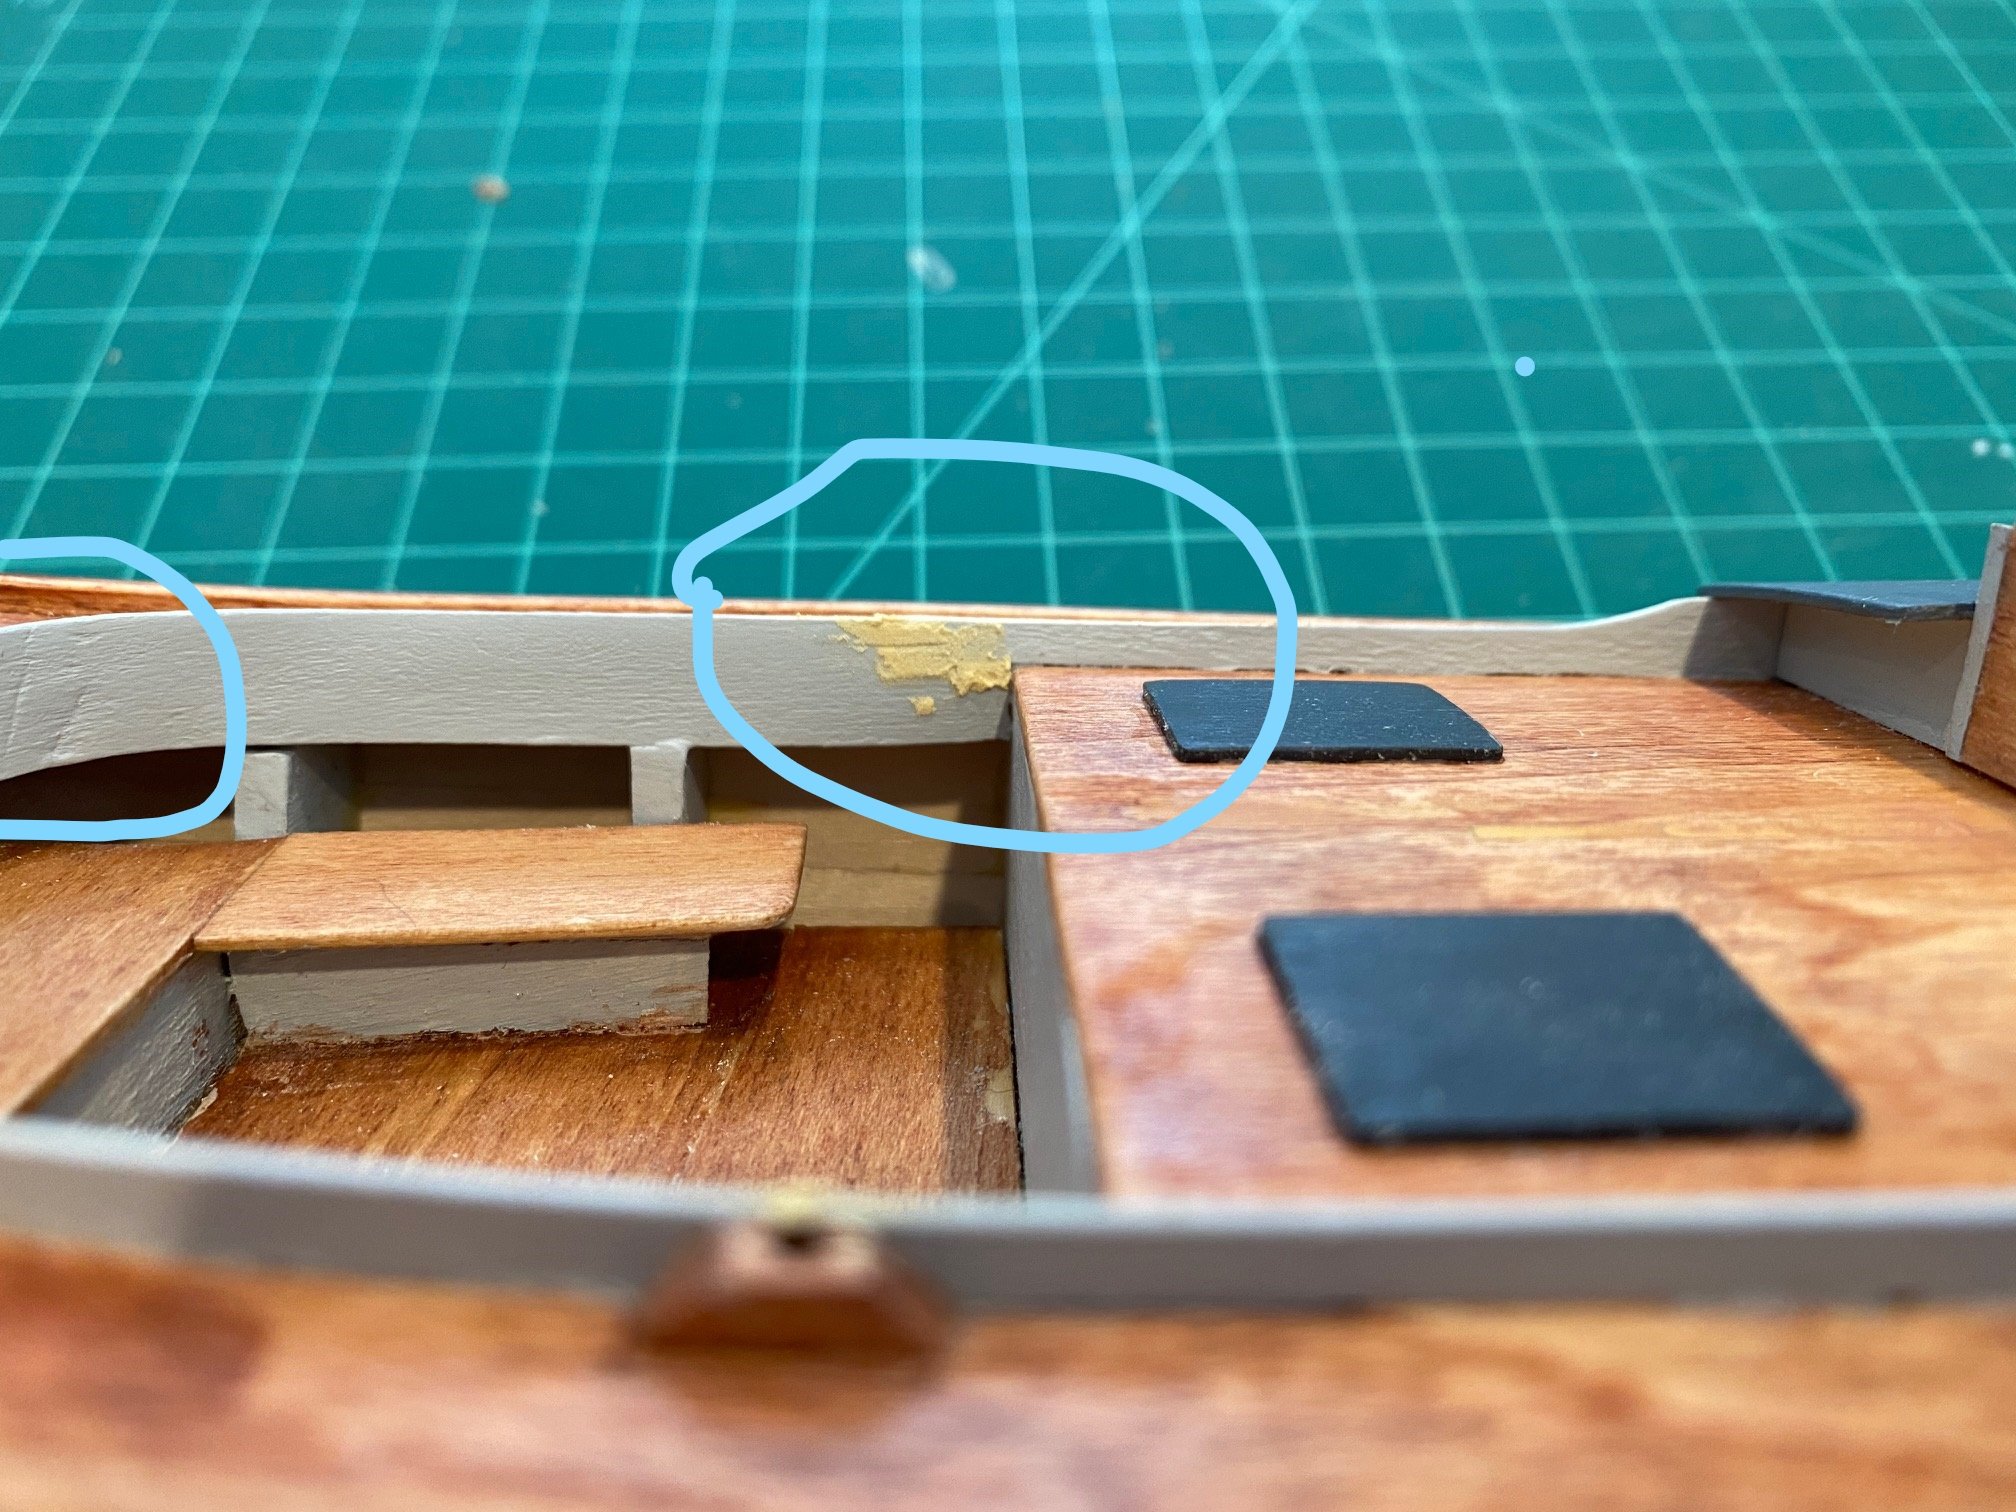
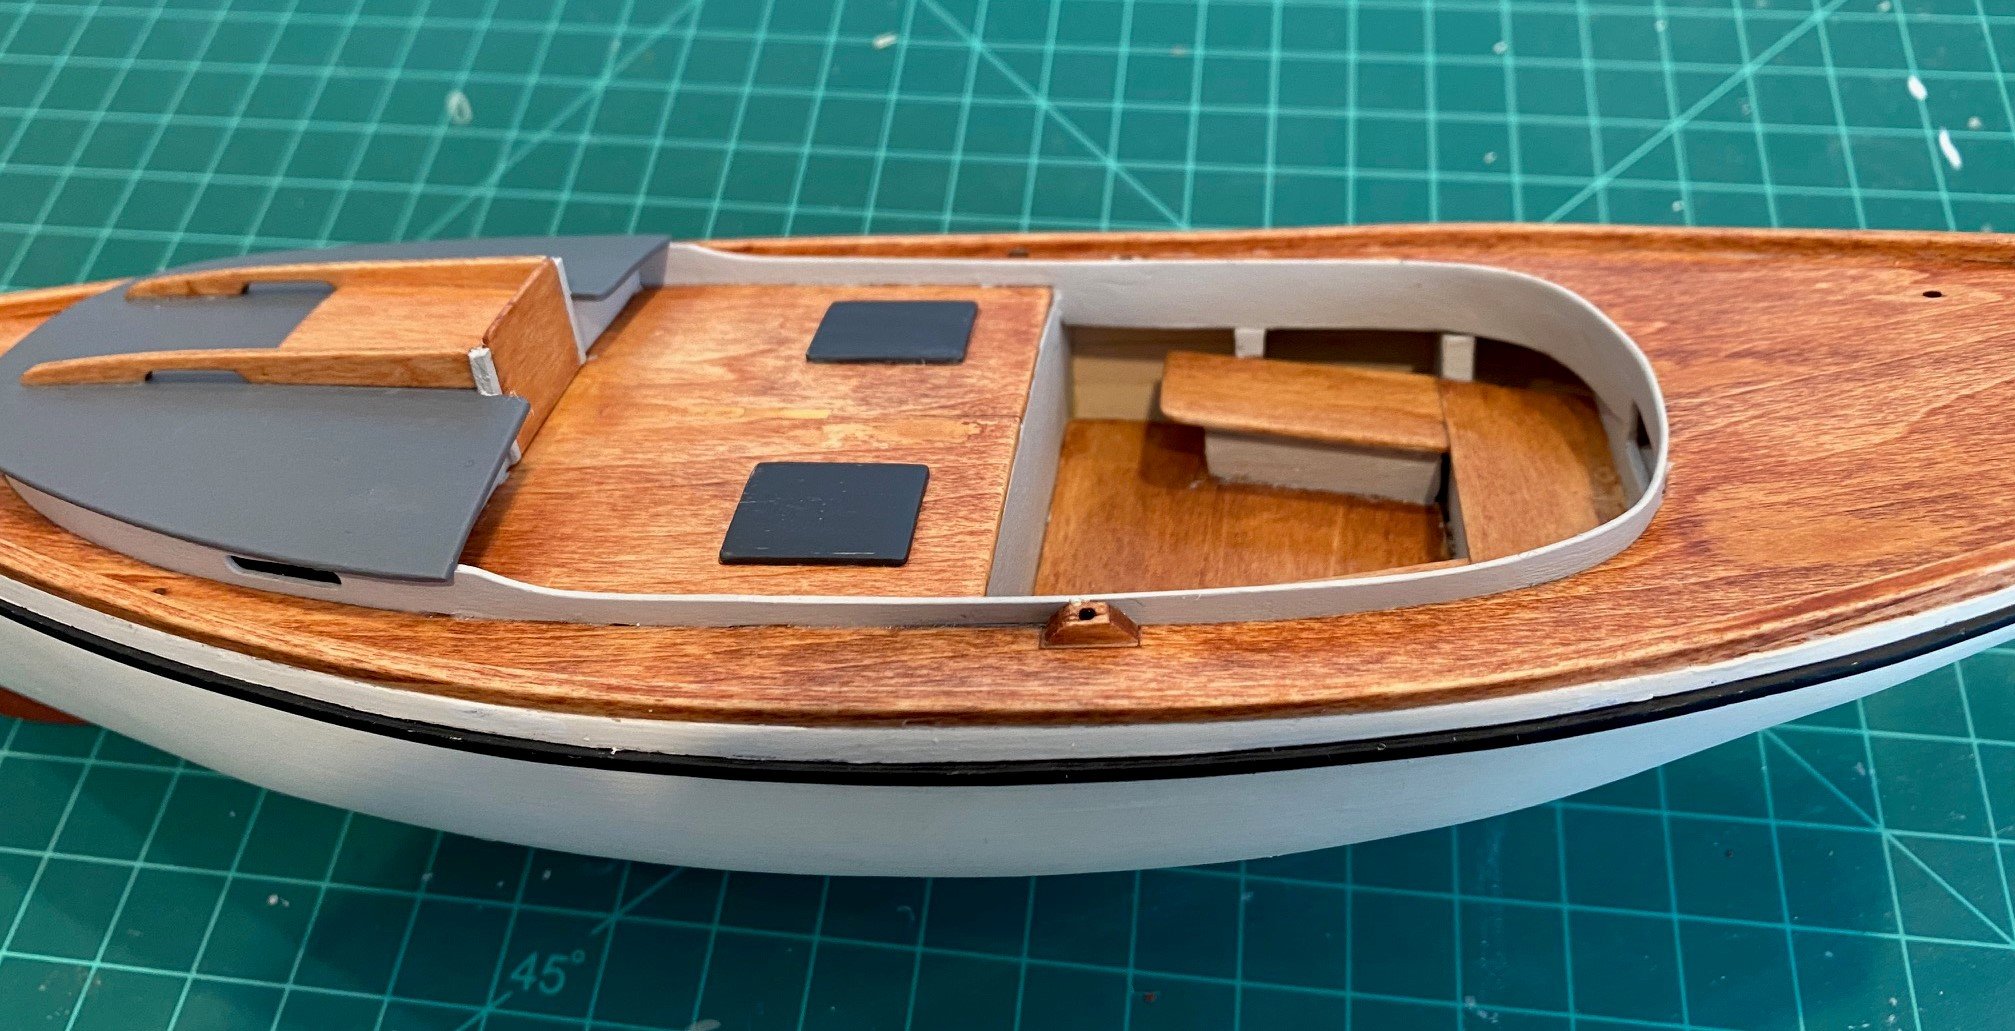
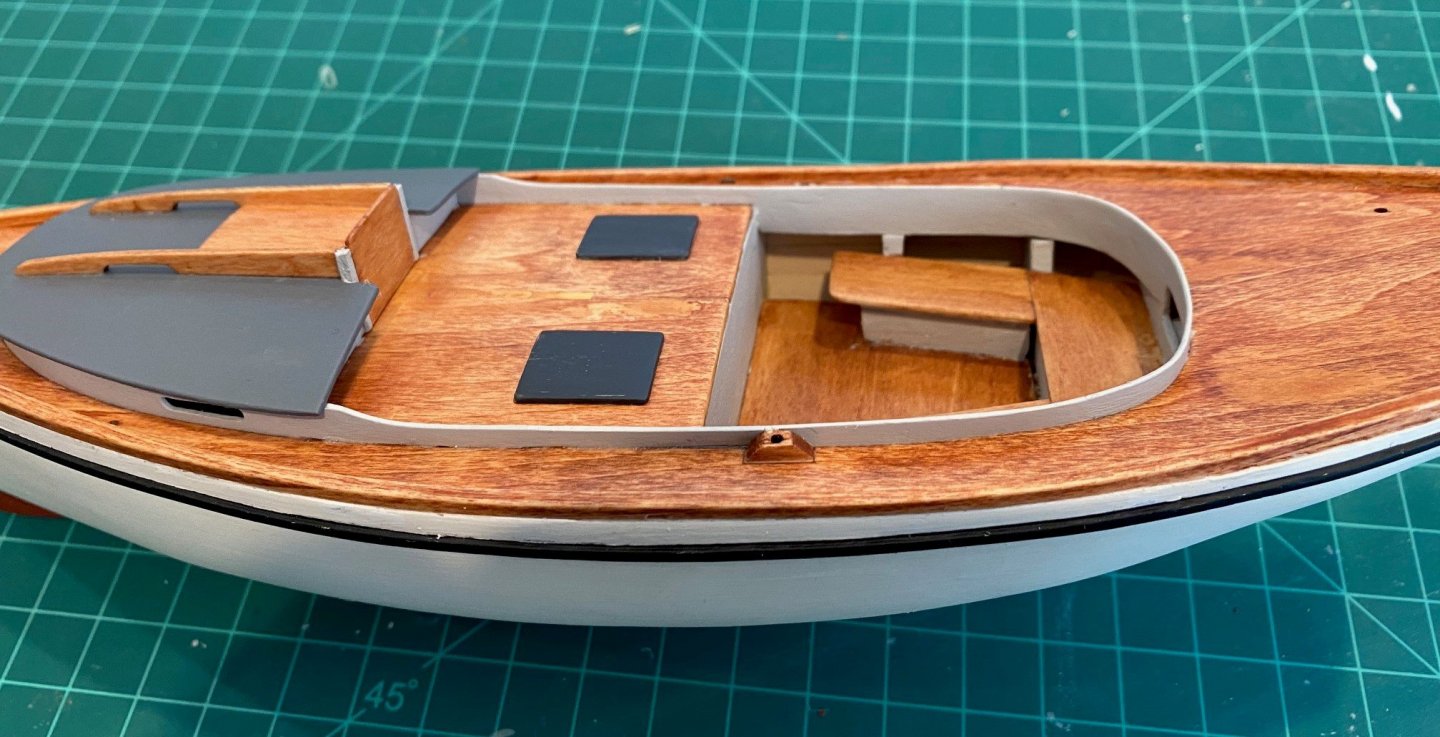
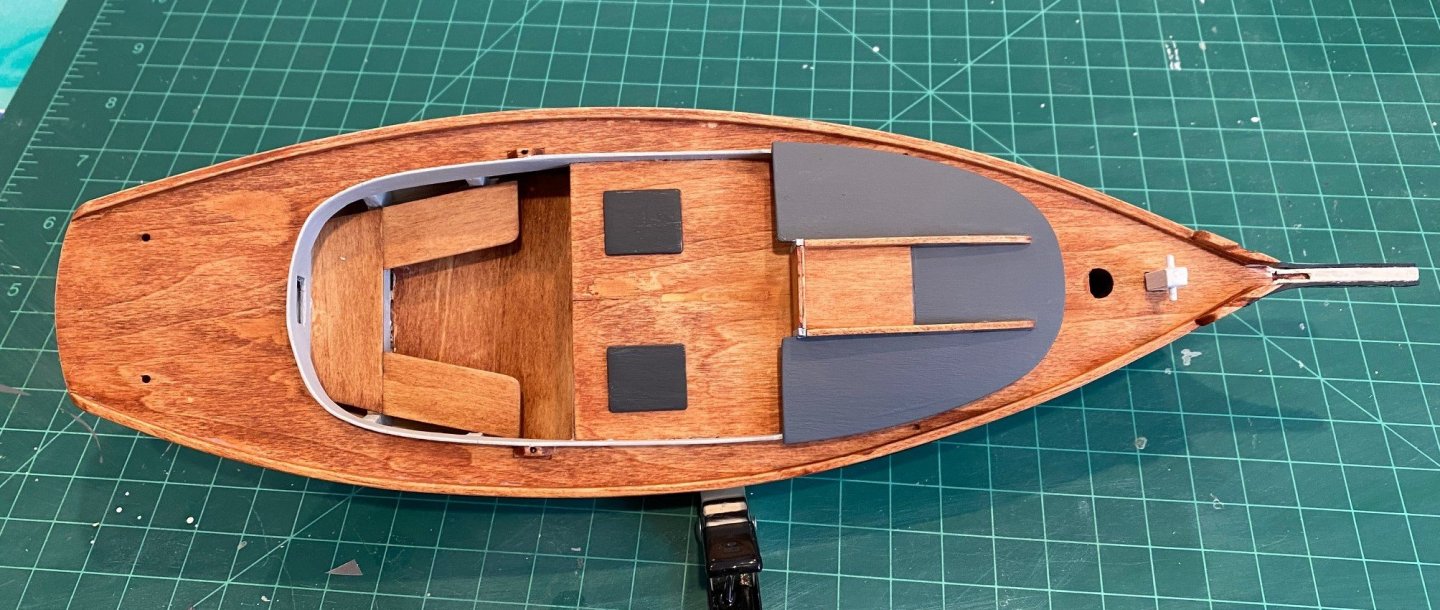
I didn’t like the small gap between the coaming and the end of the cabin sides so I filled it in with putty. Also, I filled in the area in the aft part of the coaming were it had a tendency to crease. Put the cabin roof on and the access hatches on and then sprayed with a matte clear coat. Now I will move on to shape the mast and spars. Waiting on the replacement sheet that has the rudder and tiller as well as the right size of line.

- 62 replies
-
- 2
-
-
- muscongus bay lobster smack
- Finished
- (and 1 more)