HOLIDAY DONATION DRIVE - SUPPORT MSW - DO YOUR PART TO KEEP THIS GREAT FORUM GOING! (Only 24 donations so far out of 49,000 members - C'mon guys!)
×


SkiBee
-
Posts
249 -
Joined
-
Last visited
Content Type
Profiles
Forums
Gallery
Events
Everything posted by SkiBee
-
 Paint will cover all fills. Looks really great
 -
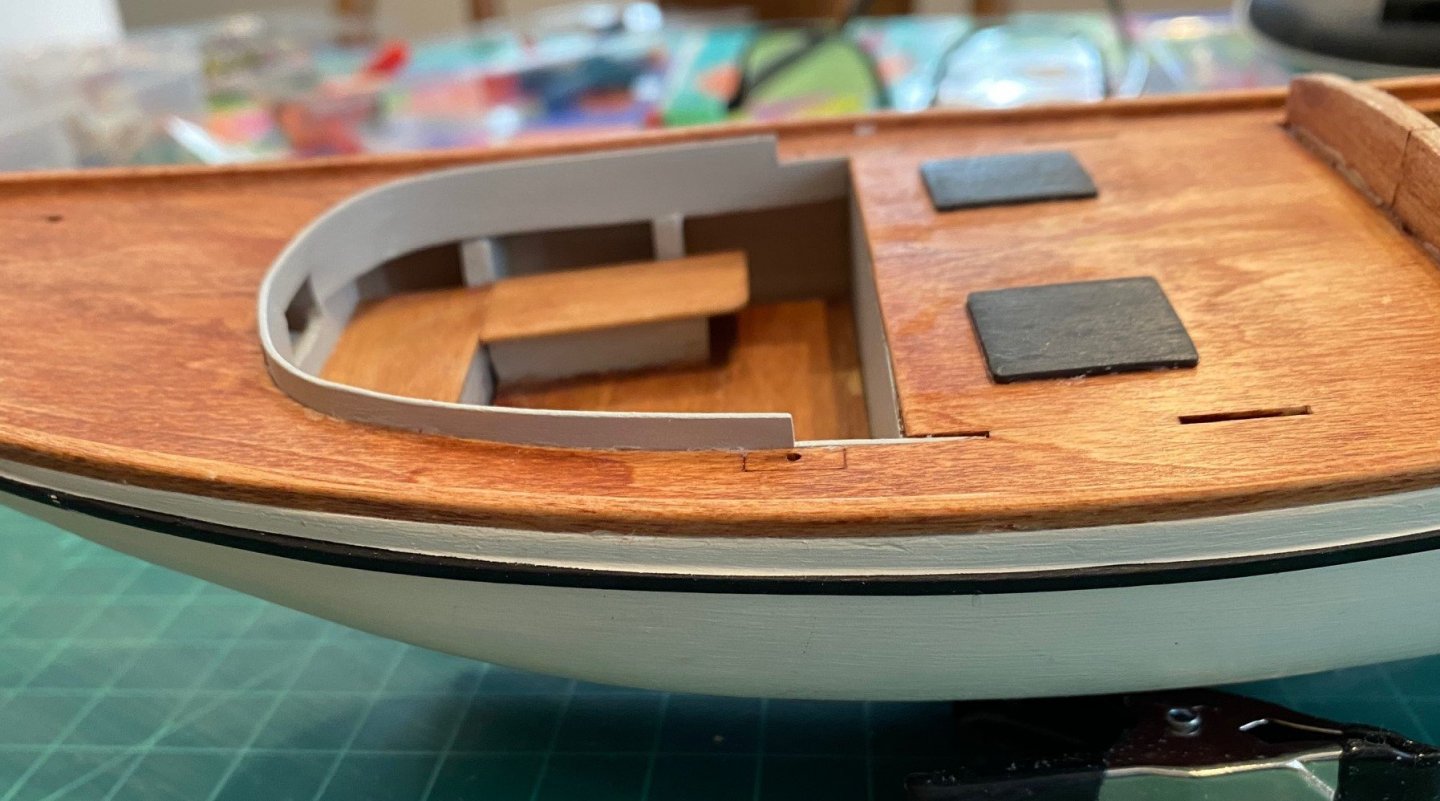
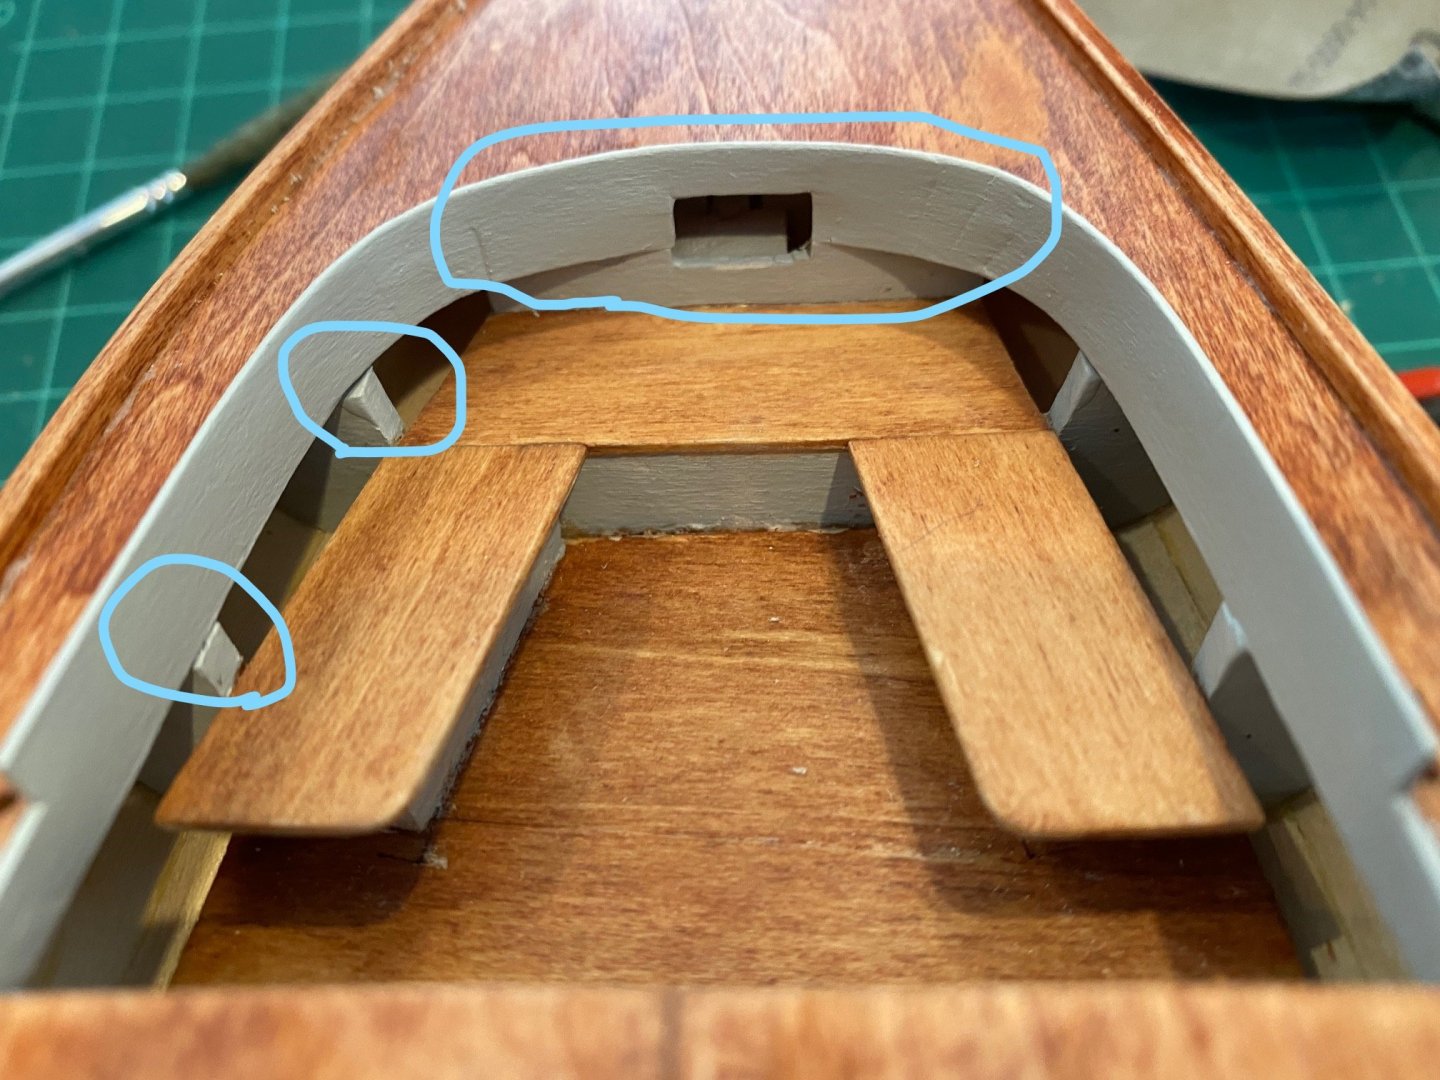
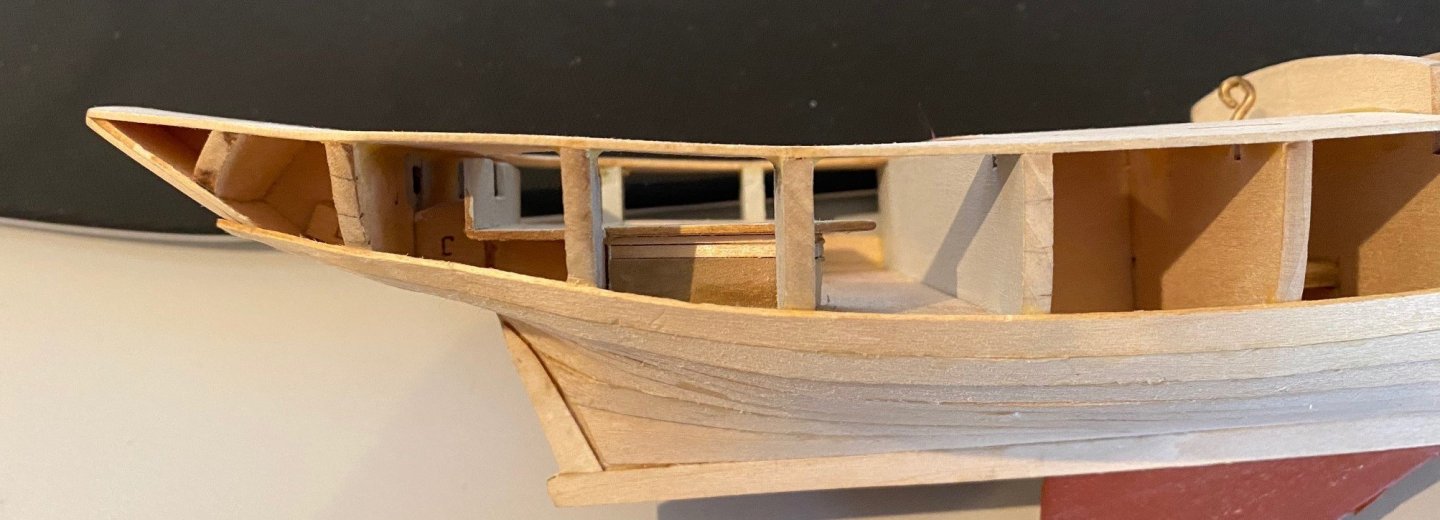
It took me 3 bending sessions for the Coaming and Cabin Sides so as not to break the wood. I started with a wide bend, then a smaller one, then actually using the model as a bending mold. The Cabin Sides worked out really nice. However, the Coaming kept wanting to bend at a 90 deg angle rather than a curve but I finally was able to get the curve. It took me a minute to figure out that the top of the fwd end of the coaming sat level with the deck since there weren’t good pictures in the instruction of this area and since a schematic drawing was not included in the kit. The real problem was the coaming would not fit level to the deck and the fwd starboard tab kept wanting to go below the deck level. The problem was the Coaming stopped when it hit the ‘seat back’, since the seat back stuck out fwd of the deck opening. I had to reduce the height of the seat back to the Coaming could sit lower. Also, I had to cut down the two starboard frames in the seating area to get the coaming to sit level. I also had to widen the space between the deck and the frames in the cabin area. I cut the frame to widen the gap for the cabin side to sit down in rather than the deck to ensure a smooth curve of the cabin side.

- 62 replies
-
- 2
-

-
- muscongus bay lobster smack
- Finished
- (and 1 more)
-
I glued the planks on the same way, just be careful not to push down anywhere but directly over a bulkhead, I pushed on some unsupported sections and that’s how I ended up with some depressions that I had to fill
- 52 replies
-
- 2
-
-
- Model Shipways
- muscongus bay lobster smack
- (and 1 more)
-
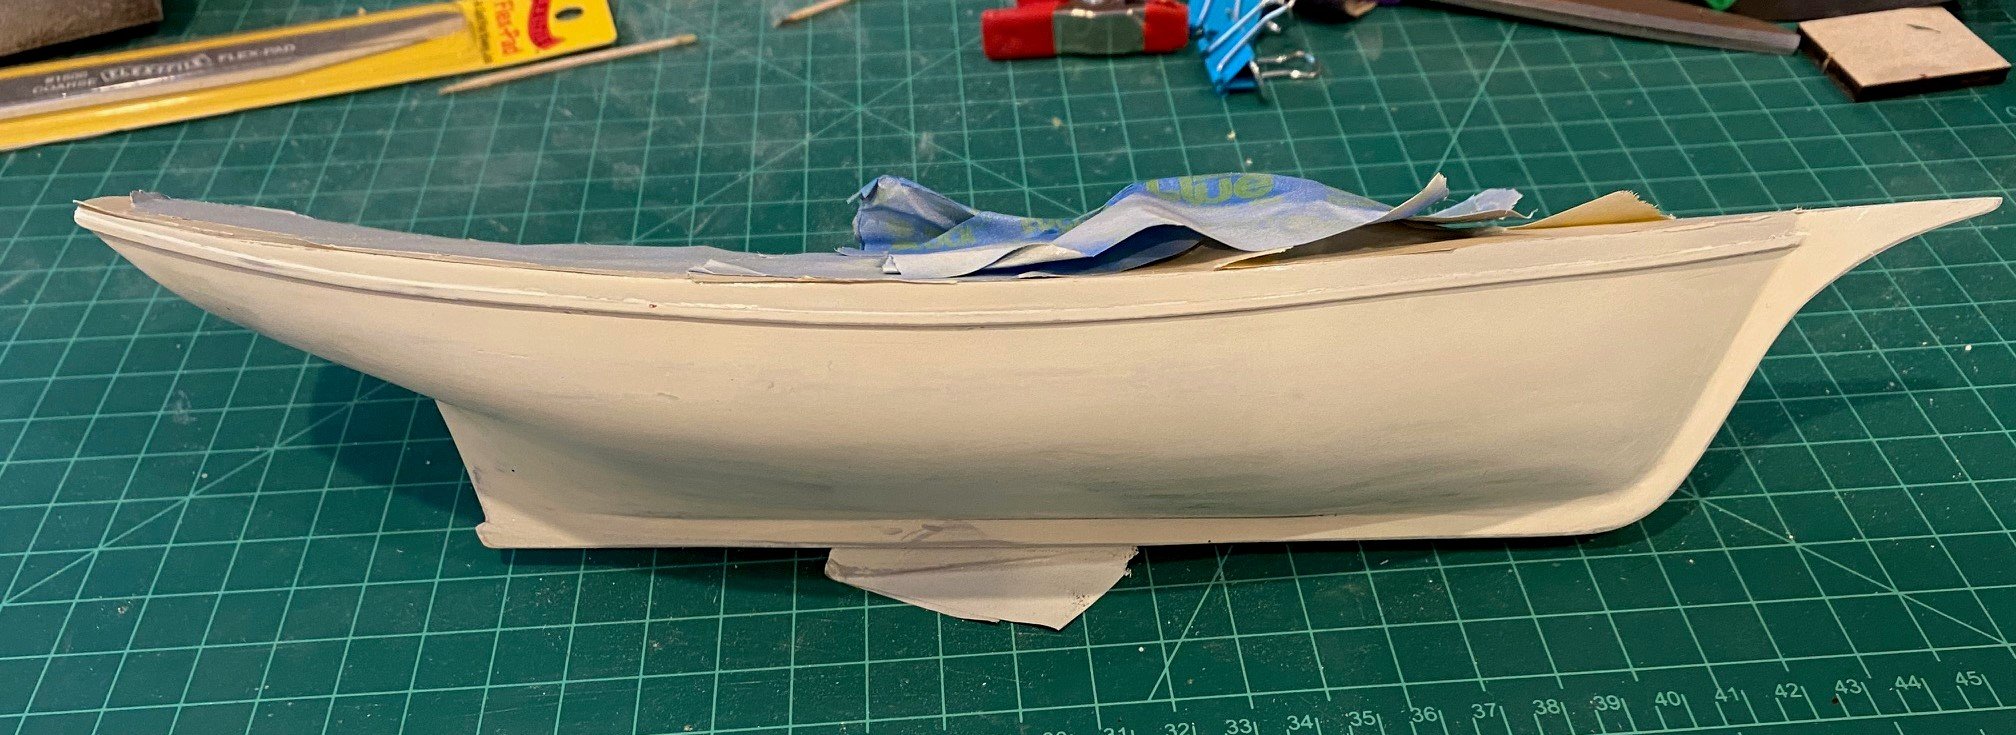
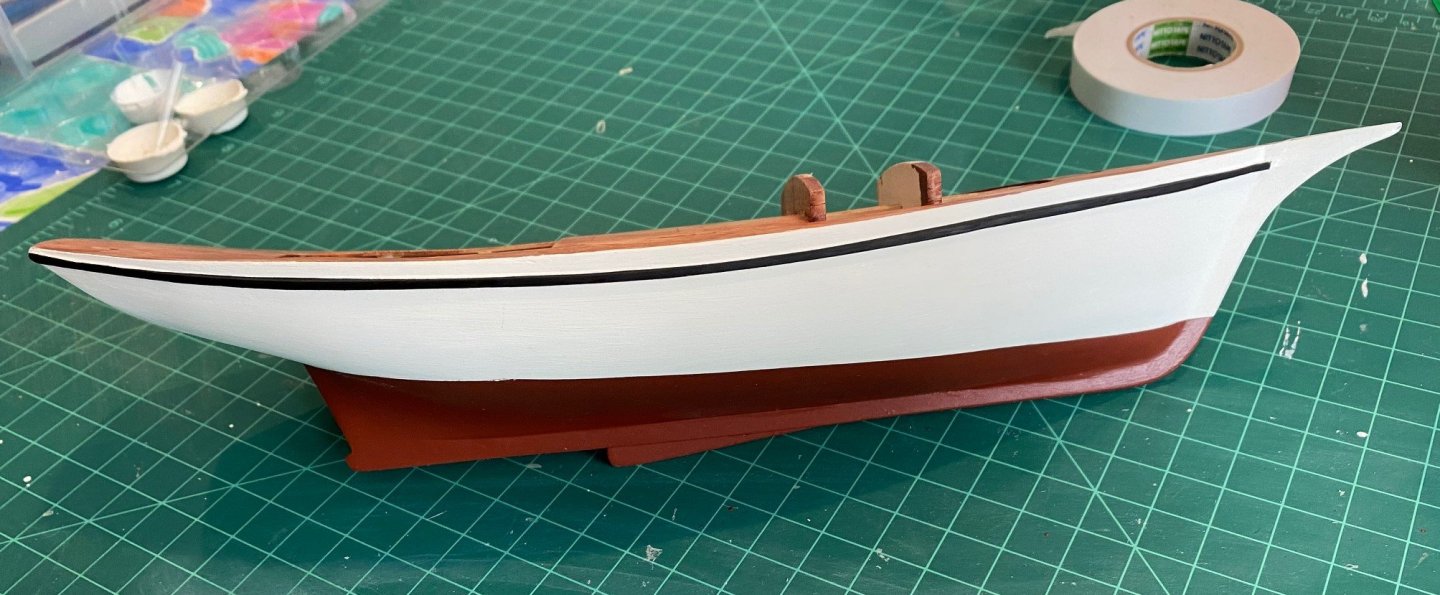
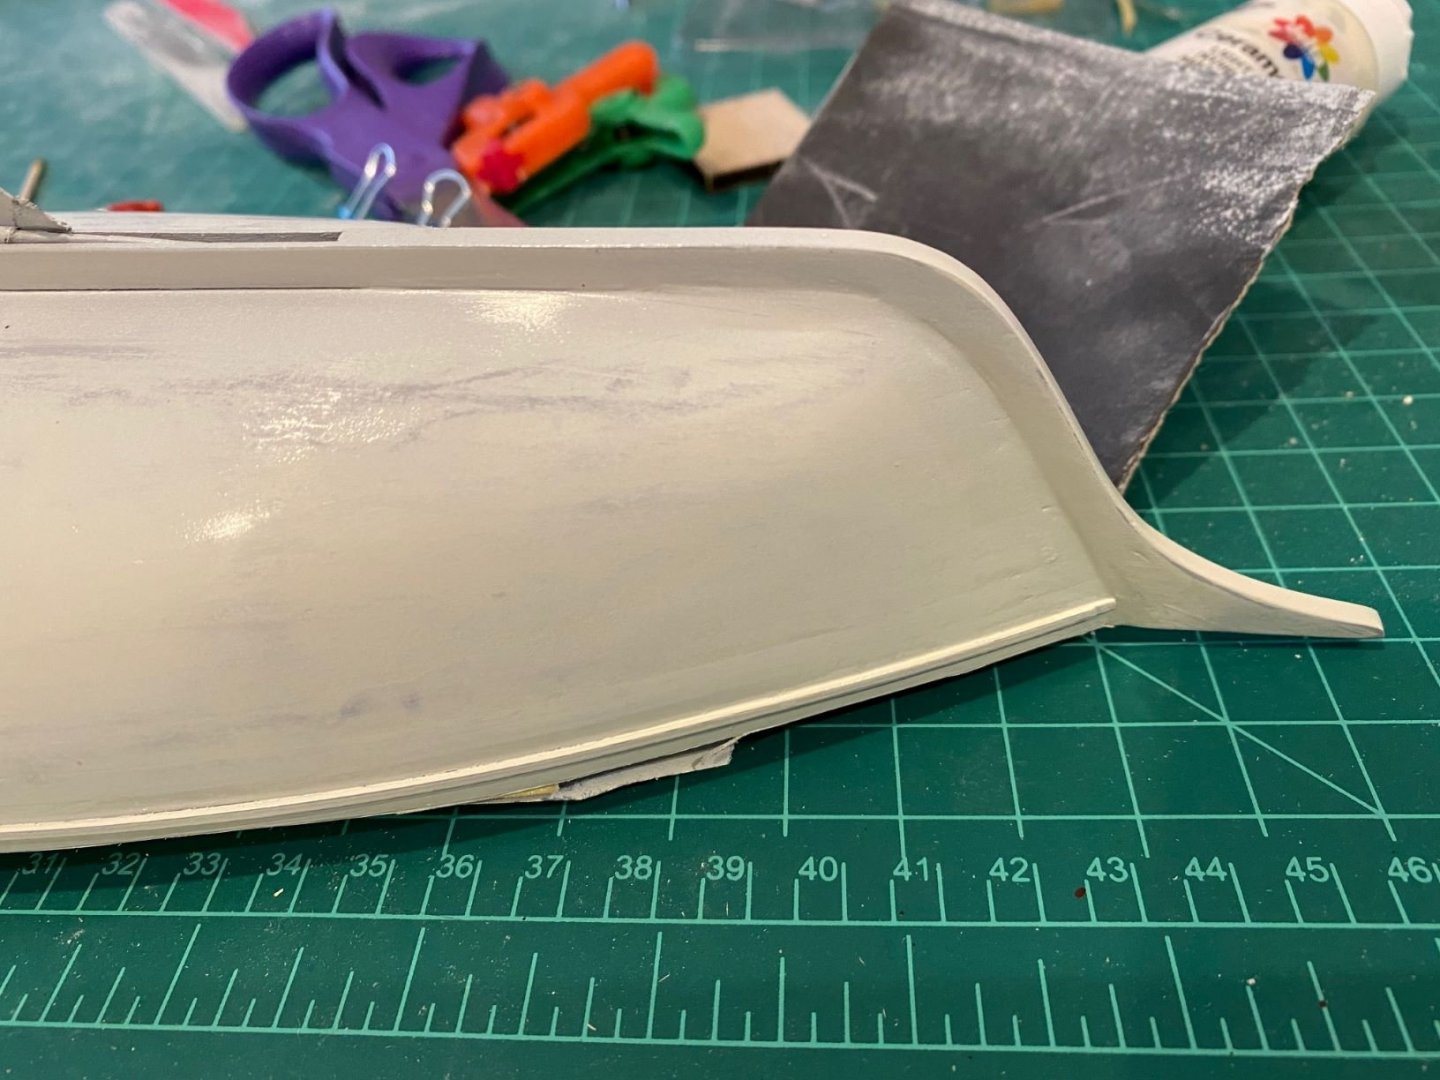
I’ve finished the hull painting; I painted the upper half a slight off white, mixing white paint with a little cream color paint. (My wife does a lot of crafts and has a lot of acrylic paints) I did paint the bottom of the hull Model Expo Hull Red, MS4968. I thought that the hull was a little bland so I painted the rub rail a Tamiya Flat Black that I had. For the first time I used Tamiya plastic masking tape and it was fantastic. I really like the way you can stretch the tape to make curves, the water line, or fit a curved piece, the toe rail.
- 62 replies
-
- 3
-
-
- muscongus bay lobster smack
- Finished
- (and 1 more)
-
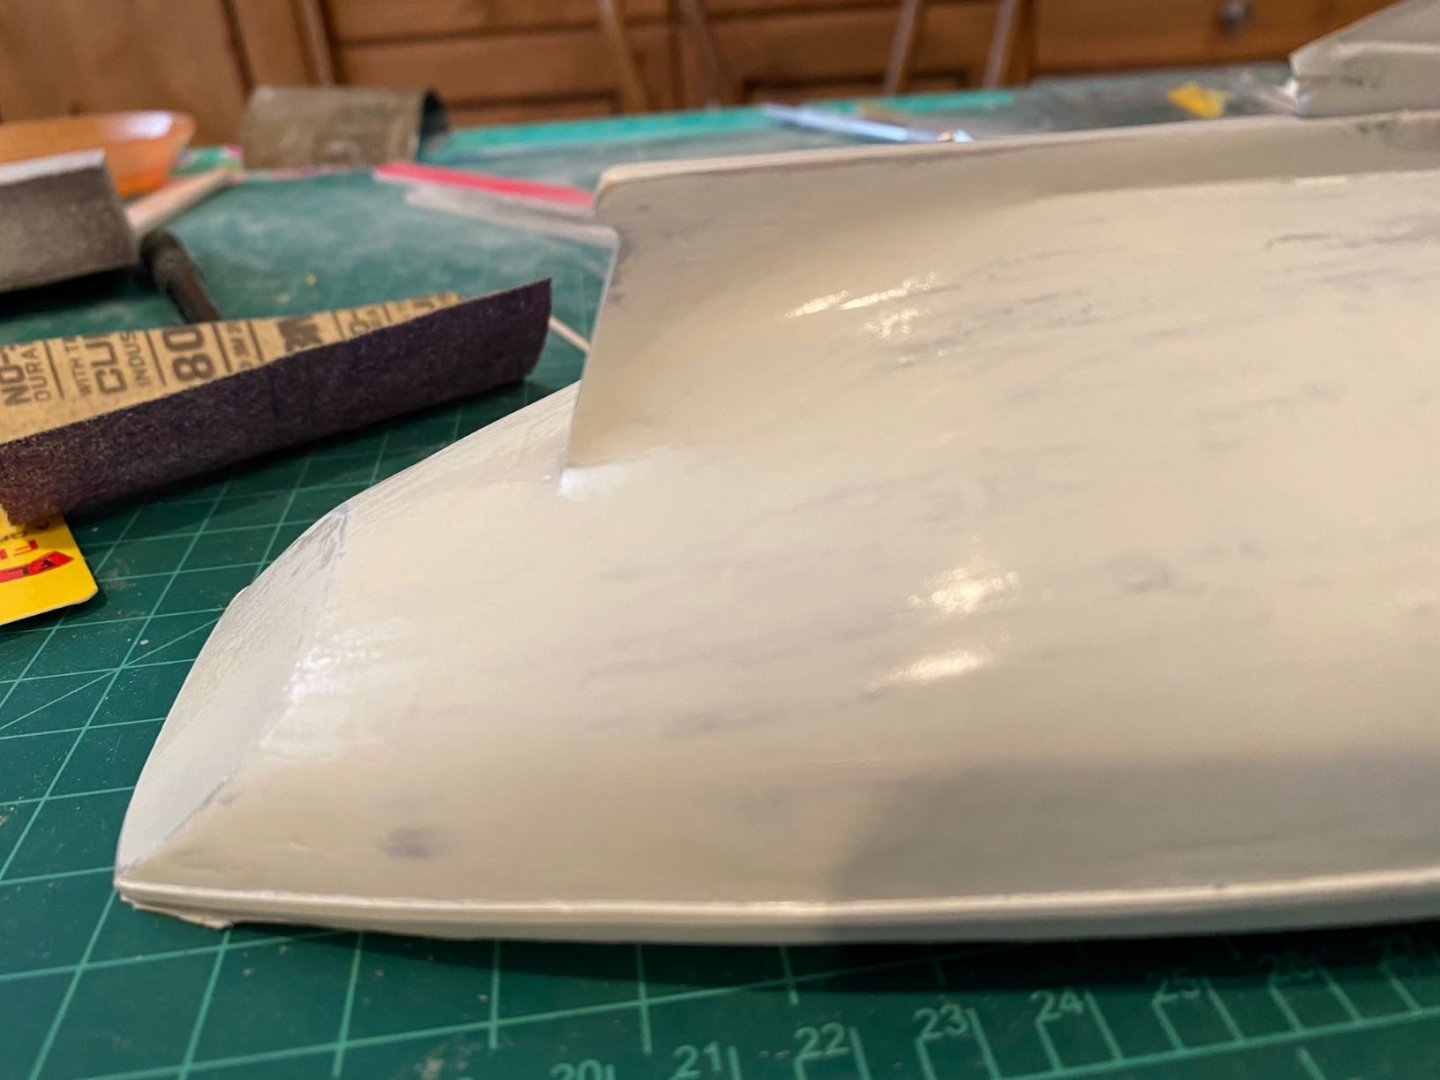
After a couple of coats of gray spay primer and an off-white spray paint, I thought might look ok but did not like the color. Needs a little more work on the bow. Wet sanded to get some dust off and will start painting the hull later this week.

- 62 replies
-
- 3
-
-
- muscongus bay lobster smack
- Finished
- (and 1 more)
-
Fantastic job.
-
Finished filling and sanding the hull, there are still wavy and depression spots, but they are not as prominent. Hopefully, they won’t be very noticeable when painted with flat paint. Trying to decide what color of stain to use on the deck and toe rails. Will paint the hull off white and hull red.

- 62 replies
-
- 2
-
-
- muscongus bay lobster smack
- Finished
- (and 1 more)
-
@cbeckenb what color and type of stain did you use on the toe rail? How are you going to finish the deck, paint or stain?
-
@bobandlucy the key is to take as much time as needed to bend your blanks to match up so you don’t have to put a lot of pressure on them when gluing. Also, don’t put very much pressure on the plank where there is not a bulkhead behind to support, thus avoiding all the depressions that I ended up with, especially fwd and around the aft stem.
-
Really looking good, your 10th and sheer plank looks like it was designed that way.l
-
Current Projects:
Muscongus Bay Lobster Smack - Model Shipways - 1:24
Phantom New York Pilot Boat - Model Shipways - 1:96 {on hold until Lobster Smack is complete}Completed Projects:
18th Century Long Boat - Model Shipways - 1:48Norwegian Sailing Pram - Model Shipways - 1:12
Lowell Grand Banks Dory - Model Shipways - 1:24
-
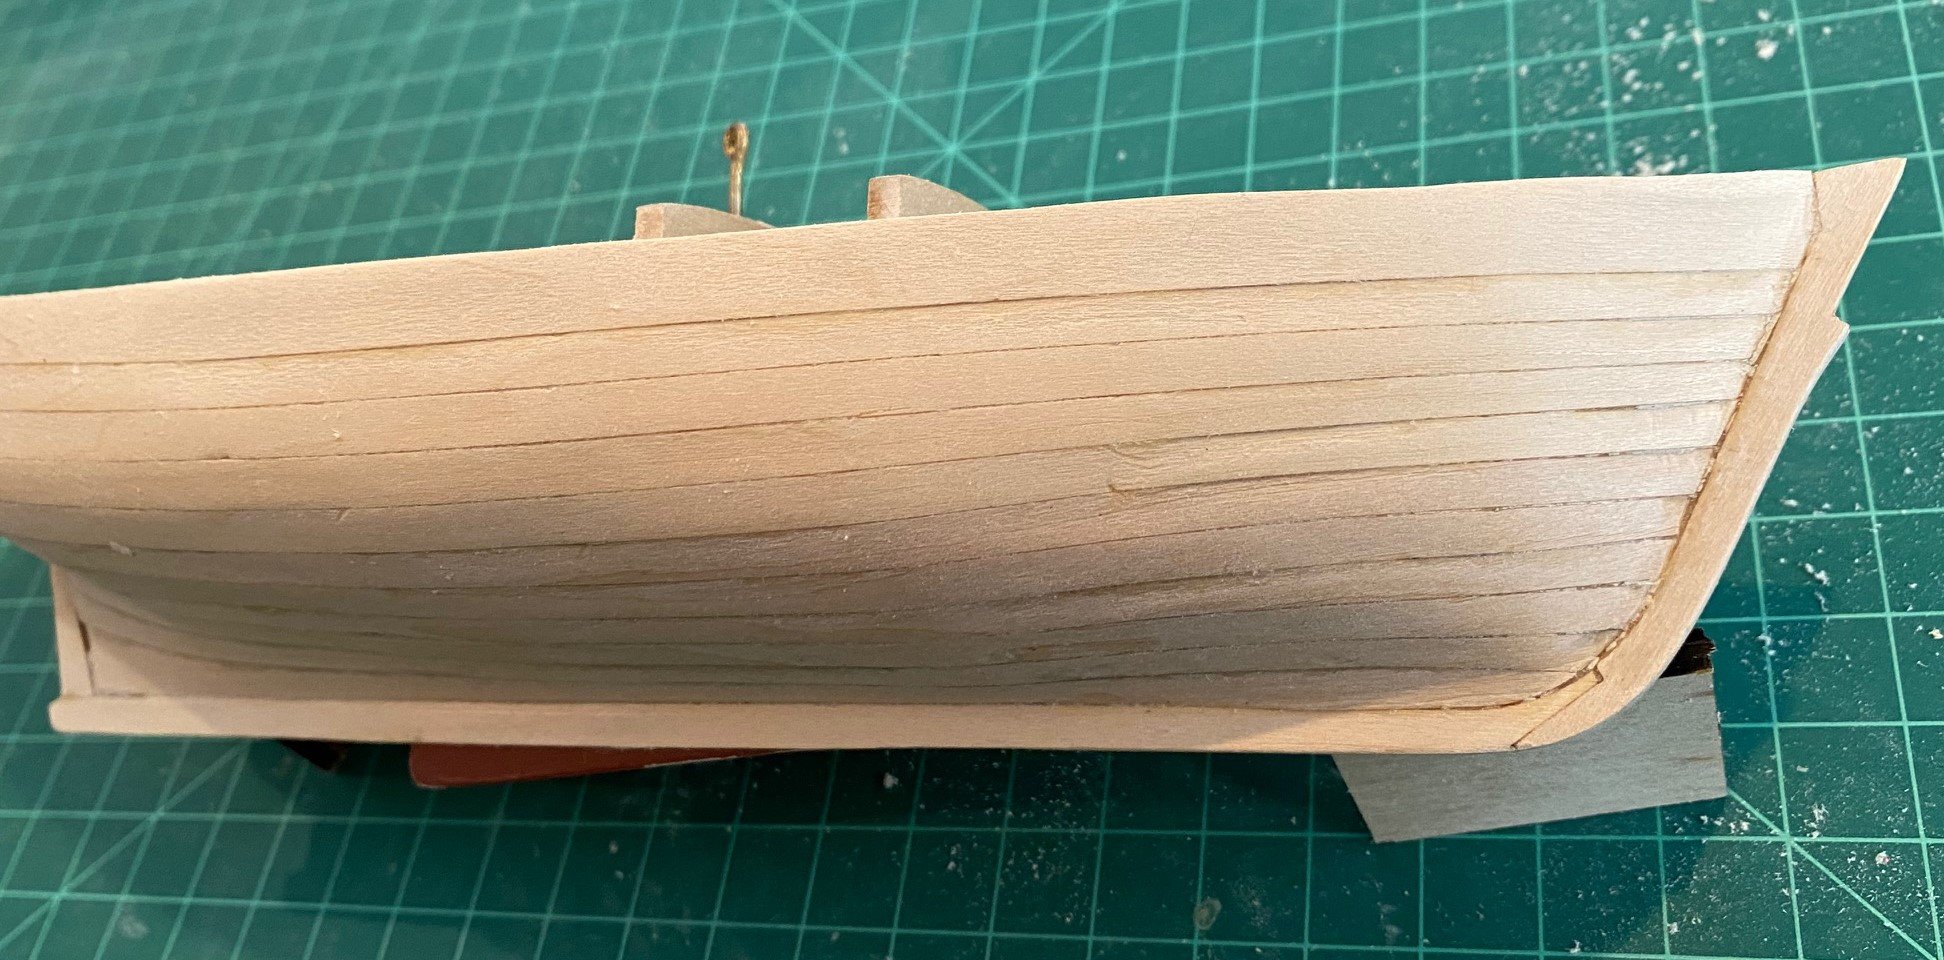
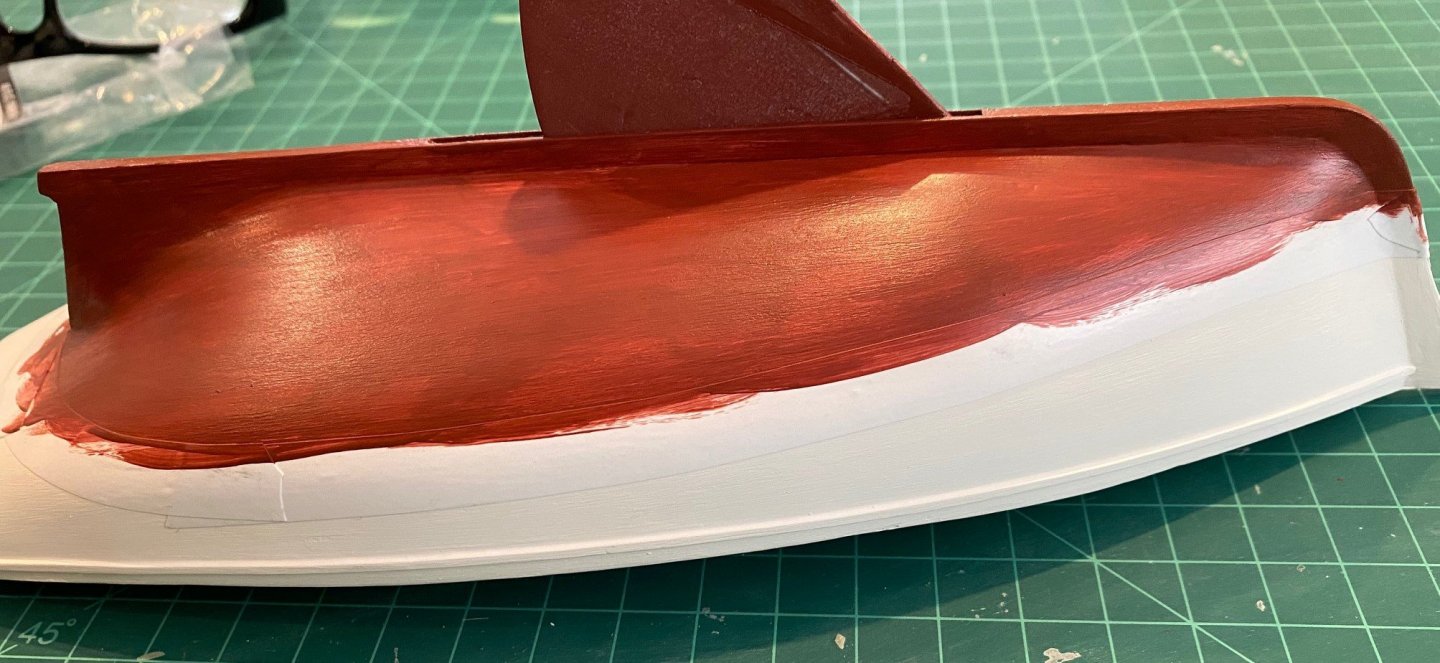
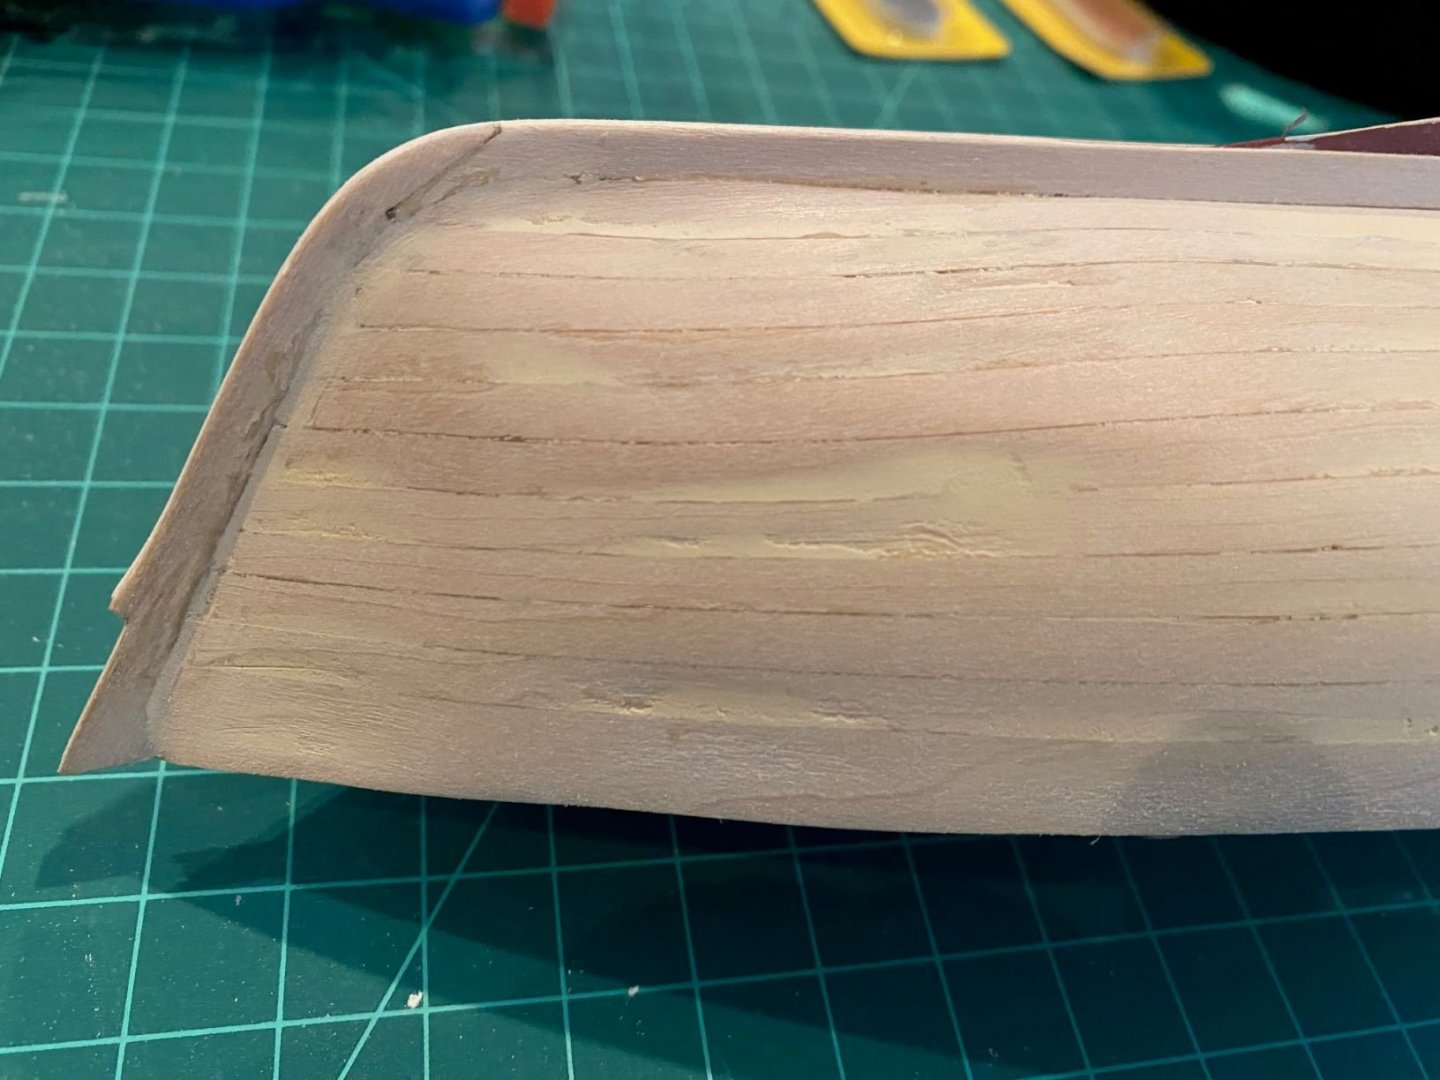
The starboard side I sanded a little more then put the first coat of putty on to fill in the gaps and depressions. You can see that the depression at the aft end next to the stern post will need much more fill and smoothing. I think I should have sanded more to even the planks more, so that is what I did on the port side, I think it looks better and will result in a better job.


- 62 replies
-
- 1
-
-
- muscongus bay lobster smack
- Finished
- (and 1 more)
-
@cbeckenb You have done a fantastic job on planking!!!! Mine looks like crap compared to yours, well done. If you haven't solved your sheer stake problem yet, I would look at taking the total distance from the #9 plank to the top of the deck and divide by 2 to make two planks (a new plank 10 and a new sheer plank) to replace the sheer plank. Good luck
-
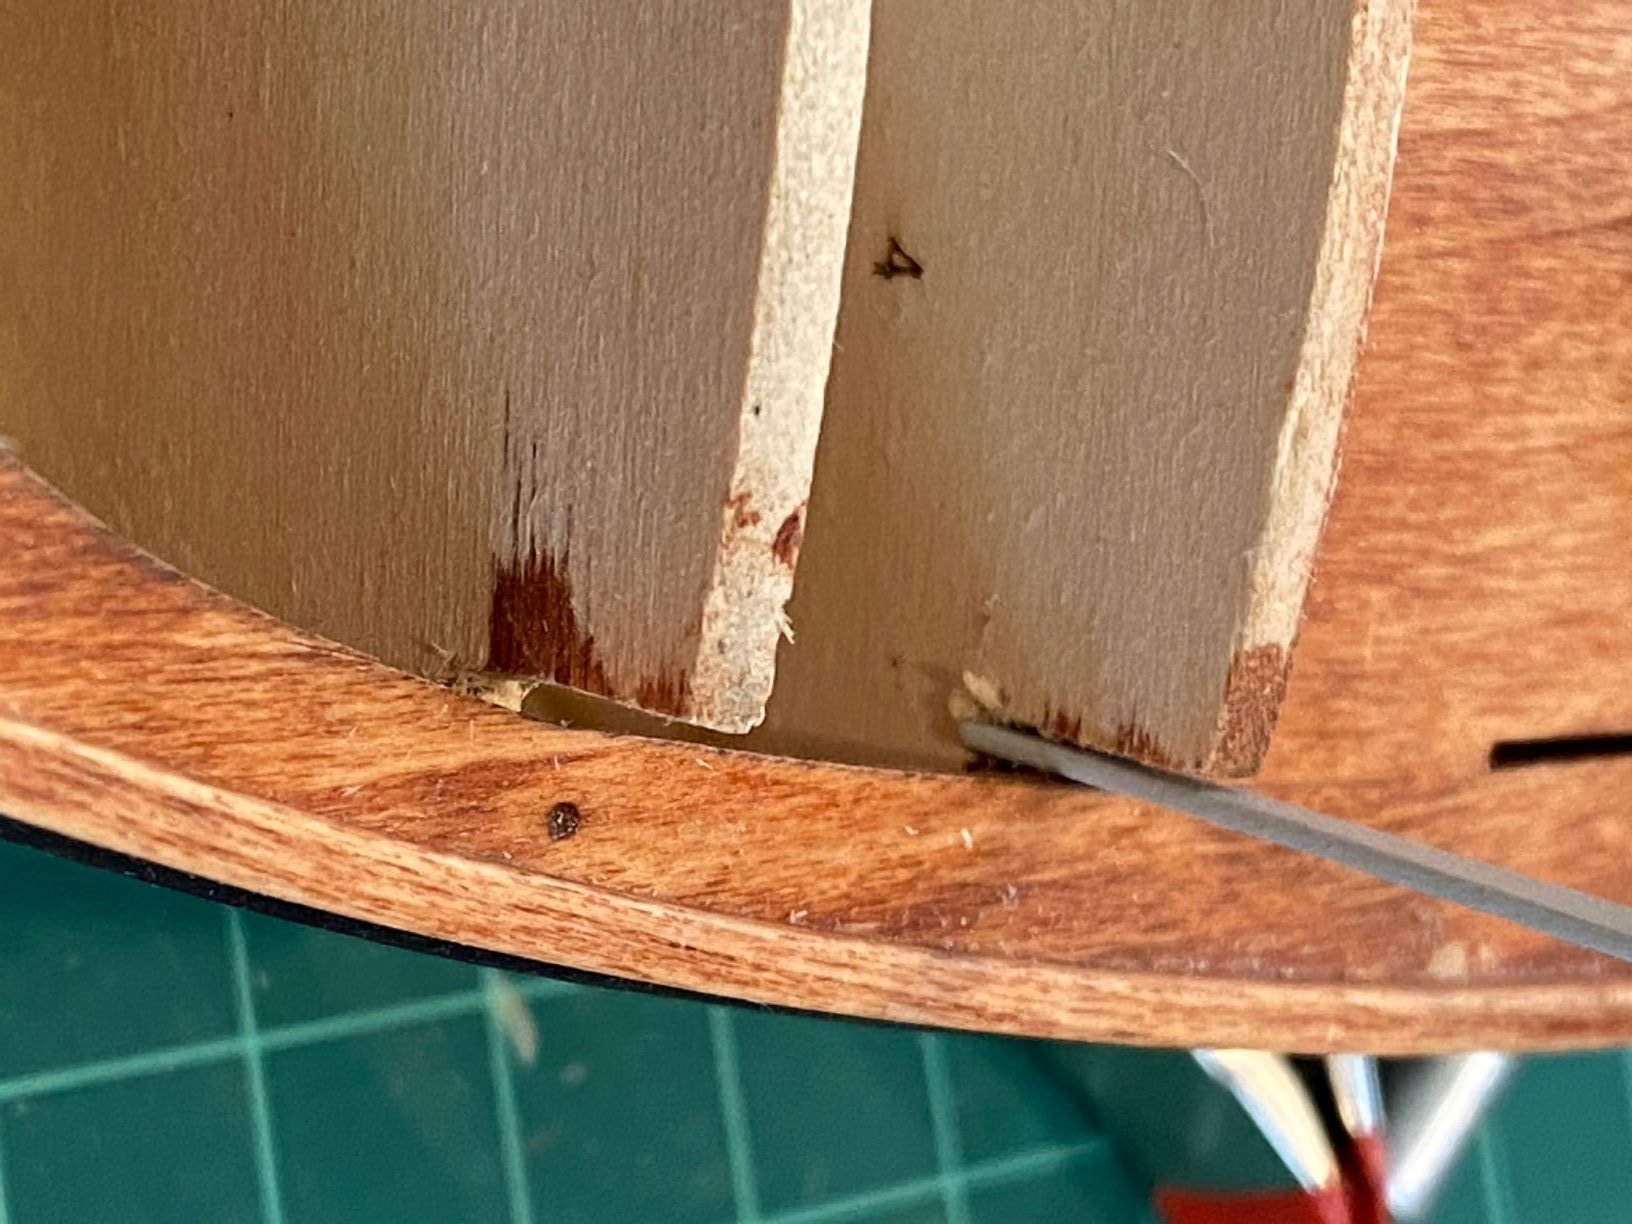
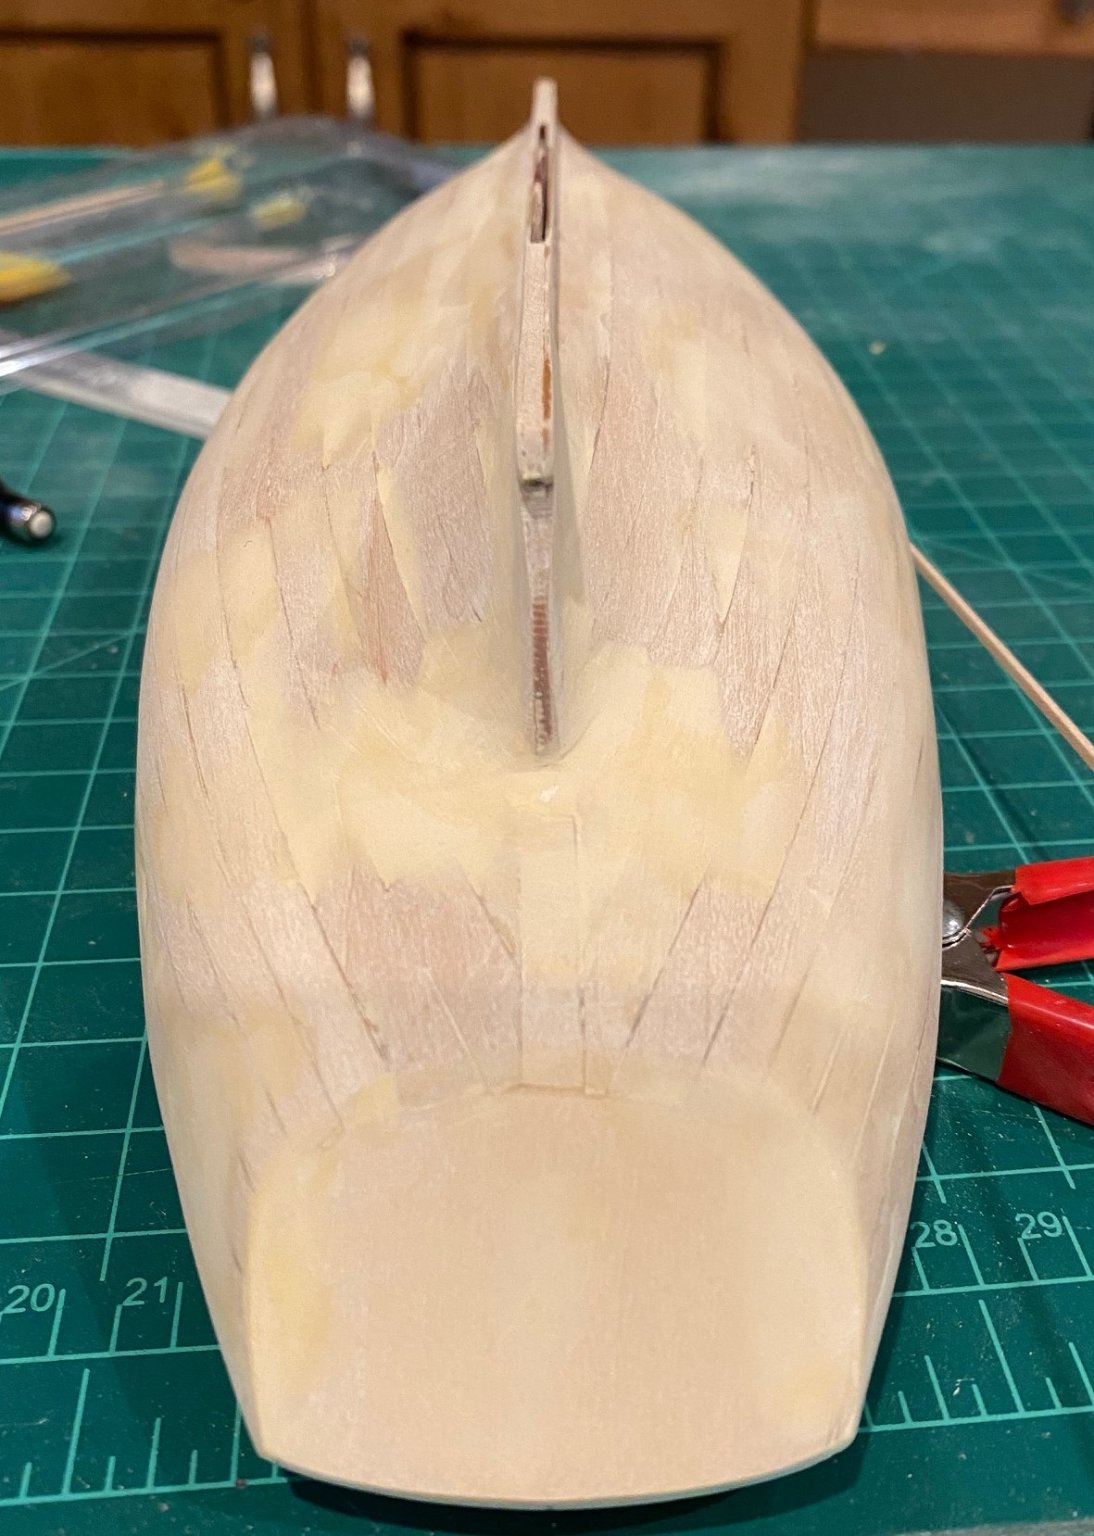
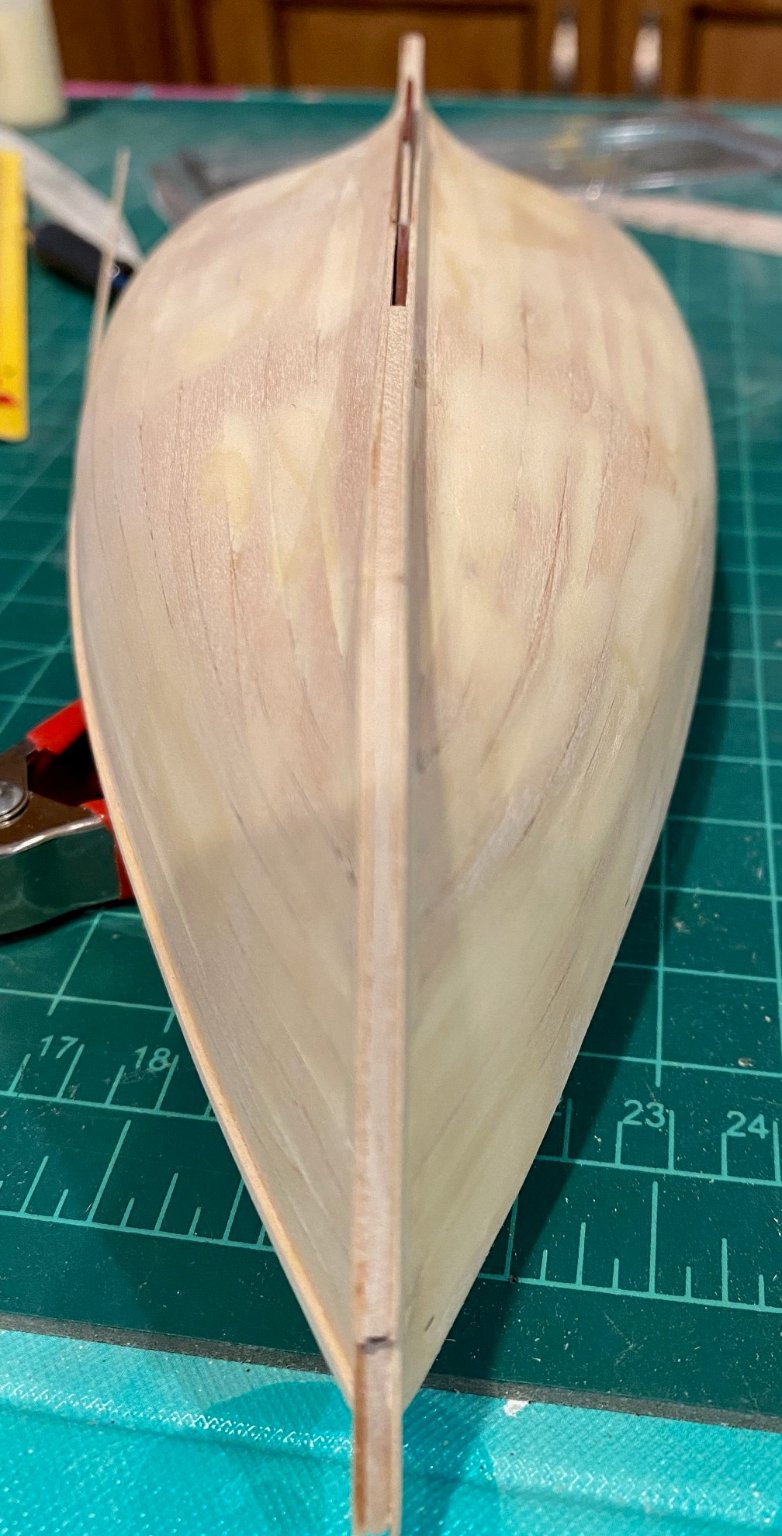
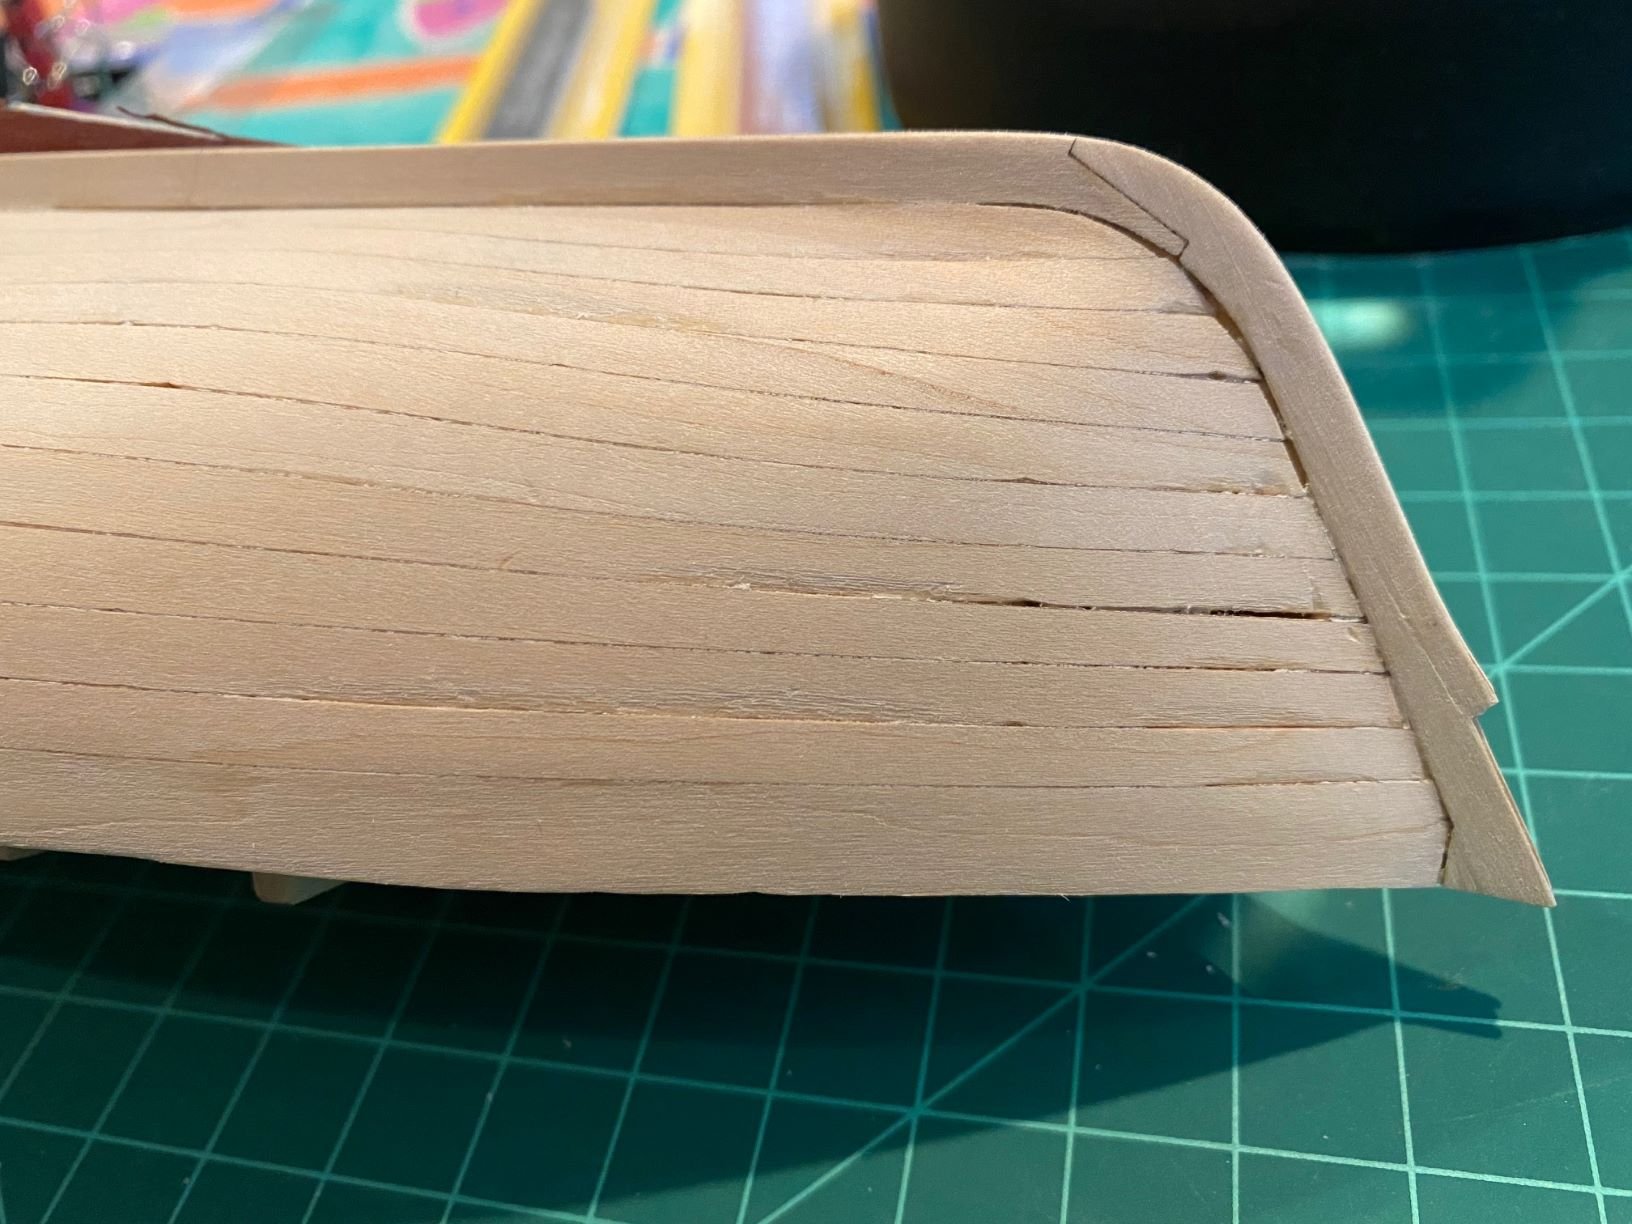
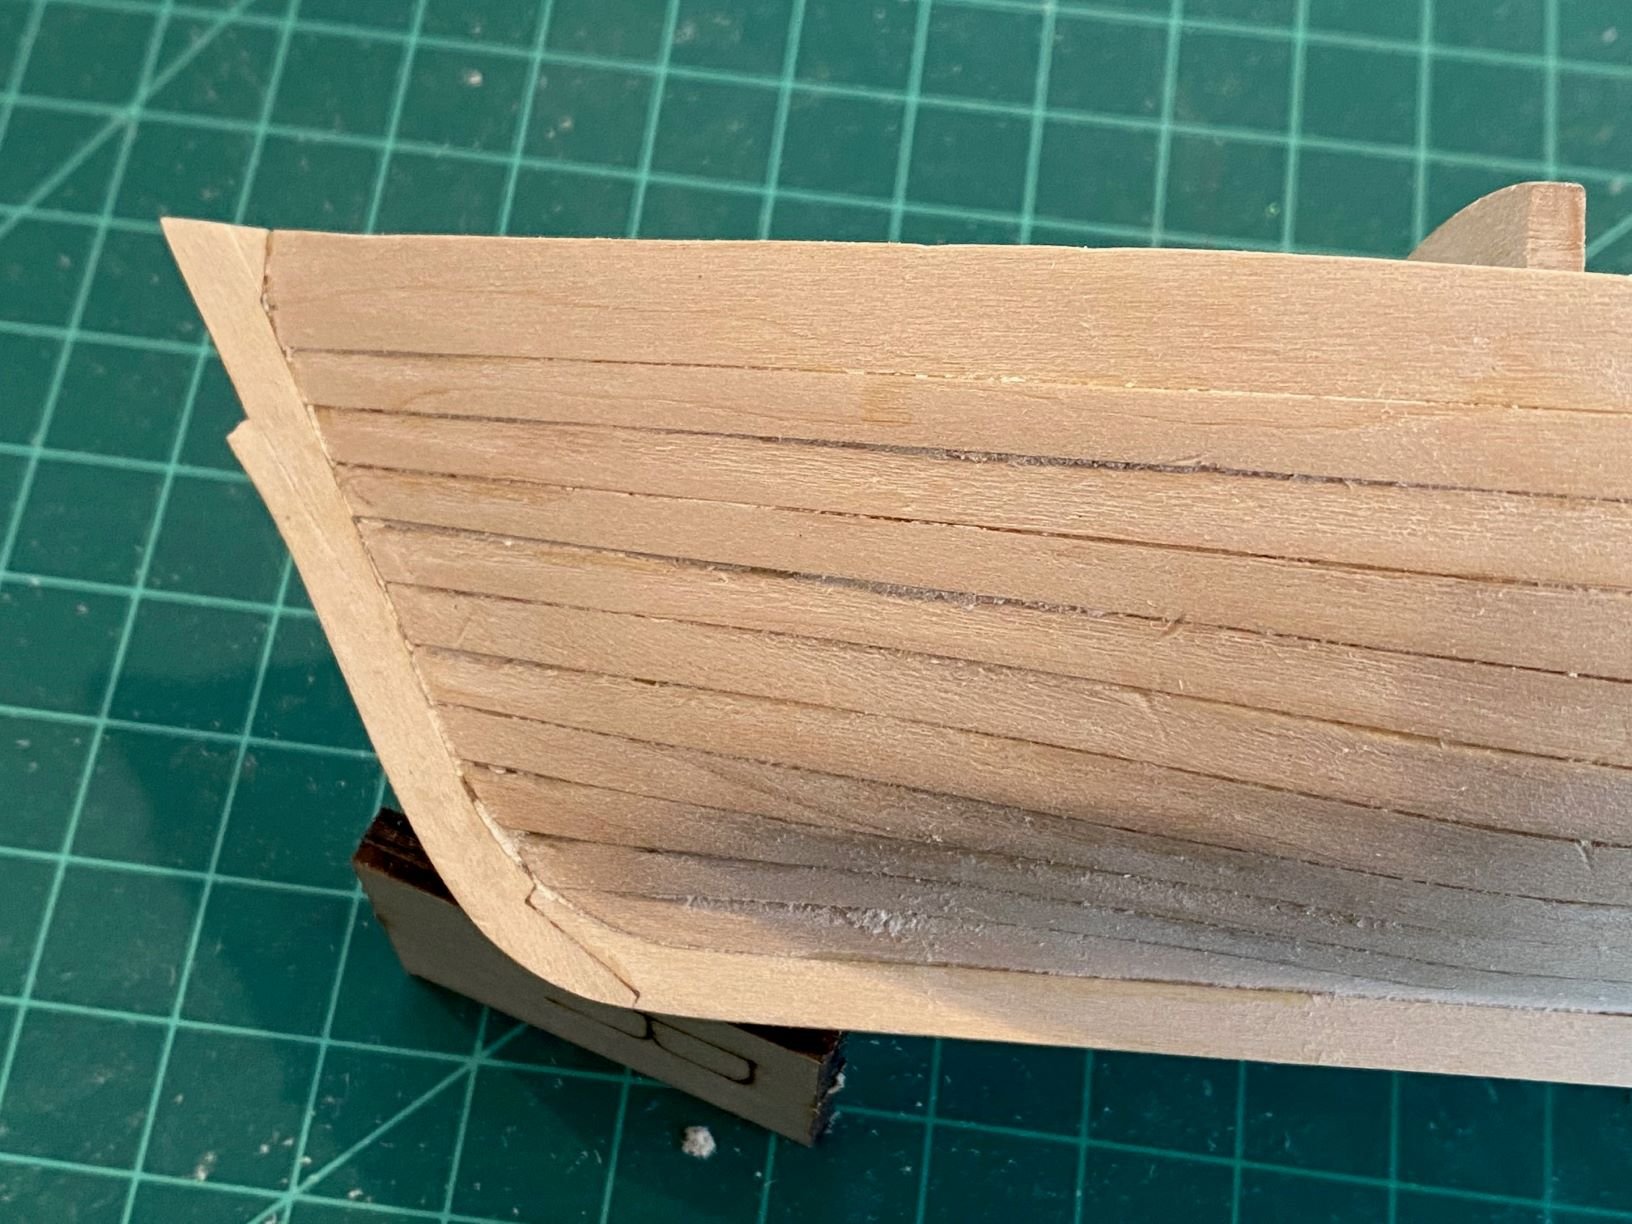
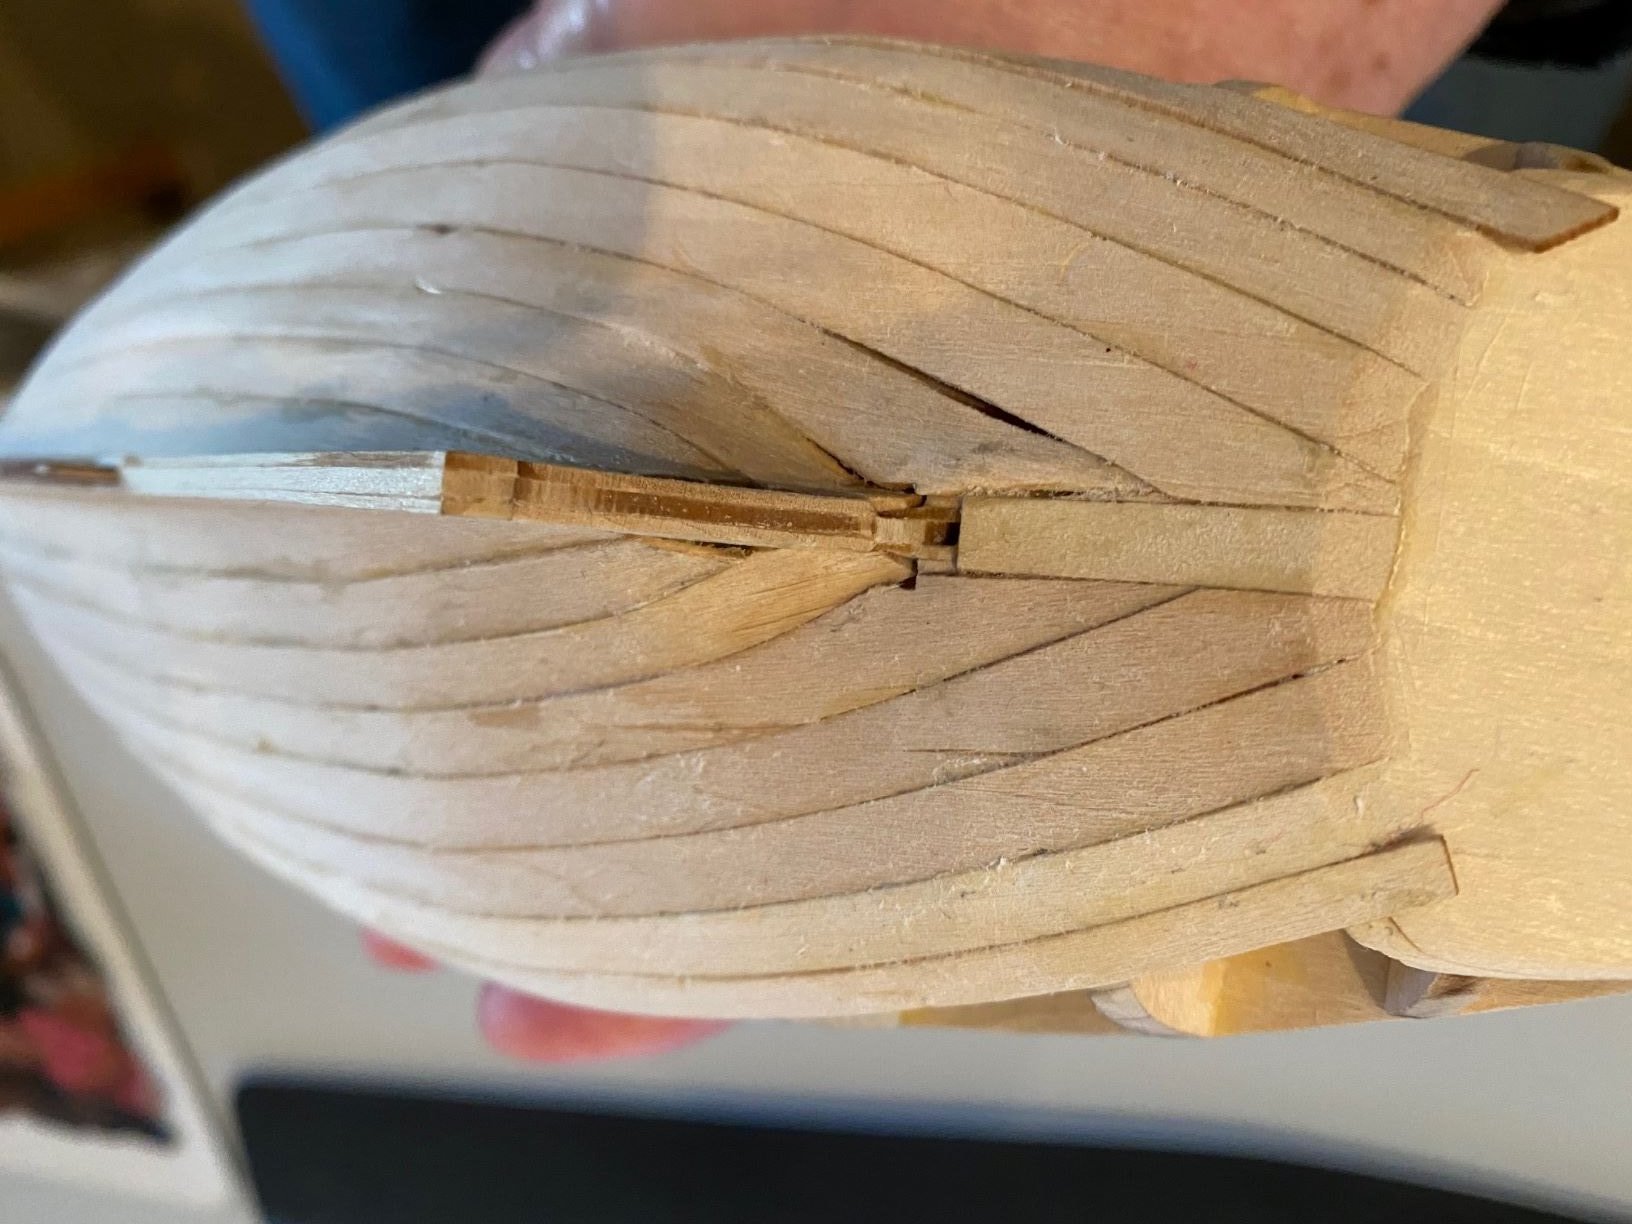
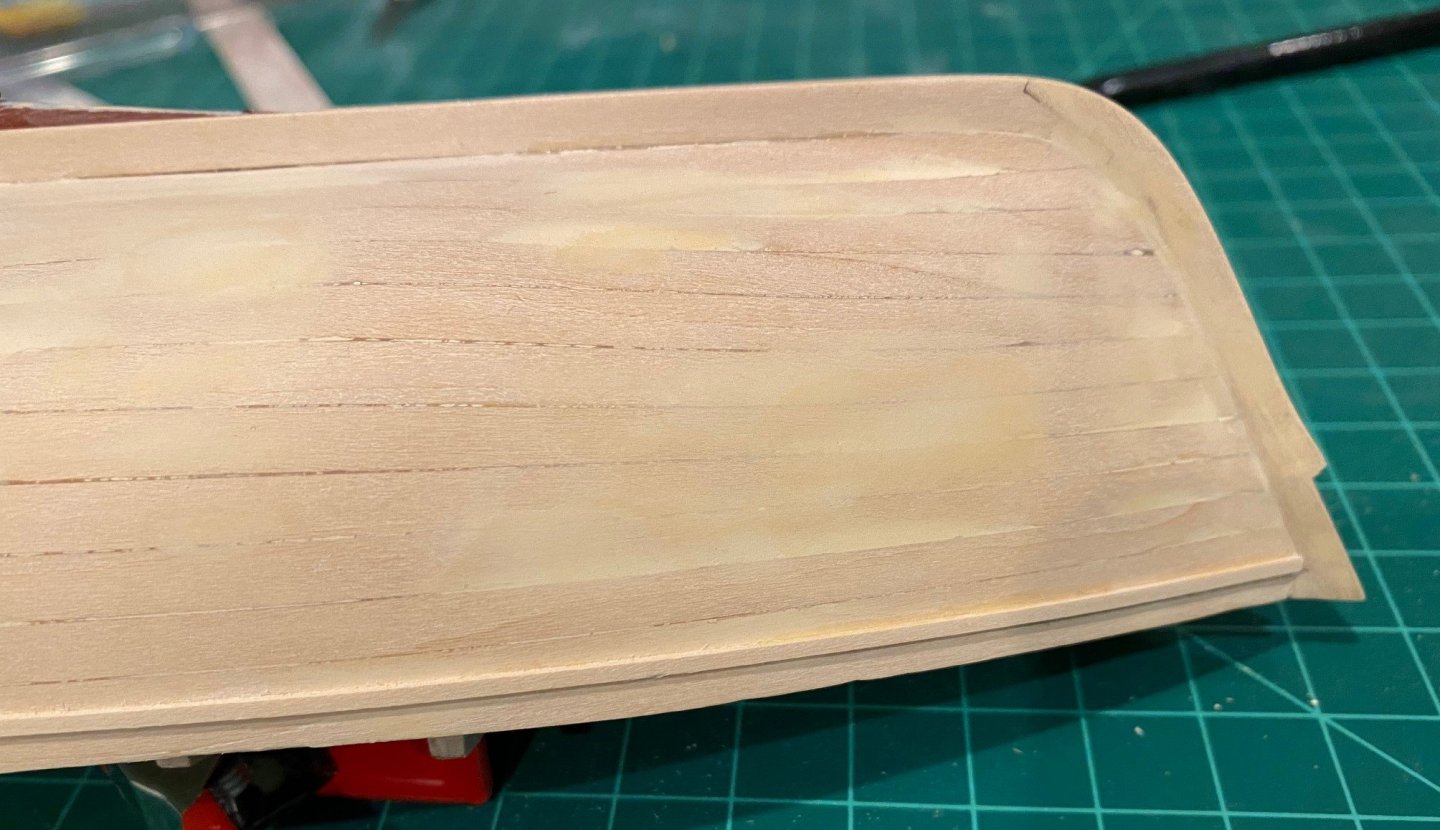
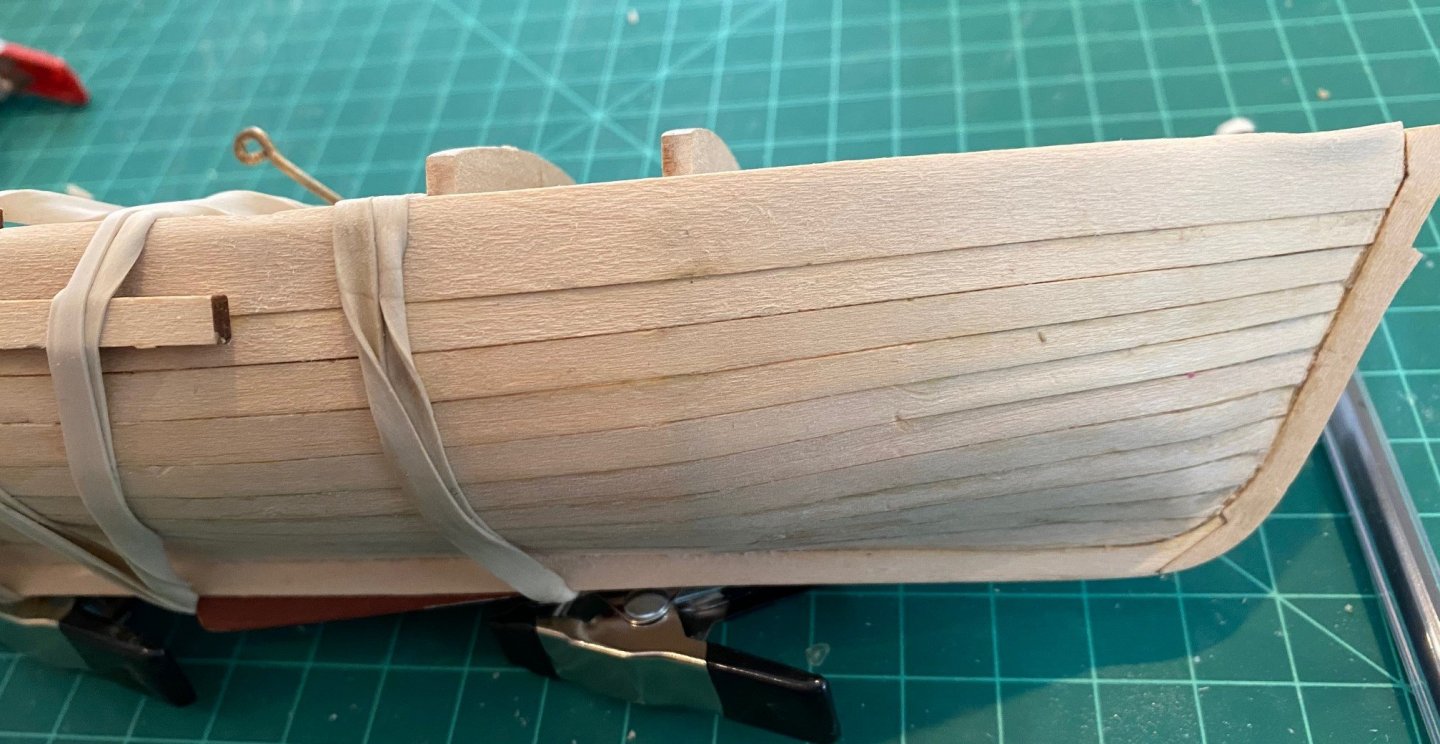
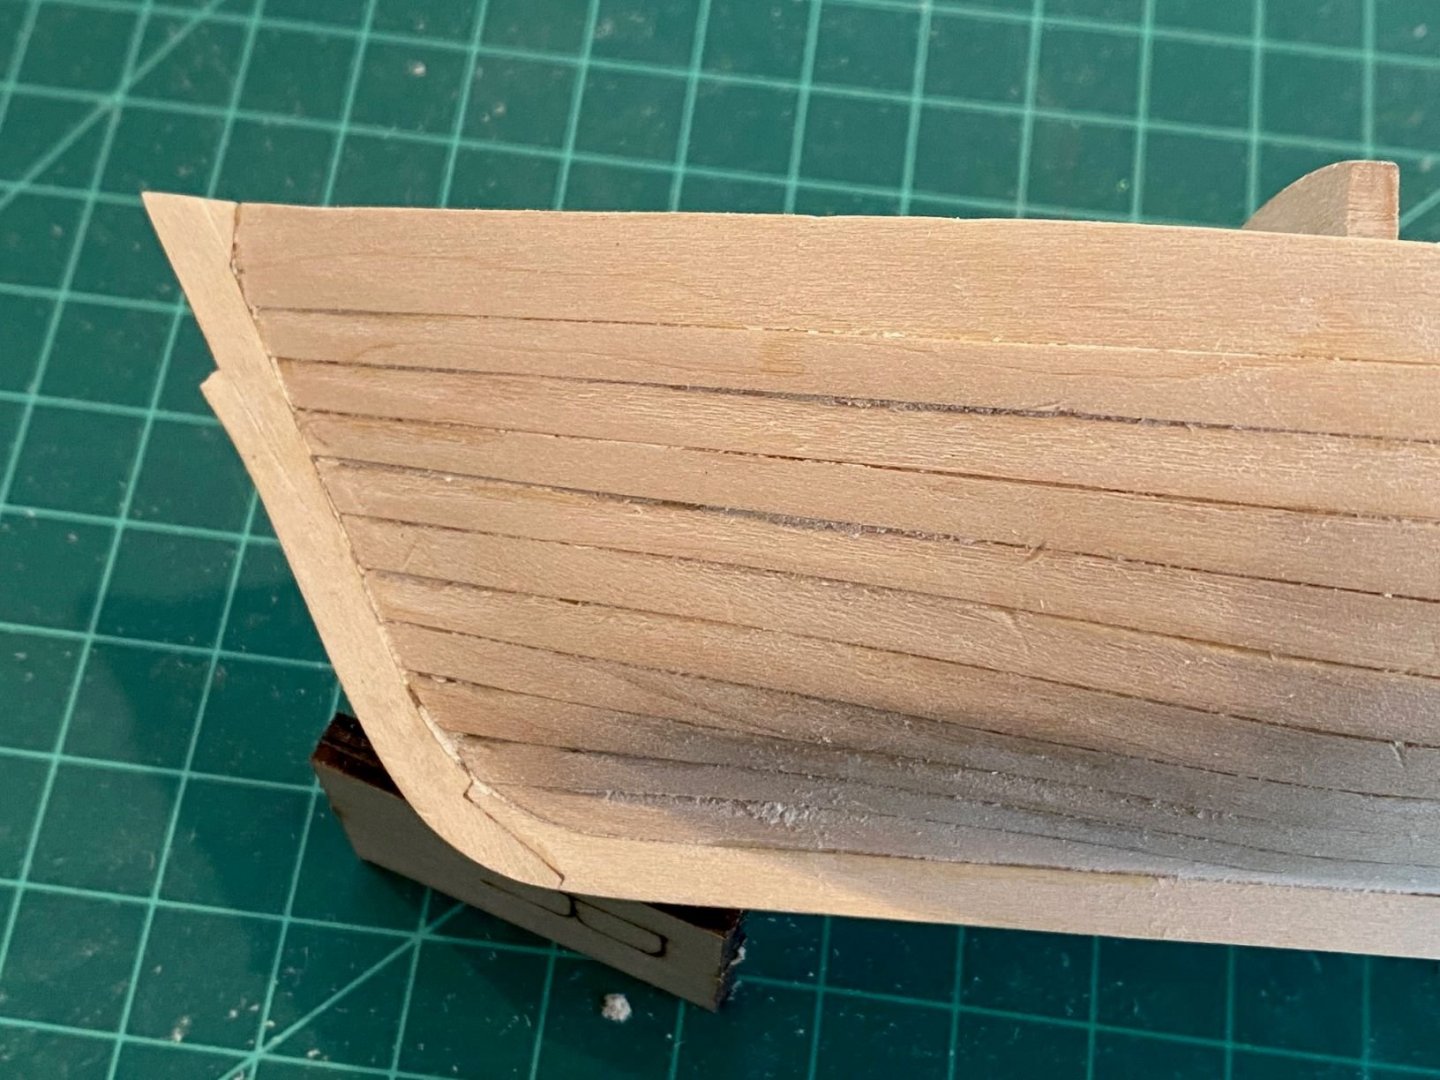
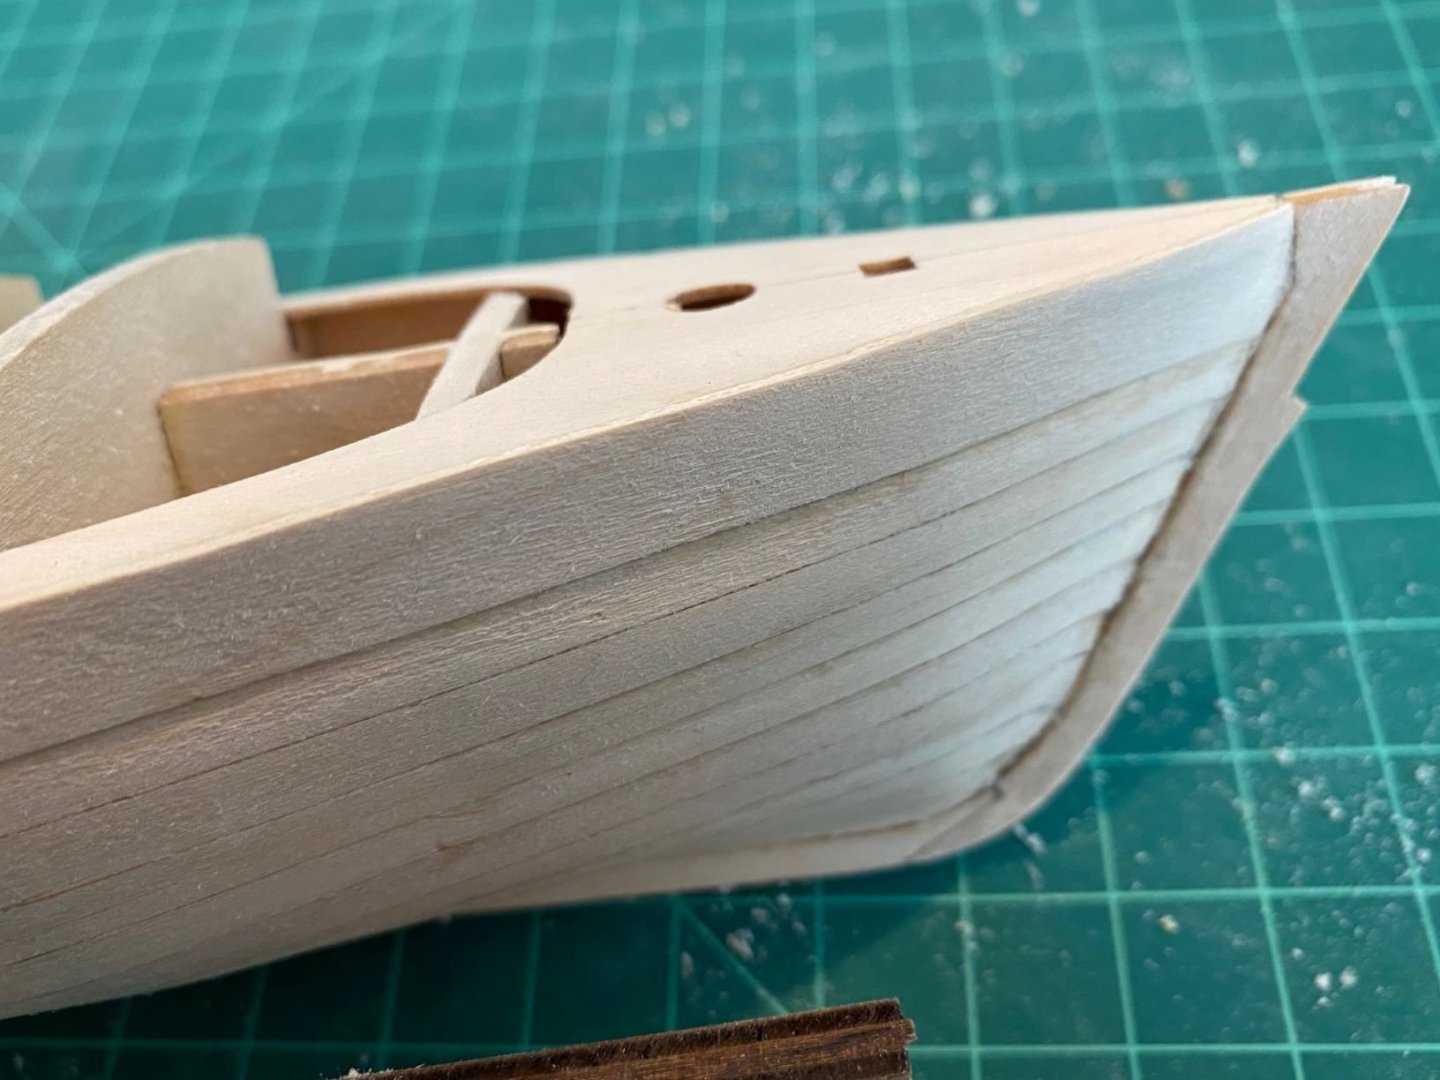
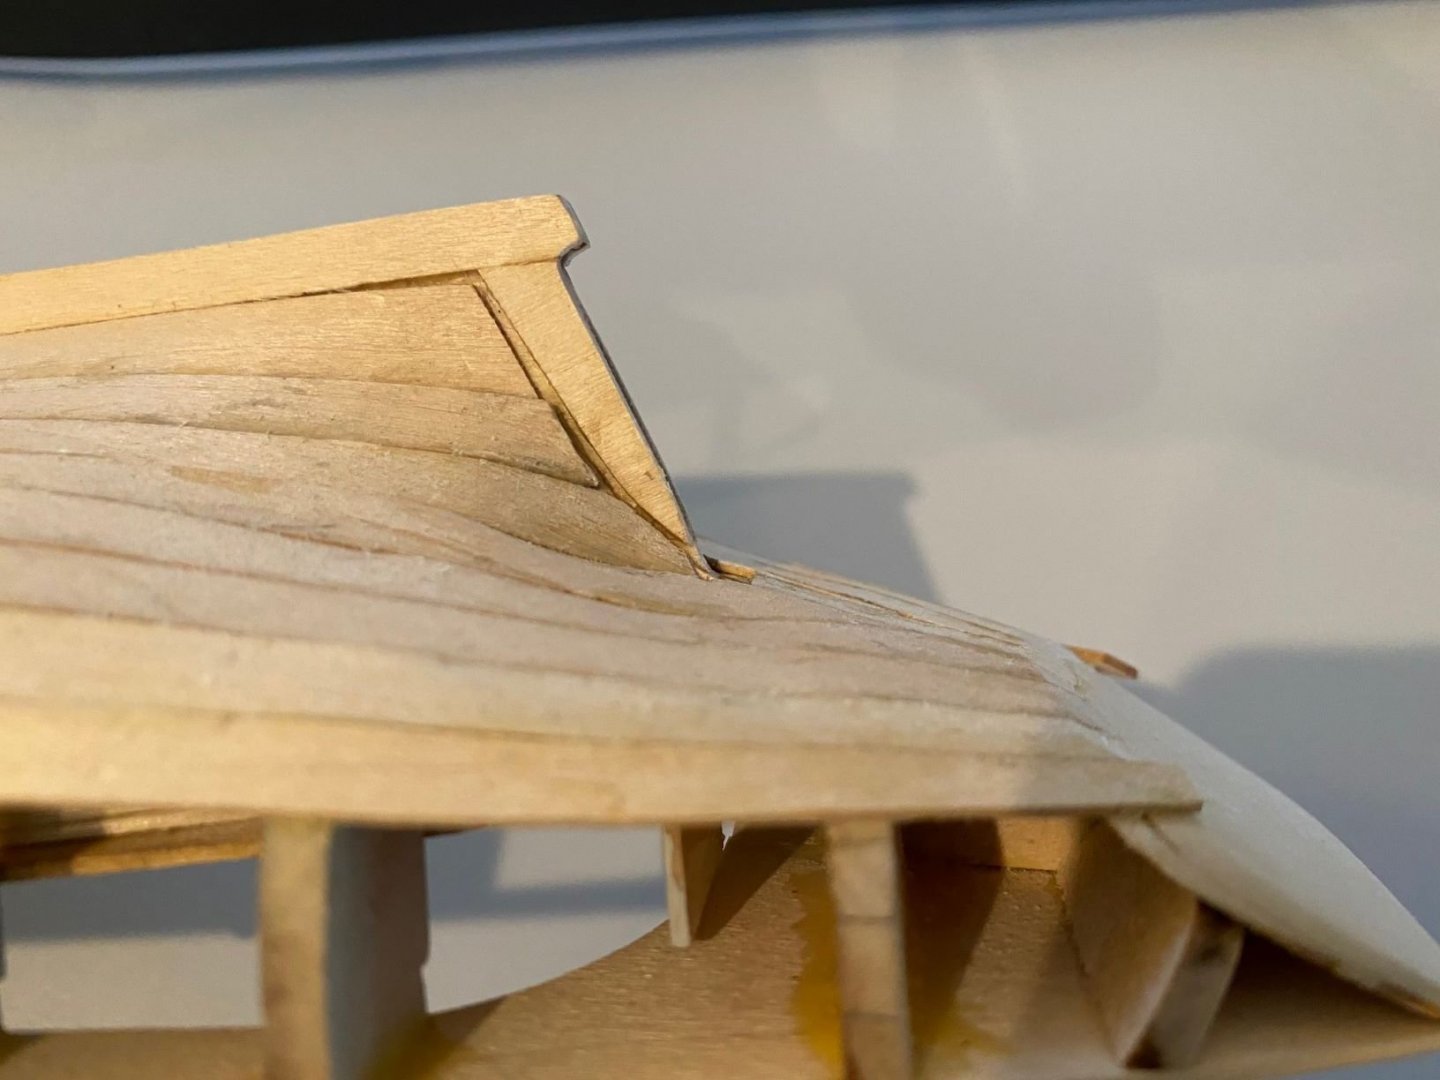
Finishing the Planking Finally, was able to get back to planking this past week and I have finally finished it. Planking this boat has been a challenge and my key recommendation to everyone is to take your time to bend the planks to help reduce gaps. The Sheer Plank, I had to wet the sheer planks a few times to get the right vertical bend as well as to form it at the aft end. When I was forming them one of the challenges was the top of the plank kept wanting to bend over the edge of the deck which made it difficult to get the plank to butt up tight to the other plank and not gap at the deck interface. My recommendation is to take your time and use some left over wood to keep the elastic band from bending the sheer plank over the deck, see pic’s below. Also, you can see the gap at the aft end that I finally had to hold around the aft end while the glue dried. Also make sure you have enough glue coverage on the deck edge to bond the sheer take to the deck. I then used my knife to trim the sheer plank down to the deck. As I was trimming the plank wanted to split along the grain, you can see some areas where the sheer plank dips below the deck a little which was caused by this split. Even being aware of the grain, I still had a few areas that dipped below the deck. Started to sand the hull as you can see the results of my initial rough sanding below. I would like to sand the hull smoother before resorting to using putty, but concerned of making the planks to thin. I will have to use putty to fill in at the bow and stern, see below. I’m going to rough sand some more and will upload pic’s before I start to putty the gaps and depressions.


- 62 replies
-
- 1
-
-
- muscongus bay lobster smack
- Finished
- (and 1 more)
-
Side Note: Most of us refer to our workspace as our Ship Yard, I was lucky enough to work in the Washington DC Navy Yard for a few years before I retired. It was really interesting working in one of the old buildings that had been preserved, as well as walking around and looking at all the old buildings and reading about them and what they were originally used for. The Yard also has a great museum that the public can access and I highly recommend to anyone to visit and just walk around, but first look up the history of the yard.
-
The aft end of your planks look really good, much better than mine. I like the way you used a combo of rubber bands and clamps. I wish you had started your build before me, Great Job
-
@niwotwill thanks, I really appreciate your input!
-
@Bob Keeler please fell free to ask me about this build or message me directly
-
Will start mine when I’m done with the lobster smack, look forward in learning from your experience.
-
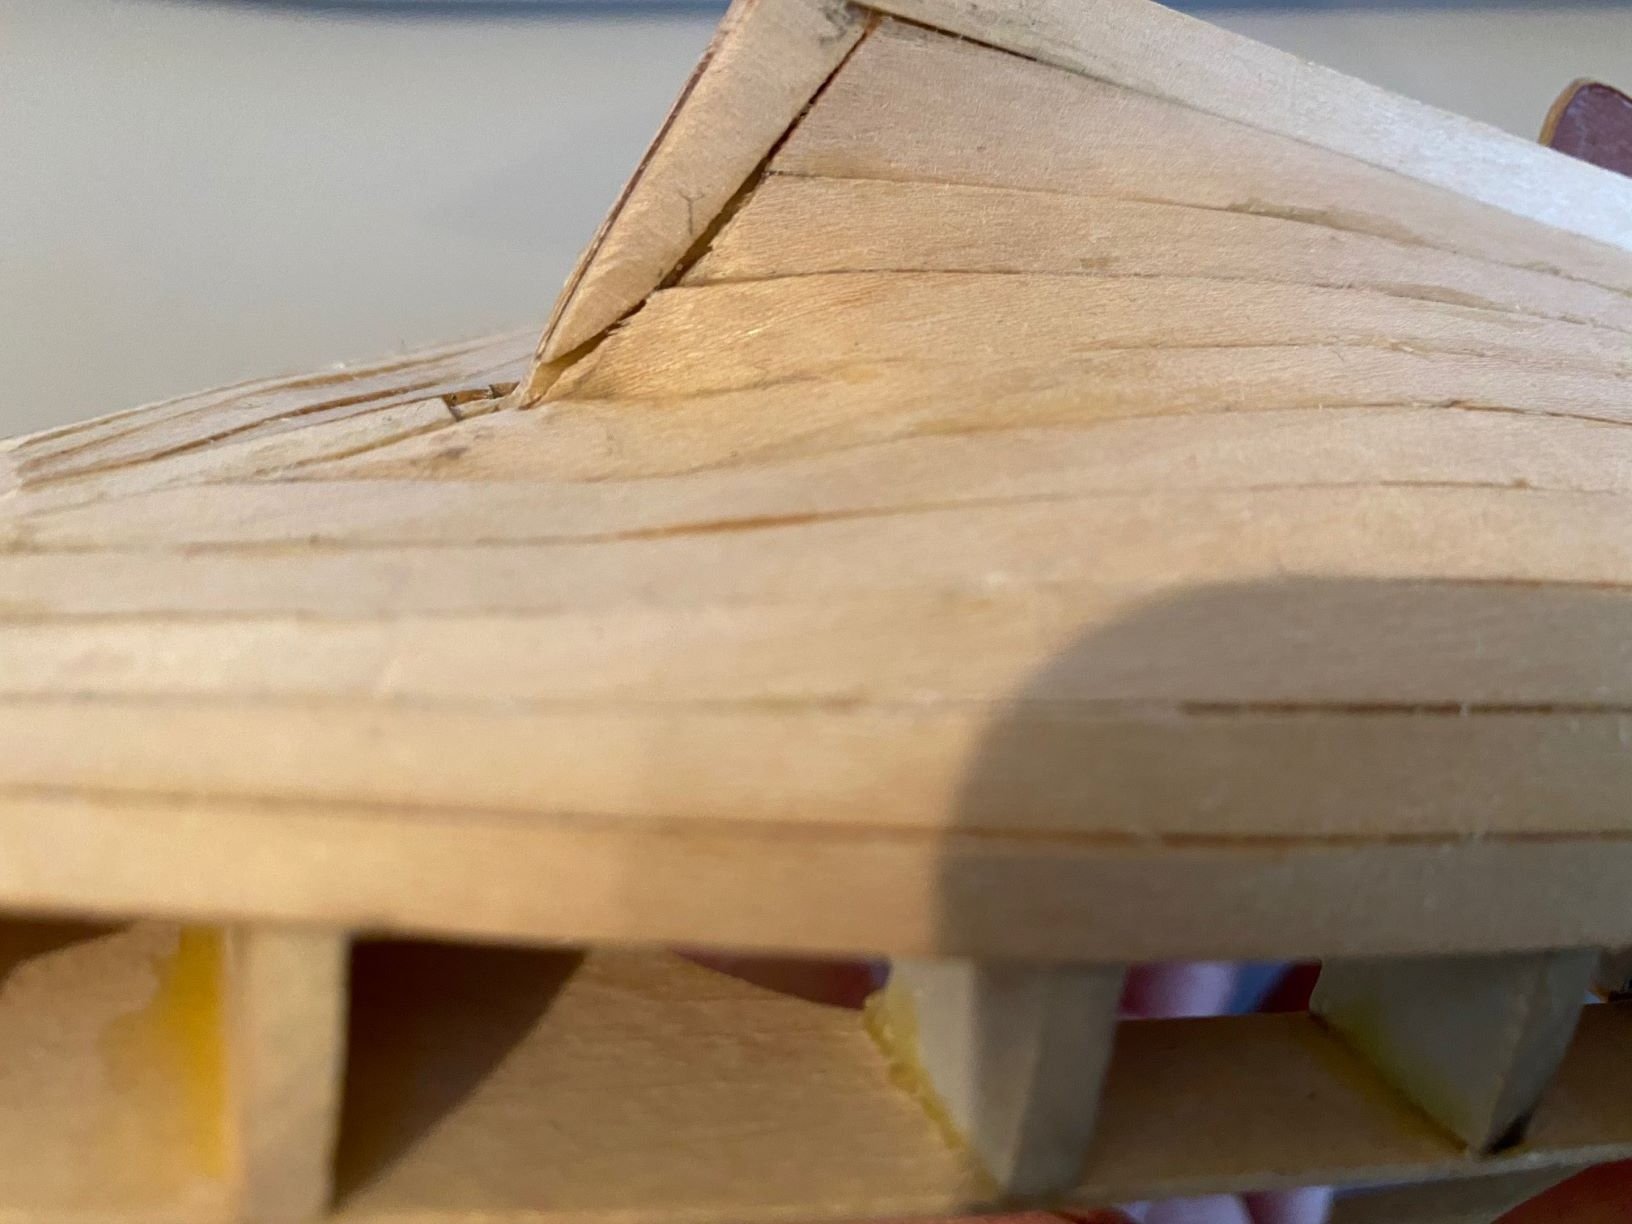
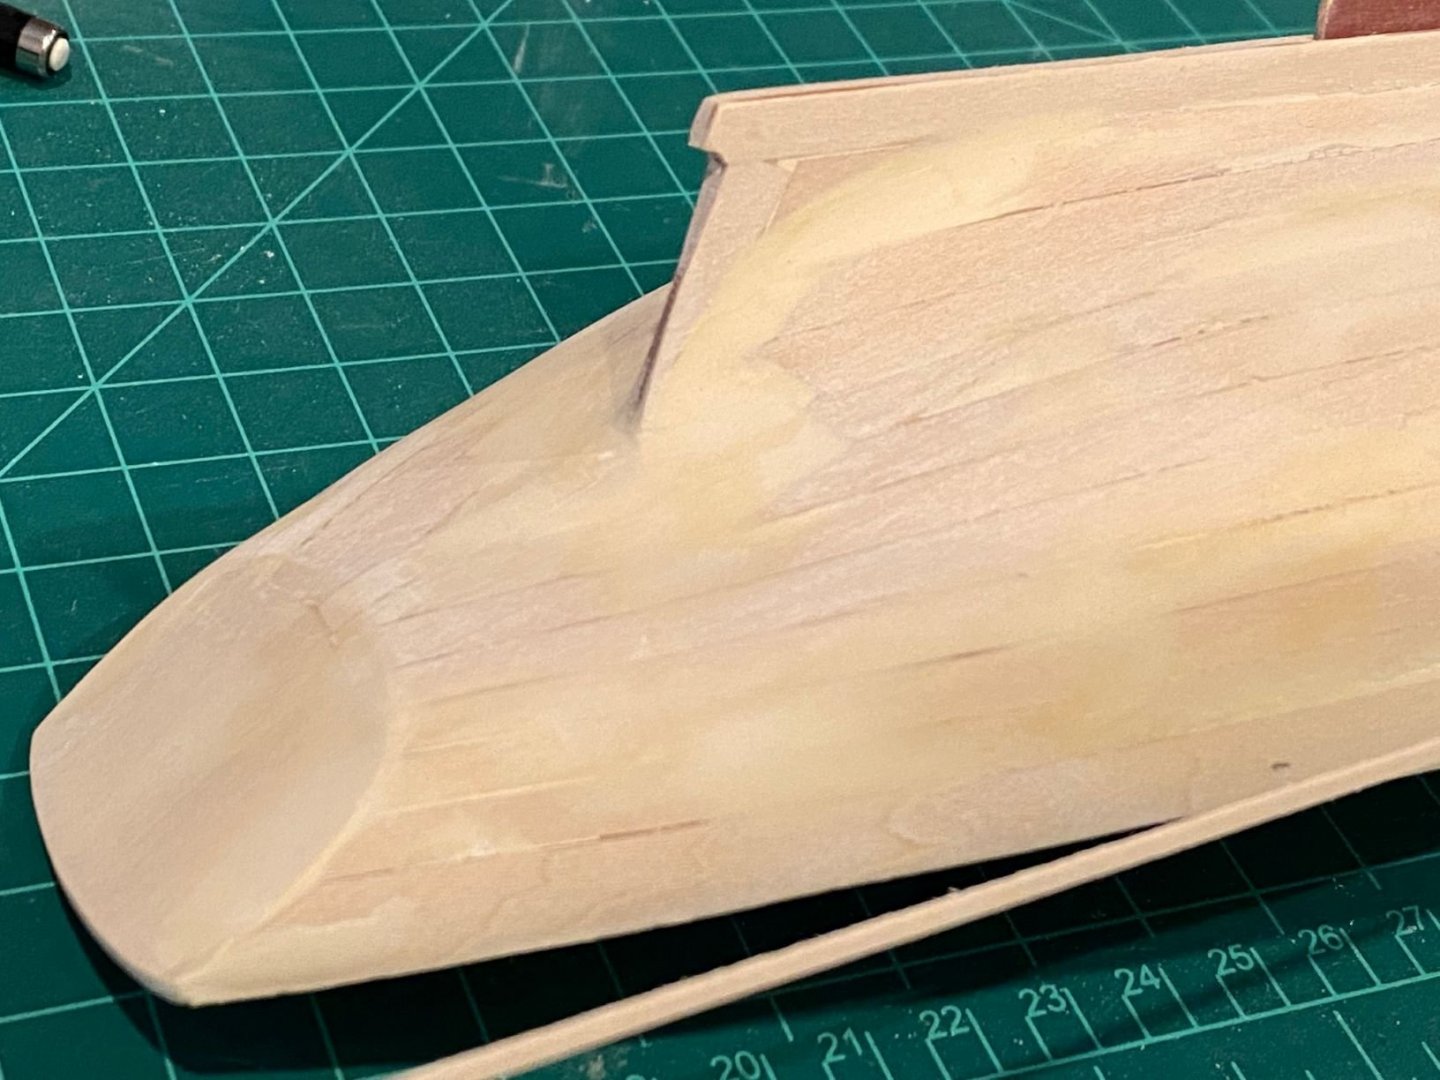
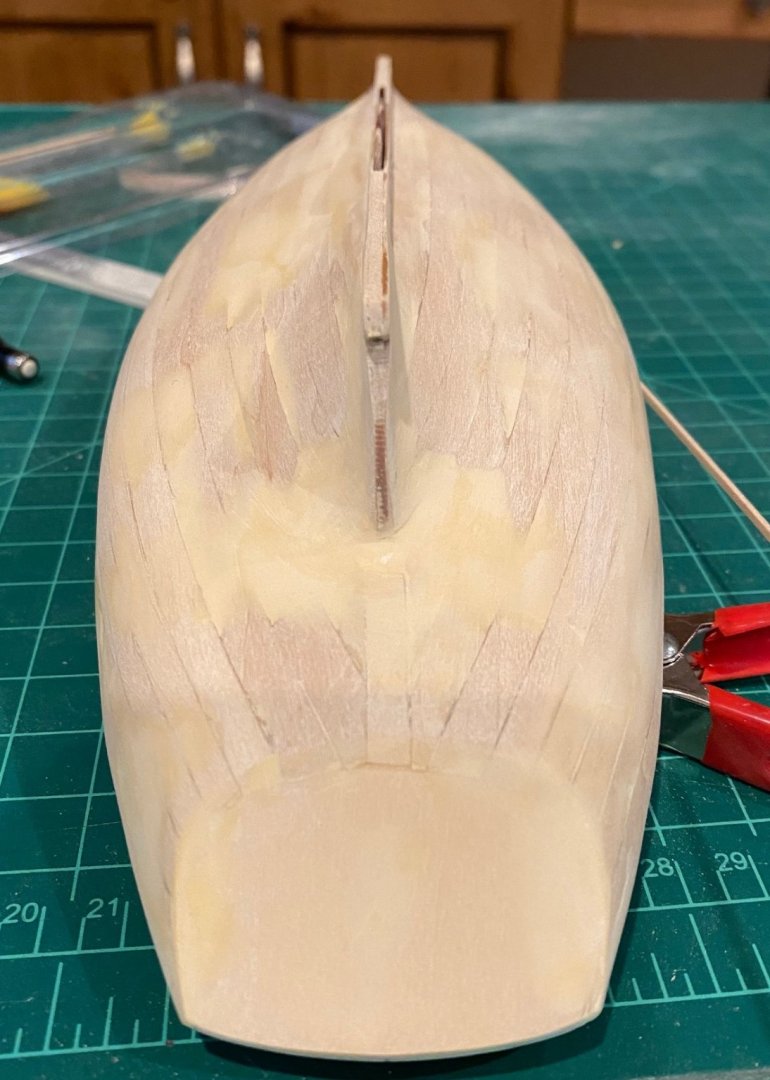
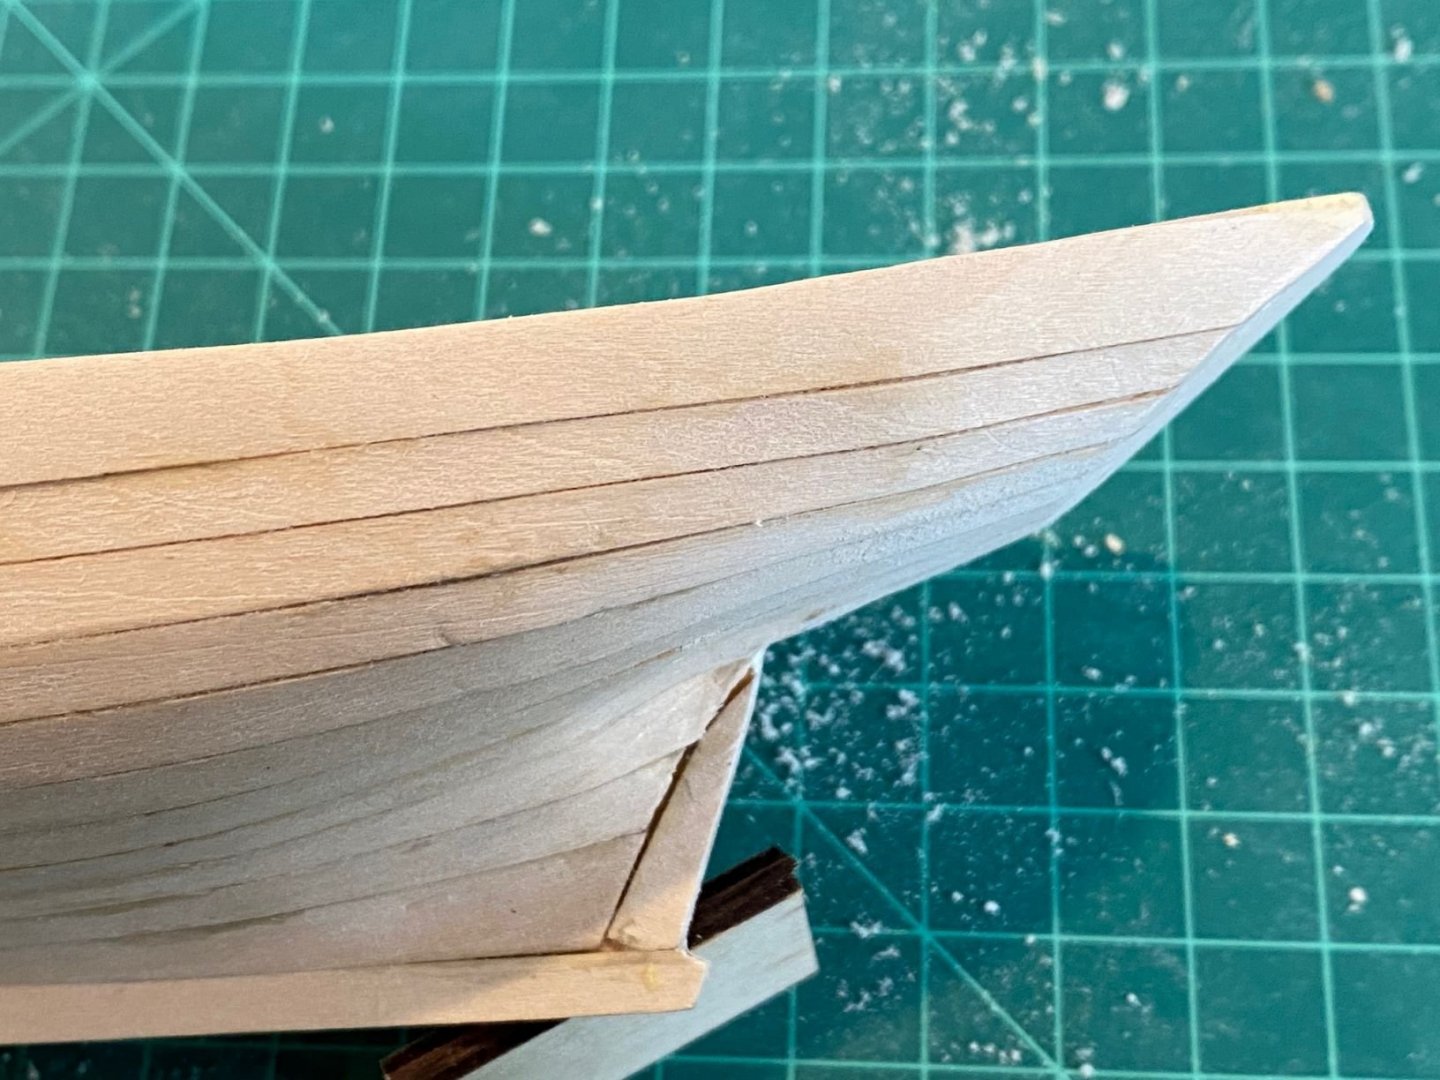
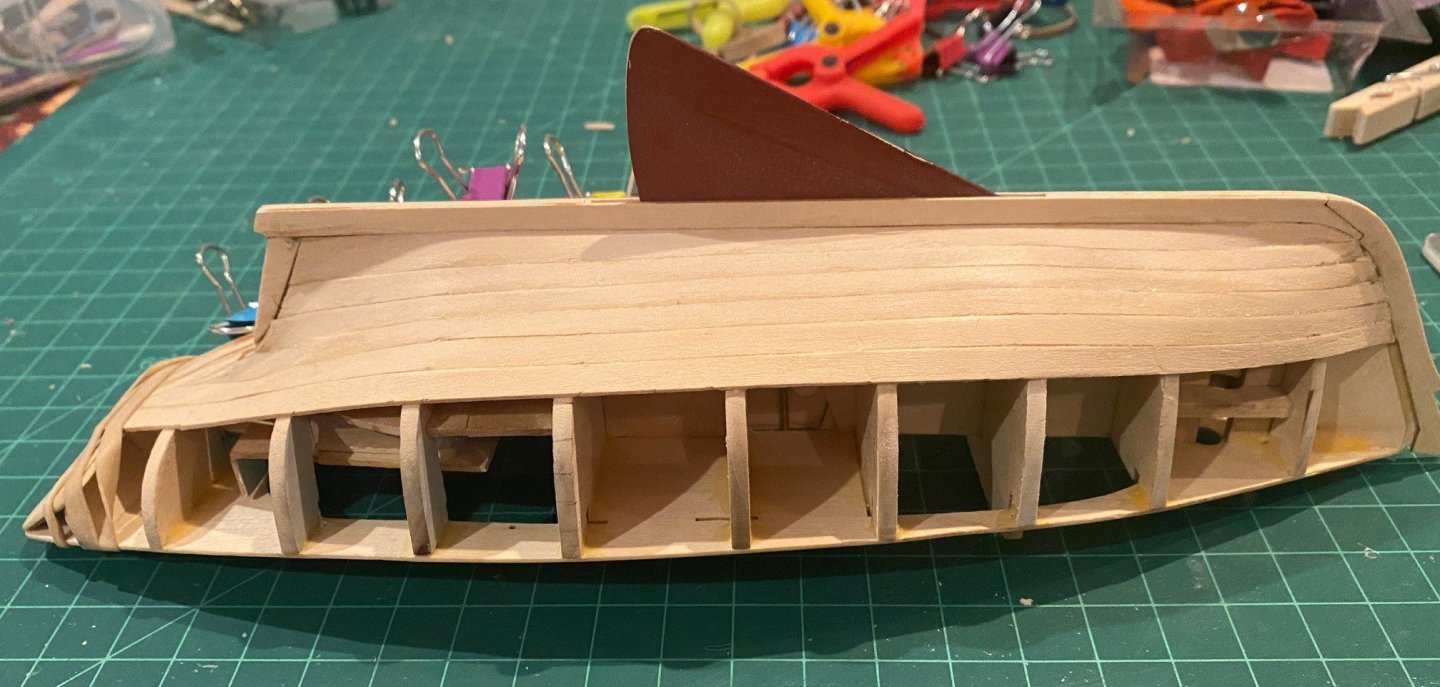
Planking Life requirements got in the way of enjoyment of building models this past month, but I’m back to work on the planks. Planking this model continues the learning challenge, but I am gaining more knowledge that I can apply to future builds. Planking at the Bow end; the challenge with garboard plank at the bow was getting the bend in it and fitting it in the rabbet. To get the bend, I soaked the plank in hot water then clamped it down on the frames and let it dry. After the plank was dry, I dry fitted it in the fwd end and then started gluing the garboard from the bow to the aft, 2 or 3 frames at a time, holding the plank in place with clamps like I did when setting the bend. I ended up with a small gap between the plank and the stem / keel doublers, it appears to be caused by not having enough bevel on the spine for the rabbet. Thus, the rabbet was more like a grove which was difficult to get a smooth transition in. So, take extra time to get the spine bevel smooth for a good transition. The other area that was a challenge was the smooth transition from the stem to frame 2 to frame 3. As mentioned before frame 3 was not faired enough or frame 2 was faired too much, more than likely both. ‘druxey’ recommended removing the plank and sanding frame 3 down with sanding sticks, unfortunately by the time I read his post I had already glued a few more planks on. However, I noticed that the depression lessened as I progressed and was essentially gone by plank 4. If needed I’ll fill it in with wood putty since as you can see the gap between the planks and stem will need to be filled. The other key problem was the aft plank transition of planks 3 to 7 between frame 8 and 9. You can see by the below pictures a number of issues from gaps and depressions. I believe the problem resulted from trying to bend/form the planks at that curve and fitting flush on the stern post doublers and reinforcing piece ‘D’ on each side of the aft spine. The dent was probably due to putting to much pressure on that spot as I was forming and then gluing the planks. I tried rewetting the planks to get them to relax but that only helped a little. I really did not notice the degree of depression until I was gluing plank 8, thus I did not want to remove all the planks and start over, so I’m going to wait until I am done planking and sanding to see if I need to fill in the depression. The lesson learned is to take more time forming the planks until they fit better without a lot of forcing prior to gluing them in place.


- 62 replies
-
- 3
-
-
- muscongus bay lobster smack
- Finished
- (and 1 more)
-
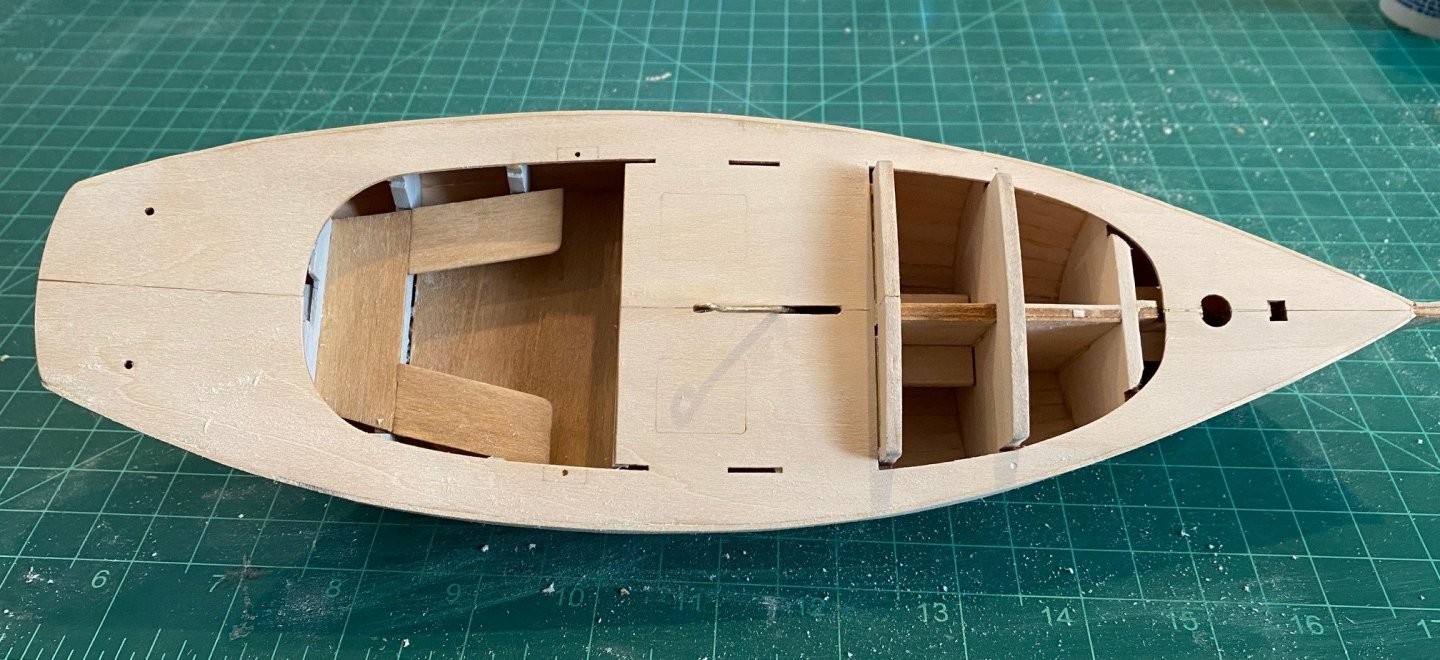
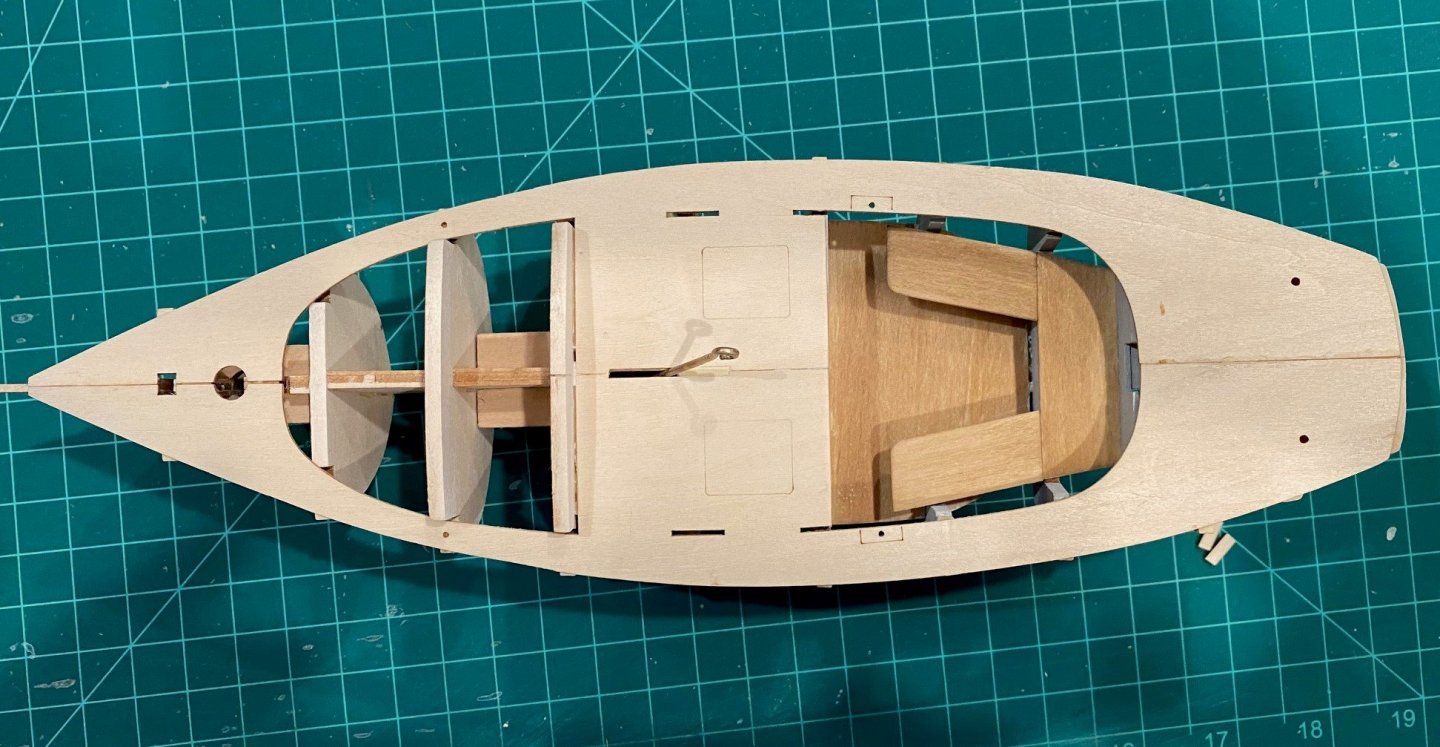
@GGibson I regard to frame 6, it looks like the port side is flush with the keel but the starboard looks like the bottom of frame 6 is not flush with the keel. if that is true, that could contribute to the problem. I did fair the top of my frames to try and help smooth the deck as it went from frame to frame. In the pictures below, you can see that on the port side, frame 6 sits a little higher too. As I mentioned in my build log I wished I would have spent a little more time fairing the tops, but I think in the end all will be good. Lesson learned.
-
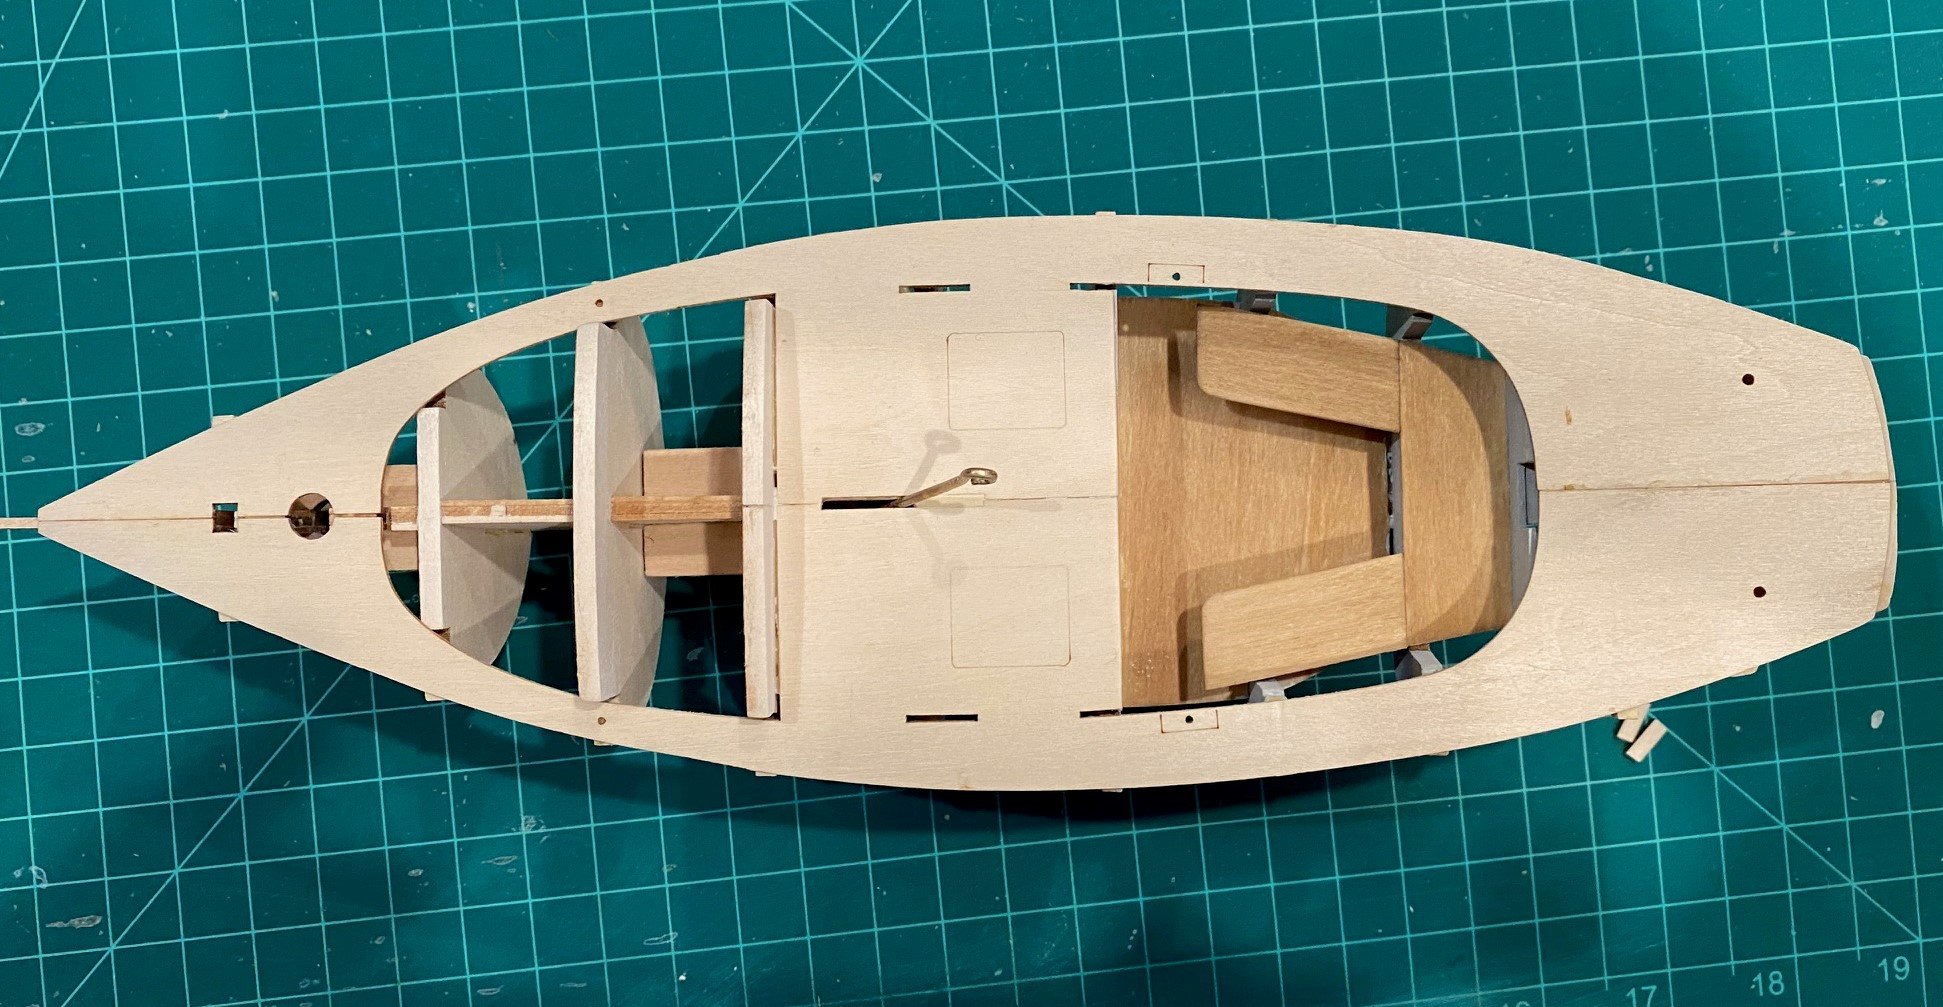
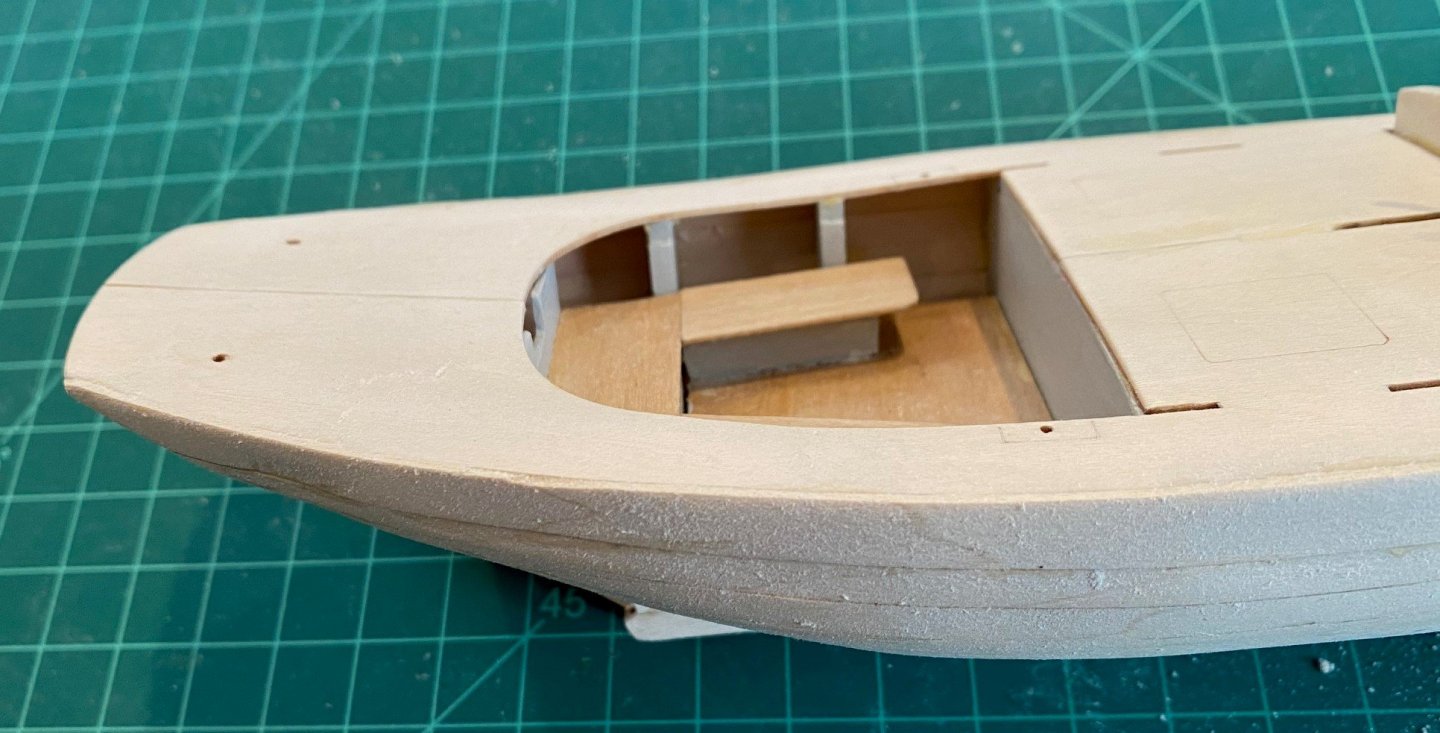
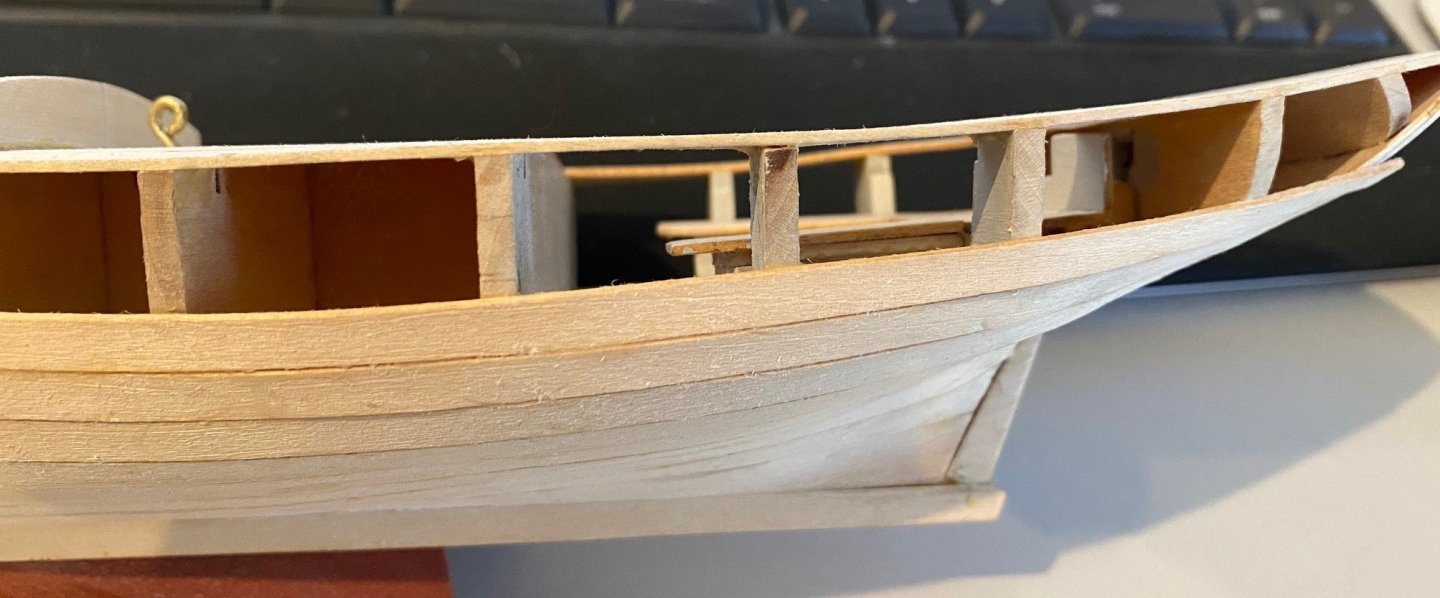
@GGibson The way I looked at the pictures in the instructions from page 15 to 17, the gap between the bulkhead frame and the deck is for the coaming and cabin sides to fit down into. I have not install them yet. The key thing is that you want the deck to go to the outside of the frames to eliminate sanding the frames down to be even with the deck. You can see the small gap I left between the deck and frames below. It was a lot of work to sand the frames down even wit the deck.
- 29 replies
-
- 1
-
-
- Model Shipways
- muscongus bay lobster smack
- (and 1 more)
-
@GGibson I built the Model Shipways 18th Century Longboat Wooden Model Ship prior to this model. The planking was easier then this model and I learned some good basics on planking from it. Overall the Longboat was easier then the lobster smack.
- 62 replies
-
- 1
-
-
- muscongus bay lobster smack
- Finished
- (and 1 more)
-
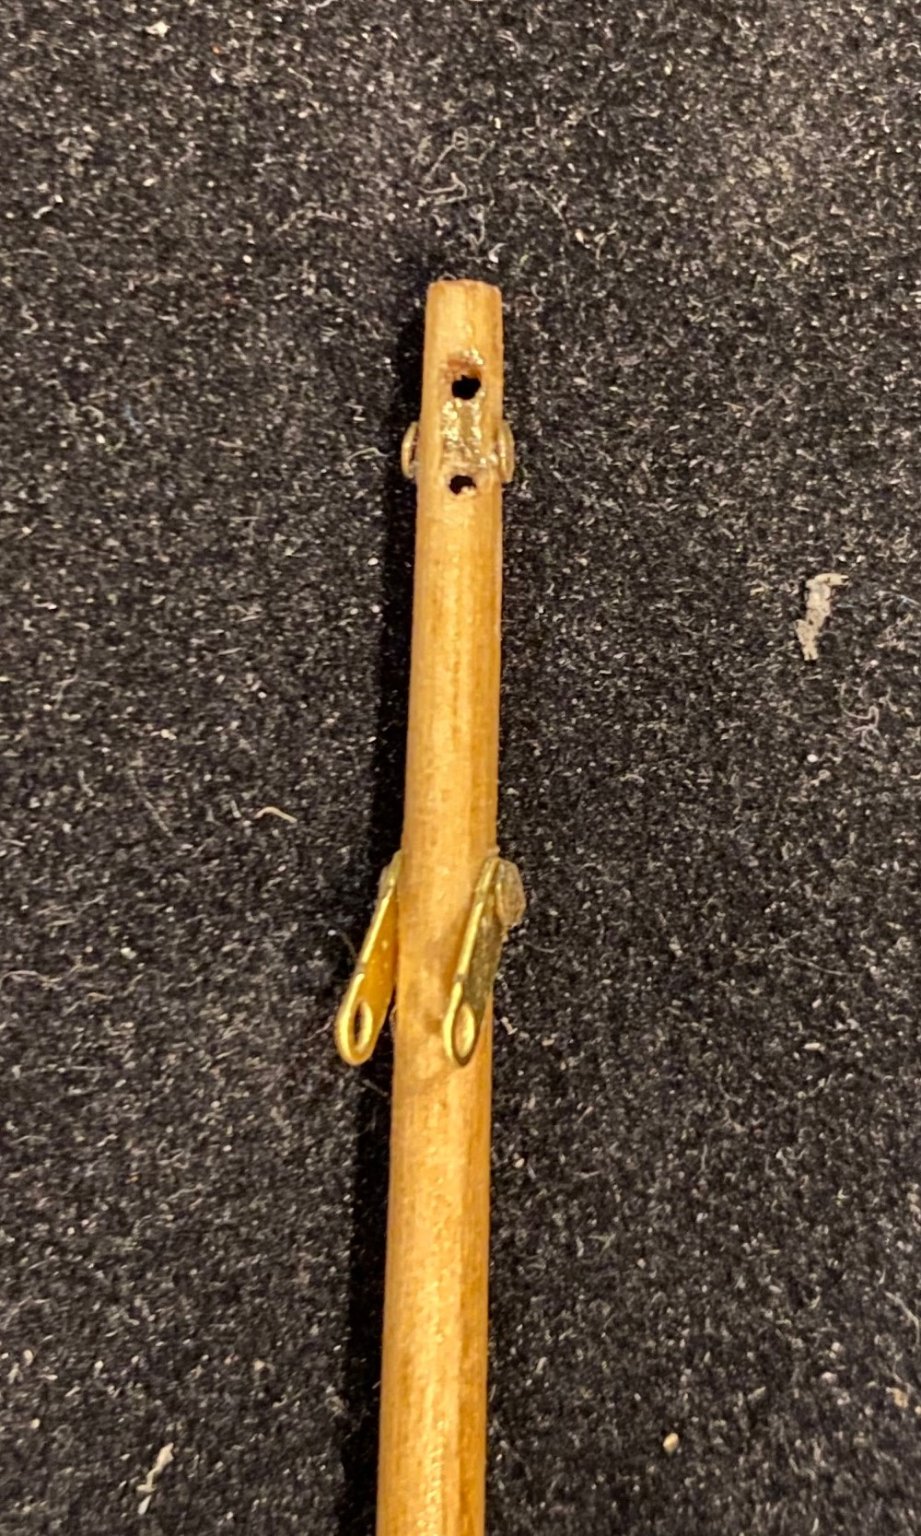
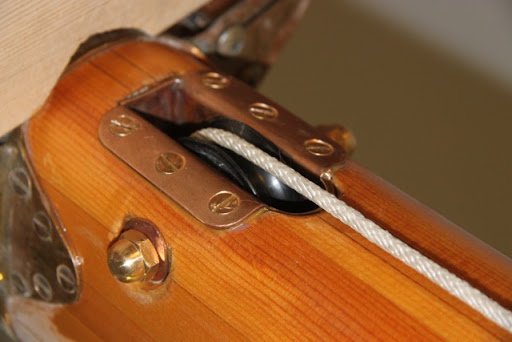
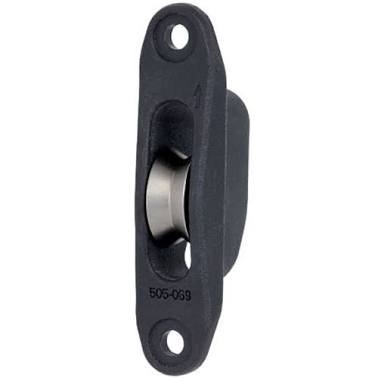
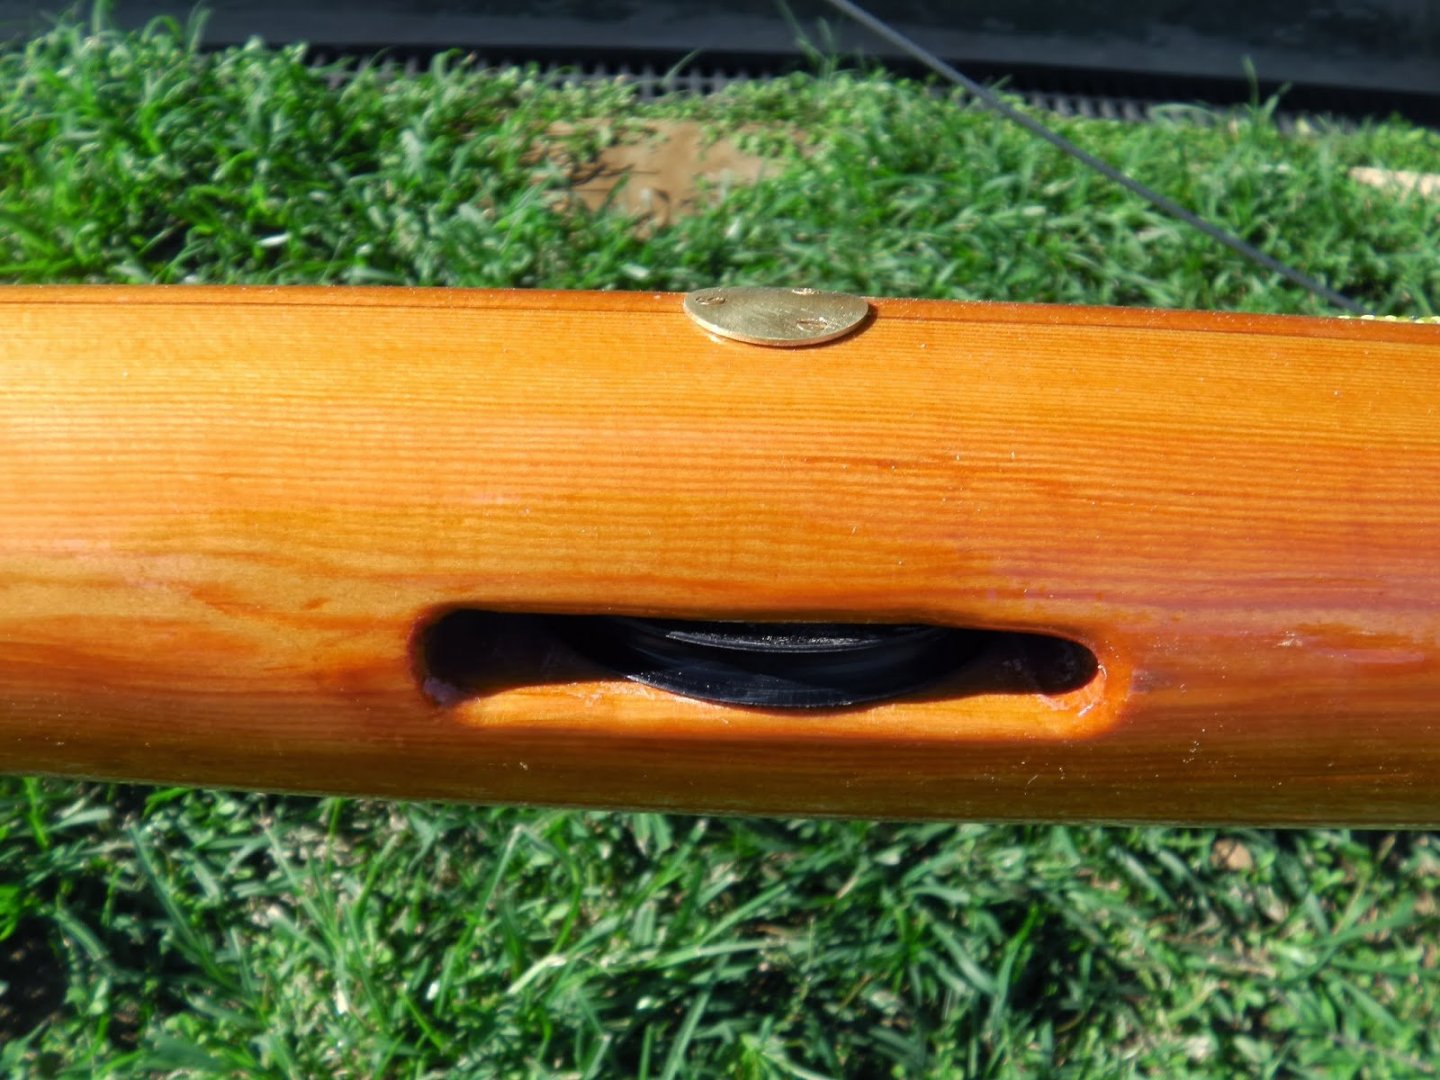
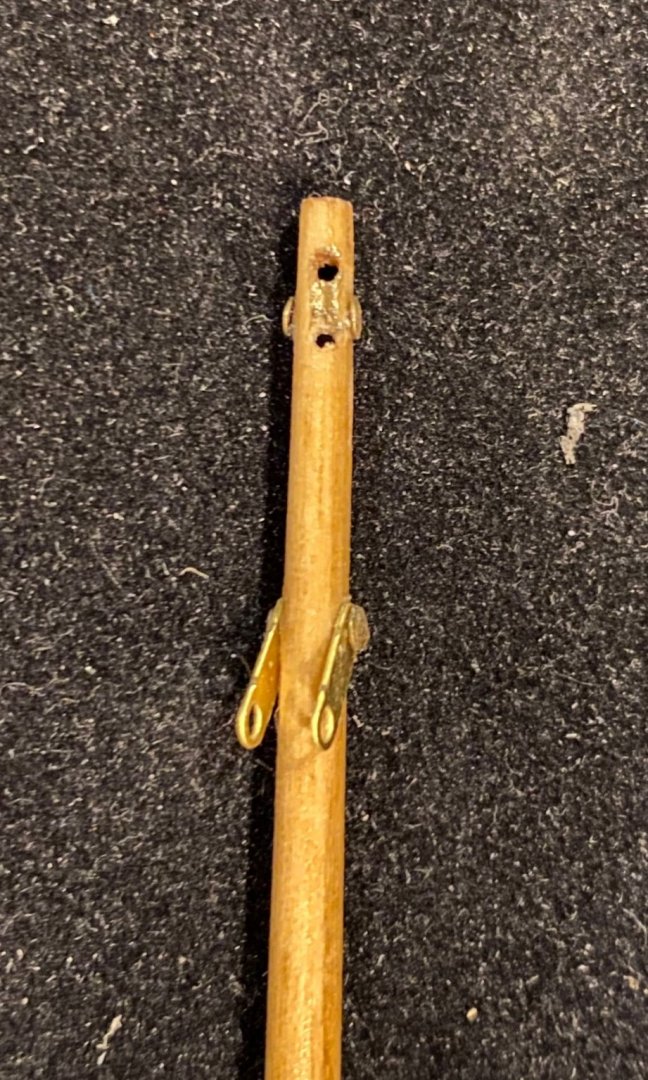
Not being a sail boat expert but an engineer; a sheave is just a pulley. They can be hooked up exterior of the mast or imbedded in the mast or spar. On my pram, I painted the inside of my sheave cut brass to simulate a pulley and put nail heads on the side to simulate the pulley axel.
- 26 replies
-
- 4
-
-
- Model Shipways
- Norwegian sailing pram
- (and 2 more)
-
@Cousin Teapot I sent you a message and some Pic's of the Stern Transom and Knee. The above picture is the bow transom. Good luck
- 54 replies
-
- 1
-
-
- norwegian sailing pram
- model shipways
- (and 1 more)