DONATION DRIVE - SUPPORT MSW - DO YOUR PART TO KEEP THIS GREAT FORUM GOING!
×


SkiBee
-
Posts
251 -
Joined
-
Last visited
Content Type
Profiles
Forums
Gallery
Events
Everything posted by SkiBee
-
40 years ago I started with a solid hull model and failed to get past step one. I've built a lot of plastic models but never went back to try a wood model, shaping a hull and the rigging intimidated me. A couple of years ago I decided to try my hand at wood models and saw an advertisement for Model Expo & Shipways models. I started with the Model Shipways 3 ship beginners set and they took me step by step and I learned a lot of skills and knowledge for a fair price. So much I tried my hand at a solid hull again and it's been successful so far. I highly recommend the Model Shipways Shipwright 3 Kit Series. By the time you finish the 3rd boat, the Muscongus Bay Lobster Smack, you will have the skills to take on anything. They might be small and appear to be simple, but that's what you want in the beginning and to learn the basic skills, then try the other models. Also, search "new to ..." there are many others that have asked the same question and there are a ton of great recommendations on this website.
-
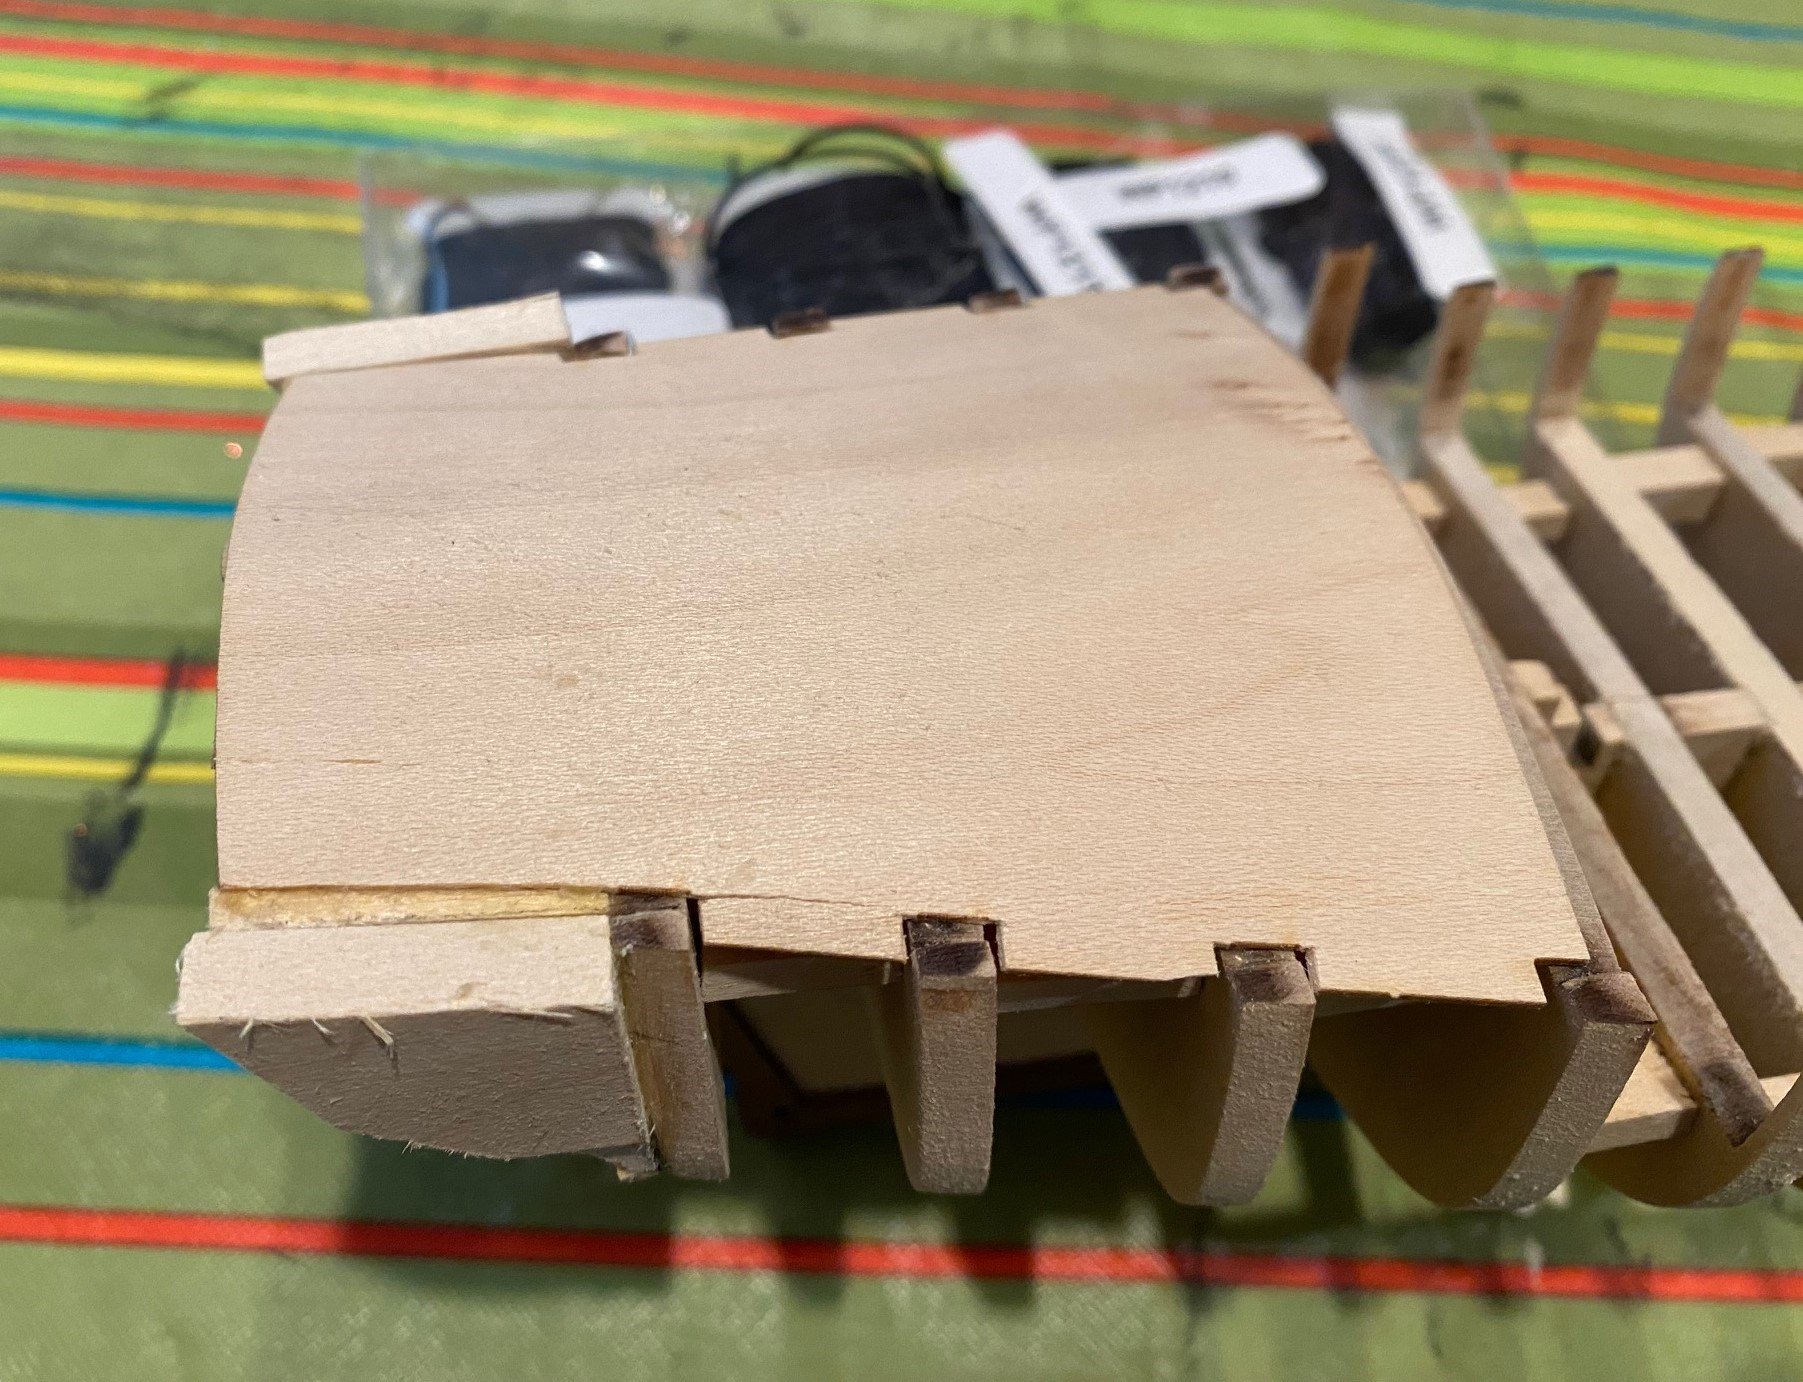
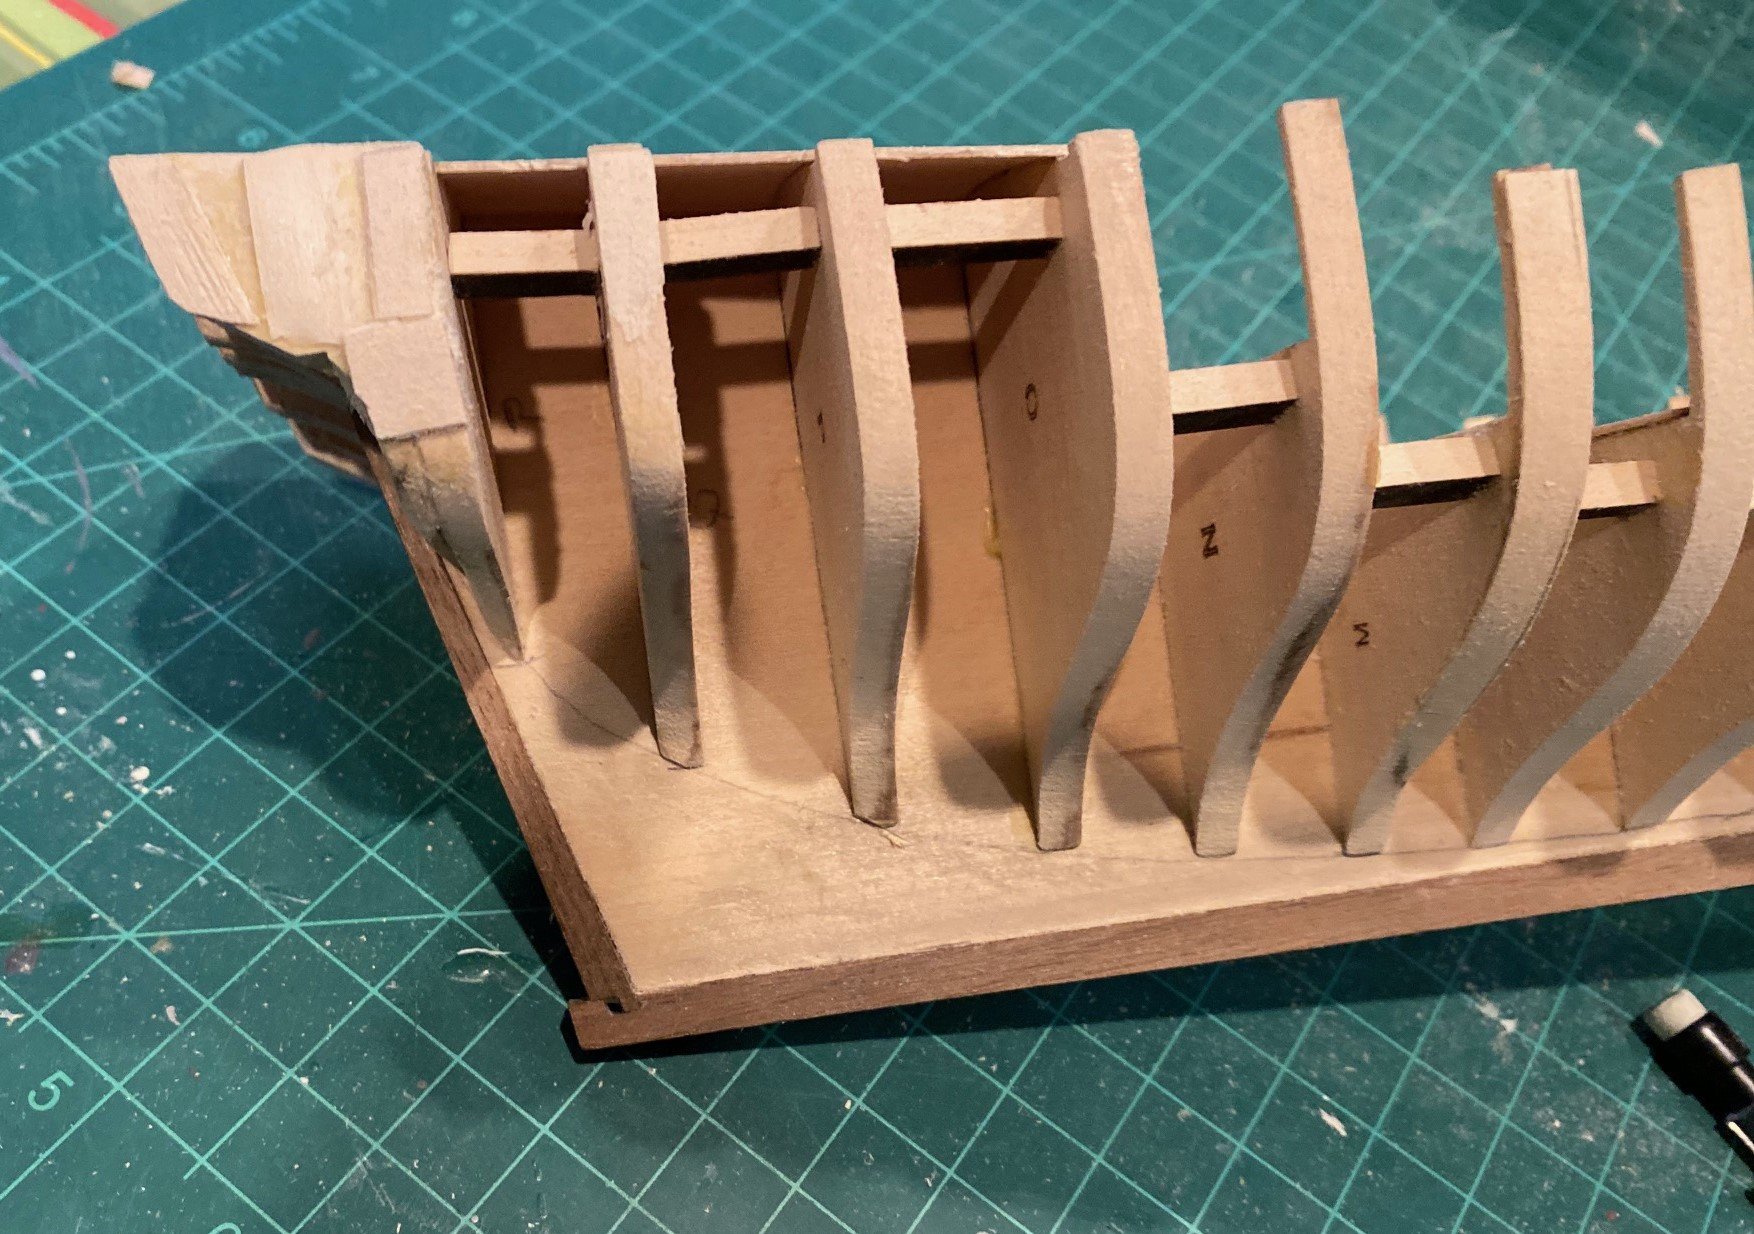
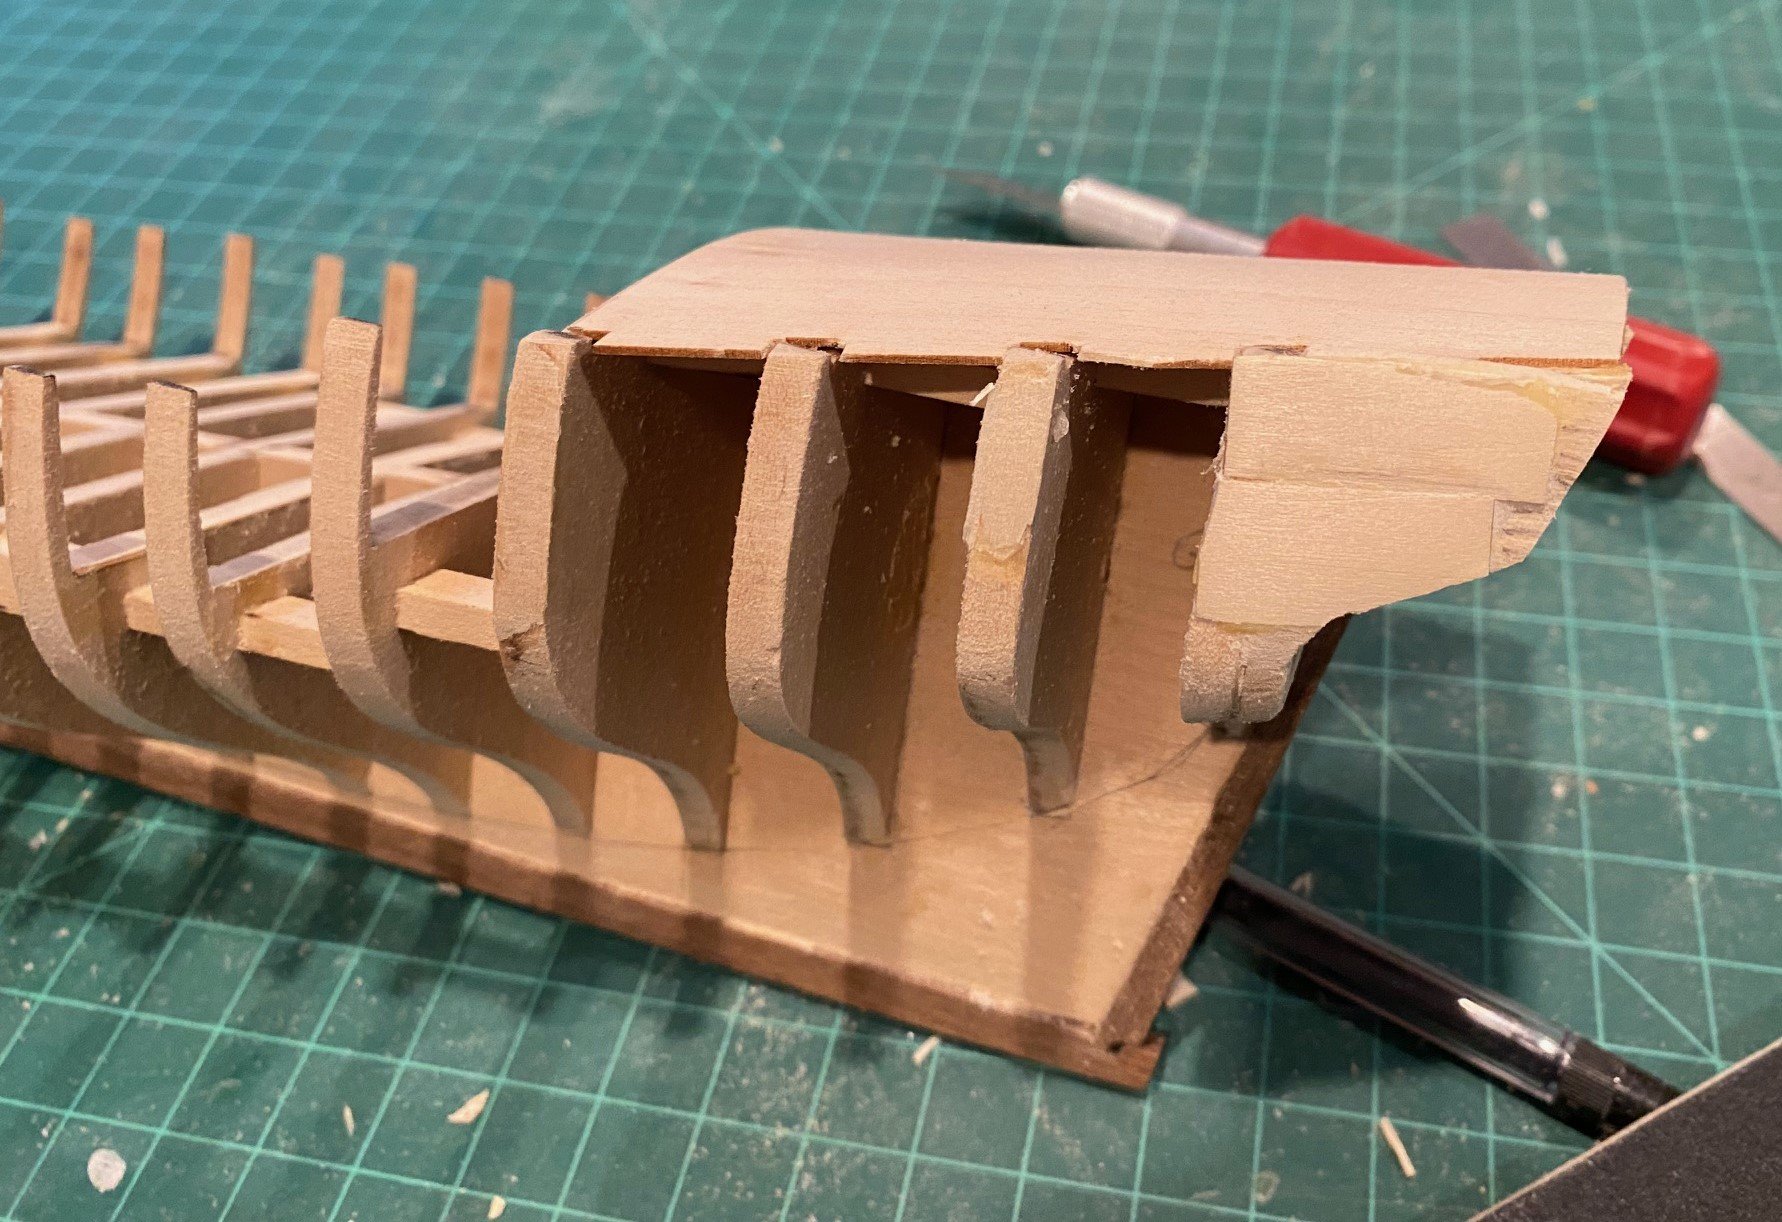
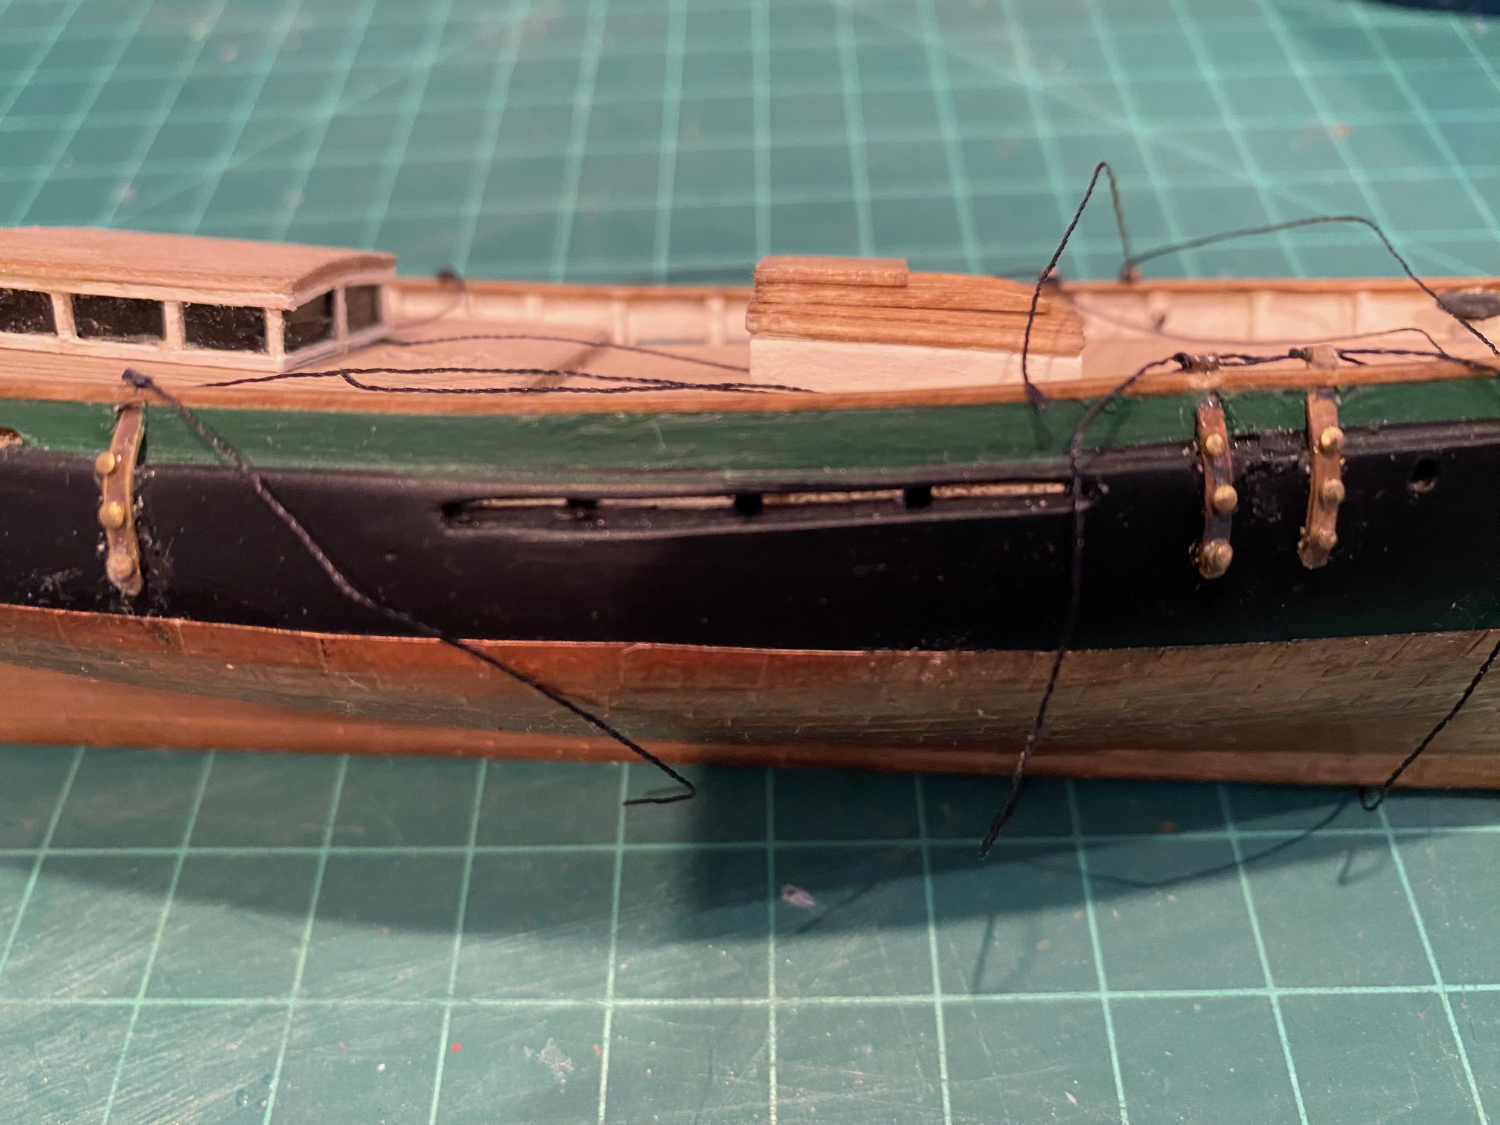
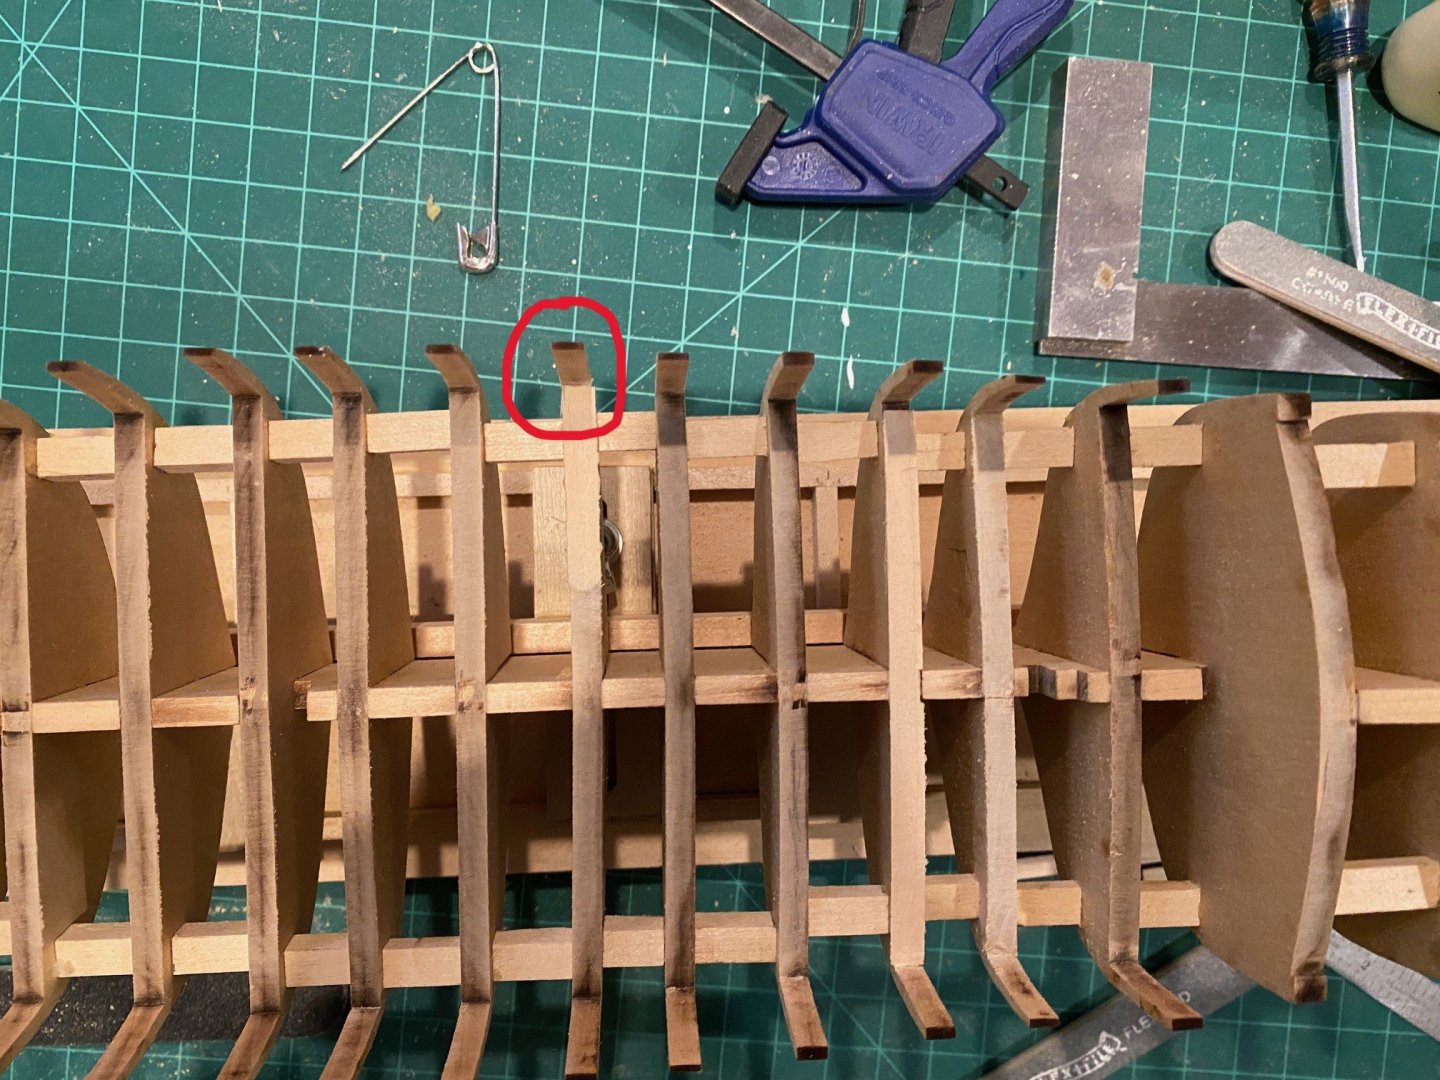
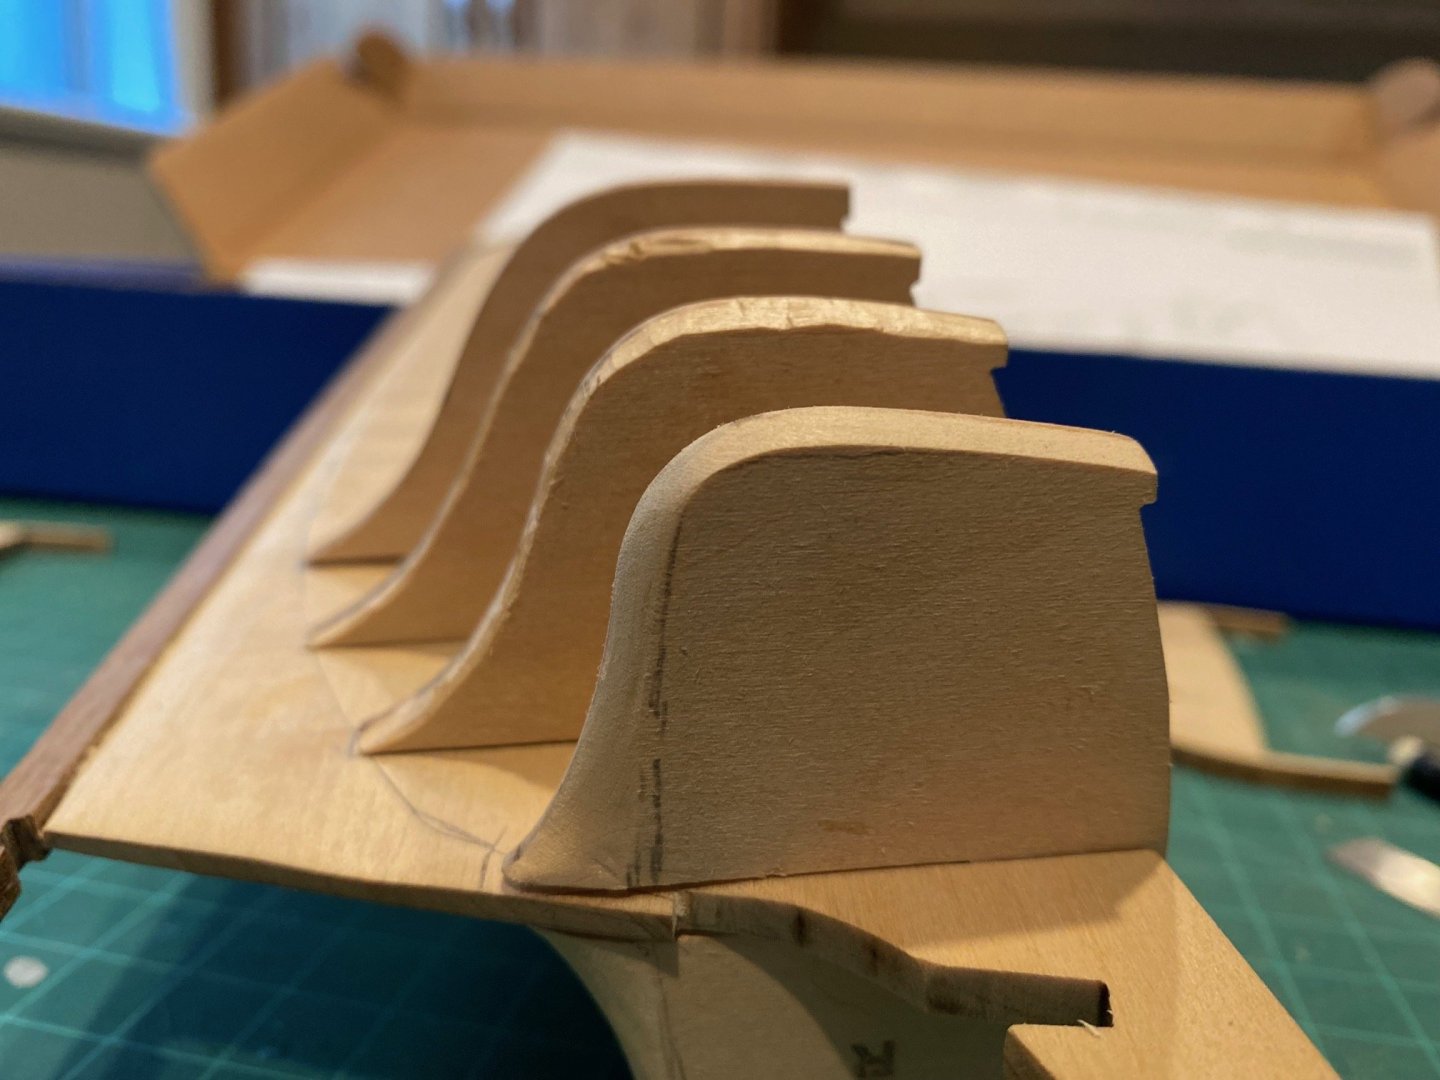
 I installed the Stern Frames using the windows as a spacer, then the Transom and Filler Block and tried to blend the transom and filler to flow into the bottom of Bulkhead R , and form the curved counter. Also sanded the top and aft end of the stern frame to ensure they all were even/curved the right amount for the aft deck and such. The sternpost got in the way of evening out everything. Glued in the aft deck. Added the stern frame filler blocks. When I was faired these blocks, I rounded them front to aft instead of continuing the line created by the outside edge of the last 4 bulkheads. After I realized that I should have continued the line from the bulkheads, I had to add some additional wood strips and sand them to correct this. You can see that I broke off most of the aft deck tabs between the bulkheads, glued them back in the best I could. Continued to break those tabs as I built the bow filler blocks and did the final fairing of the sides and top of the bulkheads. NOTE: I wish I had waited until all of this work was done to glue in the aft deck, I’m glad I did not glue in the main deck. Part of this is how I hold the boat by the bulkheads as I work on the boat. I also broke off a few stanchions too. I don’t think adding the deck would have prevented that, I think the block I added between the bulkheads added more stability than the deck would.


-
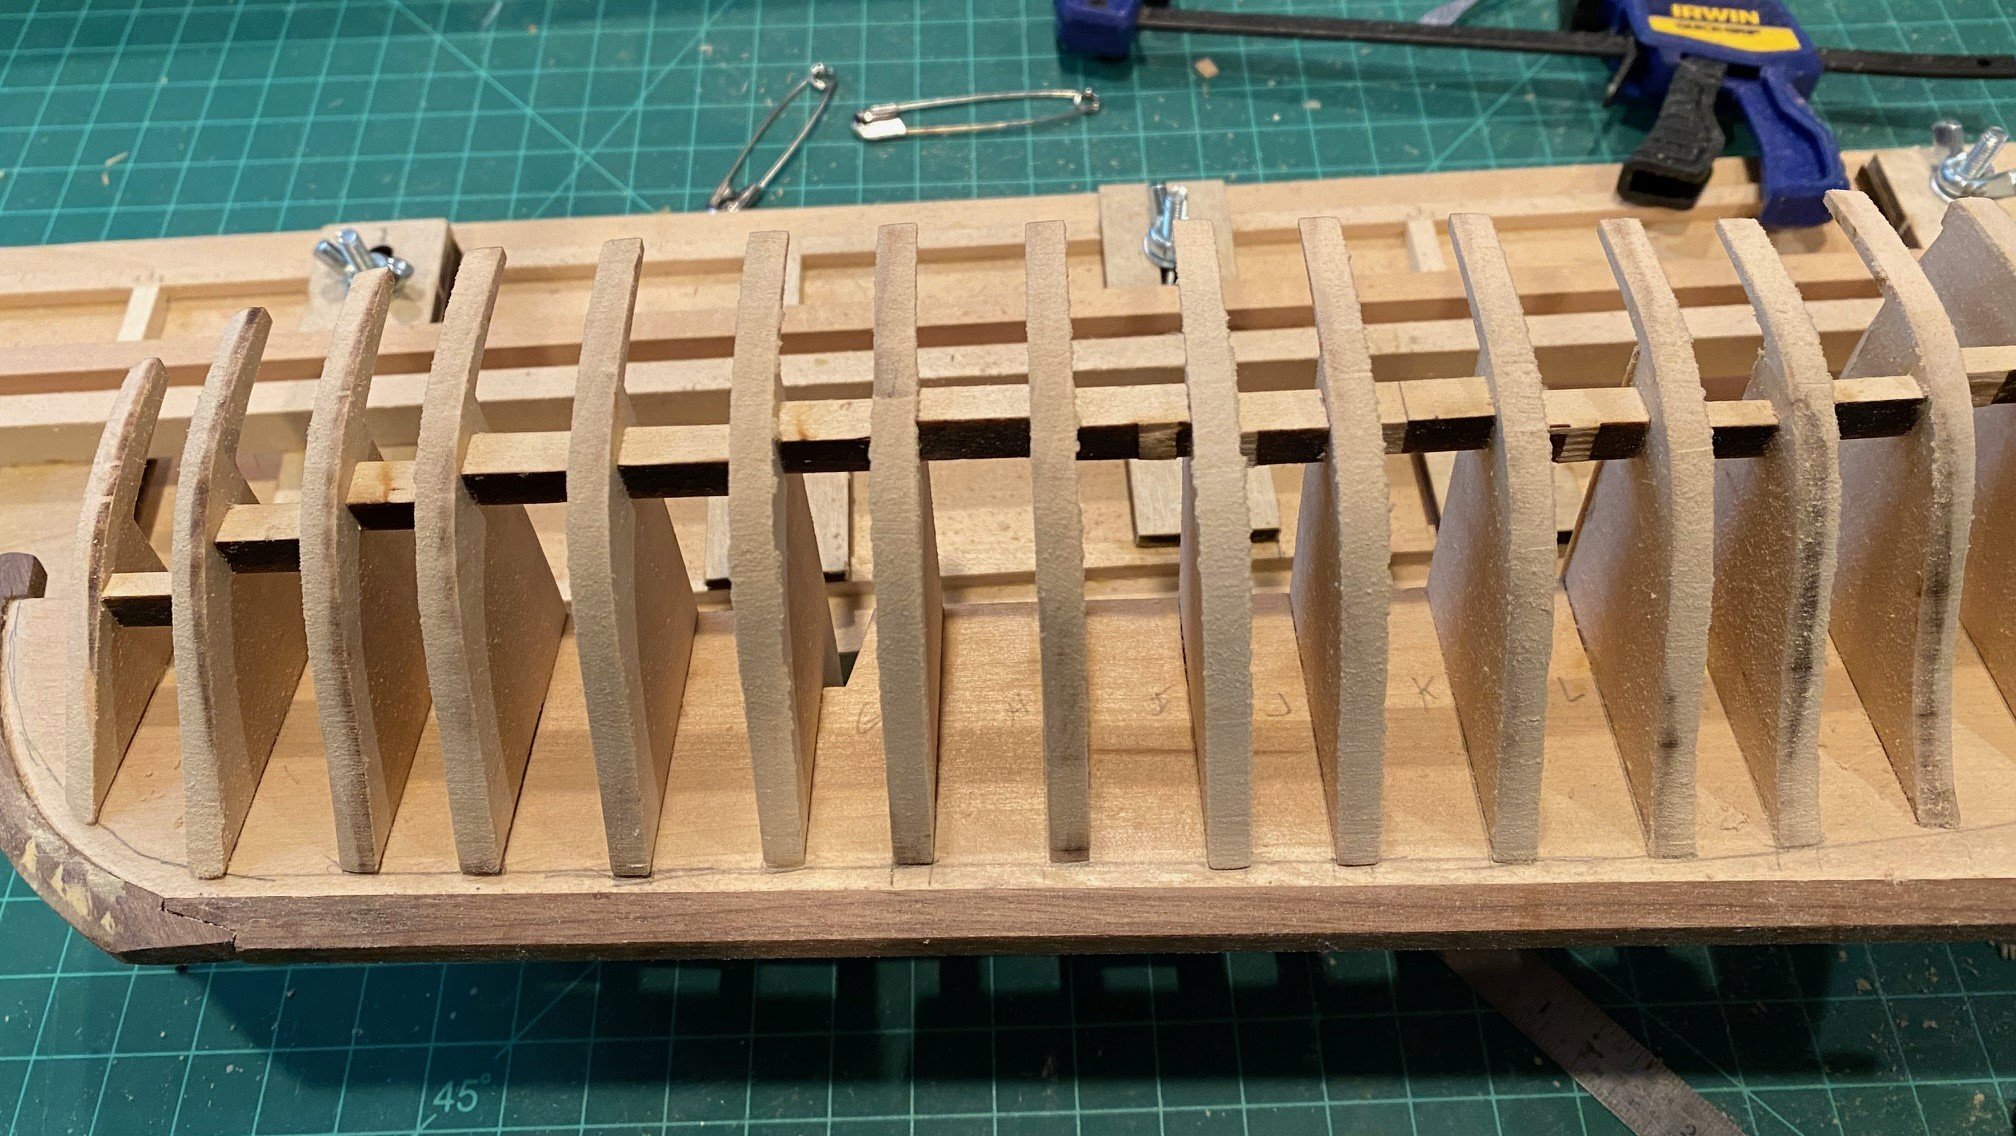
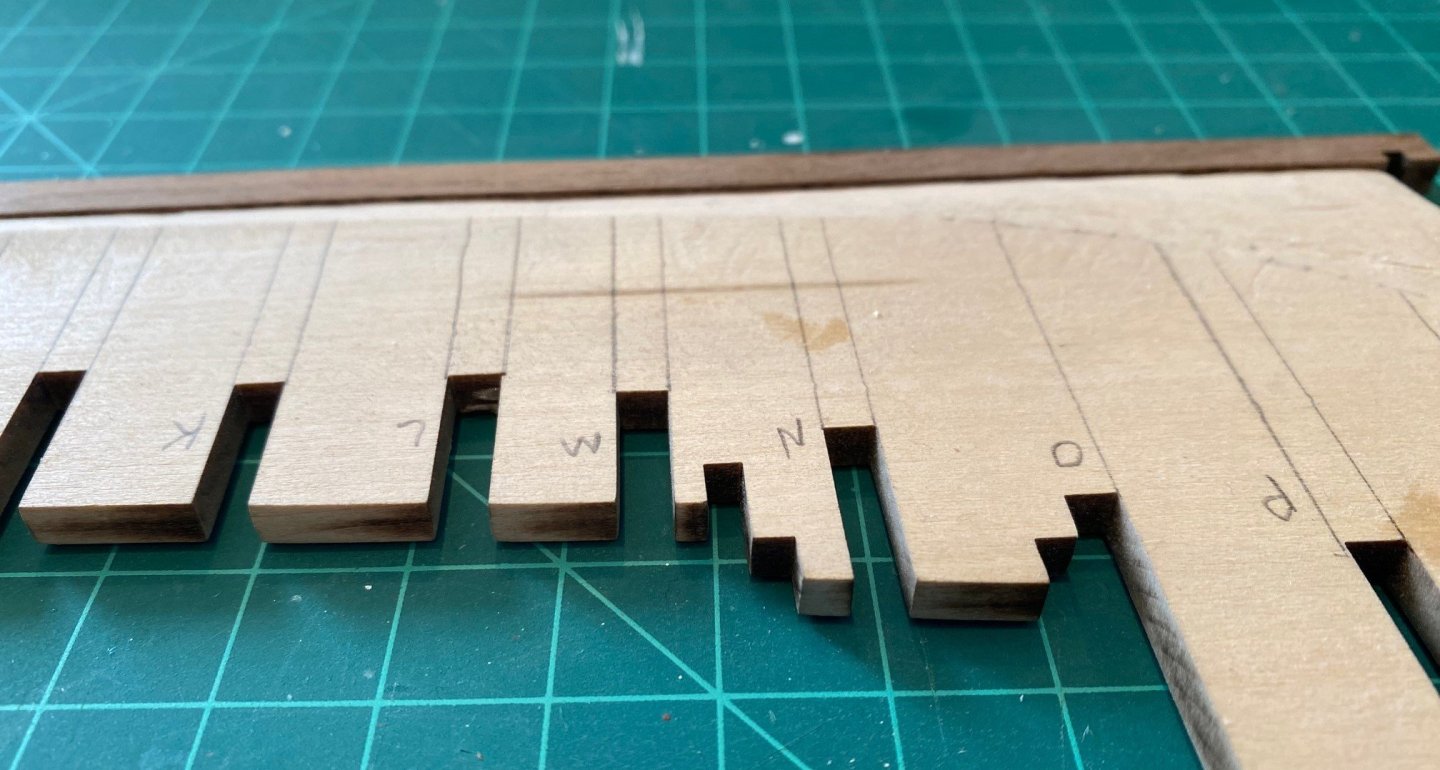
I’ve been fairing the Port side, putting in a few hours. I guess Hunt, in his Practicum, says that it should only take 15 minutes, I guess that is if the parts are cut perfectly and you glue them in right. You can see the bulkheads I had to significantly sand down vs the ones I didn’t. I shimmed the top of one bulkhead, and I might need to shim the ones that still show laser marks. I also need to address the ends of the bulkheads, there are bulkheads on each side of the bearding line.

-
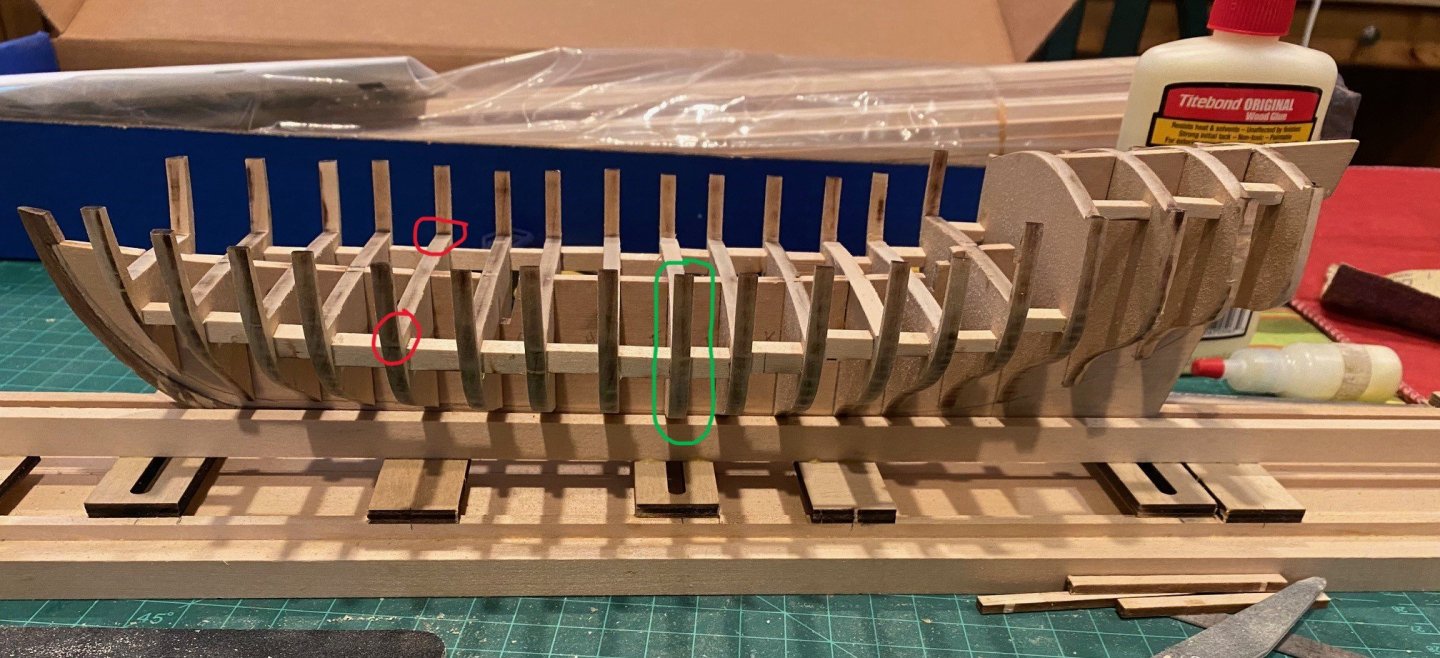
As I faired the deck, I found that my bulkheads were all 90 deg top to bottom, fwd and aft. But I had a couple of bulkheads that were going to need shims and or a lot of sanding. I determined the cause was I did not pay attention to making sure that the bulkhead was level port to starboard as I was gluing in the first 8 bulkheads. There were two that were going to require a fair amount of shimming and sanding. I thought about dissolving the glue, yellow wood glue, and redoing them, but I was concerned that I might cause other problems of brakeage, so I left them and will glue and shim. In this pick the red circled bulkhead is that worst one, the starboard side was below the port side. You can see that I shimmed the top of the bulkhead so it would be even fore and aft with the other bulkheads and side to side of itself. The green is to show that the bulkheads are 90 degrees vertical, and the red is an example of level from port to starboard on the top.
-
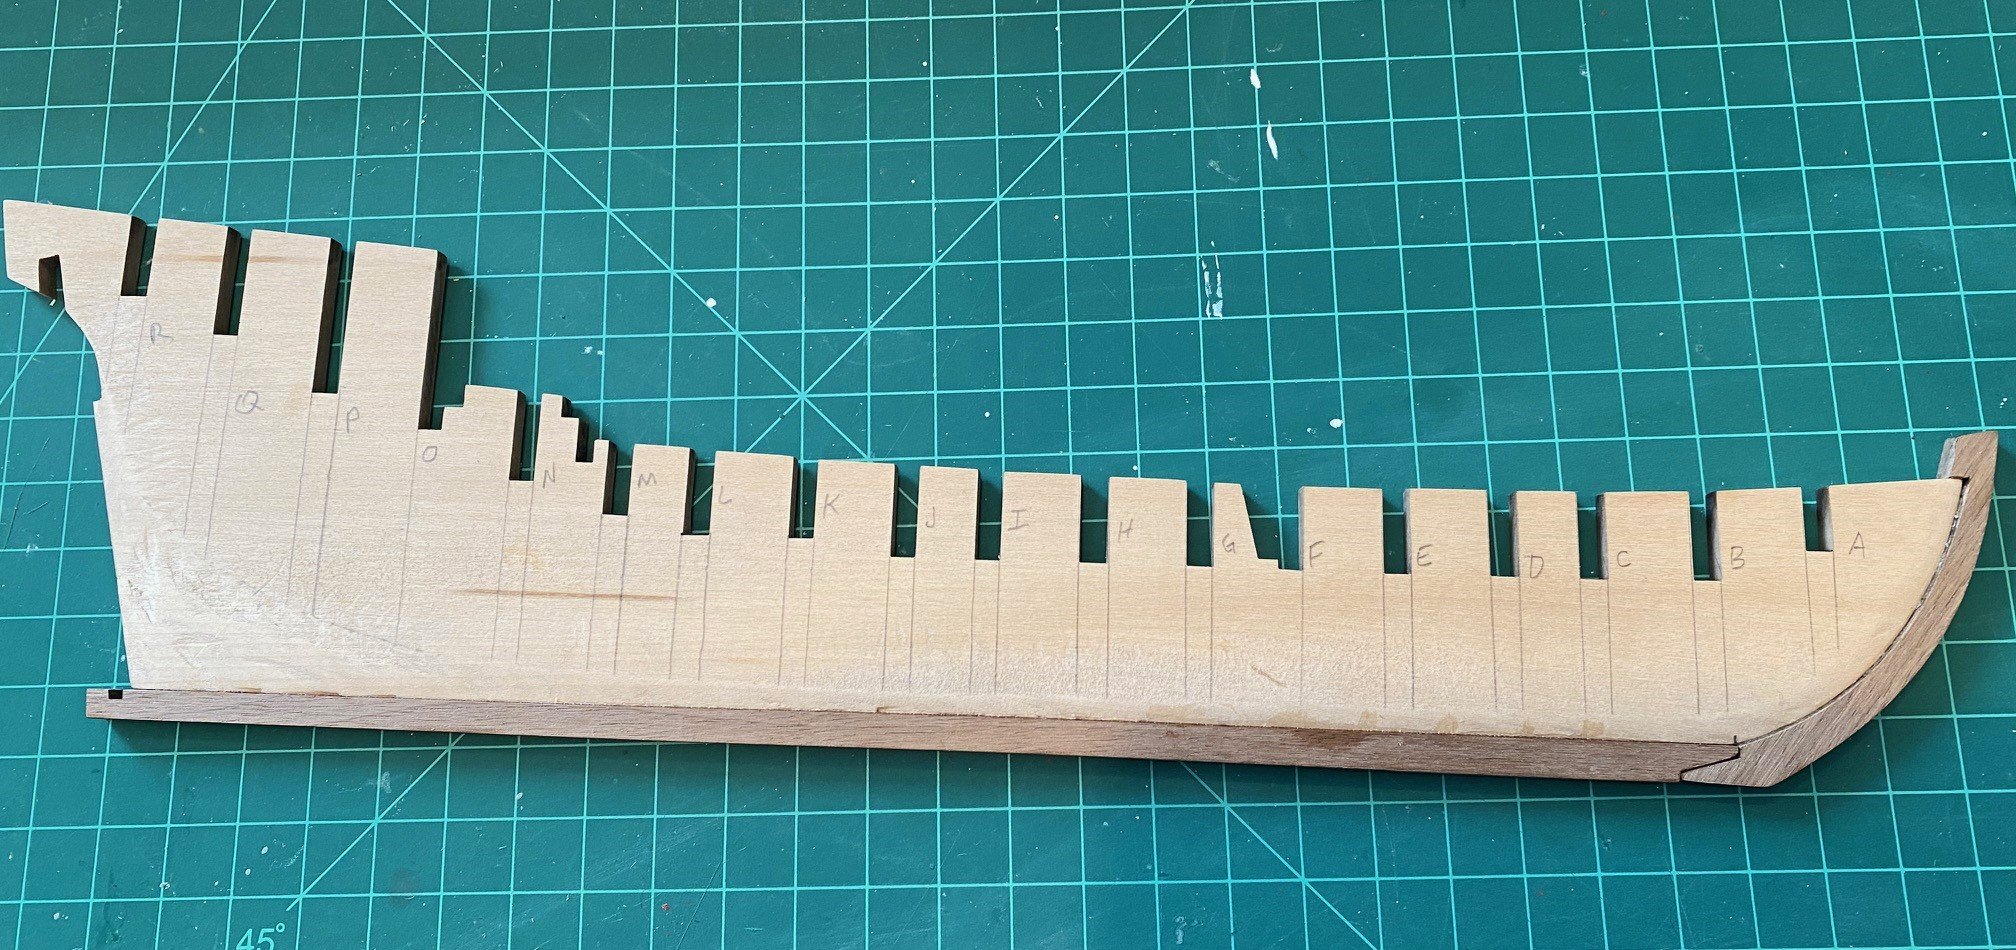
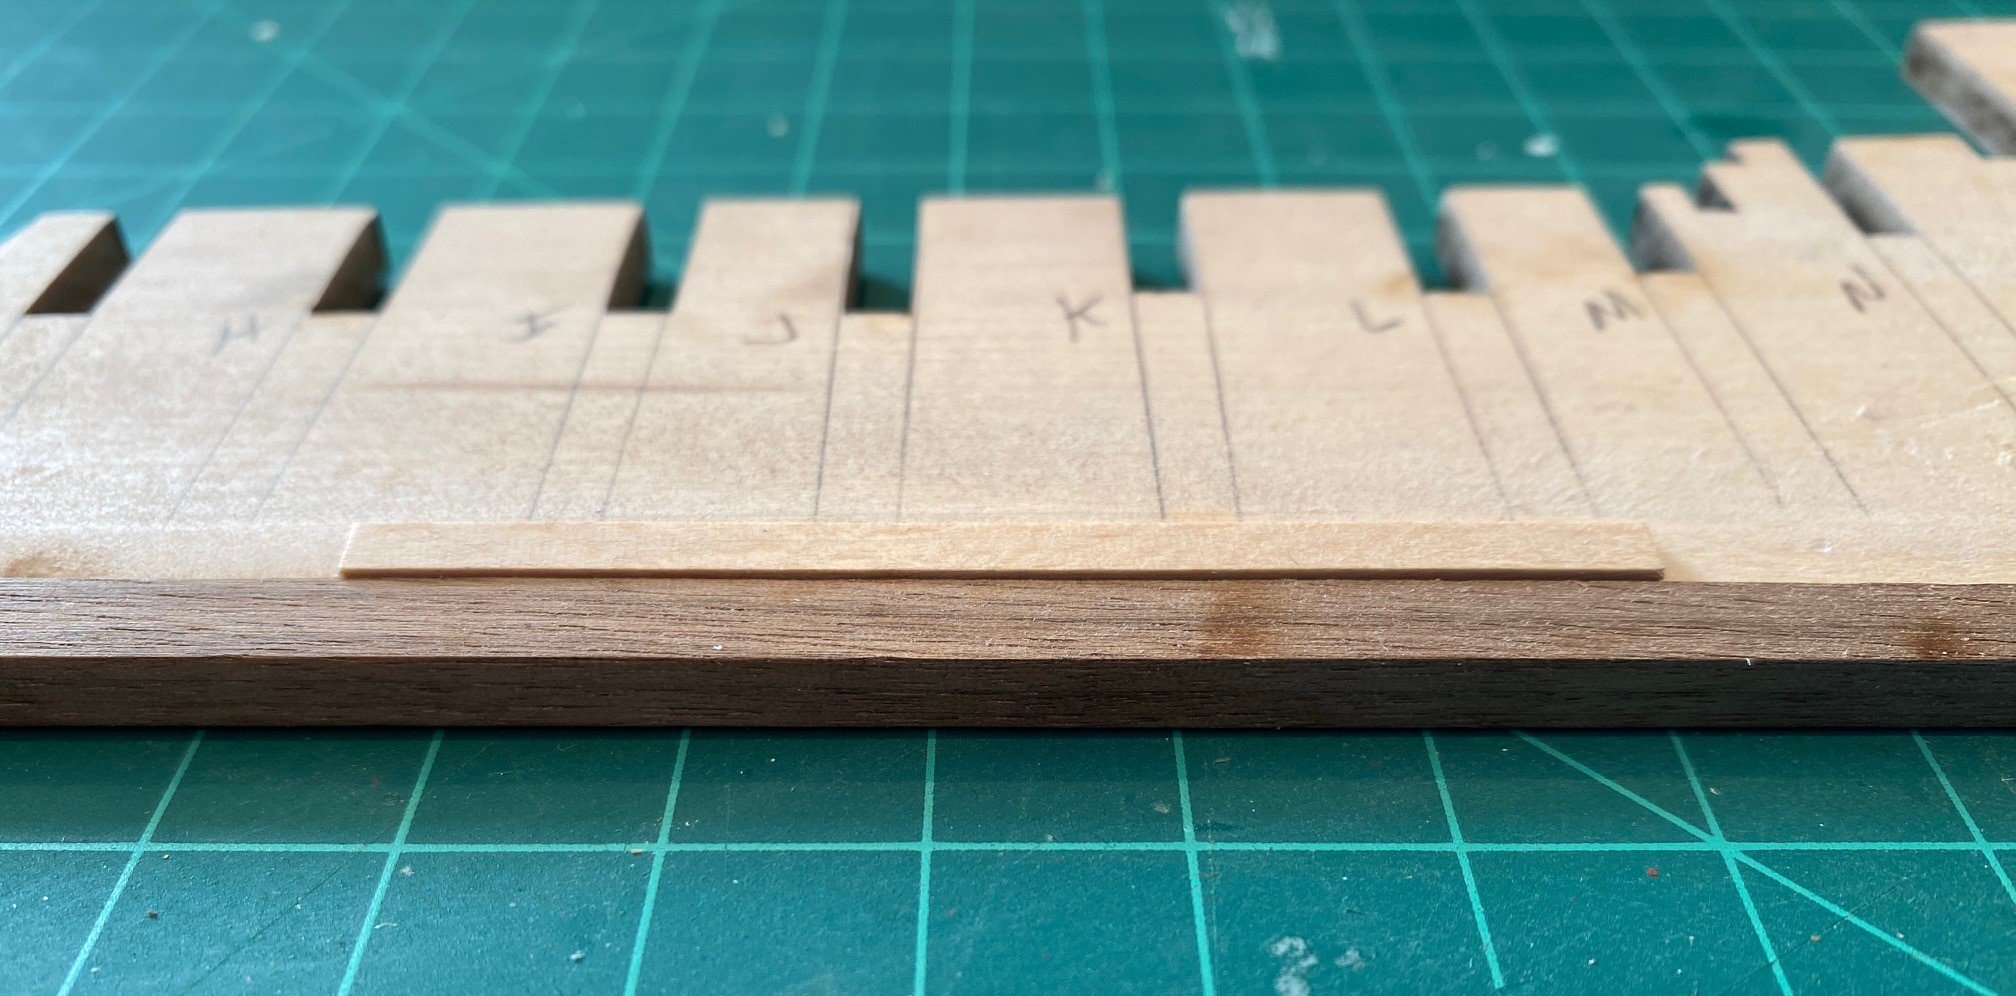
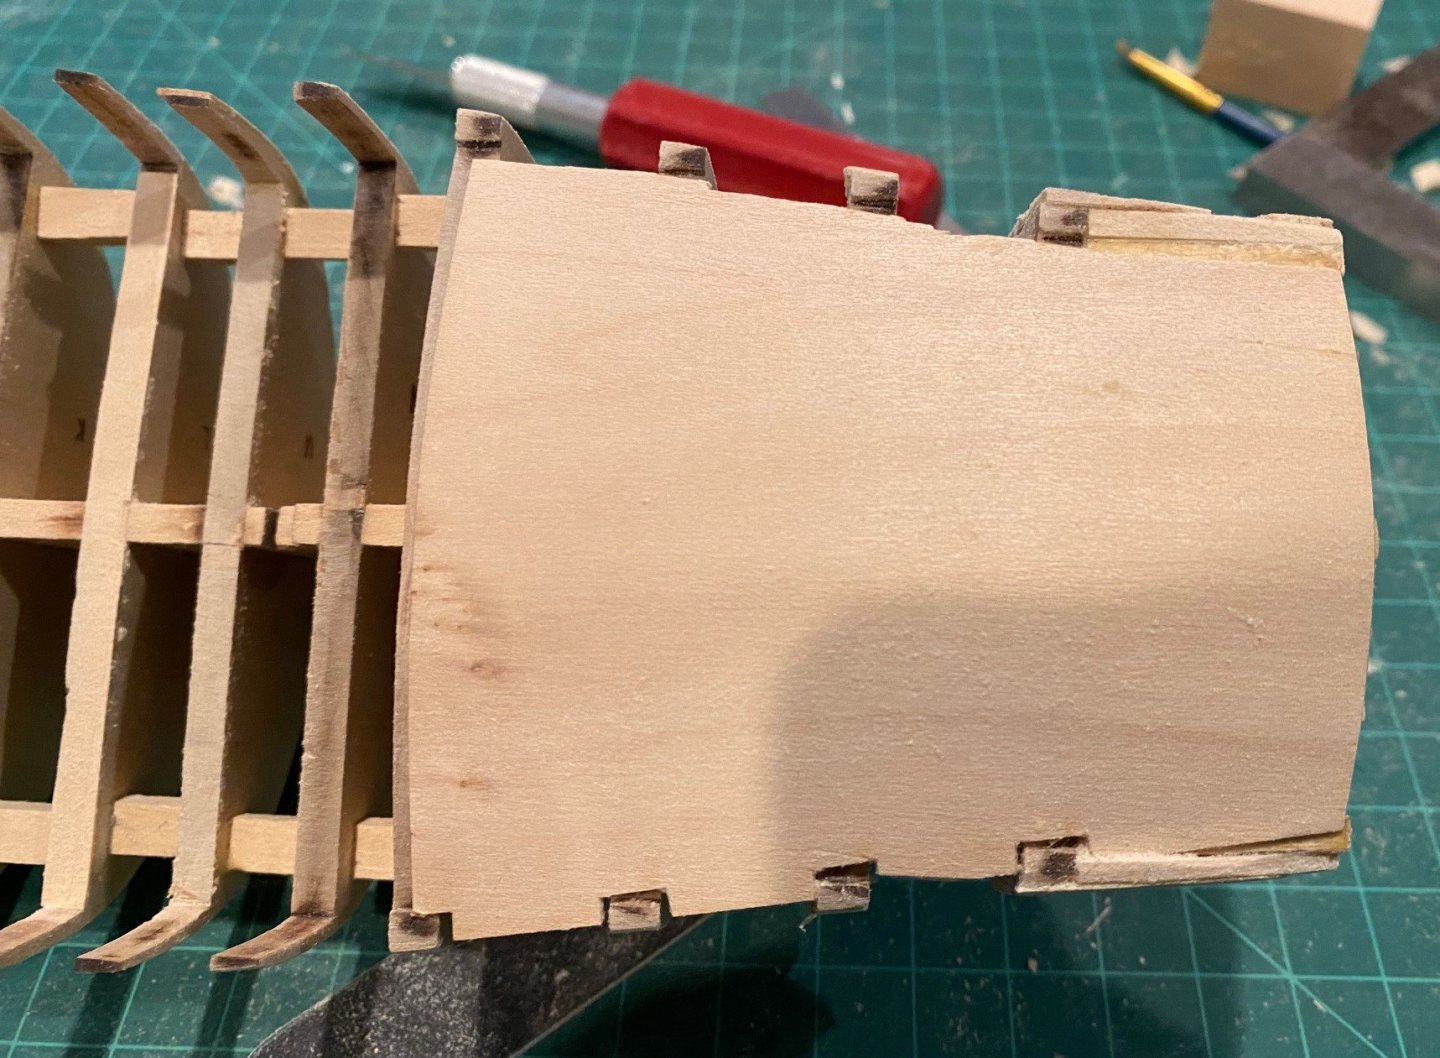
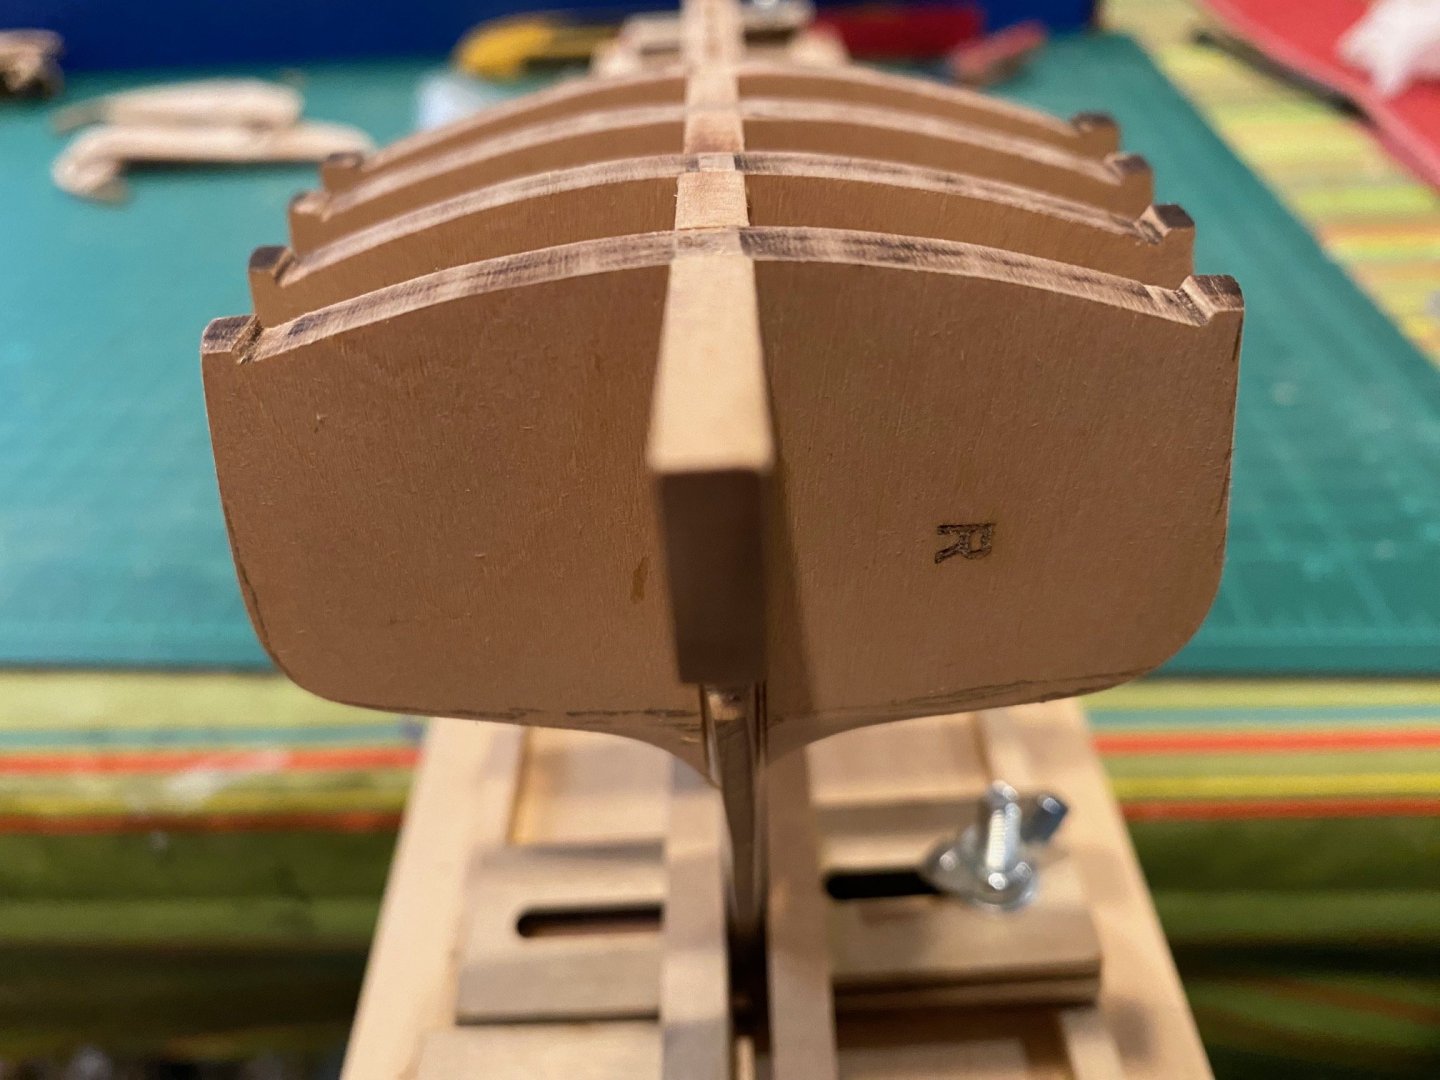
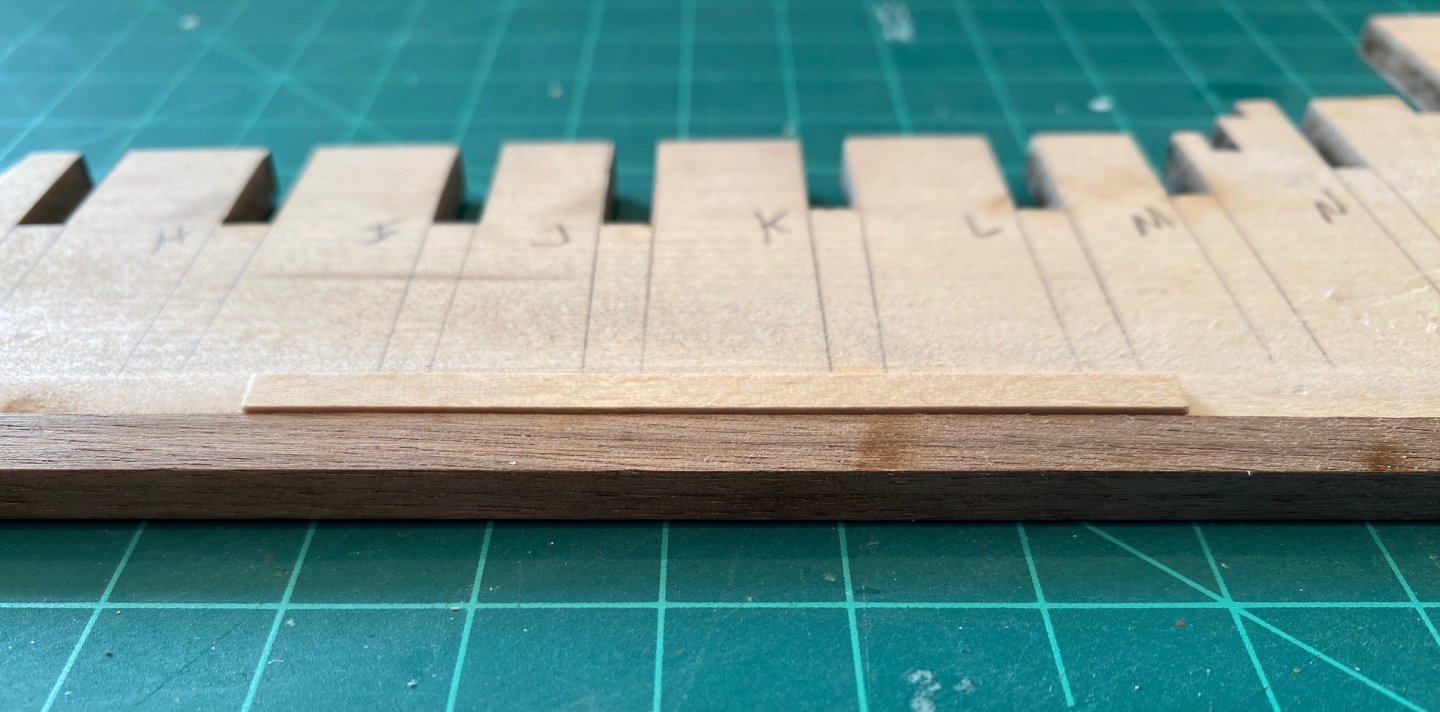
Made sure that the top of the bulkhead was even with the center keel by sanding the top of the slot a little more. Then sanded the top of the slots where I added the shim until even with the center keel. Started to glue in the bulkheads, back to front. I’m going to just glue in the 4 aft bulkheads first and sand the top of them even, for the aft sub-deck. This way the I will have less of chance of breaking any of the fwd bulkhead stanchions. I’m not sure but it seems like the Starboard side of the bulkhead is a little lower than the Port. Once the glue dries completely, I’ll check it out. I measured from a ground reference point to the top of the aft bulkheads, the starboard side is slightly lower than the port. But I don’t think it will be enough to make a difference in the final product. Placing a metal rule on the bulkhead tops, there was very little height discrepancies from fwd to aft bulkheads. So I proceeded to sand them even from fwd to aft, not a lot of sanding was required, but I wonder if I should sand more since only the fwd half of each bulkhead has a flat slant. I then proceeded to add in a small block between the bulkheads to provide some strength during the remainder of the build. I also continued to glue in the remaining bulkheads


-
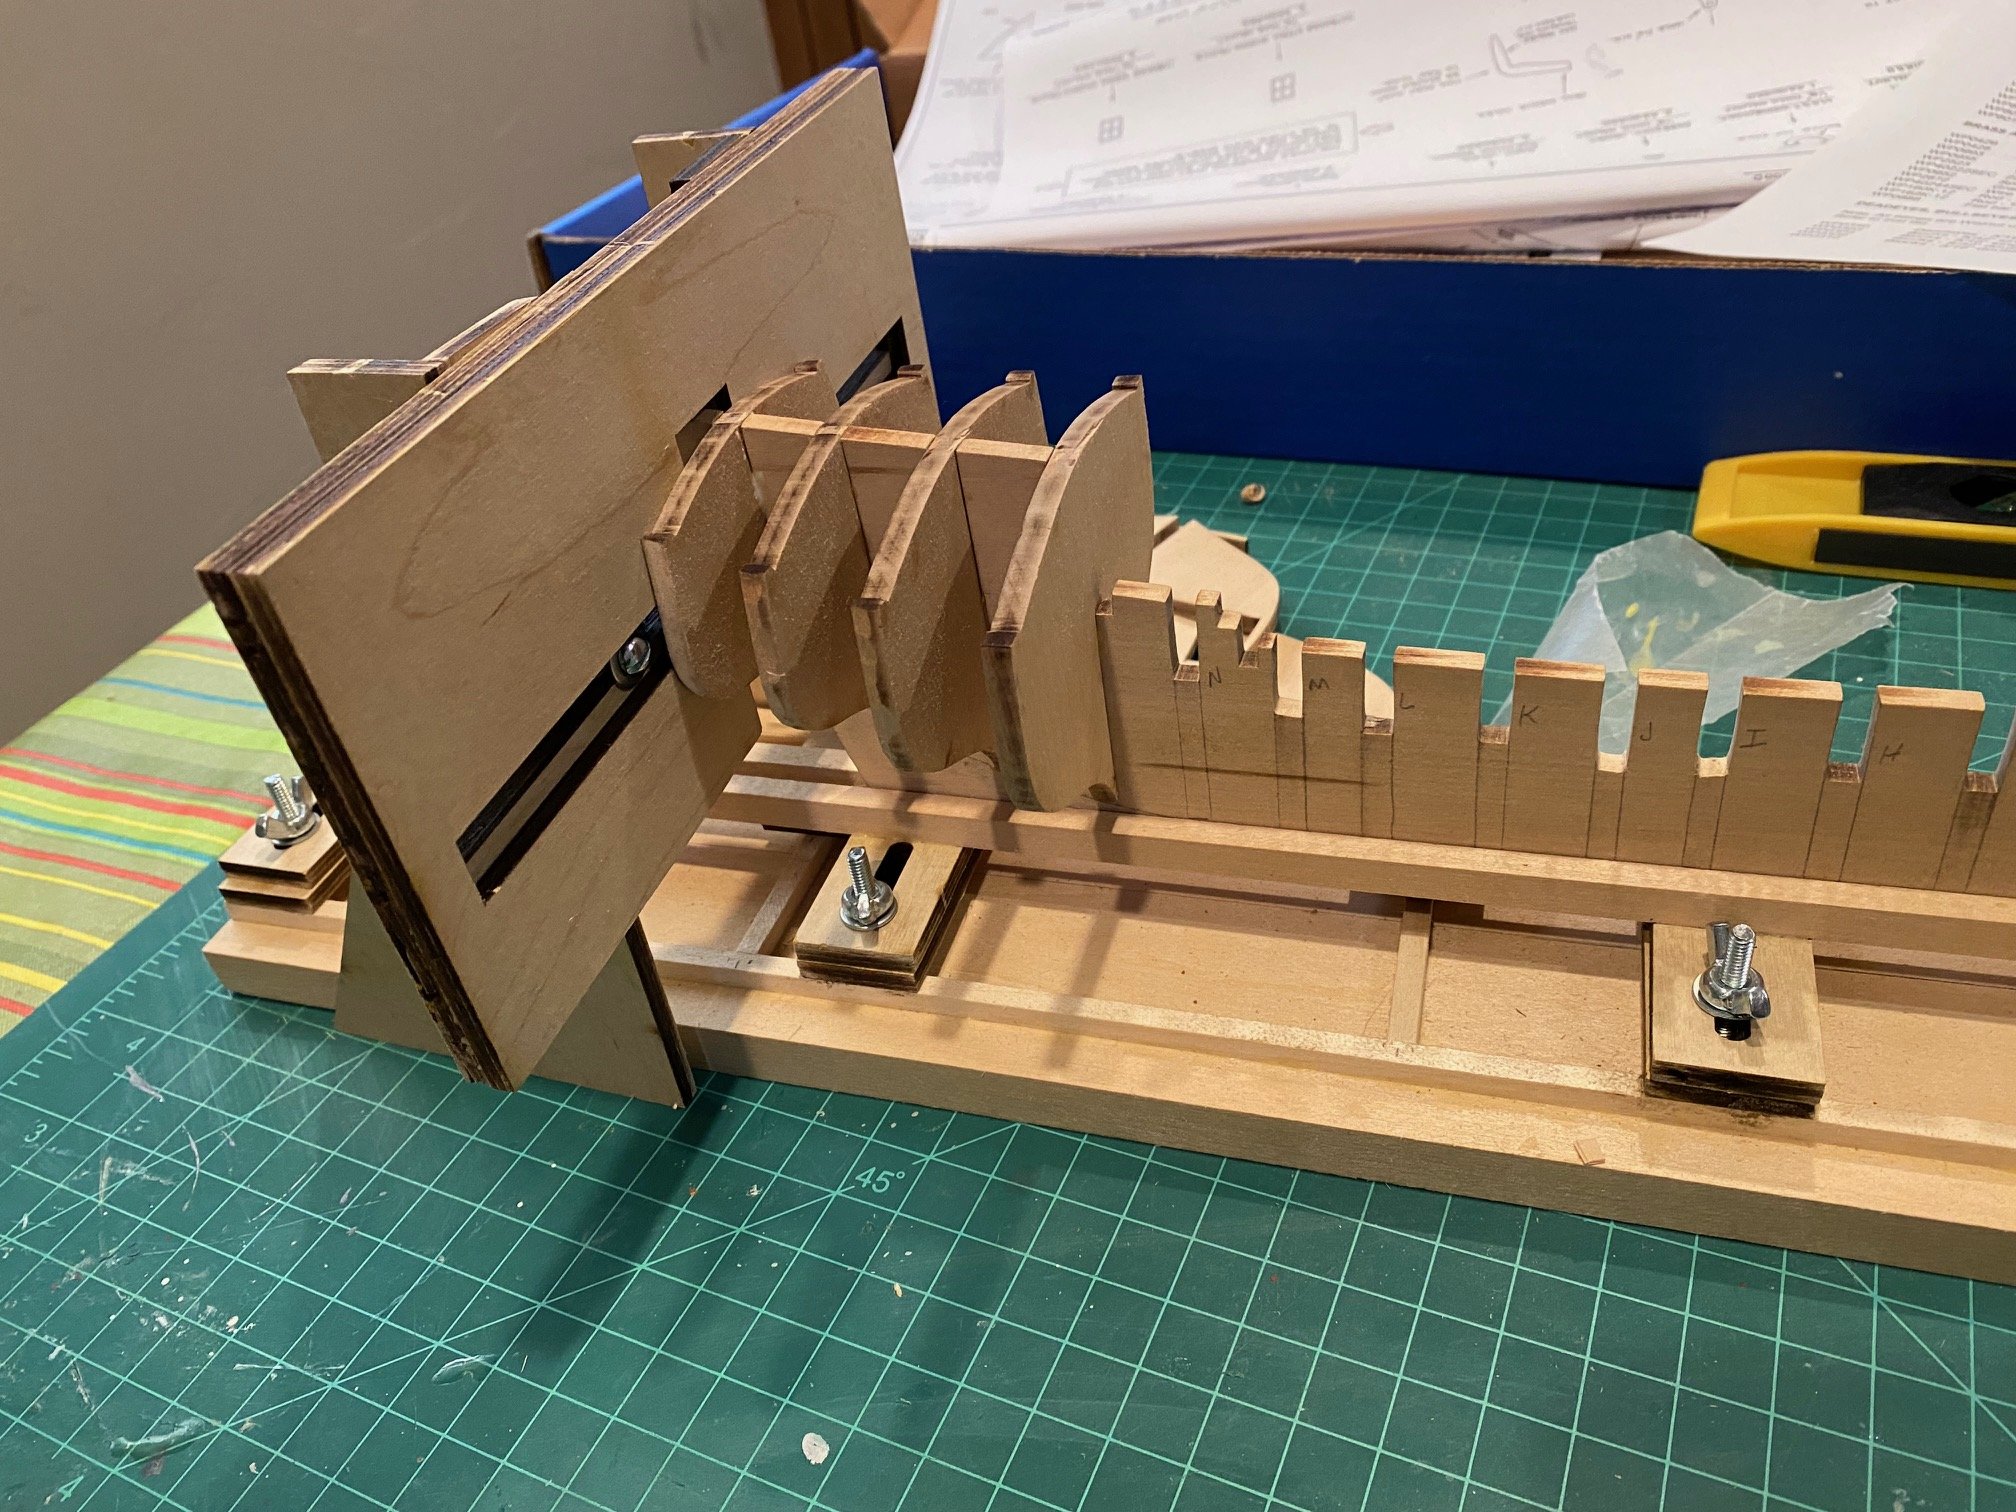
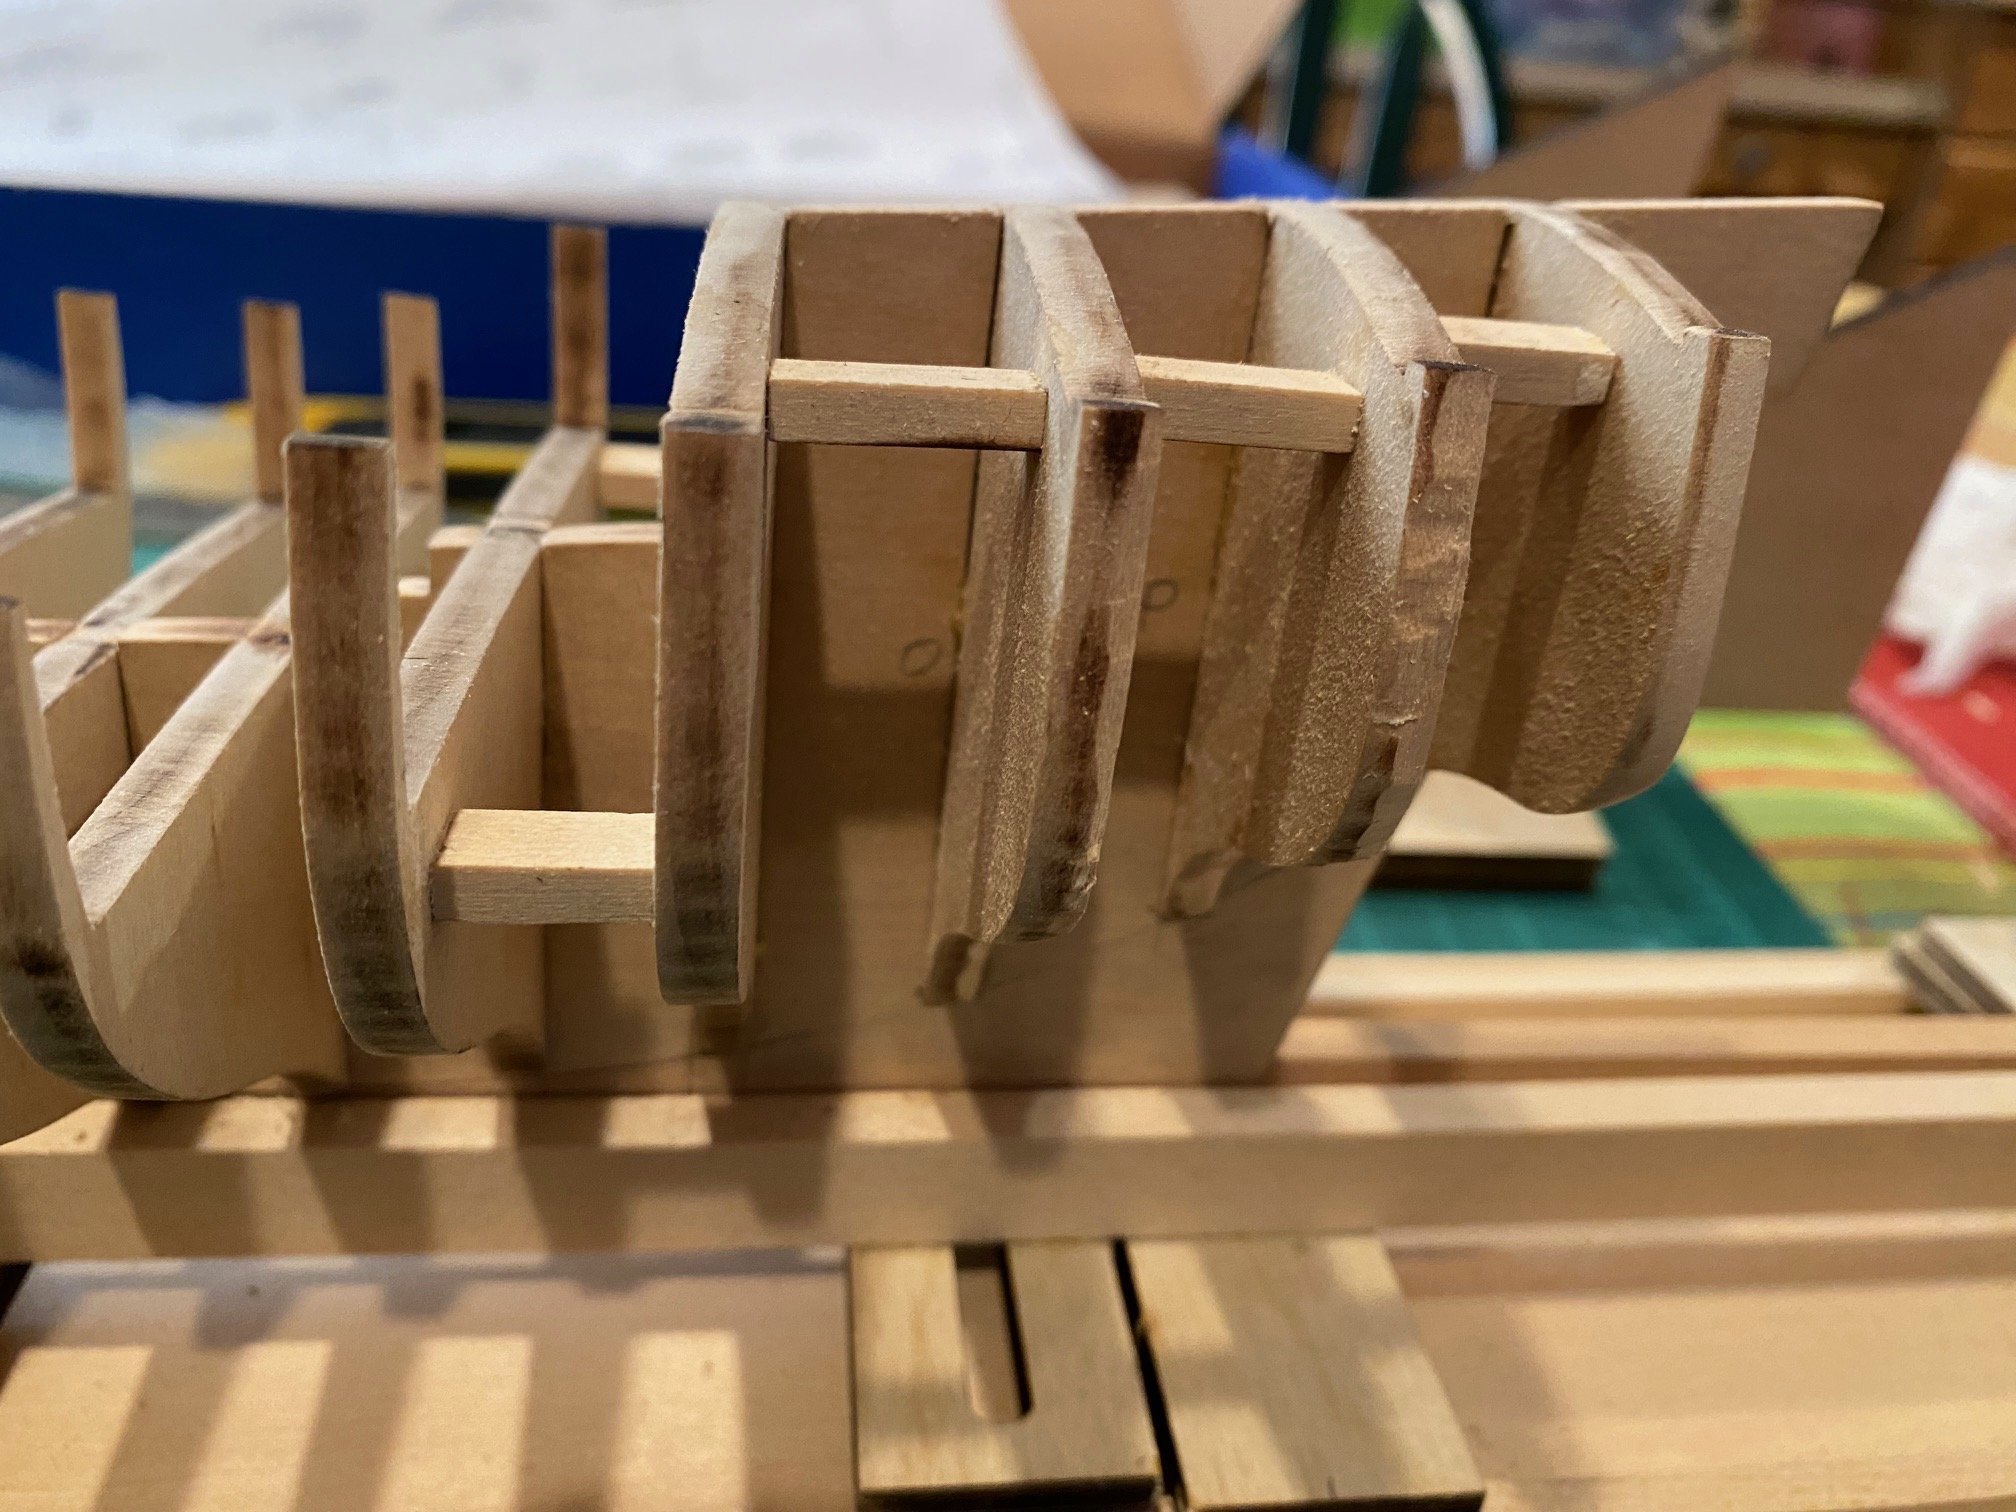
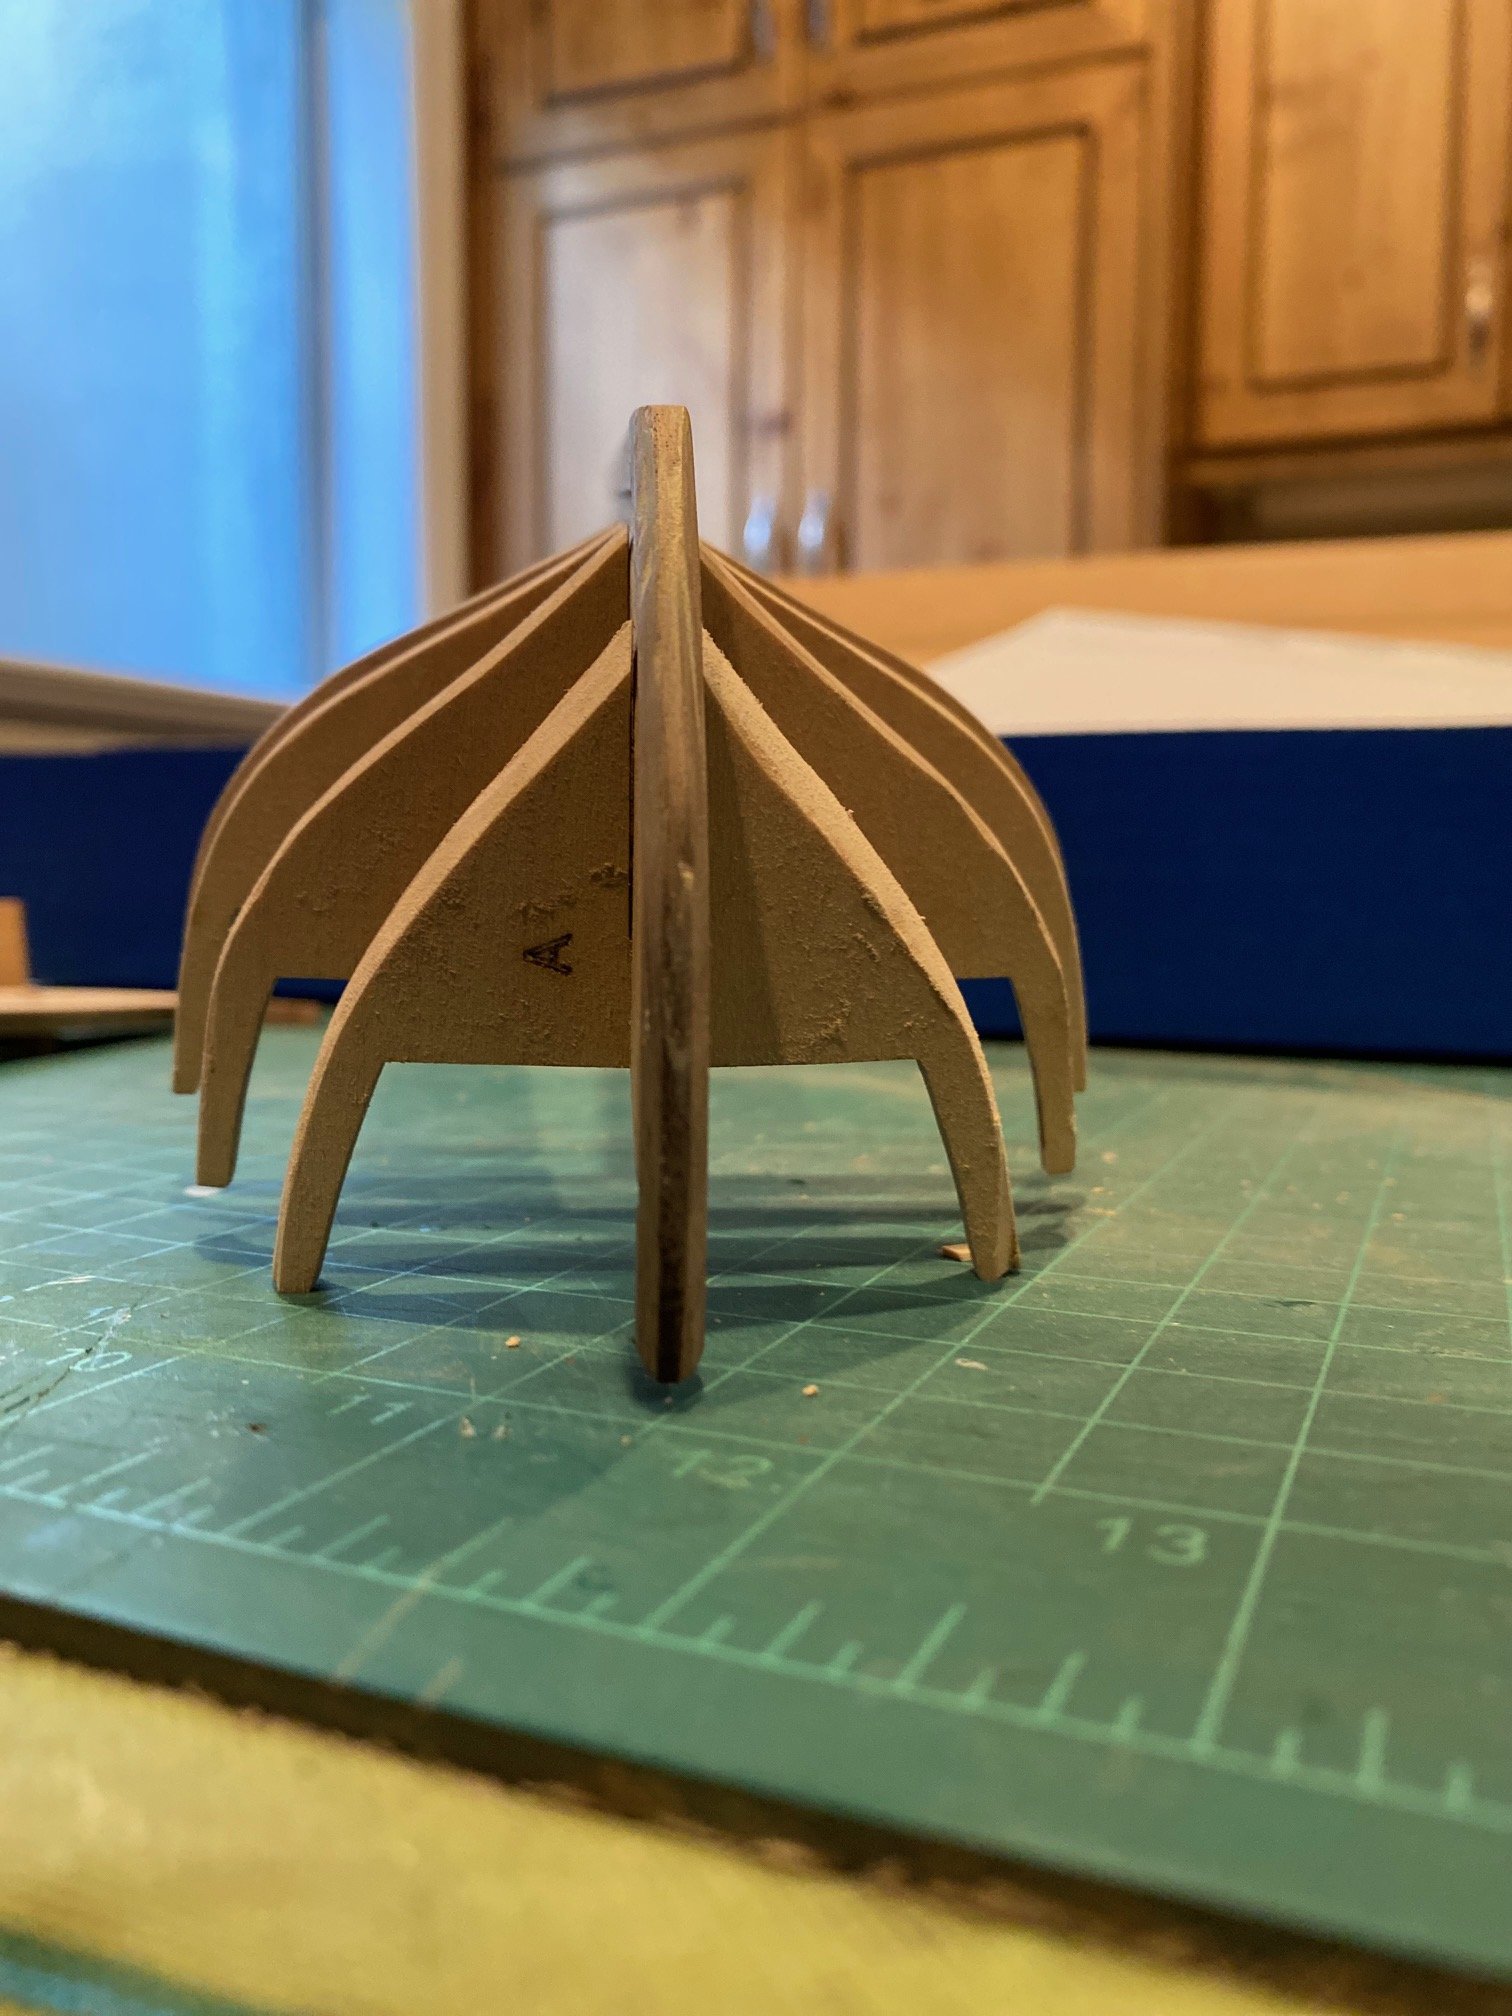
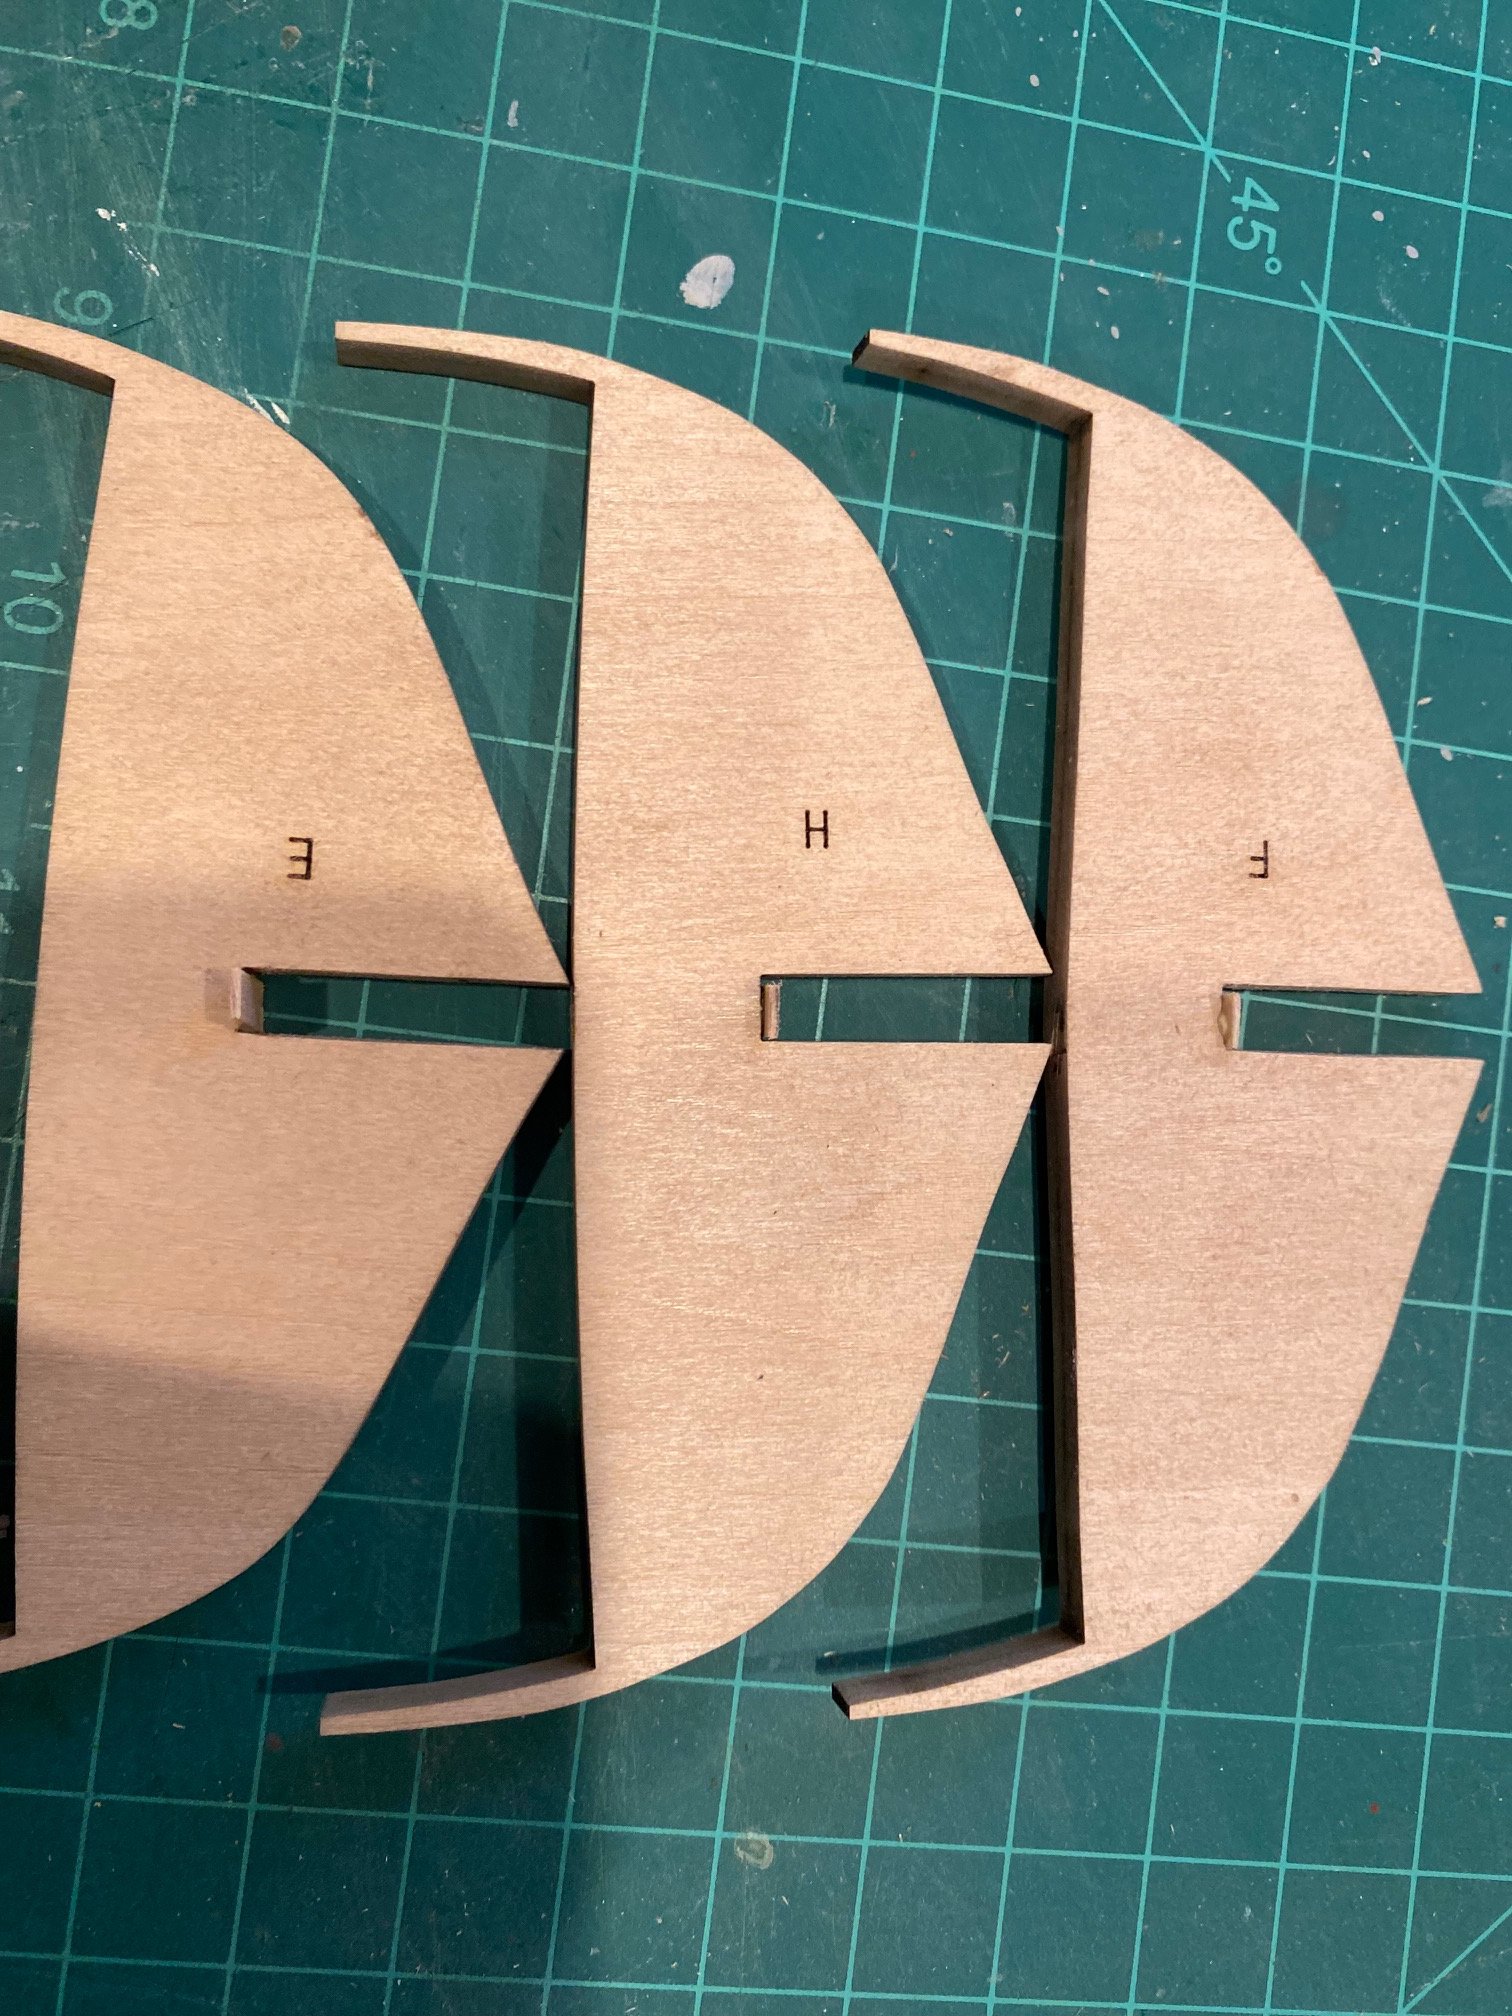
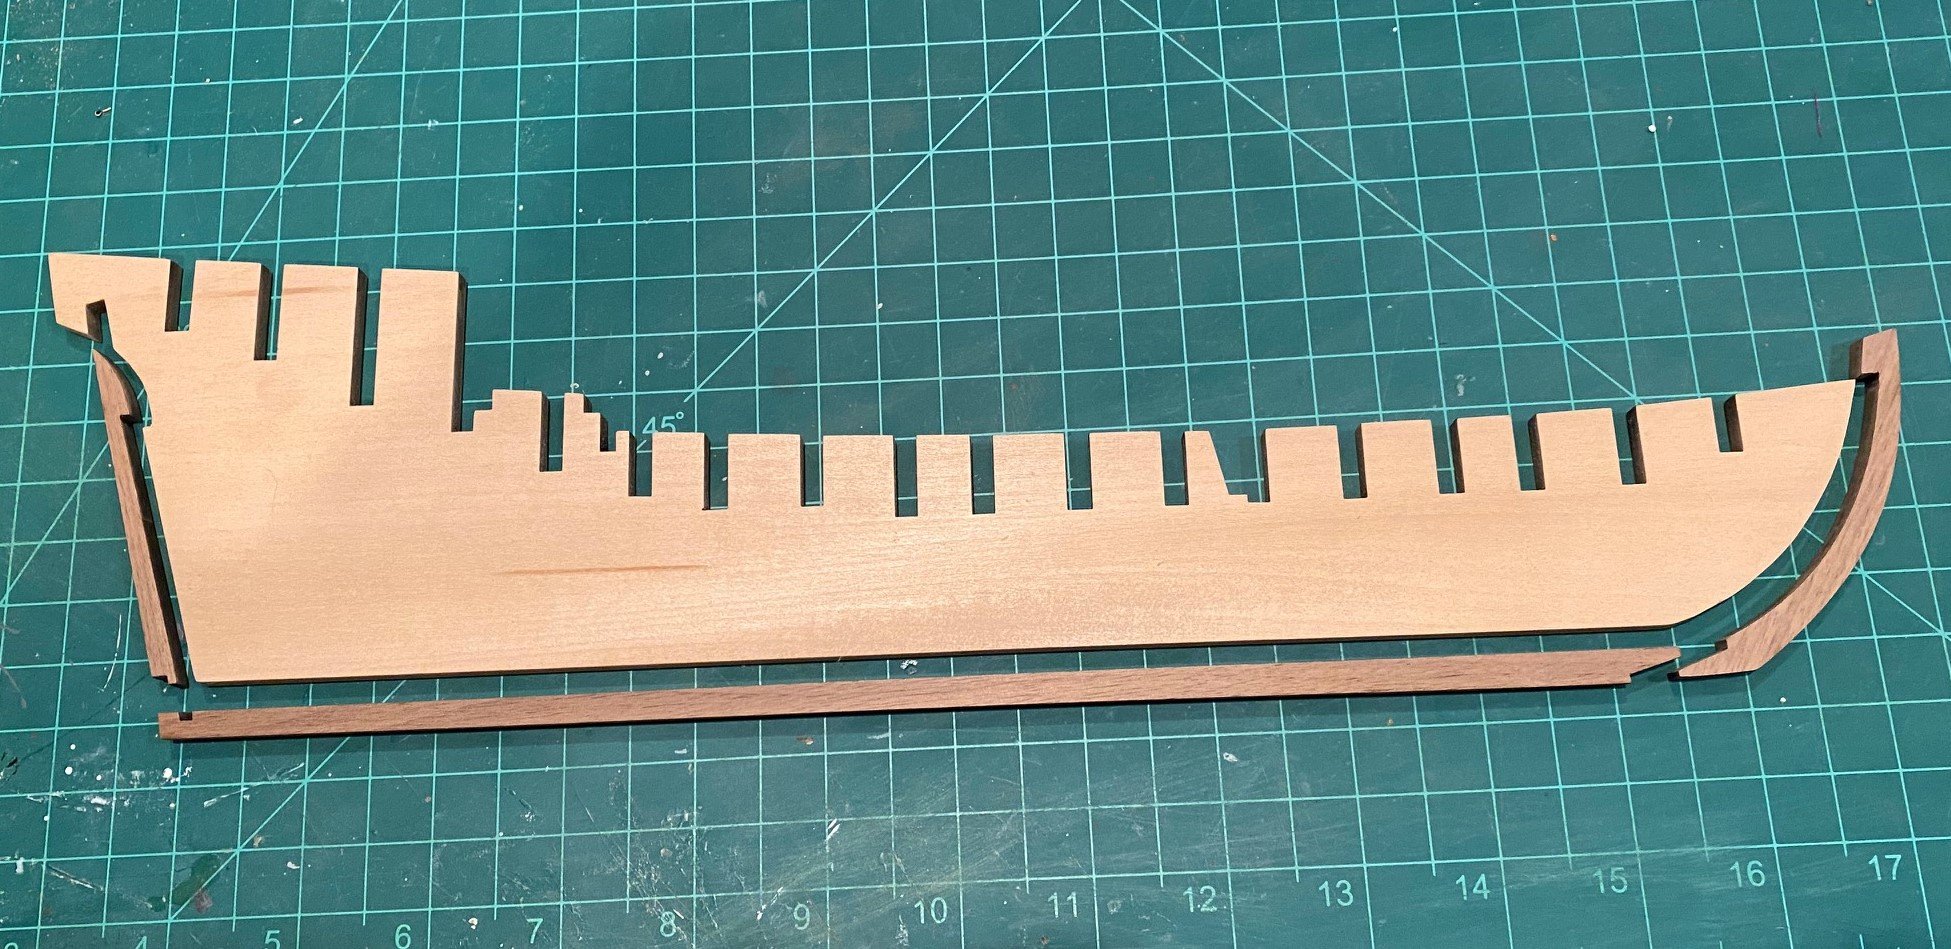
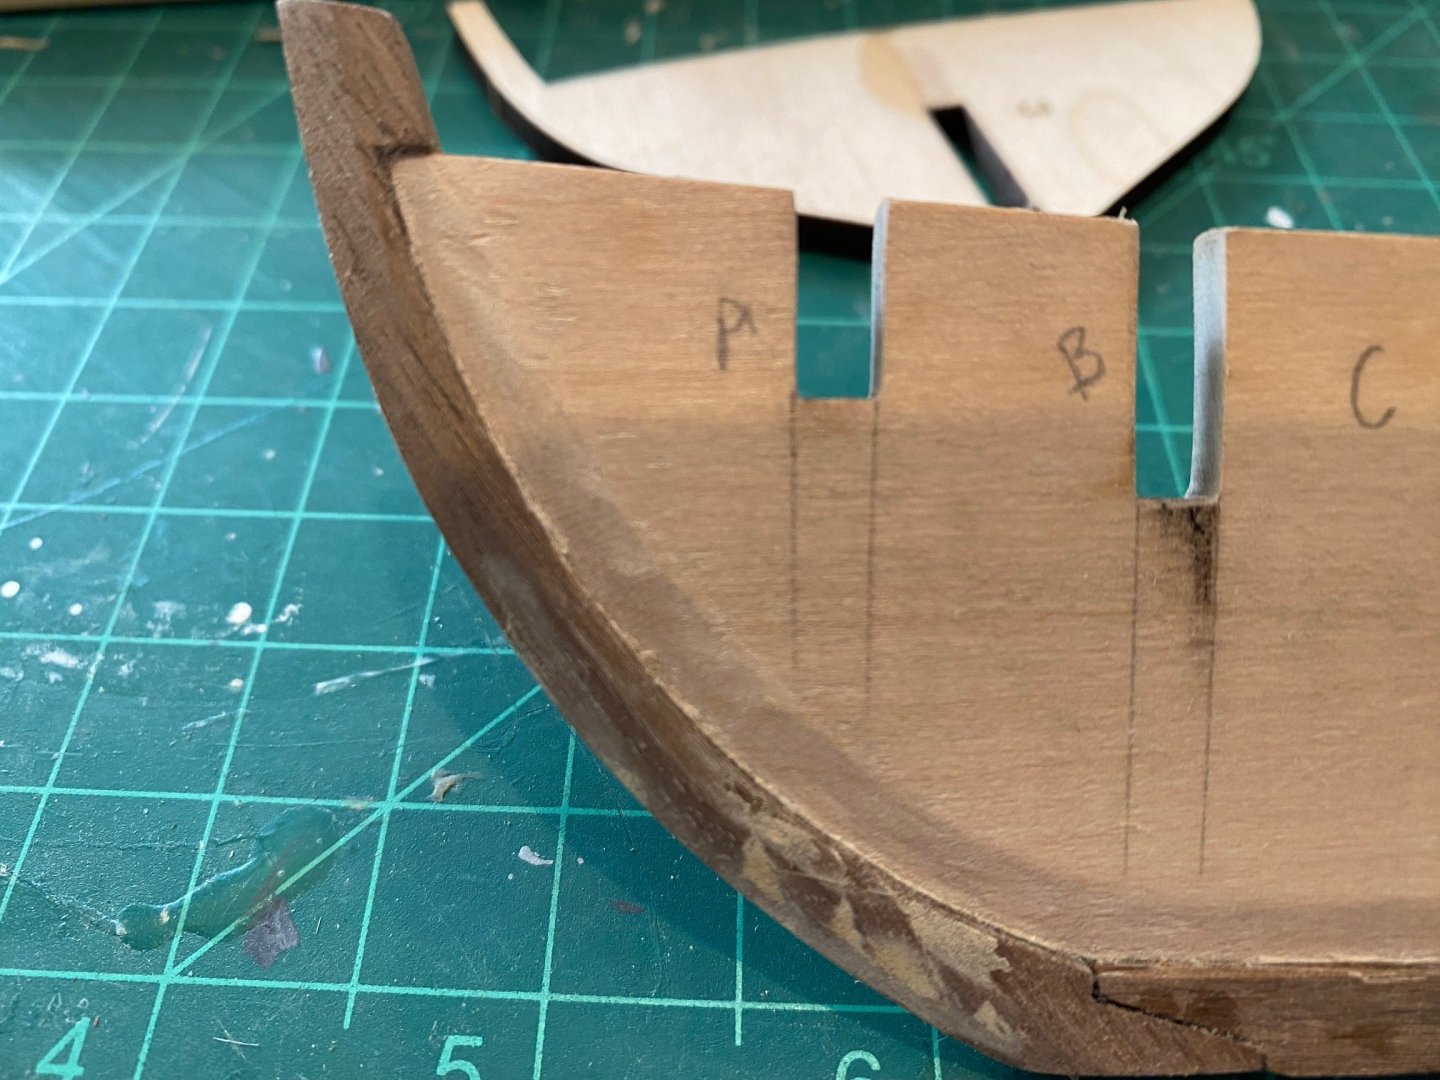
I used a curve blade and a sanding stick to get the Stem taper per the drawing. It appeared the I should leave about a 1/16th of the stem edge as is. I did have trouble at the cutting the tapper at the curve due to the grain of the wood, I gouged the stem a little. I did an initial fill with wood putty; I’ll refine the tapper smoothness after planking. I sanded all the bulkhead slots so they would slide on the center keel with some resistance. Also sanded and scraped all the edges of the bulkheads to remove the char, which took a while. Fitting all the bulkheads to the Center Keel, a few stuck up a little over the top edge of the Center Keel, so I sanded the top and bottom of the slots until they did not stick up over the top edge. There were 3 bulkheads that I will have to add a thin shim to get it even with the edge. I did another trial fit of a piece of plank to see if the rabbet was deep enough. I decided to deepen the rabbit using a curved blade, #22, and sand smooth. Looks better butt the superglue left more of a bead that I could not sand off or cut off without deepening of the rabbet. I’m going to leave it as is and look at tapering the edge of the plank to fit. I decided to trim the aft 3 bulkheads and fwd 3 bulkheads per the drawings now. I used a curve blade to cut the transom curve of bulkhead R and part of the angle of bulkhead P & Q, then sanded them to smooth out the cuts but not to the final angle. The rest of the bulkheads I’ll get the proper angle by fairing them after installation, at that time I’ll check the thickness of the bulkhead extensions. I will wait to trim the inside of the bulkhead extensions until after the planking is done to provide more stability & strength to them.


-
CiscoH As you know I recently started the AVS myself. I just wanted everyone to know I get more information, how to and problem solutions then the included instructions or even the Luck instructions.
-
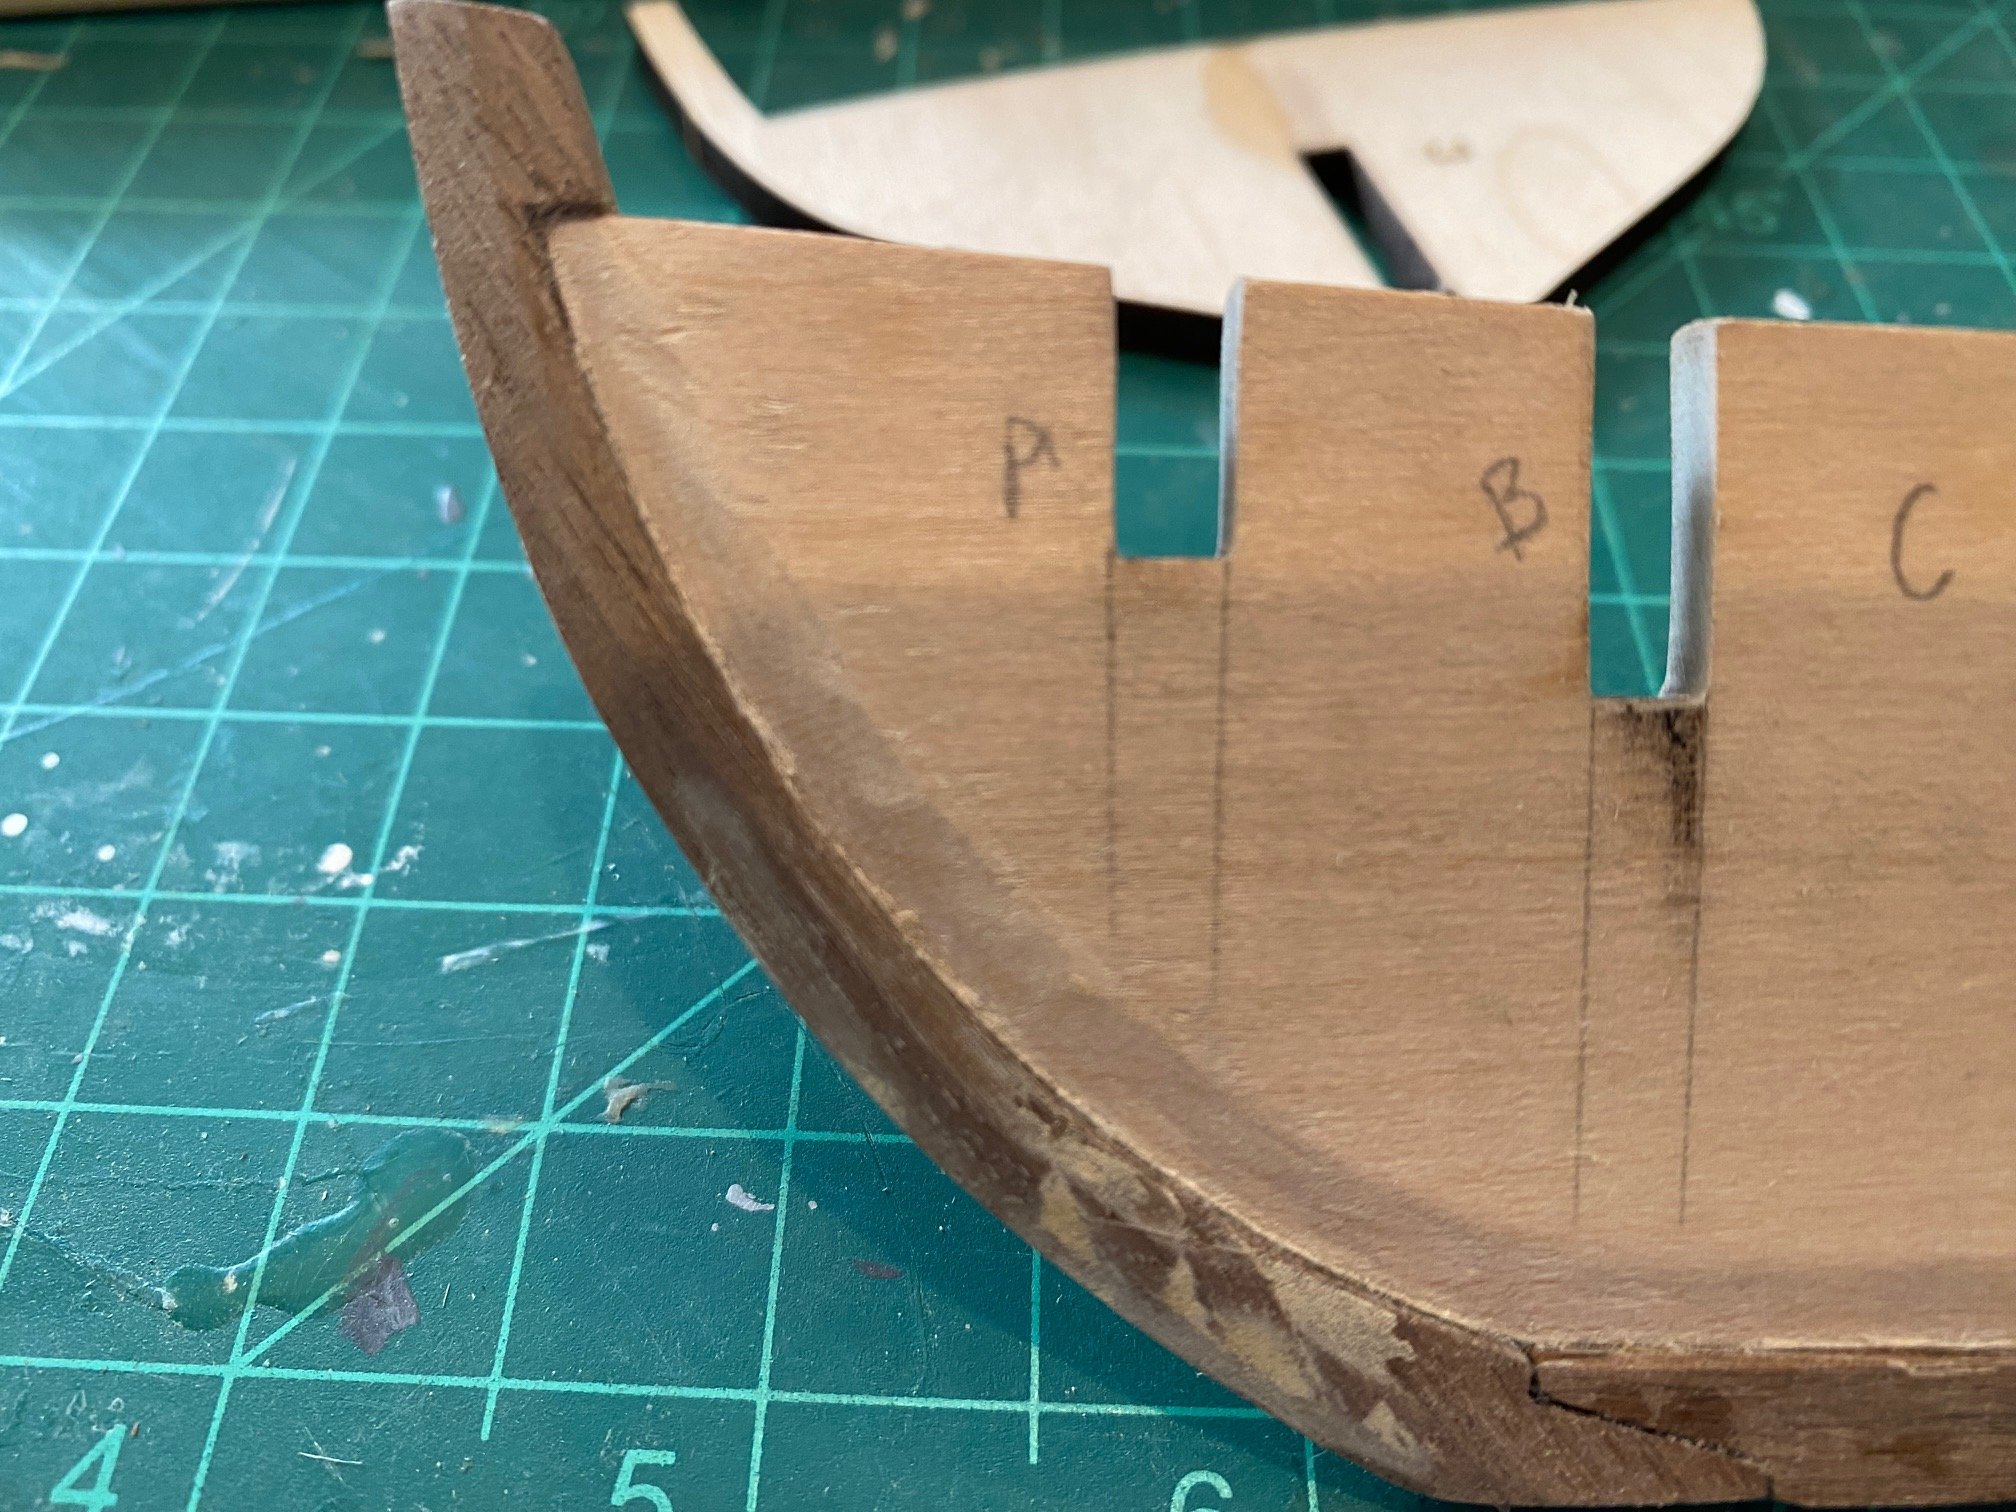
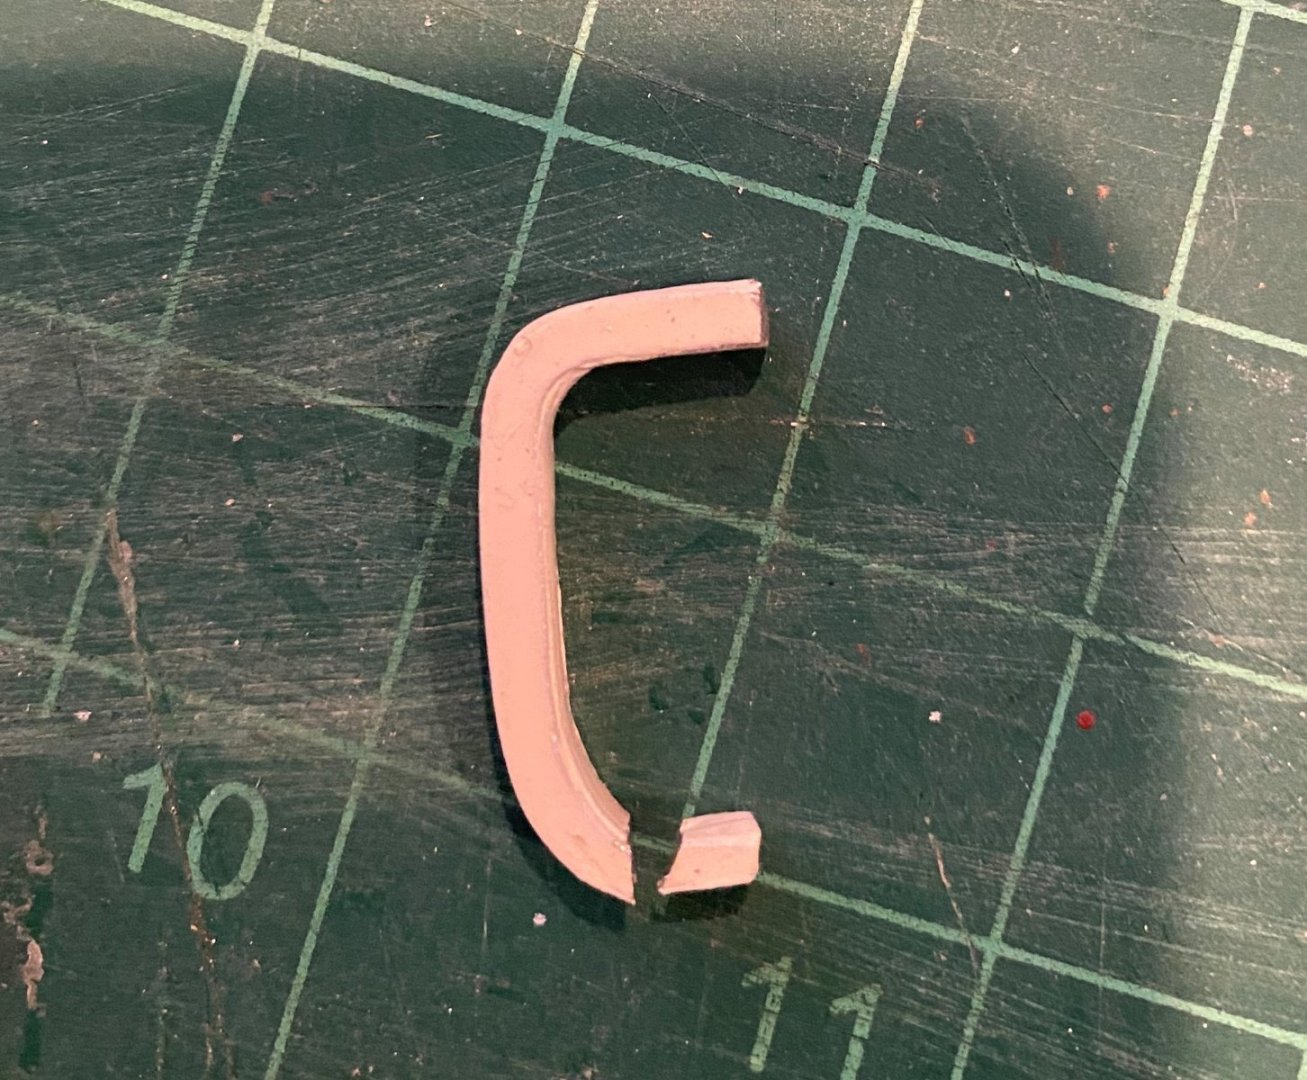
I traced the bearding line on the center keel. I cut the rabbit using mostly a curved blade since it worked better for me. I used a compas to draw my cut line on the bottom edge of the center keel. I checked the depth of the cut with a piece of the base wood plank by itself since I decided to use a single plank layer. I did sand the rabbit a little to smooth it out and make as even as I could. Then I glued the Stem and keel to the Center Kell. Since the Center Keel and the Stem and Keel are the same thickness, I laid both down on some was paper and flattened them both out. All the pieces were flat with no noticeable curve. Then I spread some wood glue on the stem and held the pieces together just using my fingers. Then I decided to use super glue on the keel and used a couple of adjustable clamps to hold the two pieces together. I had to adjust the clamp so I would not get an angled joint. I decided not to glue the stern post on at this time, it was a recommendation in one of the instructions I had read. I checked to see if the rabbit was deep enough by using a piece of planking. There is a little edge above the keel, so I'll try and sand the rabbit down a little later, but I wanted to see how the rabbit lined up with the bottom of the bulkheads. But I found that the bulkheads would not readily fit into the center keel slots. I broke bulkhead C in half when I was trying to take it out, to tight of a fit. So, I'm using a sanding stick to open up the slots until the bulkheads fit with some resistance. I am making sure that the bottom of the slot is square, so the bulkheads seat all the way to the bottom of the slot.


-
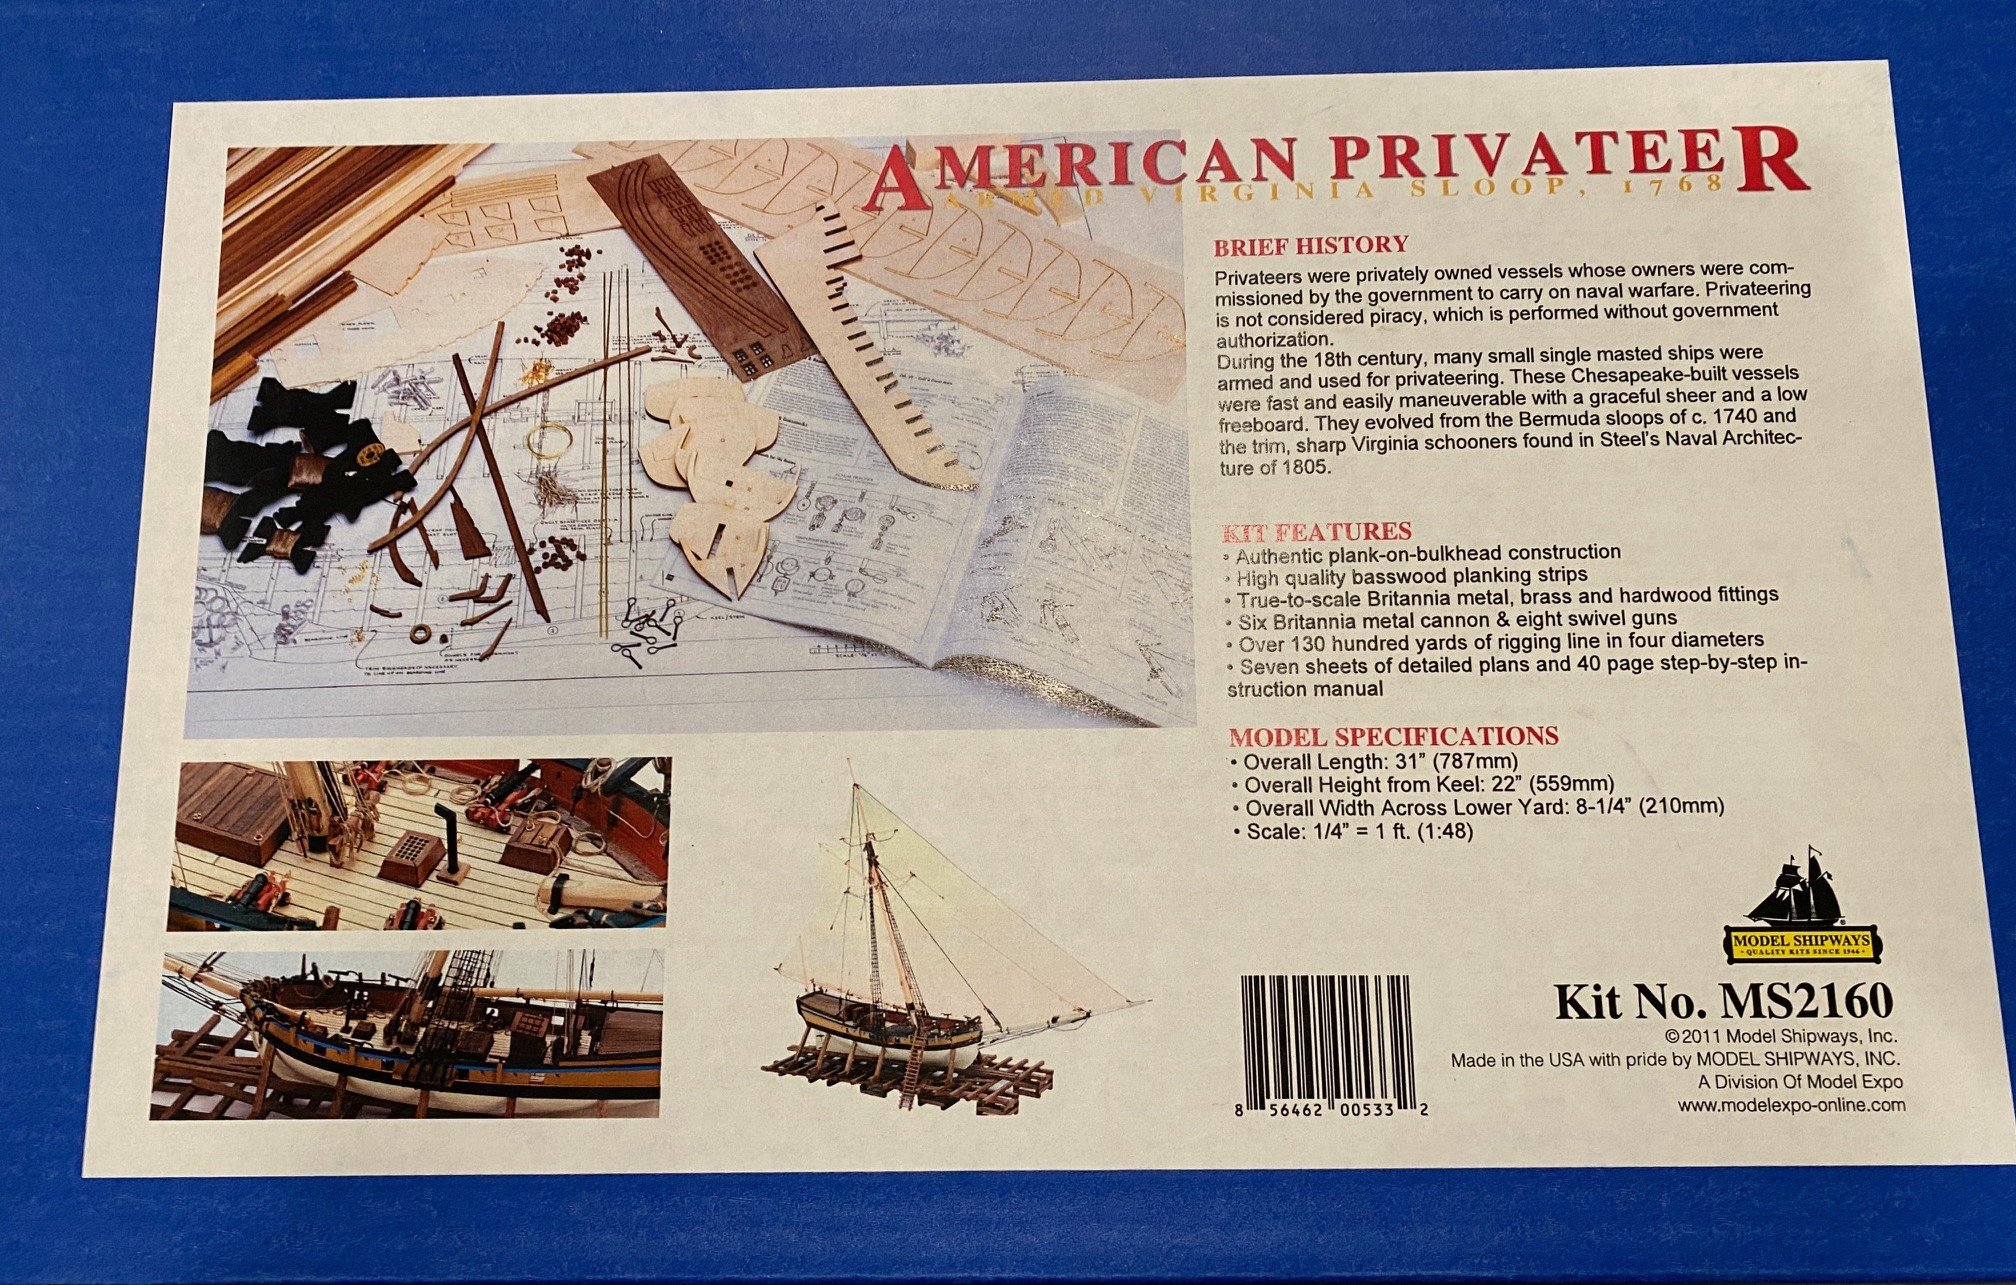
I'm taking a break from building the New York Pilot Boat Phantom and going to start building the Armed Virginia Sloop by Model Shipways. I chose this model because there are some great sources of information beside the kit instructions, there is a Practicum by Robert E. Hunt via Lauck Street Shipyard, and some great Ship Logs, especially CiscoH's. Here is the normal start picture of the box, I started by removing the laser char from the center keel, keel, sternpost and stem. I might have removed to much from the sternpost notch, but I think I can work around that. I'm going ahead and using the included walnut for the keel, sternpost and stem. I'm trying to decide now if I only put one level of planking or do the two levels per the instructions. I don't think I want to use the walnut since I plan to paint the haul but would like to keep the definition of the planks. I would have to buy some additional planks if I went with two layers. Not sure what wood is available and pre-cut for planking, especially at the thickness of the walnut planks, 0.02 inch. Plus, I don't have a way to cut planks to width and thickness. Any recommendations would be appreciated.


-
It's been a year since I've done any work on the Phantom. I tried to get back into it but just can't get interested, so I decided to take a sidestep and start the Armed Virginia Sloop by Model Shipways. So follow me at a new build site for the AVS. I will come back and finish this ship since I do like its lines. My best Jim
-
Great job, keep up the good work and unless you plan on staining the hull, wood putty fixes most mistakes.
- 37 replies
-
- 3
-

-
- Model Shipways
- muscongus bay lobster smack
- (and 1 more)
-
40 years ago I started with a solid hull model and failed to get past step one. I've built a lot of plastic models but never went back to try a wood model, shaping a hull and the rigging intimidated me. A couple of years ago I decided to try my hand at wood models and ordered Model Shipways Long Boat, it looked simple enough. I was making progress but making a lot of mistakes. Then I saw an advertisement for Model Shipways Shipwright 3 ship beginners set and they took me step by step and I learned a lot of skills and knowledge (including planking) for a fair price. I learned so much I tried my hand at a solid hull again and it's been successful so far. I highly recommend the Model Shipways Shipwright 3 Kit Series. By the time you finish the 3rd boat, the Muscongus Bay Lobster Smack, you will have the skills to take on anything. They might be small and appear to be simple, but that's what you want in the beginning and to learn the basic skills, then try the other models. Plus, there are a lot of build logs on the 3 at this web site. Whatever you decide to start with, take your time and always feel free to take a break from the build.
-
First timer introduction and needing some advice
SkiBee replied to Stuka's topic in New member Introductions
40 years ago I started with a solid hull model and failed to get past step one. I've built a lot of plastic models but never went back to try a wood model, shaping a hull and the rigging intimidated me. A couple of years ago I decided to try my hand at wood models and saw an advertisement for Model Expo & Shipways models. I started with the Model Shipways 3 ship beginners set and they took me step by step and I learned a lot of skills and knowledge for a fair price. So much I tried my hand at a solid hull again and it's been successful so far. I highly recommend the Model Shipways Shipwright 3 Kit Series. By the time you finish the 3rd boat, the Muscongus Bay Lobster Smack, you will have the skills to take on anything. They might be small and appear to be simple, but that's what you want in the beginning and to learn the basic skills, then try the other models. Whatever you decide to start with, take your time and always feel free to take a break from the build. -
Beginner looking for advice on first kit
SkiBee replied to O-Nurse's topic in New member Introductions
40 years ago I started with a solid hull model and failed to get past step one. I've built a lot of plastic models but never went back to try a wood model, shaping a hull and the rigging intimidated me. A couple of years ago I decided to try my hand at wood models and saw an advertisement for Model Expo & Shipways models. I started with the Model Shipways 3 ship beginners set and they took me step by step and I learned a lot of skills and knowledge for a fair price. So much I tried my hand at a solid hull again and it's been successful so far. I highly recommend the Model Shipways Shipwright 3 Kit Series. By the time you finish the 3rd boat, the Muscongus Bay Lobster Smack, you will have the skills to take on anything. They might be small and appear to be simple, but that's what you want in the beginning and to learn the basic skills, then try the other models. -
I agree with you, the Pram and Dory were a little more enjoyable, but i did learn a lot building this one.
- 40 replies
-
- 1
-
-
- Model Shipways
- Muscongus Bay Lobster Smack
- (and 1 more)
-
The nice thing about the 3 kits in the starter set is that they teach you so much, along with fixing our goofs. I made a lot of them, and on the Moscongus I really had a hard time learning to bend planks in multiple directions, wood filler was my friend on this model. You're doing great, hang in there.
- 62 replies
-
- 4
-
-
- Muscongus Bay Lobster Smack
- Model Shipways
- (and 1 more)
-
Well, another life got in the way of building. I glued the remaining fwd companionway to the deck. Now on to the chain plates. It was difficult to cut the holes into the railing but I only messed up one, but I need to move on. Not the happiest with them, if I was to do it over I would have the rail hang over the hull a little more.

-
Fix uneven paint area
SkiBee replied to DMM's topic in Painting, finishing and weathering products and techniques
Instead of stripping off the paint, why not just use some wet sandpaper and get it smooth then repaint the whole area again. -
Planking Book?
SkiBee replied to BWDChris's topic in Building, Framing, Planking and plating a ships hull and deck
I started the Long Boat and while I was waiting for a replacement piece, I changed my mind and built the Model Shipways Shipwright 3 Kit Combo Series. This series is a great way to learn some of the basic skills that you will need on future builds. -
Roger, Outstanding work for you second ship! Cisco is right, small does not equal easy. You might try the Model Shipways Muscongus Bay Lobster Smack as your second ship, it will give you some additional practice planking before the Armed Virginia Sloop. I started a solid hull as my follow-on to the Lobster Smack, a challenge in a different way then planking. Good luck in your next challenge.
- 18 replies
-
- 2
-
-
- 18th century longboat
- Model Shipways
- (and 1 more)
-
Planking Book?
SkiBee replied to BWDChris's topic in Building, Framing, Planking and plating a ships hull and deck
BWDChris, What ship are you starting with? -
I started with a long boat and then switched to the 3 Model Expo kits recommended above. I'm glad I did; I learned a lot of things that built upon what I had just learned. I went back and finished the Long Boat and didn't make as many mistakes and was much more relaxed. As mentioned above, patience is a must as well as starting a build log on this website where you can ask questions and get great advice.
-
I had the same experience, 40 years ago I started with a solid hull model and failed to get past step one. I've built a lot of plastic models but never went back to try a wood model, shaping a hull and the rigging intimidated me. A couple of years ago I decided to try my hand at wood models and saw an advertisement for Model Expo & Shipways models. I started with the Model Shipways 3 ship beginners set and they took me step by step and I learned a lot of skills and knowledge for a fair price. So much I tried my hand at a solid hull again and it's been successful so far. I highly recommend the Model Shipways Shipwright 3 Kit Series. By the time you finish the 3rd boat, the Muscongus Bay Lobster Smack, you will have the skills to take on anything.
-
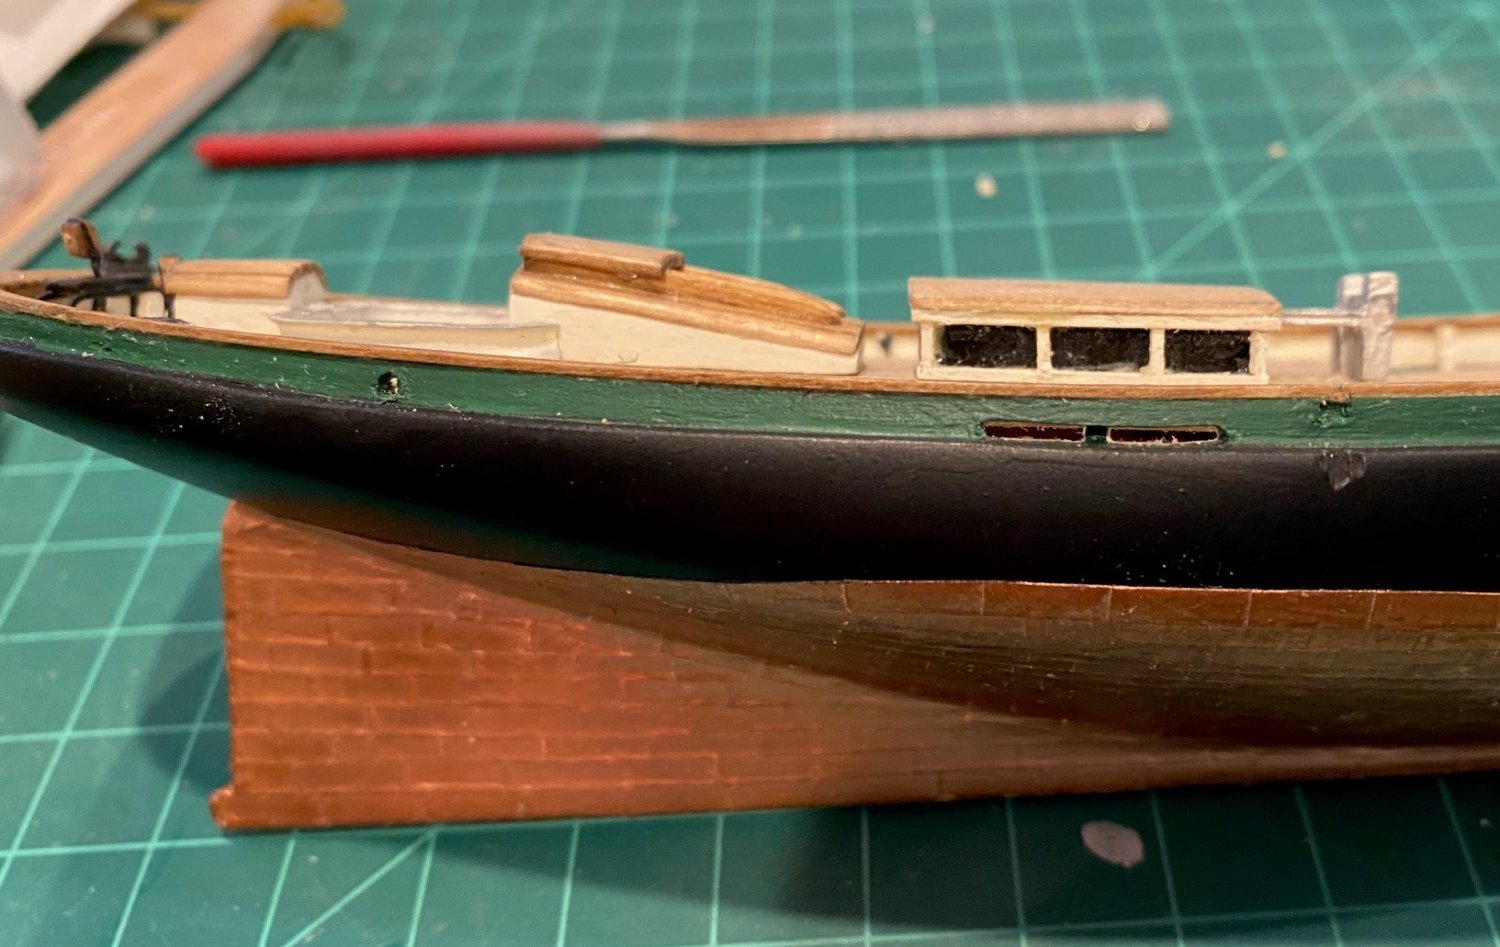
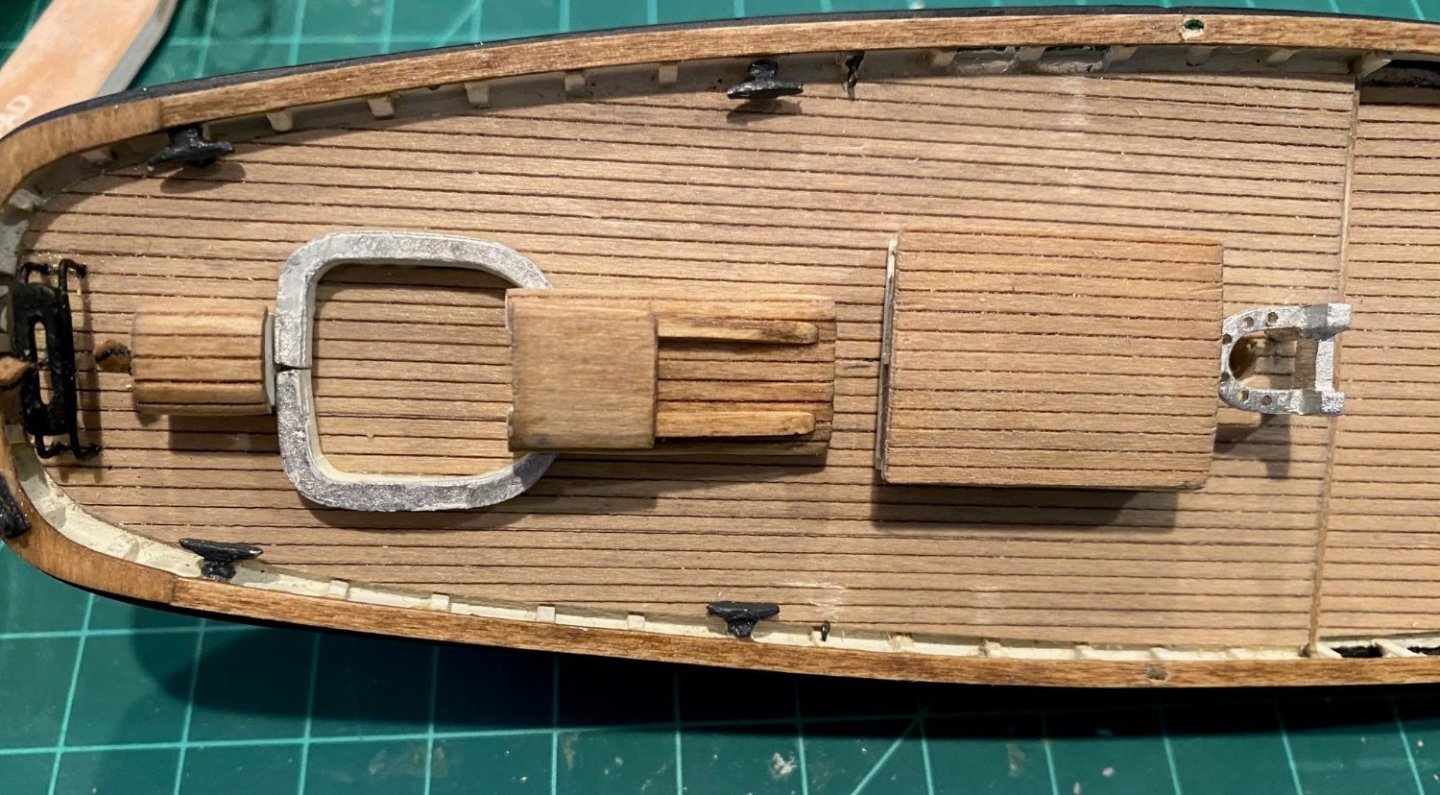
I laid some double-sided tape on the deck and placed everything on the deck including the fife rail so that I could determine the best way to fit everything on the deck. Reduced the gap between the fife rail and skylight, as well as the gap between the aft companionway and the skylight where the stove pipe goes. But I still had a miss fit with t cockpit coaming. I considered many options to fit the coaming and settled on letting the coaming interface with the companionway a little further down the side of the companionway. But I still had to cut off the end of the coaming so it would fit correctly. In hindsight if I had checked the layout with the pieces before finishing them, I would have shortened the companionway and skylight. I also forgot to trace the outline of the coaming to make the seat out of wood or manila folder, so I'm just going to paint it a wood brown.

-
Really nice work