HOLIDAY DONATION DRIVE - SUPPORT MSW - DO YOUR PART TO KEEP THIS GREAT FORUM GOING! (Only 27 donations so far out of 49,000 members - C'mon guys!)
×

SkiBee
-
Posts
249 -
Joined
-
Last visited
Content Type
Profiles
Forums
Gallery
Events
Everything posted by SkiBee
-
 @Karleop Fantastic, I will be refering back to your log when I start to build mine.
 -
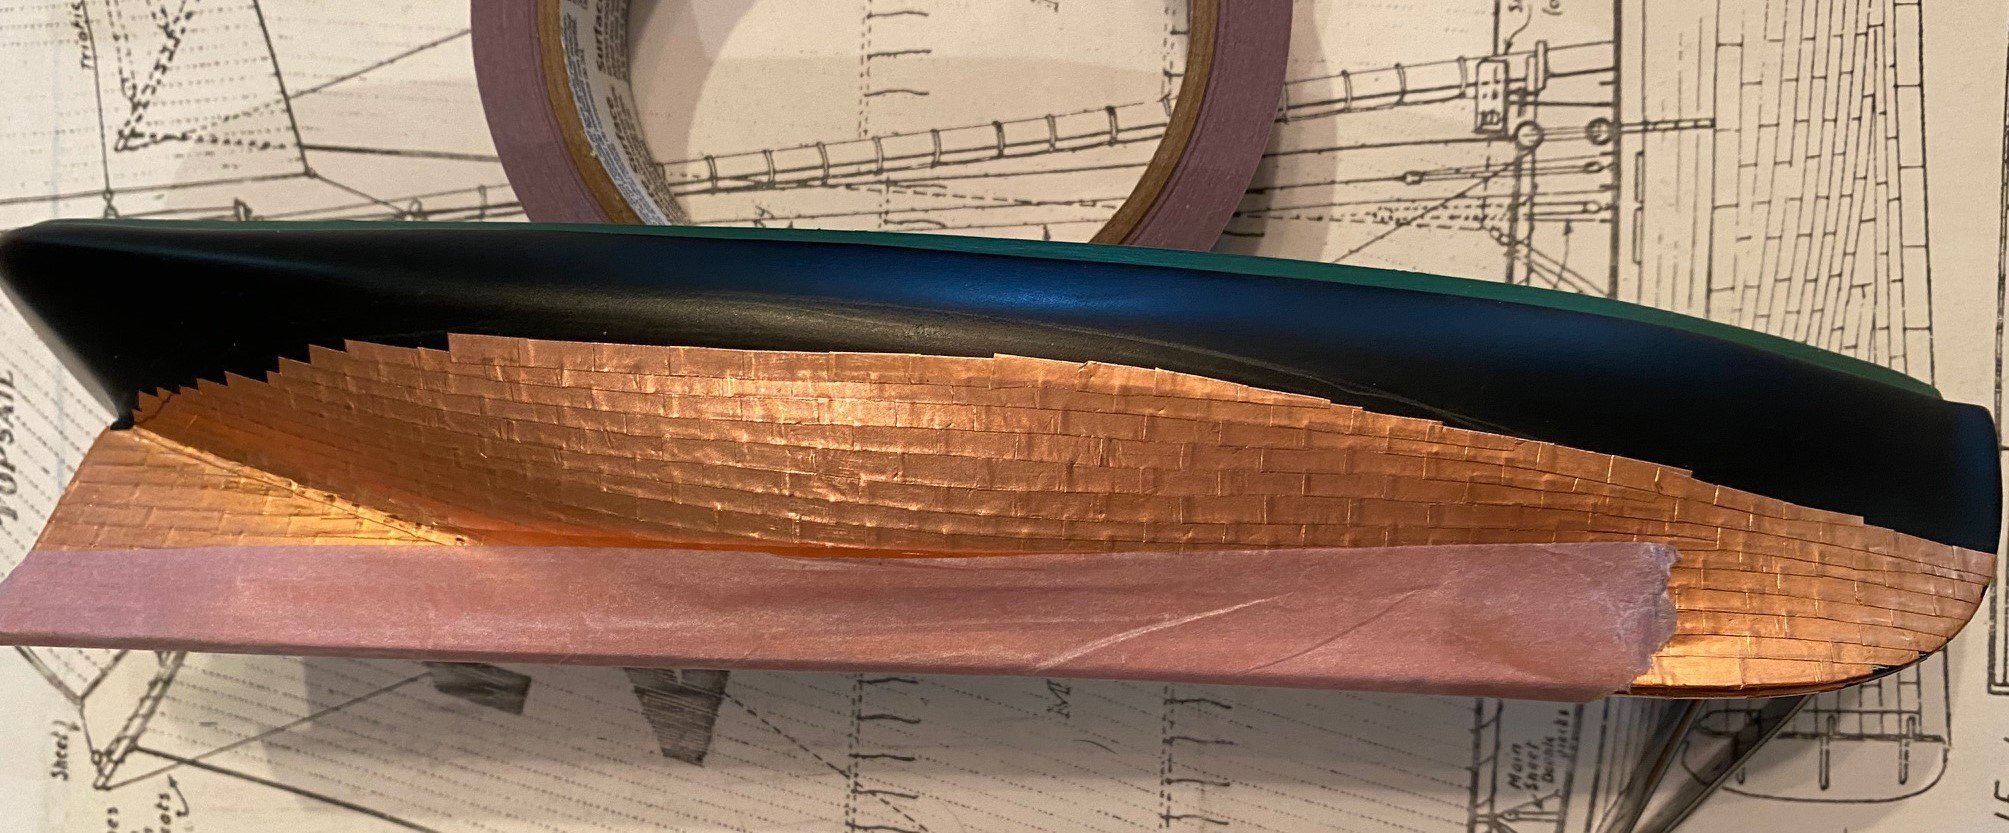
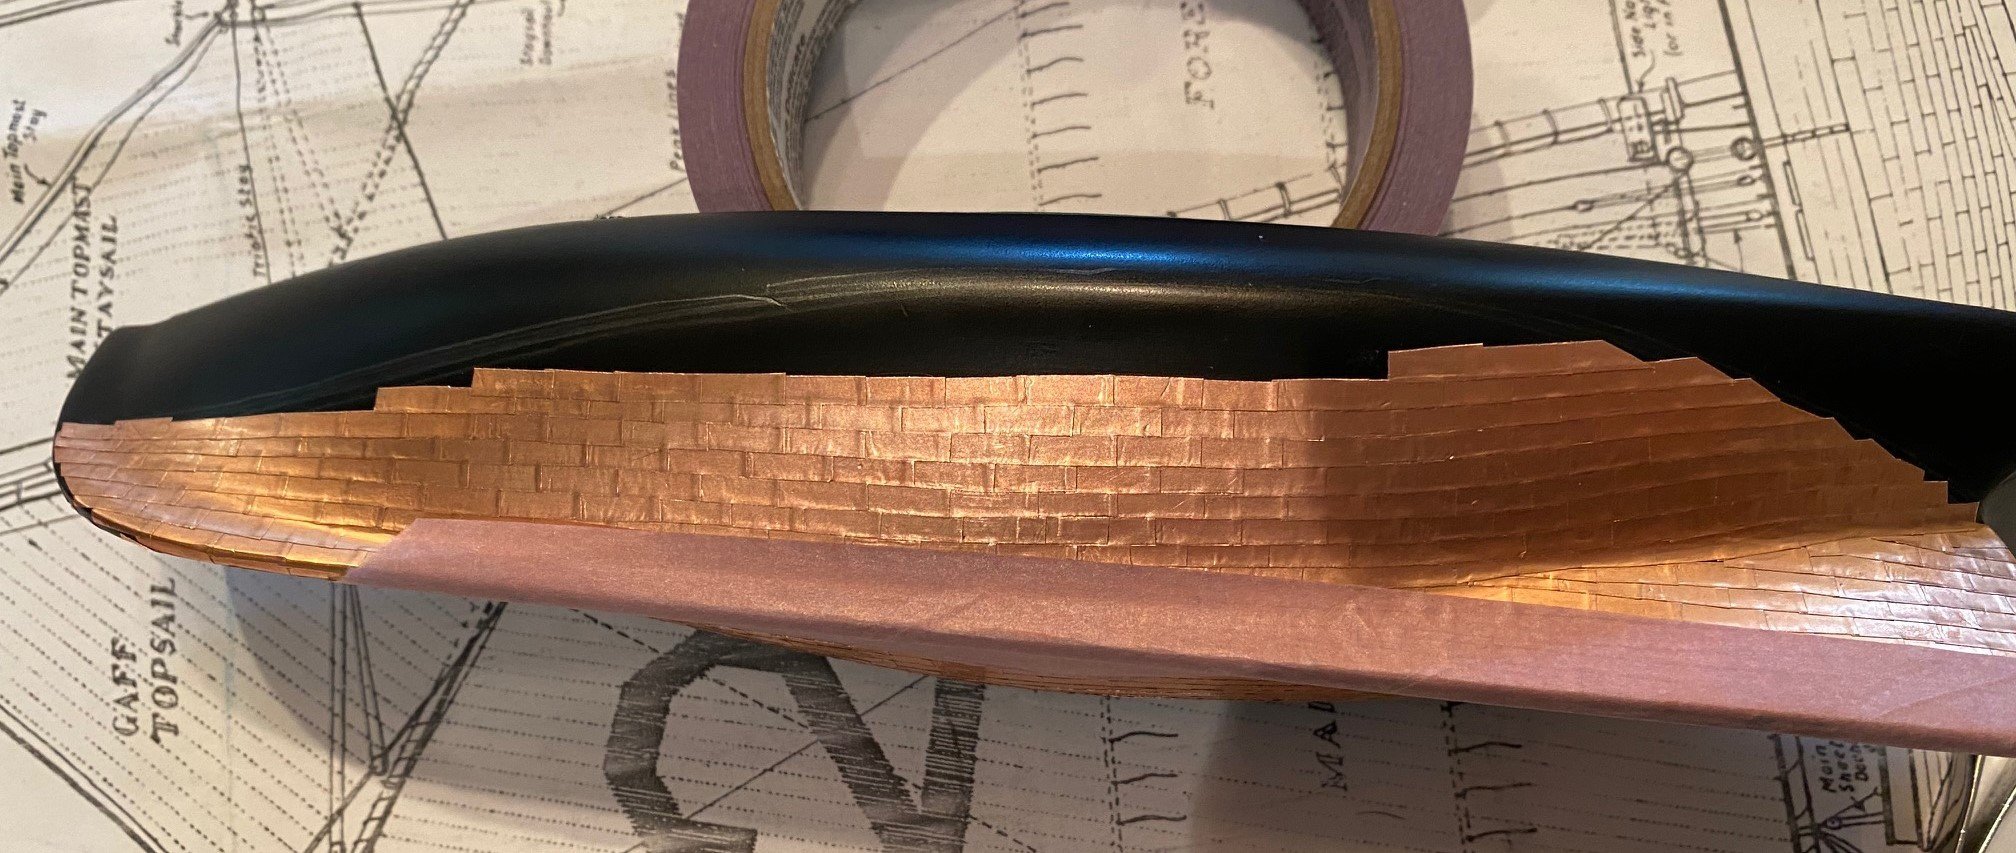
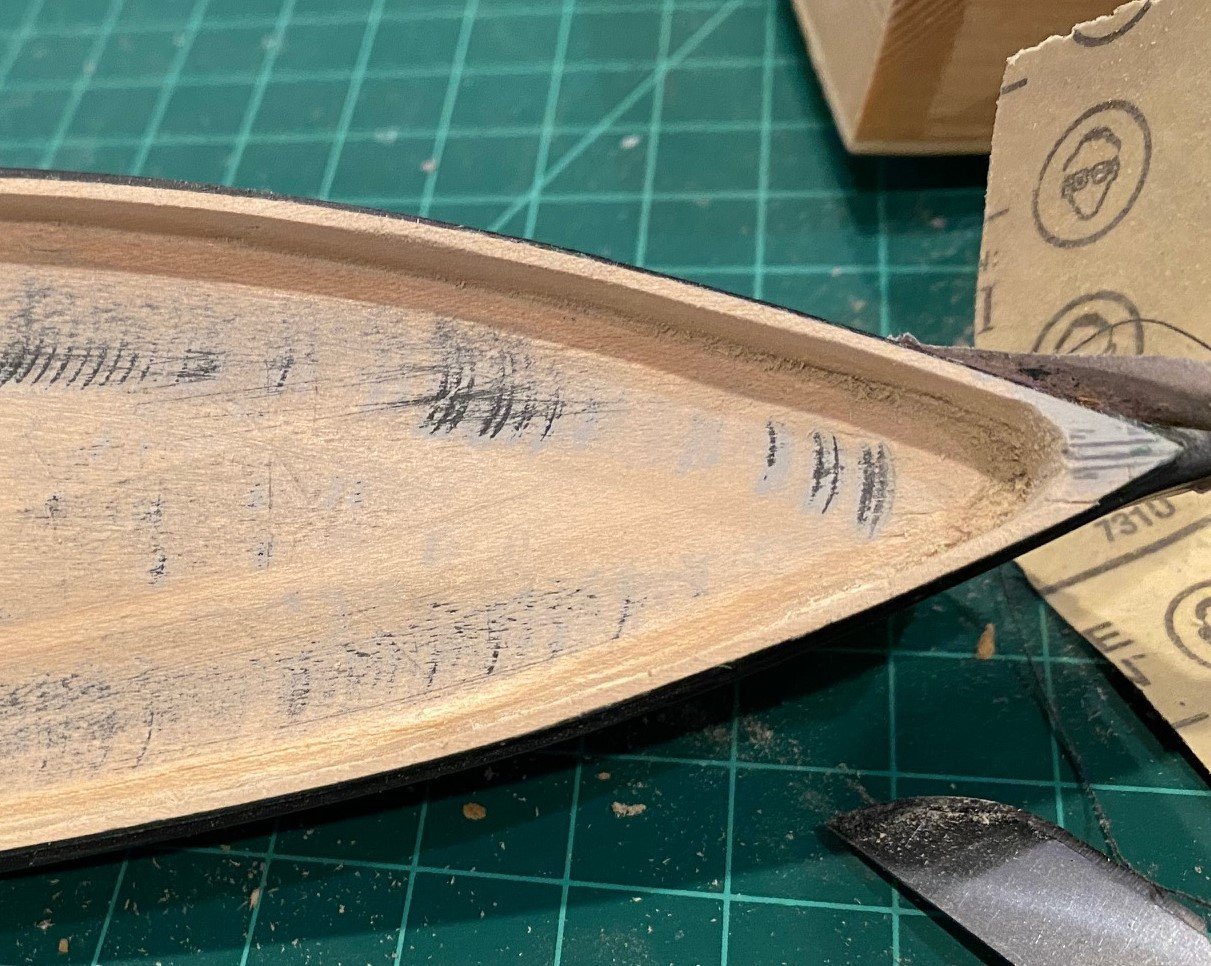
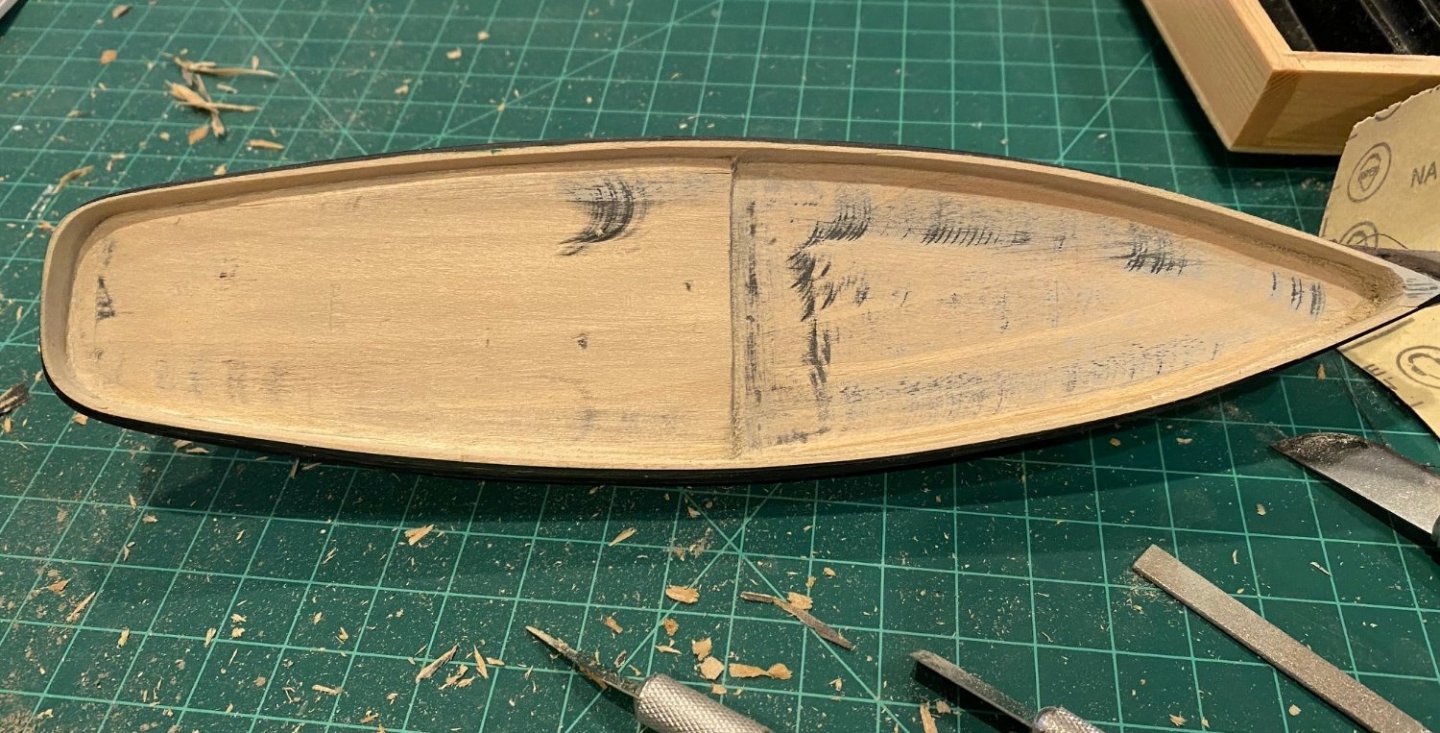
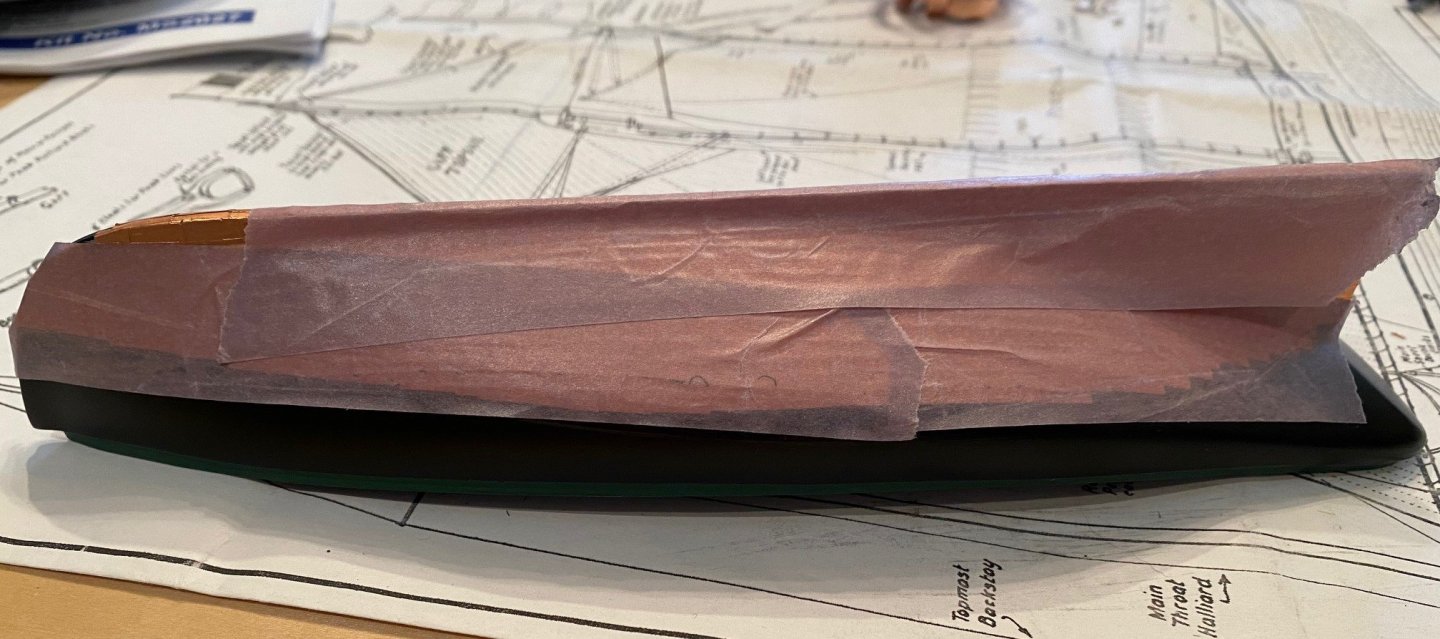
The holidays are finally over so I can get back to the yard. I started to thin the bulwark; first with a curved #22 blade to score the bottom of the bulwark even with the deck. Then I used a #18 chisel blade to cut straight down in small cuts, making sure that if I needed to flip out the shaved wood that I leaned the blade handle towards the center line and not to the outside of the hull. I cleaned up and rounded the bow and aft corners with a small triangle blade. I ended up with about 1/16th of a bulwark, then I used sanding course sticks to smooth and thin out the bulwark. This resulted in a thickness 3/64ths. When I temporarily installed a bulwark stanchion and determined the width of the required cap rail, I think it looks to wide. So I think I will thin out the bulwark and stanchions a little more. I am glad that I covered the copper plating with sensitive painter's tape the way I had to handle the hull to cut and sand.
-
Just a thought. Due to the problem with worms, insects, and termites found in ship dunnage; wouldn't the timbers for the launch way be coated in some sort of anti-insect proofer, such as tar/creosote. It seems that would make the launch way darker to blackish.
-
Yes it is and my fat fingers didn't help
-
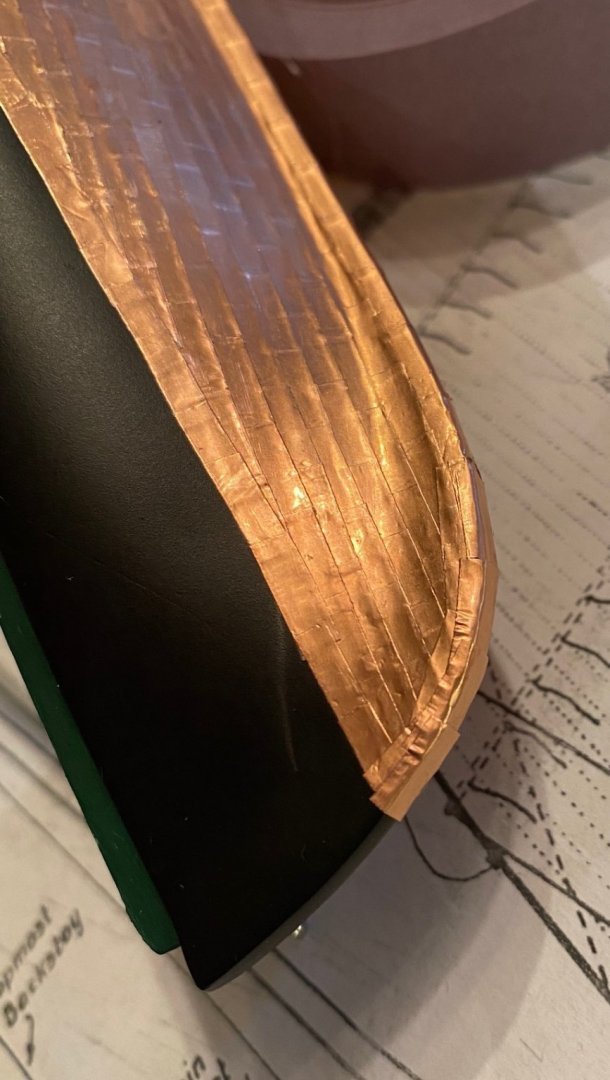
@lraymo A great question. Both the 'Instructions' by G. F. Campbell, the schematic and the 'Practicum' by C. Passaro are not very clear and confusing. All three agree that the width (height) of the plate is 1/8 inch, split the tape down the middle. But the Practicum says the plates are 1/4 inch long, the sheet 2 of the schematic measures out to 1/2 inch long. I don't remember why I cut my plates 3/8 inch long. I might now go with the 1/2 inch long for reduced number of plates but I do like the look of the 3/8 inch, they look proportional to the width. The 1/2 inch long plates might not curve smoothly.
-
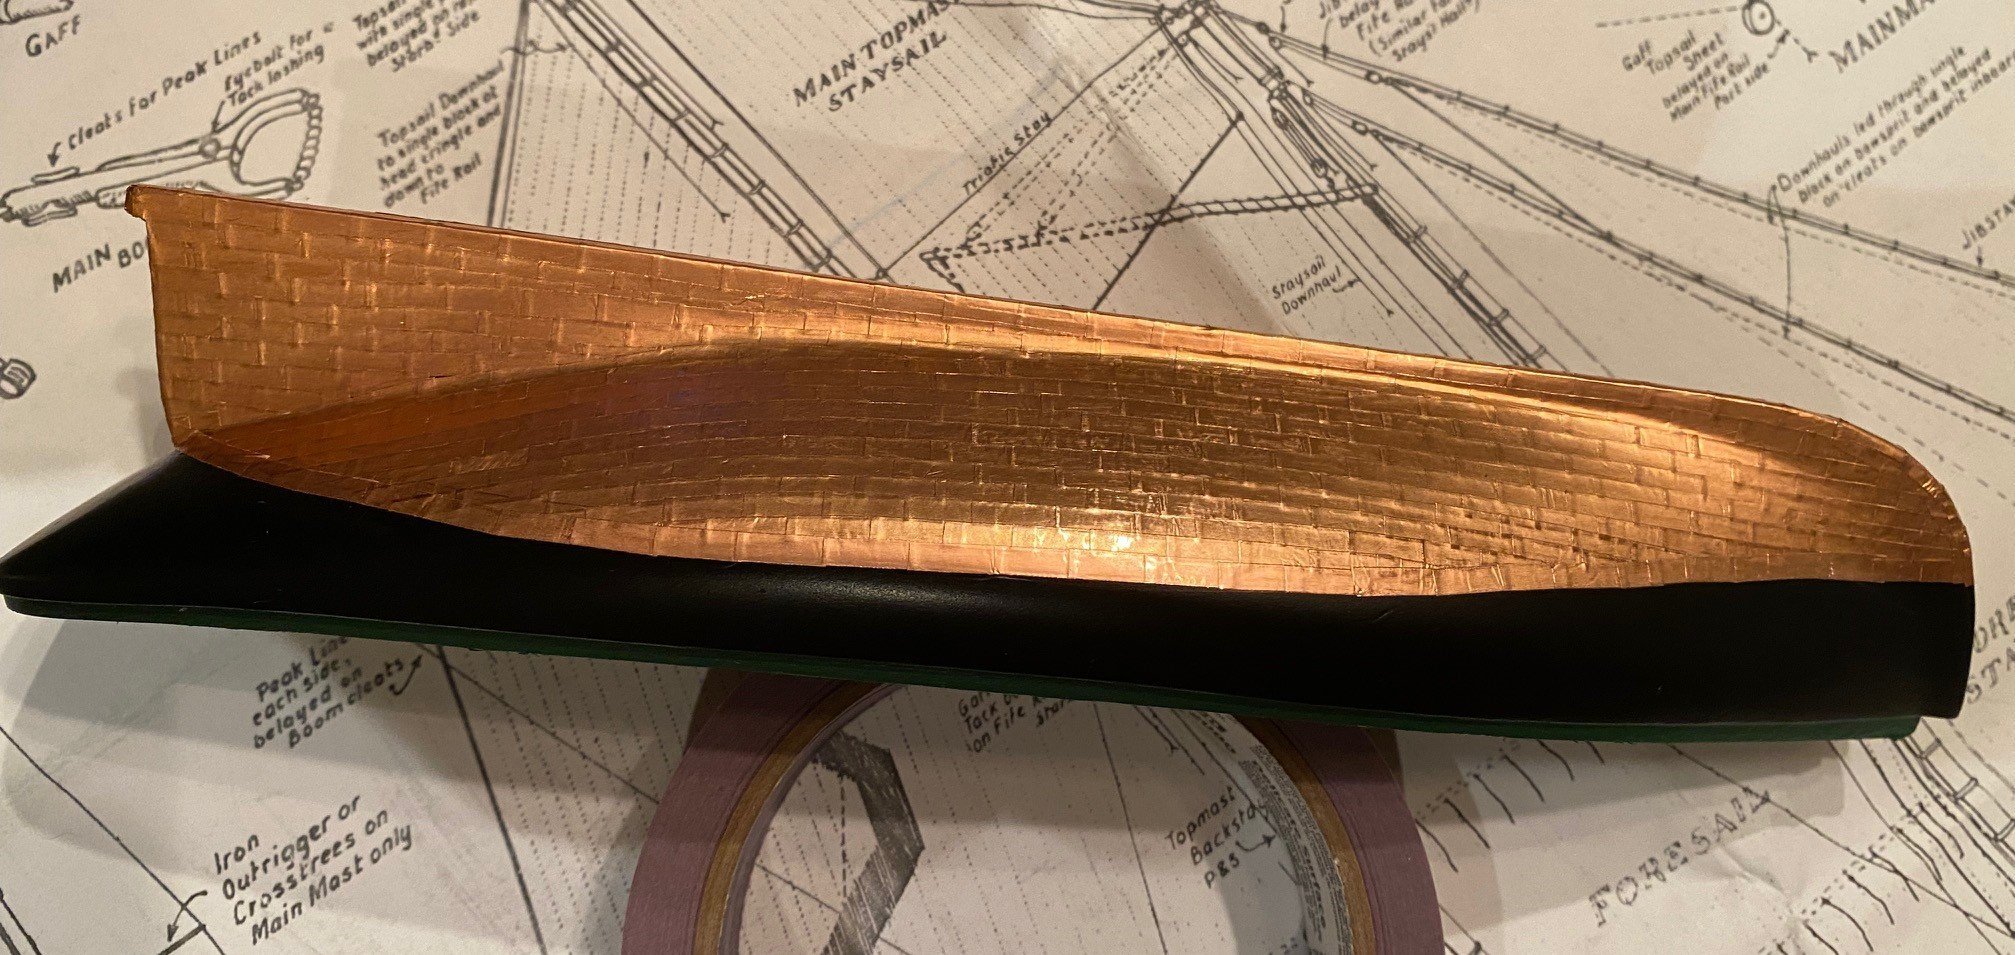
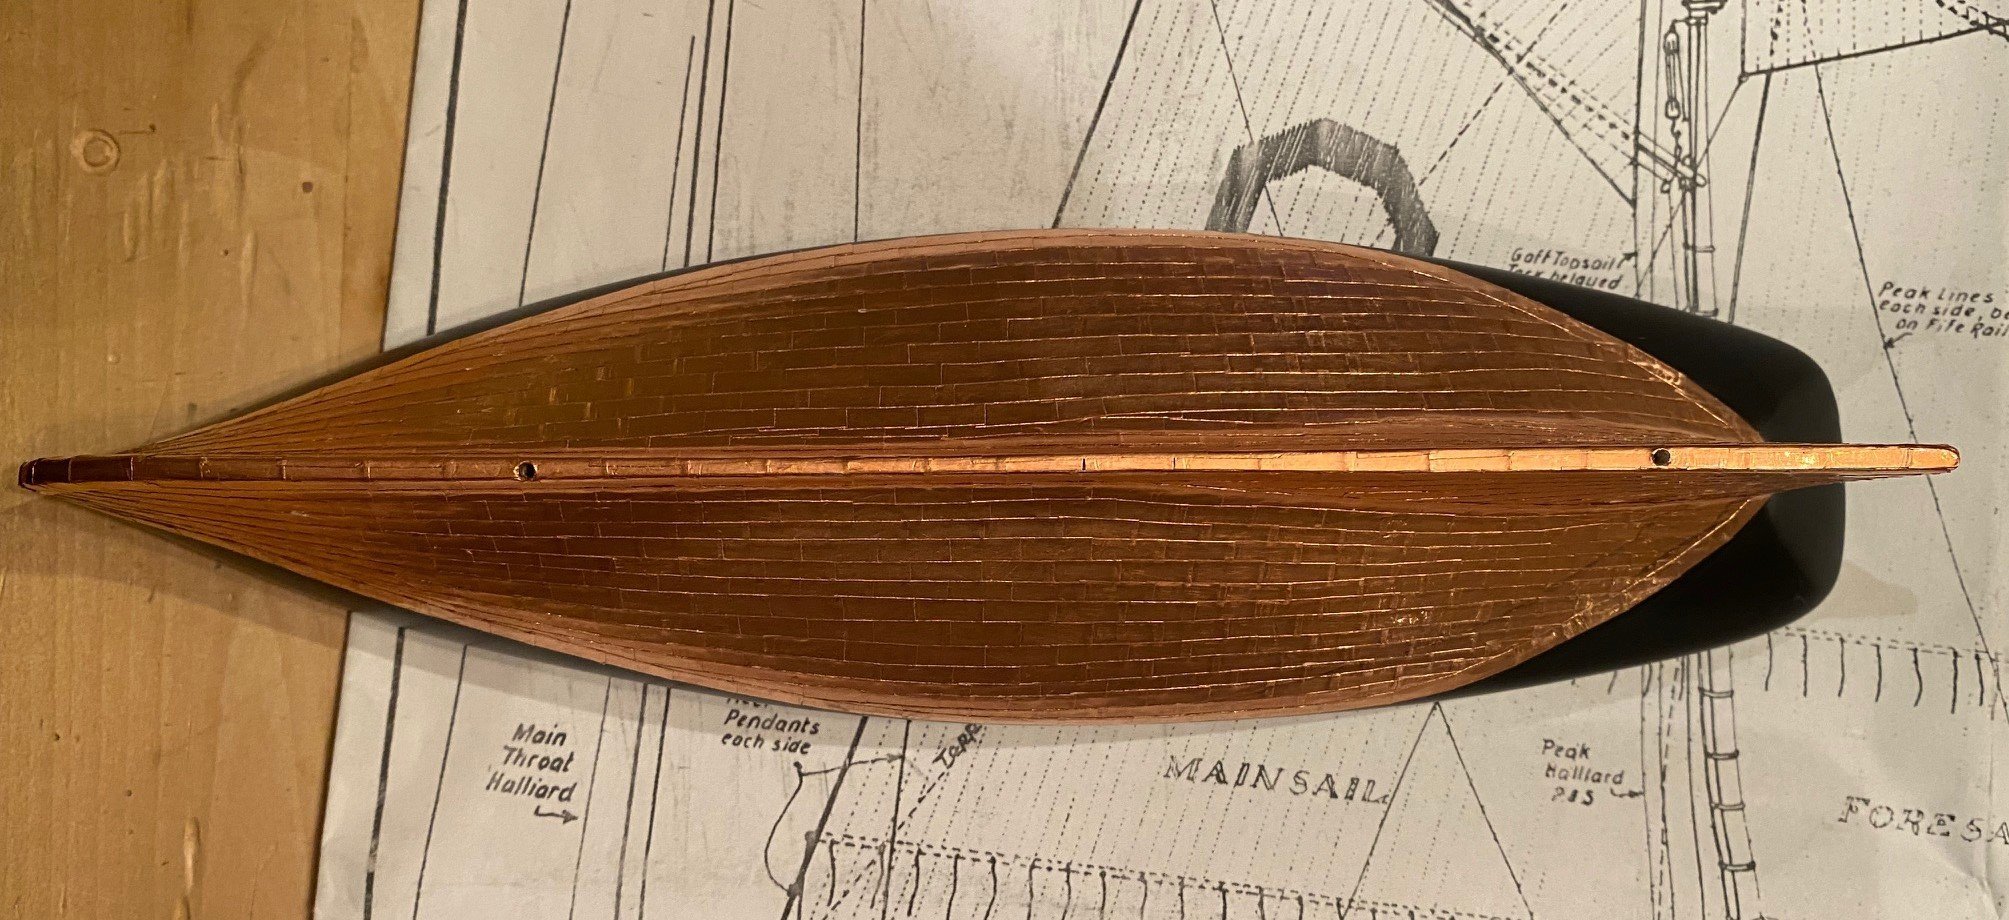
I'm finally done with coppering the hull, this was as tedious as setting the rigging. I don't like how the bow stem turned out, it's not very smooth and somewhat misaligned. I haven't decided if I will redo it or not, but I need to move on and work on something else for awhile.


-
Nice job on the Long Boat, it was my third boat I built. Will be following your build of the AVS since it is the next ship that I will build. Right now I'm building the Phantom New York Pilot boat. It is a solid hull that is coppered, both of these are a challenge.
-
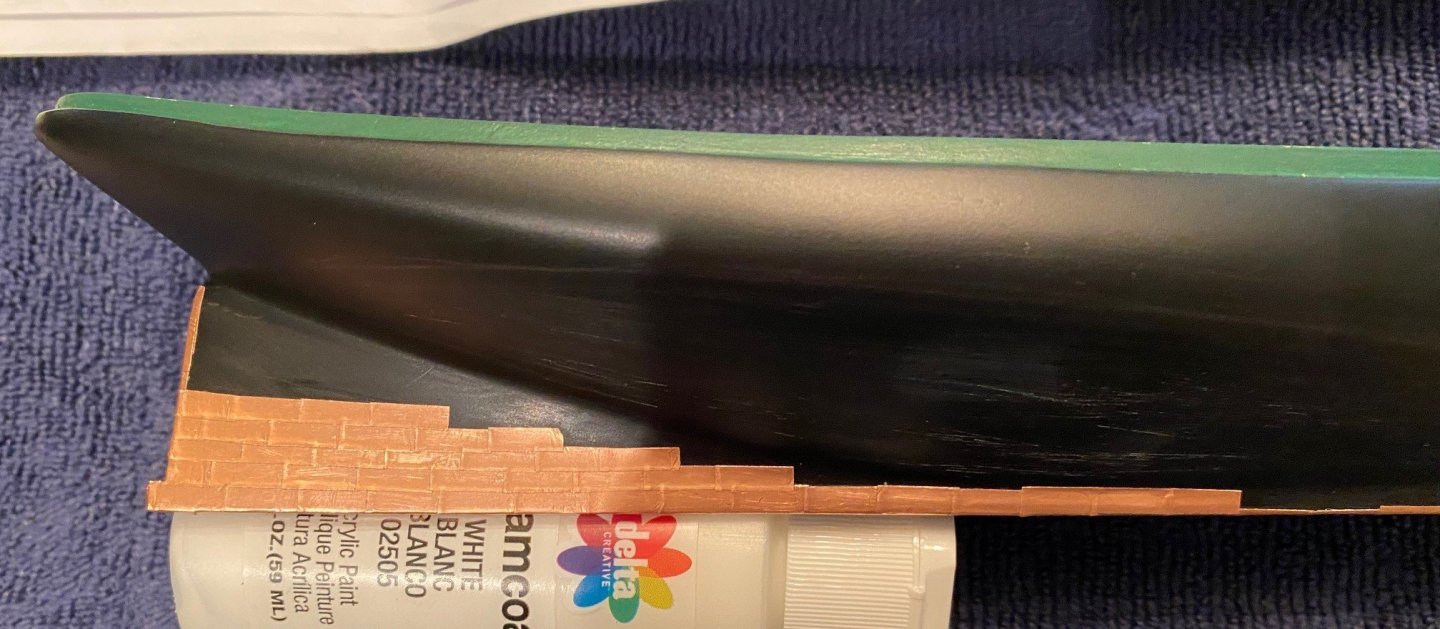
Coppering the hull is much more difficult and time consuming then I thought it would be. This experience will be very helpful in the future. I would recommend getting the deck flat before working on coppering the hull to help prevent snagging the copper edges. One of the problems I ran into was inconsistency in the runs of the tiles; inconsistency of my overlap, both horizontal and vertical, the runs had a small wave appearance. I strongly recommend that you decide how you want the tiles to flow on hull, fore to aft and top to keel, this would be similar to a planking plan. Then scribe lines for the starting and final rows and tick marks for the runs. This would be similar to tick marks on bulkheads/frames to keep your planks aligned to your planking plan. As another builder mentioned, the copper edges are easy to snag and lift or compress as you work on the model, they sure are easy to snag. Not sure if there is a way to prevent, I think I might try sticky plastic wrap or painter’s tape. As you can see below, I used sensitive painter’s tape which peels of the hull without lifting the copper.


-
@Raymond Morris thanks, let me know if you have any questions
- 54 replies
-
- 1
-

-
- norwegian sailing pram
- model shipways
- (and 1 more)
-
@steveg In my opinion the boat you choose has a lot to do with what your experience is. Have you built many models before, plastic or wood?
-
Keith, yes you could use a pin for the rudder to rotate on, I just didn't see the need for the rudder to move on this model. Personal choice.
-
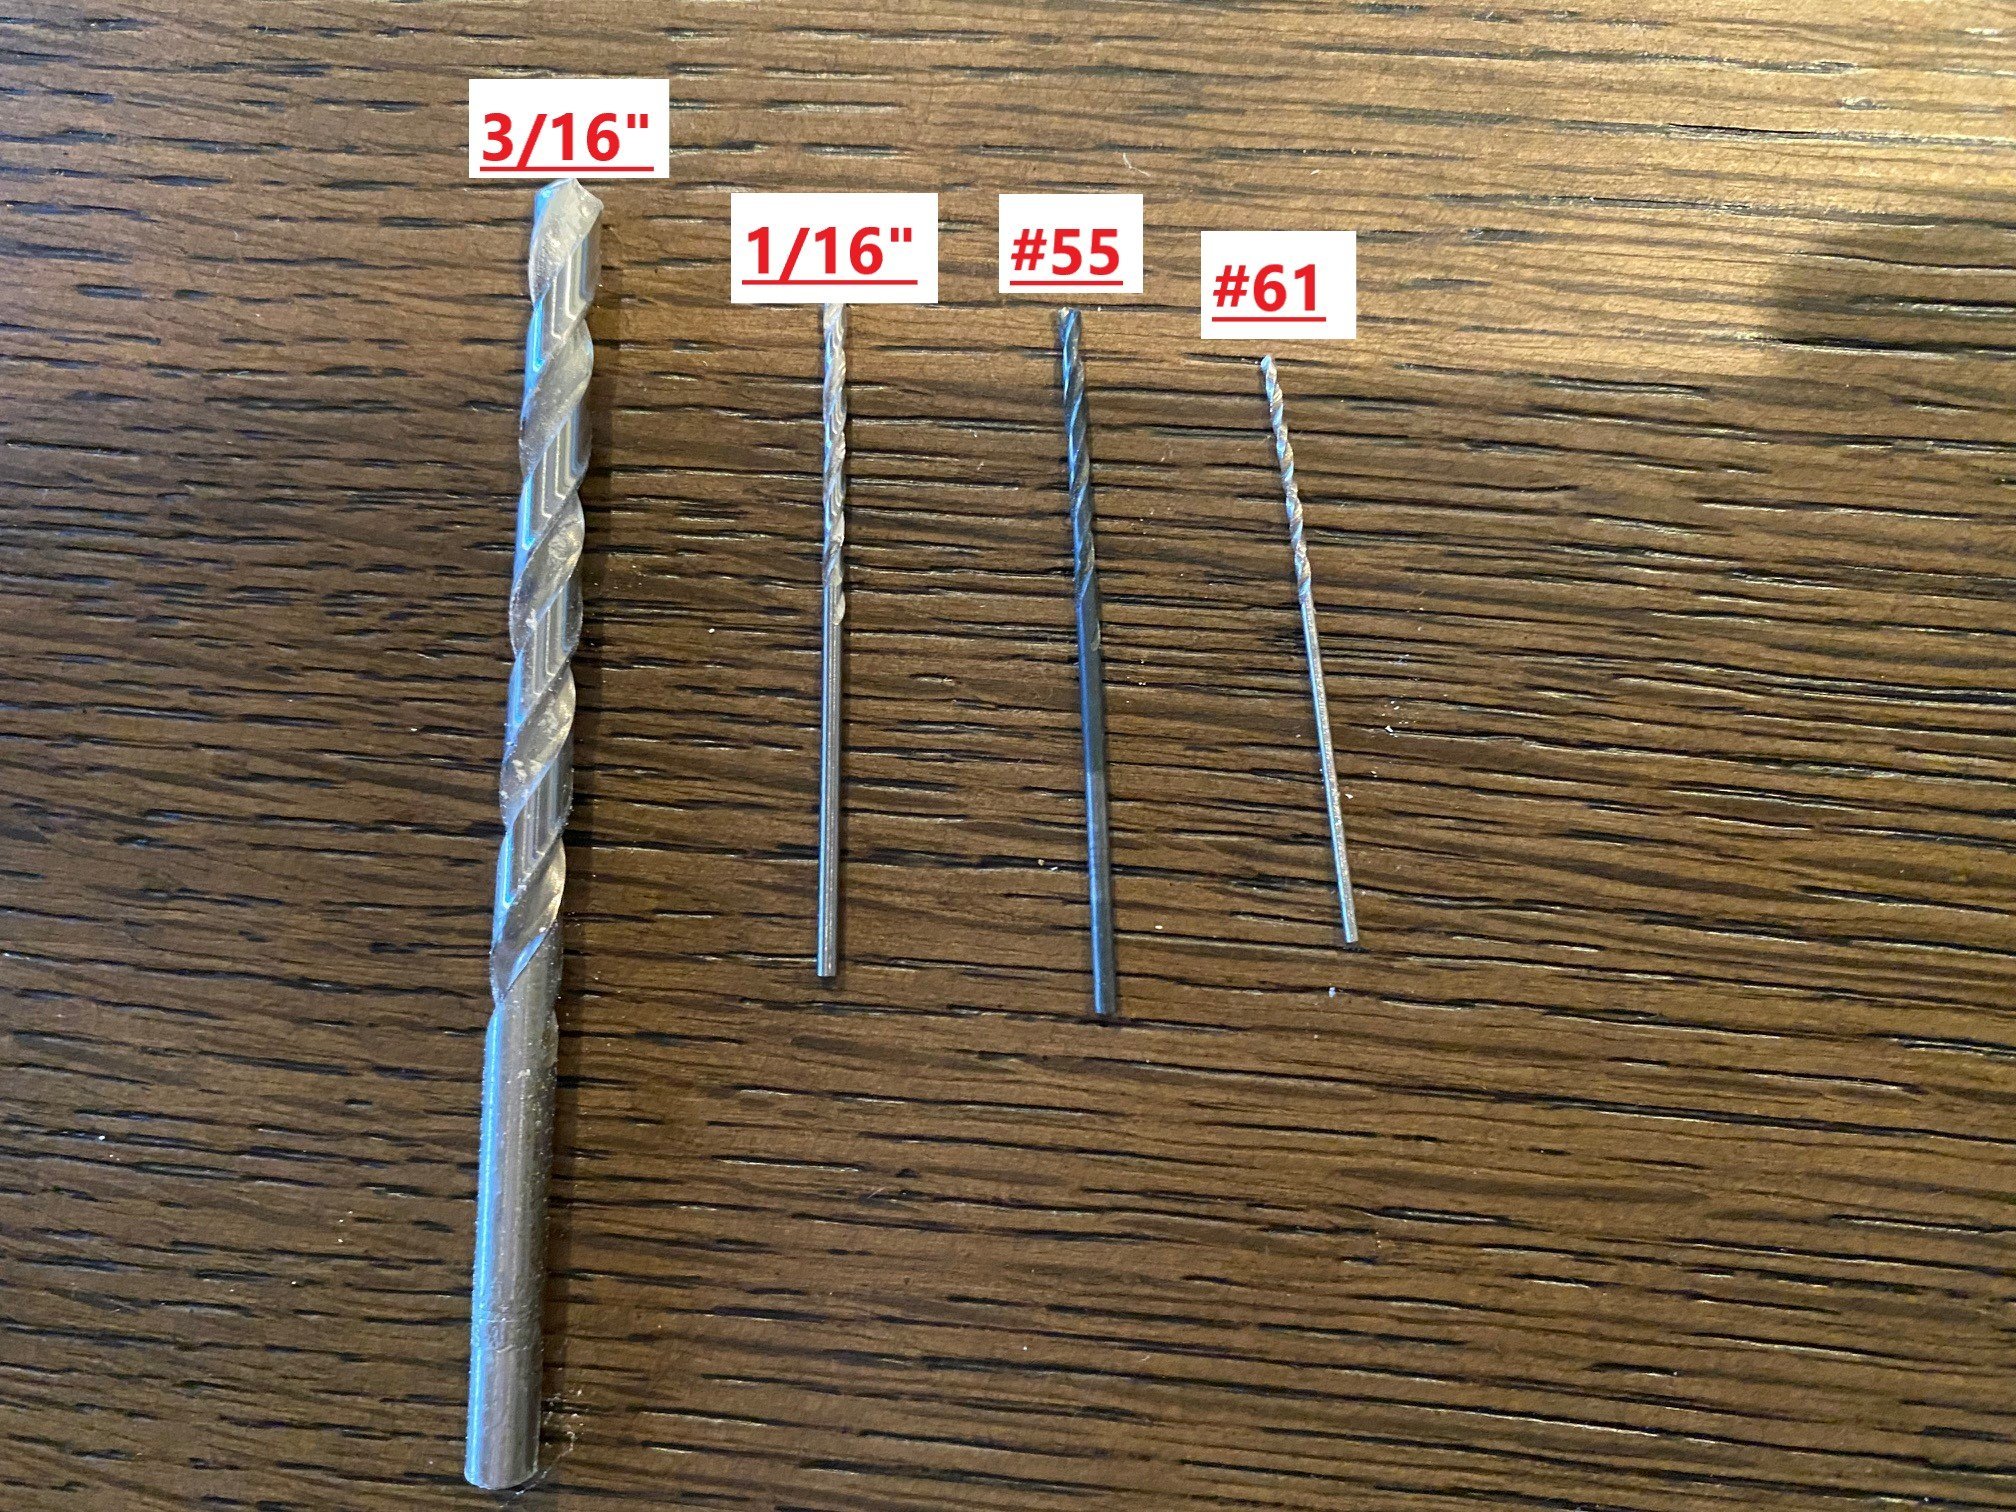
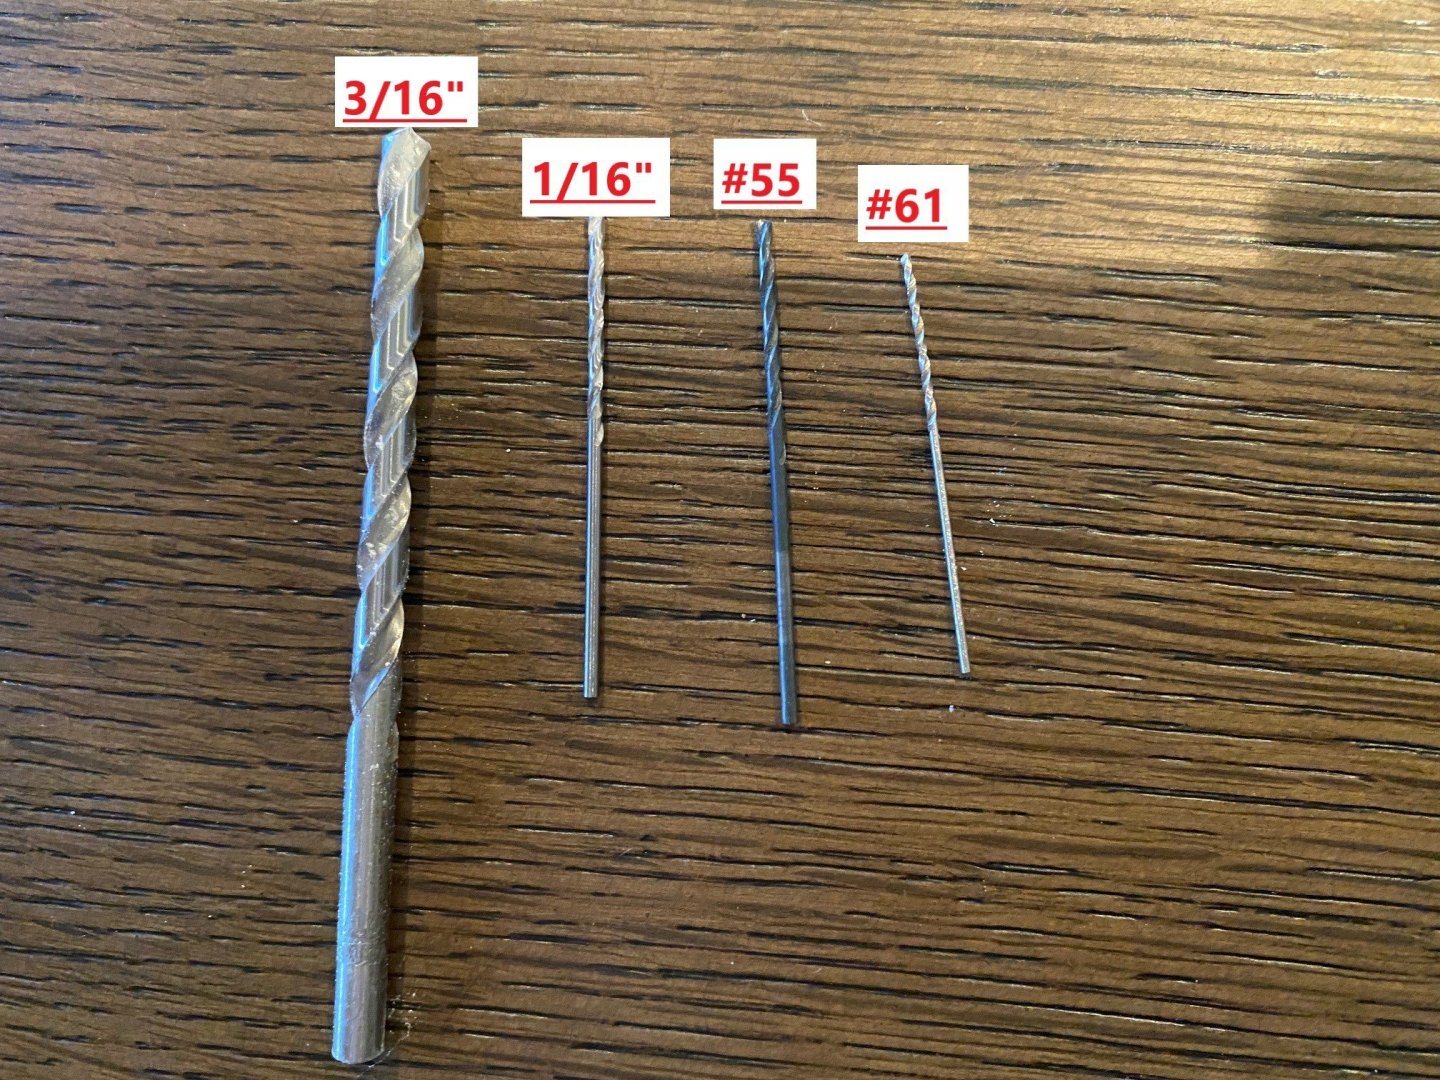
@lraymo Drill bit size can be very confusing. Below is a picture of a 4 different bits. You can see that a 3/16 inch drill bit is larger than what bits you have. I have not seen a model tool drill bit set that has a 3/16 inch drill bit. That is why I recommended just going to a hardware store like Ace or Home Depot and buying just the 3/16 inch bit. (Side Note: I did not drill the hole for the rudder to fit in since I cut the rudder to short for it to go up into the hull, so I sanded it to just fit in and will glue it in place.) For the mounting pins that go in the launch way, I used a 1/16 inch bit that I had in a wood bit set, from a 1/16 inch to 1/4 inch. You can see from the picture that a #55 bit that you have, it is close to a 1/16th inch bit. I would recommend trying it first and see if the pin goes in without to much trouble. If the pin does not go in easily then try to widen the hole by using the #55 drill bit like a file to open up the hole until the pin fits. If not then you will have to buy a 1/16 inch bit or a #52 bit. What is extra confusing is the Micro Mark drill bit kit you pictured is sized for drilling tap holes that are sized to match the screw that would go into the hole. If this is still confusing, send me a message via the web site.
-
@lraymo I used a 1/16" bit that I had in my wood drill bit set, it would be about a 51 or 52 gauge bit. I did use a pin vise to hold the bit, mine has 4 different sized ends and the large hole end worked. If you don't have a wood bit set with small bits, try your local hardware store, sometimes you can just buy one instead of a set of them.
-
@lraymo you asked: Rudder confusion! In reading ahead, it says its now good time to drill the hole for the rudder. What hole are they talking about? See instruction page 10, your drilling the hole for the very top of the rudder, see the part of the rudder in the blue circle.
-
@lraymo For a 3/16 hole, your going to use a regular wood drill bit, not one of the small ones you have. A 3/16 inch bit would be equivalent to a #13 gauge drill bit. The following web page provides a conversion chart for gauge size to inch and mm. https://en.wikipedia.org/wiki/Drill_bit_sizes Before you drill a hole for the rudder to pivot on, measure the rounded end that will fit in the hole. You might need a bit smaller or bigger than a 3/16" Good Luck
-
@GGibson Good to have you back; but those Granddaughters do need our time, almost as much as we need time with them. I stained my deck before gluing in the coaming and cabin sides, just use white glue.
-
I used a chisel blade for vertical cut after I scored the side of the hull with a curved #22 blade. It worked really nicely, I was afraid to use the chisel blade to cut the horizontal. Refer to my build log. Good work
-
Started coppering the hull, another challenge to overcome and a learning experience. With my fat fingers it is a little hard to get the right amount of overlap both horizontally and vertically, as well as splitting the copper tape evenly down the middle. There is a difference on the copper tile laydown in the printed instructions illustration and the schematic. The schematic looks like they followed planking type layout. I started per the printed instructions, but I can see that I will probably end up some where between the two.
-
Drilled the holes to mount the boat to the launch way and dry-fitted the hull to it.

-
For clear coats, I've found that Tamiya Clear Flat is a good overcoat. Also, I routinely use Rust-oleum Clear Flat or Matt for a clear overcoat. The later being cheaper than Tamiya, I've not had a problem with the nozzle spurting as mentioned above. I've not been clear coating painted surface as much as stained or bare wood.
-
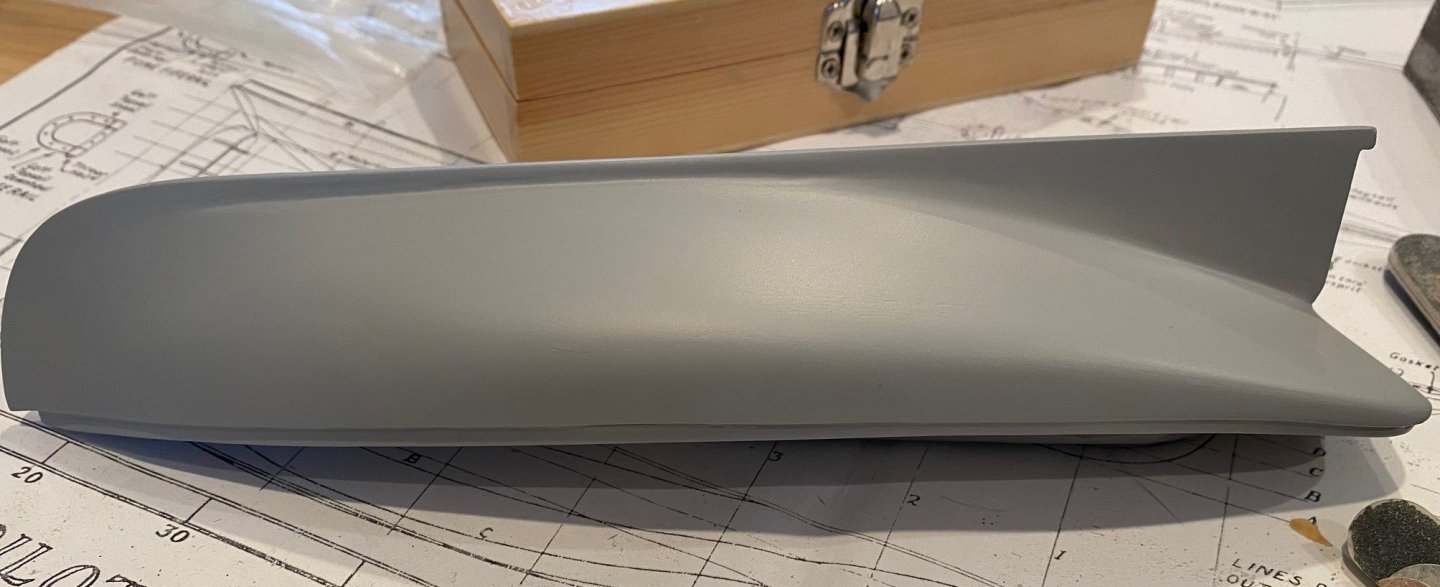
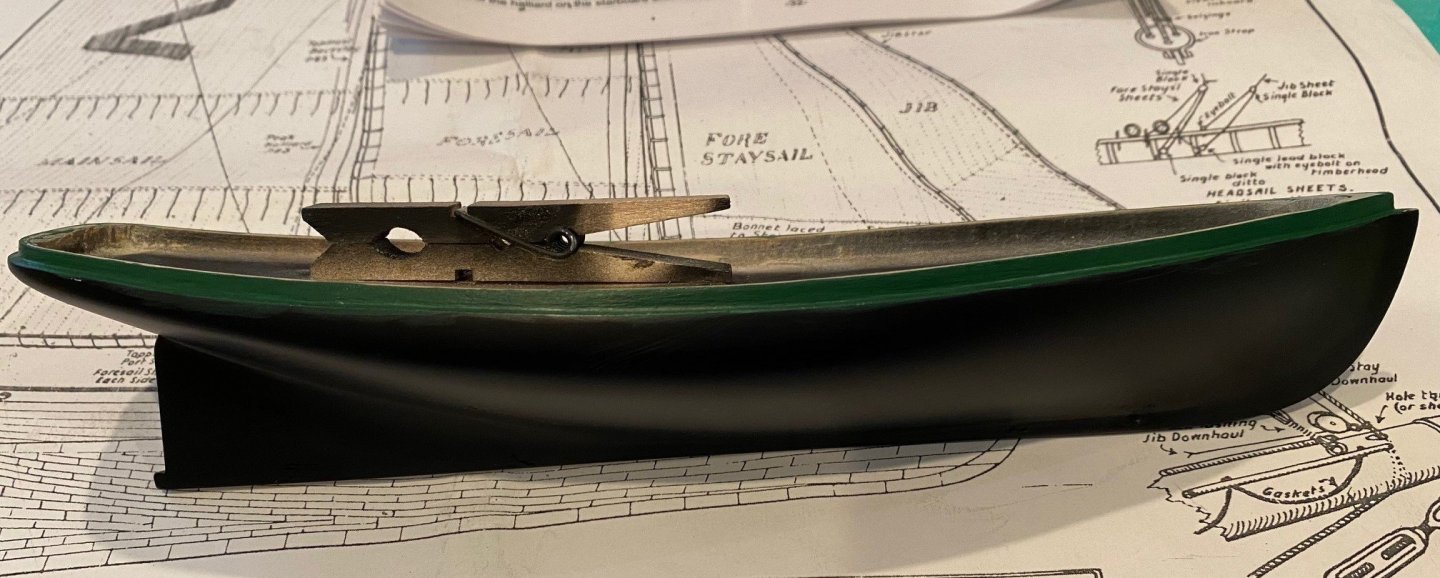
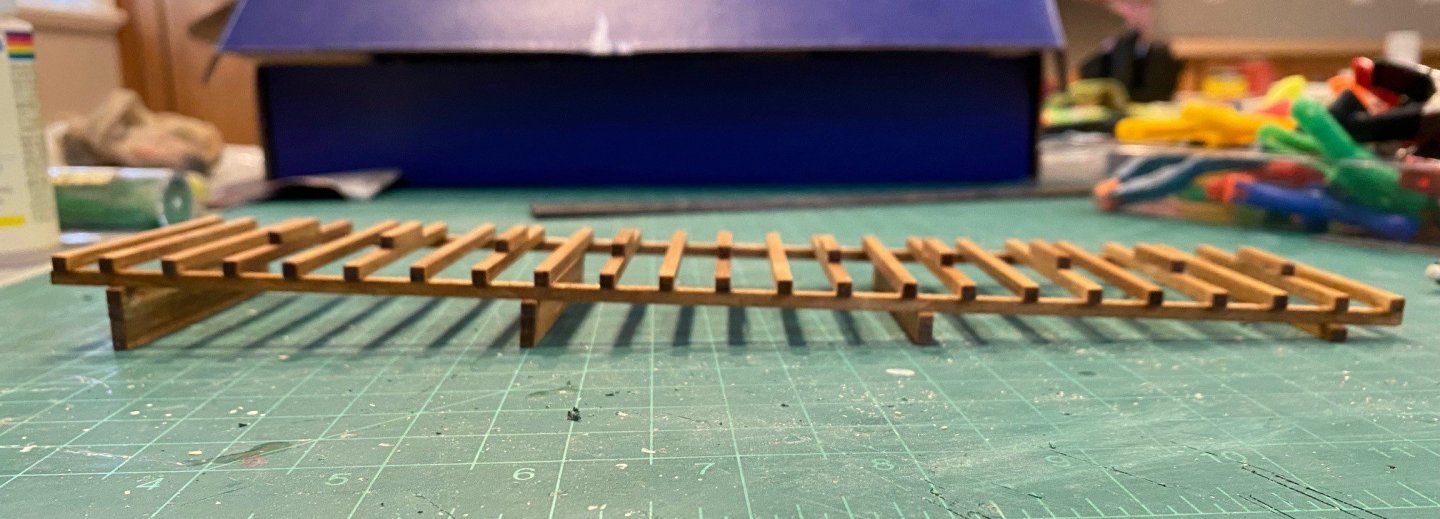
Final coat of primer on the hull, Tamiya Fine Gray Primer. Decided to do a little something different, I painted the step below the cap rail Model Expo Bulwark Dark Green acrylic, left over from the Grand Banks Dory. A small problem arose, that in some areas the paint peeled off when I removed the tape, I used to mask the step off when I painted the rest of the hull Tamiya Matt Black spray paint. I think the problem is that I did not really rough up the surface of the primer prior to applying the acrylic, the primer I used does have a very smooth finish. So, I sanded the step down to mostly bare wood and tried again, need to touch up the black paint. While the coats of paint were drying, I built the launching way. One recommendation, the instructions say to build the end riser with 5 pieces of wood, but if you lay it out you only need to use 4 to have a constant rise over the launching way.
-
@lraymo I also called it good enough on the hull shape, it looked good to me even though the two sides are not symmetrical. You can't tell when just looking at it.
-
@lraymo I forgot to mention that I currently building the Phantom too and started a build log. I’m done shaping the hull and have it primed.