HOLIDAY DONATION DRIVE - SUPPORT MSW - DO YOUR PART TO KEEP THIS GREAT FORUM GOING! (Only 24 donations so far out of 49,000 members - C'mon guys!)
×


SkiBee
-
Posts
249 -
Joined
-
Last visited
Content Type
Profiles
Forums
Gallery
Events
Everything posted by SkiBee
-
 I did the 3 Model Shipways kits since I had no experience with wooden models, built many plastic models but no wood. With each one I learned a lot and gained basic and mid modeling skills. I found the price very manageable. Recommend you look at a few build logs on this site for any model you might be interested in building before buying. Also, start a build log for anything you do, since you can ask others for help. The key is take your time, enjoy and realize that no one will notice any flaw but you, good modeling.
 -
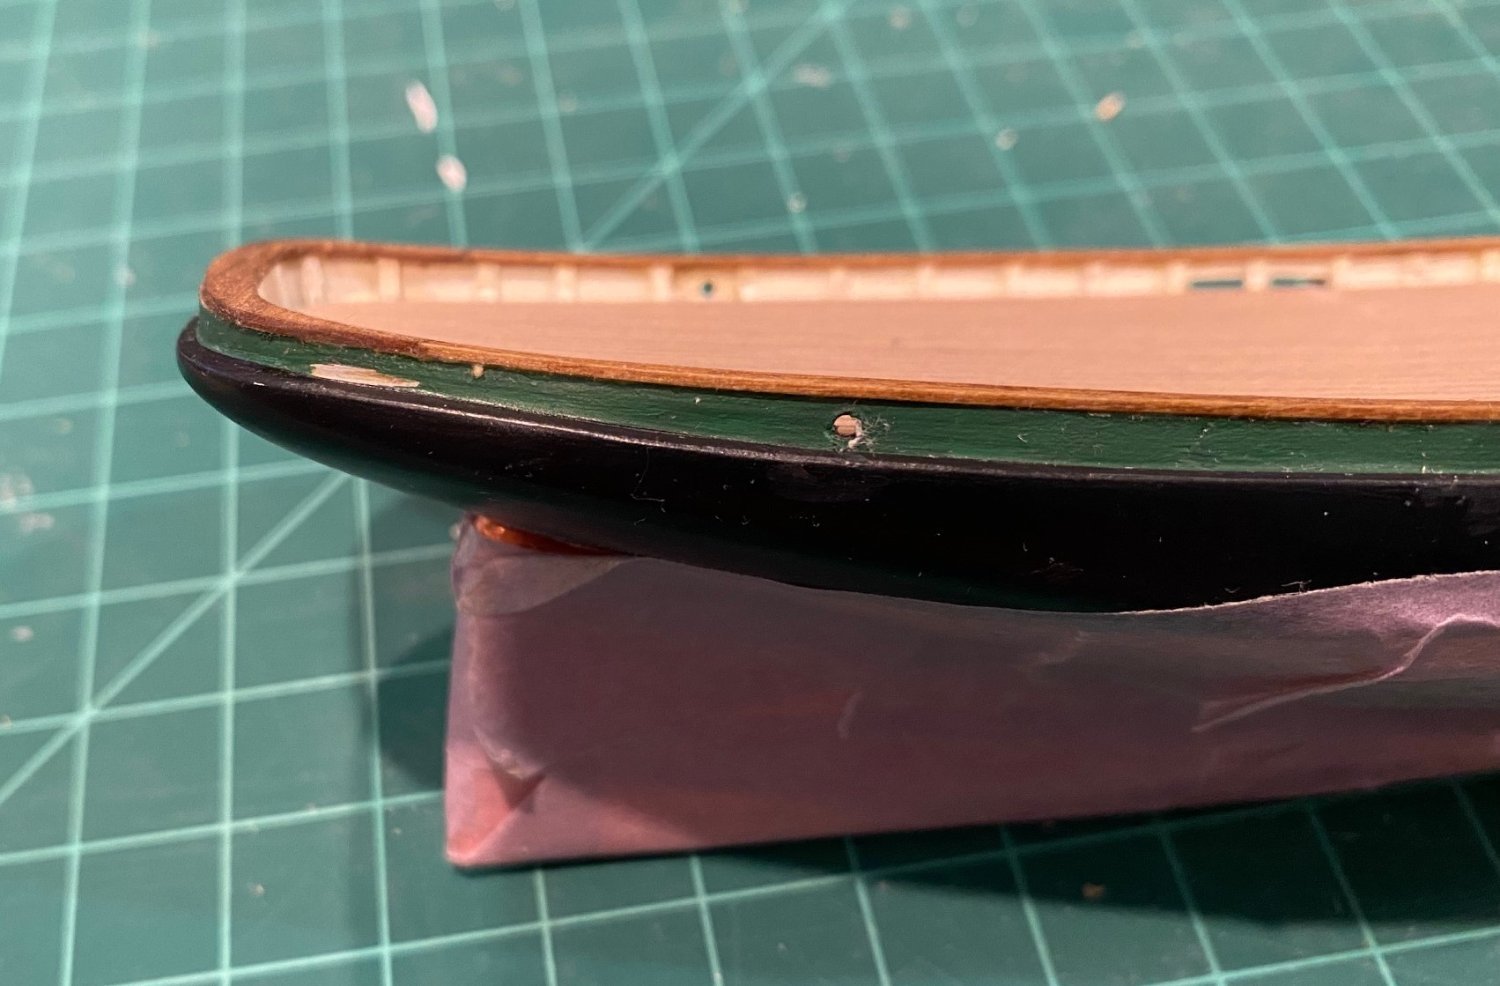
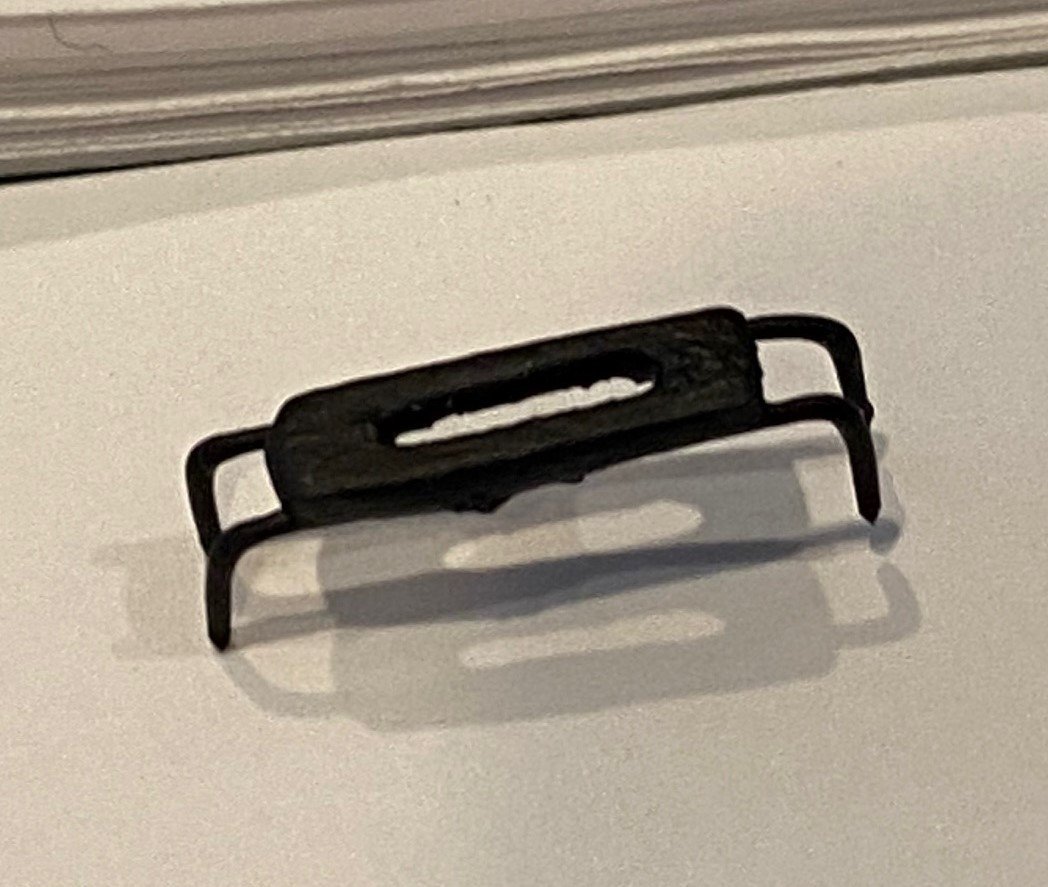
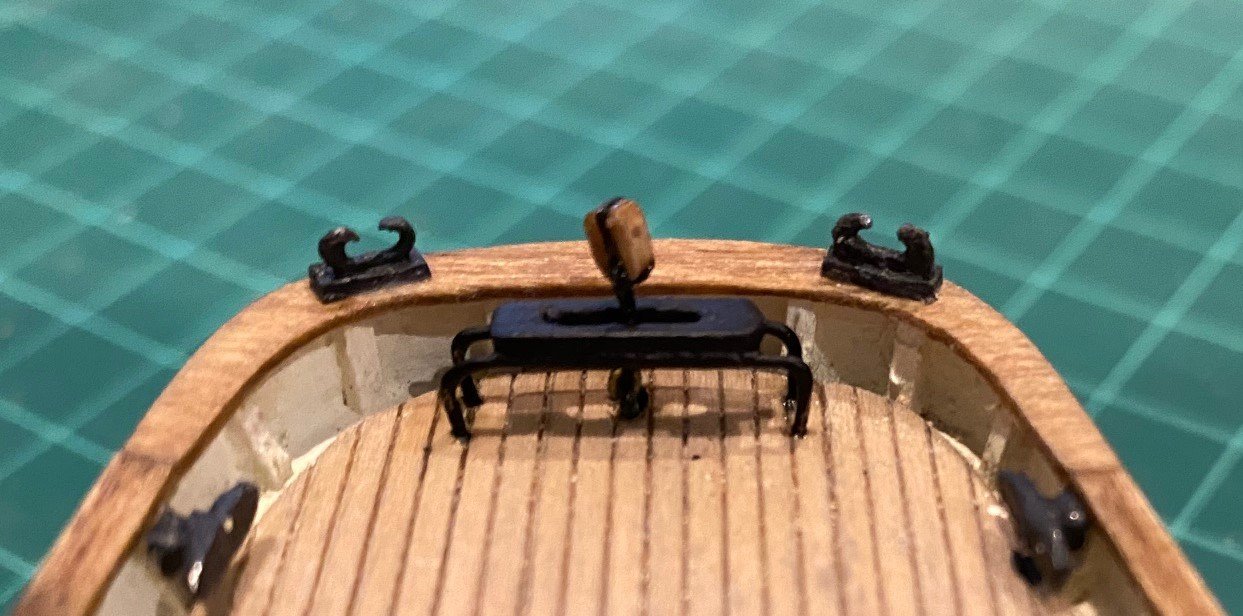
Had to take a couple of months off again for other things. I repainted the black and green on the hull to cover up all the marks and scratches, looks better. I’m not going to follow the sequence of the instructions but build/install the deck wooden structures like the wheelhouse, companionways and skylight, plus the centerline hardware like traveler, cockpit, stove pipe and such next. In other wards install deck hardware from centerline out, to avoid breaking off the belaying pins and eyebolts. For the traveler, I used the thick gage wire that came with the kit. I made the top of the traveler out of a thin strip of wood instead of brass for the ease. Then I spray painted the traveler and the eye bolts flat black. It was difficult to work with the very small single block. At first, I was going to use thin wire to affix the block to the eyebolt, but I went with thread in the kit. I supper glued the thread to the top of the eyebolt and then down the side of the block. I tied it to the eyebolt before gluing in the eyebolt and the traveler. Then the tied the single block to the eyebolt that goes in front of the traveler.
-
Introducing myself and already seeking advice
SkiBee replied to kdm's topic in New member Introductions
Keith Welcome, it's a lot of fun and there is a wealth of information and experience to draw from the folks here on MSW. A few recommendations to help you get started: > If you are interested in a model to build, look at some of the build logs for that ship here on MSW. > I'm in the middle of building the NY Phantom now, personally I would not recommend that you start with it. > I've built a number of plastic models in my life, some skills do translate to wood models, but there are a lot of new skills with wood. > I started to build the Long Boat, but halfway through I switched to the Model Shipways Lowell Grand Banks Dory to learn something about planking. Then I built the Norwegian Pram by MS to gain more basic skills and rigging. And finally built the Long Boat which was a lot of fun and a good challenge of my new skills. > Before I started the Phantom, I built the Lobster Smack by MS. All three; Grand Banks Dory, Norwegian Pram and the Lobster Smack are a great series to start with. Each build upon the skills learned in the previous one. > The key is to read some of the logs before you start a model, start it and start your own build log. You will get a LOT of GREAT help from others via your log. Have fun! -
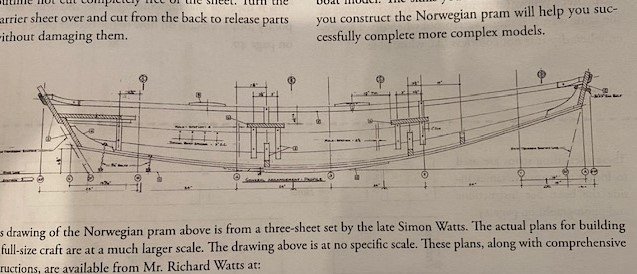
David A picture would help clarify your question on the hole, but below is a schematic from the instructions that show the hole. The first thing to do when you have a question is look at a few of the existing build logs on the site. Good luck and hang in there, this is a great boat to learn from especially your mistakes. You'll be the only one to notice your mistakes and fixes. Have FUN. Jim
- 1 reply
-
- 2
-

-
Your work looks great, I did enjoy building the Dory, learned a lot.
-
Welcome and have fun, I enjoyed building the Dory
-
Welcome, as Keith said your Grand Banks Dory is great, I like the enhancements you made to it. I hope you enjoy the Sailing Pram; it continues with new skills that you will need in the future. Just don't get frustrated if you hit a snag.
-
I was on a wooden mine sweeper in 1970 for a short while, all I remember was polishing brass (not painted), checking the bilge and chipping paint on everything else. Everything was painted but the deck, it was raw but well-aged wood.
-
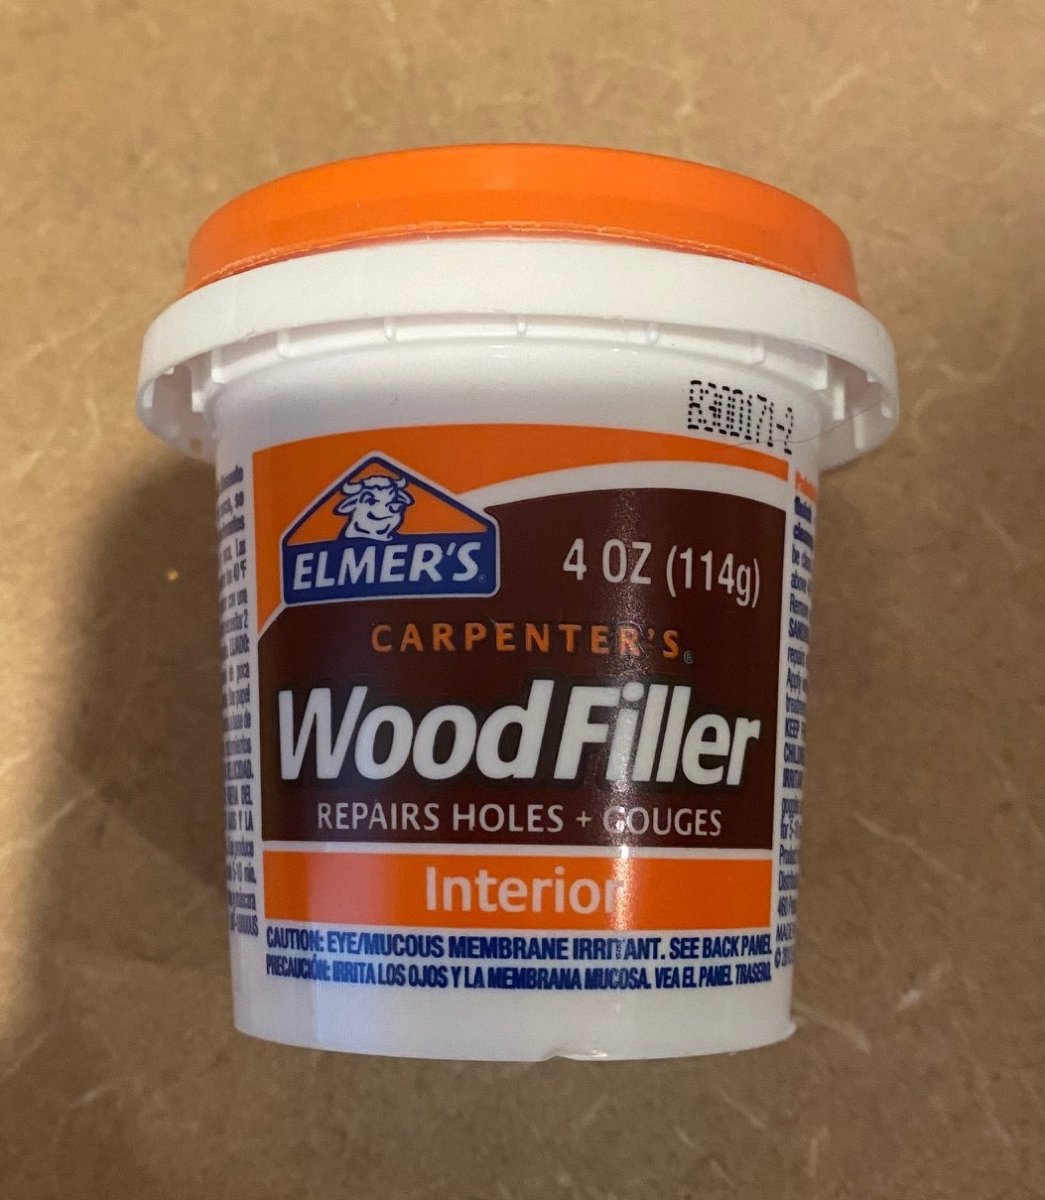
@gulfmedic1 Doc, yes I did, but I finally went with the imperfections once the hull was smooth and looked ok. My hull is also not symmetric when you look at it from the aft, but I'll display it, so you see the side. I'm the only one that will notice the imperfections in the hull. I used some Elmers wood filler; it stains ok when not a large area. Hope all is well with you and yours, the old Doc
-
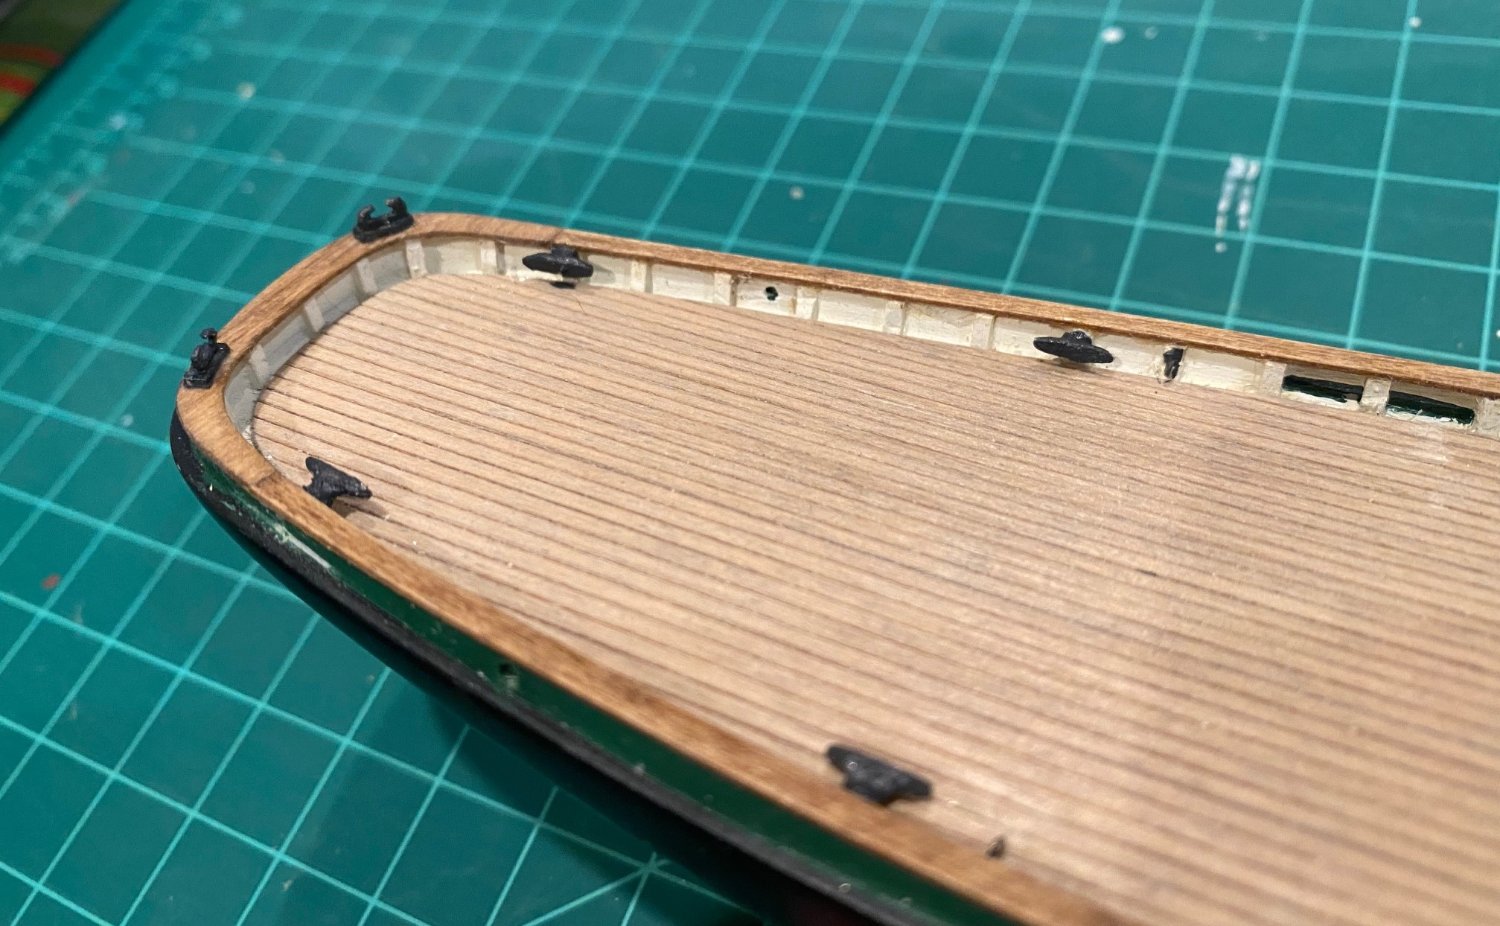
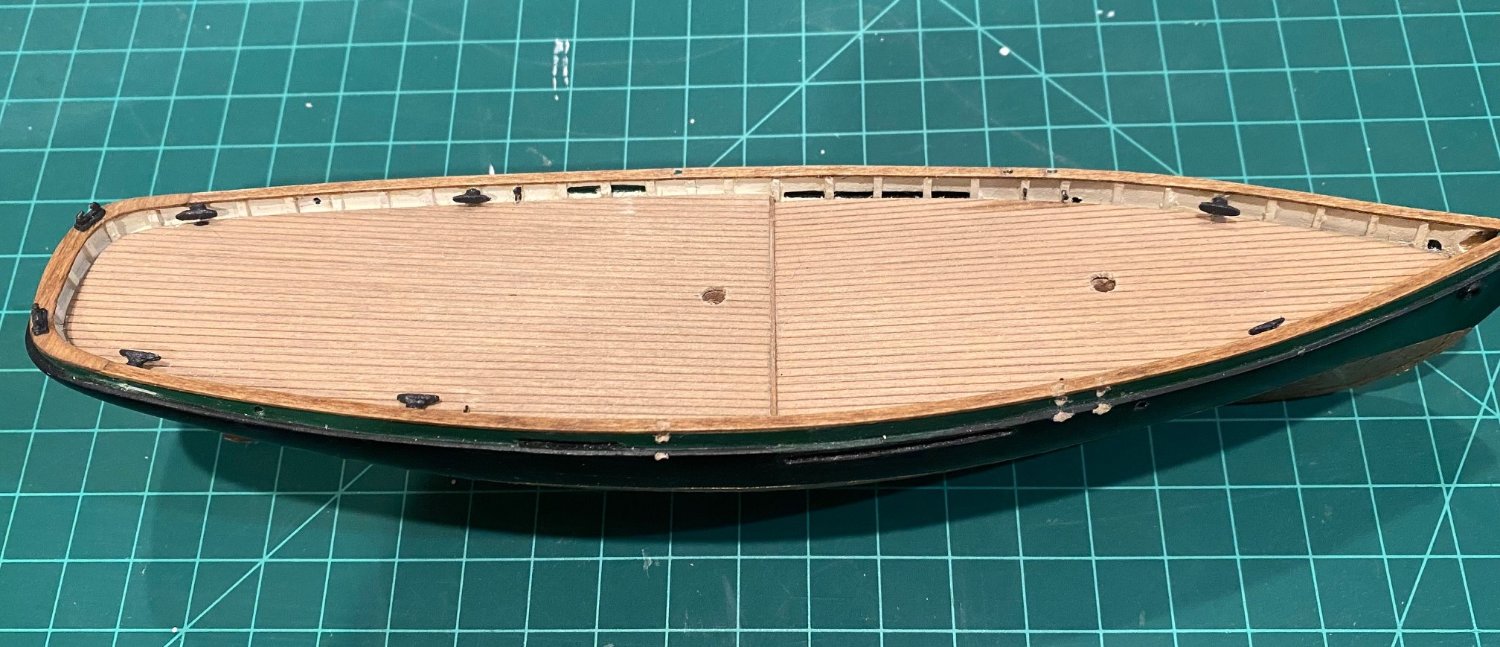
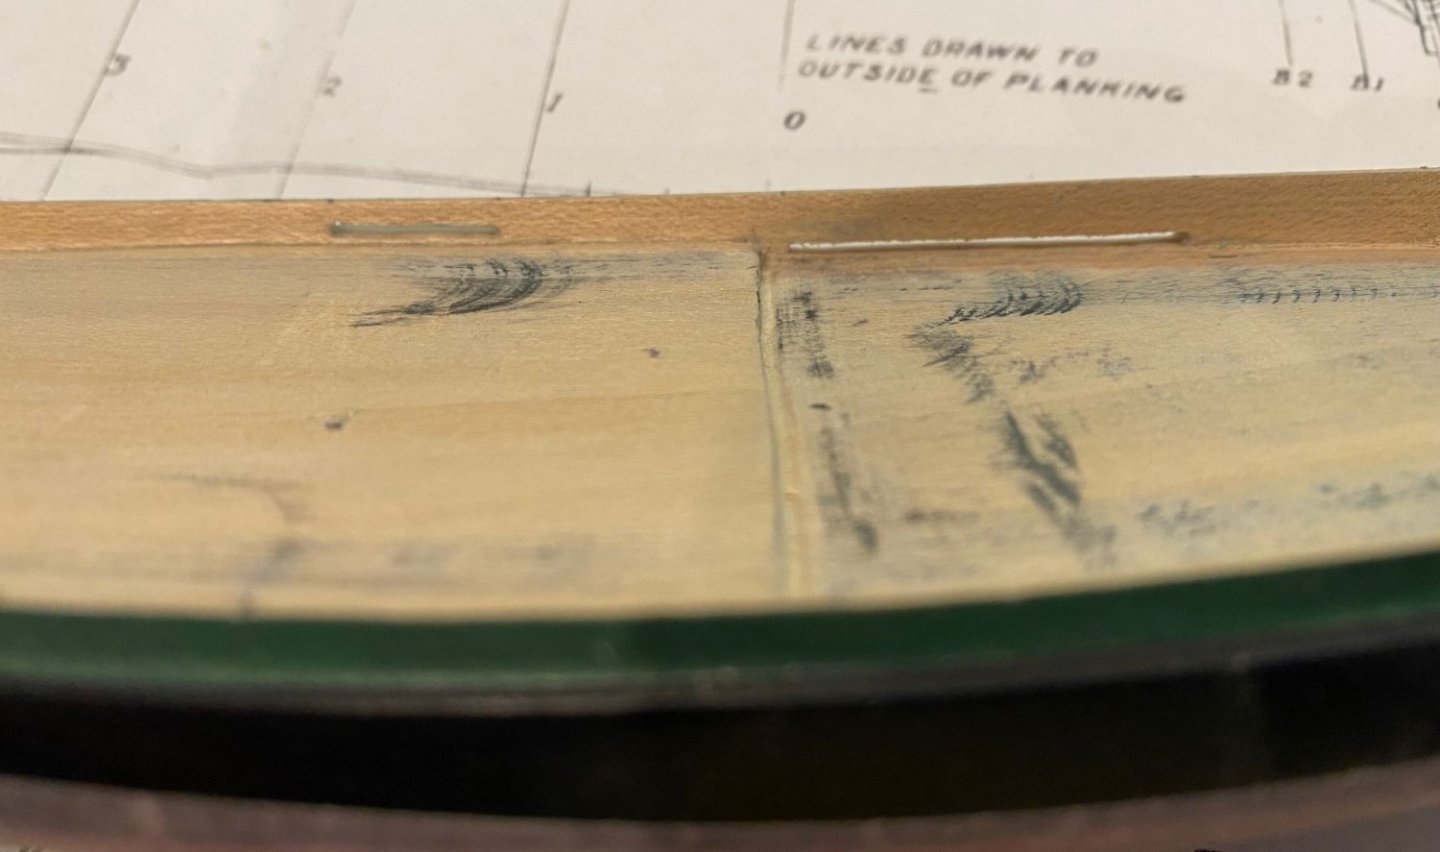
Like a lot of you, this past year had a lot of challenges and things that took up all my time. But thankfully things are calming down and I’m back to working on the Phantom. Installed the eye bolts and then filed down the cleats. The cleats that came with the kit looked oversized for their location and the scale of the ship, to me they would look better if they were 1/8 inch or less. So, I tried to file them down more to scale. I drilled pilot holes for the post on the end of the cleat, but I did drill through the hull a couple of times, so will have to do repair work later. Also, made the fairleads out of the thick wire and glued them on a thin piece of wood rather than manila folder material. Drilled the holes for the masts, started off with a small pilot hole then worked up to 11/32 in bit. I used a piece of cardboard to get the fore-aft angle on the mast, the angle was from the drawing. Started to drill/cut/file the holes in the cap rail for the chain plates. Since my cap rail barely hung over the edge, the hole came out about halfway down the step. In hindsight, I wish I would have seen what the chain plates look like on the outside of the cap rail. Started to make the chain plates but I’m going to order some carbide bits, even with annealing the brass I break regular steel bits and it takes forever. I might try using my Dremel after I buy a chuck that will hold a micro drill bit. Finished the chain plates since I received the new carbide bits and they did work much better, I did break one due to putting to much side pressure on it. What I really need is a good pair of small tip jewelers needle nose pilers to make things like the bend in the chain plates. I’m going to take a day or two to repaint the hull and the green strip since they are quite scratched up.


-
Love the extra detail like the grab handles. Great work Just recovering from my 2nd knee replacement, your end results depend on how good you are at doing your PT.
- 26 replies
-
- 1
-
-
- muscongus bay lobster smack
- Model Shipways
- (and 1 more)
-
I wet sanded between coats of paint, also I used a stain preconditioner before staining. I agree with druxey, try your stain on excess wood before committing to staining your boat
- 26 replies
-
- 2
-
-
- muscongus bay lobster smack
- Model Shipways
- (and 1 more)
-
Lynn, I used a combination of sanding sticks, sanding blocks, a dowel with sand paper wrapped around it. And I still used a combination of knife blades to thin the bulkhead down, very carefully
-
Been there done that, it is amazing what putty will cover up. It really is looking great.
- 26 replies
-
- 1
-
-
- muscongus bay lobster smack
- Model Shipways
- (and 1 more)
-
Lynn, I tried to match the schematic in the instructions too; but if you look at my results, they don't look much different than yours, plus both sides of my hull are different. When done, I think it all looks good. It's the journey not the destination.
-
@tlee01 there is a lot of work to build and plank the hull to do before you need to paint anything. Good luck, take your time, have patience and have FUN.
- 26 replies
-
- 1
-
-
- muscongus bay lobster smack
- Model Shipways
- (and 1 more)
-
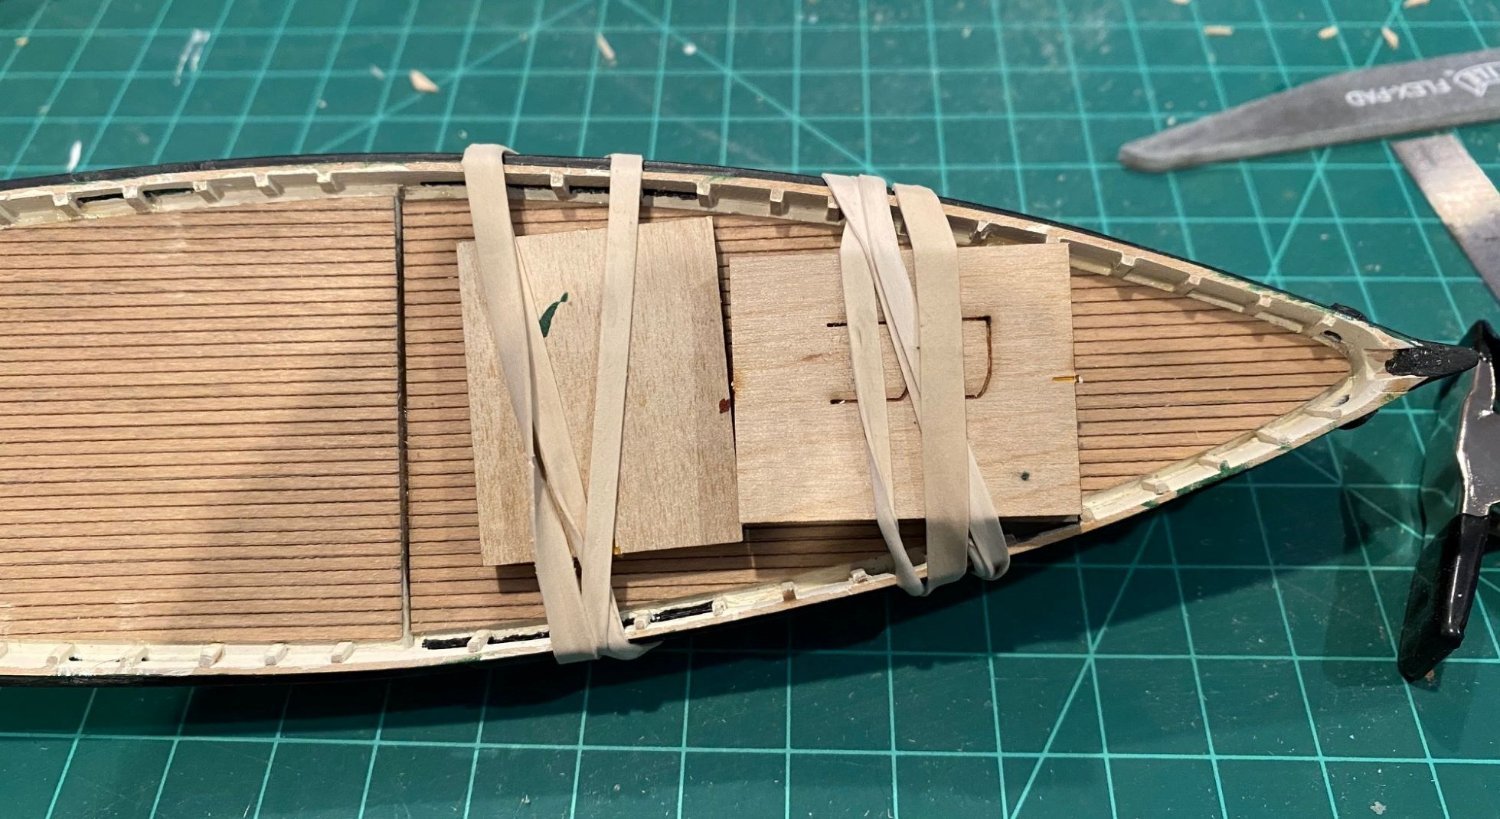
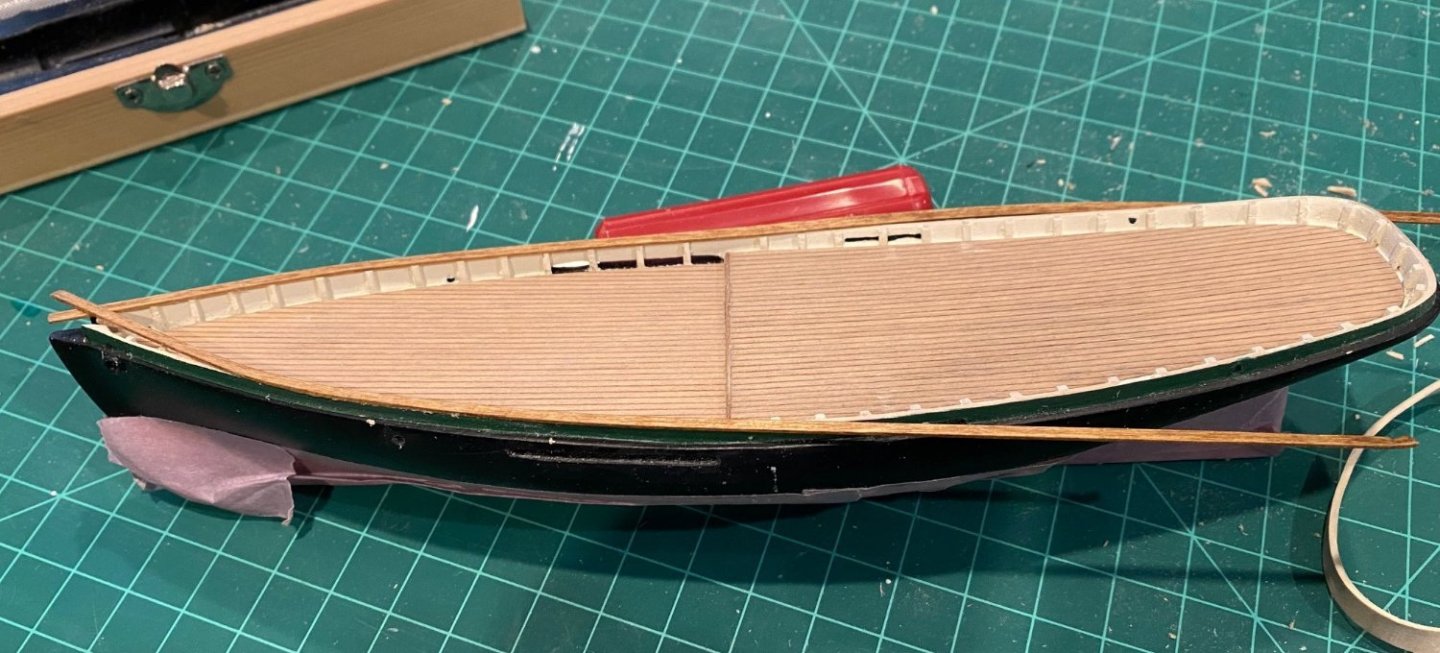
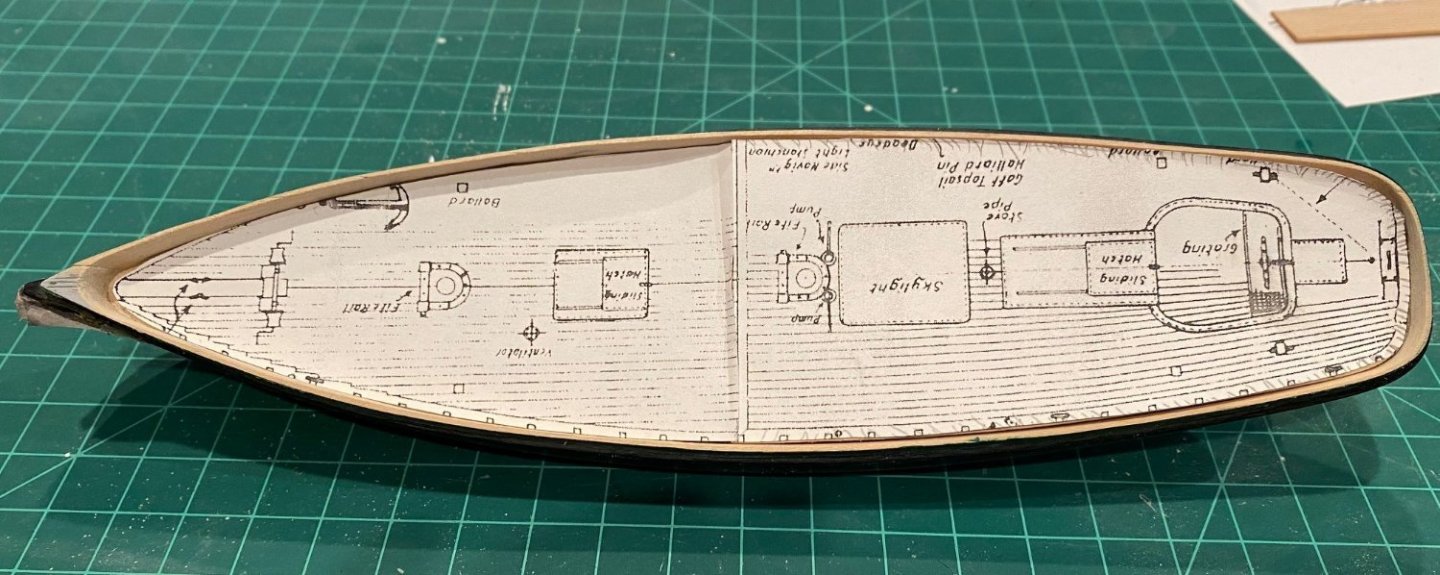
Glued the deck down with rubber cement, I’ll see how that works. I had read about some glues causing ripples in the wood. Probably should have used more of a wood contact cement, but I wanted some ability to do last second adjustments to the deck alignment. I did not have a square piece of wood to use as the step, so I used a strip and sanded it to match the deck height, not to good on the Port side, but from the side and top it looks good. Started to bend the wood strips for the cap rail. The curve on the aft end is too much of a 90 deg for me to bend. I have a piece of wood that was from one of my previous builds that I’m going to try and cut out the aft end of the cap rail and then butt the ends of the strips to it. Also, I’m going to stain the cap rail a Light Oak (Minwax). I think it looks good, except that the grain does not flow in the same direction that the strips do, but I have a lot of clean up and touch up on the green step and the black hull.


-
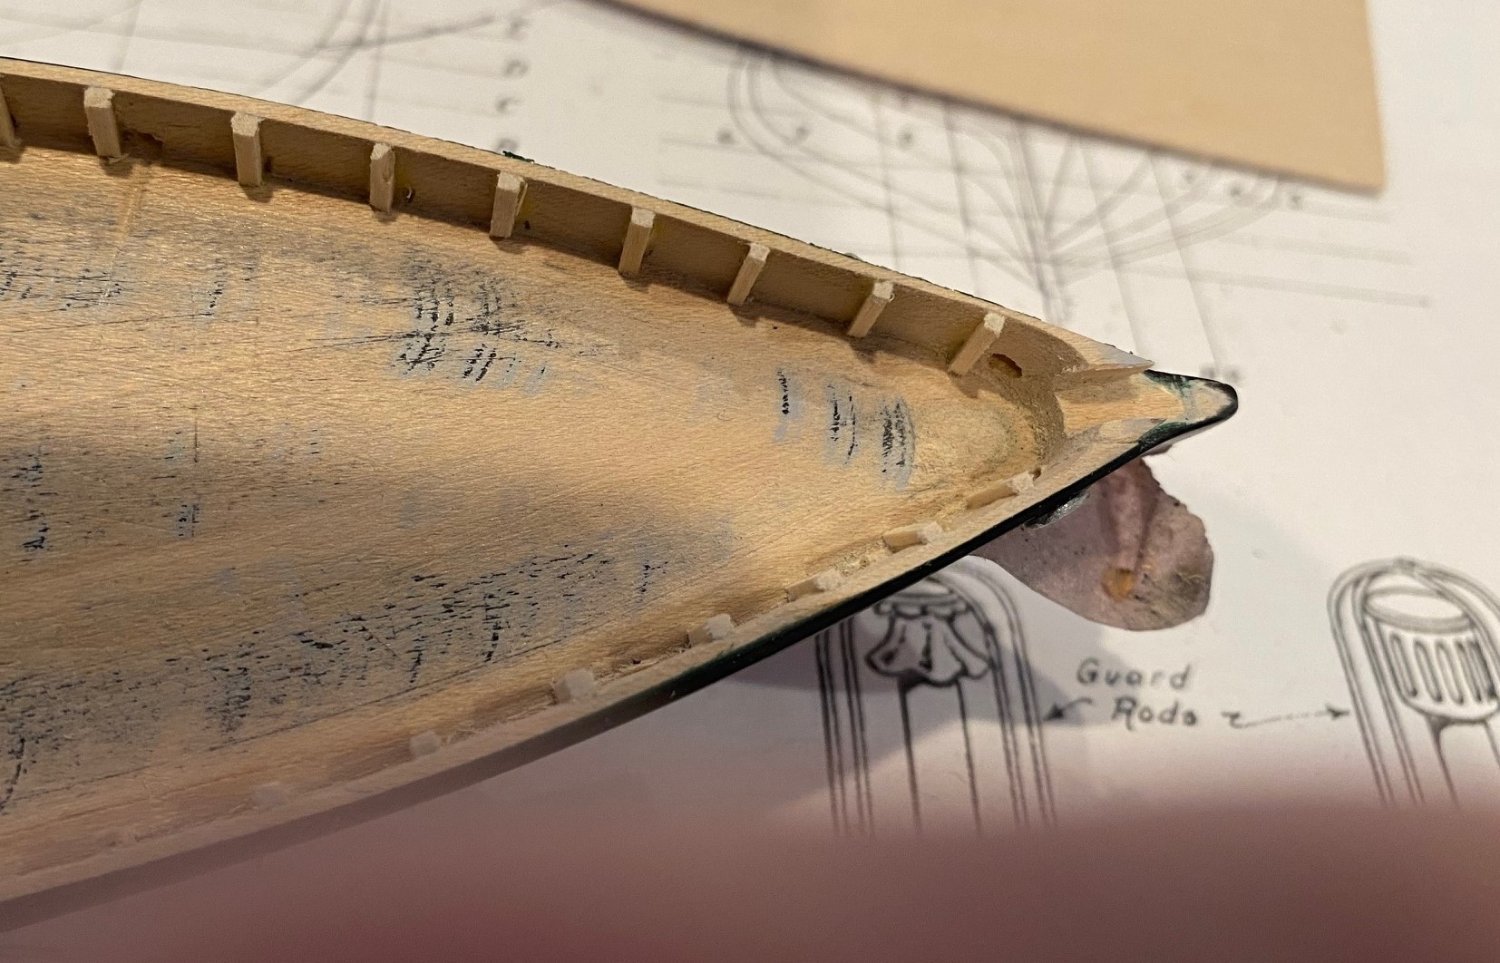
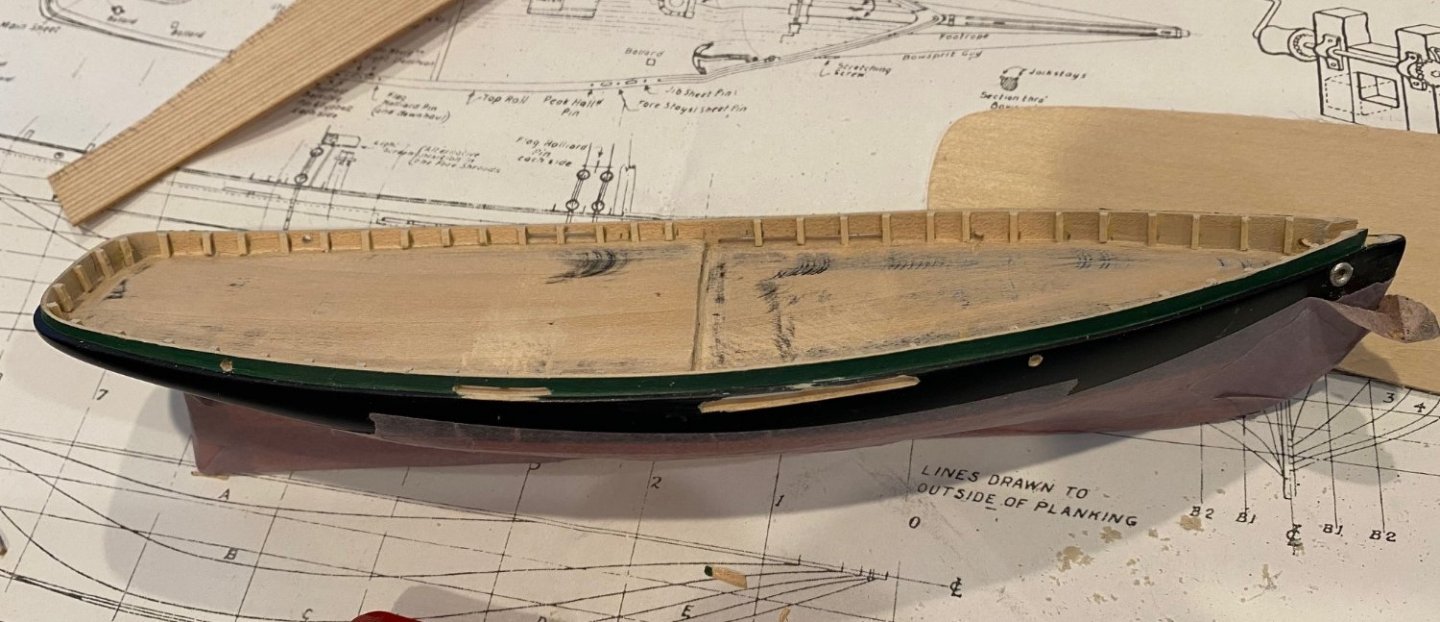
Drilled the holes on the side of the boat and for the hawse pipe and glue on the lid. I then installed the bulwark stanchions. You can see that I installed the stanchions prior to gluing in the deck and water way, the reason is that I am building it with a depressed waterway to collect and channel the deck water, by sanding the sides of the deck to fit inside the stanchions. This might not be accurate, but I wanted to see how it looked. I also cut out the bowsprit notch. I’m going to try and make the cap rail out of the supplied wood strips; we’ll see how that looks.

-
Great job
-
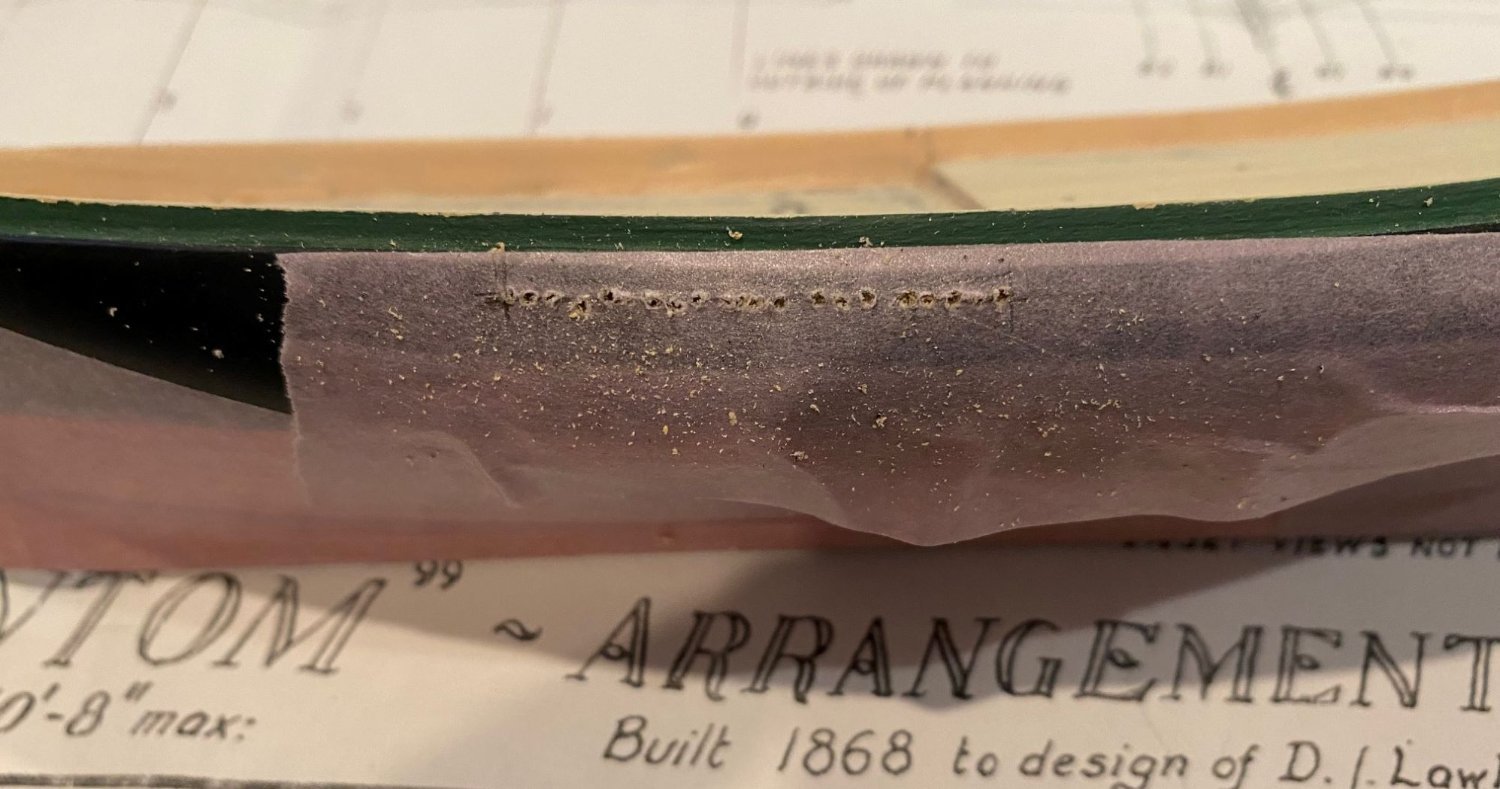
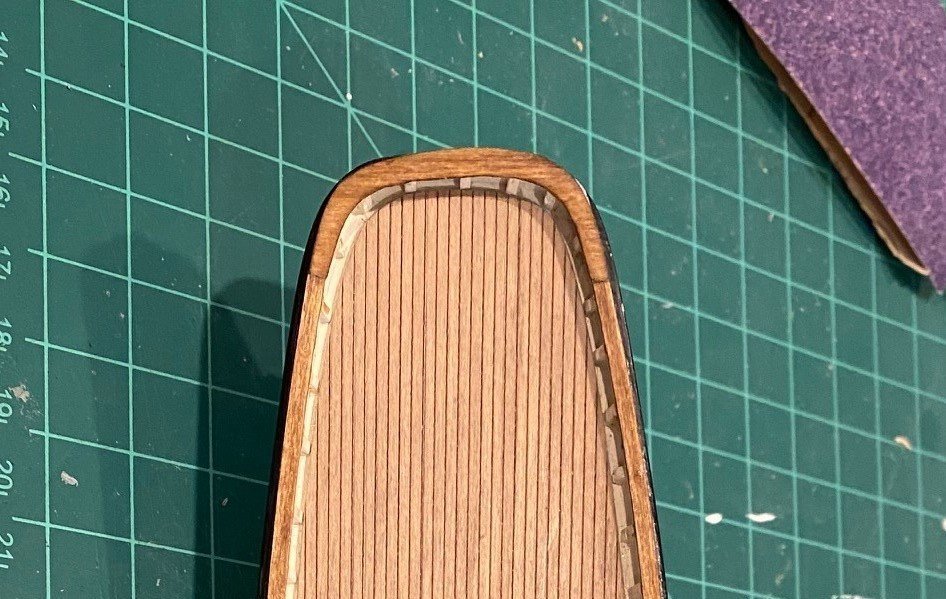
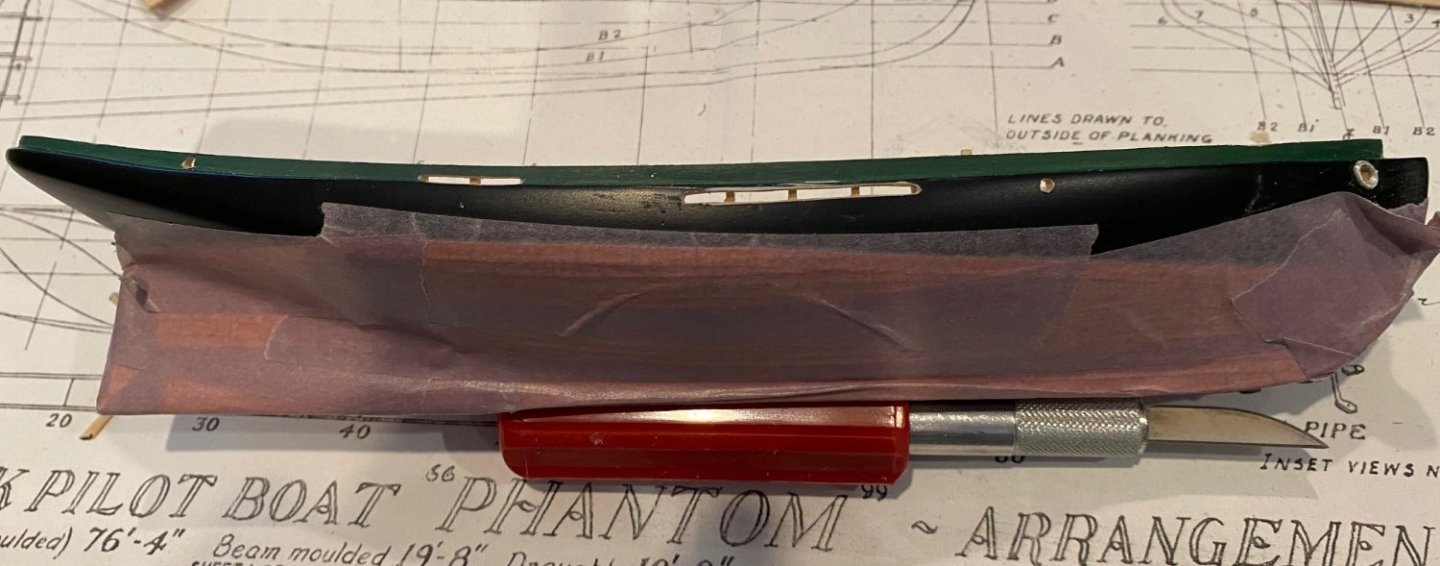
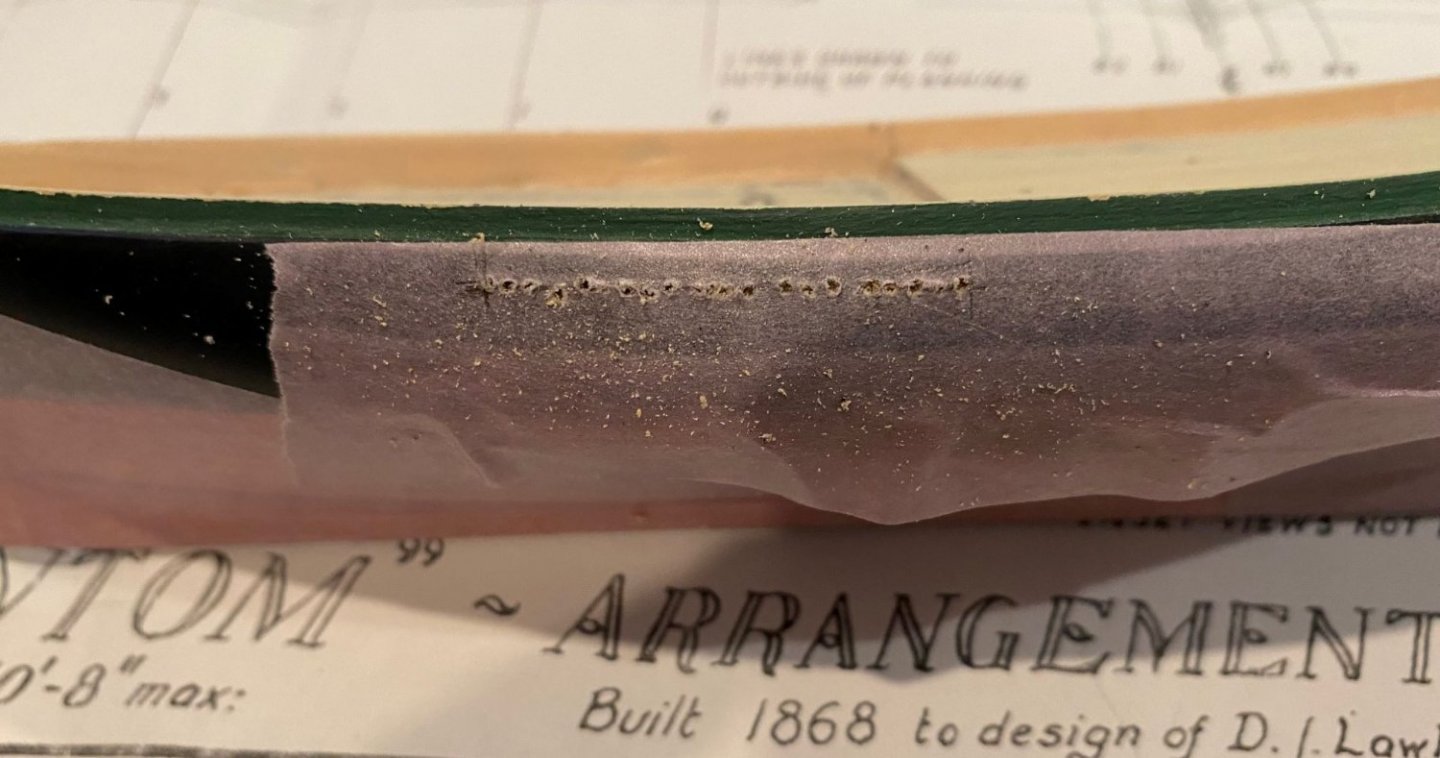
Thanks for the positive comments, they do help. Cut the fwd deck out of the stock and sanded the edges until it fit fairly well. I’m going to stain them with a weathered gray stain before gluing them in. Started on the scuppers, first I covered the outside of the hull with a piece of sensitive painters’ tape to help prevent lifting the edges where I drilled, to prevent accidental scratching with the tools and to help mark the location of the scuppers on the outside. I followed the instructions on measuring down from the top of the hull down to the deck and then marking the outside and drilling holes as close to each other as possible. But then I used the drill bit like a file to connect the holes and then cleaned the slot out with a small file and sanding strip. They might be a little two big, top to bottom, but I didn't have a smaller file. I did get a little to close to the step edge on fwd port side, this led to a small split in the wood from the scupper to the step edge. I used a little white glue to fix the split. I plan on sanding my deck pieces edges a little more to simulate a water way, that is why my scuppers are as close to the wood block deck. I plan to touch up the outside of the hull once I drill the other holes, also I will then paint the bulwarks prior to gluing the deck in to prevent getting paint on the deck.

-
@lraymo First, I was very, very intimidated by the copper tape, but just took my time and worked aft to fwd and bottom to top. I painted the hull prior to tapping and it worked ok. I was a little concerned to the tape not adhering well, but a little test sample on un-painted wood vs painted wood indicated it would not be any more of problem. That said, it is easy to lift the edge of an applied piece of copper tape and create a problem. I found that just taking my time was the best solution, also covering major completed sections with sensitive painter's tape to prevent edge damage while I coppered the rest. Also, I still have the tape covering my copper hull while I work on the rest of the ship. In regard to painting and sanding, like Keith said, I usally spray primer a couple of coats on and then lightly sand it prior to spraying a couple of coats of color. I do use fine and very fine wet sand paper when I'm sanding the color. I usally pray a lot and don't sand the final coat.
-
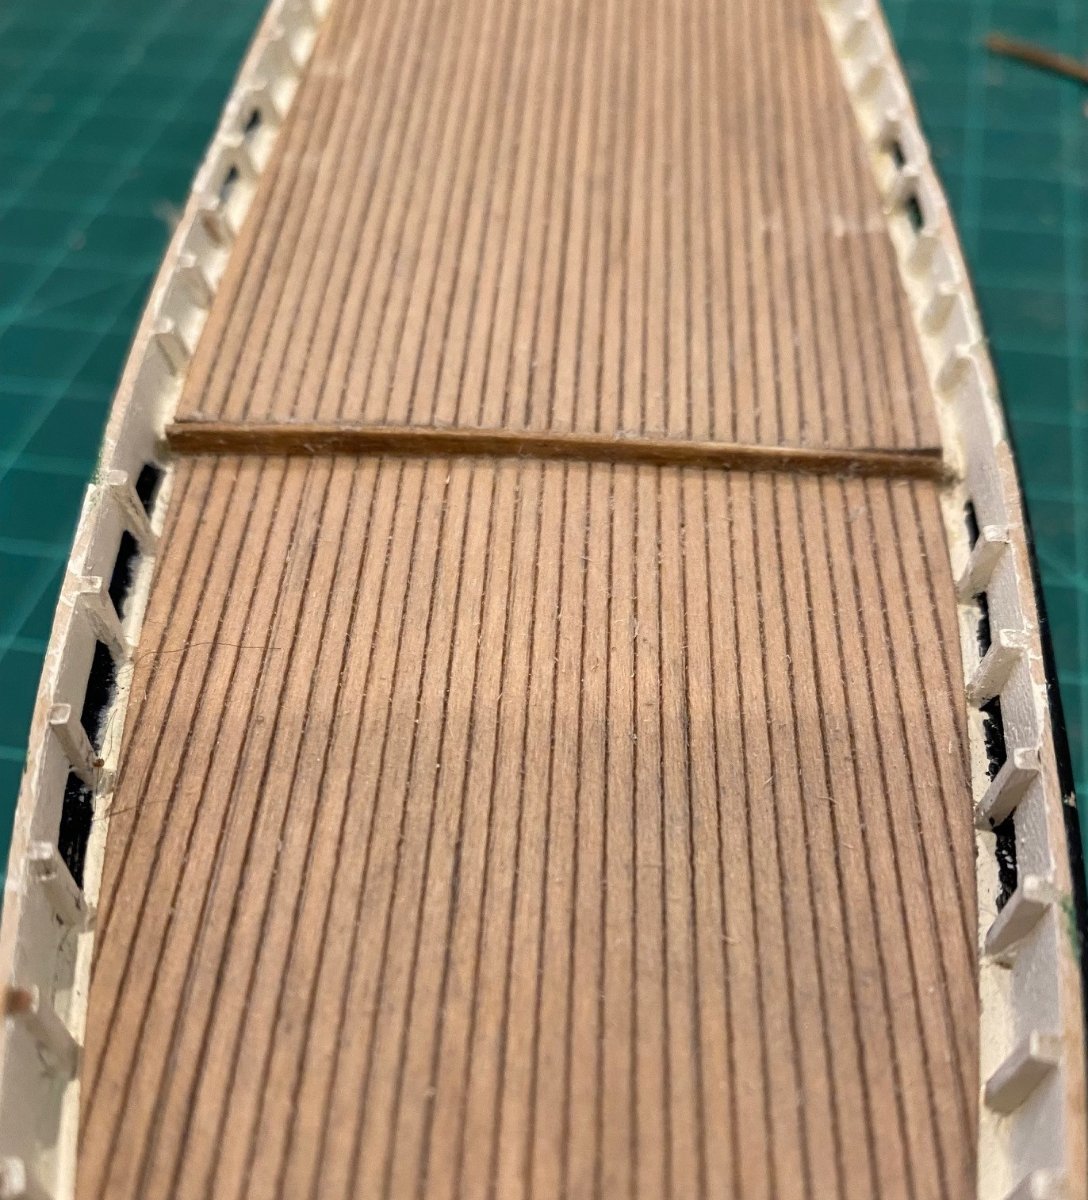
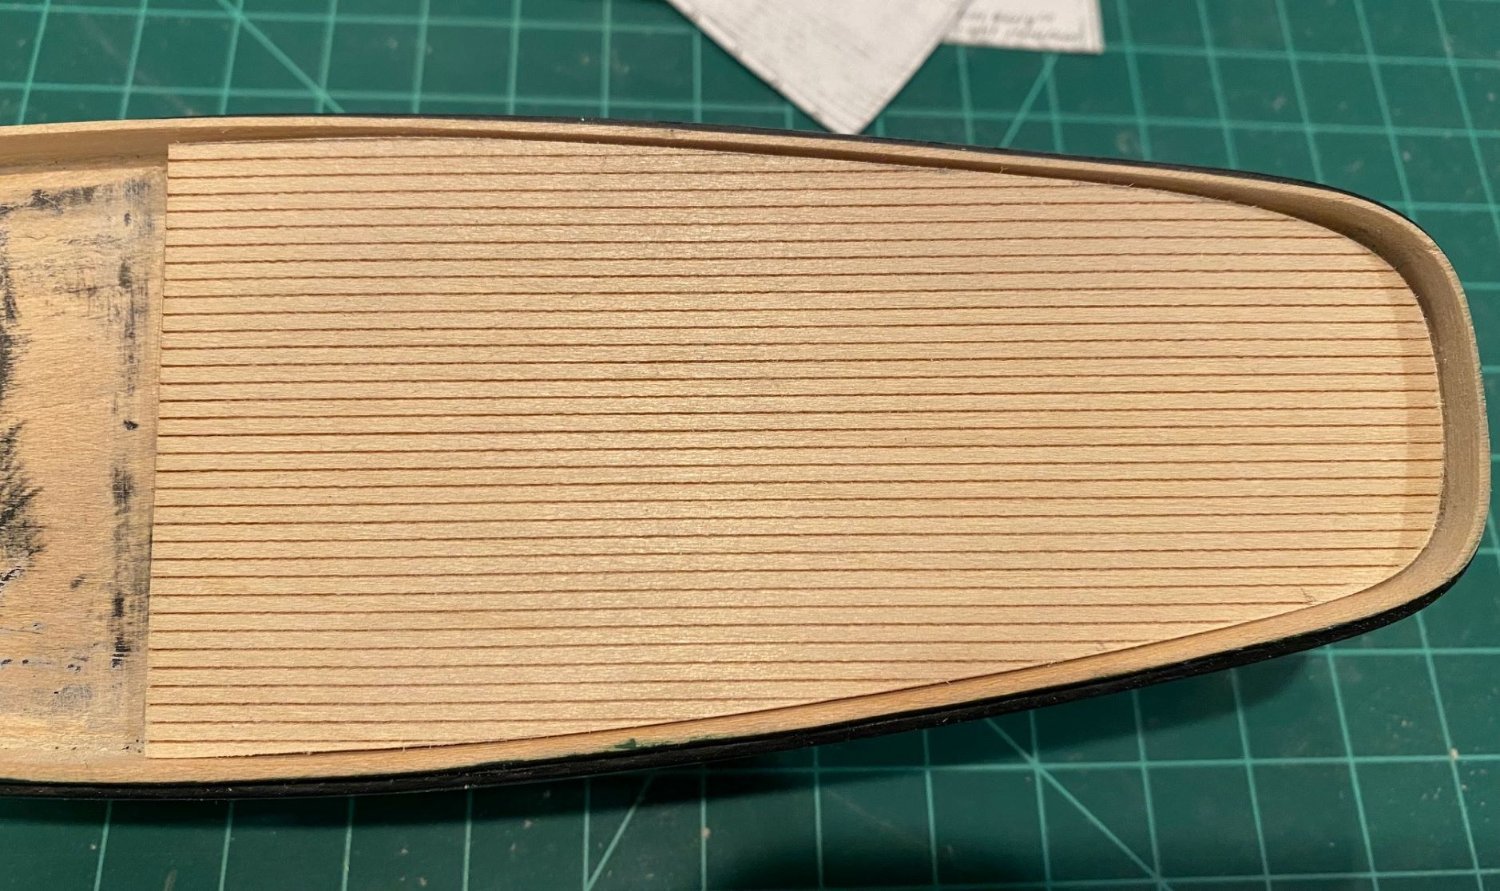
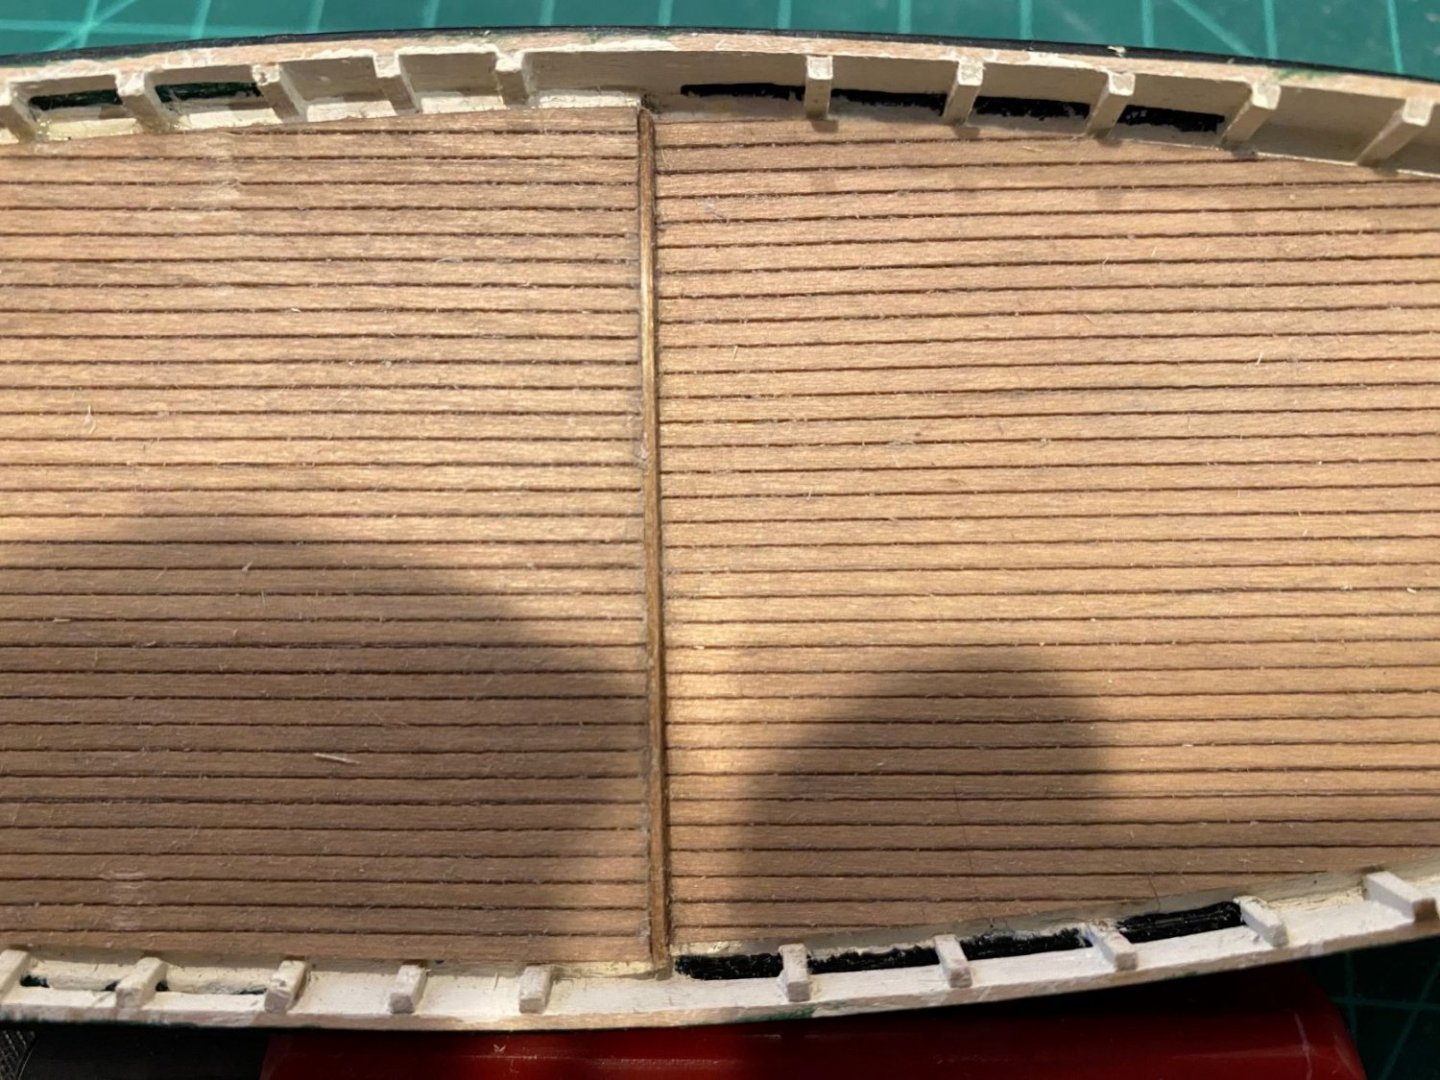
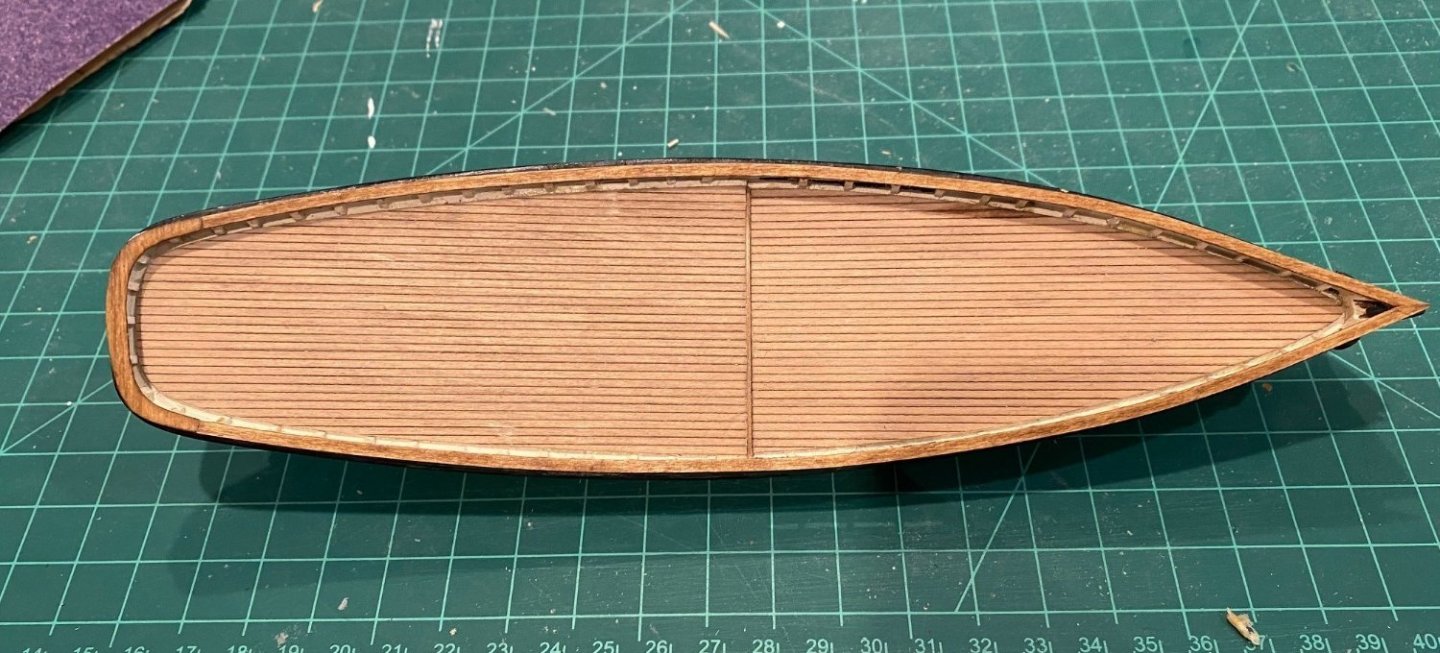
I sanded the bulkheads more, got them pretty even, somewhere between 1/32 and 3/64 inch. I would have liked to get them thinner but didn’t want to break them and I got tired of sanding. I did sand down the stanchions wood a little thinner. Now to the deck, I still might have more of a hump in the middle than I should but it seems like the wood is really hard compared to the outer sides of the deck. I made a copy of the drawing and cut out the deck little larger, so I could fit it to the actual model by trimming it down. Then transferred it to the scribed deck material. Started cutting out the aft deck a little larger than required and sanded the edges down until it fit with a minor gap.

-
All I can say is WOW!!!!!