


DaJH
-
Posts
10 -
Joined
-
Last visited
Content Type
Profiles
Forums
Gallery
Events
Posts posted by DaJH
-
-
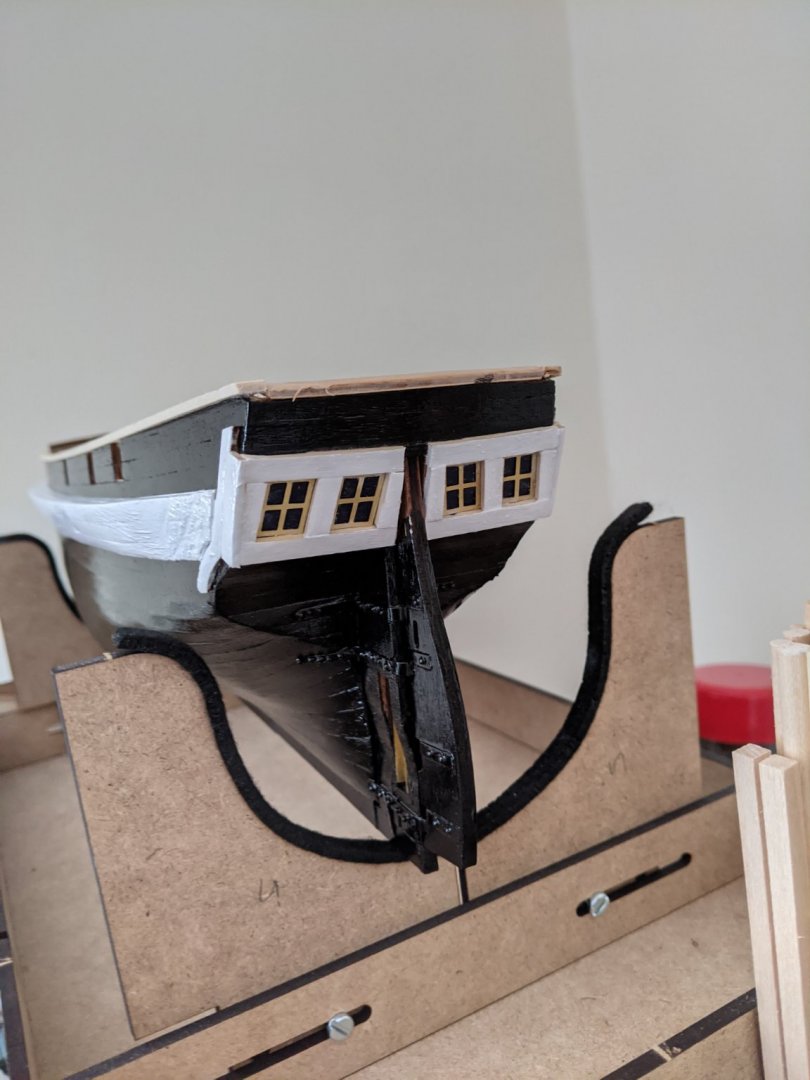
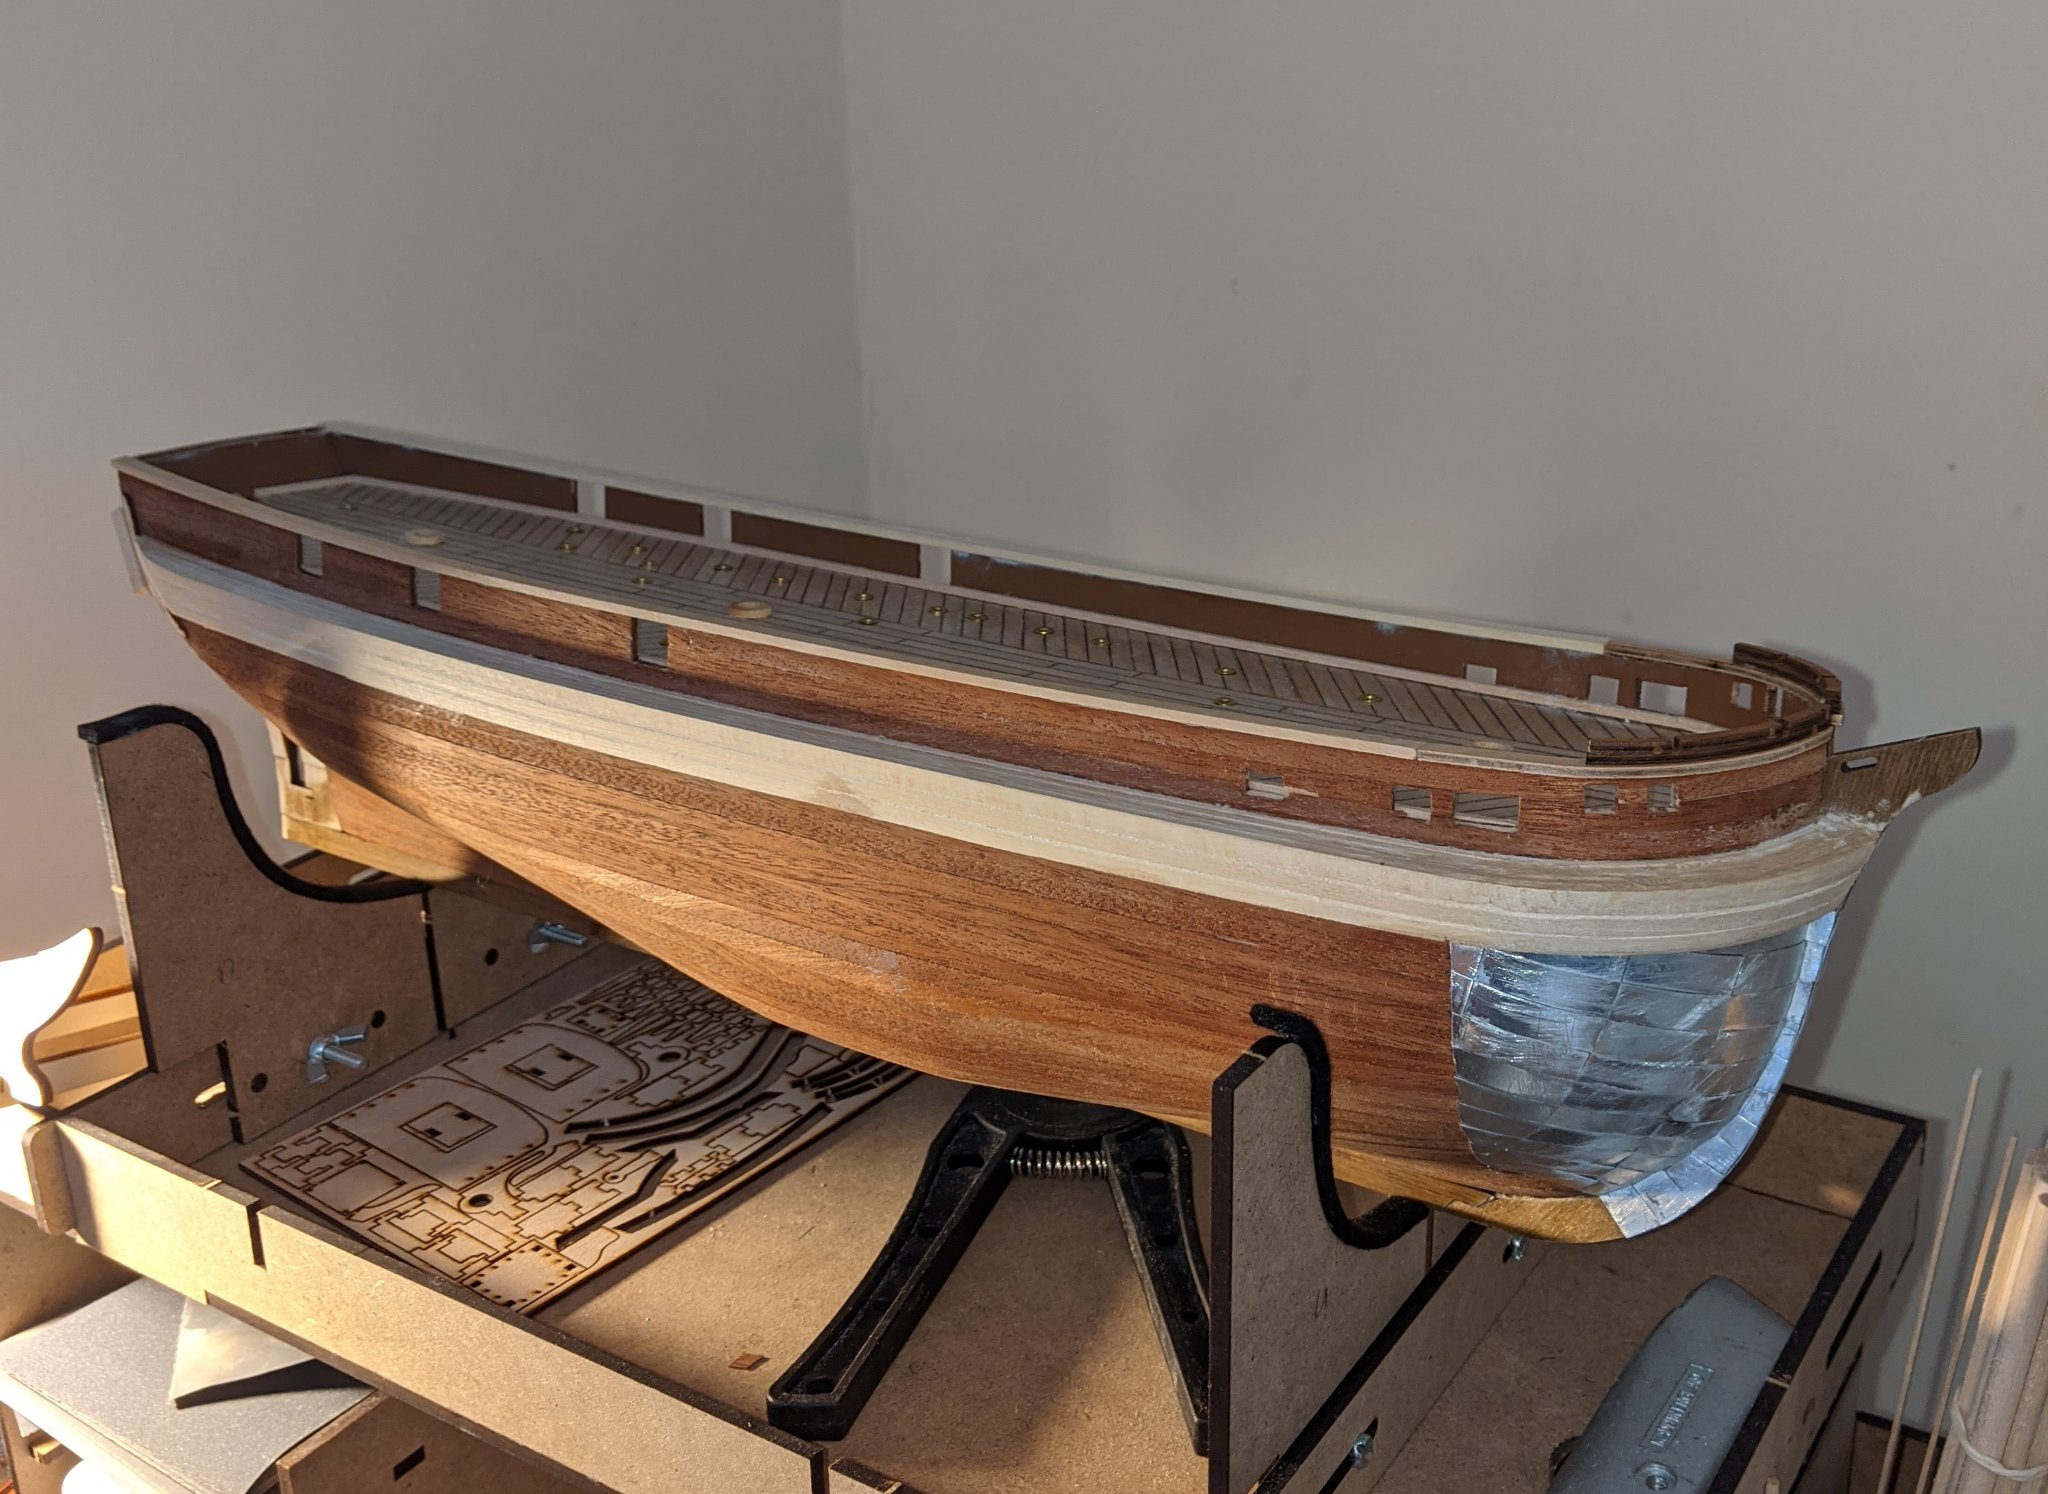
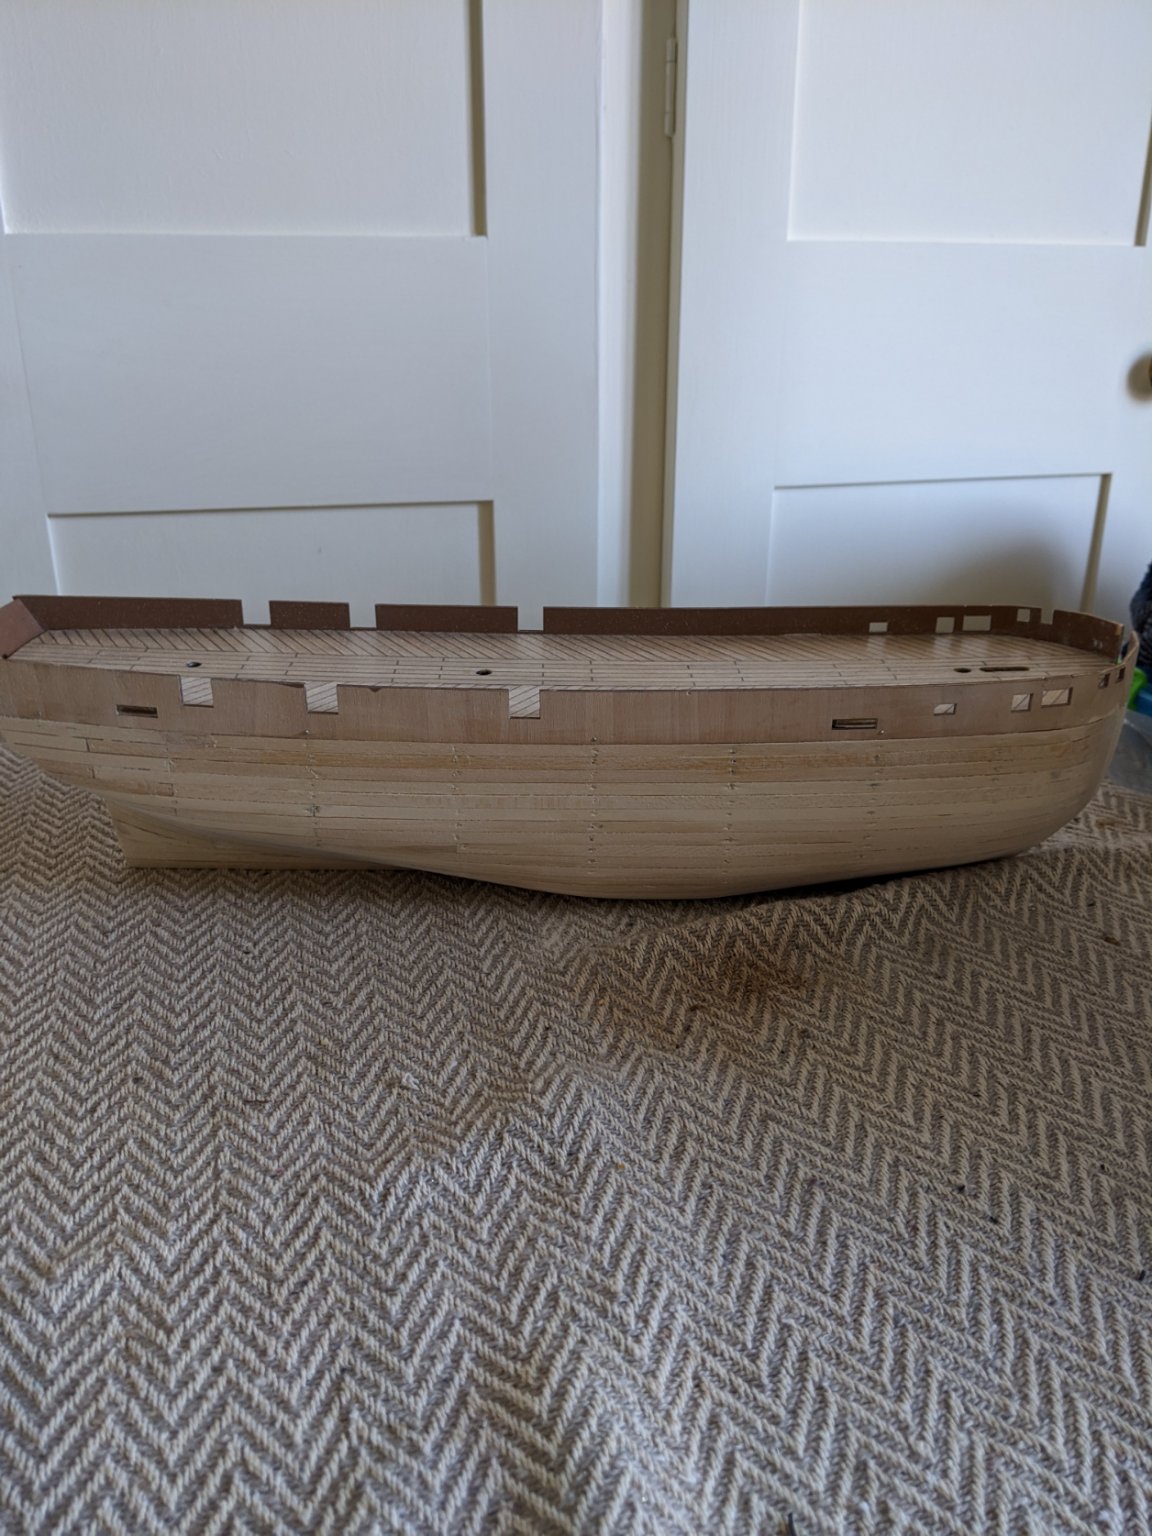
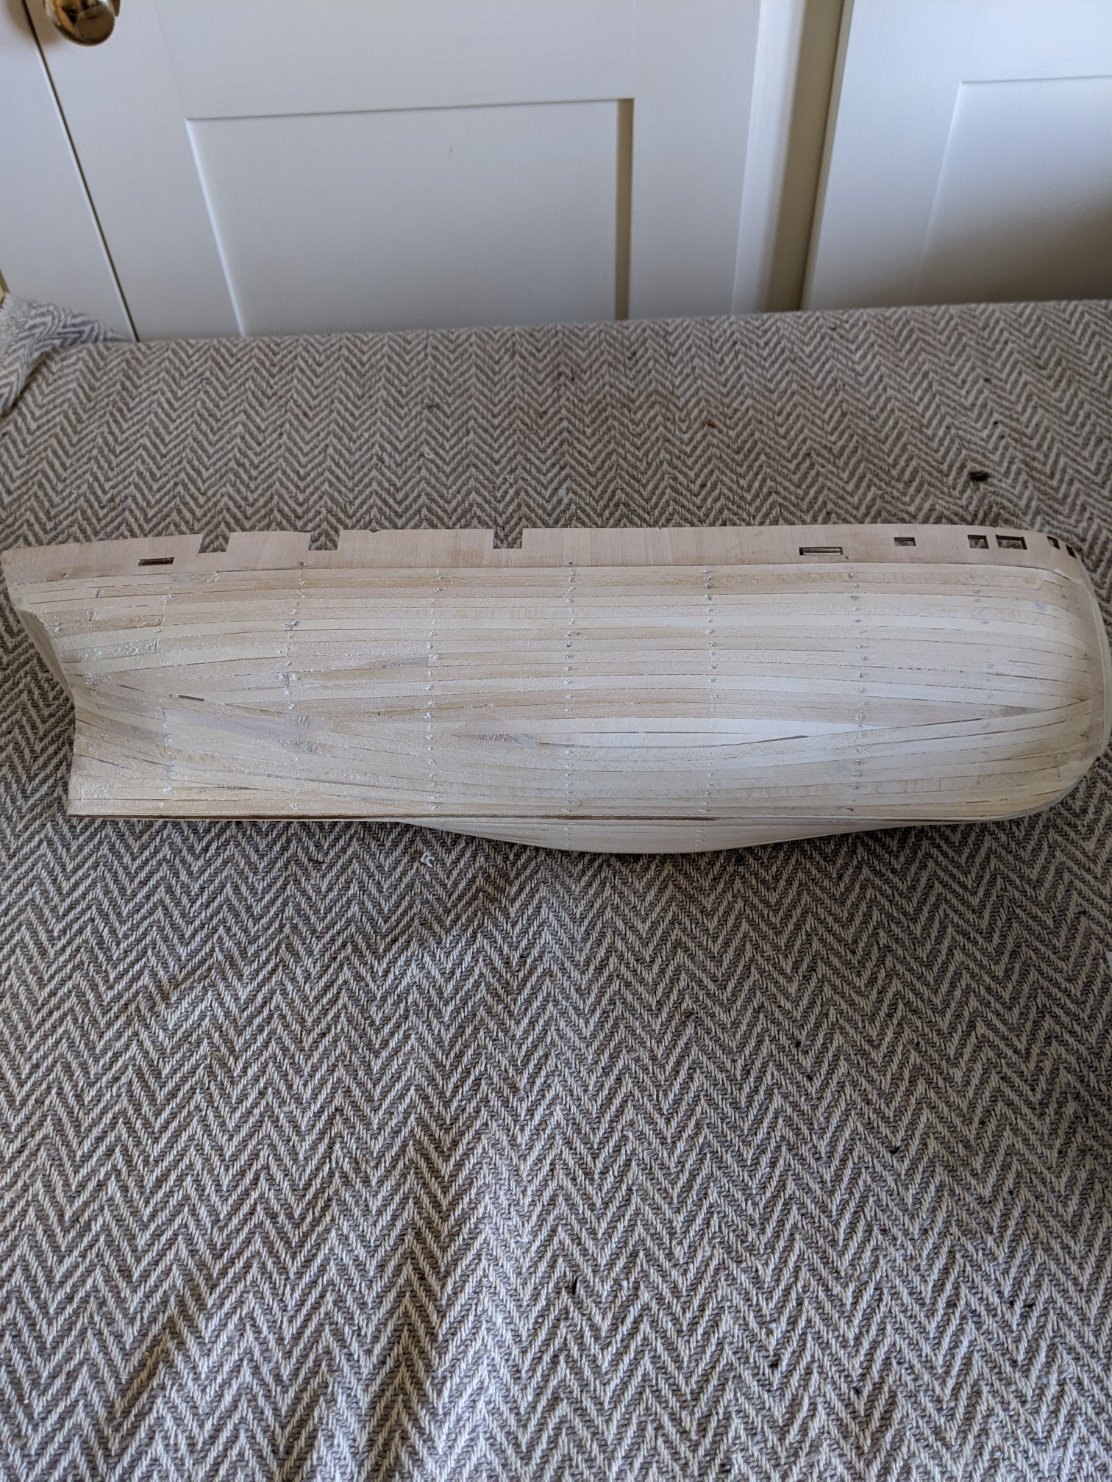
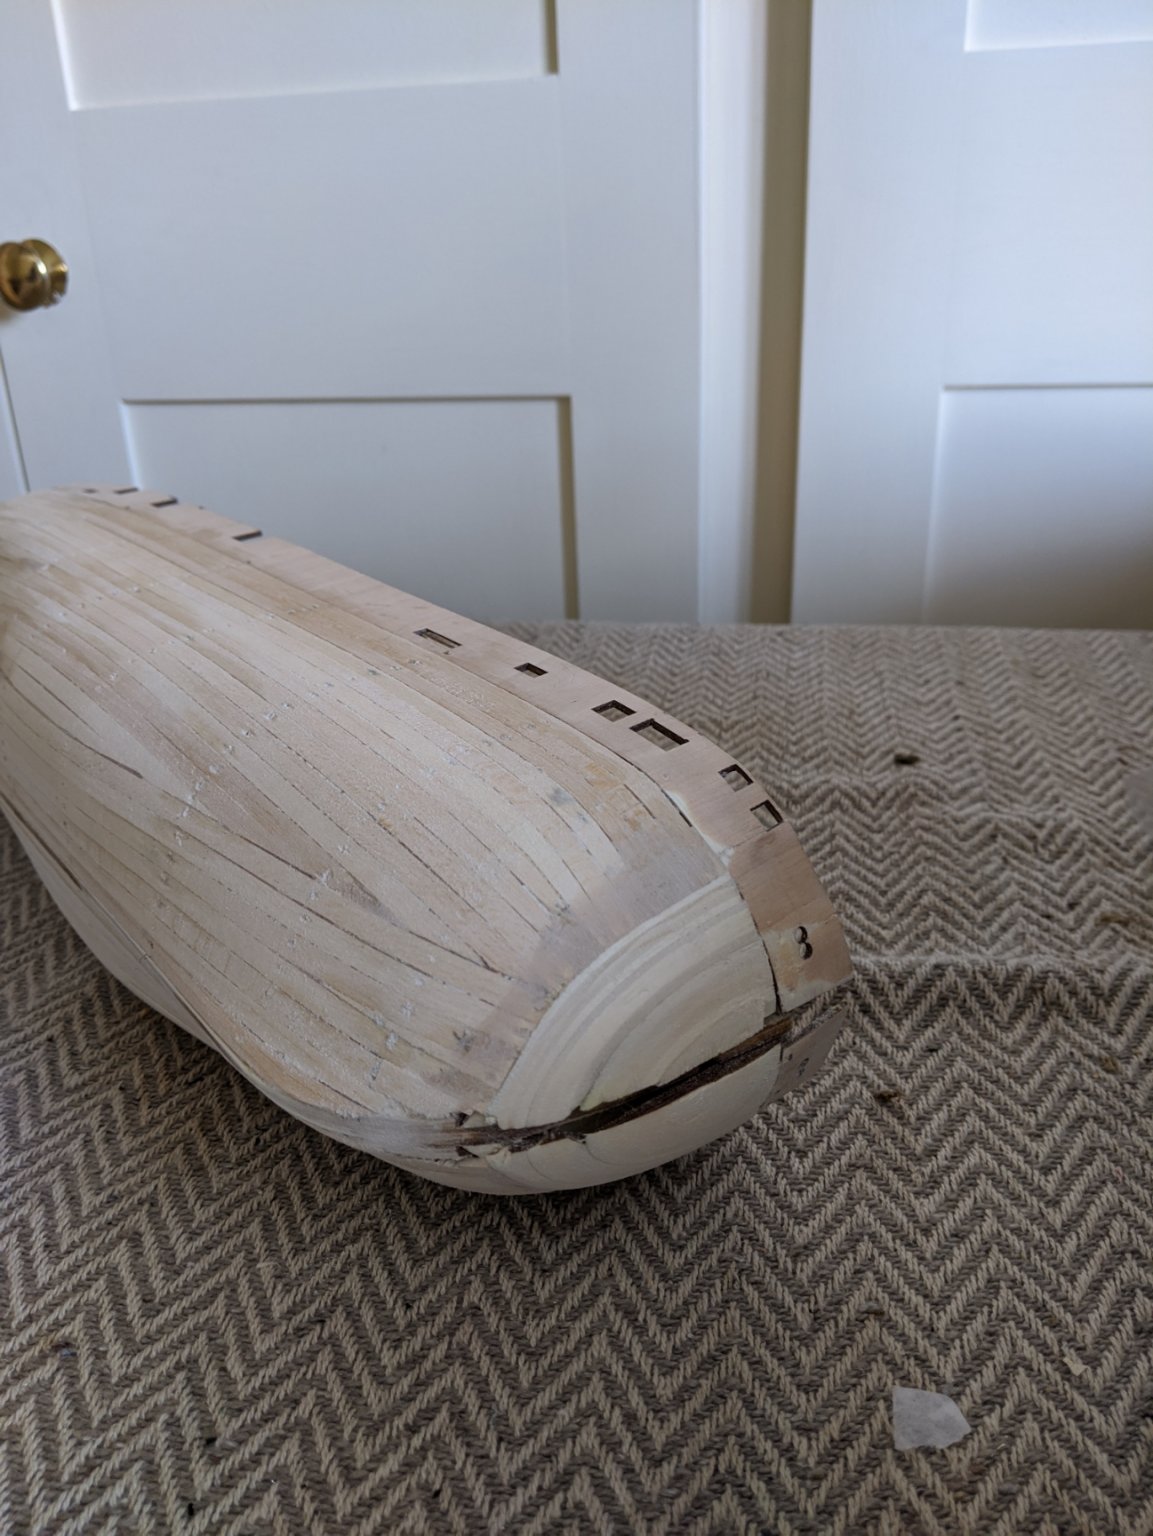
Work has recommenced on the Terror as I have some free time again!... First step was to install the ice shocks, I had to use a little wood filler after sanding as the wood is quite brittle and broke away in parts, especially where it bends at the bow... also they did not quite line up at the bow (my own fault) but as I had used CA glue I was unable to adjust the planks, I managed to rectify this with a little more filler and careful sanding.
Second was the addition of the aluminum sheets, they are difficult to bend to shape but I'm happy with the finish overall.
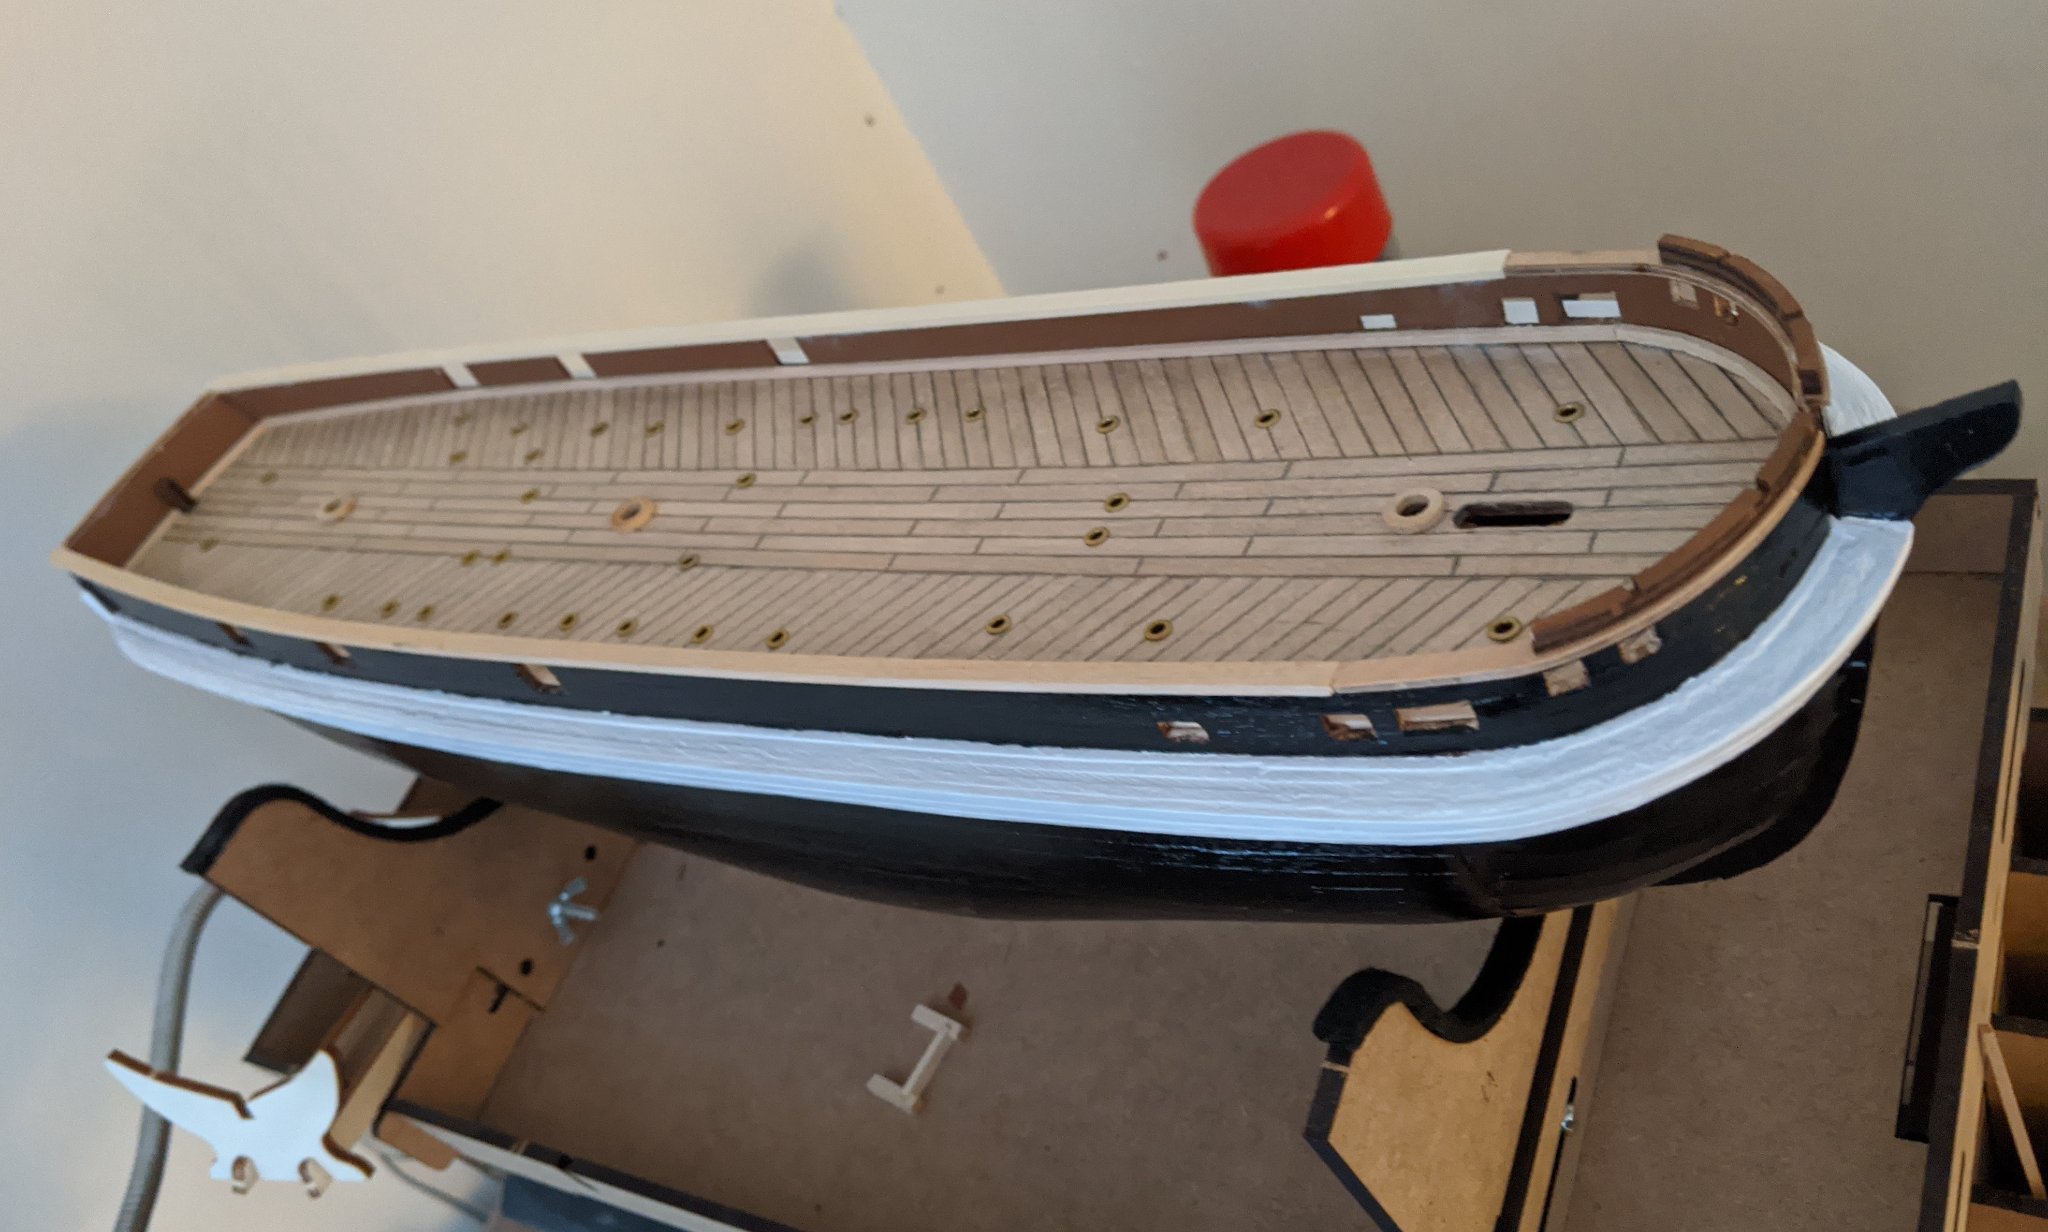
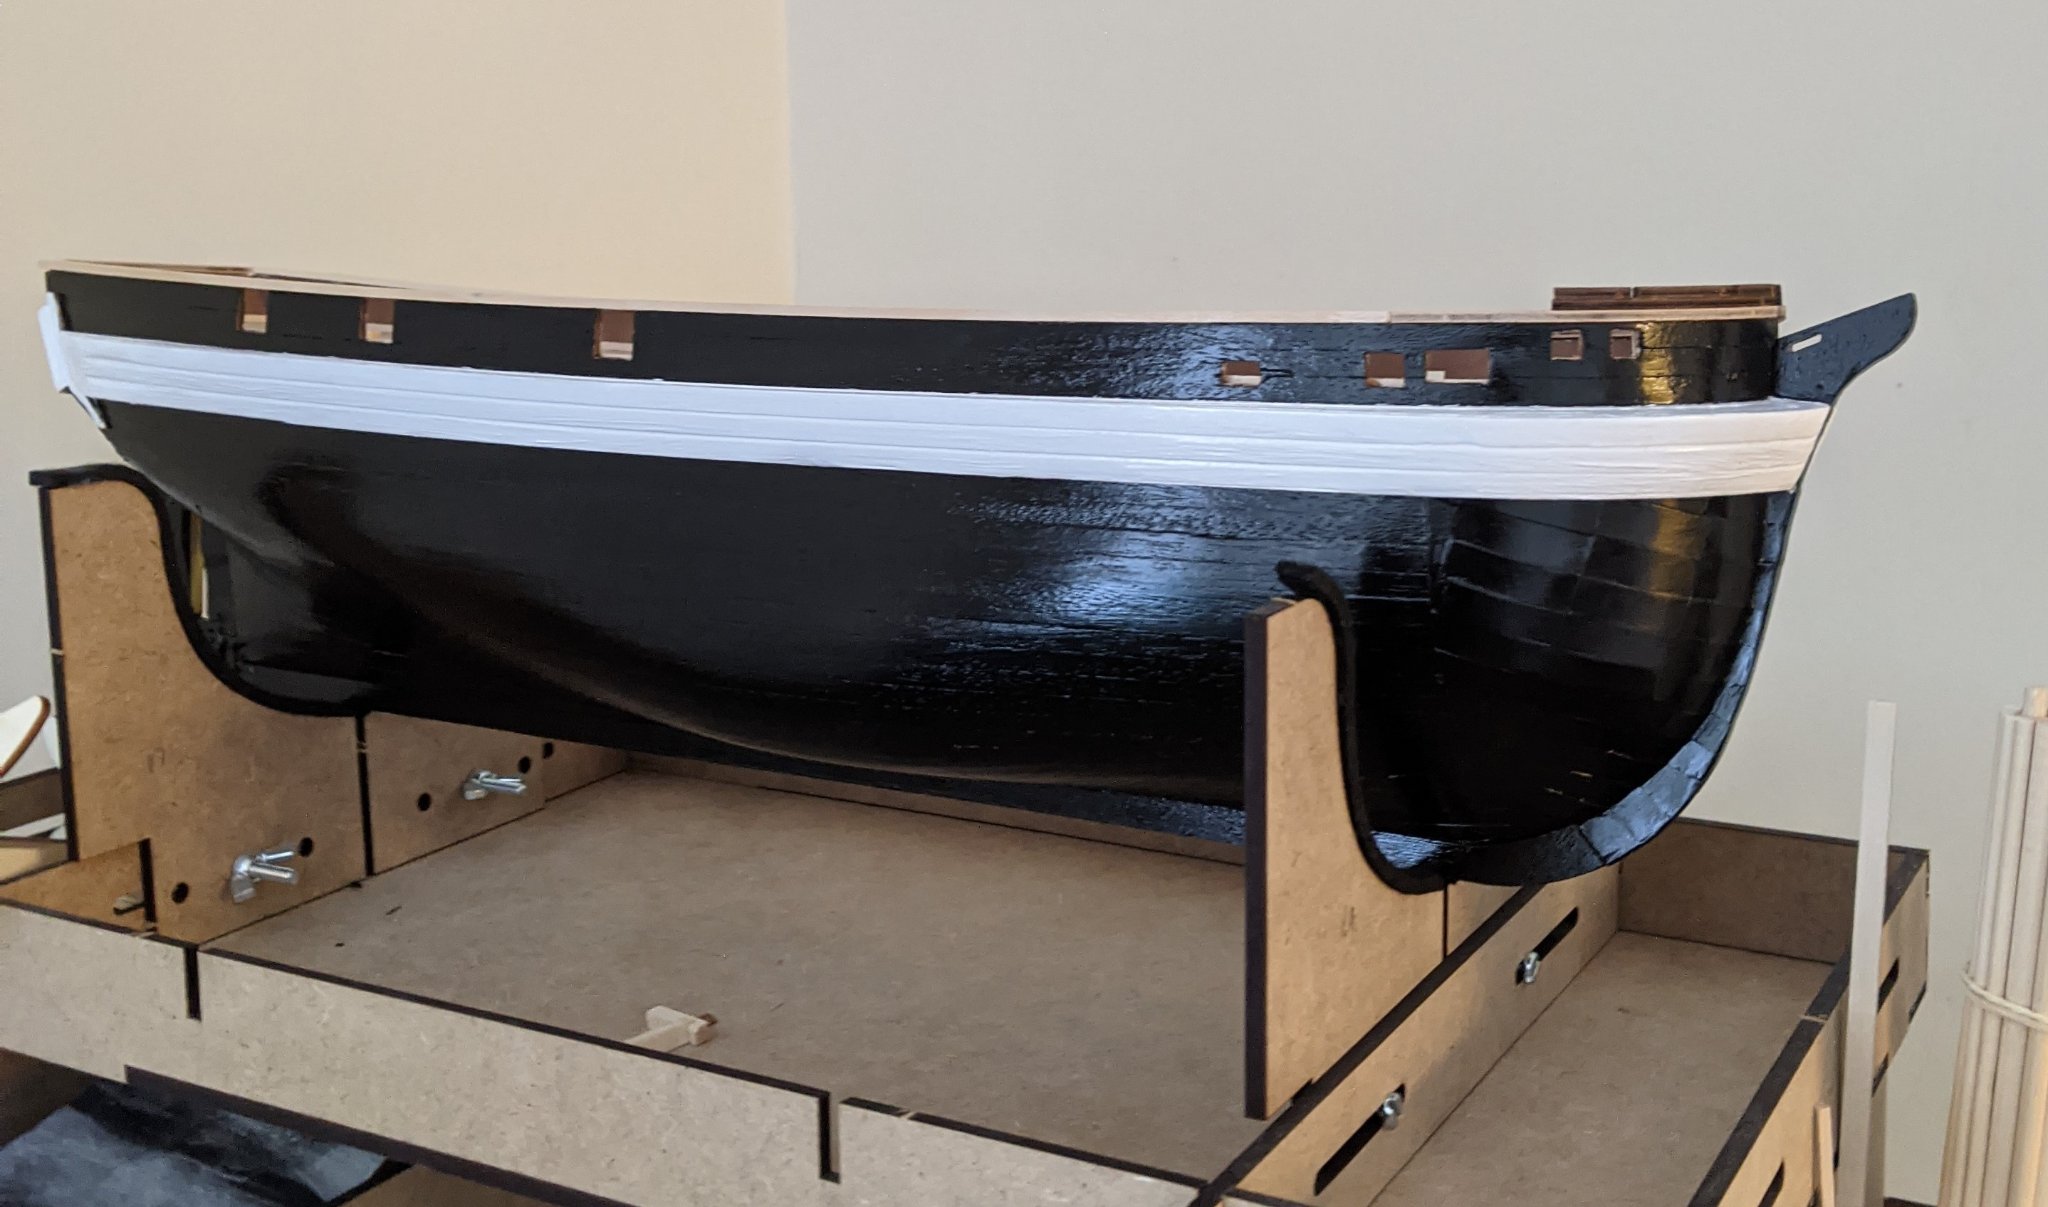
It was at this point I decided to paint the hull black/white, a few coats hides a multitude of sins!
This is my first build so I have been following the instructions to the letter, I have read on other build logs that the instructions are incorrect in places, so I hope I haven't messed anything up too badly so far. It is all experience for my next model.


-
22 hours ago, Keith S said:
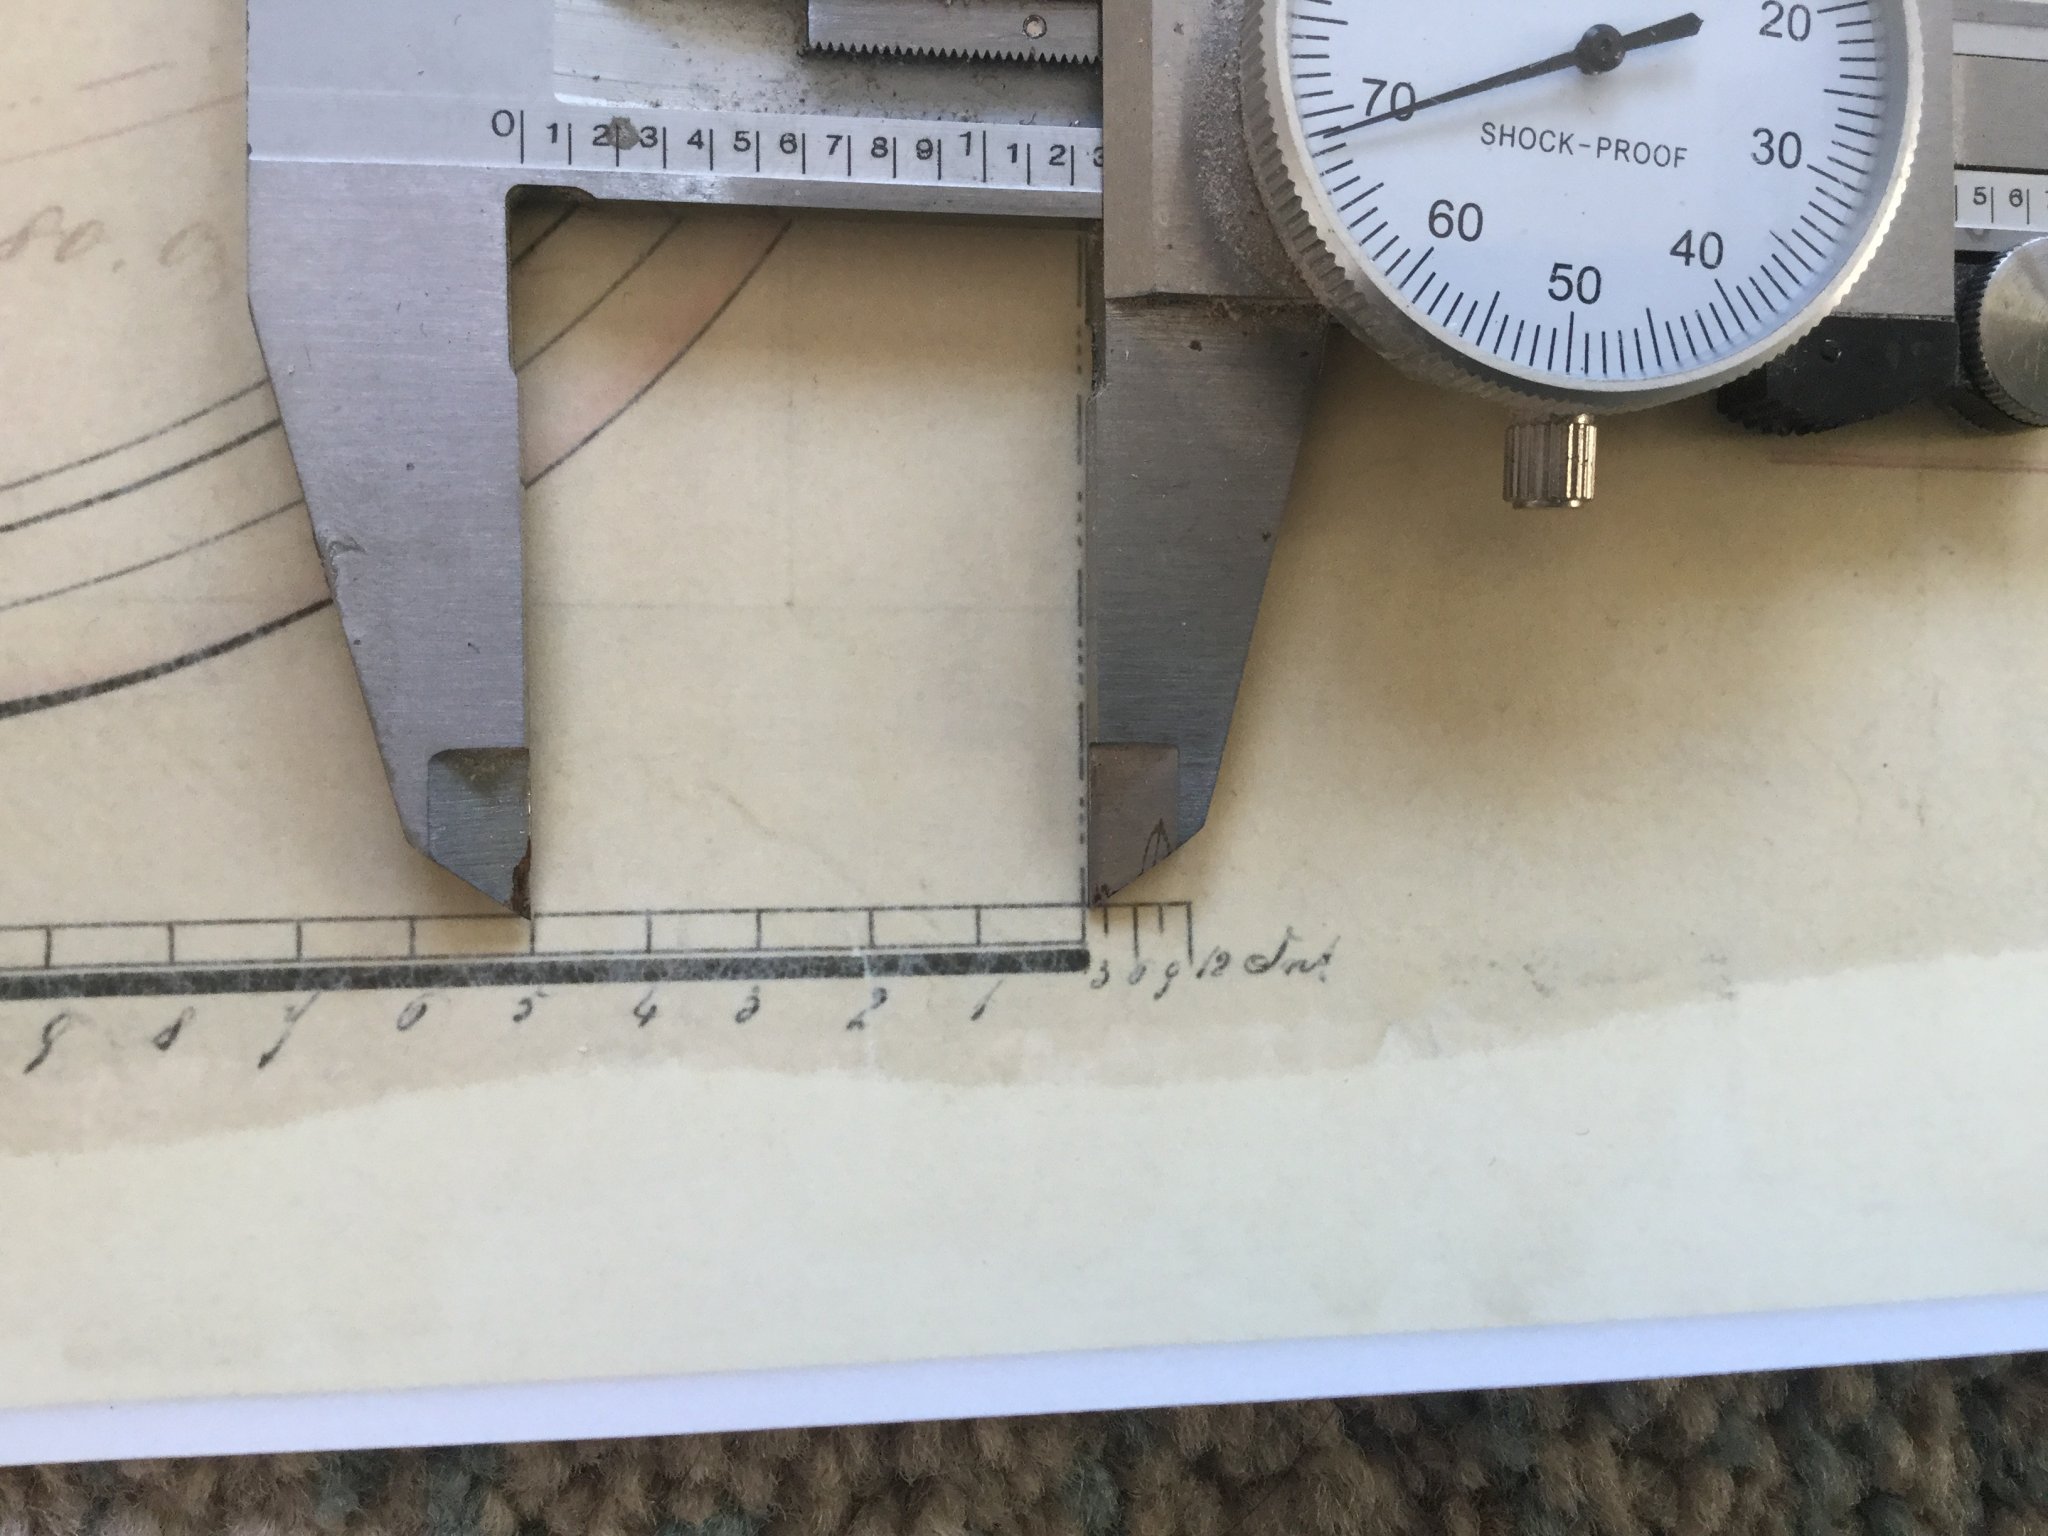
You are correct. They should be 20mm below the top of the bulwark. Also, they do not turn upward at the bow. They are parallel to the top of the bulwark all around.
Here is the measurement from the real ship: you can see it's exactly five feet, which corresponds to 20mm in 1:75 scale.
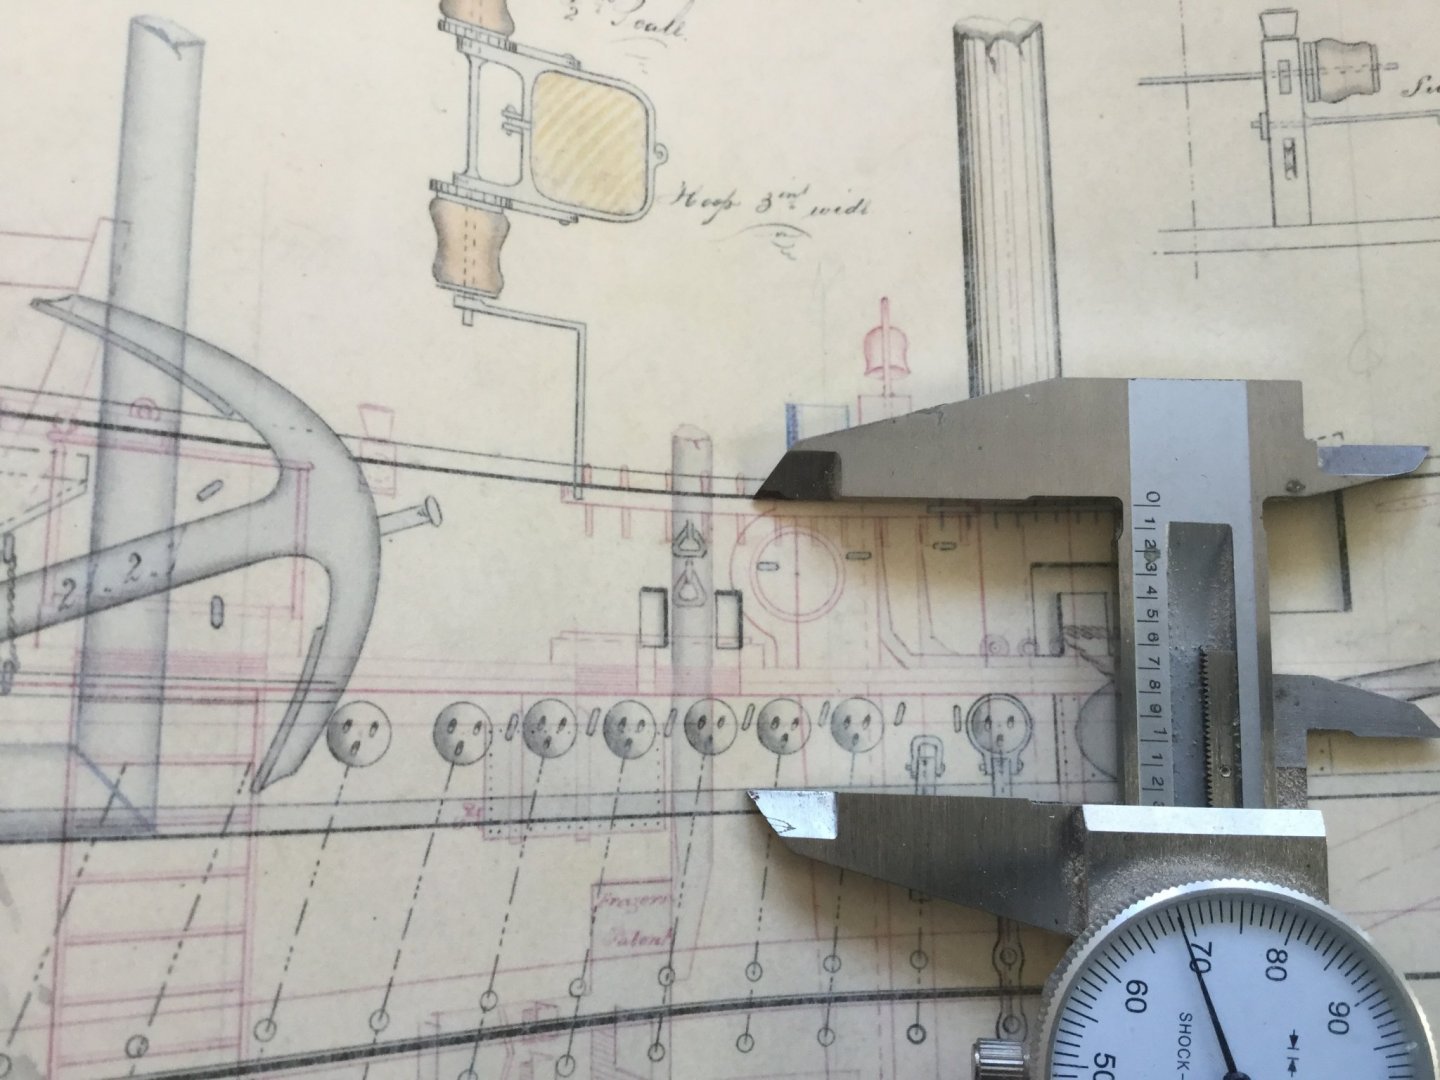
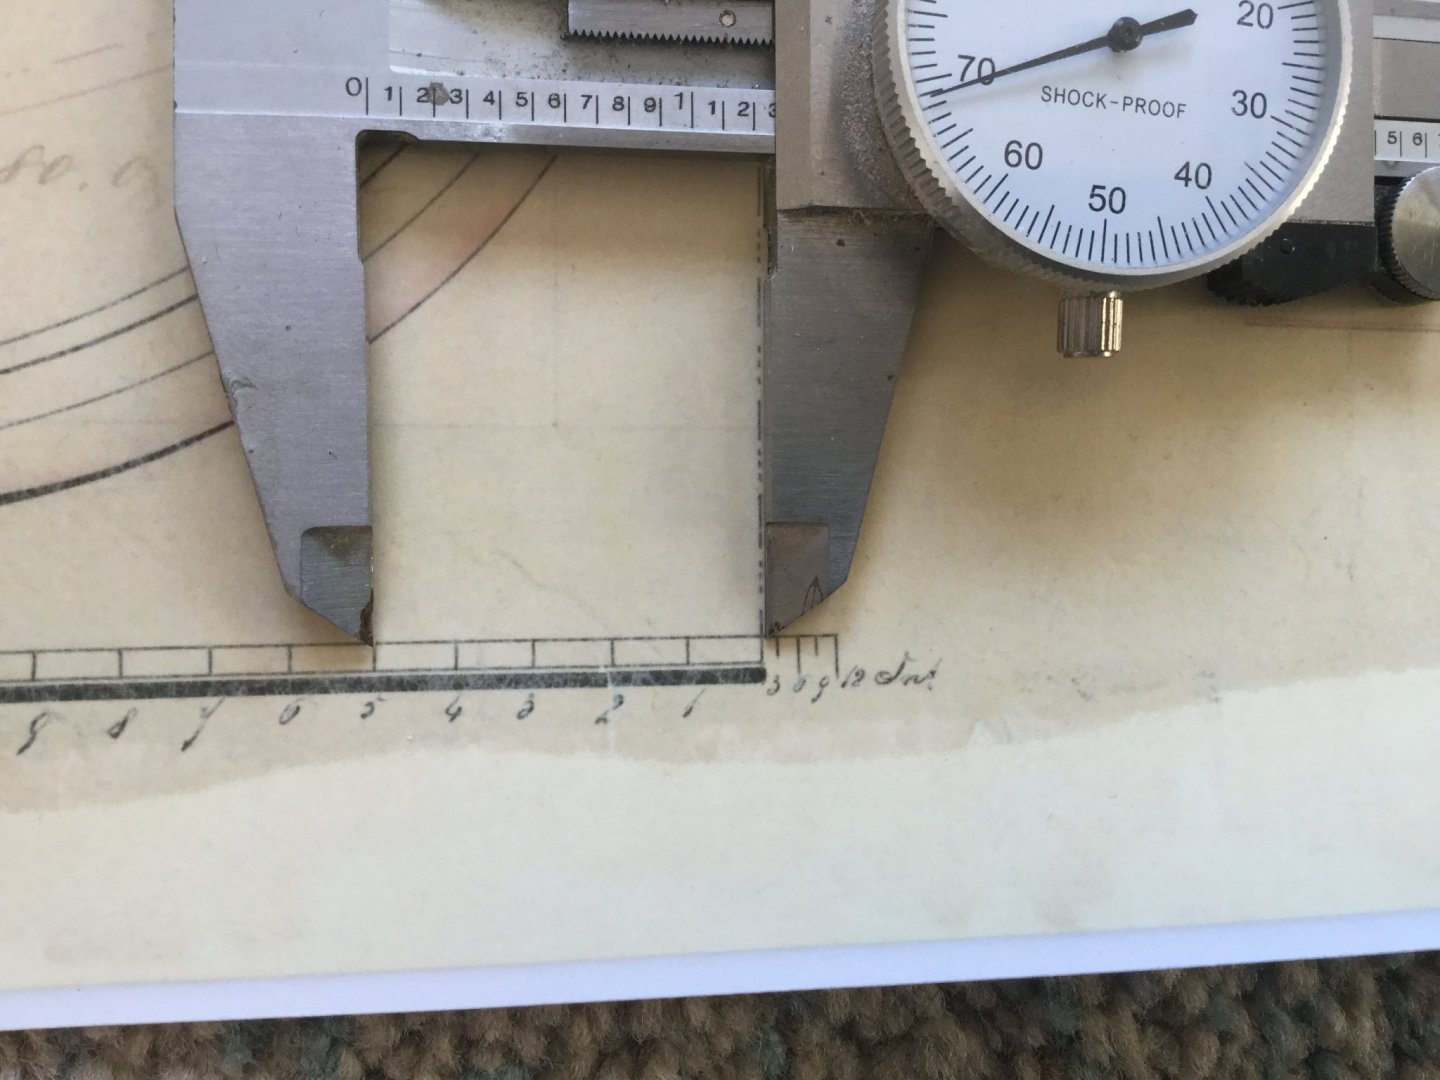
Thank you Keith that's very helpful. I see you have the original plans so I will know who to ask in future!
")
-
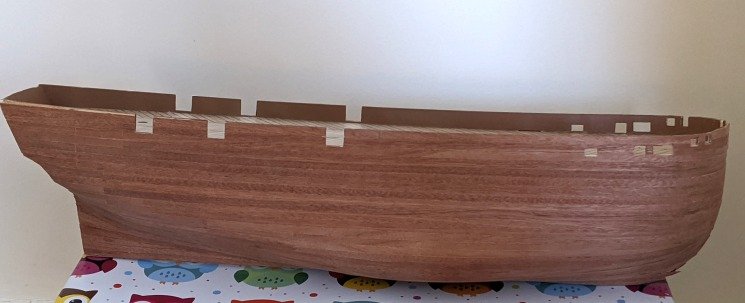
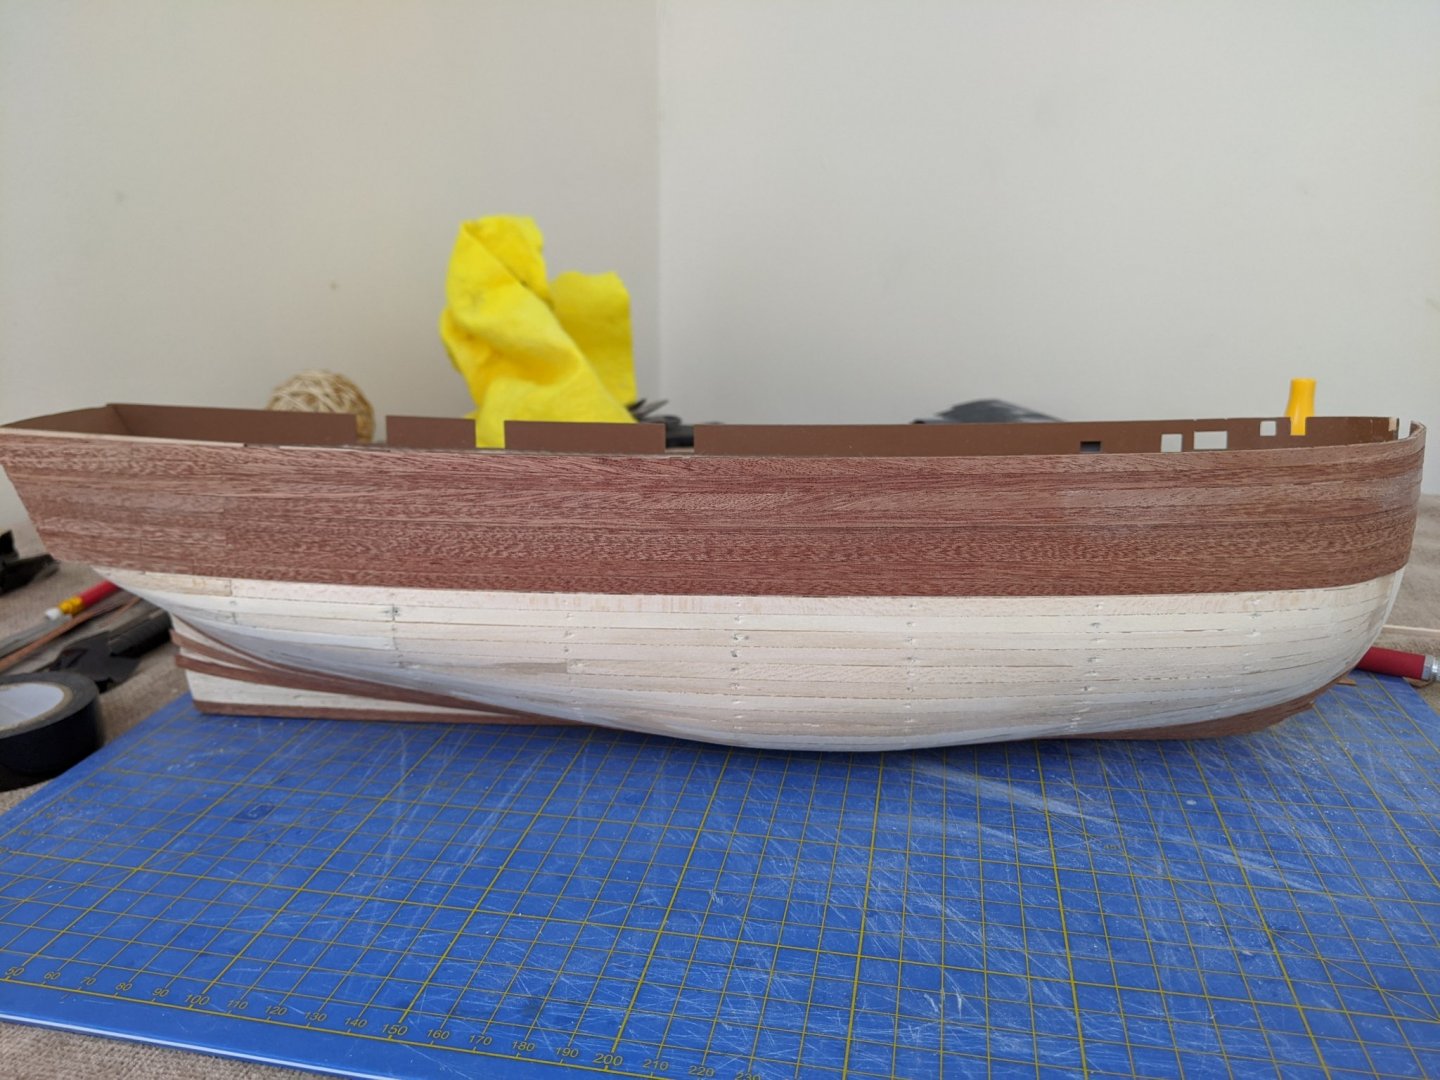
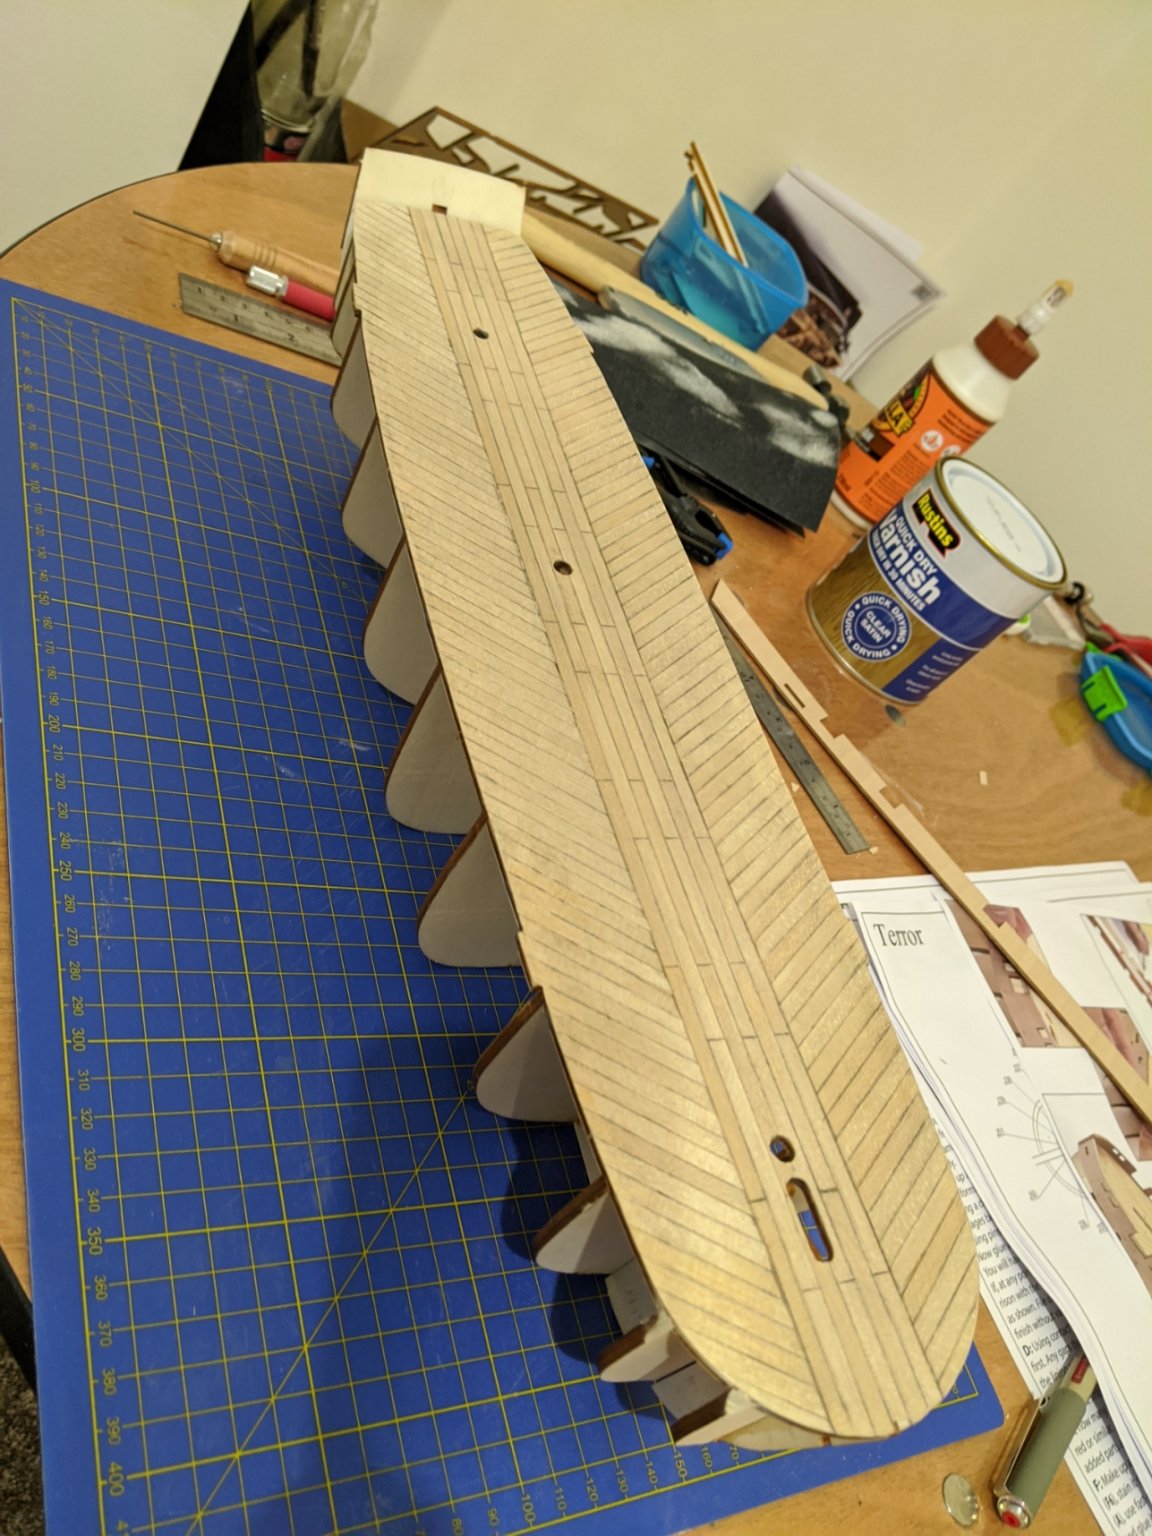
The second layer of planking almost finished, a few more finishing touches and sanding. I have learnt a lot from this planking experience for my next model! I am thinking of the Occre Golden Hind or Beagle next.
The next stage is to install the rubbing strakes, but I have a question for those building this model. The instruction states they should be installed 15mm from the top of the bulwarks but that doesn't seem right, maybe a little bit more? Also should the rubbing strake be 15mm (or more) all along or turn upwards at the bow? Thanks
-
2 hours ago, clearway said:
thanks for looking in everyone- been plodding away with the shroud protection / rubbing strake planking (5 planks thick at the top). instructions say to do this after applying 2nd planking, but even if i do go down the 2nd planking route i would rather have these applied to the proper hull planking. as an aside i have come across a load of 1mm x 4mm walnut strip in my workshop which is nice and dark so might end up with a natural wood finish yet🤔.
keep up the good work everyone
Keith
Looks great! I wish I had thought of that! Something to bear in mind for my next model.
-
Thanks, I decided to use white glue for the second planking, much easier to use than contact glue.
- clearway and GrandpaPhil
-
 2
2
-
It was suggested to me when I joined earlier this month that I should start a build log so here goes.
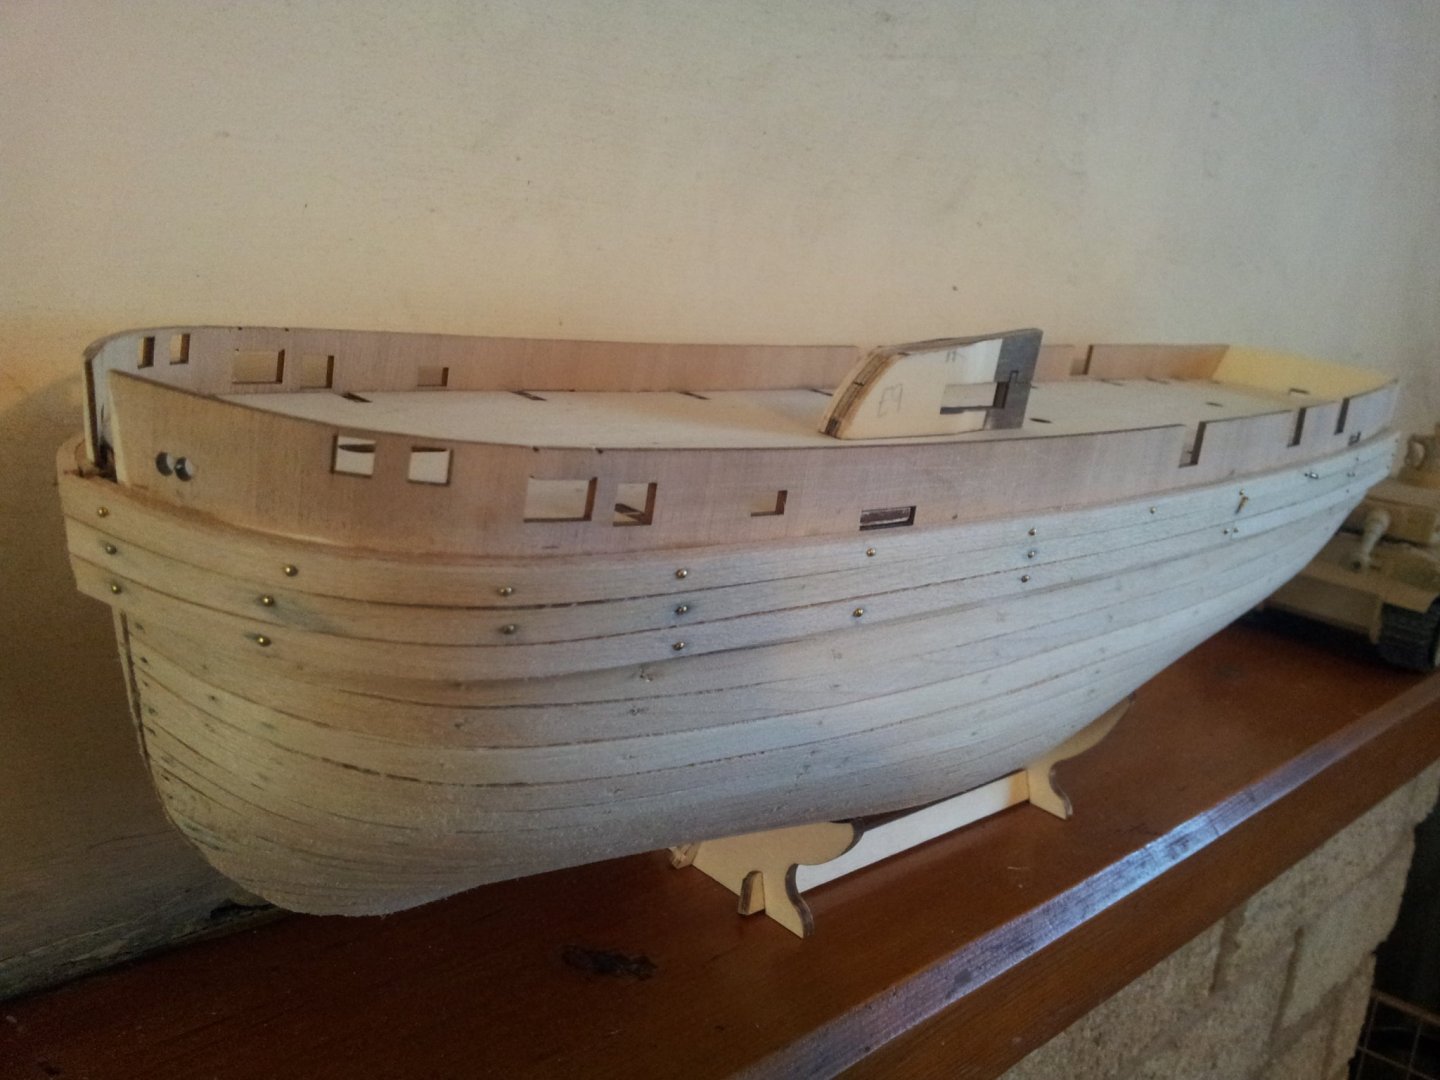
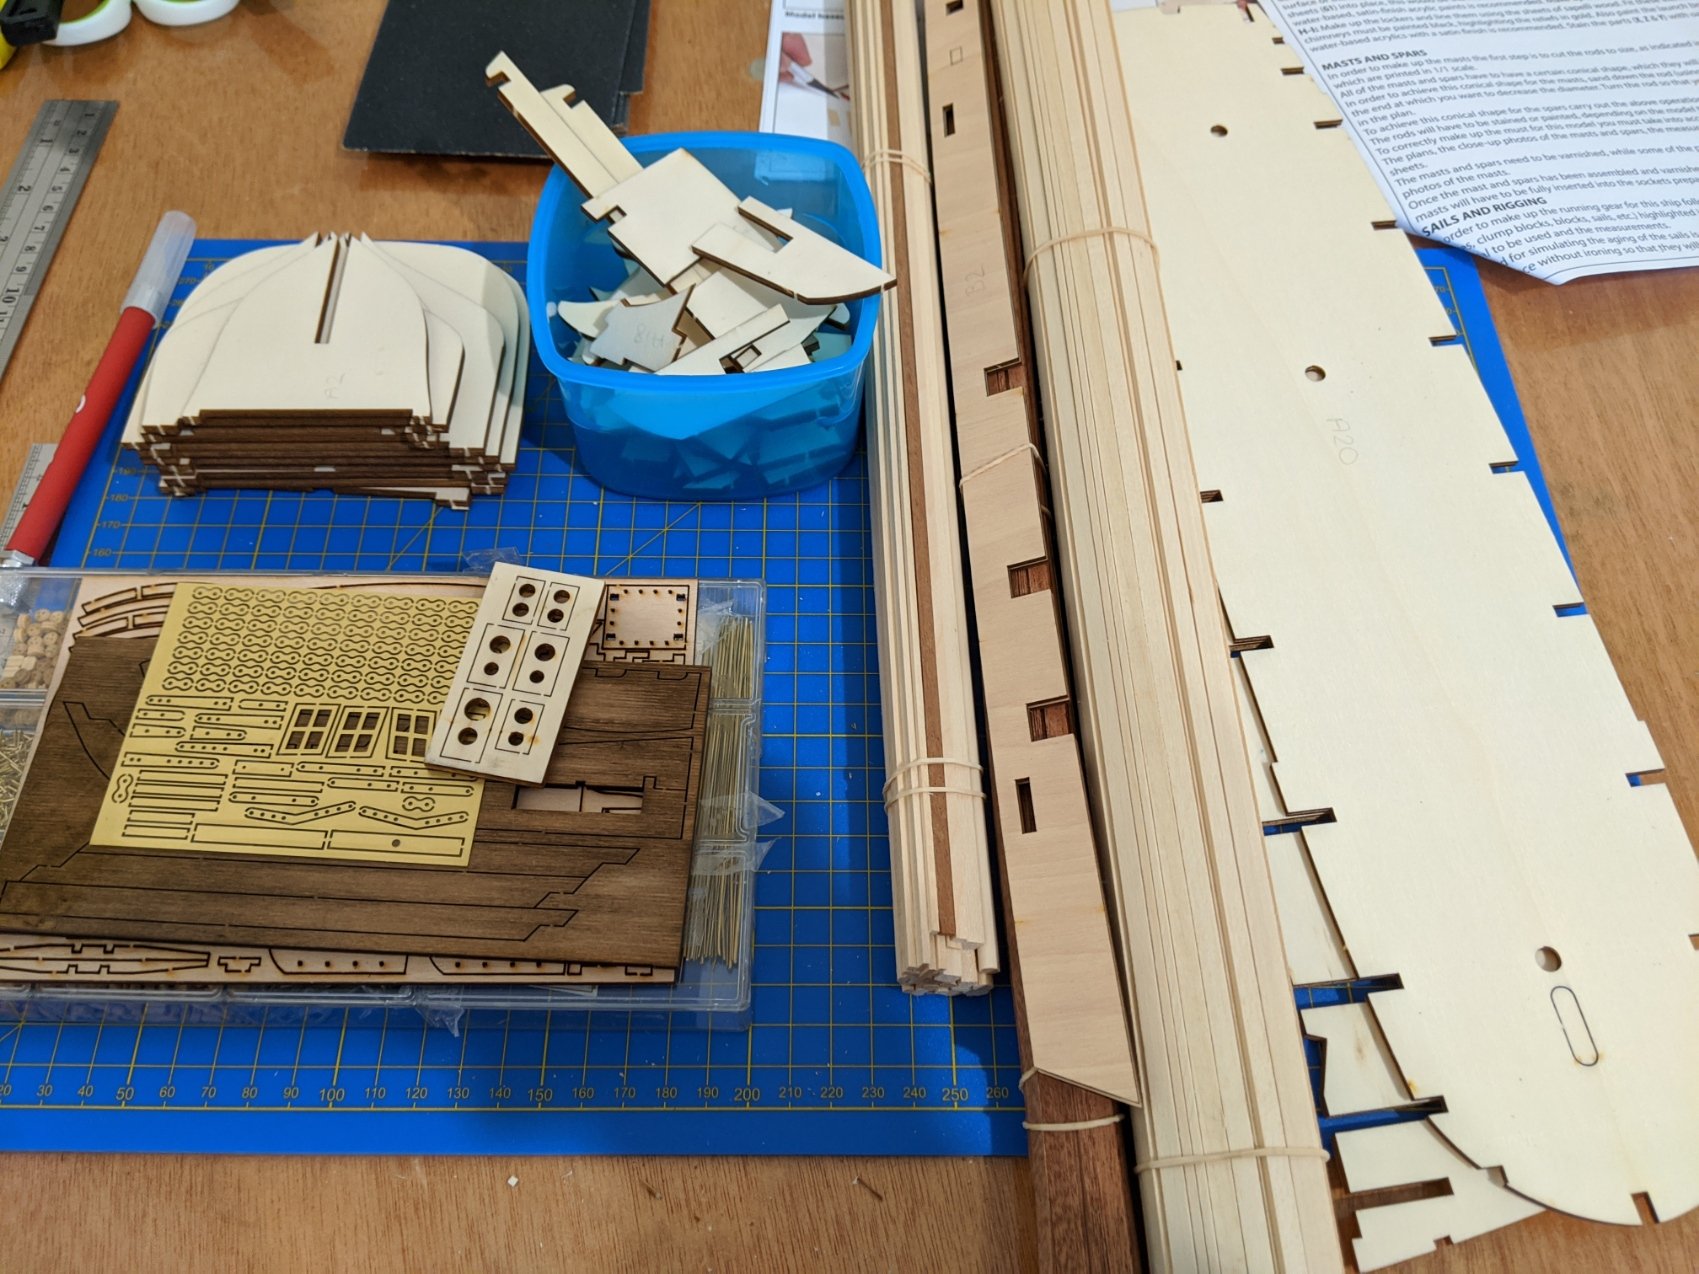
This is my first wooden model but I have some prior experience with plastic models. So far I have completed the first layer of planking of the ship which after much sanding and application of wood filler seems to be shaping up nicely. The next stage is the second layer of planking.
I have probably made many mistakes already but I am learning as I go.


-
-
I have just started on the HMS Terror myself. Your build log has been very helpful to me, thanks. Do you have any advice for someone starting out with this kit, or anything you wish you had done differently at earlier stages? Any advice you have is appreciated.
-


HMS Terror by DaJH - OcCre - 1:75
in - Kit build logs for subjects built from 1801 - 1850
Posted
I've been doing some work on the deck pieces and I've also made a start on the masts and the bowsprit. The next stage is the fitting of the chainplates, I don't like the out of the box option so I have bought some Billing Boats chainplate straps from Cornwall Model Boats for a more elegant solution. I have a question for those who have done or are doing this model, the instructions don't state the placement or measurements of the chainplates, as this is my first model I don't want to fit them in the incorrect place and then have problems with the shroud rigging later on. From studying the OCCRE Youtube videos it seems that the first chainplate of each of the three 'sets' of chainplates aligns with each of the masts and there are approx 5mm apart (see image below) - any help or assistance would be greatly appreciated🙂