HOLIDAY DONATION DRIVE - SUPPORT MSW - DO YOUR PART TO KEEP THIS GREAT FORUM GOING! (Only 20 donations so far - C'mon guys!)
×


Kranck
-
Posts
69 -
Joined
-
Last visited
Content Type
Profiles
Forums
Gallery
Events
Everything posted by Kranck
-
HMS Victory by Kranck - Corel - 1:98
Kranck replied to Kranck's topic in - Kit build logs for subjects built from 1751 - 1800
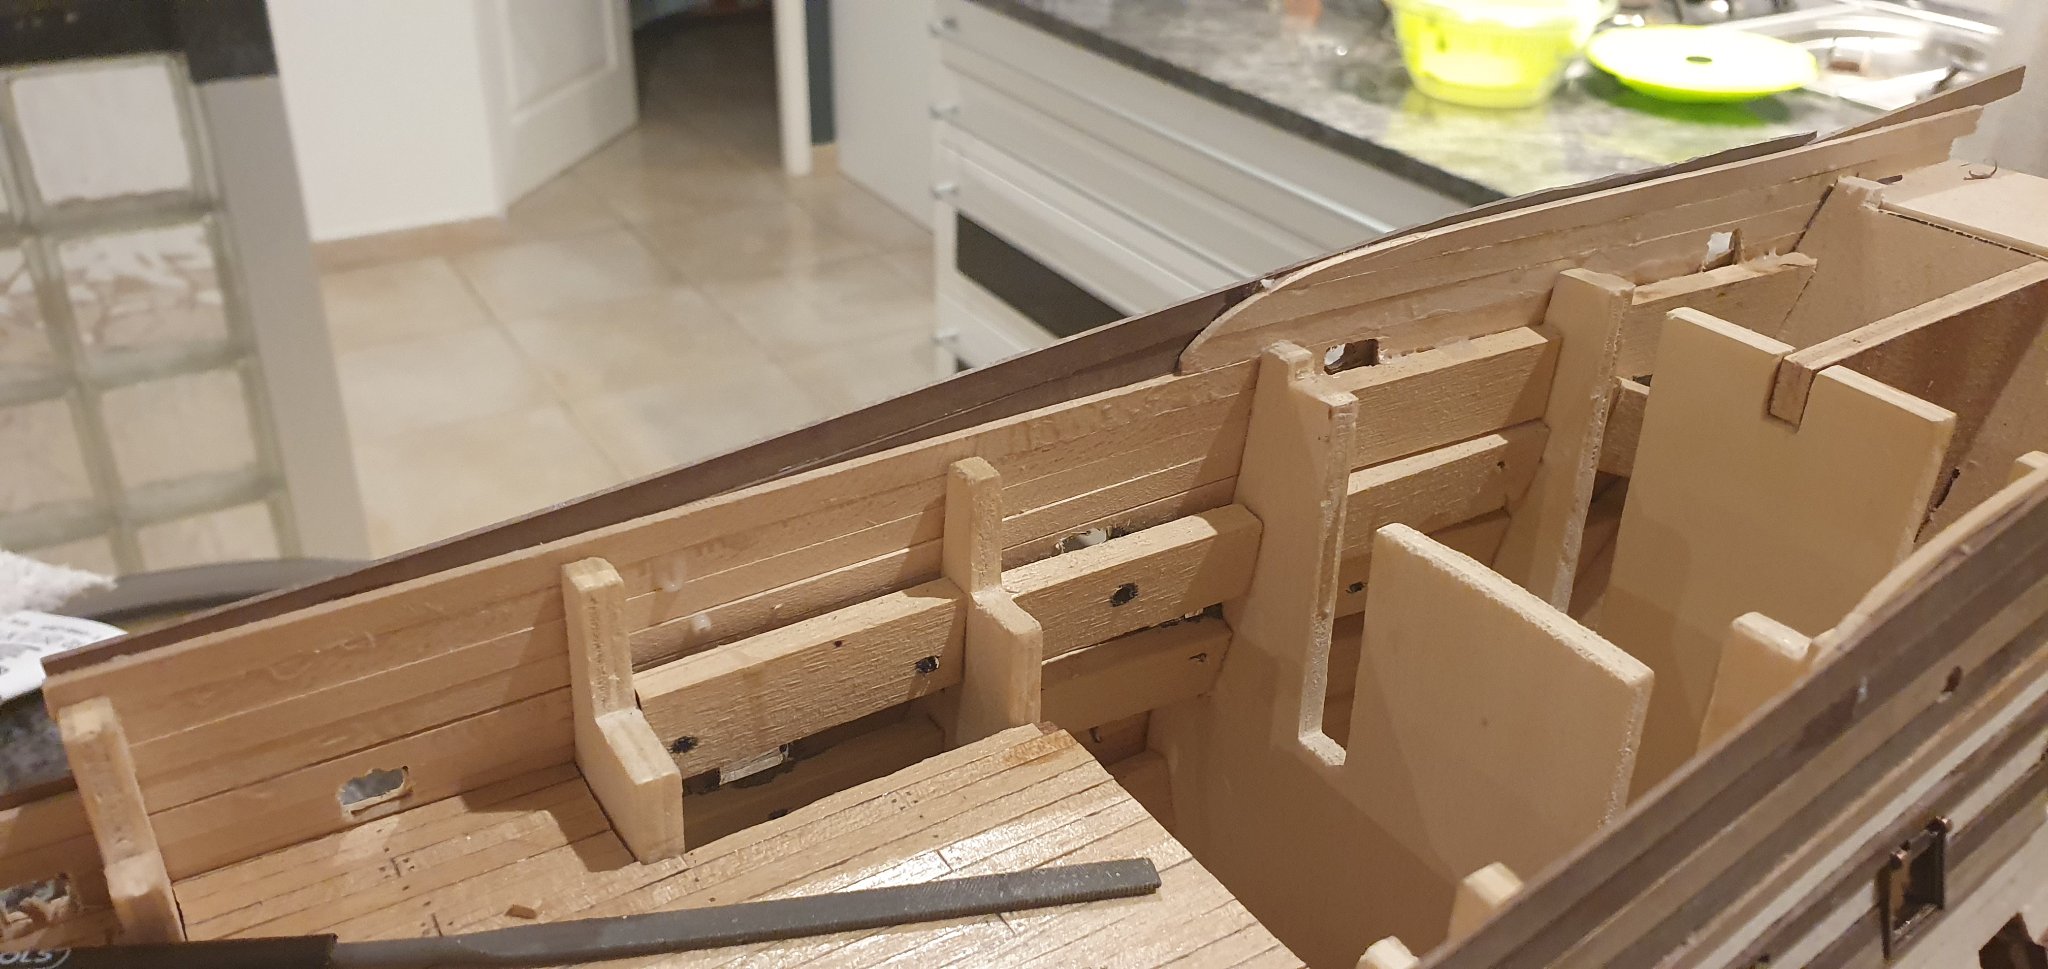
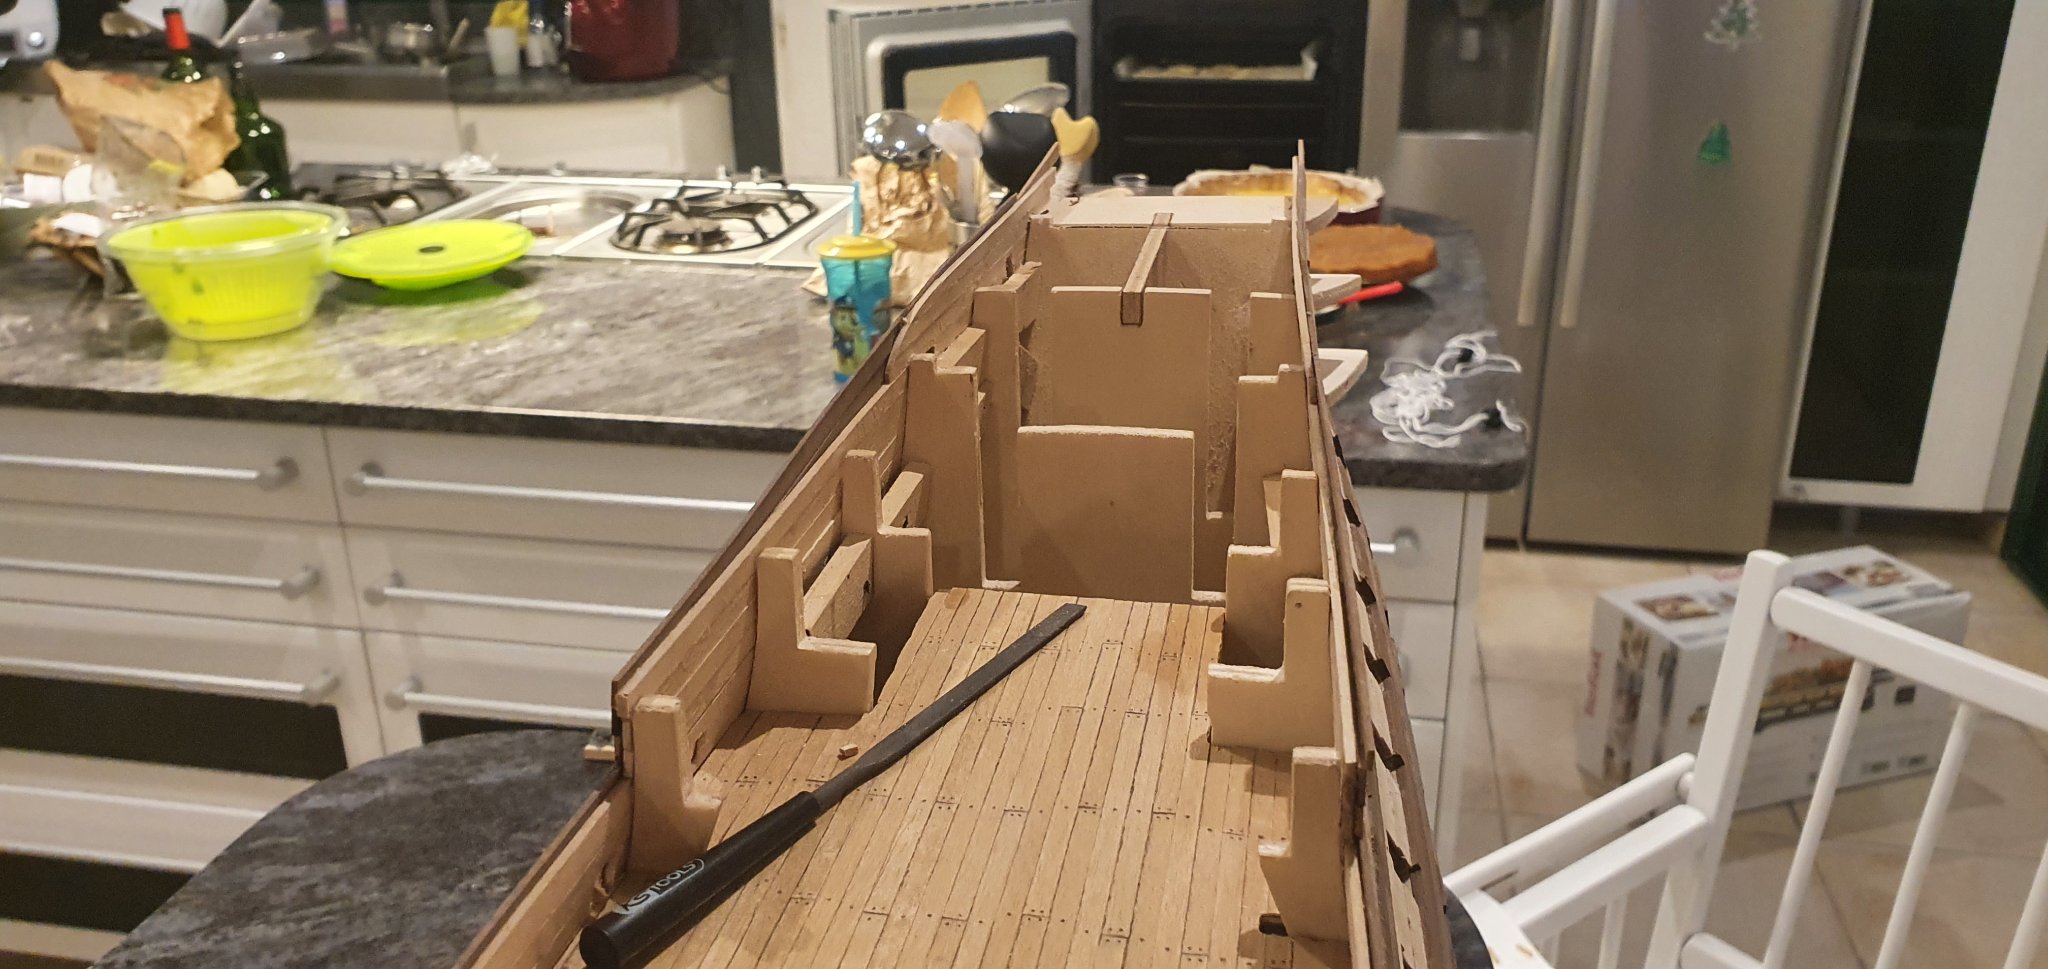
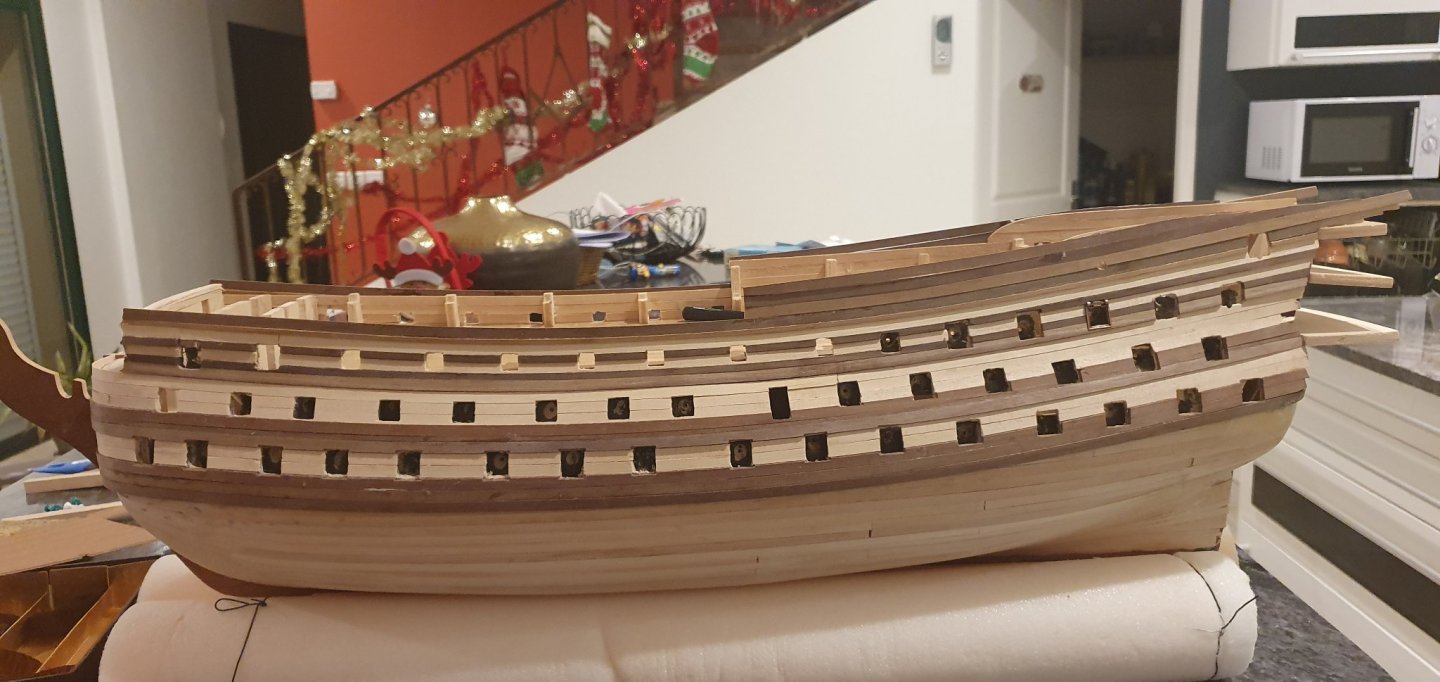
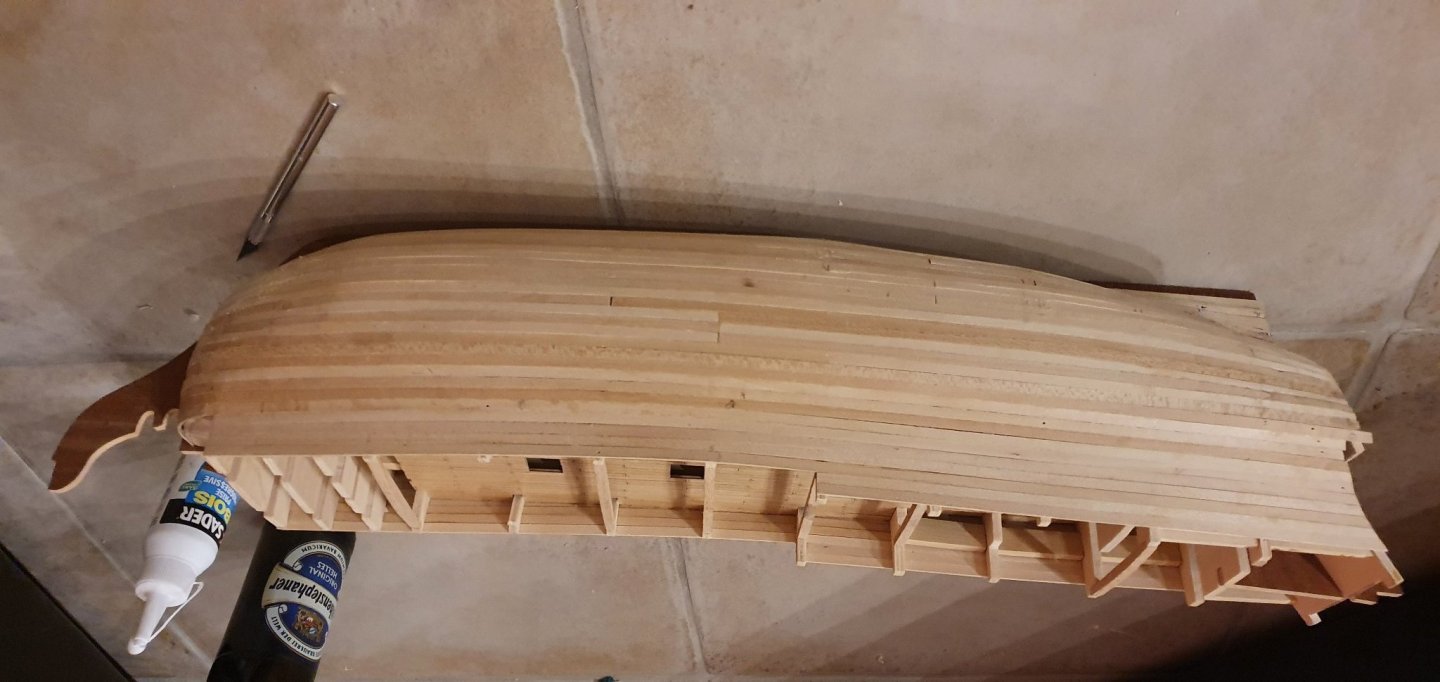
Hi all, Going slowiy but steadily here. Until I ran into the latest issue... Unlike first planking i started the second planking from the wales and up. However, once i got to the upper deck level, i noticed the slope is different and planks are laid far too steep in the stern part. I don t know what to do... especially for the planks just below the gunwale on the top deck... Any kind of advice most welcome !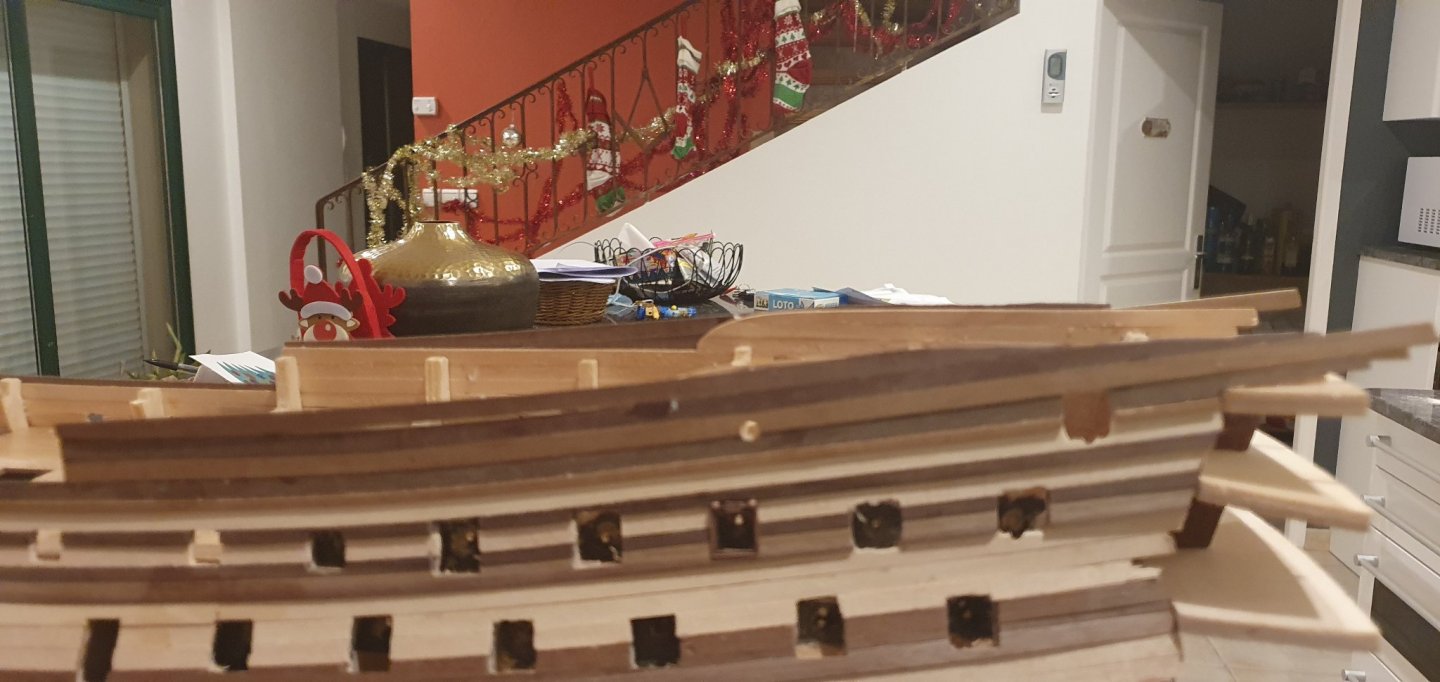


-
Hi, Sick skills !! I suppose that is an issue that has been adressed many times on this website, but the actual question is to define what 'correct' is. Model kits cannot compare to the marvel you are currently building. So in so far the model remains aesthetically pleasing, I would be content with learning a few tricks about wood works and discovering the world of model ships. Should I do it again, i would try an easier kit model, but apart from that, I'm quite content with how I spend my spare time. Hoping to get better and better.
-
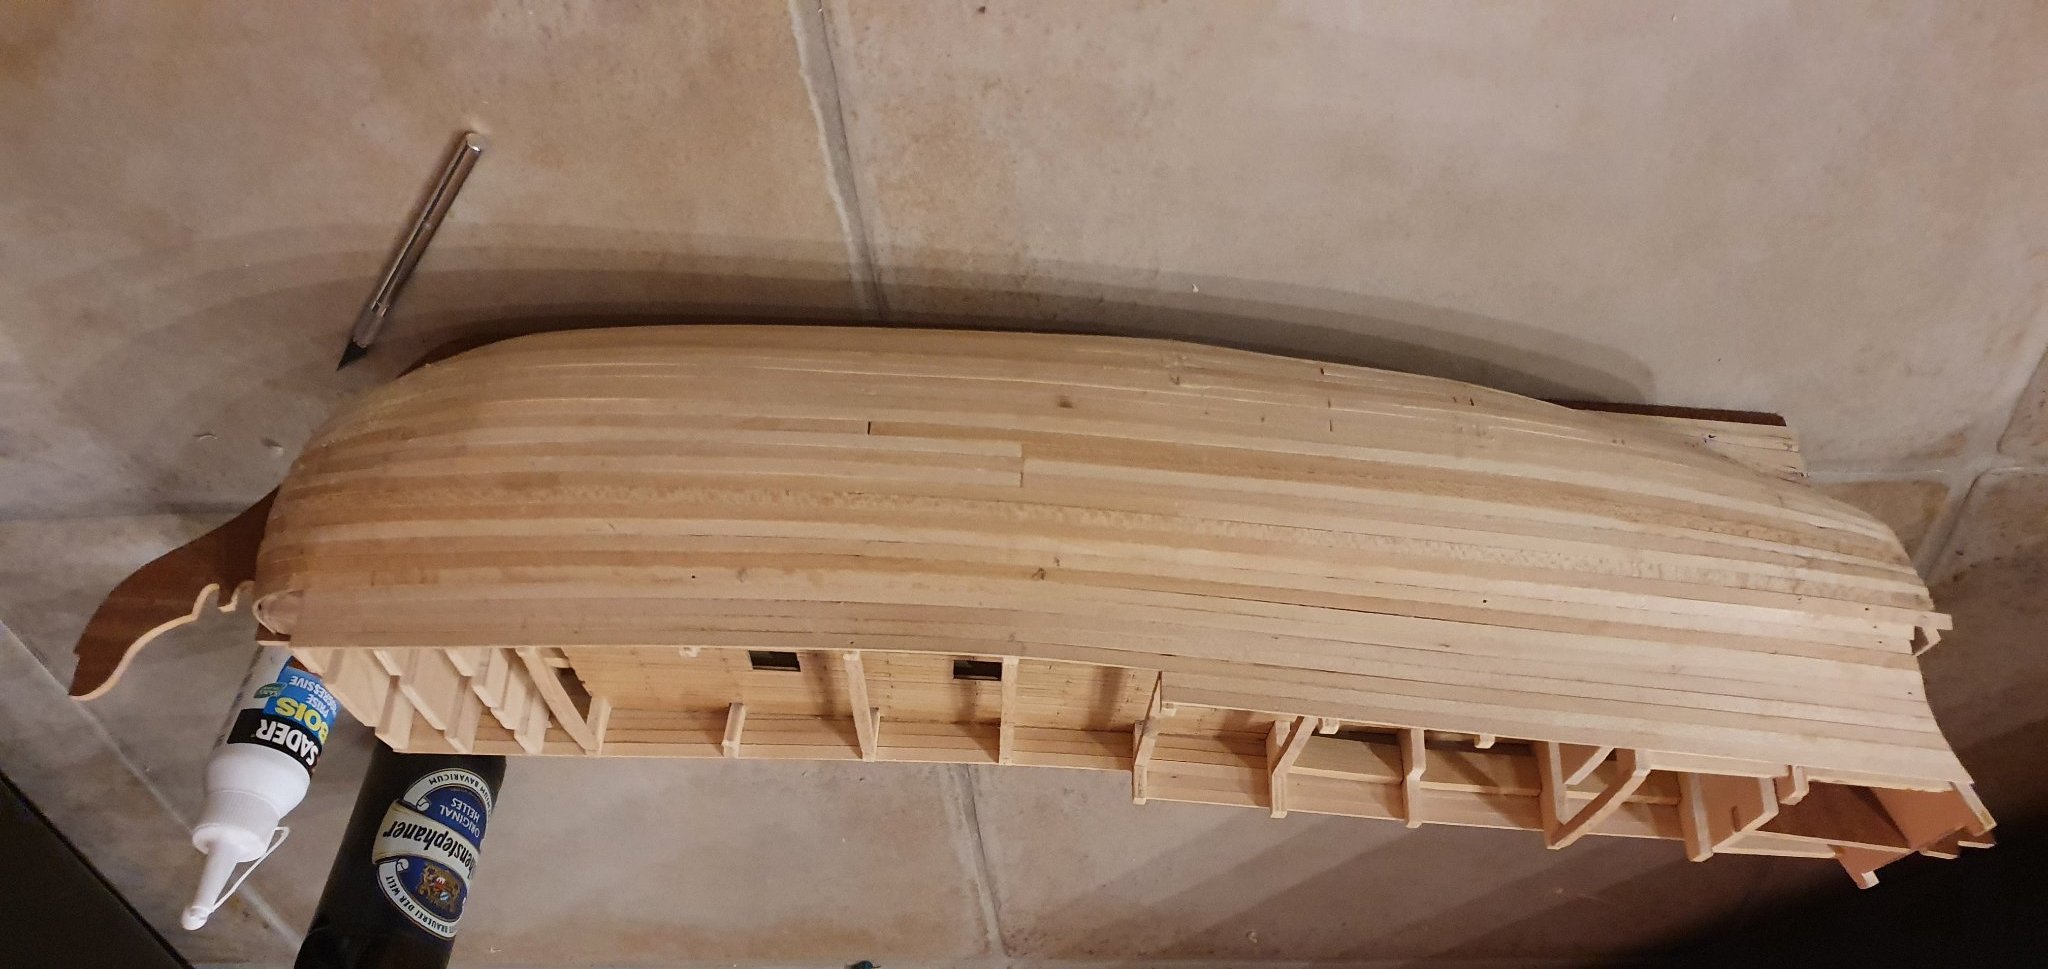
I like the idea of the pastel dust. However, I think that you may add some kind of tainted varnish to improve the 'woodish' looks of pressed wood. I'm currently adding the second layer of the upper part of the hull. Quite a pleasant task and nice to finally get an idea of what the ship will finally look like.
-
I also had in mind to keep the wooden look of the hull. It is a very good idea to change the color of the wood. The results look so good! I'm currently in the process of cutting out the gun ports. Then a bit more of filling and sanding and I will start second planking. If you have some time to spare, would you mind displaying a view if the stern? I still have some issues deciding what to do with the upper stern. Happy to follow your steps Nicolas
-
Eventually, what kind of wood did you use for second planking with the walnut?
-
HMS Victory by Kranck - Corel - 1:98
Kranck replied to Kranck's topic in - Kit build logs for subjects built from 1751 - 1800
Thank you for your comment ! I intend to plank the deck as you mentioned. However, what about the hull planks themselves for the second layer? I see that many modelists choose to keep them as long as possible (for the good looks I suppose), while others cut the planks (as used to be done in shipyards at the time I suppose). What would you do? -
HMS Victory by Kranck - Corel - 1:98
Kranck replied to Kranck's topic in - Kit build logs for subjects built from 1751 - 1800
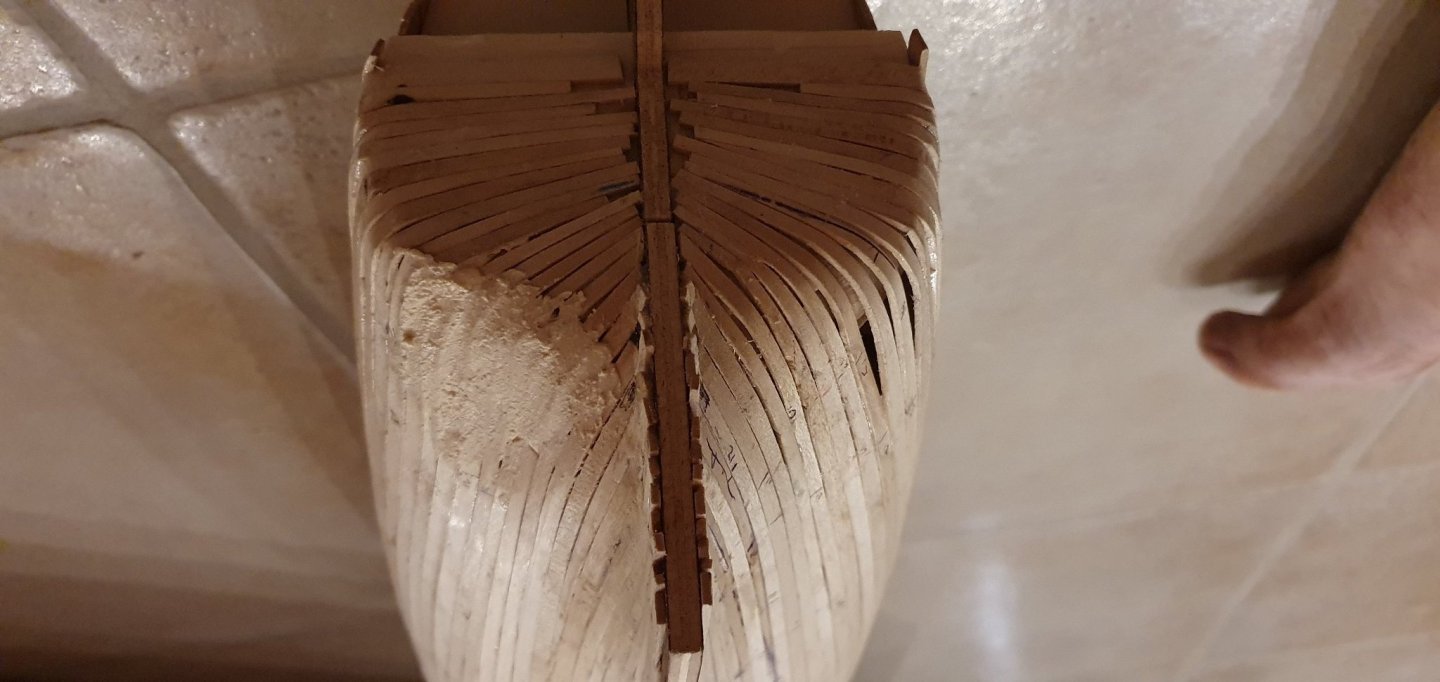
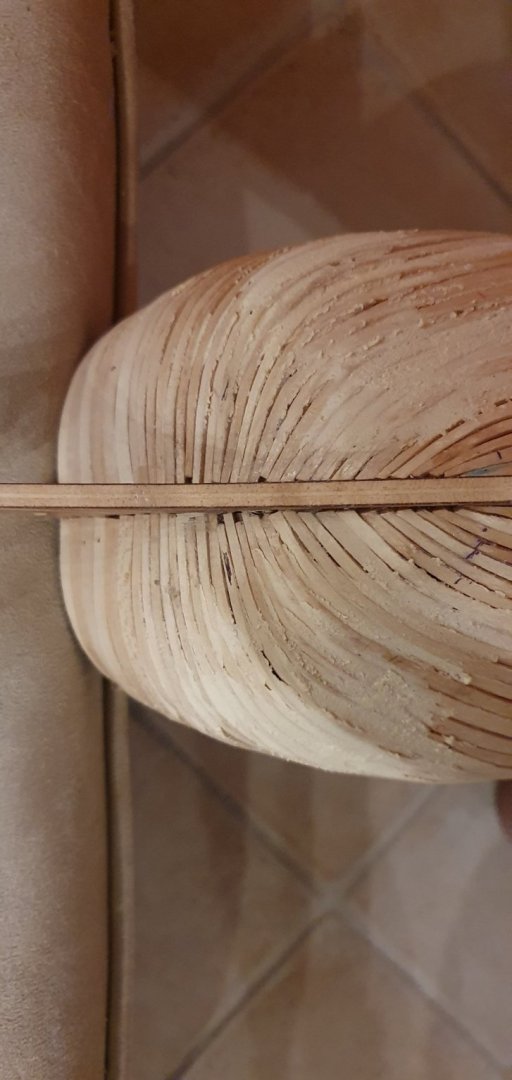
I forgot one other mistake: - Stealers. Don't like them. -
Ad there it is !
-
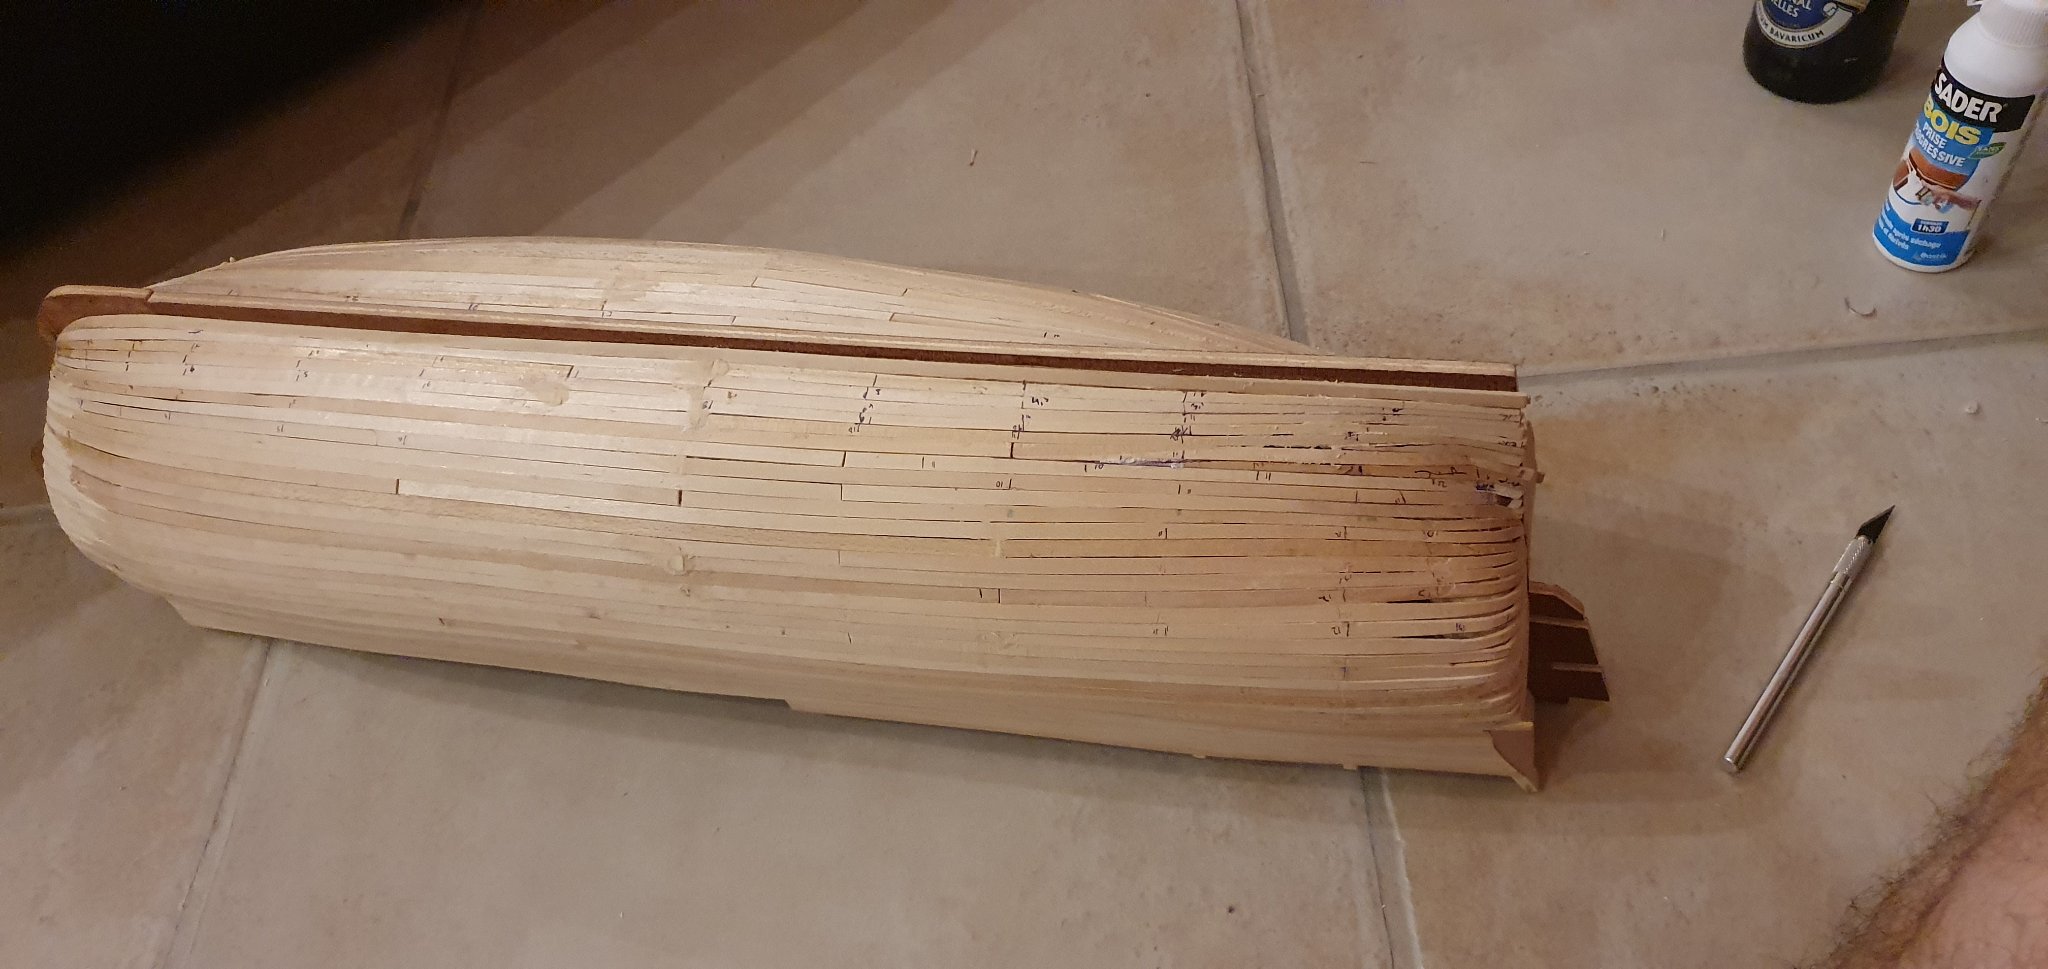
So, after some months of hard work on this first ship, it is eventually time to start a build log. Building started in July after this gift kit unexpectedly ended up in my hands . Unfortunately or fortunately, I acquired a new house and moved almost at the same time. So work in the shipyard resumes when the multiple improvements in the house and my new job let me some scarce free time. I have no experience in wood work (nor manual work actually!). So I bought a lot of tools to help compensate 😉. Not sure it was a good idea but well, one has to start somewhere at some point. Forums on this website helped a lot to avoid some mistakes. Yet, I eventually made a lot of them... Let us summarize the consecutive steps up to the current stage of the build: - Frames were attached to the keels after tapering (alas, I did not compare the two sides of each frame - I planked the upper deck and lower deck - Bits of woods that attach to the half gun were set between each frame. - Stern and bow fillers were adequately shaped (all praise dremmel power tools). - Many pages about planking were carefully read. Then they were read again. And again. - Months and much energy were spent for first layer planking with the following mistakes: + Miscalculation of stern and bow tapering. For instance, the planks close to the main and upper deck are too wide at the extremities. + Unredeemable (well, almost) mistake in the overall curvature of the tucked stern. + Overall ugliness - Currently happily sanding and filling. Next steps: 1. Drill holes and design gun ports. Wondering how to accurately set each location. Then I can move the half-gun holders at the right place, if necessary. Forum pages shall be read and read again. 2. Anxiously bite my nails while wondering about how the lowest planks should meet the keel. 3. Despair for a while. Read ther build log for tthe 20th page. 4. Cautiously get to 2nd layer planking. 5. Observe result. Incriminate lack of experience and dubious genes to explain obvious failure. All comments and tips are more than welcome !

-
Excellent planking. Just finished the first layer of my Victory. I'll start the building log to let you have a look. I'm a beginner too, but obviously you have remarkable skills with your hands that I do not possess yet ! May I enquire about how you decided the location of gun holes? I find that blueprints are not that reliable nor usable... Bests, Nicolas Now stariting the log ! Need a camera though...
-
Ok. I'll stiick to wood. Just finished first planking. Pondering about the next step.
-
Thank your for the answer ! Very interesting. Funnily enough I just started today to use CA glue instaead of wood glue... I'll try your tricks ! Including mending the broken planks with CA Maybe it is time to start a build log indeed...
-
Very impressive ! Beautiful work and done so fast !! I'll be following attently. What is your technique to bend the planks so nicely at the stern? Despite a filler that is (in my very very humble opinion) more accurate than yours (with double curvature and all like jpett's if I remember well), my planking is sorely lacking in precision and broken planks remain frequent... Best regards Nicolas
-
Thanks all, Recently bought a new house so shipyard works slowed down a little... Yet, the first layer of planking is coming along quite nicely, but not after scrutinizing this website for hours and hours. A few mistakes at the stern, but no catastrophe in sight. I hope to get better with second planking, hopefully starting in one month or so.
-
Nicely done with the first walnot planks. I hope to put the first one on my build in a month or two. Just a question: What do you intend to do with the edges on the keel? Set some walnut there too? Best regards, Nicolas
-
Hi Emmet, I'm planking my own Victory out there in the South of France. Following your steps and trying to learn at the same time. Tumbling and falling into the same traps I guess... First planking is half done, I'm curious to hear about 2nd layer planking with walnut wood. How is going for you? Best regards, Nicolas
-
Thank you all for the warm welcome. I used to build plastic models of tanks as a hobby when I was a child. 35 now and ready for more ambitious tasks !
-
Hi all, The name is Nicolas, from France. As a present for my mother, who's quite fond of model boats, I decided to venture in the weird waters of model building. I foolishly bought the infamous Corel HMS Victory kit for my first trip. Started planking yesterday. Quite the challenge ! I have no previous experience in the field, but I remain (reasonably) confident. Best regards !
-
hi, Excellent Work! This has been inspirationnal as a newer version of this kit is just in front of me at home... Problem is that it is my first one. Might not have been a wise choice... I m currently struggling fitting the main deck on the bulkheads and i Wonder if you could help me with an issue not depicted on the blueprints. Namely , i cannot figure out if the deck curvature is bending upward at the forward part of the ship or if it is flat ( but slighly bent from the centre to the sides) ? I think this could interfere with planking the bulkheads... Best regards ! Nicolas