


Micklen32
-
Posts
619 -
Joined
-
Last visited
Content Type
Profiles
Forums
Gallery
Events
Posts posted by Micklen32
-
-
Good luck on that then Adriaan
I am sure you have it right


-
-
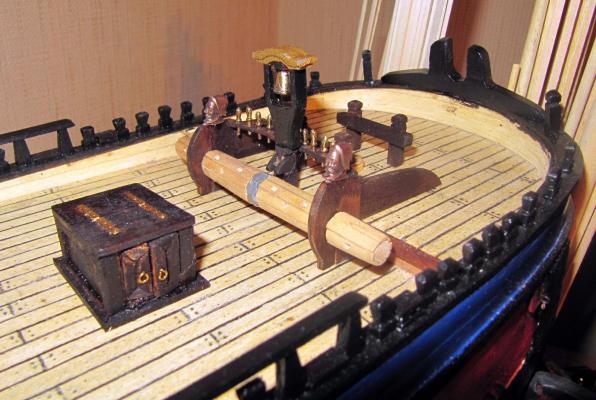
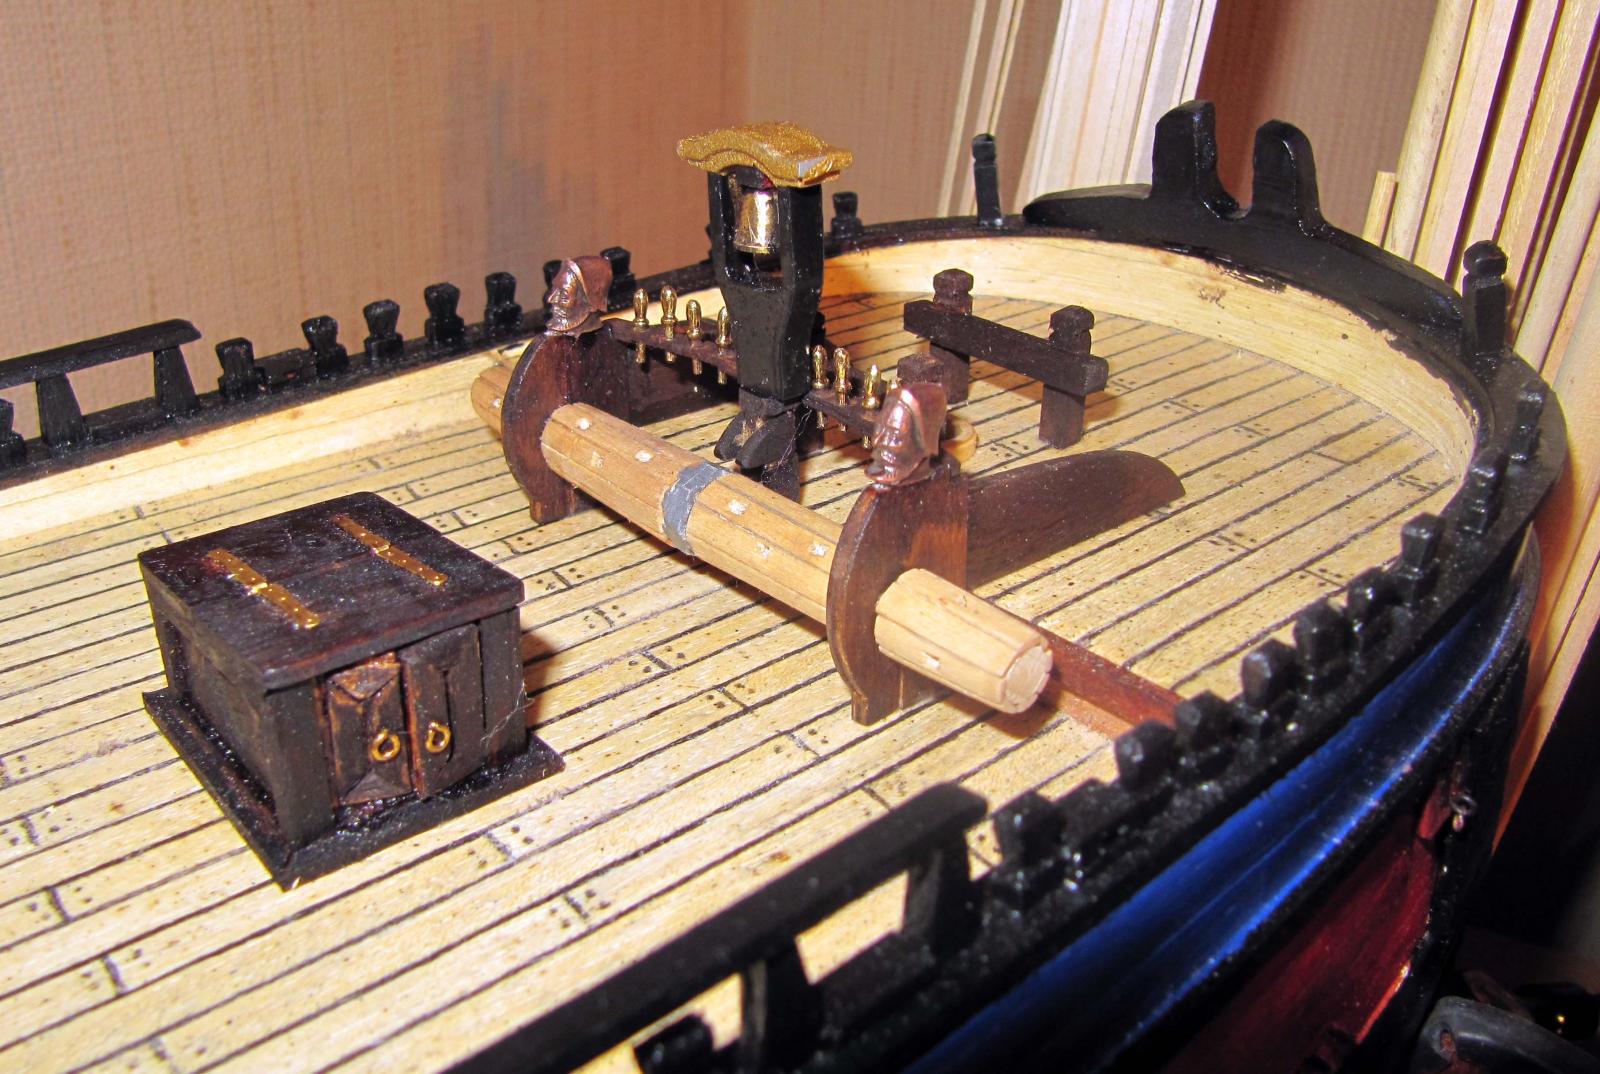
Regarding the Falconet supports what about this ???
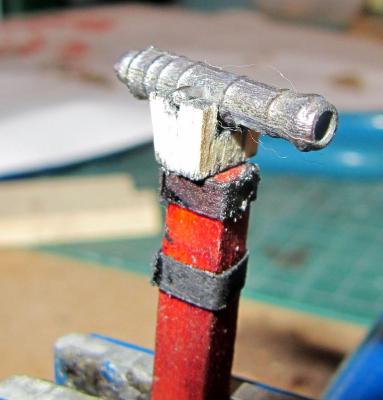
I don't think I can make it a lot smaller
I haven't got any metal sheet to make metal ones
I suppose I could get some, but are these good enough, painted black ????
I can make where the cannon sits a little rounder and neater and they will swivel as they are mounted with a nail
So???????????????
-
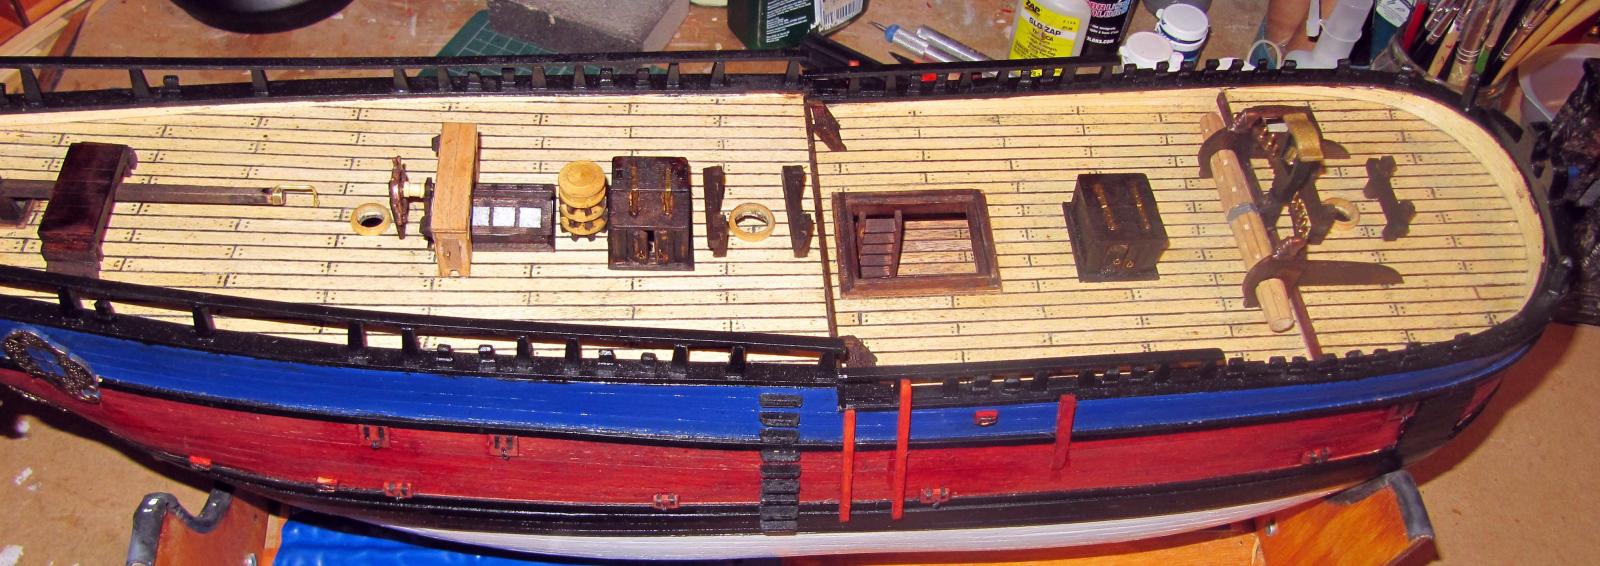
The front of the ship is looking a lot busier now

I must remember to drill the holes in the bow

Very annoyed about the Falconet supports
They are preformed brass and they are much too small and the holes to take the pins on the Falconets are far too small
The problem is the supports are to small and light to take a hole big enough for the pins
It just shreds them

I will have to build my own out of wood and hope they look ok
I will have to be fitting the channel soon so I will have to be thinking about ordering the chain plates
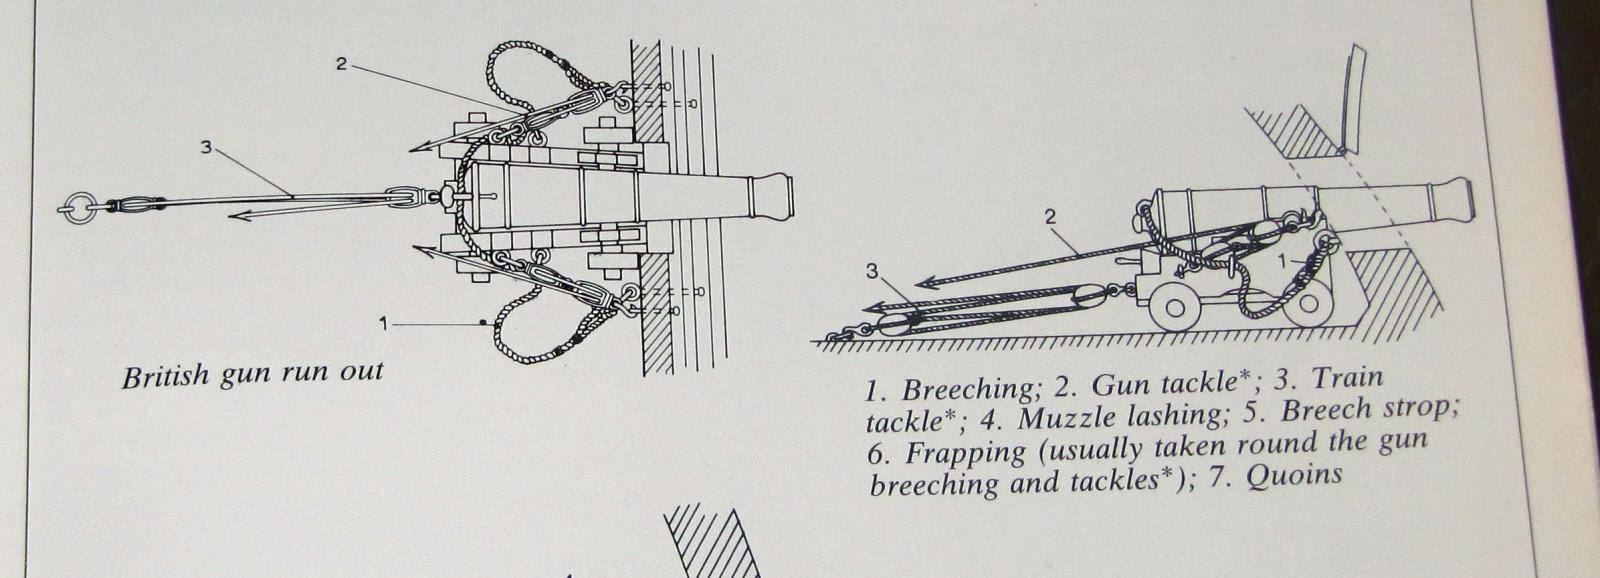
I have the blocks and deadeyes for the Will to get and I do want to try to do a proper train and gun tackle for the deck cannon so I will need some tiny blocks

I am looking at the way Steve (shipaholic) has done his then I look at the plans in Historic Models and they show the ropes and blocks at the side as Steve has done, the gun tackle, but then it also shows what they call the train tackle which is a single rope with two blocks attached to the rear of the cannon
See below
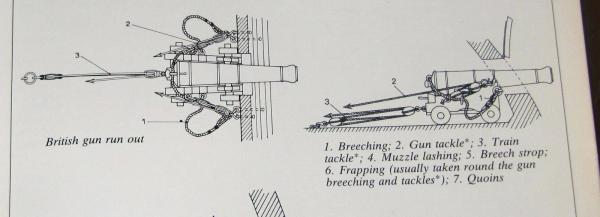
I would appreciate a discussion on this as there is a difference, but who will notice ???
Well yes, Me

So what do we think on this matter
I know there is no great rush but obviously I need to settle it a fit them before I start the masts
AAAAGH
 The Masts :mellow:
-
Prompted by you I went and did what research I could find
It was, as you say, a very expensive treatment but it does say in somewhere that the finish was pink
Apparently Humbrol did a colour in one of their special ranges, MC10 but I don't think it's available now
I will keep trying but if not I guess a red oxide would be a fair finish
Let is see what transpires
I am back on the Endeavour until I get the larger nozzles, then I will give it a couple of coats of white before getting the top coats on
Hopefully that should then look realistic
-
Good question SjorsNice Mick,
Are you gonna paint the hull?
And if, what colour?

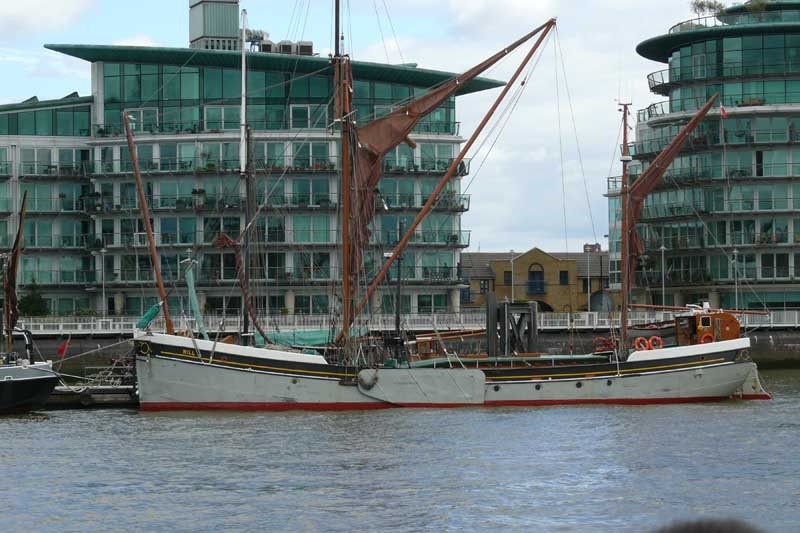
It went through a few colours in its life
But when it was working for Everards and also how it is now is grey above the waterline and they say pink below
Any idea what they mean by pink??????
I am presuming something like red oxide
So that is the livery I will probably give it

This is how she is now
-
Thanks EamonnNice wee boat.. Everards were a huge company, I forget the amount of ships they had but it was substantial (at any one time, I mean) Great to see a build log of a different type of sail/work boat every now and again, keep up the good work (and the tips) you got me wondering whether that damp cloth approach would work for different fillers :)Eamonn
As you probably read, the Admiral and I just fell in love with it
As to the filler I would imagine it would work with any water based filler
It would just be a question of getting the right time
After it had stopped moving but before it solidified
This Brummer makes it quite easy as it tends to dry fairly regularly and then smooths beautifully
What makes it stand out from other fillers I have used is its creaminess
-
-
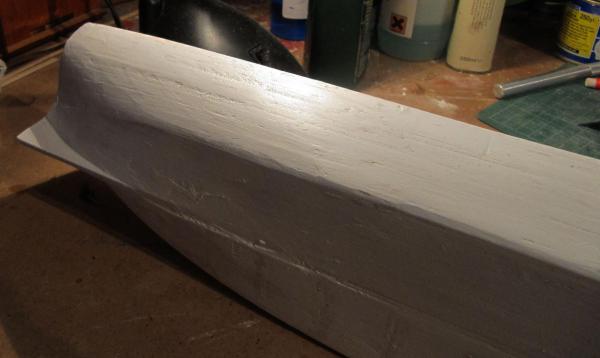
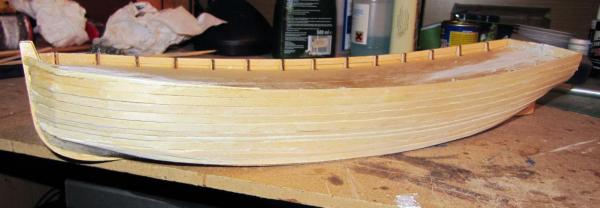
Ok I have done as I said
I put another coat of filler on after I had sanded it as smooth as I felt I could
Then a little tip for you, particularly with this filler, I soaked a piece of a soft kitchen roll I use, wrung it out but left it fairly wet, and gently wiped over the filler once it had started setting
This really gave me a great finish

I am now going to leave it until I get my nozzles for the airbrush
If I need something to do I could fill around the deck and frames to make the inside solid and smooth

We shall see
I have it going well now and I am pleased

-
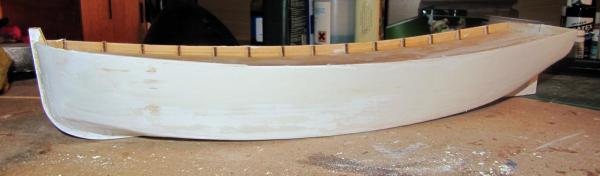
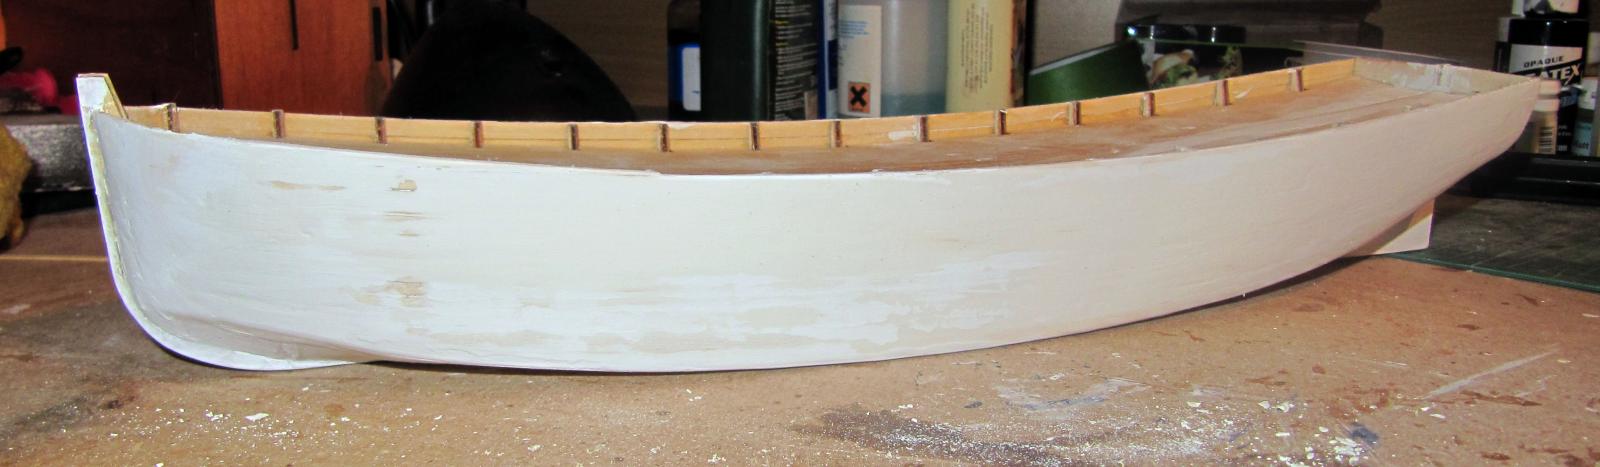
I have put a coat of filler on and very lightly sanded it
Then I gave it a thin coat of white paint to highlight any imperfections

It's very difficult to show the imperfections without proper lighting and a better camera
I knocked down the brightness quite a bit in PS and that helped
I am using a new fine filler I have found Brummer
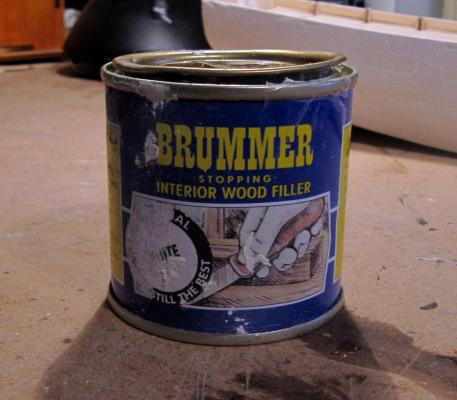
If you can get hold of this I can very much recommend it
It is like a thick hand cream, absolutely smooth and spreads beautifully
I will let that dry out and give it another coat of filler in bright light to try and get it as smooth as possible
I will then spray a couple of coats of paint on when my 0.5mm nozzles arrive as the 0.3mm I have fitted to my airbrush did not give a satisfactory coat when used before
It's more for detailing than putting on a thick coat
- trippwj, chris watton and mtaylor
-
 3
3
-
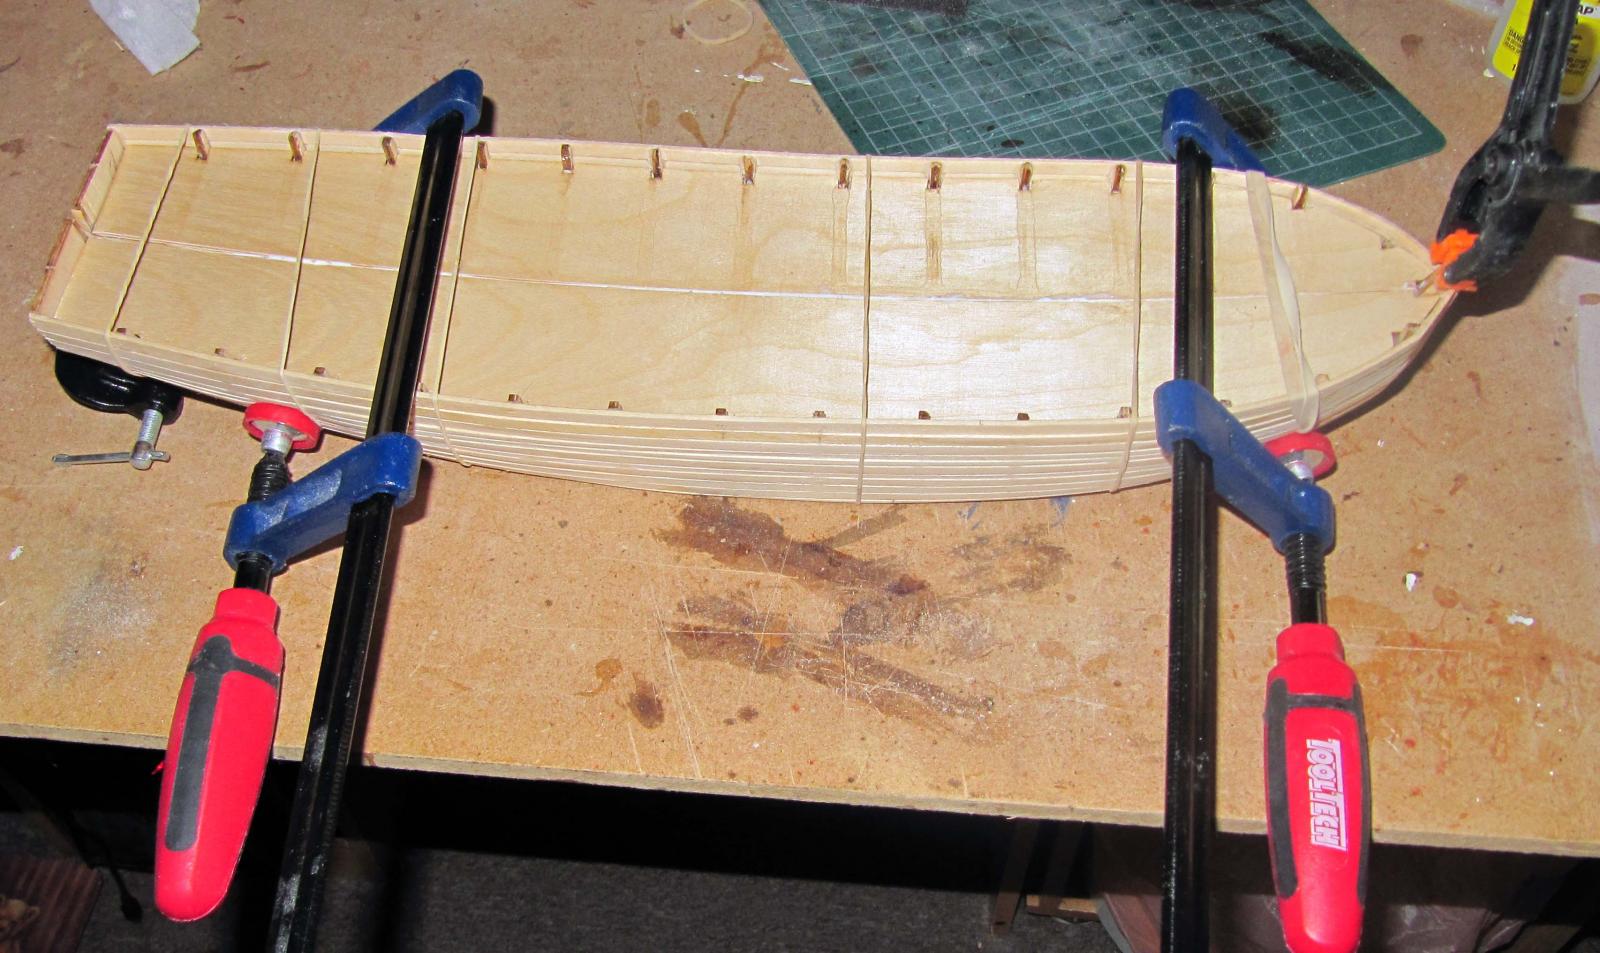
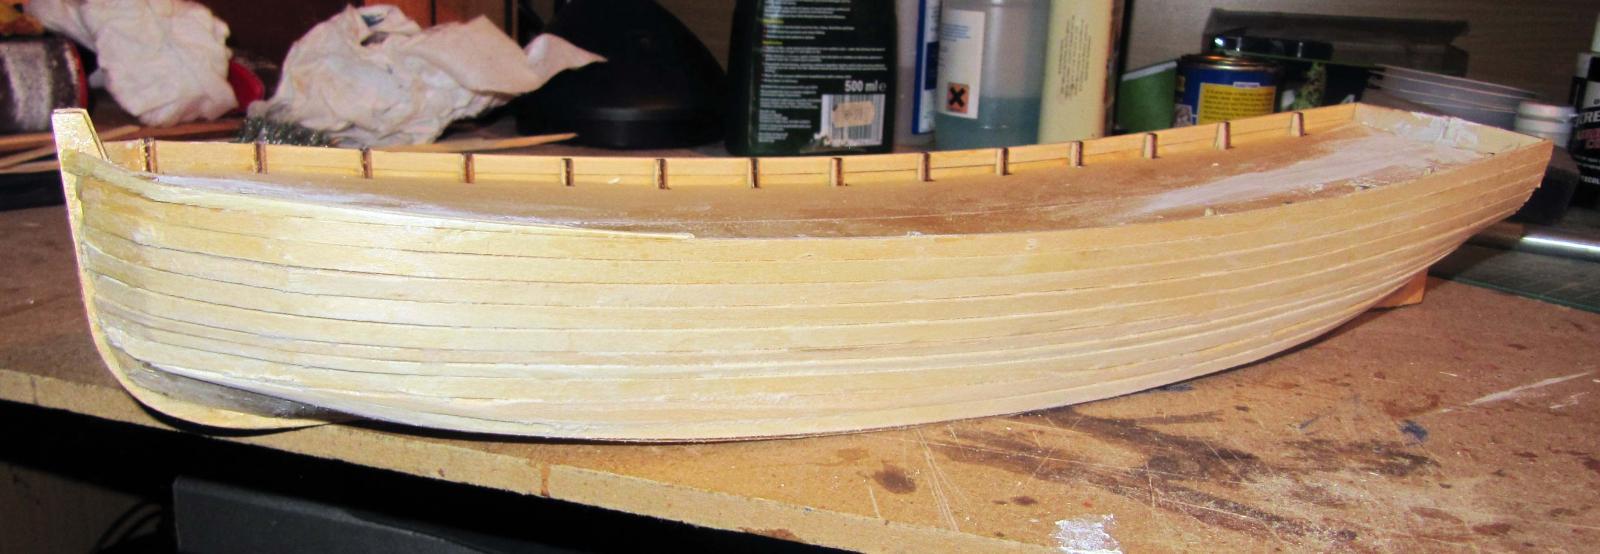
Thank you Mark and Sjors and welcome Mark
I had to give the Admiral her baking tray back that I was using to soak the strips so I had to finish the planking
I then found it very difficult to get a perfect fit with the two halves
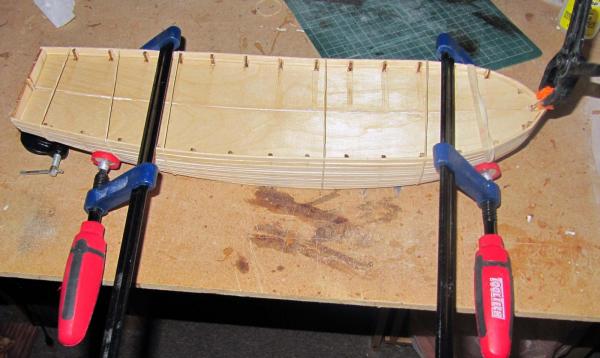
But with the assistance of my small sash clamps I got it as close as I could
Bit of sanding to do then a bit of filling followed by some gentle sanding to get the metal look finish
I may do that tomorrow
I may do more on the Endeavour
Nice to have a choice
-
I don't know about a bigger bench Adriaan
You have so much on the go I would say a bigger workshop
That Gorch Fock is one big boat
Like me now with the Will it is nice to have something different to turn to
I know after assembling the porthole and scupper covers on the Endeavour with my mag headset on fried things and a rest doing something bigger was needed
It's certainly coming along nicely though isn't it
Is the hull fully painted or is there any wood showing?
Nice work Adriaan
-
When I want just a bit of protection without it really showing I have a can of spray satin lacquer
That does the job very well and with a steady hand you can put a couple of coats on without it really showing
-
Mate you are prolific! Such a fast build, well done.
Thanks Greg
Things are certainly coming together well
I am so pleased with the book that's just arrived (see above)
It clearly shows several things I wasn't 100% sure of, especially the fitting of the cannon
Rest day today though

-
Hi all
Having a really lazy day today
Been out with the Admiral on the old scooter to our local Kentucky, then round the corner to a newish ice cream parlour
Yum Yum!!!!!!!
Just to let everybody know, especially Alistair, Historic Model Ships arrived today
Certainly can't complain about the condition and an in depth delve shows more detail than I will ever take in
I would definitely say that this is a book for all Historic ship modellers
It looks excellent and will certainly point me in all the right direction and let me know what things are called, so I can say to Sjors things like " Those round tops look very posh compared to mine" or Wow never seen a sprit topmast like that!!!"
Well well pleased Alistair and overjoyed I got it at such a good price
Thanks for the poke in the right place
-
Today I have again been hard at work with the glue bottles


Looking at that window now it is in I think I will do the glass black


It's amazing how long it takes to stick bits on
Still a lot to stick on and hopefully most will get done next week
Then we have the fun stuff
The cannon
Right time to hit the shower
-
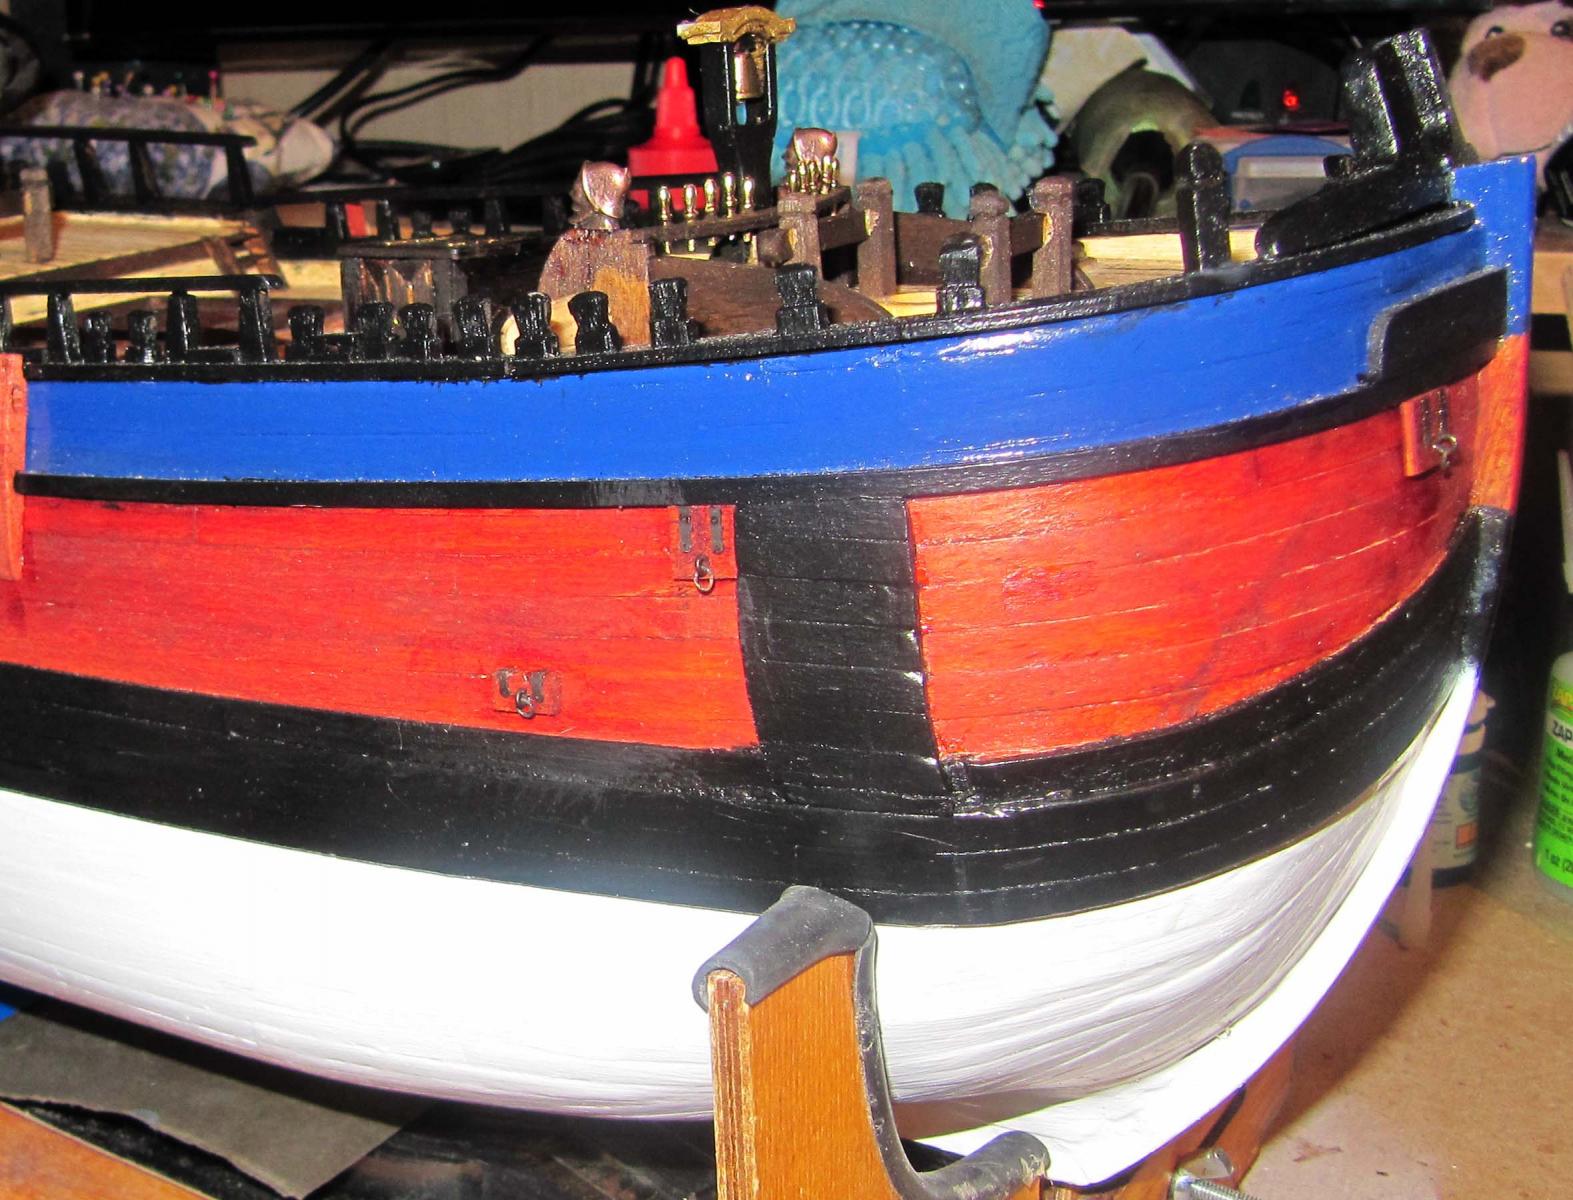
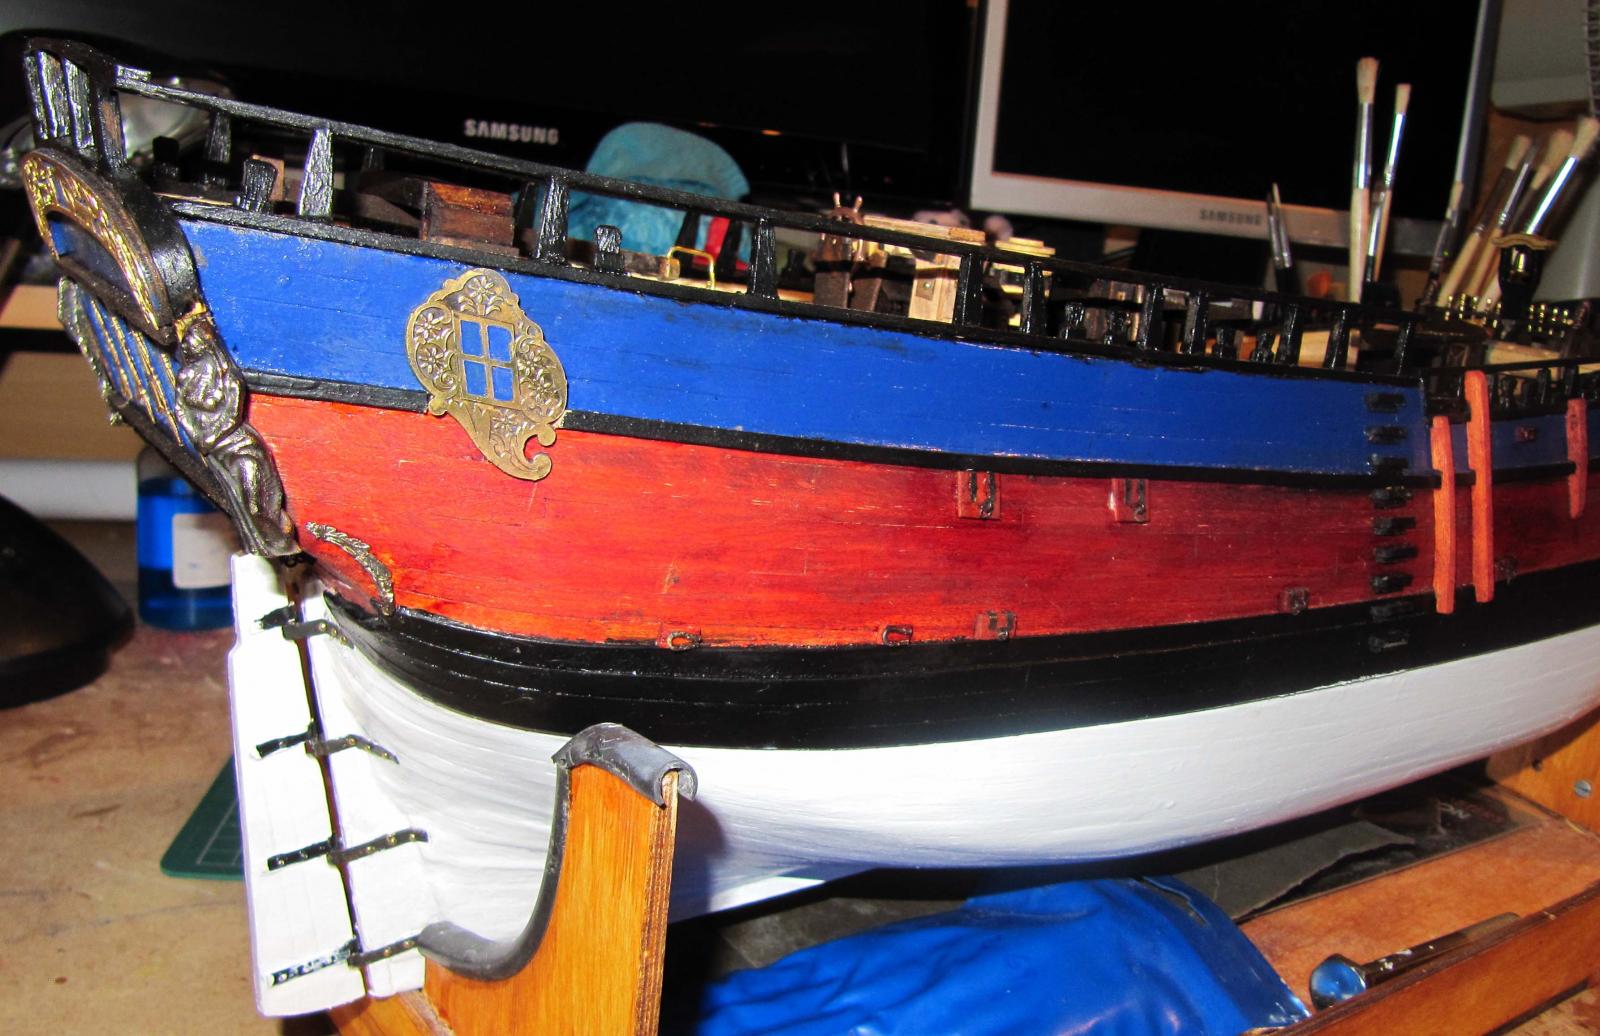
Morning all
I intend to concentrate here for a bit as I have so many parts assemled
I blackened the windows and the decorations

What do you think?????
The blue is not as bright as that, the flash has brought it out a bit
I think they look good
The decorations particularly came out well
Right, off the work
-
-
Nice job Edward
Looks very smooth
Just what you want for a nice planking
-
-
thanks for the in put i forgot to mention its bass wood, at least i think so it came with the phantom kit
Well basswood is fairly soft and malleable so should not take too long
Lovely work with the launch Scott
It's coming along really well
-
Well all i am back at it, I started cutting the wood for the launchways, I have decided to do that for now then get back to the ship. I have started to get ready to trim the keel, I am going to use the process that Hopefull did, by using the 1/8x1/8 wood and center it and use it as a guide to fair the keel.
I do have a question, for a 1/8 x 1/8 piece of wood 12 inches long how long do i have to soak it so i can bend it so it will sit on the keel
pics to follow soon
Hi Scott
It depends very much what the wood is I think
Something like Lime takes very little time at all and even a few minutes soaking in hottish water will enable shaping
A hardwood however will take a lot longer to soften, maybe several hours
Just keep taking it out and have a feel
Remember softwood will swell and soften quite a bit and then shrink back as it dries, so keep that in mind and also treat the wood gently
Prepare it before soaking as it does not sand well at all when soaked
Good luck with the build
-
No updates as I have been working 6 out of 9 days so far, and since I work 24 hour shifts at the firehouse, that has not left me a lot of time
:)And we have to assume that taking the kit with you is not an option
- Sjors, DCIronfist and rdsaplala
-
3
-
It all comes to try our patience doesn't it Adriaan
Like my deck being out of line on the Will Everard
You have done a nice job to sort things
You are certainly giving yourself a lot of extra work the way you are bashing this kit
I am sure it will all be worth it in the end though


HMB Endeavour by Micklen32 - OcCre - 1:54
in - Kit build logs for subjects built from 1751 - 1800
Posted · Edited by Micklen32
Right I had a look around at the suggestions here
Thank you very much all of you
Then I had a look at what I had
So
How about this one with the wire blacked
I am fairly pleased with it but I know how important it is to get it as right as possible
Please let me know what you think, remembering how limited I am in the bedroom