HOLIDAY DONATION DRIVE - SUPPORT MSW - DO YOUR PART TO KEEP THIS GREAT FORUM GOING! (Only 20 donations so far - C'mon guys!)
×

SweepHall
-
Posts
34 -
Joined
-
Last visited
Content Type
Profiles
Forums
Gallery
Events
Everything posted by SweepHall
-
 Stick some glue behind it, put a pin through it (may need a little hole first to stop it splitting) and put a clamp on the bit sticking out (pale wood - no idea what it's actually called) to wedge against the wale. That's my newbie suggestion anyway.
 -
Hopefully you can get it put together a little faster than this gentleman https://www.bbc.co.uk/news/uk-england-oxfordshire-53579079
-
Prynhawn da pawb - (Good afternoon all) from Wales!
SweepHall replied to SweepHall's topic in New member Introductions
Well... I played cricket from junior level for around 20 years and only stopped playing over the last year or two when I got a little bit addicted to golf instead. Whilst playing cricket I used to have a habit (a bad habit if you listened to my captain) of sweeping* everything I could. Now, my surname is Hall and someone once passed a comment about my sweep and called me SweepsAll. That eventually turned into SweepHall and the name stuck from there on. *for those of you who don't know what sweeping is, it's a shot in cricket called a sweep shot. -
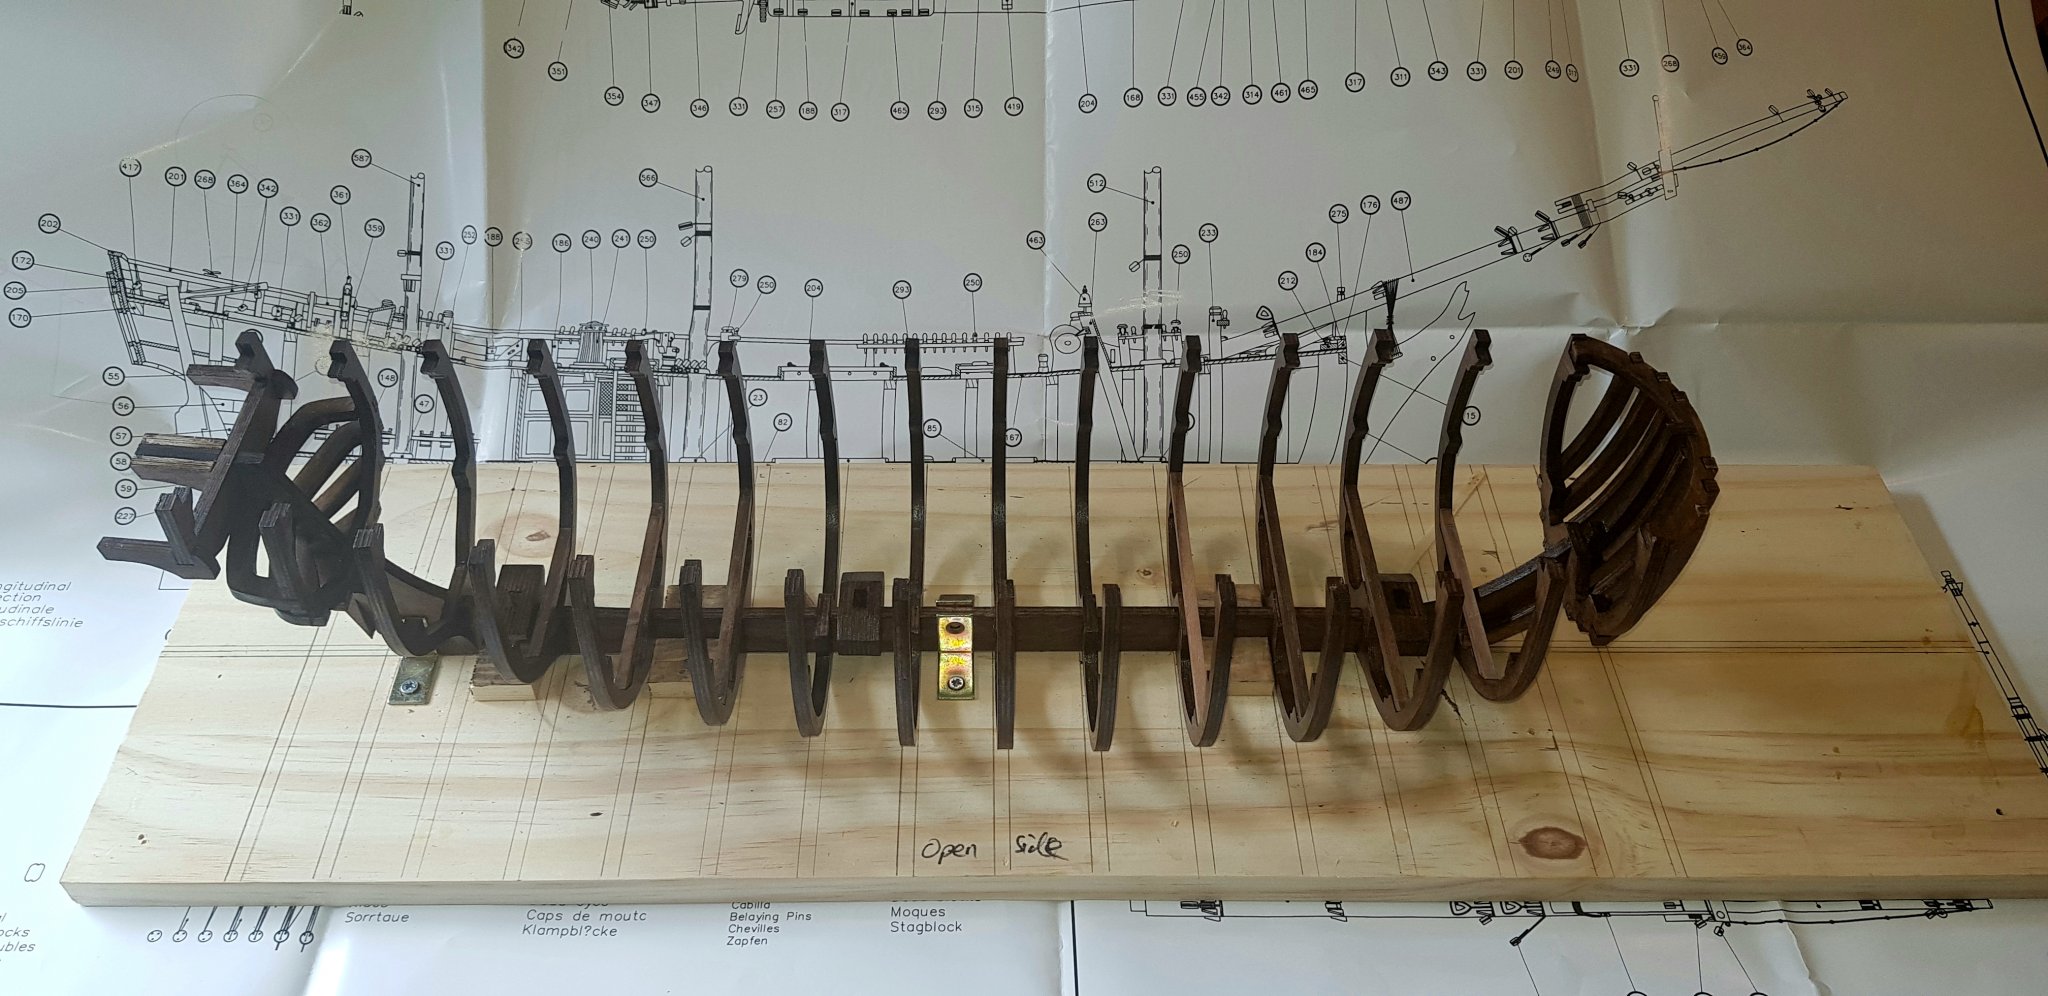
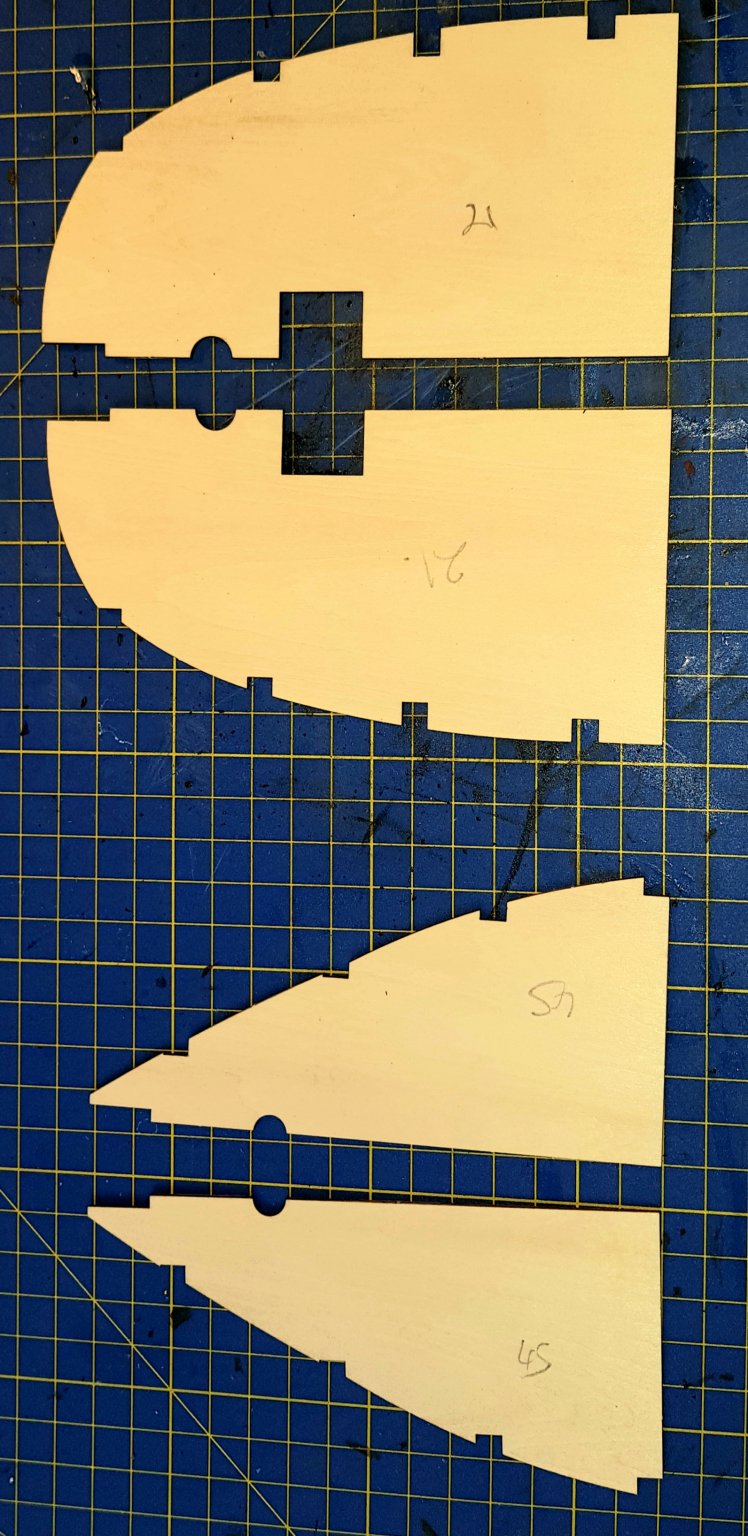
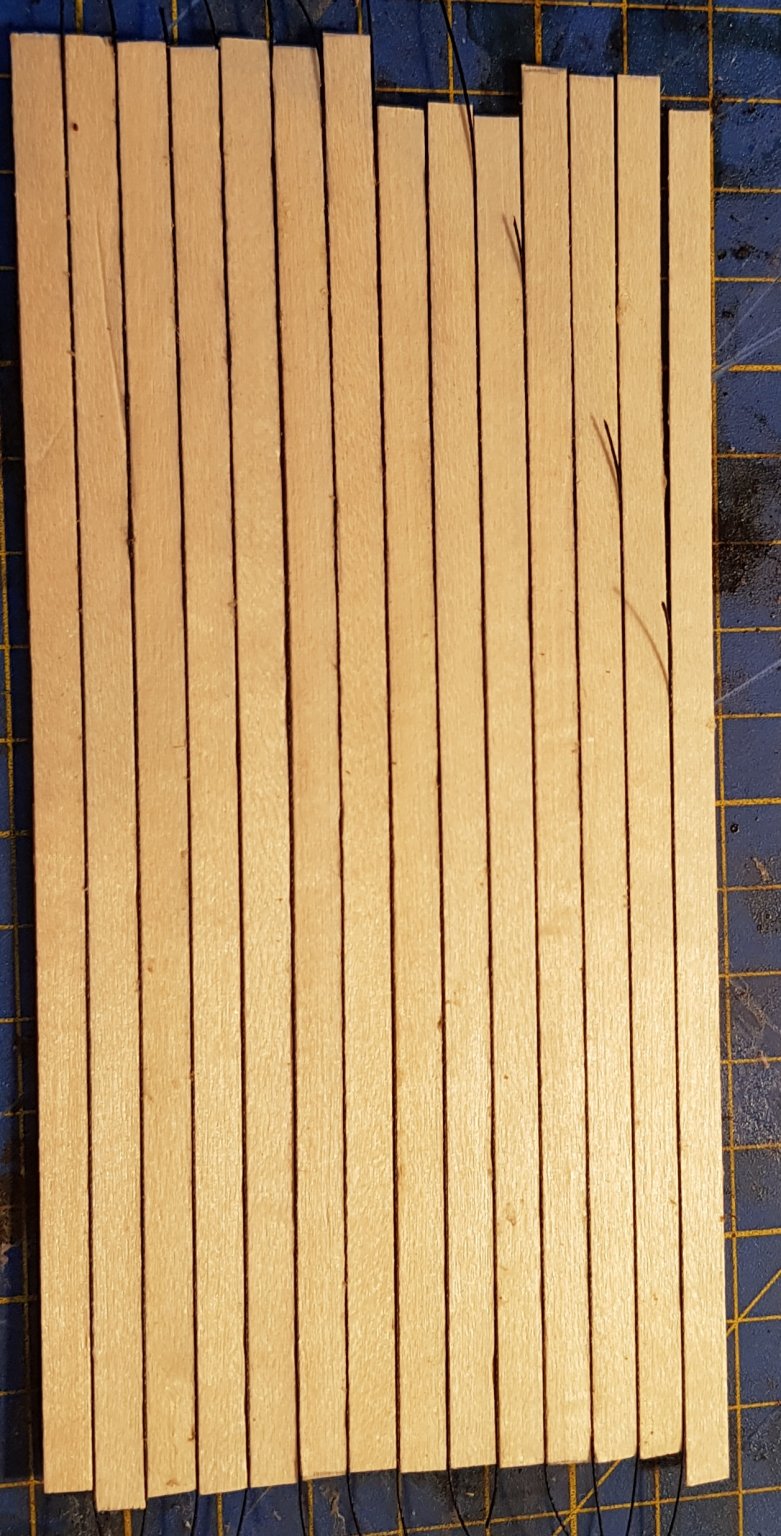
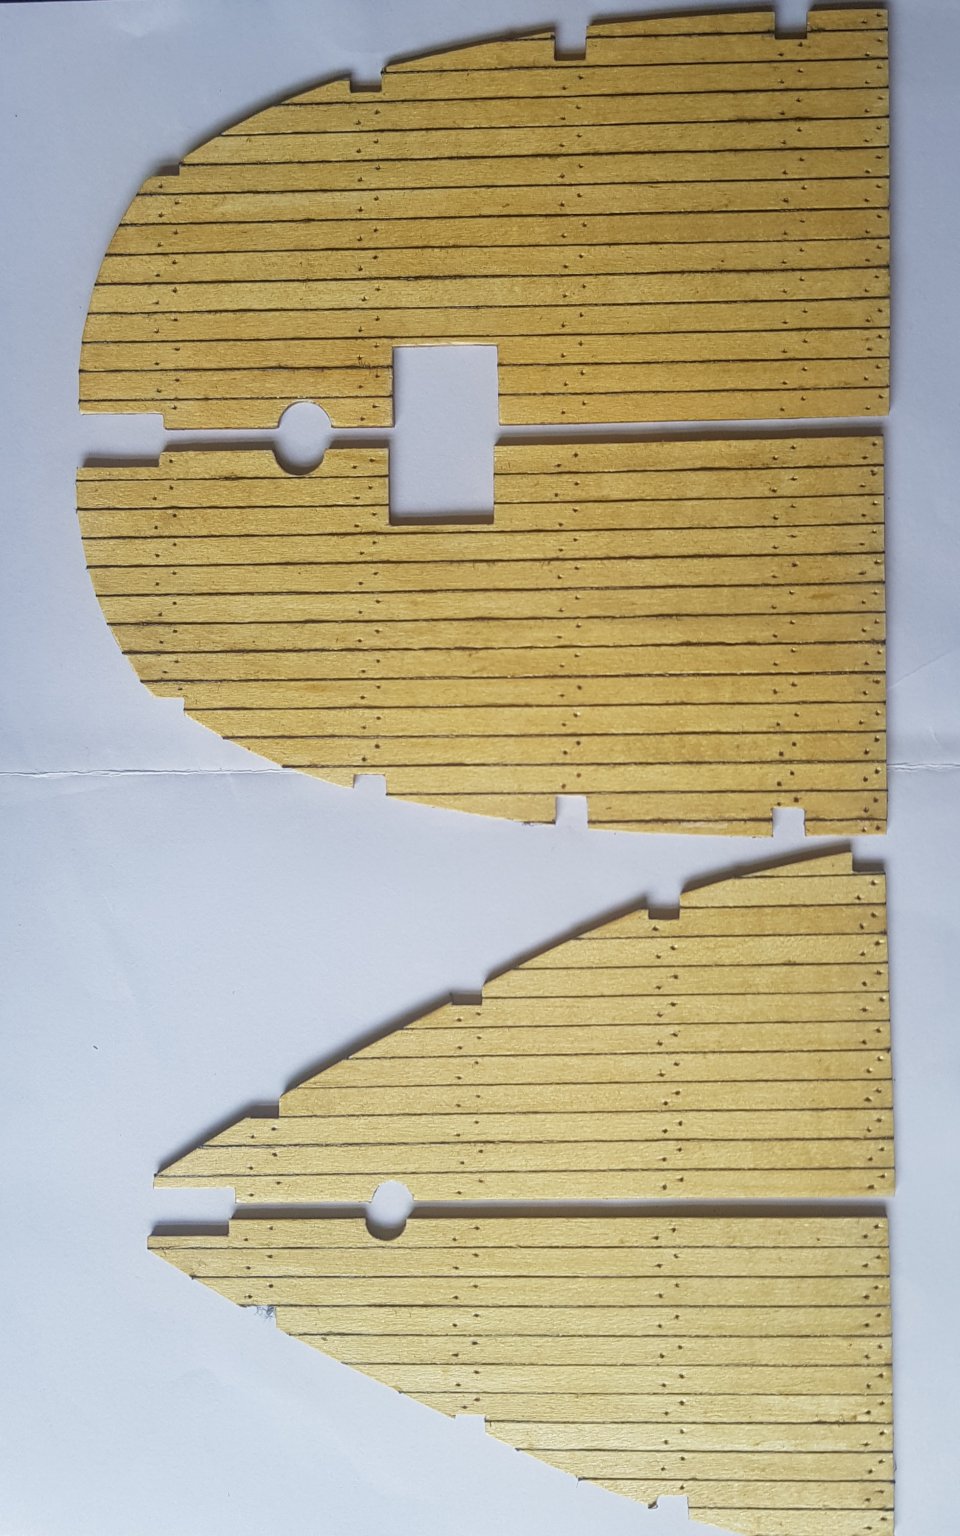
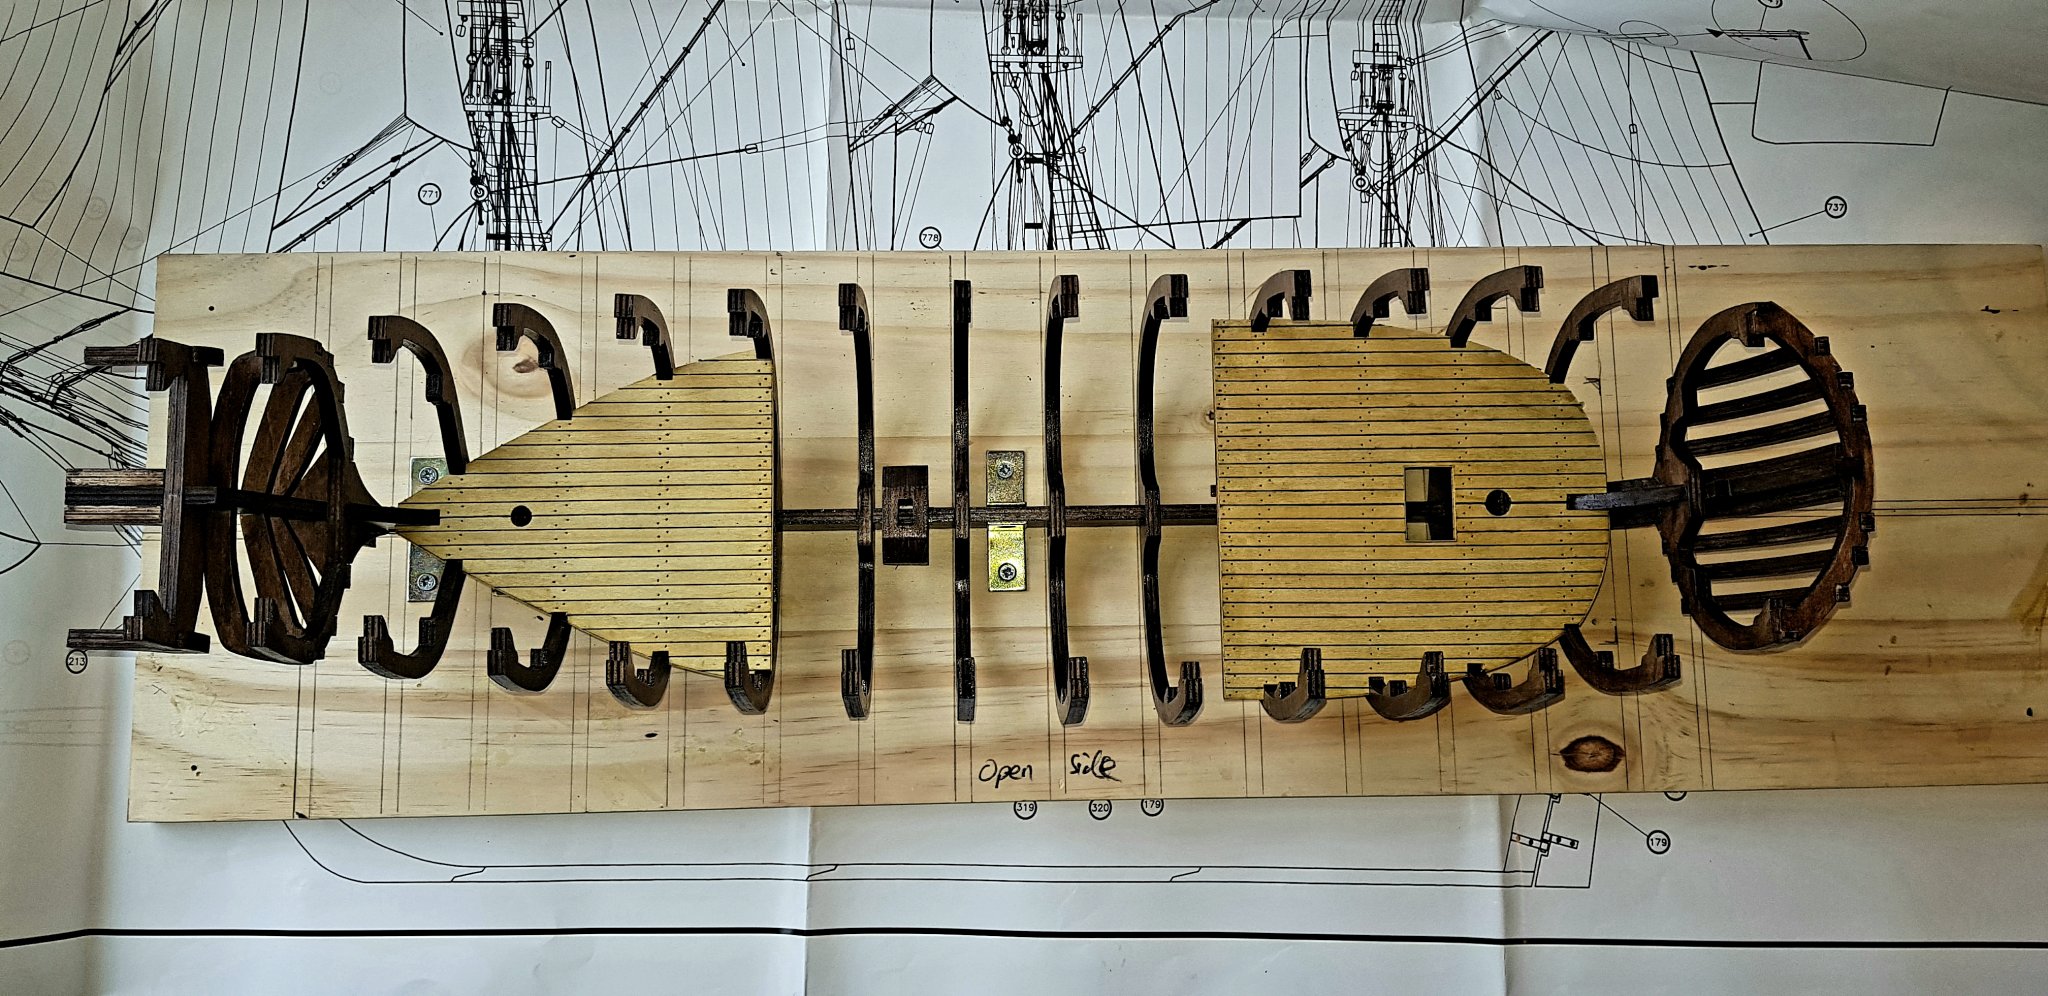
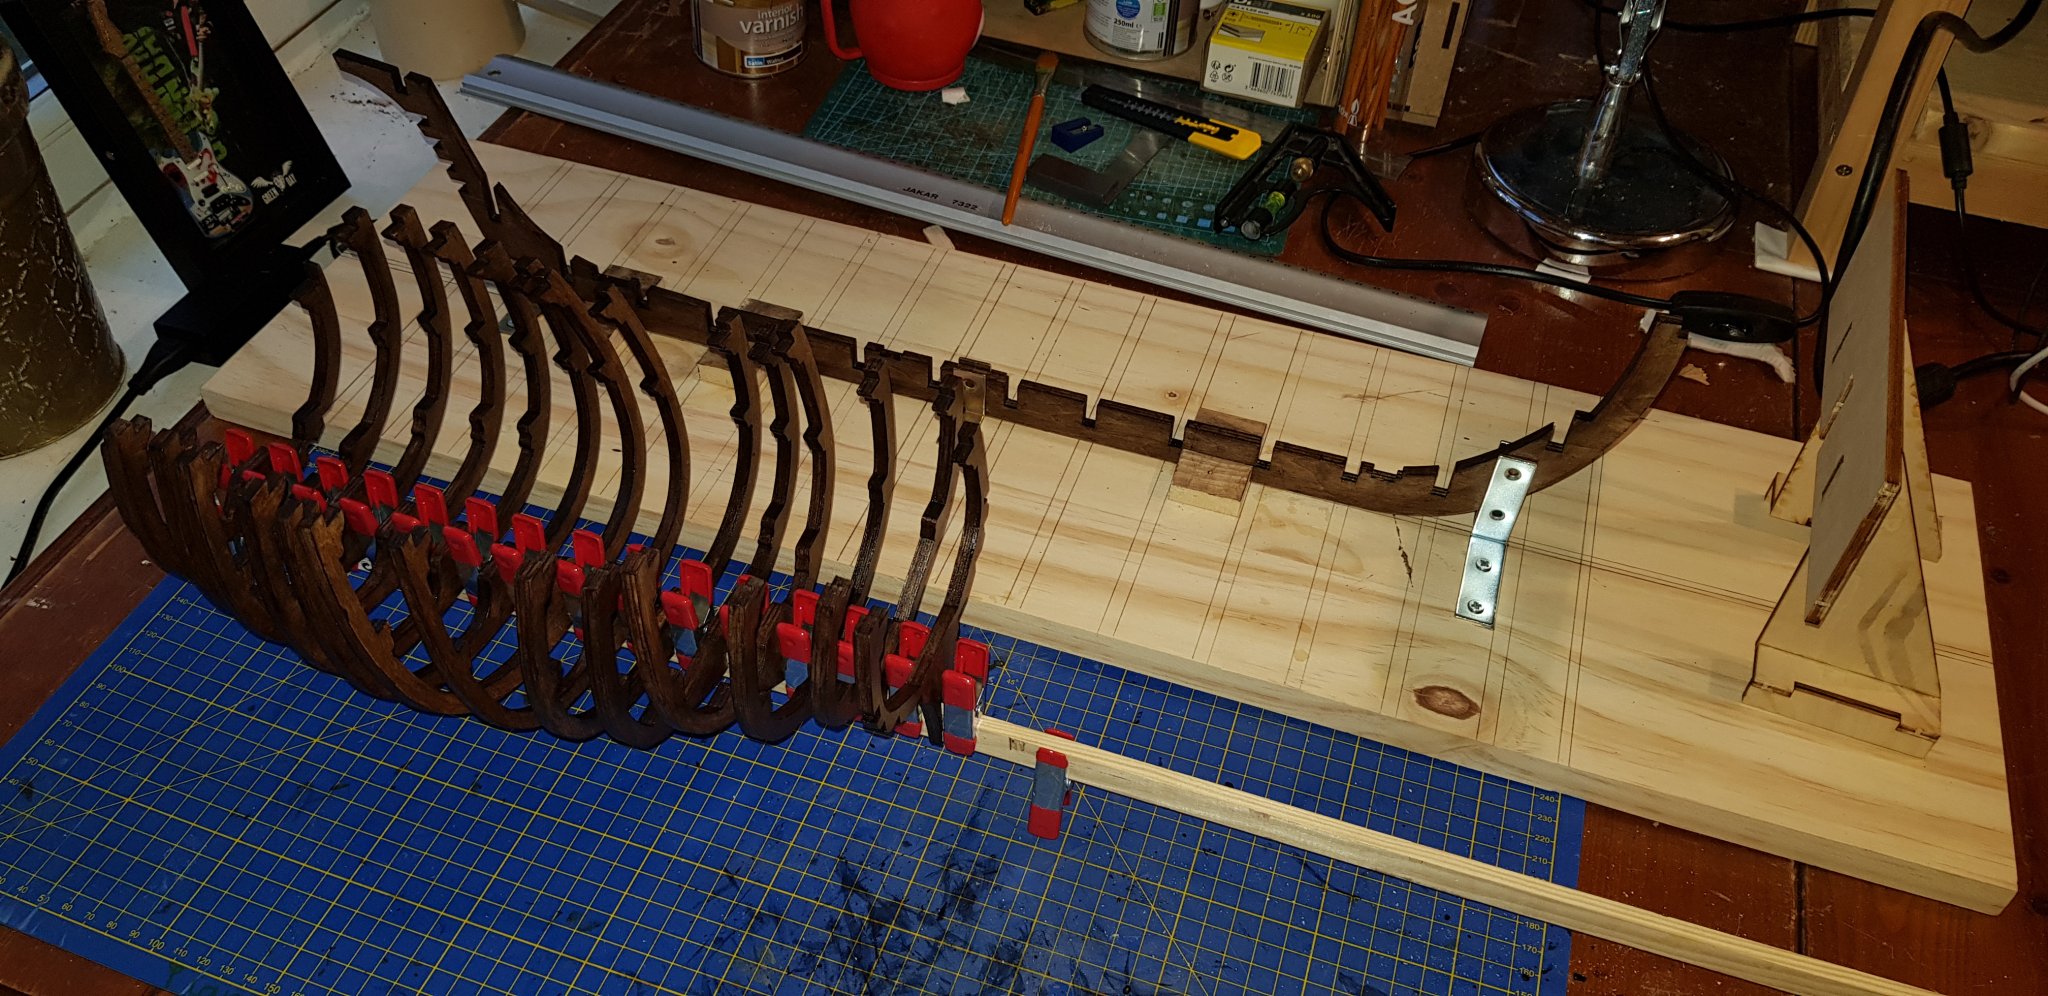
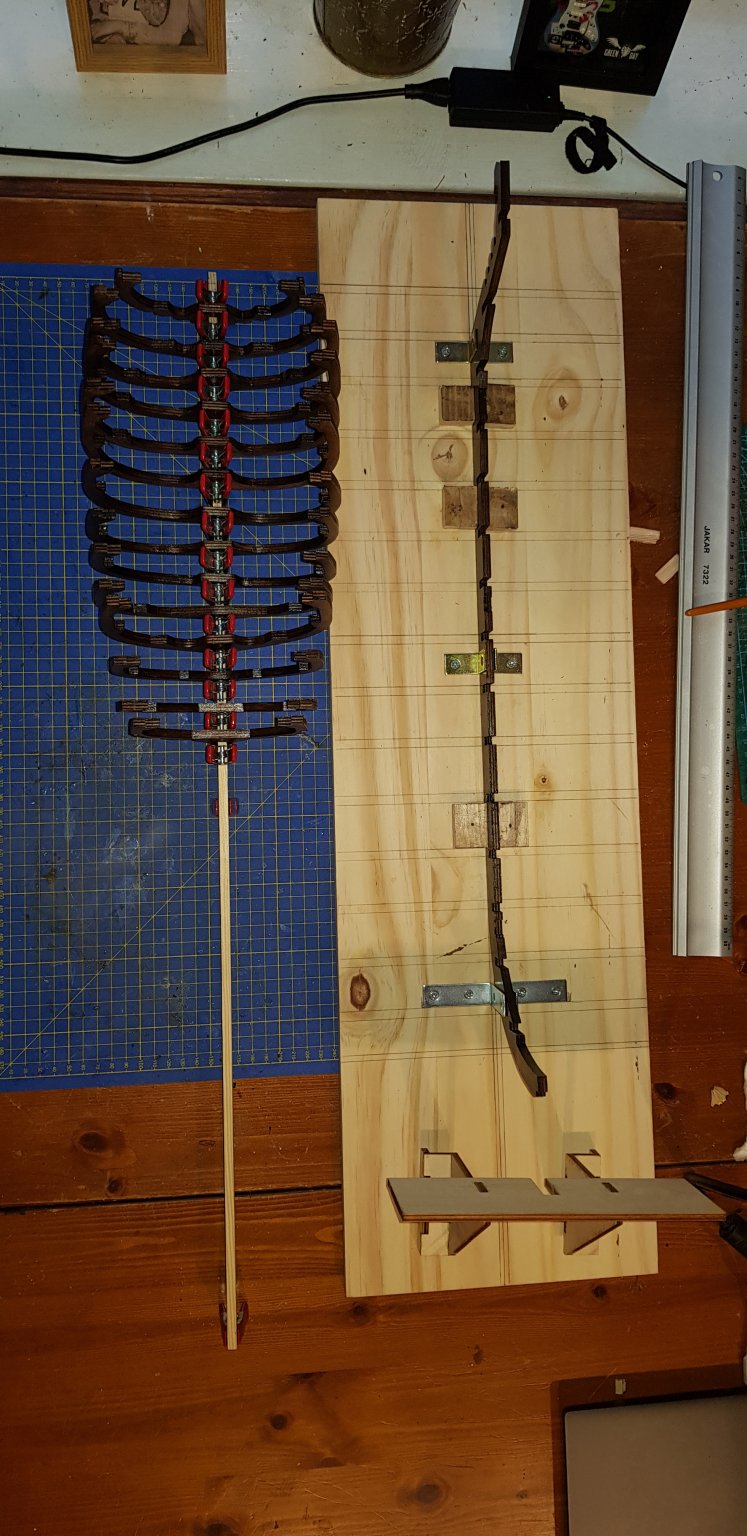
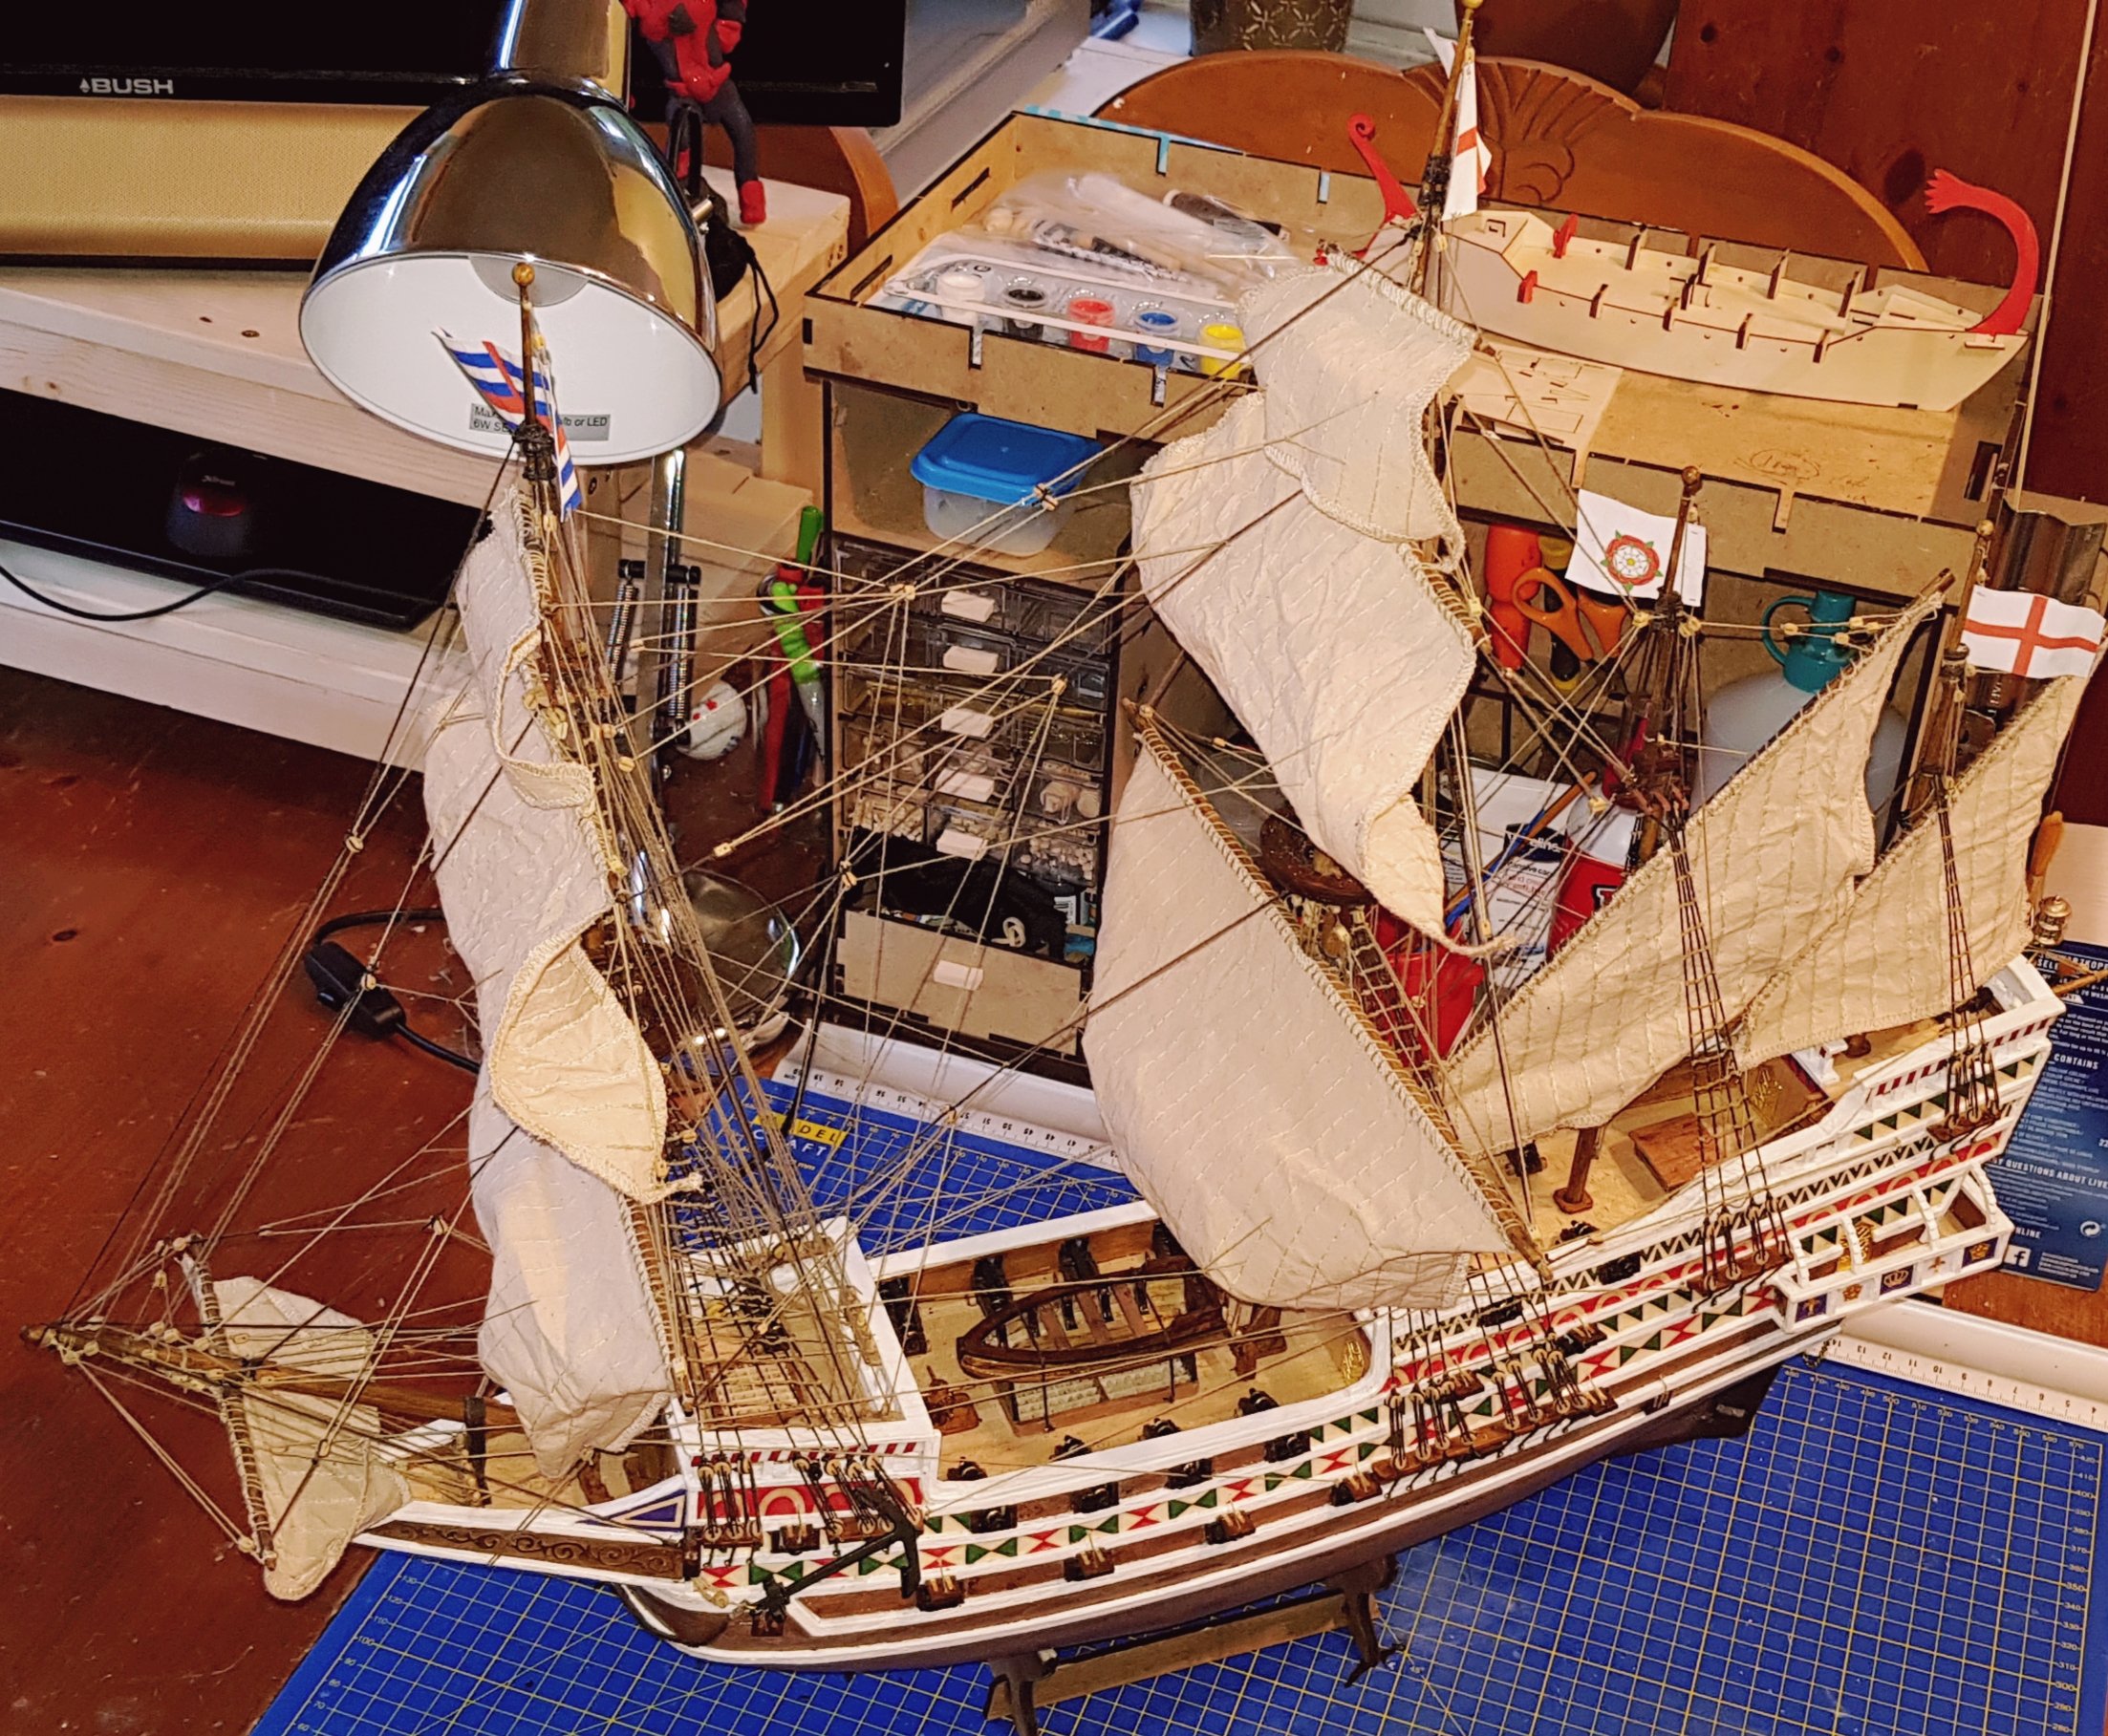
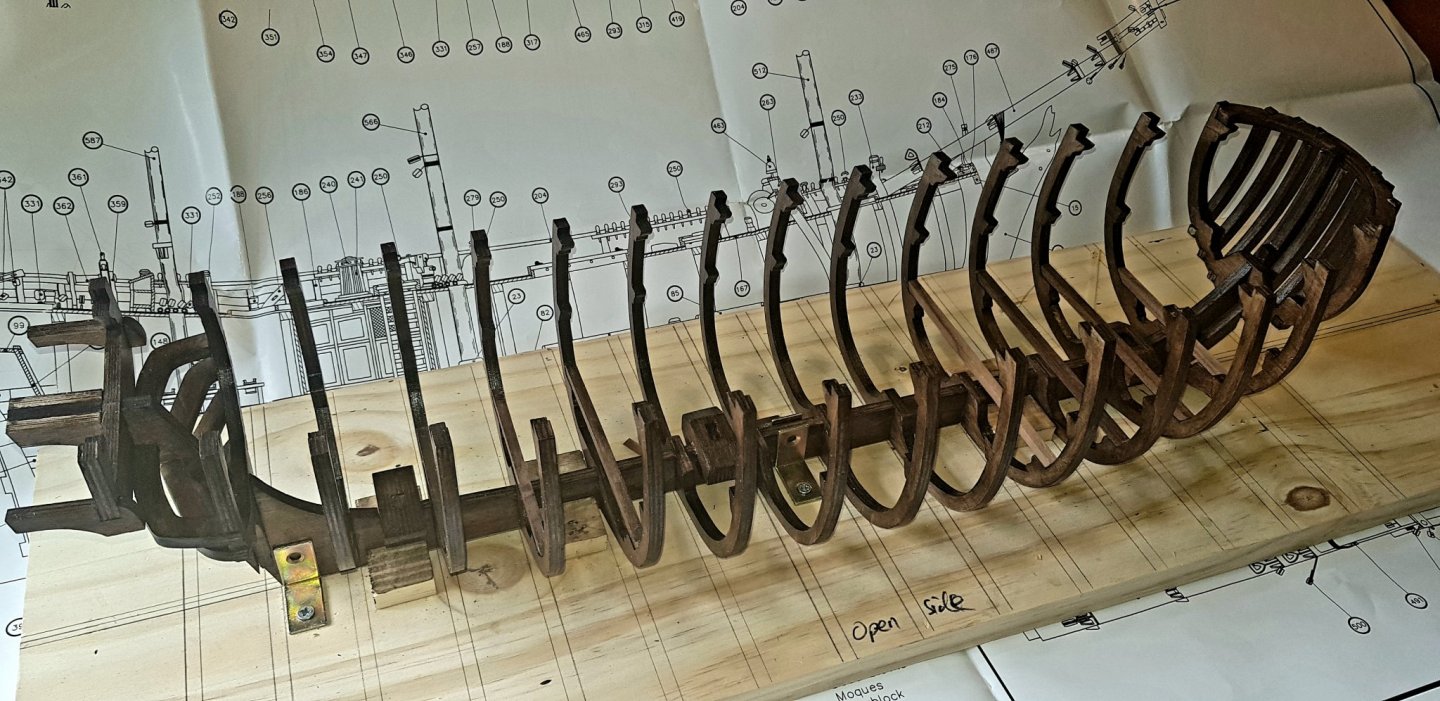
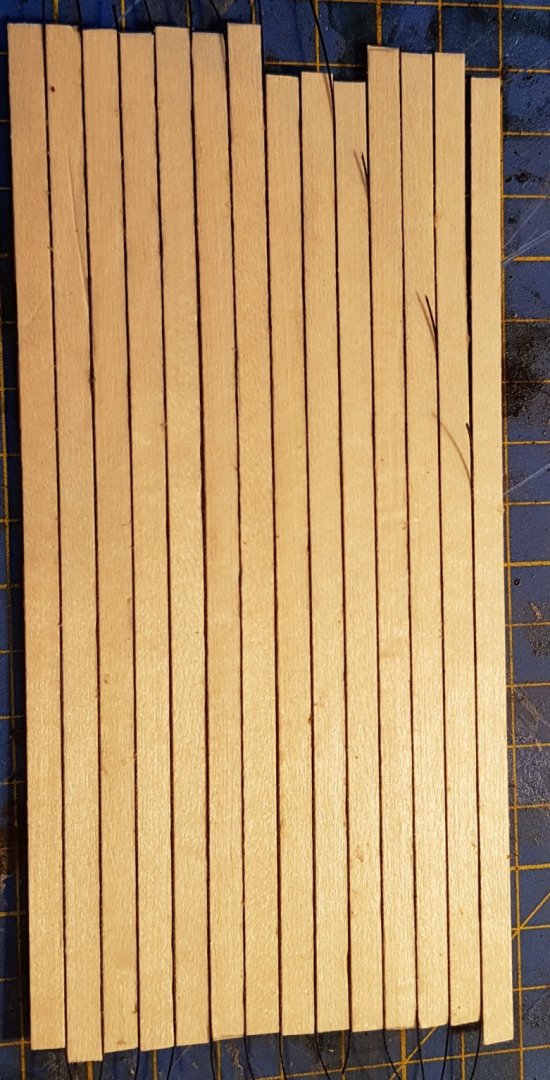
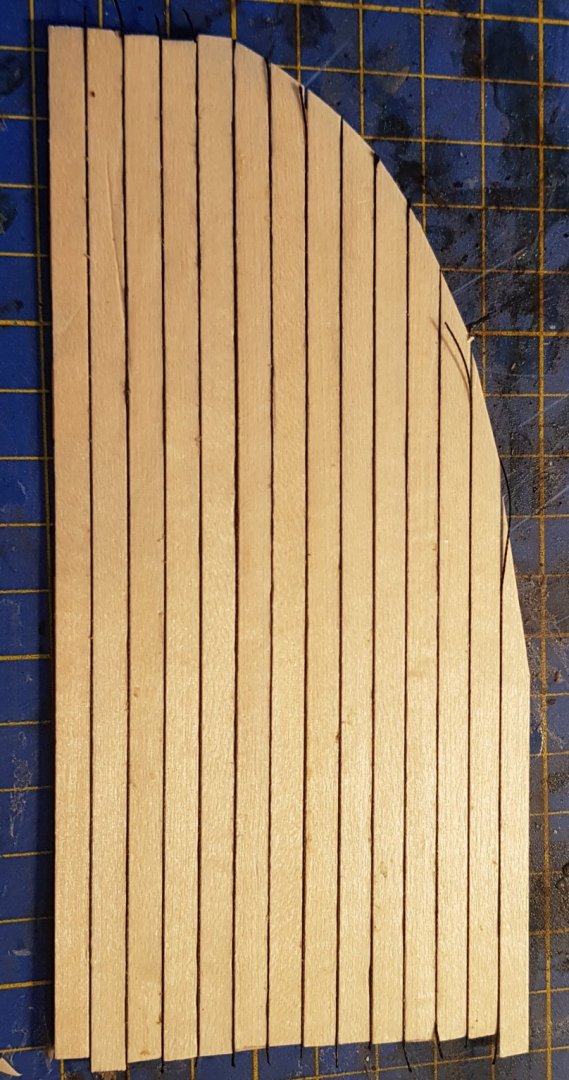
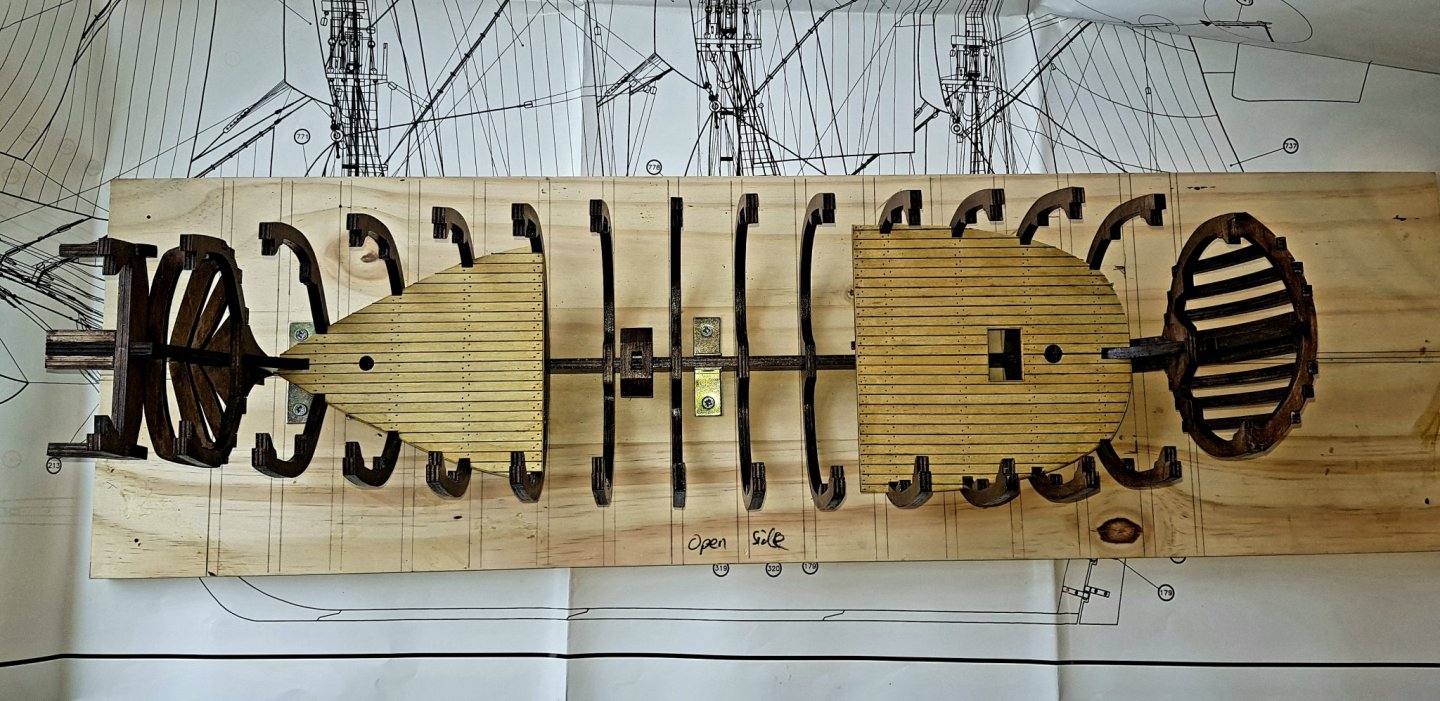
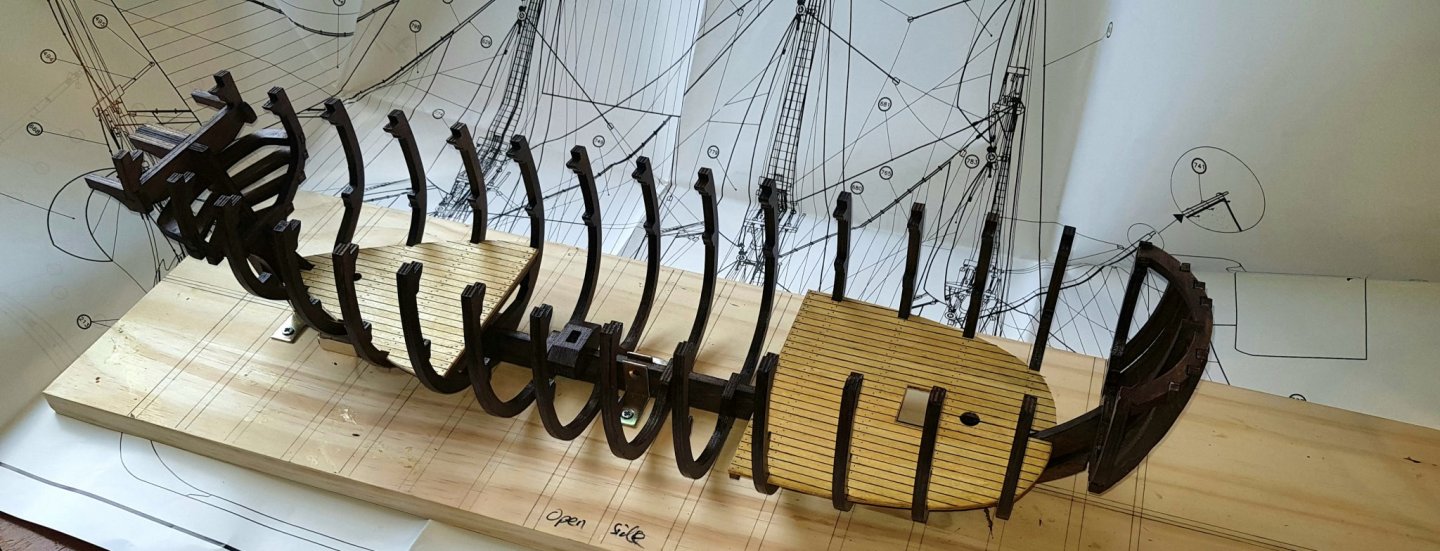
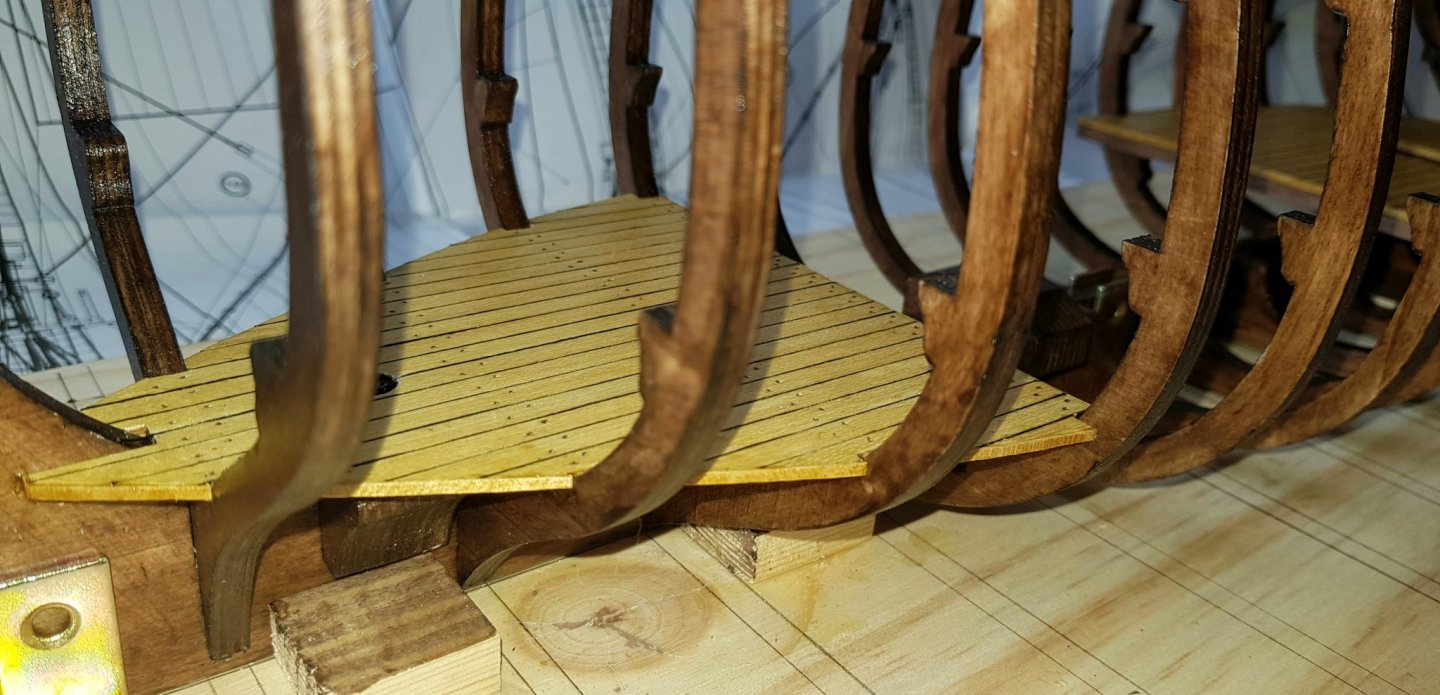
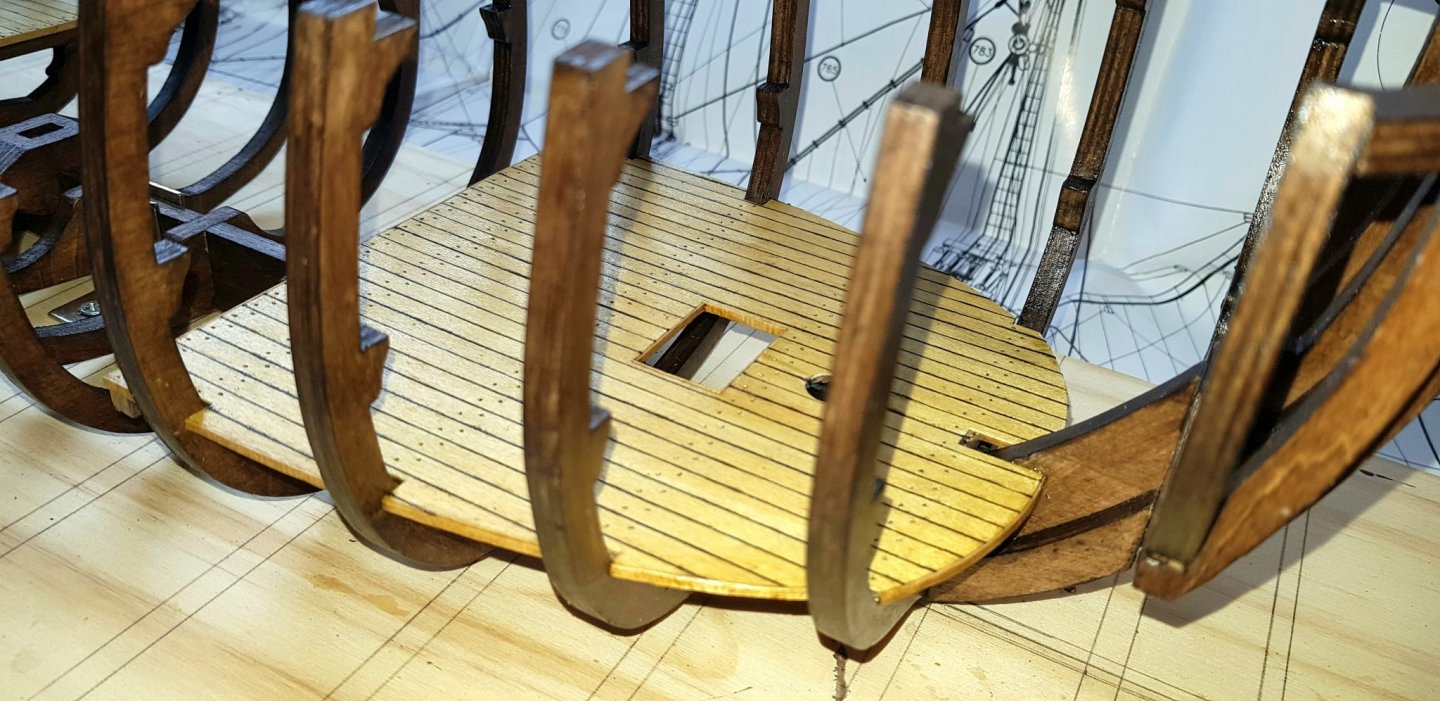
So an update of work over the weekend. Finished the staining/varnishing of everything to do with the frame of the ship. Checked the levels whilst installing all the frames and everything appears to be level and at the correct distances (some of the frames had to be persuaded to stay level). So now onto the hold decks. I'd seen on another page about using cotton thread as the caulking between the planks so I thought I'd give it a go. I stained and varnished underneath the decks before doing any work on the top of them. Very little of the hold deck will be visible from underneath but the lower deck and the main deck will be. It wasn't overly difficult putting the cotton in, but I found it got easier if it was coated in some watered down PVA first. I think I did a better job on the ones I did later as I got into the swing of it by then but I'm pleased with the result overall. And I finished the decks using a bit of light oak varnish and using a pencil to simulate the nail heads. I did have a go at drilling holes and using a bit of wood filler but I couldn't get it to work on the small holes and I think the pencil looks good enough. Installed onto the ship. Some very minor filing on the groves so they sat on the frames nicely but everything is still level and in the correct place. And I also added a veneer on the edges of the deck to hide the plywood edge. Am not going to bother veneering the other side as 1 - it's not open and 2 - you won't be able to see it because of the cabins. And now onto the planning and measuring up for the custom cabins on the hold deck.


-
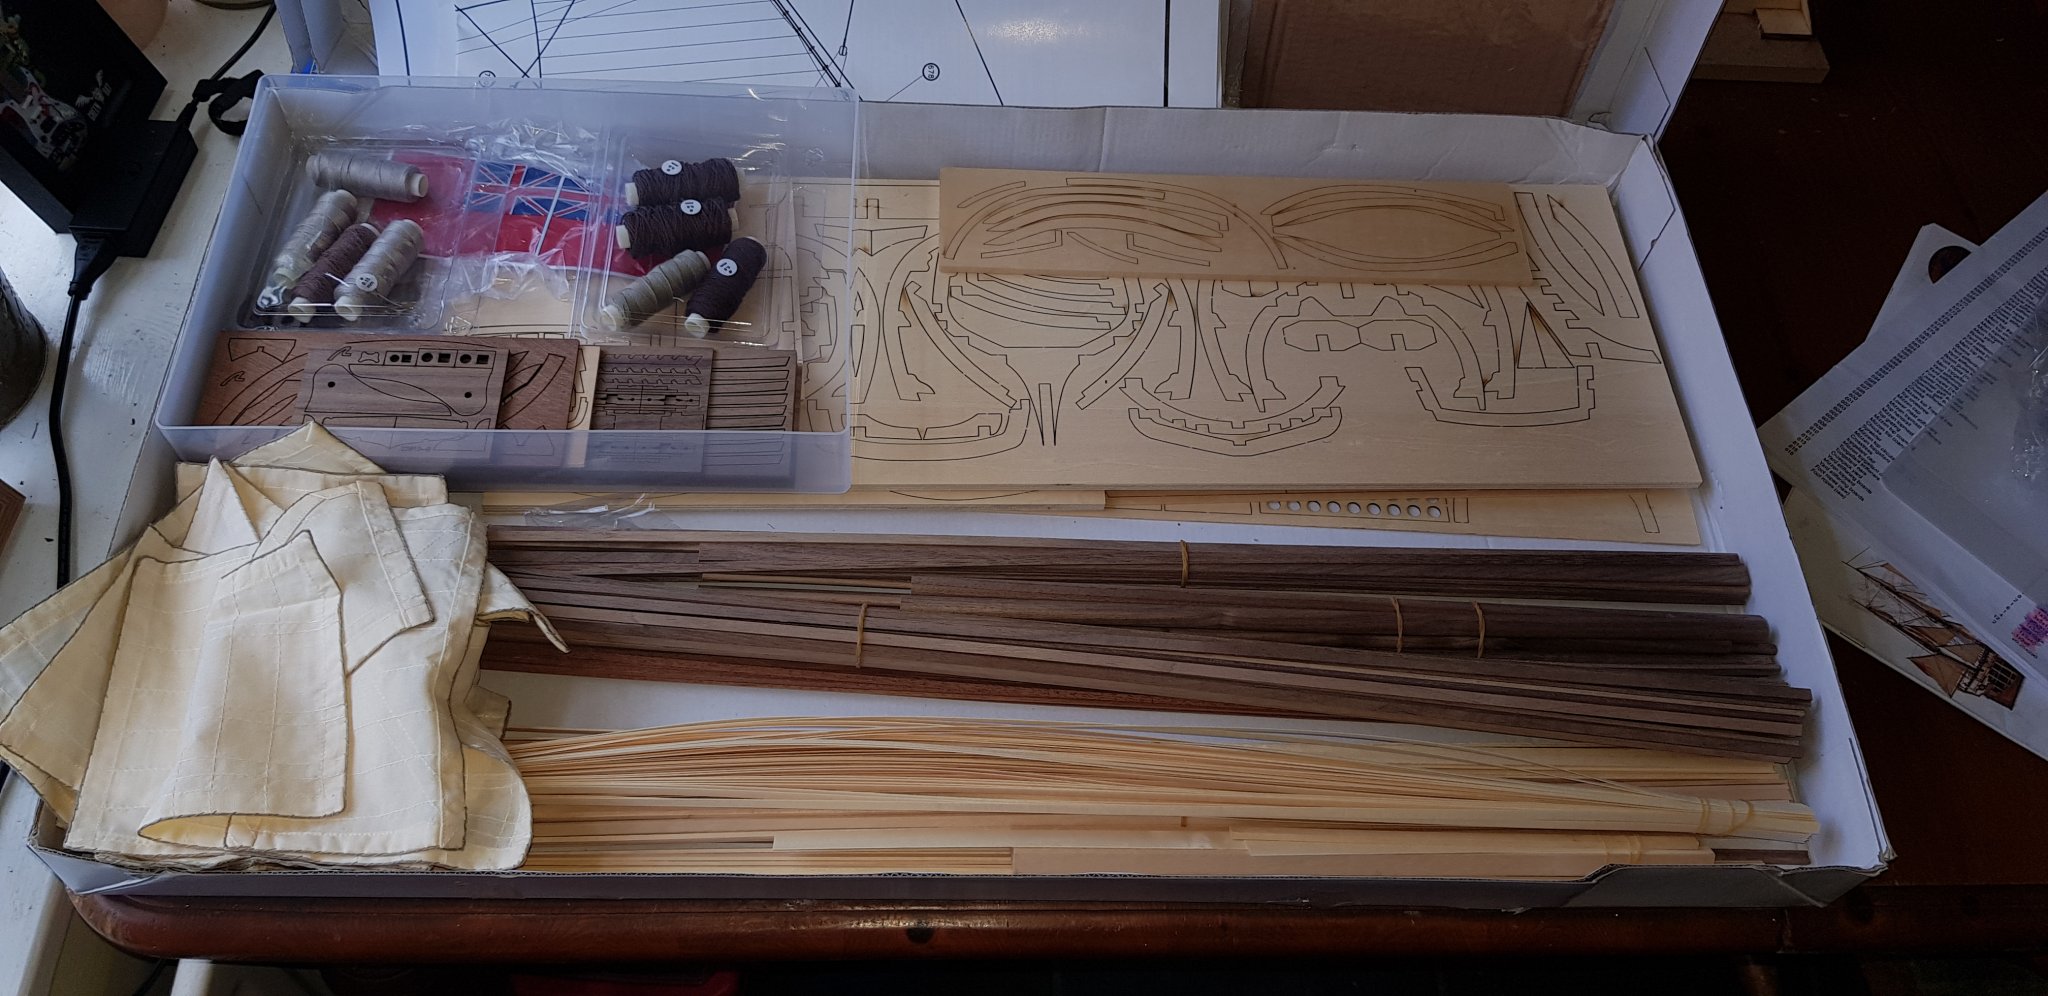
Hi all Newbie member from Wales here and just thought I'd pop in and say hi. Built a few models as child but nothing that requires the time and effort that model ship building seems to need! Have lurked on here for a while getting tips for my first build which was the HMS Revenge by Occre (the hints and tips are fantastic btw); gave me something to during lockdown because of Covid19. I've enjoyed reading through the build logs and wish I had done one for that build. I'm doing a build log for the AL Bounty 1:48 scale, so any tips, advice and encouragement will be gratefully received!
-
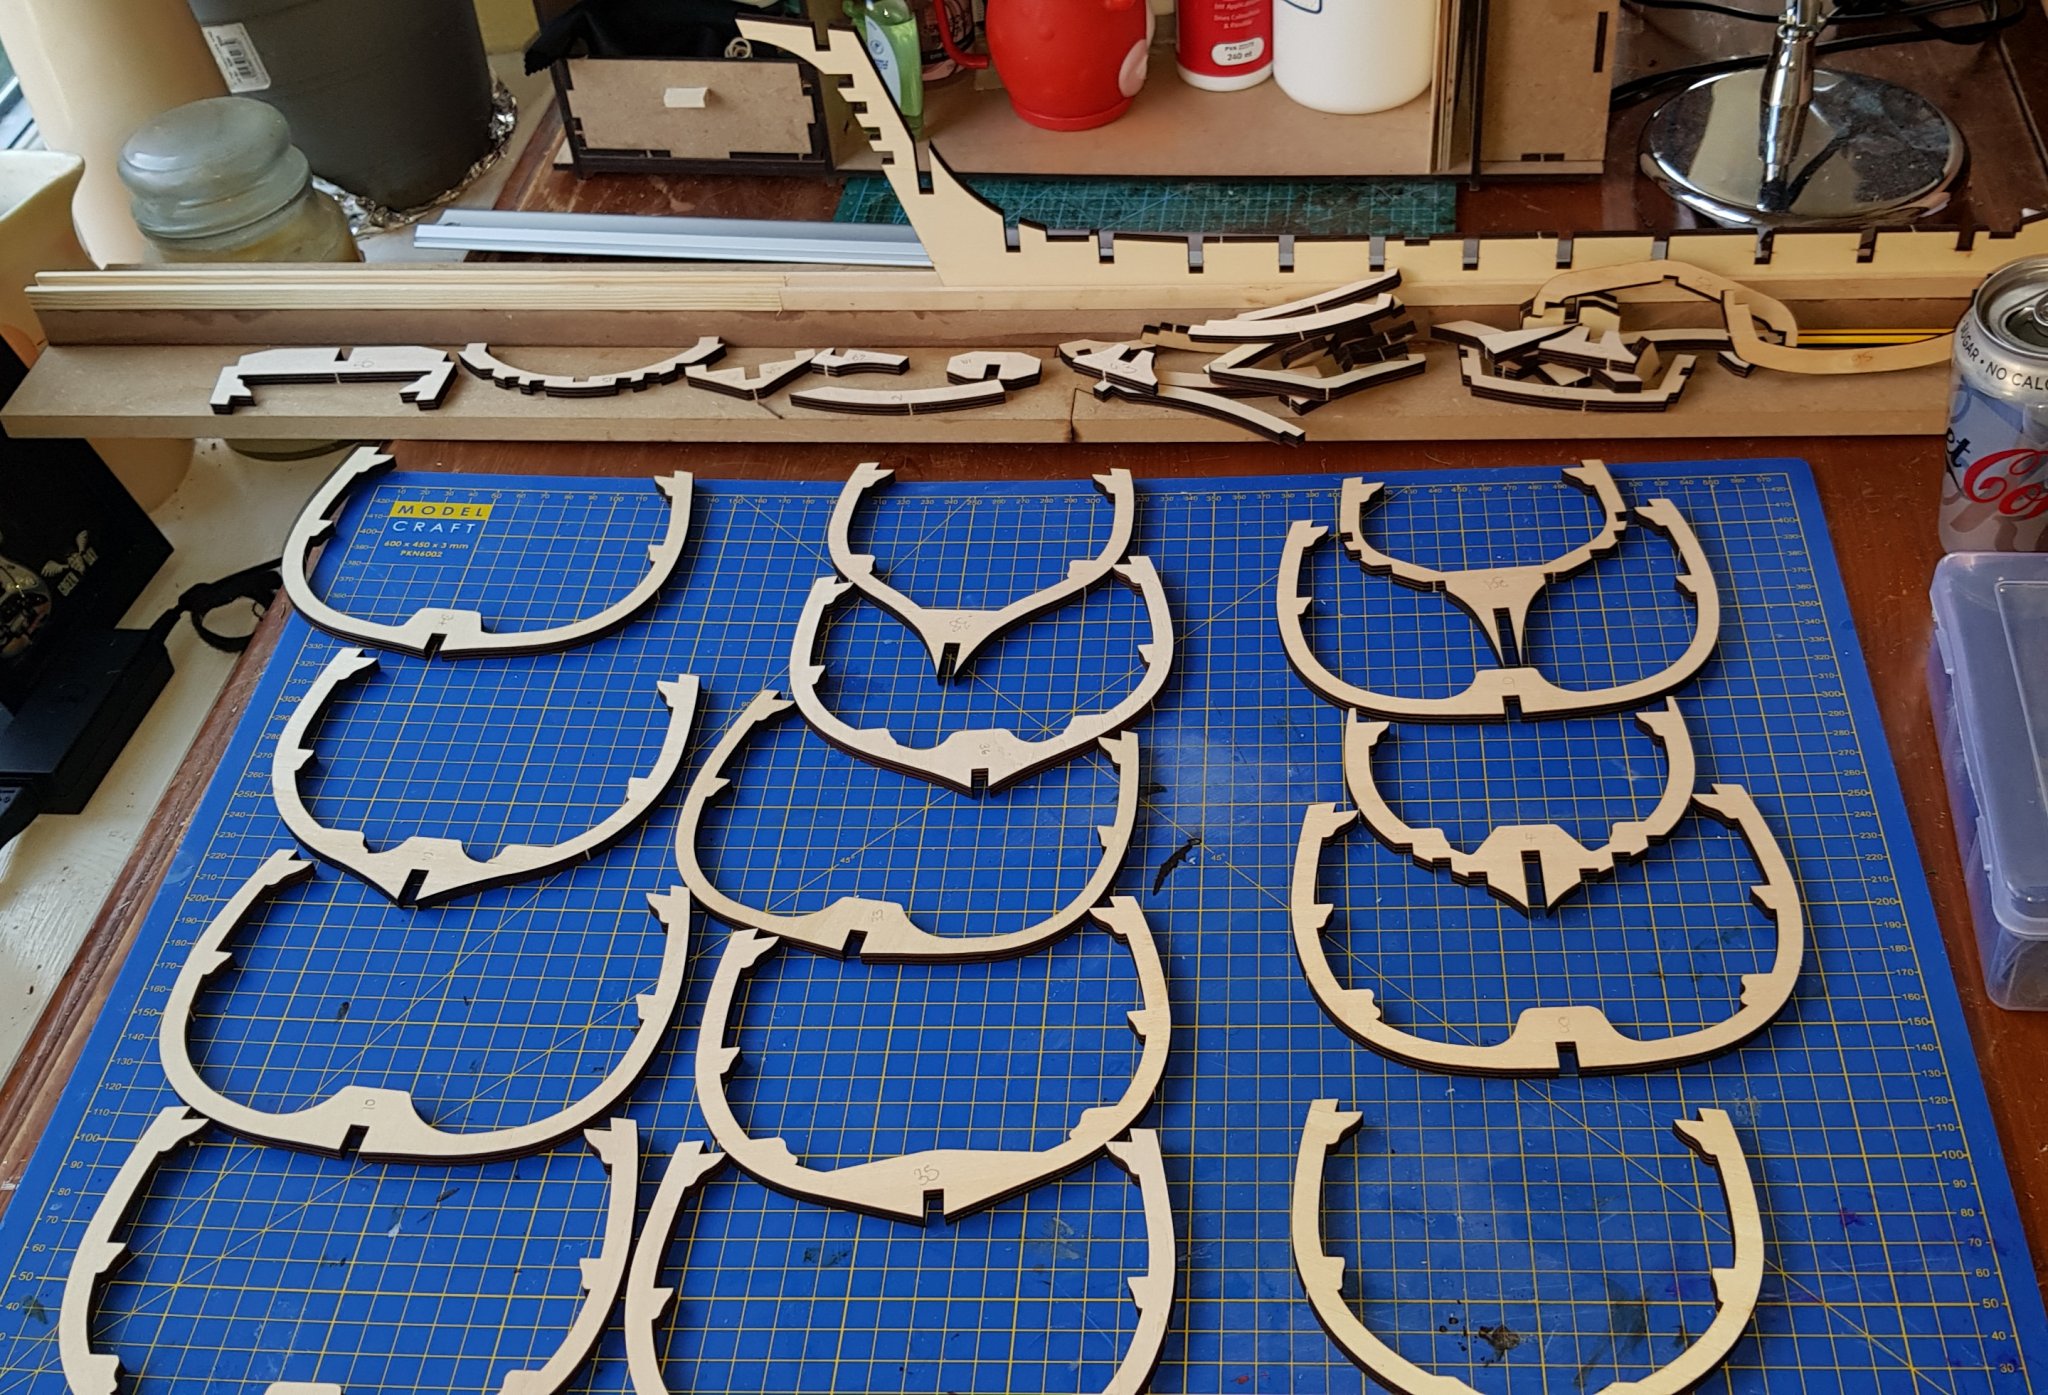
Have stained the framed and the false keel with satin walnut varnish. I quite like the finish with just the two coats. Also finished my jig which has helped straighten out the false keel a little as it was slightly warped. Now to finish off the varnishing of all the smaller frames pieces


-
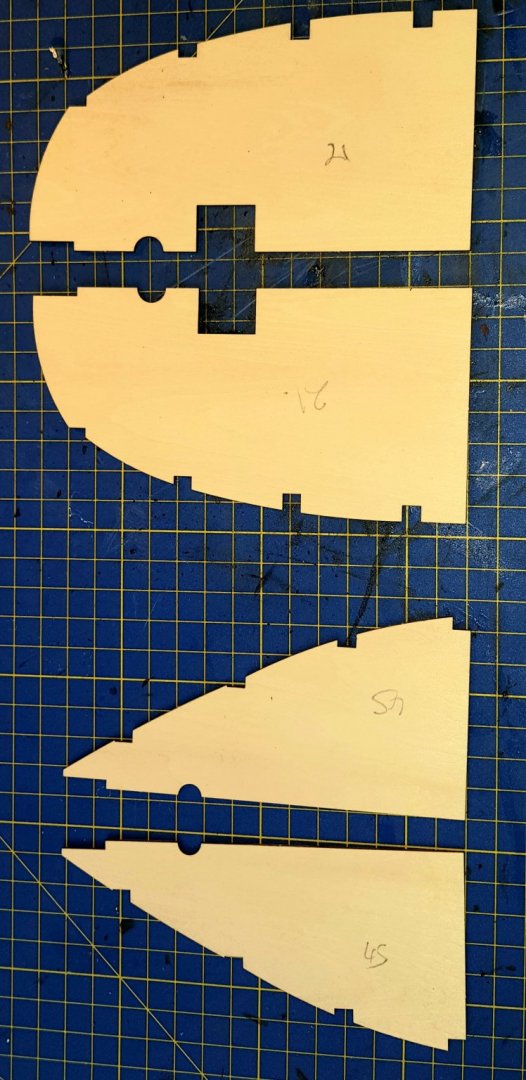
Hi all First build log but second build having just finished building the HMS Revenge by Ocre. Was a fairly basic model but I feel I learnt quite a lot doing it. Have purchased the AL Bounty kit after seeing a few of the build logs on here and quite liked the idea of the open side and the amount of detail you could put in it. It was a toss up between the Bounty and Caldercraft's Mary Rose but, in the end, the Bounty won. I'm going to be making quite a few additions to the interior as had been done in other logs as I feel it adds more to the model. I'm also going to have a go at adding some internal lighting to the ship as what's the point of the interior detail if you can't see it? I'm also planning on putting a bit of paint on the exterior to brighten it up a bit (just a little blue and yellow) After opening the box, spending a few hours reading the instructions and typing the part list up onto a spreadsheet to make identification and searching easier, I noticed that there's a number of pieces missing: 8mm brass rings, 0.6x6 basswood, 1x8 basswood and cloth for the bales plus there not being enough 0.6 x 3 basswod, 1 x 10 basswood, 1 x basswood, 3 x 5 basswod and ø6 dowells. As I was ordering more material to make additional cabins and features, I just re-ordered what was missing. I purchased the Billings boats slip to use for the bounty but have found it's no good for this model as the frames go right down to the bottom of the false keel. I've made my own version using a shelf, some angle brackets and some blocks of wood. Hopefully it gets the frames in a perfect position. One thing I could do with advice on is what is single planking and double planking? The bounty model is single planked but the Revenge model I made had 1 layer of basswood/lime planks and then you covered it with 0.6mm strips over the top. I really liked the finish this gave the model in the end and would like to do the same thing for the bounty (plus it hides the pin heads). Is this what is referred to as double planking and would anyone advise against it on the AL Bounty? Edit - have learnt this is called a veneer. No idea if it's the "done thing thing" or not, but I'm going to do it anyway. The Revenge took me a month and half to complete but I'm planning on spending a lot more time (I know it's going to take months/year(s)) on the Bounty to get it "perfect". I've made a start cutting the pieces out of the kit and have started the sanding/staining/varnish process as I like the walnut finish on the frames and false keel. Any tips and advice would be greatly appreciated. Will keep you all updated and thanks for reading!