Jeff preisler
-
Posts
92 -
Joined
-
Last visited


-
 catopower reacted to a post in a topic:
USS Perry by Jeff Preisler - FINISHED - BlueJacket Shipcrafters - Scale 1/8" = 1'
catopower reacted to a post in a topic:
USS Perry by Jeff Preisler - FINISHED - BlueJacket Shipcrafters - Scale 1/8" = 1'
-
catopower reacted to a post in a topic:
USS Perry by Jeff Preisler - FINISHED - BlueJacket Shipcrafters - Scale 1/8" = 1'
-
catopower reacted to a post in a topic:
USS Perry by Jeff Preisler - FINISHED - BlueJacket Shipcrafters - Scale 1/8" = 1'
-
catopower reacted to a post in a topic:
USS Perry by Jeff Preisler - FINISHED - BlueJacket Shipcrafters - Scale 1/8" = 1'
-
catopower reacted to a post in a topic:
USS Perry by Jeff Preisler - FINISHED - BlueJacket Shipcrafters - Scale 1/8" = 1'
-
catopower reacted to a post in a topic:
USS Perry by Jeff Preisler - FINISHED - BlueJacket Shipcrafters - Scale 1/8" = 1'
-
catopower reacted to a post in a topic:
USS Perry by Jeff Preisler - FINISHED - BlueJacket Shipcrafters - Scale 1/8" = 1'
-
catopower reacted to a post in a topic:
USS Perry by Jeff Preisler - FINISHED - BlueJacket Shipcrafters - Scale 1/8" = 1'
-
catopower reacted to a post in a topic:
USS Perry by Jeff Preisler - FINISHED - BlueJacket Shipcrafters - Scale 1/8" = 1'
-
catopower reacted to a post in a topic:
USS Perry by Jeff Preisler - FINISHED - BlueJacket Shipcrafters - Scale 1/8" = 1'
-
Jeff preisler reacted to a post in a topic:
USS Perry by Bleong - BlueJacket Shipcrafters - 1:96
-
Jeff preisler reacted to a post in a topic:
Friendship Sloop by gsdpic - FINISHED - BlueJacket Shipcrafters - 1:12
-
 Jeff preisler reacted to a post in a topic:
Spray by Jeff Preisler - BlueJacket Shipcrafters - 3/8" = 1'
Jeff preisler reacted to a post in a topic:
Spray by Jeff Preisler - BlueJacket Shipcrafters - 3/8" = 1'
-
Jeff preisler reacted to a post in a topic:
Spray by Jeff Preisler - BlueJacket Shipcrafters - 3/8" = 1'
-
Very nice workmanship!! I also have this kit in my collection and when I decide to construct it, your detailed build thread will be a wealth of information for me. Thank you.
-
Jeff preisler reacted to a post in a topic:
Endurance by Tomculb - FINISHED - OcCre - 1:70
-
Jeff preisler reacted to a post in a topic:
Endurance by Tomculb - FINISHED - OcCre - 1:70
-
Jeff preisler reacted to a post in a topic:
Endurance by Tomculb - FINISHED - OcCre - 1:70
-
Jeff preisler reacted to a post in a topic:
Endurance by Tomculb - FINISHED - OcCre - 1:70
-
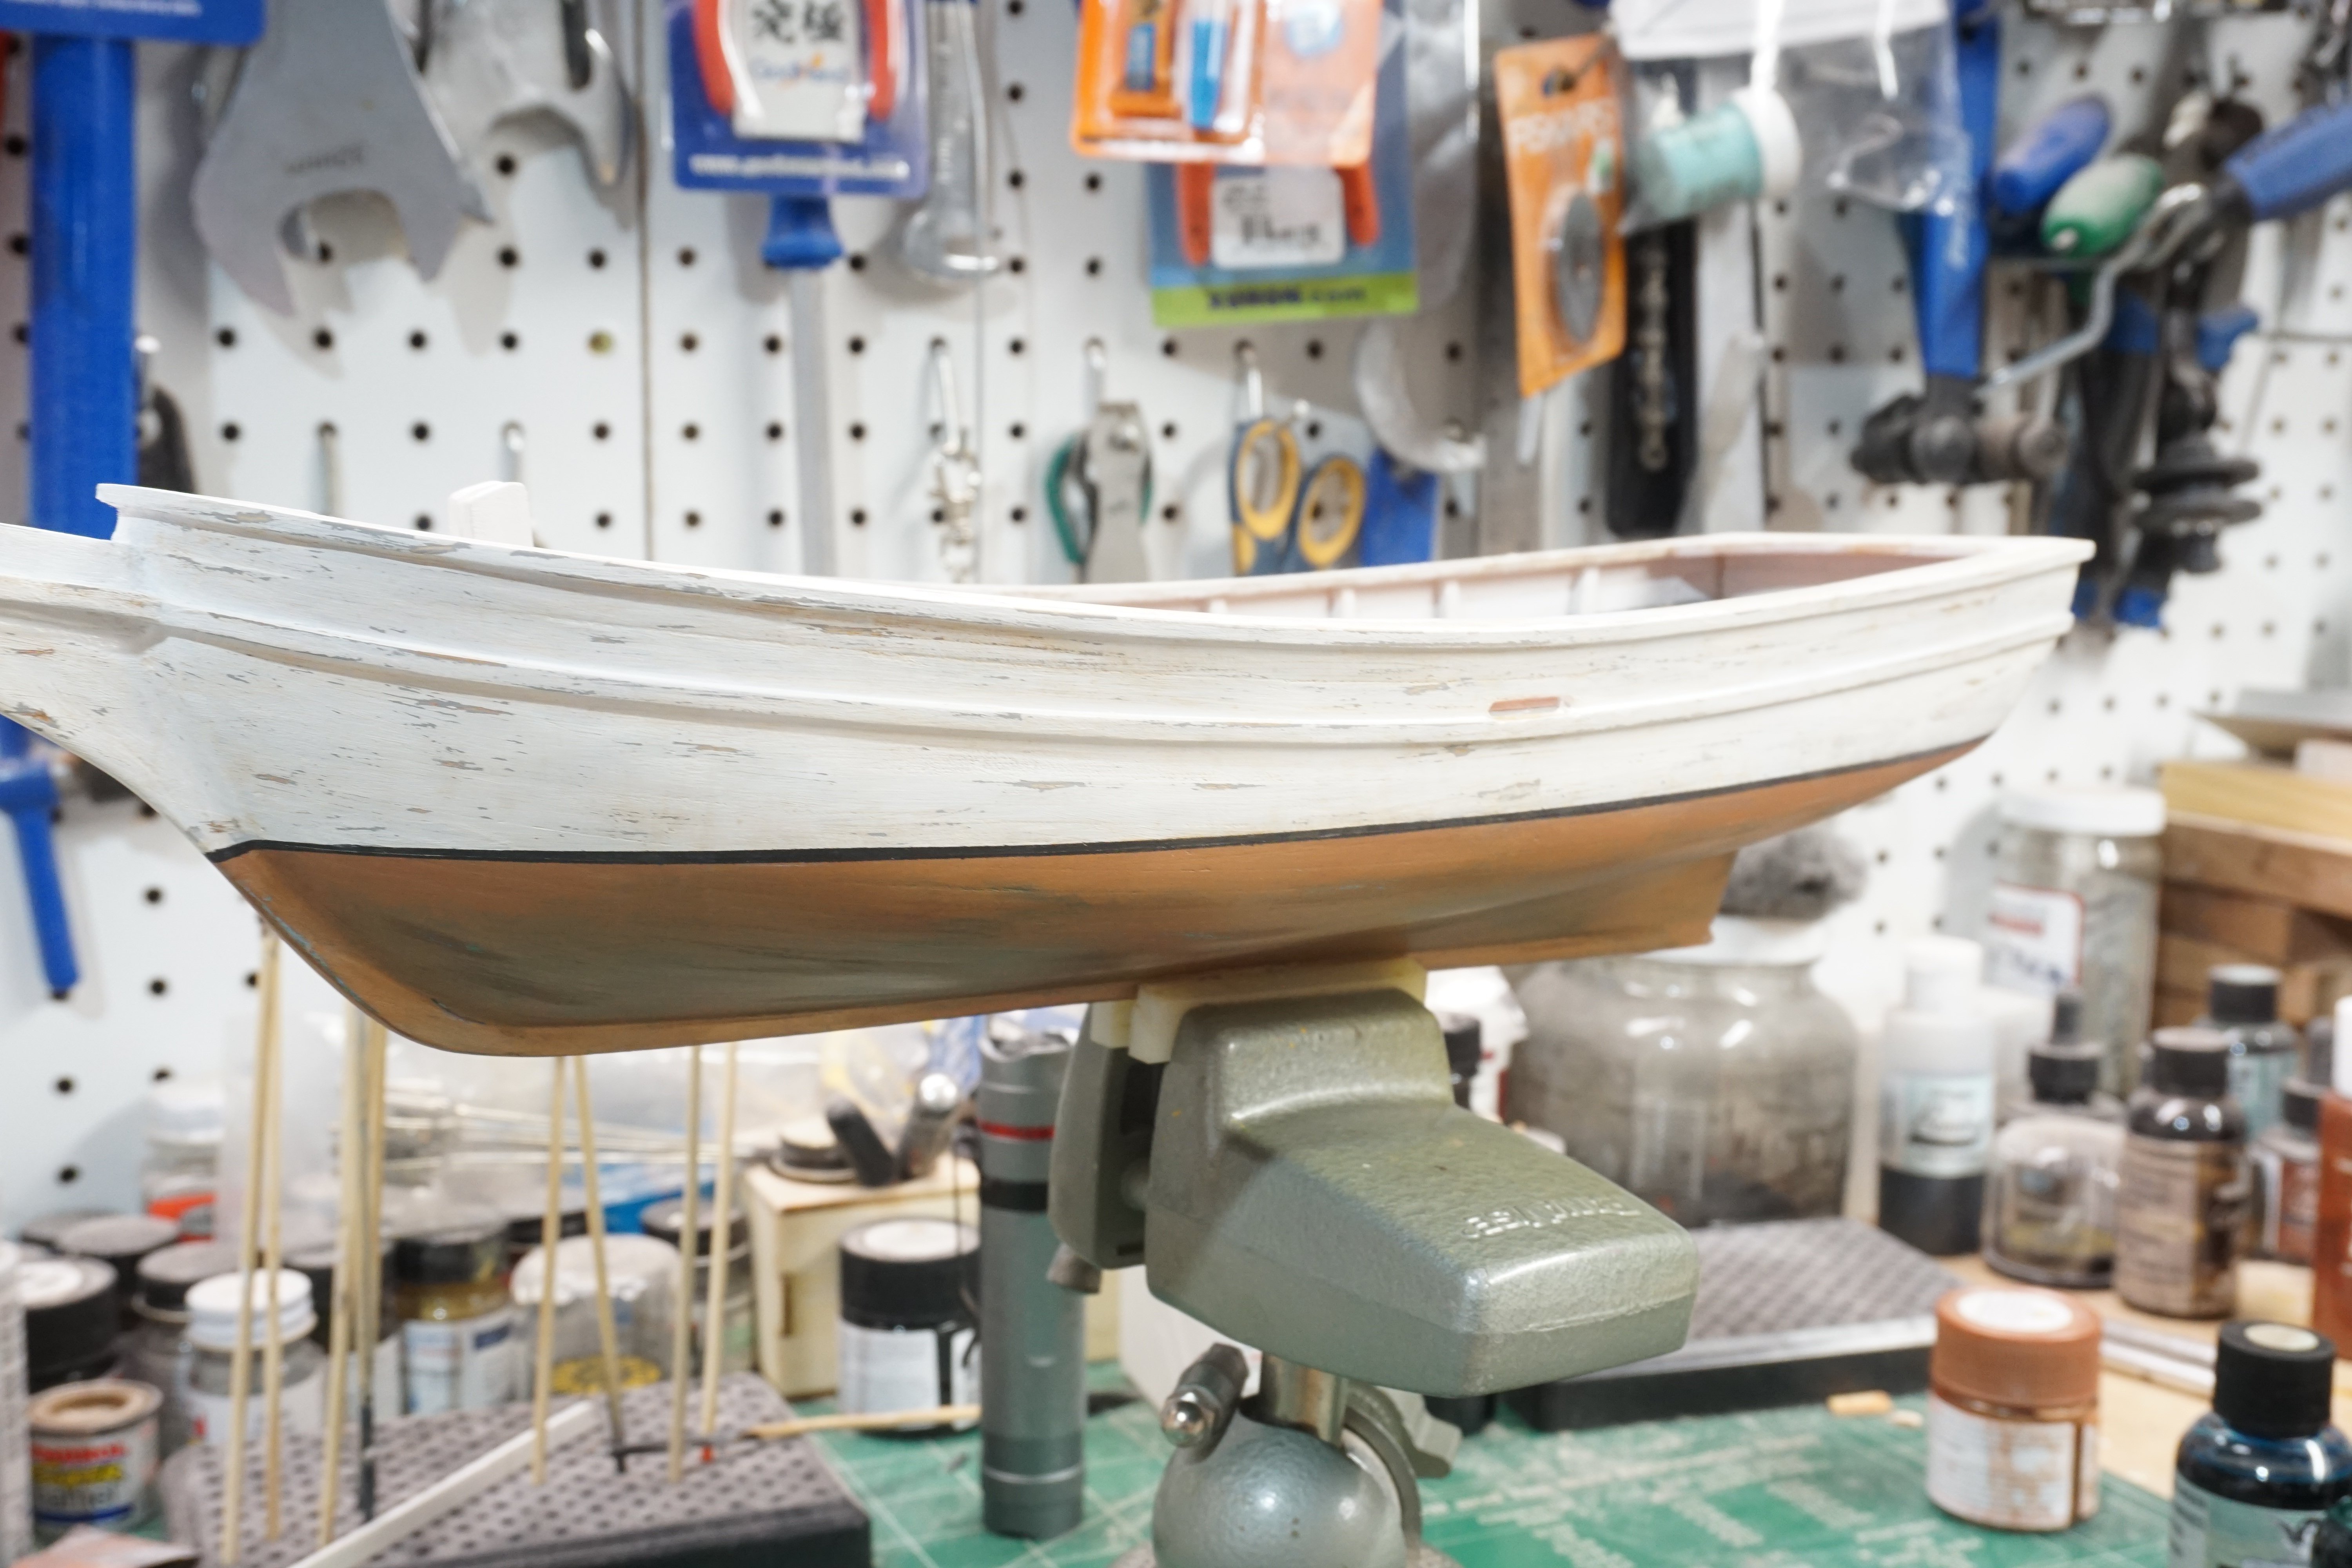
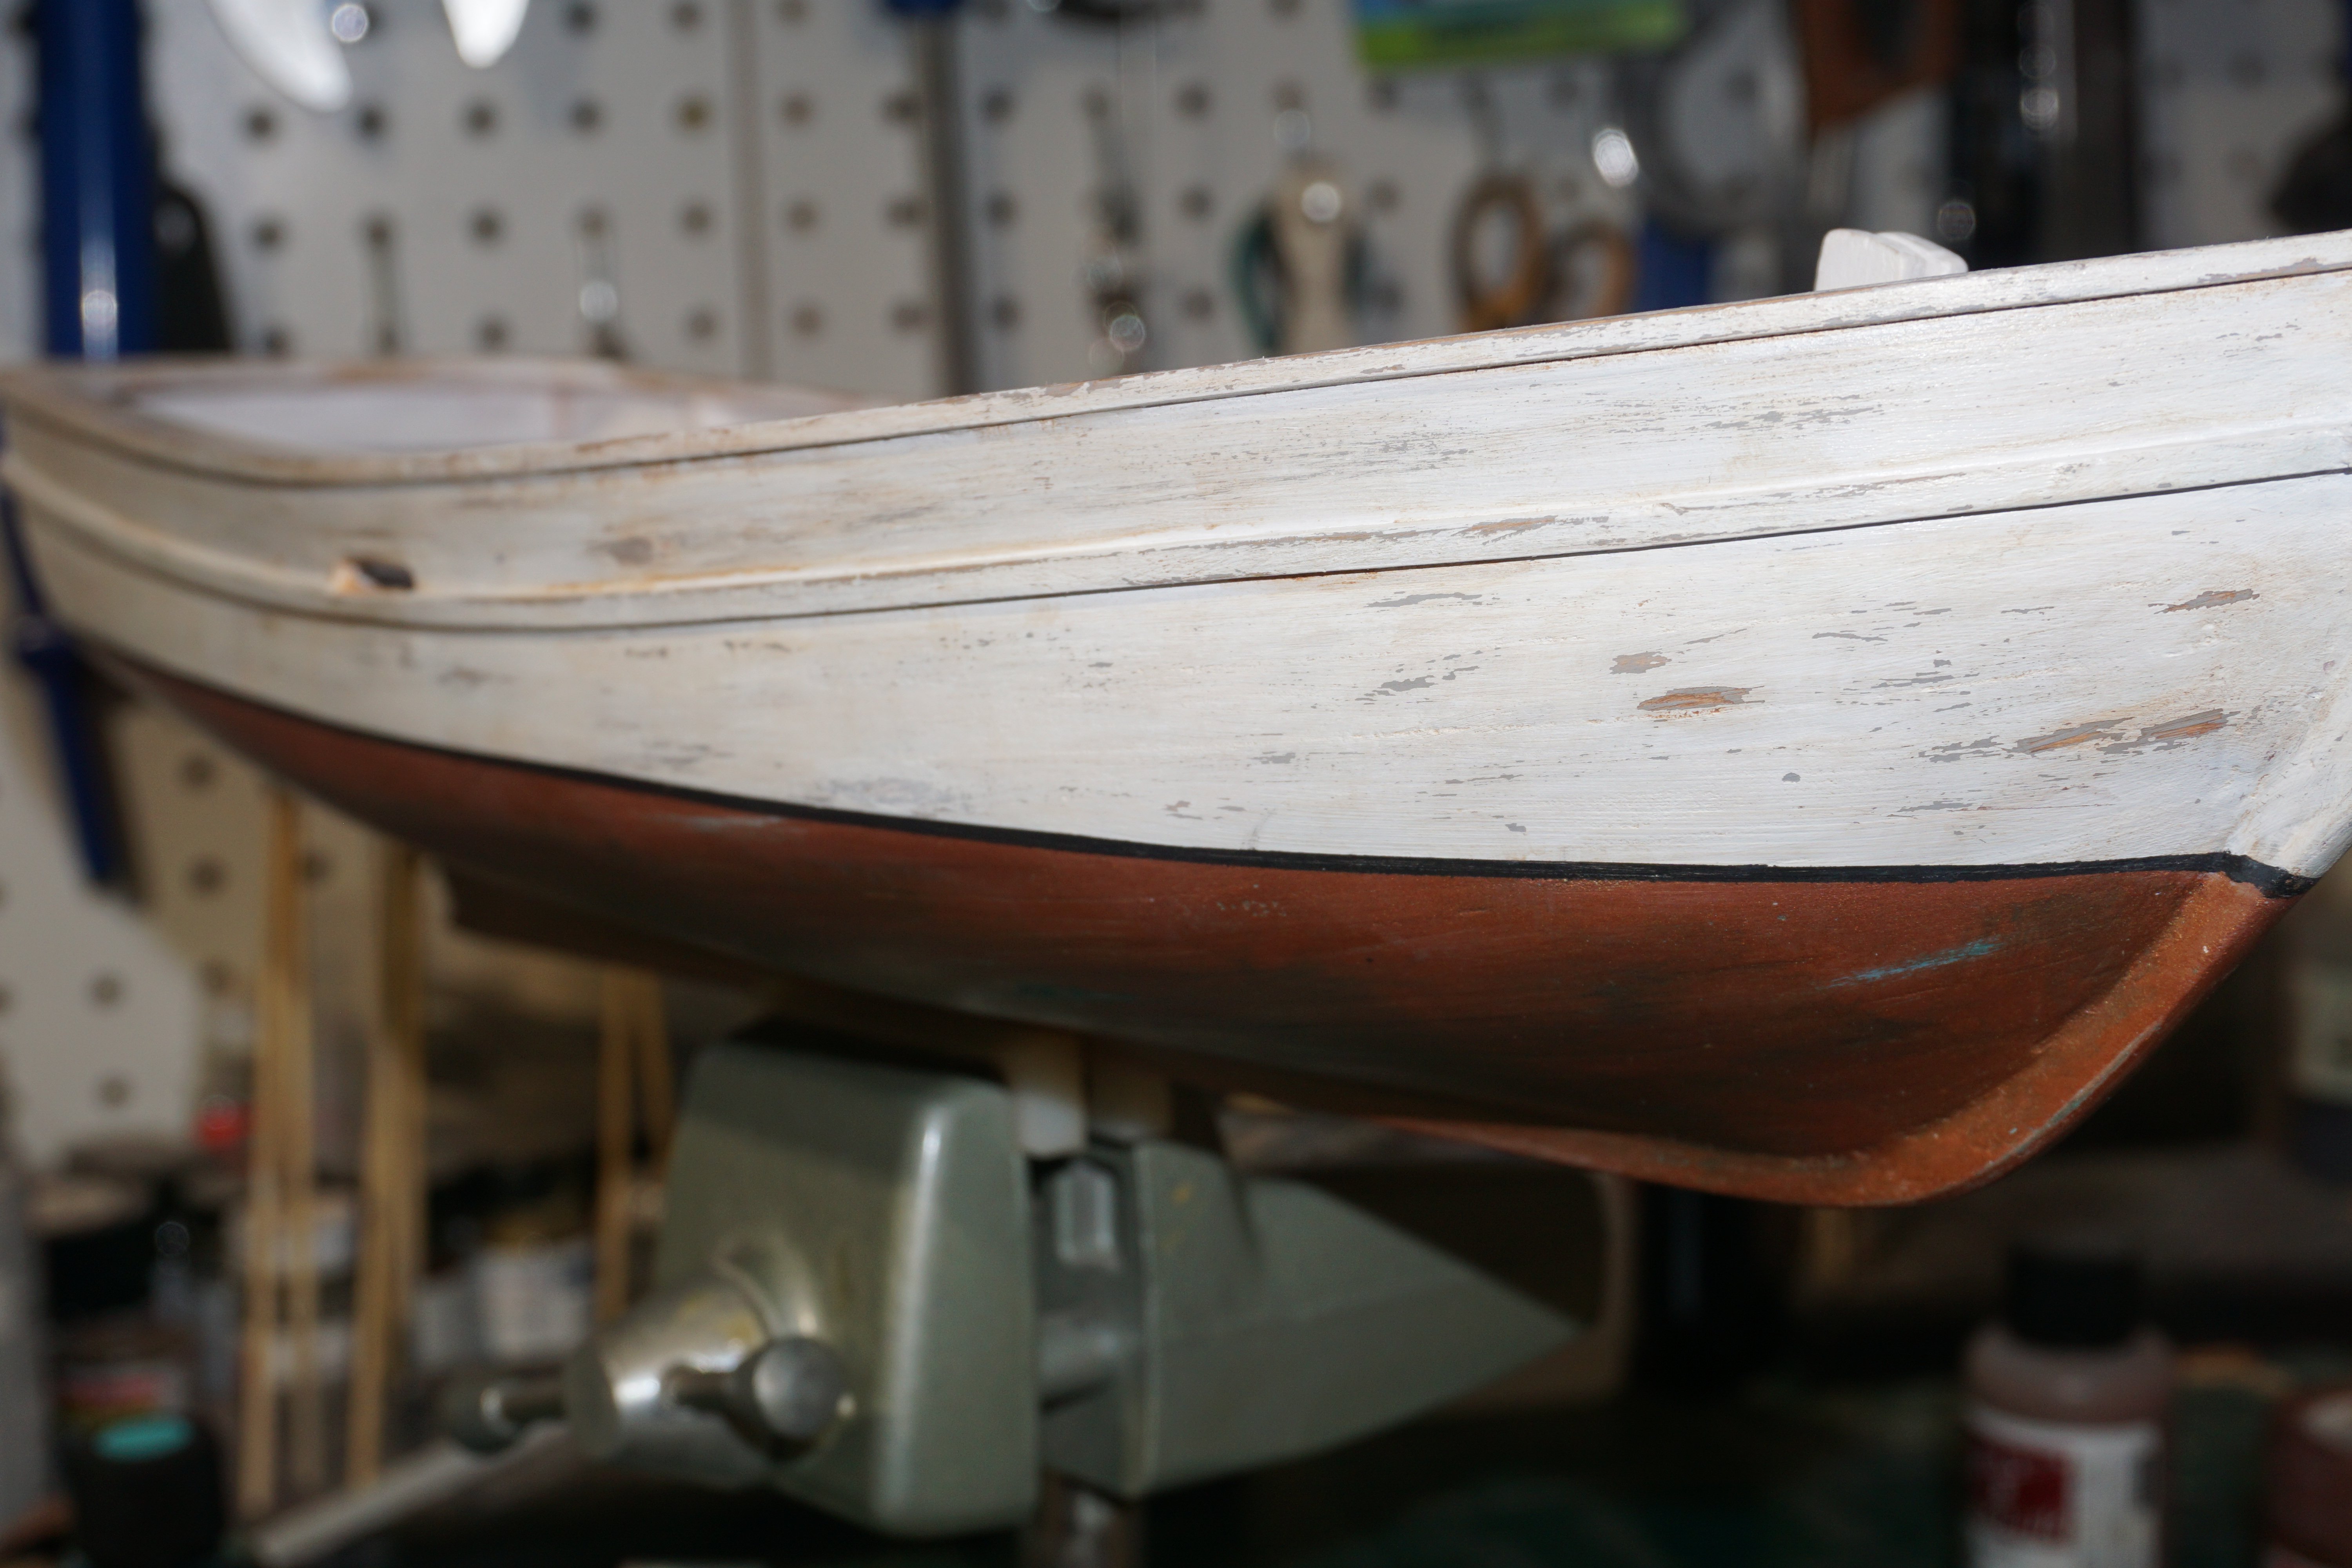
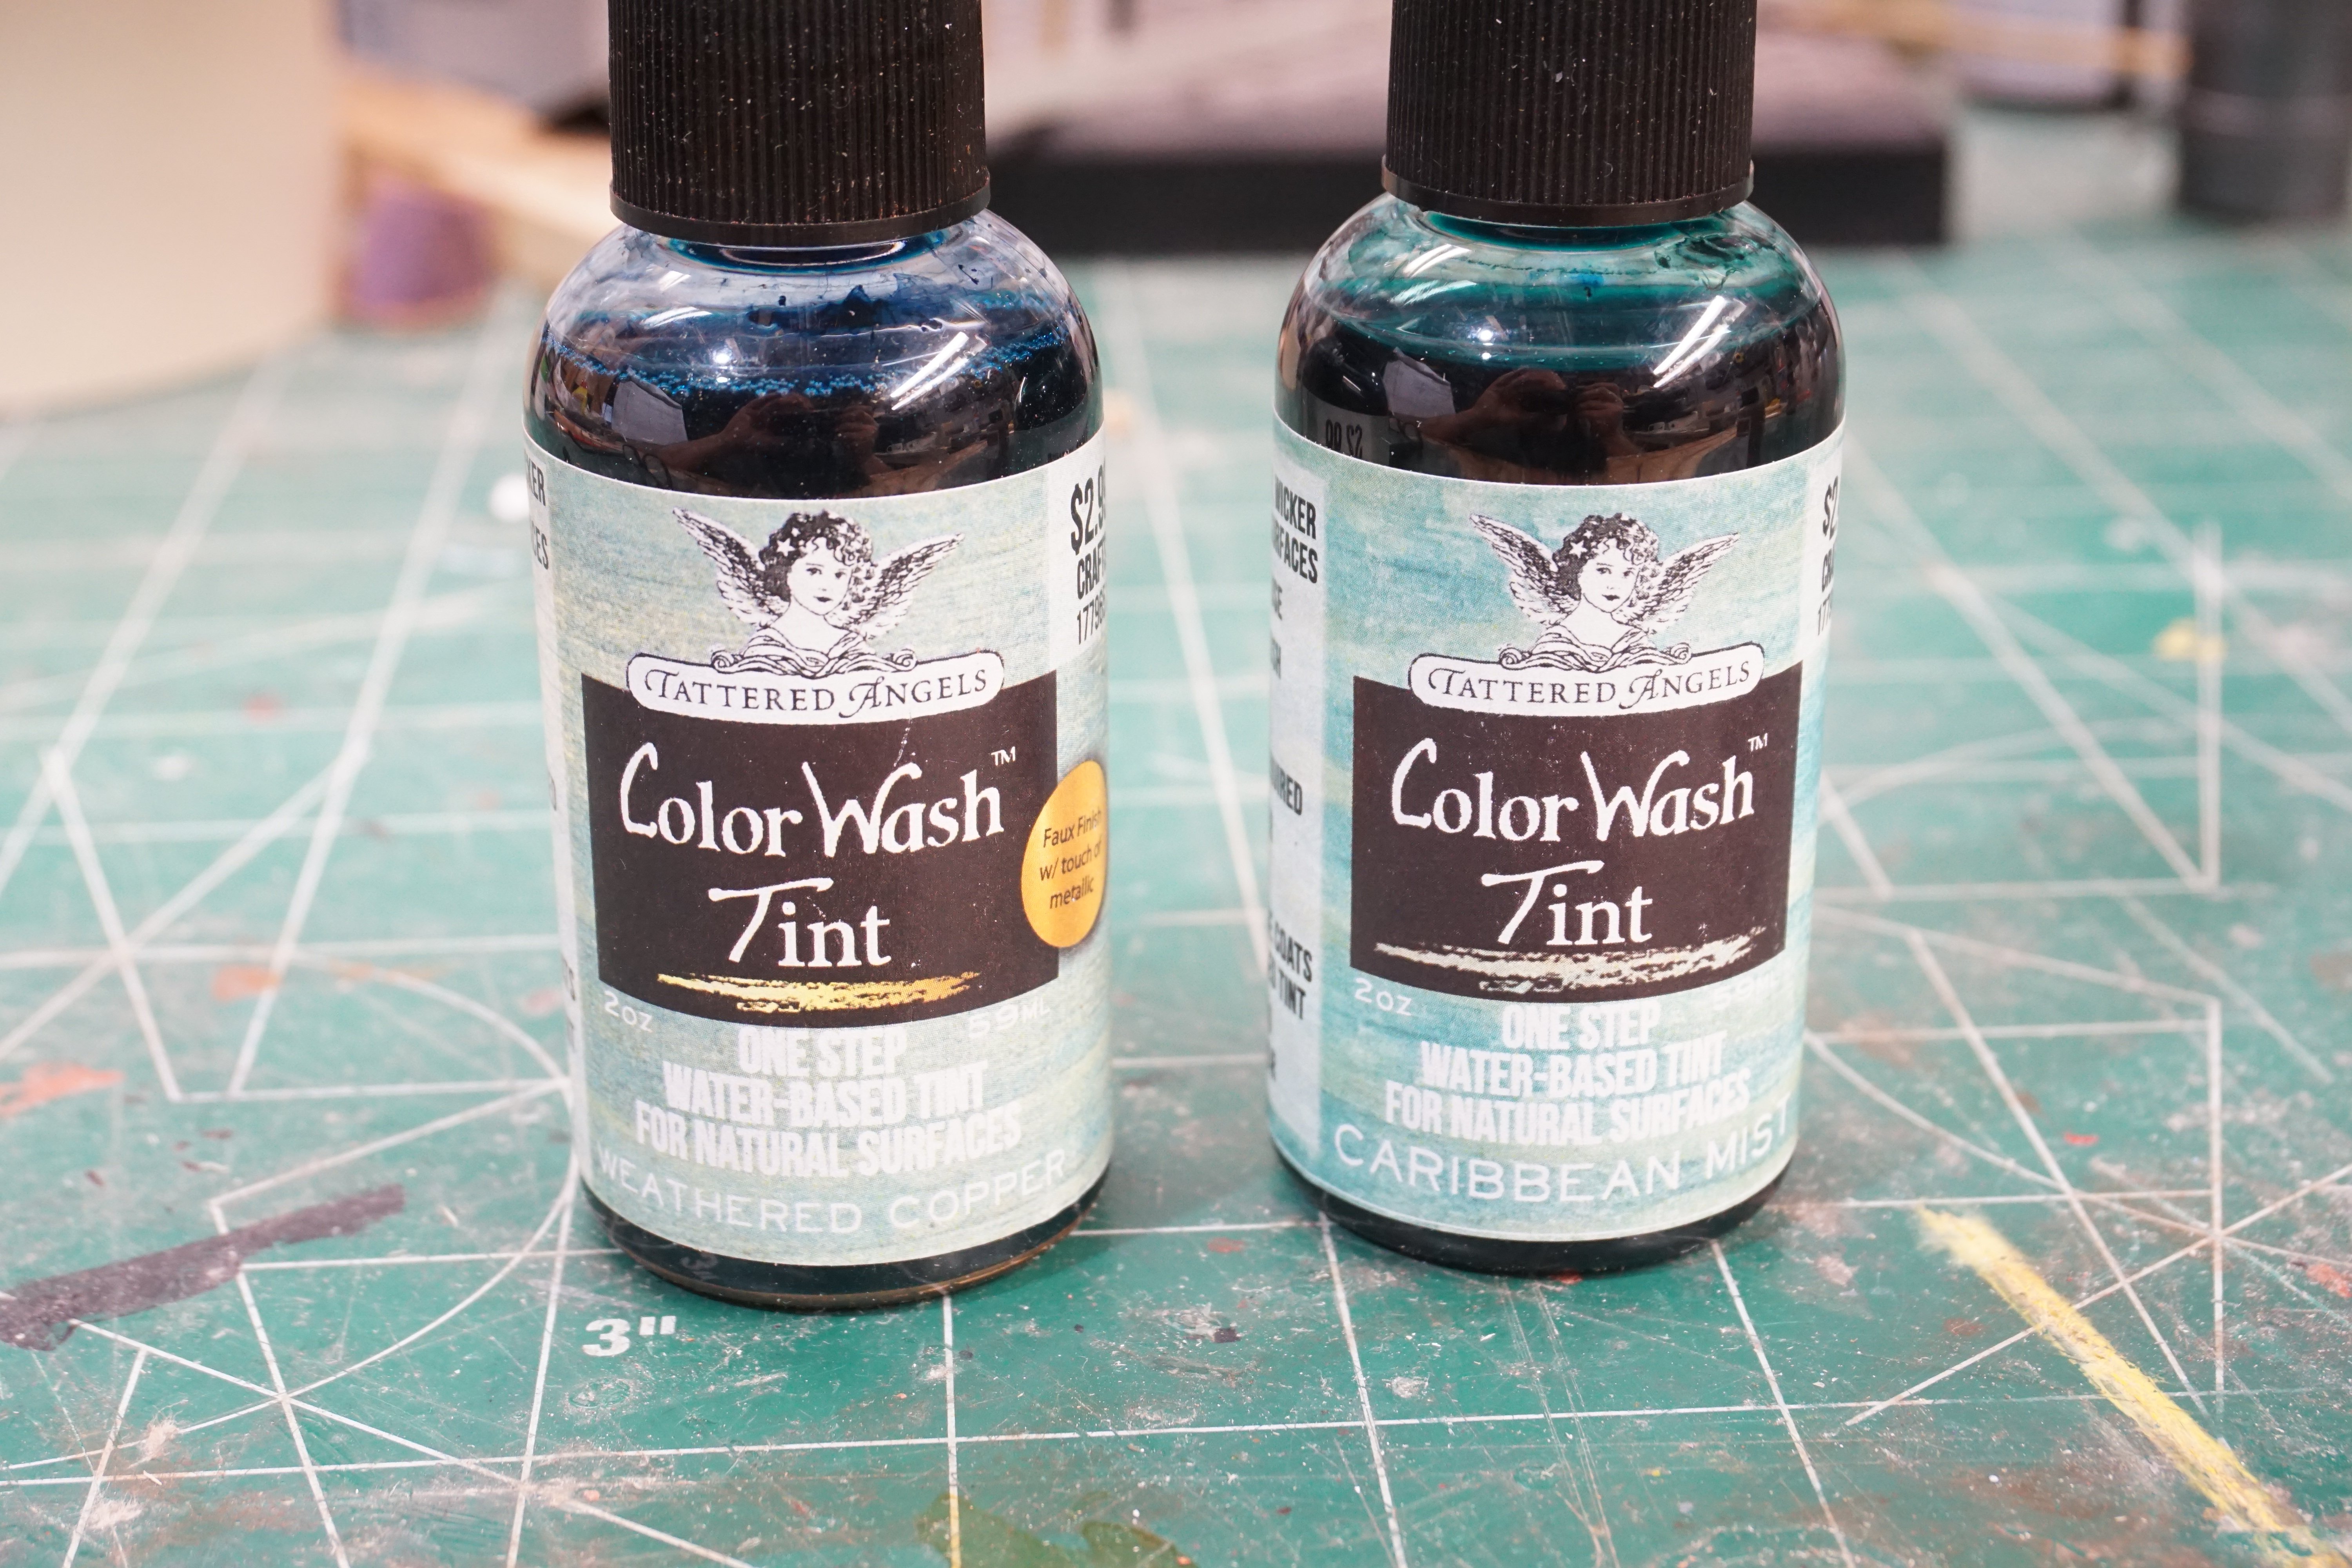
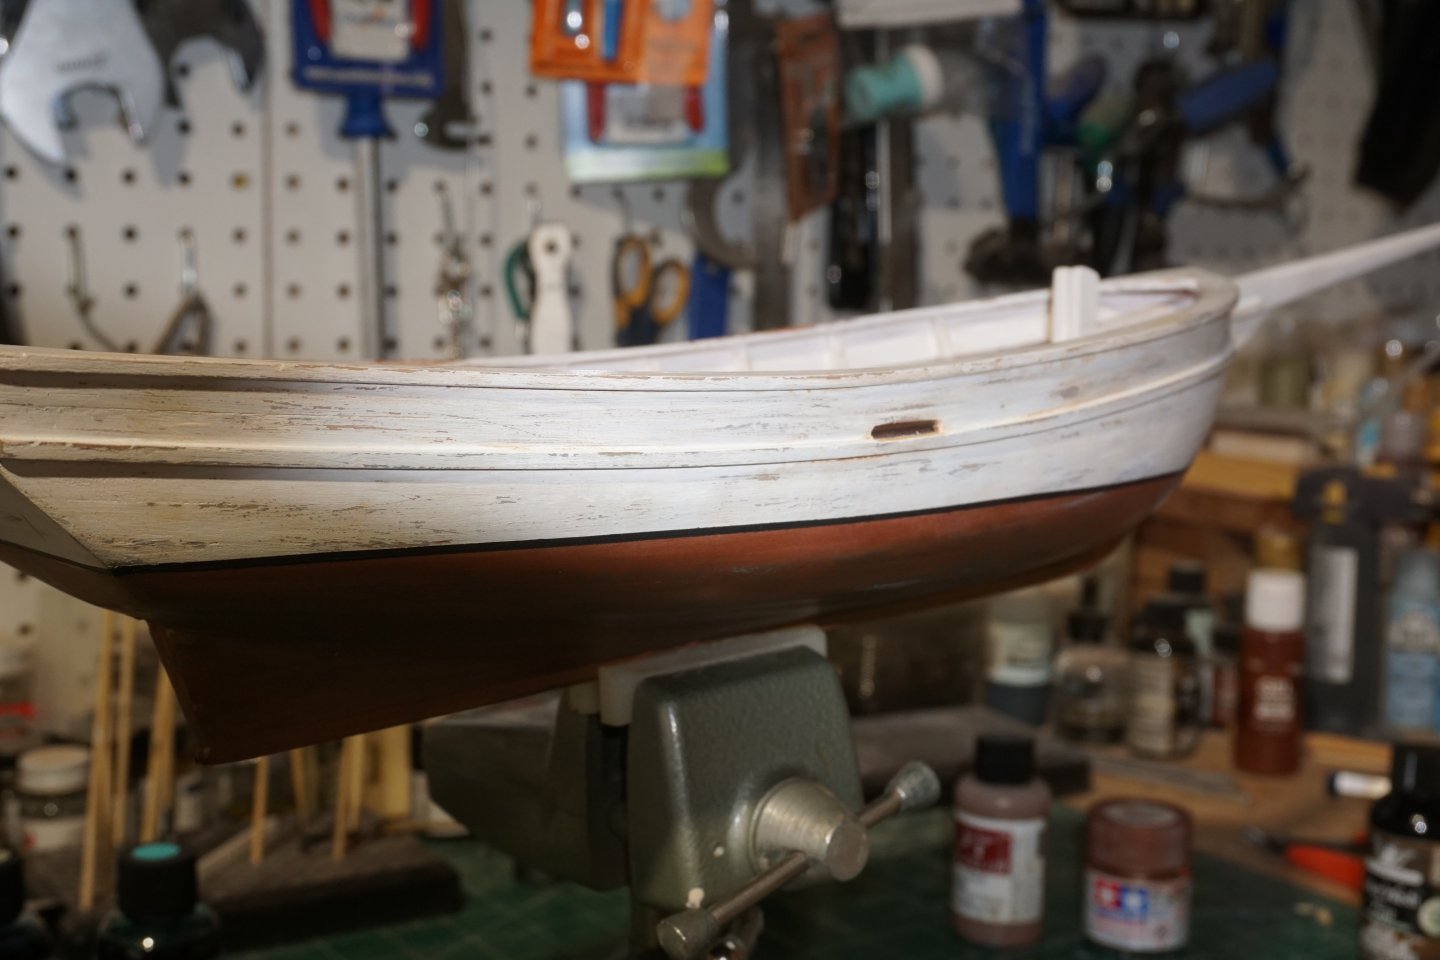
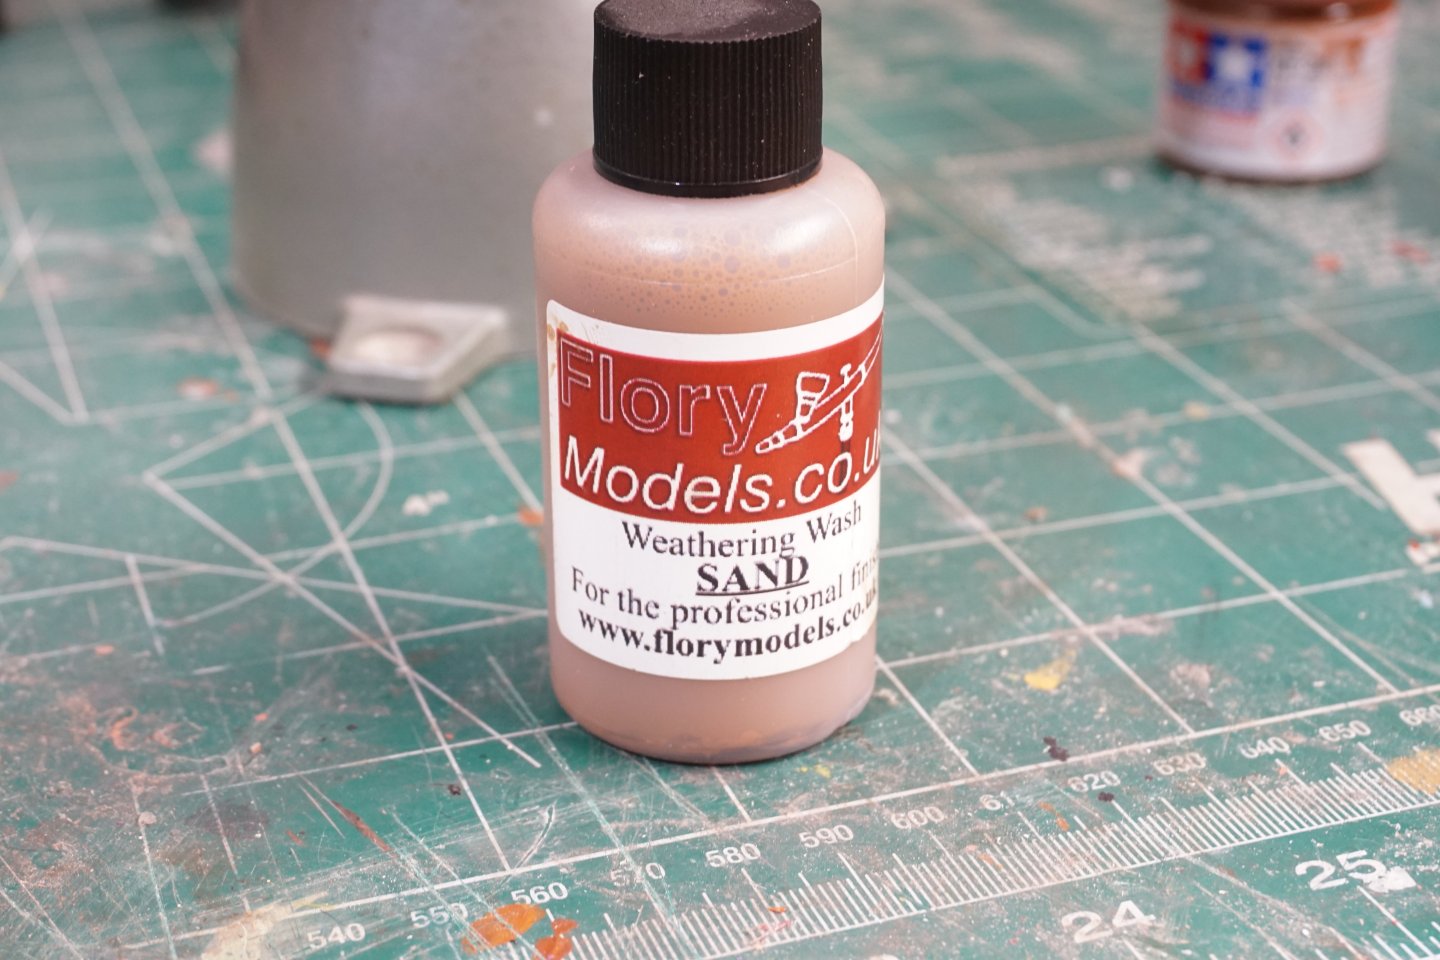
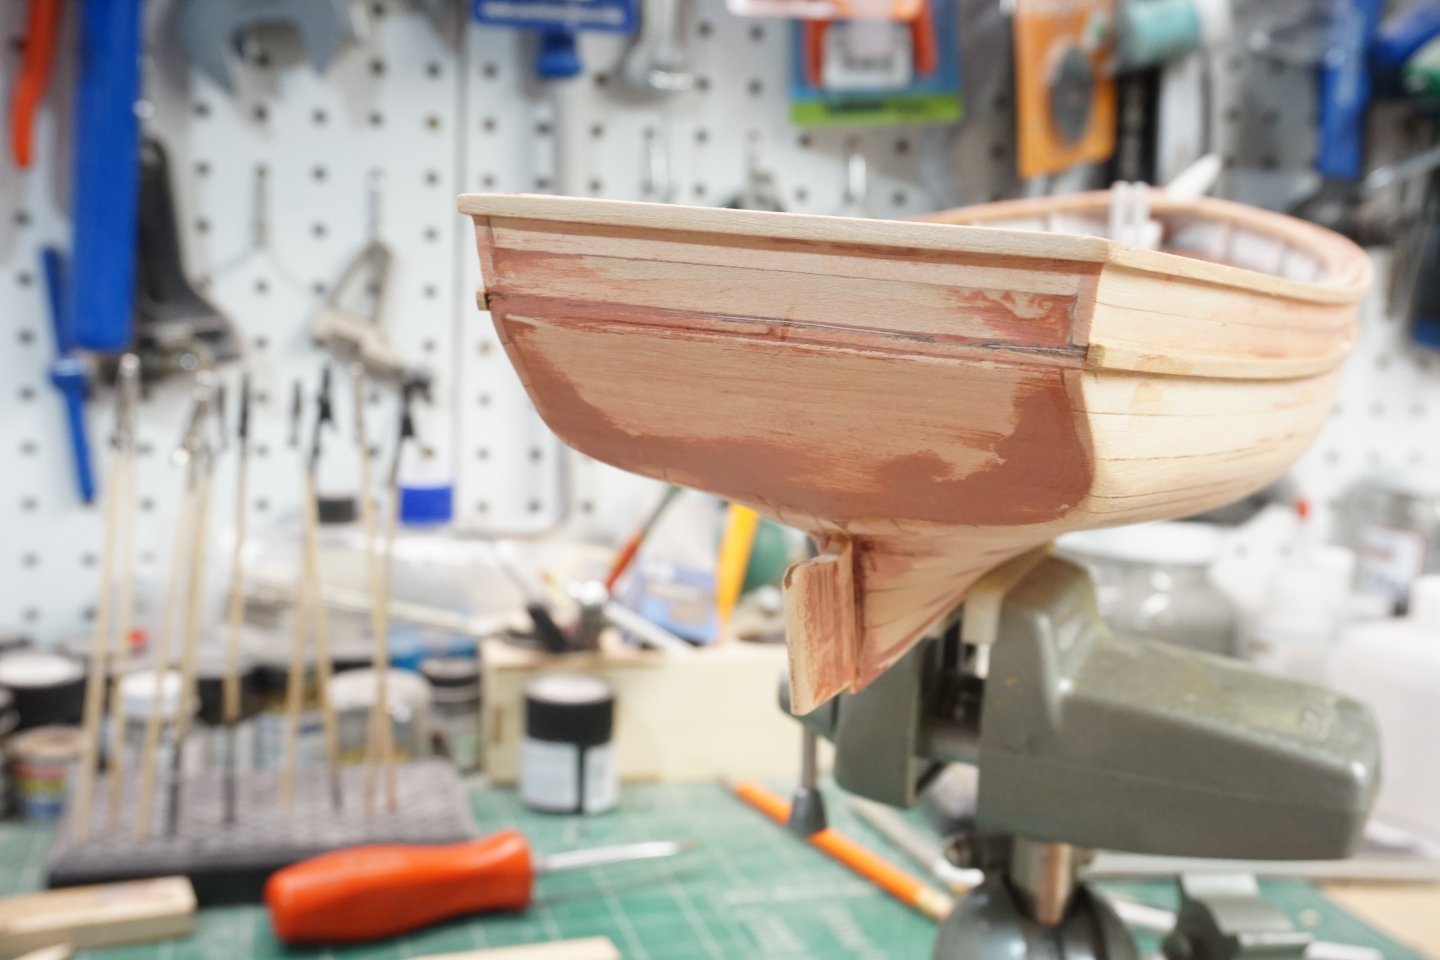
After priming the hull with Dupli-Color scratch filler primer and final sanding, I marked out the waterline. Using Liquitex acrylic white mixed with some matt medium I brush painted the hull above the waterline, then below the waterline I brush painted with Tamiya dark copper. I wanted to give the paint the look of being faded and weather battered from the long voyage at sea. I first roughed up areas of the hull with some sanding sticks to give the appearance of worn faded paint then using my x-acto knife, I scraped in some various scratches. For the lower hull applied a wash of weathered copper and Caribbean mist, (product I found at hobby lobby). Lastly, for the upper hull I applied a sand color clay-based wash from Florymodels.co.uk: what is nice about this clay wash from Flory is that even after it dries you can rub it off if it's not to your liking.


-
Jeff preisler reacted to a post in a topic:
Spray by Jeff Preisler - BlueJacket Shipcrafters - 3/8" = 1'
-
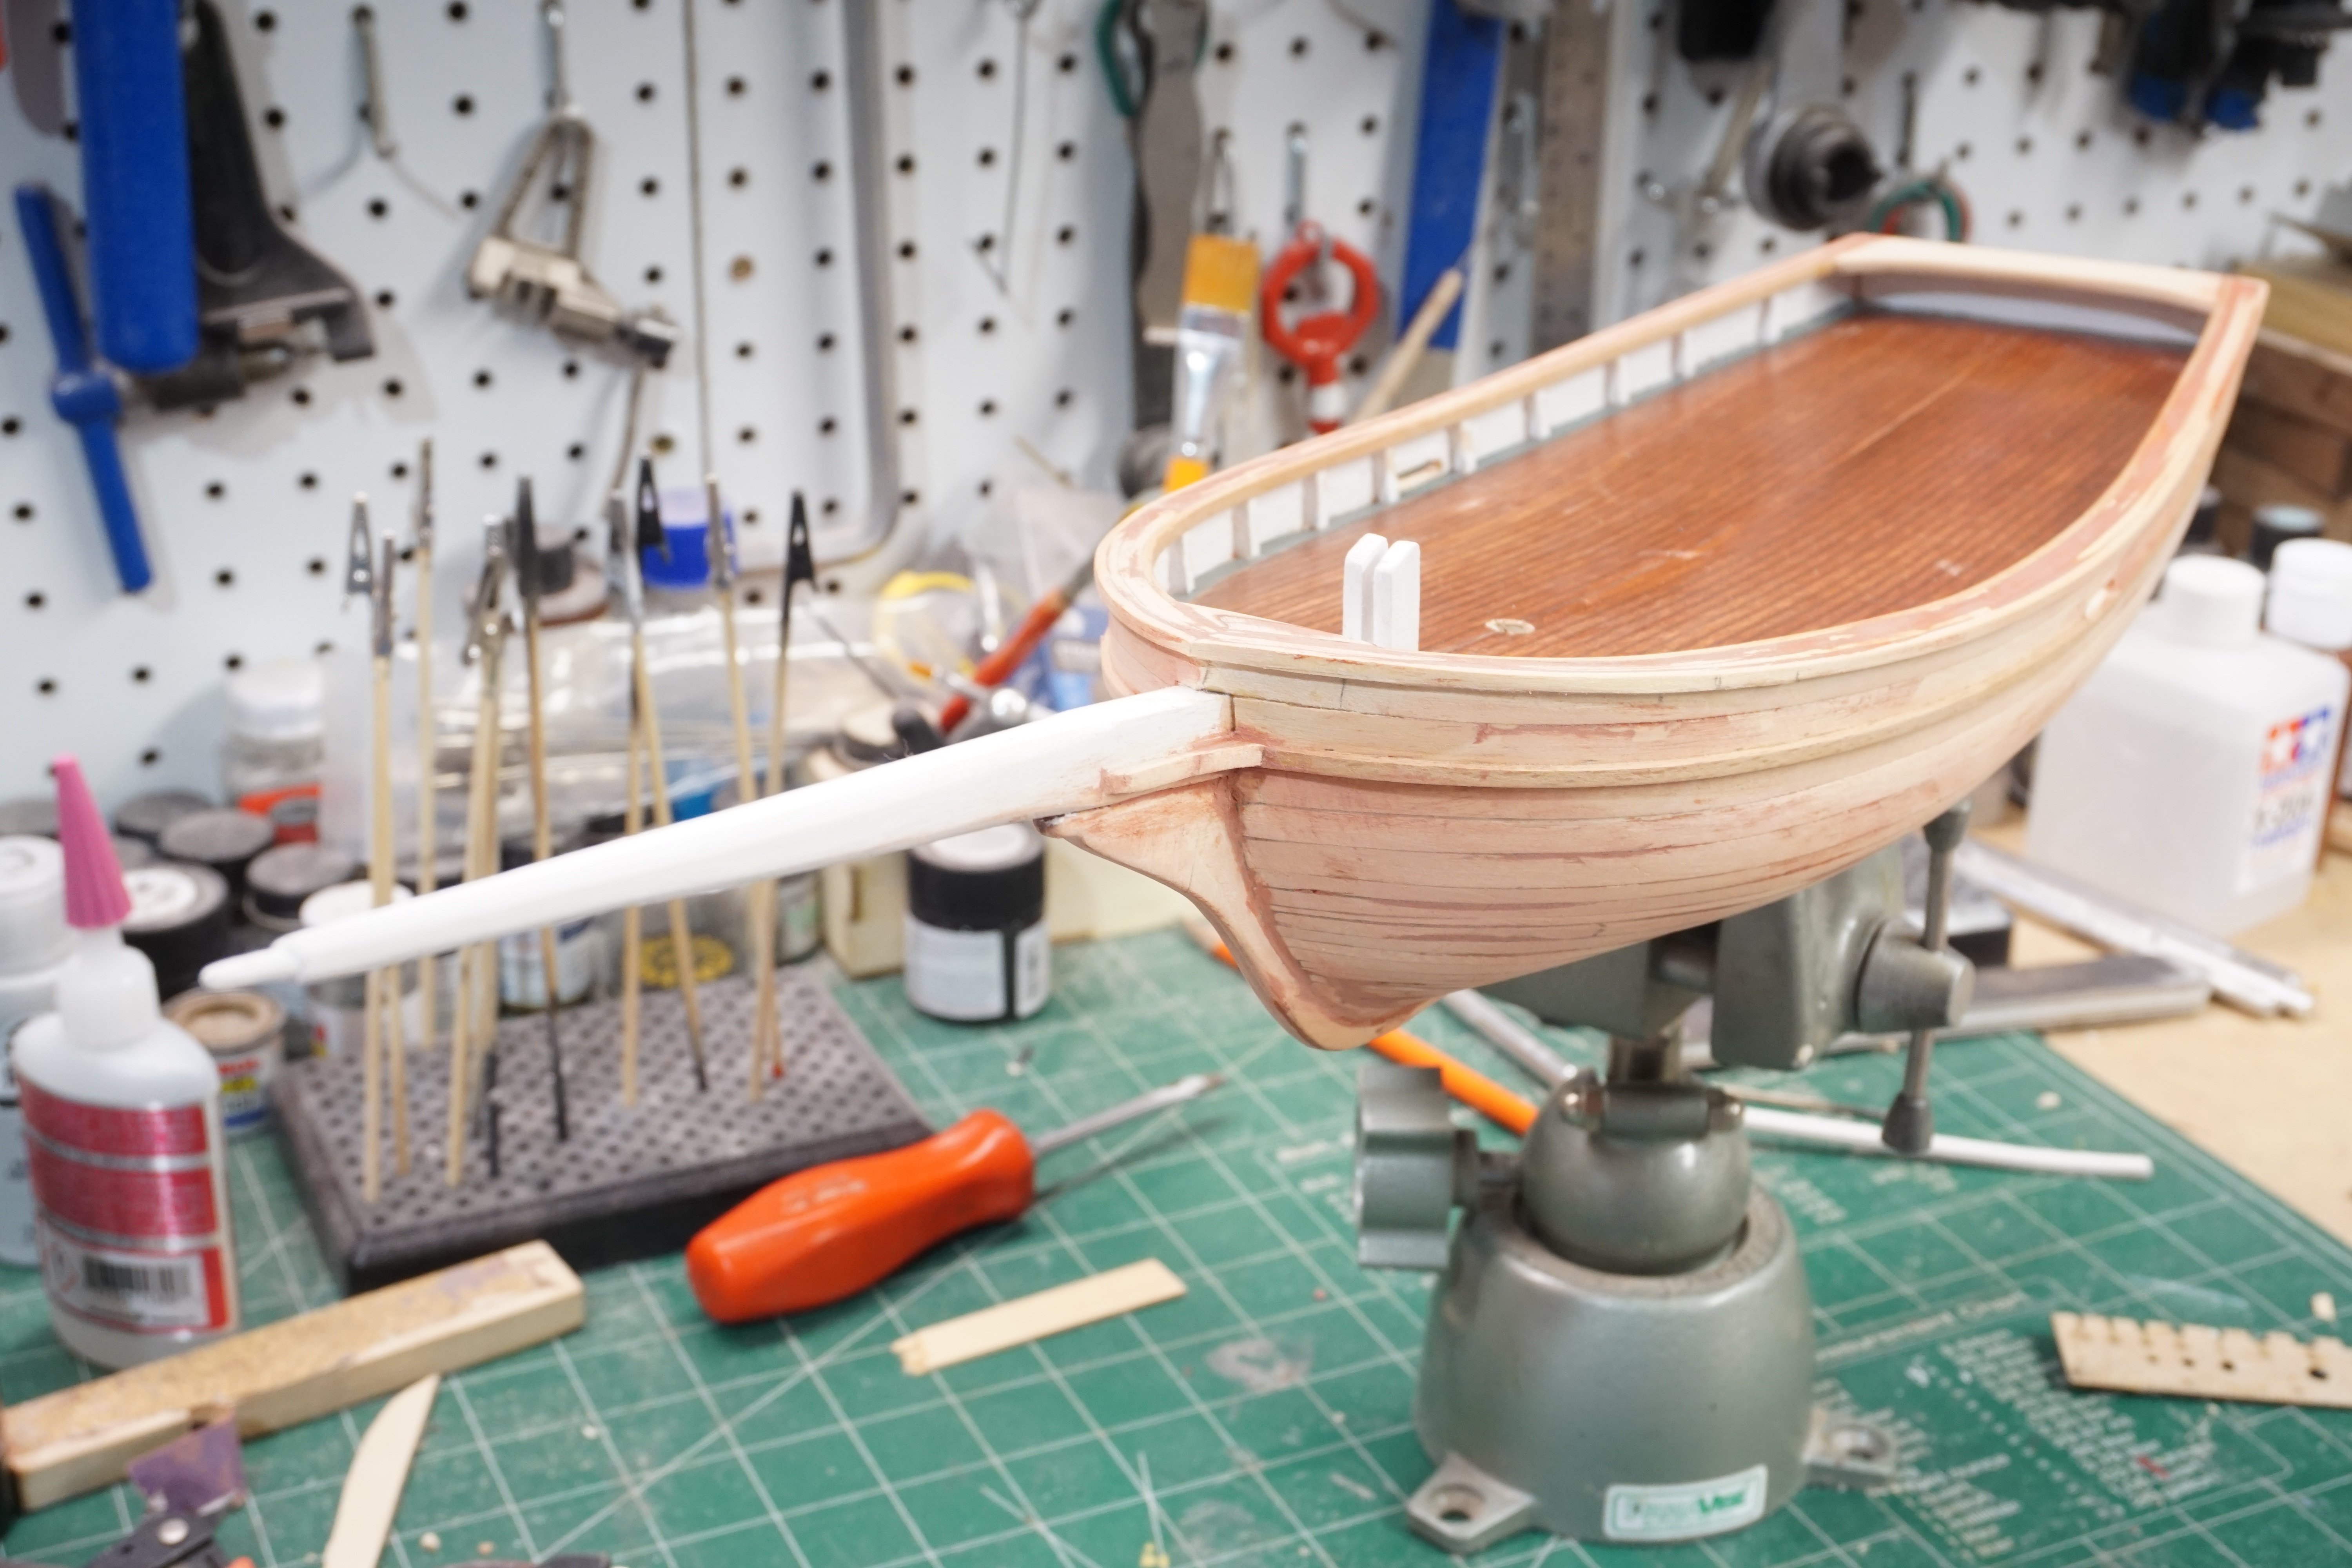
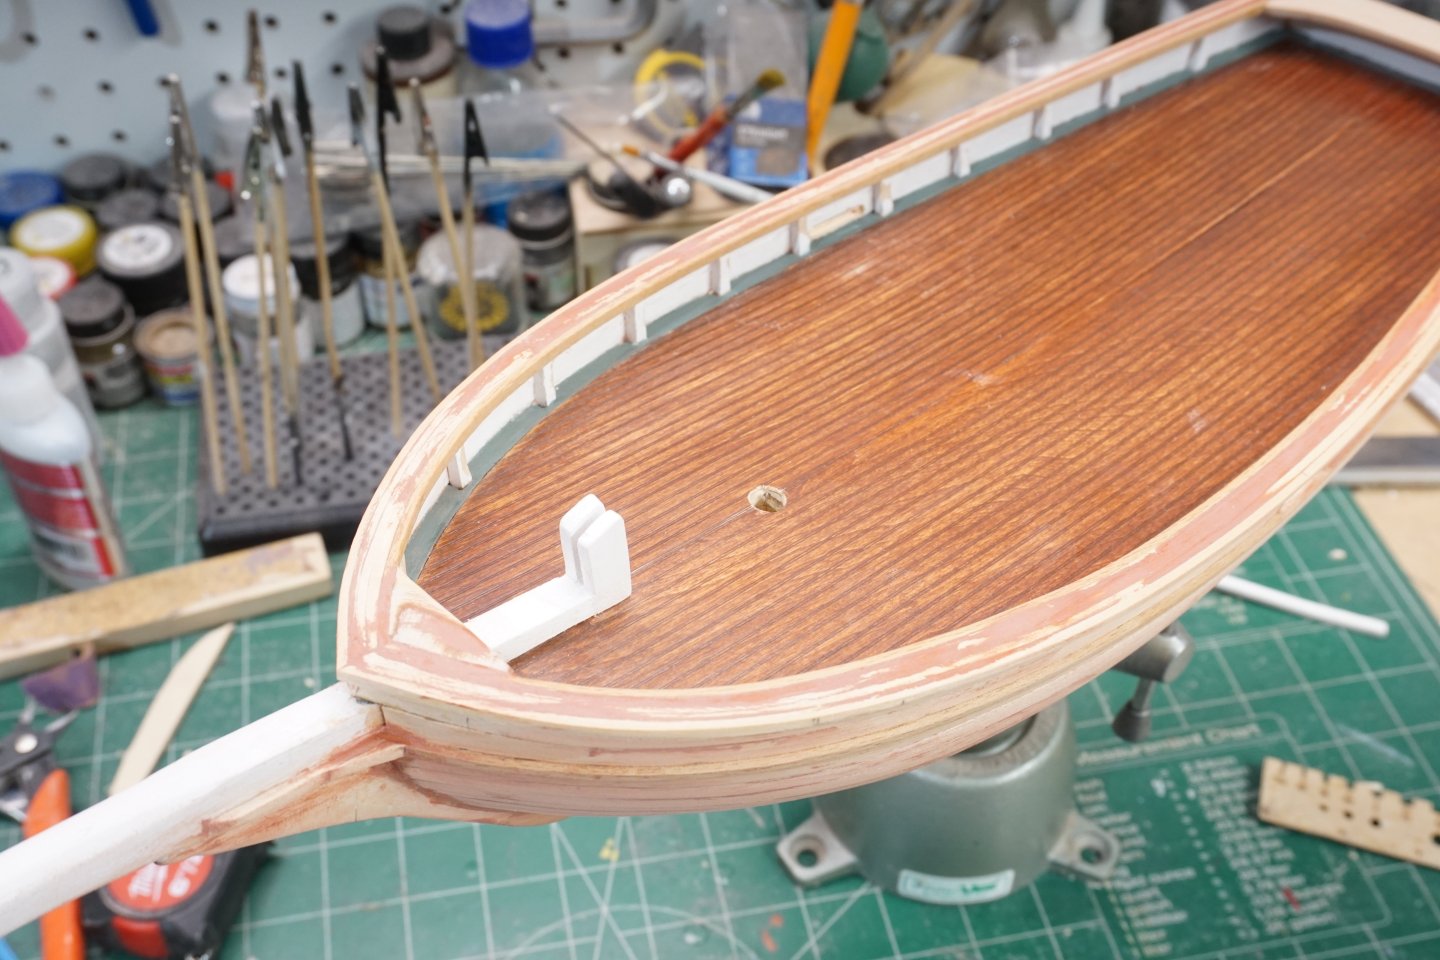
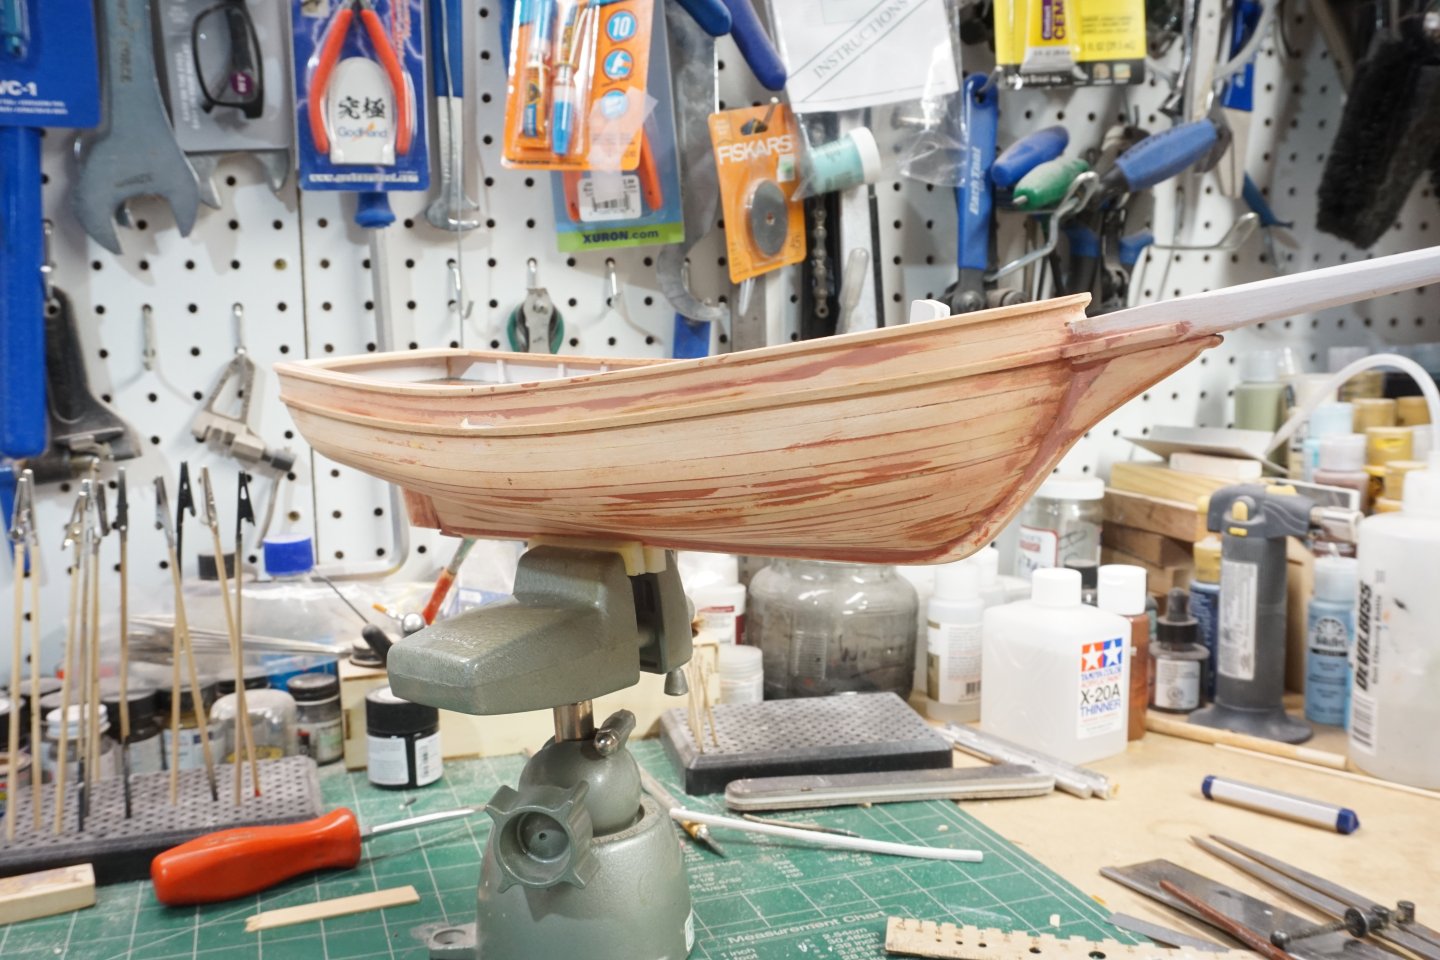
More progress on the hull including carving out and shaping and installation of the bowsprit from 3/8" basswood stock and cutting out the knightheads and attaching them to the base of the bowsprit. Shaped the 1/8" square rail stanchions and glued them into position while leaving them little long until the bulwarks planking was added, then I cut them flush and finally installed the cap rails. Then my next step was to fabricate the rudder assembly per kit instruction. Lastly, shaped and attached the bow block and taffrail deck (above the transom) and installed the rub rails and cut out the scuppers. So far everything is coming together pretty good without much trouble.

-
Jeff preisler reacted to a post in a topic:
Spray by Jeff Preisler - BlueJacket Shipcrafters - 3/8" = 1'
-
Very nice work!! I always wanted to try a card model myself. I will be following your build with great interest, thank you for your detailed photos and instruction.
- 37 replies
-
- 1
-
-
- Baltimore
- heinkel models
- (and 2 more)
-
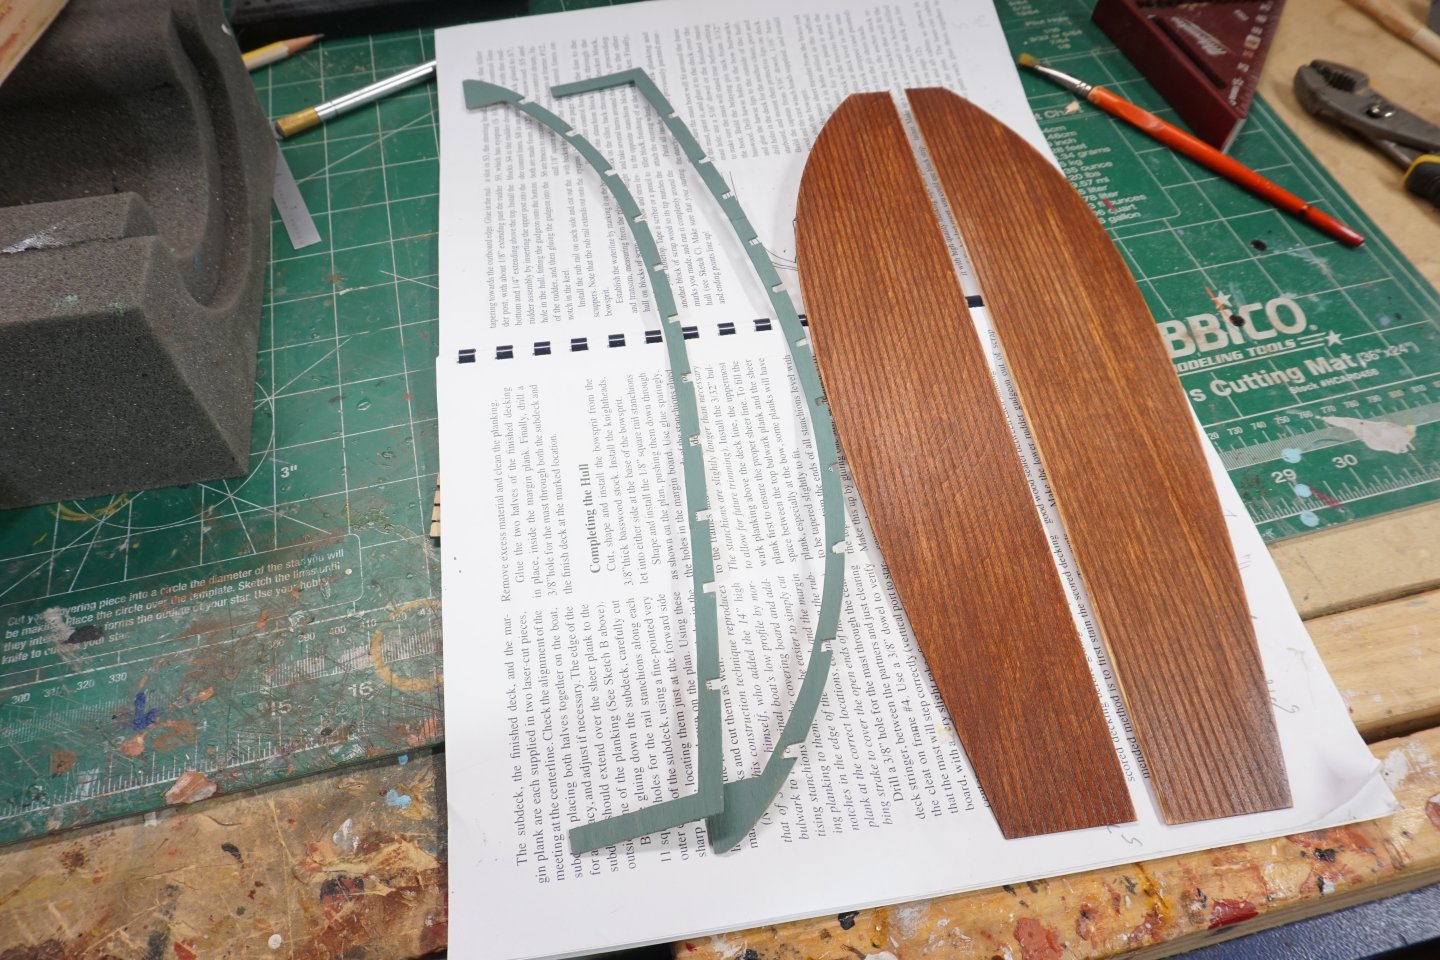
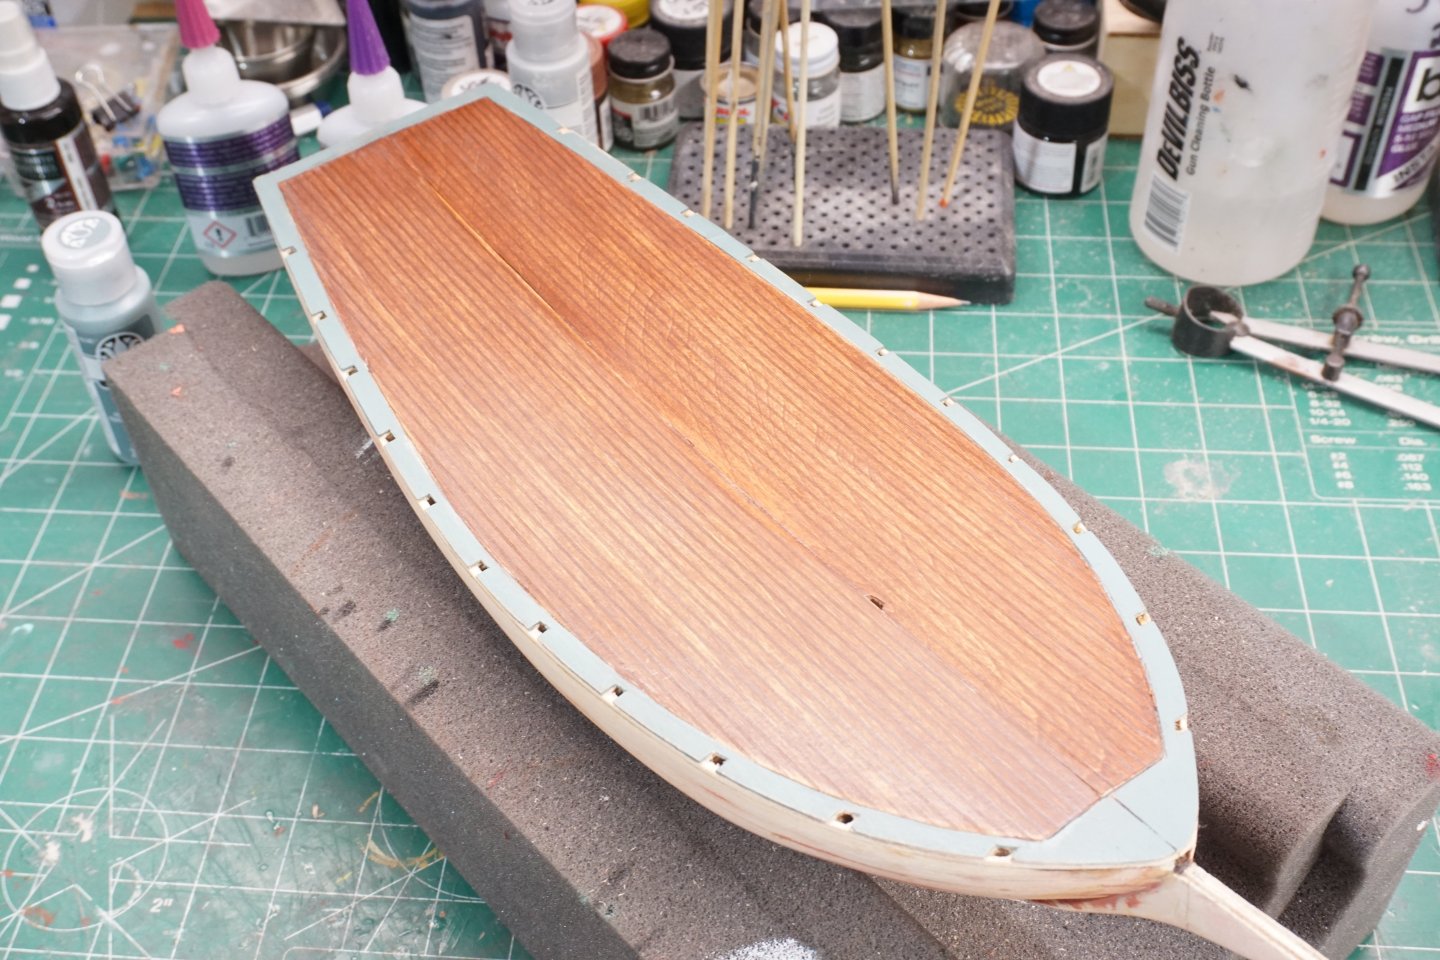
After applying automotive filler and sanding of the hull, I marked out and cut the square holes on the sub deck for the rail stanchions. Glued the sub deck down then carefully cut out the stanchion notches on the margin plank. Next, I stained the main decking, and brush painted the margin plank with a greenish grey color. After some trimming/sanding and I was sure everything was going to line up, I glued it altogether.

-
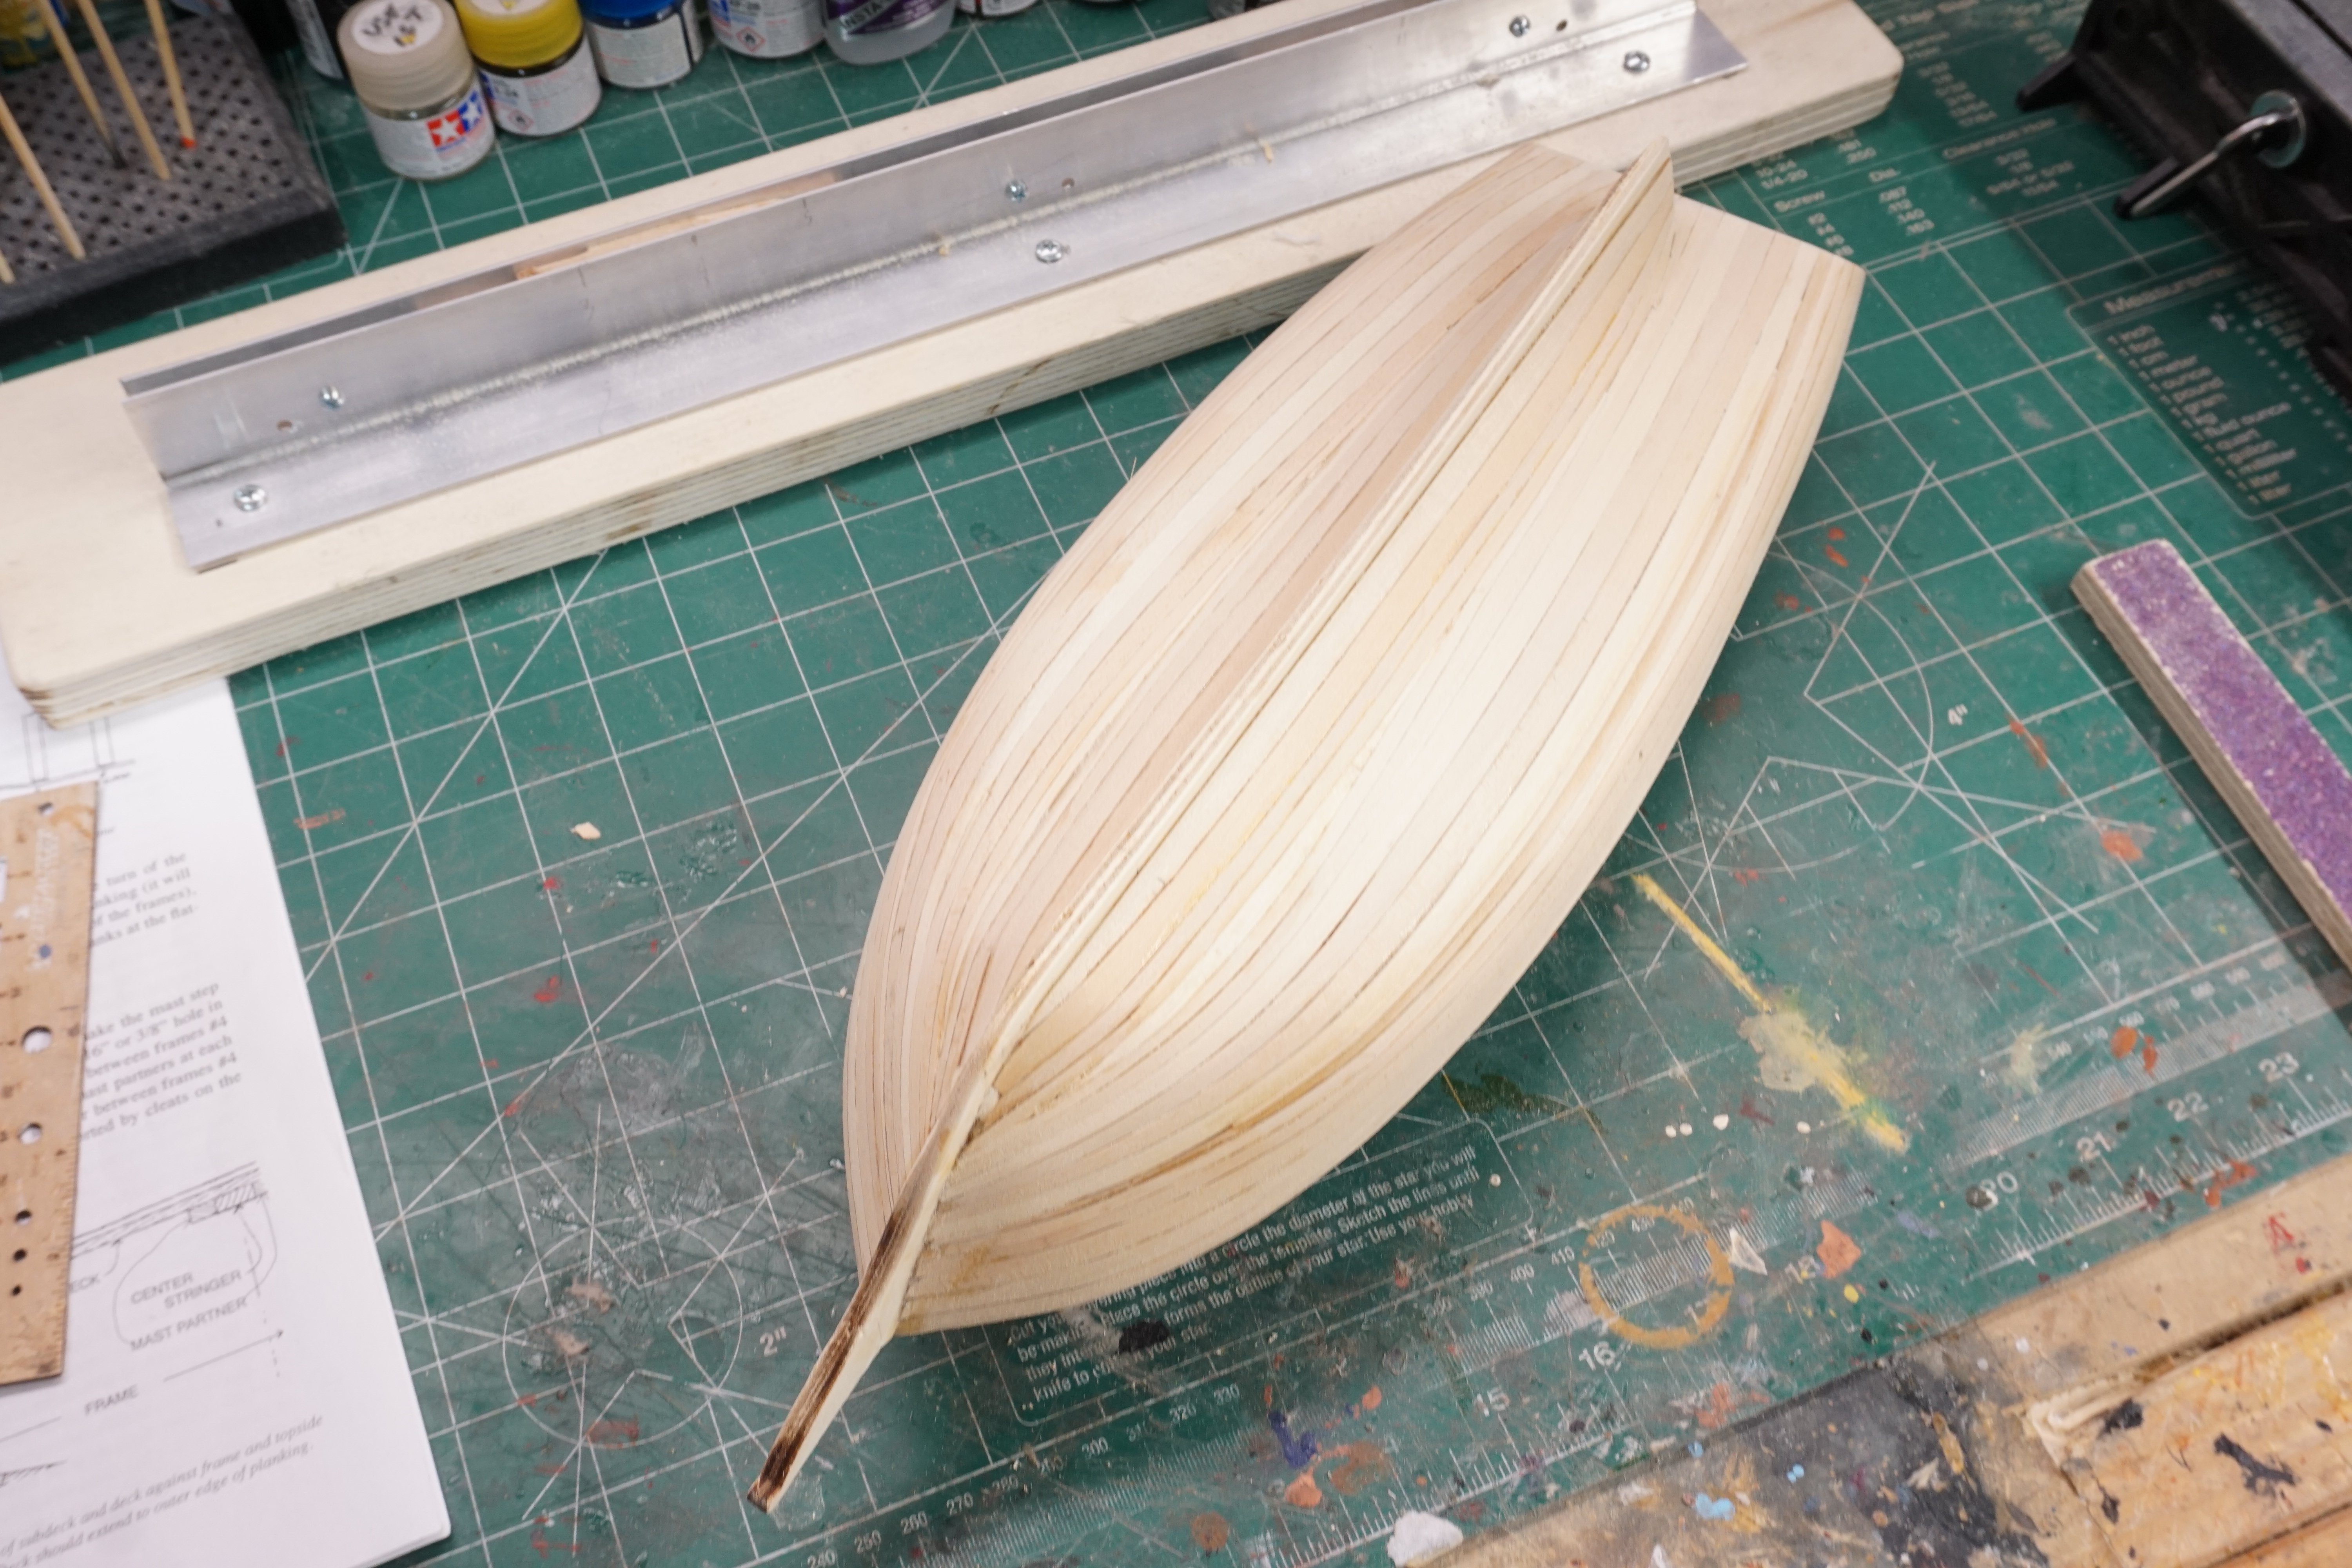
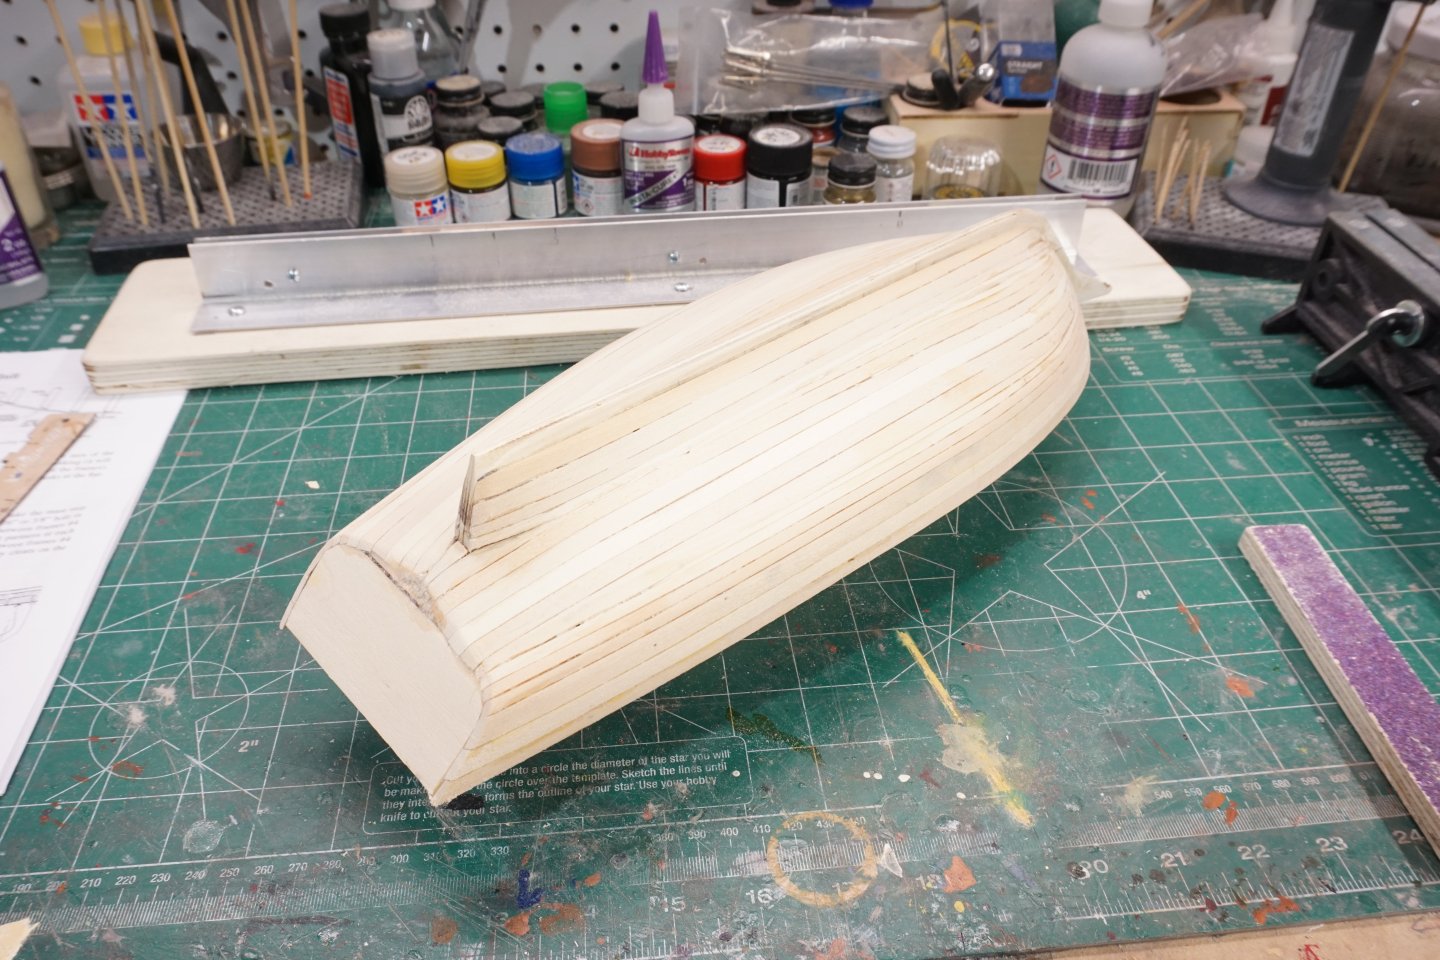
Finished up the planking this evening. Per kit instructions, I used the narrower 1/8-inch planks at the turn of the bilge as it was easier to go around the sharper curves. I tapered the planks at the bow, and also had to add 4 cheater planks, (2 per side). Just have to do some more sanding and filling, then I can move on to working on the deck.

-
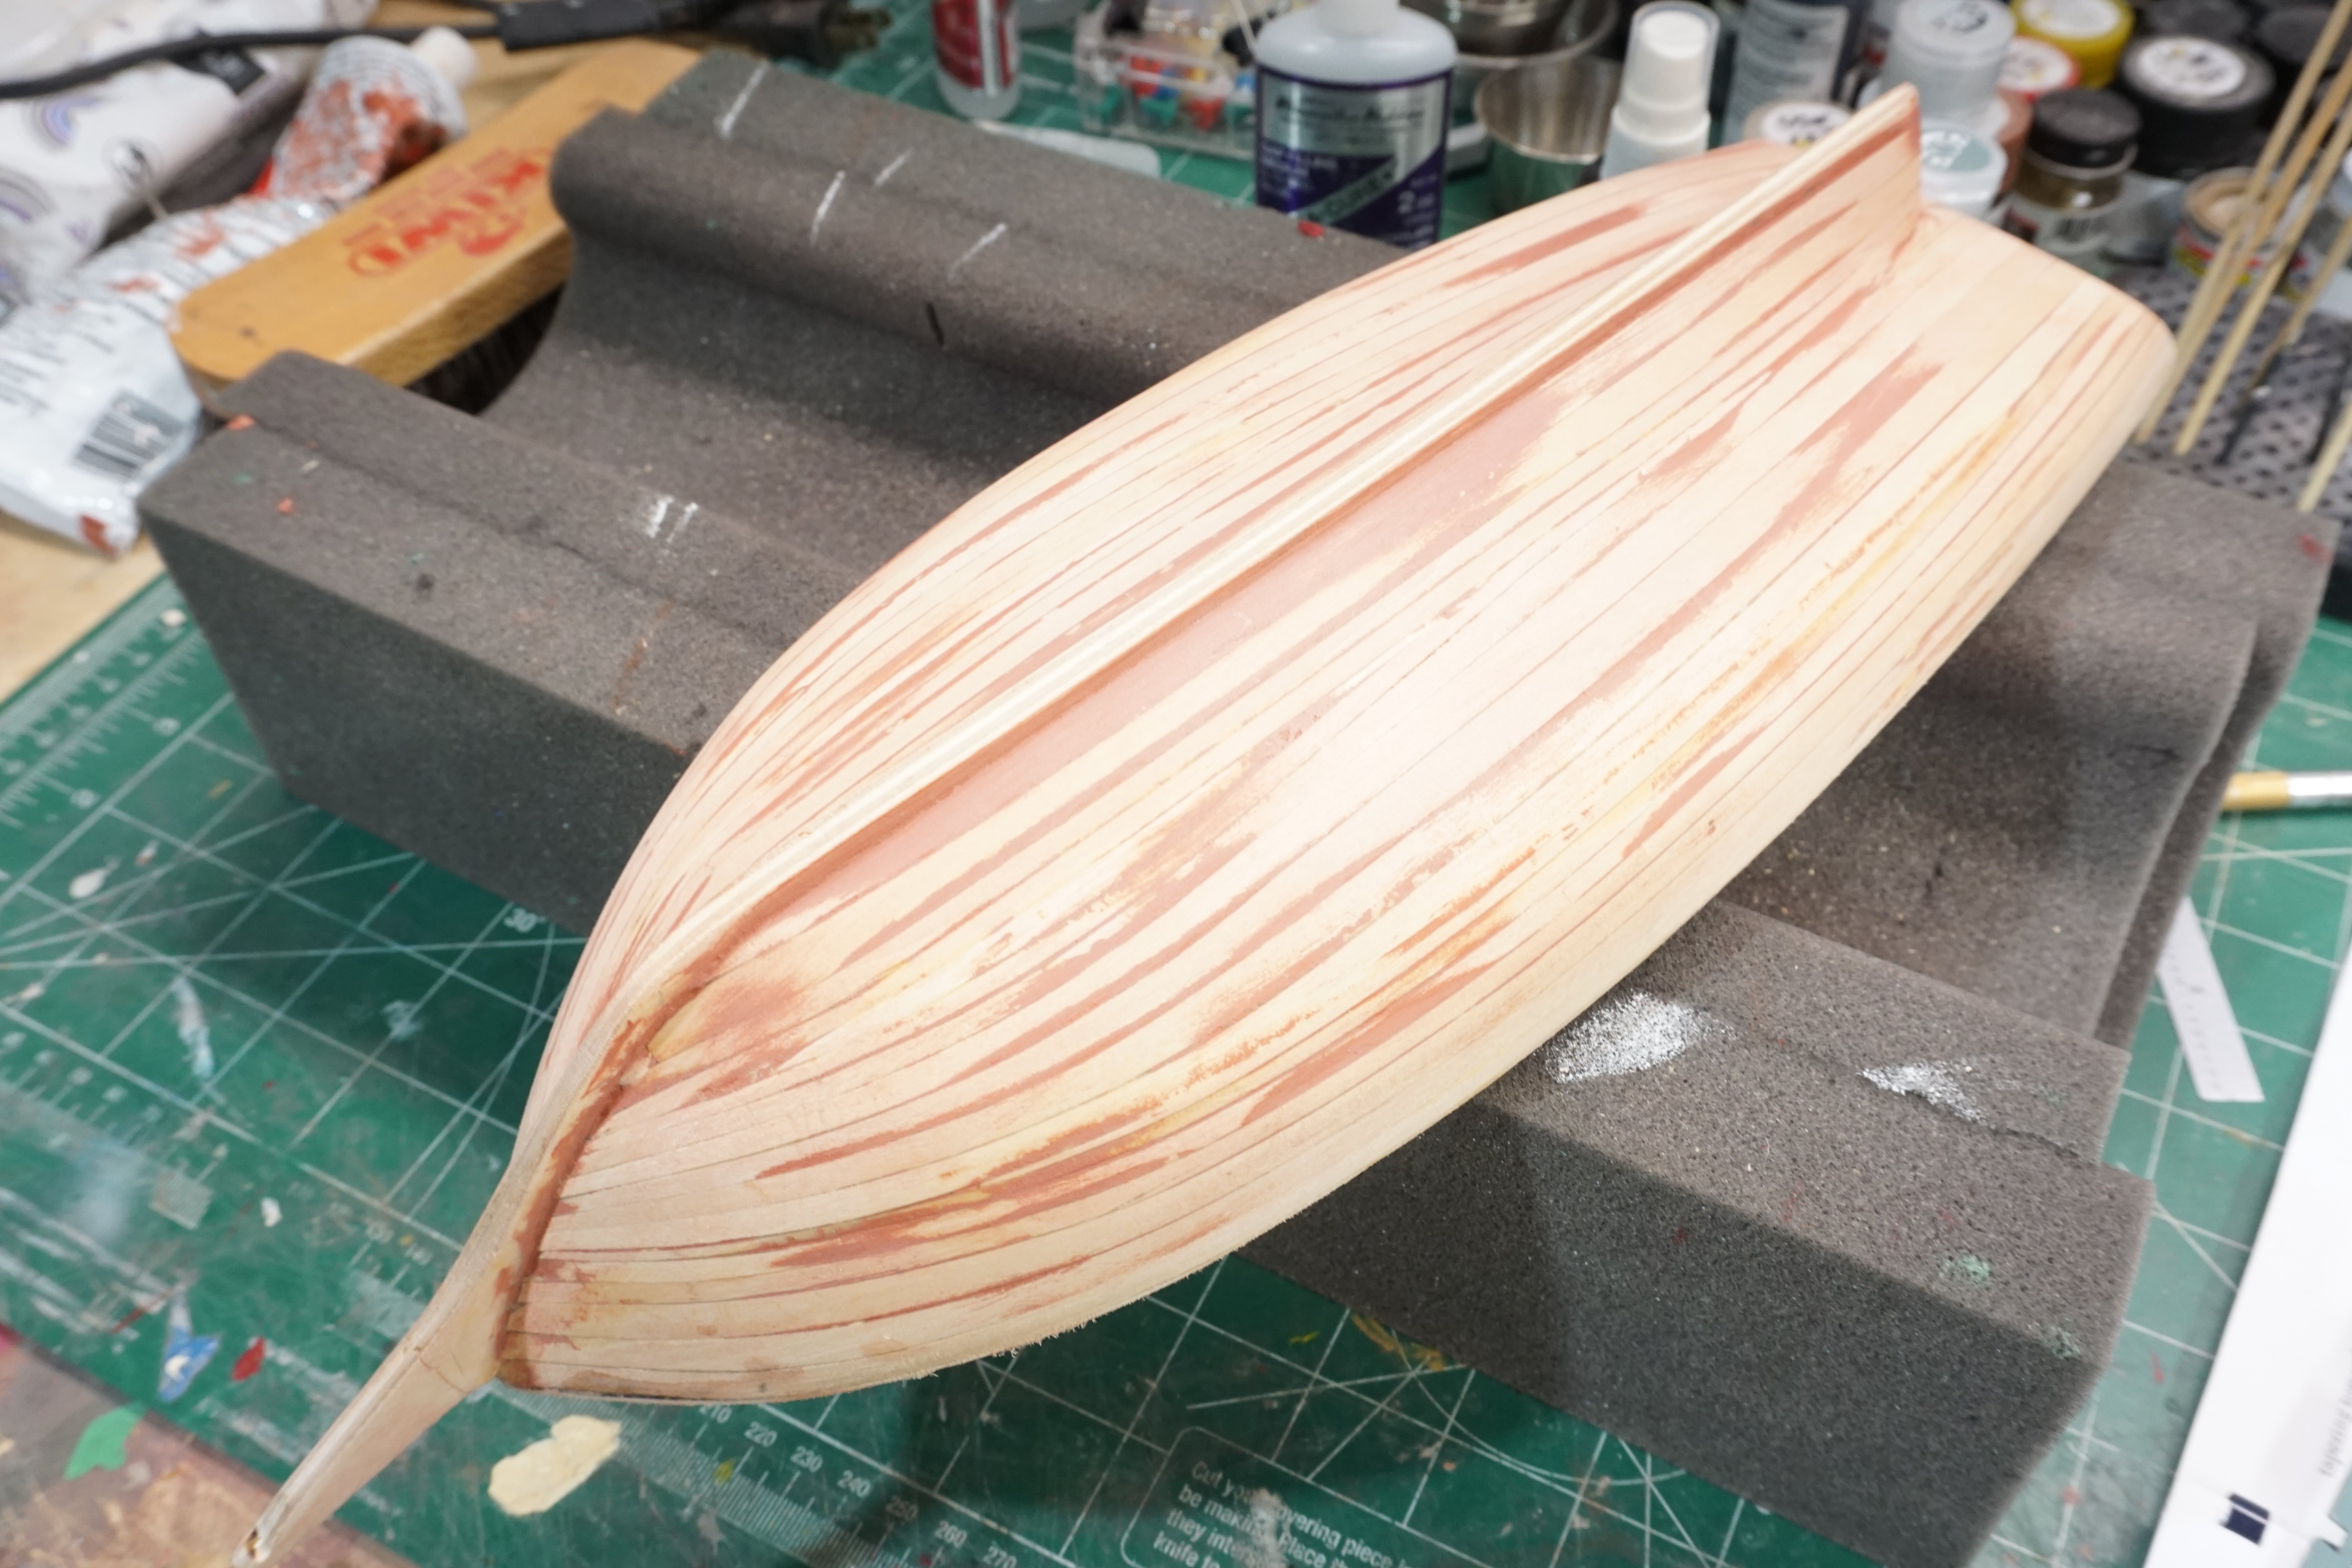
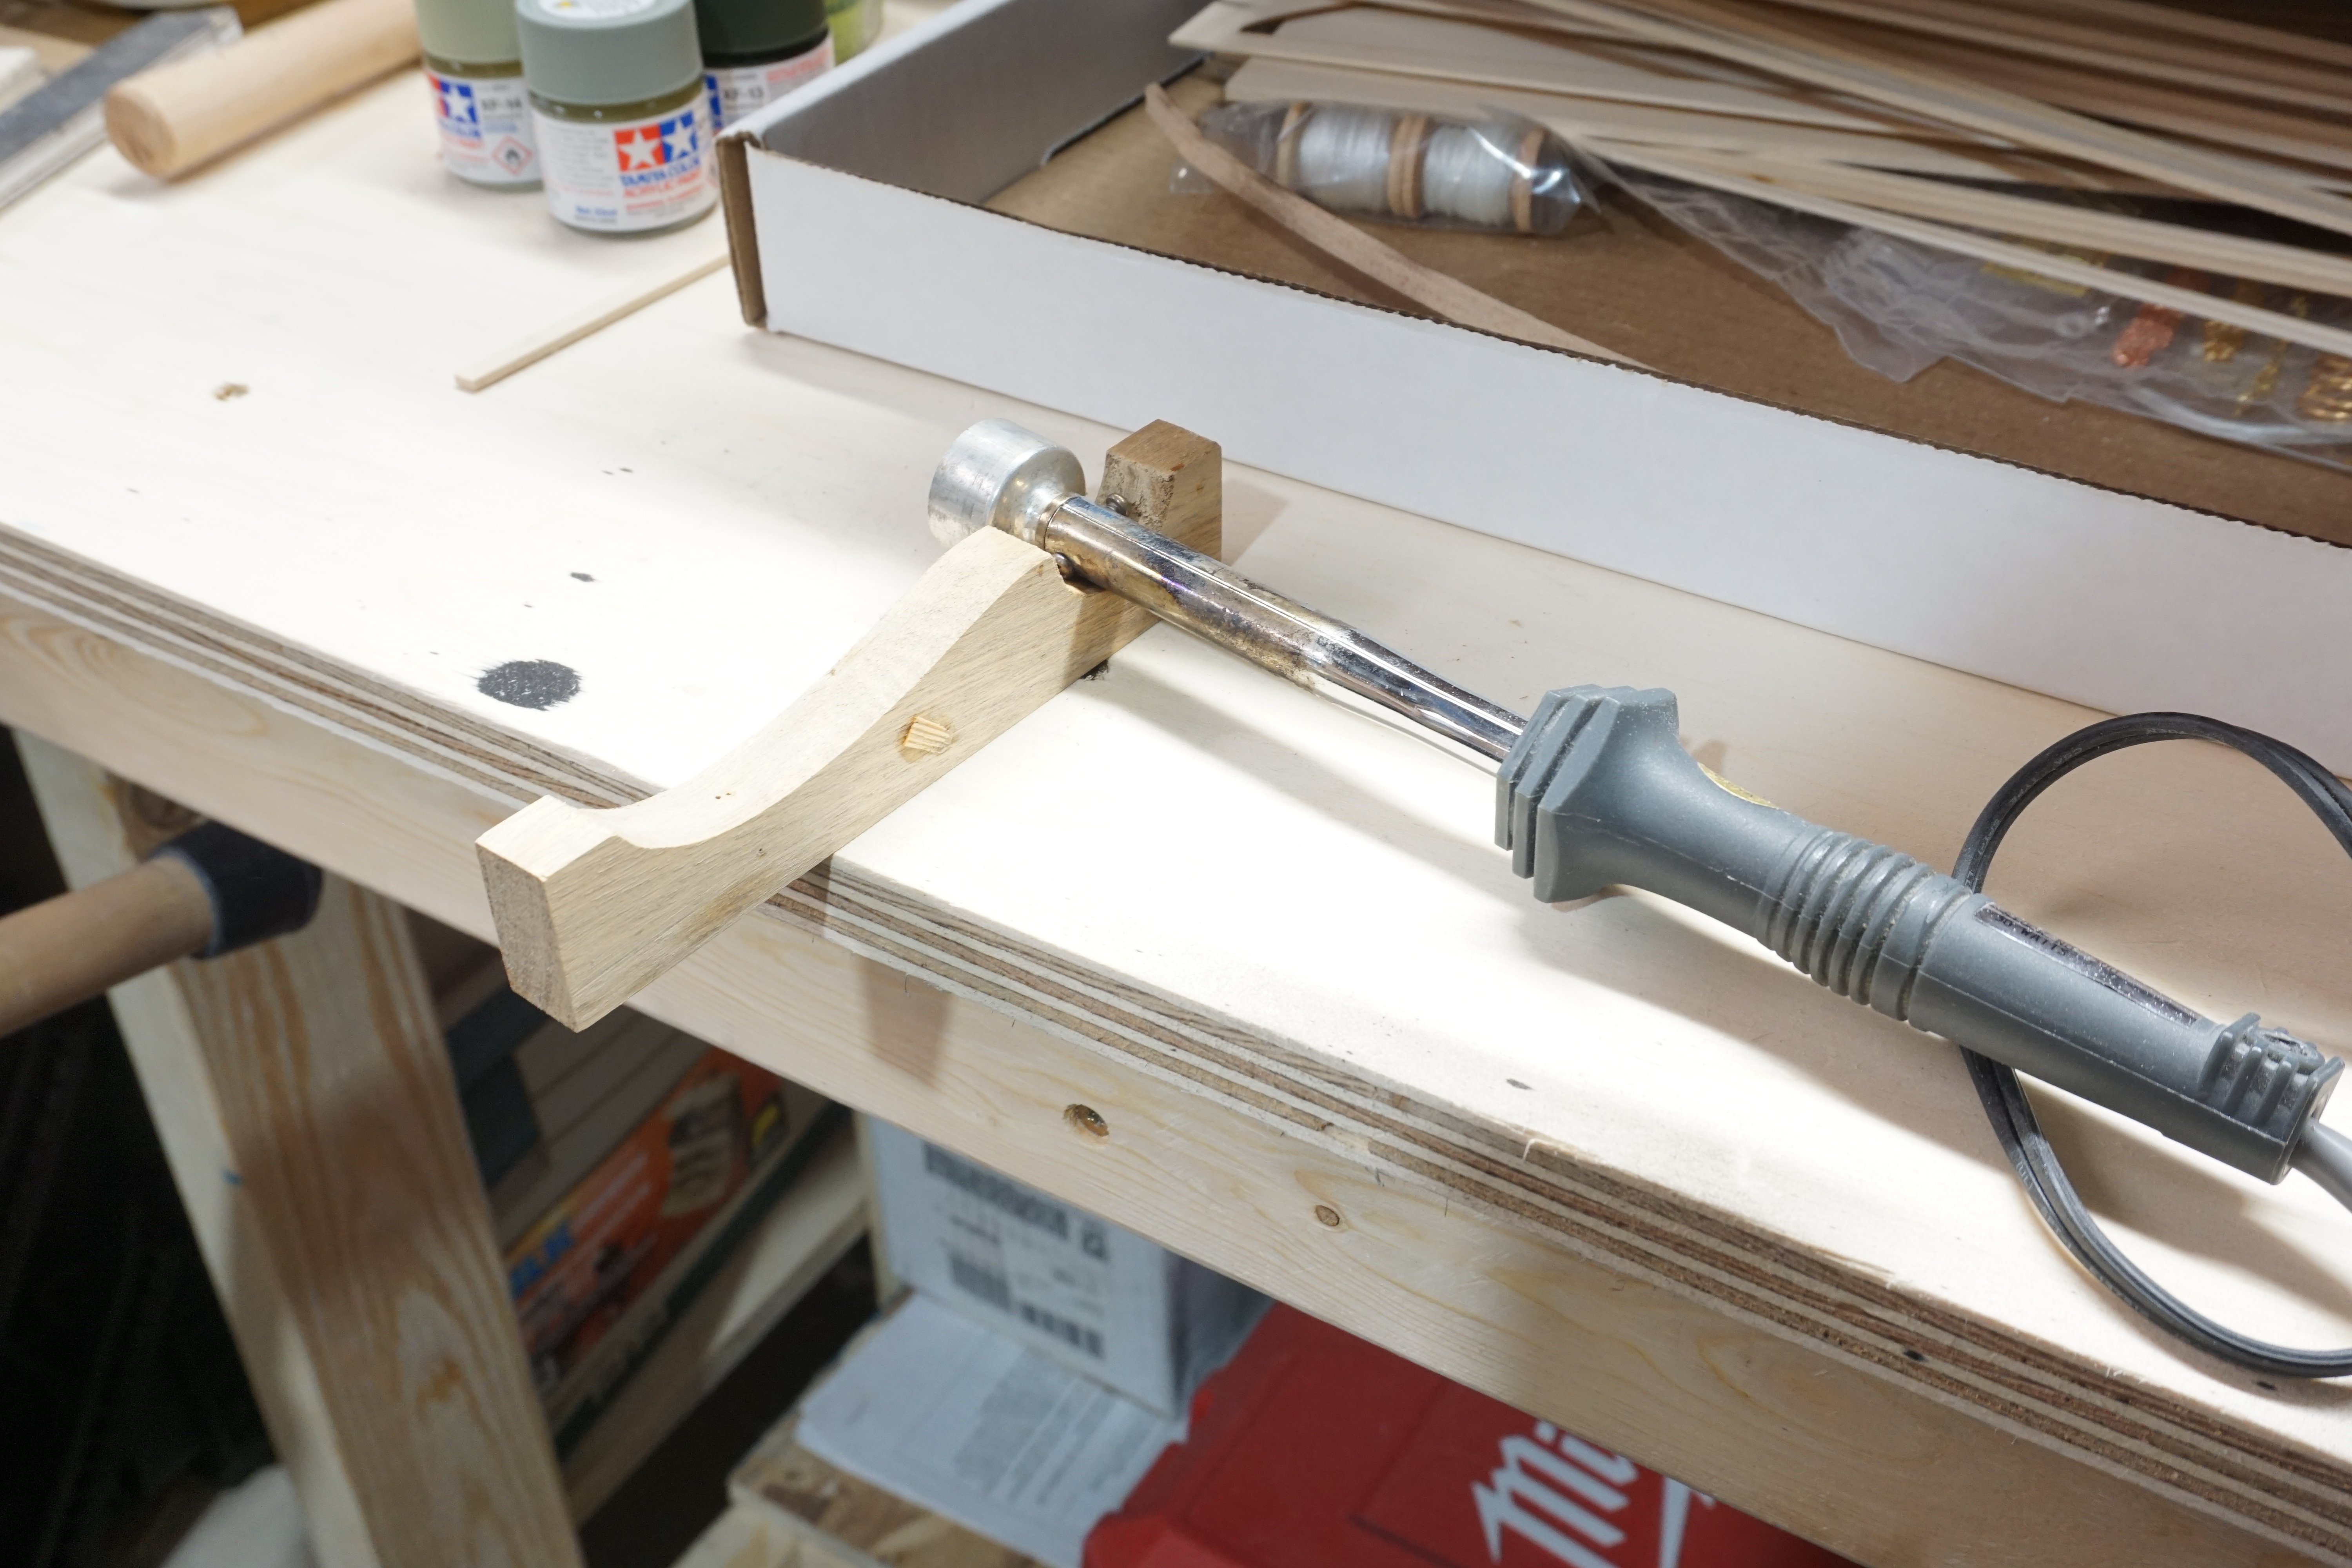
Over the holidays, I was able to get a good start on the planking. After soaking the planks in water and using my hot iron bending tool I was able to get the curve close enough to my liking. I use a combination of medium CA and Tite-bond 2 wood glue for adhering planks.


-
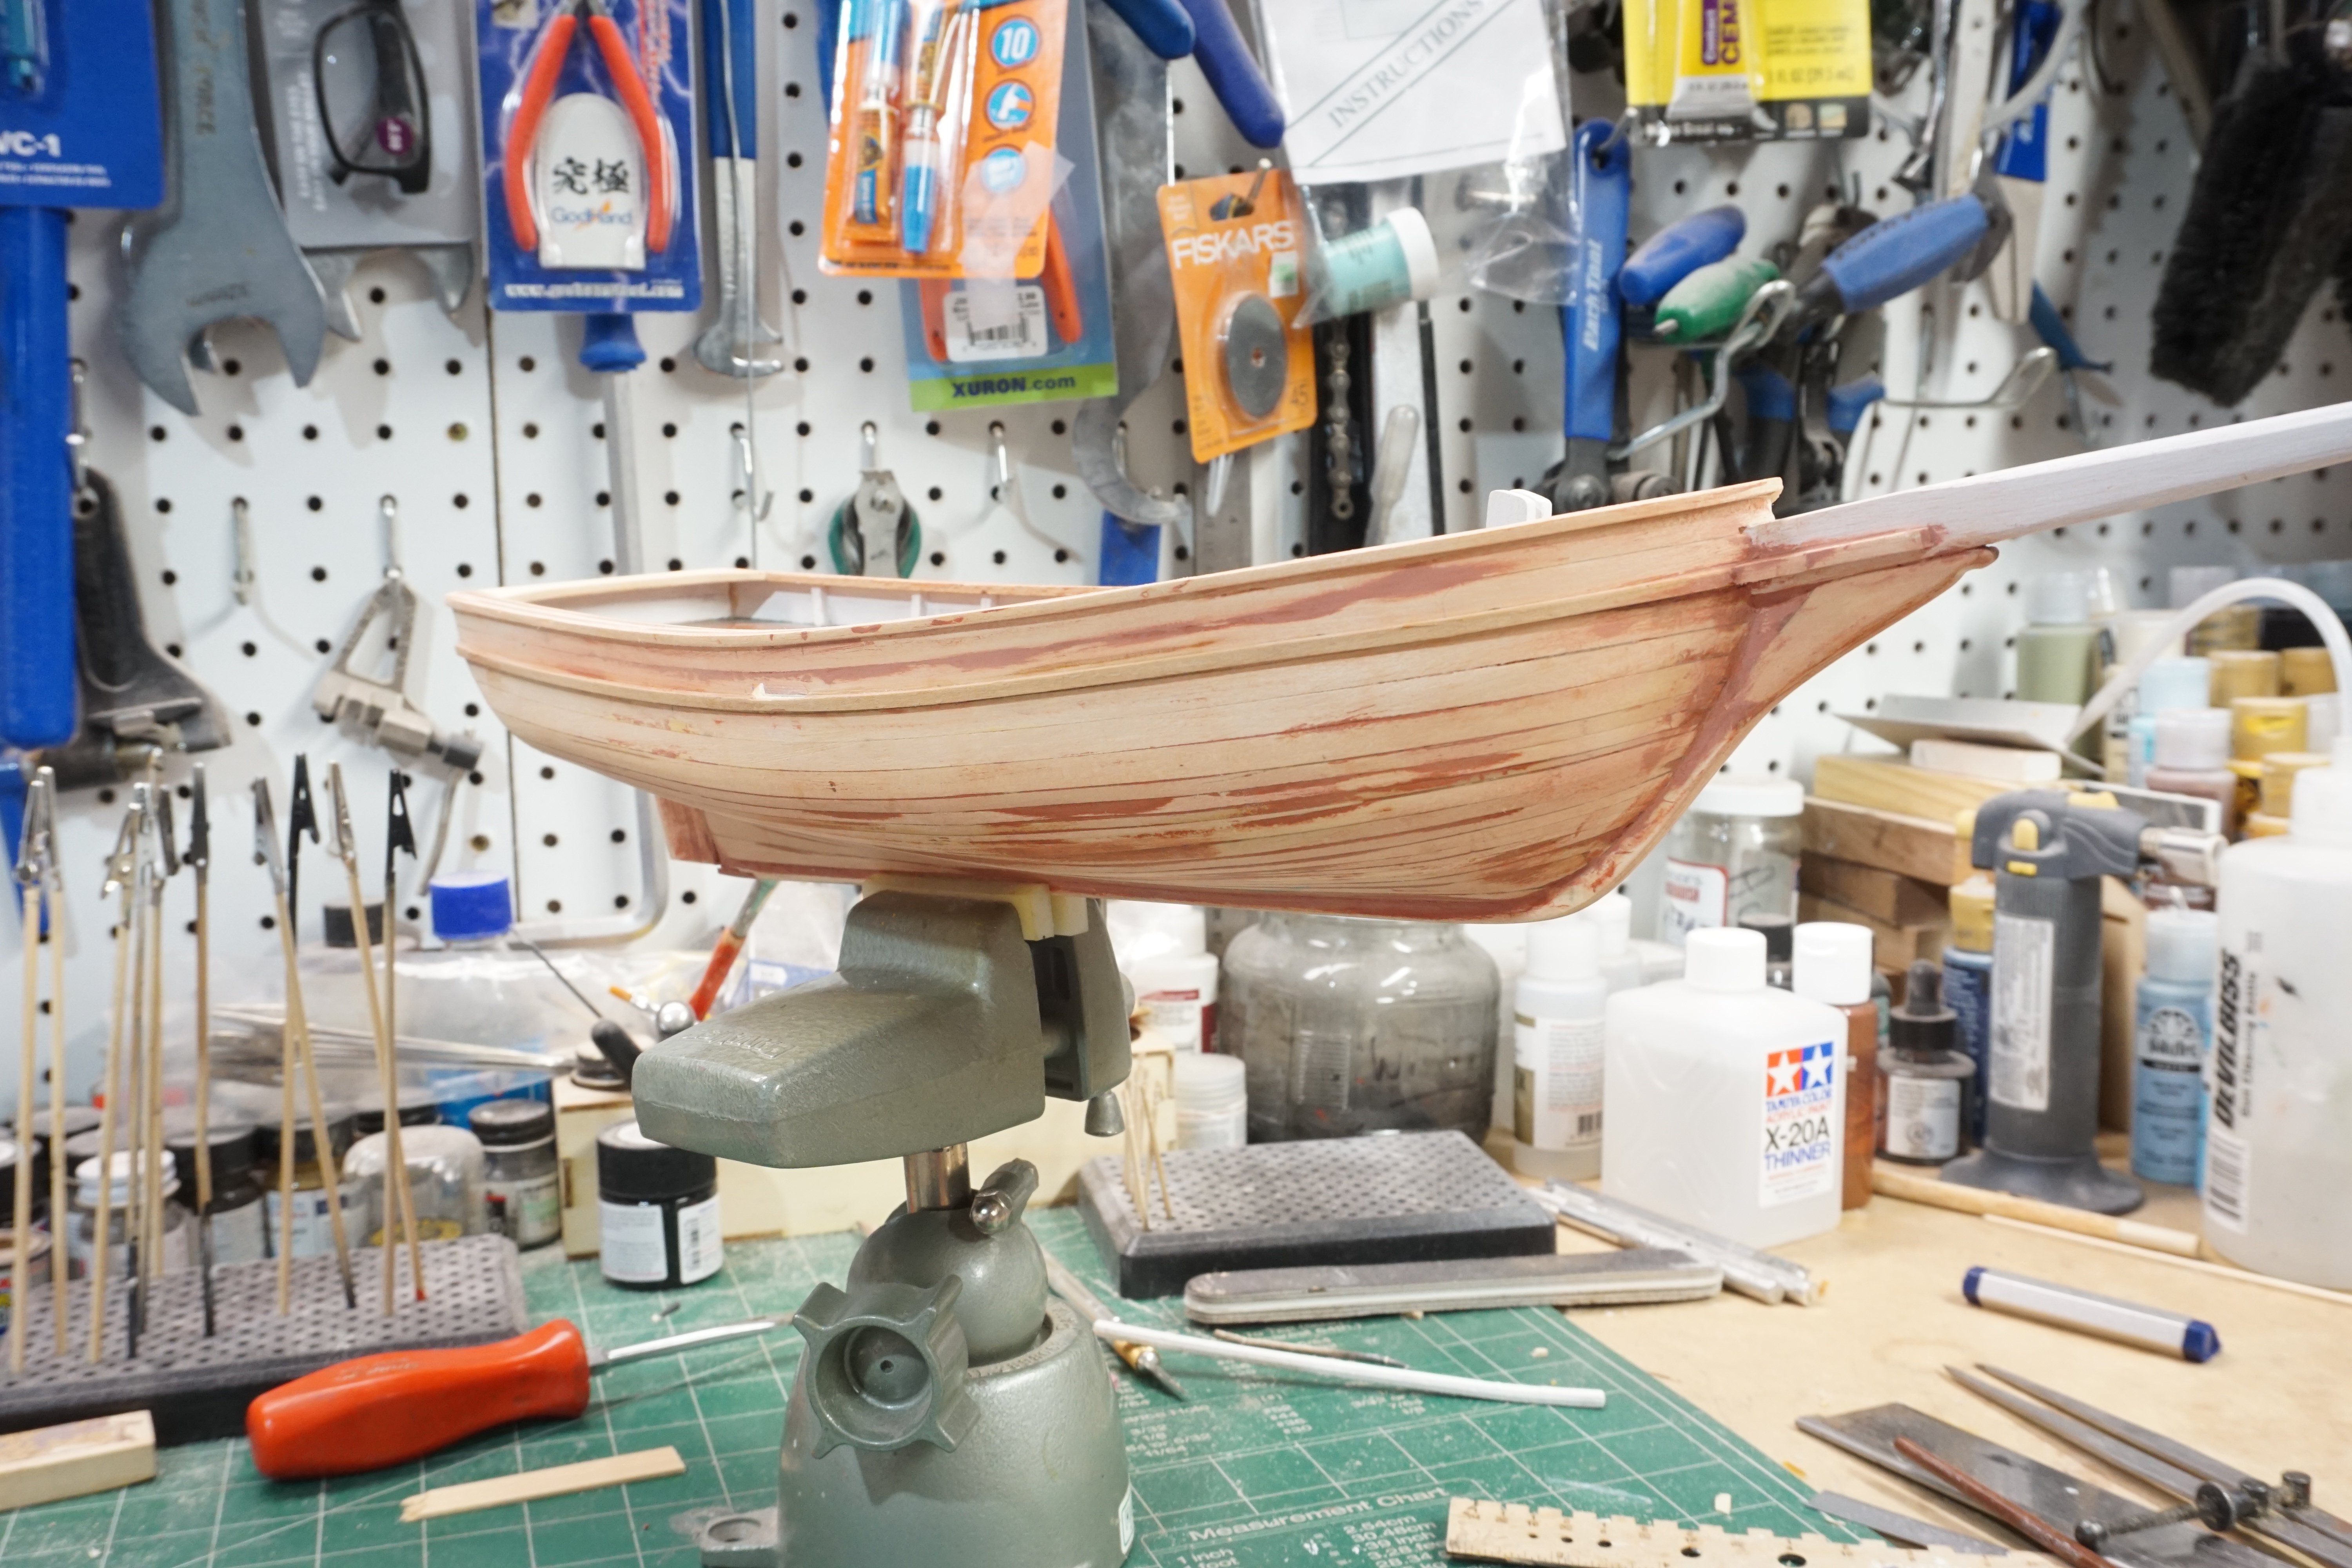
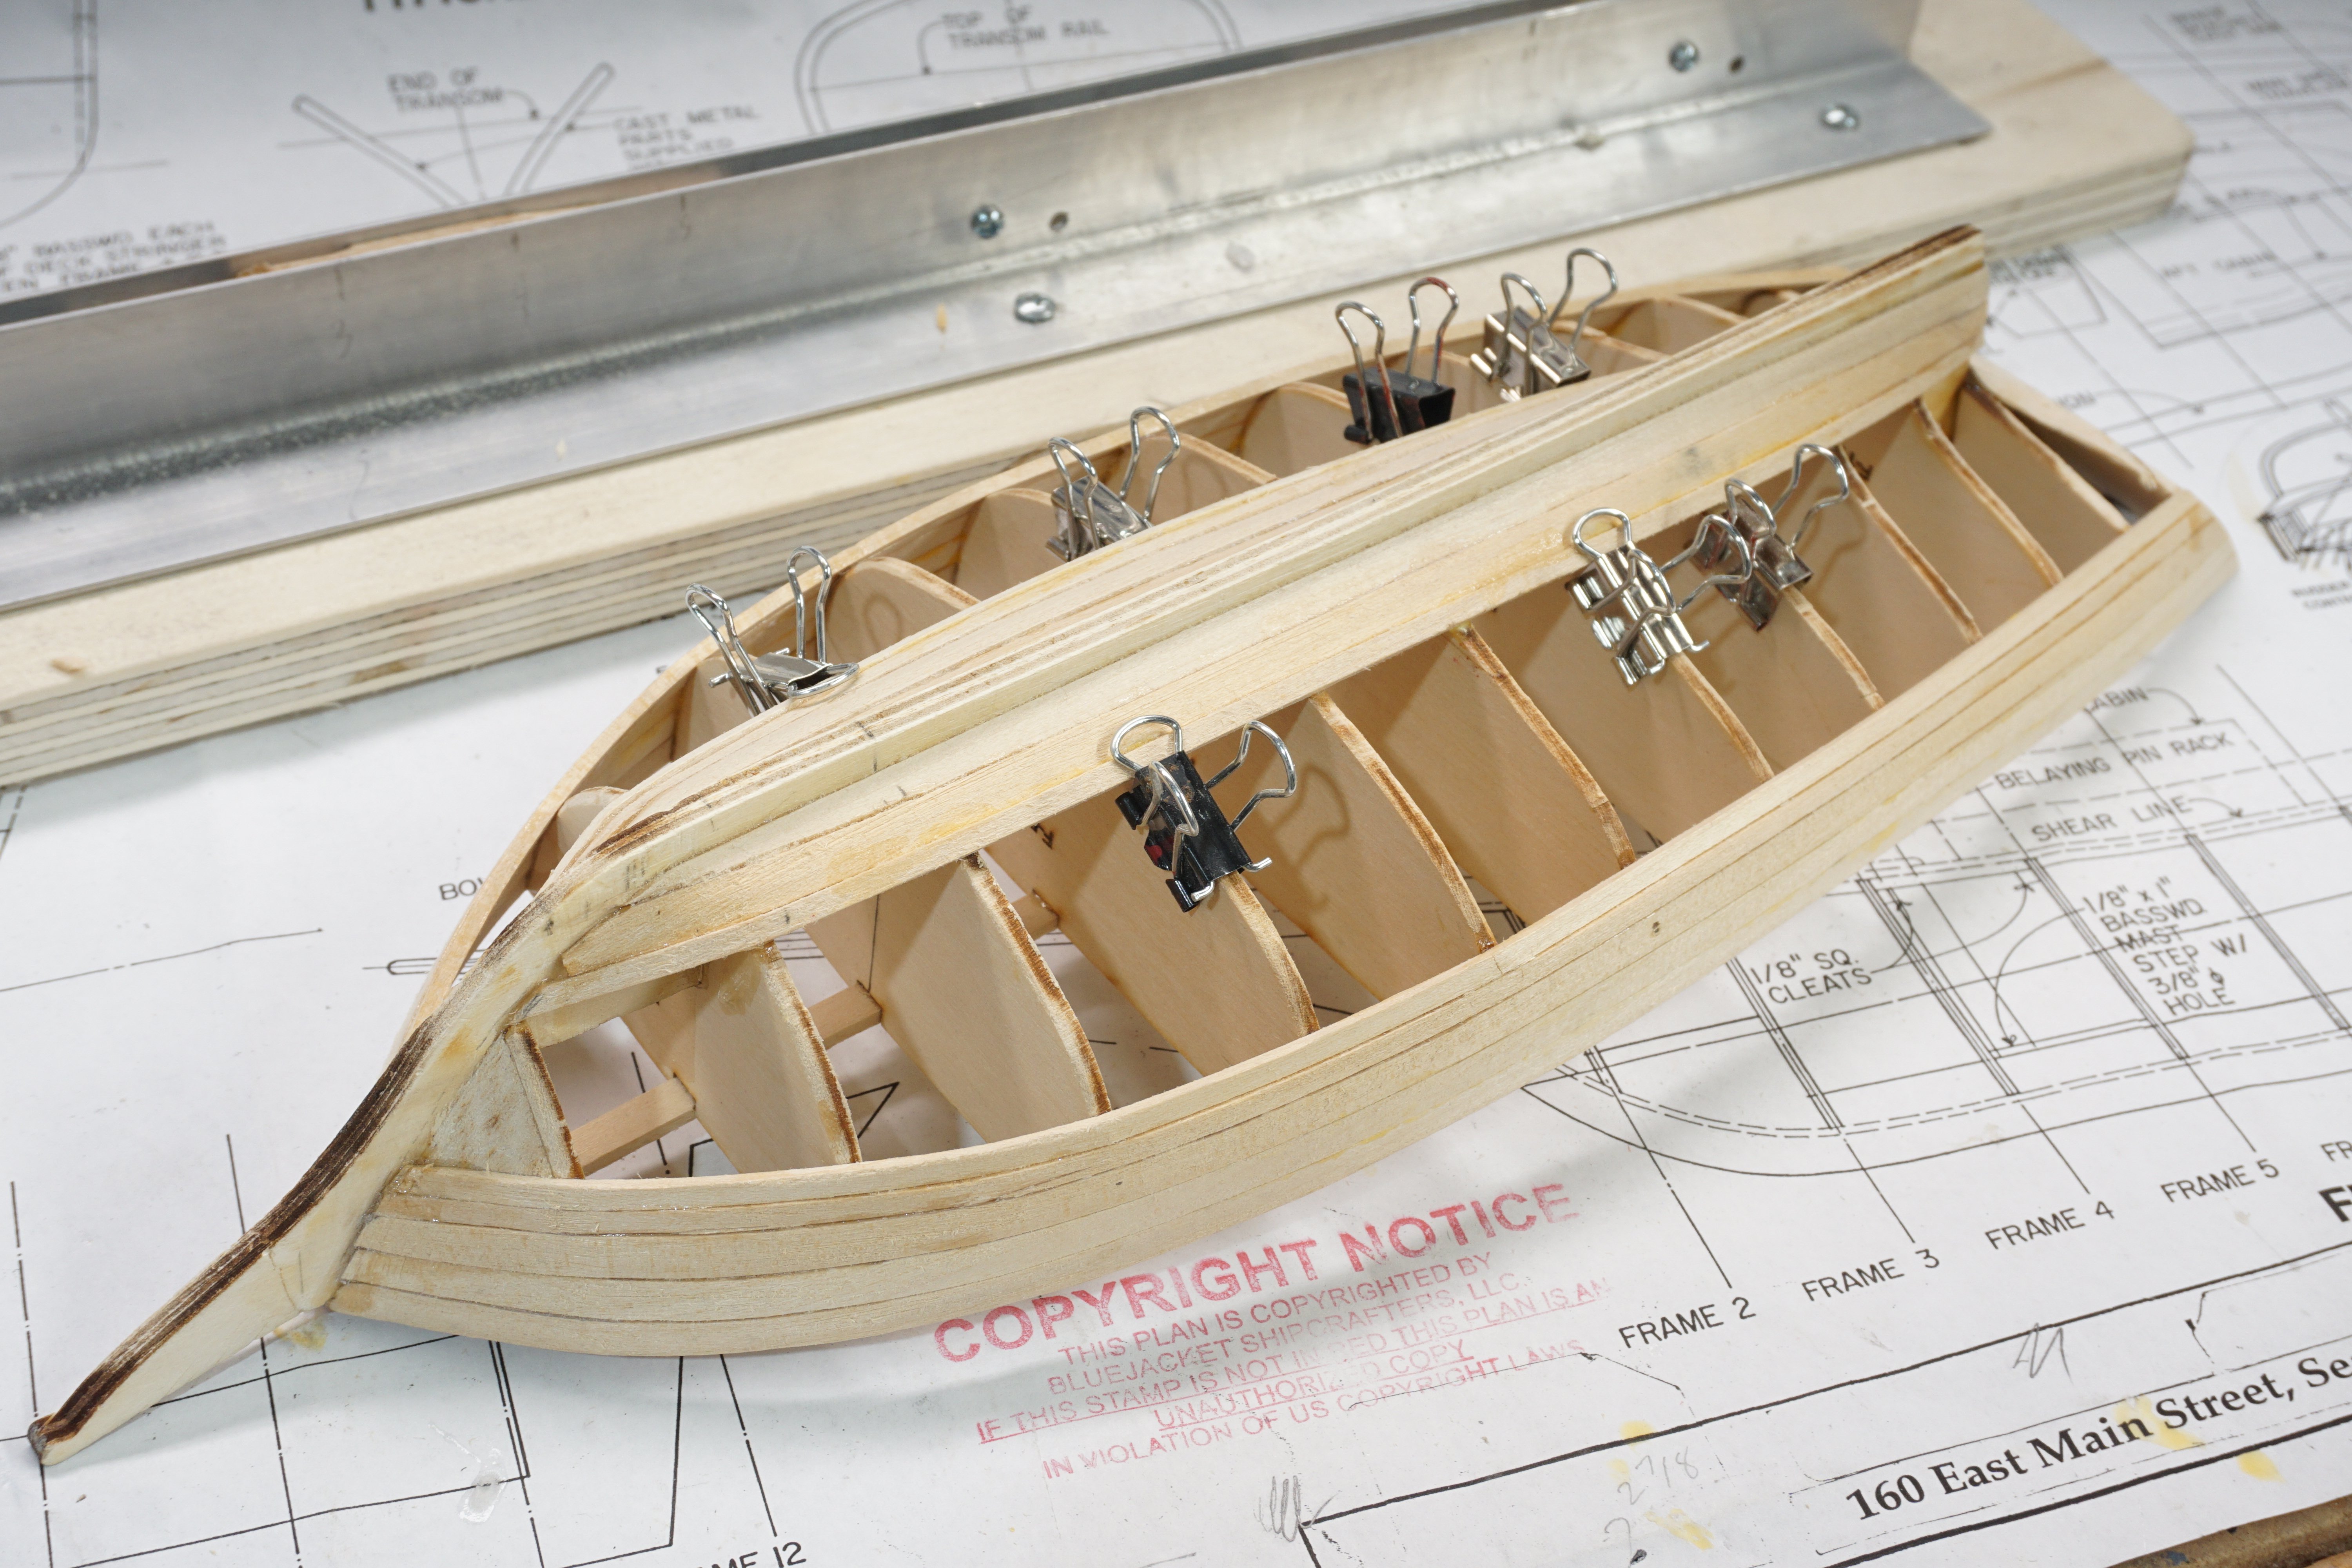
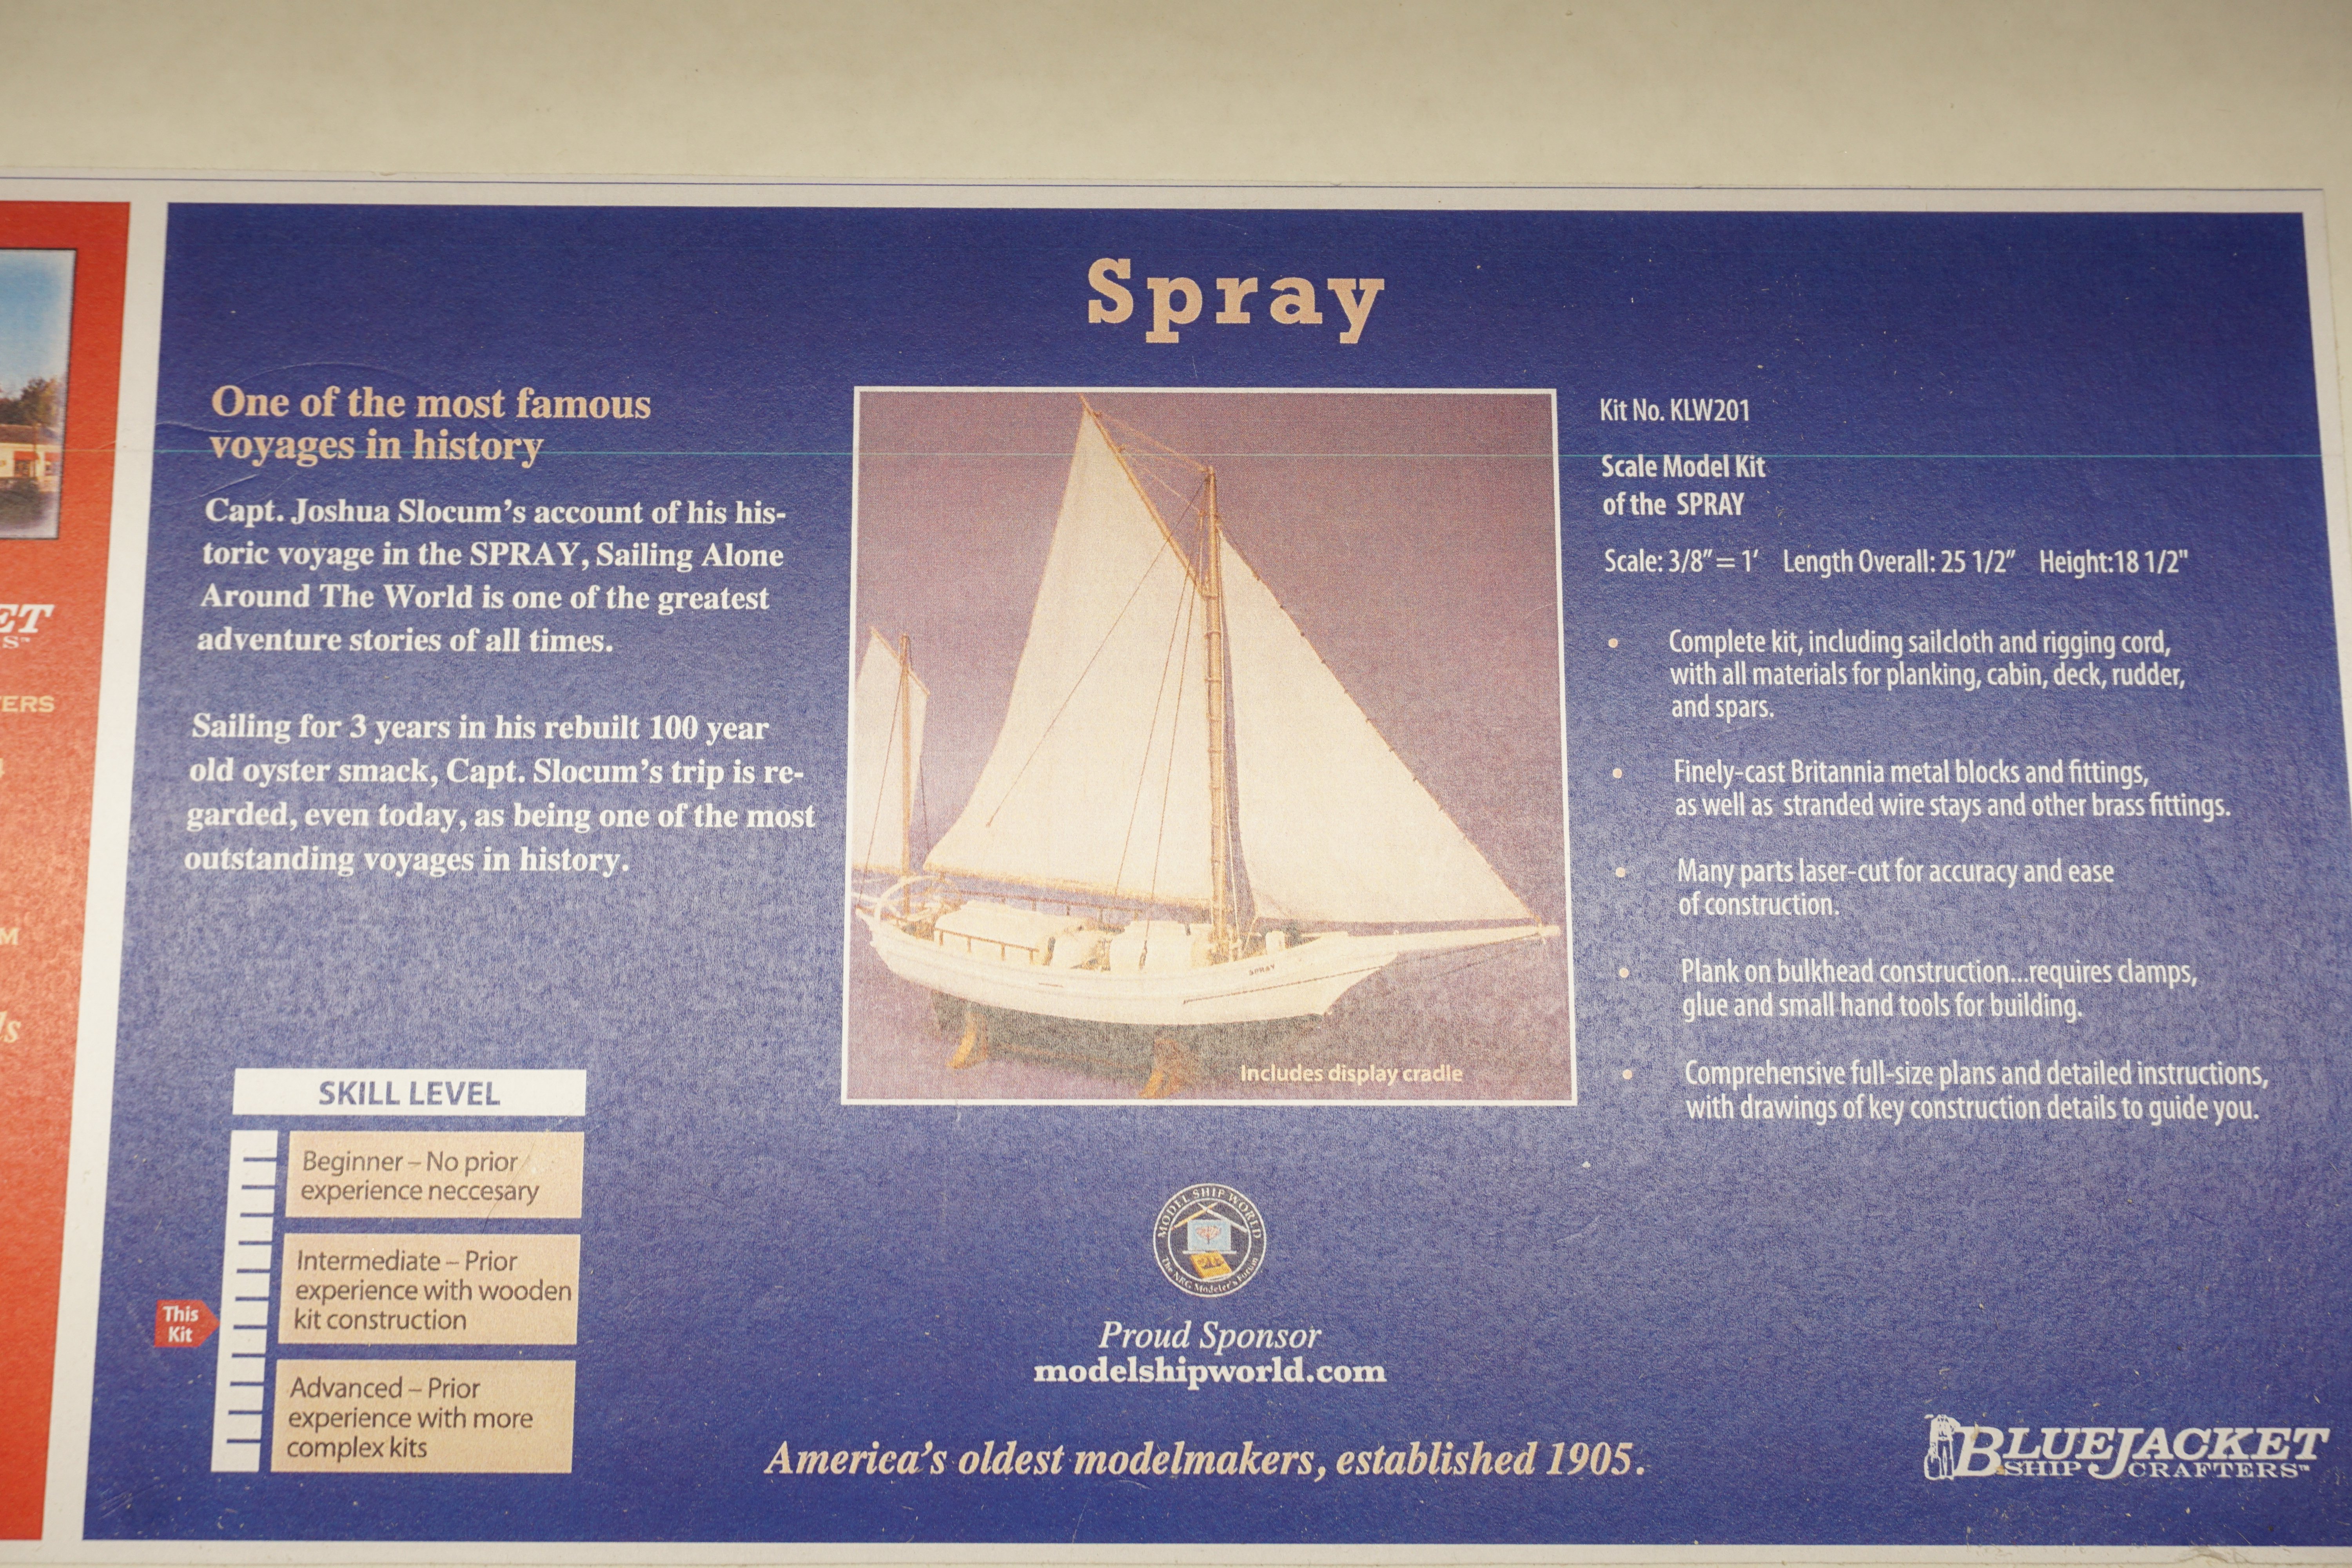
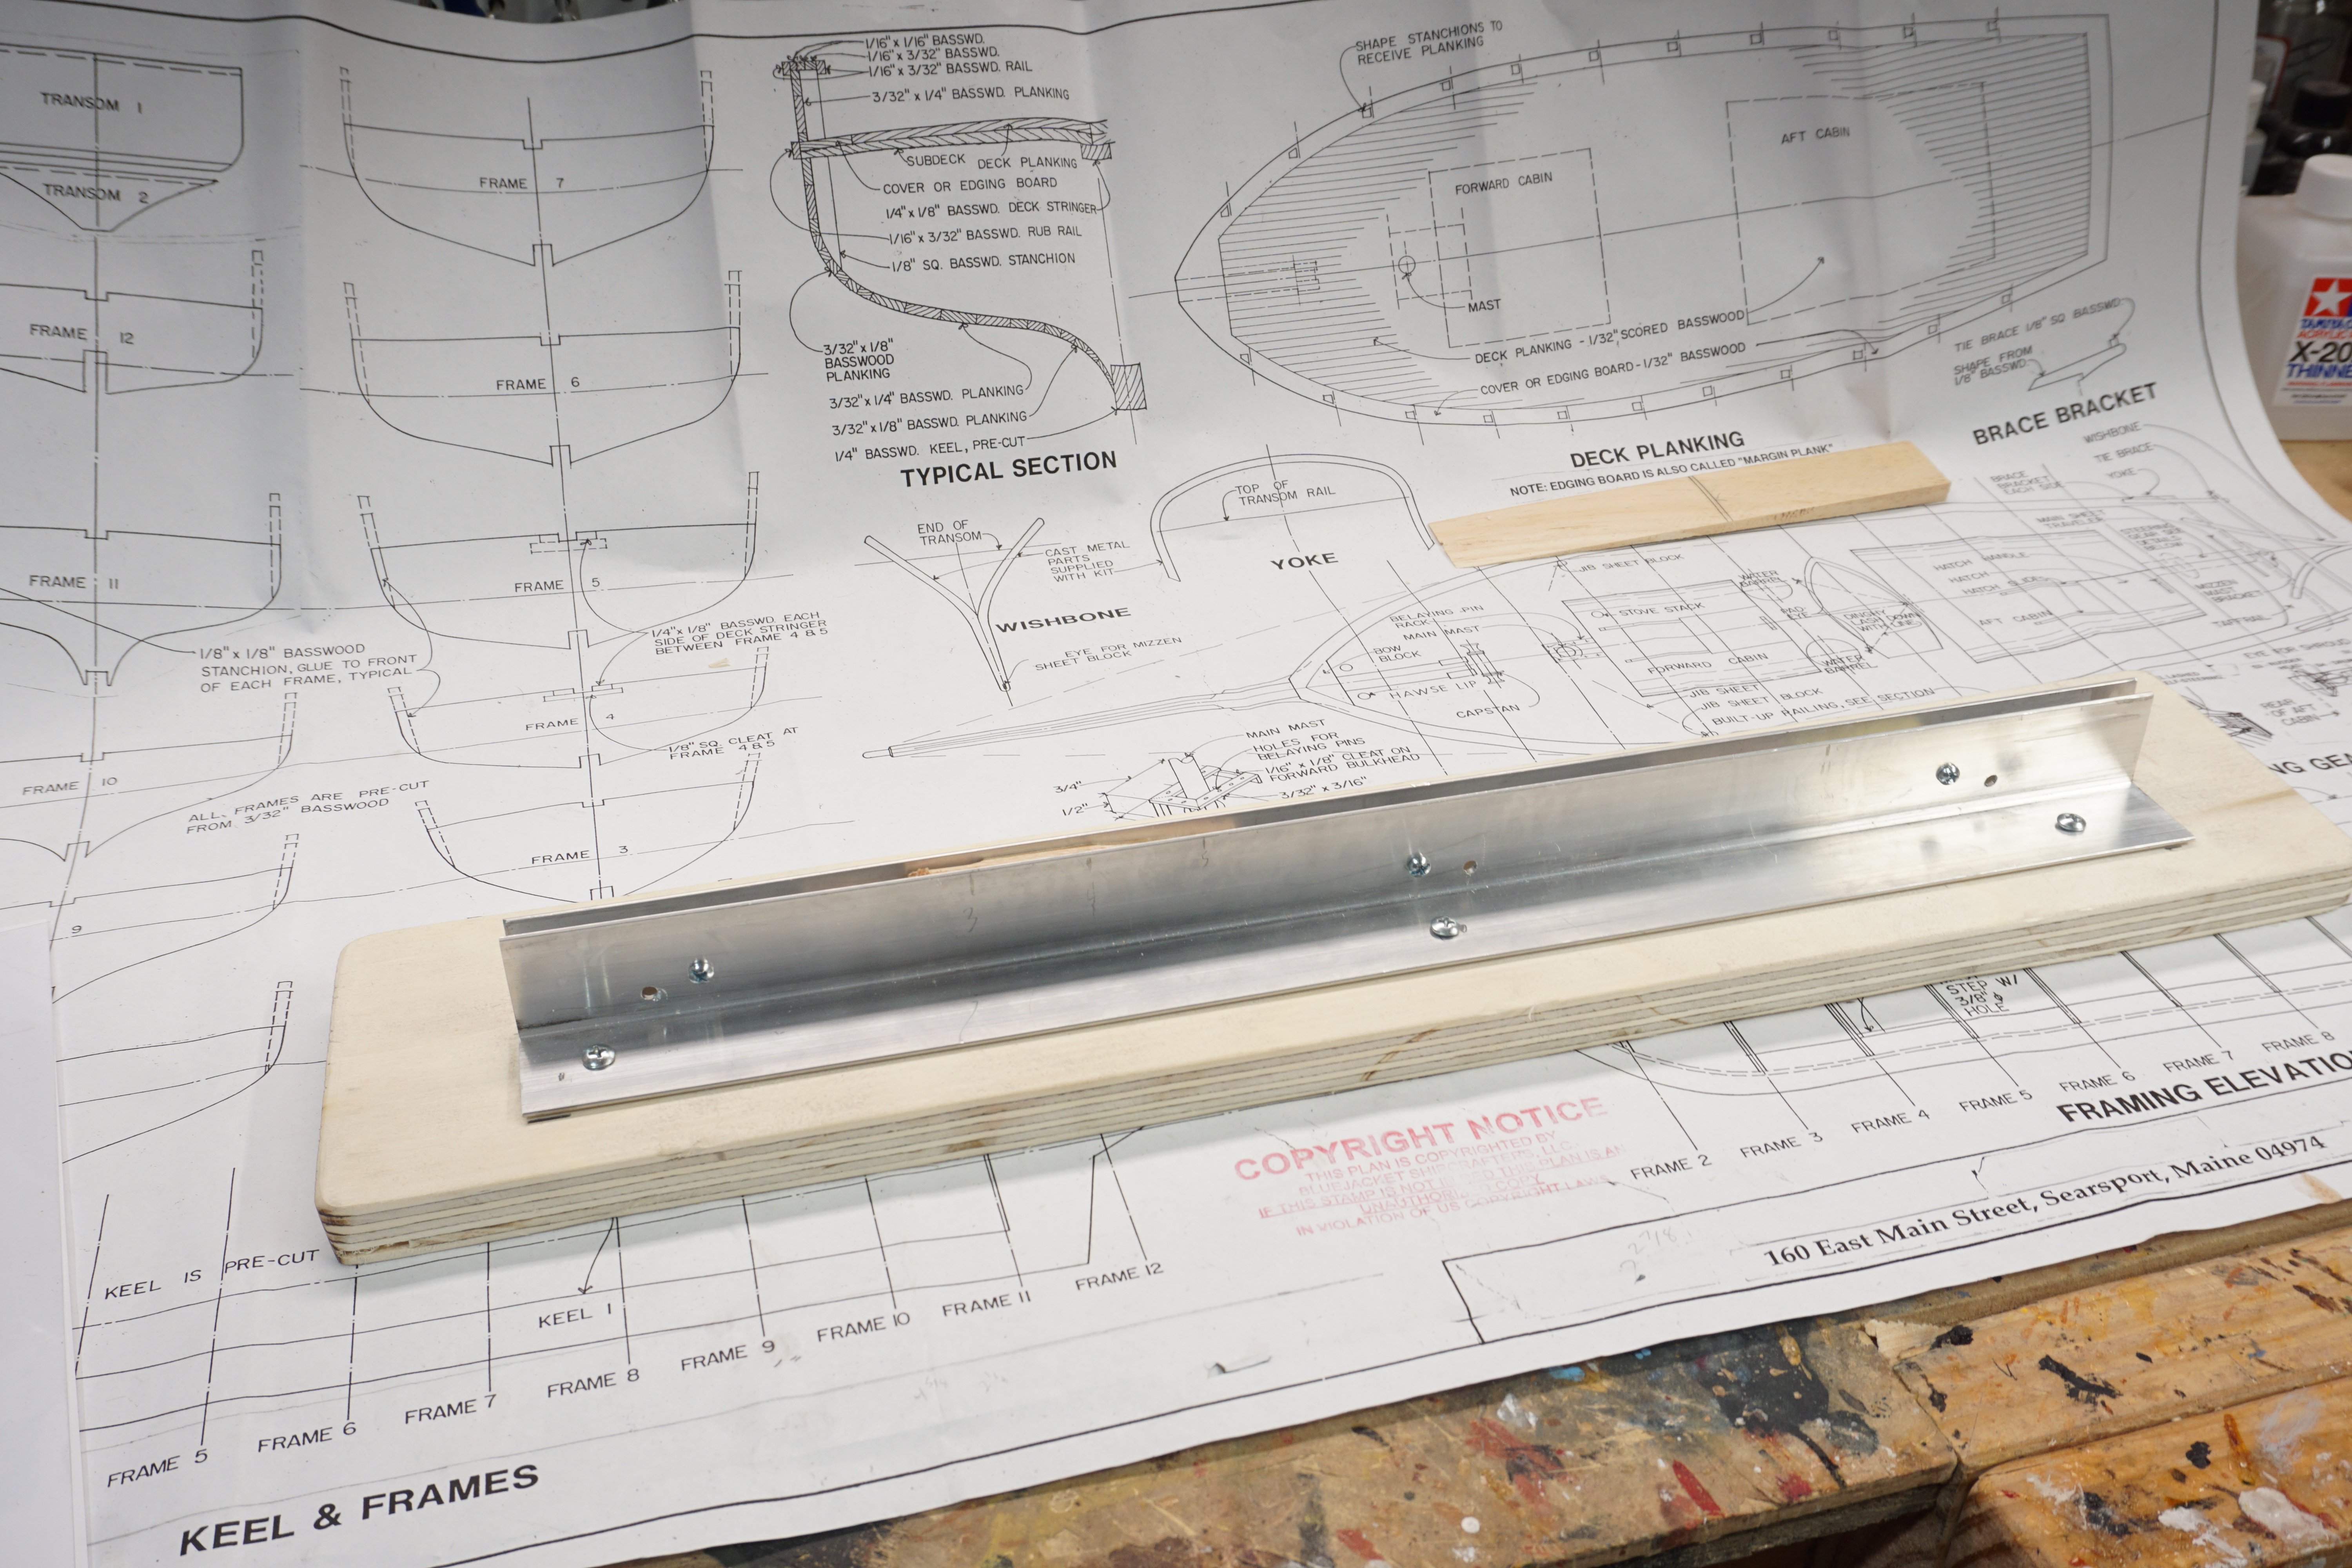
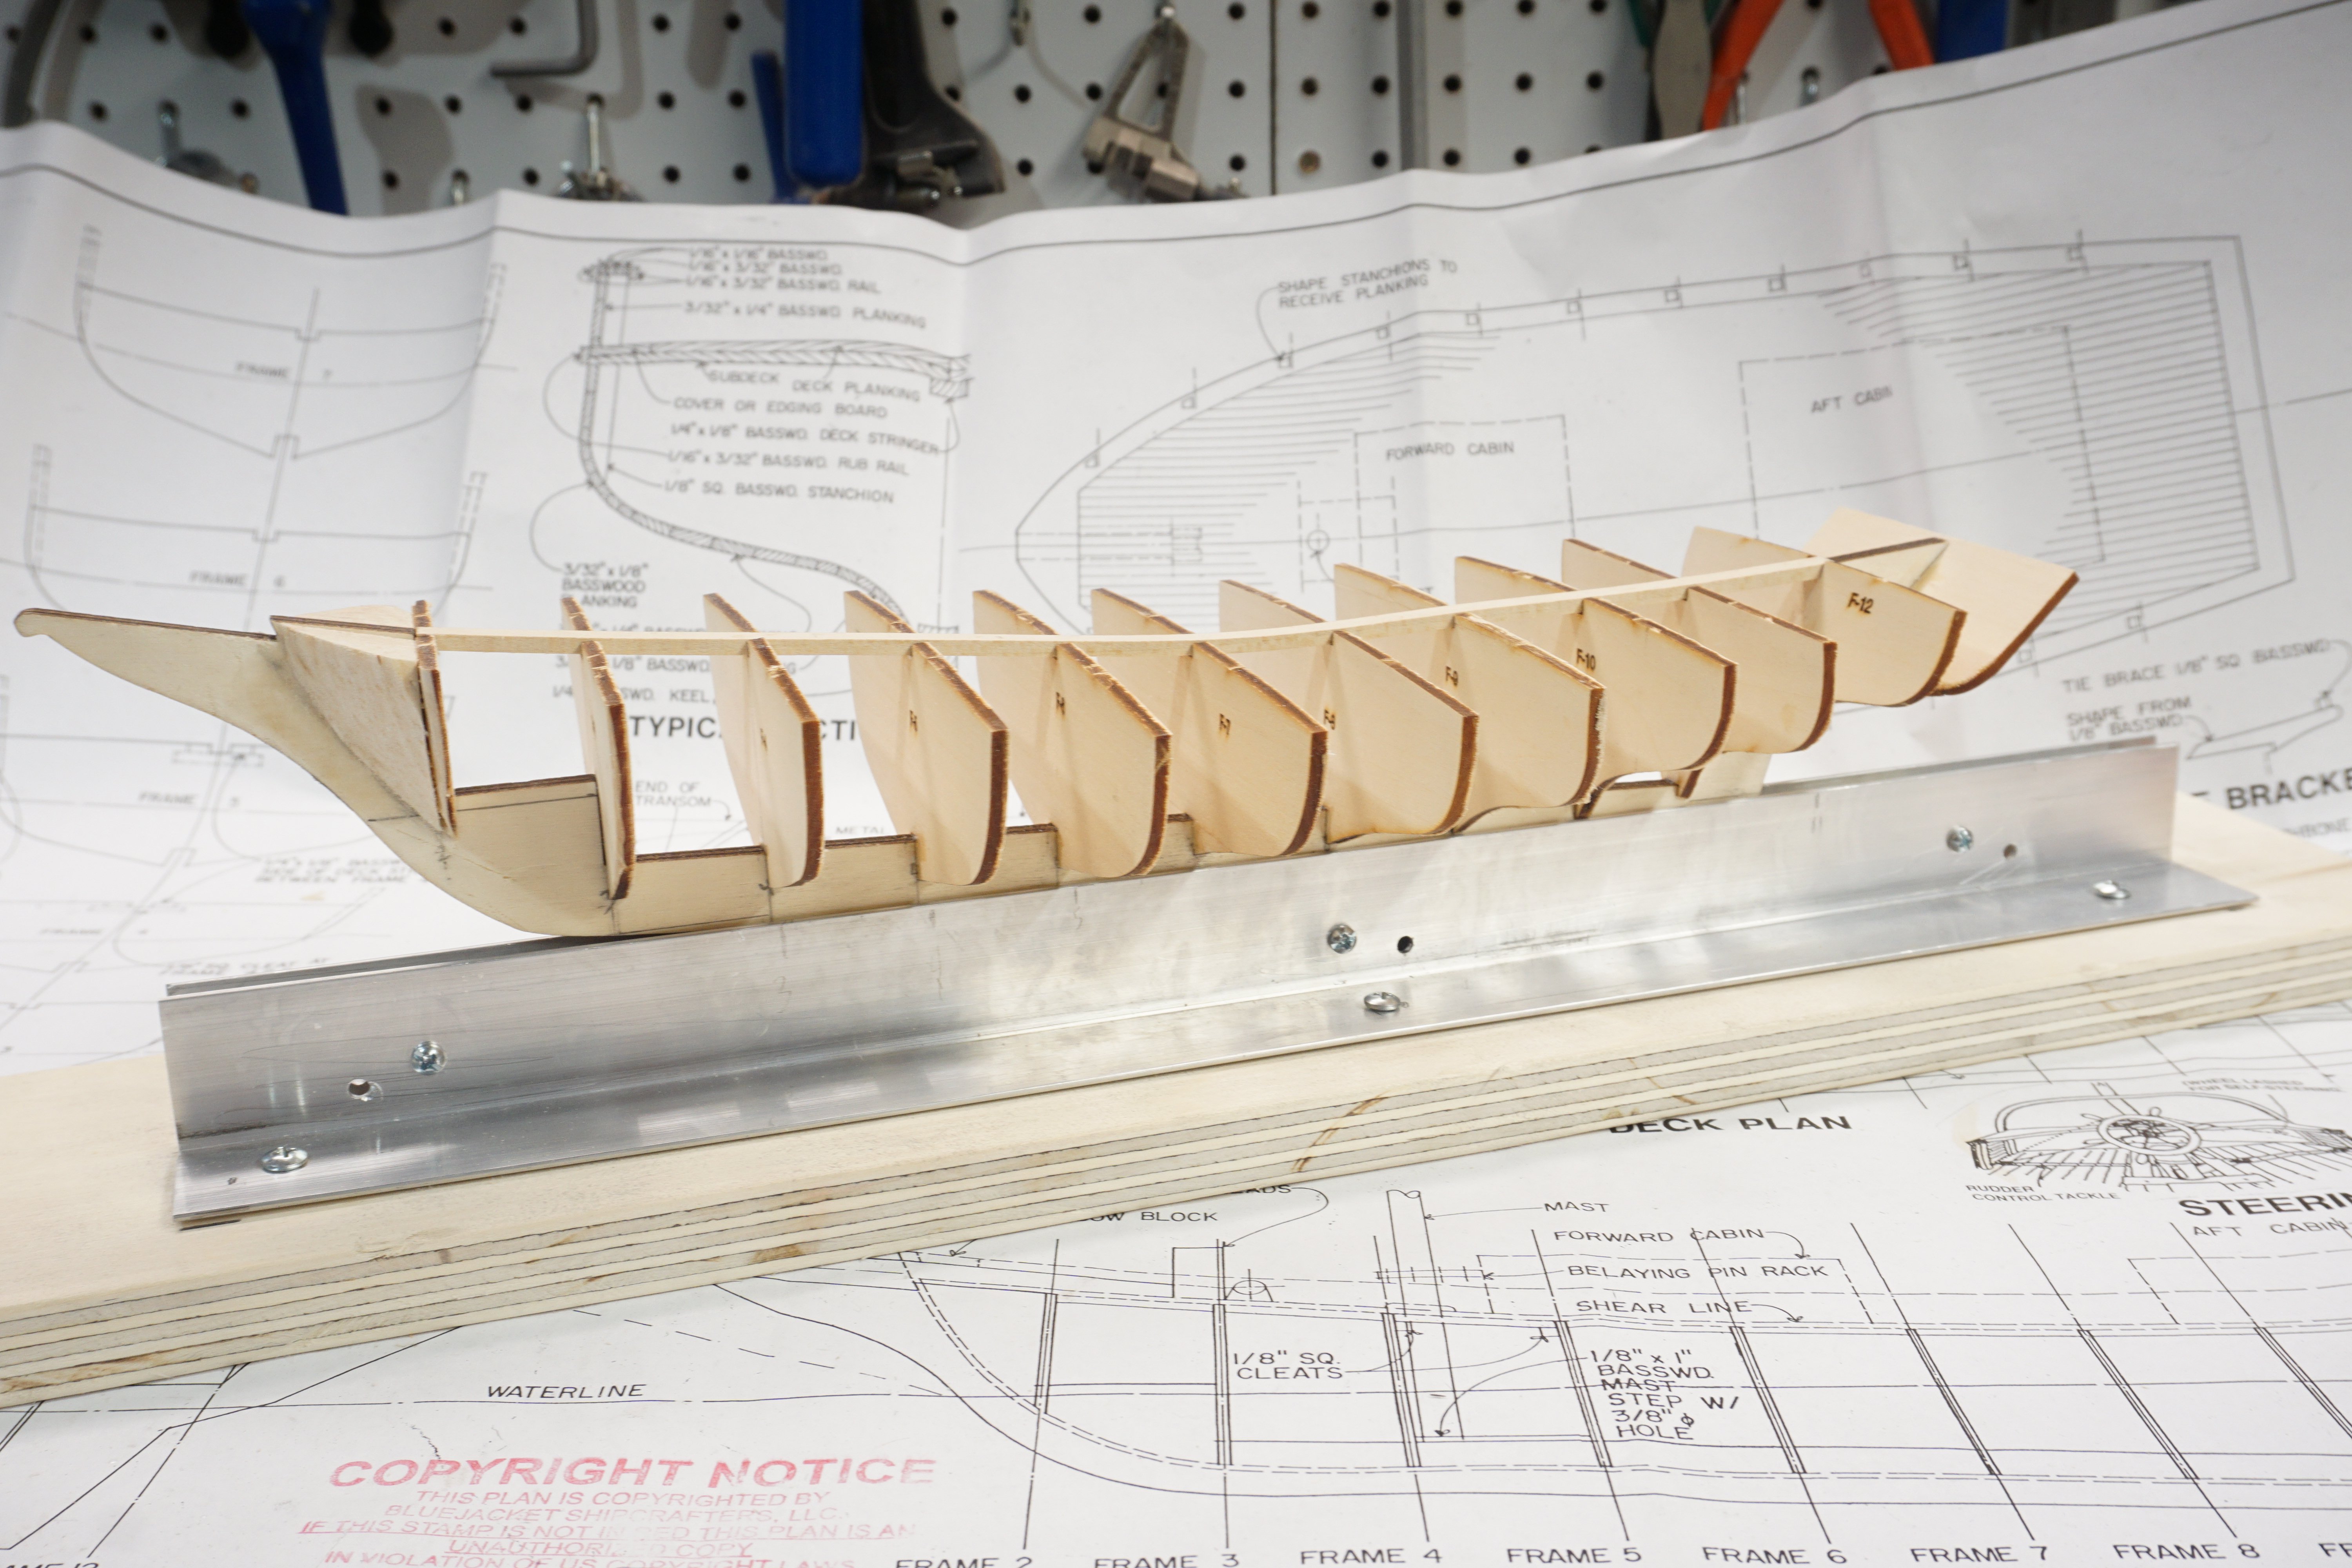
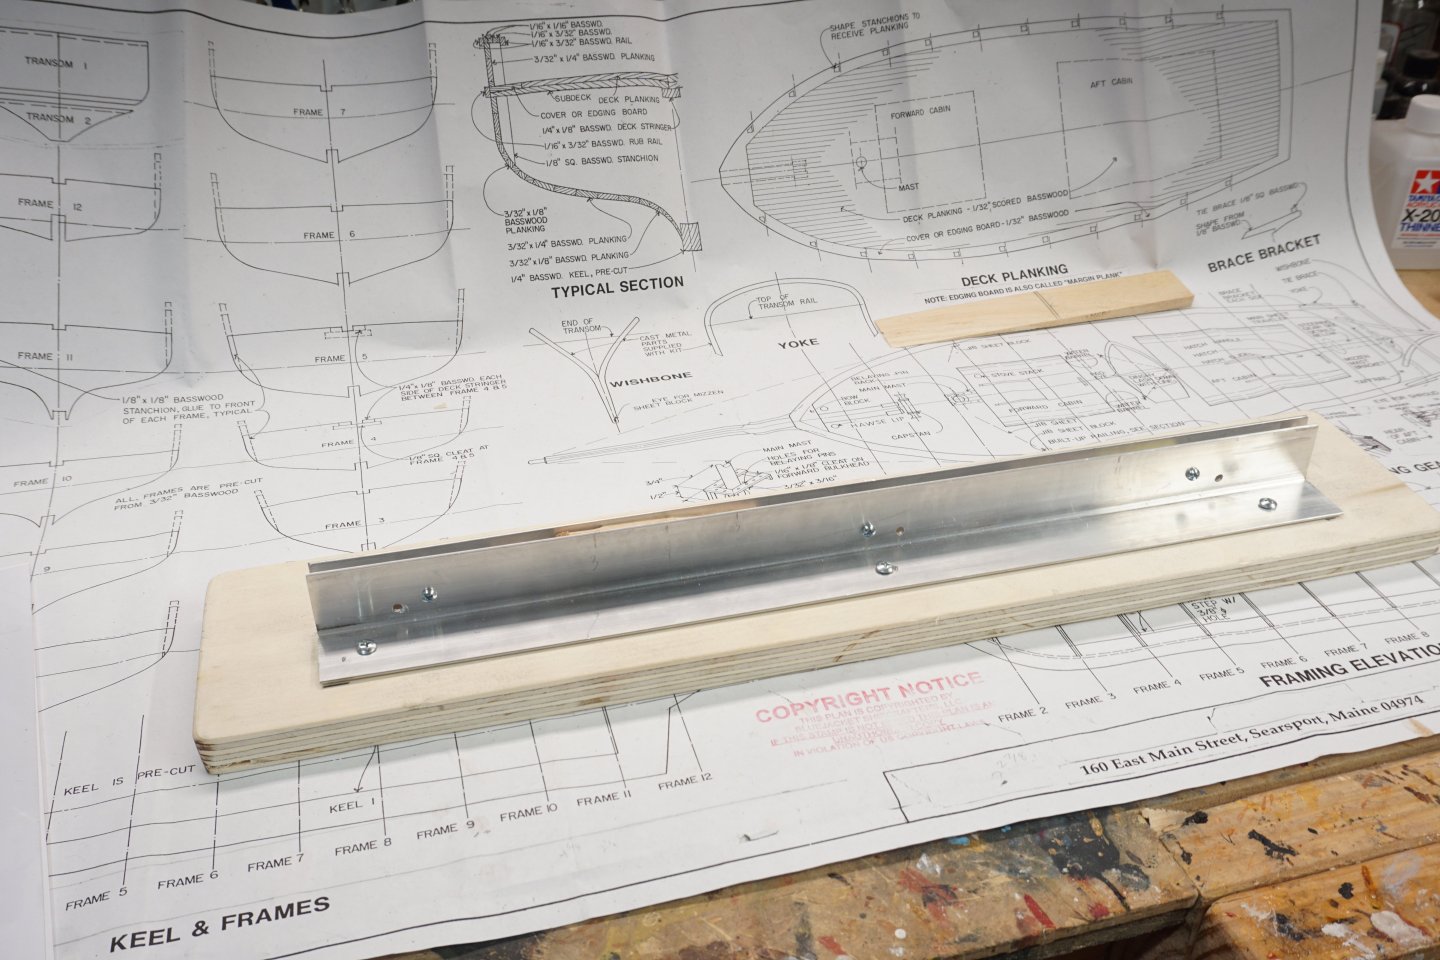
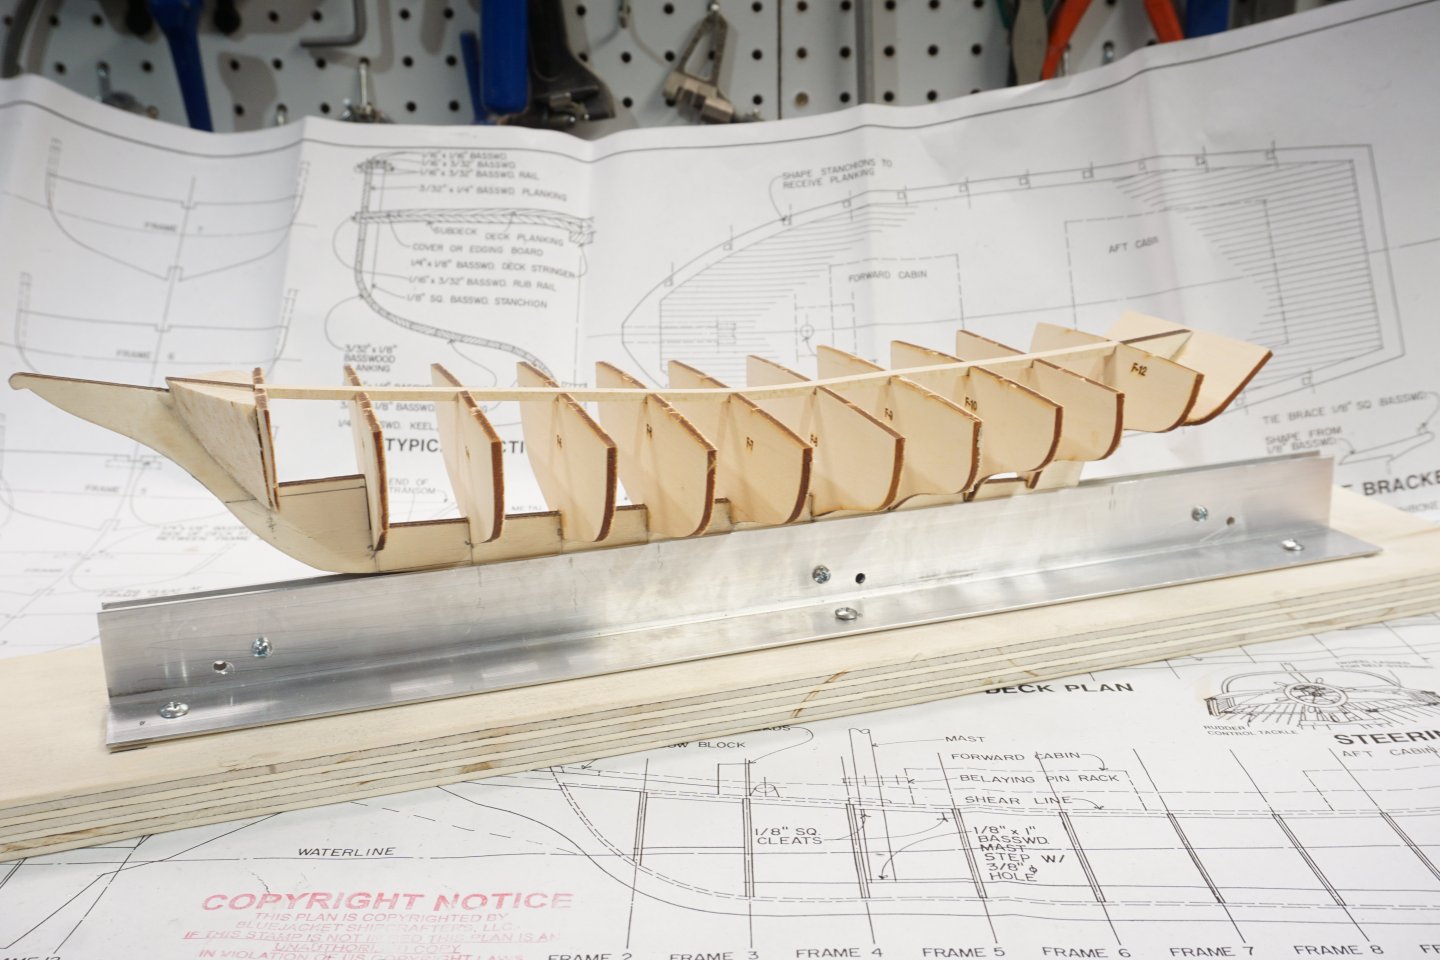
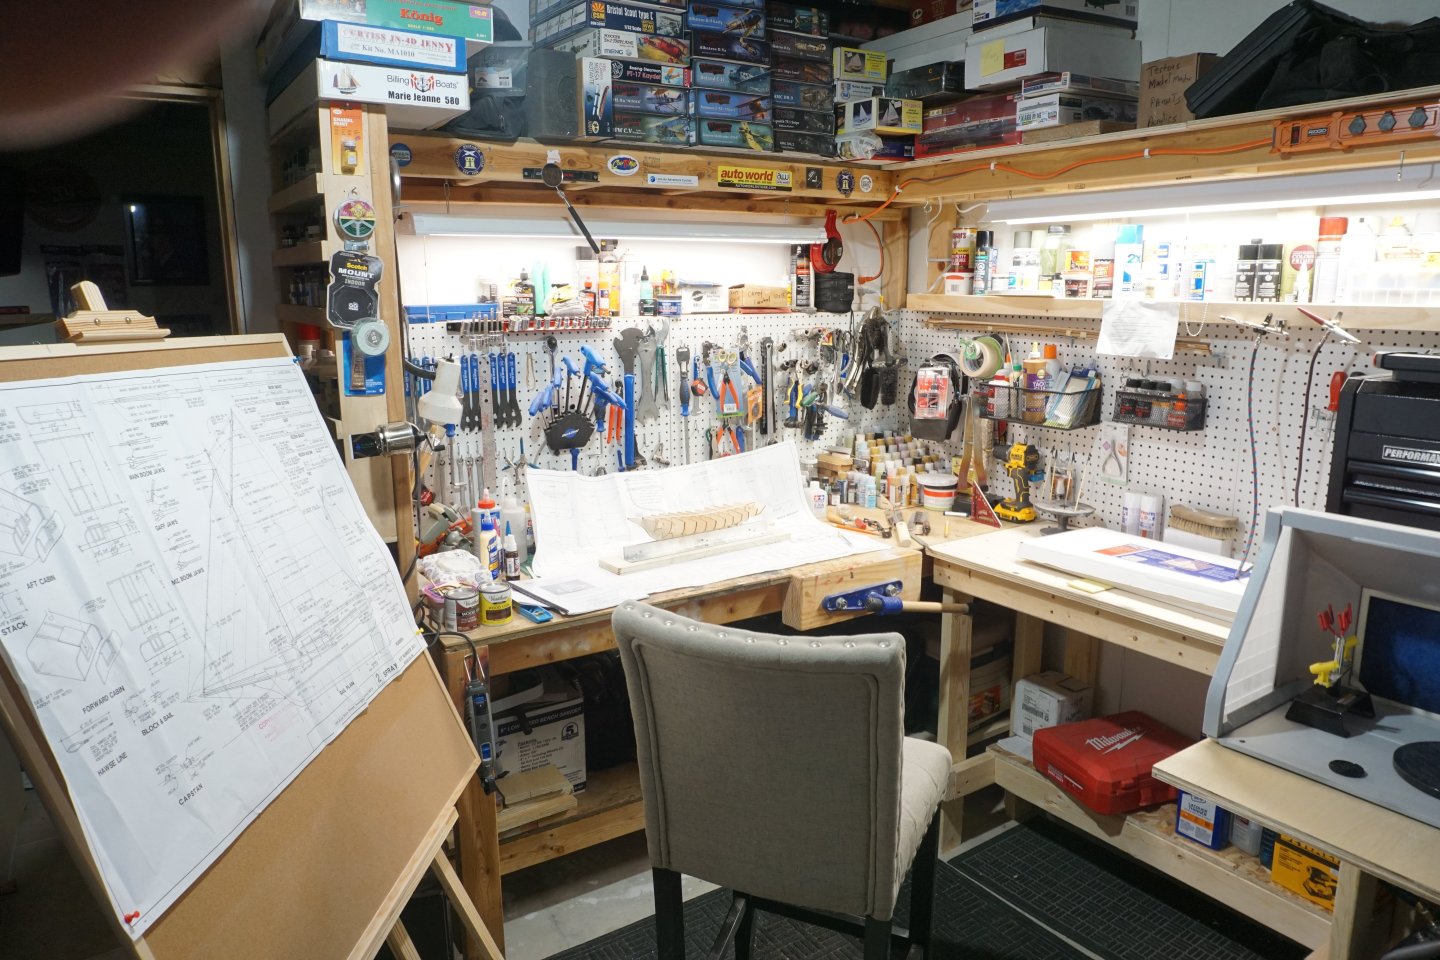
For my next project I decided on Joshua Slocum's Spray from BlueJacket Shipcrafters. After reading over build manual and viewing some of the build logs my 1st thing was to make that ship building cradle that others have made. This cradle was not expensive and easy to construct, I should have made this a while ago as it's adjustable and will work with my future builds. I assembled the Keel and bulk heads, then I added some filler blocks at the bow to give the planks more gluing area. I recently built an addition on to my workbench as it was way to cluttered before.

-
Thank you for the nice compliment. I'm happy my photos are helpful.
- 32 replies
-
- 1
-
-
- Lackawanna
- BlueJacket Shipcrafters
- (and 1 more)
-
Thank you. I didn't log actual build hours, but I spent approximately 3 months from start to finish. This kit was a challenge for me, but the only issues I had was the Pilot house railing due to its tight curves and the stair rails. The kit supplies brass wire to go in between the stanchions and due to the tight curves, I thought it would be easier to use thread. At Hobby lobby. I found some goldish colored thread that looked like cable approx. the same thickness as the brass wire the kit supplies. After getting it installed, I painted the thread with some brass-colored paint. Lastly, the pilot house stair rails didn't look good when gluing together so I soldered the joints instead (my soldering experience is minimal). Sorry it took me so long to reply as I haven't been on MSW for a few months. good luck with your build and I hope it's going smoothly. any more questions feel free to ask and I will try to answer.
- 32 replies
-
- 1
-
-
- Lackawanna
- BlueJacket Shipcrafters
- (and 1 more)
-
Thank you. In my opinion, Bluejacket kits are excellent, and the instructions and plans are very good as well. I did search for pictures of other modelers Lackawanna builds, and actual photos of the real ship for some close-up details and help with the rigging. Also, Nick and Al at Bluejacket are very helpful with any questions you may have about their kits if you run into issues with something. If you get this kit, I hope you do a build thread and feel free to ask me any questions. Sorry it took me so long to reply as I haven't been on Model ship world for a few months.
- 32 replies
-
- 3
-
-
- Lackawanna
- BlueJacket Shipcrafters
- (and 1 more)
-
Thank you for your nice compliment and interest in my build.
- 29 replies
-
- 1
-
-
- Nantucket Lightship
- BlueJacket Shipcrafters
- (and 1 more)
-
Thanks, Nic for your nice compliment and the 10% discount.
- 29 replies
-
- 2
-
-
- Nantucket Lightship
- BlueJacket Shipcrafters
- (and 1 more)
-
Thank you for your interest in my build and the nice compliment! I'm by no means a photographer, but it was the evening, and I took the photos with the dining room lights off using just my camera flash.
- 29 replies
-
- 2
-
-
- Nantucket Lightship
- BlueJacket Shipcrafters
- (and 1 more)
-
The kit is supplied with adhesive backed lettering. Very easy to work with and after applying pressure around any raised or recessed detail it will conform nicely. Thank you for the nice compliment on my build and glad you like.
- 29 replies
-
- 2
-
-
- Nantucket Lightship
- BlueJacket Shipcrafters
- (and 1 more)