
Jsk
-
Posts
89 -
Joined
-
Last visited
1 Follower

Recent Profile Visitors
227 profile views


-
 Canute reacted to a post in a topic:
Keeping my head in the game.....
Canute reacted to a post in a topic:
Keeping my head in the game.....
-
Canute reacted to a post in a topic:
17th-Century Speeljacht by 0Seahorse - FINISHED - scale 1/50 - CARD
-
mtaylor reacted to a post in a topic:
17th-Century Speeljacht by 0Seahorse - FINISHED - scale 1/50 - CARD
-
mtaylor reacted to a post in a topic:
Reef line length...
-
Bob Cleek reacted to a post in a topic:
Reef line length...
-
ccoyle reacted to a post in a topic:
17th-Century Speeljacht by 0Seahorse - FINISHED - scale 1/50 - CARD
-
Scottish Guy reacted to a post in a topic:
Reef line length...
-
Scottish Guy reacted to a post in a topic:
Reef line length...
-
Scottish Guy reacted to a post in a topic:
Reef line length...
-
Scottish Guy reacted to a post in a topic:
17th-Century Speeljacht by 0Seahorse - FINISHED - scale 1/50 - CARD
-
Jsk reacted to a post in a topic:
17th-Century Speeljacht by 0Seahorse - FINISHED - scale 1/50 - CARD
-
Thanks, Bob. I suspect there is no term in the entire maritime lexicon that has a single, simple meaning. I think I'll forego actually pointing the reef points since I'm working at 1/72 scale. Thank you for this^^ I was confused about this because most of what I've seen on-line do indeed misuse the term. --jeff
-
Perfect. Thank you!
-
Was there any sort of standard length for reef lines? Frankly, I don't have a good feel for how long they should be. I understand that the lines further up the sail would be longer than those lower down because they needed to encompass a greater amount of reefed sail. But having never reefed a sail I really don't know how long the lines should be. If all else fails I'll just go with what looks right according to other models I've seen. TIA --jeff
-
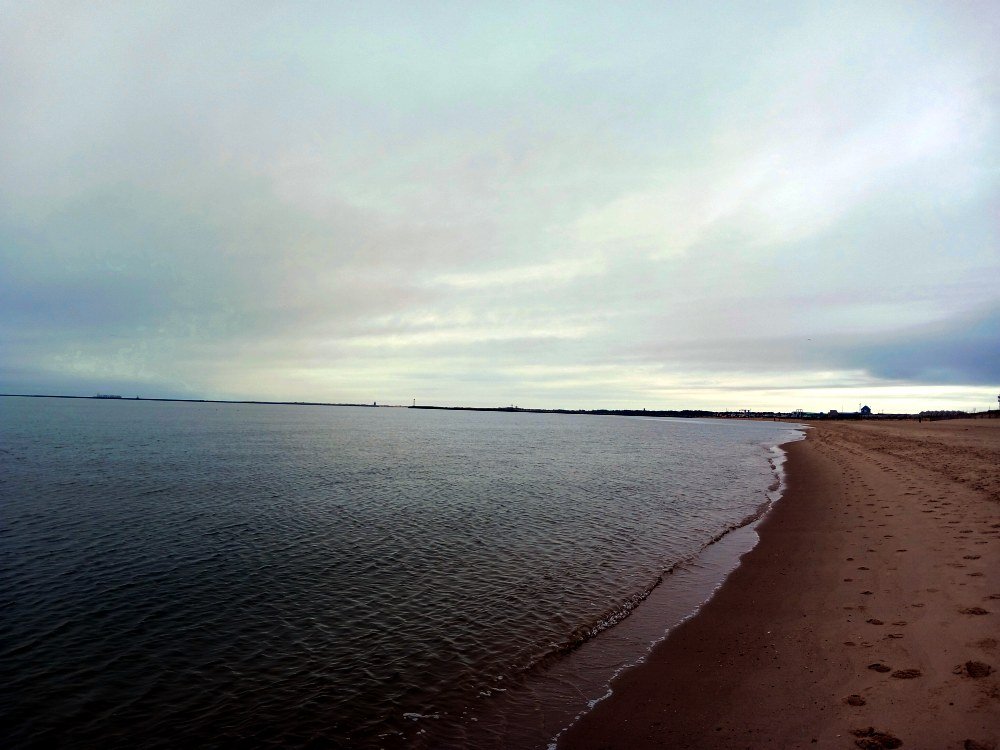
 @ccoyle, I have noticed a distinct lack of cliffs in Delaware. I might have to search the coastal areas a little more closely. 😉
- 34 replies
-
- 1
-
-
- card
- Revenue Cutter
- (and 1 more)
-
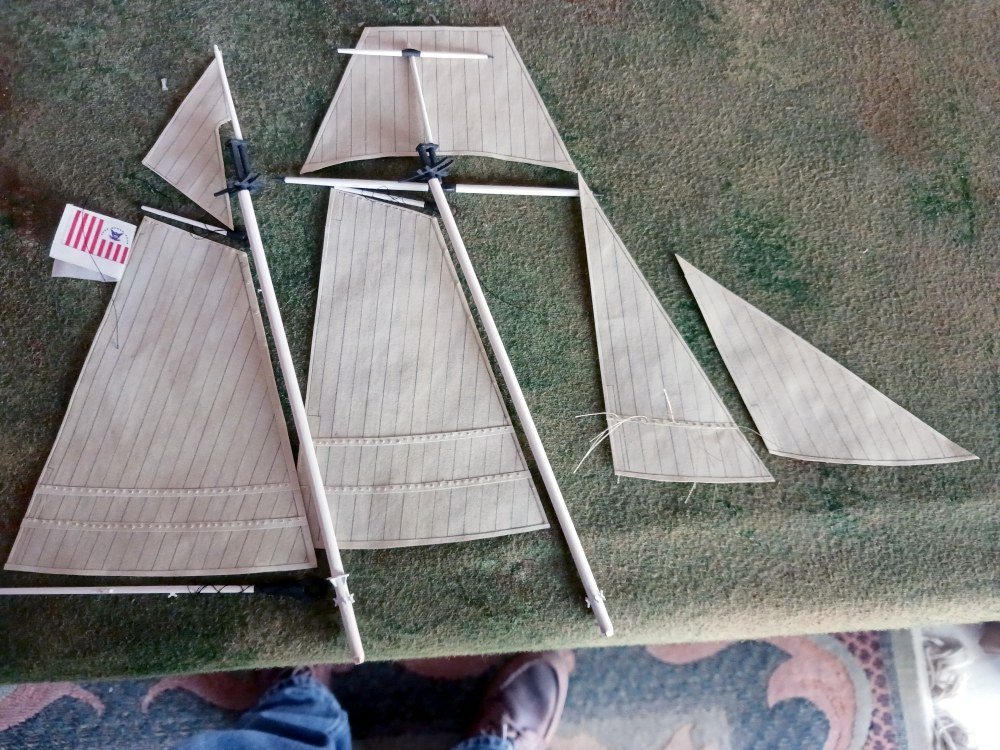
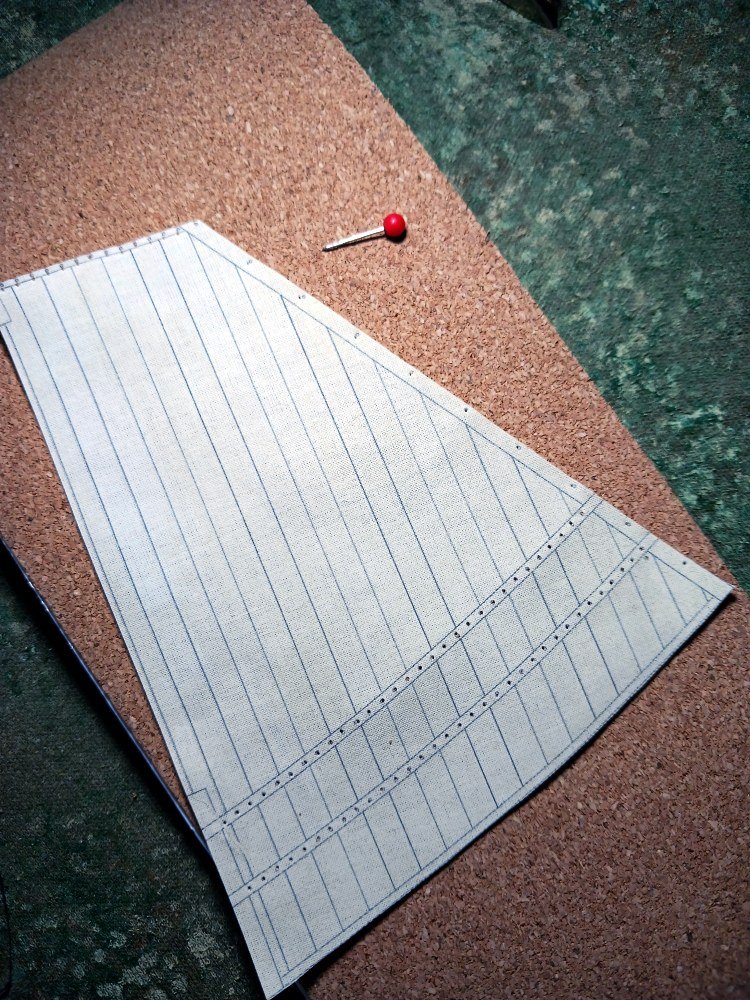
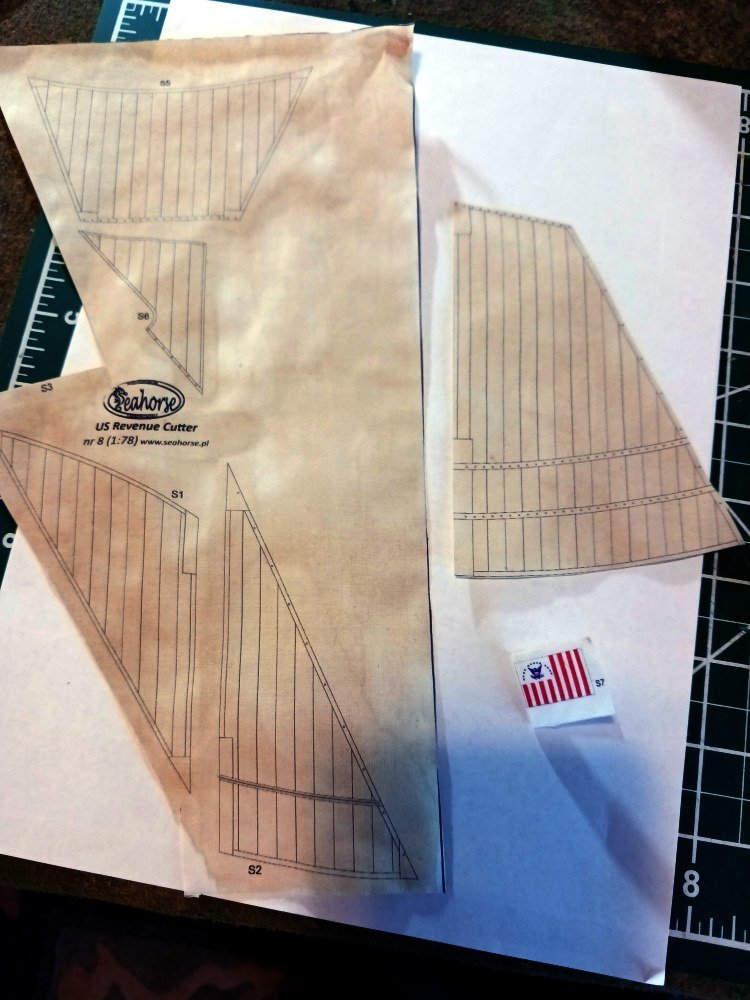
After working on the boom and gaffs I worked on the sails. I used a watered down acrylic paint (about 50/50) of a 'sandstone' color to color the white fabric. I hung the fabric like so much laundry on a line and let it dry for a good 24 hours. The fabric had a nice stiffness to it after the paint treatment. Since the sails are printed on one side only I used a thin lead mechanical pencil to draw the seams on the reverse side and then applied a thinned coat of watered down white glue to seal them. (I've happily used Aleene's Tacky glue for the entire project.) I simply used an knife to cut the sails apart and glued thin strips of the same painted fabric for the tablings and reefing bands. I've not yet glued on the bolt ropes but decided to try the reefing points first. So... were there standard lengths for the reef lines? And what's the best way to tame them? The painted fabric: I used a pin and some cork backing to open the reefing points: Went away to Lewes, Delaware, for the weekend searching for some inspiration. Found some looking north: Found some more looking south: Returned home and added unruly reef lines to the fore sail:

- 34 replies
-
- 3
-
-
- card
- Revenue Cutter
- (and 1 more)
-
Thanks, Tomek. So the trucks are for the parrels. That makes life easier! I don't have any wire to strip the insulation from so I was going to cut sections from a CA glue applicator tip. I think I could make it work but now I know I don't have to.
-
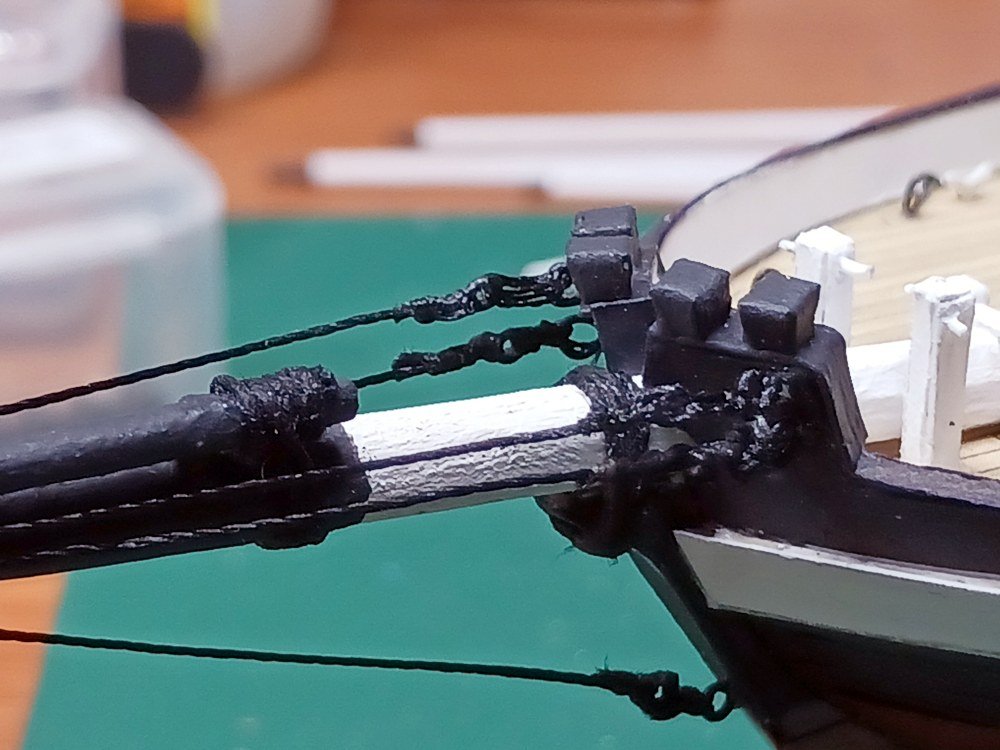
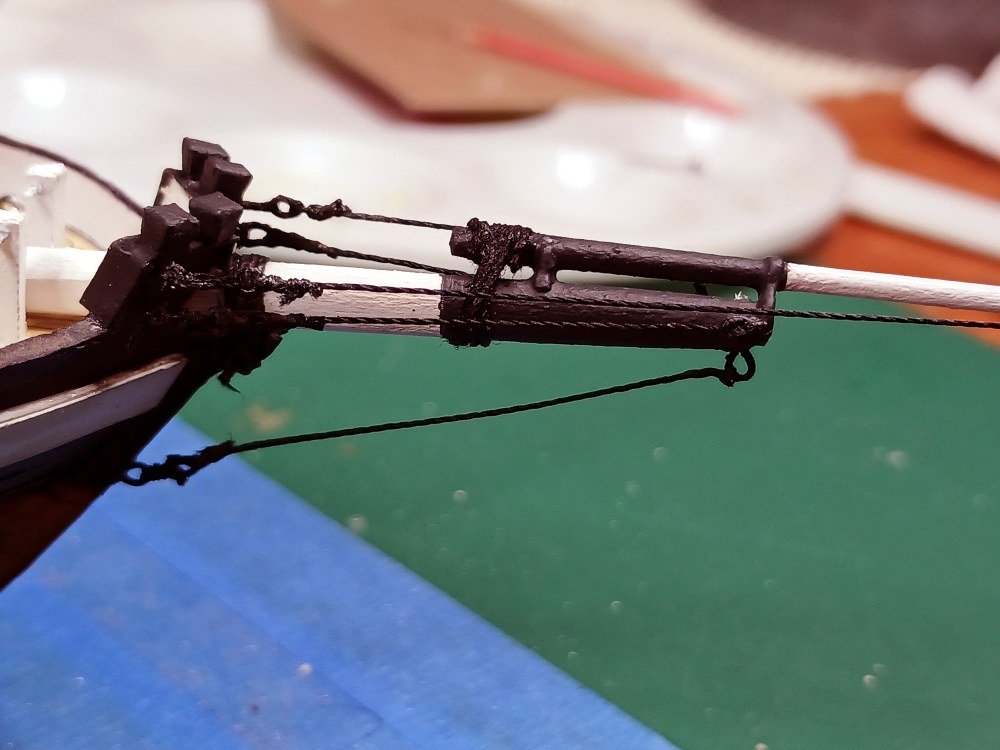
Thanks all. I've definitely been working slowly here. Feeling my way, so to speak. I do have the bow sprit mostly rigged. I wish it was a bit neater but I suppose that will come with experience. I struggled a lot with the thimbles and finally gave up on them. I think if I simply tied the lines to the thimbles rather than try and seize the line around them I'd have been more successful. Looking at @modeller_masa and @0Seahorse builds I see that's how they did it. What I ended up doing was to create a loop around a brass wire and seize the line as if the wire was a deadeye. Then I slid the line off the wire and coated the loop with CA to harden it so I essentially had a line attached to a thimble. It worked, mostly. I've started working on the parrels for the gaffs and boom but I have a question here. The instructions show short lengths of wire insulation to use for the parrels. But I notice the 3d printed parts include 'trucks'. According to my glossary, a truck is the cap at the top of a mast. That doesn't make sense for these spherical beads. Are these actually to be use for the parrels? I don't know what else they would be used for. I certainly want to place the gaffs and booms (and hoops) before attaching the topmasts. I haven't decided if I want to try bending the fore and aft sails to the masts after rigging or construct the masts with sails before and then rigging around them. I think it might be easier to do the standing rigging around the sails rather than try attaching the sails after the standing rigging is in place. Hmmmm....
- 34 replies
-
- 3
-
-
- card
- Revenue Cutter
- (and 1 more)
-
Jsk reacted to a post in a topic:
3D Naval Guns 1850s ~ 1870s
-
Iteration is one of the benefits of virtual modeling! Very interesting project.
-
Jsk reacted to a post in a topic:
Keeping my head in the game.....
-
I'm late to the party (as normal) but I don't think you need to be concerned that Sketchup doesn't do curves. I don't believe *.stl format does either and any model intended to be 3d printed need to be triangulated when exported to a format the printer will accept. I think the resolution of the printer determines how small (and hence how smooth) the triangles can be. I could be very wrong on this as I have intentionally avoided getting a 3d printer. (I simply don't need another hobby!) But that box of blocks is very tempting! If you're looking for other modeling software you might give Wings3d a look. The learning curve is much less than something like Blender and it would probably speed up you modeling pipeline quite a bit. I've modified *.stl files in Wings and had them printed so I know it's capable of producing printable files.
-
 Jsk reacted to a post in a topic:
Making an 1.00mm block
Jsk reacted to a post in a topic:
Making an 1.00mm block
-
I think I've met my match. Now that I've collected the rigging supplies I decided to start with the bow sprit. From what I can tell it looks like the bob stay and guys are seized to thimbles. The thimbles provided in the kit are 2mm, outside diameter and seem to be beyond my hand/eye coordination. So what are my options? I notice @Dr PR used blocks (here). I think I'd be able to manage that (since the blocks I have are bigger than the thimbles) but his ship is a bigger vessel (and scale!) than I'm working on. Would a 31 tonne cutter be rigged that way? I know that period rigging could vary a lot depending on the captain's preferences but I don't want to veer too far from normal. But I'm also facing the conundrum of desiring details that are probably beyond my abilities. Hmmm. 😡
-
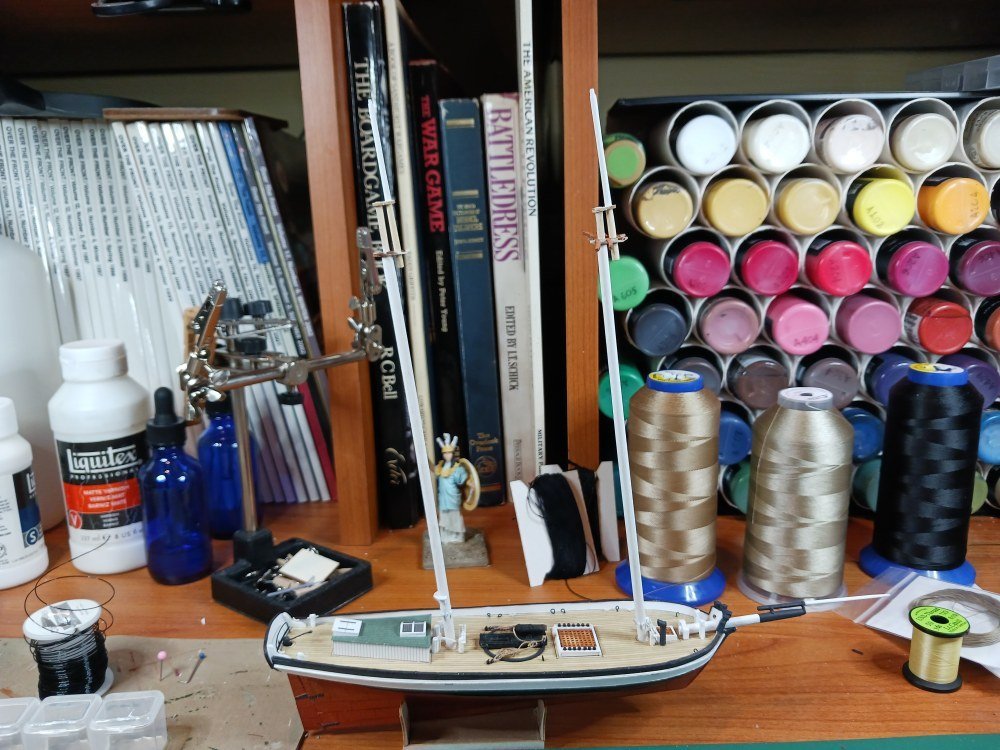
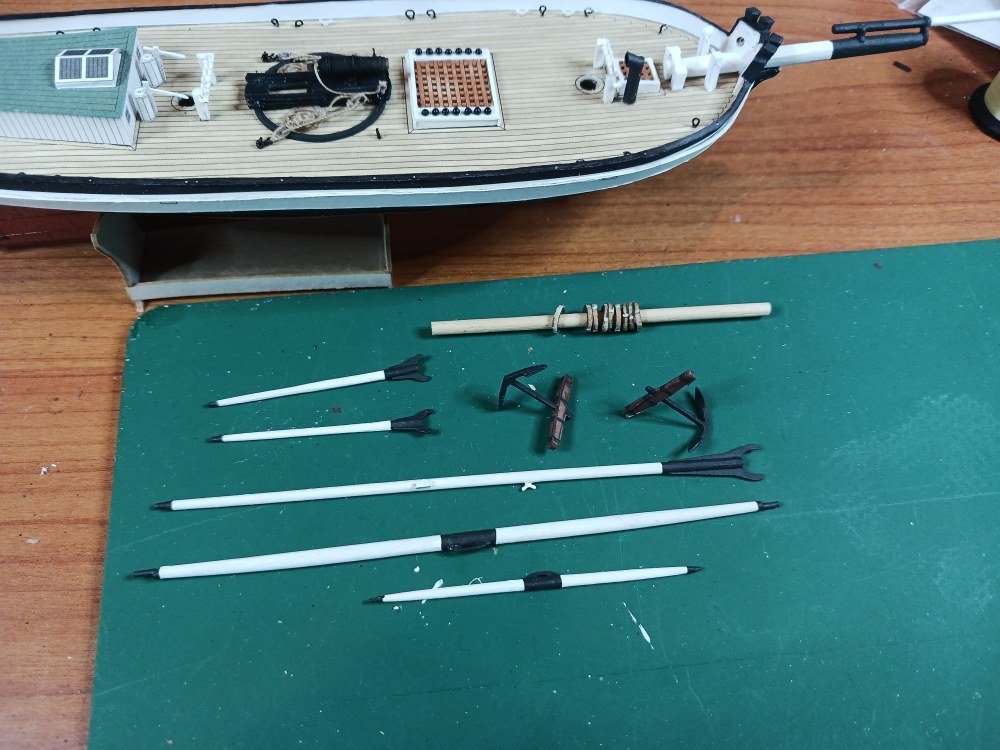
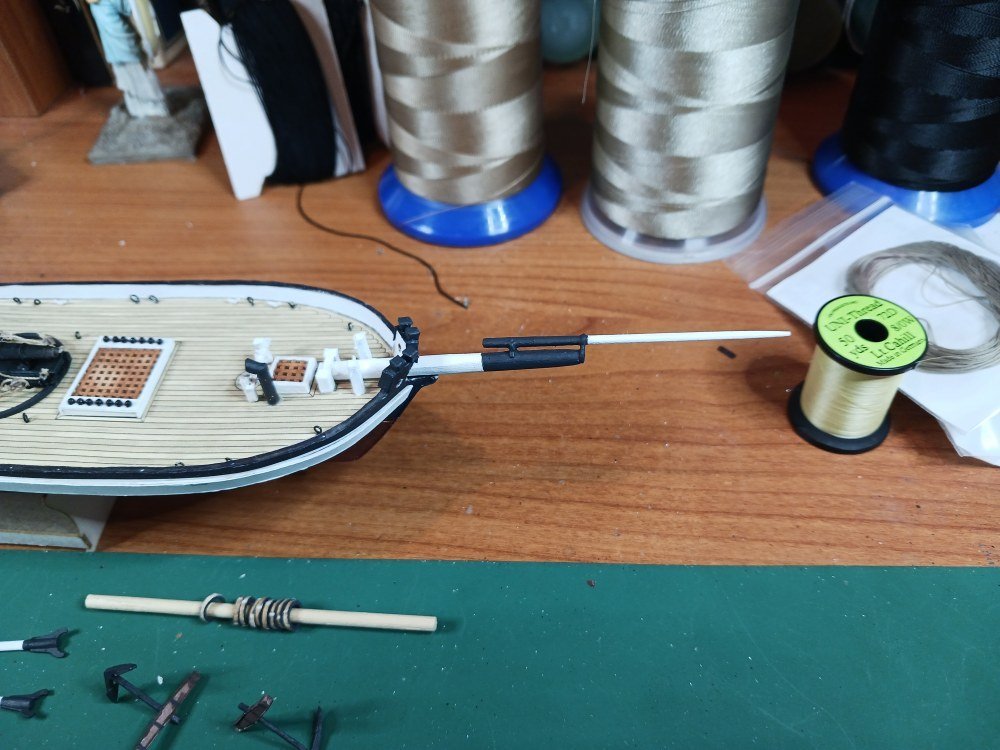
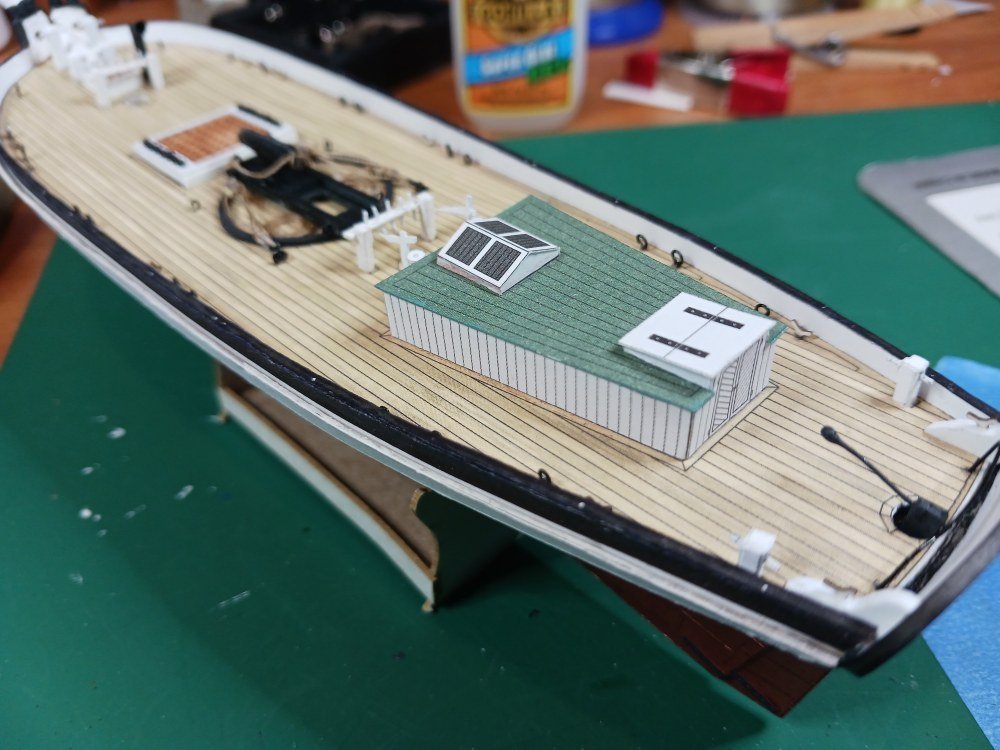
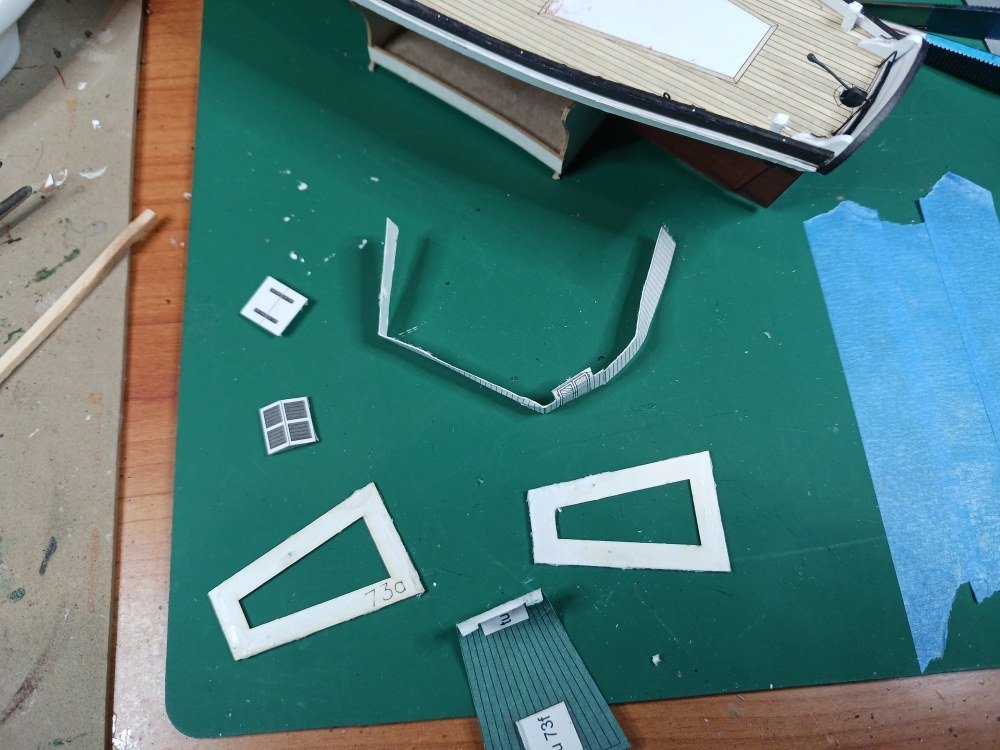
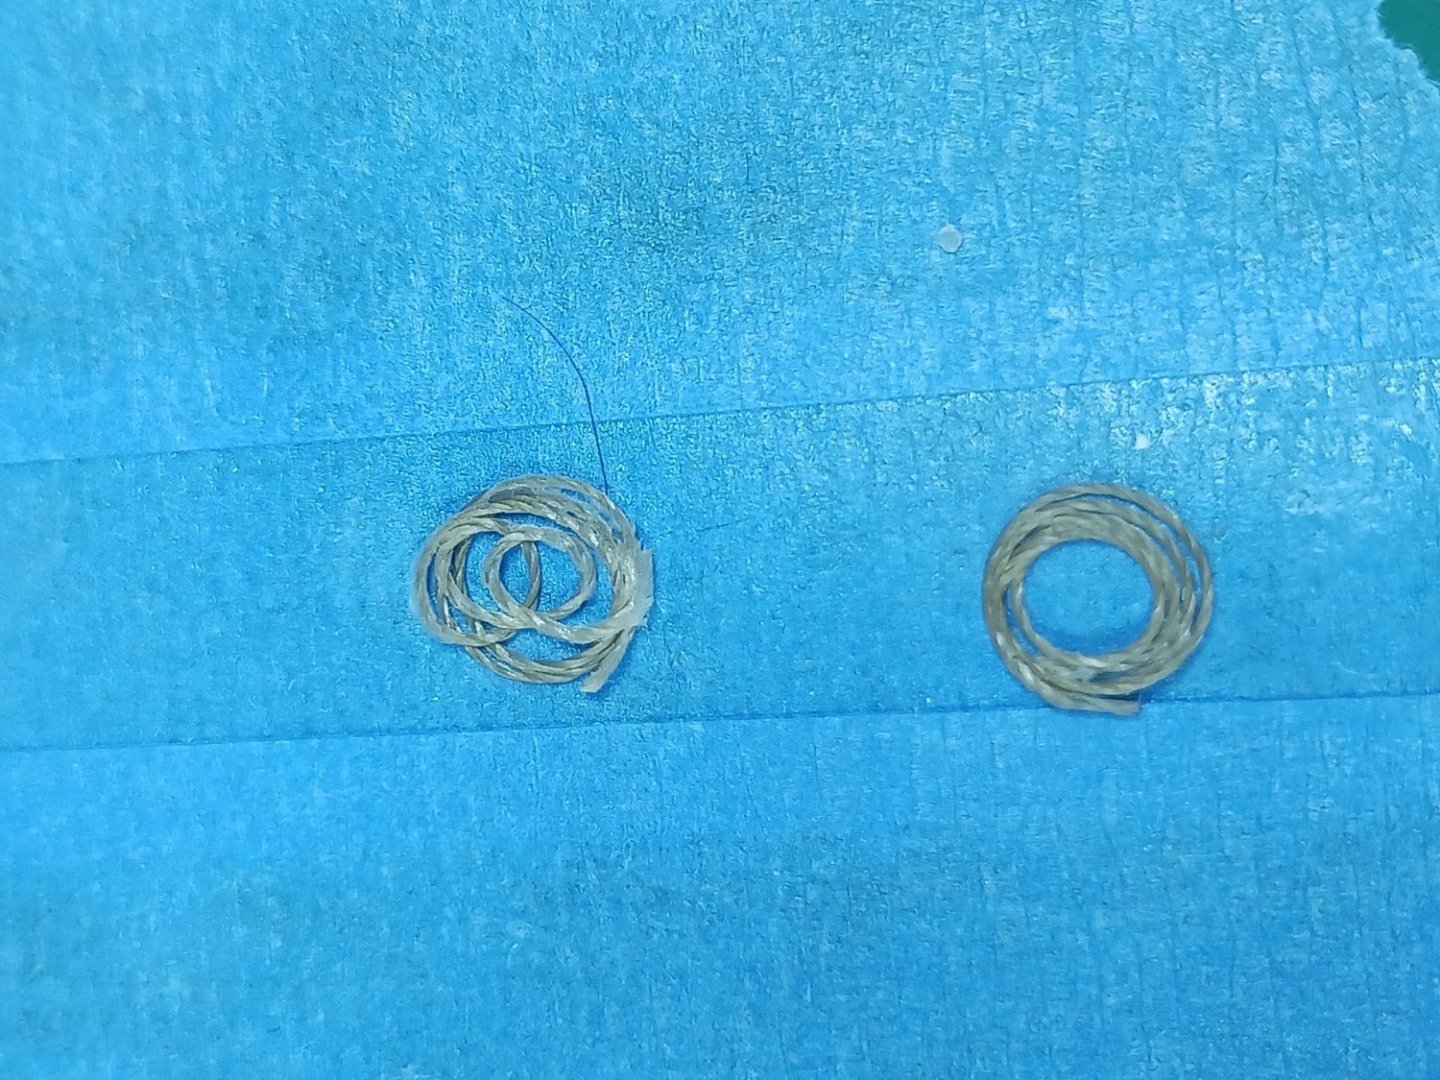
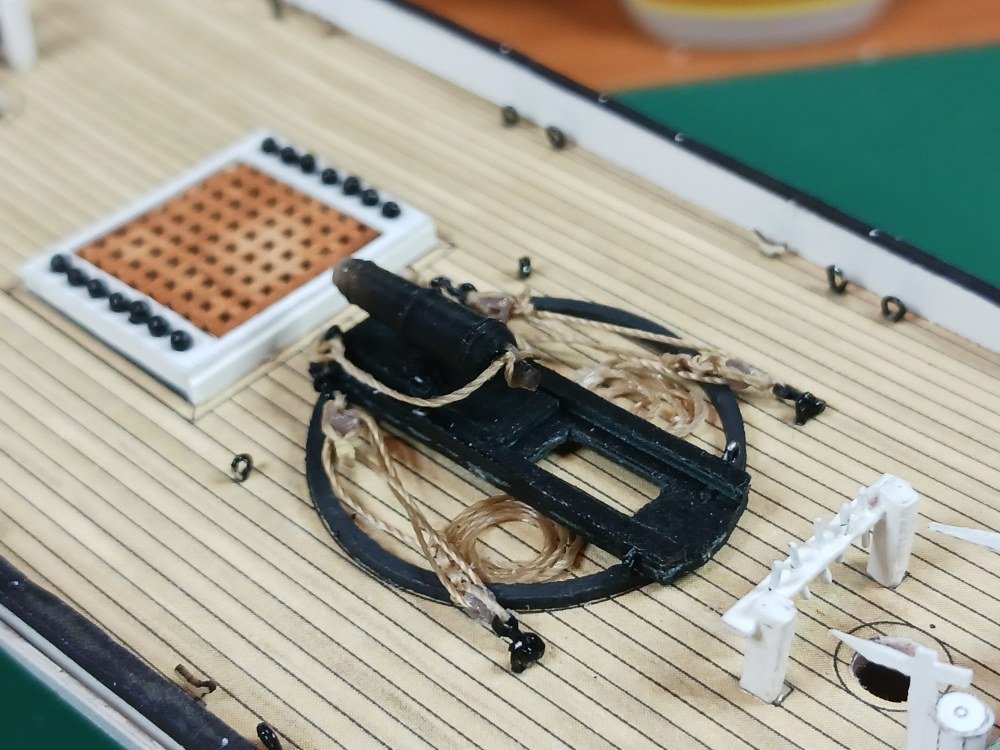
Thanks for the likes and checking in, everyone. OK, ignoring the two steps back of the crushed cabin I proceeded with the pivot gun. Thanks to @modeller_masa's tip above I was able to strop and reeve the blocks for the pivot gun. Actually, using masking tape to hold things in place was key to being able to do it. So simple but it totally escaped me! Thank you! I did decide to go with only two lines, though, and rather than have the falls coiled on deck I decided to place them out of the way inside the pivot ring. With the pivot gun finished I just couldn't let the dented cabin remain. Part of this was to see if I could fix the issue--This is a learning project after all (Aren't they all?). I was able to deconstruct the cabin by using isopropyl alcohol applied with a cotton swab. Once the glue had softened I was able to gently separate the cabin from the deck and then the roof from the cabin walls to get to the internal 1mm thick structural pieces. It takes patience to let the alcohol work its magic but it is possible. I did, however, break down and use of the duplicate wall and roof from the extra copy of the model that came when I purchased it. Looks like new. With that finished it was time to move on to the bow sprit and jib boom. I hadn't sized these pieces correctly. They remain more robust than the plans call for but I was afraid that taking them down to the specified diameter would make them too fragile for my clumsy, inexperienced hands. I fudged it. No one will know but me. (And everyone who reads this!) I then finished the various spars by adding cleats, etc., and painting. While I have assembled the mast tops I've not yet glued them in place and the masts themselves are only dry-fitted to the hull. I need to decide how I'm going to handle the main sail hoops before permanently attaching the top masts. A couple weeks ago I had ordered an extra set of blocks and dead eyes from @0Seahorse as well as some rigging material. They took a bit longer than normal to arrive but arrive they did. Today. Between ordering and arrival, though, I spent a fair amount of time reading up on rigging here on the forum and looking for suitable material. Oh, the wonderful world of (non)standardized thread sizes! It seems that in the modeling world thread (and miniature rope) is usually identified by diameter--a totally practical way of indicating size. But outside the modeling world (for example in the fly-tying world) there seem to be two systems commonly used. The first is the 'ought' system where the thickness of thread is indicated by the number of 'oughts' or zeroes. But the standard 'ought' seems to differ among manufactures. What is consistent is that the greater the number of 'oughts', the thinner the thread. I chose to get a spool of 8/0 (eight oughts) fly tying thread to use as seizing material. It is almost microscopically thin. The second 'real-world' system of thread 'standards' is the 'denier' system. IIRC, the 'denier' score of a thread is the weight of 9000 yards of the thread. I noticed that the spool of thread that I had on hand (which was somewhat too thick to use for the pivot gun rigging) was 210D... (the label was damaged). So I figured if I could acquire a spool of say, 120 denier thread then it should be approximately half as thick. This turned out to be true when I received a spool of 120D embroidery thread. And I just noticed that the 8/0 thread is also marked 72D on the spool. Some manufacturers indicate both systems, some only one. So I now have three different threads to compare. The first is the Syren miniature rope. Very nice stuff. I have four spools of polyester thread, two in tan (210D and 120D), one black (210D) and the fly tying thread (72D). I'll probably use these for most of this project. And finally I have the Seahorse rigging thread in 0.3 and 1.0 millimeter. This appears to be cotton thread and while perfectly fine, it does exhibit a bit of fuzziness which is reduced to almost nil with a little waxing. (I keep a tube of Bert's Bees lip balm on the desk for just that purpose!) I'll probably use it for the heavier lines of the standing rigging as well as the anchor cable. So that's how things stand for now.

- 34 replies
-
- 5
-
-
-
- card
- Revenue Cutter
- (and 1 more)
-
Wow, the Mendota photo is great at high resolution. Details that strike me is that the gun carriage appears unpainted, natural wood and how bright the metal work is. I also notice that the inside of the vent appears unpainted. (Only model builders and war gamers notice these types of things!)
- 524 replies
-
- 1
-
-
- sloop of war
- constellation
- (and 9 more)
-
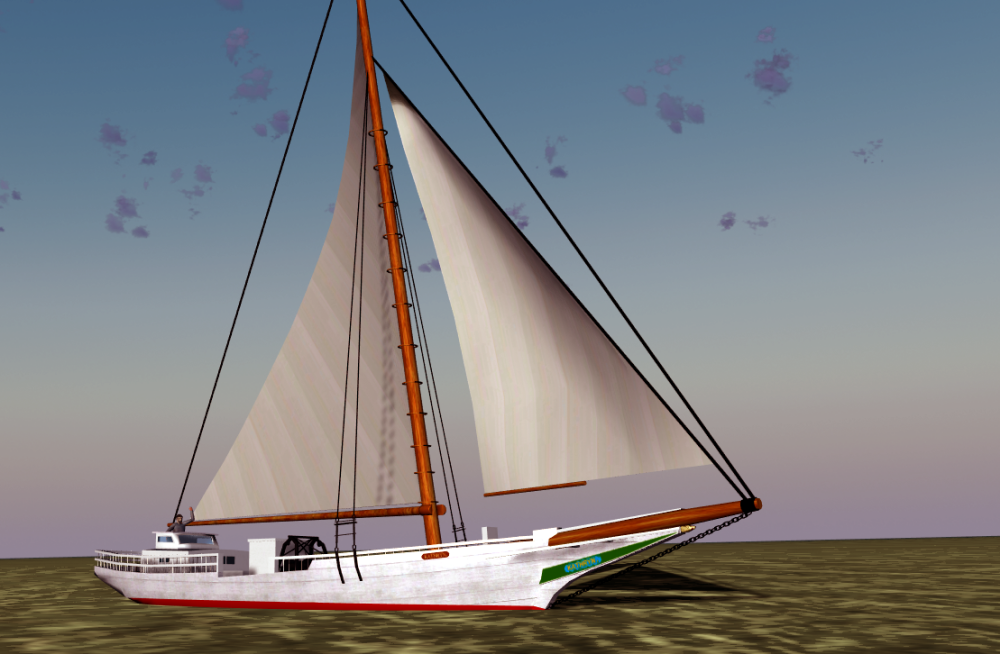
Congratulations, MM! She looks great! I love the color of the sails. Did you dip them in tea to get that color? Regardless of the scale she's a graceful vessel. At 31 tonnes it does look a bit cramped. It's a shame the construction records are so scarce and and the number of each class built is speculative. It seems like (according to Chapelle) the two larger classes were favored and only the name 'Alert' is tenuously associated with the 31 tonne class. Still, it looks like the small cutters were useful up to the 1830s when larger builds seem to become the norm for the Revenue Service. I agree, too, that this card model is more complex than one would think.
- 16 replies
-
- 1
-

-
- Revenue Cutter
- Seahorse
- (and 2 more)
-
Jsk reacted to a post in a topic:
Status of Orel Kits...
-
Jsk reacted to a post in a topic:
US Revenue Cutter 1815 by modeller_masa - FINISHED - Seahorse - 1/72 - CARD
-
Speaking of paper and sails... Has anyone experimented using coffee filter paper for sails? Somewhere on the interwebs I read that silk span was originally used to filter coffee before it was adopted by model airplane enthusiasts (in the 40s?). I'm not sure that's true but being a 'build with what you have on hand guy' I like the idea. I snagged a filter from the Admiral and found that it was surprisingly strong paper. But I went no further as we only had unbleached filters and I did not then have a need to make a sail. BTW, Phil, thanks again for your wonderfully detailed posts and research. I'm about to embark on my first rigging job on the Seahorse Revenue Cutter so I've been intently studying your build log.
