CTYankee
-
Posts
42 -
Joined
-
Last visited
Content Type
Profiles
Forums
Gallery
Events
Everything posted by CTYankee
-
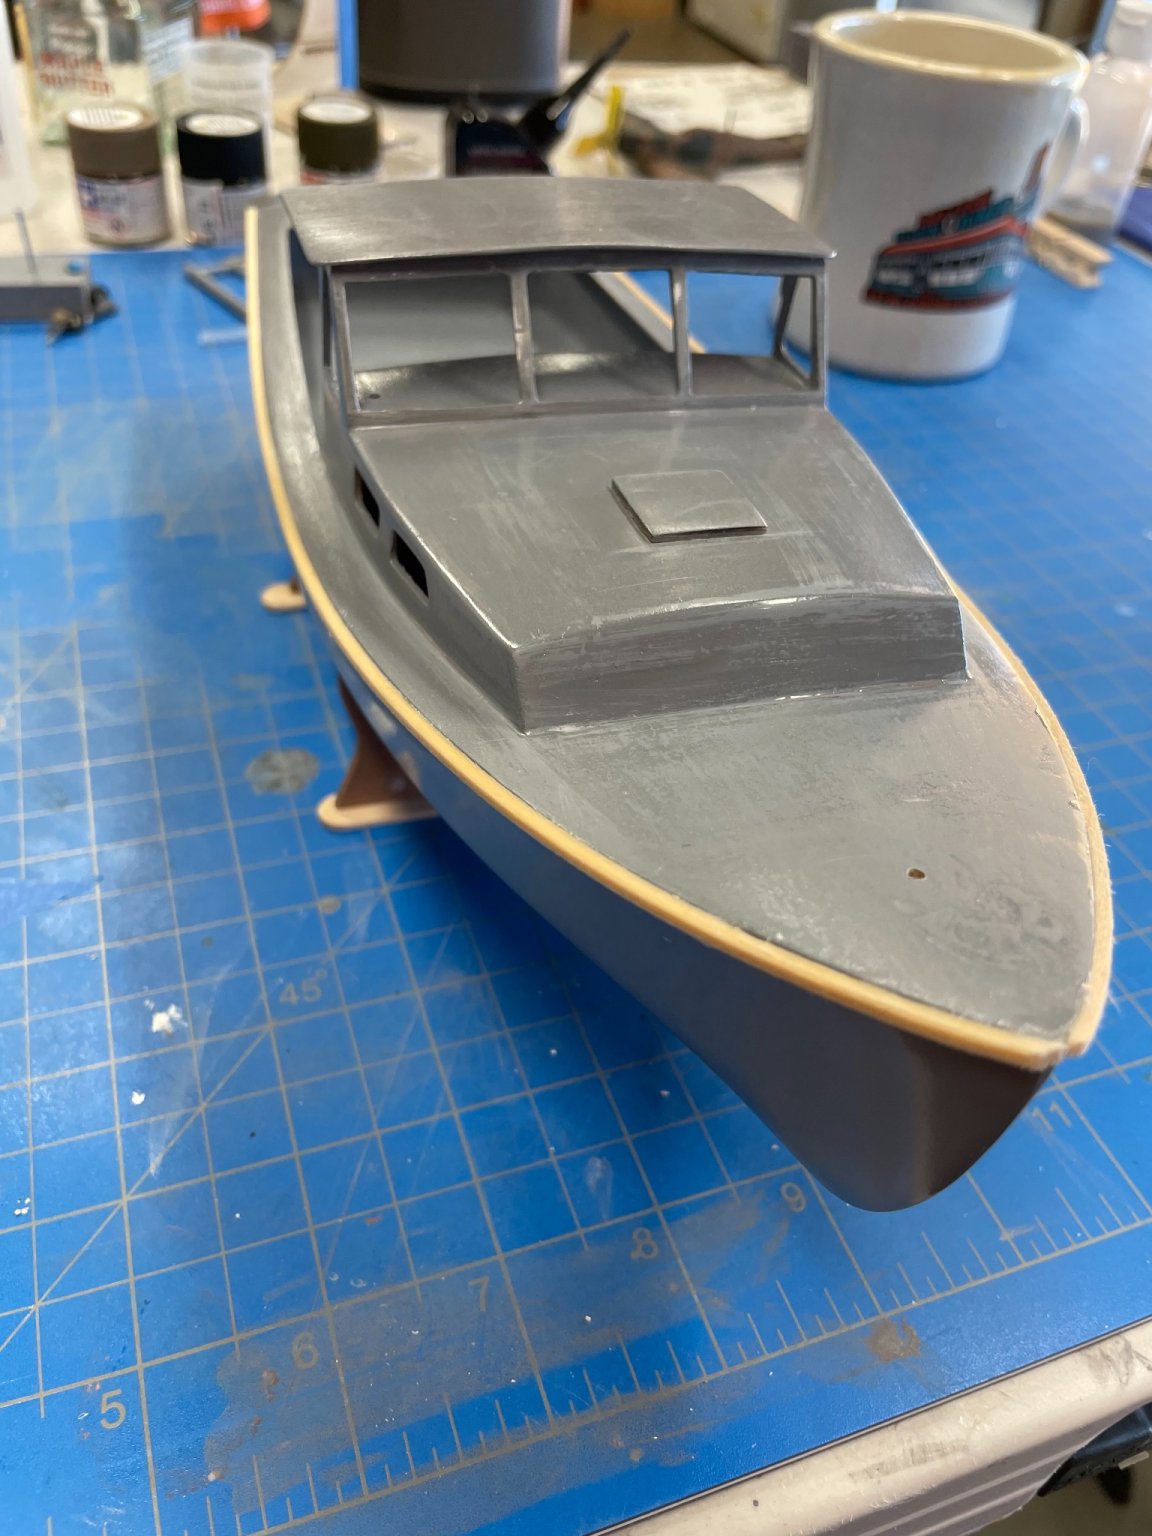
 Happy New Year All, I hope this update find you all well. I've been making slow progress since November. I finally finished the initial assembly and have moved on to painting. I finally found a spray primer from the HW store that didn't give me excessive trouble. It is a Krylon and maybe is a bit too "industrial" as the spray nozzle lays it on quite heavy, but, after swapping on a nozzle from a different rattle can I got the boat coated and ready for finish painting. This step is very slow as its cold here in northern CA and as I usually work early mornings I can only find time to paint about once per week. That and I'm still figuring out how to brush well. Its a delicate balance. I'm still putting on coats of white. Next time I would probably prime white instead of grey but I picked grey as that is what came with the original kit. Here are just a few pictures from the last few months. I'll update more as the painting progresses.

- 32 replies
-
- 4
-

-
- red baron
- first build
- (and 1 more)
-
@pwog - Thats an interesting idea. The issue I am having is not with their paint. As I mentioned in this thread or another, I used the True North Primer very quickly as I was practicing use a bit before committing paint to my boat and at the time I was not thinning it enough so it didn't last long. Both issues I had were with Testors products (model master brush on and main-line rattle can). I am going to try some HW store primer next I think as I have read many folks, such as Schooner have good luck with it.
-
Just want to let you all know I haven't abandoned my build- I've just had terrible luck painting... I've applied and removed primer twice now. I need to take about a month break due to some other projects and hope to be back to work by mid-November. Take Care-
-
@Bob Cleek another N00B question- do you use IPA, denatured ethanol, top-shelf vodka ;)?
-
I think I'm jinxed... I couldn't find any crushable enamel primer anywhere so I transitioned to Testors Spray Primer. I removed all the old paint using thinner, then acetone. This left a layer of the original primer that was really well cured. So I didn't remove that. I then sprayed the boat. In this spray some of the surfaces were new and thus virgin wood, and some of them were previously painted but down to bare wood (with a slight tint to them where the pain sunk in, I think) and she had the original well cured primer. The instructions state: recoat within 30 minutes or after 48 ours to prevent wrinkling (is that 'orange peel'?), so thats what I did. One light coat, waited unit it looked dry, another, waited, then another. I waited 48 Hours to find the paint still doesn't sand well- gums up the paper. I've now waited about a week, same situation- better than before but still not great. What do you all think I did wrong? I didn't wait long enough? Put it on too thick.? BTW- its been ~90 degrees and pretty dry (~50%RH) here in San Jose. Tagging some friends from my other paint thread (https://modelshipworld.com/topic/25522-iso-enamel-tips-for-beginners/) so y'all see this and can weight in: @Bob Cleek @pwog @Dr PR @Louie da fly @druxey @mtaylor
-
This thread has become an incredible source of knowledge! Amazing all! @Bob Cleek Actually- i think that is Vallejo Model Air. Thats a pre-thinned acrylic, right?
-
@MrBlueJacket, I don’t understand what you mean by once you tape, painting under the tape do you mean: don’t try tape on bare wood because the tape will never stick and seal properly. So alway tape on a pre painted surface, or c,ear if you want the unpainted look?
- 87 replies
-
- 2
-
-
- bluejacket shipcrafters
- red baron
- (and 3 more)
-
@Bob Cleek I finally watched that video. It was great! for Enamel paint- anything you’d do very differently?other than use natural bristle brushes and thin with the correct thinner? I also noticed no primer here- is that unique to plastic models? I’m having a hard time finding enamel model primer and I can’t figure out why! finally- great tip on using artist paints. I tried some on some scrap for an experiment and I couldn’t figure out why it never dried! have a great weekend!
-
@pwog you are using that included primer on all wood surfaces before the final color coats right? In other words you have primer grey beneath the white, correct? I can't tell for sure based on your comment: ". I finished my priming and still have enough primer left to paint the well deck floor, as required."
-
@Bob Cleek thank you for such a detailed and thoughtful answer!
-
‘Universal’ Primer
CTYankee replied to CTYankee's topic in Painting, finishing and weathering products and techniques
Thanks all for the valuable feedback here! Lots to think about. -
Good day all- In my other thread: @druxey suggested i use ‘universal’ spray primer. Can someone clarify what that is? I see a bunch of references to Tamiya, but i thought tamiya was acrylic and I am not sure if that will be compatible with the enamel paints i plan to put over top. In a different thread @wefalck mentioned the paint systems need o be compatible, so I am bit nervous. I have already spent hours un-borking my previous boo-boo. (I started this new thread to help newbs like me find the answer to this question in the future. I’m sure I’m not the only one who is- or has been- mystified)
-
Thanks for all of the guidance. This forum is so wonderful- people of all different skill sets helping each other out. There’s a ton of junk on the internet these days but this is just the top of the top.
-
@Louie da fly good point. I was actually referring to painting over the first coat of the other primer which has cured nicely.
-
@druxey, the reason I have been trying to stick with brushed paints is that I wanted to complete the project with only the tools provide in the kit; to make it accessible to any beginner, like myself. Once I had to go buy new paint I should have probably pivoted. What is universal primer, exactly? which one would you recommend? I imagine it can we sprayed over exiting enamel primer that is already there and that you could put enamel on top of it? Thanks for your help!
-
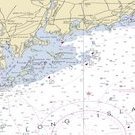
Because I was practicing my painting technique quite a bit (and using too much paint in the bringing) I burned through my 15mL bottle of True North primer (the brand that Blue Jacket sells) halfway through my model. I looked for enamel primer (in bottles not spray) everywhere and could find it... anyone know why? I finally bought some model master primer off of Amazon. Maybe my first mistake. When trying to mix it I notice that there are white swirls within the grey primer (see picture below). I should have stopped there and asked you fine folks but I continued on (my second mistake). Adding some thinner seems to make it worse (second picture). BTW- I am using Testors Thinner with the Model Master Primer. I didn't test it anywhere before committing it to my model (my next mistake), and after 96 hours I think it is still not cured. My best indication is that when I sand the coat I get 'pebbles' on my paper. Is this paint totally borked? Whats the best way to recover my project? Sand it all off? For those of you who are advocates of Acrylic paint- I hear you. My reason for using enamel is that it is included in the kit, and as this is a beginner kit, I am trying to have my build-log be something someone can follow without buying extra stuff, except a few nicer brushes.
-
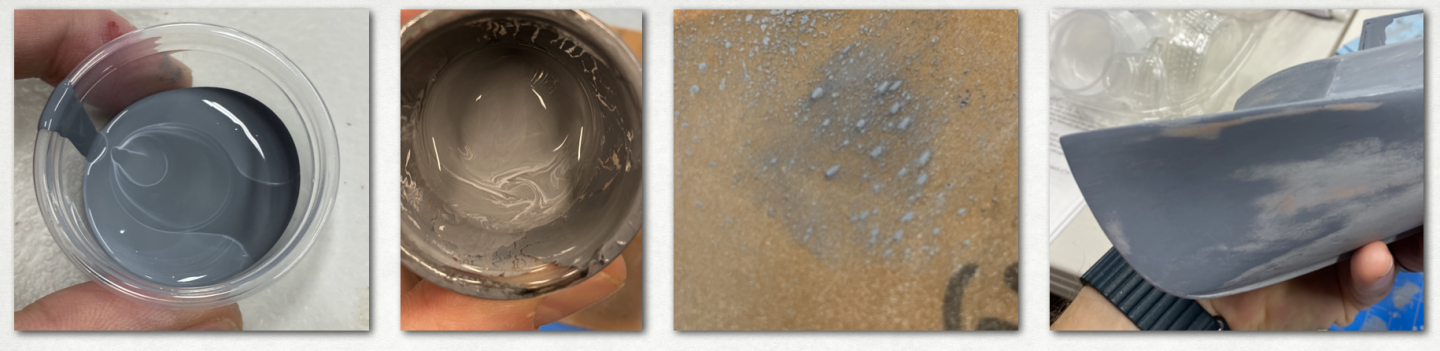
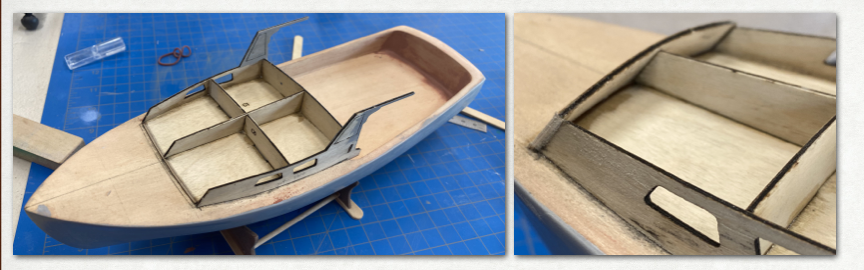
Now that the cabin sides are attached it was time to sand sides and the former pieces to complementary shapes. You will also notice that I painted the inside of the cabin black. I thought this would be a good addition to the model as one can easily look into the cabin and in the right light I didn’t want them to see unfinished wood. It was also an excellent opportunity to practice painting in tight quarters. This job did not come out amazing, but t was good practice and a high level of refinement isn’t needed in this particular case. I debated as whether to agonize over this one to show a dedication to the process and an attention to detail that will pay forward into my more complex models in the future but I decided that in this case the return on investment wasn’t there. Plus after breaking the cabin side the first time whilst trying to sand the inside of the cabin i wanted to get additional parts on to add structure ASAP.
- 32 replies
-
- 5
-
-
- red baron
- first build
- (and 1 more)
-
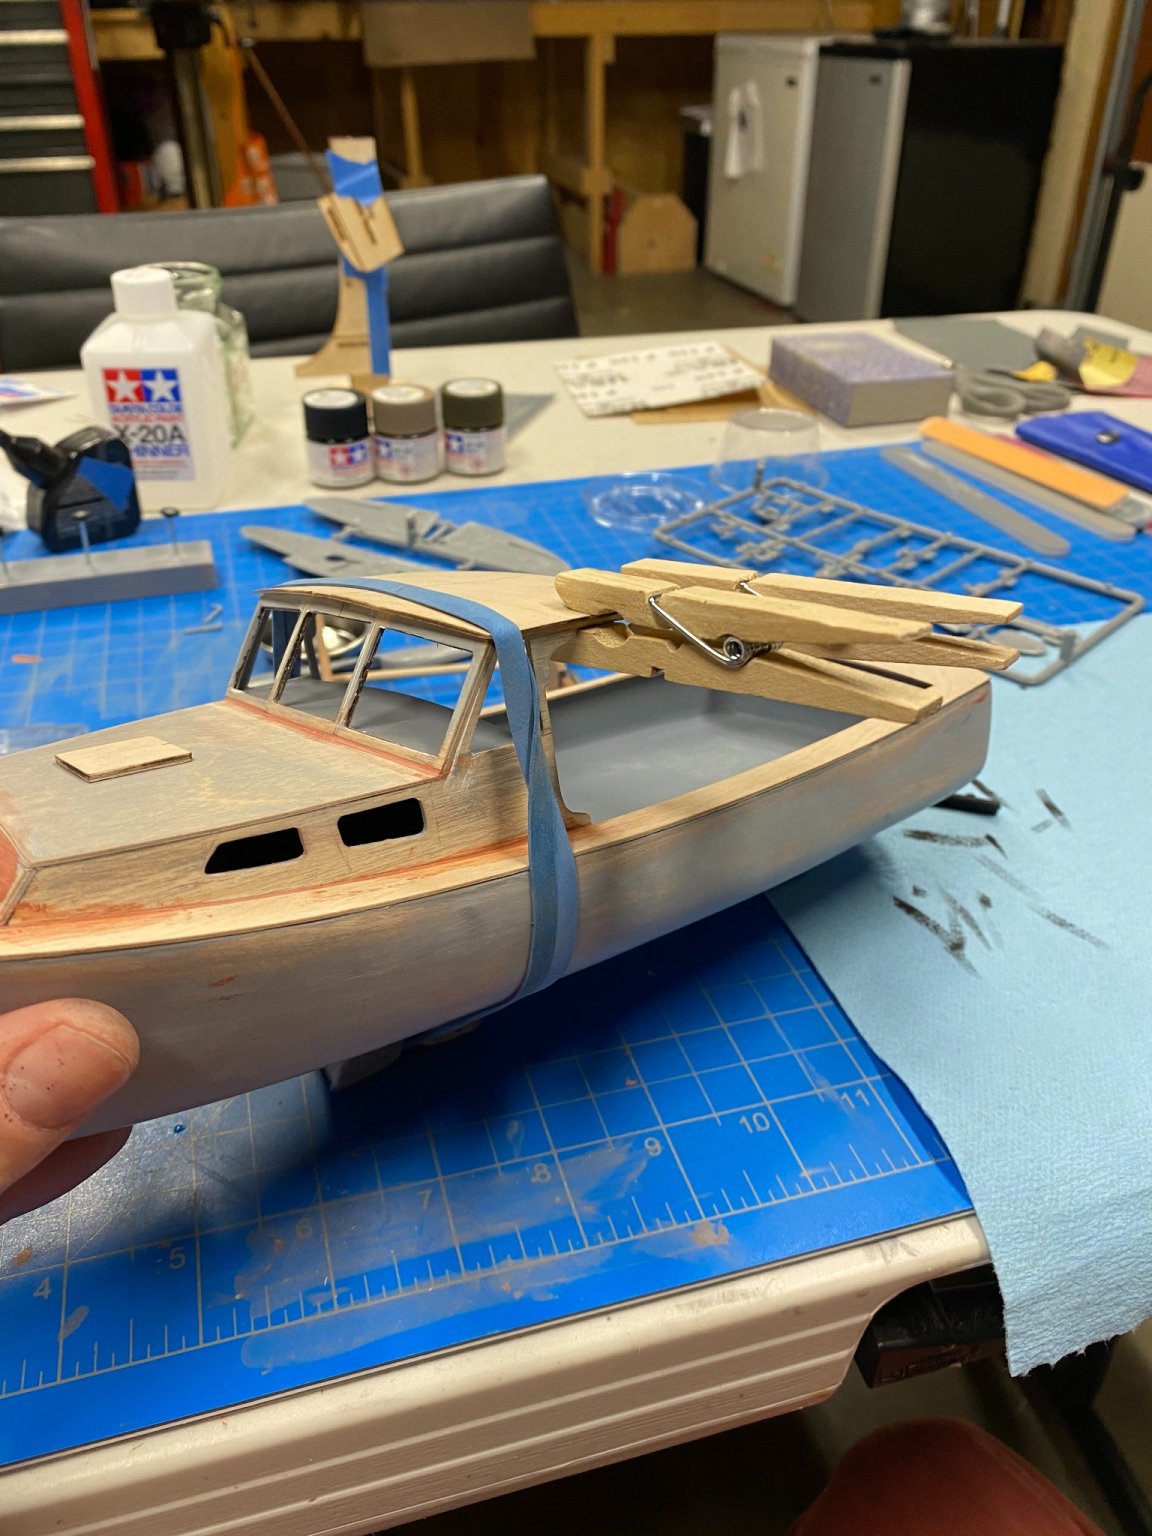
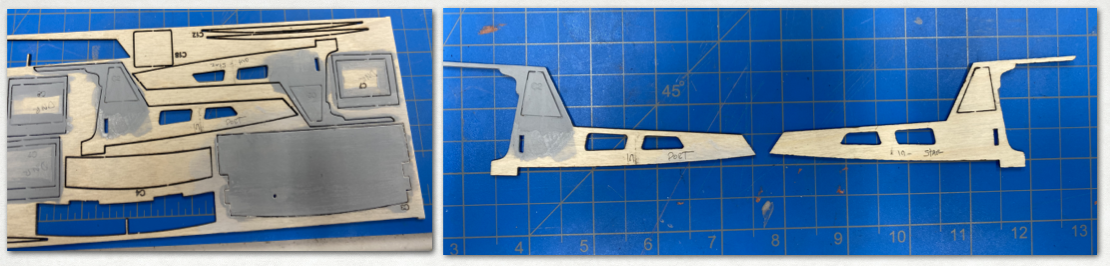
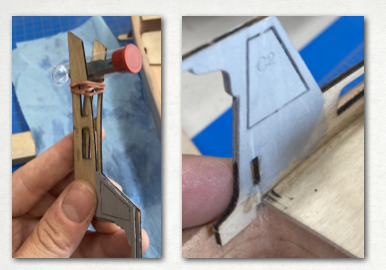
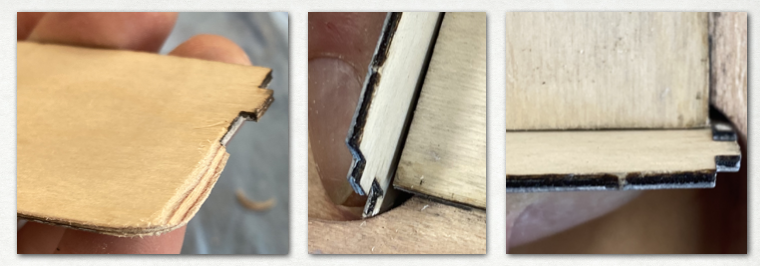
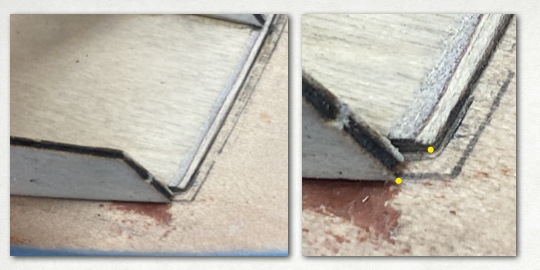
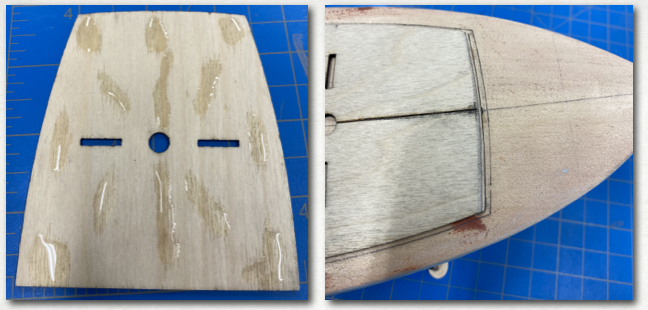
One of the very first steps of the kit is to paint one side of various parts as they will be harder to paint in place. as the face inward. Among these parts are the cabin sides. I painted the parts on the panel. When prepping to assemble them i realized that due to how the parts are slayed out to maximize fit if you paint both of them on the same side of the panel you will have painted the inside of one and the outside of the other. So now I need to go paint the other side. Once painted and cured i went on to forming and placing the cabin sides… To form them i tried following the instructions, soaking and bending by hand, but i couldn’t seem to get them to keep the shape. So I soaked them again and, using a rubber band and the vial of knife blades as a jig let them dry held in shape. This worked better. Remember, if you use this method, you need to keep the insides out during this step to get the correct curvature. I dry fit the port side cabin piece and was happy with the fit. I ended up scooting it back a bit from the datum on the front of the cabin former to get it to align better behind the holes which will receive the aft piece of the cabin. Before I committed to this i used a flexible ruler to ensure that id be okay with how the front of the cabin would shape around these pieces and I was pleased. More detail follows in a few steps. In order to fit the aft cabin wall the instructions say to round the bottom to fit the curvature of the bottom of the well deck. As you can see in this picture I needed to also carve the back side to get the piece to nest along the curvature of the well deck walls. These pictures show how I aligned the cabin sides to the cabin former. As you can see the sides are scooted toward the aft, whereas the instructions ask you to align then flush. This alignment worked for me because of how the front of the cabin will curve. In the second photo above you can see the two yellow dots, representing where the front cabin piece will touch, follow the curve of the front cabin former. With all the pieces dry fit it was time to glue it up. STOP!!!! Warning!!! Read the directions carefully (unlike me) or else you will get to learn how to use CA debonder. The instructions CLEARLY state… Glue one cabin side into place. Then glue JUST THE FRONT of the other. This will allow you the flexibility to get the aft cabin wall tabs slipped into the receiving cut-outs in each cabin side.Once the three pieces are aligned, then glue the two remaining pieces. I did not do this. I glued both sides up throughly. Then, after realizing the pieces didn’t fit i had to go debond one side and start again. Fortunately that was easier than i feared. After gluing the last cabin wall in place things are starting to come together... WARNING #2: The instructions clearly state that the cabin sides at the windscreen openings are very fragile. I have confirmed through the scientific method this to be true. My Hypothesis: They cant be THAT fragile. My Experiment: Sand away without paying carful regard to how you are handling the boat. Result: I broke the port cabin side... TWICE. Conclusion: My hypothesis is incorrect. Heed the warnings in the future. In all seriousness, both times I broke the side was when I was holding the boat in my hand or lap trying to sand at a hard to reach area. My advice is keep the boat in its cradle and pay very close attention to where your clumsy limbs are at all times.
- 32 replies
-
- 5
-
-
- red baron
- first build
- (and 1 more)
-
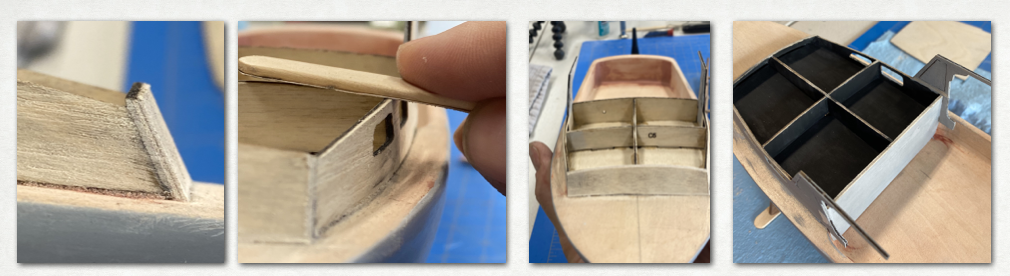
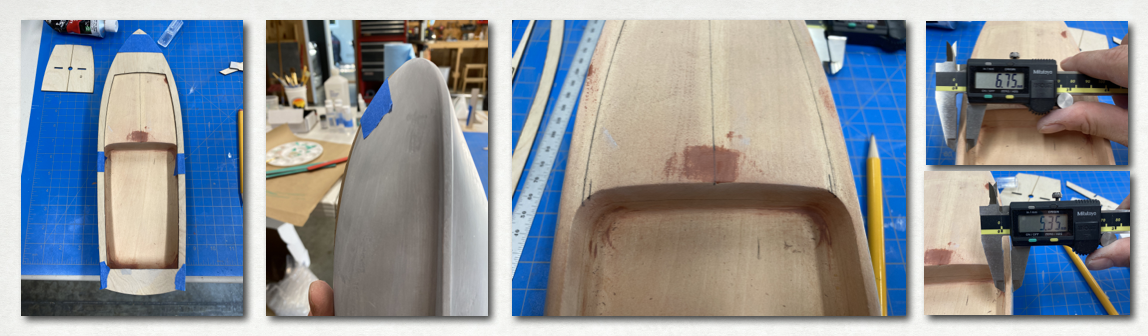
Onto the cabin... I started by aligning the deck to the hull and taping it in place. The deck overhung the hull in a few places, but by a small and even amount that I imagine will be sanded down to flush in a later step. I traced the opening for the cabin and noticed that it didn’t seem aligned, despite my assessment of the hull being correctly placed in the previous step. This is because the well deck has not been carved dead center in the hull. Because the deck overhangs the hull on the interior I didn’t see the need to sand it to equal- the deck will be what draws your eye so it won’t look wonky when its assembled. Gluing the base for the cabin former ended up being a case of “sometimes its better to be lucky then good”. In my previous dealings with the CA included it the kit it seemed to have an extended working time. It didn’t seem to bond until I got the pieces absolutely dead line to line and applied pressure- so I wasn’t at all worried about getting this piece properly aligned. I dispensed the glue as shown, flipped it over, lined it up by eye off of the piece and then QUICKLY placed it and tweaked the alignment. The piece froze into place near instantly. I had no time to slide it around to get it aligned as I thought I might based on my past experience. I chalk this up to the fact that previously I was trying to glue relatively small pieces together where the volume of glue was large compared to the part and the presence of oxygen was high. In this bigger part, the glue immediately wetted out to a thin layer and due to the form the glue was shielded from additional oxygen so the anaerobic curing happened instantly. Luckily, i nailed the placement. The other two pieces of the cabin former went on without drama.
- 32 replies
-
- 5
-
-
- red baron
- first build
- (and 1 more)
-
Paul- Great to see the progress. I didn't reinforce the keel and so far I've been impressed on how strong it has been. I HAVE broken the cabin... TWICE. (I'll detail that in my next update) So be careful once you start cabin assembly. I didn't get the floor of the well deck super smooth and have been agonizing over what to to and then I remembered- the floor of the well deck of the real boat must not be super smooth either, it must be textured for grip, no? I am having a total crap time priming and sanding smooth. Take a look at my posts and let me know if you have any advice.
- 87 replies
-
- 2
-
-
- bluejacket shipcrafters
- red baron
- (and 3 more)
-
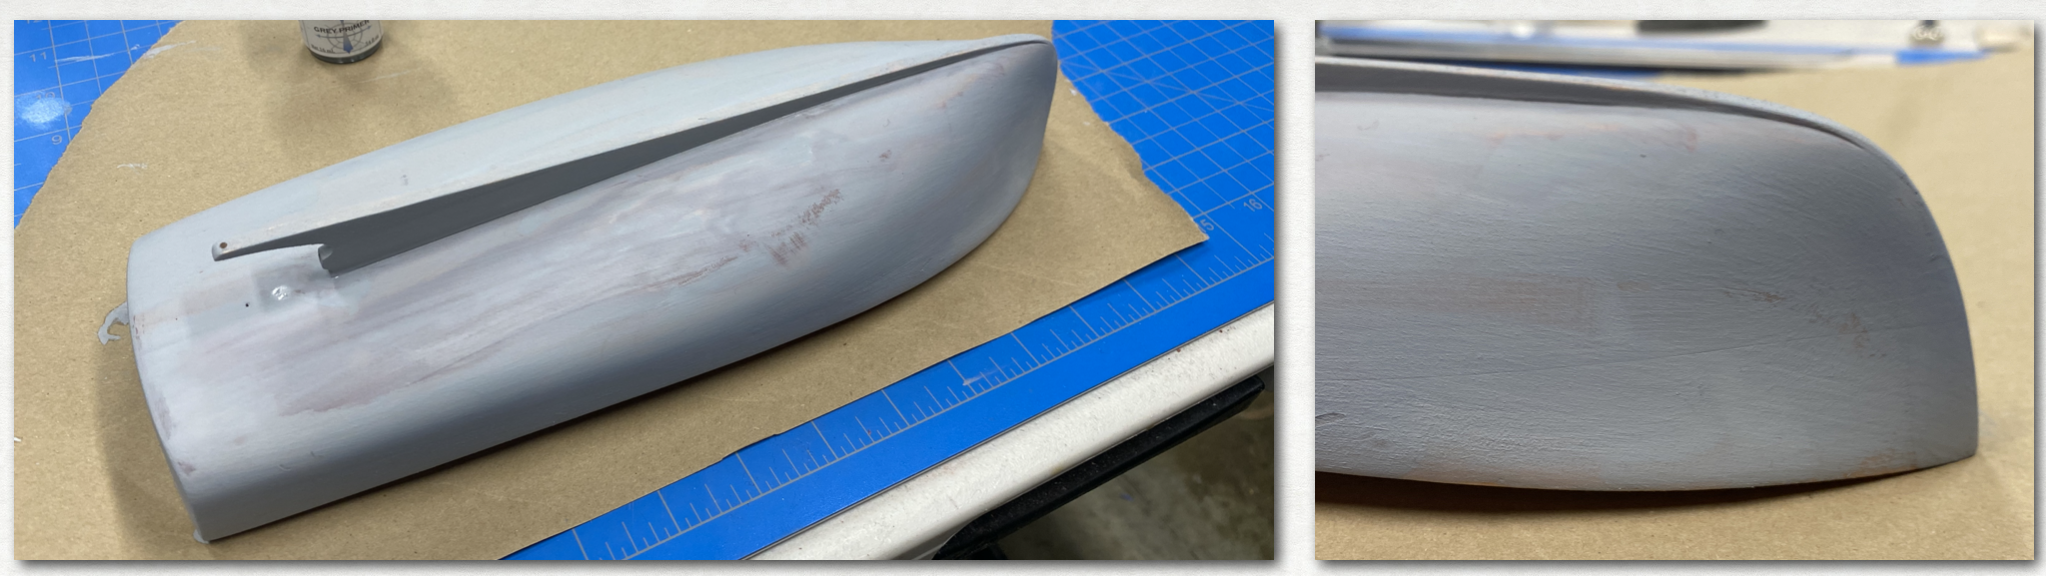
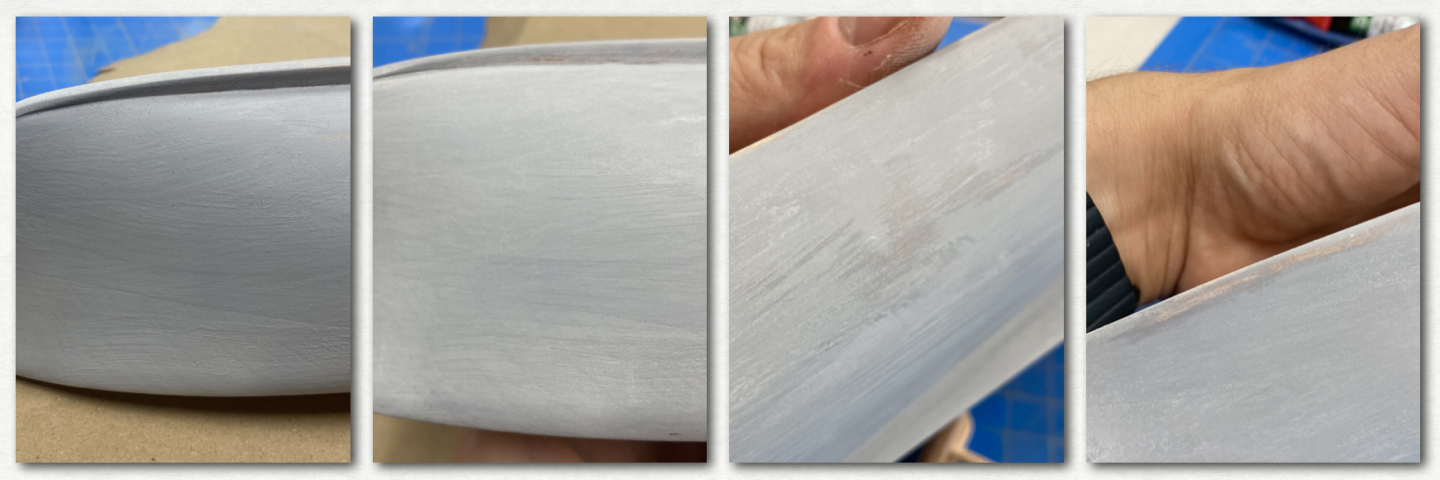
Painting is hard. Actually, the painting is easy, the thinning is hard. I cant seem to dial in the right ratios of paint to thinner even though I’ve been using a pipet to dose the material. It seems like a drop of thinner one way or the other leaves me with very different results. One time i’ll get something no better than a wash, other i leave massive brush strokes. Maybe the problem is I’ve been trying to mix ~1-2mL of paint at a time, but I am hesitant to mix more. Any thoughts on the right ratios here? After coat 1, we’re just starting to build up coverage. As you can see from the detail show there is fair bit of texture left behind suggesting maybe the primer is not thinned enough. Sanding is hard, too. This first picture is un-sanded, as we go left to right we get smoother and with less brush strokes but I also start sanding through in spots. The third picture looks streaky but the finish actually feels very smooth. My current thinking is that after the first coat just lightly sand off the ‘fuzz’ and then hit it with a second coat. Maybe even lightly sand and add a third. Once you’ve got a good base built up, then start working through the grits to get that fiberglass smooth finish. If you try to make every coat smooth you’ll just keep getting back to wood. Thoughts? One note: I’ve been letting the enamel paint dry and cure for 24 hours between coat and sand. As its hot and dry right now that seems like enough. Longer is probably better if you can be patient. I am going to take a break from the priming and smoothing of the hull. Its pretty smooth and I could be happy with it but I'd love to try to get it one step glassier. My thought it there is going to be a lot of handling of the craft during the subsequent steps so I'll save my final hull work until the cabin is compete and I am just about ready to finish paint everything. I've actually been on the cabin for a few days now as my build log get updated in spurts with progress being made between each post. More to come on that soon...

- 32 replies
-
- 2
-
-
- red baron
- first build
- (and 1 more)