Redshadowrider
-
Posts
301 -
Joined
-
Last visited
Content Type
Profiles
Forums
Gallery
Events
Everything posted by Redshadowrider
-
Thanks to Justin, Even though I used a wide angle lens for the photo, I agreed with Justin that something was off in the gun sills (starboard). They just didn't look like a smooth transition between ports. So I went back and researched them, found a few that were off, and fixed them by removing the original sill and replacing them. Not too many, 4 or 5, and not very much. However, when you multiplied the small errors across the hull, they created other issues. Here are the results of repair/replacement with the wide angle lens, and the top sills in place, it is much smoother. I might do the bow port, but am not sure if it is that far off.

- 436 replies
-
- 5
-

-
- Syren
- Model Shipways
- (and 1 more)
-
Still, I still have the opportunity to recheck it again. I do think that some sills are angled especially near the stern and bow. If I understand it correctly, it is because the carronades run parallel to the deck. This means they are not level forward/aft, only port to starboard because of the angle of the deck. However, I will check it all now rather than later. I think I am going to try and level a couple of the sills somehow. On one, I think sanding will work. On another, I might add a shim across the top and sand clean. I don’t think that I need to remove them. I have the top row on now, and will add a picture. I used a block that is 15/32” high that should have carried any error to the top making it easier to tell.
- 436 replies
-
- 2
-
-
- Syren
- Model Shipways
- (and 1 more)
-
I know what you say about the squirrely. Sills. I see it, but when I measure it, they are right on the laser marks, and level in side to out. Add to that, my eyesight using +1 readers or my jewelers visor, I am not sure what is needed. Even the initial plank that I put up temporarily was right on the mark. I am using a wide angle lens that may be adding to it.
-
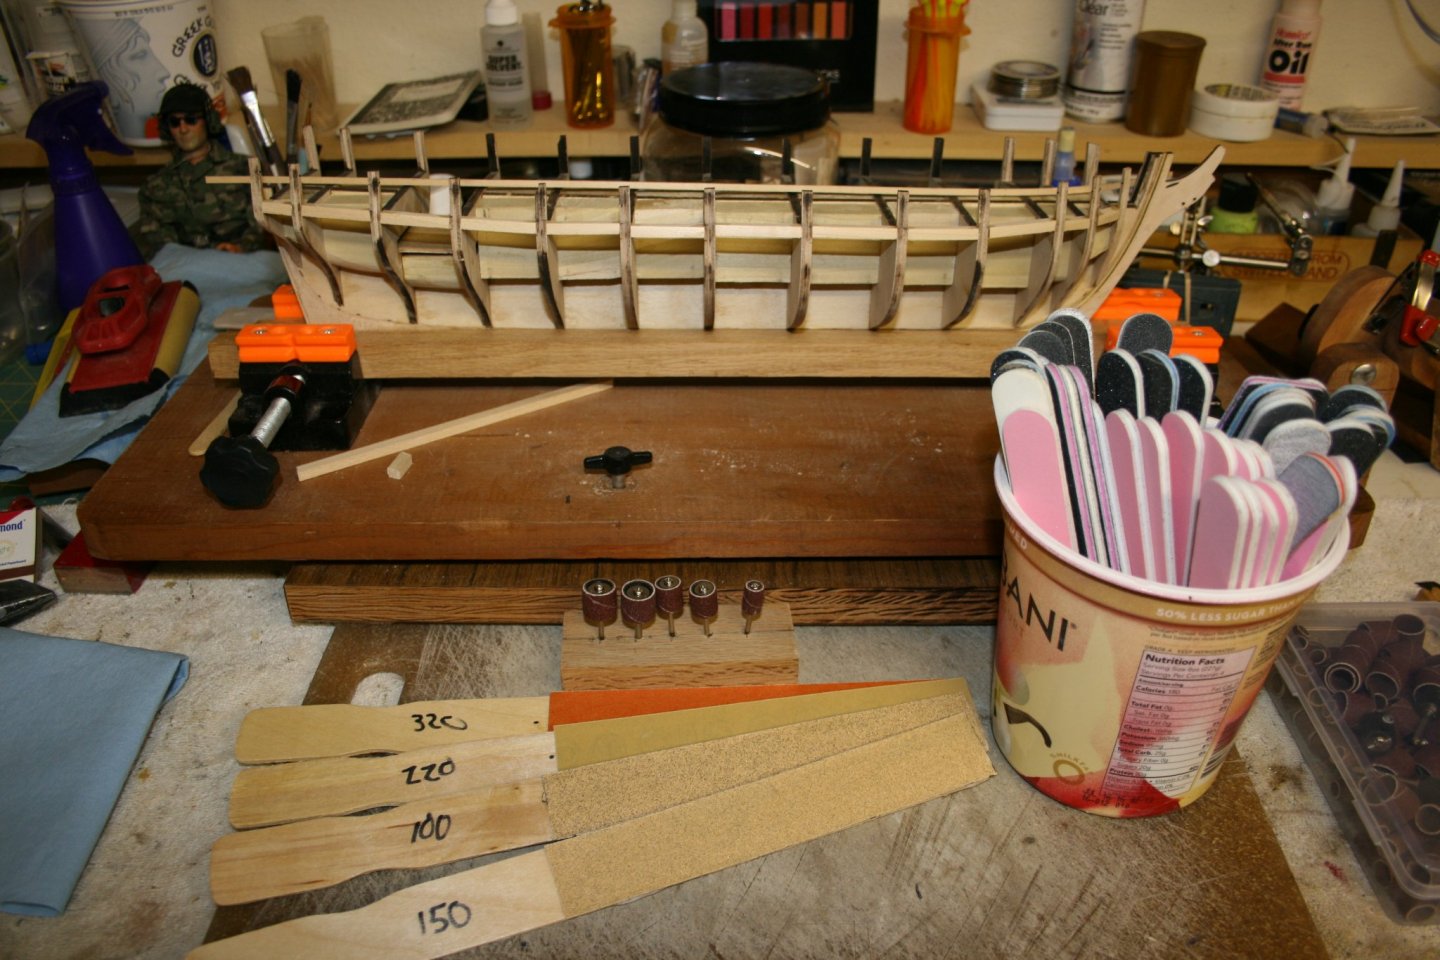
The Sanding Phase: ...or phases... 😄 After sanding the gunport sills on the starboard, it became obvious that I needed more than just one or two sanding sticks. So I ordered paint stirring sticks, emory board sanding stick types, and Dremel barrel sanding bits. I am still looking for Dremel sanding disks for the hard to get places, but I have a pretty good start. I have yet to sand the deck side of the sills, but that will be when I get both sills and tops in place. Starting on the gunport tops now.. 15/32" opening.
- 436 replies
-
- 4
-
-
- Syren
- Model Shipways
- (and 1 more)
-
You would think that I would be used to it with my other hobby. However, I am allergic to balsa dust....go figure. 😁
-
Thanks guys, I was hoping for a super secret way of doing the deck side sanding. 😁 Since I have looked at Walrus’s log, I will look at yours Overworked. Both sound pretty much what I thought it would be. I think I will be building some new sanding sticks. Update: Just looked through your log Overworked. I am off to find an engraver.... 👍
- 436 replies
-
- 2
-
-
- Syren
- Model Shipways
- (and 1 more)
-
Sanding Question: I have been reading about sanding the bulwark stanchions and gun port sills. I understand how I can accomplish sanding the outside using the stirring stick like I did when I was fairing the hull. However, I am not sure what the process is on the inside. Walrus, I looked through your build log, and saw that you used a Dremel, but I am wondering what you did. I did a search and am still trying to find a thread that lays it out.
- 436 replies
-
- 2
-
-
- Syren
- Model Shipways
- (and 1 more)
-
I decided today, that I am going to buy the Micro Mark Sanding tool since there is going to be a lot of repetitive sanding of the top and bottom gunport sills. After sanding and placing 3 of the sills in place, I find I need a tool to ensure my sanding accuracy. I have a disk/belt sander that is on a floor stand, and it works fine for big pieces and those needing a lot of sanding. I just need something more of the scale needed to sand different parts of the Syren kit. Want to avoid eating too much wood from the part I am sanding. 😄 I will continue with other items until it arrives. ....below is a picture of the lower deck finished with tung oil.

- 436 replies
-
- 2
-
-
- Syren
- Model Shipways
- (and 1 more)
-
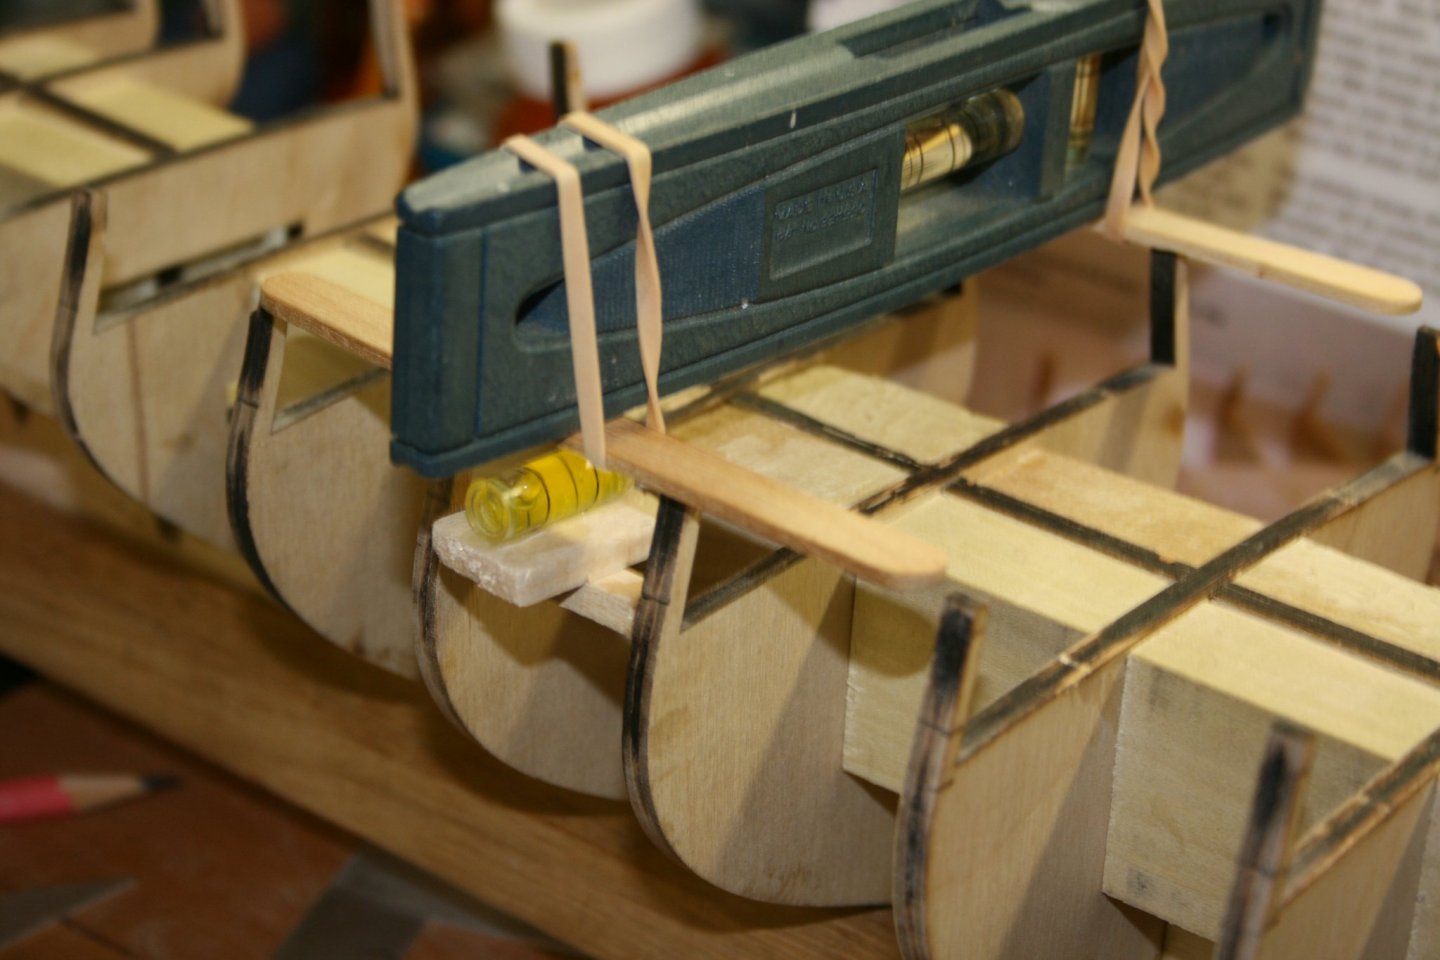
Gun Port Sills/Tops At this writing, I have finally received the Tung Oil that was on order. So I have backtracked to the lower deck placement. It has never been a major issue, but I don't like leaving a trail of unfinished steps. Right now, I am only holding off on sanding the bulwark stanchions "thinner" until later. Even if I did do them, there is more coming anyway. Since that is the case, I will combine the two sanding steps into one final one. Just makes the final one longer ... at least that is what I tell myself. 😄 I threw together a sill leveling tool that worked fine on the first (most important) gunport sill. Right on the marks, and level port to starboard. You can see the hand level banded to two popsicle sticks The small level below is a bubble level used in a airplane "balancing" tool. I use another balancing process on the plane so it is not needed. I glued it to a small piece of wood. If you place the popsicle sticks at the top of the stanchions and level port to starboard, using the small bubble to read out the gun port sill, ensuring it is also level. (I might just fashion a better longer level set up. The rubber bands allow for different widths. I think this will achieve the need to level the sills on each gunport.) I am readying myself for cutting and sanding around 72 pieces?...for the 18 sills and tops on both sides.
- 436 replies
-
- 4
-
-
- Syren
- Model Shipways
- (and 1 more)
-
Yeah, I have read the instructions over the thinning of the bulwarks. After reading them, I am convinced that thinning them now would mean I would break them, just trying to finish it. So far, I am holding off as long as possible. I have had one bulkhead where the top section on both sides just fell off. I am lucky it is at the top, so I think it will be covered by the cap rail. 🙄
-
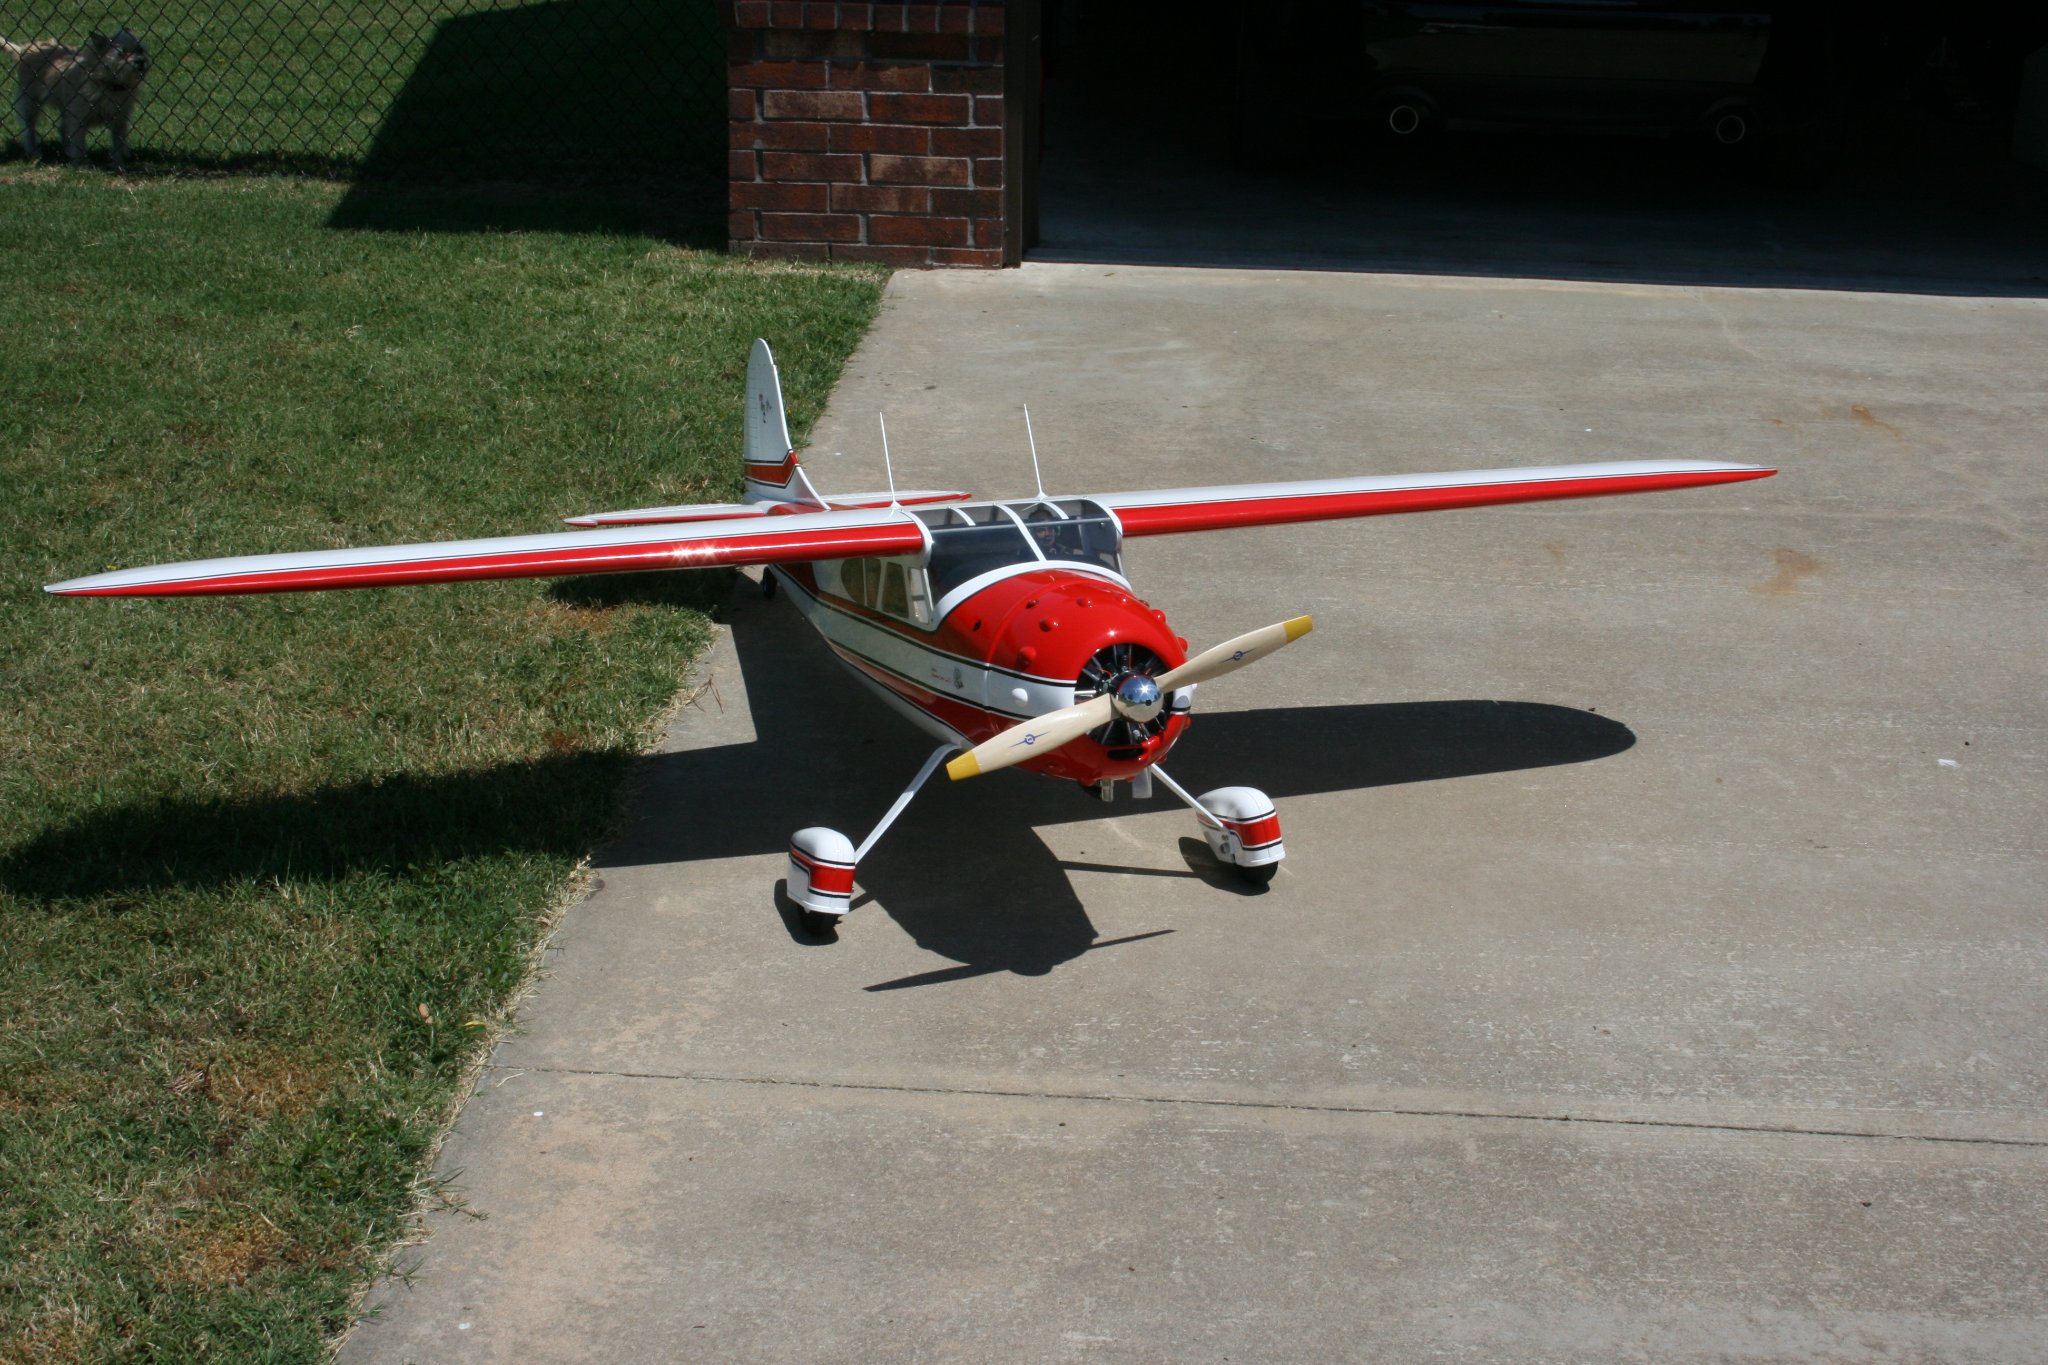
Yes, I am having fun. I am a retired engineer, although not structural. I am in the habit of solving problems and this kit has provided the questions I like solving. And, it is like plane building from the framing point of view. Comment: There are marks on each bulkhead that look like I can use. There are 3 marks with the second up from the bottom mark appearing to show the top edge of the gun port sill as it forms the bottom plank (The sill.). I will add a picture when it is clamped in place. This is explained in the instructions in a later paragraph.

- 436 replies
-
- 3
-
-
- Syren
- Model Shipways
- (and 1 more)
-
Thanks, it does help some. And I heard back from Chuck Passaro as well. He says to avoid using the templates altogether, and us “tick strips.” That is fine, and all, but I will need to read up and learn how to use them. As far as construction is concerned, it’s not that much different than frame building on the planes. If I get it started right between each bulkhead, the pieces, the rest is just accuracy. Got some studying to do. 👍
- 436 replies
-
- 1
-
-
- Syren
- Model Shipways
- (and 1 more)
-
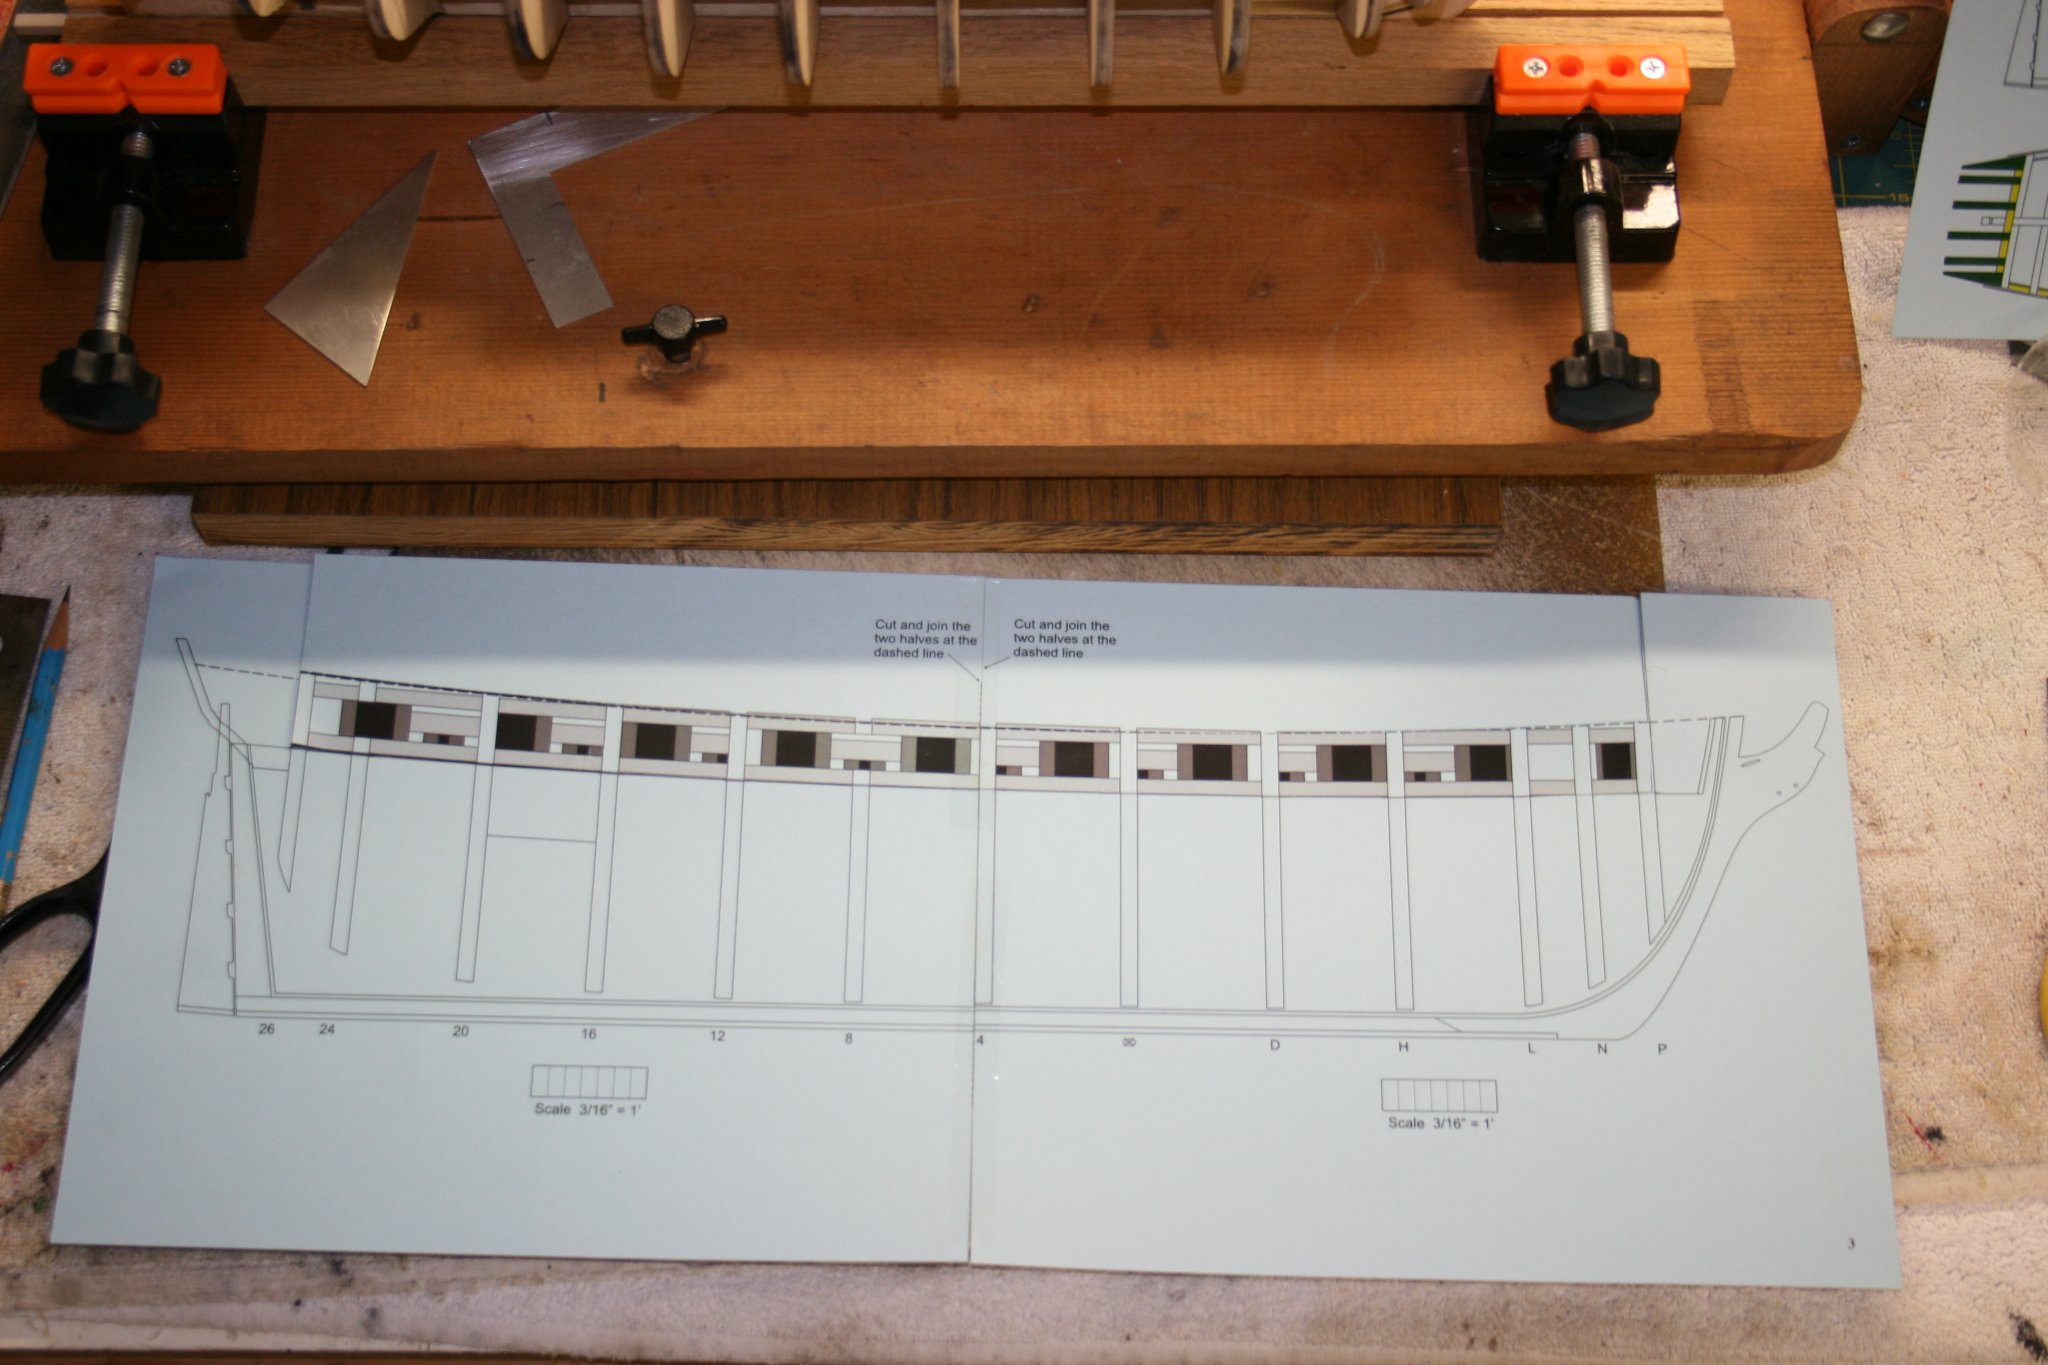
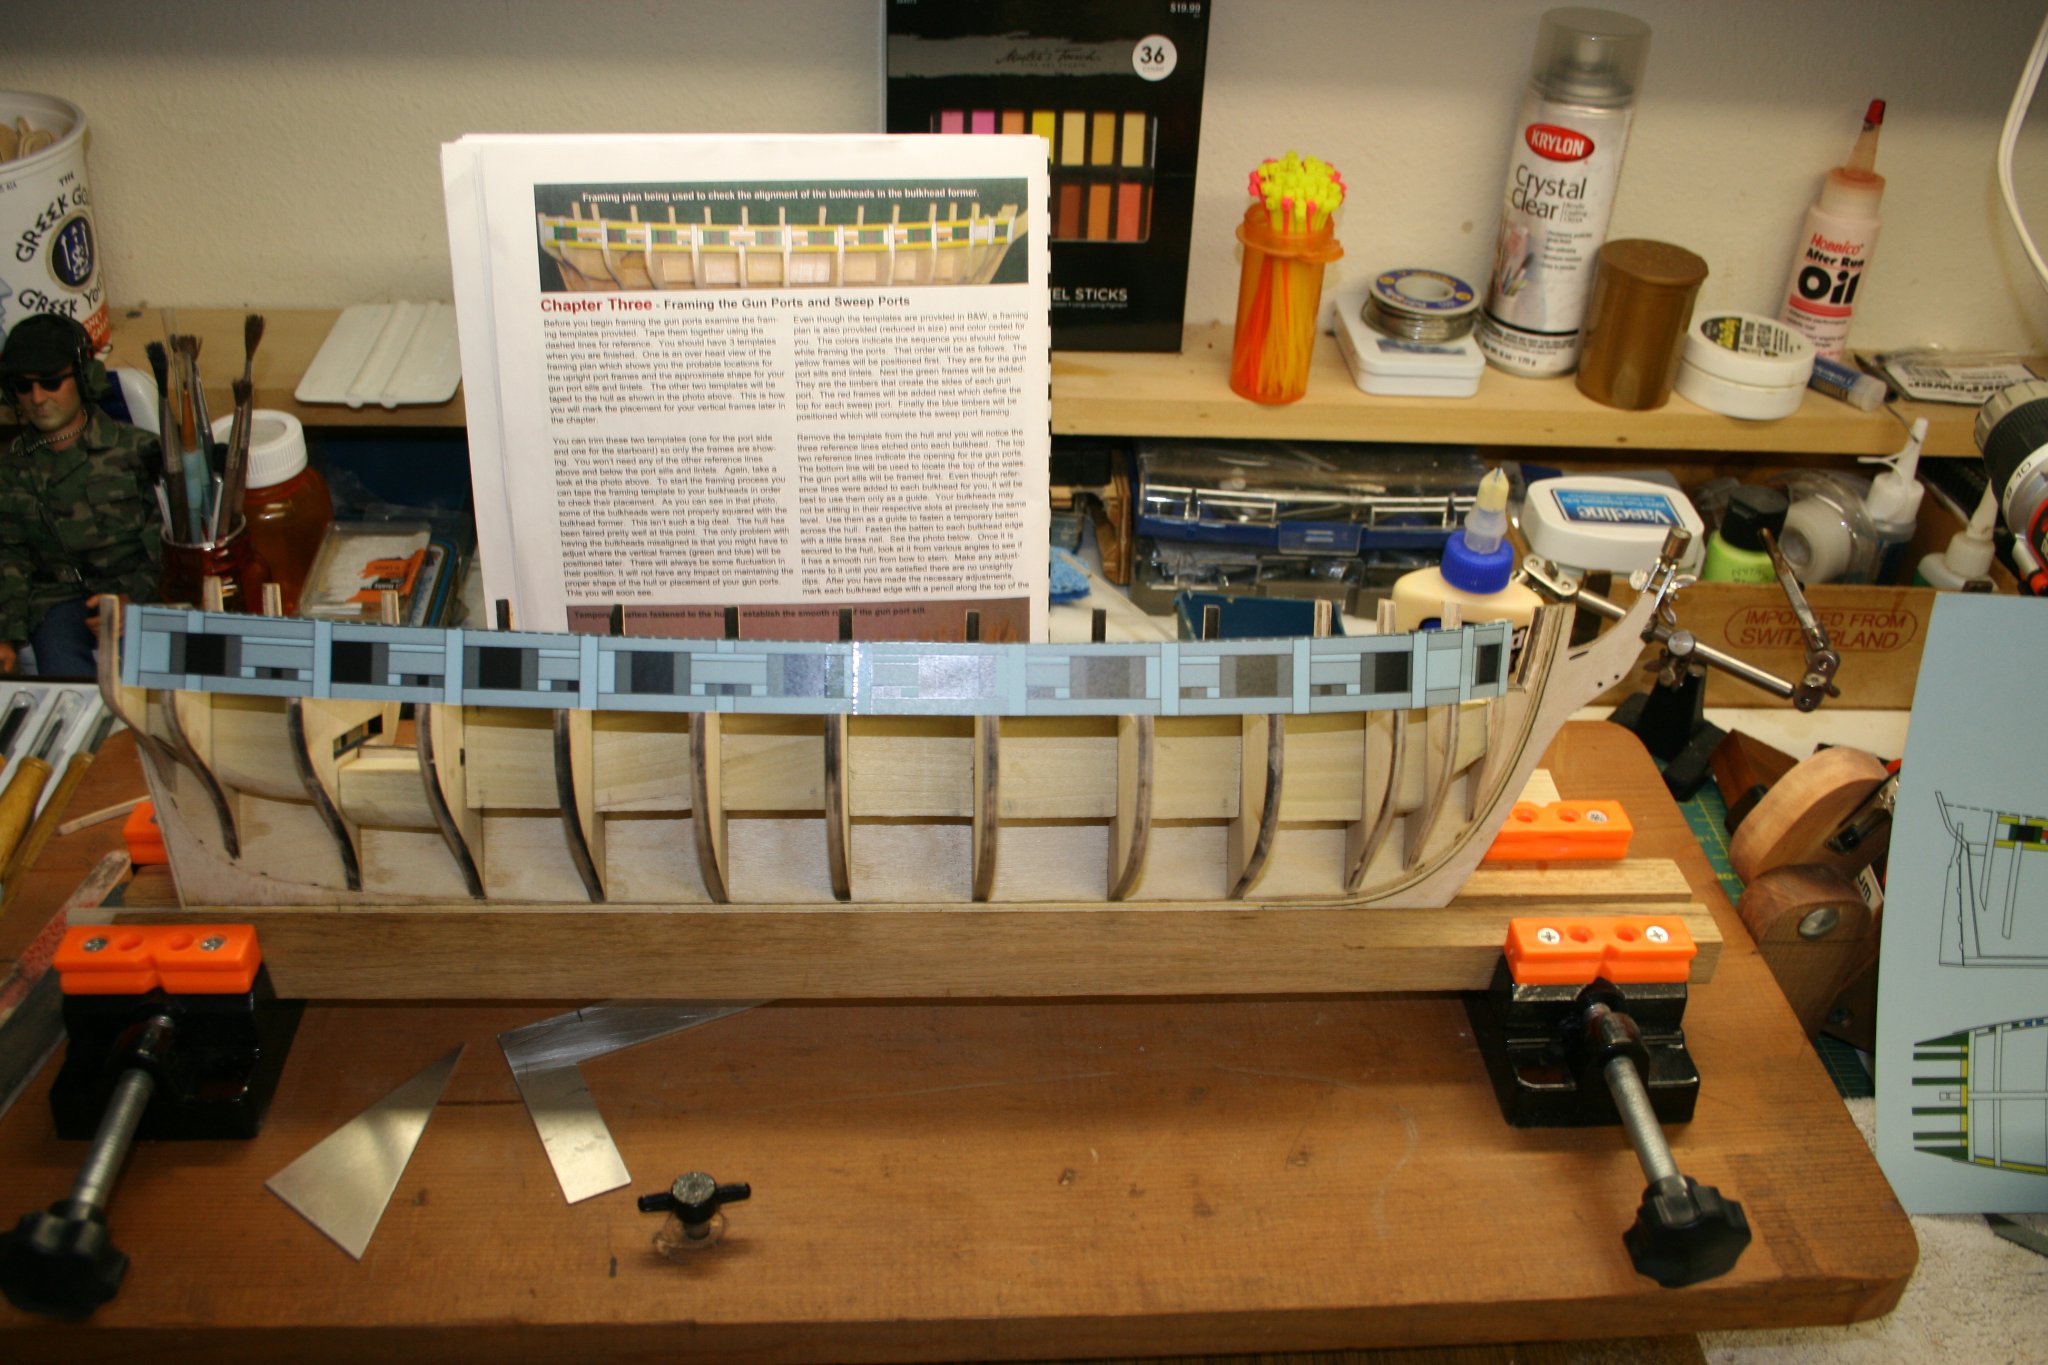
TEMPORARILY STUMPED Chapter 3 starts out with the instructions and set up for the gun ports and the supporting structure surrounding them. I have followed the instructions to the letter and have a problem. I taped together the gun port template and cut it out as the instructions indicate. However, as you can see by the pictures, the templates are not even close to the actual layout of the bulkheads. I understand that some will be out of place and need to be reconstructed, but this pattern has only about 2 that are close. The rest so out of line, that I am very concerned that if I use the template provided, that It will throw off everything else that is downline. My assumption is that the template paperwork that was provided "might" be printed at the wrong size for it to be 100% the size needed. As a newbie, I am reluctant to move forward until I have a template that is the right size. I looked at other build threads here and if there is a picture it appears that the bulkheads match the template. I have considered using the template only for plank locating, but and not comfortable doing that. I am wondering if anyone has any information or suggestion on this issue? Has anyone else encountered this? My plan is to contact both Micro Mark, and Model Shipways for advice.


- 436 replies
-
- 2
-
-
- Syren
- Model Shipways
- (and 1 more)
-
Thanks, Overworked, I am still waiting for the Tung oil. It’s supposed to come today, but if not I may have to reorder. Will have to see.
-
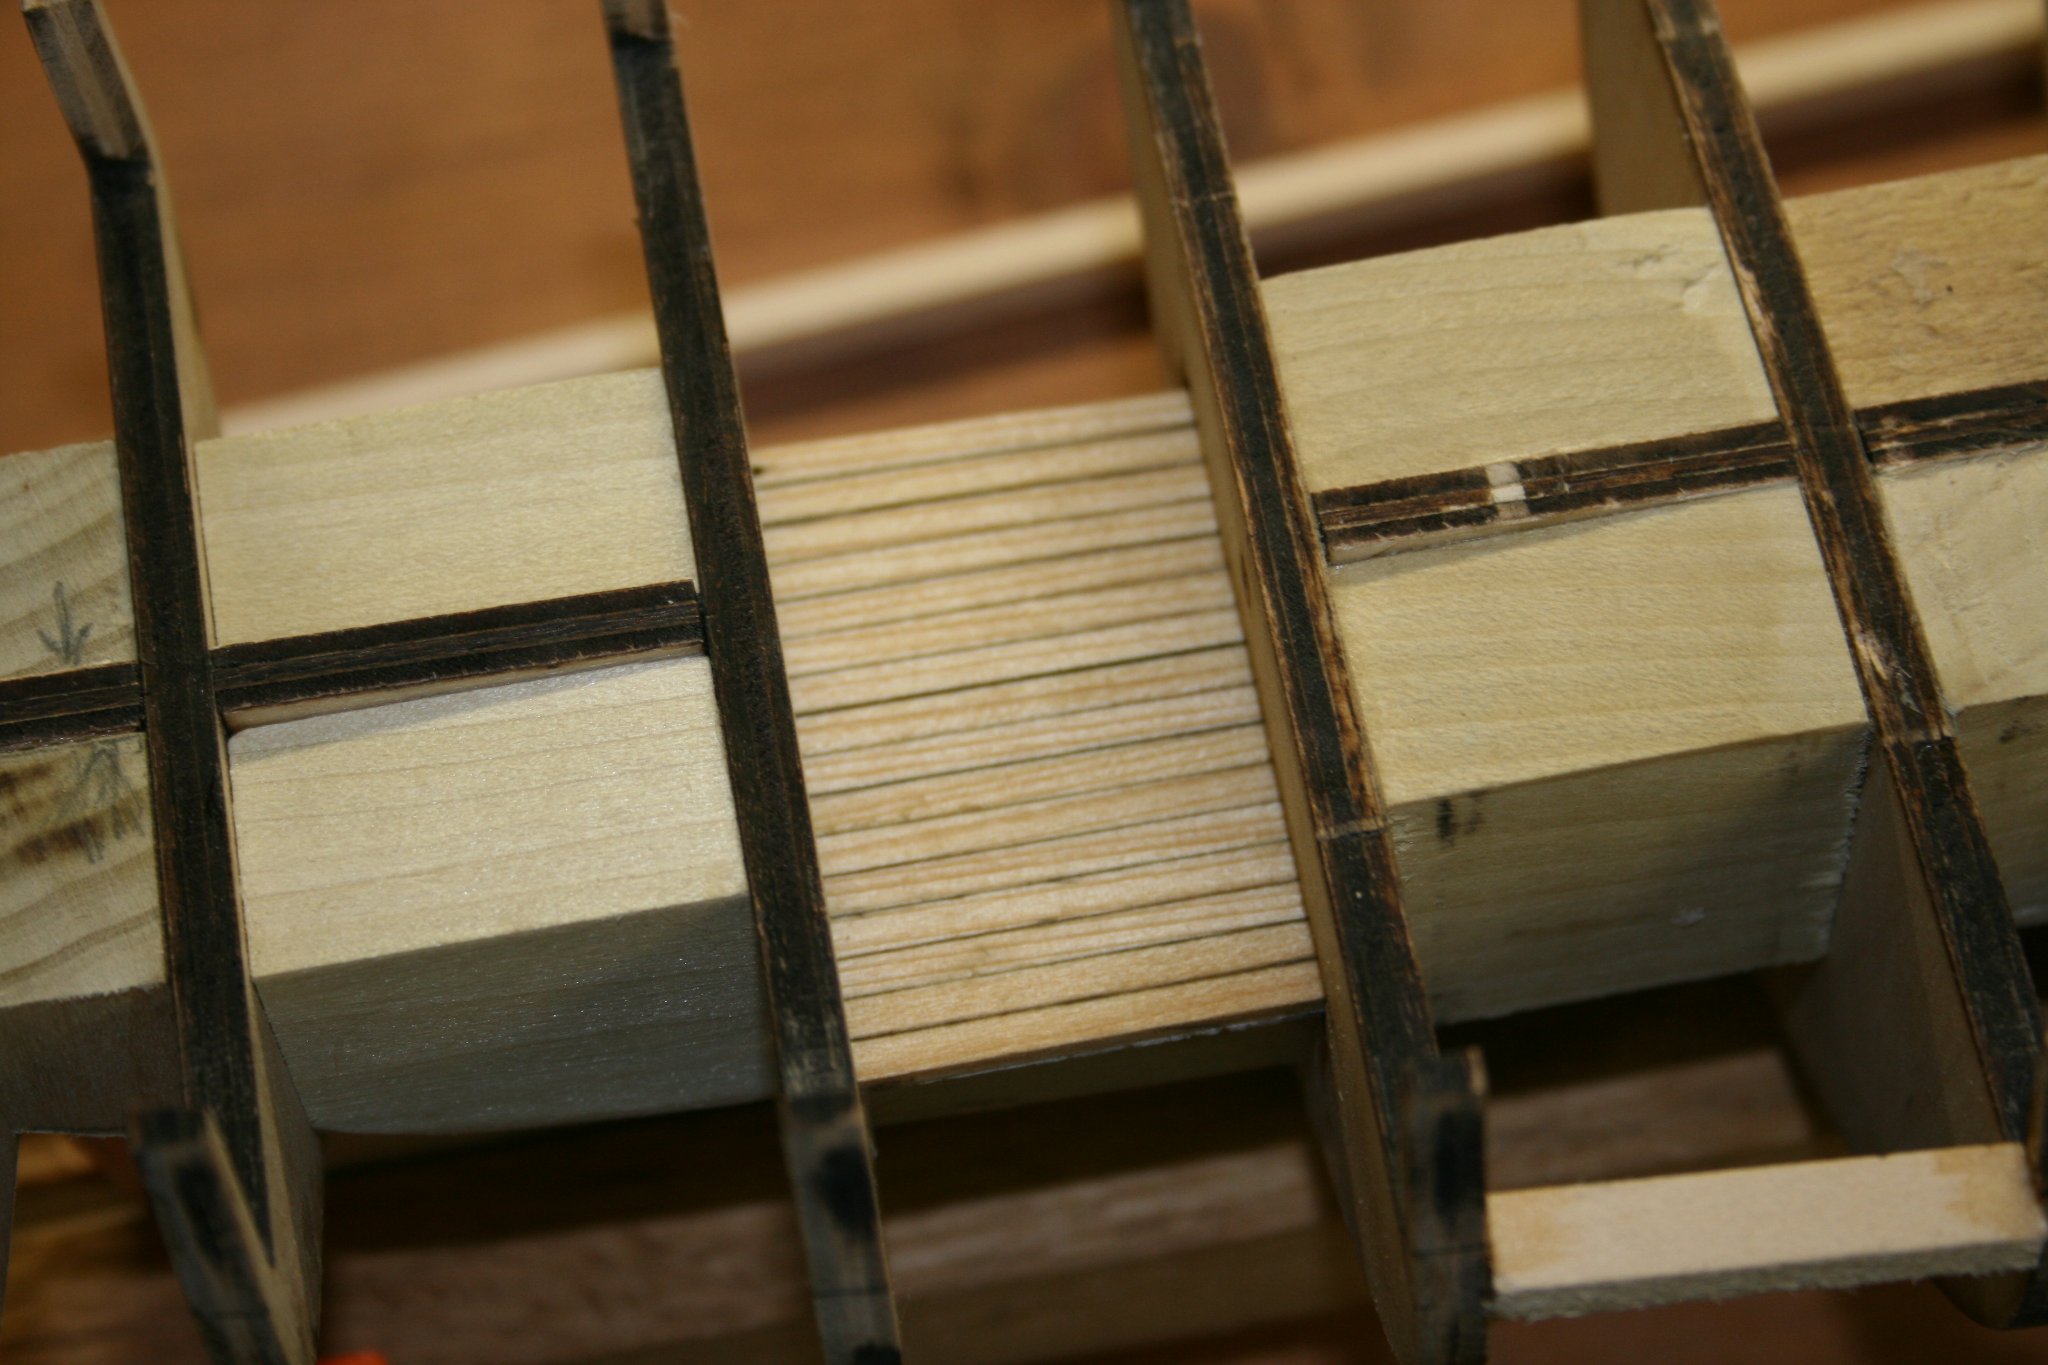
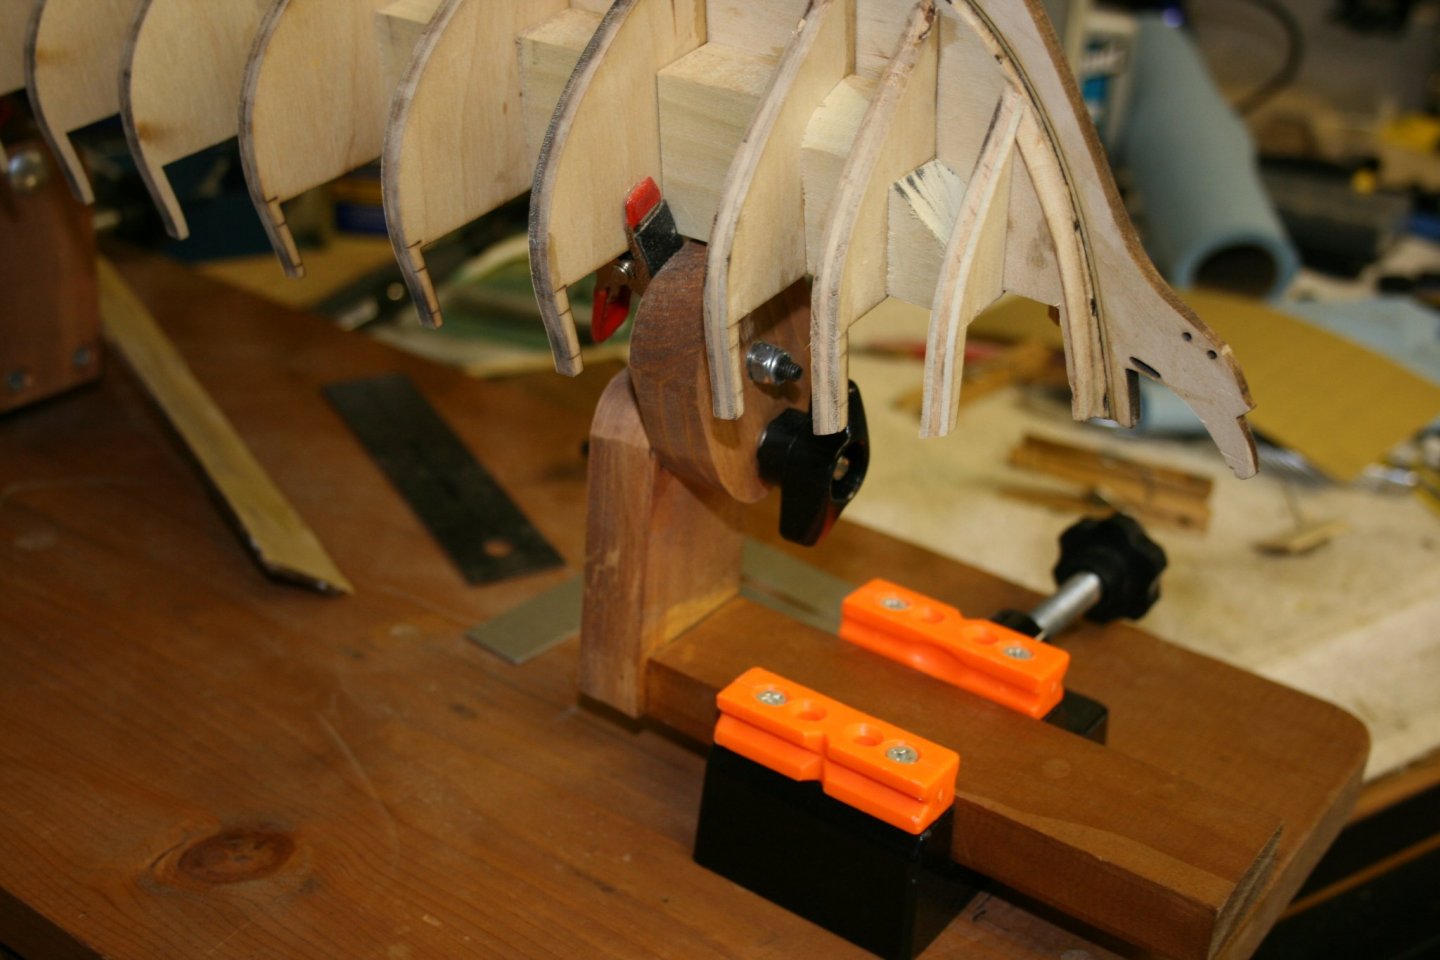
Fairing Underway I have come to the point where I need to fair the hull and have done one side already and am started on the other. I read on a thread (I think someone following this build.) that they used a pain stirring stick with sandpaper glued on. I can say, from my view, this is a perfect tool for it. Just enough pressure to sand where needed, and the ability to have a little bend in it. This makes the bow to stern fairing task much easier than a solid sanding bar. (Newbie Opinion) You can see in the picture the sanding bar, and the supports that I built for the building board. The arms that are being used have a long base that can be clamped into the board vises allowing for adjustment to fit the position of the bulkheads on different models. I have added a close up in case you are interested in how I built them. Add to that the lazy susan hardware, it makes for a convenient way to get to both sides without moving the whole model. Newbie Error: (minor) Make sure to sand both sides of the bow fillers as the inside and the outside are needed. I forgot to sand the deck side and had to come back when the forms were glued in place. It's not difficult if you have a dremel and a small chisel, but you won't need either if you remember. Still some sanding to do and it's on to Chapter 3......

- 436 replies
-
- 2
-
-
- Syren
- Model Shipways
- (and 1 more)
-
Thanks for the answer and warning on the char problem. I will make sure to remove it before gluing. The Tung oil is delayed until tomorrow, so there is no rush. I can take time to make sanding is correct since all gluing is done and the hull is pretty solid.
- 436 replies
-
- 1
-
-
- Syren
- Model Shipways
- (and 1 more)
-
Newbie Question: I have noticed that the adjustments to outside edge of the bulkheads appears to be mostly in the first 4 bulkheads and the last 3 or 4 at the stern. The plank then lies flat on the next several bulkheads until close to the stern where some adjustments begin again. Am I seeing this correctly?
- 436 replies
-
- 1
-
-
- Syren
- Model Shipways
- (and 1 more)
-
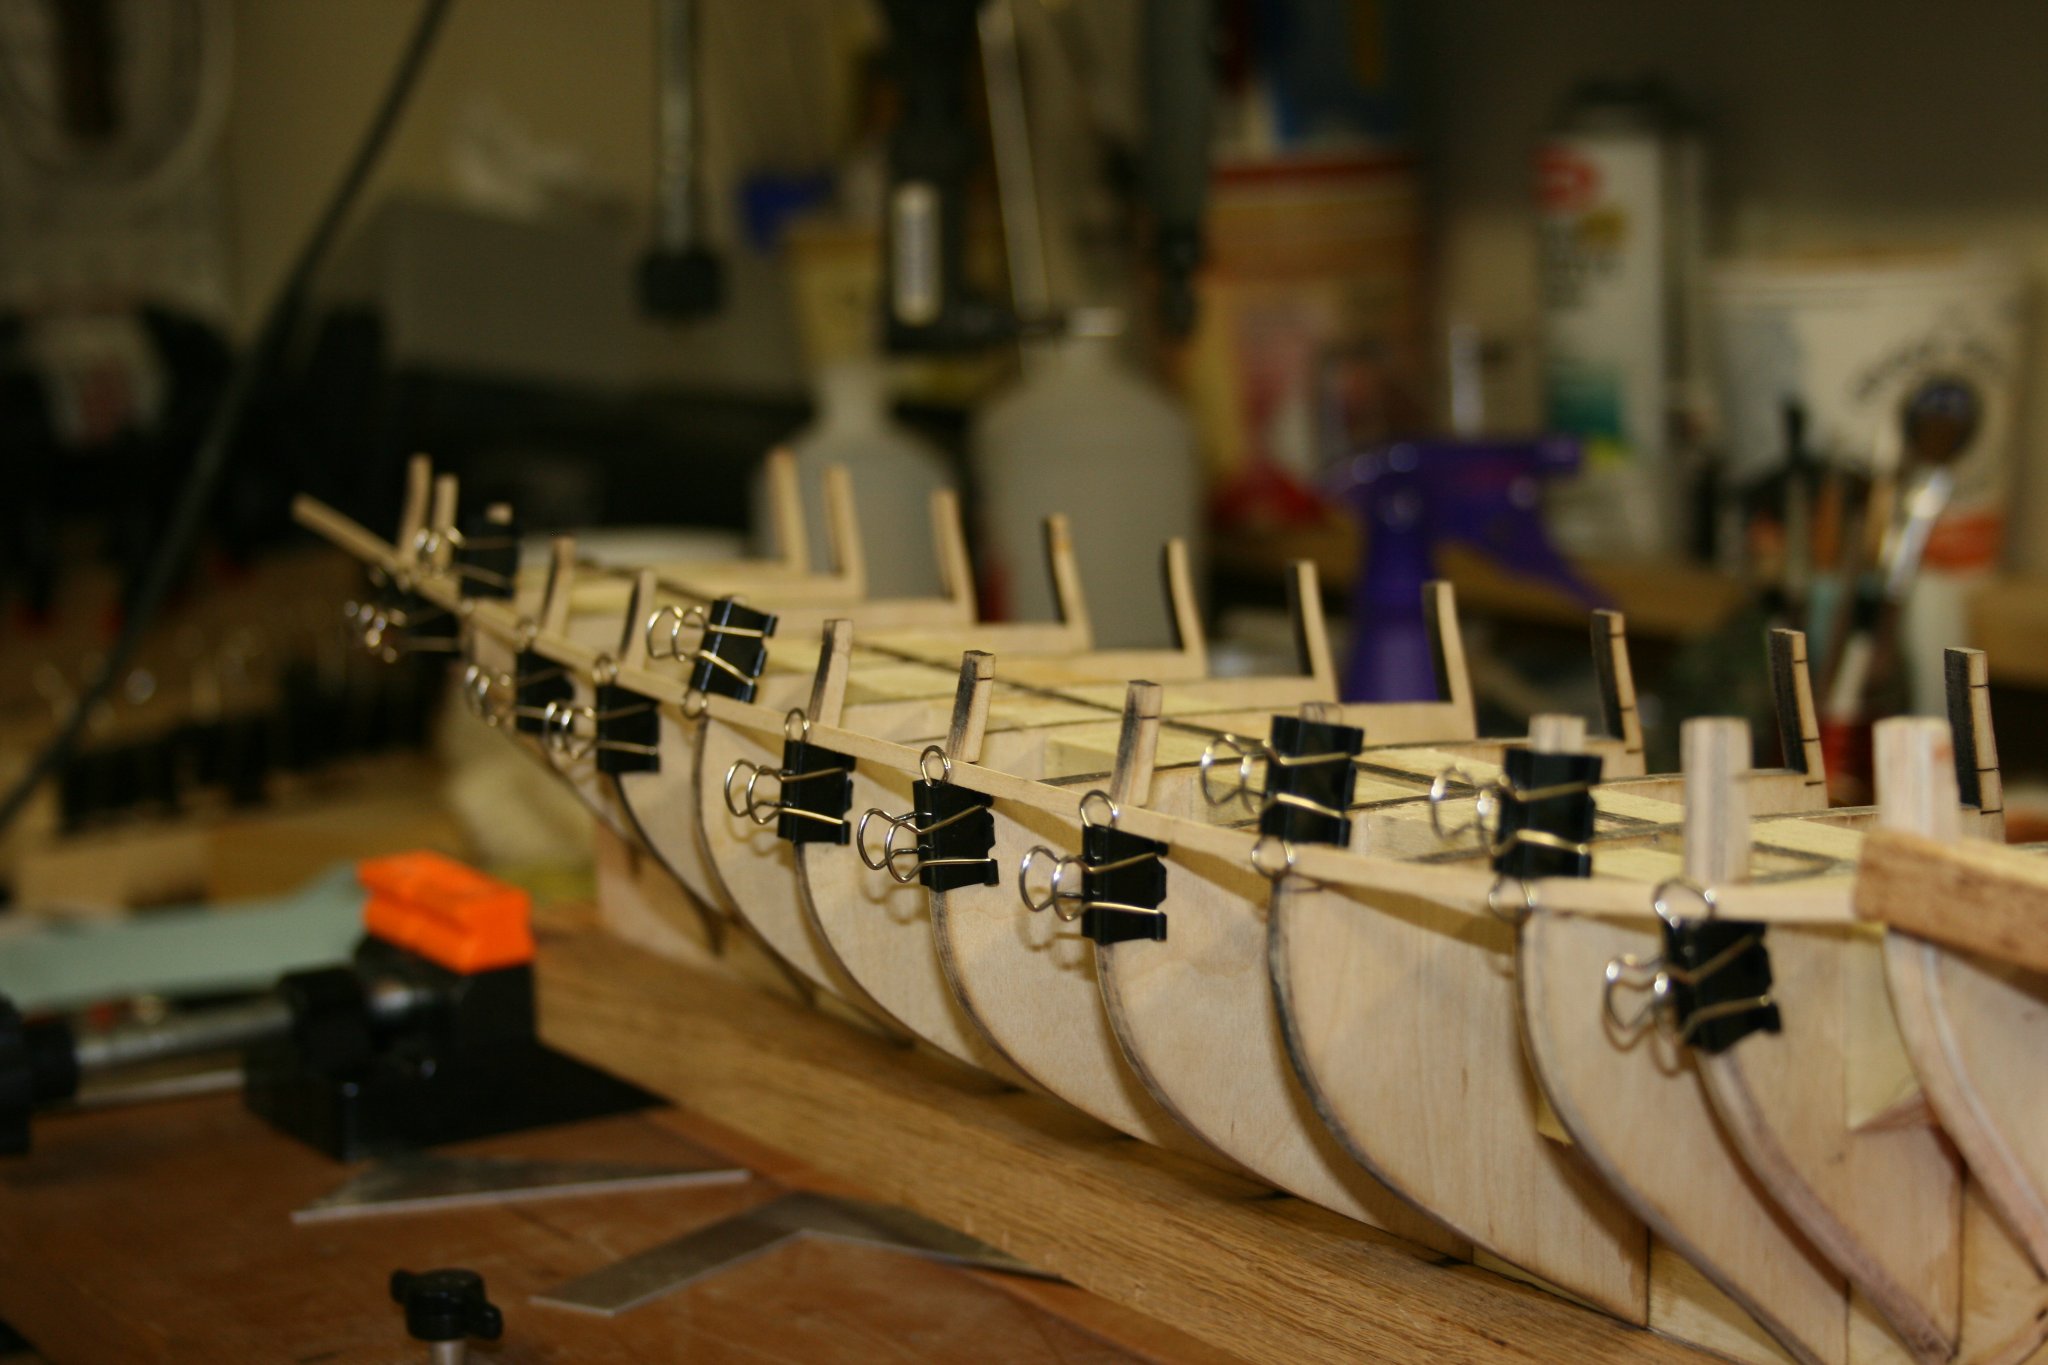
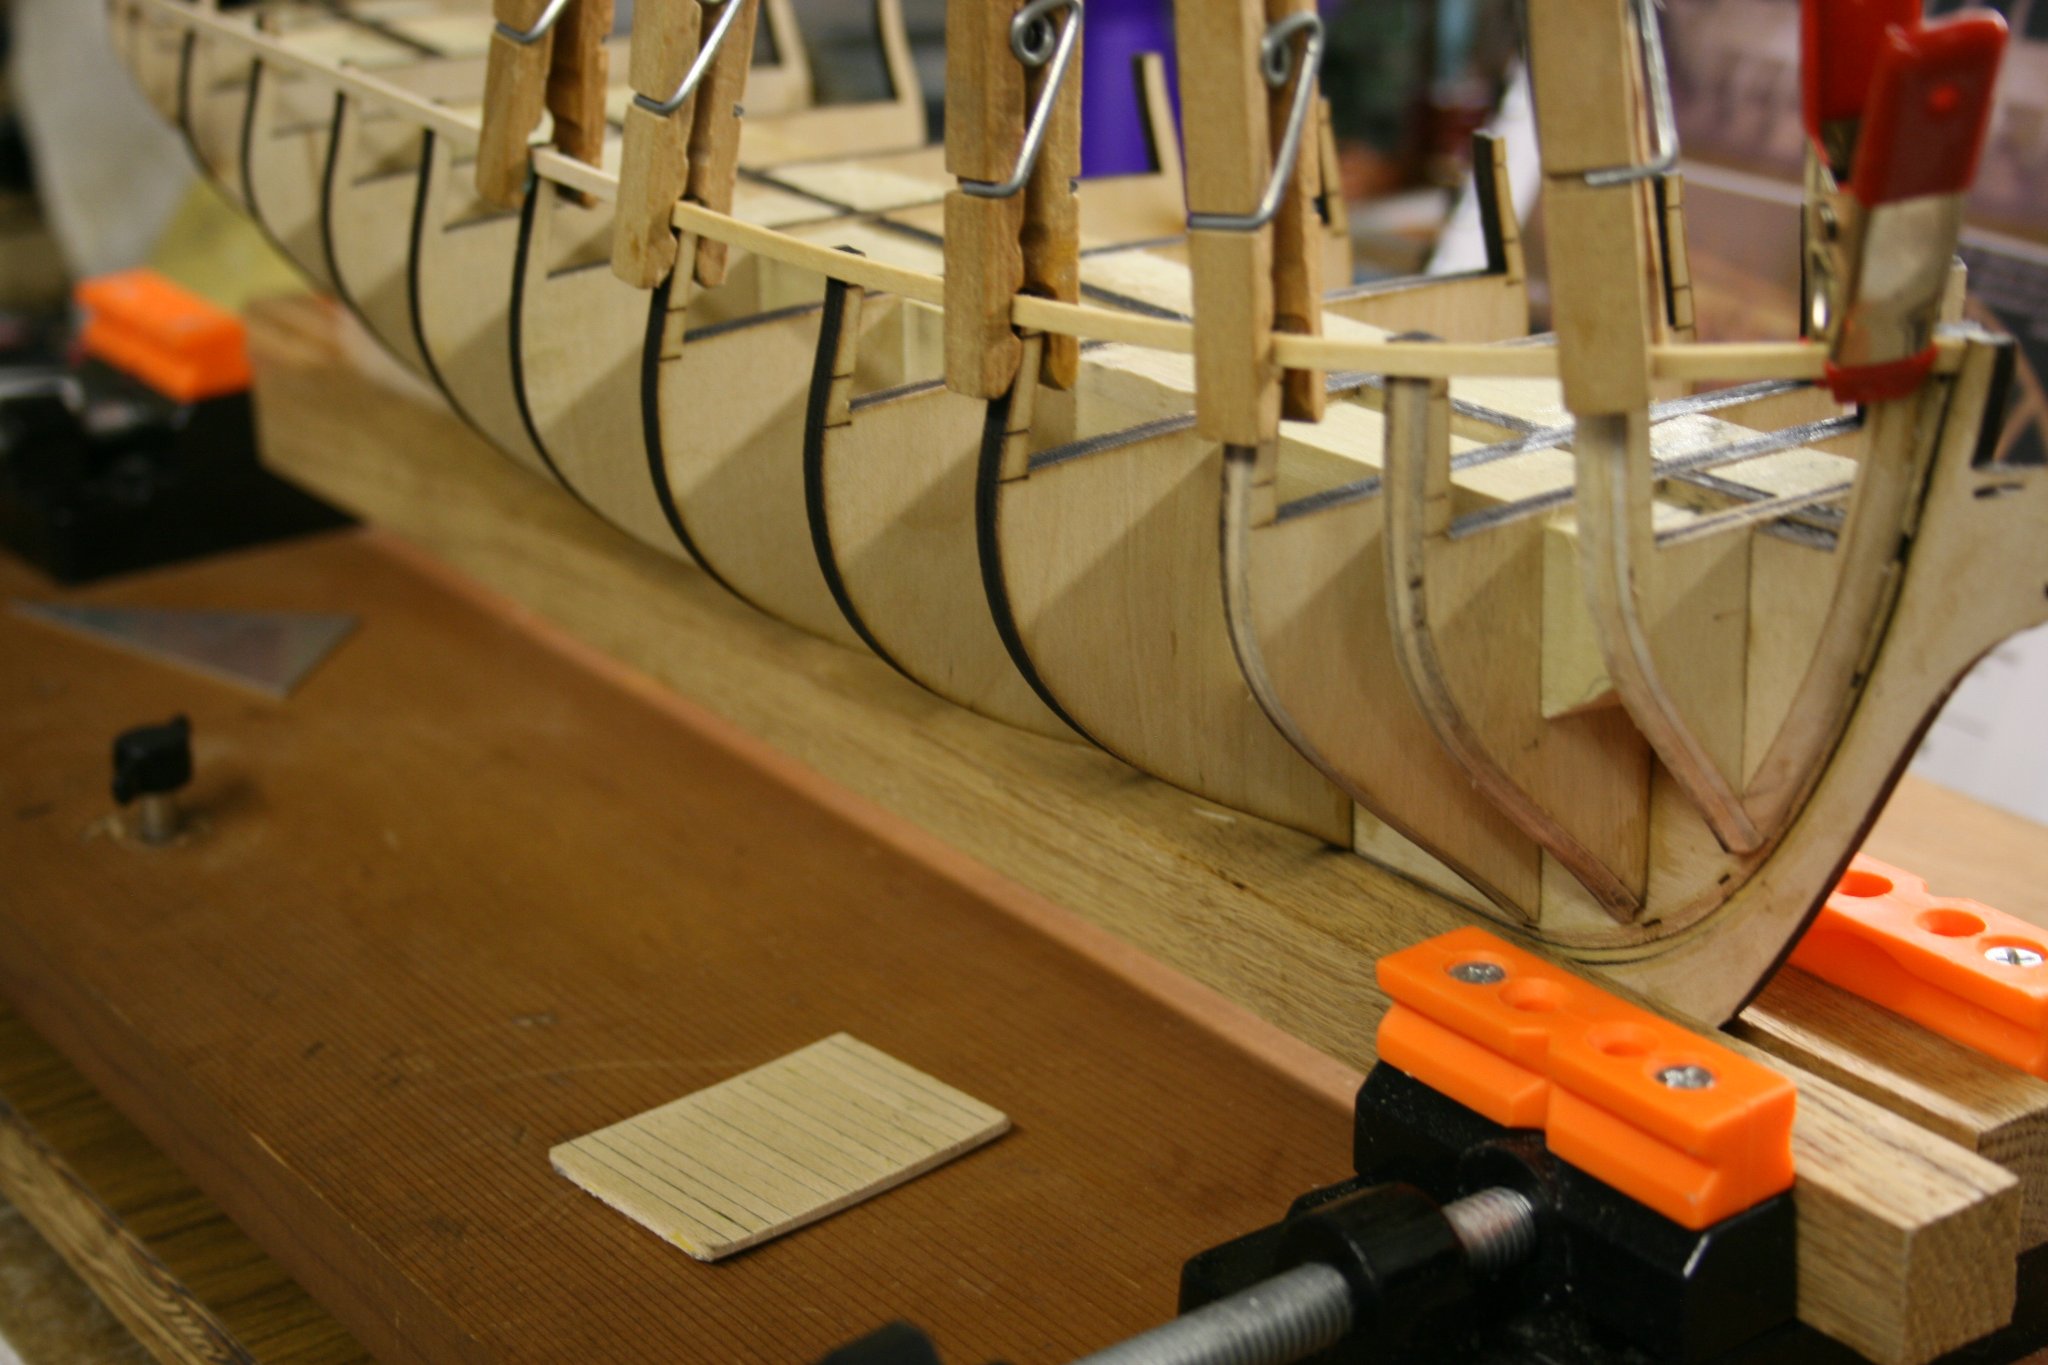
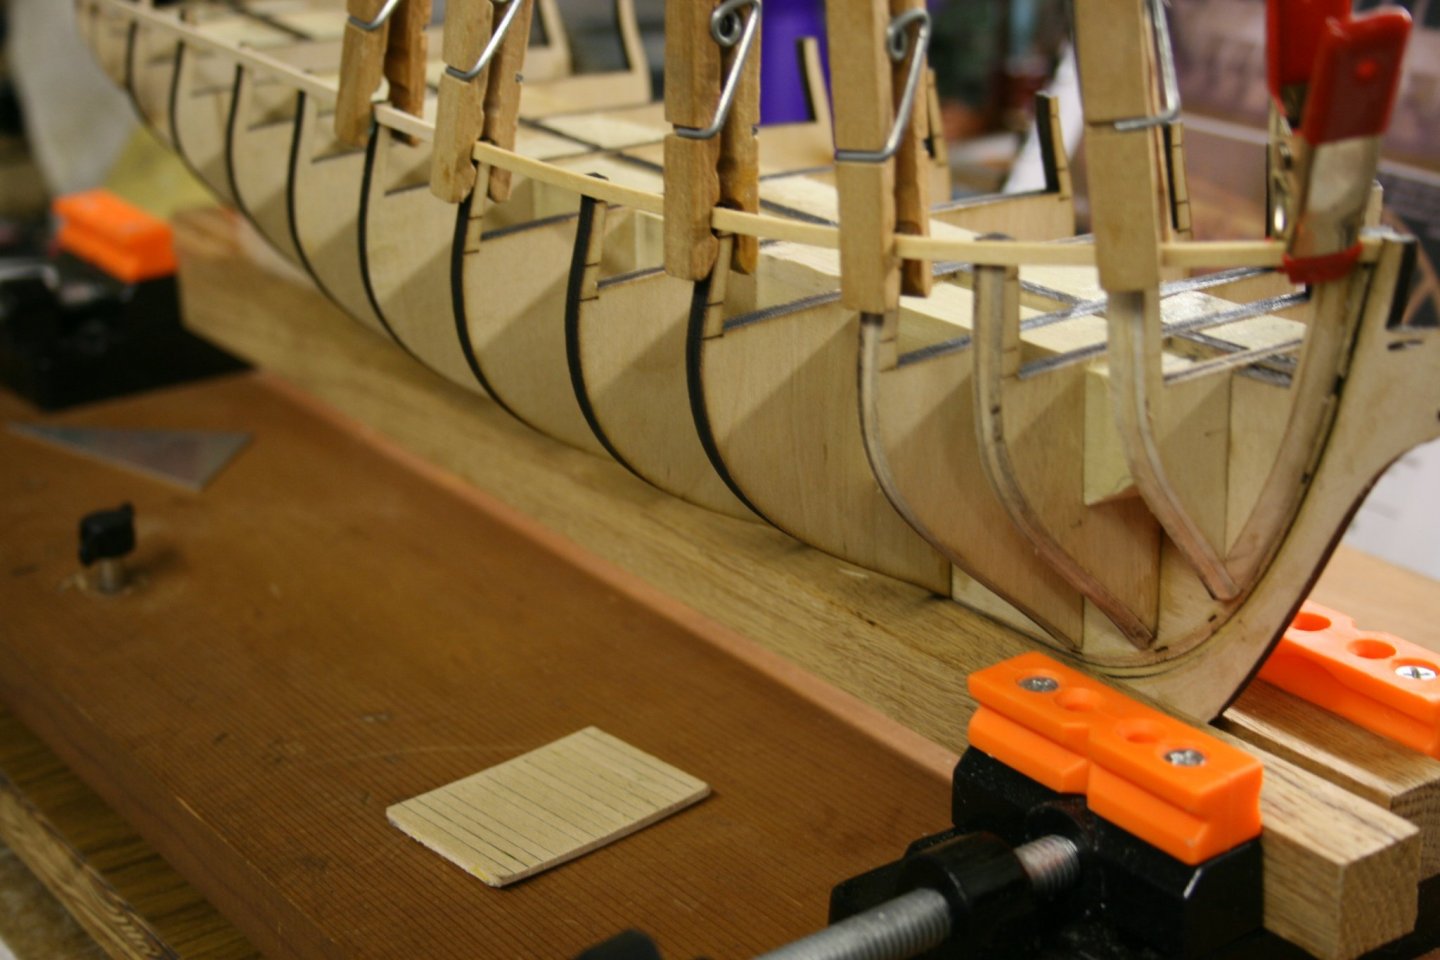
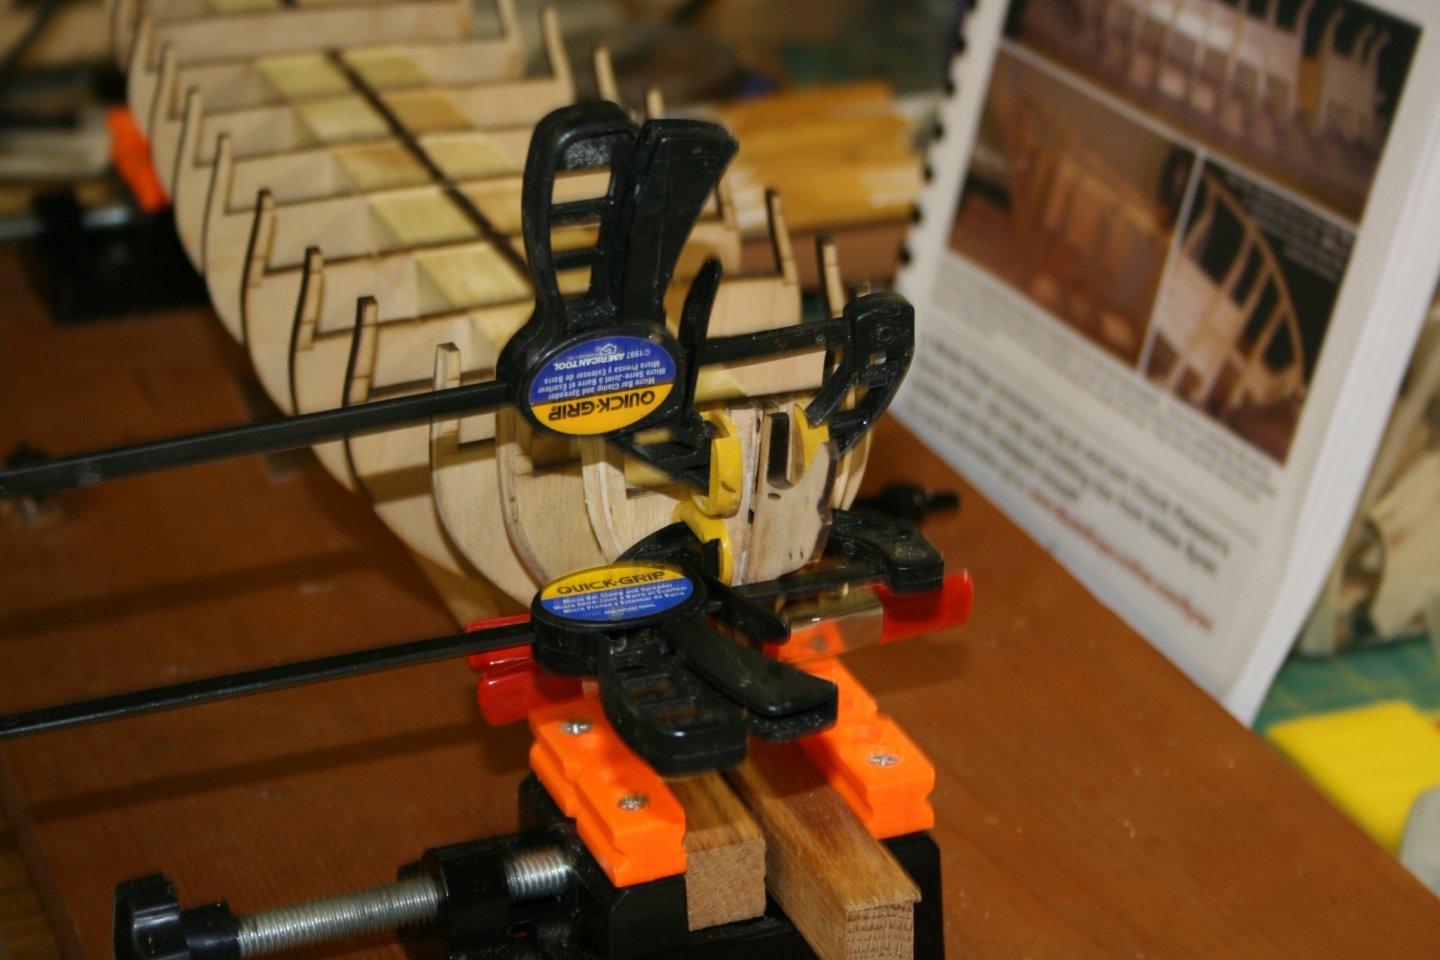
First plank being formed and dried in place for bow pattern. So far, it looks very good, with only a small amount of adjustments on the outside. Since I haven't done the inside yet, that will the the side with more work needed. Time for a break as I have a board meeting of the RC flying club that I belong to and I am waiting for the tung oil to arrive. In the picture, you can see the lower deck awaiting application of the tung oil.
- 436 replies
-
- 4
-
-
- Syren
- Model Shipways
- (and 1 more)
-
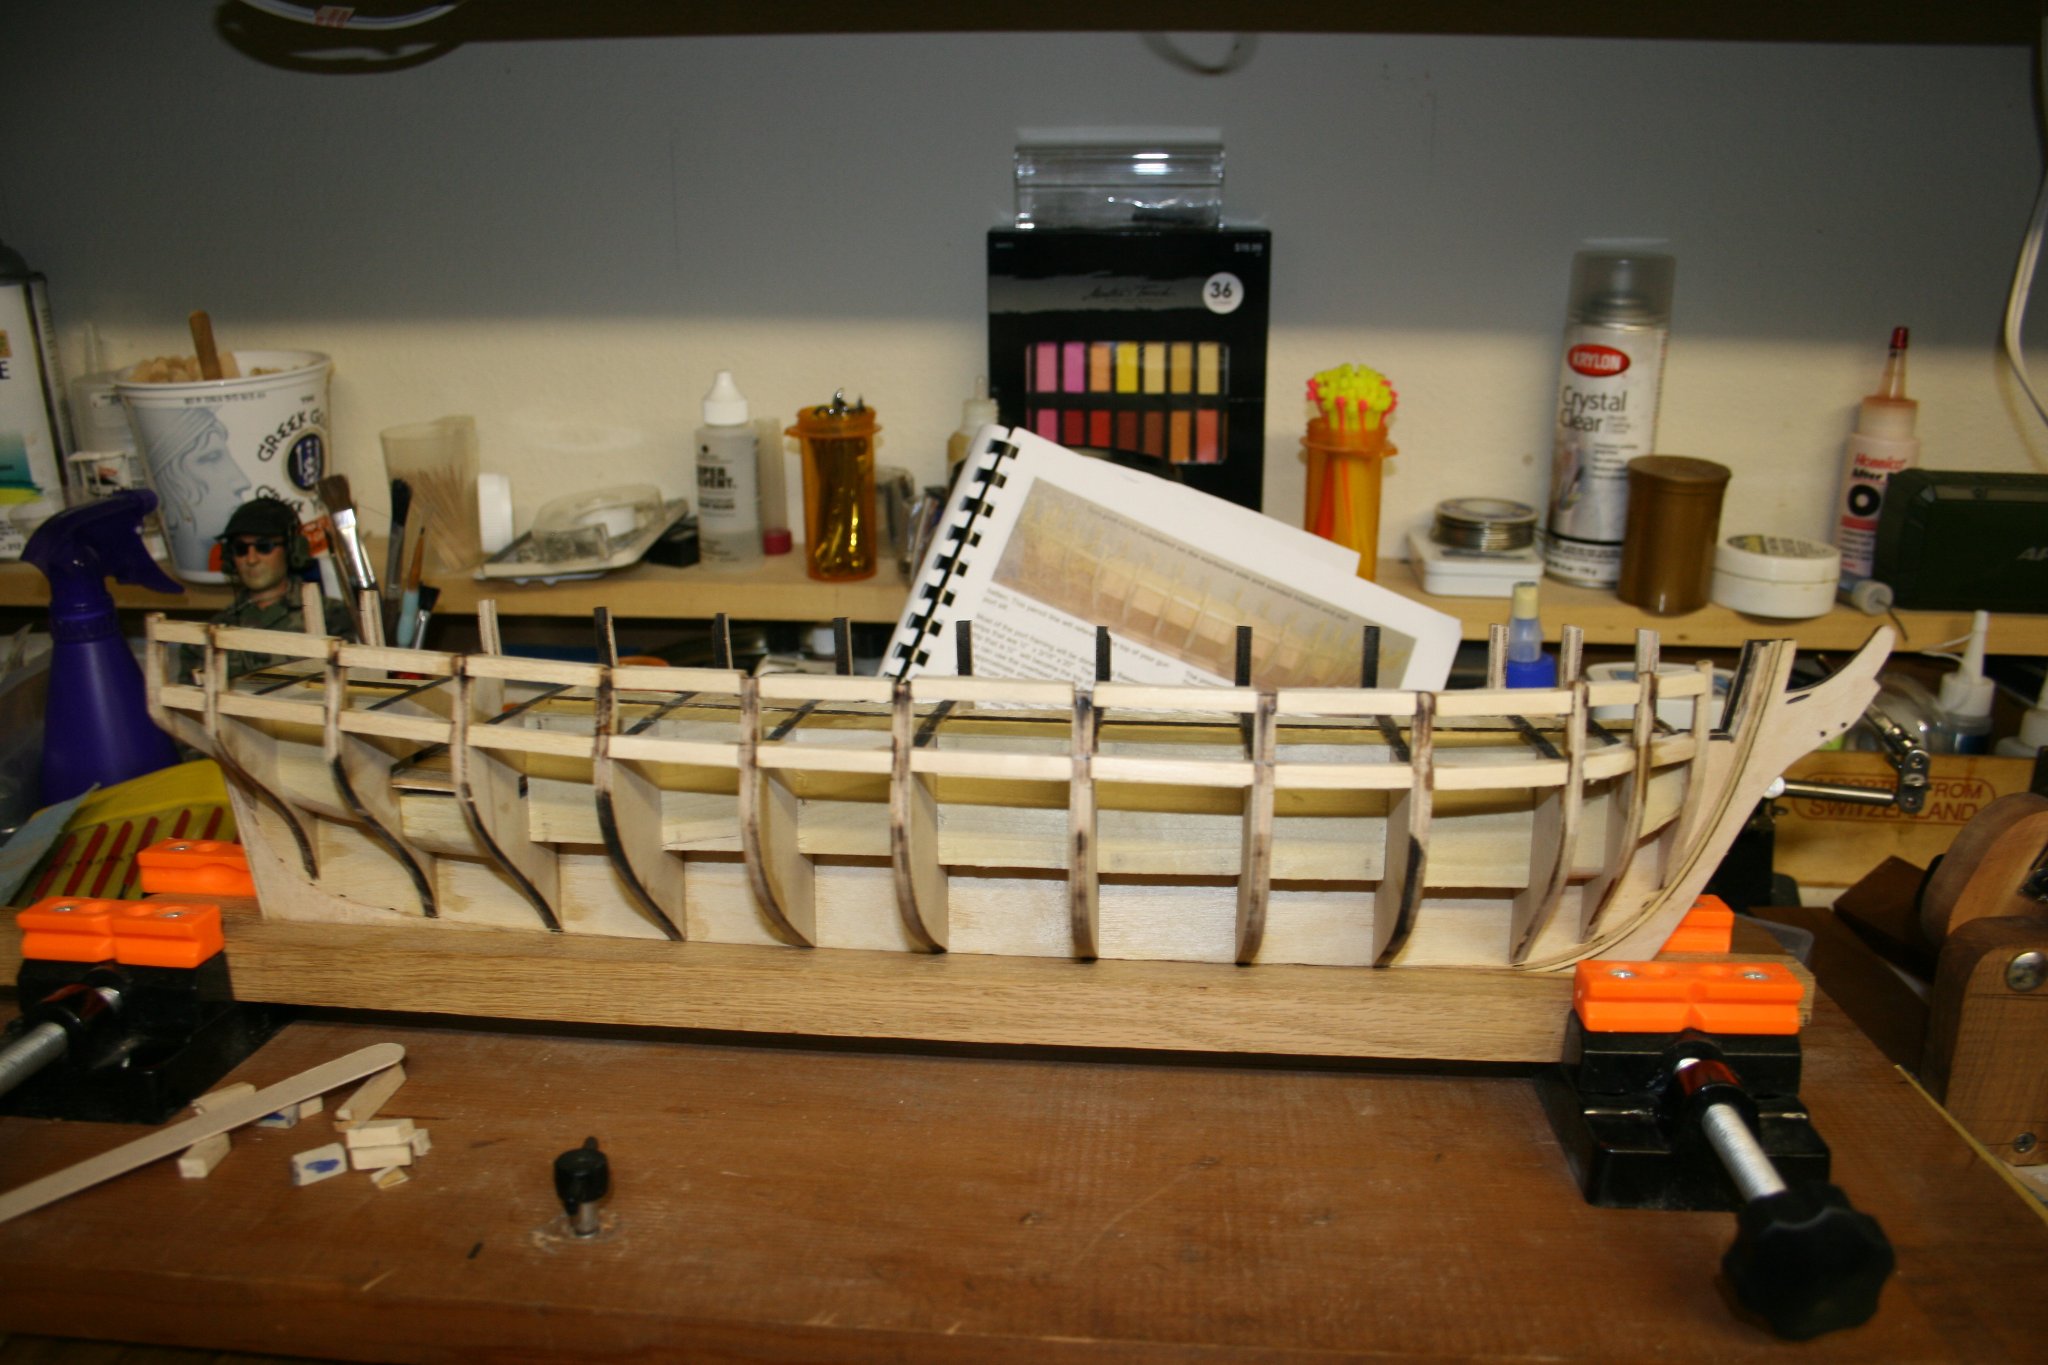
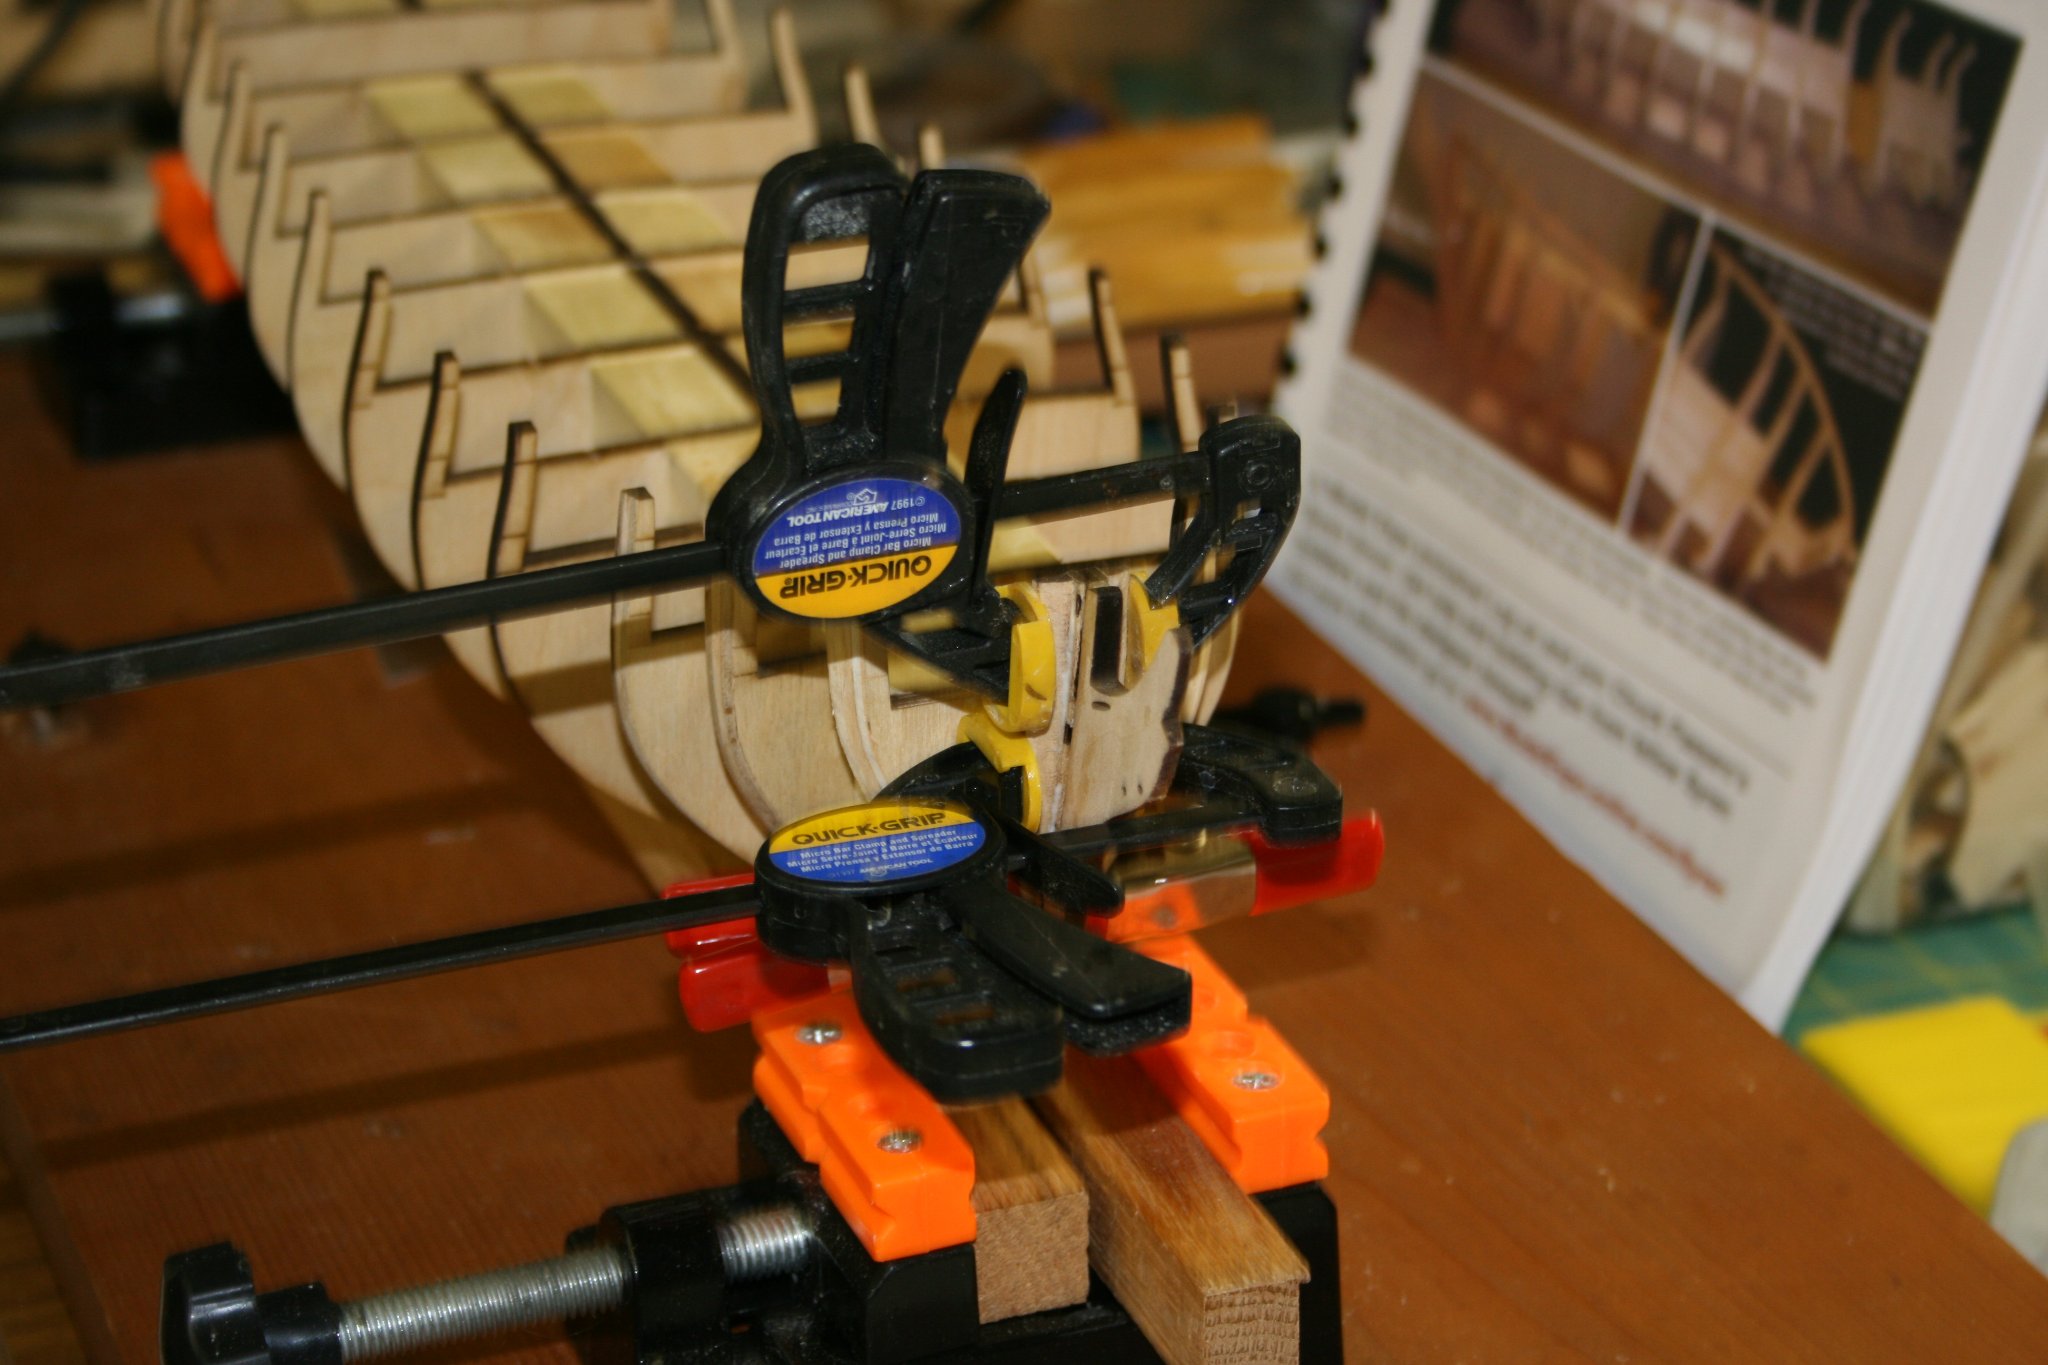
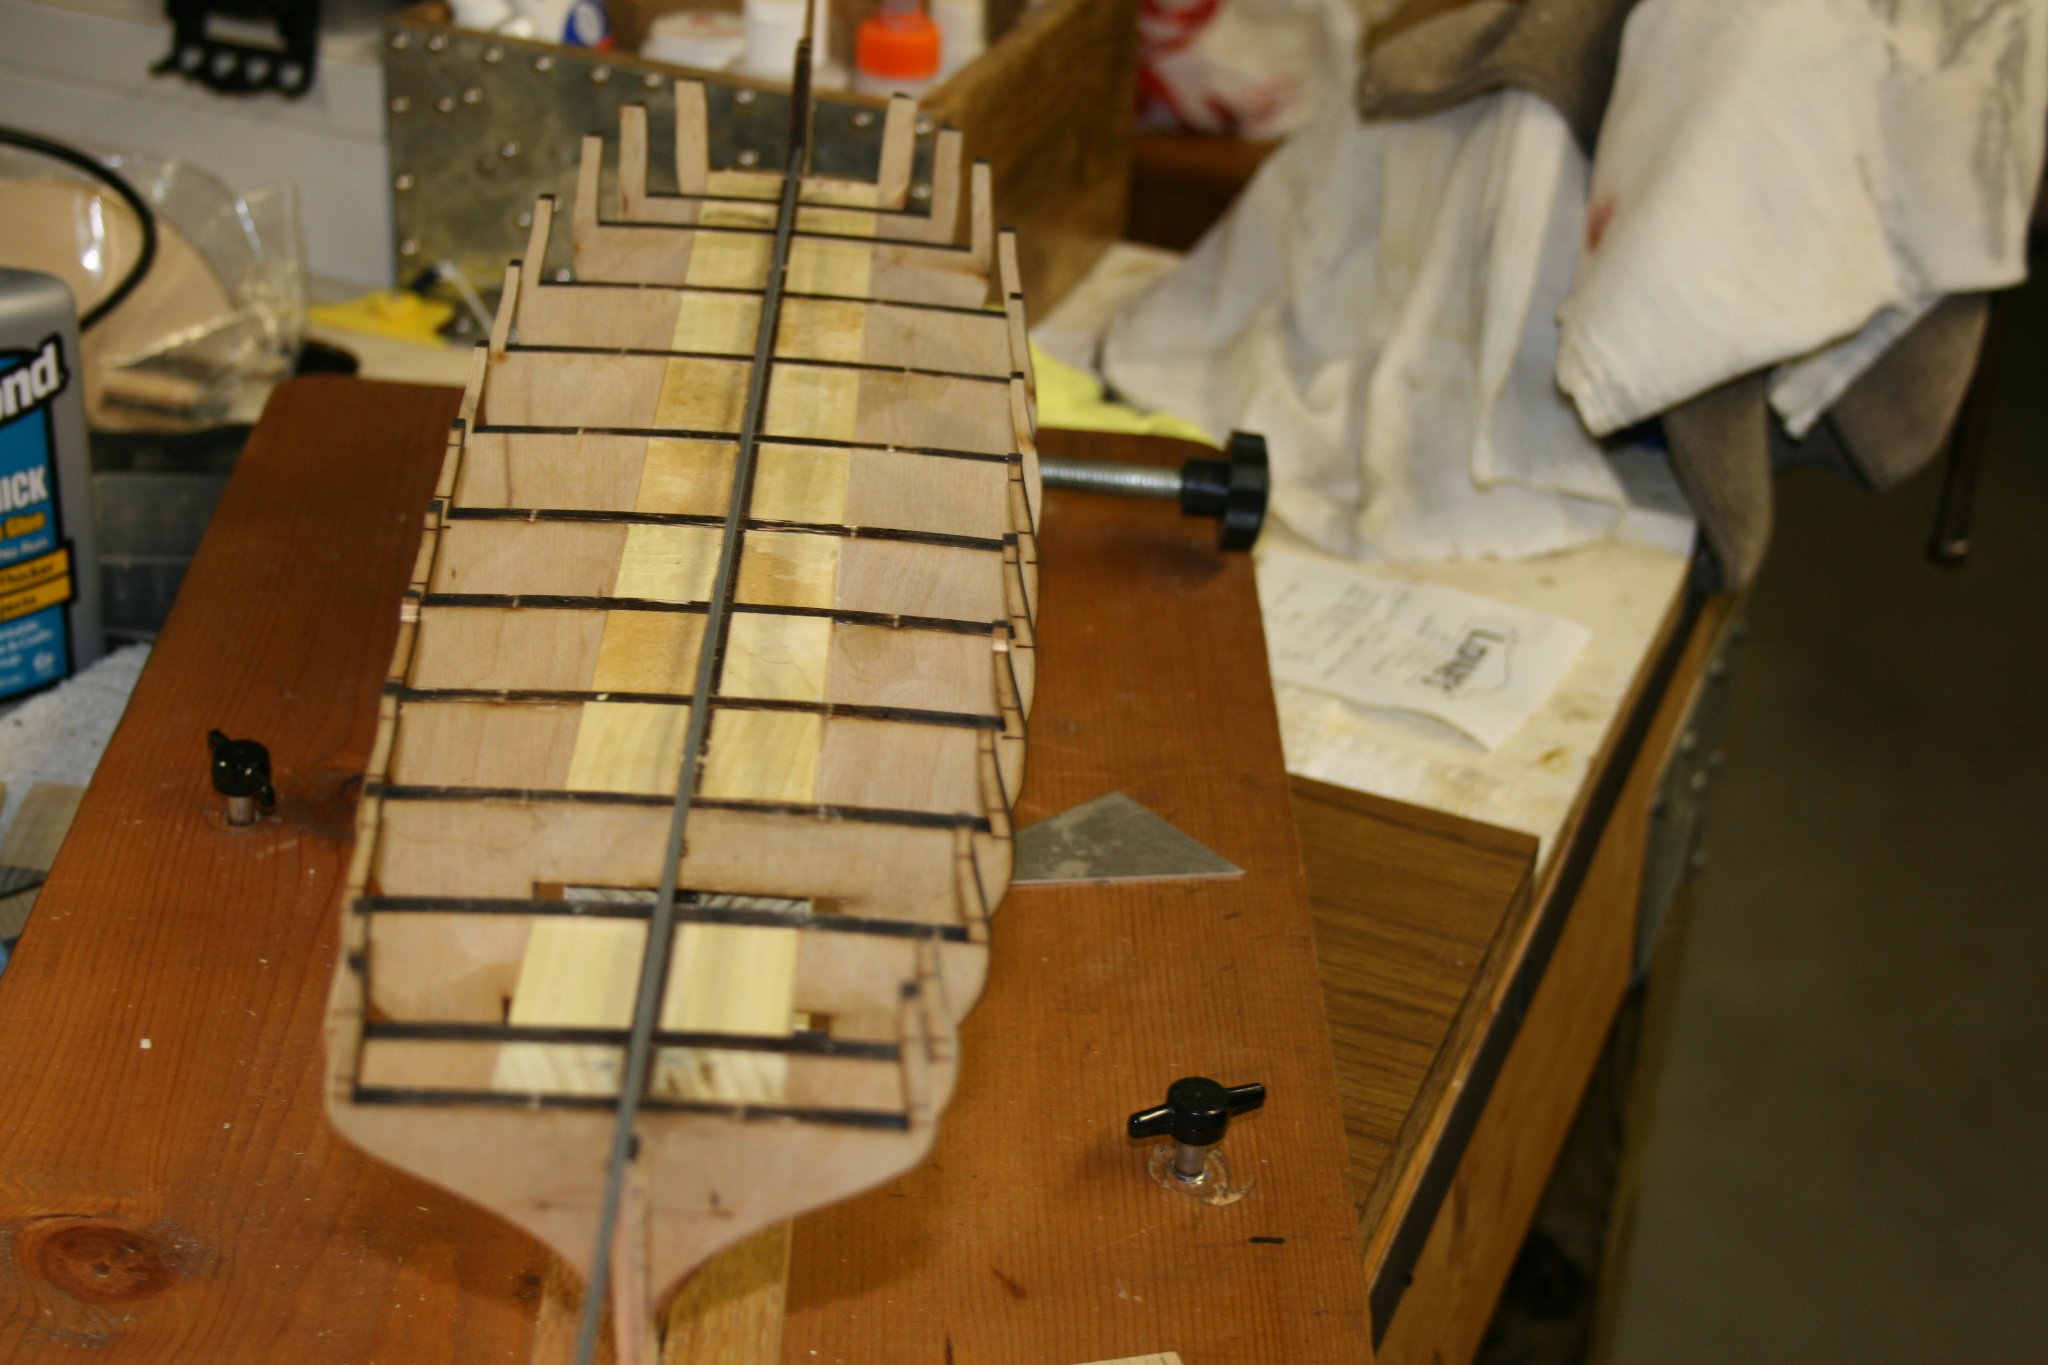
Bow filler blocks now in.. sanded, clamped and glued. After they dry, I will undertake "fairing" of the hull. I should have the tung oil later today and will add first coat to the lower deck piece. For fairing, I think I like the idea of gluing a strip of sandpaper to a paint stirring stick, but am open to other ideas. As soon as the glue dries on the bow filler blocks, I will be adding bulkhead glue (CA) from the bottom. This will allow capillary action to solidify the bulkheads to the bulkhead former. Obligatory pic:
-
Status Update I tried to think of something to call this. I am retired, but Project Management still creeps back in. 😁 Last thing before a short break. .... well maybe, maybe not. I have finished, except for the bow fillers, which come tomorrow. The instructions recommend that you shape them before gluing in, so that's doable. I have completed the lower deck, except for finish, and placement. I have decided on Tung Oil, as it just looks good on a wooden ship. Any way onto something I noticed in the instructions, and can easily lead to a little confusion. Hull Fairing (Minor Point?) ...Page 7 - Line 5 / /Right hand column Once all of the bulkheads are temporarily in position, you will fair the hull ..Page 8 - Caption underneath of the Bow Filler pictures "It can not be emphasized enough how important it is to fair the hull properly. Check that a planking strip will lay flat across all bulkheads....." As a newbie, and this build log, I consider this minor, but if this is your first time, you need to know. It seems you can choose to fair after putting in the bulkheads temporarily on page 7. Or wait until after all spacing blocks area glued in as on Page 8. I chose the second option on page 8. I am more comfortable fairing the hull with not a lot of movement in the bulkheads. So far I am glad that I waited.... In the picture, I have finished the spacer blocks, and the build of the lower deck. With things glued in place, I am personally more confident that things won't move during the fairing process. I have also taken an aircraft control rod and laid it along the center deck. I know it isn't a perfect use of it, but it was narrow enough to fit between the bulwarks on the bow. Looks good to me. Next is using tung oil on the lower deck then gluing it in place. Until I get the tung oil (ordered today) I will shape and try fairing.

- 436 replies
-
- 1
-
-
- Syren
- Model Shipways
- (and 1 more)
-
Thanks, I will give it a look. After looking, there is no question, Tung Oil is the answer.
-
Thanks for the comment on the glue. I had forgotten that glue can present a problem. We don’t stain any part of our planes. 😀 Tung oil it is.
- 436 replies
-
- 1
-
-
- Syren
- Model Shipways
- (and 1 more)
-
Question: I have been considering wood finish for planking and decks. There is Golden Oak Minwax as the instructions indicate, and another, Tung oil, that I have seen in other builds. I am going to have to order it anyway, so I have time and for input from y’all. Suggestions are welcome.... 😄