Redshadowrider
-
Posts
301 -
Joined
-
Last visited
Content Type
Profiles
Forums
Gallery
Events
Everything posted by Redshadowrider
-
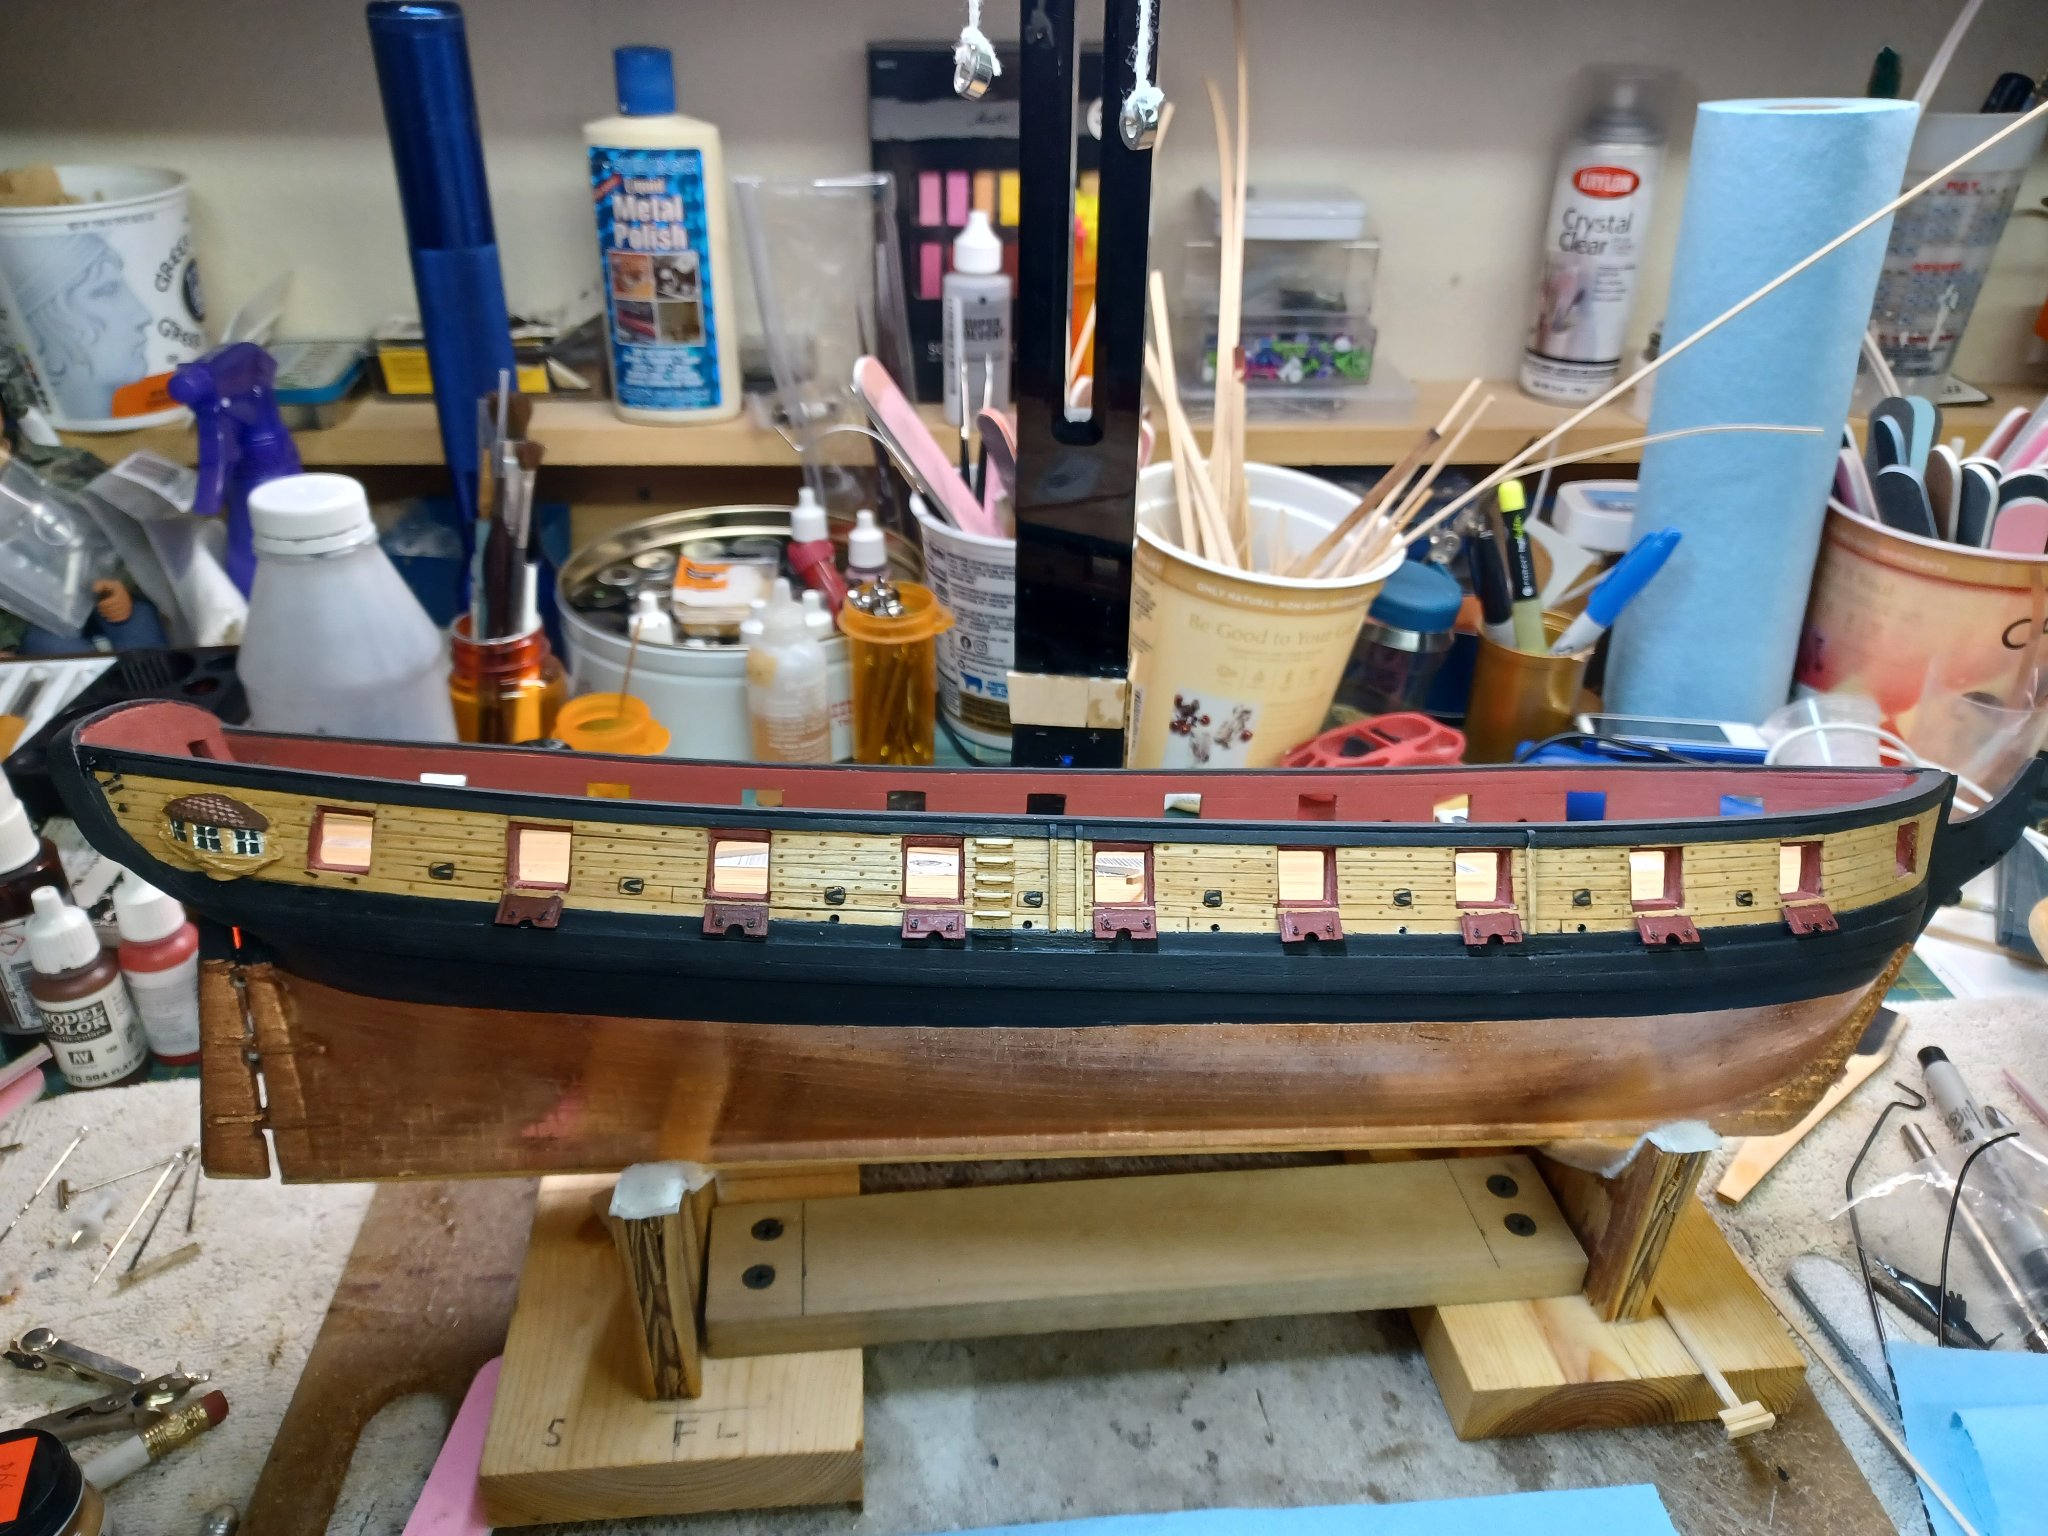
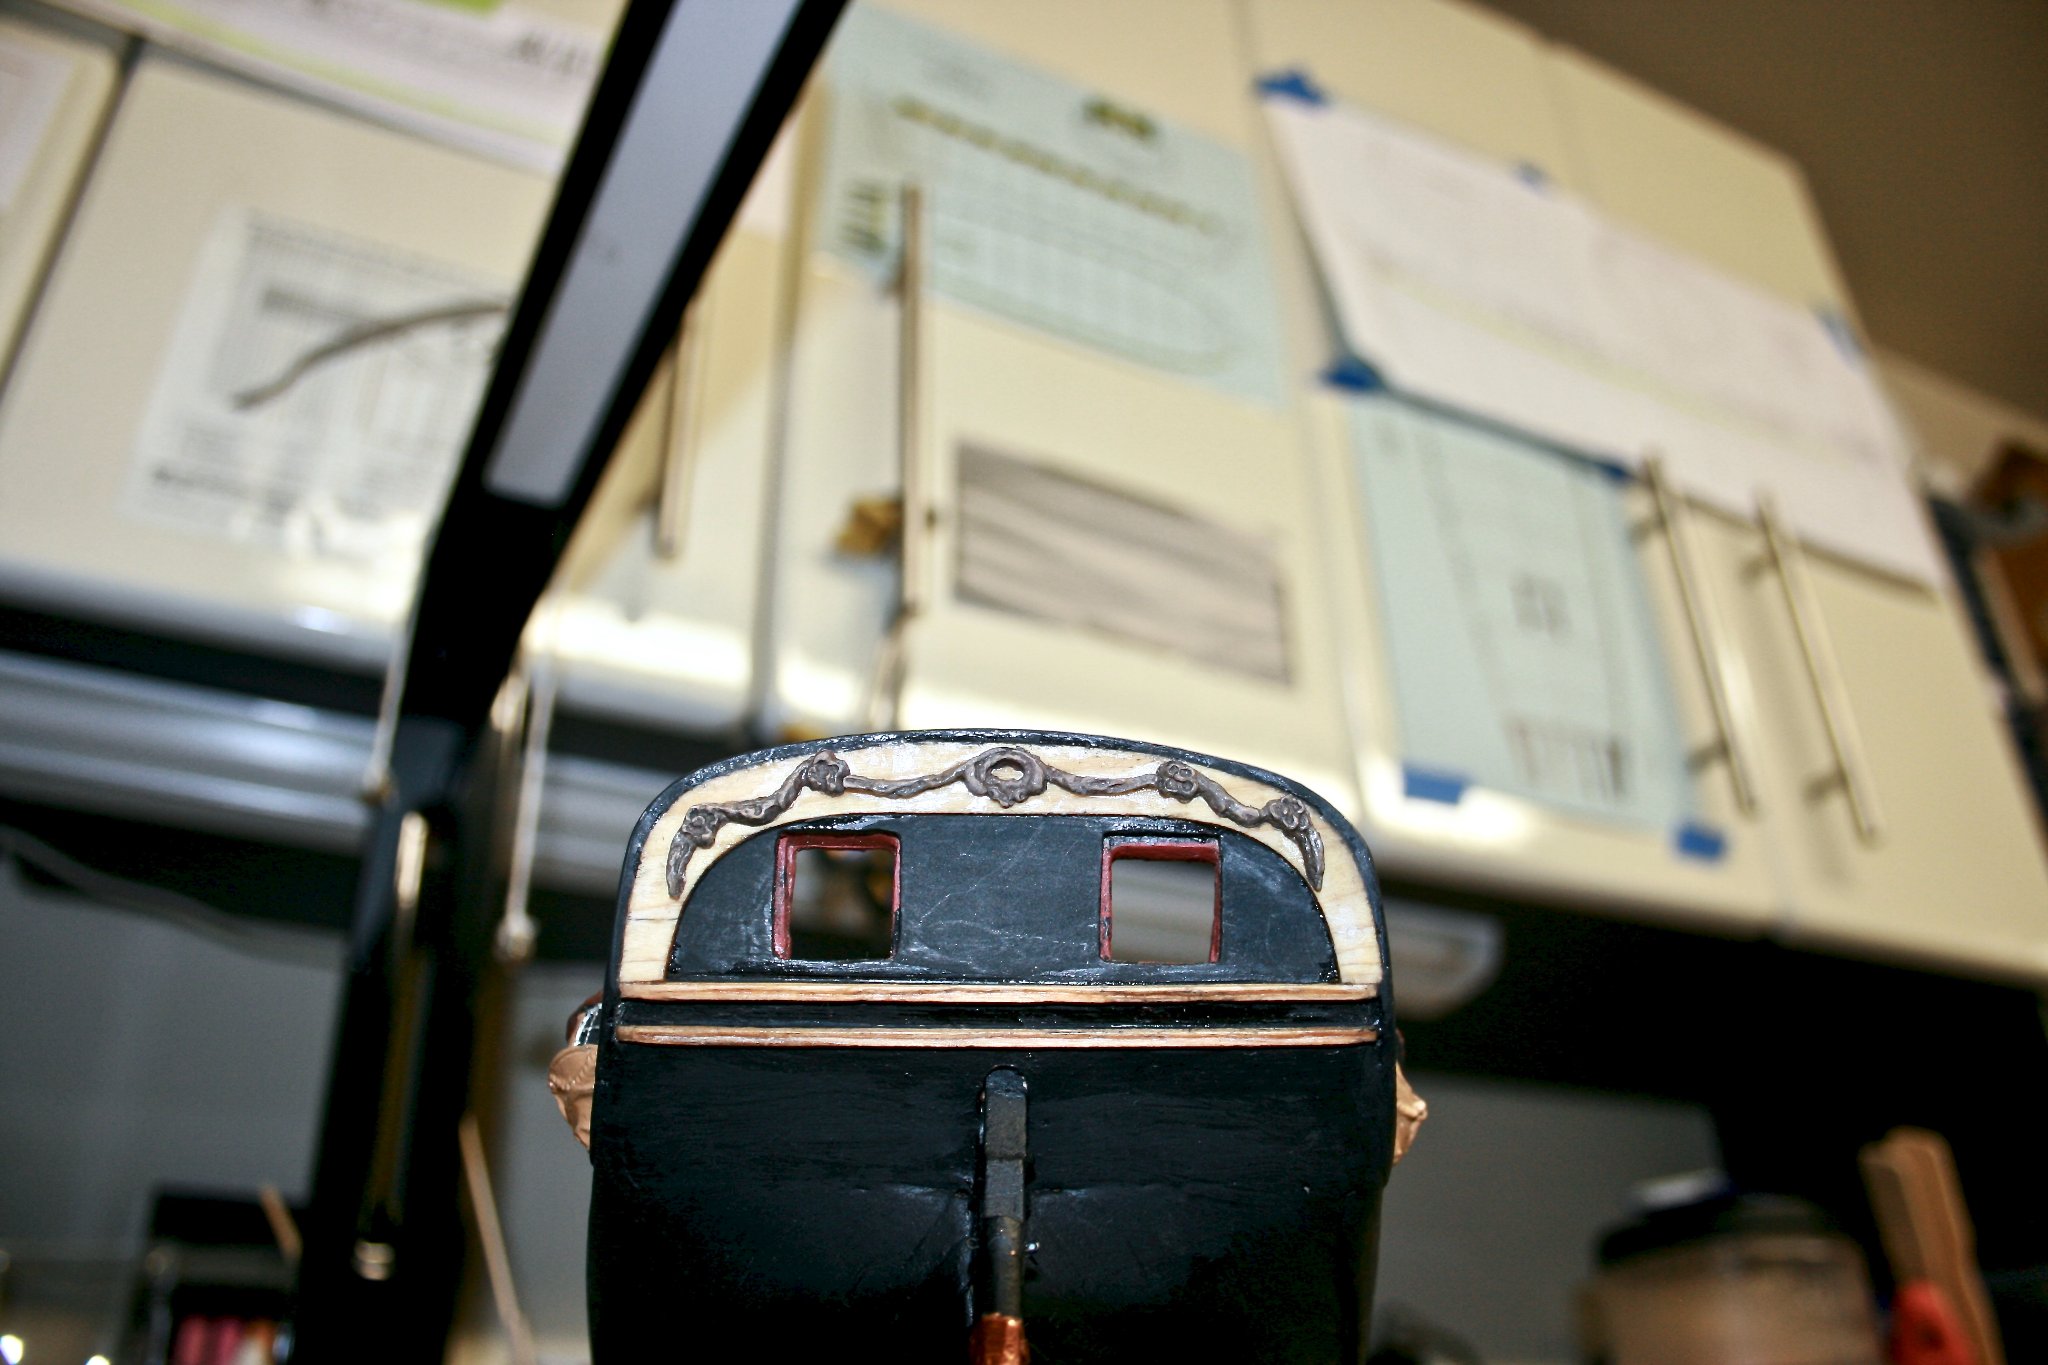
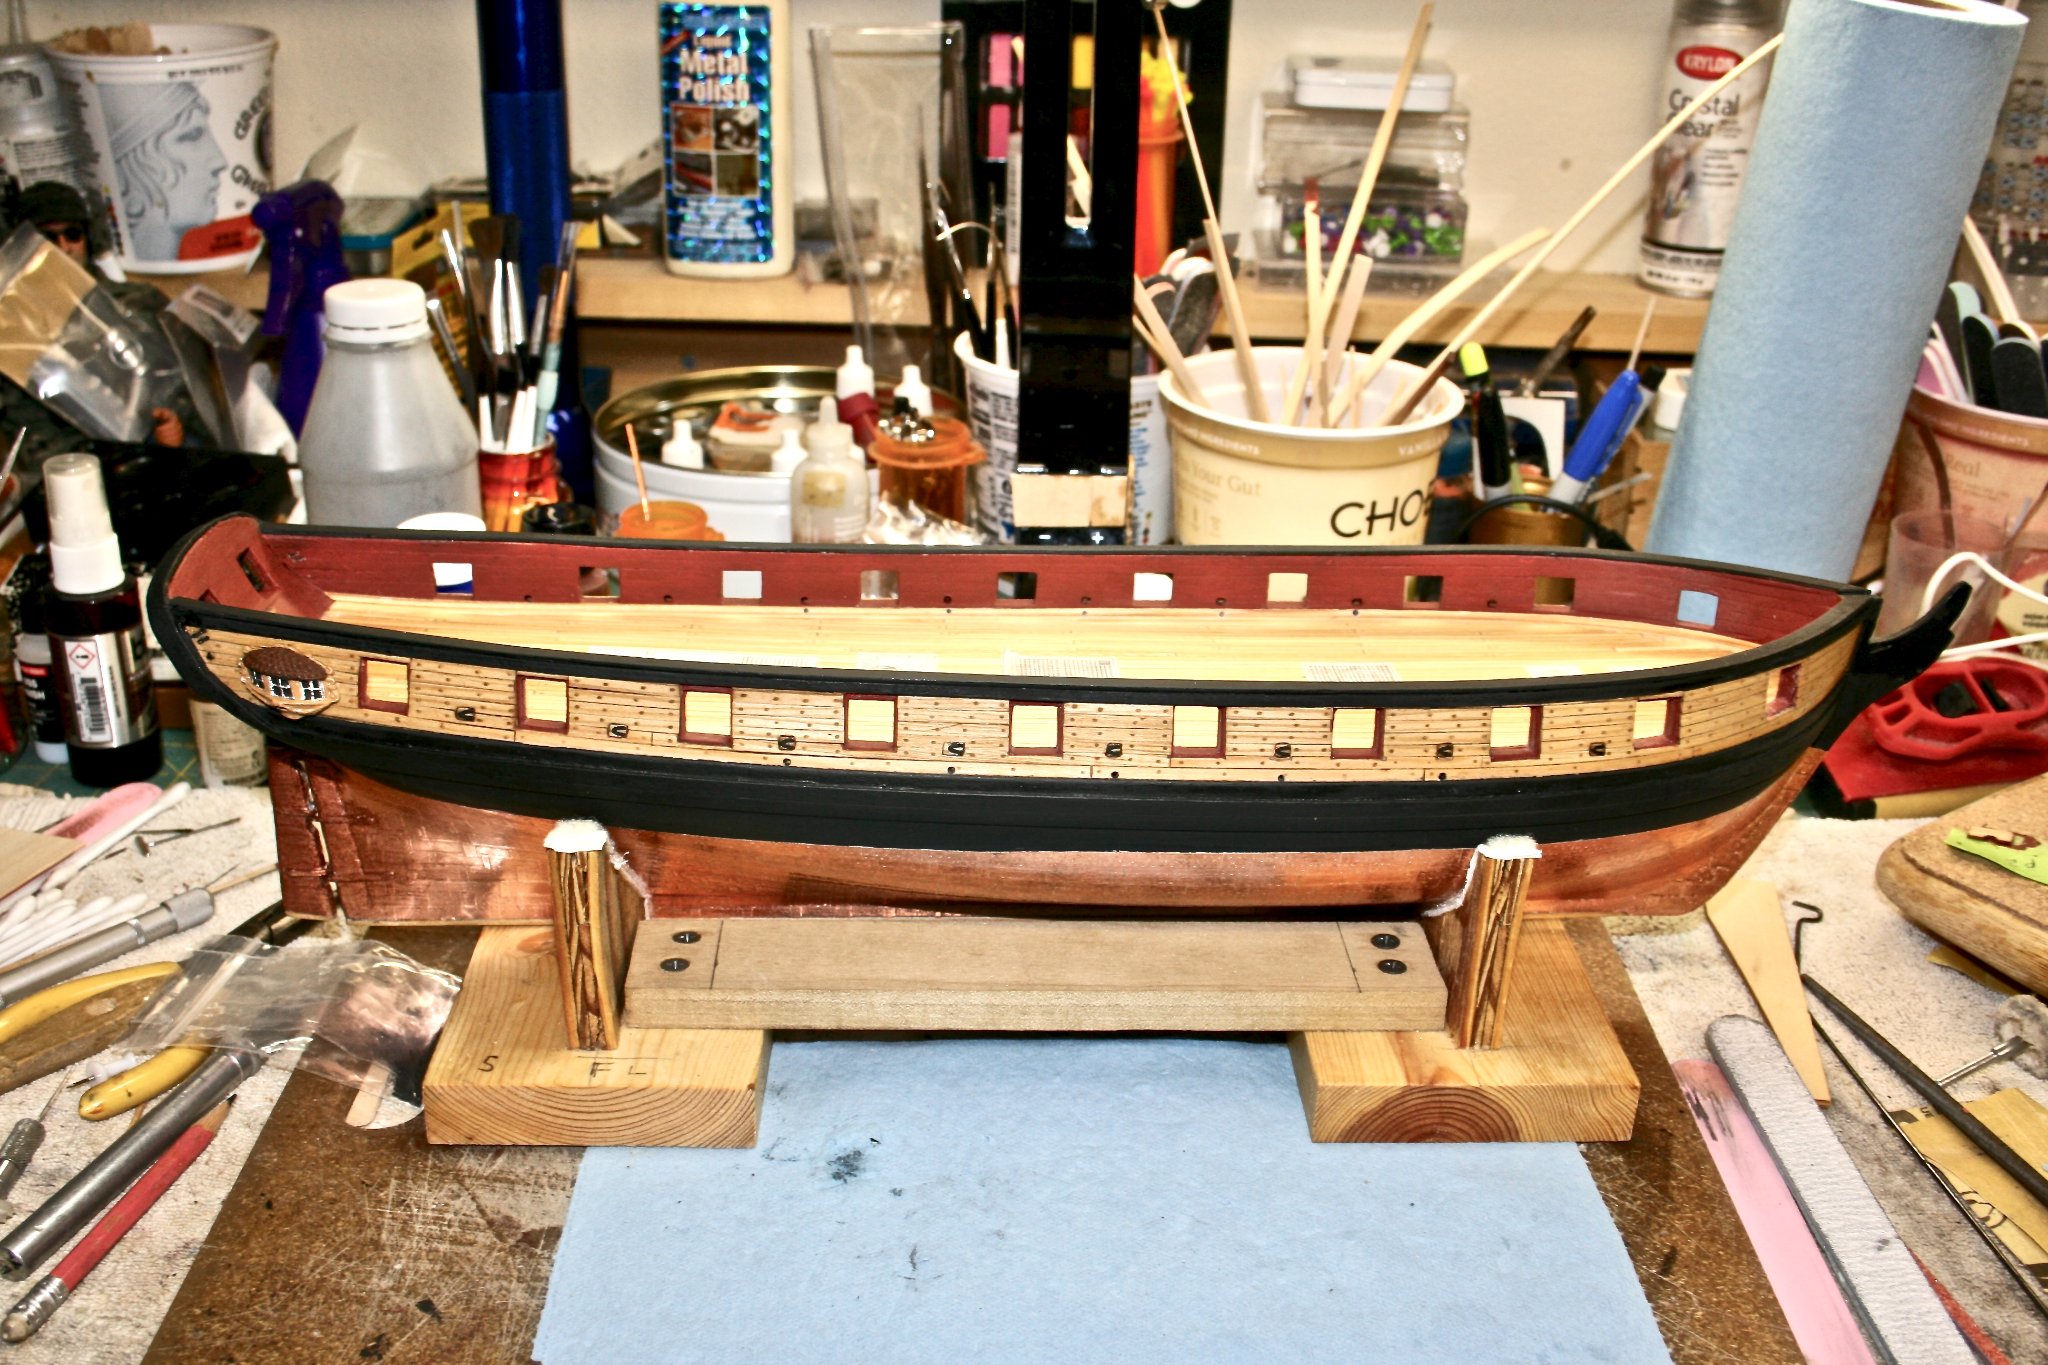
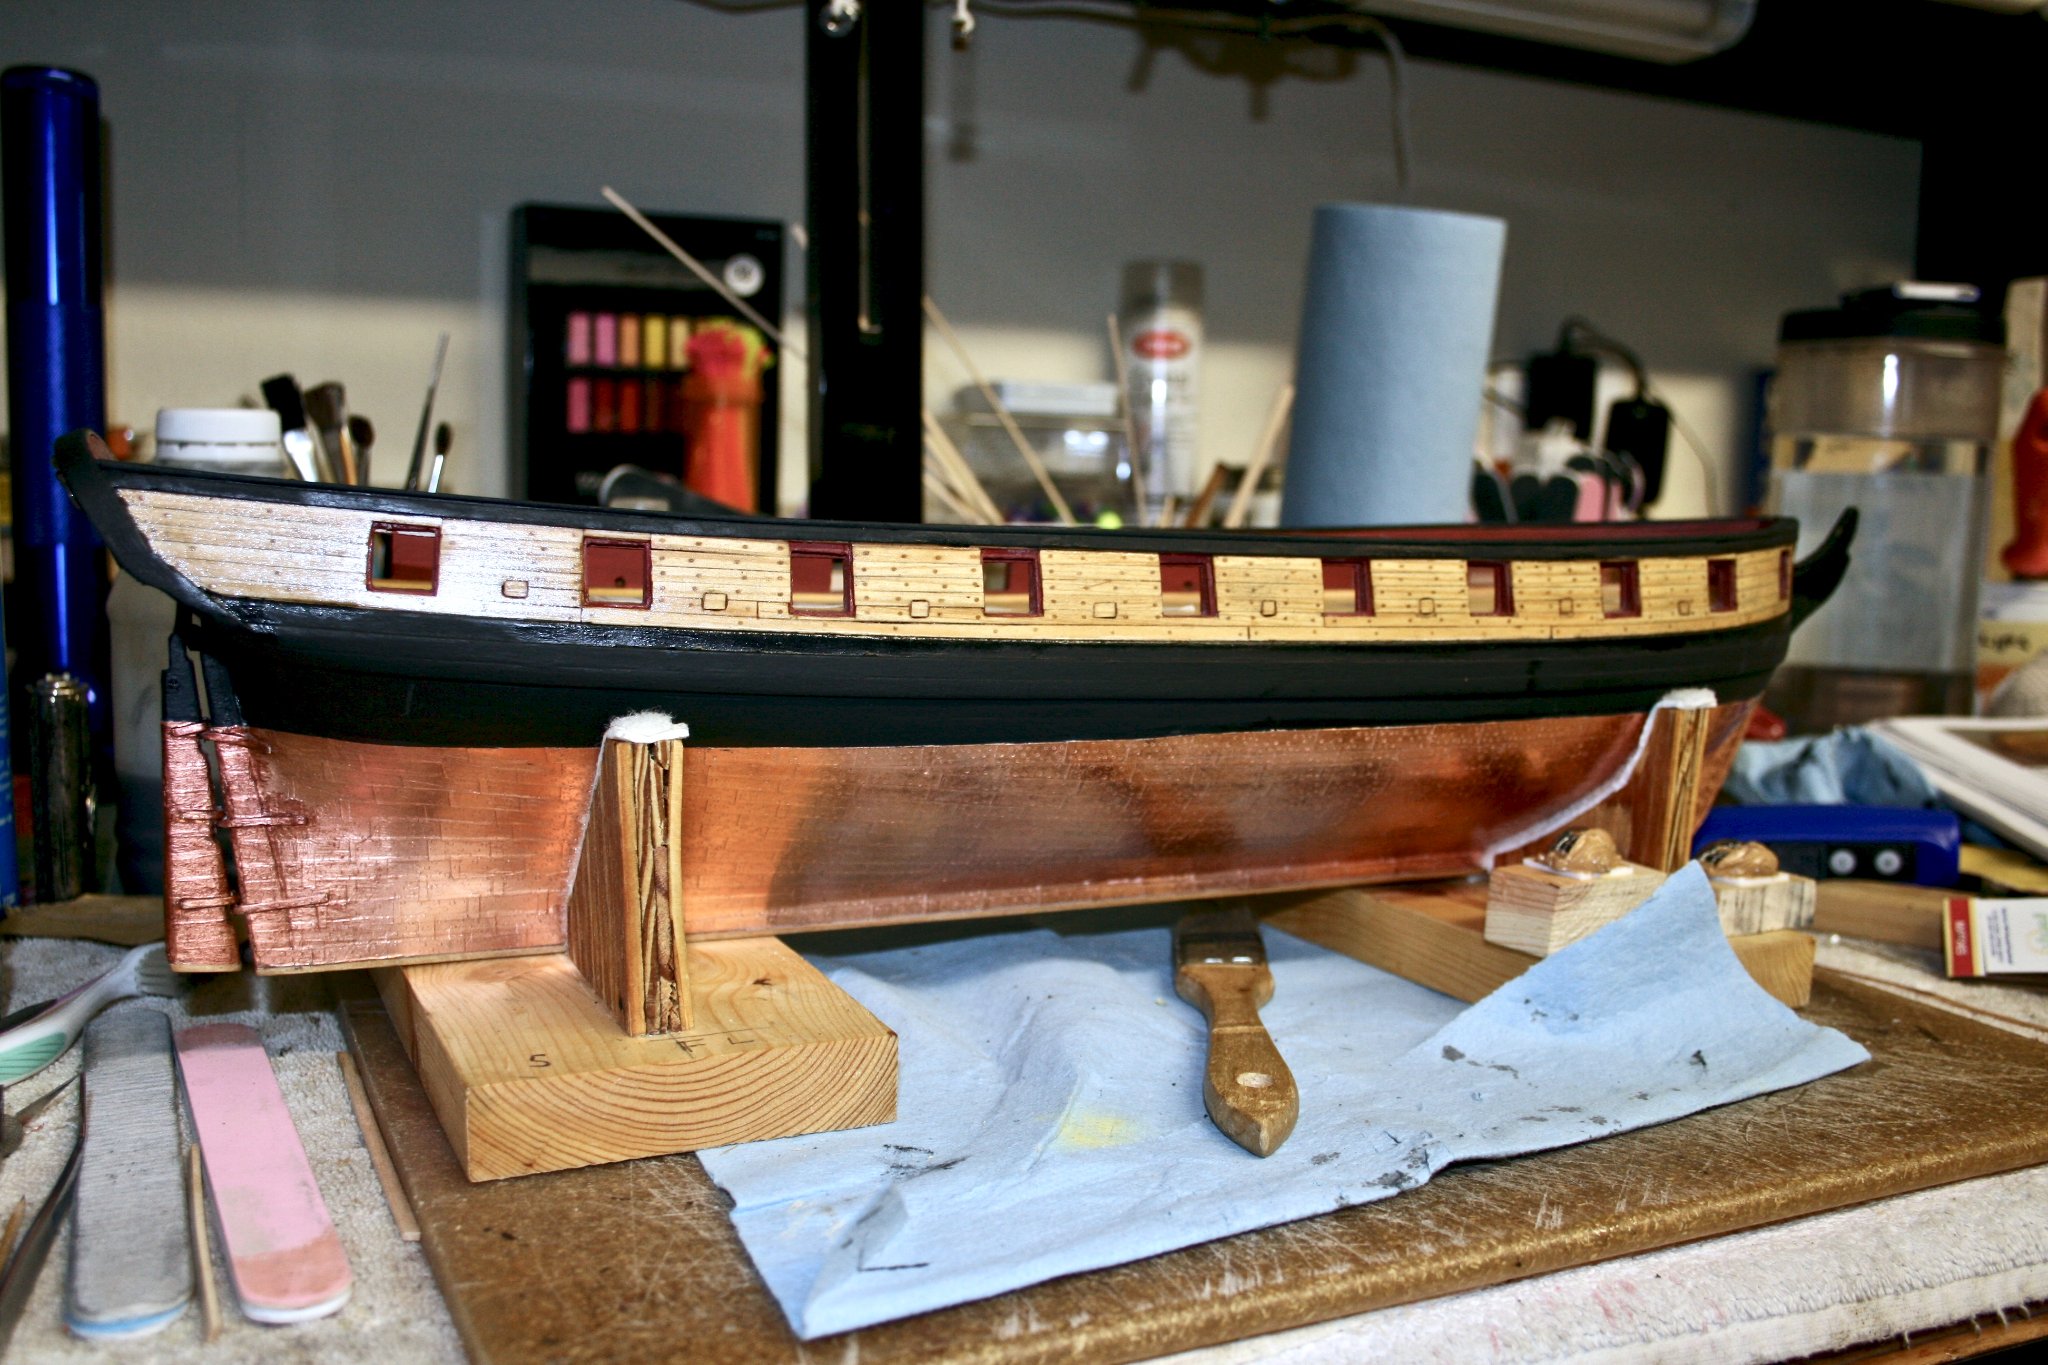
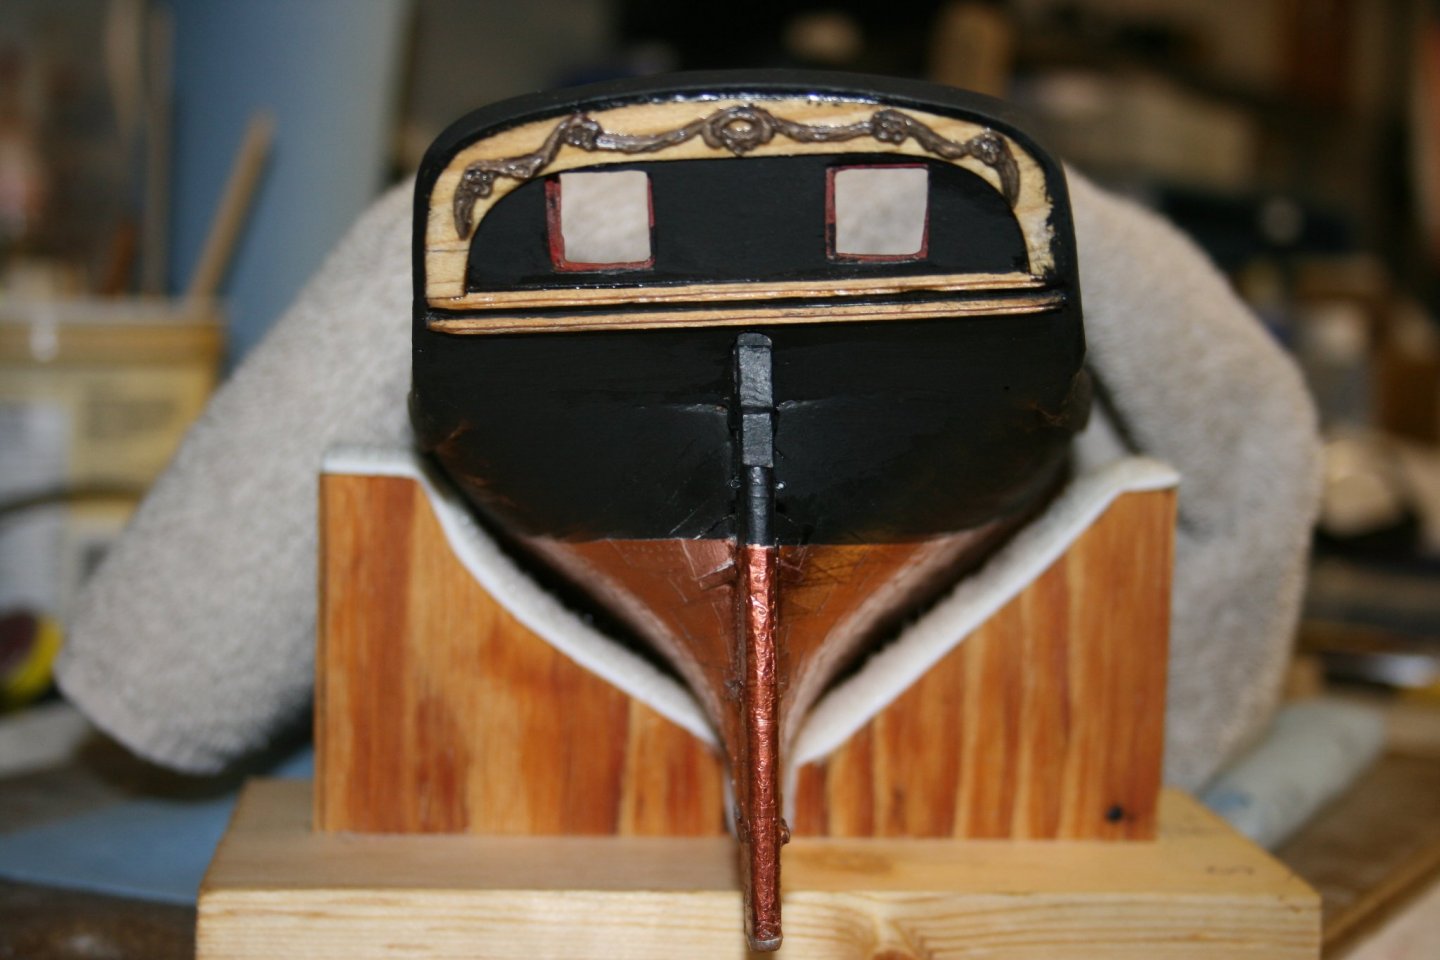
Progress Made: After seeing the ideas that @abelsonand @WalrusGuy provided, I decided to change the transom. Originally, I had wanted some of it to be wood in appearance, but cracks in both pieces made it necessary to make the change. I am happy with how it came out, and am back on track. I have two pictures attached, the new transom view, and the progress on the starboard side. I still have 2 gun port doors to add, but the rest of the 1/2 port doors are installed. I am on the fence with adding the hinge pins due to their size. In the picture, there are hinge pins in the gun port door at the stern, but try and see them is a problem. I am tempted to get some wire with a sleeve at .26 gauge and see if it makes a difference. I think the .28 is just too small and an increase in size should not hurt the scale if done correctly. I have also completed the ladder, fenders, and chess tree on the starboard side. Here are the pictures that I took today.


- 436 replies
-
- 3
-

-
- Syren
- Model Shipways
- (and 1 more)
-
Thanks guys, I wish there were multiple transom face pieces. That’s the parts I have broken......and now a black stern. I am going to add some trim similar to what the pictures show.
-
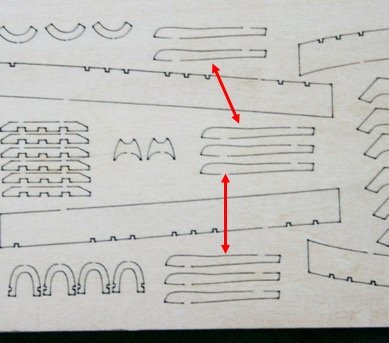
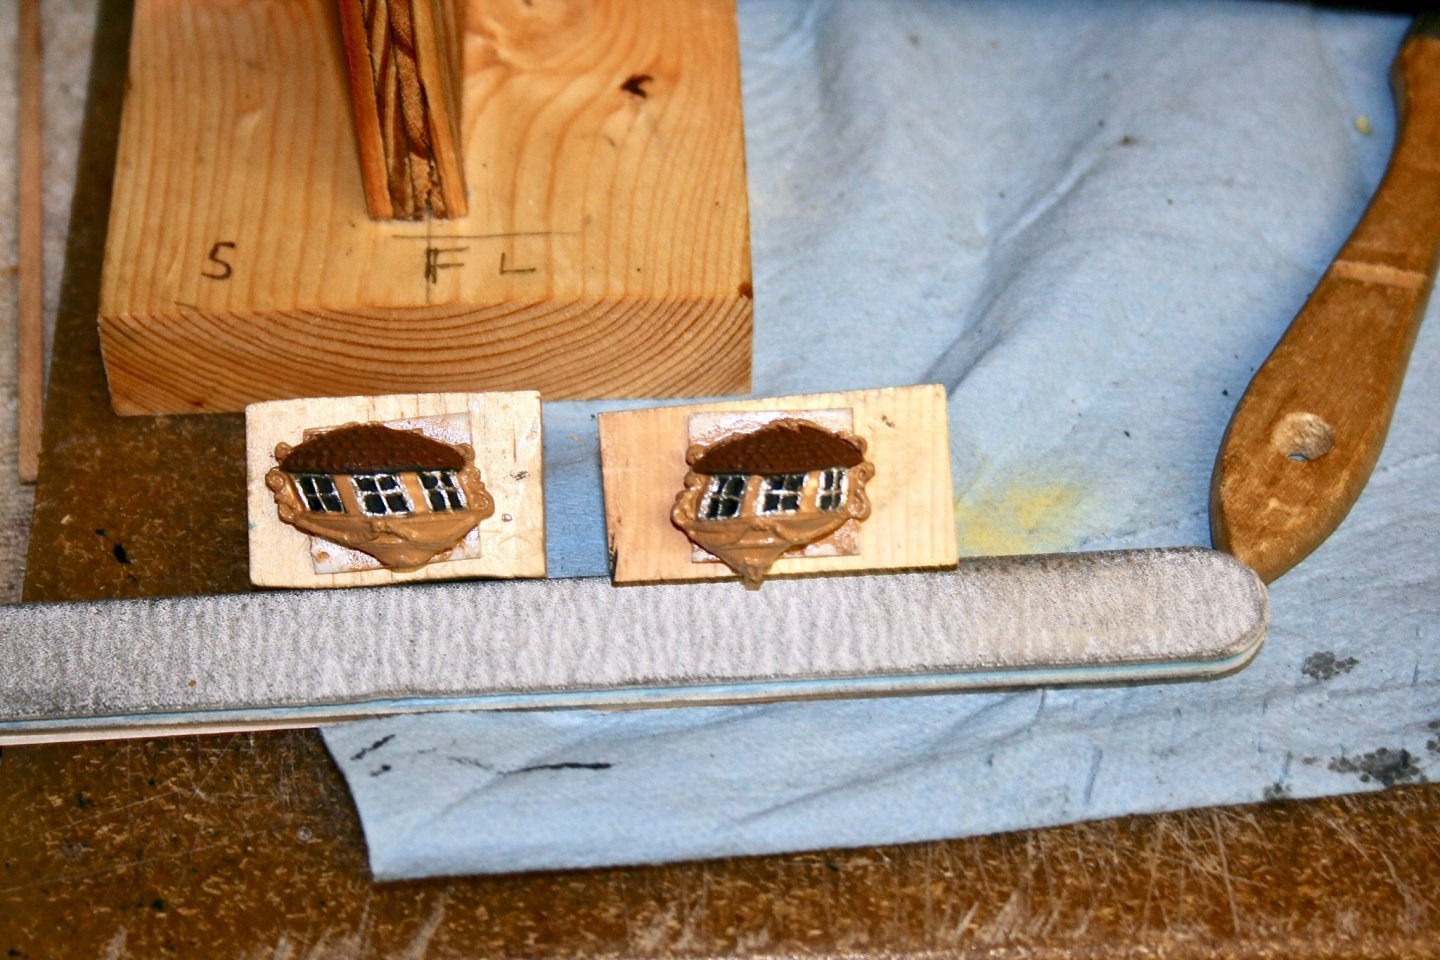
Question on Fenders and Chess Tree: I am at the point where I am ready to install both the fenders, and chess tree on the starboard side. I have, what I think are the right parts for them, but even after looking at the plans, and pictures in several forum build logs, I need input. I am assuming that the parts pictured, are those that I am to use? My confusion is from there being 8 pieces, but only 6 are used to create both fenders and chess trees. Are these the correct pieces to use? The instruction book says they are laser cut and 1/16" thick, so these parts fit that description. Thanks, in advance.
- 436 replies
-
- 1
-
-
- Syren
- Model Shipways
- (and 1 more)
-
Thanks Steven, @abelson that does really clean it up. The only issue I have is the carvings are glued on. The outline is fairly smooth, so painting around it, will mostly be slow, but doable. It will help to highlight it as well with background being darker.
-
Thanks for the pictures @WalrusGuy. These pictures have given me an idea on how to make some minor changes.
-
Need some help/input here: Because there was a visible crack in the wood on the transom, I ended up painting it black. Since then, I have began to think that it is pretty dark, and have contemplated converting it to light colored. I have several options that I have determined, but want to see if anyone has a better idea. Here are my options: 1. Carefully sand the transom inserted area and finish to wood with tung oil. 2. Create a template to insert to the black area except above and below the gun port lids. (The gun port doors will still be inserted into the black edge, but doing the insert without the port edges will not extend them beyond the back of the transom. 3. Using a wood color, paint the blackened insert keeping all dimensions the same. (If I do this, I would also consider painting the wood part where the carving is the same color. Not sure this is a practical solution though.) This is what I have considered, so if there are other ideas I overlooked, I would appreciate any other thoughts.

- 436 replies
-
- 2
-
-
- Syren
- Model Shipways
- (and 1 more)
-
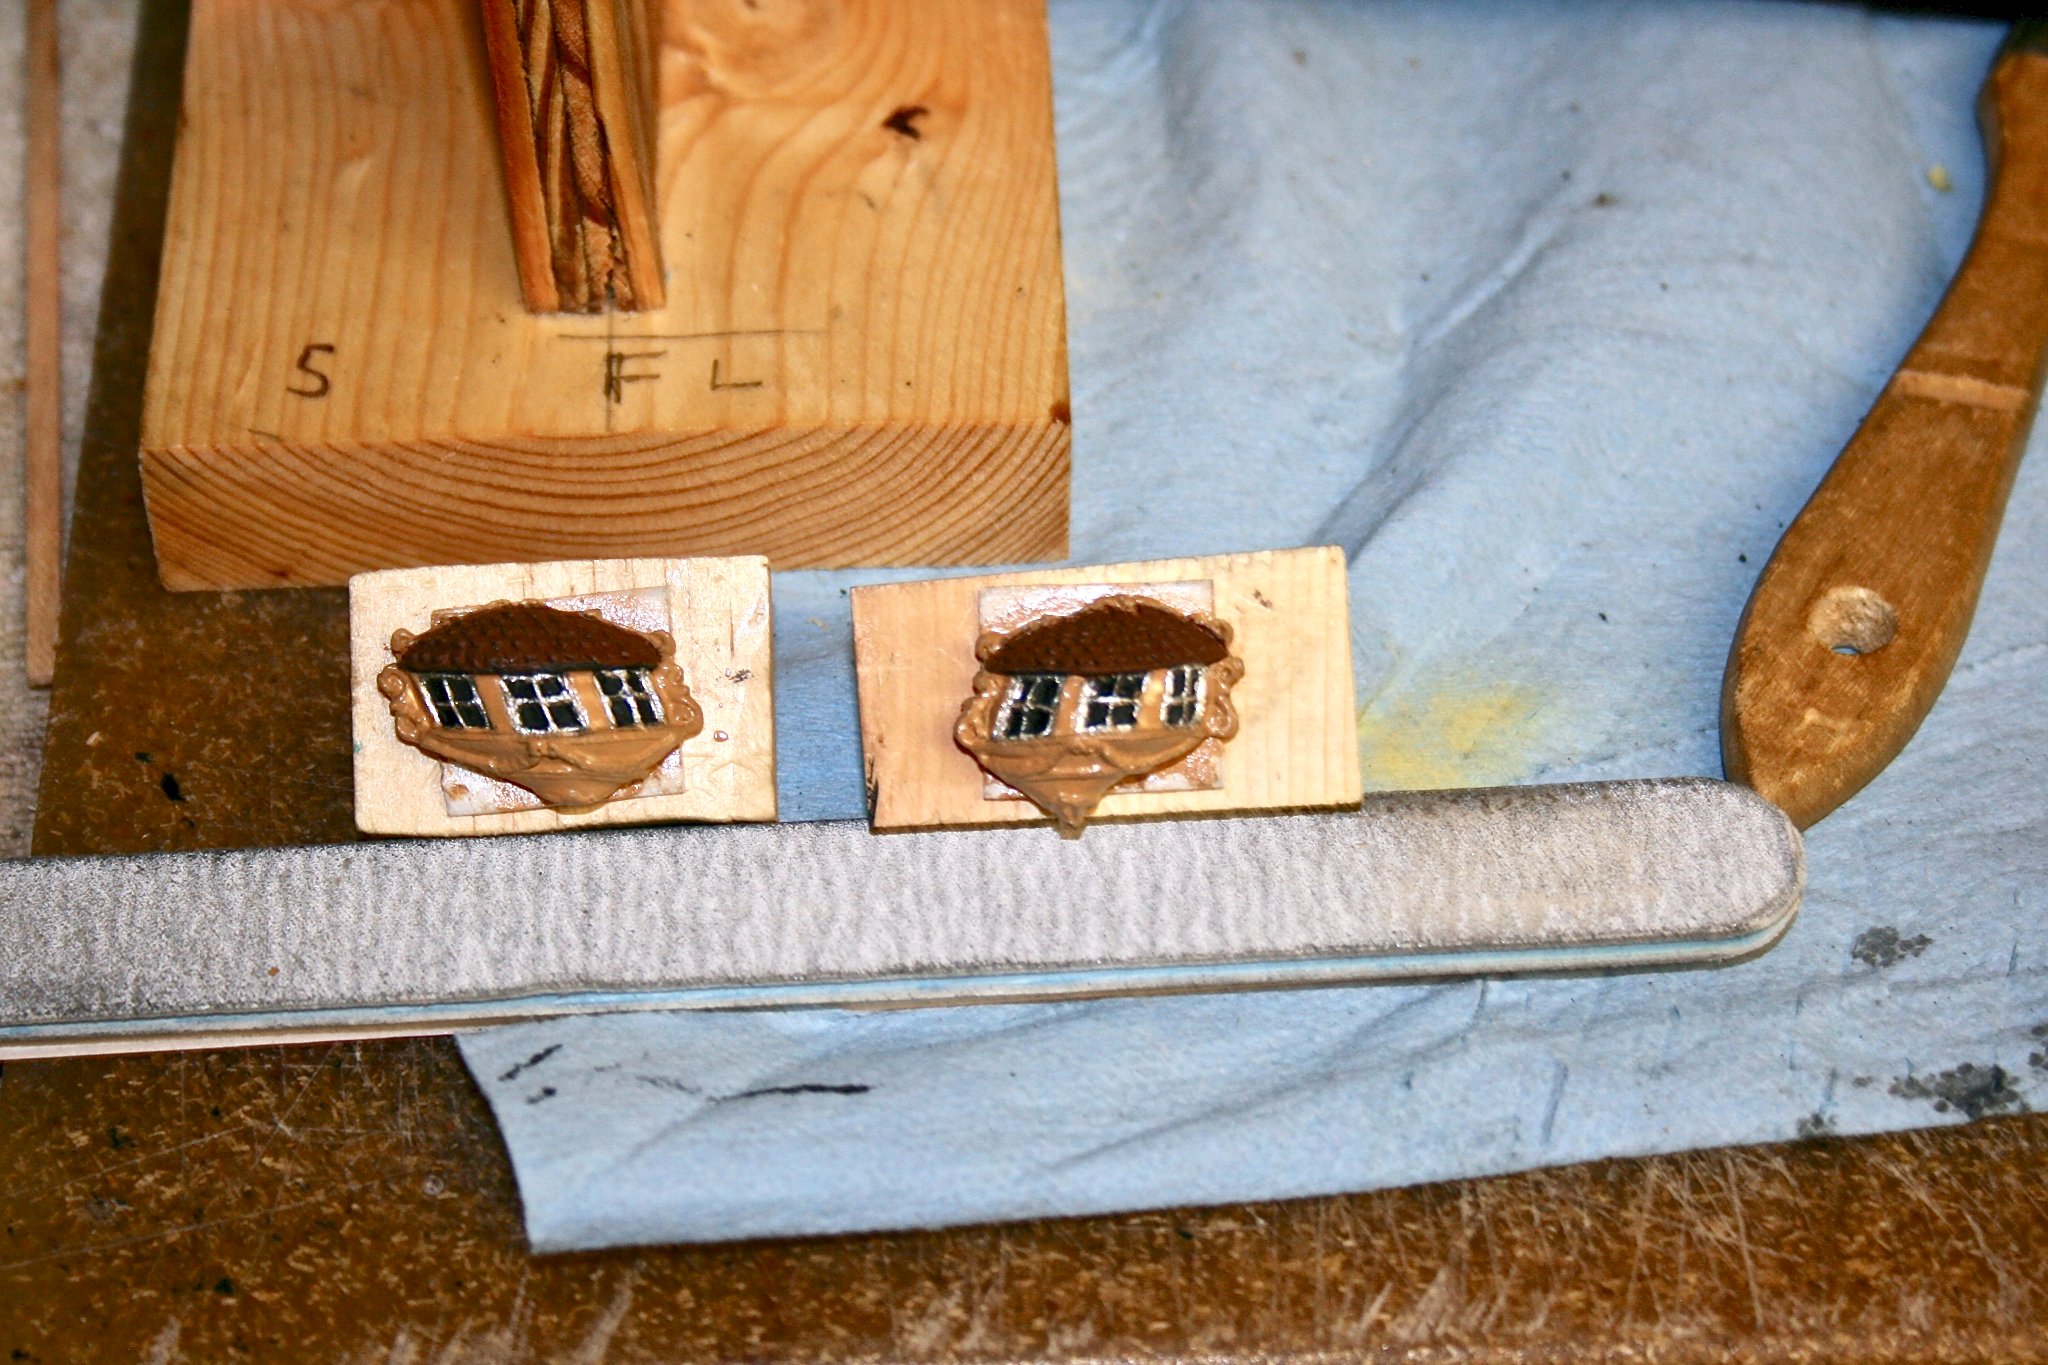
Details, Details, Details..... Hey fellow modelers, it has been quiet awhile since I have posted my progress. Between the steps I am on and a delay on an order for Blackening liquid, I haven't made much. However, I am back to building and not waiting for an order. The blackening liquid (Birchwood Casey) took 2 weeks to get here. Would have picked it up locally, but it had 2 day delivery indicated on Amazon. Well, it went Reno to Sparks NV - Sparks to Denver Co - Denver to Oklahoma City - to Missoula, MT - Missoula to Salt Lake City - Salt Lake City "back" to Denver - back to Oklahoma City - then to Tulsa - and delivered. Not a good record for UPS. In any case, now complete are the Sweep Port doors/hinges; stern sheaves and split rings; scuppers on both interior and exterior; and quarter badges finished and installed. (I did look @WalrusGuy and his construction of the badges and decided to use the cast ones.) For now, the badges are just too small for me to build and I was already 2 weeks delayed by the blackening. I have fitted, painted, and finished the gun port doors, and they are almost ready to install. The problem for me is trying to glue the gun port hinges in the same exact place on each door. After seeing how Walrus Guy installed his, I have decided to insert the hinge on the hull first, then attach the door. Trying to glue each hinge separately opens up misplacing one or several of them. So I will attach them to the hull first and thanks to Walrus for the idea.👍

- 436 replies
-
- 2
-
-
- Syren
- Model Shipways
- (and 1 more)
-
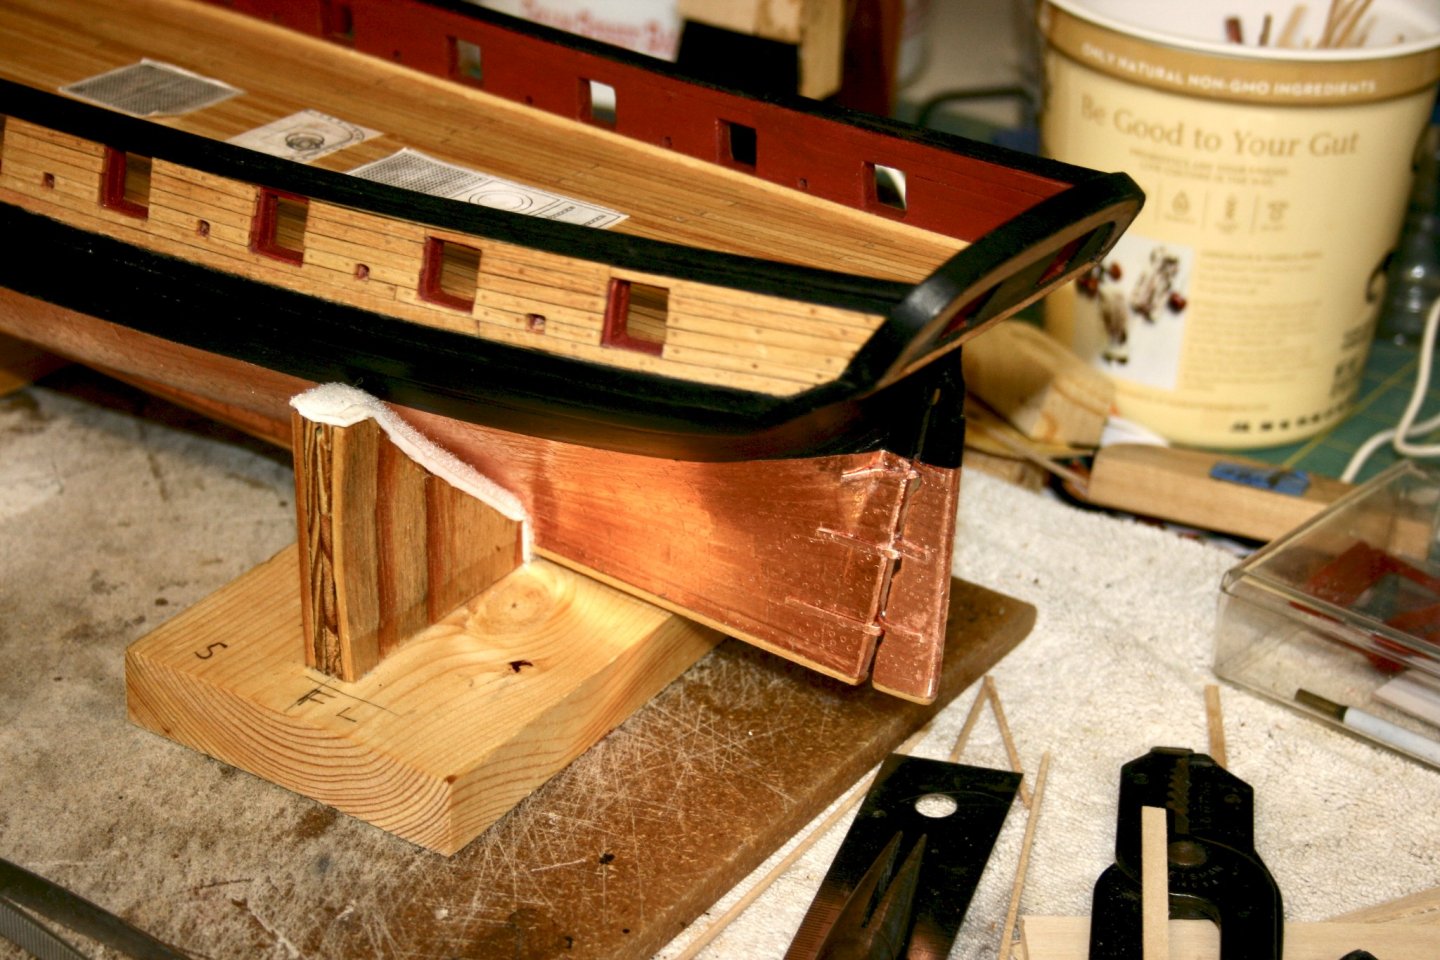
Some Progress, & One BIG Error: I have attached pictures showing my latest progress from adding the Carved Decoration on the stern, to completing the rudder, and a big start on the sweep port doors. .....and then there was the mistake. Mistake - Something not intended. 😁 Once I completed the plating of the hull, and added the rudder, I wanted to try and polish out some of the scratches in the plating. These are inevitable when burnishing the copper on the hull itself. Well, I almost bit the big one on this. You can see the rudder in one of the pictures, and tell that I didn't polish, but roughed it up somewhat. It took me awhile to determine what to do, so I got some acrylic paint, and carefully added it to the damaged areas. Surprise, It makes it look like it is an aged rudder after heavy use. I have already treated the rest of the tiles with SPF 30 sun block and am waiting to see if I get any results. Once I do, the rudder and hull will fit together nicely. This one scared me big... I was thinking the hull and rudder might need to be redone, but for now, I think it has been saved. Some final adjustments down the road and it will look aged. In the other pics, I have installed the sweeper port doors, sanded, and refinished the planking ...again. I have ordered the brass blackening liquid and will put it to use when it gets here. Then I will add the "V" hinges after they are blackened as well as the stern sheaves and quarter-badges. Also included a picture of the painting results of the 2 cast badges in the kit. I considered building my own, but settled on the castings. I think they will work out fine based on what they look like. Lastly, I have a picture of the stern which includes a good view of the rudder, and the simulated wood carving on the transom. One Question on "Split rings and Eye bolts." In the instruction booklet, it is indicated that the eye bolt and split ring combination uses 28 gauge wire for the split ring. However, in the kit, is a bag that appears to be the same split rings in brass. I would just need to blacken them just like the "V" hinges on the sweep ports. Are these brass rings the ones I am to use?.... I wouldn't think I need to make my own. Just want to make sure. PS. I just noticed the over paint of the transom cap rail (black) to the unpainted transom surface. I will be sure to clean it up.🙃
- 436 replies
-
- 2
-
-
- Syren
- Model Shipways
- (and 1 more)
-
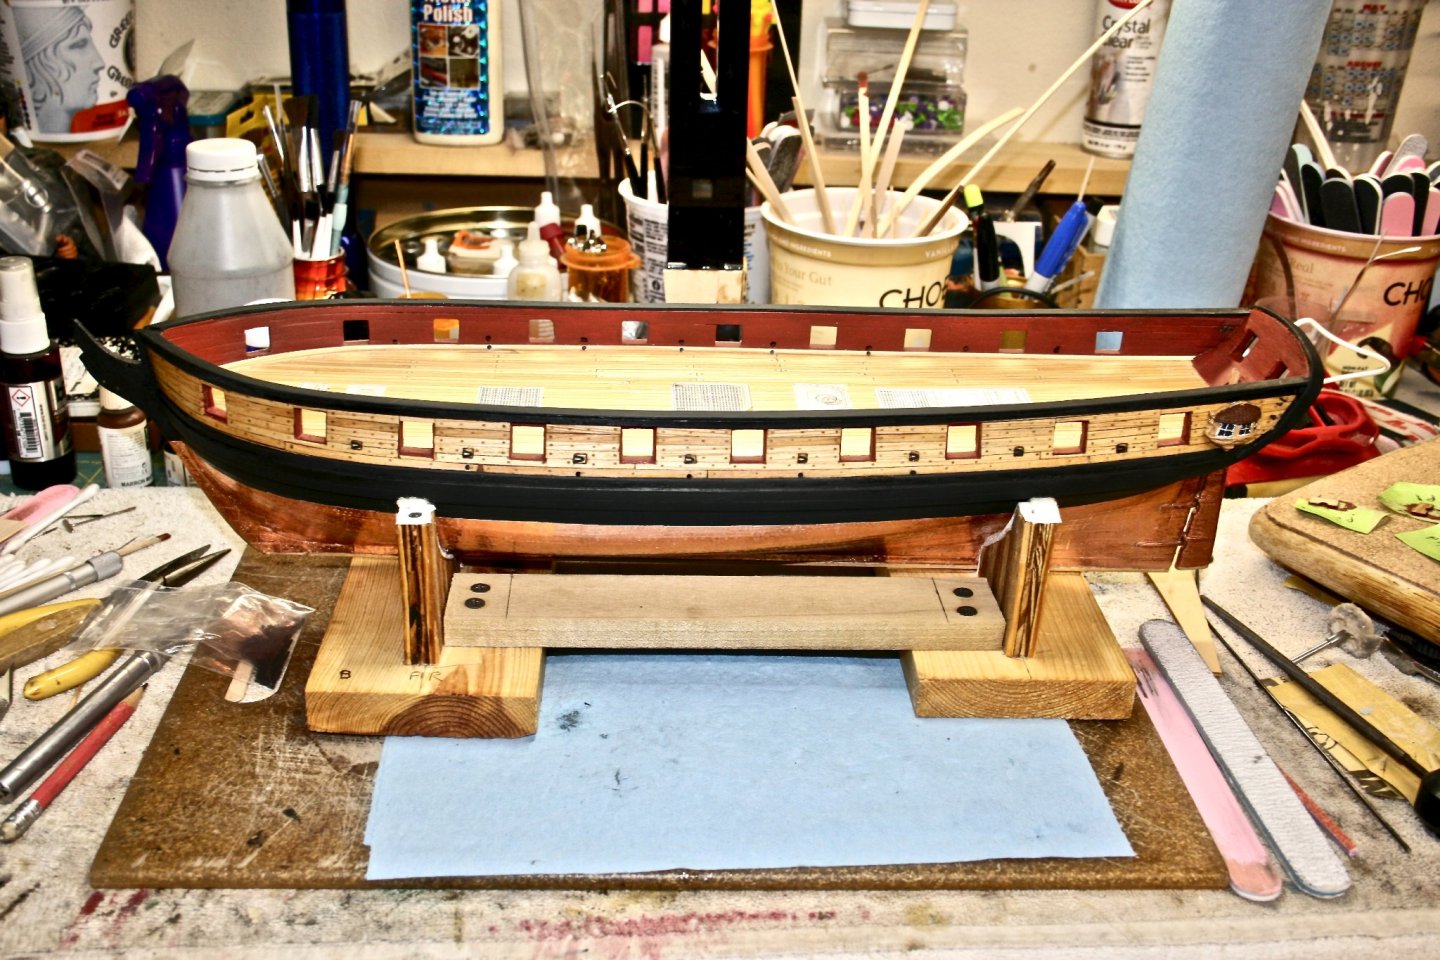
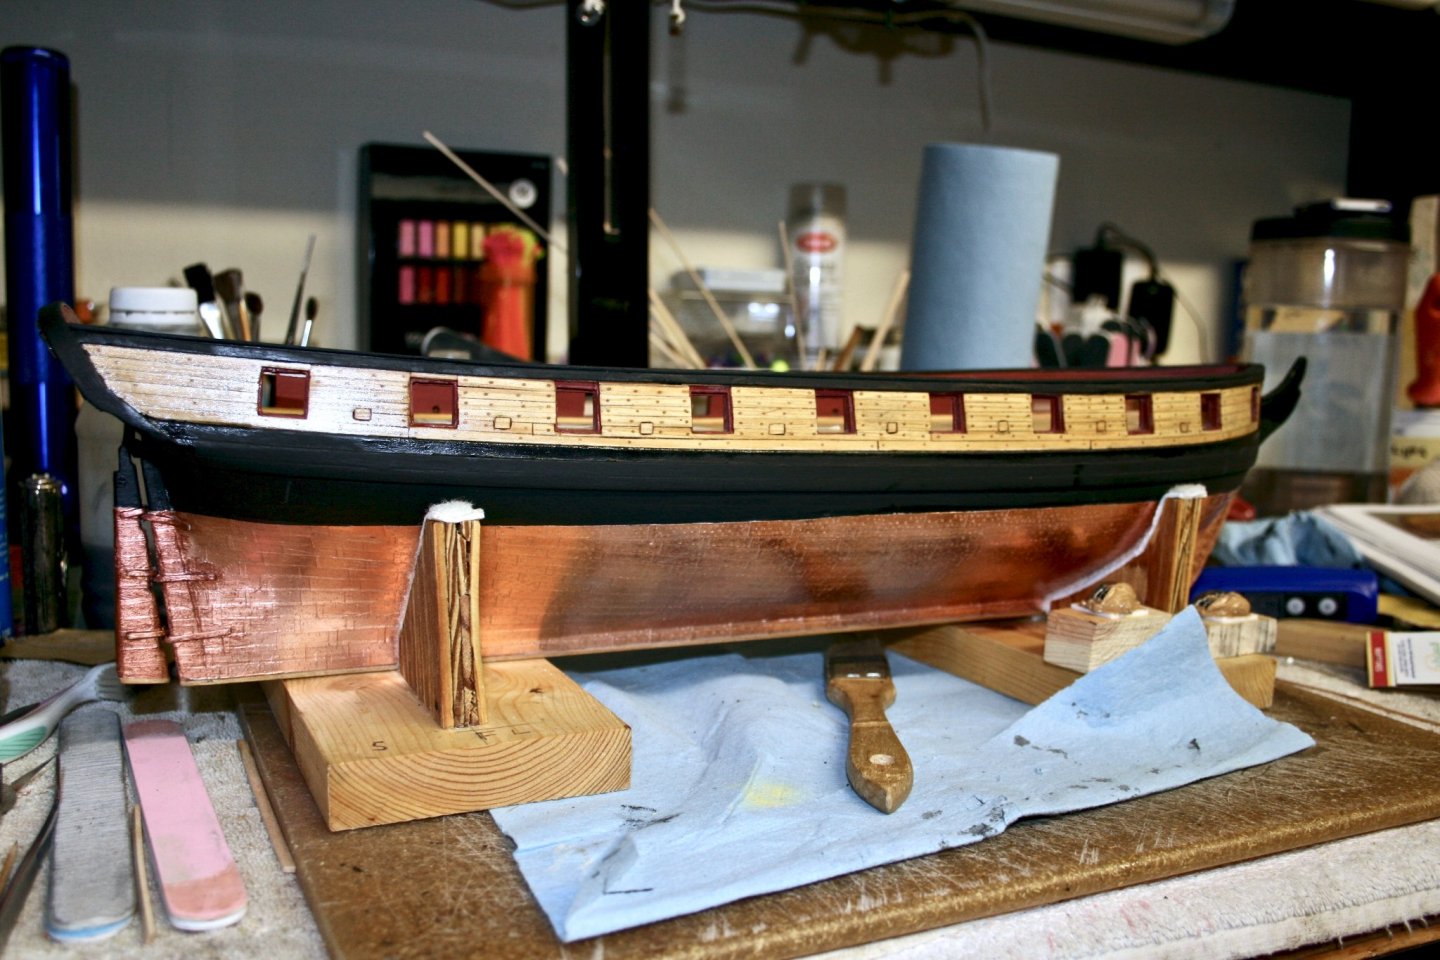
Rudder & Cap Rails - Finally made some progress since returning from vacation. You know the type, more tired when you get back than when you left? 😀 Mostly from driving too many miles in too short of time. Now back to construction. I have been stalling on the cap rails for some time now. Mostly, I wanted to get a lot done before adding them. And, I decided to buy a micro scraper rather than build one. Anyway, Saturday, I got the scraper and today, I completed adding the rails, and painting. I need a little more sanding here and there, but for the most part, they are done. (I know, my guess is this isn't the last time I touch them up.) 😃 Also completed mounting the rudder, although, I do think I need some more clean up. I added the pintles and gudgeons using CA, now it needs to be cleaned, and some nail heads put into the straps. Pics too.....

- 436 replies
-
- 4
-
-
- Syren
- Model Shipways
- (and 1 more)
-
Hi Guy’s, Made it back from vacation, and have returned to the building table. Not too much to report on so far, so no pics. Got the rudder shaped, plated, and the false keel added to the hull and rudder. Also, was able to drill the hole for the rudder and needs just a little paint inside and out. Next step is the gudgeons and pintles and I am not looking forward to this step. The only reason is the soldering. You would think that with all my plane experience, I would be good at it by now. I am getting better, but it’s still difficult to get a good looking weld. Will update soon.
-
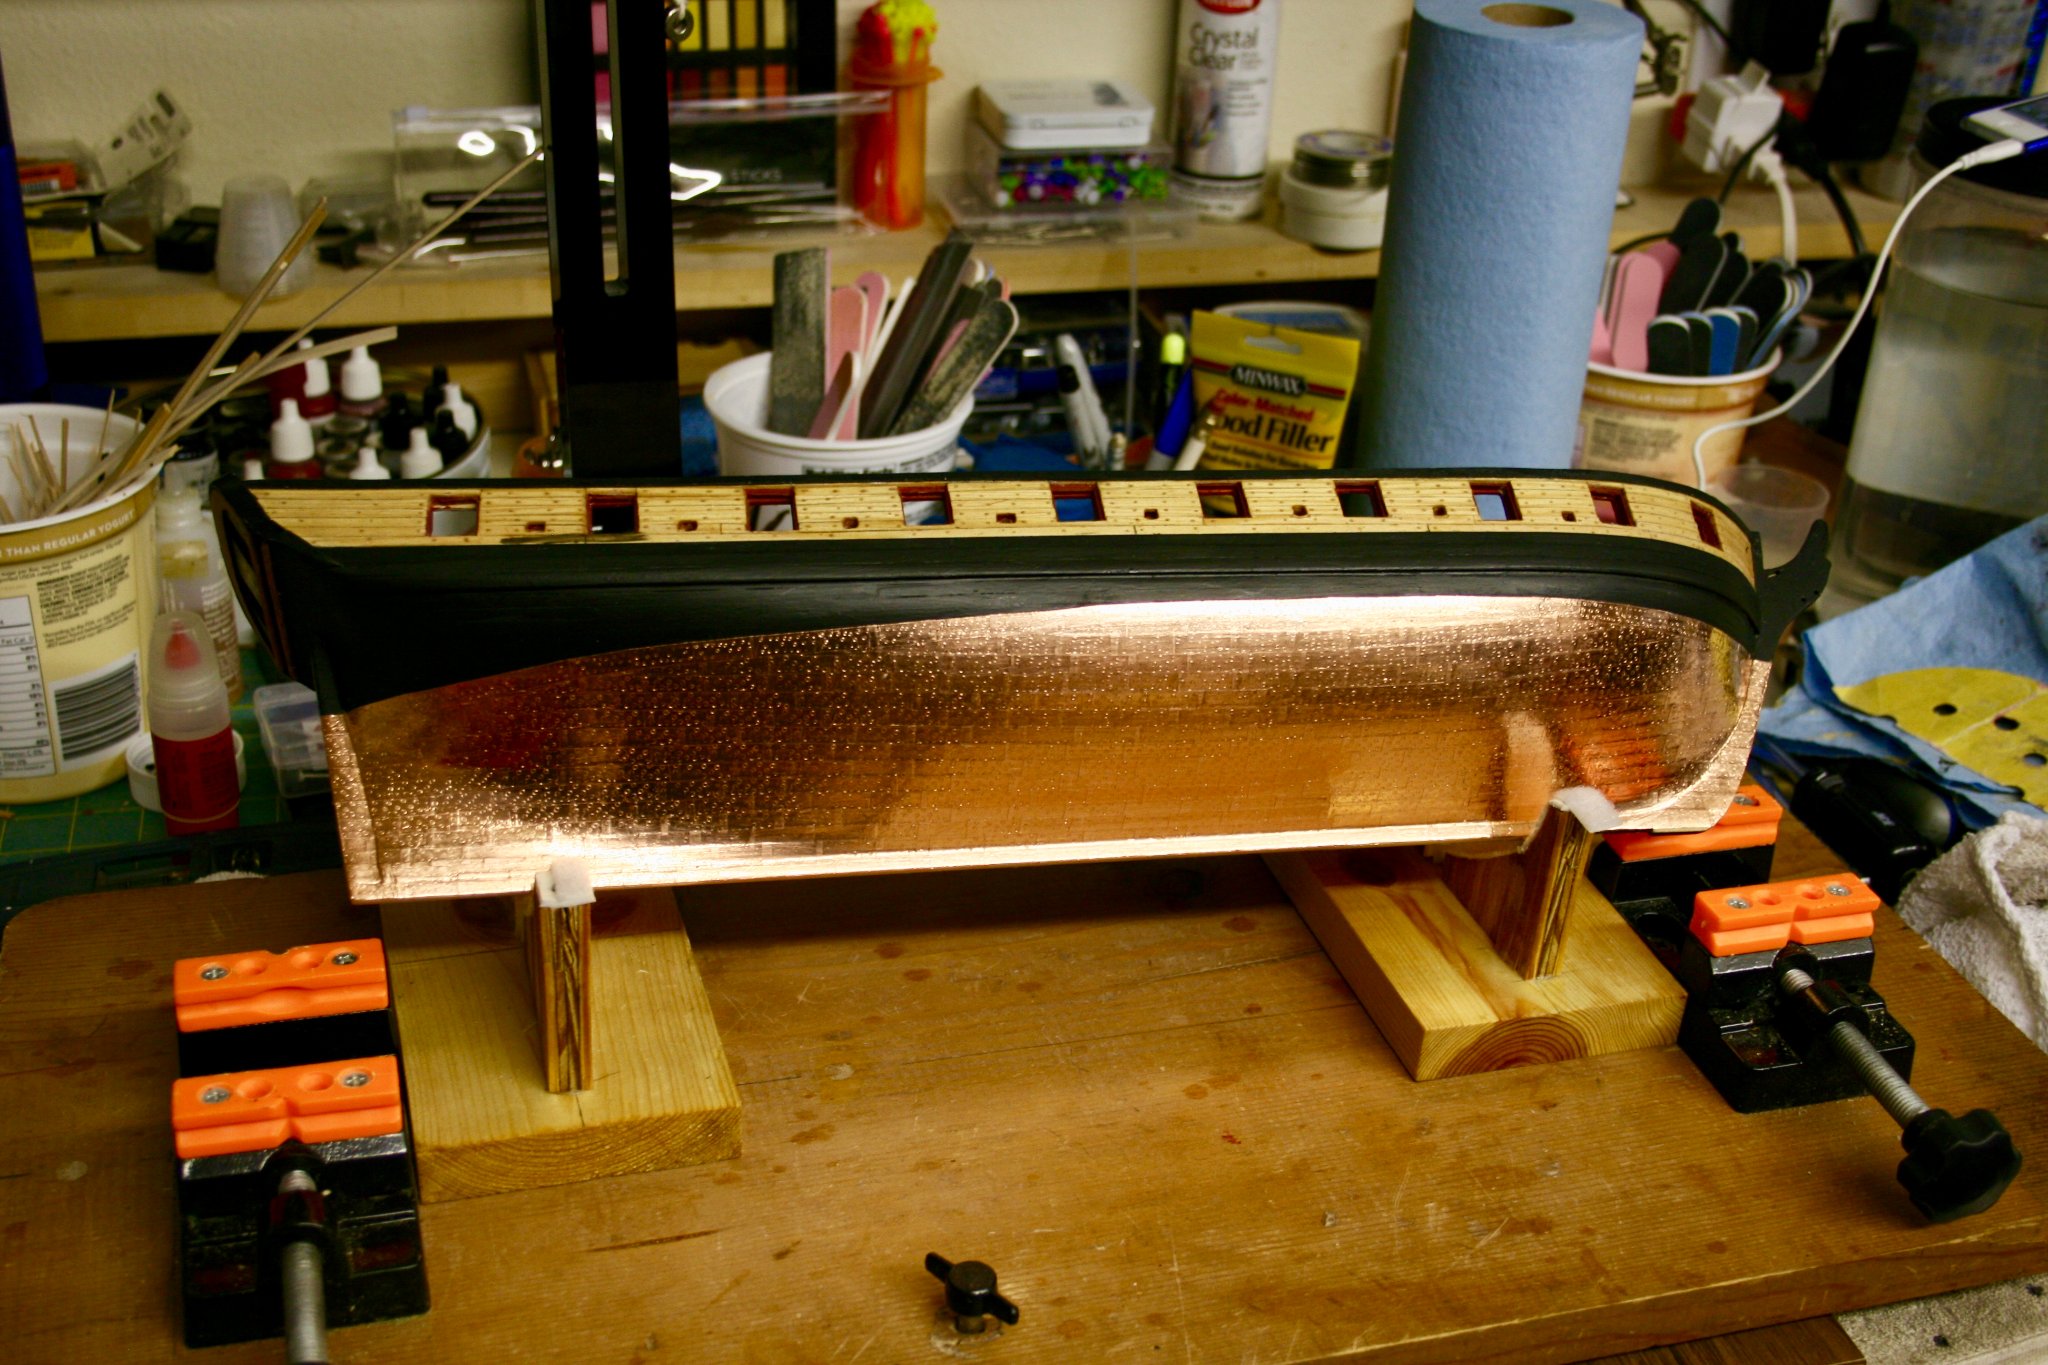
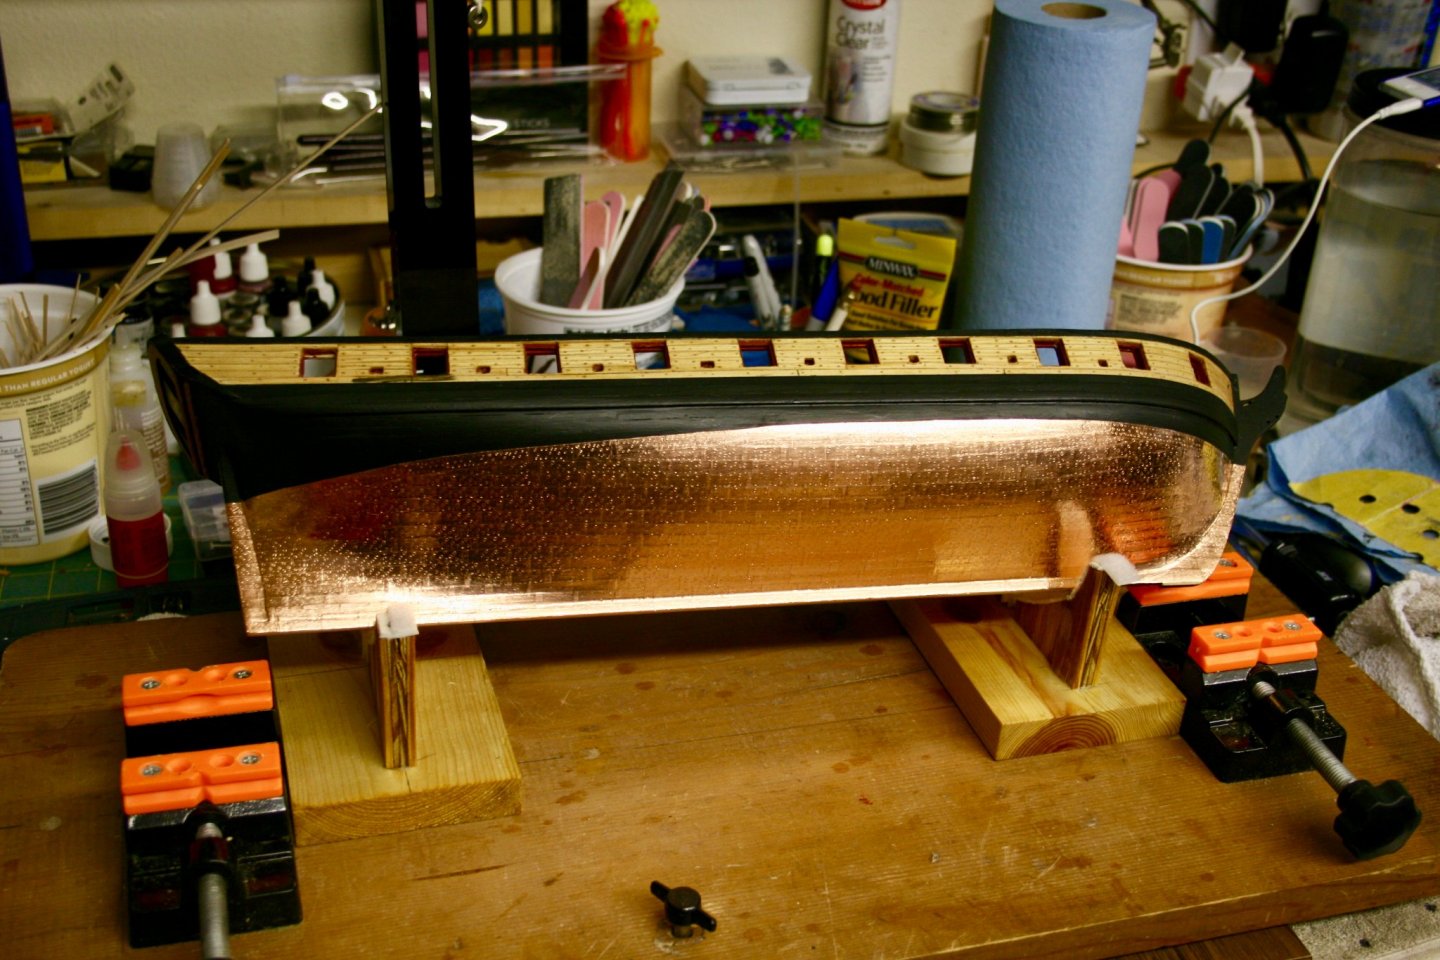
She's plated!!!!!! Well except for the Stem Knee and Stern Post, but those will be cake to get finished. I am certainly glad that I never signed on to shingle a roof. I wouldn't have been a roofer very long. Any way, after the stem and stern, It's on to the rudder which I am looking forward to. However, now I will be on a short vacation, so no ship building. I did clean up both starboard, and port plates with acetone just to make sure all is clean. Now, I might just let the patina come naturally, but may look into helping along. Either way, I will be ok with it. Now pics:

- 436 replies
-
- 6
-
-
- Syren
- Model Shipways
- (and 1 more)
-
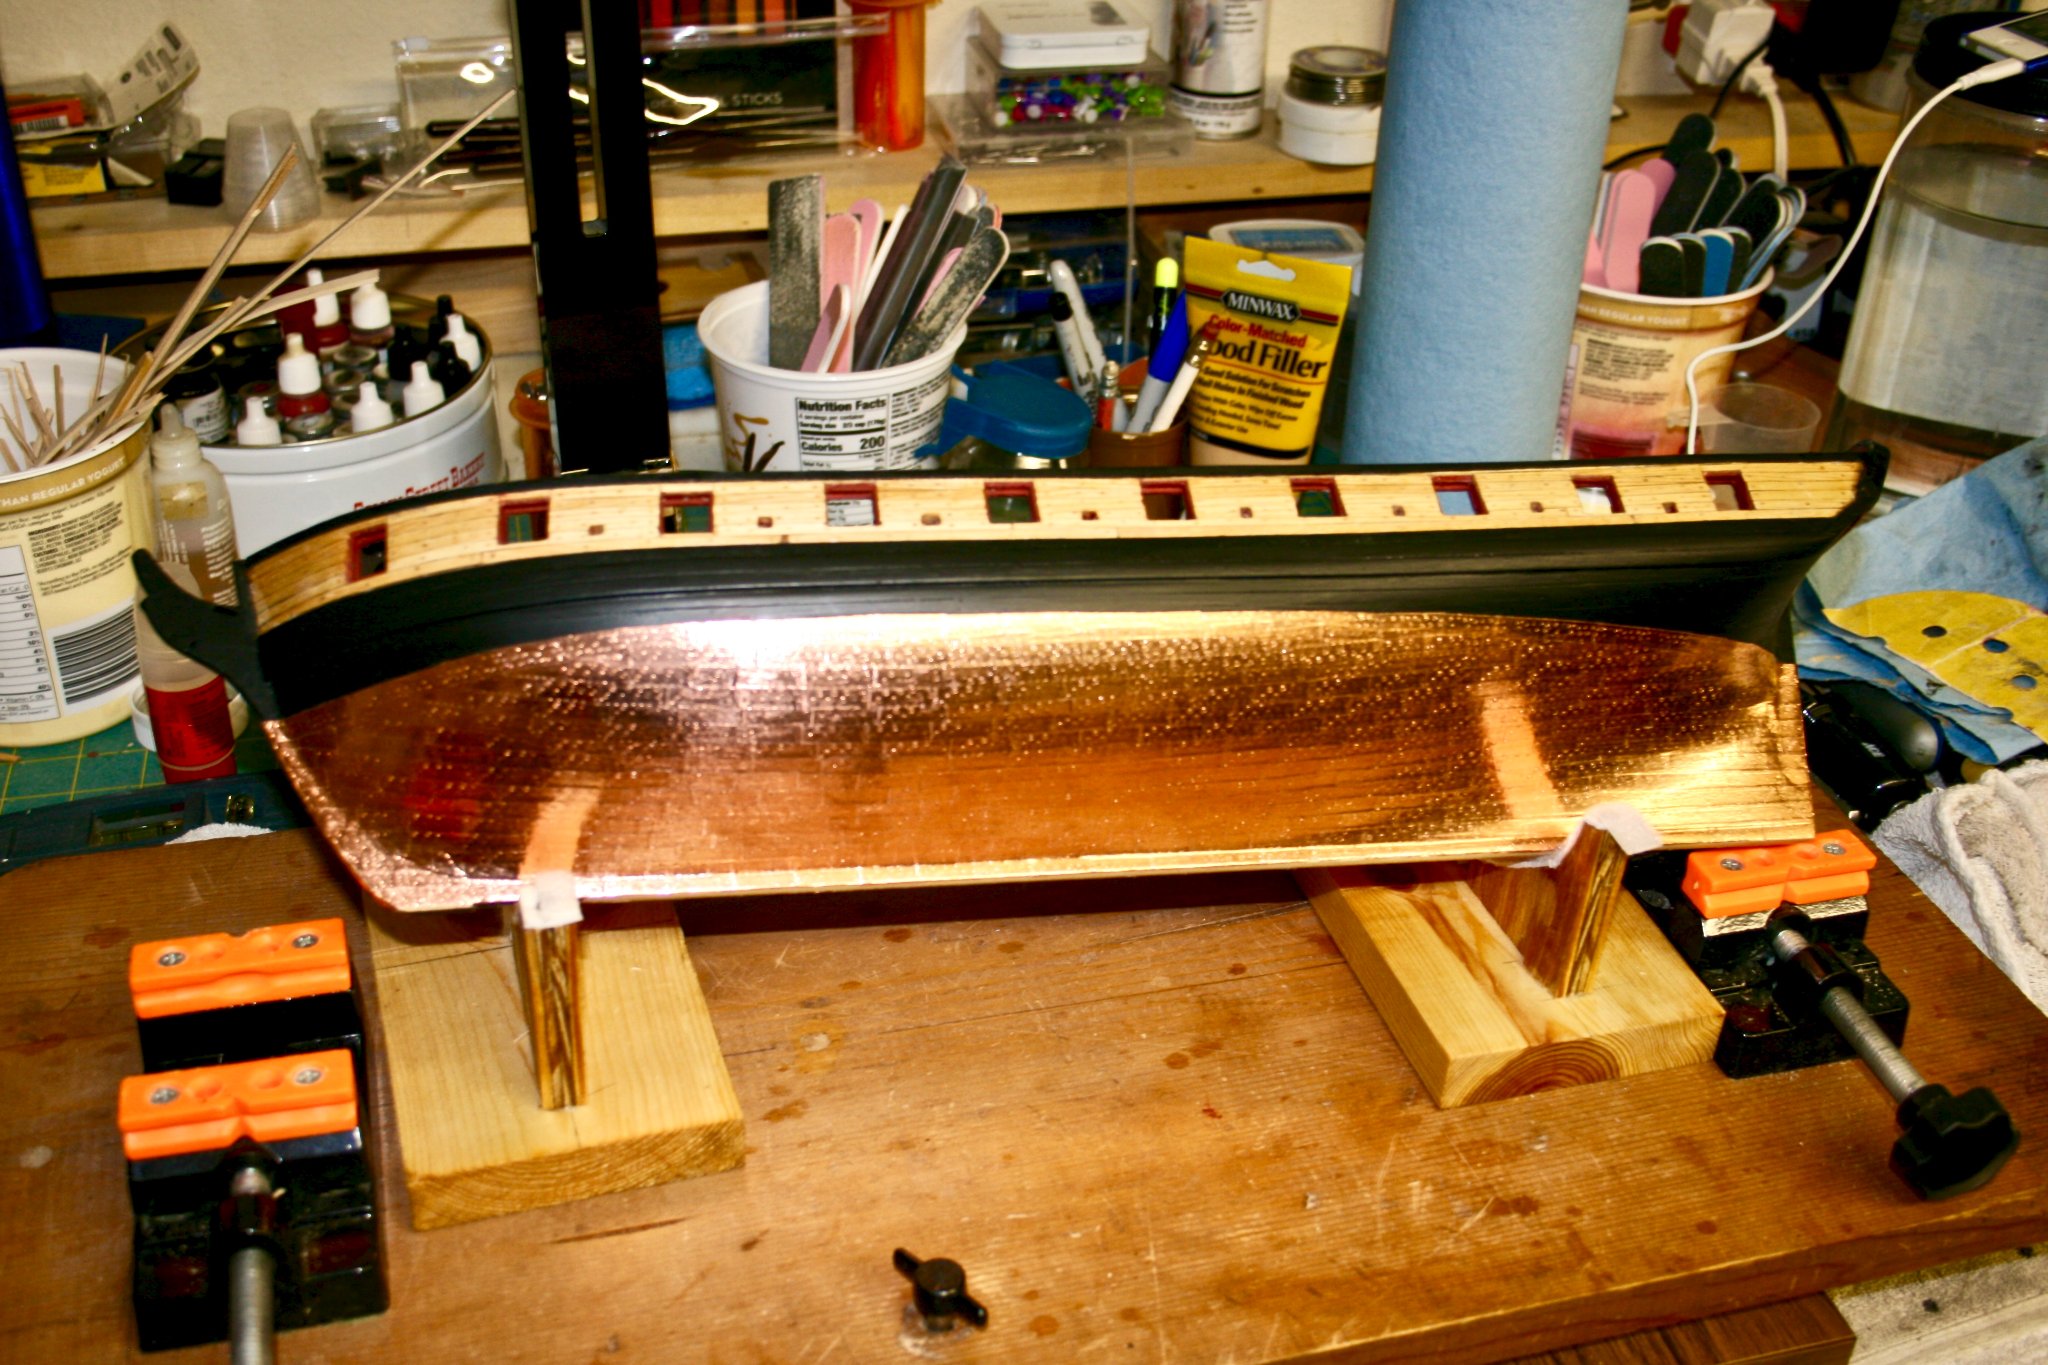
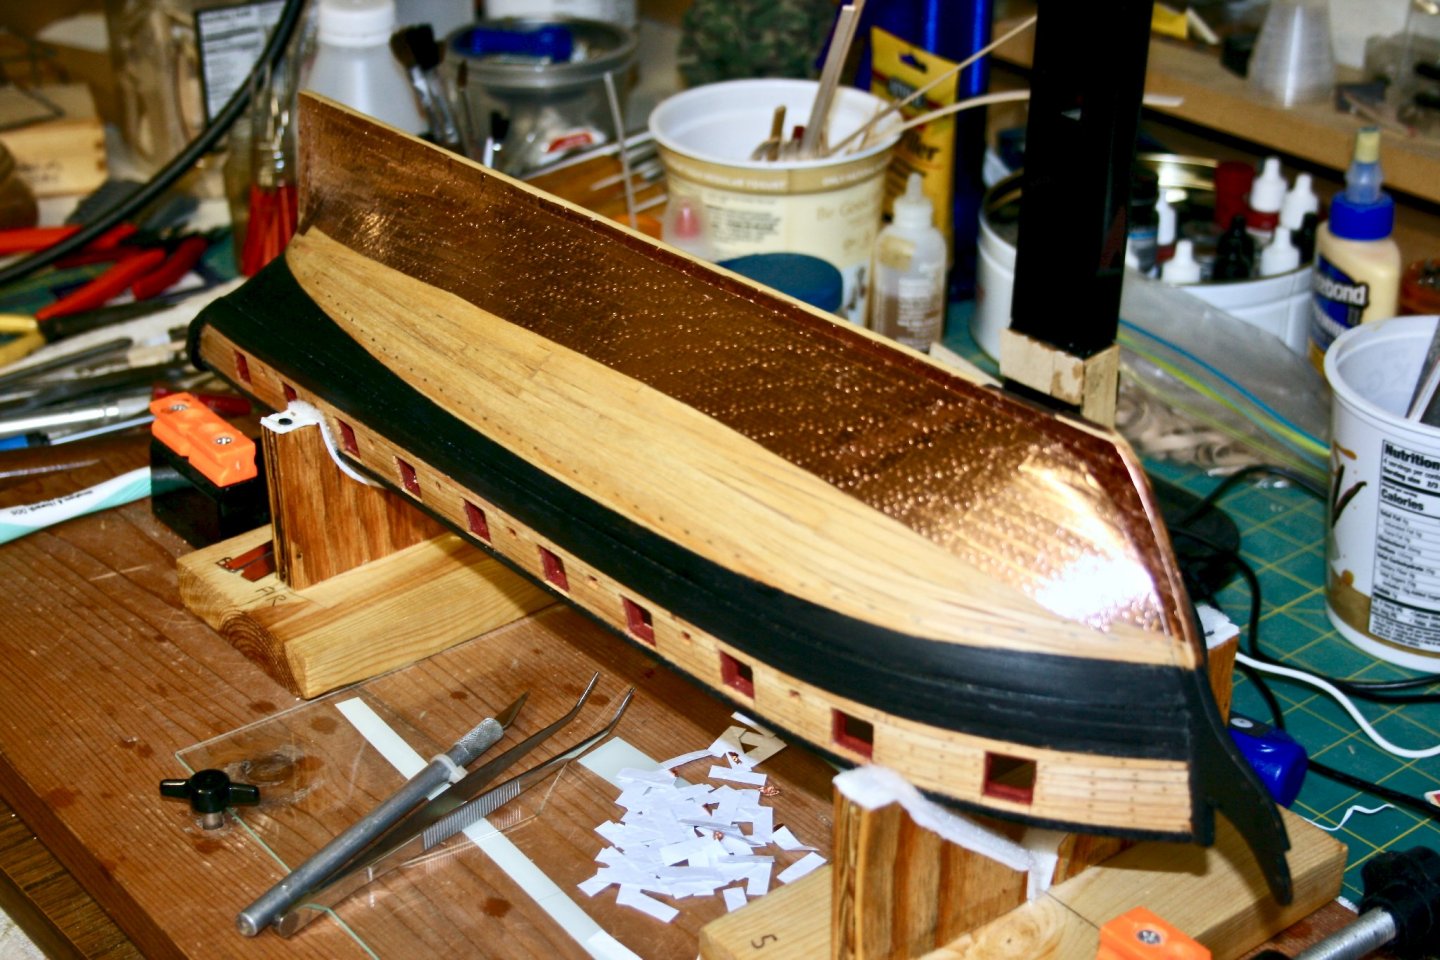
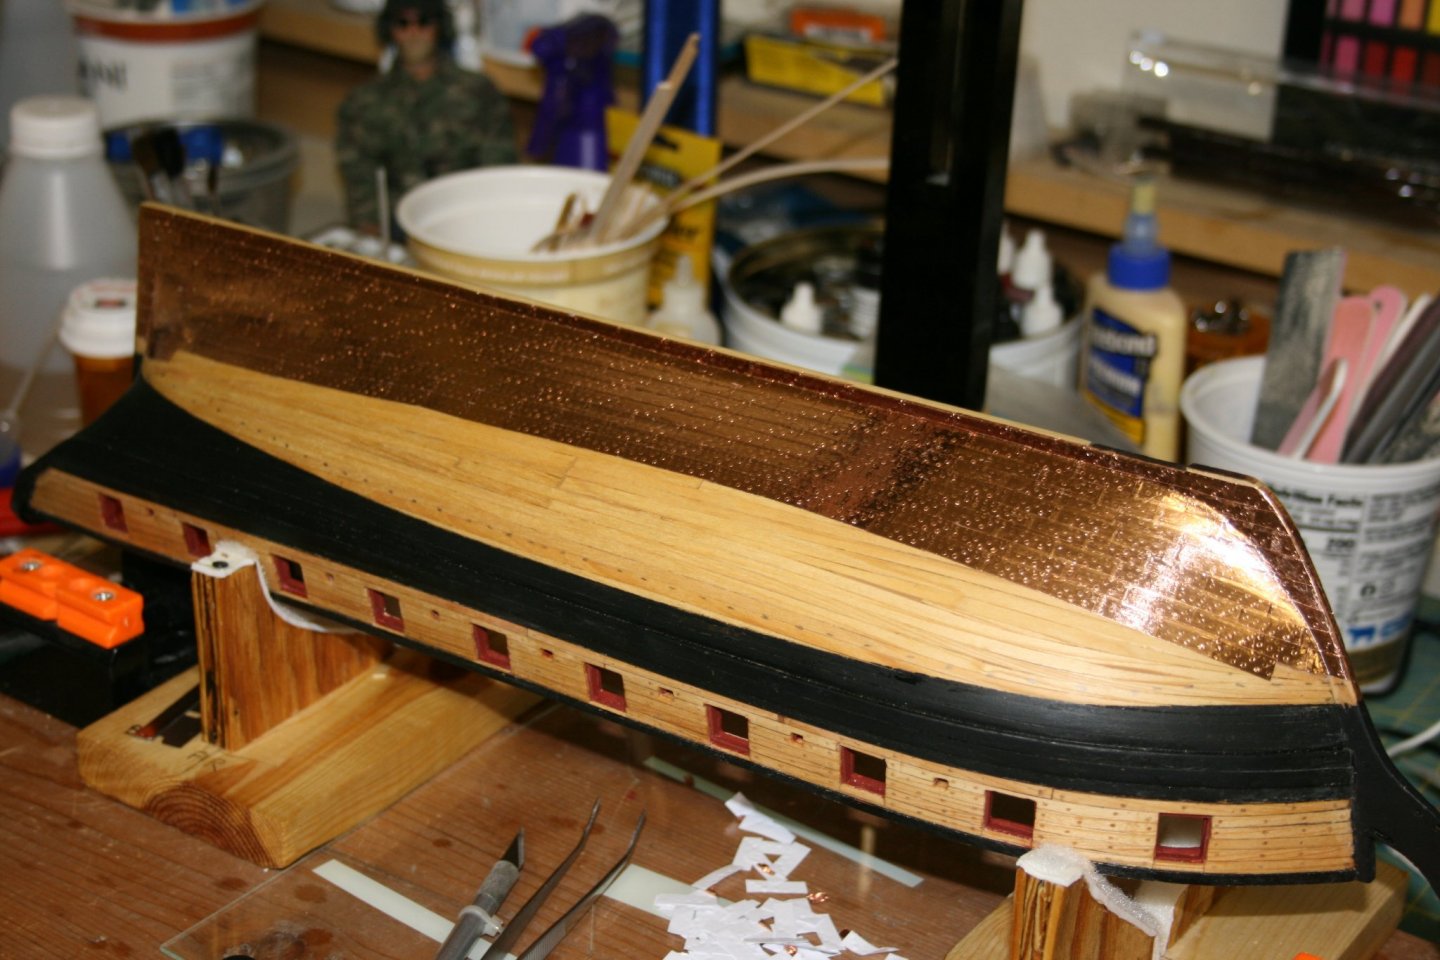
All Dressed Up and No Where to Go: Well, actually, the starboard is next. Just finished the port side copper plates and now it is onto the starboard. I can say, that I am getting tired of looking at the bottom of the ship, but it is getting there. I am happy that it turned out like it did, but it is nerve wracking just laying them out and making sure that the butt joints do not end up on top of the one below or above each one. On a couple, they did end up pretty close, but I will let you find them. 🙃 Newbie Points: 1. Be sure to dress up the black portion of the waterline when you get close to it with your plates. It is much easier to retouch BEFORE you have plates to mask off. 2. I cleaned up the whole side with acetone so that any finger prints, or sticky backing glue left on the plates was removed. 3. Keep an eye on each plate, it is easy to punch a hole for a nail head. It's not a big deal, but when the plate is installed, the hole can leave the wood underneath exposed. 4. If you don't like the way a plate looks, remove it. You will always know it is there. 5. I burnished each plate just after installation, rather than wait. The plates can move a little, and you might need to reinstall them. I found this worked well for me.

- 436 replies
-
- 5
-
-
- Syren
- Model Shipways
- (and 1 more)
-
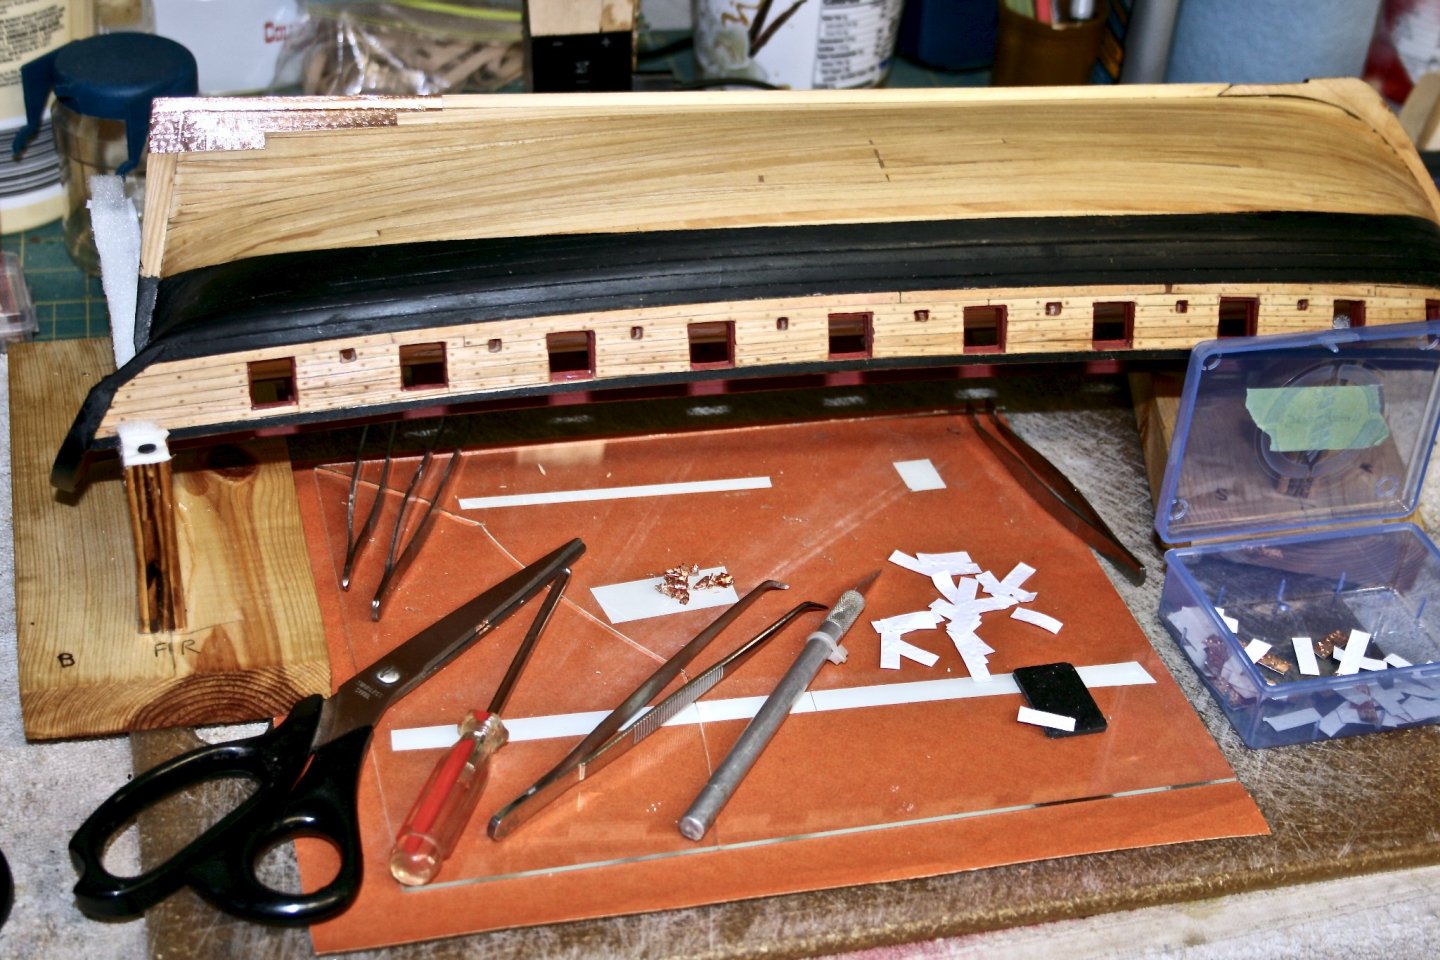
Stamp, Cut, Separate, Paste: Here is an update on my progress in adding the copper plates. Not much to say except there is a lot of work in this phase. I have been able to separate the backing from the copper side fairly easily, so it could be worse. So far, I am ok with the outcome, but I am getting close to having to cut the plates for the dressing belt and it looks like it can be tricky. Newbie Note: I recommend using a jewelers visor to make it easier to place each plate correctly. Although that may be because my eyes aren't what they used to be. AND.... With the visor on, I can see a small amount of the adhesive is squeezed out of the sides when you burnish each plate. I recommend wiping it down with Acetone, which is what I did. Well, I ran out of stamped plates, so back to work. 😄
- 436 replies
-
- 4
-
-
- Syren
- Model Shipways
- (and 1 more)
-
Thanks, @WalrusGuy I was hoping that was it. 😊. I have been looking through your build, and that of @NovaStorm and @Overworked724 to see if I could tell. Also want to thank all of you for your input and assistance with my build. It is appreciated. 👍This type of kit work can cause one to overthink each step.
- 436 replies
-
- 2
-
-
- Syren
- Model Shipways
- (and 1 more)
-
Progress Made + A Question: Question: In the paper plans that came with the kit, the placement of the plates is indicated. I have taken the 2 halves and taped them together for a good starboard view. I see some stealers in the rows, and am wondering if that is just a depiction of row on the hull as it flattens, or are they needed? I had no problem on the planking, but am not sure how to cut/install for the copper. I will be checking threads, but am wondering if they are critical and do I just eyeball them? OOPS....I guess that is really 2 questions.🙃 And...pics of my progress:


- 436 replies
-
- 4
-
-
- Syren
- Model Shipways
- (and 1 more)
-
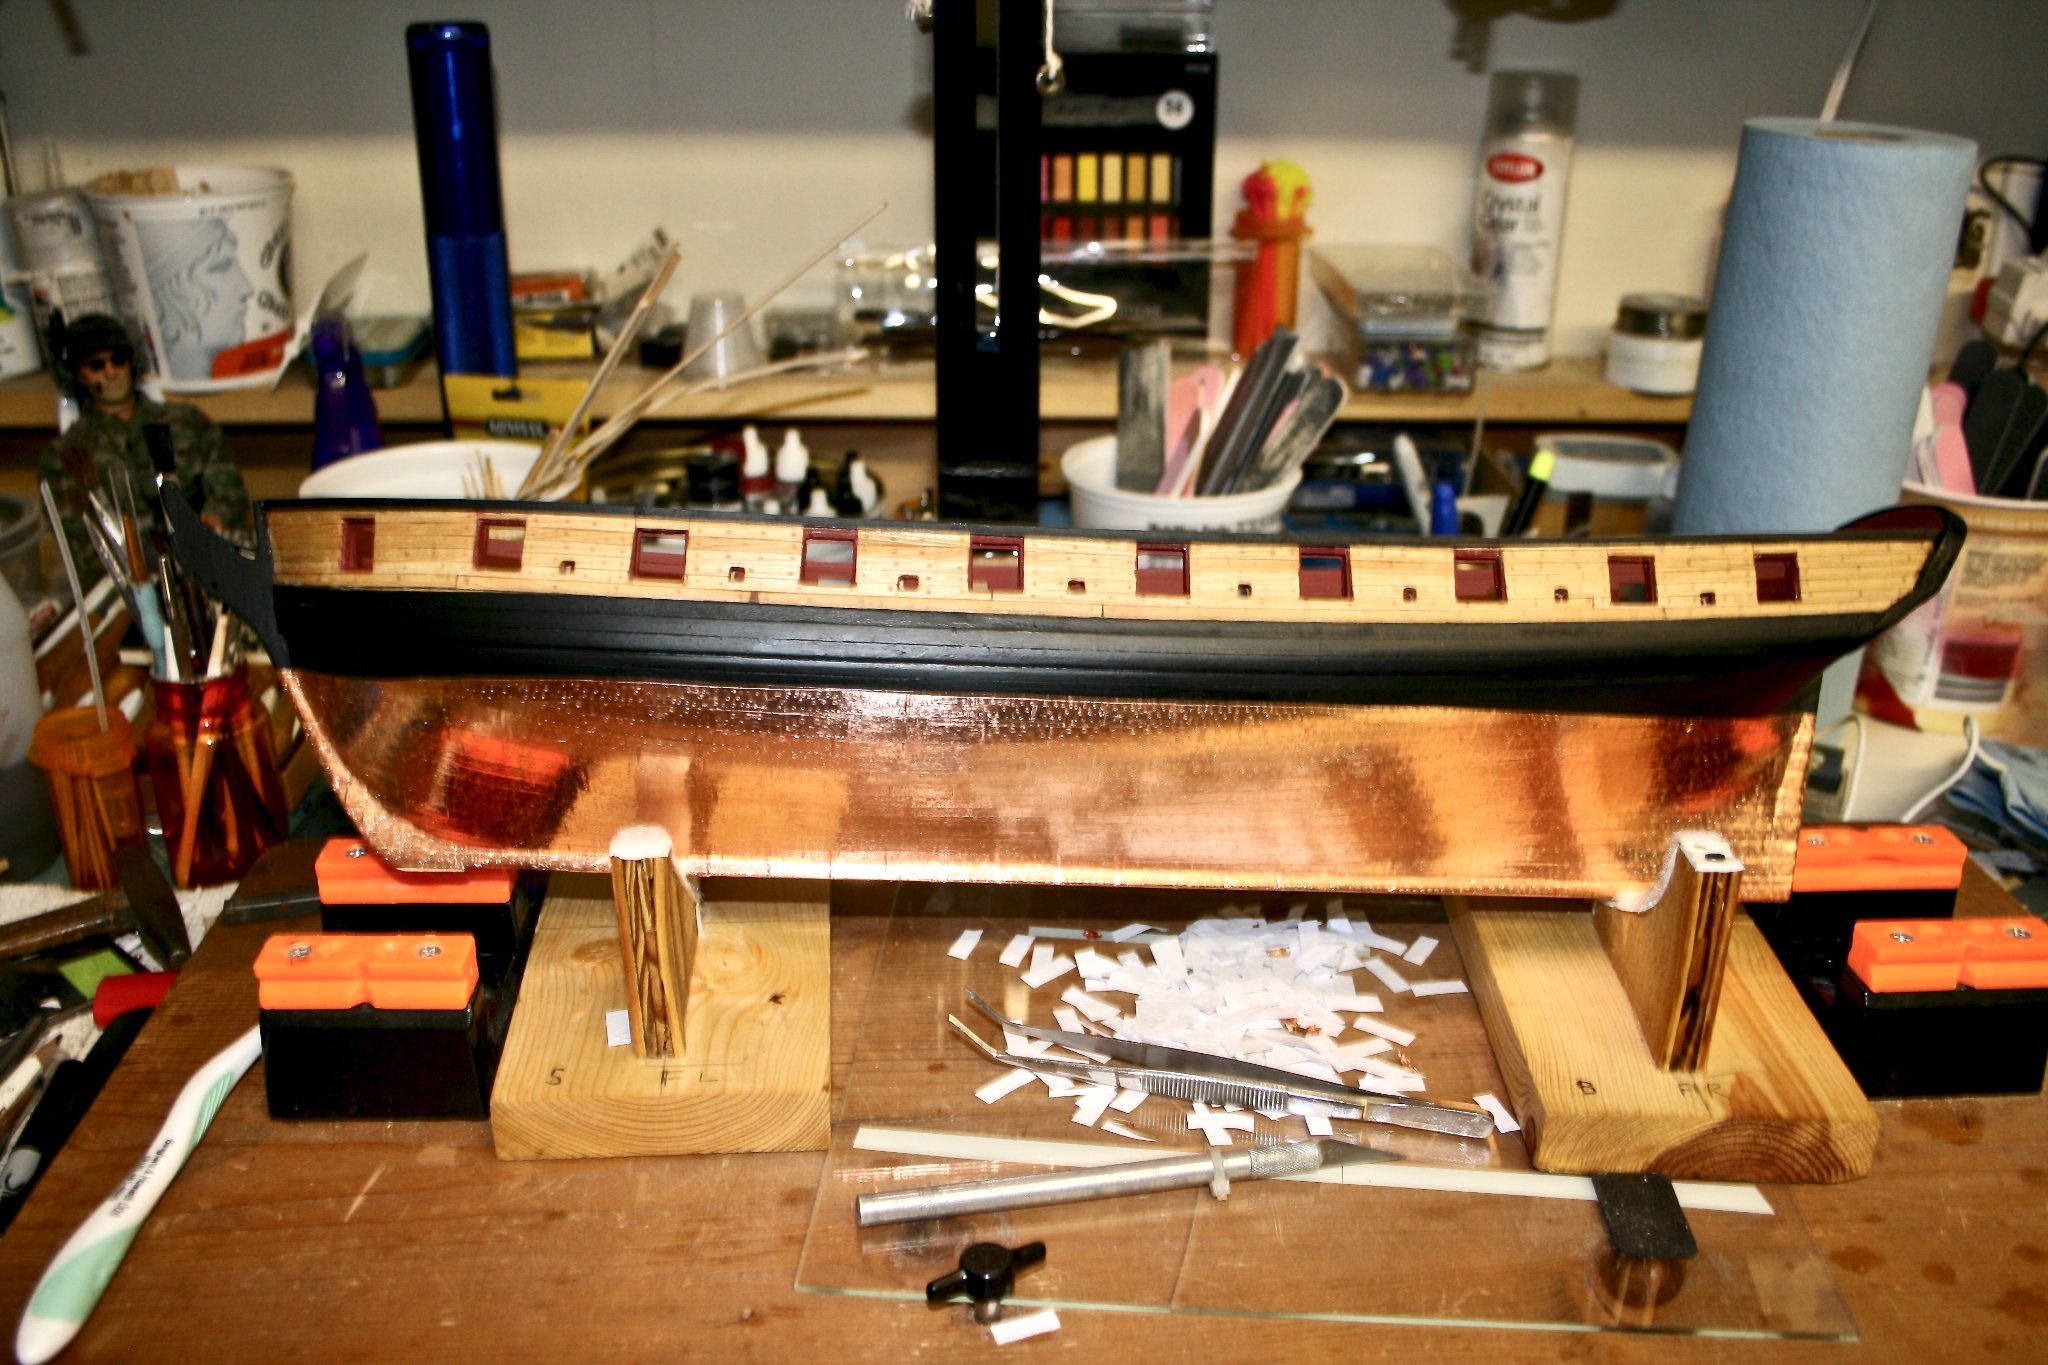
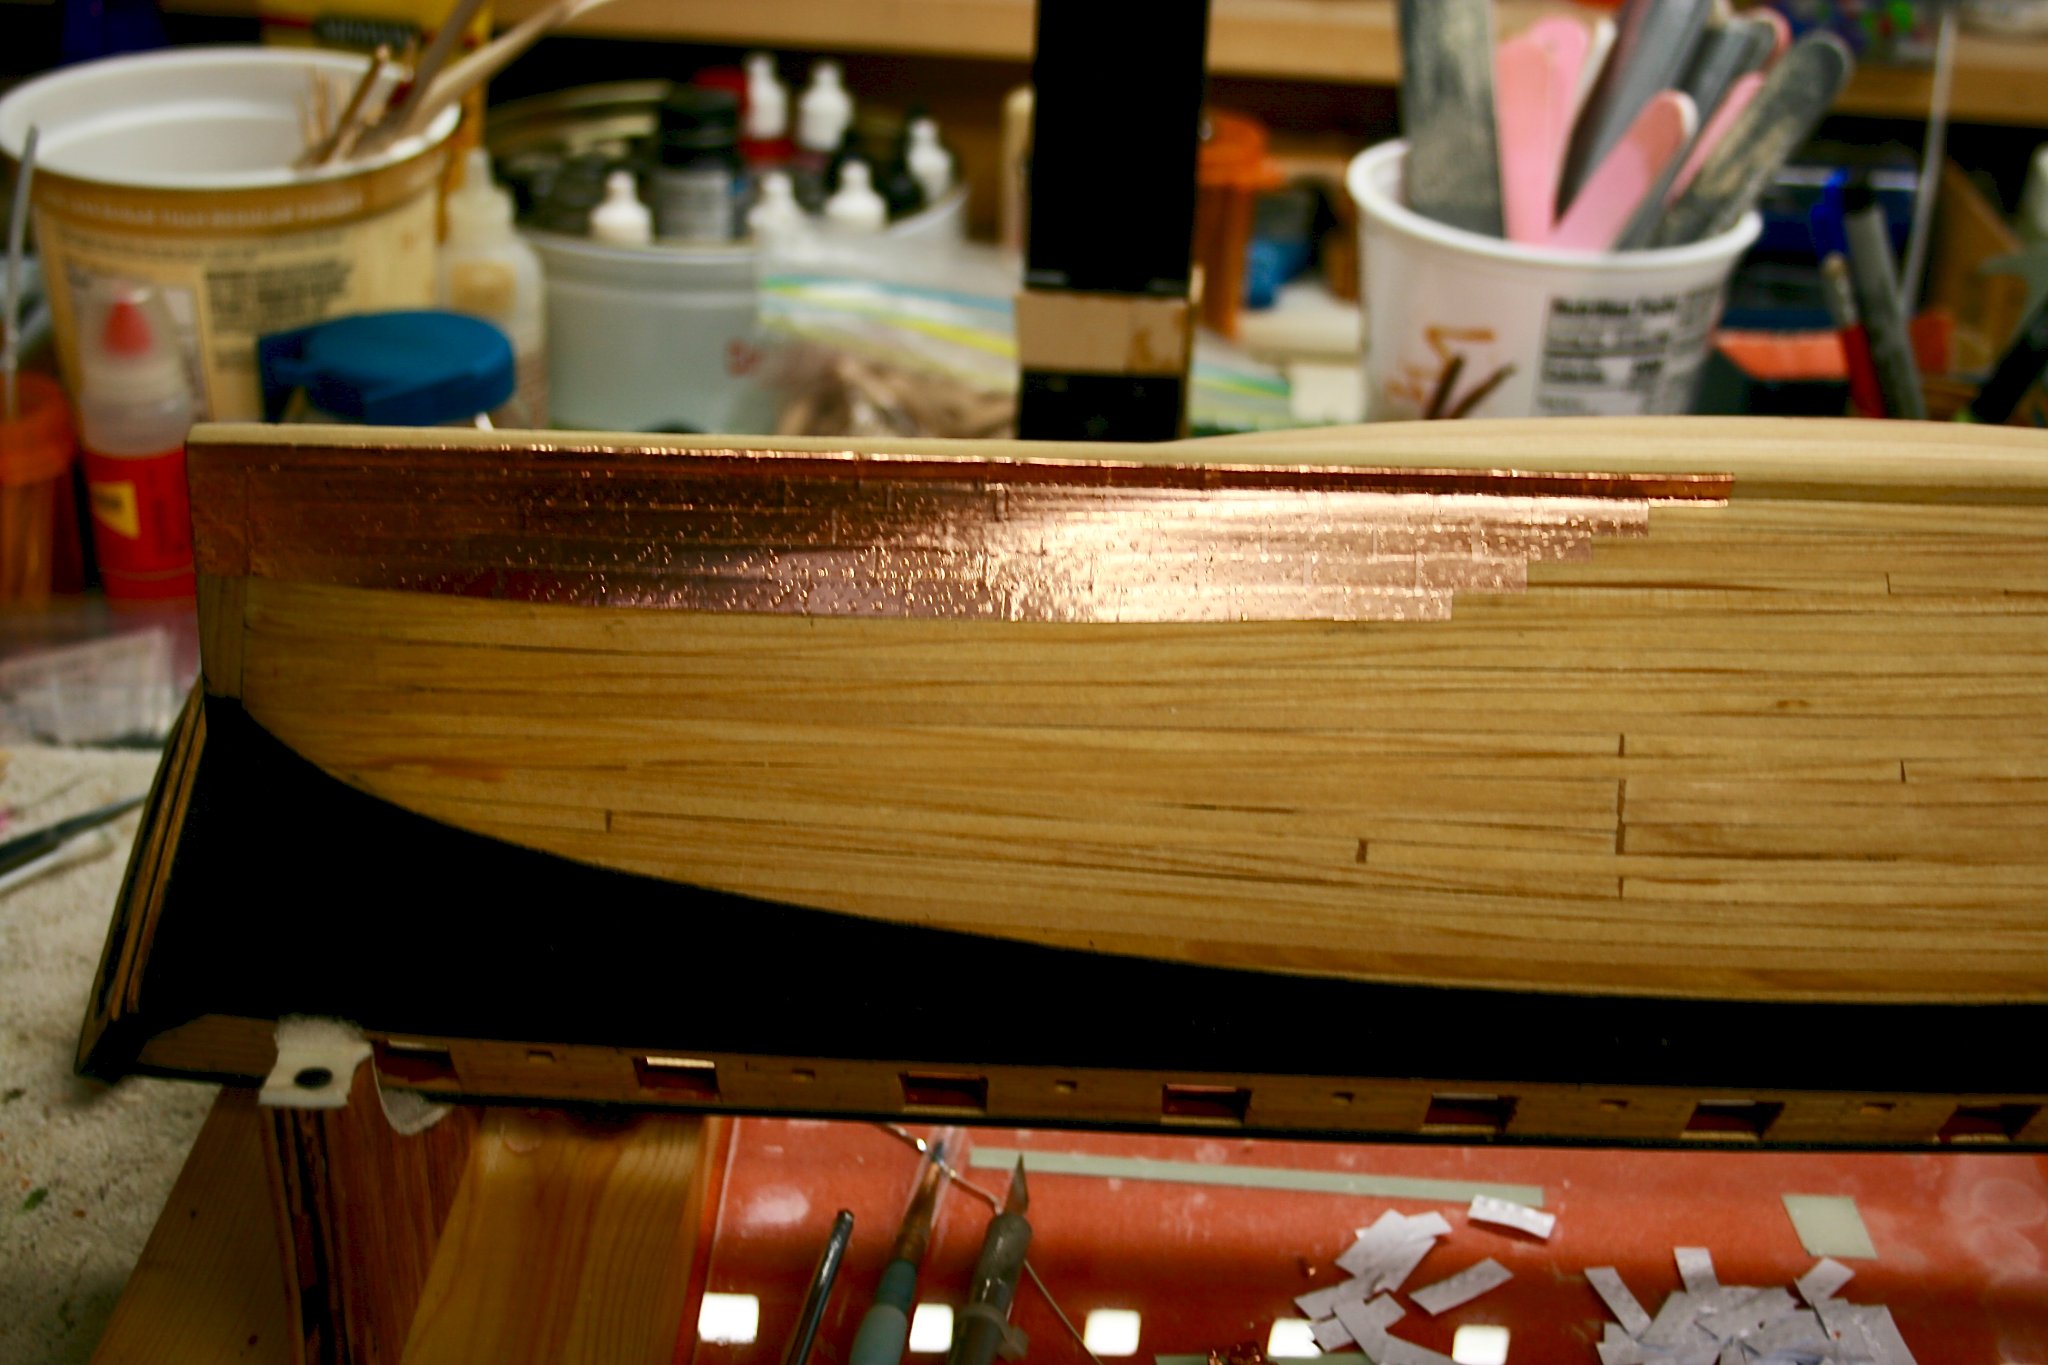
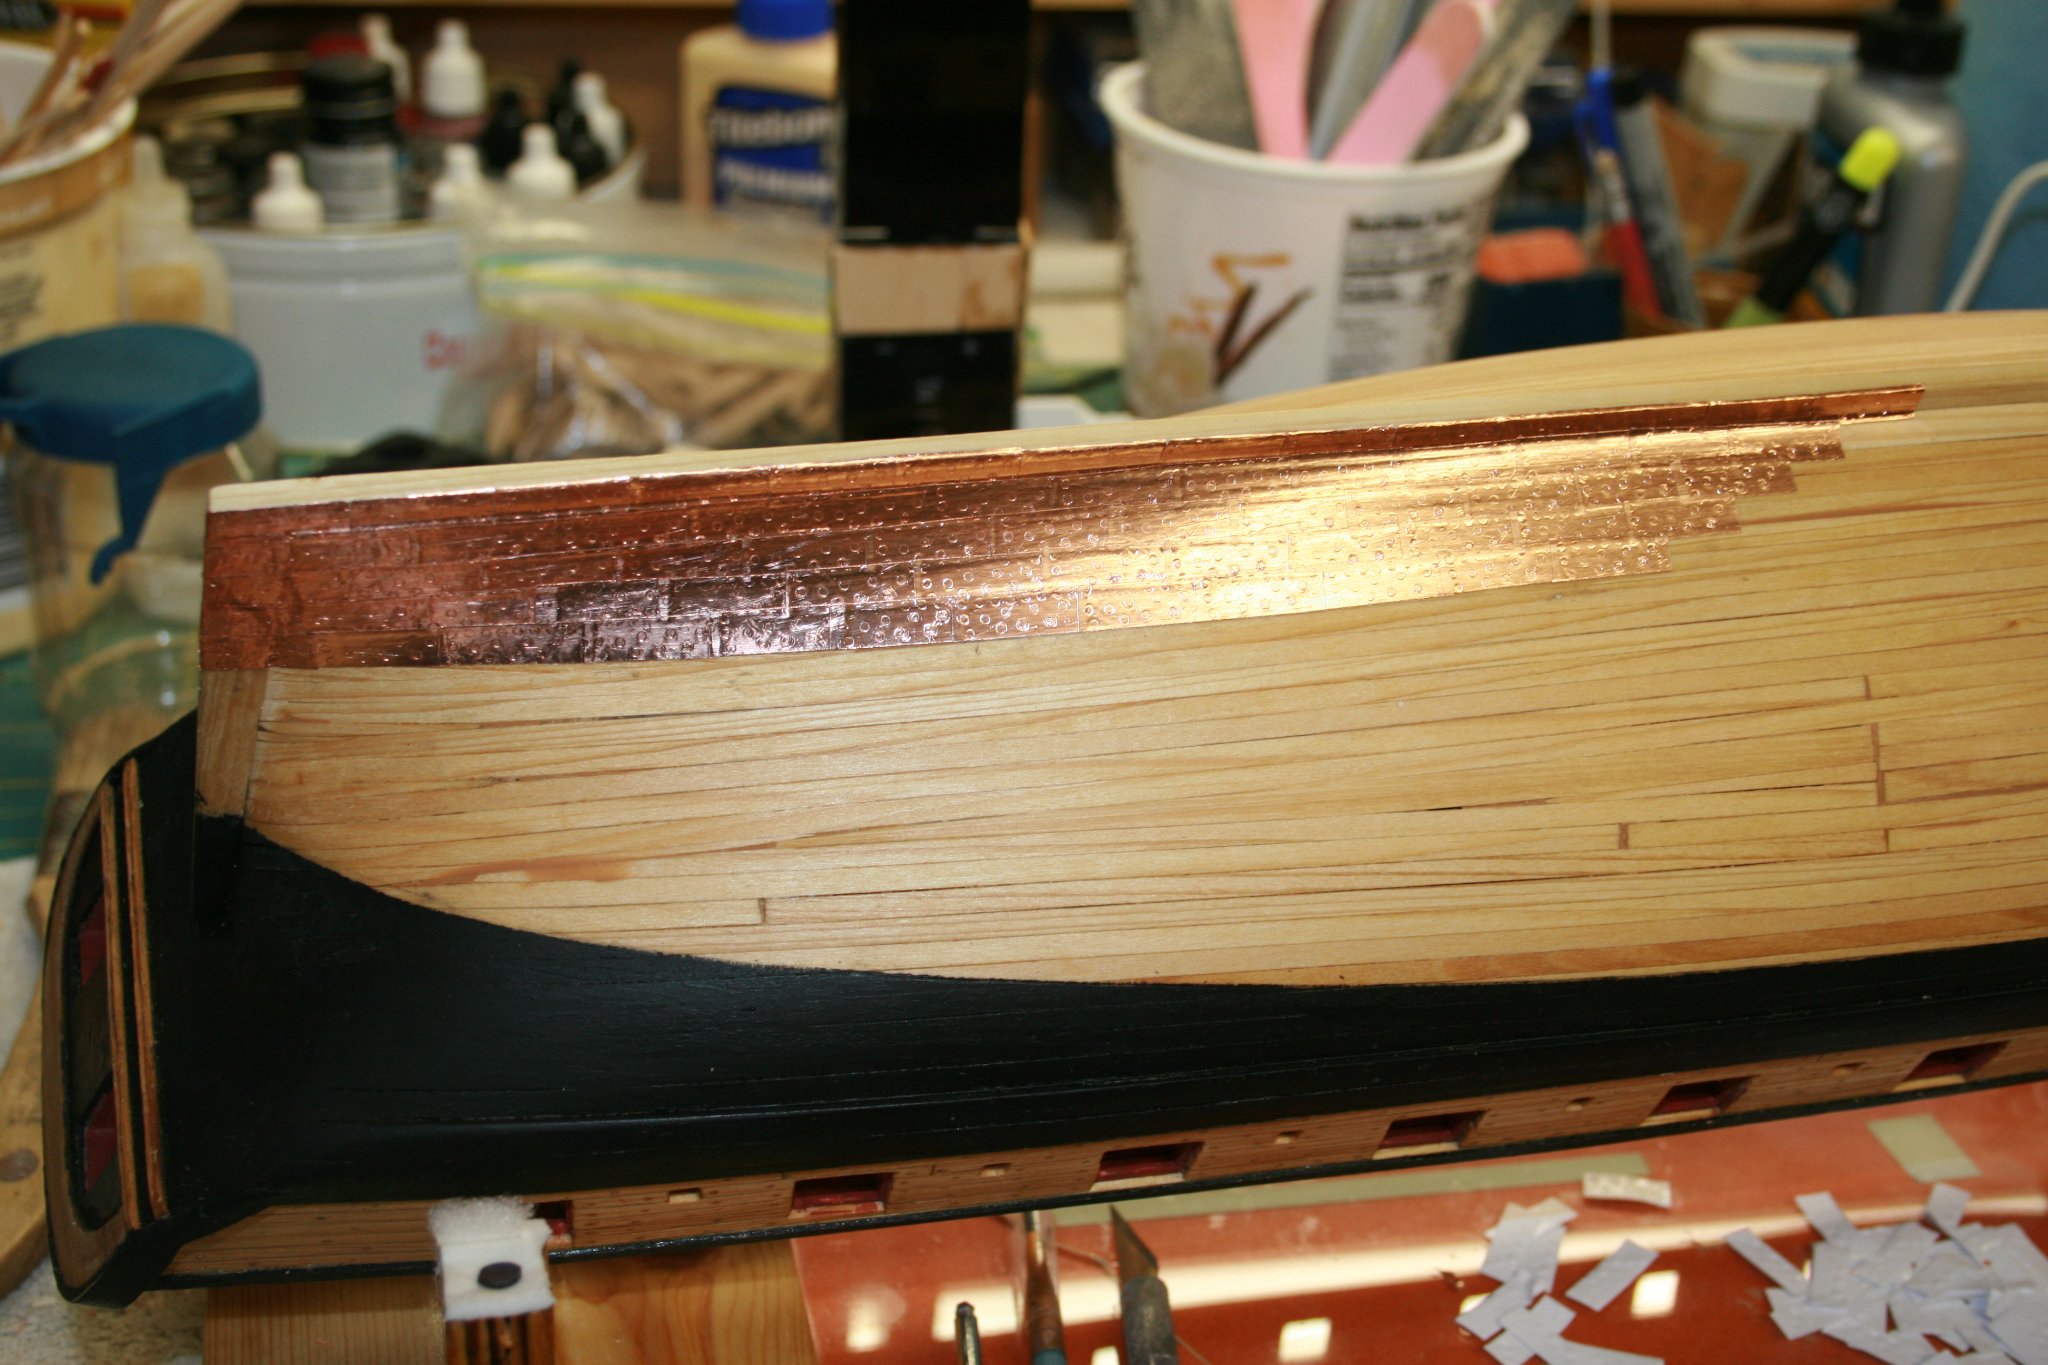
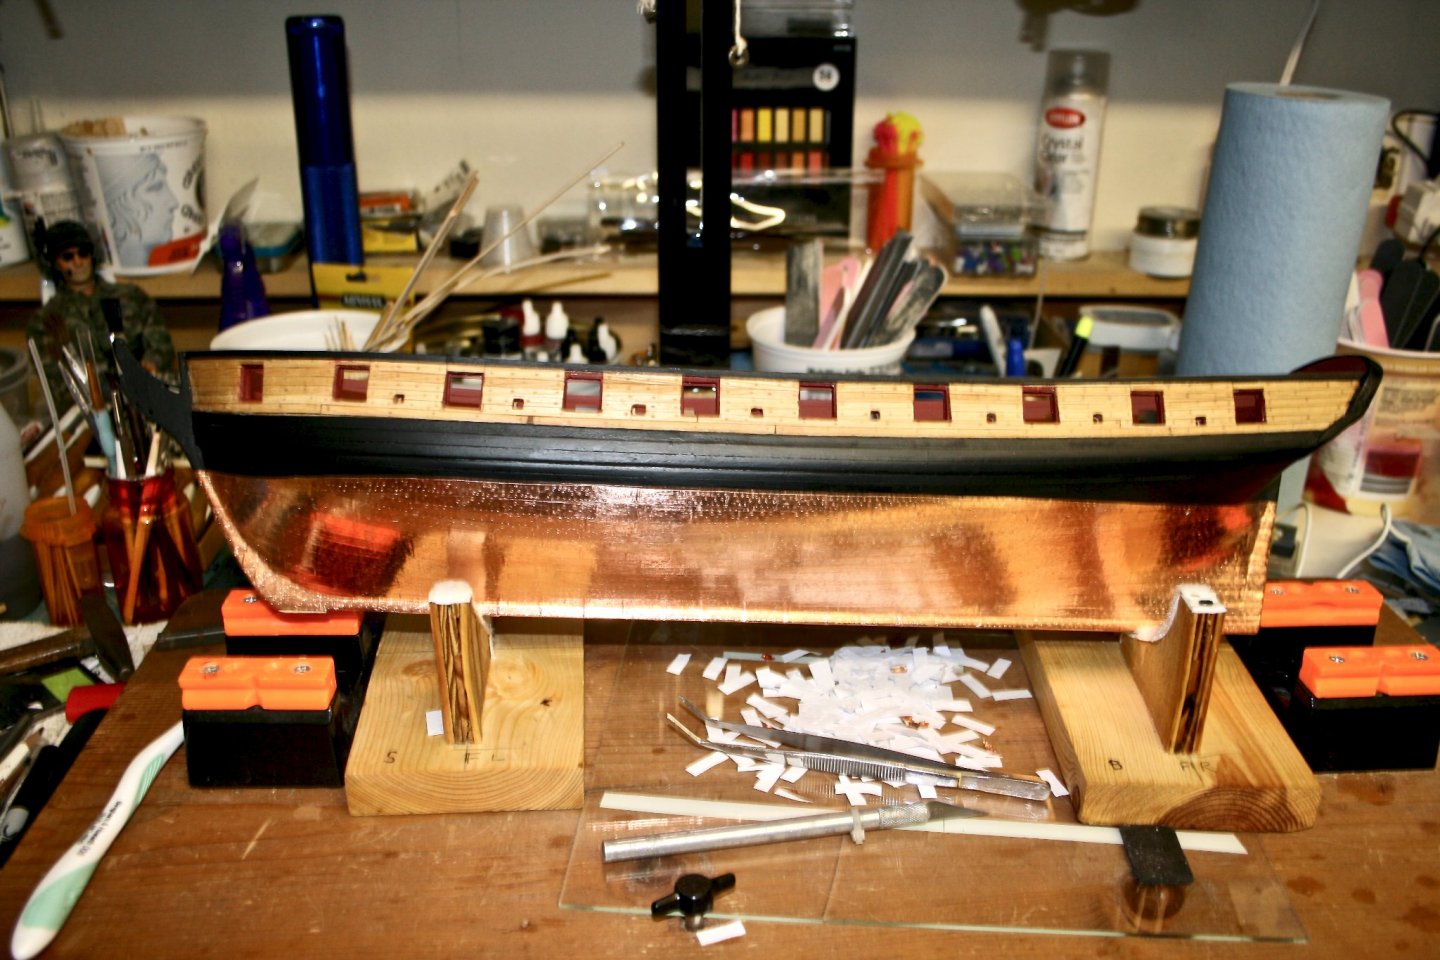
Copper Test and Confetti Fest: I completed the stamping of approximately 40-50 plates for the port side. At that point, I decided to test the installation of them on the hull. This is a nerve wracking step, to say the least. My hands shake already, and placing the plates correctly is a challenge. Before, I continue, I thought I would get some input from other builders. If I need to do them over, I will, but I am somewhat satisfied with the first ones. I have also found that as I add them, I get better at handling them. Here is a first picture of my effort. In the picture, you can see my progress, and the tools. First on the tool line is scissors (duh 😄), that is followed by the small hex driver that I am using to burnish them onto the wood, a pile of used plates (this does not, in any way, mean that they are still usable on the ship 😂) The tweezers are for installation, X-acto knife for removing the backing, confetti, the holding pad, and the spare plates. The holding pad is a double sided sticky pad that we use in the RC planes to hold down receivers to keep vibrations to a minimum. I put each plate copper side down and hanging slightly over the edge, (one is showing), then I use the X-acto knife to carefully remove the backing, and then pick the plate up with the tweezers. The pad is just sticky enough to hold the plate still while removing the backing and, by hanging over the edge, I have a place to grab the plate when ready. If anyone has a suggestion on a different way, or even if you think I should redo the plates already on the ship, I can handle it. 😄 I can say that I won't be able to spend long hours adding the plates, my back is killing me..LOL
- 436 replies
-
- 4
-
-
- Syren
- Model Shipways
- (and 1 more)
-
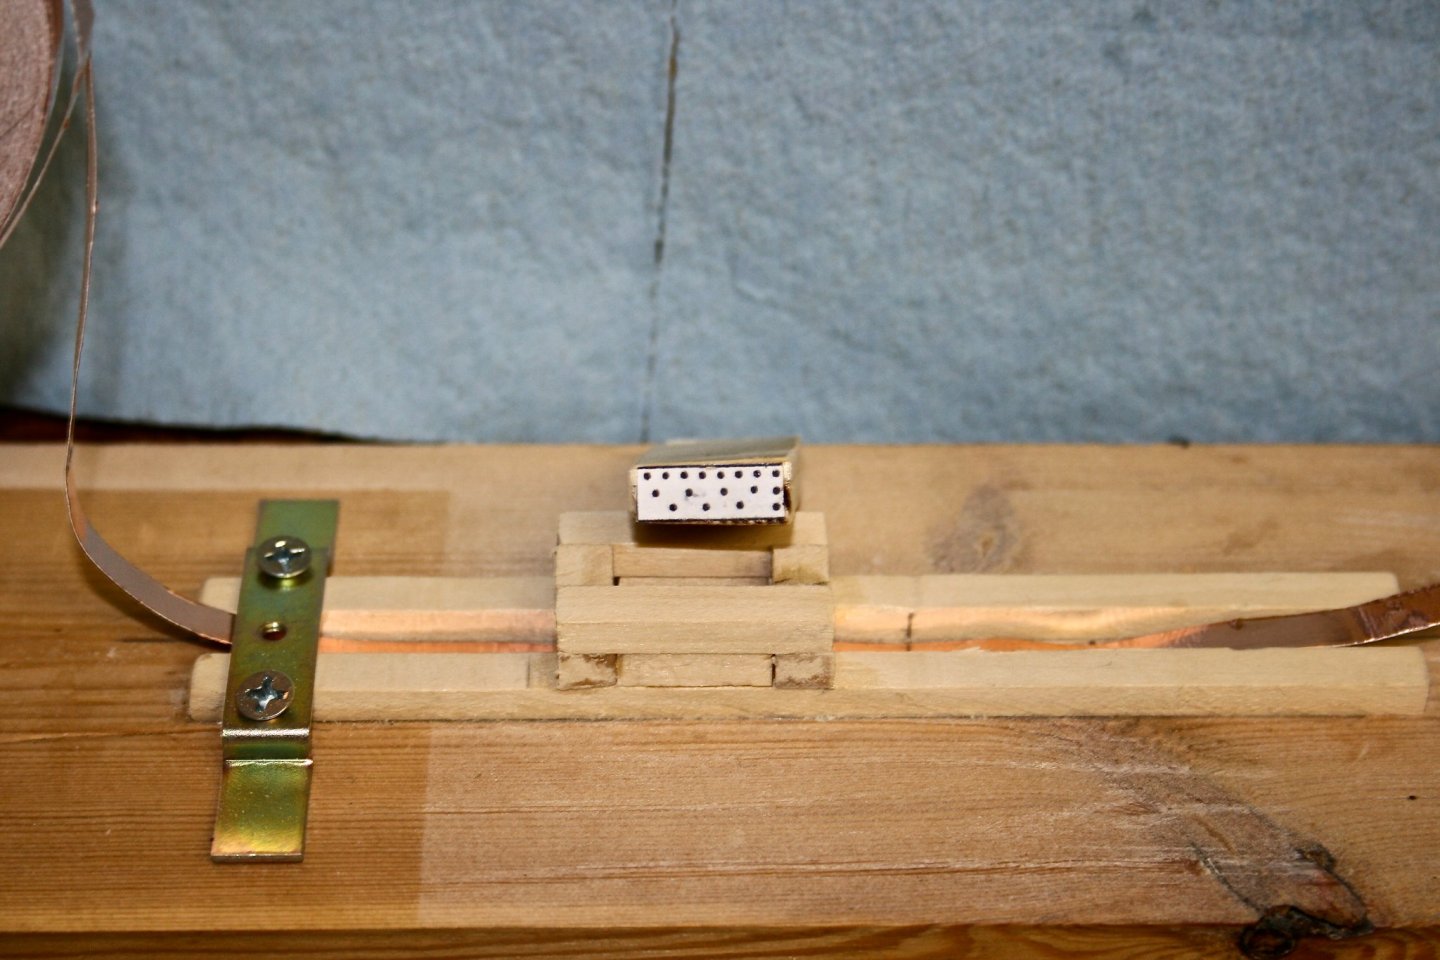
A'stamping I will go. Not sure how many plates I will need for each side, but I will make plenty. It's been awhile because I ran into a little problem on the stamp for the Port side. Basically, it broke on the side when I was adding the t-pins and as it goes, I didn't have any scrap wood of the same size. Sooo, off to Lowes (my second home) for some hard wood. I settled with red oak...well truthfully that is what they had. Anyway, got the Starboard stamp completed and went back to stamping....until the Port one broke. I hadn't used hardwood on it, but it was the striker part that snapped. Who knew that putting it on cross grain would make it weaker? Well, everyone, including me. I put it back together, and to both starboard and port stampers, I added a metal striker plate to each. (Shown in the pics) Now back to stamping each plate.


- 436 replies
-
- 5
-
-
- Syren
- Model Shipways
- (and 1 more)
-
Thanks @Overworked724, I should have guessed you did it earlier. Although yours is more complex, we started about the same. I am using T-pins since they work out to be the perfect size, and are made out of stainless steel. I hope I don’t regret not putting an aluminum plate behind them. 🤞 I will add to my thread with pics. I finished the Starboard stamp, and tested using a tack hammer. The first one came out pretty good.
-
Your ship is looking fantastic. I was hoping you had reached the copper plating part so I could see what ingenious tool you put together for stamping. Alas, I am going to have to go it alone. 😁😁 I am going to test stamping by placing a flat headed bolt in my drill press and using pressure to make the nail head impressions. I am hoping this will put less stress on the stamper in the instruction book. Keep up the great work.
-
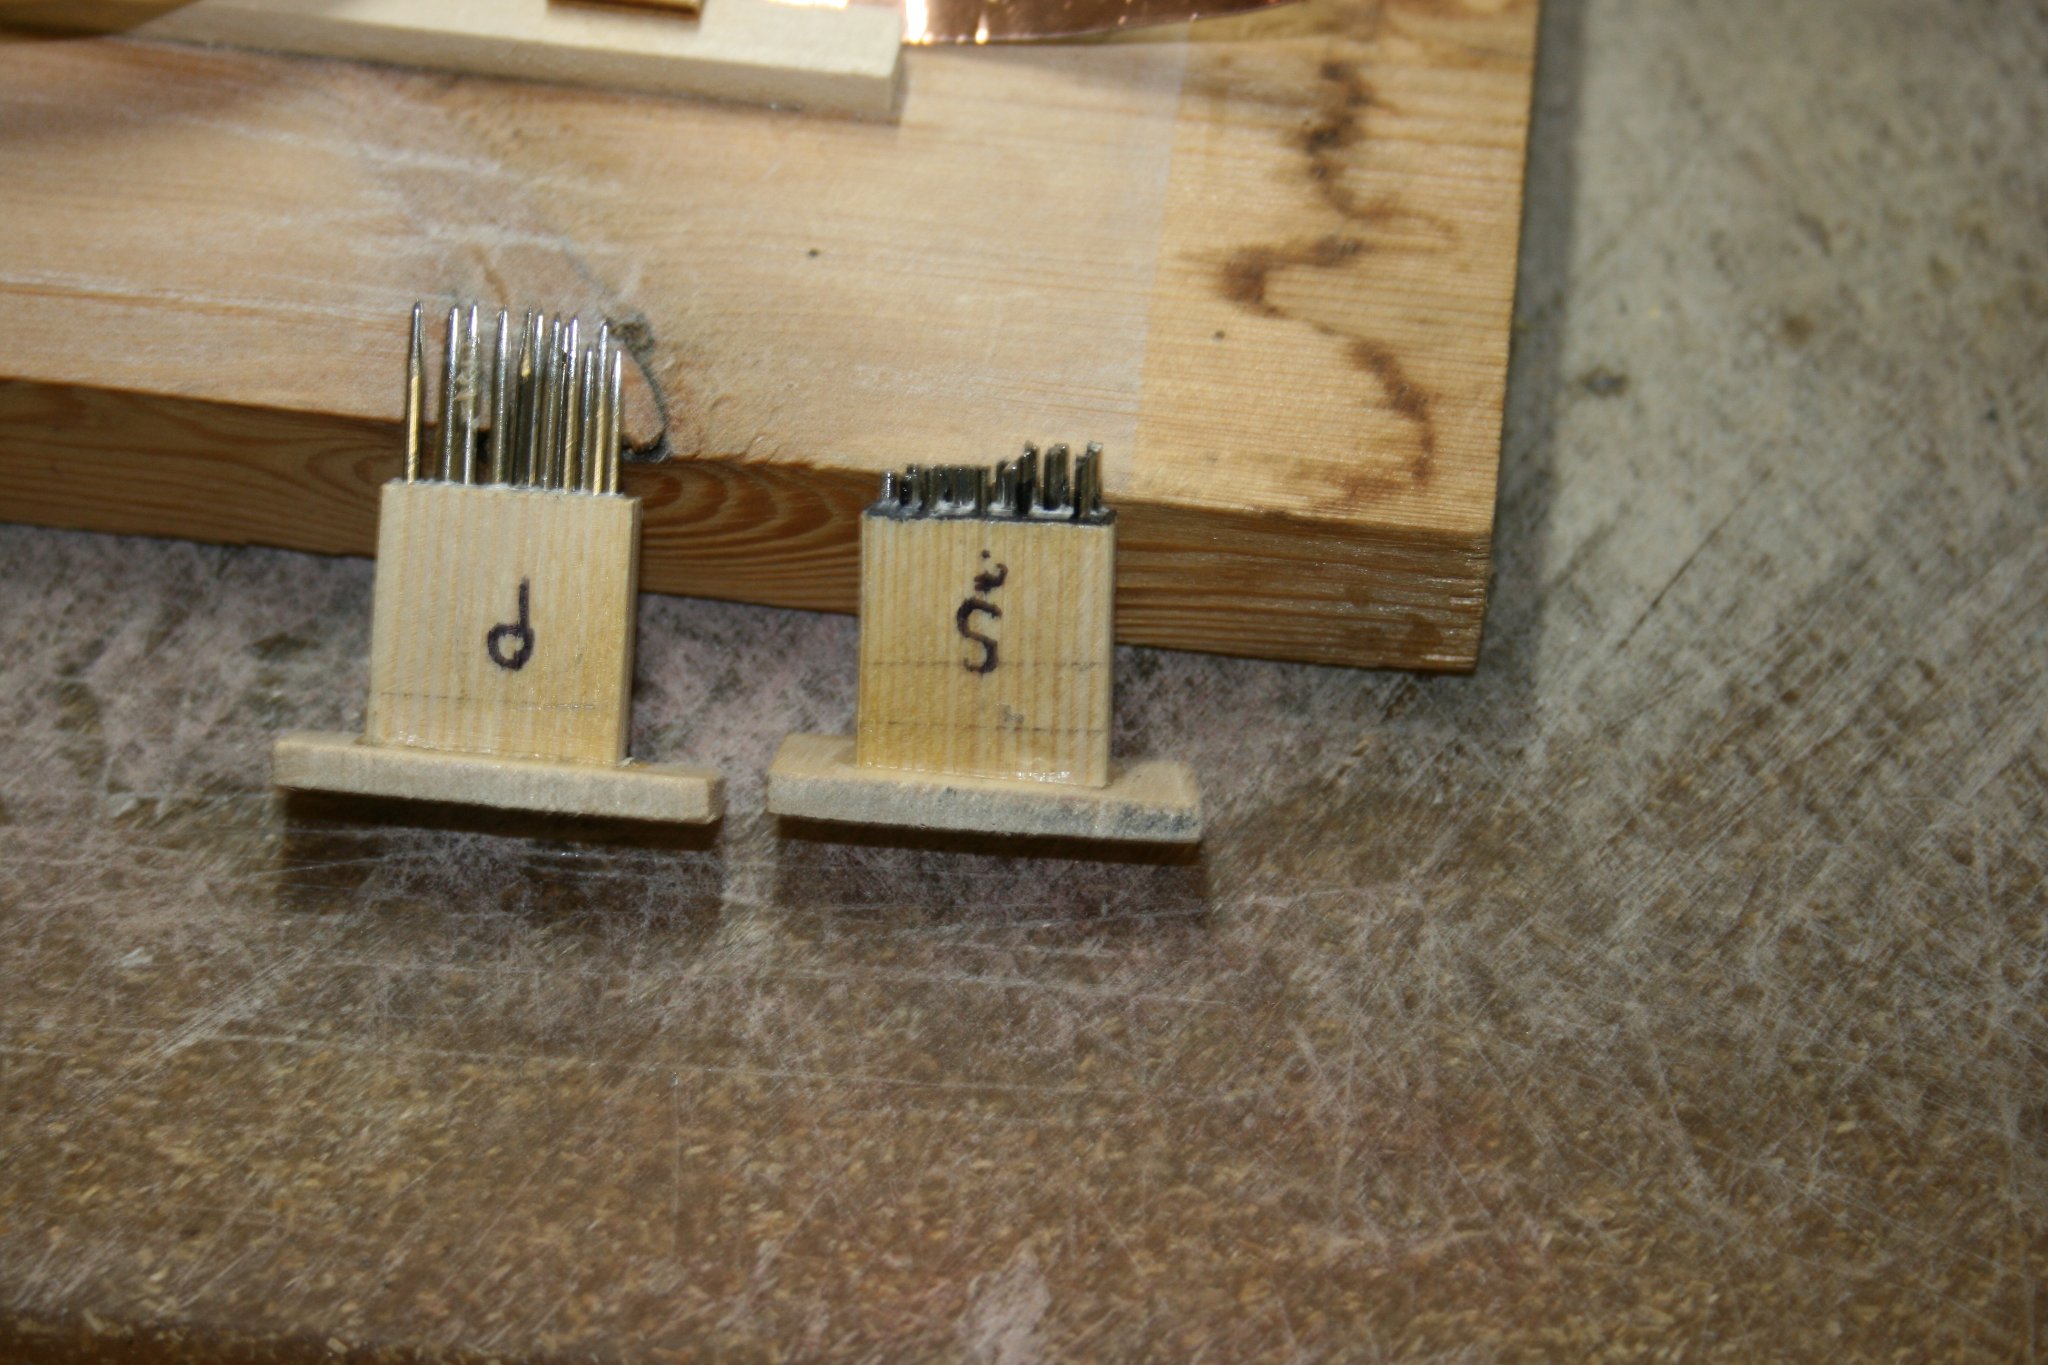
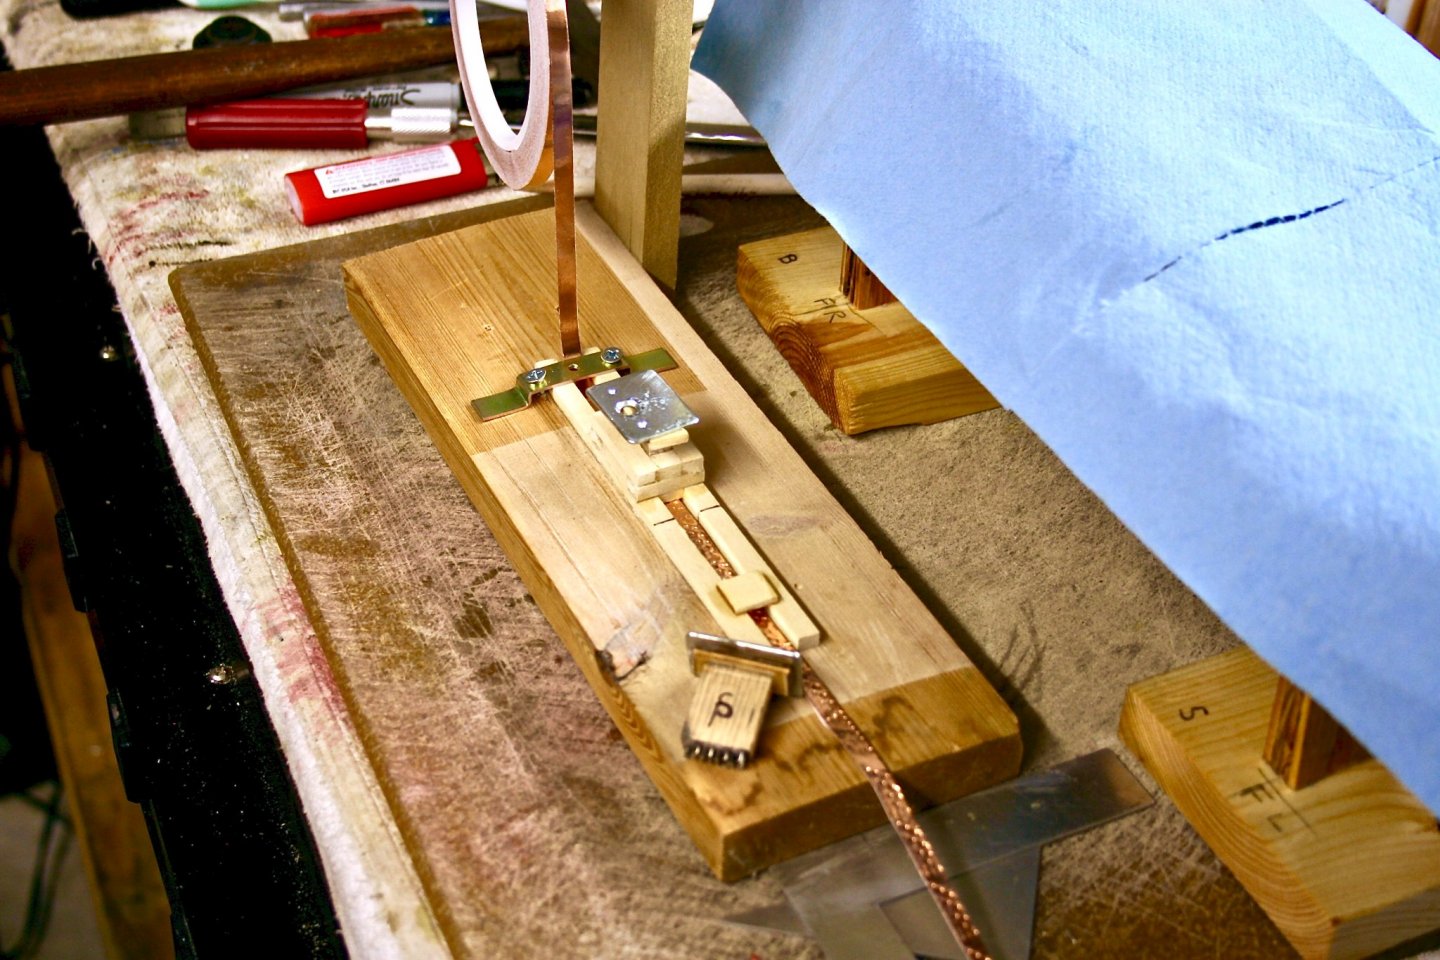
Plate Stamping Tool: It has come time to put together a copper plate stamping tool. I have read several threads on here that show how different builders have approached it and I have started mine. Basically, I hunted my junk stuff (which I have tons 🙂) And have started the construction. I am pretty close to being finished, but didn't have enough T-pins for the stampers. I am creating (as indicated in the instructions) a Port and Starboard stamper and it is shown in one of the pics below. I am planning to use T-pins for each stamper as they are just the right size. And they are stiff enough to not bend since they are made out of stainless steel. I have used them for years in building planes and thought I had plenty... oops. Well I will have them tomorrow. I will continue with a couple of additional pics when it is ready. Here is what I have so far.

- 436 replies
-
- 4
-
-
- Syren
- Model Shipways
- (and 1 more)
-
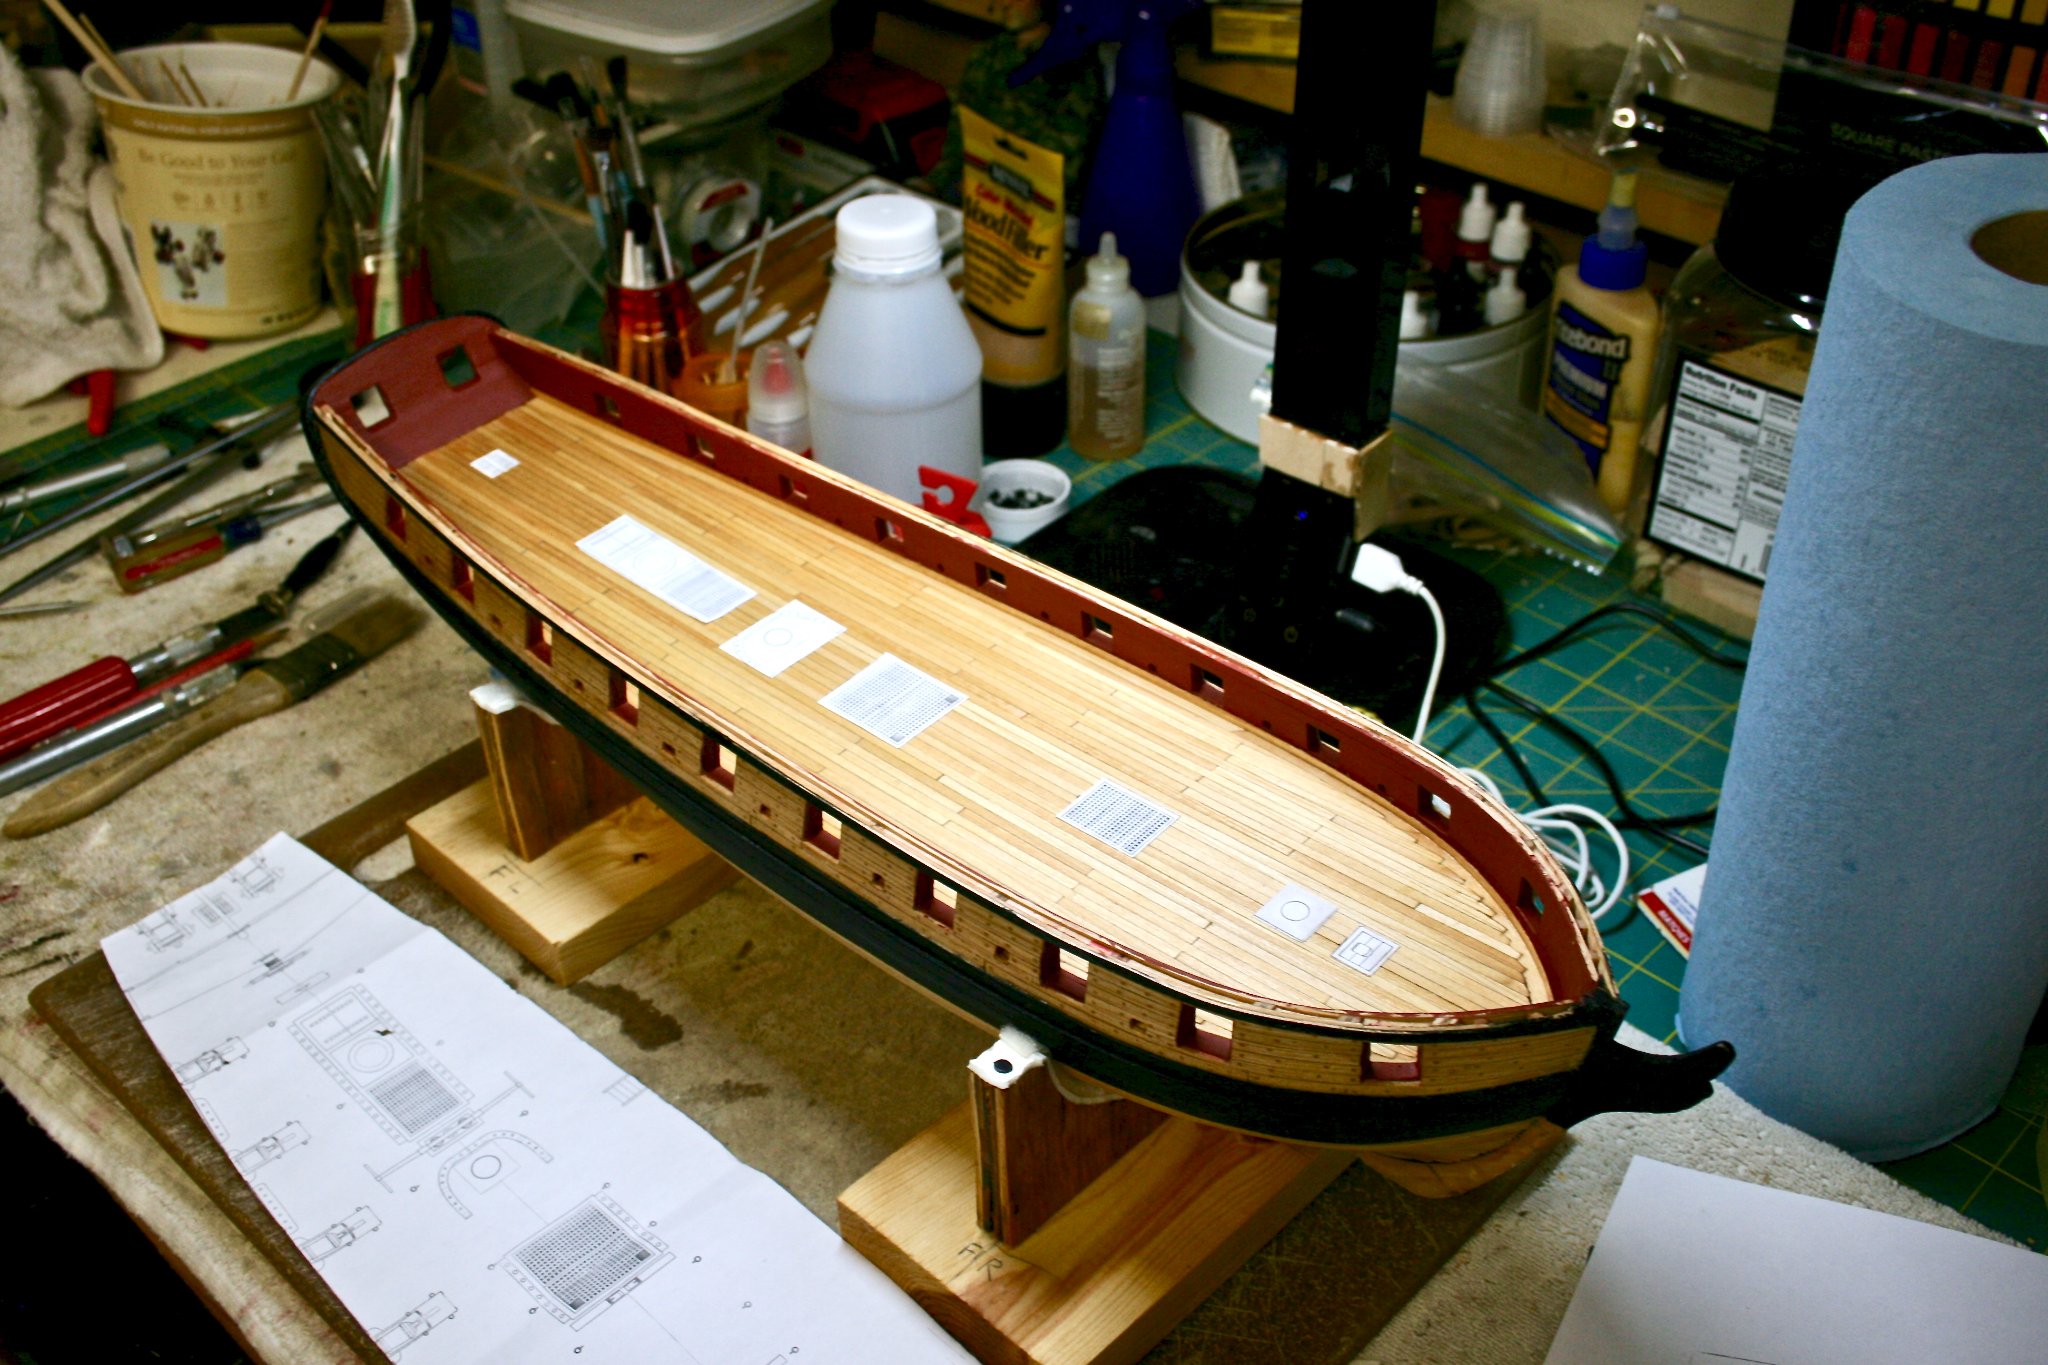
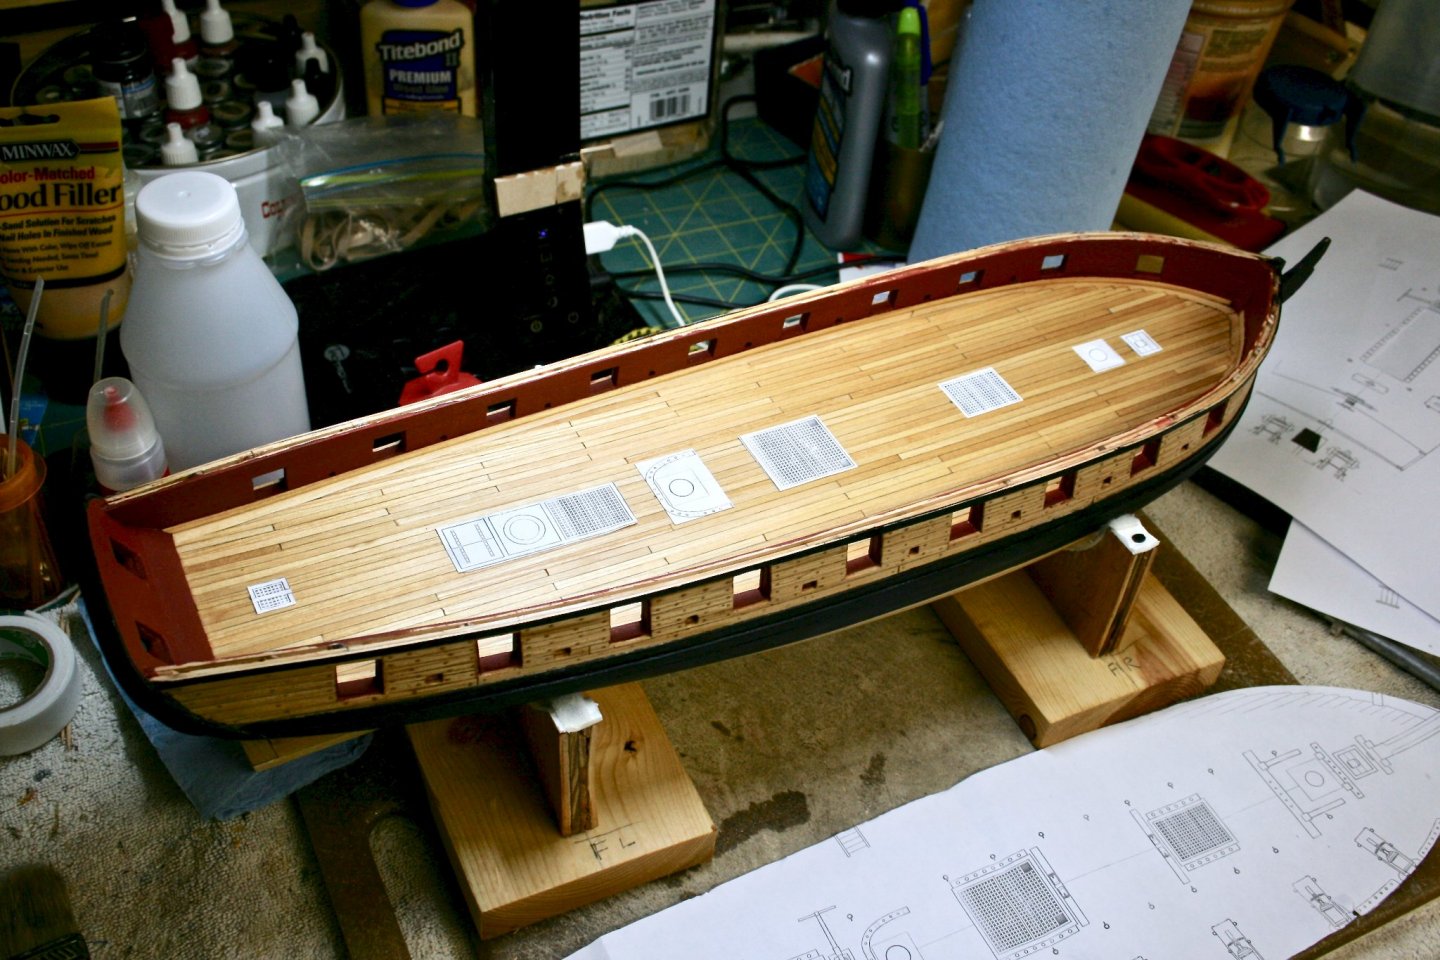
In Need of a Shave: The first round of tree nails are drying on the deck and awaiting trimming and sanding. I say first round, because, I am not totally convinced I need additional ones. The center of the deck where most of the furniture is, will need them at plank ends, for sure. However, since I made the planks 20 scale feet in length, they are shorter that the 4 bulkhead size. Because of that, in looking at the deck, I think that at the butt end of each plank is enough to keep it from becoming to busy. The center will have quite a few and will fill the bill. Adding additional tree nails to some of the long boards seems to be to be overkill. If I had used the 4 bulkhead sizes, I would probably feel differently. And now the pics:

- 436 replies
-
- 4
-
-
- Syren
- Model Shipways
- (and 1 more)
-
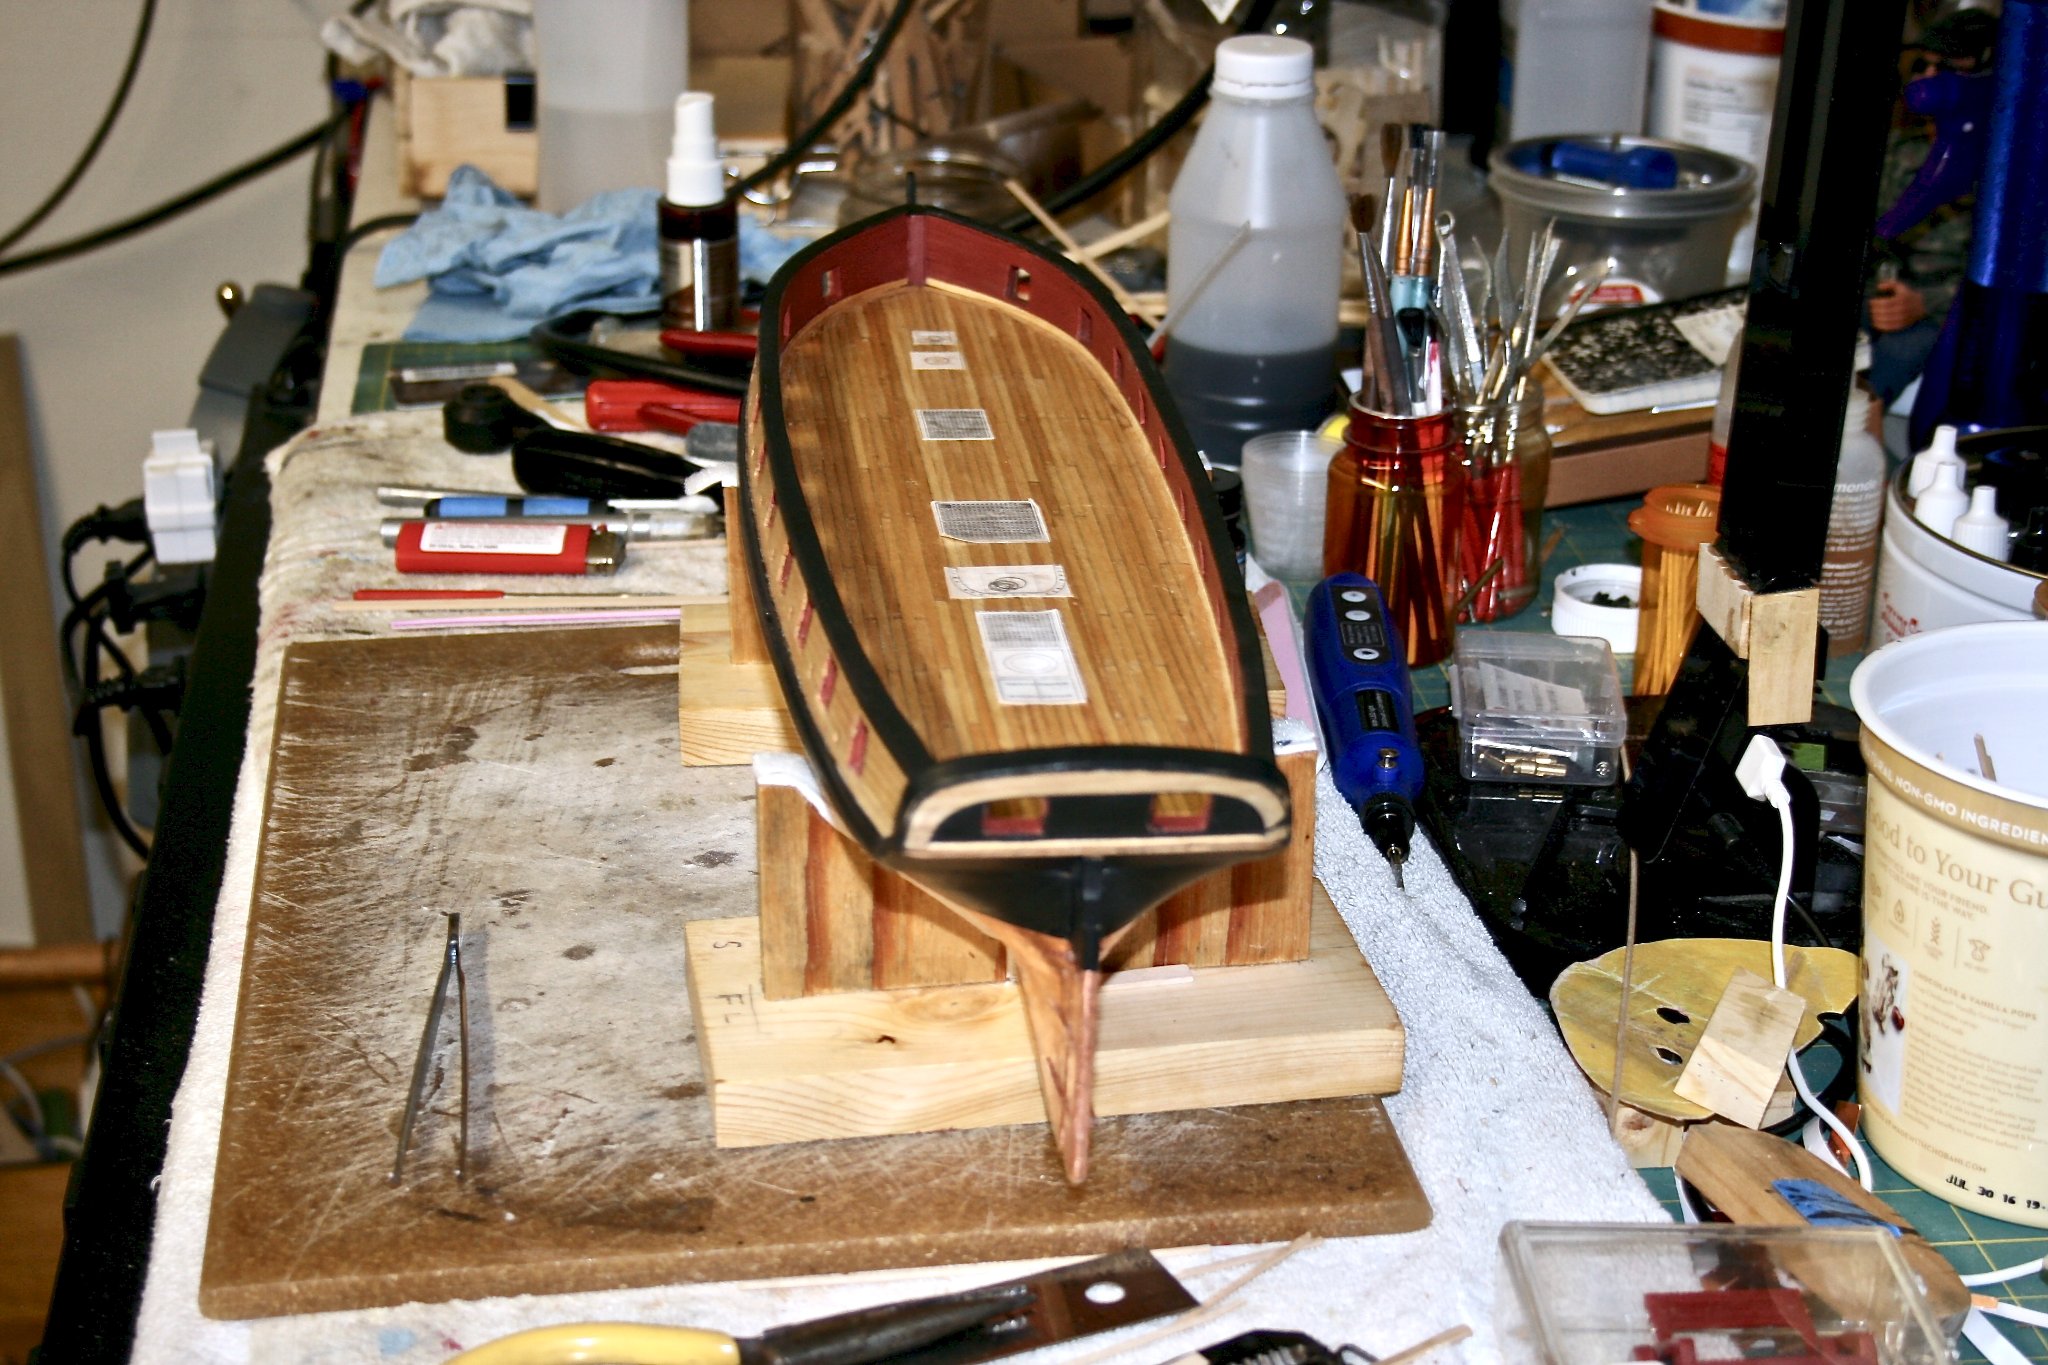
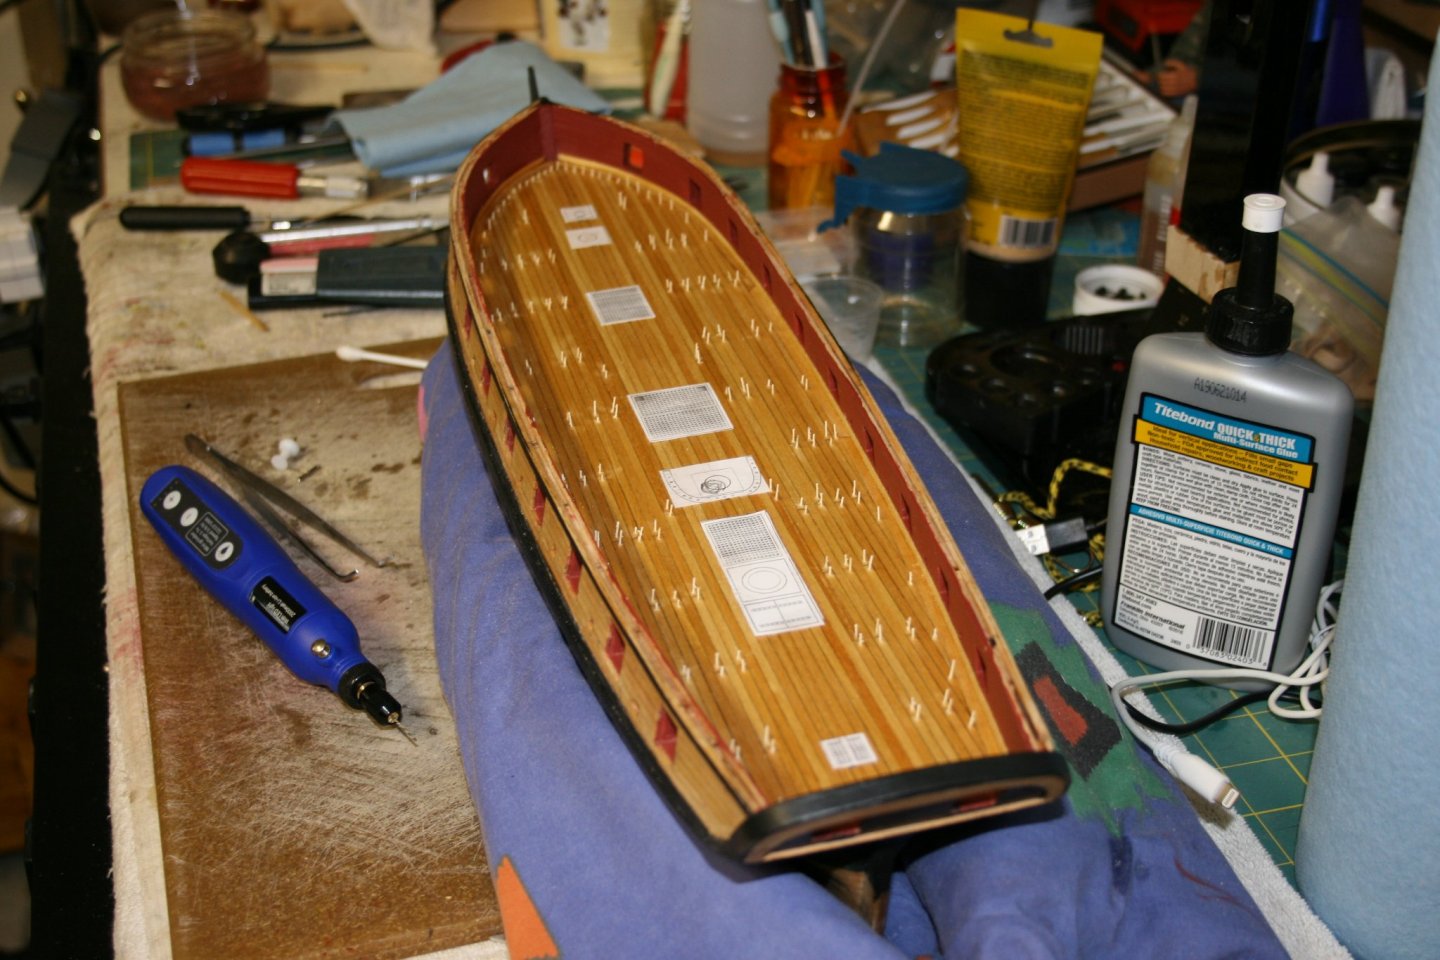
Chapter 8 - Plating: Well almost..... I have to make the stamping tool, and start punching out the plates, but first.... There are 2 items left to do before I move onto the plating. First, I need to add the cap rail. I have the wood for it, but I need to transfer the shape to it by tracing the hull shape. AND... Second, I need to tree nail the deck, sand and refinish. I will start on the tree nailing first so that I don't have to work around the cap rail. It is much easier, and allows a little larger space to work in. It's not a huge deal, but whether I add it now or after, I also gain not hitting it ... you know I will. 😀 So, I started adding the deck furniture, so I can save on the number of tree nails I need. Any drilling, gluing, sanding, and refinishing that I can avoid is welcome. Particularly, since I just did all that with the deck. So I have started cutting out each piece, and then will know where the nails need to be. I have the original for measurements, and copied the deck plans that I get the parts from. And lastly, I foresee not using the building board with the clamps after the copper plating is in place. So I built a set of hull stands to save any marring of the plates. Here are pics:

- 436 replies
-
- 6
-
-
- Syren
- Model Shipways
- (and 1 more)
-
Oops.... I did go through several. 🤫 My apologies to @NovaStorm who posted the idea on a thread of @WalrusGuy .......my bad.
-
Thanks, I knew I had seen something before, so I did some looking. And, I found your post, and glued two 1/8” planks lengthwise in a L shape. The waterways are sanded and drying with their first coat of Tung oil. I also have them in my bending jig adding the bow curve. They are so thin, even bending them dry is easy. Next step is to put one final coat of mixed flat red and brown on the bulwarks and transom. The scuppers still need painting after adding them with a needle file. I will add a couple of pics when done.....and then it’s the copper plating. 😃
-
Thanks, @Overworked724. I have to say that I am very pleased at how it turned out. That first cut into the margin plank was nerve wracking, but after that, it got easier. Then as the details jumped out as I brushed on the Tung oil, I couldn’t believe the difference. Today, I completed filing out the scuppers, and am trying to figure out how to do the waterways. Although, I am still not sure how to file/sand a piece of square stock only 1/16” thick at a 45 degrees. Next, I need to start assembling the press for each copper plate. Until then, I just sit here and look at how it came out. 😁
- 436 replies
-
- 1
-
-
- Syren
- Model Shipways
- (and 1 more)