Redshadowrider
-
Posts
301 -
Joined
-
Last visited
Content Type
Profiles
Forums
Gallery
Events
Everything posted by Redshadowrider
-
Heads or Nails i have been mulling over the possibility of not adding the tree nails to this build. The more I think about it, the more I come to the conclusion that the time spent is worth it. Maybe I will settle on using wood filler, but I do have an x-y table on the way and some soft wood blocks from plane building that will work well for making wood nails. If your reservations on adding them is just the tedious process, I am not concerned. If it is my skill level, then feel free to explain the difficulties I will encounter. I can take it...... 🤪
- 436 replies
-
- 1
-

-
- Syren
- Model Shipways
- (and 1 more)
-
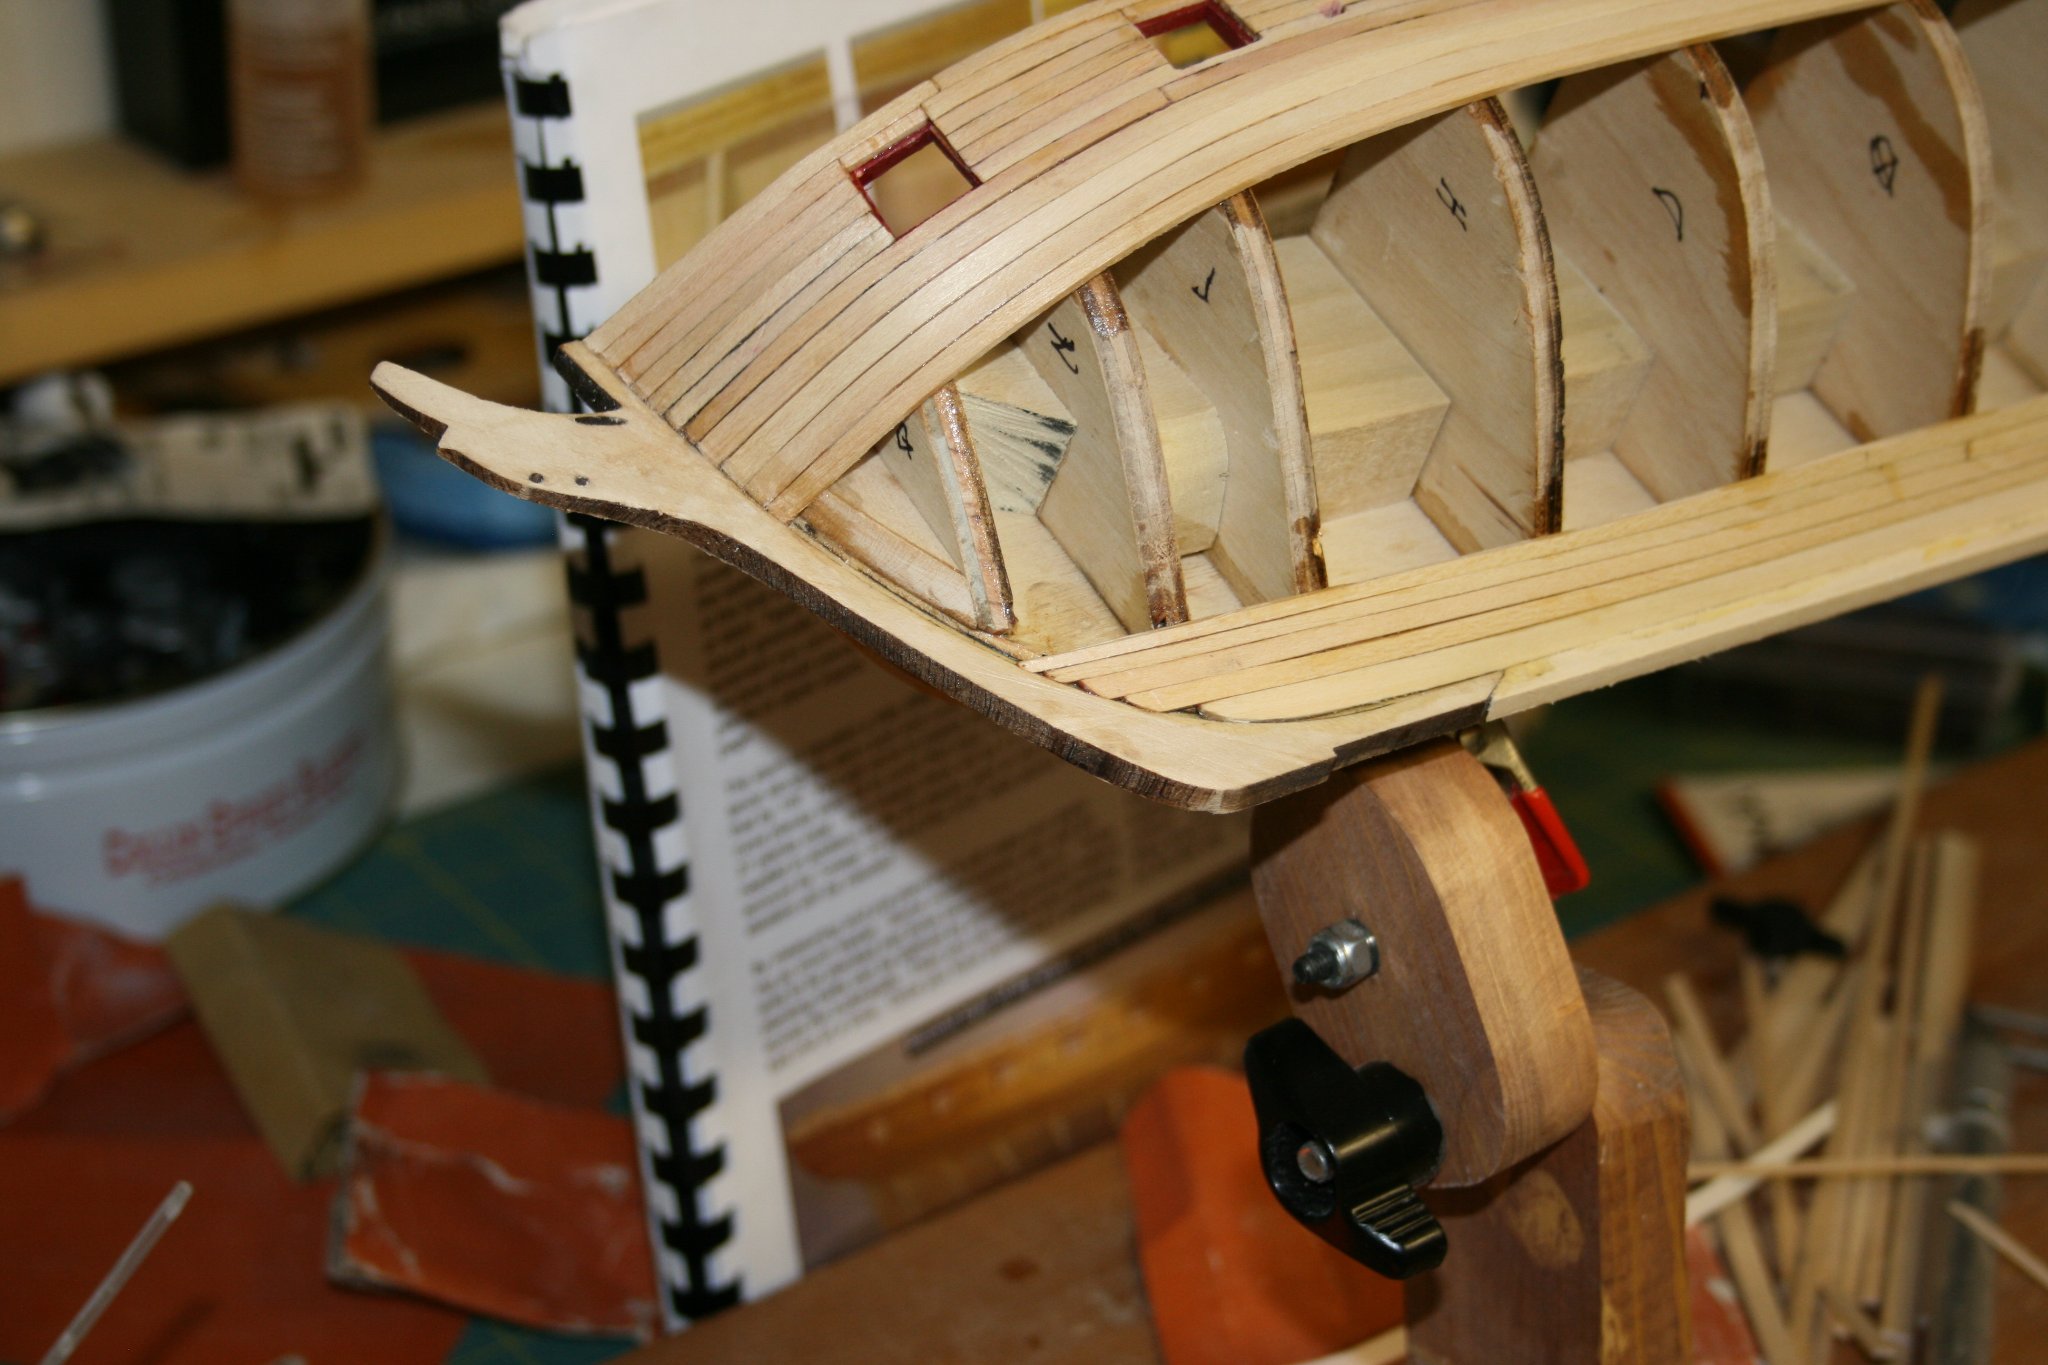
@Overworked724 I reread your process and just missed the 20 gauge needle part. I did get the map pin ground down tip though... 😀 It's Waling Time!: NO.....not that..... THIS: I am doing what each of you have suggested and thinking over the treenail part. I will do a test run with scrap material to see if I will continue planning them. In the mean time, I have the wales to add and am wondering if I should sand the hull before adding? I have done some in the area where the 3 wales will be attached, but it is not finish sanding by any means. Just enough to smoothly support the wale planks. As you can see, I did mark the bulkheads in anticipation of adding the tree nails. Between Covid and Winter, I got time.

- 436 replies
-
- 2
-
-
- Syren
- Model Shipways
- (and 1 more)
-
@Overworked724 I am planning to make tree nails using the drill press method that you used. Can you provide me the actual needle size that you used?
-
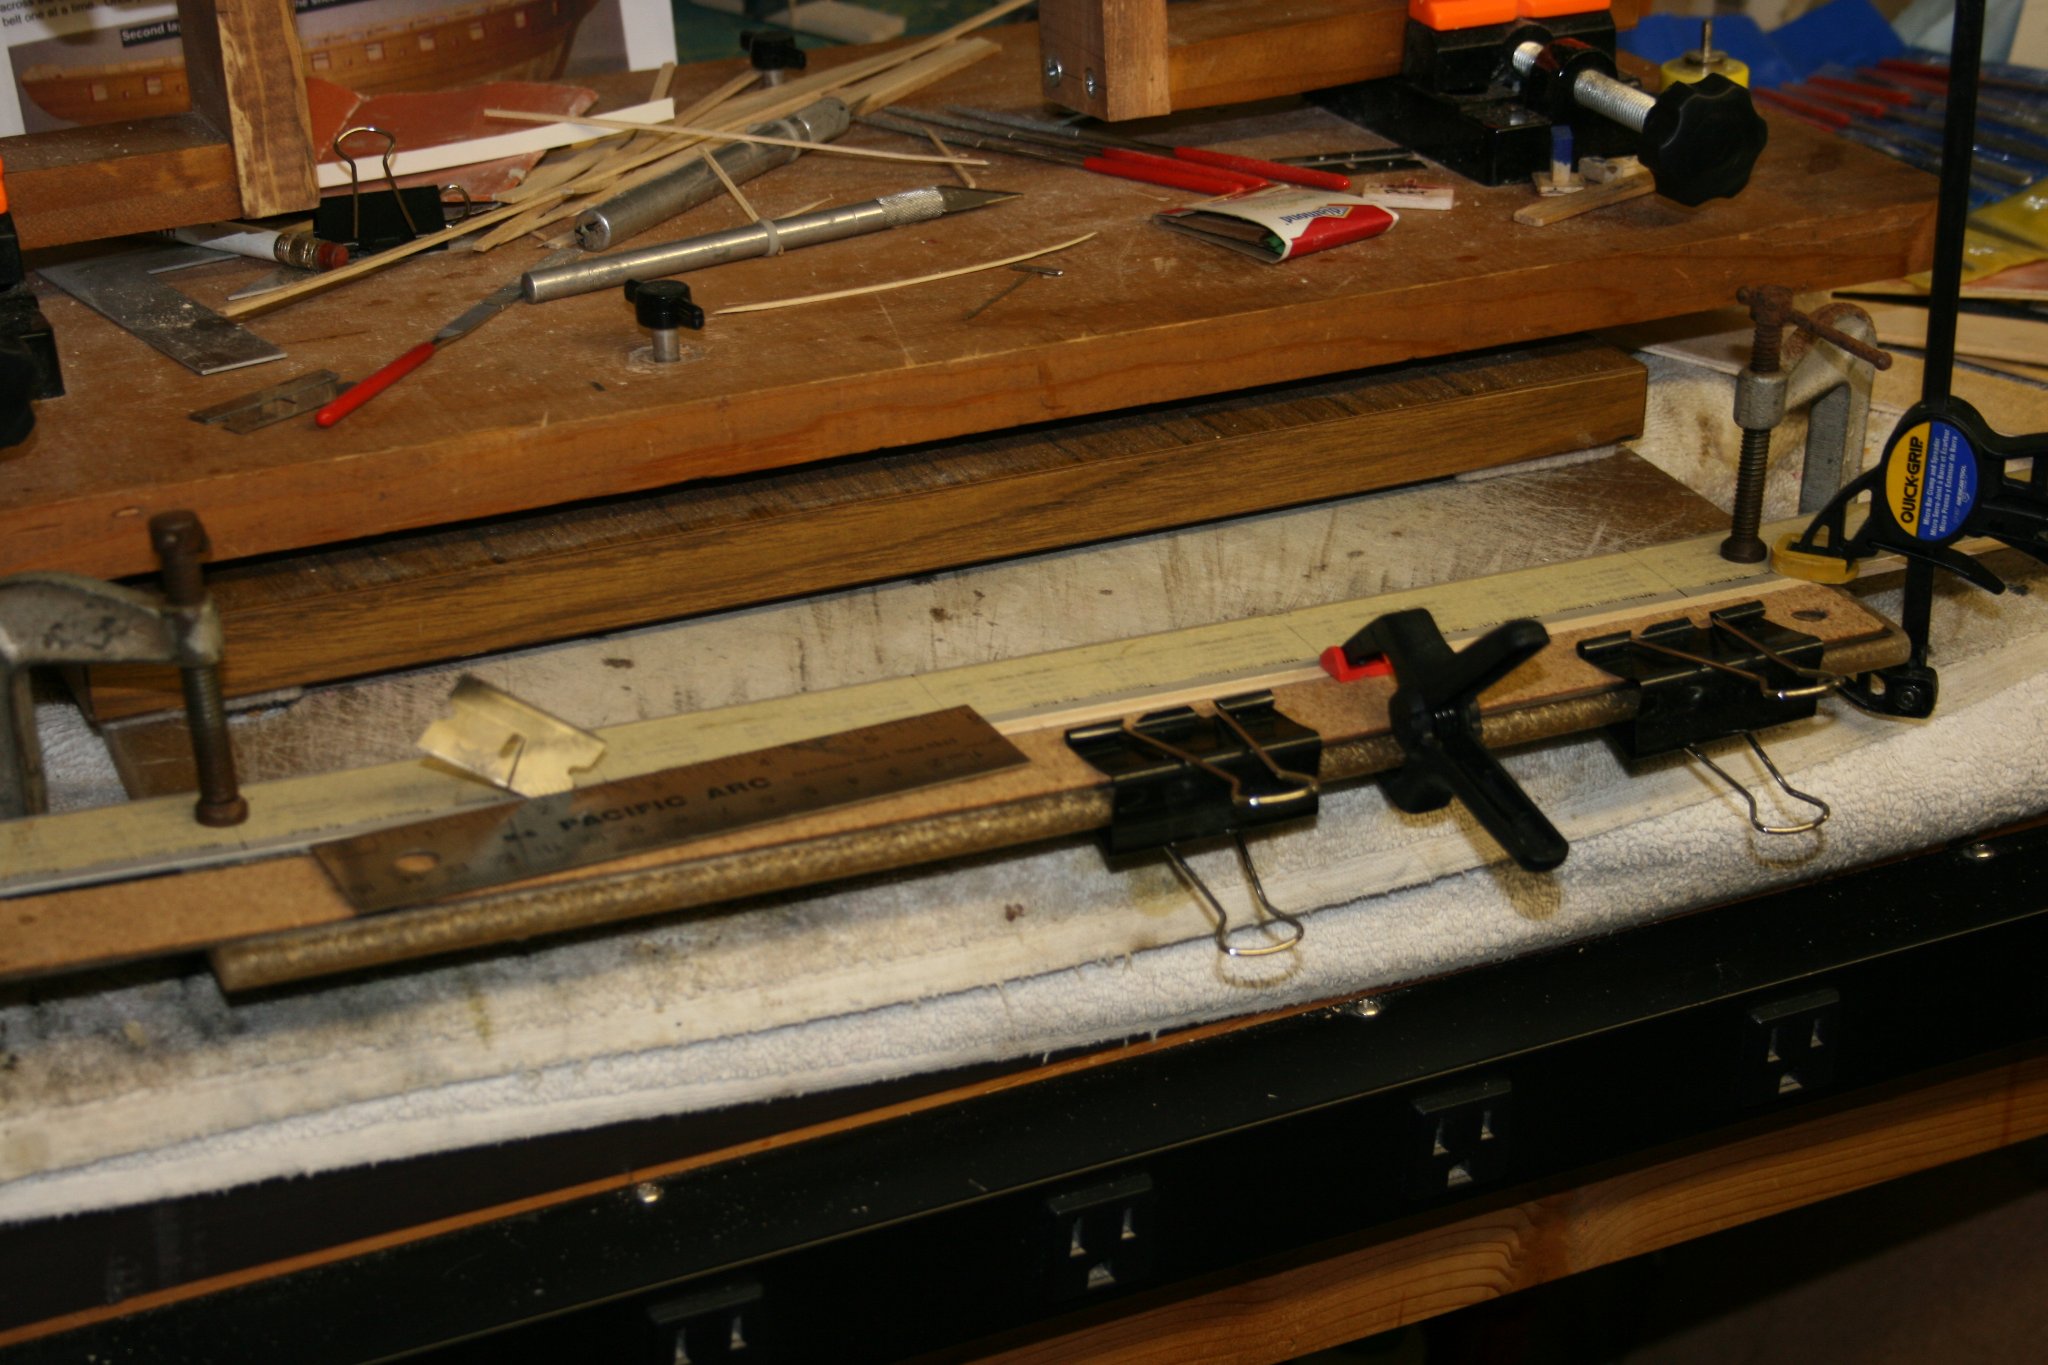
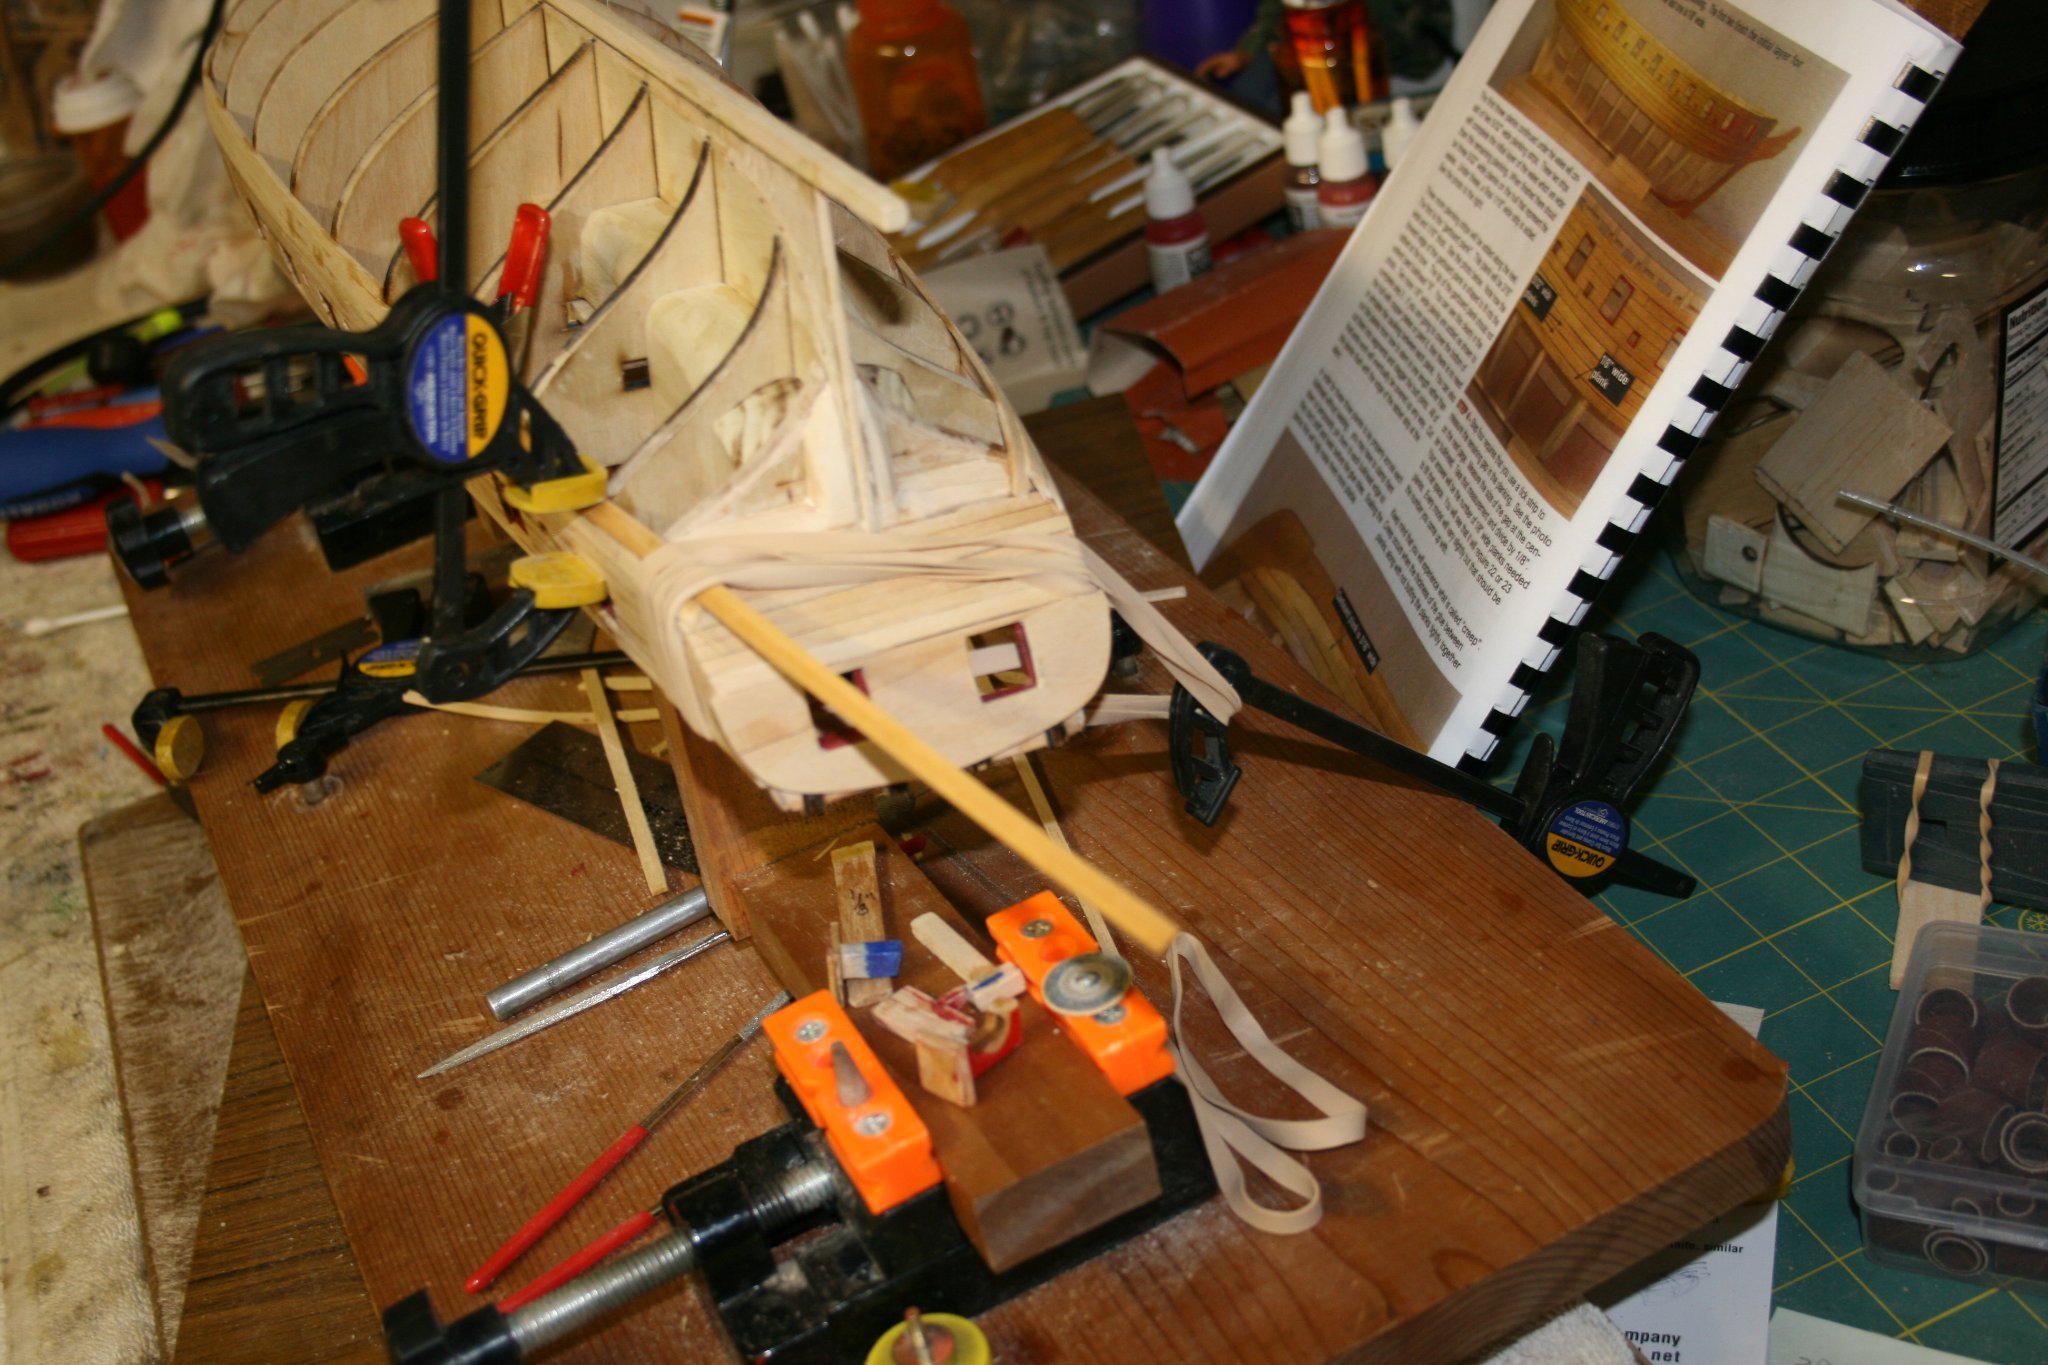
If You are a Newbie (Like me): About now, you are at this point, are saying to yourself..... Now I need a plank ripping device that can cut at an angle. Well, that's what I am saying. According to the math, I need 22 planks to fit into a slot, not made for that many. So I need to shave off about 5/32" and leave 3 allowing the 22 planks to fit the bow. (I have decided to split the planks somewhere in the middle, on a bulkhead so I can bend them at both ends. Thanks to @Overworked724 for giving me an idea how to make one. I used 3 steel rulers (6", 18" and 1 meter) to create a channel to fit and hold the plank in place for cutting. Using the 18" and 1 meter, they are long enough to create the small channel. The 6" is used to actually cut the plank with a razor blade. (it is thinner than a #11 X-acto blade.) And all the clamps, and cutting board competes the platform. Here are 2 pics, One of the "Linear Plank Cutting Machine" and the results on the bow. 😀


- 436 replies
-
- 7
-
-
- Syren
- Model Shipways
- (and 1 more)
-
LOL...Thanks, I never thought about trying the cutting method. Looks like a new #11 blade, and a very sharp pencil, and I will be good to go.
- 436 replies
-
- 1
-
-
- Syren
- Model Shipways
- (and 1 more)
-
It came to the point where I had to dust off my algebra skills, and determine how much material to remove from each plank. This is the bow portion where each 1/8” plank needs to be narrowed to allow for all 22 planks to be added. It’s funny, in a way, that I am better at trig, than algebra. So I struggled in reconstructing the “X” equals memories, but after quite a while, I finally reached the answer... 3/32” for the width of each plank. So I decided to reread the instructions to ensure accuracy. As Murphy's Law intervened, here is what I found in the instruction booklet: .........measure the size of the gap at bulkhead “N” and divide that by 22 or 23 strips. The answer you get will be the width those 22 strips need to be tapered to. The planks at the bow will be tapered to around 3/32” wide (give or take)....... My answer?..... after resurrecting my algebra?... 3/32" It was right there in print. 😀 BTW: Can anyone point me in the direction of how to narrow the planks to the narrowed width? It's like trying to sand a wet noodle and it keeps flipping in it's side.
-
And the Total Irony..... When I got this finished, I looked at the front point of Garboard. It turned out to be exactly where the picture in the instruction book shows. In an effort to get more space, I “accidentally” got it in the right place. Who knew? 😃
- 436 replies
-
- 2
-
-
- Syren
- Model Shipways
- (and 1 more)
-
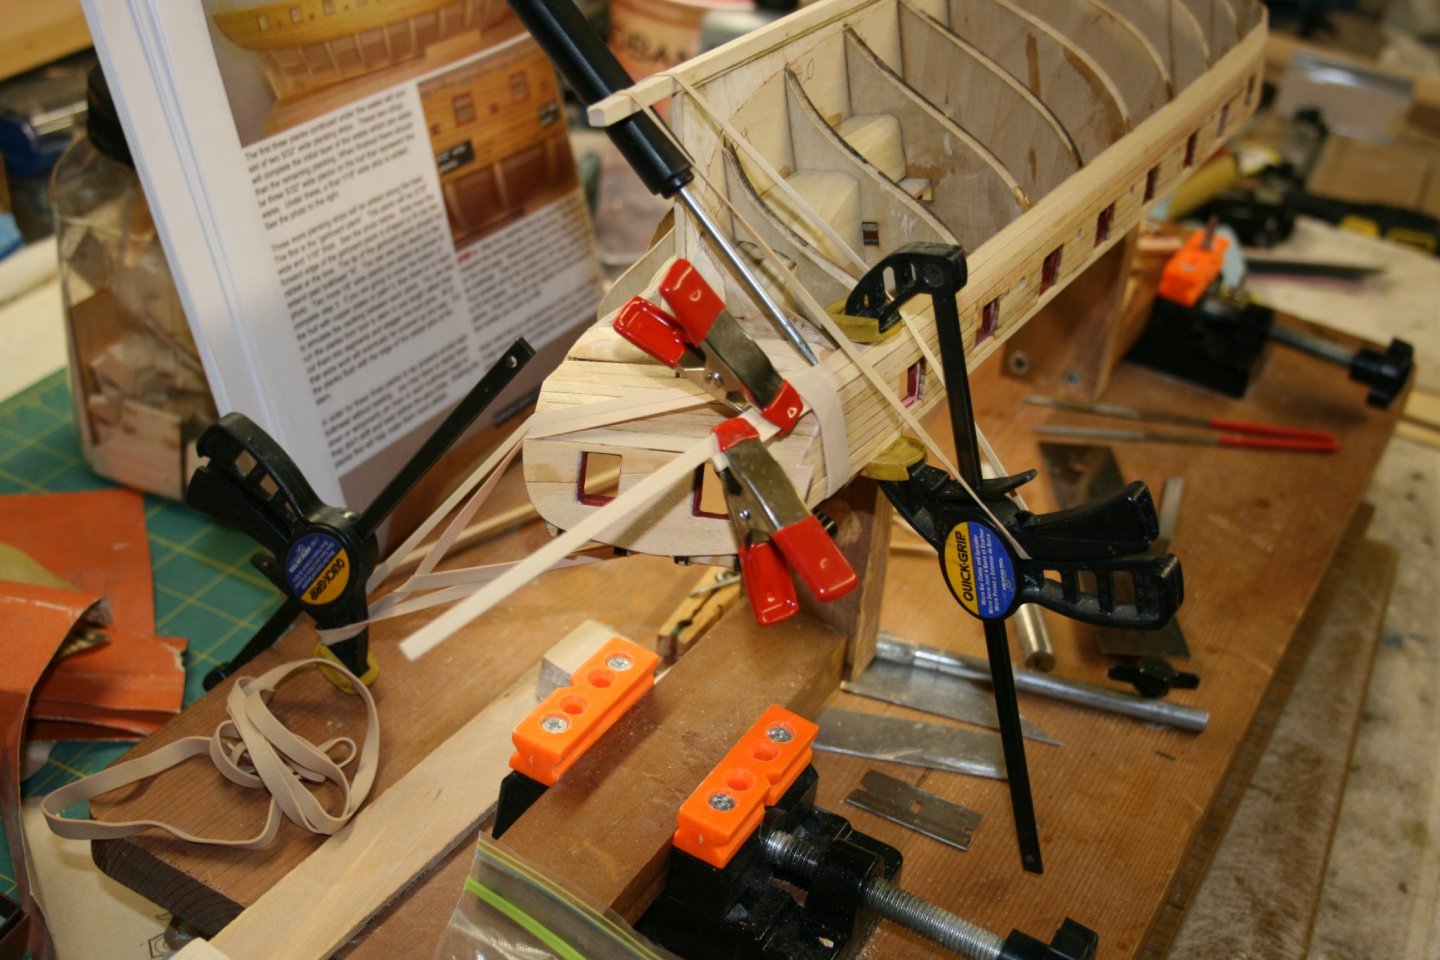
And Now, for Something Completely Different..... I decided to try a little different process to get the Garboard to match the curve in, at least, one direction. I started by taping a small piece of file card behind the stem on the plans, then turned it over to the plan face. I took a small map pin and copied the curve by punching through to the card. After this, I cut out the curve and tried to match where it started, to where the plank ended. It is, in no way, exact, but it can get you close so sanding is less. Then I soaked the plank a little longer than normal and put it in the curve jig. The curve needed is close to the jig I build for the bow planks. While it was still damp, I fit (forced) it into the rabbet and clamped it as close to position as I could get. Then I glued the dry bulkhead contact points and removed the clamps, and worked the rest into place with my fingers. (Just as Overworked recommended.) 😀 It didn't come out perfect, but for my first one I am ok with it. It's much easier once you realize that the copper plates will be placed over them anyway. Fill it here an there is small spots and it will work fine. Also meant to add, that I did the tick strip measure and it came out to 22 planks...right on the money.

- 436 replies
-
- 5
-
-
- Syren
- Model Shipways
- (and 1 more)
-
Thanks guys, I tried to dry fit a plank, and it also creates a compound curve. This is also difficult when building and covering an airplane. Unfortunately, unlike covering, wood doesn’t stretch very much. 😄
- 436 replies
-
- 2
-
-
- Syren
- Model Shipways
- (and 1 more)
-
@Overworked724 I am now at the point where the Garboard is to be added. I was reading your log, and saw your comment about not going all the way to bulkhead N. I am wondering if you went ahead with installing it this way? Or did you go ahead and curve it to bulkhead N? And would you do it the same way again?
- 436 replies
-
- 2
-
-
- Syren
- Model Shipways
- (and 1 more)
-
Think Outside of the Box; It's the new Paradigm, Work Smarter Not Harder..... or whatever floats your corporate boat. 😀 I decided that I would try soaking both ends of the planking that is making up the wales, and that was a good choice. However, it meant that I would soak a plank, add in the curve on the jig, then have to soak it again to make sure the stern would match the curve of the counter. So I made a decision to split the planks somewhere in the middle and soak them separately. The butt joints will either be under the wale, or will be copper plated, so a joint is not a big deal. This way, I can soak the plank for the bow, and when I applied it, I could mark out a bulkhead on which to glue the center of the plank. I am staggering them so that the butt joints are not on the same bulkhead. Now, I can be working on the bow (fairly easy) while the stern section is soaking. Then when I am ready, I can add the stern part of the plank, glue it to several bulkheads and clamp it around the counter while it is still wet and pliable. After it dries, I can glue and shape the plank as needed. Now that is synergy.... LOL...

- 436 replies
-
- 5
-
-
- Syren
- Model Shipways
- (and 1 more)
-
Now, that’s funny, I looked right at it and it didn’t register...duh. 🤫 I just tossed out a small container of the same stuff. It matches balsa pretty well.
-
LOL, I was just looking at your build at this same area. Did it say what filler you used? I was mostly looking at the pictures. 😁
-
Planking the Curve: I have plenty of clamps, but have run out of room for them while planking around the counter at the wales. Any suggestions on how this should be done will be appreciated. I am thinking of upping the soaking time of each plank, but not sure if I am just making it harder on myself. Currently am looking through build logs at this process to see if someone has a better idea. Here is my clamping cobweb 😃
- 436 replies
-
- 5
-
-
- Syren
- Model Shipways
- (and 1 more)
-
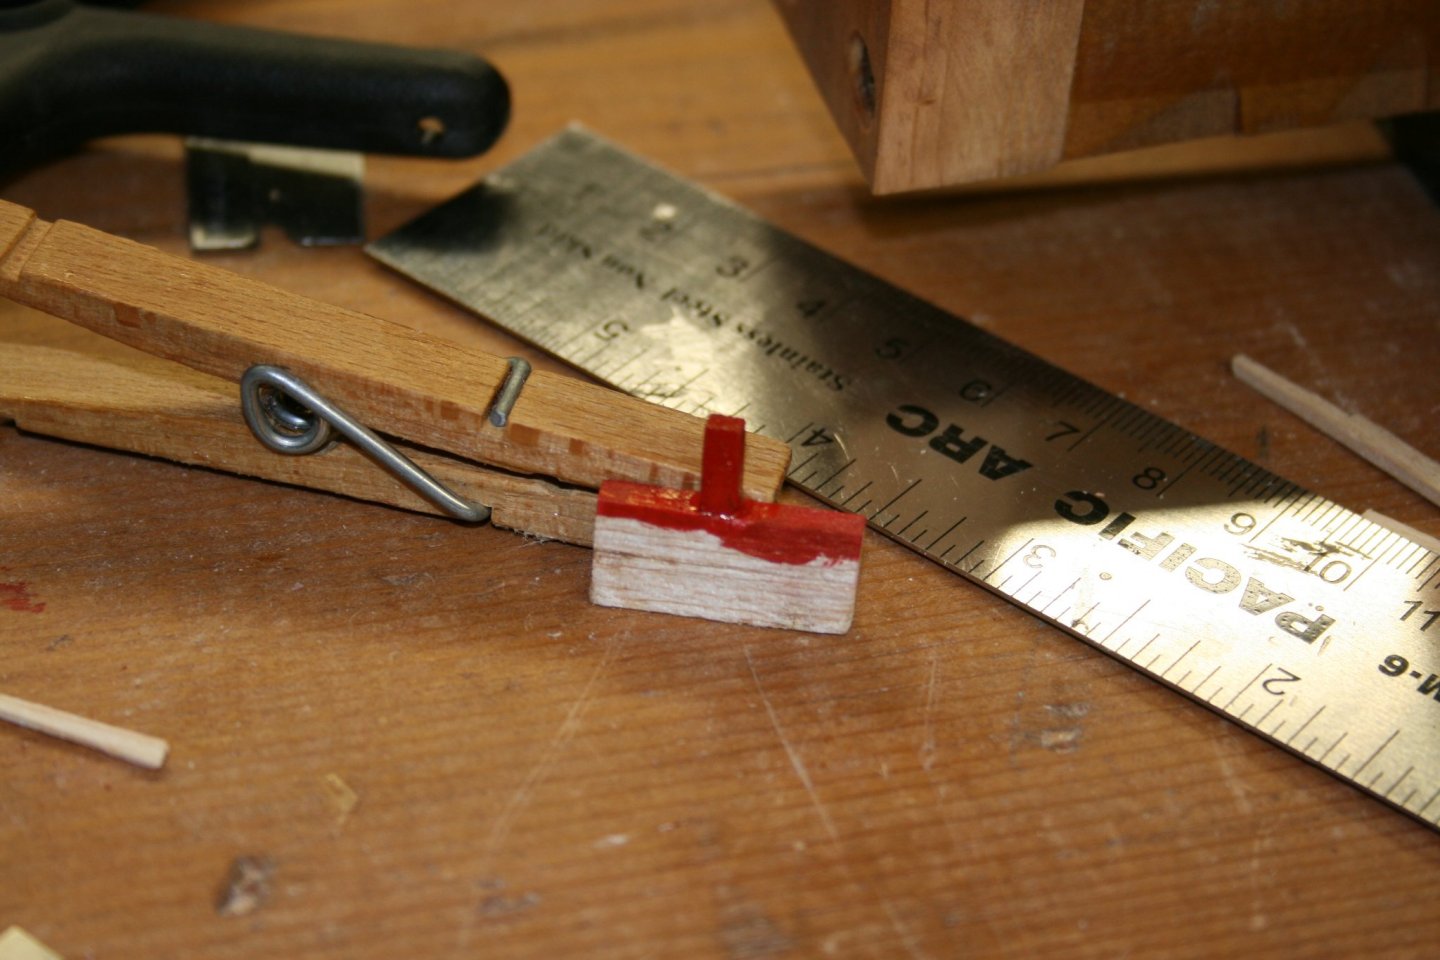
In the picture above, if you look closely, there is a plank on the port side that is not totally seated. I am not sure what is causing the misalignment, but there is at least 1/2 of the plank below where sanding is required, but that is just to level the surface. At that point, it will start to thin at the high point. I am considering trying to fix rather than sand because with it painted black I am fairly sure the repair would not be seen. Input on this, or any other way to fix, other than sanding or repair? I do need to put a good light on it and look closer as well. Resolved: After sleeping on the question, I figured out how to fix the high plank. Rather than cut into the outside of the counter and try to replace the plank that is not seated, I sanded a wedge into a scrap plank, and glued it behind the misaligned plank. Doing that avoided any cutting into existing planking and provided a base which will hold up to sanding. Onto the next step... More Planks.... 😉
- 436 replies
-
- 1
-
-
- Syren
- Model Shipways
- (and 1 more)
-
TA - DAH..... Don't ya' love it when a plan works from start to finish. Here is the completed result, with only sanding left to do. One other recommendation....... which I didn't take a photo of. Once I completed the gun ports, and test fitted the transom, before I glued it on, I took a 5X7 card stock and traced out the part. If you look at my final picture, you can see where a crack is glued together and I was still able use. If I couldn't have fixed it, the traced part would have saved one heck of a lot of rework.
- 436 replies
-
- 5
-
-
- Syren
- Model Shipways
- (and 1 more)
-
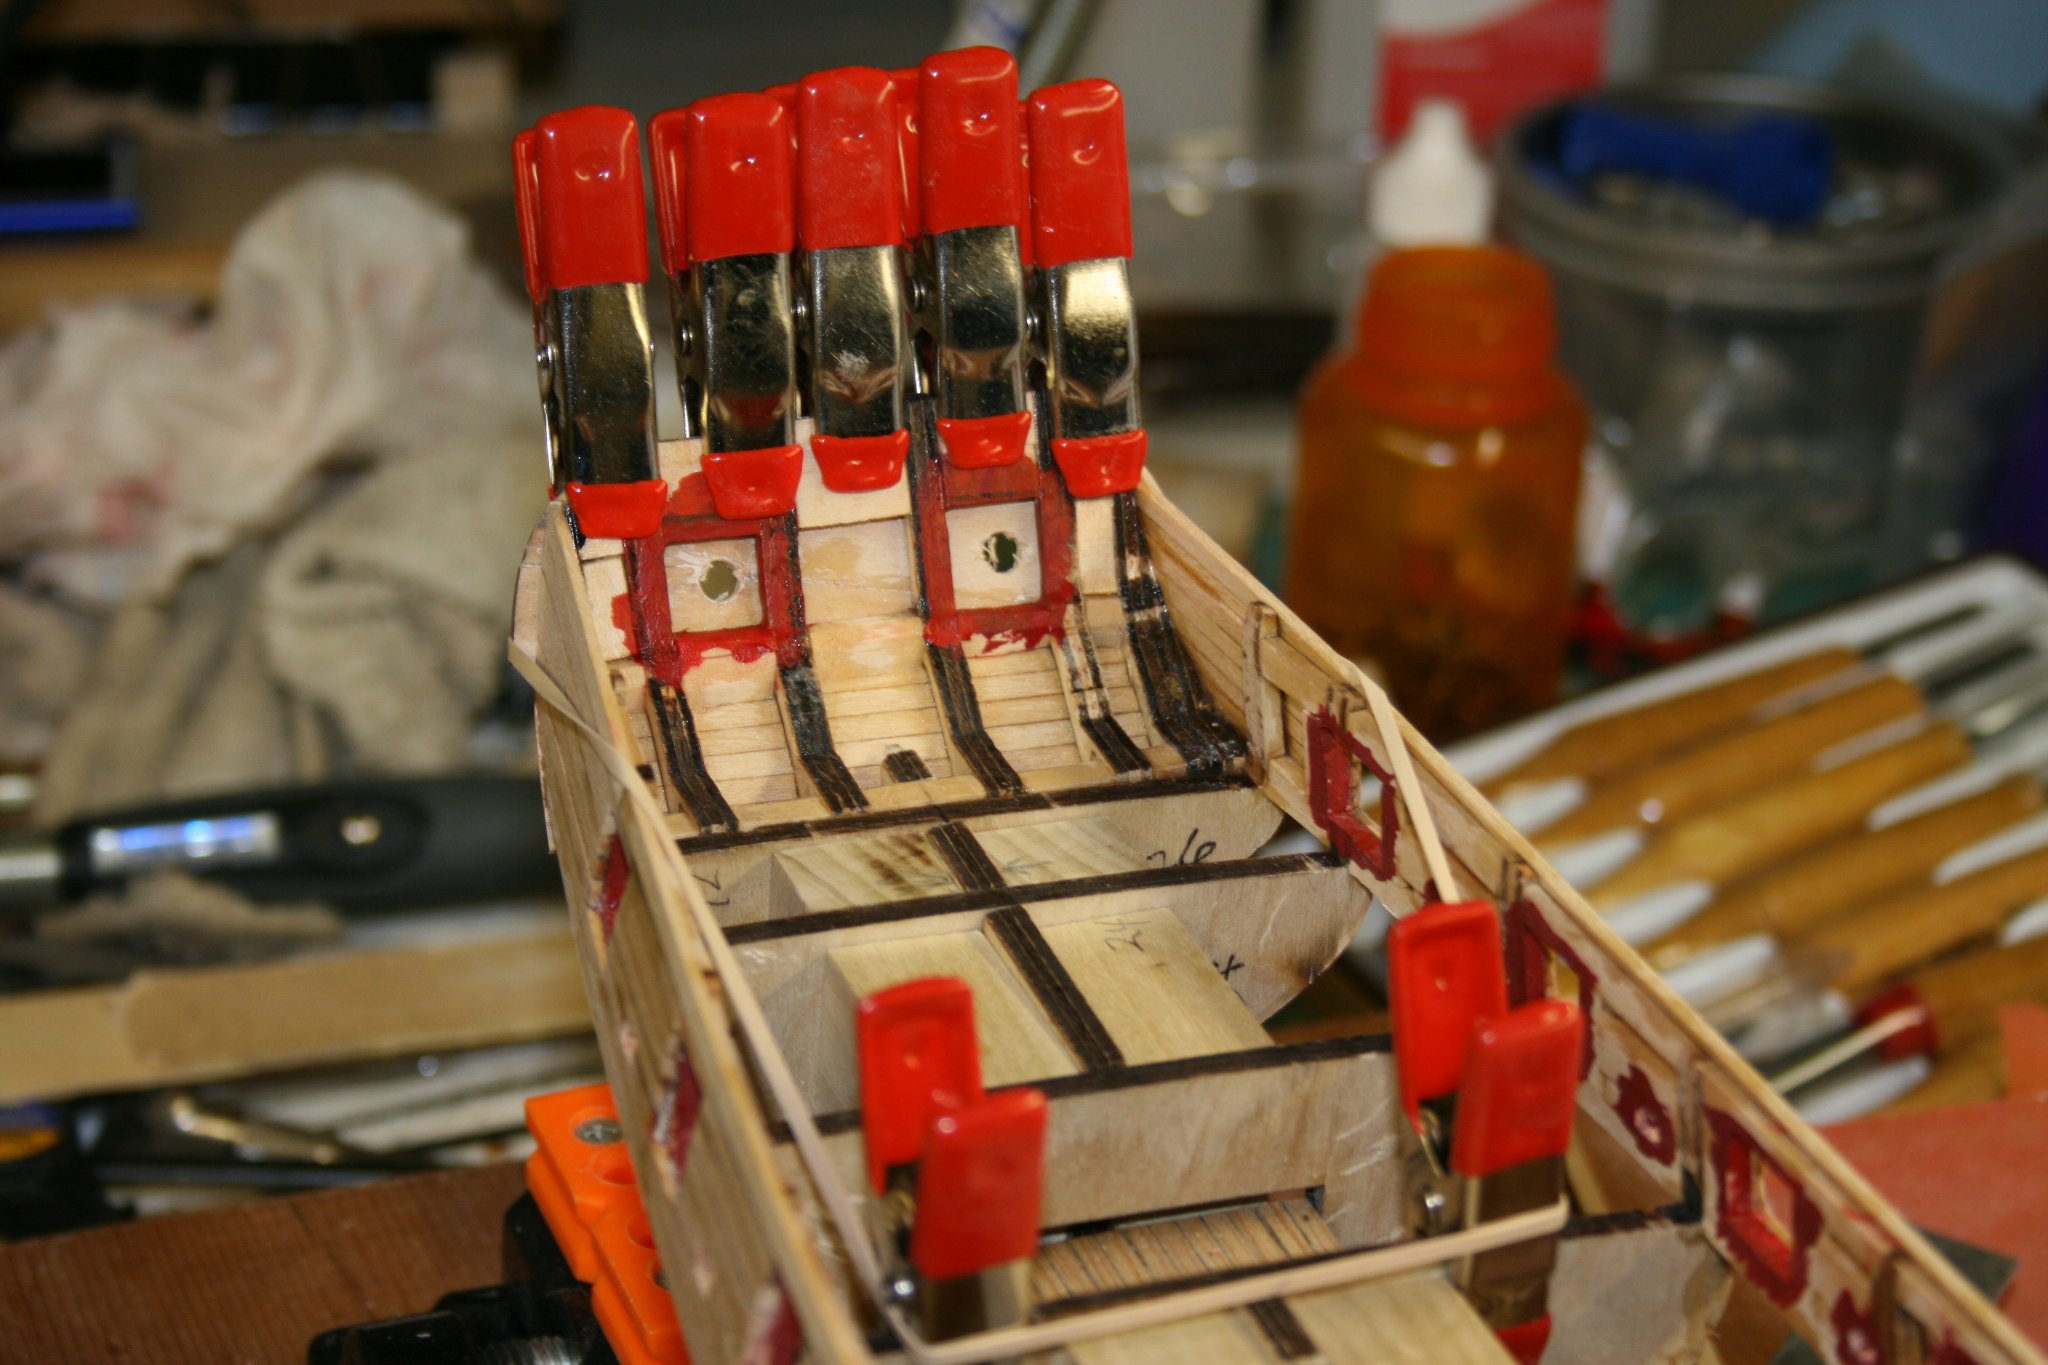
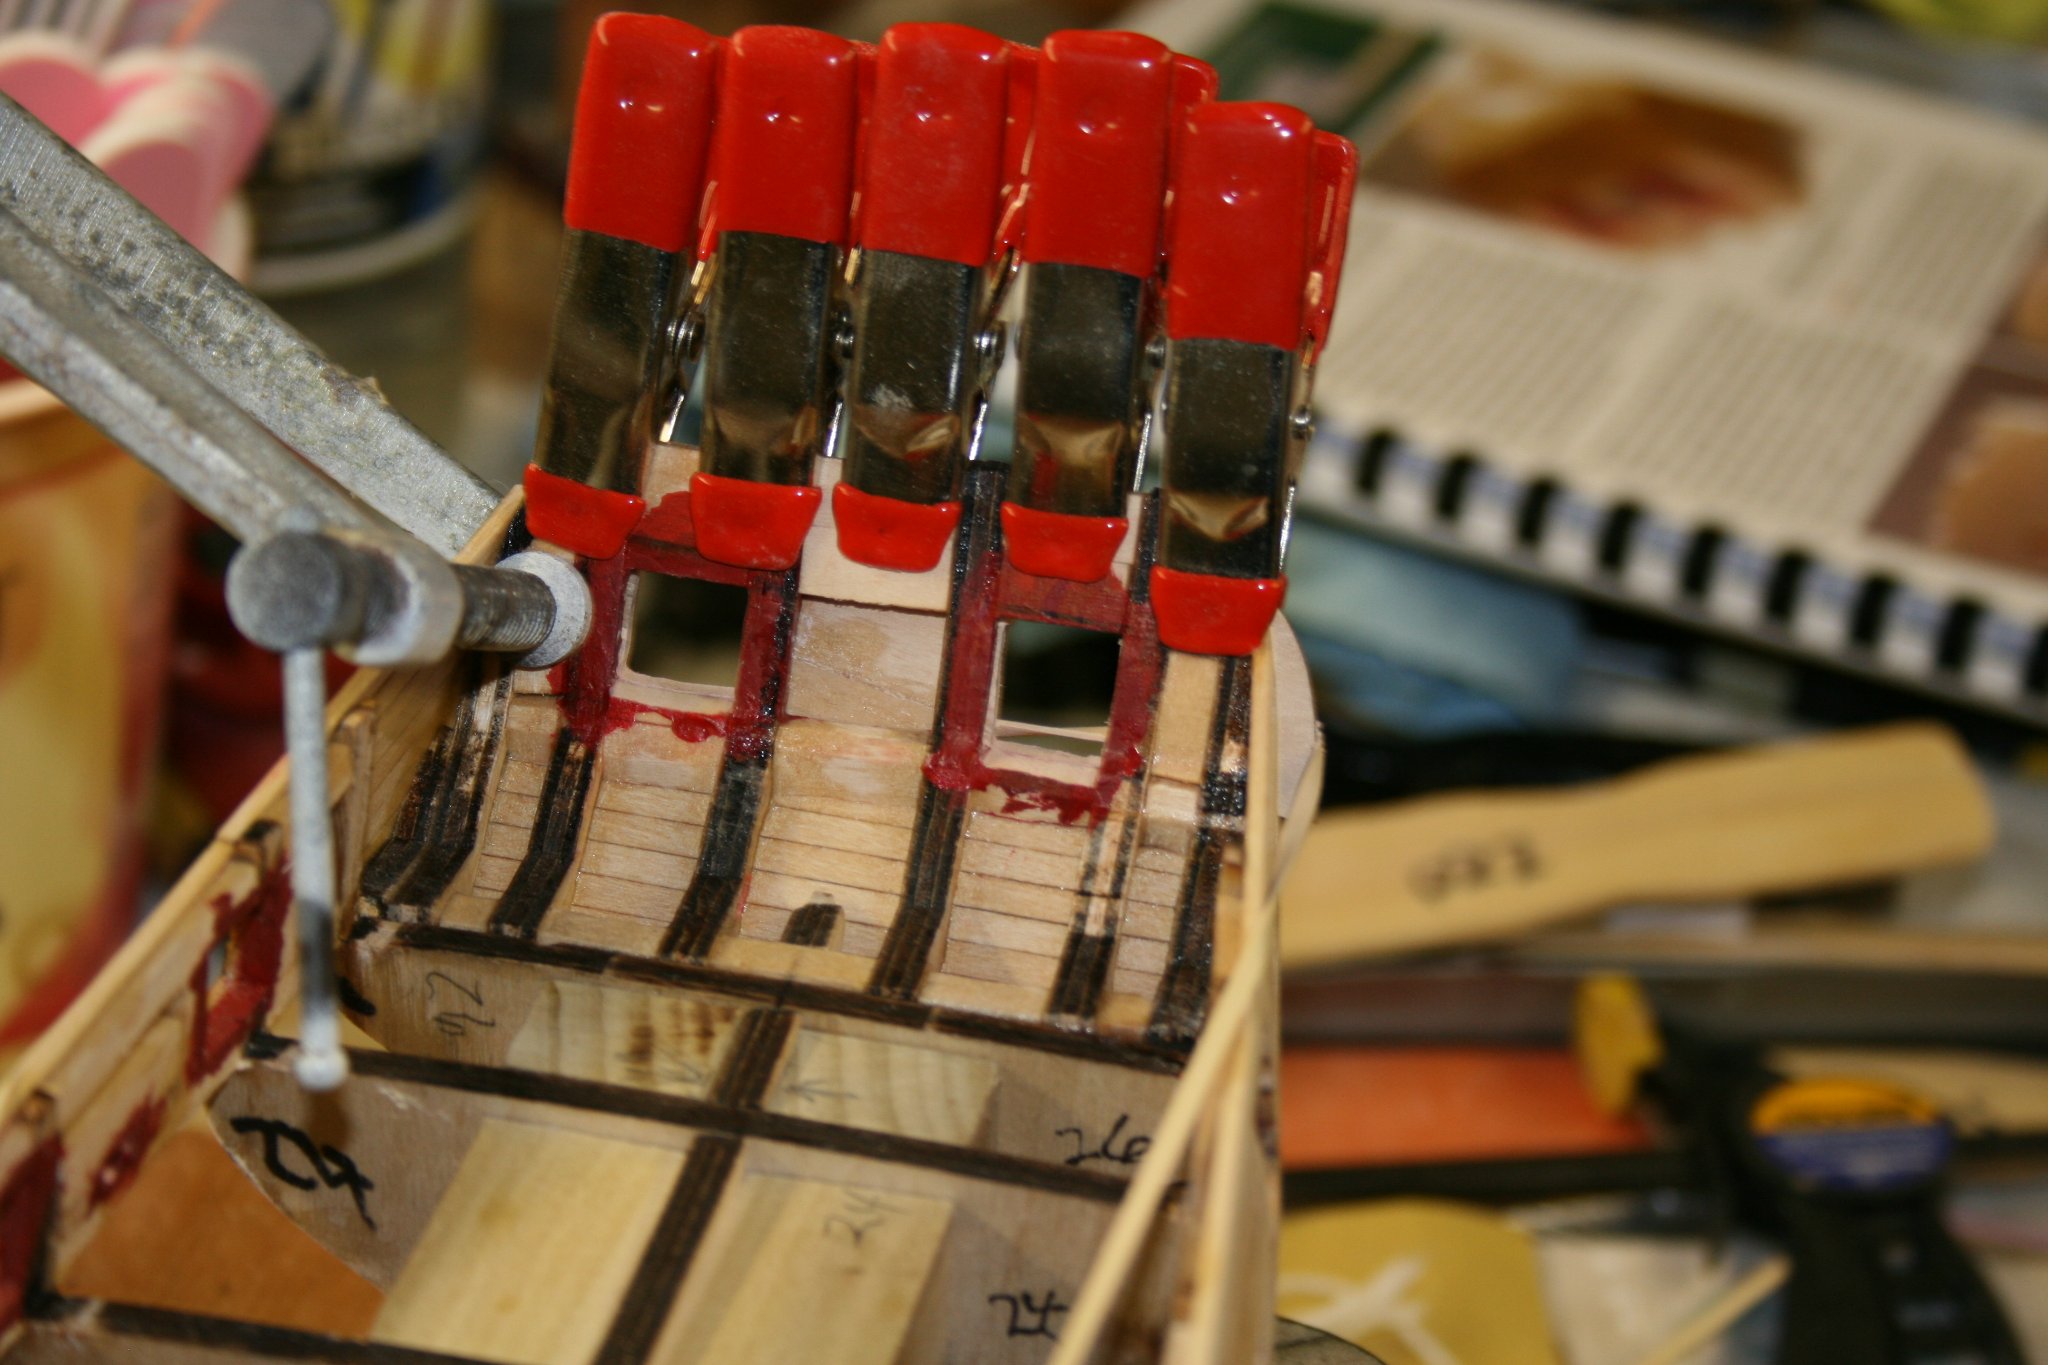
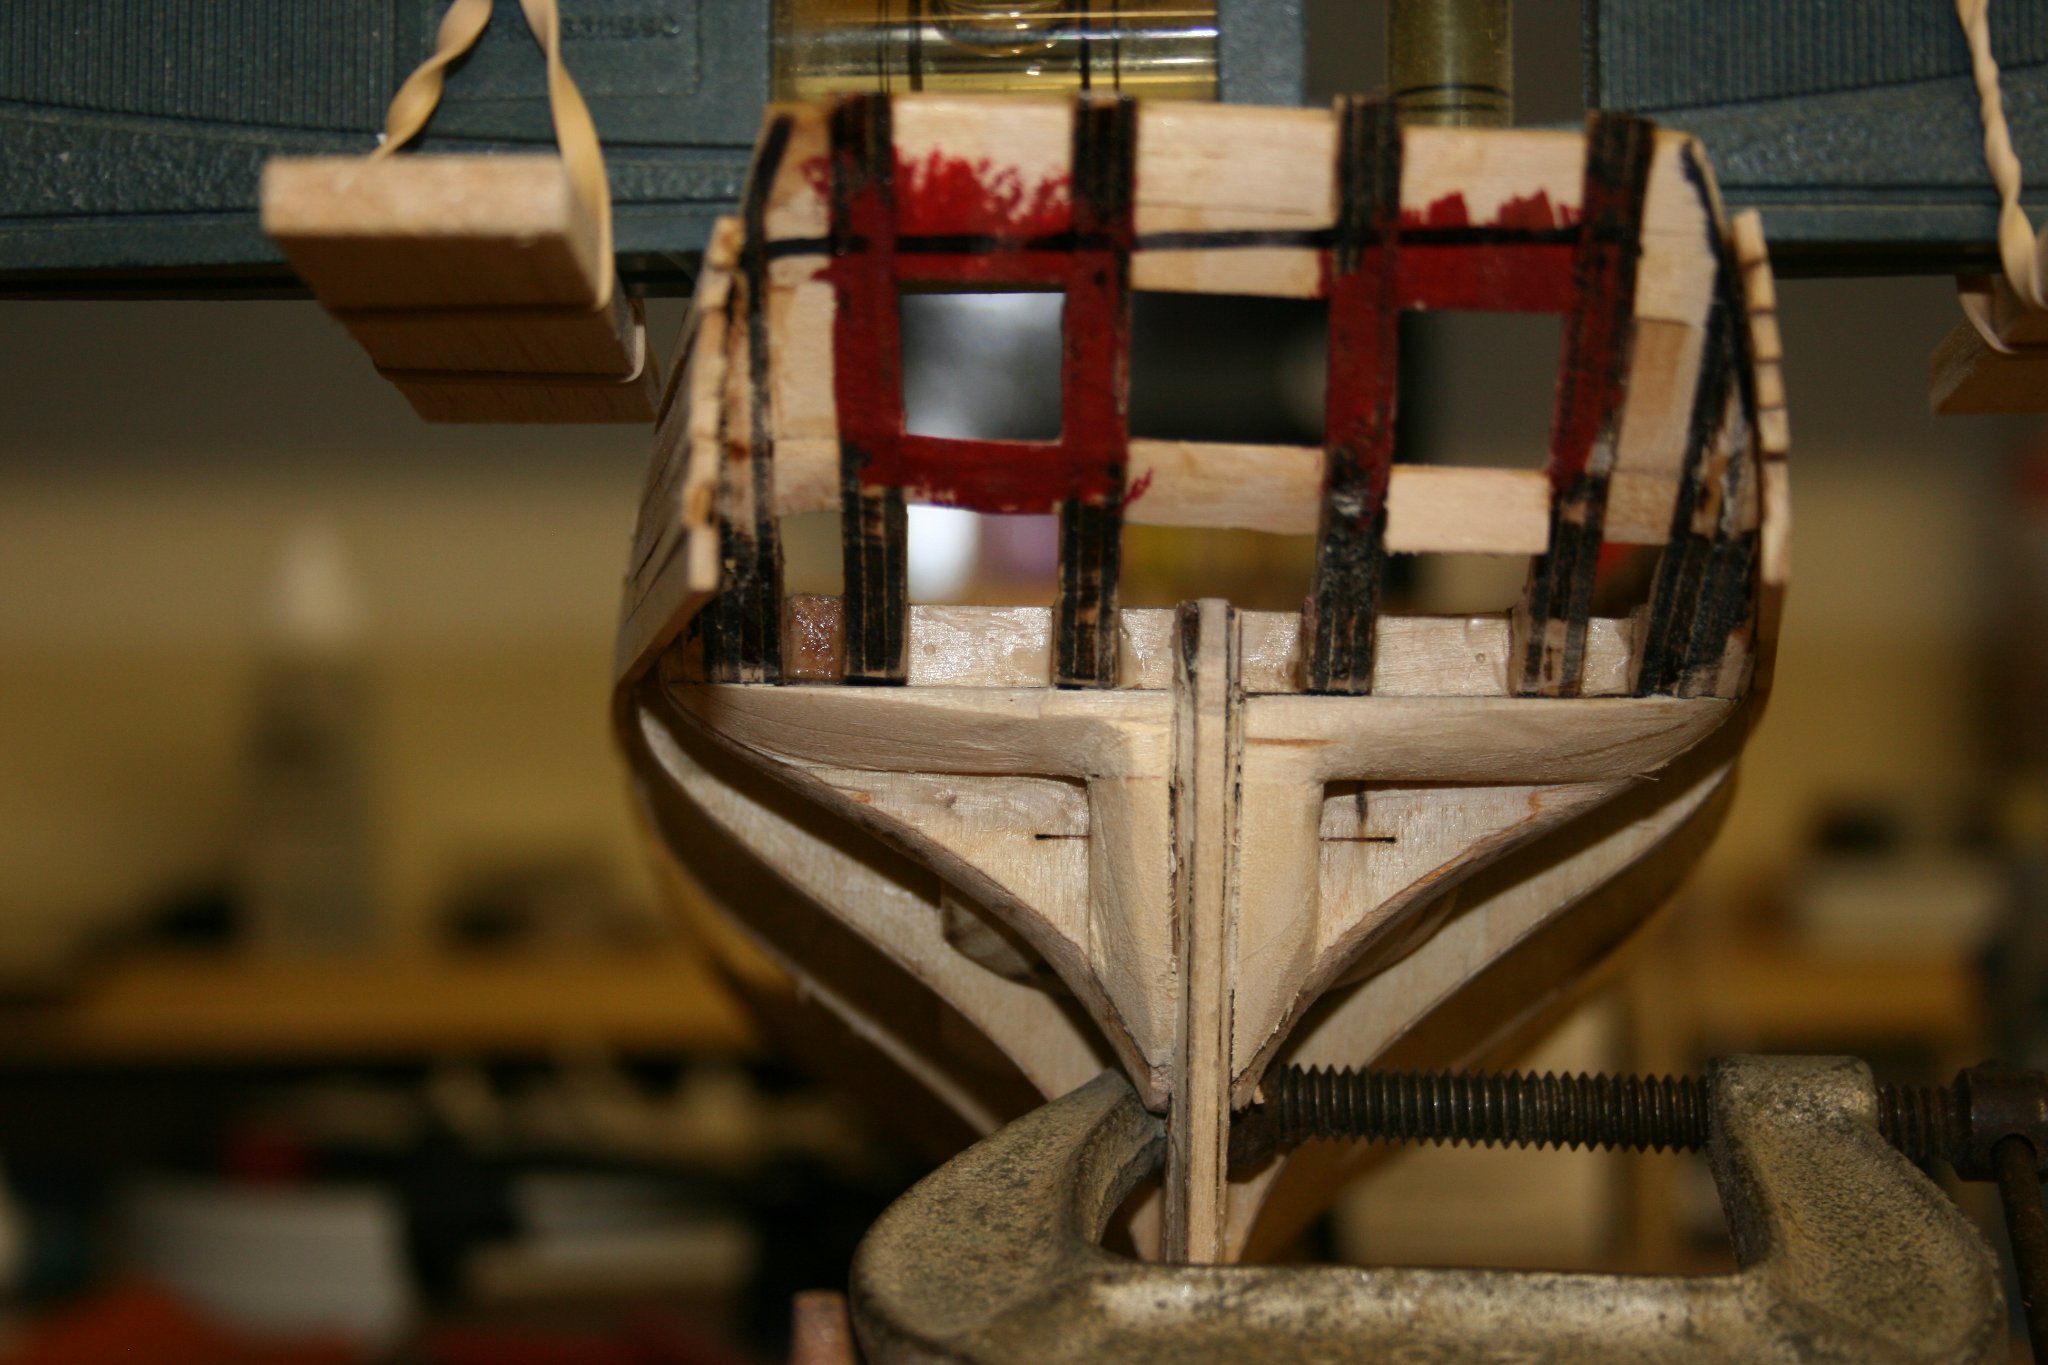
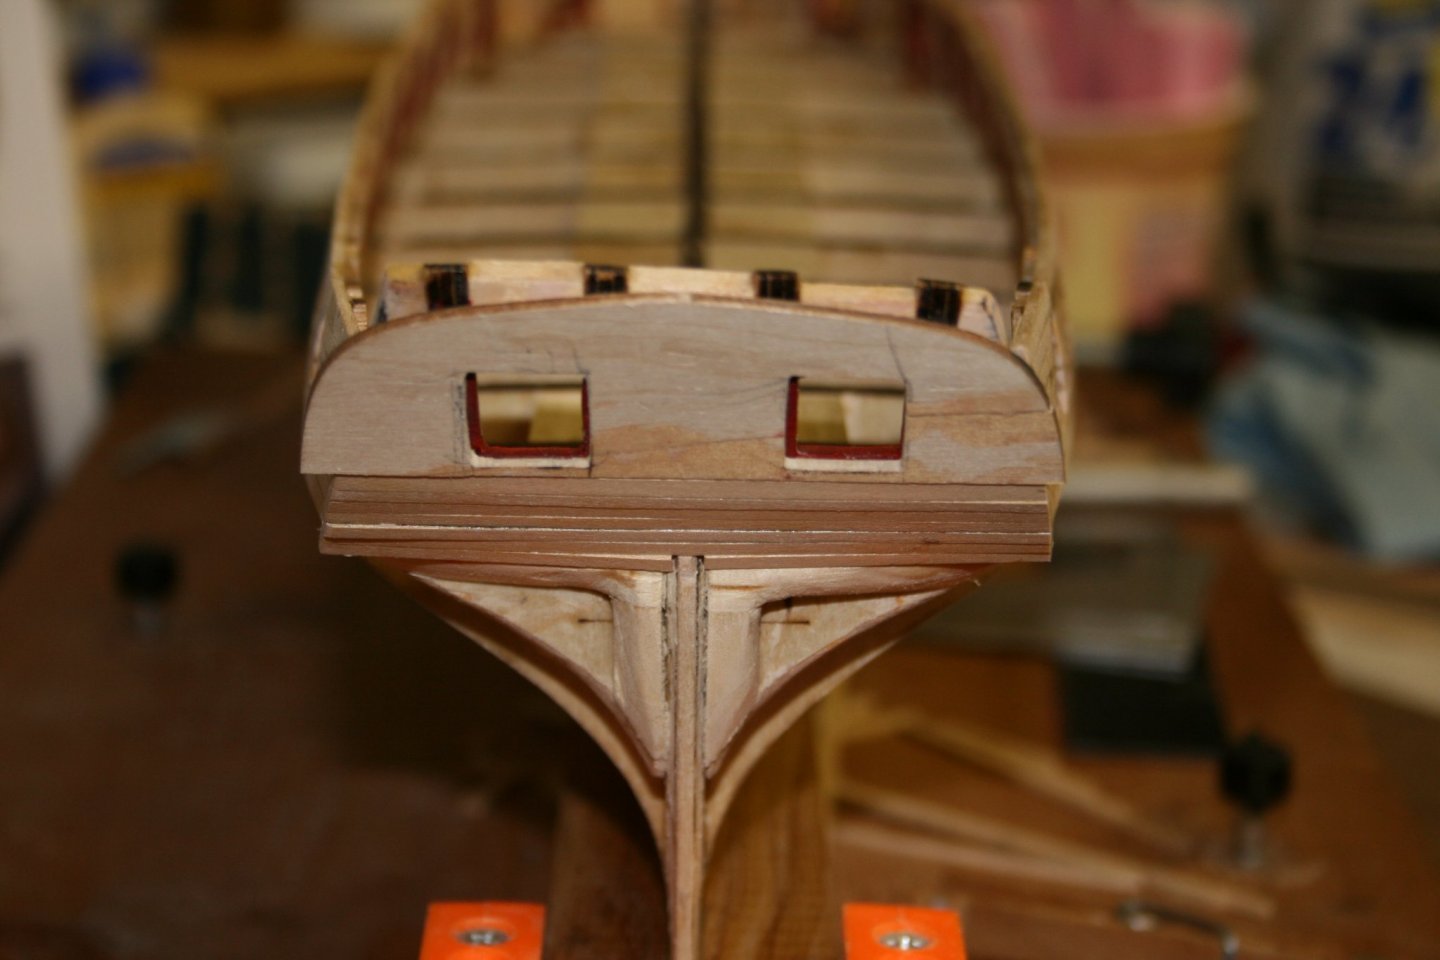
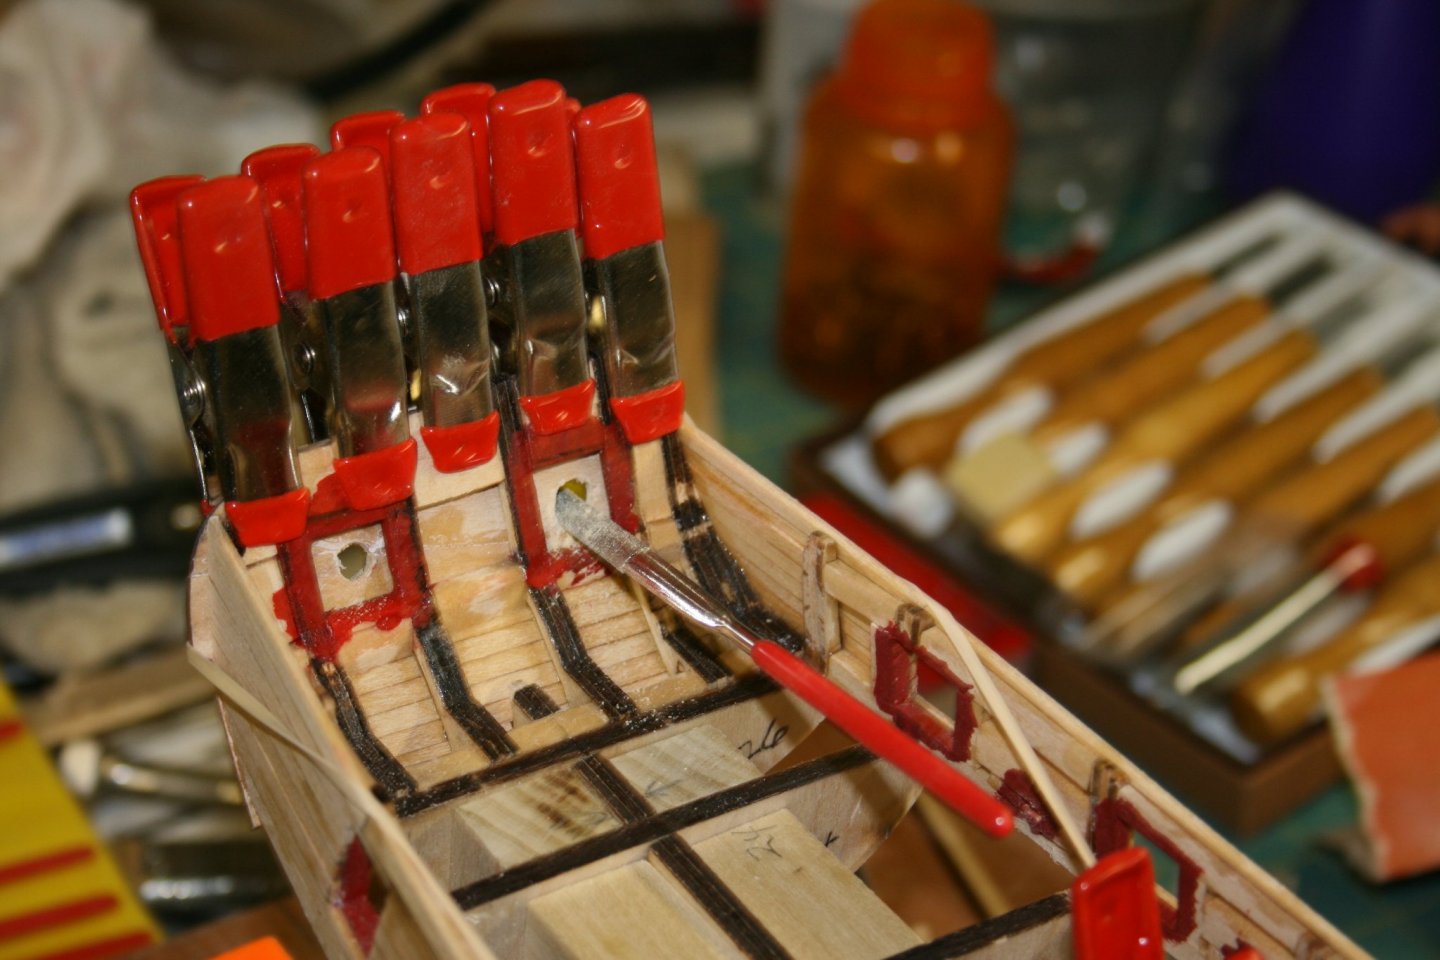
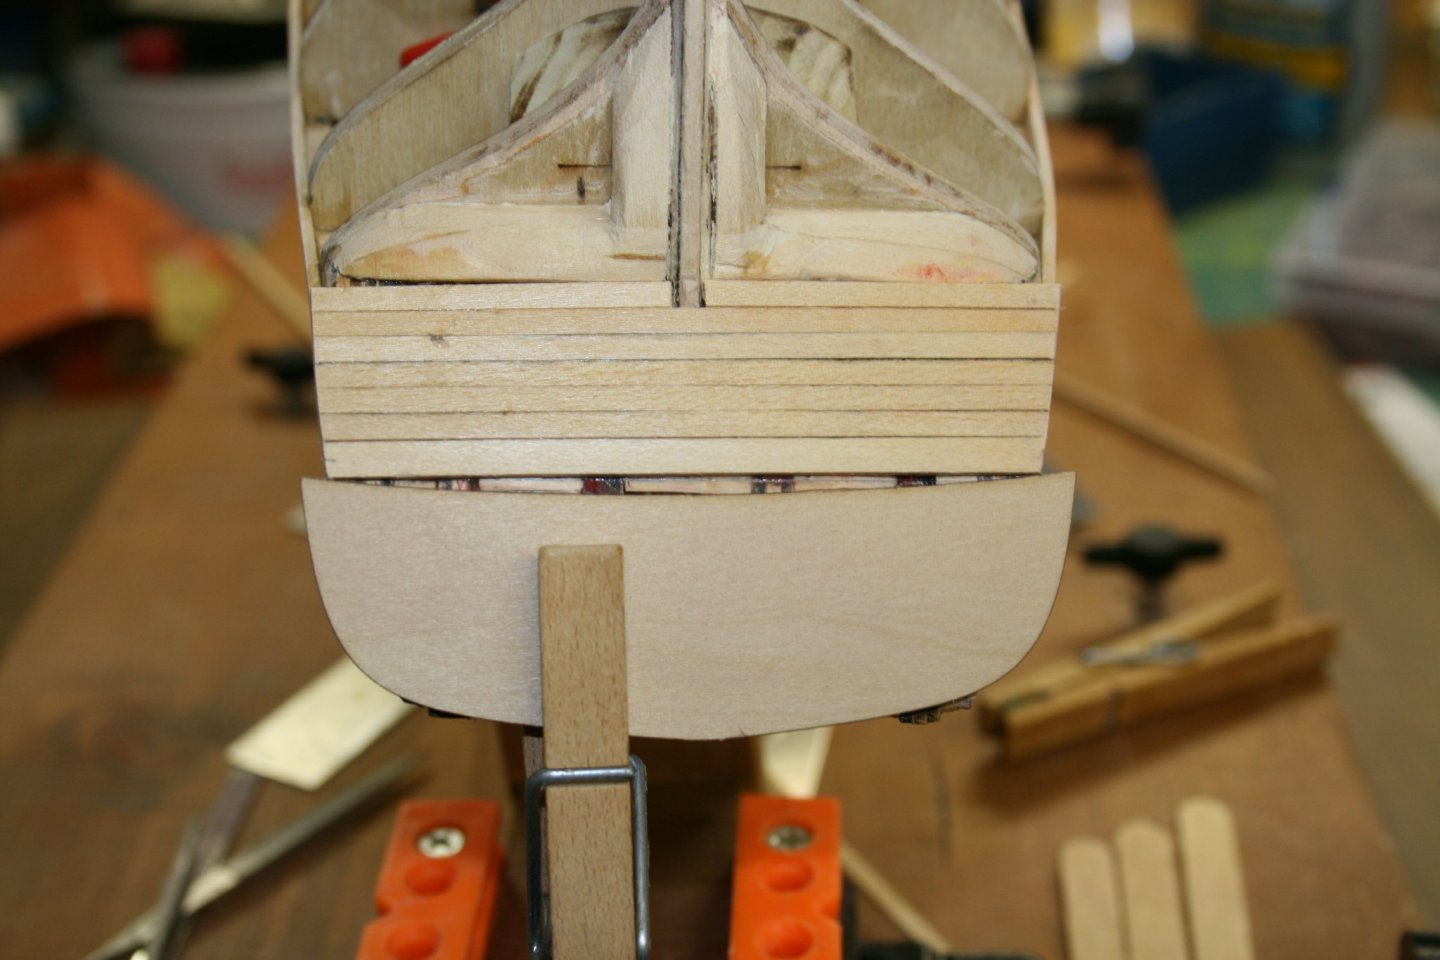
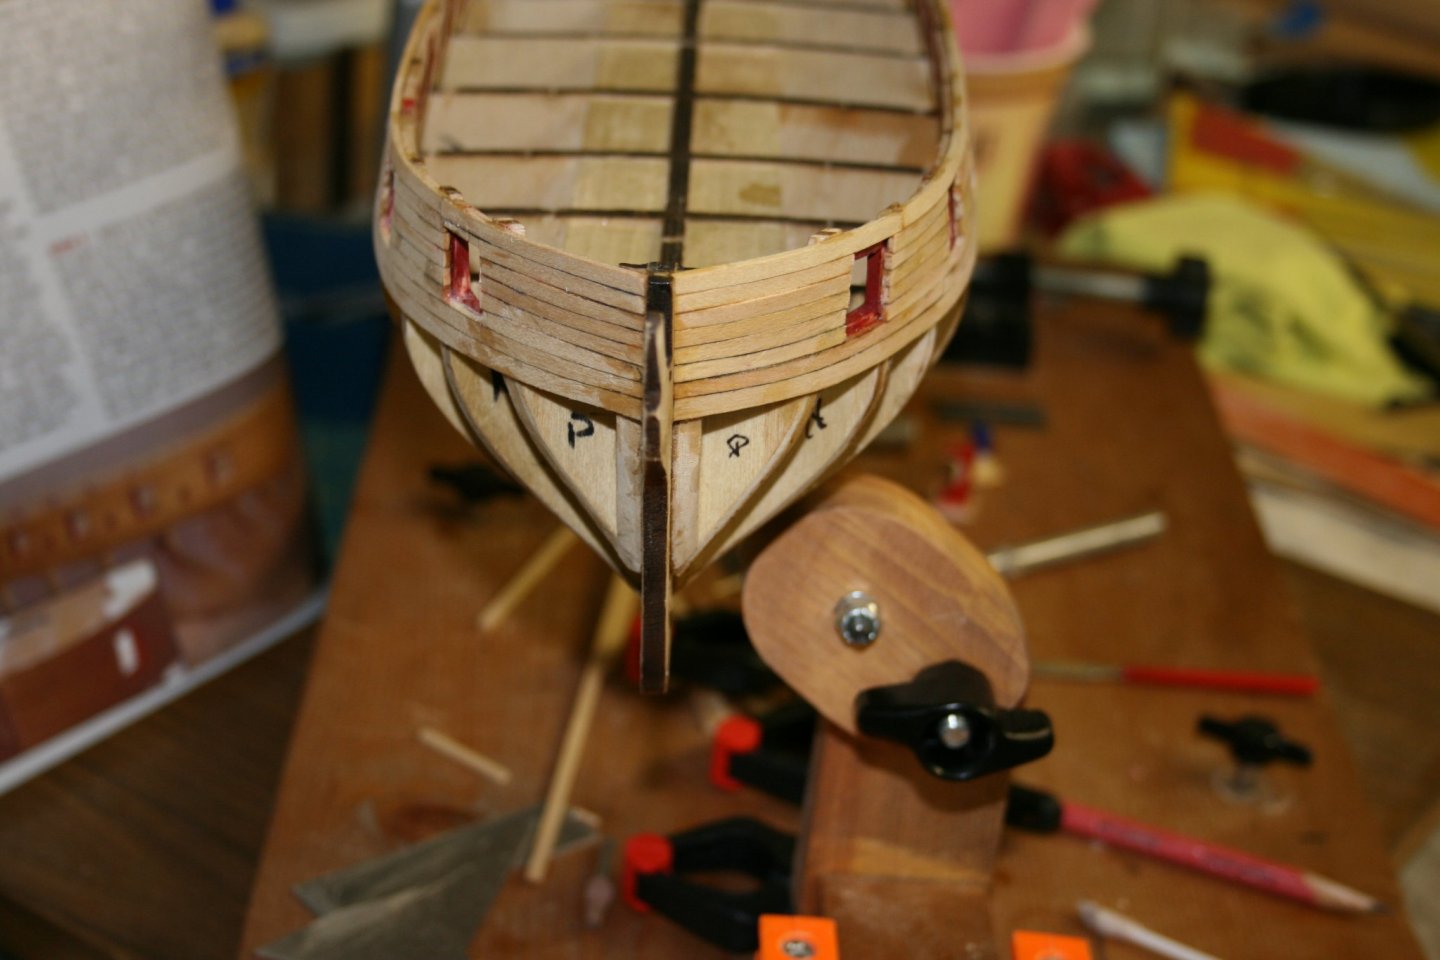
.....And now, the transom: I have read through several build threads, the instruction booklet, and the forum thread that Chuck has created. I can tell you, this is one step that, as a newbie, needs a paragraph or two of explanation. Every one that I read (except Chuck's), starts me to question why it is curved on the bottom. I am sure it needs the curve, but it seems more than likely will not have one. 😄 And it seems we all arrive at the same place with the same question. The biggest issue is getting the gun ports to line up correctly after they are cut into the transom. Not much room for error here, as the transom overhang on the starboard and port sides is not very big, nor is the distance (1/16") from the bottom of the transom to the bottom of the sill. Added to that is the angle needed to make sure the sills remain level, and square to the holes in the transom. Some posts that I read had problems with aligning the transom, and I spent some time considering how to do this. Particularly since the gun ports are already painted red and any filing on the ship will require repainting.. So here is what I did. First, I clamped the transom, in position on the counter after I removed the curved portion of the transom bottom, fitted the piece to the counter, and marked the gun ports from inside. Then I removed the transom and drilled a hole in each gun port. Second, I began using a small file and eventually bigger ones to complete the filing to the gun port size. After the filing was complete for both ports, I removed the transom from the ship. (BTW: Doing it this way allowed me to use the file and the correct angle in order to keep the sills and lintels level. Both gun ports are completed to the sills and lintels. Now I use my templates for the last 2 gun ports. Both ports are now the correct size and the transom is clamped to the counter. Next step is to line it up on the outside for gluing.....but first I will repaint the frames red.


- 436 replies
-
- 3
-
-
- Syren
- Model Shipways
- (and 1 more)
-
I will take a look at yours. Thanks Overworked. I looked at it and “may” do mine that way, but decided to approach it differently. I have removed the slight curve by squaring off the bottom. It seems to match up, when I compare the distance from the sill to the transom on both ports. As I go along, I will make other measurements and checking photos on other builds. And, I test fitted the transom overlay..the arched piece....and it looks good too, but, I will keep looking.
-
What to do, what to do? As you can see from the picture, the exact curve of the transom is not exactly a match to the plank on the counter. My question is do I just shape the transom to match the plank, or modify the plank to match the curve? My thought is that it is much easier to match the transom to the planking, and I don't think it will throw anything off, but before I do, I thought I should ask. I was able to get the lintels and sills on the gun ports to fit correctly, and they are now level to each other.
- 436 replies
-
- 1
-
-
- Syren
- Model Shipways
- (and 1 more)
-
I had visions of counting planks and being off one row of planks, one plank on one side being the wrong size for the wale....and on and on. Since I used CA for the glue, I was not looking forward to fixing it. But, if this does it, I dodged a non-existent bullet. 😀 scary thoughts.
- 436 replies
-
- 1
-
-
- Syren
- Model Shipways
- (and 1 more)
-
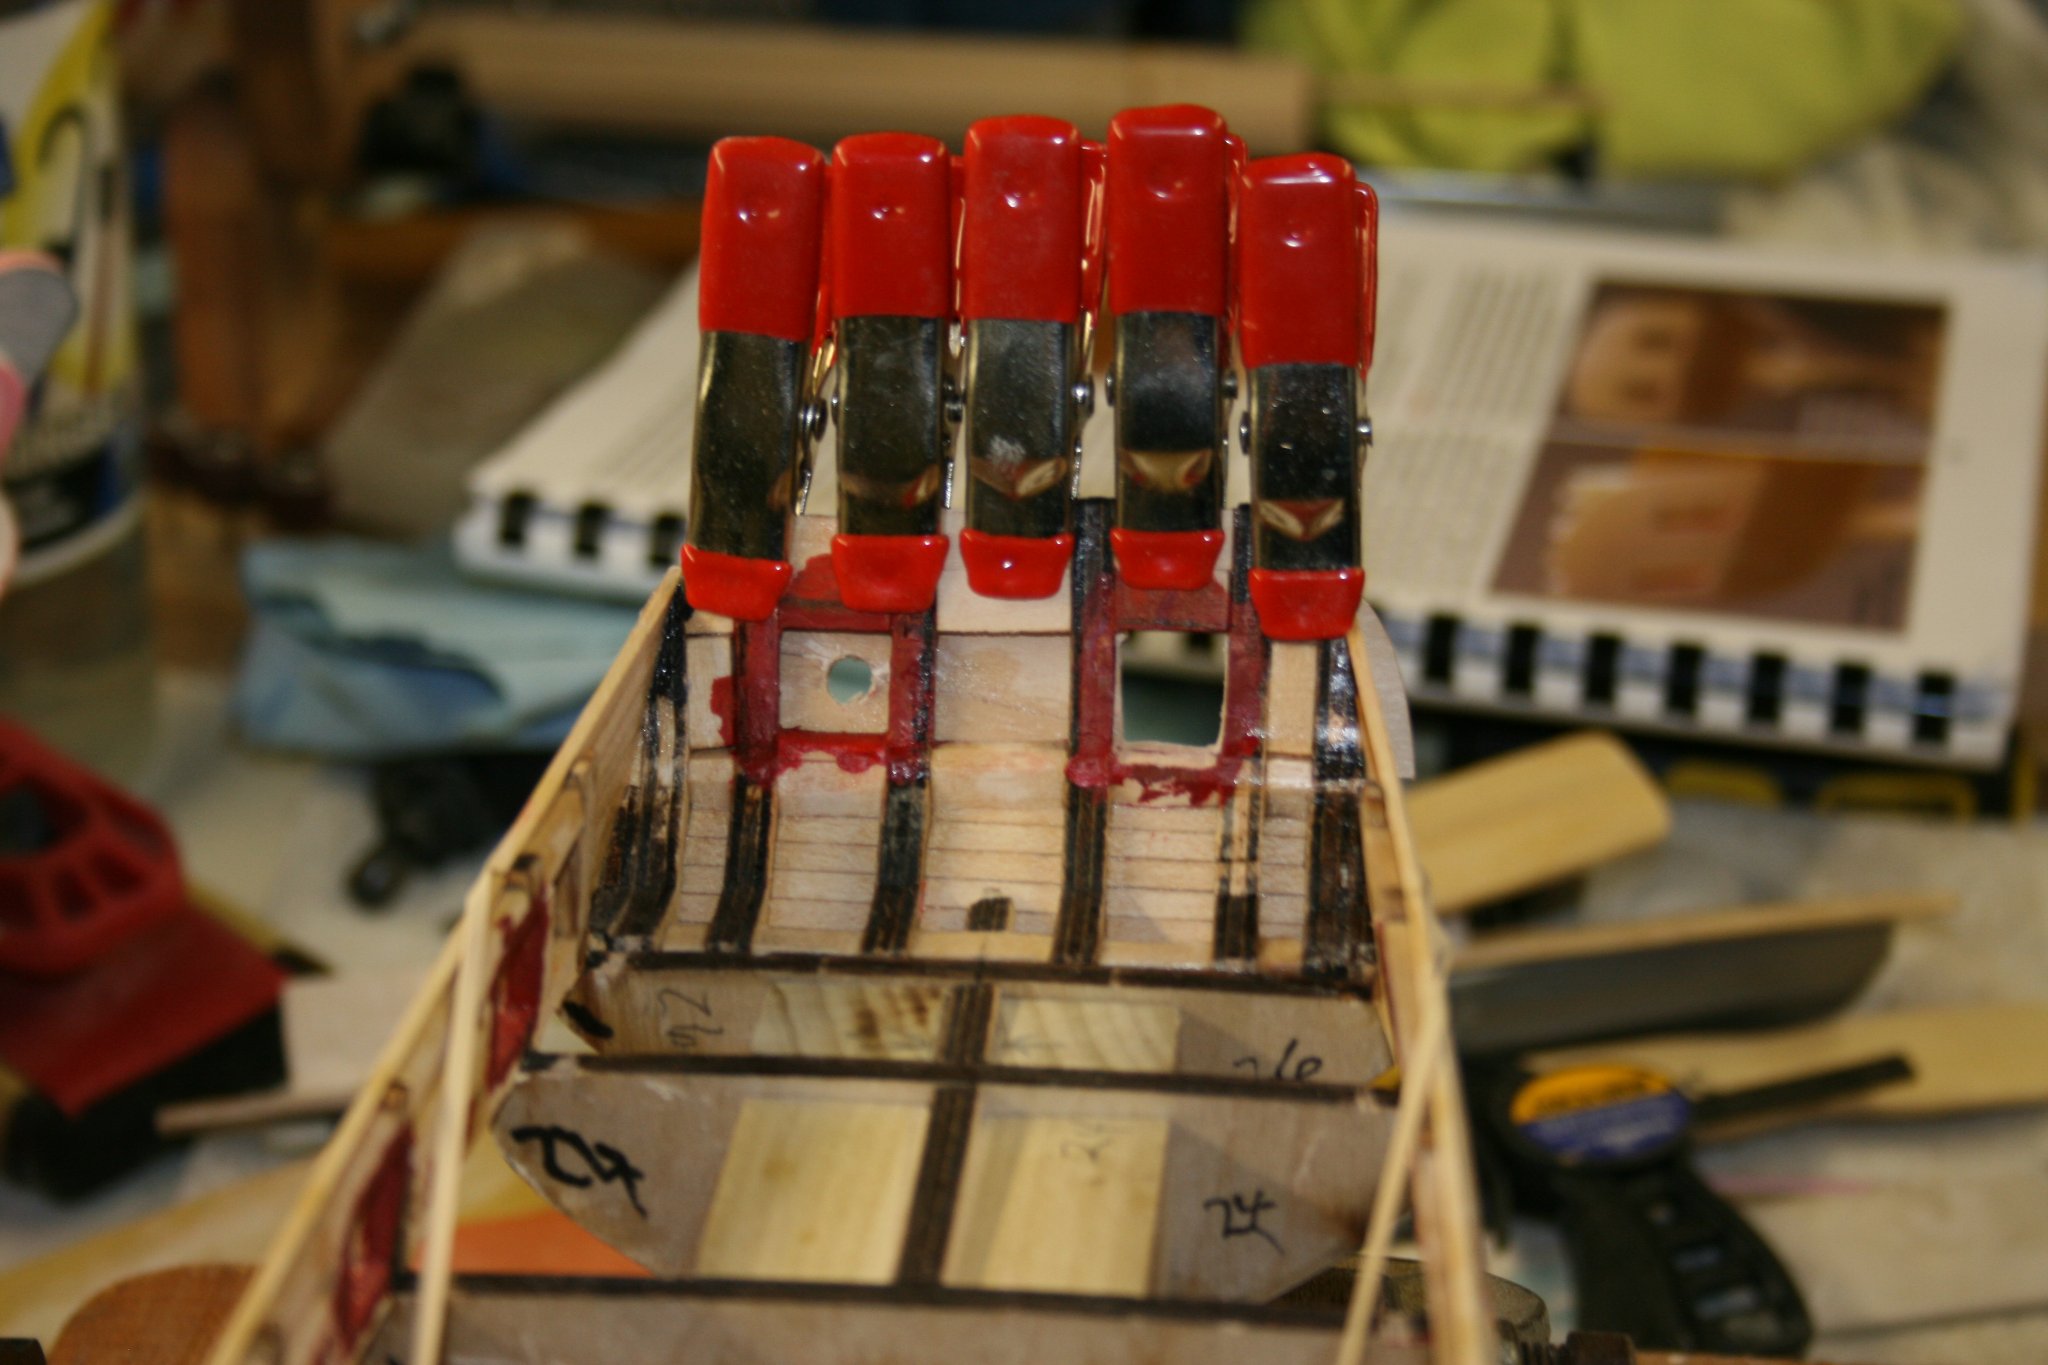
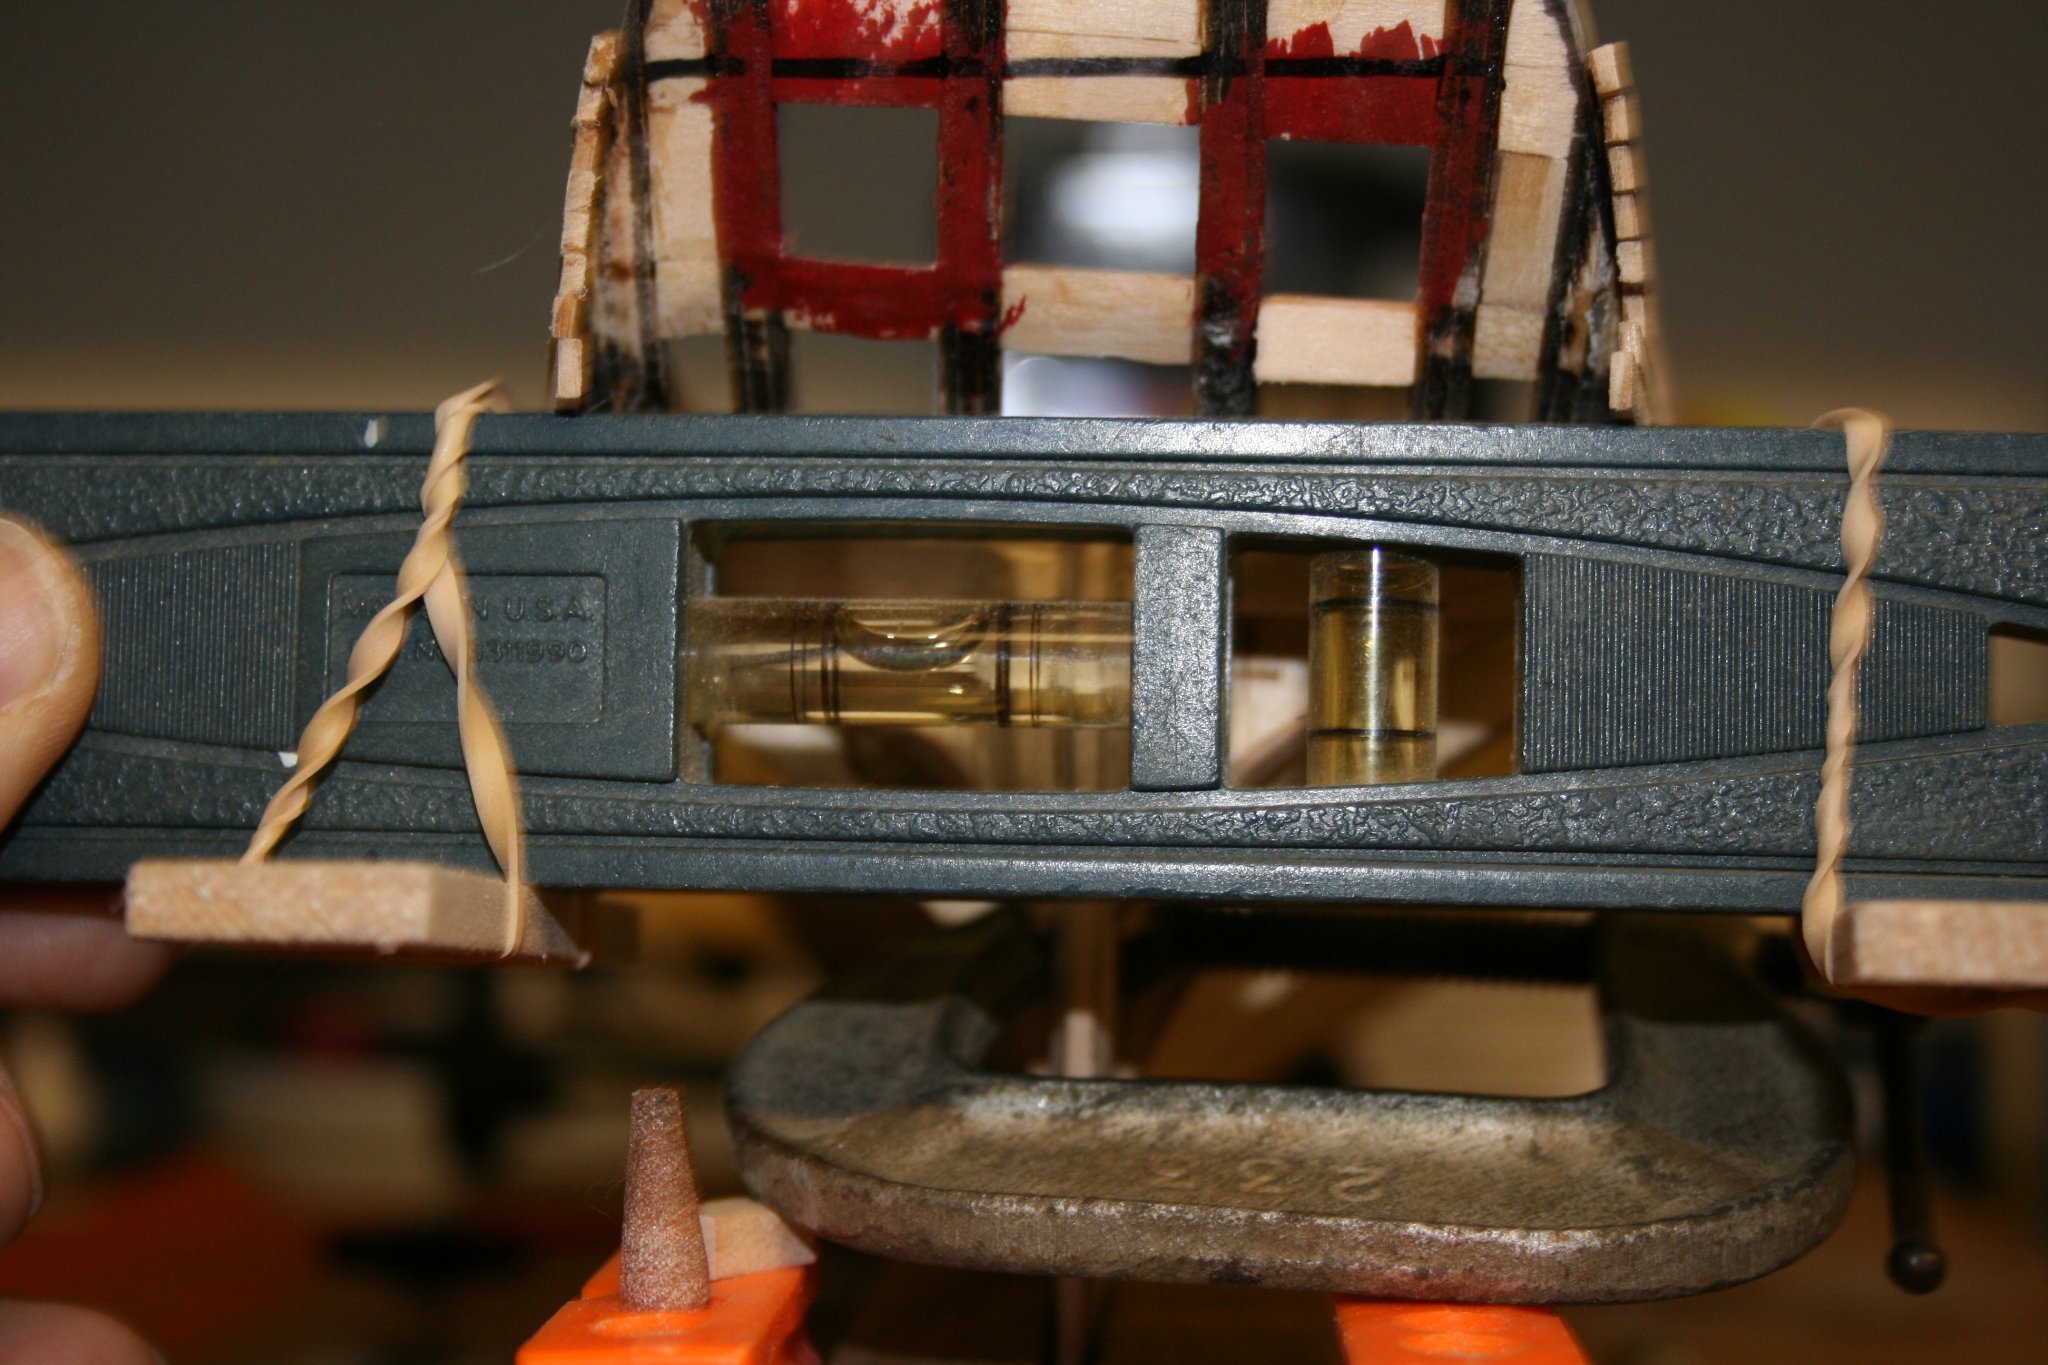
Thank you Walrus. That is exactly what it is, and add to that an optical illusion. It's like in those no gravity houses that have water that runs uphill. I have attached a picture that shows the parts that need to be shifted. Won't do the middle one, it is hidden anyway. If you look closely, I have removed the transom template from the plans and clipped it to where it will be when glued on. Then, I have done what you have recommended. I checked the canon heights in the gun ports. I draped a short piece of string with weights on both ends over the top plank at the counter. The amount that the string intersects with the RED port painting is just about the same that is needed at the bottom of the port. So if I remove the red parts below the string, move it to the bottom, clean it up, I will be right on target. The irony is that it is just the sills and lintels being off and the rest is mostly optical illusion. I measured everything, counted boards, checked their sizes, removed the planks that extended beyond the counter, then test fit the transom. If I clean up just the lintels and sills, it will all work. And lastly the starboard side on the counter is lower than the port side. When I remove the excess above the transom, everything will be where it should and the optics will also change. It's weird, but very little is wrong. 😄
- 436 replies
-
- 3
-
-
- Syren
- Model Shipways
- (and 1 more)
-
Whoa, OOPS (PIck Either): As you can see from the pictures, I have reached the counter/transom stage, and somethin' just ain't right. 😄 The black line has been drawn from port to starboard using the top plank as the base. The level shows that the ship and planking are level, but the counter/transom is somewhat off. Well more than somewhat, it's an outright mistake. However, knowing where that mistake is, is what I am trying to figure out. -The sills for both gun ports are not quite level, but not so far off as to create the problem with the gun port lintels. -I have measured the gun port sizes, and they are right at the 15/32" in height, so they are not off. -I checked the curve of the counter sides and it is the same on both port and starboard. -And the base plank is in the right spot. -Checked the width of all planks and they are as supposed to be. I am pretty sure I have to reposition the sills and lintels, to ensure they are at the right level. The top plank on port and starboard help locate the lintels, and I think I should start there and work my way down to the sills. However, before I cut them out and move them, I would like some input. From what I can tell, the issue is in the counter/transom build, but I want to make sure I am not missing something.


- 436 replies
-
- 1
-
-
- Syren
- Model Shipways
- (and 1 more)
-
Ongoing Question: As I continue through the build, I have noticed that the planking appears to have the finish in place. I am planning to use Tung oil, the question is when should I add the finish? Reading the forum on finishing, has not helped much as a common answer seems to be “...it depends.” 🙂
-
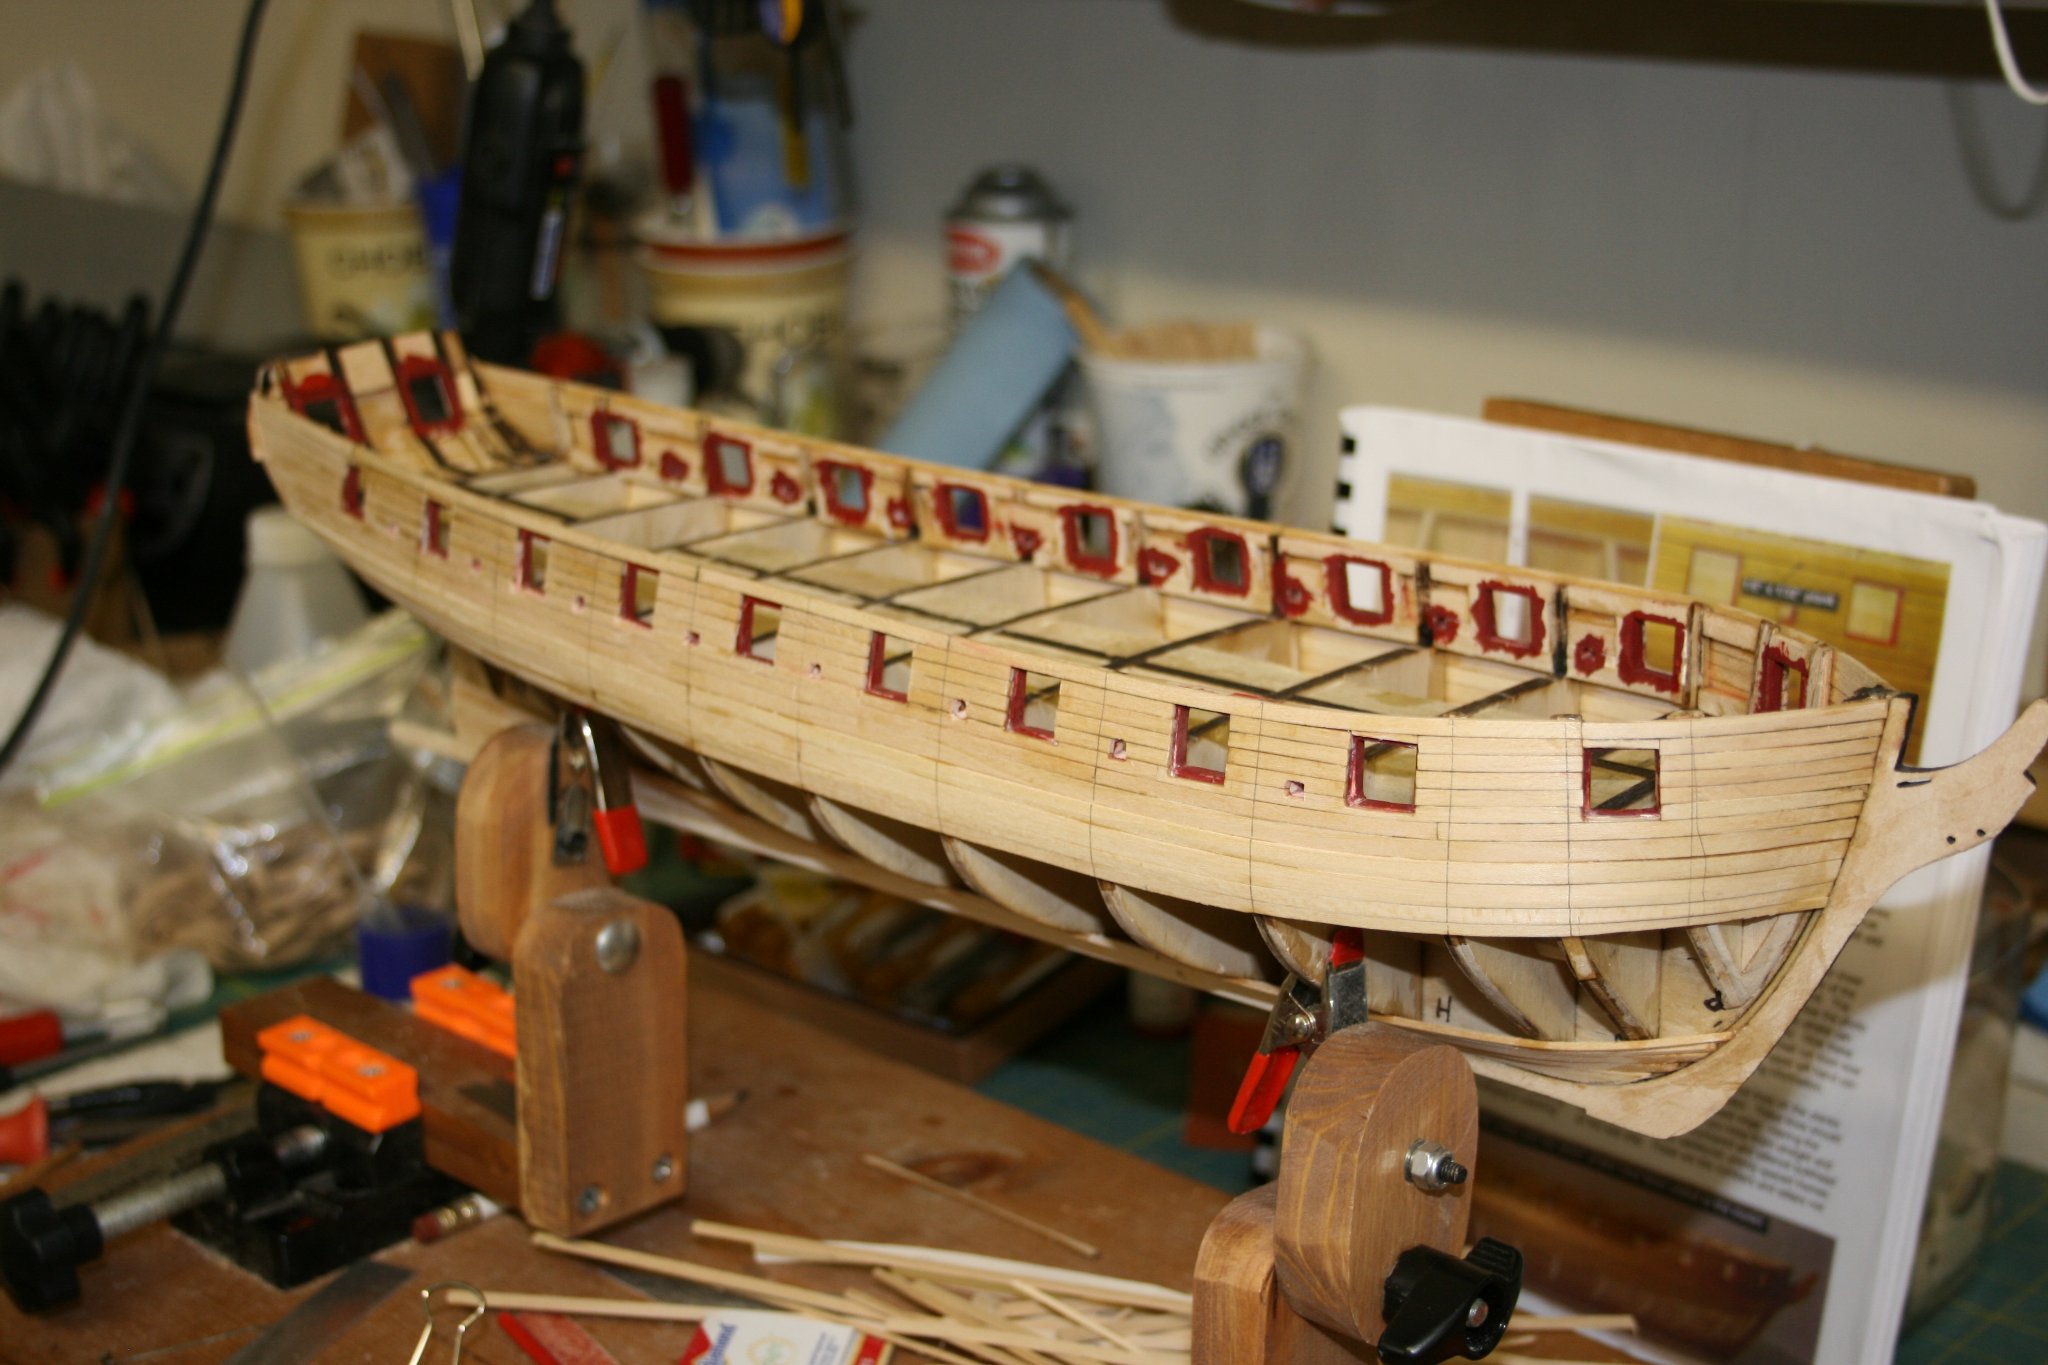
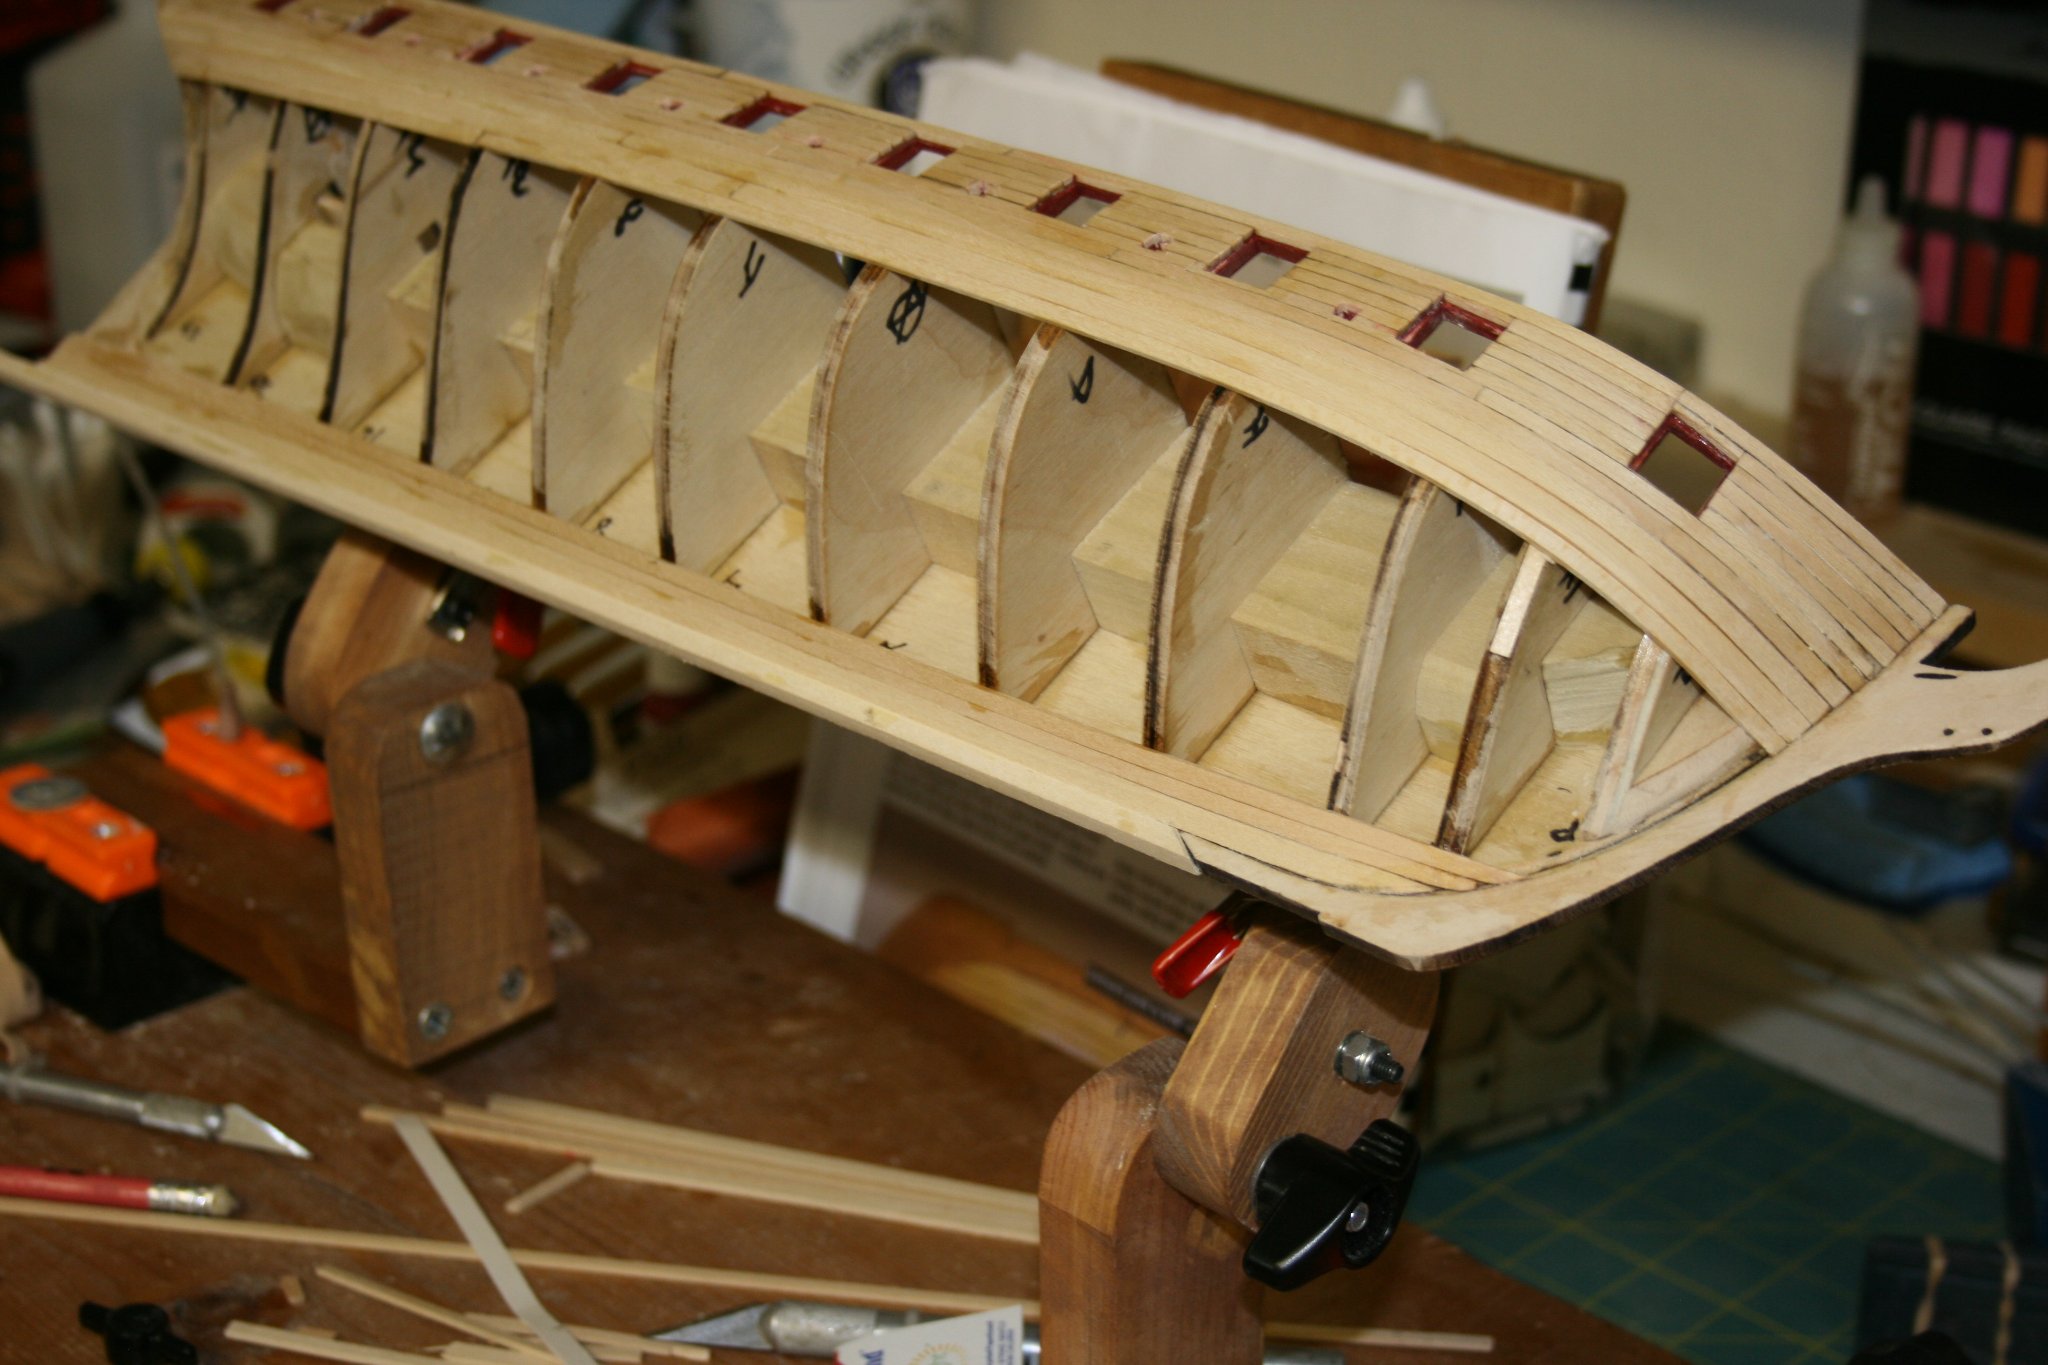
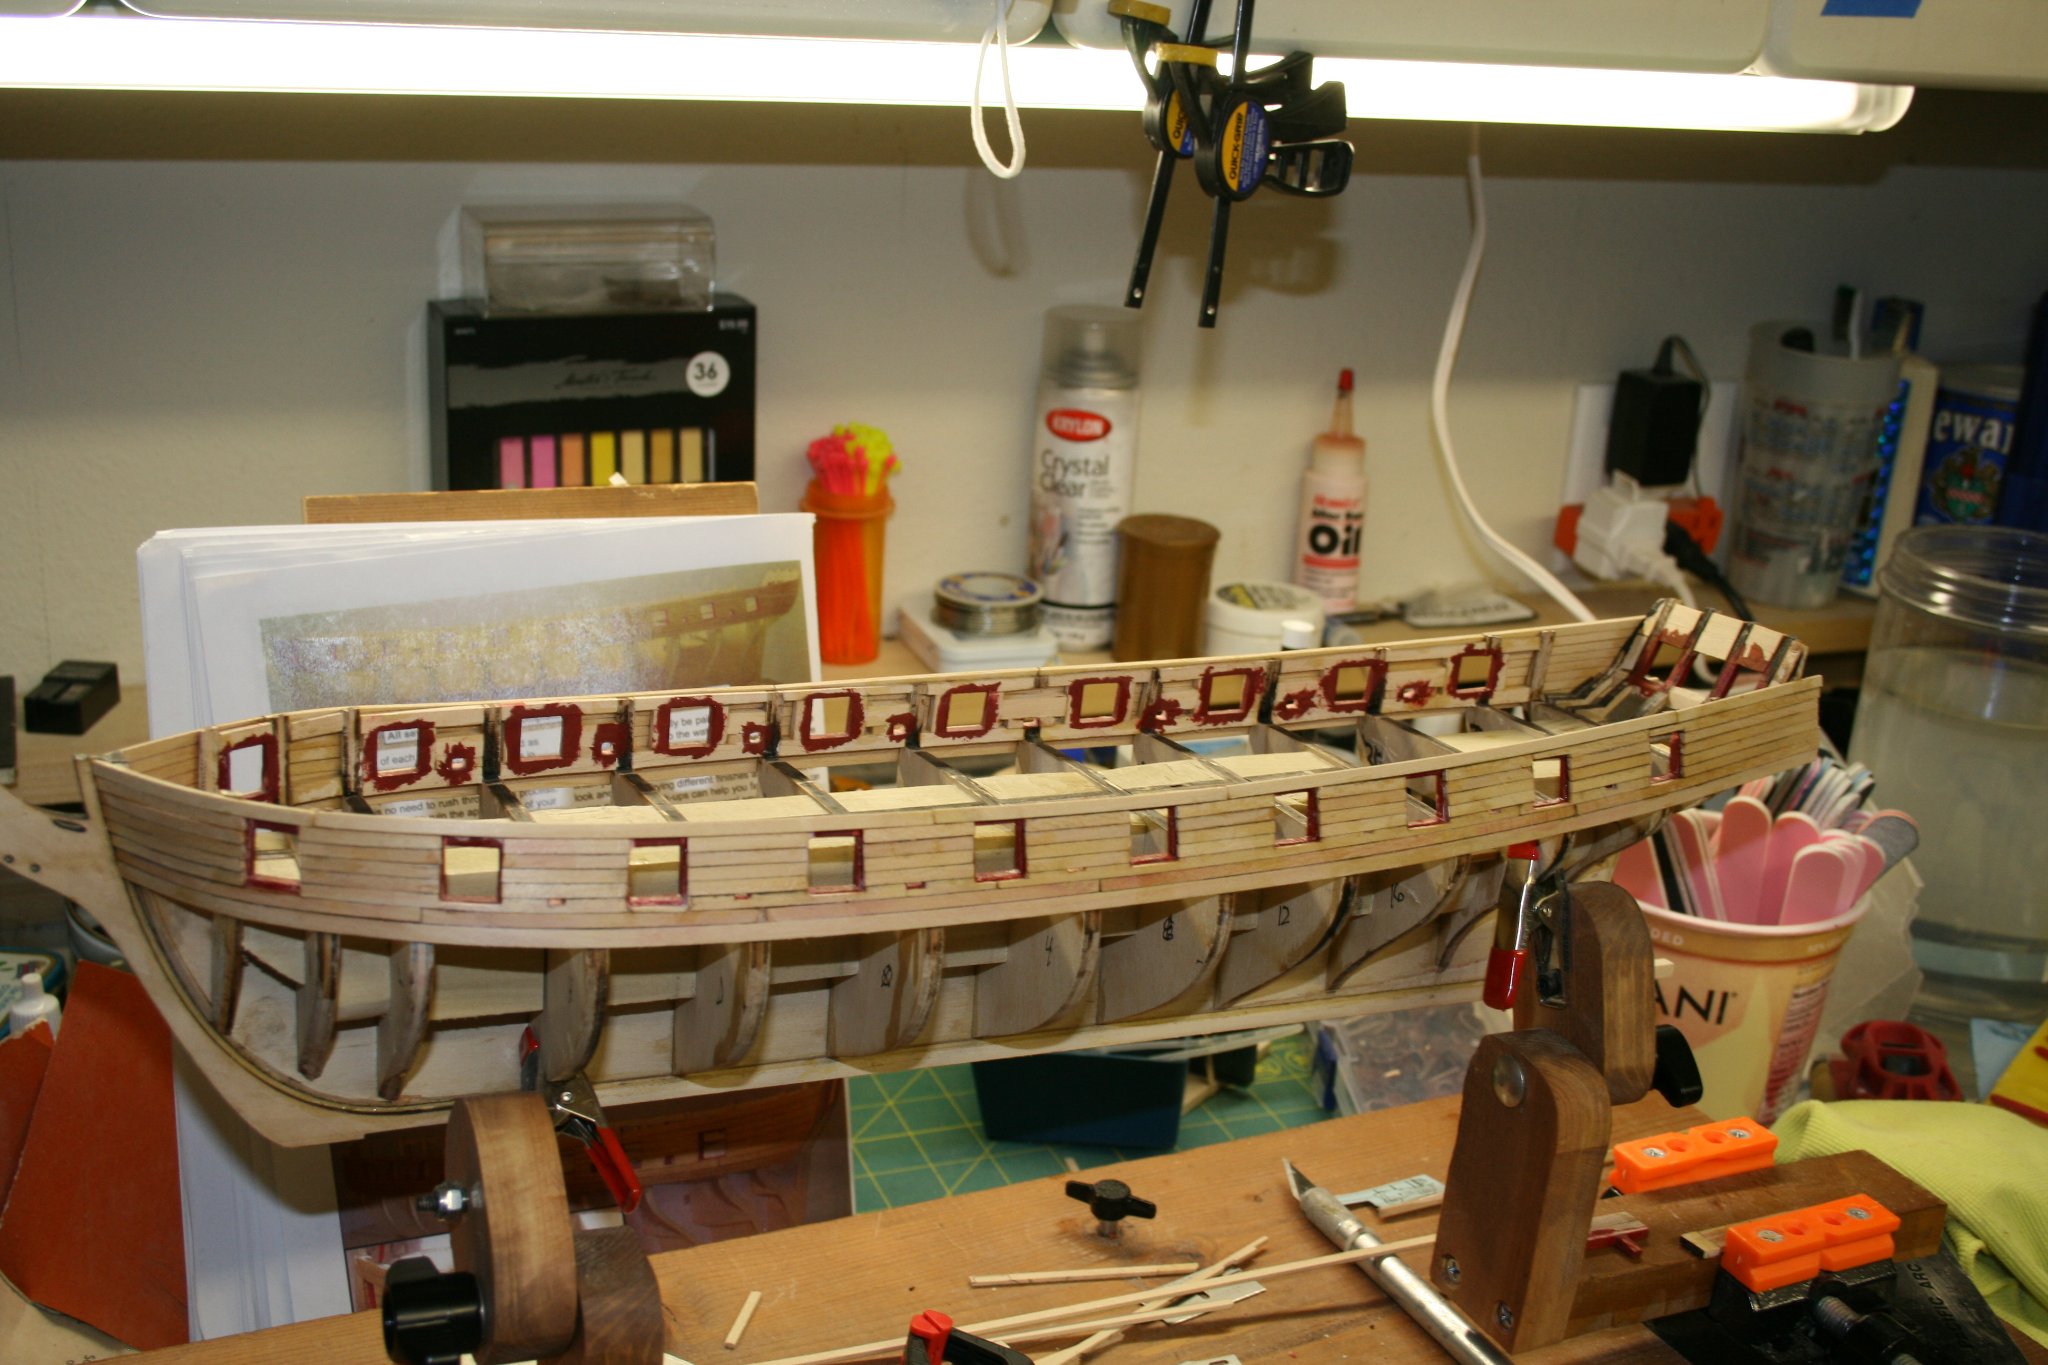
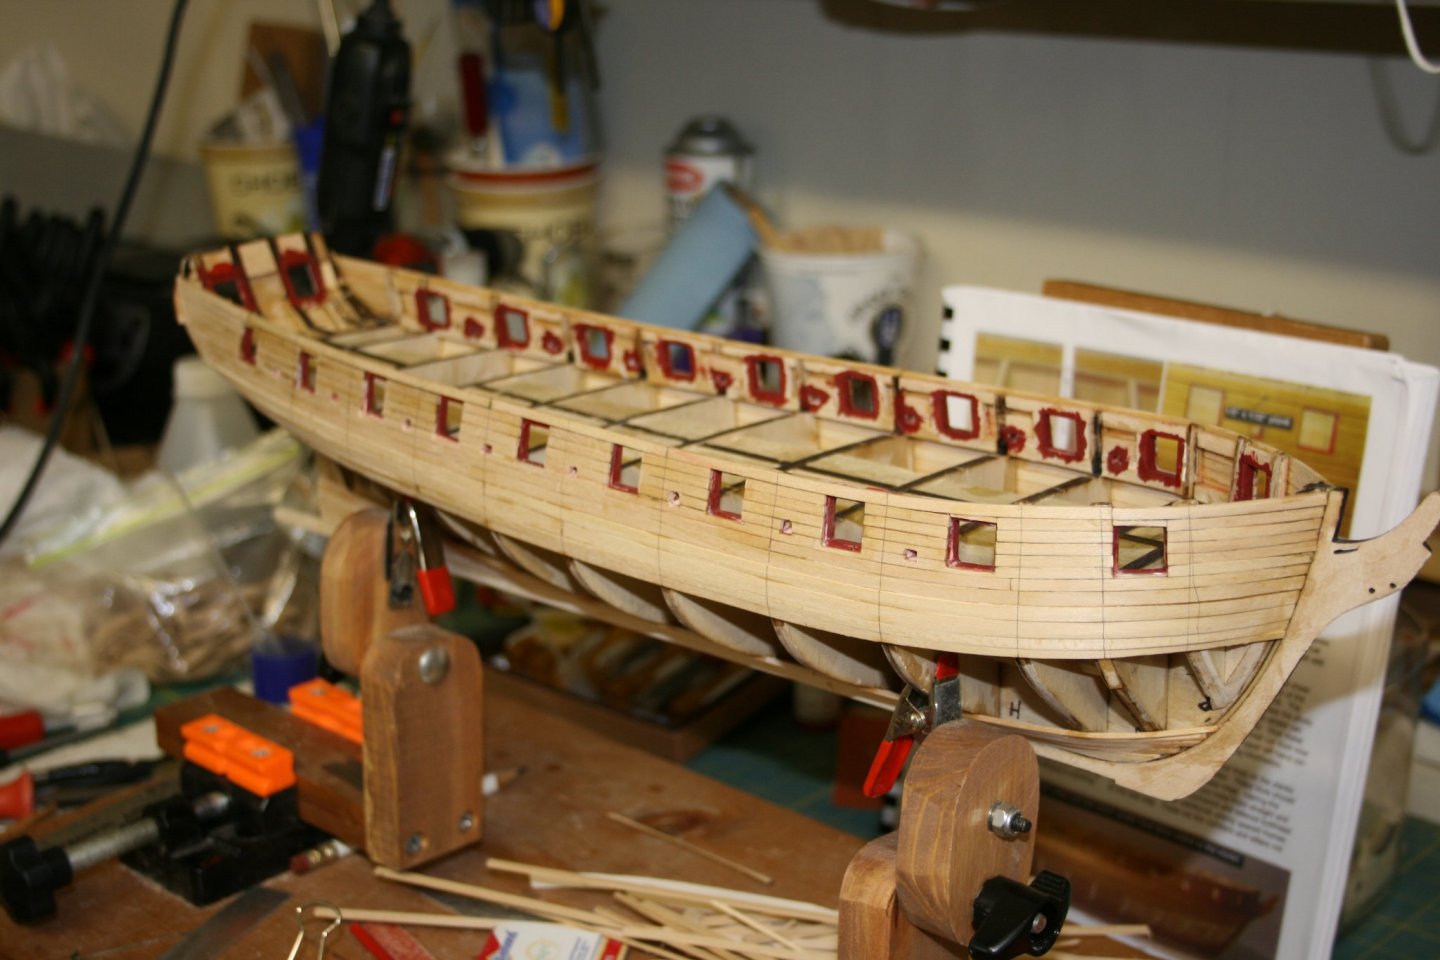
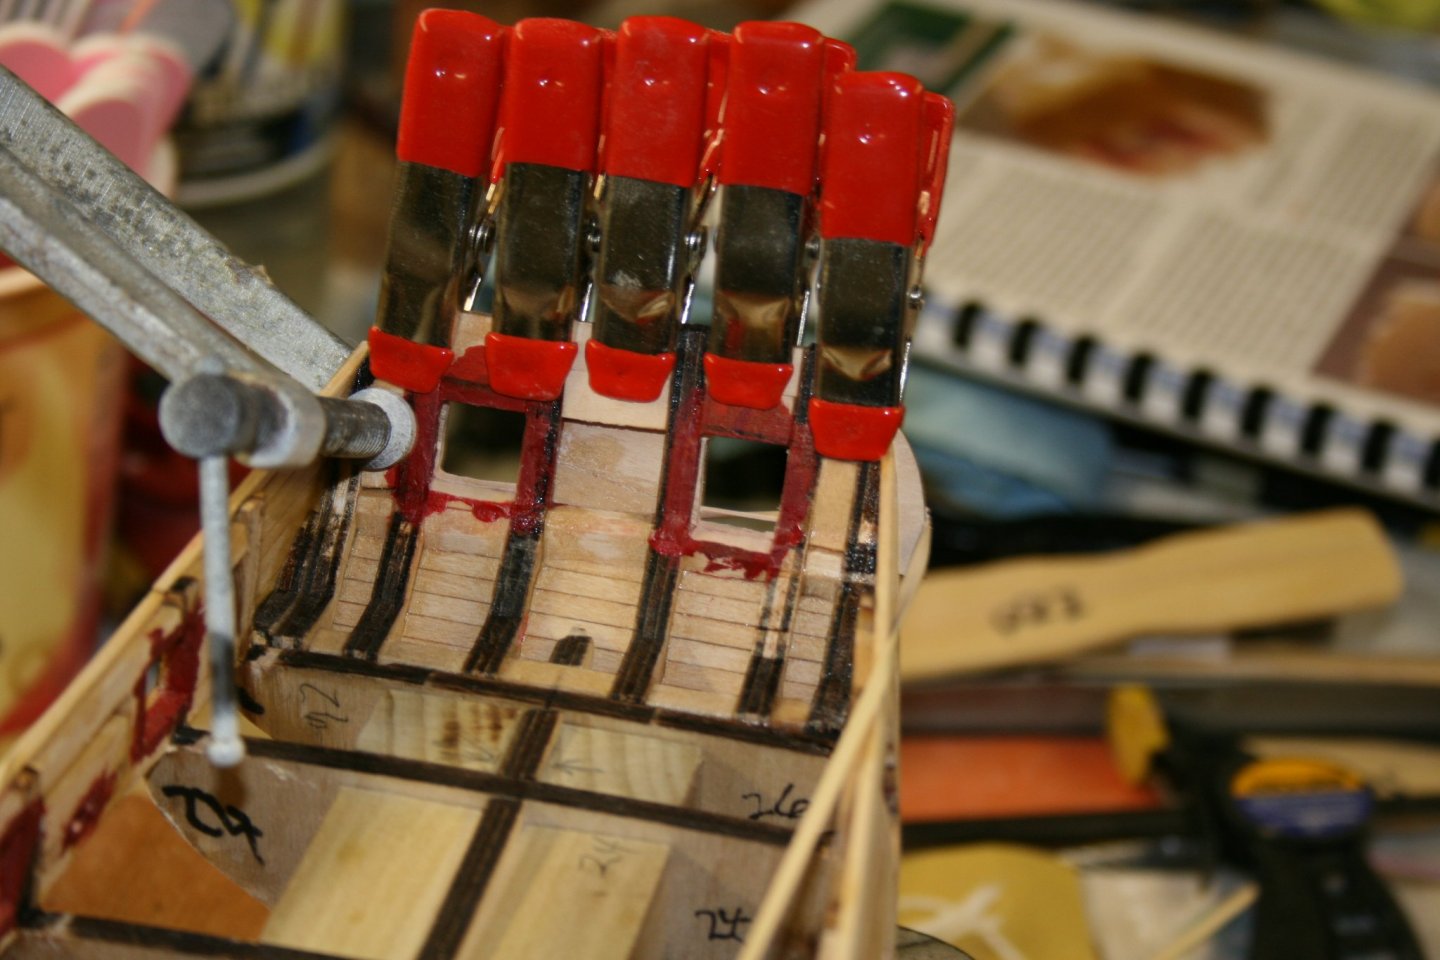
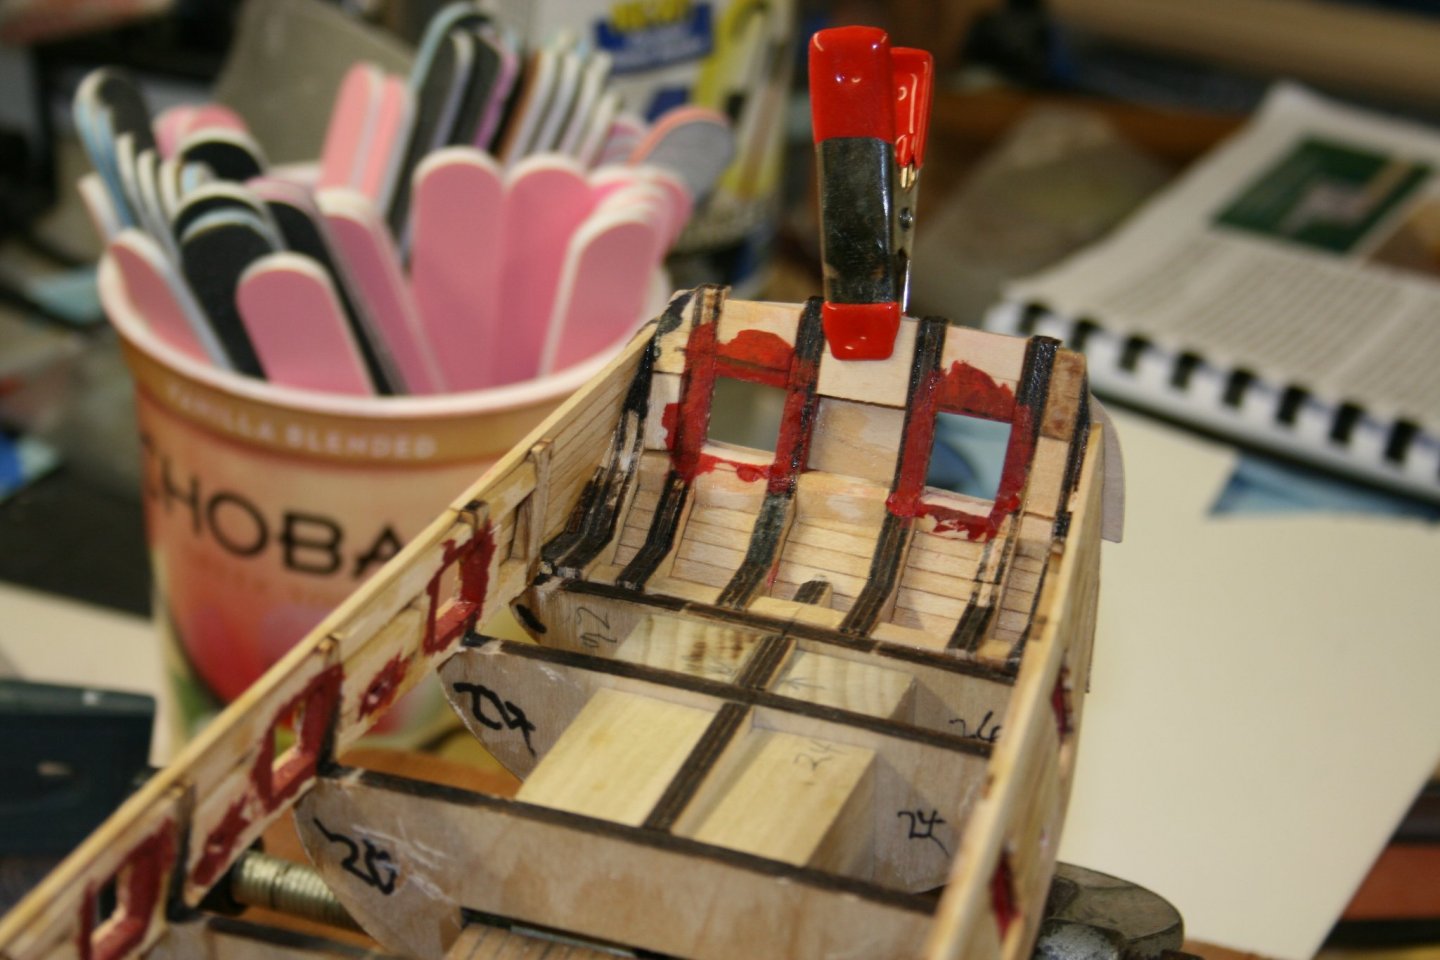
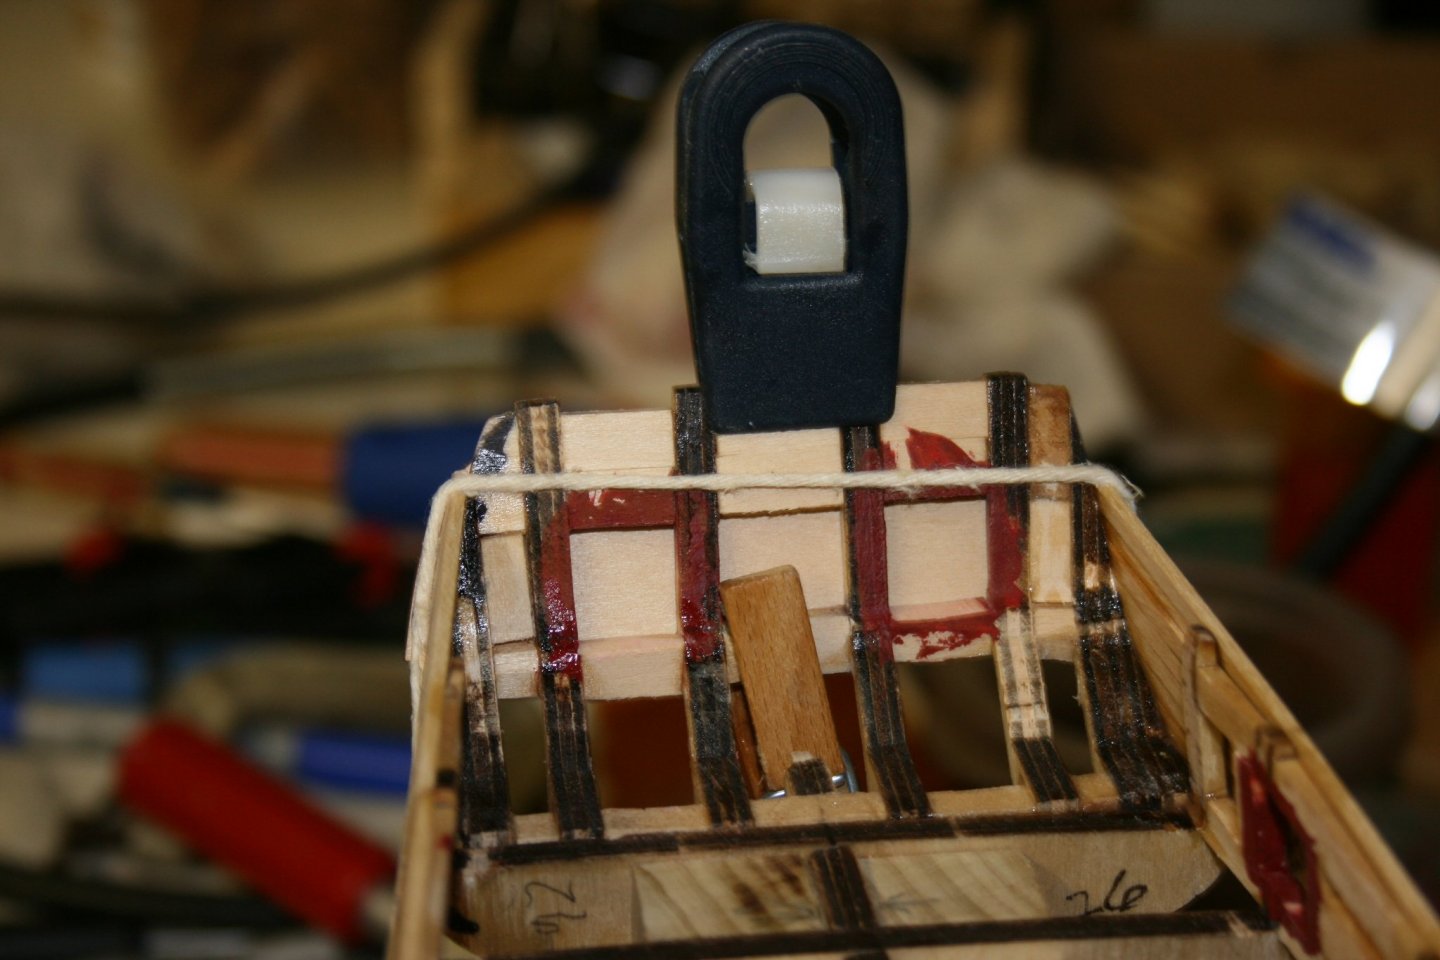
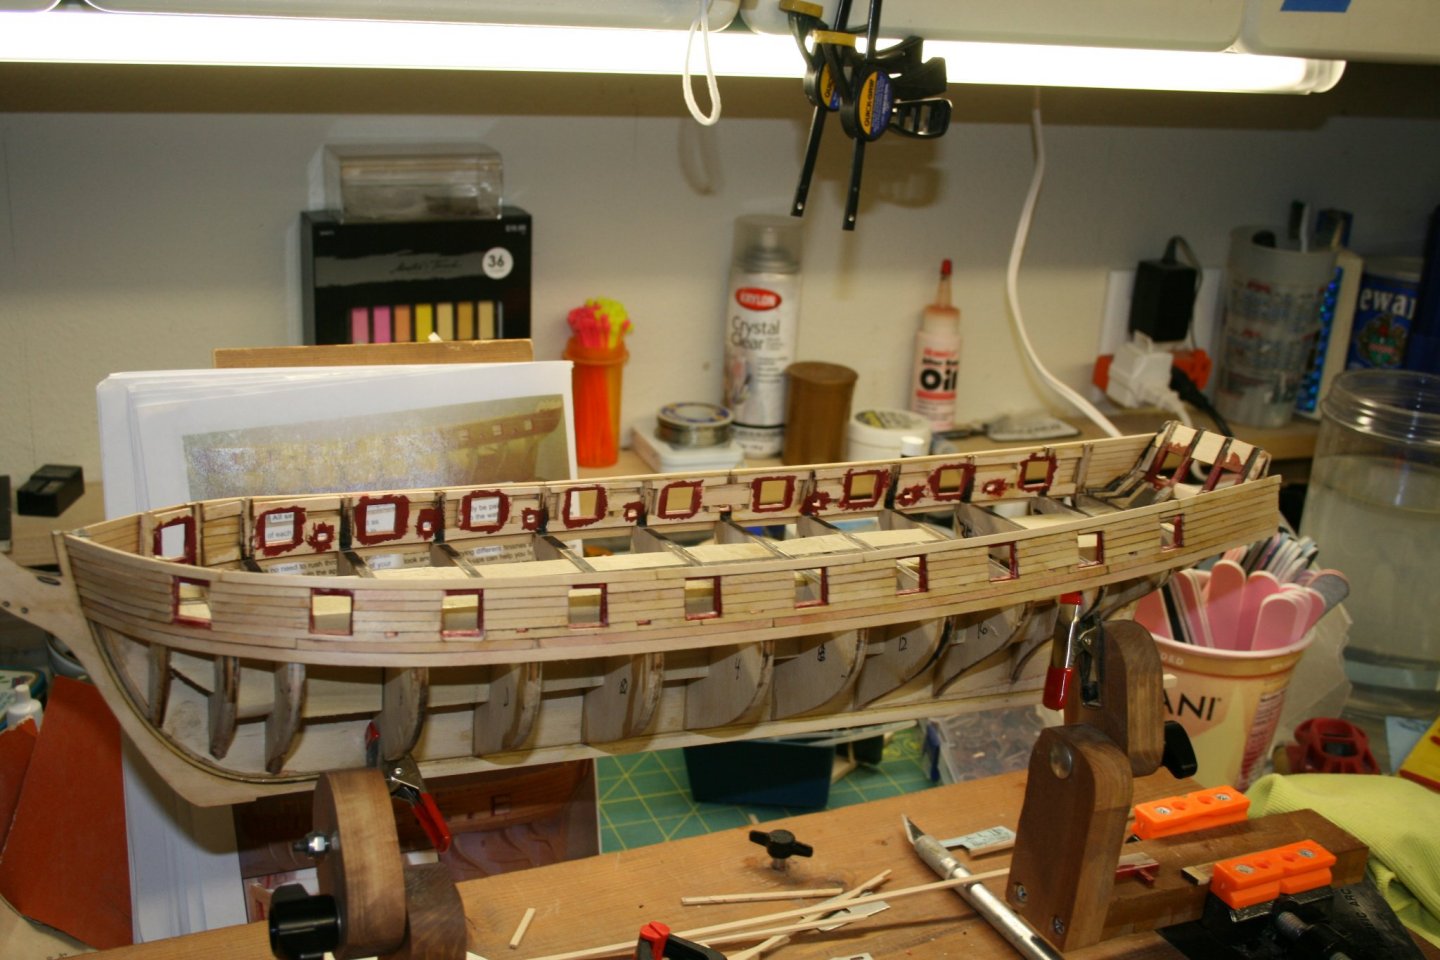
Port Side: Upper planking is now almost complete, just need to cut out the Sweep Ports openings. All are marked and should take about 30 - 45 minutes. Then it will be on to the transom area, with one issue ....however... In completing the planking, there is a very small difference between the two. So small that it is barely noticeable, but it did help me find an issue. Although I used my canon template and a 1/16" inch thick plank, it is lower in one port than the other. In looking at it, either the sills, or the lentils are off level. I suspect a transom measurement mistake. If you look at Post #98 it is the upside down transom view. The lentils all line up across, but the sills are not level. The upper left support does not match up with the other two. However, it is the first thing on my list for tomorrow, to check. I really need to get a better stool for the workbench though, my back is killing me after the planking. BTW: The 2 templates for the gun port doors is exactly what I needed to square up the gun ports. And I was able to plank somewhat faster because I just put a template in side by side gun ports and measuring the plank length was not required. Here are the pics:
- 436 replies
-
- 5
-
-
- Syren
- Model Shipways
- (and 1 more)
-
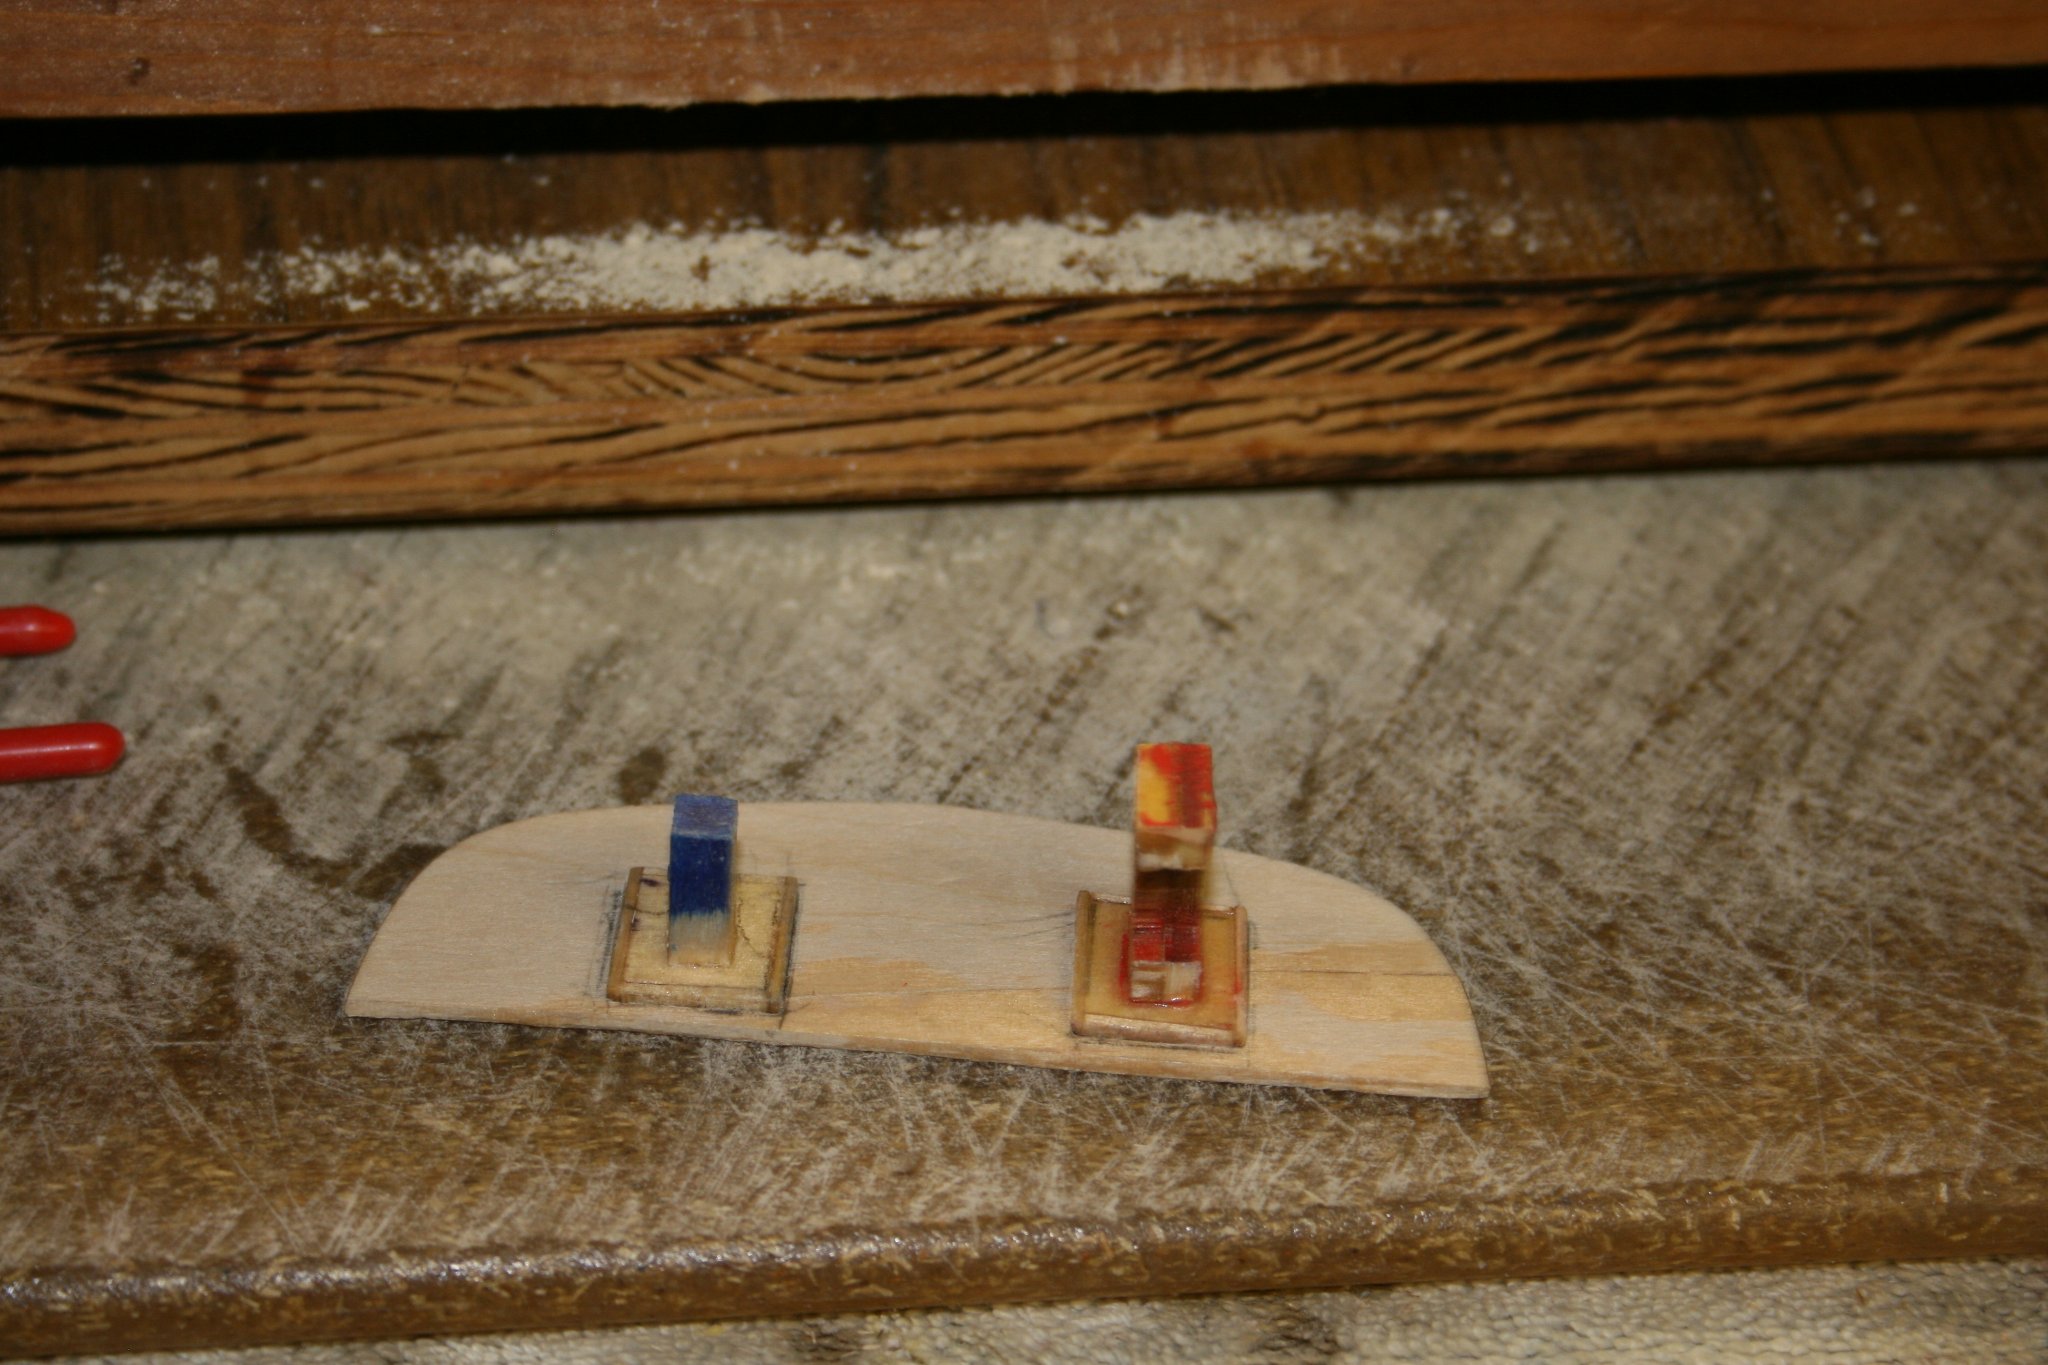
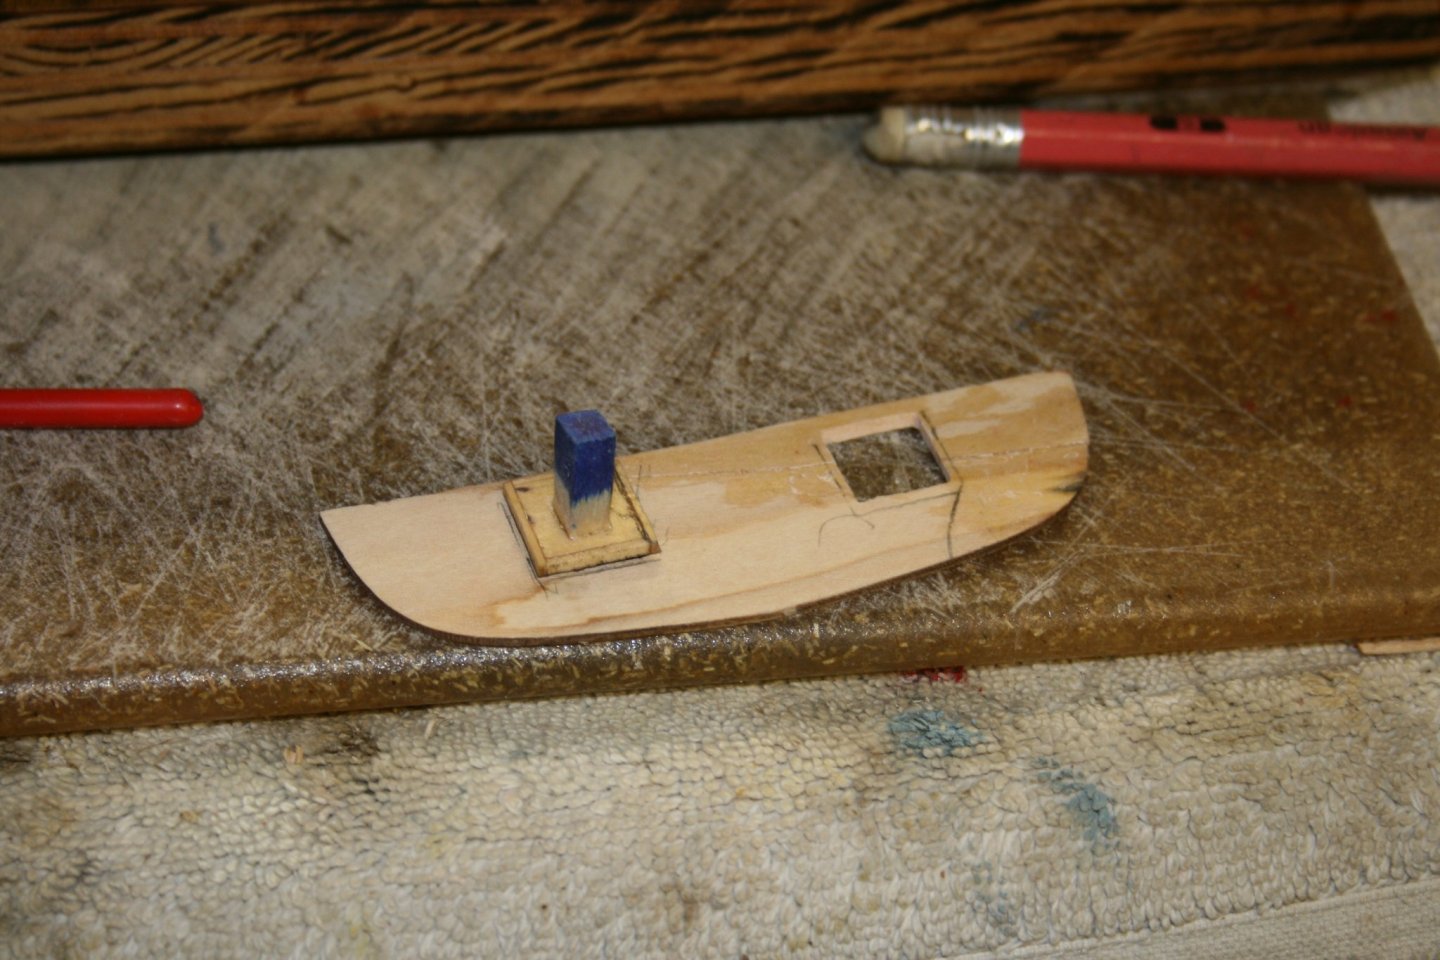
Starboard Planking Done: Well, at least above the wale, and I still have the sweep ports to finish. Rather than try to finish the sweep ports during the planking process I did the bottoms as I installed the planking which left a small gap where the sweep port is located. To this end, my plan is to go back, find the small gap and clean it out to the right size. It is my last step before going over to the port side and doing all this again. Such is the life of a ship builder.. do one side and then do it all over. 😁 Newbie Note: Rather than constantly moving from deck side to outside hull when cleaning out the sweep ports, I built another template. It is 1/8" x 1/8" square and will allow me to check the size on the outside while doing the clean out. A patent is ok, as usual. 😄

- 436 replies
-
- 5
-
-
- Syren
- Model Shipways
- (and 1 more)