Redshadowrider
-
Posts
301 -
Joined
-
Last visited
Content Type
Profiles
Forums
Gallery
Events
Everything posted by Redshadowrider
-
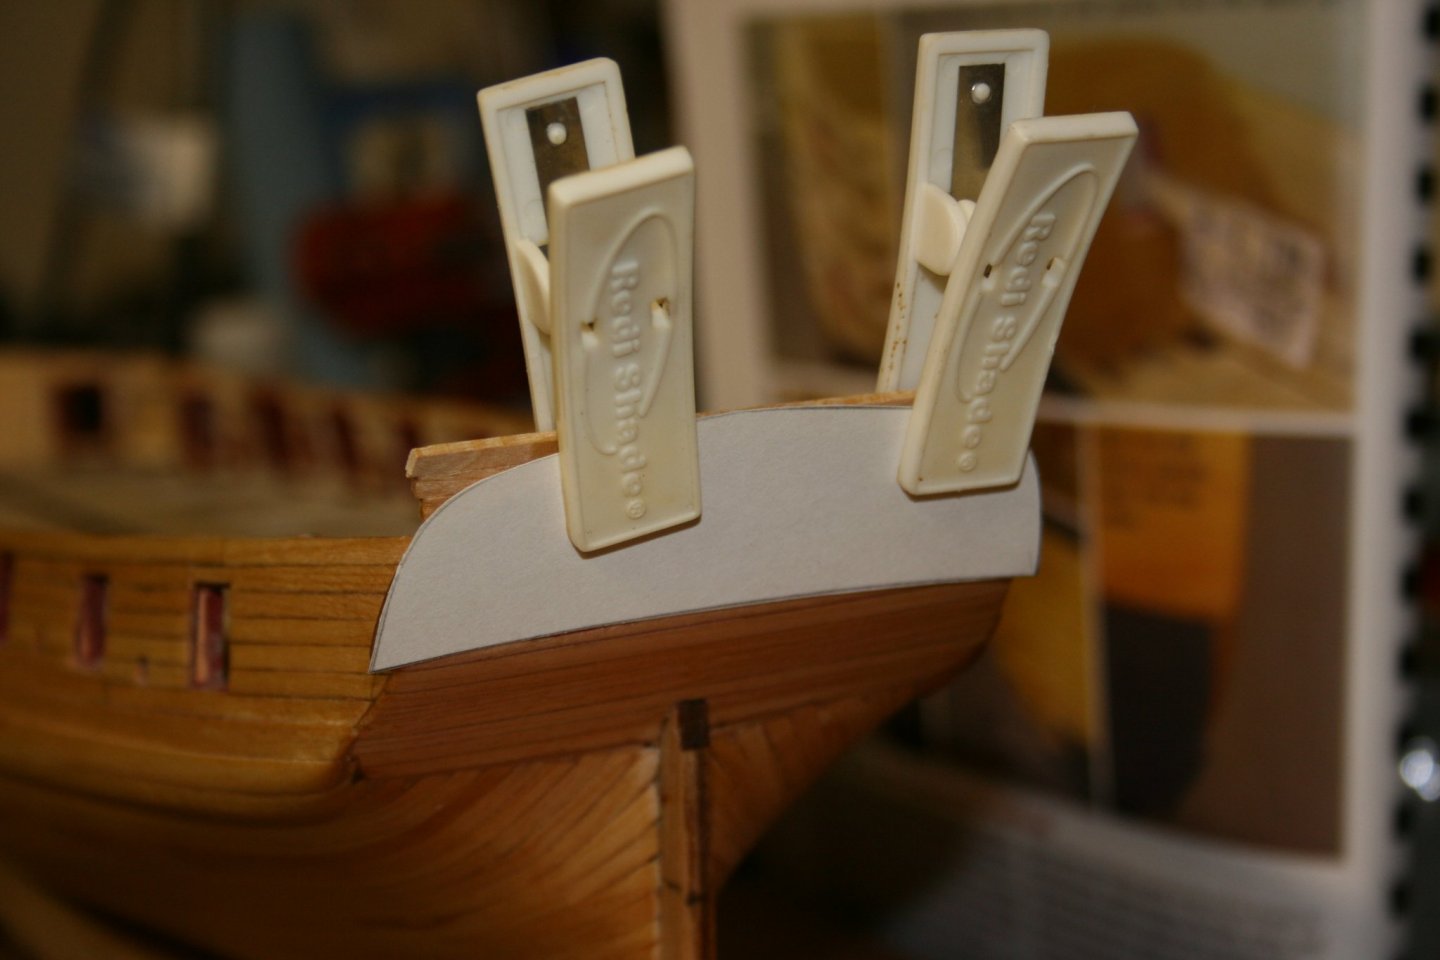
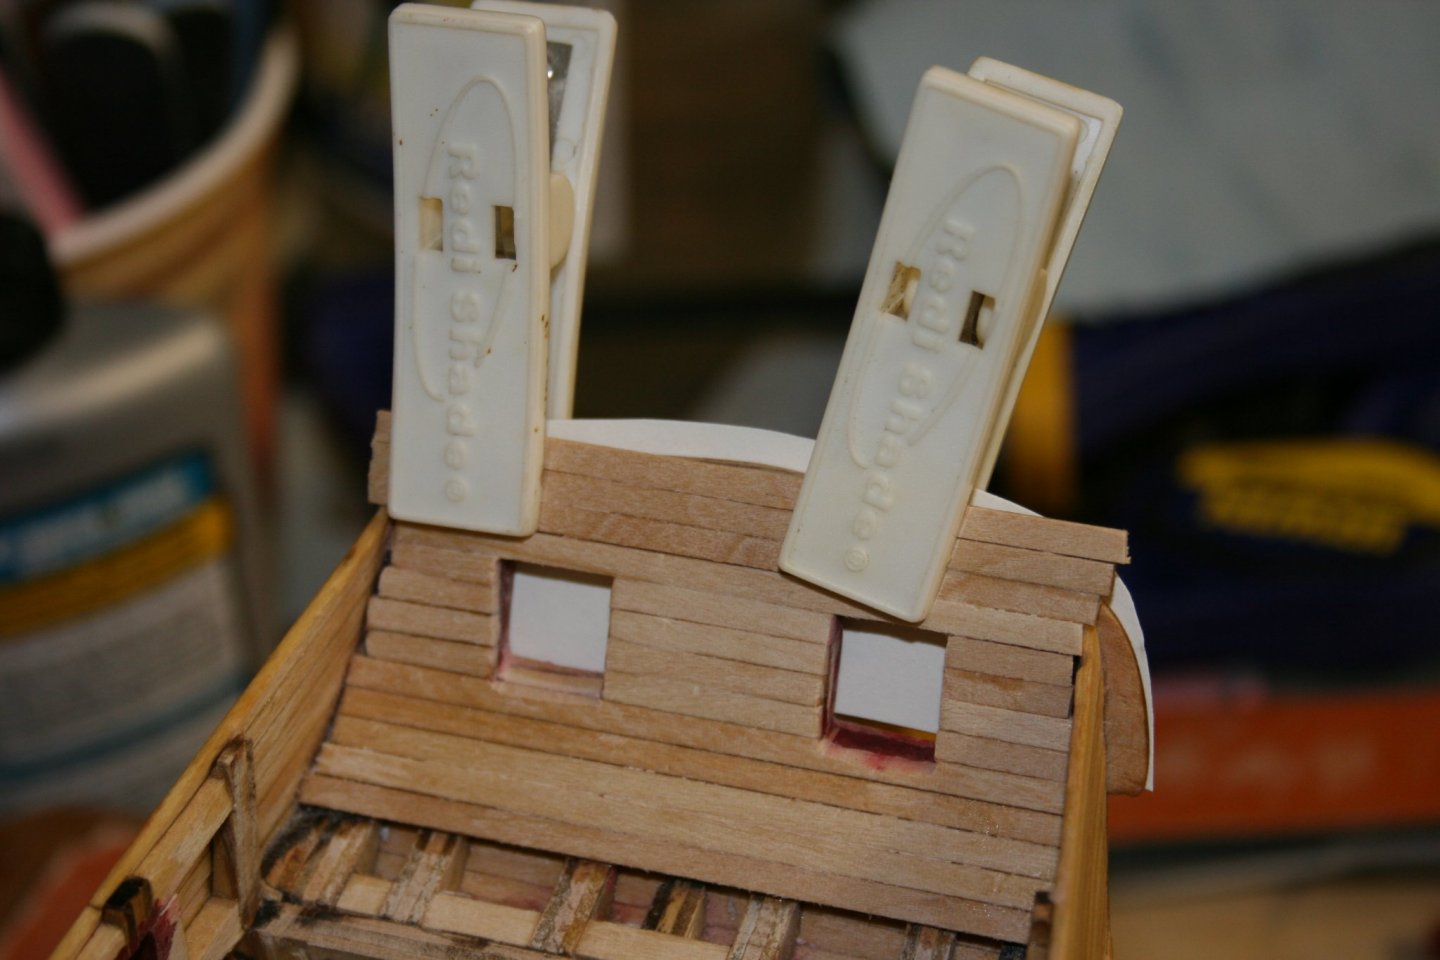
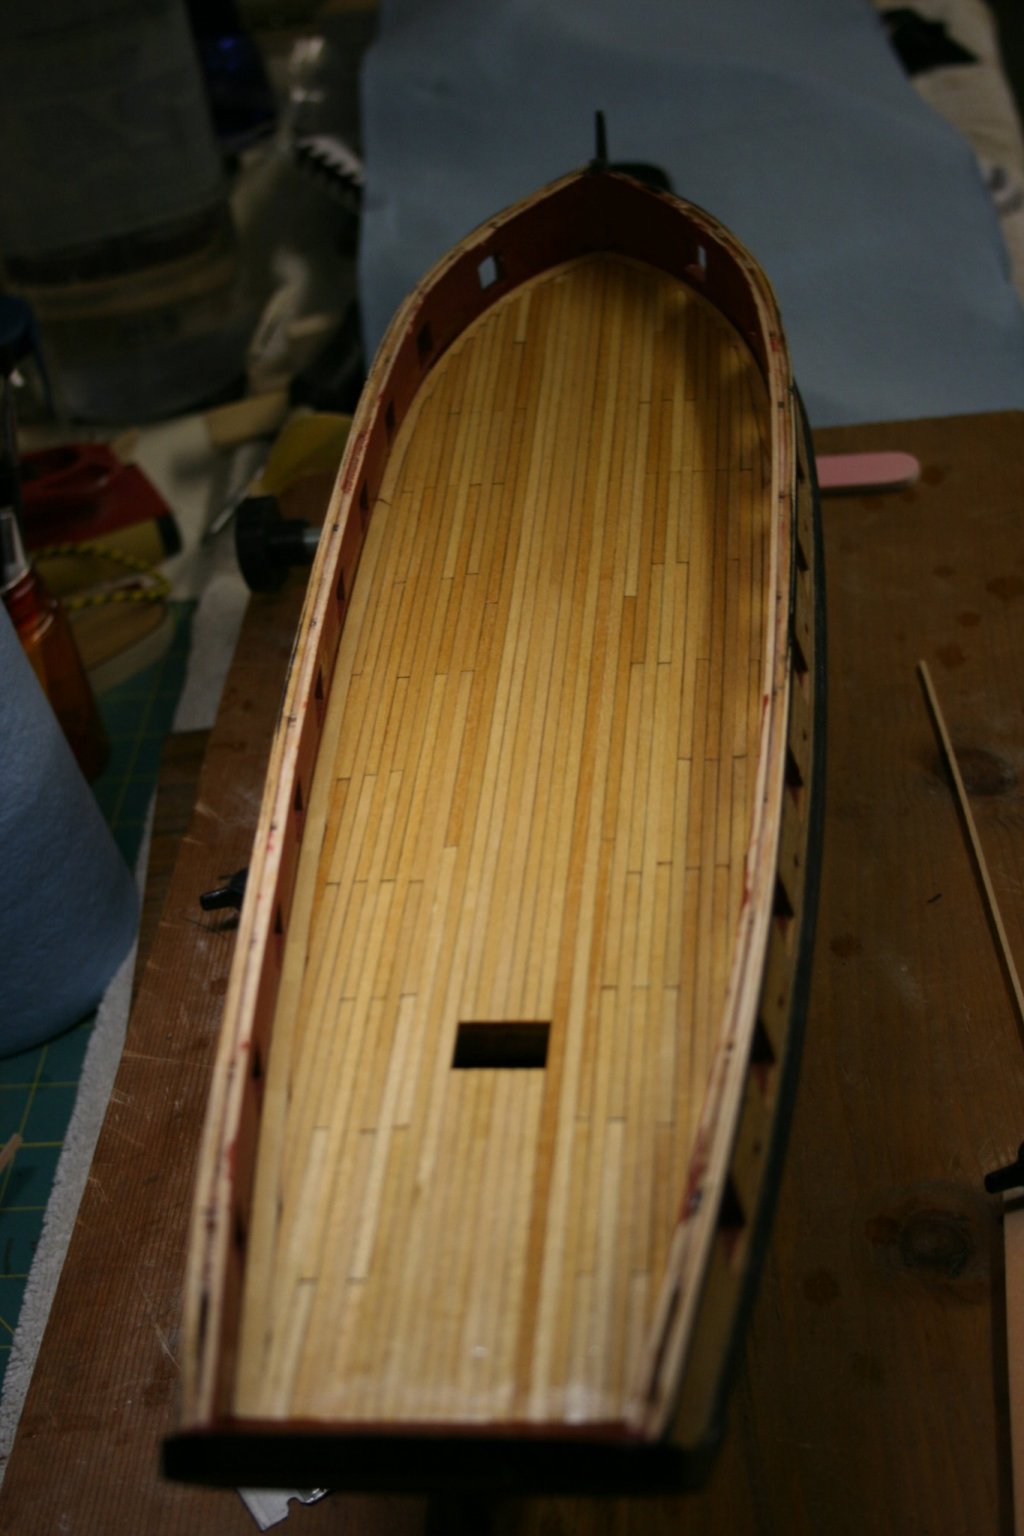
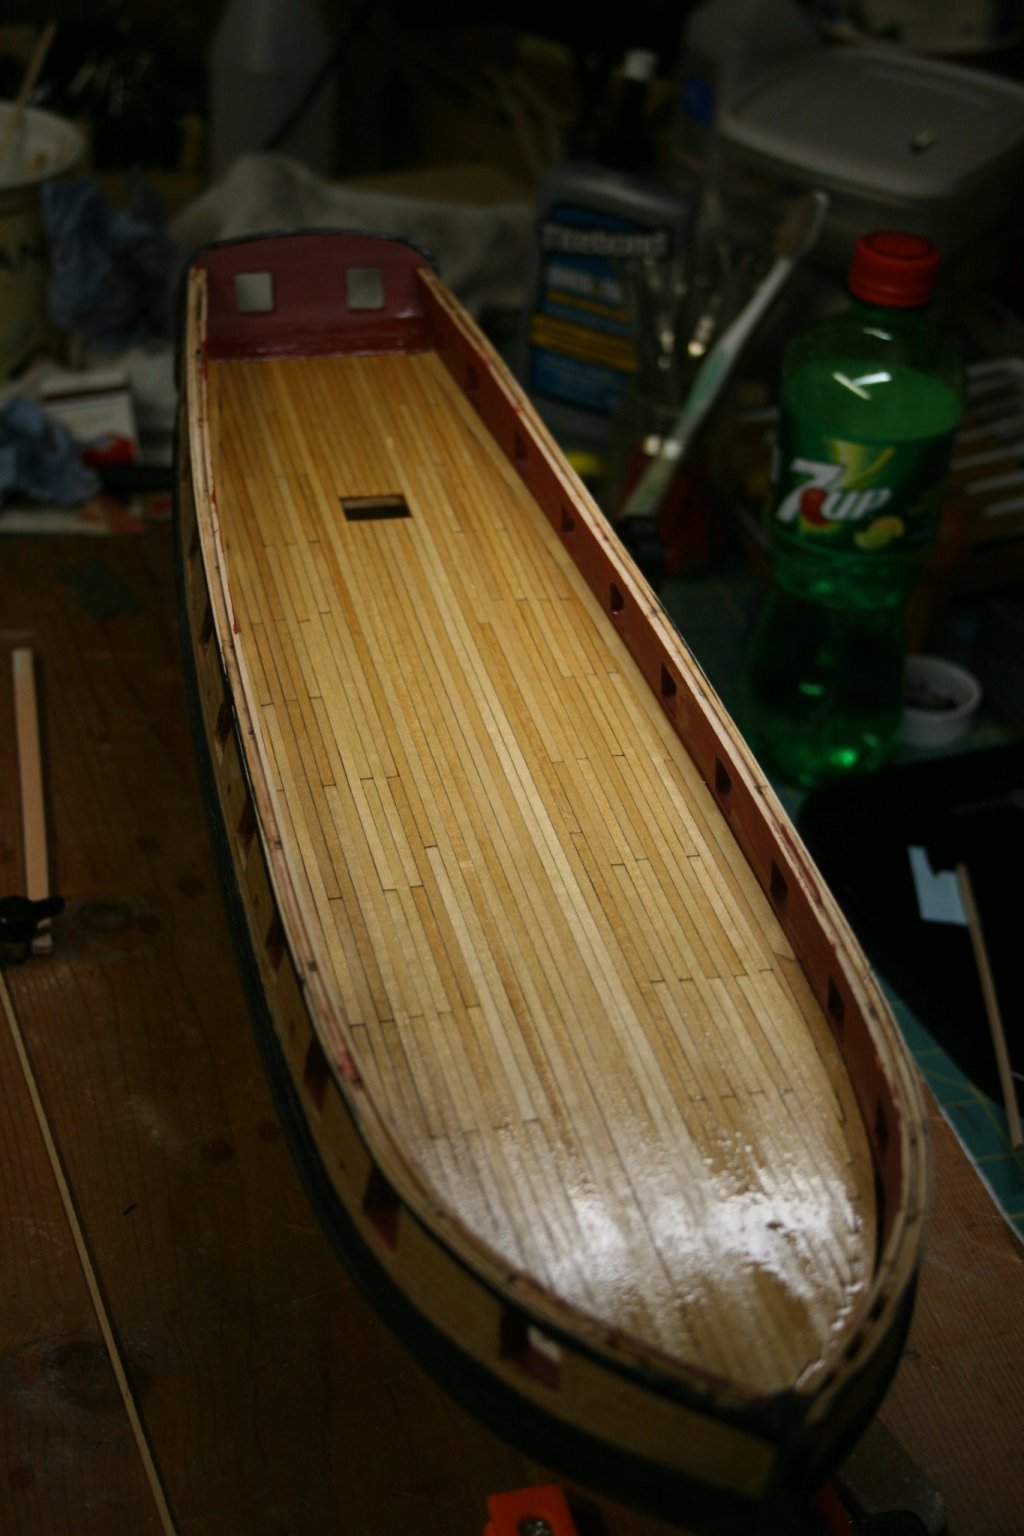
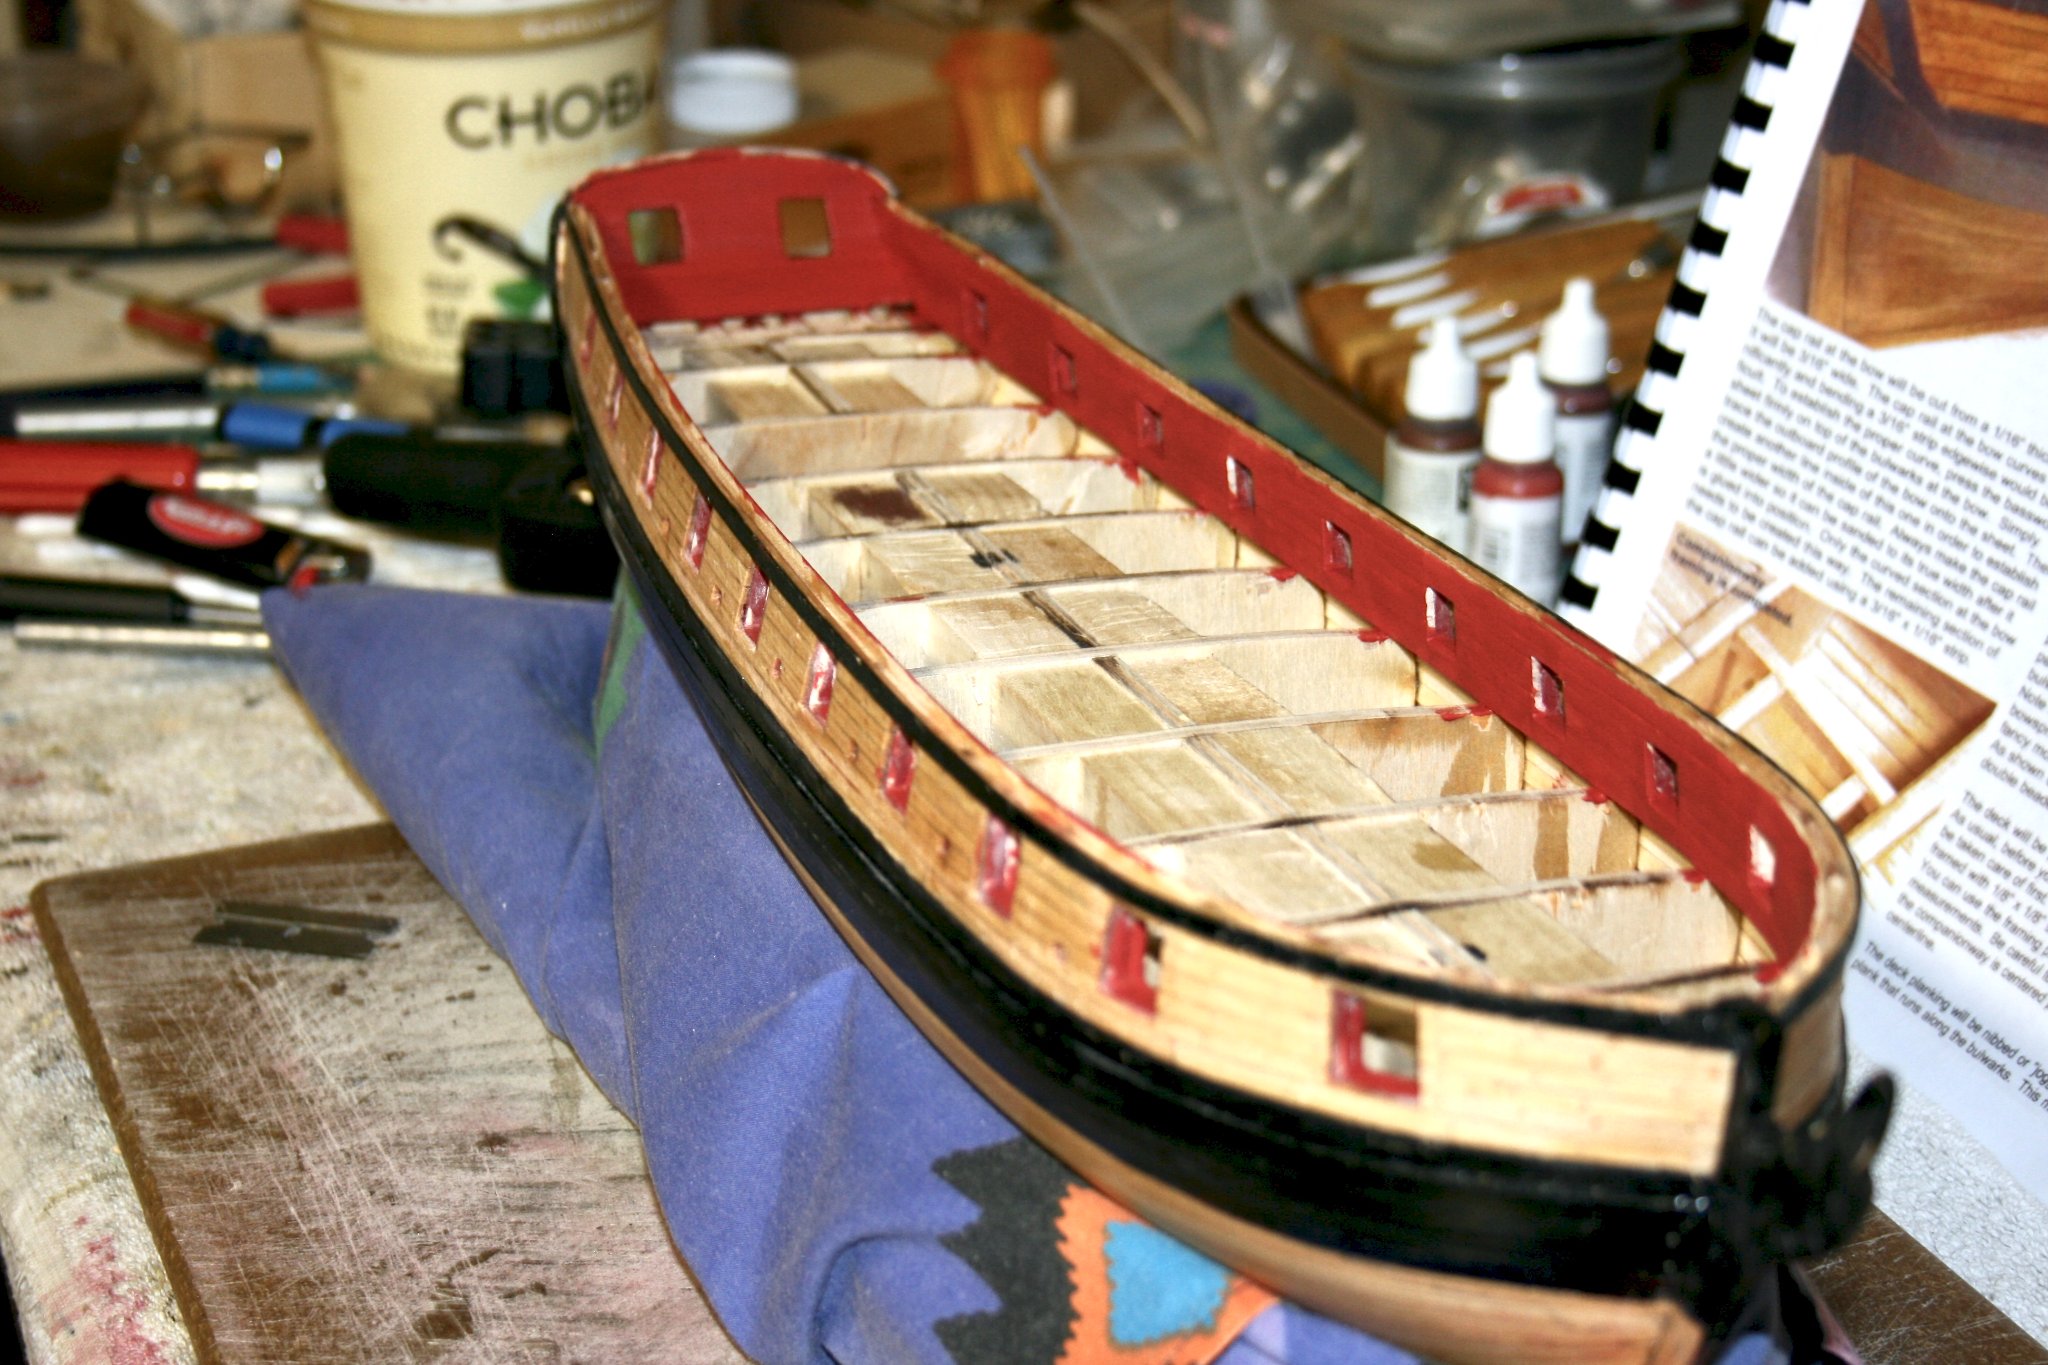
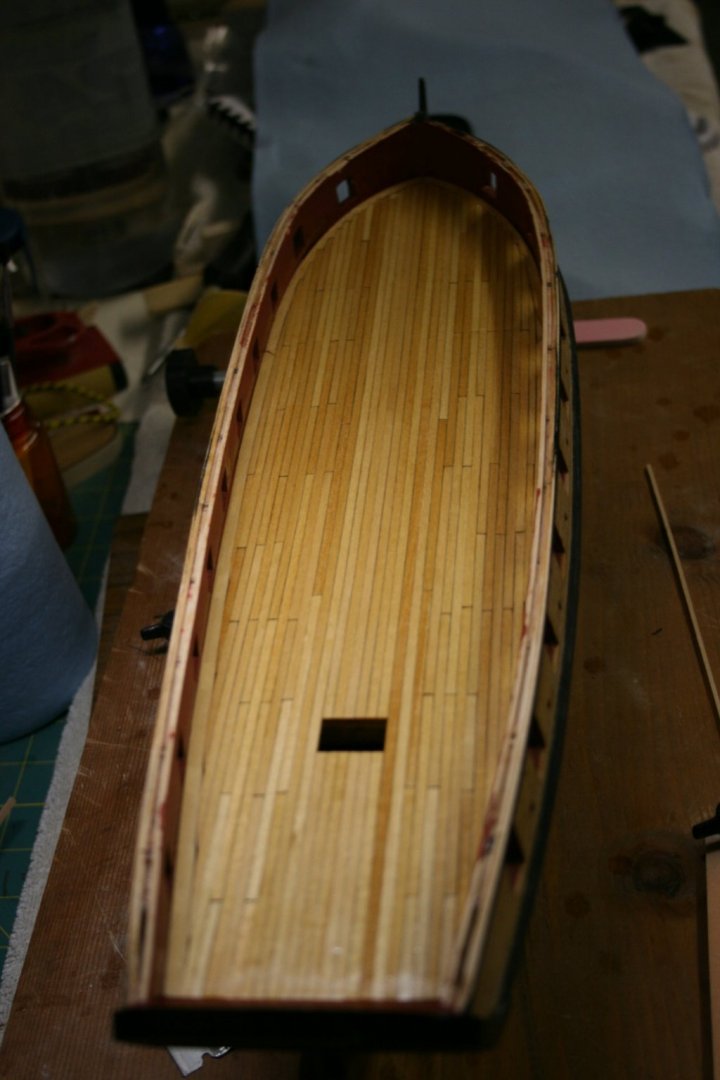
Knib One, Purl Two..........😀 Just finished the deck, sanding done, and first coat of Tung oil on. If you don't look close, you can't tell I didn't get staggering the butts 4 planks apart. For some reason, I just had a problem with it. I am pretty sure it was at the start and it was based on a difference in plank lengths. One of the books I read had planks on a ship this size at 20'... or 3.75 inches. So I cut quite a few planks ahead of time. (My Bad) The instructions say to use a 4 bulkhead stretch, which would be much longer than than 20'. I couldn't make a 4 board pattern work with such short planking. So I put down whatever worked. And I don't think it came out half bad. Anyway, no one else will know.. 😎 I test fit the waterway before I added the Tung oil, and it is right at the 1/16" the instructions call for. After the surface dries, I will do the deck lay out, so I can add the tree nails where needed. And I will note one item. I noticed that the tree nails on the bulwarks did not have a clean look. I am attributing that to the wood I used is pretty soft. Once they were in, I think the tree nails deformed slightly during sanding and finishing. I think I have some harder wood of about the same color and am planning to use it for the decking. On another note. I am glad that I held off on the cap rail until now. With it not being installed, I have just a little more room to work on the deck and waterways. Here are a couple of pics:

- 436 replies
-
- 5
-

-
- Syren
- Model Shipways
- (and 1 more)
-
Yes, I am adding pencil to the planking. I think it will be more visible when finish sanded, and the Tung oil brushed on. I was pretty lucky in the margin planks. I only needed a little sanding, and their flex was enough to clamp in place for gluing. I do have a space heater for the garage, but when the temperature is below freezing or below zero, as it was last week, it’s just too small. And, we don’t get that cold here very often. Thanks for the nice comments. I have learned a lot about ship building and many of the working skills have transferred from my primary hobby.
- 436 replies
-
- 1
-
-
- Syren
- Model Shipways
- (and 1 more)
-
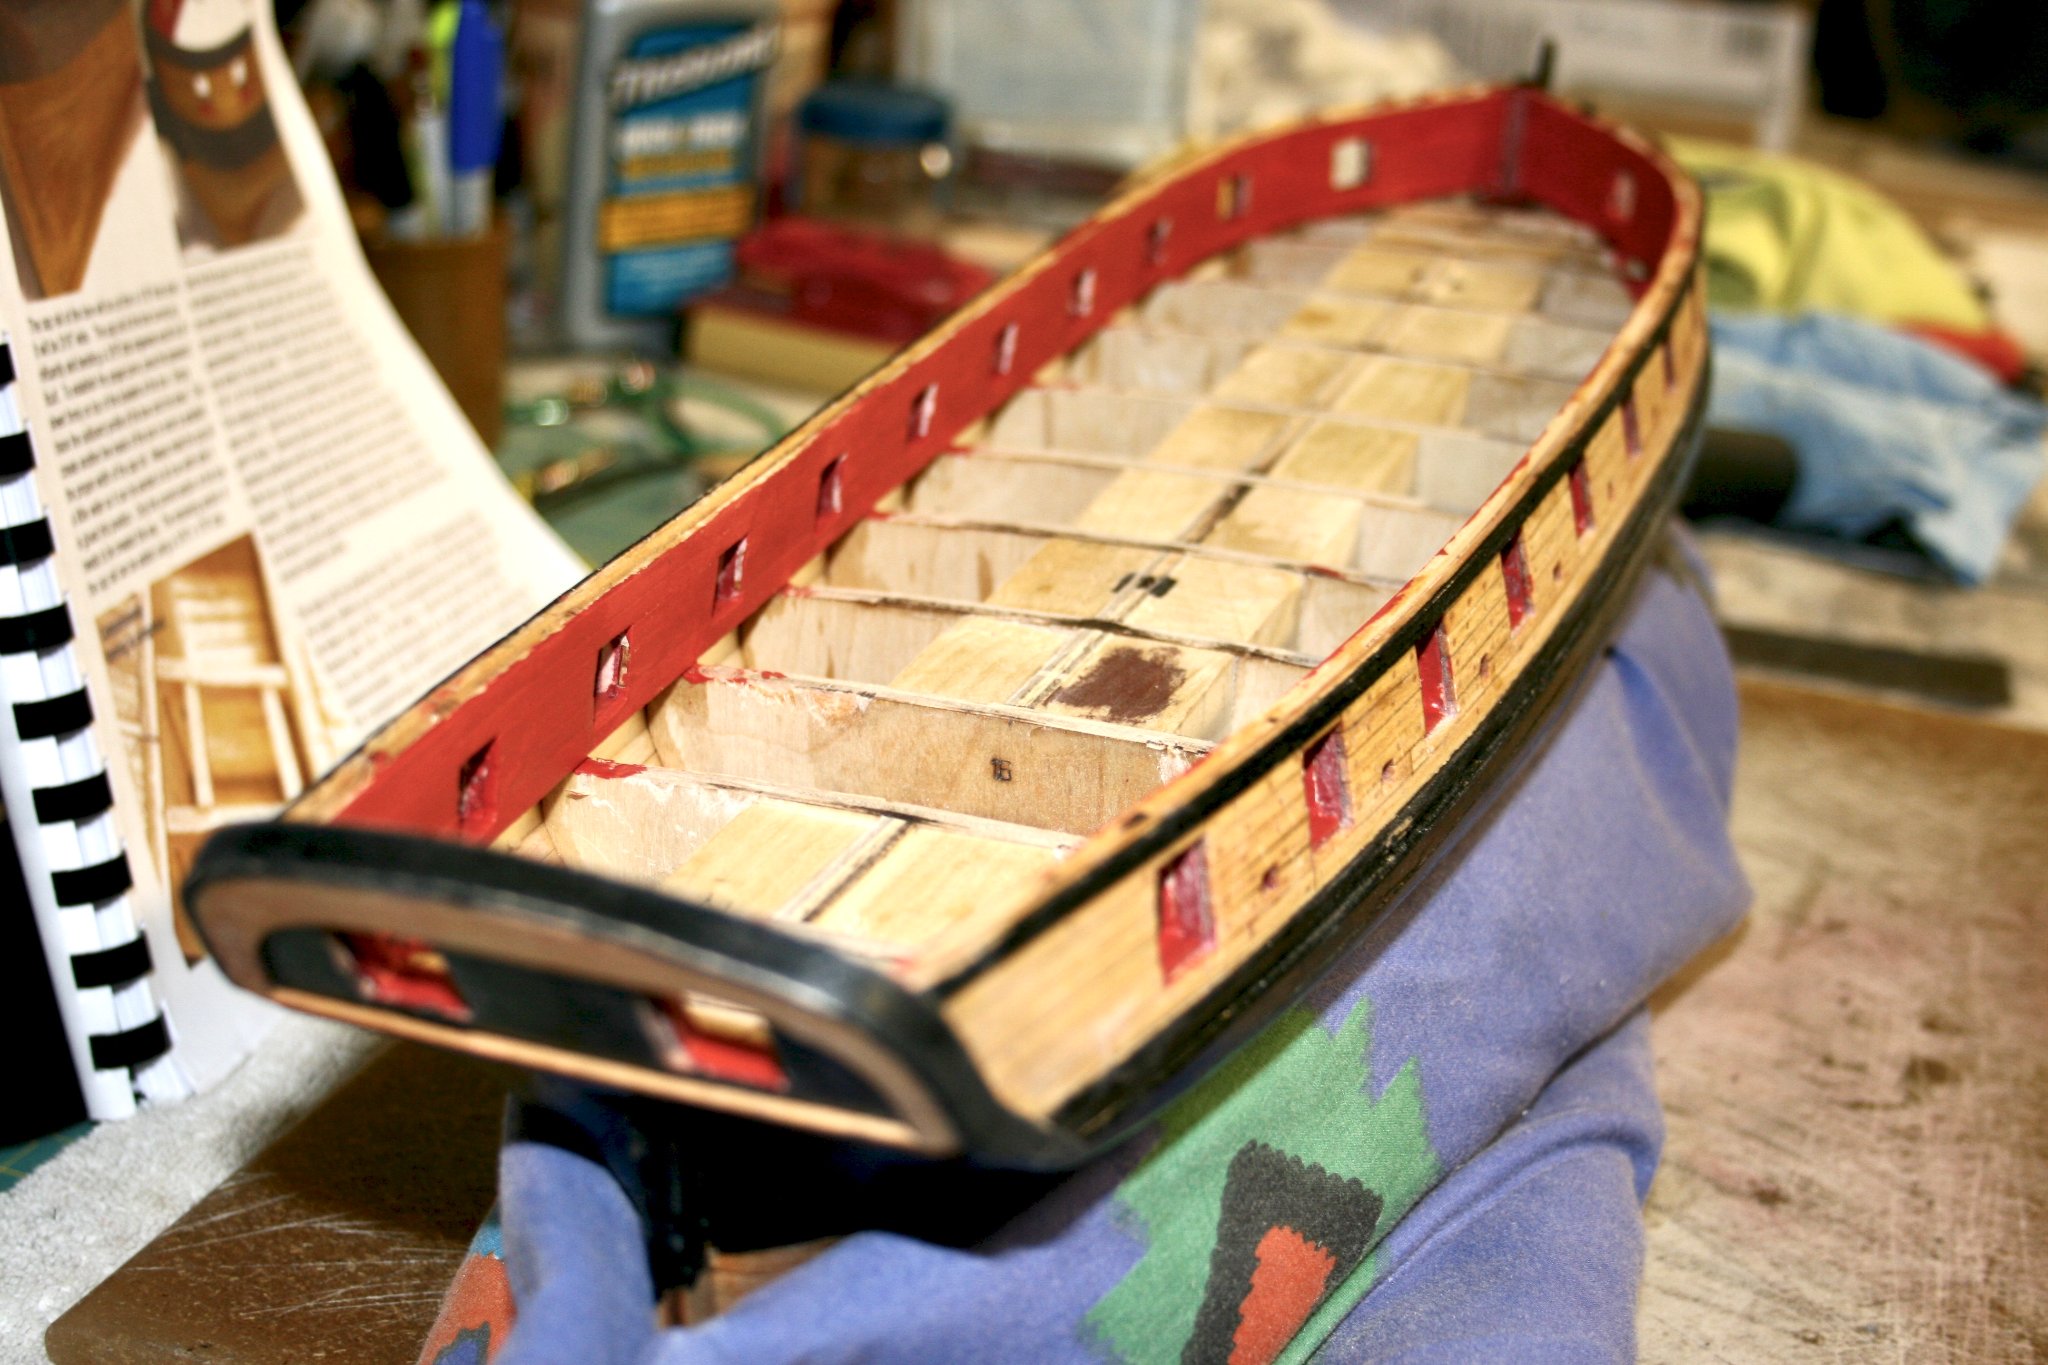
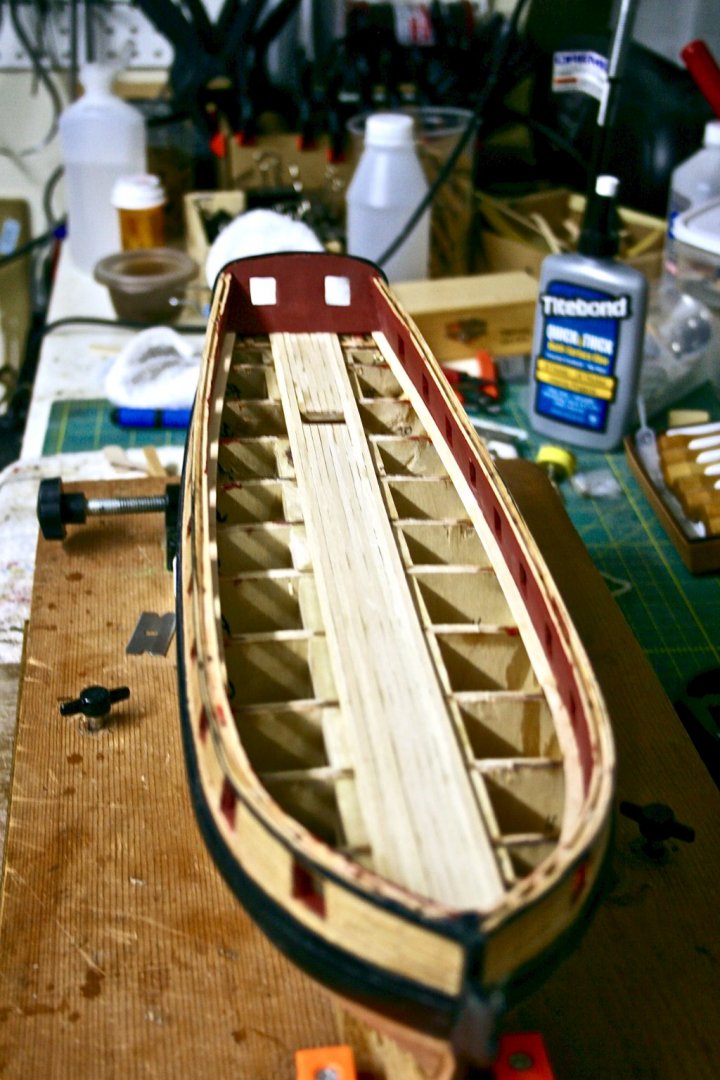
Snow, Ice, and Covid: Well, no, I haven't been slacking off, but weather and such has conspired to slow me down. However, I have completed the margin planks and the first set of planks for the deck. All the ones that are covered by the deck furniture are in place and now, it is nibbing I will go. I have copied the deck layout and will cut out each deck grate, etc, so I can lay out the location of the tree nails. And, I will start my first nibbing exercise. The garage (my dry dock) has been too cold to work in, so I brought what I could indoors. Here are the pics of my progress.

- 436 replies
-
- 3
-
-
- Syren
- Model Shipways
- (and 1 more)
-
Ready to Plank: Not much else to say at this time. Other than 1 vaccine shot down, one more to go.. next week. 😀


- 436 replies
-
- 4
-
-
- Syren
- Model Shipways
- (and 1 more)
-
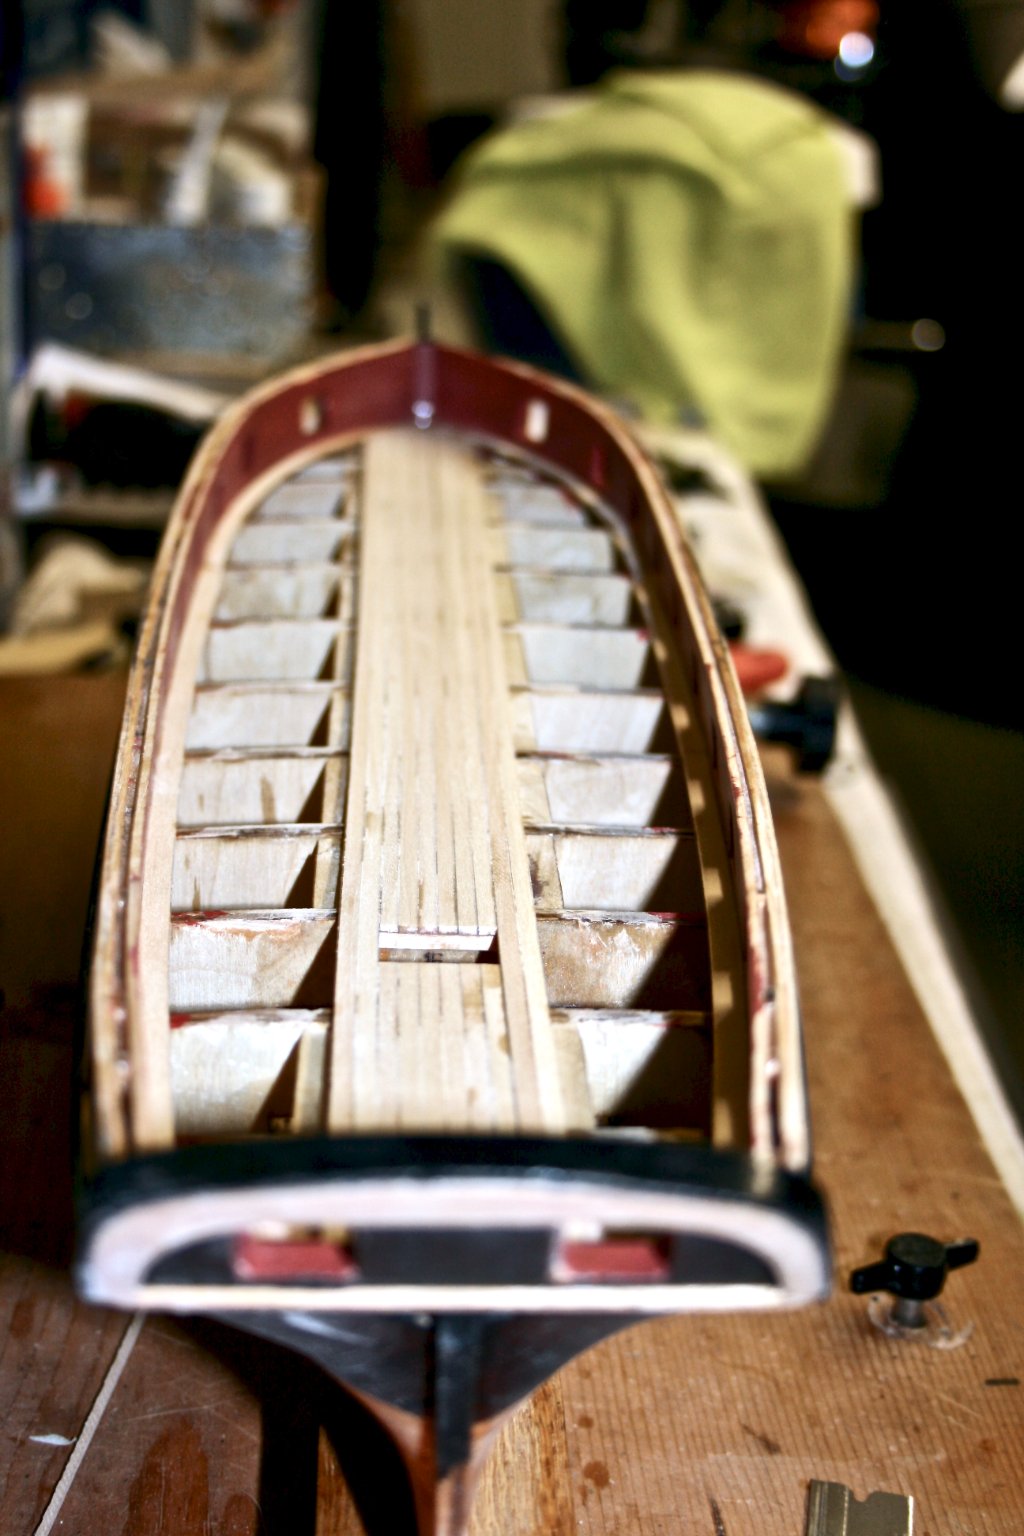
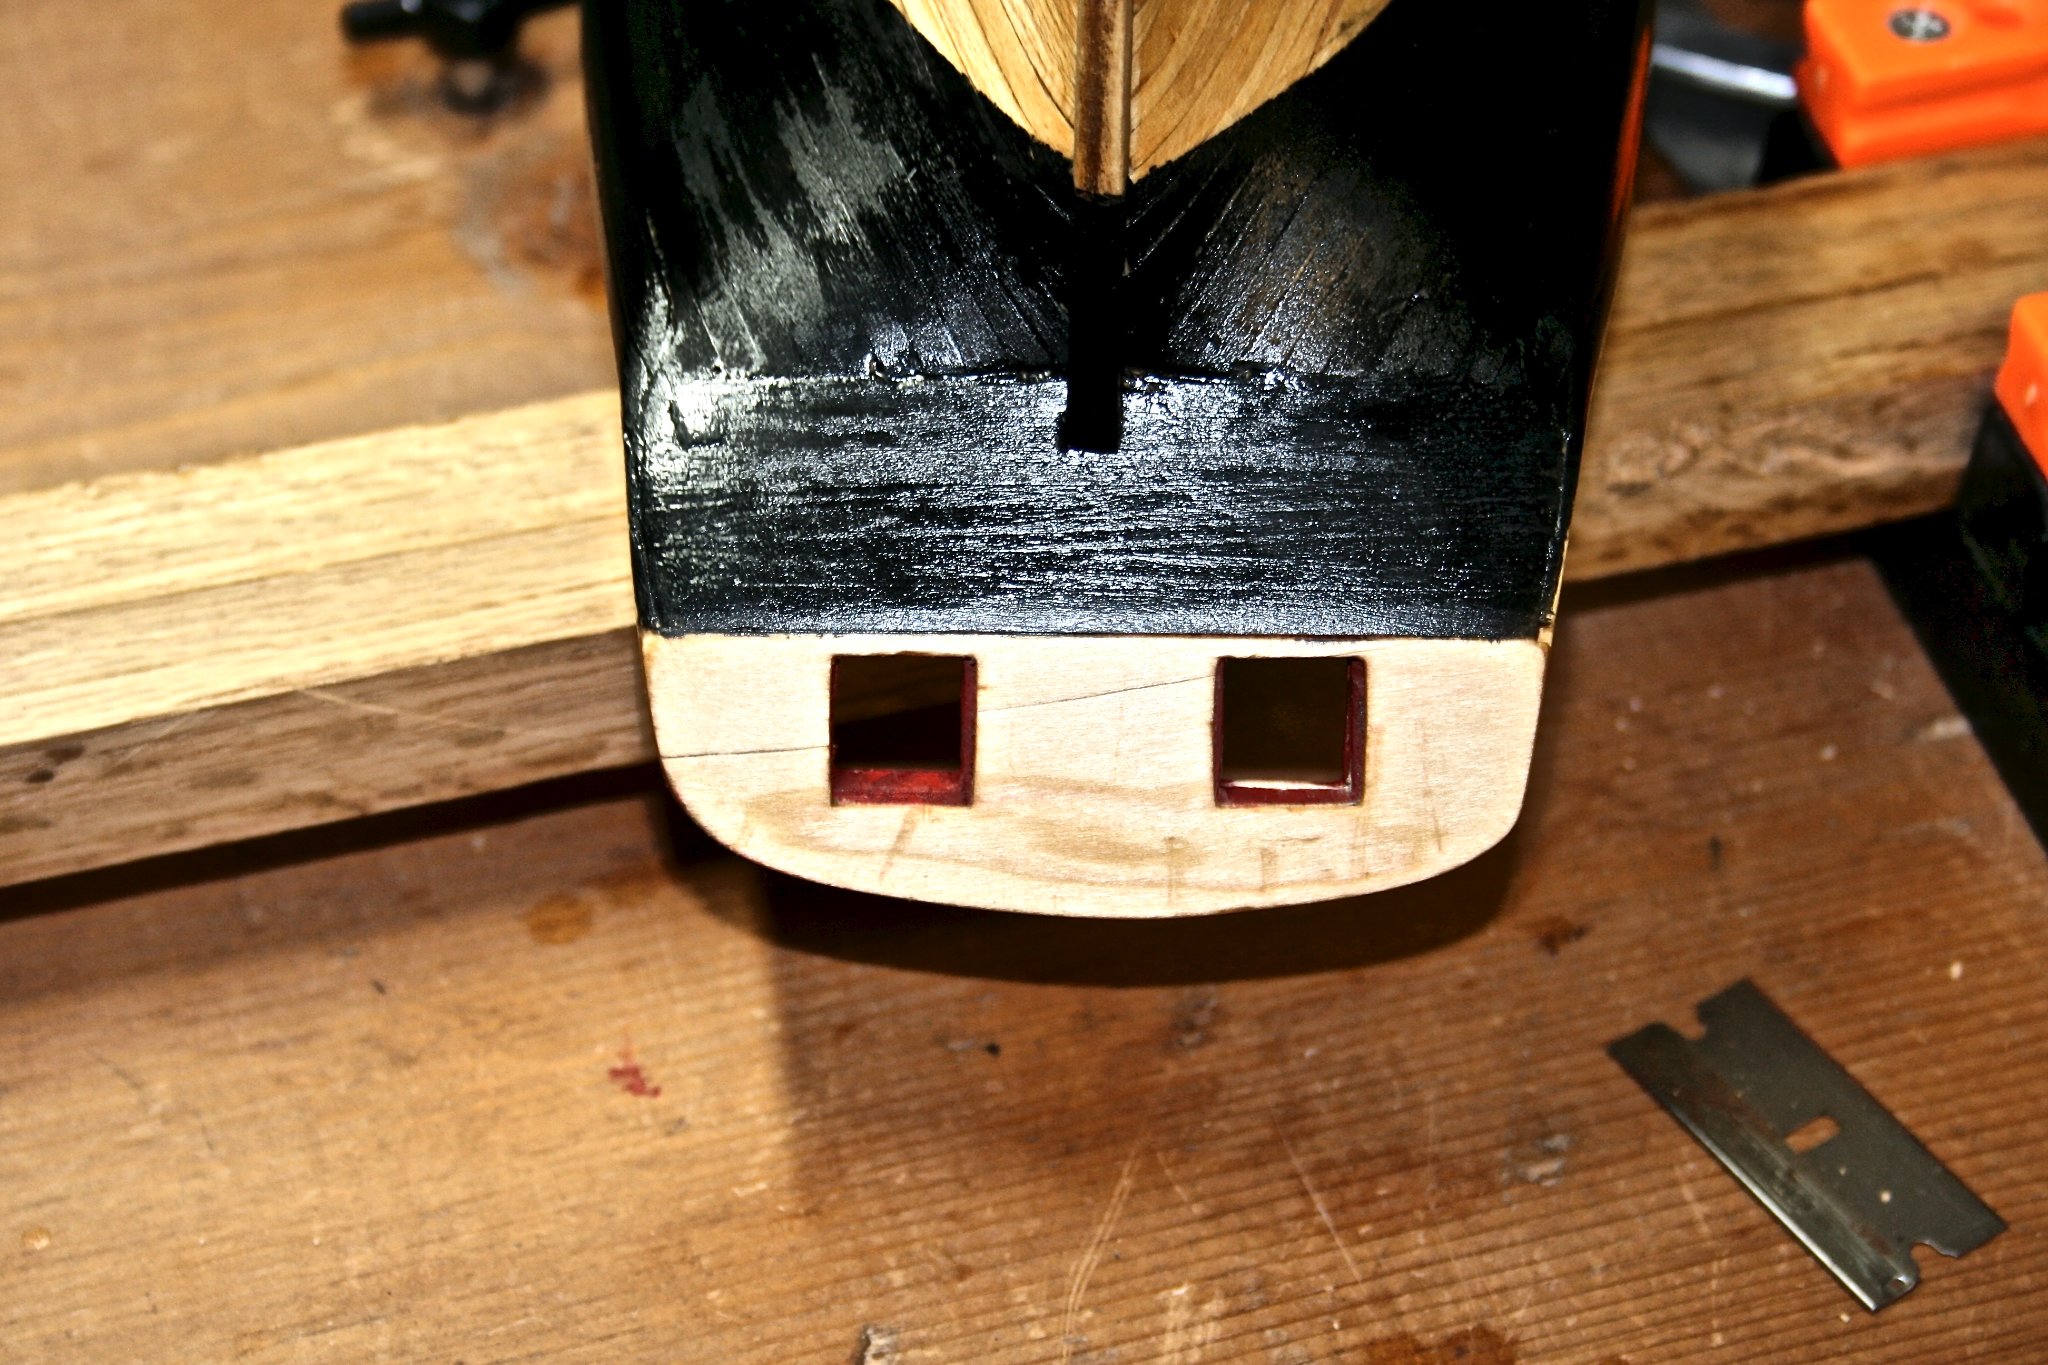
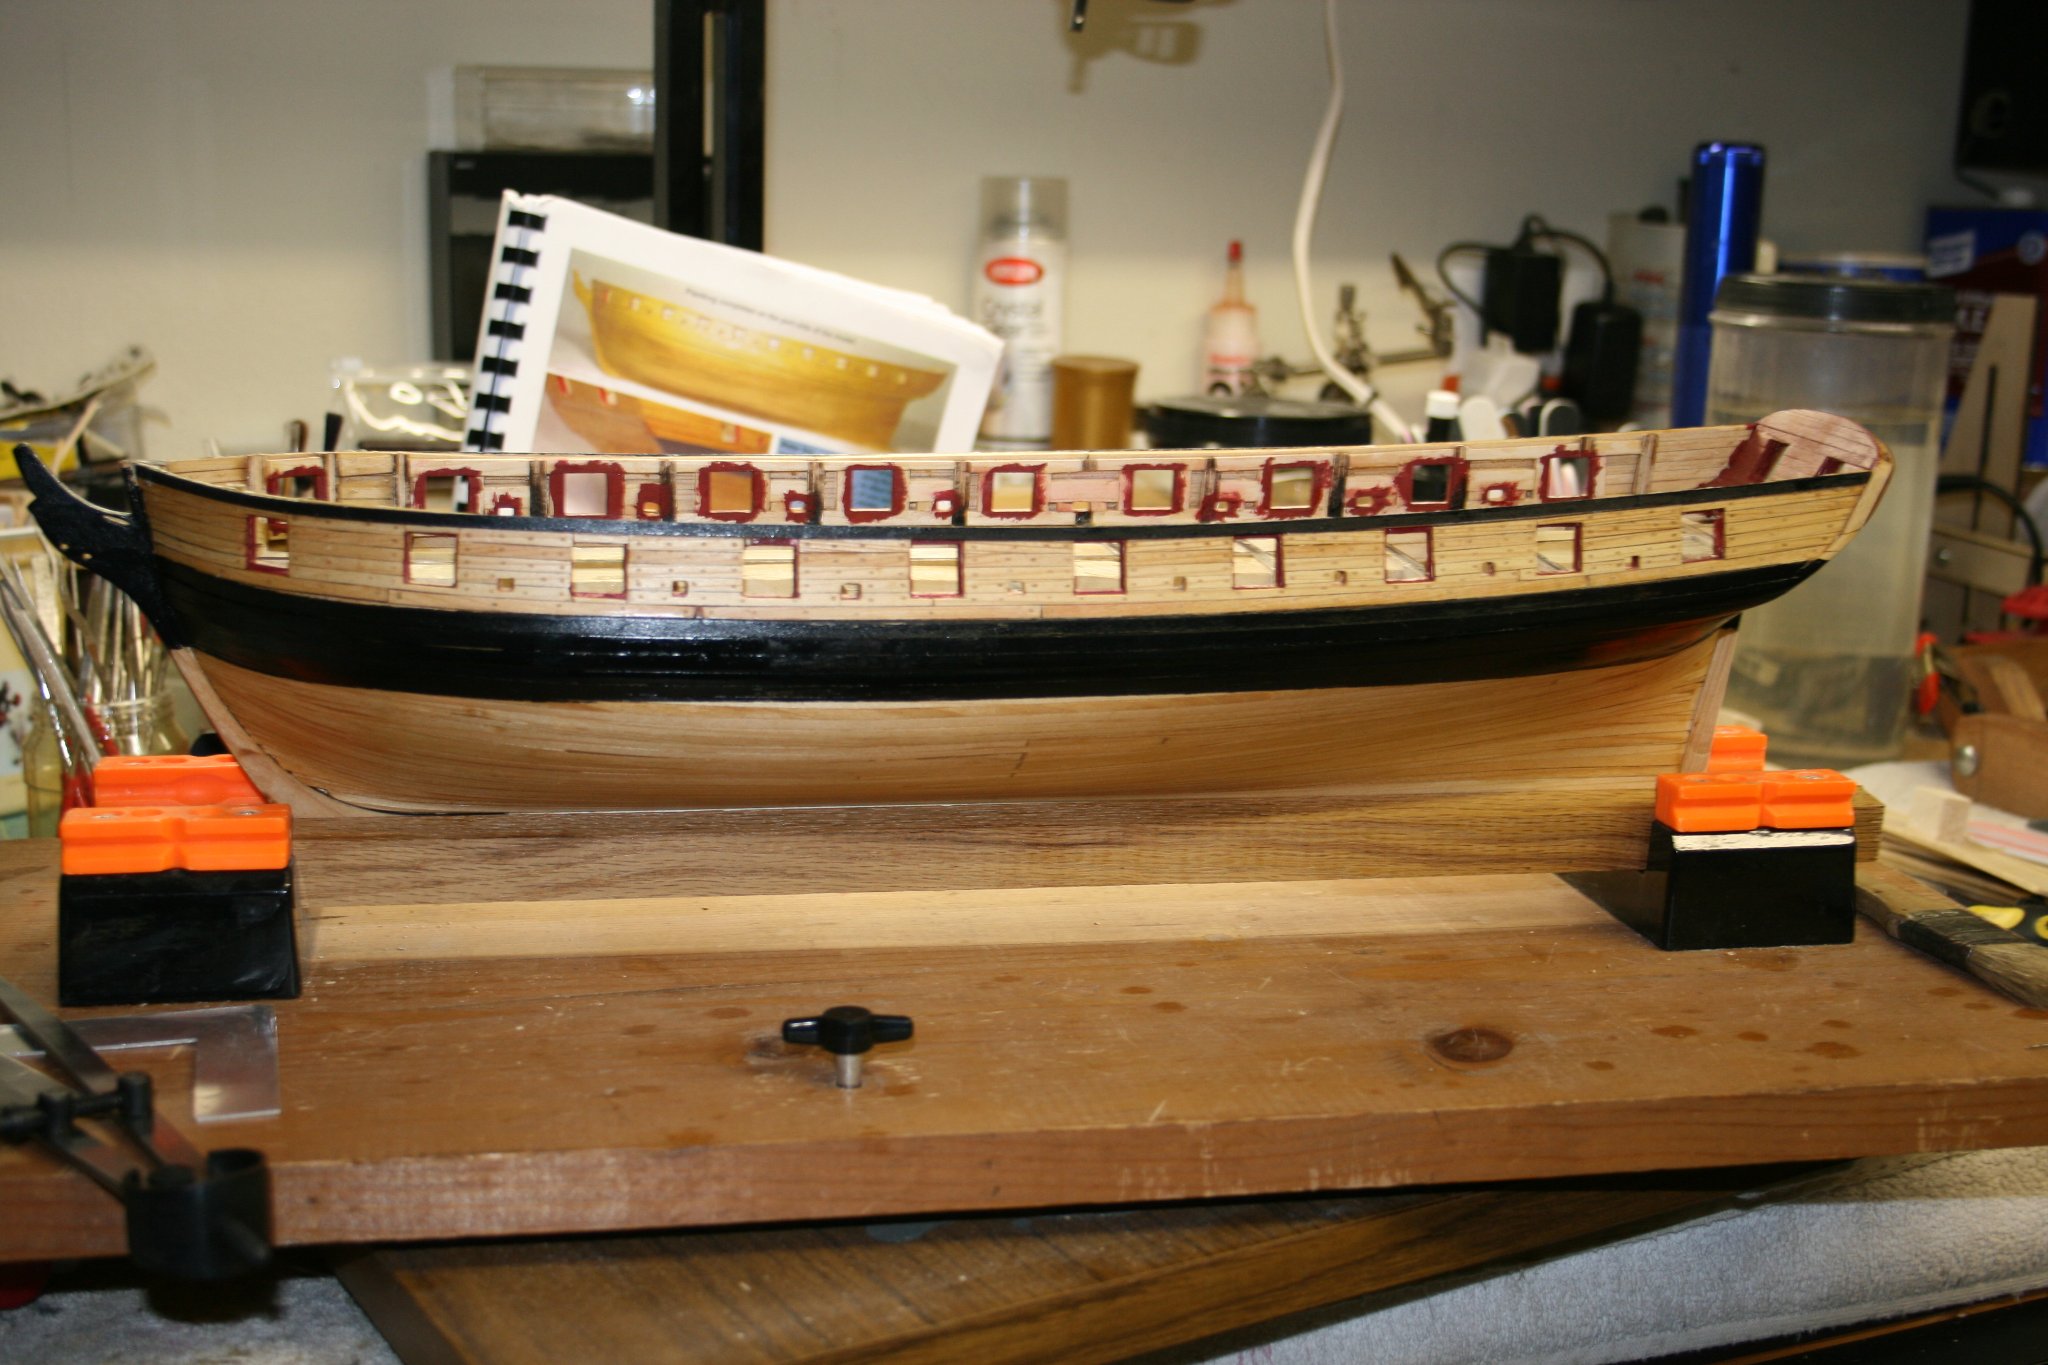
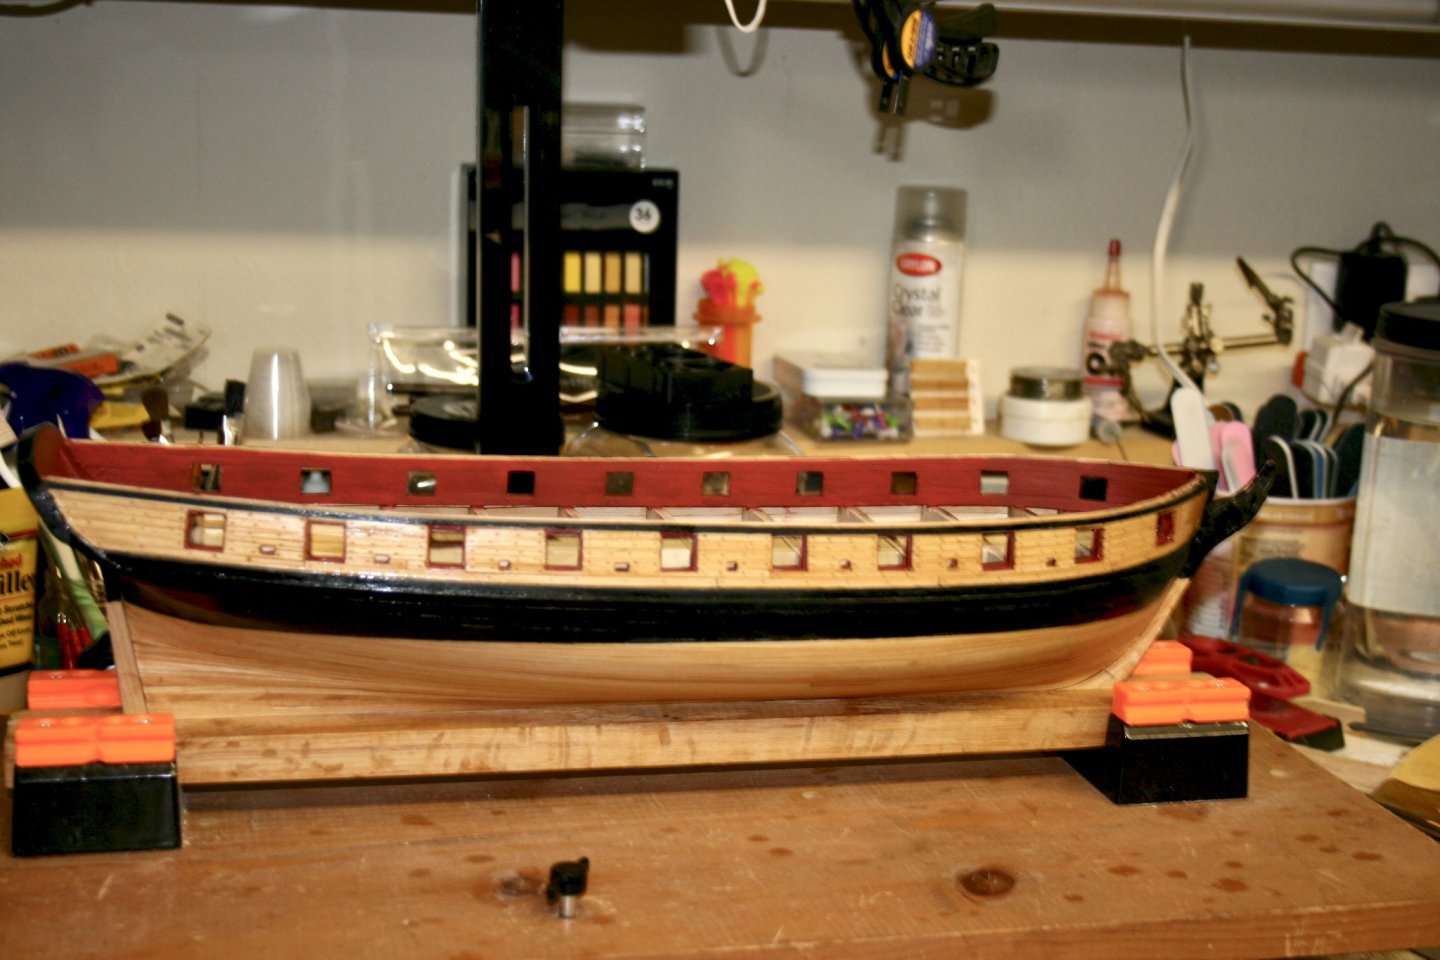
Warmer Weather & Progress: Although I say warmer, it is pretty relative. For here, when you get to the temperature that you can glue and paint, you have to move forward. Just finished the inboard bulwarks, with one coat of paint, and minor filling on the transom cap. Still needs another coat in order to balance out the coverage, and a little flat black on the cap edge front. Then I will do as others have done, start the deck planking before the cap rails are installed. Just seems to give a little more room and shouldn't make a difference. (Unless I missed something.) Question on the Cap Rail: Although it is a little out of focus, the outside planking at the bow extends higher than the deck side with the bulwarks sticking out above. If I sand it level, it will cut into the sheer strake and I can't tell from the pictures in the instruction booklet. I have counted the planks above the port sill and I have 6, but in pictures of the bow planking there are 7. Leads me to believe that the plank does not extend the entire length of the hull. (Never mind this question. I reviewed several build blogs and found out how @Overworked724 handled the same issue. I am moving ahead.) 😊 Any input on the sanding of the cap rail bulwarks is welcomed. (Here are some pics.)


- 436 replies
-
- 4
-
-

-
- Syren
- Model Shipways
- (and 1 more)
-
LOL..... Before I got the discs, and the scrapers, I decided to try my hand at doing them myself. I used an awl for the grooves, and a few rippler files to smooth it, then I dipped into Tung oil and hung them up to dry. Thanks for the compliment. I do have the scrapers and the cutting discs now. It should be easier now. 🙂
-
Between changing the carronades, the sculpty, and not joggling the planking, you sure keep me thinking. 😊. I may not go the same direction, but it does keeps me considering other ways to build. On the 3D products, like the carronades, I have had some experience with them too. I tried a 3D printed headset for one of my scale pilots in one of my planes. It was so brittle that it broke into pieces just in assembly after painting. You ship is looking great and I am wishing mine could be as clean looking. Although, I am leaving some minor clean up until later. Next step for me is the thinning of the bulwarks and onto the decking.
-
Yep, Still Here: I can say without a doubt that the toughest part of this build so far is the stern and transom. Numerous small separate pieces that need cutting and shaping so they fit together. Add to that the cap rail, it is a phase that needs a lot of attention, then add the painting and it becomes a challenge. Not one that cannot be overcome, but one that can be frustrating at times. Add to this, cold weather stops and starts, keeps one from getting into the flow of the build. However, I am 99.5% ready move to the next chapter with only a small amount of clean up and detail painting left. Onto Chapter 7
- 436 replies
-
- 5
-
-
- Syren
- Model Shipways
- (and 1 more)
-
Thanks Patrick. I have seen these, but was looking at your picture and the disc appears to be silver. I thought the terra-cotta colored discs would fit the Bill, but wanted to make sure. 👍
-
Question @Overworked724 I have been trying to find a source for the .009 cutting discs shown in your log. So far it seems that I can only get them from Dedeco. I tried Amazon and they require a business account and a healthcare license. Can you tell me where you got yours?
-
👍 Soaked, Cooked, Bent, & Clamped: Got it done!. I soaked the strip in cold water overnight. Cooked the strip in boiling water for 5 minutes, and let set for 10. Bent it slowly around the form, and clamped it in place. I think I got it now... yay. Now according to the Admiral, I have a pot to clean in the kitchen. 😃 According to her, she doesn't like the taste of wood. hehe
- 436 replies
-
- 3
-
-
- Syren
- Model Shipways
- (and 1 more)
-
I have 2 RC plane building tools that I will use with the boiling water. A Covering iron, and a heat gun, which are used in attaching the shiny colored film on the frames. The covering iron does pretty much what you would think. We tack down the covering on the frame using the iron. Then using the heat gun, you shrink the covering until it tightens against the frame. It takes practice, but gives a professional look to the plane. Using these 2 tools should give me the control I need. This is a wing that I recovered recently.
-
I plan one try with the strip in boiling water. I can then determine if the wood is easier to shape. The critical part for me is what happens when the strip goes over each top to side transition. The wood tends to crimp and leave a shape like a hose over a sharp edge. If the form allows for a smooth curve transition then I think I can be successful. I have done some final sanding on the transom and sides as well. To make the form, I traced the shape onto a narrow board from the lite ply form the part was cut from, then sanding it to the outside edge of the mark. It is almost exact.
-
Thanks Walrus, I have been reading several blogs, and tutorials. It seems that the internal wood temperature needs to reach around 200 degrees. Hot water doesn’t get it to that temp, boiling or steaming is recommended.
-
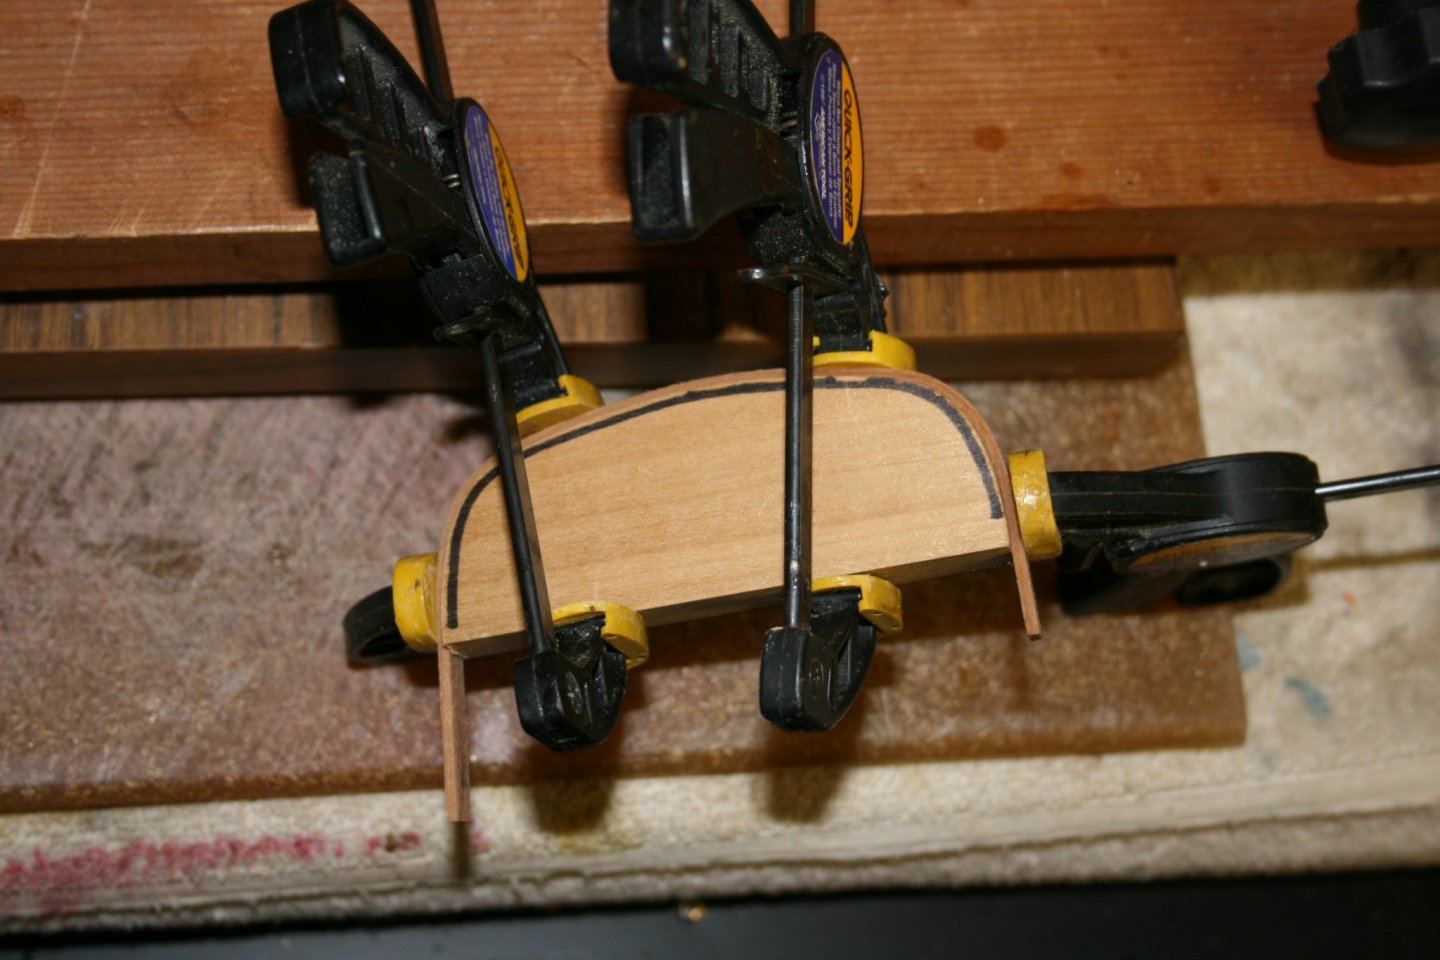
Ready, Soak, Snap..... I have now wasted 2 cap strips for the transom. For the third attempt, I have made a form that will provide better support during the bending process. The issue is when bending the strip onto the sides of the transom. Other than that, I did manage to cut the piece in 1/2, but the curve from top to side still doesn’t want to follow the curve. I am using hot water to soak the strip, but I am thinking, I need to get it to the boiling point. Will add pics later.
-
LOL... This is why I am taking a break from RC scale. I spend as much time detailing out the cockpit as I did on the rest of the plane. In the red and white plane earlier in the thread, the instrument panel is a copy of a full scale plane. (Post 160) You can go down the rabbit hole really quickly when deciding how much you want to do. In one plane, I even have a scale Time magazine laying on the back seat. 😄 I am sure I will fix it. Just seeing if there is a better mousetrap on how to do it.
-
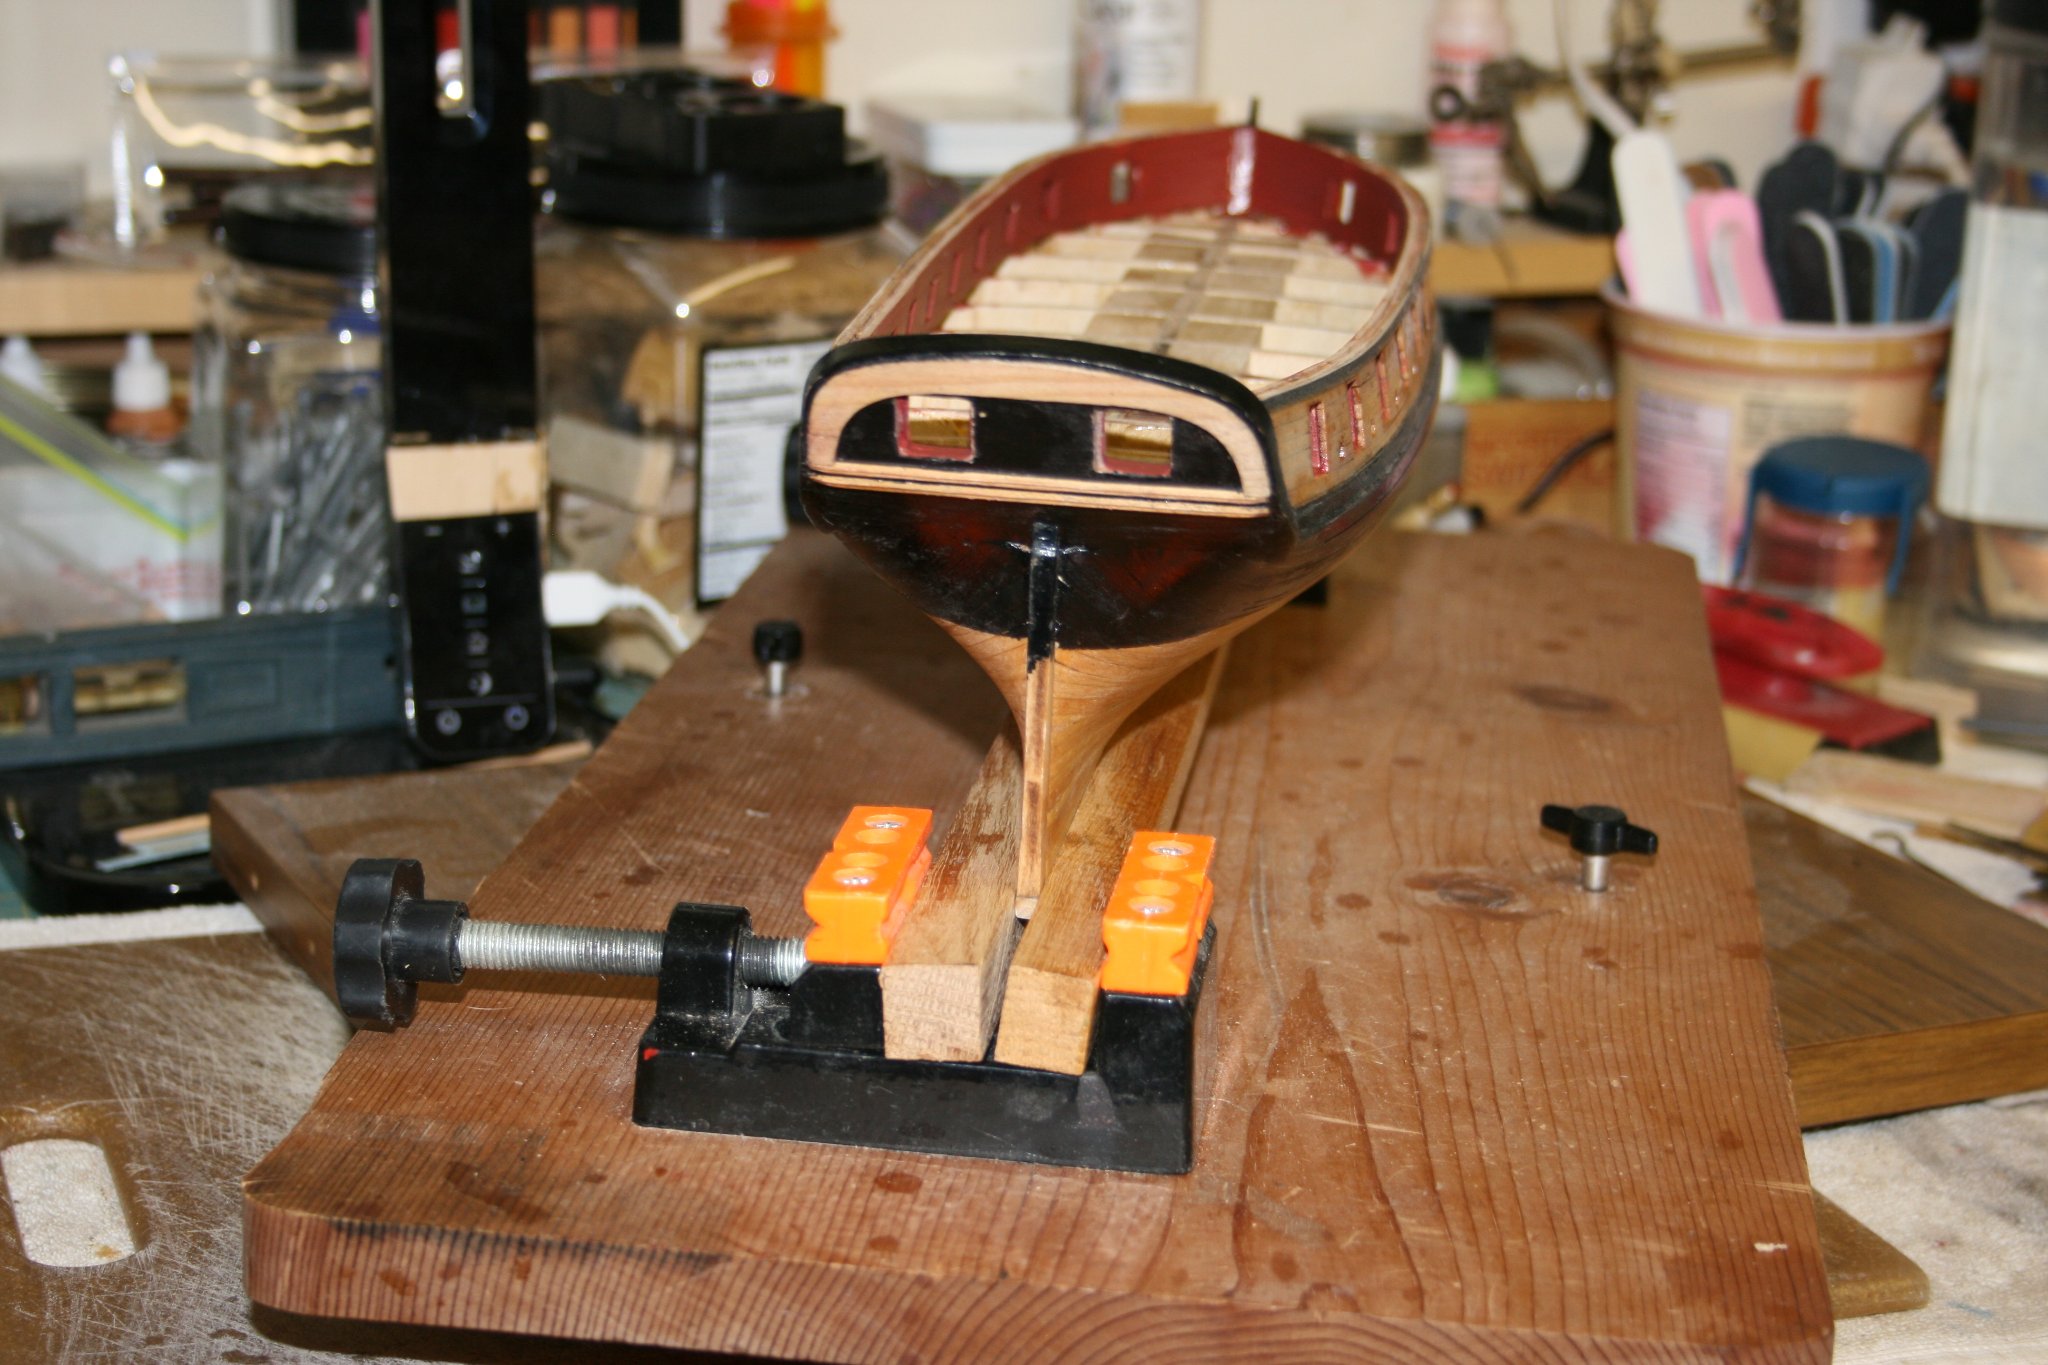
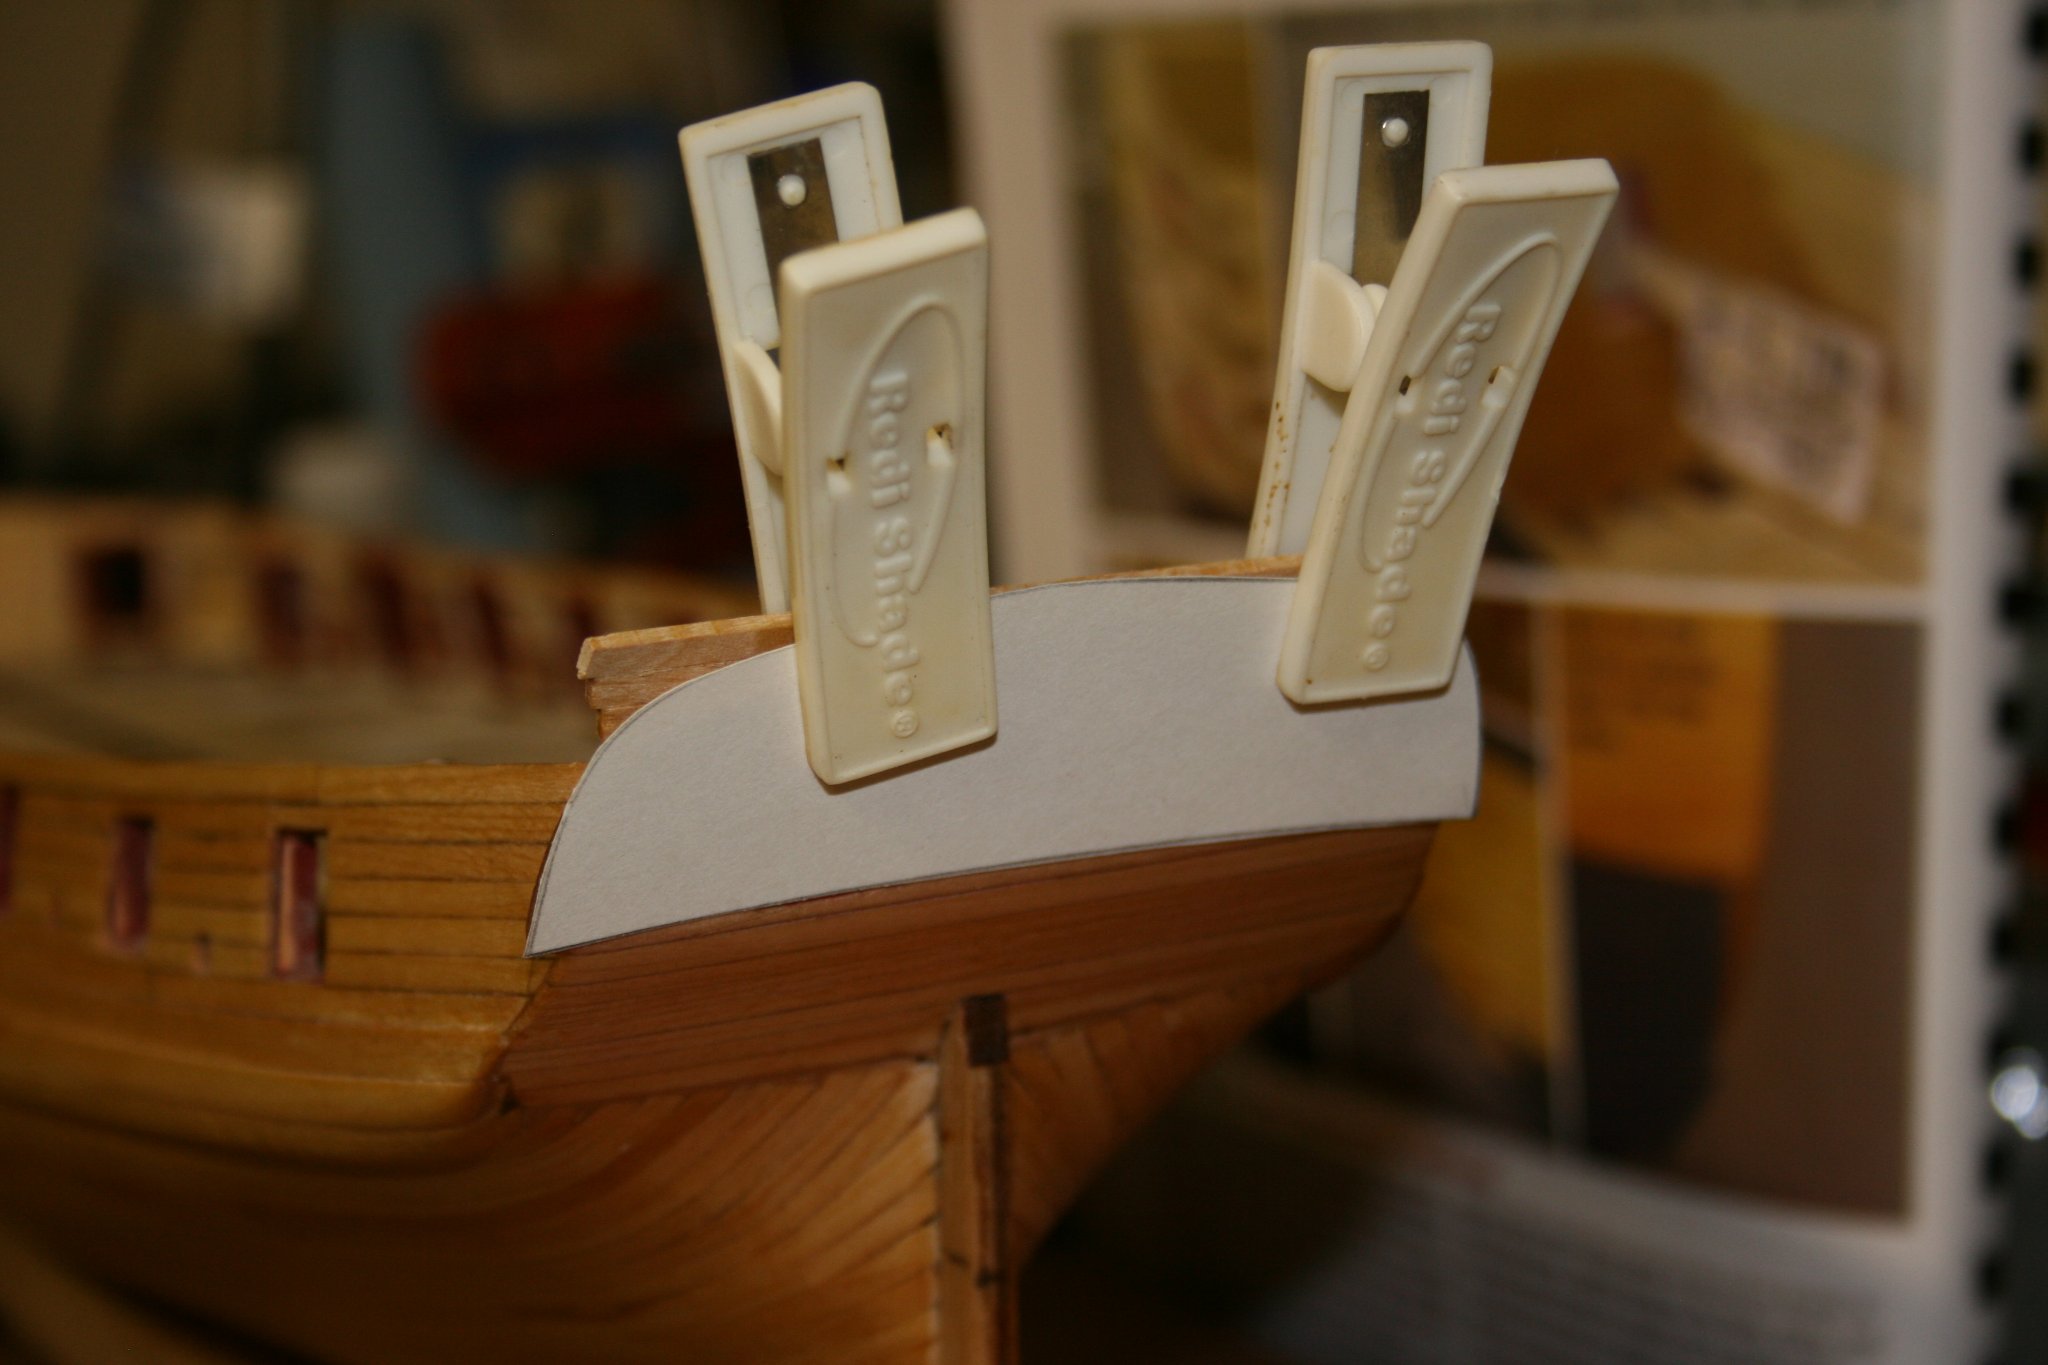
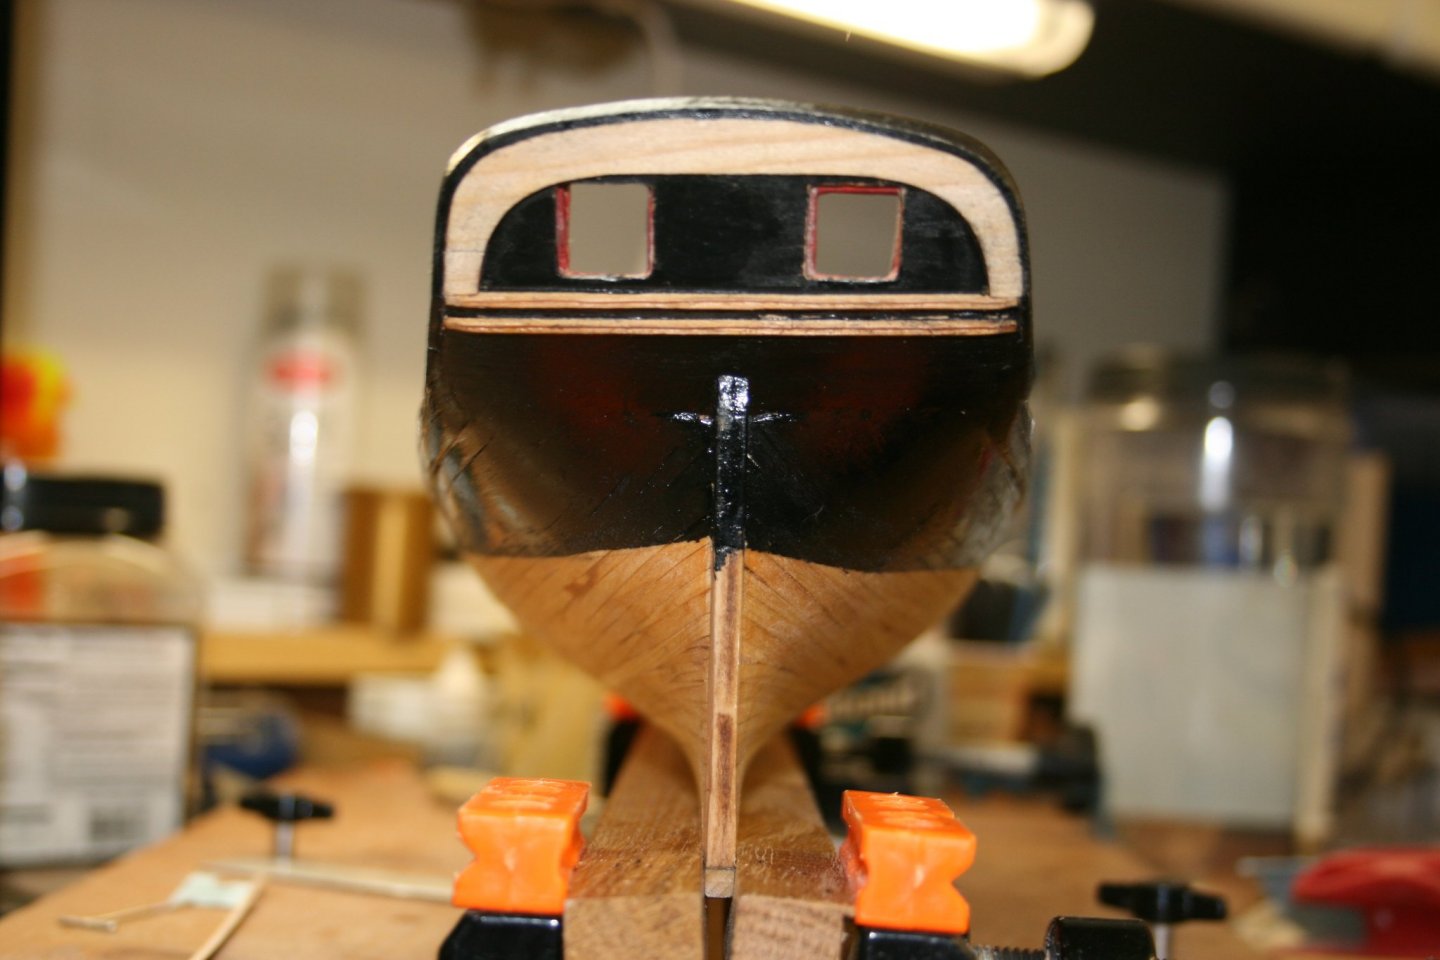
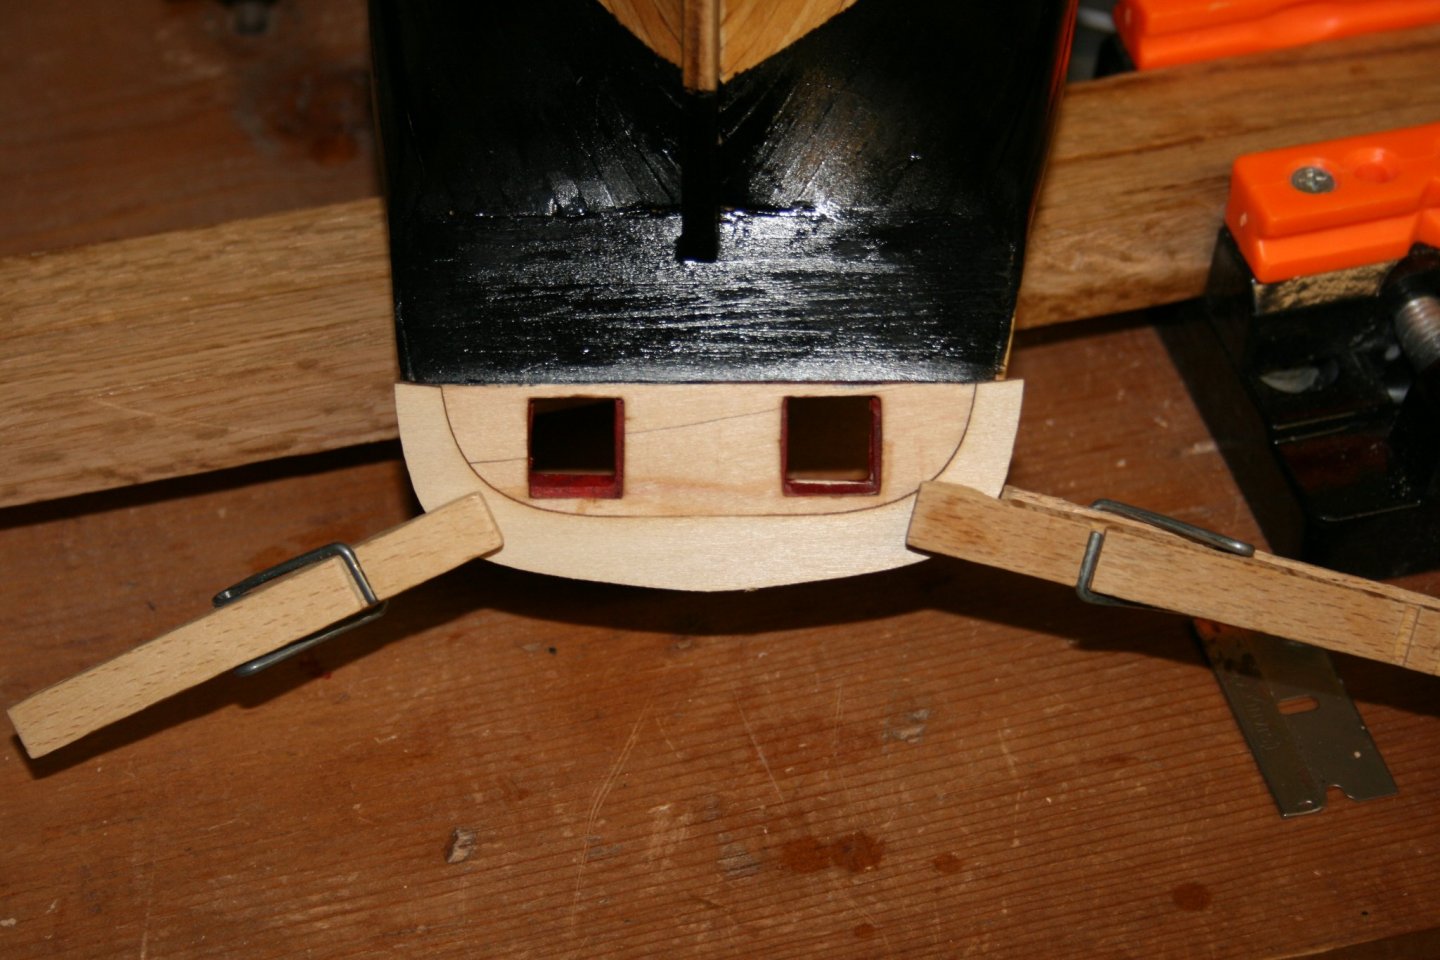
Another Decision to Make: I have been considering my options for the transom for quite a while now. As you can see in the picture, there is a crack running across the surface. It will not be hidden by the additional piece that surrounds the gun ports and even tree nails will not hide it. I have a few options, of which, each have their pros and cons. I could go ahead and paint it black as some have on their ships, but I would prefer not to. Or, I could sand down the whole transom and replace it. I am not really supportive of this idea because it involves the gun ports and the door areas. Or, I could repair it some other way, and this is my choice. I had a project some years back where I used iron on veneer for a table edge. I have plenty left over (white birch) which would probably match the color and consistency of the planking already in use. To ensure that the transom retains its correct thickness for the cap rail, I could shape the veneer into the area that is exposed after the additional panel is glued on. It would reduce the thickness of the edge, but would keep the rest of the transom at its current thickness. Right now, I am pressing the rolled veneer to ensure it is nearly flat before using. I will then glue on the second panel, and place the white birch veneer in the gun ports area and go ahead and tree nail it. Then sand it paper thin to retain the edge between the two areas. Any input that you have is welcome.

- 436 replies
-
- 1
-
-
- Syren
- Model Shipways
- (and 1 more)
-
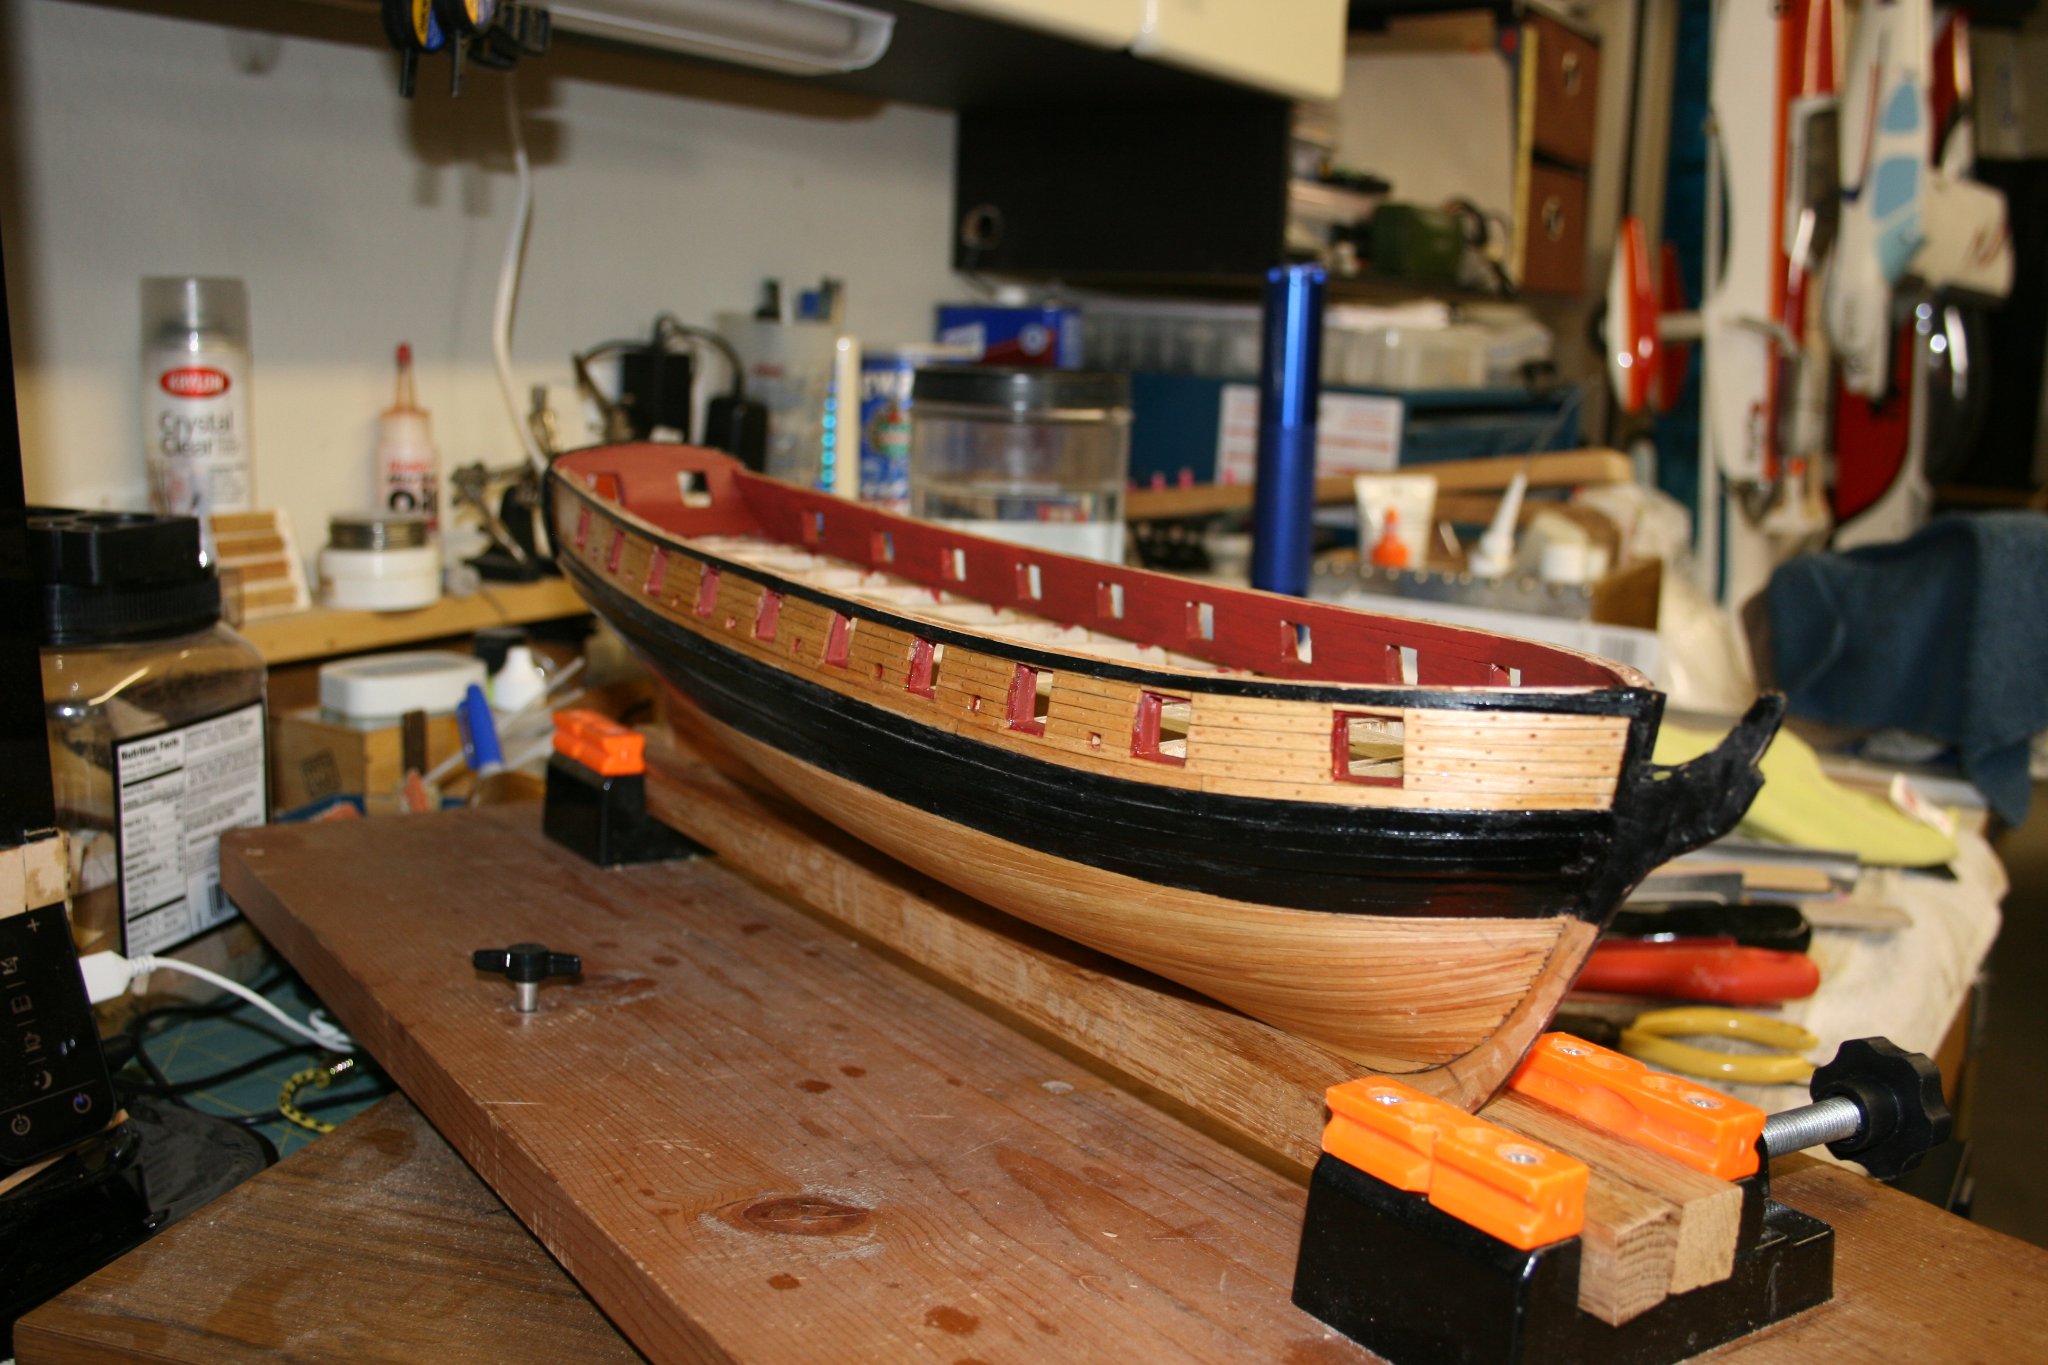
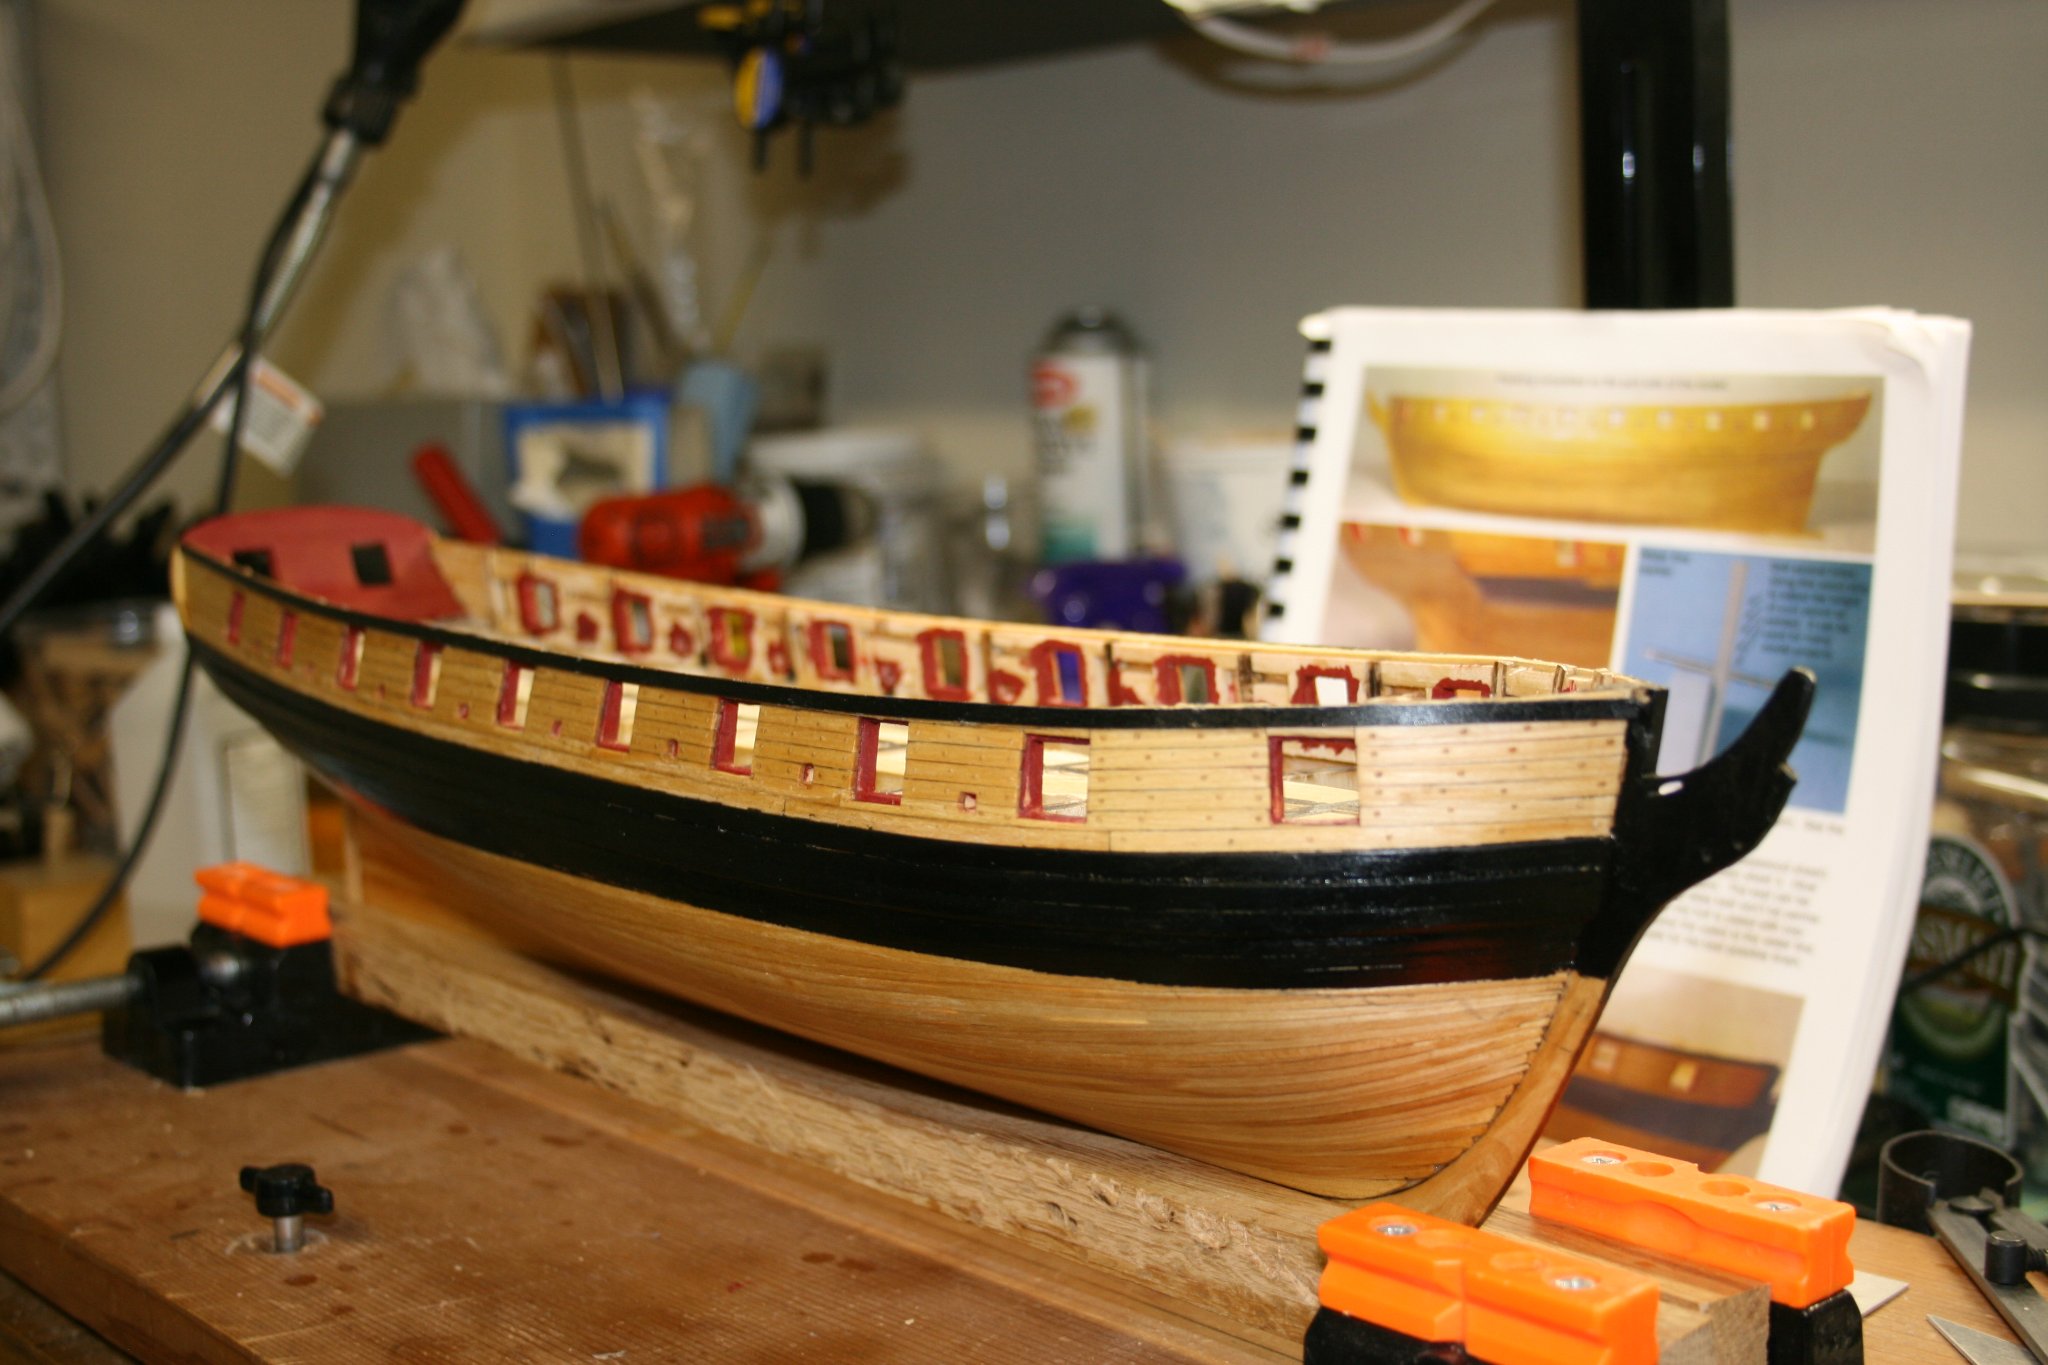
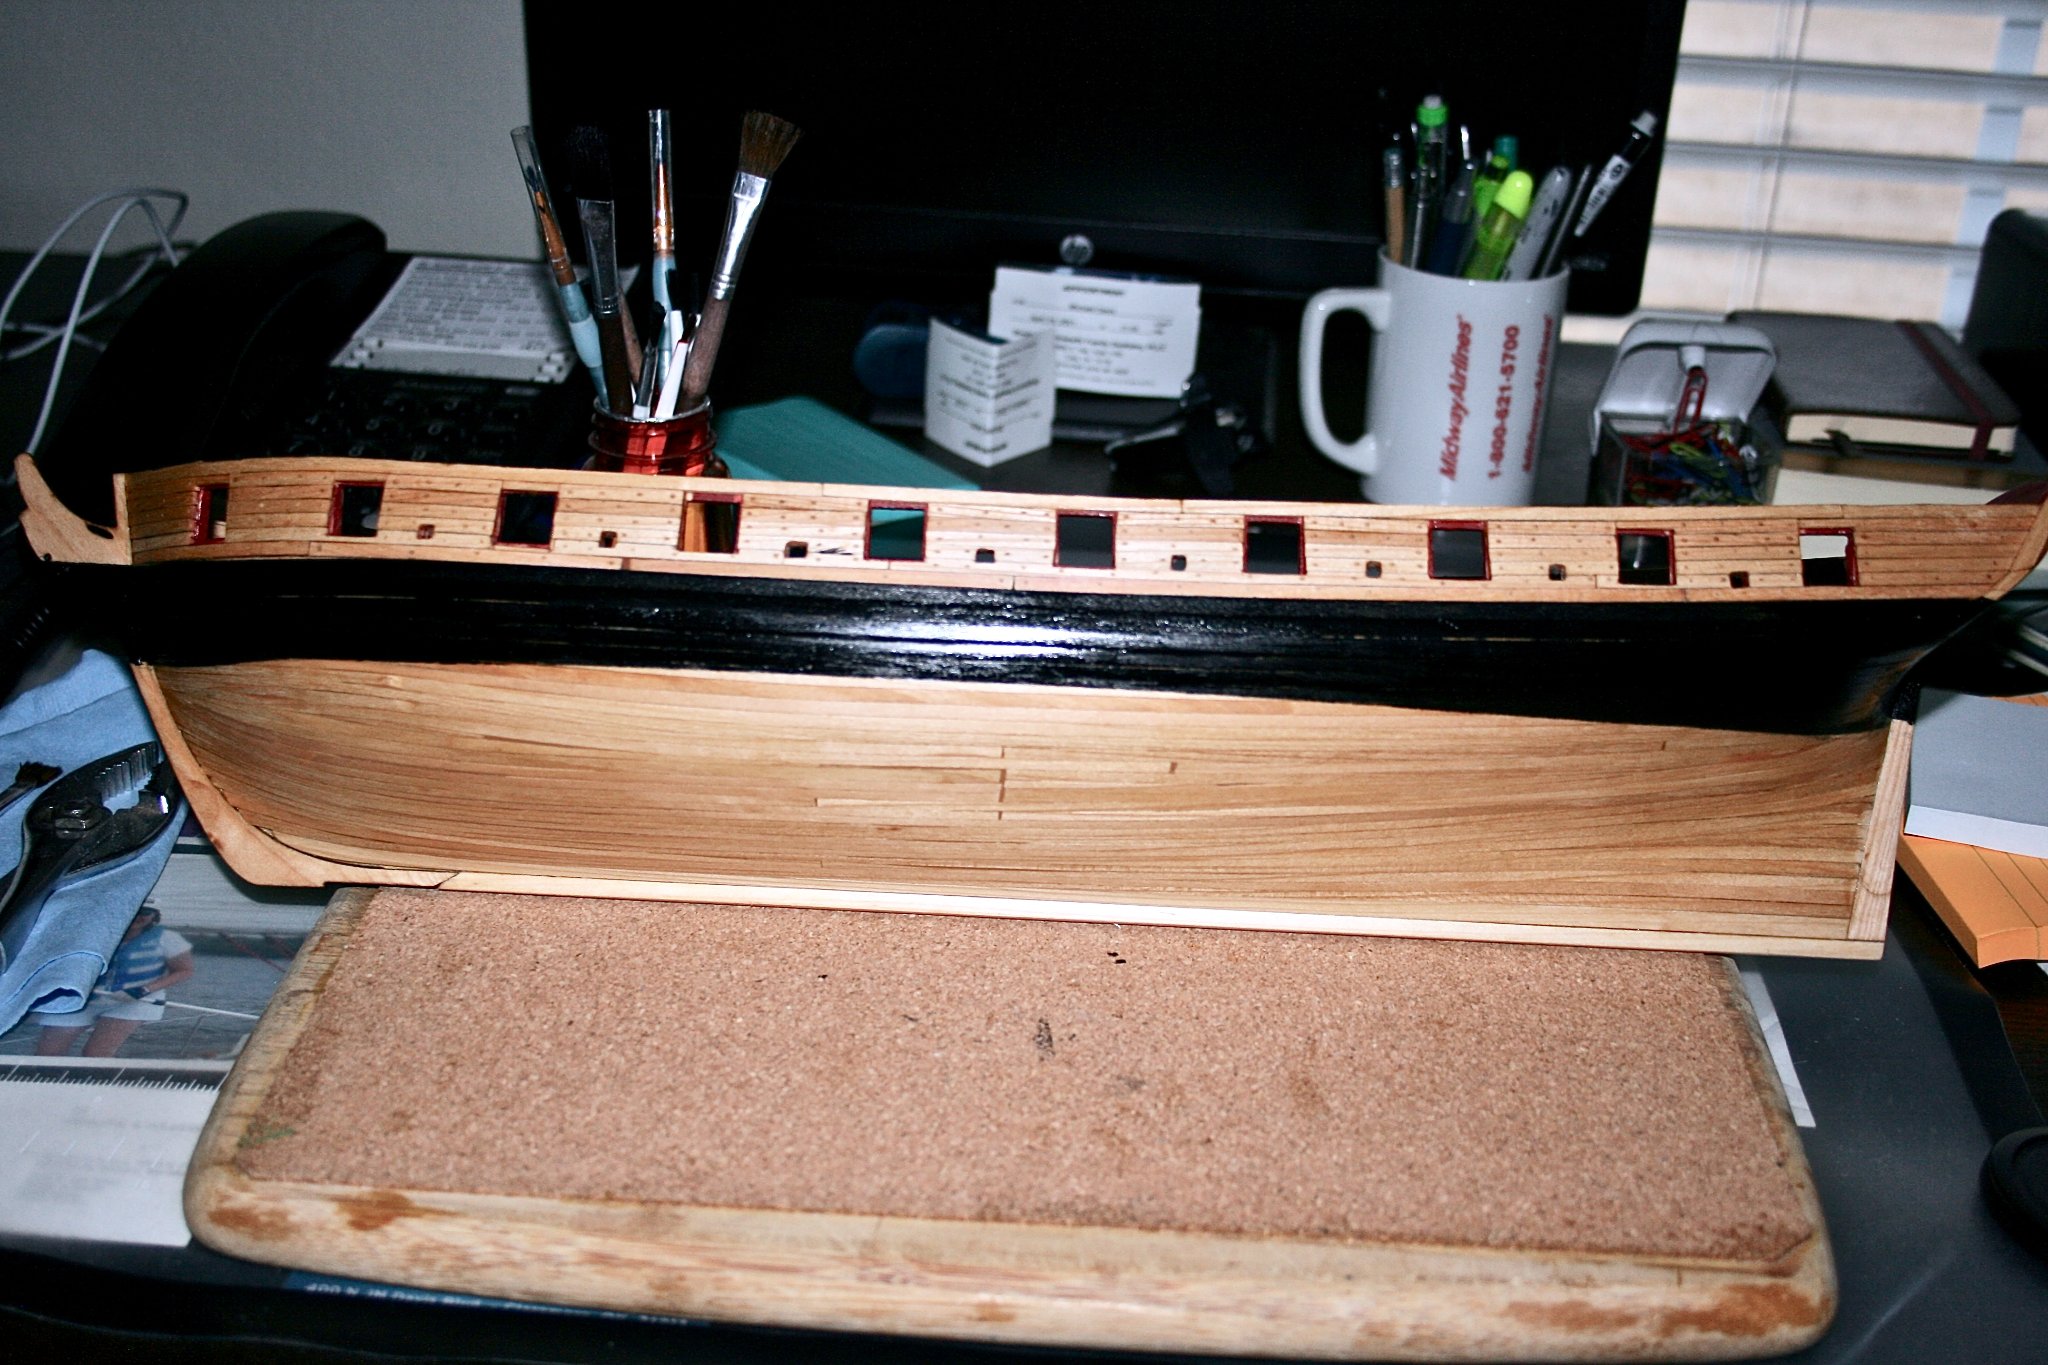
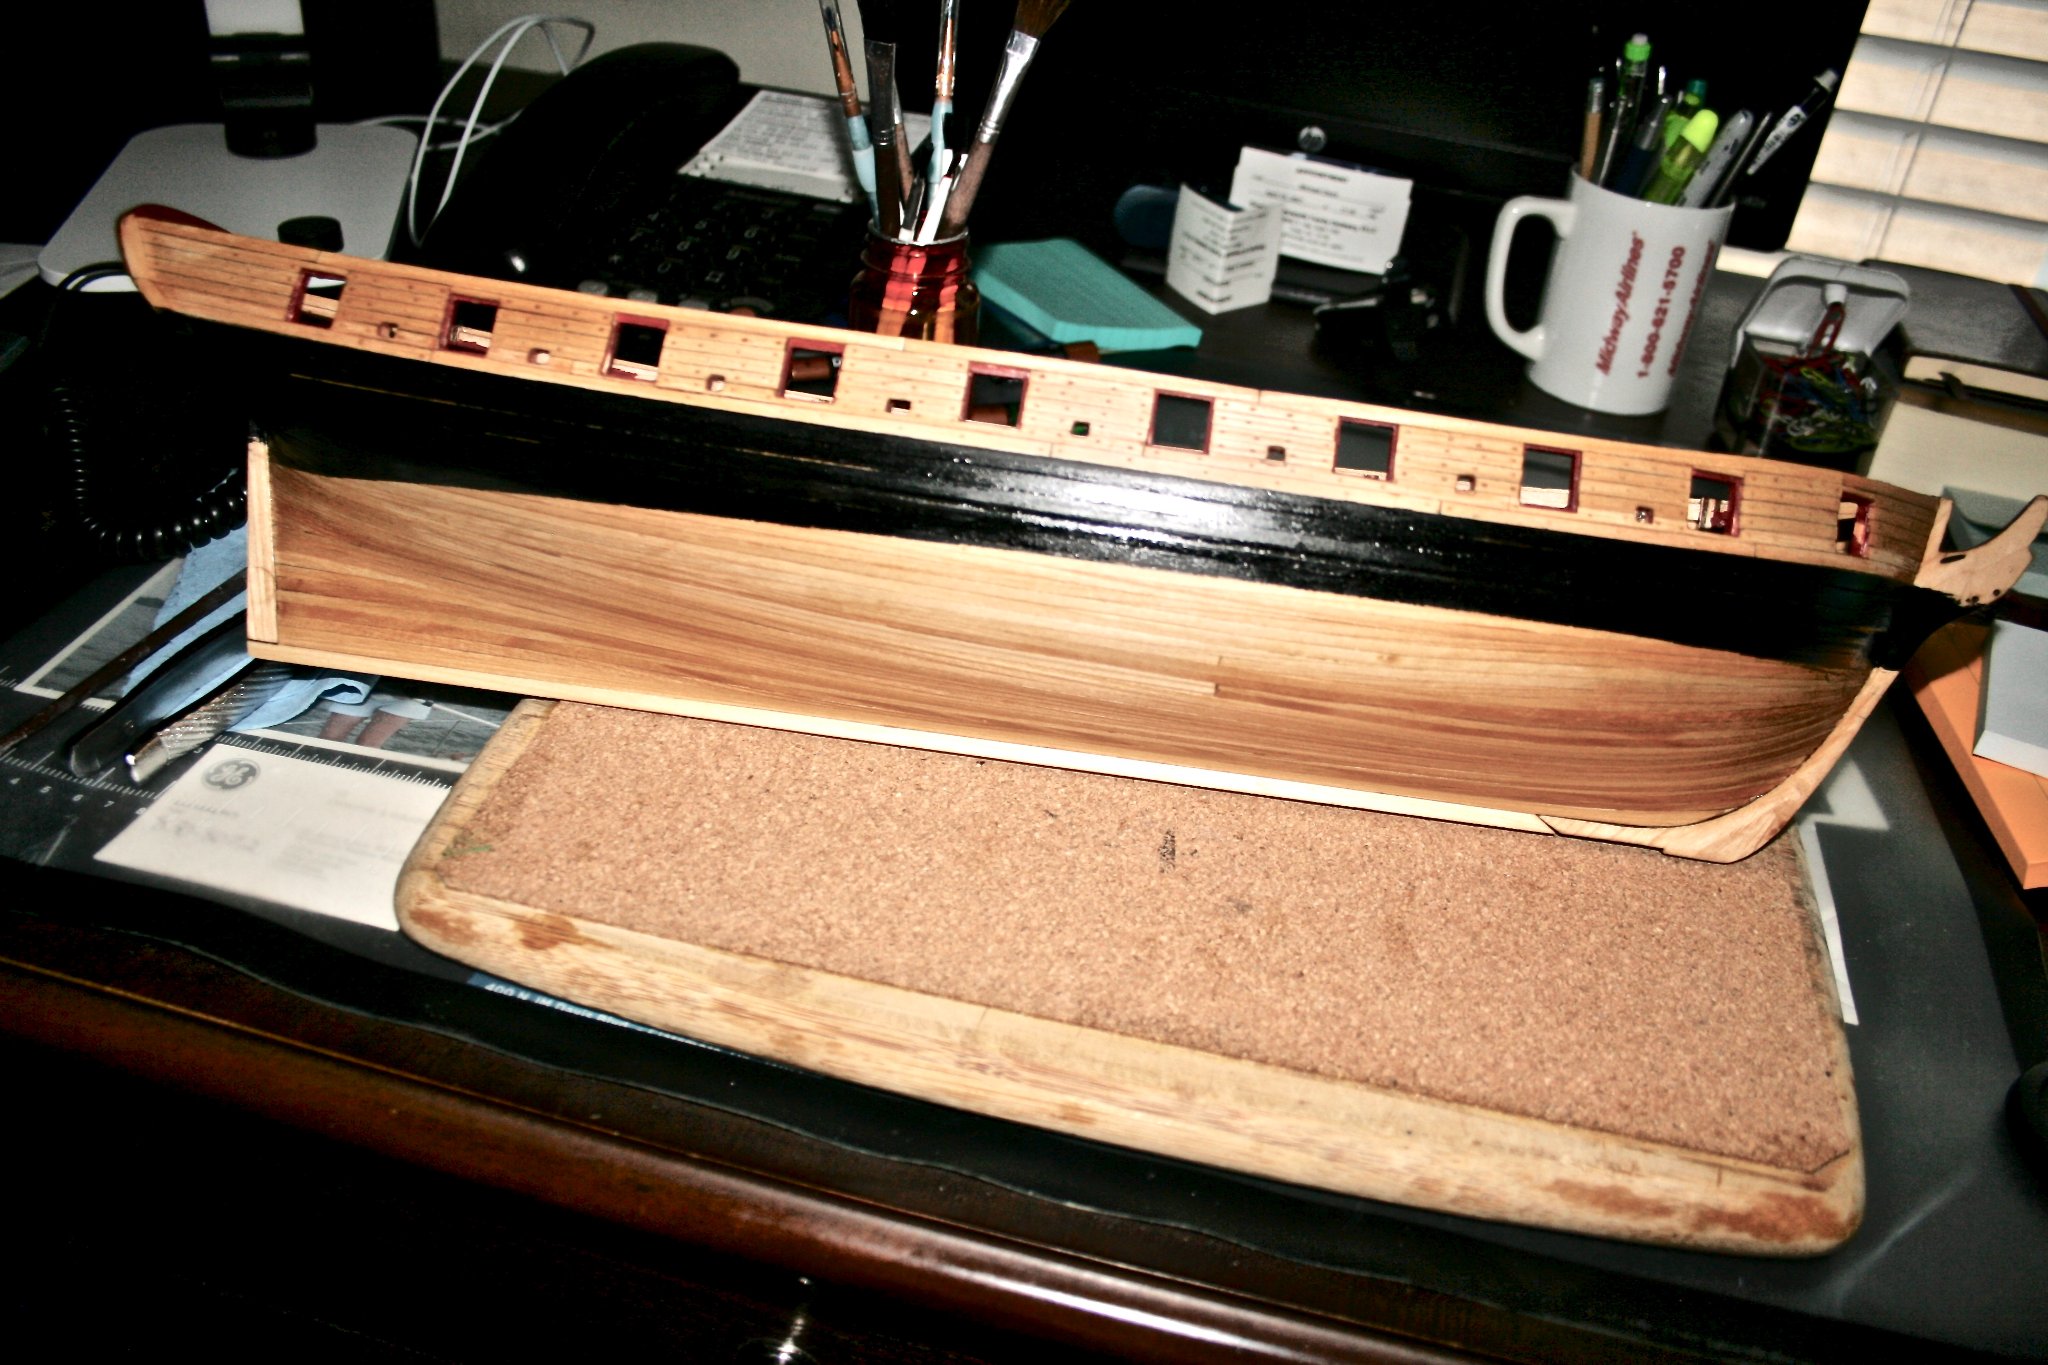
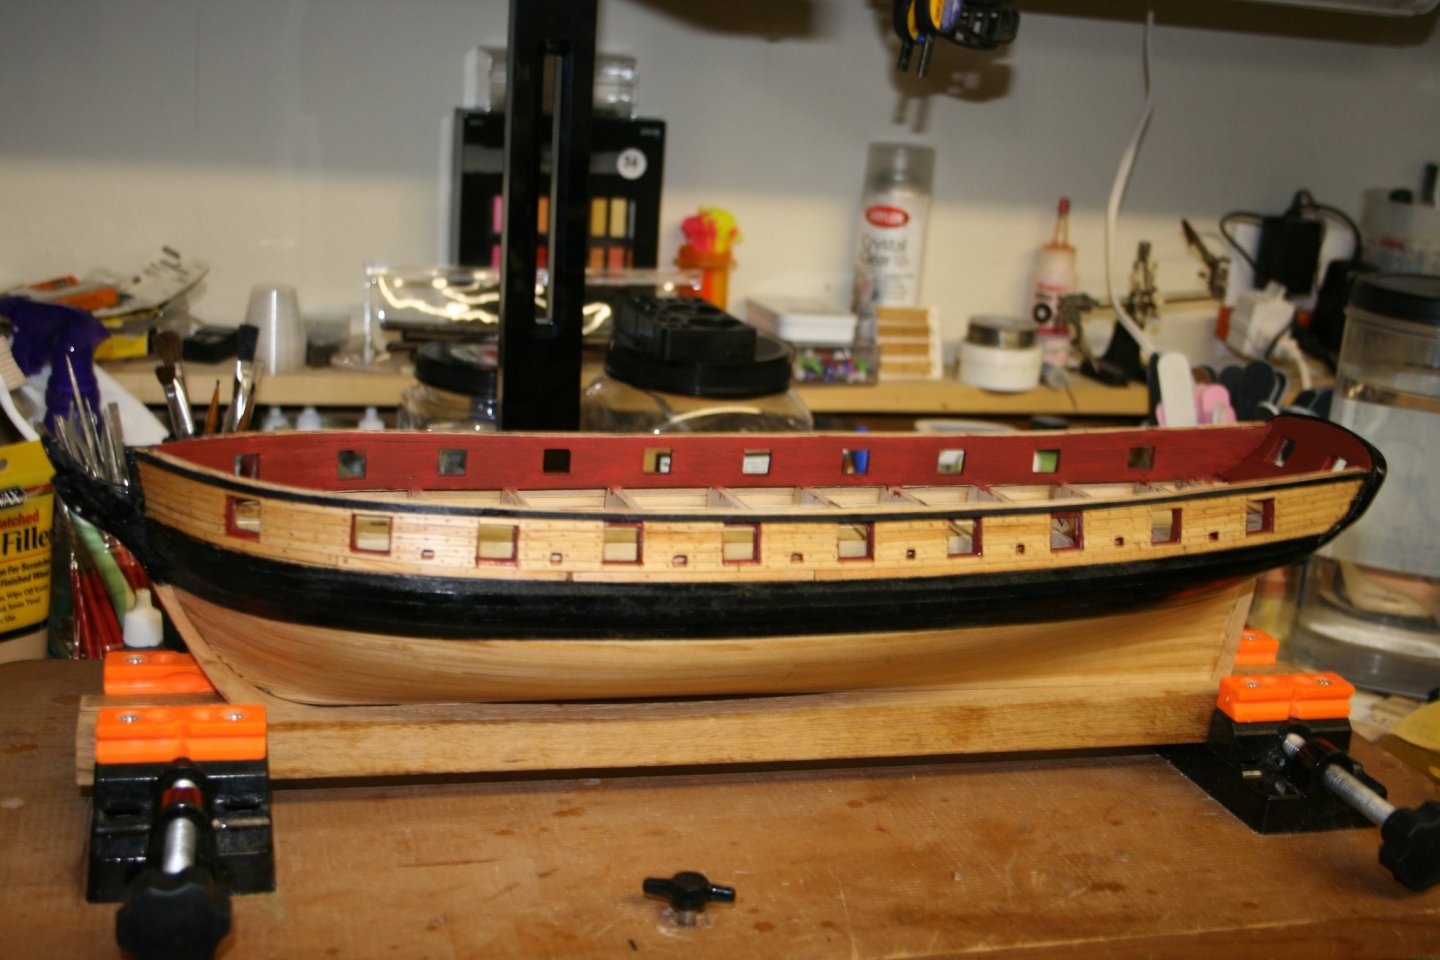
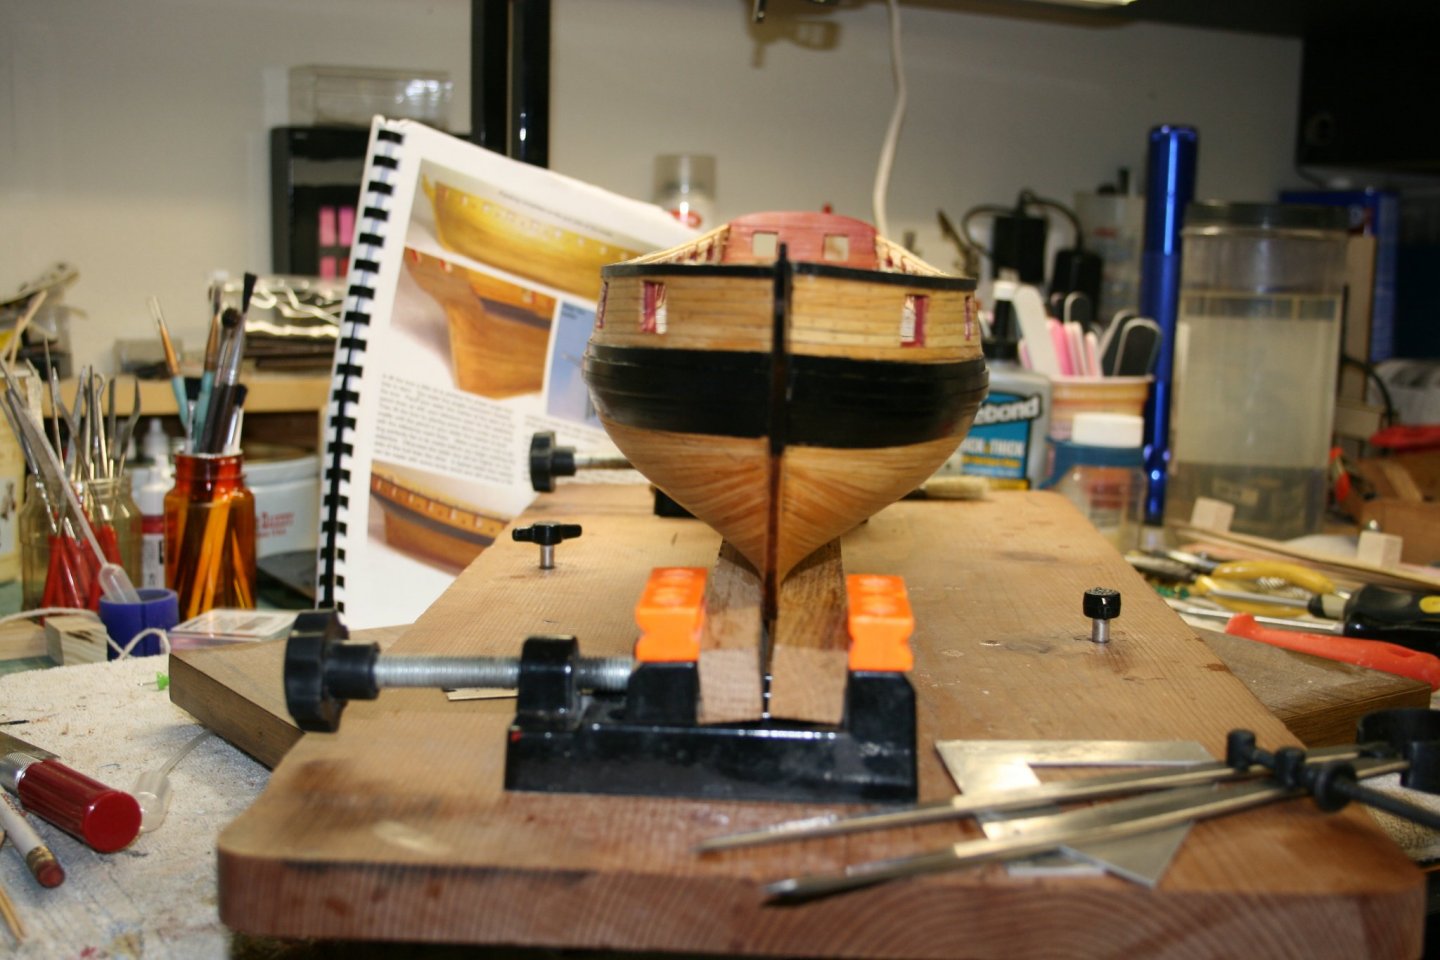
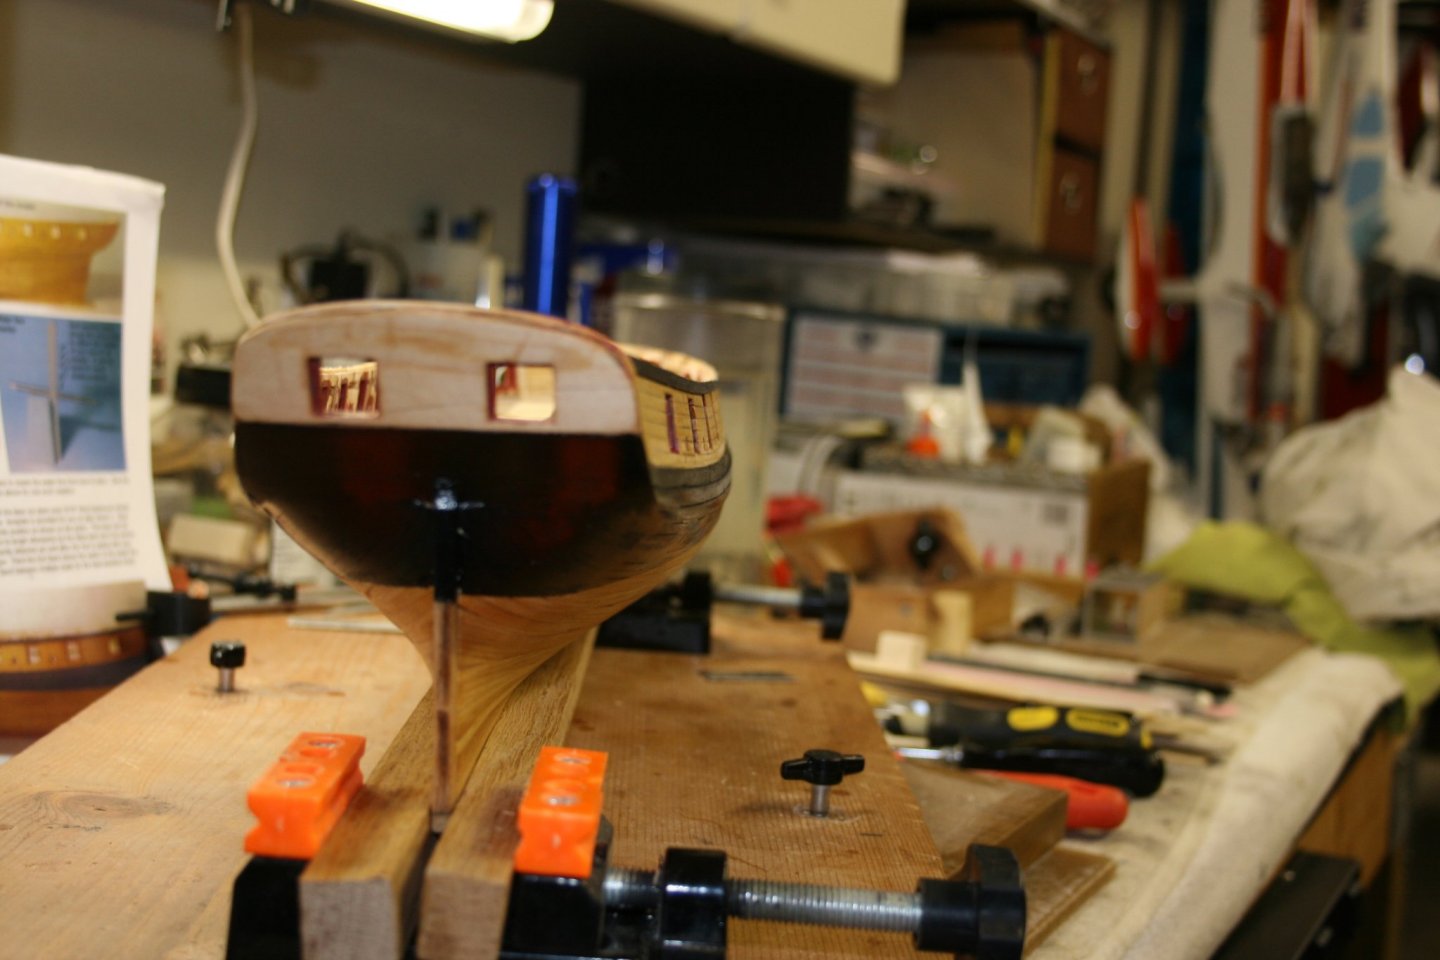
Latest Pics: I have the transom and its cap to complete and will be ready to move on. Still, it is still pretty cold in the dry dock area. 😁 Here are my latest pictures. Warm days are ahead so a couple of small things to do in the meantime. Newbie Observation: This is not meant as a critical comment, just something I did and it worked out. I waited to add the sheer strake until I had everything done to this point. It seemed to make tree nailing, gluing, and sanding easier because it provided a better sanding and working area on the planks.


- 436 replies
-
- 2
-
-
- Syren
- Model Shipways
- (and 1 more)
-
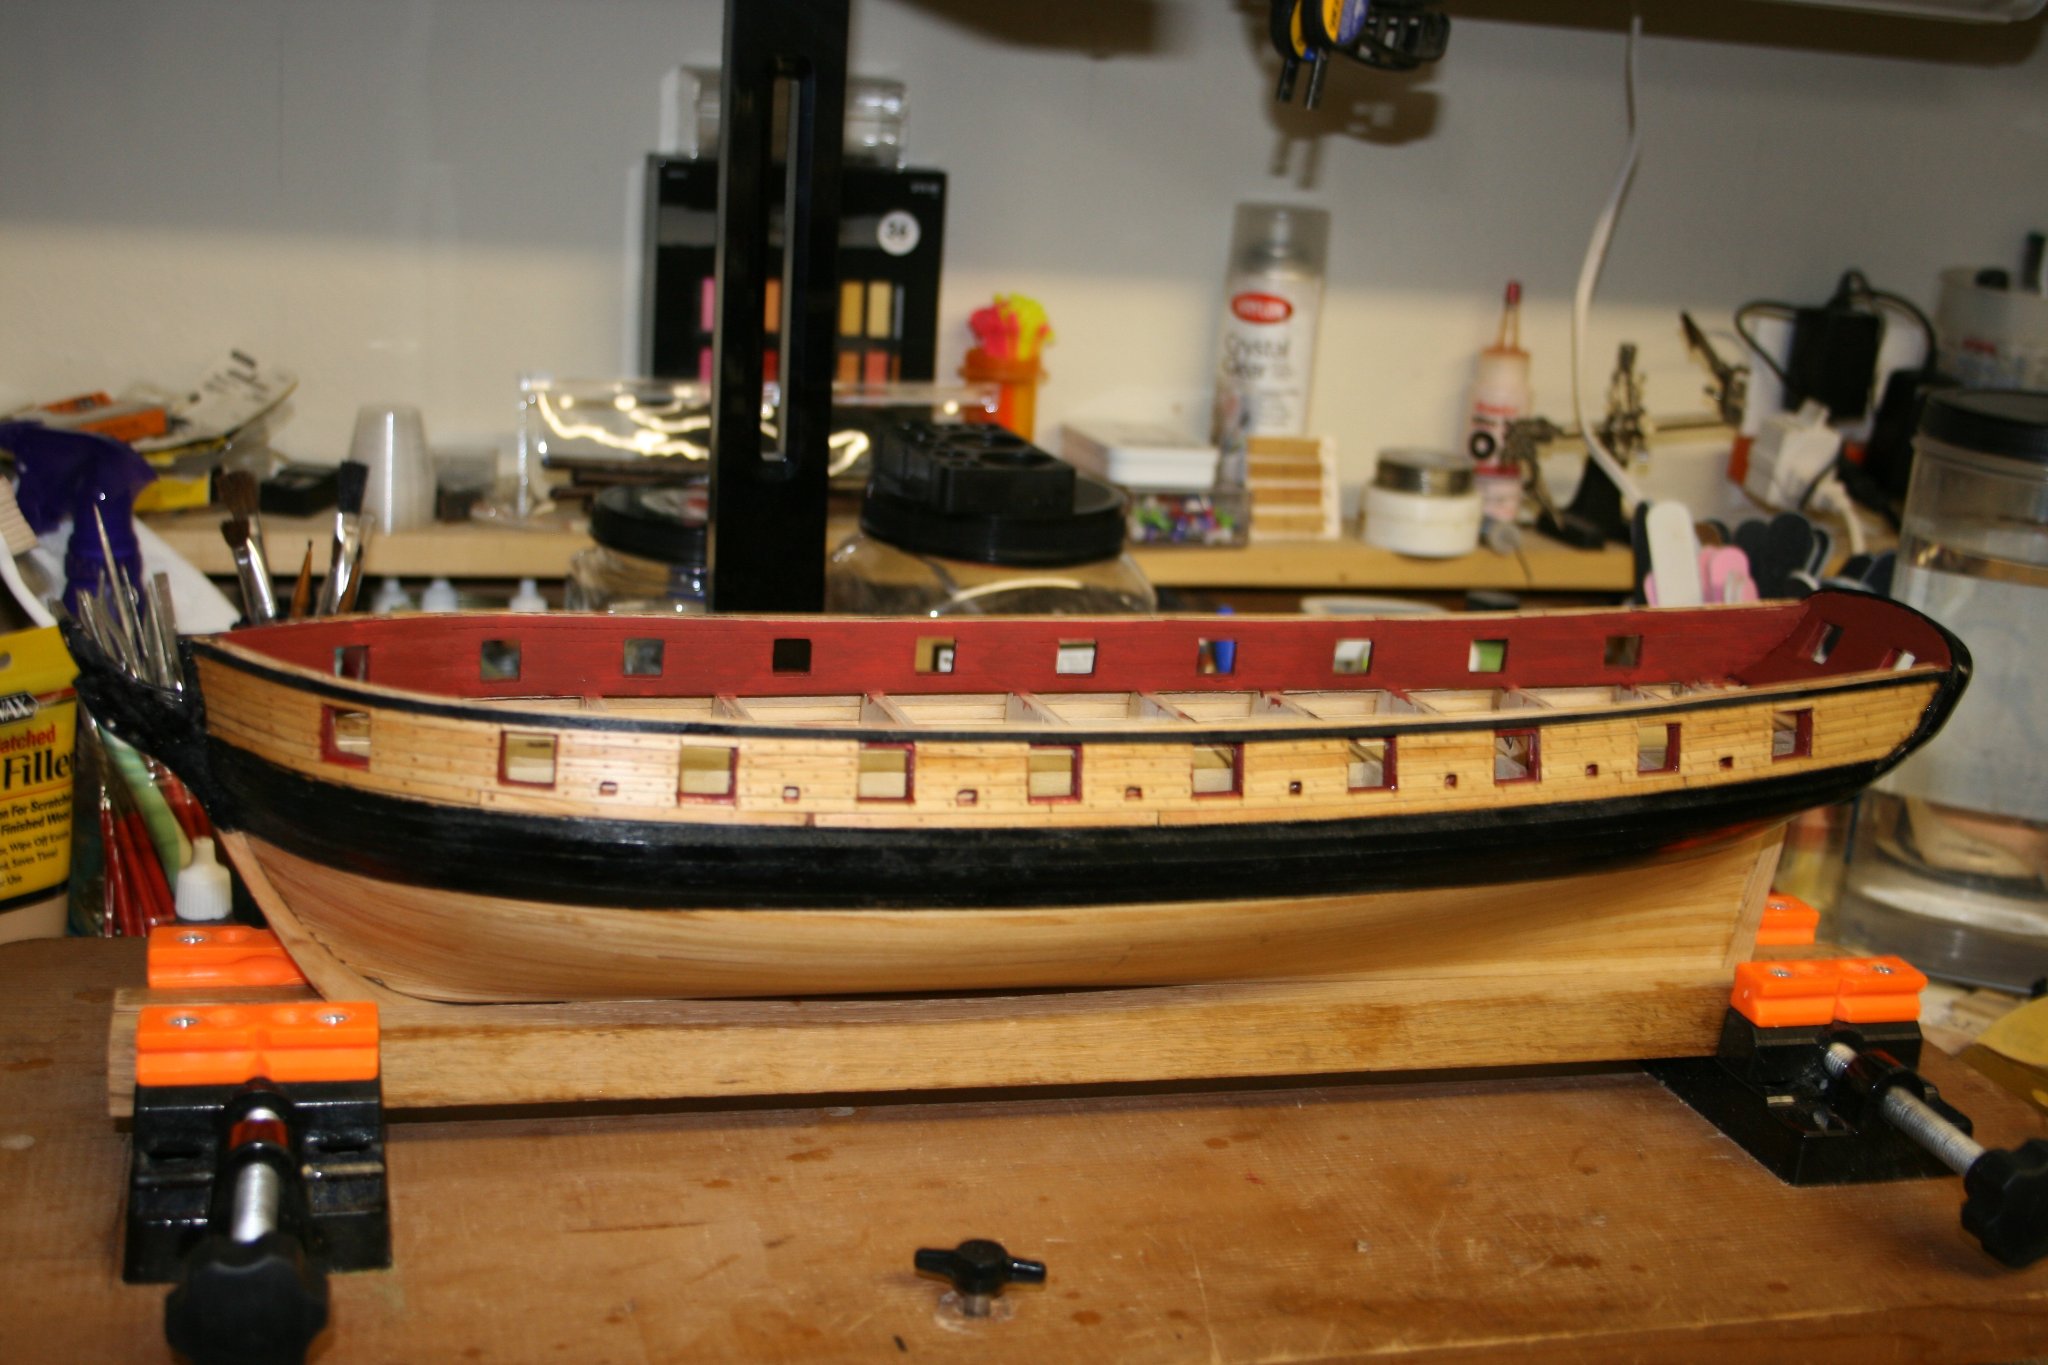
Wales and Nails....... Remember the feeling when you start pulling off the masking (or similar) tape after painting? I still have a few things to fix, but nothing that is a major mistake. However, as far as the taping is concerned, no run through, or seepage along a hull planks. I will take more pictures when back in the shop. It was too cold to paint, so I brought it inside. If you look closely, you can see the tree nails in place. I still have the strakes to add, but those will will be painted, in advance. I will also add a picture of the transom, when it has a little more to show. The only item to fix on the stern is just a small adjustment to the last 1" ahead of the stern post. The port and starboard sides do not match at the stern post, but it's just that last 1".


- 436 replies
-
- 5
-
-
- Syren
- Model Shipways
- (and 1 more)
-
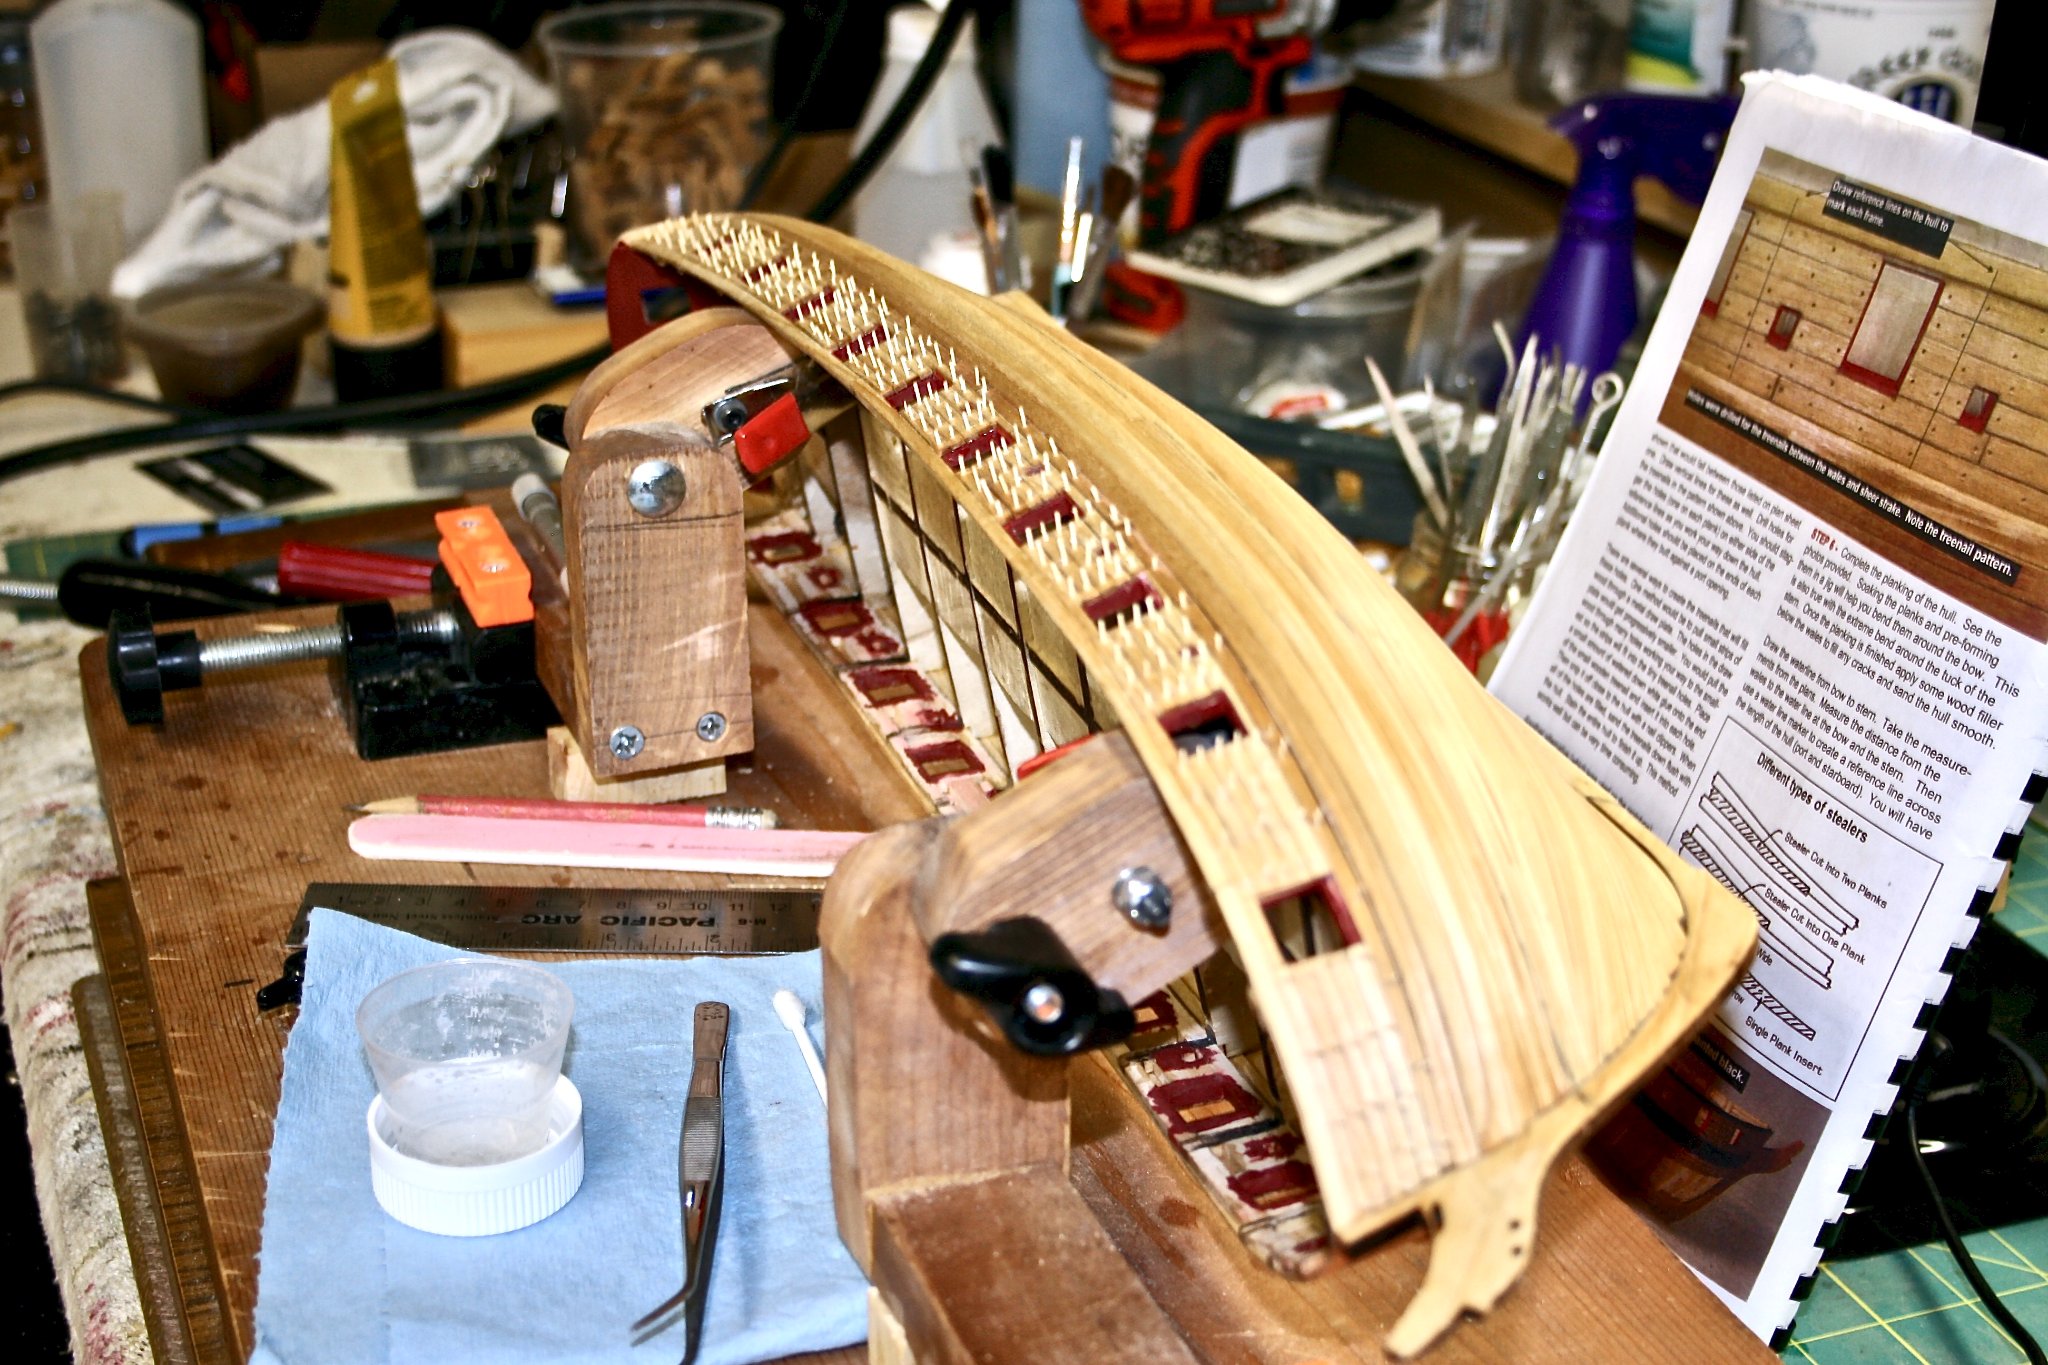
Porcupine Pirate: Port side has been nailed and I am just waiting for the glue to dry. After this side is done, it's on to starboard, then to painting the wales and to the waterline. Newbie tips for tree nails: 1. Do not place all of your tree nails out at one time. One slip and you are watching them fly. (No, I used only little amounts at a time.😁) 2. Keep a container of water on hand and keep rinsing your tweezers (if that is what you use) to keep them clean. Over time, they can pick up glue on the tips and cause the tree nails to stick to them. 3. Keep a couple of Q-tips handy and when you leave a glob of water/glue on the tree nail and hull, they will soak it up very easily. No need to sand glue blobs after drying. 4. Keep your pin vise, or drill handy, so when you run across a drilled hole that is not deep enough, you can fix it.

- 436 replies
-
- 3
-
-
- Syren
- Model Shipways
- (and 1 more)
-
I Am Still Here. 😀 I am drilling, drilling, and making nails. However, my second needle got clogged with compressed wood. So much so, that even a small sewing needle could not remove the clog. Even soaked it in light oil to see if that would help.....then...💡.... I have a BIC lighter for melting string ends. Put it to the needle, and sure enough, smoke and small sparks came out of both ends clearing out the wood. Back to making tree nails. Not sure you can patent fire. 🥸 Tip Update: Forgot my metallurgy and after burning out the wood and cleaning out the needle, I started more tree nails. Needle snapped due to the heat making the needle brittle...lesson learned. If you can’t clean out the needle, get a new one! 😏 Actually, the best tip is to use harder wood that is dry.
- 436 replies
-
- 1
-
-
- Syren
- Model Shipways
- (and 1 more)
-
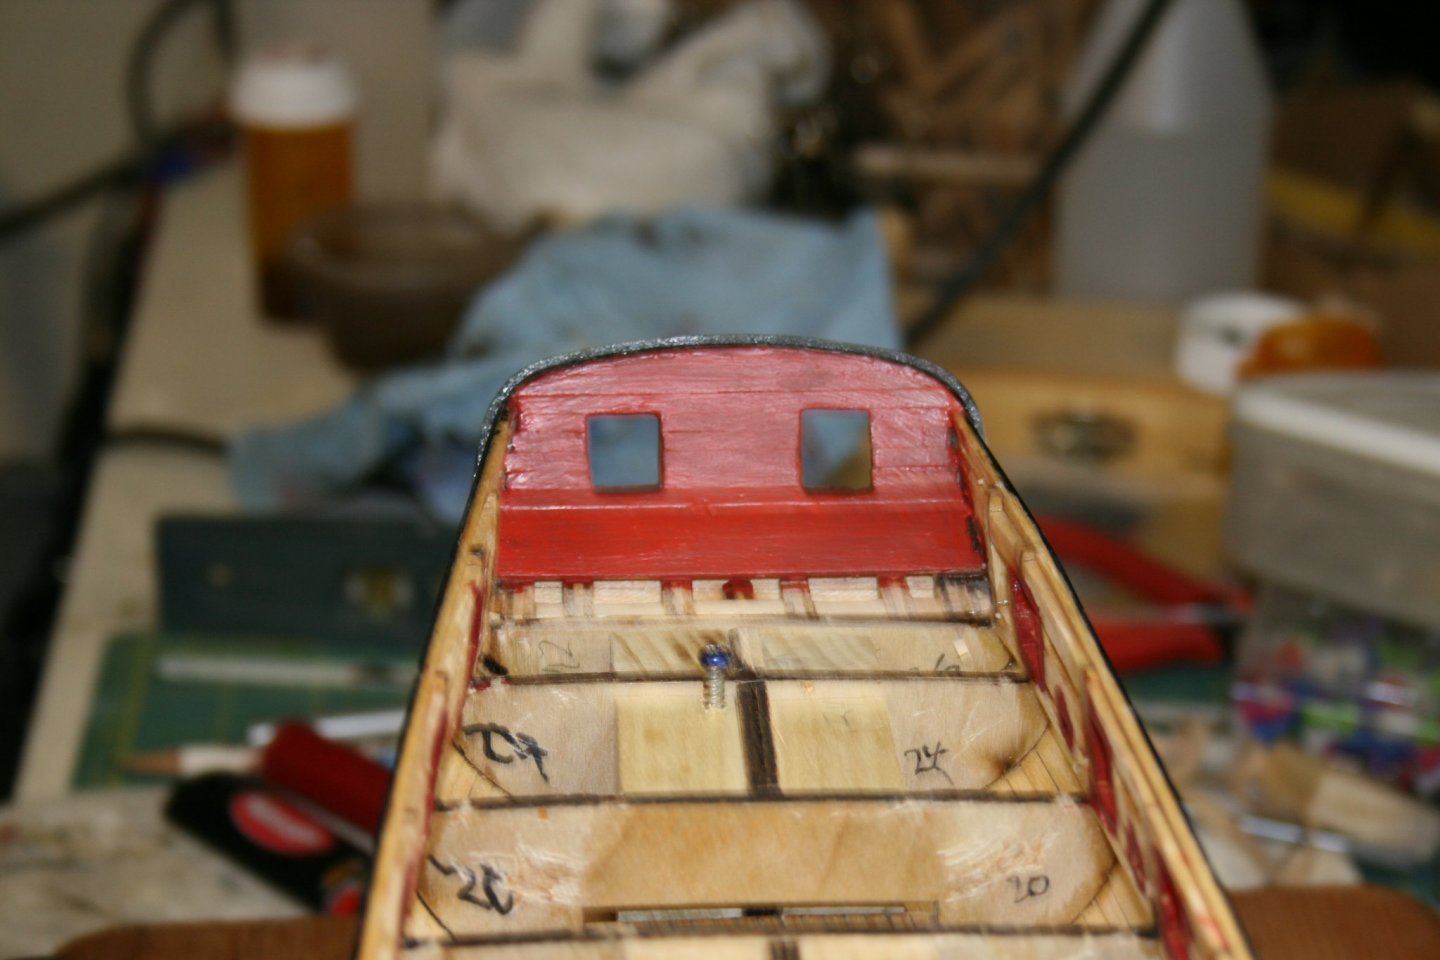
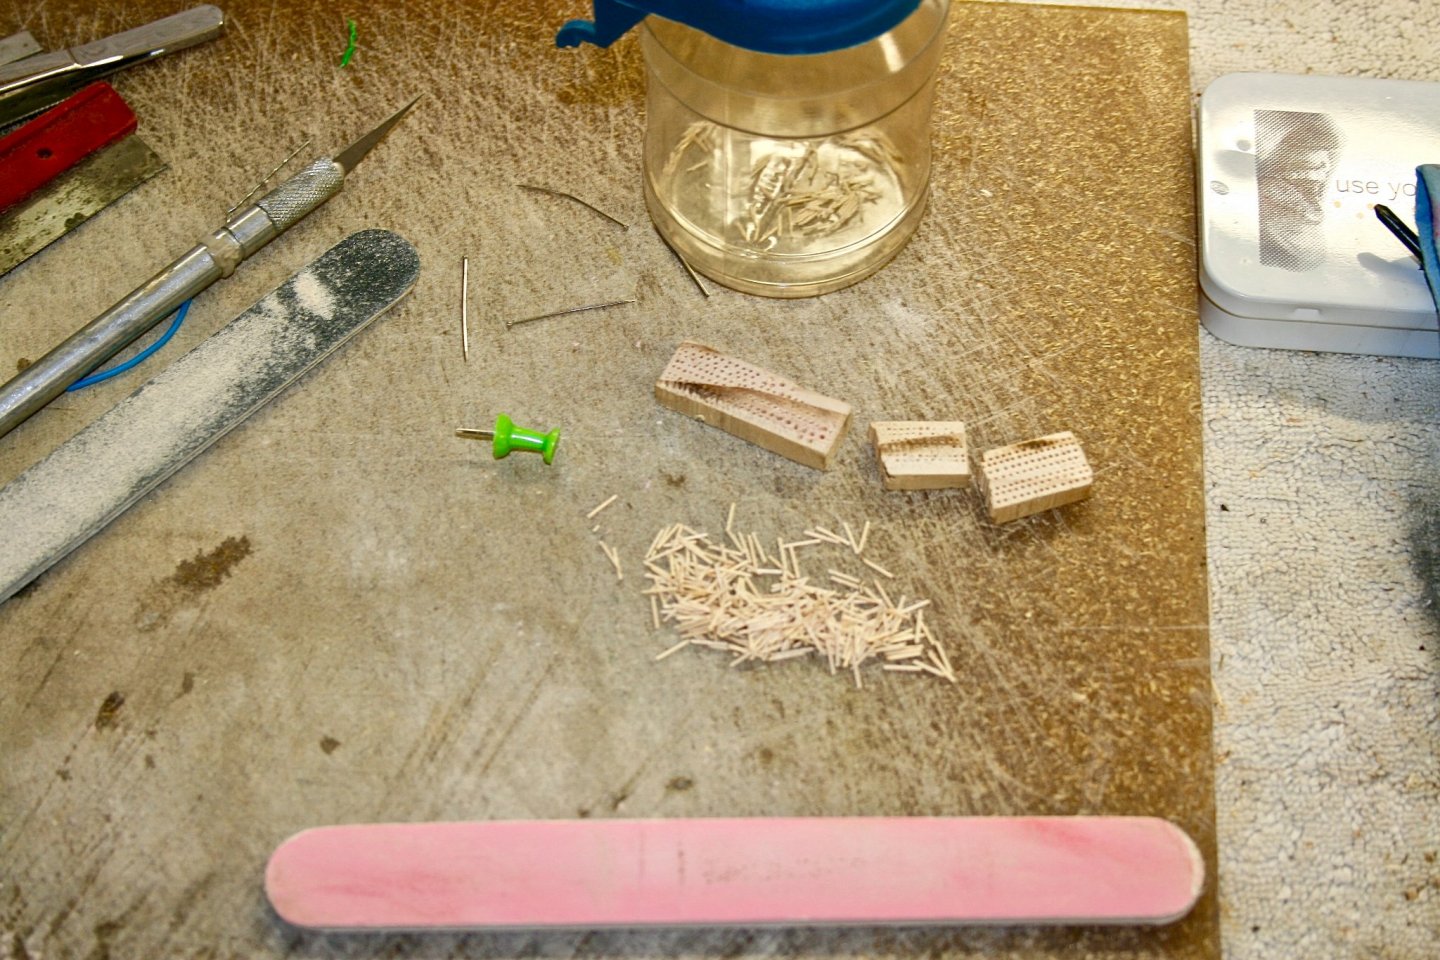
Keep your needle clean.....and....don't sneeze: Finally, I have reached a point where I have to begin the tree nails. I have stalled as long as I can and now need to get them done. Except for my reluctance to begin drilling holes in the planking, I am ready. In preparation for that, I have started making more tree nails. In doing so, I have found out a couple of things that did not occur to me. 1. The needle that punches out the nails has to be kept clean in it's interior. If you don't, all you end up doing is compressing the wood into the needle and it will leave a hole instead of the pressed out tree nail. I think it is because the wood I am using is not hard wood and it is relatively soft with tree sap still present. When the needle is pressed, it began to push the wood into the needle and it will not release it when the drill press is removed. 2. Don't, in any way sneeze, cough, or blow dust off of your bench. If you do, the tree nails will go with the dust.. (Can't tell you why I know that. 🐡 ) Also, have completed the shaping and painting of the transom. It still has marks on it, but I still have to add another red coat, and clean it up. Next is the cap rail...after the tree nails. One thing that I am happy about is that the small twist in the planking has been hidden pretty well. Once the shape was sanded and area painted, the shape is as it should be. Whew......

- 436 replies
-
- 2
-
-
- Syren
- Model Shipways
- (and 1 more)
-
Dry Dock Temporarily Closed Due to Cold Weather... 🥶 and snow.
-
@Overworked724 I have been looking over different tree nail posts in preparation for mine. I see that on yours, you used a double nail pattern. I am planning on the single nail pattern as in the instructions, unless there is a compelling reason? Just curious.
-
Resolution to Transom Issue Found?: I think I have found a way to ensure that my transom is in the right place, or at least, is set correctly. Because I had cut off the curve of the transom part, it did lower the height just a little. By tracing the outline of the original part, and clipping it to the existing structure, I can determine if the loss of height needs to be adjusted. You can see, in the pictures, that the transom would have been higher, if the curves had been left in. However, this would not take into account the sanding that was done to shape the transom. By using the part outline, I can approximate the original height, and add a strip of 1/16" or less to the curve of the top. The ports might be a little lower, but by testing the canon template in them, I should be fine. More investigation is required just to make sure I do the right thing.