Redshadowrider
-
Posts
301 -
Joined
-
Last visited
Content Type
Profiles
Forums
Gallery
Events
Everything posted by Redshadowrider
-
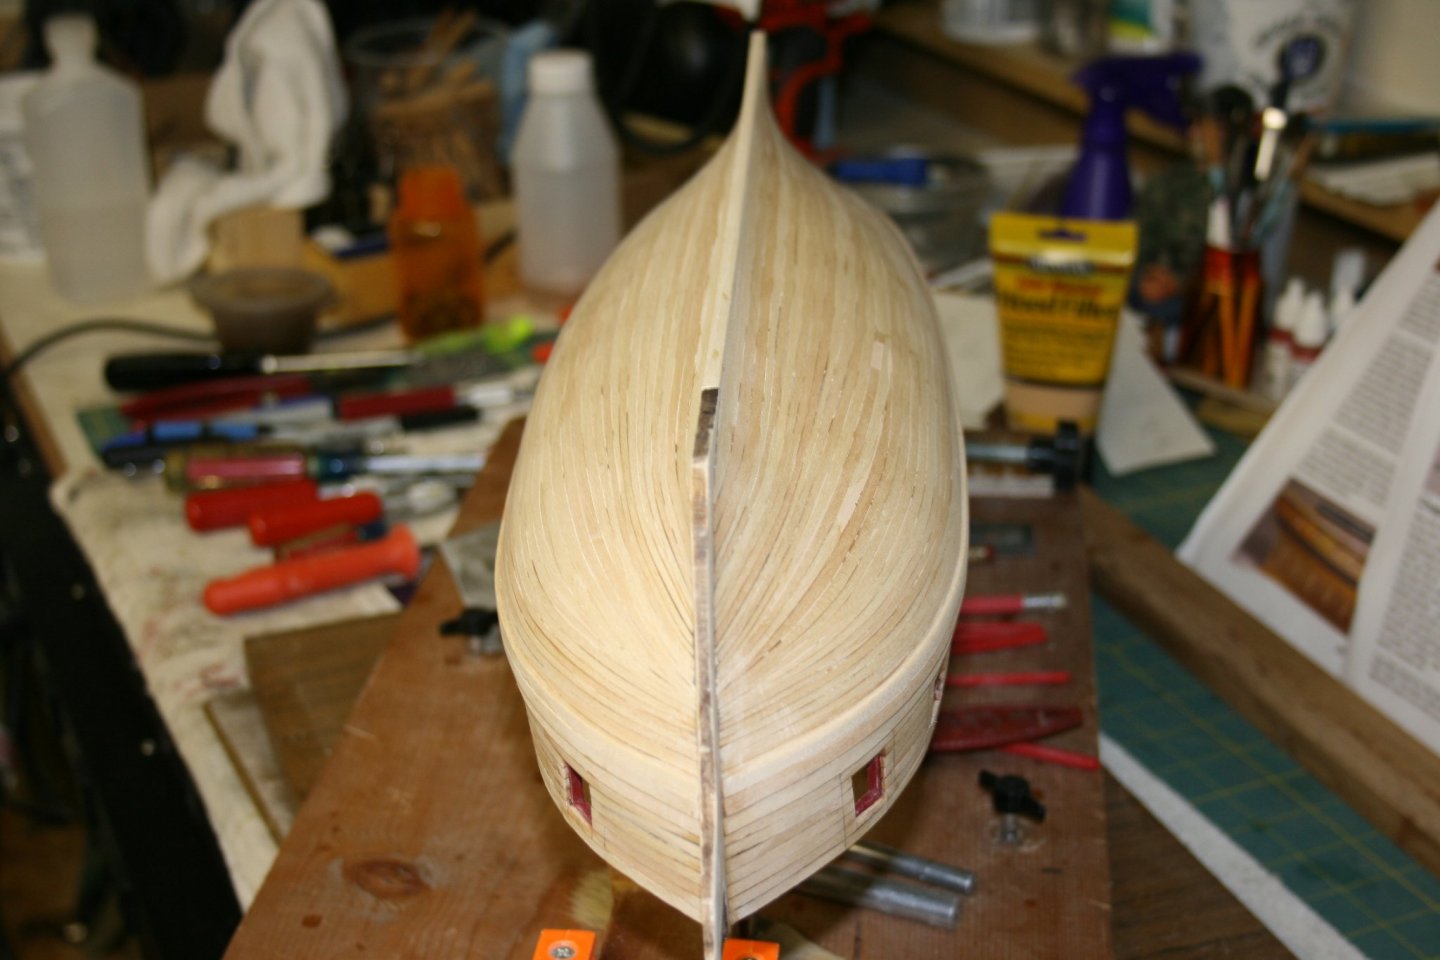
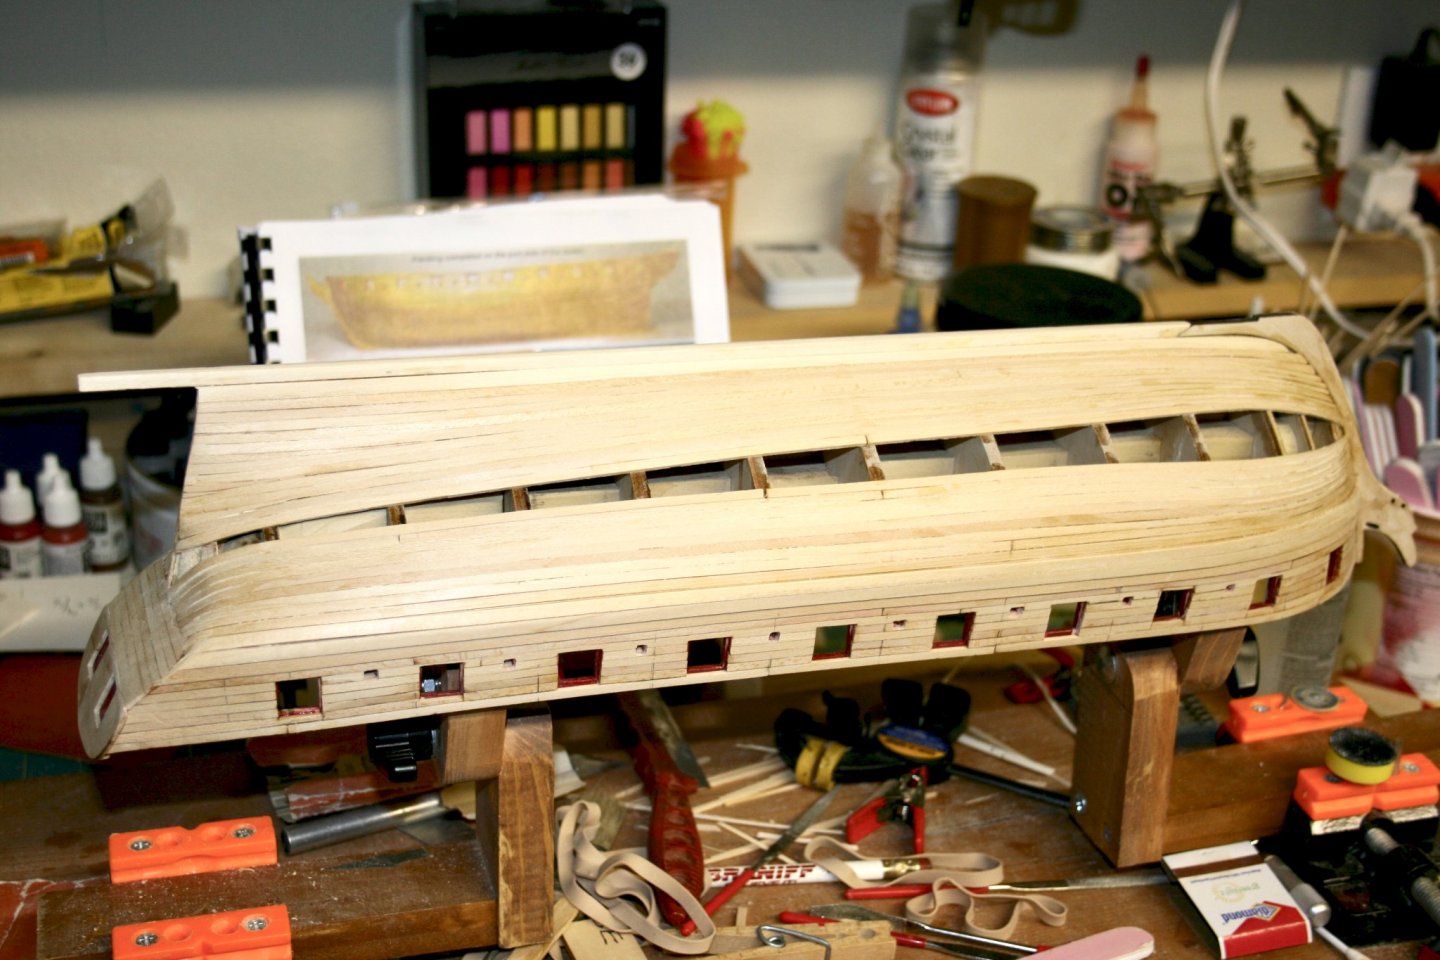
I think I found where the twist is. Looking at the first picture (Bulkhead 26), the distance from the bulkhead to the first plank is less on the starboard than it is on the port. This put in a small twist that is carried to the top of the planking. If it would have been square, the planks would have lined up correctly. This would mean the other measurements would check out ok, and they do. Since the planks are going to be painted red, it will mostly disappear when that is done.
-
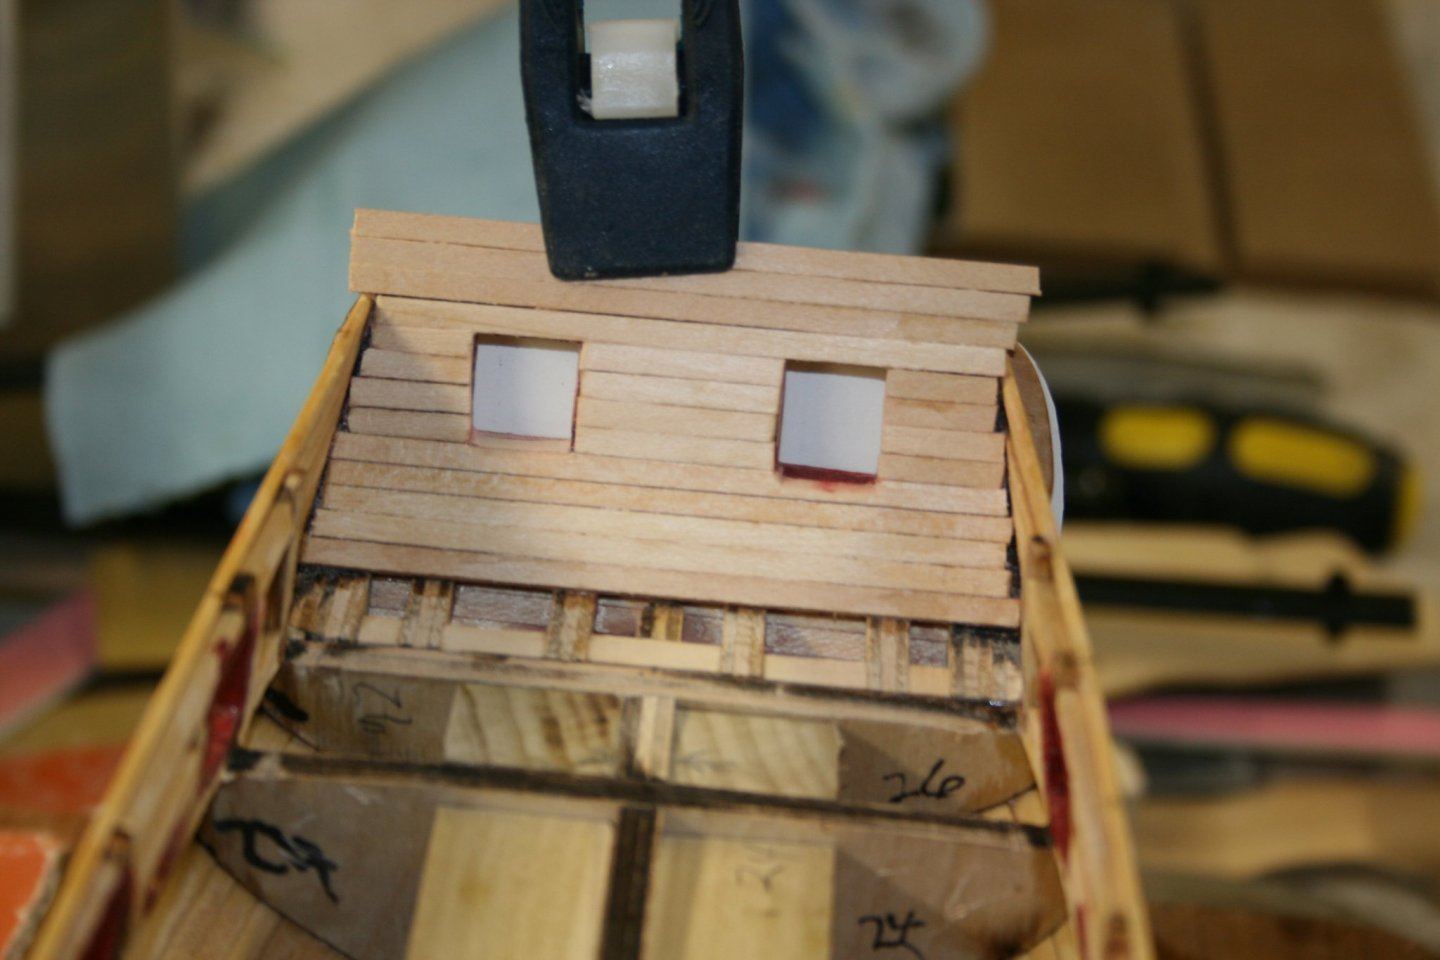
I think it is one of those things that bother me because I know it is there. I am pretty sure that it originates back to when I cut off the curved portion of the transom. That does give me a little adjustment when I cap off the transom cap rail. And once I get the bulwarks covered on the deck side it will move to the background even more. Every measurement I take shows that from keel up, the planking is identical on both sides. Also, don’t worry about me catching you, I still have tree nails to do. 😏
-
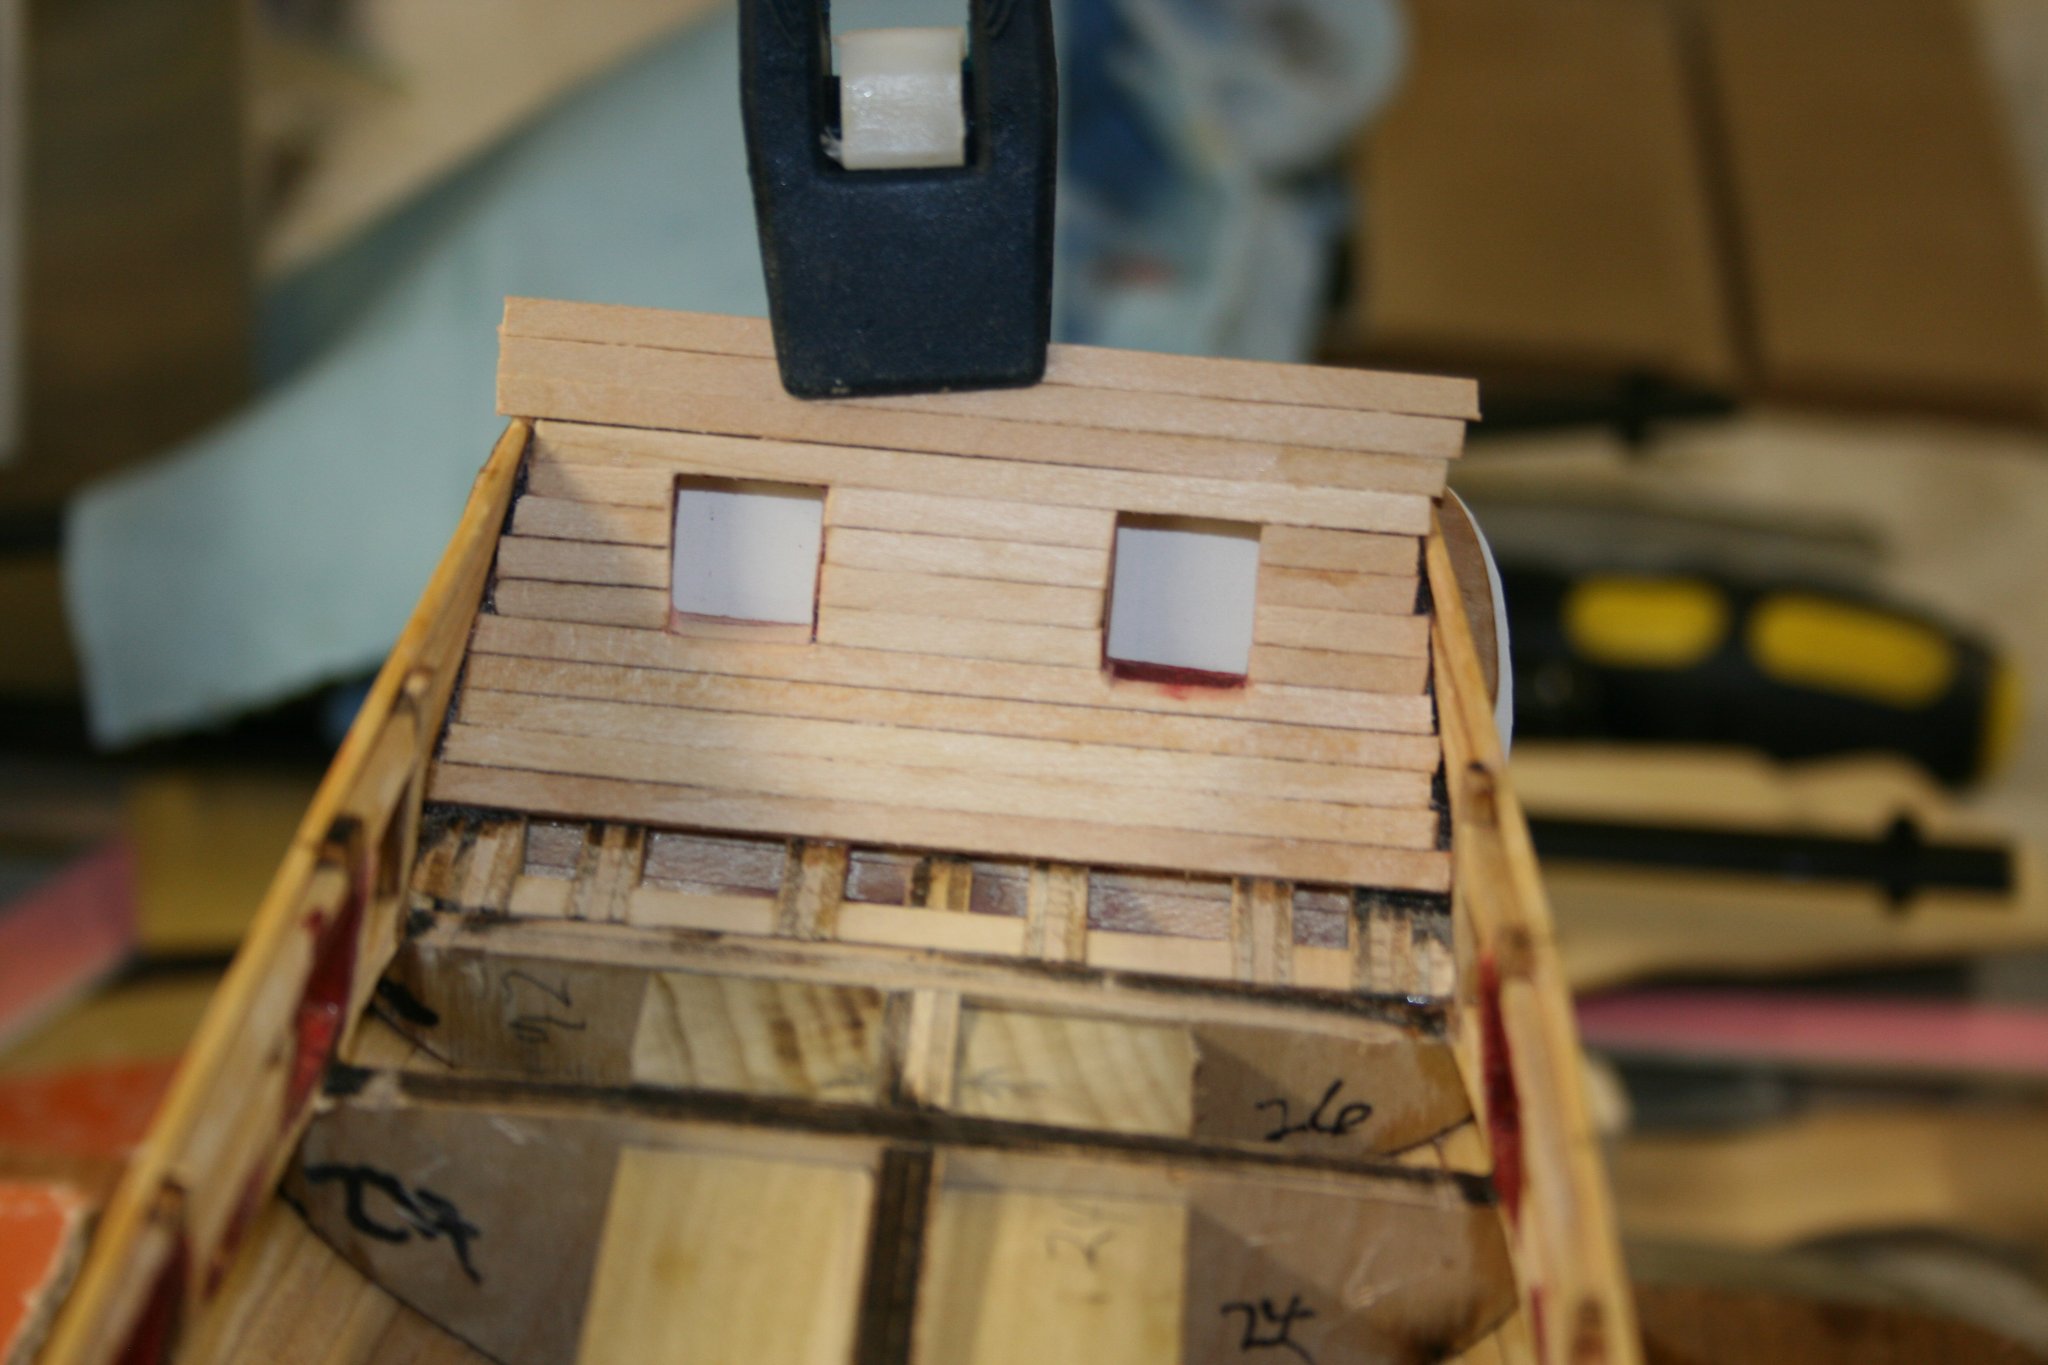
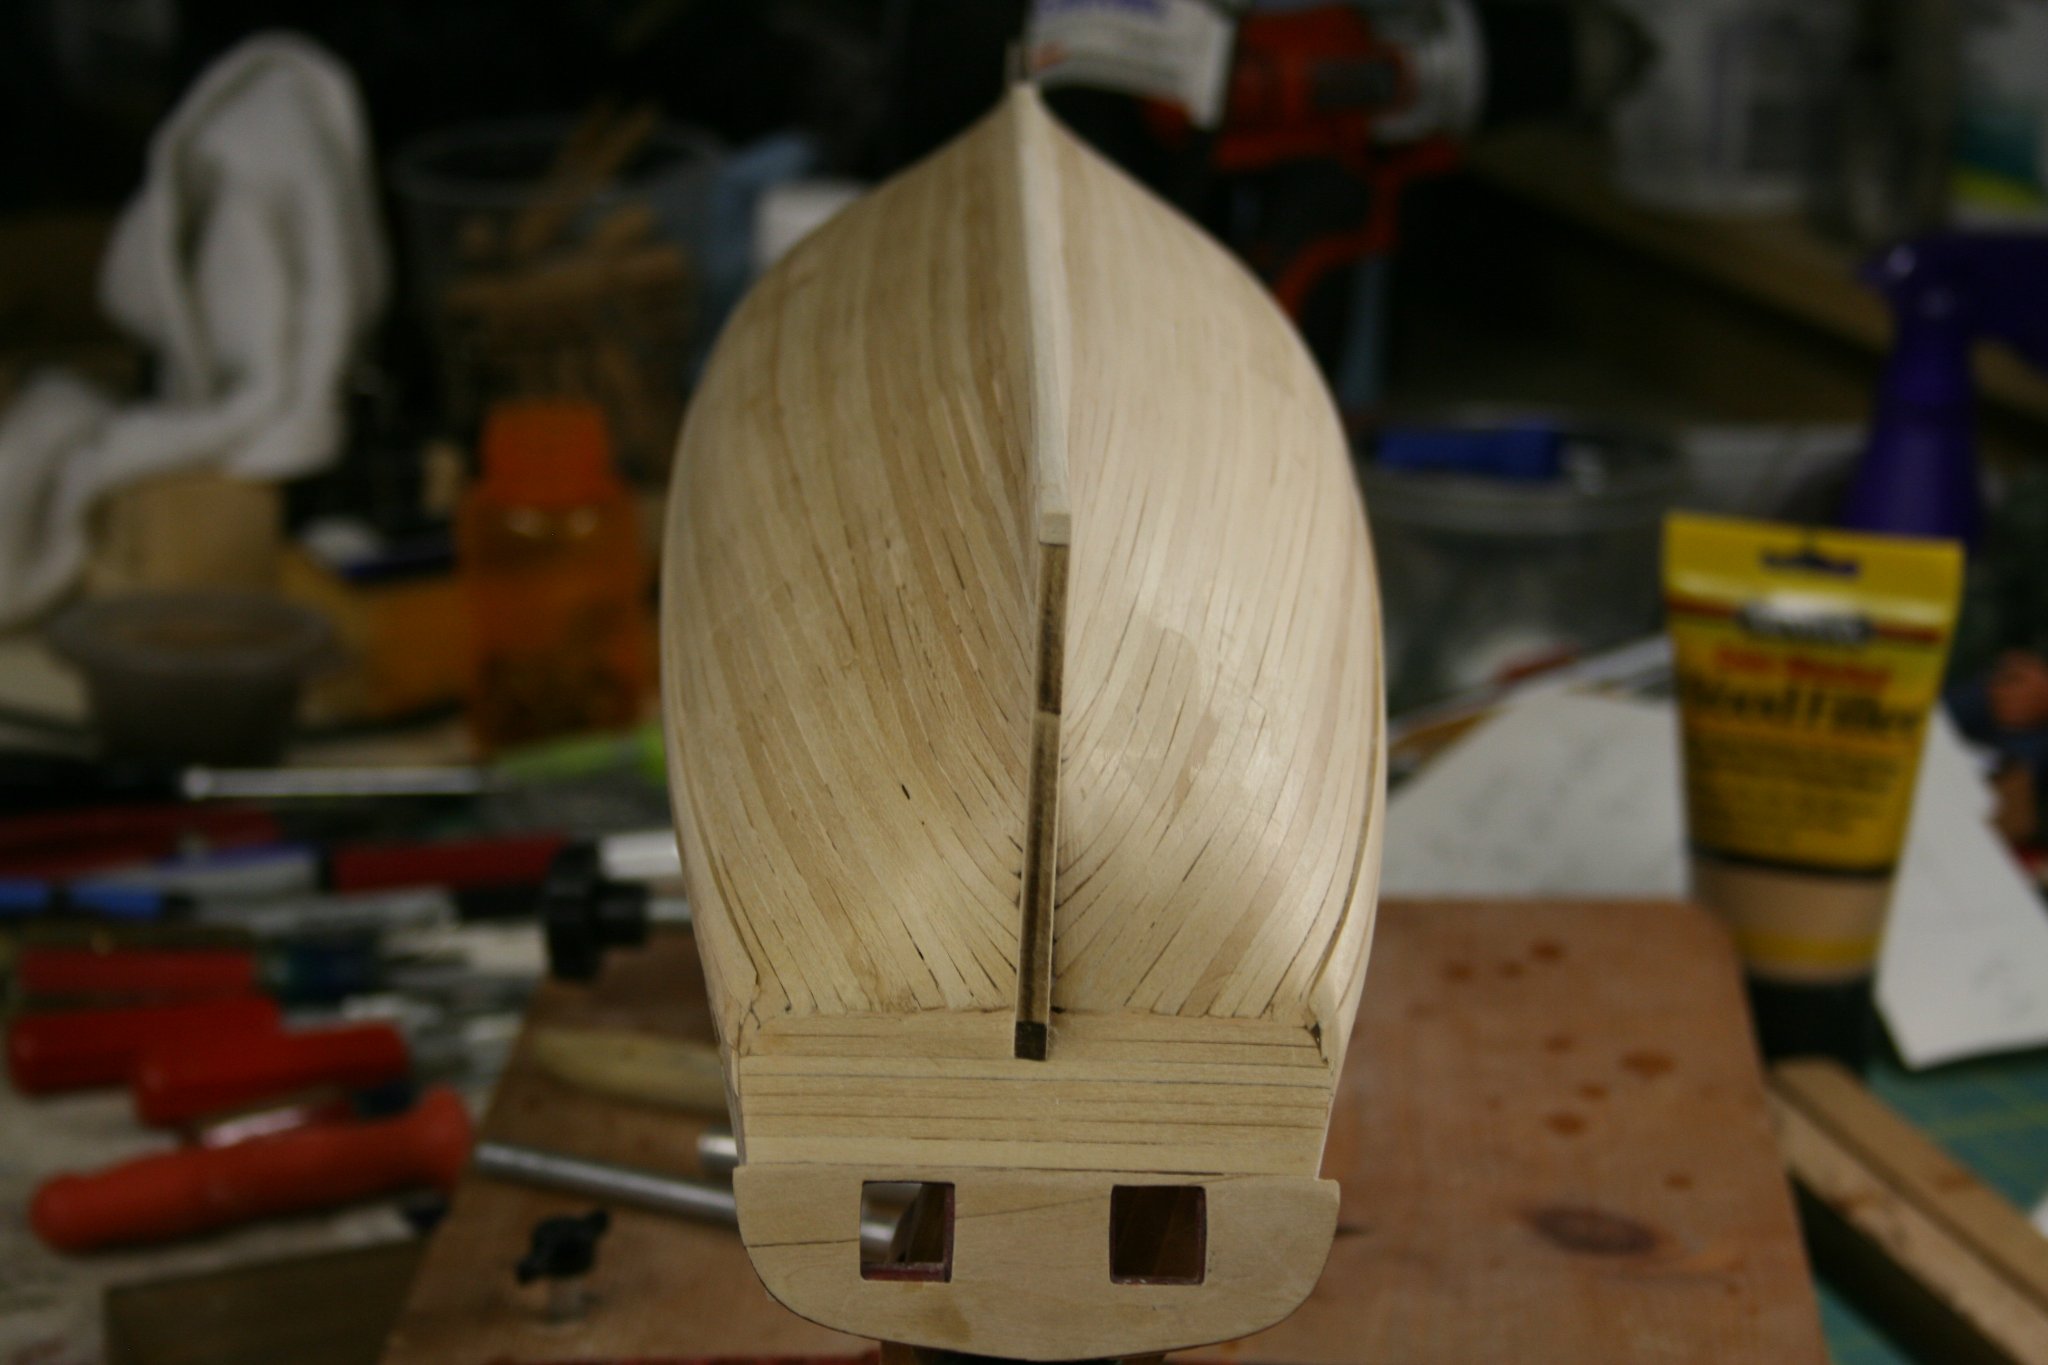
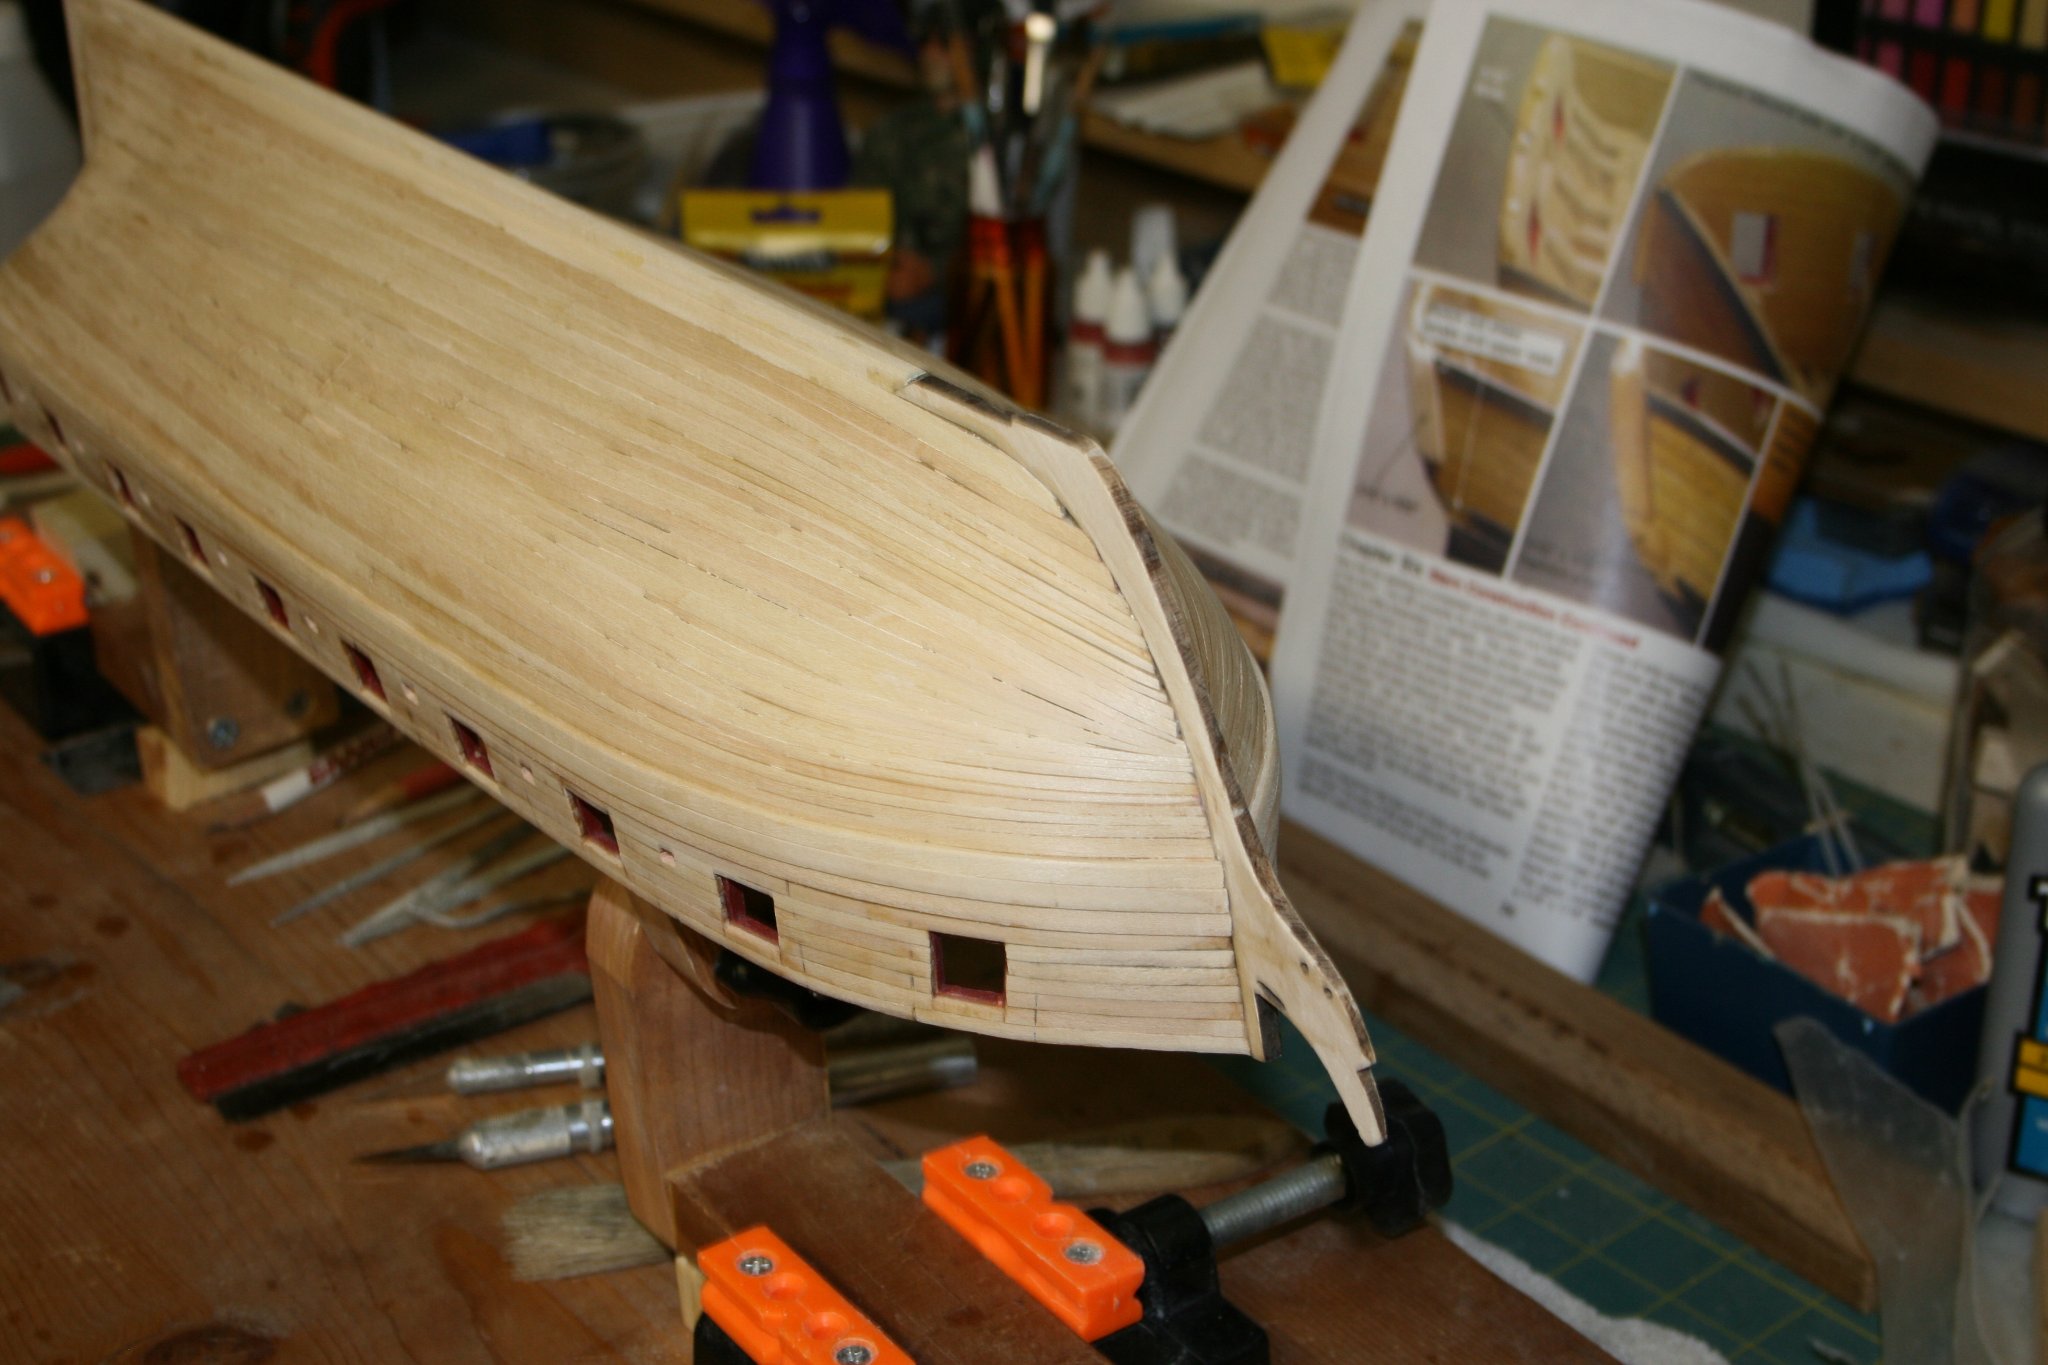
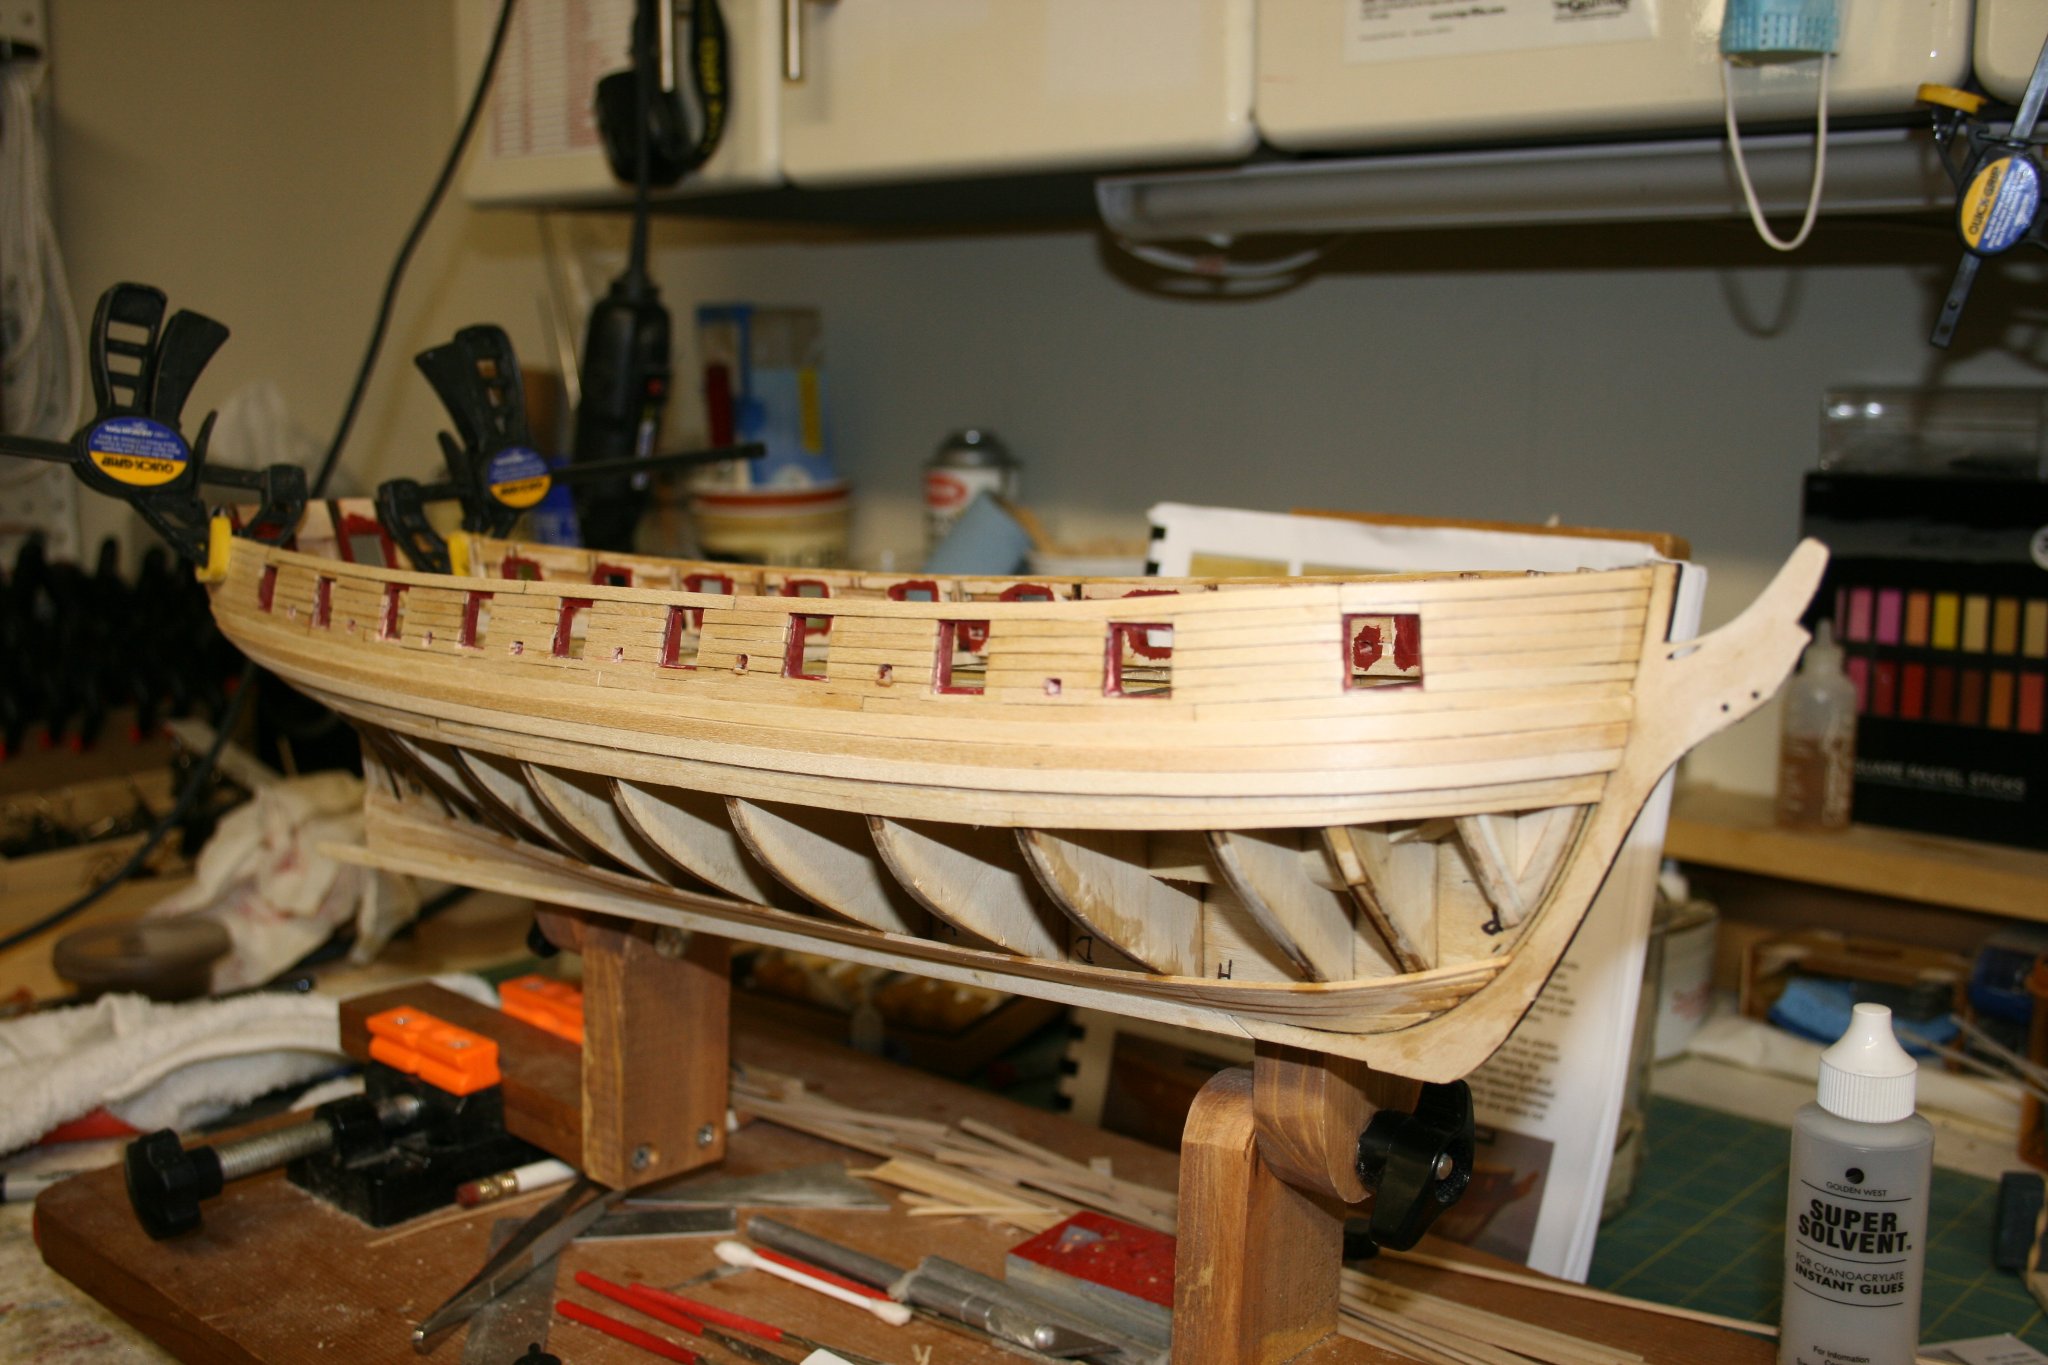
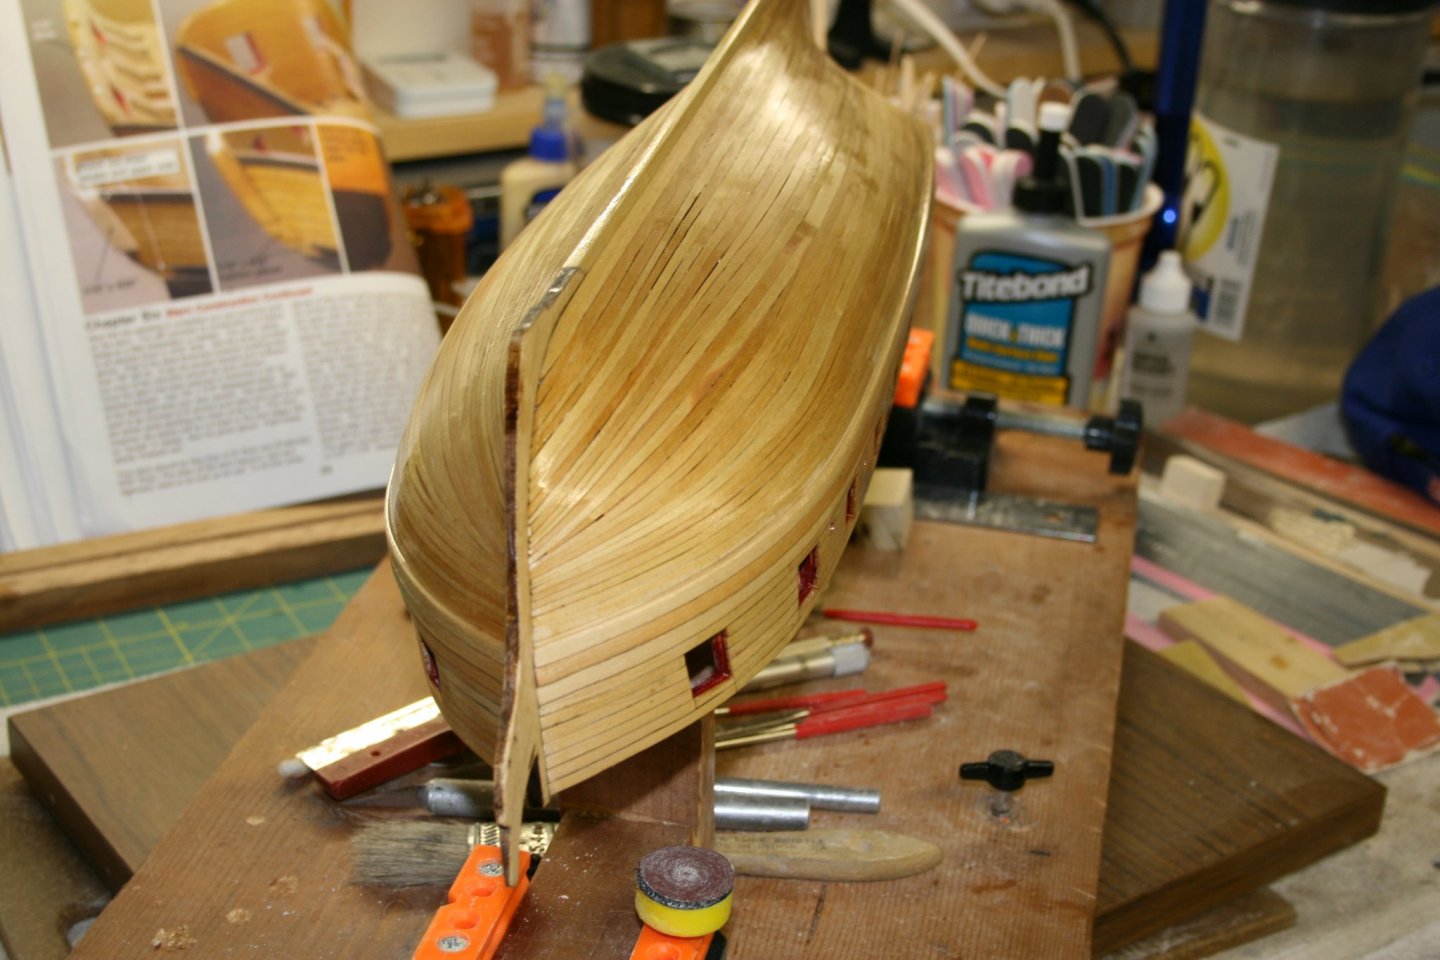
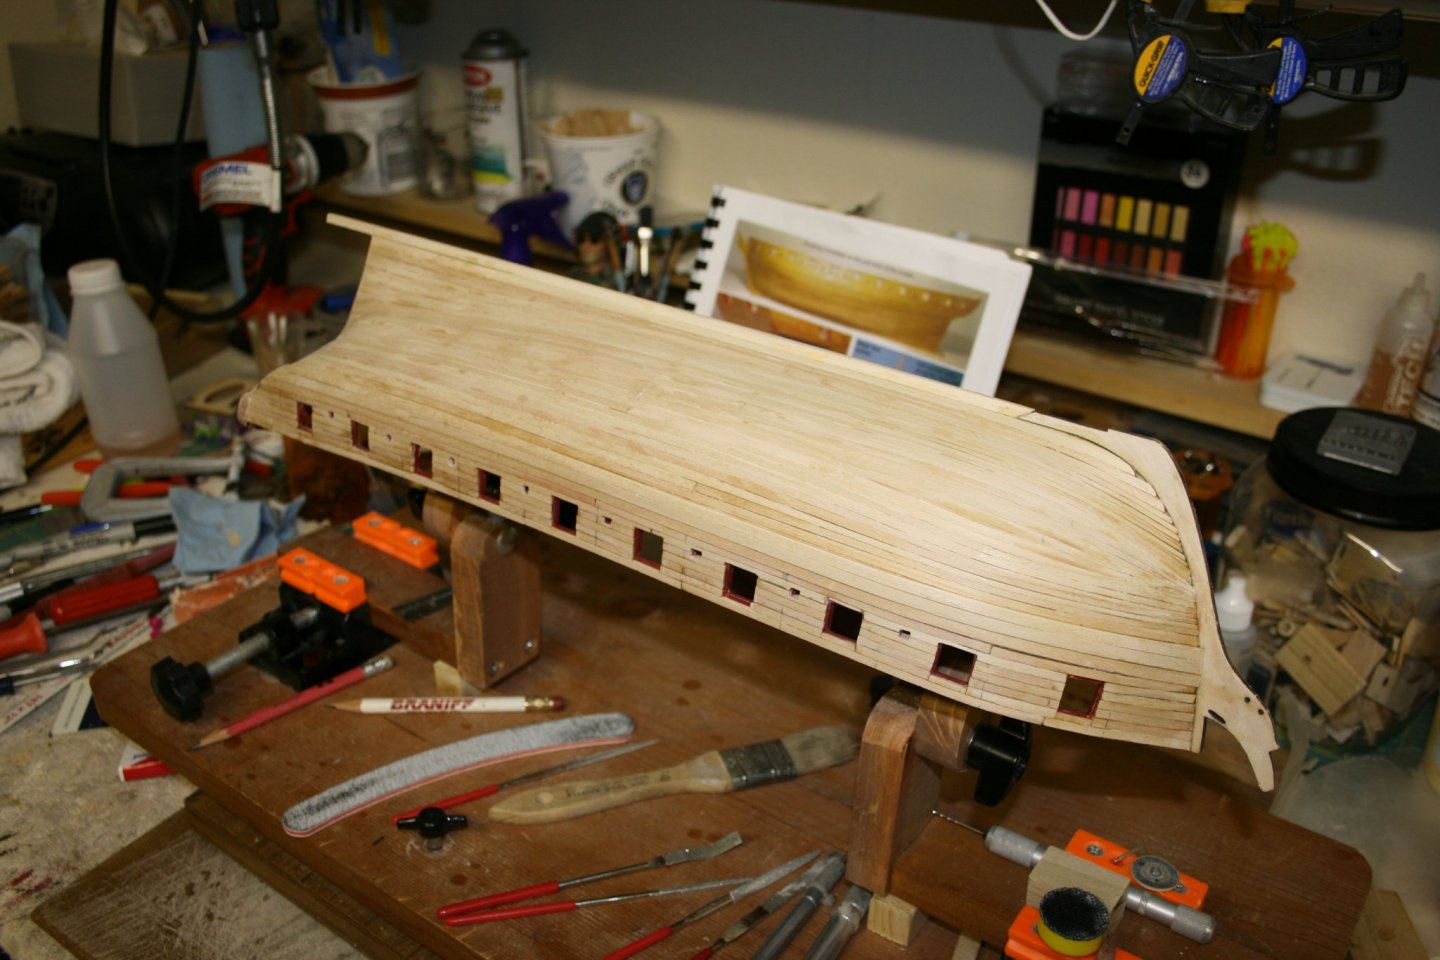
The Mystery Continues: A few posts back, I noted that the transom and gun ports seemed out of alignment. So I set about measuring, checking, and finally concluded that the gun port sills and lintels for the error. I was unable to find anything wrong, other than that and it squared up pretty well. However, after I added the deck side planking on the transom, there it was again. Looking at the picture, you can see the plank that borders the gun port. On the left (as you look at it) the plank is lined up to the bottom, but on the right side it is the top. I have counted the planks above the wale (both sides) and there are 7, checked the sills and lintels and gun ports are fine. So, I am going to just continue and work out the issue when I place the trim planking on the transom. To correct it, it would mean raising it 1/16" on one side and raising it 1/16", on the other, yet all other parts are ok. So, I decided that maybe the best resolution, is to never point it out to anyone... 😁😁 Too cold in the garage to continue, so I am going to break for today.
- 436 replies
-
- 3
-

-
- Syren
- Model Shipways
- (and 1 more)
-
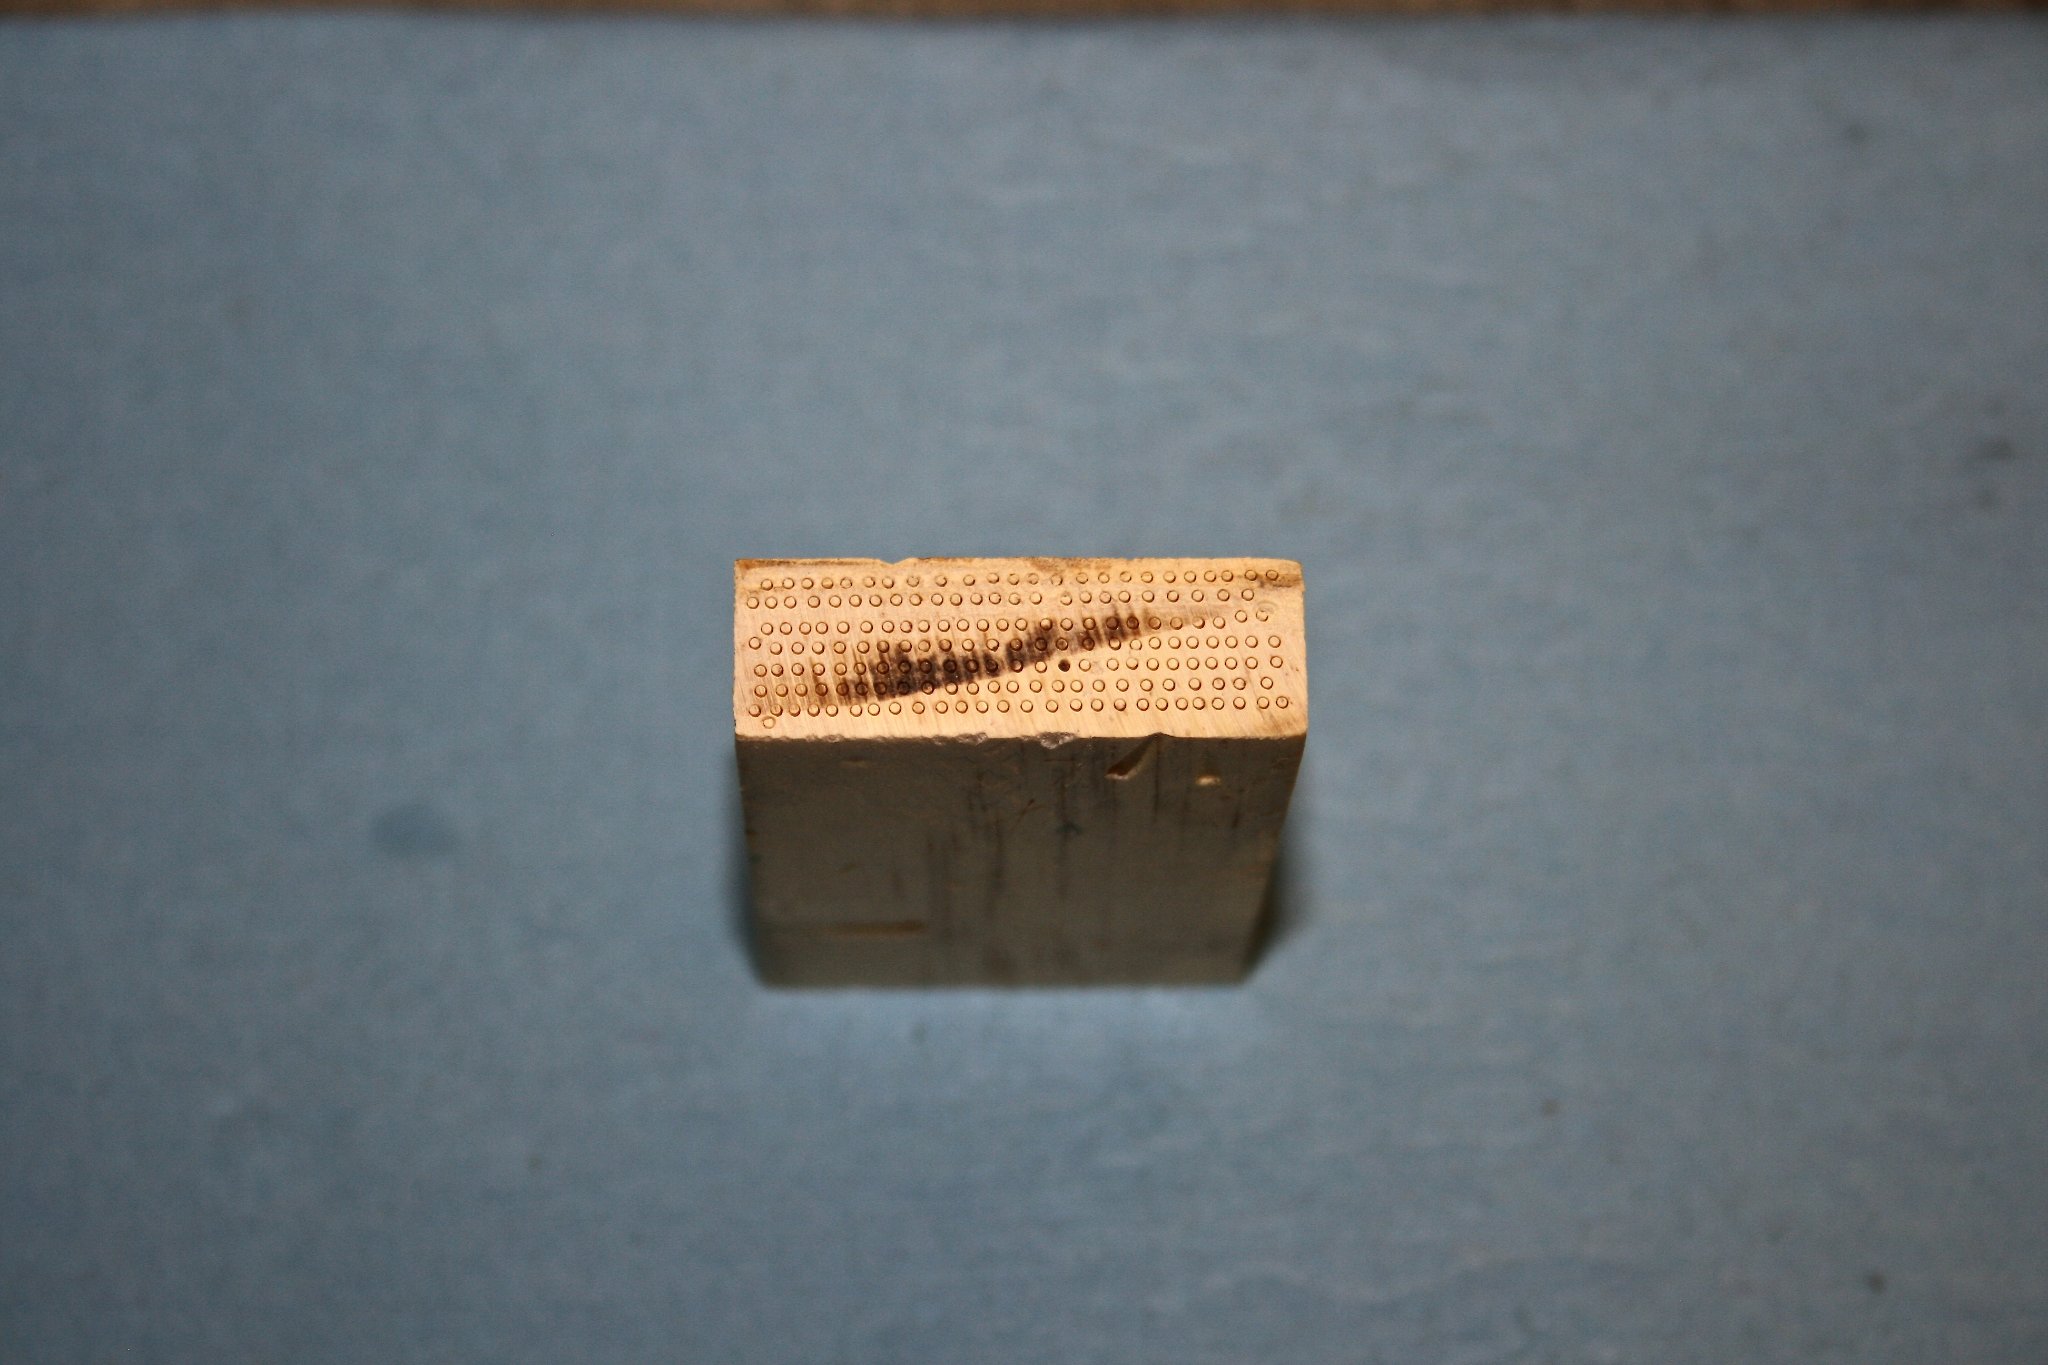
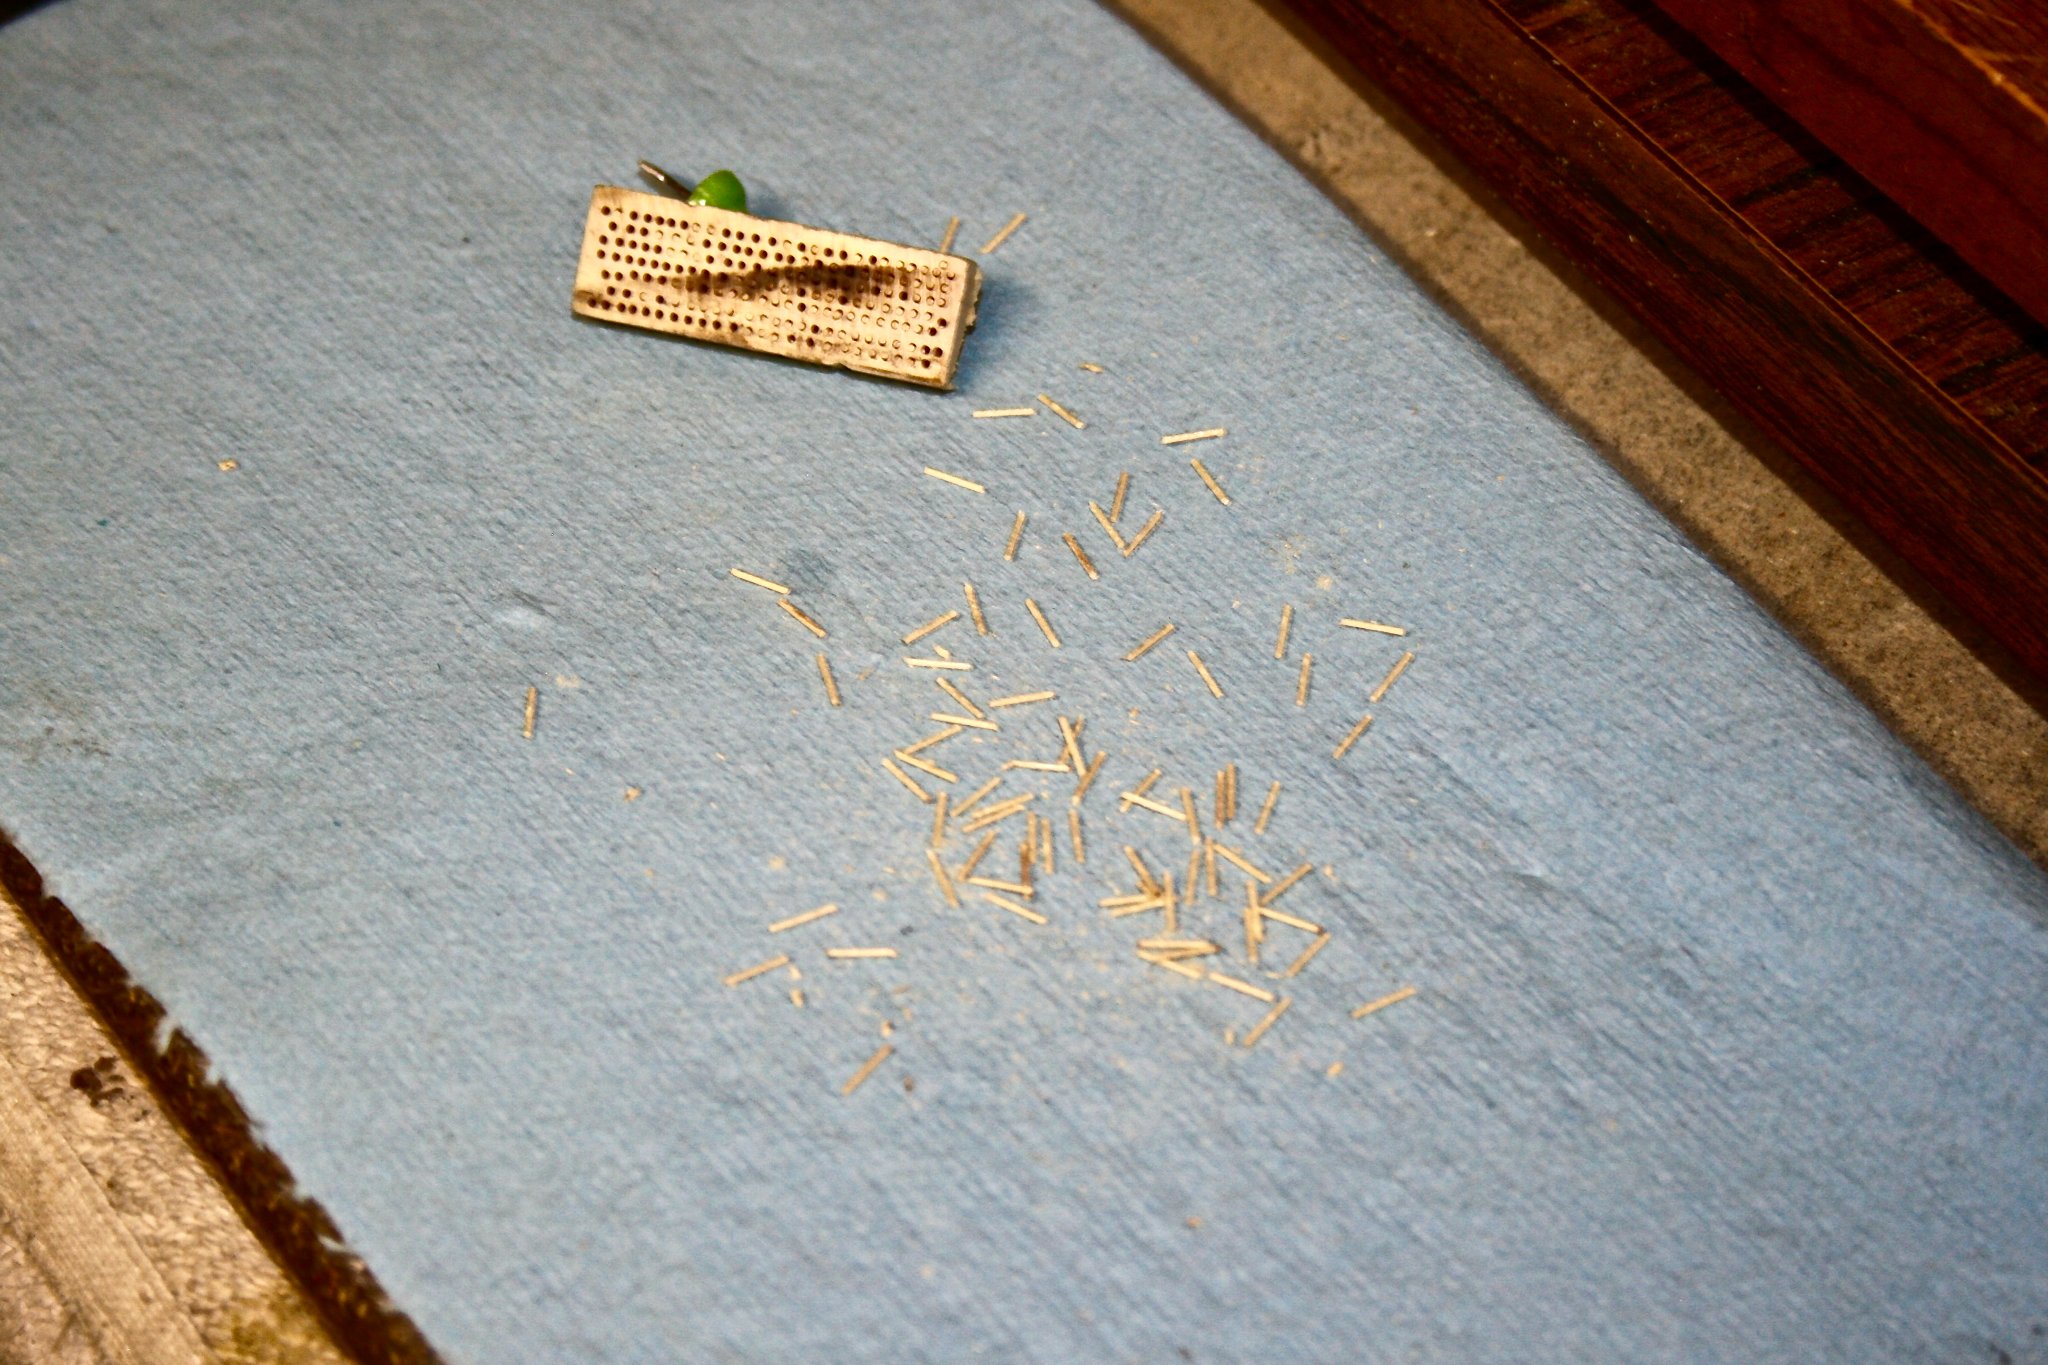
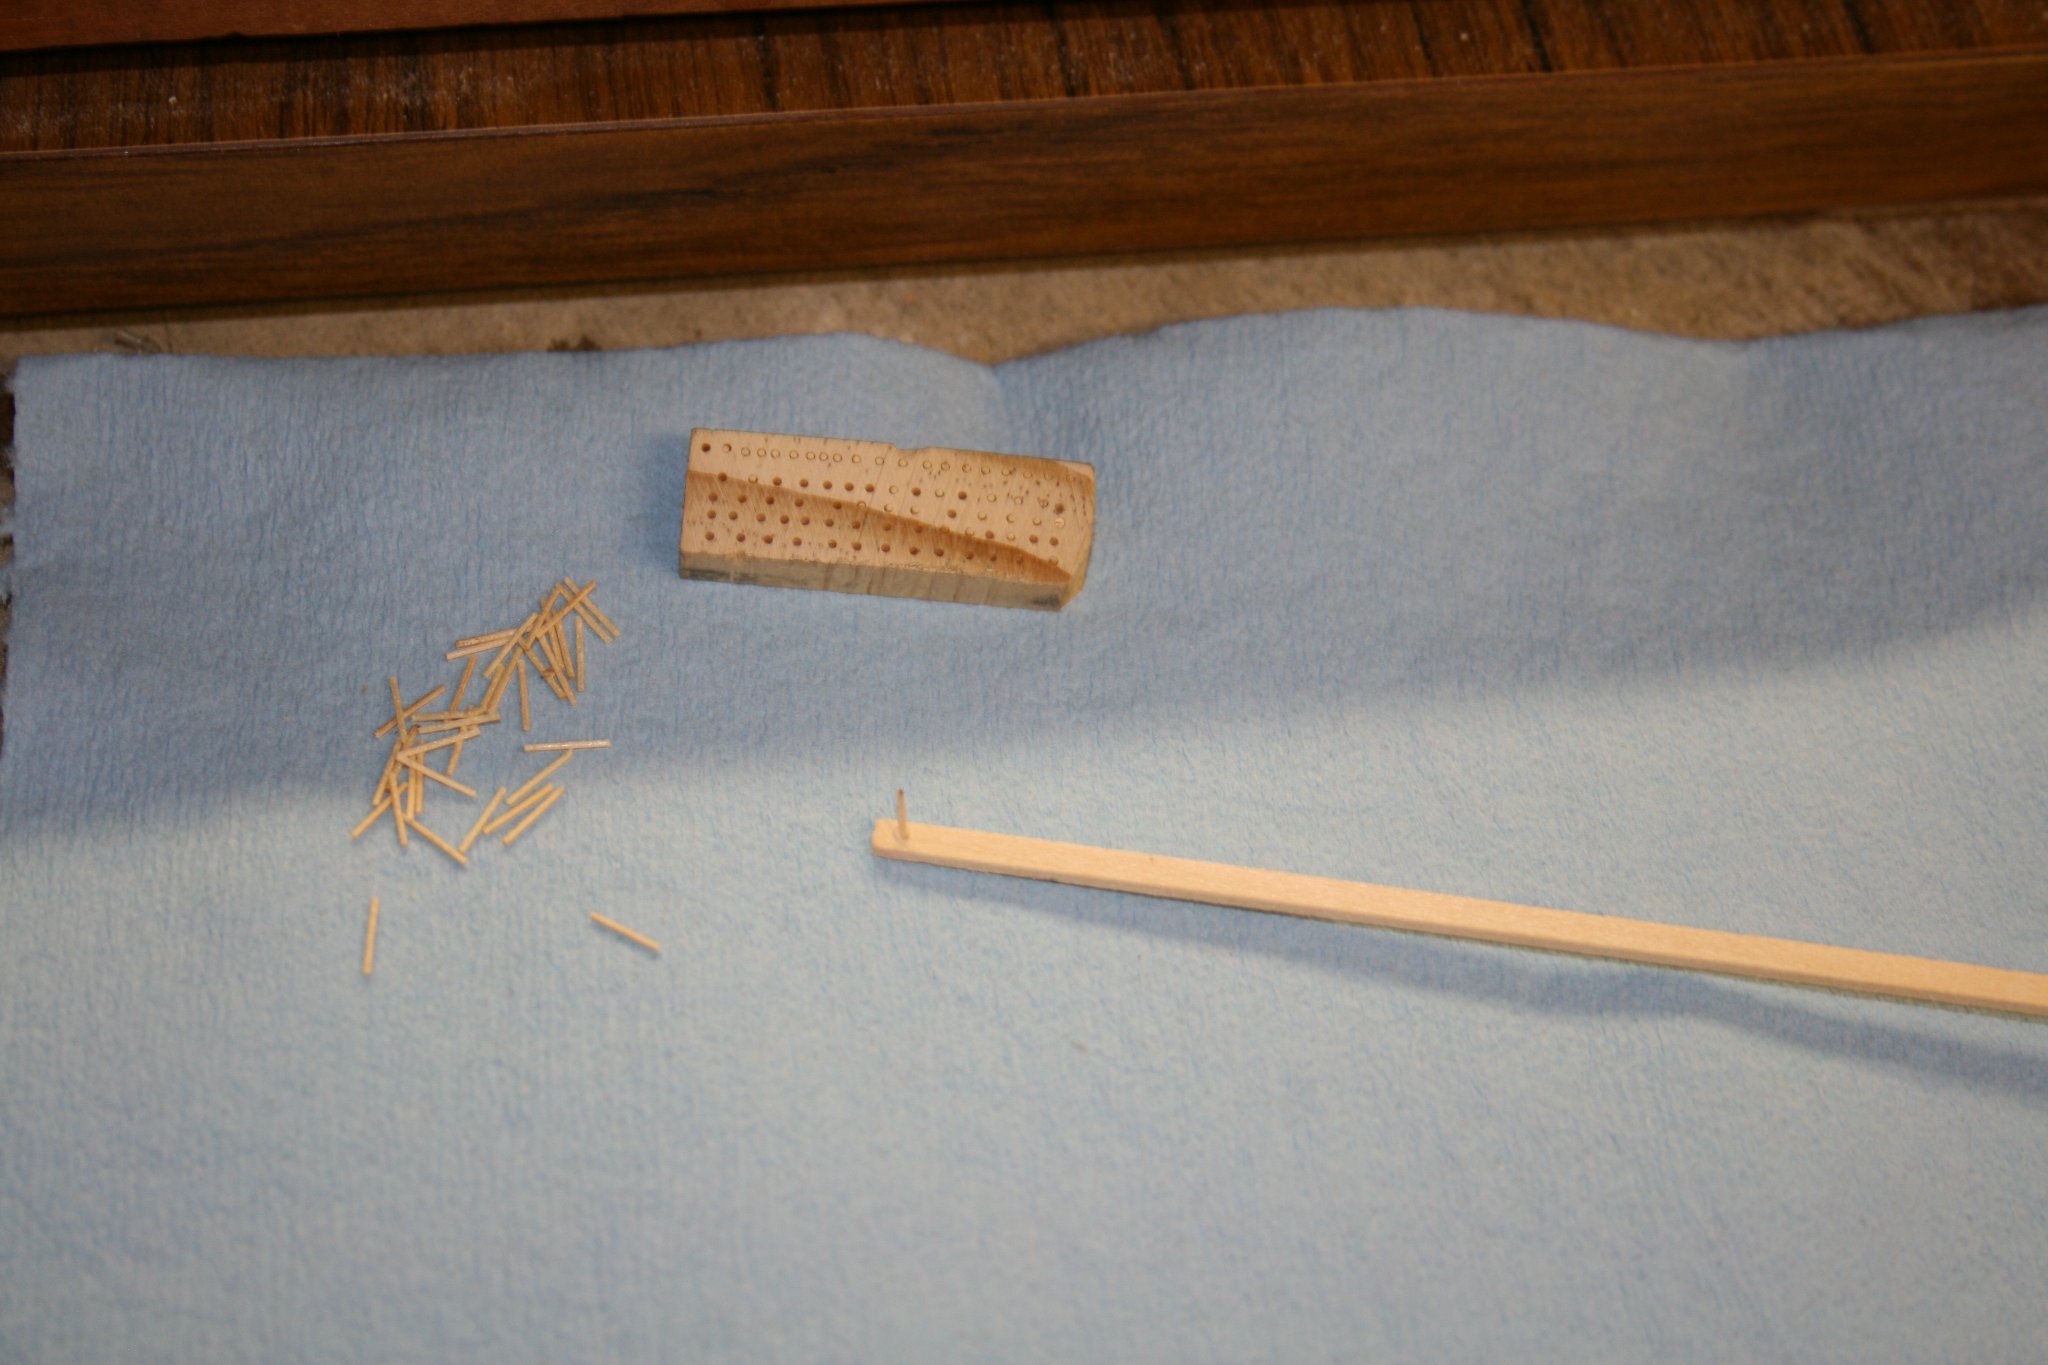
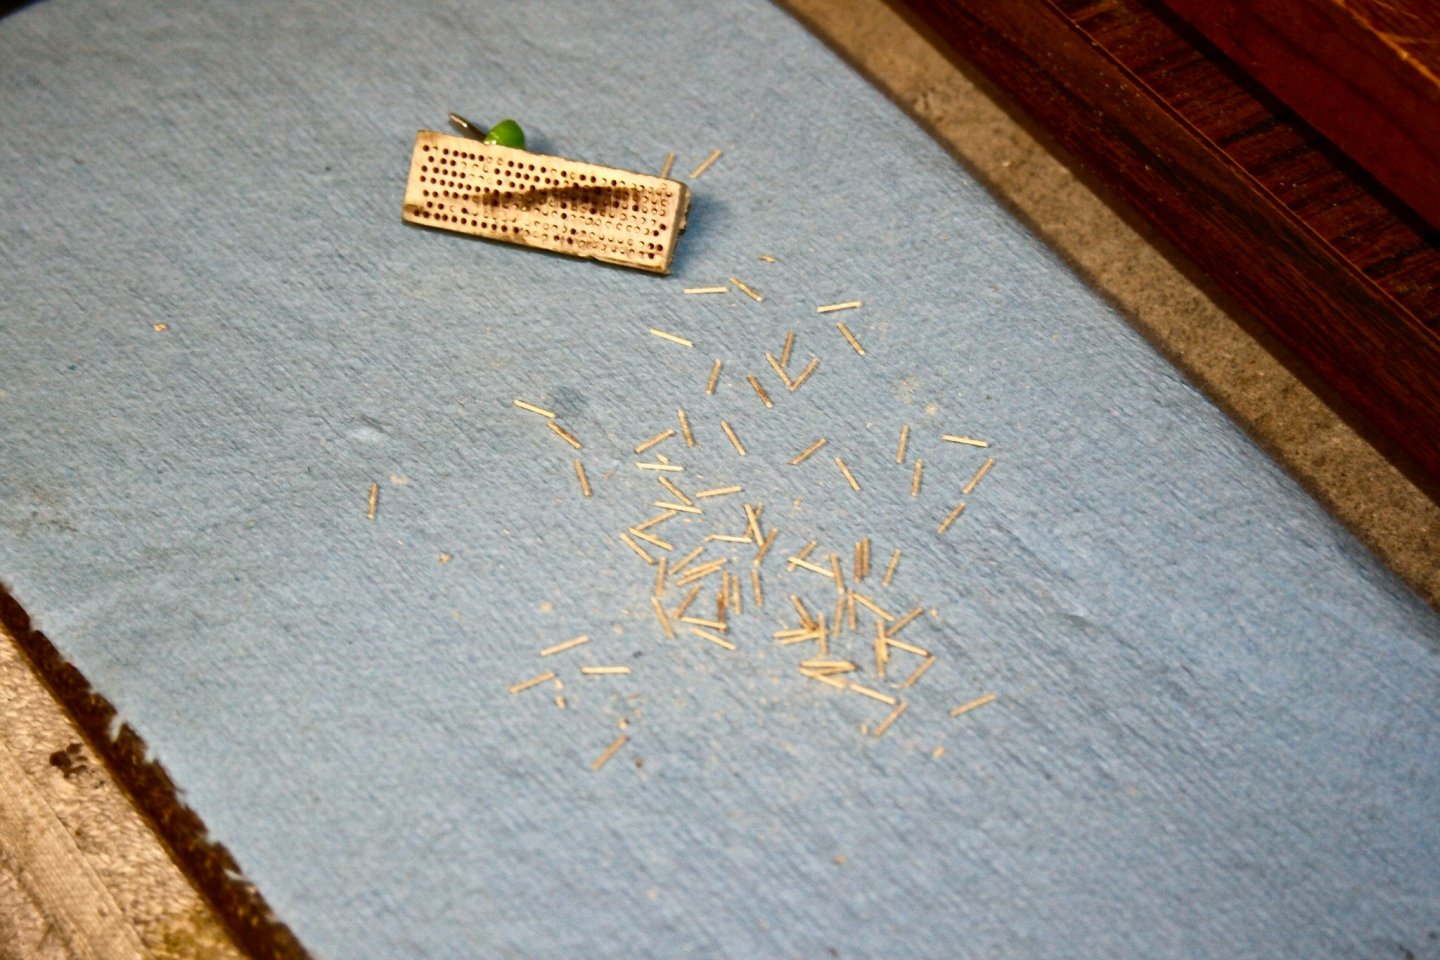
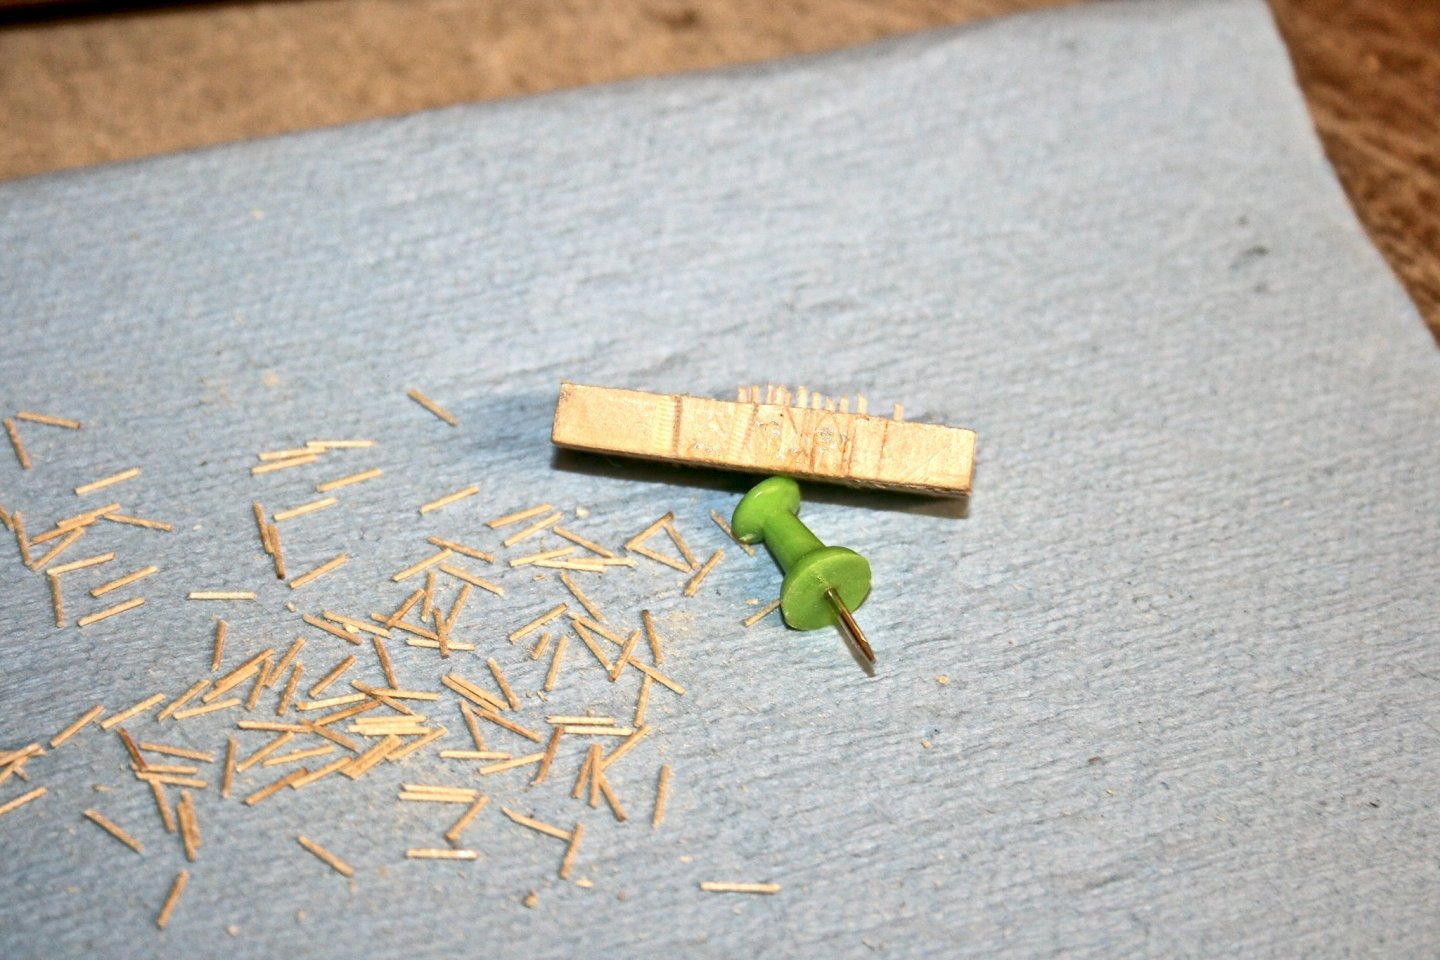
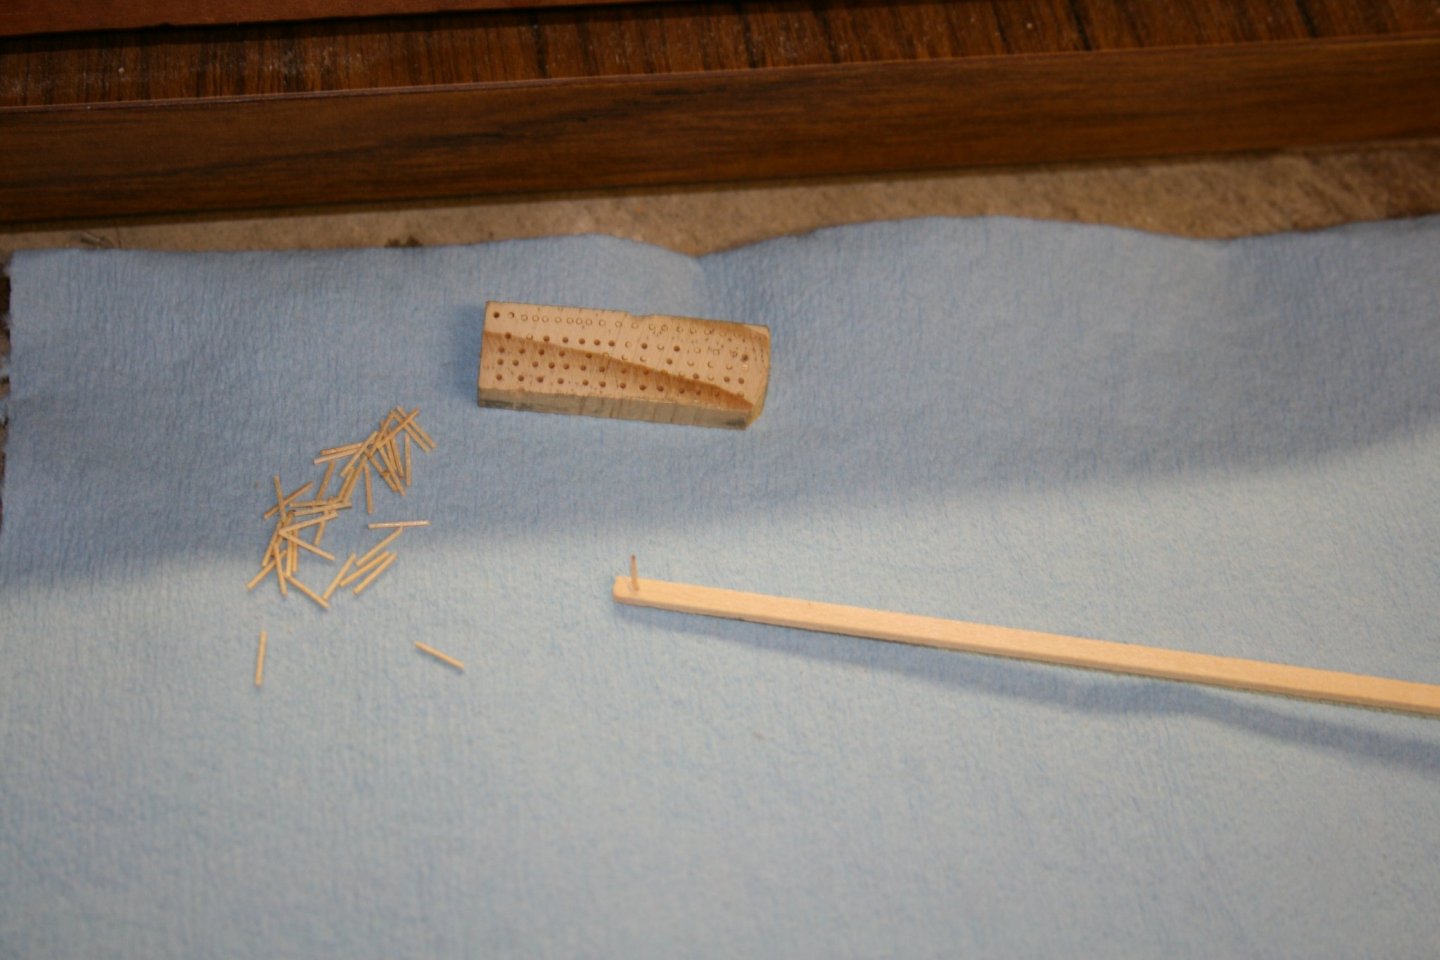
Nails, Nails, Nails: A big, big thank you to @Overworked724for showing his method for making tree nails. I was able to make 140 in about 35-40 minutes using his process. I have pictured it here and hope that it is clear to all. It is worth the effort to put together the tools you need to make this work well. Now, if I could just locate one of those "nailers", I would be set. 😁 Newbie Tip: Once you have the block of pressed nails (shown), removing the nails can be helped along. I found that many of them (with dry wood) will just pop out by using the backside of a razor saw and tapping the wood block. More than half of them came right out and I was left with not having to use the map pin to remove many. Those that will not just fall out, will stick out enough to just grab and pull out of the block. I have shown that in one of the pictures. (sub tip: Don't cut your fingernails before making nails. 😆

- 436 replies
-
- 3
-
-
- Syren
- Model Shipways
- (and 1 more)
-
It's "Miller", uh, Drying Time: The first coat of Tung Oil has been applied to the hull and now I wait for awhile. It sure makes a difference to look at with the planking now highlighted. Once it is dry, I will start on the Tree Nails, and painting the black areas of the wales, the stem and stern posts, etc. It is tempting to leave the hull without copper, but I will save that for another build. Newbie note: For any out there, it sure helped me to have previous wood shaping experience. The build did have some moments where it was invaluable in knowing what I wanted to do before actually doing it. I have built, and repaired many RC planes that helped to give me a little experience in shaping curved surfaces, and joining them to other parts. However, this was my first stint at bending wood to the shape needed.

- 436 replies
-
- 5
-
-
- Syren
- Model Shipways
- (and 1 more)
-
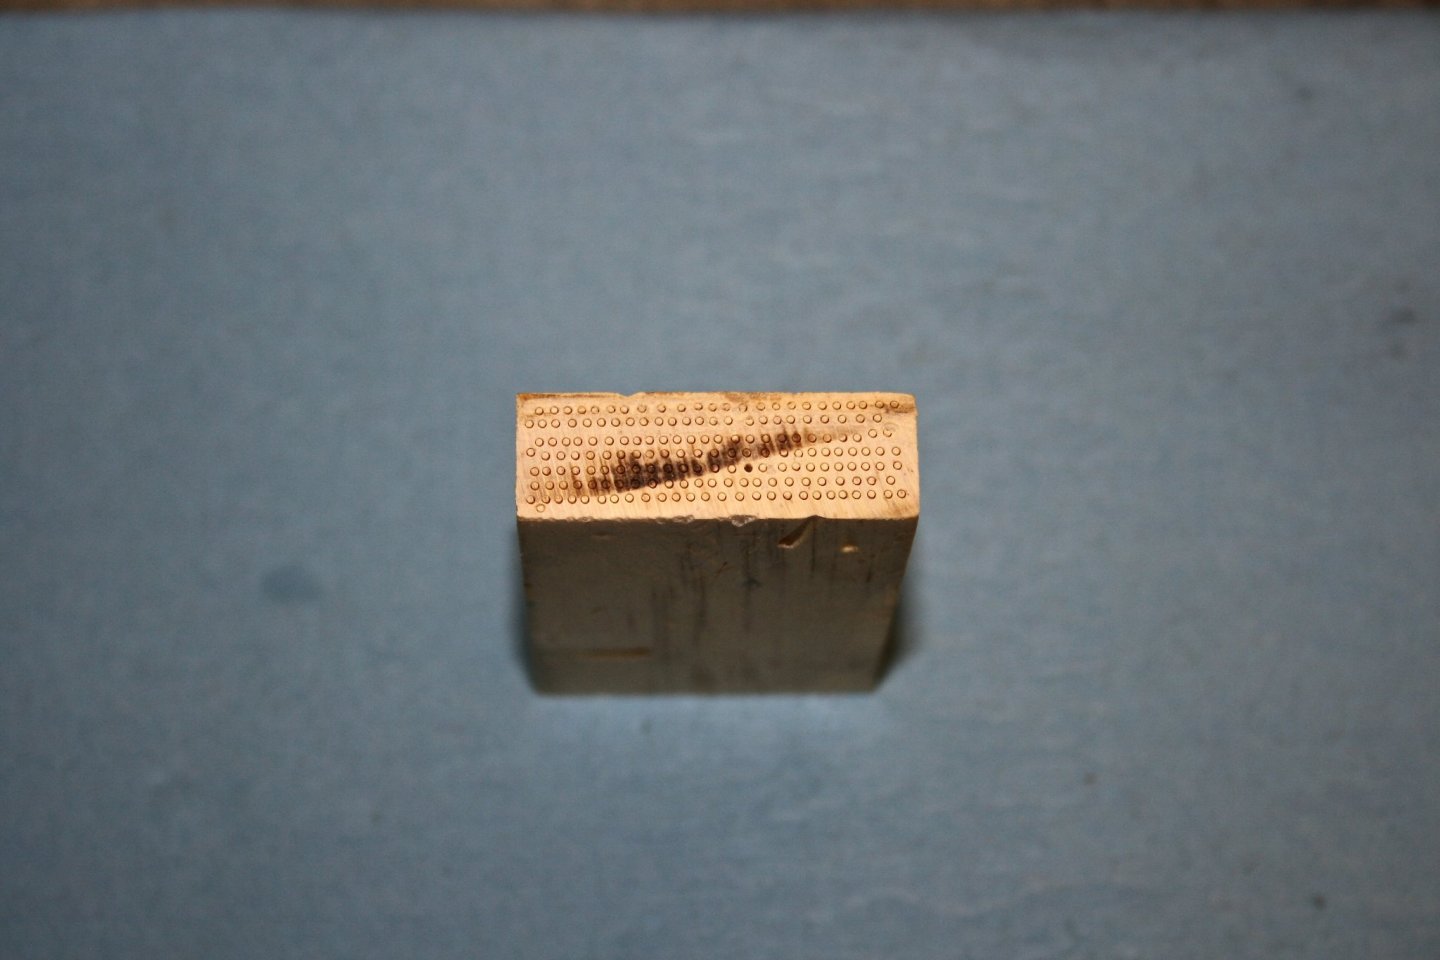
Tree Nail Testing Results: Taking the original test planks, I selected Number 3 for additional testing. On this plank, you can see 2 drilled holes.. (well truly 3) and the results. -The hole to the left has been drilled with a Dremel flexible extension with a handheld pen style end. This did create a smooth drilled hole, but, in handling, it also created the one near to it by accident. Using the flexible extension is somewhat cumbersome, and caused me to accidentally start a hole in the wrong place. Using the extension means that the speed control is on the full size Dremel and does not allow for speed adjustments without a long reach. -The hole on the right arrow was drilled by pen vise, manually and, to me, looks just as good as the first one. And, I had better control with the pin vise than with the extension. (Still, I may buy me a mini engraver so that I can drill without using the pin vise.....TBD) Based on what I am seeing, I think that I will put a coat of Tung Oil on the hull. This should keep the drilled holes to be much cleaner.

- 436 replies
-
- 2
-
-
- Syren
- Model Shipways
- (and 1 more)
-
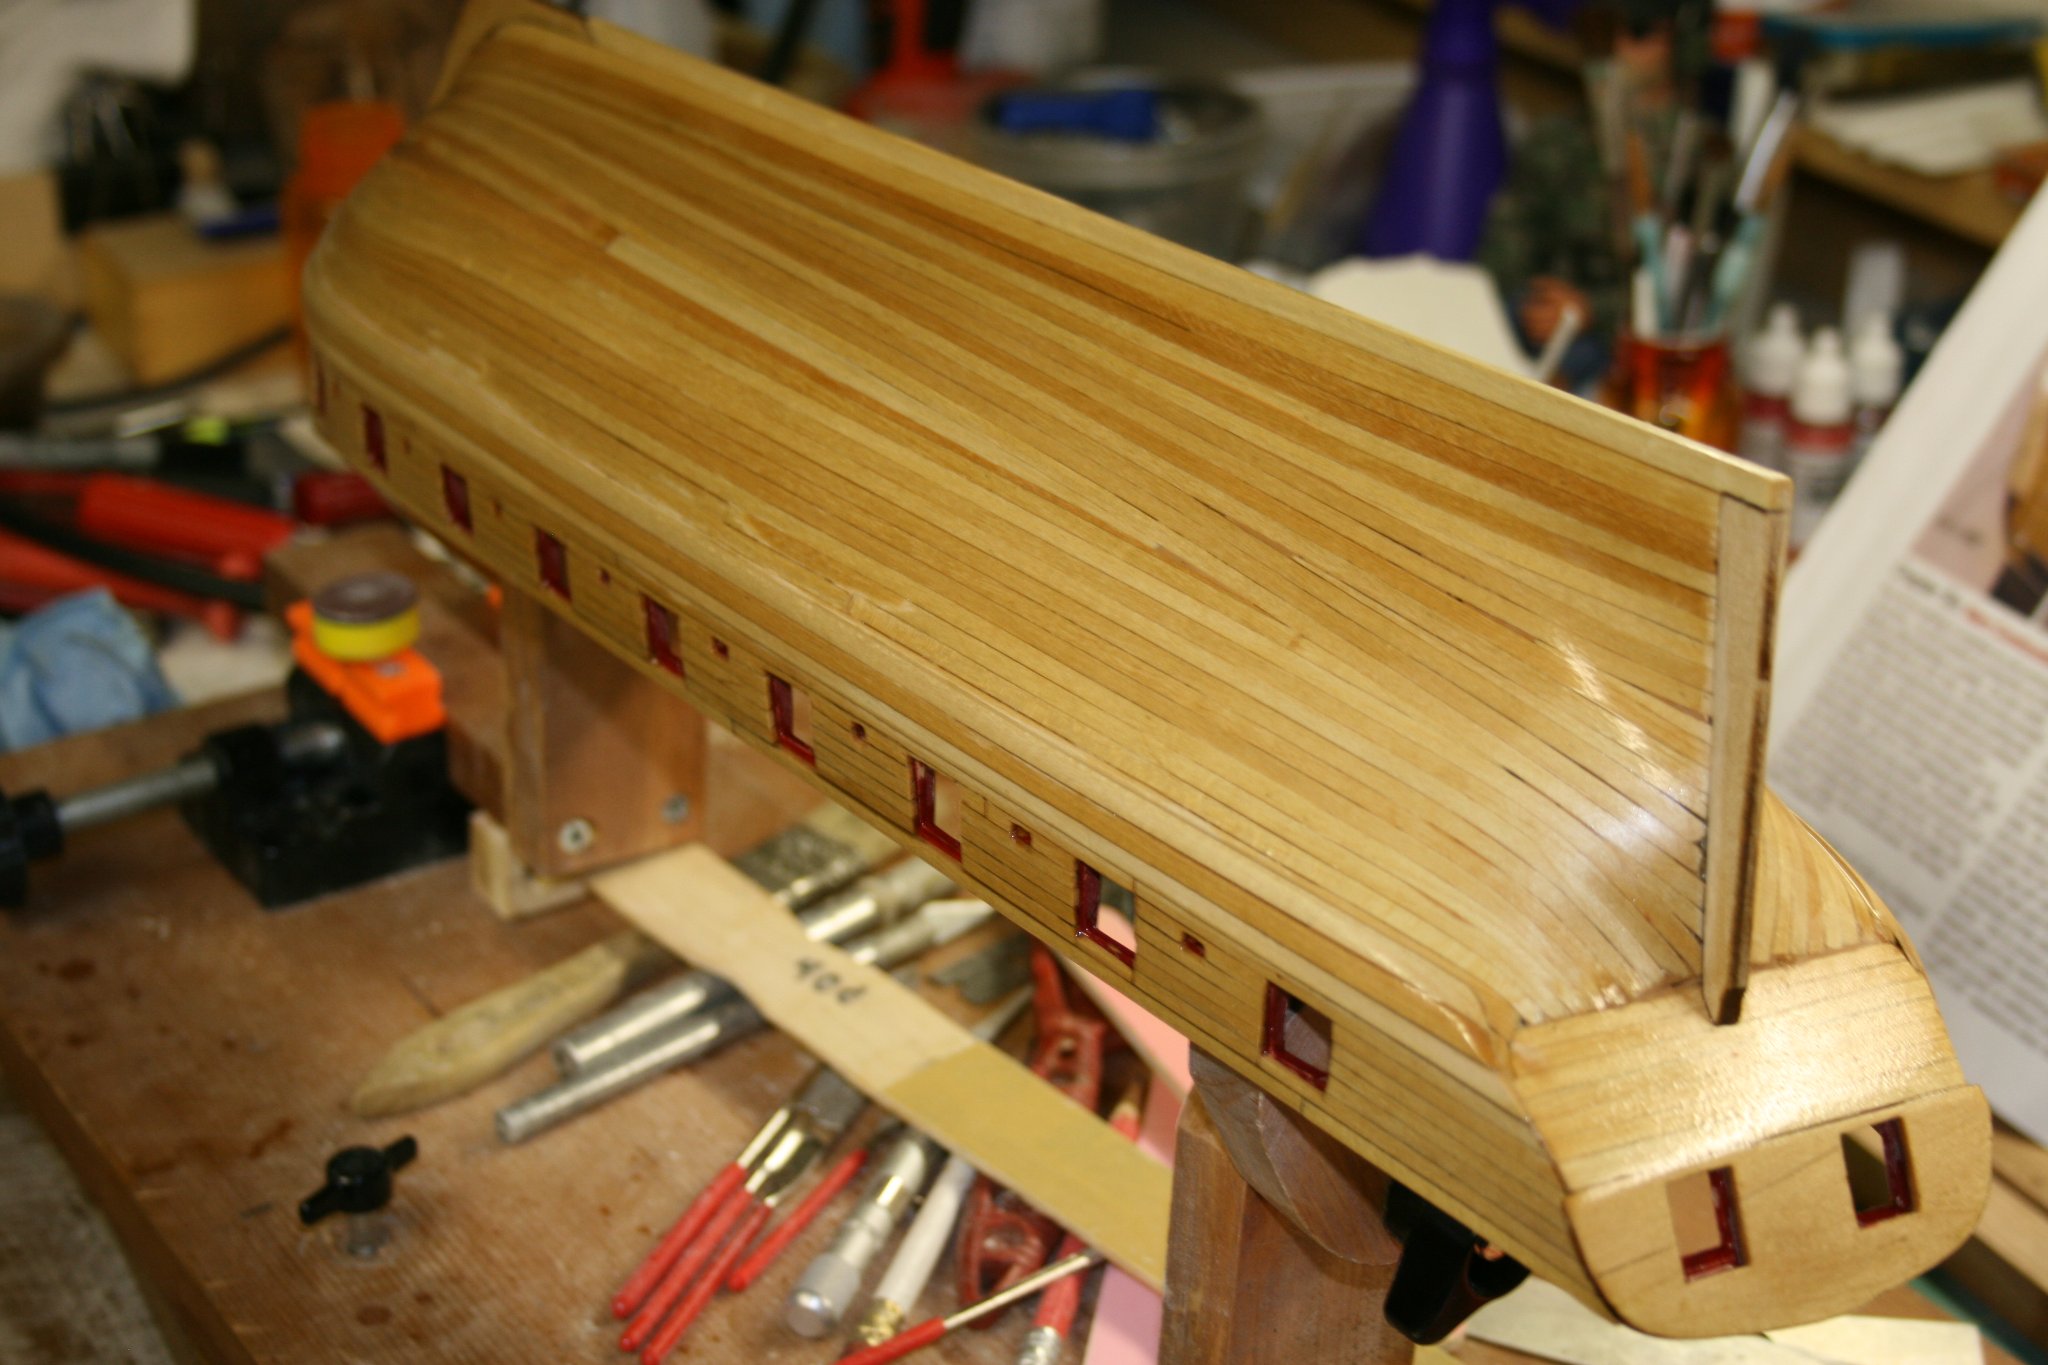
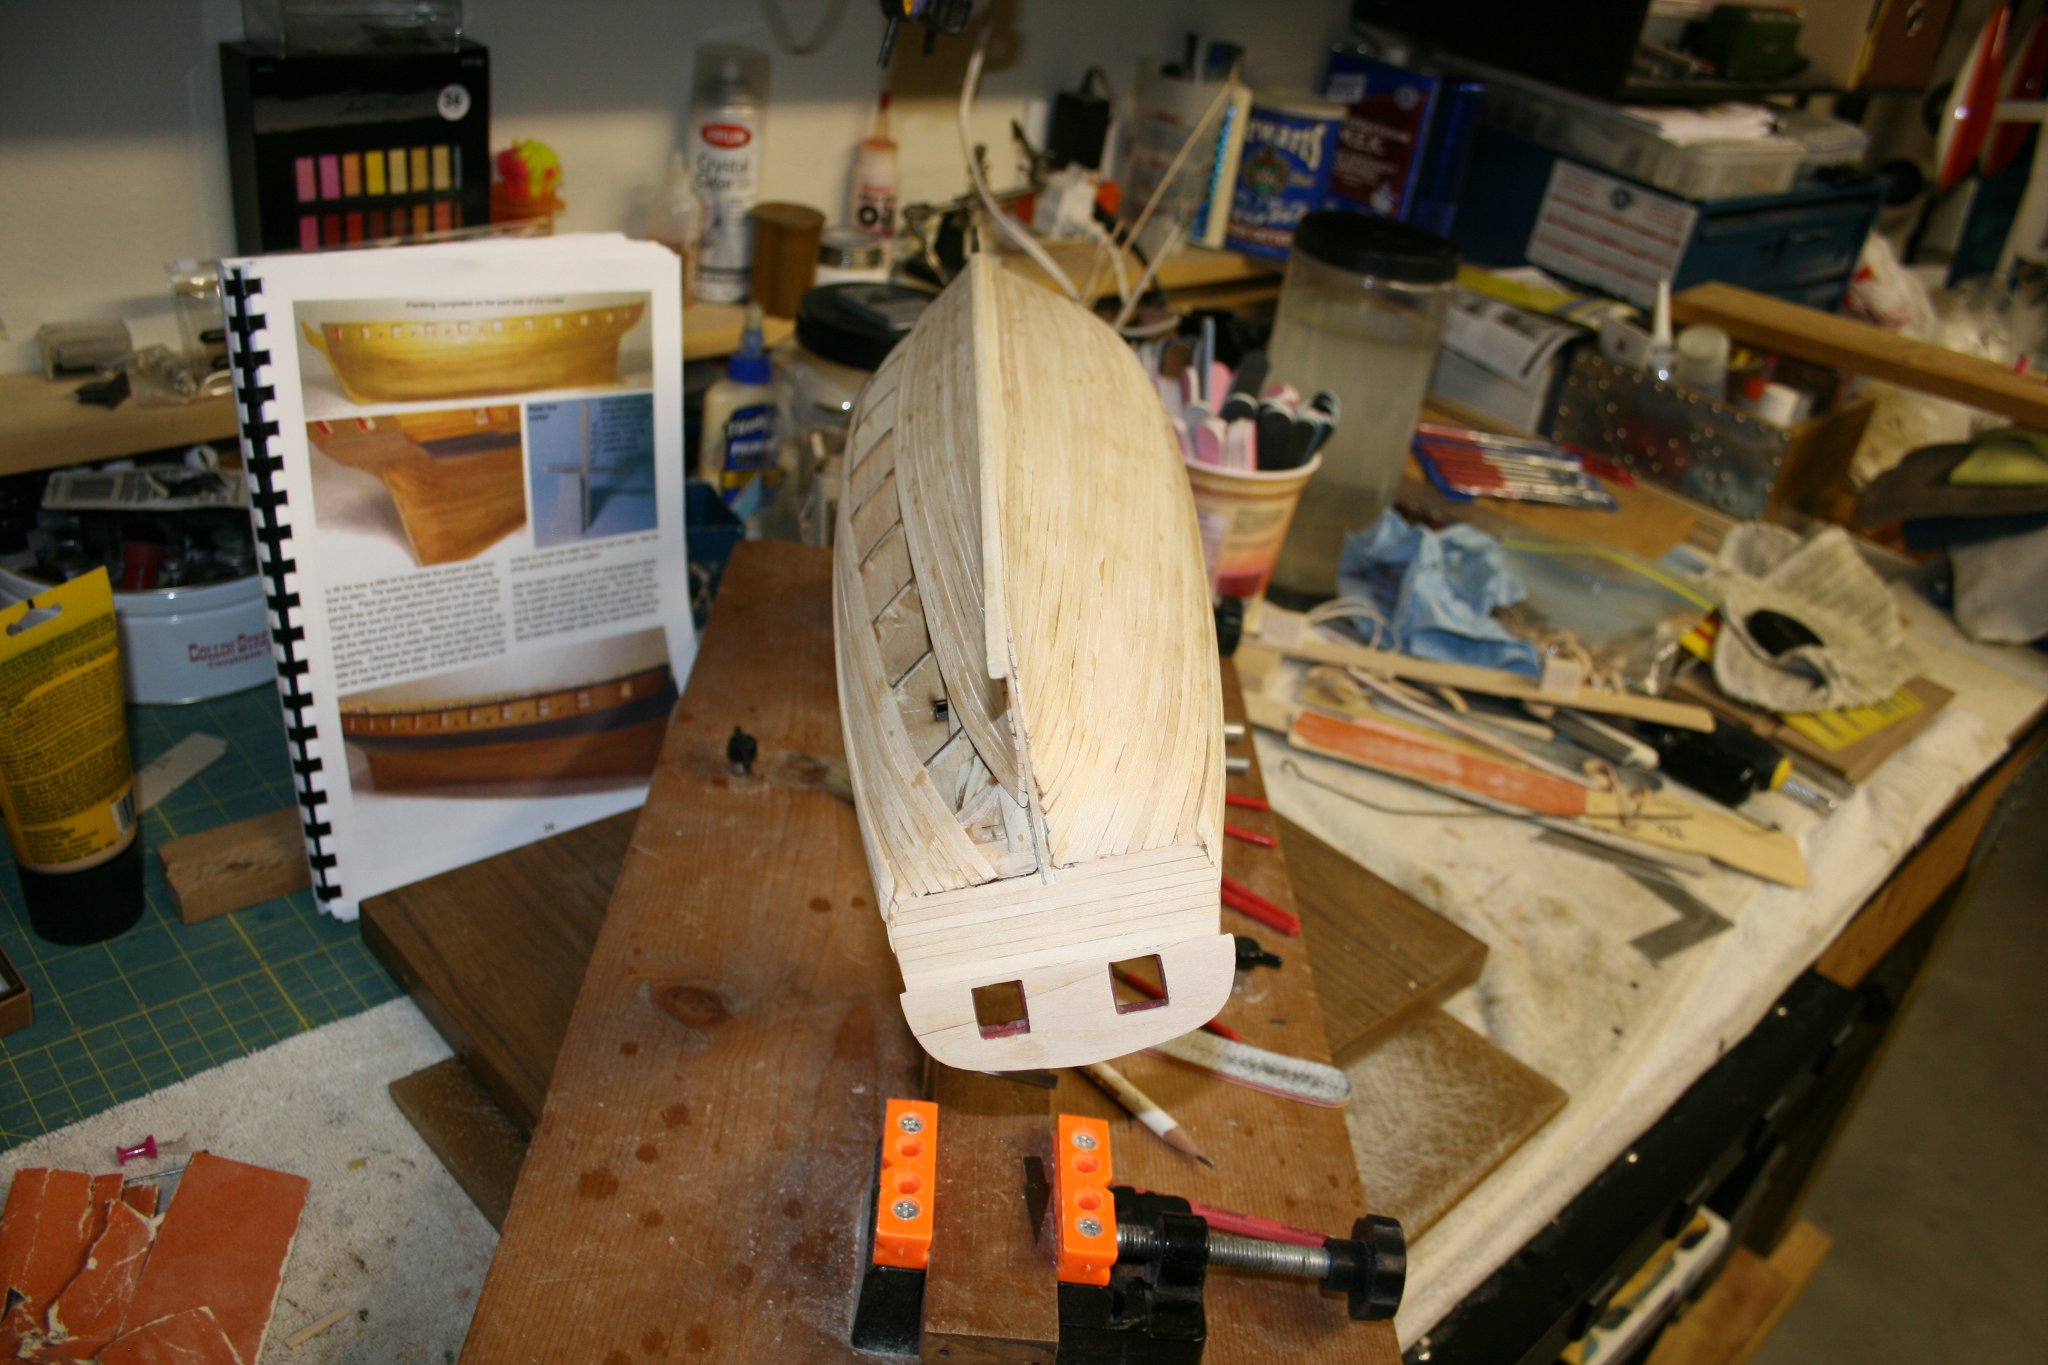
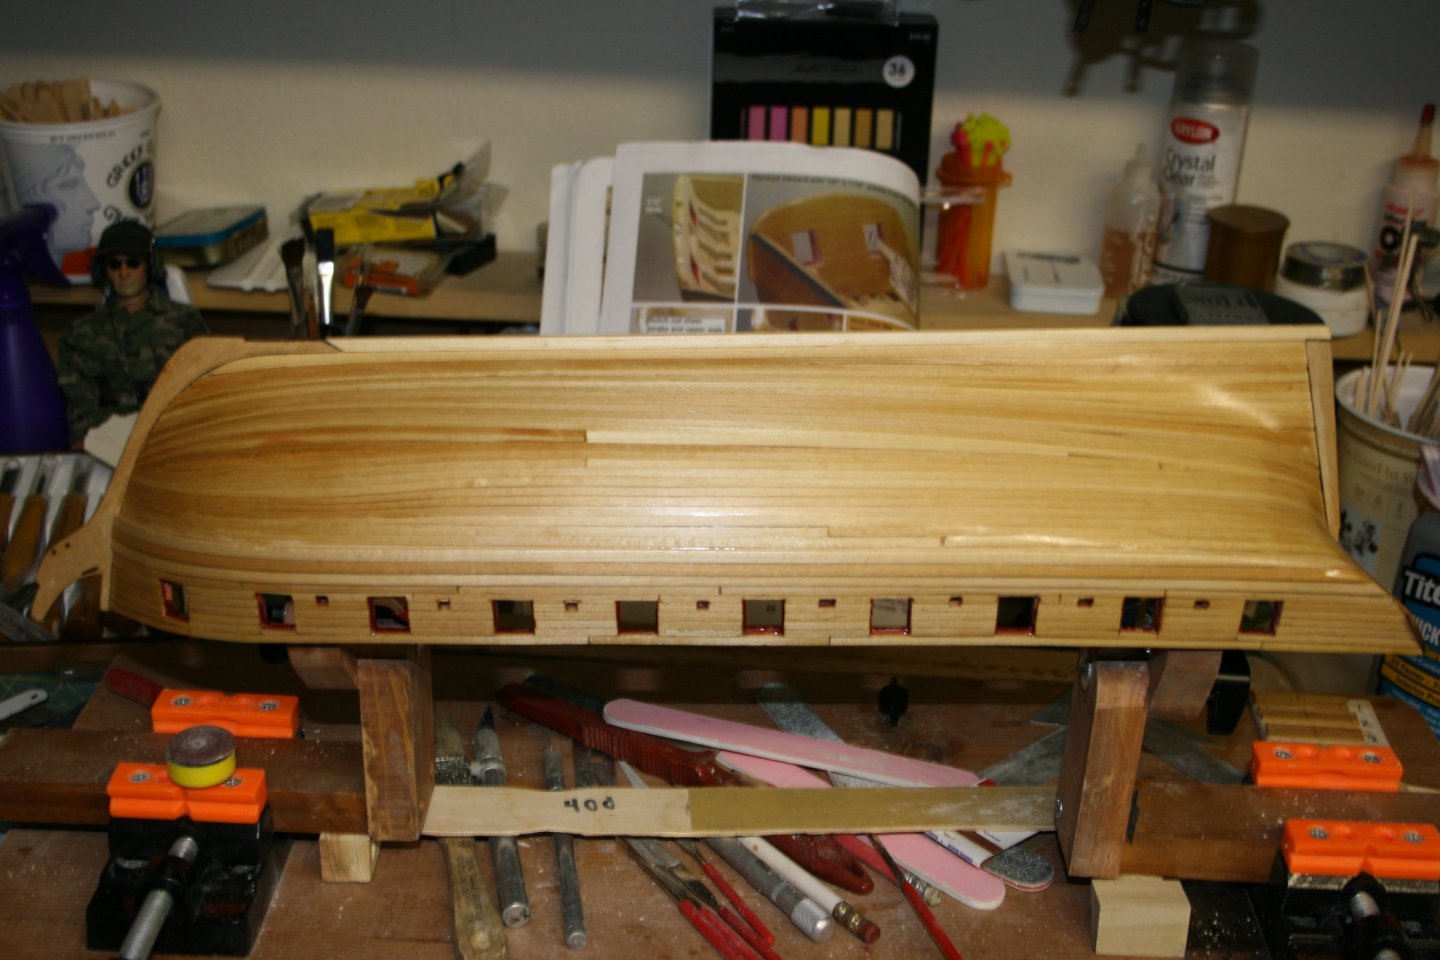
A Little Fill, a Lot of Sanding, and 1 Stern Post: I have finally reached Chapter 6, and have completed the sanding of the hull. It took about 6-8 total hours of hand sanding to get it smooth enough so you are unable to feel any plank edges, and leaving only teeny tiny spaces between some planks. My assumption is that the copper plates will not show any planking edges since the opening is small enough as not to be felt. At least now, I can stop looking at the bottom and begin the deck area. However, before I move on, it is time to either add the tree nails, or not. I am leaning toward adding them, but will test a couple of them on the test planks that I built. I want to see if the tung oil will harden the surface of the planks enough to avoid tearing the wood when drilling the holes for the tree nails. So technically, testing is the next step.


- 436 replies
-
- 4
-
-
- Syren
- Model Shipways
- (and 1 more)
-
AHH, but Will She Float?: My first planked hull ready for a little fill here and there, and sanding, sanding, and sanding.😀 I can tell that planking (correctly) is a skill/art that needs to be learned. I also found out that the planking needs a string line, and maybe more measuring points. I did find out that this is a lot like fixing balsa planes that need repair. You have to learn how to see the pattern on the hull and copy it to the planks and 1/8" widths. However, for the first time through, and still finish sanding left, I think it came out ok. ... I now have a question.... I think I am going to do the tree nails, but before I start drilling, I am considering the finish. After all sanding, and filling is done, I would go ahead and put on 1 coat of Tung Oil. I want to harden the surface a little. I am thinking that tearing of the wood around the hole for the tree nail. could be eliminated, or at least reduced by doing the finish, then drilling? Here are the progress pics:


- 436 replies
-
- 2
-
-
- Syren
- Model Shipways
- (and 1 more)
-
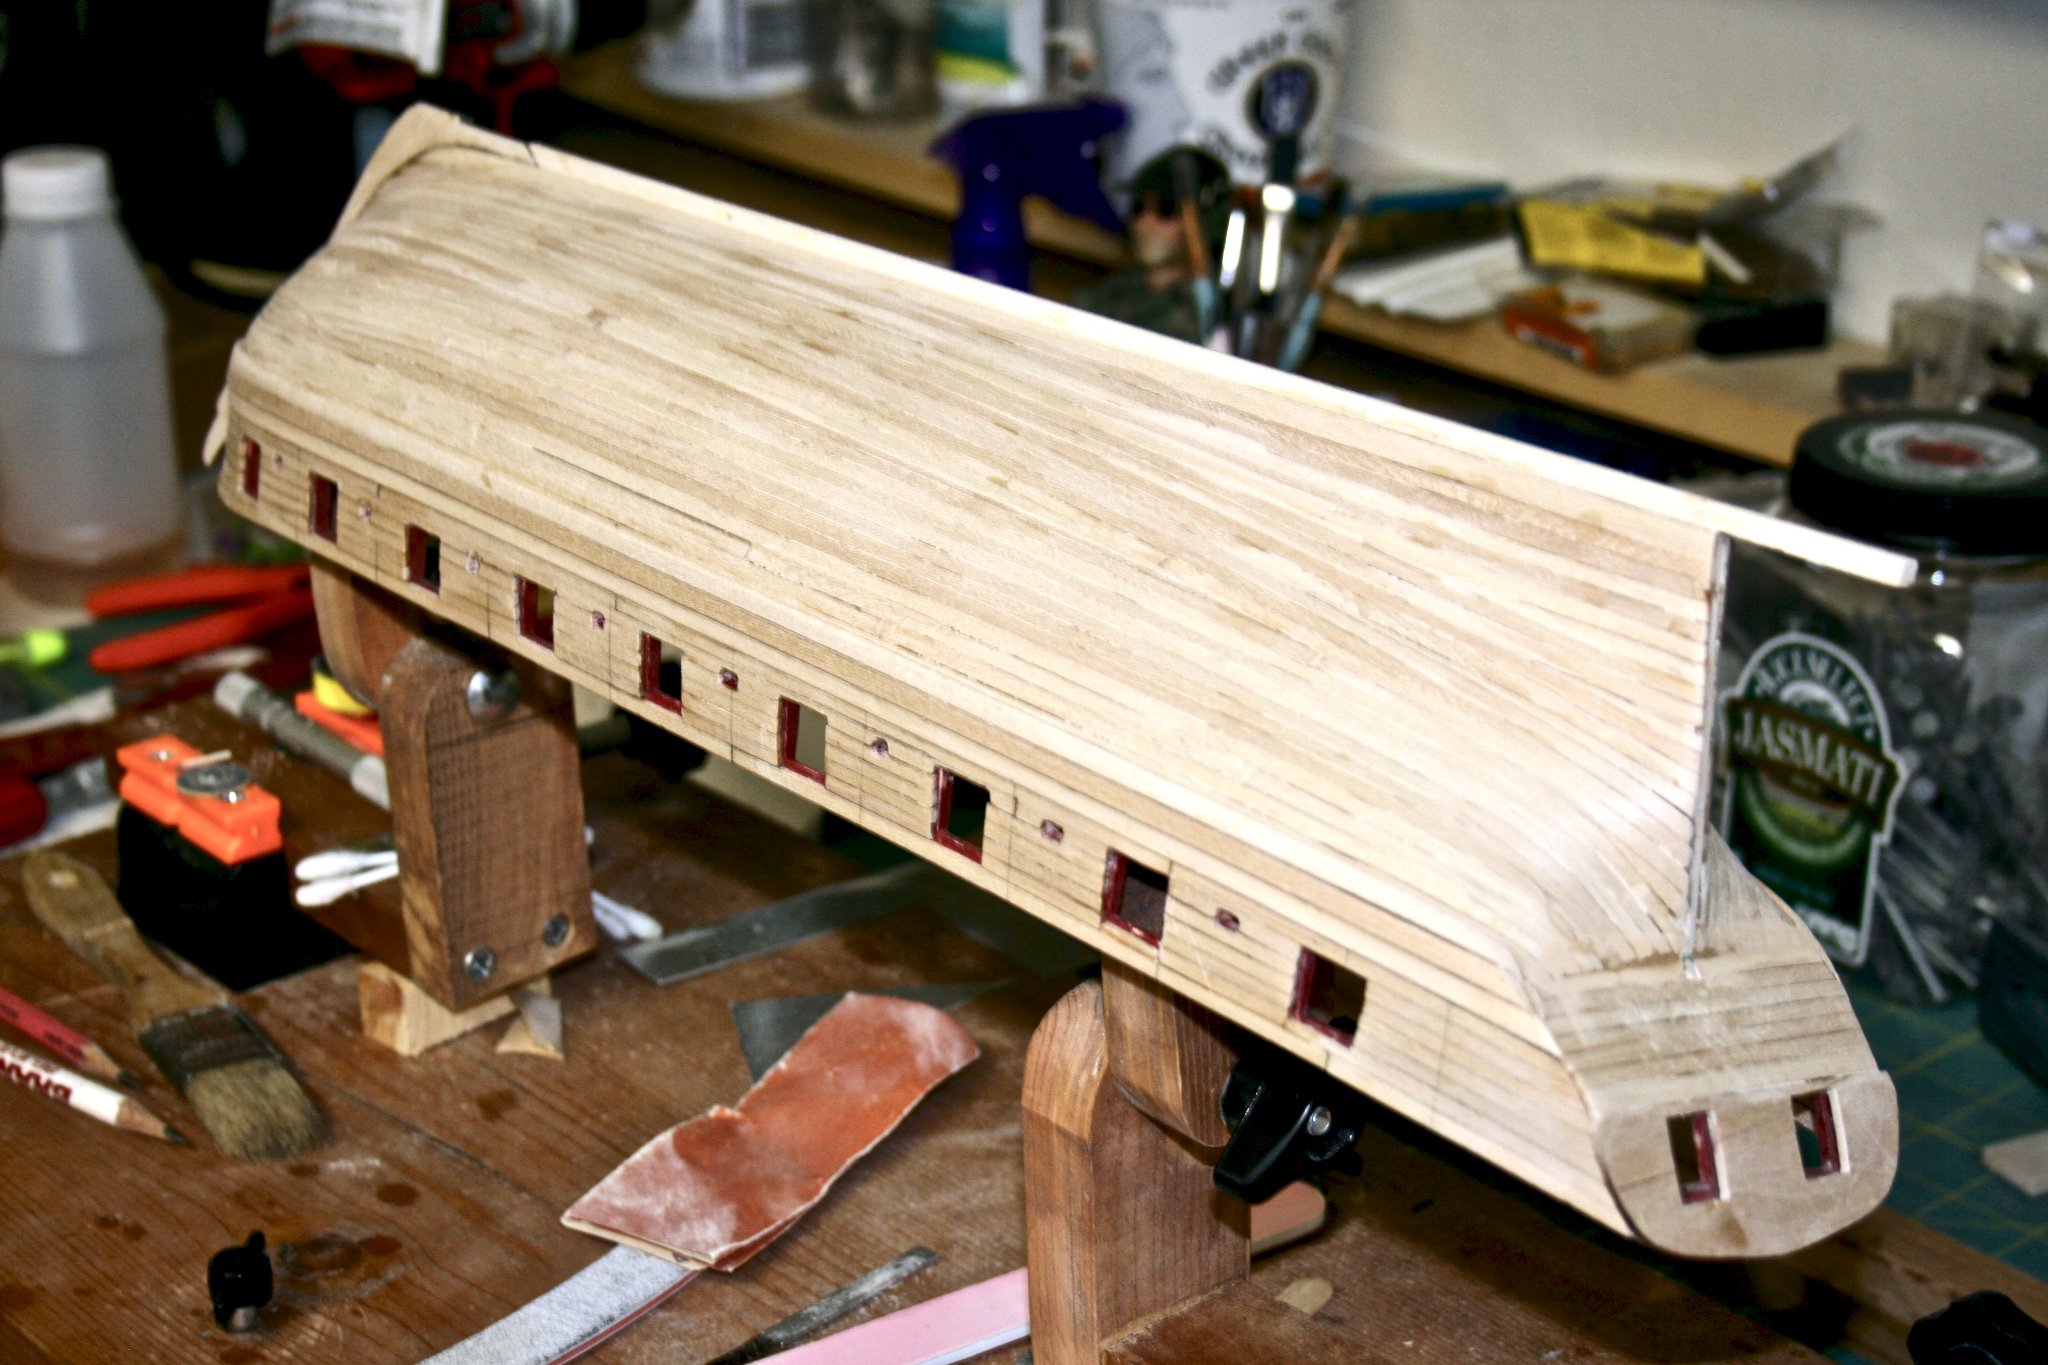
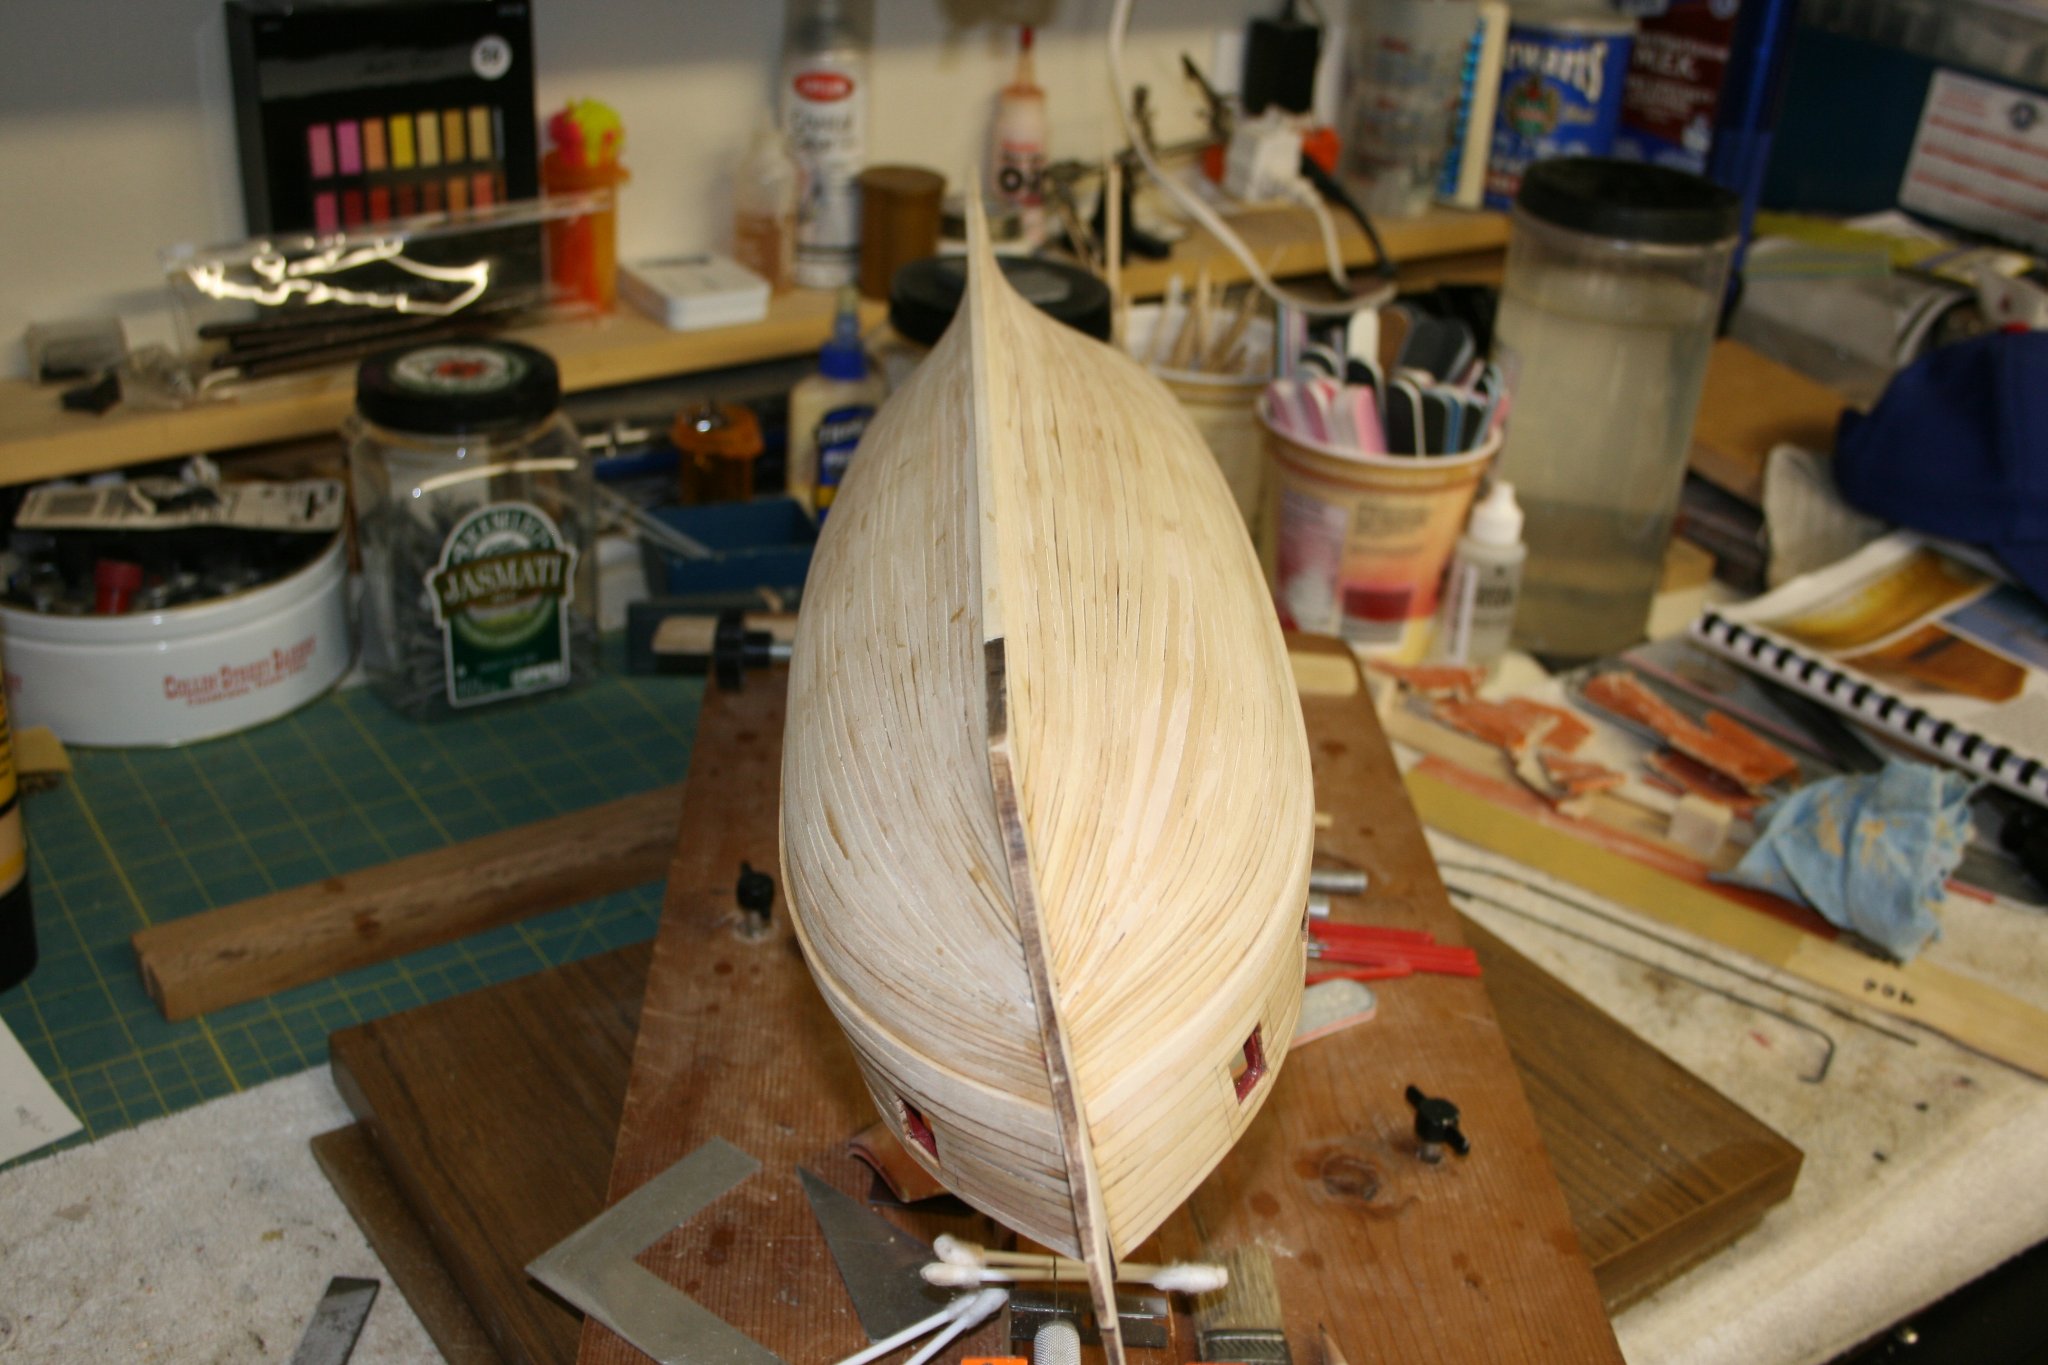
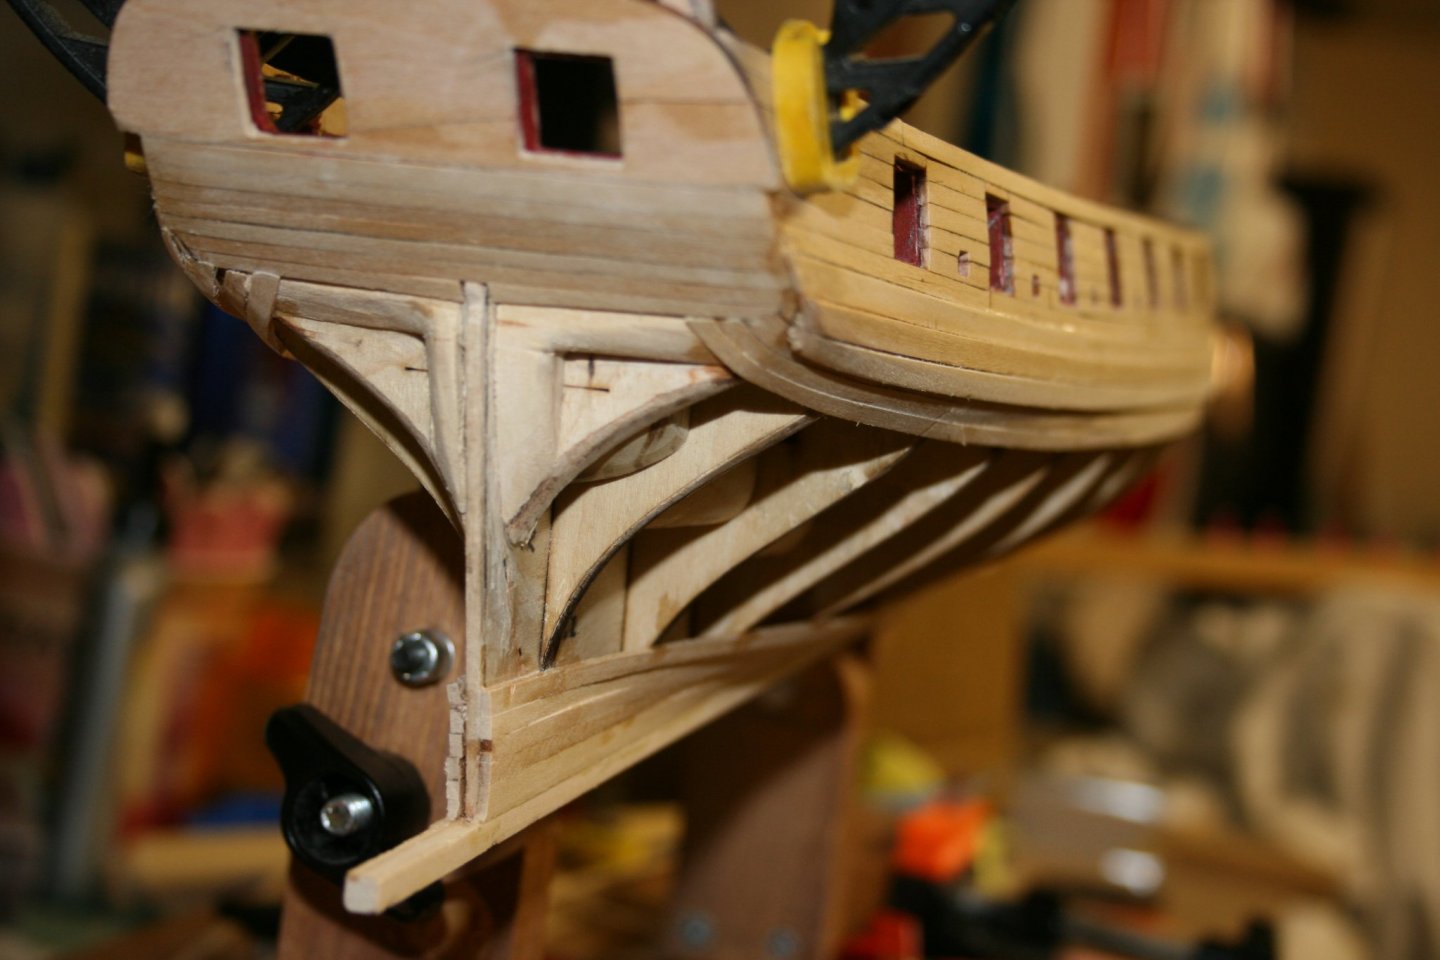
A Planking We Will Go... I have been able to complete planking on the port side with filling and sanding left. The starboard is nearly done as shown. I think I have found, at least, part of the problem with not having enough space ahead of the "N" bulkhead, but from there to the stern, very little adjustments were needed. I got to looking at the garboard and the 2 planks above it. Even though it did not extend beyond the bulkhead, I did not fit it into the rabbet very well. Add the next 2 planks in to the mix and I just didn't get them fit into the rabbet very well. (Lesson Learned) Also learned that basswood snaps like a twig... if not fully wet... 😀

- 436 replies
-
- 5
-
-
- Syren
- Model Shipways
- (and 1 more)
-
Thanks @Overworked724, I was hoping to have it finished before my next update, but have the question about closing it up. I can create at least 1 short (2 to 3) bulkhead fillers. It’s probably not the recommended solution, but once the copper is on, how I fixed it will not be visible.
-
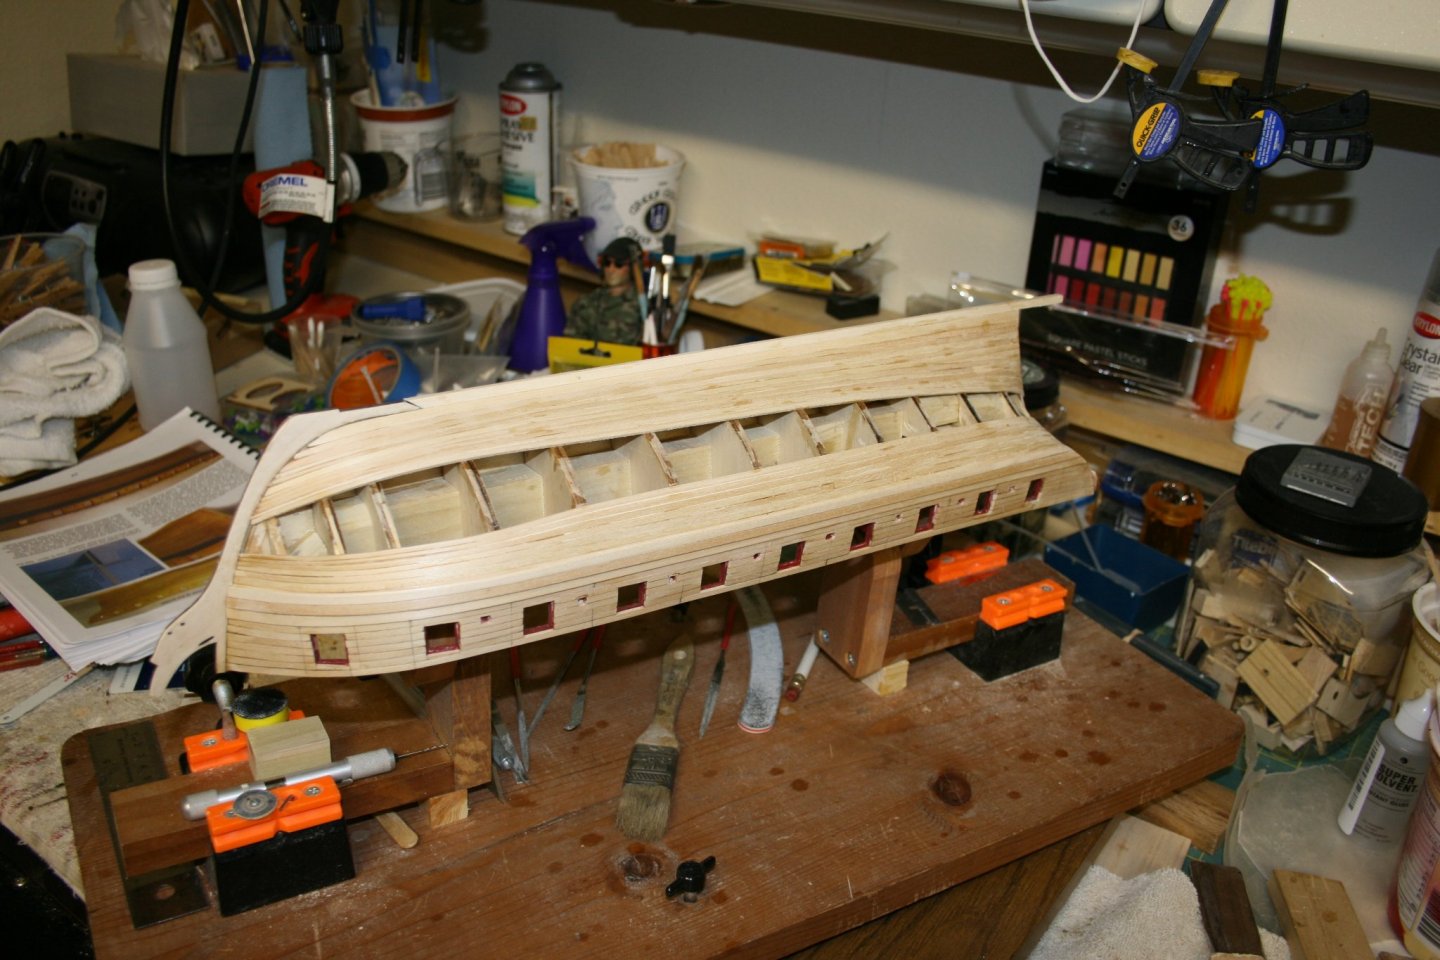
Hey guys, it's been a while since I have posted, but have been quite busy planking. 🤪 I have also come to a point where I found out the value of using lines across the hull at different levels. I have measured the Bow (Bulkhead N), the midship and Stern (Counter and Stern Post) more times than I can count. I refigured after each round of plank adds once I started about 10 planks in on top and bottom of the hull. Here are my latest measurements taken at the same places the instructions have indicated: Bow (Bulkhead N) 5/8" remaining, Midship 5/8" remaining, and you might guess the Stern is also 5/8". However, I have an area between the Mid measure and N where I removed too much material and I have a bulge. It's about 1/8 - 1/4 wider than the other points would indicate. I am planning to place a couple of stealers in the bulge area to "soak" up the extra space. With the hull being completely under the copper plates, it will be unseen. I am just wondering if the fix I have planned is ok, assuming that I will make sure to begin and end on a bulkhead for strength purposes? Next hull, it will be string lines so that I do not fall into this again.
- 436 replies
-
- 2
-
-
- Syren
- Model Shipways
- (and 1 more)
-
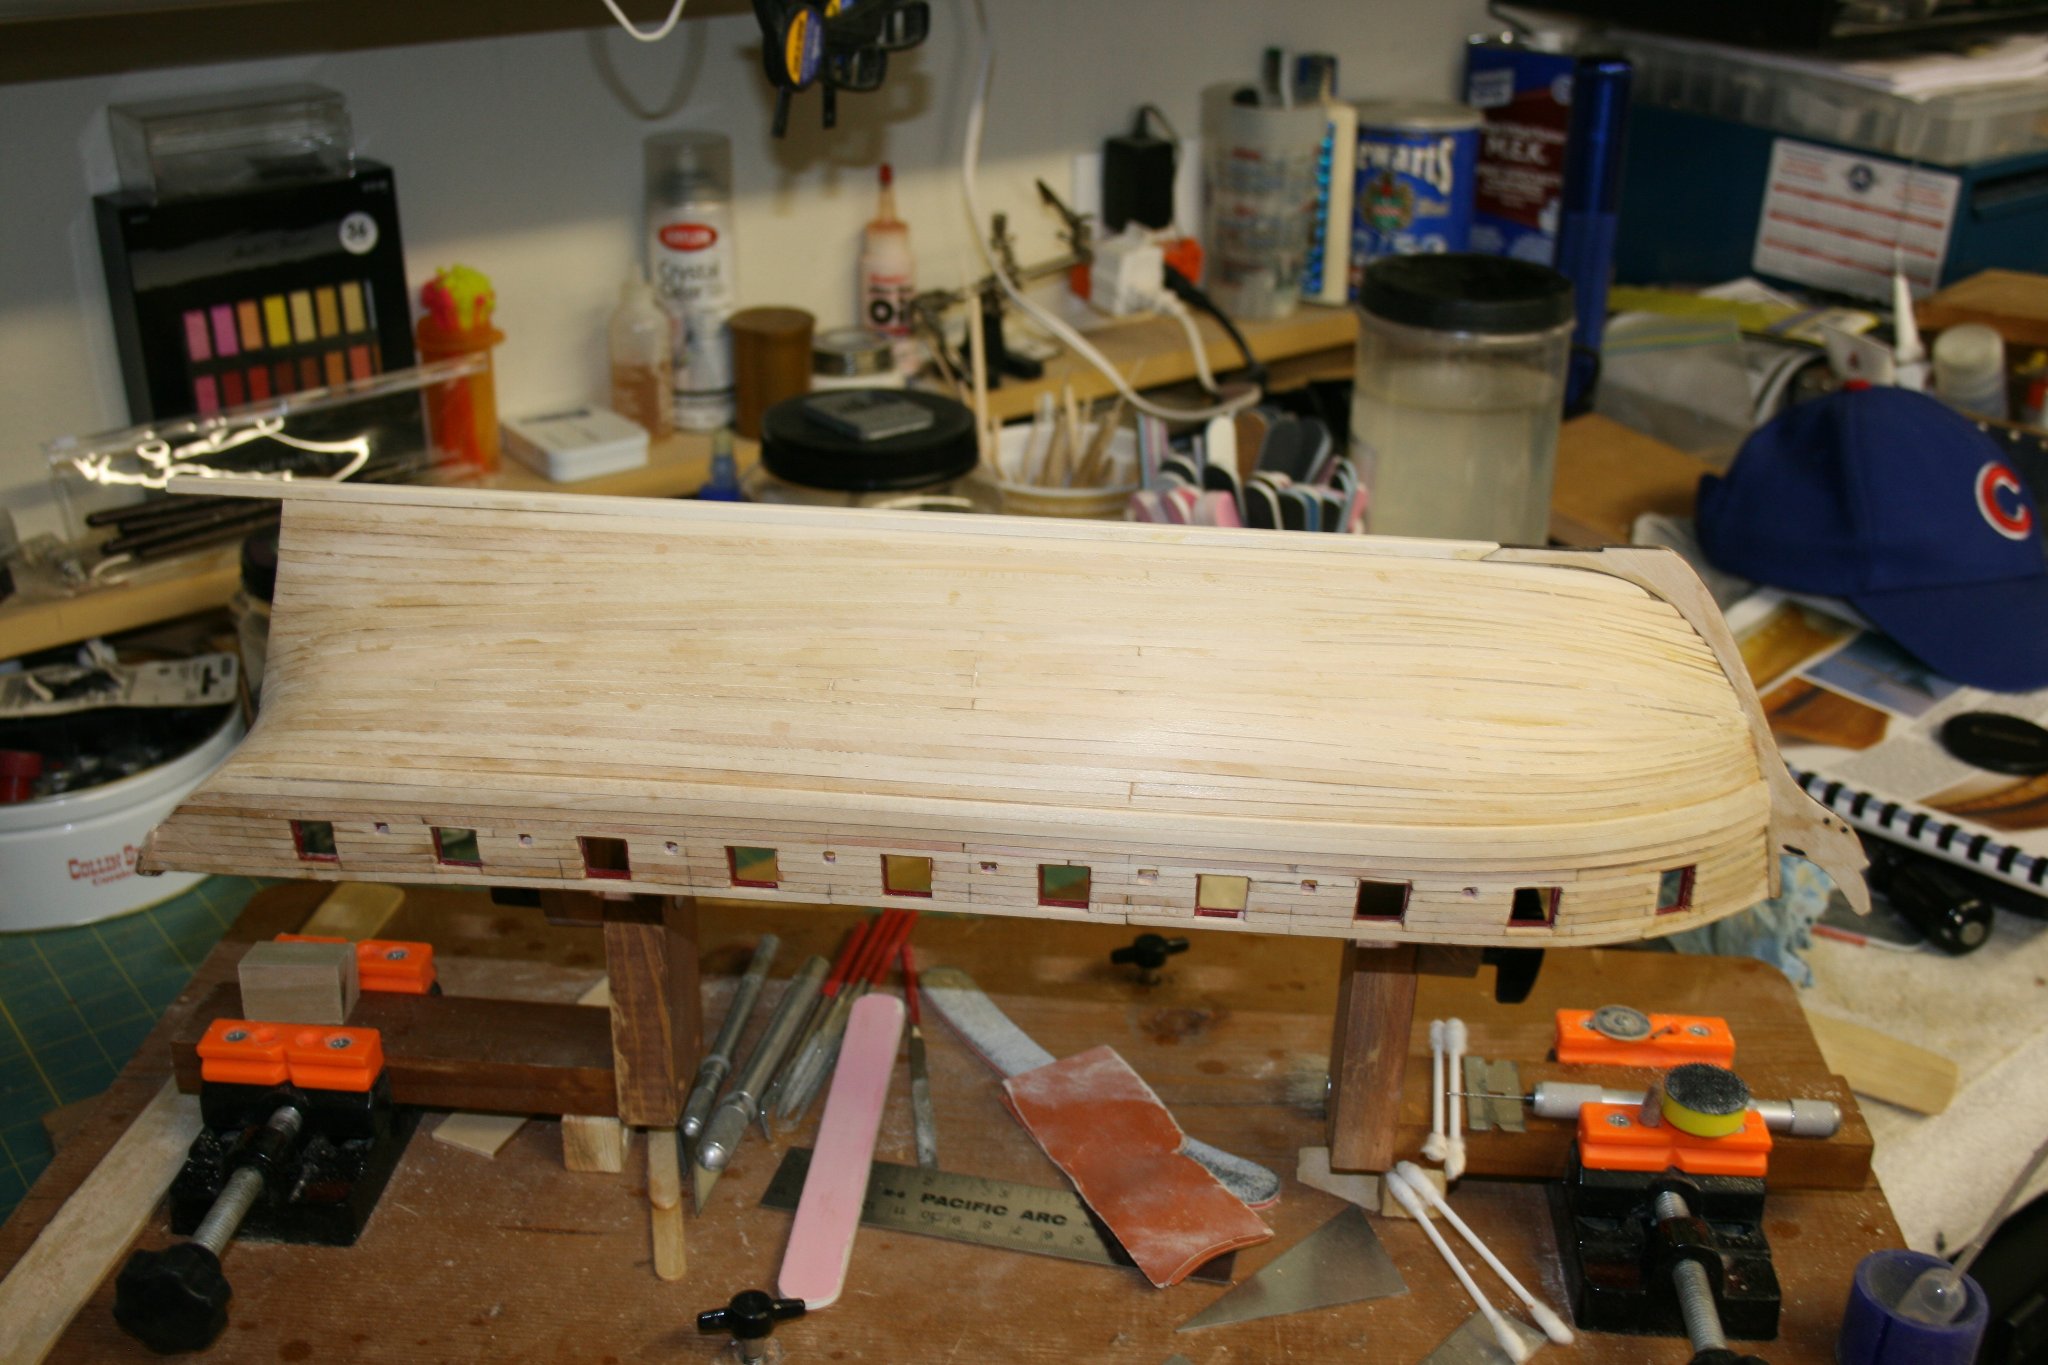
Decisions, Decisions: I remain on the proverbial fence on whether to do the tree nails, or not. In light of this, I have continued to plank the hull, while keeping my options open. I swear, though, I think the space that remains open, grows wider when I am not looking. 😬 I will say, that by doing one side, then switching to the other, allows me to double check the size of each open bulwarks. Even with adding stealers and reducing at the bow, I remain even, both starboard and port. Will post a picture or two when this complete.
- 436 replies
-
- 2
-
-
- Syren
- Model Shipways
- (and 1 more)
-
I am using a pln vise with the smallest bit I have 1/32”. This is even smaller than a t-pin so going smaller is a challenge. Not to count how small the fill, or wood nails would be. I am wondering if once I get everything else on her, they will no longer be a focal point and fade into the background. It’s a lot of drilling if they don’t. 😬
-
The point I am getting to is similar. The instructions indicate a 0.55 drill for the holes, and I even dropped down 1 size. Looking at the scale, it appears like one tree nail would occupy over 1/4 of a single plank. That seems too big for me. I am considering just doing the decking only, but have time to change my mind. BTW: Number 1 has been my choice as well.
- 436 replies
-
- 2
-
-
- Syren
- Model Shipways
- (and 1 more)
-
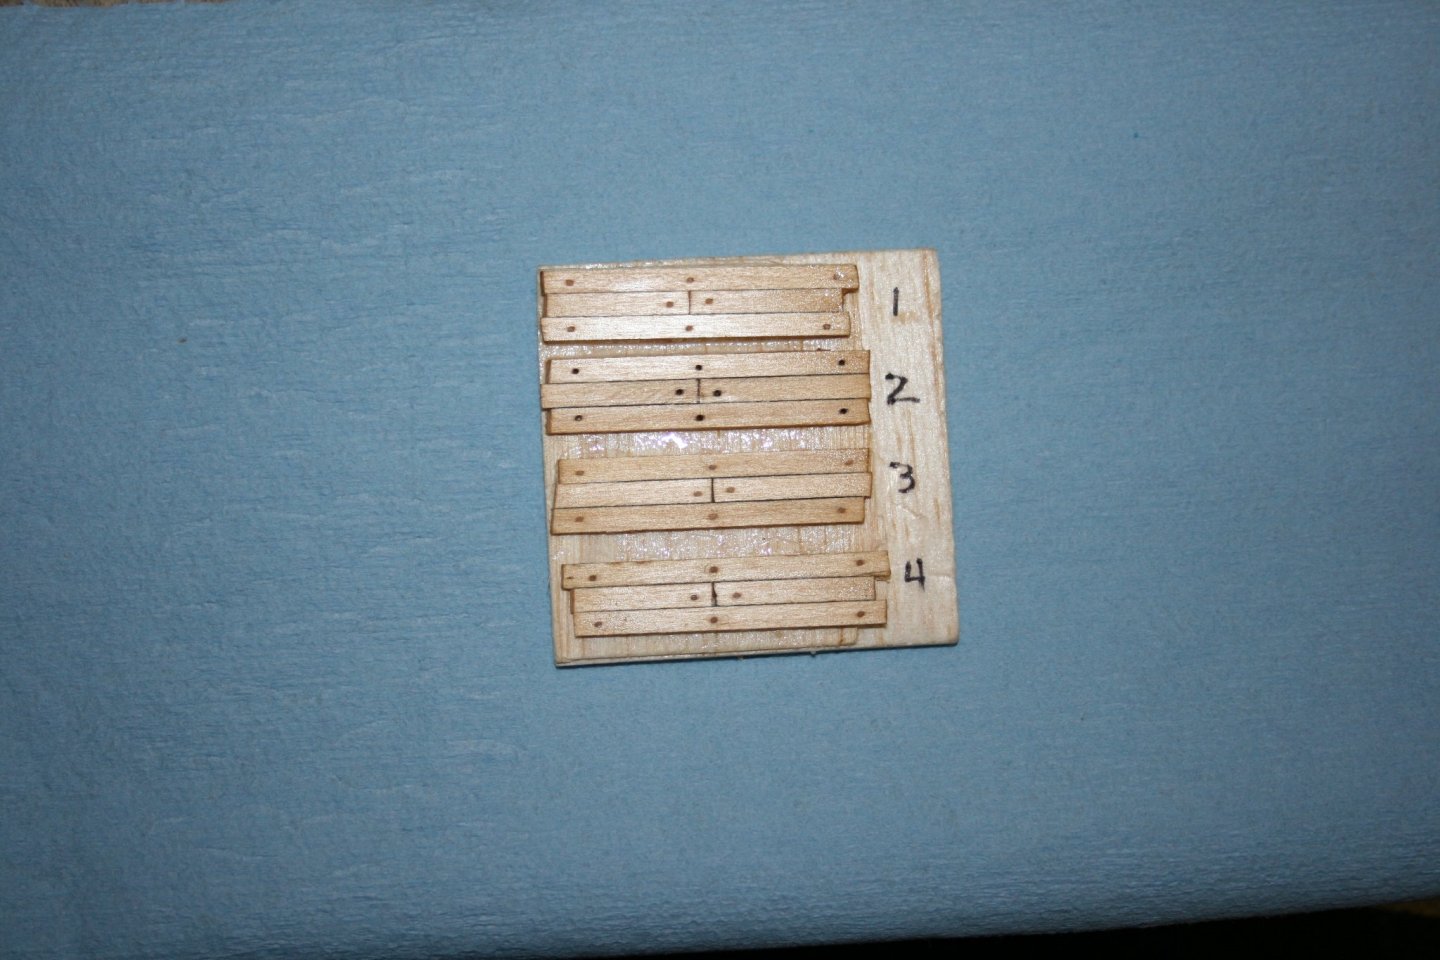
Testing Results: I have completed 4 different examples of tree nail builds shown below. I would be interested in knowing which you think is best? (Funny, in the pictures, they look pretty much the same.) 1. Done using natural wood filler. 2. Using a sharpened pencil to outline the holes. 3. Using the tree nails that I made with the drill press and needle. 4. Using the tree nails from the press, and staining the nails in cherry wood stain. Picture 1 is with 1 coat of tung oil, and picture 2 is with 3 coats of tung oil.

- 436 replies
-
- 3
-
-
- Syren
- Model Shipways
- (and 1 more)
-
Regarding the mini x-y table, I am impressed. For the price, it is worth money, albeit not a heavy duty table. It’s features, and quality are quite surprising for the price. If you are considering it, there is an unboxing video on you tube that sums it up better than I could. I do, however, consider it to be a light duty tool.
- 436 replies
-
- 1
-
-
- Syren
- Model Shipways
- (and 1 more)
-
@Justin P. Not sure which bits you are asking about. If it is the wood type for the tree nails, I just grabbed a piece of wood I had on hand. Just let me know and I will be happy to respond...just haven’t had my coffee yet.. ☕️
-
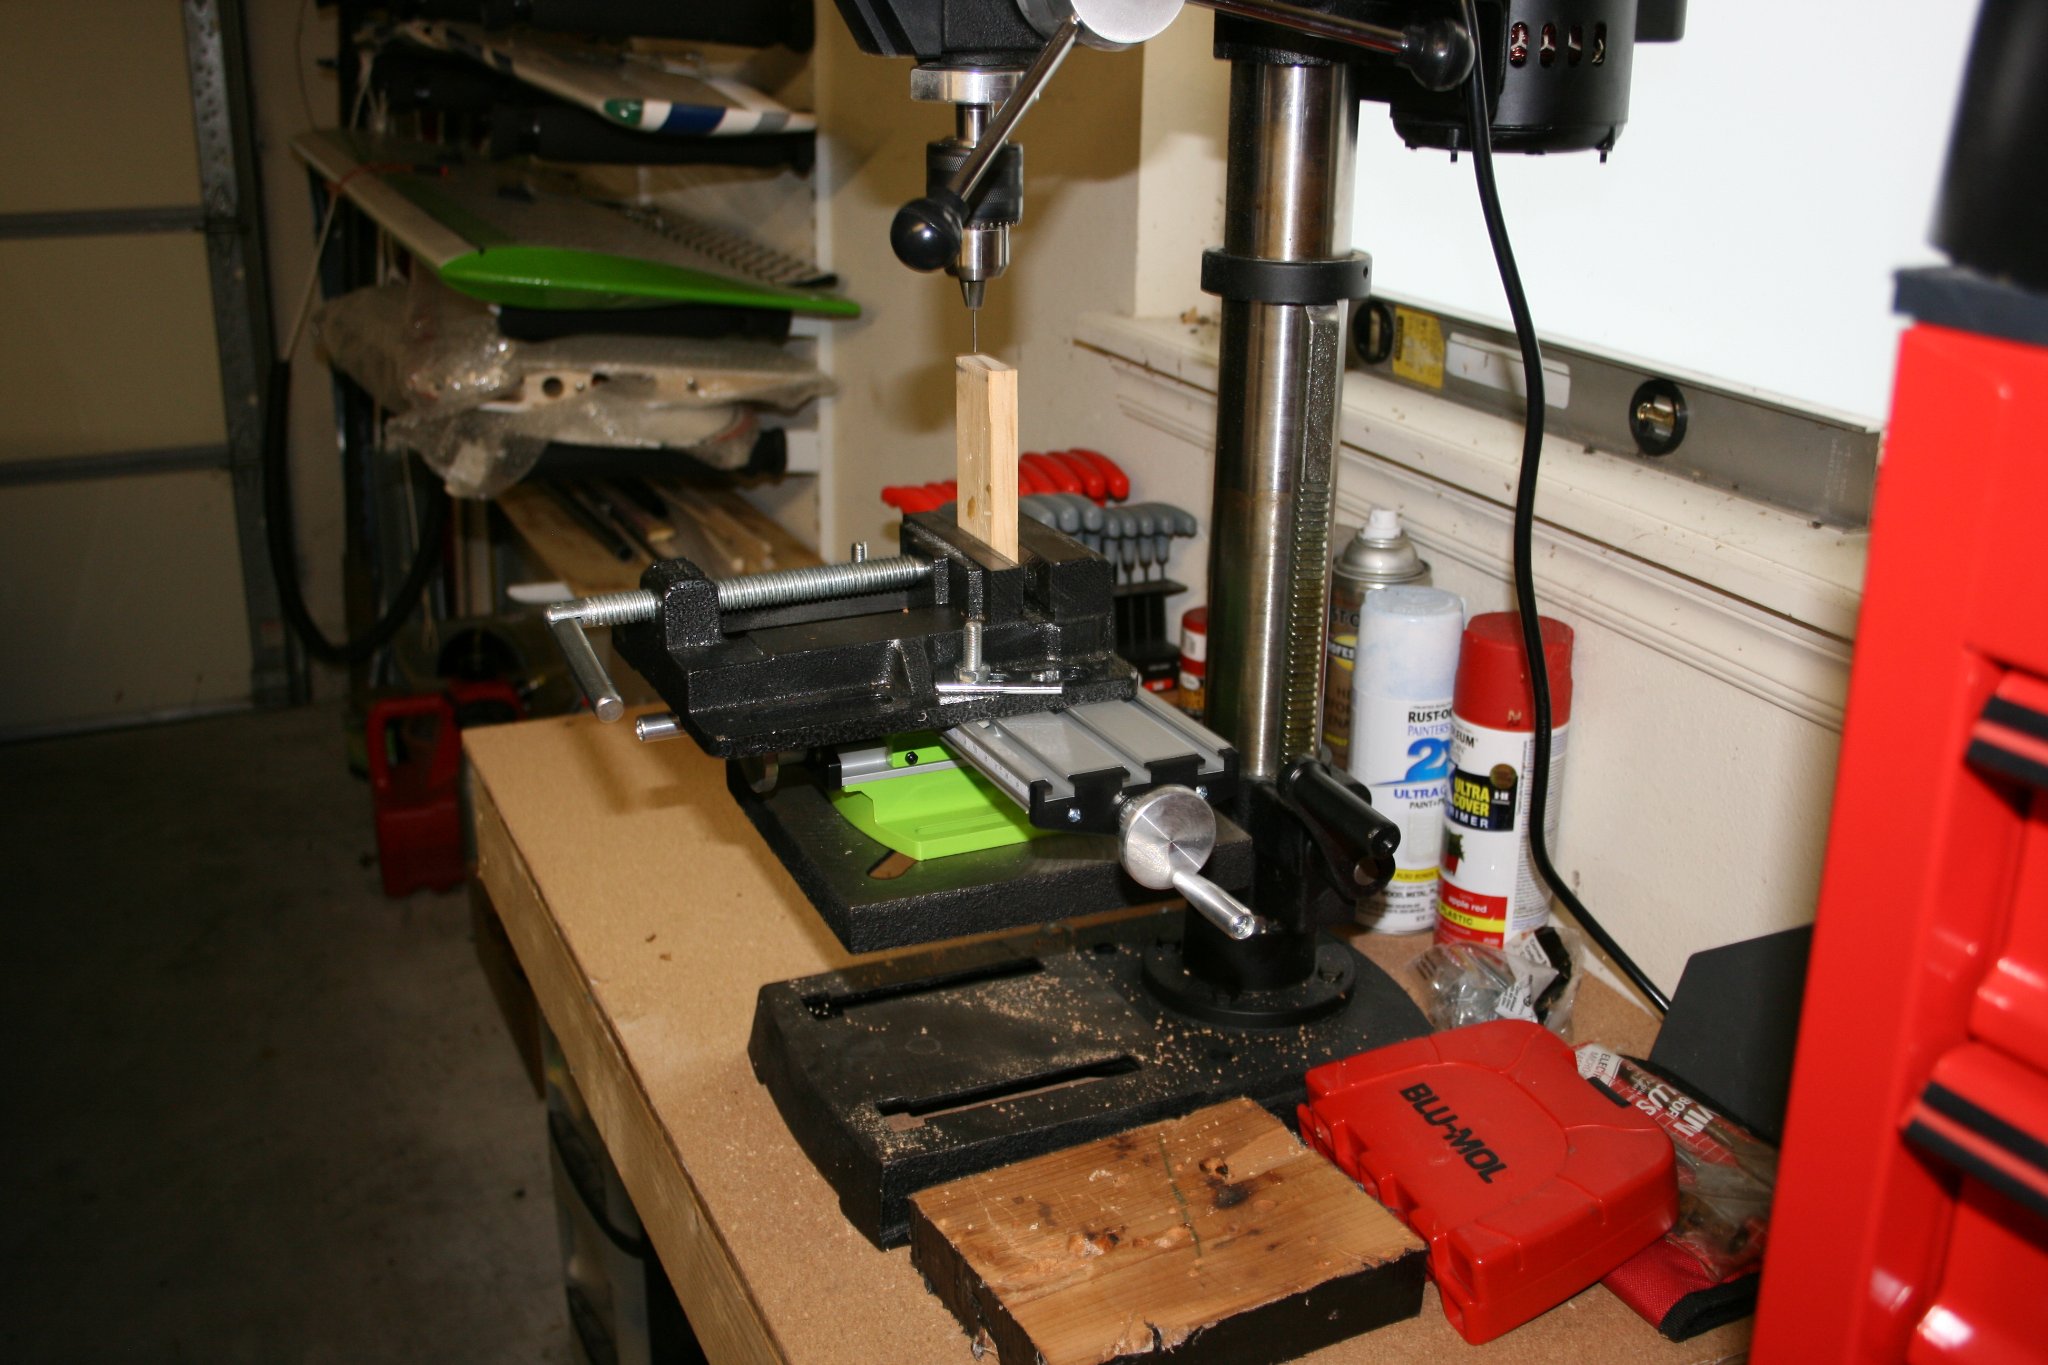
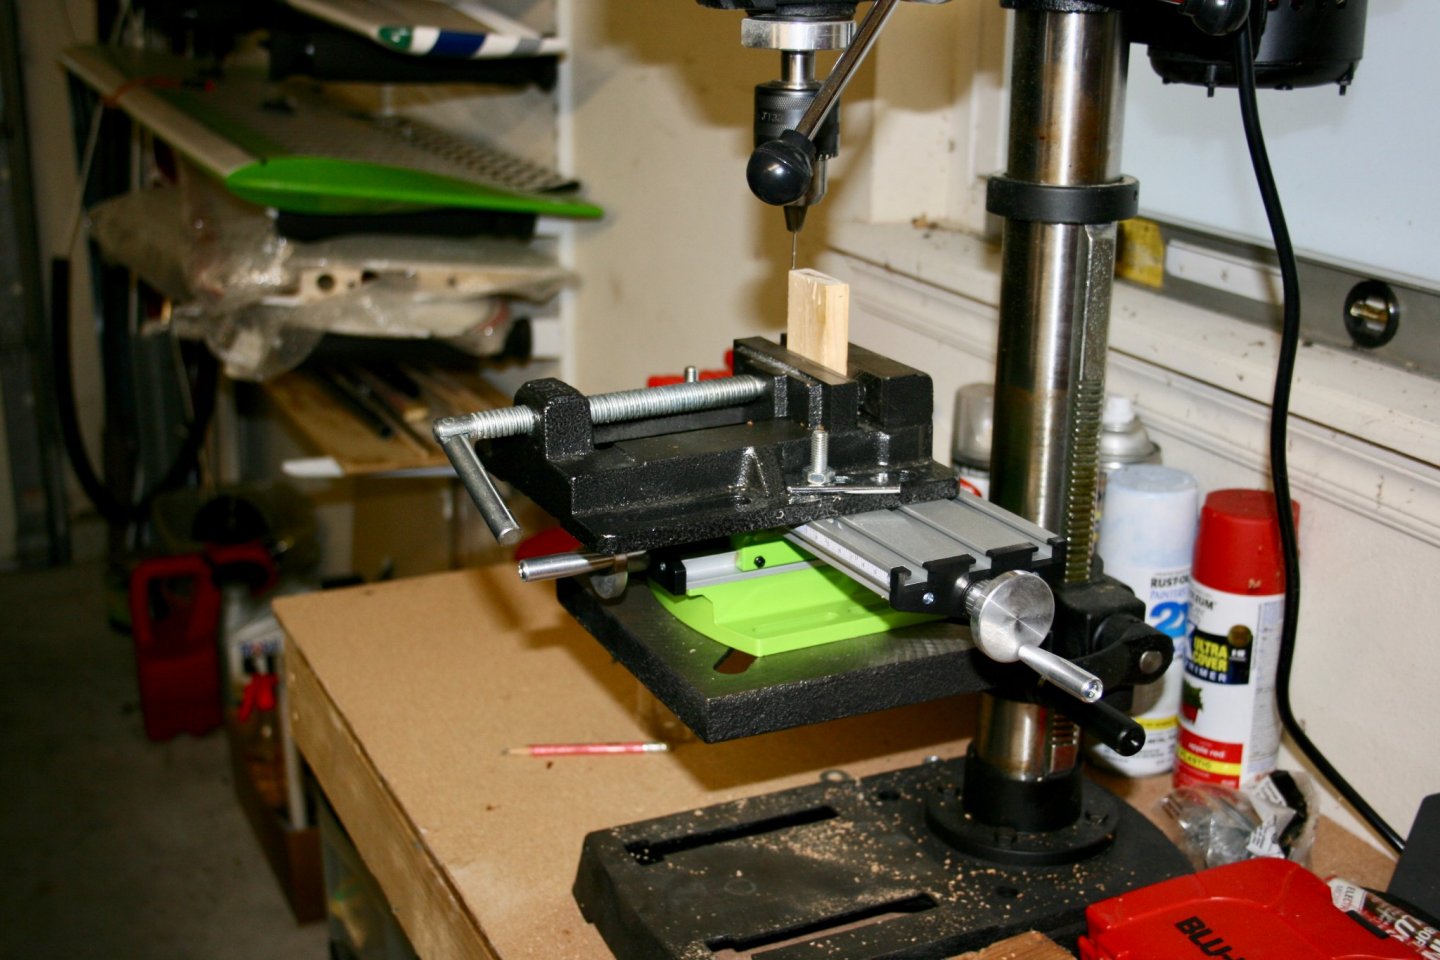
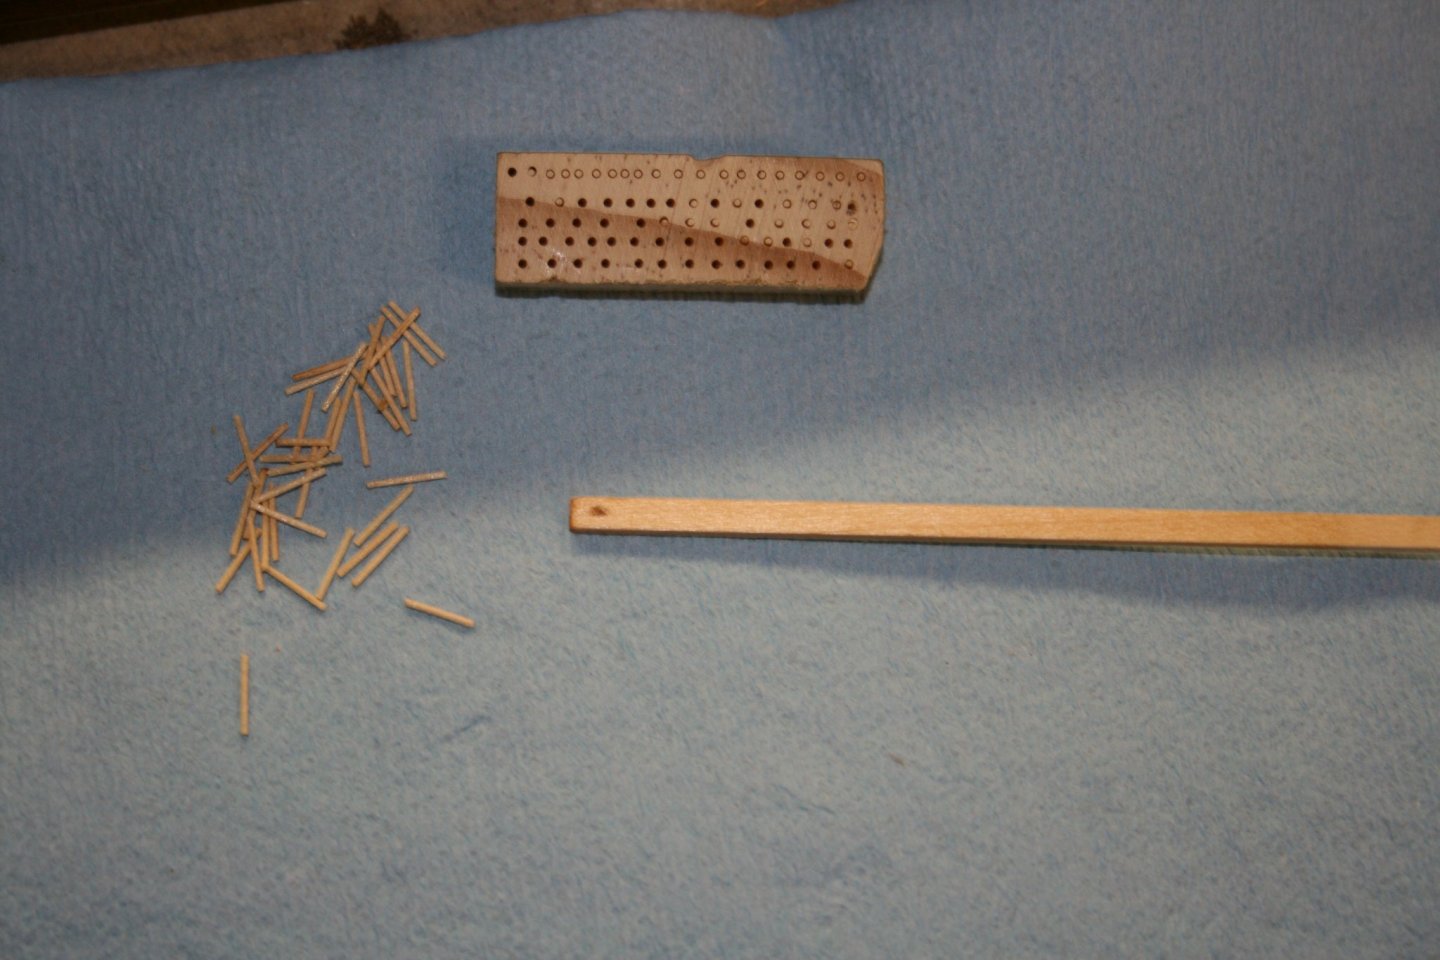
Makin' Nails in the Rain..... Its gotta be a song. 😀 @Overworked724@WalrusGuy@Justin P. Well, I got the chance to make nails today. It's crappy weather, COVID, and College Football affecting my day. This morning, the mini x-y table, and the 20 ga needles arrived and i went to work. Setting up the press, sanding the needle for a clean cut, and mounting it in the press. You can see that making the nails, once the equipment is ready, is quite easy. And I was able to insert the nail in the hole drilled into the plank, glue it in, cut and sand it as well. The pictures pretty much tell the story. I am going to do testing as that first drilled hole, with the tung oil, does pop out, but the hole is somewhat rough on the edges. I think it is from the pin vise drill and the low speed I had with the bit by only hand drilling it. In my testing, I will use the dremel for drilling. I have the flexible extension, so I won't have to use the motor end. However, I am looking at some of the micro engravers, like Overworked used.

- 436 replies
-
- 4
-
-
- Syren
- Model Shipways
- (and 1 more)
-
Thanks For the thoughts Overworked, it is appreciated that I can be of help even as a newbie. And it is good to know others as yourself are quick to assist me when I have questions. I know what you are saying about the COVID issue, I still have a hard time understanding why someone laying in a hospital bed still can’t believe it’s what they have. My brother-in-law and my aunt are still on the road to recovery. With our new grandson we are remaining pretty much quarantined so we can visit again. Good luck and stay healthy.
-
Instructions Question: It says in the printed instructions that the waterline is marked in the plan. I have been looking, but I want to make sure I am looking at the right place. On Plan 1, there are dotted lines at the bow and the stern that appear to mark the end points. Is that the plan #, and the correct indicators?
-
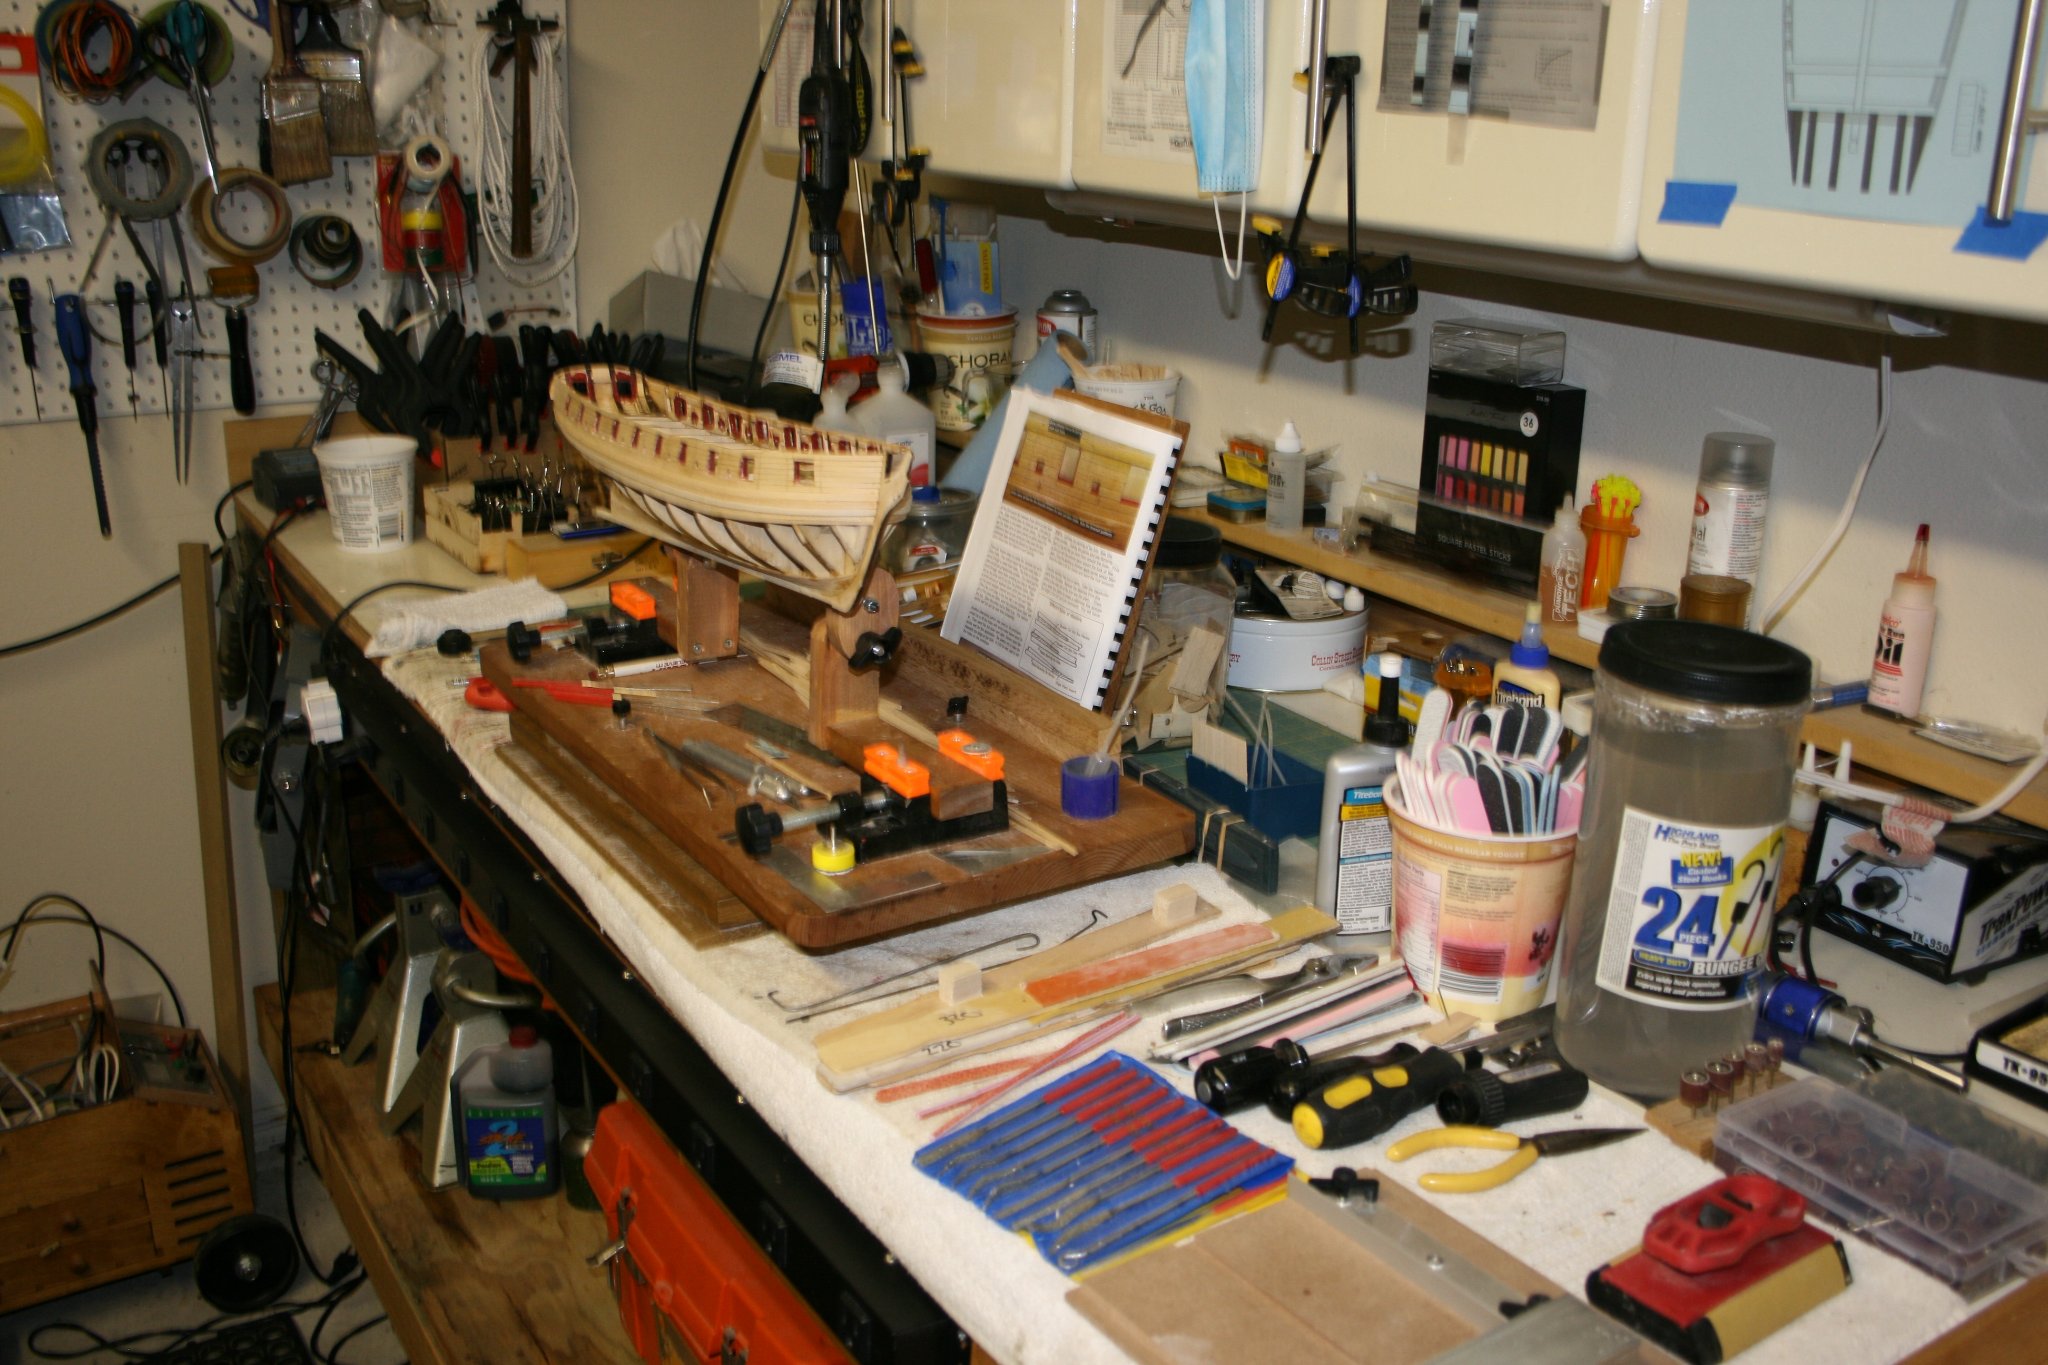
In Every Build: There comes a time when "everything in its place" isn't. 😀 Usually when I get to a convenient pause in building activity, I take my mess and organize it back to where I started. Over time, files, sanding boards, pencils, and just everything in general get tossed out of the way. I might be holding a part, trying to balance something, or similar, and I just put the tool down where there is a spot. Sooooo..... today is that day. The x-y table and 20 ga needles will be here tomorrow, or Monday. So I am taking a breather and took the time to straighten out my bench. It still looks like a mess, but it is an organized one and I know where things are. 😃 Building to resume with tree nails when I have the stuff to do them.

- 436 replies
-
- 2
-
-
- Syren
- Model Shipways
- (and 1 more)
-
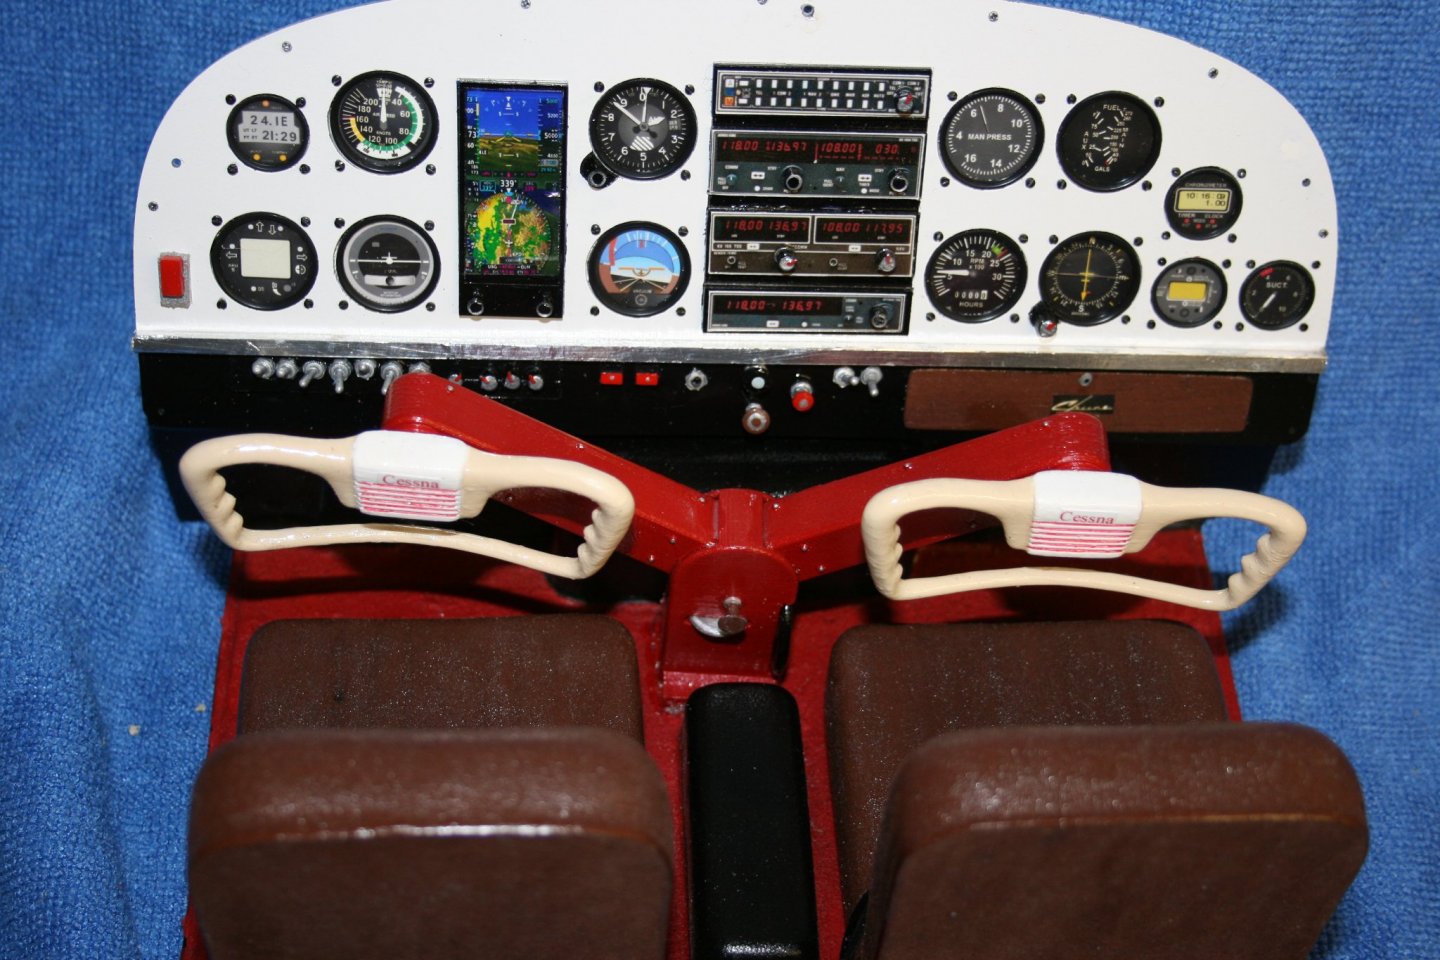
Thanks for the compliment, and the tape idea. What I am going to need to test thoroughly, is the placement of the tree nails in the holes. I am pretty sure I will be able to do it. In the picture that I posted, you can see the small screws that are holding the instruments in. Each one had to be glued in separately.
- 436 replies
-
- 1
-
-
- Syren
- Model Shipways
- (and 1 more)
-
Thanks @Overworked724 I am itching to get some Tung oil on this, but I gotta test the nails first. What I have to do is see if I can drill, fill, or add a tree nail before I move on. I have to see if my vision and hand eye coordination is still there for the detail stuff. Here is a picture of my latest detail work in the red and white plane I showed earlier. I can’t take credit for the dials, but it all came in a kit and the faces had to be cut from a sheet of dials. I used a T pin to puncture the outer rims, multiple times. (Will add a pic when I get to the right media.). ......LOL made it.
- 436 replies
-
- 2
-
-
- Syren
- Model Shipways
- (and 1 more)
-
A Waling We Will Go: I have added both the port and starboard wales and have done some minor sanding clean up I have not installed the hull strake as I have yet to decide if I am going with tree nails or not. If I go ahead with the tree nailing, I do not want to have this in the way while trying to clip and sand the tree nails. The more I look at the width of the planks (1/8"), I am wondering if I should pursue it. Something that I did was to run the pencil for the caulking along the corner of each plank, rather than fully across the width. What that means is that in some planks, you can sand through the pencil line and it starts to disappear. Maybe the tung oil will bring it back out, but won't know till I apply it. Otherwise, it is cleaning up pretty well 😀

- 436 replies
-
- 3
-
-
- Syren
- Model Shipways
- (and 1 more)
-
I have multiple pin vises, and sets of mini drill bits. And a jewelers visor with 4 different magnifications for close in work. I do agree that testing is a must. I plan on a Tung oil finish and by using some of the different wood I have. I need to test as much for final outcome of the finish as much as anything. And I still need a tiny tiny hammer. 😂 i am not touching the model until I know I can do it.
- 436 replies
-
- 1
-
-
- Syren
- Model Shipways
- (and 1 more)