Redshadowrider
-
Posts
301 -
Joined
-
Last visited
Content Type
Profiles
Forums
Gallery
Events
Everything posted by Redshadowrider
-
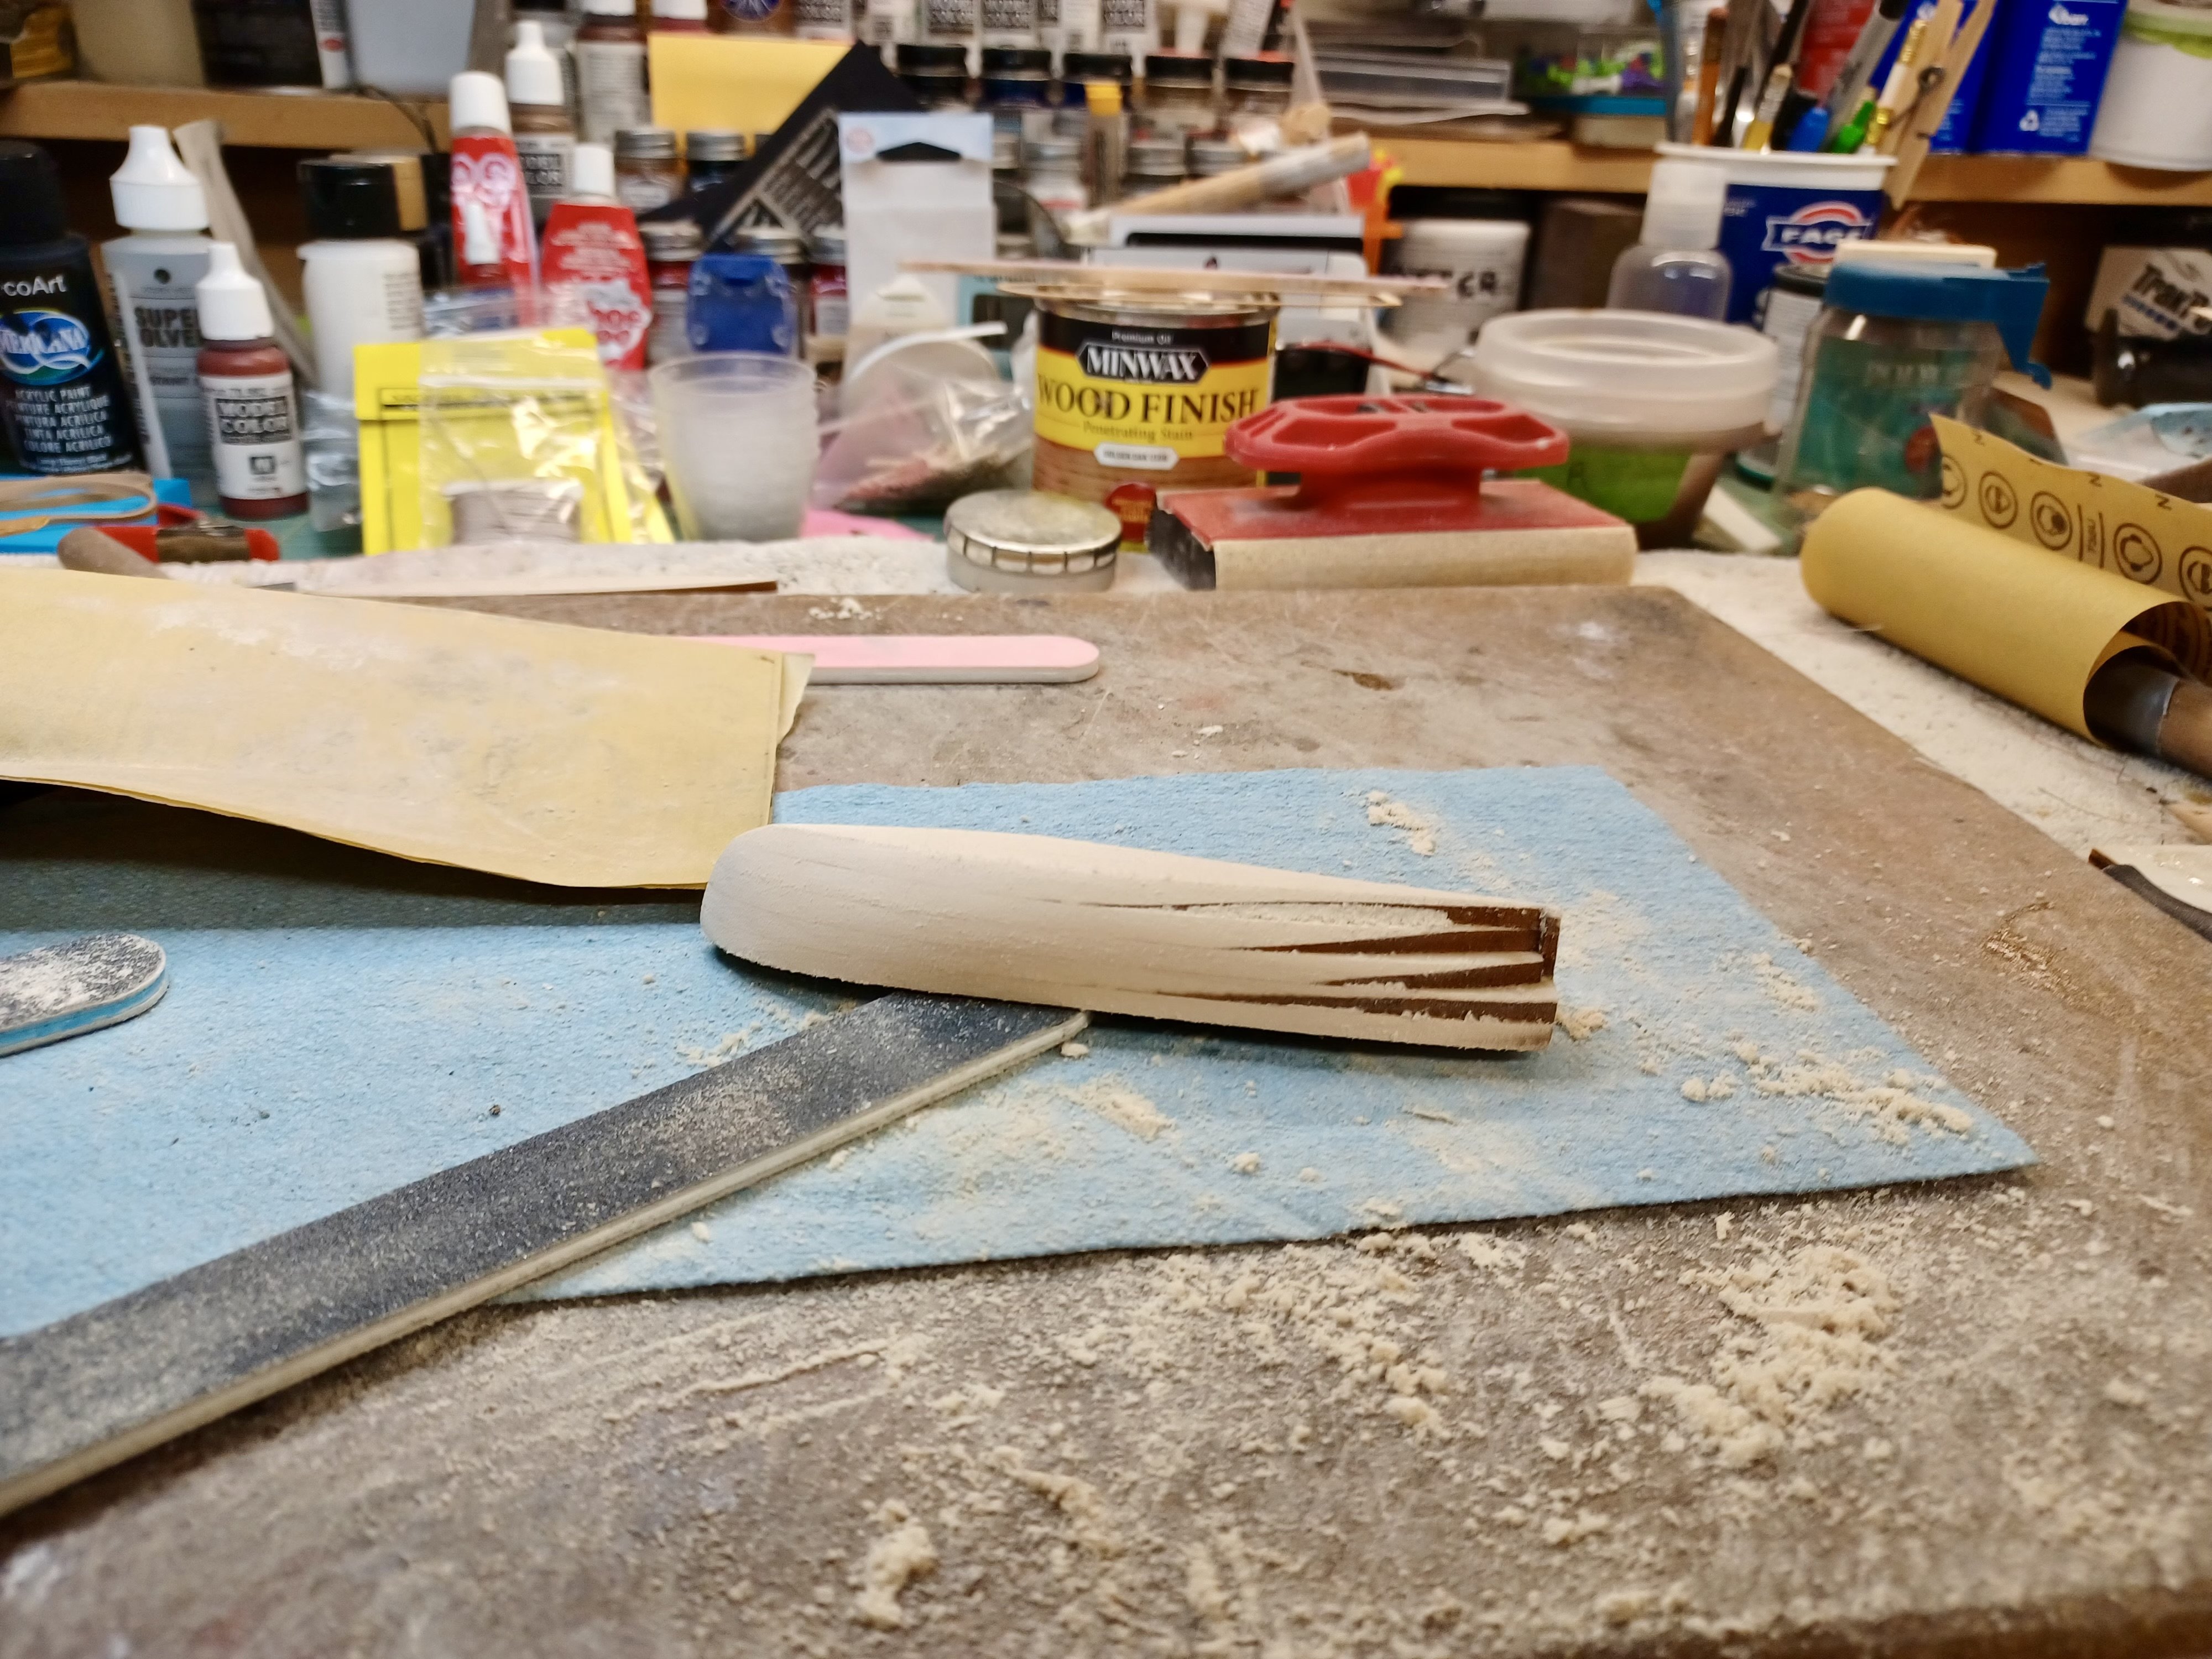
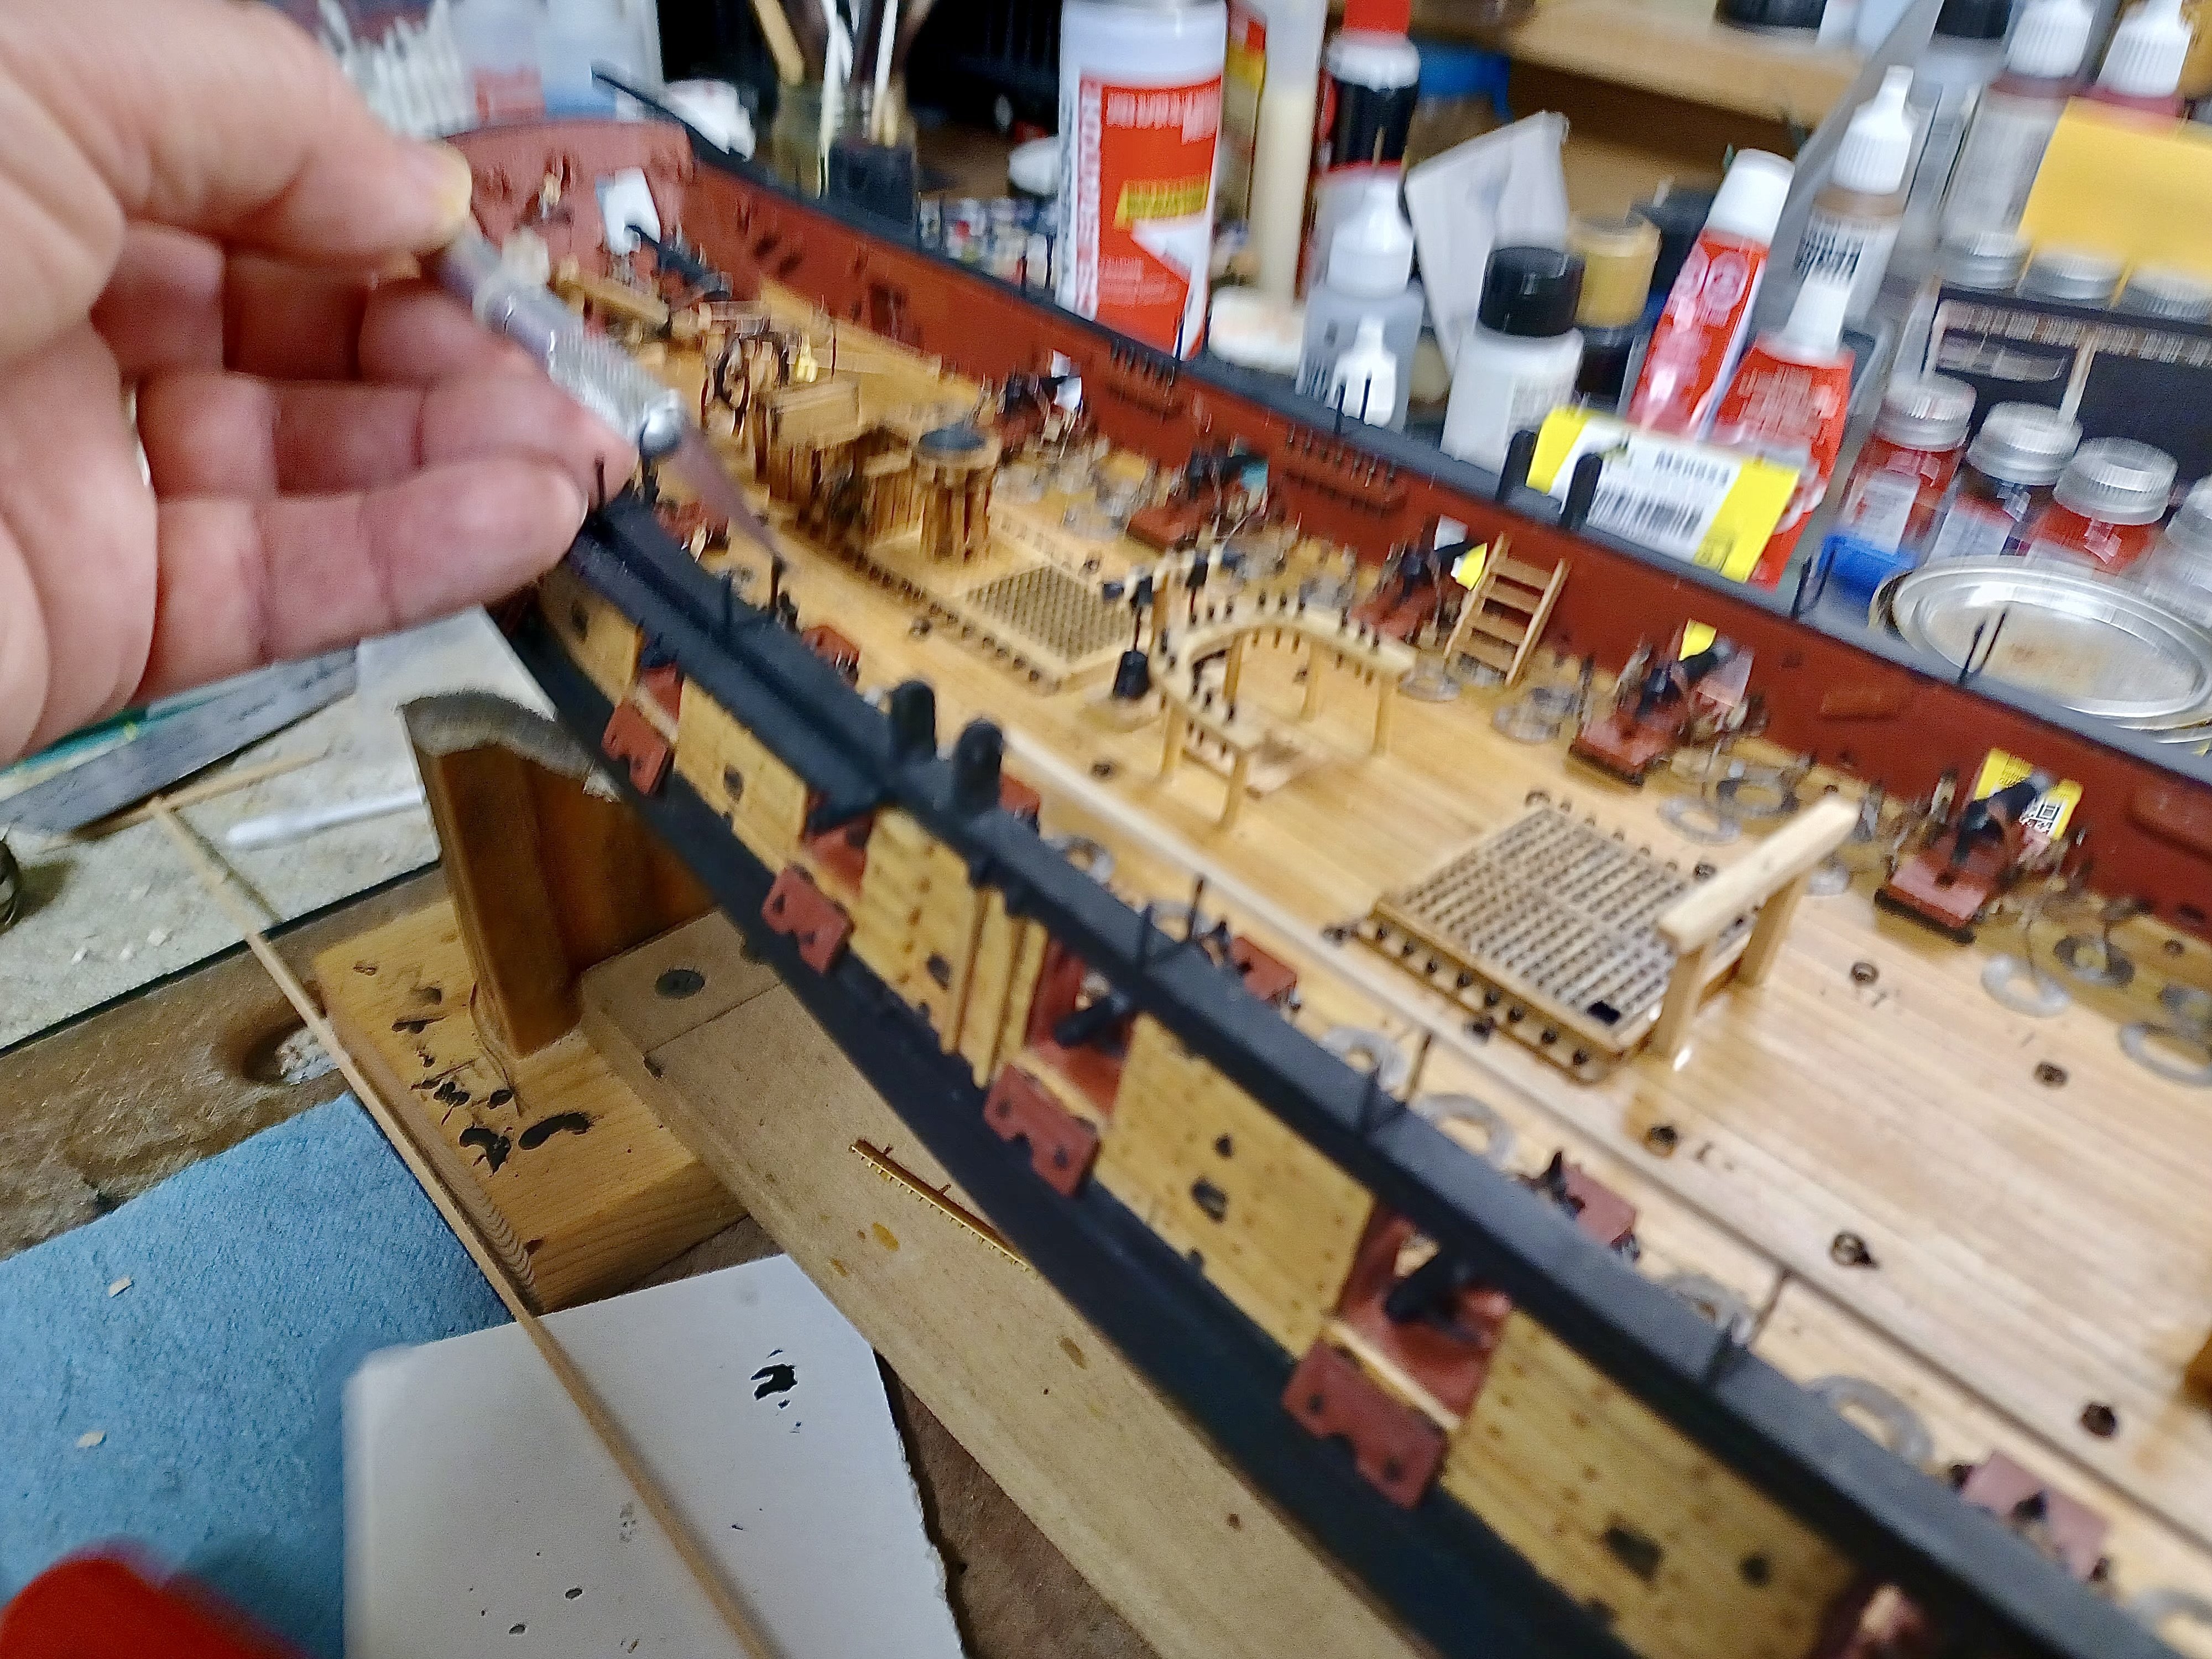
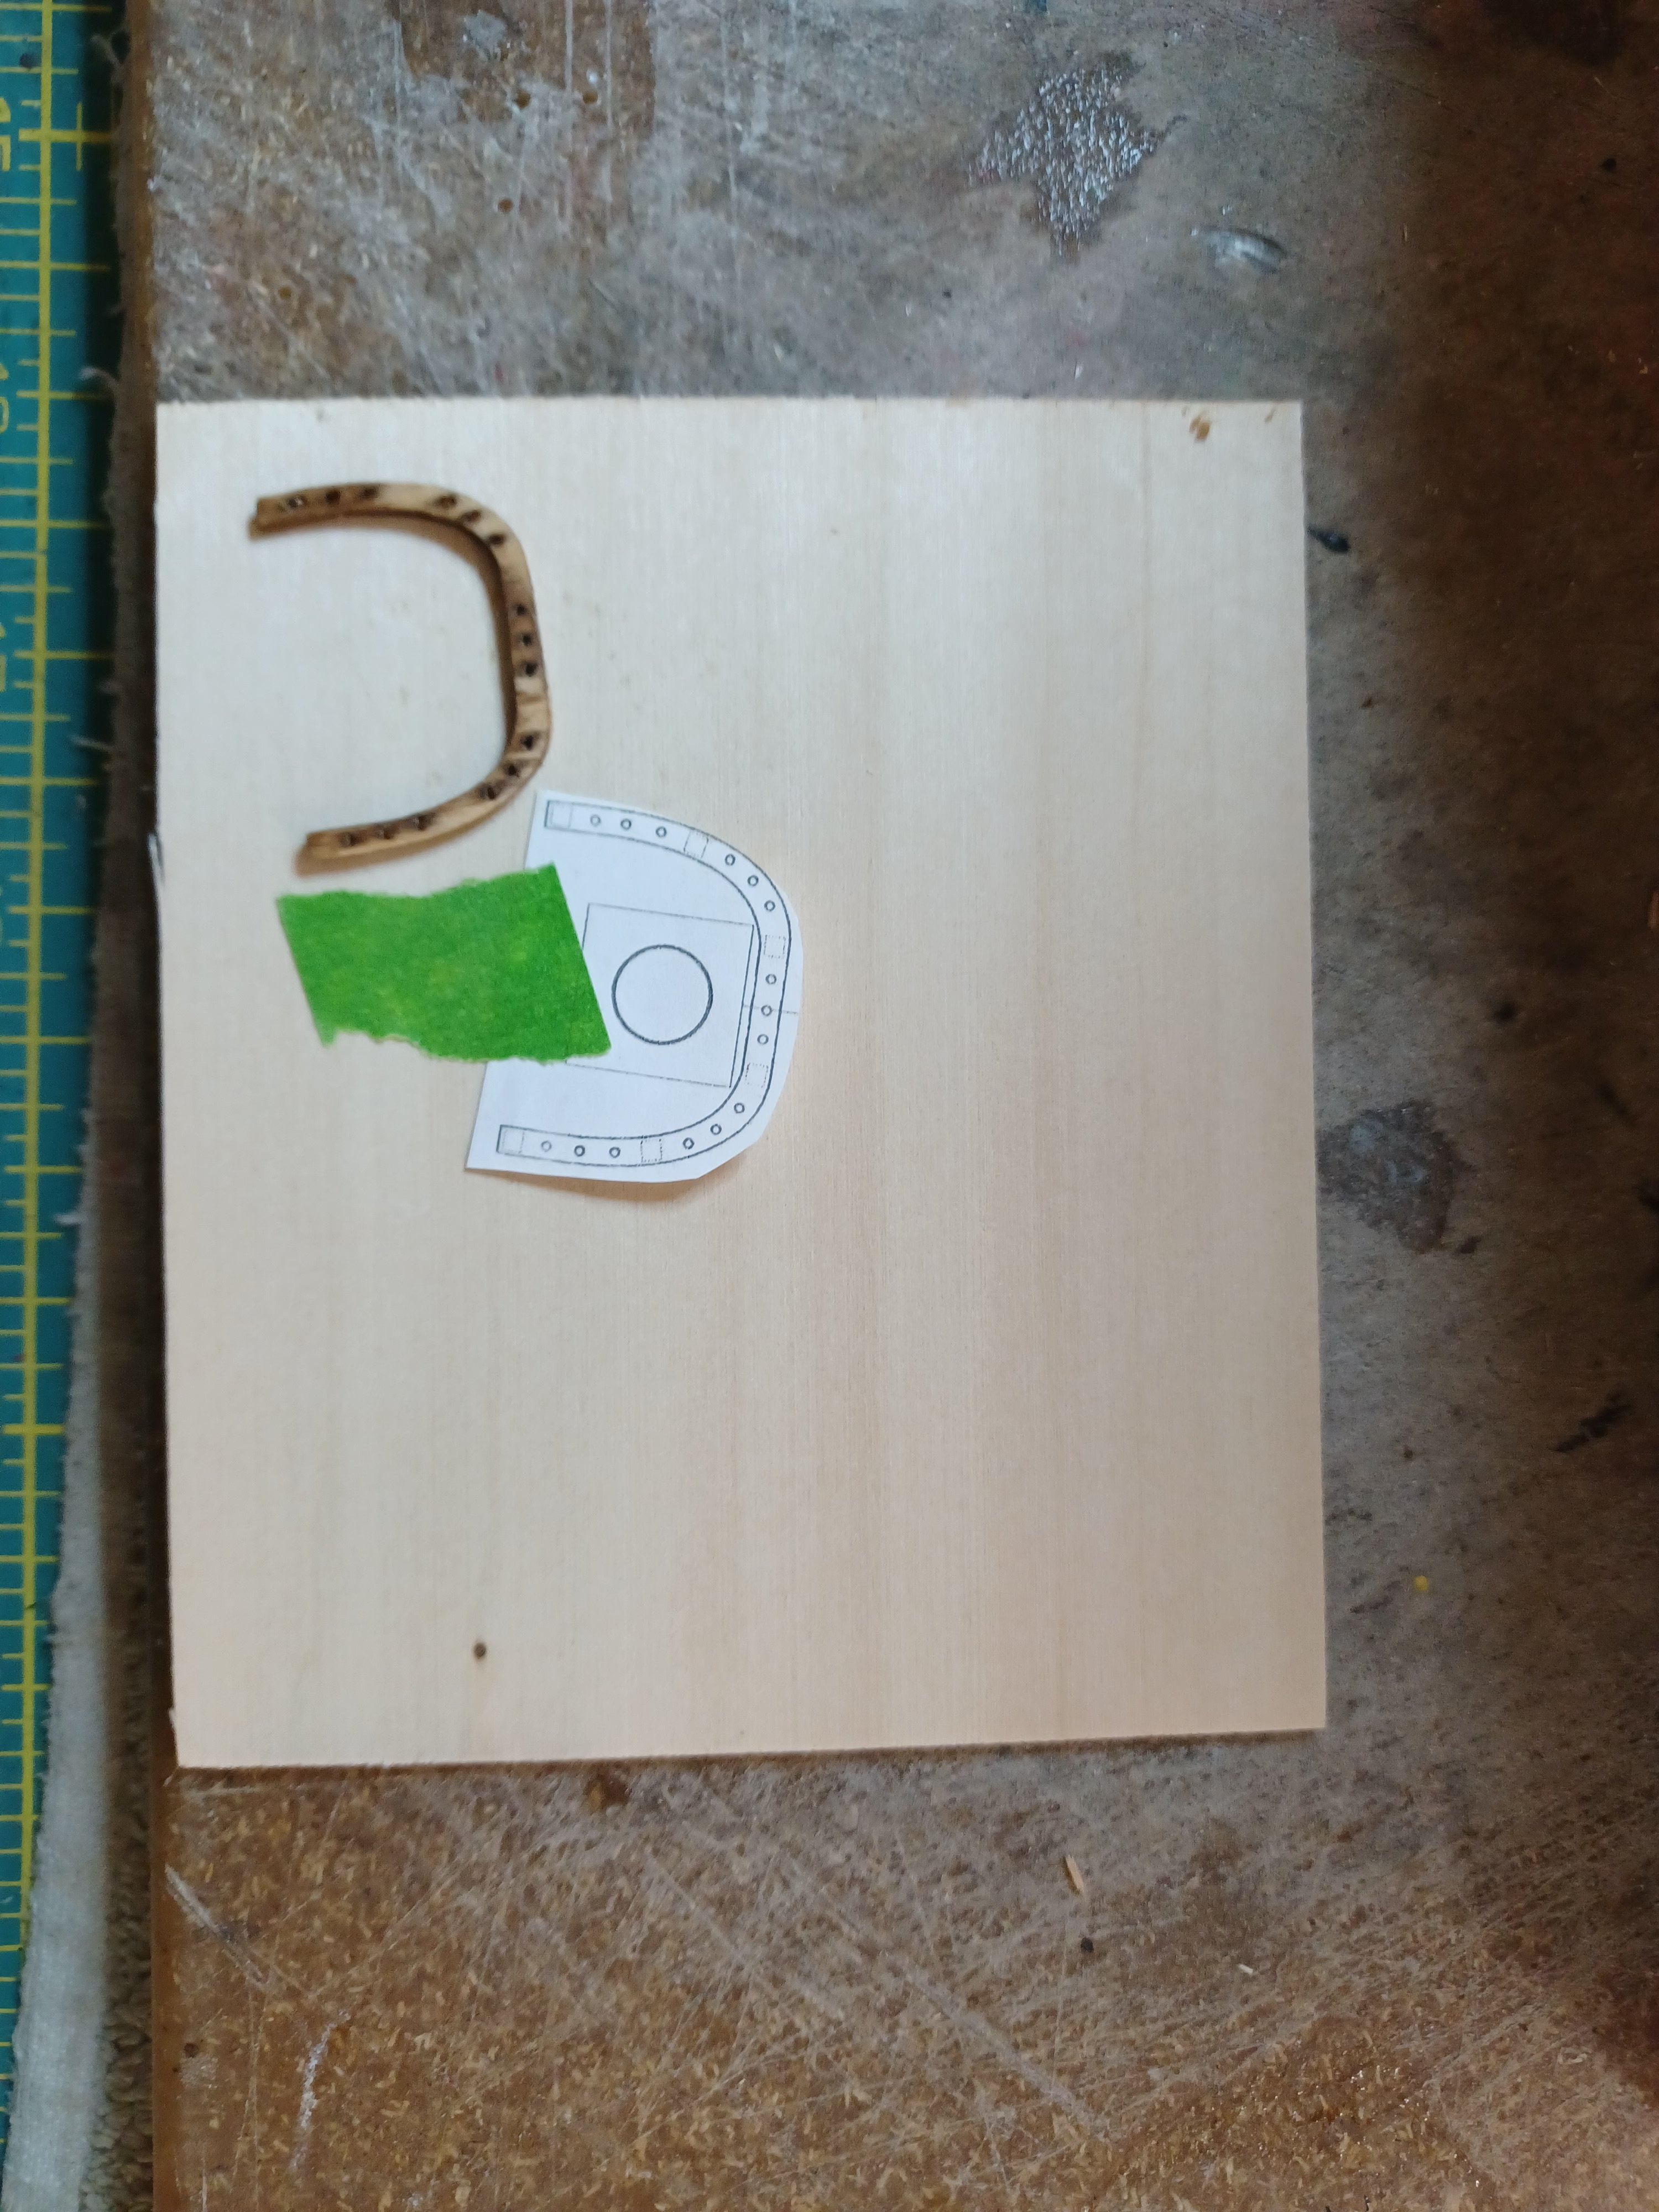
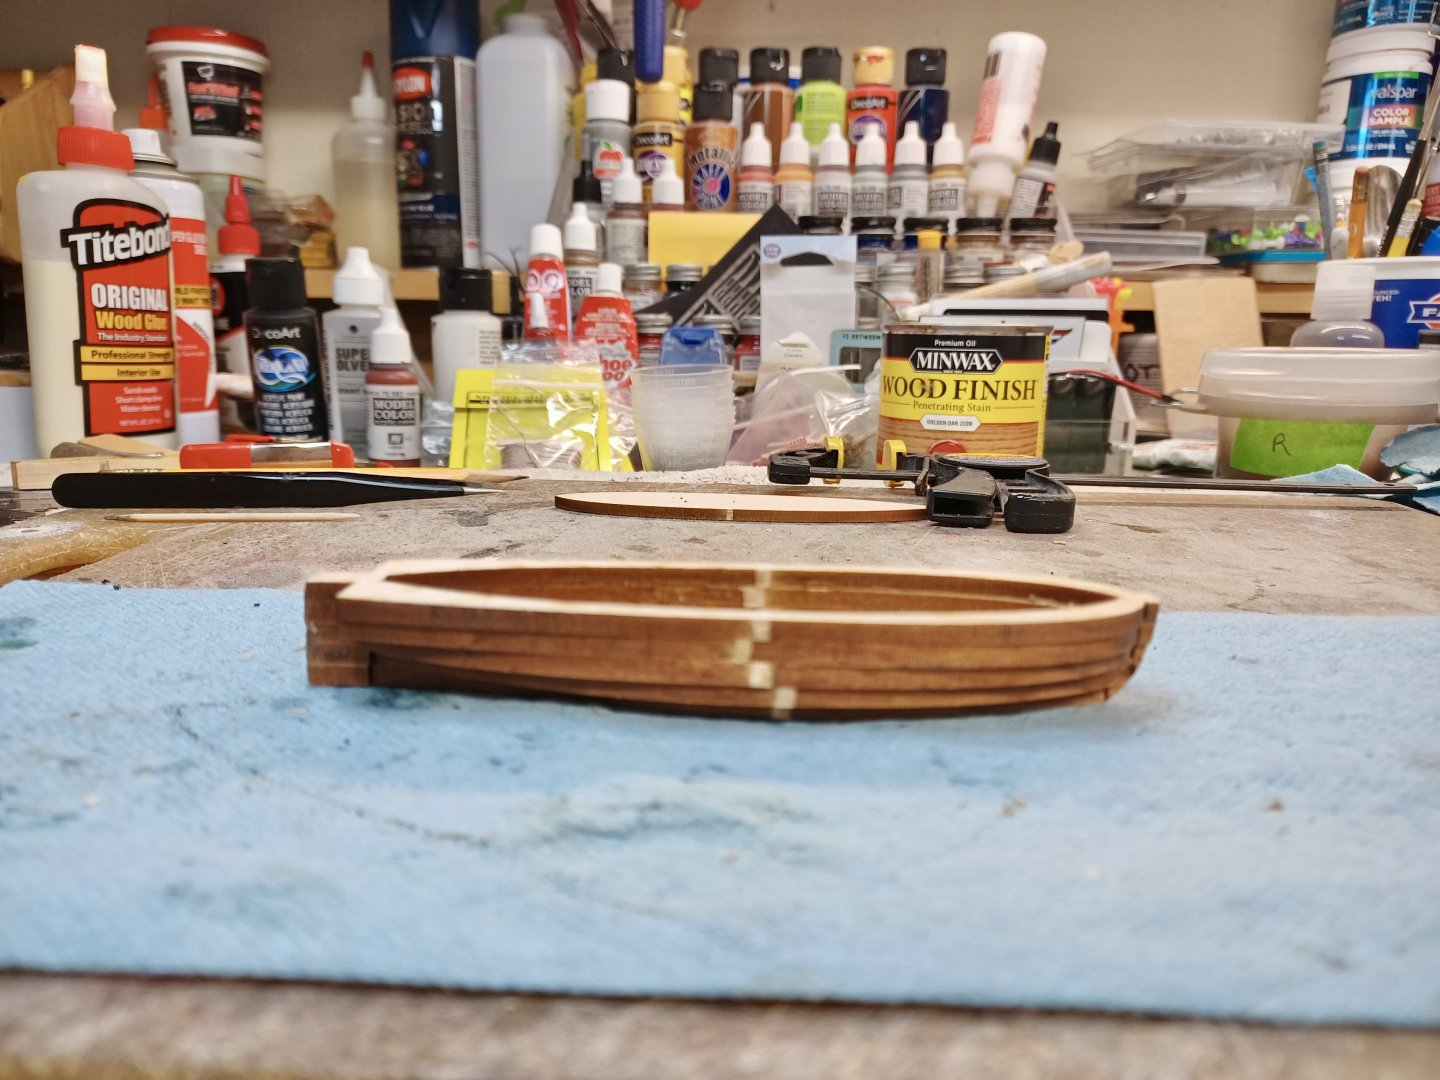
Let Me Explain In the two pictures, you can see that it’s time for the cap rail. I tried fitting the 2 laser cut parts, but they both were just too narrow. The instructions indicate that the boat should be turned over and the outline be traced on 1/32” basswood. However, I think these were for a time when the laser forms were not available, and there isn’t any left over wood with a big enough space to accommodate the traced outline. Sooooo, off to Hobby Lobby for some stock. The result is what you see in the pics, and I will show the finished results when ready.

- 436 replies
-
- 5
-

-
- Syren
- Model Shipways
- (and 1 more)
-
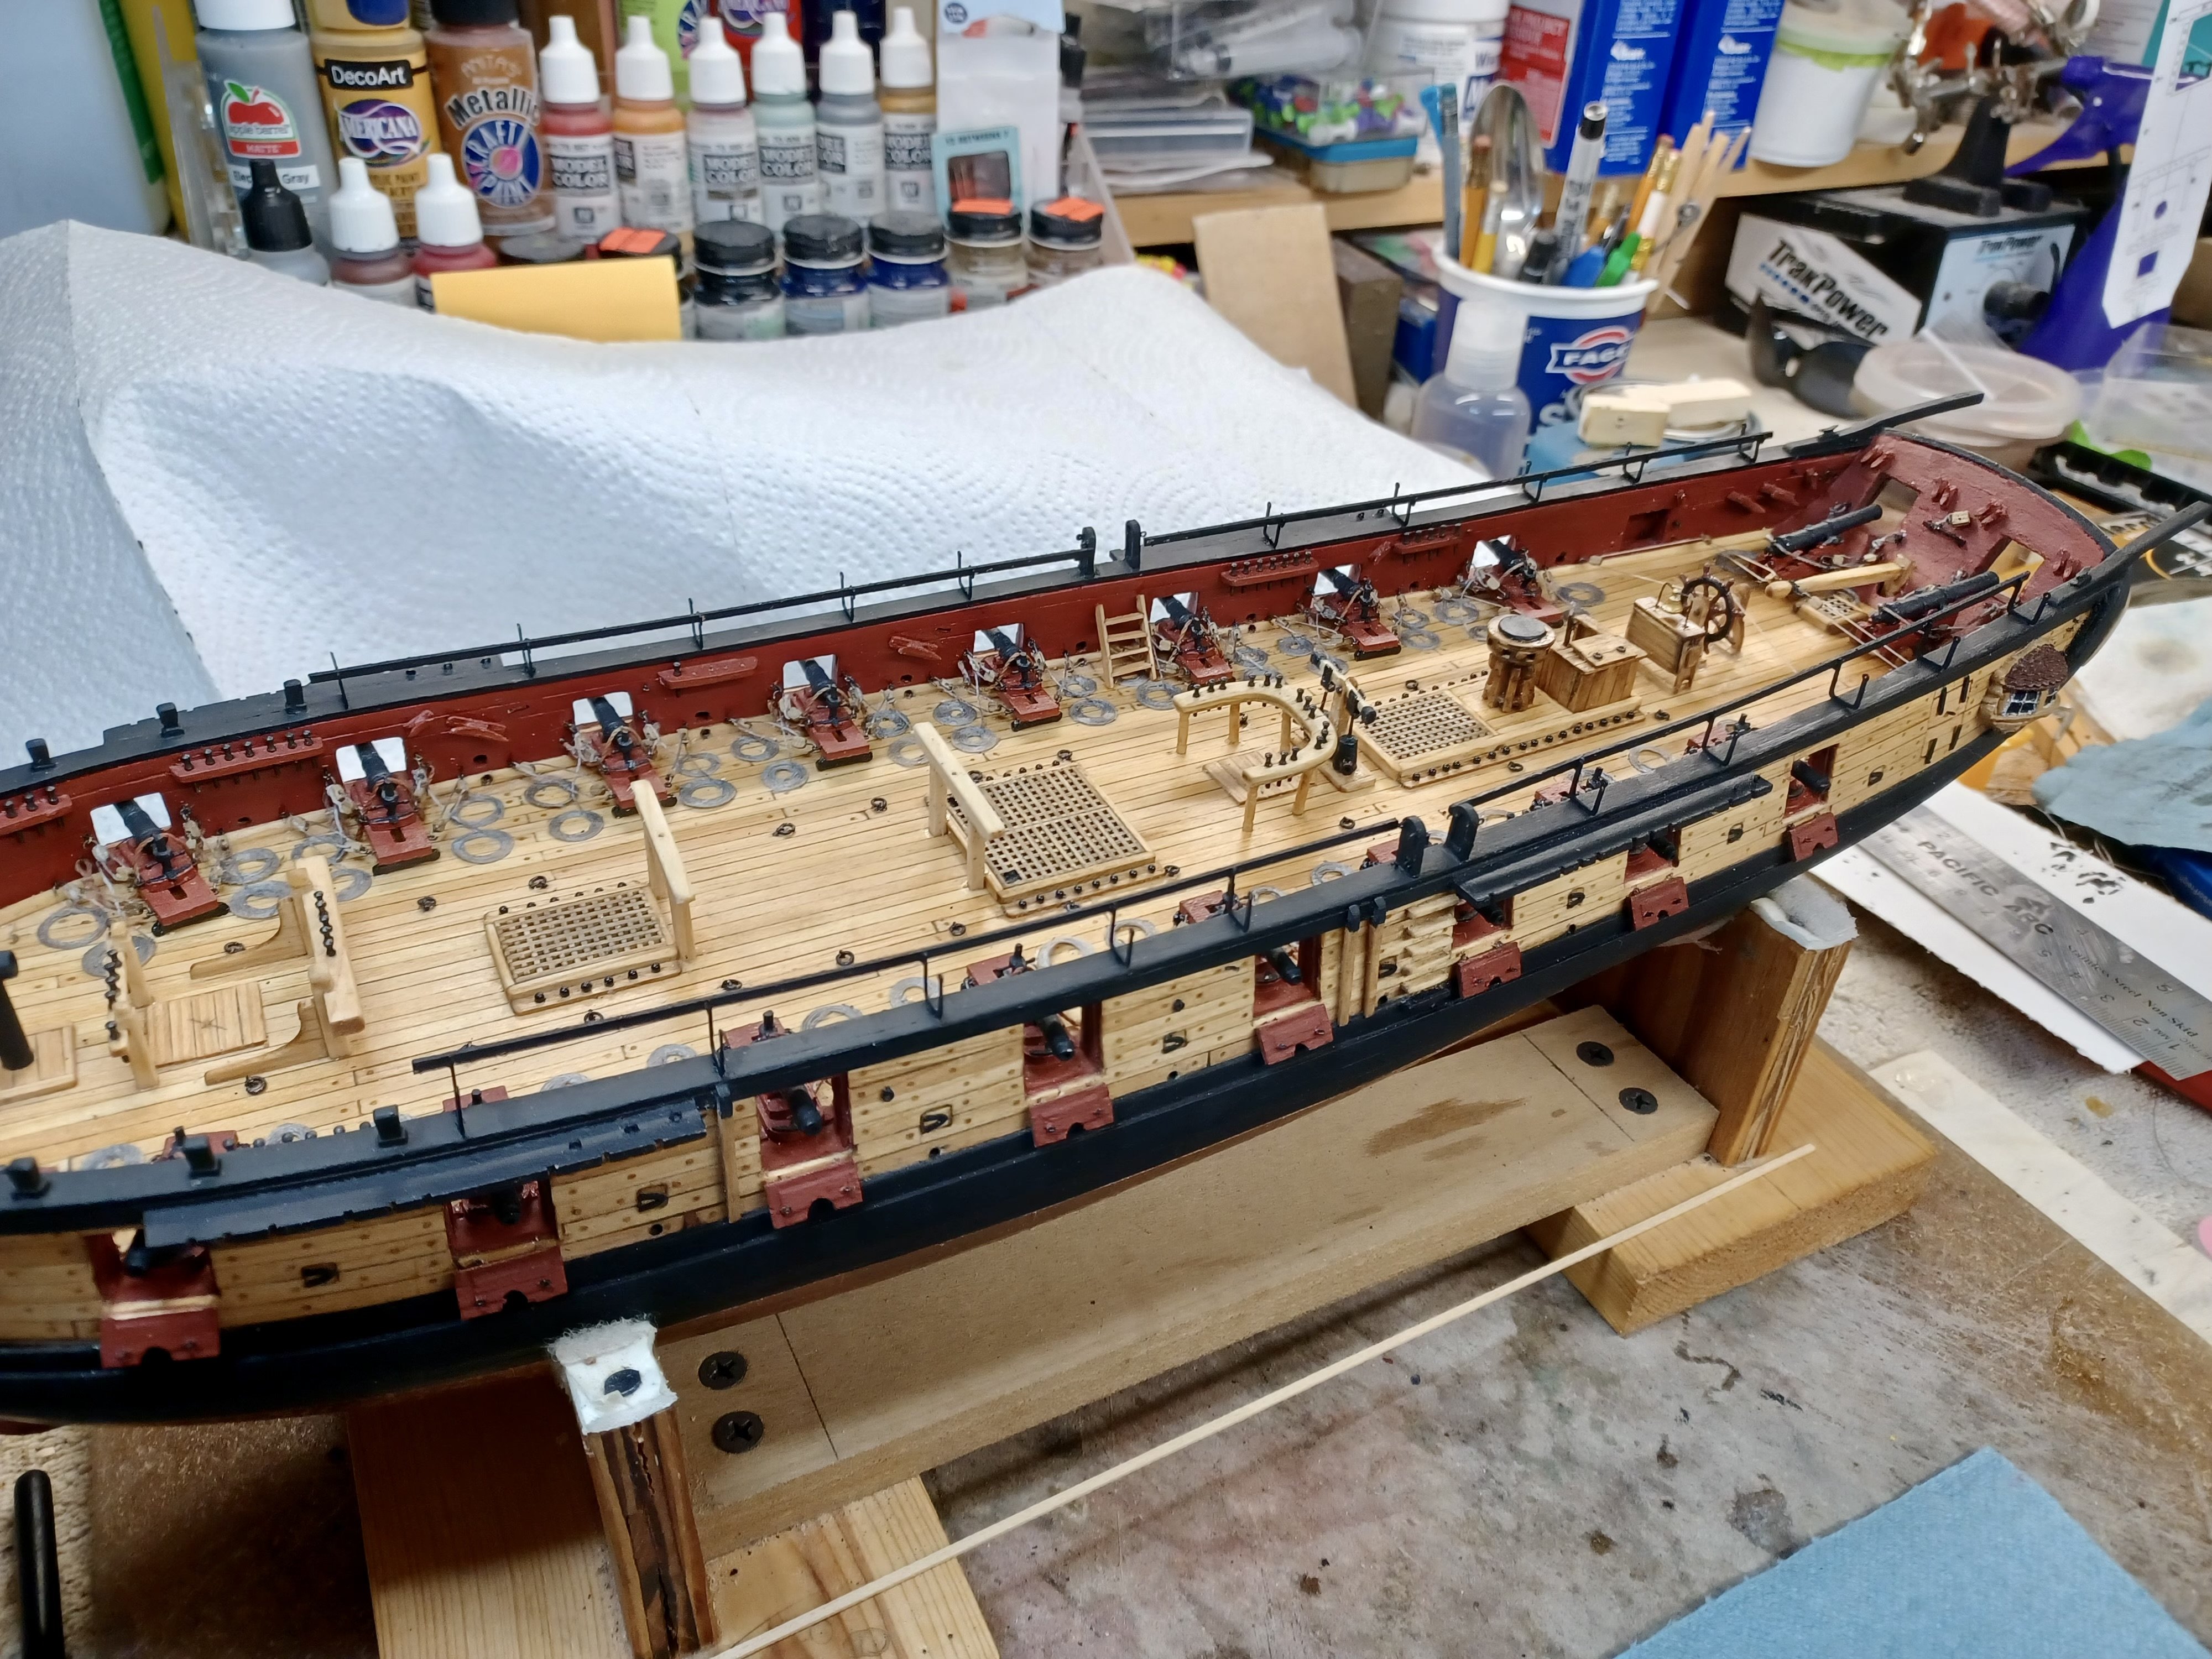
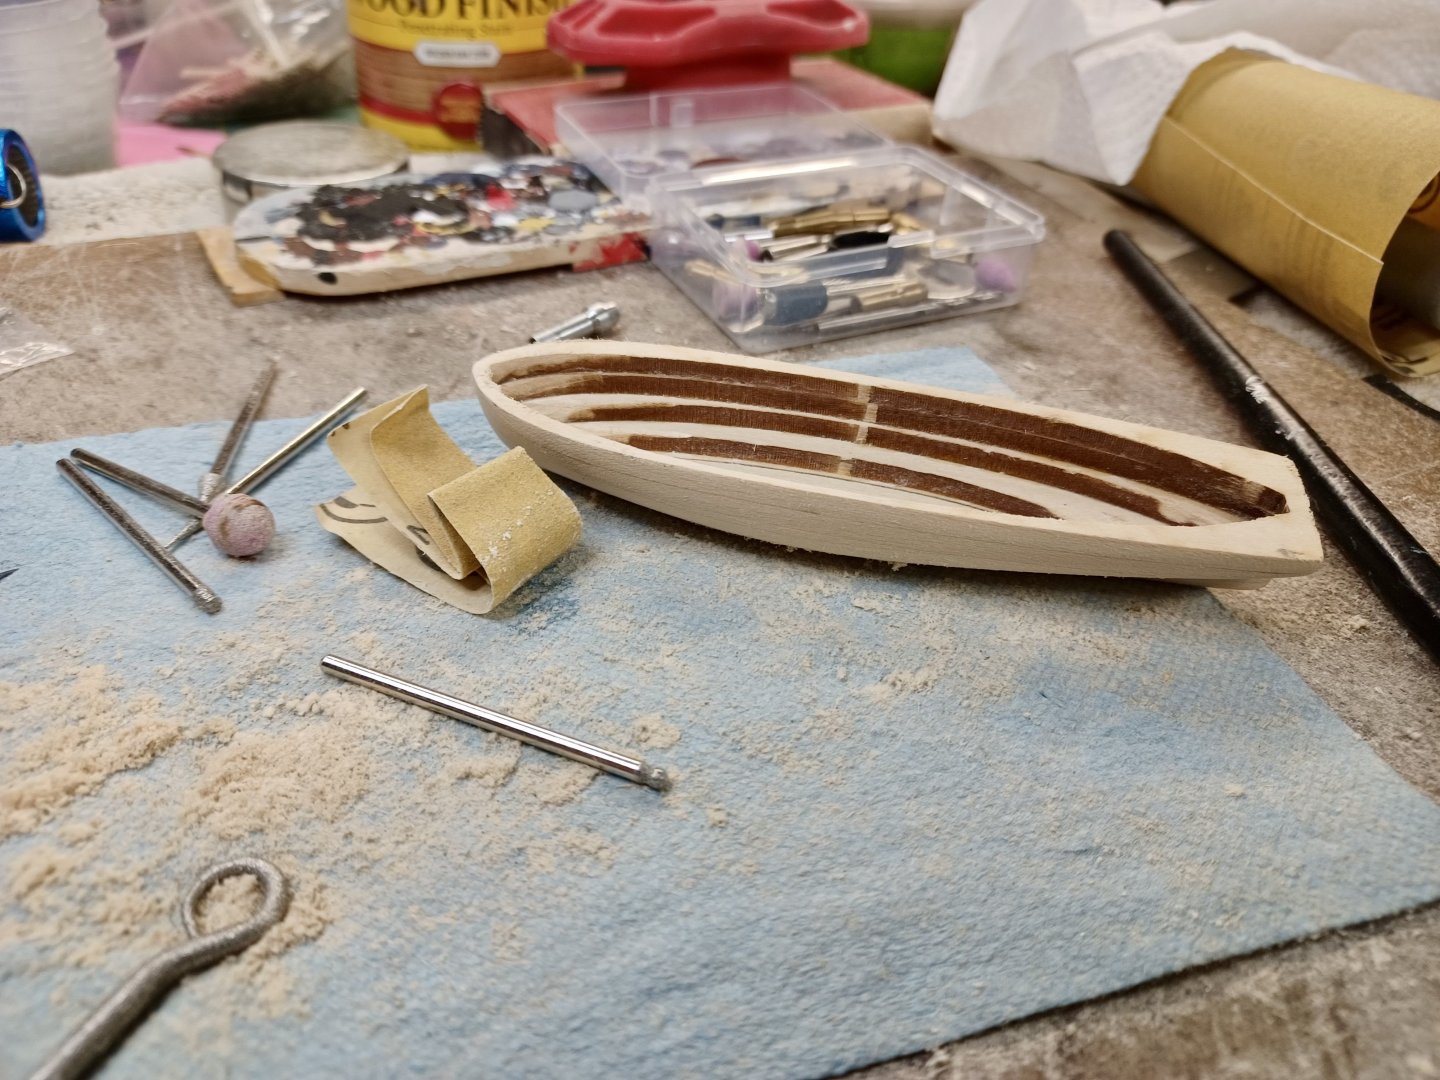
Time for an Update With all of the little parts and steps to do, I felt it best to get further along before an update. The biggest issue I have had has been with my CA. For some reason, it will not set as quickly, and I have had to use kicker more often. It’s either that, or CA is not very compatible with Tongue Oil. Rather than taking stain to the wood, I have been using Tongue Oil to finish unpainted wood. I did use an oak stain on the companionway and the capstan, but I thought they came out a little dark, so have gone back to the oil. Anyway, here is a picture of the progress on the longboat. I can see the light at the end of the long boat tunnel, but do have more work ahead. Here is a pic.

- 436 replies
-
- 6
-
-
- Syren
- Model Shipways
- (and 1 more)
-
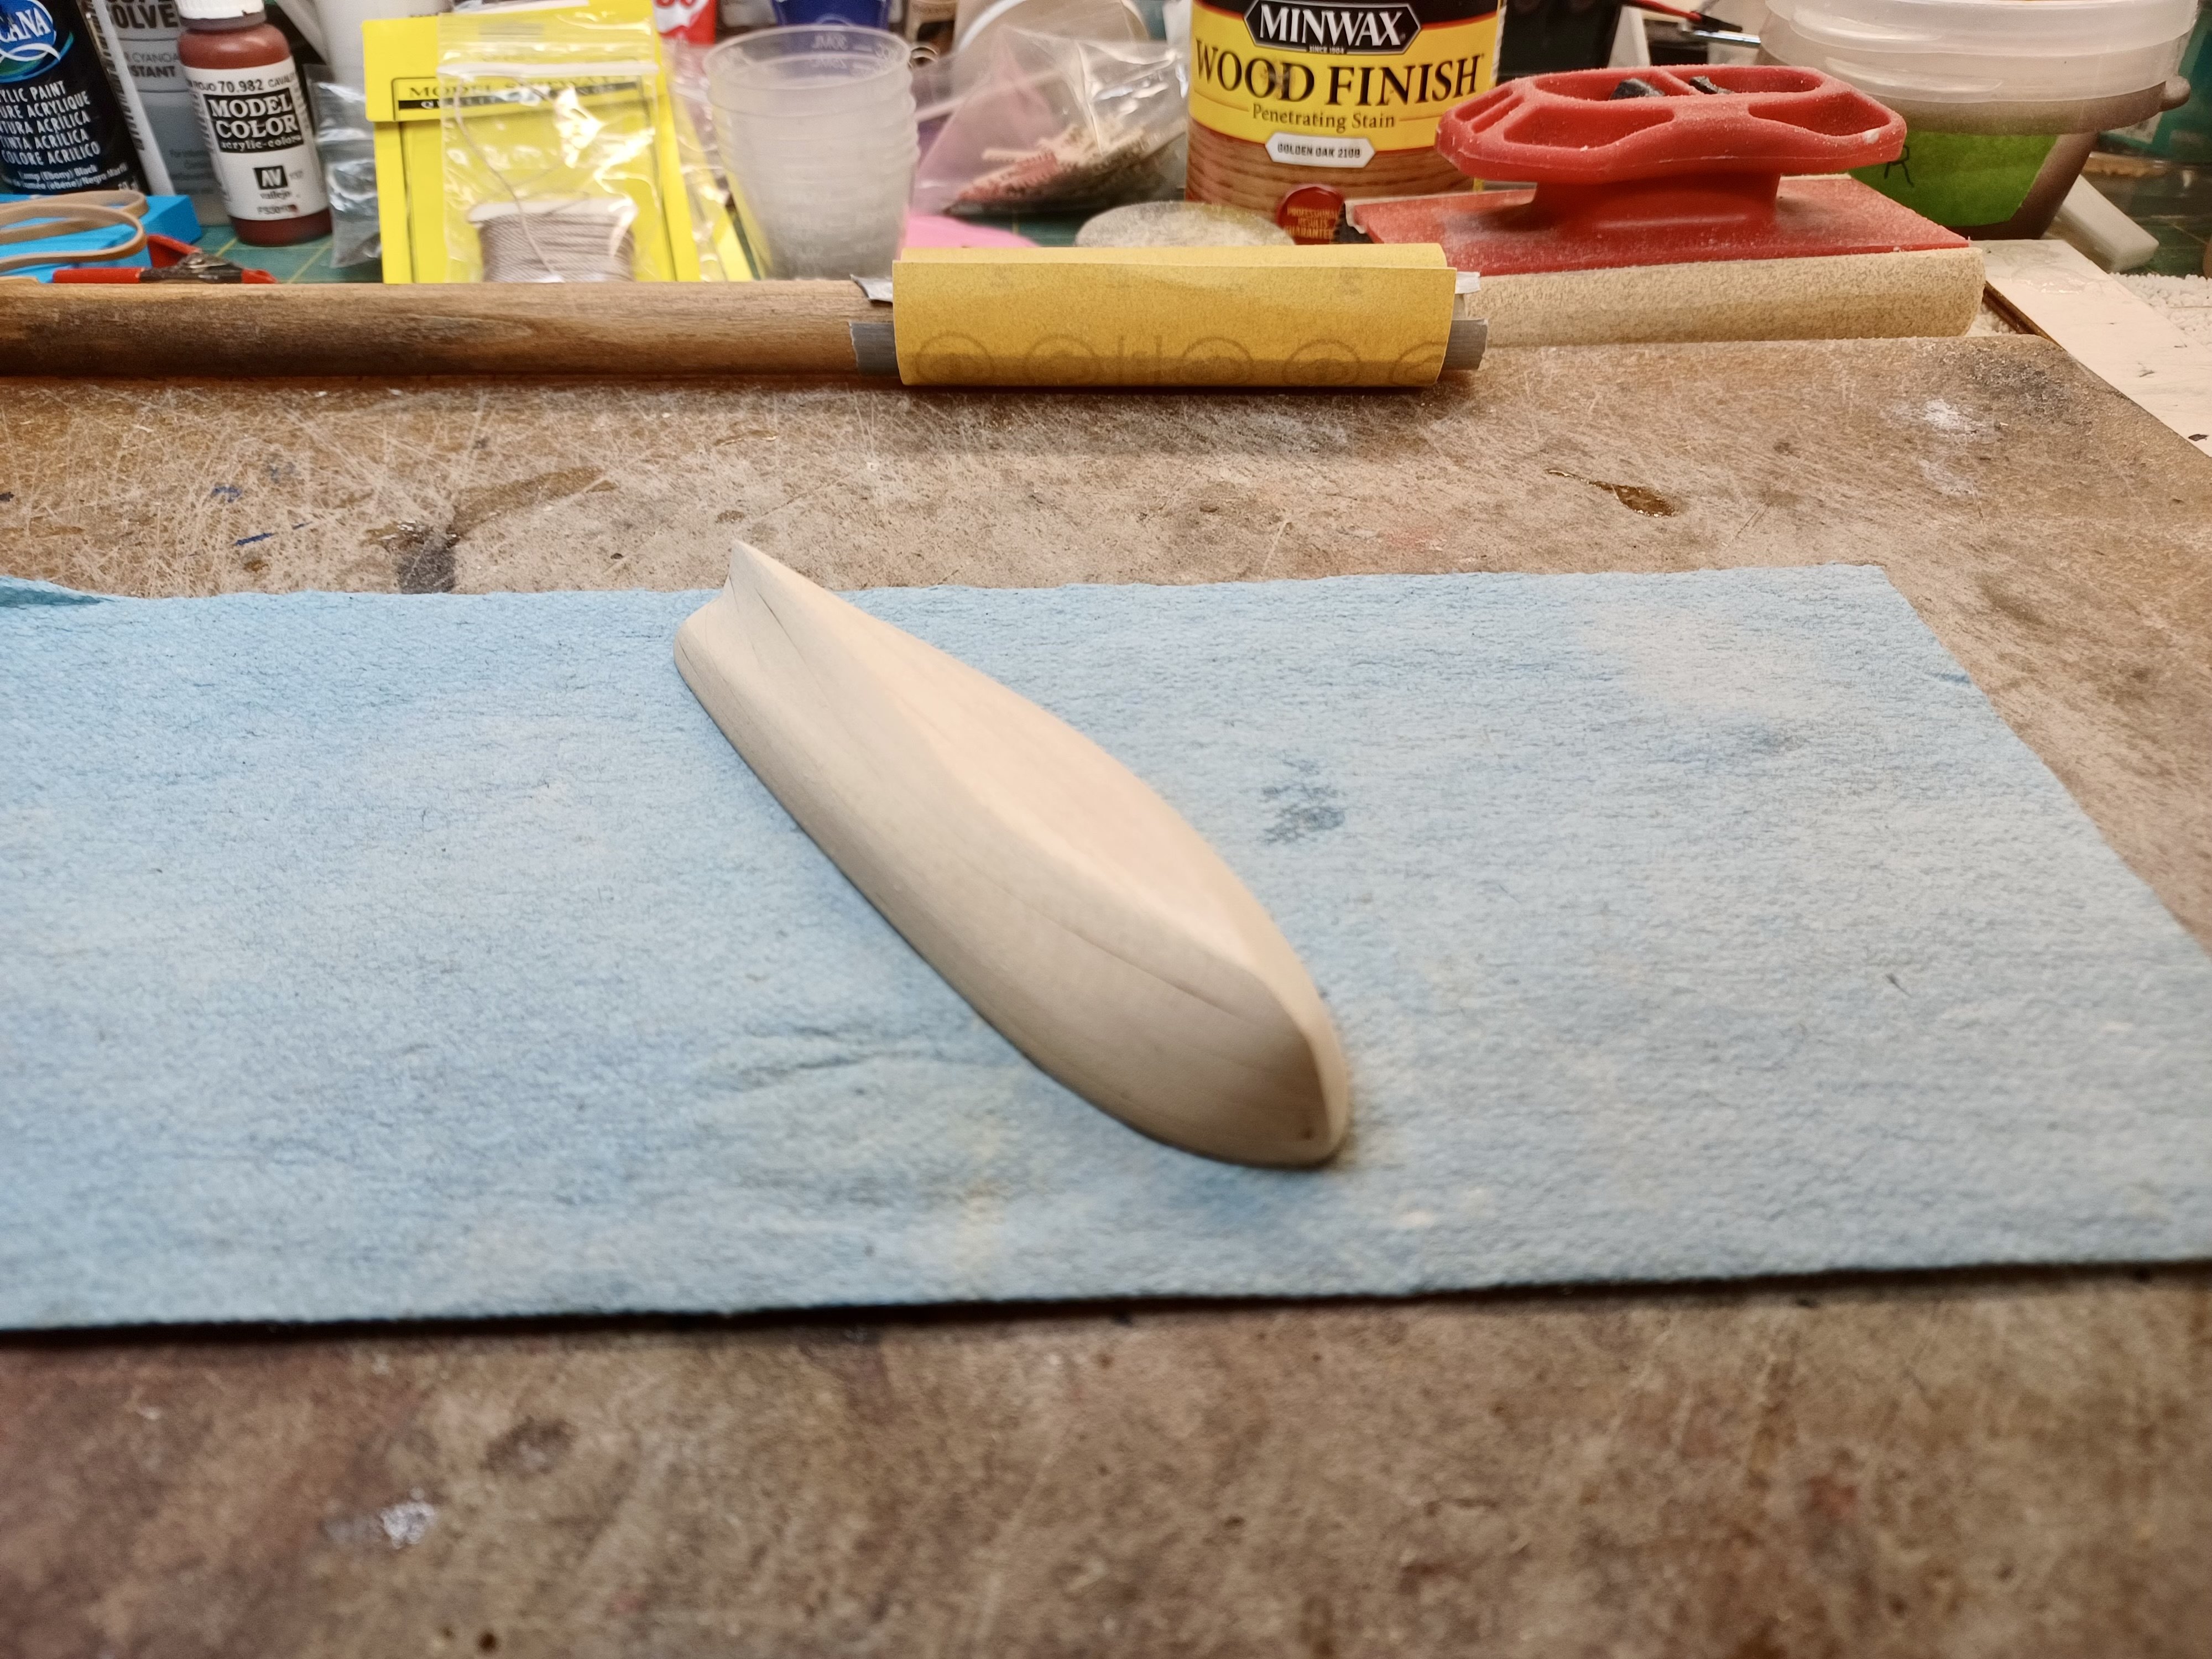
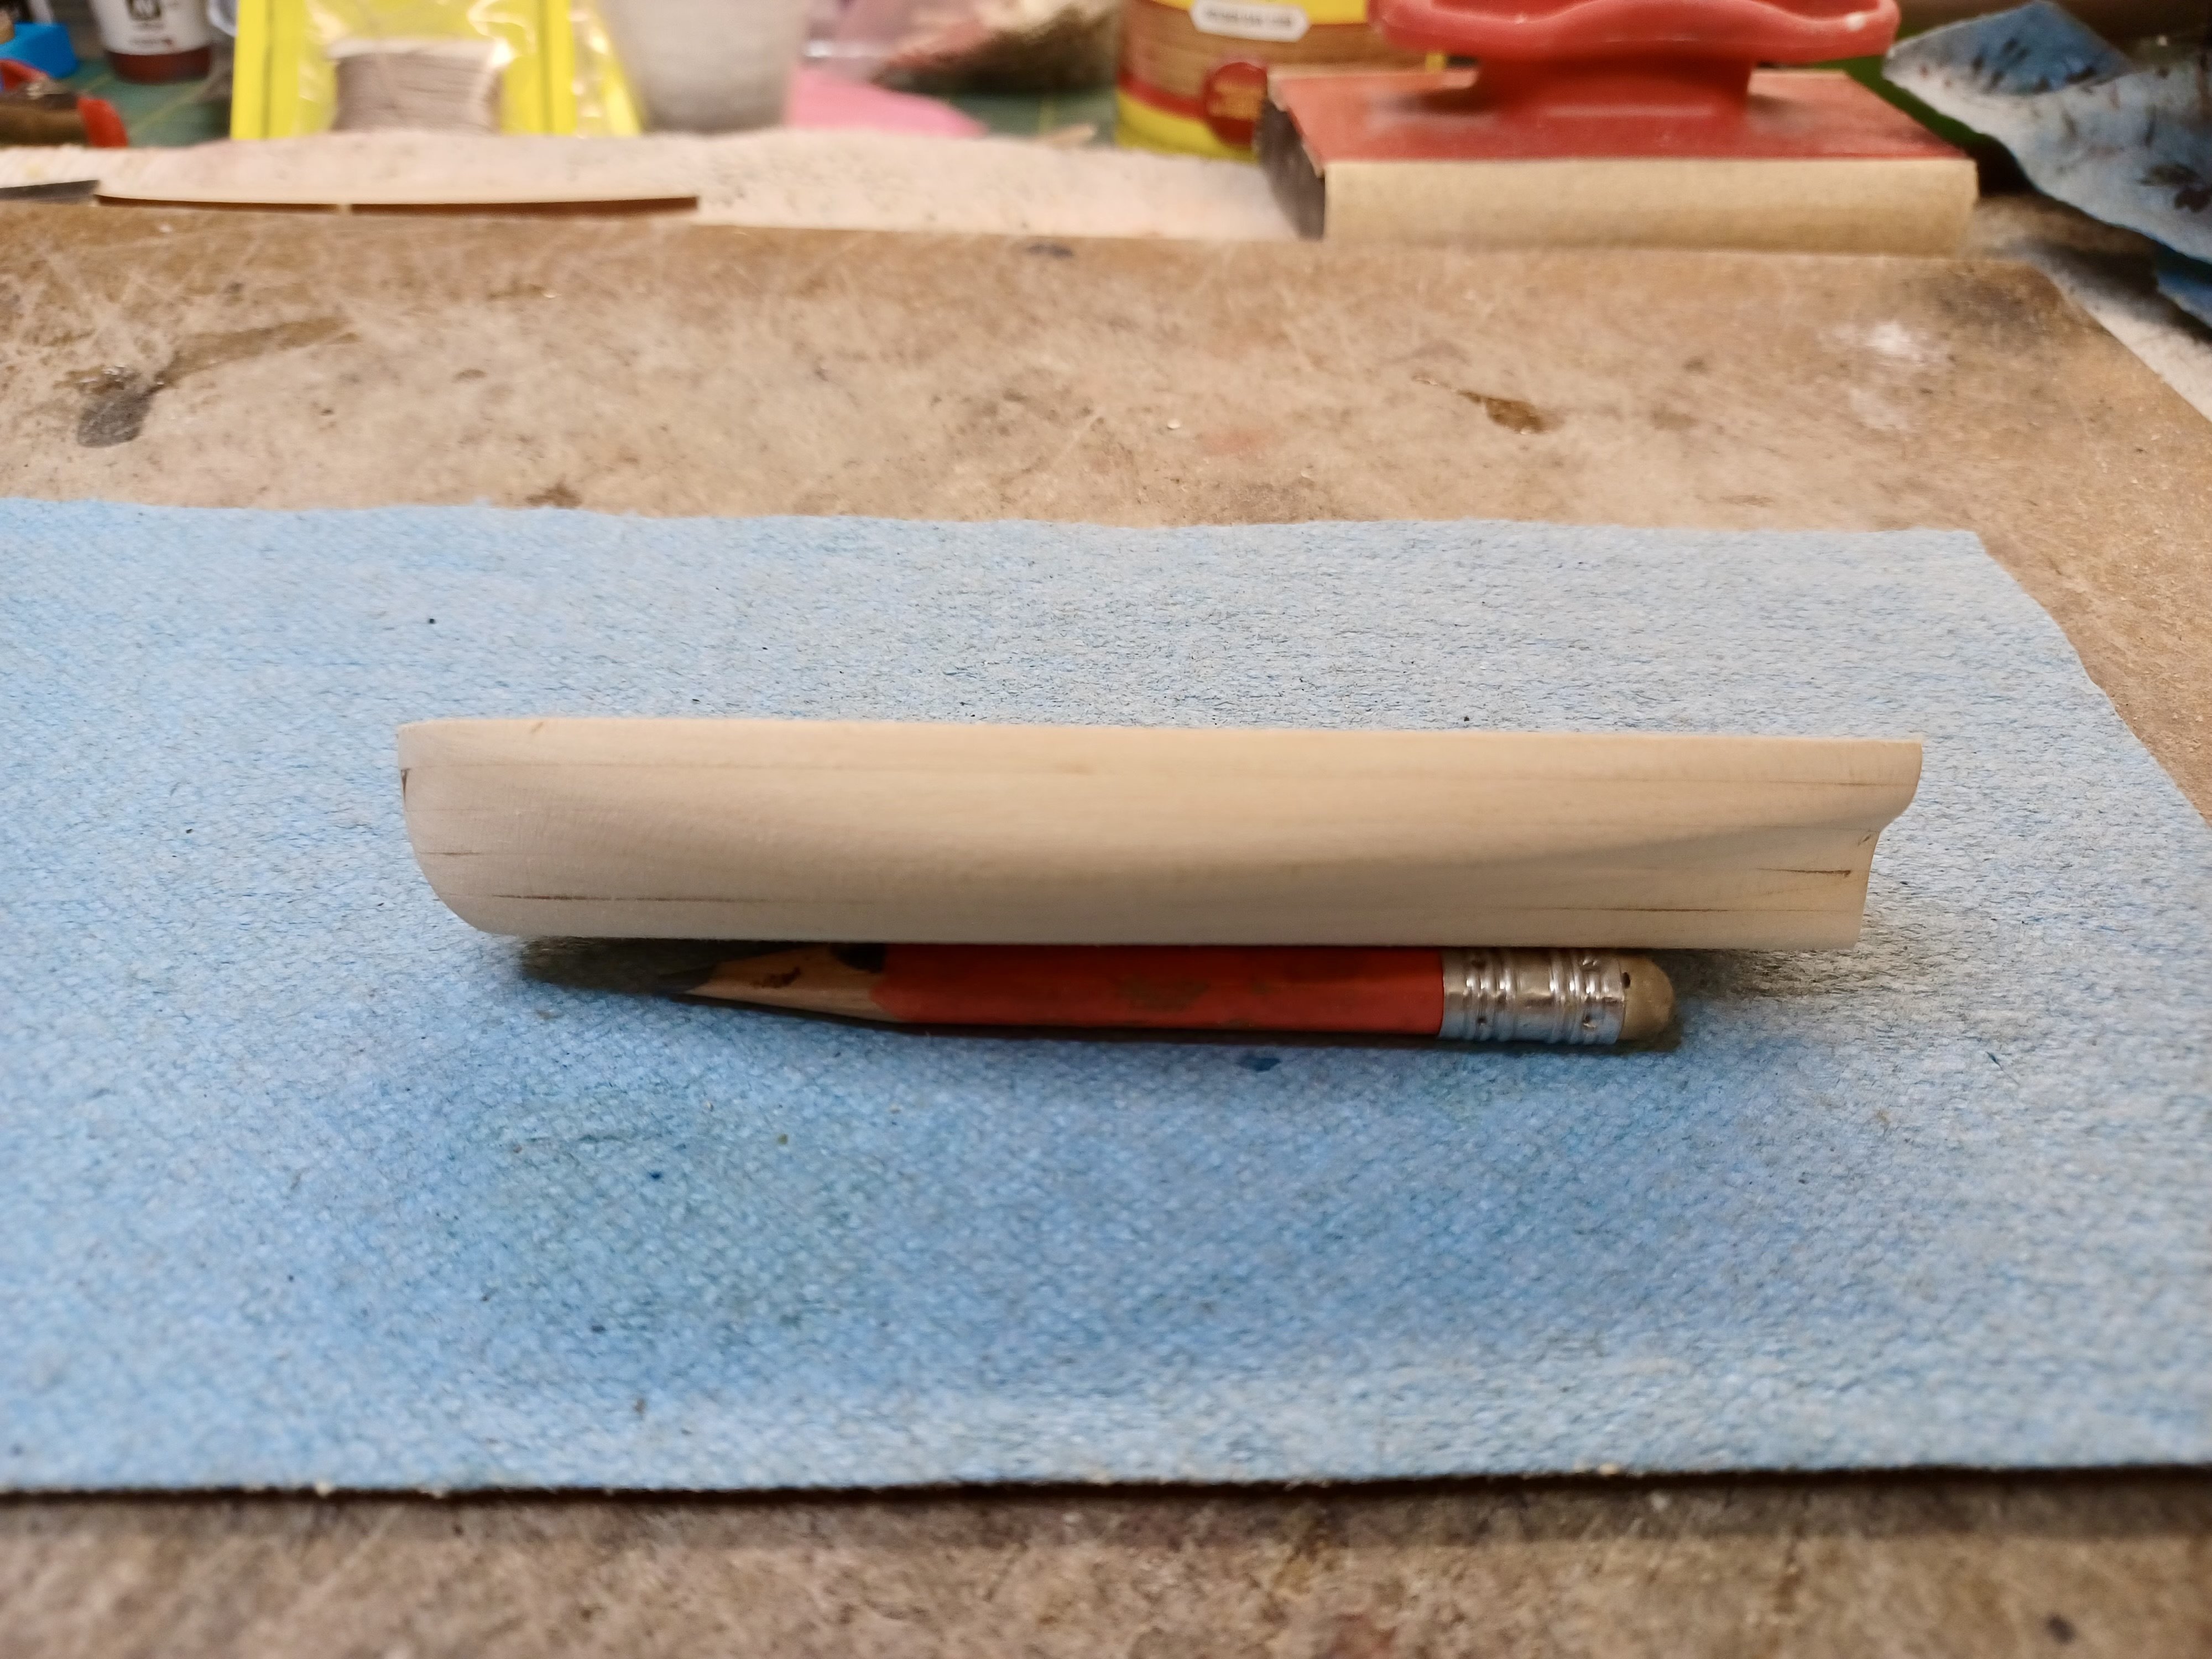
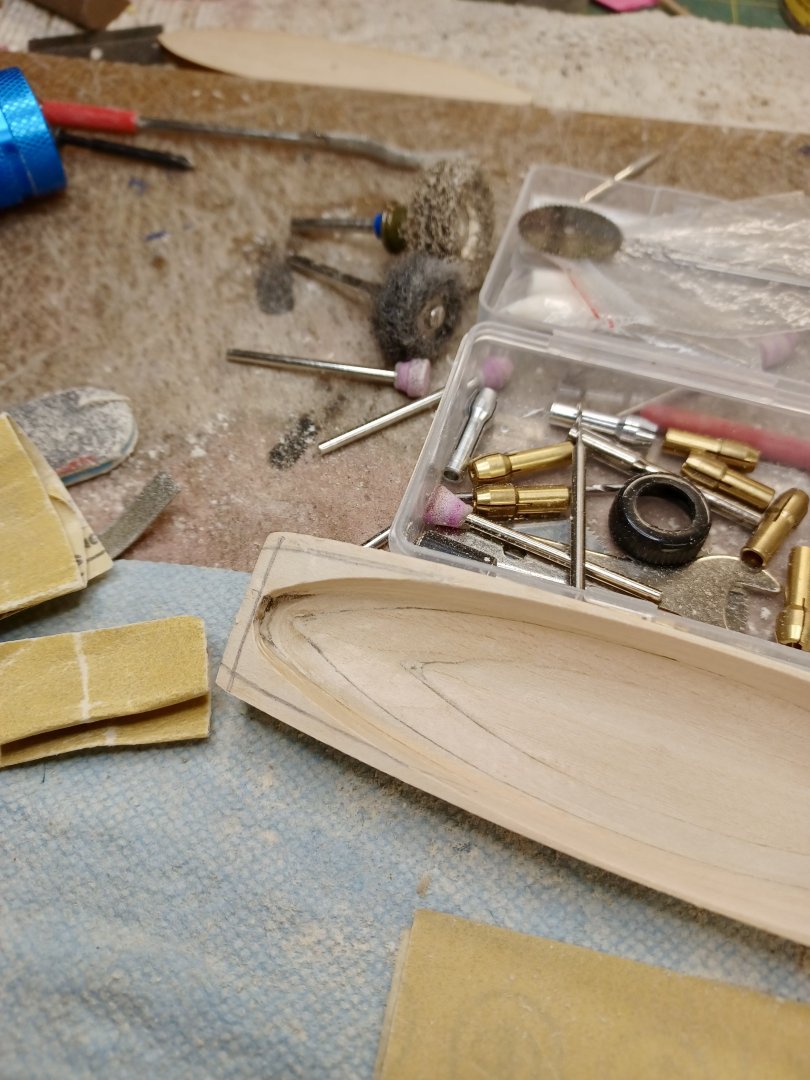
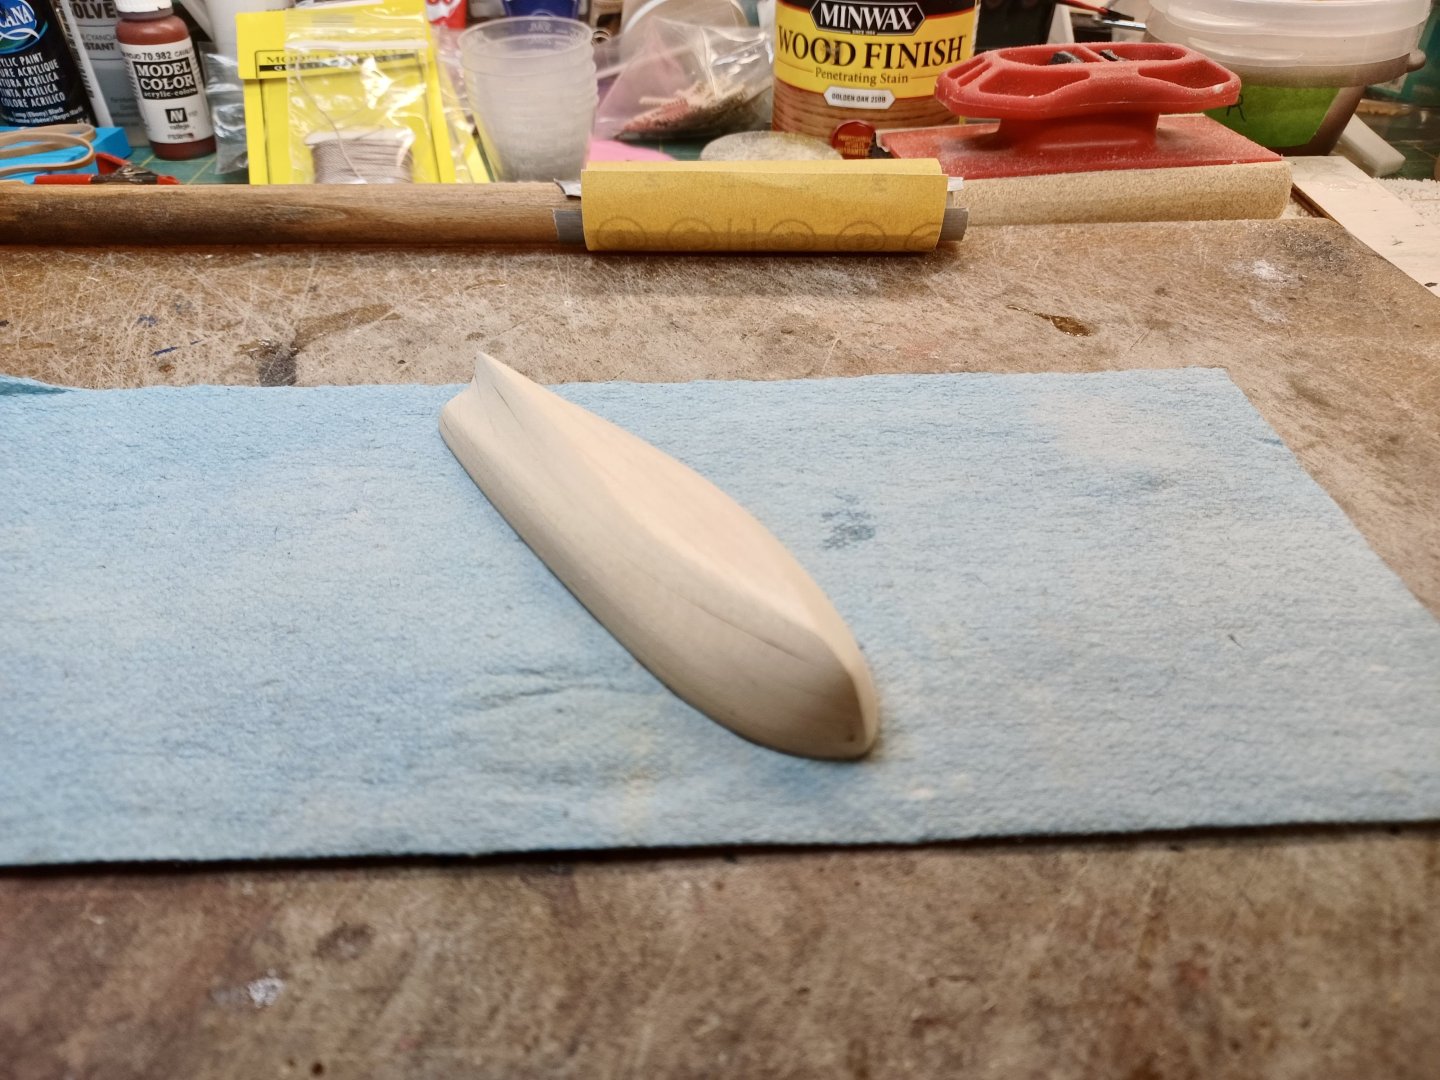
Getting Very Close For those who like sanding, the longboat will more than satisfy you. And, I can see why the boat that hangs from the stern davits was not part of this kit. I am now at the stern, and the picture shows the markings for the area that remains. Seems appropriate that this part remained until the last, as it is probably the most critical sanding area of the long boat. I have had only one little area where I let the wood get too thin where I broke through. It was small enough that it has already been fixed. Still, a couple hours to go before adding the interior parts.
- 436 replies
-
- 2
-
-
- Syren
- Model Shipways
- (and 1 more)
-
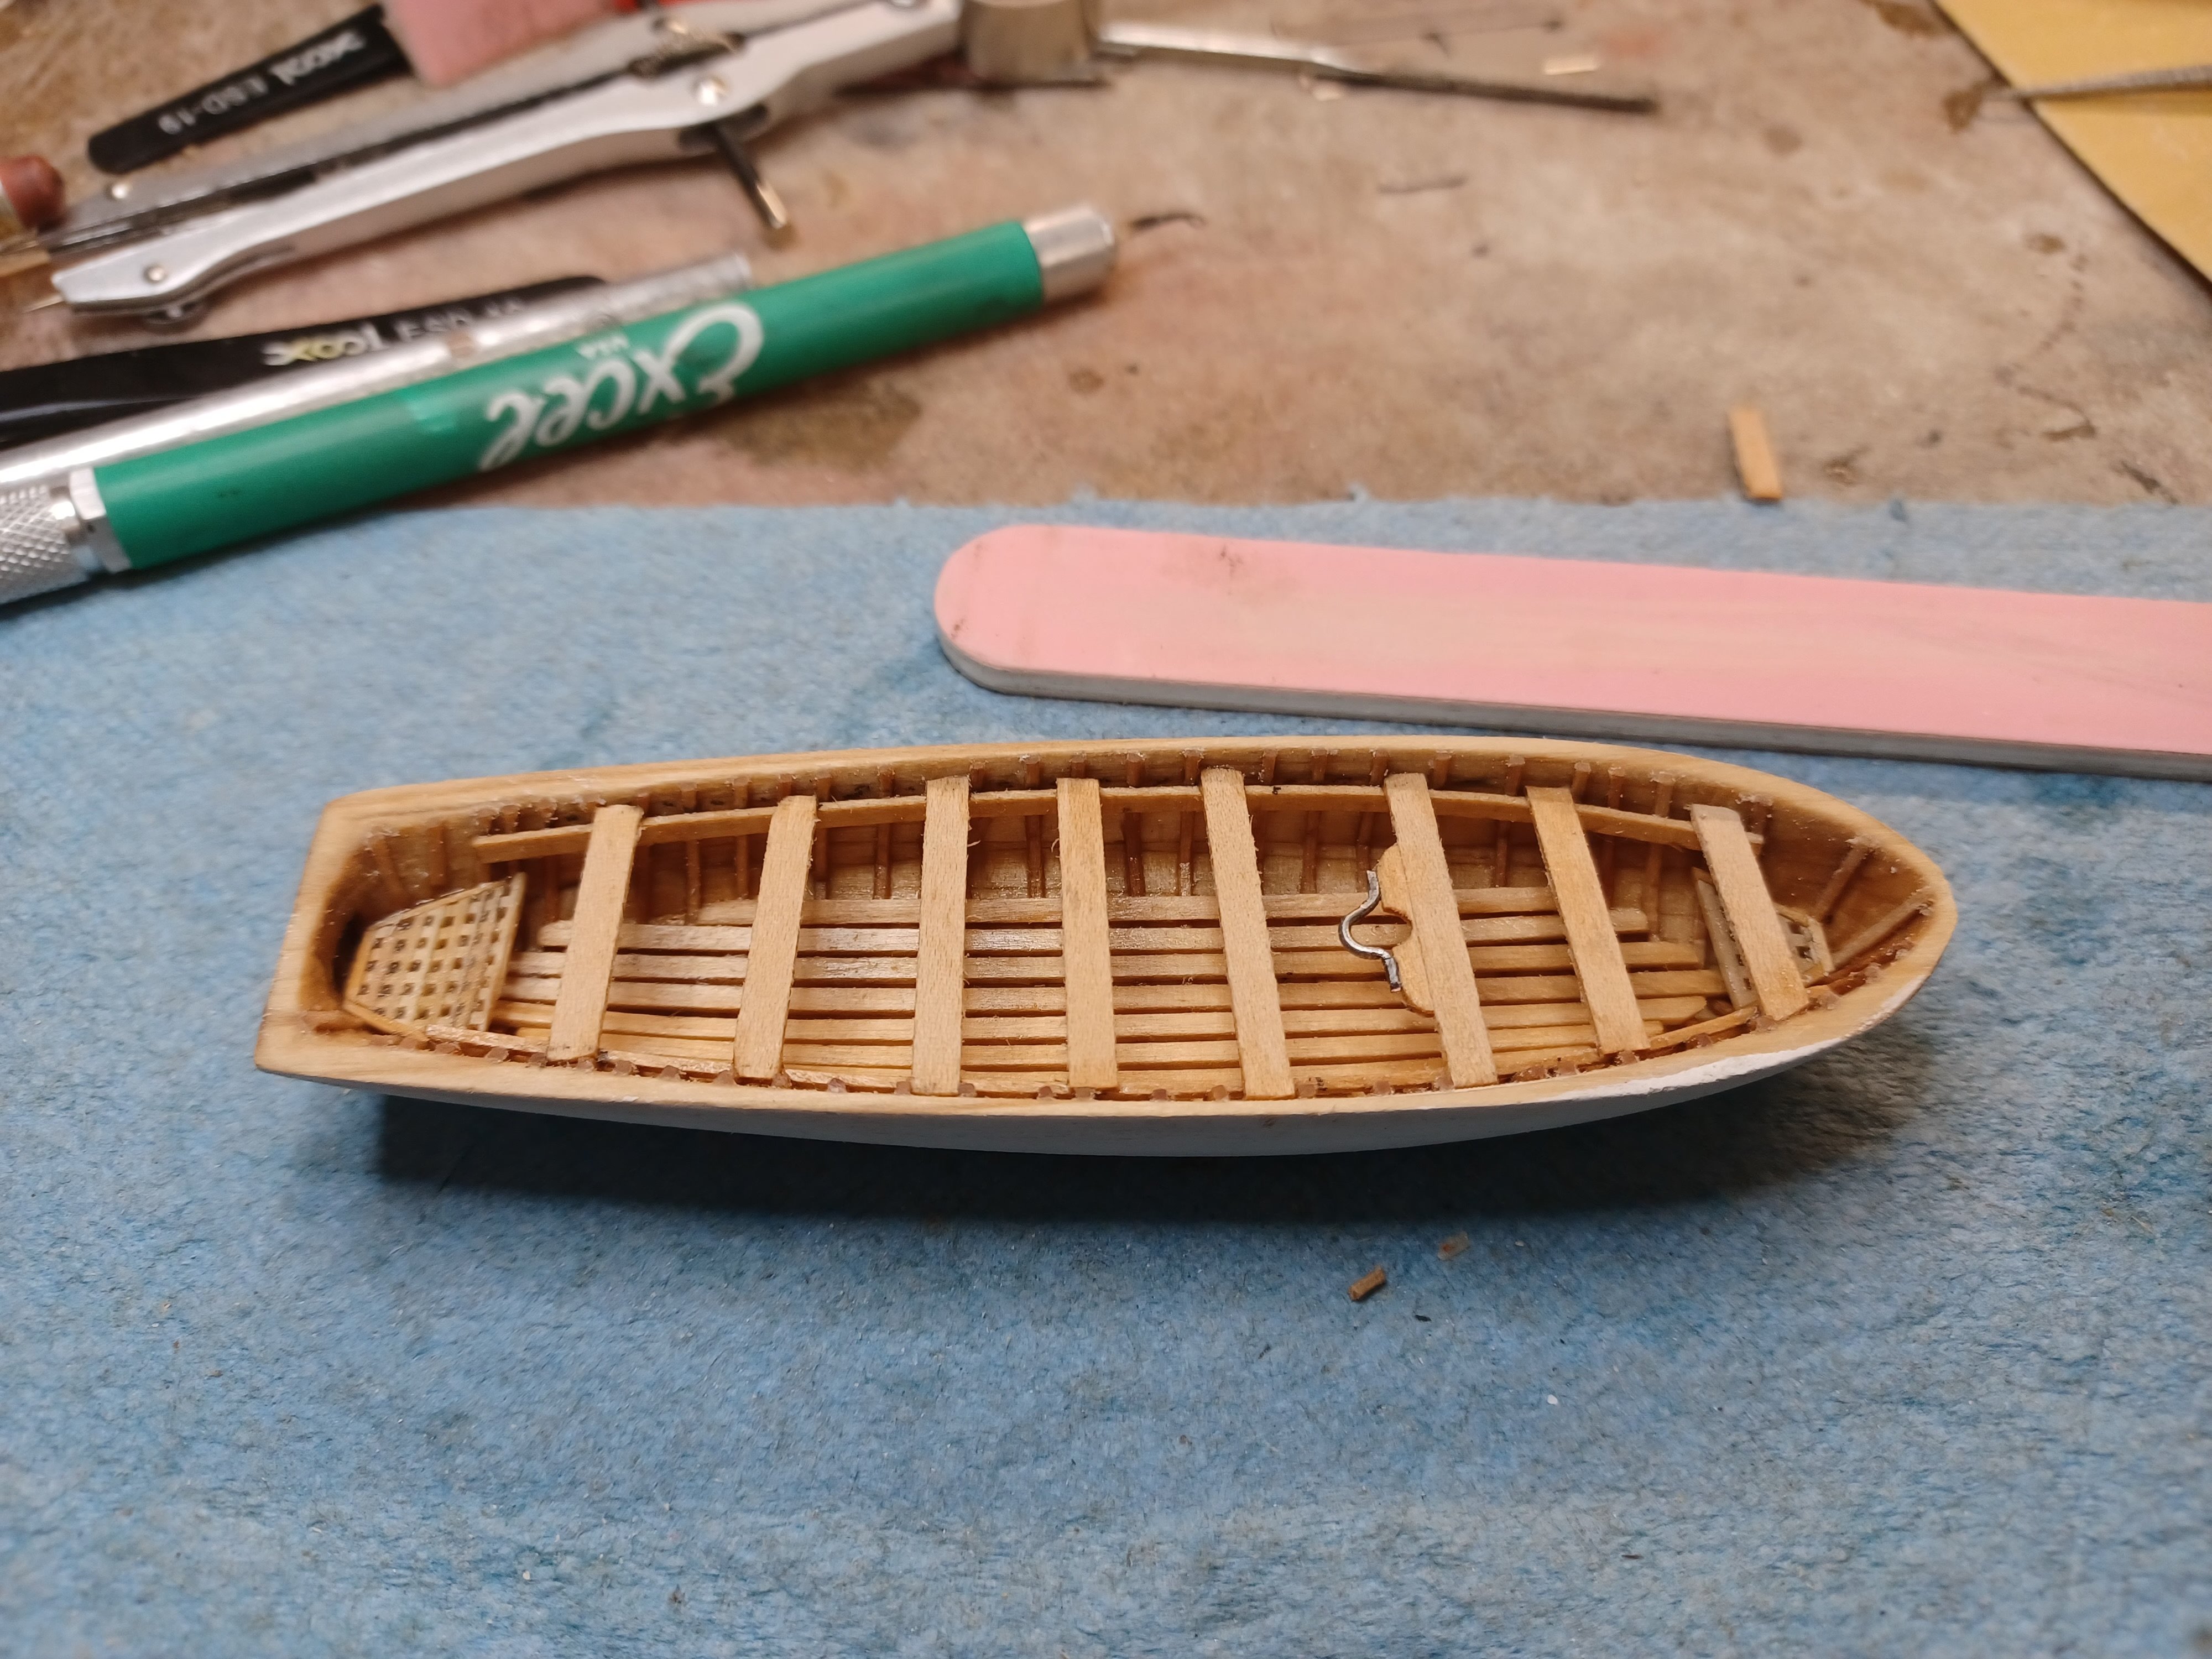
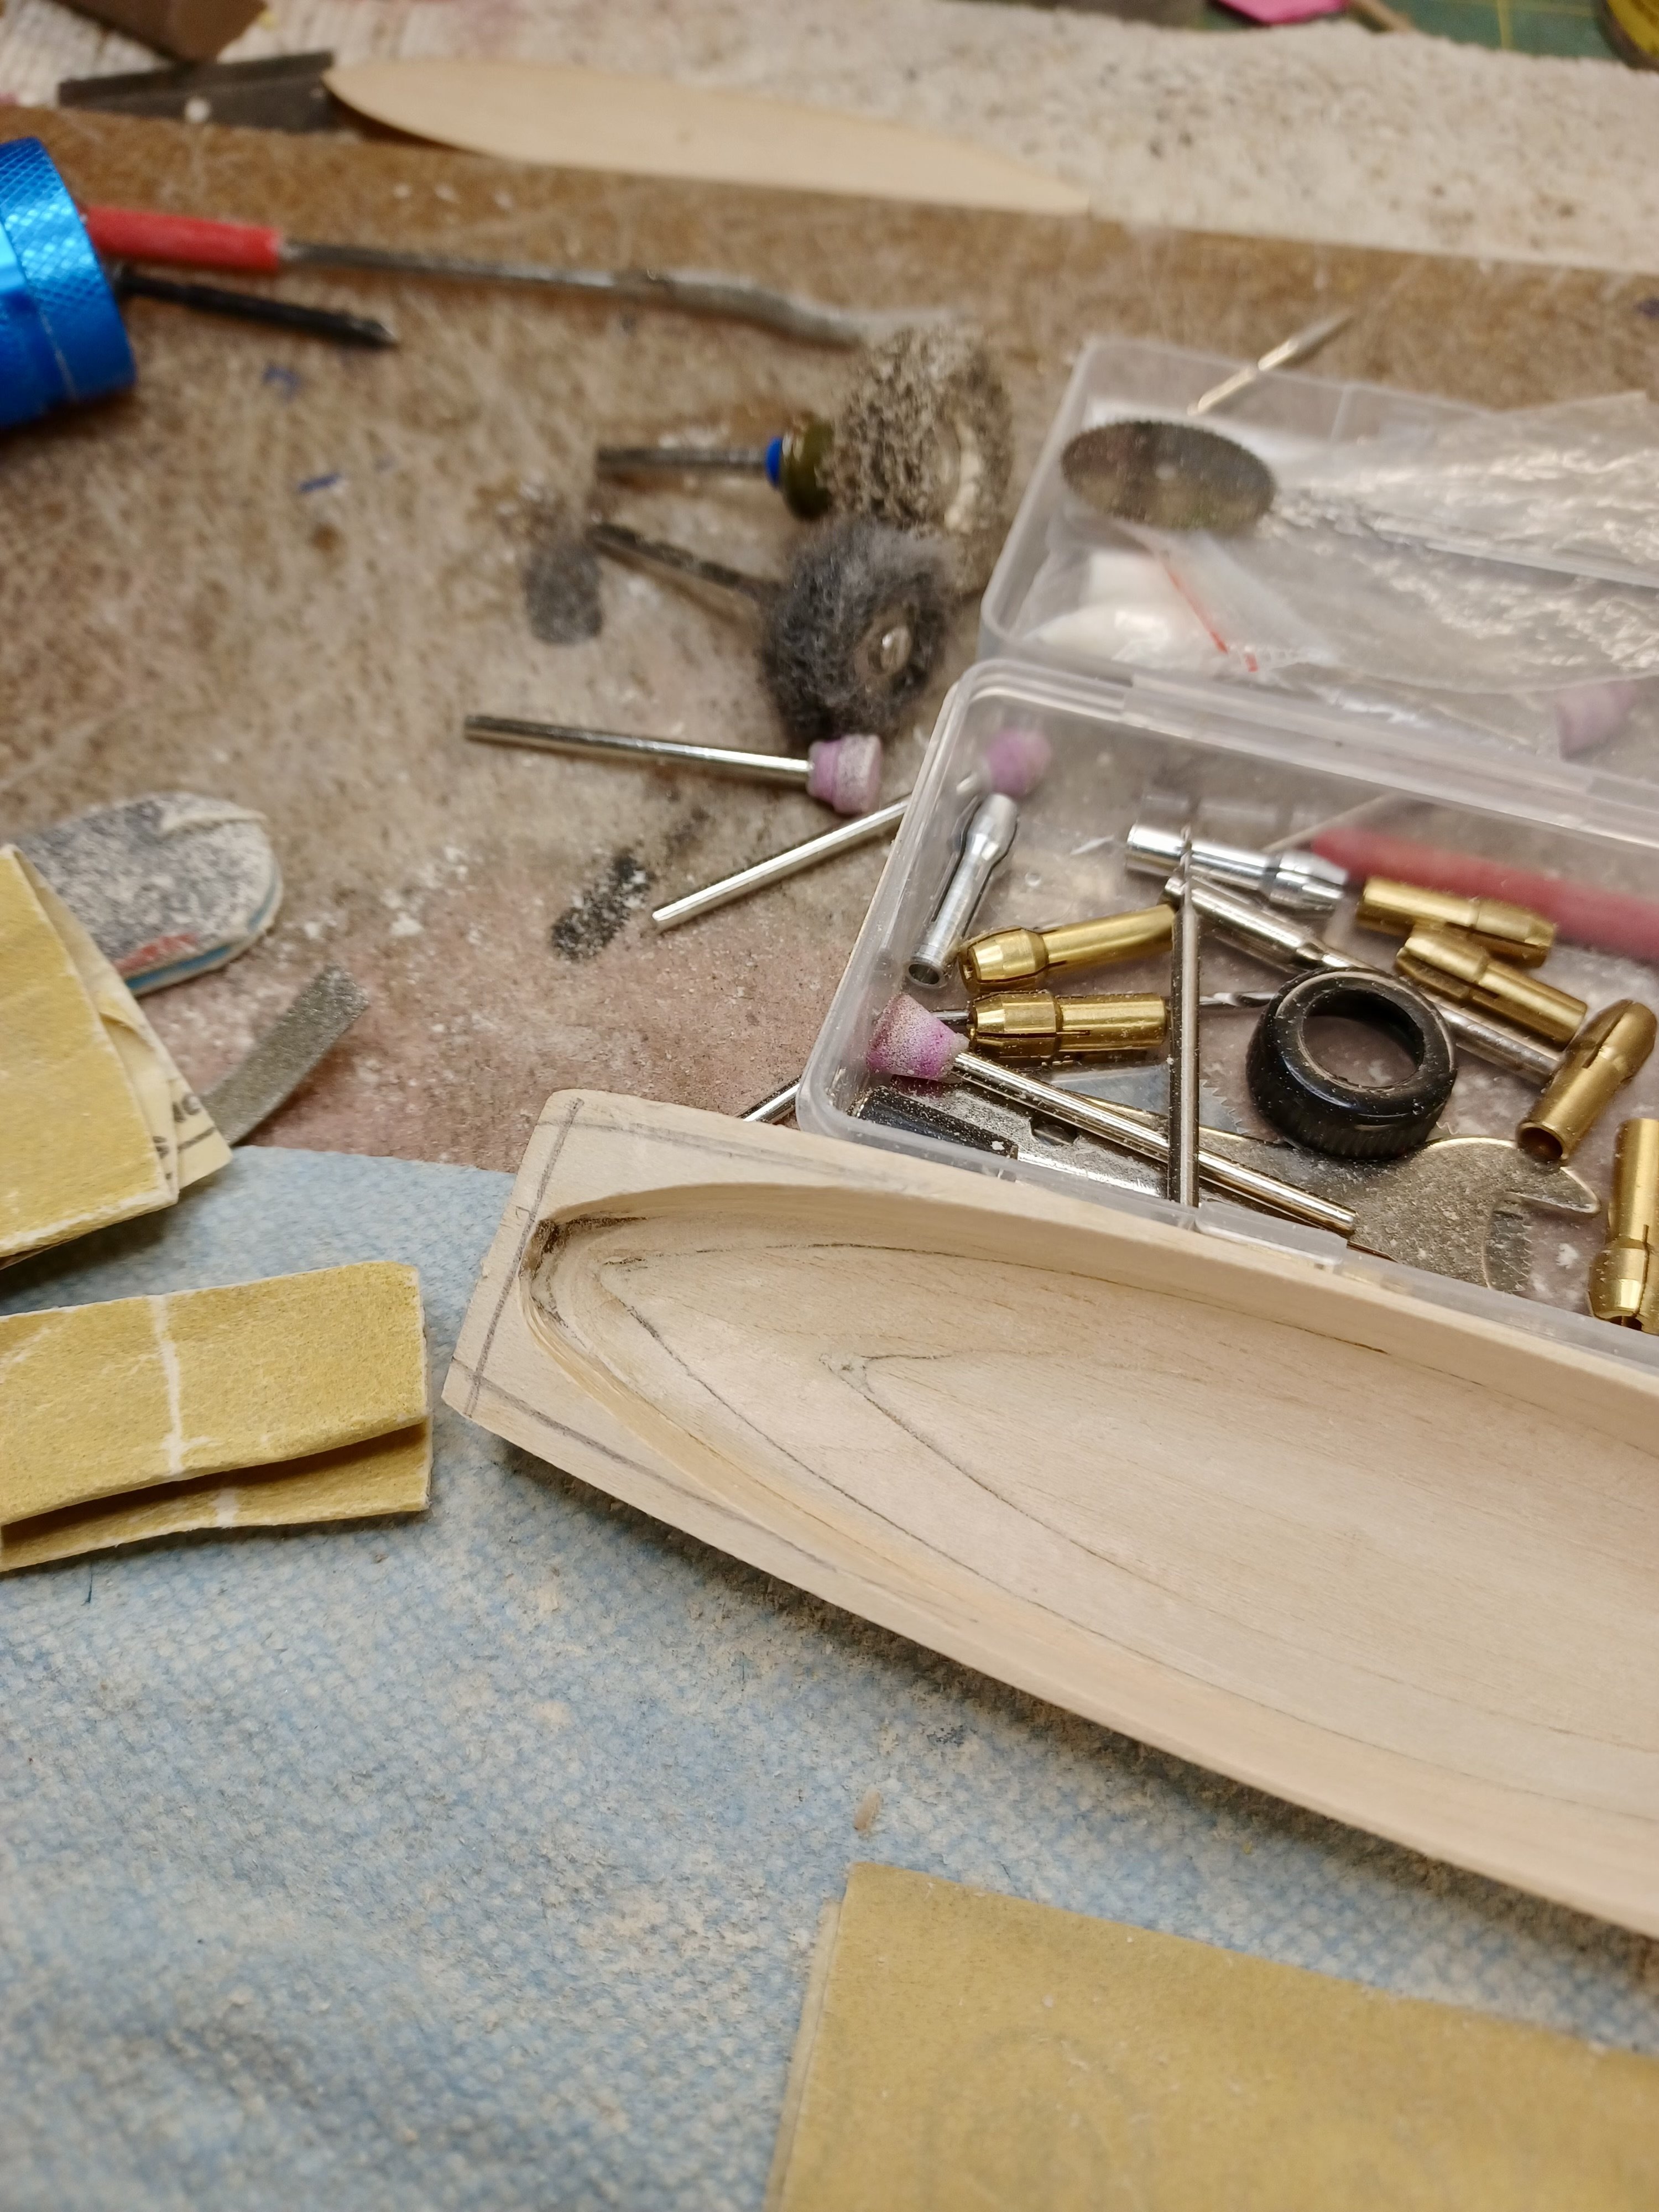
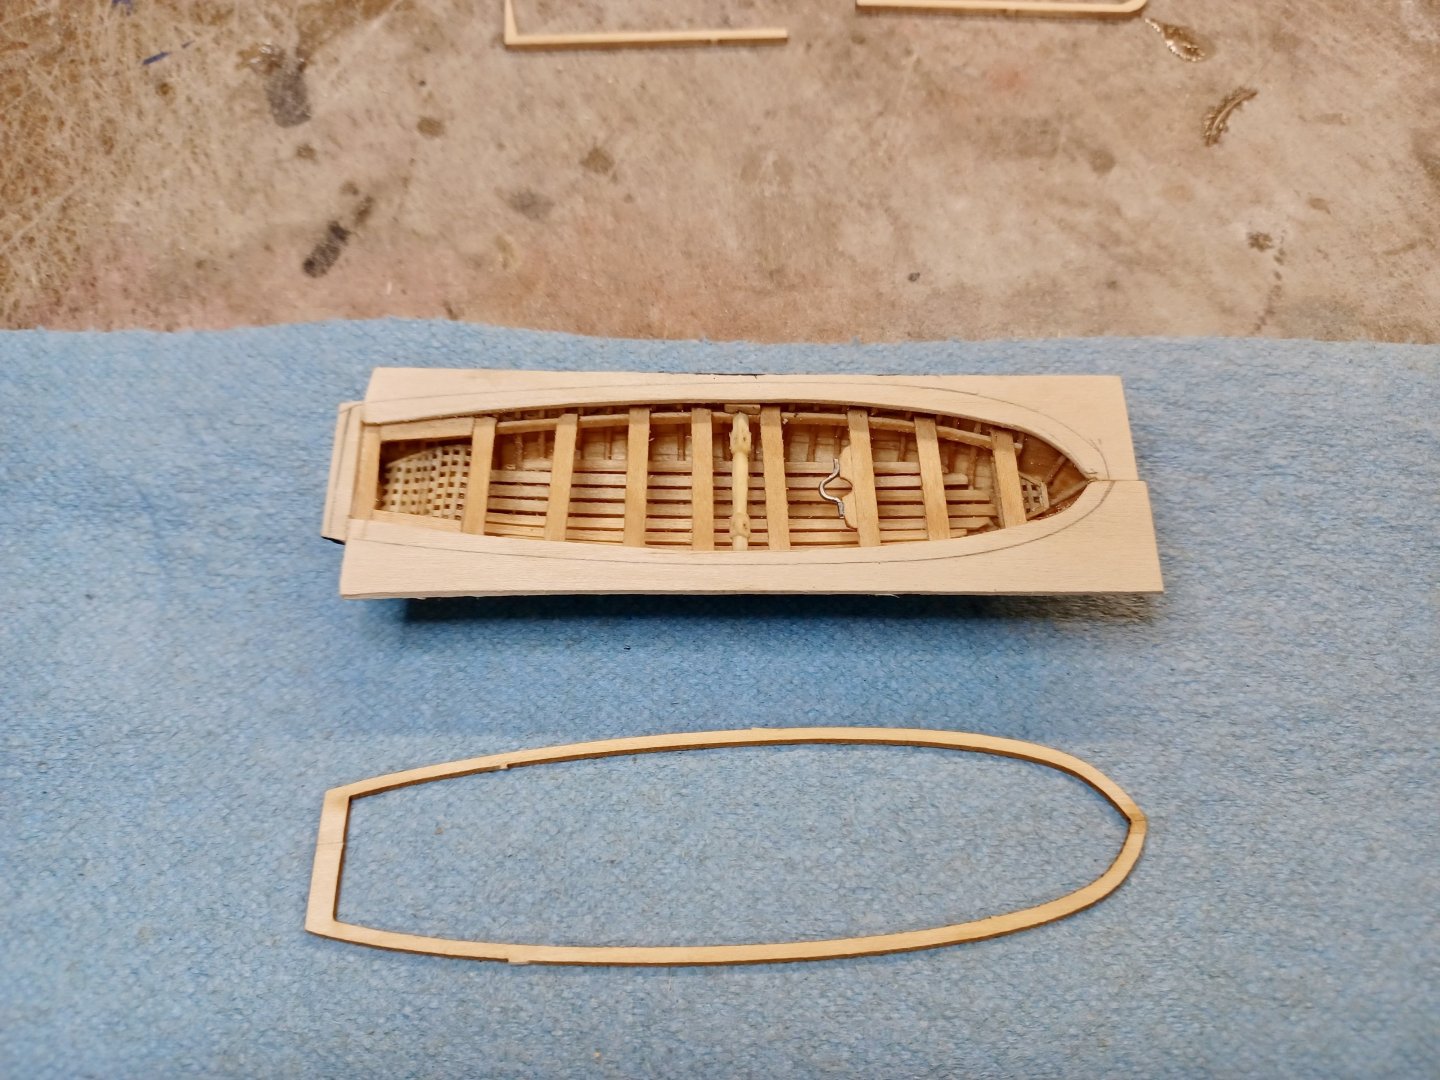
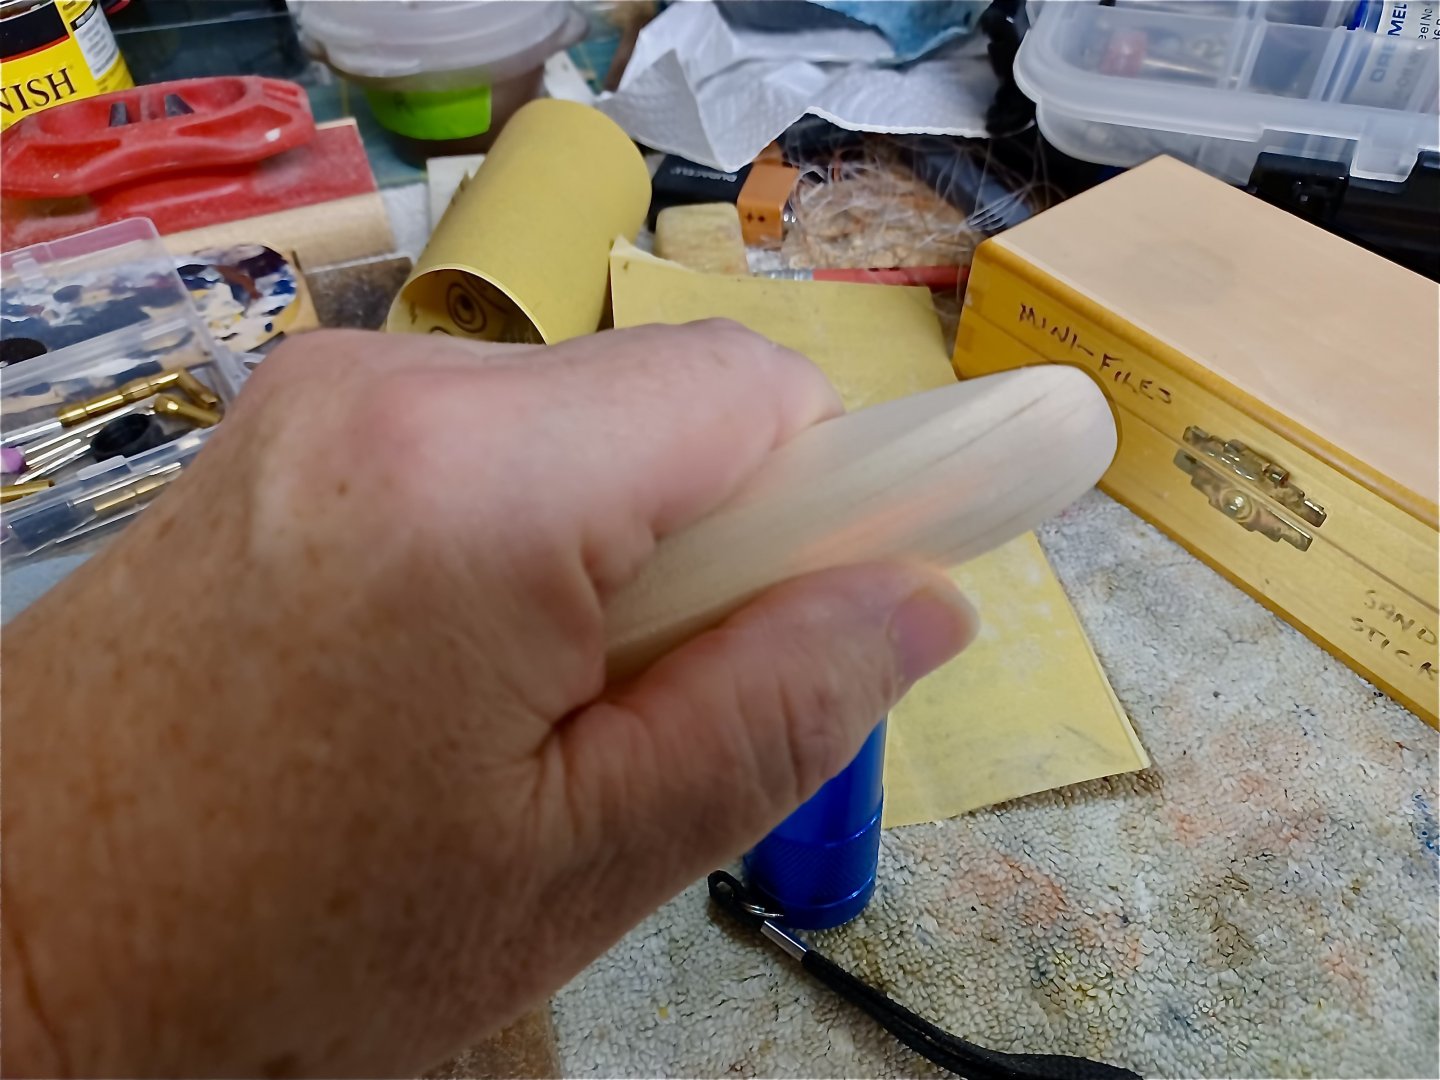
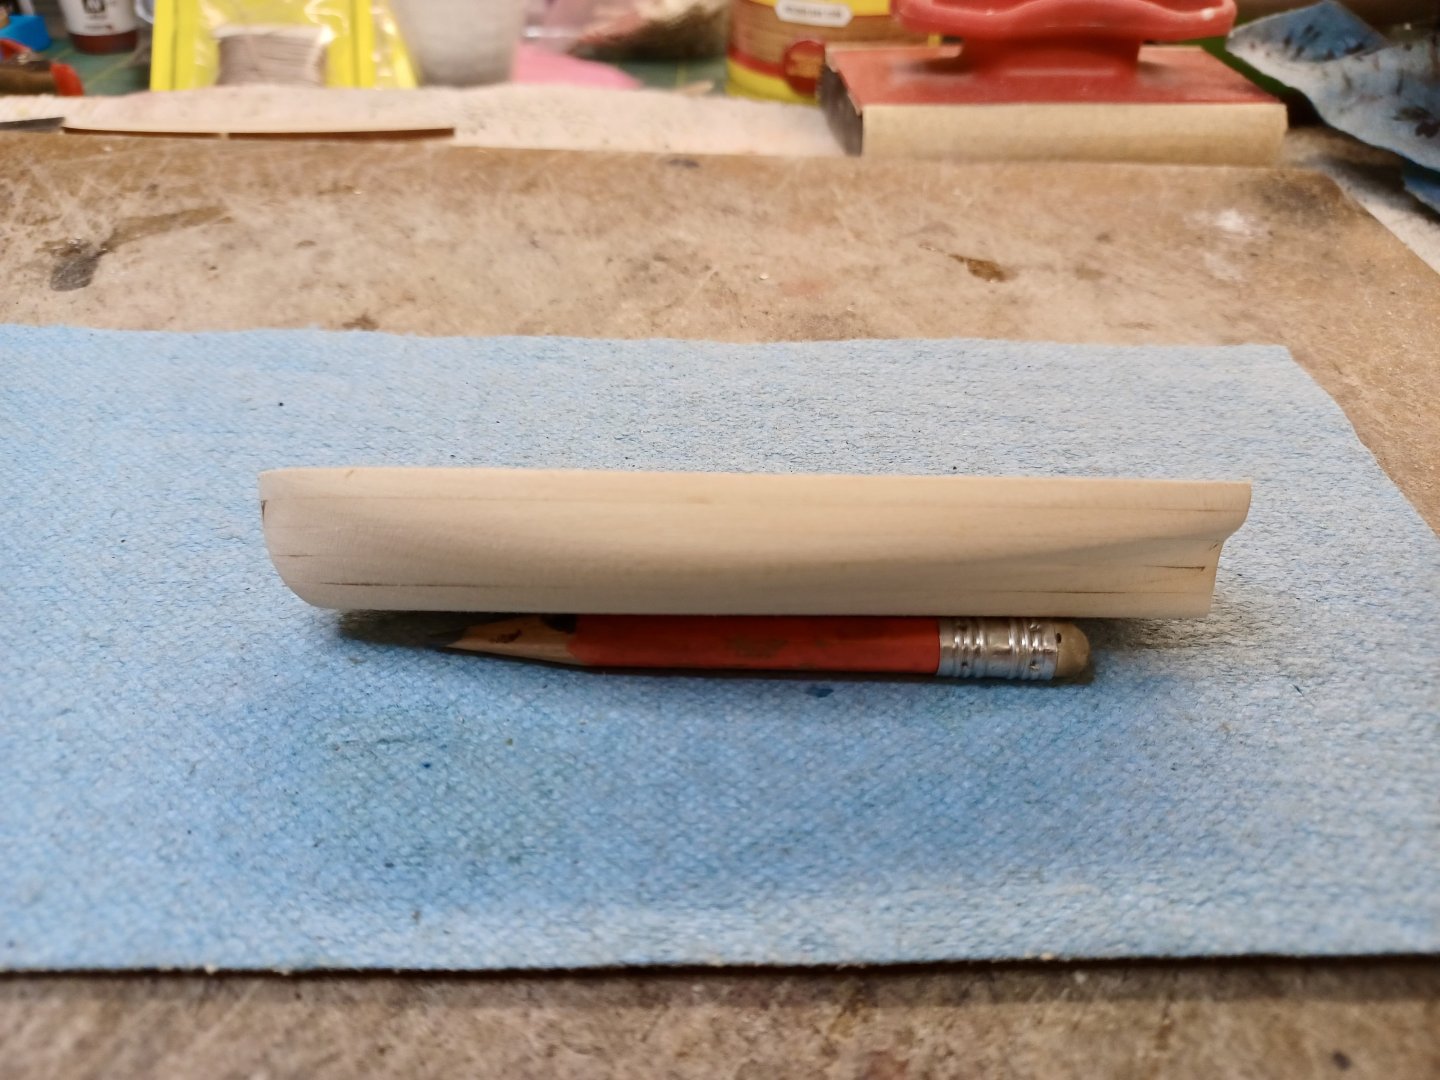
Dentistry 101 Now it is on to the longboat inside shaping. All of the sanding steps in my previous post are still relevant. Removing the biggest part of the burned wood from the lifts is still a good guide. However, I recommend keeping a sharp lookout right at each lift joint. Since we sanded enough on the outside to remove it, the closer you get to it being removed, the thinner the joint is. Again I have started at the bow concentrating on forming in a good vertical joint bottom to top. In the picture, you can see the different dremel bits, mini file, and sandpaper. I constantly switch in order to sand out different parts at different angles and shape. Picture two is how I check the thickness in the sanded area. Once you can see the light glowing through the wood…stay away from that area. The goal, for me, is to remove excess wood in the areas where no light is emitted.
- 436 replies
-
- 1
-
-
- Syren
- Model Shipways
- (and 1 more)
-
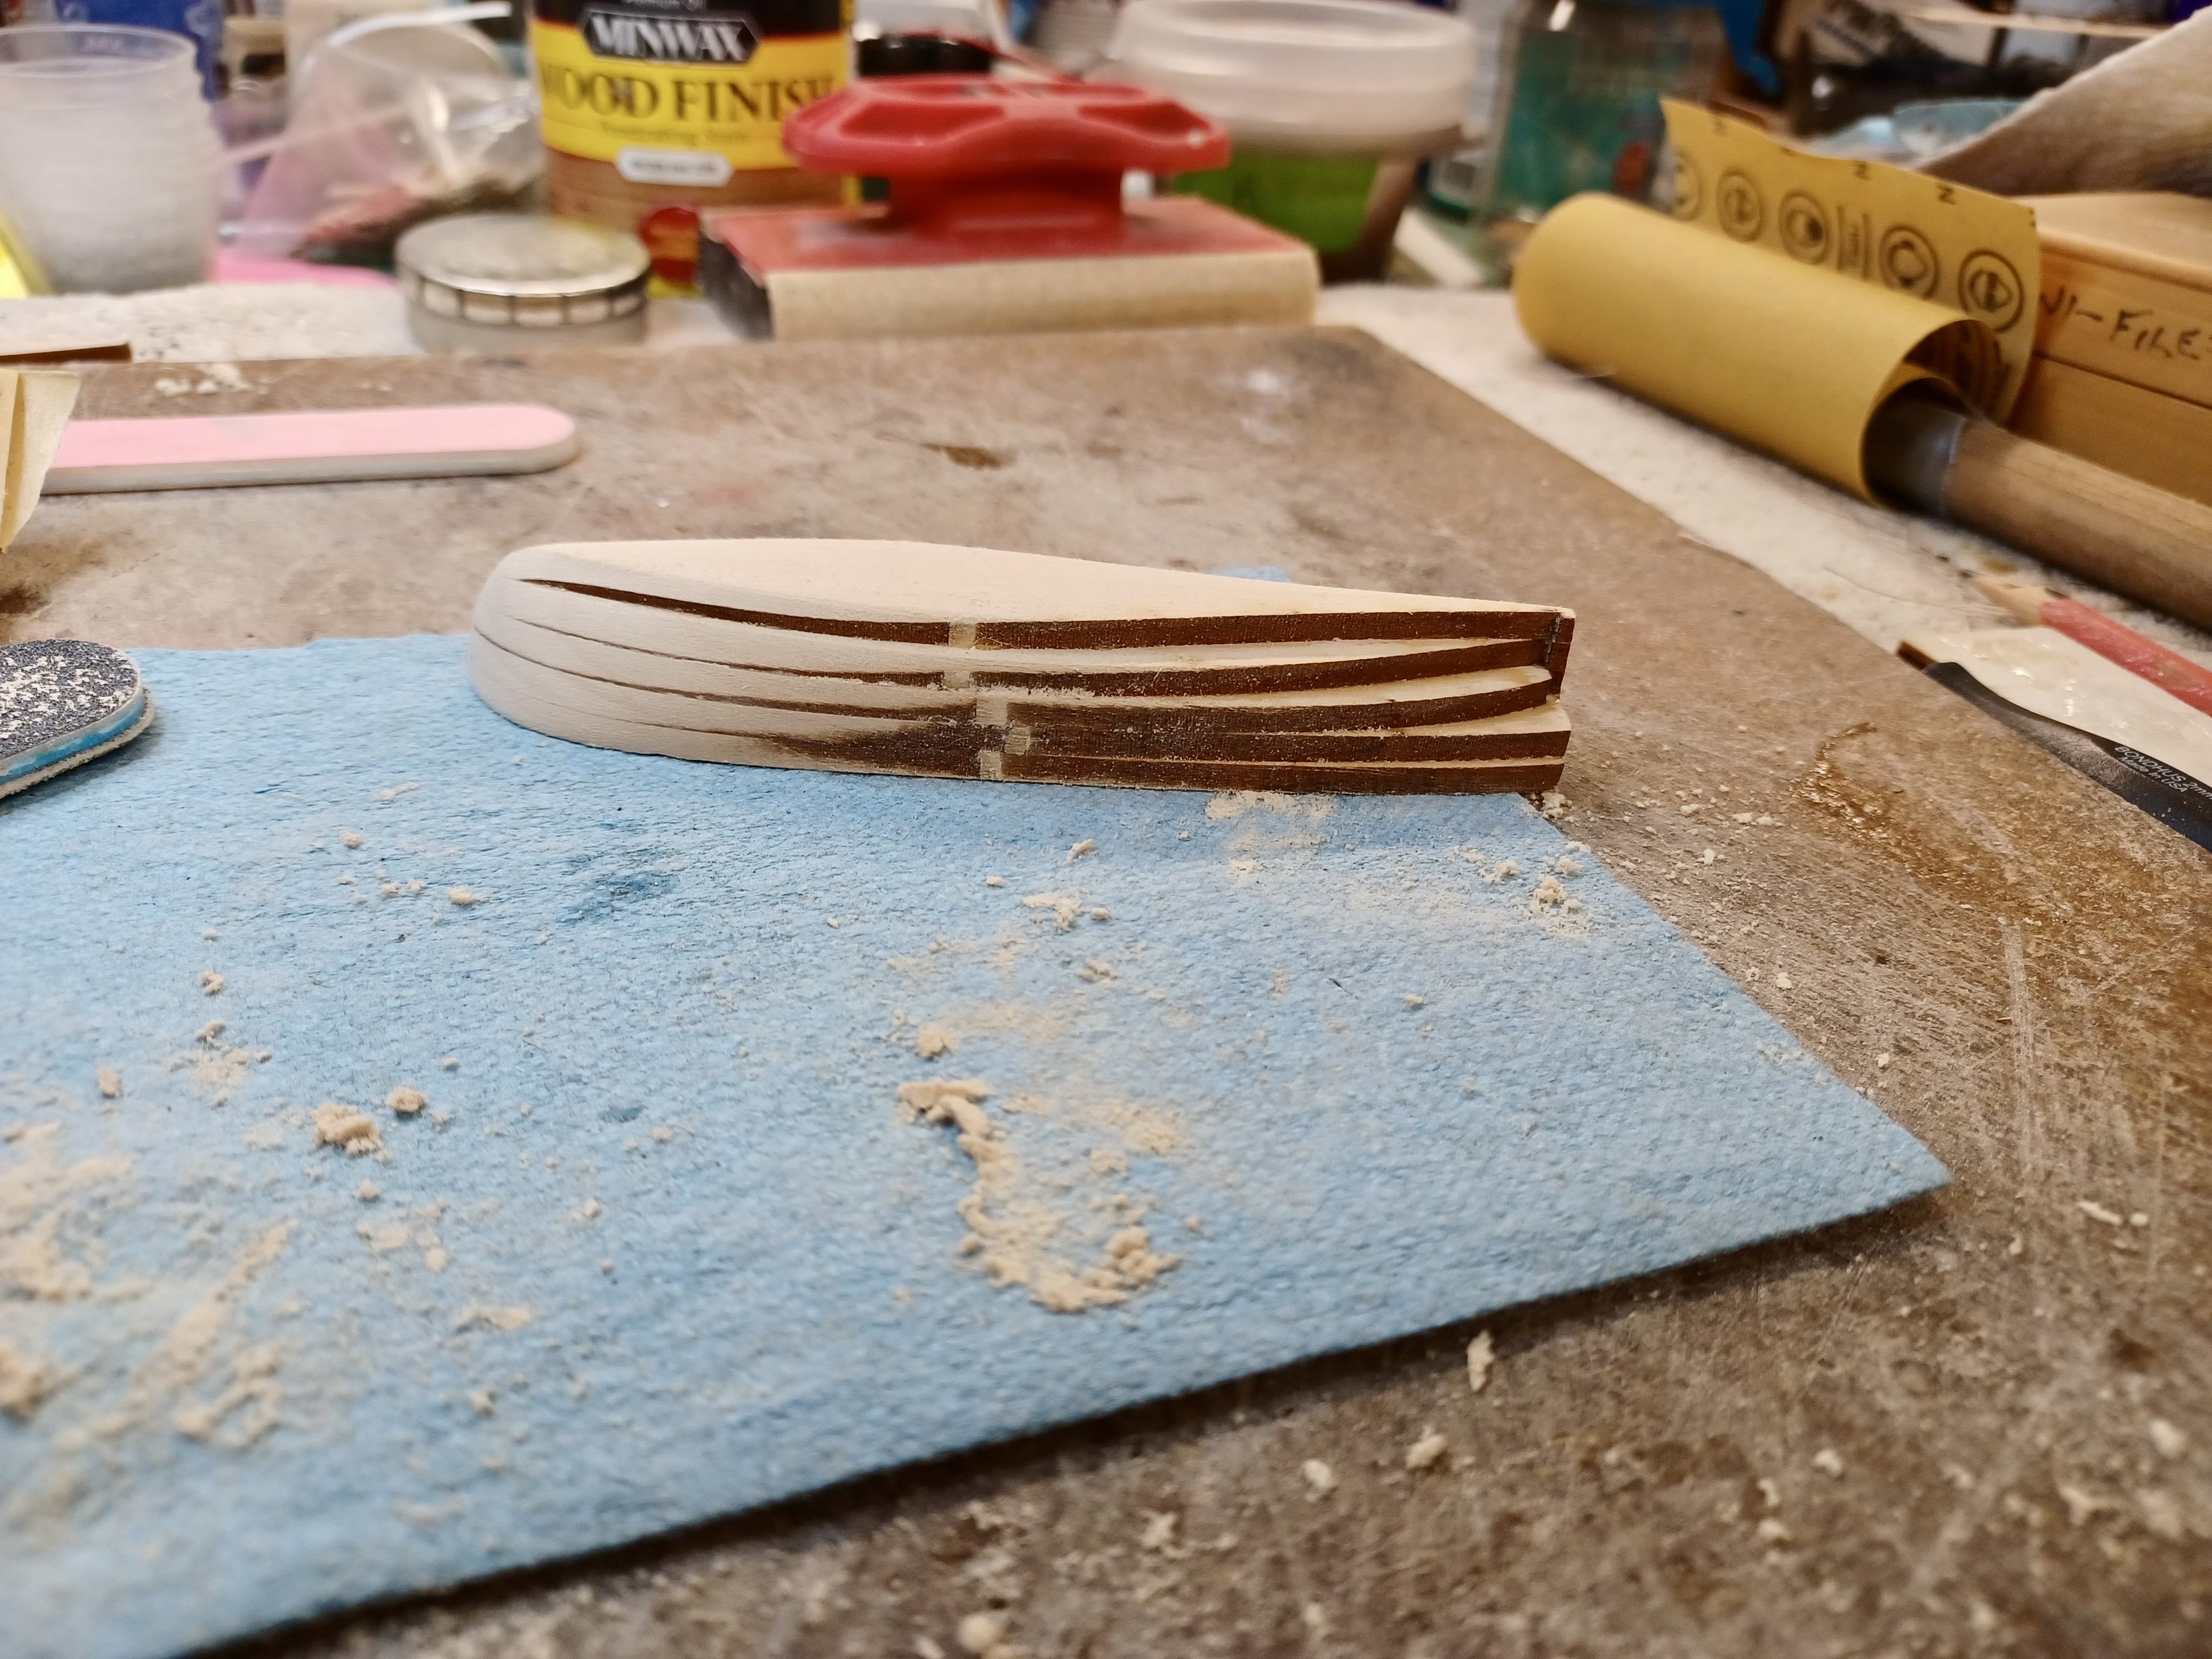
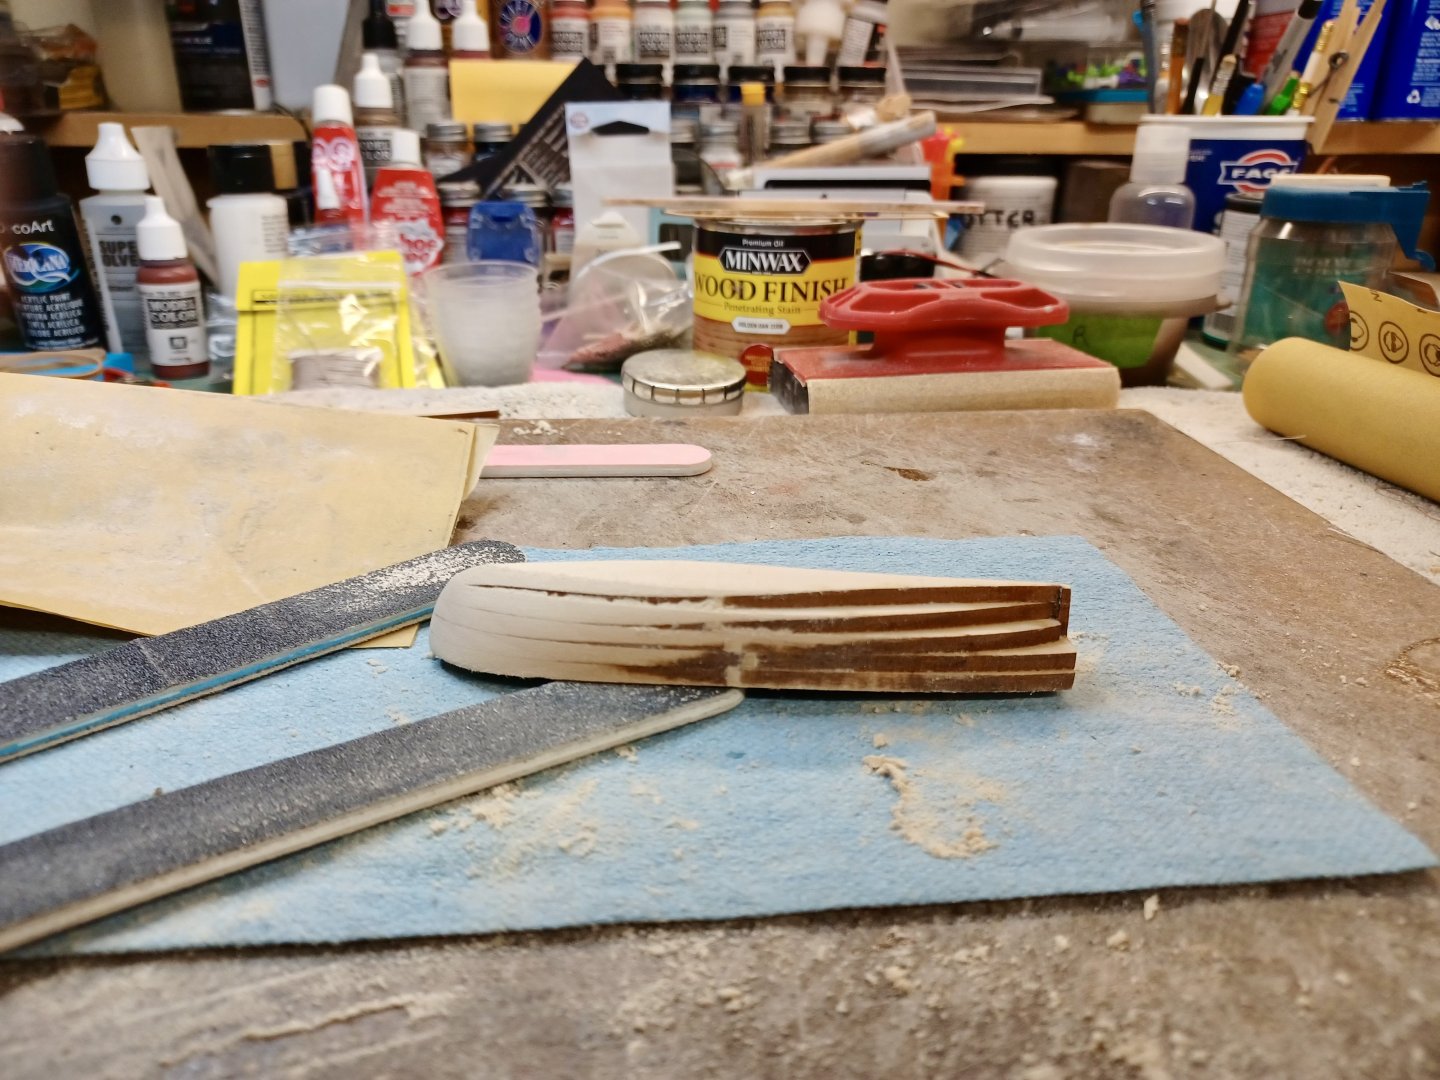
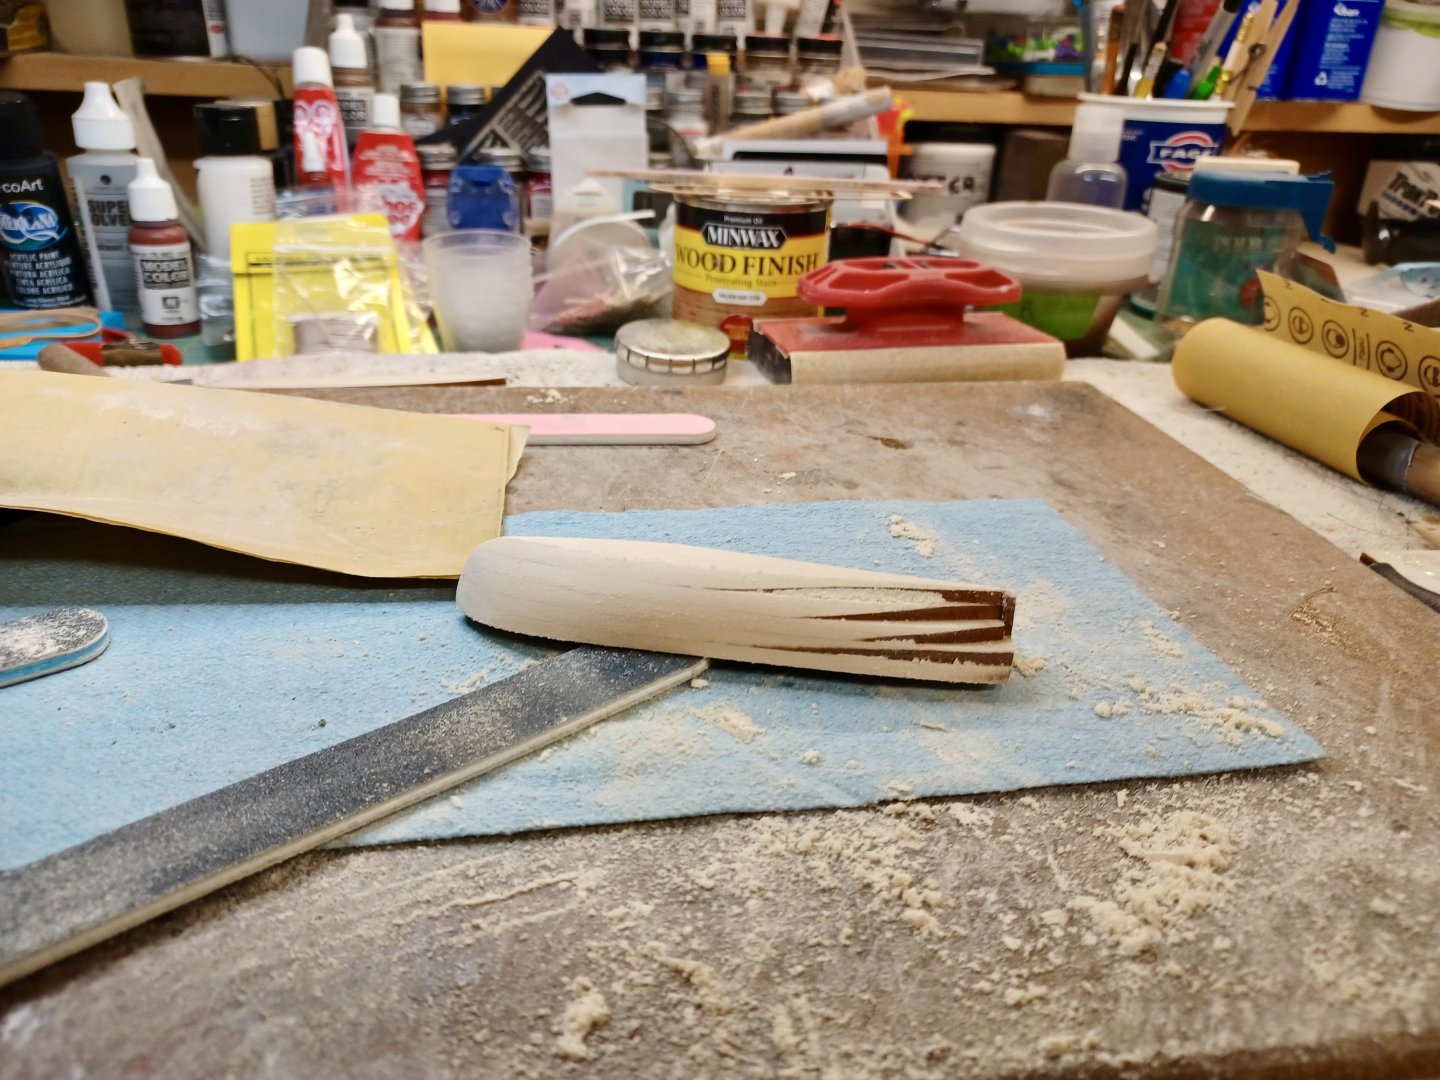
First Round on Longboat Complete Here is a series of pictures that depicts how I did my sanding/shaping. Some of this has been used in shaping balsa pieces on my planes. I am not saying this is the best, or only way to shape the lifts, just how I do it. For First Timers: 1. Pick an end to start at. (I chose the wider part at the bow.). This allows for a wider area to start with. In smaller, or narrower areas, you will find the changing file size and shape a frequent chore. 2. Try to sand across two lifts each time. Begin sanding the ridges down I try to vary which 2 lifts I work on. The intent is to sand the darker laser cut areas away leaving only clean wood. 3. Since the bow is a wide area, sand evenly across all lifts. As you do, the darker parts will begin to narrow. The goal is to remove just enough material to eliminate the lines totally. However, pay close attention to the thickness of the wood, all lifts. 4. As you follow the steps above, keep drawing the sanding further back narrowing the lines into the narrowest you can get. Most will simply disappear and if you stop sanding that area as soon as they do, the shape will begin to appear. 5. The narrowest areas at the stern will take several different sanding tools. Sandpaper wrapped around dowels of different sizes is my way. Along with mini files and sanding sticks. 6. Along the way, try dragging a fingernail across the lines. When you get to the point that you can diminish the amount of sanding in that area.

- 436 replies
-
- 6
-
-
- Syren
- Model Shipways
- (and 1 more)
-
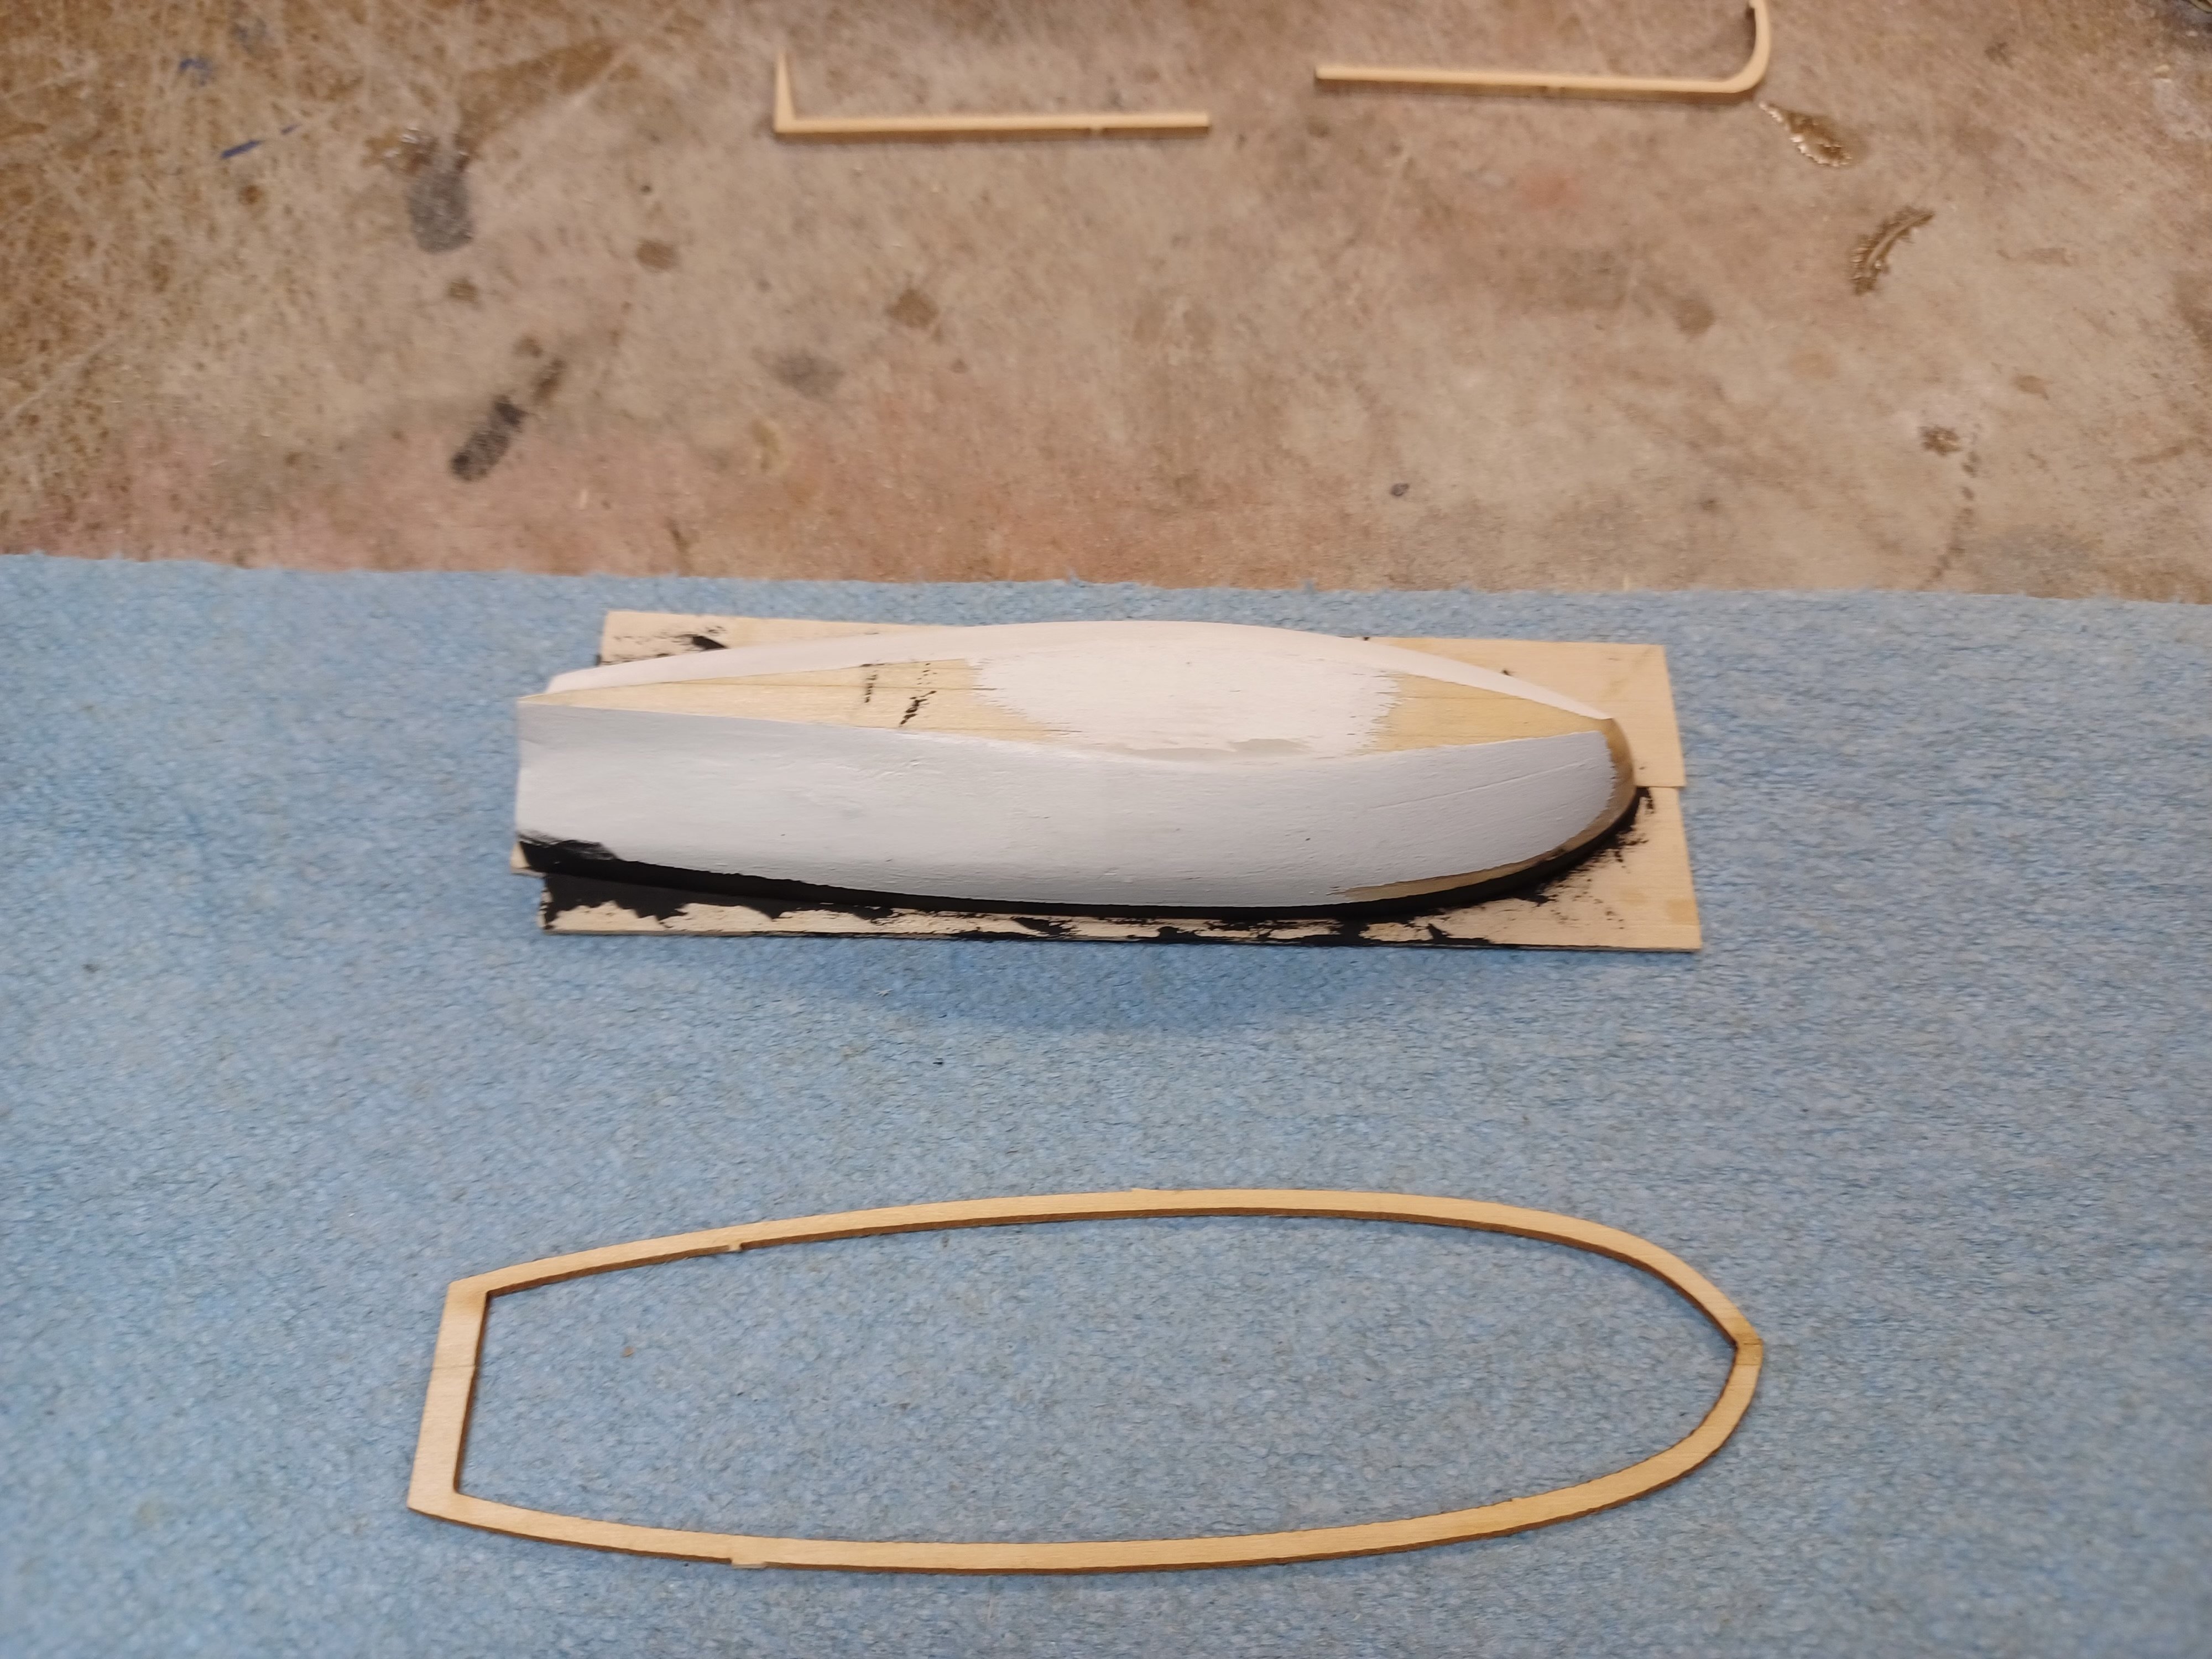
Sanding, Sanding - Pause - More Sanding Started on the longboat gluing up the lifts and waiting 24 hours to ensure that all of the glue had dried and set. Admittedly, I am used to sanding being in radio control plane building and repair. I have sanded wingtips, cowls, etc, and the only thing different is that I hadn’t worked with lifts. Here are pics of my progress and, I have been able to get the first round of sanding done on the port side. Next will be starboard, and then a final fine sanding.
- 436 replies
-
- 5
-
-
- Syren
- Model Shipways
- (and 1 more)
-
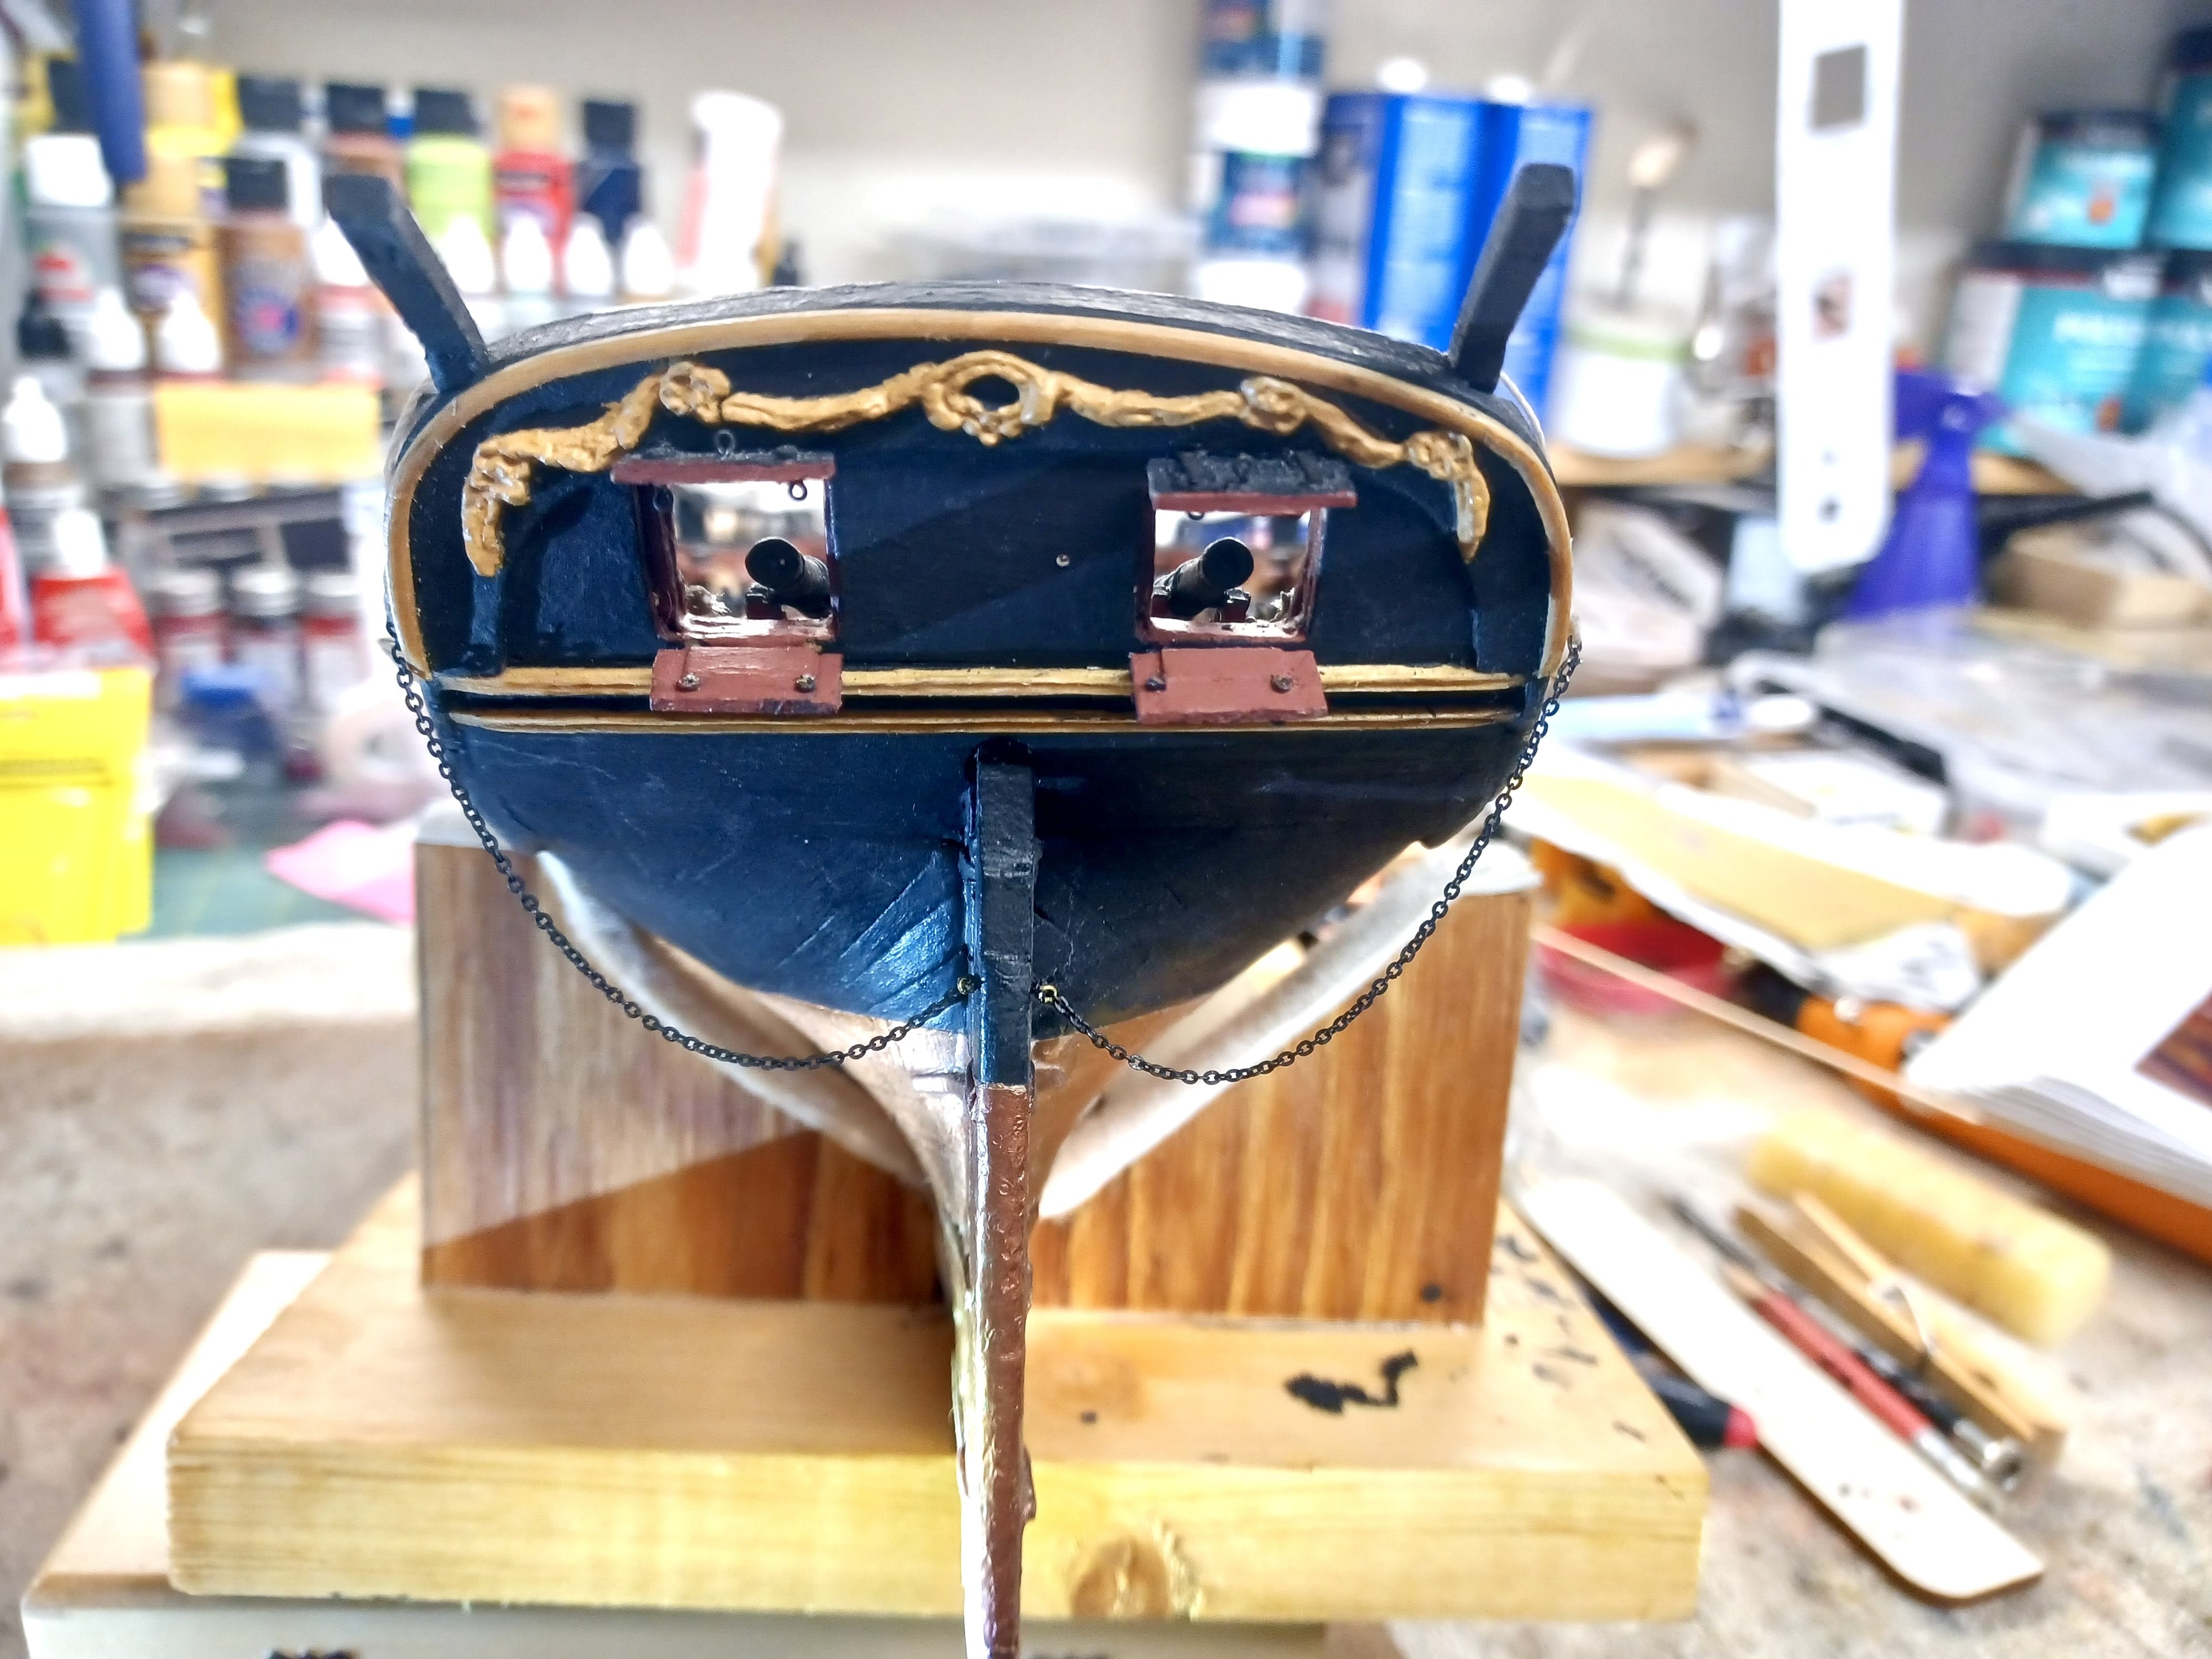
Rudder Pendants Completed and In I got the pendants assembled and in after blackening the chain. I first split the chain into two equal pieces so as to make them easier to work with. And, should I make a disastrous mistake on one, it would leave me enough to still complete this step. I also found it easier to attach the chain to the tiller first, then set the length by tying it off to the cleat. Don’t let the look make you think this is easy. It isn’t the most difficult task, but the chain links are tiny, and attaching them to the eyebolts is a pain. Lastly, making them hang the same on both sides of the tiller is a challenge. Now it’s on to Chapter 15 for the 25 foot longboat….Or was that Chapter 25 for the 15 foot longboat. ☺️

- 436 replies
-
- 4
-
-
- Syren
- Model Shipways
- (and 1 more)
-
Hammock Rails and Rigging Lines are In… I have completed this task up to the point that it is time to add the netting, however, I am hesitant to do so. Up to this point, I have found that, had I built before, I “might” have waited until later in the build. I had to fix items that I had accidentally bumped, and knocked out of position. I believe that putting the netting in, will provide a ready made snag area. I also believe that if I need to repair any damage to the hammock rails, the netting will make it more difficult. Looking ahead, the rudder pendants, and the long boat assembly will not interfere with them, so I will chug along making sure I don’t add something that will get in the way of completing netting.

- 436 replies
-
- 2
-
-
- Syren
- Model Shipways
- (and 1 more)
-
Issue Resolved, & Rails Almost Ready… After a quick use of my gray matter (not my hair 😏) I figured a way to adjust the slots on the hammock cranes. Sorry for the picture quality, but I think you can see my process. I simply laid my Xacto knife with spine on the bottom and gave each slot a slight twist. Then, it was a simple process of adding the wood rail, and slightly down pushing it into place. The second pic shows the result after painting. One thing to note is that I did not glue the rails to the boarding panels yet. If I did, it would interfere with rigging the crane wire to the eye bolts on the panel. After, the rigging is done, and before adding the netting, I will glue them in place.


- 436 replies
-
- 8
-
-
- Syren
- Model Shipways
- (and 1 more)
-
Well, That Was Quick…and a Concern The airplane assembly took barely any time away from the Syren and I have moved on. The next step on the hammock cranes is done and also raised a concern. After painting, and adding them to the cap rail, I have seen how delicate they are. The slots that fit the inside wood rail are not wide enough to accommodate the strip that is used. So, I either have to sand the wood used so it will fit, OR modify each crane by widening the slot on each. Neither choice is very palatable..thin the wood making it weaker, or figure out a way to widen the slots on 20 cranes without damaging them in the process. Newbie Note: If this is your first build like me, fit each crane slot to the wood BEFORE you glue them to the cap rail.

- 436 replies
-
- 6
-
-
- Syren
- Model Shipways
- (and 1 more)
-
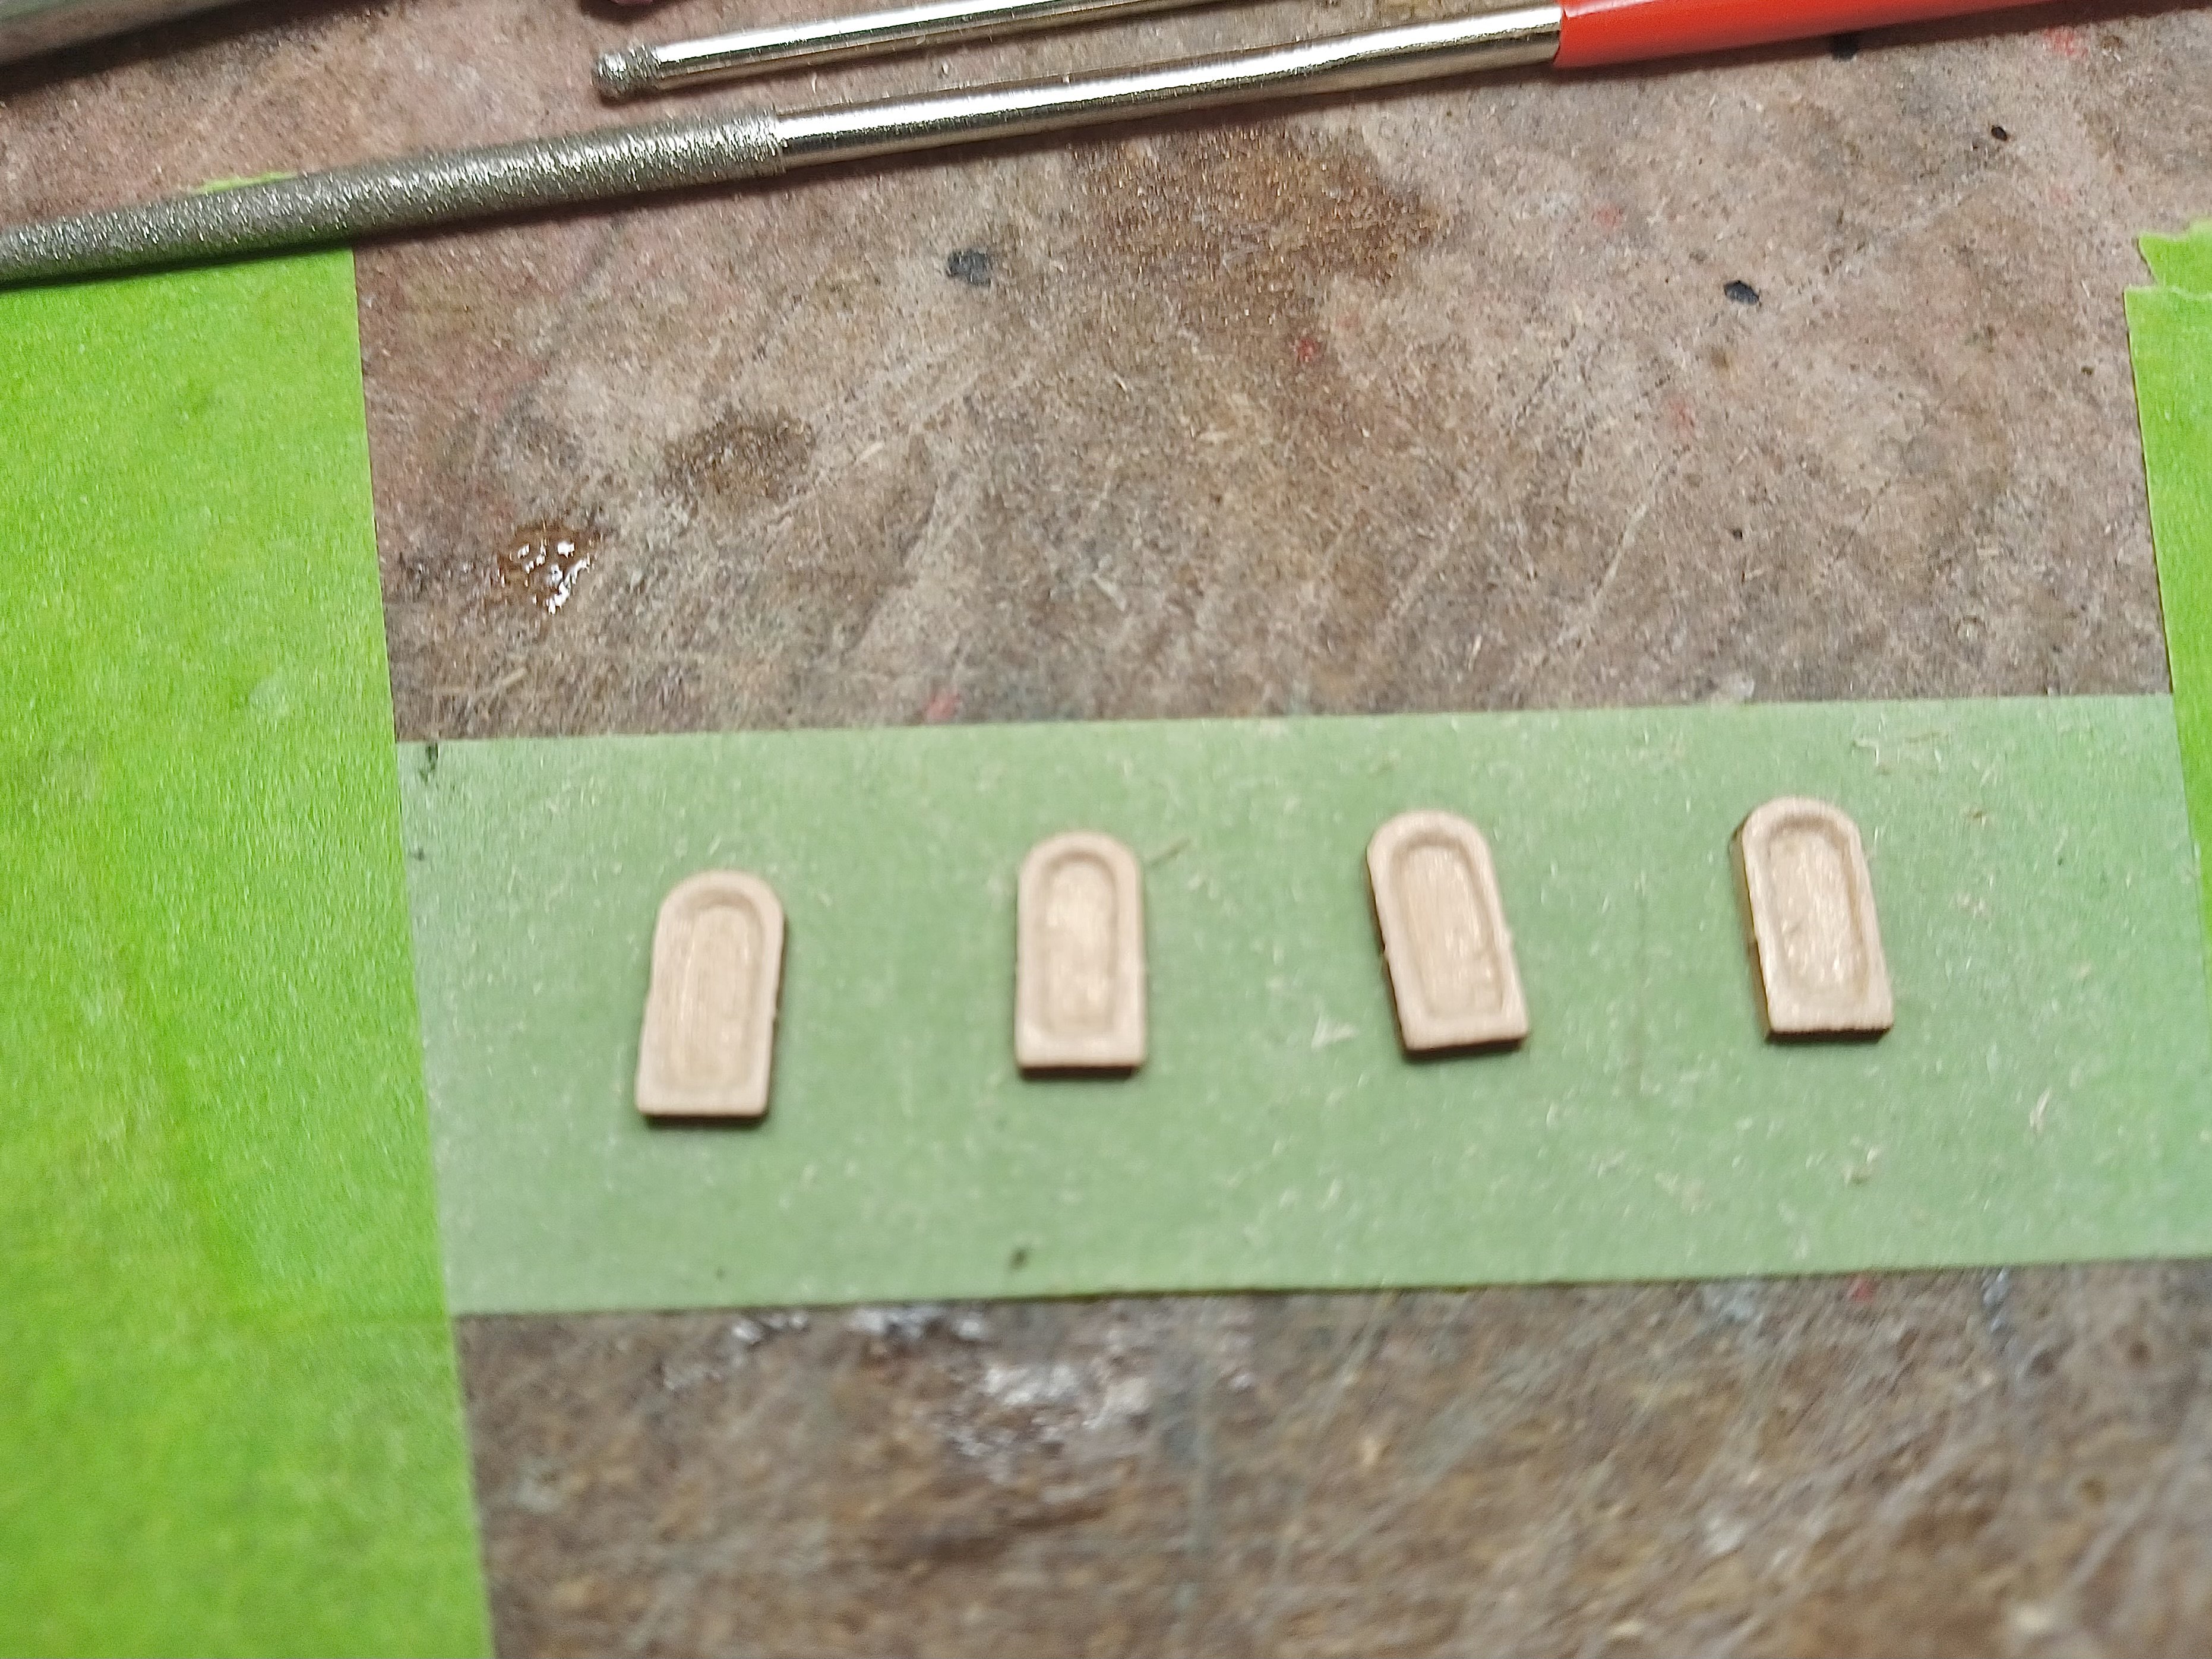
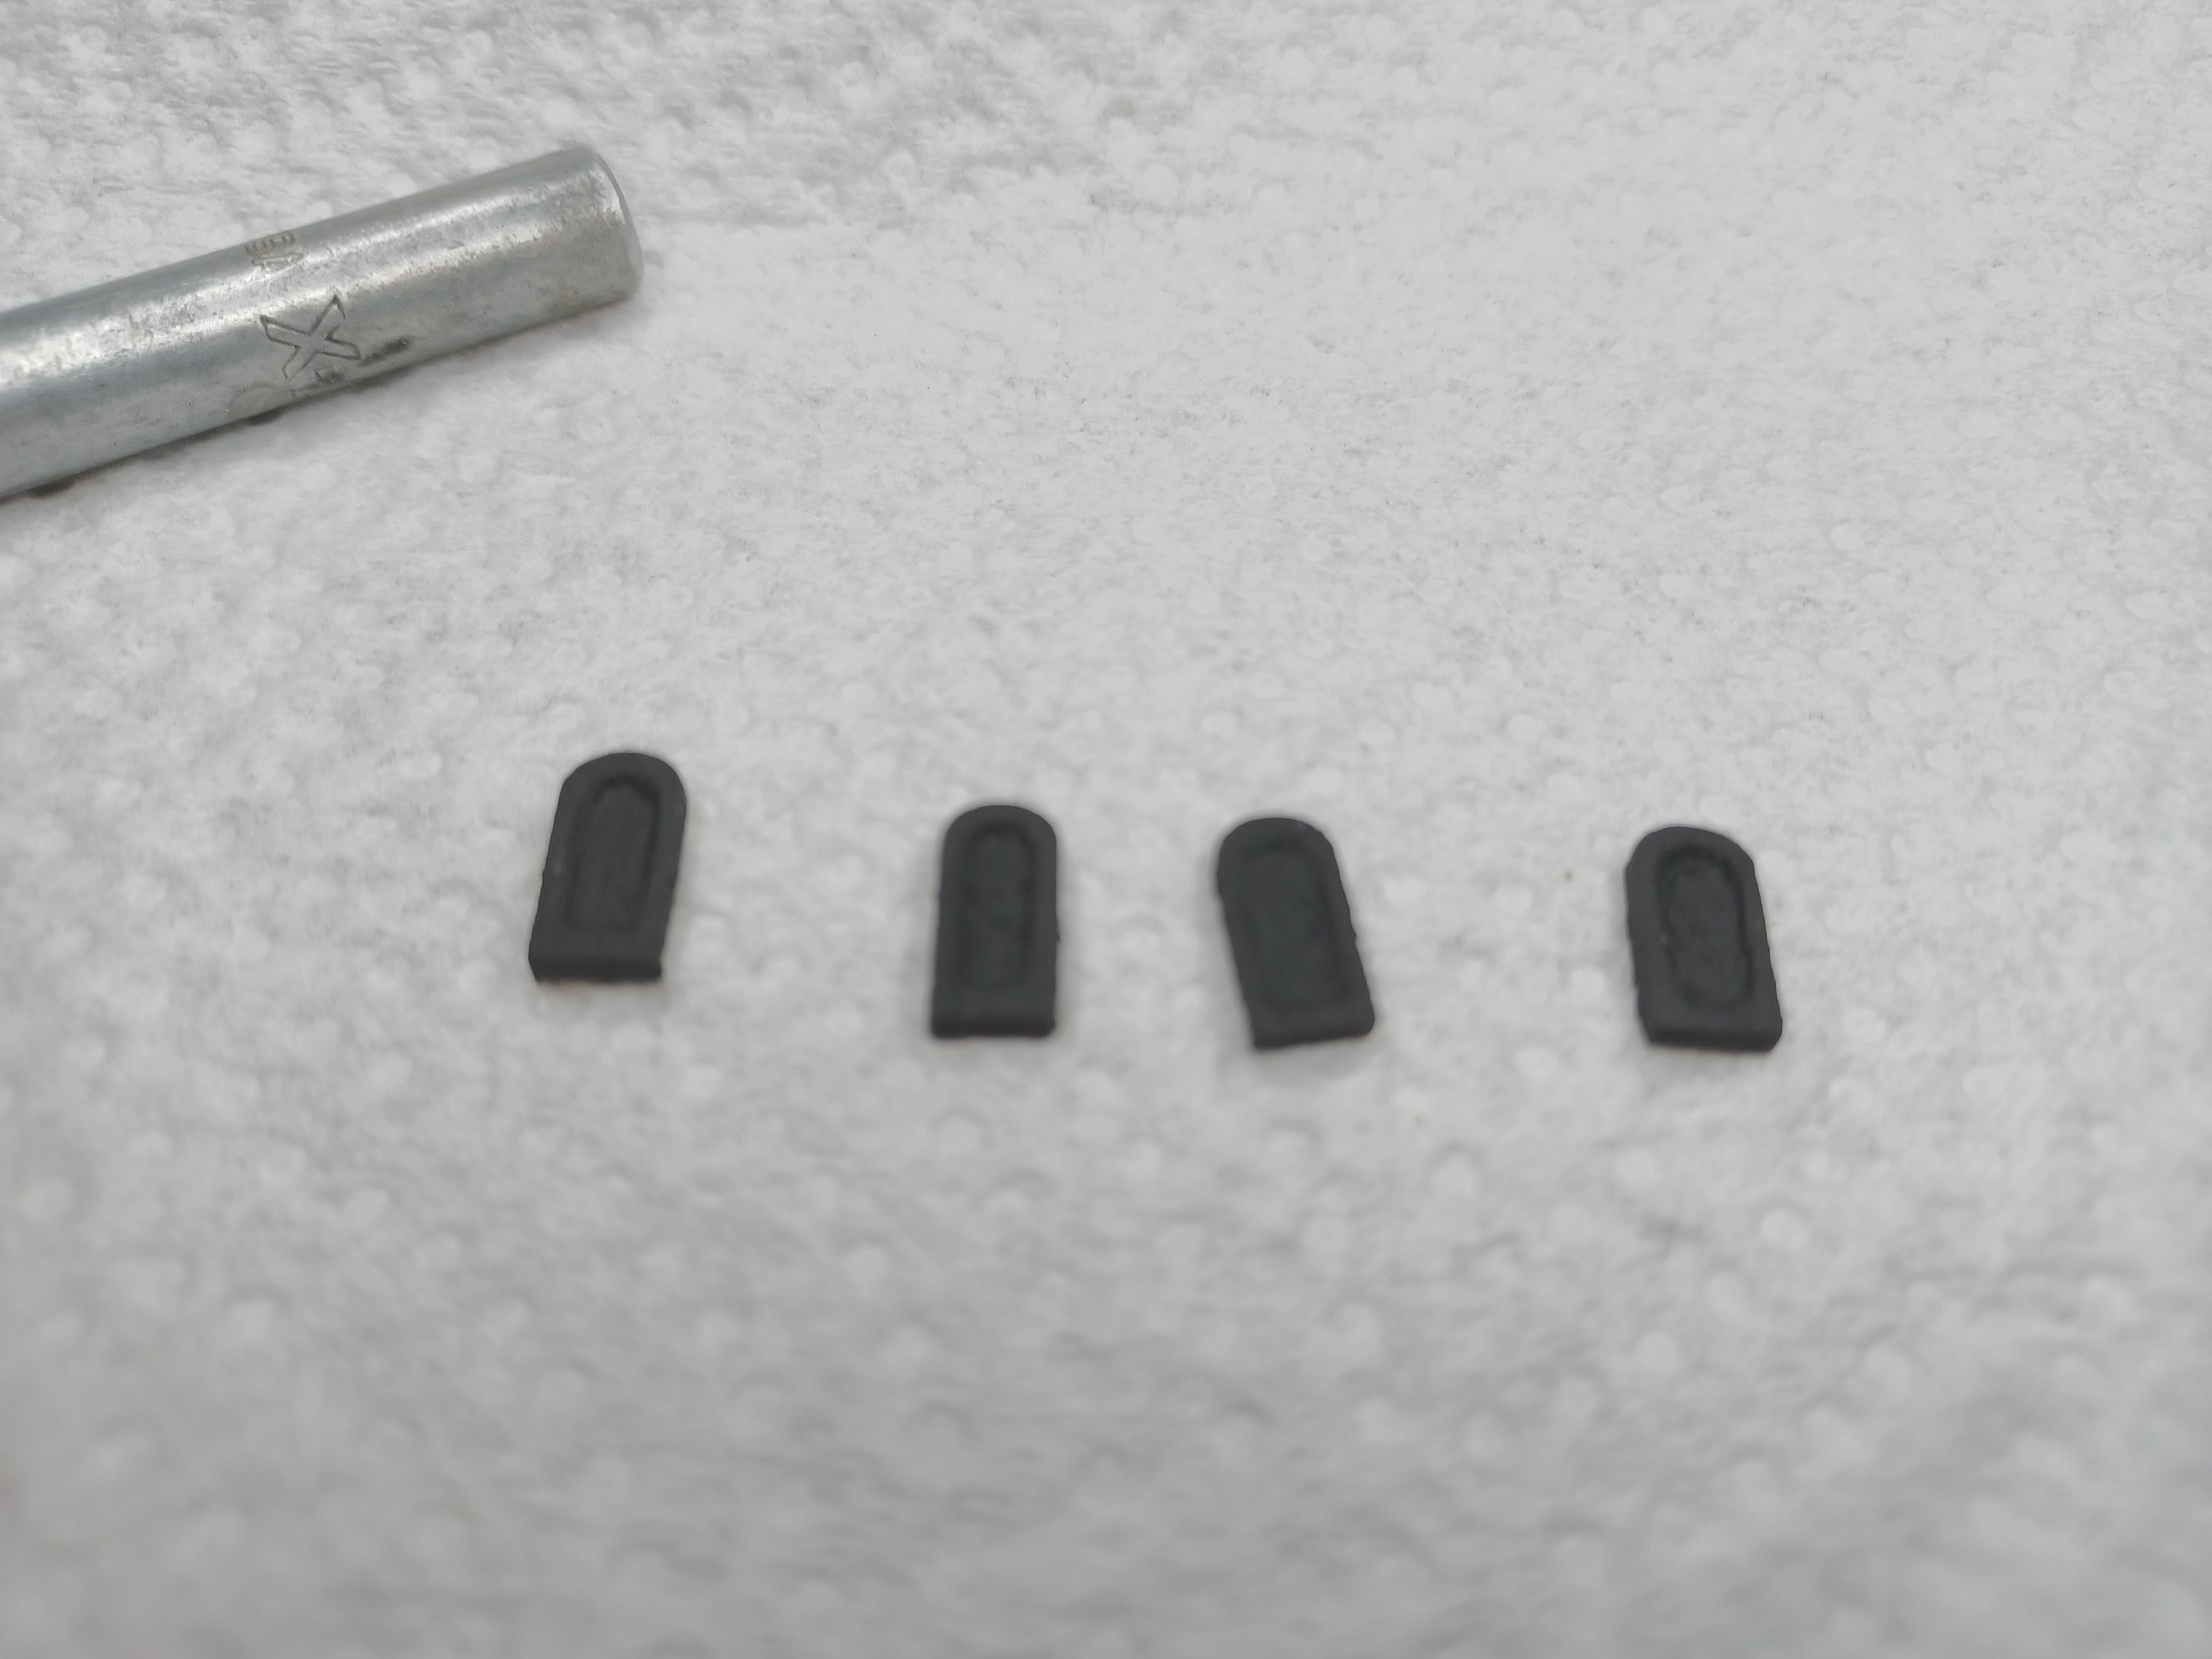
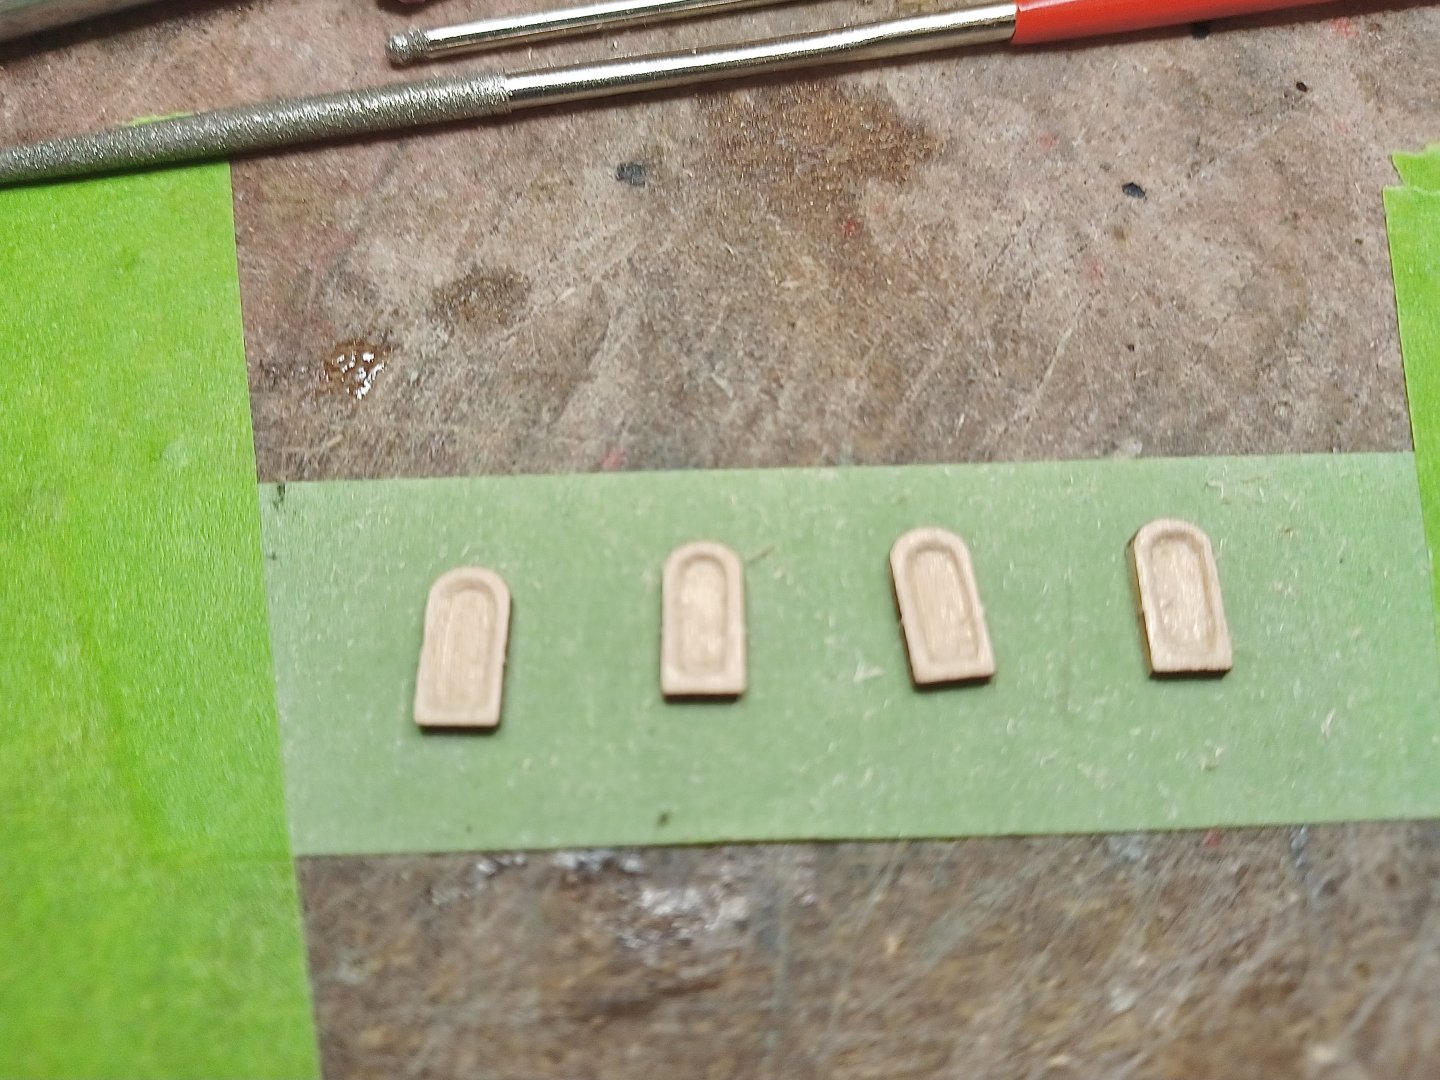
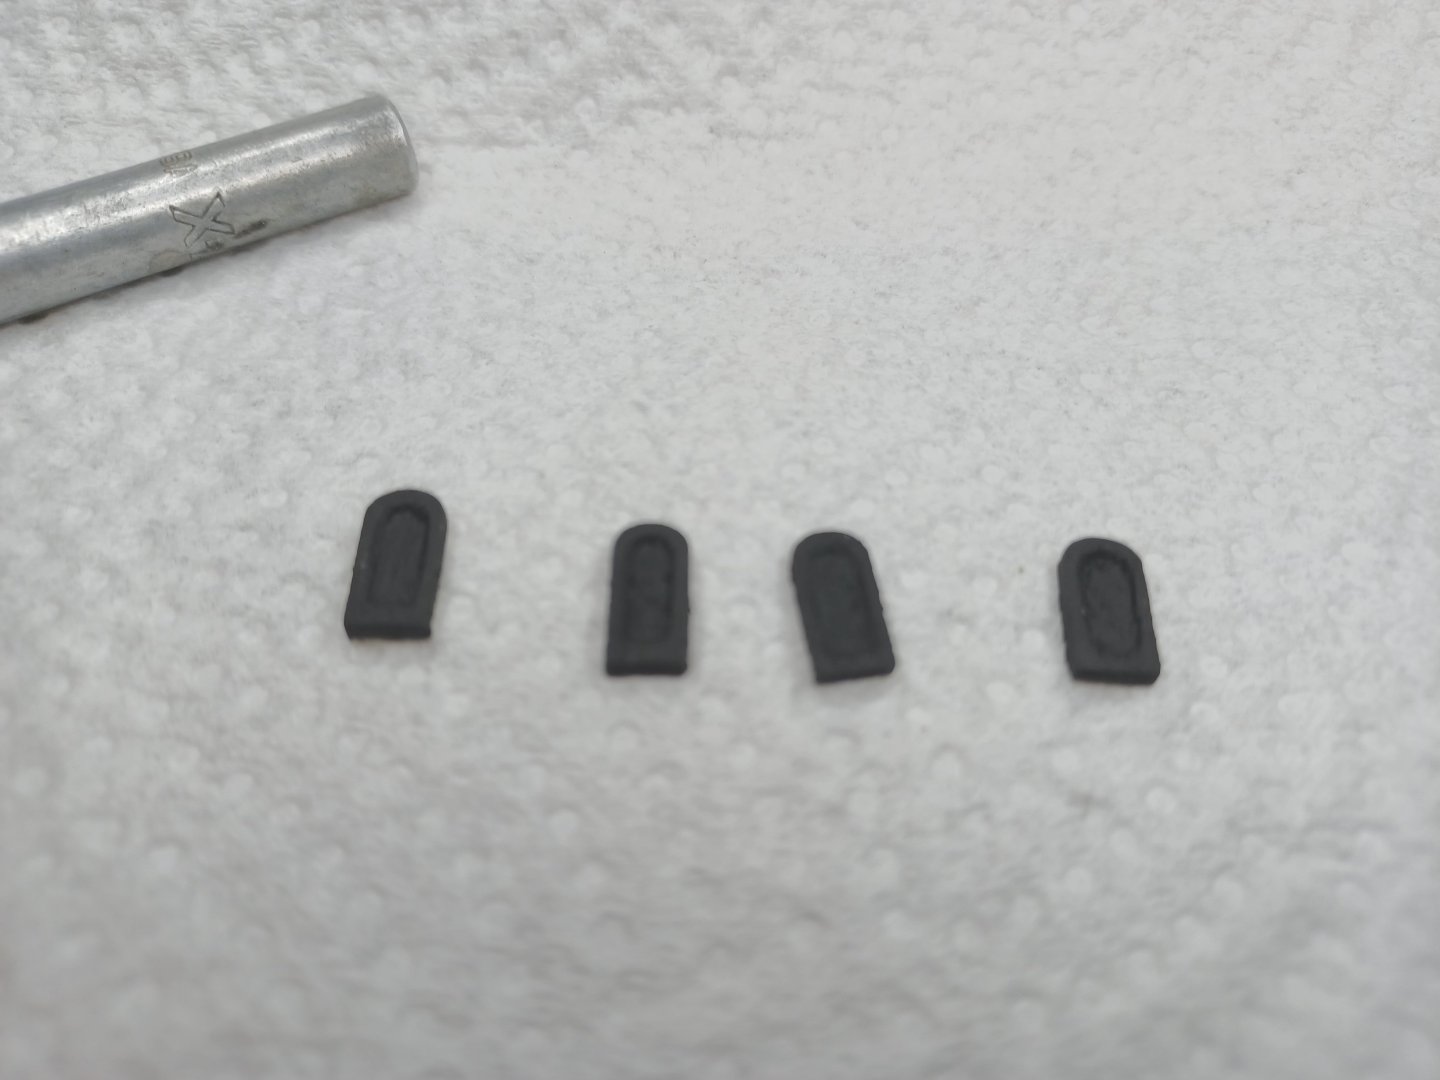
One Last Step Before moving over to my plane assembly, I decided to get the boarding panels ready. And I was determined to add the edging that Chuck’s practicum suggested. The pics are not the best, but the unpainted ones show the detail.
- 436 replies
-
- 1
-
-
- Syren
- Model Shipways
- (and 1 more)
-
Just Couldn’t Do It..🤫 The crooked ladder step just kept bugging me, so I fixed it. I was lucky, and didn’t have to remove it, as I was able to fix it in place. Now I am ready to move on.
- 436 replies
-
- 4
-
-
- Syren
- Model Shipways
- (and 1 more)
-
Ladders In, and a Small Dilemma. I was able to construct and add the boarding ladders. They look better from regular distance even though the steps look out of alignment. Now, it’s on to the hammock rails….but, first. It is fast becoming flying weather, and I really need to assemble a new plane. I have only one work area, and I need the same area that I am using now. I will be stepping away from the Syren while I put together an A10 “Warthog.” Once it is together, I will continue with the Syren. And, weather permitting, some flying in. And the PICS.


- 436 replies
-
- 6
-
-
- Syren
- Model Shipways
- (and 1 more)
-
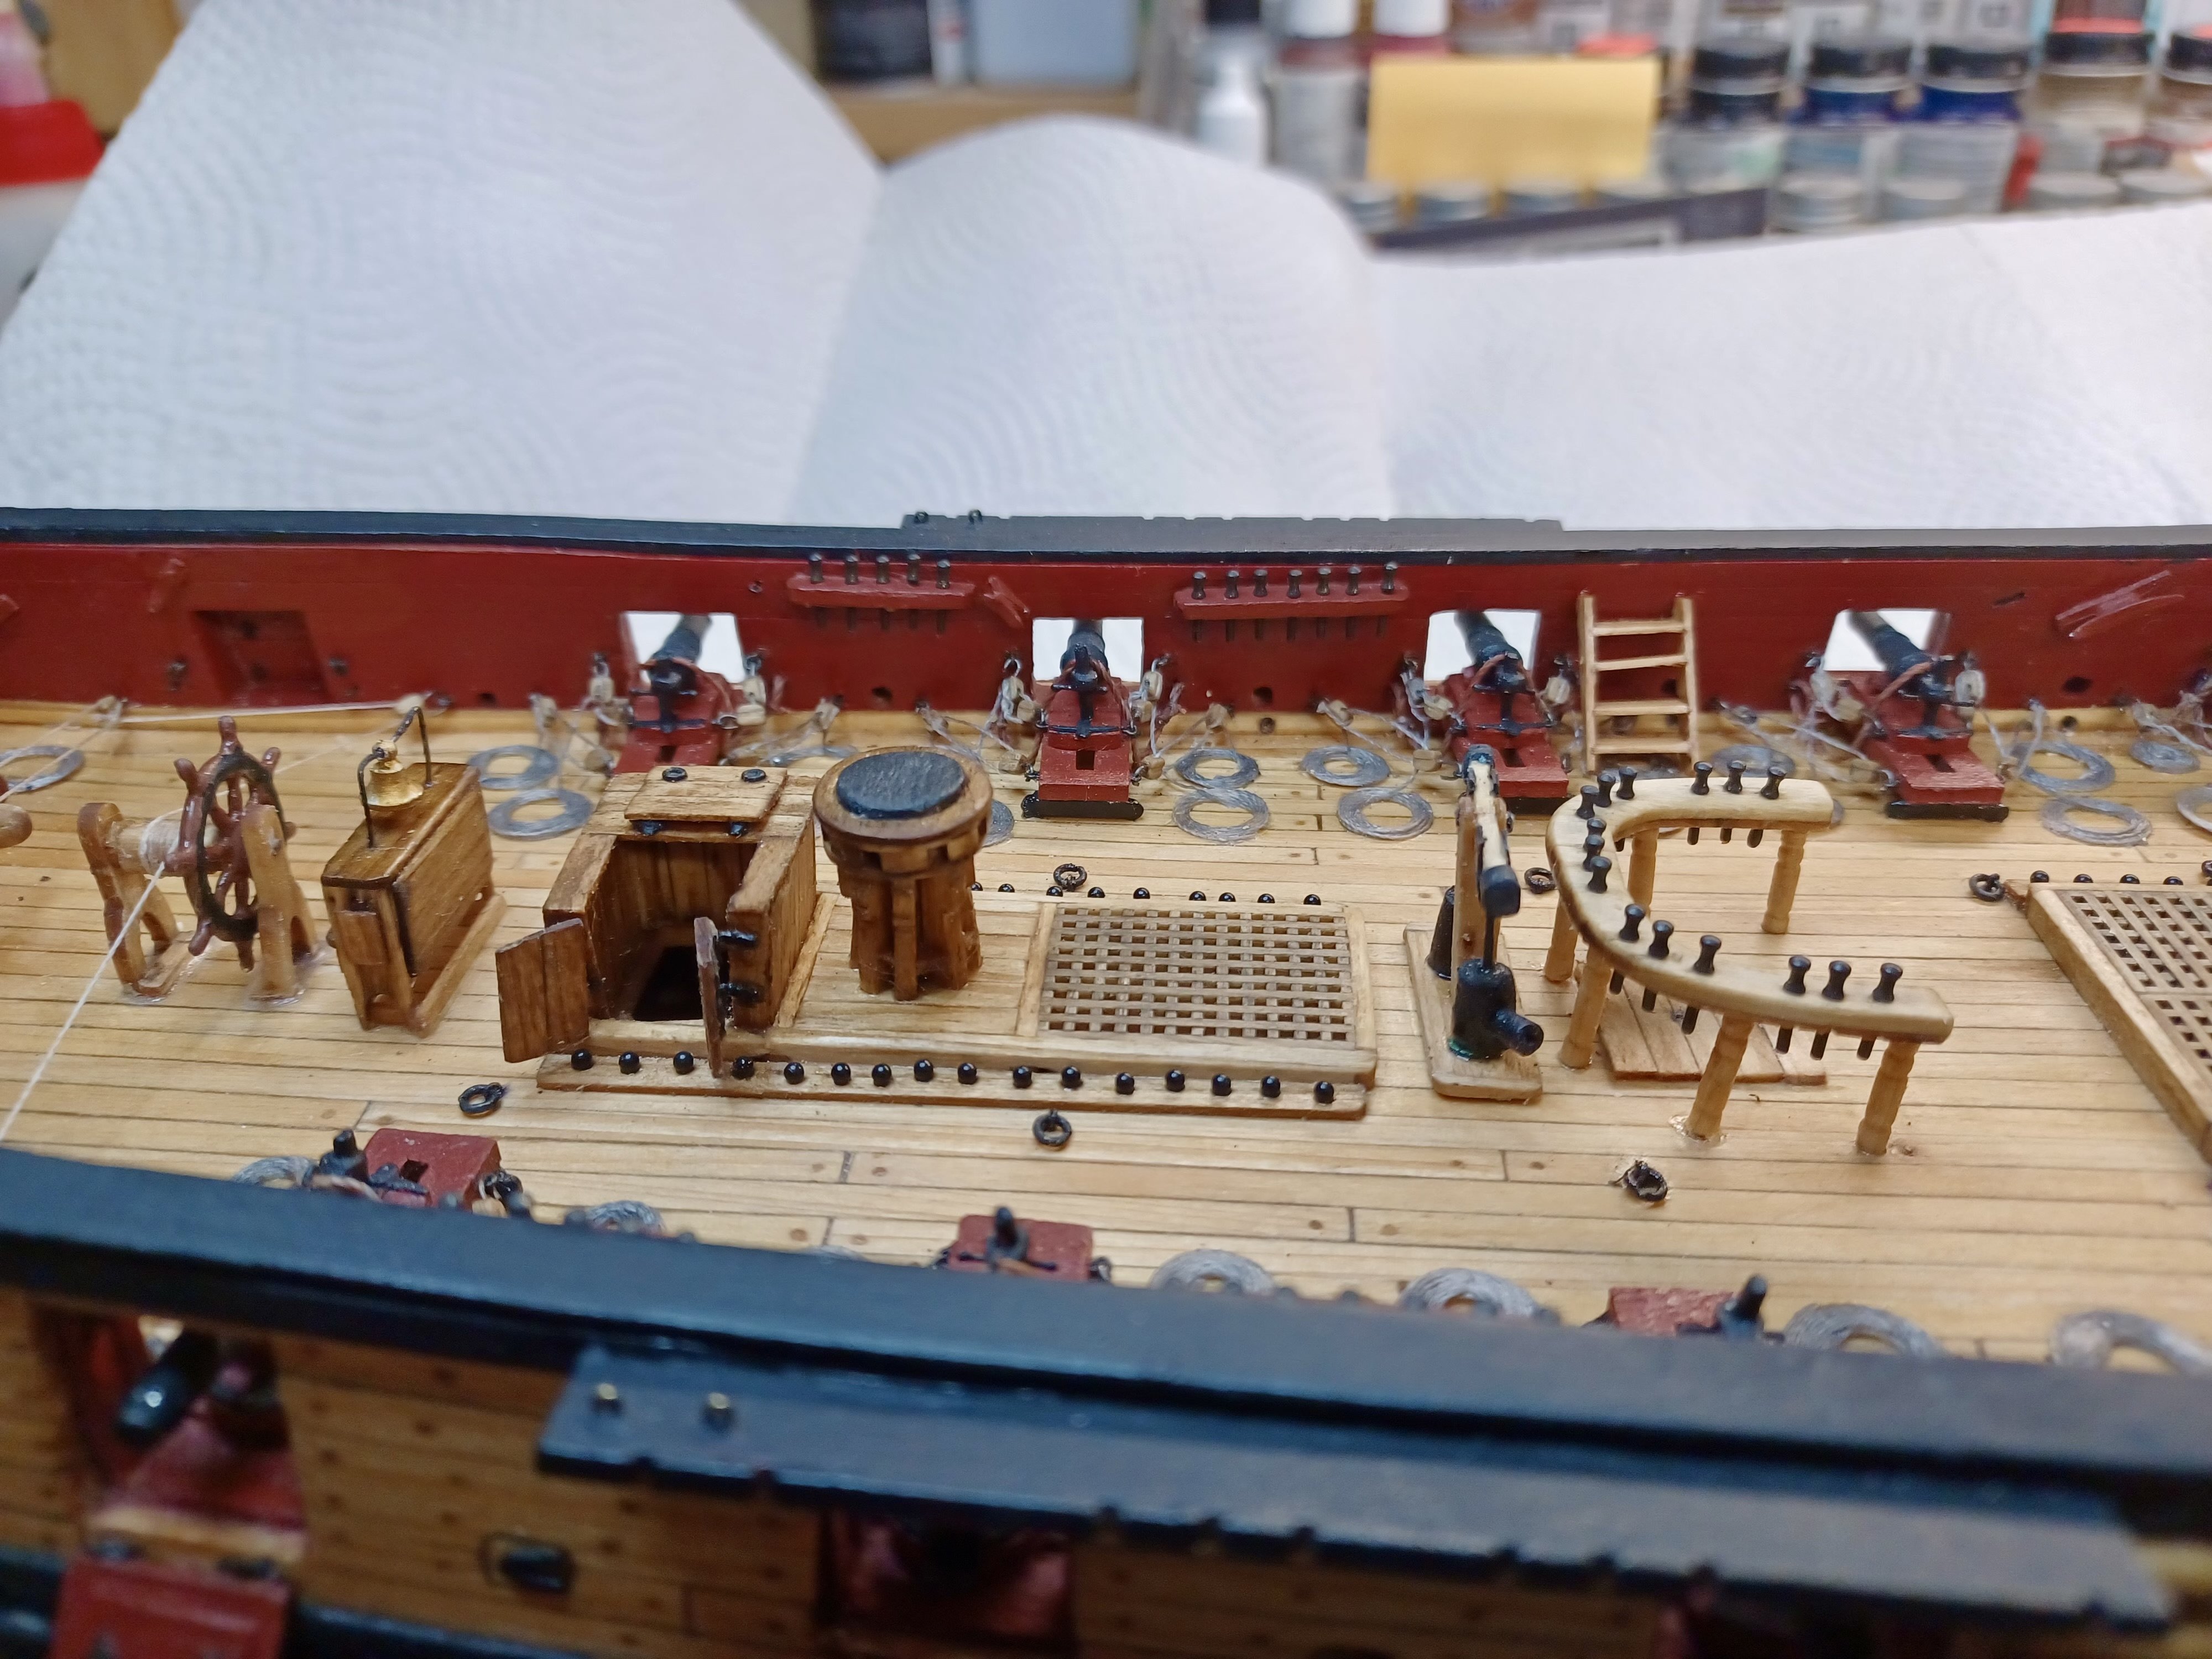
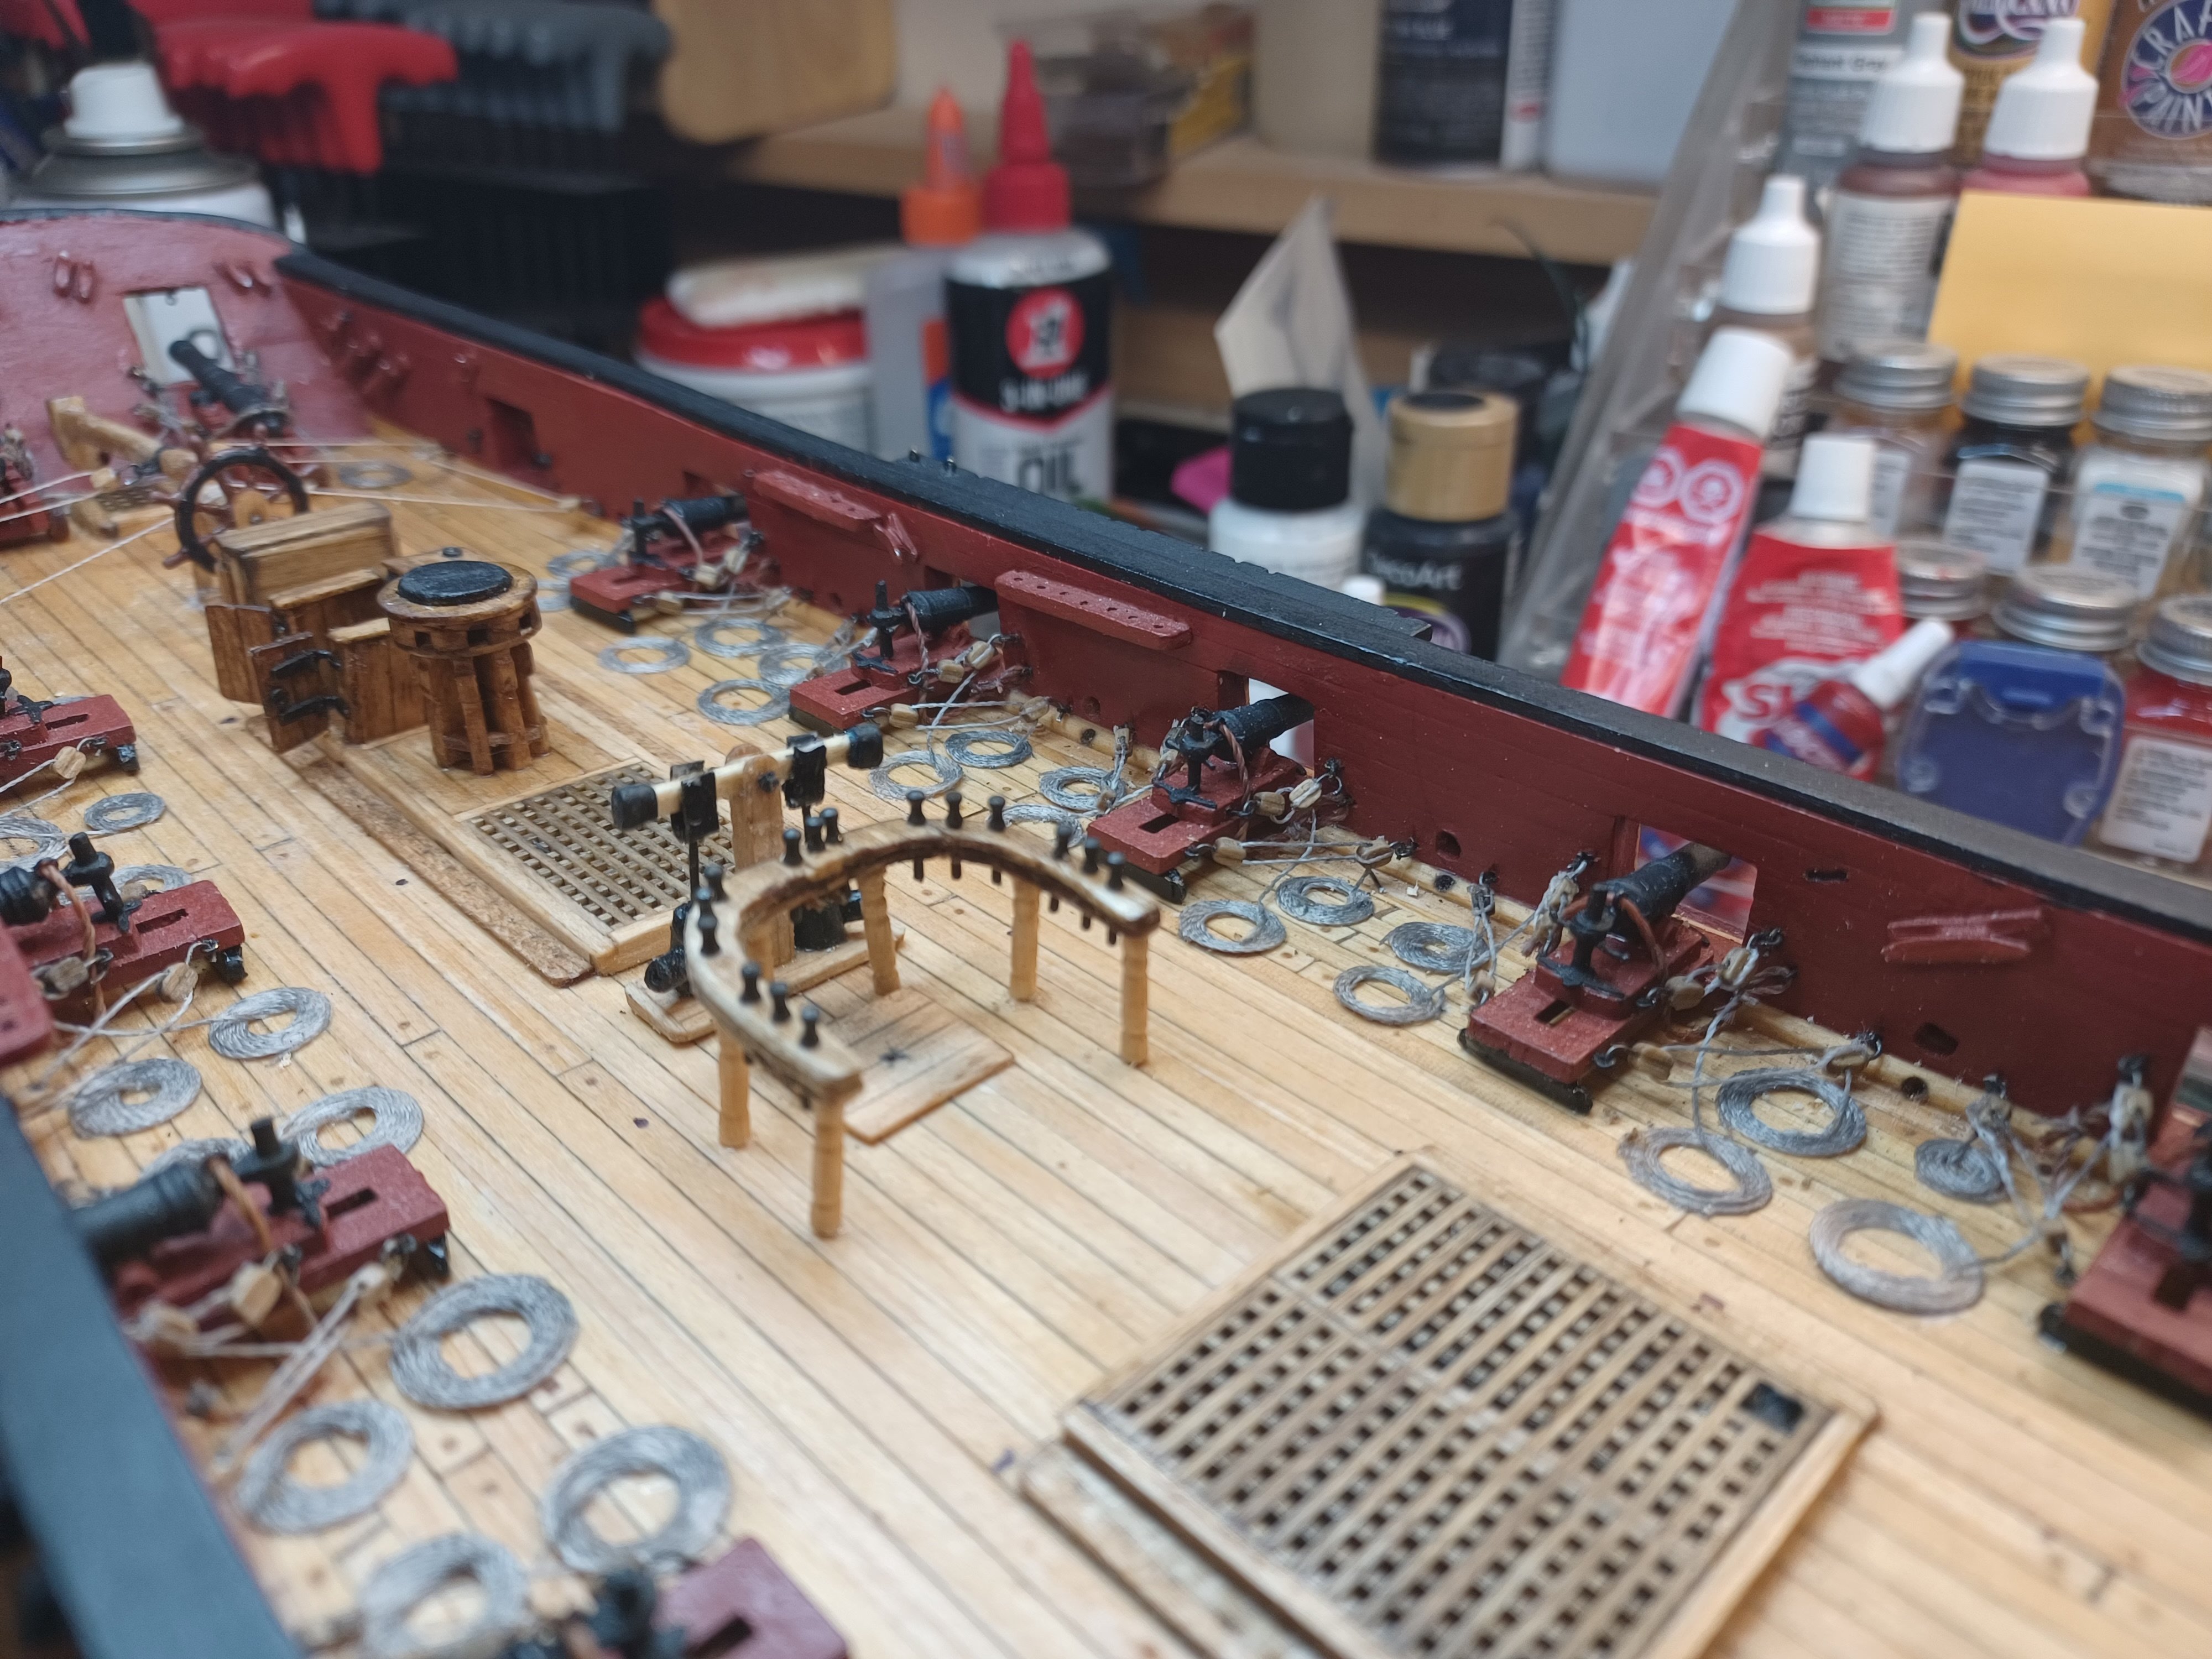
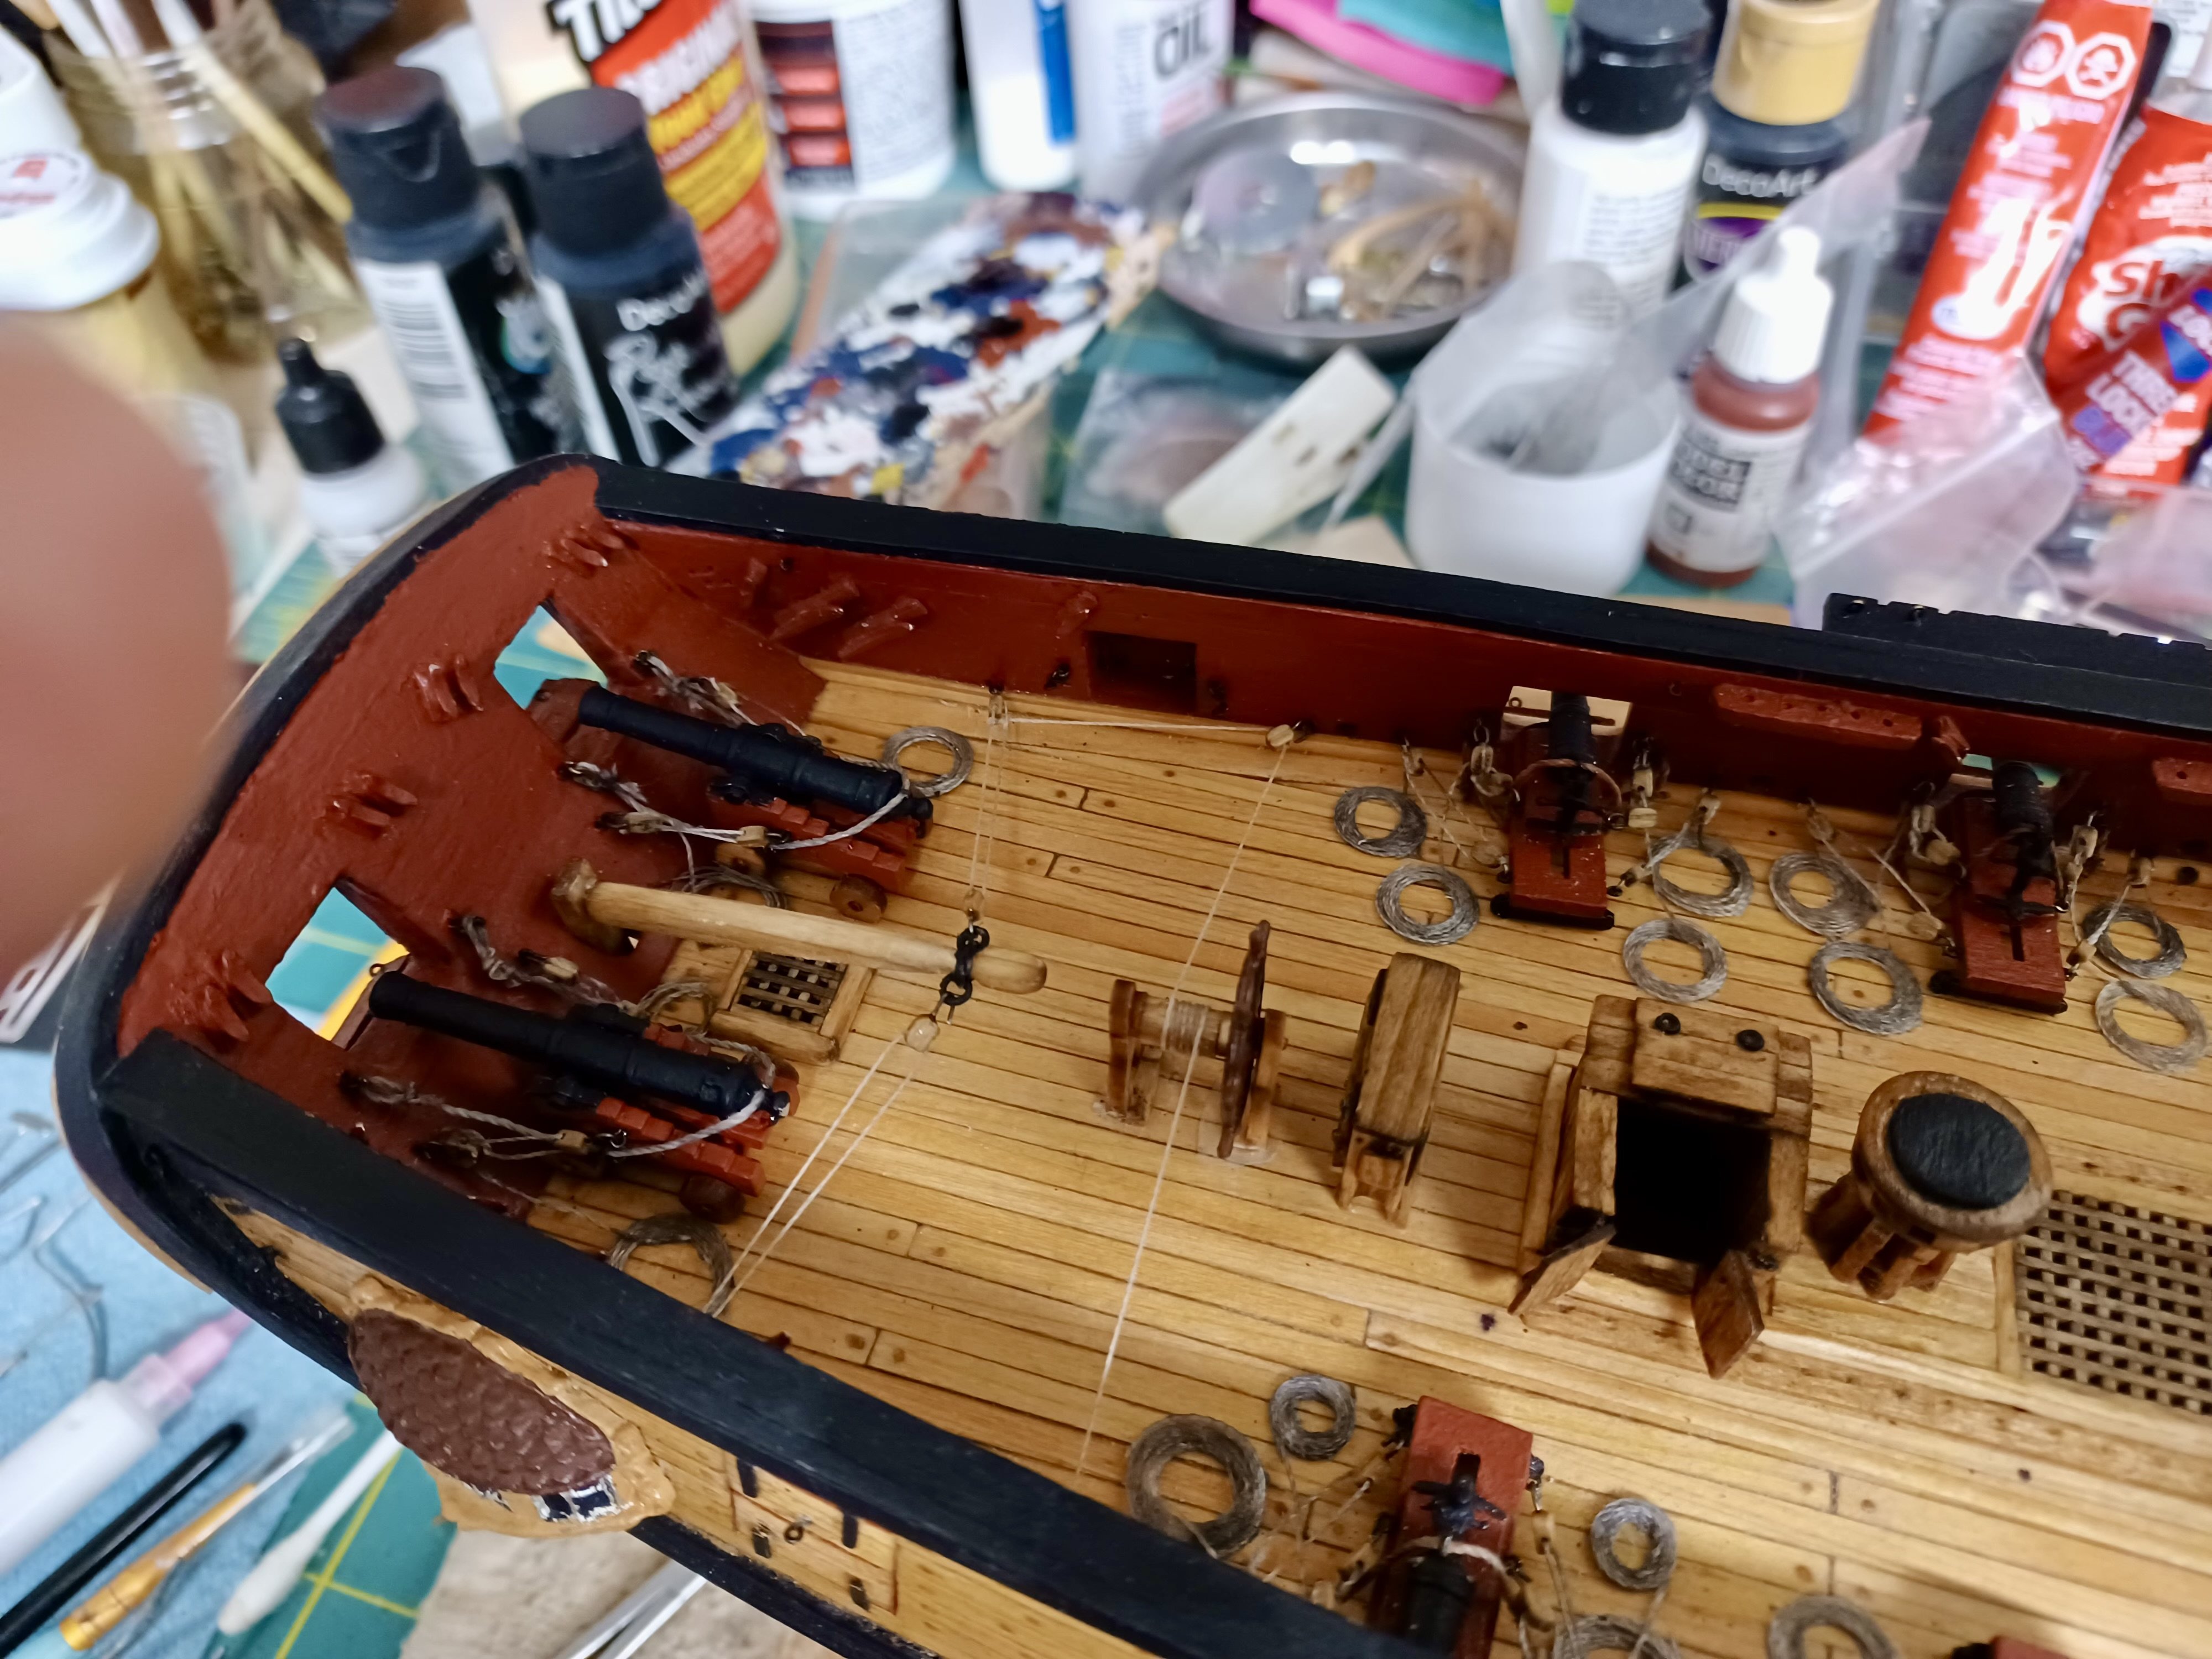
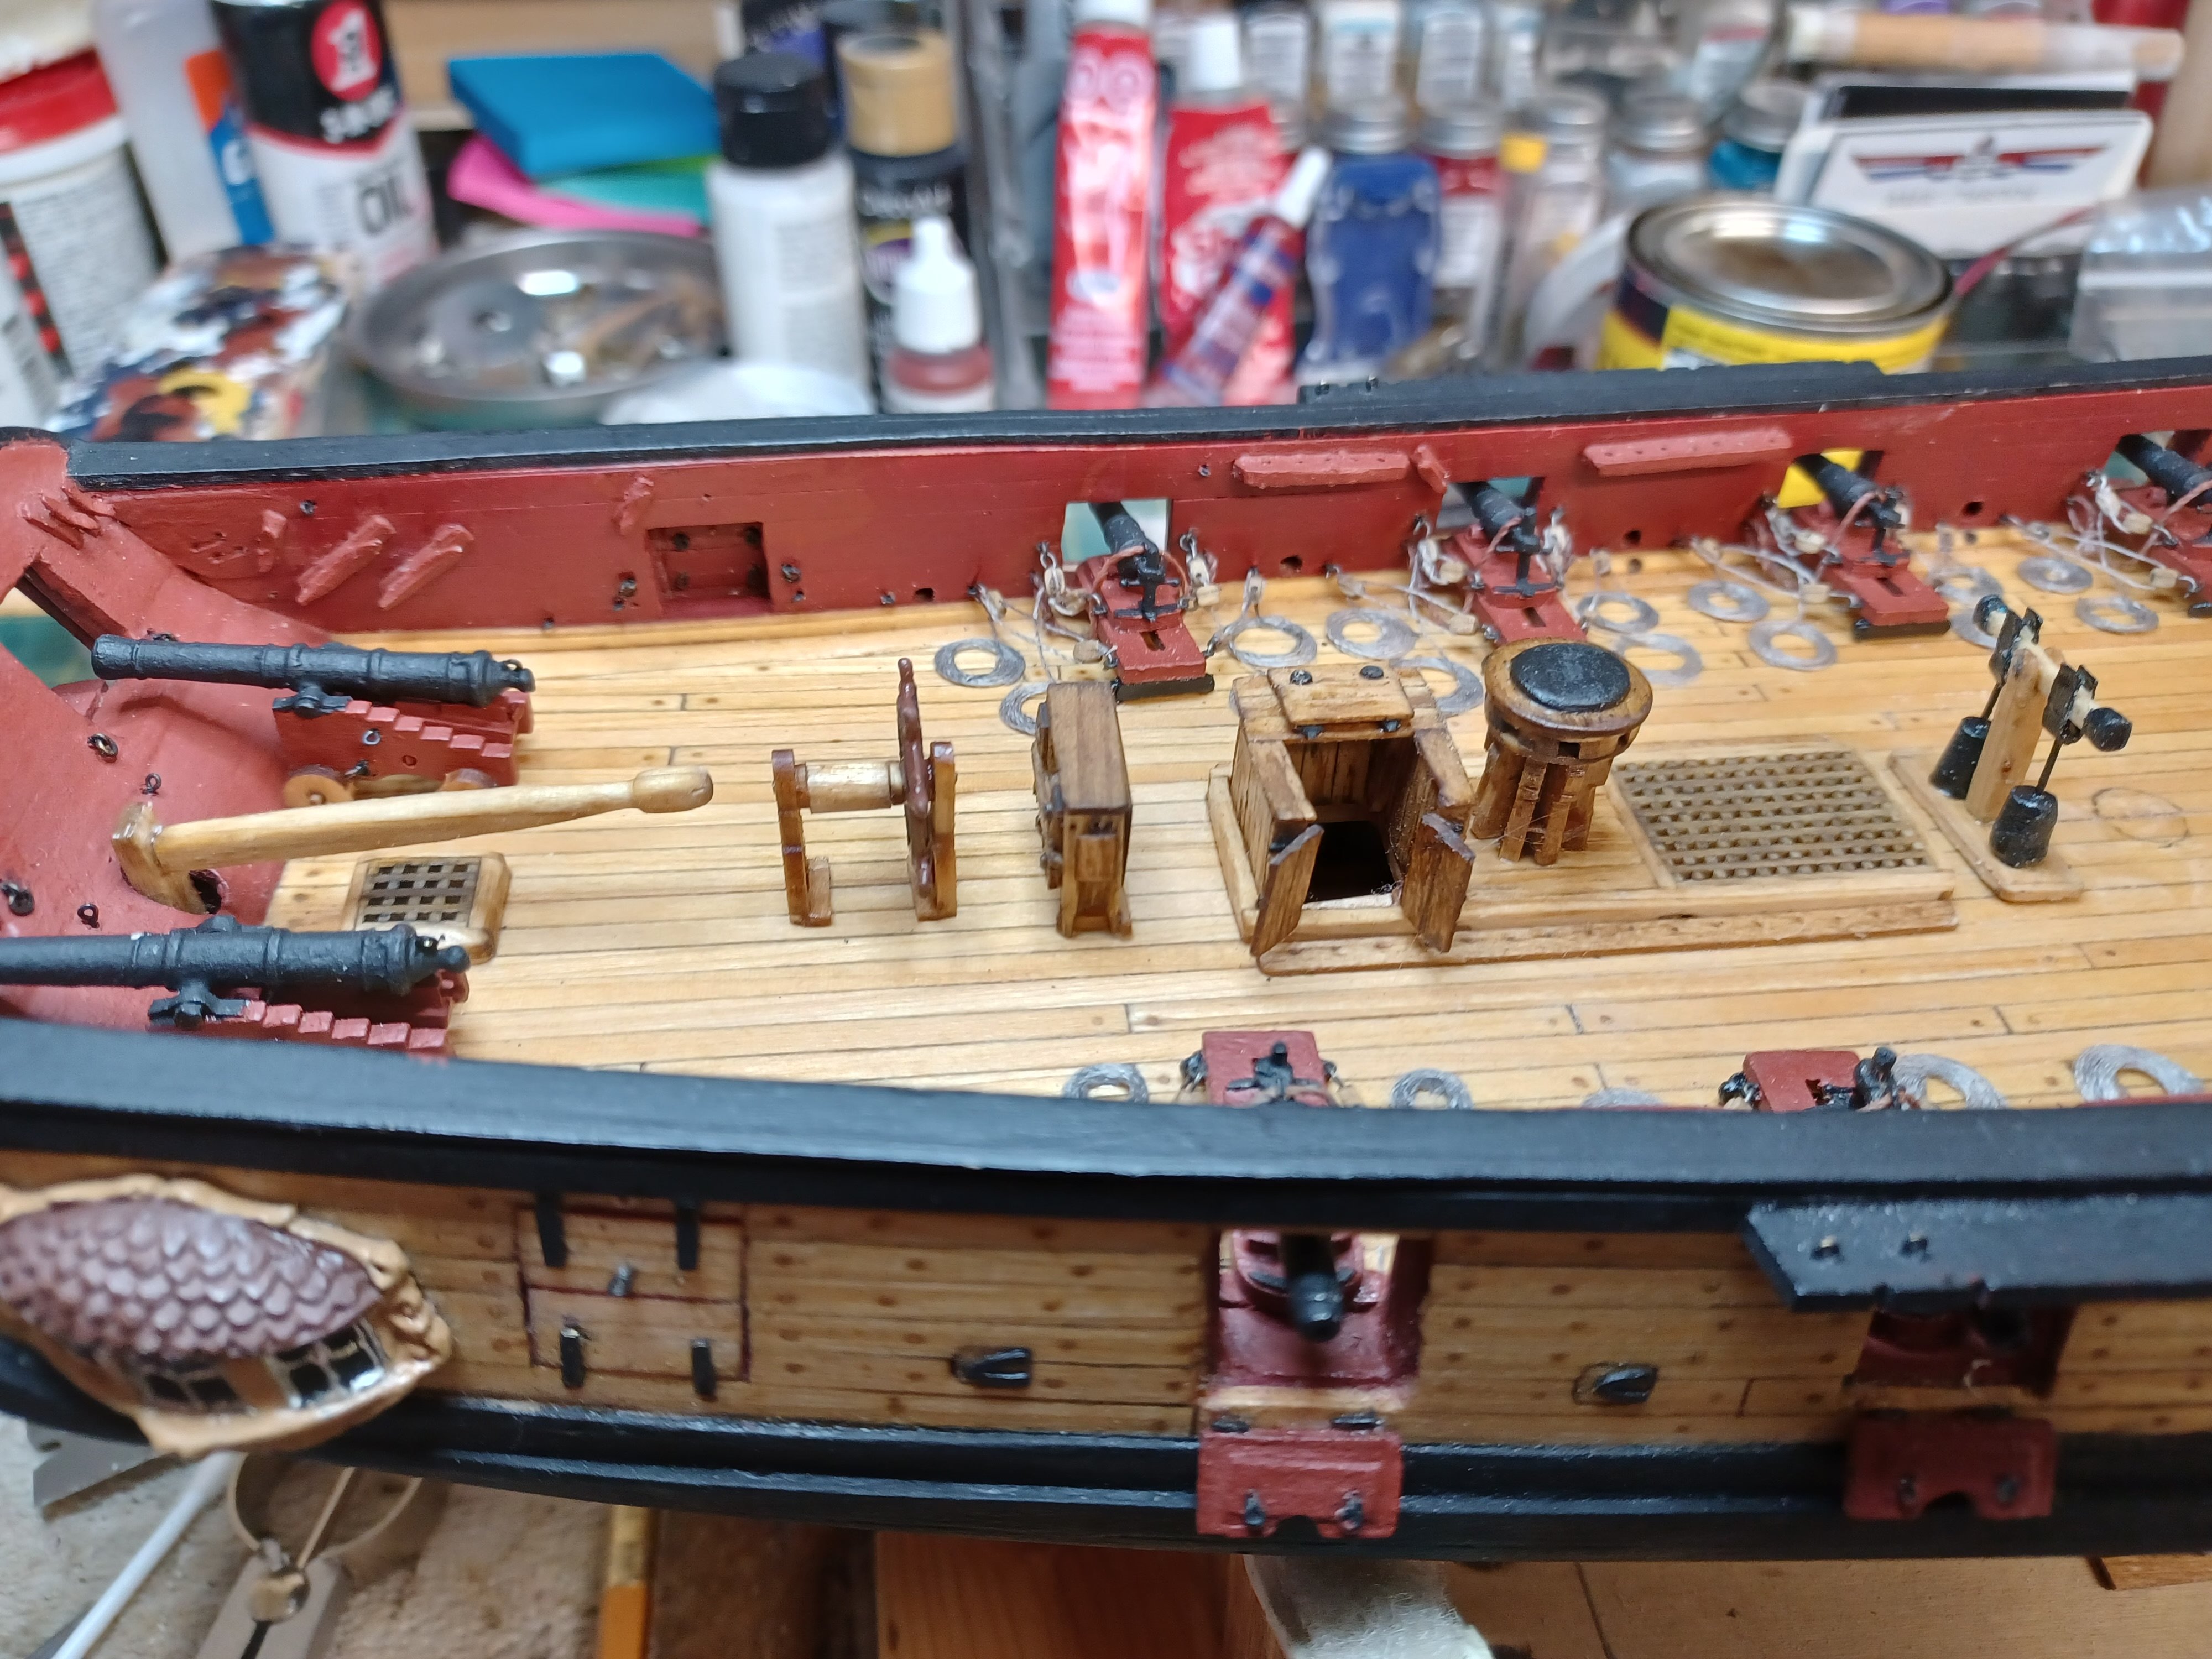
Thanks, @Overworked724 I was so glad I did it. Not a fault in the kit, but I would opt for either better wood, or let us cut in the groove around the perimeter in a thicker, single piece. Half Way to Chapter 15 in the Manual……… I have reached the part where, the hammock rail assemblies are to be installed. To me, this translates to the deck being just a little bit tougher to get to the outside deck area. So, I went back to earlier chapters looking for items that I may have waited on. Already mentioned; Ship’s Bell, Traveler, and Belay Pin Placements. However, as it happens, I missed adding the boarding ladders when I added the companionway. This will require moving the carronades outhaul coils to accommodate the ladder….oh, and building 2 of them first. I am sure this will not be the last time I check for anything missed. And, lastly, I took liberty and did the frame for the ships bell differently.

- 436 replies
-
- 8
-
-
- Syren
- Model Shipways
- (and 1 more)
-
New Rail Ready/New Rail In As I said in a previous post that a newbie might want to create a new rail piece if the wood used in the kit is real weak. Looking back, I ended up doing it anyway. While trying to straighten one of the stanchions, the original broke again. So, I thought enough is enough and made the new piece. Here is a pic of the redone part, and after installation. Cannonballs are now in leaving only the traveler and ship’s bell to add. Will make them part of the next chapter. On to Chapter 14…..


- 436 replies
-
- 5
-
-
- Syren
- Model Shipways
- (and 1 more)
-
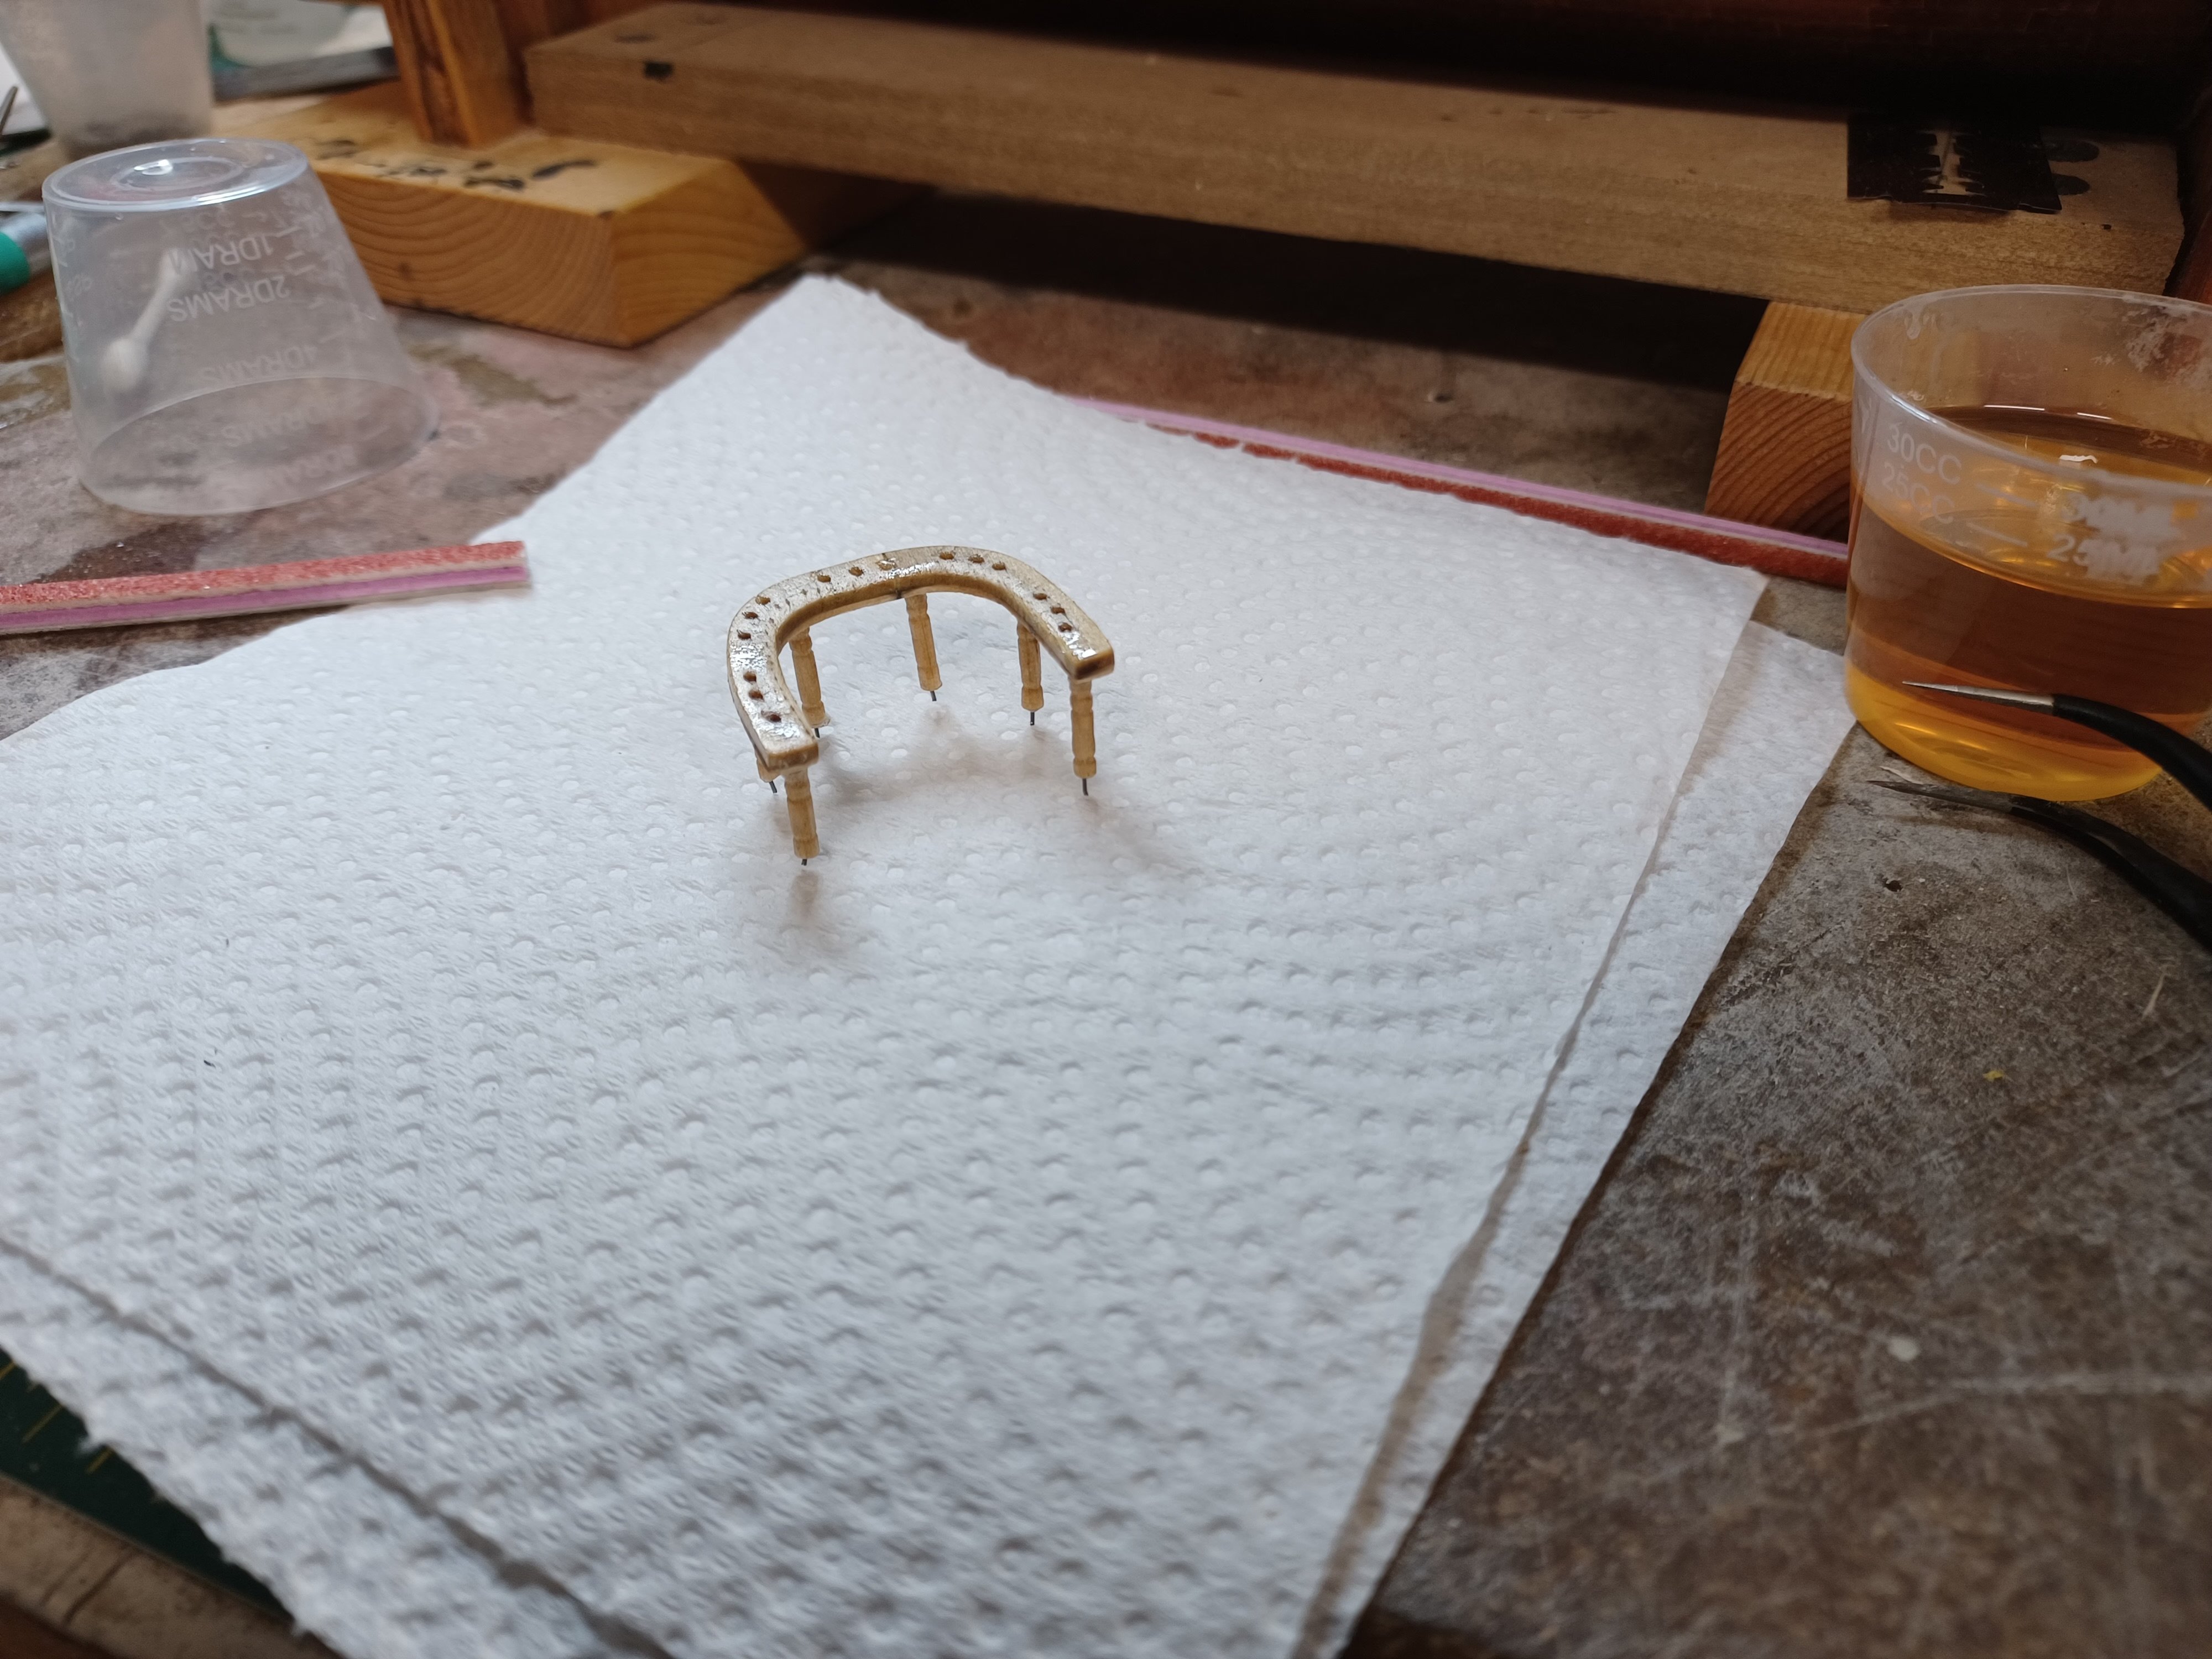
Fife Rail Redo It was probably inevitable that I would not be happy with the fife rail and choose a redo. And that’s exactly what happened. While doing an overall deck cleanup, I saw that one of the supporting stanchions was not vertical. More than likely it was not that visible to others, but to me it really stuck out. Using a razor blade, I cut through the one stanchion and tried to reposition it. As was the case through its construction, the rail came apart for the last time. I found a spare deck plan, cut out the rail drawing and began a total rebuild. The pictures show the new wood with the pattern glued to the new wood. When it dries, I will reshape the new part and return it to its place on deck. The other pic shows my progress and then it will be on to chapter 14 in the manual.
- 436 replies
-
- 2
-
-
- Syren
- Model Shipways
- (and 1 more)
-
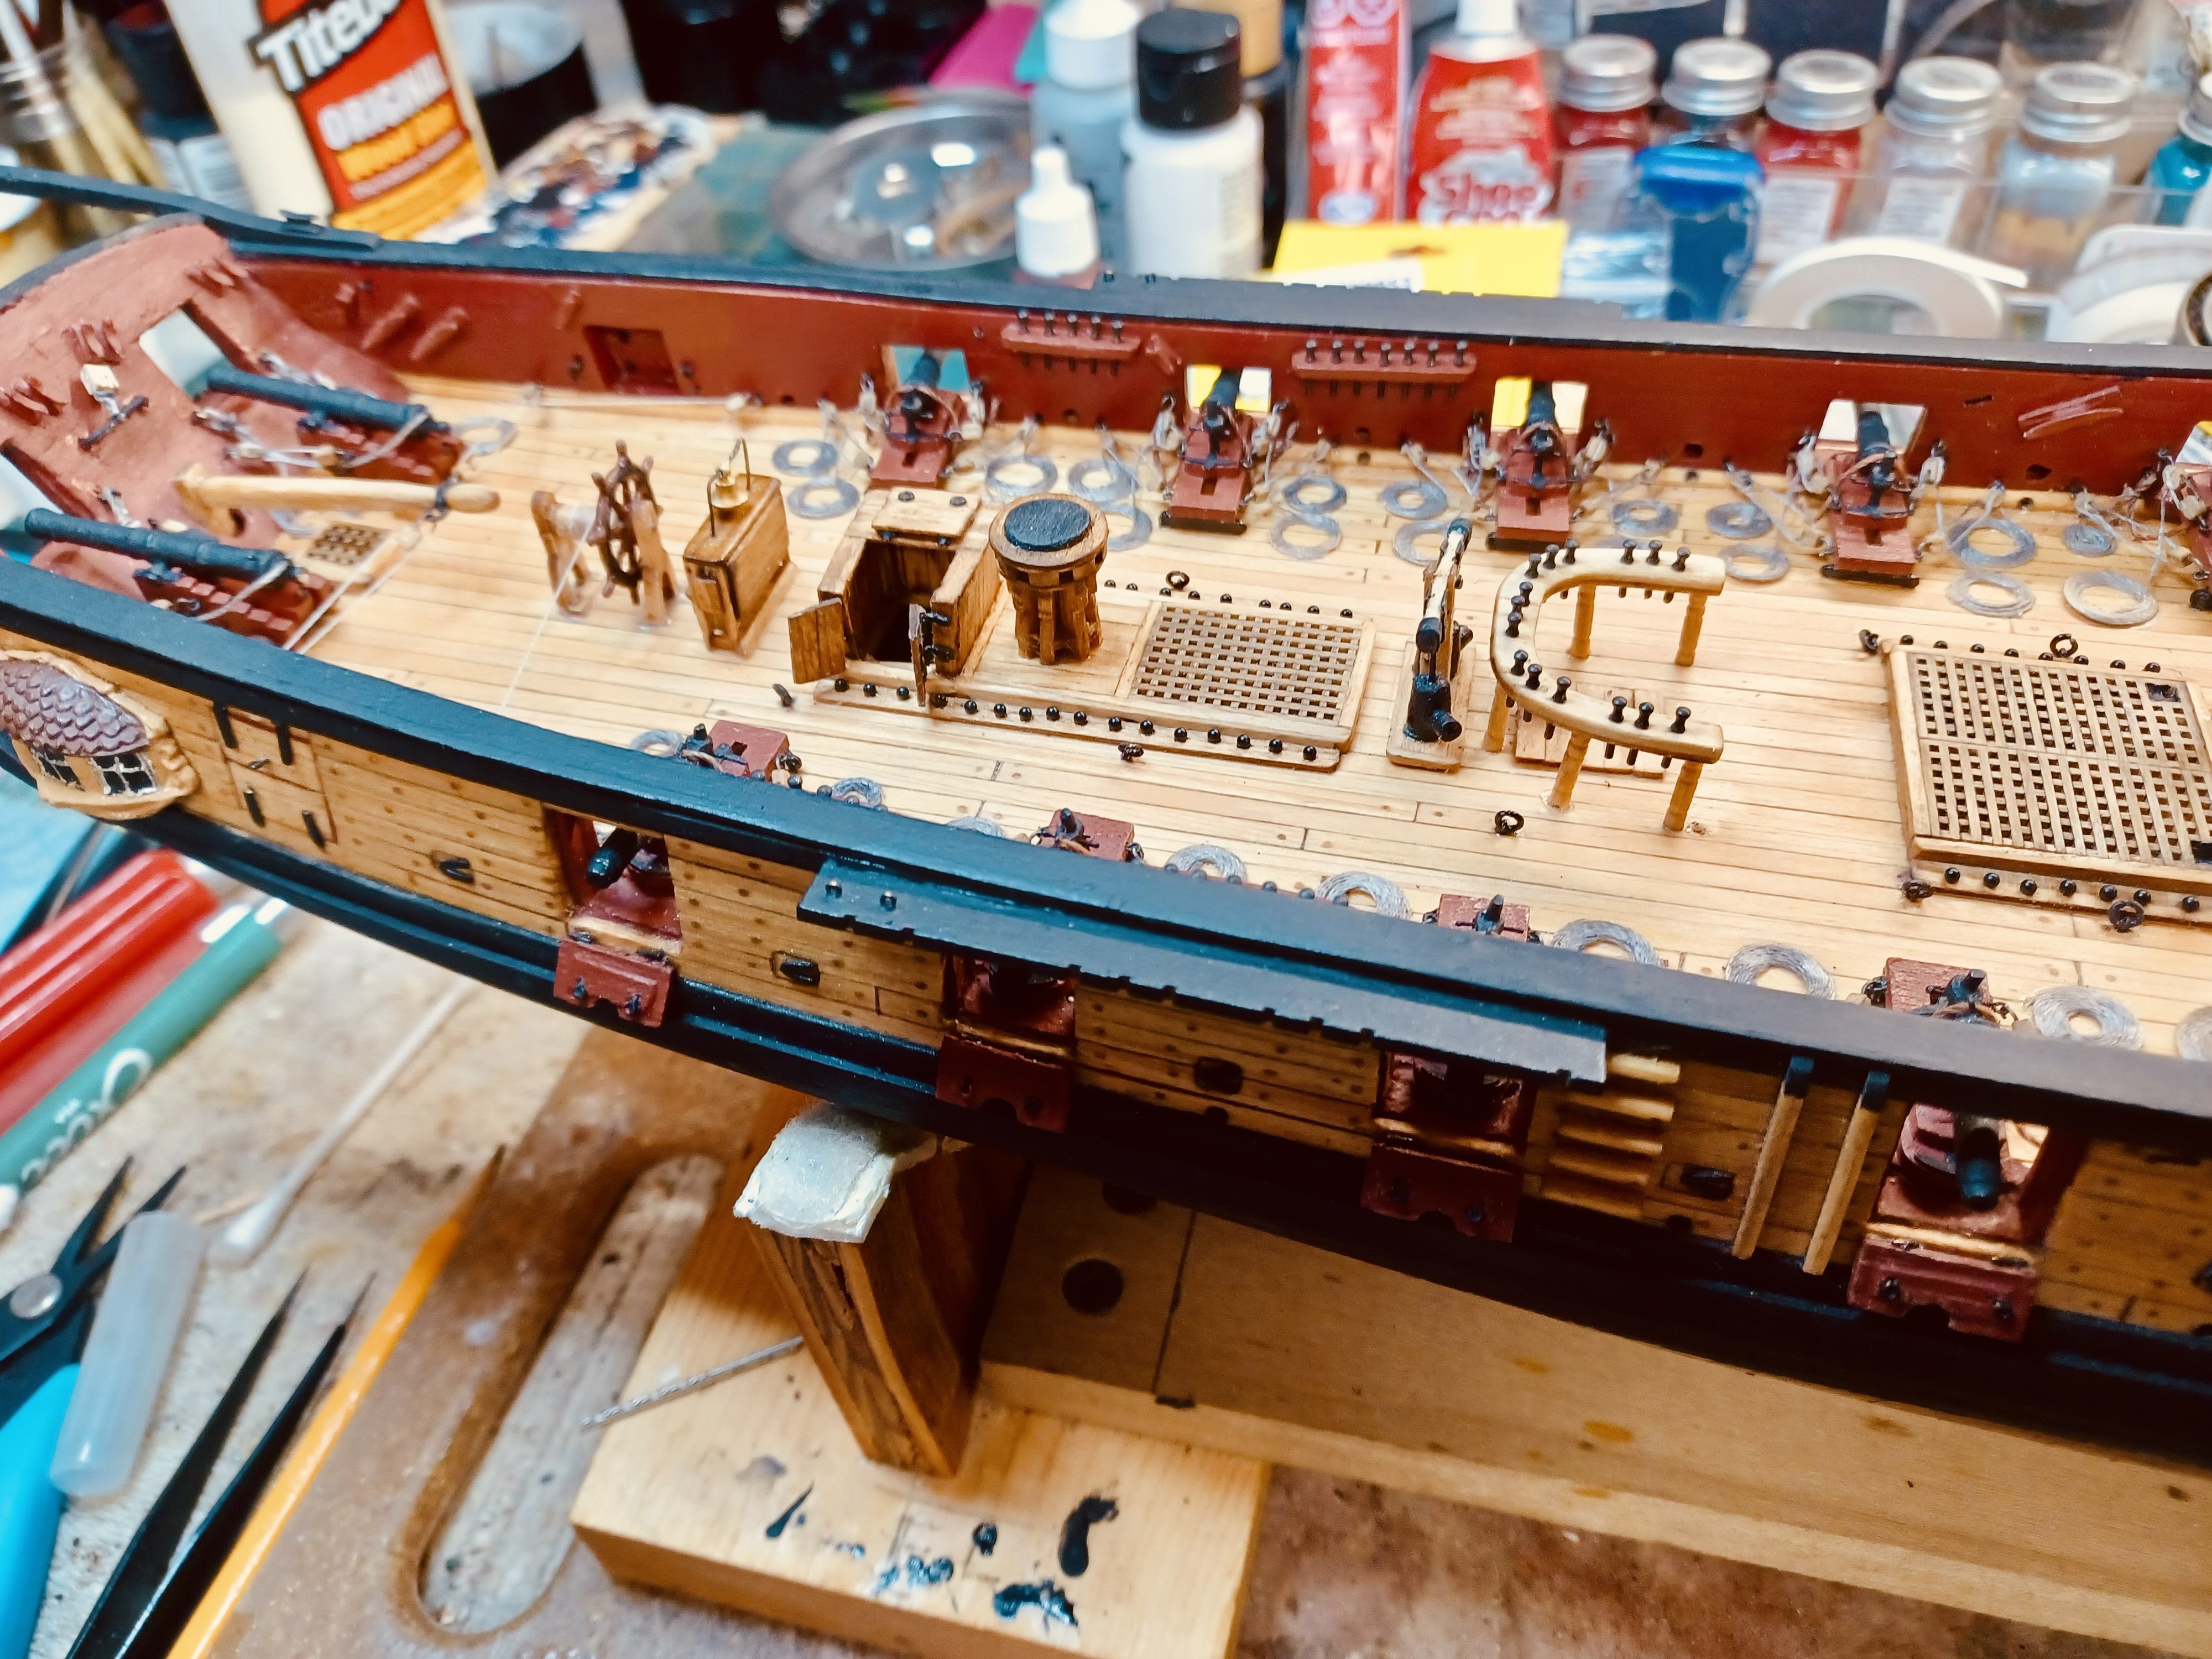
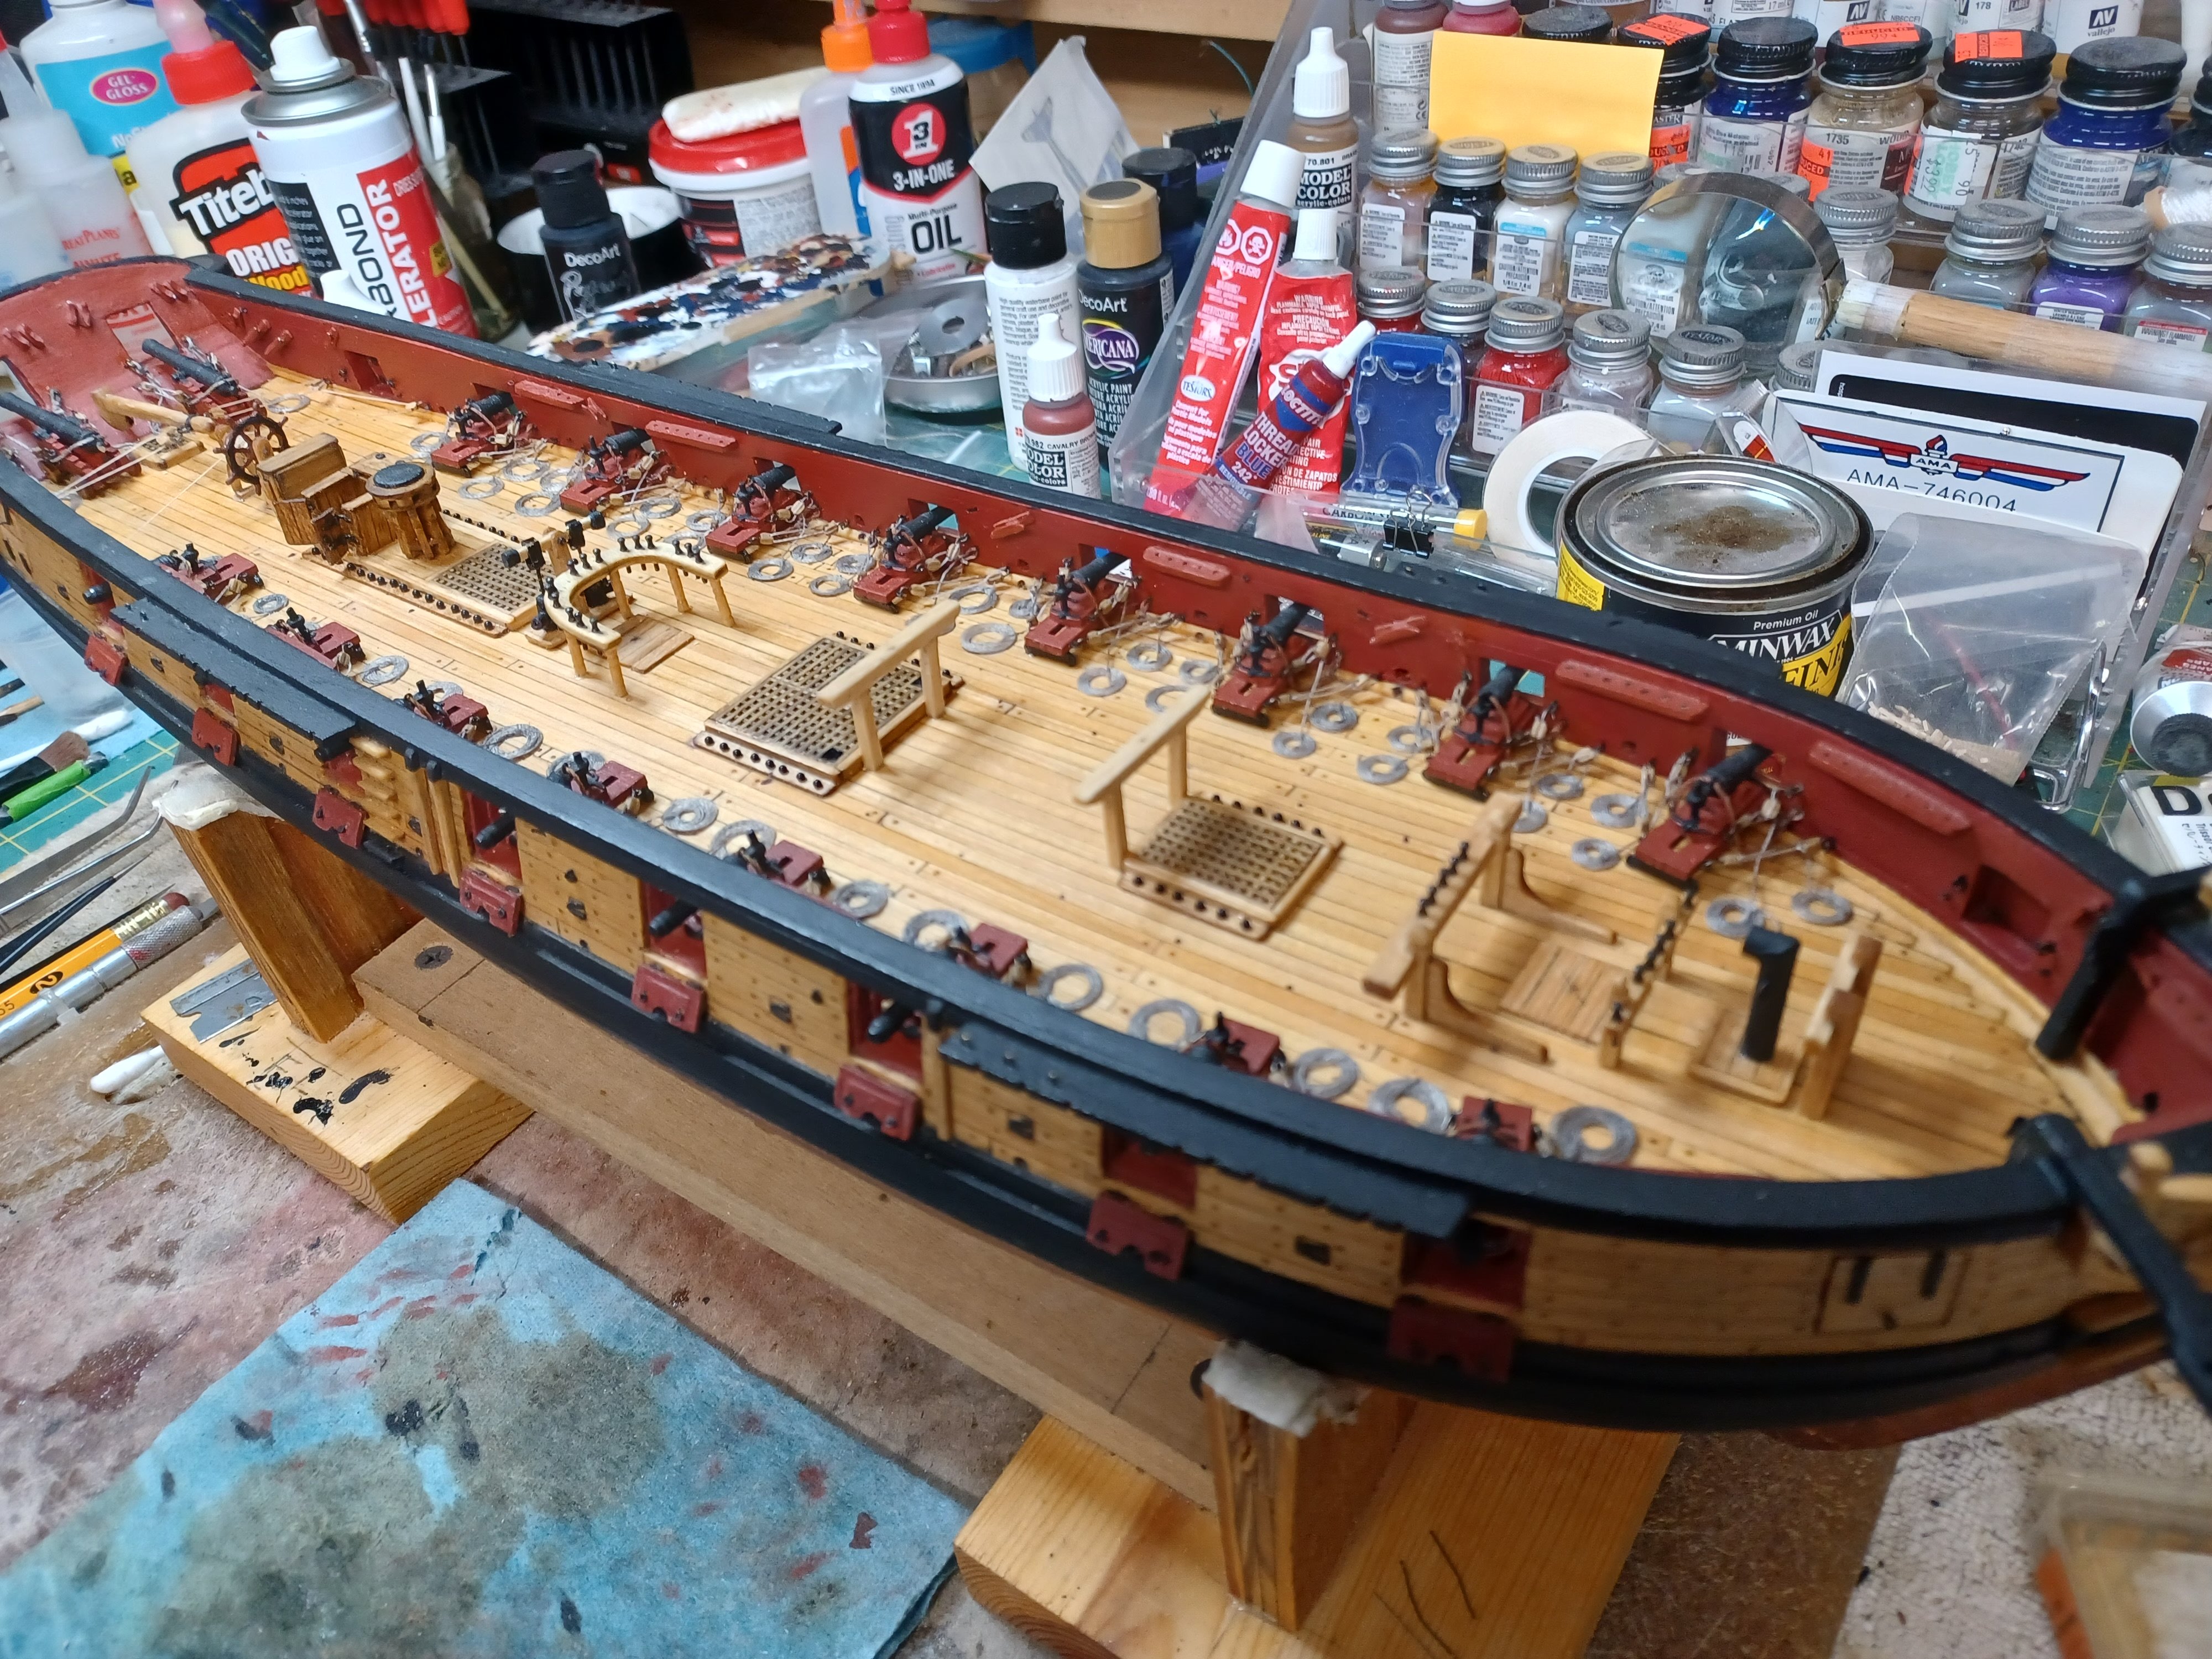
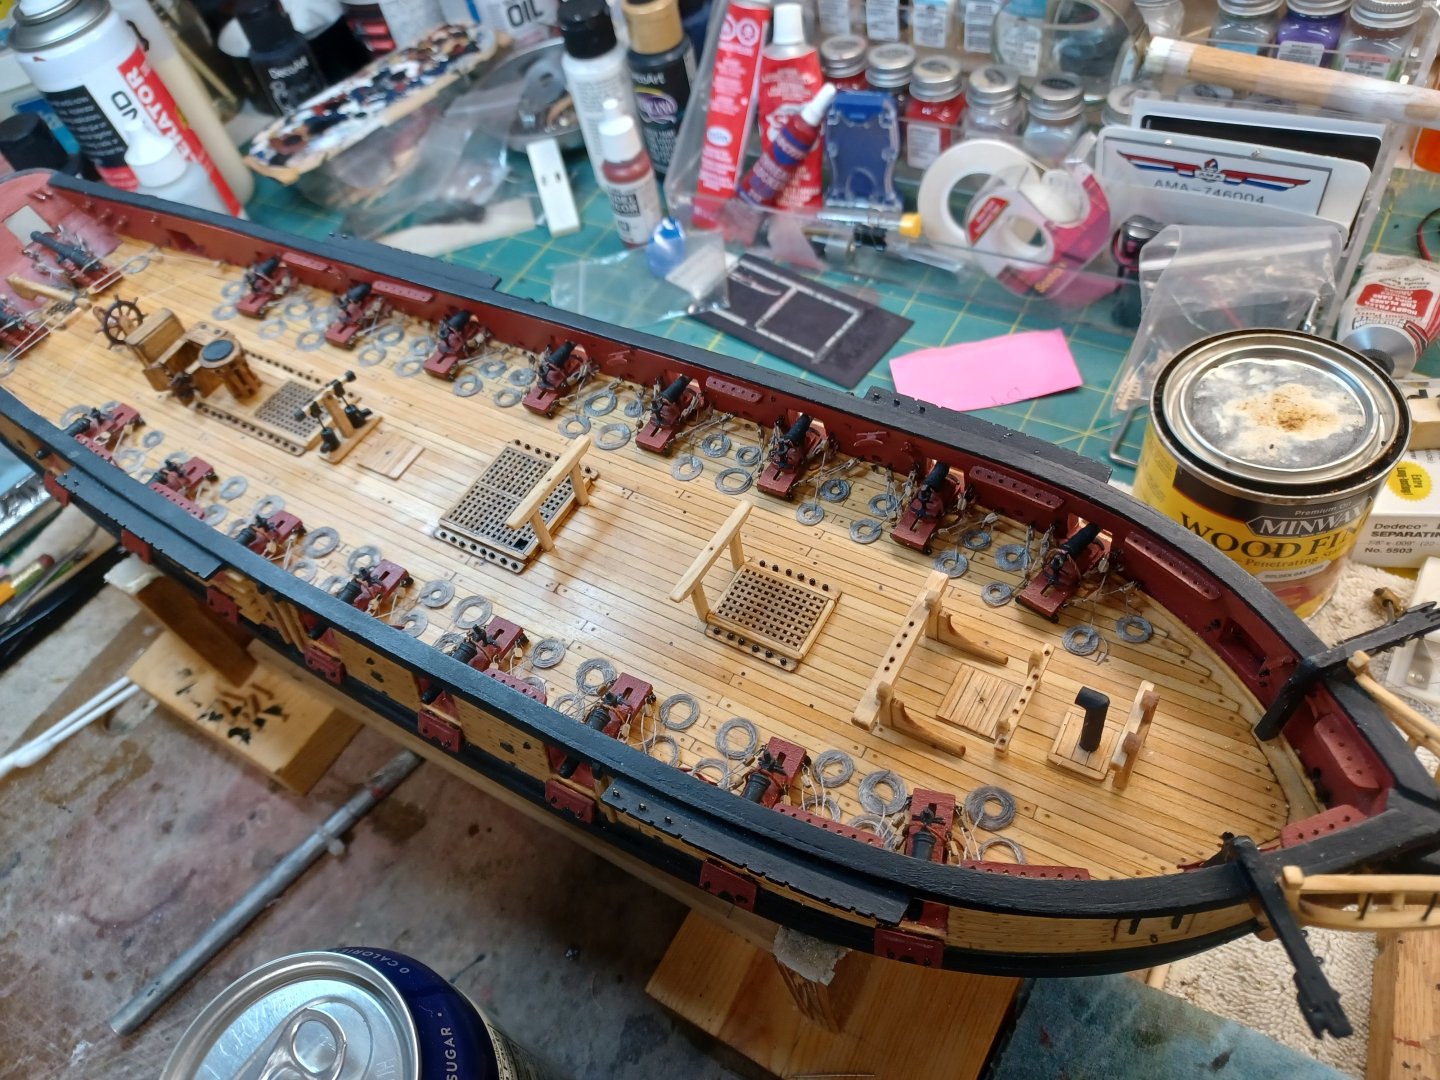
Gallow’s Bitts & Riding Bitts In Just completed these 2 features and added some tongue oil to the main decking. After it sits for a few hours it will be time to clean up the oil. Luckily, it won’t stay shiny as in the picture.

- 436 replies
-
- 1
-
-
- Syren
- Model Shipways
- (and 1 more)
-
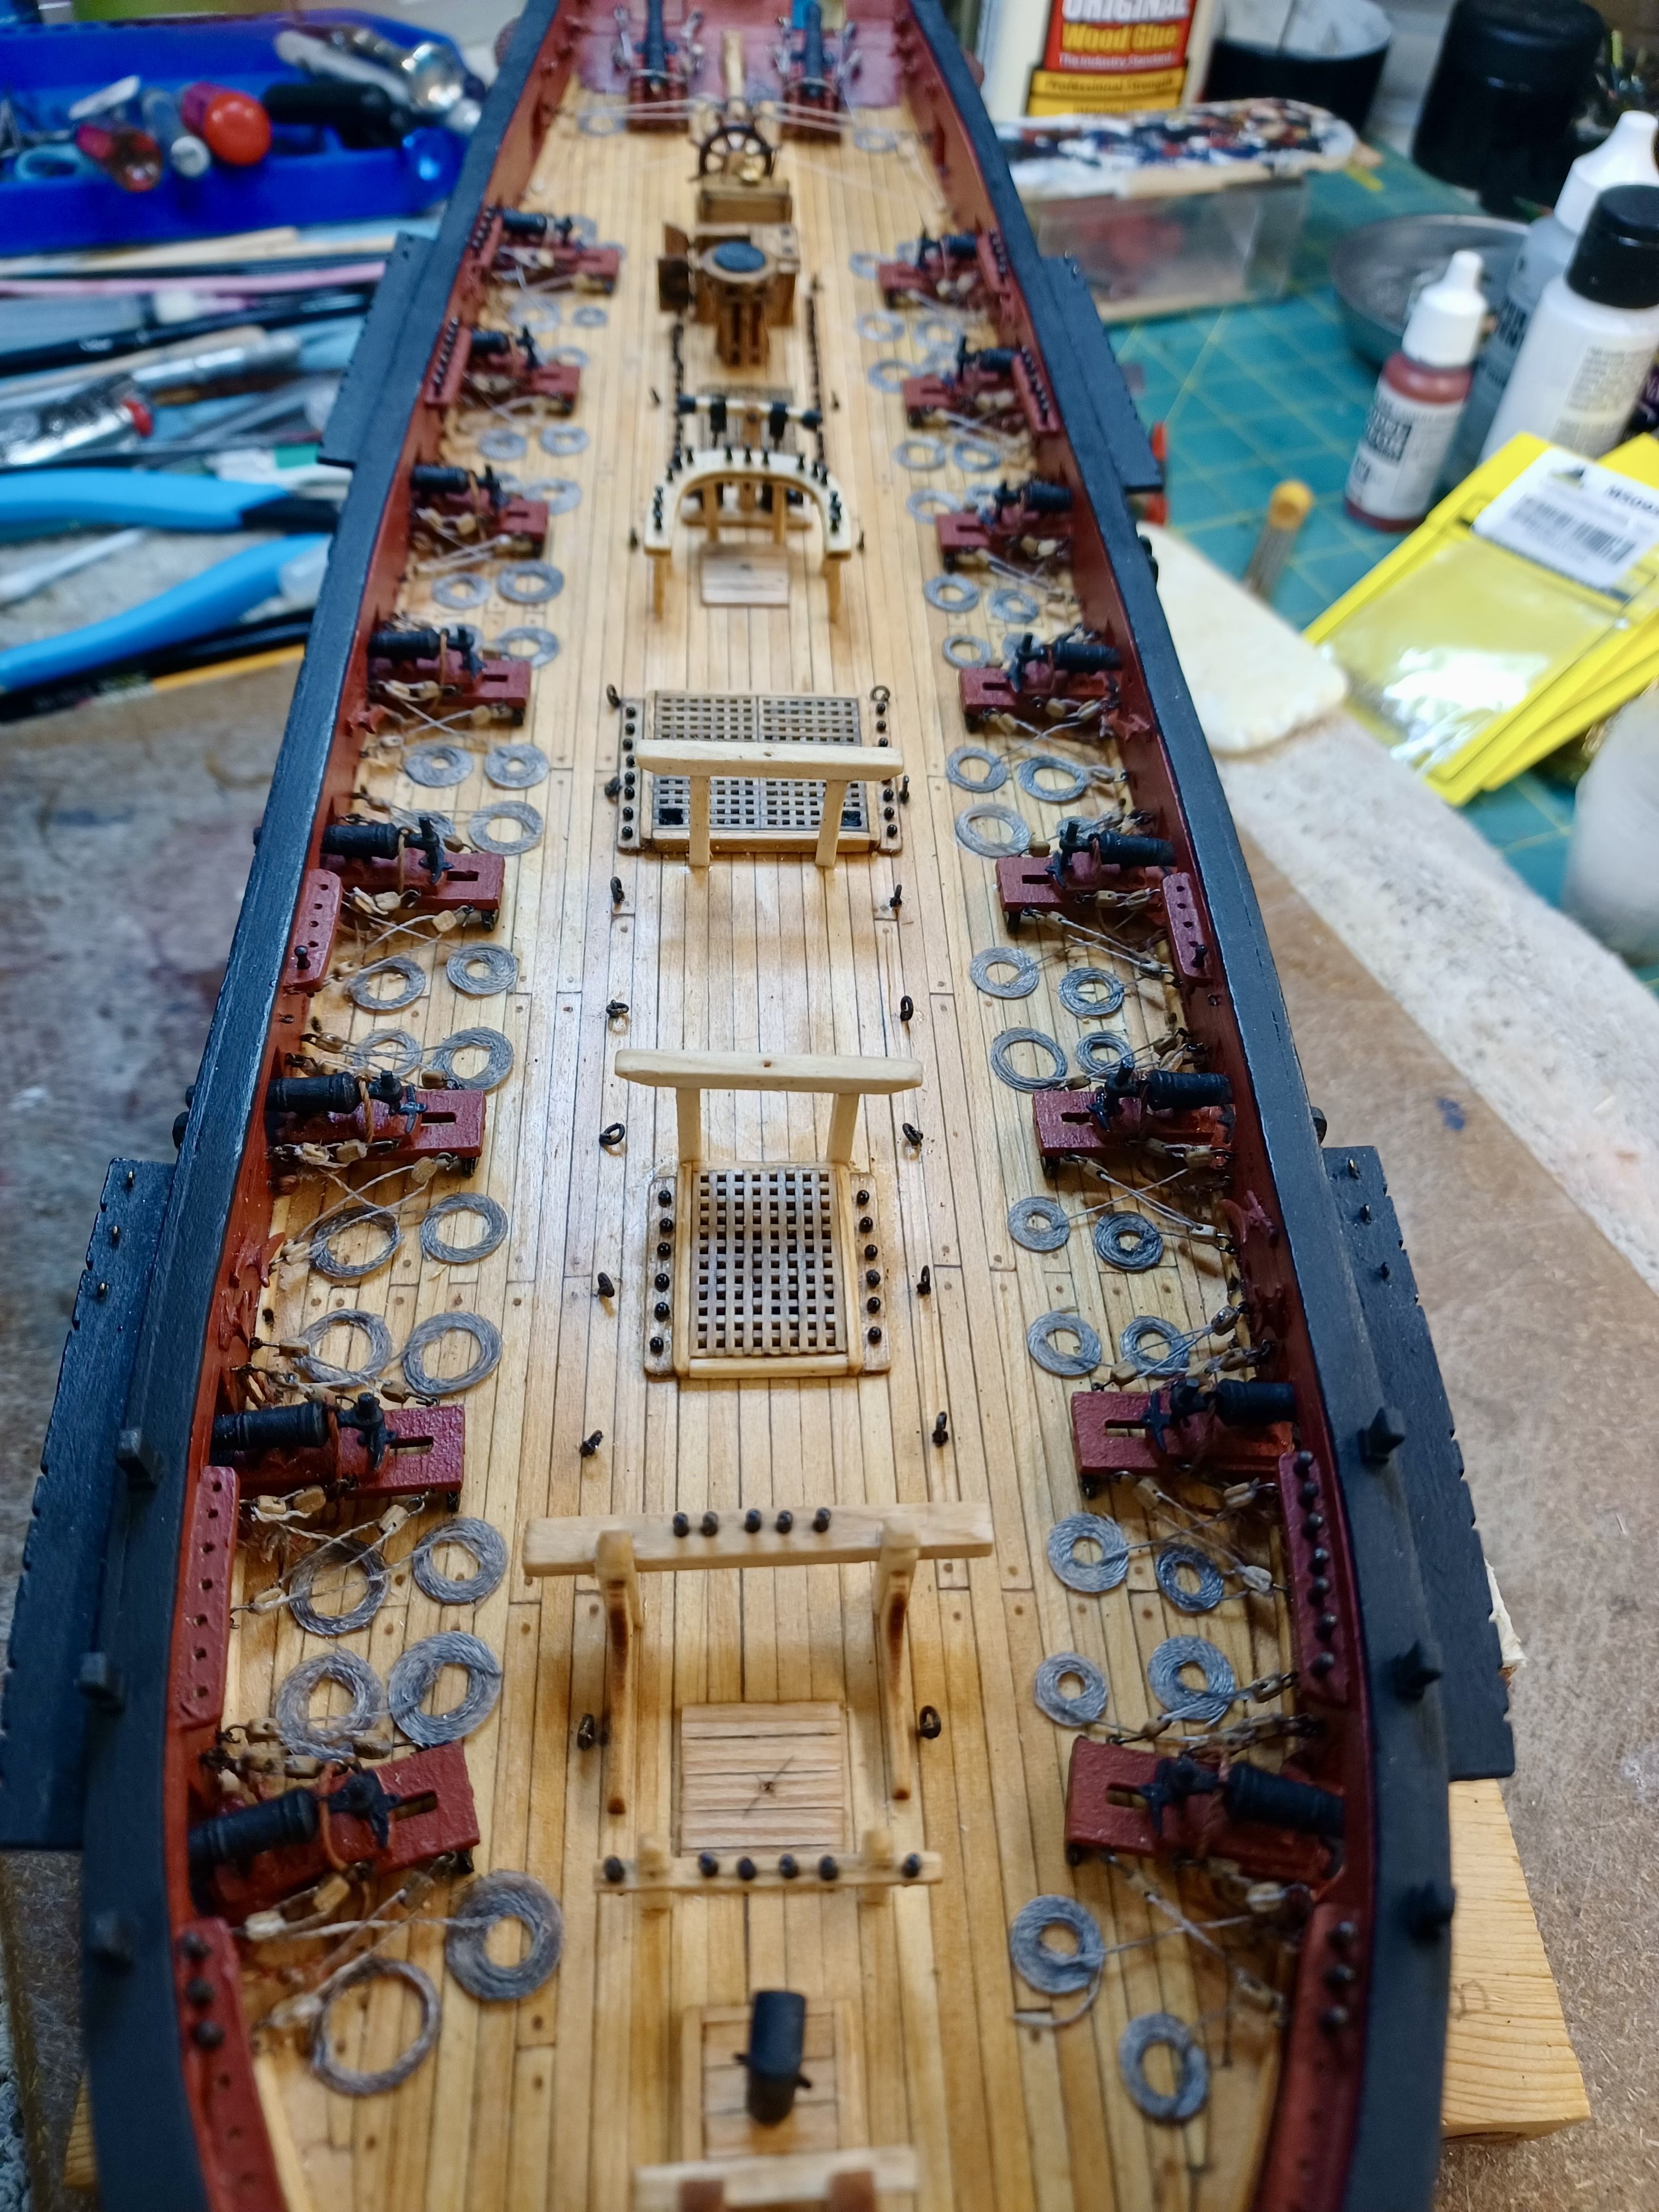
A Final Cleanup Always Helps Here is the fife rail after a careful sanding, and a “wood” colored wash.
- 436 replies
-
- 2
-
-
- Syren
- Model Shipways
- (and 1 more)
-
Fife & Ten… Finally got it to hold together and installed. I could still do some clean up, but I had to repair it twice before I could get it completed , so touching it might lead to a dust pile. In any case, I can still do some touch up if I decide to. All in all, I thought that turning the stanchions would be the hard part. Little did I know it was the easier thing to do. Newbie Note: If I had to do it again, I would simply create new rail pieces. Although, that would depend on the state of the wood from where they came from. In this case, it looked ok, but just fell apart upon touching it.

- 436 replies
-
- 3
-
-
- Syren
- Model Shipways
- (and 1 more)
-
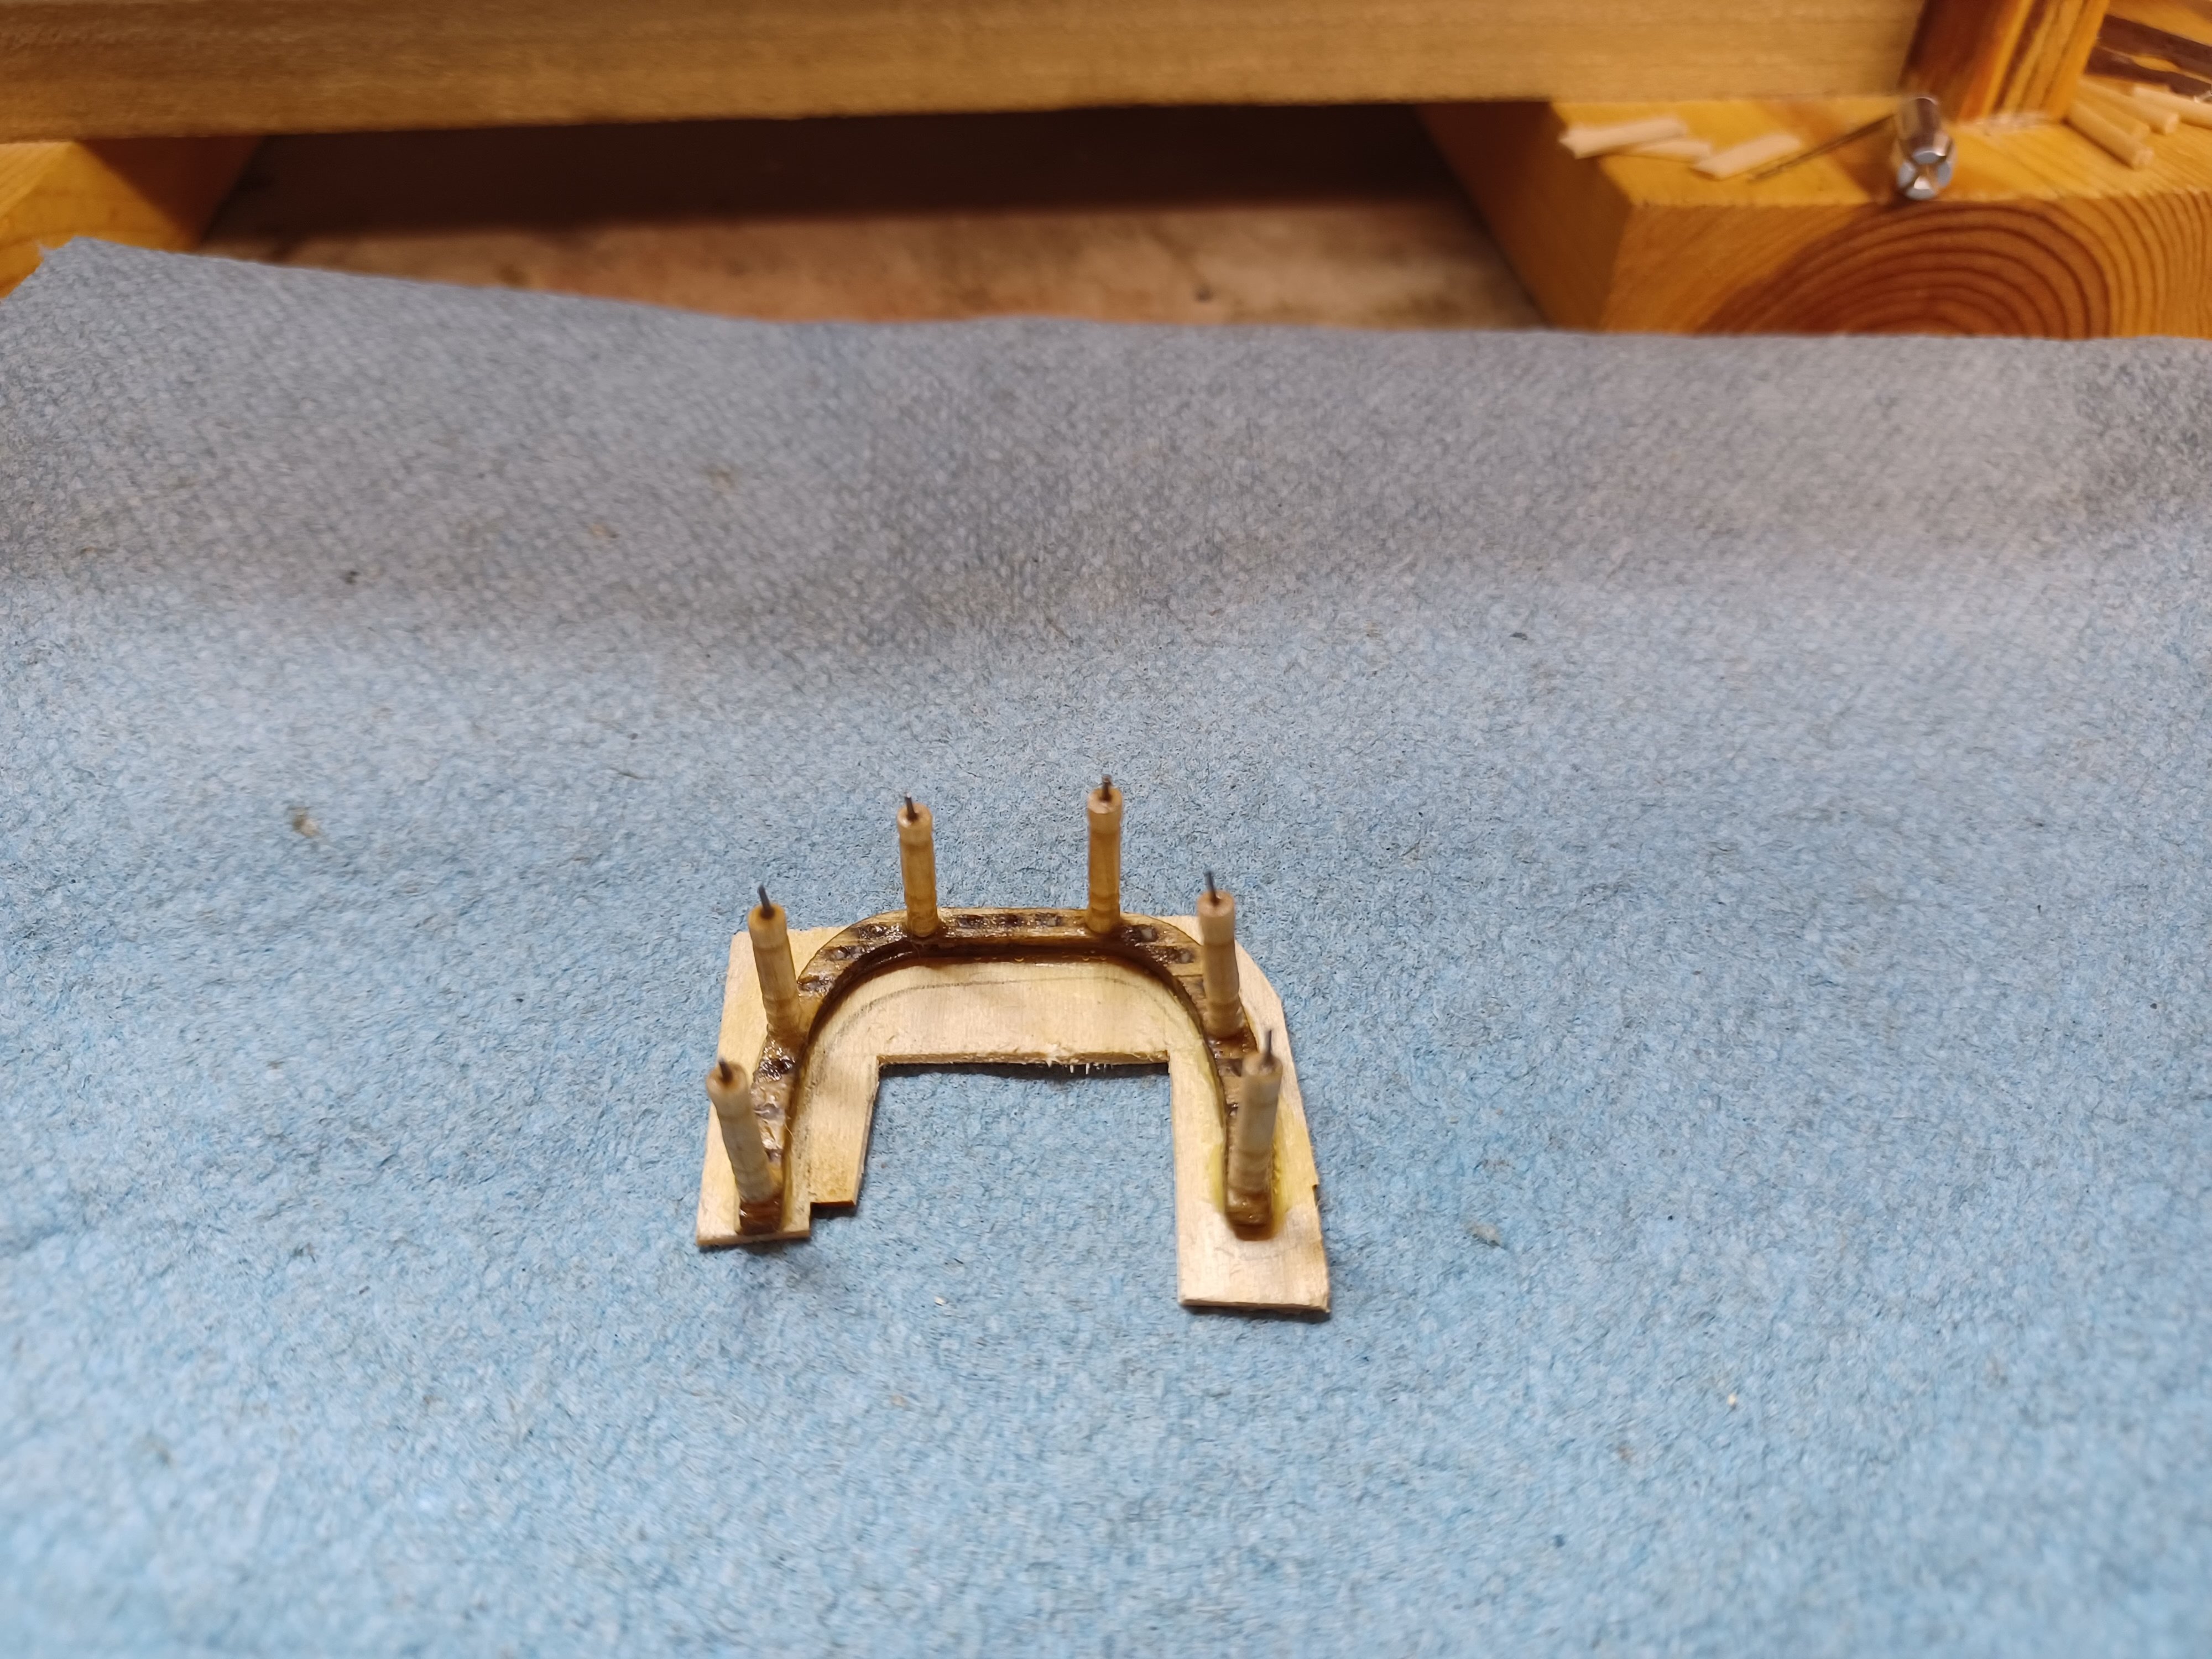
….And here we are. Despite being as careful as I could, the fife rail broke again (twice). So it came down to a complete rebuild, or one last attempt to finish the part. My decision is to reinforce the current pieces and see if a rebuild can be avoided. Using a cutout from the original wood used, I am going to try to clean this up.
- 436 replies
-
- 2
-
-
- Syren
- Model Shipways
- (and 1 more)
-
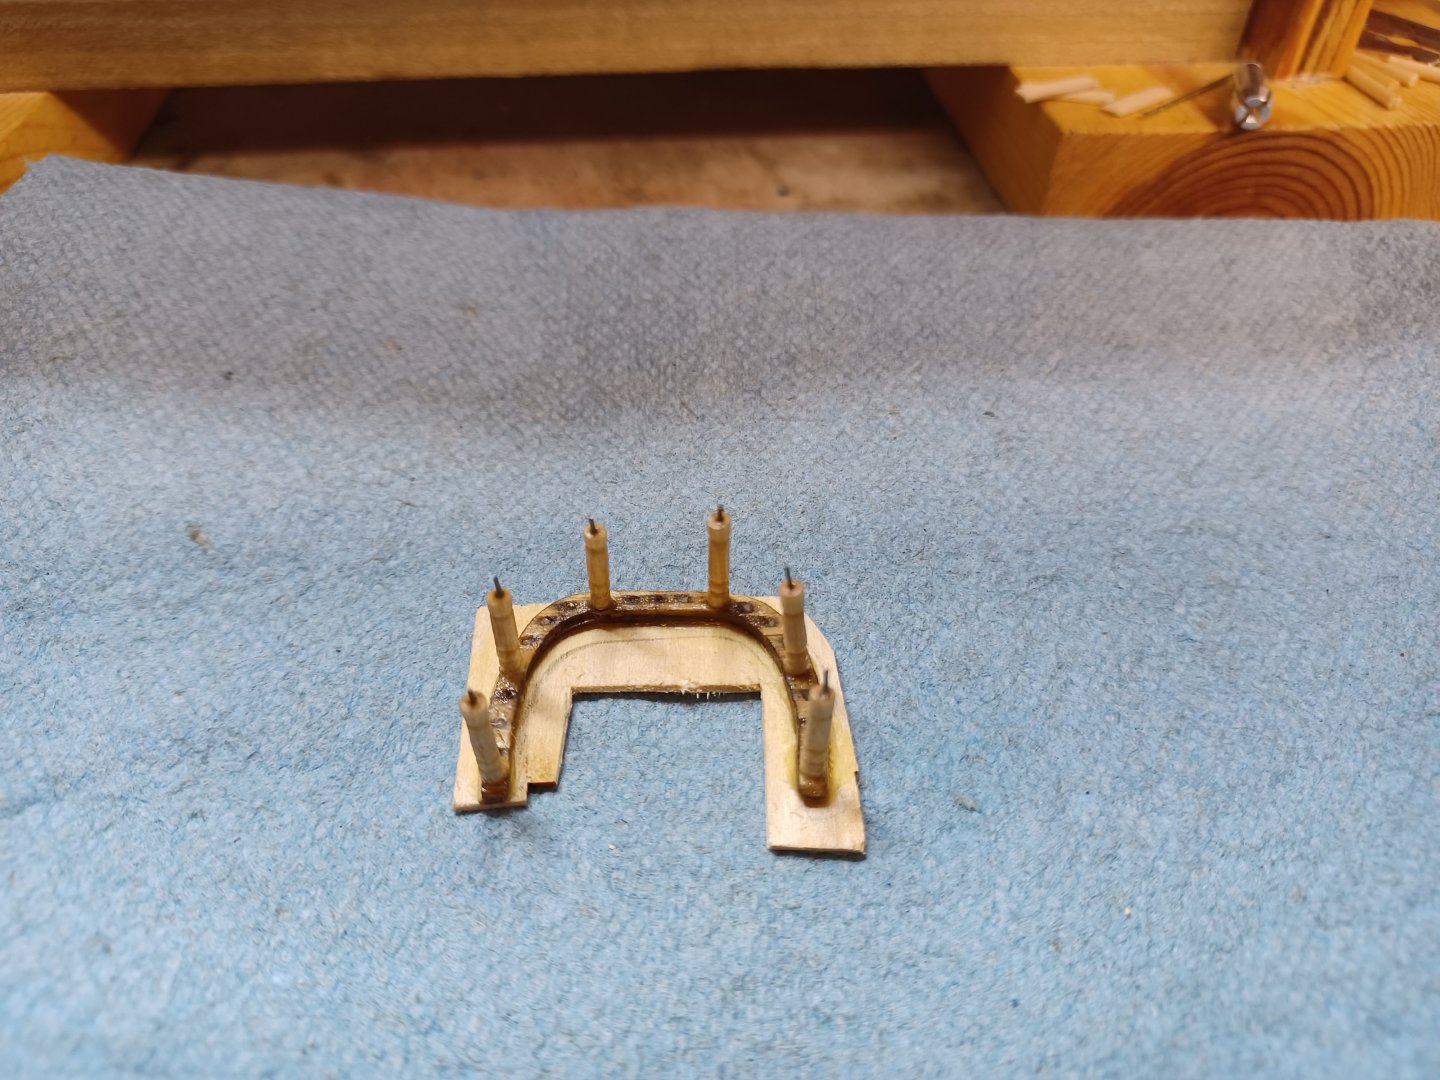
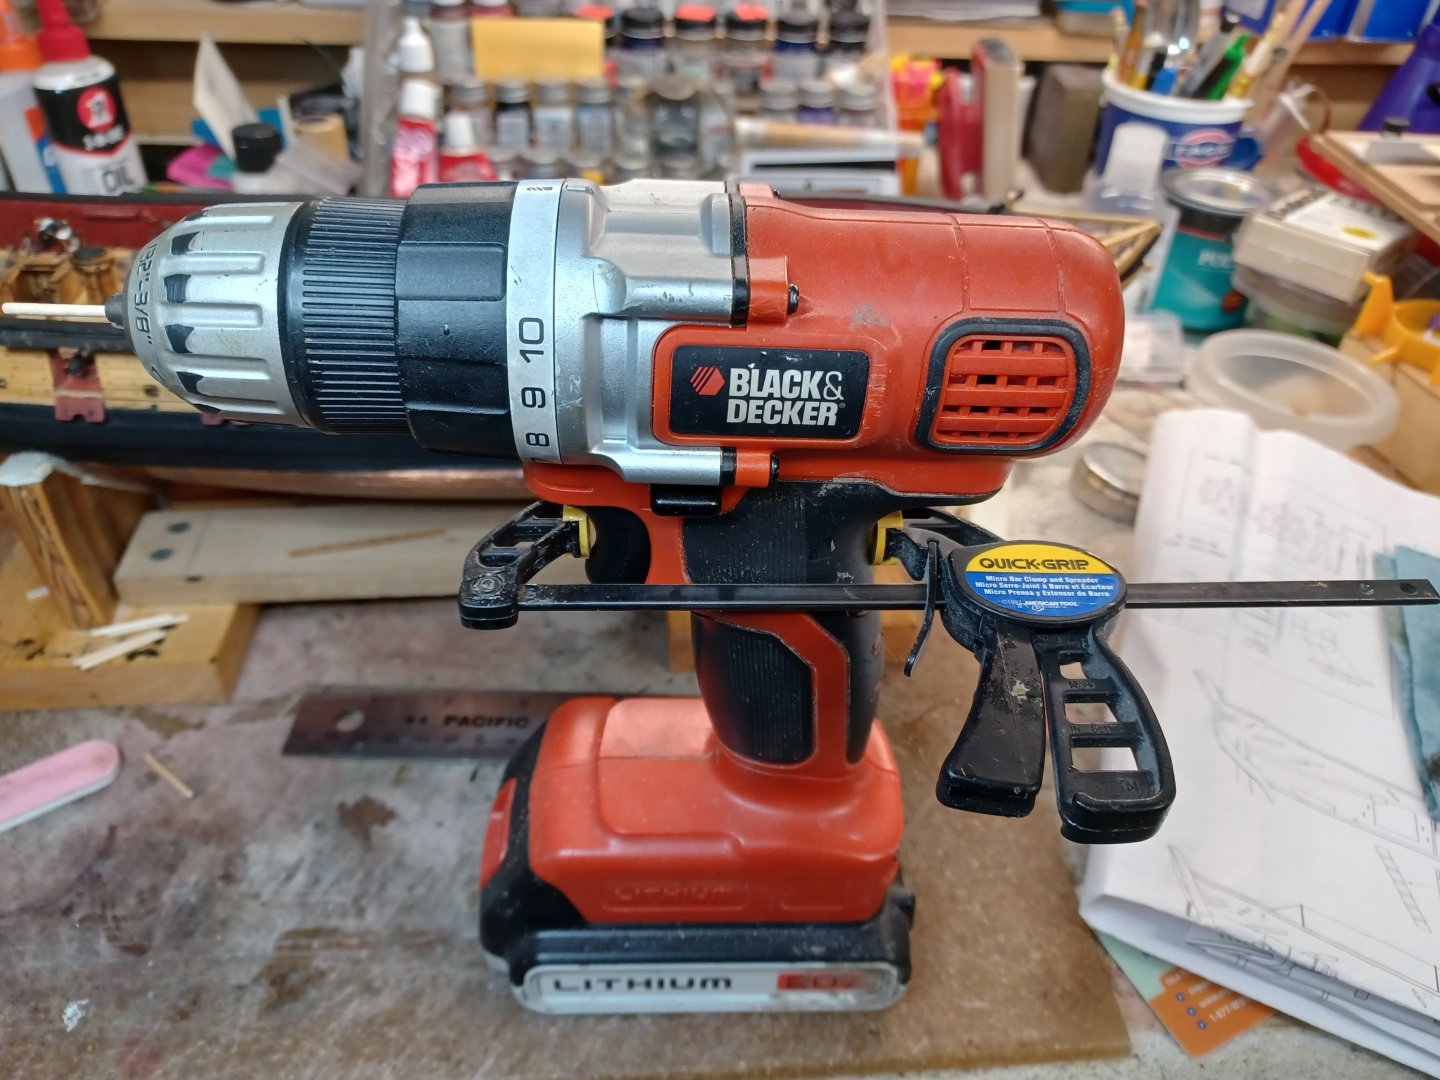
Fife Rail and a Few Comments If this is your first time through this build, you probably already know, but if not, please be warned. The fife rail parts (2 of them) are far more delicate than the instruction manual lets on. They mention rounding off the rail top and bottom pieces “before” you glue them together. Good luck with that. My parts barely will stay together, and has required multiple repairs while trying to impart the suggested curve. The cross grain piece came apart with even the lightest touch requiring reassembly. So many times, in fact, that I am one more break from creating a new part out of a piece light ply I use in airplane construction. I am no expert, but these 2 rail parts are just too flimsy in their original laser cut configuration. However, I have persisted and the two pieces are now glued together. Next break, and they will be gone, and a new part constructed. One of the two pictures show the current state of the rails, which will need cleaning up. (While I hold my breath.)…and how I have approached making the supports. For a poor man’s lathe, I use my cordless drill with a small clamp used to hold the trigger at a constant speed while freeing both hands for the shaping. I will update with pics when it is ready for the install. Whether it is the original or remade pieces.

- 436 replies
-
- 1
-
-
- Syren
- Model Shipways
- (and 1 more)
-
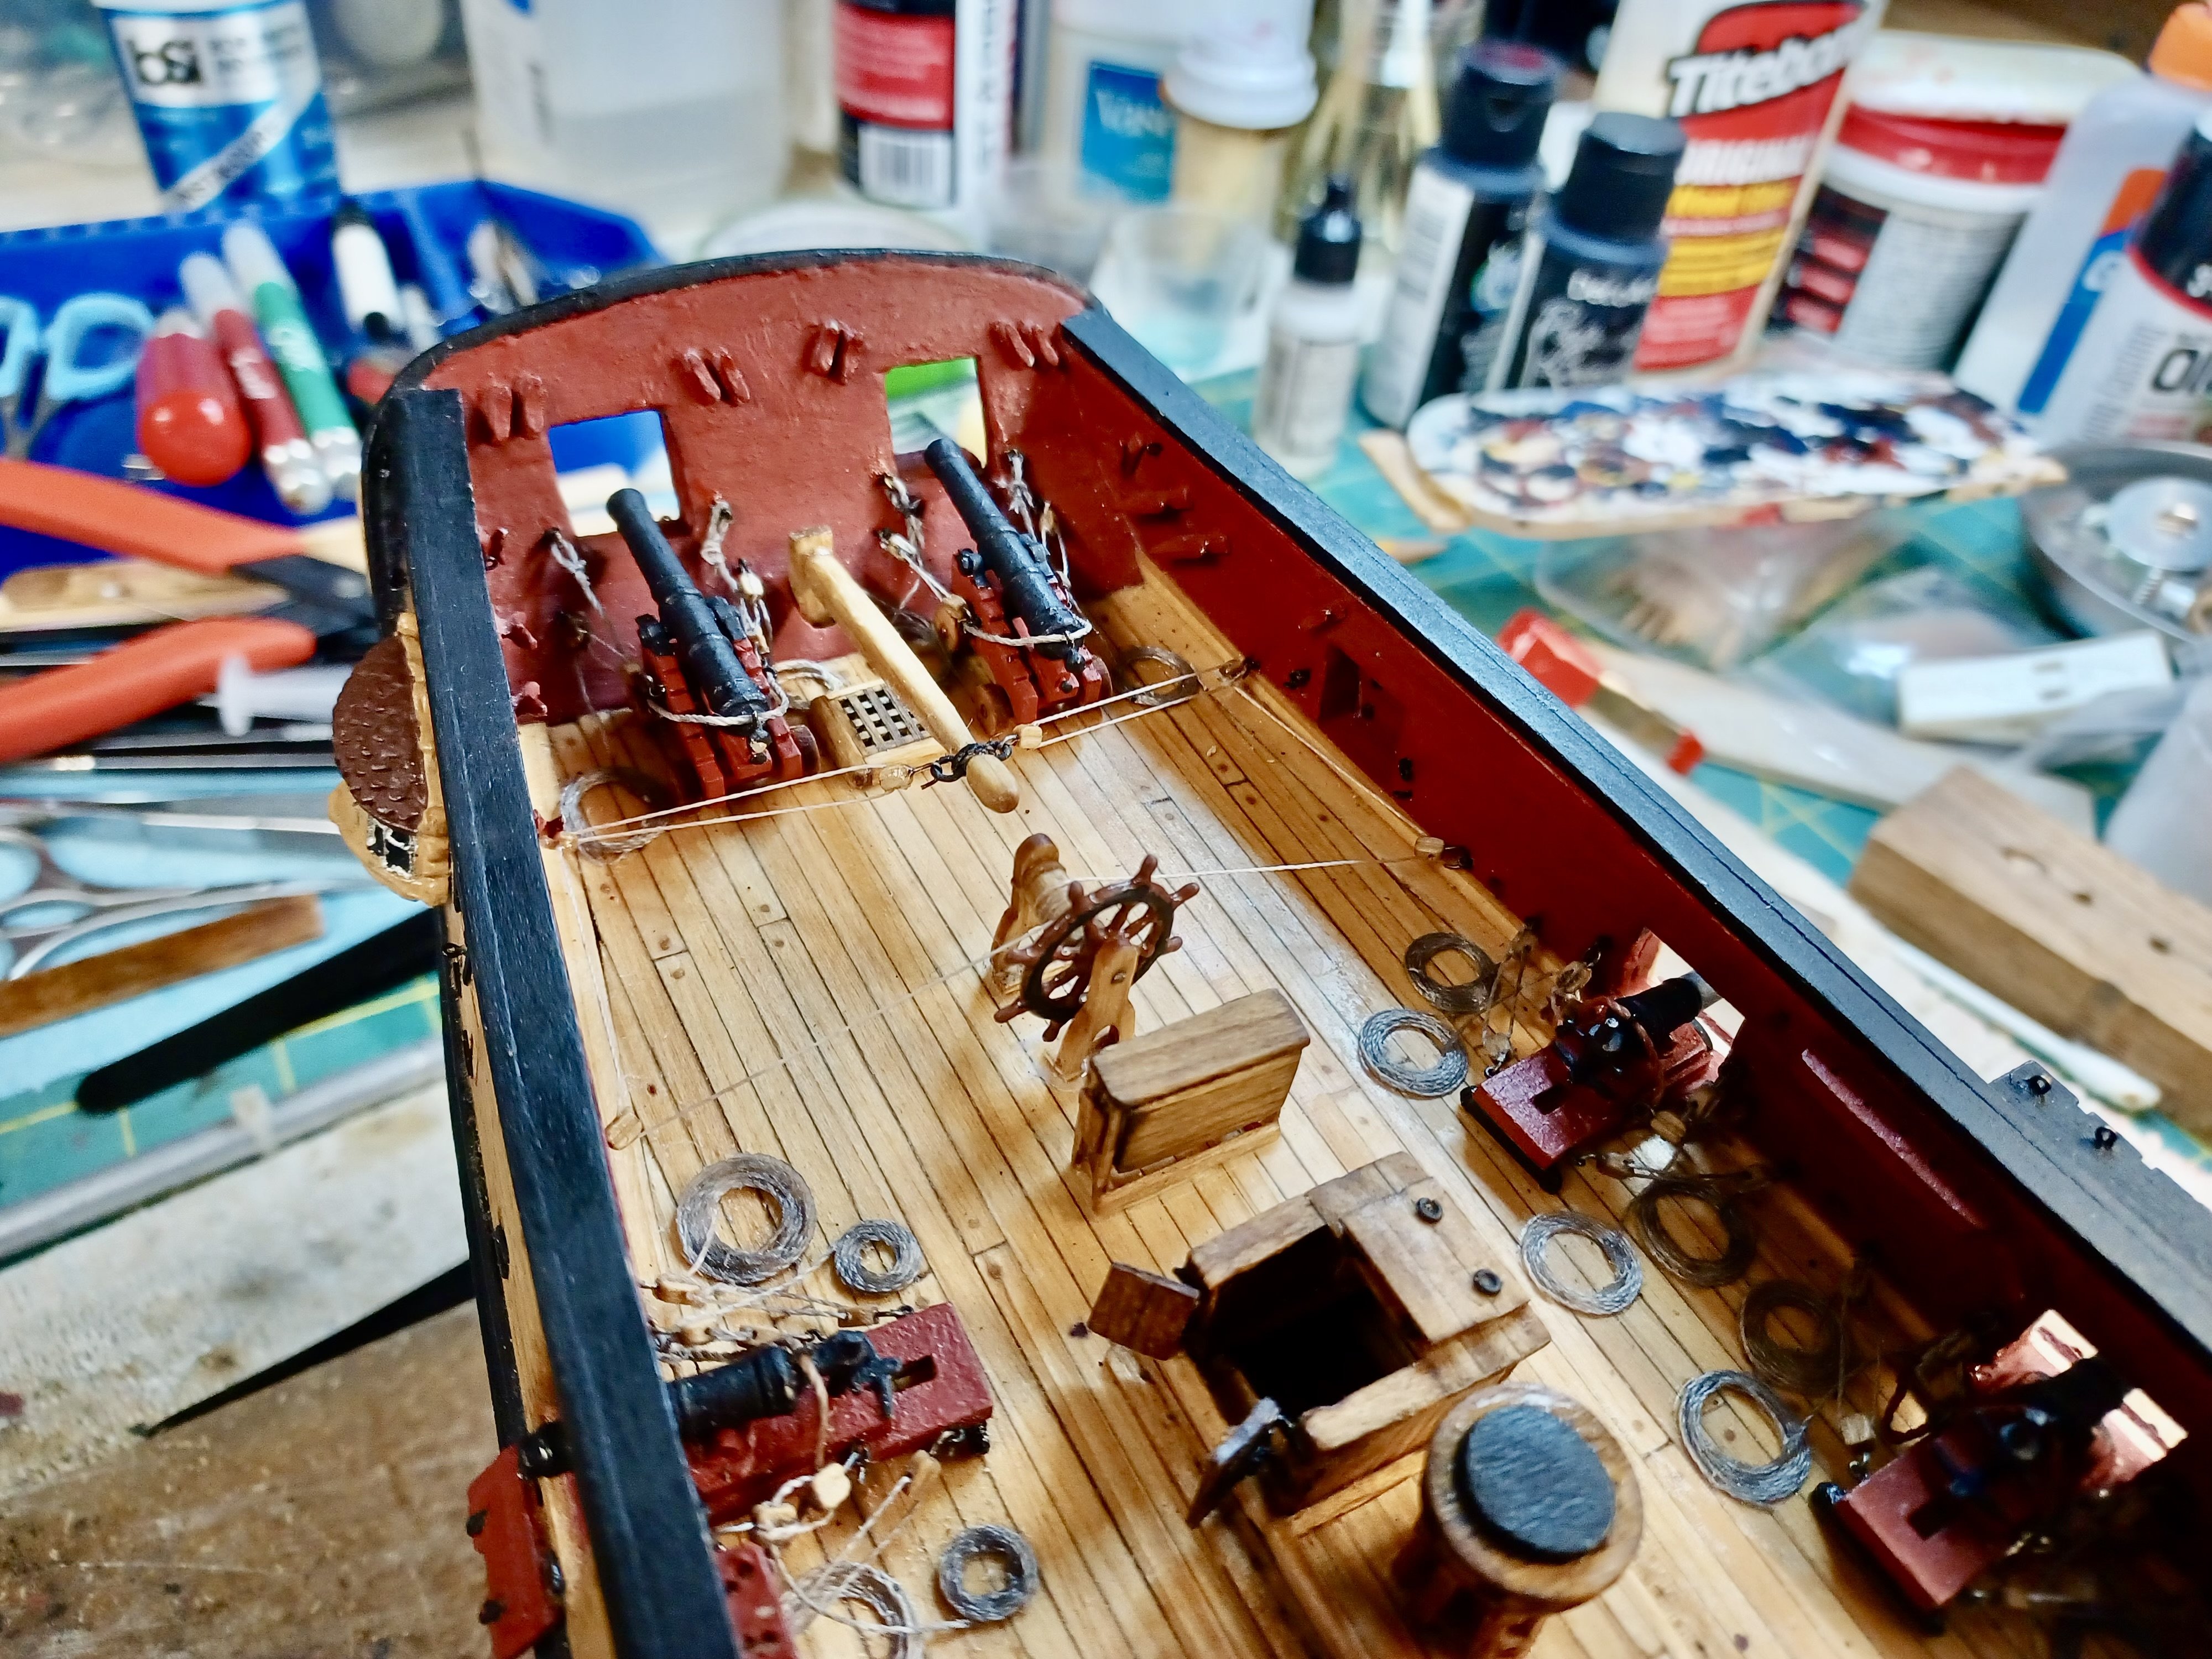
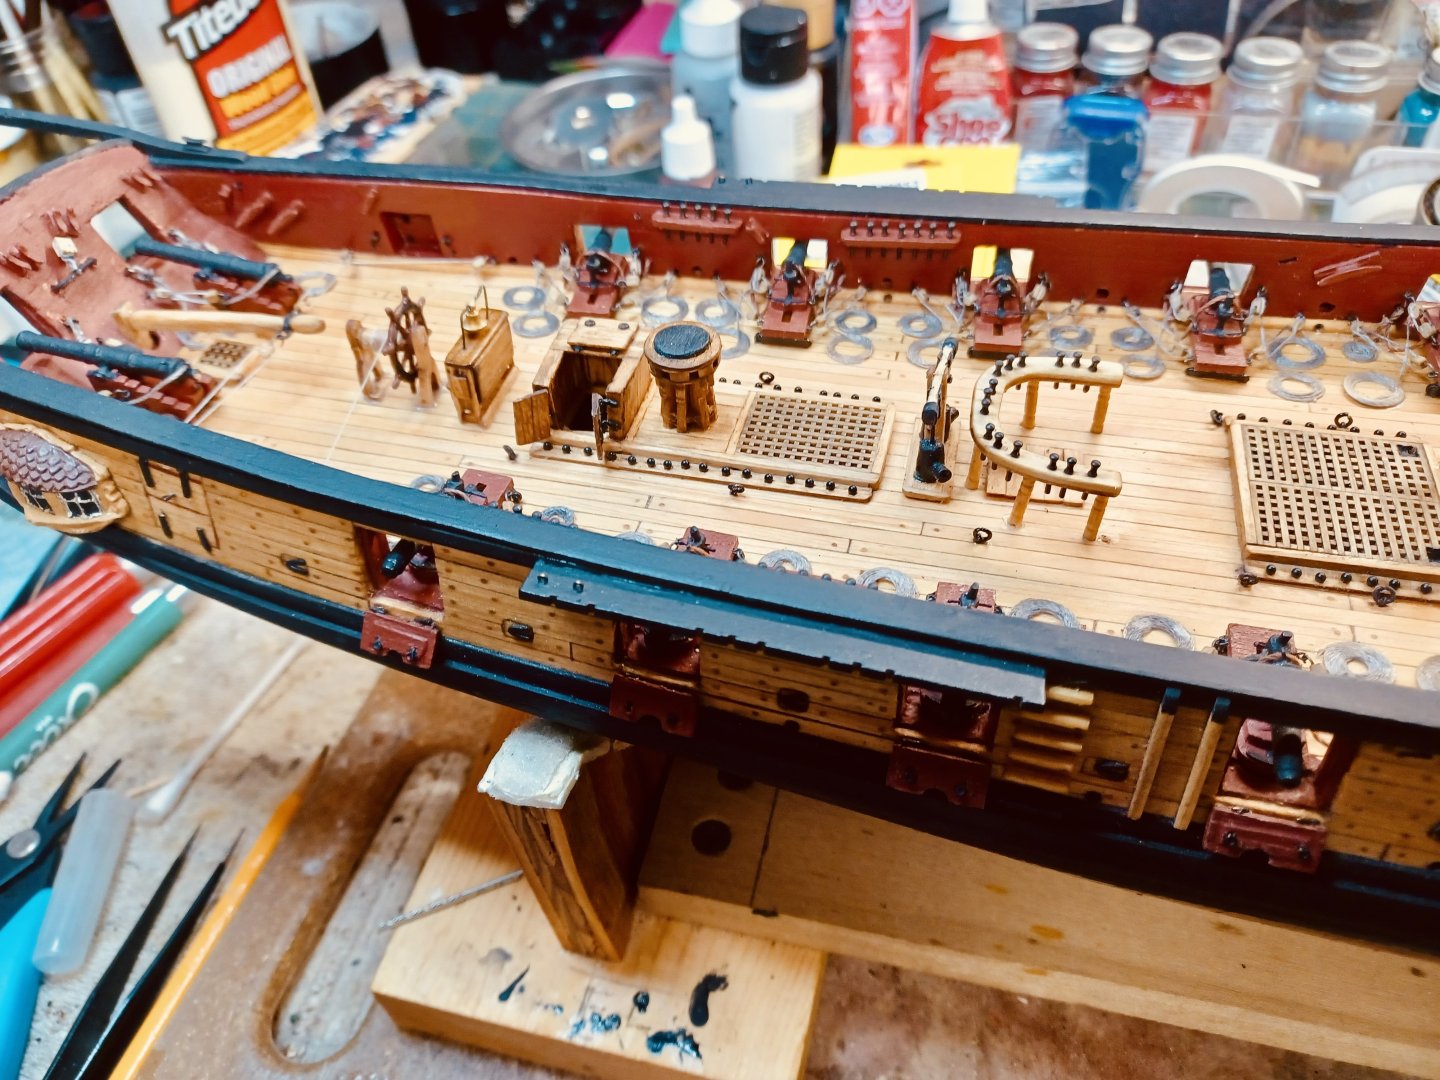
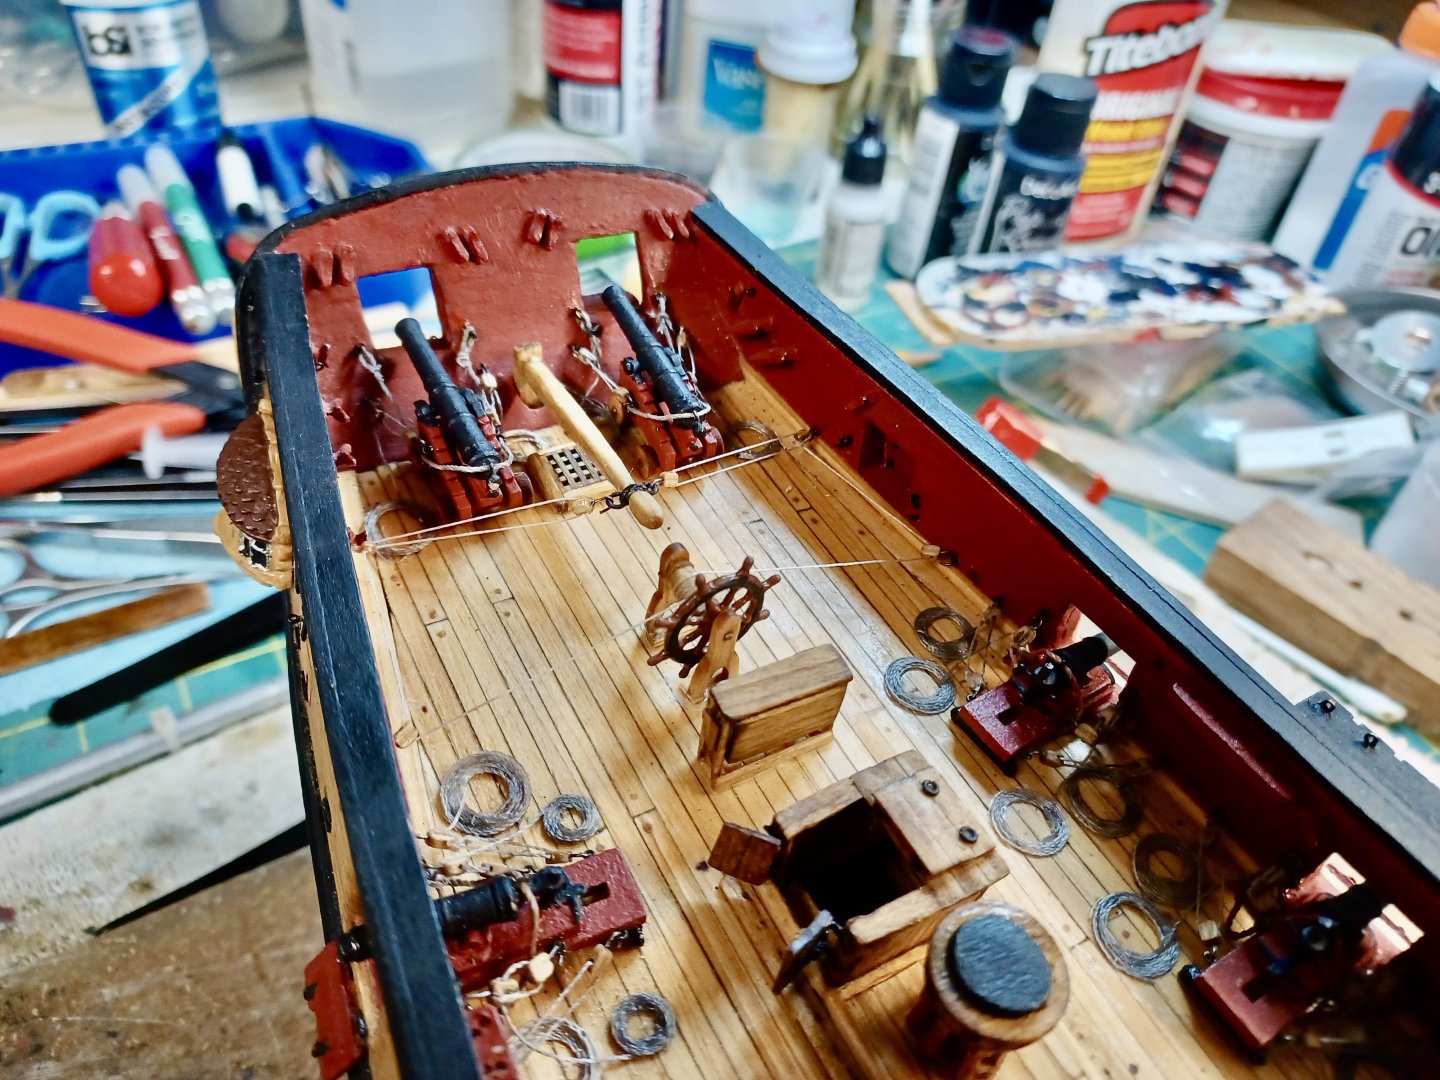
Cannonballs, Brass Bell, & a Traveler As far as I can tell, these 3 items are those items left to complete….then it’s on to Chapter 13. Here are the pics of the tiller and aft cannon rigging, just completed. The instruction manual provides the option of rigging the tiller with either one, or two lengths of line. I was lucky to able to complete it using only one.

- 436 replies
-
- 4
-
-
- Syren
- Model Shipways
- (and 1 more)
-
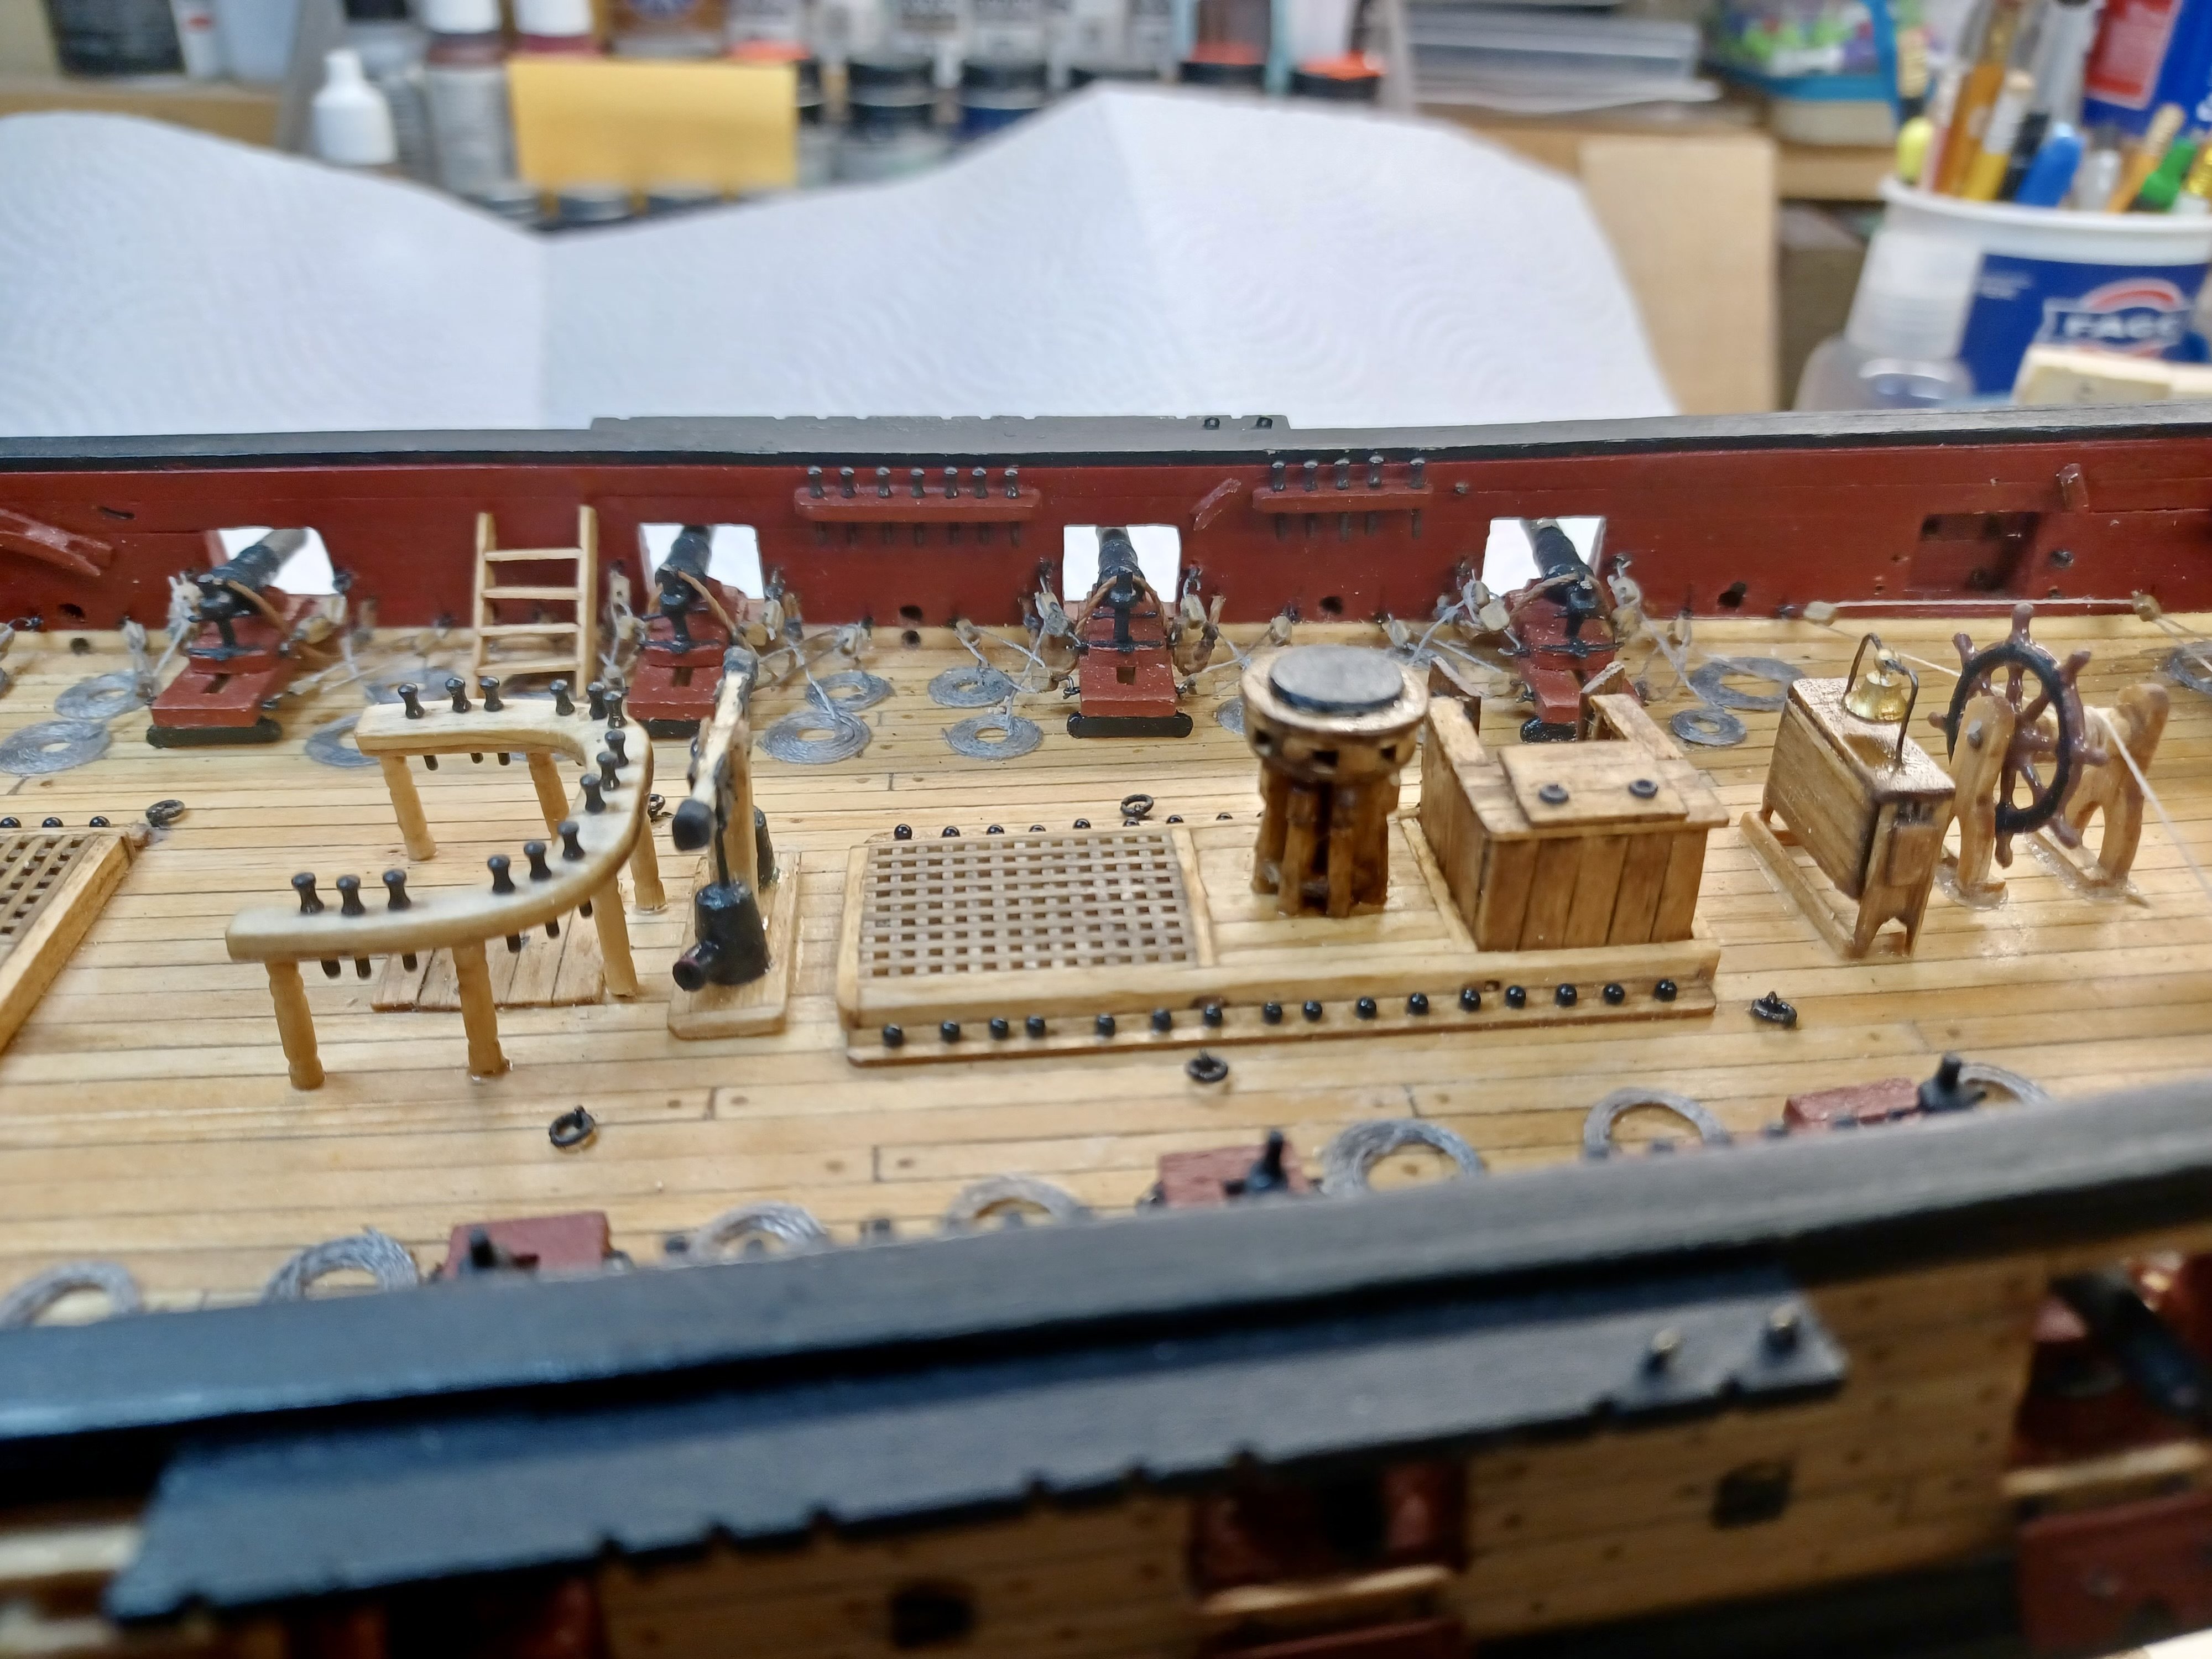
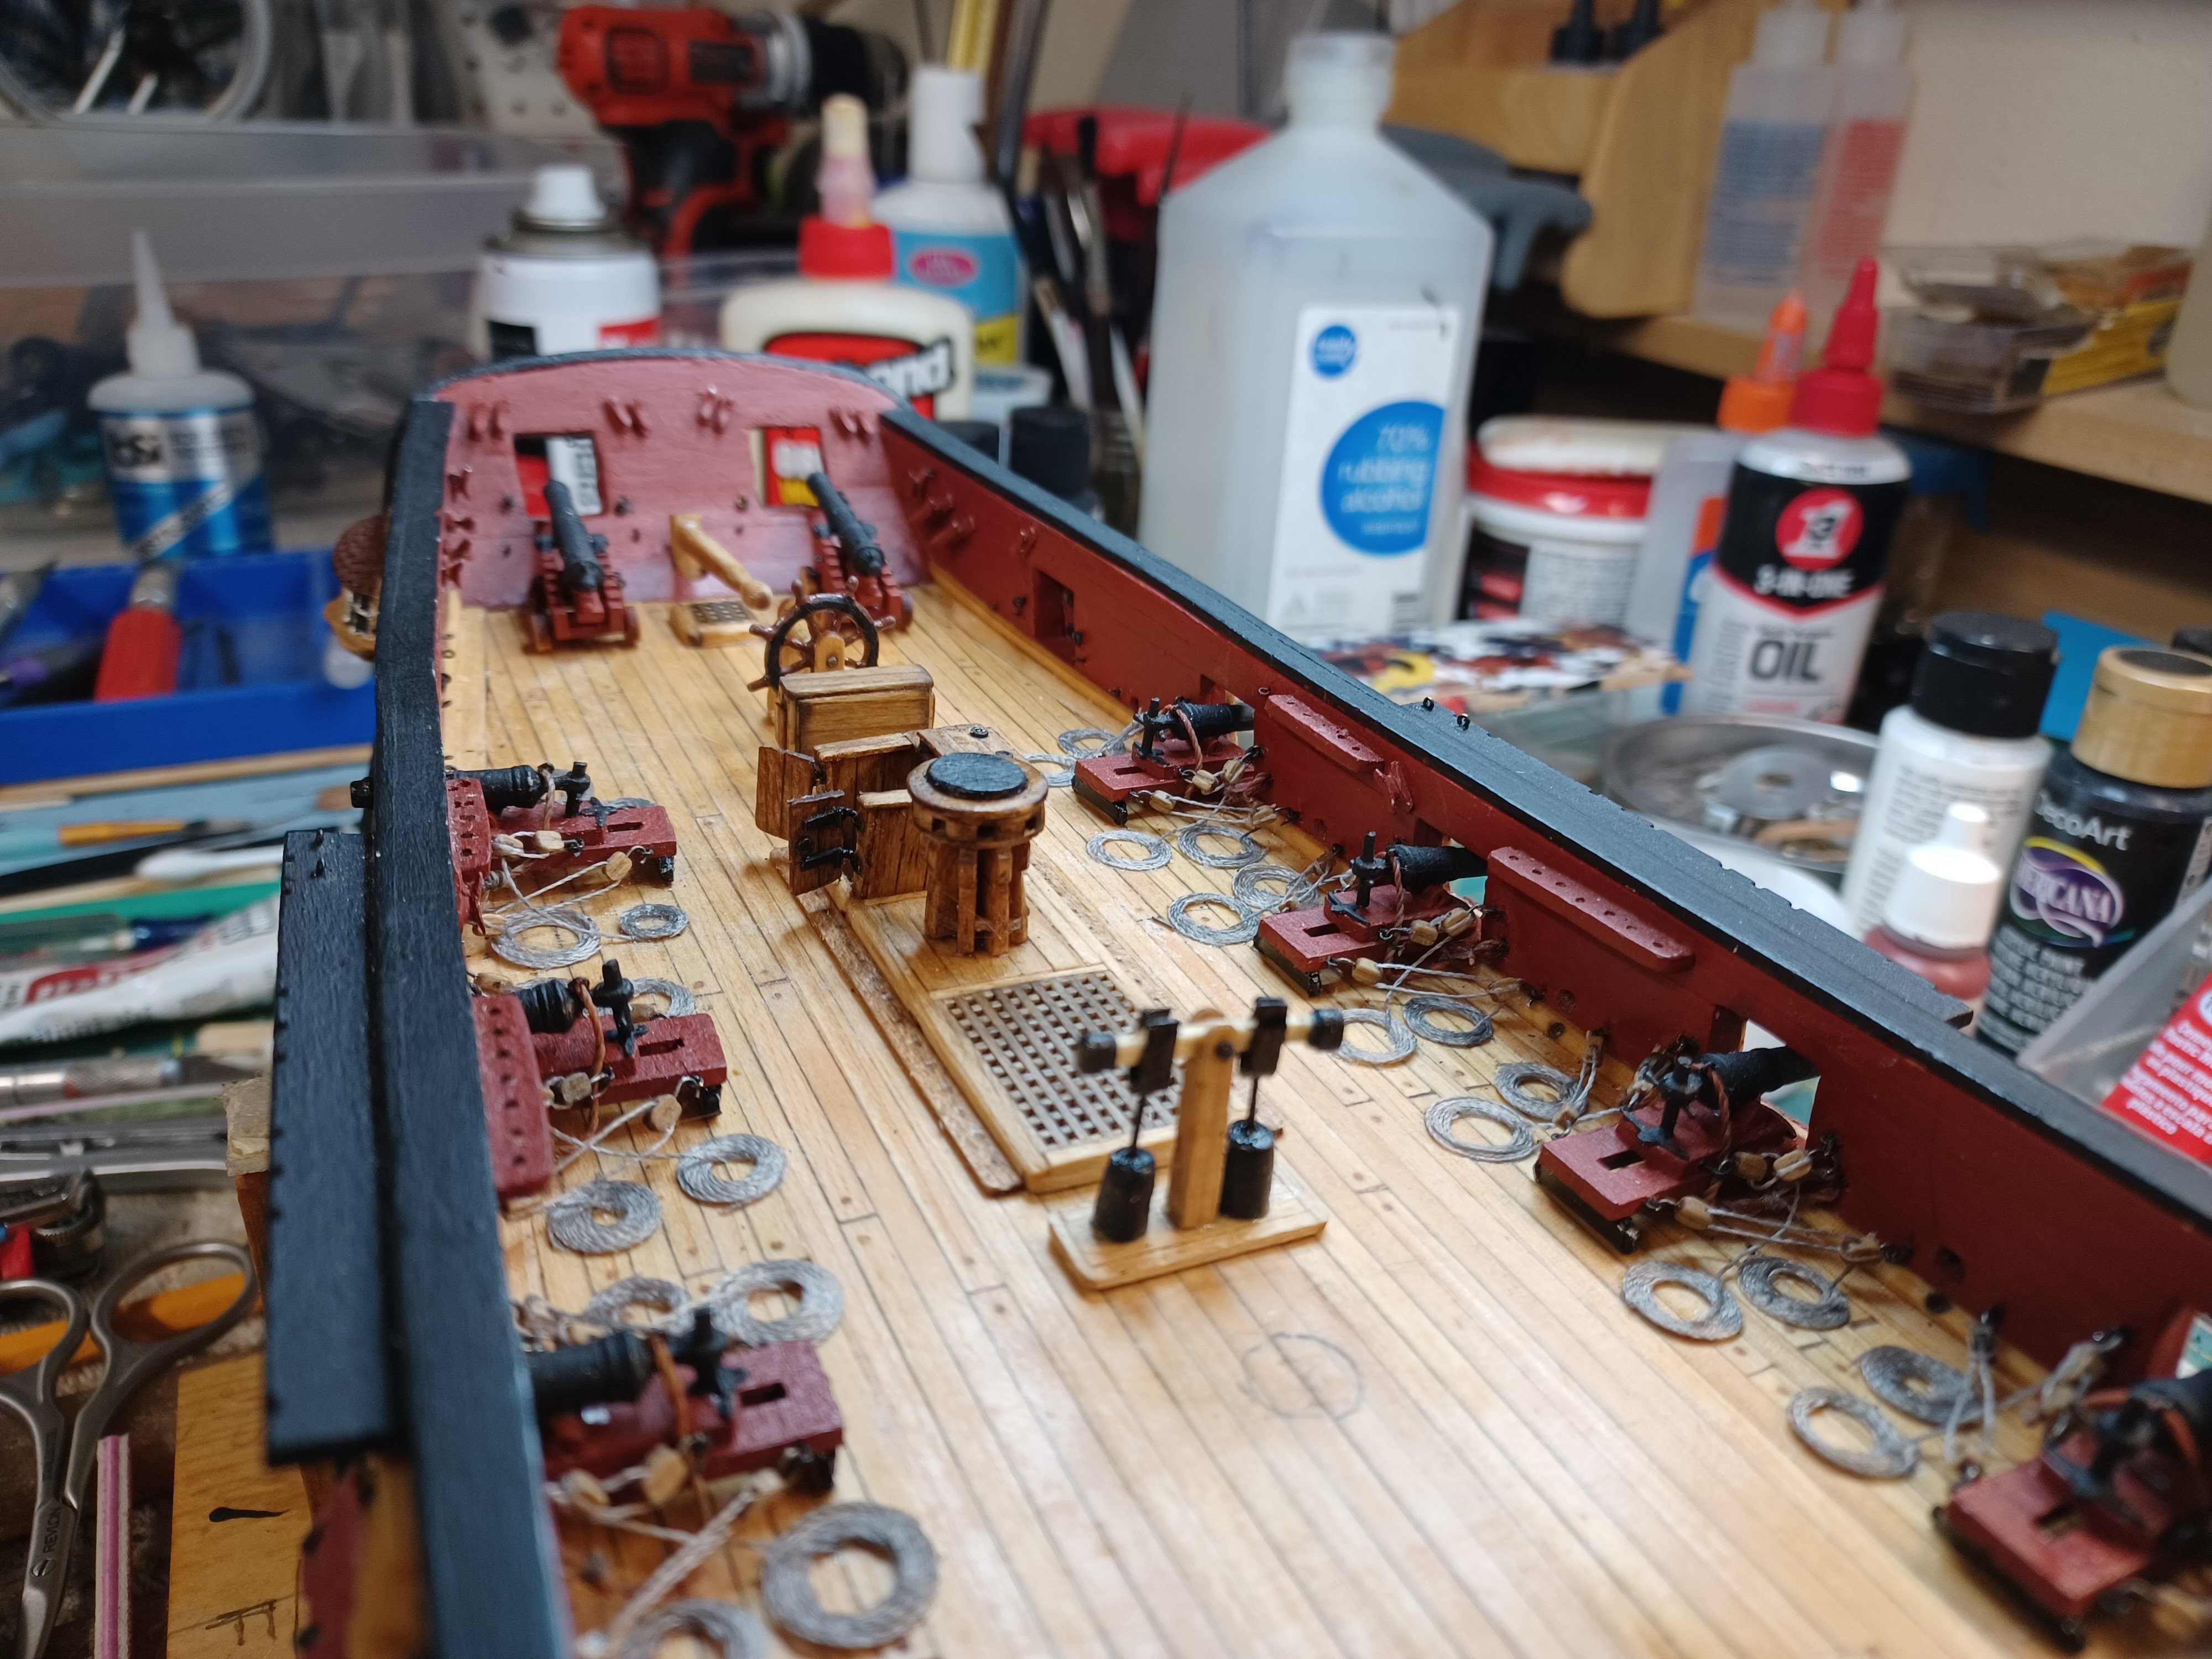
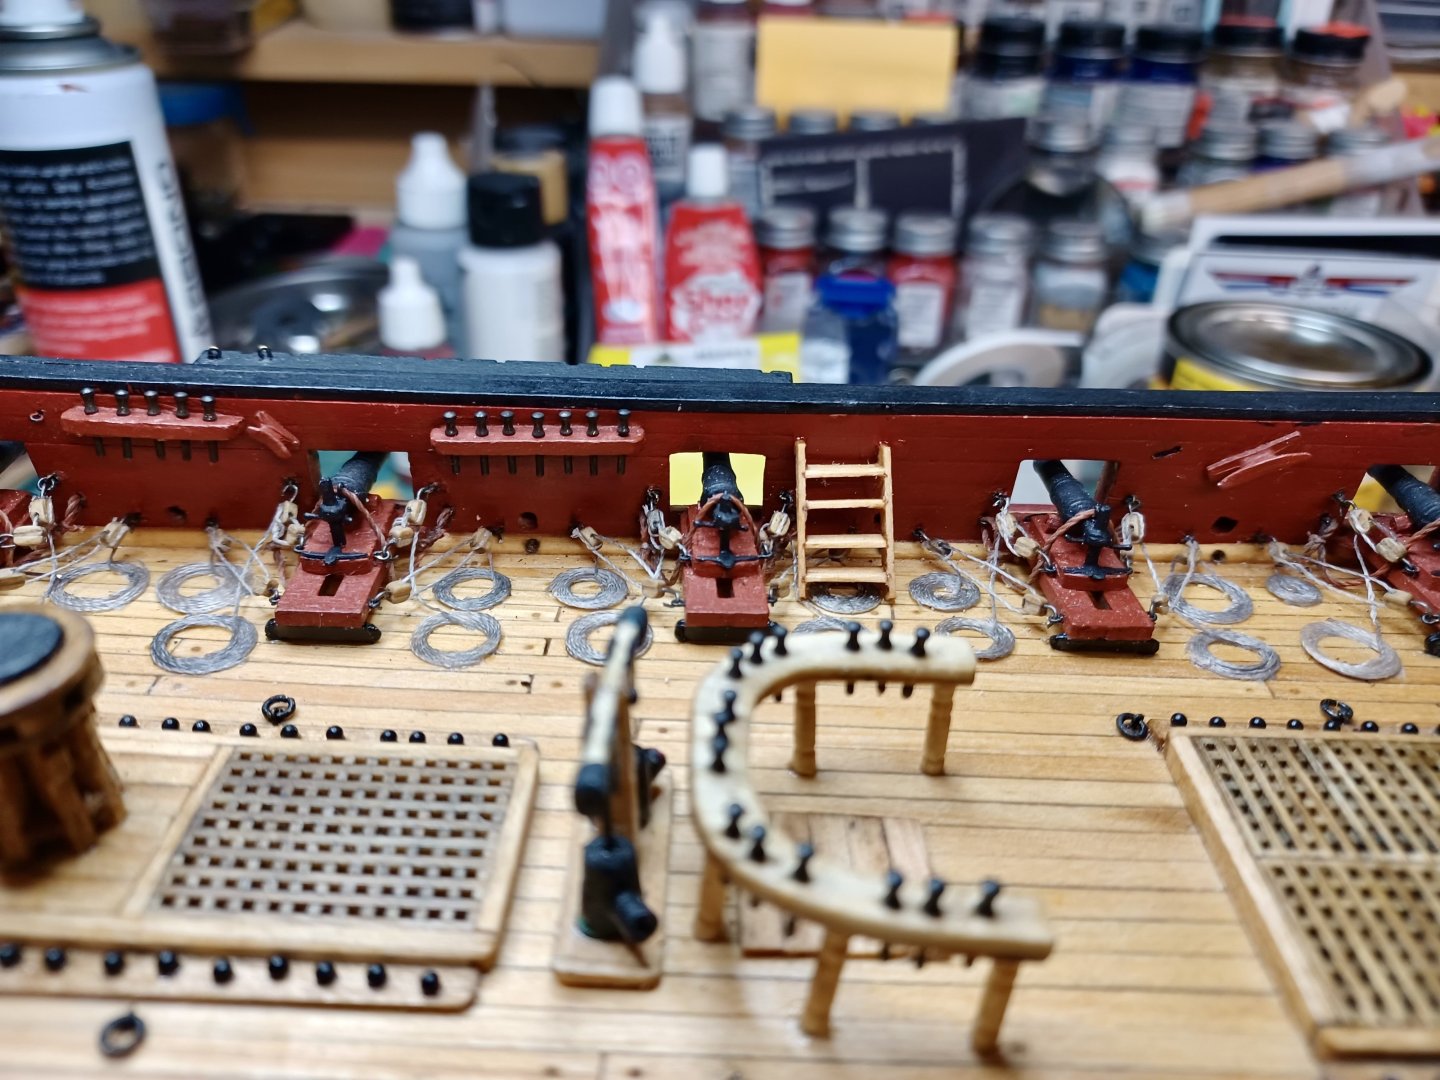
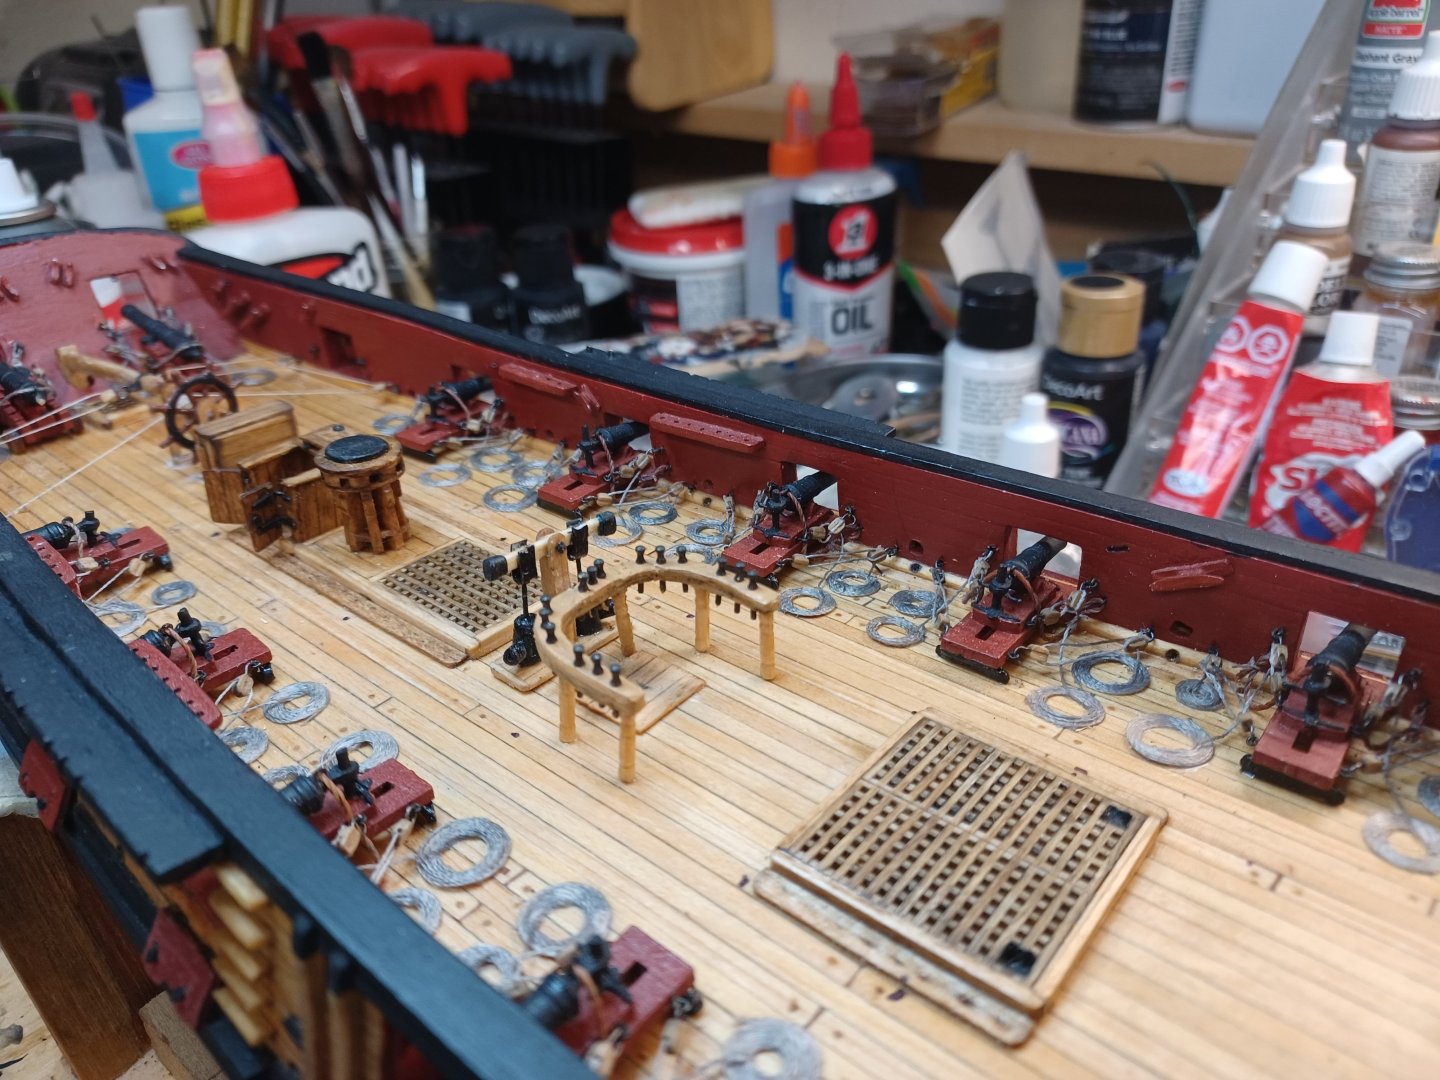
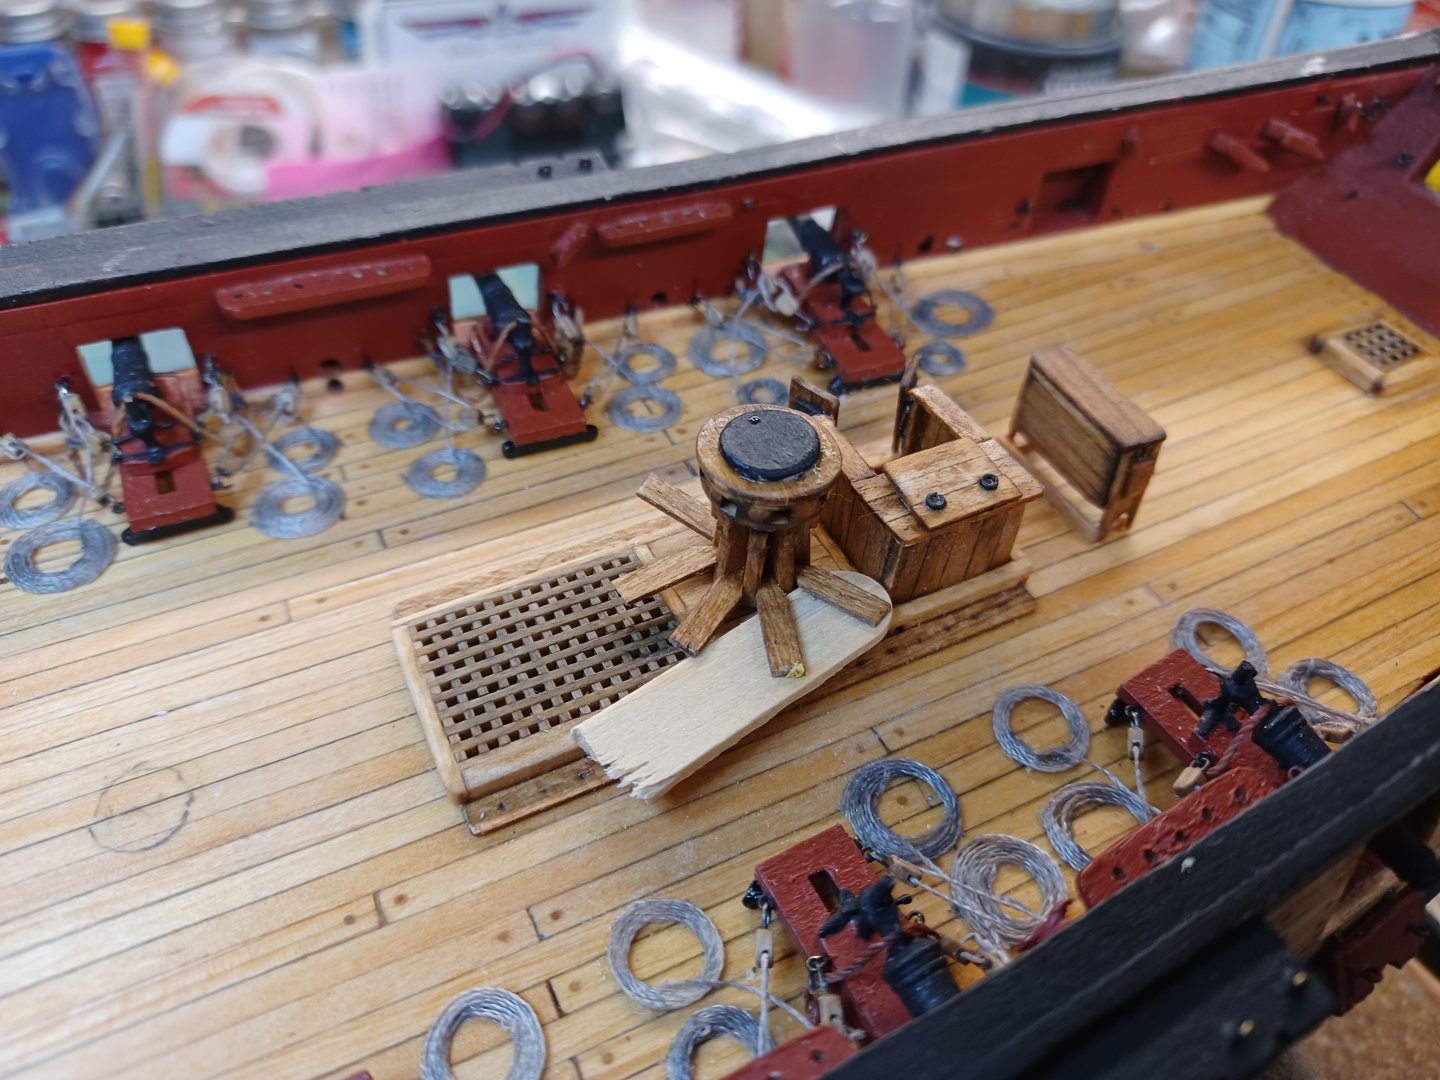
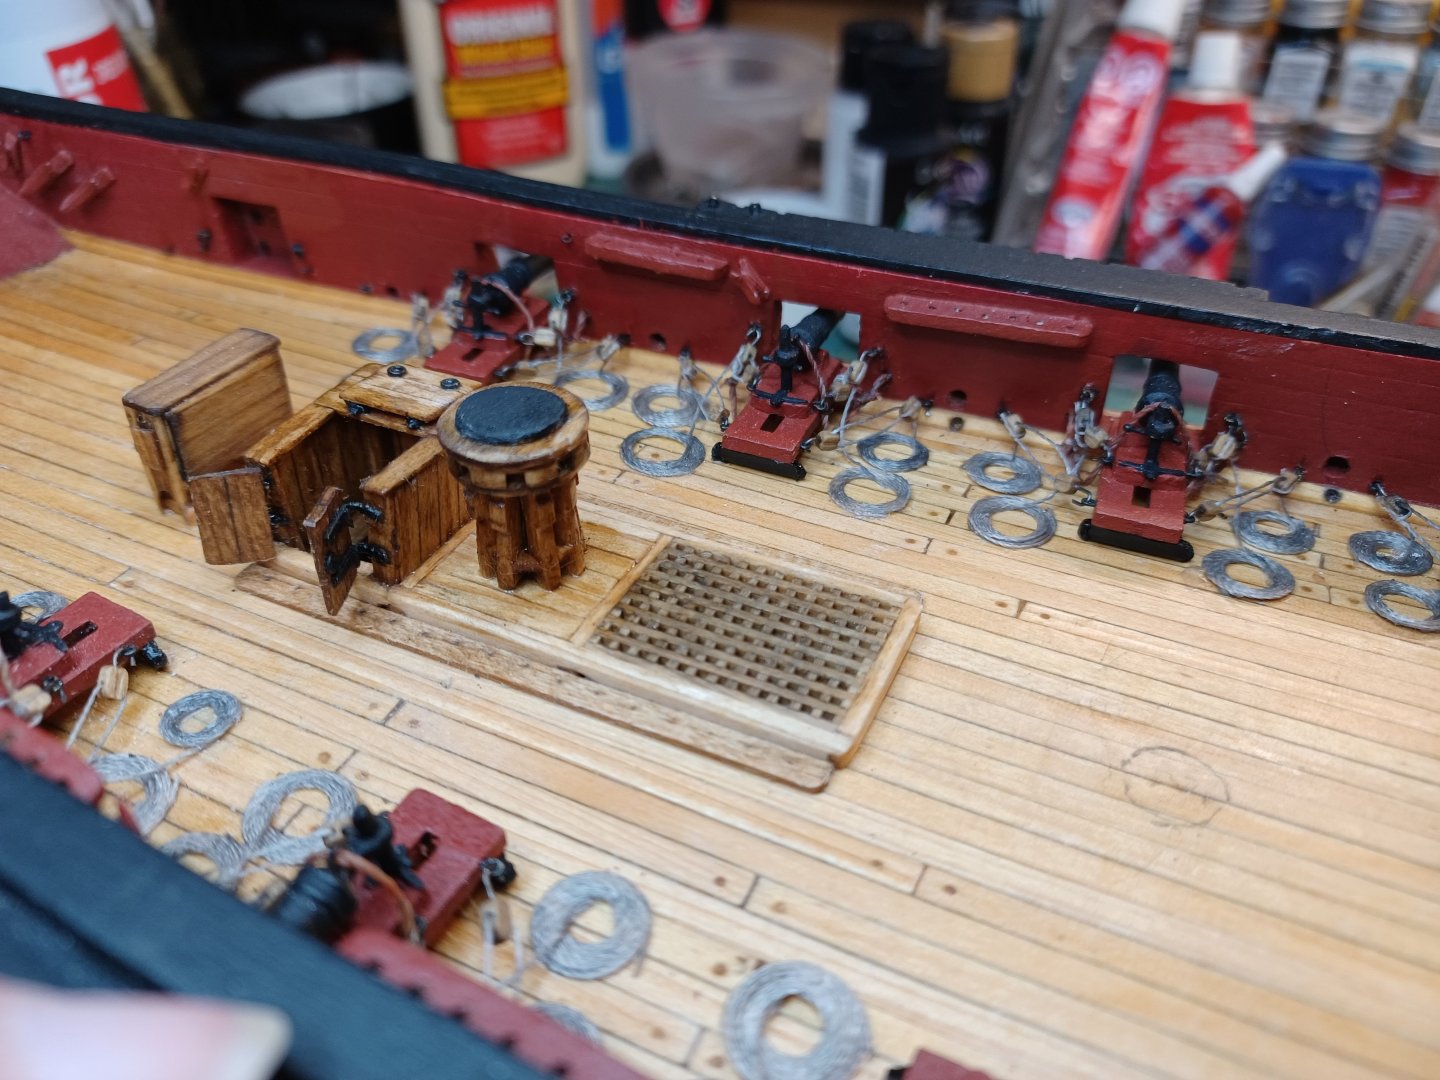
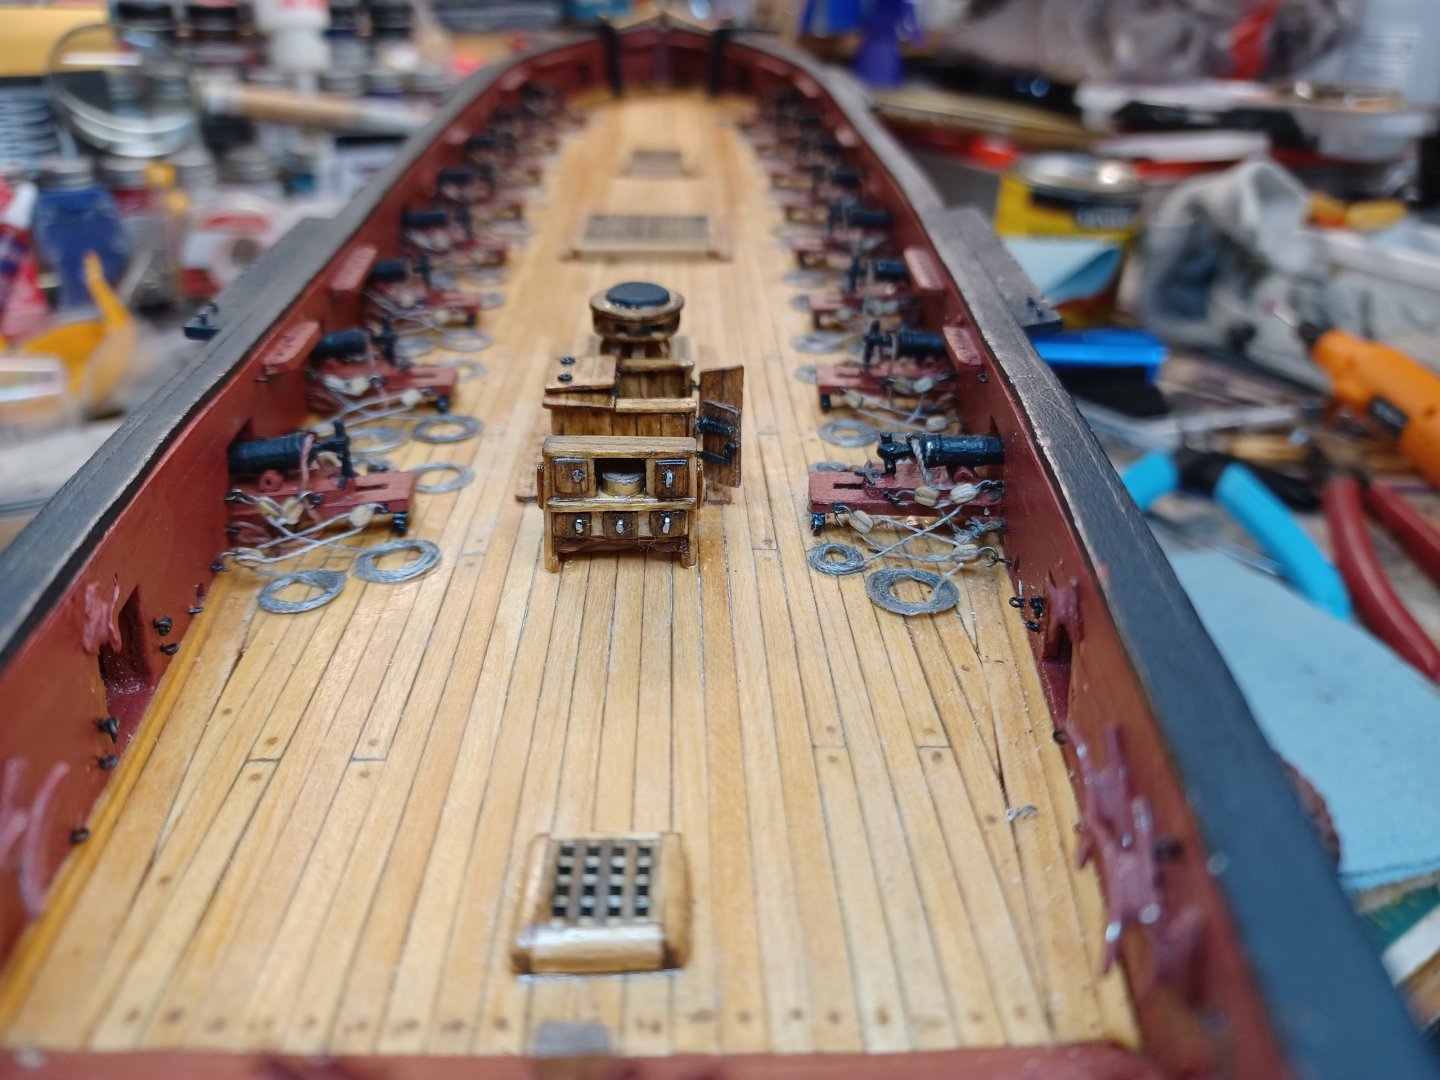
A Few Items Nearing Completion I have been working on a few deck features at the same time and am getting close to having them done. Just installed the bilge pump today, but forgot to add the exit pipes, one on each side. I will make sure I get them in before moving on. Other things to finish are the cannon rigging, and the wheel connections to the tiller. Lastly, the bell needs to be mounted to the binnacle, and the cannonballs set in. Just hesitant to do the cannonballs now. I can see them rolling all over even when glued.


- 436 replies
-
- 3
-
-
- Syren
- Model Shipways
- (and 1 more)
-
Before I Forget I decided to return to the capstan and try to add the small wedges that go between the whelps. I used a piece of popsicle stick to space them the same. Now all I have left is to decide if I will do an upper row.
- 436 replies
-
- 2
-
-
- Syren
- Model Shipways
- (and 1 more)
-
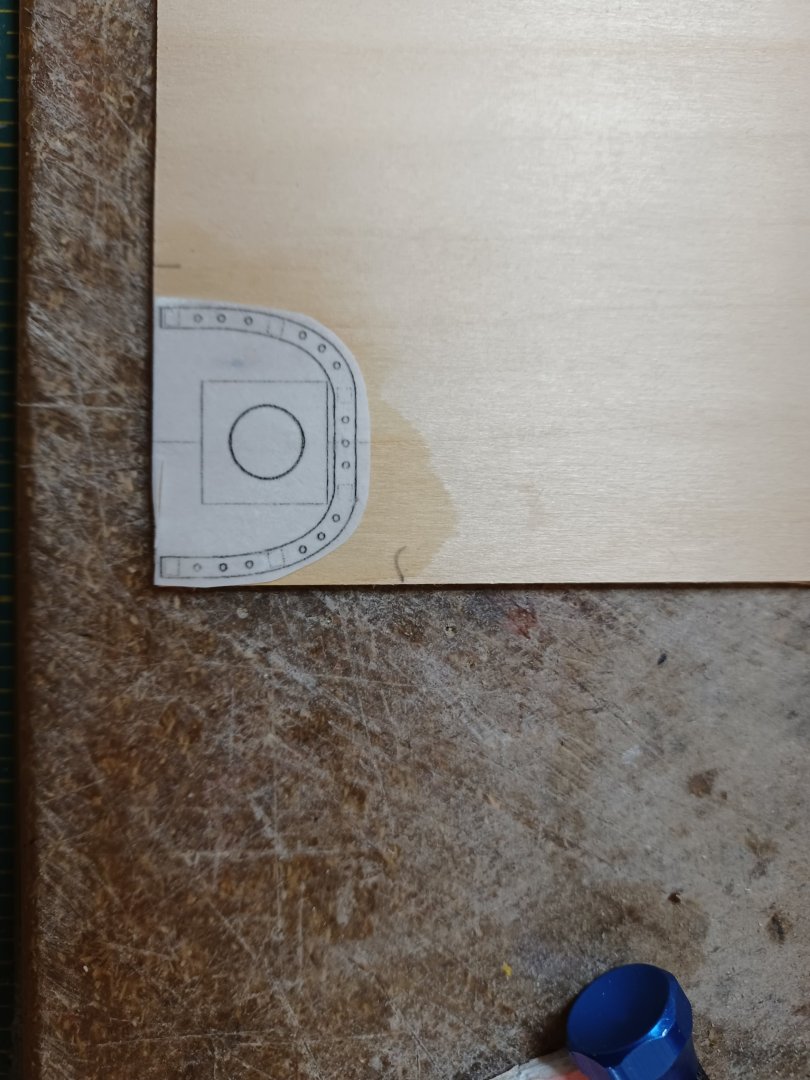
Binnacle Improved I was lucky that the binnacle was just tacked into place, so I was able to remove it. No, I did not mean to just have it tacked, but it was supposed to be installed. No worries though, I did some improvements in the cabinet handles. By grinding the heads of the straight pins, which allowed them to become loose, I put them in a vise and smashed them. I think they have a better look, and the color now resembles pewter. And, I was able to clean up the binnacle, which needed the “whiskers” removed.
- 436 replies
-
- 2
-
-
- Syren
- Model Shipways
- (and 1 more)