Redshadowrider
-
Posts
301 -
Joined
-
Last visited
Content Type
Profiles
Forums
Gallery
Events
Everything posted by Redshadowrider
-
Thanks for the suggestion, I have a bottle of the mix that I used on the coils. I will test it out along with using a looper and CA before selecting which glue to use. What I like is the instant set of the CA, but it can leave a glossy surface.
- 436 replies
-
- 1
-

-
- Syren
- Model Shipways
- (and 1 more)
-
Thank you, I have a set coming today. And then I will move forward. I should be able to finish up the out haul lines in a few days then on to the breach lines.
-
41 ready I continue to assemble the out haul lines and am at 41. Couple of minor issues have slowed my progress. One has been resolved…CA activator. I had a small spray bottle that I use for my RC work, but ran out. And is now replaced. The biggest issue I am having is the out haul blocks. I need to add the hooks to the blocks, but drilling the hole for them is on a temporary hold. I need to find a good set of micro drill bits. I have some Gyro in 0.034mm, but they are so flimsy, they barely hold up to balsa let alone the harder wood used for blocks. Anyone out there have a brand to recommend?
- 436 replies
-
- 1
-
-
- Syren
- Model Shipways
- (and 1 more)
-
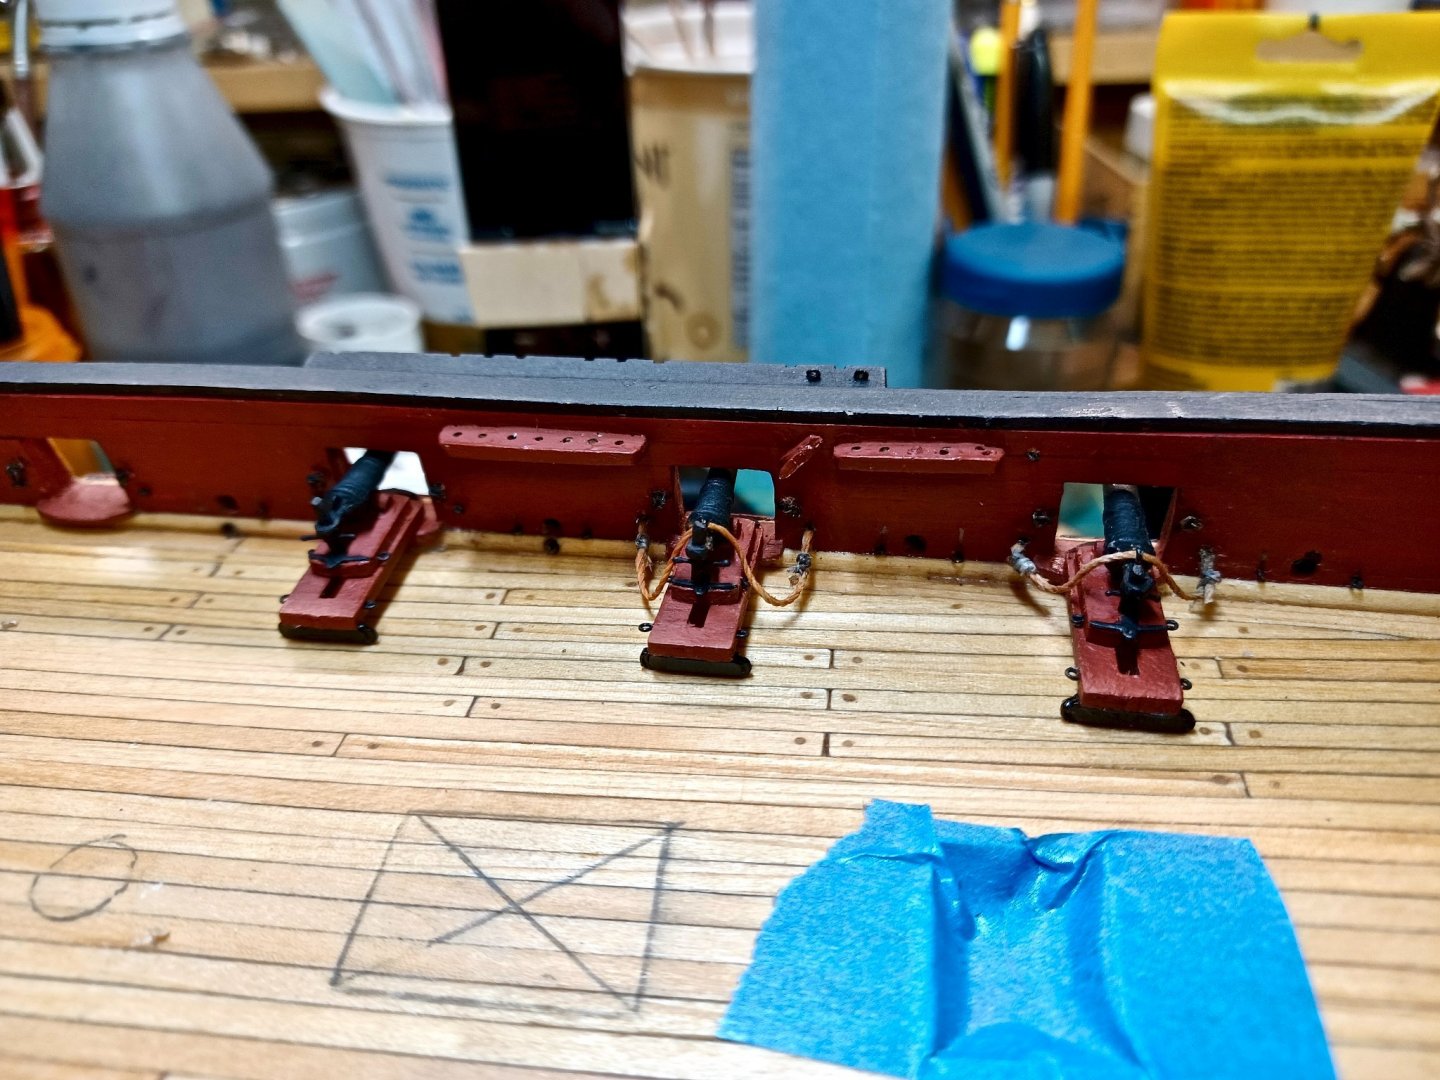
Will Appreciate Some Input Usually, I am successful in either finding, or creating a jig, to help in putting together the small bits and pieces on this model. However, I am struggling to figure out one for assembling the outhaul lines. You can see, in the picture, 3 completed parts, but with almost 70 to go, I need something to improve the process. Does anyone have a system that works well? I thought I had found it with the jig pictured, but it is more trouble than it’s worth until after the line has been completed. It helps to line up everything, but that’s about it. Update 12/16: I now have 6 done, and am still refining the process. In addition, I have renamed it, Sproing because that is what happens when a clamped block jumps across my bench and disappears. Update 12/20: I am continuing to assemble the outhaul lines and am up to 20 completed. As I have, done so, I took a count of the blocks that I have with the hooks and found that I am short, so I have taken time to create the amount that I need. I should be able to resume today.

- 436 replies
-
- 1
-
-
- Syren
- Model Shipways
- (and 1 more)
-
74 Or 75? Who can Say for sure?😁 Now don’t go counting, it is 74. I have 75 drying in the garage. Or who knows, I might have miscounted the bigger group. Anyway, I finally completed the Flemish Coils, and, as you can see, I have them separated to avoid tangling. I am trying something that might work, but will test first. I am planning a drop or two of CA on each coil to attach it to the deck. However, CA tends to leave a glossy surface and the thin stuff can find its own way to your hand faster than you can stop from being glued to your project. So, I am working with coil to use acrylic Matt Varnish to wet, and then let dry before attaching. Now 2 pics. 1 is of the 70+😁coils just completed. And the next is the jig I made for constructing the tackle. But, before that, I need to complete the breach lines.

- 436 replies
-
- 2
-
-
- Syren
- Model Shipways
- (and 1 more)
-
I hope you are right that this is one of the toughest parts of the build. I am up to 47 coils using the new jigs. Unless things change, my next update will be after I complete all of them. However, for now, a couple of things to be aware of. In the picture, I have the most recent 5 coils drying in the jigs. I became very frustrated trying to get the completed coil off of the jig. Mostly it is two items, the single razor is just too thick and not flexible enough to slide under the finished coil. So, I picked up a pack of double edge razor blades. The double edge blades make it easier to slide under the coil and release it from the counter without causing damage. And, by only loosely tightening the mandrel screw, it makes the coil line release in the center much easier. Big Hint: I am pretty sure that I read somewhere to not hold the line real tight when winding it around the jig. So, I release the line from my grip after each turn so that I don’t put a twist in the coil. This helps to release the tension that builds up as it is wrapped. It is amazing to watch the line spin releasing the tension. There is quite a lot in just one turn. Big Hint 2: as I have indicated, the biggest problem is the coil unraveling from the center out. I just tried something that may be the fix. On the last batch, rather than to wait until the coil was completed to inject the glue, I put a drop of glue/water mix in each hole around the center BEFORE I started winding. This allows the glue to be picked up by the line as it is wound. So far, it has eliminated the center out problem.
-
Still Making Coils I am up to 42 now… Funny how 18 cannons do not sound like a lot until you start making the rigging. The new jigs work better than others, but the line still does not stay in place in the center of the coil. If the center comes loose, it can unravel very easily. However, I am consistently getting 4 or 5 out the jigs, so I continue.
- 436 replies
-
- 1
-
-
- Syren
- Model Shipways
- (and 1 more)
-
Slowly Making Progress Although a few need to be redone, the new jig (now have 5) has made the process much easier. So you don’t have to count, I am up to 35 now…. 5 not shown, are on the jigs drying.
- 436 replies
-
- 2
-
-
- Syren
- Model Shipways
- (and 1 more)
-
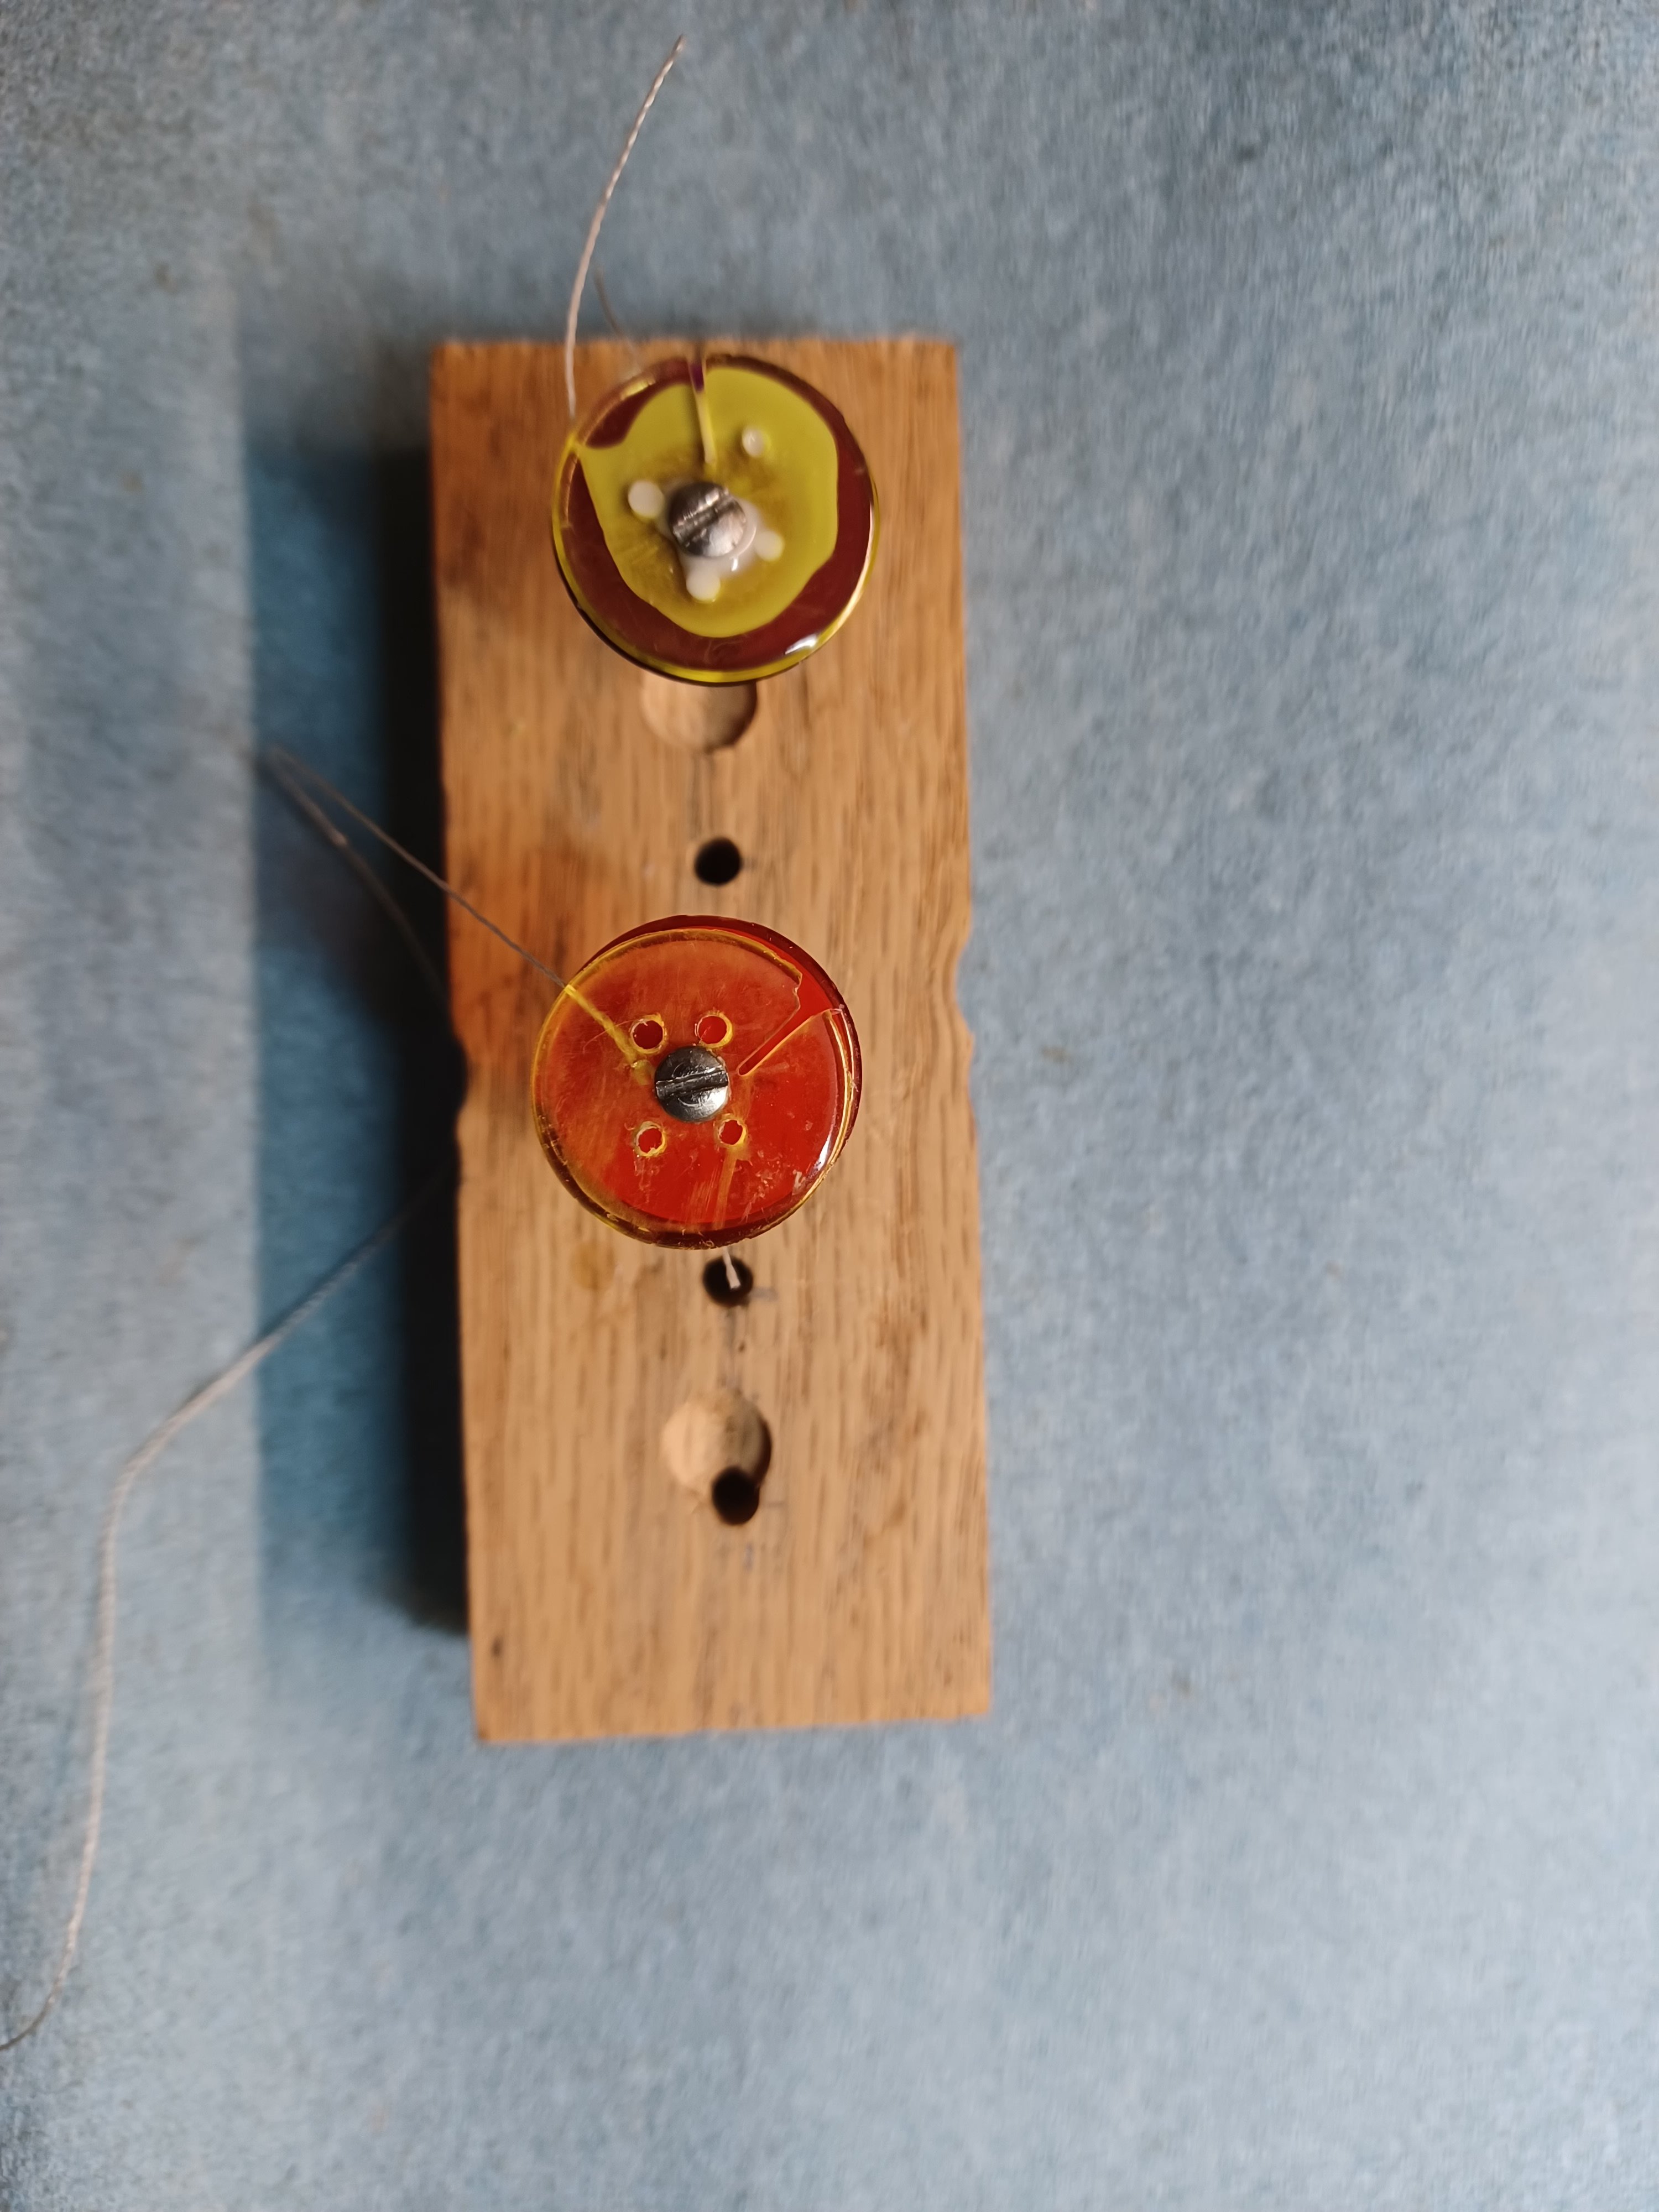
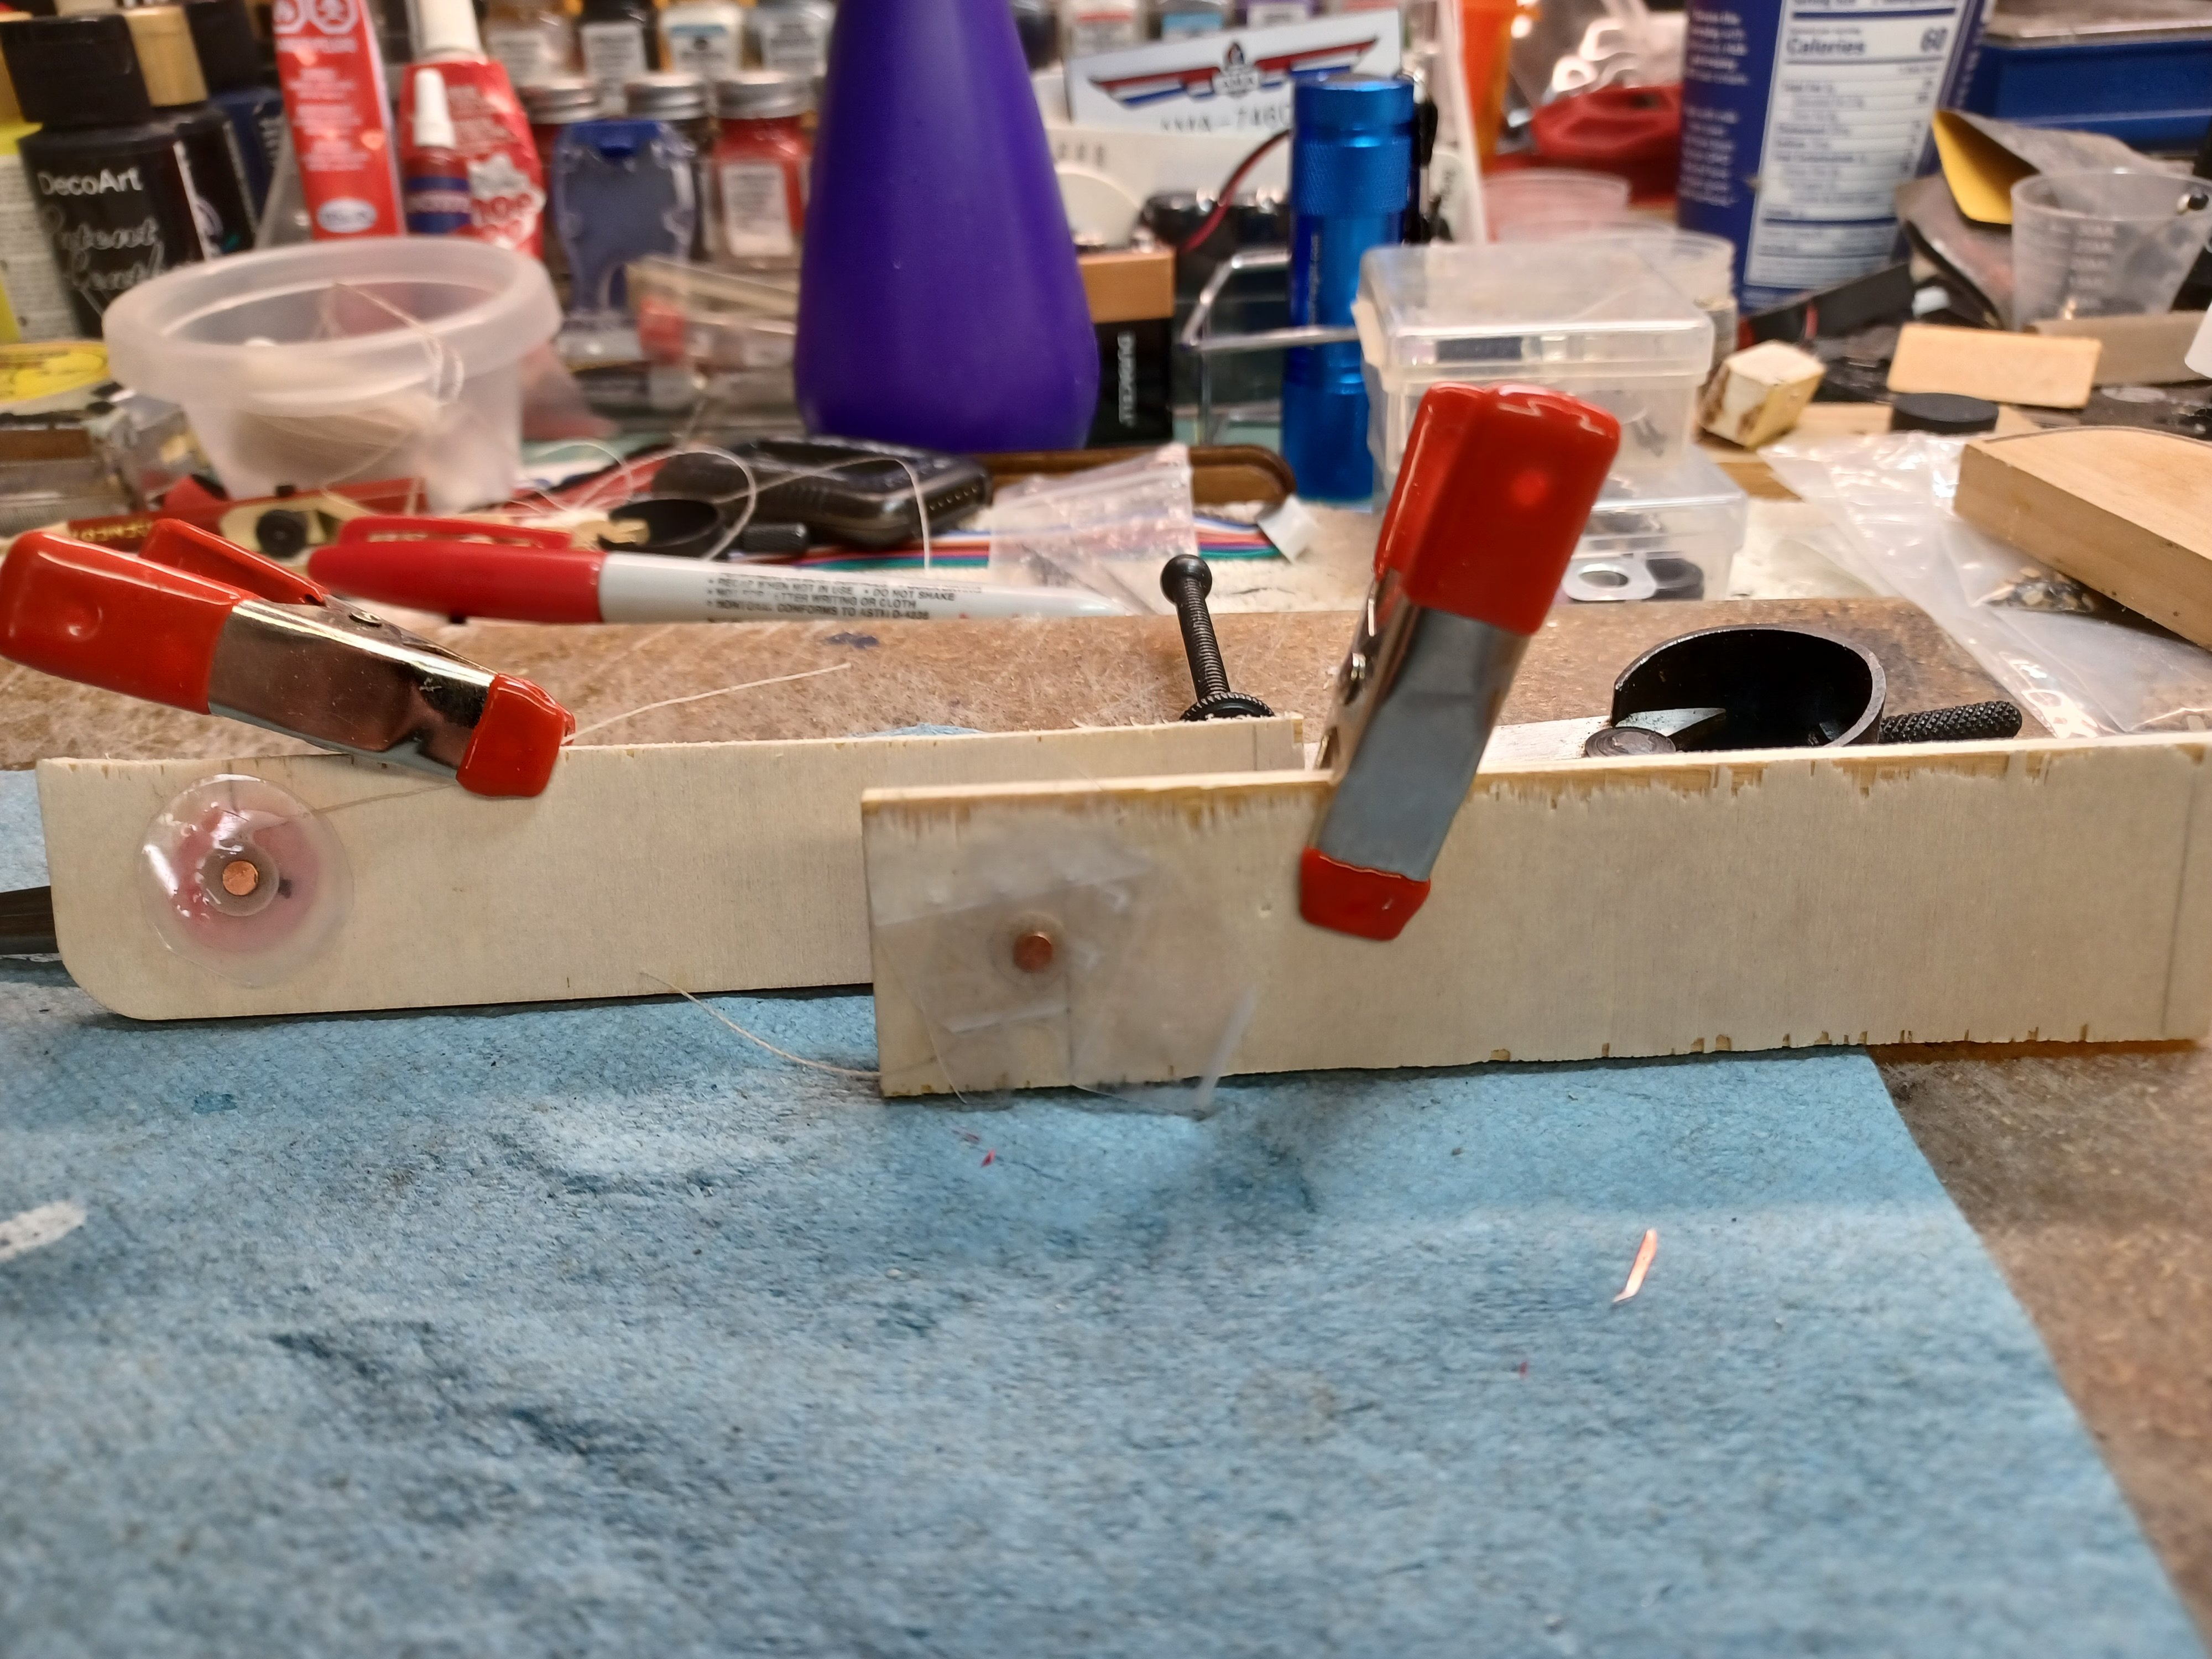
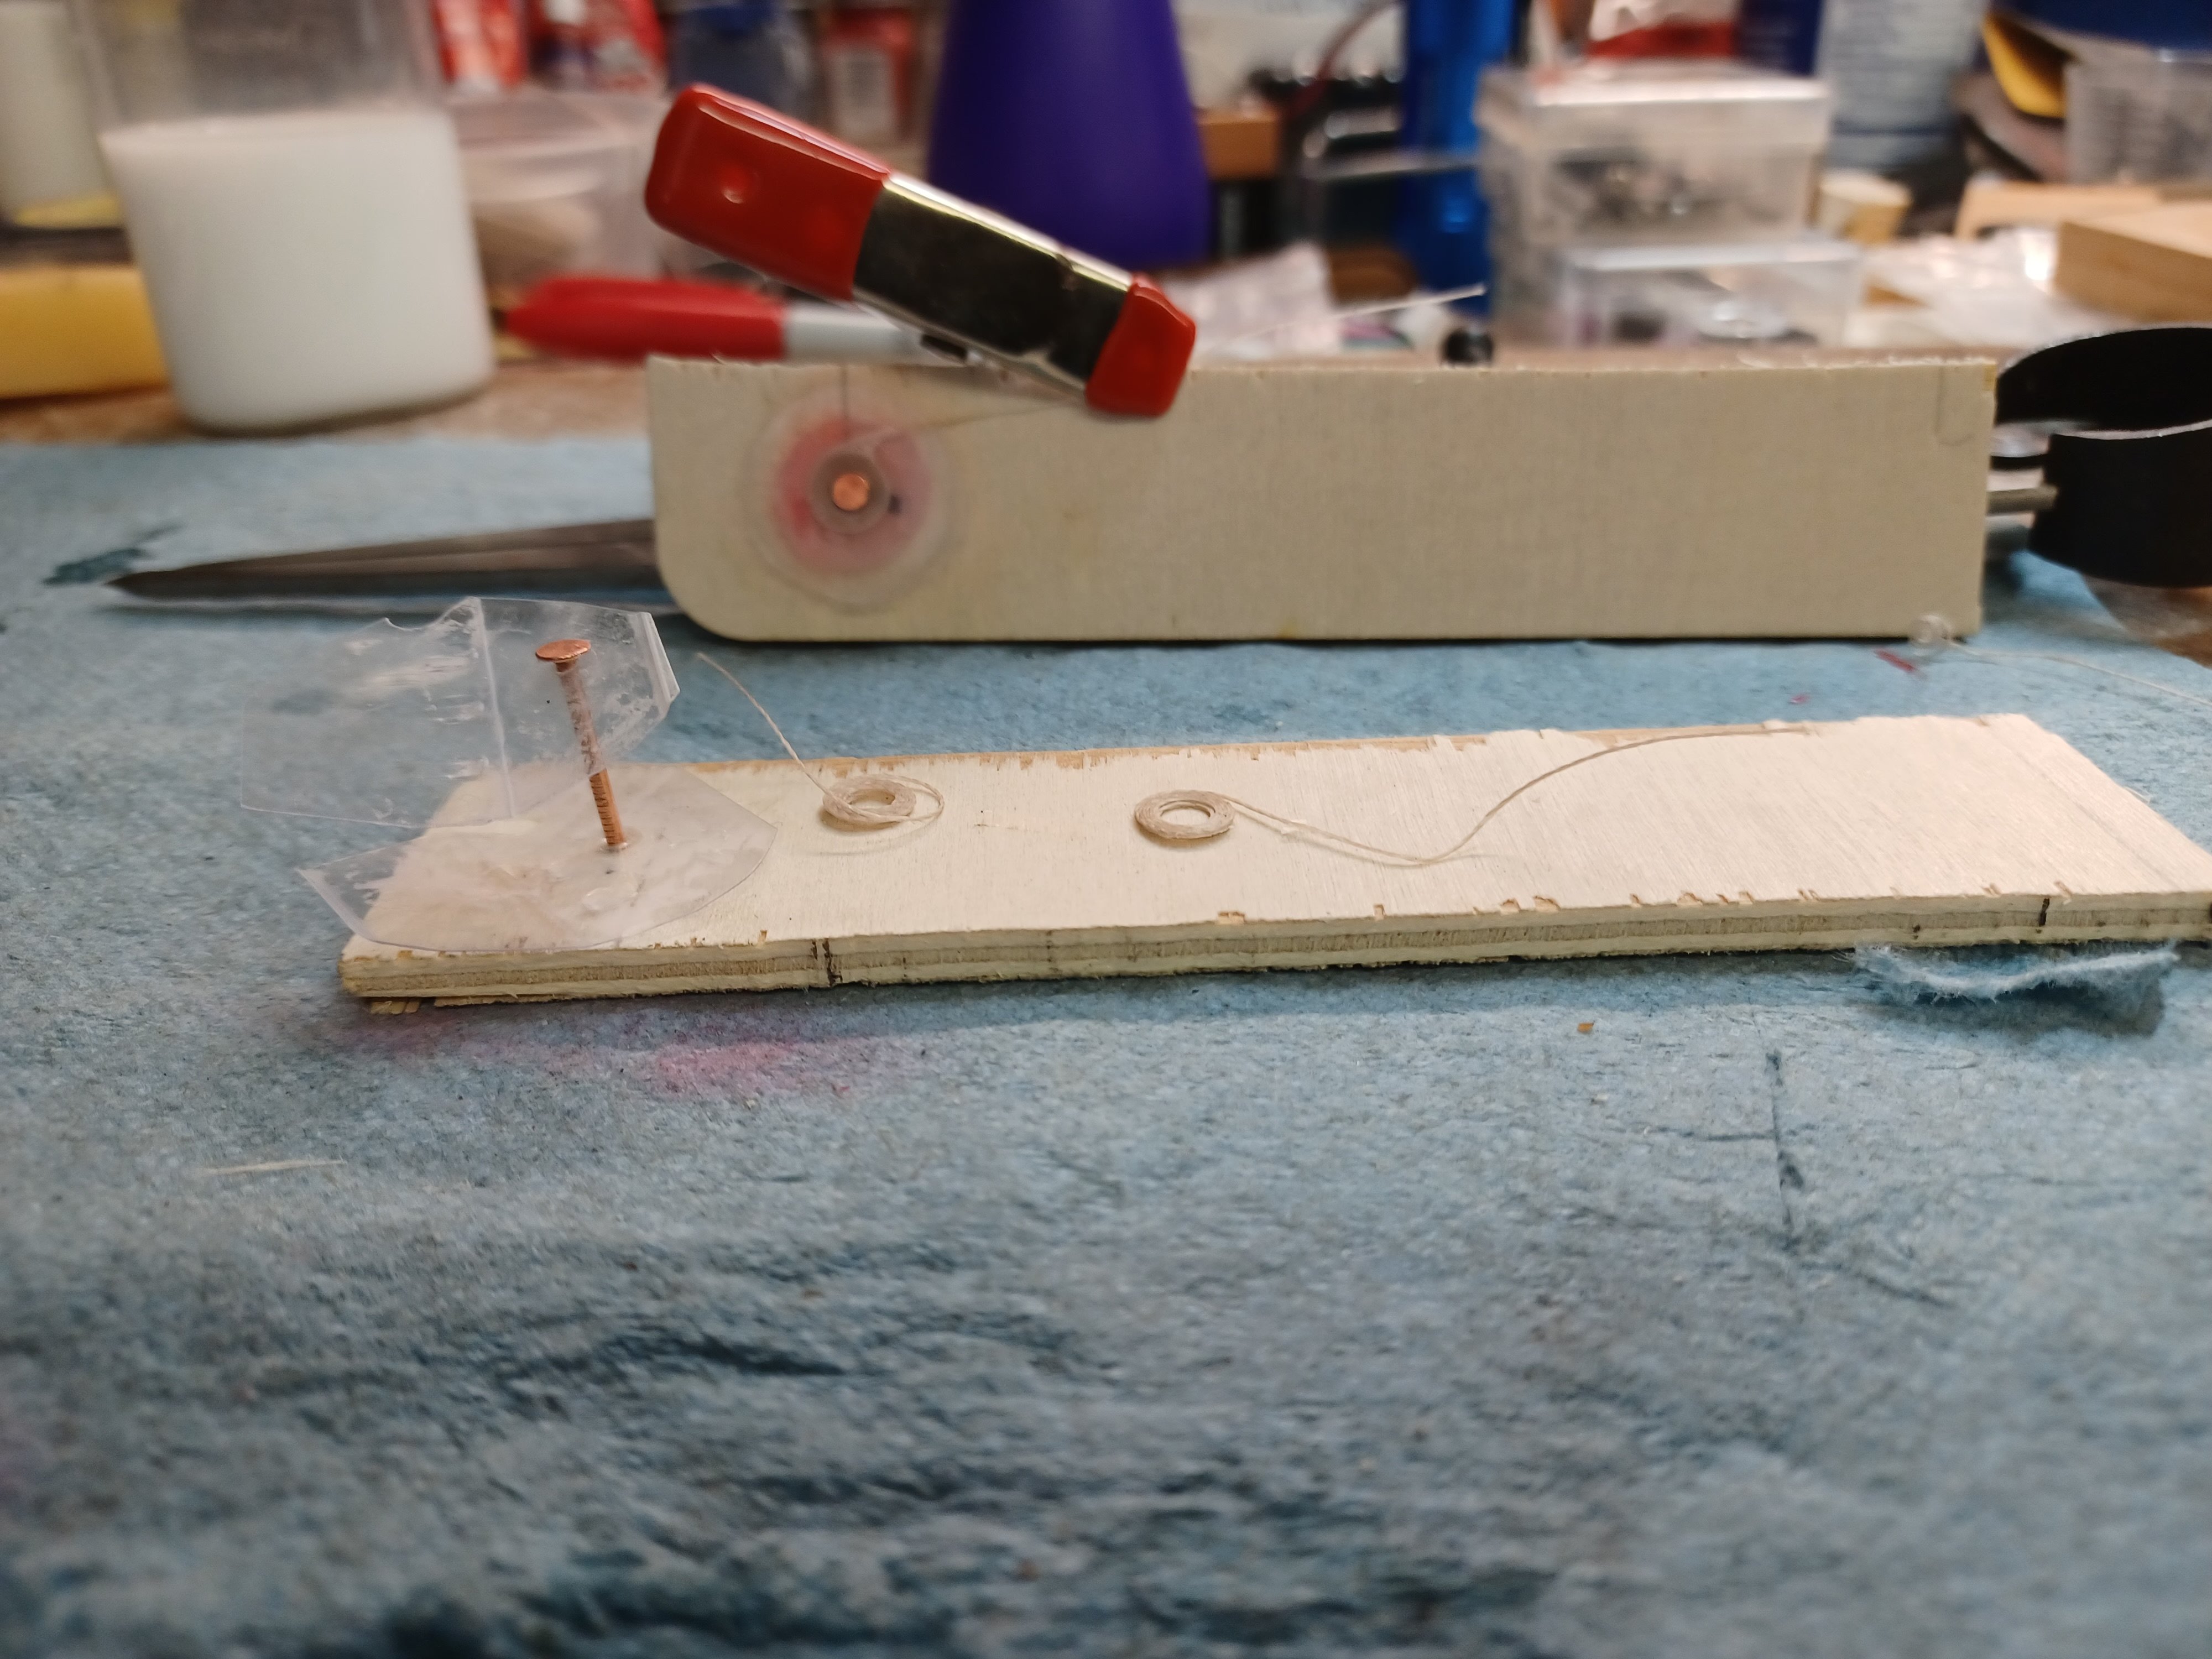
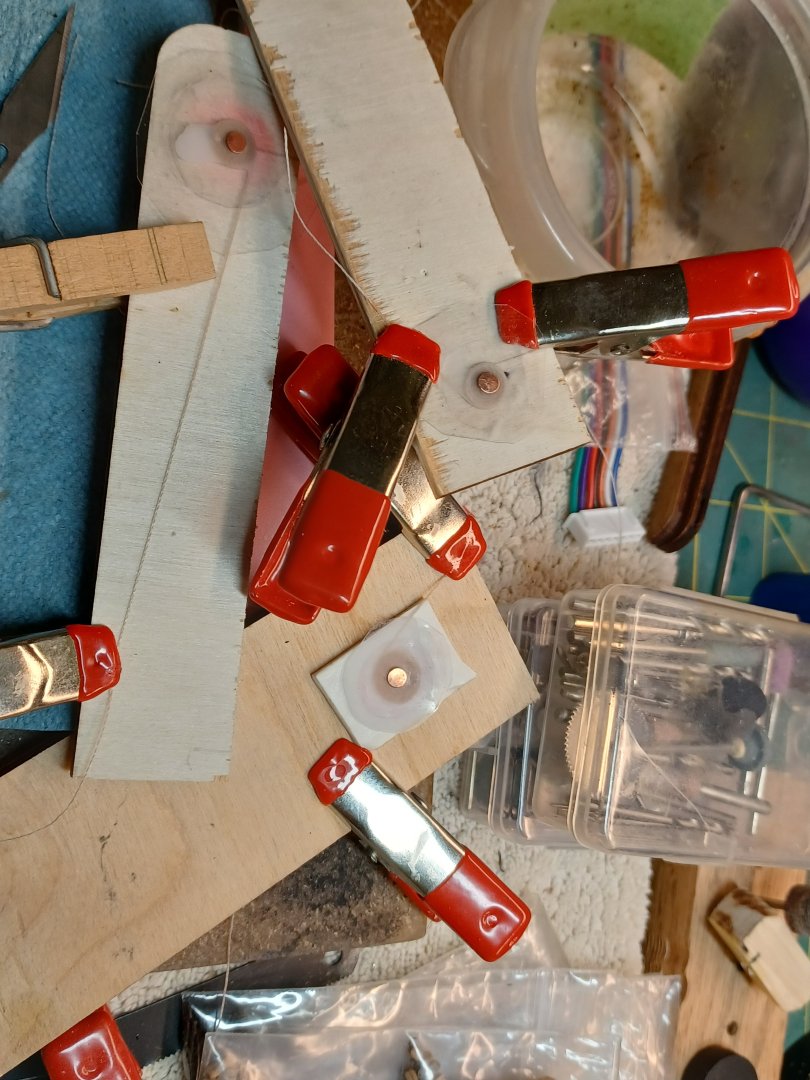
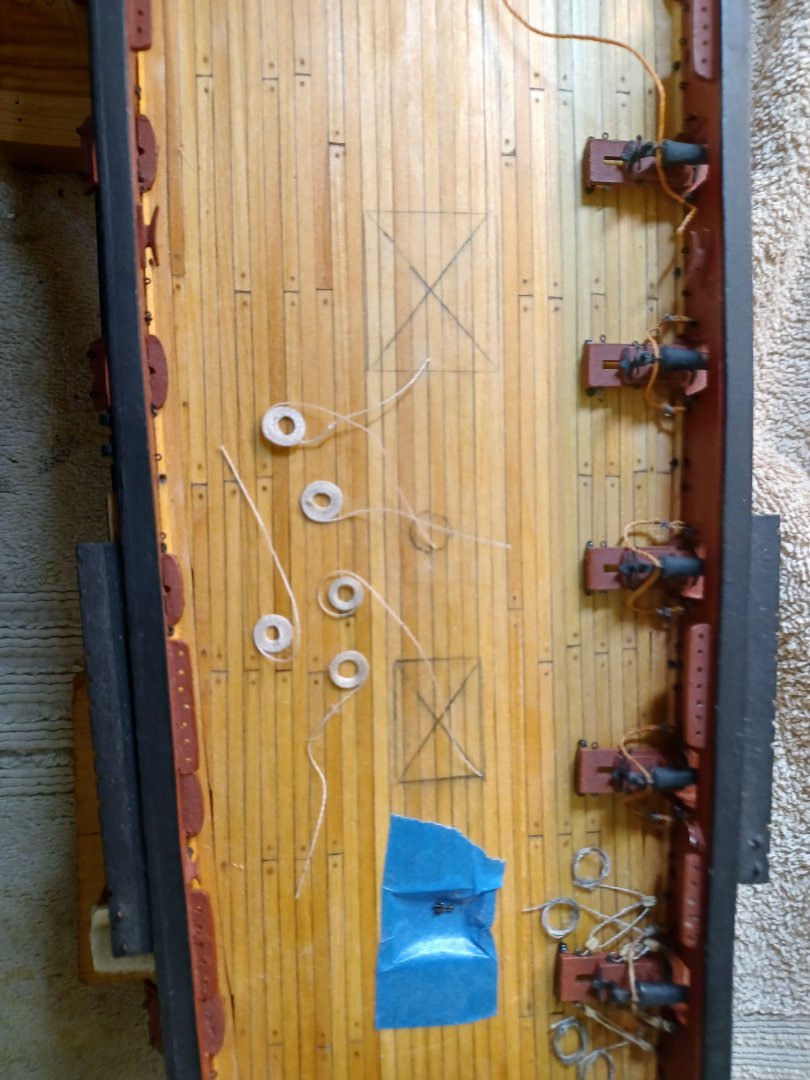
Finally Success on Flemish Coils! There are 3 pictures below that show how I finally resolved the problem of coils coming apart when removing the jig. Last round, I was 4 for 4, with all holding their shape and not unraveling. 1. The first picture shows the parts of the jig. A mandrel and screw from my dremel tool is put to use. The two disks are Math Counters and are easily found on Amazon. Please note the center hole and one drilled right beside it on the darker disk. The coil line is threaded through the offset hole. Then, the top disk (yellow) is placed on top of the darker disk and screwed in place. 2. By holding the line in place, the long part of the line is wrapped around the screw to form the coil. Please note that the yellow disk has 4 holes drilled around the center hole. These 4 holes allow me to inject water/glue to be injected directly onto the coiled thread. 3. The completed coil is placed in a block of wood and left to dry. Once dried, the mandrel and screw are removed, and the coil is gently removed for install on the ship. You can also see a slot cut into the top disk. It was another of my test jigs that didn’t work very well. HINT Using a lighter colored disk on top is the best way to view the line as it is coiled around the mandrel screw.


- 436 replies
-
- 2
-
-
- Syren
- Model Shipways
- (and 1 more)
-
Out of the 3 coils pictured, only 1 came out. The other 2 uncoiled from the center out when I attempted to take them off of the jig. I am going to try another method and will provide an update. At a 3 to 1 average, completion rate, it will take longer than my patience will last.
-
Still Struggling with Rope Coils I am getting through the coils (at a snails pace), but run into the same problem on each. When I am ready to remove the pin and plastic disks in to release the coil, it pulls the center of the coil and the string unravels from the center out. I have tried several things, but it has been hit or miss. I am using a syringe to inject a water glue mix and sometimes it works, but not that well.
- 436 replies
-
- 2
-
-
- Syren
- Model Shipways
- (and 1 more)
-
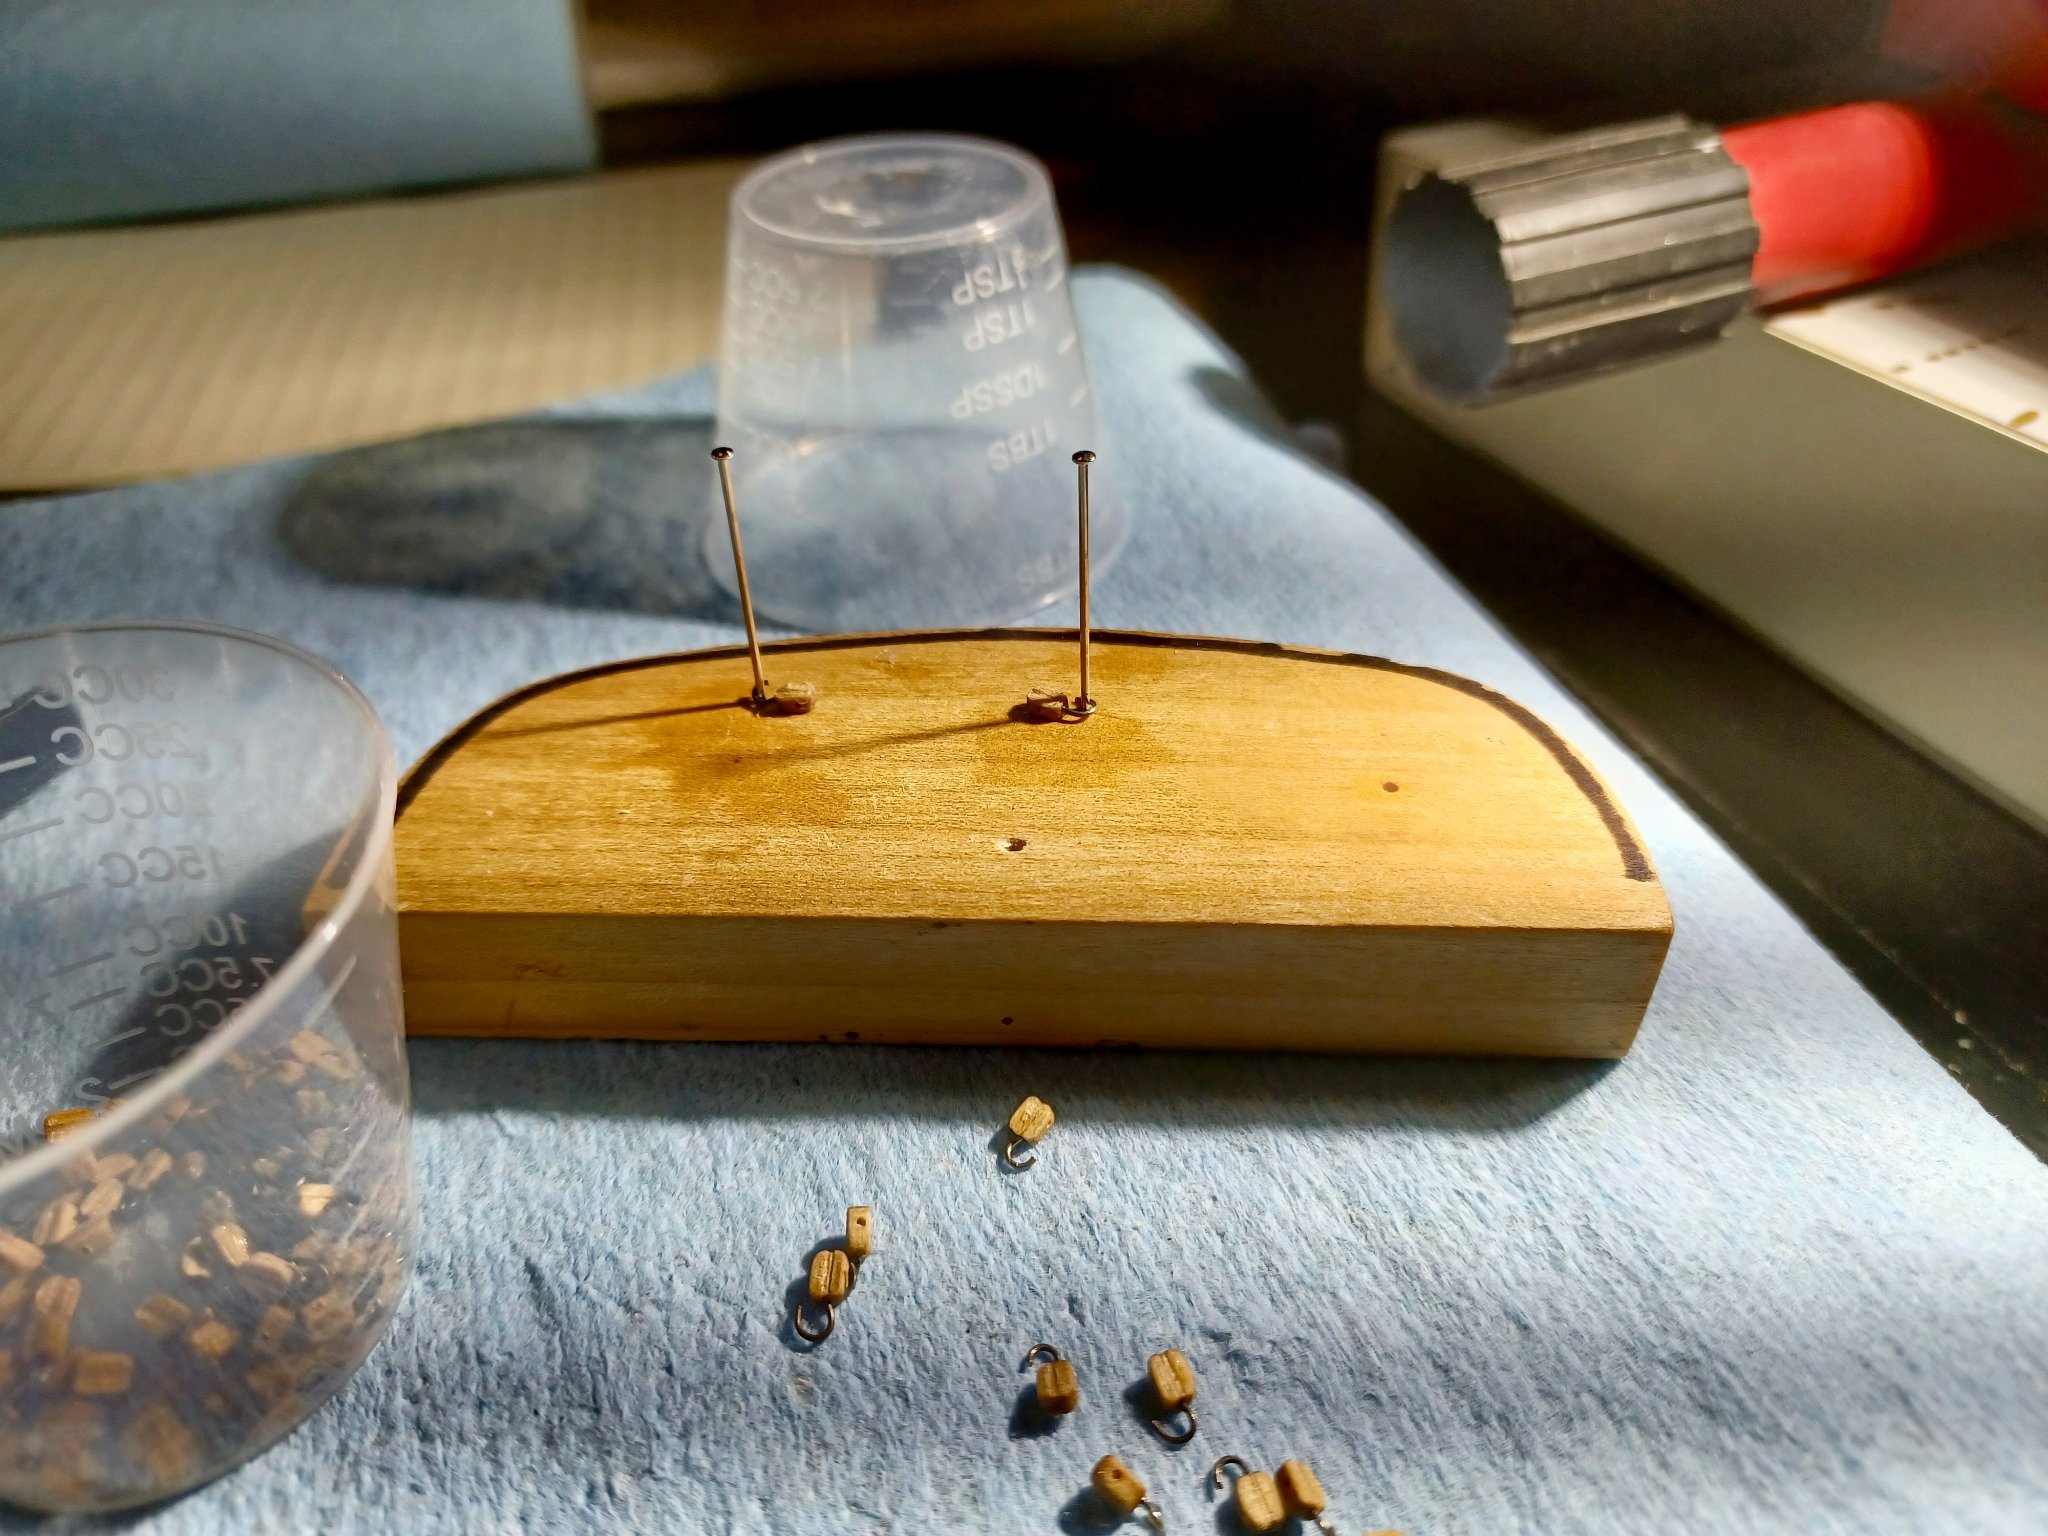
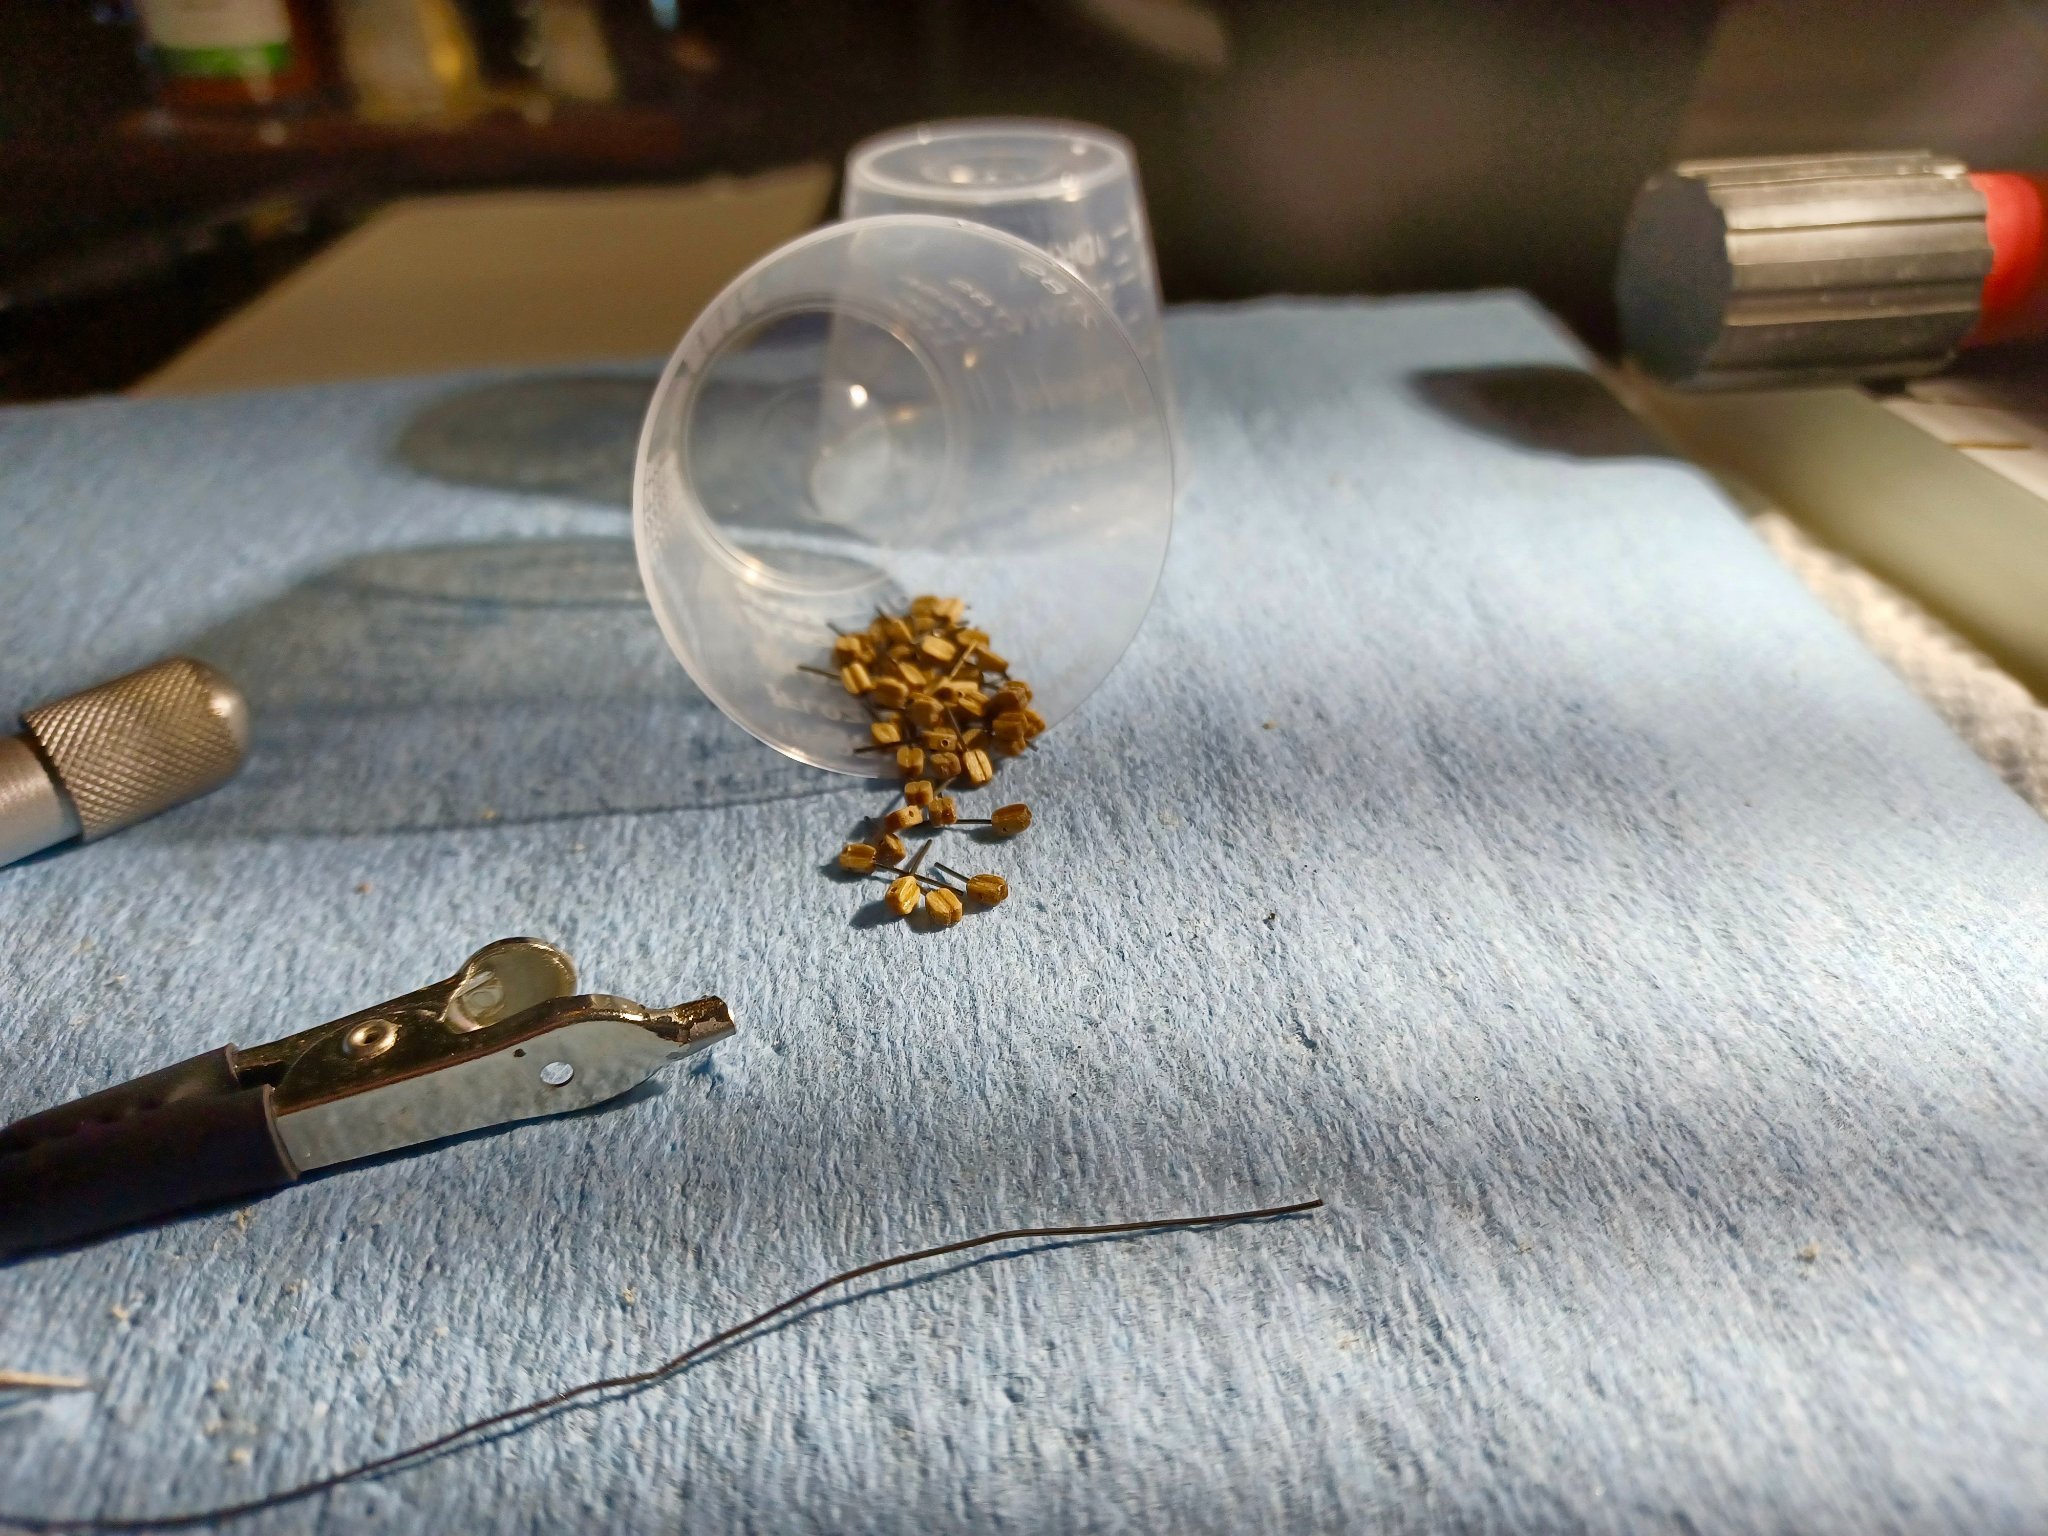
OFF AND RUNNING Only 57 more to go. I am working on making the deck coils and have 7 done. Looking at the new ones, I have decided to replace those already installed. They look more like they should and better now that I figured out how to make them.
-
Ok, couple of pics. They are of the tool I put together to make coiled ropes for deck cannon. Very simple, 2 pieces of plastic, small nail and wood “handle” for handling…hehe.


- 436 replies
-
- 3
-
-
- Syren
- Model Shipways
- (and 1 more)
-
Well, I am back going to pick up again where I left off. My focus has been on my RC flying, and I have been concentrating on that. I have been a club officer, and have been busy with that. When I got to the cannon rigging, I became very frustrated by how little room I had to work with. However, the biggest issue was my shaking hands. I have always had this issue, but with the planes I fly, not in such limited space. Well, I am now going to work my way through it. I will add some pics soon, particularly one of the tool I constructed to use for rope coils. Any way, I am excited to be building again, and will provide updates. I am still breathing and have been well….so here I go.
-
@abelson To be honest, I haven’t worked on the ship for a few weeks now. This is a good time of the year for flying, and, I have had maintenance chores on several planes that has taken my time. As the fall progresses, I will get back to work on it and provide updates.
- 436 replies
-
- 1
-
-
- Syren
- Model Shipways
- (and 1 more)
-
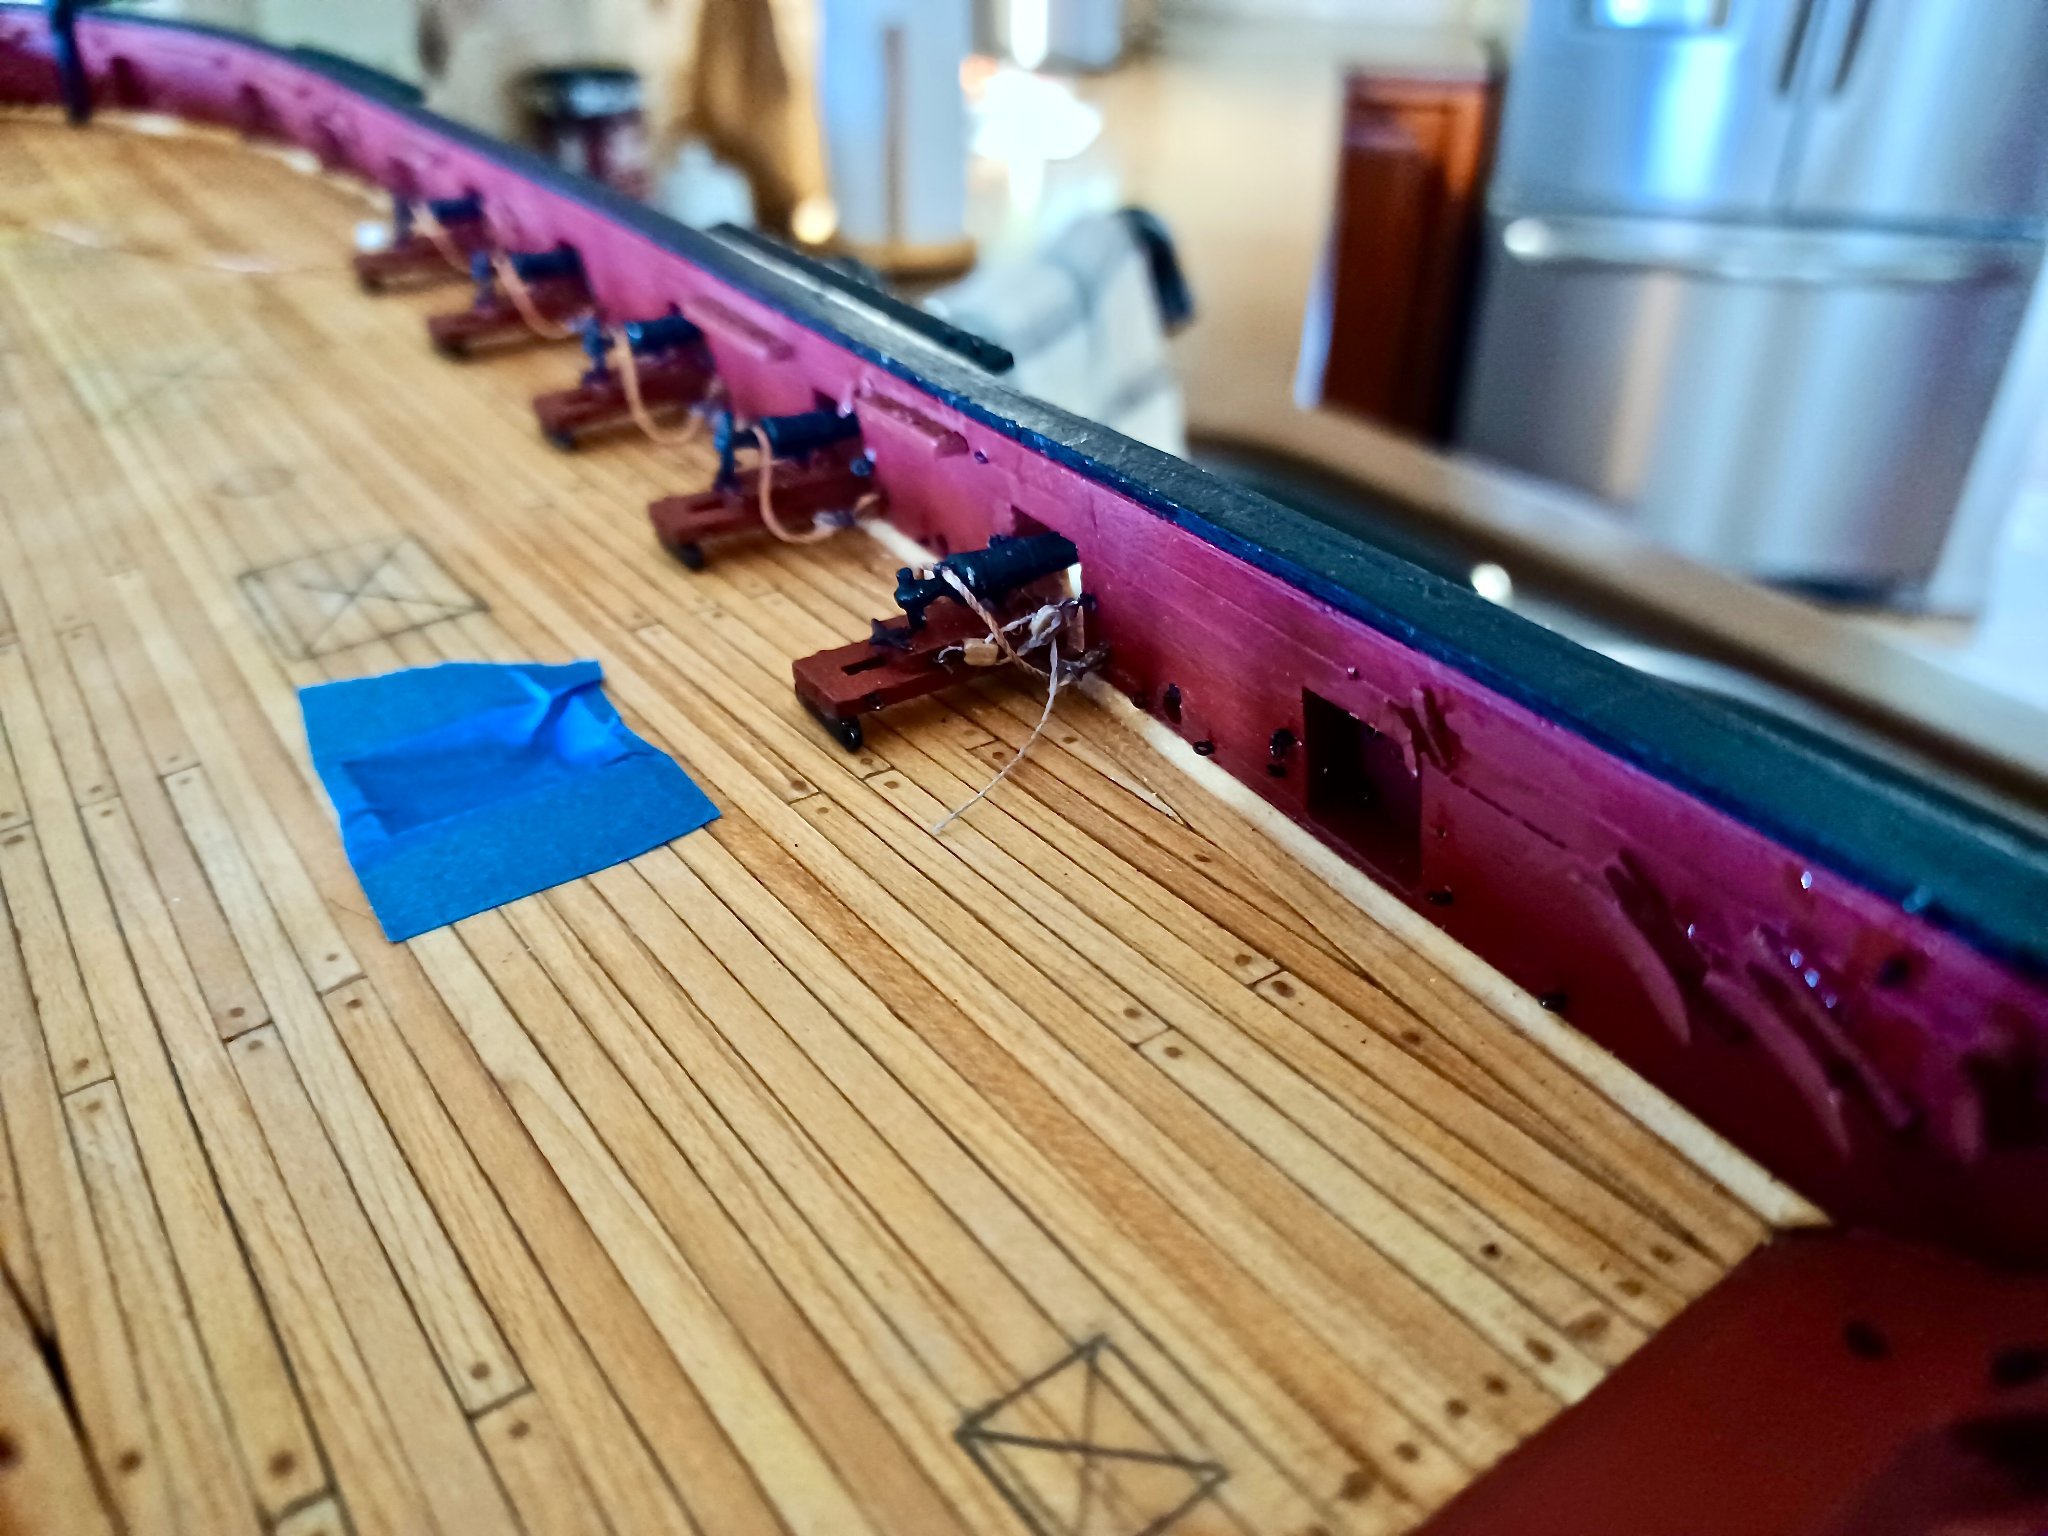
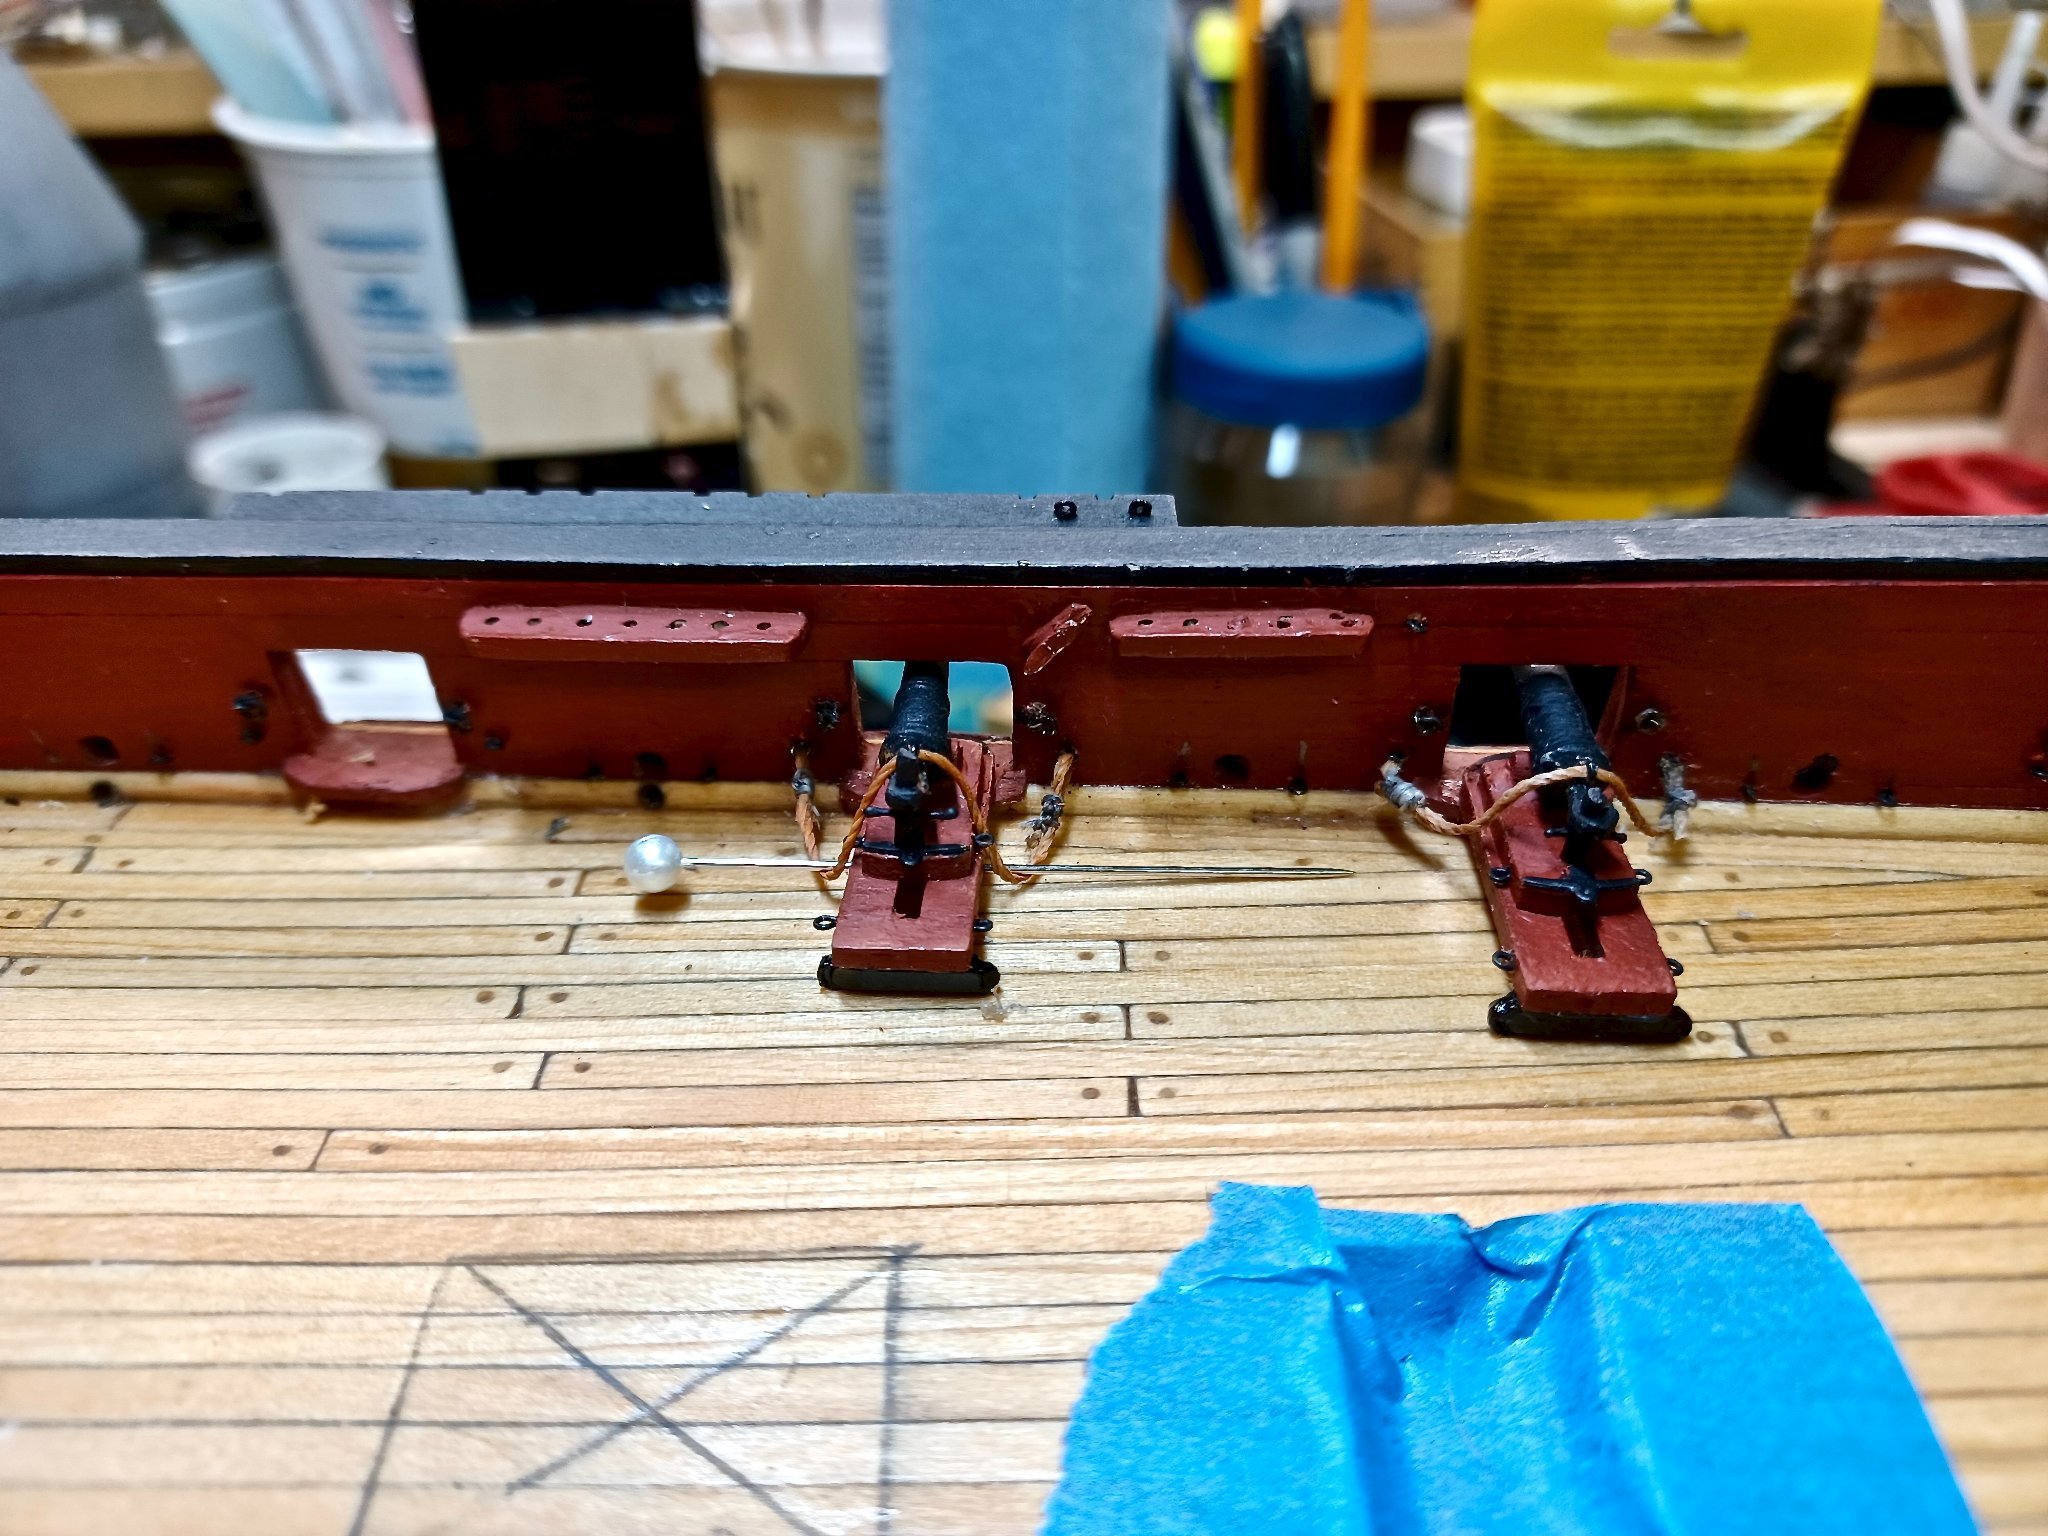
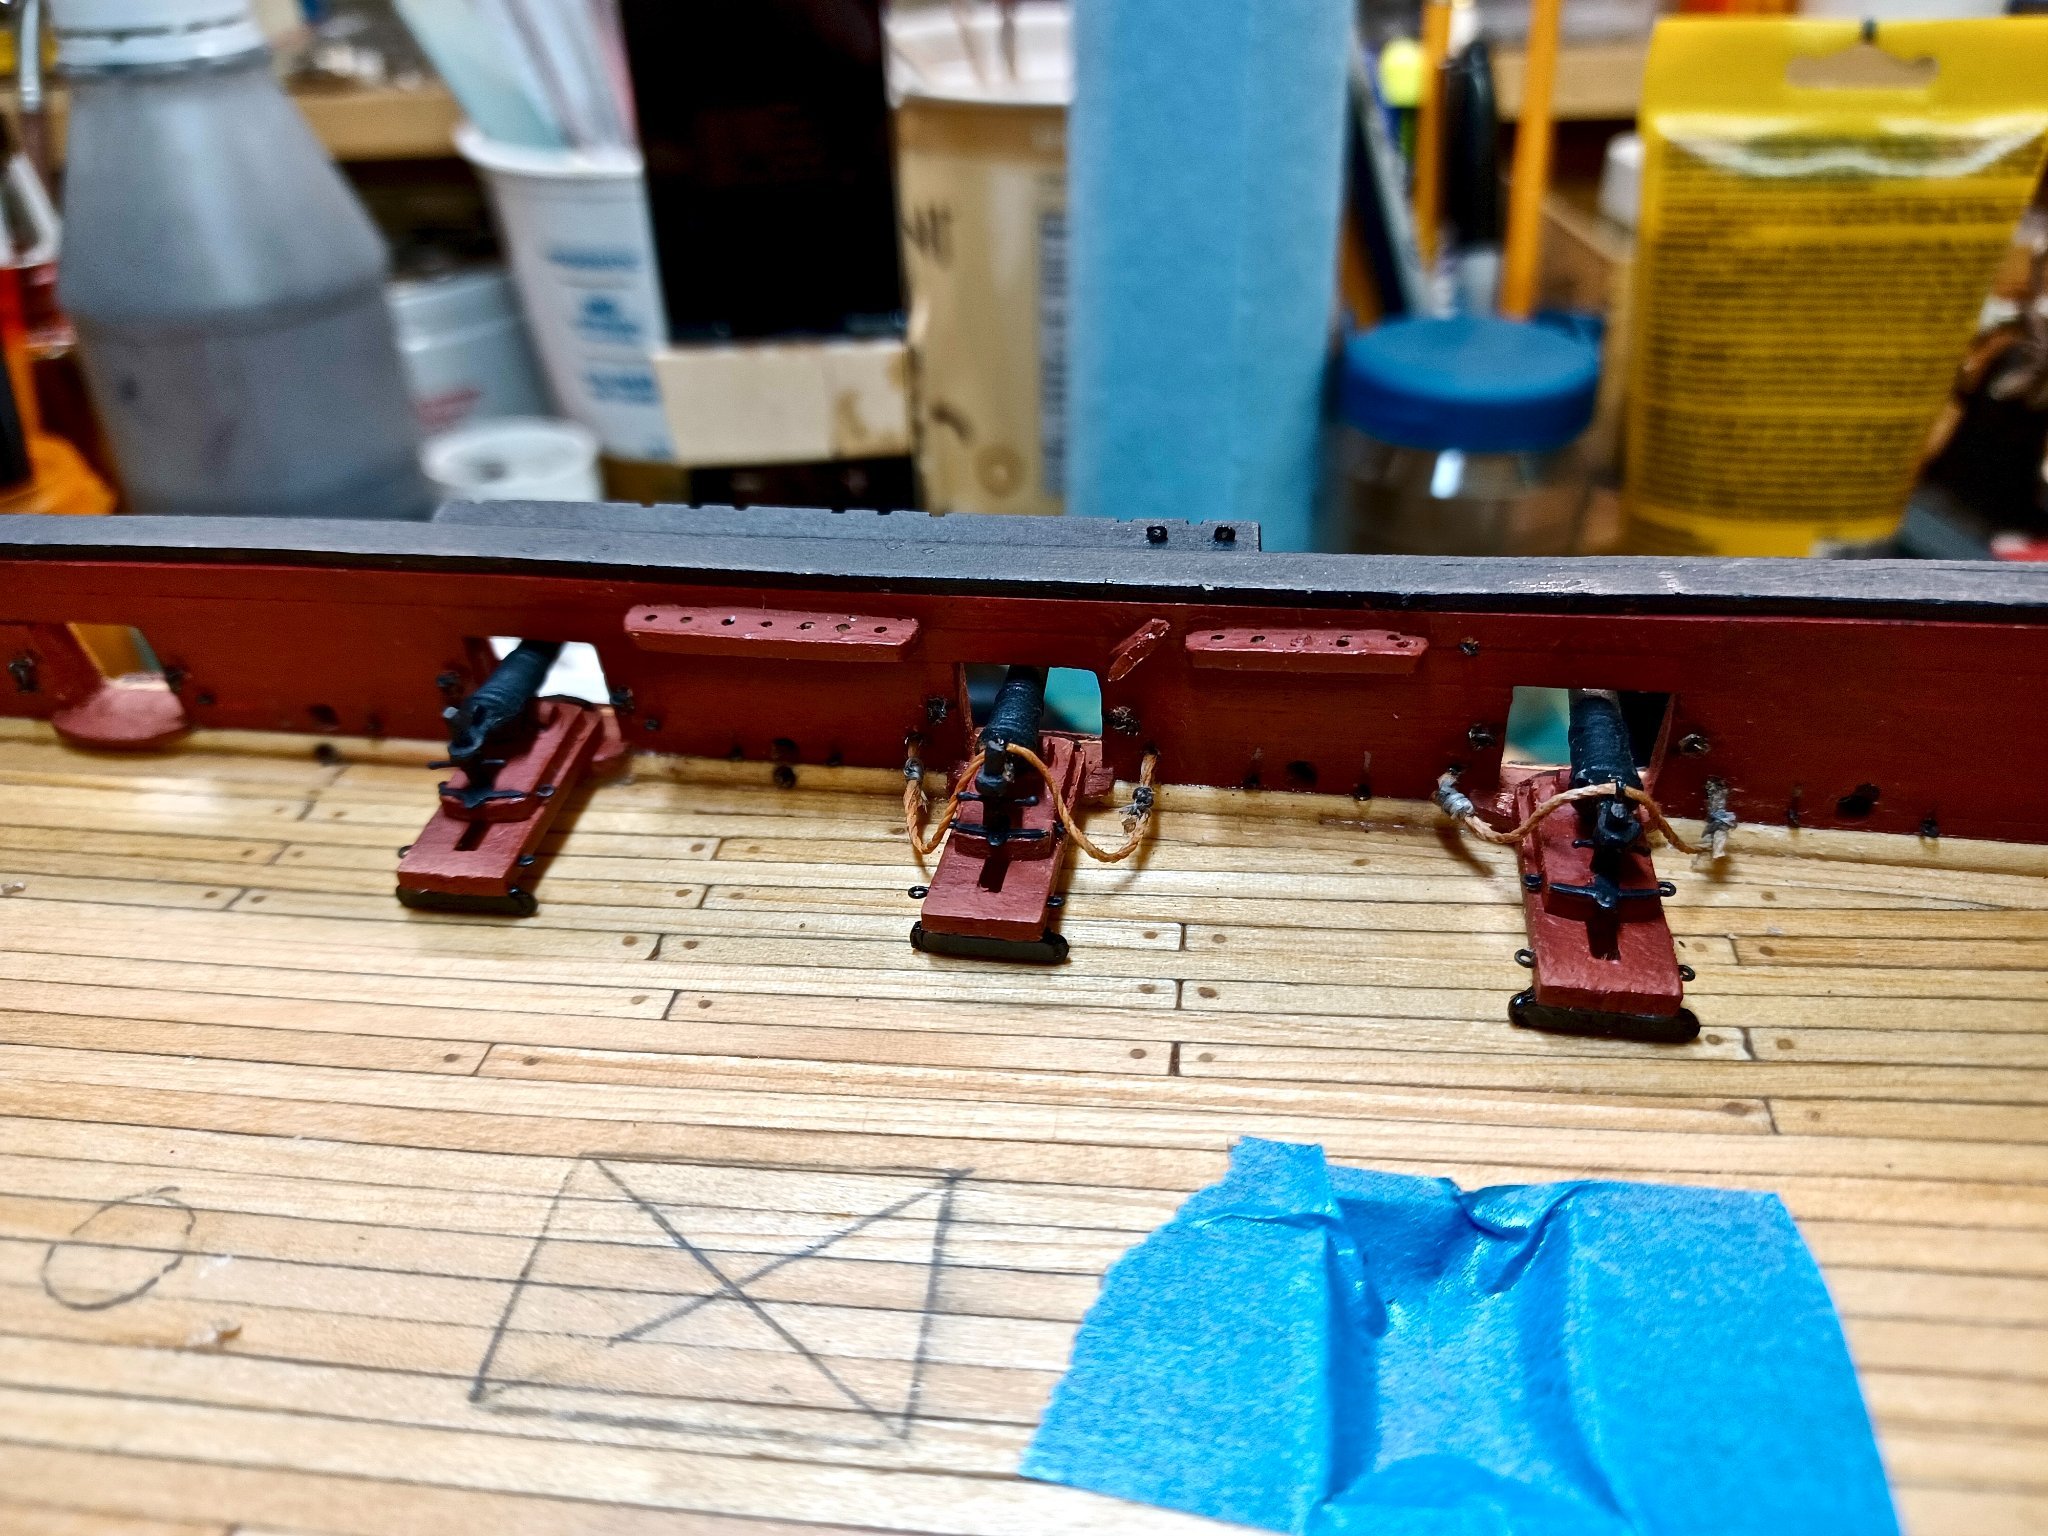
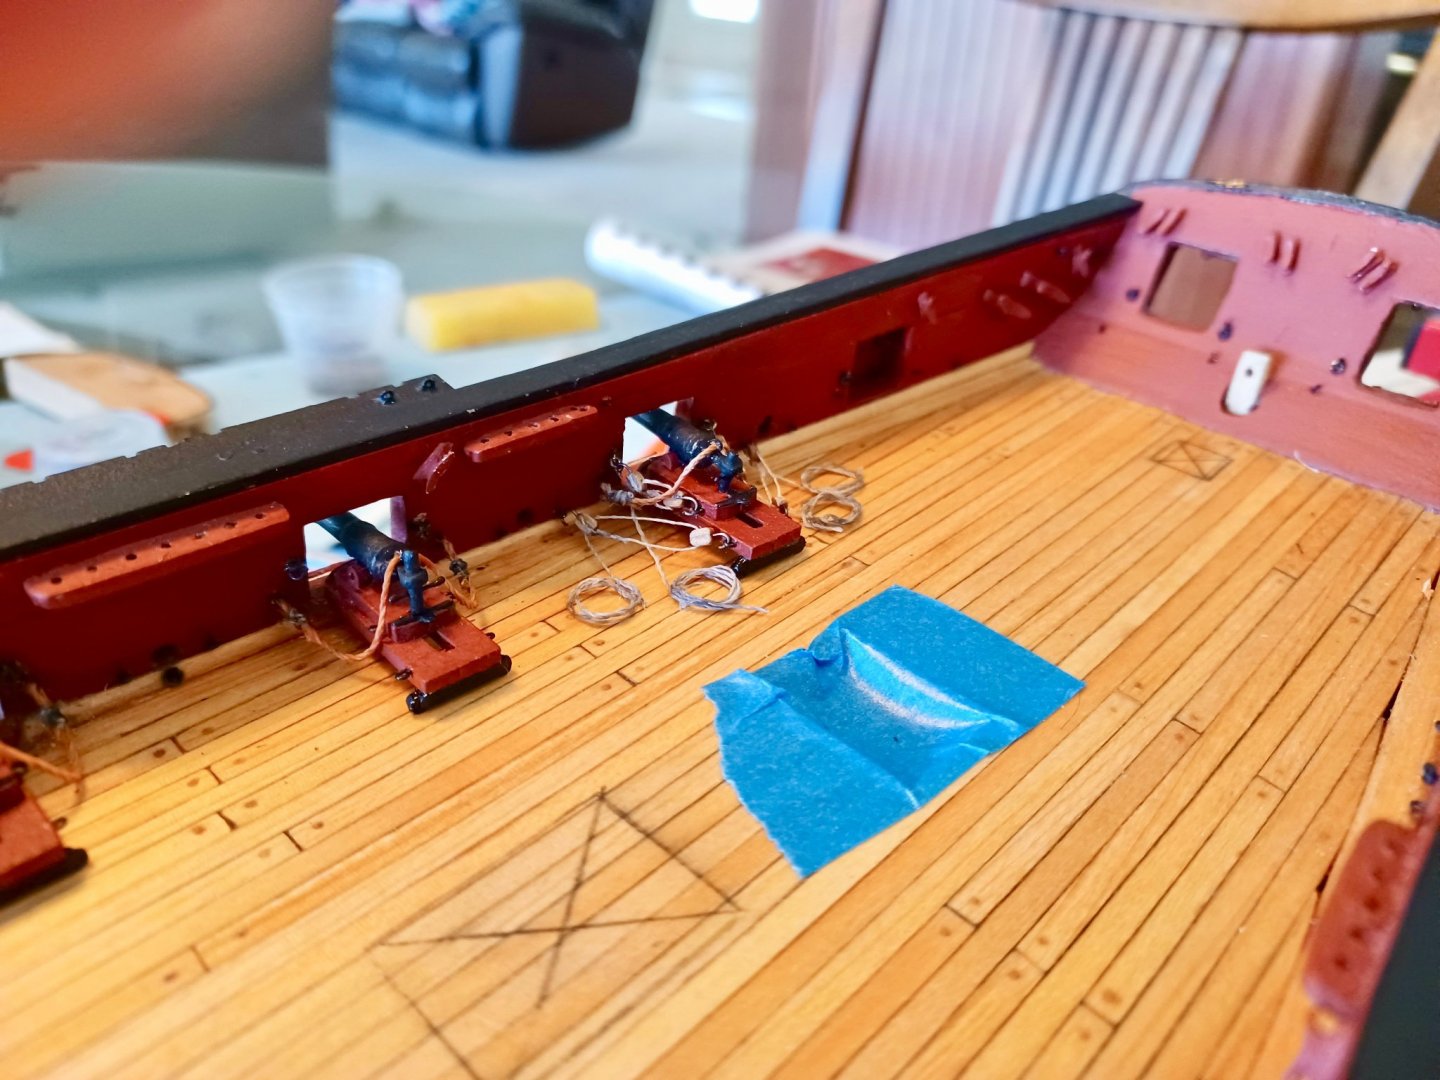
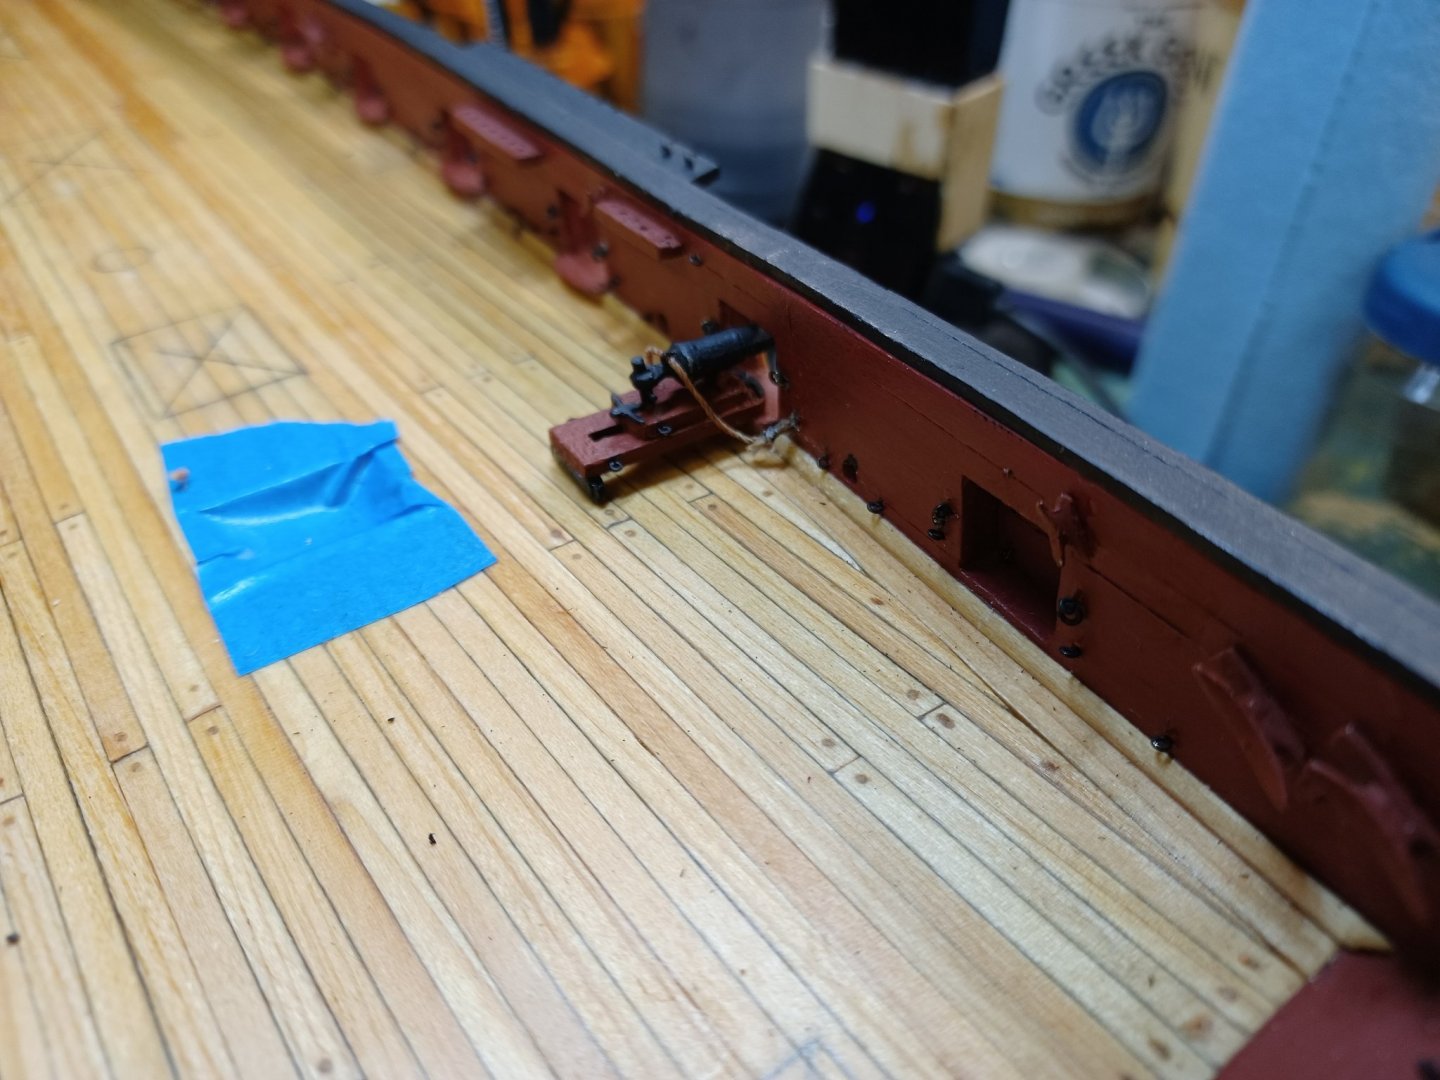
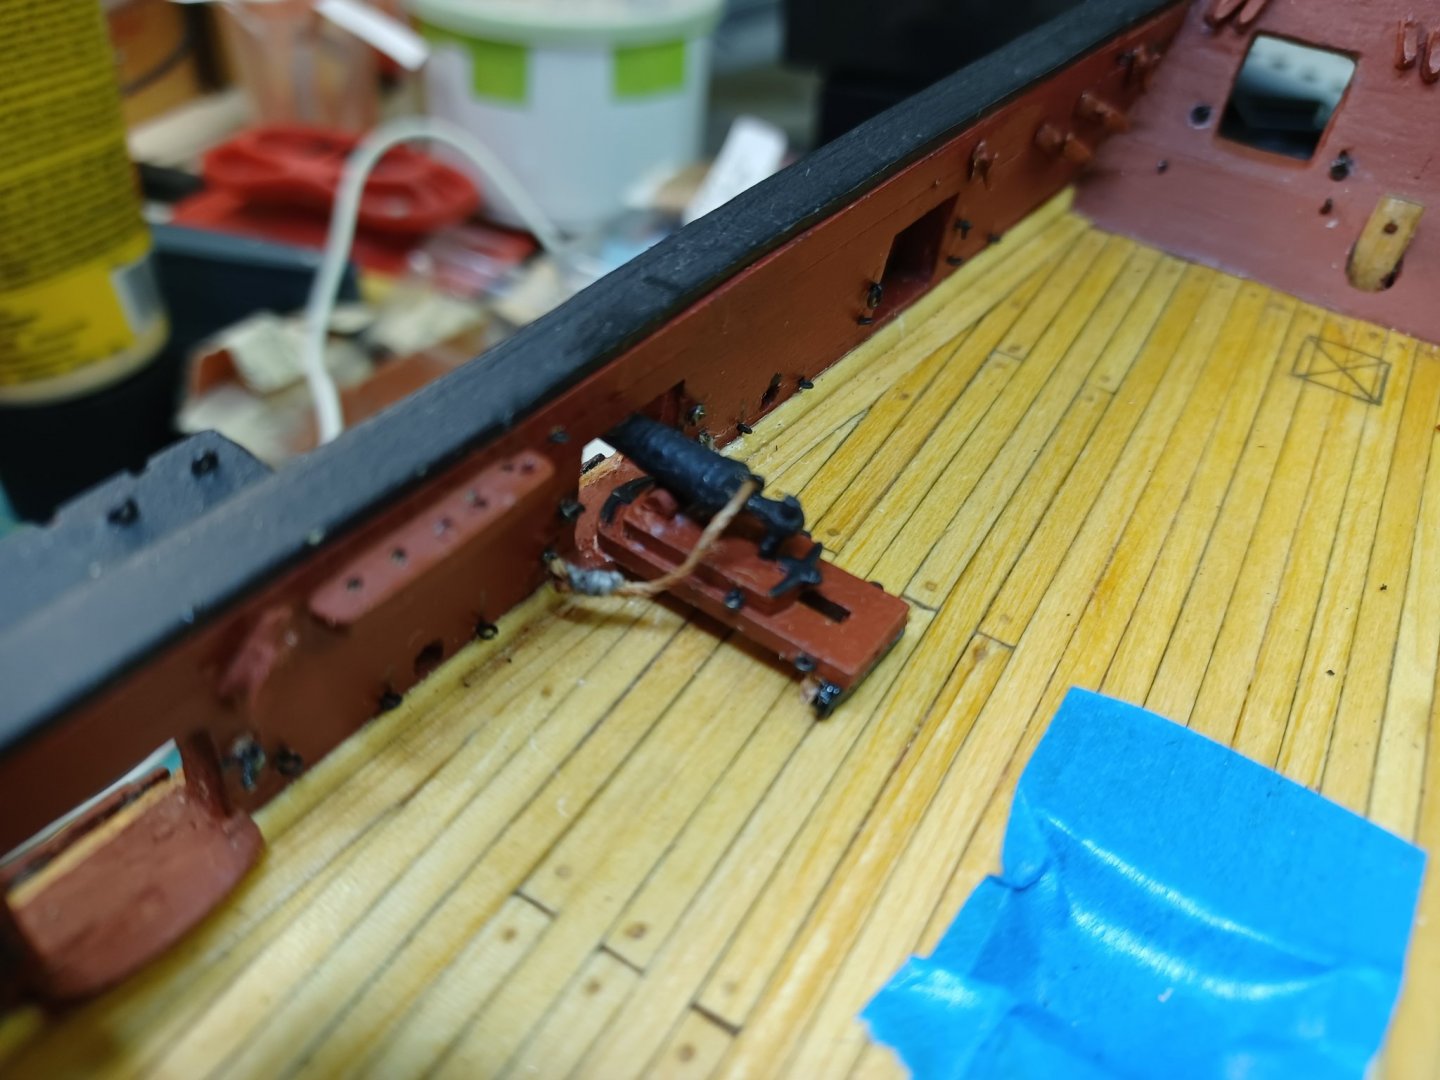
One Down..... I don't even want to count how many to go. This is one frustrating phase on this build. I will say, that my absence from here is due mainly to not working on the ship for a couple of weeks. We have had some activities at our flying field that have occupied my time. Labor Day, yearly invitational with out of state flyers spending 5 days flying and B.S.ing. And it just won't turn to fall temperatures here. Now, I am back at it, but I still have miles to go. Here is my first rigged carronade. I think it came out ok considering how much detail is in such a small space. One thing I am going to look into is how to make the coiled rope touch the deck completely.
- 436 replies
-
- 5
-
-
- Syren
- Model Shipways
- (and 1 more)
-
One Down 71 to Go:😅 Got my first blocks and tackle in place on the carronade. Just 71 more, and I will be done.....uh-huh. Sorry about the picture quality in the close up. (I decided to remove the other picture. I thought this would be better.) It is not that visible without the glaring light and a little distance. Well back to the kitchen table. 👍 OOPS... For those expert riggers, you may have noticed that the outhaul block is at the back end of the carronade. Fear not, I noticed this when I went back to continue. It is now fixed and is attached to the bulwark. 😁

- 436 replies
-
- 3
-
-
- Syren
- Model Shipways
- (and 1 more)
-
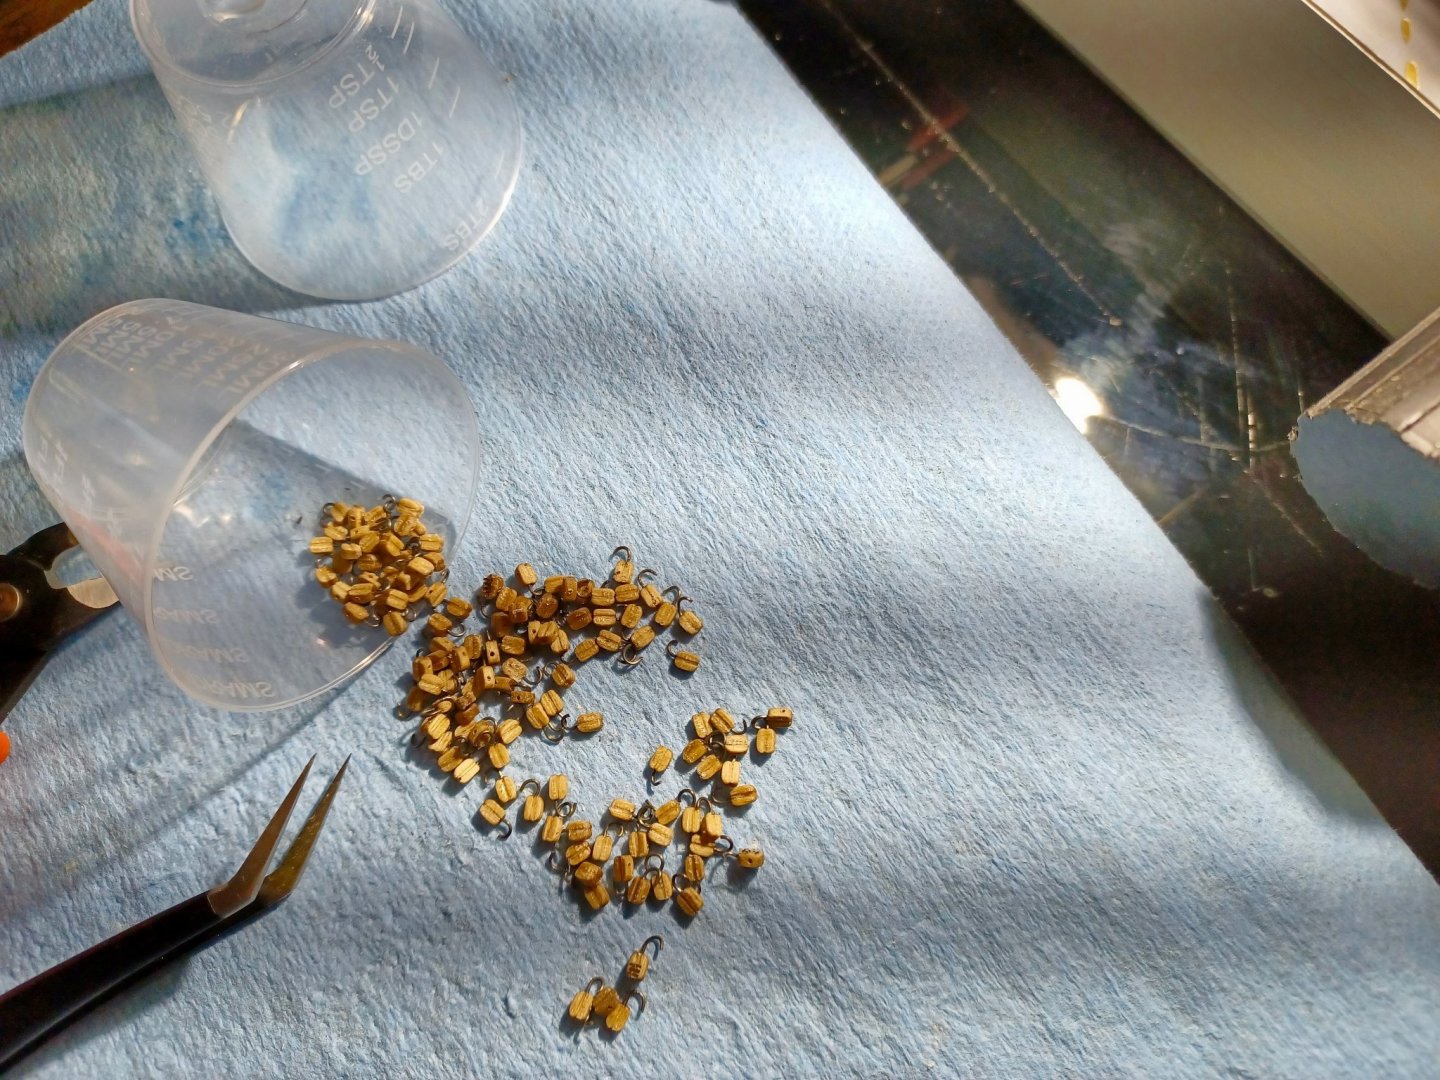
Hooks & Tackles: I have completed the installation and bending of the hooks on each tackle. I counted enough (64) to be able to get through all of the carronades. In fact, just in case, I did 65, but in bending the hook, it "sproinged" off into never never land. It is possible that it fell right back into my pile of tackles and hooks, but time will tell. I am either even or 1 extra to complete the rigging of the carronades. In the pictures, you can see the completed tackles/hooks and also one that shows a small jig I put together for help in rigging each tackle assembly. Pics are below..... Newbie Tip: For gluing each tackle block and hook, I used a "glue looper" which is a tool I didn't even know existed. It is invaluable for gluing in small amounts in a small area. I recommend it highly. In the second picture, you can see a mixing cup tipped upside down. The small shallow cup is formed on the bottom and can be used for holding CA as you work through each tackle. The glue stays in liquid form until you are ready to fill the looper end. And it is still clean for mixing epoxy or paint, etc. later.

- 436 replies
-
- 3
-
-
- Syren
- Model Shipways
- (and 1 more)
-
We have been married almost 44 years. I learned ages ago, that it is best not to ask. 😉
- 436 replies
-
- 1
-
-
- Syren
- Model Shipways
- (and 1 more)
-
Progress is Slow and Tedious: Unfortunately, my building area is in the garage. Most of the time it is bearable, but this time of year, it is a sauna. Indoor temps have been ranging around 95-100, and that doesn't figure in the heat index. Soooo, I got permission from the Admiral to temporarily do some constructing at the kitchen table. I have 4 carronades in place and breech lines attached, but have temporarily halted their install. And on top of that, we visited our first grandson for his 1st birthday, so I took a rest. I have started building out the tackles for the carronades, and am doing the wire for the hooks first. Once that is done, it will be time to bend them in a curve and snip off. So far, I have done enough for 7 carronades with one left for a single side of the Syren. It is going well, but drilling the small holes for the hook is a pin vise process. Any drilling under power ensures that I would probably have a lot of drill dust. 😄 ......but it is air conditioned.

- 436 replies
-
- 3
-
-
- Syren
- Model Shipways
- (and 1 more)
-
Second Cannon & Newbie Tip: I have completed the breech line on the second cannon, and had an idea how to make the sagging lines the same on both sides. I have colored the line with a couple of colors of pastel chalk (yellow orange and brown) then sealed it with bees wax. To keep the length on both sides of the cannon, I inserted a long pin through the line on each side under the base. I let it sit to allow the breech line to keep its shape and then carefully pulled it out. Both sides sag the same and are the same length. (I might do the first cannon over, but will wait to see how it looks with all the others.) My guess is it will fade into the background. I will now spend my time completing the starboard side and then onto the port. Unless I find something that really needs posting, I will wait until the starboard breech lines are completed for another update.

- 436 replies
-
- 3
-
-
- Syren
- Model Shipways
- (and 1 more)
-
Gotta give you a huge amount of credit @Overworked724 on your custom side projects. As a newbie to this hobby, I spend my time thinking how to make things easier. 😁
-
I Think it is Passable: I did check the Syren Ship model site and the ropes section is under construction. It appears that the source of their rigging lines is changing. So, I decided to try with what I have since it is the very first time that I have worked rigging. Here is the breech line on the first cannon and I think it will pass. I was very clumsy at first, but as I progressed, I started to get a hang of the rigging line. It is going to be an adventure to say the least, but I think I can do it now. I have gained a new respect for those that do this as a hobby.... 👍
- 436 replies
-
- 3
-
-
- Syren
- Model Shipways
- (and 1 more)
-
Thanks, I will take a look at it. I was planning on using what is in the kit, but it will not be a big change since I have just started.
-
Quick Question: I am having trouble finding the size of the thread used to lash the breach line to the rings on the bulwarks. Can someone answer this?