HOLIDAY DONATION DRIVE - SUPPORT MSW - DO YOUR PART TO KEEP THIS GREAT FORUM GOING! (Only 13 donations so far - C'mon guys!)
×


achuck49
-
Posts
129 -
Joined
-
Last visited
Content Type
Profiles
Forums
Gallery
Events
Everything posted by achuck49
-
 Will do, should have thought of that earlier.
 -
Will do, should have thought of that earlier.
-
Ahoy! When working on solid hull boats such as the MS Phantom or Sultana not all areas can be shaped with a dremil or sandpaper. So how does one use a chisel to trim that area between fore and aft decks or thin the thick bow portion. The aft part of the deck should be flat but it slopes upward and that portion of the bullwork needs to be cleaner. How to position the hull for chiseling, how does one do this type of work. Chuck A
-
Hi Regardless of any problems you have with the hull, it is Sooooo much better than my skill level. Looks good
- 50 replies
-
- 1
-

-
- artesania latina
- Virginia
- (and 2 more)
-
I know know a great deal concerning artillery. Not a boast, but I have about 50 years worth of expertise in this specialty. Loud noise can cause hearing loss over time. You can, for example, go to a lother of rock concert's and over time suffer a loss at certain frequencies, but carry-on just fine. With artillery, the issue is blast over pressure. If the over pressure is outside the hull, then you have a loud rock concert in the 10th of a second or less of the actual blast. If the firing took place inside the hull, the over pressure could perforate ears and and cause brain concussions. With modern artillery has muzzle brakes that direct the pressure to the side of the tube. At maximum charges not many persons are required to have hearing protection in the battery area.
-
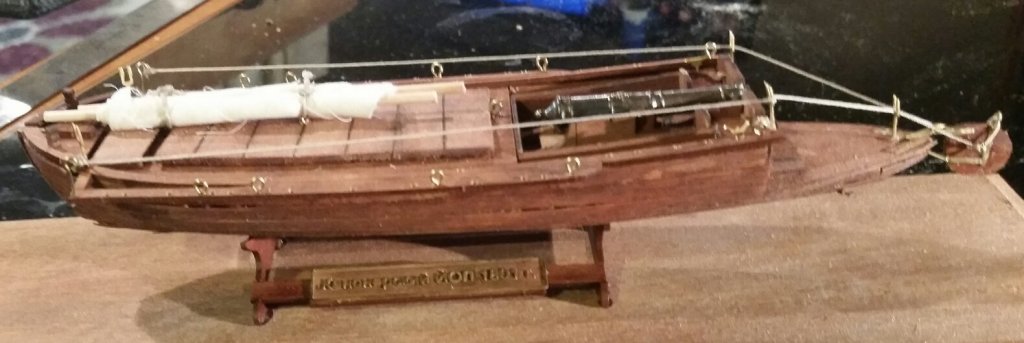
Question: how do I mark the title 'finished'? I wanted to have sails flapping in the wind,as the craft fly's across the Black Sea. Reality bites again, I fear that any attempt to do anything else will result in damage to the paper thin deck.
- 14 replies
-
- 5
-
-
- cannon jolle
- master korabel
- (and 1 more)
-
A major problem has raised it's ugly head. The masts required for the sails, are missing or I am supposed to create them. With all of the instructions written in Russian, it is impossible to know. The instructions, parts listing, and diagrams do not show anything to any type of scale. There are illustrations showing the craft nearly as mine is with the masts stowed and laying in the deck and with full sails. It is so fragile that I lean towards a stowed mast.
- 14 replies
-
- 1
-
-
- cannon jolle
- master korabel
- (and 1 more)
-
At long last I have the sides installed. My enthusiasm for this kit is waining. It is small and fragile. If I am in the same room something gets bent or broken.
- 14 replies
-
- 1
-
-
- cannon jolle
- master korabel
- (and 1 more)
-
What does 'razor' cut mean? Another word for laser?
-
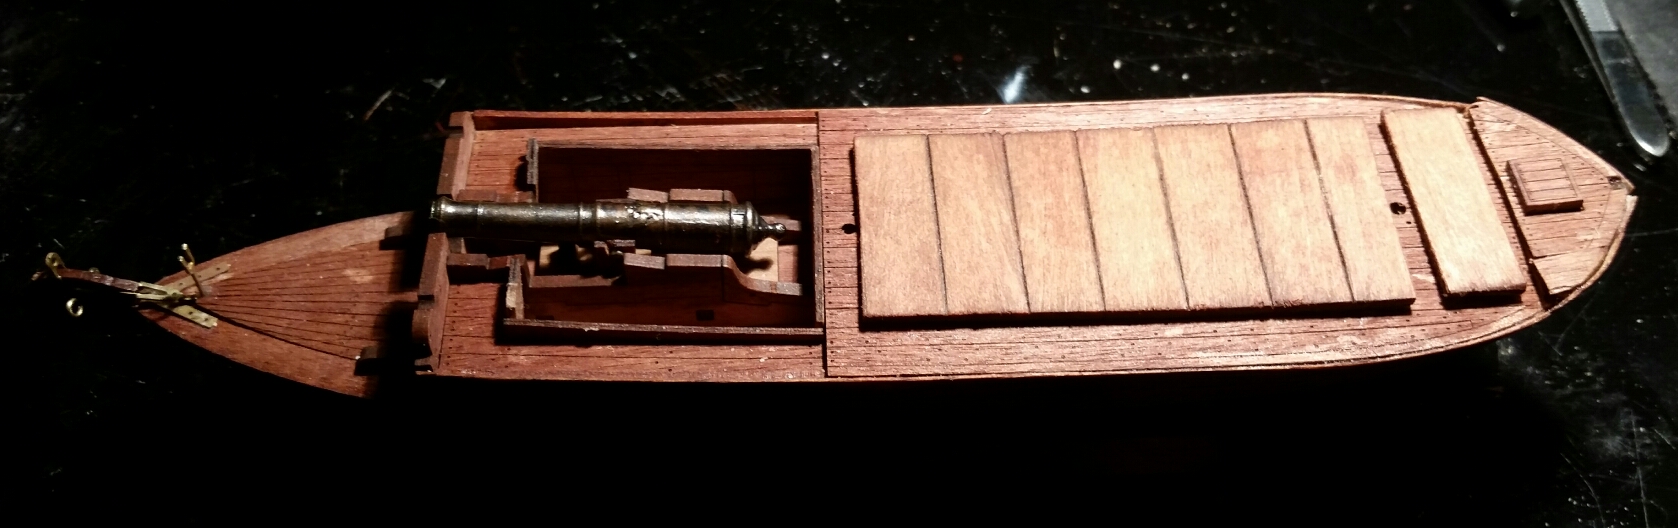
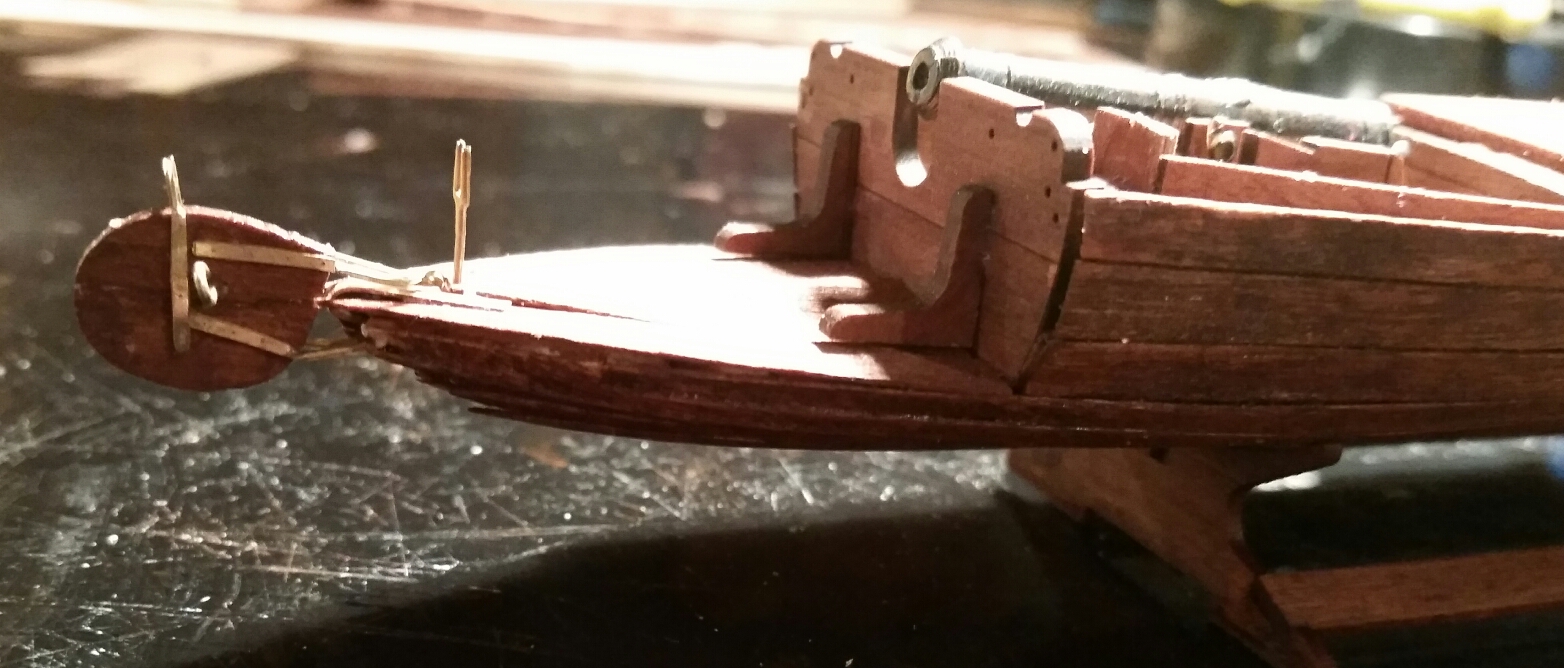
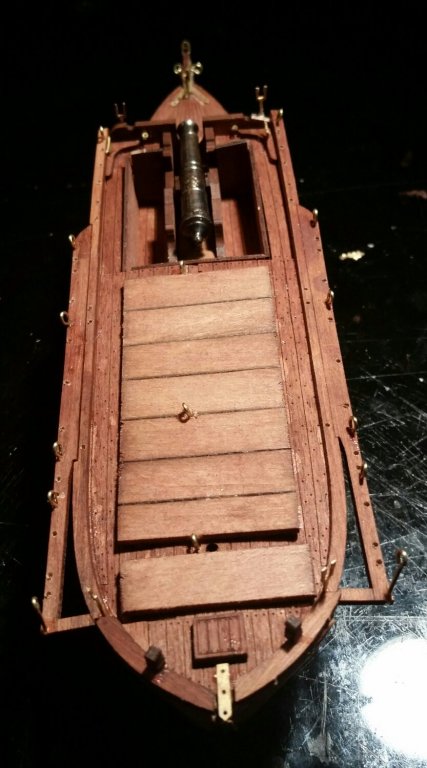
The cannon is installed, rudder in place and the new hatch covers attached.


- 14 replies
-
- 1
-
-
- cannon jolle
- master korabel
- (and 1 more)
-
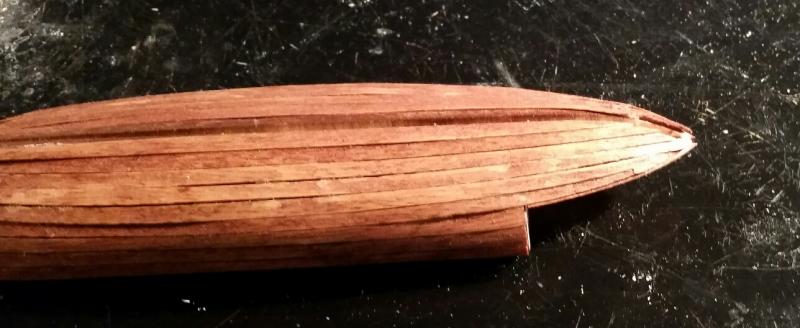
It has a hull! Not perfect by any stretch of the imagination, but it is the best I have done so far. Stained it red oak, because I like the color. After I finish with the wooden pieces on the deck area, I will stain it the same. Then poly it because I think it will look nice with a bit of a shine. The broken hatch covers are still a bit of a challenge. I have tried some scrap basswood strips, they look OK, but not correct. I might just take some old sail cloth, soak it in coffee and cut out a canvas piece. Not much wood work left. Mount the cannon and then some side pieces for masts and such. The cannon is brass that has been pre-blackened. Chuck A
- 14 replies
-
- 2
-
-
- cannon jolle
- master korabel
- (and 1 more)
-
Hi The internet is such a wondrous thing. It is so easy to converse between continents now. I am not real certain about a successful build, but good bad or otherwise it will be finished. Korabel does not do paint or even copper bottoms. I plan on coating it with some Danish Wood Oil to both protect the wood and give it a subtitle finish. Chuck A
- 14 replies
-
- 1
-
-
- cannon jolle
- master korabel
- (and 1 more)
-
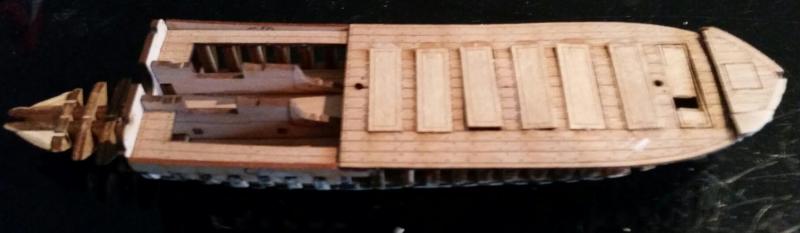
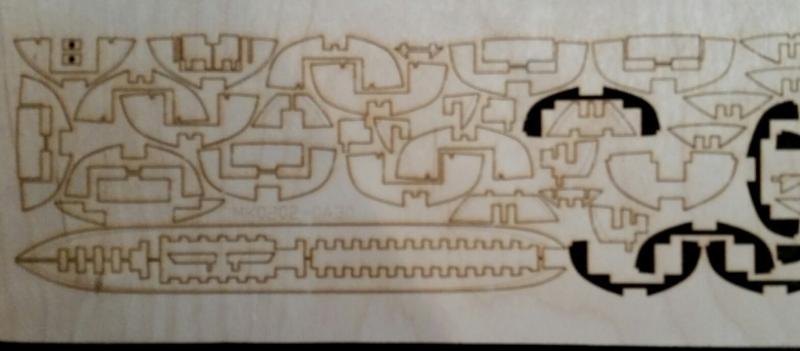
Disaster has hit the Jolle! I was attempting to remove some deck pieces from the sheet of parts. As I have mentioned before, this is difficult because of the tight laser cutting of the parts. I admit that I was frustrated and to speed things along, I used the edge of a single blade razor blade to try cut a piece loose. Bad idea, it caused the entire sheet of parts to split length wise. This also went through a number of pieces, cutting them in half. I tried to repair the damage with glue, but that failed. The thickness of this sheet of wood is equal to two or three sheets of normal typing paper. The glued part did not have enough strength to hold it's own and it would flop over or just fall apart. So I had the idea of taking some scraps and using them, see the hatch cover in the attached pic. Looks horrible, but I said I would show warts and all of this build and I will. Then I was not paying attention to the top of the model and pushed my finger through the scraps. I have another idea, but it will have to wait until I plank the hull.
- 14 replies
-
- 1
-
-
- cannon jolle
- master korabel
- (and 1 more)
-
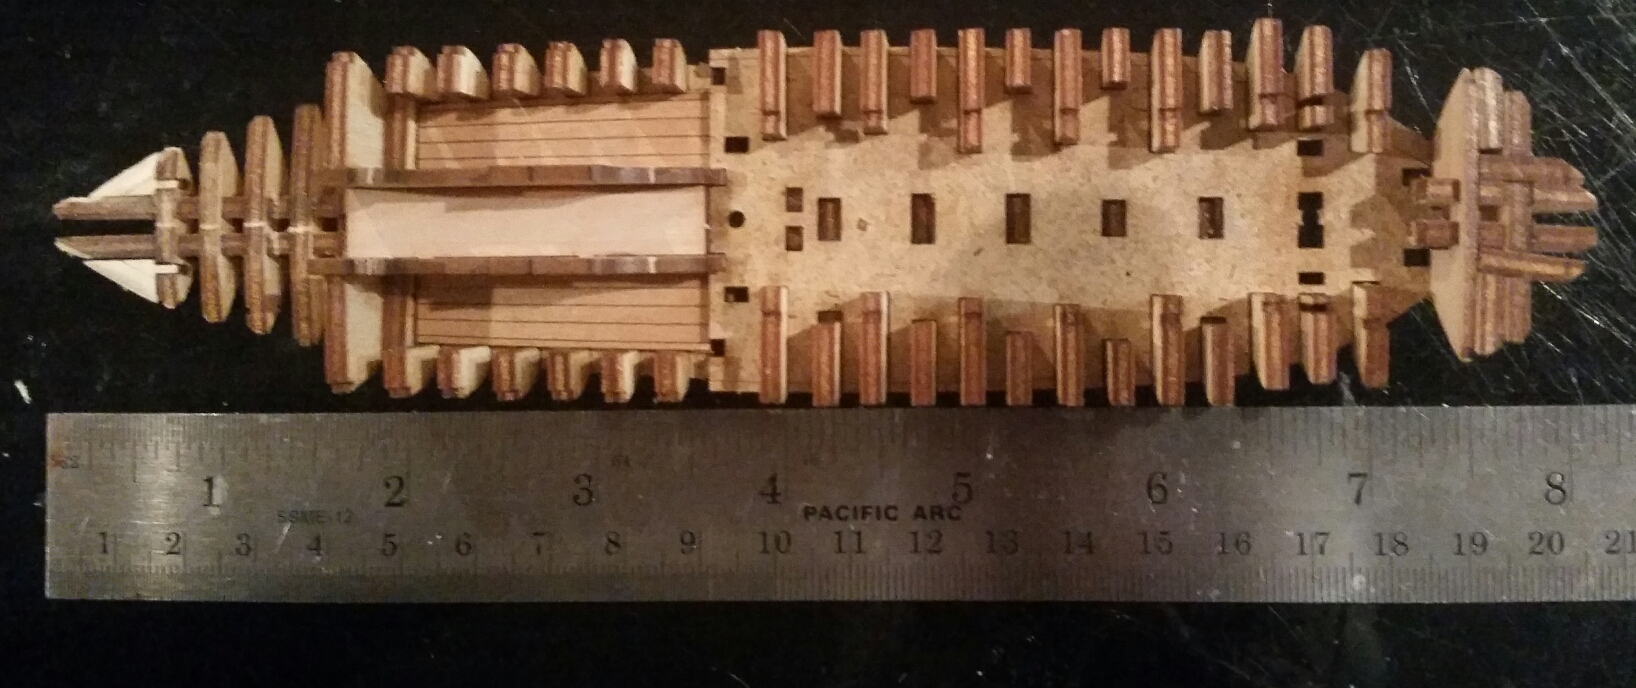
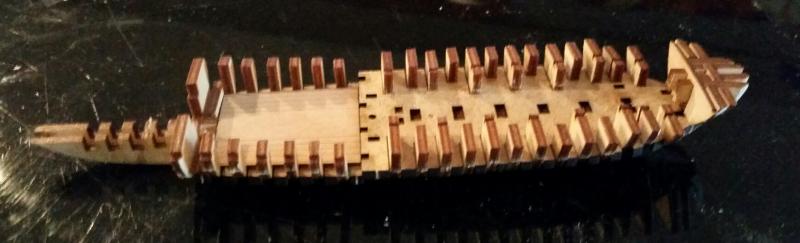
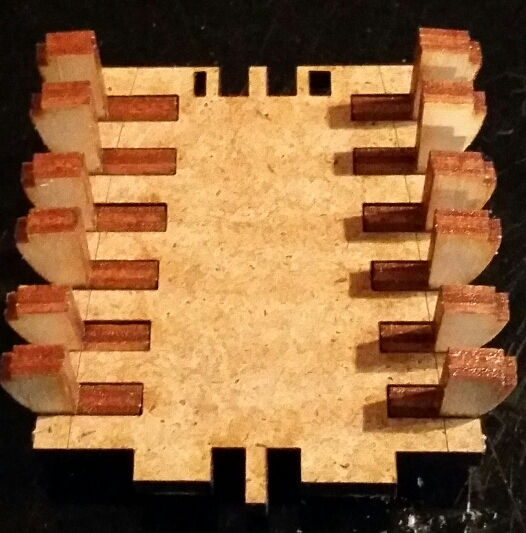
The pieces of this kit fit as tightly as a box of Legos. The ribs can only fit in the appropriate slot, facing the correct direction. As of this attached photo, I had not needed to use any glue. The fit is that tight.
- 14 replies
-
- 2
-
-
- cannon jolle
- master korabel
- (and 1 more)
-
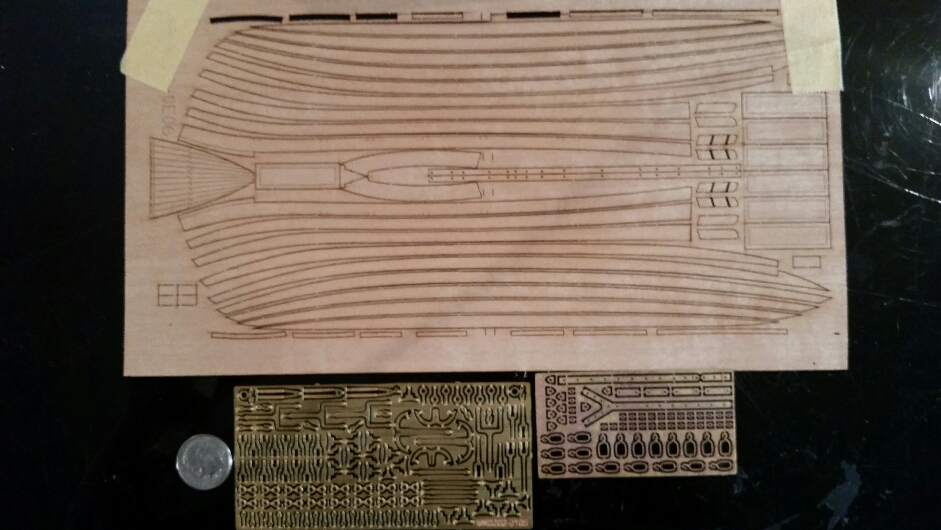
I started working on the Jolle this morning and discovered some startling features of the kit. First is that the laser cutting of the pieces is exceptionally precise. I could not get a sharpe blade into the burn line to help loosen the pieces. I needed to get a small piece of tubing and model hammer and tap them loose enough to break away from the main board. Another discovery is that the printed page identifying various parts does not match the actual wood containing the pieces. To add to this list of horrors is the fact that printed material is not to scale with the actual parts. I had to have the instructions showing the next needed part, next to the paper showing the part number, next to the board that contains the laser cut pieces. Not an easy way to participate in a 'relaxing hobby'. There is a plus side, the fit of the laser cut pieces is the best I have ever had the pleasure of working with. I soon learned that if something does not fit or looks funny, it is either the wrong piece or the wrong location for the piece. The pieces fit as tightly as do the pieces in a jigsaw puzzle.
- 14 replies
-
- 3
-
-
- cannon jolle
- master korabel
- (and 1 more)
-
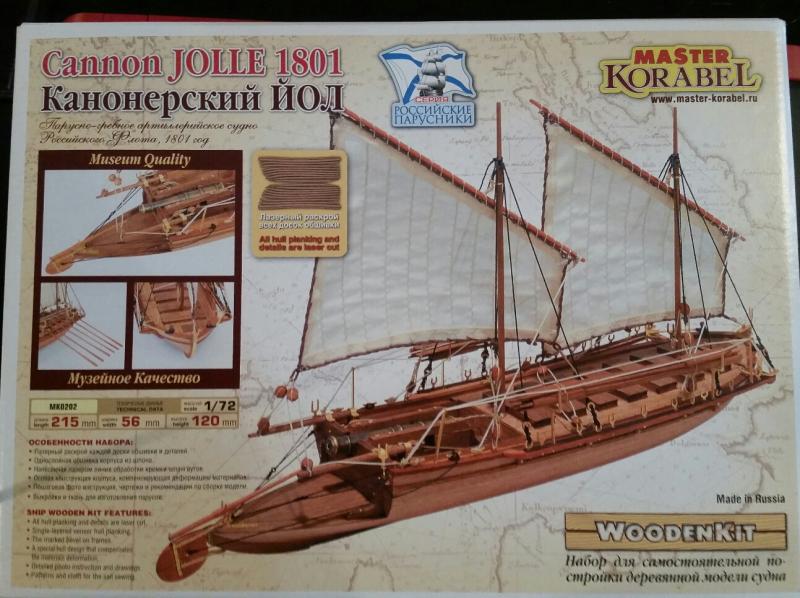
Greetings and Salutations, I have wanted to start a build log and successfully complete a build log for a long time. I have a true mental block when it comes to building a hull that is not solid out of the box. Master Korabel has all the parts and pieces precut so I figured ‘how hard can this be?’. The Cannon Jolle 1801, was up for auction and I won the bid for about 1/3 the original price. This supports my opinion that this will not be a hard build. Expensive kits are hard, inexpensive kits should therefore be easy. The box is about 14"x8" inches and it is full of empty space because inside the parts and pieces are very small. Please notice the size of the kit when compared to a U.S. dime. Well this means that I need a smaller work space for this particular kit. Even though the written instructions are in Russian, the photos of the actual build are clear and concise. I will finish this log. It good then great, if bad, then everyone can learn what not to do. What can possibly go wrong? Chuck A

- 14 replies
-
- 8
-
-
- cannon jolle
- master korabel
- (and 1 more)
-
If you keep working I will keep following
-
How do I stain or dye super white plastic sails to look more realistic? Chuck A
-
No instructions, purchased from a friend.
-
good Saturday morning, I recently purchased a combined 2" belt sander / circular sander combination. There are no dust bags included. Is there something around the home that would do the trick??? Cotton socks are too porous, I ripped up some old tee shirts and while they were better than nothing, they did not seem as efficient as the commercially made dust bags. Any suggestions??? Chuck Aldrich (feeling great on this fine Saturday morning)
-
to all above, my most hearty thanks
-
I got it on eBay about 2 years ago; in original wrapper.
-
Thanks Understand completely Will write small and attach small photo
-
Thanks! Your explanation falls within my skill set