DaveBaxt
-
Posts
1,324 -
Joined
-
Last visited
Content Type
Profiles
Forums
Gallery
Events
Everything posted by DaveBaxt
-
Hello Tim I have started following your blog and found that the photos are great to follow and helping me lots in tigging my Bounty. What a fantastic model you have built. I am not sure if this is the correct place to add this and you can delete it if needs be.The photos also show great detail too. As you know I am well. Best the Amati model and the instructions are somewhat lacking, It is much more clear your sequence of building this as well . Best regards Dave
- 171 replies
-
- 4
-

-
- artesania latina
- bounty
- (and 1 more)
-
Ah the grand days of my youth when every Christmas I looked forwatd to the next level of meccano. Thanks for all that information regarding the sering machine which I am pretty sure I could now put together.Best regards Dave
-
Thank you John. I have just noticed that they are currently sold out.
-
Thank you wefalck for your input and agree it does,t look to difficult to make and will take a search for the thread you mention. Just wondering about sourcing the parts and would it be much more expensive to get one of chucks servomatic shipped out to the uk. I now see that the servo matic is sold out so the only option at the moment is to make one. I now have a choice to make. For the length of time it takes to make one of these or do I continue to work on the model. I would imagine serving those lines would be a lengthy process? I am all for time saving gizmos.Best regards Dave
-
Thank you John for the link. I now have some of those threads you mmentioned and look and can now sww where I need to go with this. That serving machine sounds interesting and wonder if they deliver such a thing to the Uk. Best regards Dave
-
Thank you Jan. The reason I picked the Bounty by Amati was being a total novice at modelling and only my second building a ship and first of a period ship was because there was a set of videos which I thought would make life easier.However the guy in videos does suggest because of a number of issues is probably not for the beginner. I am basically treating this ship as a learning curve although I am trying to do my best from the guidance of the good people on here. If you are saying that Corel and Amati are both intermediate manufacturers and there are better ones in Quality. I am not familiar with these names but will have look into the availability here in the UK. I have been looking into another manufacturer called Jotika or Caldercraft and wonder what your thoughts are on these or is it the same company? The ship in question id the HMS Bark Endeavour. Best regards Dave
-
Roger Thank you for your reply, and it is clear to me now that I must as you say learn the ropes. This is clear to me now that this is something that will take further research. However It is more than a little frustrating when looking at the Amati drawings and clearly looking at some of them on face value don,t work and I therefore wonder how much research they have actually done. To complicate matters they appear to be adding double blocks rather than single etc.I know it sound like I am laying my frustrations at Amatis door but for what it is worth I have no complaints about the kit its self and believe in the hands of a knowledgble person would turn out to be a very fine model. I am now wondering if this is probably always going to be the case with all supplied kits and now beginning to see why people decide to scratch build. Are there any kit manufacturers out there that are better researched or have at least better instructions? I again thank you for helping me understand the situation regarding what is turning out to be an all consuming hobby. Best regards Dave
-
Thanks for sending the link. I wouldn,t of noticed the position of the yards if no sails fitted . I am now really looking forward to the new book arriving. Best regards Dave
-
I am aware that the standing rigging is to be completed first and the shrouds on the lower masts completed before the masts can be assembled, however what I for got to mention is that at the moment I am just building the mast temporarily as I have yet not started on the standing rigging. It was my attention to build all the mast parts and keep each mast in a seperate plastic bag. I was also under the impression that it would benifit to fit all the blocks to the mast before moving onto the rigging ropes. Now I am beginning to wonder that the shroud pairs should be fitted before I wrap any of these blocks around the mast in the same area. although I have already done the blocks on the fore mast in these areas I could just remove them until I have done the shrouds or does it not matter which ones go on first. I would imagine it would as the shroud pairs would be permanent but the other added blocks for running gear would be semi permanent .Hope I am making sense. Best regards Dave
-
Unfortunately no. I am beginning to think that the Amati drawings are a waste of time . Look at the page marked lifts and my understand it they are for tilting the masts. According to their drawing (attached) the topgallant brace where the one side of the is connected to the trestle trees, the other side is not. So of my understanding, ,one side going down to the deck and a belaying pin , the other side connected to the trestle tree would prevent it all from working. I think after looking at the book I(Rigging period ship models) and the the Amati drawing is just confusing .So as you say apart from just looking at the Amati for general guidence and to see what is required ie Lifts and Braces, then look at the books to see how it is properly done. Thank you for sending me an example of the book and although I have not yet studied it closely,already it looks to be a great help. Once again I thank you for all your help and guidence. Best regards Dave
-
Unfortunately no. I am beginning to think that the Amati drawings are a waste of time . Look at the page marked lifts and my understand it they are for tilting the masts. According to their drawing (attached) the topgallant brace where the one side of the is connected to the trestle trees, the other side is not. So of my understanding, ,one side going down to the deck and a belaying pin , the other side connected to the trestle tree would prevent it all from working. I think after looking at the book I(Rigging period ship models) and the the Amati drawing is just confusing .So as you say apart from just looking at the Amati for general guidence and to see what is required ie Lifts and Braces, then look at the books to see how it is properly done. A quick look at the 18th centuary lifts I dont need the rings and eye bolts on top of the trestle trees .A shame as I have only just glued them in place.Unless the ropes down to the deck first run through them . That could make sense. Thank you for sending me an example of the book and although I have not yet studied it closely,already it looks to be a great help. After a quick look at the 18th centuary lifts , the yards have two blocks, a smaller one on top of a larger one , the Amati don,t have a block at all on the top gallant yard. Why two blocks ? Once again I thank you for all your help and guidence. Best regards Dave

-
Thanks Popeye. No sails this time but hopefully the next model. Thank you for your time. Best regards Dave
-
Thanks for that Jan. Fortunately I kind of thought of there would be a few mistakes and I would need some practice. I have got a number of spares So will be fine.Best regards Dave
-
Gregory That is exactly the same book I already have and I agree there are some excellent drawings which most of which I have learned about rigging and what is needed.However they are a lot different to what Amati have offered for the Bounty. Perhaps with the help of the other book the Penny will drop.Once again than you for taking the time to help me. Any future input will be extremely welcome. Best regards Dave
-
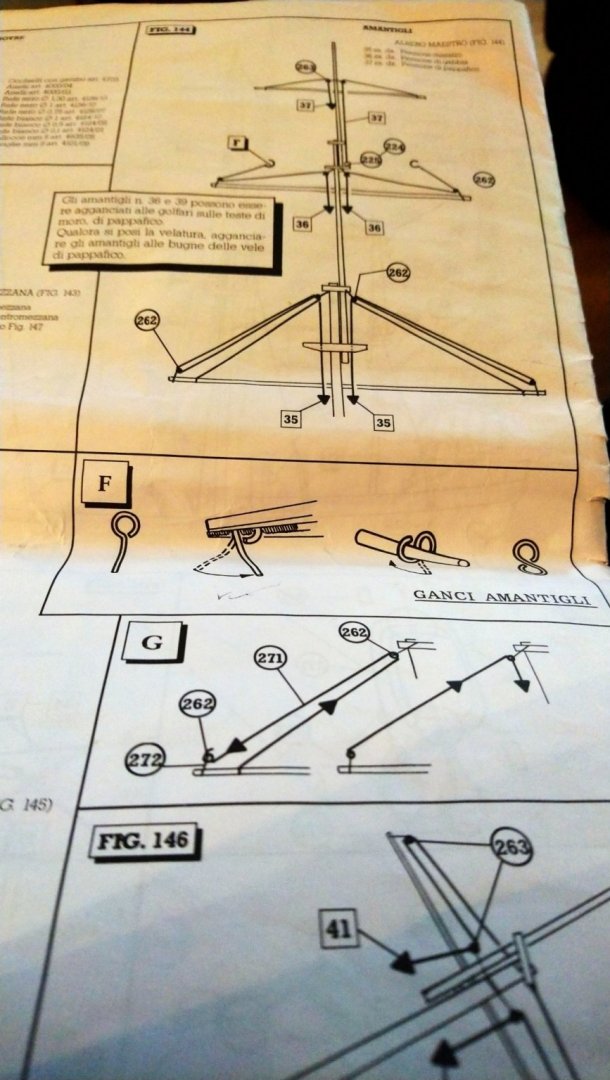
Thank you to everyone that has replied to my question. I have uploaded another photo of the drawings which shows the attachment with the letter F and another one G . Personally I dont,t where they go but in the diagram G which shows a hook so I am just confused . However there is a booklet that came with the instructions which is a translation and it says that fig 144 are the lifts. Sorry if this does not help you in anyway. Now I have decided that the only way I have a chance of sorting this out is to learn everything from scratch so I ordered the book you have mentioned in the hope it will explain what each be of equipment is for and how it is likely to work. This is the second book which I will now have. The first book although helpful but was just drawing of a particular ship and unfortunately it did not explain anything. Hopefully once I give my self some time to study this I will have a better idea what is needed on my model. Best regards Dave
-
Thank you Pat and may have some way in explaining what is going on. You are correct in saying that I am treating this ship as a learning experience. I have since noted and although I appreciate that each mast is different there are a lot of similarities . I am definately looking at the other drawings to get what you say a feel for what is going on .However this is where I am finding the confusion . There is a booklet that came with the kit,which is rough translation from Italian to English and for just about every piece of running rigging there is a port and starboard . This is what makes me believe there are infact 2 blocks for each operation. However when looking at the sheet drawings this is not the case. As most of these blocks are in the same area and can be fitted at a later date perhaps I should just fit what I can see and hopefully then the penny will drop later on. Another way forward would be to go with my gut feeling and fit what I think what blocks are required for both standing and running rigging using the belaying pin plan and trace some of these lines from start to finish. The book you have mentioned may be an option and Imight consider this. Do you think this book would be of any other future models that I build? Once again I am thankful for your help and I appreciate what must be difficult questions to answer as all ships and there plans differ. Best regards Dave
-
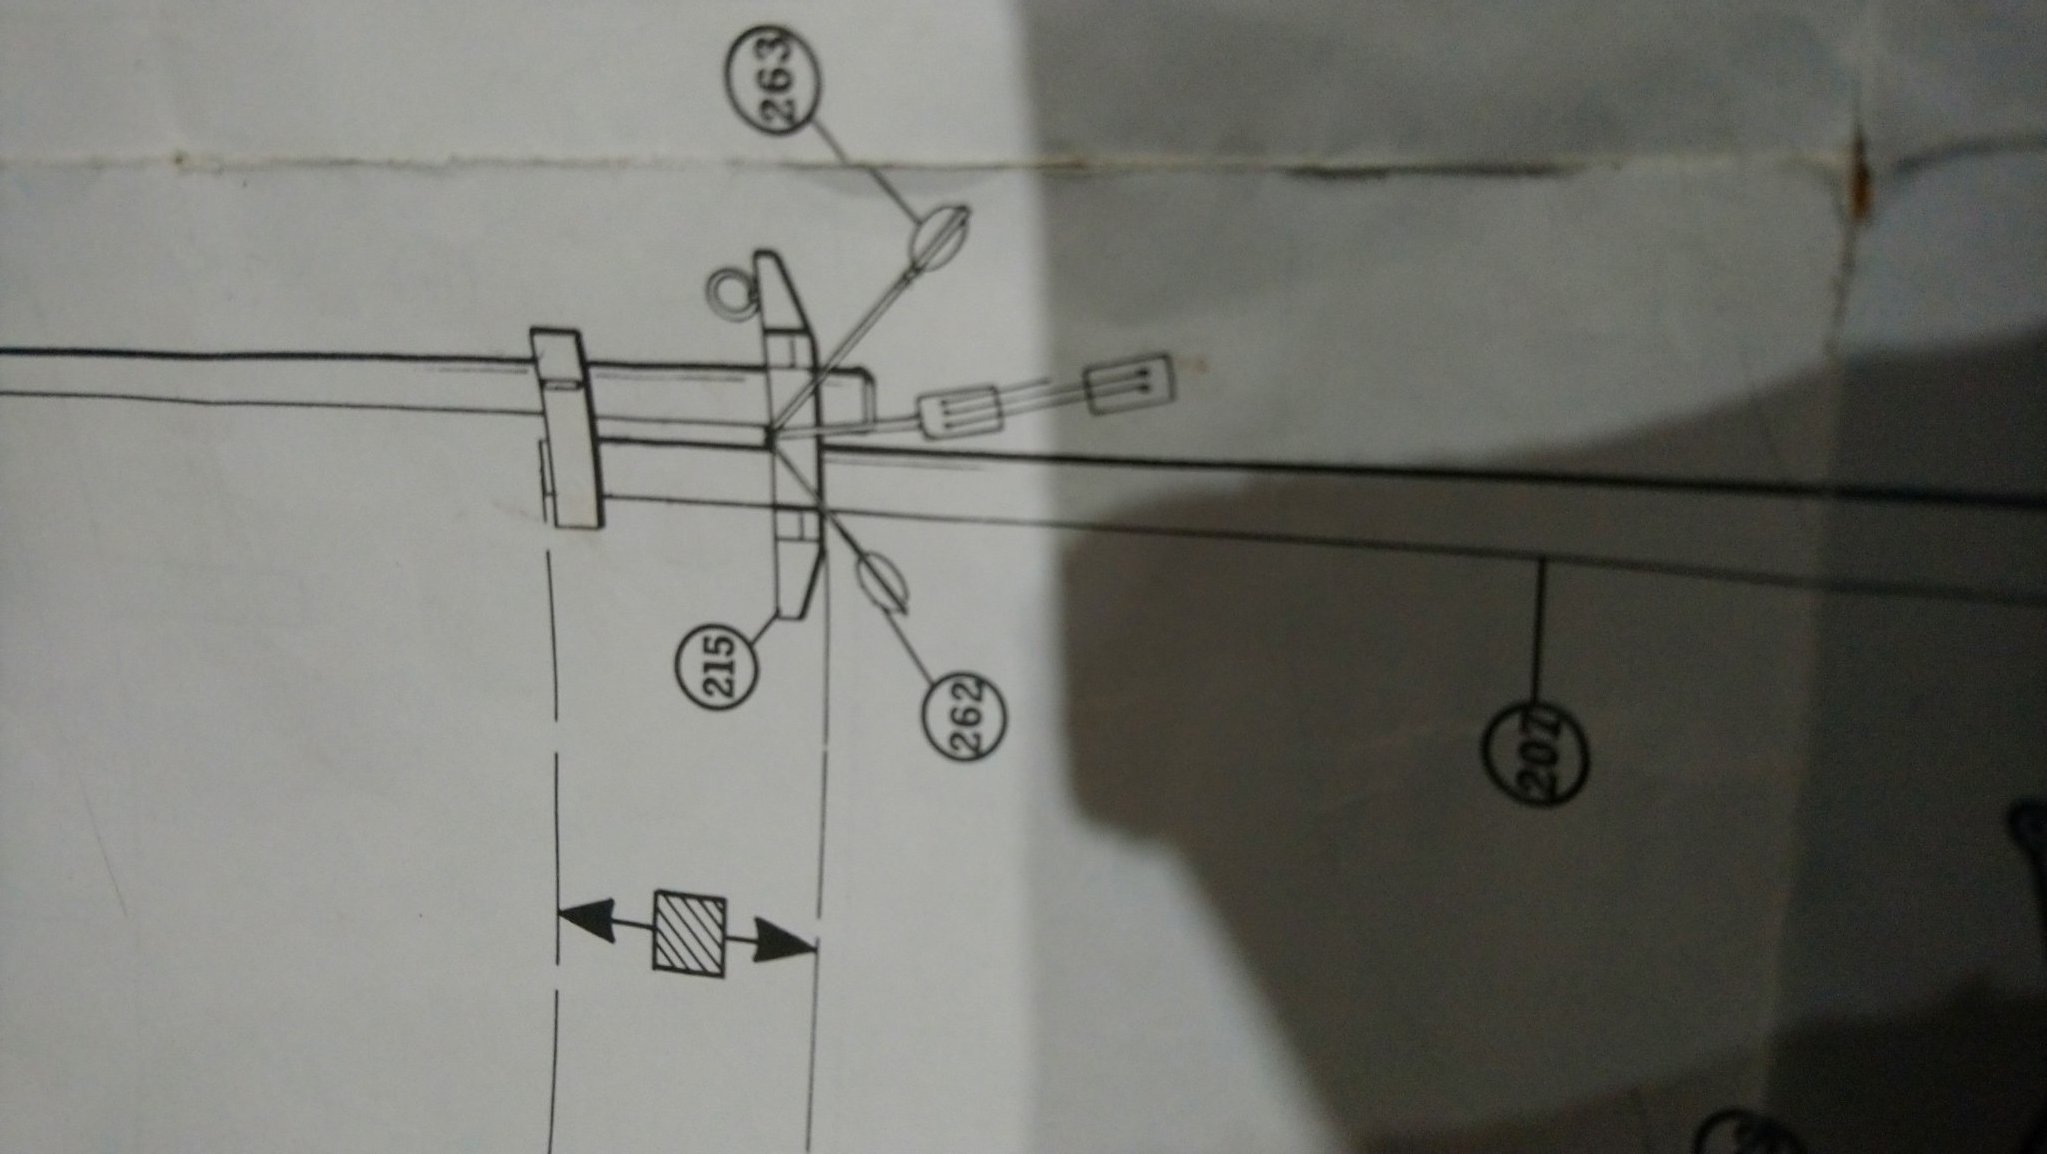
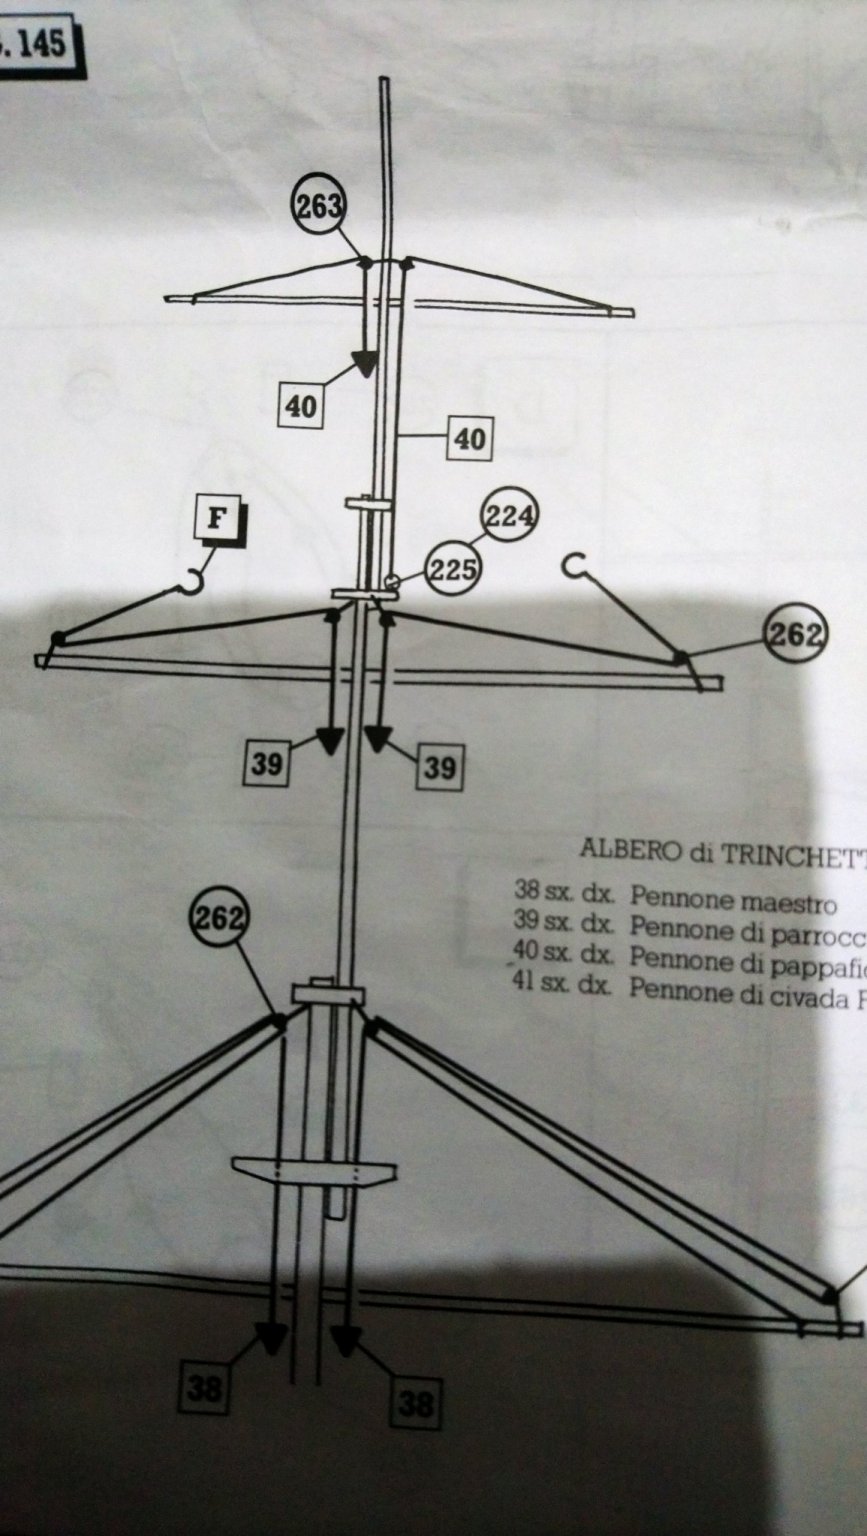
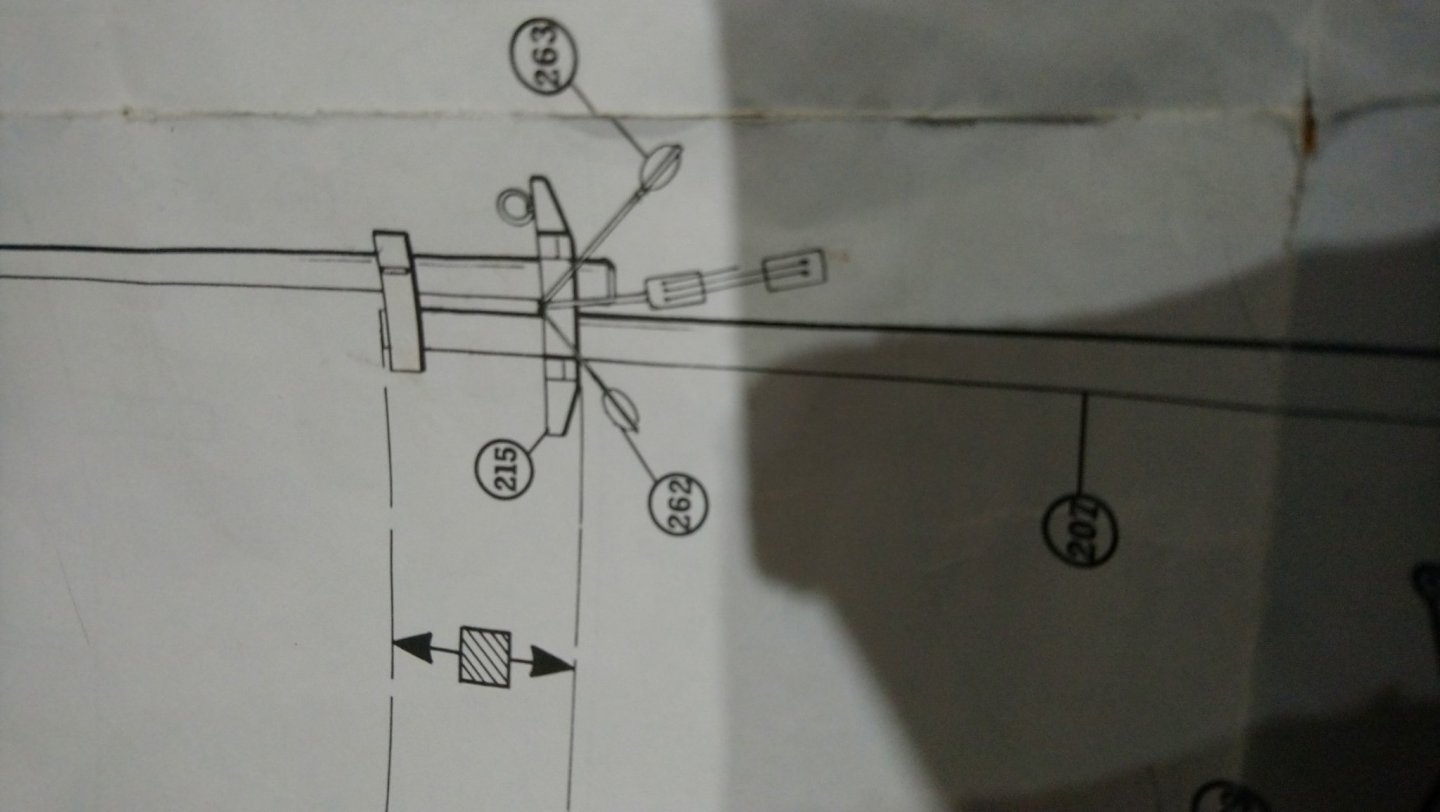
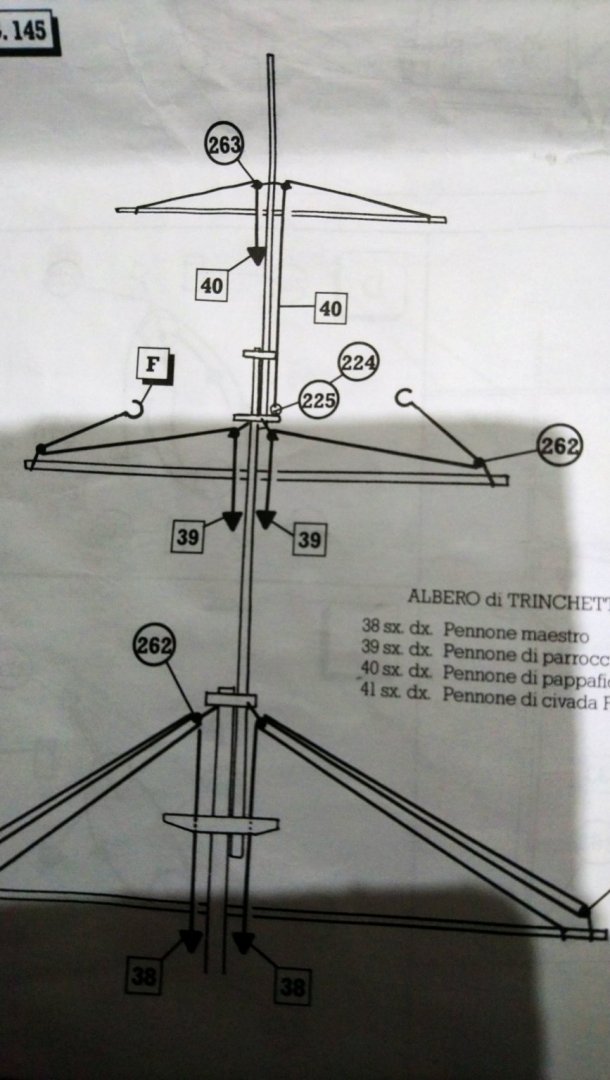
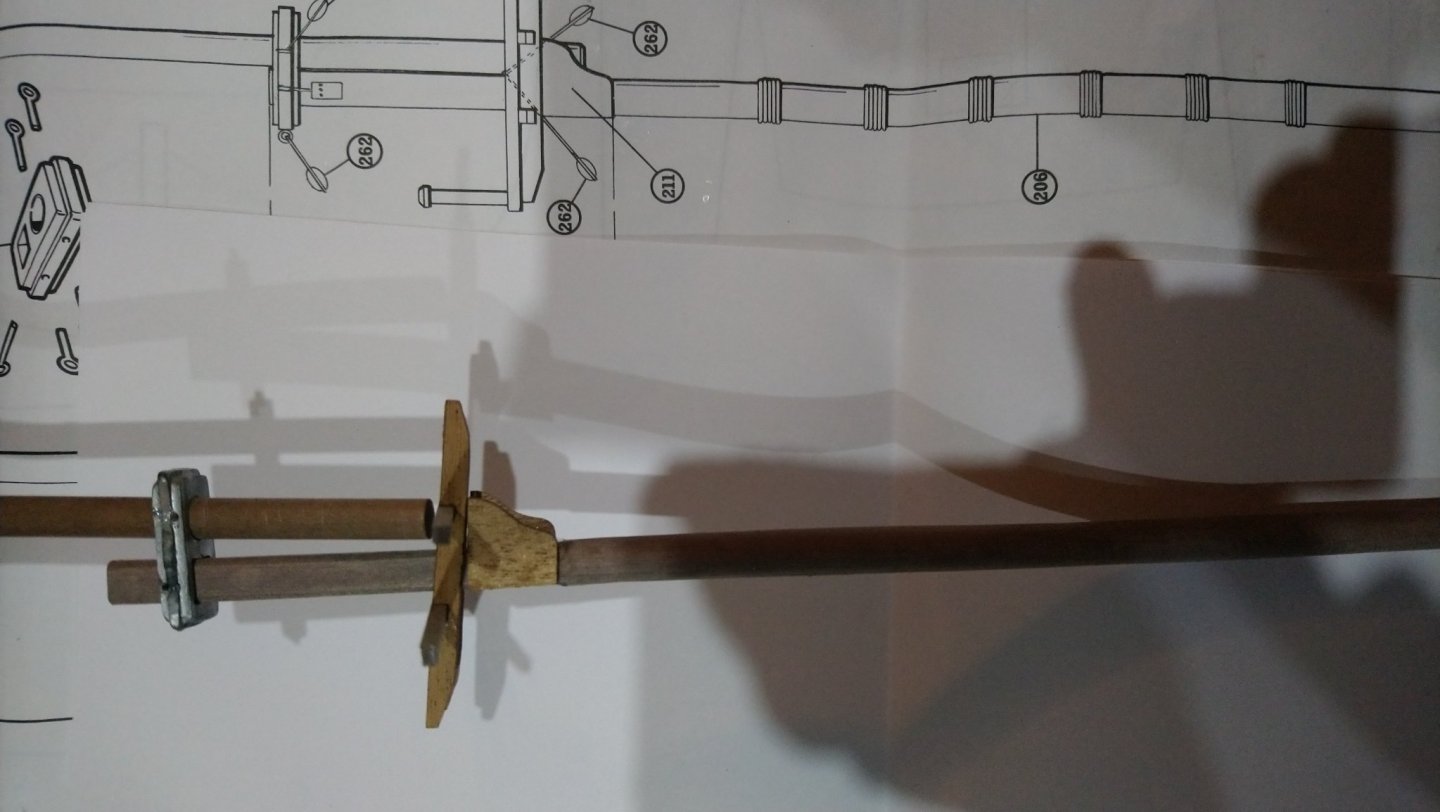
I am currently building the masts of the HMS Bounty and although this ship may have difference I am hoping that it has similarities to other ships of her age. Being a first time builder of a period ship I am have a bit of a hard time understanding the drawings supplied by Amati. It was my intention to connect all the blocks which are attached to the mast before fitting the masts onto the ship. However not all the blocks are shown on the main drawing. Some blocks are omitted all together and some are not even the correct numbers /or not the correct block. I am currently working on the fore mast and the problem I am have is the section where the trestle trees and cross trees connect the topgallant foremast and top foremast. Here is a photo of the drawing of that area You can see on this drawing there are 3 blocks shown that wrap around the upper trestle trees. The block where there are 3 holes has in fact got 2 of these blocks .Also the blocks with numbers 262 and 263 have 2 holes and 3 holes respectively. I have been trying to find out if there is a mistake here or whether there should be more block in this position. I will add another couple of photos of the drawings of the fore mast lifts and Bowsprit yard which also connects to this area.The drawing below which shows the lift (I think) does not show the numbers of the blocks but look like blocks with one hole. and there is 2 of them hanging from the trestle trees. So There are other drawings but these show blocks with two holes. So I can,t work out what is going on. At the moment I have just fitted the blocks which are shown on the main drawing but this may well be wrong. Has any one got any ideas to try and help me out. I have looked at a couple of blogs of the Bounty but nothing mentioned about this area. I have contacted the author of these blogs but unfortunatly they no longer have the drawings. Any input would be greatly appreciated. Best regards Dave TTt
-
Thanks for your input. I have now managed to source some here in the uk and should be with me soon. Thanks for the tip where to get the Veevus threads from best regards Dave
-
Thanks John for your input and I have just ordered some of the thread you use 16 so hopefully now I can make a start on the rigging which at the moment is totally confusing. So no doubt I will be asking a lot more questions best regards Dave
-
Hello Pat Sorry for any delay in my reply. I definately need some thing different for seizing that what I am using as I am finding it very difficult to work with. Apart from cutting into my hands it seems very difficult to absorb any wax . I believe it to be thin enough but its not stiffening up like the other thicker threads and is very difficult to work with. I would be very interested in the article you have wrote and would be grateful for a pm. Hoefully it would shine some light on what in itself is quite a complex subject. Best regards Dave
-
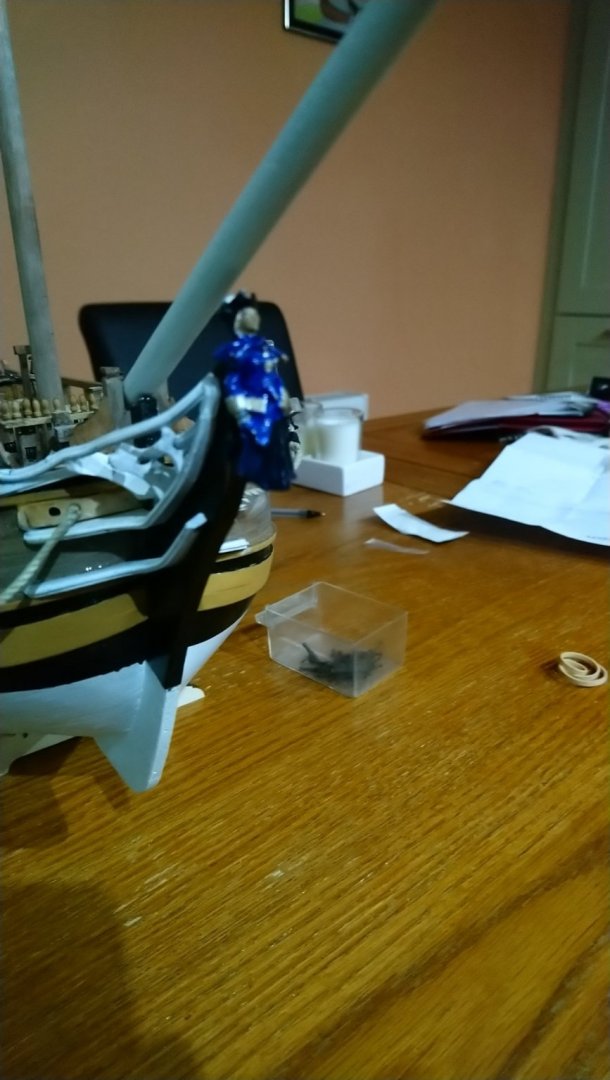
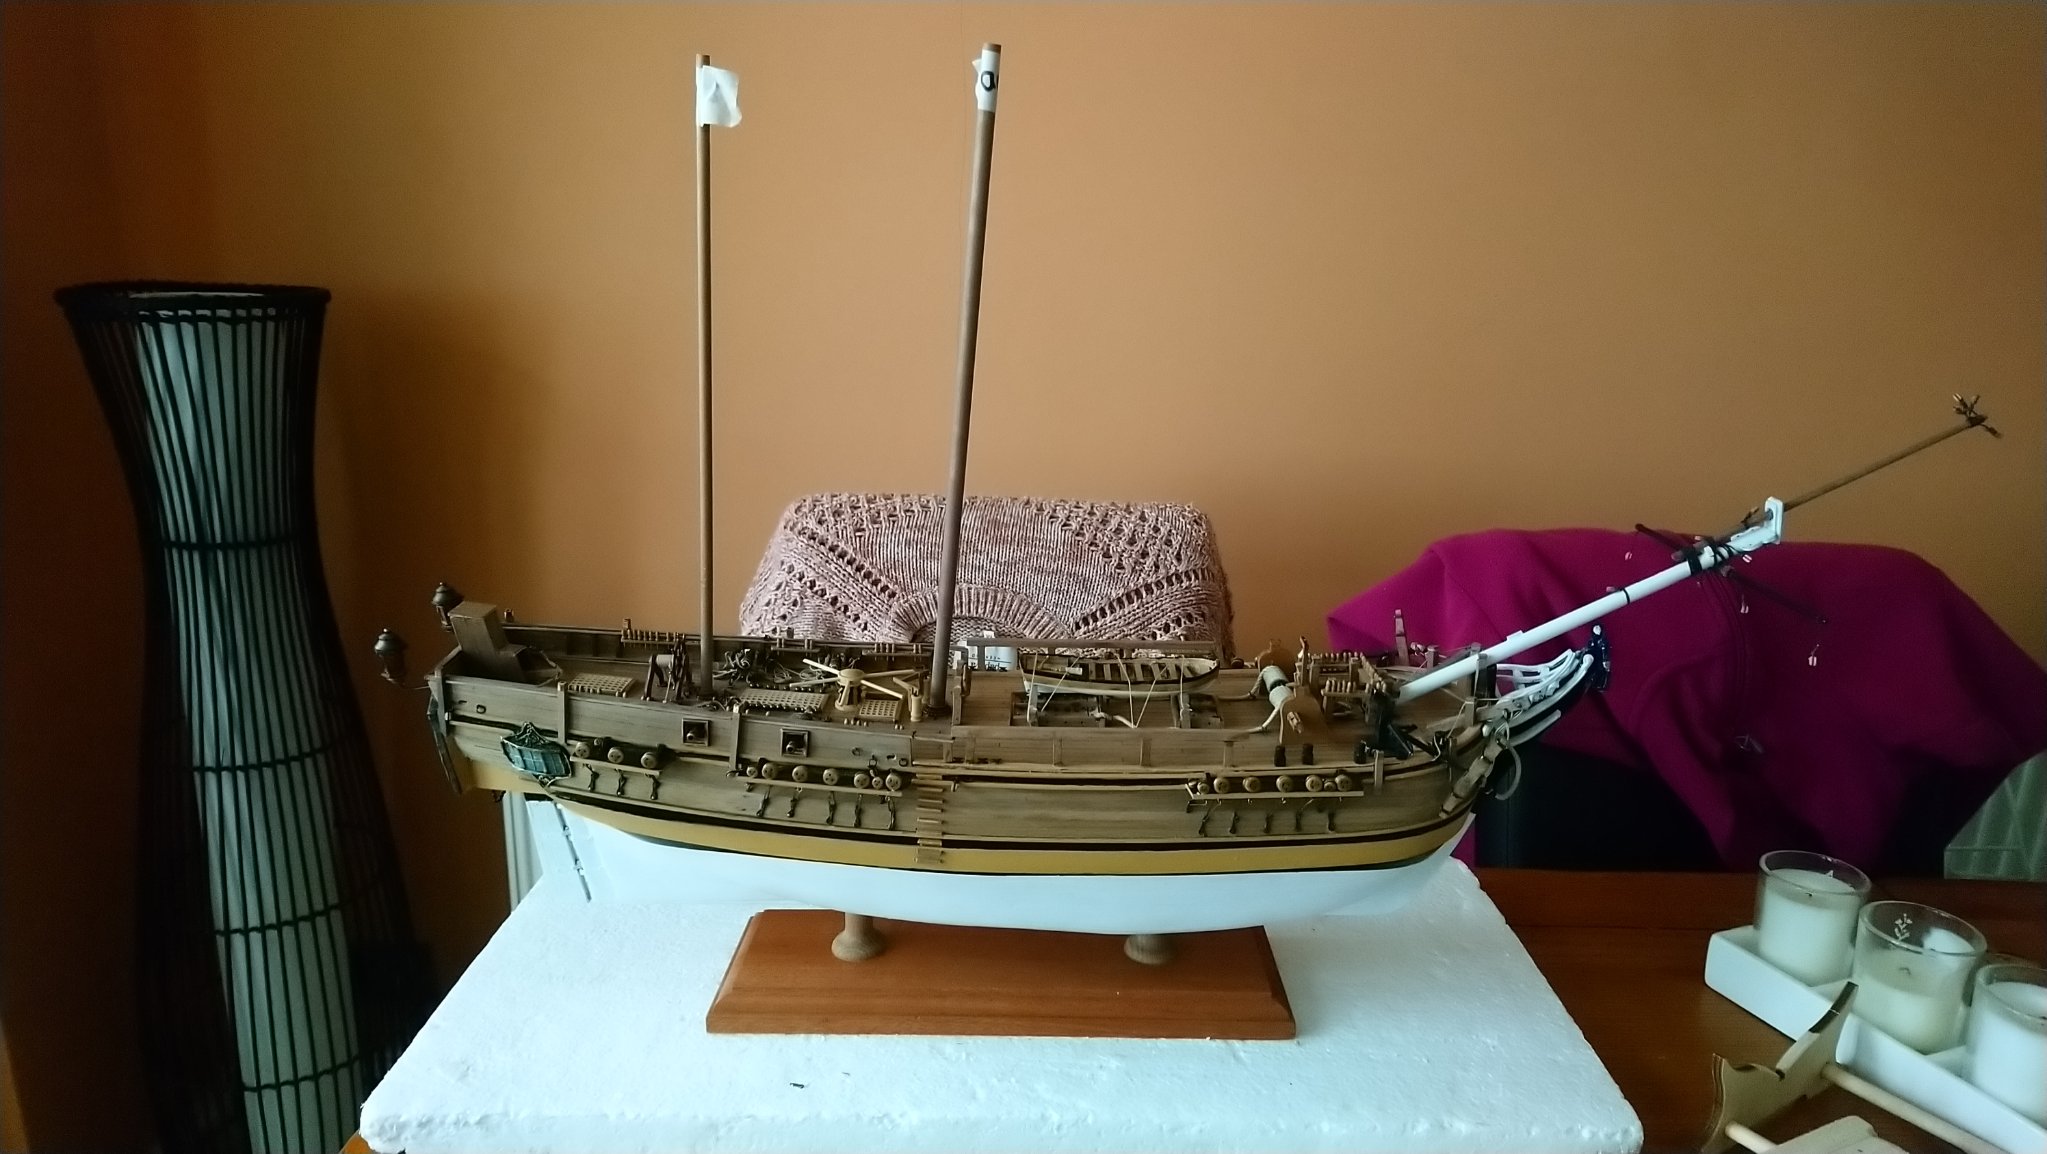
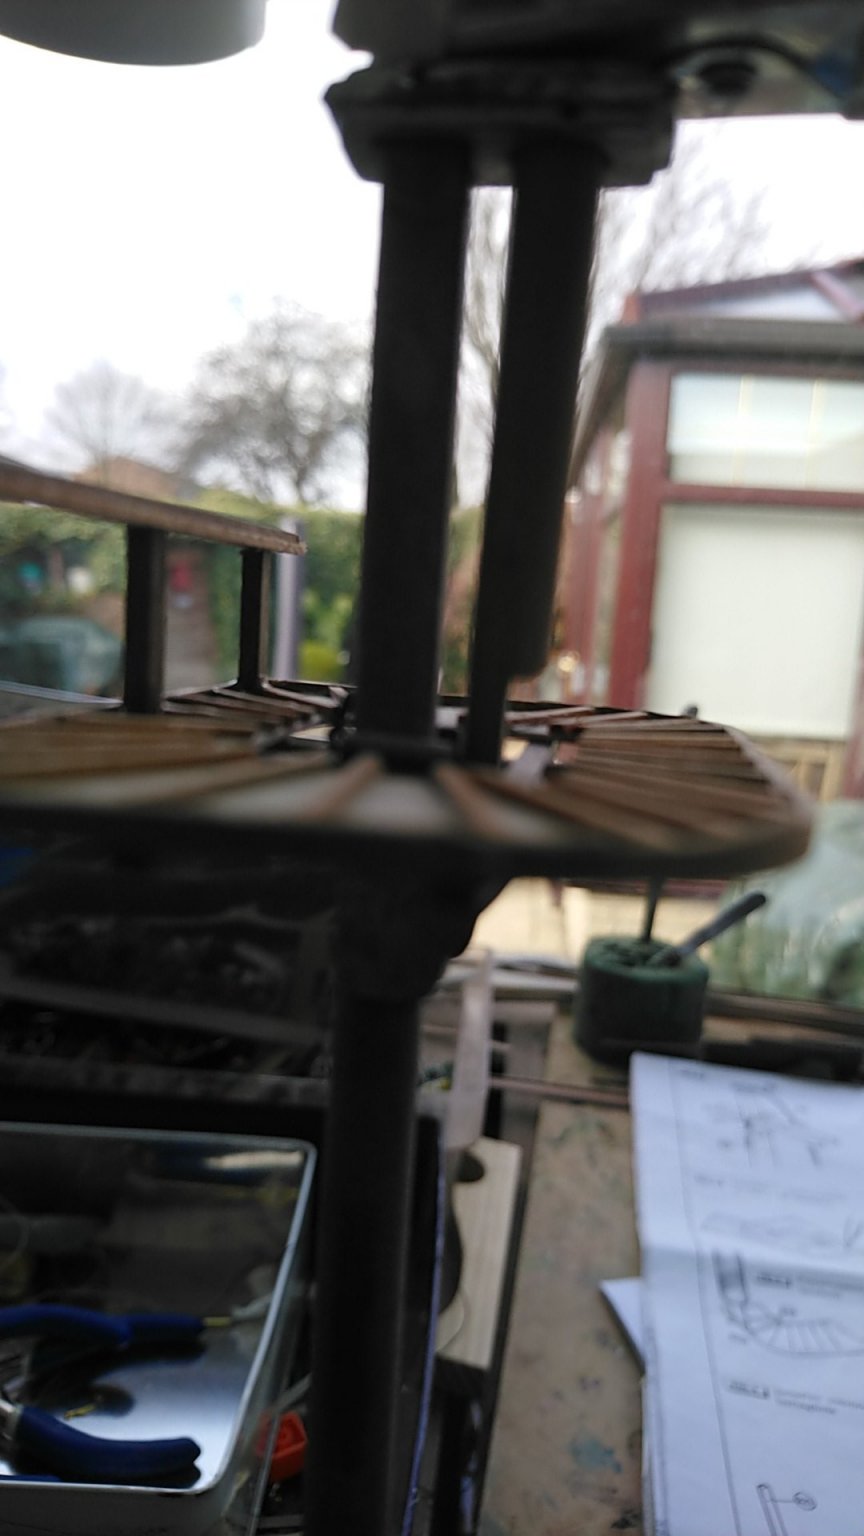
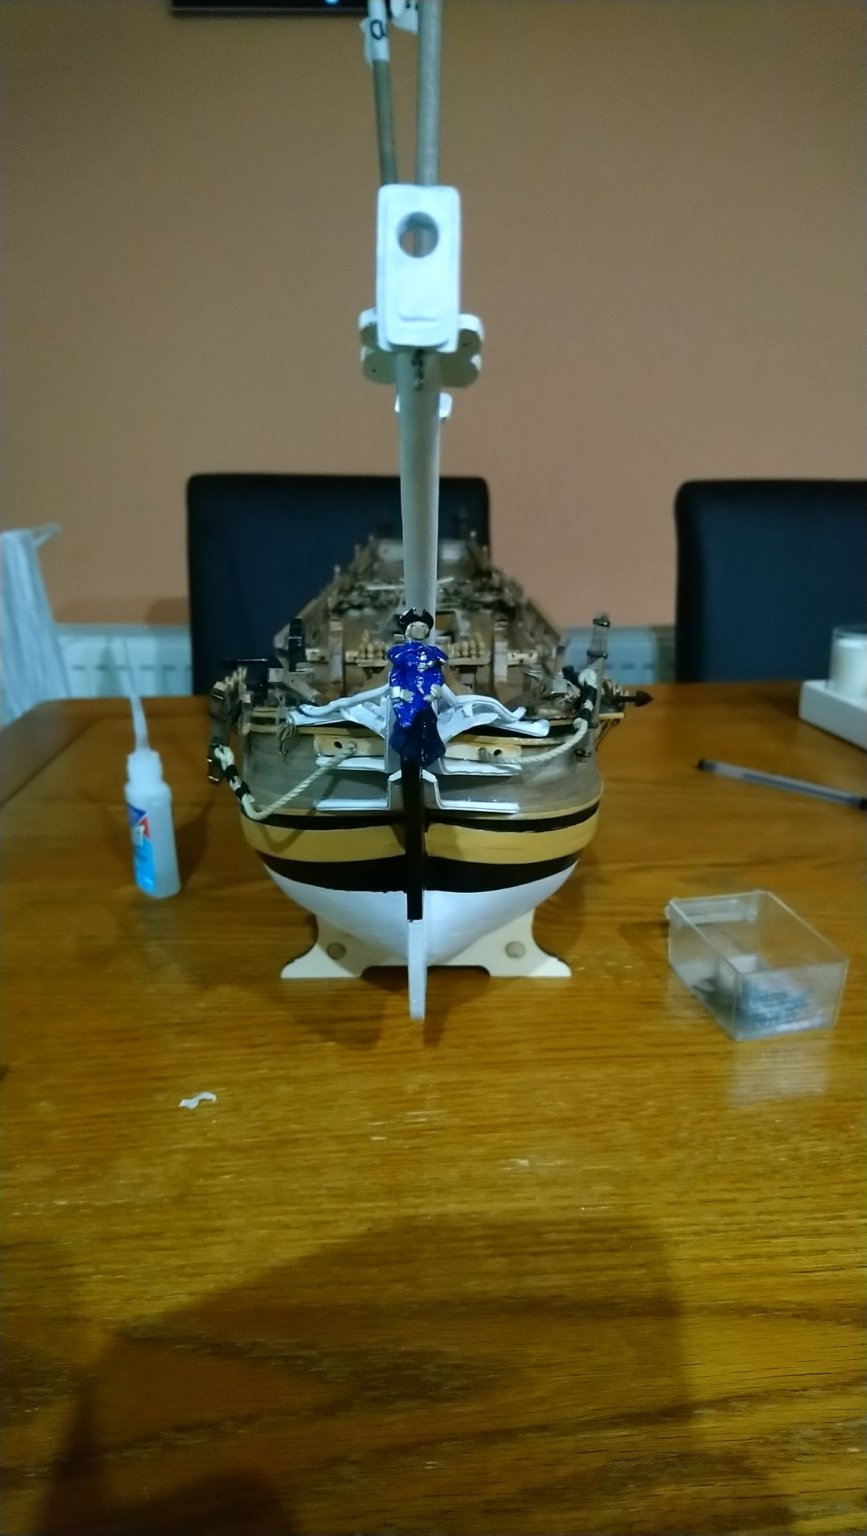
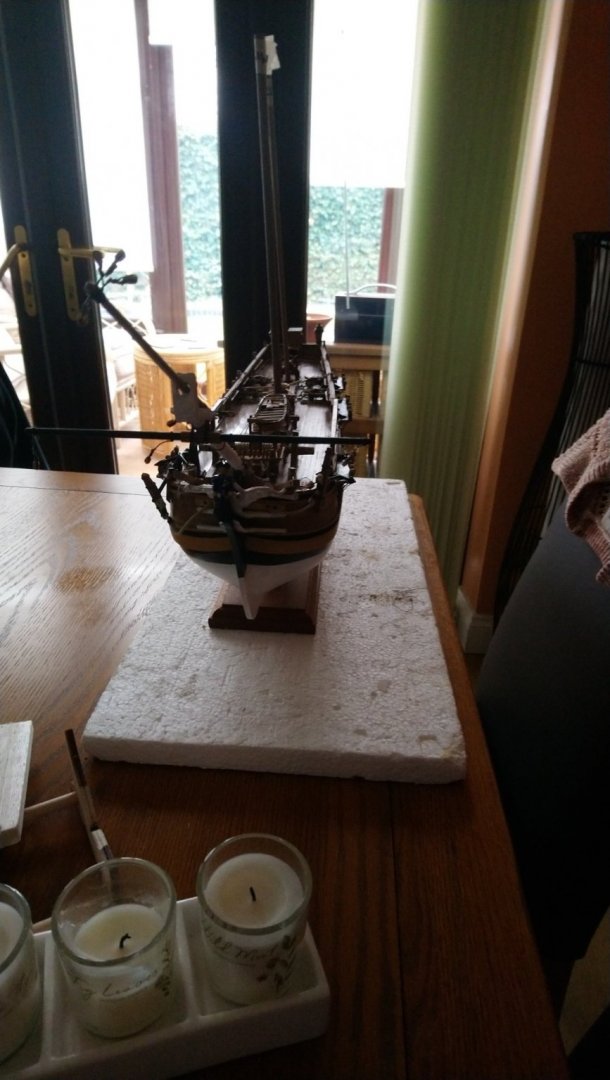
A couple of photos of the Bowsprit and yard. Not sure at what angle the bowsprit is supposed to be or even if there is any adjustment. There is a gap between the mast and the figure head but not sure if the mast sits on top of the figure head. At the moment the bowsprit is not secured in position. Also one of the photos shows the new walnut stand which I think is a big improvement.

-
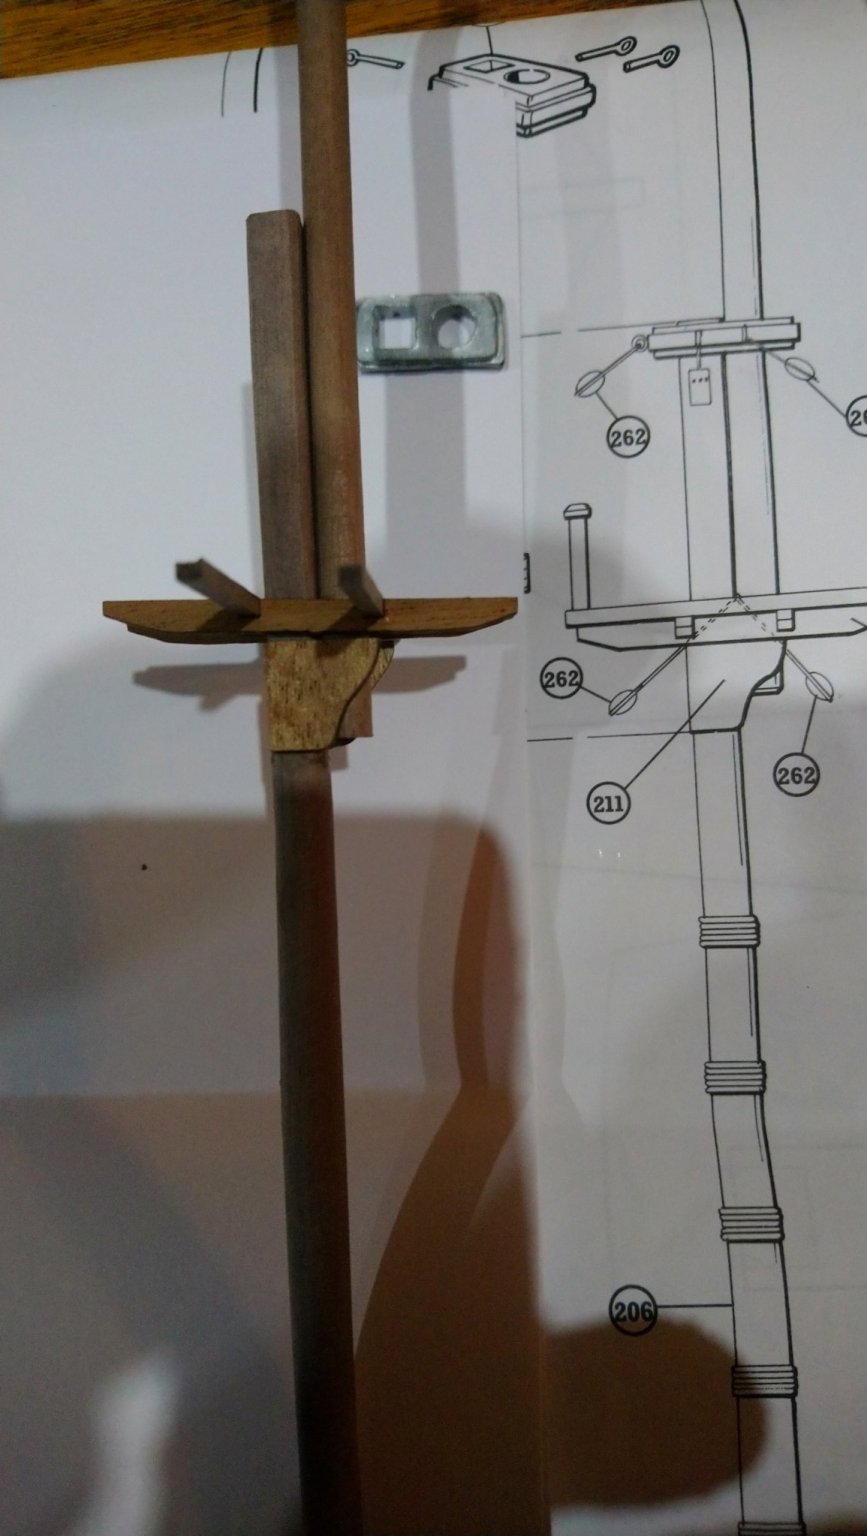
Thanks for the photo Jerry. I am really glad that you uploaded that photo as it reinforces my thoughts that there is in fact a gap and now gives me more confidence to move forward with not just this mast but the others too. .It also give me a chance to look at those pieces of wood glued to the center of the yard . I also like the look of that serving. I seen a picture of your tool for serving on your blog of the Bounty. I have managed to source one on ebay but unfortunately it is made in China so have some doubts whether to bother or not. In the mean time I have made a tool to do it by hand and will see how I get on. Best regards Dave Here is a better photo of the flat required so that the top mast fits with a clear gap in between the two mast at the overlap. The top mast can be pushed down between the cheeks fro this position.I also fitted a chock as per the drawing

-
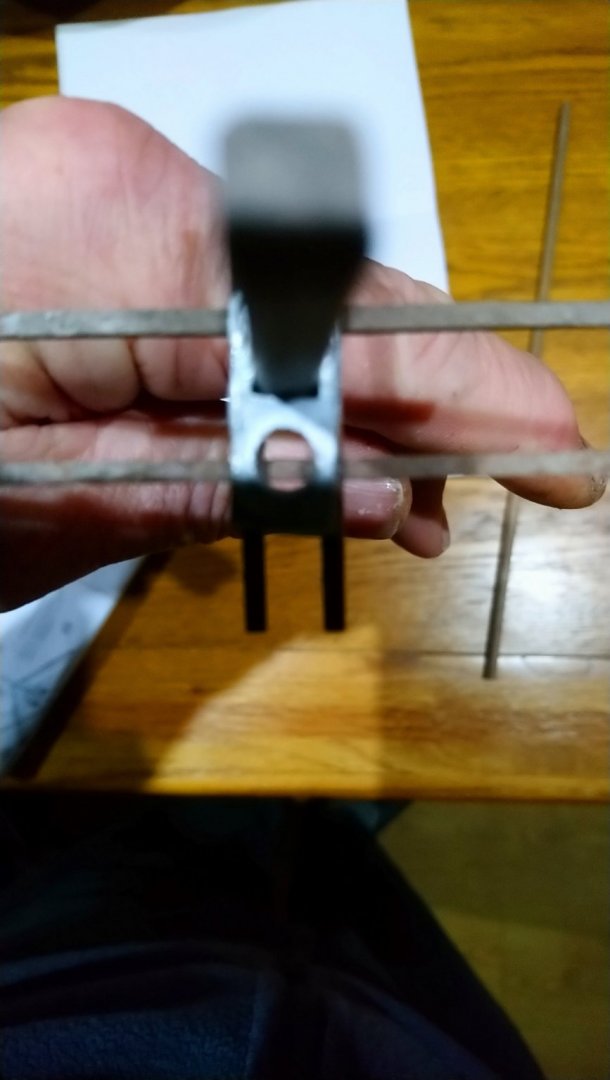
Made a start on the mast and completed adding the blocks to the bowsprit and bowsprit yard. Here is a couple of photos of the this work. I then moved onto the fore lower mast and the top mast. The problem is that I think the drawings are incorrect due to not able to pass the top mast through the lower mast tresle trees . According to the drawing the top mast passes through the lower mast cheeks. However this is not possible due to the cross trees getting in the way. The reason for this is because the top piece with both square hole and round hole for the lower and top masts keeps these masts about 3 mm apart. According to the drawing this space between the masts does not exist. See the below photos I eventually solve this problem by removing the material from the bottom of the top mast , this allowed the top mast to lowere further between the lower mast cheeks and my next photos will show the lower fore mast completed and with the top mast in the correct position. I It was also necassary to remove some of the material form the mast cap so it the gap was equal through out the overlap of the two mast. Hope this makes sense. Best regards Dave

-
I have been having a look at some of the fly tying threads and that is another hobby in itself . Very confusing all the different sizes . However what jumped out and hit me straight away was the pre waxed threads which are also sold in the jewelry making trade . I just wondered what you think of this Pat and if anyone else has tried using this? Just for the record Any help with size 12 thread here in the uk would be appreciated. Thank you Pat for your input It is much appreciated Best regards Dave
-
Thanks for that jerry you are too kind. I have spent the last few hours painting the figure head which came out ok ( from a distance.I will upload a few photos and see what you think. I have also made a tool to help with serving the line. Not as fancy as yours which I tried to find hear in the uk but no luck. I have also started on the bowsprit and tried my hand at tapering the mast all of which is satisfactory. Now for the 3 mm blocks on the bow sprit and bow sprit yard, all 12 of them. The kit supplied a number of black threads. The instructions are saying 1.3 mm for the stays,1 mm for the shrouds and 0.75 mm for the back stays. Fortunately I have purchased 0.5 mm 0.25 mm and 0.15 mm which I was intending on using for attaching the blocks, serving and seizing.. I am intending on doing the standing rigging on the lower masts first , attaching all the blocks to the masts , working from forward to aft. Hopefully after following the guy in the Amati video and checking the drawing,when I eventually get to the running rigging all the blocks are in the correct place and I can get to them. Sounds like I have a plan in mind so here goes with the rigging. Once again Jerry I thank you for all your input.Best regards Dave