DaveBaxt
-
Posts
1,301 -
Joined
-
Last visited
Content Type
Profiles
Forums
Gallery
Events
Everything posted by DaveBaxt
-
Thanks once again for your input Jerry which is always welcomed. Even with my planks tapered I am still have a few issues with them breaking. I have found by applying heat with the heat iron before physically bending the plank I do have some success. However after your suggestion it is clear that I am not allowing them to soak for long enough. Hopefully I can now proceed without too much trouble. Best regards Dave.
-
Hello Jerry. The idea of the 4" pipe sound brilliant and just what I need. Please don,t take this the wrong way but the idea of the thread is to break it into sections. The idea behind is explained on MSW by Chuck Passario.Here is the link. I have tried using planks instead of thread but found thes just got in the way. I am assuming with this approach you can see whether of not you need to drop planks or gain planks ( sorry if this is the wrong terminology) Here is the links. Chuck has also produced a few videos which shows his technique of bending planks edge ways which is where I am having a problem. Hre is the link to the information which is on this website. http://modelshipworldforum.com/resources/Framing_and_Planking/Lining Off your hull for planking.pdf And here is the link to Chucks video, the first of three.
-
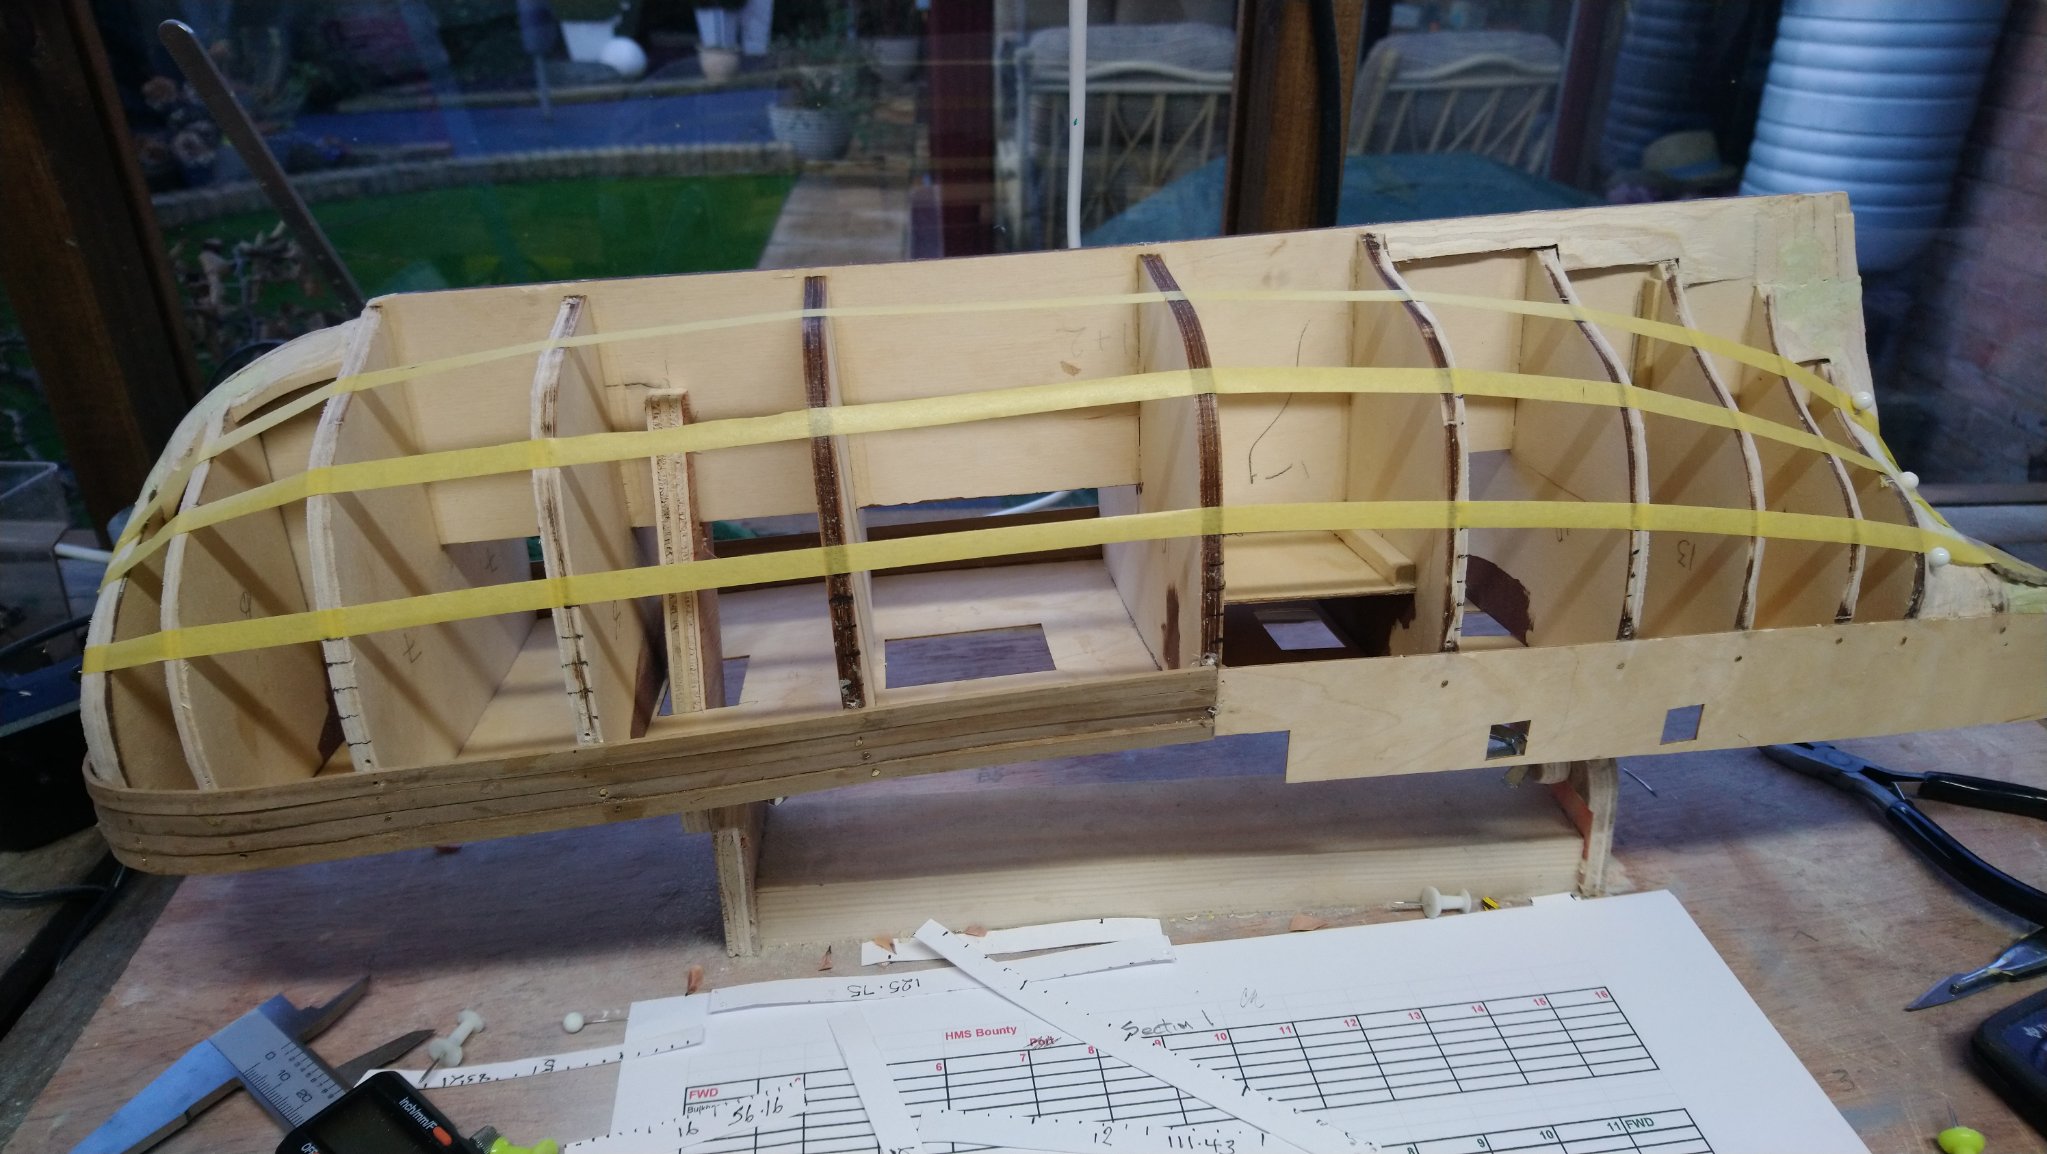
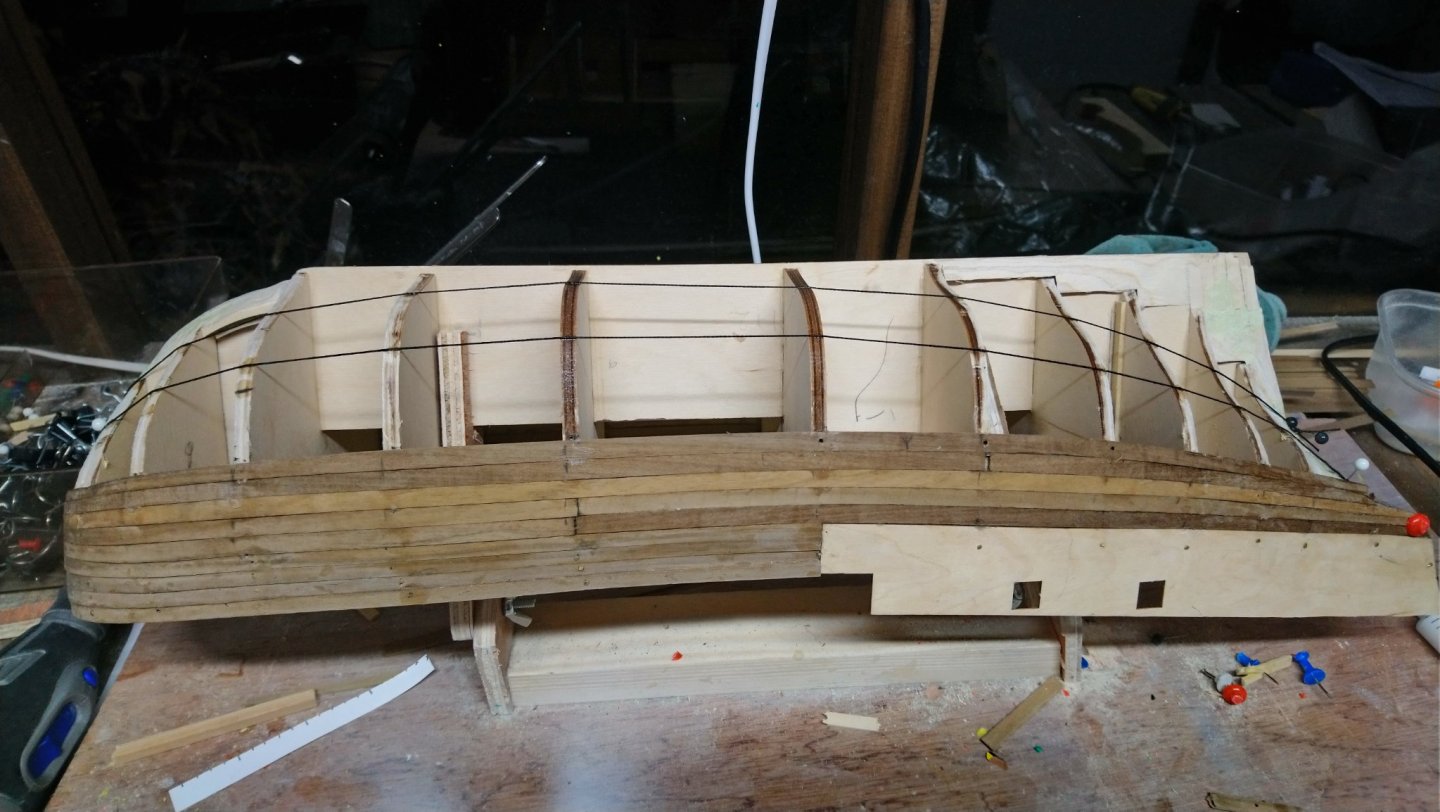
Just completed the first Band ( 10 planks ) I attempted to fit full length planks but due to breaking a few when bending I ended up using more planks than I would have liked. I do have a few spares which I managed to source but these are 5 mm wide and not 6. I am trying to bend the planks edge ways as in chucks videos and this is where I have just pushed them a fraction too far and split. As you can see in the photos I have also scrapped the idea of using tape and have now used black rigging rope. Hopefully this will last a bit longer. I have also adjusted them better so they lay a bit better. Because I have moved them I will need to measure up again and will probably just mark off a band at a time. I also think I may need to drop a few planks forward as in one of the bands it looks a bit tight. I am not sure if this is the correct approach as it is very time consuming and there will be another layer of planks on top. I am not worried how long it takes me as I need the practice in trying to perfect this way of laying planks.

-
I am currently building the Bounty made by Amati. The instructions say that Stem post , keel and stern post must be fitted after the first layer of planking and before the second layer of planking . The width of the Stem post or as they call the cut water has a thickness of 5 mm as does the stern post . The keel which fits on to the false keel is only 4 mm . It has been suggested on the set of Bounty videos that to make up the difference of 1 mm the keel should be planked ( second planks are 0.5 mm thick ) My question is :- How is it possible to ensure that these all line up, especially as the hull is already planked? Is there an accurate way of doing this or is it just by line of sight? Sorry for the earlier mistakes.
-
I appreciate where you are coming from Jerry and will attempt the full planks where I can , When I am bending the planks I am having to soak them in hot water for 10 minutes and have been doing this in a sealed flask which governs the length of my planks. I wish I had access to steaming the planks but I am doing this model out of the house and in a purpose build shed so do not have any heating other than an electric kettle. At the moment I should manage as I only need to bend one end. Thanks once again for your input. Best regards Dave
-
The instructions say that both decks and second Hull layer are 0.5 x 4 mm Walnut . First layer hull planking is 1.5 mm x 6 mm. Walnut Thanks for asking best regards Dave
-
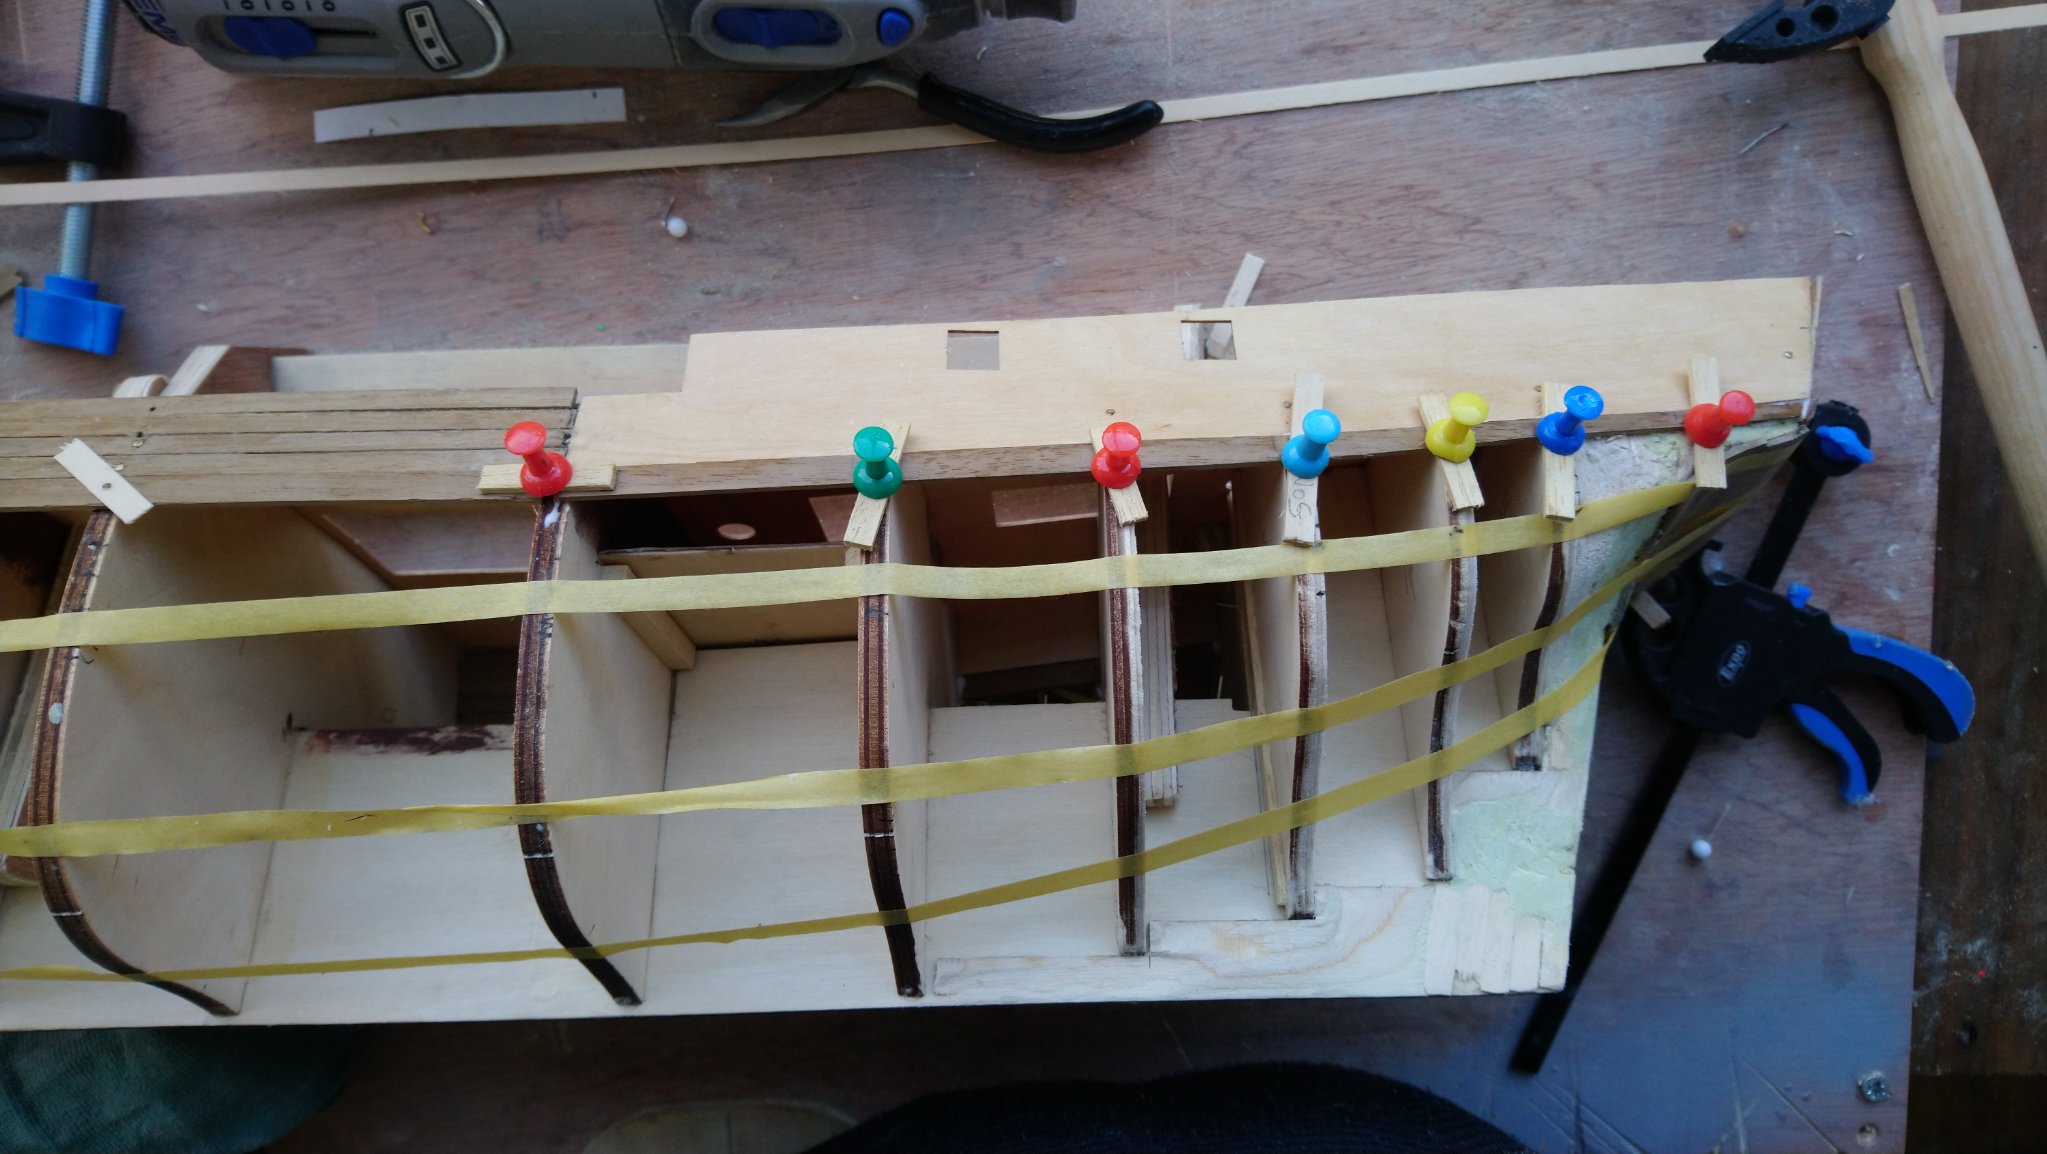
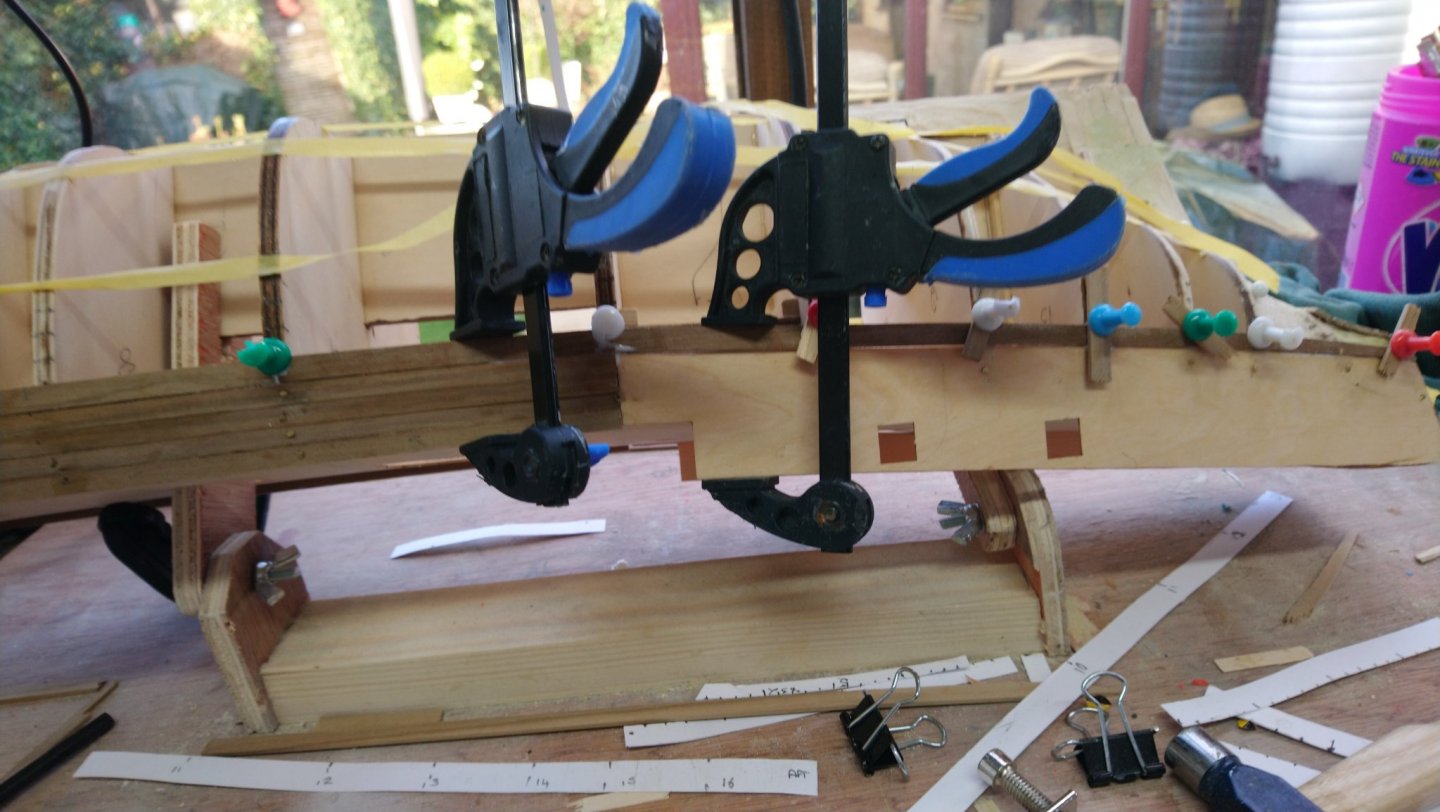
Quick update regarding planking. The photos are showing the easiest way of securing the Walnut planks for me as the fold back clips are not cutting it. I am also having to drill tiny holes in the edges of the bulwarks to make getting the large headed pins to go in easier. This way I am not actually drilling the planks but just to the side in the hope that this will not allow any gaps between the planks. As you cab see from one of the photos I did not acheive this as hoped so had to use a couple of clamps to keep the planks together. This is a slow process but I am in no hurry and would like to make as good a job as I can., even though these planks will be hidden by the second layer of planking.Also marking the sections using modelling tape as not been a success so might replace them with thread from the kit. Hope there is a bit spare in the kit.

-
Cheers sticker. Thanks for your Input. I think they will be the same videos, I am not sure if they are Amatis official videos however the guy in the video keeps mentioning that it is a commisiioned Bounty and due to the Amati introduction and a link to the videos from their website perhaps it was commissiod by Amati. Just a thought and could be wrong.
-
Yes definately Walnut 1.5 mm x 6 mm and it a real pain a very slow process of ahaping and bending. I have already split quite a few. As Jerry has said it is much easier to taper them for bending. I have considered using Lime strips 1.5 mm x 5 mm which is much easier to work with however as difficult it is I think I will continue. I have received a number of suggestion from a number of people see I have made a start and will post some more photos of the best way forward for me. Thanks once again for you question. Before I pick my next model I will ask someone who has previously build it what the planks are made of and if the instructions are in English.
-
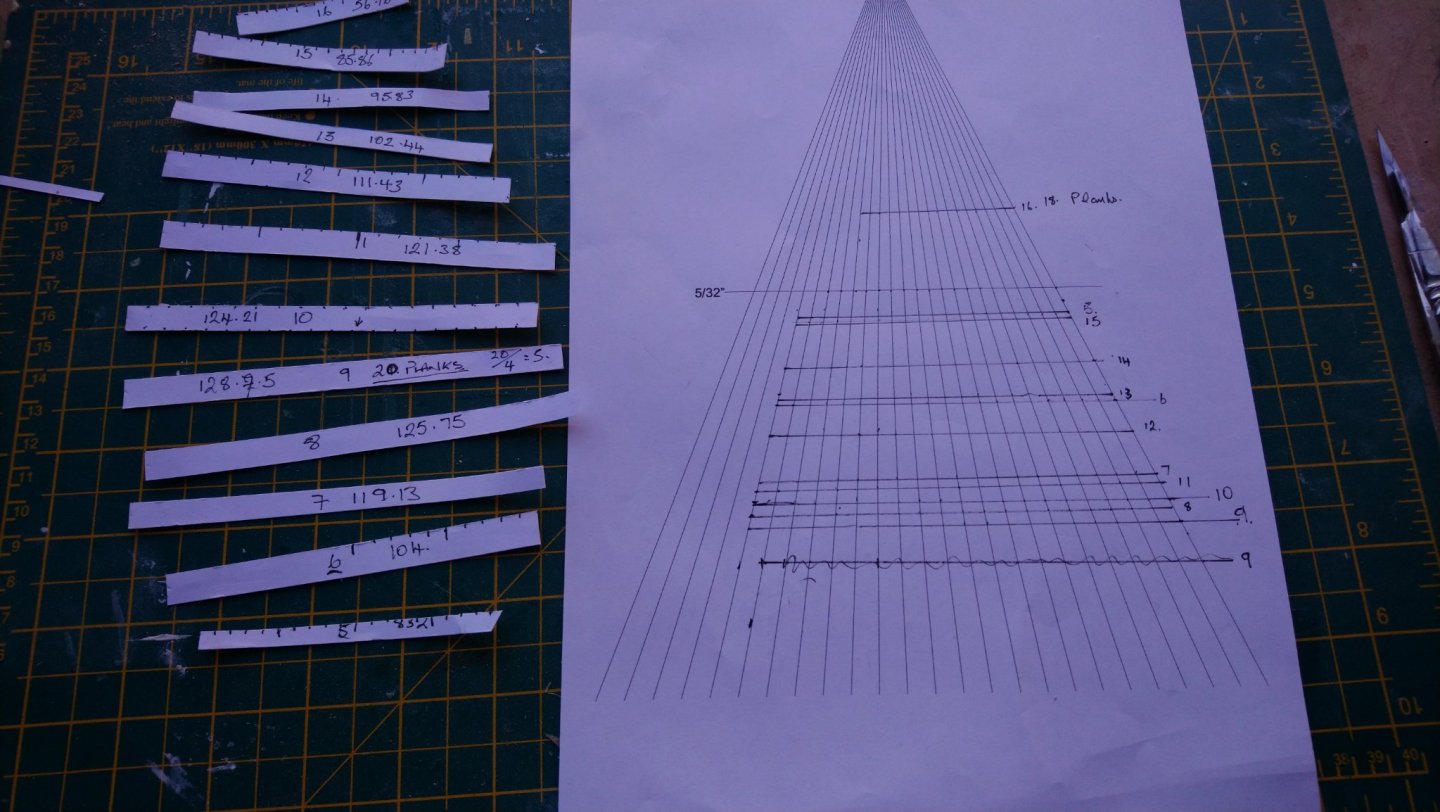
Here are a couple of photos of my Planking fan and marking off the hull. I am not sure whether to use this method or split the sections into 4 where the planks will naturally lay flat. The last time I did this my planking turned out ok but it took me ages. I think I will mark the hull of using the planking fan and then go over with a few temporary planks and see how it looks.

-
Hello again Jerry and welcome back.Regards the pins. It is my intention of no longer using the Brass pins as I am worried in case they wil cause me problems with the second layer of planking. The ones I have already used I will try and remove and if I can,t I will try and file them flush if possible. I am planning on using drawing pins and scrap pieces of wood pushed into the edges of the bulkheads together with fold back clips and basicaly anything that will allow me to keep the planks flat and prevent as much of clinkering ( I think it is called that) as possible. Regards getting your interest back up I really hope so Jerry as I am sure your experiences will be invaluable, especially later on when I try rigging for the first time
-
Thanks Jerry and welcome aboard. I think in the instructions it does say to plank that part of the hull but not until the bulwark to keel is completed. The guy in the Amati video used 1 mm plywood instead of planking which is not in the kit. I probably would have done the same but I have not got any spare plywood of that size..I also wanted to see how I would get on bending the planks. I managed this but its far from perfect .I also wanted to get a line going the full length of the ship as I thought it would be easier for lining off the hull. I am planing on tapering the planks where needed and trying Chucks method of bending and fitting the planks. Please feel free to add anything else which you feel could be incorrect as thats what I am here for to learn. Regards the pins. I will try and remove them if I can't get them out will just file the heads down. I am planning on not using anymore if I can and just use pins with a flat piece of scrap wood for securing. I have also thought about using tree nails. Now that I have started planking I am also using fold back clips or here in the uk call bull dog clips Cheers Dave
-
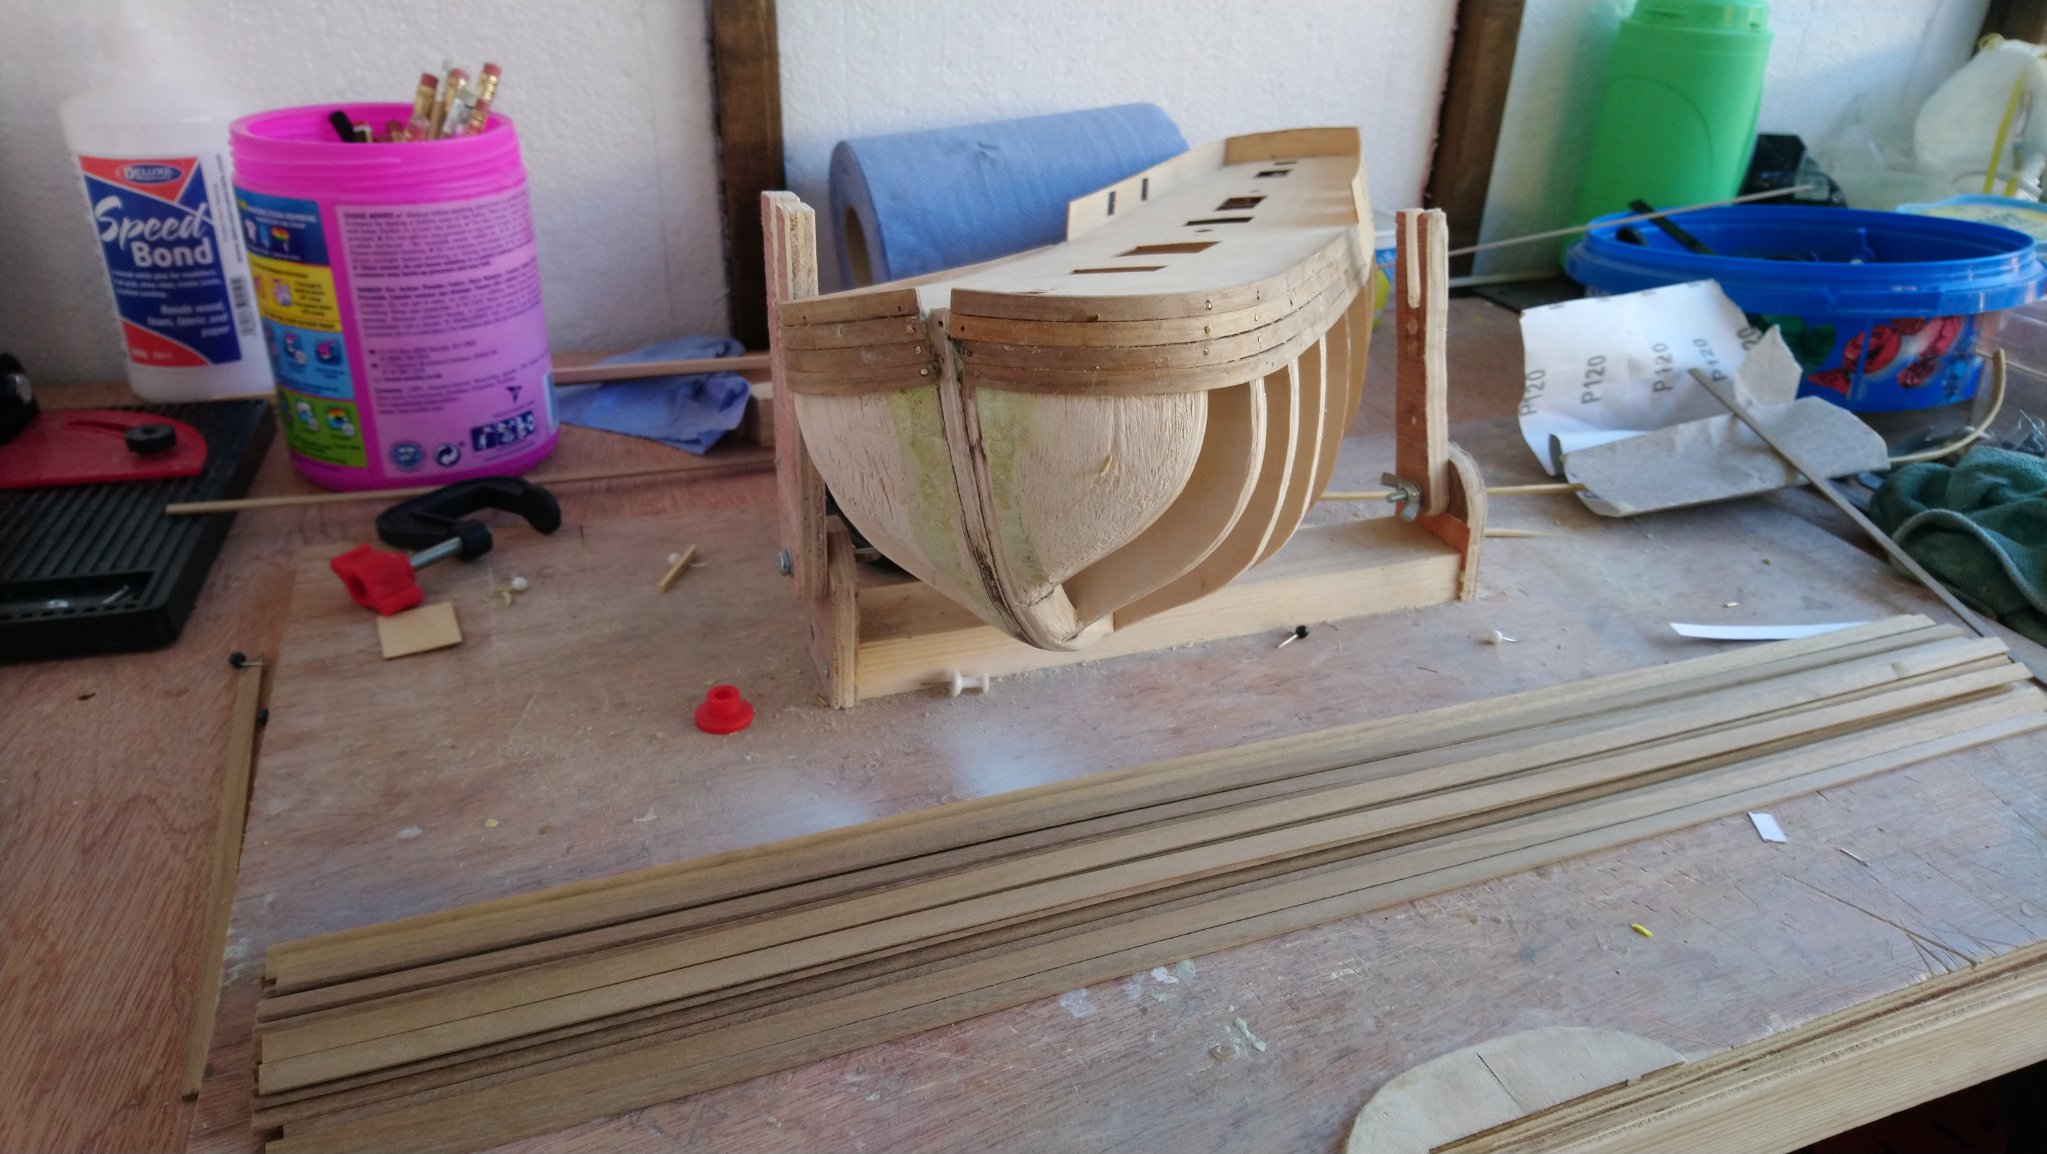
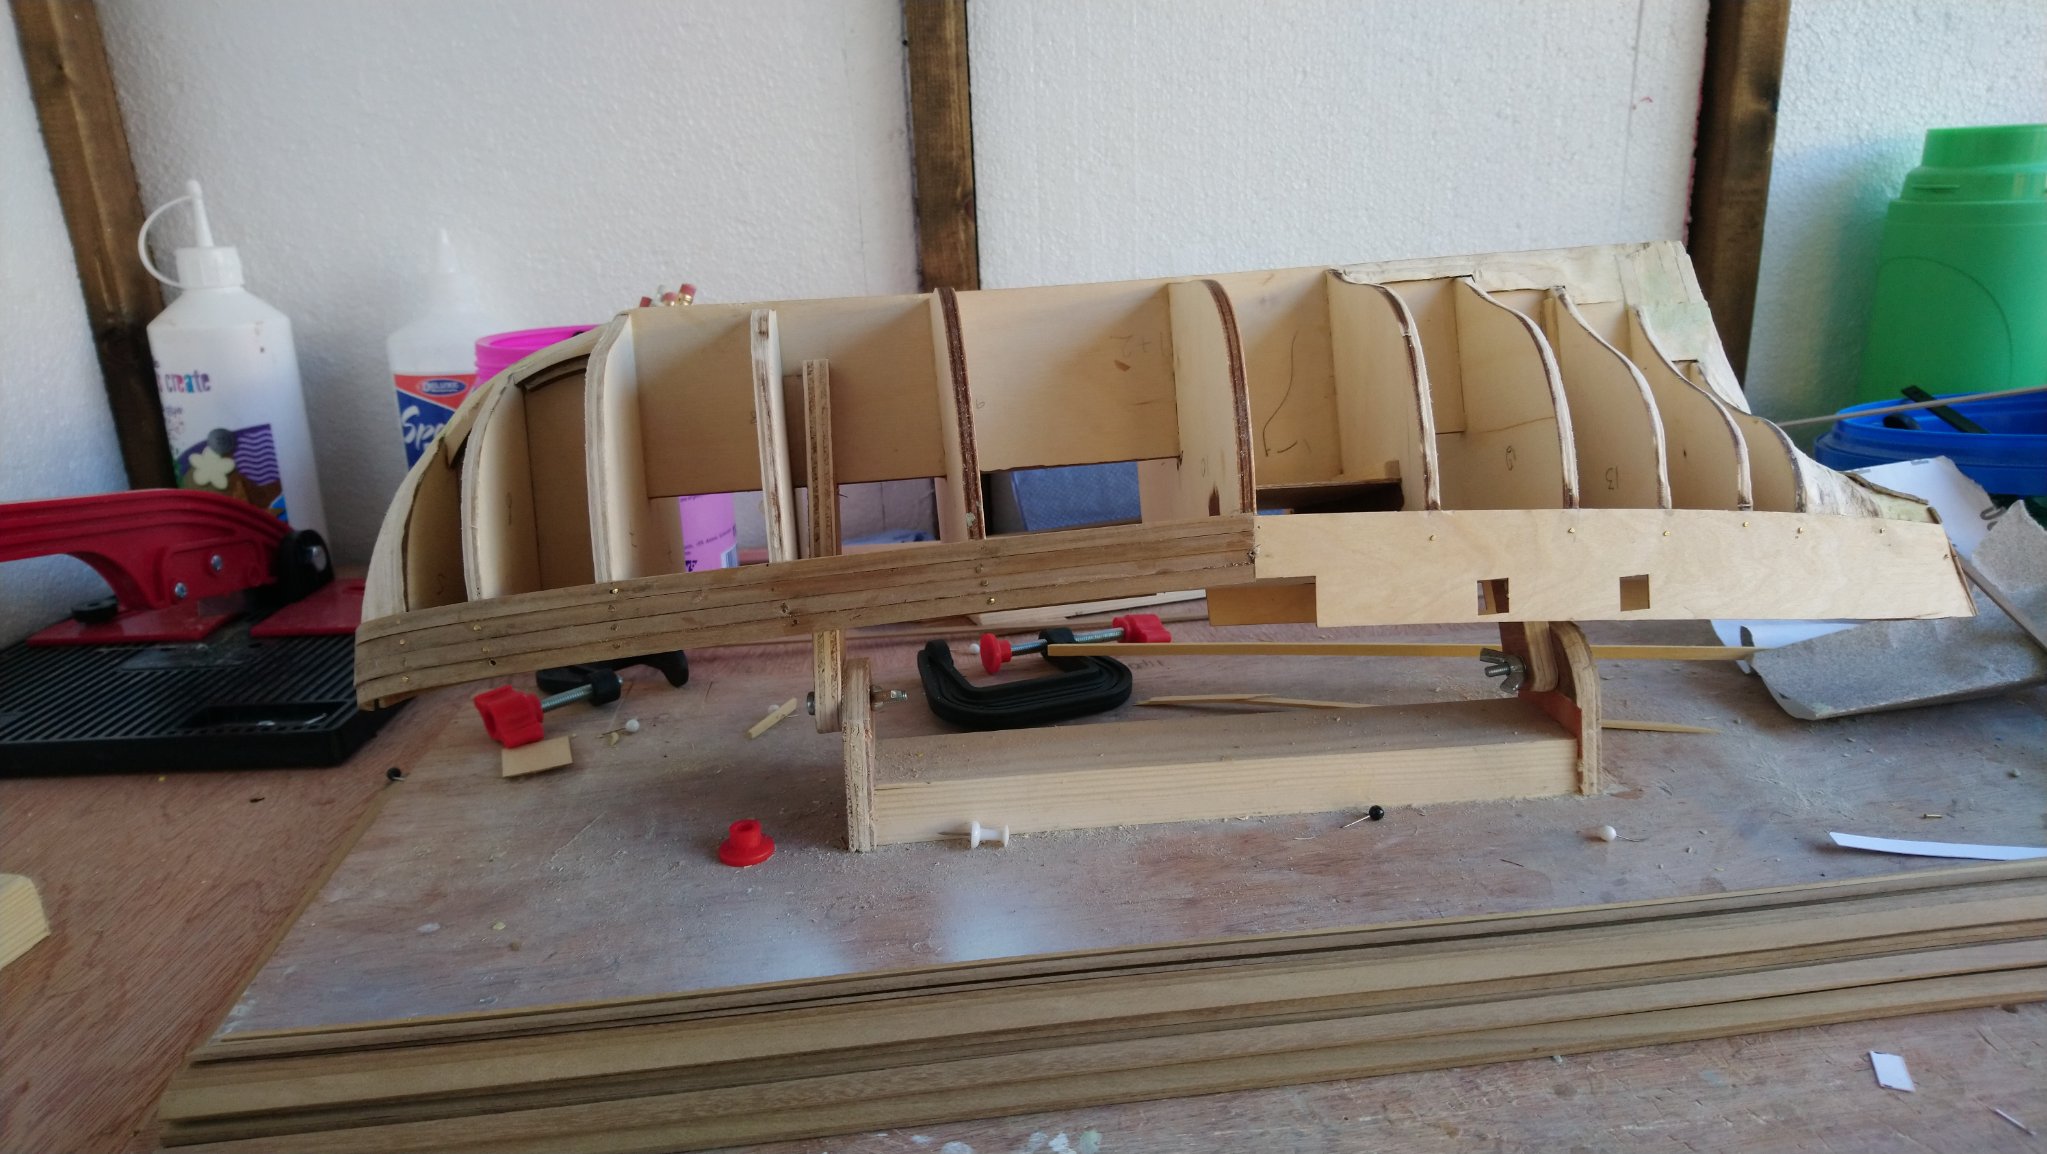
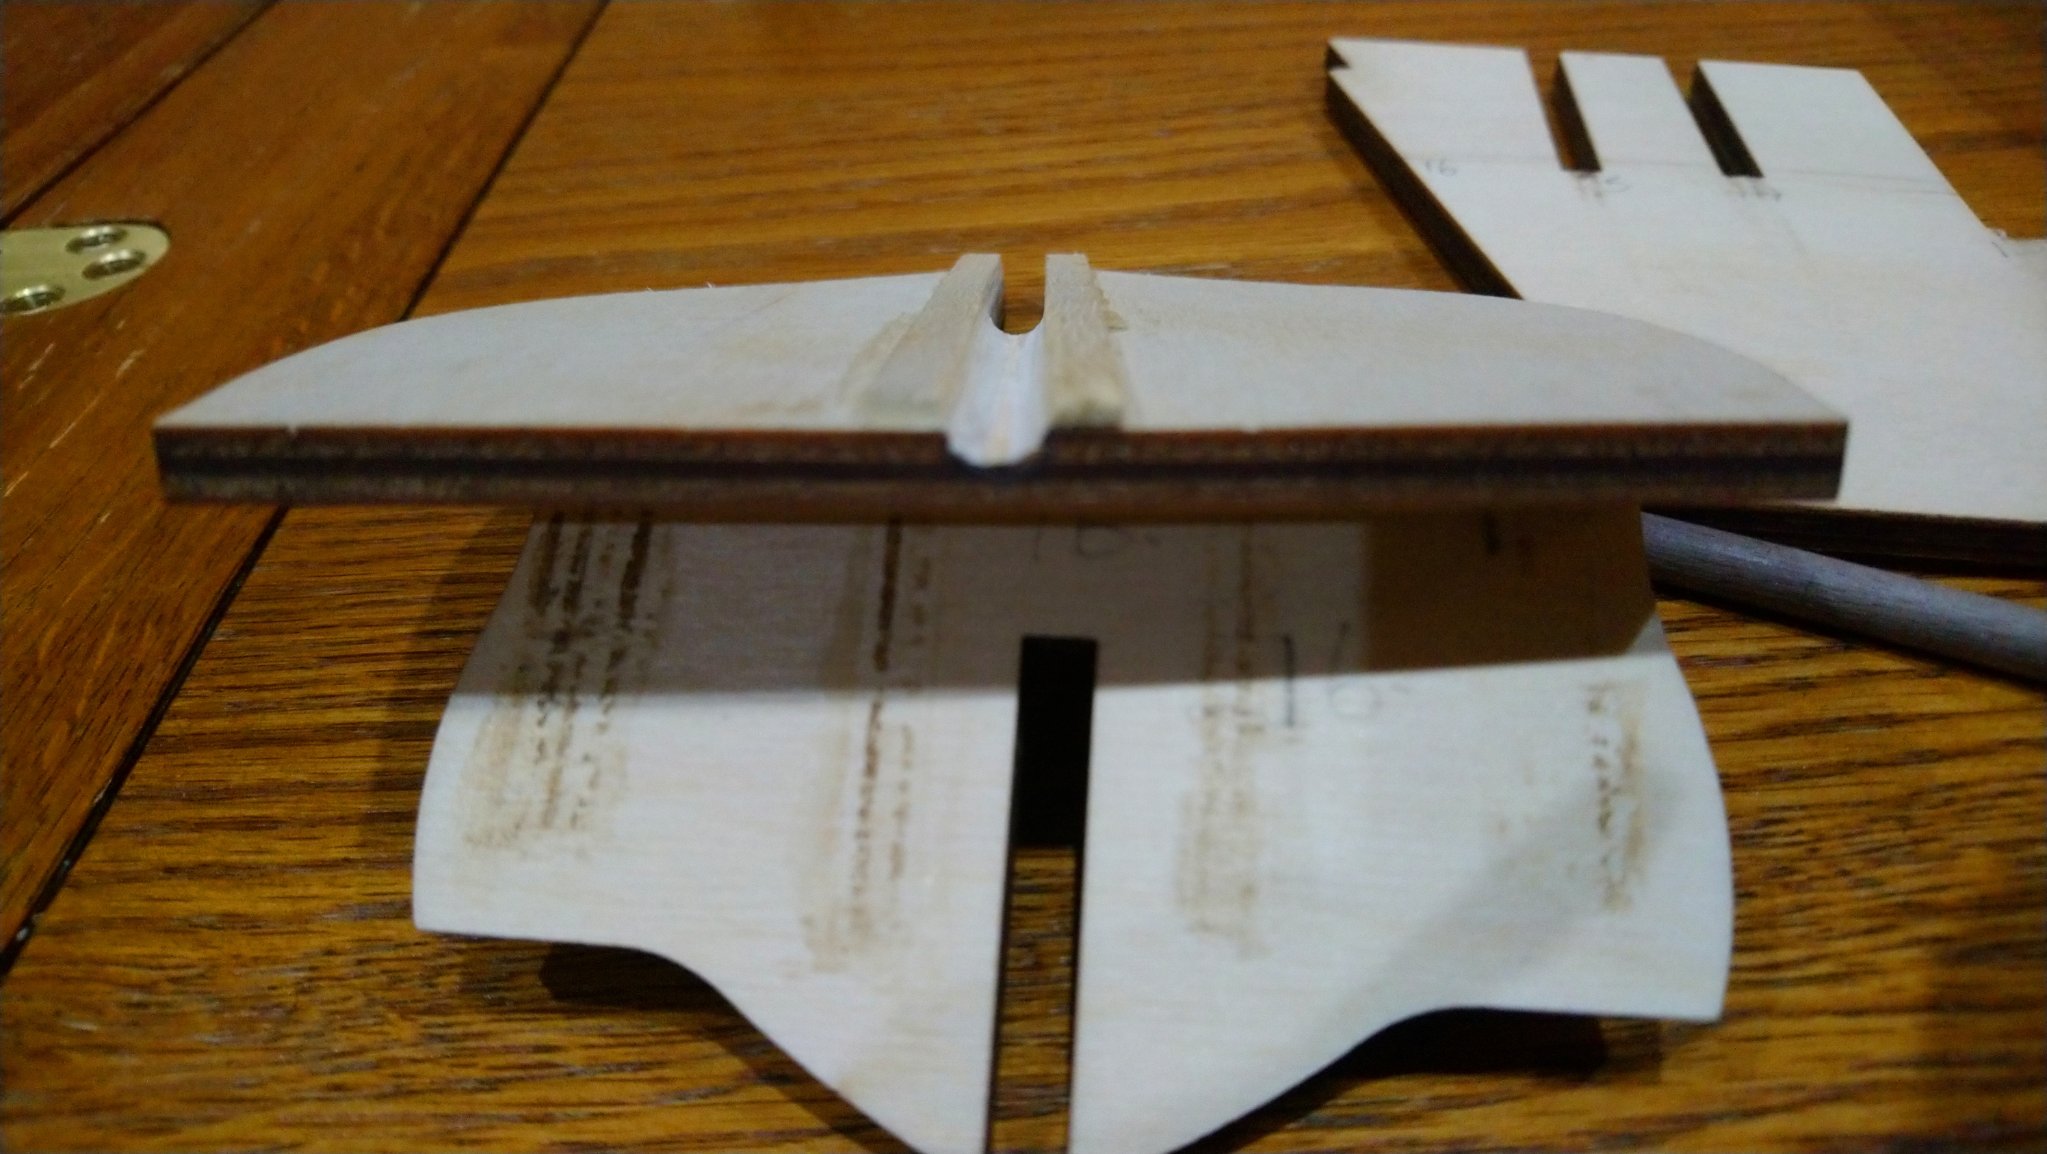
Latest . Completed attaching bulkheads to keel. Fitted and shaped strengthening pieces to stem and stern. Fitted balsa wood blocks to bow and stern and sanded to shape . Fitted bulwatks made out of 1mm plywood and then fitted a number of planks t gave the same distance from the deck


-
Planking pins/nails
DaveBaxt replied to DaveBaxt's topic in Building, Framing, Planking and plating a ships hull and deck
Thank you everyone for some fantastic solutions. I have been using the scrap bits of wood to secure the plank but have been using pins instead of nails. Not sure if the nails I have will allow a scrap of would underneath the nail head but will give it a go. I see some people are using cocktail sicks as tree nails and I have a number of these at had so might give this a try and see how that goes. I could of coarse as you suggested just use the nails and file the heads flush with the plank when the glue has dried. I will need a lot of nails nut they are not expensive. I will probably try the other solution first and see how I get on.Any thoughts on this would be more than welcome. ps I have been using a electric plank bender to bend the planks which I am slowly getting the hang of this. I have will probably use steam at some stage as there are a few pieces the need bending to fit on the gun whales and I was thinking of making a jig for this purpose. Cheers Dave -
Planking pins/nails
DaveBaxt replied to DaveBaxt's topic in Building, Framing, Planking and plating a ships hull and deck
Hello there and thanks for your quick reply. Treenails, you got me there. I will have to ask google see what I get. The model is the HMS Bounty by Amati. All the wood in the box is Walnut including 1.5 x 6 mm and 0.5 x 4 mm. -
AS I am about to star on the first layer of planking which happens to be Walnut 1.5 mm x 6 mm , which is not the easiest to bend, however I am managing . The problem seems to be securing the planks. As there will be a second row of planking I thought I would like to try pinning the planks. I have laid a few and after drilling the planks I am finding it much easier using 7mm brass nails However I thought it would be a good idea to remove them afterwards however I am finding this almost impossible without damaging the planks. Is ther an easy way to remove them? I could of coarse just use clamps but wonder if the planks will sit as well due to the difficulty of bending.I know there are several different ways of clamping but just thought about nails.
-
I really Like the look of this kit and just wondered if you could rotate this 180 degrees? I much prefer to have something to support the ship whilst planking. I have made a jig for this but I have only just started on my second model and already I have had to modify it twice.
-
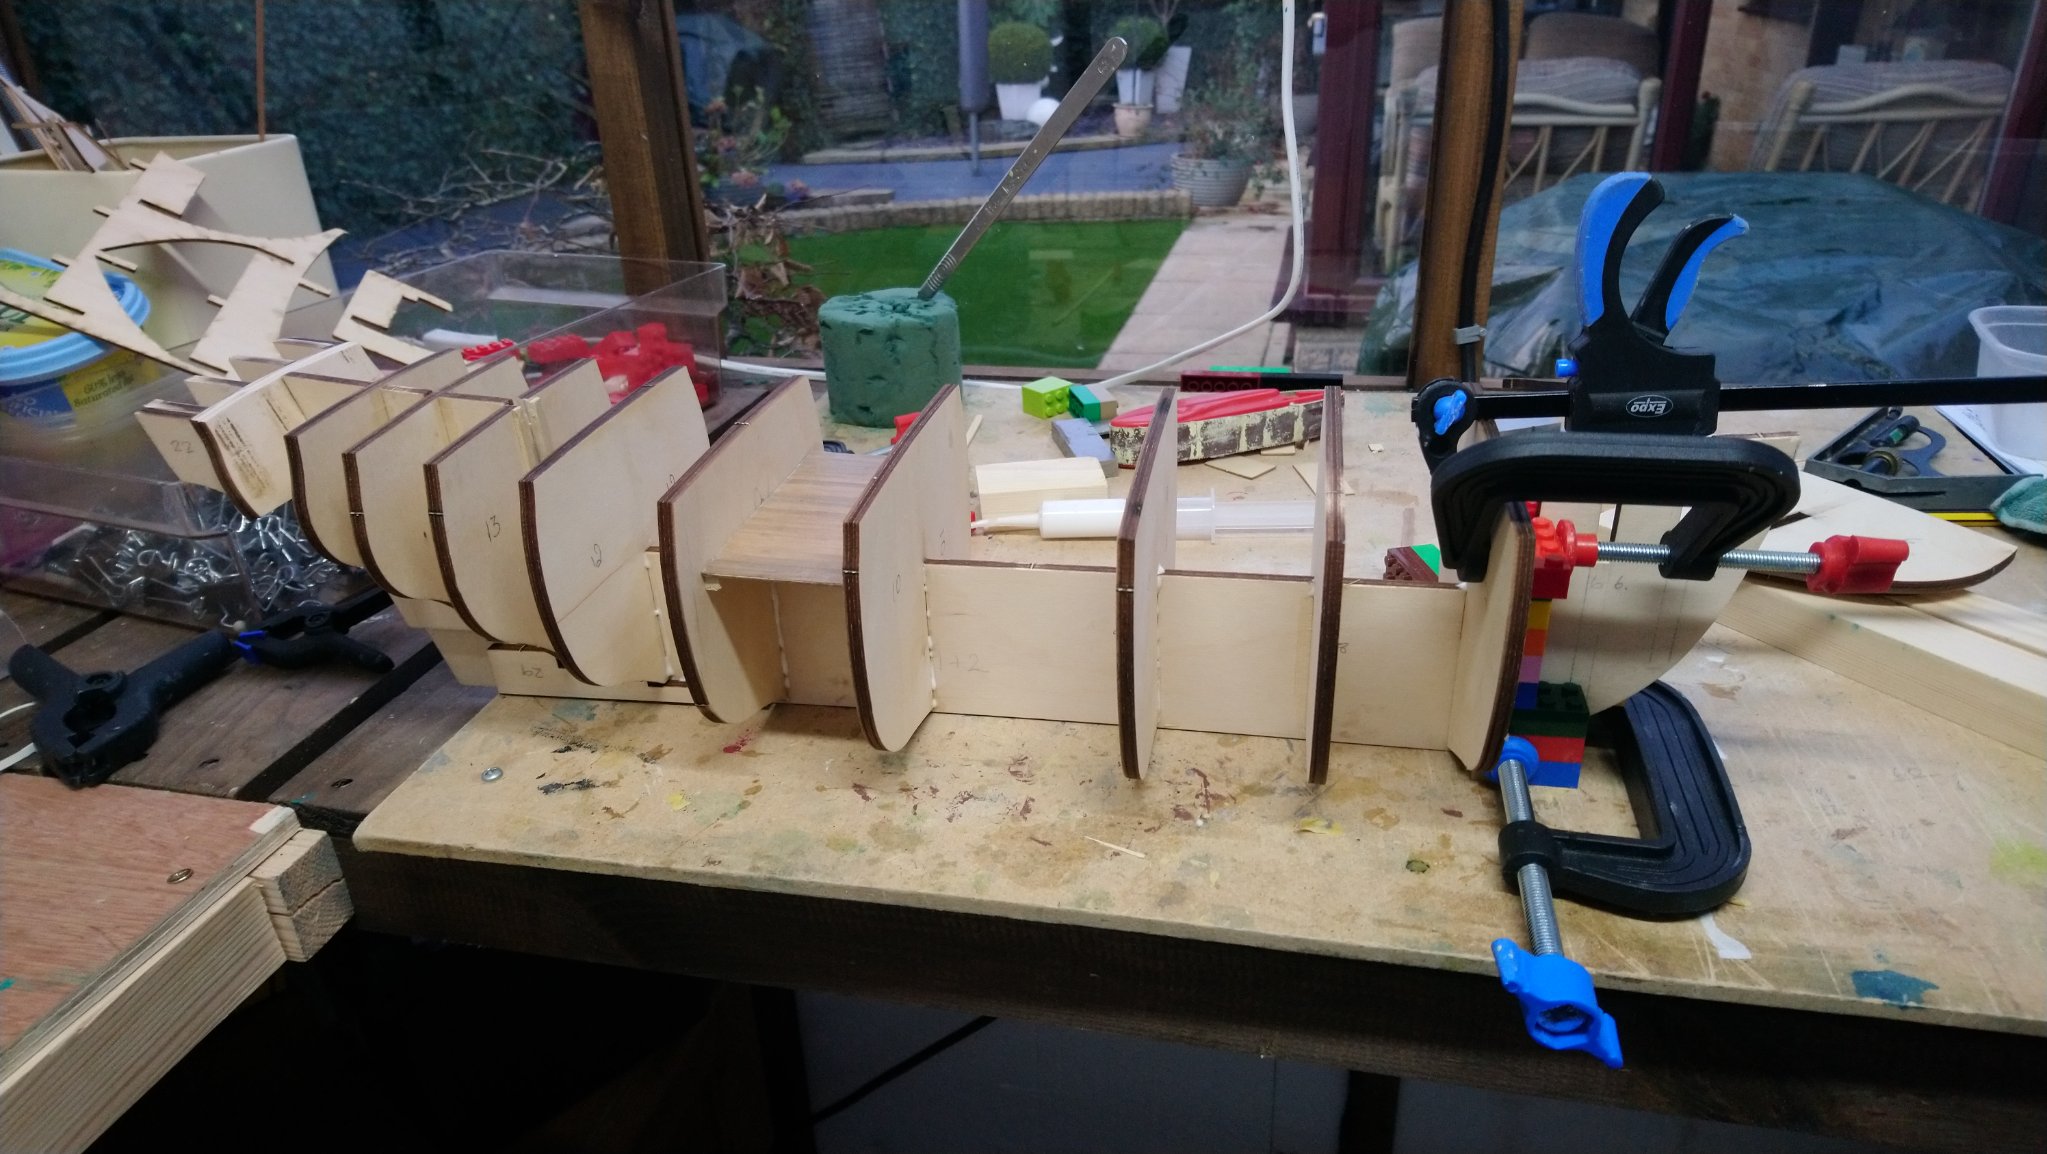
I have just completed the fitting of the bulkheads and the strengthening pieces.for and aft the ones fwd were way out and i had to remove a lot of wood to make them fit. I will add some photos as regards the assembly of the bulheads with the great help of using lego to make sure they were 90 degs to the keel and parallel to each other. I have a number of questions regarding the next way to go. The instructions say after checking everything lines up with the deck,it can then be fitted after first planking it. However in the videos the guy does not carry out the planking until the deck is fitted,however in both cases the deck is fitted before the start of planking the hull. I have thought for me it would be easier to plank the hull first as I would like to use a home made jig ,whereby it is secured to the bulkheads which would be more difficult if the deck was fitted. I appreciate that there would be less chance of twisting if the deck was fitted first. Any thoughts would be appreciated. When I do start the first layer of planking I intend to try chucks way and line off the hull first. Also According to the instructions and videos the stem piece is not fitted until the first layer of planking is completed but before the second layer, however after watching chucks videos on planking I notice that the stem piece is already fitted before the planking . I am not sure if it will make much difference unless you have a rabbit .This will then help to reduce the keel and the stem will help to secure the planks. Unfortunatley the instructions to not show rabbiting and the guy in the video has not done this either . I would be most grateful for any input on both these issues before I go ahead.


-
I have just completed the fitting of the bulkheads and the strengthening pieces.for and aft the ones fwd were way out and i had to remove a lot of wood to make them fit. I will add some photos as regards the assembly of the bulheads with the great help of using lego to make sure they were 90 degs to the keel and parallel to each other. I have a number of questions regarding the next way to go. The instructions say after checking everything lines up with the deck,it can then be fitted after first planking it. However in the videos the guy does not carry out the planking until the deck is fitted,however in both cases the deck is fitted before the start of planking the hull. I have thought for me it would be easier to plank the hull first as I would like to use a home made jig ,whereby it is secured to the bulkheads which would be more difficult if the deck was fitted. I appreciate that there would be less chance of twisting if the deck was fitted first. Any thoughts would be appreciated. When I do start the first layer of planking I intend to try chucks way and line off the hull first. Also According to the instructions and videos the stem piece is not fitted until the first layer of planking is completed but before the second layer, however after watching chucks videos on planking I notice that the stem piece is already fitted before the planking . I am not sure if it will make much difference unless you have a rabbit .This will then help to reduce the keel and the stem will help to secure the planks. Unfortunatley the instructions to not show rabbiting and the guy in the video has not done this either . I would be most grateful for any input on both these issues before I go ahead.
-
Hello all. I am still relatively new to buillding models and have just completed my first model which was fairly straight forward. However I think I have really upped my game with this one hopefully I haven,t bit off more than I can chew. The reason I picked this one is that Amati have 17 videos on how to assemble on Youtube. I have checked that everything is in the box, although it only gives a list but not how many of each,however it all appears to be there. I have already come across a few issues which were explained in the first video mainly with assembly of the keel , frames, false deck support pieces and false deck. The only problem so far which has caused some thought which although pointed out in the video which was the hole in the false deck for the mizzen mast lines up with one of the bulkheads. Unfortunately the guy on the video does not mention a solution to this problem. Fortunately I believe i have found a way . I will try and post a couple of photos which show how I have done this. I am of coarse assuming that the hole in the deck is accurate.
-
Thanks for all you input guys and some good points worth considering. Before I start building my next Ship. I will try and start a log ,hopefully that we if I have any issues I can get help before making too many mistakes.
-
This was one of the reasons I thought about buy a different rope instead of going with the Amity. As this could work out expensive ,thought I would just replace the standing rigging. I also thought as this is my first ship with rigging perhaps I should just go with the Amity just so I can compare it with other model suppliers . I am planning picking models from different makes just so I can compare how good/bad they are,unless someone does not recomend a particular kit. My next model I was thinking of the Endeavour made by Caldercraft.Just a thought but will get some input first.